---
title: Set up a Brother QL-820NWBc
sidebar:
order: 3.1
---
Toreca Cloud creates a PDF. Print it through the operating system's print dialog or send it directly with the print app. First check that the printer works on its own.
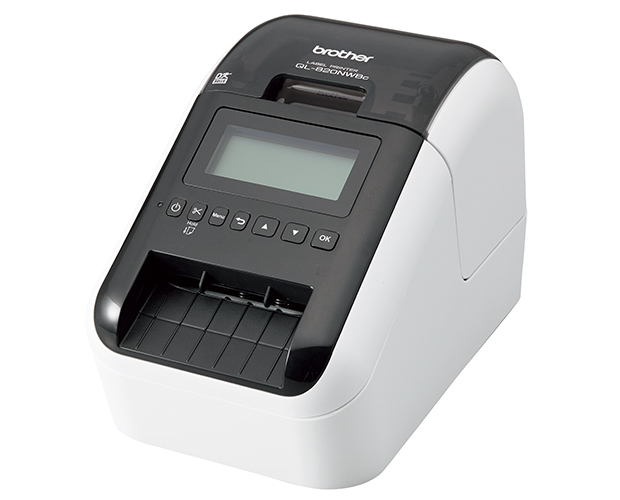 [Photo source: Brother official product page](https://www.brother.co.jp/product/labelprinter/ql820nwbc/index.aspx)
To print without opening each PDF, see [Install and use the print app](/en/guides/inventory/desktop-print-app).
## Check the roll first
The QL-820NWBc uses DK labels and tape. Check the part number against the [official supplies list](https://www.brother.co.jp/product/labelprinter/ql820nwbc/accessory/index.aspx).
### Using DK-2210
[Brother specifies DK-2210](https://direct.brother.co.jp/shop/g/g5V791C2F251/) as continuous paper tape, 29 mm wide and 30.48 m long. It has no individual die-cut labels.
Select **Brother DK-2210 (29 × 50 mm)** in Toreca Cloud. The PDF is 29 mm wide with a 50 mm feed length, one label per page. The artwork already follows the feed direction; do not rotate the PDF manually.
| Setting | Value |
| ------------ | -------------------------------------------------- |
| Driver paper | 29 mm continuous tape (DK-2210) |
| Feed length | 50 mm |
| Orientation | Portrait; no PDF rotation |
| Scale | Actual size (100%); no fit-to-page scaling |
| Cutting | Auto Cut off; Cut at End on for a continuous strip |
The finished paper, viewed horizontally, is **50 × 29 mm**. Text and QR codes occupy a 25 × 44 mm safe area: 2 mm from each tape edge and 3 mm from each cut. The QR body is 17 mm.
[Brother's official print-area reference](https://download.brother.com/welcome/docp100306/cv_ql820_eng_escp_101.pdf) specifies approximately 25.9 mm of printable width on 29 mm continuous tape. The PDF does not draw across the full 29 mm width.
:::note
New prints offer DK-2210, A4 65-up and A4 24-up. The older 50 × 25 mm roll preset is hidden from normal choices, but existing batch PDFs remain available. Choose **Brother DK-2210** for this tape. Existing PDFs keep their original format. Reprint the same label numbers on the new paper; you do not need to reissue numbers.
:::
## 1. Prepare the printer
### 1-1. Open the cover
Turn the printer off and lift the front DK roll cover. On first use, also remove the platen protection sheet and clock battery insulation sheet.
 ### 1-2. Fit the DK roll
Fit the spool arms into the guides securely. Match the roll orientation to the diagram.
 ### 1-3. Feed the leading edge through the output slot
Feed the tape through the label output slot until its edge reaches the end of the slot. Close the cover, then connect the AC adapter and power cord.
 Diagram source: [Brother official FAQ: Load or replace a DK roll](https://faq.brother.co.jp/app/answers/detail/a_id/11034) (Japanese). Brother lists the QL-820NWBc among the supported models. See the [Quick Setup Guide](https://download.brother.com/welcome/docp100285/ql820nwb_jpn_qsg_d017p8001_02.pdf) for the complete setup.
Brother directs QL-820NWBc owners to the QL-820NWB manuals. Read the [model differences](https://download.brother.com/welcome/docp100714/d02jdw001a_balder_insertion_ql_jp.pdf) too: the c model has no USB host port and does not support ad-hoc Wi-Fi.
## 2. Install the software
Open [Brother's software downloads](https://www.brother.co.jp/download/software/index.aspx), select QL-820NWB/820NWBc, and choose your exact Windows or macOS version. Check support and install the software offered for that OS. Connect the printer when prompted by the installer.
P-touch Editor can help check the printer connection. For stock labels, use the PDF generated by Toreca Cloud.
## 3. Connect the computer
For USB, follow the installer prompts to connect the computer to the printer's rear USB port and turn it on. Confirm it appears in the OS printer list.
For store Wi-Fi, prepare the router, SSID, password and a USB cable. In the driver installer, choose wireless networking, then choose the option to use a USB cable for setup. Complete the network configuration and disconnect USB when prompted. Confirm the computer can reach the printer over the store network.
**The QL-820NWBc does not support WPS connection.** Use the [official Wi-Fi instructions](https://faq.brother.co.jp/app/answers/detail/a_id/13471/related/1), including the Windows/Mac videos and WPA3 instructions.
For wired LAN, connect the rear LAN port to the store network and follow the wired-network section of the [Quick Setup Guide](https://download.brother.com/welcome/docp100285/ql820nwb_jpn_qsg_d017p8001_02.pdf).
## 4. Check the printer separately
Print a sample from P-touch Editor or another application, using the paper setting for the installed roll. Resolve connection, feeding and paper errors before testing stock labels.
## 5. Check the Toreca Cloud test PDF
1. Under **Settings** › **Label printing**, open the test PDF for **Brother DK-2210**.
2. Select the QL-820NWB/820NWBc, 29 mm continuous tape, length 50 mm, portrait, Actual size (100%), and, for a continuous strip, Auto Cut off and Cut at End on.
3. Measure the 40 mm scale. The frame is 25 mm across the tape and 44 mm along the feed direction. Check for clipping.
4. If size is correct and only position is wrong, adjust X/Y and save (0.1 mm steps, up to ±3.0 mm). X moves right and Y moves down on the PDF. Large offsets can move content outside the printable area; test small changes first.
5. Choose **Brother DK-2210** in the stock label dialog and print a small batch. Check two consecutive labels for cut alignment and scan both QR codes with the putaway app before printing in bulk.
See [Putaway and QR labels](/en/guides/inventory/putaway) for creating and reprinting PDFs. The start position is always 1.
A PDF cannot force driver paper or cutting settings. Set them as above and check feeding, cuts and QR scanning on the actual printer.
## Troubleshooting
| Problem | Check |
| ---------------------------------- | --------------------------------------------------------------------------------------------- |
| Wi-Fi setup fails | Do not use WPS on the c model. Check credentials and complete USB-assisted setup |
| Paper error | Match the roll and driver settings. Do not use TD-series paper registration instructions |
| No 50 × 25 mm option | Choose Brother DK-2210 in Toreca Cloud and 29 mm continuous tape, length 50 mm, in the driver |
| Content shrinks or clips | Check scaling, paper dimensions, orientation and printable area |
| Printing failed after PDF creation | Reprint the batch with the same label numbers; reissuing numbers is unnecessary |
Setup is not verified until the physical print and QR scan checks succeed.
## Print about ten labels as one strip
1. Select the units in **Inbound**, then open **Print QR labels**. The initial arrival-date filter now includes all dates.
2. Choose DK-2210 and match the certificate numbers, asset numbers and positions in **Print order and item matching**. Identical card names still appear as separate units.
3. With print app 0.1.5 or later, select **Print a connected strip**. Both Mac and Windows use a network-connected QL-820NWB with DK-2210. When printing the PDF in another app, turn **Auto Cut** off and **Cut at End** on in that app's print settings.
4. Submit once. The desktop app sends all PDF pages as one job and cuts only at the end. Connected-strip printing is limited to 200 labels in one PDF; separate PDFs are not guaranteed to stay connected.
5. Match the paper count, `#001/10` sequence, label code and certificate to the batch details. An item detail opened from a batch offers **Back to print batch**.
The QL-820NWB cutter is a full-cut type. DK-2210 is continuous tape without perforations; these settings do not add half-cuts or tear lines. Use scissors to separate the strip.
The desktop app sets the output mode for this job without changing the OS defaults. Check one label, ten labels and the output after a printer restart on each PC you use. If submission is uncertain or printing stops partway, inspect the printer, OS queue and paper first. Reprint from the existing batch instead of issuing new label numbers.
Sources: [Brother's continuous-printing instructions](https://help.brother-usa.com/app/answers/detail/a_id/144132/~/chain-or-continuous-printing-and-not-cutting-every-label), [official QL specifications (full cut)](https://www.brother.eu/-/media/product-downloads/devices/nordics/eu_en/labelling-machines/ql_800_leaflet_english_single_pages.pdf), and [QL-820NWB media](https://www.brother.co.jp/product/labelprinter/ql820nwb/accessory/index.aspx).