---
title: Prepare and send documents with CloudSign
sidebar:
order: 5
---
| Workflow | Where to work | How to confirm completion |
| ---------------------- | ------------------------------------- | ------------------------------------------------- |
| API integration | Prepare the document from the deal | Synchronize its sending and signing status |
| Legacy manual workflow | Open the saved CloudSign template URL | Record sent/signed only after it actually happens |
Settings management and document preparation/sending have separate permissions.
## 1. Check the connection and readiness
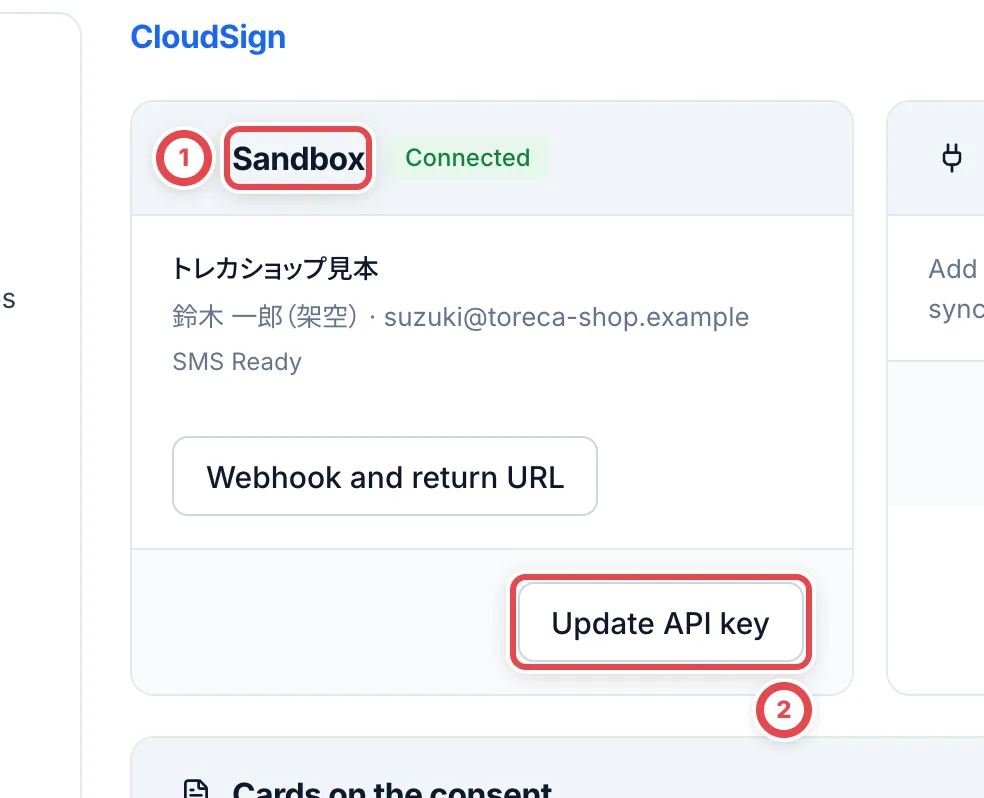
Open **Settings → CloudSign**. Match the sandbox or production environment at ①. Use **Add API key** or **Update API key** for that environment’s client ID. Check the key-update action at ② and readiness further down the page. Before replacing a key, verify the provider account and shop.
Follow the **Webhook and return URLs** instructions on the provider side too. On-screen signing needs the required provider SMS setup. Saving settings does not send a document.
 ## 2. Choose standard wording and initial item selection
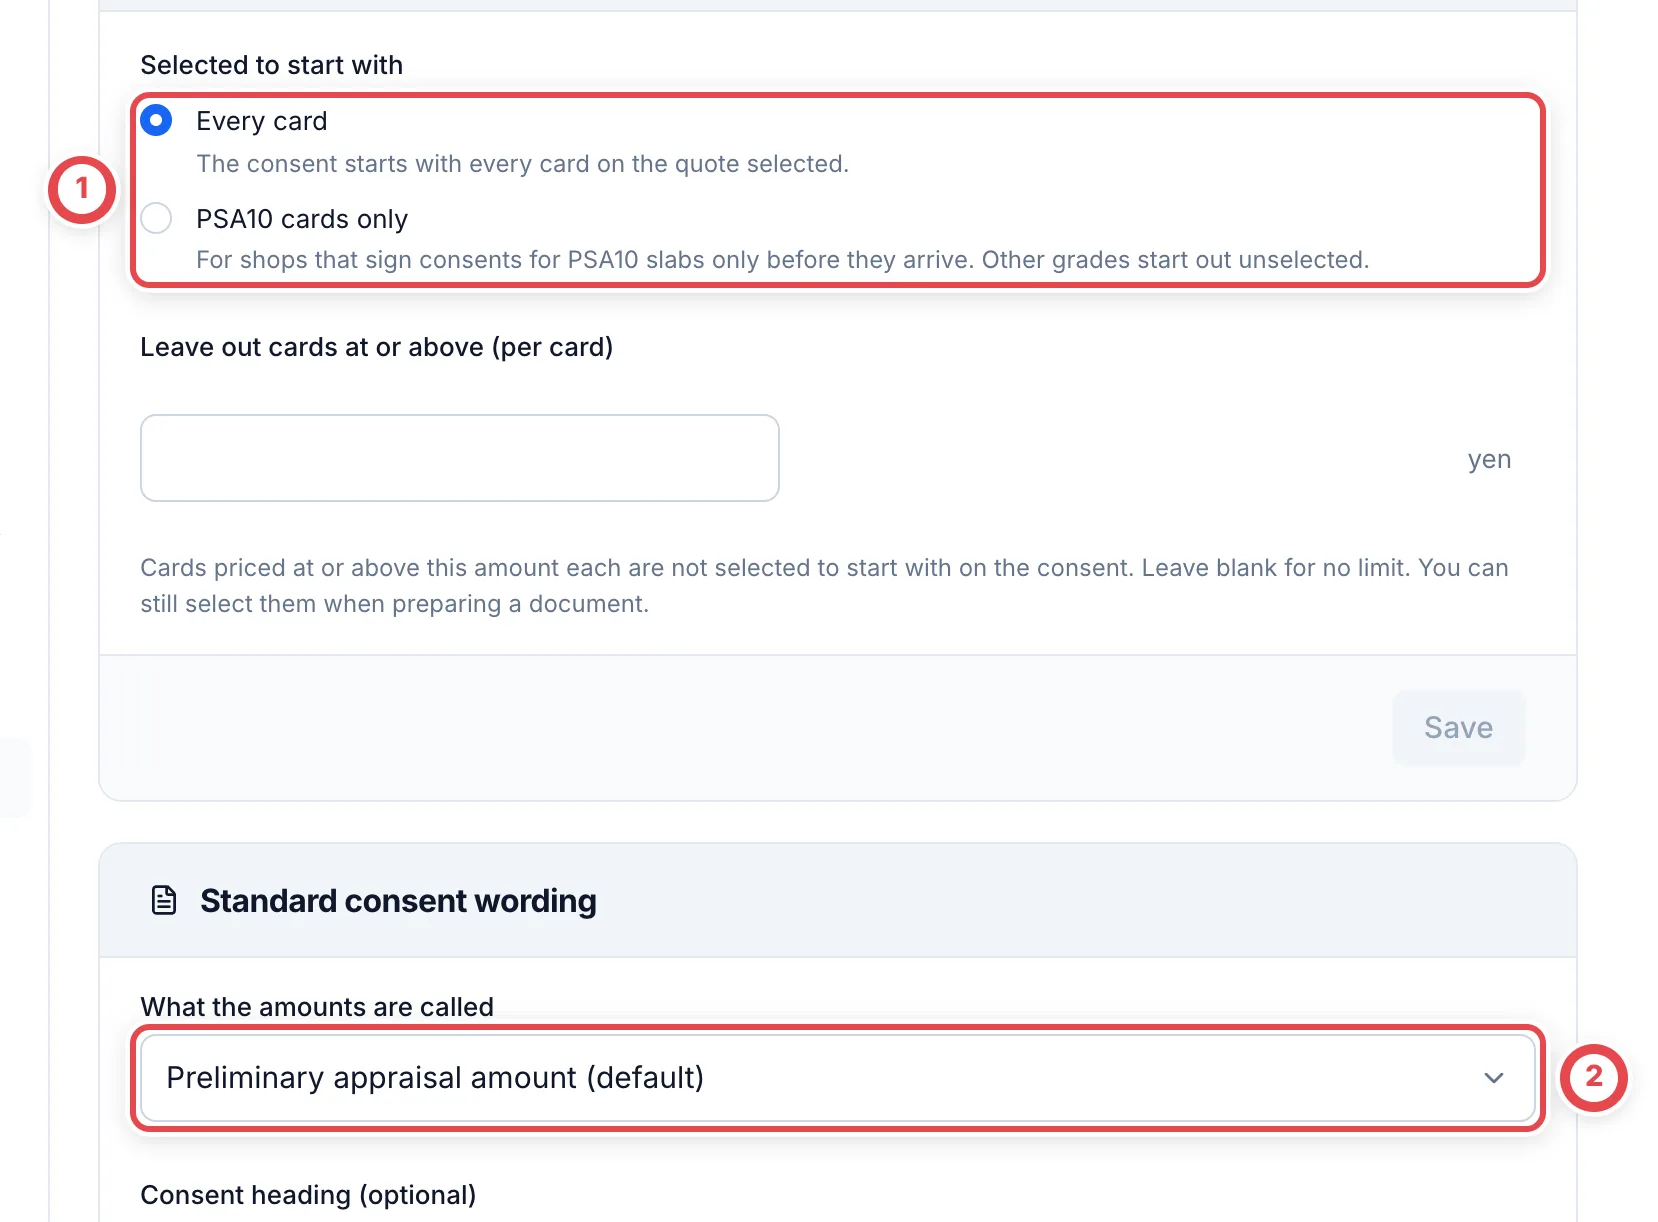
At ①, choose whether all items or only PSA10 items start selected, and whether a per-item amount excludes items from the initial selection. Review the actual selection again when preparing each document.
At ②, set the standard form’s amount wording and title. Confirmed-price wording is for operations that guarantee a price before physical arrival. Preview the business information, dealer permit, seal and item table using PDF preview. Changes apply to newly prepared documents; existing documents retain their original content.
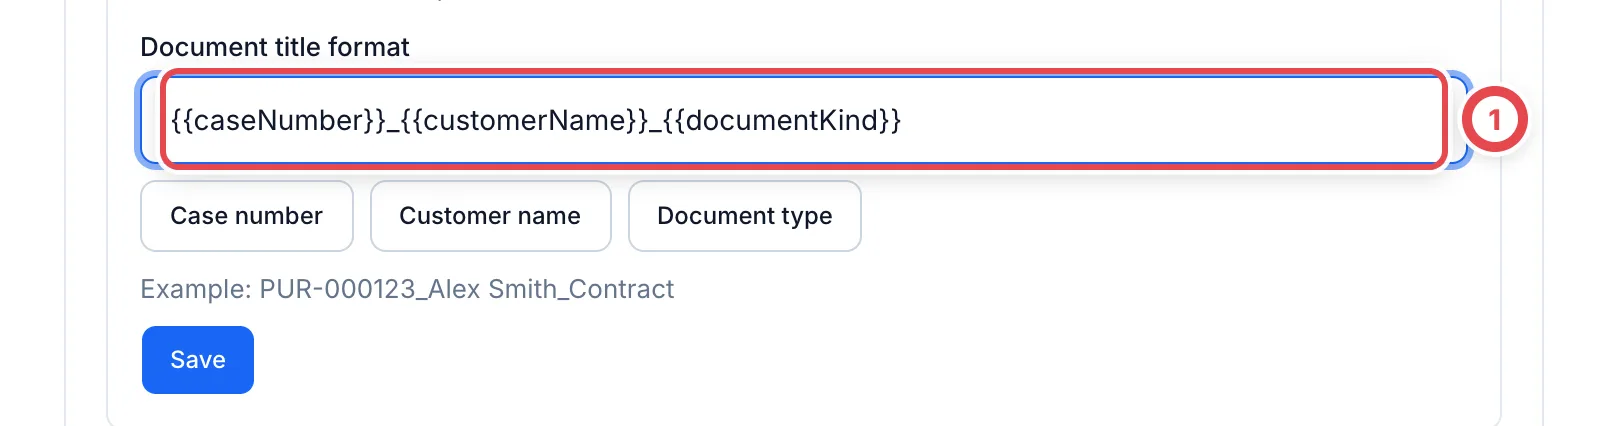
Under **Document templates**, set a document title format for each template. Add the case number, customer name and document type using the buttons, review the example and save. A blank format uses the case number and document type. Selecting a template fills the title, which can still be edited before creating the document. This title is separate from the heading inside the PDF. Changes do not alter existing documents.
 ## 3. Choose items, destination and recipients
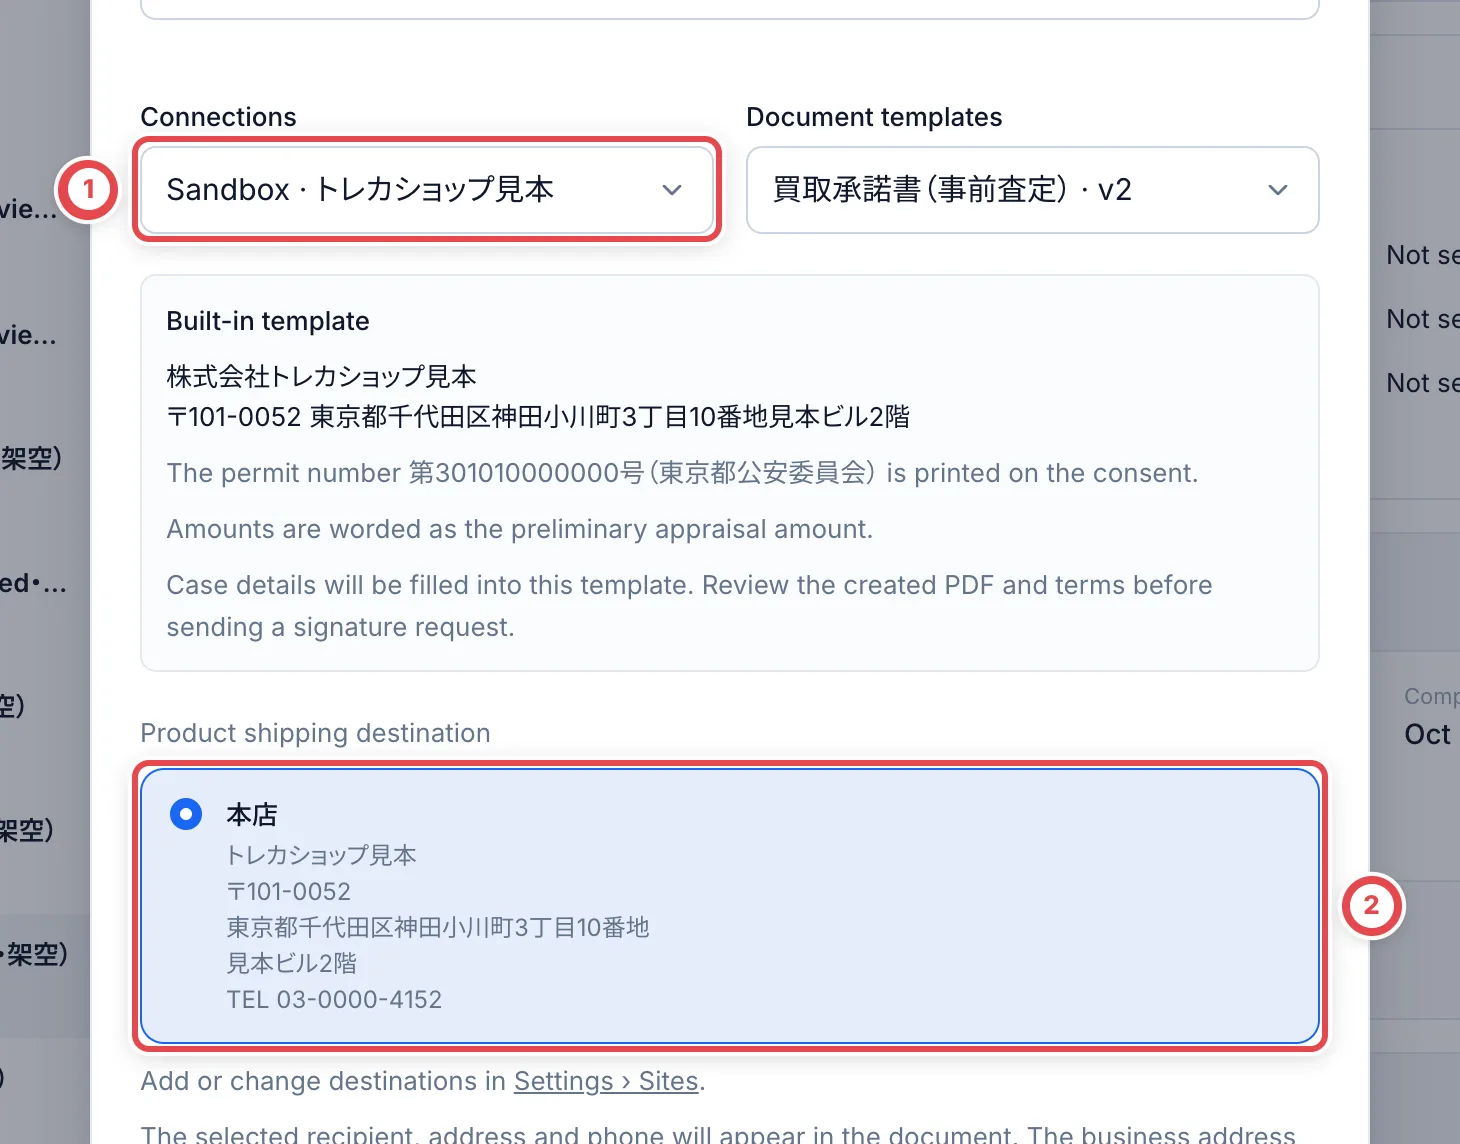
Open **Shipping** for the correct customer and deal, then **Prepare document** under the purchase contract or power of attorney. Match the connection/environment at ① and select the template. For a supported template, choose the product shipping destination at ②. Manage addresses in **Settings → Sites and locations**.
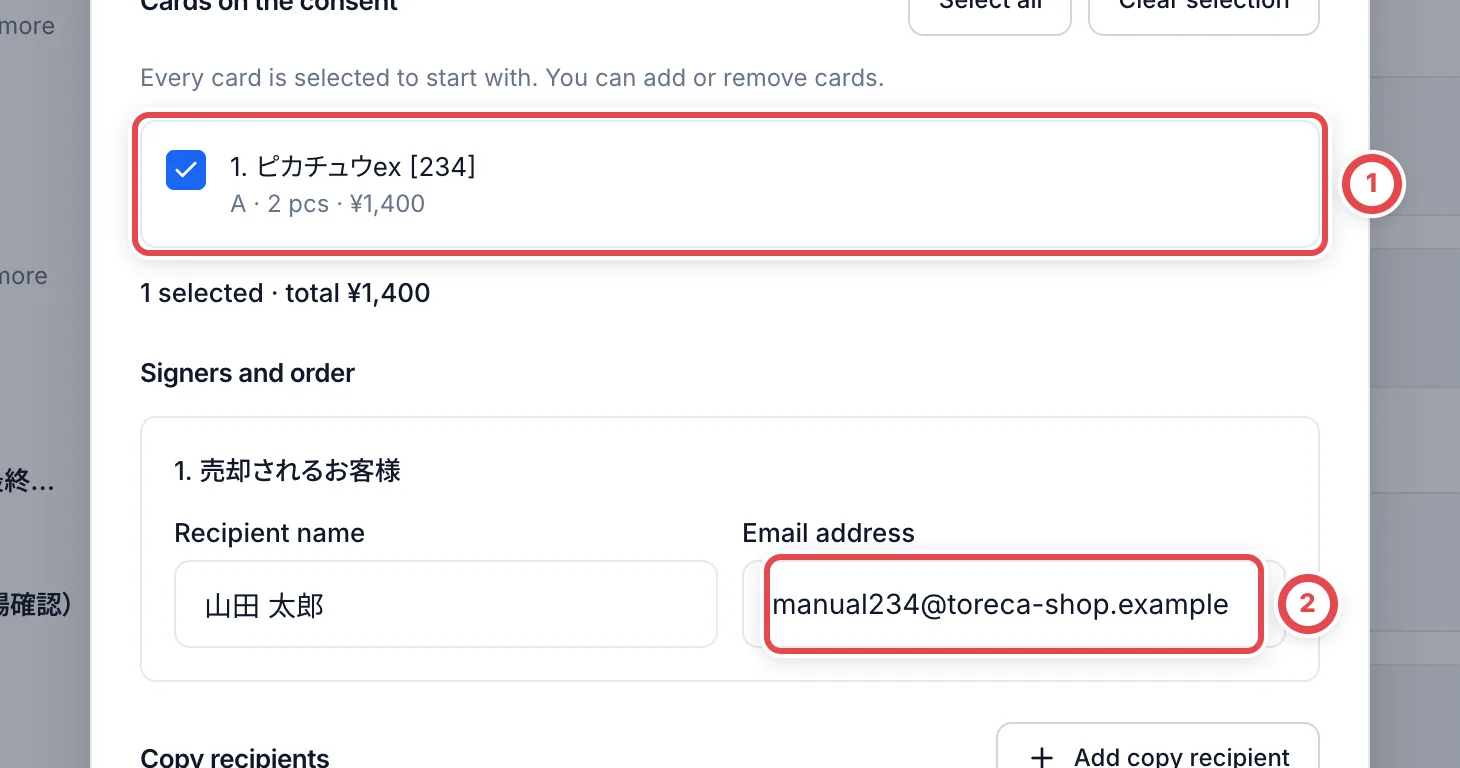
 Scroll down and match selected items, quantity and total at ① to the quote. A set price covers the entire set. Check the recipient’s name, email and any required phone number at ②. Do not reuse another customer’s recipient details. Preparation alone does not send a document.
 ## 4. Review the PDF and send
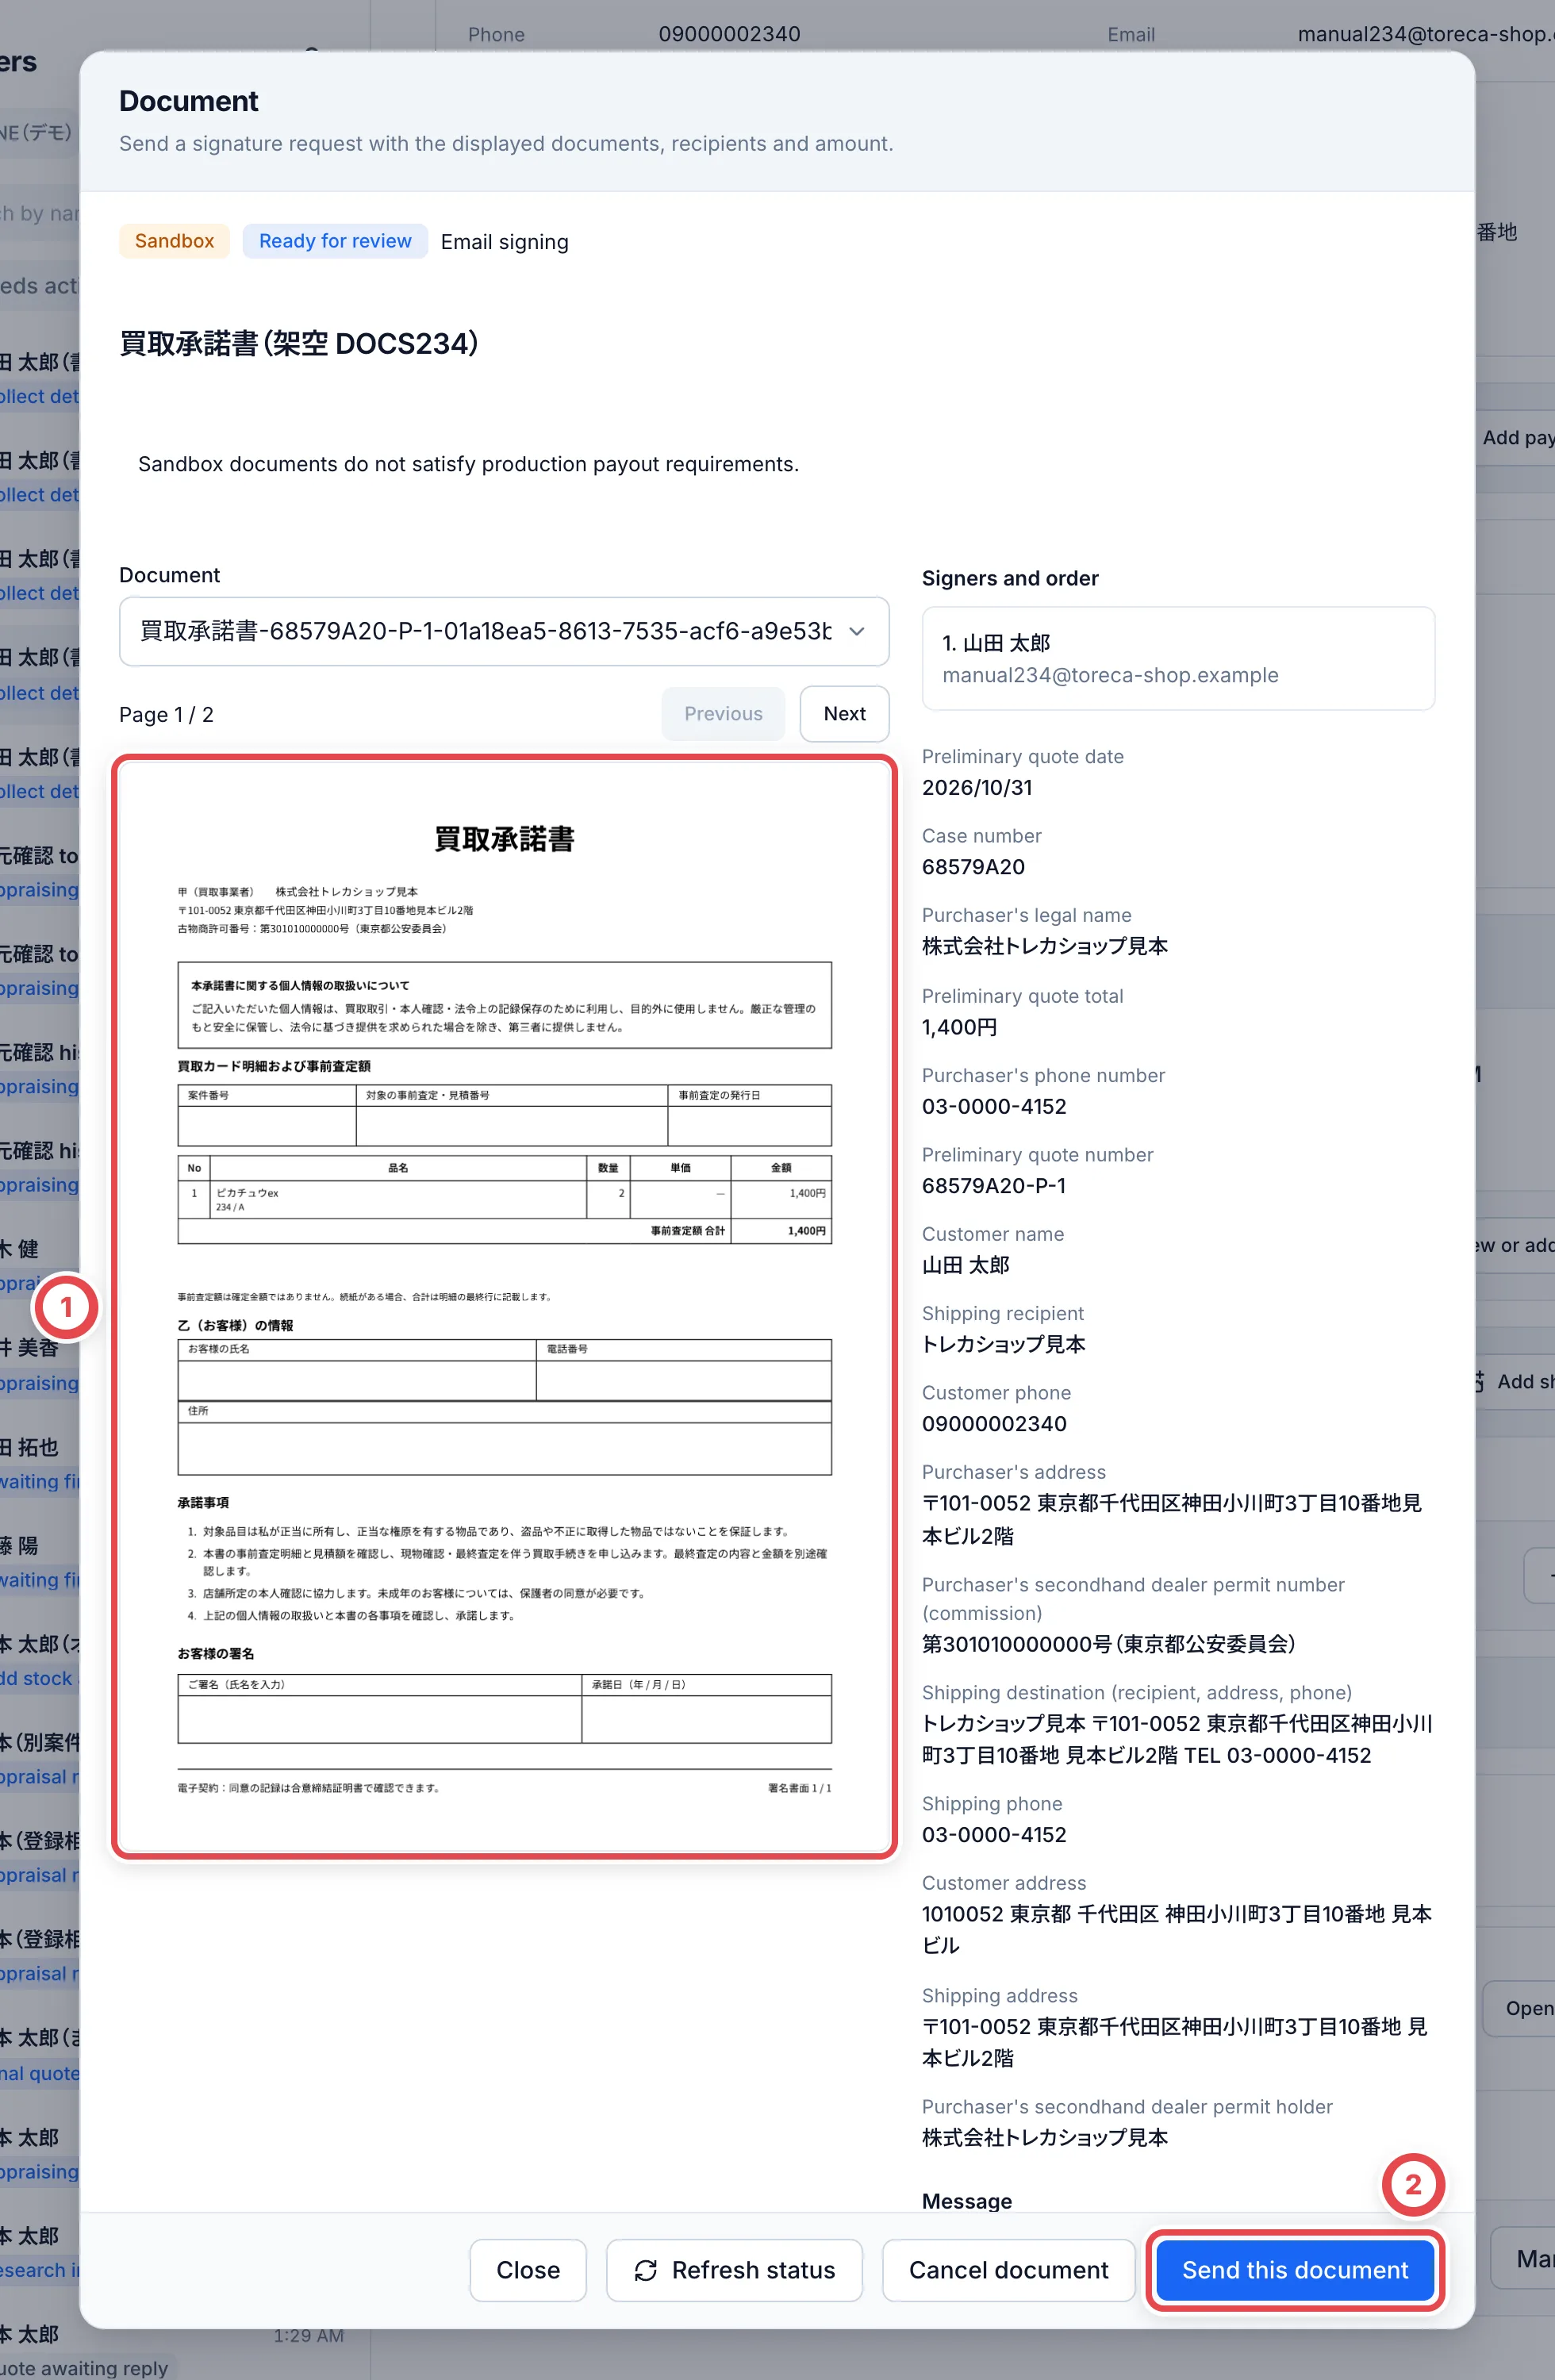
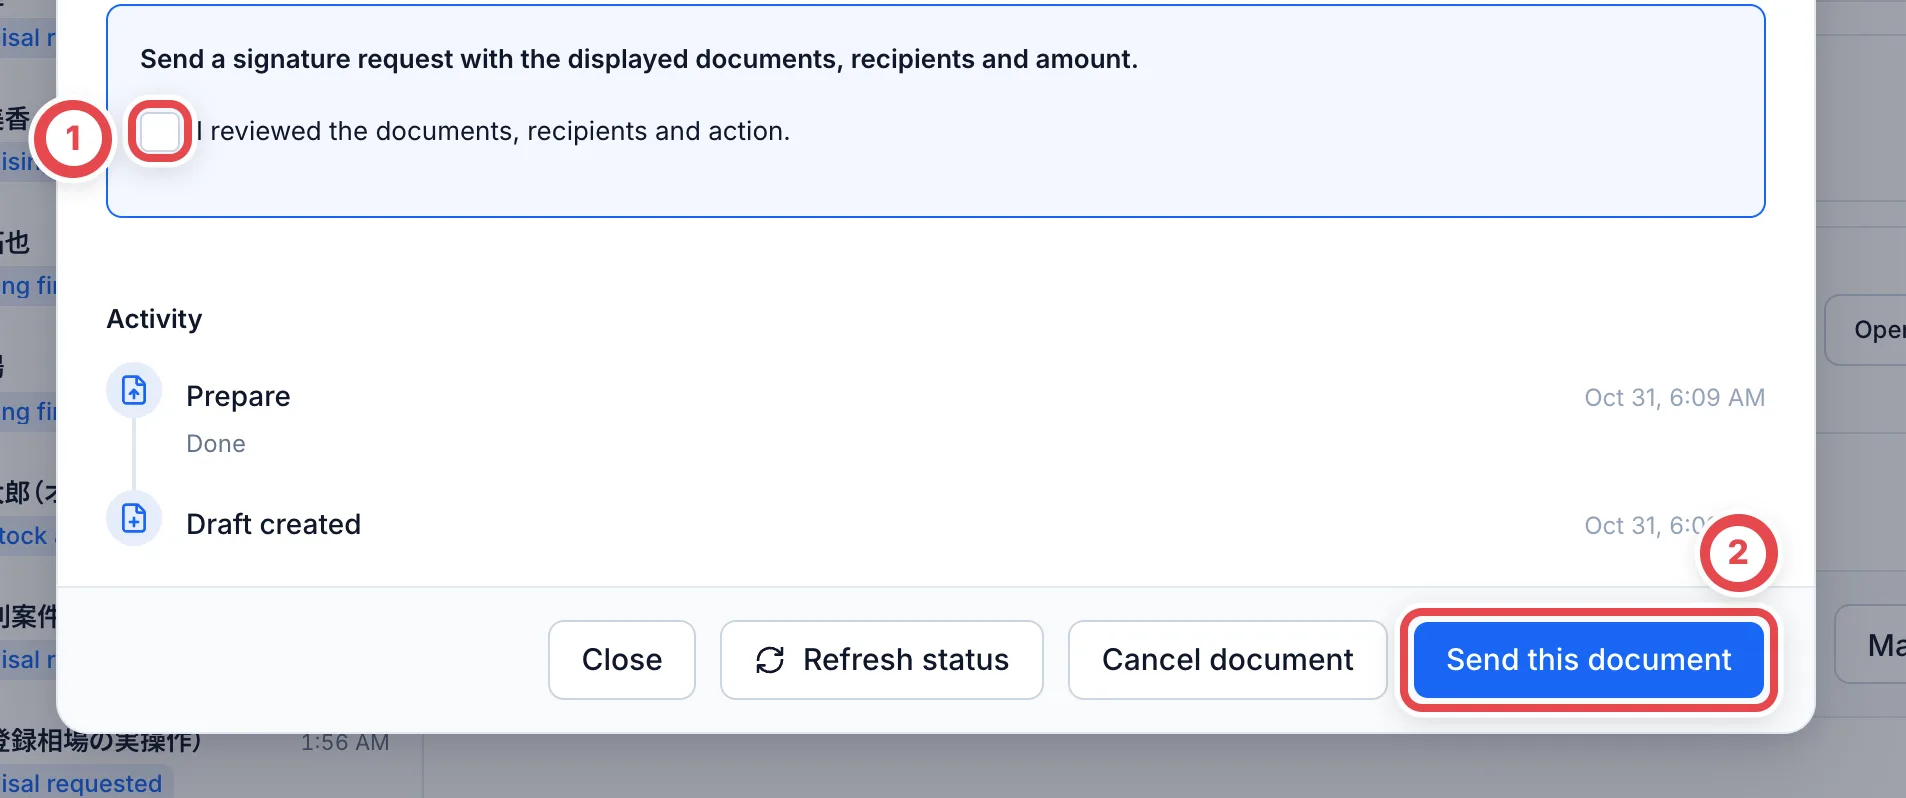
Open the prepared PDF at ①. Check the title, customer, issuer, items, quantities, amount and destination, then verify recipients and delivery method. Scroll down and select the confirmation checkbox for the document, recipients and operation before pressing **Send this document**.
:::warning
Confirming the send action at ② starts a real CloudSign delivery. Check the environment, recipients and PDF before confirming.
:::
If the quote or recipient has changed, prepare and review current content instead of sending the stale version.
 ## 5. Confirm sending and signing status
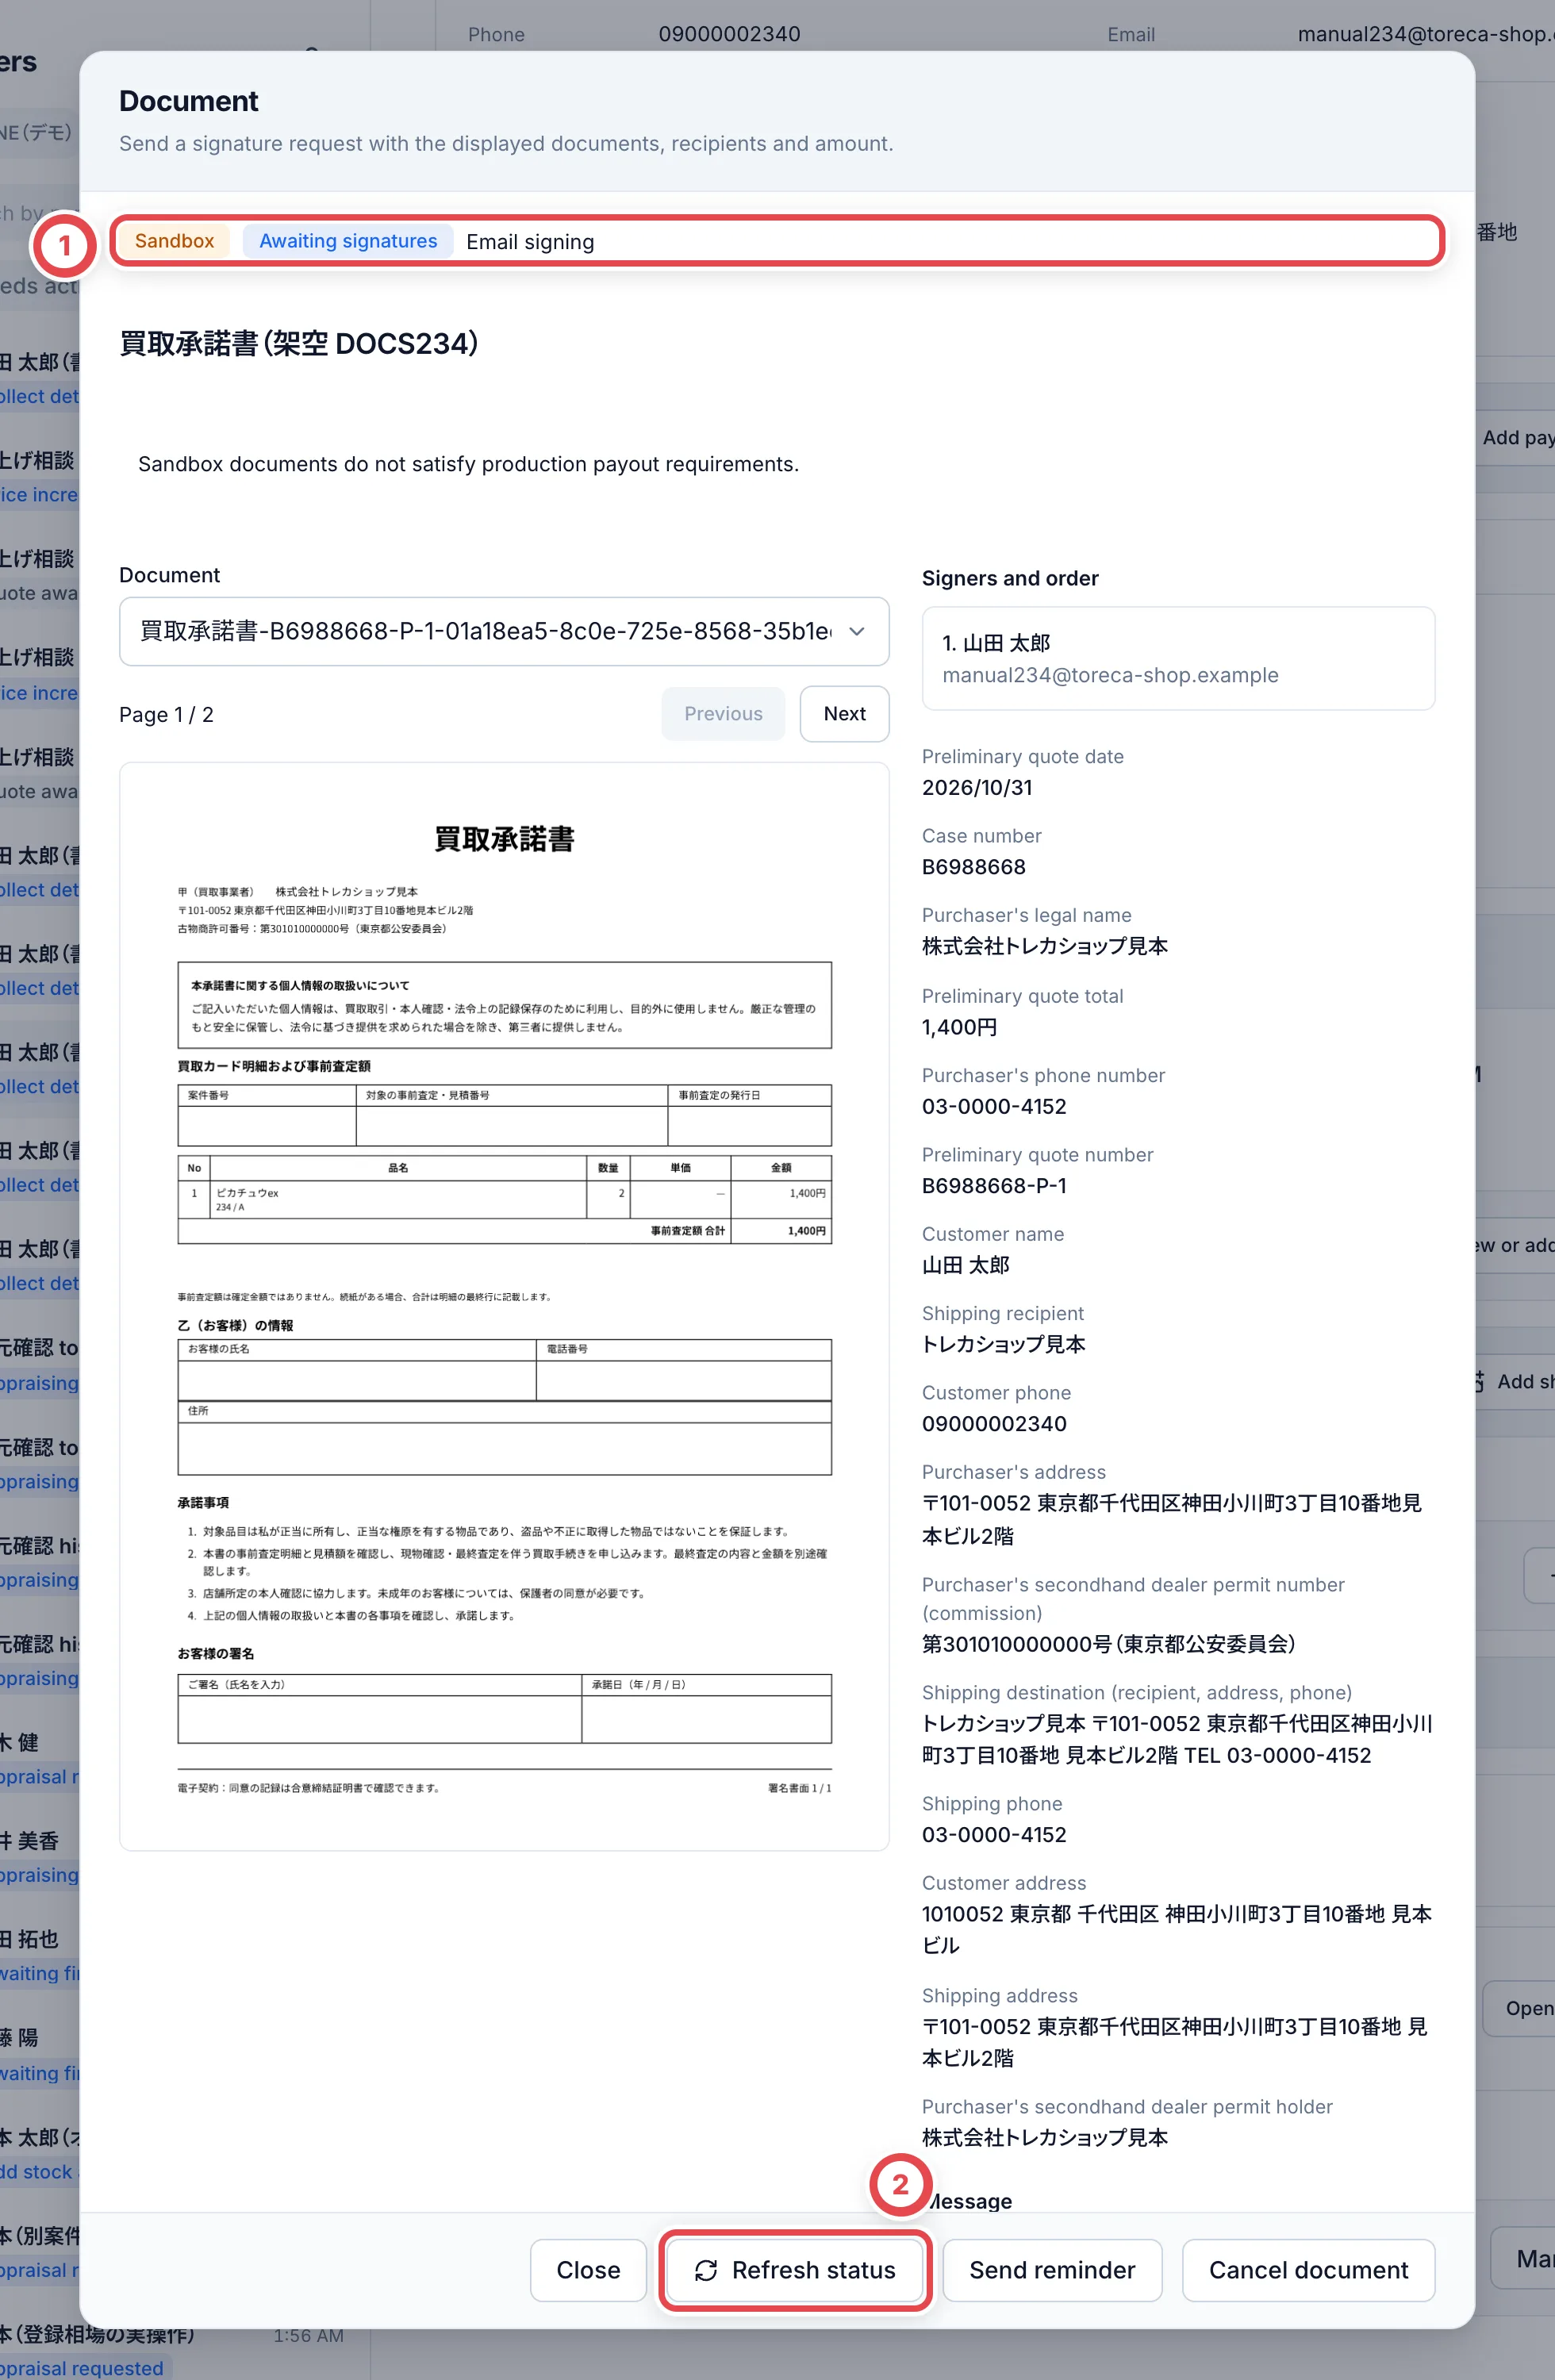
Check the document status and activity at ①. Wait while sending is in progress. Completed documents provide the signed PDF and agreement certificate. They are also available in [Contracts](/en/guides/purchase/contracts).
For an unknown outcome or sync error, follow the existing document’s status/sync action at ②. Confirm whether that document was already sent or signed before creating another. Reminders and cancellation also perform provider operations.
 ## Troubleshooting
| What you see | What to check |
| ------------------------------------- | ---------------------------------------------------------------------------------------------- |
| Cannot prepare a document | Check connection, permissions, readiness and deal prerequisites such as identity verification. |
| Cannot select a destination | Check template support and the registered shipping sites. |
| Quote contents have changed | Recheck the quote and prepare current document content. |
| Sending result is unknown | Check/synchronize the same document; avoid duplicate sending. |
| Manual sent/signed buttons are absent | API-managed documents use their synchronized state. Keep the two workflows separate. |