# トレカクラウド ヘルプセンター
> トレカクラウドの使い方、AIエージェント(MCP)のつなぎ方、外部連携APIのリファレンスをまとめたヘルプセンターです。
# トレカクラウド ヘルプセンター
Source: https://docs.toreca-cloud.com/
**[使い方](/guides)**
買取・在庫管理・設定の操作手順
**[AI連携(MCP)](/mcp)**
AIエージェントから在庫・買取を操作
**[外部連携API](/api)**
在庫・買取強化対象を外部アプリと連携
**[よくある質問](/faq)**
ログイン・権限・連携のよくある質問
## 困ったときは
ページ右上の「アシスタント」に質問すると、このヘルプセンターの内容から答えます。答えが見つからないときは、契約時にご案内した窓口へお問い合わせください。
新しい機能と修正は[変更履歴](/changelog)で毎日更新しています。
---
# 外部連携APIの概要
Source: https://docs.toreca-cloud.com/api
外部連携API(パートナーAPI)は、店舗が許可した外部アプリのためのAPIです。LPやXの投稿に買取強化対象を載せるアプリ、在庫を同期するオリパや業務システムがこのAPIを使います。
外部アプリは、店舗のメンバーがブラウザで許可したときに発行されるトークンでAPIを呼びます。APIキーの共有はしません。どの店舗の情報を読むかはトークンで決まり、リクエストで店舗を指定することはできません。
## 基本情報
| 項目 | 値 |
| ------------ | ----------------------------------------------------- |
| ベースURL | `https://api.toreca-cloud.com/partner/v1` |
| 認可 | OAuth 2.1 の認可コードフロー(PKCE S256 が必須) |
| クライアント | 事前登録した機密クライアント(`client_secret_basic`) |
| 形式 | JSON。すべての応答に `Cache-Control: no-store` |
## 使えること
| 権限(scope) | 使えること |
| ---------------------- | ------------------------------------------ |
| `purchase-boosts:read` | 買取強化対象の一覧を読む。在庫は見えません |
| `inventory:read` | 拠点・保管場所・在庫の個体を同期する |
| `inventory:write` | 販売した個体を確保して出庫する |
| `inventory:move` | 棚の移動、拠点間の移動、持ち出しと戻し |
LPや投稿用のアプリには `purchase-boosts:read` だけを許可してください。在庫を一切見せずに、買取強化対象だけを渡せます。
## はじめるまでの流れ
1. **店舗が連携先を登録する**
店舗の管理者が、設定の「外部連携」で連携先を登録します。表示名、戻り先URL、許可することを選ぶと、クライアントIDとクライアントシークレットが発行されます。外部連携の画面が見えないときは、トレカクラウドの運営にご連絡ください。
2. **店舗のメンバーが接続を許可する**
外部アプリが認可画面を開き、店舗のメンバーがログインして「許可する」を押します。外部アプリは認可コードをトークンに交換します([認可の流れ](/api/authorization))。
3. **接続を作る**
最初に `POST /connection` を呼びます。店舗が接続を解除すると、以後のAPIは
`connection_revoked` で拒否されます。
4. **APIを呼ぶ**
アクセストークンをBearerで付けて呼びます。トークンの保管と更新は[トークンの保管と有効期限](/api/tokens)を守ってください。
各エンドポイントの詳細は[APIリファレンス](/api/reference)にあります。
在庫連携を実装する場合は、[在庫の同期・確保・出荷・移動](/api/inventory-operations)で、確保と掲載の使い分け、配送申請、再試行を確認してください。
---
# 認可の流れ(OAuth)
Source: https://docs.toreca-cloud.com/api/authorization
外部連携APIは、OAuth 2.1 の認可コードフローで許可を得ます。PKCE(S256)は必須です。トークンを受け取る処理は、クライアントシークレットを守れるサーバー側で行ってください。
## エンドポイント
| 用途 | URL |
| ------------------------ | ------------------------------------------------------------------------------ |
| 認可 | `https://api.toreca-cloud.com/api/auth/oauth2/authorize` |
| トークン | `https://api.toreca-cloud.com/api/auth/oauth2/token` |
| 失効 | `https://api.toreca-cloud.com/api/auth/oauth2/revoke` |
| リソース(`resource`) | `https://api.toreca-cloud.com/partner/v1` |
| 認可サーバーのメタデータ | `https://api.toreca-cloud.com/api/auth/.well-known/oauth-authorization-server` |
| 保護リソースのメタデータ | `https://api.toreca-cloud.com/.well-known/oauth-protected-resource/partner/v1` |
認可・トークン・更新のすべてのリクエストに、`resource=https://api.toreca-cloud.com/partner/v1` を付けます。
## 1. 認可画面を開く
`code_verifier` を乱数で作り、そのSHA-256を `code_challenge` にします。`state` も乱数で作り、戻ってきたときに照合します。
```ts
import { createHash, randomBytes } from "node:crypto";
const verifier = randomBytes(32).toString("base64url");
const challenge = createHash("sha256").update(verifier).digest("base64url");
const state = randomBytes(16).toString("hex");
const url = new URL("https://api.toreca-cloud.com/api/auth/oauth2/authorize");
url.search = new URLSearchParams({
response_type: "code",
client_id: process.env.TORECA_CLIENT_ID!,
redirect_uri: "https://lp.example.com/oauth/callback",
scope: "openid profile offline_access purchase-boosts:read",
state,
code_challenge: challenge,
code_challenge_method: "S256",
resource: "https://api.toreca-cloud.com/partner/v1",
}).toString();
// verifier と state をセッションに保存してから、url へリダイレクトする
```
`scope` には `offline_access` を入れてください。入れないとリフレッシュトークンが発行されず、15分ごとに許可を取り直すことになります。登録時に許可されていない権限を求めると、`invalid_scope` で拒否されます。
## 2. 店舗のメンバーが許可する
メンバーはトレカクラウドにログインし、接続する店舗(①)と許可する内容(②)を確かめて「許可する」(③)を押します。許可すると、`redirect_uri` に `code` と `state` が付いて戻ります。
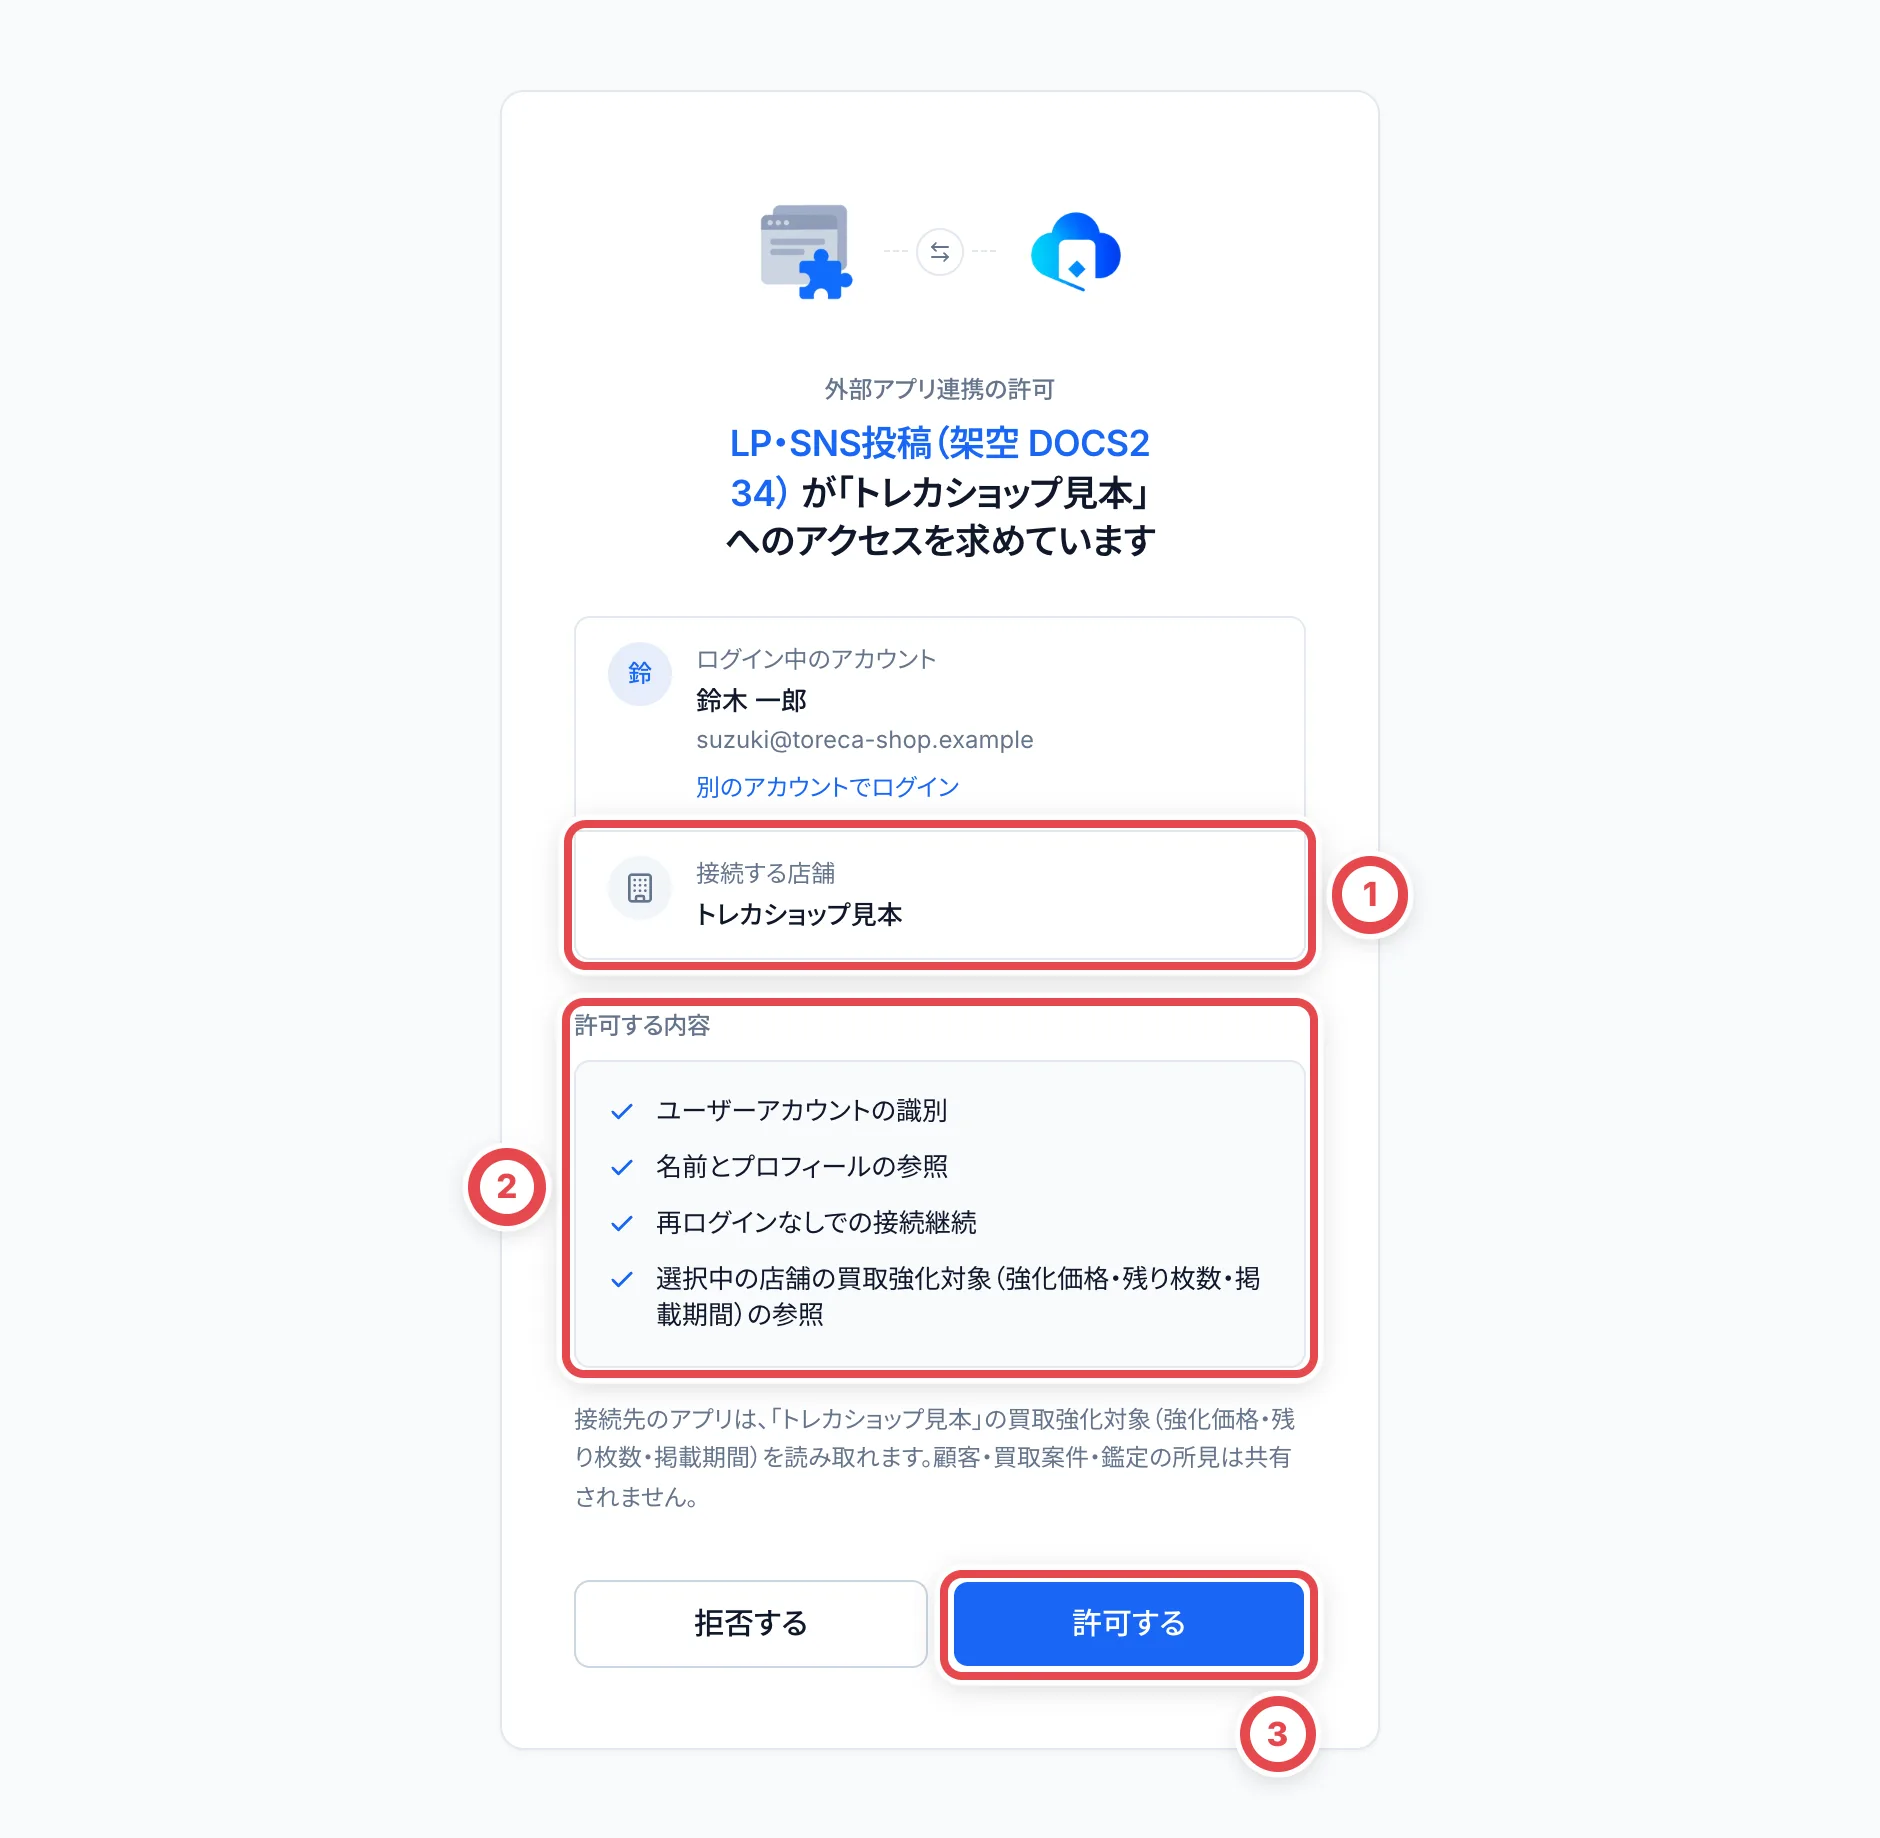 買取強化対象だけを読む連携先の許可画面です。②に、登録時に許可した内容だけが並びます。
## 3. コードをトークンに交換する
```ts
const response = await fetch(
"https://api.toreca-cloud.com/api/auth/oauth2/token",
{
method: "POST",
headers: {
Authorization:
"Basic " +
Buffer.from(
`${encodeURIComponent(clientId)}:${encodeURIComponent(clientSecret)}`,
).toString("base64"),
"Content-Type": "application/x-www-form-urlencoded",
},
body: new URLSearchParams({
grant_type: "authorization_code",
code,
redirect_uri: "https://lp.example.com/oauth/callback",
code_verifier: verifier,
resource: "https://api.toreca-cloud.com/partner/v1",
}),
},
);
const token = await response.json();
// { access_token, refresh_token, token_type: "Bearer", expires_in: 900, scope }
```
## 4. 接続を作る
トークンを受け取ったら、最初に `POST /partner/v1/connection` を呼びます。応答には接続した店舗の情報が入ります。
```bash
curl -X POST https://api.toreca-cloud.com/partner/v1/connection \
-H "Authorization: Bearer $ACCESS_TOKEN"
```
以降のAPIは、この接続が有効な間だけ使えます。トークンの保管と更新は[トークンの保管と有効期限](/api/tokens)で説明します。
---
# 在庫の同期・確保・出荷・移動
Source: https://docs.toreca-cloud.com/api/inventory-operations
すべてのパスは `https://api.toreca-cloud.com/partner/v1` からの相対パスです。先に[認可と接続](/api/authorization)を済ませます。項目・上限・応答の詳細は[APIリファレンス](/api/reference)で確認してください。
## 1. 在庫を同期する
1. `GET /inventory/sites` で拠点と棚を取得します。
2. `GET /inventory/changes` をカーソルなしで読み、`hasMore: true` の間は `nextCursor` を次の `cursor` に渡します。受け取った `type` と `id` ごとに `data` を上書き保存します。
3. 最後のカーソルを保存し、次から続きを読みます。Webhookは更新の合図なので、通知を受けたら同じ変更フィードを読みます。
`inventory:read` が必要です。連携先の在庫範囲が「割り当てのみ」なら、店舗がその連携先へ割り当てた範囲だけが見えます。`holdable` は取得時点で確保可能かどうかの目安です。取得後の別操作で状態が変わることもあるため、確保の成功は書き込み応答で判断します。
価格だけの更新は個体の変更フィードに出ません。現在の評価額は `POST /inventory/market-values` に `{"ids":["個体のUUID"]}` を渡して読みます。最大200件、重複不可です。見える個体に価格がない場合は `marketValue: null`、存在しない・範囲外の個体は結果から除かれます。
## 2. 販売から出荷までを選ぶ
どちらも `inventory:read` と `inventory:write` が必要で、接続を許可したメンバーにも現在の `inventory.write` 権限が必要です。読む操作も、確保・掲載・配送の詳細には両スコープが必要です。
| 使う場面 | 流れ |
| ------------------------------------------------------------ | ------------------------------------------------- |
| 1個体の販売を確保して出荷する | `holds` → 必要なら `confirm` → `ship` |
| オリパ・販売へ掲載し、当選・購入後に顧客の配送依頼をまとめる | `commitments` → `allocate` → `shipments` → `ship` |
### 確保して出荷する
`POST /inventory/holds` に `requestId`、`inventoryItemId`、`purpose`(`oripa` または `sale`)、`destinationLabel`、`reason` を渡します。`externalRef` は任意の自社側参照番号です。
| 操作 | 結果・注意 |
| ----------------------------------------------- | -------------------------------------------------------------------------- |
| 作成 | `reserved`。`expiresAt` は現在より後、90日以内。省略時は無期限 |
| `POST /inventory/holds/{id}/extend` | `reserved` の期限を変更 |
| `POST /inventory/holds/{id}/release` | `reserved` を解除して `cancelled`。発送待ちは解除不可 |
| `POST /inventory/holds/{id}/confirm`、本文 `{}` | 購入・当選が確定し `awaiting_shipment`。期限が消え、パートナーから解除不可 |
| `POST /inventory/holds/{id}/ship` | `reserved` または `awaiting_shipment` を出荷して `shipped` |
一括作成は `/inventory/holds/batch`、解除は `/release-batch`、出荷は `/ship-batch`。最大100件で、1件の拒否で新しい変更は全件取り消されます。詳細は `GET /inventory/holds/{id}` で読み直せます。
### 掲載・当選から配送申請する
1. `POST /inventory/commitments` に `requestId`、`inventoryItemId`、`purpose`、`label`、任意の `externalRef` を渡します。個体は棚に残り、オリパ・販売への掲載(`on_sale`)になります。この時点では配送伝票を作りません。
2. 当選・購入後に `POST /inventory/commitments/{id}/allocate` を呼びます。任意の `allocationRef` に自社の注文・開封番号を残せます。`allocated` は顧客保有のまま店で保管している状態です。
3. 顧客が配送を希望したら `POST /inventory/shipments` に `requestId`、`commitmentIds`、`destinationLabel`、`reason` を渡します。最大200件の `allocated` をまとめ、commitmentは `shipping` になります。
4. 実際の発送時に `POST /inventory/shipments/{id}/ship` を呼びます。追跡番号は `trackingNumber` です。
掲載の一括作成・当選・解除は `/inventory/commitments/batch`、`/allocate-batch`、`/release-batch` で、最大200件、全件成功または全件取り消しです。
出荷前の配送取り消しは `POST /inventory/shipments/{id}/cancel`。個体は `allocated` に戻ります。掲載・当選自体の解除は `/inventory/commitments/{id}/release` を使い、配送申請中なら先に配送を取り消します。`setAside: true` は解除後もこの連携先への割り当てを残します。紛失個体を解除しても紛失状態は変わらず、販売可能には戻りません。
配達失敗などで実物が戻ったときは `POST /inventory/shipments/{id}/returns` を使います。元の棚へ返品し、顧客保有の新しい `allocated` commitmentを作ります。応答の `commitmentId` は返品元、`commitment.id` は新しいIDなので、自社の参照を更新します。
:::warning
配送申請を読み直したとき、`items[].commitmentId` が元の掲載IDと一致しない・`null` の場合は、出荷・返品を止めて店舗の管理者へ確認してください。この場合、正しい元のIDを指定しても `commitment_not_on_shipment` になることがあります。拒否を避けるために価格指定を削除したり、別のIDへ置き換えたりしないでください。
:::
## 3. 出荷時の金額
金額は通貨の最小単位の整数で、JPYなら円です。0〜10,000,000,000を指定できます。
- 確保の出荷では `saleAmountMinor` を指定します。省略すると最新の円評価額を使い、評価額もない場合は `sale_amount_required` で出荷を拒否します。
- 配送申請の出荷では `items` に `commitmentId` と `saleAmountMinor` を渡します。指定しない行は円評価額を使います。
- `saleCurrency` の既定は `JPY`。確保では金額、配送申請では `items` が必要です。配送申請をJPY以外で出荷する場合は、全行の金額を指定します。
金額未取得を0円に置き換えて再送しないでください。自社の売価を確認してから同じ対象を出荷し直します。
## 4. 棚・拠点・持ち出し
`inventory:read` と `inventory:move`、メンバーの `inventory.write` 権限が必要です。取得も同じ権限で、自社が作成した伝票だけを扱えます。
| 操作 | 入力と結果 |
| ---------------------------------------- | ----------------------------------------------------------------------------------------------------- |
| `POST /inventory/items/{id}/move` | `toLocationId` と `reason`。同じ拠点内の棚へ移動。同じ棚なら `moved: false` |
| `POST /inventory/transfers` | `requestId`、`toSiteId`、`inventoryItemIds`、`reason`。1拠点から別拠点へ最大200件発送し、移動中にする |
| `POST /inventory/transfers/{id}/receive` | `toLocationId` は移動先拠点の棚。任意の `inventoryItemIds` を受取。省略時は移動中の全件 |
| `POST /inventory/transfers/{id}/return` | `reason` と任意の `inventoryItemIds`。移動中の個体を元の棚へ戻す。受取済みは対象外 |
| `POST /inventory/checkouts` | `requestId`、`inventoryItemIds`、`destinationLabel`、`reason`。撮影・イベントなどへ最大200件持ち出す |
| `POST /inventory/checkouts/{id}/return` | `items` の各 `inventoryItemId`・`toLocationId` と `reason`。持ち出した実物を棚へ戻す |
持ち出し中の個体は `removed` で、棚・販売可能在庫から外れます。販売出荷としては扱いません。拠点間移動は `GET /inventory/transfers/{id}`、持ち出しは `GET /inventory/checkouts/{id}` で読み直します。
## 5. 再試行・拒否への対処
作成時の `requestId` は、自社の1回の業務操作に対して1つのUUIDを保存し、通信失敗後も同じ内容で再利用します。初回は201、同じ作成の再実行は200と現在の状態を返します。別の内容へ流用すると `idempotency_conflict` です。応答を受け取れなかったことだけを理由に新しいIDを発行しないでください。
未知の項目・空の理由・重複ID・上限超過は拒否されます。理由は前後空白除去後1〜2,000文字で、不正な制御文字は使えません。クライアントから個体の `version` は送りません。
| エラー | 対処 |
| ----------------------------------------- | ------------------------------------------------------------------------ |
| `conflict` | 対象を読み直し、現在の状態を確認してから同じ操作を再試行 |
| `receipt_not_confirmed` | 店舗側の受取確認を完了してから再試行 |
| `unit_unavailable` / `unit_not_allocated` | 在庫・割り当てを同期し直す。別の個体へ変えるなら新しい業務操作として作成 |
| `hold_confirmed` / `hold_shipped` | 確保解除できない段階。店舗側で伝票を確認 |
| `commitment_shipping` | 出荷前なら配送申請を取り消してから解除 |
| `shipment_shipped` | 出荷前取り消し不可。実物が戻った場合だけ返品を記録 |
| `*_blocked` / `*_refused` | 状態・紛失・棚・拠点などを店舗で確認。拒否を成功扱いしない |
エラーには対象の `inventoryItemIds`、`holdIds`、`commitmentIds`、`requestId` が添えられる場合があります。[権限とエラー](/api/scopes-and-errors)も参照してください。
---
# 買取強化対象を取得する
Source: https://docs.toreca-cloud.com/api/purchase-boosts
買取強化対象は、店舗がしばらく通常より高く買い取るカードやBOXの一覧です。店舗は毎日コンソールで価格と残り枚数を見直し、最終見積の承諾を記録すると残り枚数が減ります([買取強化対象の使い方](/guides/purchase/purchase-boosts))。外部アプリは、この一覧をAPIで読んでLPや投稿に載せます。
## 必要な権限
`purchase-boosts:read` だけで読めます。在庫の権限(`inventory:read`)は要りません。店舗の連携先の登録で「買取強化対象を読み取る」を許可してもらい、認可のときに `scope` へ `purchase-boosts:read` を入れてください。
## 一覧を取得する
```bash
curl https://api.toreca-cloud.com/partner/v1/purchase-boosts \
-H "Authorization: Bearer $ACCESS_TOKEN"
```
```json
{
"boosts": [
{
"id": "01a1…",
"target": {
"kind": "card",
"card": {
"id": "01a0…",
"name": "リザードンex",
"cardNumber": "201/165",
"imageUrl": "https://images.toreca-cloud.com/…",
"rarity": { "code": "SAR", "name": "SAR" },
"set": { "id": "…", "code": "SV2a", "name": "ポケモンカード151" },
"game": {
"id": "…",
"code": "pokemon",
"name": "ポケモンカードゲーム"
}
},
"grade": {
"id": "…",
"code": "10",
"label": "PSA 10",
"serviceCode": "psa",
"serviceName": "PSA",
"serviceKind": "third_party"
}
},
"priceMinor": 120000,
"currency": "JPY",
"remainingQuantity": 2,
"status": "open",
"startsAt": null,
"endsAt": "2026-10-10T15:00:00.000Z",
"note": "美品に限ります",
"updatedAt": "2026-10-04T09:12:33.000Z"
}
],
"generatedAt": "2026-10-04T09:30:00.000Z"
}
```
| 項目 | 意味 |
| --------------------- | ---------------------------------------------------------------------------------------------------- |
| `target.kind` | `card`(カード)か `box`(BOX・パック・デッキ)。BOXのときは `target.product` に商品の情報が入ります |
| `target.grade` | 対象のグレード。`null` はグレードを問いません |
| `priceMinor` | 1枚あたりの強化価格。円の整数です(120000 は12万円) |
| `remainingQuantity` | あと何枚買い取るか。`null` は上限なしです |
| `startsAt` / `endsAt` | 掲載期間。`endsAt` の時刻になった時点で掲載が終わります。`null` は指定なしです |
| `note` | 店舗がLPや投稿向けに書いた一言です |
一覧には、いま掲載中のものだけが強化価格の高い順に入ります。開始前、一時停止中、終了したもの、期限が過ぎたものは入りません。
## 受付を締め切った強化も載せる
`include=filled` を付けると、残り枚数が0になった強化も `status: "filled"` で返ります。LPで「受付終了」と表示したいときに使います。
```bash
curl "https://api.toreca-cloud.com/partner/v1/purchase-boosts?include=filled" \
-H "Authorization: Bearer $ACCESS_TOKEN"
```
## 使い方のこつ
- 残り枚数は買取のたびに減ります。LPは数分から15分おきに取り直すか、表示のたびにサーバー側で取得してください。応答はキャッシュせずに使う前提です。
- 投稿の文面は、`target.card.name`、グレードの `label`、`priceMinor`、`remainingQuantity` から組み立てられます。
- 画像は `imageUrl` をそのまま使えます。画像がないカードは `null` です。
- 店舗が掲載を止めると、次の取得から一覧に出なくなります。前回の結果を残して表示し続けないでください。
```ts
const yen = new Intl.NumberFormat("ja-JP");
const lines = boosts.map((boost) => {
const name =
boost.target.kind === "card"
? `${boost.target.card.name}${boost.target.grade ? ` ${boost.target.grade.label}` : ""}`
: boost.target.product.name;
const left =
boost.remainingQuantity === null
? ""
: `(あと${boost.remainingQuantity}枚)`;
return `${name} ${yen.format(boost.priceMinor)}円${left}`;
});
const post = ["本日の買取強化", ...lines].join("\n");
```
項目の定義は[APIリファレンス](/api/reference)にあります。
---
# トレカクラウド 外部連携API
Source: https://docs.toreca-cloud.com/api/reference
店舗が許可した外部アプリのためのAPIです。OAuth 2.1 の認可コードフロー(PKCE S256)で受け取ったアクセストークンを、`Authorization: Bearer` で付けて呼びます。どの店舗の情報を扱うかはトークンで決まります。
すべての応答に `Cache-Control: no-store` が付きます。エラーは `{ "error": "コード" }` の形です。
Version 1
Base URL: `https://api.toreca-cloud.com/partner/v1`
## 接続
店舗との接続を作る・確かめる・やめる操作です。どちらかの読み取り権限で呼べます。
- [`POST /connection`](/api/reference/接続/create-connection) — 接続を作る.
- [`GET /connection`](/api/reference/接続/get-connection) — 接続を確かめる.
- [`DELETE /connection`](/api/reference/接続/delete-connection) — 接続をやめる.
## 買取強化対象
店舗が通常より高く買い取るカードやBOXの一覧です。`purchase-boosts:read` で読めます。
- [`GET /purchase-boosts`](/api/reference/買取強化対象/list-purchase-boosts) — 買取強化対象の一覧を取得する.
## 在庫
拠点・保管場所・在庫の個体の同期です。`inventory:read` が必要です。
- [`GET /inventory/sites`](/api/reference/在庫/list-sites) — 拠点と保管場所を取得する.
- [`GET /inventory/changes`](/api/reference/在庫/list-changes) — 在庫の変更を読む.
- [`GET /inventory/items/{id}/photos/{side}`](/api/reference/在庫/get-item-photo) — 個体の写真を取得する.
- [`POST /inventory/market-values`](/api/reference/在庫/read-market-values) — 個体の現在の評価額を読む.
- [`POST /inventory/holds`](/api/reference/在庫/create-hold) — 個体を確保する.
- [`POST /inventory/holds/batch`](/api/reference/在庫/create-holds) — 個体を一括で確保する.
- [`POST /inventory/holds/release-batch`](/api/reference/在庫/release-holds) — 確保を一括で解除する.
- [`POST /inventory/holds/ship-batch`](/api/reference/在庫/ship-holds) — 確保した個体を一括で出荷する.
- [`GET /inventory/holds/{id}`](/api/reference/在庫/get-hold) — 確保の状態を読む.
- [`POST /inventory/holds/{id}/release`](/api/reference/在庫/release-hold) — 確保を解除する.
- [`POST /inventory/holds/{id}/confirm`](/api/reference/在庫/confirm-hold) — 確保を発送待ちにする.
- [`POST /inventory/holds/{id}/extend`](/api/reference/在庫/extend-hold) — 確保の期限を変更する.
- [`POST /inventory/holds/{id}/ship`](/api/reference/在庫/ship-hold) — 確保した個体を出荷する.
- [`POST /inventory/commitments`](/api/reference/在庫/create-commitment) — 個体をオリパ・販売に掲載する.
- [`POST /inventory/commitments/batch`](/api/reference/在庫/create-commitments) — 個体を一括で掲載する.
- [`POST /inventory/commitments/allocate-batch`](/api/reference/在庫/allocate-commitments) — 当選・購入を一括で確定する.
- [`POST /inventory/commitments/release-batch`](/api/reference/在庫/release-commitments) — 掲載・当選を一括で解除する.
- [`GET /inventory/commitments/{id}`](/api/reference/在庫/get-commitment) — 掲載・当選の状態を読む.
- [`POST /inventory/commitments/{id}/allocate`](/api/reference/在庫/allocate-commitment) — 当選・購入を確定する.
- [`POST /inventory/commitments/{id}/release`](/api/reference/在庫/release-commitment) — 掲載・当選を解除する.
- [`POST /inventory/shipments`](/api/reference/在庫/create-shipment) — 当選・購入済みの個体を配送申請する.
- [`GET /inventory/shipments/{id}`](/api/reference/在庫/get-shipment) — 配送申請を読む.
- [`POST /inventory/shipments/{id}/ship`](/api/reference/在庫/ship-shipment) — 配送申請の個体を出荷する.
- [`POST /inventory/shipments/{id}/returns`](/api/reference/在庫/return-shipment) — 届かなかった個体の返品を記録する.
- [`POST /inventory/shipments/{id}/cancel`](/api/reference/在庫/cancel-shipment) — 出荷前の配送申請を取り消す.
- [`POST /inventory/items/{id}/move`](/api/reference/在庫/move-item) — 同じ拠点内で棚を移動する.
- [`POST /inventory/transfers`](/api/reference/在庫/create-transfer) — 個体を別の拠点へ発送する.
- [`GET /inventory/transfers/{id}`](/api/reference/在庫/get-transfer) — 拠点間移動を読む.
- [`POST /inventory/transfers/{id}/receive`](/api/reference/在庫/receive-transfer) — 移動中の個体を受け取る.
- [`POST /inventory/transfers/{id}/return`](/api/reference/在庫/return-transfer) — 移動中の個体を元へ戻す.
- [`POST /inventory/checkouts`](/api/reference/在庫/create-checkout) — 個体を持ち出す.
- [`GET /inventory/checkouts/{id}`](/api/reference/在庫/get-checkout) — 持ち出しを読む.
- [`POST /inventory/checkouts/{id}/return`](/api/reference/在庫/return-checkout) — 持ち出した個体を棚へ戻す.
## カードマスタ
トレカクラウドのカードマスタの検索です。`inventory:read` が必要です。
- [`GET /cards`](/api/reference/カードマスタ/search-cards) — カードマスタを検索する.
- [`GET /cards/{id}`](/api/reference/カードマスタ/get-card) — カードを1件取得する.
## 変更通知
在庫が変わったことを知らせるWebhookの登録です。`inventory:read` が必要です。
- [`PUT /webhook`](/api/reference/変更通知/set-webhook) — Webhookを登録する.
- [`DELETE /webhook`](/api/reference/変更通知/delete-webhook) — Webhookを消す.
---
# カードを1件取得する
Source: https://docs.toreca-cloud.com/api/reference/%E3%82%AB%E3%83%BC%E3%83%89%E3%83%9E%E3%82%B9%E3%82%BF/get-card
`GET /cards/{id}`
**Responses**
- `200` — カード
- `404` — \`not\_found\`
Response example, 200:
```json
{
"id": "497f6eca-6276-4993-bfeb-53cbbbba6f08",
"name": "string",
"localizedNames": {
"property1": "string",
"property2": "string"
},
"cardNumber": "string",
"setTotalRaw": "string",
"janCode": "string",
"languageCode": "string",
"variant": "string",
"finish": "string",
"imageUrl": "http://example.com",
"rarity": {
"code": "string",
"name": "string"
},
"set": {
"id": "497f6eca-6276-4993-bfeb-53cbbbba6f08",
"code": "string",
"name": "string",
"nameEn": "string"
},
"game": {
"id": "497f6eca-6276-4993-bfeb-53cbbbba6f08",
"code": "string",
"name": "string"
}
}
```
---
# カードマスタを検索する
Source: https://docs.toreca-cloud.com/api/reference/%E3%82%AB%E3%83%BC%E3%83%89%E3%83%9E%E3%82%B9%E3%82%BF/search-cards
名前、カード番号、JAN、IDで有効なカードを検索します。最大25件です。
`GET /cards`
**Responses**
- `200` — カード
- `401` — \`invalid\_token\`。トークンがない、期限切れ、または別のリソース向けです。
- `403` — \`insufficient\_scope\`、\`connection\_revoked\`、\`client\_disabled\`、\`forbidden\` のいずれかです。
Response example, 200:
```json
{
"cards": [
{
"id": "497f6eca-6276-4993-bfeb-53cbbbba6f08",
"name": "string",
"localizedNames": {
"property1": "string",
"property2": "string"
},
"cardNumber": "string",
"setTotalRaw": "string",
"janCode": "string",
"languageCode": "string",
"variant": "string",
"finish": "string",
"imageUrl": "http://example.com",
"rarity": {
"code": "string",
"name": "string"
},
"set": {
"id": "497f6eca-6276-4993-bfeb-53cbbbba6f08",
"code": "string",
"name": "string",
"nameEn": "string"
},
"game": {
"id": "497f6eca-6276-4993-bfeb-53cbbbba6f08",
"code": "string",
"name": "string"
}
}
]
}
```
---
# 当選・購入を確定する
Source: https://docs.toreca-cloud.com/api/reference/%E5%9C%A8%E5%BA%AB/allocate-commitment
当選・購入した人のために店で保管する状態へ進めます。allocatedの再実行は変更しません。 inventory:readに加え、この操作のスコープと許可したメンバーのinventory.write権限が必要です。
`POST /inventory/commitments/{id}/allocate`
**Request body** (`application/json`, required)
- `allocationRef` (string)
Request body example:
```json
{
"allocationRef": "string"
}
```
**Responses**
- `200` — 成功
- `400` — \`invalid\_request\`。パラメーターが正しくありません。
- `401` — \`invalid\_token\`。トークンがない、期限切れ、または別のリソース向けです。
- `403` — \`insufficient\_scope\`、\`connection\_revoked\`、\`client\_disabled\`、\`forbidden\` のいずれかです。
- `404` — \`not\_found\`
- `409` — 競合・requestIdの流用・受取未確認
- `422` — 現在の状態・対象・値では実行できません。errorと対象IDを確認します。
Response example, 200:
```json
{
"id": "497f6eca-6276-4993-bfeb-53cbbbba6f08",
"createdAt": "2019-08-24T14:15:22Z",
"updatedAt": "2019-08-24T14:15:22Z",
"inventoryItemId": "ef1bc09e-447a-46aa-a9d9-d86e3d490831",
"assetNumber": "string",
"purpose": "oripa",
"label": "string",
"externalRef": "string",
"status": "on_sale",
"allocatedAt": "2019-08-24T14:15:22Z",
"allocationRef": "string",
"shipmentId": "47efd5a2-af91-4417-950a-7f546cd1b5cf",
"closedAt": "2019-08-24T14:15:22Z"
}
```
---
# 当選・購入を一括で確定する
Source: https://docs.toreca-cloud.com/api/reference/%E5%9C%A8%E5%BA%AB/allocate-commitments
最大200件、id重複不可。全件成功または全件取り消しです。 inventory:readに加え、この操作のスコープと許可したメンバーのinventory.write権限が必要です。
`POST /inventory/commitments/allocate-batch`
**Request body** (`application/json`, required)
- `commitments` (object[], required)
Request body example:
```json
{
"commitments": [
{
"id": "497f6eca-6276-4993-bfeb-53cbbbba6f08",
"allocationRef": "string"
}
]
}
```
**Responses**
- `200` — 成功
- `400` — \`invalid\_request\`。パラメーターが正しくありません。
- `401` — \`invalid\_token\`。トークンがない、期限切れ、または別のリソース向けです。
- `403` — \`insufficient\_scope\`、\`connection\_revoked\`、\`client\_disabled\`、\`forbidden\` のいずれかです。
- `409` — 競合・requestIdの流用・受取未確認
- `422` — 現在の状態・対象・値では実行できません。errorと対象IDを確認します。
Response example, 200:
```json
{
"commitments": [
{
"id": "497f6eca-6276-4993-bfeb-53cbbbba6f08",
"createdAt": "2019-08-24T14:15:22Z",
"updatedAt": "2019-08-24T14:15:22Z",
"inventoryItemId": "ef1bc09e-447a-46aa-a9d9-d86e3d490831",
"assetNumber": "string",
"purpose": "oripa",
"label": "string",
"externalRef": "string",
"status": "on_sale",
"allocatedAt": "2019-08-24T14:15:22Z",
"allocationRef": "string",
"shipmentId": "47efd5a2-af91-4417-950a-7f546cd1b5cf",
"closedAt": "2019-08-24T14:15:22Z"
}
]
}
```
---
# 出荷前の配送申請を取り消す
Source: https://docs.toreca-cloud.com/api/reference/%E5%9C%A8%E5%BA%AB/cancel-shipment
出荷前のみ取り消せます。個体はallocatedへ戻ります。出荷済みはshipment_shippedで拒否されます。 inventory:readに加え、この操作のスコープと許可したメンバーのinventory.write権限が必要です。
`POST /inventory/shipments/{id}/cancel`
**Request body** (`application/json`, required)
- `reason` (string, required)
Request body example:
```json
{
"reason": "string"
}
```
**Responses**
- `200` — 成功
- `400` — \`invalid\_request\`。パラメーターが正しくありません。
- `401` — \`invalid\_token\`。トークンがない、期限切れ、または別のリソース向けです。
- `403` — \`insufficient\_scope\`、\`connection\_revoked\`、\`client\_disabled\`、\`forbidden\` のいずれかです。
- `404` — \`not\_found\`
- `409` — 競合・requestIdの流用・受取未確認
- `422` — 現在の状態・対象・値では実行できません。errorと対象IDを確認します。
Response example, 200:
```json
{
"id": "497f6eca-6276-4993-bfeb-53cbbbba6f08",
"createdAt": "2019-08-24T14:15:22Z",
"updatedAt": "2019-08-24T14:15:22Z",
"orderNumber": "string",
"status": "reserved",
"version": 0,
"destinationLabel": "string",
"externalRef": "string",
"trackingNumber": "string",
"shippedAt": "2019-08-24T14:15:22Z",
"items": [
{
"commitmentId": "4e1ecf7c-8127-4207-92b0-010ff43ff54d",
"inventoryItemId": "ef1bc09e-447a-46aa-a9d9-d86e3d490831",
"assetNumber": "string",
"status": "string",
"sale": {
"amountMinor": 0,
"currency": "string",
"source": "string"
}
}
]
}
```
---
# 確保を発送待ちにする
Source: https://docs.toreca-cloud.com/api/reference/%E5%9C%A8%E5%BA%AB/confirm-hold
購入・当選が確定し発送だけが残ったときに呼びます。期限が消え、パートナーから解除できなくなります。本文は空オブジェクトです。 inventory:readに加え、この操作のスコープと許可したメンバーのinventory.write権限が必要です。
`POST /inventory/holds/{id}/confirm`
**Request body** (`application/json`, required)
Request body example:
```json
{}
```
**Responses**
- `200` — 成功
- `400` — \`invalid\_request\`。パラメーターが正しくありません。
- `401` — \`invalid\_token\`。トークンがない、期限切れ、または別のリソース向けです。
- `403` — \`insufficient\_scope\`、\`connection\_revoked\`、\`client\_disabled\`、\`forbidden\` のいずれかです。
- `404` — \`not\_found\`
- `409` — 競合・requestIdの流用・受取未確認
- `422` — 現在の状態・対象・値では実行できません。errorと対象IDを確認します。
Response example, 200:
```json
{
"id": "497f6eca-6276-4993-bfeb-53cbbbba6f08",
"createdAt": "2019-08-24T14:15:22Z",
"updatedAt": "2019-08-24T14:15:22Z",
"orderNumber": "string",
"status": "reserved",
"version": 0,
"inventoryItemId": "ef1bc09e-447a-46aa-a9d9-d86e3d490831",
"purpose": "oripa",
"destinationLabel": "string",
"externalRef": "string",
"expiresAt": "2019-08-24T14:15:22Z",
"trackingNumber": "string",
"sale": {
"amountMinor": 0,
"currency": "string",
"source": "entered"
}
}
```
---
# 個体を持ち出す
Source: https://docs.toreca-cloud.com/api/reference/%E5%9C%A8%E5%BA%AB/create-checkout
撮影・イベントなどへ最大200件持ち出します。個体は棚と在庫を離れremovedとなり、返却するまで販売できません。 同じrequestId・同じ内容の再実行は200、初回作成は201です。requestIdを別の内容へ流用するとidempotency_conflictになります。 inventory:readに加え、この操作のスコープと許可したメンバーのinventory.write権限が必要です。
`POST /inventory/checkouts`
**Request body** (`application/json`, required)
- `requestId` (string, required)
- `inventoryItemIds` (string[], required)
- `destinationLabel` (string, required)
- `reason` (string, required)
- `externalRef` (string)
Request body example:
```json
{
"requestId": "d385ab22-0f51-4b97-9ecd-b8ff3fd4fcb6",
"inventoryItemIds": [
"497f6eca-6276-4993-bfeb-53cbbbba6f08"
],
"destinationLabel": "string",
"reason": "string",
"externalRef": "string"
}
```
**Responses**
- `200` — 成功
- `201` — 作成しました
- `400` — \`invalid\_request\`。パラメーターが正しくありません。
- `401` — \`invalid\_token\`。トークンがない、期限切れ、または別のリソース向けです。
- `403` — \`insufficient\_scope\`、\`connection\_revoked\`、\`client\_disabled\`、\`forbidden\` のいずれかです。
- `409` — 競合・requestIdの流用・受取未確認
- `422` — 現在の状態・対象・値では実行できません。errorと対象IDを確認します。
Response example, 200:
```json
{
"id": "497f6eca-6276-4993-bfeb-53cbbbba6f08",
"createdAt": "2019-08-24T14:15:22Z",
"updatedAt": "2019-08-24T14:15:22Z",
"orderNumber": "string",
"version": 0,
"destinationLabel": "string",
"reason": "string",
"externalRef": "string",
"shippedAt": "2019-08-24T14:15:22Z",
"items": [
{
"inventoryItemId": "ef1bc09e-447a-46aa-a9d9-d86e3d490831",
"assetNumber": "string",
"status": "out",
"returnedAt": "2019-08-24T14:15:22Z",
"returnLocationId": "1d1d177a-c4a1-4389-b833-16c3941f123e"
}
]
}
```
---
# 個体をオリパ・販売に掲載する
Source: https://docs.toreca-cloud.com/api/reference/%E5%9C%A8%E5%BA%AB/create-commitment
個体を店の棚に置いたままオリパまたは販売へ掲載します。配送伝票はまだ作りません。 同じrequestId・同じ内容の再実行は200、初回作成は201です。requestIdを別の内容へ流用するとidempotency_conflictになります。 inventory:readに加え、この操作のスコープと許可したメンバーのinventory.write権限が必要です。
`POST /inventory/commitments`
**Request body** (`application/json`, required)
- `requestId` (string, required)
- `inventoryItemId` (string, required)
- `purpose` (string, required)
- `label` (string, required)
- `externalRef` (string)
Request body example:
```json
{
"requestId": "d385ab22-0f51-4b97-9ecd-b8ff3fd4fcb6",
"inventoryItemId": "ef1bc09e-447a-46aa-a9d9-d86e3d490831",
"purpose": "oripa",
"label": "string",
"externalRef": "string"
}
```
**Responses**
- `200` — 成功
- `201` — 作成しました
- `400` — \`invalid\_request\`。パラメーターが正しくありません。
- `401` — \`invalid\_token\`。トークンがない、期限切れ、または別のリソース向けです。
- `403` — \`insufficient\_scope\`、\`connection\_revoked\`、\`client\_disabled\`、\`forbidden\` のいずれかです。
- `409` — 競合・requestIdの流用・受取未確認
- `422` — 現在の状態・対象・値では実行できません。errorと対象IDを確認します。
Response example, 200:
```json
{
"id": "497f6eca-6276-4993-bfeb-53cbbbba6f08",
"createdAt": "2019-08-24T14:15:22Z",
"updatedAt": "2019-08-24T14:15:22Z",
"inventoryItemId": "ef1bc09e-447a-46aa-a9d9-d86e3d490831",
"assetNumber": "string",
"purpose": "oripa",
"label": "string",
"externalRef": "string",
"status": "on_sale",
"allocatedAt": "2019-08-24T14:15:22Z",
"allocationRef": "string",
"shipmentId": "47efd5a2-af91-4417-950a-7f546cd1b5cf",
"closedAt": "2019-08-24T14:15:22Z"
}
```
---
# 個体を一括で掲載する
Source: https://docs.toreca-cloud.com/api/reference/%E5%9C%A8%E5%BA%AB/create-commitments
最大200件。requestIdとinventoryItemIdはそれぞれ重複不可。全件成功または全件取り消しです。 同じrequestId・同じ内容の再実行は200、初回作成は201です。requestIdを別の内容へ流用するとidempotency_conflictになります。 inventory:readに加え、この操作のスコープと許可したメンバーのinventory.write権限が必要です。
`POST /inventory/commitments/batch`
**Request body** (`application/json`, required)
- `commitments` (object[], required)
Request body example:
```json
{
"commitments": [
{
"requestId": "d385ab22-0f51-4b97-9ecd-b8ff3fd4fcb6",
"inventoryItemId": "ef1bc09e-447a-46aa-a9d9-d86e3d490831",
"purpose": "oripa",
"label": "string",
"externalRef": "string"
}
]
}
```
**Responses**
- `200` — 成功
- `201` — 作成しました
- `400` — \`invalid\_request\`。パラメーターが正しくありません。
- `401` — \`invalid\_token\`。トークンがない、期限切れ、または別のリソース向けです。
- `403` — \`insufficient\_scope\`、\`connection\_revoked\`、\`client\_disabled\`、\`forbidden\` のいずれかです。
- `409` — 競合・requestIdの流用・受取未確認
- `422` — 現在の状態・対象・値では実行できません。errorと対象IDを確認します。
Response example, 200:
```json
{
"commitments": [
{
"requestId": "d385ab22-0f51-4b97-9ecd-b8ff3fd4fcb6",
"created": true,
"commitment": {
"id": "497f6eca-6276-4993-bfeb-53cbbbba6f08",
"createdAt": "2019-08-24T14:15:22Z",
"updatedAt": "2019-08-24T14:15:22Z",
"inventoryItemId": "ef1bc09e-447a-46aa-a9d9-d86e3d490831",
"assetNumber": "string",
"purpose": "oripa",
"label": "string",
"externalRef": "string",
"status": "on_sale",
"allocatedAt": "2019-08-24T14:15:22Z",
"allocationRef": "string",
"shipmentId": "47efd5a2-af91-4417-950a-7f546cd1b5cf",
"closedAt": "2019-08-24T14:15:22Z"
}
}
]
}
```
---
# 個体を確保する
Source: https://docs.toreca-cloud.com/api/reference/%E5%9C%A8%E5%BA%AB/create-hold
販売可能な個体を1点確保します。expiresAtは現在より後、90日以内。省略すると無期限です。 同じrequestId・同じ内容の再実行は200、初回作成は201です。requestIdを別の内容へ流用するとidempotency_conflictになります。 inventory:readに加え、この操作のスコープと許可したメンバーのinventory.write権限が必要です。
`POST /inventory/holds`
**Request body** (`application/json`, required)
- `requestId` (string, required)
- `inventoryItemId` (string, required)
- `purpose` (string, required)
- `destinationLabel` (string, required)
- `reason` (string, required)
- `externalRef` (string)
- `expiresAt` (string)
Request body example:
```json
{
"requestId": "d385ab22-0f51-4b97-9ecd-b8ff3fd4fcb6",
"inventoryItemId": "ef1bc09e-447a-46aa-a9d9-d86e3d490831",
"purpose": "oripa",
"destinationLabel": "string",
"reason": "string",
"externalRef": "string",
"expiresAt": "2019-08-24T14:15:22Z"
}
```
**Responses**
- `200` — 成功
- `201` — 作成しました
- `400` — \`invalid\_request\`。パラメーターが正しくありません。
- `401` — \`invalid\_token\`。トークンがない、期限切れ、または別のリソース向けです。
- `403` — \`insufficient\_scope\`、\`connection\_revoked\`、\`client\_disabled\`、\`forbidden\` のいずれかです。
- `409` — 競合・requestIdの流用・受取未確認
- `422` — 現在の状態・対象・値では実行できません。errorと対象IDを確認します。
Response example, 200:
```json
{
"id": "497f6eca-6276-4993-bfeb-53cbbbba6f08",
"createdAt": "2019-08-24T14:15:22Z",
"updatedAt": "2019-08-24T14:15:22Z",
"orderNumber": "string",
"status": "reserved",
"version": 0,
"inventoryItemId": "ef1bc09e-447a-46aa-a9d9-d86e3d490831",
"purpose": "oripa",
"destinationLabel": "string",
"externalRef": "string",
"expiresAt": "2019-08-24T14:15:22Z",
"trackingNumber": "string",
"sale": {
"amountMinor": 0,
"currency": "string",
"source": "entered"
}
}
```
---
# 個体を一括で確保する
Source: https://docs.toreca-cloud.com/api/reference/%E5%9C%A8%E5%BA%AB/create-holds
最大100件。requestIdとinventoryItemIdはそれぞれ重複不可。新規の確保は全件成功または全件取り消しです。 同じrequestId・同じ内容の再実行は200、初回作成は201です。requestIdを別の内容へ流用するとidempotency_conflictになります。 inventory:readに加え、この操作のスコープと許可したメンバーのinventory.write権限が必要です。
`POST /inventory/holds/batch`
**Request body** (`application/json`, required)
- `holds` (object[], required)
Request body example:
```json
{
"holds": [
{
"requestId": "d385ab22-0f51-4b97-9ecd-b8ff3fd4fcb6",
"inventoryItemId": "ef1bc09e-447a-46aa-a9d9-d86e3d490831",
"purpose": "oripa",
"destinationLabel": "string",
"reason": "string",
"externalRef": "string",
"expiresAt": "2019-08-24T14:15:22Z"
}
]
}
```
**Responses**
- `200` — 成功
- `201` — 作成しました
- `400` — \`invalid\_request\`。パラメーターが正しくありません。
- `401` — \`invalid\_token\`。トークンがない、期限切れ、または別のリソース向けです。
- `403` — \`insufficient\_scope\`、\`connection\_revoked\`、\`client\_disabled\`、\`forbidden\` のいずれかです。
- `409` — 競合・requestIdの流用・受取未確認
- `422` — 現在の状態・対象・値では実行できません。errorと対象IDを確認します。
Response example, 200:
```json
{
"holds": [
{
"requestId": "d385ab22-0f51-4b97-9ecd-b8ff3fd4fcb6",
"created": true,
"hold": {
"id": "497f6eca-6276-4993-bfeb-53cbbbba6f08",
"createdAt": "2019-08-24T14:15:22Z",
"updatedAt": "2019-08-24T14:15:22Z",
"orderNumber": "string",
"status": "reserved",
"version": 0,
"inventoryItemId": "ef1bc09e-447a-46aa-a9d9-d86e3d490831",
"purpose": "oripa",
"destinationLabel": "string",
"externalRef": "string",
"expiresAt": "2019-08-24T14:15:22Z",
"trackingNumber": "string",
"sale": {
"amountMinor": 0,
"currency": "string",
"source": "entered"
}
}
}
]
}
```
---
# 当選・購入済みの個体を配送申請する
Source: https://docs.toreca-cloud.com/api/reference/%E5%9C%A8%E5%BA%AB/create-shipment
このアプリのallocatedなcommitmentを最大200件まとめます。個体はreserved、commitmentはshippingになります。 同じrequestId・同じ内容の再実行は200、初回作成は201です。requestIdを別の内容へ流用するとidempotency_conflictになります。 inventory:readに加え、この操作のスコープと許可したメンバーのinventory.write権限が必要です。
`POST /inventory/shipments`
**Request body** (`application/json`, required)
- `requestId` (string, required)
- `commitmentIds` (string[], required)
- `destinationLabel` (string, required)
- `reason` (string, required)
- `externalRef` (string)
Request body example:
```json
{
"requestId": "d385ab22-0f51-4b97-9ecd-b8ff3fd4fcb6",
"commitmentIds": [
"497f6eca-6276-4993-bfeb-53cbbbba6f08"
],
"destinationLabel": "string",
"reason": "string",
"externalRef": "string"
}
```
**Responses**
- `200` — 成功
- `201` — 作成しました
- `400` — \`invalid\_request\`。パラメーターが正しくありません。
- `401` — \`invalid\_token\`。トークンがない、期限切れ、または別のリソース向けです。
- `403` — \`insufficient\_scope\`、\`connection\_revoked\`、\`client\_disabled\`、\`forbidden\` のいずれかです。
- `409` — 競合・requestIdの流用・受取未確認
- `422` — 現在の状態・対象・値では実行できません。errorと対象IDを確認します。
Response example, 200:
```json
{
"id": "497f6eca-6276-4993-bfeb-53cbbbba6f08",
"createdAt": "2019-08-24T14:15:22Z",
"updatedAt": "2019-08-24T14:15:22Z",
"orderNumber": "string",
"status": "reserved",
"version": 0,
"destinationLabel": "string",
"externalRef": "string",
"trackingNumber": "string",
"shippedAt": "2019-08-24T14:15:22Z",
"items": [
{
"commitmentId": "4e1ecf7c-8127-4207-92b0-010ff43ff54d",
"inventoryItemId": "ef1bc09e-447a-46aa-a9d9-d86e3d490831",
"assetNumber": "string",
"status": "string",
"sale": {
"amountMinor": 0,
"currency": "string",
"source": "string"
}
}
]
}
```
---
# 個体を別の拠点へ発送する
Source: https://docs.toreca-cloud.com/api/reference/%E5%9C%A8%E5%BA%AB/create-transfer
1つの拠点の販売可能な個体を最大200件発送し、in_transitにします。同一拠点への発送はできません。 同じrequestId・同じ内容の再実行は200、初回作成は201です。requestIdを別の内容へ流用するとidempotency_conflictになります。 inventory:readに加え、この操作のスコープと許可したメンバーのinventory.write権限が必要です。
`POST /inventory/transfers`
**Request body** (`application/json`, required)
- `requestId` (string, required)
- `toSiteId` (string, required)
- `inventoryItemIds` (string[], required)
- `reason` (string, required)
- `carrier` (string)
- `trackingNumber` (string)
- `externalRef` (string)
Request body example:
```json
{
"requestId": "d385ab22-0f51-4b97-9ecd-b8ff3fd4fcb6",
"toSiteId": "80101396-c399-408c-88ad-cd8029268567",
"inventoryItemIds": [
"497f6eca-6276-4993-bfeb-53cbbbba6f08"
],
"reason": "string",
"carrier": "string",
"trackingNumber": "string",
"externalRef": "string"
}
```
**Responses**
- `200` — 成功
- `201` — 作成しました
- `400` — \`invalid\_request\`。パラメーターが正しくありません。
- `401` — \`invalid\_token\`。トークンがない、期限切れ、または別のリソース向けです。
- `403` — \`insufficient\_scope\`、\`connection\_revoked\`、\`client\_disabled\`、\`forbidden\` のいずれかです。
- `409` — 競合・requestIdの流用・受取未確認
- `422` — 現在の状態・対象・値では実行できません。errorと対象IDを確認します。
Response example, 200:
```json
{
"id": "497f6eca-6276-4993-bfeb-53cbbbba6f08",
"createdAt": "2019-08-24T14:15:22Z",
"updatedAt": "2019-08-24T14:15:22Z",
"transferNumber": "string",
"status": "in_transit",
"version": 0,
"fromSiteId": "33a55c88-1ae8-426c-bfdd-0fd03c0d6ee1",
"toSiteId": "80101396-c399-408c-88ad-cd8029268567",
"carrier": "string",
"trackingNumber": "string",
"reason": "string",
"externalRef": "string",
"shippedAt": "2019-08-24T14:15:22Z",
"completedAt": "2019-08-24T14:15:22Z",
"items": [
{
"inventoryItemId": "ef1bc09e-447a-46aa-a9d9-d86e3d490831",
"assetNumber": "string",
"status": "in_transit",
"fromLocationId": "178bb398-90d2-4fc3-a4a0-37fc0eed2806",
"toLocationId": "e81ad314-9cb9-45ae-9ad9-f1b5ebcc7aae",
"resolvedAt": "2019-08-24T14:15:22Z"
}
]
}
```
---
# 確保の期限を変更する
Source: https://docs.toreca-cloud.com/api/reference/%E5%9C%A8%E5%BA%AB/extend-hold
reservedの期限だけを変更します。現在より後、90日以内の日時を指定します。 inventory:readに加え、この操作のスコープと許可したメンバーのinventory.write権限が必要です。
`POST /inventory/holds/{id}/extend`
**Request body** (`application/json`, required)
- `expiresAt` (string, required)
Request body example:
```json
{
"expiresAt": "2019-08-24T14:15:22Z"
}
```
**Responses**
- `200` — 成功
- `400` — \`invalid\_request\`。パラメーターが正しくありません。
- `401` — \`invalid\_token\`。トークンがない、期限切れ、または別のリソース向けです。
- `403` — \`insufficient\_scope\`、\`connection\_revoked\`、\`client\_disabled\`、\`forbidden\` のいずれかです。
- `404` — \`not\_found\`
- `409` — 競合・requestIdの流用・受取未確認
- `422` — 現在の状態・対象・値では実行できません。errorと対象IDを確認します。
Response example, 200:
```json
{
"id": "497f6eca-6276-4993-bfeb-53cbbbba6f08",
"createdAt": "2019-08-24T14:15:22Z",
"updatedAt": "2019-08-24T14:15:22Z",
"orderNumber": "string",
"status": "reserved",
"version": 0,
"inventoryItemId": "ef1bc09e-447a-46aa-a9d9-d86e3d490831",
"purpose": "oripa",
"destinationLabel": "string",
"externalRef": "string",
"expiresAt": "2019-08-24T14:15:22Z",
"trackingNumber": "string",
"sale": {
"amountMinor": 0,
"currency": "string",
"source": "entered"
}
}
```
---
# 持ち出しを読む
Source: https://docs.toreca-cloud.com/api/reference/%E5%9C%A8%E5%BA%AB/get-checkout
このアプリが作成した対象だけを取得できます。 inventory:readに加え、この操作のスコープと許可したメンバーのinventory.write権限が必要です。
`GET /inventory/checkouts/{id}`
**Responses**
- `200` — 成功
- `400` — \`invalid\_request\`。パラメーターが正しくありません。
- `401` — \`invalid\_token\`。トークンがない、期限切れ、または別のリソース向けです。
- `403` — \`insufficient\_scope\`、\`connection\_revoked\`、\`client\_disabled\`、\`forbidden\` のいずれかです。
- `404` — \`not\_found\`
- `409` — 競合・requestIdの流用・受取未確認
- `422` — 現在の状態・対象・値では実行できません。errorと対象IDを確認します。
Response example, 200:
```json
{
"id": "497f6eca-6276-4993-bfeb-53cbbbba6f08",
"createdAt": "2019-08-24T14:15:22Z",
"updatedAt": "2019-08-24T14:15:22Z",
"orderNumber": "string",
"version": 0,
"destinationLabel": "string",
"reason": "string",
"externalRef": "string",
"shippedAt": "2019-08-24T14:15:22Z",
"items": [
{
"inventoryItemId": "ef1bc09e-447a-46aa-a9d9-d86e3d490831",
"assetNumber": "string",
"status": "out",
"returnedAt": "2019-08-24T14:15:22Z",
"returnLocationId": "1d1d177a-c4a1-4389-b833-16c3941f123e"
}
]
}
```
---
# 掲載・当選の状態を読む
Source: https://docs.toreca-cloud.com/api/reference/%E5%9C%A8%E5%BA%AB/get-commitment
このアプリが作成した対象だけを取得できます。 inventory:readに加え、この操作のスコープと許可したメンバーのinventory.write権限が必要です。
`GET /inventory/commitments/{id}`
**Responses**
- `200` — 成功
- `400` — \`invalid\_request\`。パラメーターが正しくありません。
- `401` — \`invalid\_token\`。トークンがない、期限切れ、または別のリソース向けです。
- `403` — \`insufficient\_scope\`、\`connection\_revoked\`、\`client\_disabled\`、\`forbidden\` のいずれかです。
- `404` — \`not\_found\`
- `409` — 競合・requestIdの流用・受取未確認
- `422` — 現在の状態・対象・値では実行できません。errorと対象IDを確認します。
Response example, 200:
```json
{
"id": "497f6eca-6276-4993-bfeb-53cbbbba6f08",
"createdAt": "2019-08-24T14:15:22Z",
"updatedAt": "2019-08-24T14:15:22Z",
"inventoryItemId": "ef1bc09e-447a-46aa-a9d9-d86e3d490831",
"assetNumber": "string",
"purpose": "oripa",
"label": "string",
"externalRef": "string",
"status": "on_sale",
"allocatedAt": "2019-08-24T14:15:22Z",
"allocationRef": "string",
"shipmentId": "47efd5a2-af91-4417-950a-7f546cd1b5cf",
"closedAt": "2019-08-24T14:15:22Z"
}
```
---
# 確保の状態を読む
Source: https://docs.toreca-cloud.com/api/reference/%E5%9C%A8%E5%BA%AB/get-hold
このアプリが作成した対象だけを取得できます。 inventory:readに加え、この操作のスコープと許可したメンバーのinventory.write権限が必要です。
`GET /inventory/holds/{id}`
**Responses**
- `200` — 成功
- `400` — \`invalid\_request\`。パラメーターが正しくありません。
- `401` — \`invalid\_token\`。トークンがない、期限切れ、または別のリソース向けです。
- `403` — \`insufficient\_scope\`、\`connection\_revoked\`、\`client\_disabled\`、\`forbidden\` のいずれかです。
- `404` — \`not\_found\`
- `409` — 競合・requestIdの流用・受取未確認
- `422` — 現在の状態・対象・値では実行できません。errorと対象IDを確認します。
Response example, 200:
```json
{
"id": "497f6eca-6276-4993-bfeb-53cbbbba6f08",
"createdAt": "2019-08-24T14:15:22Z",
"updatedAt": "2019-08-24T14:15:22Z",
"orderNumber": "string",
"status": "reserved",
"version": 0,
"inventoryItemId": "ef1bc09e-447a-46aa-a9d9-d86e3d490831",
"purpose": "oripa",
"destinationLabel": "string",
"externalRef": "string",
"expiresAt": "2019-08-24T14:15:22Z",
"trackingNumber": "string",
"sale": {
"amountMinor": 0,
"currency": "string",
"source": "entered"
}
}
```
---
# 個体の写真を取得する
Source: https://docs.toreca-cloud.com/api/reference/%E5%9C%A8%E5%BA%AB/get-item-photo
数分だけ有効な署名付きURLへ302で転送します。必要なら画像を取り込んで自分で保管してください。
`GET /inventory/items/{id}/photos/{side}`
**Responses**
- `302` — 署名付きURLへの転送
- `404` — \`not\_found\`
- `503` — \`photo\_unavailable\`
---
# 配送申請を読む
Source: https://docs.toreca-cloud.com/api/reference/%E5%9C%A8%E5%BA%AB/get-shipment
このアプリが作成した対象だけを取得できます。 inventory:readに加え、この操作のスコープと許可したメンバーのinventory.write権限が必要です。
`GET /inventory/shipments/{id}`
**Responses**
- `200` — 成功
- `400` — \`invalid\_request\`。パラメーターが正しくありません。
- `401` — \`invalid\_token\`。トークンがない、期限切れ、または別のリソース向けです。
- `403` — \`insufficient\_scope\`、\`connection\_revoked\`、\`client\_disabled\`、\`forbidden\` のいずれかです。
- `404` — \`not\_found\`
- `409` — 競合・requestIdの流用・受取未確認
- `422` — 現在の状態・対象・値では実行できません。errorと対象IDを確認します。
Response example, 200:
```json
{
"id": "497f6eca-6276-4993-bfeb-53cbbbba6f08",
"createdAt": "2019-08-24T14:15:22Z",
"updatedAt": "2019-08-24T14:15:22Z",
"orderNumber": "string",
"status": "reserved",
"version": 0,
"destinationLabel": "string",
"externalRef": "string",
"trackingNumber": "string",
"shippedAt": "2019-08-24T14:15:22Z",
"items": [
{
"commitmentId": "4e1ecf7c-8127-4207-92b0-010ff43ff54d",
"inventoryItemId": "ef1bc09e-447a-46aa-a9d9-d86e3d490831",
"assetNumber": "string",
"status": "string",
"sale": {
"amountMinor": 0,
"currency": "string",
"source": "string"
}
}
]
}
```
---
# 拠点間移動を読む
Source: https://docs.toreca-cloud.com/api/reference/%E5%9C%A8%E5%BA%AB/get-transfer
このアプリが作成した対象だけを取得できます。 inventory:readに加え、この操作のスコープと許可したメンバーのinventory.write権限が必要です。
`GET /inventory/transfers/{id}`
**Responses**
- `200` — 成功
- `400` — \`invalid\_request\`。パラメーターが正しくありません。
- `401` — \`invalid\_token\`。トークンがない、期限切れ、または別のリソース向けです。
- `403` — \`insufficient\_scope\`、\`connection\_revoked\`、\`client\_disabled\`、\`forbidden\` のいずれかです。
- `404` — \`not\_found\`
- `409` — 競合・requestIdの流用・受取未確認
- `422` — 現在の状態・対象・値では実行できません。errorと対象IDを確認します。
Response example, 200:
```json
{
"id": "497f6eca-6276-4993-bfeb-53cbbbba6f08",
"createdAt": "2019-08-24T14:15:22Z",
"updatedAt": "2019-08-24T14:15:22Z",
"transferNumber": "string",
"status": "in_transit",
"version": 0,
"fromSiteId": "33a55c88-1ae8-426c-bfdd-0fd03c0d6ee1",
"toSiteId": "80101396-c399-408c-88ad-cd8029268567",
"carrier": "string",
"trackingNumber": "string",
"reason": "string",
"externalRef": "string",
"shippedAt": "2019-08-24T14:15:22Z",
"completedAt": "2019-08-24T14:15:22Z",
"items": [
{
"inventoryItemId": "ef1bc09e-447a-46aa-a9d9-d86e3d490831",
"assetNumber": "string",
"status": "in_transit",
"fromLocationId": "178bb398-90d2-4fc3-a4a0-37fc0eed2806",
"toLocationId": "e81ad314-9cb9-45ae-9ad9-f1b5ebcc7aae",
"resolvedAt": "2019-08-24T14:15:22Z"
}
]
}
```
---
# 在庫の変更を読む
Source: https://docs.toreca-cloud.com/api/reference/%E5%9C%A8%E5%BA%AB/list-changes
拠点・保管場所・個体の変更を、カーソルの続きから返します。`data` は読み取り時点の値なので、受け手は `id` で上書き保存するだけで済みます。カーソルなしで呼ぶと先頭から返り、全件を同期できます。削除はなく、無効化は `isActive`、個体が在庫から出たことは `status` で表れます。
`hasMore` が `true` の間は、`nextCursor` を付けて続けて読みます。
`GET /inventory/changes`
**Responses**
- `200` — 変更
- `400` — \`invalid\_request\` または \`invalid\_cursor\`
- `401` — \`invalid\_token\`。トークンがない、期限切れ、または別のリソース向けです。
- `403` — \`insufficient\_scope\`、\`connection\_revoked\`、\`client\_disabled\`、\`forbidden\` のいずれかです。
Response example, 200:
```json
{
"changes": [
{
"type": "site",
"id": "497f6eca-6276-4993-bfeb-53cbbbba6f08",
"data": {}
}
],
"nextCursor": "string",
"hasMore": true
}
```
---
# 拠点と保管場所を取得する
Source: https://docs.toreca-cloud.com/api/reference/%E5%9C%A8%E5%BA%AB/list-sites
無効なものも含めて、店舗のすべての拠点と保管場所を返します。
`GET /inventory/sites`
**Responses**
- `200` — 拠点の一覧
- `401` — \`invalid\_token\`。トークンがない、期限切れ、または別のリソース向けです。
- `403` — \`insufficient\_scope\`、\`connection\_revoked\`、\`client\_disabled\`、\`forbidden\` のいずれかです。
Response example, 200:
```json
{
"sites": [
{
"id": "497f6eca-6276-4993-bfeb-53cbbbba6f08",
"code": "string",
"name": "string",
"kind": "string",
"countryCode": "string",
"timezone": "string",
"isActive": true,
"createdAt": "2019-08-24T14:15:22Z",
"updatedAt": "2019-08-24T14:15:22Z",
"locations": [
{
"id": "497f6eca-6276-4993-bfeb-53cbbbba6f08",
"siteId": "60189e9c-7d12-438c-b9ca-6998d9c364b1",
"code": "string",
"name": "string",
"kind": "string",
"isActive": true,
"createdAt": "2019-08-24T14:15:22Z",
"updatedAt": "2019-08-24T14:15:22Z"
}
]
}
]
}
```
---
# 同じ拠点内で棚を移動する
Source: https://docs.toreca-cloud.com/api/reference/%E5%9C%A8%E5%BA%AB/move-item
同じ拠点内の有効な棚へ移します。同じ棚ならmoved=false。別拠点はdifferent_siteで拒否され、transfersを使います。 inventory:readに加え、この操作のスコープと許可したメンバーのinventory.write権限が必要です。
`POST /inventory/items/{id}/move`
**Request body** (`application/json`, required)
- `toLocationId` (string, required)
- `reason` (string, required)
Request body example:
```json
{
"toLocationId": "e81ad314-9cb9-45ae-9ad9-f1b5ebcc7aae",
"reason": "string"
}
```
**Responses**
- `200` — 成功
- `400` — \`invalid\_request\`。パラメーターが正しくありません。
- `401` — \`invalid\_token\`。トークンがない、期限切れ、または別のリソース向けです。
- `403` — \`insufficient\_scope\`、\`connection\_revoked\`、\`client\_disabled\`、\`forbidden\` のいずれかです。
- `404` — \`not\_found\`
- `409` — 競合・requestIdの流用・受取未確認
- `422` — 現在の状態・対象・値では実行できません。errorと対象IDを確認します。
Response example, 200:
```json
{
"moved": true,
"item": {
"id": "497f6eca-6276-4993-bfeb-53cbbbba6f08",
"createdAt": "2019-08-24T14:15:22Z",
"updatedAt": "2019-08-24T14:15:22Z",
"assetNumber": "string",
"sourceKind": "purchase",
"status": "string",
"version": 0,
"siteId": "60189e9c-7d12-438c-b9ca-6998d9c364b1",
"locationId": "1a5515a3-ba81-4a42-aee7-ad9ffc090a54",
"grade": {
"serviceCode": "string",
"serviceName": "string",
"serviceKind": "third_party",
"code": "string",
"label": "string",
"numericScore": 0
},
"certificationNumber": "string",
"certificationVerified": true,
"conditionNote": "string",
"acquisitionAmountMinor": 0,
"currency": "string",
"acquiredAt": "2019-08-24T14:15:22Z",
"lastMovedAt": "2019-08-24T14:15:22Z",
"allocation": "yours",
"holdable": true,
"commitment": {
"id": "497f6eca-6276-4993-bfeb-53cbbbba6f08",
"purpose": "oripa",
"label": "string",
"externalRef": "string"
},
"marketValue": {
"amountMinor": 0,
"currency": "JPY",
"pricedAt": "2019-08-24T14:15:22Z"
},
"conditionTags": [
{
"id": "497f6eca-6276-4993-bfeb-53cbbbba6f08",
"name": "string"
}
],
"photos": {
"front": {
"url": "http://example.com",
"updatedAt": "2019-08-24T14:15:22Z"
},
"back": {
"url": "http://example.com",
"updatedAt": "2019-08-24T14:15:22Z"
}
},
"card": {
"id": "497f6eca-6276-4993-bfeb-53cbbbba6f08",
"name": "string",
"localizedNames": {
"property1": "string",
"property2": "string"
},
"cardNumber": "string",
"languageCode": "string",
"variant": "string",
"finish": "string",
"imageUrl": "string",
"rarity": {
"code": "string",
"name": "string"
},
"set": {
"id": "497f6eca-6276-4993-bfeb-53cbbbba6f08",
"code": "string",
"name": "string",
"nameEn": "string"
},
"game": {
"id": "497f6eca-6276-4993-bfeb-53cbbbba6f08",
"code": "string",
"name": "string"
}
}
}
}
```
---
# 個体の現在の評価額を読む
Source: https://docs.toreca-cloud.com/api/reference/%E5%9C%A8%E5%BA%AB/read-market-values
読み取り専用のPOSTです。最大200件の重複しない個体IDを指定します。権限の範囲外・存在しない個体は返しません。評価額がない個体はmarketValueがnullです。価格だけの変化は変更フィードに出ないため、現在価格はこの操作で読みます。
`POST /inventory/market-values`
**Request body** (`application/json`, required)
- `ids` (string[], required)
Request body example:
```json
{
"ids": [
"497f6eca-6276-4993-bfeb-53cbbbba6f08"
]
}
```
**Responses**
- `200` — 成功
- `400` — \`invalid\_request\`。パラメーターが正しくありません。
- `401` — \`invalid\_token\`。トークンがない、期限切れ、または別のリソース向けです。
- `403` — \`insufficient\_scope\`、\`connection\_revoked\`、\`client\_disabled\`、\`forbidden\` のいずれかです。
Response example, 200:
```json
{
"items": [
{
"id": "497f6eca-6276-4993-bfeb-53cbbbba6f08",
"marketValue": {
"amountMinor": 0,
"currency": "JPY",
"pricedAt": "2019-08-24T14:15:22Z"
}
}
]
}
```
---
# 移動中の個体を受け取る
Source: https://docs.toreca-cloud.com/api/reference/%E5%9C%A8%E5%BA%AB/receive-transfer
移動先拠点の有効な棚を指定します。inventoryItemIds省略時は移動中の全件。受取済みの再指定は変更せず、返却済みは拒否します。 inventory:readに加え、この操作のスコープと許可したメンバーのinventory.write権限が必要です。
`POST /inventory/transfers/{id}/receive`
**Request body** (`application/json`, required)
- `toLocationId` (string, required)
- `inventoryItemIds` (string[])
Request body example:
```json
{
"toLocationId": "e81ad314-9cb9-45ae-9ad9-f1b5ebcc7aae",
"inventoryItemIds": [
"497f6eca-6276-4993-bfeb-53cbbbba6f08"
]
}
```
**Responses**
- `200` — 成功
- `400` — \`invalid\_request\`。パラメーターが正しくありません。
- `401` — \`invalid\_token\`。トークンがない、期限切れ、または別のリソース向けです。
- `403` — \`insufficient\_scope\`、\`connection\_revoked\`、\`client\_disabled\`、\`forbidden\` のいずれかです。
- `404` — \`not\_found\`
- `409` — 競合・requestIdの流用・受取未確認
- `422` — 現在の状態・対象・値では実行できません。errorと対象IDを確認します。
Response example, 200:
```json
{
"id": "497f6eca-6276-4993-bfeb-53cbbbba6f08",
"createdAt": "2019-08-24T14:15:22Z",
"updatedAt": "2019-08-24T14:15:22Z",
"transferNumber": "string",
"status": "in_transit",
"version": 0,
"fromSiteId": "33a55c88-1ae8-426c-bfdd-0fd03c0d6ee1",
"toSiteId": "80101396-c399-408c-88ad-cd8029268567",
"carrier": "string",
"trackingNumber": "string",
"reason": "string",
"externalRef": "string",
"shippedAt": "2019-08-24T14:15:22Z",
"completedAt": "2019-08-24T14:15:22Z",
"items": [
{
"inventoryItemId": "ef1bc09e-447a-46aa-a9d9-d86e3d490831",
"assetNumber": "string",
"status": "in_transit",
"fromLocationId": "178bb398-90d2-4fc3-a4a0-37fc0eed2806",
"toLocationId": "e81ad314-9cb9-45ae-9ad9-f1b5ebcc7aae",
"resolvedAt": "2019-08-24T14:15:22Z"
}
]
}
```
---
# 掲載・当選を解除する
Source: https://docs.toreca-cloud.com/api/reference/%E5%9C%A8%E5%BA%AB/release-commitment
掲載・当選を解除します。setAside=trueならこの連携先への割り当てを残します。配送申請中は先に配送を取り消します。紛失個体の解除は紛失のままで、在庫復帰しません。 inventory:readに加え、この操作のスコープと許可したメンバーのinventory.write権限が必要です。
`POST /inventory/commitments/{id}/release`
**Request body** (`application/json`, required)
- `reason` (string, required)
- `setAside` (boolean)
Request body example:
```json
{
"reason": "string",
"setAside": true
}
```
**Responses**
- `200` — 成功
- `400` — \`invalid\_request\`。パラメーターが正しくありません。
- `401` — \`invalid\_token\`。トークンがない、期限切れ、または別のリソース向けです。
- `403` — \`insufficient\_scope\`、\`connection\_revoked\`、\`client\_disabled\`、\`forbidden\` のいずれかです。
- `404` — \`not\_found\`
- `409` — 競合・requestIdの流用・受取未確認
- `422` — 現在の状態・対象・値では実行できません。errorと対象IDを確認します。
Response example, 200:
```json
{
"id": "497f6eca-6276-4993-bfeb-53cbbbba6f08",
"createdAt": "2019-08-24T14:15:22Z",
"updatedAt": "2019-08-24T14:15:22Z",
"inventoryItemId": "ef1bc09e-447a-46aa-a9d9-d86e3d490831",
"assetNumber": "string",
"purpose": "oripa",
"label": "string",
"externalRef": "string",
"status": "on_sale",
"allocatedAt": "2019-08-24T14:15:22Z",
"allocationRef": "string",
"shipmentId": "47efd5a2-af91-4417-950a-7f546cd1b5cf",
"closedAt": "2019-08-24T14:15:22Z"
}
```
---
# 掲載・当選を一括で解除する
Source: https://docs.toreca-cloud.com/api/reference/%E5%9C%A8%E5%BA%AB/release-commitments
最大200件、ID重複不可。全件成功または全件取り消しです。setAsideと紛失時の扱いは単体解除と同じです。 inventory:readに加え、この操作のスコープと許可したメンバーのinventory.write権限が必要です。
`POST /inventory/commitments/release-batch`
**Request body** (`application/json`, required)
- `commitmentIds` (string[], required)
- `reason` (string, required)
- `setAside` (boolean)
Request body example:
```json
{
"commitmentIds": [
"497f6eca-6276-4993-bfeb-53cbbbba6f08"
],
"reason": "string",
"setAside": true
}
```
**Responses**
- `200` — 成功
- `400` — \`invalid\_request\`。パラメーターが正しくありません。
- `401` — \`invalid\_token\`。トークンがない、期限切れ、または別のリソース向けです。
- `403` — \`insufficient\_scope\`、\`connection\_revoked\`、\`client\_disabled\`、\`forbidden\` のいずれかです。
- `409` — 競合・requestIdの流用・受取未確認
- `422` — 現在の状態・対象・値では実行できません。errorと対象IDを確認します。
Response example, 200:
```json
{
"commitments": [
{
"id": "497f6eca-6276-4993-bfeb-53cbbbba6f08",
"createdAt": "2019-08-24T14:15:22Z",
"updatedAt": "2019-08-24T14:15:22Z",
"inventoryItemId": "ef1bc09e-447a-46aa-a9d9-d86e3d490831",
"assetNumber": "string",
"purpose": "oripa",
"label": "string",
"externalRef": "string",
"status": "on_sale",
"allocatedAt": "2019-08-24T14:15:22Z",
"allocationRef": "string",
"shipmentId": "47efd5a2-af91-4417-950a-7f546cd1b5cf",
"closedAt": "2019-08-24T14:15:22Z"
}
]
}
```
---
# 確保を解除する
Source: https://docs.toreca-cloud.com/api/reference/%E5%9C%A8%E5%BA%AB/release-hold
reservedのみ解除できます。解除済みはそのまま返します。発送待ちはhold_confirmed、出荷済みはhold_shippedで拒否されます。 inventory:readに加え、この操作のスコープと許可したメンバーのinventory.write権限が必要です。
`POST /inventory/holds/{id}/release`
**Request body** (`application/json`, required)
- `reason` (string, required)
Request body example:
```json
{
"reason": "string"
}
```
**Responses**
- `200` — 成功
- `400` — \`invalid\_request\`。パラメーターが正しくありません。
- `401` — \`invalid\_token\`。トークンがない、期限切れ、または別のリソース向けです。
- `403` — \`insufficient\_scope\`、\`connection\_revoked\`、\`client\_disabled\`、\`forbidden\` のいずれかです。
- `404` — \`not\_found\`
- `409` — 競合・requestIdの流用・受取未確認
- `422` — 現在の状態・対象・値では実行できません。errorと対象IDを確認します。
Response example, 200:
```json
{
"id": "497f6eca-6276-4993-bfeb-53cbbbba6f08",
"createdAt": "2019-08-24T14:15:22Z",
"updatedAt": "2019-08-24T14:15:22Z",
"orderNumber": "string",
"status": "reserved",
"version": 0,
"inventoryItemId": "ef1bc09e-447a-46aa-a9d9-d86e3d490831",
"purpose": "oripa",
"destinationLabel": "string",
"externalRef": "string",
"expiresAt": "2019-08-24T14:15:22Z",
"trackingNumber": "string",
"sale": {
"amountMinor": 0,
"currency": "string",
"source": "entered"
}
}
```
---
# 確保を一括で解除する
Source: https://docs.toreca-cloud.com/api/reference/%E5%9C%A8%E5%BA%AB/release-holds
最大100件、ID重複不可。発送待ち・出荷済みが1件でもあると全件を拒否します。解除済みは変更しません。 inventory:readに加え、この操作のスコープと許可したメンバーのinventory.write権限が必要です。
`POST /inventory/holds/release-batch`
**Request body** (`application/json`, required)
- `holdIds` (string[], required)
- `reason` (string, required)
Request body example:
```json
{
"holdIds": [
"497f6eca-6276-4993-bfeb-53cbbbba6f08"
],
"reason": "string"
}
```
**Responses**
- `200` — 成功
- `400` — \`invalid\_request\`。パラメーターが正しくありません。
- `401` — \`invalid\_token\`。トークンがない、期限切れ、または別のリソース向けです。
- `403` — \`insufficient\_scope\`、\`connection\_revoked\`、\`client\_disabled\`、\`forbidden\` のいずれかです。
- `409` — 競合・requestIdの流用・受取未確認
- `422` — 現在の状態・対象・値では実行できません。errorと対象IDを確認します。
Response example, 200:
```json
{
"holds": [
{
"id": "497f6eca-6276-4993-bfeb-53cbbbba6f08",
"createdAt": "2019-08-24T14:15:22Z",
"updatedAt": "2019-08-24T14:15:22Z",
"orderNumber": "string",
"status": "reserved",
"version": 0,
"inventoryItemId": "ef1bc09e-447a-46aa-a9d9-d86e3d490831",
"purpose": "oripa",
"destinationLabel": "string",
"externalRef": "string",
"expiresAt": "2019-08-24T14:15:22Z",
"trackingNumber": "string",
"sale": {
"amountMinor": 0,
"currency": "string",
"source": "entered"
}
}
]
}
```
---
# 持ち出した個体を棚へ戻す
Source: https://docs.toreca-cloud.com/api/reference/%E5%9C%A8%E5%BA%AB/return-checkout
最大200件、inventoryItemId重複不可。各個体の戻し先の棚と理由を指定します。全件成功または全件取り消しです。 inventory:readに加え、この操作のスコープと許可したメンバーのinventory.write権限が必要です。
`POST /inventory/checkouts/{id}/return`
**Request body** (`application/json`, required)
- `items` (object[], required)
- `reason` (string, required)
Request body example:
```json
{
"items": [
{
"inventoryItemId": "ef1bc09e-447a-46aa-a9d9-d86e3d490831",
"toLocationId": "e81ad314-9cb9-45ae-9ad9-f1b5ebcc7aae"
}
],
"reason": "string"
}
```
**Responses**
- `200` — 成功
- `400` — \`invalid\_request\`。パラメーターが正しくありません。
- `401` — \`invalid\_token\`。トークンがない、期限切れ、または別のリソース向けです。
- `403` — \`insufficient\_scope\`、\`connection\_revoked\`、\`client\_disabled\`、\`forbidden\` のいずれかです。
- `404` — \`not\_found\`
- `409` — 競合・requestIdの流用・受取未確認
- `422` — 現在の状態・対象・値では実行できません。errorと対象IDを確認します。
Response example, 200:
```json
{
"id": "497f6eca-6276-4993-bfeb-53cbbbba6f08",
"createdAt": "2019-08-24T14:15:22Z",
"updatedAt": "2019-08-24T14:15:22Z",
"orderNumber": "string",
"version": 0,
"destinationLabel": "string",
"reason": "string",
"externalRef": "string",
"shippedAt": "2019-08-24T14:15:22Z",
"items": [
{
"inventoryItemId": "ef1bc09e-447a-46aa-a9d9-d86e3d490831",
"assetNumber": "string",
"status": "out",
"returnedAt": "2019-08-24T14:15:22Z",
"returnLocationId": "1d1d177a-c4a1-4389-b833-16c3941f123e"
}
]
}
```
---
# 届かなかった個体の返品を記録する
Source: https://docs.toreca-cloud.com/api/reference/%E5%9C%A8%E5%BA%AB/return-shipment
実際に戻った出荷済み個体を最大200件指定します。元の棚へ返品し、顧客保有のallocatedな新commitmentを作ります。応答のcommitmentIdは元のID、commitment.idは新しいIDです。同じrequestIdでの再実行は作成済みを返します。 inventory:readに加え、この操作のスコープと許可したメンバーのinventory.write権限が必要です。
`POST /inventory/shipments/{id}/returns`
**Request body** (`application/json`, required)
- `requestId` (string, required)
- `commitmentIds` (string[], required)
- `reason` (string, required)
Request body example:
```json
{
"requestId": "d385ab22-0f51-4b97-9ecd-b8ff3fd4fcb6",
"commitmentIds": [
"497f6eca-6276-4993-bfeb-53cbbbba6f08"
],
"reason": "string"
}
```
**Responses**
- `200` — 成功
- `400` — \`invalid\_request\`。パラメーターが正しくありません。
- `401` — \`invalid\_token\`。トークンがない、期限切れ、または別のリソース向けです。
- `403` — \`insufficient\_scope\`、\`connection\_revoked\`、\`client\_disabled\`、\`forbidden\` のいずれかです。
- `404` — \`not\_found\`
- `409` — 競合・requestIdの流用・受取未確認
- `422` — 現在の状態・対象・値では実行できません。errorと対象IDを確認します。
Response example, 200:
```json
{
"returns": [
{
"commitmentId": "4e1ecf7c-8127-4207-92b0-010ff43ff54d",
"commitment": {
"id": "497f6eca-6276-4993-bfeb-53cbbbba6f08",
"createdAt": "2019-08-24T14:15:22Z",
"updatedAt": "2019-08-24T14:15:22Z",
"inventoryItemId": "ef1bc09e-447a-46aa-a9d9-d86e3d490831",
"assetNumber": "string",
"purpose": "oripa",
"label": "string",
"externalRef": "string",
"status": "on_sale",
"allocatedAt": "2019-08-24T14:15:22Z",
"allocationRef": "string",
"shipmentId": "47efd5a2-af91-4417-950a-7f546cd1b5cf",
"closedAt": "2019-08-24T14:15:22Z"
}
}
]
}
```
---
# 移動中の個体を元へ戻す
Source: https://docs.toreca-cloud.com/api/reference/%E5%9C%A8%E5%BA%AB/return-transfer
移動中の個体を出発時の棚へ戻します。inventoryItemIds省略時は移動中の全件。受取済みは返却できません。 inventory:readに加え、この操作のスコープと許可したメンバーのinventory.write権限が必要です。
`POST /inventory/transfers/{id}/return`
**Request body** (`application/json`, required)
- `reason` (string, required)
- `inventoryItemIds` (string[])
Request body example:
```json
{
"reason": "string",
"inventoryItemIds": [
"497f6eca-6276-4993-bfeb-53cbbbba6f08"
]
}
```
**Responses**
- `200` — 成功
- `400` — \`invalid\_request\`。パラメーターが正しくありません。
- `401` — \`invalid\_token\`。トークンがない、期限切れ、または別のリソース向けです。
- `403` — \`insufficient\_scope\`、\`connection\_revoked\`、\`client\_disabled\`、\`forbidden\` のいずれかです。
- `404` — \`not\_found\`
- `409` — 競合・requestIdの流用・受取未確認
- `422` — 現在の状態・対象・値では実行できません。errorと対象IDを確認します。
Response example, 200:
```json
{
"id": "497f6eca-6276-4993-bfeb-53cbbbba6f08",
"createdAt": "2019-08-24T14:15:22Z",
"updatedAt": "2019-08-24T14:15:22Z",
"transferNumber": "string",
"status": "in_transit",
"version": 0,
"fromSiteId": "33a55c88-1ae8-426c-bfdd-0fd03c0d6ee1",
"toSiteId": "80101396-c399-408c-88ad-cd8029268567",
"carrier": "string",
"trackingNumber": "string",
"reason": "string",
"externalRef": "string",
"shippedAt": "2019-08-24T14:15:22Z",
"completedAt": "2019-08-24T14:15:22Z",
"items": [
{
"inventoryItemId": "ef1bc09e-447a-46aa-a9d9-d86e3d490831",
"assetNumber": "string",
"status": "in_transit",
"fromLocationId": "178bb398-90d2-4fc3-a4a0-37fc0eed2806",
"toLocationId": "e81ad314-9cb9-45ae-9ad9-f1b5ebcc7aae",
"resolvedAt": "2019-08-24T14:15:22Z"
}
]
}
```
---
# 確保した個体を出荷する
Source: https://docs.toreca-cloud.com/api/reference/%E5%9C%A8%E5%BA%AB/ship-hold
reservedまたはawaiting_shipmentを出荷します。saleAmountMinor省略時は最新の円評価額を使用し、評価額もなければsale_amount_requiredです。saleCurrencyにはsaleAmountMinorが必要です。JPYが既定です。出荷済みの再実行は変更しません。 inventory:readに加え、この操作のスコープと許可したメンバーのinventory.write権限が必要です。
`POST /inventory/holds/{id}/ship`
**Request body** (`application/json`, required)
- `saleAmountMinor` (integer)
- `saleCurrency` (string)
- `trackingNumber` (string)
Request body example:
```json
{
"saleAmountMinor": 0,
"saleCurrency": "string",
"trackingNumber": "string"
}
```
**Responses**
- `200` — 成功
- `400` — \`invalid\_request\`。パラメーターが正しくありません。
- `401` — \`invalid\_token\`。トークンがない、期限切れ、または別のリソース向けです。
- `403` — \`insufficient\_scope\`、\`connection\_revoked\`、\`client\_disabled\`、\`forbidden\` のいずれかです。
- `404` — \`not\_found\`
- `409` — 競合・requestIdの流用・受取未確認
- `422` — 現在の状態・対象・値では実行できません。errorと対象IDを確認します。
Response example, 200:
```json
{
"id": "497f6eca-6276-4993-bfeb-53cbbbba6f08",
"createdAt": "2019-08-24T14:15:22Z",
"updatedAt": "2019-08-24T14:15:22Z",
"orderNumber": "string",
"status": "reserved",
"version": 0,
"inventoryItemId": "ef1bc09e-447a-46aa-a9d9-d86e3d490831",
"purpose": "oripa",
"destinationLabel": "string",
"externalRef": "string",
"expiresAt": "2019-08-24T14:15:22Z",
"trackingNumber": "string",
"sale": {
"amountMinor": 0,
"currency": "string",
"source": "entered"
}
}
```
---
# 確保した個体を一括で出荷する
Source: https://docs.toreca-cloud.com/api/reference/%E5%9C%A8%E5%BA%AB/ship-holds
最大100件、id重複不可。各行の価格省略は単体出荷と同じです。取り消し済みを含むと全件拒否し、新規の出荷は全件成功または全件取り消しです。 inventory:readに加え、この操作のスコープと許可したメンバーのinventory.write権限が必要です。
`POST /inventory/holds/ship-batch`
**Request body** (`application/json`, required)
- `holds` (object[], required)
Request body example:
```json
{
"holds": [
{
"id": "497f6eca-6276-4993-bfeb-53cbbbba6f08",
"saleAmountMinor": 0,
"saleCurrency": "string",
"trackingNumber": "string"
}
]
}
```
**Responses**
- `200` — 成功
- `400` — \`invalid\_request\`。パラメーターが正しくありません。
- `401` — \`invalid\_token\`。トークンがない、期限切れ、または別のリソース向けです。
- `403` — \`insufficient\_scope\`、\`connection\_revoked\`、\`client\_disabled\`、\`forbidden\` のいずれかです。
- `409` — 競合・requestIdの流用・受取未確認
- `422` — 現在の状態・対象・値では実行できません。errorと対象IDを確認します。
Response example, 200:
```json
{
"holds": [
{
"id": "497f6eca-6276-4993-bfeb-53cbbbba6f08",
"createdAt": "2019-08-24T14:15:22Z",
"updatedAt": "2019-08-24T14:15:22Z",
"orderNumber": "string",
"status": "reserved",
"version": 0,
"inventoryItemId": "ef1bc09e-447a-46aa-a9d9-d86e3d490831",
"purpose": "oripa",
"destinationLabel": "string",
"externalRef": "string",
"expiresAt": "2019-08-24T14:15:22Z",
"trackingNumber": "string",
"sale": {
"amountMinor": 0,
"currency": "string",
"source": "entered"
}
}
]
}
```
---
# 配送申請の個体を出荷する
Source: https://docs.toreca-cloud.com/api/reference/%E5%9C%A8%E5%BA%AB/ship-shipment
指定した行はsaleAmountMinor、その他は円評価額で売上を記録します。価格がない行はsale_amount_required。JPY以外では全行の金額が必要です。saleCurrencyにはitemsが必要で、commitmentIdはこの配送内で重複不可です。 inventory:readに加え、この操作のスコープと許可したメンバーのinventory.write権限が必要です。
`POST /inventory/shipments/{id}/ship`
**Request body** (`application/json`, required)
- `trackingNumber` (string)
- `saleCurrency` (string)
- `items` (object[])
Request body example:
```json
{
"trackingNumber": "string",
"saleCurrency": "string",
"items": [
{
"commitmentId": "4e1ecf7c-8127-4207-92b0-010ff43ff54d",
"saleAmountMinor": 0
}
]
}
```
**Responses**
- `200` — 成功
- `400` — \`invalid\_request\`。パラメーターが正しくありません。
- `401` — \`invalid\_token\`。トークンがない、期限切れ、または別のリソース向けです。
- `403` — \`insufficient\_scope\`、\`connection\_revoked\`、\`client\_disabled\`、\`forbidden\` のいずれかです。
- `404` — \`not\_found\`
- `409` — 競合・requestIdの流用・受取未確認
- `422` — 現在の状態・対象・値では実行できません。errorと対象IDを確認します。
Response example, 200:
```json
{
"id": "497f6eca-6276-4993-bfeb-53cbbbba6f08",
"createdAt": "2019-08-24T14:15:22Z",
"updatedAt": "2019-08-24T14:15:22Z",
"orderNumber": "string",
"status": "reserved",
"version": 0,
"destinationLabel": "string",
"externalRef": "string",
"trackingNumber": "string",
"shippedAt": "2019-08-24T14:15:22Z",
"items": [
{
"commitmentId": "4e1ecf7c-8127-4207-92b0-010ff43ff54d",
"inventoryItemId": "ef1bc09e-447a-46aa-a9d9-d86e3d490831",
"assetNumber": "string",
"status": "string",
"sale": {
"amountMinor": 0,
"currency": "string",
"source": "string"
}
}
]
}
```
---
# Webhookを消す
Source: https://docs.toreca-cloud.com/api/reference/%E5%A4%89%E6%9B%B4%E9%80%9A%E7%9F%A5/delete-webhook
`DELETE /webhook`
**Responses**
- `204` — 消しました
---
# Webhookを登録する
Source: https://docs.toreca-cloud.com/api/reference/%E5%A4%89%E6%9B%B4%E9%80%9A%E7%9F%A5/set-webhook
在庫が変わったときに通知するURLを登録します。通知に在庫の中身は載せないので、受け取ったら `/inventory/changes` を読んでください。呼ぶたびに新しい署名用シークレットが返ります。URLはhttpsで、戻り先URLのどれかと同じオリジンにします。
通知は `POST url` で、本文は `{"type":"inventory.changed","tenantId","connectionId","occurredAt"}` です。`X-TorecaCloud-Signature: v1=` は、シークレット文字列をキーにした `HMAC-SHA256(".<本文>")` です。時刻が300秒以上ずれた通知は拒否してください。
`PUT /webhook`
**Request body** (`application/json`, required)
- `url` (string, required)
Request body example:
```json
{
"url": "string"
}
```
**Responses**
- `200` — 登録しました
- `422` — \`invalid\_webhook\_url\`
Response example, 200:
```json
{
"url": "http://example.com",
"secret": "string",
"createdAt": "2019-08-24T14:15:22Z"
}
```
---
# 接続を作る
Source: https://docs.toreca-cloud.com/api/reference/%E6%8E%A5%E7%B6%9A/create-connection
認可のあと最初に呼びます。解除済みの接続はもう一度有効になります。すでに有効なら、接続日時はそのままです。
`POST /connection`
**Responses**
- `200` — 接続
- `401` — \`invalid\_token\`。トークンがない、期限切れ、または別のリソース向けです。
- `403` — \`insufficient\_scope\`、\`connection\_revoked\`、\`client\_disabled\`、\`forbidden\` のいずれかです。
Response example, 200:
```json
{
"id": "497f6eca-6276-4993-bfeb-53cbbbba6f08",
"tenant": {
"id": "497f6eca-6276-4993-bfeb-53cbbbba6f08",
"name": "string",
"slug": "string"
},
"user": {
"id": "string",
"name": "string",
"email": "user@example.com"
},
"clientId": "string",
"status": "active",
"connectedAt": "2019-08-24T14:15:22Z",
"webhook": {
"url": "http://example.com",
"createdAt": "2019-08-24T14:15:22Z"
},
"cursor": "string"
}
```
---
# 接続をやめる
Source: https://docs.toreca-cloud.com/api/reference/%E6%8E%A5%E7%B6%9A/delete-connection
接続を解除し、登録したWebhookを消し、このアプリがその店舗で持つリフレッシュトークンをすべて失効させます。
`DELETE /connection`
**Responses**
- `204` — 解除しました
- `401` — \`invalid\_token\`。トークンがない、期限切れ、または別のリソース向けです。
- `403` — \`insufficient\_scope\`、\`connection\_revoked\`、\`client\_disabled\`、\`forbidden\` のいずれかです。
---
# 接続を確かめる
Source: https://docs.toreca-cloud.com/api/reference/%E6%8E%A5%E7%B6%9A/get-connection
`GET /connection`
**Responses**
- `200` — 接続
- `401` — \`invalid\_token\`。トークンがない、期限切れ、または別のリソース向けです。
- `403` — \`insufficient\_scope\`、\`connection\_revoked\`、\`client\_disabled\`、\`forbidden\` のいずれかです。
Response example, 200:
```json
{
"id": "497f6eca-6276-4993-bfeb-53cbbbba6f08",
"tenant": {
"id": "497f6eca-6276-4993-bfeb-53cbbbba6f08",
"name": "string",
"slug": "string"
},
"user": {
"id": "string",
"name": "string",
"email": "user@example.com"
},
"clientId": "string",
"status": "active",
"connectedAt": "2019-08-24T14:15:22Z",
"webhook": {
"url": "http://example.com",
"createdAt": "2019-08-24T14:15:22Z"
},
"cursor": "string"
}
```
---
# 買取強化対象の一覧を取得する
Source: https://docs.toreca-cloud.com/api/reference/%E8%B2%B7%E5%8F%96%E5%BC%B7%E5%8C%96%E5%AF%BE%E8%B1%A1/list-purchase-boosts
いま掲載中の買取強化対象を、強化価格の高い順に返します。開始前、一時停止中、終了したもの、期限が過ぎたものは返しません。
許可したメンバーには、店舗での `purchases.read` 権限が必要です。
`GET /purchase-boosts`
**Responses**
- `200` — 買取強化対象の一覧
- `400` — \`invalid\_request\`。パラメーターが正しくありません。
- `401` — \`invalid\_token\`。トークンがない、期限切れ、または別のリソース向けです。
- `403` — \`insufficient\_scope\`、\`connection\_revoked\`、\`client\_disabled\`、\`forbidden\` のいずれかです。
Response example, 200:
```json
{
"boosts": [
{
"id": "497f6eca-6276-4993-bfeb-53cbbbba6f08",
"target": {
"kind": "card",
"card": {
"id": "497f6eca-6276-4993-bfeb-53cbbbba6f08",
"name": "string",
"localizedNames": {
"property1": "string",
"property2": "string"
},
"cardNumber": "string",
"setTotalRaw": "string",
"languageCode": "string",
"imageUrl": "http://example.com",
"rarity": {
"code": "string",
"name": "string"
},
"set": {
"id": "497f6eca-6276-4993-bfeb-53cbbbba6f08",
"code": "string",
"name": "string"
},
"game": {
"id": "497f6eca-6276-4993-bfeb-53cbbbba6f08",
"code": "string",
"name": "string"
}
},
"grade": {
"id": "497f6eca-6276-4993-bfeb-53cbbbba6f08",
"code": "string",
"label": "string",
"serviceCode": "string",
"serviceName": "string",
"serviceKind": "third_party"
}
},
"priceMinor": 0,
"currency": "string",
"remainingQuantity": 0,
"status": "open",
"startsAt": "2019-08-24T14:15:22Z",
"endsAt": "2019-08-24T14:15:22Z",
"note": "string",
"updatedAt": "2019-08-24T14:15:22Z"
}
],
"generatedAt": "2019-08-24T14:15:22Z"
}
```
---
# 権限とエラー
Source: https://docs.toreca-cloud.com/api/scopes-and-errors
## 権限(scope)
トークンには、読み取りの権限(`inventory:read` か `purchase-boosts:read`)が少なくとも1つ必要です。どちらもないトークンは、どのエンドポイントでも拒否されます。
| scope | 呼べるエンドポイント |
| ---------------------- | ------------------------------------------------------------------------------------------------------------ |
| `purchase-boosts:read` | `/purchase-boosts` |
| `inventory:read` | 在庫同期・現在評価額、`/cards`、`/webhook`。伝票の詳細は下記の操作権限も必要です |
| `inventory:write` | 確保・掲載・当選・配送申請・出荷・返品(`holds` / `commitments` / `shipments`)。`inventory:read` も必要です |
| `inventory:move` | 棚の移動、拠点間の移動、持ち出し。`inventory:read` も必要です |
| どちらかの読み取り権限 | `/connection` |
権限は、店舗が連携先を登録するときに選びます。登録で許可されていない権限を認可のときに求めると、`invalid_scope` で拒否されます。
書き込みと、その確保・掲載・配送・移動伝票の取得には、接続を許可したメンバーの現在の `inventory.write` 権限も必要です。[在庫操作の流れ](/api/inventory-operations)で操作ごとの条件を確認してください。
## エラーの形
エラーは `{ "error": "コード" }` の形で返ります。権限が足りないときは、足りない権限も添えます。
```json
{ "error": "insufficient_scope", "scope": "inventory:read" }
```
このときは `WWW-Authenticate` ヘッダーにも、足りない権限と保護リソースのメタデータのURLが入ります。
## 主なエラー
| ステータス | `error` | 意味と対処 |
| ---------- | ----------------------- | -------------------------------------------------------------------------------------------------- |
| 400 | `invalid_request` | パラメーターが正しくありません |
| 401 | `invalid_token` | トークンがない、期限切れ、または別のリソース向けです。更新してから再試行します |
| 403 | `insufficient_scope` | 必要な権限がトークンにありません。店舗に権限の追加を頼み、許可を取り直します |
| 403 | `connection_revoked` | 接続がない、または店舗が解除しました。`POST /connection` を呼ぶか、許可を取り直します |
| 403 | `client_disabled` | 店舗または運営がアプリを停止しています |
| 403 | `forbidden` | 許可したメンバーが退会した、または必要な権限を失いました。別のメンバーに許可を取り直してもらいます |
| 404 | `not_found` | 対象がないか、パスのIDの形が正しくありません |
| 409 | `idempotency_conflict` | 同じ `requestId` を別の内容に使っています。元の操作と内容を確認します |
| 409 | `conflict` | 同時更新です。対象を読み直してから再試行します |
| 409 | `receipt_not_confirmed` | 店舗側の受取確認が完了していません |
| 422 | 状態・値に応じたコード | 在庫・割り当て・出荷状態・価格などを確認します。対象IDが添えられる場合があります |
| 503 | `photo_unavailable` | 個体の写真をいま取得できません。時間をおいて再試行します |
---
# トークンの保管と有効期限
Source: https://docs.toreca-cloud.com/api/tokens
外部連携APIのトークンは、店舗のメンバーが許可したことの証明です。漏れると、その店舗の情報を第三者に読まれます。次の決まりを守ってください。
## 有効期限
| トークン | 有効期限 | 使い方 |
| -------------------- | ------------ | ------------------------------------------------------------ |
| アクセストークン | 発行から15分 | APIを呼ぶときに `Authorization: Bearer` で付けます |
| リフレッシュトークン | 発行から90日 | アクセストークンの期限が切れたら、新しいトークンと交換します |
リフレッシュトークンは、使うたびに新しいものに入れ替わります。以後の通常更新には新しいトークンを使います。定期的に更新していれば、90日を過ぎても接続を続けられます。更新応答を受け取れなかった場合だけ、下記の回復手順を使います。
## 更新のしかた
```ts
const response = await fetch(
"https://api.toreca-cloud.com/api/auth/oauth2/token",
{
method: "POST",
headers: {
Authorization: "Basic " + basicCredentials,
"Content-Type": "application/x-www-form-urlencoded",
"X-Toreca-Refresh-Recovery": "1",
},
body: new URLSearchParams({
grant_type: "refresh_token",
refresh_token: storedRefreshToken,
resource: "https://api.toreca-cloud.com/partner/v1",
}),
},
);
const next = await response.json();
if (!response.ok) {
// refresh_superseded は保存済みの最新トークンを読み直す。
// invalid_grant は再認可が必要。エラー本文・トークンをログに出さない。
throw new Error("Token refresh failed");
}
// next.access_token と next.refresh_token を一緒に保存し直す
```
- APIが `401` を返したら、リフレッシュトークンで更新してから1回だけ再試行します。
- 更新は1つの接続につき同時に1回にし、保存までを直列化してください。
- 新しいアクセストークンとリフレッシュトークンは、受け取ったら一緒に保存します。
- 更新が `invalid_grant` で失敗したら、店舗のメンバーにもう一度許可してもらいます。
### 更新応答を受け取れなかったとき
`X-Toreca-Refresh-Recovery: 1` を付けて更新すると、このパートナーAPIの機密クライアントは更新結果の回復を使えます。接続は有効である必要があります。MCPや別リソースのトークンには使えません。
1. 通信切断・保存失敗時は、同じリフレッシュトークン、同じクライアント認証・`resource`・`scope`、同じヘッダーで再試行します。
2. 後継トークンがまだ次の更新に使われていなければ、同じ更新応答が返ります。受け取ったトークンを一緒に保存します。
3. `refresh_superseded` は、その後継も更新済みという意味です。保存済みの最新トークンを読み直します。古い処理の応答で新しい保存値を上書きしないでください。最新値を失った場合は再認可します。
回復は期限切れ・失効・接続解除・権限喪失を迂回しません。`invalid_grant` を繰り返し再送せず、接続と認可を確認します。
## 保管のしかた
- トークンとクライアントシークレットは、サーバー側だけに置きます。ブラウザ、スマホアプリ、静的サイトのJavaScriptには入れないでください。
- データベースに保存するときは暗号化し、読める人と処理を絞ります。
- ログ、エラー報告、分析ツールにトークンを出さないでください。
- クライアントシークレットが漏れたおそれがあるときは、店舗の管理者に「シークレットを再発行」を頼みます。古いシークレットはすぐに使えなくなります。
## 接続が止まるとき
次のときは、トークンが期限内でもAPIが拒否されます。
| 状況 | 応答 |
| ---------------------------------------------------- | ------------------------ |
| 店舗が接続を解除した | `403 connection_revoked` |
| 店舗または運営がアプリを停止した | `403 client_disabled` |
| 許可したメンバーが退会した、または必要な権限を失った | `403 forbidden` |
| 必要な権限(scope)がトークンにない | `403 insufficient_scope` |
外部アプリから接続をやめるときは `DELETE /partner/v1/connection` を呼びます。このアプリがその店舗で持つリフレッシュトークンもすべて失効します。
---
# 2026年10月4日のリリース
Source: https://docs.toreca-cloud.com/changelog/v2026-10-04
## 新機能
### 買取強化対象
- 買取強化対象を一覧で管理し、最終見積の承諾で残り枚数を減らし、外部連携のAPIで読めるようにする
### 在庫
- 外部仕入記録の取込で、仕入額の根拠を表す状態タグを名前で付け外しできるようにする
- 入庫伝票の在庫に、自社の別システムでの買取(売り手・買取額・承諾書と証拠・認定番号)を紐付け、実物の認定番号で確定できるようにする
- 印刷した後にカード・グレードなどが変わった個体を「要再印刷」で抽出し、同じ番号で刷り直せるようにする
- 着金確認が済むまで、買い取ったカードを出庫予約・販売・拠点間移動・移管・連携先の割り当てに回せないようにする
- 在庫に入庫の画面を作り、買取の荷物を発送中から棚まで追えるようにする
- 入出庫をページ内のサブサイドバーにし、個体の履歴に格納スキャン・印刷・ピッキング・棚卸しまで全部残す
- 在庫の画面をサイドバーに並べ、見出しと拠点の切り替えをそろえ、選んだ拠点を覚える
- 在庫一覧の絞り込みを頭文字とPSAスライダー中心にし、まとめて読み込む。棚卸しの不足を在庫に反映できるようにする
- 移動先の拠点で格納アプリから読むだけで拠点間移動を受領できるようにする
- 頭文字を「あ」と「い」のように複数選んで絞り込めるようにする
- ラベルを条件に合う全点で一気に印刷し、頭文字(あ・あ〜お)で絞れるようにする
- 在庫の一覧を名前の五十音順(あ→ん)で並べられるようにする
### 振込
- 振込かんばんを画面いっぱいに広げ、カードを列へドラッグすると対応するダイアログを開けるようにする
- 振込一覧を承諾〜着金までのかんばんにし、着金の確認を記録できるようにする
- 振込一覧の承認待ちの行に「承認する」を置き、ページを移らずにその場で承認できるようにする
- 振込結果のダイアログから、振込の証拠(画面の写真・明細の PDF)を添付できるようにする
- ネットバンクの振込の受付一覧を取り込み、振込ごとに結果を記録する
- 振込を全銀フォーマットで書き出し、取り込みで振込結果をまとめて記録する
- 元払いで届いた荷物の送料を振込に上乗せできるようにする
### 買取成立
- 本人確認がまだない取引でも、最終見積の承諾だけを先に記録できるようにする
### 通知
- 通知のタイトルの頭に分類名を付け、Telegram の一覧で種類を見分けられるようにする
- コンソールを開いている画面にはデスクトップ通知をトーストでも出し、テスト送信を押すたびに新しい通知にする
- 業務通知をデスクトップ通知(PWA / Web Push)でも受け取れるようにする
- Telegram のボットを店ごとに設定画面から接続できるようにする
- 業務の動きをメールと Telegram で知らせ、通知ごと・送り先ごとに店が切り替えられるようにする
### 顧客
- 査定依頼タブの上に「2次査定を依頼」を置き、押すと未見積のカードを選んで依頼のバーを開く
- 査定依頼の行に申告の鑑定情報を出して直せるようにし、見積のグレードを申告から始める
- 査定依頼タブの行の「…」から見積前のカードを理由付きで削除できるようにする
- 査定依頼タブから相場調査を依頼でき、回答の価格を参考時価に入れる
- ベルはタブに数字の出ている作業だけを並べ、数字を出さず点灯で知らせる
- LINEトークのバッジは未返信のメッセージの件数を数え、ベルは「新着メッセージ N件」の1件として出す
- トークのメッセージ選択をドラッグでまとめてできるようにする
- トークの AI 読み取りの進捗をヘッダーの左に出し、段ごとに読み込み表示を切り替える
- AI読み取りの確認で、同じカードが査定依頼に入っていれば警告する
- 取引のない顧客にもお客様情報を登録・修正できるようにする
- 顧客ペインを最後の動き順にし、要対応・お客様待ちの件数と行ごとの状態をピルで出す
### その他
- BOX・パック・デッキの掛け率を店ごとに決められるようにし、価格帯のルールより先に当てる
- 「レビュー」を現場の呼び方の「2次査定」にそろえる
- 対応項目に「案件」タブを足し、案件に紐づく作業だけを案件ごとにまとめて出す
- 最終査定の金額を直接・+円・×率で入力できるようにする
- LINEの文面を設定画面で書き換えられるようにし、見積の既定文面を実運用に合わせる
- 入庫タブを、カードを選んでラベルを印刷する表にまとめる
- 未特定のカードもまとめて調査を依頼できるようにする
- 契約書と委任状を本人確認の後から出し、契約書は配送中に巻いて「不要」も記録できるようにする
- トークからの依頼読み取りをダイアログで待たせず、トーク上部の進捗バーに出し、終わったら対応項目に載せる
- 発送先を拠点に複数登録し、発送のお願いでダイアログから選べるようにする
- 案件の担当をなくし、LINE で名乗る名前を事業者情報に持たせる
- お客様情報・本人確認・送り状を1本のリンクにまとめ、伝票の手動記録をヘッダーのボタンからのダイアログにする
- 発送案内の文章案をページに常時出し、本人確認フォームのリンクを同じカードにまとめる
- 口座名義がお客様と異なるときに委任状を求め、CloudSign で送る導線と記録を足す
- サイドバーの「相場」を別タブで開く
- 認証まわりの画面のアイコンを、既存のイラストセットに置き換える
- 顧客の一覧とペインから、案件を作らずに名前だけで顧客を追加できるようにする
- 伝票の記録をお客様のフォームと同じ送り状の写真にそろえ、コンソールからフォームのリンクを出せるようにする
- 一次審査・送付済みの見積からカードを外して再査定し、複数の見積を1つにまとめ直せるようにする
- LINEリードを顧客の一覧に移し、未登録の友だちは顧客として登録してからトークで依頼を抽出する
- 顧客の LINE トークから依頼を読み取り、1件ずつ確認して査定依頼に追加する
- 顧客ページの各タブに店がやる番の件数を出し、右上のベルにこの顧客の通知をまとめる
- 対応項目に取引の作業・お客様の返答待ち・振込・LINE未返信・受付の要確認を足し、上から片付ければ一日の仕事が終わる一覧にする
- 見積の文章案の枠にラベルとコピーを載せ、LINEで送るボタンを操作の行に並べる
- 個体詳細の所在の経緯をアクティビティのタイムラインにし、査定の根拠の二重の表を1本のリストにする
- 在庫の詳細で、どの拠点のどの棚に何枚あるかとラベル番号を見せ、個体の操作を見出し右のメニューにまとめる
- 顧客ページに LINE トークのタブを足し、トークの表示を LINE リードの部品にそろえる
- 調査依頼の送信・回答・取り下げの完了をトーストで知らせる
- 相場調査を取引の流れに載せ、調査担当の一覧と詳細を作り直す
- 取引を顧客タブと同じ段階ページに分け、発送のご連絡をフォームで受け取る
- 買取の既定値・店頭で完結・次の操作、在庫の対応項目とまとめて状態タグ、調査担当の着地(承認済み14項目)
- 買取・価格調査・在庫管理の手数を減らす(業務フローの通しレビュー)
- customer purchase workspace and quote portal (ORIPA-212)
- add appraisal research workflow and rolling market window
- 古物台帳を帳簿様式と同じ並びの表で常に確認でき、CSV と印刷でいつでも書き出せるようにする
- 在庫ラベル(QR)と格納スキャナーアプリ
- カード一覧に国別フィルターを追加し、初期表示を日本のポケモンカード(相場あり)にする
- 対応項目タブを追加する
- 査定を保存した人を、担当のいない案件の担当にする
- お客様情報・本人確認フォームの提出内容を案件画面のダイアログで確認できるようにする
- 顧客フォームの品物と写真を一時保存して再開する
- 生年月日を PC ではカレンダーで選べるようにする
- フォームリンクのコピーを分割ボタンにし、再発行をメニューへしまう
- add shared customer intake with manual profile entry
- LINEリードを要対応の受信箱として作り直す
- リード一覧を要対応・すべてで引き、売却希望・写真・未読で絞り込めるようにする
- connect intake photos to identification and appraisal
- 埋め込みを一括作成するジョブ用スクリプトを追加
- カード・BOX・パックを横断する高速検索と意味検索を追加
- センタリング判定を追加(撮影ゲート・連続撮影・公式画像との重ね合わせ)
### AI連携(MCP)
- Claude・ChatGPT から接続したときは同意画面と接続一覧にそのロゴを出す
- テナント MCP から在庫を一通り扱えるようにする(条件検索・確認一覧・訂正・伝票の取り消し・所在の訂正・出庫予約・紛失・差し戻し・移動の取り消し・棚卸し)
- 接続時に作業ロールを選び、そのロールのツールだけを出し、12時間で接続を終える。Claude(claude.ai)から接続できるようにする
- 拠点・保管場所の作成、棚のまとめ移動・拠点間移動をテナントMCPに、BOXマスタ登録を運営MCPに追加
- 既存在庫をテナントMCPから全項目つきで登録できるようにする
### 買取
- 届いたあとに鑑定品の番号を1枚ずつ入れ、成立のときに在庫と古物台帳へ1枚ずつ写す
- 「商品を追加」で鑑定会社・グレード・鑑定番号を選んで入れられるようにする
- 鑑定品の申告グレードと鑑定番号を査定依頼に保存し、あとから直せるようにする
- 発送案内の記録をチェックボックスではなく確認ダイアログで受ける
- 本人確認・振込先が無くても買取成立の手前まで進められるようにする
- export final offer consent PDF (ORIPA-207)
### AI読み取り
- LINE の AI 読み取りで鑑定会社・グレード・鑑定番号を読み、PSA 10 と素のカードを別の候補にする
- 取引に追加済みの写真はトーク全体の読み取りから外し、トークに印を付ける
- AI 読み取りの確認でお客様の写真とマスタ画像を並べて出す
### 取引
- 事前見積の一部だけを承諾でき、外したカードは見送りとして見積前に戻す
- 最終見積への承諾を「承諾を記録」にし、振込の確認で買取成立とする
### 格納
- 格納の画面を、1行の要約と「要対応・印刷バッチ・セッション・担当者」のタブにまとめる
### 画面全般
- MCP・格納アプリの接続で開く同意画面とログイン画面で、誰がどの店舗に接続するのかを先頭に出し、スマホではボタンを下に固定する
- 待ち表示を loading.dev のスピナーにそろえ、送信中のボタンにスピナーを出す
- 設定・振込・本人確認・古物台帳・ログイン前後の画面を英語で表示する(英語対応 3/3・4本目)
- 買取・査定・見積・発送・鑑定の画面を英語で表示する(英語対応 3/3・2本目)
- 在庫・入出庫・格納・棚卸し・相場の画面を英語で表示する(英語対応 3/3・3本目)
- 顧客・トーク・ダッシュボードと共有部品を英語で表示し、訳済みの英語を書き直す(英語対応 3/3・1本目)
- ブラウザが描く select・radio・日付・confirm をデザインシステムの部品に置き換える
- 取引・顧客まわりの lib の文言を翻訳ファイルへ移す
- 在庫・カードまわりの lib の文言を翻訳ファイルへ移す
- 本人確認・設定まわりの lib の文言を翻訳ファイルへ移す
- 翻訳ファイルを領域ごとに分け、lib の関数とテストから読めるようにする
- 店舗コンソールを日本語と英語で表示できるようにする(土台)
- 組織の切り替えをサイドバー上部からアカウントメニューへ移す
- サイドバーを「買取」「管理」の見出しでまとめ直し、相場を下段の設定の上へ移す
- サイドバーの折りたたみボタンをロゴの横に移す
- お客様情報をドロワーから顧客のタブに移し、表示を整理する
- 顧客ページのドロワーからお客様情報を登録・修正できるようにする
- サイドバーを一列に並べ替え、買取依頼を外す
- 顧客の「本人確認の記録」から、確認した内容と保管書類の詳細を開けるようにする
- LINE未登録の一覧に「対象外」の切り替えを足し、誤って対象外にした友だちを探せるようにする
- 査定依頼の進行状況を案件一覧と同じ言葉で細かく出す
- 書類のアップロード欄で HEIC の写真を選べるようにし、JPEG に変換して送る
- 振込先の銀行・支店を名前と支店番号で検索して選ばせ、コード入力をなくす
- サイドバーから本人確認を外し、本人確認書類は対応項目と顧客ページから受け取る
- 顧客リストを1000px以上で出し、レールは並べきれない幅だけ自動で畳む
- 商品を追加で種類を選ばせず、写真かキーワードでカードとBOXをまとめて探す
- レビュー待ちの見積では次の操作をアラートにし、レビューを開く・省略を並べる
- 顧客サイドパネルを無限スクロールにする
- 同じ個体を「×50」の1行にまとめ、開くと1点ずつ見られるようにする
- keep purchase work and quotes in customer details
- 在庫のタブを4本に畳み、一覧の上の帯を1段のツールバーにする
- 入庫登録のUI/UXを改善する
- サイドバーの項目を「買取」「管理」の見出しでまとめ、設定を下部へ移す
- 対応項目をダイアログで開き、その場で完了できるようにする
- LINEのやり取りを、案件の見出しから開いて画面の右端に重ねるパネルで見られるようにする
- BOX・パック・構築済みデッキにイラストを付け、種別イラストの背景を透明にする
### 顧客フォーム
- 口座名義が違うとき、委任状か旧姓などのご本人口座かを選べるようにする
- スマホの本人確認の完了・リンク切れ画面にイラストを入れる
- 顔撮影をカメラ中心の画面にし、正面・右・左の3枚を向きの矢印と丸い撮影ボタンで撮れるようにする
### LINE連携
- LINE トークのヘッダーから、Liny の1対1トークを別タブで開けるようにする
- LINE の文面を実運用の最終査定メッセージの文体にそろえ、見積の3経路を1つの文面にする
### 2次査定
- 通知のレビュー依頼リンクから、その依頼のダイアログを開く
### 設定
- 拠点の住所に郵便番号からの住所検索と都道府県のセレクトを付ける
### 格納アプリ
- 格納アプリ 0.2.0 — 作業・在庫・設定の3タブ、在庫の閲覧、格納の破棄、開発者モード
- 格納アプリを TestFlight で配れるようにする
### ラベル
- カードのラベルでグレードの数字(PSA 10 の 10 など)を大きく太くする
- 長いカード名は 6pt まで縮めて全文を刷り、それでも入らないときだけ省略する
### 本人確認
- 2回目以降のお客様は「お変わりないですか」に答えれば本人確認書類を出し直さずに済むようにする(既定オフ)
### 外部連携
- 外部アプリとの在庫連携を拡張する(確保・移動・割り当て・状態タグ・写真)
## 改善と修正
### 在庫
- 在庫一覧のギャラリーで、カードの金額を在庫の合計ではなく1枚あたり(時価の合計÷枚数)で出す
- 印刷サイズの案内と確認ダイアログの対象名を戻す
- 在庫の画面から操作の説明文を削除
- 保管場所を「拠点-保管場所」で出し、タイルを価格と在庫のまとまりに分ける。PSA のタグをそろえ、五十音表が細くなる不具合を直す
### 格納
- 印刷バッチの残りから紛失・販売した在庫を外し、刷り直したラベルとの関係を明細に出す
- 印刷バッチの格納を印刷後に読んだ在庫だけで数え、スキャンの記録と期間指定を足し、在庫を「133/165」で探せるようにする
- 格納の数字を読み取りとそろえ、タブの格納待ちを画面の拠点で数える
### 顧客フォーム
- 最終見積の承諾を記録した取引でも、本人確認のフォームを送れるようにする
### 通知
- AI 読み取りの通知のリンクで、顧客のトークを開いて読み取りの候補に着くようにする
### 画面全般
- 表の行の入力エラーを行の下の帯に出し、文を1行に収める
- 主操作が決まっている場所で outline だけが並ばないようにする
- 主操作が決まっている場所で outline だけが並ばないようにする
- 「LINEの文面を作る」の説明文を外し、「場面」を「状況」にする
- 写真の確認画面で、最後の写真の次は最初へ、最初の前は最後へ進めるようにする
- シュリンクの有無が不明な BOX の名前の後ろに空の「()」を出さない
- 顧客ページのお客様情報タブを一番右に移す
- LINY-LEAD などの長い案件番号を短縮し、取引ヘッダーで折り返さないようにする
- メインのサイドバーを畳んでも設定ナビのラベルが消えないようにする
- LINE未接続の帯を、トークを受け取る Liny / Lステップの接続で判定する
- 相場調査の「他のグレードの記録」を畳まずに常に出す
- なくなった画面を指していた案内文とドキュメントを直す
- 「見積書のレビューを依頼する」を押すと依頼ボタンの行まで移動する
- 見積の再送信・到着時の差分・一部辞退の返送に、顧客の取引ページから届くようにする
- 相場の読み込み中を、絞り込みとカードのグリッドの形で表示する
- 「お客様の申告を確認」を、申告内容と写真をその場で開くダイアログにする
- 取引の状態でページごと消えていた本人確認・振込・不備BOX返送に届くようにする
- Enterで入力確定後に確定ボタンへ移動する
- LINEリードで枠の外をスクロールするとページが空白まで流れるのを直す
- 設定の不要な選択と保存済み丸め単位の表示を修正
- 絞り込みレールをヘッダー固定の内側スクロールにし、結果の横に付いて来るようにする
- ファイル選択を素の input から揃えた部品に置き換え、印影を組織設定の下へ移す
- 設定を開いたときの既定画面を組織設定にする
- ラベル印刷の開始位置を既定で1面目にし、案件ごとの改ページを既定オフにする
- 最終査定で事前見積の承認状態を引き継がない
- 本人確認を記録済みの案件では記録内容を表示し、登録ボタンを出さない
- advance after tracking-free inbound slip [ORIPA-187]
- 案件のLINEトークの吹き出しの尖りを上側に揃える
- 作業カードへのスクロールで上端に 32px の余白を空ける
- navigate directly from case checklist items
- prevent stage labels overlapping chevron edges
- summarize ledger quantities by product kind
- keep partially priced appraisals incomplete
- restore appraisal submission review navigation
### その他
- 英語の調査画面の名前を Research に、状態を Awaiting に縮める
- 別のアカウントでログイン中に招待を開いても、招待先のアカウントを作って参加できるようにする
- 確定ボタンをフッターの右下にそろえ、開発中にずれを検査する
- 古物台帳のページ説明文を削除
- コンソールの全ページで走っていた重い集計をやめ、相場一覧・運営カード一覧・カードピッカーの検索を速くする
- 発送案内の記録を、お客様情報と本人確認がそろう前でもできるようにする
- 発送案内の「集荷を希望される場合」の折りたたみを外す
- 対応済みの項目を開いたときに赤いエラーを出さず一覧を更新する
- 次の操作に「先に必要なこと」を並べず、先にやることをそのまま次の操作として出す
- 発送案内の記録を顧客台帳と本人確認で判定し、止まる理由と確認の入口を画面に出す
- 本人確認書類の登録で正常な画像が形式不一致・読み取り不可で弾かれるのを直す
- 調査依頼の写真表示と回答・査定反映を修正
- 設定フォーム・決定ボタンとLINE受付の戻り先を修正
- 最終査定の自動保存がサーバーの対象範囲外の行を送って 422 になるのを直す
- align guidance with conflicts and export validation
- 印影が未登録の見積書では空の「印」枠を出さず、発行元の欄を詰める
- 格納の重複検知・要対応の片付け・在庫一覧の一括選択と拠点切替・アプリの音とカメラ
- distinguish unmatched cards from missing AI matching responses
- 本人確認画像の表示・撮影順と入力導線を改善
- guide face capture without automatic pose detection
- 対応項目の取りこぼしと二重読み込みをなくす(Codex レビュー対応)
- 手動受付で商品名のない写真明細を保存できるようにする
- 口座番号の確認入力をなくす
- 振込先の登録に失敗した理由を app-api の文言どおりに表示する
- お店の画像をアルバムに入れず、拡大表示の読み込み失敗から戻れるようにする
- 対象外にする・解除するの監査ログに変更前後の状態を記録する
- 一覧のカード画像を WebP バリアントで配信する
### 顧客
- 査定依頼のカード一覧で、カード名を2行まで出し、相場調査を参考時価の下に、「特定する」を文字リンクにする
- 顧客詳細の本人確認ラベルを、白地の枠と状態のドットで出す
- トークの読み取り中の表示から、下端の進捗の線を外す
- 顧客リストの行から、全行に付いていた LINE の吹き出しアイコンを外す
- 通知のあるベルを塗りつぶさず、線のベルの右上に点を出す
- 本人確認と依頼人コードの注意を戻す
- 顧客・取引・LINEの画面から操作の説明文を削除
- ベルの「LINE未返信」を押すと最新のメッセージへ移り、通知が消えるようにする
- 査定依頼のカードを特定しても、行が別の位置へ動かないようにする
- LINE未登録の友だちのページでも、顧客ペインで「すべて」を選べるようにする
### 買取
- 見積送付時の注意を戻す
- 買取・査定・鑑定の画面から操作の説明文を削除
- 本人確認の依頼の記録は確認ダイアログだけにする
- 同じカードを複数点買い取った明細を1点ずつの在庫・QRラベルにする
### 設定
- 確認ダイアログに対象の名前を戻す
- 設定の画面から操作の説明文を削除
- 設定の各ページの説明文を削除
### 本人確認
- 本人確認を鑑定後・最終見積の承諾後でも記録できるようにし、止めるのを買取成立だけにする
### 取引
- レビュー待ちの見積から「再見積を入力」を外す
- 見積は事前査定中で作り、受付の要確認から空の取引を作らない(空の取引をなくす 1/3)
- 本人確認を記録したら本人確認待ちを抜け、ペインと対応項目も次の操作と同じ条件で言う
- 取引ページの戻るボタンを、顧客リストが出ている幅でも出す
### AI読み取り
- 照合が一部返らなかった読み取りも確認に進め、拾い直した読み取りでも再試行できるようにする
- 応答の止まった Gemini 呼び出しを打ち切って投げ直し、型番だけの検索で落ちないようにする
- 読み取り依頼をLINE同期より先に処理し、写真待ちの依頼で後ろを止めない
### 買取成立
- 入庫受付の棚がない店でも最終見積の承諾を記録でき、記録後は入庫タブへ移る
- 買取成立の本人確認措置入力欄を削除する
### ラベル
- ラベルの点線をやめ、テスト印刷をエーワンのテンプレと同じ切れ目の線+ずれの目盛りにする
- 65面シートをエーワン 28974 の公式テンプレートに合わせ、各面に区切り線を刷る
### 振込
- simplify manual result confirmation
- 振込実行記録の申し送り入力をなくす
### AI連携(MCP)
- テナントMCPのツール一覧が取れない問題を直す
### 査定
- 査定下書きの保存理由を任意にする
---
# 2026年10月4日のリリース(2回目)
Source: https://docs.toreca-cloud.com/changelog/v2026-10-04-2
## 改善と修正
### 買取強化対象
- 買取強化対象の説明を外部連携の許可の名前にそろえ、外部連携が無効な店舗ではリンクを出さない
---
# 2026年10月5日のリリース
Source: https://docs.toreca-cloud.com/changelog/v2026-10-05
## 新機能
### 在庫
- 在庫一覧をCSVで書き出し、仕入額が実際か推定かと相場の出どころを確かめられるようにする
- スラブの認定番号を在庫で一意にし、番号で個体を探して紐付けられるようにする
### その他
- settle from invoice and checked goods without confirmation steps
- 法人取引の画面で請求書を登録し、振込額との差額と登録番号を確認できるようにする
- 法人の売り手に対応する(法人の顧客・法人の確認・法人名での買取成立と古物台帳)
### 査定
- 査定額と最終提示額を分けて数量・状態別に調整できるようにする
### 買取強化対象
- 2次査定のダイアログに買取強化の目安を出し、グレードを「PSA 10」と表示する
## 改善と修正
### AI連携(MCP)
- 設定のMCPで「接続中」か「切断」かが分かるようにし、接続の期限を7日にする
### 画面全般
- ヘルプセンターの撮影で見つけた文言のずれを直す(棚卸しの「Mark as found」、入庫の点数表示、要再印刷、振込の上限額)
### 設定
- MCPの一覧で最終アクセスと状態の列を離し、外部連携の停止・解除の確認文を買取強化対象を読む連携先にも合わせる
### その他
- 見積レビューを提示額の直接編集とコメント記録に変更
---
# 2026年10月6日のリリース
Source: https://docs.toreca-cloud.com/changelog/v2026-10-06
## 新機能
### その他
- 返品対応を一覧で管理し住所承諾後に集荷・発送する
- add free-word search to appraisal requests
- 請求書PDFの明細をAIで読み取り確認済み商品を登録する
### LINE連携
- 紹介タグの成立買取と3%手数料をCSV出力する
### 査定
- 最終査定で未申告カードとまとめ査定を追加できる
### 画面全般
- LINE写真とマスタ画像を拡大して比較する
## 改善と修正
### その他
- accept stored invoice MD5 when reading PDF originals
- combine unquoted and appraised customer cards
- open cases with late parcels from dashboard
- filter awaiting replies from dashboard
- count settled quantities in case ledger summary
- 法人の不要な委任状送付を対応項目から除外
- render chart dates consistently in Tokyo timezone
- show single chart observation instead of empty history
### 査定
- skip requote review for count changes and exclusions
### 画面全般
- price corporate arrivals without preliminary quotes
- retain stale intake filter from dashboard
- guide completed deals to receipt confirmation
- label normal and numbered reprint attributes
### 設定
- LINE連携の長い案内を画面幅に収める
---
# 2026年10月7日のリリース
Source: https://docs.toreca-cloud.com/changelog/v2026-10-07
## 新機能
### 画面全般
- カードごとにスニダン成約を取得し参考時価を明示反映する
- default label print order to card name
- 写真とマスタの比較に虫眼鏡と倍率切り替えを追加
### その他
- 指定カードの成約取得を排他付き永続キューで処理する
- backfill missing Pokemon rarity from verified official evidence
- prefill and preserve slab grading details
### 顧客
- 未変更の顧客名にLinyのシステム表示名を自動採用する
## 改善と修正
### 画面全般
- keep market collection controls within appraisal rows
- preserve display order in bulk card selection
- Liny情報をプロフィールに集約してトーク領域を確保する
- スニダン導線を査定画面で常時表示する
- 通知の装飾を抑え、閉じる・再試行を操作しやすくする
### その他
- 記録の日時・経路・確認入力を減らす
- require PSA numbers before starting payouts
- scale SNKRDUNK target discovery for the full catalog
- Vertexが拒否する明細数schema指定を除いてPDF読取を復旧する
- resolve Snkrdunk links from stored catalog product IDs
---
# 2026年10月8日のリリース
Source: https://docs.toreca-cloud.com/changelog/v2026-10-08
## 新機能
### その他
- add parcel-scoped arrival photos and reviewed LINE sharing
### 査定
- 店舗の登録相場をグレード別に再利用する
### 画面全般
- 記録・履歴・タブを揃え、査定と相場取得の操作を整理
## 改善と修正
### その他
- preserve the official Mega glyph in printed card names
- withhold official card-back placeholders without stopping rarity scan
- PDF再読取時に手入力を保持し、差し替え・取消を可能にする
### 画面全般
- keep market evidence details inside viewport
- compact customer display name field
### 査定
- align collected prices with sale evidence and collection state
---
# 2026年10月9日のリリース
Source: https://docs.toreca-cloud.com/changelog/v2026-10-09
## 新機能
### その他
- 承諾時に証拠を保存し、振込申請で確認する
- scope customer workflows to the selected LINE account
### LINE連携
- 運用ツールとLINEを1つの連携として追加・管理する
## 改善と修正
### その他
- preserve sidebar state across customer navigation
---
# 2026年10月10日のリリース
Source: https://docs.toreca-cloud.com/changelog/v2026-10-10
## 改善と修正
### 顧客
- hide unused LINE setups and retain empty workspace
### 画面全般
- show LINE registration results with Sonner
- open LINE friend talks for accounts without customers
- replace consent evidence with a single current attachment
- clarify payout approval notices and link to submission
- show transfer export warnings on each excluded payout
- remove duplicate dialog dismiss controls
- clarify payout account and export dialogs
---
# 2026年10月11日のリリース
Source: https://docs.toreca-cloud.com/changelog/v2026-10-11
## 新機能
### 在庫
- 販売の下書き・見積書・販売契約のロックと入金の消し込み
- 返品・請求書の発行・入金の記録・連携先への移管販売
- qualified invoices, tax basis, lot billing and a reworked outbound screen
- 法人向けまとめ売り(取引先・販売額の按分・損益・納品書)
### その他
- テナントごとに LINE などの機能を運営コンソールから ON/OFF できるようにする
- record card name readings and sort inventory by them
## 改善と修正
### 顧客
- 顧客入口で表示対象のアカウントを開く
### 在庫
- stop stray scrolling past lists and tab strips
### 振込
- show completion after recording receipt
- simplify receipt confirmation and contain message scrolling
- remove redundant approval notice
- separate bank submission from file creation
---
# 2026年10月12日のリリース
Source: https://docs.toreca-cloud.com/changelog/v2026-10-12
## 新機能
### その他
- カタログ商品の画像をマニフェストで取り込めるようにする
- 予約の確認・変更・キャンセルと前日のお知らせをお客様へメールで送る
- 来店予約(予約ページ・予約の確認と変更・週のカレンダーと受付・店舗ごとの設定)
- 支払い完了で買取明細書を発行し、お客様へメールで送れるようにする
- 予約と違う同じカード・同じグレードの個体を、作業者の確認で差し替えて取り出す
- 店頭のお客様画面(iPad・スマホ)で最終見積の承諾・お客様情報・署名を受け、対面で本人確認する
- ⌘B(Windows は Ctrl+B)でサイドバーを開閉する
### 格納アプリ
- 設定から新しい画面(試験中)に切り替えられるようにする
### 振込
- 操作できる作業を明示し、完了履歴を分離
- 店頭の買取を現金で支払えるようにする(支払い方法の選択と手渡しの記録)
### AI連携(MCP)
- 販売の下書き出庫・販売額の設定・連携先への販売をMCPから
- 個体を指定してQRラベルの印刷バッチを作るツール
## 改善と修正
### 振込
- clarify bank submission summary
### LINE連携
- LINE を取れないアカウントの写真を「取得中」と出さない
---
# 2026年10月13日のリリース
Source: https://docs.toreca-cloud.com/changelog/v2026-10-13
## 新機能
### 格納アプリ
- 格納の履歴を「全員/自分」で切り替え、テナント全員のセッションを見られるようにする
- 格納の履歴から格納・移動を取り消し、要対応を削除できるようにする
### 在庫
- 在庫の全画面に共通の検索バーを置き、⌘K で個体を探せるようにする
### 振込
- 全銀データをテナントごとの機能スイッチにし、振込ボードから手動の振込結果を記録できるようにする
### その他
- 「スニダンで見る」リンクをテナントごとに ON/OFF できるようにする
### 買取
- 店頭受付の案件から発送・お客様への連絡の部品を外す
## 改善と修正
### その他
- ピッキングで商品違いの行に入った個体どうしの販売額を、それぞれのカードの額に戻す
- 作業者が確認すれば、予約にない個体でも未取り出しの行と入れ替えて取り出せるようにする
- 差し替えで外れた個体を、作業者の確認で予約に戻せるようにする
- 作業者が確認した差し替えは、登録上は別拠点の個体でもできるようにする
- 予約ページの「おおよその枚数」をデスクトップではドロップダウンで選べるようにする
---
# 2026年10月14日のリリース
Source: https://docs.toreca-cloud.com/changelog/v2026-10-14
## 新機能
### 格納アプリ
- 入庫・出庫・移動・棚卸しを本番APIで操作できる新UIを追加する
- スキャンと作業の入口を備えたWeb連動のSwiftUI試作を追加する
### 在庫
- 在庫の画面の中のタブと入出庫のサブナビを外し、見出しをページ名にする
### その他
- サイドバーを「買取|在庫」の切り替えで分け、在庫の画面をサイドバーから直接開けるようにする
- 店頭を現金払いで開始し支払方法を切り替え可能にする
- enforce purchase modes across entry points and notifications
- add hierarchical purchase mode switches
### 画面全般
- align purchase flows and navigation with enabled modes
## 改善と修正
### その他
- restore purchase intake navigation and preserve counter quote channels
- 統合時に重複した支払設定の機能取得を整理する
- ピッキングで入れ替わった個体の販売額の振り直しに監査ログのラベルを付ける
- 現金設定の保存にも店頭機能の競合制御を適用する
- 機能無効化と保存・送信を直列化し部分更新を防ぐ
- 単一買取モードの区分選択を省略する
### 在庫
- 在庫の検索で、変換中の文字で探さず、ひらがな・半角カナ・空白の違いでも見つかるようにする
### 画面全般
- 機能停止による拒否を説明し入力と再送操作を保持する
- サンプルボタンのアイコンを削除する
- テンプレートとサンプルの表示を簡潔にする
- 文面の例をボタンから開くダイアログにする
- LINE文面の編集欄をテキストカーソルにする
- 文面編集の見出しをプレビューと例に揃える
---
# 2026年10月15日のリリース
Source: https://docs.toreca-cloud.com/changelog/v2026-10-15
## 新機能
### その他
- 案件画面で書類準備・送信・締結同期と顧客署名を進める
- 手入力と訂正に対応した現金管理・レジ締めを追加
## 改善と修正
### 画面全般
- clarify CloudSign API key setup actions
- retain list origin when adding payout consent
- 支払いの未申請と承認待ちで次の操作を分ける
- preserve purchase list origin across deal navigation
- retain counter customer draft when going back
- APIトークンなしでLINE運用ツールを登録できるようにする
---
# 2026年10月16日のリリース
Source: https://docs.toreca-cloud.com/changelog/v2026-10-16
## 新機能
### その他
- 標準3書式を全店舗で登録不要にする
### AI連携(MCP)
- 承認画面で MCP 接続の期限を選べるようにする
## 改善と修正
### 画面全般
- 本人確認リンクから対象欄へスクロールする
- keep CloudSign work visible and guard unidentified quotes
### その他
- restore guardian consent request and review entry point
- require reviewed guardian consent and support final requotes
---
# 2026年10月18日のリリース
Source: https://docs.toreca-cloud.com/changelog/v2026-10-18
## 新機能
### その他
- 連携先の配送伝票は店舗から動かさず、時価を渡し、見つからない当選カードを扱えるようにする
- 連携先のオリパ・出品・当選を在庫の状態で持ち、配送申請ごとに出庫伝票を作る
### 画面全般
- 英語表示のときLINEのトークをブラウザ内蔵の翻訳で英語にし、原文も見られるようにする
- サイドバーを折りたたんでいる間、アイコンに名前のツールチップを出す
## 改善と修正
### その他
- 掛け率ルールを編集しても、価格帯以外の条件(鑑定品のみ・グレードなど)が黙って消えないようにする
### 画面全般
- 見積の期限は使わないので、未使用の期限ダイアログを消し、期限を更新するよう案内する文言を直す
- 取引の画面の「提示済みにする」を、押す前に確かめる
- 受付フォームが停止中のとき、お客様に「現在利用できません」と出し、再試行をすすめない
- 画面の古い文言と英語の訳を直し、来店予約の曜日を英語の画面では英語で出す
- タッチ端末では数量ステッパーの欄を広げ、6桁が欠けないようにする
- 横に並んだ入力欄・ボタン・ラベルの上端と高さを揃える
- タッチ端末では文字入力欄を16px未満にしない
---
# 2026年10月20日のリリース
Source: https://docs.toreca-cloud.com/changelog/v2026-10-20
## 新機能
### 格納アプリ
- 出庫済みの在庫を格納スキャンで差し替える(追記方式・scanSwap 既定オフ)
- 別拠点の在庫は読んだ拠点へ移し、紛失中は発見として戻し、出庫済みは同じ在庫の数を知らせる
### 在庫
- カードの在庫画面で個体を選び、移動・グレード訂正・カードの付け替えをその場でする
- 伝票に人が読む表示名(202610131230_第1回入庫)を付け、伝票の番号を目立たせない
### その他
- 特定の検索で見つからないカードを、店の画面からマスタ登録依頼として運営へ出せるようにする
- 2次査定で時価・掛率・提示額・相場に対する割合を並べ、スニダンと相場の再取得を置く
- AI読み取りの2画面比較に、AIが選んだカードの名前・番号・版とスニダンの商品名を文字で出す
- 最終査定の鑑定番号カードに、個体ごとの番号を常時表示する
- 標準の買取承諾書の文言を店ごとに選べるようにする(事前査定額/確定金額)(4/4)
- 書類に事業者の情報・古物商許可・印影を最初から入れる(3/4)
- 買取承諾書に載せるカードを選べるようにし、見送ったカードは載せない(2/4)
- 店舗が独自の役割(副管理者など)を追加・改名・停止・並び替えできるようにする
- 権限の表を店が編集できるようにし、重要な操作ごとの権限を足す
- 2次査定提示後の値上げ希望を案件に付け、サイドバー・やることリスト・通知で担当者に知らせる
- 最終査定の社内用写真を、見積全体でまとめて複数枚登録できるようにする
- 契約書・委任状をお客様をまたいで一覧し、お客様情報からも見られるようにする
- 拠点間移動の一覧を状態タブ+件数と中身の見える条件チップにし、状態を意味で塗る
- 顧客一覧の絞り込みボタンを右端に固定し、状態タブがはみ出すときはタブ側を横スクロールにする
- 顔撮影前の同意チェックを色付きの帯にし、帯全体を押せる見た目にする
- 買取|在庫の切り替えでページ・メニュー・対応項目をまとめて切り替える
- 書類の経緯を他画面と同じアクティビティ表示にし、カードの行を開けばダイアログなしで見られるようにする
- SNKRDUNKの相場・在庫時系列をBrowser Use Cloud経由で収集
### 買取
- 誤って進めた段階(承諾・到着・最終査定)を、理由つきで前に戻せるようにする
## 改善と修正
### AI連携(MCP)
- 伝票と在庫個体の取り違えを断り、訂正と伝票の取り消しを dryRun の確認つきにする
### その他
- 到着の記録で法人かどうかをトランザクションの中で読む
- 契約書・委任状の案件番号と見積番号を画面と同じ短い形で差し込む
- 契約書を入力から送信まで1つのダイアログで送れるようにし、紙に出ない変化で送信が止まらないようにする
---
# 2026年10月21日のリリース
Source: https://docs.toreca-cloud.com/changelog/v2026-10-21
## 新機能
### その他
- streamline store purchases with customer ID capture
- 履歴から案件を復元し、操作直後に取り消せるようにする
- 登録済み拠点から商品の発送先を選択する
- 新UIの入庫をQR格納へつなぎ既存作業の入口を揃える
- 店頭の本人確認の方法を設定で選べるようにする(既定は対面)
- connect quote receipt to customer tablet consent
- セット価格の最終見積でも一部だけ承諾できるようにし、外したカードの分を按分で差し引く
- 古物台帳の明細から、買取案件・在庫個体・訂正元の記録へ移れるようにする
- カードの写真検索で鑑定ケースのラベル(PSA 10・鑑定番号)も読み、追加するカードの鑑定欄に入れる
- 店頭の辞退・一部承諾はその場で返却して閉じ、店頭で完結のときに事前査定のとおり最終査定を作る
### LINE連携
- 値上げ希望を根拠付き候補から確認して登録する
### 本人確認
- 対面本人確認で身分証を読み取り画像証跡を保存する
### 格納アプリ
- 警告を確認して現物在庫を訂正・続行できるようにする
### 画面全般
- 残る業務入力の理由候補を補完する
- 査定の参考時価が全部そろったら、店舗掛率を空欄に自動で当てる
- 荷物が届く前に「これも一緒に送ります」と言われたとき、届いたら最終査定で足せることを発送待ちの画面に出す
- 買取依頼を新規顧客で登録するとき、打った名前の登録済み顧客を候補に出し、選ぶと既存顧客に切り替える
- 入荷の例外と差分の外部連絡の「確認根拠」にも、よく使う文のチップを並べる
- 最終見積の送付後に「これも」「これは外して」と言われたとき、再見積で直すことを回答カードに出す
- 最終見積の承諾後に「この1枚は売らない」と言われたとき、承諾を戻して再見積する道をその場で案内する
- 事前査定中の案件にも、あとからカードを追加できるようにする
- 最終査定の「状態の補足」に、店の状態タグ(未設定なら既定の候補)をチップで並べる
- 理由の入力欄によく使う理由のチップを並べ、押すだけで書き込めるようにする
- 店頭の案件に「発送」段階を出さず、辞退・一部承諾は「お返し」として記録する
### 買取強化対象
- カードの詳細から、そのカードの買取強化をそのまま始められるようにする
### 在庫
- 入庫で打ち間違えた状態メモと認定番号を、カードの在庫画面から訂正できるようにする
- テナント間移管を送った側も、まだ受け入れられていない個体の一部だけを引き戻せるようにする
- 拠点間移動の配送業者・追跡番号を、移動中のあいだ後から入れ直せるようにする
- 在庫の書類の理由・メモ・配送業者を、前回の内容と候補から選べるようにする
- 個体を見ている画面から、その個体を載せたまま移動・移管・登録の取消へ進める
- 出庫予約から外した個体を、同じ予約にもう一度入れられるようにする
- 棚卸しとラベル再発行の理由を、よく使う理由から選べるようにする
### 買取
- 事前見積の承諾後〜到着前の「これも送ります」を申告の明細として受け、最終査定で値付けする
- 見積の承諾前なら、取引の受付方法を店頭⇄郵送で切り替えられるようにする
- 事前査定中でも、まだ値付けしていないカードは「お客様の申し出」で外せるようにする
### AI読み取り
- LINE の読み取りで、お客様がカードに添えた言葉を明細の説明に残す
### 設定
- メンバーの停止・権限の変更・クラウドサインの取消の理由を、候補と前回の理由から選べるようにする
## 改善と修正
### その他
- 対面の本人確認で身分証の画像を選ぶ欄を分かりやすくする
- 店頭の提示中の見積を店の対応として数え、一覧で対応が必要な行を見分けやすくする
- 一覧の「次の対応」を店頭の流れの言い方にする
- 査定依頼の行の進行状況を店頭の言い方にする
- 店頭案件の査定依頼で「鑑定情報を直す」を出さない
- 圏外で再起動しても保存済み権限で格納を始められるようにする
- 店頭の現金払いで2人目の承認をなくす
- 店頭案件では2次査定を求めない
- 署名後に次の手続きへ進めるようにし、署名済みの契約書を案件に残す
- 店頭案件で次の操作と重複する「見積を提示する」と「提示済みにする」をなくす
- 署名欄でiPadの文字選択・Scribble・手のひらが署名を邪魔しないようにする
- 操作名から確認・実行・取消の違いを判断できるようにする
- パートナートークン更新結果の永続的な回収
- 請求書が揃うまで成立操作を止める
- 保存に失敗した手順へ戻れるようにする
- 押せないボタンに理由を添える(クラウドサインの承諾書・自分の役割の停止)
- お客様がフォームで回答した見積に「再見積」を出さない(押すと必ず 409 だった)
- レジ間の移動も、記録上の現金を超えるときは管理者が理由を添えて記録できる
- 現金の記録で、API が必ず断る条件を押す前に画面で知らせる
- 停止中の取引先は、法人取引の作成で選べないことを先に示す
- LINE の送り先が無いお客様には「LINEで見積を送る」を出さず、提示の記録だけにする
- 接続の停止を、何が止まるかを確かめてから行う
- 設定画面の「承諾書に載せる明細」と「標準書式」が同じ key で並ばないようにする
- ダイアログの中のページ送りを、確定ボタンの置き場所チェックから外す
- 店頭で受け付けた法人の案件は、到着の記録と本人確認依頼の店頭ガードから外す
- 店頭の受け取り・お返しが途中で止まる経路をなくす(Codex 指摘)
- 店頭で振込を選んだとき、その場で振込先を登録でき、署名済みの契約書を承諾の証拠に添付できるようにする
- 店頭受付の案件にリモート専用の操作をさせず、18歳未満の店頭買取を成立で止める
### 査定
- 「スニダンで見る」を別ウィンドウで開く
- 事前査定の時価を即時計算し商品追加・取り消しをまとめて保存する
- 未解決差分のある案件の受領開始を防ぐ
### 格納アプリ
- 予約を残して所在を訂正し入力なしで確定できるようにする
### 振込
- 店舗ルールに沿って承認待ちの現金支払いを再開できるようにする
### 画面全般
- 入力と操作ボタンの高さ・見積見出しを統一する
- カード・在庫・BOX の詳細の見出しを、長い名前でも2行まで読めるようにする
- 送付済みの見積の「再送信」が何も送らずに成功と出ていたのを、LINE の文面コピーに置き換える
- 有効期限を過ぎた事前見積で、承諾を記録しようとすると必ず断られていたのを、期限切れを知らせて再見積を主にする
- 振込先の口座が無い支払いで「振込を申請」が出て、申請すると断られていたのを止める
- 案件の支払いカードで、申請した本人やPSA番号の未入力のとき「承認する」が理由なく押せた・灰色になっていたのを、理由付きで止める
- 未特定のカードがあるのに「最終査定を入力する」が押せ、受領だけ記録して断られていたのを、押す前に止める
- 鑑定中・差分確認中の取引が、一覧で「現物を確認して最終査定」と出て案件の「次の操作」と食い違っていたのを直す
- 支払いの完了履歴と振込申請ダイアログでも、取引番号を短縮表記にする
- 返品対応で取引番号がフル表記(MANUAL-4F4686B1-C6B8-…)のまま出ていたのを短縮し、一覧から取引へ飛べるようにする
- 相場の「取得」と一括の「相場調査を依頼」が押せないとき、何を先にすればよいかを出す
- 「2次査定を依頼」が押せないとき、その理由をボタンの横に出す
- 顧客ページでも、名前が長いと「状態を変える」と通知が左端の2行目に落ちていたのを直す
- お客様名が長い案件で、ヘッダーの「⋮」メニューが左端の2行目に落ちていたのを直す
- セット価格の最終見積で「一部だけ承諾」が黙って消えていたのを、再見積を案内する一文に置き換える
- 選択中の絞り込みチップにポインタを載せると、白い文字のまま背景が薄い青になっていたのを直す
- 店頭受付の案件に LINE・振込・書類アップロードの導線を出さない
### 在庫
- カードの在庫画面の選択バーで、押せないボタンの理由を1行で出す
- 予約中の販売に「在庫はまだ確保していません」と出さない
- 拠点間移動とテナント間移管で、API が返す断りの理由をそのまま出す
- テナント間移管で BOX・パック・デッキを選ぶ前に断る
### 設定
- 在庫が残る拠点を利用停止にしようとしたら、保存の前に知らせて在庫一覧へ案内する
### 格納
- 要対応の1行の「取り消す(対応不要)」も、確かめてから記録する
### 顧客
- 顧客を開いたとき、進行中の取引がある受付経路に着地させる
---
# 2026年10月22日のリリース
Source: https://docs.toreca-cloud.com/changelog/v2026-10-22
## 改善と修正
### その他
- select the invited shop before welcome
- show the stored basis-point precision in rates
- format the dealer permit number only once
- カスタム役割で許可された画面を開けるよう共通情報と業務権限を分ける
- app-api/admin-api をビルド済み JS で起動し、本番は常時1台待機させる
### 格納アプリ
- keep label lookup navigation in the inventory path
- dismiss lookup keyboard after manual submission
### 在庫
- identify unlabeled units before taking a return
- explain lookup access to voided labels
- read selected units and expanded boxes within their actual scope
- preview label sheets with the actual PDF layout
- use label numbers for daily stock workflows
### 買取
- reopen customer presentation choices for a revised quote
### AI連携(MCP)
- CodexからテナントMCPへ接続できるようにする
---
# 2026年10月22日のリリース(2回目)
Source: https://docs.toreca-cloud.com/changelog/v2026-10-22-2
## 新機能
### 在庫
- 50×25mmロール紙の在庫ラベルに対応
- 原価未確定の入庫を0円と区別する
- 鑑定ラベルに認定番号を追加し印字位置を揃える
## 改善と修正
### LINE連携
- 再試行の変更前後を同一transactionで監査する
### その他
- explain read-only access without claiming authorship
- isolate disconnected partner refresh retries
### 格納アプリ
- 棚卸しとピッキングの読み取りを再起動後も保持する
---
# 2026年10月23日のリリース
Source: https://docs.toreca-cloud.com/changelog/v2026-10-23
## 新機能
### 在庫
- 棚全体とスキャン期間のロックで現物優先の所在上書きを防ぐ
- count interchangeable sealed lots by quantity
- enforce opt-in sealed lot shelves
- start stock counts for a selected shelf
- 在庫からスニダンの商品ページを開けるようにする
- add native DK-2210 label PDFs
- 入庫伝票の取消状態と一覧の絞り込み・並び替えを追加する
- 在庫一覧の相場順を1枚あたりの相場で並べる
### 顧客フォーム
- 既存顧客が登録情報を確認・修正して送り状へ進める
### その他
- MacとWindowsのインストーラーを設定画面から配布する
- 相場のカード詳細からスニダン商品ページを開く
- Mac・Windowsの登録プリンターへラベルを直接印刷する
### 格納アプリ
- 格納先を固定して現物優先で連続訂正する
## 改善と修正
### その他
- 接続・用紙・テスト登録から業務印刷まで迷わず進める
- Windowsセットアップの日本語名を正しく表示する
- 旧形式の承認を保持し、作成前と保存時の見積チェックをそろえる
- 請求書OCRの推論量と出力を抑え一時エラーを再試行する
### ラベル
- A4とロール紙で商品名と認定番号の欠けを防ぐ
### 本人確認
- 店頭本人確認を設定不要にし、受付から登録・書類追加へ進める
### 在庫
- preserve standalone holds when lost stock is recovered
- BOX類もカードとまとめてロール印刷できるようにする
- 検索バーの罫線をメイン領域の左右端まで表示する
### 画面全般
- 社内用の査定写真を明細上にプレビュー表示する
### 顧客フォーム
- 全書類の顔撮影と連絡先の入力整形を揃える
---
# 2026年10月24日のリリース
Source: https://docs.toreca-cloud.com/changelog/v2026-10-24
## 新機能
### その他
- 商品・時価・買取を後続記録まで一括訂正する
- 店舗割当で現金管理と受渡し記帳のアクセスを制限する
### 在庫
- 入庫伝票で選択したカードの登録を取り消す
## 改善と修正
### その他
- 送信完了画面の手順図を削除
- ステップ遷移時に画面の先頭を表示する
### 画面全般
- 顧客情報入力の重複した補足説明を整理
- clarify appraisal formula layout and simplify dialog labels
- 全画面のアコーディオンを常時表示と詳細ボタンへ置き換える
### 査定
- continue saved counter quotes through receipt to PDF
- edit preliminary offers as fixed line totals
- focus and highlight the appraisal editor from next action
- preserve empty adjustments and show pricing results
---
# 2026年10月25日のリリース
Source: https://docs.toreca-cloud.com/changelog/v2026-10-25
## 新機能
### その他
- 箱・金庫の締めと差額調査を店舗単位で追えるようにする
## 改善と修正
### その他
- verify same-process OAuth tokens without self HTTP
- 店舗残高と差額確認の画面・帳票を改善する
### 在庫
- 在庫一覧の相場の集計で、1点ごとの相場を1回だけ引く
---
# 2026年10月26日のリリース
Source: https://docs.toreca-cloud.com/changelog/v2026-10-26
## 新機能
### その他
- 締結完了を通知設定から配信できるようにする
- show a completion screen after counter cash handover
### 査定
- 社内用の査定写真に削除操作を追加
## 改善と修正
### その他
- allow staff to manage customer forms and prepare payments
- resume counter QR in its original browser
- clarify and de-emphasize statement reissue action
- allow correcting saved PSA numbers before payment
- show card thumbnails when entering PSA numbers
- streamline signed counter purchase registration
- enable signature drawing only after consent
- rename customer details edit action
- remove redundant change actions heading
- reject repeated scans of single-use QR links
- simplify unit price details for quote items
- place quote guidance below the total
- restore unread QR codes and regenerate in one action
- distinguish QR waiting from customer screen display
- refresh Alpine runtime and resolve remaining npm advisories
- hide separate slab entry from counter appraisal
- 本人確認の登録結果が不明な場合の再確認と案内を修正
- disable market research for counter purchases
- hide per-card unit price beneath appraisal totals
- make appraisal exclusion action visible and easy to press
- 査定の金額・掛率・数量欄をコンパクトに揃える
- initialize appraisal rates and clarify automatic pricing mode
- allow new appraisal line IDs through channel validation
- merge identical cards when adding appraisal items
### 設定
- 本人確認方法を管理画面から変更できるようにする
---
# 2026年10月28日のリリース
Source: https://docs.toreca-cloud.com/changelog/v2026-10-28
## 改善と修正
### その他
- reject null bytes in customer display names
- defer manual certification numbers until purchase payment
- isolate inventory reads and monitor API readiness
### 画面全般
- unify payout account registration
- open customer tabs with pending work
- continue counter appraisals directly to quote review
---
# 2026年10月28日のリリース(2回目)
Source: https://docs.toreca-cloud.com/changelog/v2026-10-28-2
## 新機能
### 顧客
- 査定依頼タブで変えた状態・時価・掛率を下書きとして保存する
### その他
- 2次査定で明細ごとに時価の出どころを表示する
- 相場ありの調査回答の通知から、査定を仕上げる画面を開く
- テンプレートごとに書類名の形式を設定する
- LINE読み取りの確認で写真を90°ずつ回転できるようにする
- 2次査定で写真と時価・掛率を確認できるようにする
- 写真を16枚ずつに分けて読み取り、トーク全体の抽出は16枚のまま維持
- トーク抽出で1回に読める写真の上限を64枚に引き上げ
- 店舗のスニダンリンクを訂正する
### 本人確認
- 顧客詳細から本人確認書類を事前保存できるようにする
### 通知
- 通知の文面を編集できるようにする
### 買取
- 仮カードで買取とマスタ追加希望の確認を可能にする
### 画面全般
- LINEトークのアルバム写真ごとのチェックボックス
## 改善と修正
### その他
- 調査回答の通知の行き先を、通知の中身と一緒に組み立てる
- overlap LINE card matching and photo search
- QRコードを出している間は画面全体を覆い、他のお客様の情報を見せない
- 契約書の宛名差分を確認して作成できるようにする
- 回転した写真の読み込み失敗時の表示と狭い枠でのはみ出しを直す
- require review for ambiguous card printings
- 売買契約書の同意事項のチェック欄が✕入りの四角で印刷される不具合の修正
- improve LINE card matching with photo search
- collapse market filters on narrow screens
- avoid bank decryption in registered information review
- allow shipment label before registered information review
- open item form before card search
- 価格付きの調査回答で依頼者に届かない通知の修正
### 画面全般
- clarify catalog request review workflow
- collapse market filter groups by default
- アルバム写真の選択のドラッグ先と当たり判定の修正
### 顧客
- お客様の情報で、未入力でも保存できることと後で止まることを示す
### 通知
- remove honorifics from default messages
---
# 2026年10月29日のリリース
Source: https://docs.toreca-cloud.com/changelog/v2026-10-29
## 新機能
### 振込
- combine consent review and payout submission
### その他
- カードの管理メモを工程間で引き継ぐ
- 査定依頼タブのグレードで調査を頼み、グレードを変えるときは再調査につなげる
- 調査の回答でグレードを確定し、再調査でも前の回答を残す
## 改善と修正
### その他
- 差分確認とまとめ査定取消後の再開へ到達できるようにする
- グレードを変えた再依頼に、取引の履歴と監査ログの表示名を付ける
- 回答のグレードの扱いを直し、調査依頼の画面の読み込みを並べる
- 2次査定の時価の出どころ「スニダン」を「スニダン成約」にする
- prioritize PSA in appraisal grade choices
### 査定
- show required box checks before initial final quote
- restore box checks before final pricing
- 写真追加を見積全体の写真欄から直接開く
- allow final box pricing and retain source
- 別のカードに特定し直した明細に、前の見積の時価の出どころを付けない
### 画面全般
- move management notes into item action menus
### 顧客
- 商品と査定額の確認を頼む2次査定でも、再確認が必要な登録相場を見積の前に止める
- 査定依頼タブで再確認が必要な登録相場を行に示し、下書きの保存を断った理由をそのまま出す
- 再確認が必要な登録相場では見積を作らず、特定し直したカードの下書きを直す
- 査定依頼タブの状態・グレードを参考時価と同じ順で決め、違うグレードの調査回答も出す
- 査定依頼タブの下書きに時価の出どころを残し、開き直して見積にしても付ける
---
# 2026年10月30日のリリース
Source: https://docs.toreca-cloud.com/changelog/v2026-10-30
## 新機能
### 査定
- 最終査定の番号・金額・買取可否を1枚ごとの入力に統合
### その他
- 請求書の下書きから現物確認して振込へ進める
- 買取不可と相場調査の一括回答・全件通知に対応
- 単価と現物数量で法人買取を記録する
## 改善と修正
### その他
- validate Windows roll printer setup before submission
- lintジョブの対象の重なりと設定変更時のlint漏れを解消
- pre-commitのlint対象をステージしたファイルに限定
- 最終査定でカードを続けて追加し買取可否を明細から操作する
- 名前から商品候補を検索し編集可否を正しく表示する
- stgの店舗側Cookie名を本番と分け、本番にログインしたあとのstgのログインを直す
### 顧客
- 再確認が必要な登録相場の行は、2次査定の依頼と見積のまとめを止めずに、確認して手入力の値として進める
- 査定依頼タブの下書きに参考時価を保存するとき、行に出ている状態・グレードも一緒に保存する
---
# 2026年10月31日のリリース
Source: https://docs.toreca-cloud.com/changelog/v2026-10-31
## 新機能
### その他
- share manual cut printing across macOS and Windows
- 買取明細を共通カードで確認して折りたたむ
- 仮スニダンリンクを店舗承認で共通マスタへ登録する
- 二次査定の下書きと確認進捗を保存し調査回答を再レビューへ戻す
## 改善と修正
### その他
- unify certification inputs and declaration edit capabilities
- 印刷の排出方法をMacとWindowsで共通化しPC互換性を改善
### 顧客
- keep appraisal inputs and result in a formula row
### 画面全般
- カード内の情報と設定ブロックの間隔を確保
- ラベル印刷の各項目の補足説明を削除
- 入庫の重複して見える全取引ボタンを削除
- 入庫一覧の縦画面レイアウト崩れを修正
- make security back navigation visibly actionable
- 補足やエラーの高さによらず入力欄を上揃えにする
### 買取
- 明細カードのホバー・操作・金額未入力表示を整える
---
# 2026年11月2日のリリース
Source: https://docs.toreca-cloud.com/changelog/v2026-11-02
## 新機能
### その他
- グレードの入力を1つのプルダウンに揃える(TORECA-254)
- integrate manual IC capture with identity-first customer forms
- app-apiとadmin-apiの想定外の例外をSentryに送る
- 案件のある画面の逃げ道を登録依頼にそろえ、BOX・パック・デッキも依頼・承認できるようにする
- 商品を選ぶすべての画面で未登録の商品を仮登録できるようにする
- 法人取引の商品検索からも未登録のBOXを仮登録する
- BOX選択から店舗専用の仮商品を登録する
- 見積を履歴付きで取り消し商品を未見積へ戻す
- 待機リンクのコピーと端末側の接続解除を追加
### 通知
- allow members to stop their own business emails
### 買取
- 買取を流入元・成立月で絞り込んでCSVに書き出し、紹介手数料の資料も同じ入口へ移す
### 顧客
- 見積もりタブの行から見積を取り消し、取り下げた見積を一覧から削除できるようにする
- 査定依頼の行を閉じたまま、カード名で相場を、PSA番号で照合ページを開けるようにする
- 本人確認の状態を認証バッジの形で示す
### 査定
- 査定の計算行(参考時価 × 掛率 × 数量 = 査定額)を全画面でそろえる
- 掛率は店舗設定で始まり、書き換えた行だけ手入力にする(相場を確認・入力方法の切替を廃止)
## 改善と修正
### 顧客
- 顧客詳細のタブを名前の幅に詰め、収まらないときは端をフェードさせる
- 査定依頼タブの行を閉じたままでも状態を色付きバッジで出し、開いた中の重複をなくす
- 査定依頼タブの「すべて選択」と下書き保存を1行にまとめ、行のずれをなくす
### その他
- 共通リンク登録済みの明細に「リンクの登録状況」を出さない
- IC連携の案内と操作導線を整理
- enable staging IC capture and preserve local launch origin
- App Clipの撮り直し・再送導線と写真確認画面を改善
- 最終査定が無いときは「最終査定のご連絡」を事前査定の中身で作らない
- 店頭の返却を返品対応の一覧から外し、押せないボタンに理由を出す
- 返品対象の商品を見積の文面・明細・送付ダイアログ・ダッシュボードに数えない
- 1枚ごとの最終査定の案件で、辞退・買取不可の返却が詰まらないようにする
- 端末の接続解除と見積の表示がデッドロックしないようにする
- 複数点ある商品の返品は、戻った個体を選ぶところから始める
- 買取不可の BOX を買取対象にできないようにし、価格の変わらない記録で最終下書きを捨てない
- オンライン買取がオフでも店頭・法人の案件の返却を記録できるようにする
- 返品・買取不可にした商品を1枚ごとの最終見積に残さない
- 複数枚の鑑定品を番号ごとの個体に分けて登録する
- 明細カードの確認ボタンが押せないまま詰む状態をなくす
- consolidate appraisal card actions in the header
- 店頭買取を初めての人が迷わず通せるように整える
- 入庫QAでラベル印刷の表示・エラー復旧を改善
- expand preliminary appraisal fields to fill card width
### 本人確認
- use neutral submission wording for online capture
### 査定
- 最終査定で追加したカードに相場×掛率の金額を入れ、編集中も合計を出す
- 事前査定でも買取不可の商品を見積・承諾書から外す
### 在庫
- カードの解決でJSONを経由せず、「PSA 8以上」の絞り込みが12秒で失敗しないようにする
- テナント間移管の受け入れを入庫と入庫伝票に表示する
- 入出庫フォームの補足を整理しガイド画像を更新
---
# 2026年11月4日のリリース
Source: https://docs.toreca-cloud.com/changelog/v2026-11-04
## 新機能
### その他
- 見積を取り消すときに、見積もり一覧からの削除まで1回で済ませられるようにする(TORECA-265)
- LINEの文面のテンプレートを複数登録し、送るときに選んで手直しできるようにする(TORECA-257)
- LINEトークの読み取りの確認画面から、カードを手動で追加できるようにする(TORECA-259)
- AI読み取りを「読み込みを中止」で片付け、その写真を次の読み取りから外す(TORECA-260)
- お客様の写真を90度ずつ回し、画面いっぱいに開けるようにする(TORECA-262)
### 在庫
- 買取で入った在庫のカード・グレードを訂正できるようにする(TORECA-271)
### 調査依頼
- 相場調査をカードごとに理由つきで差し戻し、依頼者と Telegram に通知する(TORECA-261)
## 改善と修正
### その他
- 届いたカードだけ最終査定へ引き継いだ案件の残りの穴をふさぐ(TORECA-258)
- カード識別の表示を検品結果に合わせ、承認済み見積の比較を旧形式に対応する(TORECA-266)
- ポケモンの名前を別の言語の名前にも広げて、中国語版・英語版のカードも検索で出す(TORECA-273)
- LINE トークで1枚で送られた写真を縦横比のまま出す(TORECA-276)
- complete card identification across purchase and stock workflows (TORECA-266)
- show card identity throughout inbound and putaway views
- retain card identity across transfer workflows (TORECA-266)
- preserve card identity in inventory picker (TORECA-266)
- show card identity for return units (TORECA-266)
- 買取明細・確認操作・履歴のカード識別情報を補う(TORECA-266)
- 法人請求書明細に鑑定番号入力を追加する (TORECA-268)
- 相場調査の回答で2次査定が戻るとき、作成者・依頼者・担当の作業を引き継ぐ(TORECA-263)
- 最終査定の受領記録にサーバー時刻を使う (TORECA-267)
---
# 2026年11月4日のリリース(2回目)
Source: https://docs.toreca-cloud.com/changelog/v2026-11-04-2
## 新機能
### 本人確認
- ICの旧姓名義で口座確認を補助する (TORECA-286)
- IC文字情報と住所から顧客登録を補完する(TORECA-284)
## 改善と修正
### 査定
- 1枚ごとの最終査定で、表示中の未確認の鑑定番号を保存時に確定する(TORECA-299)
- 最終査定の1枚ごとの画面に見積全体の写真欄を戻す(TORECA-296)
### その他
- 定期ジョブに口座の暗号化設定を渡し、送信が processing_failed で止まるのを直す(TORECA-303)
- Better Authを1.7.16へ更新し脆弱性に対応(TORECA-298)
- 2次査定の再依頼で、#1304 より前の見積行のレビュー下書き・確認チェックが消えるのを直す(TORECA-293)
- 返品対応・最終査定の追加・返却の「今の記録」をサーバー時刻にする(TORECA-291)
- #1304 より前に作った下書きが「明細の内容」が変わった扱いで送れないのを直す(TORECA-289)
- 1枚ごとの最終査定を開いた案件で、必ず弾かれる鑑定番号カードを出さない(TORECA-290)
### 振込
- 届かなかった買取不可のカードがあると、振込後も「返送手配中」から閉じないのを直す(TORECA-292)
### 画面全般
- 本人確認の開始画面の補足を簡潔にする (TORECA-287)
### 本人確認
- 本人確認書類の登録が「書類の保存先が変更されています」で必ず失敗するのを直す(TORECA-285)
### AI連携(MCP)
- correct_inventory_items の説明から「買取で入った個体は訂正できません」を外す(TORECA-270)
---
# 2026年11月5日のリリース
Source: https://docs.toreca-cloud.com/changelog/v2026-11-05
## 新機能
### 顧客
- 顧客を開いたら「概要」タブで取引の今が分かるようにする(TORECA-274)
- 外国籍・海外在住のお客様の氏名・住所・電話を受け付ける(TORECA-311)
### その他
- 連携先へのテナント間販売を足す(TORECA-306)
- オーナー権限を同じ事業者のメンバーへ譲渡できるようにする(TORECA-305)
## 改善と修正
### その他
- 連携先への販売の画面で、欄のずれと文字の積み重なりが出ないよう入れ物の幅で切り替える(TORECA-310)
- iPhone向け配布設定をターゲットへ適用(TORECA-308)
- align signing with SHIP team (TORECA-297)
---
# 2026年11月6日のリリース
Source: https://docs.toreca-cloud.com/changelog/v2026-11-06
## 新機能
### 顧客
- お客様情報に顧客ごとのメモを追加する(TORECA-328)
- 概要にお客様情報を表示し、表示値をコピーできるようにする(TORECA-313)
### 調査依頼
- カードの下から相場調査を依頼し、回答が揃ったら2次査定に回せるようにする(TORECA-326)
### その他
- 見積の文面に買取不可のカードを差し込めるようにする(TORECA-321)
### 本人確認
- 専用ポリシーと保存・削除の準備を追加する
## 改善と修正
### 調査依頼
- チェックの文言を「調査が終わったら2次査定に回す」にする(TORECA-326)
- 2次査定への回送で、頼み直し・下書き・権限・依頼者の変更を扱う(TORECA-326)
### その他
- 買取不可のカードを今の鑑定情報で出し、欠品・取り下げの個体を除く(TORECA-321)
- メッセージ選択の切替で閲覧位置と画像を保持する
- 写真ビューアを通常サイズのダイアログに戻す(TORECA-312)
### 取引
- 予定外のカードを追加するときに鑑定品も登録できるようにする(TORECA-319)
- 未到着のBOXがあっても届いた分の最終査定を開けるようにする(TORECA-331)
### LINE連携
- 見積の提示文から鑑定番号と「(未確認)」を除外(TORECA-329)
### 顧客
- お名前の表記の二択を横並びのラジオにする(TORECA-311)
---
# 2026年11月8日のリリース
Source: https://docs.toreca-cloud.com/changelog/v2026-11-08
## 新機能
### 顧客
- 見積に名前を付けられるようにする(TORECA-344)
### 2次査定
- 2次査定を依頼するときに備考を書けるようにする(TORECA-343)
### 画面全般
- 相場調査の回答をカードの行から開けるようにする(TORECA-345)
### 振込
- 手数料を差し引いた額で振り込む操作を追加する(率は入力・初期値3%)(TORECA-341)
### 買取
- 最終査定のカードにもスニダンの商品ページを出す(TORECA-340)
### 調査依頼
- 相場調査のあと、選んだカードをまとめて2次査定に進める(TORECA-336)
## 改善と修正
### 調査依頼
- 相場調査の依頼の枠で、選んだ価格と進み方が画面とずれないようにする
### その他
- 型番を「123/145」の完全な形で表示する(TORECA-325)
---
# 2026年11月9日のリリース
Source: https://docs.toreca-cloud.com/changelog/v2026-11-09
## 新機能
### LINE連携
- LINE連携のツールに Lally を追加する(TORECA-358)
### ダッシュボード
- 基準日と期間を選んで査定・確定・買取の金額と点数を集計する(TORECA-316)
### その他
- add repeatable staging identity review entry
- オリパ需要をコンソールで読むAPIを追加する
### 本人確認
- start verification by scanning a QR code
- 本人確認ページの正式公開設定を追加する
- 本人確認の専用ページとアプリからの案内を追加する(TORECA-332)
### 画面全般
- 最終査定のまとめ・BOX行でも買取不可にする・解除できるようにする
- オリパ需要の画面を追加する
- 買取強化の追加ダイアログを初期値つきで開けるようにする
### 外部連携
- カードの時価とオリパ需要のパートナーAPIを追加する
- 連携先の掲載を店舗側でも扱えるようにする(TORECA-339)
## 改善と修正
### 画面全般
- 二次査定の説明帯と外側のカードを削除する
- 最終査定の明細一覧を囲む不要なカードを取り除く
- オリパ需要の行で、数と補充リクエストの揃えを直す
### その他
- restart identity QR camera for a fresh attempt
### 本人確認
- 本人確認ページからインストール済みiOSアプリを開く
---
# 2026年11月10日のリリース
Source: https://docs.toreca-cloud.com/changelog/v2026-11-10
## 新機能
### LINE連携
- Lally の友だち・トーク・プロフィールを取り込み、接続にできるようにする(TORECA-357)
- LINE連携の件数の上限をなくす(TORECA-364)
### 本人確認
- prepare production App Clip review entry
---
# 2026年11月11日のリリース
Source: https://docs.toreca-cloud.com/changelog/v2026-11-11
## 新機能
### その他
- 対応項目を工程タブに分け、案件の点数・金額・荷物を並べる(TORECA-383)
- 査定依頼タブのカードを調査予定にして、査定を進めるときにまとめて調査へ回す(TORECA-351)
- 法人取引に社内用のカード写真を保存する(TORECA-318)
- 同一顧客の案件をまとめて発送案内する(TORECA-369)
### 画面全般
- 管理メモを商品行にプレビューする(TORECA-327)
## 改善と修正
### その他
- スタッフ画面の「未確認」表示は残し、お客様に見える書類と画面だけから除去(TORECA-382)
- PSA番号・鑑定番号の「(未確認)」表示をすべての画面と書類から除去(TORECA-382)
- 最終査定の返品件数に受領済み返品対象BOXを含める (TORECA-324)
- 最終査定の依頼前に2次査定の省略を表示する(TORECA-317)
- unify preparation review dialogs (TORECA-372)
### LINE連携
- 編集済み見積文に残った鑑定番号を除去(TORECA-329)
### 画面全般
- 査定の空状態から不要な補足文を省く(TORECA-375)
- スニダンリンク承認一覧に画像と分母付き型番を表示
- 法人取引の写真枚数表示を削除する
- 法人取引の写真は保存枚数だけ表示する
- 発送案内の過剰な補足説明を省く
### 2次査定
- show type and quantity counts (TORECA-323)
---
# 2026年11月13日のリリース
Source: https://docs.toreca-cloud.com/changelog/v2026-11-13
## 新機能
### その他
- 店舗内の現金管理と役割別の入力・レポートを整える(TORECA-379)
- 詳細画面の見出しを DetailHeader にそろえる(TORECA-393)
- 状態の色と金額の表記を共通部品にそろえる(TORECA-390)
- 在庫の伝票の明細を、買取と同じ行を押して開く形にそろえる(TORECA-400)
- 承諾を記録と振込先を変更の画面から、その場で振込先の口座を追加できるようにする
### 顧客
- 商品と取引一覧にソートを追加(TORECA-264)
### 画面全般
- 法人取引の概要で進行中の全工程を確認できるようにする
## 改善と修正
### その他
- 現金管理オフの店で受け渡しの再送が権限エラーになるのを直す(TORECA-379)
- 相場調査のあとの2次査定を通常の2次査定と同じ画面と遷移にする(TORECA-402, TORECA-403)
- 査定依頼タブの行カードで「特定する」を本文から外し、名前の下の行と「…」メニューに移す(TORECA-408)
- 法人の商品行の「⋯」を行の右端に置き、列の見出しを値にそろえる
- ヘッダーの件数を部品で数え、入庫の選択中の操作は出したままにする
- 法人の商品行で買取単価・数量・金額を右の列に戻す
- カード全体に効く操作をカードのヘッダーに置く(TORECA-399)
- 振込先を変更の画面も、振込先の欄を押して口座を選ぶか追加する形にそろえる
- 振込先は欄を押して口座を選ぶか追加する形にし、追加ボタンを口座の一覧の最後に置く
- 変更できない振込では振込先を追加を出さず、追加できない人には登録の案内を出さない
- 取り下げた依頼の査定額は、出どころを確かめられない行があっても数字だけで残す(TORECA-387)
- 見積の査定で、グレードが空いたカードは申告グレードから始め、相場の最高値で選ばない(TORECA-385)
- 2次査定の依頼を取り下げたら、依頼した査定額を見積の下書きに残す(TORECA-387)
- 同じカードから作った見積の明細の調査も、その明細の調査回答として扱う(TORECA-386)
- 店舗の相場を使った明細に、別の明細の相場調査を「調査回答」として記録しない(TORECA-386)
- 対応項目の案件情報を対応項目の画面だけで読み、実効の査定を案件から引く(TORECA-383)
### 画面全般
- keep purchase case sort direction controls in place
---
# 2026年11月14日のリリース
Source: https://docs.toreca-cloud.com/changelog/v2026-11-14
## 改善と修正
### その他
- 店の訂正で入れたスニダンURLを在庫と査定の明細にも出す(TORECA-410)
- 上限を超えた参考時価が入っているあいだは、査定額を出さず確認もできないようにする(TORECA-407)
- カード以外の行からグレード欄を外し、2次査定の空のカードに店の既定を入れる(TORECA-405)
---
# 2026年11月15日のリリース
Source: https://docs.toreca-cloud.com/changelog/v2026-11-15
## 改善と修正
### その他
- 全品除外の最終査定は、査定内容の修正中も返送・処分の案内を出す(TORECA-414)
- 全品除外で保存済みの最終査定は、LINEの文面でも返送・処分の記録へ案内する(TORECA-414)
- 全品を買い取らない最終査定は見積を作らず、返品対応か「処分して取引を閉じる」で終える(TORECA-414)
- 最終見積を確認の査定明細に、買い取らない品目を合計の外で出す(TORECA-414)
---
# Toreca Cloud Help Center
Source: https://docs.toreca-cloud.com/en
**[Guides](/en/guides)**
Purchases, inventory and settings
**[AI agents (MCP)](/en/mcp)**
Manage stock and purchases through AI agents
**[Partner API](/en/api)**
Connect external apps to stock and buy boosts
**[FAQ](/en/faq)**
Common questions on sign-in, permissions and integrations
## Need help?
Ask the Assistant at the top right of any page; it answers from this help center. If it can't find the answer, contact the support desk you were given when you signed up.
New features and fixes are listed every day in the [changelog](/changelog).
---
# Partner API overview
Source: https://docs.toreca-cloud.com/en/api
The partner API is for external apps a shop has approved: apps that put buy boosts on a landing page or an X post, and oripa services or business systems that sync stock.
An app calls the API with a token issued when a shop member approves it in the browser. No API keys are shared. The token decides which shop's data the app reads; a request can't name another shop.
## Basics
| Item | Value |
| ------------- | ------------------------------------------------------------ |
| Base URL | `https://api.toreca-cloud.com/partner/v1` |
| Authorization | OAuth 2.1 authorization code flow (PKCE S256 required) |
| Client | A pre-registered confidential client (`client_secret_basic`) |
| Format | JSON; every response has `Cache-Control: no-store` |
## What it offers
| Scope | Lets the app |
| ---------------------- | --------------------------------------------------- |
| `purchase-boosts:read` | Read the buy boost list. No stock is visible |
| `inventory:read` | Sync sites, storage locations and stock units |
| `inventory:write` | Hold and ship units it sold |
| `inventory:move` | Move between shelves and sites, take out and return |
Give landing page and posting apps `purchase-boosts:read` only. They get the buy boosts and never see a single unit of stock.
## Getting started
1. **The shop registers the app**
A shop admin registers the app under Settings › Integrations: display name,
redirect URI and what to allow. A client ID and client secret are issued. If
the screen isn't there, ask Toreca Cloud support to enable it.
2. **A shop member approves**
The app opens the authorization screen, and a shop member signs in and
presses Allow. The app exchanges the authorization code for tokens
([authorization](/en/api/authorization)).
3. **Create the connection**
Call `POST /connection` first. If the shop revokes it, later calls fail with
`connection_revoked`.
4. **Call the API**
Send the access token as a Bearer token. Store and refresh tokens as
described in [tokens and expiry](/en/api/tokens).
Every endpoint is described in the [API reference](/en/api/reference).
For an inventory integration, read [sync, hold, ship and move stock](/en/api/inventory-operations) for the two sale flows, shipment requests and retries.
---
# Authorization (OAuth)
Source: https://docs.toreca-cloud.com/en/api/authorization
The partner API uses the OAuth 2.1 authorization code flow. PKCE (S256) is required. Exchange codes for tokens on your server, where the client secret can stay secret.
## Endpoints
| Purpose | URL |
| ----------------------------- | ------------------------------------------------------------------------------ |
| Authorization | `https://api.toreca-cloud.com/api/auth/oauth2/authorize` |
| Token | `https://api.toreca-cloud.com/api/auth/oauth2/token` |
| Revocation | `https://api.toreca-cloud.com/api/auth/oauth2/revoke` |
| Resource (`resource`) | `https://api.toreca-cloud.com/partner/v1` |
| Authorization server metadata | `https://api.toreca-cloud.com/api/auth/.well-known/oauth-authorization-server` |
| Protected resource metadata | `https://api.toreca-cloud.com/.well-known/oauth-protected-resource/partner/v1` |
Send `resource=https://api.toreca-cloud.com/partner/v1` with every authorization, token and refresh request.
## 1. Open the authorization screen
Generate a random `code_verifier` and use its SHA-256 as the `code_challenge`. Generate a random `state` too and check it when the user comes back.
```ts
import { createHash, randomBytes } from "node:crypto";
const verifier = randomBytes(32).toString("base64url");
const challenge = createHash("sha256").update(verifier).digest("base64url");
const state = randomBytes(16).toString("hex");
const url = new URL("https://api.toreca-cloud.com/api/auth/oauth2/authorize");
url.search = new URLSearchParams({
response_type: "code",
client_id: process.env.TORECA_CLIENT_ID!,
redirect_uri: "https://lp.example.com/oauth/callback",
scope: "openid profile offline_access purchase-boosts:read",
state,
code_challenge: challenge,
code_challenge_method: "S256",
resource: "https://api.toreca-cloud.com/partner/v1",
}).toString();
// Save verifier and state in the session, then redirect to url
```
Include `offline_access` in `scope`. Without it no refresh token is issued and you'd need a new approval every 15 minutes. Asking for a scope the shop didn't allow when registering the app fails with `invalid_scope`.
## 2. A shop member approves
The member signs in to Toreca Cloud, checks the shop (①) and what is being allowed (②), and presses Allow (③). The browser returns to `redirect_uri` with `code` and `state`.
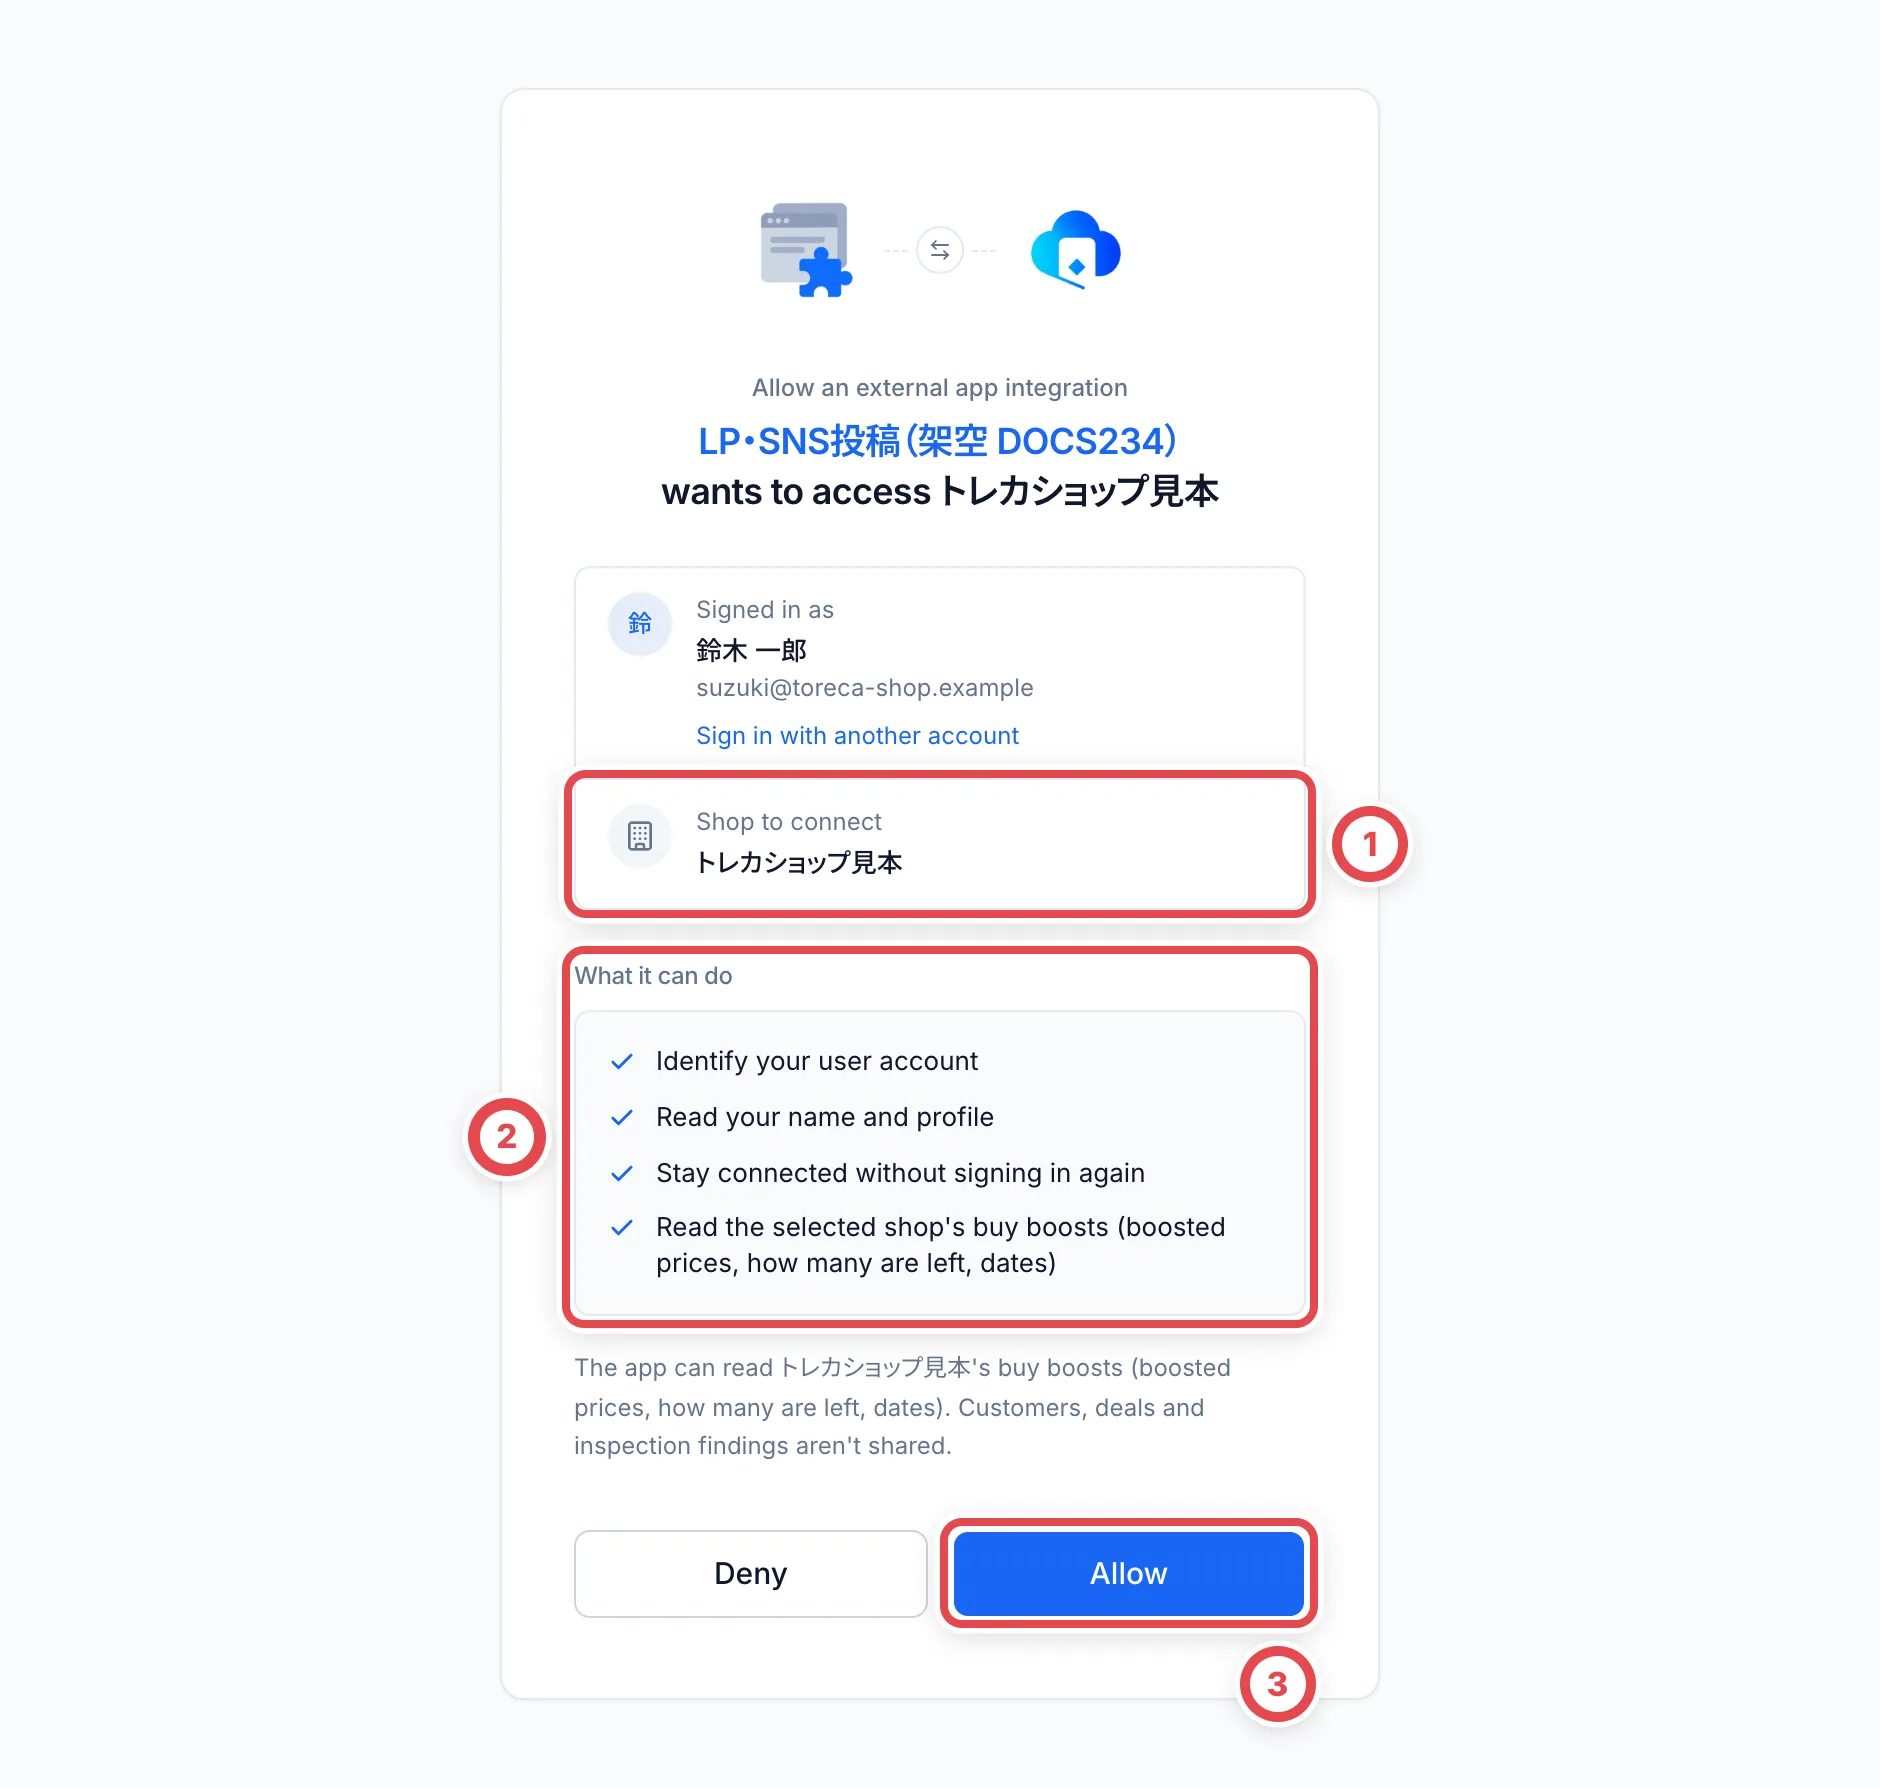 The approval screen for a partner that reads buy boosts only. ② lists only what the shop allowed when it added the partner.
## 3. Exchange the code for tokens
```ts
const response = await fetch(
"https://api.toreca-cloud.com/api/auth/oauth2/token",
{
method: "POST",
headers: {
Authorization:
"Basic " +
Buffer.from(
`${encodeURIComponent(clientId)}:${encodeURIComponent(clientSecret)}`,
).toString("base64"),
"Content-Type": "application/x-www-form-urlencoded",
},
body: new URLSearchParams({
grant_type: "authorization_code",
code,
redirect_uri: "https://lp.example.com/oauth/callback",
code_verifier: verifier,
resource: "https://api.toreca-cloud.com/partner/v1",
}),
},
);
const token = await response.json();
// { access_token, refresh_token, token_type: "Bearer", expires_in: 900, scope }
```
## 4. Create the connection
With the tokens in hand, call `POST /partner/v1/connection` first. The response names the connected shop.
```bash
curl -X POST https://api.toreca-cloud.com/partner/v1/connection \
-H "Authorization: Bearer $ACCESS_TOKEN"
```
Every other call works only while this connection is active. See [tokens and expiry](/en/api/tokens) for storing and refreshing tokens.
---
# Sync, hold, ship and move stock
Source: https://docs.toreca-cloud.com/en/api/inventory-operations
All paths below are relative to `https://api.toreca-cloud.com/partner/v1`. Complete [authorization and connection](/en/api/authorization) first. See the [API reference](/en/api/reference) for fields, limits and responses.
## 1. Sync stock
1. Read sites and shelves with `GET /inventory/sites`.
2. Call `GET /inventory/changes` without a cursor. While `hasMore: true`, pass `nextCursor` as the next `cursor`. Upsert `data` by `type` and `id`.
3. Save the final cursor and resume from it next time. A webhook is a change signal; read the same feed after receiving one.
This needs `inventory:read`. An allocated-only connection sees only the stock the shop set aside for it. `holdable` reports whether a unit could be held at read time. Another operation may change it afterwards, so only the write response confirms a successful hold.
Price-only updates do not enter the unit change feed. Read current values with `POST /inventory/market-values` and `{"ids":["unit UUID"]}`: up to 200 unique IDs. A visible unit without a price has `marketValue: null`; missing or out-of-view units are omitted.
## 2. Choose the sale-to-shipping flow
Both flows need `inventory:read` and `inventory:write`, and the approving member must still have the shop permission `inventory.write`. Reading hold, commitment and shipment details also needs both scopes.
| Situation | Flow |
| ----------------------------------------------------------------------------------------------- | ------------------------------------------------- |
| Hold one sold unit and ship it | `holds` → optional `confirm` → `ship` |
| List units in an oripa or sale, then combine customer delivery requests after wins or purchases | `commitments` → `allocate` → `shipments` → `ship` |
### Hold and ship
Send `POST /inventory/holds` with `requestId`, `inventoryItemId`, `purpose` (`oripa` or `sale`), `destinationLabel` and `reason`. An optional `externalRef` stores your own reference.
| Operation | Result and limits |
| ----------------------------------------------- | ---------------------------------------------------------------------------------------------------------- |
| Create | `reserved`. Optional `expiresAt` must be in the future, at most 90 days ahead; omitted means no expiry |
| `POST /inventory/holds/{id}/extend` | Change expiry while `reserved` |
| `POST /inventory/holds/{id}/release` | Cancel a `reserved` hold. An awaiting-shipment hold cannot be released |
| `POST /inventory/holds/{id}/confirm`, body `{}` | Settle the purchase or win as `awaiting_shipment`. Expiry is removed; the partner can no longer release it |
| `POST /inventory/holds/{id}/ship` | Ship a `reserved` or `awaiting_shipment` hold as `shipped` |
Batch create uses `/inventory/holds/batch`, release uses `/release-batch` and shipping uses `/ship-batch`. Each accepts up to 100 entries; a refusal rolls back every new change in the batch. Read back with `GET /inventory/holds/{id}`.
### List, allocate and request shipment
1. Call `POST /inventory/commitments` with `requestId`, `inventoryItemId`, `purpose`, `label` and optional `externalRef`. The unit stays on its shelf and becomes `on_sale` in an oripa or sale. No shipment exists yet.
2. After a win or purchase, call `POST /inventory/commitments/{id}/allocate`. Optional `allocationRef` records your order or opening reference. `allocated` means the shop holds it for that customer.
3. When the customer requests delivery, call `POST /inventory/shipments` with `requestId`, `commitmentIds`, `destinationLabel` and `reason`. It combines up to 200 allocated commitments, which become `shipping`.
4. At dispatch, call `POST /inventory/shipments/{id}/ship`. Put the carrier number in `trackingNumber`.
Batch listing, allocation and release use `/inventory/commitments/batch`, `/allocate-batch` and `/release-batch`. They accept up to 200 entries and succeed together or roll back together.
Before shipping, `POST /inventory/shipments/{id}/cancel` restores units to `allocated`. Release a listing or allocation with `/inventory/commitments/{id}/release`; cancel an open shipment first. `setAside: true` retains the stock allocation to this connection after release. Releasing a lost unit leaves it lost; it does not become available.
When a dispatched parcel physically returns, use `POST /inventory/shipments/{id}/returns`. Units return to their original shelves and receive new allocated commitments for the customer. In the response, `commitmentId` is the original ID and `commitment.id` is the new ID; update your references.
:::warning
If a reloaded shipment’s `items[].commitmentId` is null or differs from the original commitment, stop shipping and returns and ask the shop administrator to check it. Even the correct original ID can then fail with `commitment_not_on_shipment`. Do not remove explicit prices or substitute another ID just to bypass the refusal.
:::
## 3. Shipping prices
Amounts are integers in the currency’s minor unit: whole yen for JPY. Values from 0 to 10,000,000,000 are accepted.
- For a held unit, send `saleAmountMinor`. Omitted means the latest JPY market value; without either, shipping fails with `sale_amount_required`.
- For a shipment, `items` supplies `commitmentId` and `saleAmountMinor` per line. Unnamed lines use their JPY market values.
- `saleCurrency` defaults to `JPY`. It requires an amount for a hold, or `items` for a shipment. Non-JPY shipments need an explicit amount for every line.
Do not replace a missing price with zero just to retry. Confirm your sale price before shipping the same target again.
## 4. Shelves, sites and checkouts
These need `inventory:read`, `inventory:move` and the member’s `inventory.write` permission. Reads need the same access and only expose documents created by your app.
| Operation | Input and result |
| ---------------------------------------- | ------------------------------------------------------------------------------------------------------------------------------------- |
| `POST /inventory/items/{id}/move` | `toLocationId` and `reason`. Move within one site; already there returns `moved: false` |
| `POST /inventory/transfers` | `requestId`, `toSiteId`, `inventoryItemIds`, `reason`. Send up to 200 units from one site to another, in transit |
| `POST /inventory/transfers/{id}/receive` | `toLocationId` is a shelf at the destination. Optional `inventoryItemIds`; omitted receives all remaining in-transit units |
| `POST /inventory/transfers/{id}/return` | `reason` and optional `inventoryItemIds`. Return in-transit units to their original shelves; received units cannot use this operation |
| `POST /inventory/checkouts` | `requestId`, `inventoryItemIds`, `destinationLabel`, `reason`. Take up to 200 units out for a shoot, event or similar purpose |
| `POST /inventory/checkouts/{id}/return` | `items` with each `inventoryItemId` and `toLocationId`, plus `reason`. Put returned physical units on their shelves |
Checked-out units are `removed`, off shelves and unavailable for sale until returned. A checkout does not record a sale. Read transfers with `GET /inventory/transfers/{id}` and checkouts with `GET /inventory/checkouts/{id}`.
## 5. Retries and refusals
Save one UUID `requestId` per business creation and reuse the same ID and content after a network failure. Creation returns 201; replay returns 200 and the current object. Reusing an ID for different content fails with `idempotency_conflict`. Do not create a new ID just because you did not receive the response.
Unknown fields, blank reasons, duplicate IDs and oversized batches are refused. A reason is trimmed, must contain 1–2,000 characters and cannot contain invalid control characters. Do not send the unit’s `version`; the server reads it.
| Error | Action |
| ----------------------------------------- | --------------------------------------------------------------------------------------- |
| `conflict` | Read the target again, check its current state, then retry the same operation |
| `receipt_not_confirmed` | Have the shop complete receipt confirmation first |
| `unit_unavailable` / `unit_not_allocated` | Sync stock and allocations again. Choosing a different unit is a new business creation |
| `hold_confirmed` / `hold_shipped` | The hold can no longer be released; ask the shop to check the document |
| `commitment_shipping` | Cancel the unshipped shipment before releasing the commitment |
| `shipment_shipped` | Cannot cancel after shipping. Record a return only after the physical units return |
| `*_blocked` / `*_refused` | Have the shop check status, loss, shelf or site issues; do not treat refusal as success |
Errors may include affected `inventoryItemIds`, `holdIds`, `commitmentIds` or `requestId`. See [scopes and errors](/en/api/scopes-and-errors) too.
---
# Read buy boosts
Source: https://docs.toreca-cloud.com/en/api/purchase-boosts
Buy boosts are the cards and BOXes a shop is buying above its usual price for a while. The shop reviews prices and quantities in the console every day, and recording acceptance of a final quote lowers the number left ([buy boosts guide](/en/guides/purchase/purchase-boosts)). External apps read the list over the API and show it on landing pages and posts.
## Required scope
`purchase-boosts:read` is all you need; no inventory scope (`inventory:read`) is required. Ask the shop to allow "Read buy boosts" when registering your app, and include `purchase-boosts:read` in `scope` when authorizing.
## Read the list
```bash
curl https://api.toreca-cloud.com/partner/v1/purchase-boosts \
-H "Authorization: Bearer $ACCESS_TOKEN"
```
```json
{
"boosts": [
{
"id": "01a1…",
"target": {
"kind": "card",
"card": {
"id": "01a0…",
"name": "リザードンex",
"cardNumber": "201/165",
"imageUrl": "https://images.toreca-cloud.com/…",
"rarity": { "code": "SAR", "name": "SAR" },
"set": { "id": "…", "code": "SV2a", "name": "ポケモンカード151" },
"game": {
"id": "…",
"code": "pokemon",
"name": "ポケモンカードゲーム"
}
},
"grade": {
"id": "…",
"code": "10",
"label": "PSA 10",
"serviceCode": "psa",
"serviceName": "PSA",
"serviceKind": "third_party"
}
},
"priceMinor": 120000,
"currency": "JPY",
"remainingQuantity": 2,
"status": "open",
"startsAt": null,
"endsAt": "2026-10-10T15:00:00.000Z",
"note": "美品に限ります",
"updatedAt": "2026-10-04T09:12:33.000Z"
}
],
"generatedAt": "2026-10-04T09:30:00.000Z"
}
```
| Field | Meaning |
| --------------------- | ----------------------------------------------------------------------------------- |
| `target.kind` | `card`, or `box` for a BOX, pack or deck. A BOX has its details in `target.product` |
| `target.grade` | The grade. `null` means any grade |
| `priceMinor` | Boosted price per piece, in whole yen (120000 is ¥120,000) |
| `remainingQuantity` | How many more the shop will buy. `null` means no limit |
| `startsAt` / `endsAt` | The dates. The boost closes at the `endsAt` instant. `null` means not set |
| `note` | A line the shop wrote for landing pages and posts |
The list holds only boosts open right now, highest price first. Boosts that haven't started, are paused, ended or expired are left out.
## Include closed boosts
Add `include=filled` to also get boosts with none left, as `status: "filled"`. Use it to show "closed" on a landing page.
```bash
curl "https://api.toreca-cloud.com/partner/v1/purchase-boosts?include=filled" \
-H "Authorization: Bearer $ACCESS_TOKEN"
```
## Tips
- The number left drops with every purchase. Refresh the list every few minutes (up to 15), or fetch it server-side on each view. Don't cache responses.
- Build post text from `target.card.name`, the grade `label`, `priceMinor` and `remainingQuantity`.
- Use `imageUrl` as is. Cards without an image have `null`.
- When the shop stops a boost, it disappears from the next response. Don't keep showing the previous result.
```ts
const yen = new Intl.NumberFormat("ja-JP");
const lines = boosts.map((boost) => {
const name =
boost.target.kind === "card"
? `${boost.target.card.name}${boost.target.grade ? ` ${boost.target.grade.label}` : ""}`
: boost.target.product.name;
const left =
boost.remainingQuantity === null
? ""
: ` (${boost.remainingQuantity} left)`;
return `${name} ¥${yen.format(boost.priceMinor)}${left}`;
});
const post = ["Today's buy boosts", ...lines].join("\n");
```
Field definitions are in the [API reference](/en/api/reference).
---
# Toreca Cloud Partner API
Source: https://docs.toreca-cloud.com/en/api/reference
An API for external apps a shop has approved. Call it with the access token from the OAuth 2.1 authorization code flow (PKCE S256) in `Authorization: Bearer`. The token decides which shop's data you work with.
Every response carries `Cache-Control: no-store`. Errors look like `{ "error": "code" }`.
Version 1
Base URL: `https://api.toreca-cloud.com/partner/v1`
## Connection
Create, check and end the connection with a shop. Either read scope works.
- [`POST /connection`](/en/api/reference/connection/create-connection) — Create the connection.
- [`GET /connection`](/en/api/reference/connection/get-connection) — Get the connection.
- [`DELETE /connection`](/en/api/reference/connection/delete-connection) — End the connection.
## Buy boosts
Cards and BOXes a shop is buying above its usual price. Readable with `purchase-boosts:read`.
- [`GET /purchase-boosts`](/en/api/reference/buy-boosts/list-purchase-boosts) — List buy boosts.
## Inventory
Sync of sites, storage locations and stock units. Needs `inventory:read`.
- [`GET /inventory/sites`](/en/api/reference/inventory/list-sites) — List sites and storage locations.
- [`GET /inventory/changes`](/en/api/reference/inventory/list-changes) — Read inventory changes.
- [`GET /inventory/items/{id}/photos/{side}`](/en/api/reference/inventory/get-item-photo) — Get a unit's photo.
- [`POST /inventory/market-values`](/en/api/reference/inventory/read-market-values) — Read current market values.
- [`POST /inventory/holds`](/en/api/reference/inventory/create-hold) — Hold a unit.
- [`POST /inventory/holds/batch`](/en/api/reference/inventory/create-holds) — Hold units in a batch.
- [`POST /inventory/holds/release-batch`](/en/api/reference/inventory/release-holds) — Release holds in a batch.
- [`POST /inventory/holds/ship-batch`](/en/api/reference/inventory/ship-holds) — Ship held units in a batch.
- [`GET /inventory/holds/{id}`](/en/api/reference/inventory/get-hold) — Get a hold.
- [`POST /inventory/holds/{id}/release`](/en/api/reference/inventory/release-hold) — Release a hold.
- [`POST /inventory/holds/{id}/confirm`](/en/api/reference/inventory/confirm-hold) — Confirm a hold for shipping.
- [`POST /inventory/holds/{id}/extend`](/en/api/reference/inventory/extend-hold) — Change a hold expiry.
- [`POST /inventory/holds/{id}/ship`](/en/api/reference/inventory/ship-hold) — Ship a held unit.
- [`POST /inventory/commitments`](/en/api/reference/inventory/create-commitment) — Commit a unit to a sale.
- [`POST /inventory/commitments/batch`](/en/api/reference/inventory/create-commitments) — Commit units in a batch.
- [`POST /inventory/commitments/allocate-batch`](/en/api/reference/inventory/allocate-commitments) — Allocate won or bought units in a batch.
- [`POST /inventory/commitments/release-batch`](/en/api/reference/inventory/release-commitments) — Release commitments in a batch.
- [`GET /inventory/commitments/{id}`](/en/api/reference/inventory/get-commitment) — Get a commitment.
- [`POST /inventory/commitments/{id}/allocate`](/en/api/reference/inventory/allocate-commitment) — Allocate a won or bought unit.
- [`POST /inventory/commitments/{id}/release`](/en/api/reference/inventory/release-commitment) — Release a commitment.
- [`POST /inventory/shipments`](/en/api/reference/inventory/create-shipment) — Request shipment of allocated units.
- [`GET /inventory/shipments/{id}`](/en/api/reference/inventory/get-shipment) — Get a shipment.
- [`POST /inventory/shipments/{id}/ship`](/en/api/reference/inventory/ship-shipment) — Ship a shipment.
- [`POST /inventory/shipments/{id}/returns`](/en/api/reference/inventory/return-shipment) — Record a returned shipment.
- [`POST /inventory/shipments/{id}/cancel`](/en/api/reference/inventory/cancel-shipment) — Cancel an unshipped shipment.
- [`POST /inventory/items/{id}/move`](/en/api/reference/inventory/move-item) — Move a unit within a site.
- [`POST /inventory/transfers`](/en/api/reference/inventory/create-transfer) — Transfer units to another site.
- [`GET /inventory/transfers/{id}`](/en/api/reference/inventory/get-transfer) — Get a transfer.
- [`POST /inventory/transfers/{id}/receive`](/en/api/reference/inventory/receive-transfer) — Receive transferred units.
- [`POST /inventory/transfers/{id}/return`](/en/api/reference/inventory/return-transfer) — Return transferred units to origin.
- [`POST /inventory/checkouts`](/en/api/reference/inventory/create-checkout) — Check units out.
- [`GET /inventory/checkouts/{id}`](/en/api/reference/inventory/get-checkout) — Get a checkout.
- [`POST /inventory/checkouts/{id}/return`](/en/api/reference/inventory/return-checkout) — Return checked-out units.
## Card catalog
Search Toreca Cloud's card catalog. Needs `inventory:read`.
- [`GET /cards`](/en/api/reference/card-catalog/search-cards) — Search the card catalog.
- [`GET /cards/{id}`](/en/api/reference/card-catalog/get-card) — Get a card.
## Change notifications
Register a webhook that tells you stock changed. Needs `inventory:read`.
- [`PUT /webhook`](/en/api/reference/change-notifications/set-webhook) — Register the webhook.
- [`DELETE /webhook`](/en/api/reference/change-notifications/delete-webhook) — Remove the webhook.
---
# List buy boosts
Source: https://docs.toreca-cloud.com/en/api/reference/buy-boosts/list-purchase-boosts
Returns the buy boosts that are open now, highest boosted price first. Boosts that have not started, are paused, ended or expired are left out.
The member who approved the connection needs the `purchases.read` permission in the shop.
`GET /purchase-boosts`
**Responses**
- `200` — The buy boosts
- `400` — \`invalid\_request\`: a parameter is invalid.
- `401` — \`invalid\_token\`: the token is missing, expired, or for another resource.
- `403` — One of \`insufficient\_scope\`, \`connection\_revoked\`, \`client\_disabled\` or \`forbidden\`.
Response example, 200:
```json
{
"boosts": [
{
"id": "497f6eca-6276-4993-bfeb-53cbbbba6f08",
"target": {
"kind": "card",
"card": {
"id": "497f6eca-6276-4993-bfeb-53cbbbba6f08",
"name": "string",
"localizedNames": {
"property1": "string",
"property2": "string"
},
"cardNumber": "string",
"setTotalRaw": "string",
"languageCode": "string",
"imageUrl": "http://example.com",
"rarity": {
"code": "string",
"name": "string"
},
"set": {
"id": "497f6eca-6276-4993-bfeb-53cbbbba6f08",
"code": "string",
"name": "string"
},
"game": {
"id": "497f6eca-6276-4993-bfeb-53cbbbba6f08",
"code": "string",
"name": "string"
}
},
"grade": {
"id": "497f6eca-6276-4993-bfeb-53cbbbba6f08",
"code": "string",
"label": "string",
"serviceCode": "string",
"serviceName": "string",
"serviceKind": "third_party"
}
},
"priceMinor": 0,
"currency": "string",
"remainingQuantity": 0,
"status": "open",
"startsAt": "2019-08-24T14:15:22Z",
"endsAt": "2019-08-24T14:15:22Z",
"note": "string",
"updatedAt": "2019-08-24T14:15:22Z"
}
],
"generatedAt": "2019-08-24T14:15:22Z"
}
```
---
# Get a card
Source: https://docs.toreca-cloud.com/en/api/reference/card-catalog/get-card
`GET /cards/{id}`
**Responses**
- `200` — The cards
- `404` — \`not\_found\`
Response example, 200:
```json
{
"id": "497f6eca-6276-4993-bfeb-53cbbbba6f08",
"name": "string",
"localizedNames": {
"property1": "string",
"property2": "string"
},
"cardNumber": "string",
"setTotalRaw": "string",
"janCode": "string",
"languageCode": "string",
"variant": "string",
"finish": "string",
"imageUrl": "http://example.com",
"rarity": {
"code": "string",
"name": "string"
},
"set": {
"id": "497f6eca-6276-4993-bfeb-53cbbbba6f08",
"code": "string",
"name": "string",
"nameEn": "string"
},
"game": {
"id": "497f6eca-6276-4993-bfeb-53cbbbba6f08",
"code": "string",
"name": "string"
}
}
```
---
# Search the card catalog
Source: https://docs.toreca-cloud.com/en/api/reference/card-catalog/search-cards
Searches active cards by name, card number, JAN or ID. Up to 25 results.
`GET /cards`
**Responses**
- `200` — The cards
- `401` — \`invalid\_token\`: the token is missing, expired, or for another resource.
- `403` — One of \`insufficient\_scope\`, \`connection\_revoked\`, \`client\_disabled\` or \`forbidden\`.
Response example, 200:
```json
{
"cards": [
{
"id": "497f6eca-6276-4993-bfeb-53cbbbba6f08",
"name": "string",
"localizedNames": {
"property1": "string",
"property2": "string"
},
"cardNumber": "string",
"setTotalRaw": "string",
"janCode": "string",
"languageCode": "string",
"variant": "string",
"finish": "string",
"imageUrl": "http://example.com",
"rarity": {
"code": "string",
"name": "string"
},
"set": {
"id": "497f6eca-6276-4993-bfeb-53cbbbba6f08",
"code": "string",
"name": "string",
"nameEn": "string"
},
"game": {
"id": "497f6eca-6276-4993-bfeb-53cbbbba6f08",
"code": "string",
"name": "string"
}
}
]
}
```
---
# Remove the webhook
Source: https://docs.toreca-cloud.com/en/api/reference/change-notifications/delete-webhook
`DELETE /webhook`
**Responses**
- `204` — Removed
---
# Register the webhook
Source: https://docs.toreca-cloud.com/en/api/reference/change-notifications/set-webhook
Registers the URL notified when stock changes. Notifications carry no stock data: read `/inventory/changes` when one arrives. Every call returns a new signing secret. The URL must be https and share an origin with one of the app's redirect URIs.
Notifications are `POST url` with the body `{"type":"inventory.changed","tenantId","connectionId","occurredAt"}`. `X-TorecaCloud-Signature: v1=` is `HMAC-SHA256(".")` keyed with the secret string. Reject a notification whose timestamp is 300 seconds or more off.
`PUT /webhook`
**Request body** (`application/json`, required)
- `url` (string, required)
Request body example:
```json
{
"url": "string"
}
```
**Responses**
- `200` — Registered
- `422` — \`invalid\_webhook\_url\`
Response example, 200:
```json
{
"url": "http://example.com",
"secret": "string",
"createdAt": "2019-08-24T14:15:22Z"
}
```
---
# Create the connection
Source: https://docs.toreca-cloud.com/en/api/reference/connection/create-connection
Call this first after authorization. A revoked connection becomes active again; an active one keeps its connection time.
`POST /connection`
**Responses**
- `200` — The connection
- `401` — \`invalid\_token\`: the token is missing, expired, or for another resource.
- `403` — One of \`insufficient\_scope\`, \`connection\_revoked\`, \`client\_disabled\` or \`forbidden\`.
Response example, 200:
```json
{
"id": "497f6eca-6276-4993-bfeb-53cbbbba6f08",
"tenant": {
"id": "497f6eca-6276-4993-bfeb-53cbbbba6f08",
"name": "string",
"slug": "string"
},
"user": {
"id": "string",
"name": "string",
"email": "user@example.com"
},
"clientId": "string",
"status": "active",
"connectedAt": "2019-08-24T14:15:22Z",
"webhook": {
"url": "http://example.com",
"createdAt": "2019-08-24T14:15:22Z"
},
"cursor": "string"
}
```
---
# End the connection
Source: https://docs.toreca-cloud.com/en/api/reference/connection/delete-connection
Revokes the connection, removes its webhook, and revokes every refresh token this app holds for the shop.
`DELETE /connection`
**Responses**
- `204` — Revoked
- `401` — \`invalid\_token\`: the token is missing, expired, or for another resource.
- `403` — One of \`insufficient\_scope\`, \`connection\_revoked\`, \`client\_disabled\` or \`forbidden\`.
---
# Get the connection
Source: https://docs.toreca-cloud.com/en/api/reference/connection/get-connection
`GET /connection`
**Responses**
- `200` — The connection
- `401` — \`invalid\_token\`: the token is missing, expired, or for another resource.
- `403` — One of \`insufficient\_scope\`, \`connection\_revoked\`, \`client\_disabled\` or \`forbidden\`.
Response example, 200:
```json
{
"id": "497f6eca-6276-4993-bfeb-53cbbbba6f08",
"tenant": {
"id": "497f6eca-6276-4993-bfeb-53cbbbba6f08",
"name": "string",
"slug": "string"
},
"user": {
"id": "string",
"name": "string",
"email": "user@example.com"
},
"clientId": "string",
"status": "active",
"connectedAt": "2019-08-24T14:15:22Z",
"webhook": {
"url": "http://example.com",
"createdAt": "2019-08-24T14:15:22Z"
},
"cursor": "string"
}
```
---
# Allocate a won or bought unit
Source: https://docs.toreca-cloud.com/en/api/reference/inventory/allocate-commitment
Keeps a won or bought unit at the shop for the customer. Repeating an allocated commitment leaves it unchanged. In addition to inventory:read, this needs its operation scope and the approving member’s inventory.write permission.
`POST /inventory/commitments/{id}/allocate`
**Request body** (`application/json`, required)
- `allocationRef` (string)
Request body example:
```json
{
"allocationRef": "string"
}
```
**Responses**
- `200` — Success
- `400` — \`invalid\_request\`: a parameter is invalid.
- `401` — \`invalid\_token\`: the token is missing, expired, or for another resource.
- `403` — One of \`insufficient\_scope\`, \`connection\_revoked\`, \`client\_disabled\` or \`forbidden\`.
- `404` — \`not\_found\`
- `409` — Conflict, reused requestId or receipt not confirmed
- `422` — The state, target or value refuses the operation. Inspect error and affected IDs.
Response example, 200:
```json
{
"id": "497f6eca-6276-4993-bfeb-53cbbbba6f08",
"createdAt": "2019-08-24T14:15:22Z",
"updatedAt": "2019-08-24T14:15:22Z",
"inventoryItemId": "ef1bc09e-447a-46aa-a9d9-d86e3d490831",
"assetNumber": "string",
"purpose": "oripa",
"label": "string",
"externalRef": "string",
"status": "on_sale",
"allocatedAt": "2019-08-24T14:15:22Z",
"allocationRef": "string",
"shipmentId": "47efd5a2-af91-4417-950a-7f546cd1b5cf",
"closedAt": "2019-08-24T14:15:22Z"
}
```
---
# Allocate won or bought units in a batch
Source: https://docs.toreca-cloud.com/en/api/reference/inventory/allocate-commitments
Up to 200 unique IDs. All succeed or none do. In addition to inventory:read, this needs its operation scope and the approving member’s inventory.write permission.
`POST /inventory/commitments/allocate-batch`
**Request body** (`application/json`, required)
- `commitments` (object[], required)
Request body example:
```json
{
"commitments": [
{
"id": "497f6eca-6276-4993-bfeb-53cbbbba6f08",
"allocationRef": "string"
}
]
}
```
**Responses**
- `200` — Success
- `400` — \`invalid\_request\`: a parameter is invalid.
- `401` — \`invalid\_token\`: the token is missing, expired, or for another resource.
- `403` — One of \`insufficient\_scope\`, \`connection\_revoked\`, \`client\_disabled\` or \`forbidden\`.
- `409` — Conflict, reused requestId or receipt not confirmed
- `422` — The state, target or value refuses the operation. Inspect error and affected IDs.
Response example, 200:
```json
{
"commitments": [
{
"id": "497f6eca-6276-4993-bfeb-53cbbbba6f08",
"createdAt": "2019-08-24T14:15:22Z",
"updatedAt": "2019-08-24T14:15:22Z",
"inventoryItemId": "ef1bc09e-447a-46aa-a9d9-d86e3d490831",
"assetNumber": "string",
"purpose": "oripa",
"label": "string",
"externalRef": "string",
"status": "on_sale",
"allocatedAt": "2019-08-24T14:15:22Z",
"allocationRef": "string",
"shipmentId": "47efd5a2-af91-4417-950a-7f546cd1b5cf",
"closedAt": "2019-08-24T14:15:22Z"
}
]
}
```
---
# Cancel an unshipped shipment
Source: https://docs.toreca-cloud.com/en/api/reference/inventory/cancel-shipment
Cancels only before shipping and restores units to allocated. Shipped shipments fail with shipment_shipped. In addition to inventory:read, this needs its operation scope and the approving member’s inventory.write permission.
`POST /inventory/shipments/{id}/cancel`
**Request body** (`application/json`, required)
- `reason` (string, required)
Request body example:
```json
{
"reason": "string"
}
```
**Responses**
- `200` — Success
- `400` — \`invalid\_request\`: a parameter is invalid.
- `401` — \`invalid\_token\`: the token is missing, expired, or for another resource.
- `403` — One of \`insufficient\_scope\`, \`connection\_revoked\`, \`client\_disabled\` or \`forbidden\`.
- `404` — \`not\_found\`
- `409` — Conflict, reused requestId or receipt not confirmed
- `422` — The state, target or value refuses the operation. Inspect error and affected IDs.
Response example, 200:
```json
{
"id": "497f6eca-6276-4993-bfeb-53cbbbba6f08",
"createdAt": "2019-08-24T14:15:22Z",
"updatedAt": "2019-08-24T14:15:22Z",
"orderNumber": "string",
"status": "reserved",
"version": 0,
"destinationLabel": "string",
"externalRef": "string",
"trackingNumber": "string",
"shippedAt": "2019-08-24T14:15:22Z",
"items": [
{
"commitmentId": "4e1ecf7c-8127-4207-92b0-010ff43ff54d",
"inventoryItemId": "ef1bc09e-447a-46aa-a9d9-d86e3d490831",
"assetNumber": "string",
"status": "string",
"sale": {
"amountMinor": 0,
"currency": "string",
"source": "string"
}
}
]
}
```
---
# Confirm a hold for shipping
Source: https://docs.toreca-cloud.com/en/api/reference/inventory/confirm-hold
Call once a sale or win is settled and only shipping remains. Expiry is removed and the partner can no longer release the hold. Send an empty object. In addition to inventory:read, this needs its operation scope and the approving member’s inventory.write permission.
`POST /inventory/holds/{id}/confirm`
**Request body** (`application/json`, required)
Request body example:
```json
{}
```
**Responses**
- `200` — Success
- `400` — \`invalid\_request\`: a parameter is invalid.
- `401` — \`invalid\_token\`: the token is missing, expired, or for another resource.
- `403` — One of \`insufficient\_scope\`, \`connection\_revoked\`, \`client\_disabled\` or \`forbidden\`.
- `404` — \`not\_found\`
- `409` — Conflict, reused requestId or receipt not confirmed
- `422` — The state, target or value refuses the operation. Inspect error and affected IDs.
Response example, 200:
```json
{
"id": "497f6eca-6276-4993-bfeb-53cbbbba6f08",
"createdAt": "2019-08-24T14:15:22Z",
"updatedAt": "2019-08-24T14:15:22Z",
"orderNumber": "string",
"status": "reserved",
"version": 0,
"inventoryItemId": "ef1bc09e-447a-46aa-a9d9-d86e3d490831",
"purpose": "oripa",
"destinationLabel": "string",
"externalRef": "string",
"expiresAt": "2019-08-24T14:15:22Z",
"trackingNumber": "string",
"sale": {
"amountMinor": 0,
"currency": "string",
"source": "entered"
}
}
```
---
# Check units out
Source: https://docs.toreca-cloud.com/en/api/reference/inventory/create-checkout
Checks up to 200 units out for a shoot, event or similar purpose. Units leave shelves and stock as removed until returned. Creation returns 201; replaying the same requestId and content returns 200. Reusing requestId for different content fails with idempotency_conflict. In addition to inventory:read, this needs its operation scope and the approving member’s inventory.write permission.
`POST /inventory/checkouts`
**Request body** (`application/json`, required)
- `requestId` (string, required)
- `inventoryItemIds` (string[], required)
- `destinationLabel` (string, required)
- `reason` (string, required)
- `externalRef` (string)
Request body example:
```json
{
"requestId": "d385ab22-0f51-4b97-9ecd-b8ff3fd4fcb6",
"inventoryItemIds": [
"497f6eca-6276-4993-bfeb-53cbbbba6f08"
],
"destinationLabel": "string",
"reason": "string",
"externalRef": "string"
}
```
**Responses**
- `200` — Success
- `201` — Created
- `400` — \`invalid\_request\`: a parameter is invalid.
- `401` — \`invalid\_token\`: the token is missing, expired, or for another resource.
- `403` — One of \`insufficient\_scope\`, \`connection\_revoked\`, \`client\_disabled\` or \`forbidden\`.
- `409` — Conflict, reused requestId or receipt not confirmed
- `422` — The state, target or value refuses the operation. Inspect error and affected IDs.
Response example, 200:
```json
{
"id": "497f6eca-6276-4993-bfeb-53cbbbba6f08",
"createdAt": "2019-08-24T14:15:22Z",
"updatedAt": "2019-08-24T14:15:22Z",
"orderNumber": "string",
"version": 0,
"destinationLabel": "string",
"reason": "string",
"externalRef": "string",
"shippedAt": "2019-08-24T14:15:22Z",
"items": [
{
"inventoryItemId": "ef1bc09e-447a-46aa-a9d9-d86e3d490831",
"assetNumber": "string",
"status": "out",
"returnedAt": "2019-08-24T14:15:22Z",
"returnLocationId": "1d1d177a-c4a1-4389-b833-16c3941f123e"
}
]
}
```
---
# Commit a unit to a sale
Source: https://docs.toreca-cloud.com/en/api/reference/inventory/create-commitment
Puts a unit on an oripa or sale while it stays on the shop shelf. This does not create a shipment. Creation returns 201; replaying the same requestId and content returns 200. Reusing requestId for different content fails with idempotency_conflict. In addition to inventory:read, this needs its operation scope and the approving member’s inventory.write permission.
`POST /inventory/commitments`
**Request body** (`application/json`, required)
- `requestId` (string, required)
- `inventoryItemId` (string, required)
- `purpose` (string, required)
- `label` (string, required)
- `externalRef` (string)
Request body example:
```json
{
"requestId": "d385ab22-0f51-4b97-9ecd-b8ff3fd4fcb6",
"inventoryItemId": "ef1bc09e-447a-46aa-a9d9-d86e3d490831",
"purpose": "oripa",
"label": "string",
"externalRef": "string"
}
```
**Responses**
- `200` — Success
- `201` — Created
- `400` — \`invalid\_request\`: a parameter is invalid.
- `401` — \`invalid\_token\`: the token is missing, expired, or for another resource.
- `403` — One of \`insufficient\_scope\`, \`connection\_revoked\`, \`client\_disabled\` or \`forbidden\`.
- `409` — Conflict, reused requestId or receipt not confirmed
- `422` — The state, target or value refuses the operation. Inspect error and affected IDs.
Response example, 200:
```json
{
"id": "497f6eca-6276-4993-bfeb-53cbbbba6f08",
"createdAt": "2019-08-24T14:15:22Z",
"updatedAt": "2019-08-24T14:15:22Z",
"inventoryItemId": "ef1bc09e-447a-46aa-a9d9-d86e3d490831",
"assetNumber": "string",
"purpose": "oripa",
"label": "string",
"externalRef": "string",
"status": "on_sale",
"allocatedAt": "2019-08-24T14:15:22Z",
"allocationRef": "string",
"shipmentId": "47efd5a2-af91-4417-950a-7f546cd1b5cf",
"closedAt": "2019-08-24T14:15:22Z"
}
```
---
# Commit units in a batch
Source: https://docs.toreca-cloud.com/en/api/reference/inventory/create-commitments
Up to 200 entries; requestId and inventoryItemId must each be unique. All succeed or none do. Creation returns 201; replaying the same requestId and content returns 200. Reusing requestId for different content fails with idempotency_conflict. In addition to inventory:read, this needs its operation scope and the approving member’s inventory.write permission.
`POST /inventory/commitments/batch`
**Request body** (`application/json`, required)
- `commitments` (object[], required)
Request body example:
```json
{
"commitments": [
{
"requestId": "d385ab22-0f51-4b97-9ecd-b8ff3fd4fcb6",
"inventoryItemId": "ef1bc09e-447a-46aa-a9d9-d86e3d490831",
"purpose": "oripa",
"label": "string",
"externalRef": "string"
}
]
}
```
**Responses**
- `200` — Success
- `201` — Created
- `400` — \`invalid\_request\`: a parameter is invalid.
- `401` — \`invalid\_token\`: the token is missing, expired, or for another resource.
- `403` — One of \`insufficient\_scope\`, \`connection\_revoked\`, \`client\_disabled\` or \`forbidden\`.
- `409` — Conflict, reused requestId or receipt not confirmed
- `422` — The state, target or value refuses the operation. Inspect error and affected IDs.
Response example, 200:
```json
{
"commitments": [
{
"requestId": "d385ab22-0f51-4b97-9ecd-b8ff3fd4fcb6",
"created": true,
"commitment": {
"id": "497f6eca-6276-4993-bfeb-53cbbbba6f08",
"createdAt": "2019-08-24T14:15:22Z",
"updatedAt": "2019-08-24T14:15:22Z",
"inventoryItemId": "ef1bc09e-447a-46aa-a9d9-d86e3d490831",
"assetNumber": "string",
"purpose": "oripa",
"label": "string",
"externalRef": "string",
"status": "on_sale",
"allocatedAt": "2019-08-24T14:15:22Z",
"allocationRef": "string",
"shipmentId": "47efd5a2-af91-4417-950a-7f546cd1b5cf",
"closedAt": "2019-08-24T14:15:22Z"
}
}
]
}
```
---
# Hold a unit
Source: https://docs.toreca-cloud.com/en/api/reference/inventory/create-hold
Holds one available unit. expiresAt must be in the future and no more than 90 days ahead; omitted means no expiry. Creation returns 201; replaying the same requestId and content returns 200. Reusing requestId for different content fails with idempotency_conflict. In addition to inventory:read, this needs its operation scope and the approving member’s inventory.write permission.
`POST /inventory/holds`
**Request body** (`application/json`, required)
- `requestId` (string, required)
- `inventoryItemId` (string, required)
- `purpose` (string, required)
- `destinationLabel` (string, required)
- `reason` (string, required)
- `externalRef` (string)
- `expiresAt` (string)
Request body example:
```json
{
"requestId": "d385ab22-0f51-4b97-9ecd-b8ff3fd4fcb6",
"inventoryItemId": "ef1bc09e-447a-46aa-a9d9-d86e3d490831",
"purpose": "oripa",
"destinationLabel": "string",
"reason": "string",
"externalRef": "string",
"expiresAt": "2019-08-24T14:15:22Z"
}
```
**Responses**
- `200` — Success
- `201` — Created
- `400` — \`invalid\_request\`: a parameter is invalid.
- `401` — \`invalid\_token\`: the token is missing, expired, or for another resource.
- `403` — One of \`insufficient\_scope\`, \`connection\_revoked\`, \`client\_disabled\` or \`forbidden\`.
- `409` — Conflict, reused requestId or receipt not confirmed
- `422` — The state, target or value refuses the operation. Inspect error and affected IDs.
Response example, 200:
```json
{
"id": "497f6eca-6276-4993-bfeb-53cbbbba6f08",
"createdAt": "2019-08-24T14:15:22Z",
"updatedAt": "2019-08-24T14:15:22Z",
"orderNumber": "string",
"status": "reserved",
"version": 0,
"inventoryItemId": "ef1bc09e-447a-46aa-a9d9-d86e3d490831",
"purpose": "oripa",
"destinationLabel": "string",
"externalRef": "string",
"expiresAt": "2019-08-24T14:15:22Z",
"trackingNumber": "string",
"sale": {
"amountMinor": 0,
"currency": "string",
"source": "entered"
}
}
```
---
# Hold units in a batch
Source: https://docs.toreca-cloud.com/en/api/reference/inventory/create-holds
Up to 100 entries; requestId and inventoryItemId must each be unique. All new holds succeed or none do. Creation returns 201; replaying the same requestId and content returns 200. Reusing requestId for different content fails with idempotency_conflict. In addition to inventory:read, this needs its operation scope and the approving member’s inventory.write permission.
`POST /inventory/holds/batch`
**Request body** (`application/json`, required)
- `holds` (object[], required)
Request body example:
```json
{
"holds": [
{
"requestId": "d385ab22-0f51-4b97-9ecd-b8ff3fd4fcb6",
"inventoryItemId": "ef1bc09e-447a-46aa-a9d9-d86e3d490831",
"purpose": "oripa",
"destinationLabel": "string",
"reason": "string",
"externalRef": "string",
"expiresAt": "2019-08-24T14:15:22Z"
}
]
}
```
**Responses**
- `200` — Success
- `201` — Created
- `400` — \`invalid\_request\`: a parameter is invalid.
- `401` — \`invalid\_token\`: the token is missing, expired, or for another resource.
- `403` — One of \`insufficient\_scope\`, \`connection\_revoked\`, \`client\_disabled\` or \`forbidden\`.
- `409` — Conflict, reused requestId or receipt not confirmed
- `422` — The state, target or value refuses the operation. Inspect error and affected IDs.
Response example, 200:
```json
{
"holds": [
{
"requestId": "d385ab22-0f51-4b97-9ecd-b8ff3fd4fcb6",
"created": true,
"hold": {
"id": "497f6eca-6276-4993-bfeb-53cbbbba6f08",
"createdAt": "2019-08-24T14:15:22Z",
"updatedAt": "2019-08-24T14:15:22Z",
"orderNumber": "string",
"status": "reserved",
"version": 0,
"inventoryItemId": "ef1bc09e-447a-46aa-a9d9-d86e3d490831",
"purpose": "oripa",
"destinationLabel": "string",
"externalRef": "string",
"expiresAt": "2019-08-24T14:15:22Z",
"trackingNumber": "string",
"sale": {
"amountMinor": 0,
"currency": "string",
"source": "entered"
}
}
}
]
}
```
---
# Request shipment of allocated units
Source: https://docs.toreca-cloud.com/en/api/reference/inventory/create-shipment
Combines up to 200 of this app’s allocated commitments. Units become reserved and commitments become shipping. Creation returns 201; replaying the same requestId and content returns 200. Reusing requestId for different content fails with idempotency_conflict. In addition to inventory:read, this needs its operation scope and the approving member’s inventory.write permission.
`POST /inventory/shipments`
**Request body** (`application/json`, required)
- `requestId` (string, required)
- `commitmentIds` (string[], required)
- `destinationLabel` (string, required)
- `reason` (string, required)
- `externalRef` (string)
Request body example:
```json
{
"requestId": "d385ab22-0f51-4b97-9ecd-b8ff3fd4fcb6",
"commitmentIds": [
"497f6eca-6276-4993-bfeb-53cbbbba6f08"
],
"destinationLabel": "string",
"reason": "string",
"externalRef": "string"
}
```
**Responses**
- `200` — Success
- `201` — Created
- `400` — \`invalid\_request\`: a parameter is invalid.
- `401` — \`invalid\_token\`: the token is missing, expired, or for another resource.
- `403` — One of \`insufficient\_scope\`, \`connection\_revoked\`, \`client\_disabled\` or \`forbidden\`.
- `409` — Conflict, reused requestId or receipt not confirmed
- `422` — The state, target or value refuses the operation. Inspect error and affected IDs.
Response example, 200:
```json
{
"id": "497f6eca-6276-4993-bfeb-53cbbbba6f08",
"createdAt": "2019-08-24T14:15:22Z",
"updatedAt": "2019-08-24T14:15:22Z",
"orderNumber": "string",
"status": "reserved",
"version": 0,
"destinationLabel": "string",
"externalRef": "string",
"trackingNumber": "string",
"shippedAt": "2019-08-24T14:15:22Z",
"items": [
{
"commitmentId": "4e1ecf7c-8127-4207-92b0-010ff43ff54d",
"inventoryItemId": "ef1bc09e-447a-46aa-a9d9-d86e3d490831",
"assetNumber": "string",
"status": "string",
"sale": {
"amountMinor": 0,
"currency": "string",
"source": "string"
}
}
]
}
```
---
# Transfer units to another site
Source: https://docs.toreca-cloud.com/en/api/reference/inventory/create-transfer
Sends up to 200 available units from one site, making them in_transit. Destination must be another site. Creation returns 201; replaying the same requestId and content returns 200. Reusing requestId for different content fails with idempotency_conflict. In addition to inventory:read, this needs its operation scope and the approving member’s inventory.write permission.
`POST /inventory/transfers`
**Request body** (`application/json`, required)
- `requestId` (string, required)
- `toSiteId` (string, required)
- `inventoryItemIds` (string[], required)
- `reason` (string, required)
- `carrier` (string)
- `trackingNumber` (string)
- `externalRef` (string)
Request body example:
```json
{
"requestId": "d385ab22-0f51-4b97-9ecd-b8ff3fd4fcb6",
"toSiteId": "80101396-c399-408c-88ad-cd8029268567",
"inventoryItemIds": [
"497f6eca-6276-4993-bfeb-53cbbbba6f08"
],
"reason": "string",
"carrier": "string",
"trackingNumber": "string",
"externalRef": "string"
}
```
**Responses**
- `200` — Success
- `201` — Created
- `400` — \`invalid\_request\`: a parameter is invalid.
- `401` — \`invalid\_token\`: the token is missing, expired, or for another resource.
- `403` — One of \`insufficient\_scope\`, \`connection\_revoked\`, \`client\_disabled\` or \`forbidden\`.
- `409` — Conflict, reused requestId or receipt not confirmed
- `422` — The state, target or value refuses the operation. Inspect error and affected IDs.
Response example, 200:
```json
{
"id": "497f6eca-6276-4993-bfeb-53cbbbba6f08",
"createdAt": "2019-08-24T14:15:22Z",
"updatedAt": "2019-08-24T14:15:22Z",
"transferNumber": "string",
"status": "in_transit",
"version": 0,
"fromSiteId": "33a55c88-1ae8-426c-bfdd-0fd03c0d6ee1",
"toSiteId": "80101396-c399-408c-88ad-cd8029268567",
"carrier": "string",
"trackingNumber": "string",
"reason": "string",
"externalRef": "string",
"shippedAt": "2019-08-24T14:15:22Z",
"completedAt": "2019-08-24T14:15:22Z",
"items": [
{
"inventoryItemId": "ef1bc09e-447a-46aa-a9d9-d86e3d490831",
"assetNumber": "string",
"status": "in_transit",
"fromLocationId": "178bb398-90d2-4fc3-a4a0-37fc0eed2806",
"toLocationId": "e81ad314-9cb9-45ae-9ad9-f1b5ebcc7aae",
"resolvedAt": "2019-08-24T14:15:22Z"
}
]
}
```
---
# Change a hold expiry
Source: https://docs.toreca-cloud.com/en/api/reference/inventory/extend-hold
Changes expiry only while reserved. Specify a future timestamp no more than 90 days ahead. In addition to inventory:read, this needs its operation scope and the approving member’s inventory.write permission.
`POST /inventory/holds/{id}/extend`
**Request body** (`application/json`, required)
- `expiresAt` (string, required)
Request body example:
```json
{
"expiresAt": "2019-08-24T14:15:22Z"
}
```
**Responses**
- `200` — Success
- `400` — \`invalid\_request\`: a parameter is invalid.
- `401` — \`invalid\_token\`: the token is missing, expired, or for another resource.
- `403` — One of \`insufficient\_scope\`, \`connection\_revoked\`, \`client\_disabled\` or \`forbidden\`.
- `404` — \`not\_found\`
- `409` — Conflict, reused requestId or receipt not confirmed
- `422` — The state, target or value refuses the operation. Inspect error and affected IDs.
Response example, 200:
```json
{
"id": "497f6eca-6276-4993-bfeb-53cbbbba6f08",
"createdAt": "2019-08-24T14:15:22Z",
"updatedAt": "2019-08-24T14:15:22Z",
"orderNumber": "string",
"status": "reserved",
"version": 0,
"inventoryItemId": "ef1bc09e-447a-46aa-a9d9-d86e3d490831",
"purpose": "oripa",
"destinationLabel": "string",
"externalRef": "string",
"expiresAt": "2019-08-24T14:15:22Z",
"trackingNumber": "string",
"sale": {
"amountMinor": 0,
"currency": "string",
"source": "entered"
}
}
```
---
# Get a checkout
Source: https://docs.toreca-cloud.com/en/api/reference/inventory/get-checkout
Returns only an object created by this app. In addition to inventory:read, this needs its operation scope and the approving member’s inventory.write permission.
`GET /inventory/checkouts/{id}`
**Responses**
- `200` — Success
- `400` — \`invalid\_request\`: a parameter is invalid.
- `401` — \`invalid\_token\`: the token is missing, expired, or for another resource.
- `403` — One of \`insufficient\_scope\`, \`connection\_revoked\`, \`client\_disabled\` or \`forbidden\`.
- `404` — \`not\_found\`
- `409` — Conflict, reused requestId or receipt not confirmed
- `422` — The state, target or value refuses the operation. Inspect error and affected IDs.
Response example, 200:
```json
{
"id": "497f6eca-6276-4993-bfeb-53cbbbba6f08",
"createdAt": "2019-08-24T14:15:22Z",
"updatedAt": "2019-08-24T14:15:22Z",
"orderNumber": "string",
"version": 0,
"destinationLabel": "string",
"reason": "string",
"externalRef": "string",
"shippedAt": "2019-08-24T14:15:22Z",
"items": [
{
"inventoryItemId": "ef1bc09e-447a-46aa-a9d9-d86e3d490831",
"assetNumber": "string",
"status": "out",
"returnedAt": "2019-08-24T14:15:22Z",
"returnLocationId": "1d1d177a-c4a1-4389-b833-16c3941f123e"
}
]
}
```
---
# Get a commitment
Source: https://docs.toreca-cloud.com/en/api/reference/inventory/get-commitment
Returns only an object created by this app. In addition to inventory:read, this needs its operation scope and the approving member’s inventory.write permission.
`GET /inventory/commitments/{id}`
**Responses**
- `200` — Success
- `400` — \`invalid\_request\`: a parameter is invalid.
- `401` — \`invalid\_token\`: the token is missing, expired, or for another resource.
- `403` — One of \`insufficient\_scope\`, \`connection\_revoked\`, \`client\_disabled\` or \`forbidden\`.
- `404` — \`not\_found\`
- `409` — Conflict, reused requestId or receipt not confirmed
- `422` — The state, target or value refuses the operation. Inspect error and affected IDs.
Response example, 200:
```json
{
"id": "497f6eca-6276-4993-bfeb-53cbbbba6f08",
"createdAt": "2019-08-24T14:15:22Z",
"updatedAt": "2019-08-24T14:15:22Z",
"inventoryItemId": "ef1bc09e-447a-46aa-a9d9-d86e3d490831",
"assetNumber": "string",
"purpose": "oripa",
"label": "string",
"externalRef": "string",
"status": "on_sale",
"allocatedAt": "2019-08-24T14:15:22Z",
"allocationRef": "string",
"shipmentId": "47efd5a2-af91-4417-950a-7f546cd1b5cf",
"closedAt": "2019-08-24T14:15:22Z"
}
```
---
# Get a hold
Source: https://docs.toreca-cloud.com/en/api/reference/inventory/get-hold
Returns only an object created by this app. In addition to inventory:read, this needs its operation scope and the approving member’s inventory.write permission.
`GET /inventory/holds/{id}`
**Responses**
- `200` — Success
- `400` — \`invalid\_request\`: a parameter is invalid.
- `401` — \`invalid\_token\`: the token is missing, expired, or for another resource.
- `403` — One of \`insufficient\_scope\`, \`connection\_revoked\`, \`client\_disabled\` or \`forbidden\`.
- `404` — \`not\_found\`
- `409` — Conflict, reused requestId or receipt not confirmed
- `422` — The state, target or value refuses the operation. Inspect error and affected IDs.
Response example, 200:
```json
{
"id": "497f6eca-6276-4993-bfeb-53cbbbba6f08",
"createdAt": "2019-08-24T14:15:22Z",
"updatedAt": "2019-08-24T14:15:22Z",
"orderNumber": "string",
"status": "reserved",
"version": 0,
"inventoryItemId": "ef1bc09e-447a-46aa-a9d9-d86e3d490831",
"purpose": "oripa",
"destinationLabel": "string",
"externalRef": "string",
"expiresAt": "2019-08-24T14:15:22Z",
"trackingNumber": "string",
"sale": {
"amountMinor": 0,
"currency": "string",
"source": "entered"
}
}
```
---
# Get a unit's photo
Source: https://docs.toreca-cloud.com/en/api/reference/inventory/get-item-photo
Redirects (302) to a signed URL valid for a few minutes. Copy the image to your own storage if you need to keep it.
`GET /inventory/items/{id}/photos/{side}`
**Responses**
- `302` — Redirect to the signed URL
- `404` — \`not\_found\`
- `503` — \`photo\_unavailable\`
---
# Get a shipment
Source: https://docs.toreca-cloud.com/en/api/reference/inventory/get-shipment
Returns only an object created by this app. In addition to inventory:read, this needs its operation scope and the approving member’s inventory.write permission.
`GET /inventory/shipments/{id}`
**Responses**
- `200` — Success
- `400` — \`invalid\_request\`: a parameter is invalid.
- `401` — \`invalid\_token\`: the token is missing, expired, or for another resource.
- `403` — One of \`insufficient\_scope\`, \`connection\_revoked\`, \`client\_disabled\` or \`forbidden\`.
- `404` — \`not\_found\`
- `409` — Conflict, reused requestId or receipt not confirmed
- `422` — The state, target or value refuses the operation. Inspect error and affected IDs.
Response example, 200:
```json
{
"id": "497f6eca-6276-4993-bfeb-53cbbbba6f08",
"createdAt": "2019-08-24T14:15:22Z",
"updatedAt": "2019-08-24T14:15:22Z",
"orderNumber": "string",
"status": "reserved",
"version": 0,
"destinationLabel": "string",
"externalRef": "string",
"trackingNumber": "string",
"shippedAt": "2019-08-24T14:15:22Z",
"items": [
{
"commitmentId": "4e1ecf7c-8127-4207-92b0-010ff43ff54d",
"inventoryItemId": "ef1bc09e-447a-46aa-a9d9-d86e3d490831",
"assetNumber": "string",
"status": "string",
"sale": {
"amountMinor": 0,
"currency": "string",
"source": "string"
}
}
]
}
```
---
# Get a transfer
Source: https://docs.toreca-cloud.com/en/api/reference/inventory/get-transfer
Returns only an object created by this app. In addition to inventory:read, this needs its operation scope and the approving member’s inventory.write permission.
`GET /inventory/transfers/{id}`
**Responses**
- `200` — Success
- `400` — \`invalid\_request\`: a parameter is invalid.
- `401` — \`invalid\_token\`: the token is missing, expired, or for another resource.
- `403` — One of \`insufficient\_scope\`, \`connection\_revoked\`, \`client\_disabled\` or \`forbidden\`.
- `404` — \`not\_found\`
- `409` — Conflict, reused requestId or receipt not confirmed
- `422` — The state, target or value refuses the operation. Inspect error and affected IDs.
Response example, 200:
```json
{
"id": "497f6eca-6276-4993-bfeb-53cbbbba6f08",
"createdAt": "2019-08-24T14:15:22Z",
"updatedAt": "2019-08-24T14:15:22Z",
"transferNumber": "string",
"status": "in_transit",
"version": 0,
"fromSiteId": "33a55c88-1ae8-426c-bfdd-0fd03c0d6ee1",
"toSiteId": "80101396-c399-408c-88ad-cd8029268567",
"carrier": "string",
"trackingNumber": "string",
"reason": "string",
"externalRef": "string",
"shippedAt": "2019-08-24T14:15:22Z",
"completedAt": "2019-08-24T14:15:22Z",
"items": [
{
"inventoryItemId": "ef1bc09e-447a-46aa-a9d9-d86e3d490831",
"assetNumber": "string",
"status": "in_transit",
"fromLocationId": "178bb398-90d2-4fc3-a4a0-37fc0eed2806",
"toLocationId": "e81ad314-9cb9-45ae-9ad9-f1b5ebcc7aae",
"resolvedAt": "2019-08-24T14:15:22Z"
}
]
}
```
---
# Read inventory changes
Source: https://docs.toreca-cloud.com/en/api/reference/inventory/list-changes
Returns changes to sites, storage locations and units after the cursor. `data` is the current value at read time, so the receiver only upserts by `id`. Without a cursor it starts from the beginning, which syncs everything. Nothing is deleted: deactivation shows in `isActive`, and a unit leaving stock shows in `status`.
Keep reading with `nextCursor` while `hasMore` is `true`.
`GET /inventory/changes`
**Responses**
- `200` — The changes
- `400` — \`invalid\_request\` or \`invalid\_cursor\`
- `401` — \`invalid\_token\`: the token is missing, expired, or for another resource.
- `403` — One of \`insufficient\_scope\`, \`connection\_revoked\`, \`client\_disabled\` or \`forbidden\`.
Response example, 200:
```json
{
"changes": [
{
"type": "site",
"id": "497f6eca-6276-4993-bfeb-53cbbbba6f08",
"data": {}
}
],
"nextCursor": "string",
"hasMore": true
}
```
---
# List sites and storage locations
Source: https://docs.toreca-cloud.com/en/api/reference/inventory/list-sites
Returns every site and storage location of the shop, inactive ones included.
`GET /inventory/sites`
**Responses**
- `200` — The sites
- `401` — \`invalid\_token\`: the token is missing, expired, or for another resource.
- `403` — One of \`insufficient\_scope\`, \`connection\_revoked\`, \`client\_disabled\` or \`forbidden\`.
Response example, 200:
```json
{
"sites": [
{
"id": "497f6eca-6276-4993-bfeb-53cbbbba6f08",
"code": "string",
"name": "string",
"kind": "string",
"countryCode": "string",
"timezone": "string",
"isActive": true,
"createdAt": "2019-08-24T14:15:22Z",
"updatedAt": "2019-08-24T14:15:22Z",
"locations": [
{
"id": "497f6eca-6276-4993-bfeb-53cbbbba6f08",
"siteId": "60189e9c-7d12-438c-b9ca-6998d9c364b1",
"code": "string",
"name": "string",
"kind": "string",
"isActive": true,
"createdAt": "2019-08-24T14:15:22Z",
"updatedAt": "2019-08-24T14:15:22Z"
}
]
}
]
}
```
---
# Move a unit within a site
Source: https://docs.toreca-cloud.com/en/api/reference/inventory/move-item
Moves to an active shelf in the same site. Already there returns moved=false. Another site fails with different_site; use transfers. In addition to inventory:read, this needs its operation scope and the approving member’s inventory.write permission.
`POST /inventory/items/{id}/move`
**Request body** (`application/json`, required)
- `toLocationId` (string, required)
- `reason` (string, required)
Request body example:
```json
{
"toLocationId": "e81ad314-9cb9-45ae-9ad9-f1b5ebcc7aae",
"reason": "string"
}
```
**Responses**
- `200` — Success
- `400` — \`invalid\_request\`: a parameter is invalid.
- `401` — \`invalid\_token\`: the token is missing, expired, or for another resource.
- `403` — One of \`insufficient\_scope\`, \`connection\_revoked\`, \`client\_disabled\` or \`forbidden\`.
- `404` — \`not\_found\`
- `409` — Conflict, reused requestId or receipt not confirmed
- `422` — The state, target or value refuses the operation. Inspect error and affected IDs.
Response example, 200:
```json
{
"moved": true,
"item": {
"id": "497f6eca-6276-4993-bfeb-53cbbbba6f08",
"createdAt": "2019-08-24T14:15:22Z",
"updatedAt": "2019-08-24T14:15:22Z",
"assetNumber": "string",
"sourceKind": "purchase",
"status": "string",
"version": 0,
"siteId": "60189e9c-7d12-438c-b9ca-6998d9c364b1",
"locationId": "1a5515a3-ba81-4a42-aee7-ad9ffc090a54",
"grade": {
"serviceCode": "string",
"serviceName": "string",
"serviceKind": "third_party",
"code": "string",
"label": "string",
"numericScore": 0
},
"certificationNumber": "string",
"certificationVerified": true,
"conditionNote": "string",
"acquisitionAmountMinor": 0,
"currency": "string",
"acquiredAt": "2019-08-24T14:15:22Z",
"lastMovedAt": "2019-08-24T14:15:22Z",
"allocation": "yours",
"holdable": true,
"commitment": {
"id": "497f6eca-6276-4993-bfeb-53cbbbba6f08",
"purpose": "oripa",
"label": "string",
"externalRef": "string"
},
"marketValue": {
"amountMinor": 0,
"currency": "JPY",
"pricedAt": "2019-08-24T14:15:22Z"
},
"conditionTags": [
{
"id": "497f6eca-6276-4993-bfeb-53cbbbba6f08",
"name": "string"
}
],
"photos": {
"front": {
"url": "http://example.com",
"updatedAt": "2019-08-24T14:15:22Z"
},
"back": {
"url": "http://example.com",
"updatedAt": "2019-08-24T14:15:22Z"
}
},
"card": {
"id": "497f6eca-6276-4993-bfeb-53cbbbba6f08",
"name": "string",
"localizedNames": {
"property1": "string",
"property2": "string"
},
"cardNumber": "string",
"languageCode": "string",
"variant": "string",
"finish": "string",
"imageUrl": "string",
"rarity": {
"code": "string",
"name": "string"
},
"set": {
"id": "497f6eca-6276-4993-bfeb-53cbbbba6f08",
"code": "string",
"name": "string",
"nameEn": "string"
},
"game": {
"id": "497f6eca-6276-4993-bfeb-53cbbbba6f08",
"code": "string",
"name": "string"
}
}
}
}
```
---
# Read current market values
Source: https://docs.toreca-cloud.com/en/api/reference/inventory/read-market-values
A read-only POST for up to 200 unique unit IDs. Missing or out-of-view units are omitted; visible units with no price have null marketValue. Price-only changes do not enter the change feed; use this operation for current prices.
`POST /inventory/market-values`
**Request body** (`application/json`, required)
- `ids` (string[], required)
Request body example:
```json
{
"ids": [
"497f6eca-6276-4993-bfeb-53cbbbba6f08"
]
}
```
**Responses**
- `200` — Success
- `400` — \`invalid\_request\`: a parameter is invalid.
- `401` — \`invalid\_token\`: the token is missing, expired, or for another resource.
- `403` — One of \`insufficient\_scope\`, \`connection\_revoked\`, \`client\_disabled\` or \`forbidden\`.
Response example, 200:
```json
{
"items": [
{
"id": "497f6eca-6276-4993-bfeb-53cbbbba6f08",
"marketValue": {
"amountMinor": 0,
"currency": "JPY",
"pricedAt": "2019-08-24T14:15:22Z"
}
}
]
}
```
---
# Receive transferred units
Source: https://docs.toreca-cloud.com/en/api/reference/inventory/receive-transfer
Use an active shelf of the destination site. Omitting inventoryItemIds receives all in-transit lines. Already received lines are unchanged; returned lines are refused. In addition to inventory:read, this needs its operation scope and the approving member’s inventory.write permission.
`POST /inventory/transfers/{id}/receive`
**Request body** (`application/json`, required)
- `toLocationId` (string, required)
- `inventoryItemIds` (string[])
Request body example:
```json
{
"toLocationId": "e81ad314-9cb9-45ae-9ad9-f1b5ebcc7aae",
"inventoryItemIds": [
"497f6eca-6276-4993-bfeb-53cbbbba6f08"
]
}
```
**Responses**
- `200` — Success
- `400` — \`invalid\_request\`: a parameter is invalid.
- `401` — \`invalid\_token\`: the token is missing, expired, or for another resource.
- `403` — One of \`insufficient\_scope\`, \`connection\_revoked\`, \`client\_disabled\` or \`forbidden\`.
- `404` — \`not\_found\`
- `409` — Conflict, reused requestId or receipt not confirmed
- `422` — The state, target or value refuses the operation. Inspect error and affected IDs.
Response example, 200:
```json
{
"id": "497f6eca-6276-4993-bfeb-53cbbbba6f08",
"createdAt": "2019-08-24T14:15:22Z",
"updatedAt": "2019-08-24T14:15:22Z",
"transferNumber": "string",
"status": "in_transit",
"version": 0,
"fromSiteId": "33a55c88-1ae8-426c-bfdd-0fd03c0d6ee1",
"toSiteId": "80101396-c399-408c-88ad-cd8029268567",
"carrier": "string",
"trackingNumber": "string",
"reason": "string",
"externalRef": "string",
"shippedAt": "2019-08-24T14:15:22Z",
"completedAt": "2019-08-24T14:15:22Z",
"items": [
{
"inventoryItemId": "ef1bc09e-447a-46aa-a9d9-d86e3d490831",
"assetNumber": "string",
"status": "in_transit",
"fromLocationId": "178bb398-90d2-4fc3-a4a0-37fc0eed2806",
"toLocationId": "e81ad314-9cb9-45ae-9ad9-f1b5ebcc7aae",
"resolvedAt": "2019-08-24T14:15:22Z"
}
]
}
```
---
# Release a commitment
Source: https://docs.toreca-cloud.com/en/api/reference/inventory/release-commitment
Releases a sale or allocation. setAside=true retains the stock allocation to this connection. Cancel an open shipment first. Releasing a lost unit leaves it lost, not available. In addition to inventory:read, this needs its operation scope and the approving member’s inventory.write permission.
`POST /inventory/commitments/{id}/release`
**Request body** (`application/json`, required)
- `reason` (string, required)
- `setAside` (boolean)
Request body example:
```json
{
"reason": "string",
"setAside": true
}
```
**Responses**
- `200` — Success
- `400` — \`invalid\_request\`: a parameter is invalid.
- `401` — \`invalid\_token\`: the token is missing, expired, or for another resource.
- `403` — One of \`insufficient\_scope\`, \`connection\_revoked\`, \`client\_disabled\` or \`forbidden\`.
- `404` — \`not\_found\`
- `409` — Conflict, reused requestId or receipt not confirmed
- `422` — The state, target or value refuses the operation. Inspect error and affected IDs.
Response example, 200:
```json
{
"id": "497f6eca-6276-4993-bfeb-53cbbbba6f08",
"createdAt": "2019-08-24T14:15:22Z",
"updatedAt": "2019-08-24T14:15:22Z",
"inventoryItemId": "ef1bc09e-447a-46aa-a9d9-d86e3d490831",
"assetNumber": "string",
"purpose": "oripa",
"label": "string",
"externalRef": "string",
"status": "on_sale",
"allocatedAt": "2019-08-24T14:15:22Z",
"allocationRef": "string",
"shipmentId": "47efd5a2-af91-4417-950a-7f546cd1b5cf",
"closedAt": "2019-08-24T14:15:22Z"
}
```
---
# Release commitments in a batch
Source: https://docs.toreca-cloud.com/en/api/reference/inventory/release-commitments
Up to 200 unique IDs. All succeed or none do. setAside and lost-unit handling match single release. In addition to inventory:read, this needs its operation scope and the approving member’s inventory.write permission.
`POST /inventory/commitments/release-batch`
**Request body** (`application/json`, required)
- `commitmentIds` (string[], required)
- `reason` (string, required)
- `setAside` (boolean)
Request body example:
```json
{
"commitmentIds": [
"497f6eca-6276-4993-bfeb-53cbbbba6f08"
],
"reason": "string",
"setAside": true
}
```
**Responses**
- `200` — Success
- `400` — \`invalid\_request\`: a parameter is invalid.
- `401` — \`invalid\_token\`: the token is missing, expired, or for another resource.
- `403` — One of \`insufficient\_scope\`, \`connection\_revoked\`, \`client\_disabled\` or \`forbidden\`.
- `409` — Conflict, reused requestId or receipt not confirmed
- `422` — The state, target or value refuses the operation. Inspect error and affected IDs.
Response example, 200:
```json
{
"commitments": [
{
"id": "497f6eca-6276-4993-bfeb-53cbbbba6f08",
"createdAt": "2019-08-24T14:15:22Z",
"updatedAt": "2019-08-24T14:15:22Z",
"inventoryItemId": "ef1bc09e-447a-46aa-a9d9-d86e3d490831",
"assetNumber": "string",
"purpose": "oripa",
"label": "string",
"externalRef": "string",
"status": "on_sale",
"allocatedAt": "2019-08-24T14:15:22Z",
"allocationRef": "string",
"shipmentId": "47efd5a2-af91-4417-950a-7f546cd1b5cf",
"closedAt": "2019-08-24T14:15:22Z"
}
]
}
```
---
# Release a hold
Source: https://docs.toreca-cloud.com/en/api/reference/inventory/release-hold
Only reserved holds can be released; a cancelled hold is returned unchanged. Confirmed holds fail with hold_confirmed; shipped holds with hold_shipped. In addition to inventory:read, this needs its operation scope and the approving member’s inventory.write permission.
`POST /inventory/holds/{id}/release`
**Request body** (`application/json`, required)
- `reason` (string, required)
Request body example:
```json
{
"reason": "string"
}
```
**Responses**
- `200` — Success
- `400` — \`invalid\_request\`: a parameter is invalid.
- `401` — \`invalid\_token\`: the token is missing, expired, or for another resource.
- `403` — One of \`insufficient\_scope\`, \`connection\_revoked\`, \`client\_disabled\` or \`forbidden\`.
- `404` — \`not\_found\`
- `409` — Conflict, reused requestId or receipt not confirmed
- `422` — The state, target or value refuses the operation. Inspect error and affected IDs.
Response example, 200:
```json
{
"id": "497f6eca-6276-4993-bfeb-53cbbbba6f08",
"createdAt": "2019-08-24T14:15:22Z",
"updatedAt": "2019-08-24T14:15:22Z",
"orderNumber": "string",
"status": "reserved",
"version": 0,
"inventoryItemId": "ef1bc09e-447a-46aa-a9d9-d86e3d490831",
"purpose": "oripa",
"destinationLabel": "string",
"externalRef": "string",
"expiresAt": "2019-08-24T14:15:22Z",
"trackingNumber": "string",
"sale": {
"amountMinor": 0,
"currency": "string",
"source": "entered"
}
}
```
---
# Release holds in a batch
Source: https://docs.toreca-cloud.com/en/api/reference/inventory/release-holds
Up to 100 unique IDs. A confirmed or shipped hold refuses the entire batch. Already cancelled holds are unchanged. In addition to inventory:read, this needs its operation scope and the approving member’s inventory.write permission.
`POST /inventory/holds/release-batch`
**Request body** (`application/json`, required)
- `holdIds` (string[], required)
- `reason` (string, required)
Request body example:
```json
{
"holdIds": [
"497f6eca-6276-4993-bfeb-53cbbbba6f08"
],
"reason": "string"
}
```
**Responses**
- `200` — Success
- `400` — \`invalid\_request\`: a parameter is invalid.
- `401` — \`invalid\_token\`: the token is missing, expired, or for another resource.
- `403` — One of \`insufficient\_scope\`, \`connection\_revoked\`, \`client\_disabled\` or \`forbidden\`.
- `409` — Conflict, reused requestId or receipt not confirmed
- `422` — The state, target or value refuses the operation. Inspect error and affected IDs.
Response example, 200:
```json
{
"holds": [
{
"id": "497f6eca-6276-4993-bfeb-53cbbbba6f08",
"createdAt": "2019-08-24T14:15:22Z",
"updatedAt": "2019-08-24T14:15:22Z",
"orderNumber": "string",
"status": "reserved",
"version": 0,
"inventoryItemId": "ef1bc09e-447a-46aa-a9d9-d86e3d490831",
"purpose": "oripa",
"destinationLabel": "string",
"externalRef": "string",
"expiresAt": "2019-08-24T14:15:22Z",
"trackingNumber": "string",
"sale": {
"amountMinor": 0,
"currency": "string",
"source": "entered"
}
}
]
}
```
---
# Return checked-out units
Source: https://docs.toreca-cloud.com/en/api/reference/inventory/return-checkout
Up to 200 unique inventoryItemIds. Give each unit’s return shelf and a reason. All succeed or none do. In addition to inventory:read, this needs its operation scope and the approving member’s inventory.write permission.
`POST /inventory/checkouts/{id}/return`
**Request body** (`application/json`, required)
- `items` (object[], required)
- `reason` (string, required)
Request body example:
```json
{
"items": [
{
"inventoryItemId": "ef1bc09e-447a-46aa-a9d9-d86e3d490831",
"toLocationId": "e81ad314-9cb9-45ae-9ad9-f1b5ebcc7aae"
}
],
"reason": "string"
}
```
**Responses**
- `200` — Success
- `400` — \`invalid\_request\`: a parameter is invalid.
- `401` — \`invalid\_token\`: the token is missing, expired, or for another resource.
- `403` — One of \`insufficient\_scope\`, \`connection\_revoked\`, \`client\_disabled\` or \`forbidden\`.
- `404` — \`not\_found\`
- `409` — Conflict, reused requestId or receipt not confirmed
- `422` — The state, target or value refuses the operation. Inspect error and affected IDs.
Response example, 200:
```json
{
"id": "497f6eca-6276-4993-bfeb-53cbbbba6f08",
"createdAt": "2019-08-24T14:15:22Z",
"updatedAt": "2019-08-24T14:15:22Z",
"orderNumber": "string",
"version": 0,
"destinationLabel": "string",
"reason": "string",
"externalRef": "string",
"shippedAt": "2019-08-24T14:15:22Z",
"items": [
{
"inventoryItemId": "ef1bc09e-447a-46aa-a9d9-d86e3d490831",
"assetNumber": "string",
"status": "out",
"returnedAt": "2019-08-24T14:15:22Z",
"returnLocationId": "1d1d177a-c4a1-4389-b833-16c3941f123e"
}
]
}
```
---
# Record a returned shipment
Source: https://docs.toreca-cloud.com/en/api/reference/inventory/return-shipment
Name up to 200 shipped commitments whose units physically returned. Returns them to their original shelves and creates new allocated commitments for the customer. Each response commitmentId is the original ID; commitment.id is the new one. Repeating the same requestId returns the existing result. In addition to inventory:read, this needs its operation scope and the approving member’s inventory.write permission.
`POST /inventory/shipments/{id}/returns`
**Request body** (`application/json`, required)
- `requestId` (string, required)
- `commitmentIds` (string[], required)
- `reason` (string, required)
Request body example:
```json
{
"requestId": "d385ab22-0f51-4b97-9ecd-b8ff3fd4fcb6",
"commitmentIds": [
"497f6eca-6276-4993-bfeb-53cbbbba6f08"
],
"reason": "string"
}
```
**Responses**
- `200` — Success
- `400` — \`invalid\_request\`: a parameter is invalid.
- `401` — \`invalid\_token\`: the token is missing, expired, or for another resource.
- `403` — One of \`insufficient\_scope\`, \`connection\_revoked\`, \`client\_disabled\` or \`forbidden\`.
- `404` — \`not\_found\`
- `409` — Conflict, reused requestId or receipt not confirmed
- `422` — The state, target or value refuses the operation. Inspect error and affected IDs.
Response example, 200:
```json
{
"returns": [
{
"commitmentId": "4e1ecf7c-8127-4207-92b0-010ff43ff54d",
"commitment": {
"id": "497f6eca-6276-4993-bfeb-53cbbbba6f08",
"createdAt": "2019-08-24T14:15:22Z",
"updatedAt": "2019-08-24T14:15:22Z",
"inventoryItemId": "ef1bc09e-447a-46aa-a9d9-d86e3d490831",
"assetNumber": "string",
"purpose": "oripa",
"label": "string",
"externalRef": "string",
"status": "on_sale",
"allocatedAt": "2019-08-24T14:15:22Z",
"allocationRef": "string",
"shipmentId": "47efd5a2-af91-4417-950a-7f546cd1b5cf",
"closedAt": "2019-08-24T14:15:22Z"
}
}
]
}
```
---
# Return transferred units to origin
Source: https://docs.toreca-cloud.com/en/api/reference/inventory/return-transfer
Returns in-transit units to the shelves they left. Omitting inventoryItemIds returns all in-transit lines. Received lines cannot be returned this way. In addition to inventory:read, this needs its operation scope and the approving member’s inventory.write permission.
`POST /inventory/transfers/{id}/return`
**Request body** (`application/json`, required)
- `reason` (string, required)
- `inventoryItemIds` (string[])
Request body example:
```json
{
"reason": "string",
"inventoryItemIds": [
"497f6eca-6276-4993-bfeb-53cbbbba6f08"
]
}
```
**Responses**
- `200` — Success
- `400` — \`invalid\_request\`: a parameter is invalid.
- `401` — \`invalid\_token\`: the token is missing, expired, or for another resource.
- `403` — One of \`insufficient\_scope\`, \`connection\_revoked\`, \`client\_disabled\` or \`forbidden\`.
- `404` — \`not\_found\`
- `409` — Conflict, reused requestId or receipt not confirmed
- `422` — The state, target or value refuses the operation. Inspect error and affected IDs.
Response example, 200:
```json
{
"id": "497f6eca-6276-4993-bfeb-53cbbbba6f08",
"createdAt": "2019-08-24T14:15:22Z",
"updatedAt": "2019-08-24T14:15:22Z",
"transferNumber": "string",
"status": "in_transit",
"version": 0,
"fromSiteId": "33a55c88-1ae8-426c-bfdd-0fd03c0d6ee1",
"toSiteId": "80101396-c399-408c-88ad-cd8029268567",
"carrier": "string",
"trackingNumber": "string",
"reason": "string",
"externalRef": "string",
"shippedAt": "2019-08-24T14:15:22Z",
"completedAt": "2019-08-24T14:15:22Z",
"items": [
{
"inventoryItemId": "ef1bc09e-447a-46aa-a9d9-d86e3d490831",
"assetNumber": "string",
"status": "in_transit",
"fromLocationId": "178bb398-90d2-4fc3-a4a0-37fc0eed2806",
"toLocationId": "e81ad314-9cb9-45ae-9ad9-f1b5ebcc7aae",
"resolvedAt": "2019-08-24T14:15:22Z"
}
]
}
```
---
# Ship a held unit
Source: https://docs.toreca-cloud.com/en/api/reference/inventory/ship-hold
Ships a reserved or awaiting_shipment hold. Without saleAmountMinor it uses the latest JPY market value; no value fails with sale_amount_required. saleCurrency requires saleAmountMinor; JPY is the default. A shipped hold is returned unchanged. In addition to inventory:read, this needs its operation scope and the approving member’s inventory.write permission.
`POST /inventory/holds/{id}/ship`
**Request body** (`application/json`, required)
- `saleAmountMinor` (integer)
- `saleCurrency` (string)
- `trackingNumber` (string)
Request body example:
```json
{
"saleAmountMinor": 0,
"saleCurrency": "string",
"trackingNumber": "string"
}
```
**Responses**
- `200` — Success
- `400` — \`invalid\_request\`: a parameter is invalid.
- `401` — \`invalid\_token\`: the token is missing, expired, or for another resource.
- `403` — One of \`insufficient\_scope\`, \`connection\_revoked\`, \`client\_disabled\` or \`forbidden\`.
- `404` — \`not\_found\`
- `409` — Conflict, reused requestId or receipt not confirmed
- `422` — The state, target or value refuses the operation. Inspect error and affected IDs.
Response example, 200:
```json
{
"id": "497f6eca-6276-4993-bfeb-53cbbbba6f08",
"createdAt": "2019-08-24T14:15:22Z",
"updatedAt": "2019-08-24T14:15:22Z",
"orderNumber": "string",
"status": "reserved",
"version": 0,
"inventoryItemId": "ef1bc09e-447a-46aa-a9d9-d86e3d490831",
"purpose": "oripa",
"destinationLabel": "string",
"externalRef": "string",
"expiresAt": "2019-08-24T14:15:22Z",
"trackingNumber": "string",
"sale": {
"amountMinor": 0,
"currency": "string",
"source": "entered"
}
}
```
---
# Ship held units in a batch
Source: https://docs.toreca-cloud.com/en/api/reference/inventory/ship-holds
Up to 100 unique hold IDs; each omitted price follows single-hold shipping rules. A cancelled hold refuses the batch. All new shipments succeed or none do. In addition to inventory:read, this needs its operation scope and the approving member’s inventory.write permission.
`POST /inventory/holds/ship-batch`
**Request body** (`application/json`, required)
- `holds` (object[], required)
Request body example:
```json
{
"holds": [
{
"id": "497f6eca-6276-4993-bfeb-53cbbbba6f08",
"saleAmountMinor": 0,
"saleCurrency": "string",
"trackingNumber": "string"
}
]
}
```
**Responses**
- `200` — Success
- `400` — \`invalid\_request\`: a parameter is invalid.
- `401` — \`invalid\_token\`: the token is missing, expired, or for another resource.
- `403` — One of \`insufficient\_scope\`, \`connection\_revoked\`, \`client\_disabled\` or \`forbidden\`.
- `409` — Conflict, reused requestId or receipt not confirmed
- `422` — The state, target or value refuses the operation. Inspect error and affected IDs.
Response example, 200:
```json
{
"holds": [
{
"id": "497f6eca-6276-4993-bfeb-53cbbbba6f08",
"createdAt": "2019-08-24T14:15:22Z",
"updatedAt": "2019-08-24T14:15:22Z",
"orderNumber": "string",
"status": "reserved",
"version": 0,
"inventoryItemId": "ef1bc09e-447a-46aa-a9d9-d86e3d490831",
"purpose": "oripa",
"destinationLabel": "string",
"externalRef": "string",
"expiresAt": "2019-08-24T14:15:22Z",
"trackingNumber": "string",
"sale": {
"amountMinor": 0,
"currency": "string",
"source": "entered"
}
}
]
}
```
---
# Ship a shipment
Source: https://docs.toreca-cloud.com/en/api/reference/inventory/ship-shipment
Named lines use saleAmountMinor; others use their JPY market value. A line with no price fails with sale_amount_required. Non-JPY requires every line to be priced. saleCurrency requires items, with unique commitment IDs on this shipment. In addition to inventory:read, this needs its operation scope and the approving member’s inventory.write permission.
`POST /inventory/shipments/{id}/ship`
**Request body** (`application/json`, required)
- `trackingNumber` (string)
- `saleCurrency` (string)
- `items` (object[])
Request body example:
```json
{
"trackingNumber": "string",
"saleCurrency": "string",
"items": [
{
"commitmentId": "4e1ecf7c-8127-4207-92b0-010ff43ff54d",
"saleAmountMinor": 0
}
]
}
```
**Responses**
- `200` — Success
- `400` — \`invalid\_request\`: a parameter is invalid.
- `401` — \`invalid\_token\`: the token is missing, expired, or for another resource.
- `403` — One of \`insufficient\_scope\`, \`connection\_revoked\`, \`client\_disabled\` or \`forbidden\`.
- `404` — \`not\_found\`
- `409` — Conflict, reused requestId or receipt not confirmed
- `422` — The state, target or value refuses the operation. Inspect error and affected IDs.
Response example, 200:
```json
{
"id": "497f6eca-6276-4993-bfeb-53cbbbba6f08",
"createdAt": "2019-08-24T14:15:22Z",
"updatedAt": "2019-08-24T14:15:22Z",
"orderNumber": "string",
"status": "reserved",
"version": 0,
"destinationLabel": "string",
"externalRef": "string",
"trackingNumber": "string",
"shippedAt": "2019-08-24T14:15:22Z",
"items": [
{
"commitmentId": "4e1ecf7c-8127-4207-92b0-010ff43ff54d",
"inventoryItemId": "ef1bc09e-447a-46aa-a9d9-d86e3d490831",
"assetNumber": "string",
"status": "string",
"sale": {
"amountMinor": 0,
"currency": "string",
"source": "string"
}
}
]
}
```
---
# Scopes and errors
Source: https://docs.toreca-cloud.com/en/api/scopes-and-errors
## Scopes
A token needs at least one read scope (`inventory:read` or `purchase-boosts:read`). A token with neither is refused everywhere.
| Scope | Endpoints |
| ---------------------- | ---------------------------------------------------------------------------------------------------------------------------------- |
| `purchase-boosts:read` | `/purchase-boosts` |
| `inventory:read` | Stock sync, current market values, `/cards`, `/webhook`. Document details also need the operation scope below |
| `inventory:write` | Holds, listings, allocations, shipments, shipping and returns (`holds` / `commitments` / `shipments`). Also needs `inventory:read` |
| `inventory:move` | Shelf moves, transfers between sites, take-outs. Also needs `inventory:read` |
| Either read scope | `/connection` |
The shop chooses the scopes when registering your app. Asking for a scope it didn't allow fails with `invalid_scope` at authorization.
Writes and reads of hold, commitment, shipment, transfer and checkout documents also require the approving member’s current `inventory.write` permission. See [inventory operations](/en/api/inventory-operations) for each flow’s conditions.
## Error shape
Errors look like `{ "error": "code" }`. A missing scope is named alongside:
```json
{ "error": "insufficient_scope", "scope": "inventory:read" }
```
The `WWW-Authenticate` header then also names the missing scope and the protected resource metadata URL.
## Common errors
| Status | `error` | Meaning and fix |
| ------ | ----------------------------- | ------------------------------------------------------------------------------------------ |
| 400 | `invalid_request` | A parameter is invalid |
| 401 | `invalid_token` | The token is missing, expired, or for another resource. Refresh and retry |
| 403 | `insufficient_scope` | The token lacks a needed scope. Ask the shop to allow it, then authorize again |
| 403 | `connection_revoked` | There is no connection, or the shop revoked it. Call `POST /connection` or authorize again |
| 403 | `client_disabled` | The shop or Toreca Cloud paused the app |
| 403 | `forbidden` | The approving member left or lost a needed permission. Have another member authorize |
| 404 | `not_found` | Nothing there, or the ID in the path is malformed |
| 409 | `idempotency_conflict` | The same `requestId` was used with different content. Check the original operation |
| 409 | `conflict` | A concurrent update. Read the target again before retrying |
| 409 | `receipt_not_confirmed` | The shop has not completed receipt confirmation |
| 422 | State- or value-specific code | Check stock, allocation, shipping state or prices. Affected IDs may be included |
| 503 | `photo_unavailable` | The unit's photo isn't available right now. Retry later |
---
# Tokens and expiry
Source: https://docs.toreca-cloud.com/en/api/tokens
A partner API token proves that a shop member approved your app. If it leaks, someone else can read that shop's data. Follow these rules.
## Lifetimes
| Token | Lifetime | Use |
| ------------- | --------------------- | -------------------------------------------------------- |
| Access token | 15 minutes from issue | Send it as `Authorization: Bearer` on API calls |
| Refresh token | 90 days from issue | Exchange it for new tokens when the access token expires |
Refresh tokens rotate: every refresh returns a new one. Use the new token for later refreshes. Regular refreshes keep the connection working past 90 days. Use the recovery procedure below only when the refresh response was lost.
## Refreshing
```ts
const response = await fetch(
"https://api.toreca-cloud.com/api/auth/oauth2/token",
{
method: "POST",
headers: {
Authorization: "Basic " + basicCredentials,
"Content-Type": "application/x-www-form-urlencoded",
"X-Toreca-Refresh-Recovery": "1",
},
body: new URLSearchParams({
grant_type: "refresh_token",
refresh_token: storedRefreshToken,
resource: "https://api.toreca-cloud.com/partner/v1",
}),
},
);
const next = await response.json();
if (!response.ok) {
// For refresh_superseded, reload the latest stored token.
// invalid_grant needs authorization again. Never log token/error bodies.
throw new Error("Token refresh failed");
}
// Save next.access_token and next.refresh_token together
```
- When the API answers `401`, refresh and retry once.
- Serialize refreshes through saving, one at a time per connection.
- Save the new access and refresh tokens together as soon as you receive them.
- If refreshing fails with `invalid_grant`, ask a shop member to approve again.
### Recovering a lost refresh response
Send `X-Toreca-Refresh-Recovery: 1` when refreshing to enable recovery for a confidential partner API client. The connection must remain active. This does not apply to MCP or another resource’s tokens.
1. After a lost connection or failed save, retry the same refresh token, client authentication, `resource`, `scope` and header.
2. If the successor token has not been refreshed again, the same token response is returned. Save both tokens together.
3. `refresh_superseded` means that successor has itself been refreshed. Reload your latest stored token. Do not let an old worker overwrite newer stored credentials. If the latest value is lost, authorize again.
Recovery does not bypass expiry, revocation, disconnection or lost permissions. Do not keep retrying `invalid_grant`; check the connection and authorization.
## Storing tokens
- Keep tokens and the client secret on your server only. Never put them in a browser, a mobile app or a static site's JavaScript.
- Encrypt them at rest and limit who and what can read them.
- Keep tokens out of logs, error reports and analytics.
- If the client secret may have leaked, ask the shop admin to regenerate it ("Regenerate secret"). The old secret stops working at once.
## When the connection stops
The API refuses calls in these cases even with an unexpired token.
| Situation | Response |
| ----------------------------------------------------- | ------------------------ |
| The shop revoked the connection | `403 connection_revoked` |
| The shop or Toreca Cloud paused the app | `403 client_disabled` |
| The approving member left or lost a needed permission | `403 forbidden` |
| The token lacks the needed scope | `403 insufficient_scope` |
To disconnect from your side, call `DELETE /partner/v1/connection`. It also revokes every refresh token your app holds for that shop.
---
# FAQ
Source: https://docs.toreca-cloud.com/en/faq
## Account and shops
**I belong to several shops. How do I switch?**
Open the account menu at the bottom left and pick the shop under
Organization. Your work applies only to the shop shown.
**Can I use the console in English?**
Yes. Choose English under Language in the account menu.
**Some screens are missing from my menu**
What you can see and do depends on your role in the shop. If you can't do
something you need, ask the shop's owner or an admin to check your role
([members and roles](/en/guides/getting-started/members-and-roles)).
## Purchases
**When does a buy boost's remaining count go down?**
When you record acceptance of the final quote. If you register the deal
without recording acceptance first, it goes down at that point. Rows the
customer declined at that step give their pieces back ([buy
boosts](/en/guides/purchase/purchase-boosts)).
**Is the boosted price filled into the appraisal automatically?**
No. On the appraisal screen, rows for the same card show "Buy boost" with
the price and number left under the market price. Use it when you set the
amount.
**Can I boost only PSA 10 copies of a card?**
Yes. You can keep a grade-specific boost and an any-grade boost for the same
card side by side. A row in that grade uses the grade-specific boost first.
**How do I buy 300 cards for ¥100 in total?**
Use **Add bulk appraisal** in final appraisal with count 300 and amount 100.
It is ¥100 for the whole lot, not per card. Use a set price to keep
individual appraisals and change only the total ([bulk appraisals and set
prices](/en/guides/purchase/bulk-and-set-price)).
**Where do I handle returns?**
Open **Returns** in the sidebar, or **Open return** / **Arrange return** on
the deal. Record address approval and pickup before shipping. Copying a
message records nothing: after sending it, press **Record address contact**
and the other record buttons ([returns](/en/guides/purchase/returns)).
**Fetching SNKRDUNK sales didn't change the reference price**
Fetching checks the sales. Open the count or **Details**, then click **Use
reference price**. Request research if no amount is available, for example
with fewer than two sales ([appraisals and
quotes](/en/guides/purchase/appraisal)).
**Are PSA numbers required for payouts?**
Each purchased PSA card needs its number. Check and save each number in the
final appraisal. Use **Check / correct PSA numbers** for missing or
incorrect numbers before payment ([payouts](/en/guides/purchase/payouts)).
**Where do I enter numbers and prices for three copies of one card?**
In final appraisal, enter each physical card’s number and amount in its own
row. Use the three-dot menu to record an unpurchasable card and reason, then
check every page and save ([card-by-card final
appraisal](/en/guides/purchase/final-appraisal)).
**Why is there no completion notification after answering part of a research batch?**
A batch becomes eligible for its completion notification when every request
is answered. Continue the remaining requests from the same batch-answer
screen ([research batches](/en/guides/purchase/research-and-reviews)).
**Does saving a business invoice draft create stock?**
No. Check products, physical quantities, unit prices and adjustments, then
complete physical matching and click 「現物確認して振込へ」 (Confirm stock
and go to payout). Draft saving and settlement are separate ([business
deals](/en/guides/purchase/corporate-deals)).
**Where do I attach evidence of payout consent?**
Open **Submit payout** on the deal’s Payment page, attach the evidence and
check it. Members authorized to review the account display its full number
in that same screen before submitting
([payouts](/en/guides/purchase/payouts)).
**Do business purchases need identity checks or quote acceptance?**
Business deals follow invoice registration, goods matching, settlement and
payout. They do not require identity or company verification, quote
acceptance or a power of attorney ([business deals and
invoices](/en/guides/purchase/corporate-deals)).
**Does closing an item card save it?**
**Save and check** saves the item or review draft. **Review inputs and
close** folds it; final appraisal and other editors still require the
overall **Save** action ([item-card
operations](/en/guides/purchase/common-operations)).
**Can I pause a second review and continue later?**
**Save draft** retains input. **Save and check** also records the item's
checking status. Neither approves nor presents the quote. Recheck after
prices or the source appraisal change ([draft and checking
progress](/en/guides/purchase/research-and-reviews)).
**Can other shops use the SNKRDUNK link I added?**
**Save and request approval** initially creates a provisional link for this
purchase. A catalog approver checks the exact product, printing and URL and
confirms a reason before it becomes shared ([link requests and
approval](/en/guides/purchase/card-registration-requests)).
## Label printing
**Why can't I cut one label at a time with the printer button?**
This requires print app 0.1.5 or later, a supported network connection and
paper. Check the offered app version and connection; use PDF printing if
unsupported. If the send result is unknown, check paper and the print queue
before retrying ([desktop print
app](/en/guides/inventory/desktop-print-app)).
## AI agents (MCP)
**How much can an AI agent do?**
As much as the work role you pick at each connection allows: View only,
Stock mover, Inventory manager or Shop manager (everything). It can never go
beyond your own permissions ([work roles](/en/mcp/roles)).
**Do I need to reconnect every day?**
No. When you approve a connection you choose how long it lasts: 1 day, 3
days, 7 days, 1 month, 3 months, 1 year or No end. When Settings › MCP shows
Disconnected, reconnect; that's also when you can pick a different role and
period.
## Partner API
**We want buy boosts on our landing page. Will stock be visible too?**
Not if the app is allowed only "Read buy boosts" when it's registered. The
API then refuses every inventory endpoint with `insufficient_scope` ([read
buy boosts](/en/api/purchase-boosts)).
**How long do access tokens last?**
Access tokens last 15 minutes and refresh tokens 90 days. Refresh tokens
rotate on every refresh ([tokens and expiry](/en/api/tokens)).
**I can't find Integrations in Settings**
Toreca Cloud enables the Integrations screen per shop. Contact support to
have it turned on.
## This help center
**Can AI agents search this help center?**
Yes. Add `https://docs.toreca-cloud.com/docs-mcp` to any MCP-capable app to
search and read these pages. No sign-in is needed.
**Where can I see what's new?**
The [changelog](/changelog) lists new features and fixes by the day they
reached production.
---
# Guides
Source: https://docs.toreca-cloud.com/en/guides
First, [sign in and check your shop](/en/guides/getting-started/login), then choose your task.
## Start a purchase
**[In-store purchases](/en/guides/purchase/counter)**
Intake → Appraisal → Customer review and signature → ID check → Cash or
transfer
**[Online purchases](/en/guides/purchase/overview)**
Intake → Preliminary quote → Shipping and arrival → Final appraisal and
acceptance → Transfer
Use [Choose a purchase workflow](/en/guides/purchase) to find your current stage or [shared tasks](/en/guides/purchase/common-operations).
## Continue a task
Open the deal from **Purchase requests** and check **Next step** at ①. Use the button on the right to continue. In this example, click **Add cards** at ②.
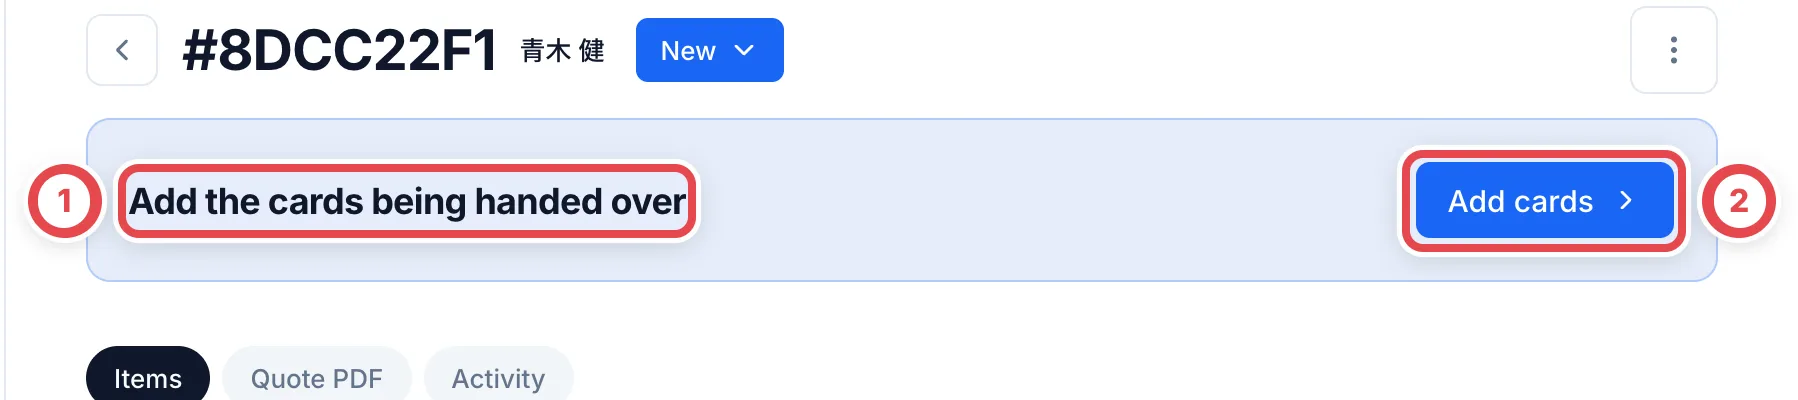 | Current task | Guide |
| ------------------------------------------------------------------- | ----------------------------------------------------------------------- |
| Inspect the original ID and record the check | [In-store ID checks](/en/guides/purchase/counter-identity) |
| Ask the customer to check their address, bank account and documents | [Review registered details](/en/guides/purchase/registered-information) |
| Pay by bank transfer | [Payouts](/en/guides/purchase/payouts) |
| Label purchased cards and put them on a shelf | [QR labels and putaway](/en/guides/inventory/putaway) |
| Count cards on the shelves | [Stock counts](/en/guides/inventory/counts) |
| Check register cash and close the day | [Cash registers and closing](/en/guides/purchase/cash) |
## Find screens and settings
**[Find your way around](/en/guides/getting-started/console)**
Use the sidebar and find work that needs attention.
**[Purchase workflows](/en/guides/purchase)**
Online purchases, in-store purchases and shared tasks.
**[Inventory](/en/guides/inventory/overview)**
Receiving, putaway, outbound and transfers.
**[Shop settings](/en/guides/settings/overview)**
Initial setup and changes for managers.
Find other tasks in the sidebar. For AI assistants, see [AI agents (MCP)](/en/mcp). For external app development, see the [API reference](/en/api).
## Additional workflows
- [Prepare and send CloudSign documents](/en/guides/settings/cloudsign)
- [Request missing cards](/en/guides/purchase/card-registration-requests)
- [Review price increase requests](/en/guides/purchase/price-increase-requests)
- [Restore cases and undo operations](/en/guides/purchase/history-and-undo)
- [Contracts and customer documents](/en/guides/purchase/contracts)
- [Correct selected stock units](/en/guides/inventory/corrections)
- [Receive sales returns](/en/guides/inventory/sales-returns)
- [Partner sales, wins and shipment requests](/en/guides/inventory/partner-sales)
- [Recover unsent iPhone work](/en/guides/inventory/scanner-recovery)
- [Market search, filters and prices by grade](/en/guides/getting-started/market)
- [Record final appraisals card by card](/en/guides/purchase/final-appraisal)
- [Single-lot shelves](/en/guides/inventory/sealed-lot-shelves)
- [Scan movement locks](/en/guides/inventory/shelf-protection)
- [Roles and permissions](/en/guides/getting-started/members-and-roles)
- [Referral reports](/en/guides/settings/referral-reports)
- [Checking and saving item cards](/en/guides/purchase/common-operations)
- [Review drafts and checking progress](/en/guides/purchase/research-and-reviews)
- [Adding and approving SNKRDUNK links](/en/guides/purchase/card-registration-requests)
---
# Finding your way around
Source: https://docs.toreca-cloud.com/en/guides/getting-started/console
## Sidebar
At the very top of the sidebar is the Buying / Inventory switch ①. The side you pick decides which screens the sidebar lists. The number next to each side is how many items are still pending there.
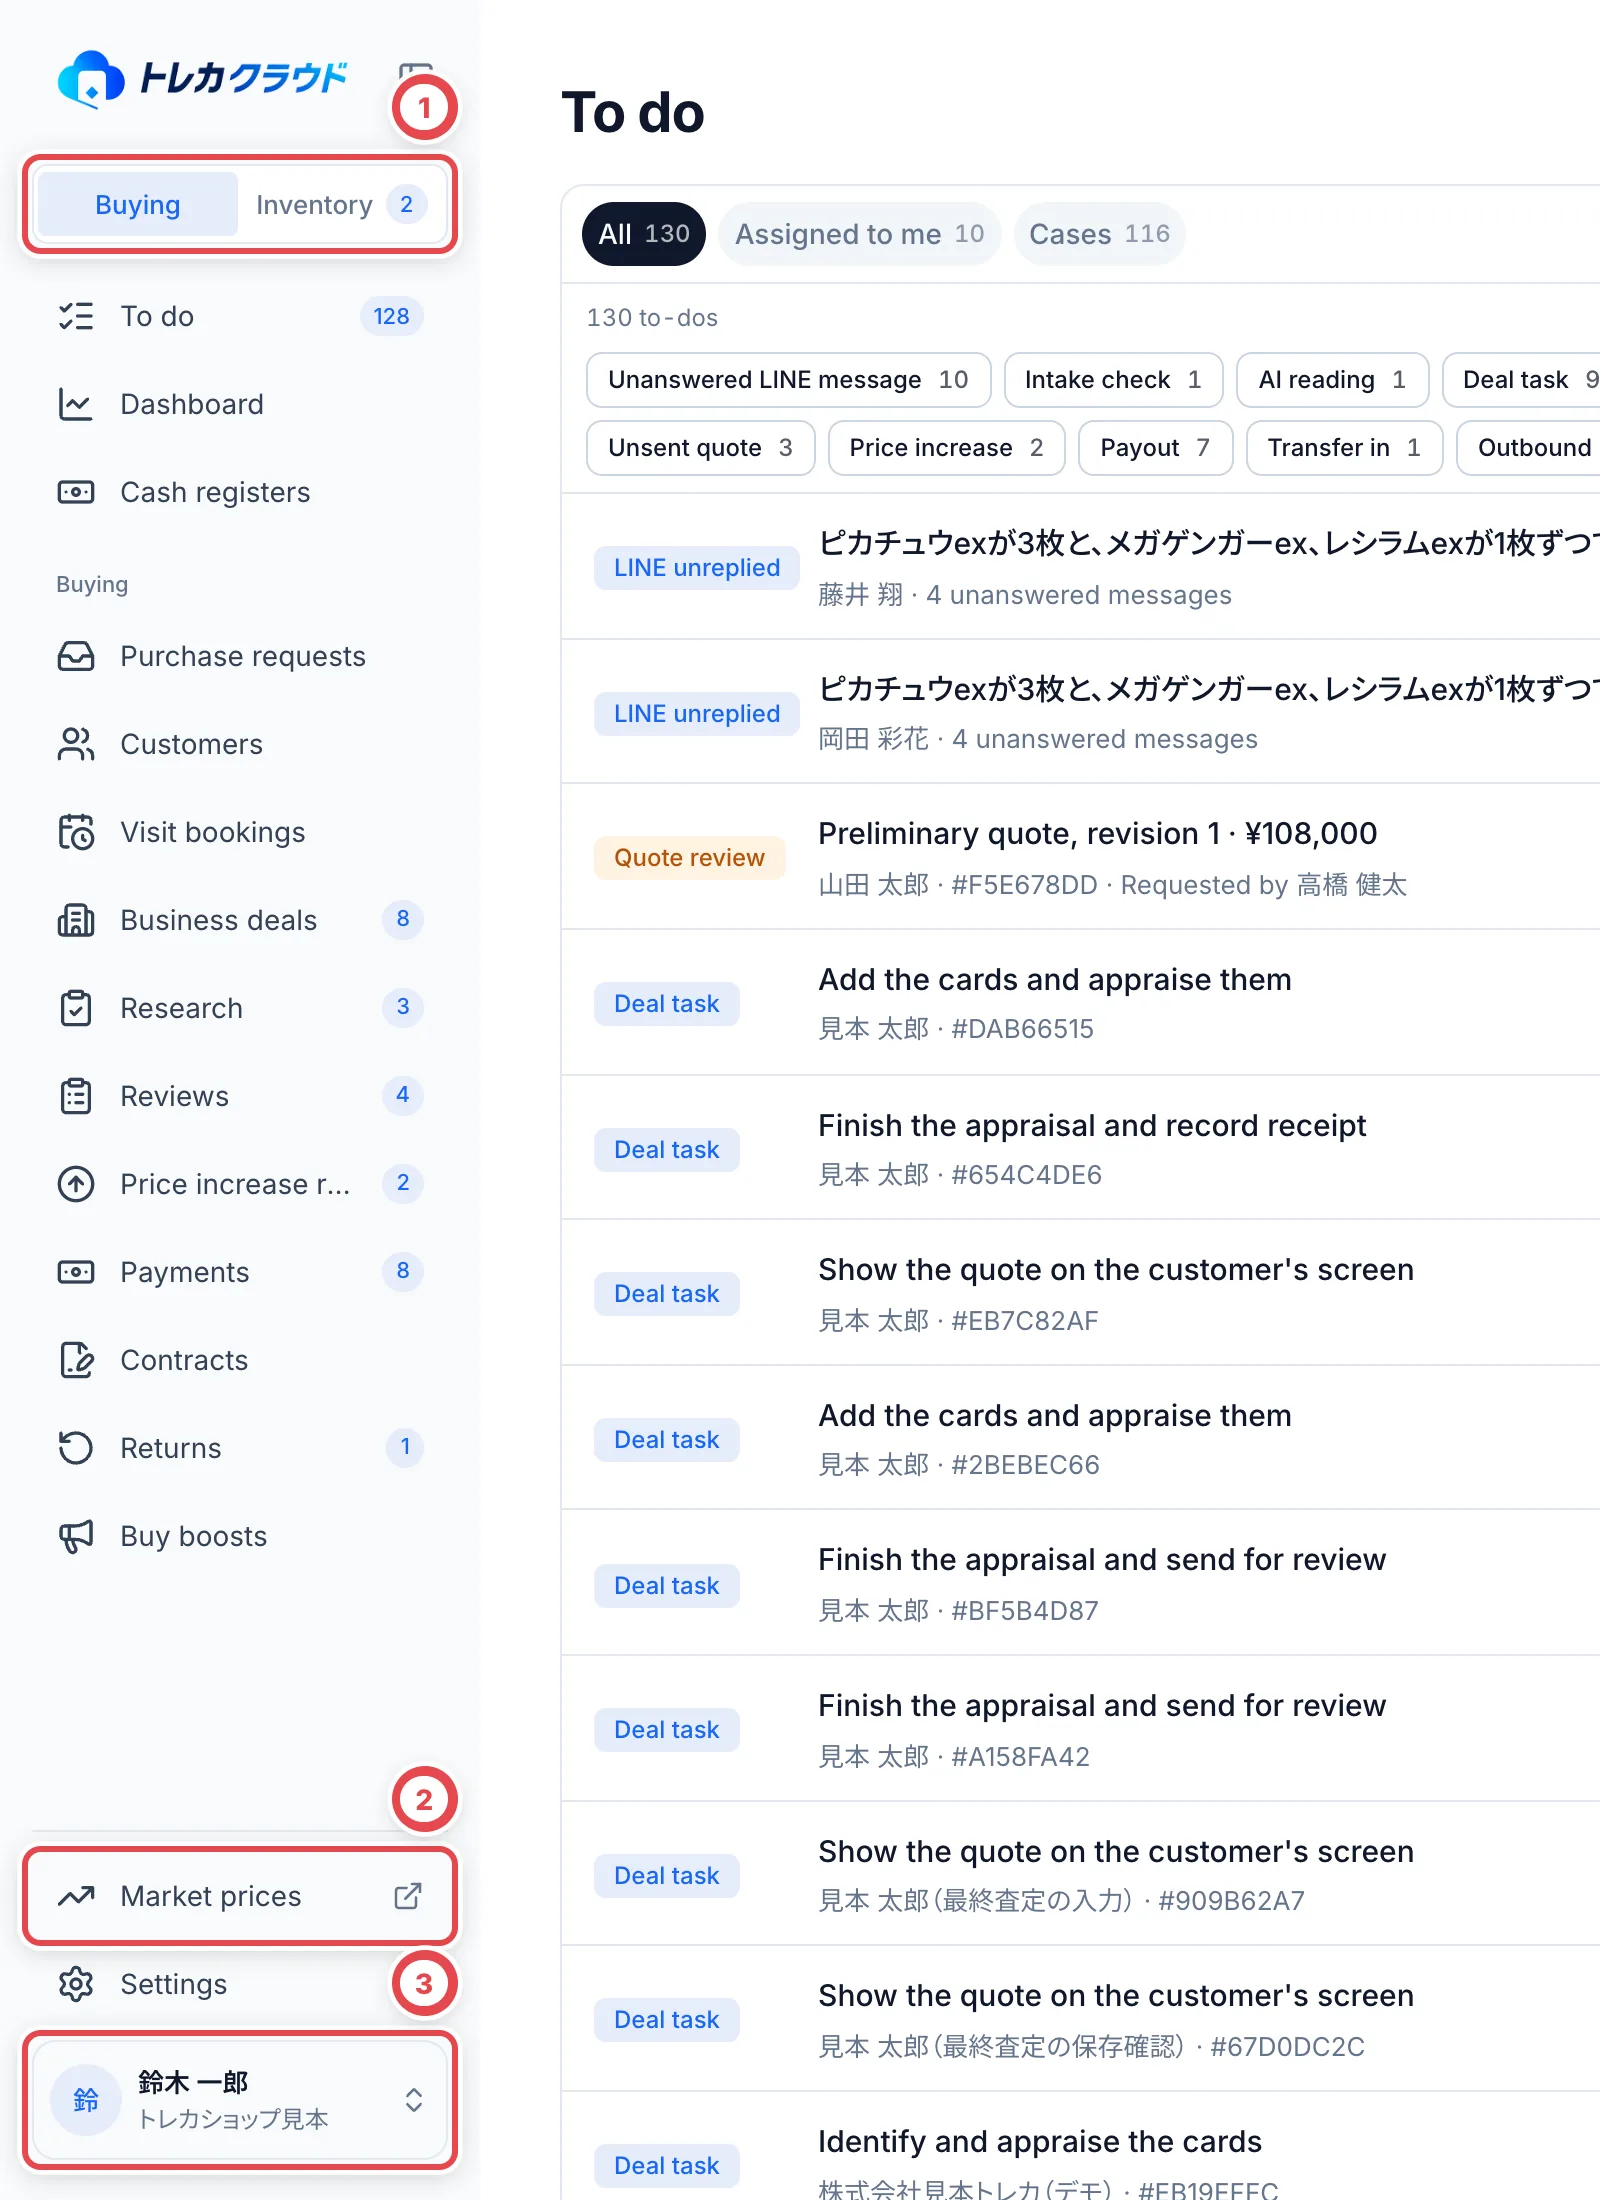 | Side | Section | Items | Used for |
| --------- | --------- | -------------------------------------------------------------------------------------------------------------------------------------------------- | ----------------------------------------------------- |
| Both | Top | To do, Dashboard, Cash registers | Today's work, the shop's numbers and cash in the till |
| Buying | Buying | Purchase requests, Customers, Visit bookings, Business deals, Research, Reviews, Price increase requests, Contracts, Payments, Returns, Buy boosts | Buying work, from intake to payment and returns |
| Inventory | Inventory | Inventory, Putaway, Stock counts | Finding, storing and counting the stock you have |
| Inventory | Movements | Receipts, Outbound, Site transfers, Tenant transfers, Partner allocations | Bringing stock in, sending it out and moving it |
| Both | Bottom | Market prices, Settings | Checking market prices and setting up the shop |
Items for features your shop doesn't use, such as visit bookings or business deals, don't appear. **Research** and **Reviews** appear only in shops that use online purchases or business deals (in-store purchases don't use them).
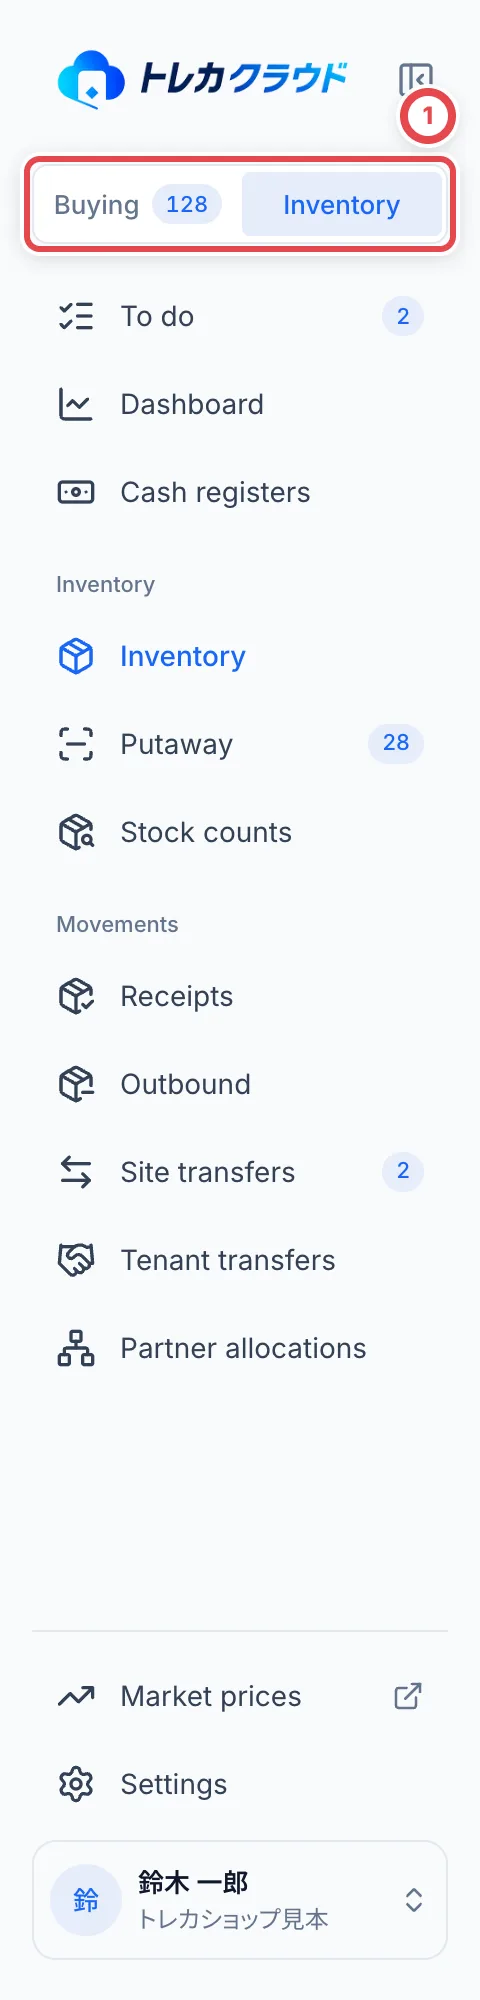 The number next to an item is how many are still pending. It disappears at zero. **Market prices** ② opens in a new tab, so the page you're working on stays open.
Use the button next to the logo to collapse the sidebar to icons. The browser remembers your choice.
The account menu ③ sits at the very bottom. It holds your account settings, the shop switcher, the language switcher and **Sign out**.
:::note
There is no sidebar item for identity verification. ID documents sent by customers show up in To do.
:::
## To do
To do lists each piece of work that needs attention now. Use the tabs at the top ① to choose what to show.
- **All** shows the whole shop's to-dos.
- **Assigned to me** shows what's addressed to you, such as reviews to decide or quotes sent back to you.
- **Cases** shows only work tied to a purchase case, grouped by case. Cases that have waited longest come first.
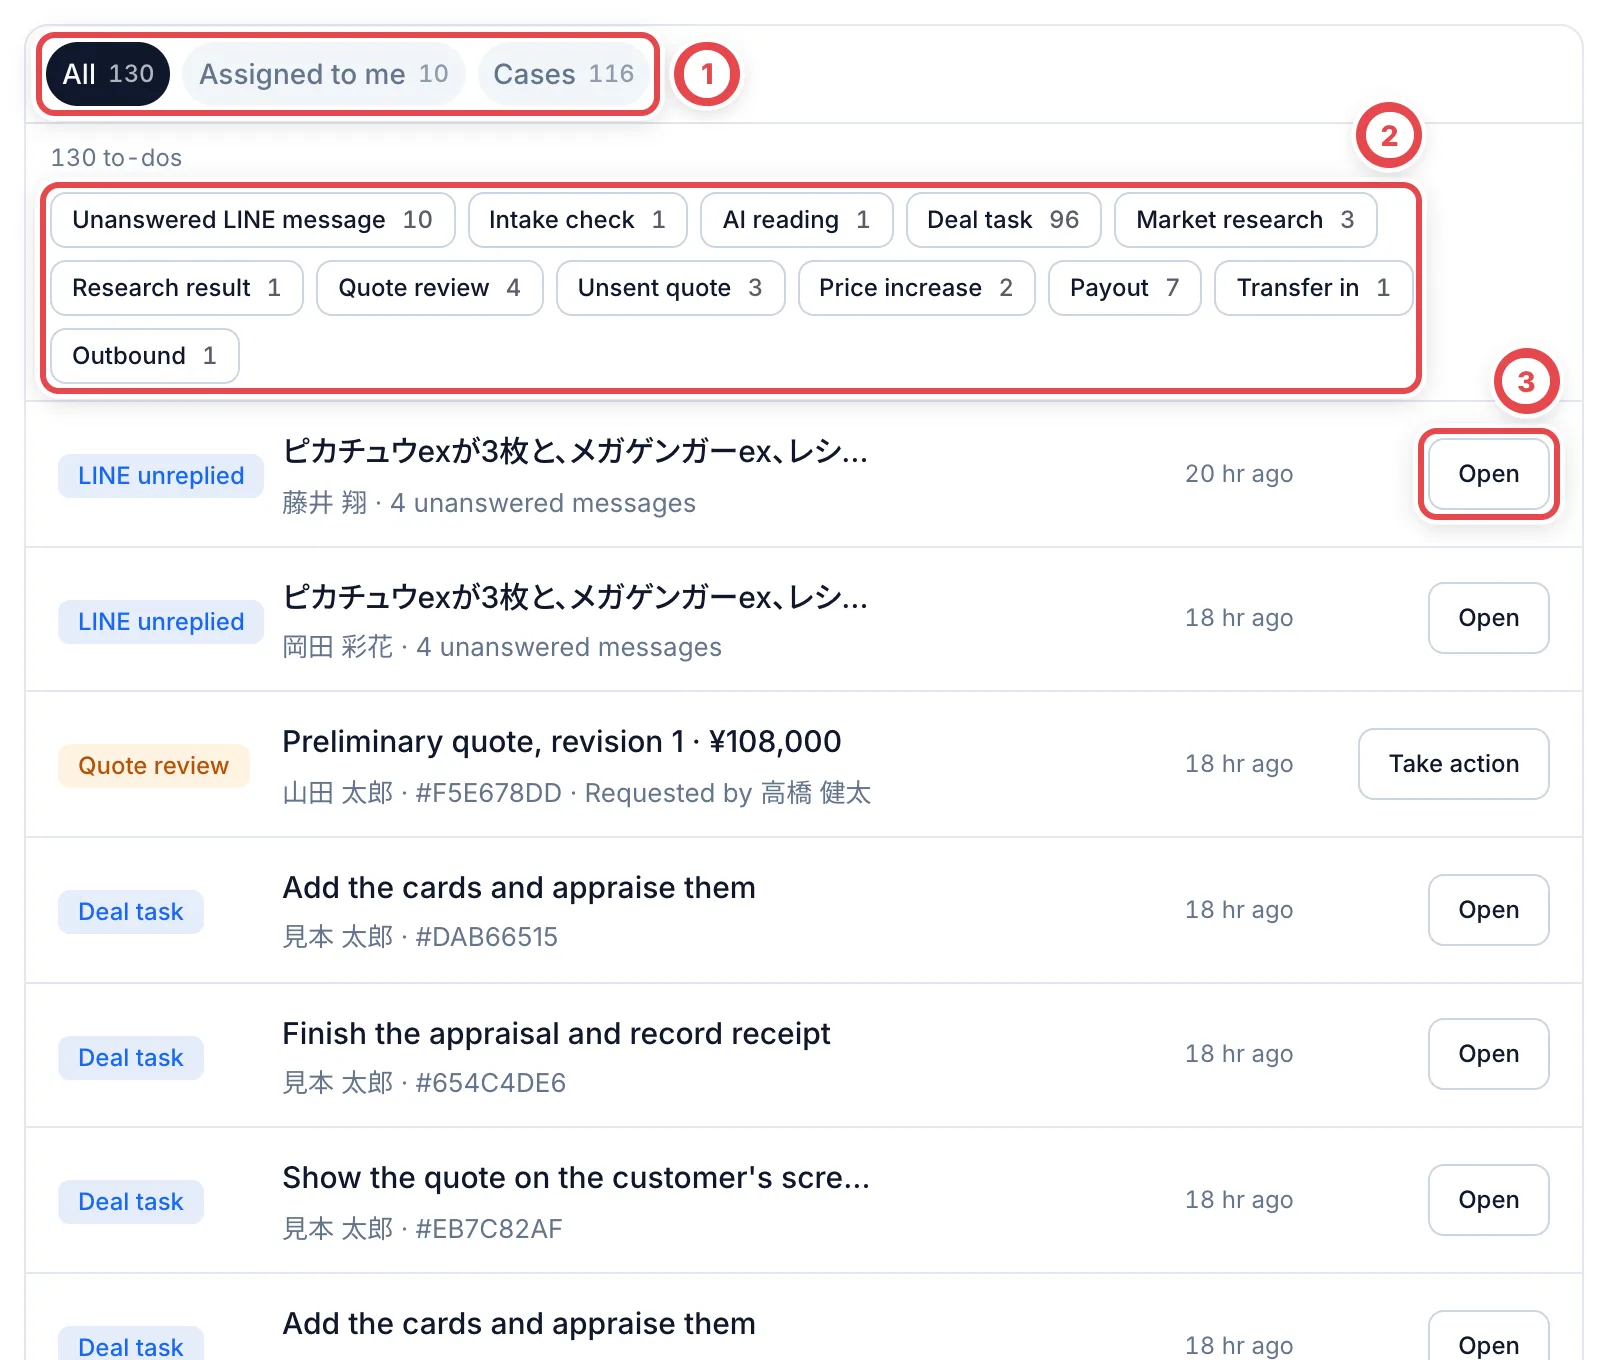 Below the tabs, ② lists the types of to-do there are right now as buttons, each with a count. Click one to show only that type; click it again to clear the filter. The main types are:
| Area | Types |
| -------------------- | ----------------------------------------------------------------------- |
| Intake | Unanswered LINE message, Intake check, AI reading |
| Appraisal and quotes | Deal task, Market research, Research result, Quote review, Unsent quote |
| Customer follow-up | Form response, ID verification, Awaiting reply, Power of attorney |
| Payouts | Payout |
| Inventory | Transfer in, Putaway issue, Outbound, Hold expiring |
Each row shows the type, what it's about, who it's assigned to and how long it has waited. Use the button on the right to act on it.
- **Open** ③ takes you to the page where the work is done. For example, a deal task opens the deal, and an unanswered LINE message opens the customer's LINE chat.
- **Review** opens a market research request.
- **Take action** opens a dialog where you can handle it on the spot: approving a quote review, presenting a quote, or checking a form response or identity verification result.
:::note
The person who made an appraisal can't approve its review. For your own appraisals, only **View** is shown.
:::
## Dashboard
The Dashboard shows how much the shop has bought and what's stuck. Pick a period at the top: **Today**, **This week**, **This month** or **Last month**. It starts on **This month**.
Across the top are four figures: **Purchases**, **Total purchased**, **Est. gross profit** and **Est. gross margin**. The first three are compared with the previous period. The margin leaves out items with no sale price. Below them, **Total purchased over time** charts the period.
**Stalled work** ① counts things like cases untouched for 3 or more days and quotes with no reply. Click a count to open the matching list.
New shops also see a **Setup** card ②. It lists connecting LINE, connecting a shipping carrier, setting buy rates, setting up bank payouts, inviting members and adding a passkey, and it disappears once everything is done.
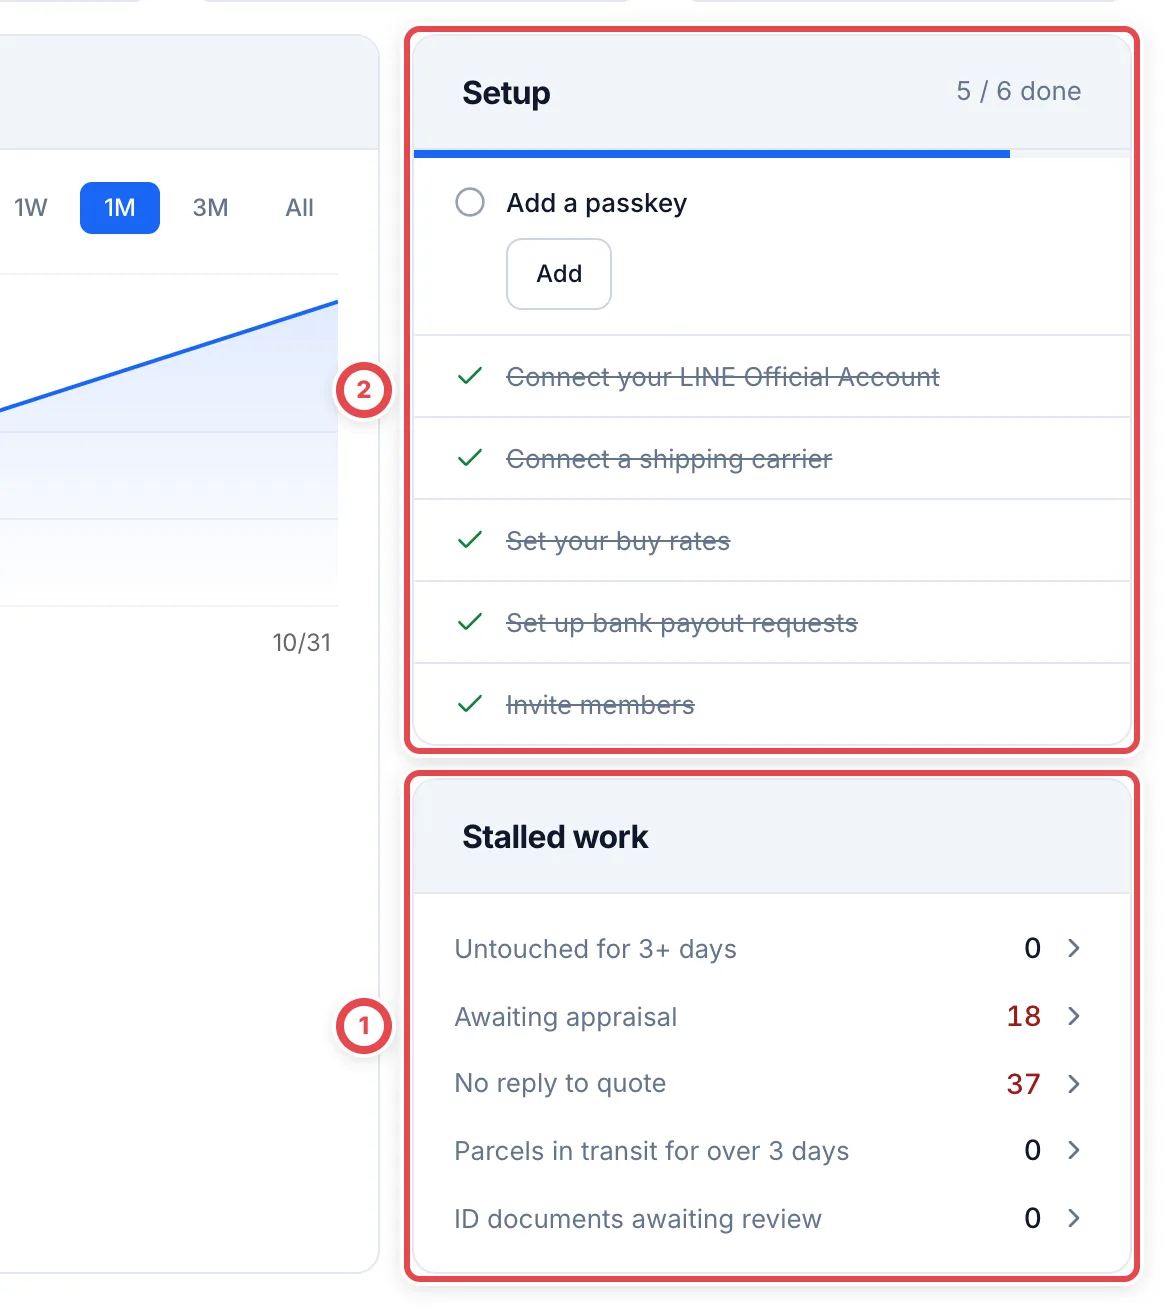 The figures cover non-cancelled cases created in the selected period. Purchase totals use effective appraisal lines and later settlement corrections where present. They are not grouped only by payment completion date. The chart also groups amounts by the case creation date.
## Troubleshooting
| What's happening | What to check and how to fix it |
| ----------------------------------------------- | ------------------------------------------------------------------------------------ |
| You can't find the inventory items | Choose **Inventory** in the switch at the top of the sidebar |
| You can't find Purchase requests or Customers | Choose **Buying** in the switch at the top of the sidebar |
| Visit bookings or other items don't appear | Your shop's settings don't use that feature |
| The sidebar has no identity verification screen | There is no sidebar item for it. ID documents sent by customers show up in To do |
| The sidebar shows only icons | It's collapsed with the button next to the logo. Click the button again to expand it |
Use [Price increase requests](/en/guides/purchase/price-increase-requests) for price discussions and [Contracts](/en/guides/purchase/contracts) to find documents across customers.
See [Find and check market prices](/en/guides/getting-started/market) for search, filters and sorting.
---
# Signing in and choosing a shop
Source: https://docs.toreca-cloud.com/en/guides/getting-started/login
You sign in to Toreca Cloud with your email and password. If you've added a passkey, you can sign in without typing a password.
## Sign in
1. **Enter your email and password**
On the sign-in page, enter your email and password and click **Sign in**. To
use a passkey, click **Sign in with a passkey** ① instead. Google sign-in is
currently unavailable.
2. **Enter your two-factor code**
If you've set up two-factor authentication, enter the 6-digit code from your
authenticator app. It continues on its own once all six digits are in.
Passkey sign-in skips this step.
3. **Choose a shop**
If you belong to one shop, it opens right away. If you belong to several,
**Choose a shop** appears; pick the one you want to work in.
After signing in you land on the Dashboard. Members with the Researcher role start on Research instead.
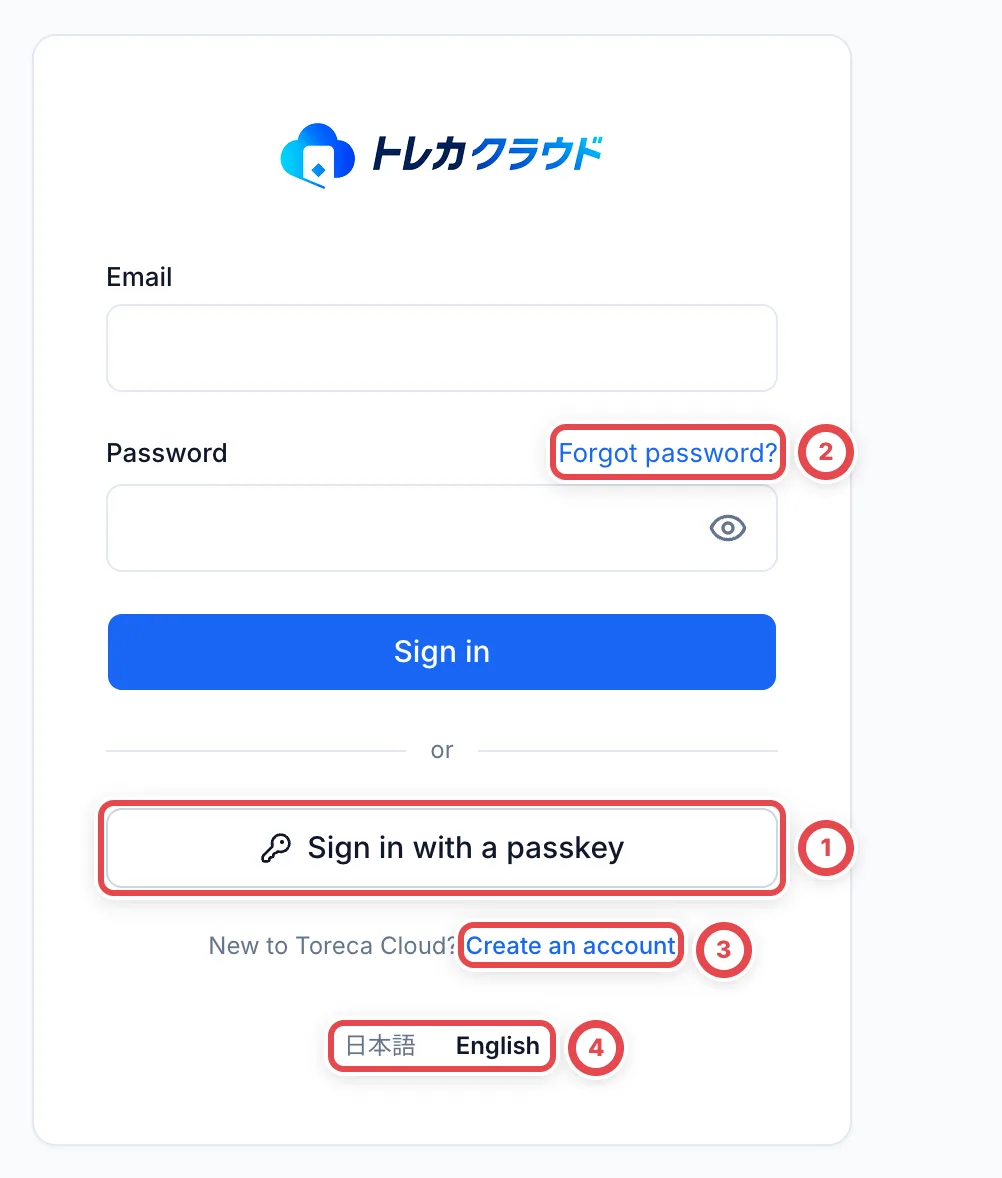 ① signs in with a passkey and ② resets your password. ③ is only for opening a new shop. ④ picks the language before you sign in.
### If you can't use your authenticator app
On the code screen, click **Can't use your authenticator app?** to sign in with a recovery code. Recovery codes are the 10 codes you saved when you set up two-factor authentication.
### If you forgot your password
1. **Get a reset link**
On the sign-in page, click **Forgot password?** ②. Enter your sign-in email
in ① and click **Send reset link**. A reset email arrives shortly.
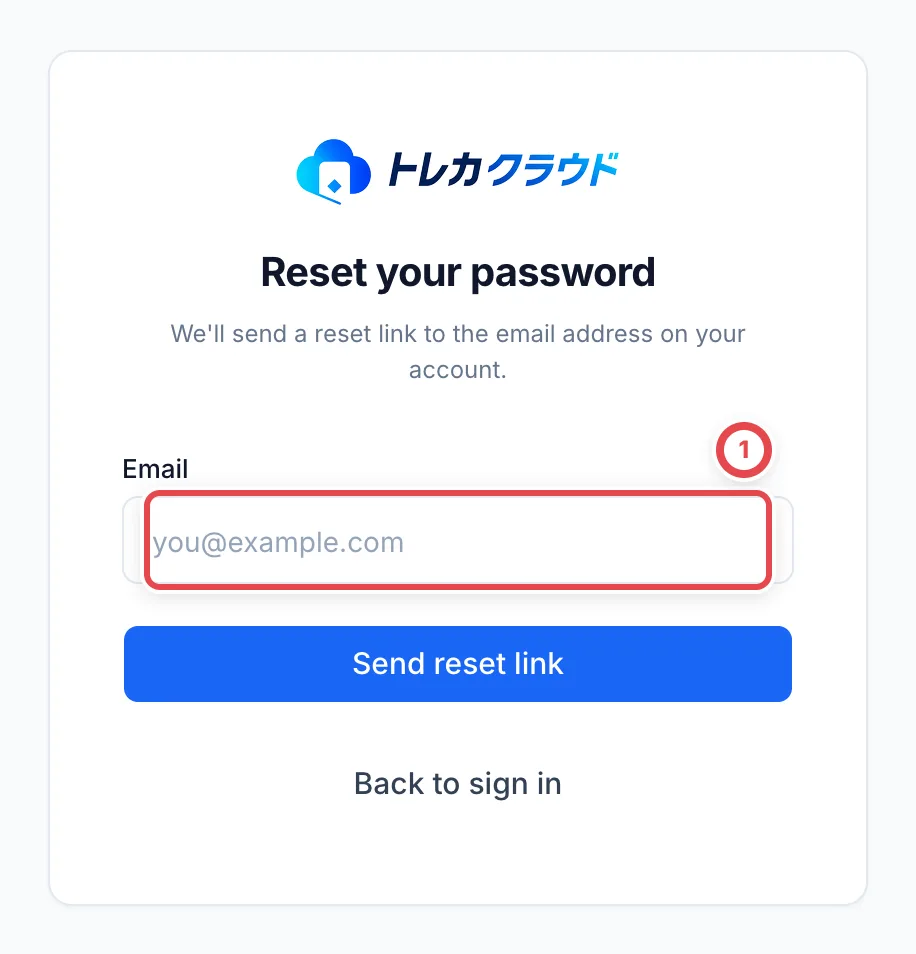 2. **Set a new password**
Open the link in the email and set a new password of at least 12 characters.
The link expires after 1 hour. If it has expired, start over.
## Join a shop from an invitation
When a shop's owner or admin invites you, you get an invitation email. Open the link to see the shop and the role you're being invited with.
- New to Toreca Cloud: enter a display name and password, then click **Create account**. Open the link in the verification email, come back to the invitation page, and click **Join this business**.
- Already have an account: click **Already have an account? Sign in to join**, sign in, and join.
Invitations are valid for 7 days. An expired link shows **This invite link isn't valid**; ask the person who invited you to resend it.
:::warning
**Create an account** ③ on the sign-in page sets up a brand-new shop. To join an existing shop, register from the link in your invitation email.
:::
## Switch shops
If you belong to more than one shop, switch between them from the account menu in the sidebar.
1. **Open the account menu**
Click the button with your name and shop name at the bottom of the sidebar.
2. **Pick a shop**
**Organizations** ① lists every shop you belong to, with a check mark next
to the one you're in. Pick another shop to switch to its home page.
The page you had open doesn't carry over. Open the page you need again after switching.
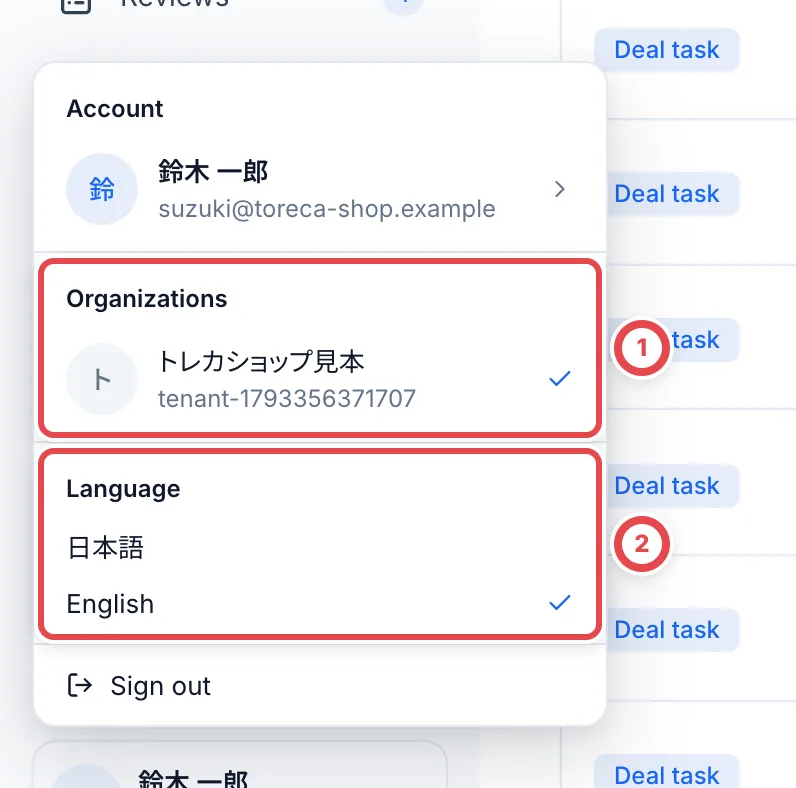 ① picks the shop to work in and ② the display language. The current choice has a check mark.
## Change the display language
In the account menu, choose **日本語** or **English** under **Language** ②. Your choice is saved to your account, so you see the same language when you sign in on another device. Before signing in, use the language switch below the sign-in form.
## Keep your sign-in secure
Under **Settings** › **Account** › **Sign-in and security**, you can:
- Change your password ①. Choose **Sign out of all other devices** to end sessions on your other devices as well.
- **Set up two-factor authentication** ②. Scan the QR code with your authenticator app and enter the 6-digit code. Be sure to save the 10 recovery codes shown at the end.
- **Add passkey** ③, so you can sign in with your fingerprint, face or PIN.
- Review **Signed-in devices**. If you see a device you don't recognize, click **Sign out** ④ to end its session.
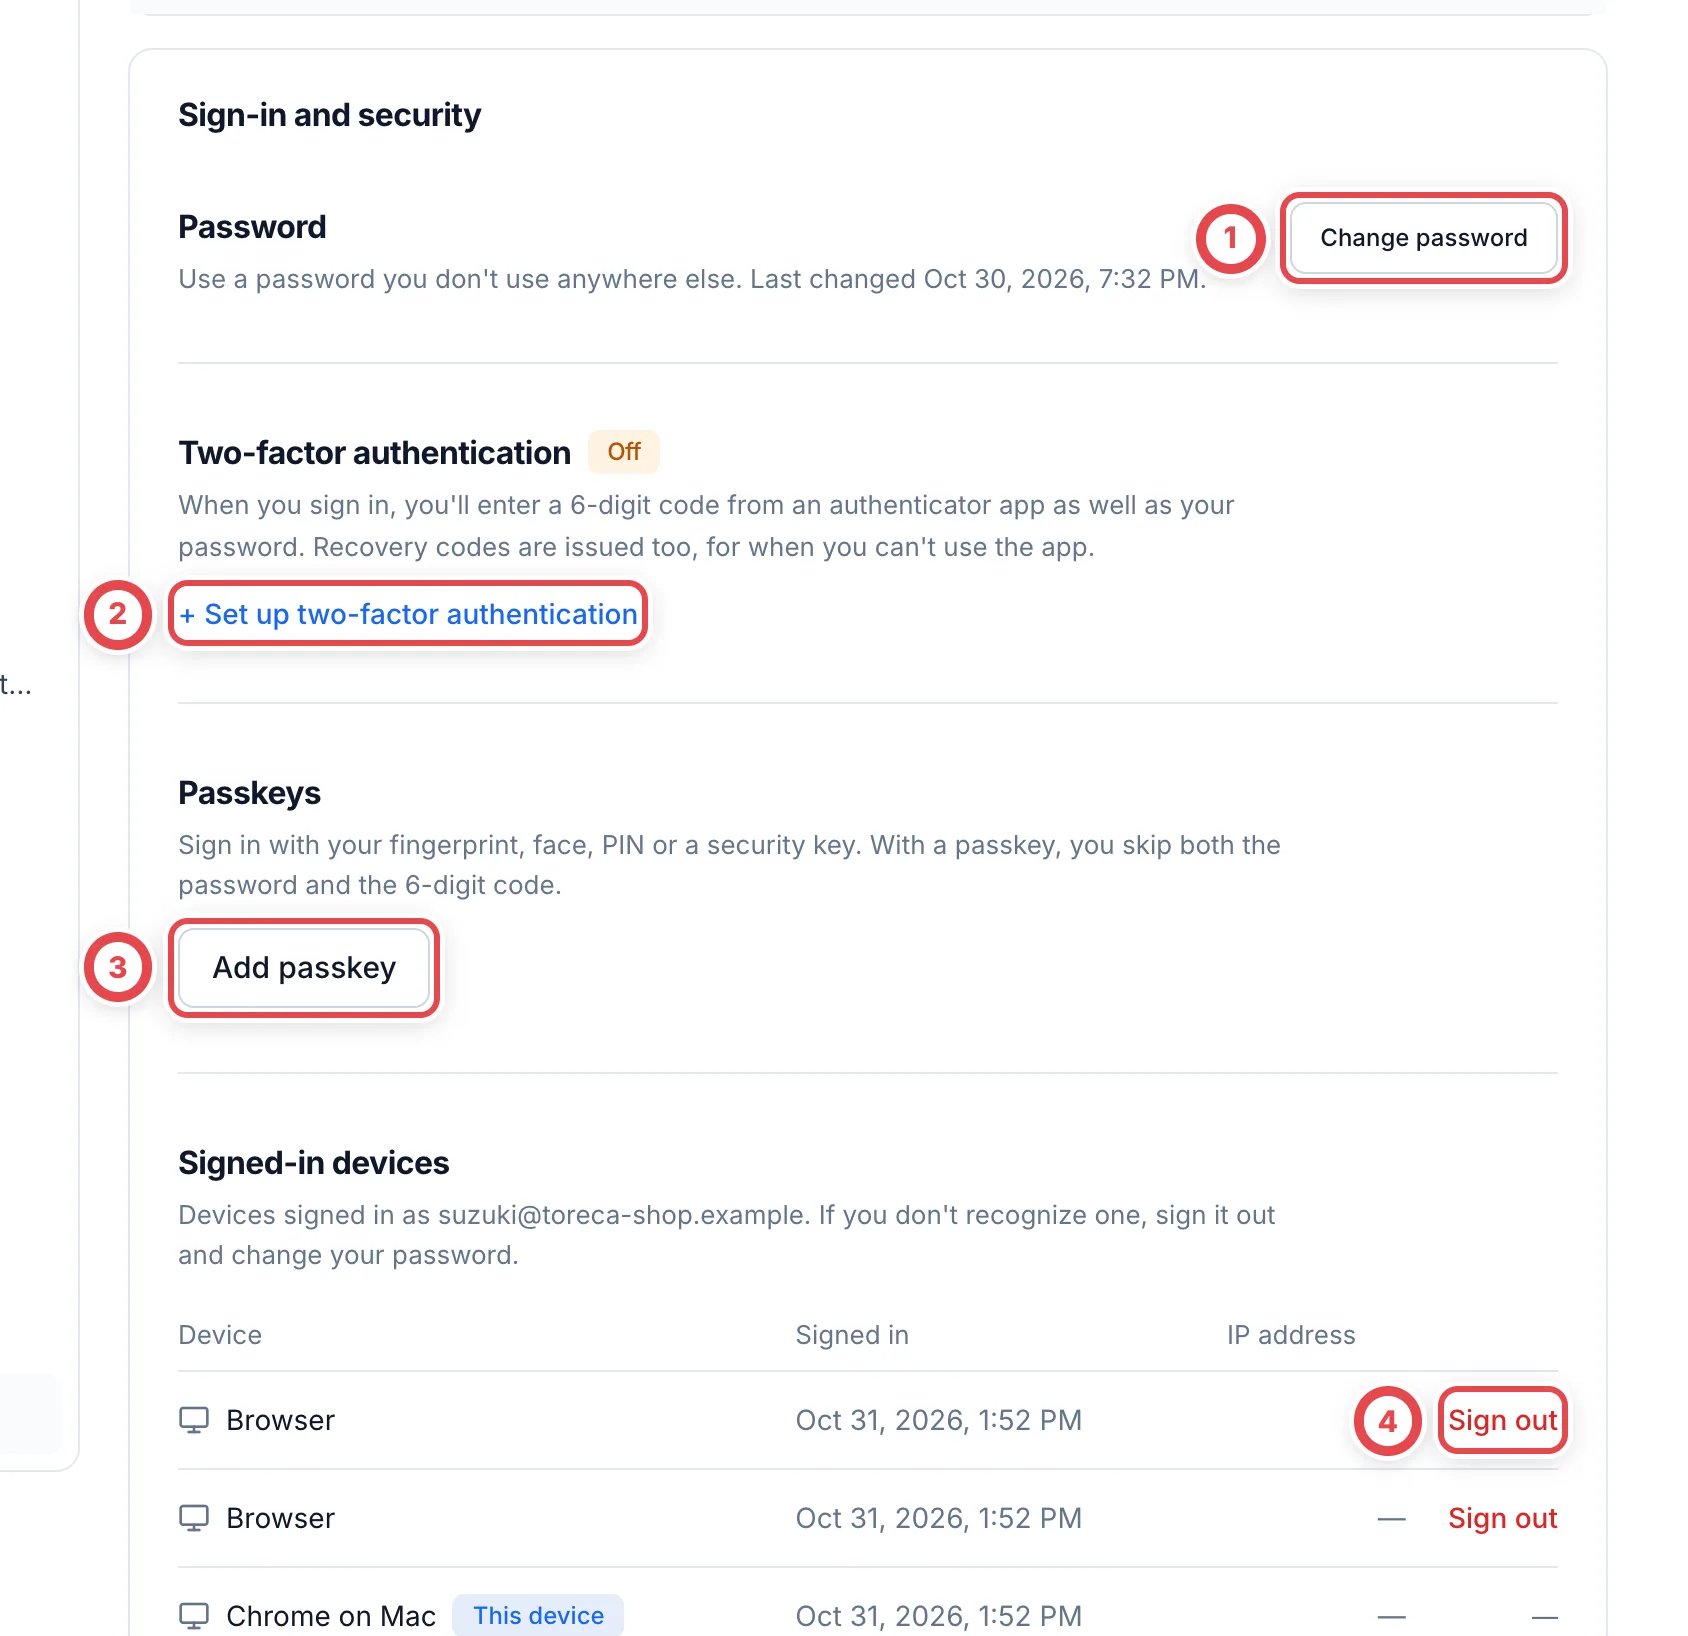 ## Troubleshooting
| What's happening | What to check and how to fix it |
| --------------------------------------------------- | ----------------------------------------------------------------------------------------------------------- |
| You forgot your password | On the sign-in page, click **Forgot password?** to get a reset link. The link expires after 1 hour |
| You don't have your authenticator app | On the code screen, click **Can't use your authenticator app?** and sign in with a recovery code you saved |
| An invitation says **This invite link isn't valid** | The invitation has expired (7 days). Ask the person who invited you to resend it |
| You want to open a different shop | In the account menu at the bottom of the sidebar, use **Organizations** to switch shops |
| You want the screens in English | In the account menu, choose **English** under **Language**. The same language is used on your other devices |
---
# Find and check market prices
Source: https://docs.toreca-cloud.com/en/guides/getting-started/market
**Market prices** at the bottom of the sidebar opens a new tab, keeping your appraisal work open while you look up cards, boxes, packs and decks.
## 1. Search by name or number
Enter a card name, number or product name in ① **Search cards**, then press Enter. The initial list shows Japanese Pokémon cards with market prices. Change the filters below to find other games, regions or products without prices.
Use **Grid view** / **Table view** to change the display. The sort menu offers Recently updated, Price: high to low / low to high, Name and Newest release. Relevance is also available with a search term. A new search, filter or sort starts from the first page; the footer shows the displayed range and total.
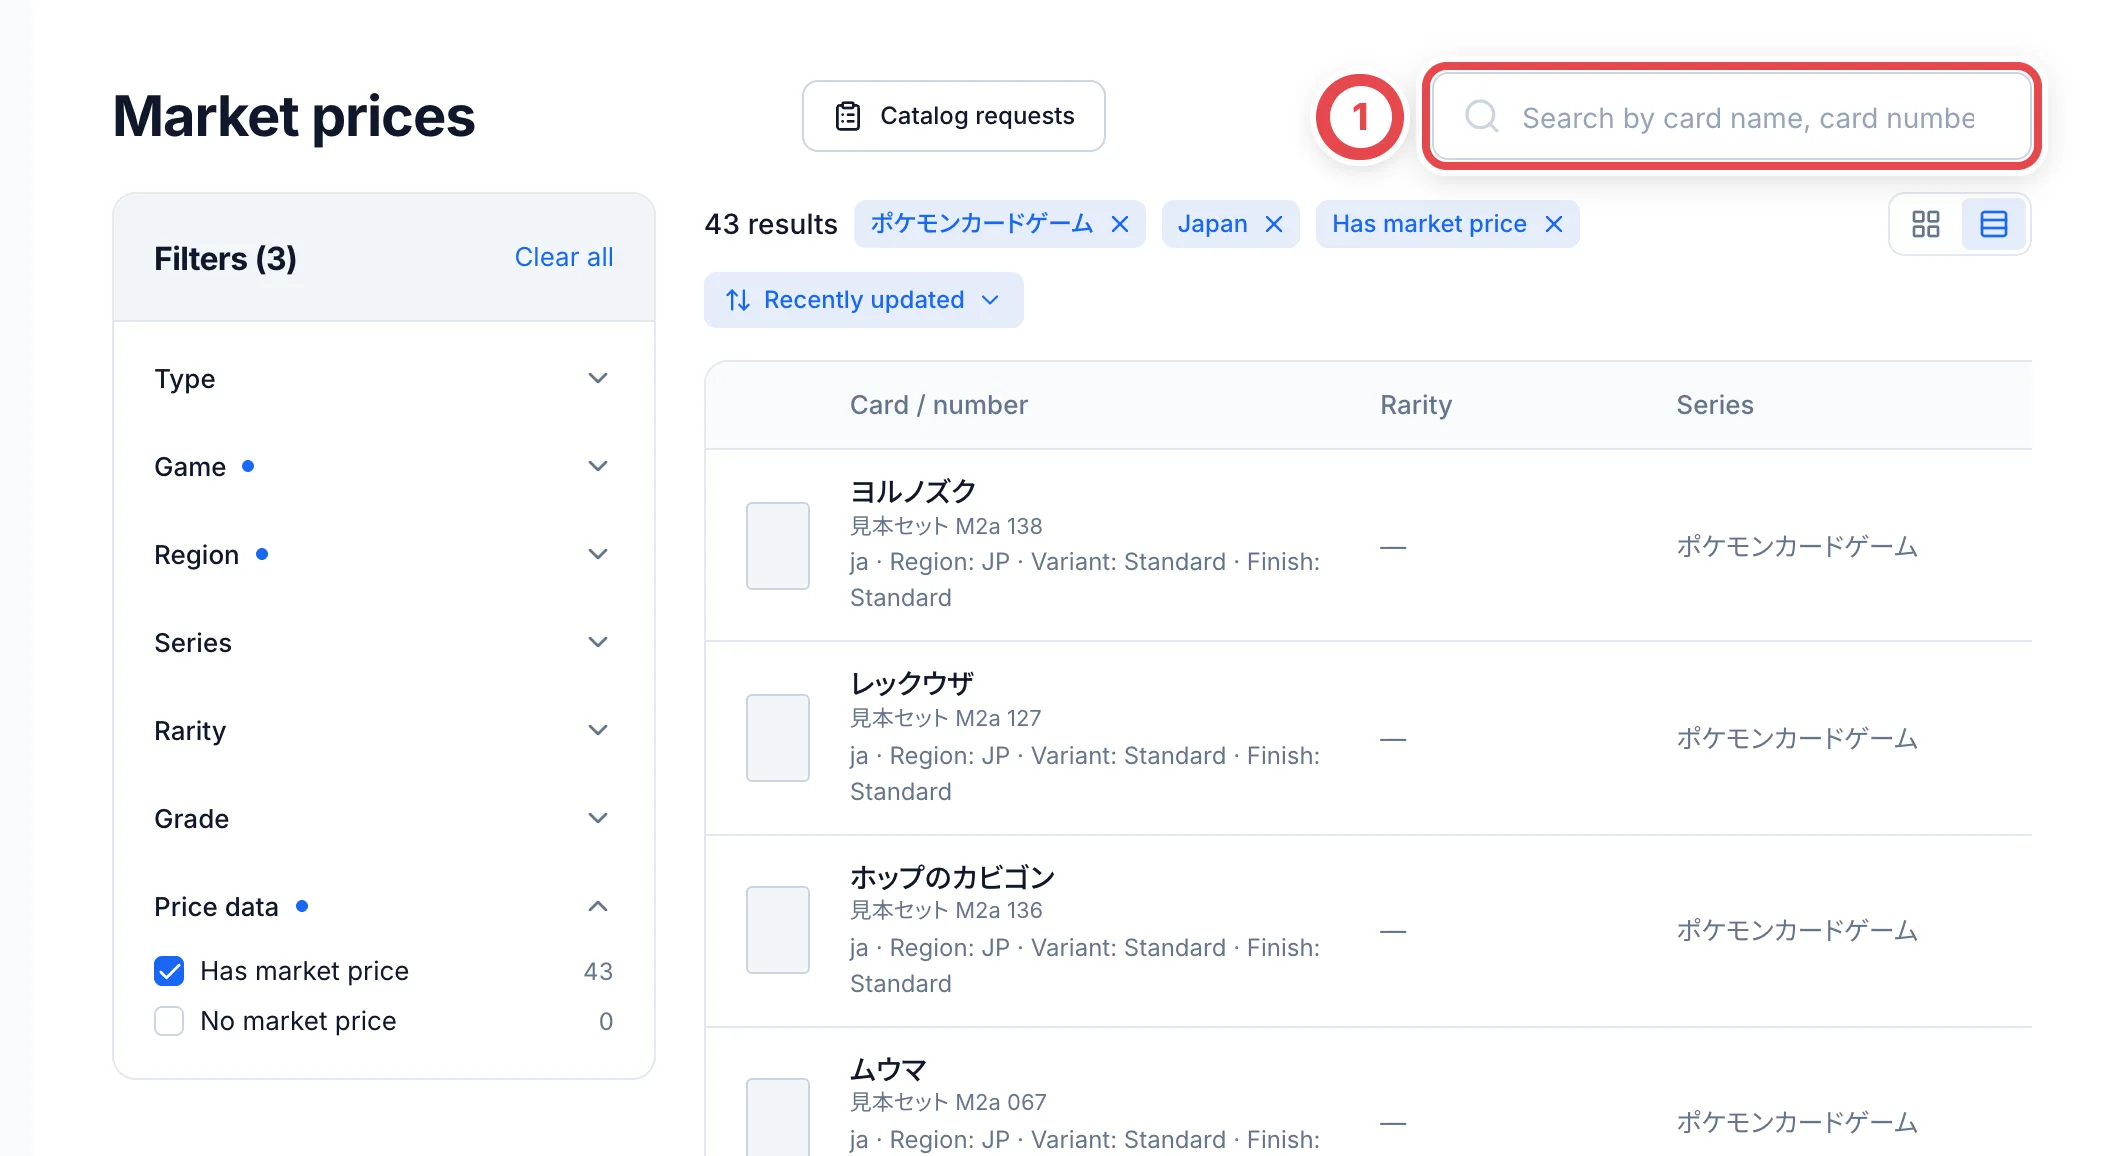 When exact matches are scarce, the screen may say that similar results are also shown. Match the number, set, region and grade to the physical item rather than relying on its name alone.
## 2. Change filters
On an iPad or another narrower staff window, open ① **Filters**. On wide screens, the filters sit to the left of the results.
Choose Type, Game, Region, Series, Rarity, Grade and Price data. A Price range control appears when a range is available. Check the counts and active filter chips above the list. Use a chip's × to remove one condition, or ② **Clear all** to remove them together. Clearing a price range removes both its minimum and maximum.
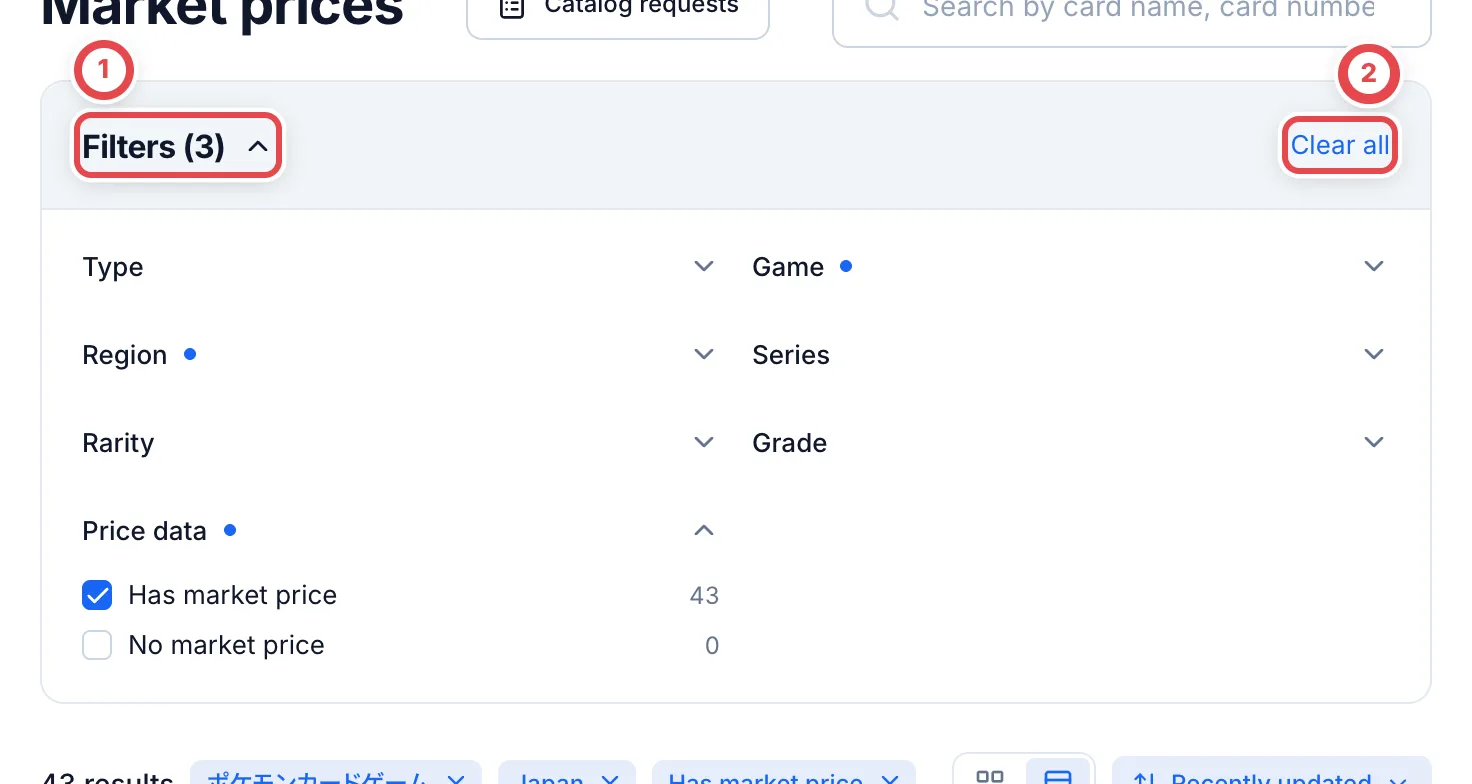 Choose **No market price** under Price data to find unpriced cards. **Clear all** is different from reopening the market without a query: reopening starts with the initial conditions again.
## 3. Check the grade and collection status
Open a product name and check its name, number, set, language and printing. In ① **Buy prices by grade**, check the grading company and grade you need.
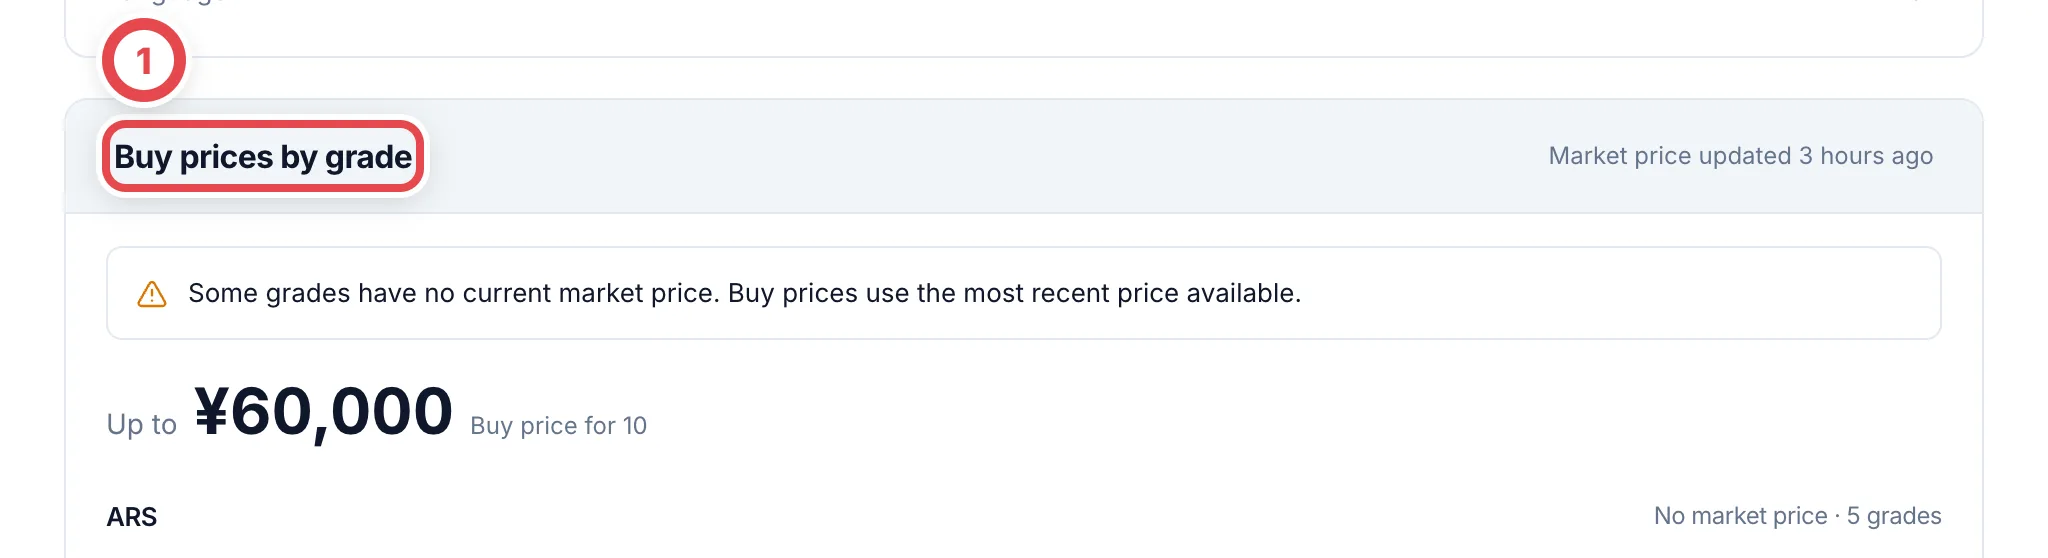
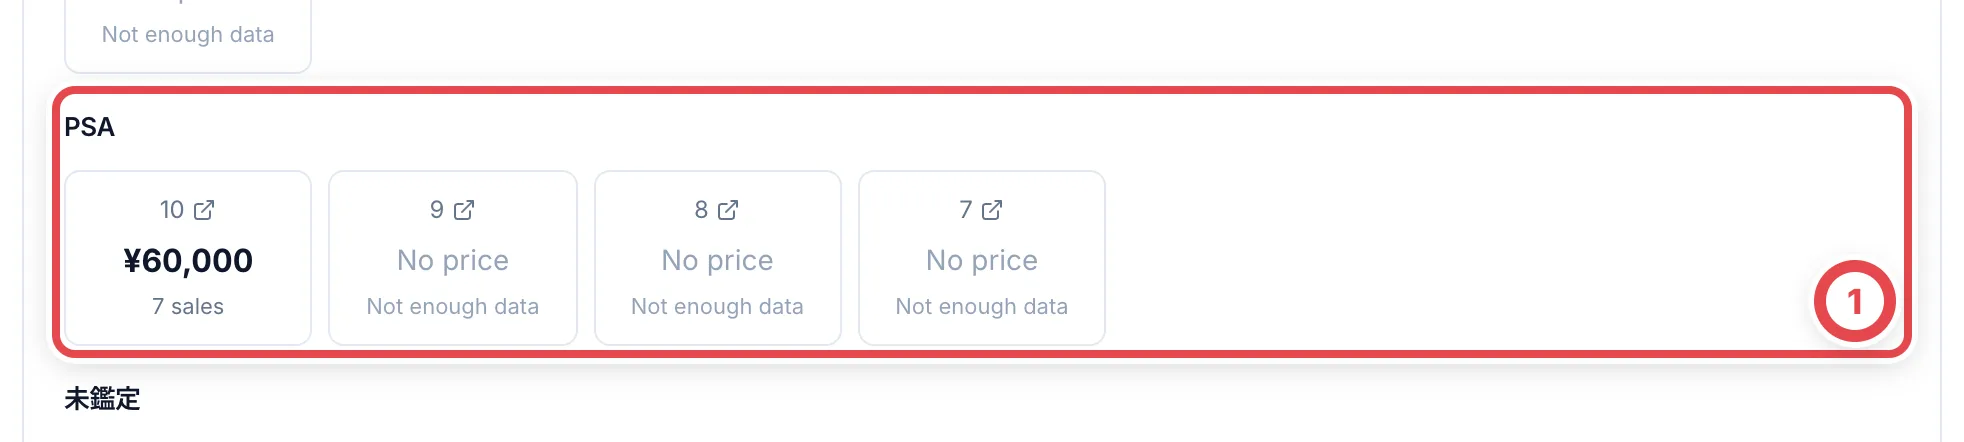 **Not aggregated** means records exist but are not yet used for automatic appraisals. **Not enough data** and **Not fetched yet** do not mean zero yen. If some grades lack a current price, check the notice that the most recent available value is being used. Also review **Price history** and **Fetch history**.
Viewing market prices does not change an appraisal. See [Appraisals and quotes](/en/guides/purchase/appraisal) to apply prices, or [Market research](/en/guides/purchase/research-and-reviews) when a needed price is missing. Use [Product and market corrections](/en/guides/inventory/product-and-market-corrections) for incorrect records.
## Troubleshooting
| What you see | What to check or do |
| ---------------------------------------------- | ------------------------------------------------------------------------------------------------------------------------------------------- |
| A known card is missing | Check the initial Game, Region and Price data filters, type and search term; remove unnecessary conditions |
| A box or pack is missing | Check Type and whether another filter leaves zero results |
| The right side of the table is hidden | Scroll horizontally within the table or use Grid view |
| A dash or insufficient data instead of a price | Check collection status and grade; research or enter a verified price rather than using zero |
| A card is missing from the catalog | See [Catalog requests](/en/guides/purchase/card-registration-requests). **Catalog requests** on the market page also lists pending requests |
---
# Members and roles
Source: https://docs.toreca-cloud.com/en/guides/getting-started/members-and-roles
Invite the staff who work in your shop from **Settings** › **Members**. Each member has a role, and the role decides what they can do.
## Roles
What each role can do is shown in the **Permissions** table at the bottom of the Members page, and your shop can change it. Changes apply to a whole role, not to individual members. The table below shows how roles are set up at the start.
| Role | What they can do |
| ------------------ | ---------------------------------------------------------------------------------------------------------------------------- |
| Owner | Everything. The person who set up the shop is the owner |
| Admin | Everything the owner can, including approving payouts, changing settings and managing members |
| Staff | Day-to-day work on customers, deals, identity checks and inventory. Can't approve payouts, change settings or manage members |
| Staff & researcher | Everything Staff can do, plus answering market research requests |
| Researcher | Mainly answers market research requests. Can only view other business data |
| Viewer | Can only view. Can't change inventory either |
Only roles with the member management permission can invite members, change roles, suspend access or change the Permissions table. At the start, that is the owner and admin. Other members see the page as view only.
To see the finer differences between roles, check **Permissions** at the bottom of the Members page. The rows are actions and the columns are roles, and a role with a check mark can do that action.
## Create your own roles (such as a deputy admin)
When none of the standard roles fits, add a role of your own. Work in the **Roles** section of the Members page.
1. **Add the role**
Click **Add role** and enter the **Role name**. Choose a standard role such
as Admin under **Copy permissions from** to start from its permissions, or
**Don't copy** to start with none.
2. **Adjust its permissions**
The new role appears as a column in the **Permissions** table. Tick and
untick the boxes to decide what it can do.
3. **Assign it to members**
Choose the new role in the **Role** column of the member list.
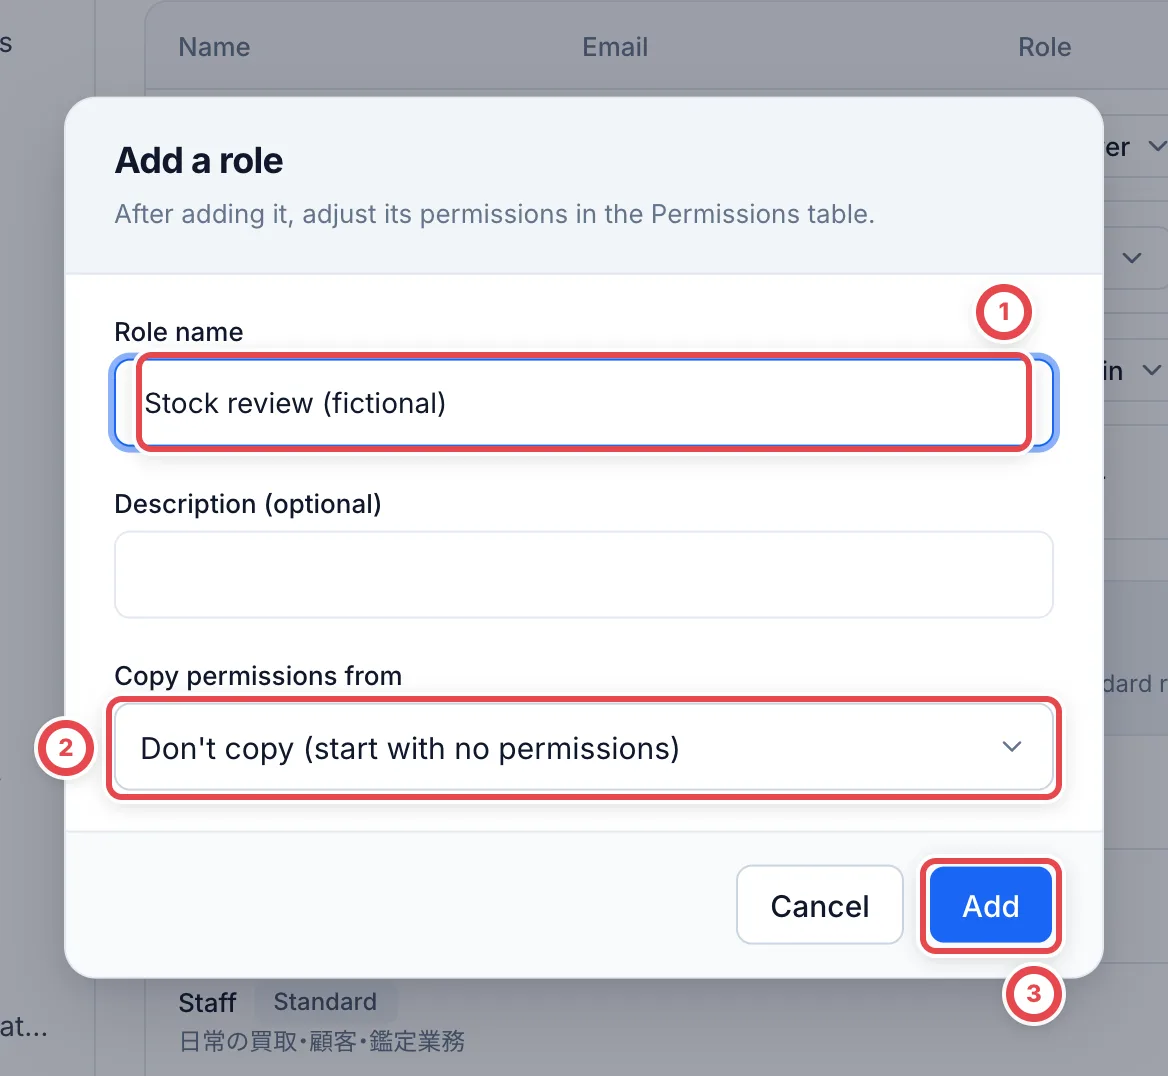 Enter a name at ①, choose which permissions to copy at ②, then add it at ③.
- From a role's **…** menu you can rename it, change its description, move it up or down, or stop it. Only your own roles can be reordered, and the standard roles always come first
- The standard roles (Owner, Admin, Staff, Researcher, Staff & researcher, Viewer) can't be renamed or stopped
- You can't use a standard role's name, or the name of another role
- You can have up to 20 roles of your own
- If a role you stop still has members, choose a role under **Move members to**. They all move together and get that role's permissions. You can't stop the role you have yourself; ask another member to
- Stopped roles are listed under **Stopped roles** and can be restored with **Restore**. A role can't be restored while another role has its name
- Members of a role with member management allowed can invite members and change roles. When you change a role, its members' account type is updated to match the permissions
- Invitations still offer Staff, Viewer and Admin. To give someone your own role, change their role after they join
## Change the Permissions table
Recording acceptance, recording arrival, finalizing the final appraisal, completing a purchase, requesting, approving and waiving a second review, approving payouts and recording their results, and sending and cancelling CloudSign documents can each be given to roles separately. For example, you can allow only admins to approve payouts, or only the owner to waive a second review.
1. **Tick and untick**
In the **Permissions** table, tick or untick the box where a role's column
meets an action's row. The box on a category row switches every action in
that category at once.
2. **Review the changes**
Click **Review and save**. The dialog lists, for each role, the actions you
are allowing and the ones you are not.
3. **Enter a reason and save**
Enter the **Reason for the change** and save. The change takes effect
immediately, and the audit log records what changed and why.
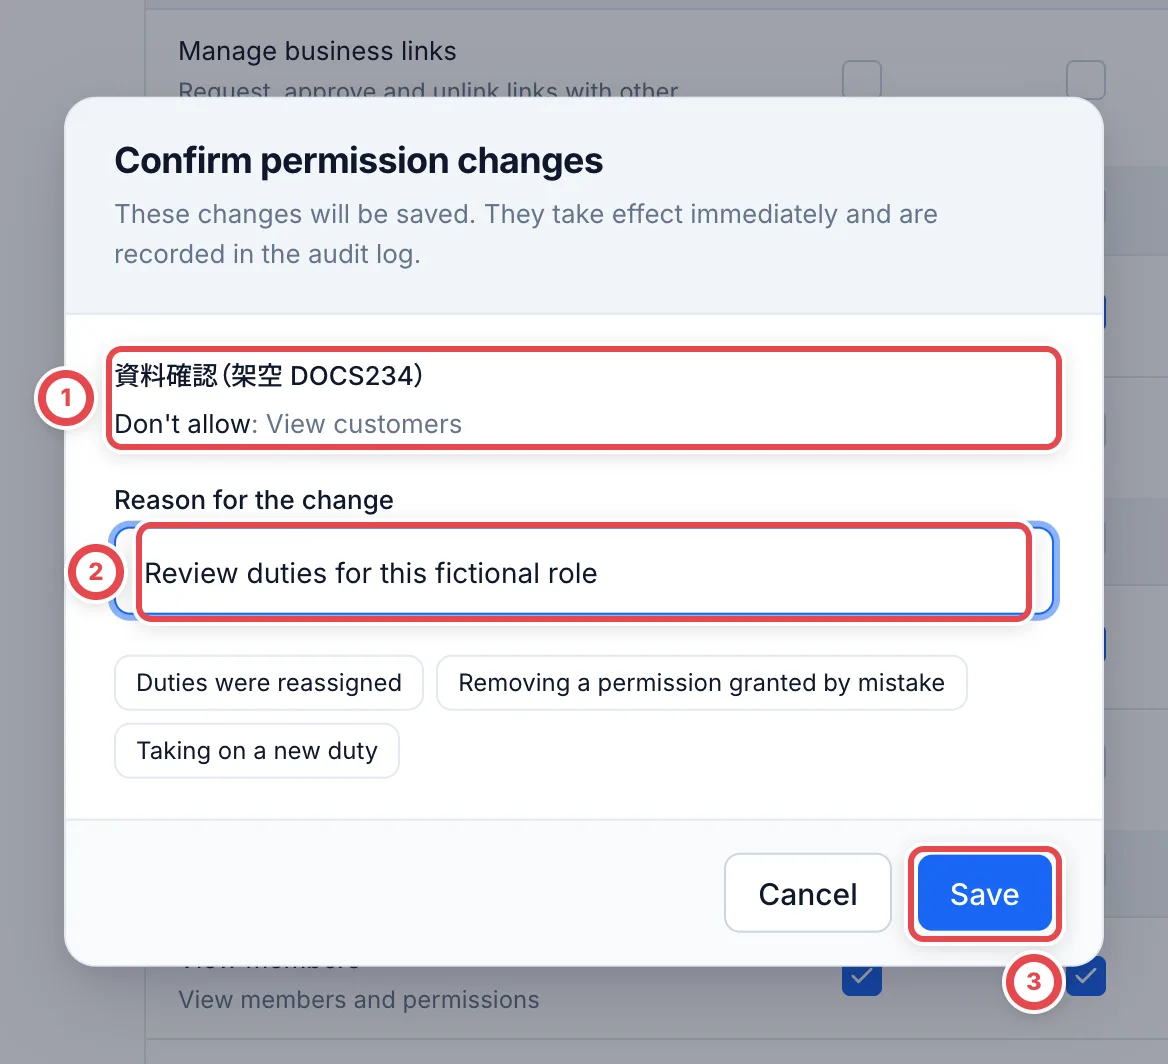 Review allowed and disallowed actions at ①, enter a reason at ②, then save at ③. Nothing changes before saving.
- The owner's column always stays fully allowed and can't be changed
- A role with member management allowed can change this table. A change that would leave nobody able to manage members can't be saved
- If someone else changed the same role first, reload the page and try again
- The permissions to undo acceptance, arrival and the final appraisal start with the owner and admin only. Undo from **Go back a stage…** in the deal's status menu (see [Shipping to final appraisal](/en/guides/purchase/shipping-and-final))
- Permissions for the new actions start with every role that can do the action today, so nothing stops working until you change it
- When an action is unavailable, the screen names the permission it needs
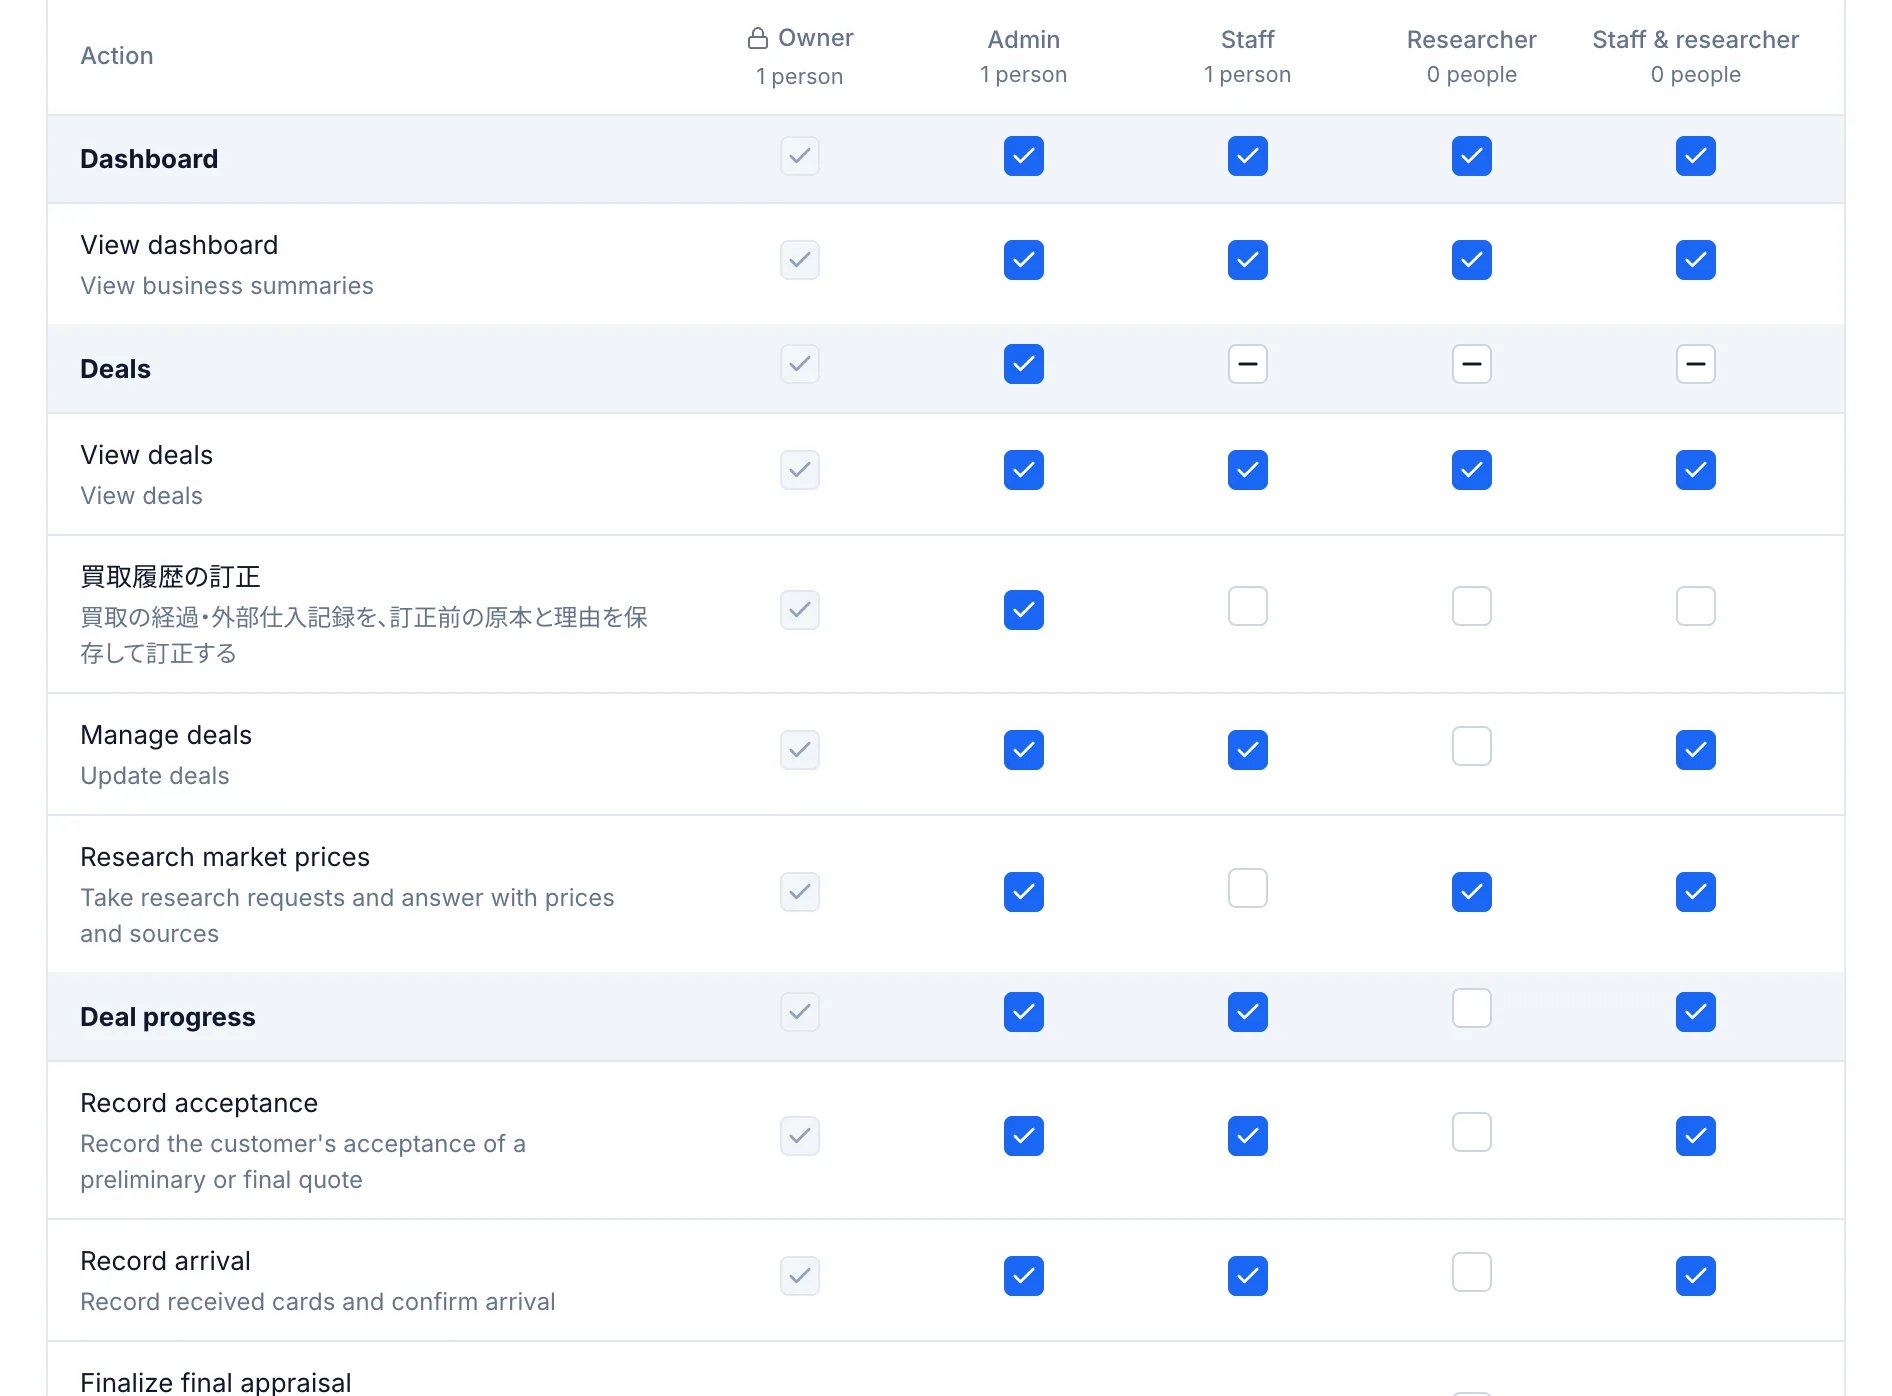 Scroll horizontally within the table to reach roles on its right. The member list can be scrolled in the same way. Some operation names, including purchase-history corrections, currently remain in Japanese in the Permissions table.
## Invite a member
1. **Open the invite dialog**
Go to **Settings** › **Members** and click **Invite member** ①.
2. **Enter an email and role**
Enter the **Email** ②, and choose a **Role** ③: Staff, Viewer or Admin.
Staff is selected by default.
3. **Send the invite**
Click **Send invite** ④. The invitation is emailed and appears under
**Invited** on the page.
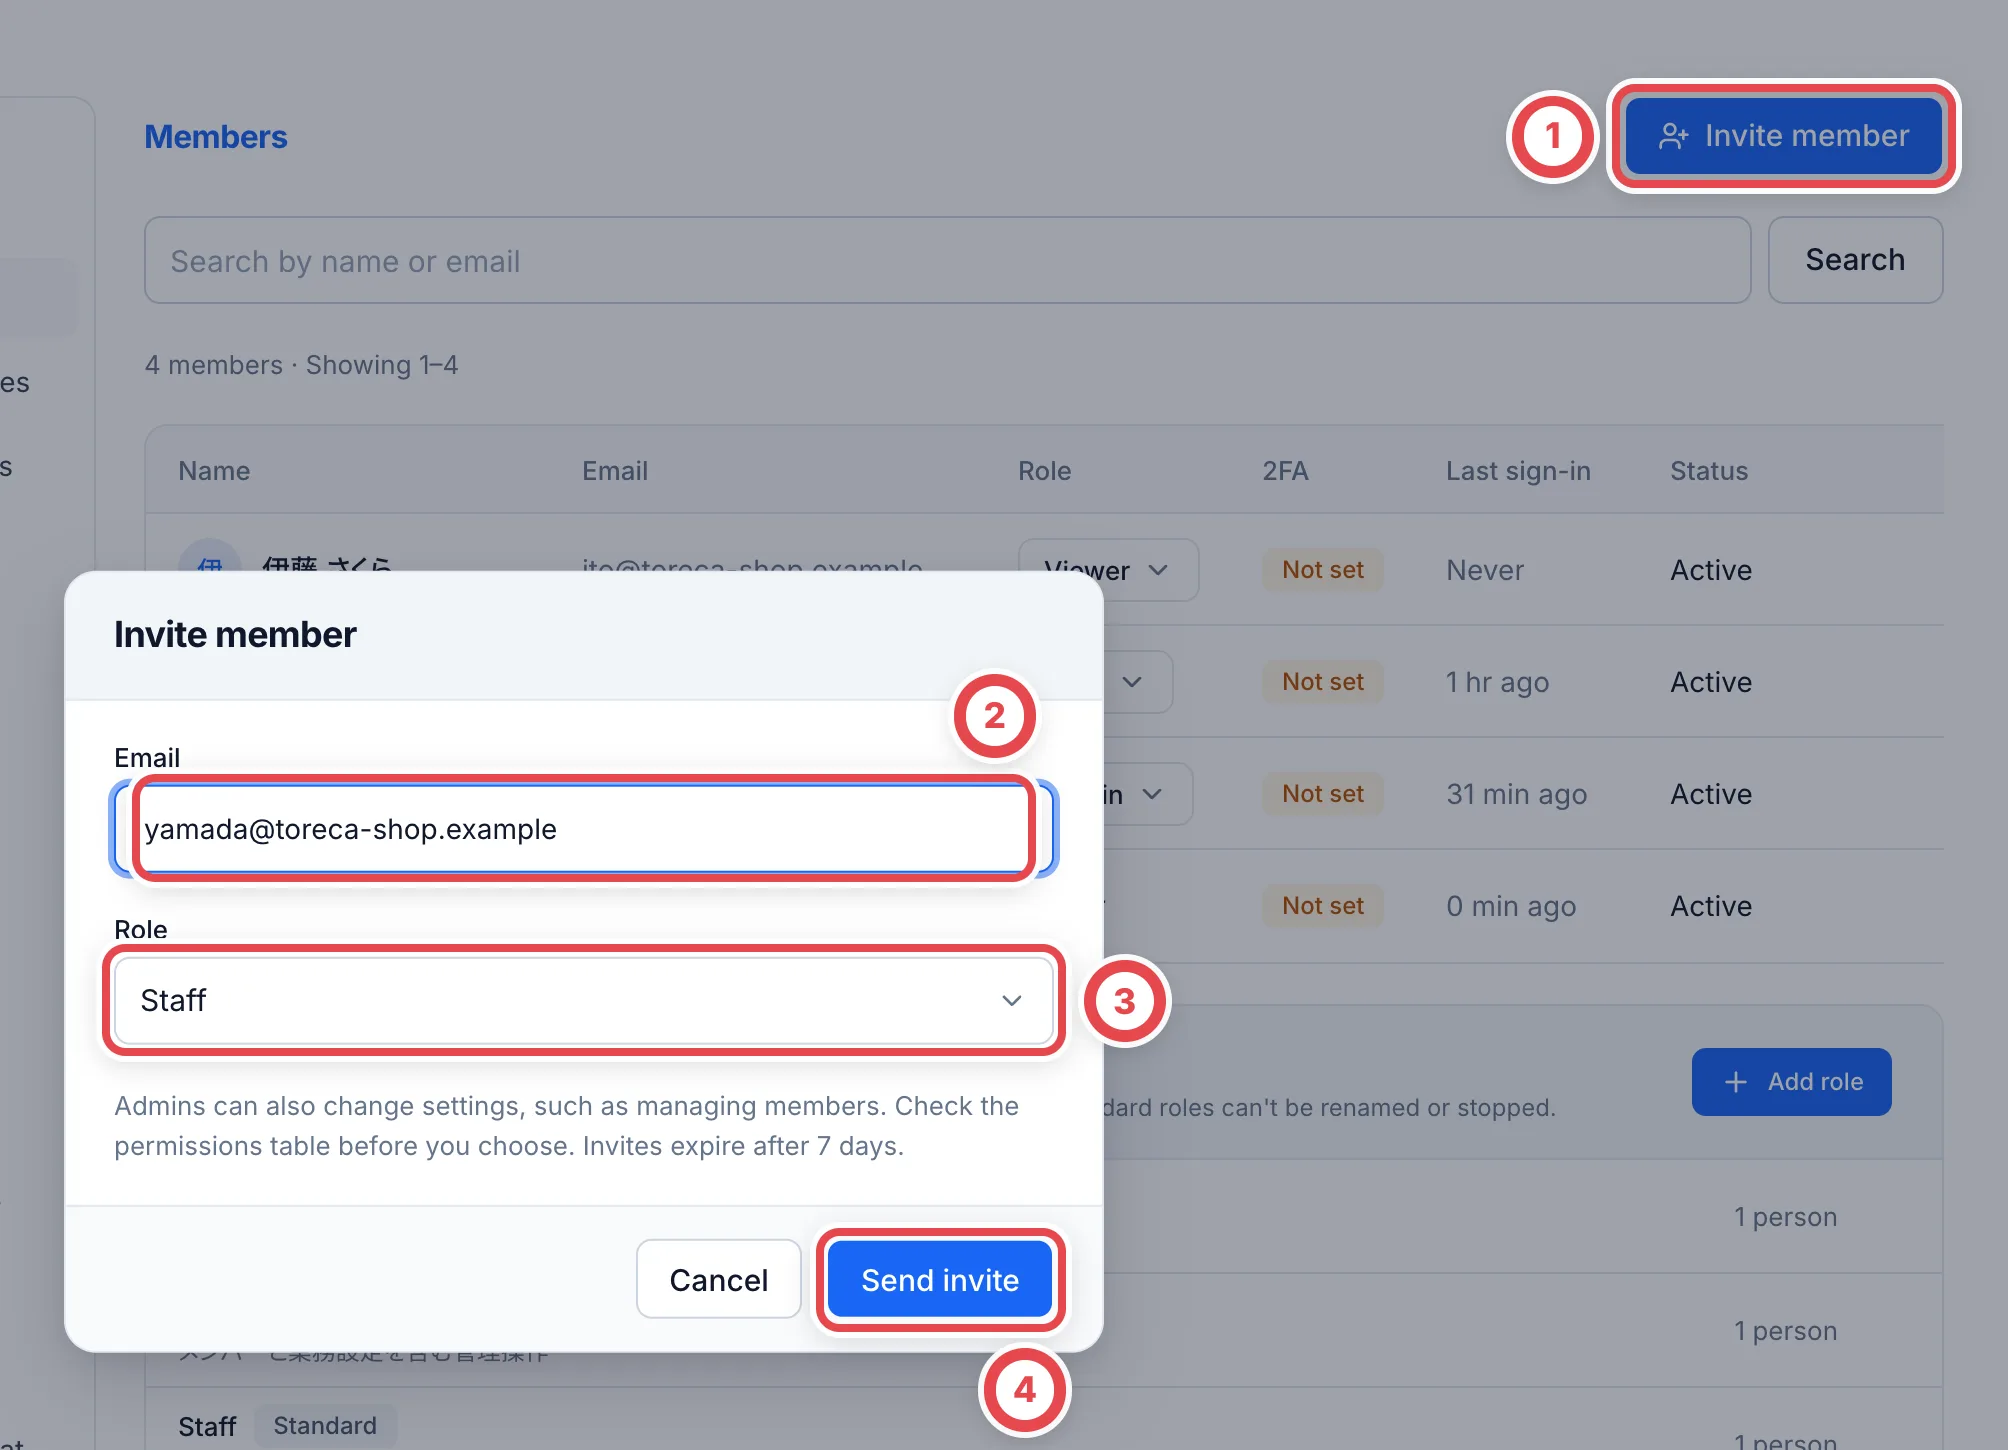 Invitations are valid for 7 days. For an invitation that hasn't been accepted yet, open **…** on its row and choose **Resend invite** or **Revoke invite**. Resending extends the expiry. For what the invited person does, see [Signing in and choosing a shop](/en/guides/getting-started/login).
:::note
Invitations can only be sent as Staff, Viewer or Admin. To make someone a Researcher, Staff & researcher, or give them one of your own roles, change their role after they join.
:::
## Change a role
Pick the new role in the **Role** column ① of the member list. The change applies right away. You can't change the owner's role or your own.
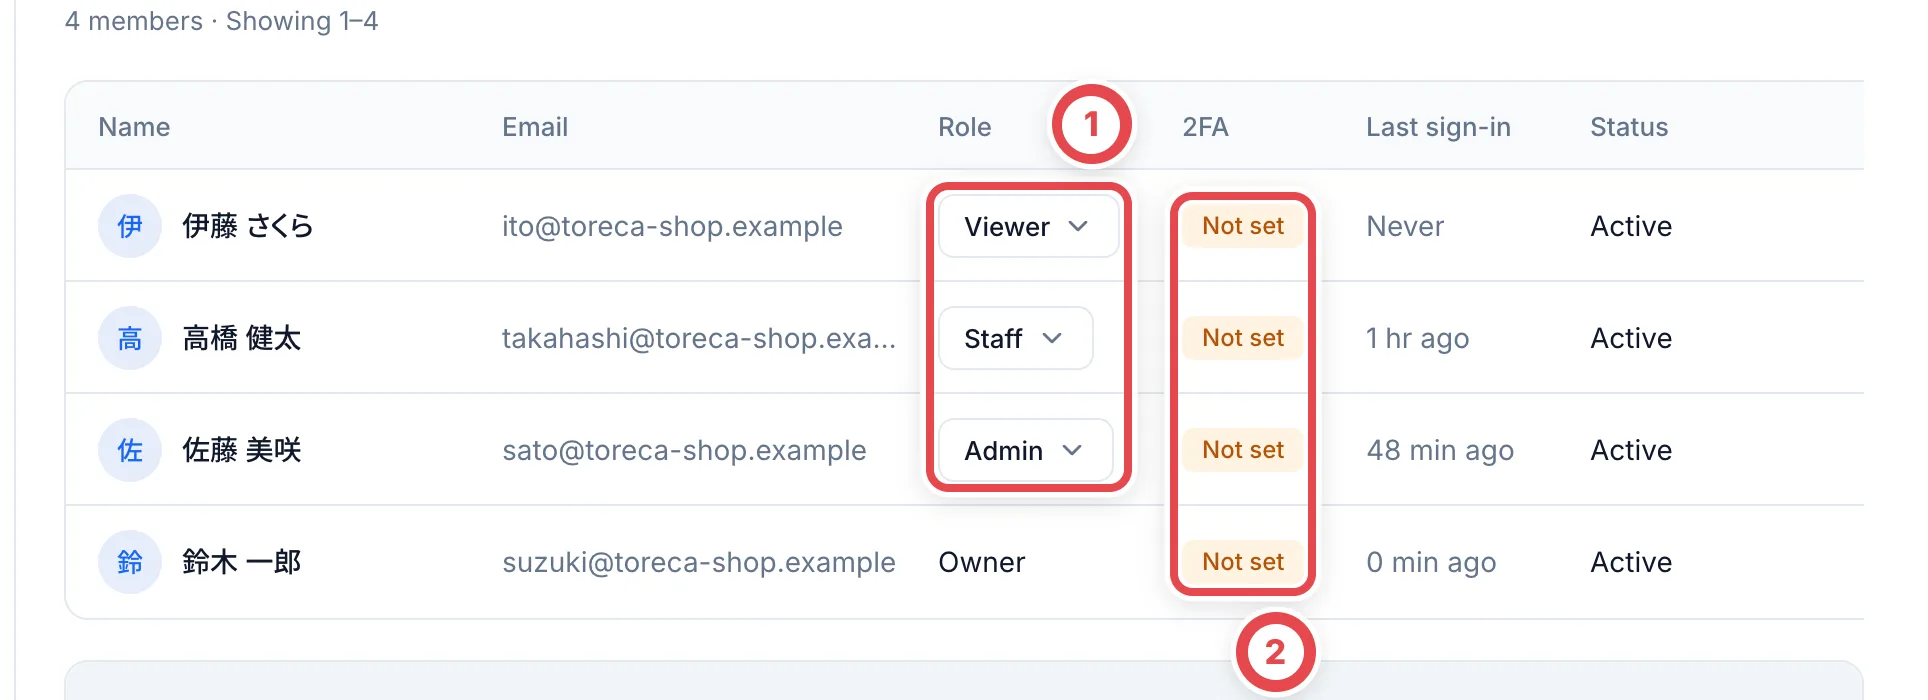 ① changes a member's role. Ask members whose 2FA in ② shows Not set to set it up.
## Suspend access
When someone stops working with you, suspend their access instead of deleting them.
1. **Choose to suspend**
Click **⋯** ① on the member's row and choose **Suspend access** ②.
2. **Enter a reason and confirm**
Enter a **Reason** and confirm. Once suspended, they can't use this shop's
console, API or MCP.
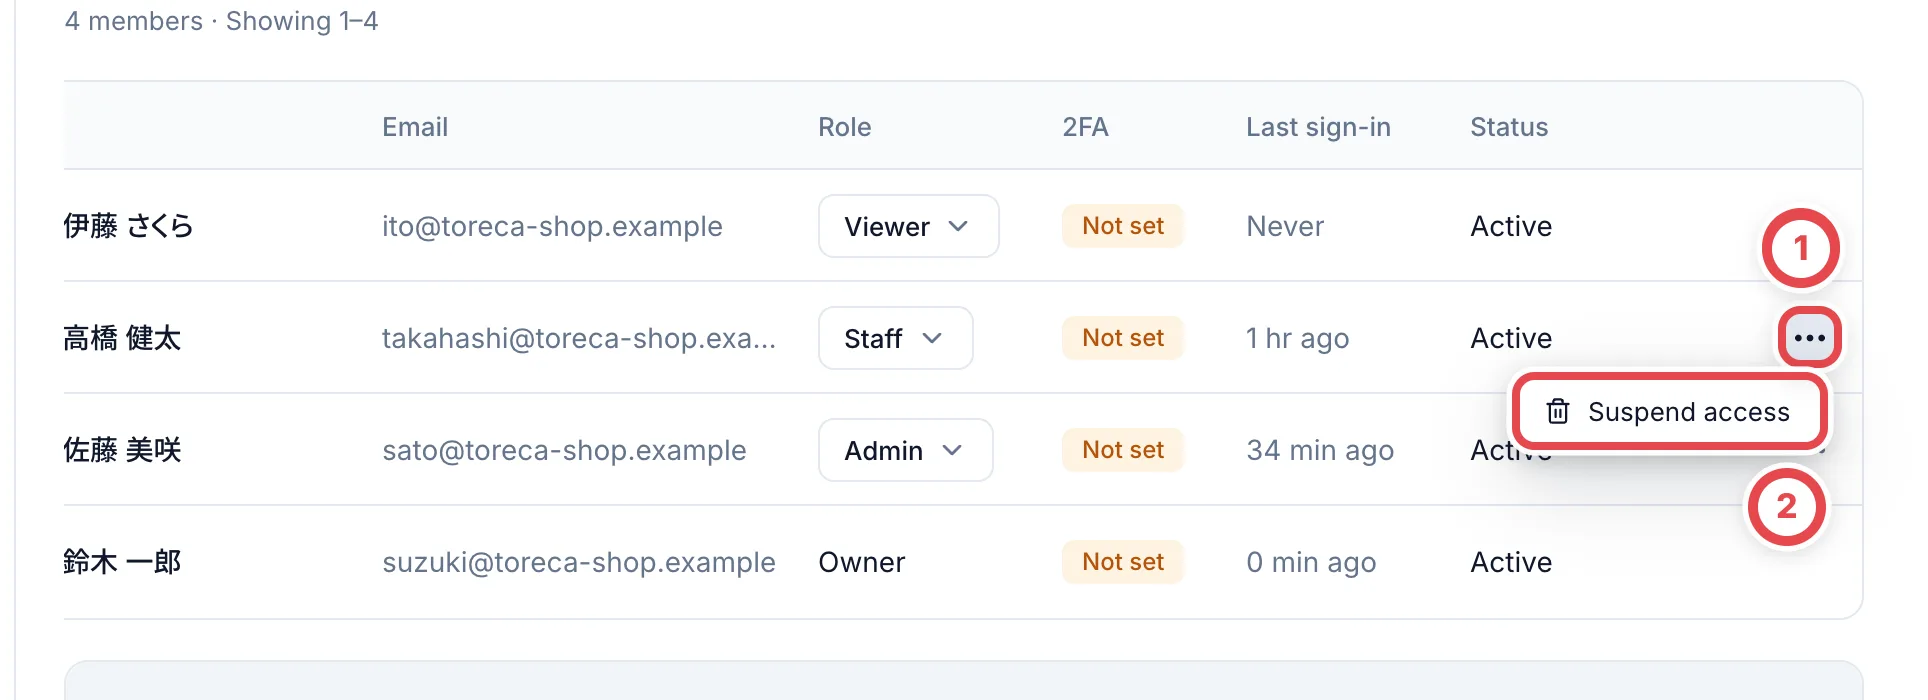 The records they left behind stay. Their cases aren't reassigned automatically, so have another member take them over as needed. To let them back in, choose **Restore access** from the same menu. You can't suspend the owner or yourself.
## What the member list shows
The list shows each member's name, email, role, two-factor status, last sign-in and status. Encourage members whose 2FA shows **Not set** to set it up; the steps are in [Signing in and choosing a shop](/en/guides/getting-started/login).
## Troubleshooting
| What's happening | What to check and how to fix it |
| ---------------------------------------------- | ----------------------------------------------------------------------------------------------------------------- |
| You can't click or don't see **Invite member** | Only roles with member management can invite members (owner and admin at the start) |
| You can't pick Researcher when inviting | Invitations can only be sent as Staff, Viewer or Admin. Change the role after they join |
| You invited someone but they can't join | Invitations are valid for 7 days. Open **…** on the row and choose **Resend invite** |
| You can't change the owner's or your own role | The owner's role and your own role can't be changed |
| You want to remove staff who left | Members can't be deleted. Choose **Suspend access**. Their records stay, and you can use **Restore access** later |
---
# Set up a Brother QL-820NWBc
Source: https://docs.toreca-cloud.com/en/guides/inventory/brother-printer
Toreca Cloud creates a PDF. Print it through the operating system's print dialog or send it directly with the print app. First check that the printer works on its own.
 [Photo source: Brother official product page](https://www.brother.co.jp/product/labelprinter/ql820nwbc/index.aspx)
To print without opening each PDF, see [Install and use the print app](/en/guides/inventory/desktop-print-app).
## Check the roll first
The QL-820NWBc uses DK labels and tape. Check the part number against the [official supplies list](https://www.brother.co.jp/product/labelprinter/ql820nwbc/accessory/index.aspx).
### Using DK-2210
[Brother specifies DK-2210](https://direct.brother.co.jp/shop/g/g5V791C2F251/) as continuous paper tape, 29 mm wide and 30.48 m long. It has no individual die-cut labels.
Select **Brother DK-2210 (29 × 50 mm)** in Toreca Cloud. The PDF is 29 mm wide with a 50 mm feed length, one label per page. The artwork already follows the feed direction; do not rotate the PDF manually.
| Setting | Value |
| ------------ | -------------------------------------------------- |
| Driver paper | 29 mm continuous tape (DK-2210) |
| Feed length | 50 mm |
| Orientation | Portrait; no PDF rotation |
| Scale | Actual size (100%); no fit-to-page scaling |
| Cutting | Auto Cut off; Cut at End on for a continuous strip |
The finished paper, viewed horizontally, is **50 × 29 mm**. Text and QR codes occupy a 25 × 44 mm safe area: 2 mm from each tape edge and 3 mm from each cut. The QR body is 17 mm.
[Brother's official print-area reference](https://download.brother.com/welcome/docp100306/cv_ql820_eng_escp_101.pdf) specifies approximately 25.9 mm of printable width on 29 mm continuous tape. The PDF does not draw across the full 29 mm width.
:::note
New prints offer DK-2210, A4 65-up and A4 24-up. The older 50 × 25 mm roll preset is hidden from normal choices, but existing batch PDFs remain available. Choose **Brother DK-2210** for this tape. Existing PDFs keep their original format. Reprint the same label numbers on the new paper; you do not need to reissue numbers.
:::
## 1. Prepare the printer
### 1-1. Open the cover
Turn the printer off and lift the front DK roll cover. On first use, also remove the platen protection sheet and clock battery insulation sheet.
 ### 1-2. Fit the DK roll
Fit the spool arms into the guides securely. Match the roll orientation to the diagram.
 ### 1-3. Feed the leading edge through the output slot
Feed the tape through the label output slot until its edge reaches the end of the slot. Close the cover, then connect the AC adapter and power cord.
 Diagram source: [Brother official FAQ: Load or replace a DK roll](https://faq.brother.co.jp/app/answers/detail/a_id/11034) (Japanese). Brother lists the QL-820NWBc among the supported models. See the [Quick Setup Guide](https://download.brother.com/welcome/docp100285/ql820nwb_jpn_qsg_d017p8001_02.pdf) for the complete setup.
Brother directs QL-820NWBc owners to the QL-820NWB manuals. Read the [model differences](https://download.brother.com/welcome/docp100714/d02jdw001a_balder_insertion_ql_jp.pdf) too: the c model has no USB host port and does not support ad-hoc Wi-Fi.
## 2. Install the software
Open [Brother's software downloads](https://www.brother.co.jp/download/software/index.aspx), select QL-820NWB/820NWBc, and choose your exact Windows or macOS version. Check support and install the software offered for that OS. Connect the printer when prompted by the installer.
P-touch Editor can help check the printer connection. For stock labels, use the PDF generated by Toreca Cloud.
## 3. Connect the computer
For USB, follow the installer prompts to connect the computer to the printer's rear USB port and turn it on. Confirm it appears in the OS printer list.
For store Wi-Fi, prepare the router, SSID, password and a USB cable. In the driver installer, choose wireless networking, then choose the option to use a USB cable for setup. Complete the network configuration and disconnect USB when prompted. Confirm the computer can reach the printer over the store network.
**The QL-820NWBc does not support WPS connection.** Use the [official Wi-Fi instructions](https://faq.brother.co.jp/app/answers/detail/a_id/13471/related/1), including the Windows/Mac videos and WPA3 instructions.
For wired LAN, connect the rear LAN port to the store network and follow the wired-network section of the [Quick Setup Guide](https://download.brother.com/welcome/docp100285/ql820nwb_jpn_qsg_d017p8001_02.pdf).
## 4. Check the printer separately
Print a sample from P-touch Editor or another application, using the paper setting for the installed roll. Resolve connection, feeding and paper errors before testing stock labels.
## 5. Check the Toreca Cloud test PDF
1. Under **Settings** › **Label printing**, open the test PDF for **Brother DK-2210**.
2. Select the QL-820NWB/820NWBc, 29 mm continuous tape, length 50 mm, portrait, Actual size (100%), and, for a continuous strip, Auto Cut off and Cut at End on.
3. Measure the 40 mm scale. The frame is 25 mm across the tape and 44 mm along the feed direction. Check for clipping.
4. If size is correct and only position is wrong, adjust X/Y and save (0.1 mm steps, up to ±3.0 mm). X moves right and Y moves down on the PDF. Large offsets can move content outside the printable area; test small changes first.
5. Choose **Brother DK-2210** in the stock label dialog and print a small batch. Check two consecutive labels for cut alignment and scan both QR codes with the putaway app before printing in bulk.
See [Putaway and QR labels](/en/guides/inventory/putaway) for creating and reprinting PDFs. The start position is always 1.
A PDF cannot force driver paper or cutting settings. Set them as above and check feeding, cuts and QR scanning on the actual printer.
## Troubleshooting
| Problem | Check |
| ---------------------------------- | --------------------------------------------------------------------------------------------- |
| Wi-Fi setup fails | Do not use WPS on the c model. Check credentials and complete USB-assisted setup |
| Paper error | Match the roll and driver settings. Do not use TD-series paper registration instructions |
| No 50 × 25 mm option | Choose Brother DK-2210 in Toreca Cloud and 29 mm continuous tape, length 50 mm, in the driver |
| Content shrinks or clips | Check scaling, paper dimensions, orientation and printable area |
| Printing failed after PDF creation | Reprint the batch with the same label numbers; reissuing numbers is unnecessary |
Setup is not verified until the physical print and QR scan checks succeed.
## Print about ten labels as one strip
1. Select the units in **Inbound**, then open **Print QR labels**. The initial arrival-date filter now includes all dates.
2. Choose DK-2210 and match the certificate numbers, asset numbers and positions in **Print order and item matching**. Identical card names still appear as separate units.
3. With print app 0.1.5 or later, select **Print a connected strip**. Both Mac and Windows use a network-connected QL-820NWB with DK-2210. When printing the PDF in another app, turn **Auto Cut** off and **Cut at End** on in that app's print settings.
4. Submit once. The desktop app sends all PDF pages as one job and cuts only at the end. Connected-strip printing is limited to 200 labels in one PDF; separate PDFs are not guaranteed to stay connected.
5. Match the paper count, `#001/10` sequence, label code and certificate to the batch details. An item detail opened from a batch offers **Back to print batch**.
The QL-820NWB cutter is a full-cut type. DK-2210 is continuous tape without perforations; these settings do not add half-cuts or tear lines. Use scissors to separate the strip.
The desktop app sets the output mode for this job without changing the OS defaults. Check one label, ten labels and the output after a printer restart on each PC you use. If submission is uncertain or printing stops partway, inspect the printer, OS queue and paper first. Reprint from the existing batch instead of issuing new label numbers.
Sources: [Brother's continuous-printing instructions](https://help.brother-usa.com/app/answers/detail/a_id/144132/~/chain-or-continuous-printing-and-not-cutting-every-label), [official QL specifications (full cut)](https://www.brother.eu/-/media/product-downloads/devices/nordics/eu_en/labelling-machines/ql_800_leaflet_english_single_pages.pdf), and [QL-820NWB media](https://www.brother.co.jp/product/labelprinter/ql820nwb/accessory/index.aspx).
---
# Correct selected units from a card’s stock page
Source: https://docs.toreca-cloud.com/en/guides/inventory/corrections
To correct a name or number across a product’s stock, use [shop product and valuation corrections](/en/guides/inventory/product-and-market-corrections). For purchase amounts and quantities, use [the originating purchase case](/en/guides/purchase/amount-and-quantity-corrections).
From a card’s stock page, select units and correct their location, grade or card identification. Inventory editing permission is required.
Grade/card corrections here apply to units created by inventory receipts. Purchased units must be corrected through the originating purchase case. Different sources are not interchangeable.
## 1. Select exact units
Open a card from inventory. Select units at ①. For grouped rows, press the row to open it and inspect labels, states and shelves, then select only the intended units. Check the action bar’s count at ②. Review the scope even after using Select all.
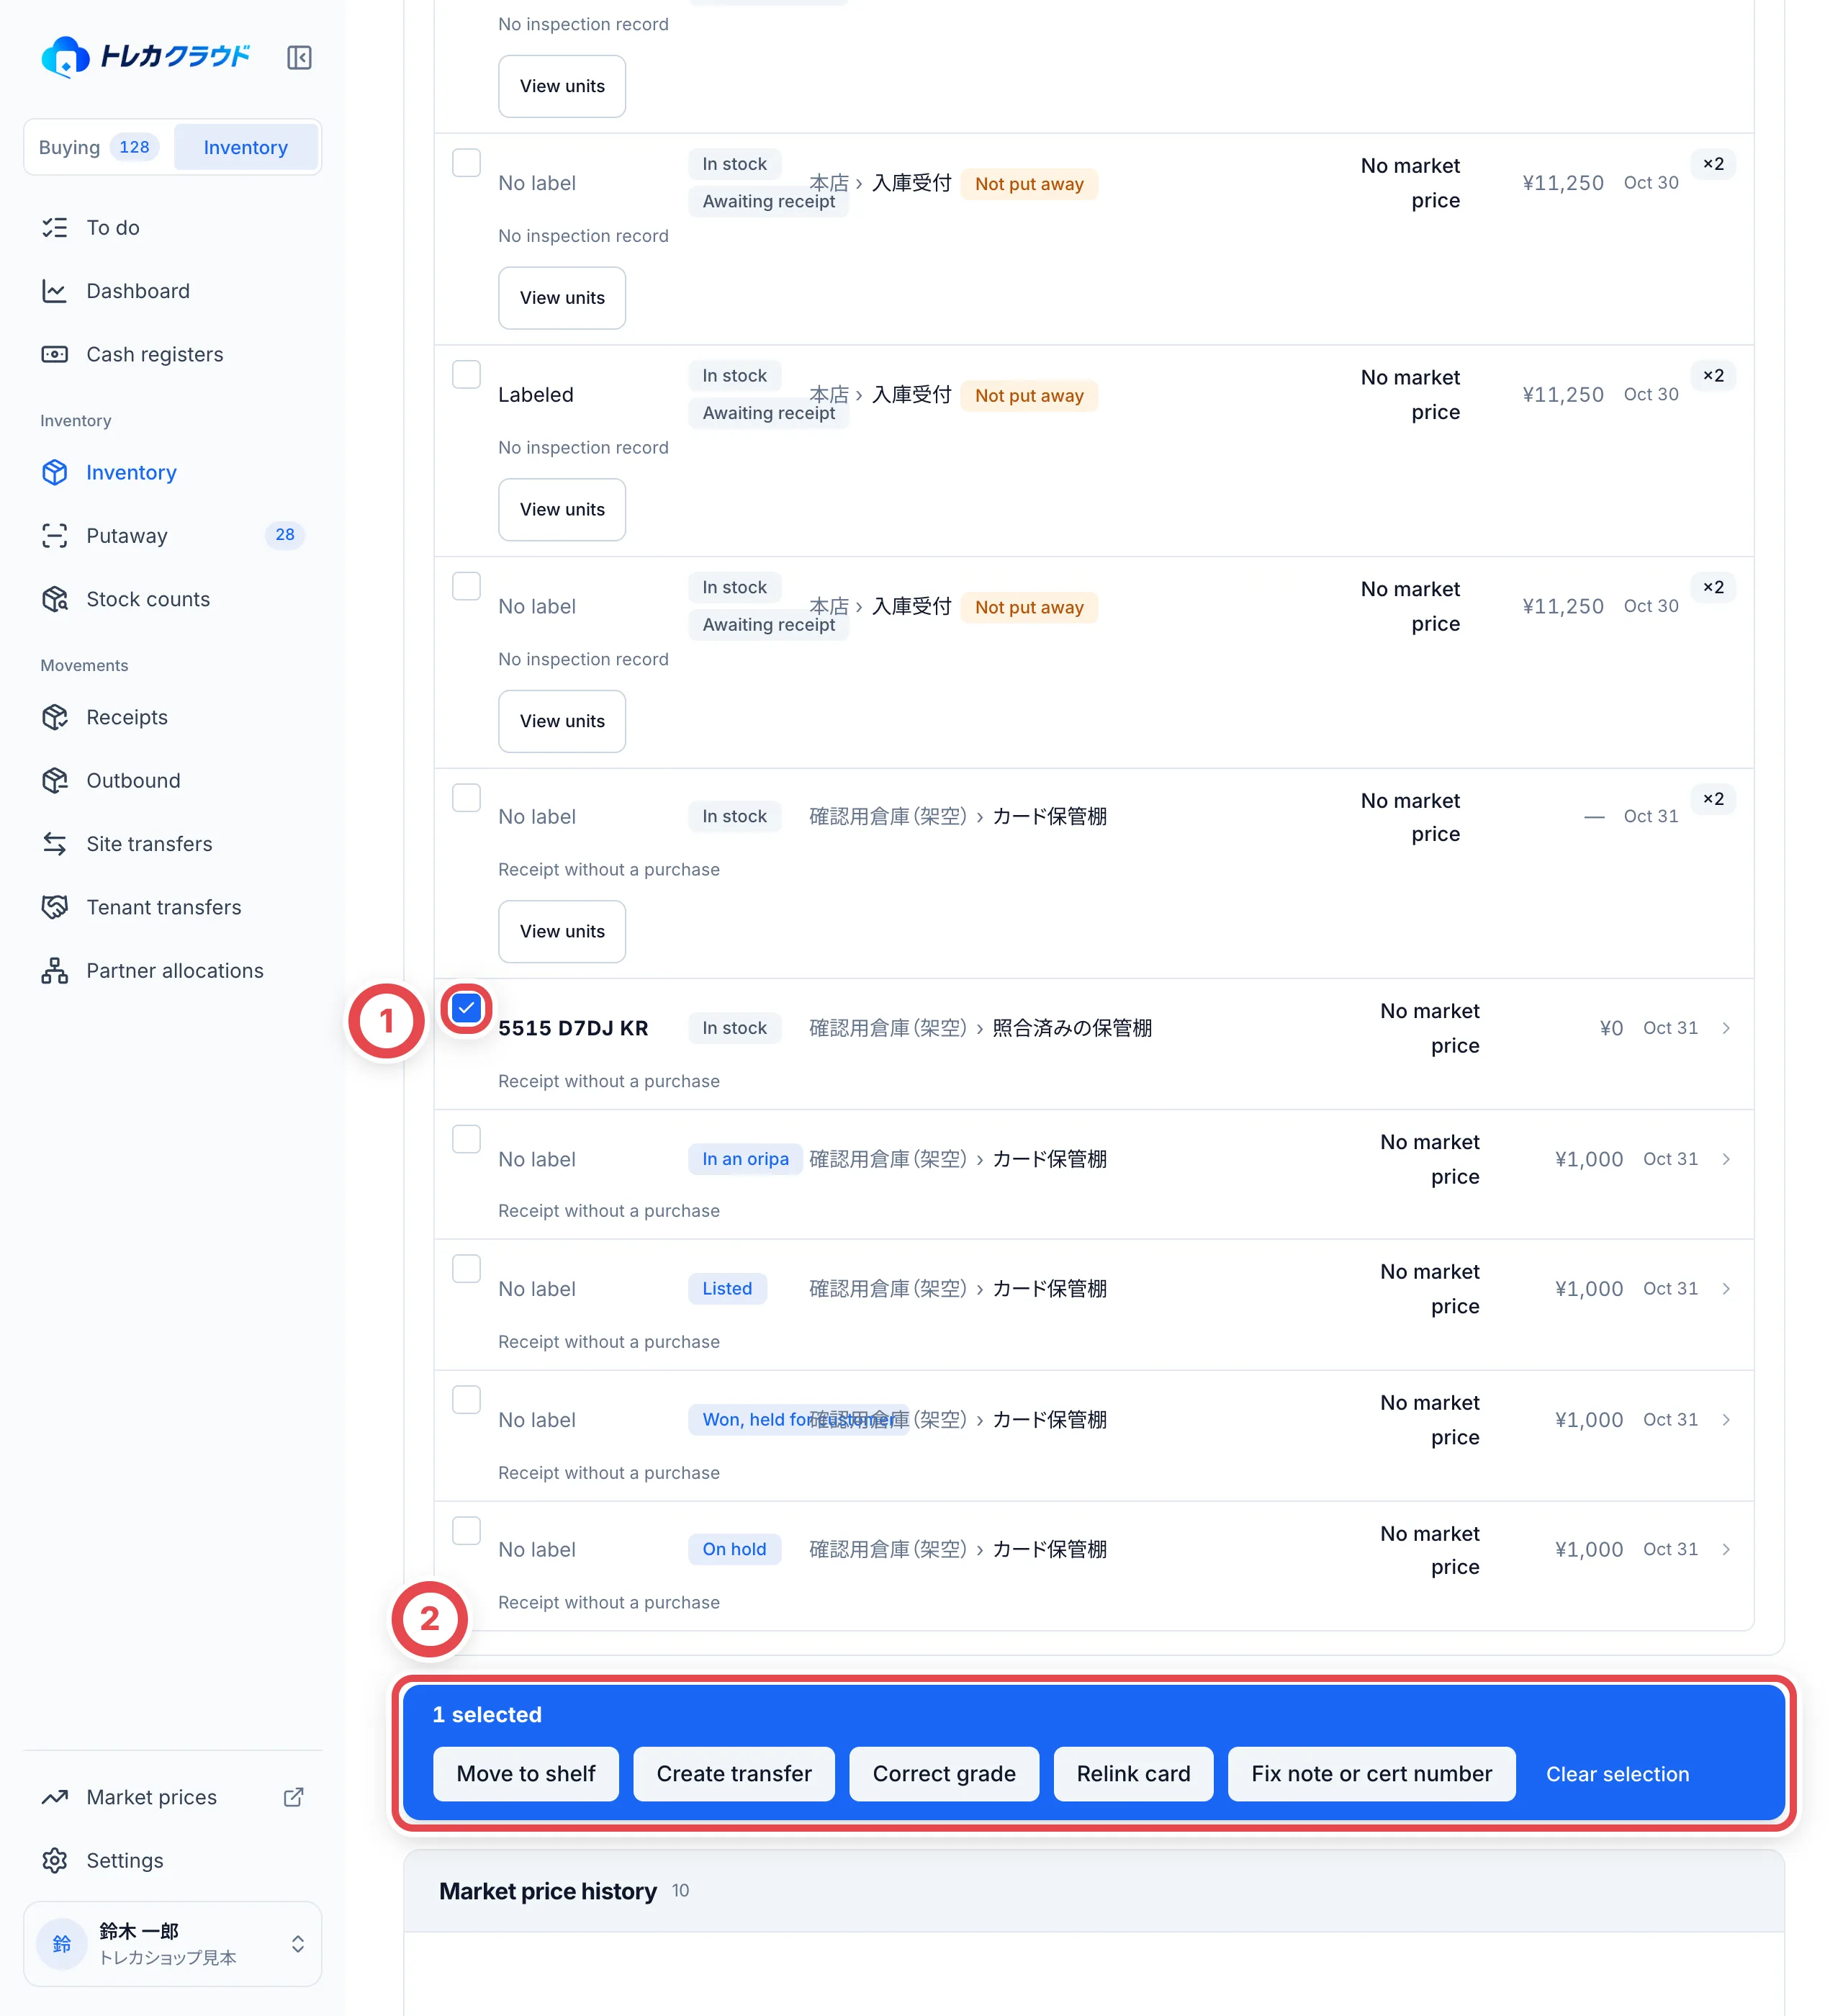 ## 2. Move their location
Open the shelf-move action at ① and specify the destination and reason. Verify the current location and count before confirming. A movement to another site uses a site-transfer order and its receipt process. Selecting a destination does not physically move cards. Reload the card/unit and verify location and history.
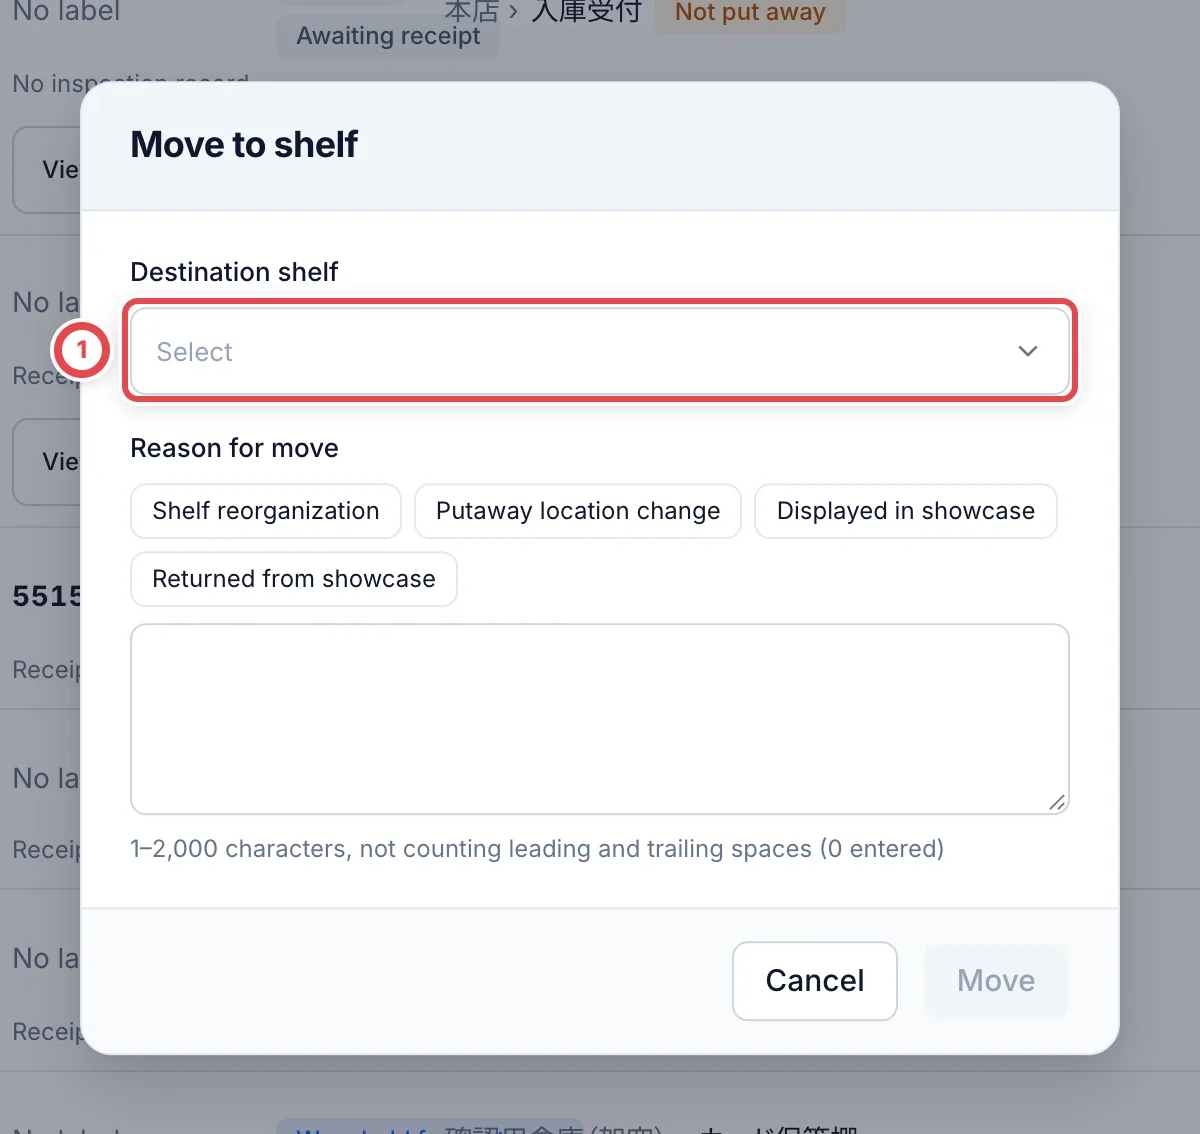 ## 3. Correct a grade
Open the grade-correction action. Select the correct grade and any required certification number at ①. Supply the reason at ② and verify the selected units before saving. Match external grader numbers to the physical slab. Moving back to an internal shop grade does not retain an external certification number.
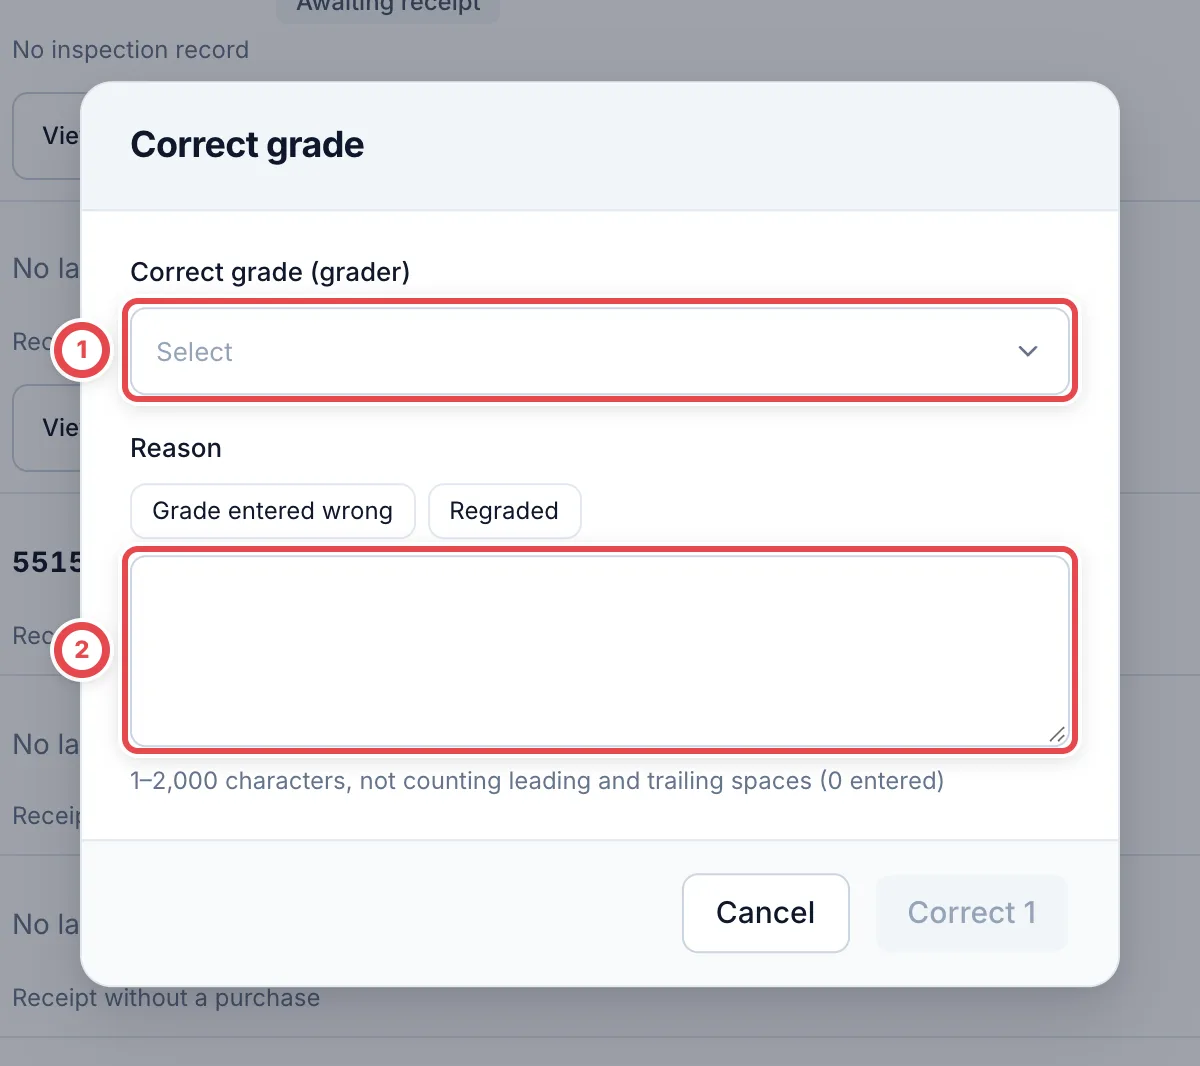 ## 4. Relink to the correct card
Open the card-relink action. Choose the correct card/printing at ① and add the reason at ②. Confirm that only the selected units will change. Afterwards, inspect the target card’s stock and each unit’s history. If labels need reprinting, use [Putaway and QR labels](/en/guides/inventory/putaway).
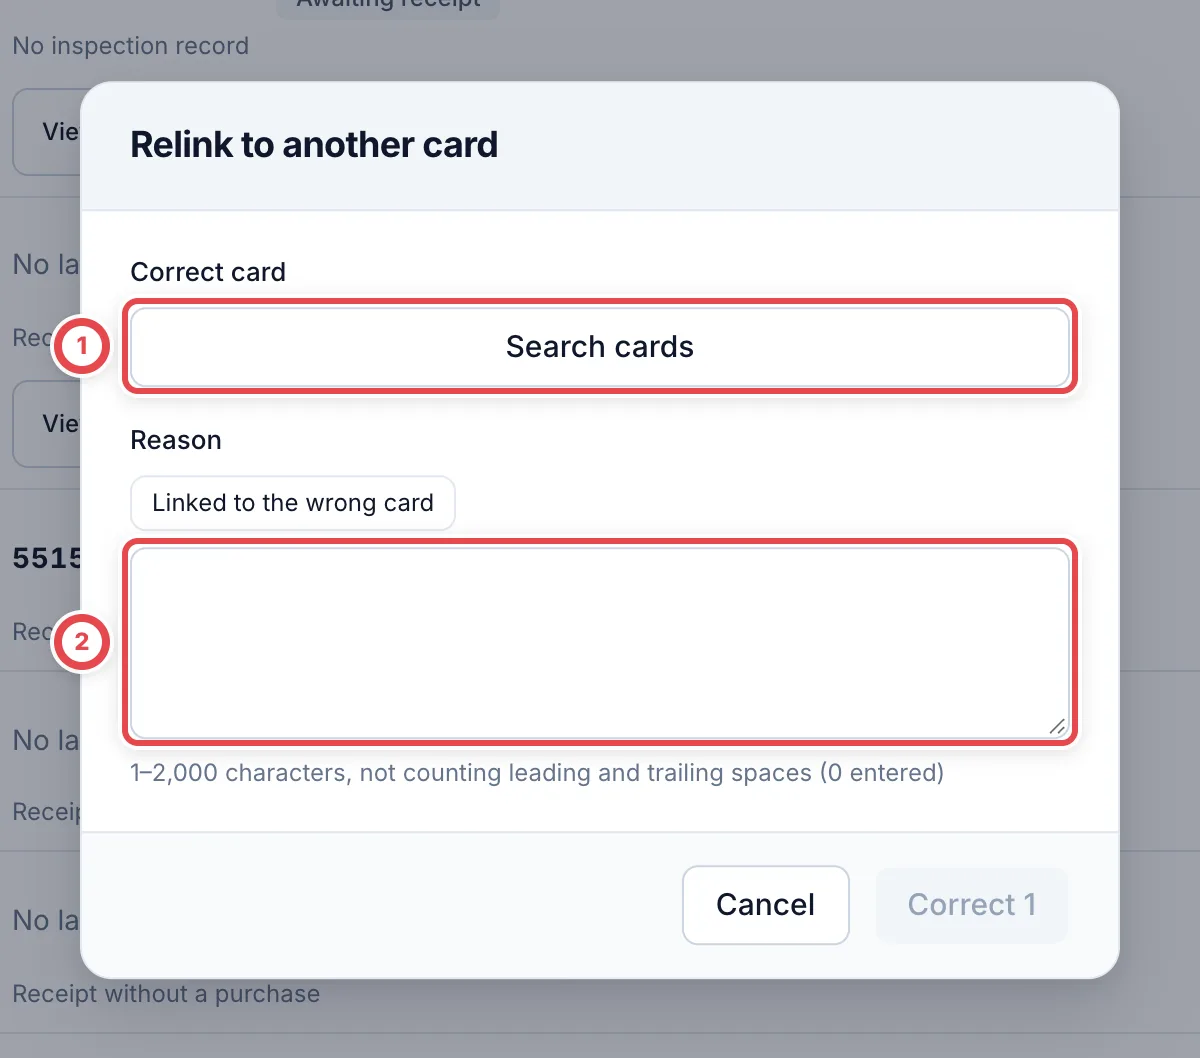 ## 5. Correct the condition note or certification number
Open **Fix note or cert number**. The note at ① replaces the current condition note; leaving it blank keeps the current note. Select **Clear the condition note** to remove it. The limit is 1,000 characters.
The certification field at ② appears when exactly one unit is selected. Only third-party graded units, such as PSA, can have their certification number corrected. Leaving it blank keeps the current number. Match the physical slab, check the reason and selected unit, then save. Reopen the unit to verify the stored note and number.
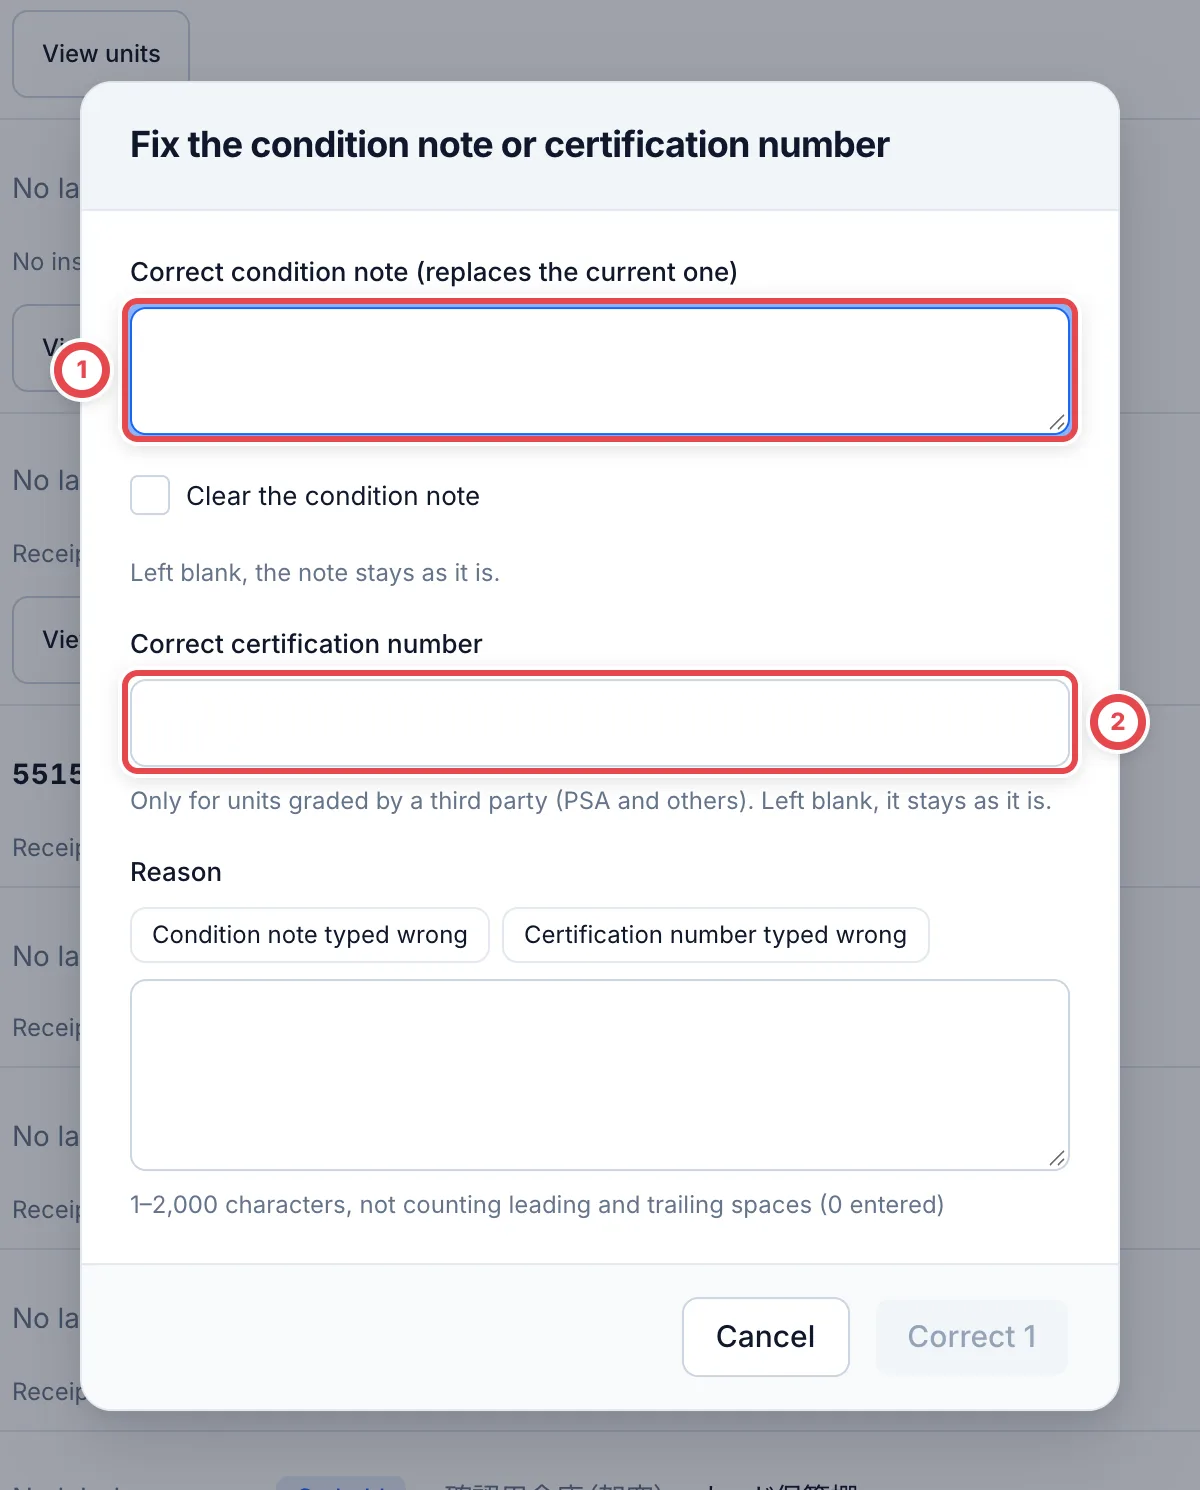 ## Troubleshooting
| What you see | What to check |
| ------------------------------- | ------------------------------------------------------------------------------------- |
| Source cannot be corrected here | Inspect the originating purchase case for purchased units. |
| No grade choices | Check access to the grade catalogue. |
| State changed | Reload current units and select the intended scope again. |
| Selection count changed | Units relinked to another card or no longer in scope can leave the current selection. |
---
# Stock counts
Source: https://docs.toreca-cloud.com/en/guides/inventory/counts
A stock count checks that recorded stock matches the physical stock. Choose a whole site or one shelf within it. **Stock in the selected scope when you start** (In stock, On hold, In an oripa, Listed, and stock allocated for a win or shipment) is included. Units in transit are not included.
## What you need first
- Permission to change inventory. Members without it see **View only** and can only look at the results.
- Stock labels stuck on the cards. For a unit without a label, check it by its asset number.
- (Optional) The putaway app. Scanning with the app is faster.
## Steps and statuses
| Step | What you do | Stock count status |
| ---- | --------------------------------------- | ------------------ |
| 1 | Start the stock count | In progress |
| 2 | Check the cards on the shelf | In progress |
| 3 | Finalize the results | Completed |
| 4 | (If needed) Write off the missing units | Completed |
| ― | (If you stop) Cancel the stock count | Canceled |
## 1. Start a stock count
Open **Stock counts** in the sidebar. The list shows your earlier stock counts. For one that is in progress, open it from ② to continue. To start a new one, click **Start stock count** (①).
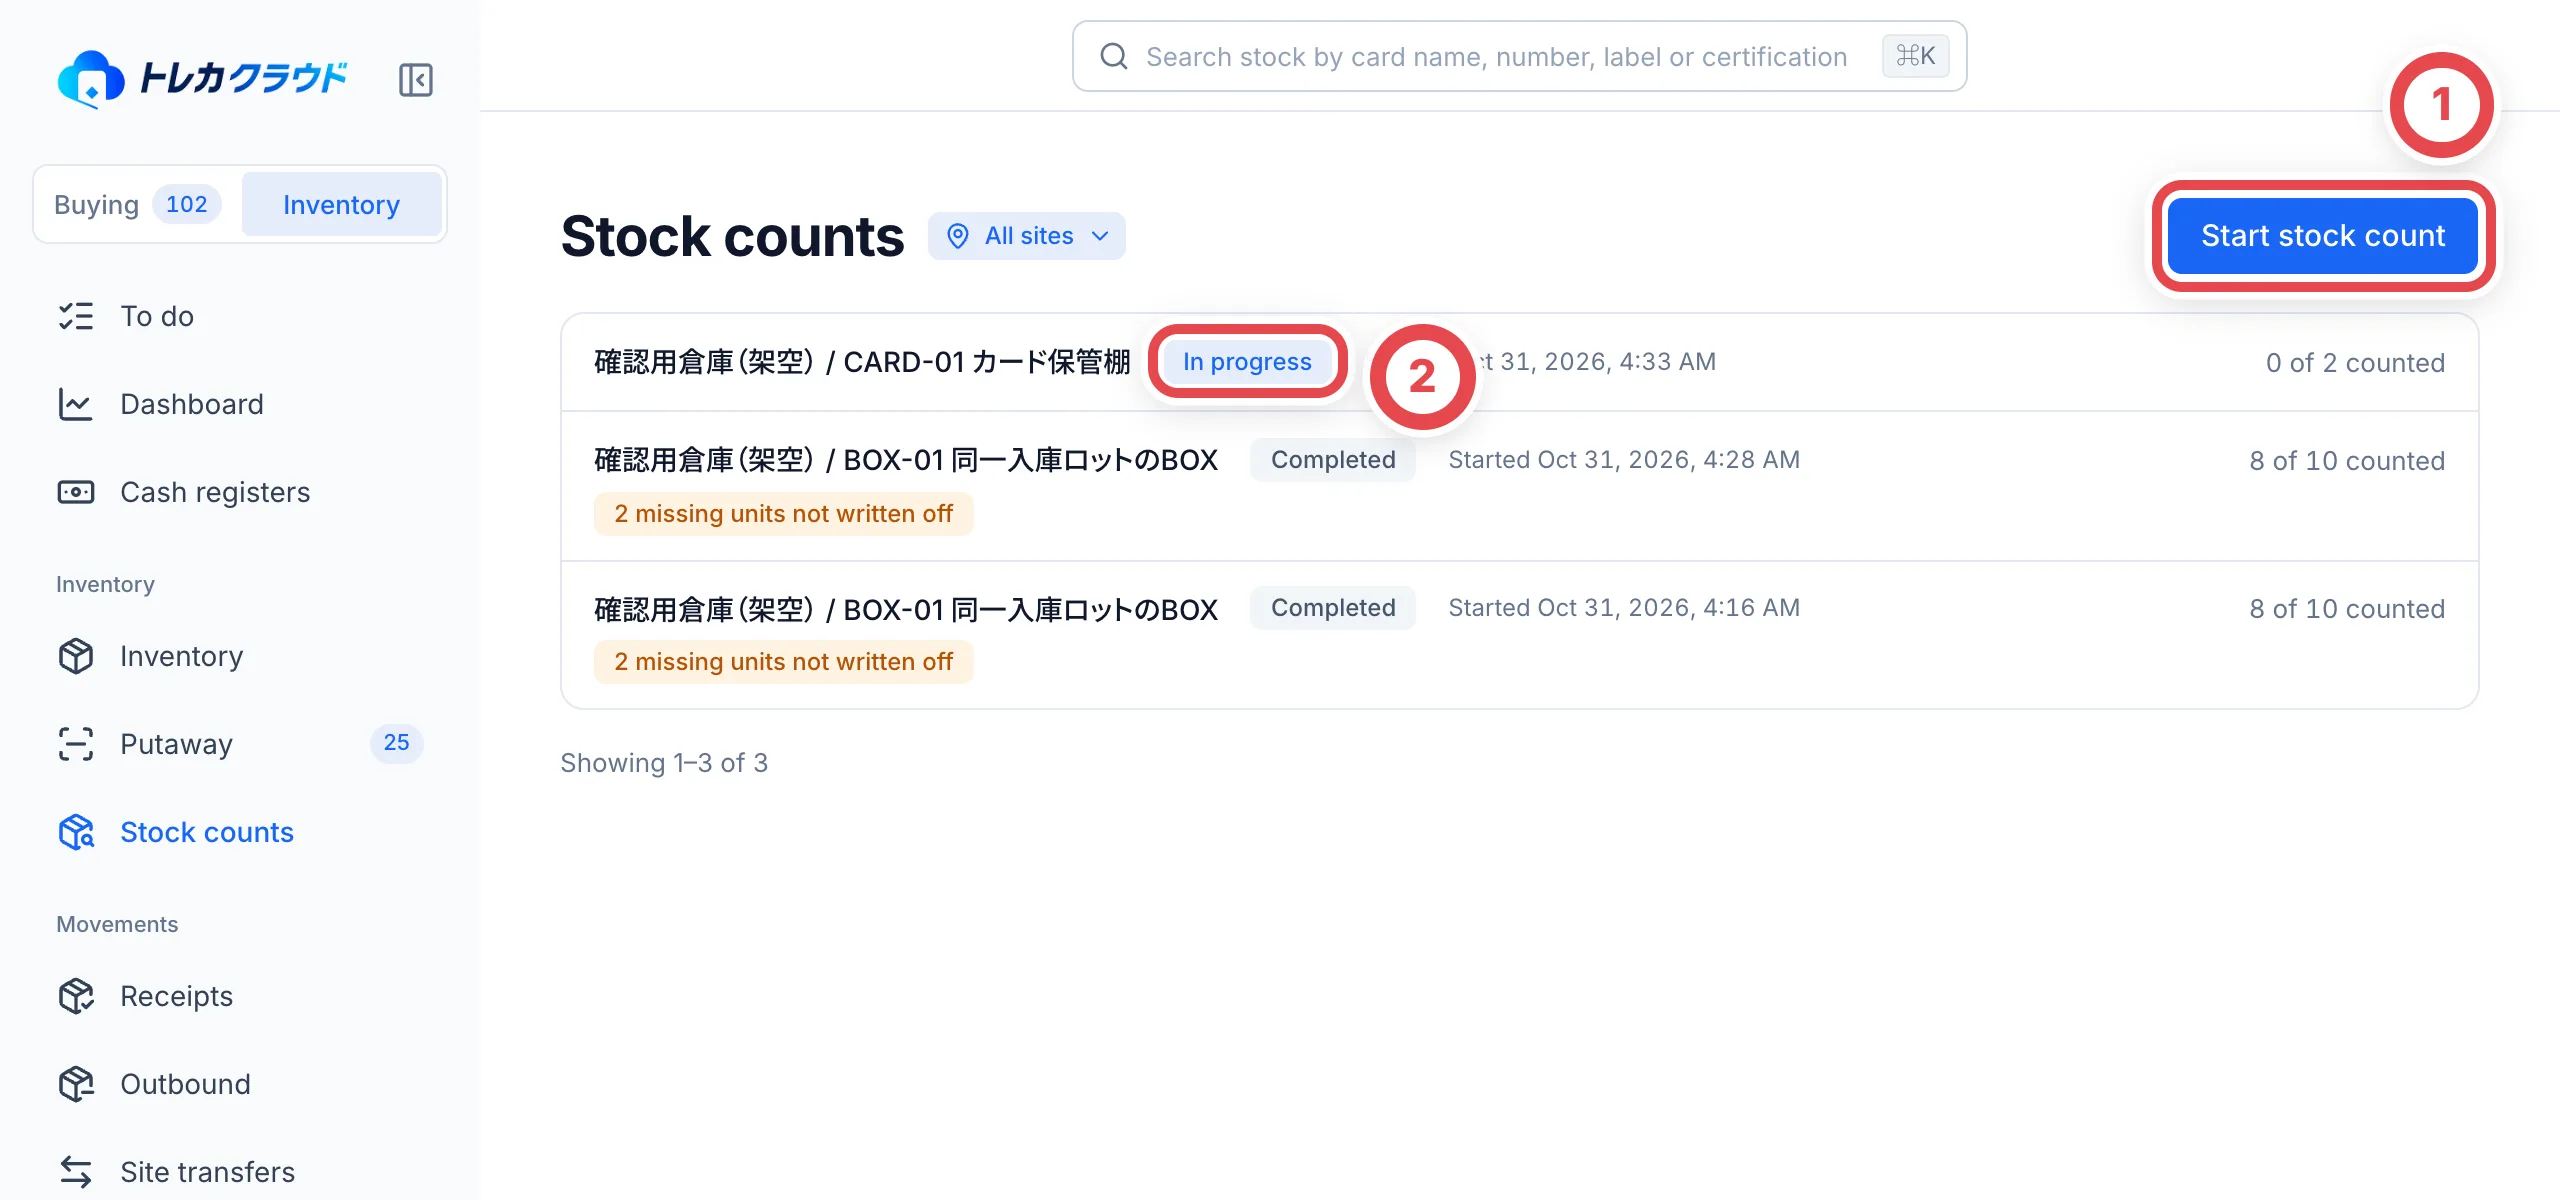 Choose the site in ①. In **Shelf / compartment** (②), select all shelves in the site or one shelf. Check that the displayed stock matches the scope you intend to count. Check **Reason** (③), then click **Start stock count** (④). **The count starts immediately** and its workspace opens.
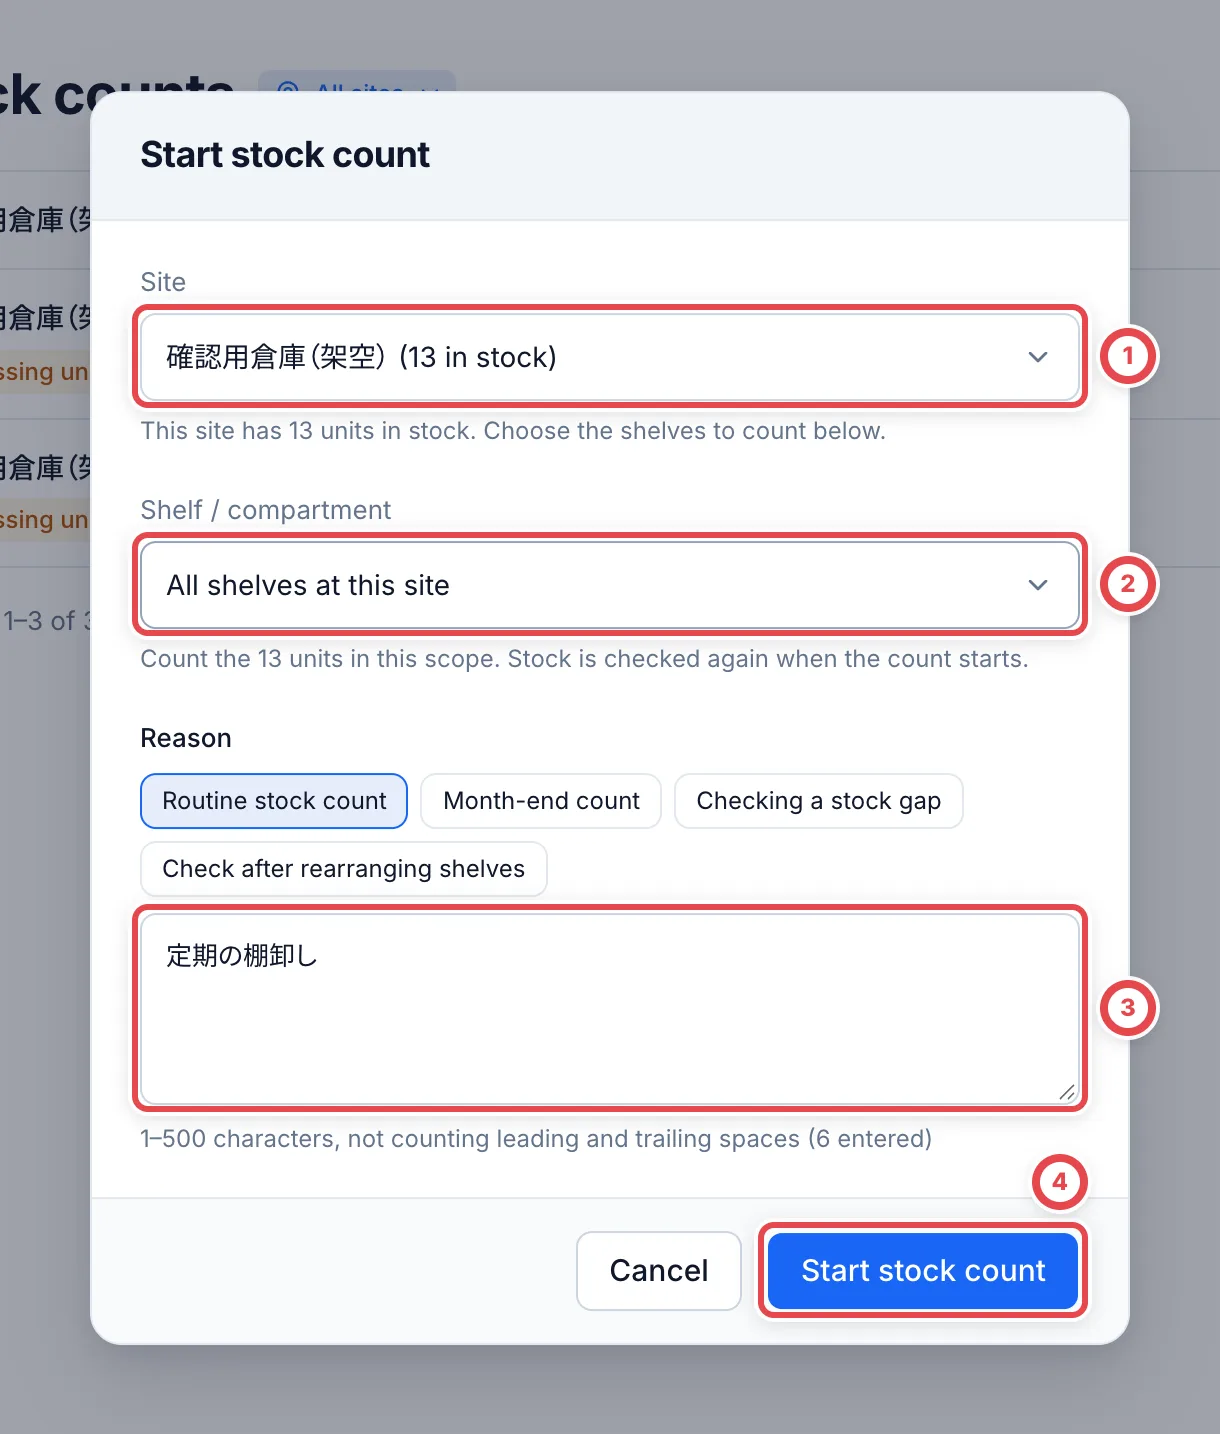 One count can include up to 5,000 units. If the whole site exceeds that limit, count it shelf by shelf. Starting the same scope at the same site resumes its open count. If a different scope is already open, you cannot start another one. Open **Stock count history**, check its scope, and complete or cancel it first.
Check **Shelf / compartment** in the workspace too. Filtering the lines by shelf does not change the scope of a count that has already started.
## 2. Check the cards on the shelf
Scan the stock label of each card on the shelf and mark it as counted. In **Stock label number** (①), scan the label or type the number, then click **Mark as counted**. A barcode reader confirms it right away. The numbers at the top show how many units are expected, counted and not counted.
Identical cards on the same shelf are grouped into one row. Click **Mark N as counted** to check them all at once. To check units one by one, click the row to open its units. **Either way, it is saved as soon as you click.** If you make a mistake, click **Undo count** (for a grouped row, **Undo all**) to go back.
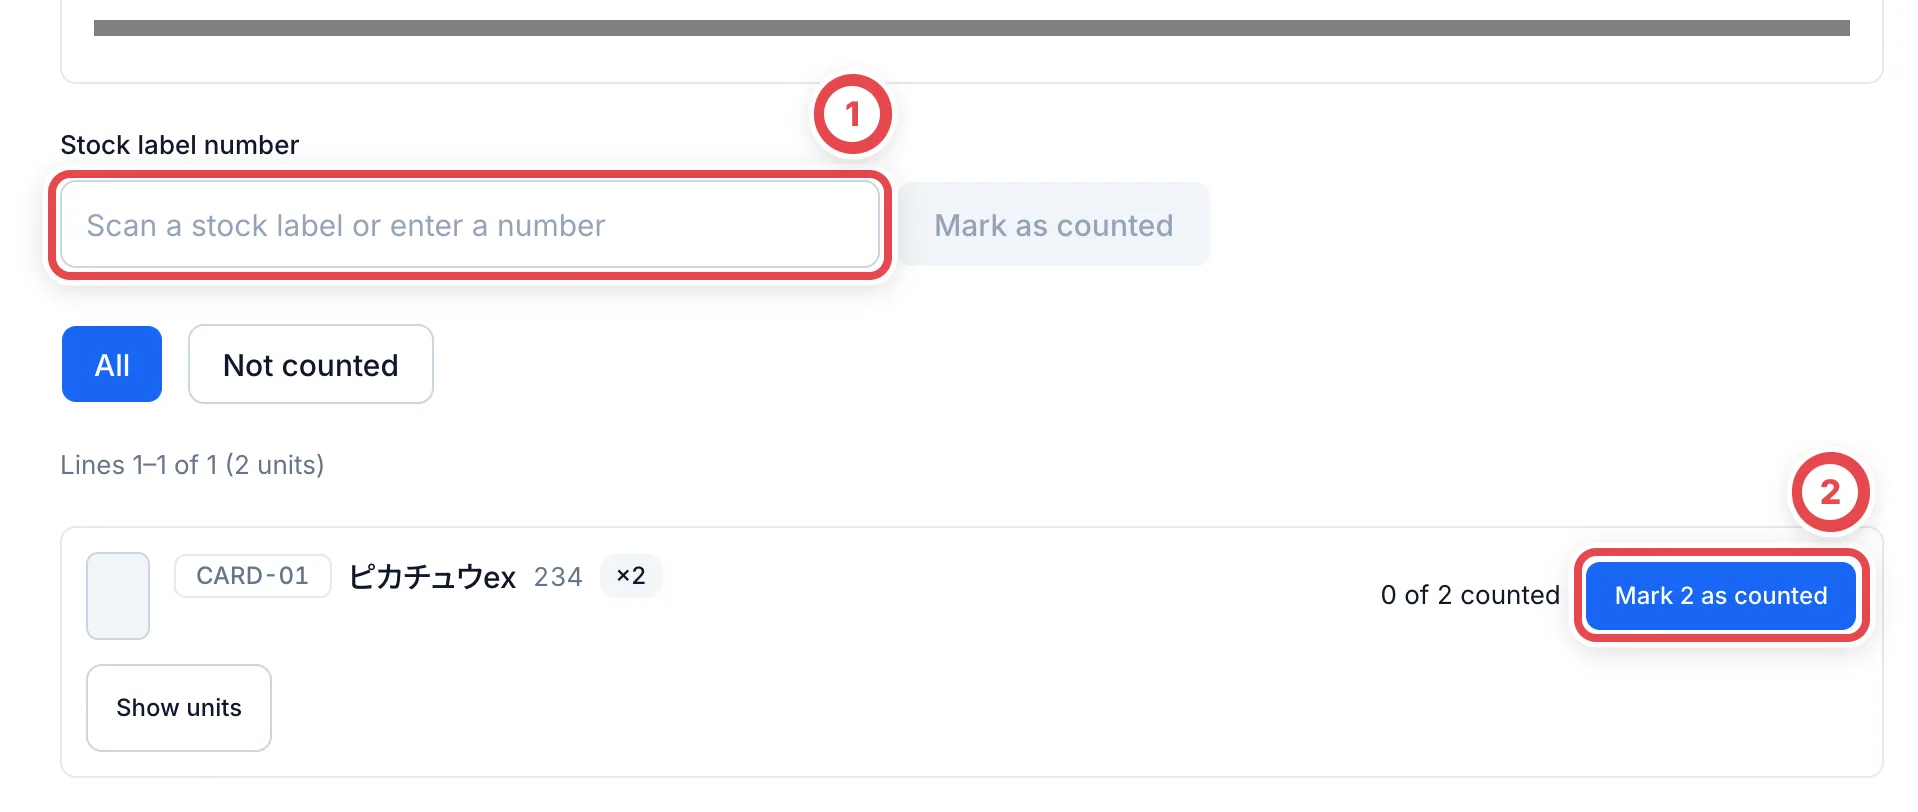 Scan a label or enter its number at ①. Use ② to mark identical cards as counted together.
You can narrow the list with **All** and **Not counted**, and by shelf (when there are two or more shelves).
### Count boxes, packs or decks from one receipt lot by quantity
On **All**, **Count by quantity** is available for a [single-lot shelf](/en/guides/inventory/sealed-lot-shelves) containing only ordinary stock from one receipt lot with a known cost.
1. Match the shelf, product and **Expected stock** at ① to the physical stock.
2. Count the units and enter **Quantity physically counted** at ②. This example has 8 physical units against an expected 10. Zero is allowed.
3. Click **Record quantity** at ③. **This replaces the shelf's counted quantity.** It does not add to the previous count.
4. Check the counted and uncounted totals: 8 counted and 2 uncounted in this example. Decide separately whether to write off shortages when finalizing the count.
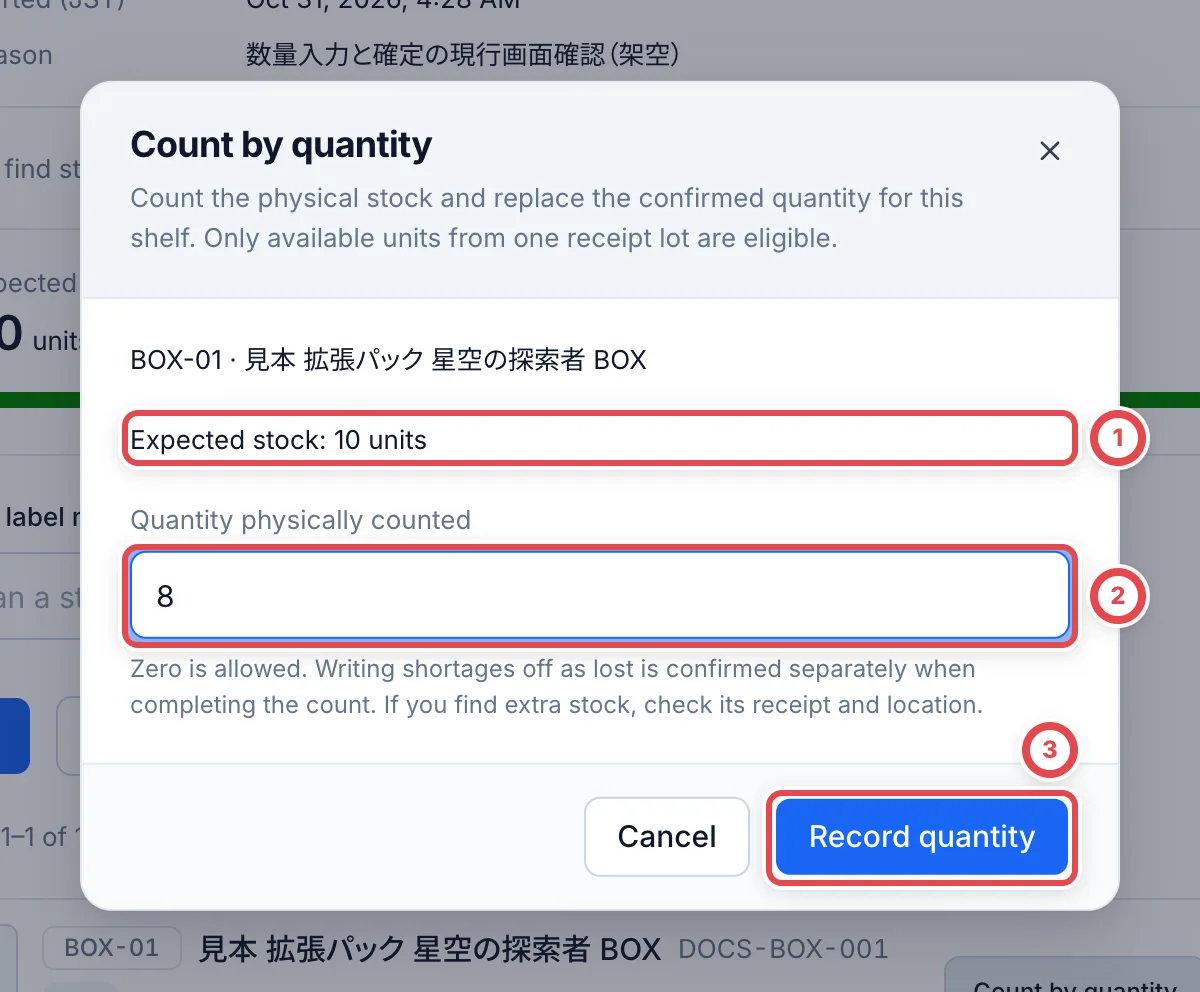 Quantity entry is unavailable for held, listed, allocated, lost or unknown-cost stock, mixed lots, or units outside the count. Use individual checks instead. If you find more than the expected stock, check its source and shelf; this dialog does not create extra units.
You can also scan stock labels one after another in the putaway app, under **作業** (Work) › **棚卸し** (Stock count). The app is in Japanese only. You can use the app's stock count after you start the count in the console. What you scan shows up in the console right away.
## 3. Finalize the results
When you finish checking, click **Complete stock count** at the bottom of the screen. It shows how many units are counted and not counted.
**Write off missing units as lost** (①) is on from the start. With it on, click **Finalize and write off** (②), and the units you couldn't find are written off as lost and removed from stock. To finalize without writing them off, turn it off and click **Finalize results**. You can write them off later. **After you finalize, you can't change what you counted.**
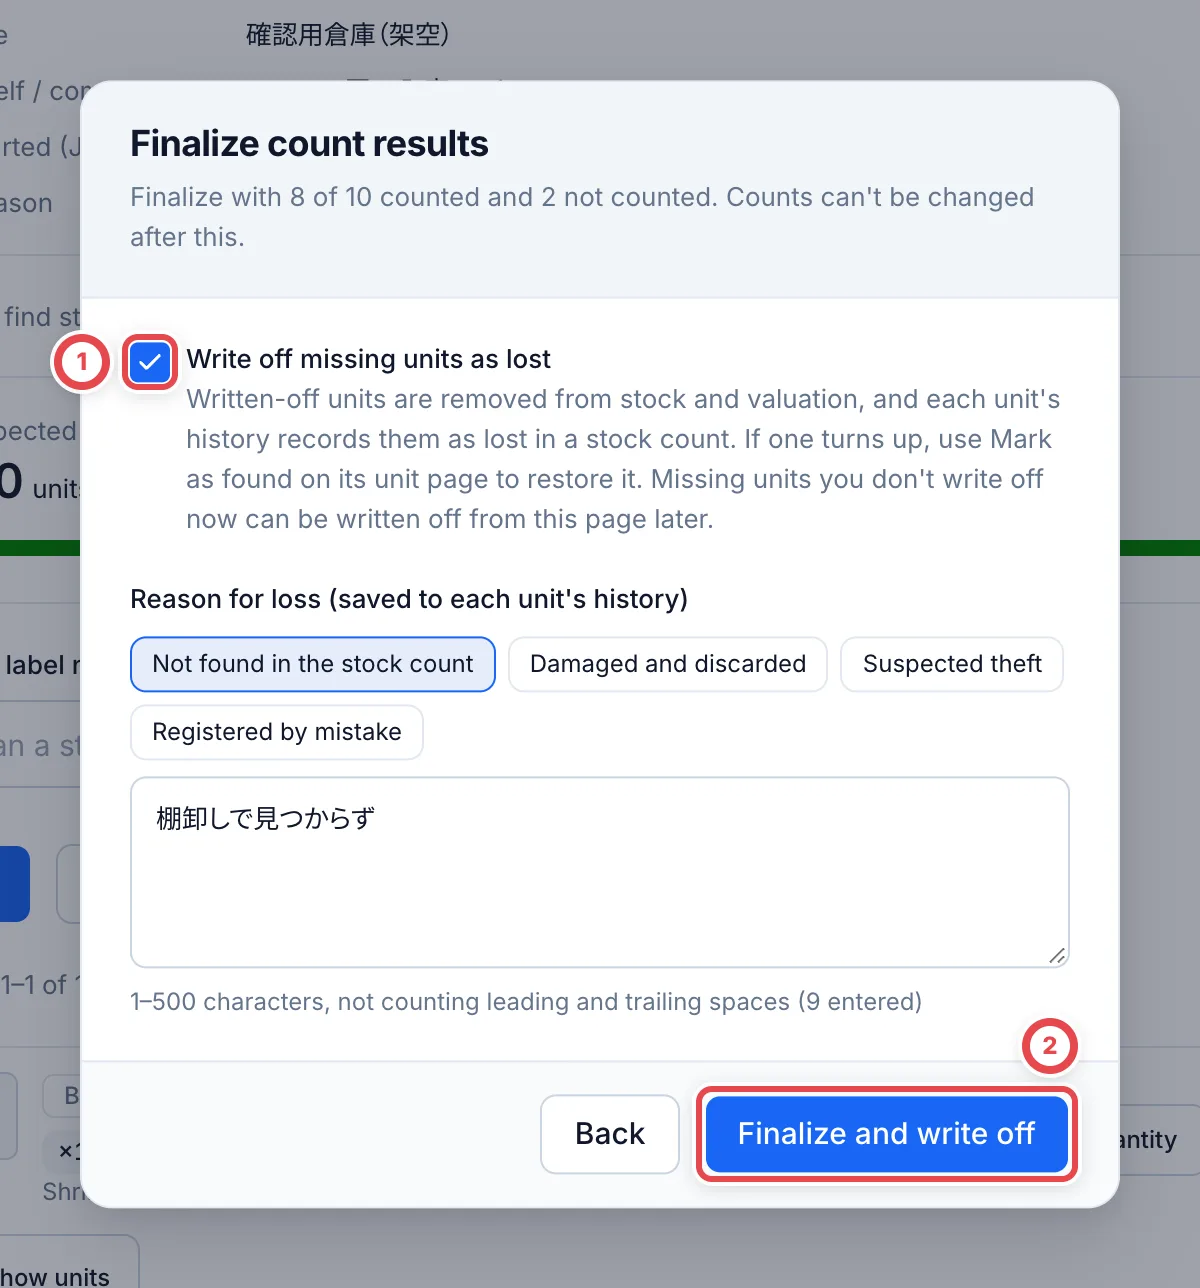
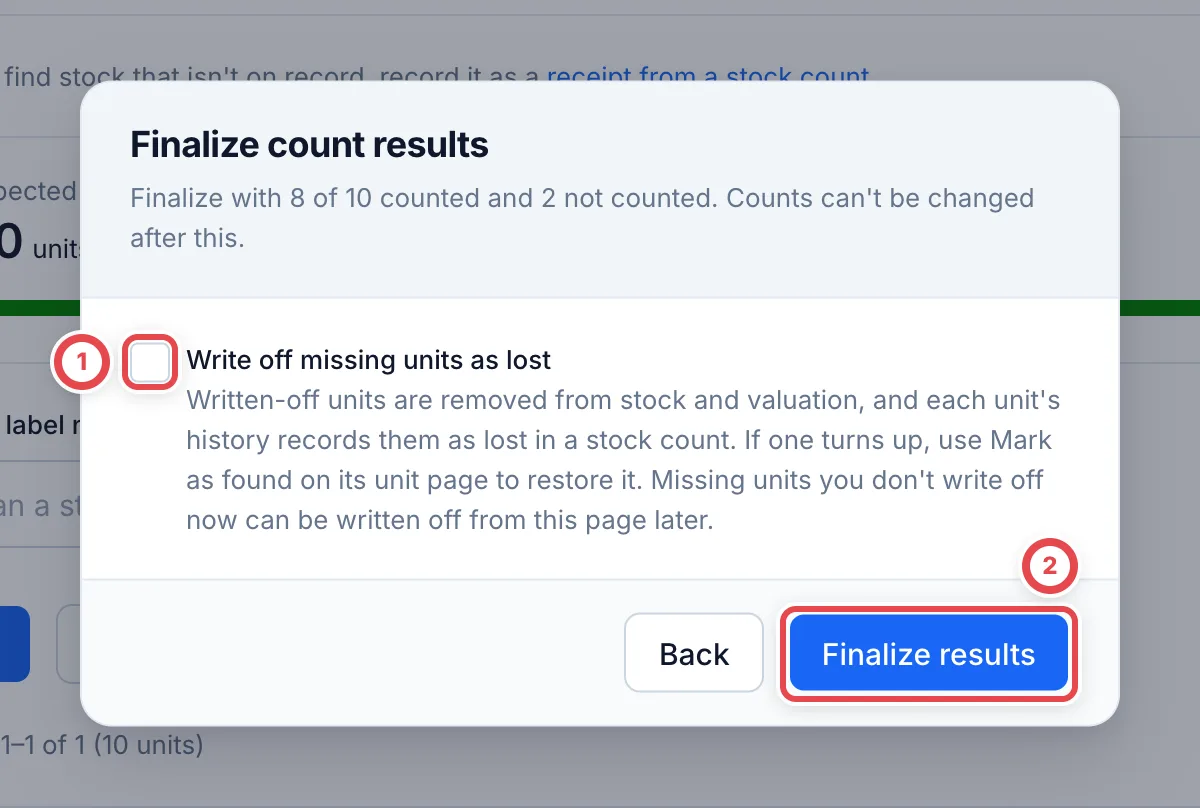 A unit that was shipped out or moved during the count becomes **Shipped out or moved during the count** when you finalize. It is not counted as missing. While the count is in progress, it still shows as not counted.
## 4. (If needed) Write off the missing units
If you finalized without writing off, the units you couldn't find stay as **Missing (not written off)** when you open the count. In ②, **Not found** shows only those units. To write them all off together, click **Write off N missing as lost** (①). Each row also has **Write off N missing**, and each unit has **Write off as lost**.
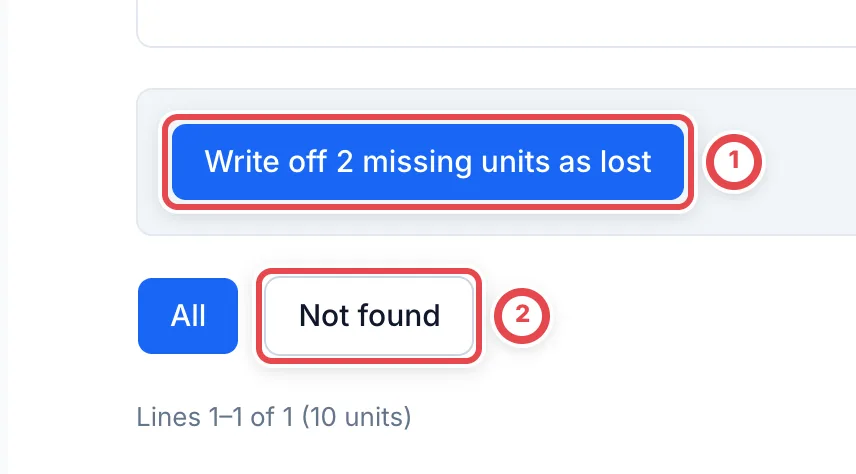 The **Write off missing units as lost** dialog opens. The reason for the loss in ① is saved to the history of each unit you write off. Click **Write off as lost** (②), and the units are removed from available stock and valuation.
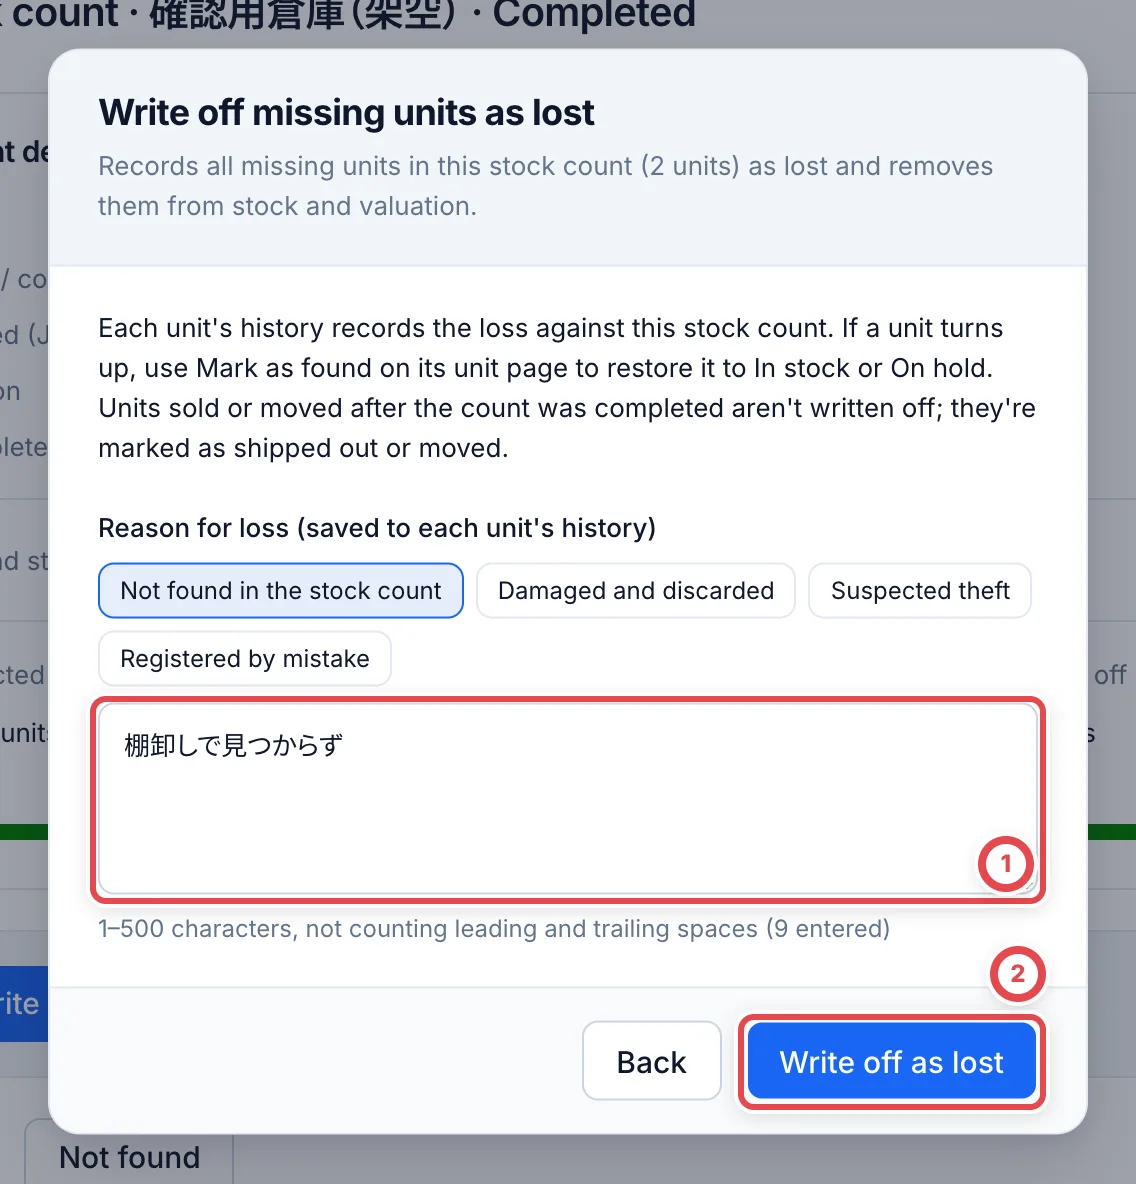 ## If you stop partway
Click **Cancel stock count**, write the reason in ①, and click **Cancel count** (②). **The count isn't canceled until you click Cancel count.** The counts you recorded so far are kept. If you start a new stock count, it counts again from the stock at that time.
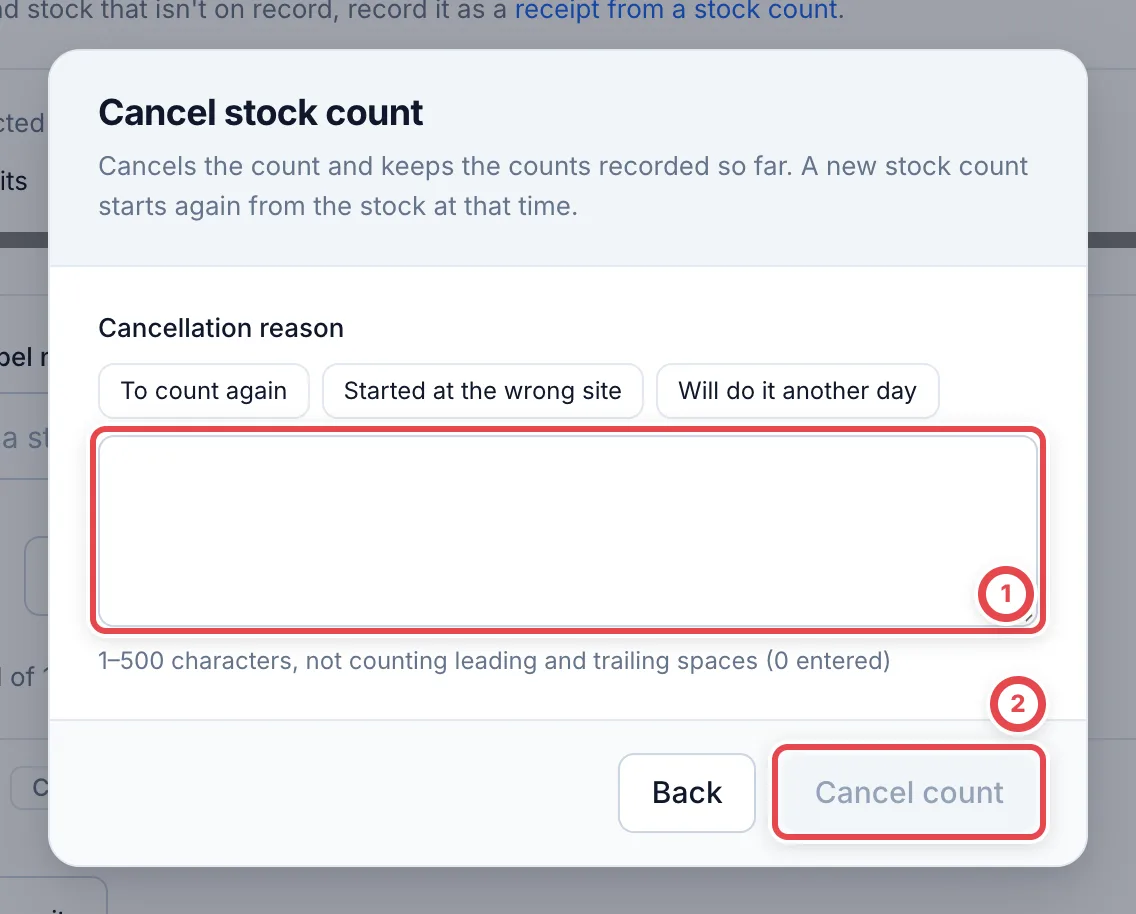 ## Put found units back in stock
If a unit you wrote off as lost turns up later, open the unit and choose **Mark as found** from the **…** menu at the top right. Choose the shelf and a reason, and it goes back to its earlier status. A unit that was on hold before it was lost goes back on hold.
If you find a card that isn't on record during a count, create a receipt slip from the **receipt from a stock count** link on the stock count screen. How to fill in a receipt slip is covered in [Receiving stock](/en/guides/inventory/receipts).
## Troubleshooting
| What's happening | What to do |
| --------------------------------------------------------------------------------------------------------------------------------- | -------------------------------------------------------------------------------------------------------------------------------------------- |
| A different scope is in progress | Open **Stock count history** and check the open count. Complete or cancel it before starting another scope at that site. |
| Count by quantity is unavailable | Use **All** and check that the shelf is single-lot, with known-cost ordinary stock from one receipt lot. Otherwise check units individually. |
| Stock changed while saving the quantity | Reload the latest count and stock, physically recount, and enter the quantity again. Do not reuse the old count without checking. |
| **Start stock count** doesn't appear and the page says **View only** | You don't have permission to change inventory. Ask an admin. |
| You are refused when you try to start | The site has no stock, has more than 5,000 units, or is inactive. |
| You tried to start a new count, but the earlier one opened | An open count for the same site and scope resumes. Continue it; complete or cancel it before starting a different scope. |
| You see "No unit with this label number is in this stock count." | The unit wasn't on the shelves of this site when you started. Units in transit and units at other sites are not counted. |
| The putaway app shows 「無効ラベル」 (Voided label) | It is an old label from before you stuck a new one on. Scan the new label. |
| You see "This stock count was updated elsewhere, for example in the putaway app. The latest state has been loaded, so try again." | It overlapped with the putaway app or with another person's action. The latest state is loaded, so do the action again. |
| You want to fix a count after you finalized | Finalized counts cannot be changed. Use **Mark as found** only for a unit written off as lost, then start a new count. |
| You clicked Cancel but the count isn't canceled | You need to click **Cancel count** in the dialog. |
## Related workflows
- [Recover unsent iPhone stock counts and picking](/en/guides/inventory/scanner-recovery)
---
# Install and use the print app
Source: https://docs.toreca-cloud.com/en/guides/inventory/desktop-print-app
Toreca Cloud Print sends stock labels from your browser to a printer on **the same computer**. Connect the app and test your printer once, then print without saving and opening a PDF each time.
See [Brother QL-820NWBc setup](/en/guides/inventory/brother-printer) for the printer itself and [Putaway and QR labels](/en/guides/inventory/putaway) for choosing stock to label.
:::note[Download]
In Toreca Cloud, open **Settings** › **Label printing** › **Print directly from this computer** to download the Mac DMG or Windows setup EXE. The Mac version is signed and Apple-notarized. The Windows version is an unsigned preview. If downloads are still being prepared, [open and print the PDF](/en/guides/inventory/putaway#4-print-at-100-and-stick-the-labels-on).
:::
## 1. Prepare your computer and printer
| Check | What you need |
| -------- | ------------------------------------------------------------------------------------------------------------------------------ |
| Computer | Apple Silicon Mac or Windows x64 |
| Printer | Install its driver on the same computer and confirm ordinary test printing works |
| Paper | For DK-2210, load 29 mm continuous tape |
| Browser | Sign into Toreca Cloud on the computer running the app. This does not provide remote printing to another computer or an iPhone |
### Using another Windows PC
Install the print app and the Brother QL-820NWB/NWBc driver on each PC, then register the printer in Windows. USB, Bluetooth and Wi-Fi may appear as separate printers. Select the network printer for Wi-Fi, using the Brother driver rather than Microsoft IPP Class Driver.
The PC must be able to reach the printer's network. Different SSIDs or 2.4/5 GHz bands can work, but guest isolation or network separation may block communication. Compare the printer's current IP address with its Windows port configuration.
Print app 0.1.3 and later checks the driver, pending jobs, paper settings and standard TCP/IP port connectivity before roll printing. When paper settings differ, a test print offers **Apply and test** on the PC to set 29 mm continuous tape, the requested feed length and portrait orientation. This changes that printer's defaults for other applications too, and saves a backup. Ordinary inventory printing does not change these settings.
These checks require print app 0.1.3 or later. Pair and test each PC, browser and account.
## 2. Install and start the app
### Mac
If you receive the DMG distribution:
1. Check its source and target platform, then open the DMG.
2. Drag **Toreca Cloud Print.app** to **Applications**.
3. Launch the copy in Applications. Do not keep running it from the mounted DMG.
4. Check the menu bar for the app. It can be running without a normal application window.
For a ZIP package, extract it and move the app into Applications before launching.
### Windows
If you receive the installer:
1. Check its source and target platform, then run the setup exe.
2. Follow the installer instructions.
3. Start **トレカクラウド印刷** (Toreca Cloud Print) from the Start menu.
4. Check the system tray, including hidden icons, for the running app.
Keep an extracted ZIP package's whole folder together. Do not move the application exe out on its own.
:::warning
If the OS cannot verify the publisher, signature or notarization, check with the distributor. These instructions do not require disabling OS protections.
:::
## 3. Connect the browser to the app
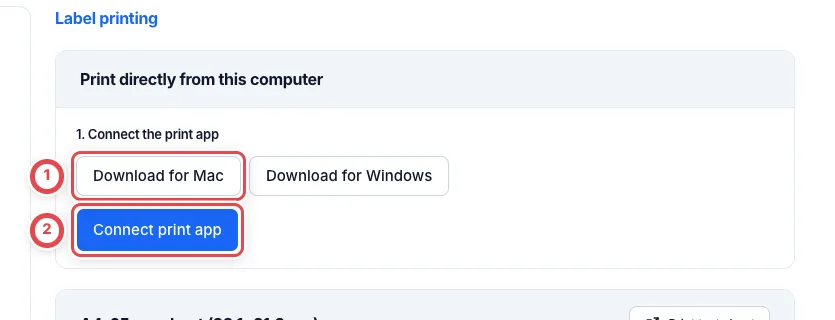 Download this computer's app at ①, start it, then connect with ②.
1. In Toreca Cloud, open **Settings** › **Label printing**.
2. Under **Print directly from this computer**, click **Connect print app**.
3. If your browser requests local network access, confirm it relates to this action and allow it.
4. In the computer app's connection prompt, check `https://toreca-cloud.com`, the account and shop, then choose **接続を許可** (Allow connection).
5. Confirm the Web page reports a connection and offers paper and printer selection.
Cancel unexpected prompts when you have not clicked Connect print app. Connect again for a different computer, browser, account or shop.
Use **Check connection** to check communication with the print app. If it fails, start the app and check again. You must also register the paper and printer and check the printed output.
## 4. Register paper and printer
1. Choose **Paper** and **Printer**.
2. Click **Save these settings and print one test page**.
3. Check physical dimensions and clipped text. Measure the DK-2210 test sheet's 40 mm scale.
4. Click **Confirm the paper and enable direct printing** only when the output is correct. **Registered: printer name** confirms registration.
If the test PDF has no QR code, print a small stock-label PDF and check QR scanning as well. After registration, check cuts and QR codes on two consecutive labels in your first direct print.
The registration button becomes available after a successful test submission on this page. Do not confirm an untested printer. Testing again clears the previous confirmation, so check the paper and register again. Choose and test again after changing the printer or paper.
### DK-2210
In settings, choose **DK-2210: 29mm wide × 50mm feed (recommended)**. In the stock label dialog, choose **Brother DK-2210 (29 × 50 mm)**. The app sends the portrait 29 × 50 mm PDF without rotation or scaling. Check the OS driver for 29 mm continuous tape, 50 mm feed length, portrait and 100% scale. Cut each label for separate pieces, or turn auto cut off and cut at end on for a connected strip; see [Brother setup](/en/guides/inventory/brother-printer).
The older **Legacy: 29mm wide × 56mm feed (50×25mm content)** format is separate. Do not confuse it with native DK-2210 29 × 50 mm output. Register the appropriate paper and printer separately for A4 65-label and 24-label sheets.
## 5. Print stock labels
1. Keep the app running and open **Print labels** from inventory or a receipt slip.
2. Choose the paper. When its registered printer is available, the action button shows **Print**. Otherwise, the dialog shows the reason and offers PDF printing. Register printers and adjust alignment in the label printing settings.
3. Check the count and preview, then print.
4. When submission is reported, also check the physical paper output.
**Submission is not confirmation that paper has finished printing.** Check the printer and OS queue for paper shortages, open covers or disconnections.
### Choose an output mode
If the version offered in Settings is earlier than 0.1.5, wait for the newer release or use a supported mode or PDF printing.
Print app 0.1.5 or later offers the same three modes on Mac and Windows. Use a network-connected QL-820NWB/NWBc with DK-2210. On Windows, register a Standard TCP/IP RAW 9100 queue. The PC must reach the printer over TCP 9100 and SNMP. The shared network path does not support USB, Bluetooth or WSD queues. Existing automatic-cut and connected-strip printing over USB on Mac remains available. Printer-button coordination requires a network connection on both operating systems.
- **Cut each label automatically** cuts every label.
- **Print a connected strip** cuts only at the end, up to 200 labels in one PDF.
- **Cut with the printer button** sends one label, then waits until cutting is armed. Briefly press the printer button to cut and send the next label. The last cut finishes the batch. Keep the PC, browser and print app running.
Older apps show only their supported modes. Use PDF printing below to continue on computers or connections outside the desktop app's support scope.
For an existing batch, **Print this PDF directly** prints the same label numbers. Labels are issued when the PDF is created; a printing failure does not require issuing new numbers.
When direct printing is unavailable, use **Create PDF**. Split large batches or print the PDFs of an issued batch if direct printing reaches its limits.
If direct printing fails after labels have been issued, the PDF and batch remain available. **Print this PDF directly** is no longer shown in that completion dialog after a failure. Open the printer settings, check the paper and queue for output already sent, then reprint the missing output from the PDF or the existing batch under **Putaway → Print batches**. Keep the same label numbers.
## 6. An unknown result or interrupted batch
If the result is unknown, **do not immediately start a new print**. The job may already be in the OS queue.
1. Check the paper and OS print queue.
2. Use **接続と送信状況** (Connections and send status) in the app menu if needed.
3. For multiple PDF parts, identify which parts were sent. Do not duplicate those parts.
4. Intentionally reprint only the missing output, with the same label numbers.
Restarting the app does not automatically resend jobs with unknown results.
## 7. Startup, updates and disconnection
- **Start automatically:** enable **ログイン時に起動** (Launch at login) in the app menu.
- **Open settings:** choose **プリンター設定を開く** (Open printer settings) in the app menu.
- **Update:** choose **終了** (Quit) first, then replace the app using the new distribution. This version has no automatic updater. Check the connection and test print after updating.
- **Disconnect this connection:** click **Disconnect** on the Web settings page.
- **Finish using a shared computer:** choose **すべての接続を解除** (Revoke all connections) in the app menu. Connect again before reuse.
Disconnecting does not cancel jobs already submitted to the OS. Check the OS queue if printing needs to stop.
## Troubleshooting
| Problem | Check |
| --------------------------- | -------------------------------------------------------------------------------------------------------------------------------- |
| Cannot connect | Start the app on the same computer, check browser local network access and the current account/shop, then click Check connection |
| Printer missing | Check the OS printer list, driver and USB/Wi-Fi connection, then reopen settings. The app does not silently use another printer |
| Direct printing unavailable | Complete a test print and registration for the selected paper |
| Wrong paper or clipping | Check DK-2210 versus the older roll format, driver length/scale/cutting and alignment offsets |
| Another job is processing | Wait; do not repeatedly click. For an unknown result, check paper and the OS queue first |
| Large batch rejected | Split the batch or open its PDFs to print manually |
| Port error at startup | Ask your contact to check duplicate app instances or conflicts with another local app |
For loading the roll and preparing the printer, see [Brother setup](/en/guides/inventory/brother-printer).
---
# Outbound, transfers and handovers
Source: https://docs.toreca-cloud.com/en/guides/inventory/outbound-and-transfers
When stock leaves the shop or moves to another site, create a document under **Movements** in the sidebar. Which document you use depends on what you're doing.
| Document | Use it when | How it progresses |
| -------------------------------- | --------------------------------------------------------------------------------------------- | -------------------------------------------------------- |
| Outbound order (sale) | Selling to a buyer | Draft → Sale prices → Sale contract → Ship out → Payment |
| Outbound order (other than sale) | Putting units into an oripa, disposal, cancelling a record, taking out for an event and so on | Reserved → (Awaiting shipment) → Ship out |
| Site transfer | Moving stock from one of your sites to another | In transit → Received |
| Tenant transfer | Handing stock over to another shop that is linked with you | Awaiting acceptance → Accepted |
Moving a unit to another shelf at the same site needs no document. Record it with **Move unit** on the unit, or **Move to shelf** in the Inventory list.
:::note
Purchased units that are still **Awaiting receipt** can't go on an outbound order, site transfer or tenant transfer. Record bank-transfer receipt or the in-store cash handover first ([Payouts](/en/guides/purchase/payouts), [In-store buying](/en/guides/purchase/counter)).
:::
## 1. Create an outbound order
Open **Outbound** in the sidebar and click **Create outbound order** (①). The tabs above (②) let you narrow the list to **Draft**, **Reserved**, **Awaiting shipment** and so on, so you can find a document you made.
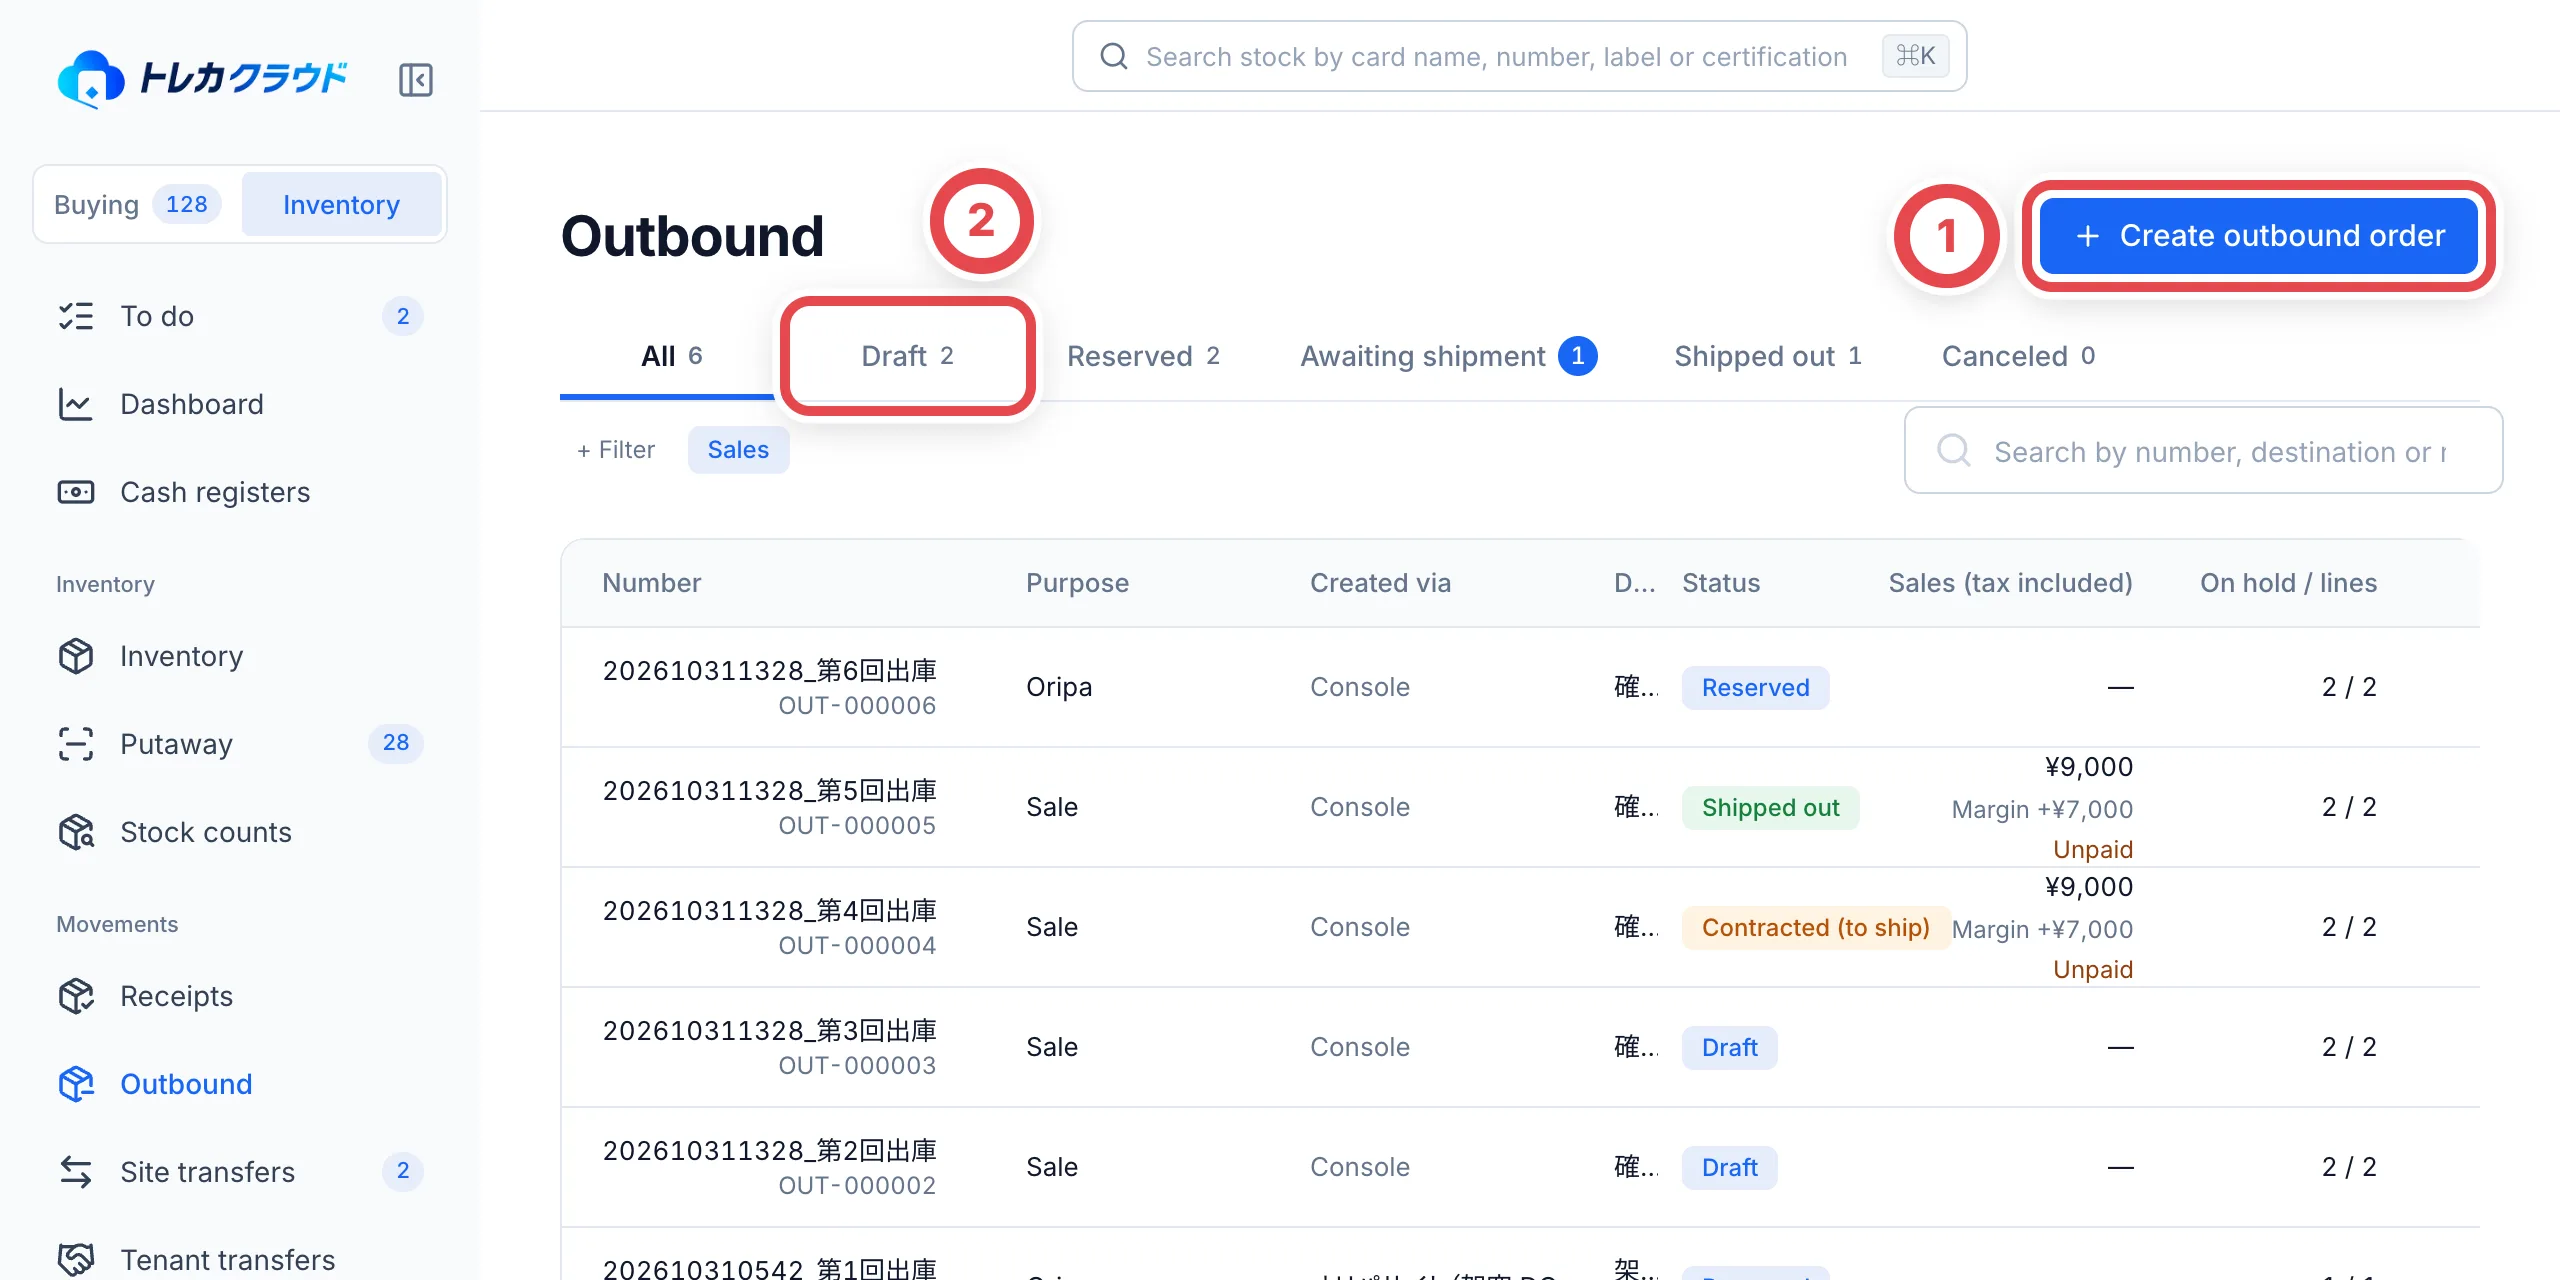 Choose a **Purpose** (①): Oripa, Sale, Disposal, Correction or Other removal. For Sale and Oripa, you can pick the customer you're selling to under **Buyer** (②). This is optional. Enter a **Reason** (③) by clicking one of the suggestions. A reason is required. **Planned ship date** and **Destination** are optional.
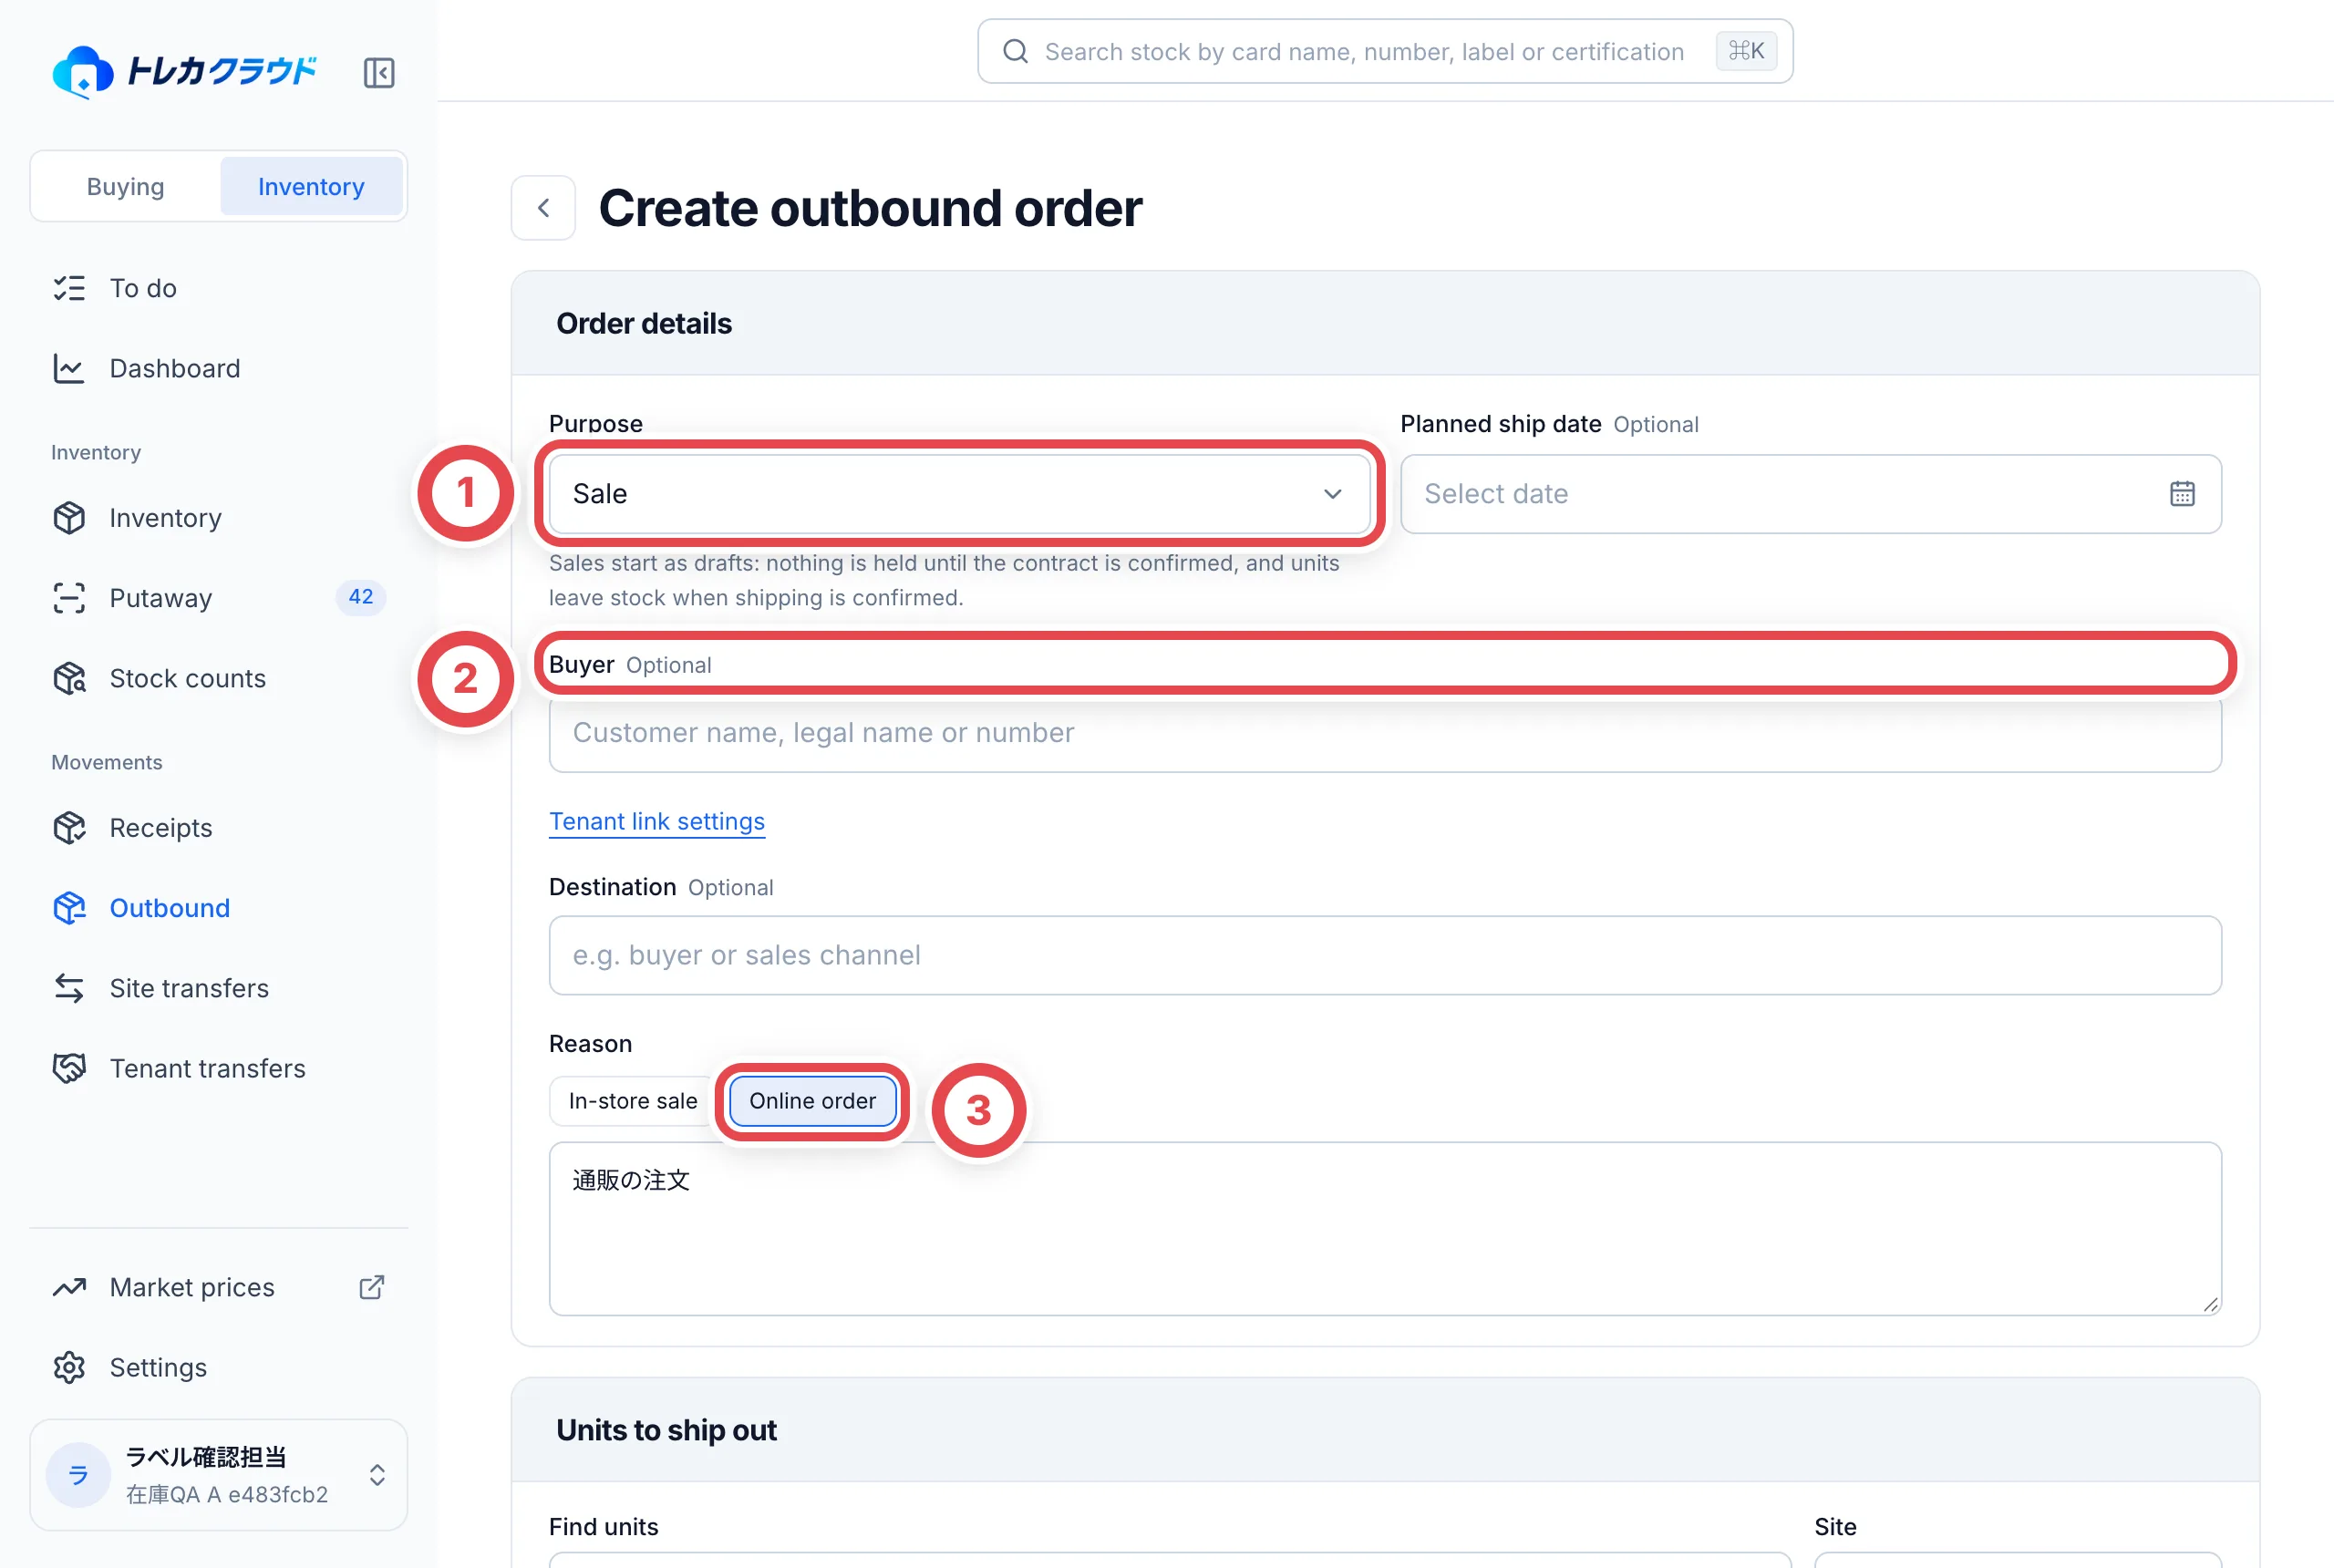 Under **Units to ship out** below, search for units by card name or card number, set the number of units in ②, and click **Add**. Units that are **Awaiting receipt** (①) show **Can't add**. When you've chosen them all, save with the button in ③. **Clicking it saves right away.**
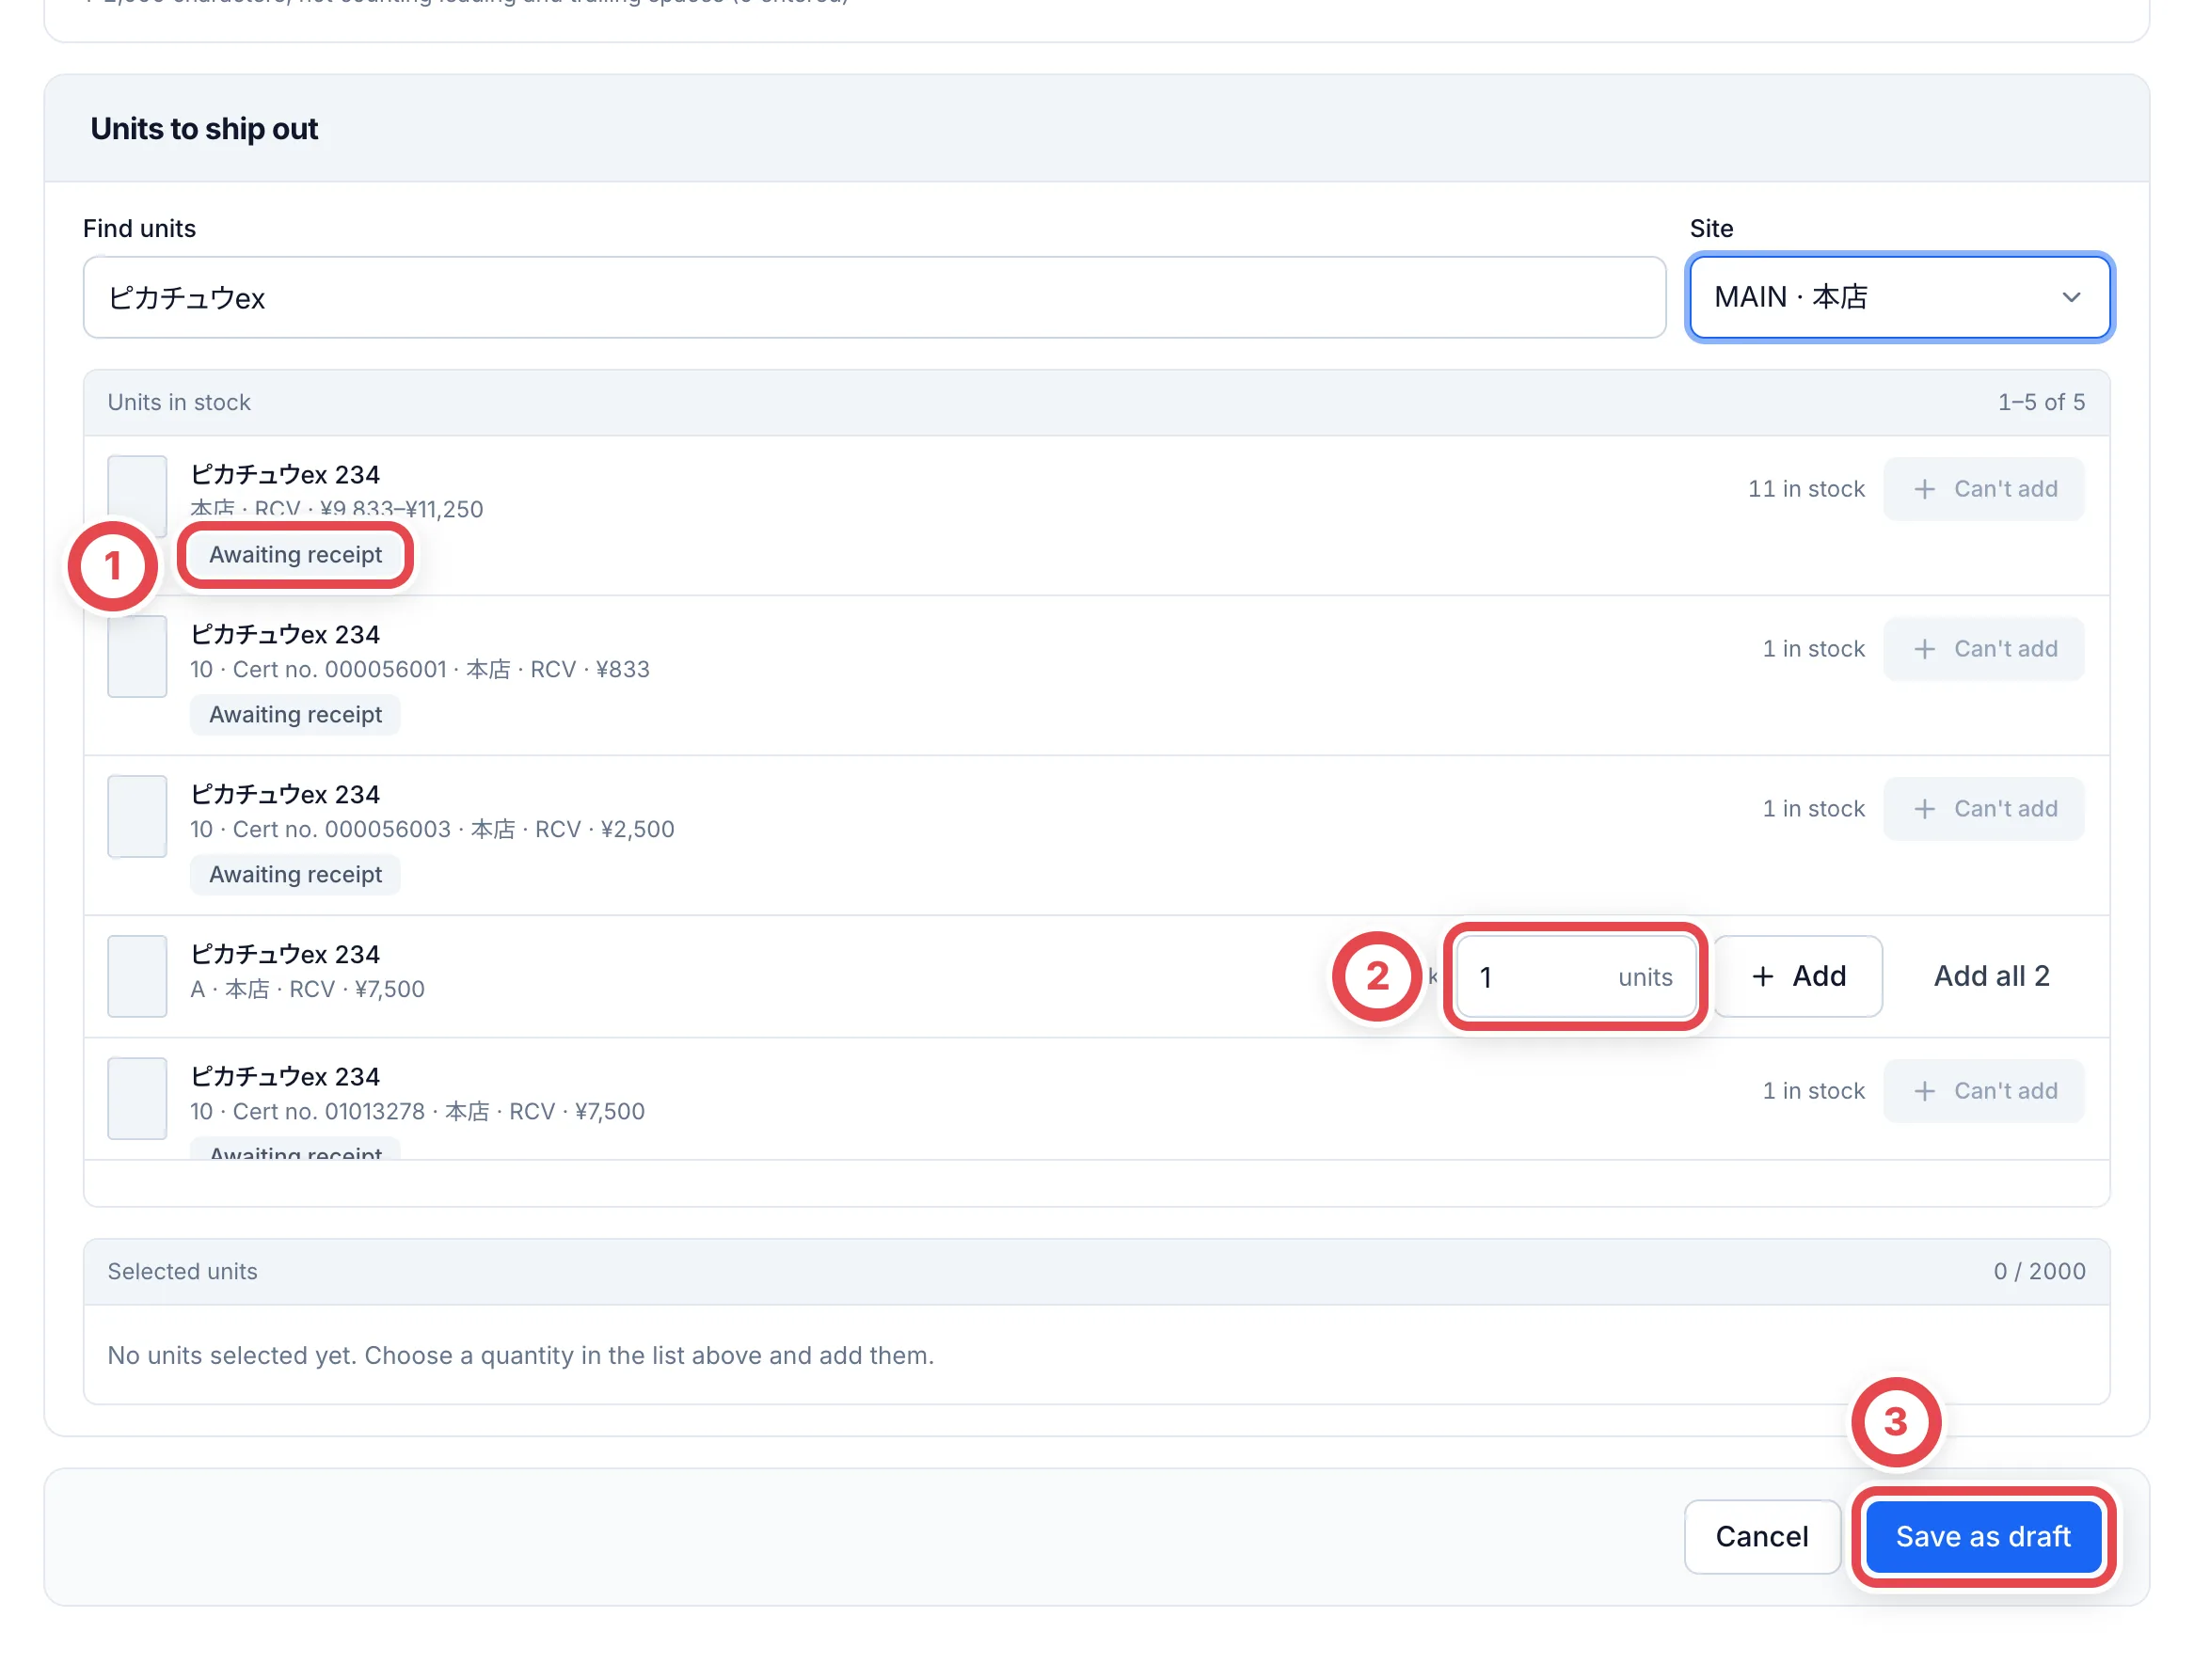 When the purpose is Sale, the button reads **Save as draft**, and **a draft doesn't hold any stock** (other documents can still use the units). For every other purpose the button reads **Save**, and saving holds the units straight away (the order is **Reserved**).
If you select units in the Inventory list and click **Create outbound order**, you start with those units already added.
To append to an existing order, use the selection bar's add action and choose the order. Each create/add operation accepts up to 2,000 units; one order supports 5,000 lines including released lines. Continue large selections in the same browser tab and verify the added count and units.
## 2. (Sale) Enter the sale prices
When you open a sale draft, **Progress and next step** at the top shows the order: Draft & quotes → Contract → Ship → Paid. First click **Enter sale prices** (①).
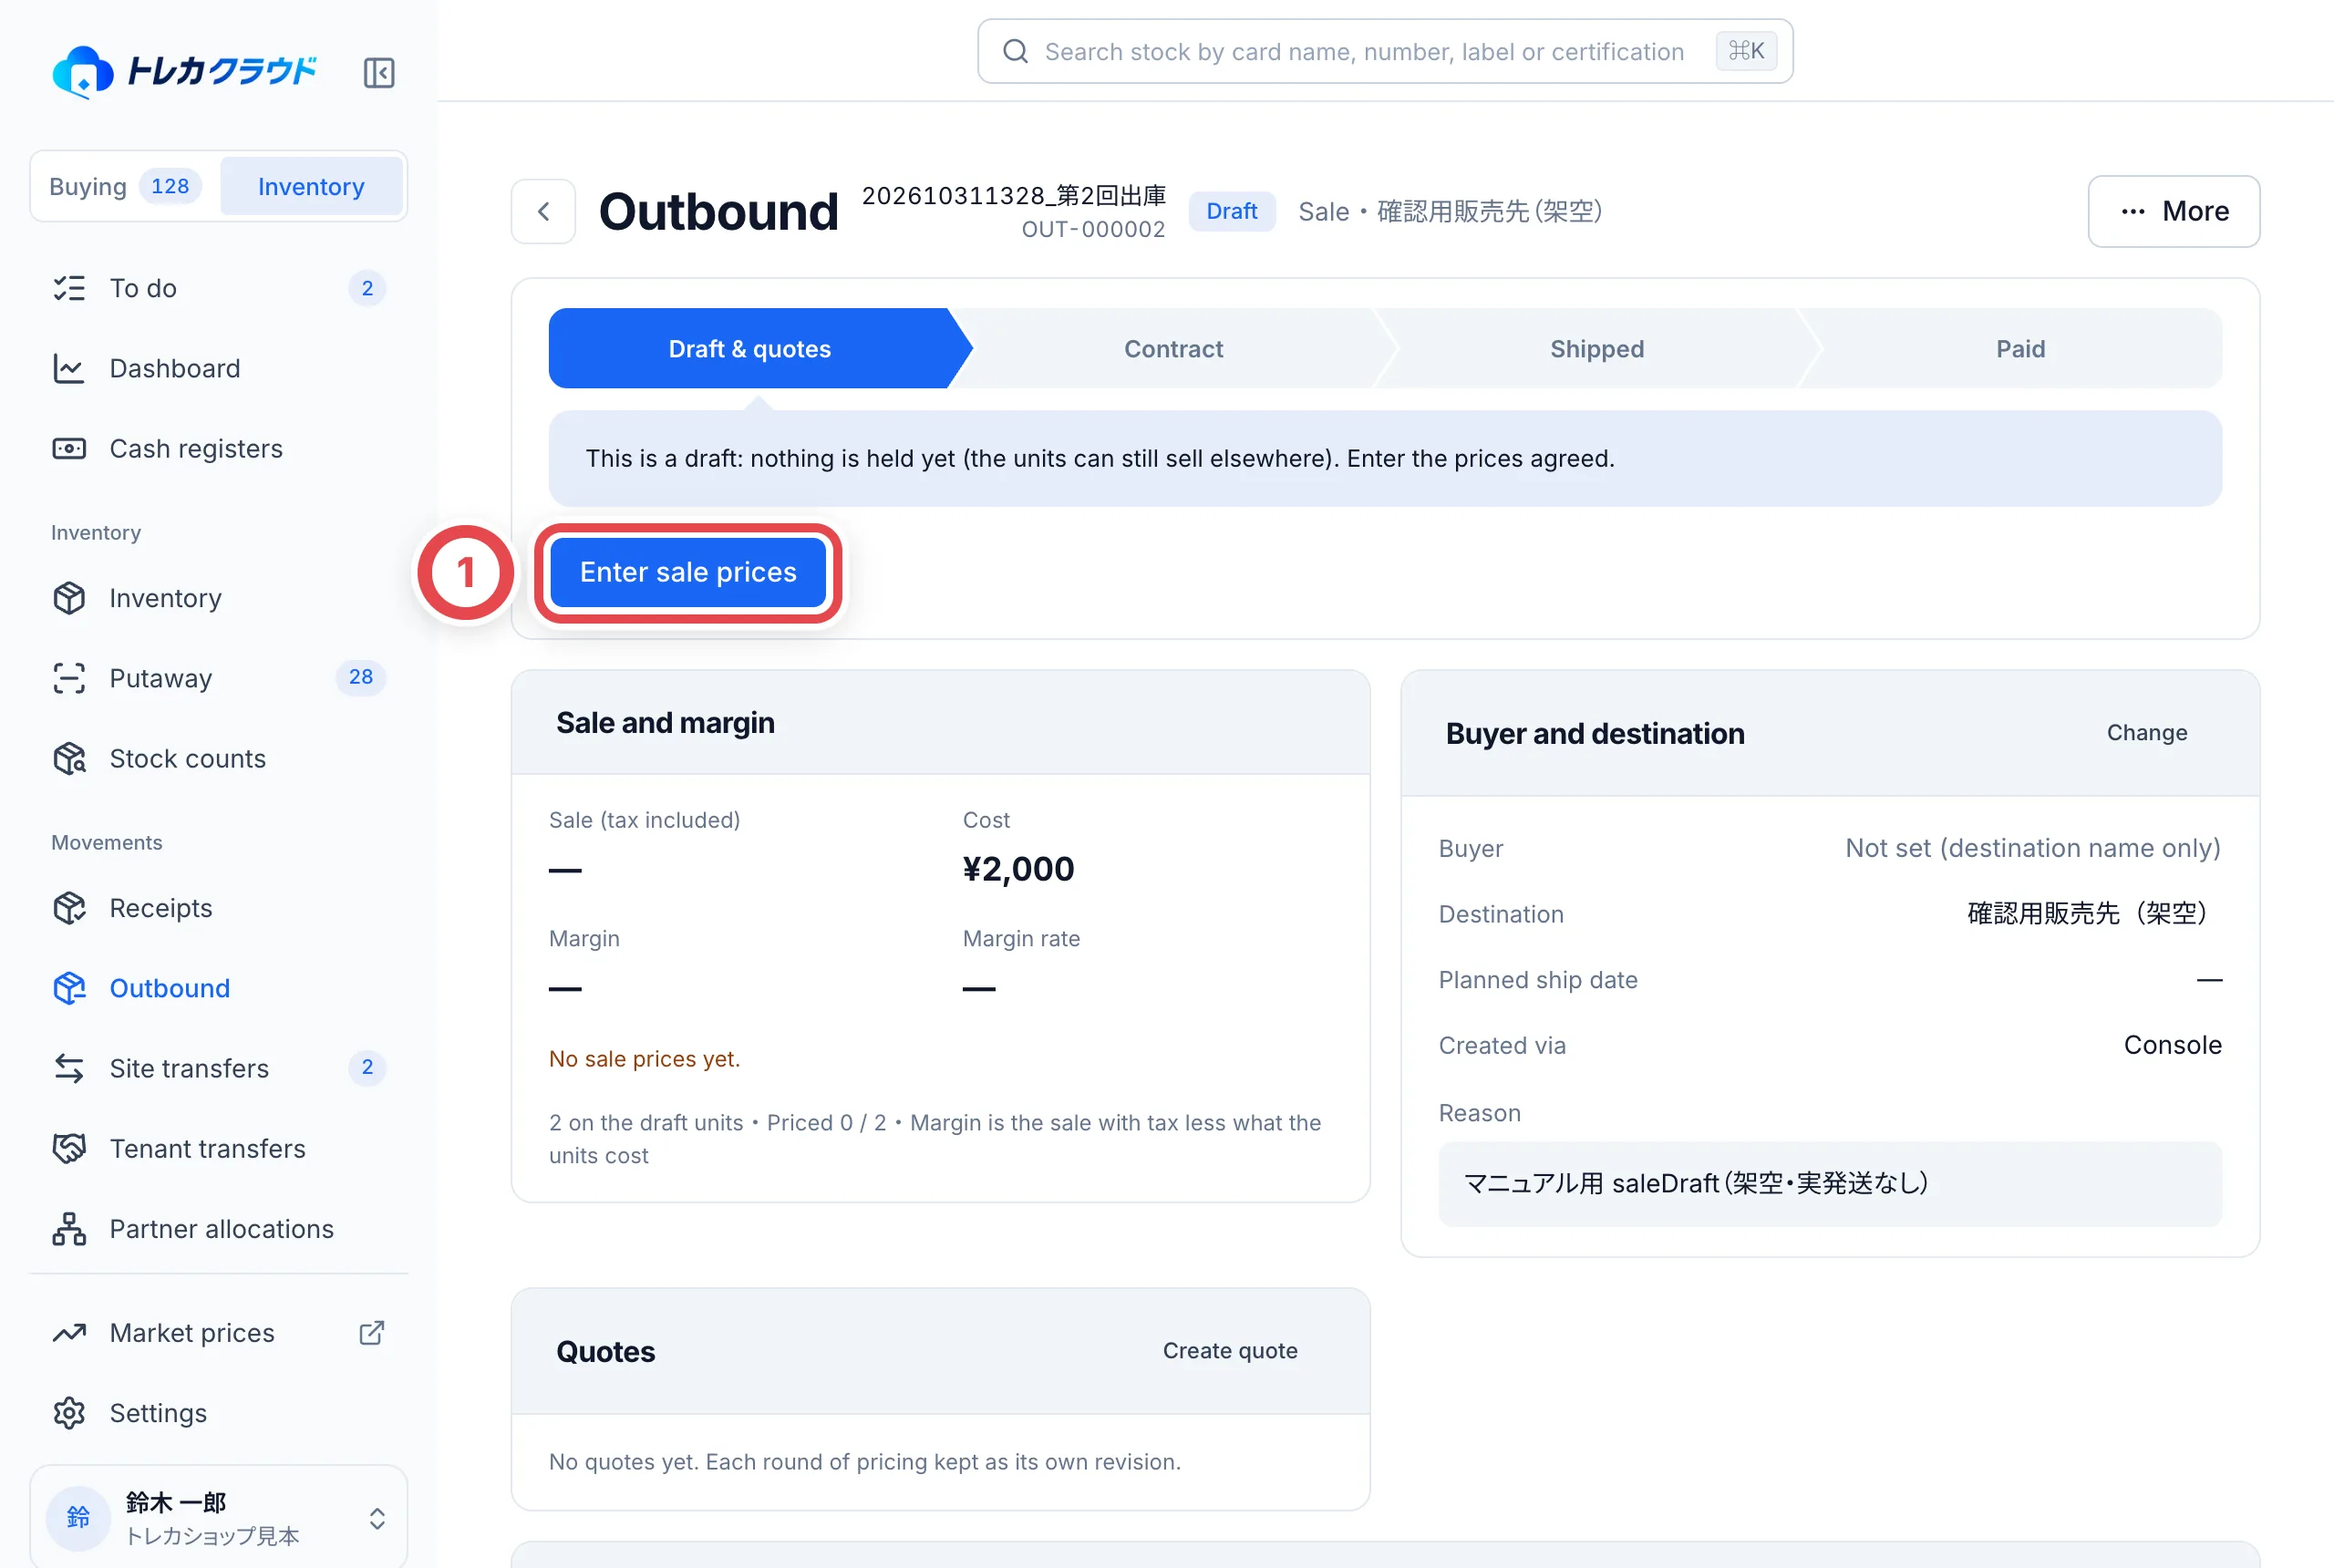 Under **How** (①), choose **Split a total**, which divides one total across the units, or **Unit prices**, which sets the price one unit at a time. If you split a total, also choose what to split it by (**Split by**: Cost, Market price or Evenly) and the **Tax** setting. **Preview** (②) shows each unit's price and margin before you save. When it looks right, click **Save**.
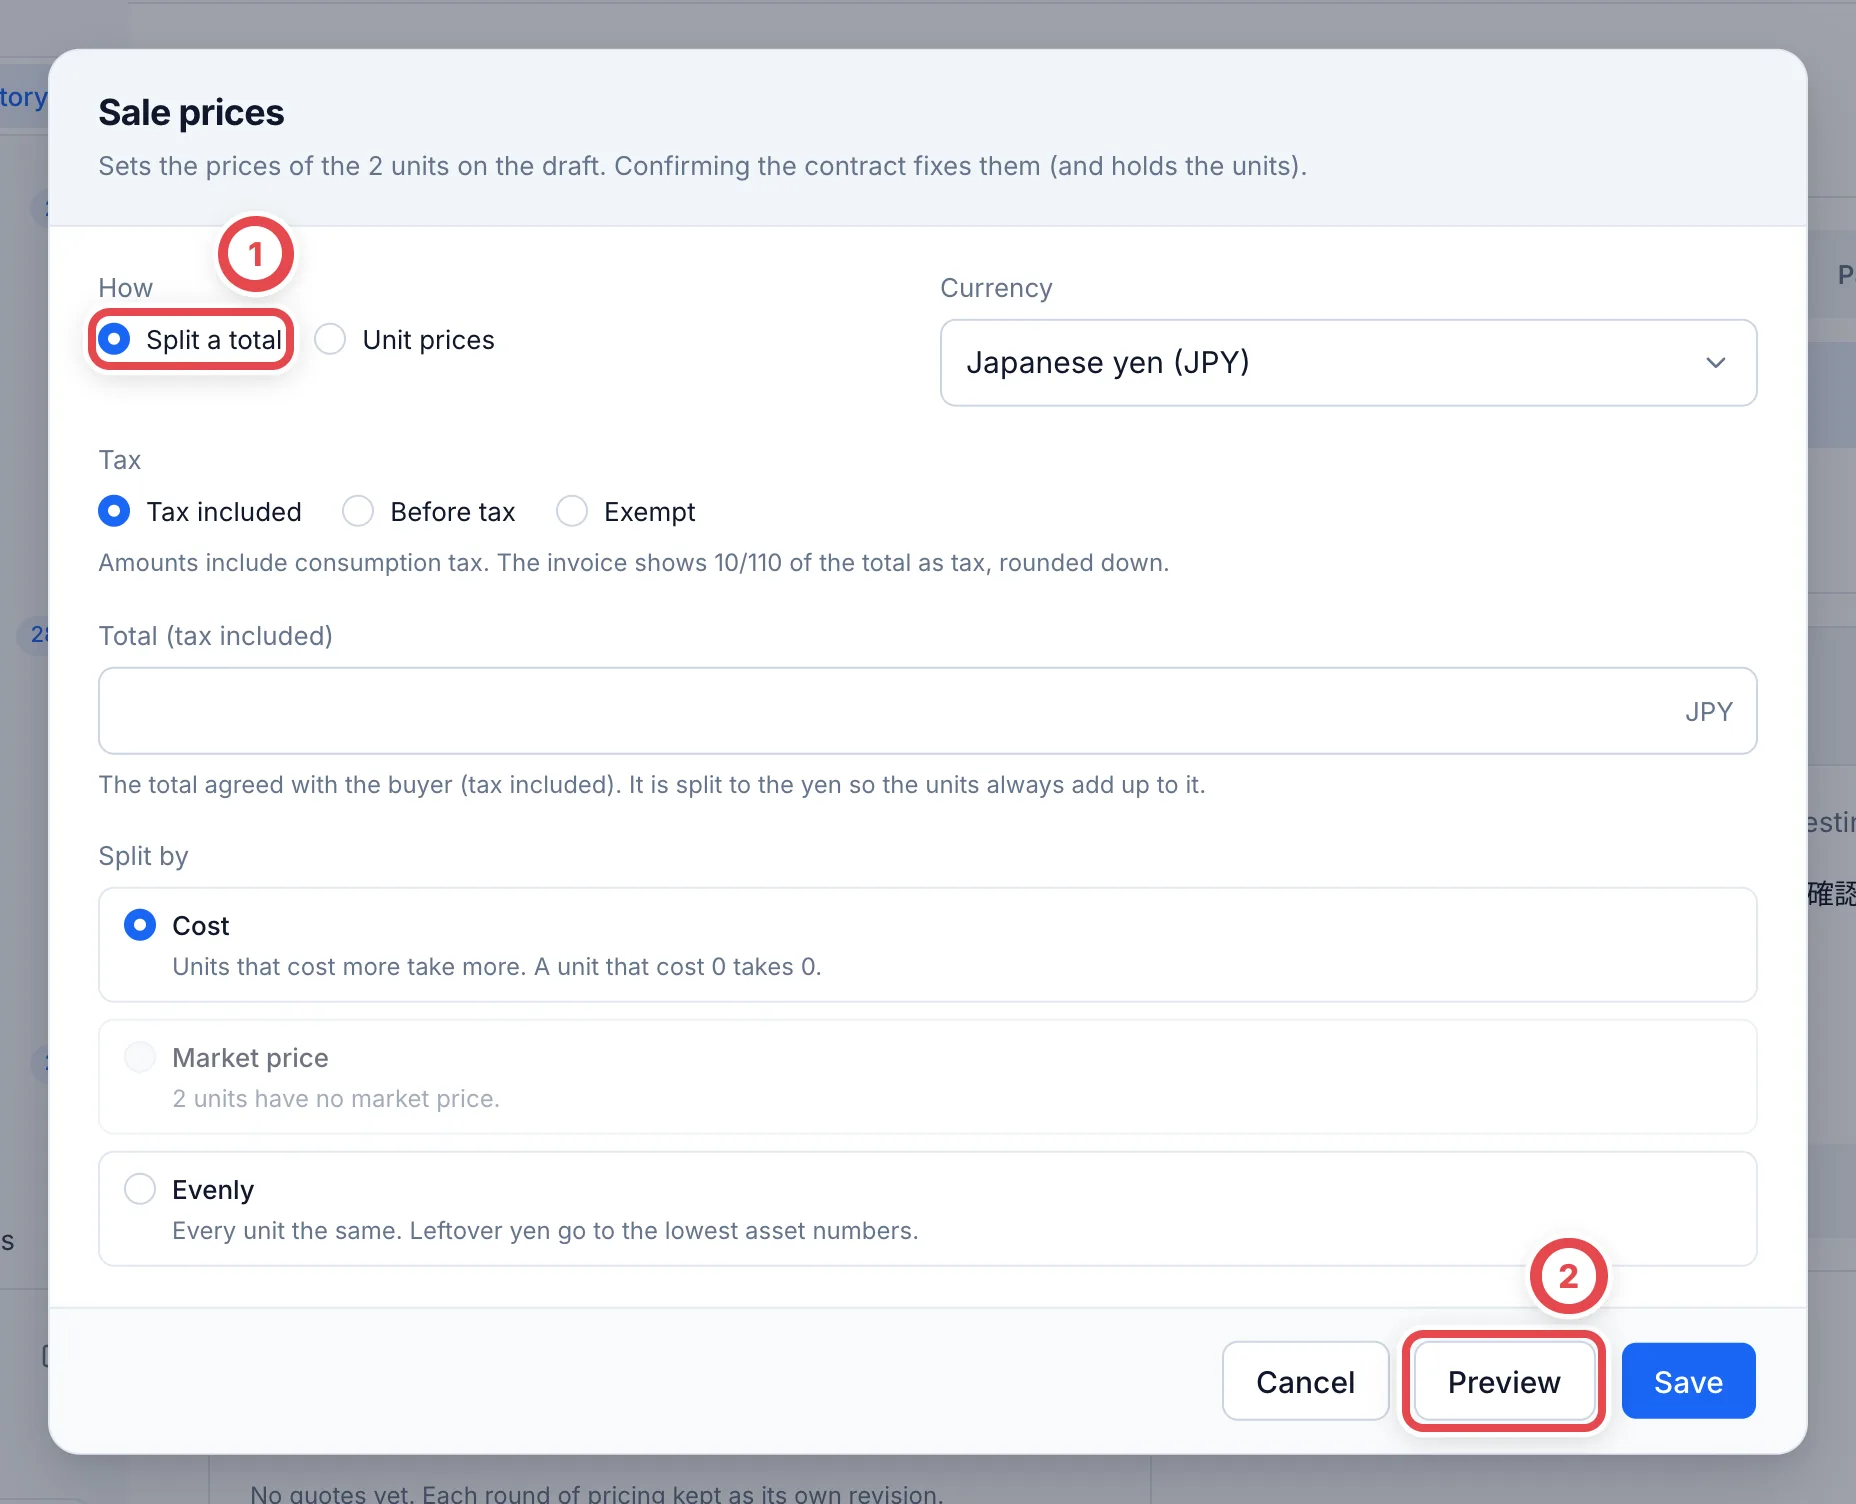 If you need a quote, click **Create quote** (optional).
## 3. (Sale) Confirm the sale contract
When you've agreed with the buyer, click **Confirm sale contract**. Check the sale amount (tax included) and the expected margin in ①, then click **Confirm with N units** (②).
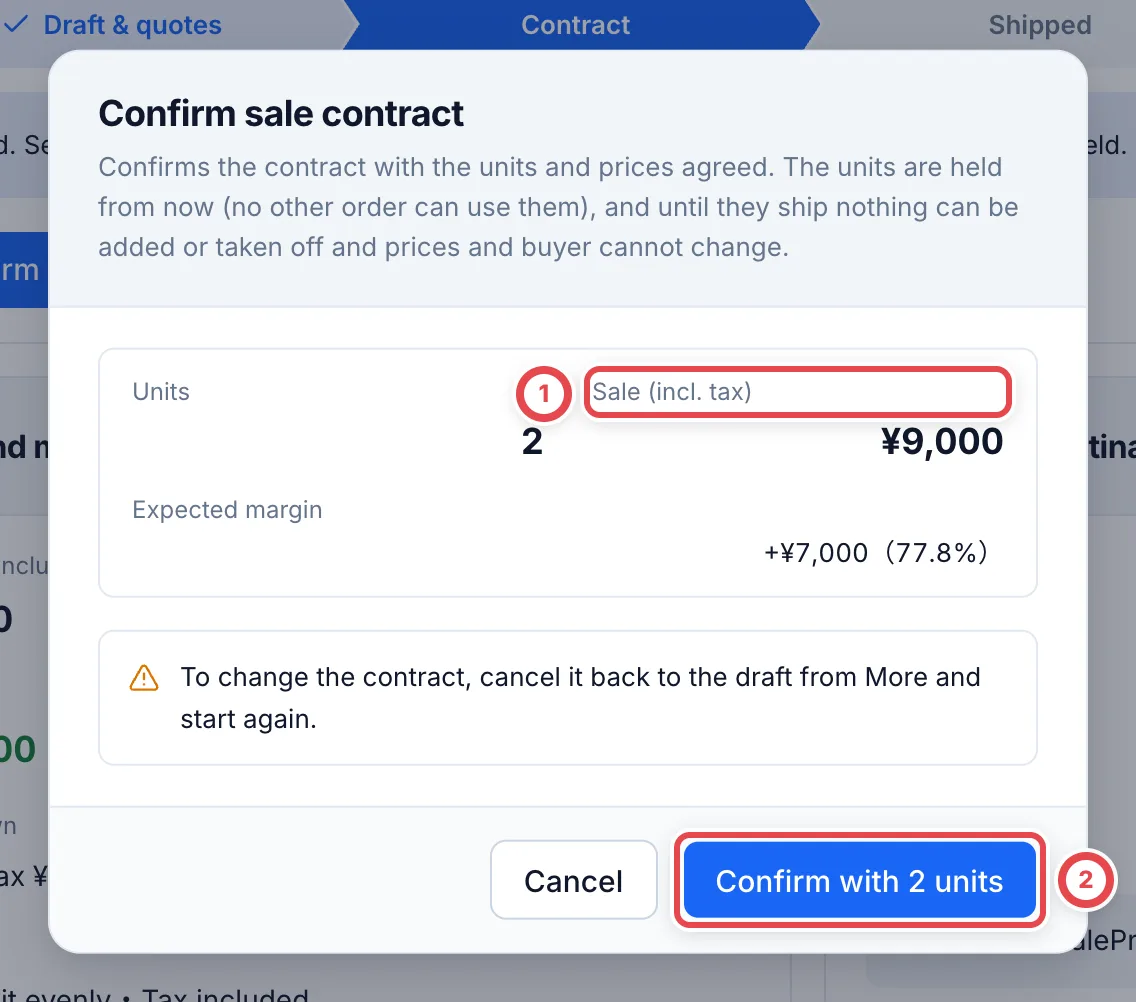 Confirming holds the units (other documents can no longer use them), and the order becomes **Contracted (to ship)**. **Until you ship out, you can't add or release units, or change the sale prices or the buyer.** To change something, click **More** at the top right, then **Cancel contract**, to send it back to a draft.
## 4. (Sale) Ship out
When you've sent the cards (or handed them over), click **Ship out**. Enter a tracking number in ① (optional), then click **Ship out N units** (②). The units become **Sold** and leave their shelves. **You can't undo this.** Make sure the cards have really left before you click.
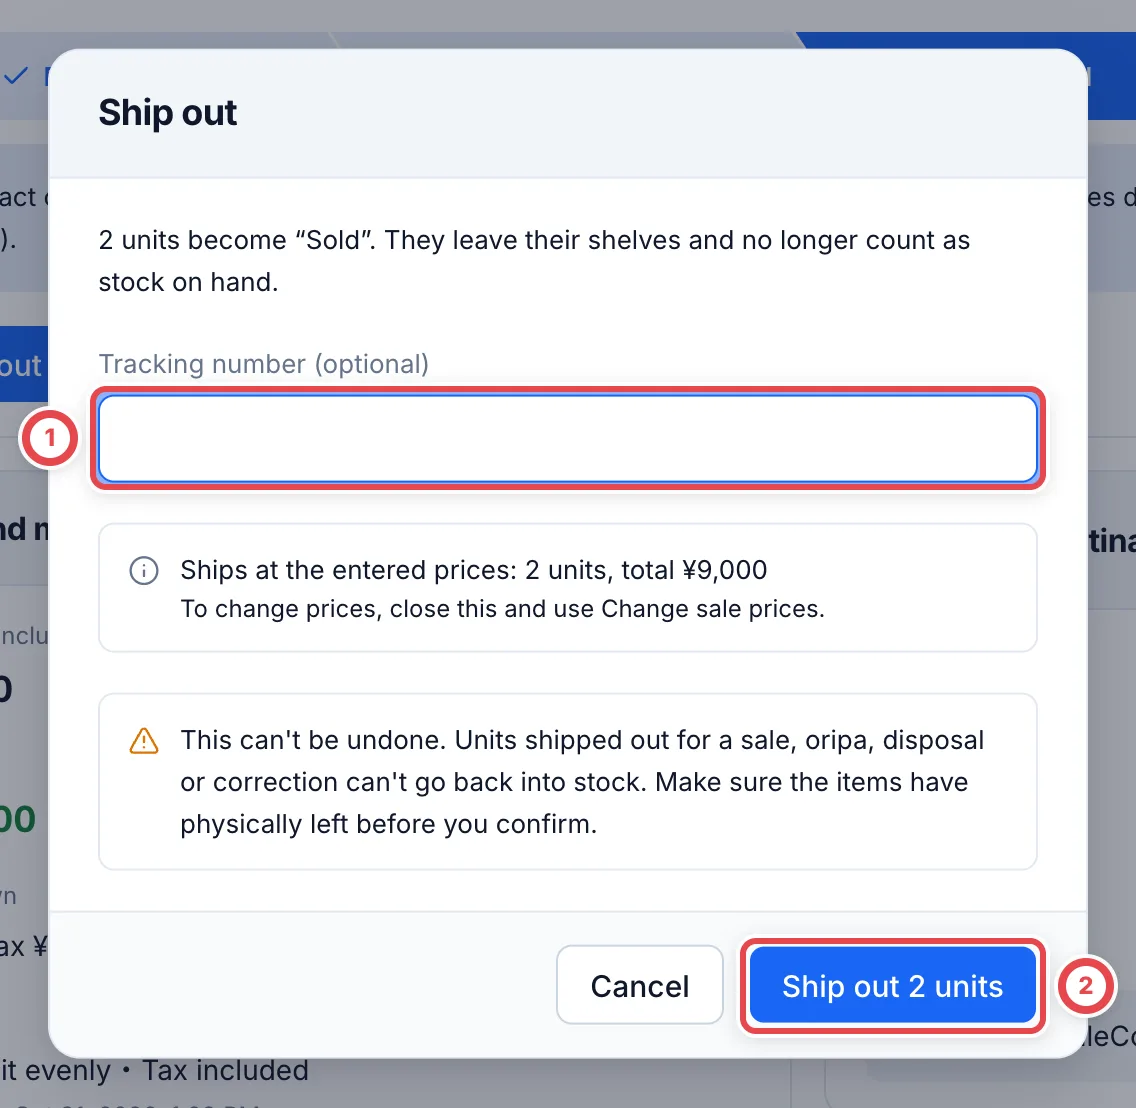 If the buyer is a linked shop that uses Toreca Cloud, you can choose **Send to “shop name” as a tenant transfer** in this dialog. The units become In transit and enter the other shop's stock when that shop accepts them.
## 5. (Sale) Issue the invoice and record the payment
After shipping out, use **Invoices and payments** to click **Issue invoice**. When you receive the money, record it with **Record payment** (①). The methods are Bank transfer, Cash and Card. You can create a delivery note and a picking list (PDF) from **Papers**. If the buyer returns units, record it with **Take a return**.
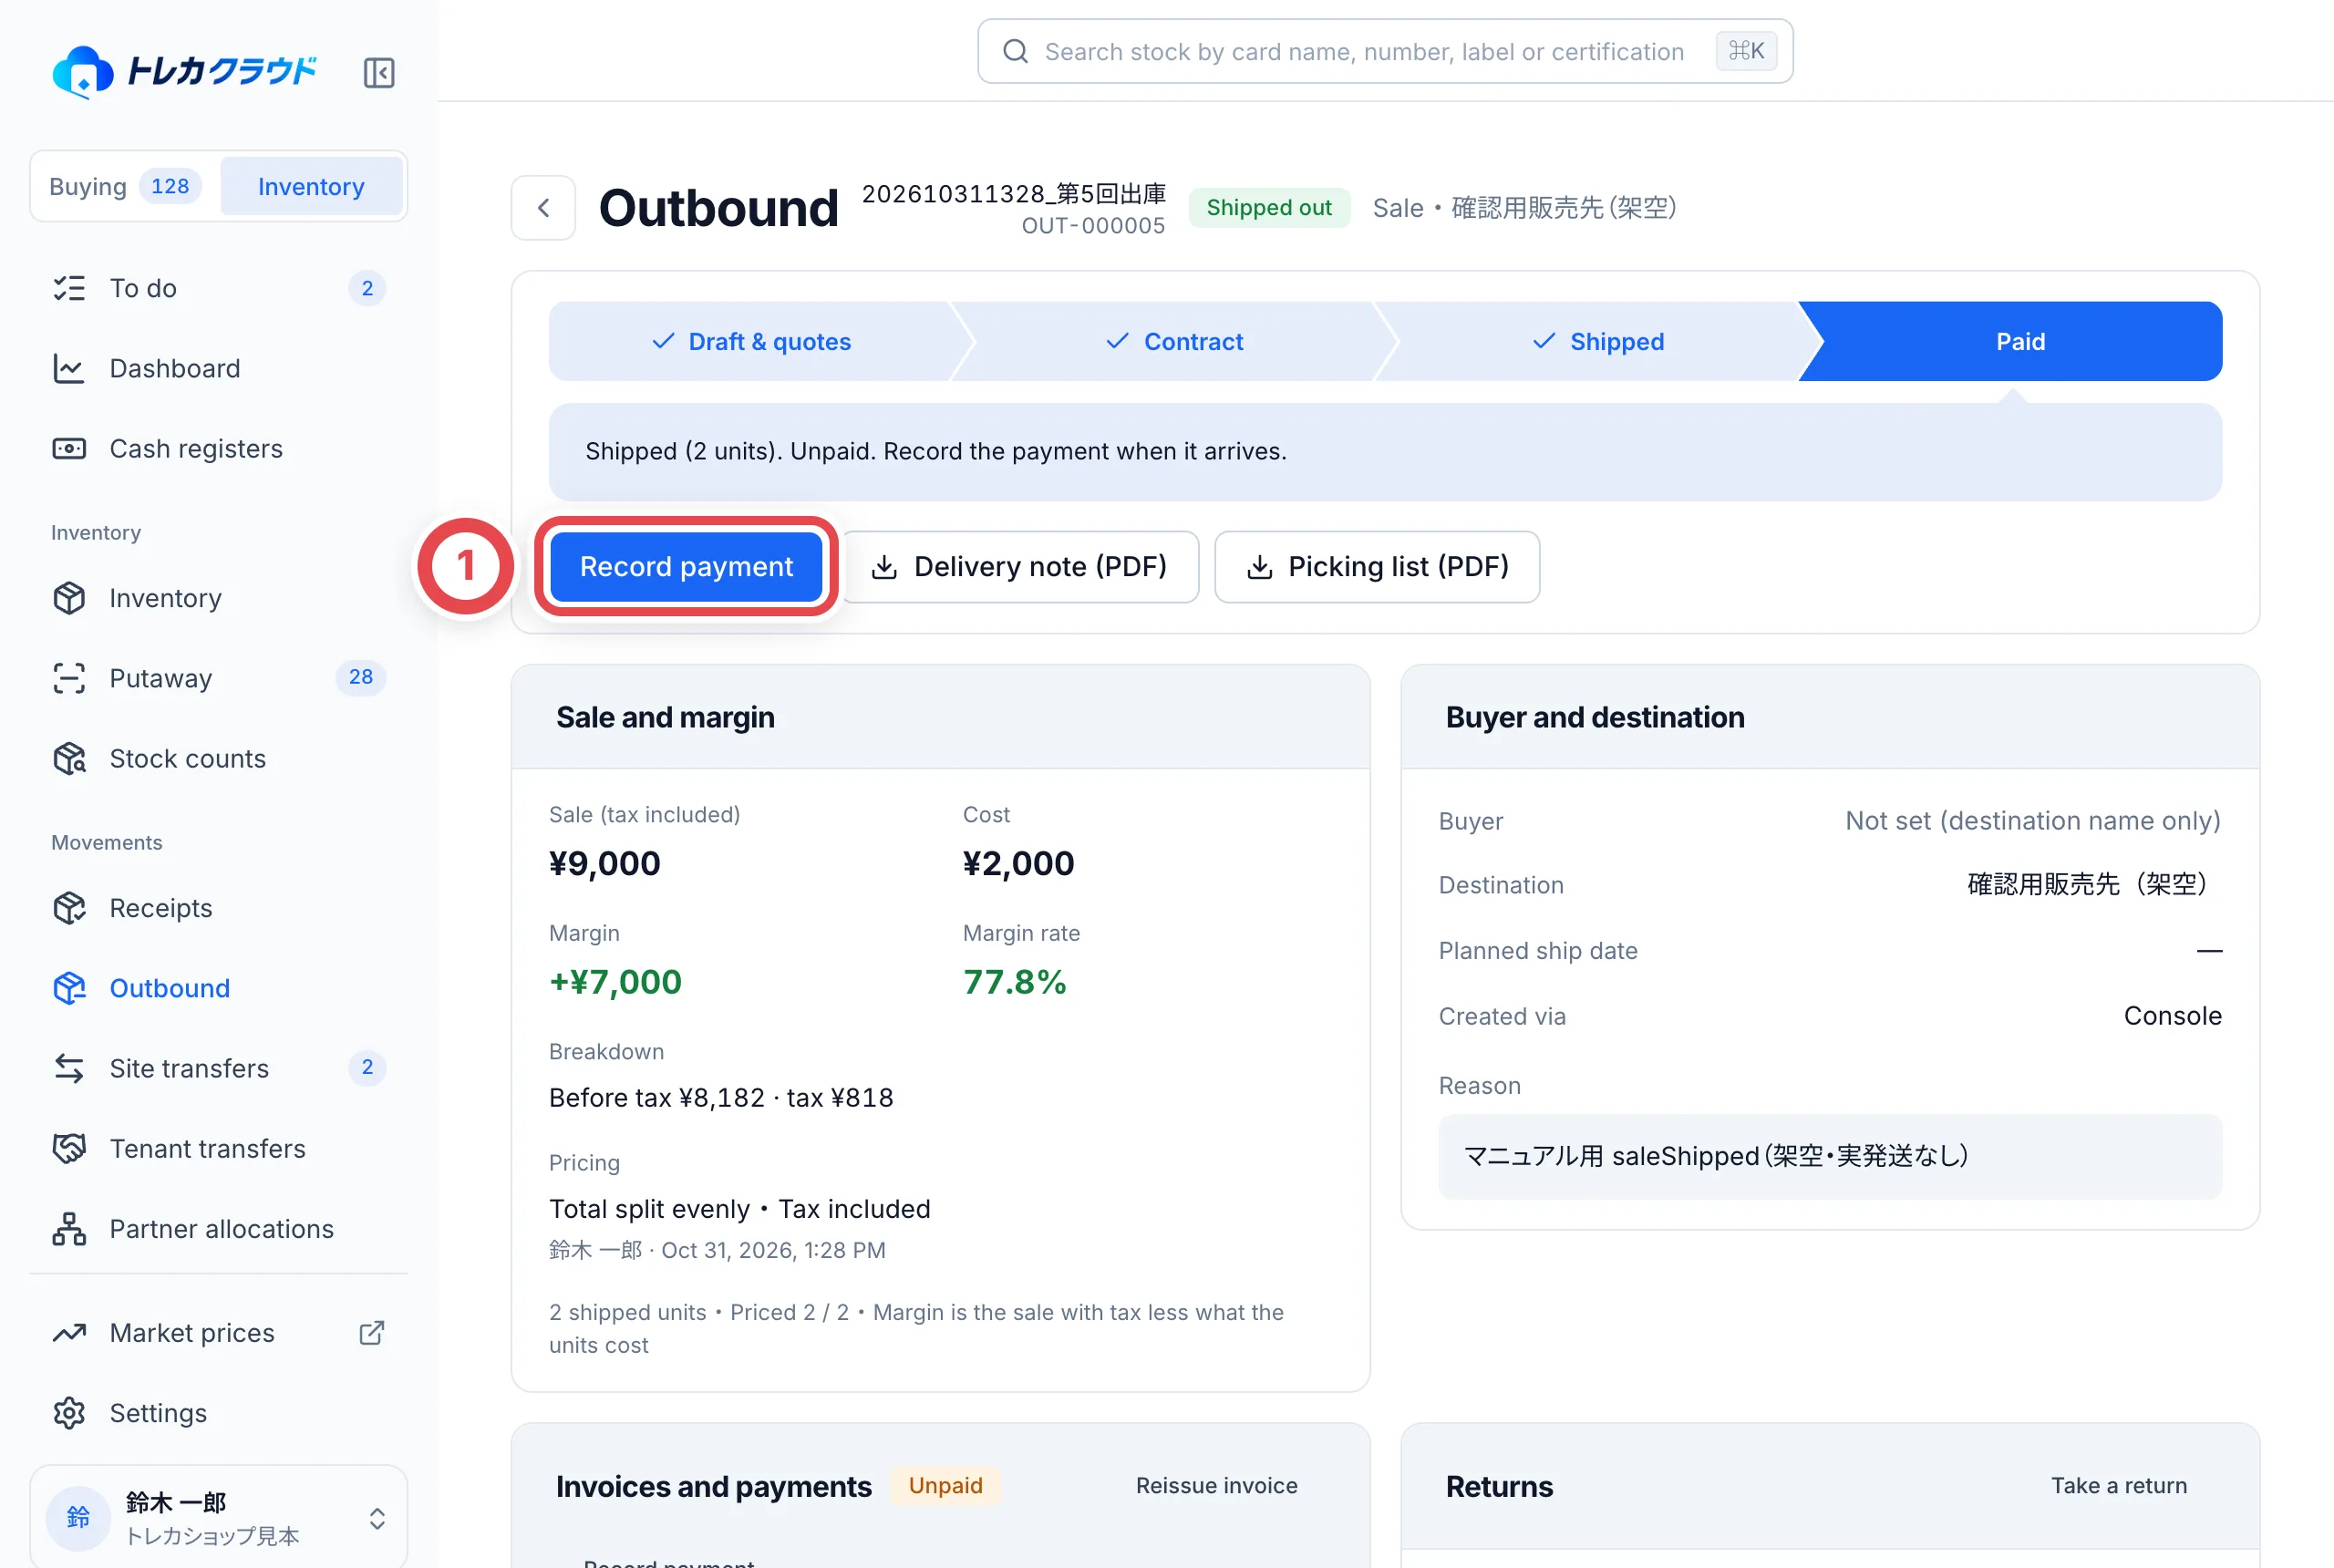 Reissuing an invoice cancels its earlier issue. Voiding a recorded payment requires a reason. Check the expected payment date or invoice due date and unpaid, partially paid, paid or overpaid status. Recording an amount does not move money through a bank or payment service.
### Selling to another Toreca Cloud shop
1. When creating a sale, choose the linked Toreca Cloud buyer and an active business link. Enter prices and confirm the contract.
2. Check the tenant-transfer option when shipping. The receiving shop matches the purchase amount, invoice and due date, then accepts the units that arrived. Its acquisition cost is the tax-inclusive sale amount.
3. After actually paying, the buyer uses **Report payment** on the transfer to record the date and amount. A report alone is not confirmed receipt of funds.
4. The seller checks the report on its outbound order and records it as a payment only after matching the received funds. Otherwise, dismiss the report with a reason.
Rejected units and units withdrawn before acceptance return to the seller's original shelf and appear as returns on the sale. Do not also record an ordinary sale return for them.
## 6. Outbound orders other than sales (oripa, disposal, take-outs and so on)
An outbound order for any other purpose is **Reserved** as soon as you save it, and its units are held. **Progress and next step** shows the buttons you can use next for that purpose. For an oripa, you can enter the oripa's sale prices with **Enter sale prices** (①). When the units have left, click **Ship out** (②).
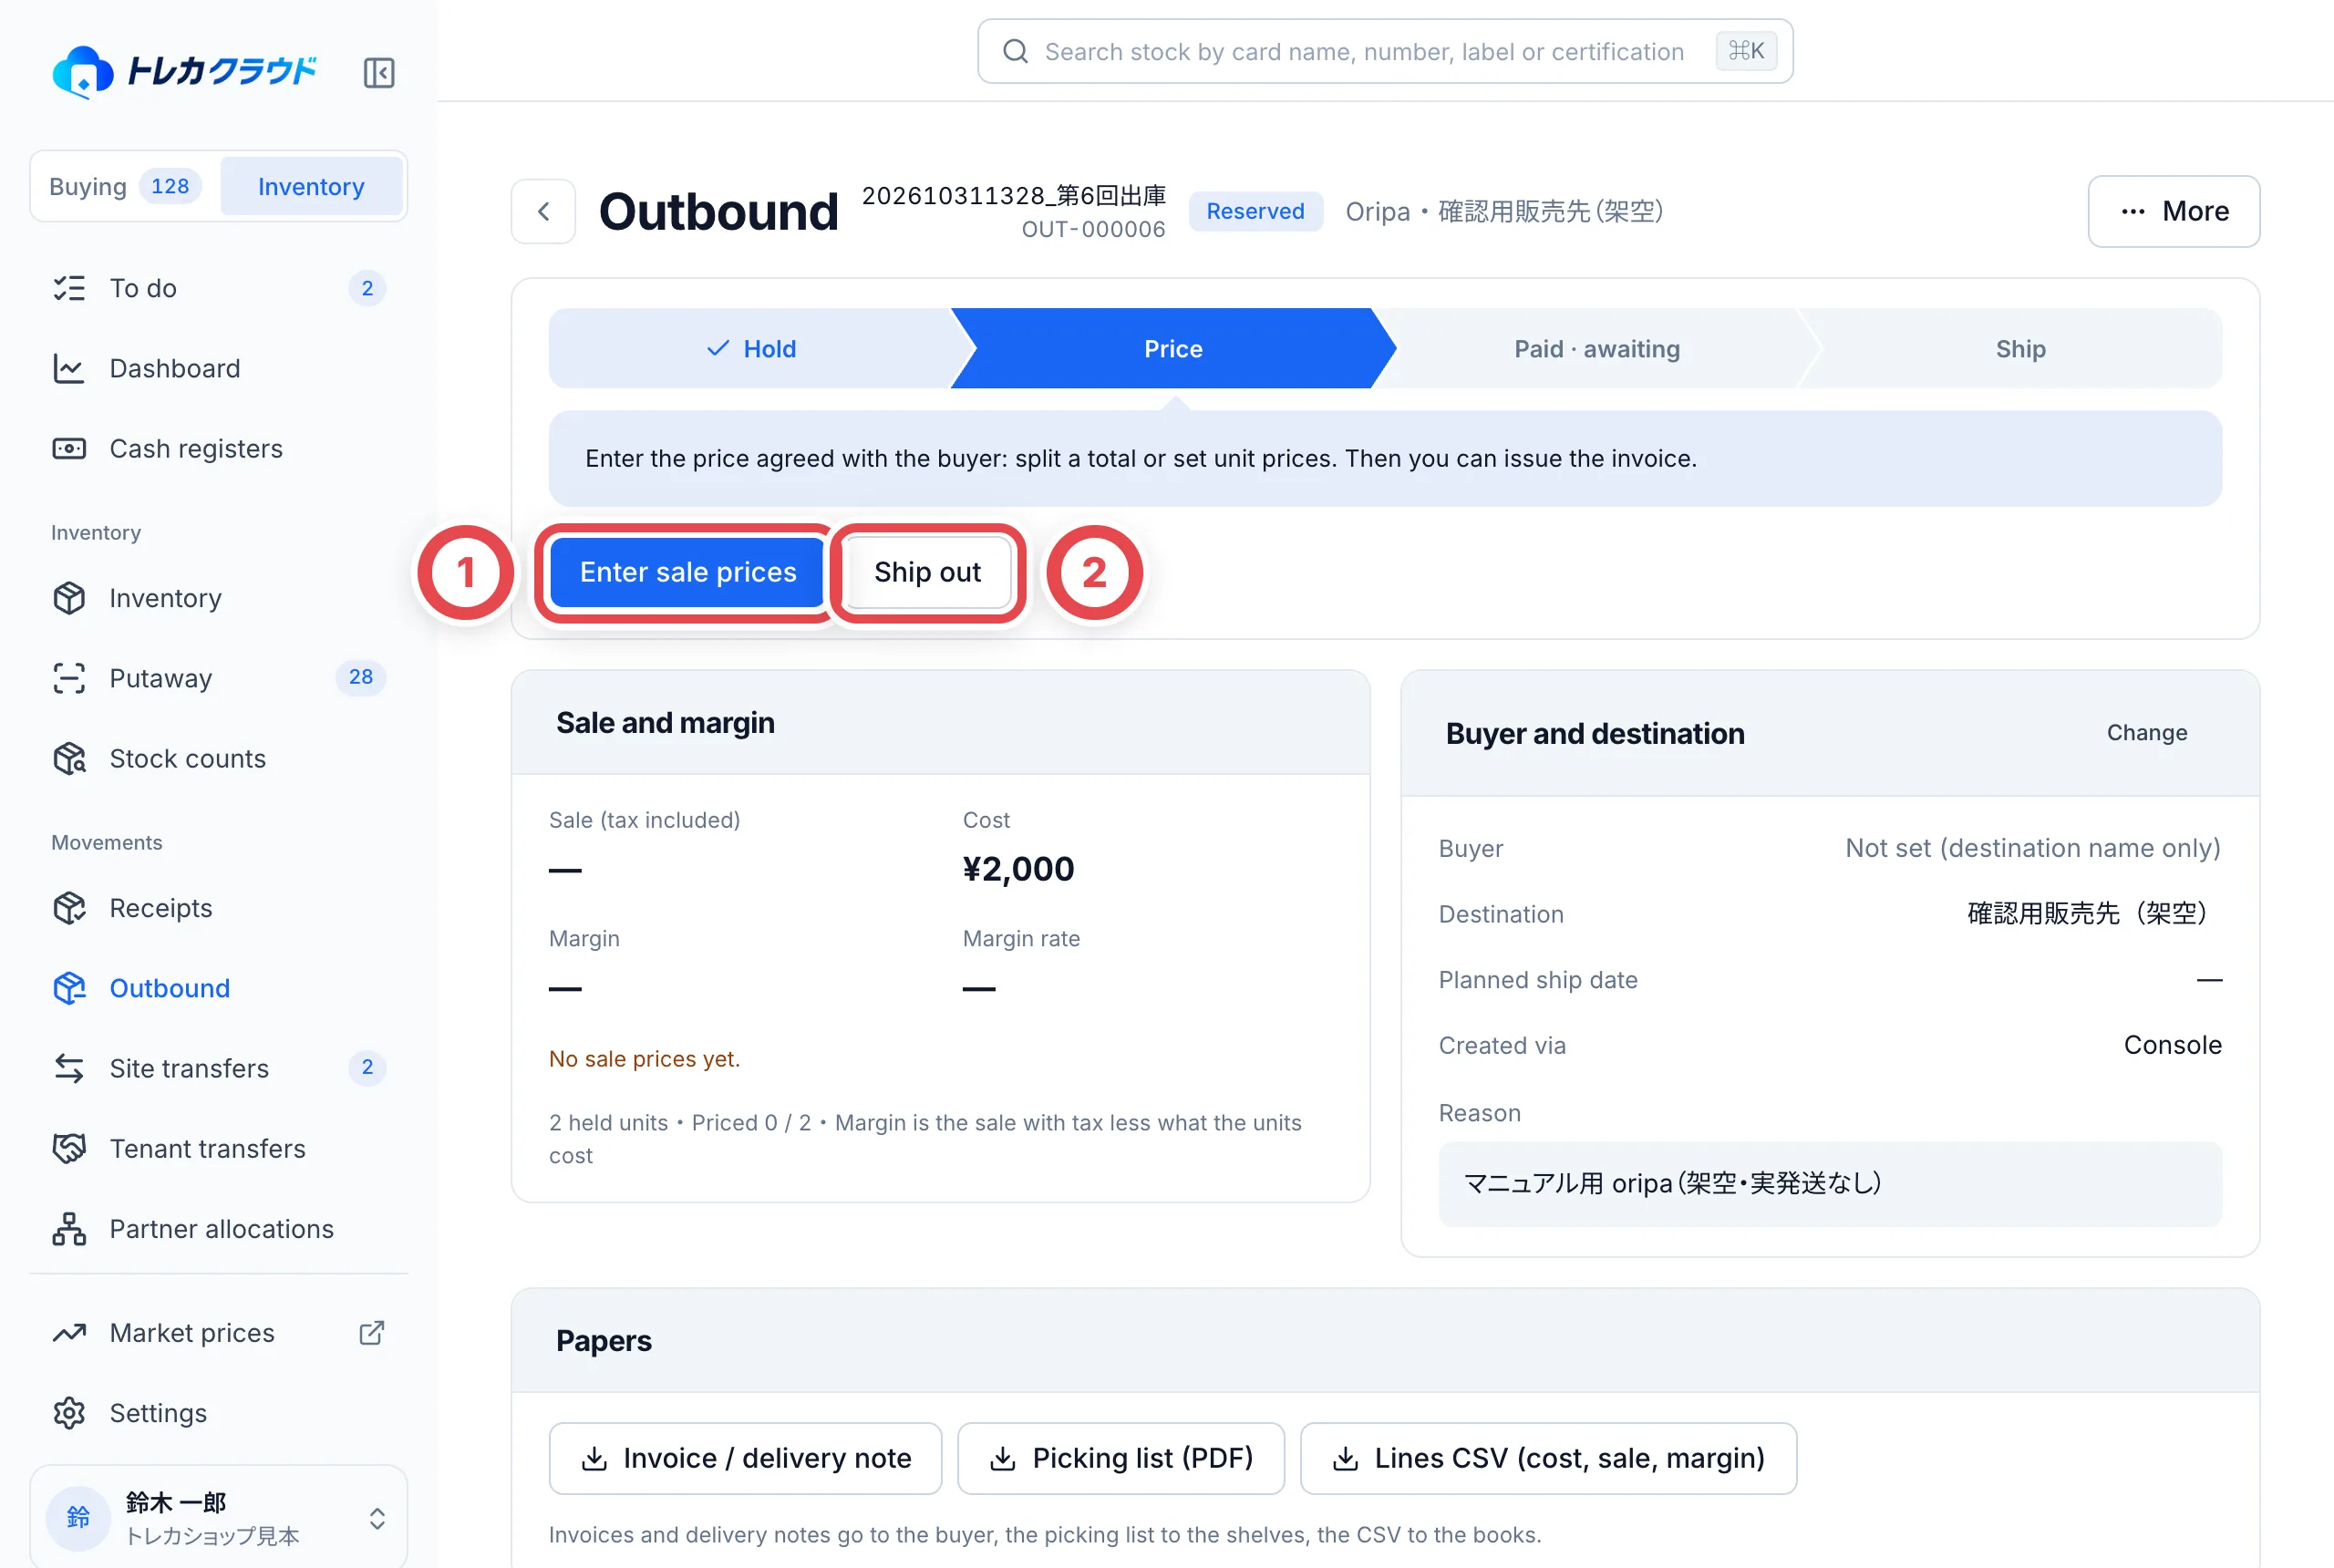 To lock in the units you're sending first, use **Mark as awaiting shipment**. Disposal and Correction orders don't have this button. To drop just one unit, click **Release** on the unit's row and choose a reason, such as Order quantity changed or Swapped for another unit.
After you ship out, the units become **Sold** for an oripa, **Disposed** for disposal, and **Removed** for Correction and Other removal. Units from an **Other removal** order can be brought back later with **Restock** on the row. Choose a shelf to return them to and a reason.
To call off the whole order, open **More** at the top right and click **Cancel order** (①), then choose a reason. On a sale draft the button is **Delete draft**. On a contracted sale it is **Cancel contract**.
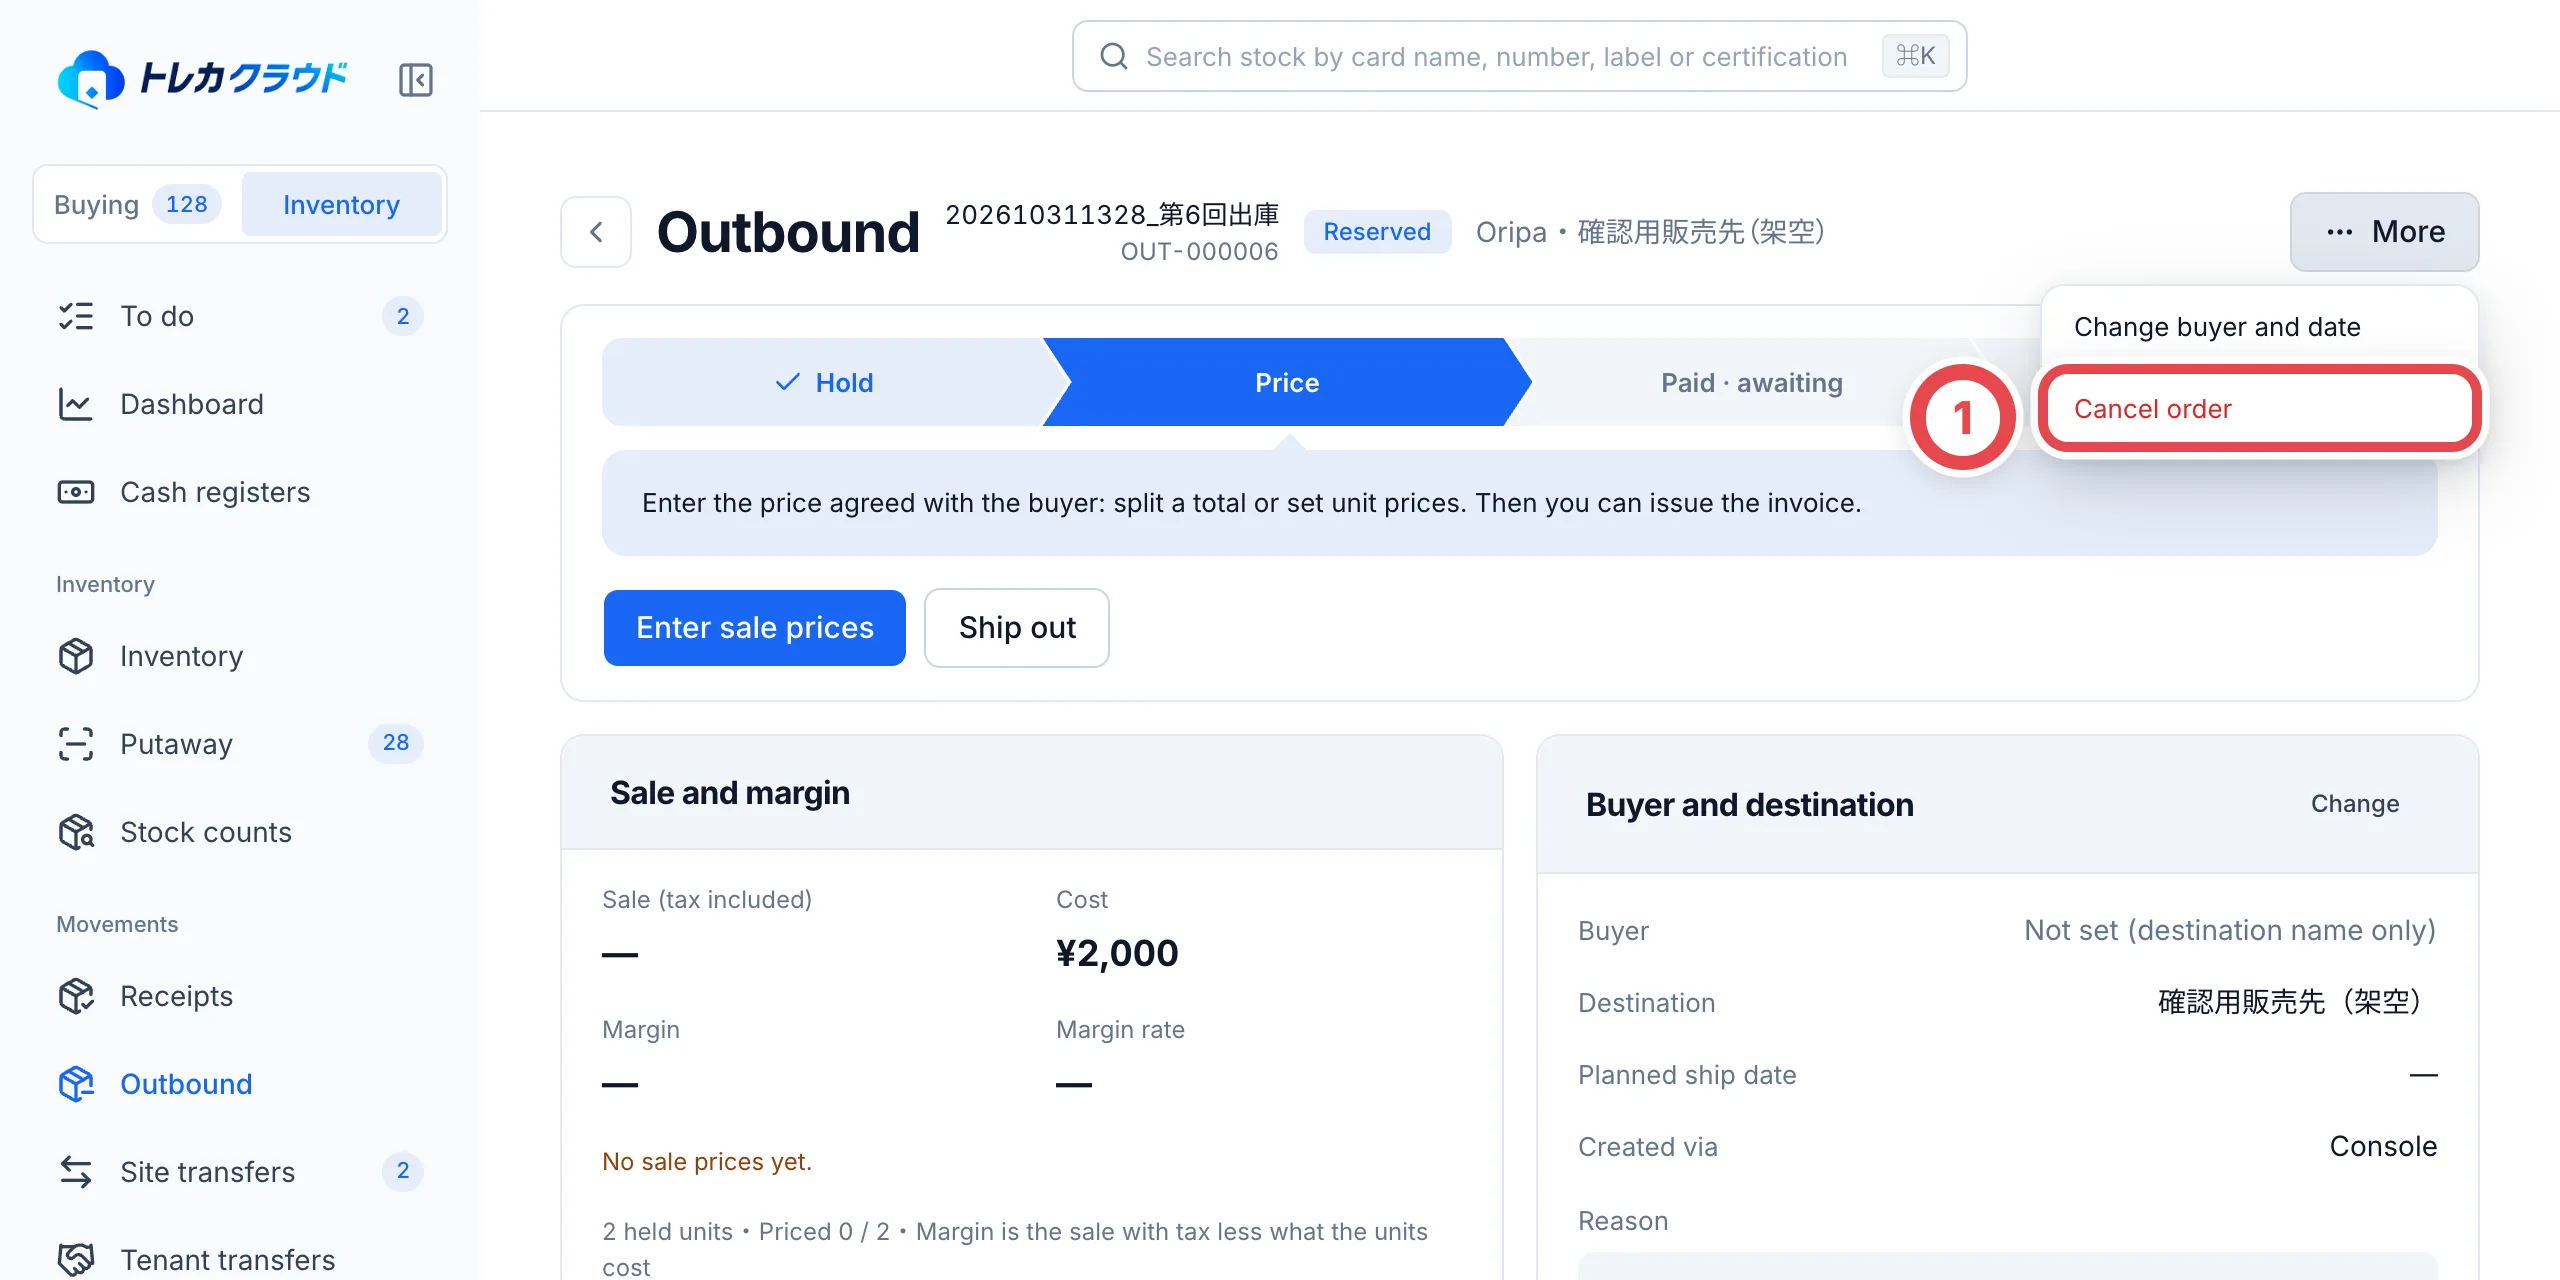 :::tip
For items registered by mistake on a receipt, select them directly in the [receipt details](/en/guides/inventory/receipts) and cancel their registration.
:::
## 7. Pick with the putaway app
In the putaway app, open ピッキング (Picking) from 作業 (Work), choose an outbound order (Reserved or Contracted) and scan stock labels. Each unit you take off the shelf is marked, and the order's page shows **Picked**. The app's screens are in Japanese only, so the button names below are given in Japanese with their meaning in parentheses.
When there are several copies of the same card at the same grade (ten PSA 10s, say), you can take a different copy from the one on the order. If you scan a unit that isn't the one on the order, the app shows the order's unit and the scanned one side by side and highlights any difference in certification number, condition tags or condition note. Tap 「差し替えて取り出す」 (Swap and pick) to put the scanned unit on this order. The unit it replaces goes back to stock. If you tap 「今回は使わない」 (Don't use it this time), put the scanned unit back on the shelf.
Turn on 「この出庫では、同じカード・同じグレードなら確認せずに差し替える」 (On this order, swap without asking for the same card and grade) to skip the question until you close the screen. On the order's page, a swapped line is marked **Swapped in** with the asset number of the unit it replaced.
When you confirm a swap, you can also use units that are registered at another site (units at the same site come first). Units that are **Awaiting receipt**, and units already allocated to a partner, can't be used as swaps.
## 8. Create a site transfer and record the shipment
A site transfer sends stock from an origin site to a destination site. You can use it when you have two or more active sites.
Click **Site transfers** in the sidebar, then **Create transfer**. Choose the **Origin** (①) and the **Destination** (②), then choose the units to move. The carrier and tracking number are optional. The reason for the transfer is required, and you can pick one from the suggestions. When you've sent them, click **Record shipment** (③). **Clicking it records right away.** The units become **In transit** and leave their shelves.
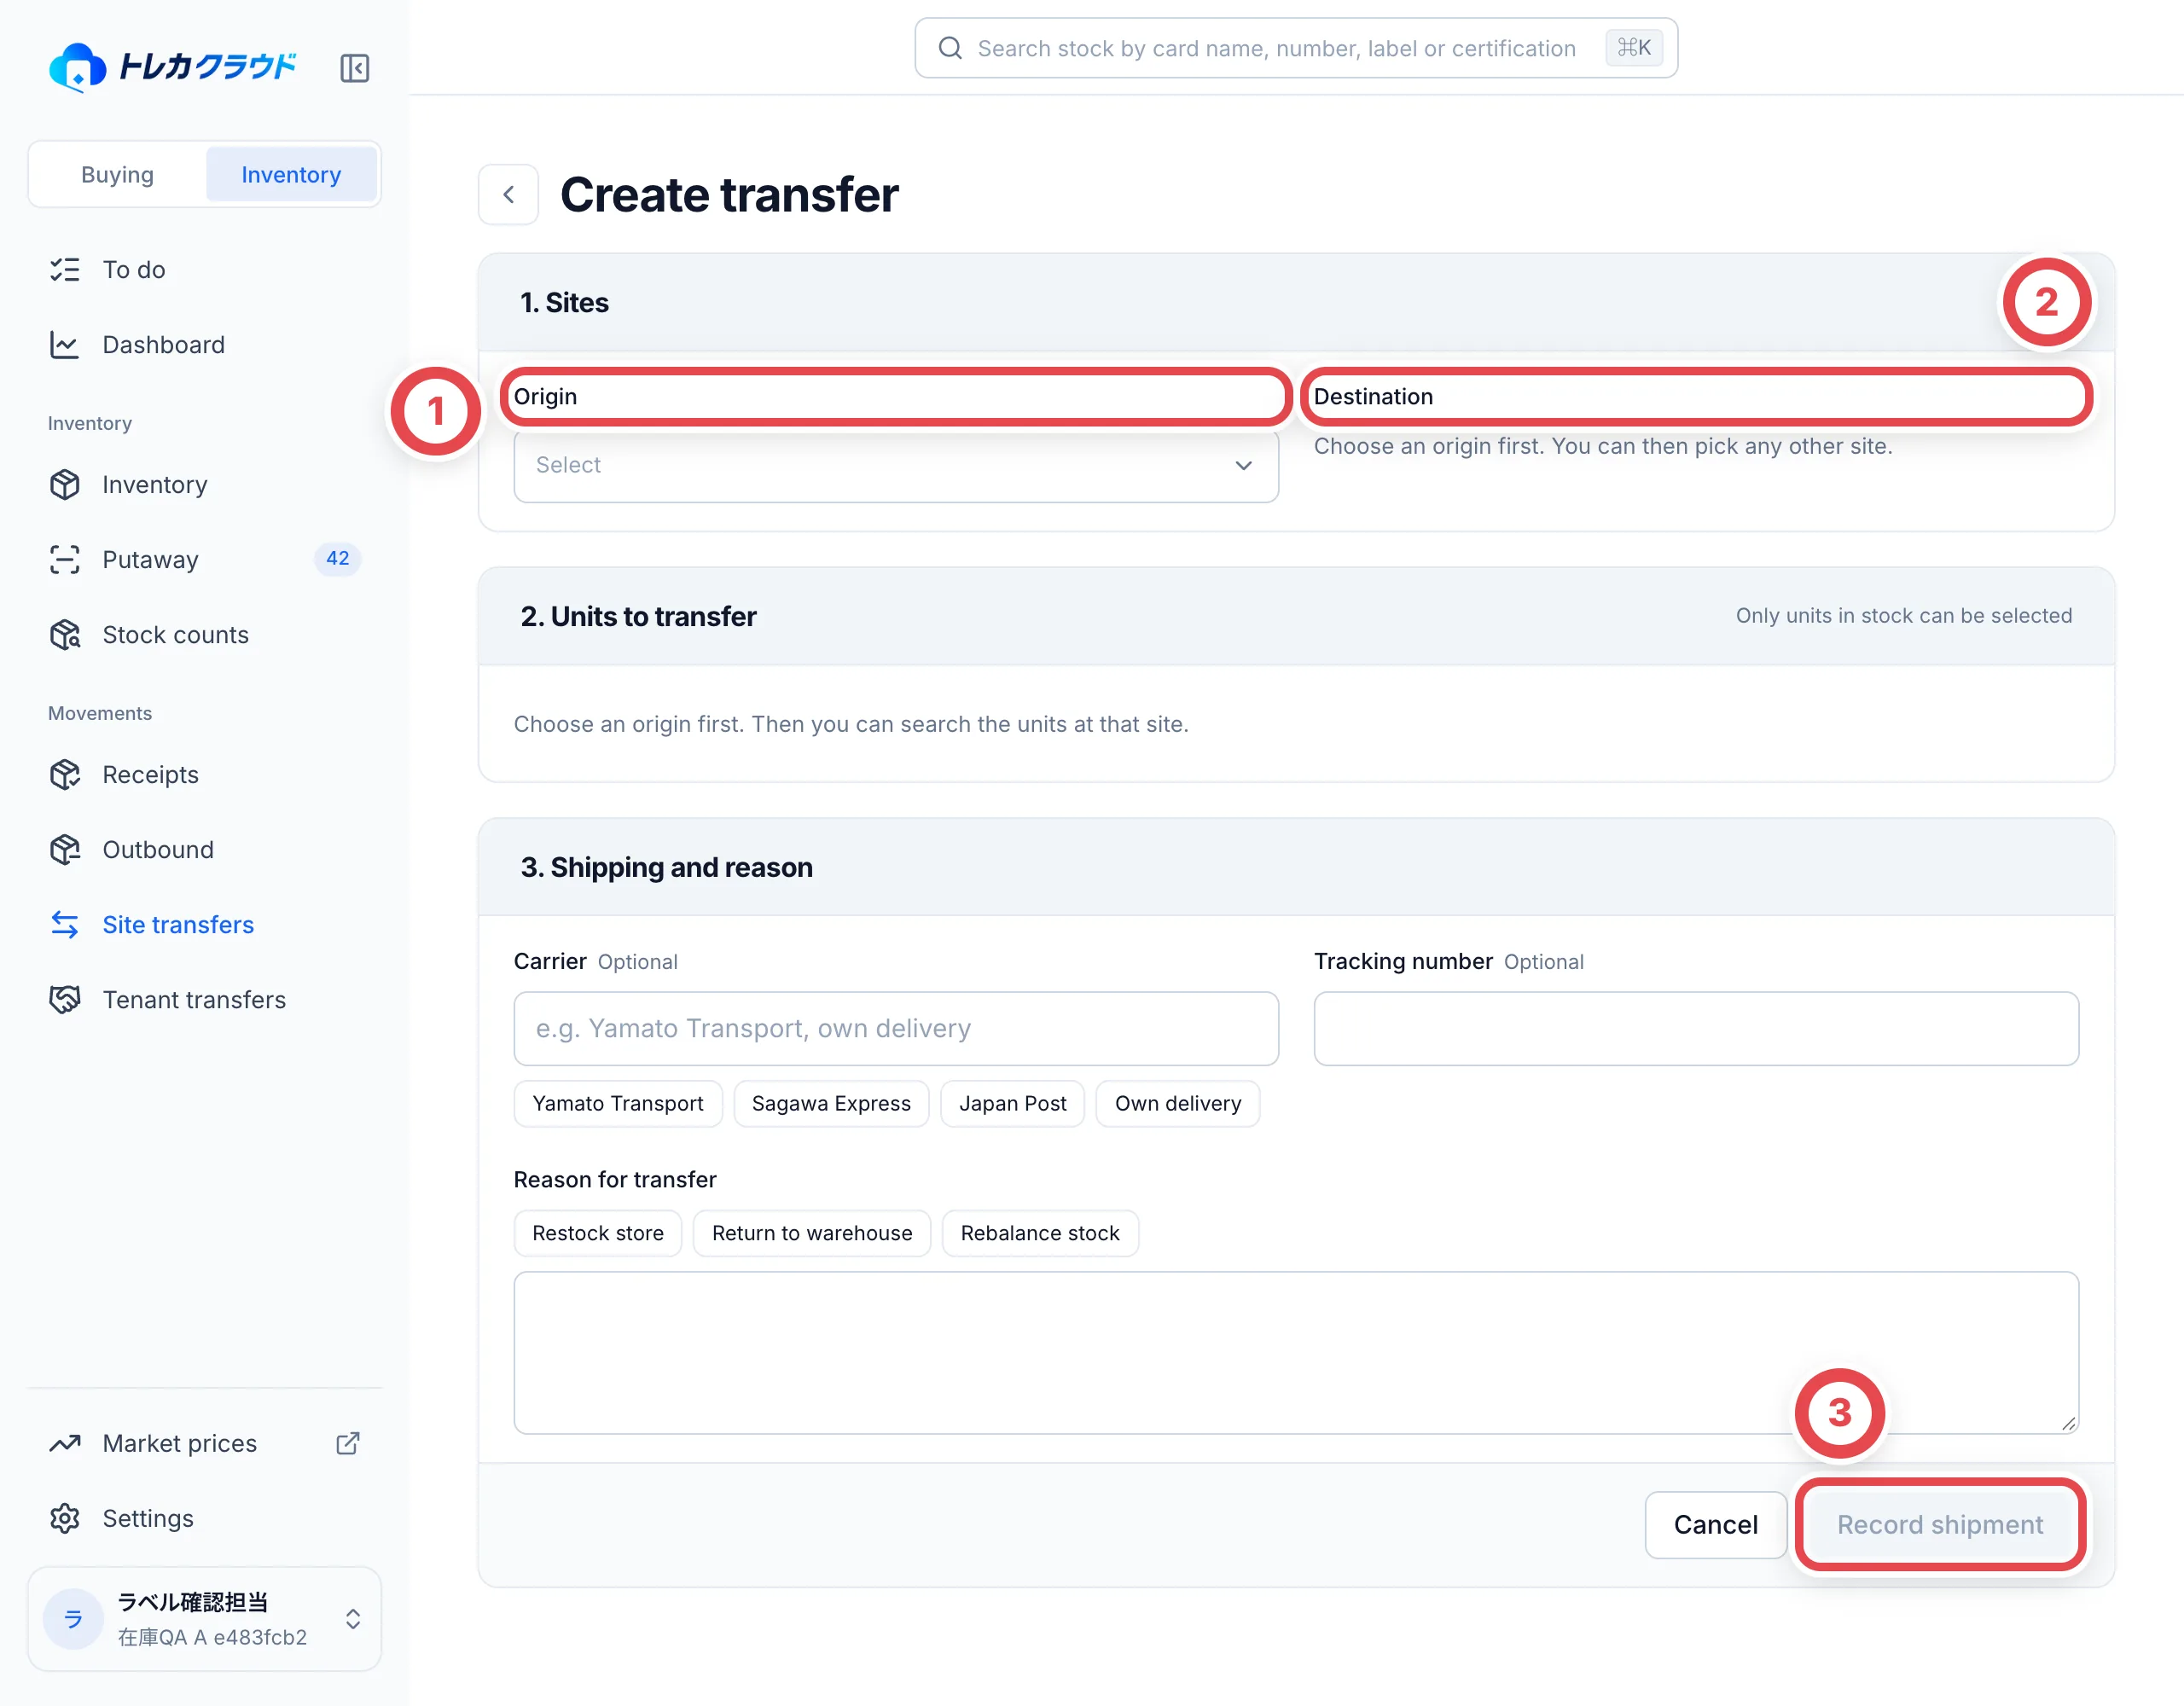 ## 9. Receive at the destination
At the destination site, open the document and click **Receive** (①). For units that didn't arrive, use **Return to original shelf** (②) to send them back to the origin, and choose a reason.
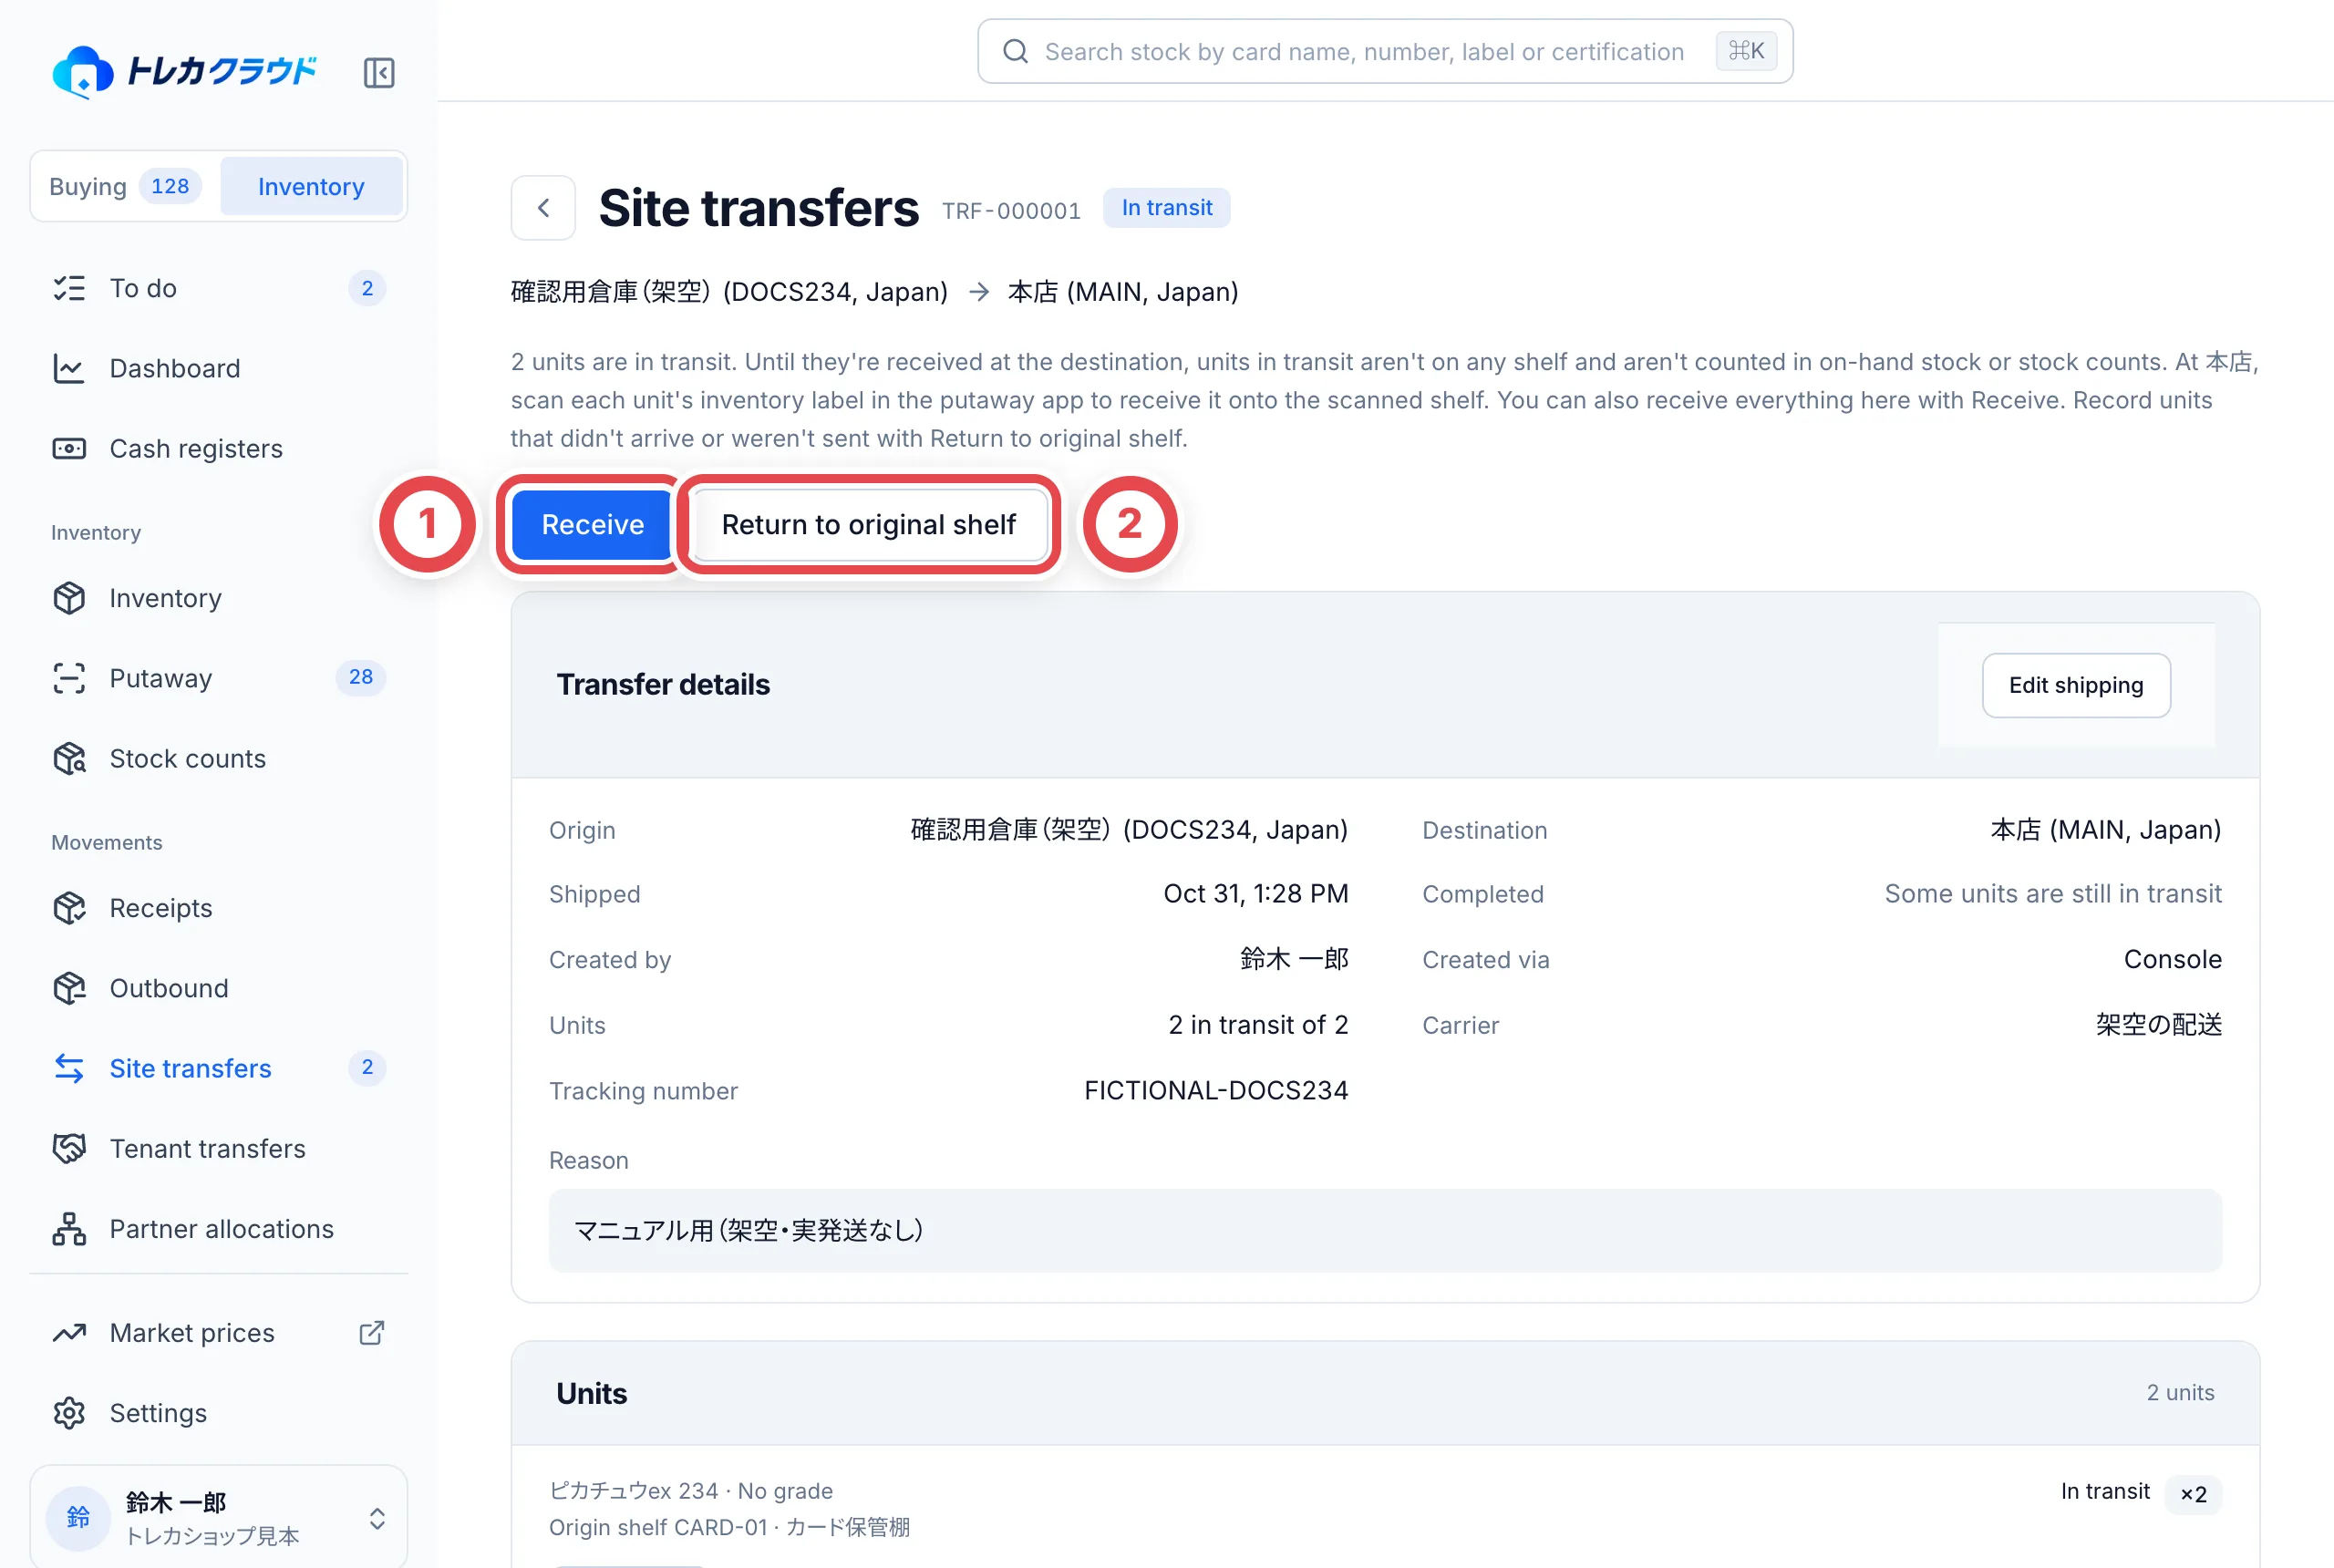 In **Receive units**, choose the receiving shelf in ①, check only the units that arrived, then click **Receive N units** (②).
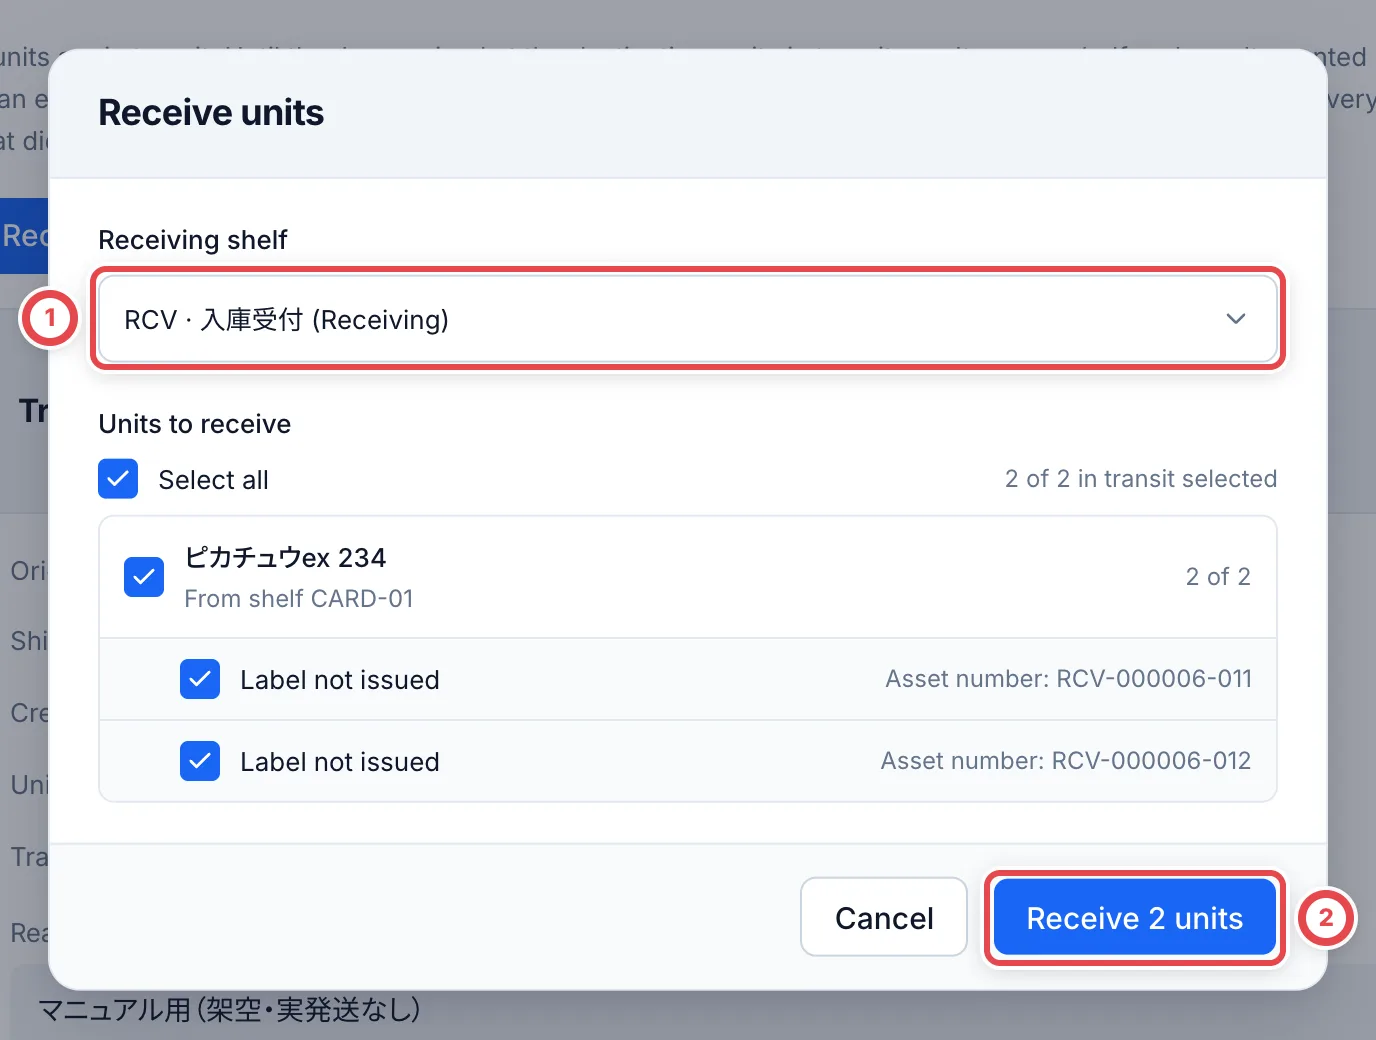 While a transfer is in transit, use **Edit shipping details** to add or correct the carrier and tracking number. Update the same transfer and reopen it to verify the saved details.
You can also receive in the putaway app under 「入荷」 (Incoming). Choose the receiving shelf first, then scan the labels of the stock that arrived. The units are received on that shelf.
## Tenant transfers
A tenant transfer hands stock over to another shop that uses Toreca Cloud. Before you use it, link with that shop under **Settings** › **Business links**. Requesting and approving links requires business-link management permission, included in the standard Owner and Admin roles. If **Tenant transfers** isn't in your sidebar, your shop can't use it.
1. Under **Tenant transfers**, click **Send transfer**, choose the **Recipient**, and enter a **Note** (required, and the other shop can see it)
2. Select units that are in stock and click **Send transfer**. **Clicking it sends right away**, and the units go **In transit**
3. The other shop chooses a receiving shelf and the units, then clicks **Accept**. Units they accept show as **Transferred** on your side
The other shop can click **Reject** if the units haven't arrived or the contents are wrong. Rejected units go back to their original shelf on your side. You can withdraw a transfer that hasn't been accepted yet with **Cancel transfer**.
The other shop receives the card, grade, certification number, condition note and cost. Customer details and purchase cases don't carry over. When the two sides are different businesses, the transfer is recorded in both secondhand ledgers, and the receiving side needs a valid secondhand dealer license.
## Partner allocations
Shops that use integrations can decide which units a partner may see and hold under **Partner allocations**. Choose a partner and the units, then click **Allocate**. For integration settings, see [Integrations](/en/guides/settings/partners).
## Troubleshooting
| What's happening | What to check and how to fix it |
| ------------------------------------------------------ | --------------------------------------------------------------------------------------------------------------------------------------------------------------------------------------------------------------------------------------------------------------------- |
| A unit shows **Can't add** | It's awaiting receipt, or it's held on another document. Record the payout receipt, or release it from that document. |
| A unit on a sale draft was used on another document | A draft doesn't hold stock. To hold it sooner, enter the sale prices and confirm the sale contract. |
| **Confirm sale contract** can't be clicked | Some units have no sale price. Use **Enter sale prices** to enter an amount for every unit. |
| You want to change units or amounts after the contract | Use **Cancel contract** under **More** to go back to a draft, then make your changes. |
| Shipped units returned, or had not actually left | Shipping itself cannot be undone. Use [sales returns](/en/guides/inventory/sales-returns) for ordinary sales/oripas, or **Restock** for Other removal. Check the specific document flow for partner shipments and tenant transfers; do not create duplicate receipts. |
| **Mark as awaiting shipment** doesn't appear | It isn't used for sales (confirming the sale contract does the same job). Disposal and Correction orders don't have it either. |
| **Create transfer** can't be used | You have only one active site. Add a site under **Settings** › **Sites and locations**. |
| Only some units arrived on a site transfer | Receive only the units that arrived, and send the rest back with **Return to original shelf** and a reason. |
| **Tenant transfers** isn't in the sidebar | Business links aren't available for your shop. Ask your admin. |
## Related workflows
- [Check partner sales, wins and shipments](/en/guides/inventory/partner-sales)
- [Receive returns of sold inventory](/en/guides/inventory/sales-returns)
---
# Inventory overview
Source: https://docs.toreca-cloud.com/en/guides/inventory/overview
Use [shop product and valuation corrections](/en/guides/inventory/product-and-market-corrections) for names, numbers and prices, [record corrections](/en/guides/inventory/record-corrections) for receipt locations and historical entries, and [purchase corrections](/en/guides/purchase/amount-and-quantity-corrections) for recorded purchase amounts and quantities.
Every card you buy is recorded in stock as its own **unit**. You put a QR label on each unit and track which shelf at which site it's on.
A lot bought through bulk appraisal becomes one unit and keeps the number of cards inside it. It's handled differently from single cards. See [Bulk appraisals and set prices](/en/guides/purchase/bulk-and-set-price).
## What you need
- Viewing inventory requires permission to view cards. The standard Viewer role includes it
- Changing inventory (moving shelves, holding stock, recording losses or editing condition tags) requires permission to view cards and edit inventory. Standard Owners, Admins and Staff can do this; custom roles depend on their assigned permissions
- To add sites and locations, you need permission to manage settings (Owner and Admin)
## Open the Inventory screens
At the top of the sidebar, use the **Buying** / **Inventory** switch and choose **Inventory**. The sidebar changes to the inventory items.
| Sidebar item | What it's for |
| ------------------------------------------ | ------------------------------------------------------------------------------------------------------------------------------------------------- |
| Inventory | Find and check the stock you have (this page) |
| Putaway | Put cards away from the receiving shelf onto storage shelves ([Putaway and QR labels](/en/guides/inventory/putaway)) |
| Stock counts | Count the stock on the shelves and make it match ([Stock counts](/en/guides/inventory/counts)) |
| Receipts | Take in stock. Record stock that didn't come from a purchase on Receipt slips, inside Receipts ([Receiving stock](/en/guides/inventory/receipts)) |
| Outbound, Site transfers, Tenant transfers | Send stock out, or move it to another site or shop ([Outbound, transfers and handovers](/en/guides/inventory/outbound-and-transfers)) |
| Partner allocations | Allocate stock to an outside seller (only for shops that use integrations) |
## 1. Set up sites and locations
You manage where stock is kept at two levels: sites and locations.
- A **site** is a building, such as a store or warehouse. Its type is Store, Warehouse, Office, Consignee or Other
- A **location** is a shelf inside a site. You tell shelves apart by their **Shelf code**, and the type is Receiving, Storage shelf, Showcase, Safe, Outbound staging or Other
Register them under **Settings** › **Locations**.
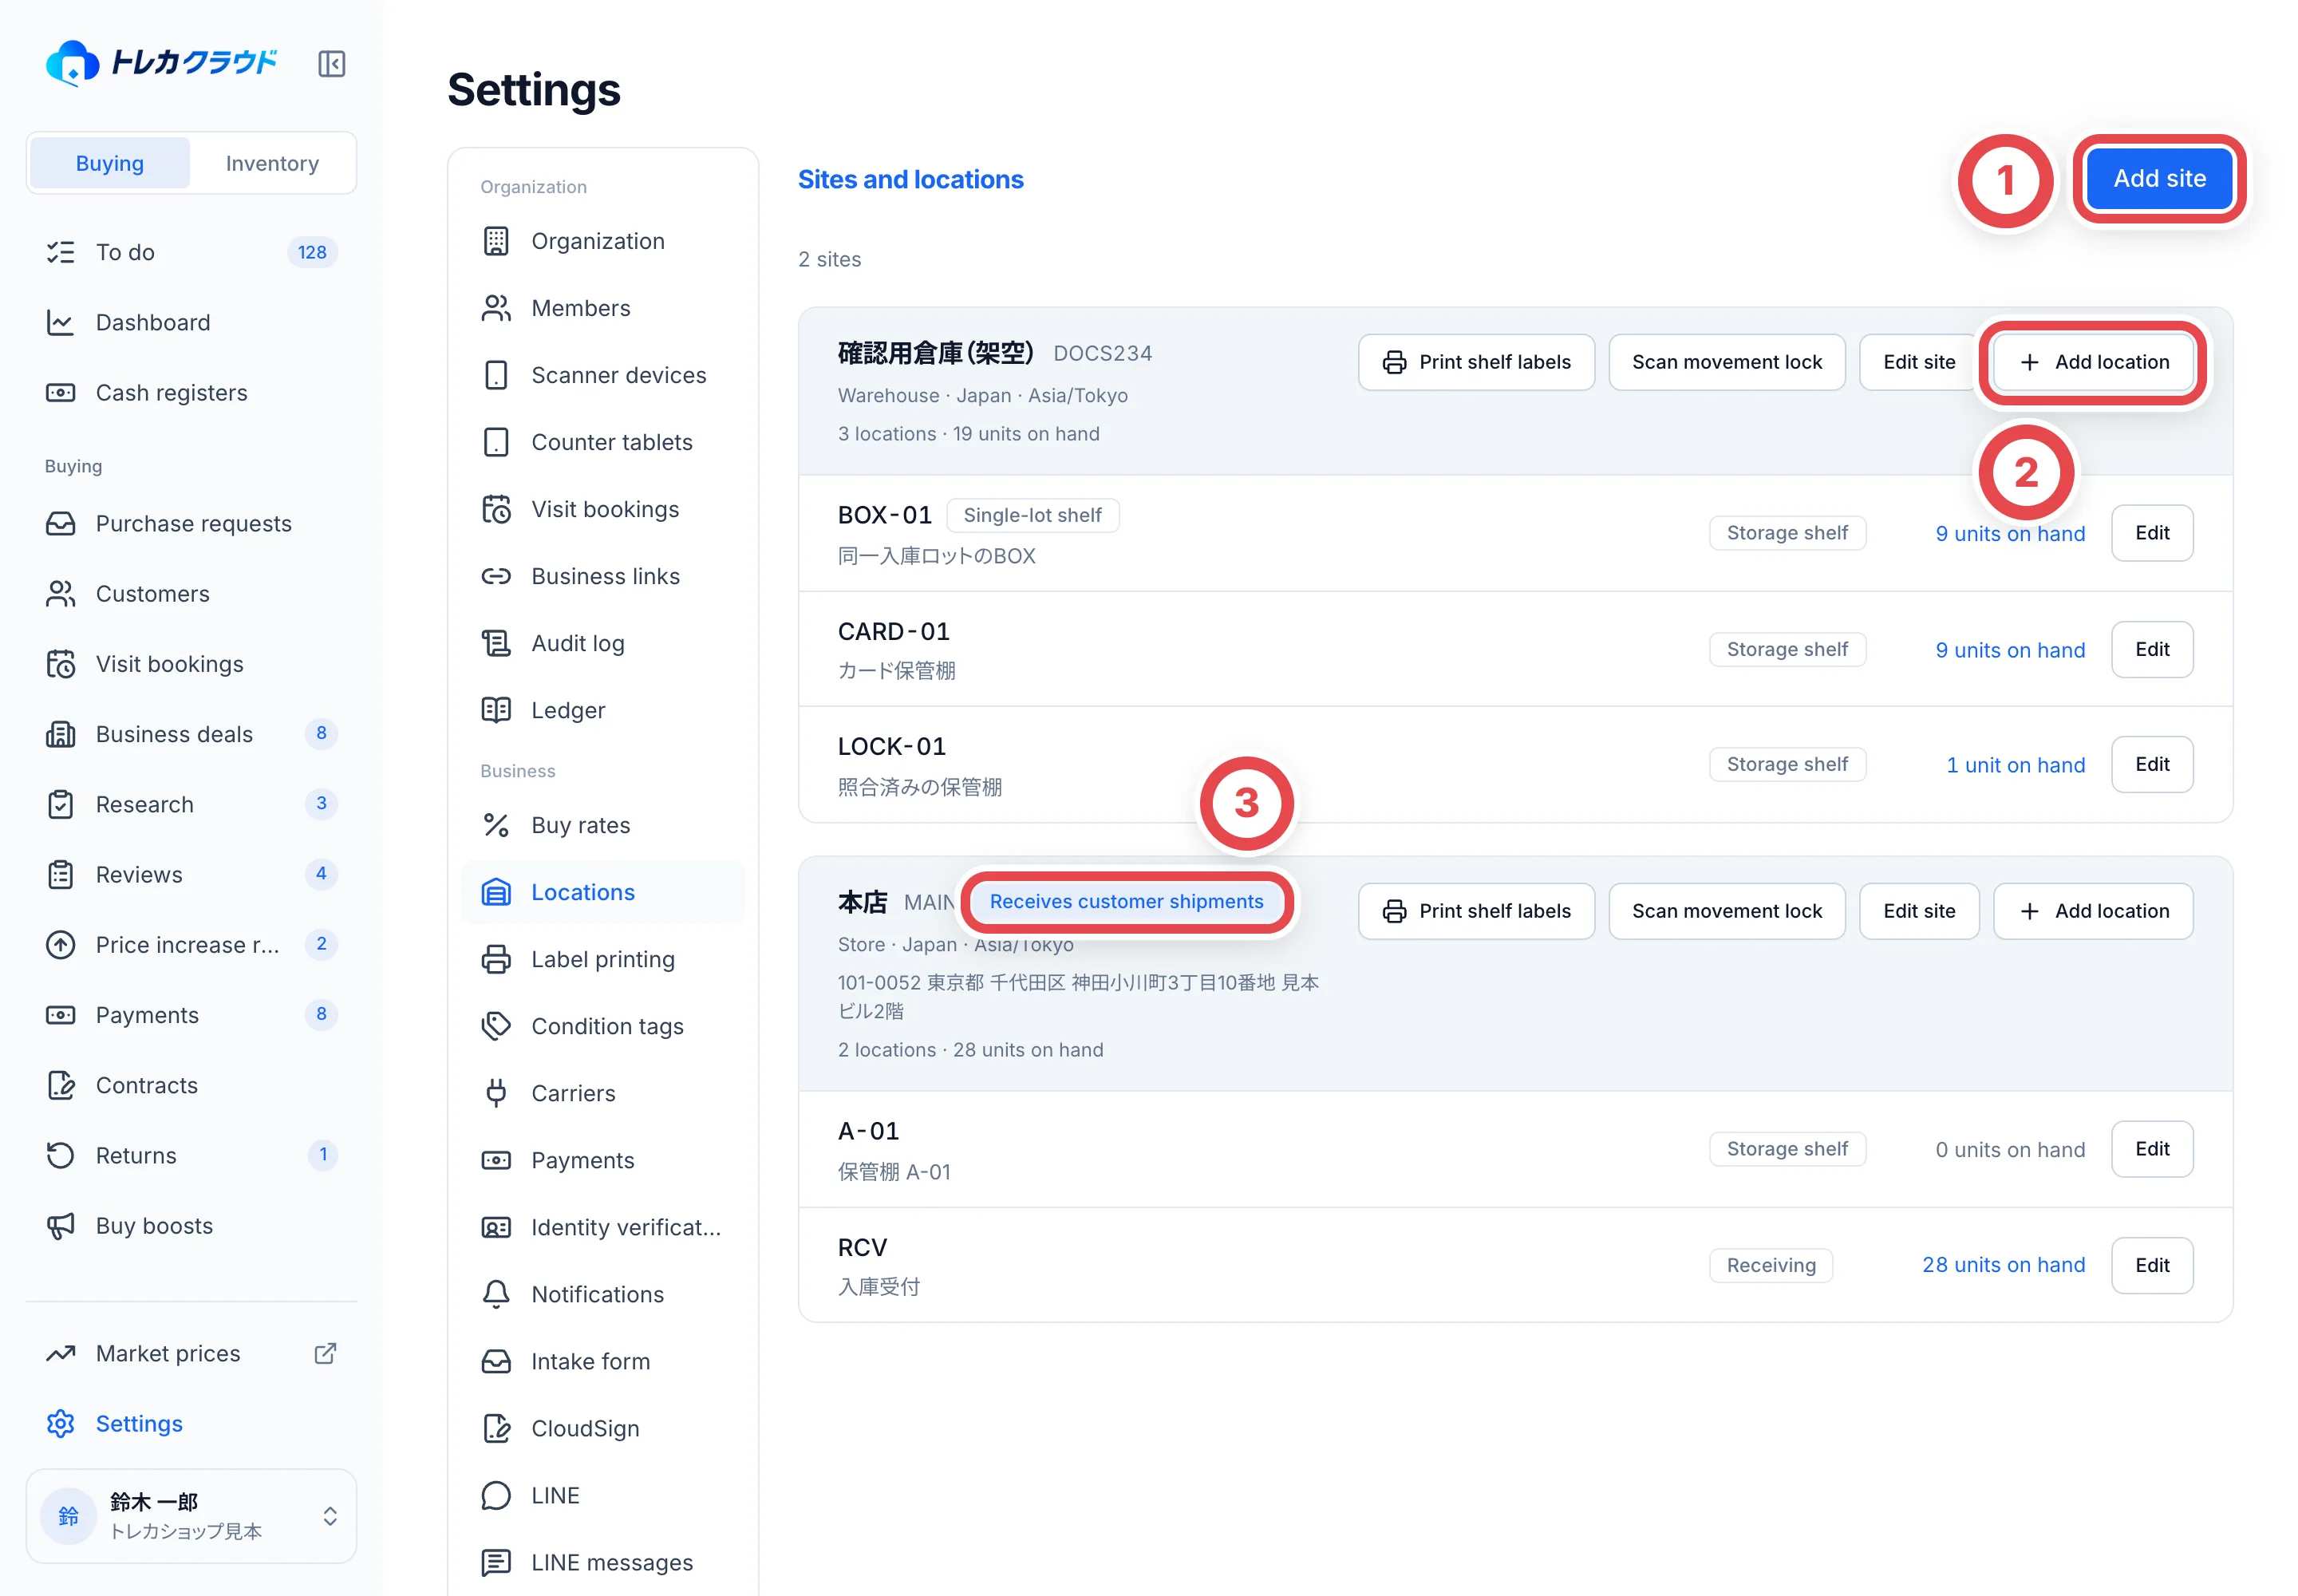 Use Add site at ① to add a store or warehouse. Use Add location at ② to add a shelf inside that site. The mark at ③ shows the site customers send their cards to.
- If you have no sites yet, click **Create main store and receiving area**. It creates a main store site with one receiving shelf and one storage shelf
- Cards you buy are first placed on the site's **Receiving** shelf. The usual flow is to put a QR label on each card there and put it away on a storage shelf
- Edit a site and turn on **Use as customer shipping destination**. The ③ mark (**Receives customer shipments**) appears, and you can choose that address when you tell customers where to send their cards
- Each shelf's row shows its type and how many units are on it now
Use a [single-lot shelf](/en/guides/inventory/sealed-lot-shelves) to keep boxes, packs and decks from one receipt together. Use [Scan movement lock](/en/guides/inventory/shelf-protection) on this same settings page to protect checked locations from scan corrections.
:::note
Sites and locations can't be deleted. When you stop using one, edit it and turn off **Use this site** or **Use this location** (it shows **Closed** in the list). A site or shelf that still holds stock can't be turned off.
:::
## 2. Find stock in the Inventory list
The Inventory list shows the stock you have, grouped by card.
Use the product-type tabs to switch between cards, boxes, packs, decks and bulk lots. Only types with stock and the type currently open are shown. The switch is hidden when there is only one type. Sealed stock is grouped by product; bulk stock is listed by lot.
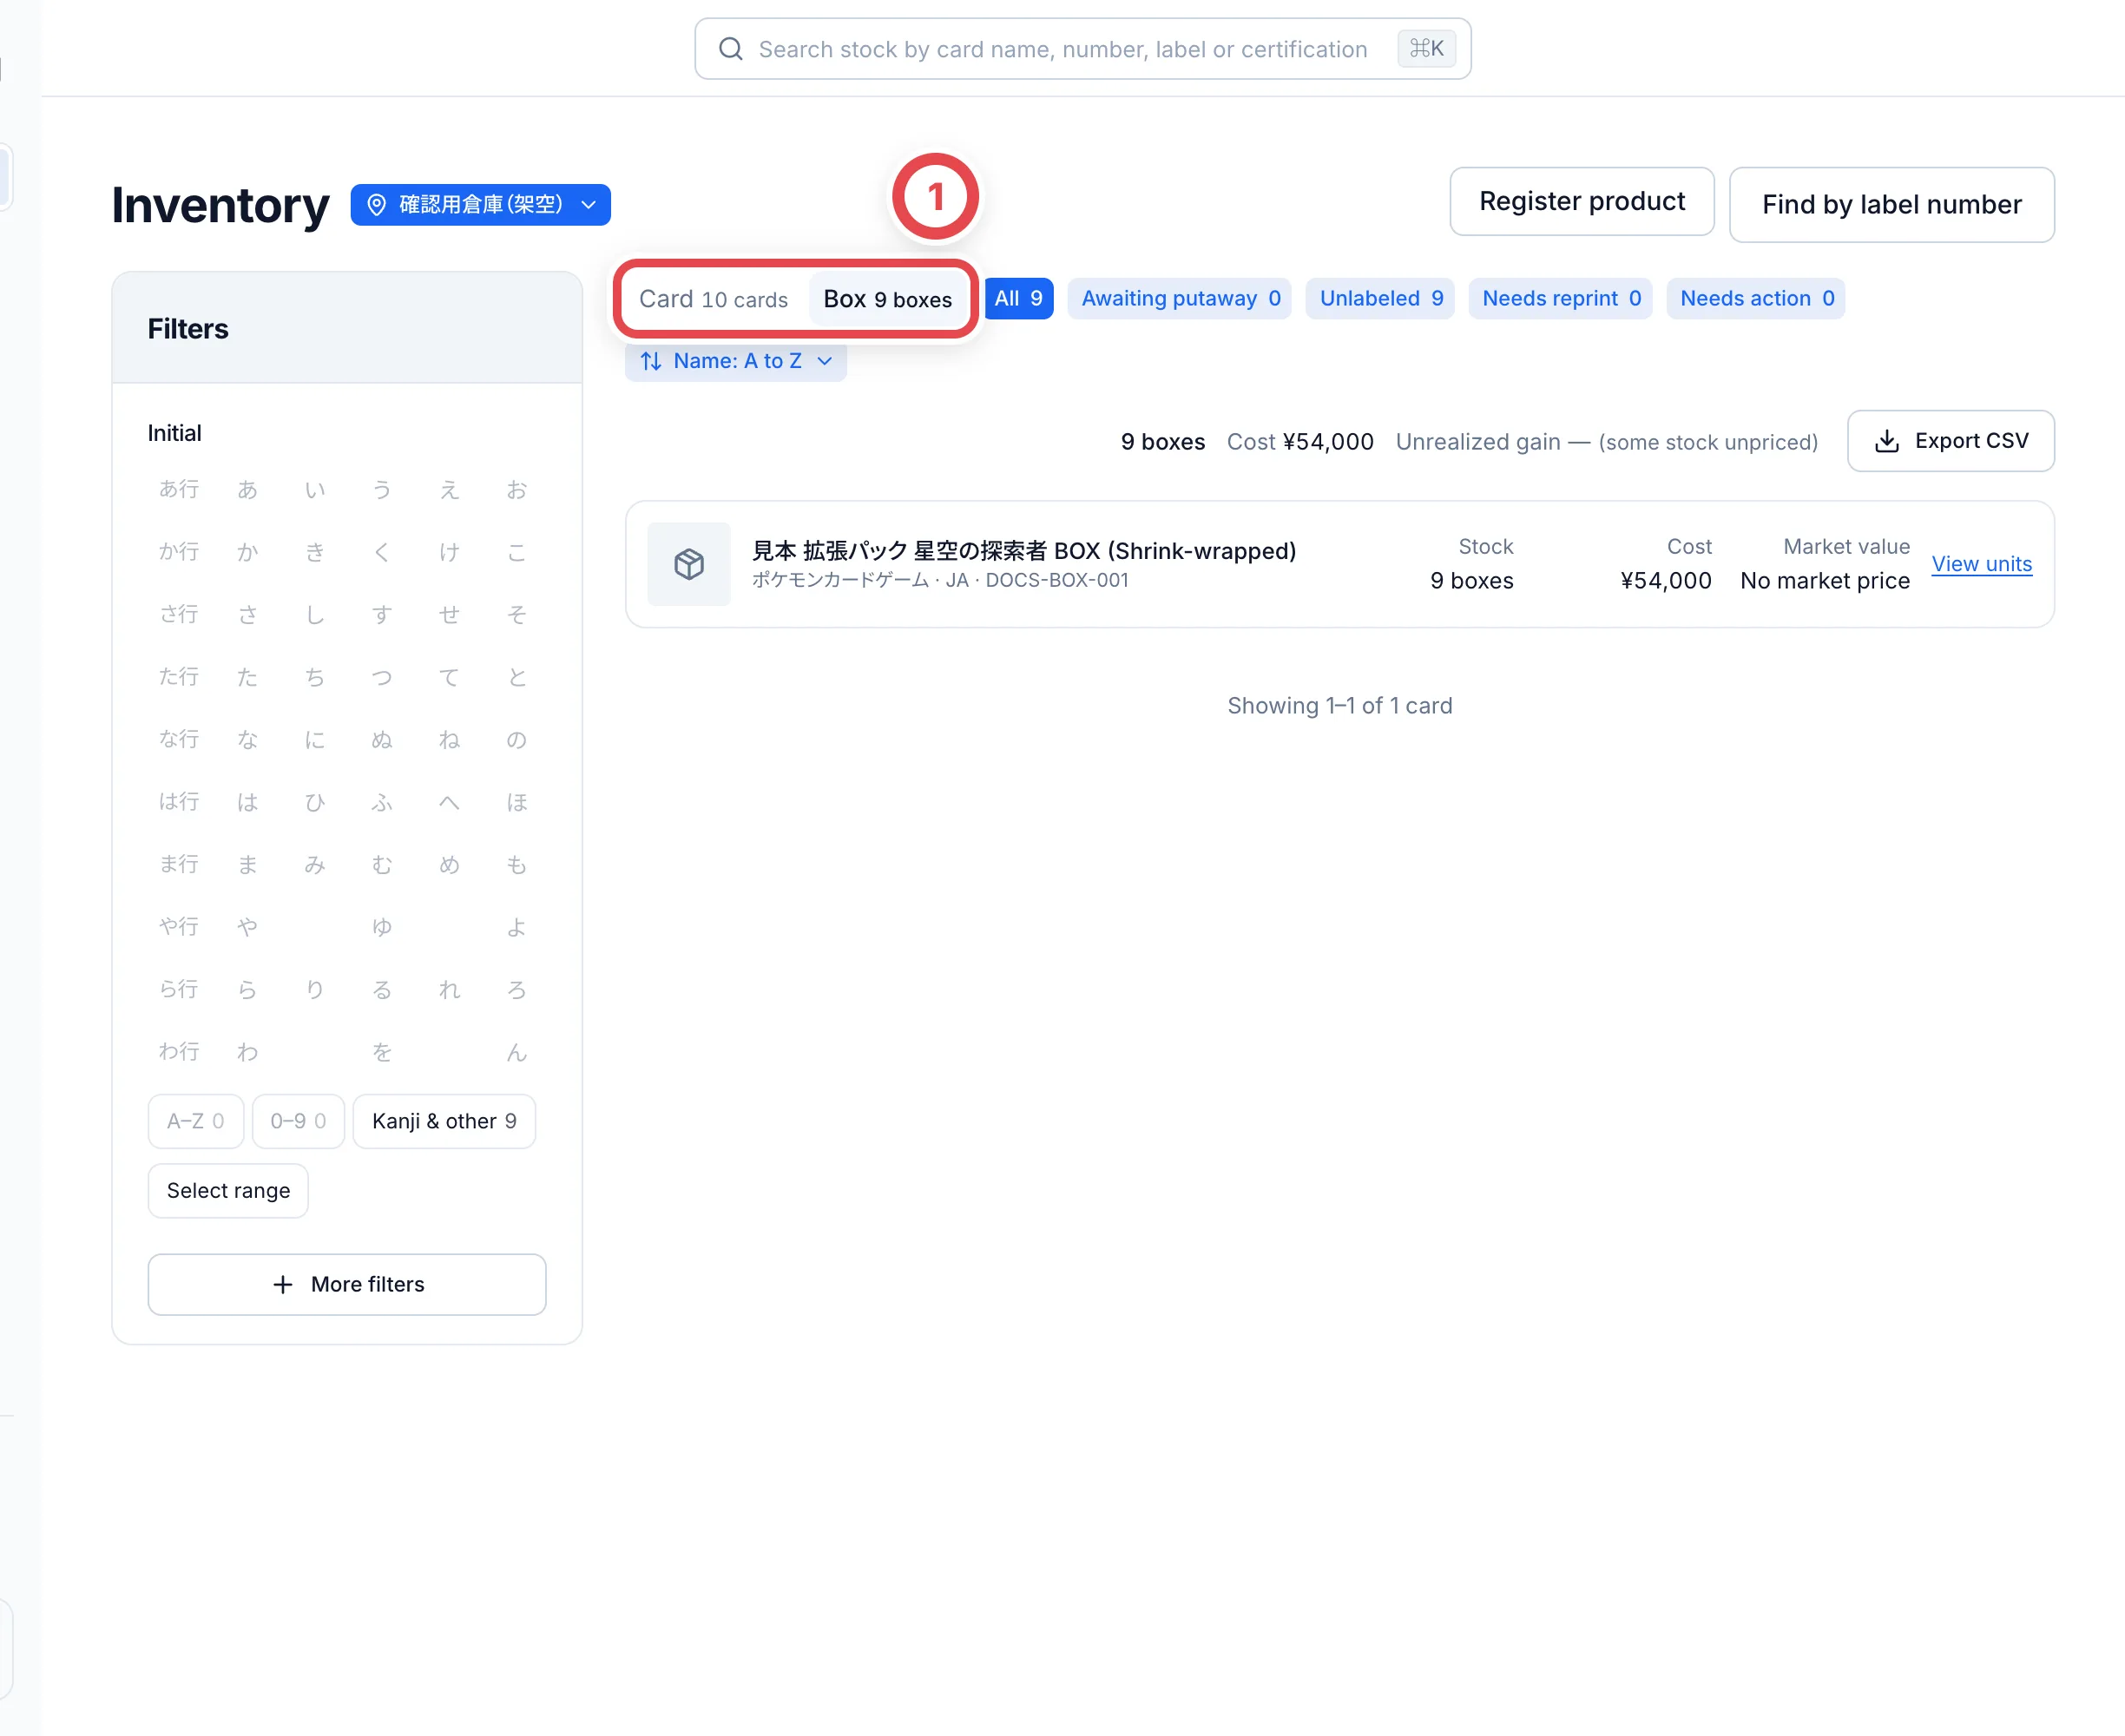
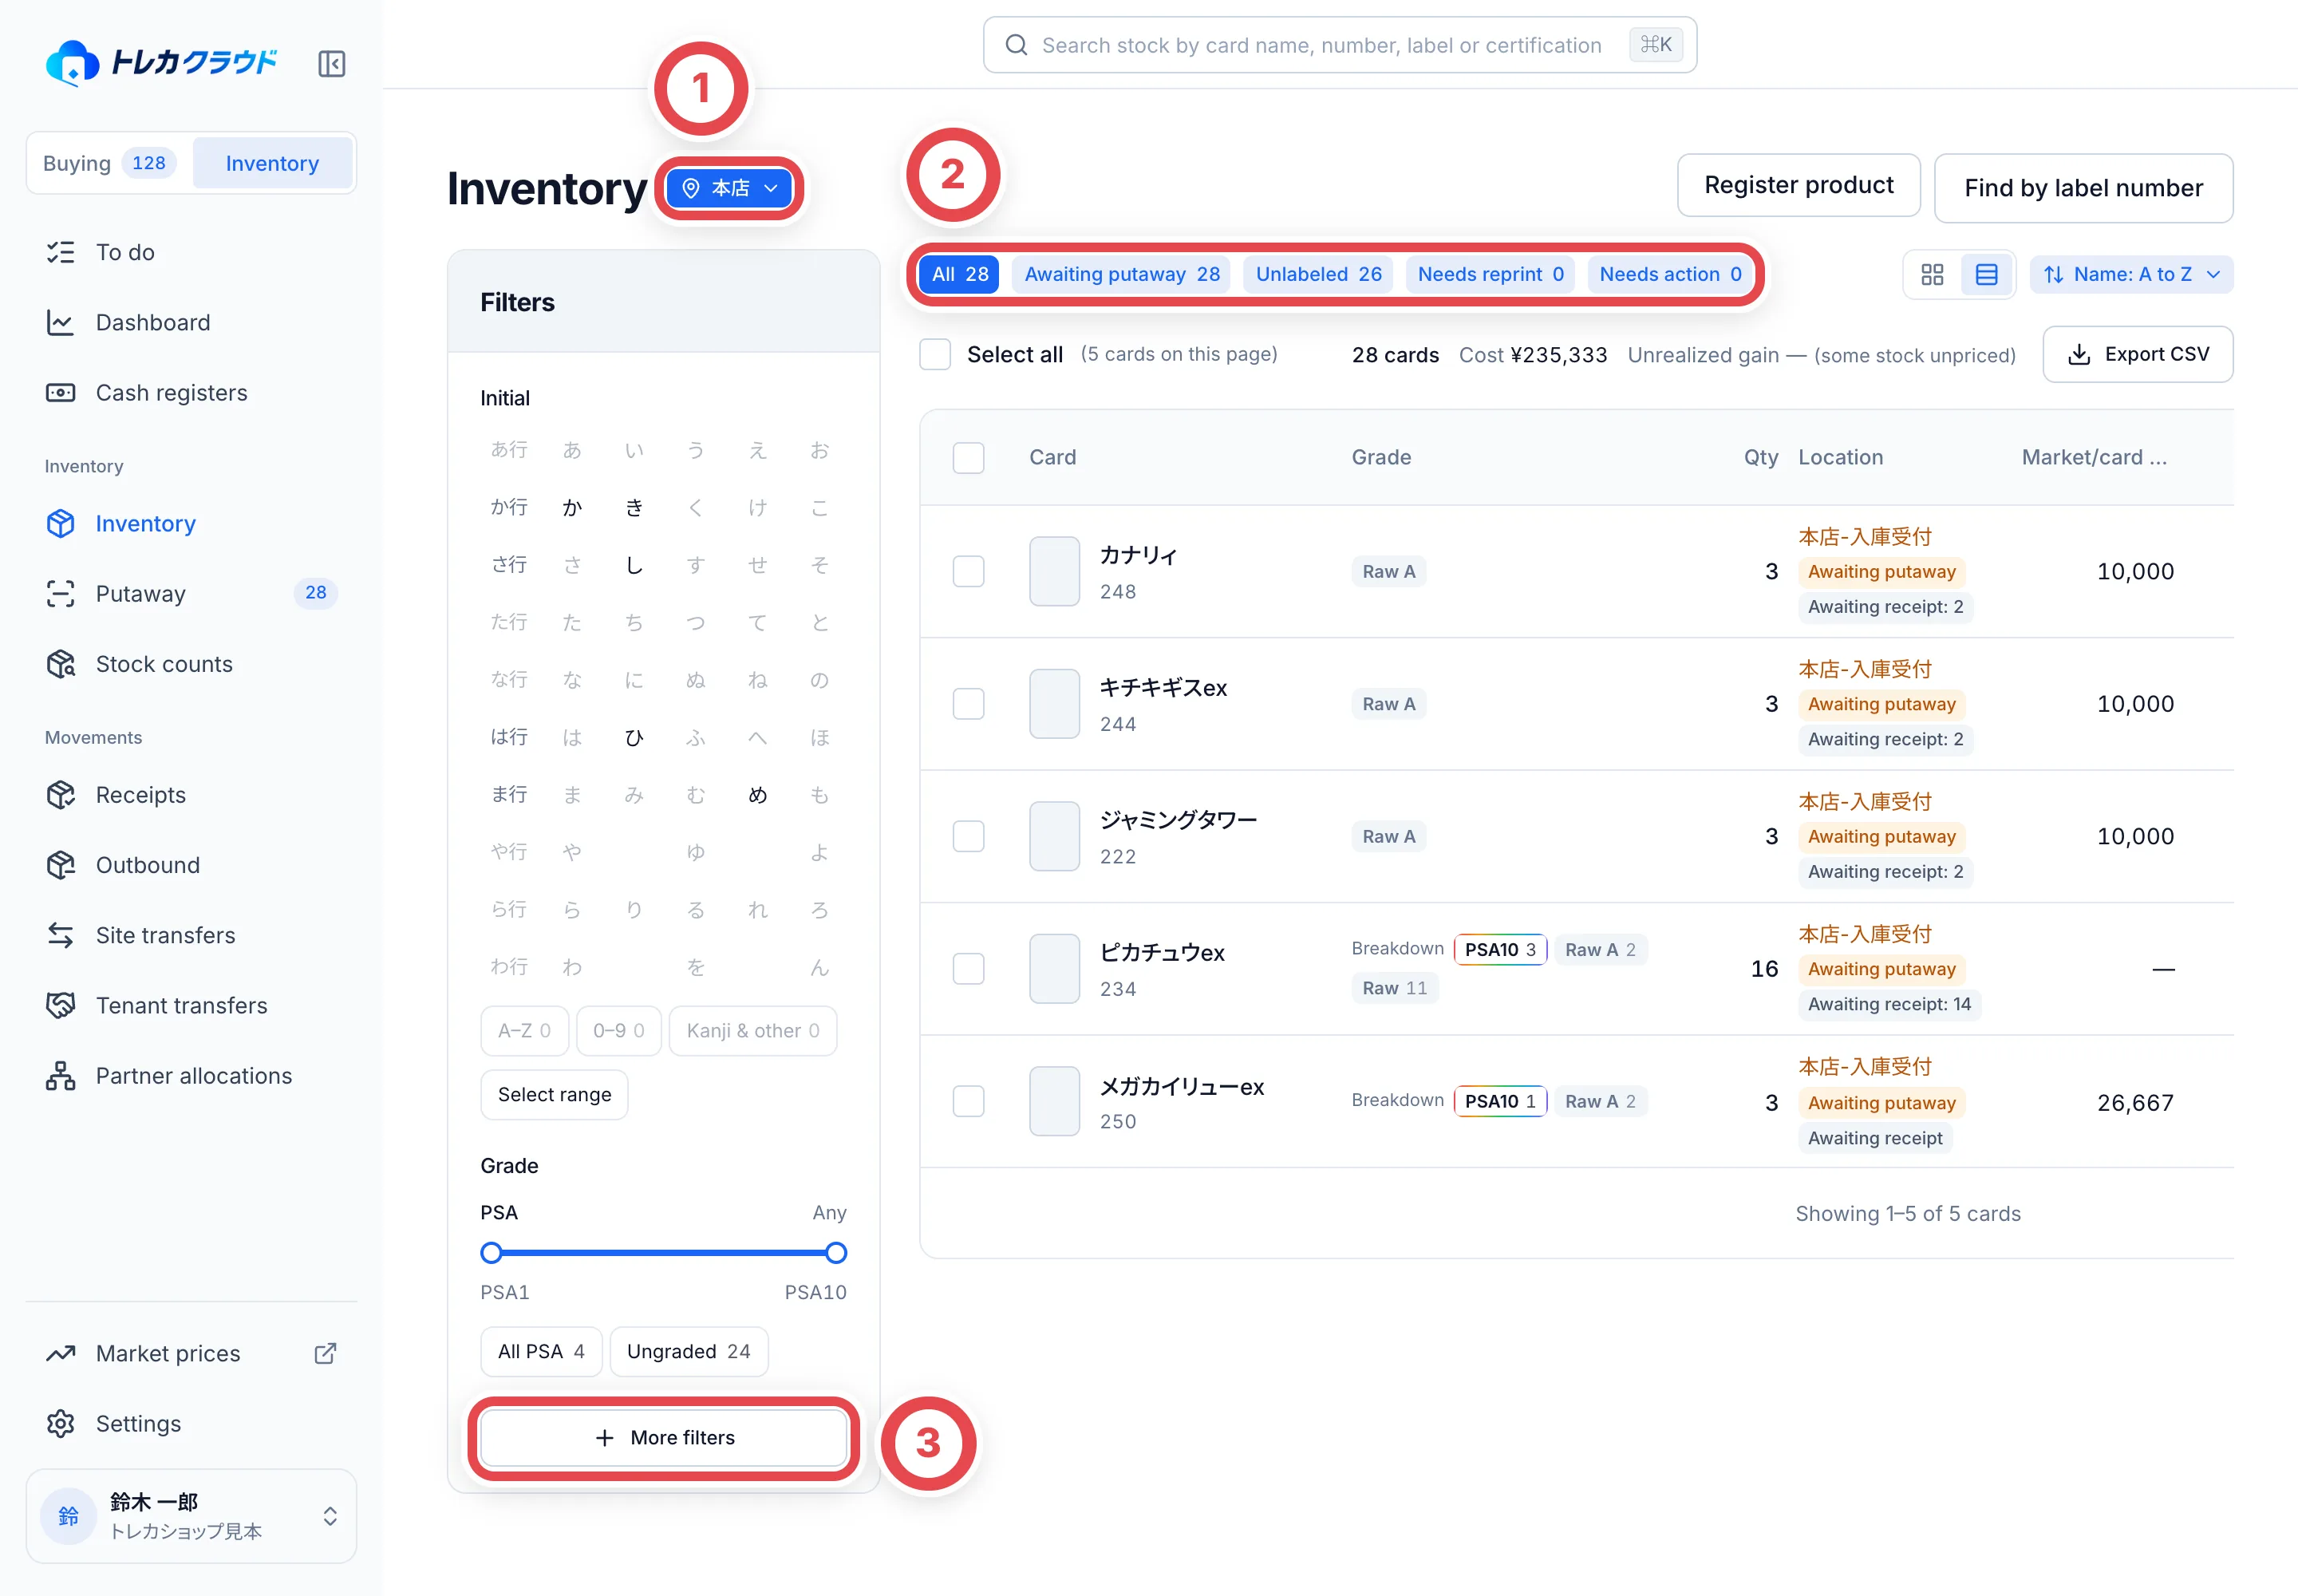 | Where | How to use it |
| ----------------------- | ------------------------------------------------------------------------------------------------------------------------------------------------------------------------------ |
| ① Site | Choose the site to show. Your choice is remembered, and becomes the starting value the next time you open Inventory or start a receipt or stock count |
| ② Stock status | Narrow the list to **Awaiting putaway**, **Unlabeled**, **Needs reprint** or **Needs action**. The number is a count |
| **Filters** on the left | Filter by the first letter of the card name (kana) or by PSA grade. **More filters** at ③ also lets you choose shelf, set, rarity, when it was received and market price range |
| Sort, top right | Choose the per-unit market price, Quantity, Last received or Name (A to Z). Market sorting uses the price of one unit, before multiplying by stock quantity |
| Switching the view | The buttons to the left of Sort switch between tiles and a table |
In the search box at the top, enter a card name, card number, label number or slab certification number. A stock label number opens that unit, and a shelf label number narrows the list to the stock on that shelf. Use **Find by label number** at the top right to open a unit by its sticker. Instructions for asset number lookup are collapsed inside that dialog.
The totals line shows the quantity, cost and unrealized gain of the stock on screen.
If any cost or market price is unknown, unrealized gain shows **—**. It is not calculated from only the priced subset. Bulk lots do not show unrealized gain.
### Export to CSV
Click **Export CSV** to the right of the totals line and choose how to export. **It exports all the stock that matches what you're looking at (site, search and filters), across every page.**
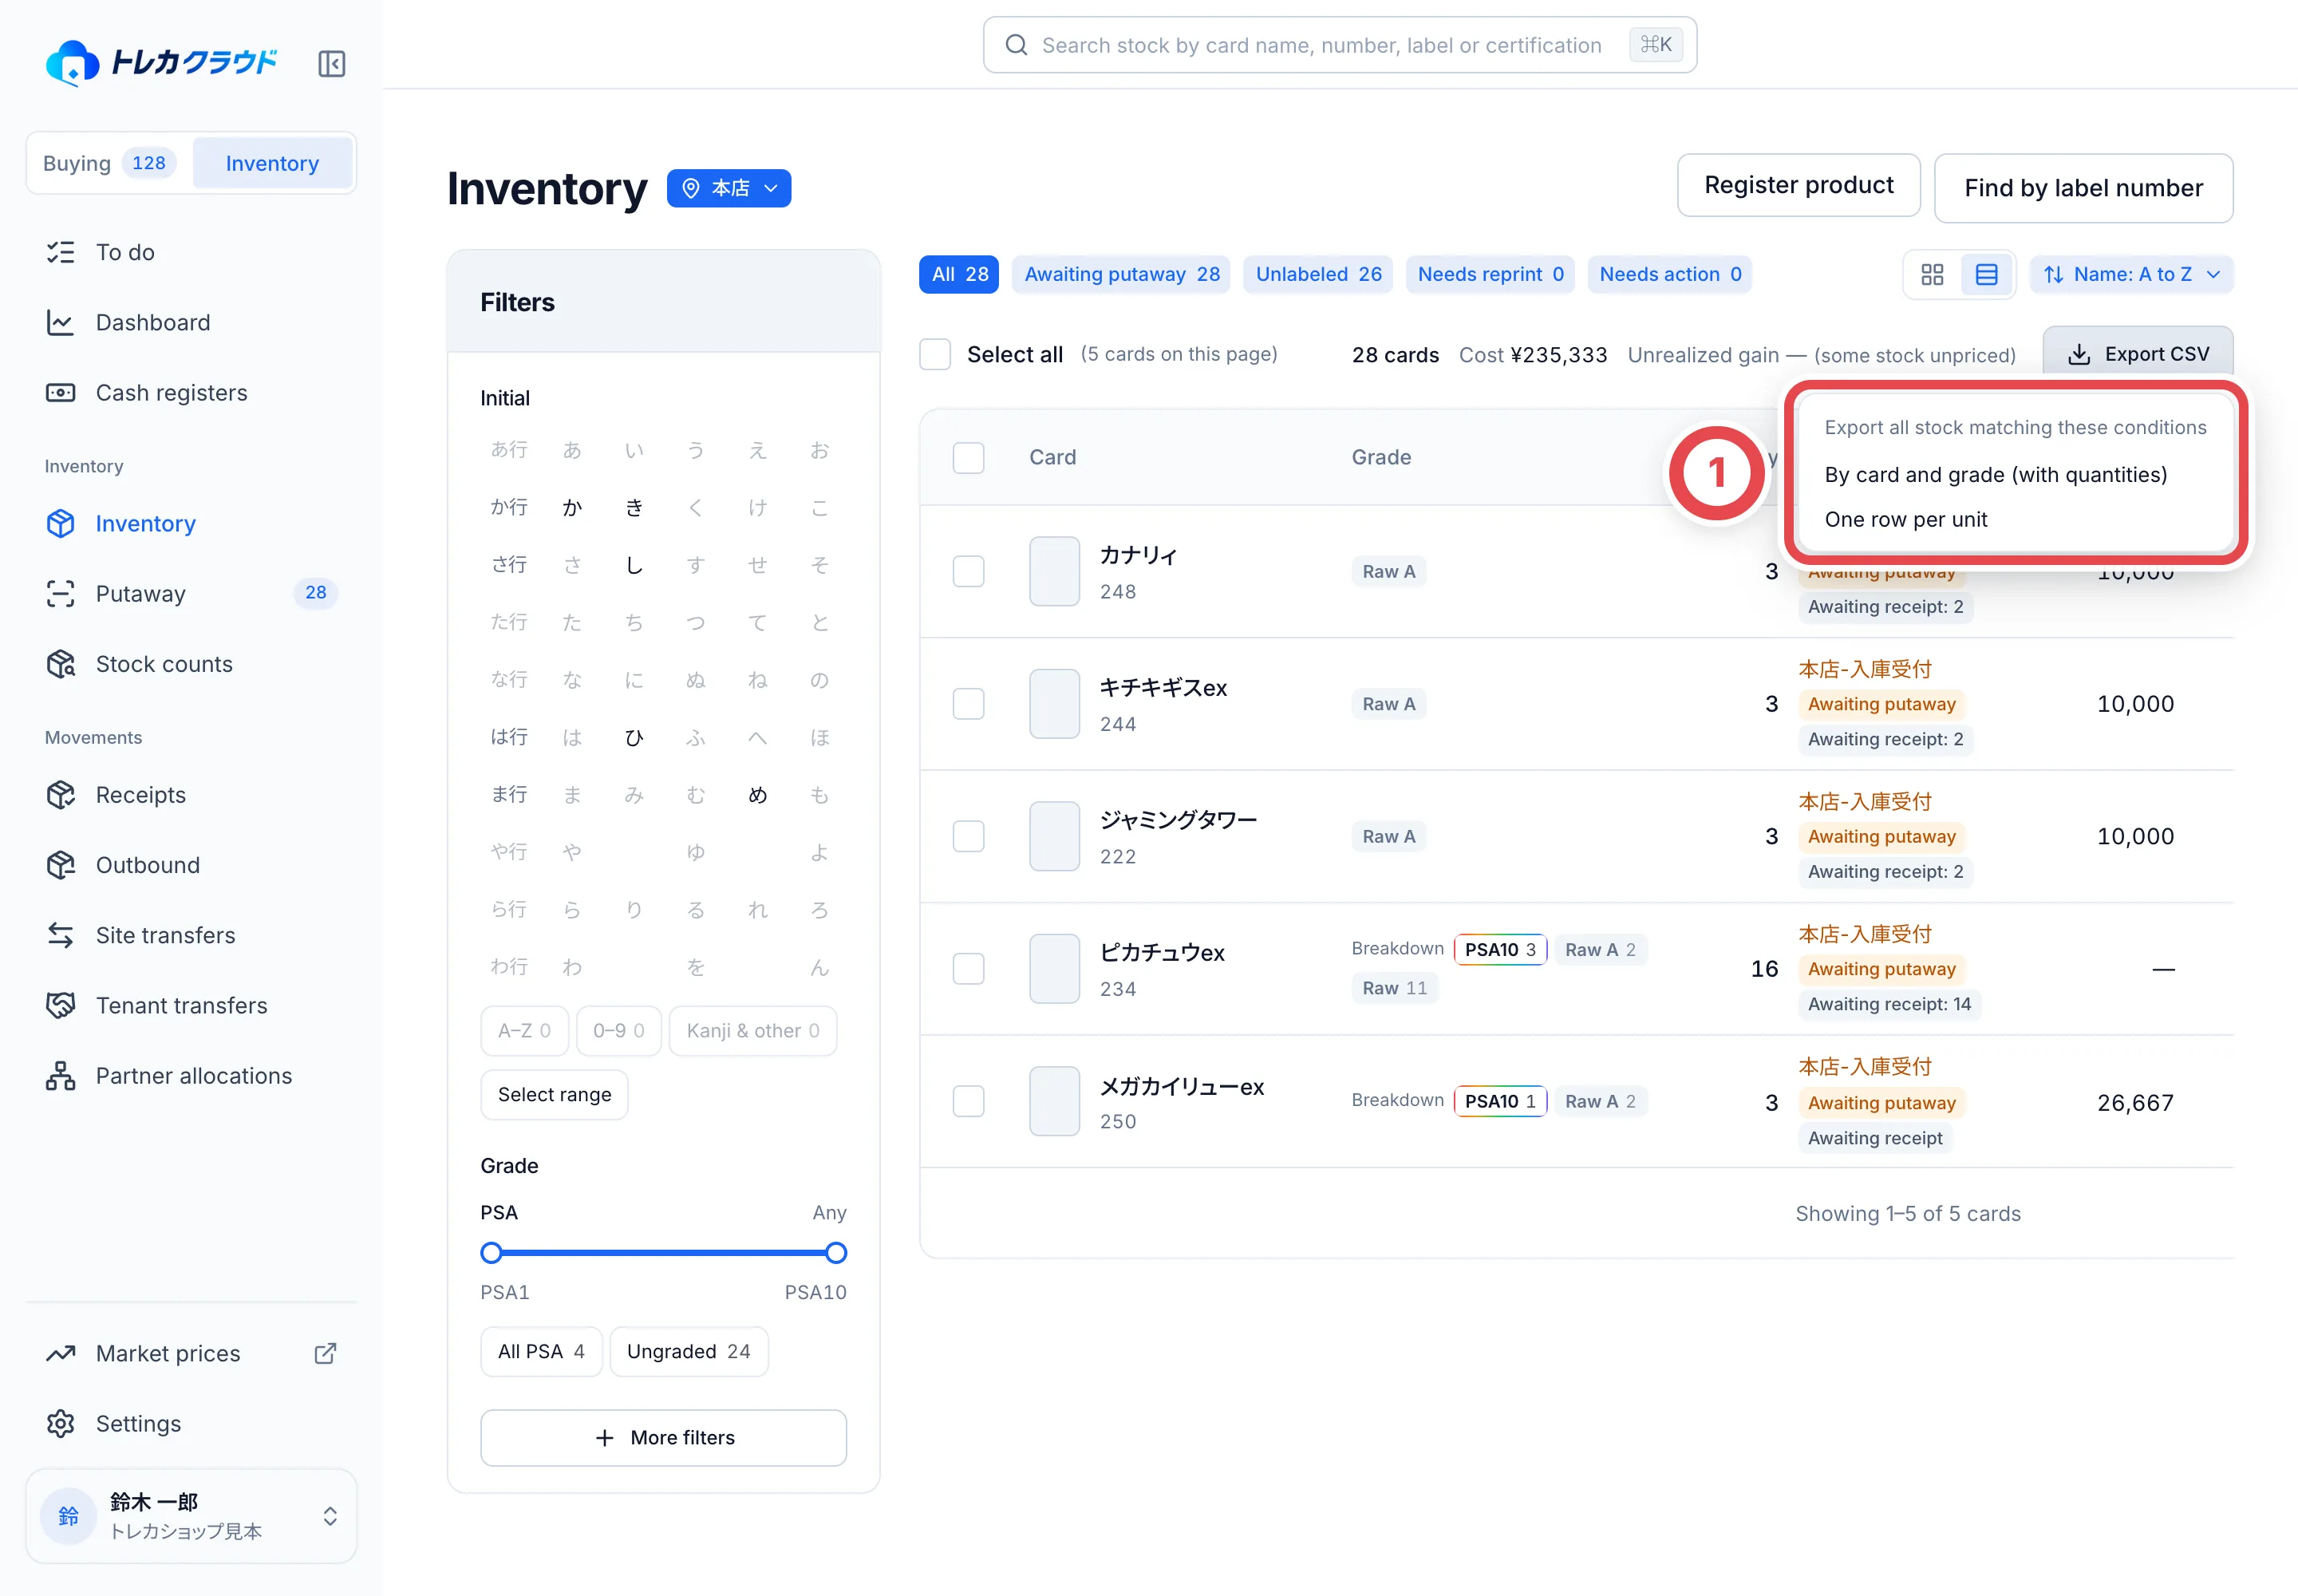 At ①, choose whether to group by card and grade, or to export one row per unit.
- **By card and grade (with quantities)** puts stock of the same card and grade with the same kind of cost on one row, with the quantity, total cost and average unit cost
- **One row per unit** lists each unit with its asset number, shelf and cost
| Value | Meaning |
| ------ | ------------------------------------------------------------------------------------------------------------ |
| 実際 | Actual: the amount paid in a Toreca Cloud purchase, or an outside purchase record matched to the actual card |
| 推定 | Estimated from outside purchase records (this includes the average unit cost of the same card) |
| 登録額 | Entered on a receipt slip or in a correction, and not matched to a purchase record |
| 未設定 | Not set: the cost is pending. This is distinct from a confirmed zero cost |
Unknown costs are blank in CSV too. They are not counted as zero. Stock confirmed as acquired free of charge has a recorded cost of zero. When the cost becomes known, record it from the unit details.
Market prices are the same values as in the Inventory list, and a card with no market price is left blank. The source and time columns show which site the price came from and when.
### Open the SNKRDUNK product page
When SNKRDUNK links are enabled for the shop, a **SNKRDUNK** link appears in inventory tables, tiles and product details. It opens the matching product page in another window or tab, leaving your inventory page in place. Market card details also offer the product-page link.
Inventory only shows links for products with a registered matching product page. Do not substitute another product's link when one is missing. The external page's current price may differ from the market snapshot shown in Toreca Cloud.
### Act on several units at once
Click the checkbox at the top left of a tile to select stock. Once you select some, a bar of actions appears at the bottom of the screen.
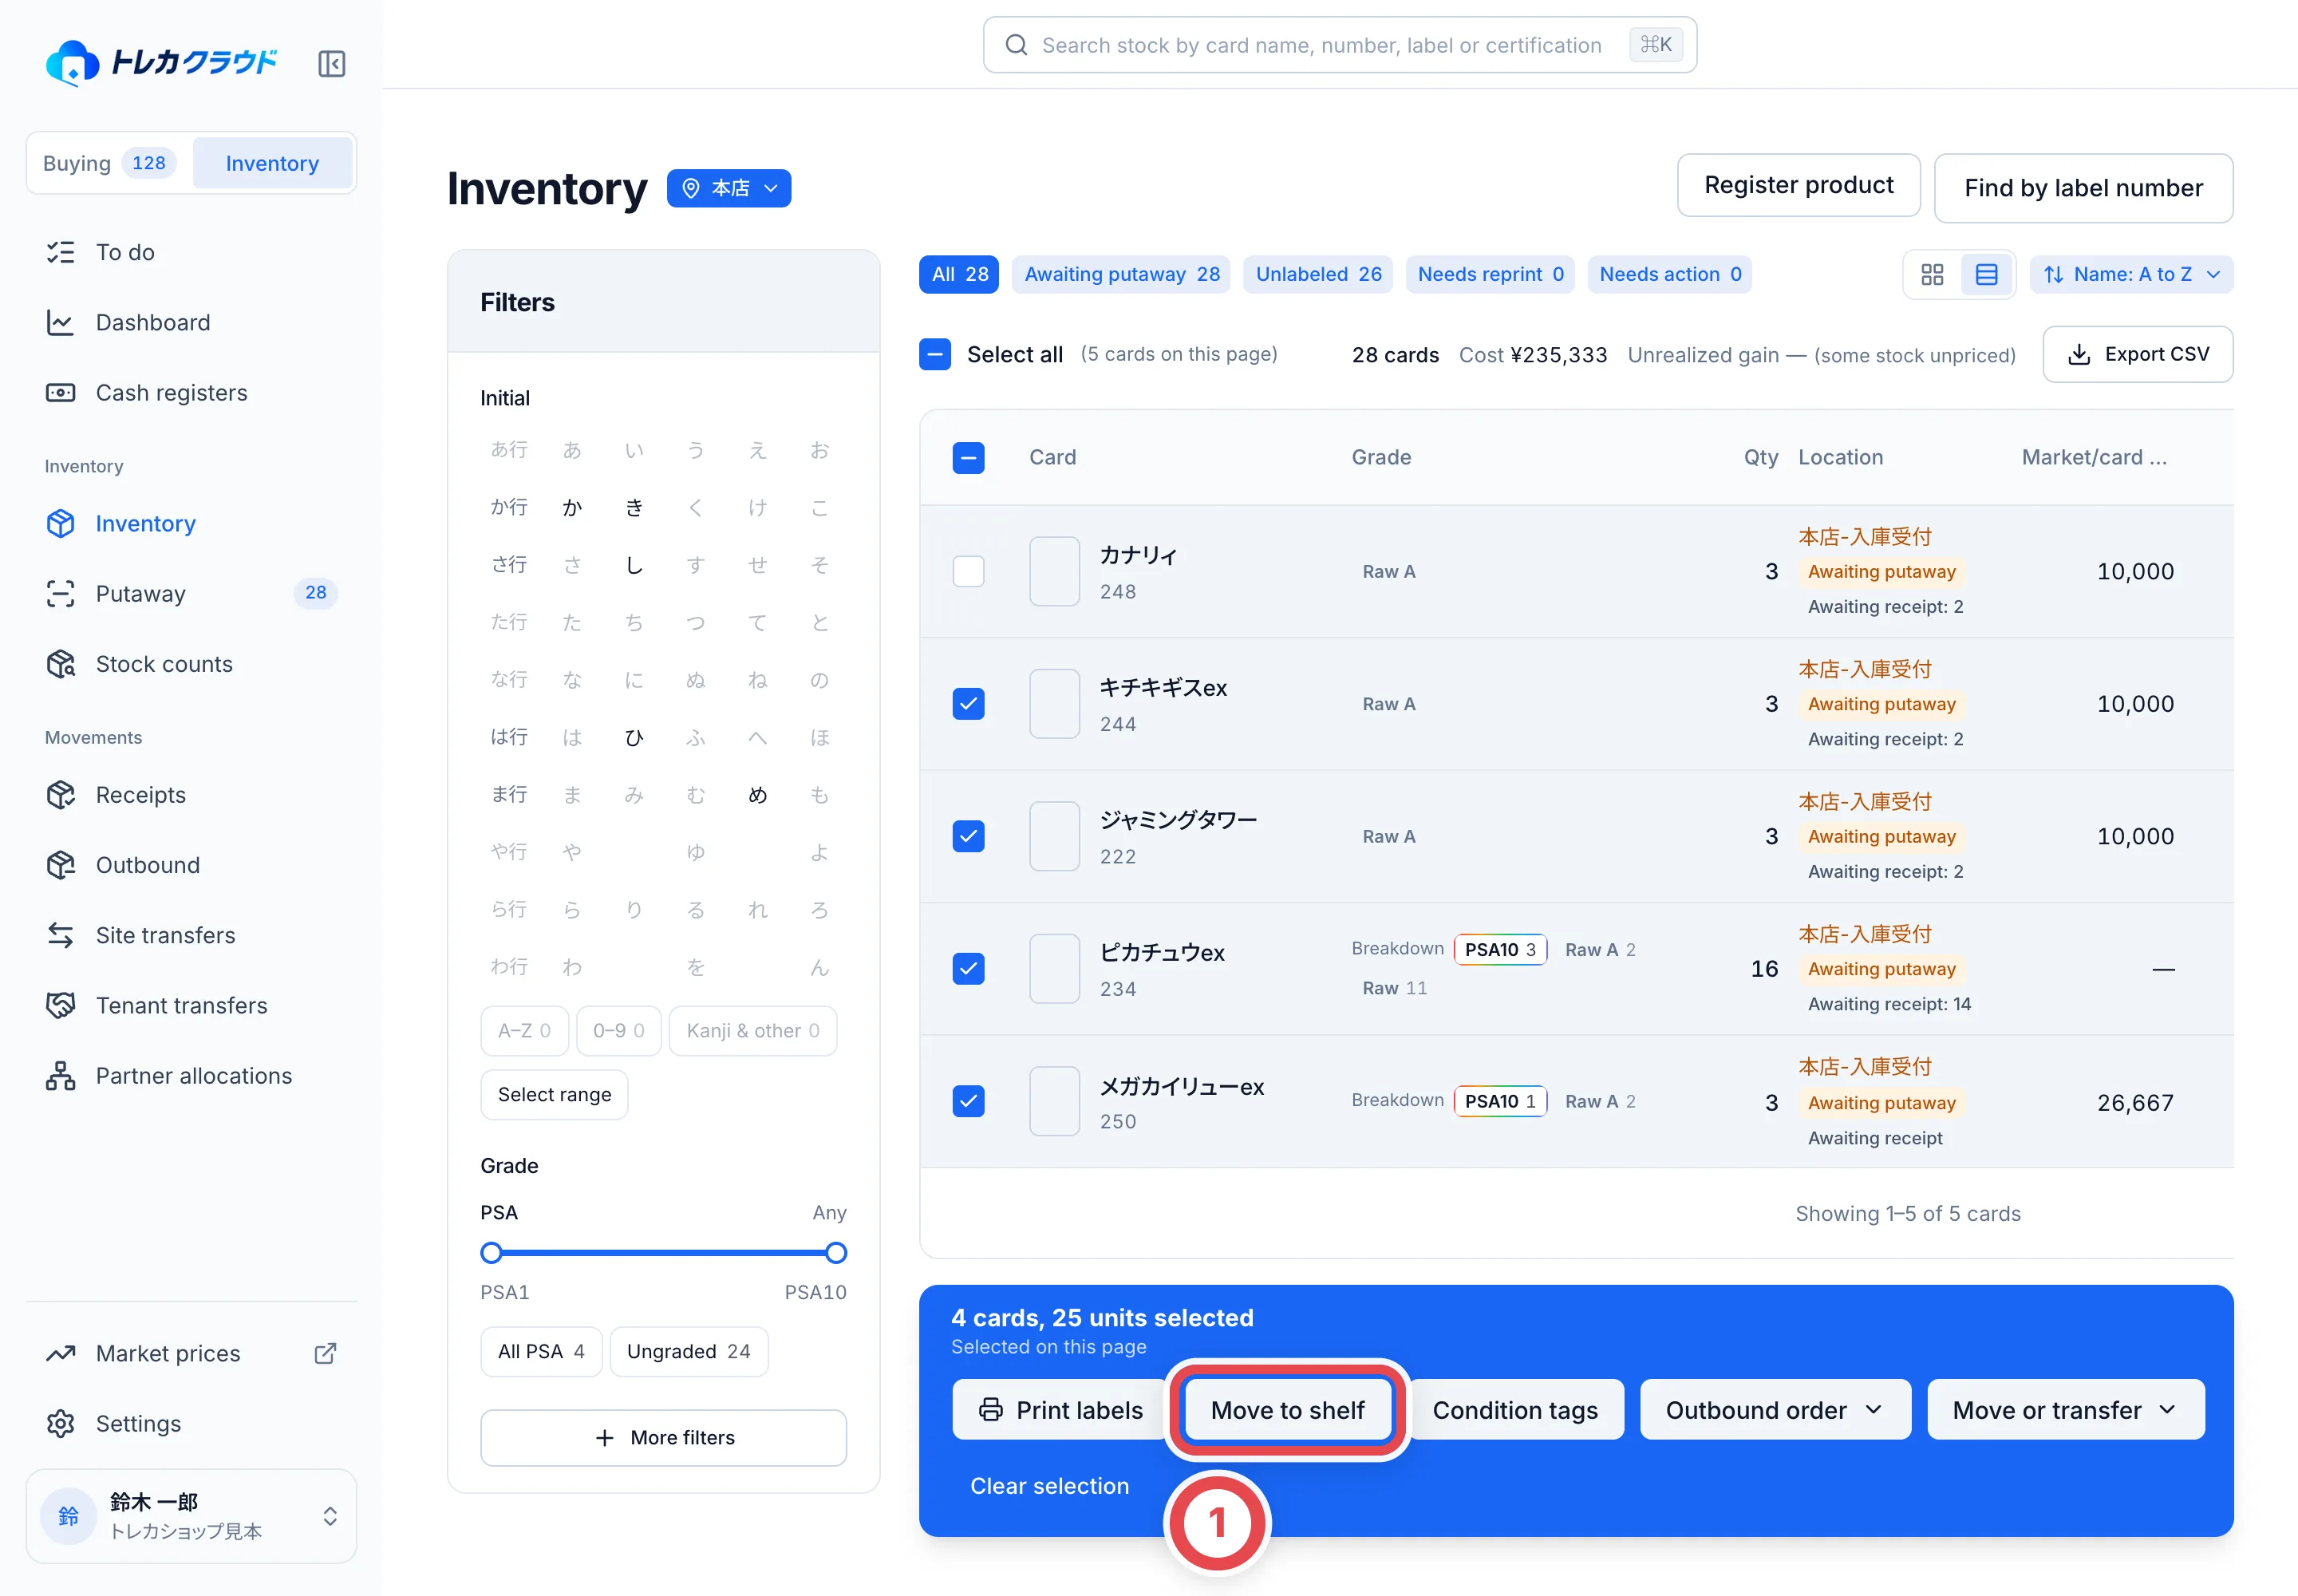 Use the buttons in the bar, such as Move to shelf at ①, on all the stock you selected.
From the bar you can print labels, move shelves, edit condition tags, create an outbound order and create a site transfer. When every unit you selected is awaiting receipt (see section 4), **Create outbound order** and **Create transfer** can't be clicked. The bar says so.
Selecting this page differs from selecting all matching stock: the latter includes other pages. Outbound and transfer forms exclude unavailable units, including held stock and units awaiting receipt. Check the count and individual units in the form before continuing.
## 3. Check a card's stock
Click a card in the Inventory list to open that card's stock page.
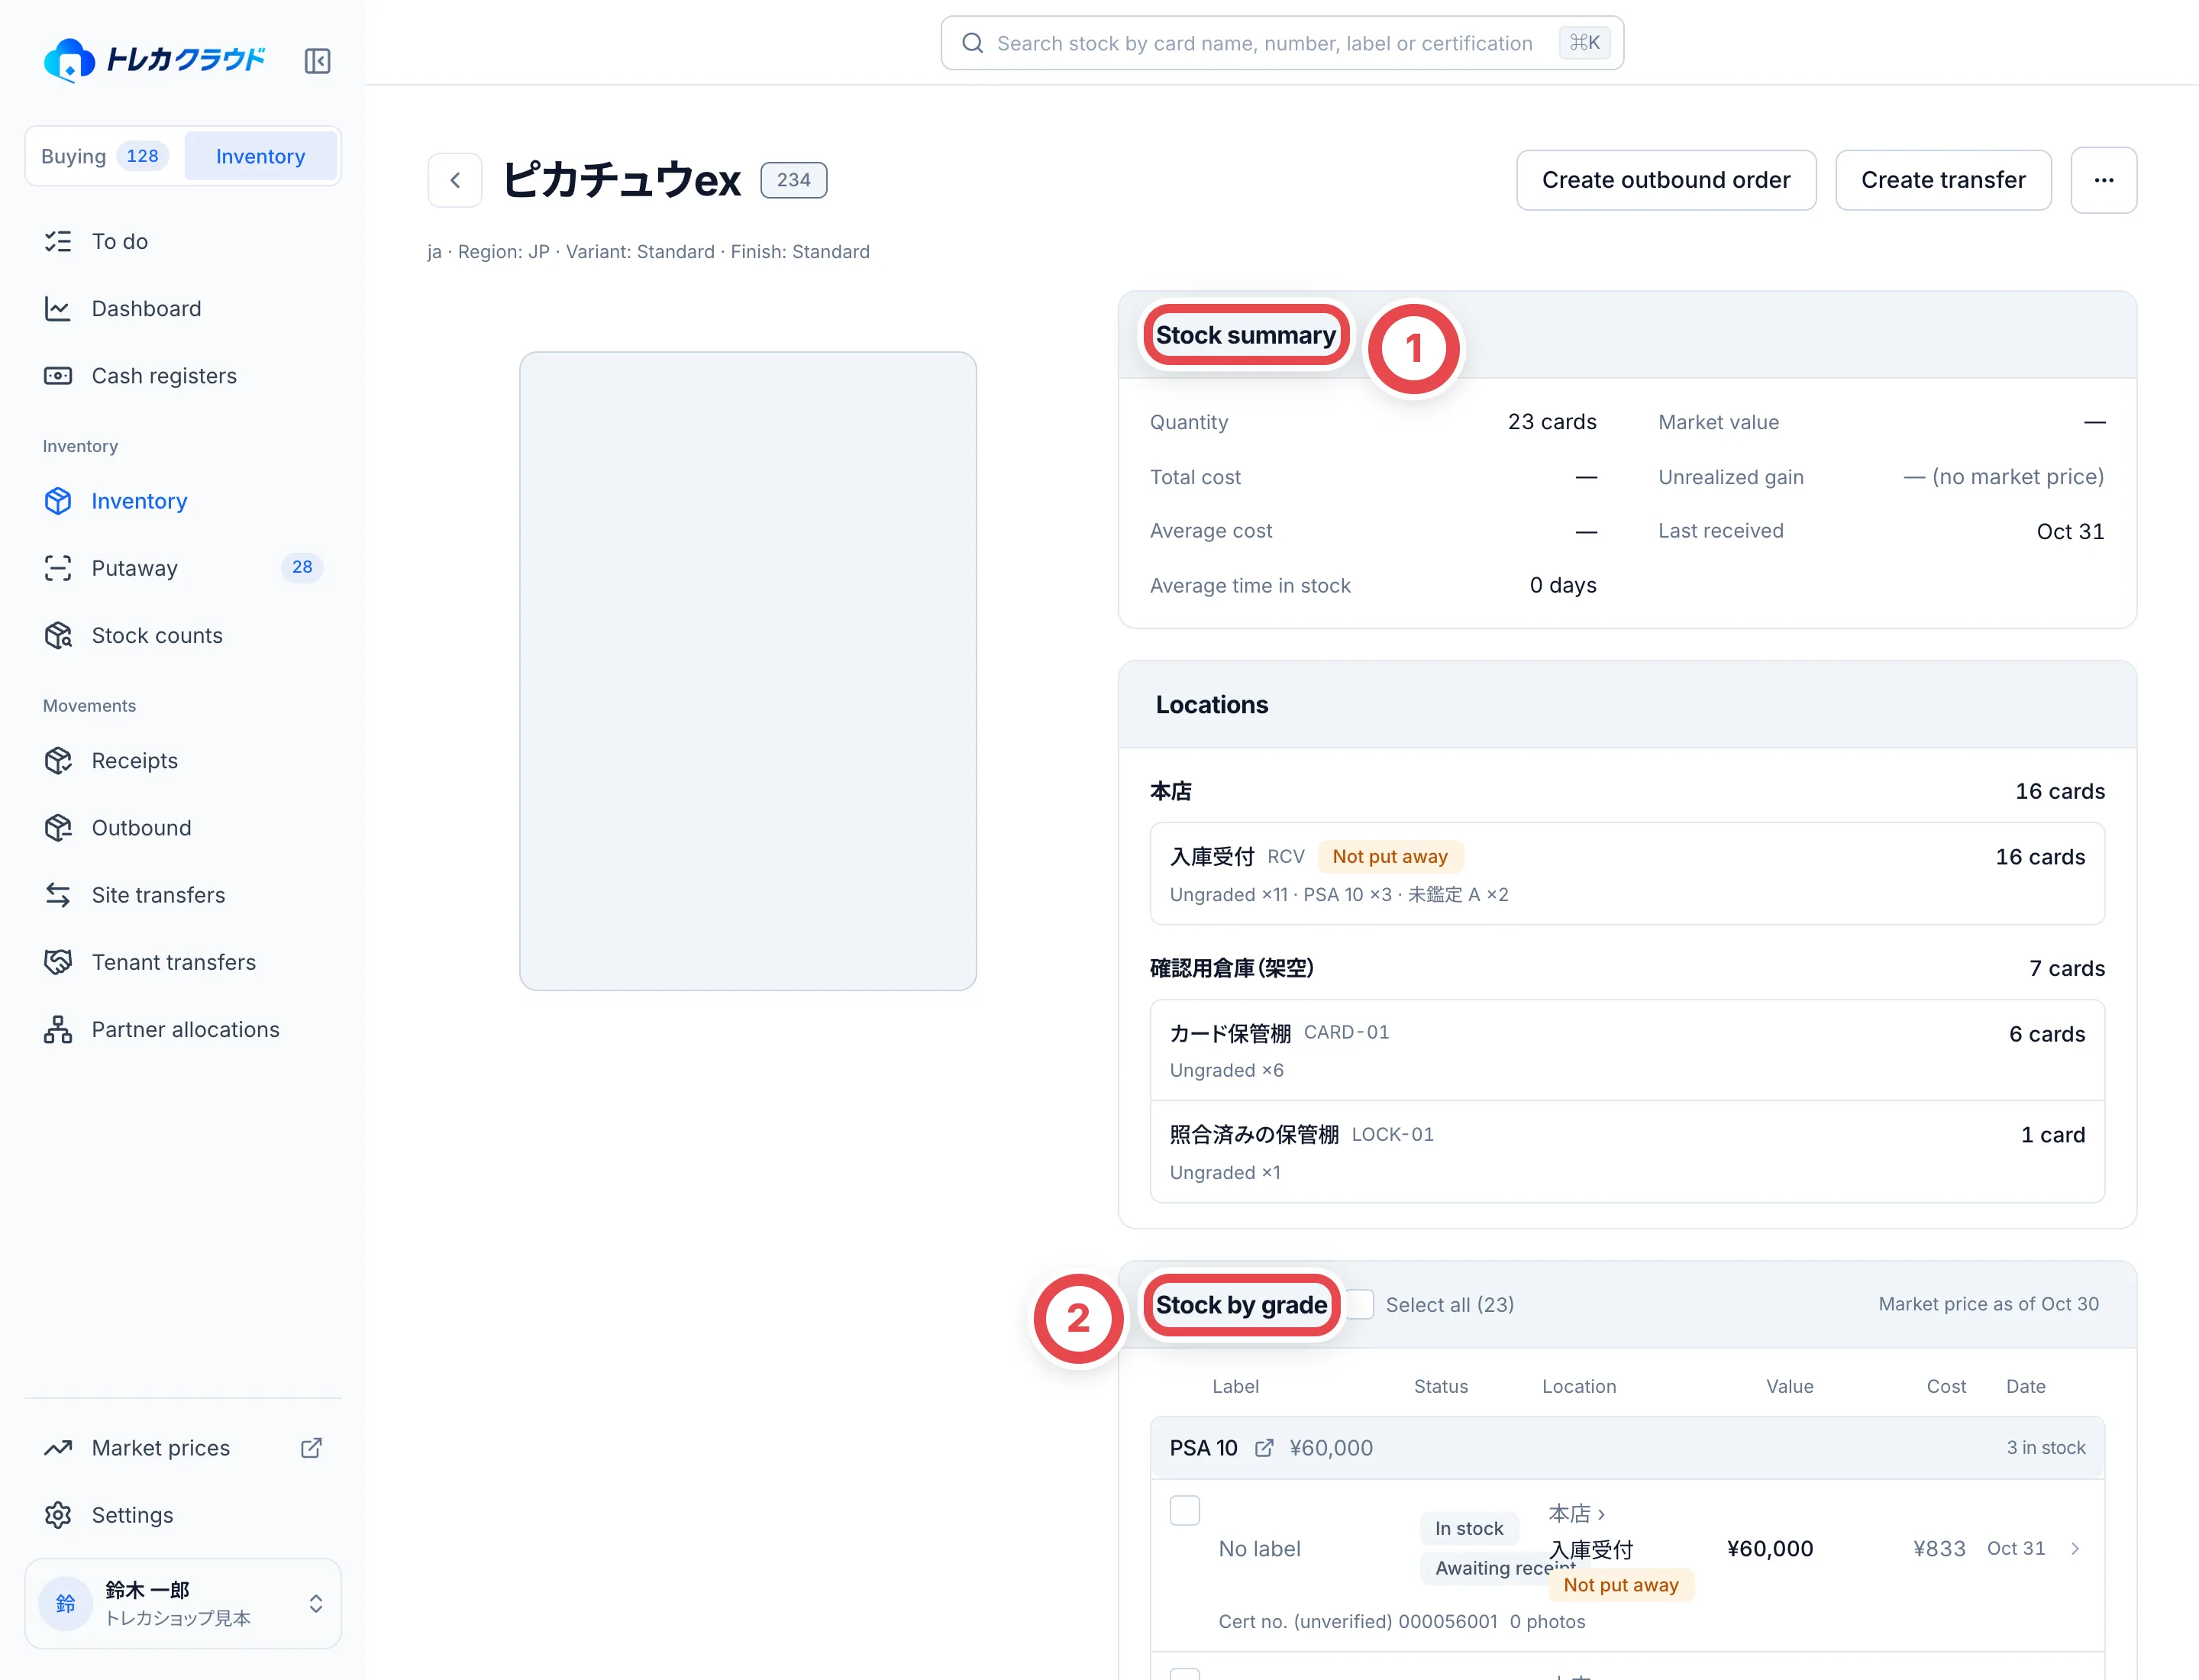 | Section | What's in it |
| -------------------- | ---------------------------------------------------------------------------------------------------------- |
| ① Stock summary | Quantity, market value, total cost, unrealized gain, average cost, last received and average time in stock |
| Locations | How many units are on which shelf at which site. Units that haven't been put away show **Not put away** |
| ② Stock by grade | For each grade, each unit's label, status, location, value and cost. Click a row to open that unit's page |
| Market price history | How this card's market price has moved |
Use **Create outbound order** and **Create transfer** at the top right to start sending this card's stock out or moving it.
## 4. Check and act on a single unit
Click a row under **Stock by grade** to open the unit's page. Under the name is the label number, and **Inventory** shows the status, site, location, cost and market value. Open **Management details** under **Inventory** to see the asset number. Units without a sticker show **Label not issued**. For a unit you bought, **Open purchase case** at the top right takes you back to the original deal.
Click **…** (**More actions**) at the top right to open the actions menu.
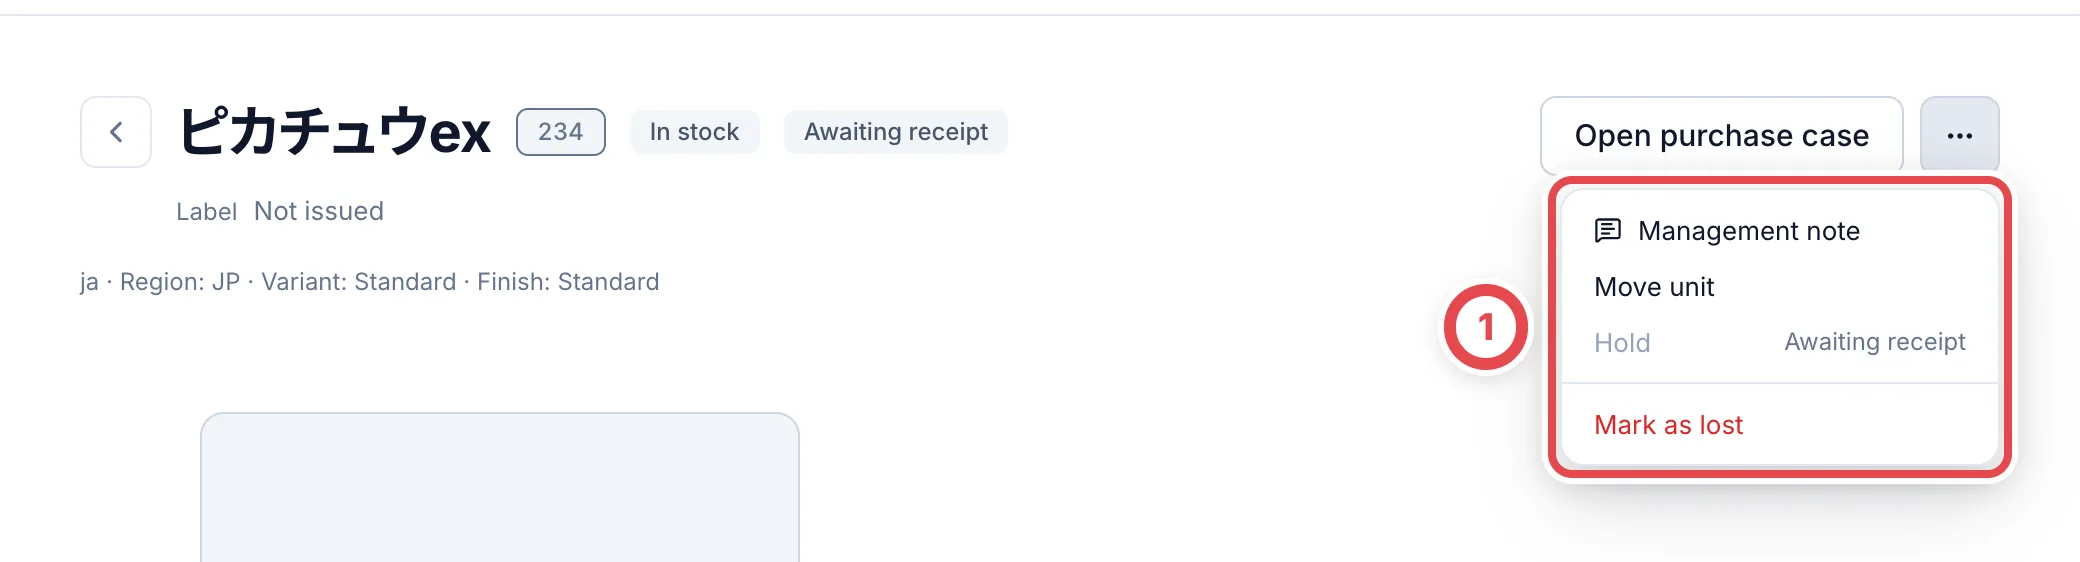 From the menu at ①, choose moving the unit to another shelf, holding it, or marking it as lost.
| Menu | What it does |
| --------------- | --------------------------------------------------------------------------------------- |
| Move unit | Records that you moved the unit to another shelf at the same site |
| Hold | Reserves the unit by creating an outbound order for this unit alone |
| Mark as lost | Takes a missing unit out of stock. If it turns up, use **Mark as found** to put it back |
| Management note | Read or edit the internal note. Purchase read permission is also required |
### Management note
Choose **Management note** from the same menu, enter the note at ① and click **Save** at ②. The limit is 2,000 characters. Reopen it to verify the save. This is separate from customer-visible appraisal notes, condition tags and photos.
For purchased stock, the note belongs to that unit. If a purchase line split into several units, open each unit to edit its own note. Read-only access cannot save. If another member updated it, reopen and review the latest content before trying again.
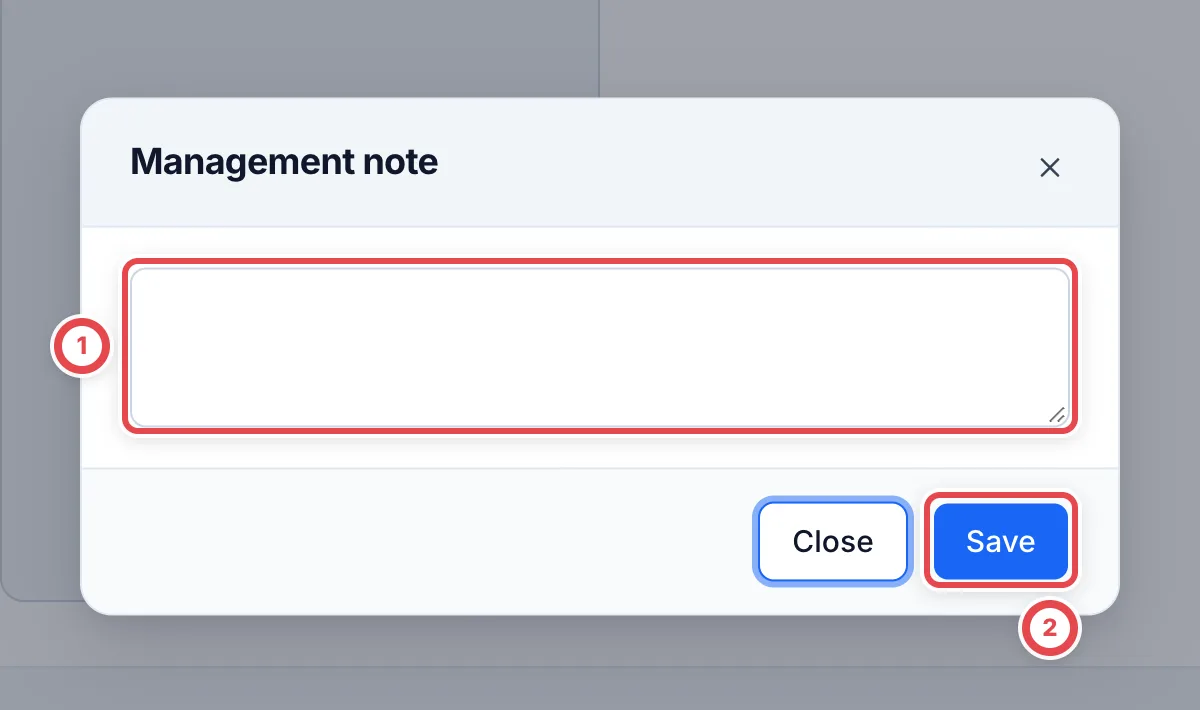 ### Units awaiting receipt
Purchased units with a recorded payment show ① **Awaiting receipt** until the customer's receipt is recorded. For bank transfers, record the receipt confirmation. For in-store cash payments, recording the cash handover clears the restriction.
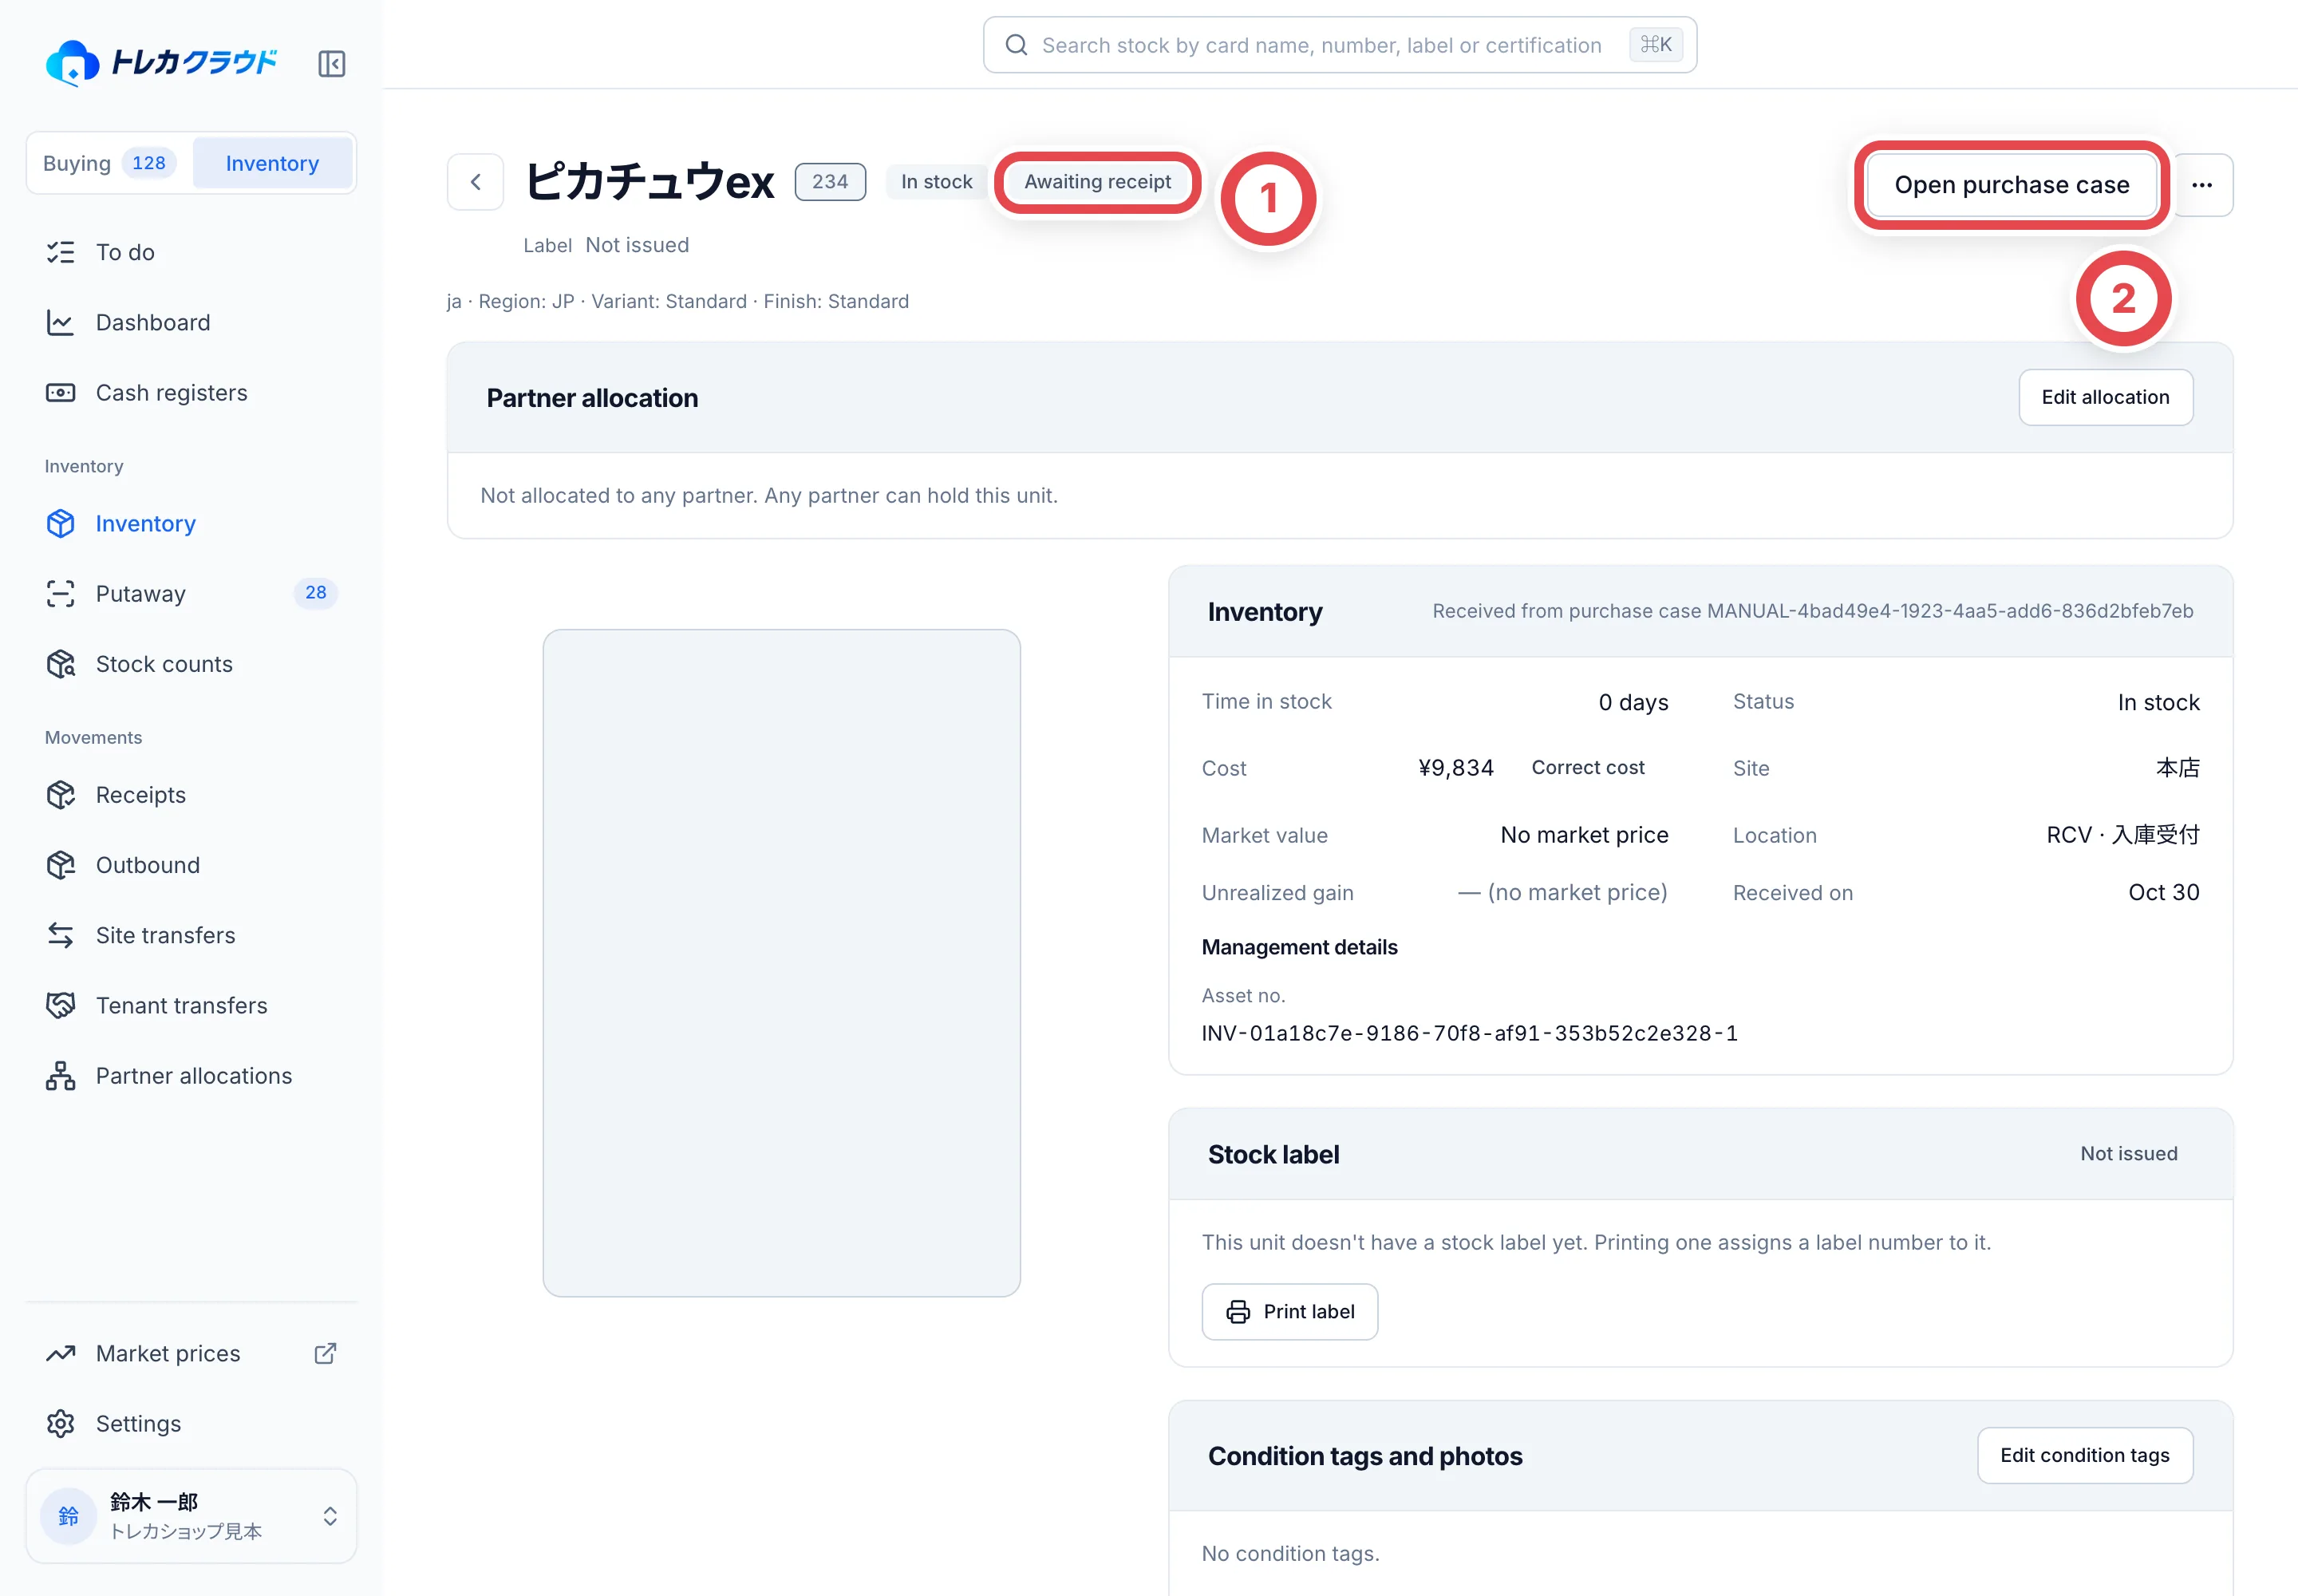 While ① Awaiting receipt shows, you can't ship the unit out or hold it. Open the original deal from ② and record the receipt confirmation.
| What you can't do while a unit is awaiting receipt | What you can do |
| --------------------------------------------------------------------- | ------------------------------------------------------------------------------- |
| Hold, ship out, site transfer, tenant transfer, allocate to a partner | Print labels, put away, move between shelves at the same site, and stock counts |
Record bank-transfer receipt confirmation on the deal's **Payment** screen ([Payouts](/en/guides/purchase/payouts)). For cash handover, see [In-store buying](/en/guides/purchase/counter).
### Condition tags and photos
Under **Condition tags and photos**, you can add tags for the card's condition (such as whitening or bent corners) and register front and back photos. Click **Edit condition tags**, tick the ones that apply and click **Save**.
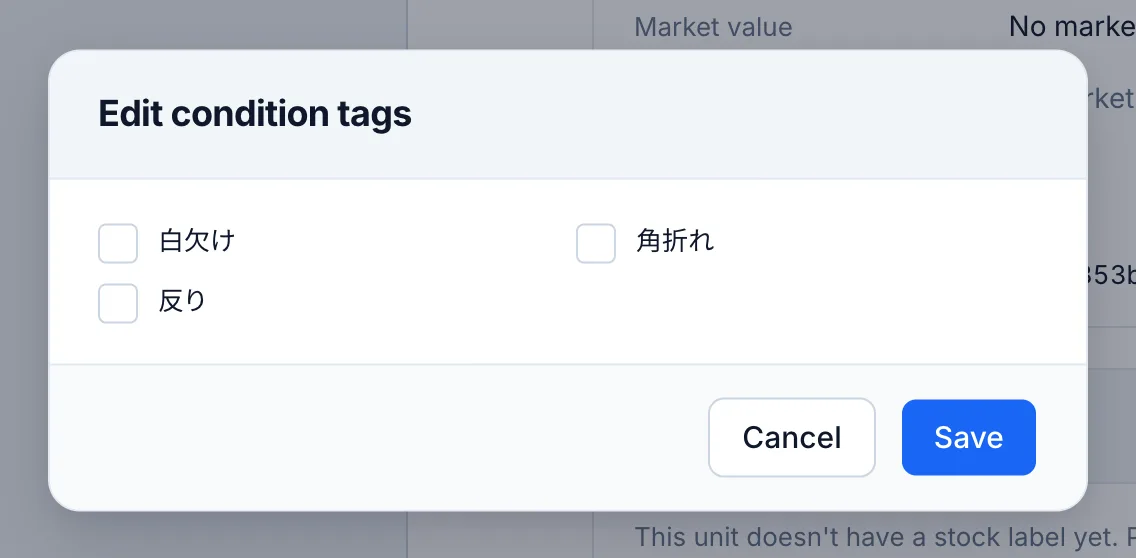 ## Unit statuses
The Inventory list shows only units that are on a shelf (In stock, On hold and so on). Units that are in transit, shipped out or lost don't appear.
| Status | Meaning |
| ----------------------- | ------------------------------------------------ |
| In stock | On a shelf and available to ship out or move |
| On hold | Reserved, for example by an outbound order |
| In transit | On its way in a site transfer or tenant transfer |
| Sold, Disposed, Removed | Shipped out for good, and no longer in stock |
| Transferred | Handed to another shop in a tenant transfer |
| Lost | Marked as lost and taken out of stock |
## Troubleshooting
| What's happening | What to check and how to fix it |
| -------------------------------------------------------- | --------------------------------------------------------------------------------------------------------------------------------------------------------------------- |
| Stock you expect isn't in the list | Check that the site at the top is right, and that no stock status or filter is still applied. Units that are in transit, shipped out or lost don't appear in the list |
| You can't click Create outbound order or Create transfer | Every selected unit awaits payment confirmation. Record bank-transfer receipt or the in-store cash handover |
| You can't hold a unit | It's awaiting receipt, or it's already on hold. Check the status on the unit's page and the mark next to the name |
| The CSV fails with "Too much stock for one file" | Narrow the stock by site or filters, then export again |
| You can't turn off a shelf | The shelf still holds stock. Move it to other shelves first |
| The buttons for changing stock don't show | Both card-view and inventory-write permissions are required. Ask an administrator to check your role |
## Related workflows
- [Correct selected units from a card’s stock page](/en/guides/inventory/corrections)
- [Check partner sales, wins and shipments](/en/guides/inventory/partner-sales)
---
# Check partner sales, wins and shipments
Source: https://docs.toreca-cloud.com/en/guides/inventory/partner-sales
Inventory used by an external sales service has states beyond an ordinary shop-created outbound reservation. Distinguish your shop’s orders from orders created for a partner customer’s shipment request.
See [Partner apps](/en/guides/settings/partners) for connection/visibility setup and [Outbound and transfers](/en/guides/inventory/outbound-and-transfers) for ordinary orders.
## 1. Check a unit’s sales state
Open the unit and check the state and partner notice at ①.
| State | Meaning |
| ------------------------------------------ | ------------------------------------------------------------ |
| In a partner oripa | Used in the partner’s randomized product. |
| Listed | Offered for sale by the partner. |
| Won/purchased, awaiting a shipment request | Acquired by the customer but not yet requested for delivery. |
Match the partner name and reference/allocation information at ②. Do not reuse committed units in another shop sale.
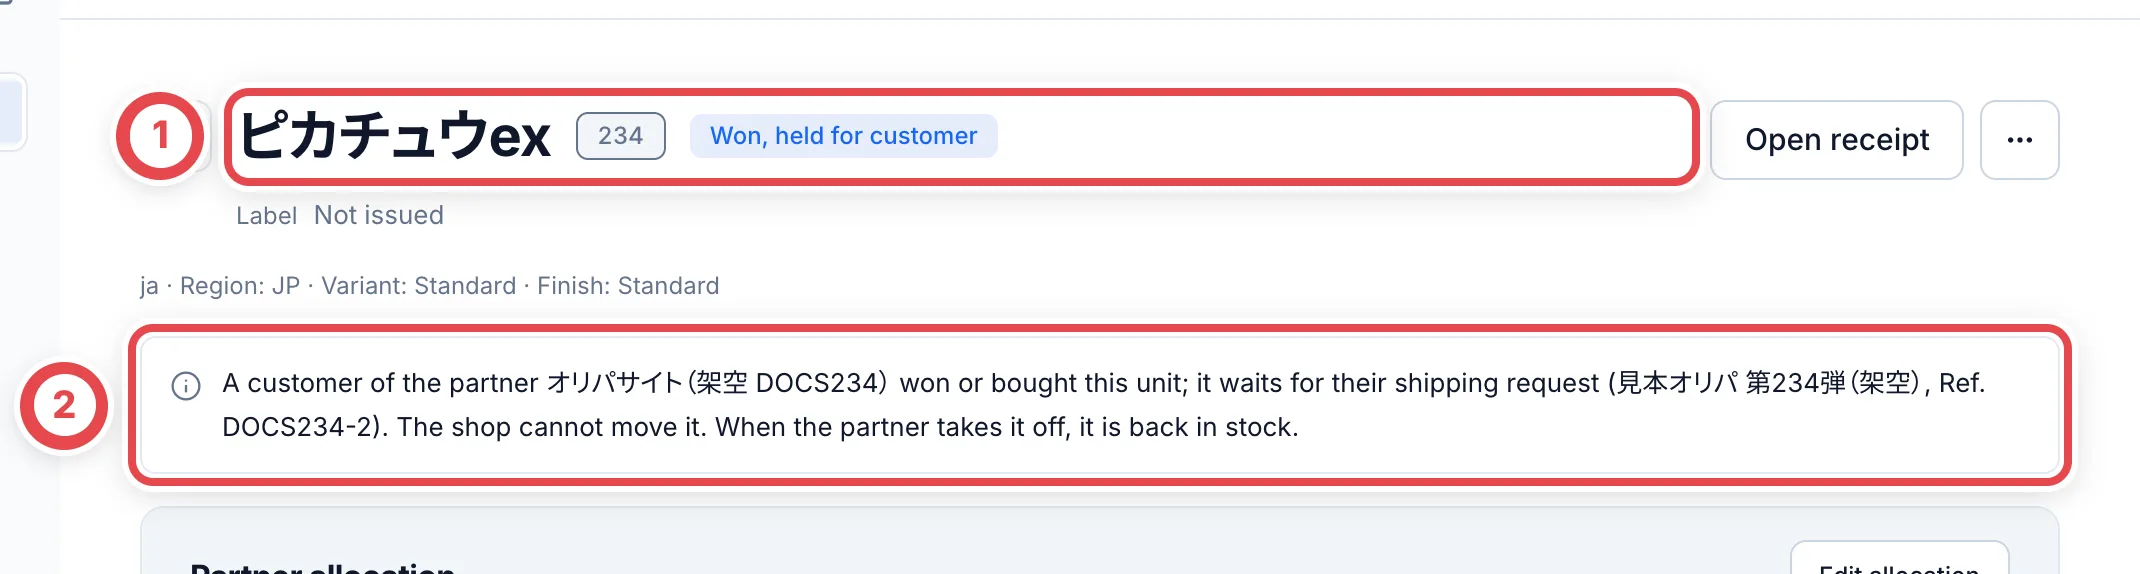 ## 2. Inspect the shipment-request order
Open the outbound order created for the shipment request. Check the partner shipment at ① and origin/reference at ②. Match the units in the item lines below. Cancellation, unit changes and shipment confirmation are controlled by the partner. Missing shop actions do not necessarily mean insufficient permission.
When picking, match the actual unit to this order. Do not apply the ordinary replacement workflow to a partner-controlled shipment.
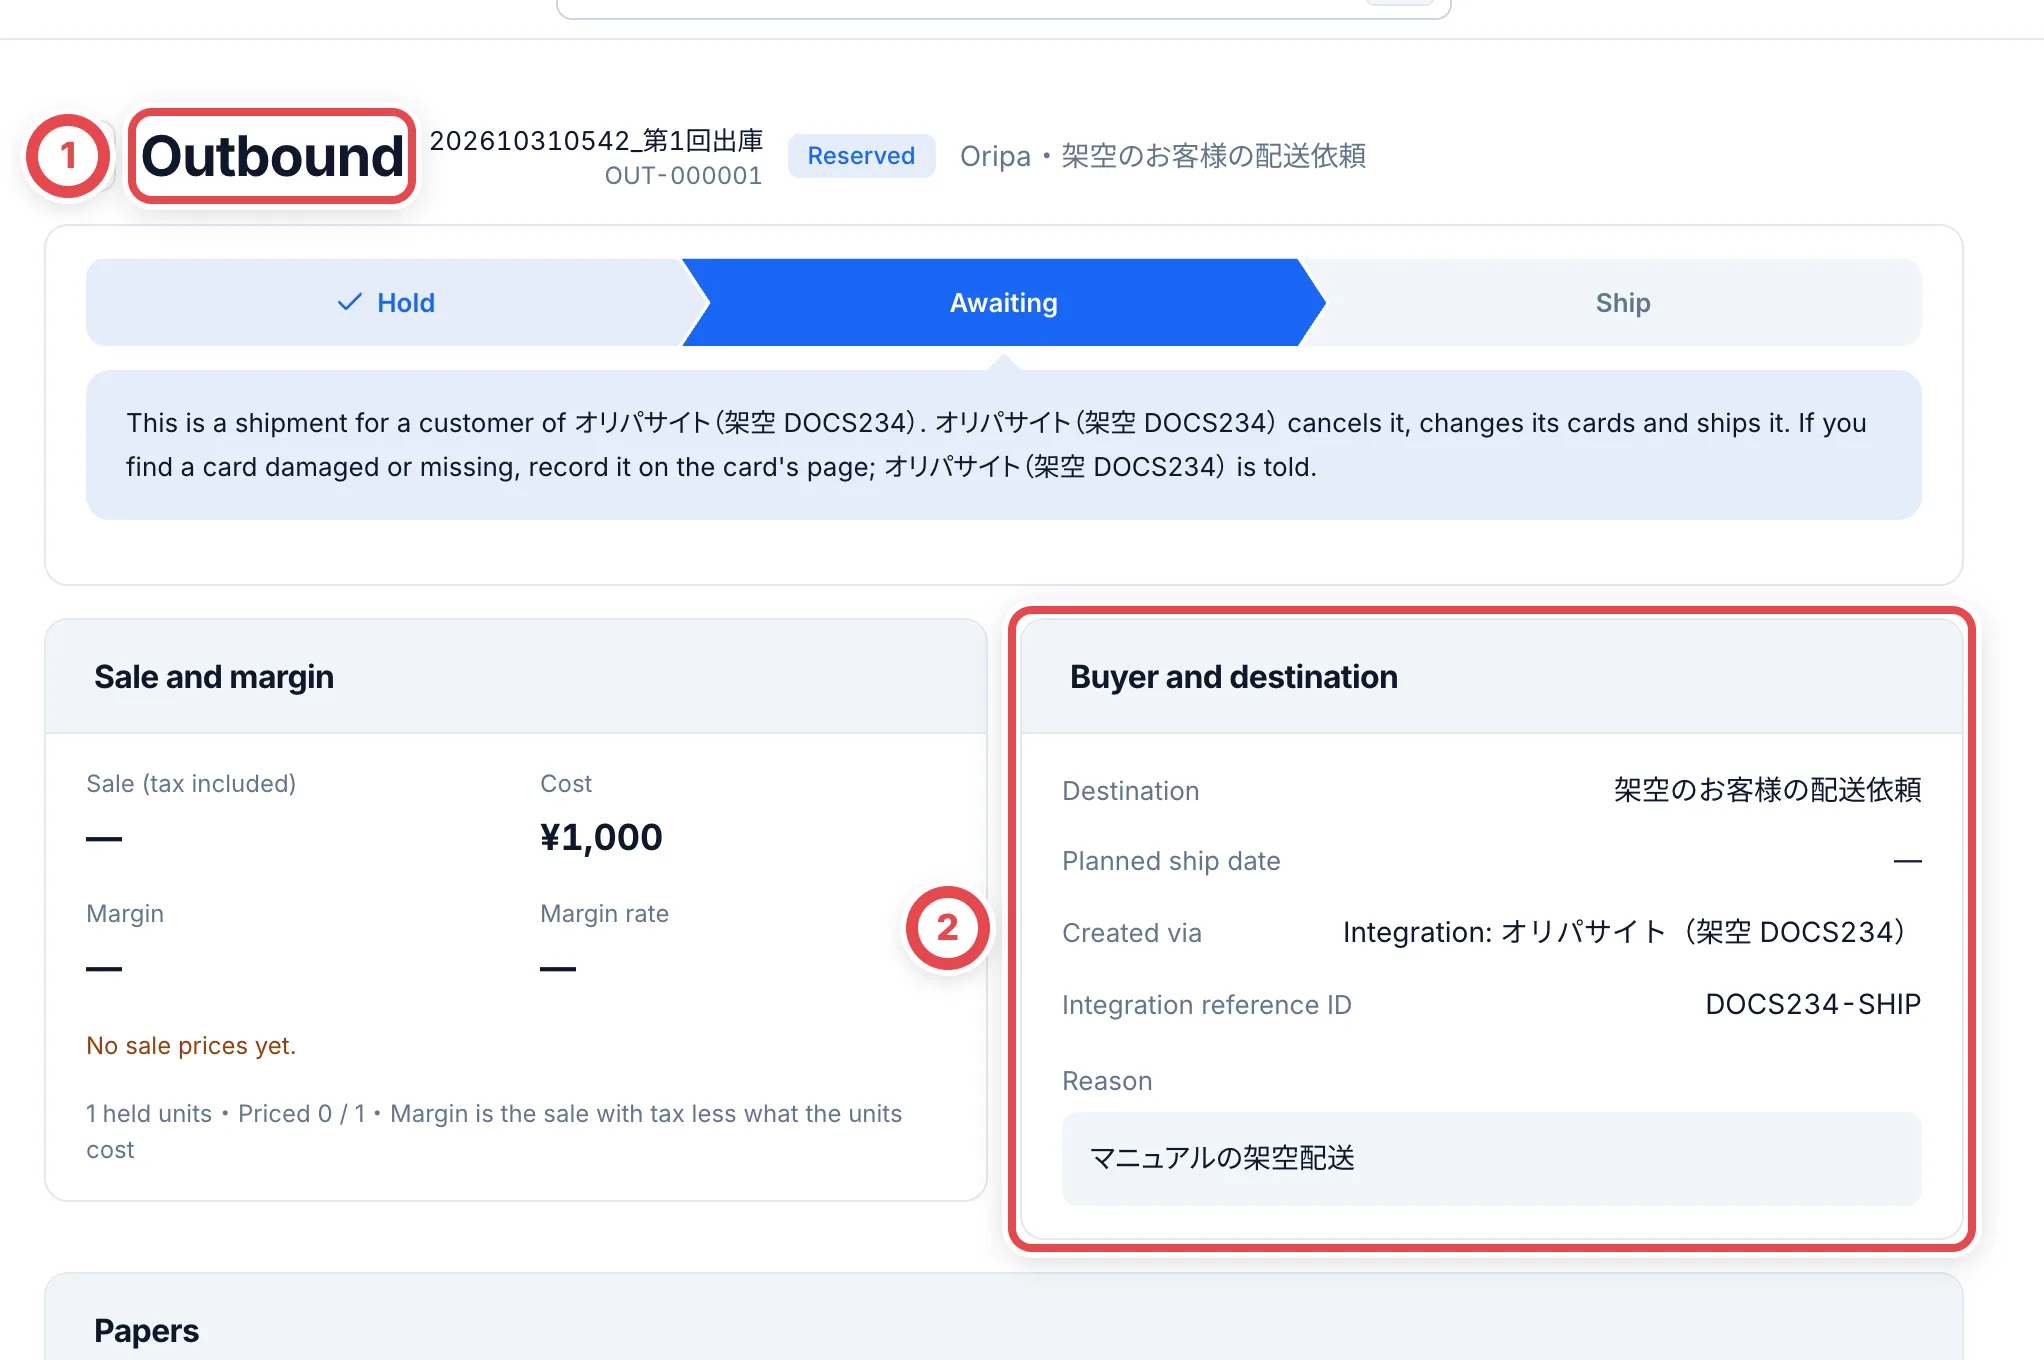 ## 3. Handle a missing or damaged unit
Open the unit detail and match the card at ①. Match shelf, label and certification numbers. Record the actual loss or condition issue from the actions menu at ②. The partner receives state changes; do not silently substitute another unit or cancel the shipment from the shop.
For a release or order change, identify the partner and reference and have the partner perform the change. Reload the unit and shipment afterwards.
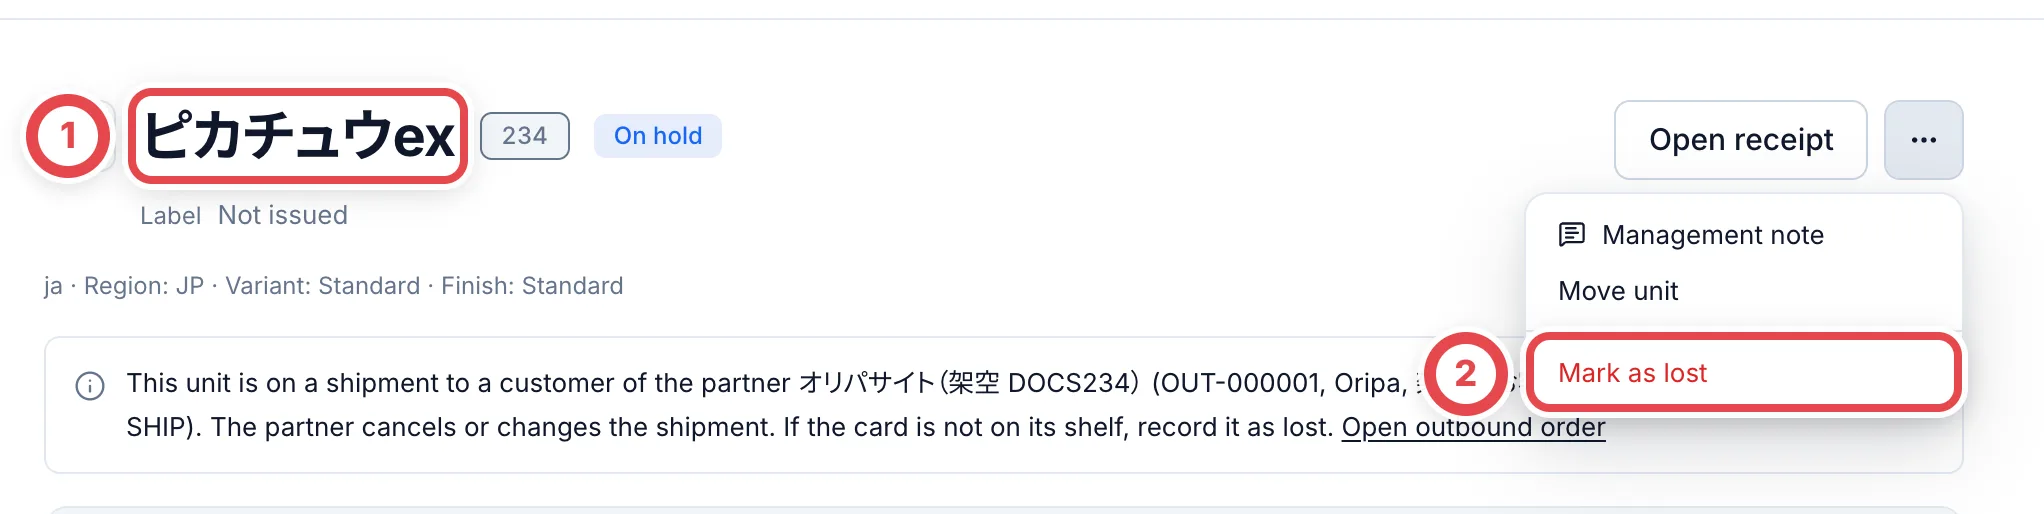 If the item is found after a loss, use **Mark as found** on its unit page and record the destination shelf and reason. A live partner sale, allocation or shipment restores its committed state. Reopen the unit and match its state and partner reference before treating it as freely available stock.
## Troubleshooting
| What you see | What to check |
| -------------------------------- | ---------------------------------------------------------------------------------------- |
| Move/outbound actions missing | Check partner sale, allocation and shipment state. |
| Cannot cancel or replace | The partner controls its customer’s shipment. |
| Holds remain after disconnecting | Disconnecting access is separate from releasing a commitment/hold/shipment. |
| Won card missing from its shelf | Inspect the exact unit’s location/history and record the actual loss or condition issue. |
---
# Correct shop product information and valuations
Source: https://docs.toreca-cloud.com/en/guides/inventory/product-and-market-corrections
Use the three-dot menu on a product’s stock page to correct its name, number or valuation for your shop. Product IDs and original values are retained. Check the product carefully: shop information applies across that product’s inventory.
| Task | Action | Result |
| ---------------------------------------------- | ---------------------------------------------------------- | ----------------------------------------------------------------------------------- |
| Correct a product’s name, number or attributes | Correct product information | Updates this shop’s information; the shared catalogue and other shops are unchanged |
| Adopt a price checked by the shop | Change valuation | Adopts a manual value for the selected grade / packaging |
| Return to automatically obtained prices | Release manual price within Change valuation | Stops adopting the manual value |
| Add a product not in the list | Register product on Inventory | Registers the product without increasing stock |
| Correct the identity of selected units only | [Correct selected units](/en/guides/inventory/corrections) | Relinks those units |
## Who can use these actions
Shop product correction permission is required to correct or register products. Manual valuation management permission is required for manual prices. You also need access to the inventory and product. Owners and administrators have these permissions by default. Ask an administrator to check your current permissions if an action is missing.
## Correct product information
### 1. Open the product menu
Open the product from Inventory. Click **…** (**More product actions**) beside its name, then **Correct product information** at ①. The valuation action at ② is used later.
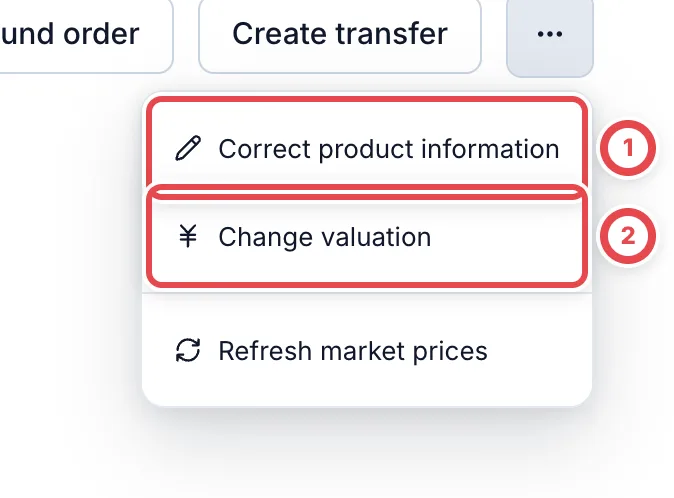 ### 2. Enter the correct information
Match the physical item and correct the **Product name** at ① and **Card number** at ②. The form also offers set, series, rarity, variant, finish, language and image URL. For cards, **SNKRDUNK product URL** changes the link on this shop’s inventory, appraisal and card detail pages. Enter a product page in the form `https://snkrdunk.com/apparels/product-number`; clear it to hide the link. This does not change where market prices are collected. If only certain units belong to a different product, use unit relinking instead.
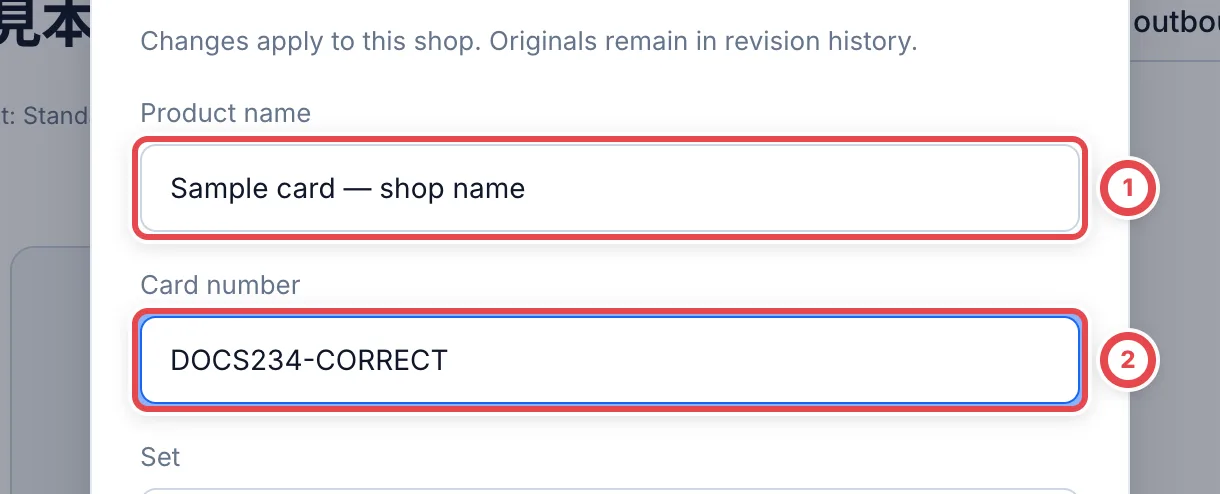
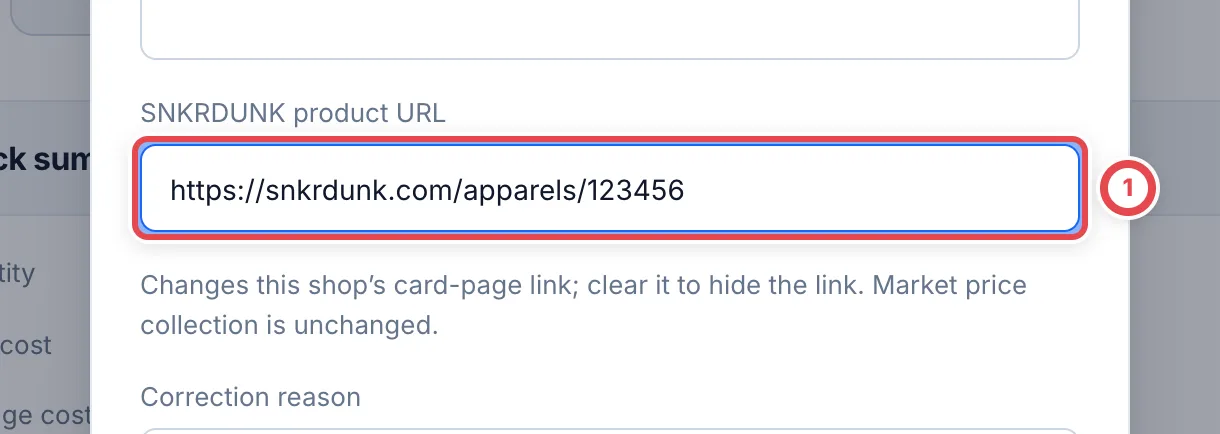 ### 3. Choose a correction reason
At ①, select **Correct an entry error**, **Match the physical stock**, **Restore previous values**, or **Other**. Use **Note (optional)** at ② for context such as the source you checked. **Other** requires details. Click **Review changes**.
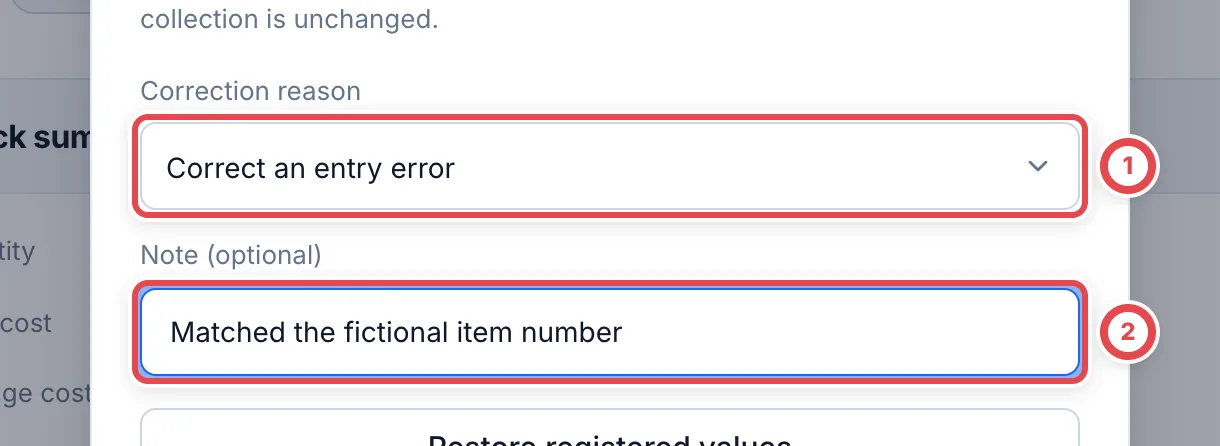 ### 4. Review and save
Check the before/after values at ① and the number of related inventory units. Use **Back** if anything is wrong.
:::warning
The shop information applies across inventory for this product. The product ID is retained and the original values remain in revision history.
:::
Click **Save changes** at ②. Reopen the product and check its name, number and revision history.
To release a shop correction, reopen **Correct product information** and select **Correction reason** first. Click **Release product corrections** for a shared product or **Restore registered values** for a shop-created product. Review the before/after values and click **Save changes** to record a new revision. Shared products return to the current shared catalogue; shop-created products return to their initial registration values.
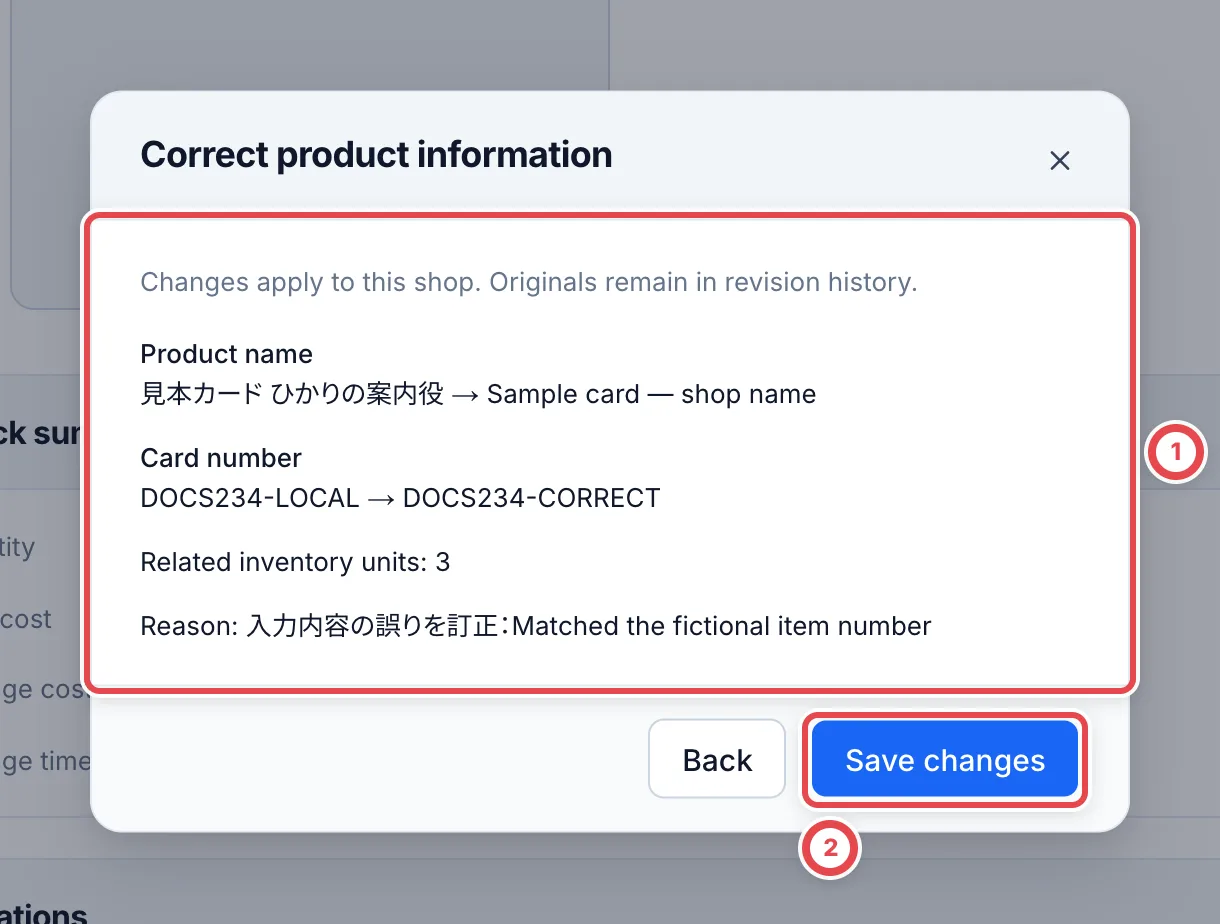 ## Change a manual valuation
### 1. Select the grade and enter a price
Choose **Change valuation** from the product menu. Check **Grade** at ① and the packaging condition for boxes, packs or decks where offered. Enter the yen value at ②. Zero and an unset price are different. Record **Source / evidence** at ③ and a source URL if needed. Price evidence and the correction reason are separate information.
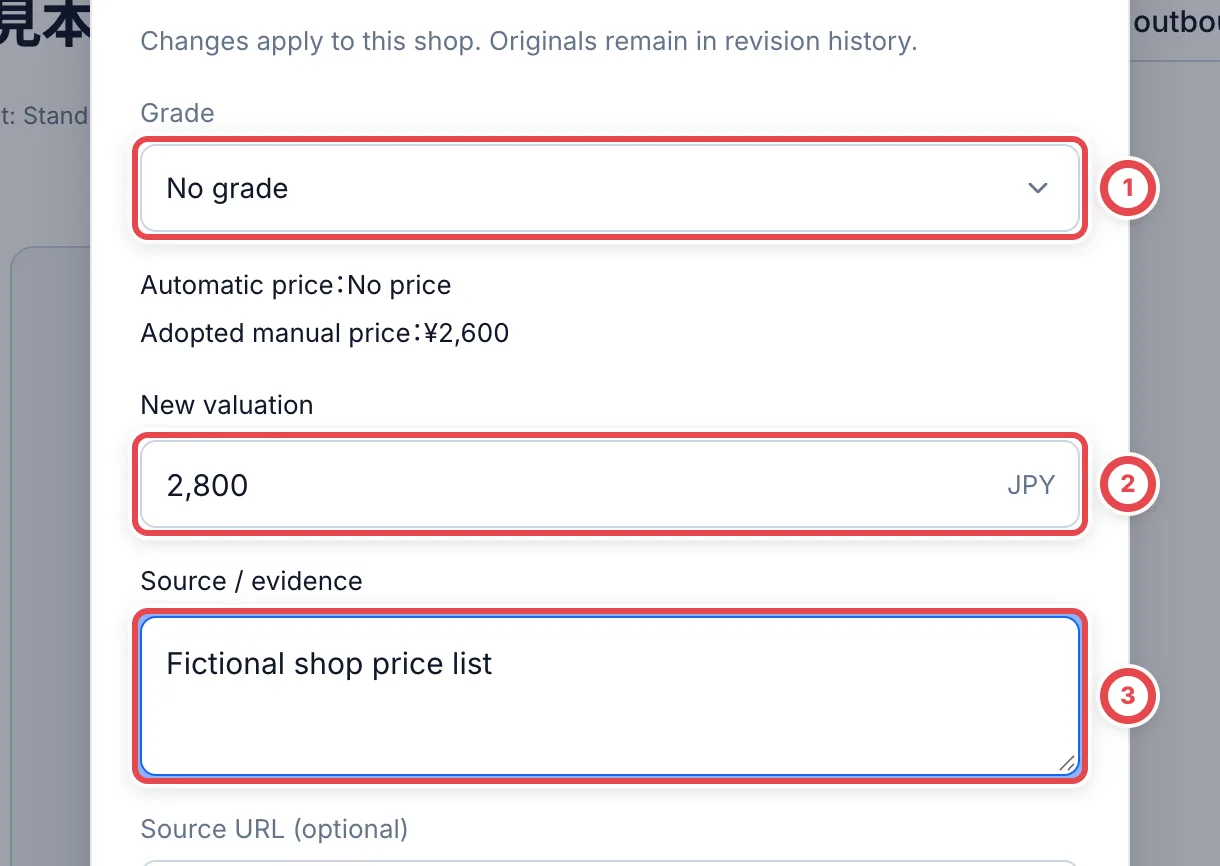 ### 2. Choose a reason and save
Select **Correction reason**, then **Review changes**. Check the price at ① and the applicable grade / packaging, then click **Save changes** at ②. Reopen the product and check its valuation and history.
An adopted manual price takes precedence. **Refresh market prices** alone does not release it.
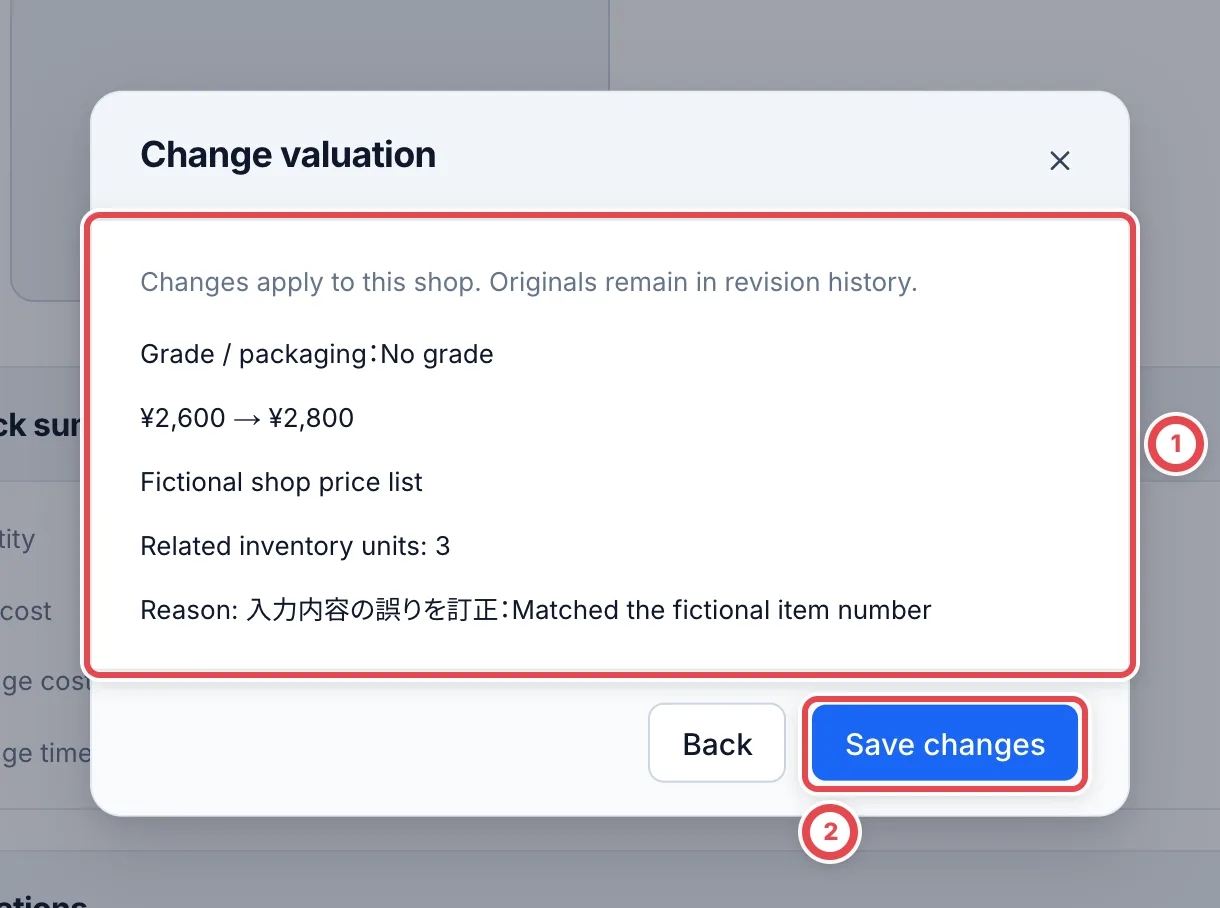 ### 3. Return to automatic prices
In **Change valuation**, select the same grade / packaging and a correction reason. Click **Release manual price**. Confirm **Use automatic price** at ①, then **Save changes** at ②. If no automatic price exists, the valuation becomes unset.
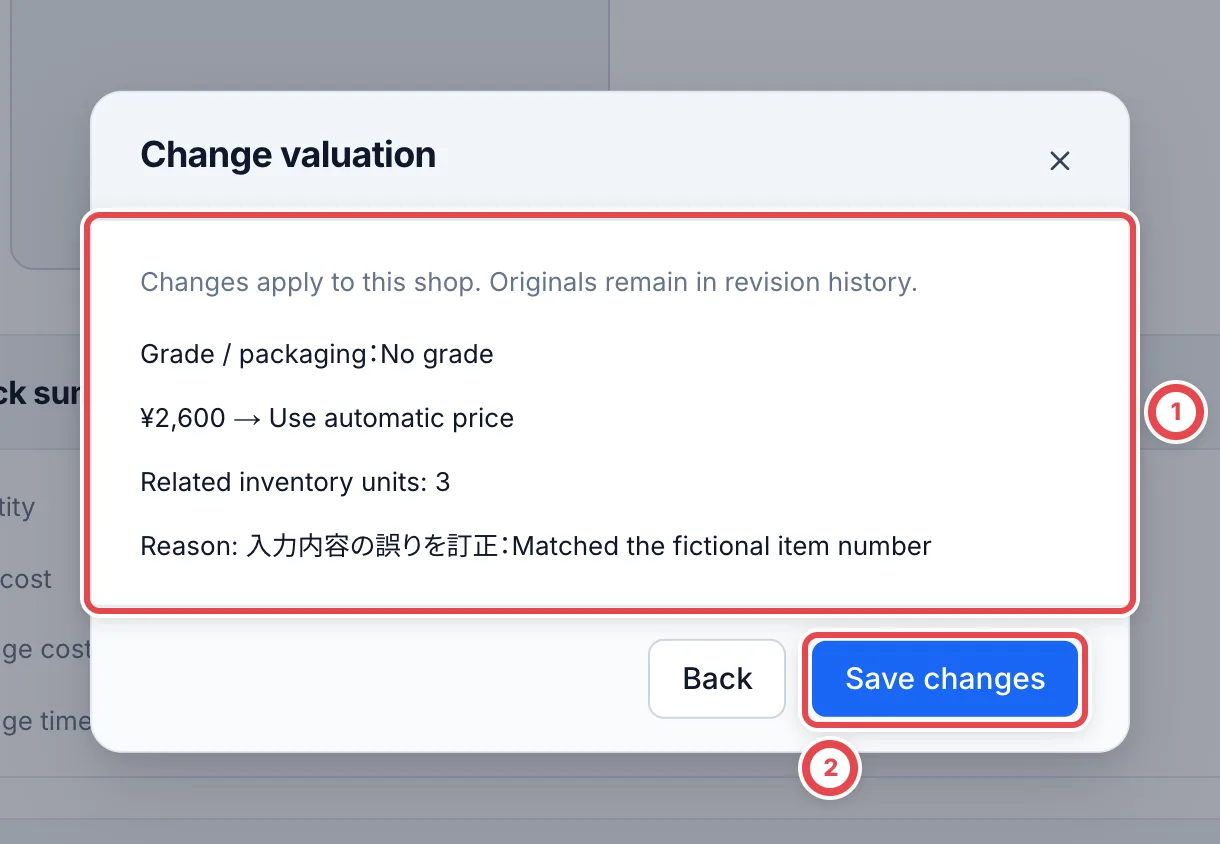 ## Refresh market prices
On a card's detail or stock detail page, open the three-dot menu at the top right and choose **Refresh market prices**. Like **Fetch from SNKRDUNK** in an online appraisal, it fetches the card's market price again from SNKRDUNK sales.
1. Choose the grade under **Grade**. Its current fetch status and the last calculated price appear.
2. Choose **Fetch from SNKRDUNK**. It moves through **Request collection**, **Wait in queue**, **Collect trades** and **Review result**. While it waits in the queue, the button reads **Check collection**.
3. When the fetch is done, the sales used and the calculated price appear. The sales fetched are added to **Fetch history** in the market section.
The **Buy prices by grade** change when the market is next aggregated, not right after a refresh. Until then, the market section shows how many records were fetched and the latest price.
Only published domestic cards can be fetched. The action appears for people who can both create or edit purchases and view cards. While a manual price is adopted, it is still used for valuation after a refresh.
## Register an unlisted shop product
### 1. Enter the product and registration reason
Open **Register product** on Inventory. Select the product type at ① and its game. Enter the product name at ②, number and other details. Select **Registration reason**, then **Review details** at ③.
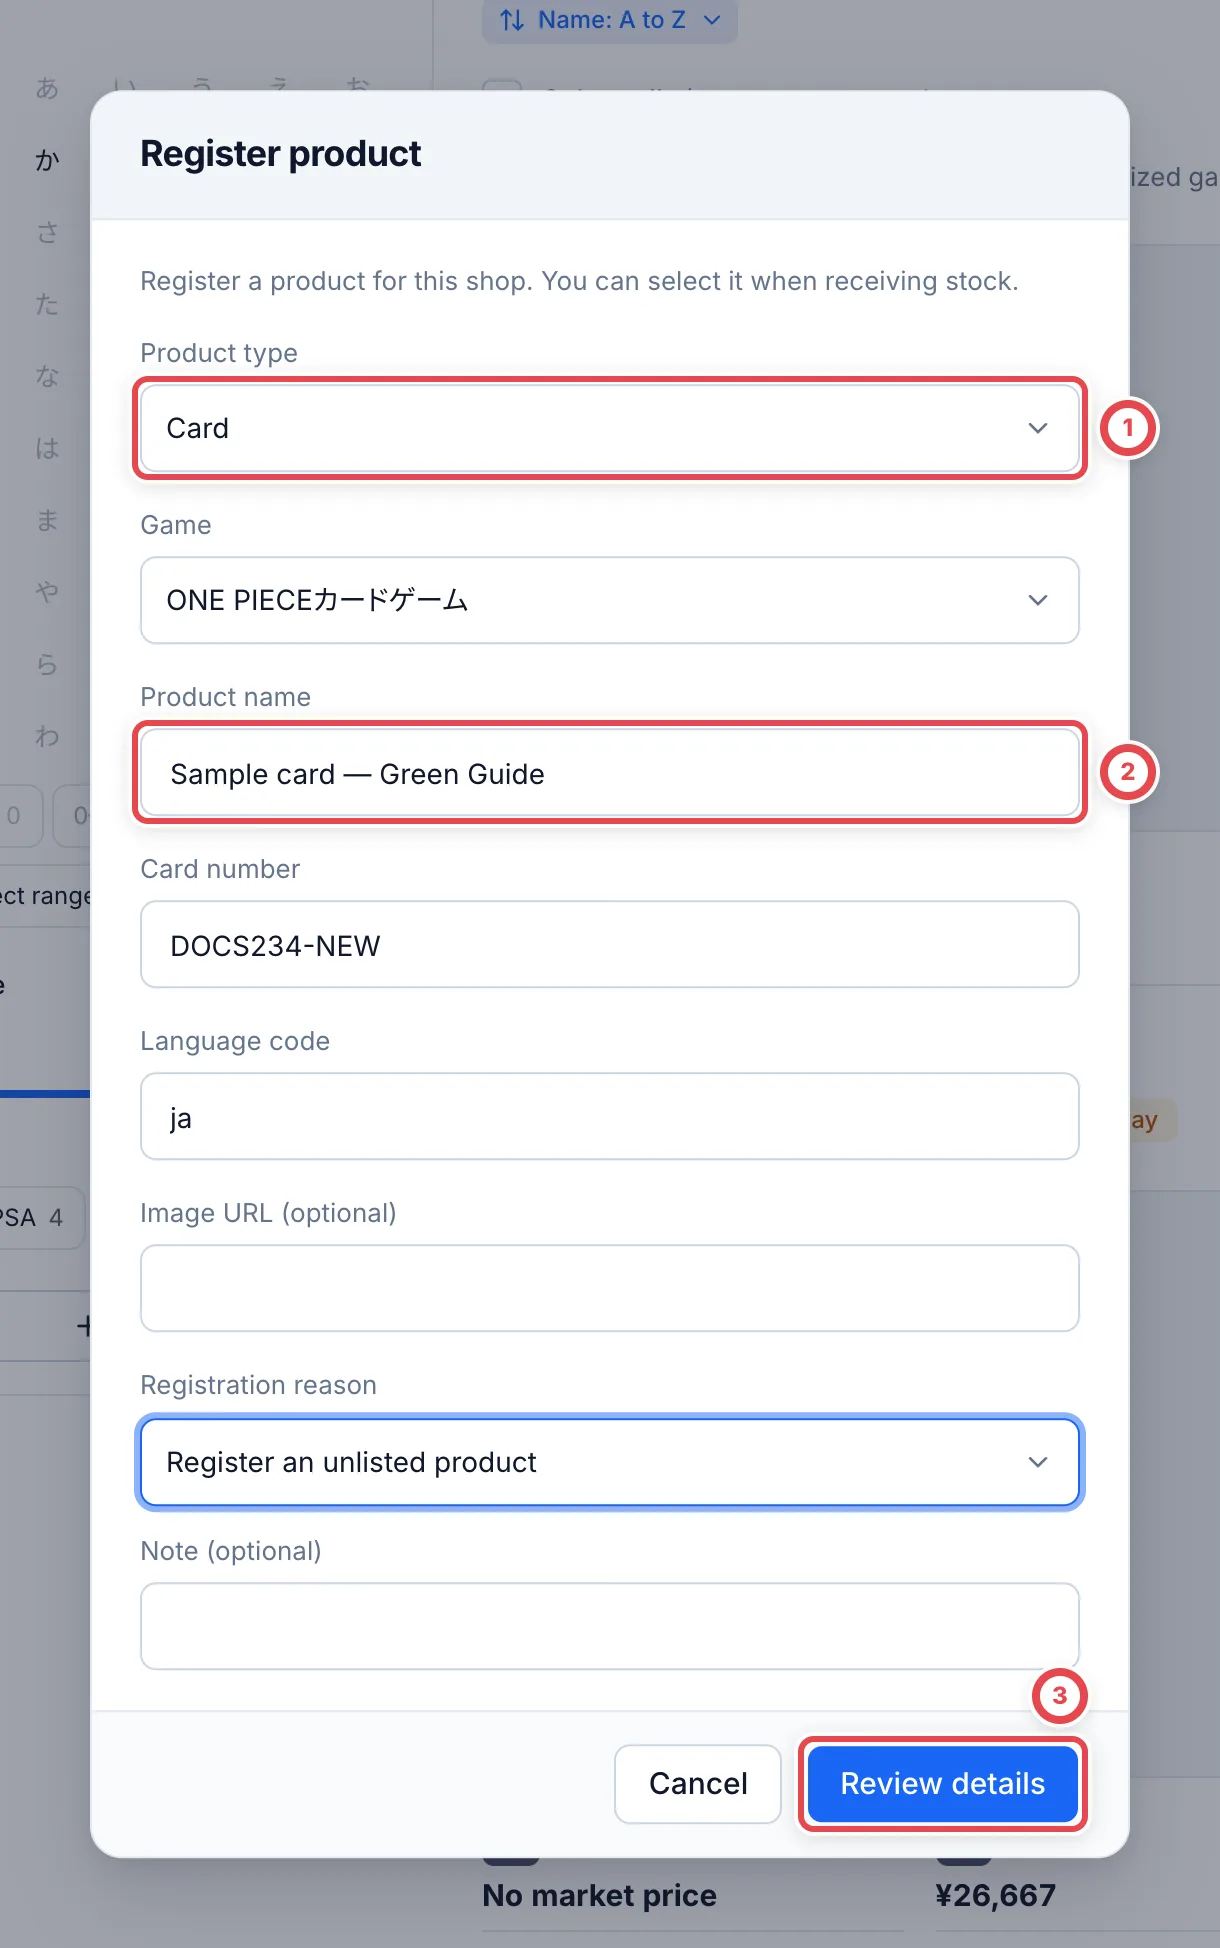 ### 2. Register the product, then receive stock
Check the product and number at ①, then **Register product** at ②. Registration opens the product detail in **Market prices**. Check its name and number.
To receive the physical item, select **Inventory** at the top of the sidebar, then **Receipts** → **Receipt slips** → **Receive stock**. Open **Search for a card**, search for the registered name or number, and select the product.
:::note
Registration does not add stock. Record the physical receipt with an [inventory receipt](/en/guides/inventory/receipts).
:::
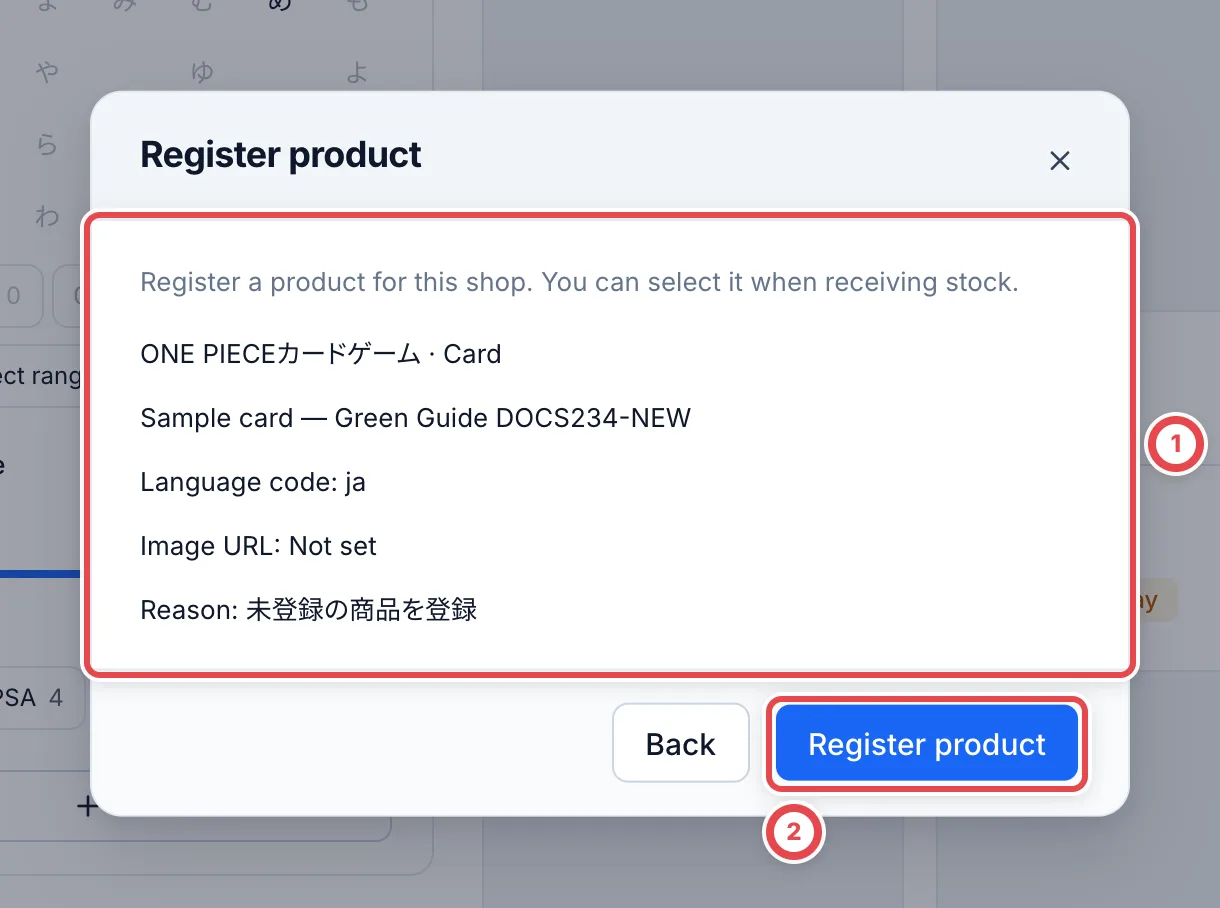 ## Troubleshooting
| What you see | What to check |
| ----------------------------------------------- | ------------------------------------------------------------------------------------------------------- |
| Review is disabled | Check that values changed, required fields and a reason are supplied, and Other has details |
| Only some units need correction | Use [unit corrections](/en/guides/inventory/corrections) |
| Refreshing prices does not change the valuation | Check whether a manual value is adopted for the selected conditions; release it to use automatic prices |
| The record changed | Reopen the latest product and review the correction again |
| Save outcome is uncertain | Reopen the product and revision history before repeating a correction |
---
# Putaway and QR labels
Source: https://docs.toreca-cloud.com/en/guides/inventory/putaway
Print QR labels in the console and attach them to the cards, then record their shelves with the iPhone app 「トレカクラウド 格納」 (Toreca Cloud Putaway).
- First print: [paper and printer setup](#paper-and-printer-setup)
- Labels already printed: [put cards away with the app](#7-put-cards-away-with-the-app)
- A scan turned red: [clear items that need action](#8-clear-items-that-need-action)
## 1. Open the Putaway page
Open **Inventory → Putaway**. To print all unissued labels, use ③ and continue to [printing the labels](#3-print-the-labels). To choose specific cards, follow the next step.
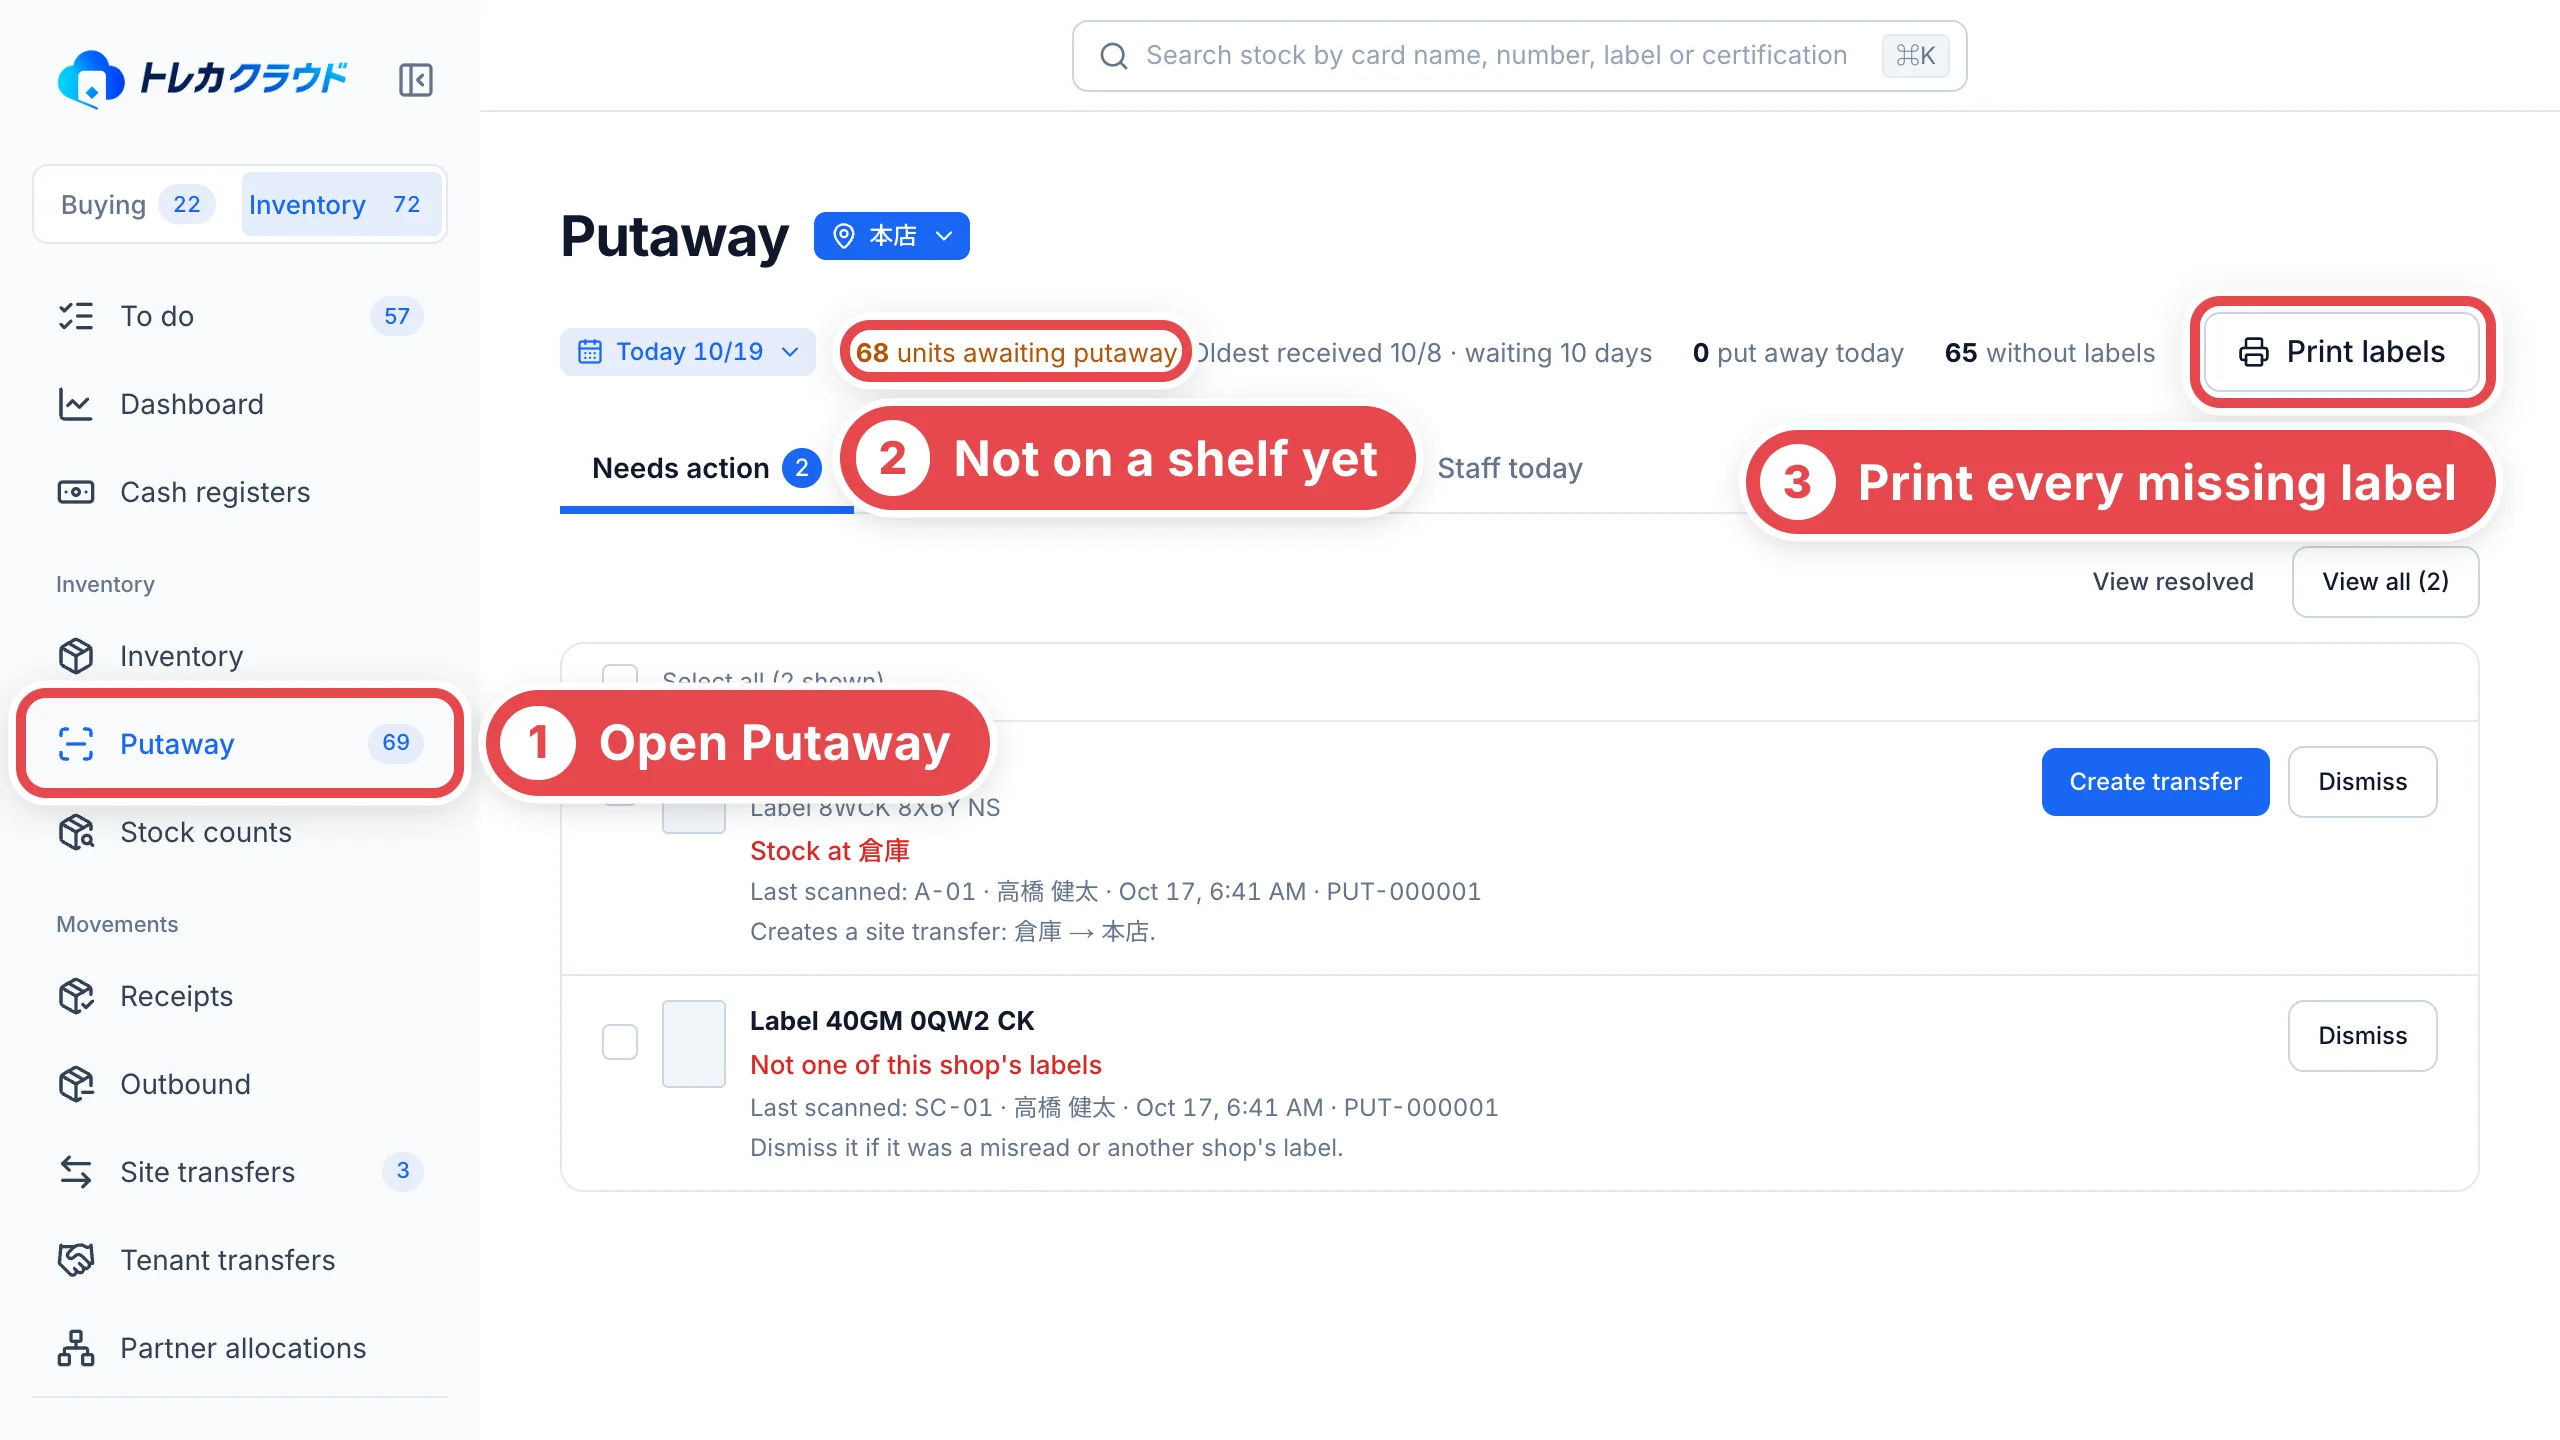 ## 2. Choose the cards to print
Open **Movements → Receipts**, select the cards and click **Print QR labels**. Look under **Awaiting receipt** for deals whose payment receipt is unconfirmed, or **To receive** once confirmed.
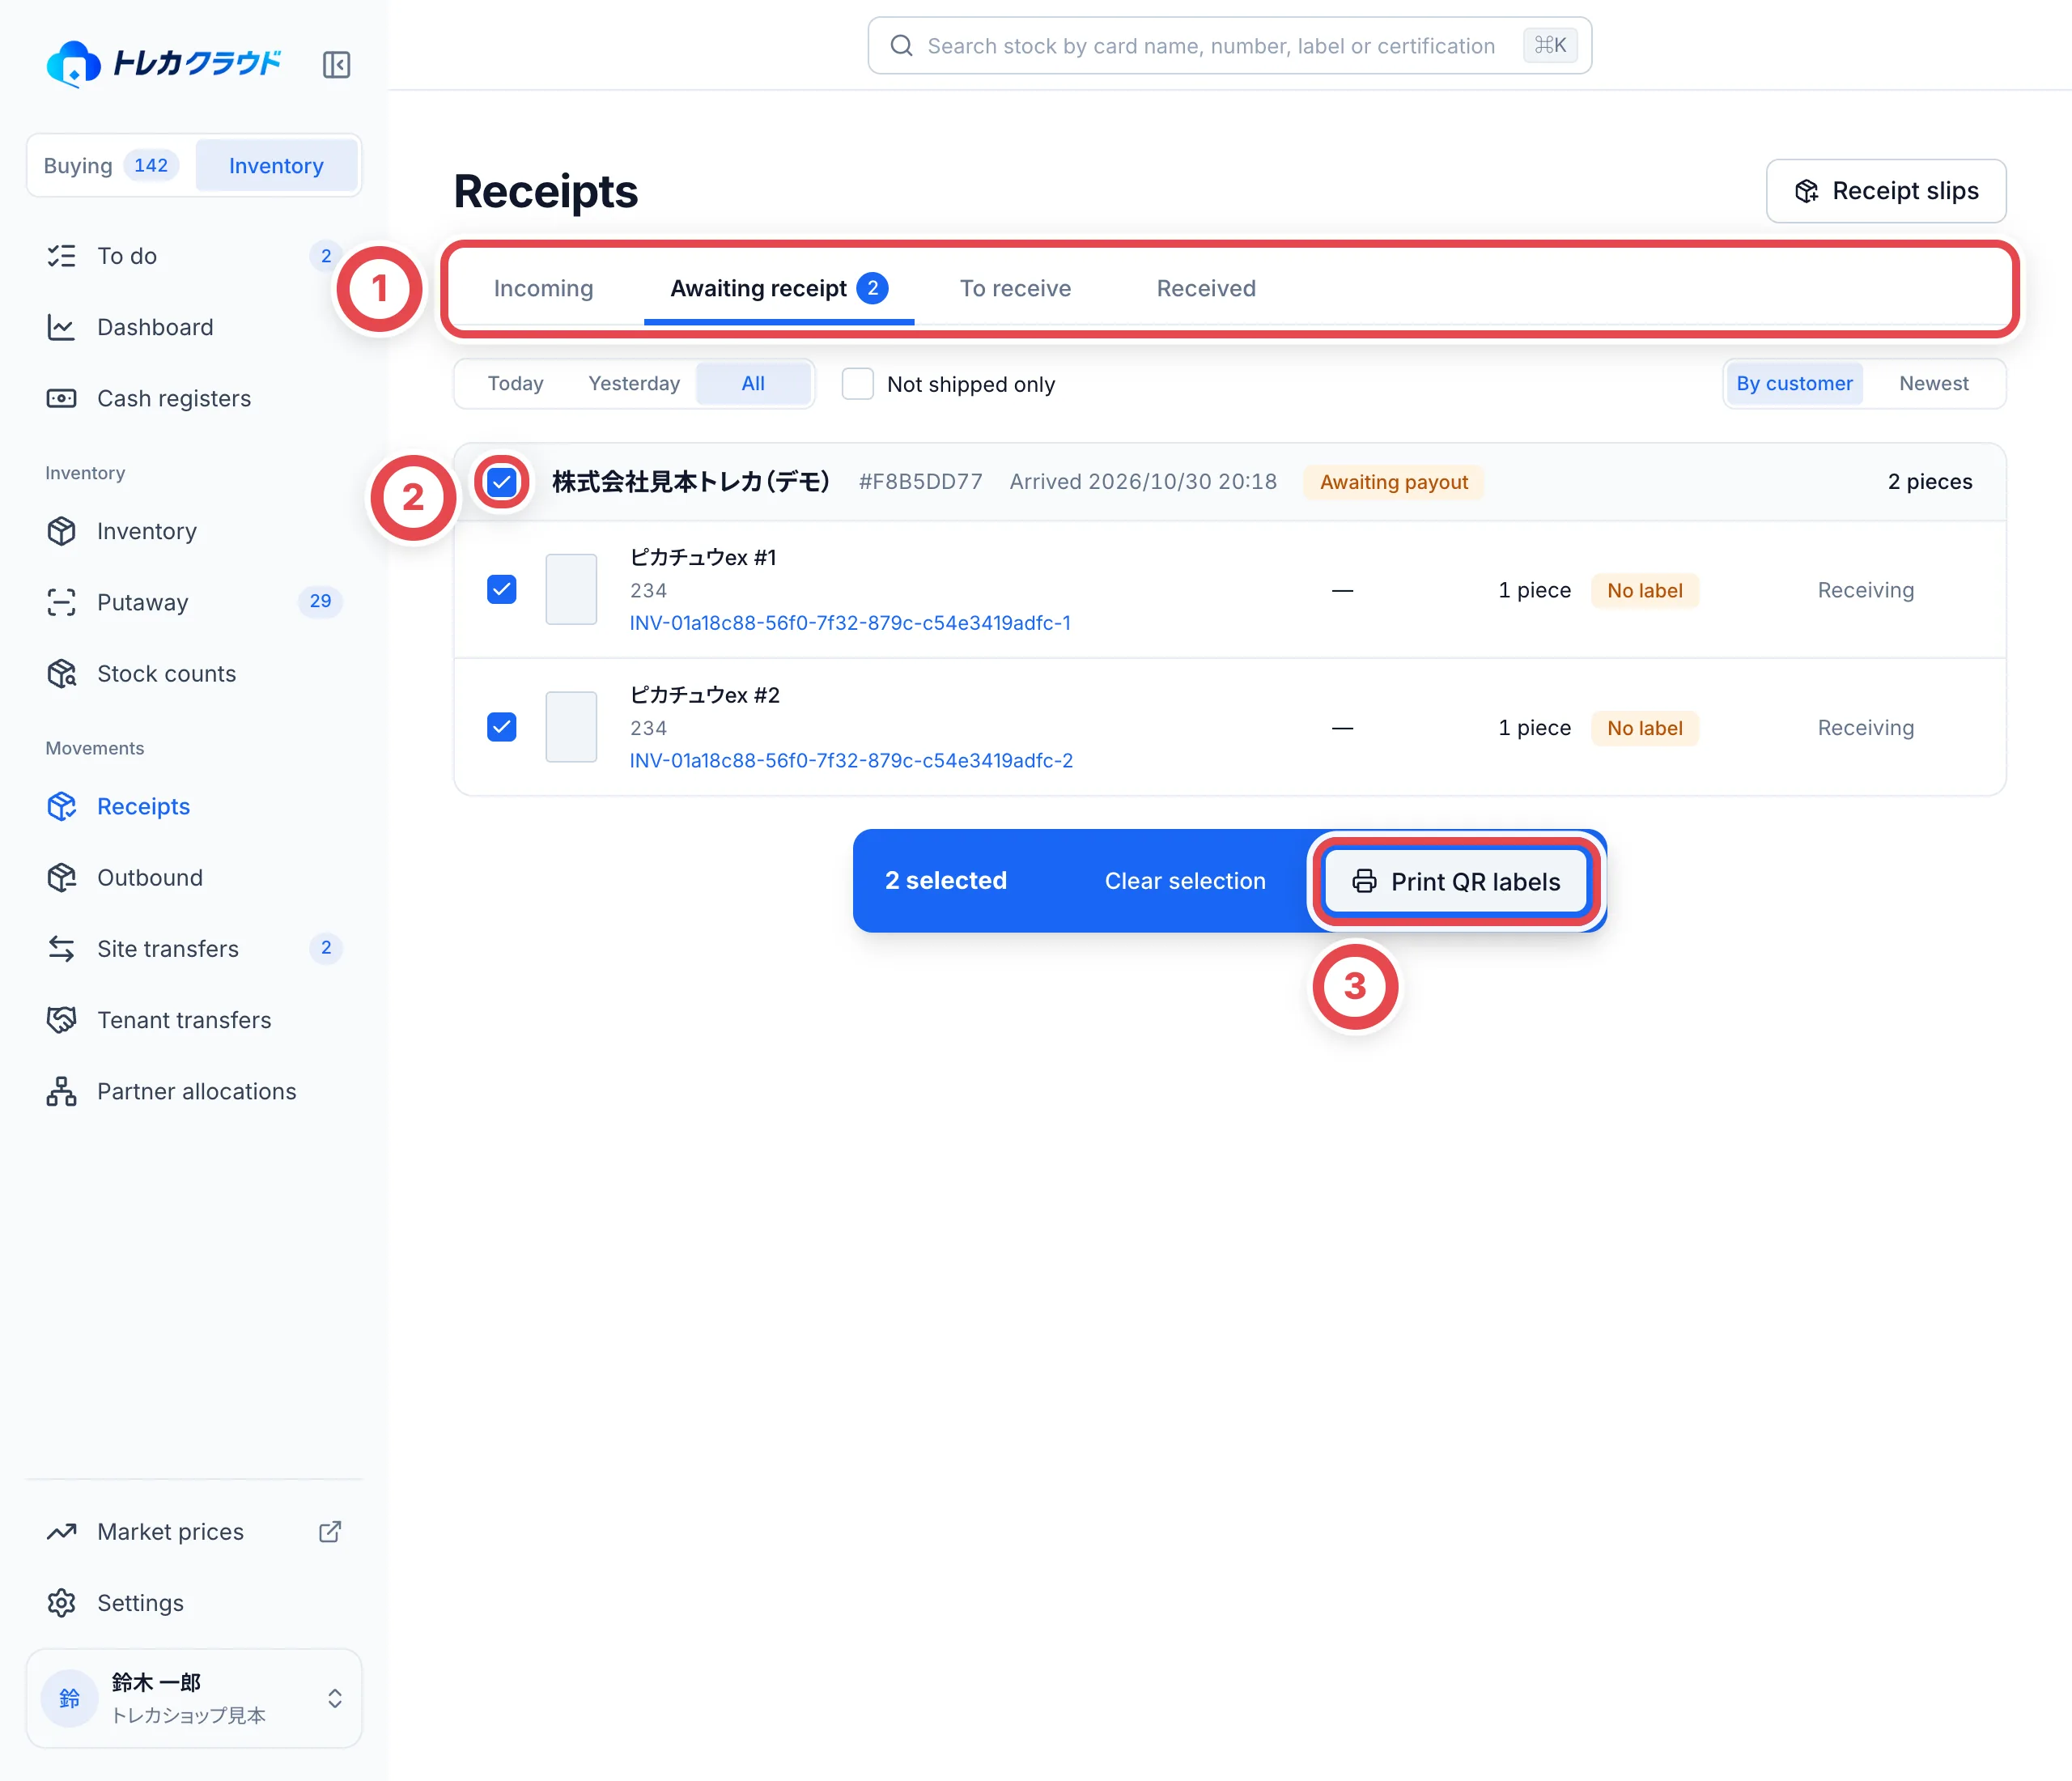 To print from a receipt slip, use **Print labels** on that slip.
## 3. Print the labels
### Print with a label printer
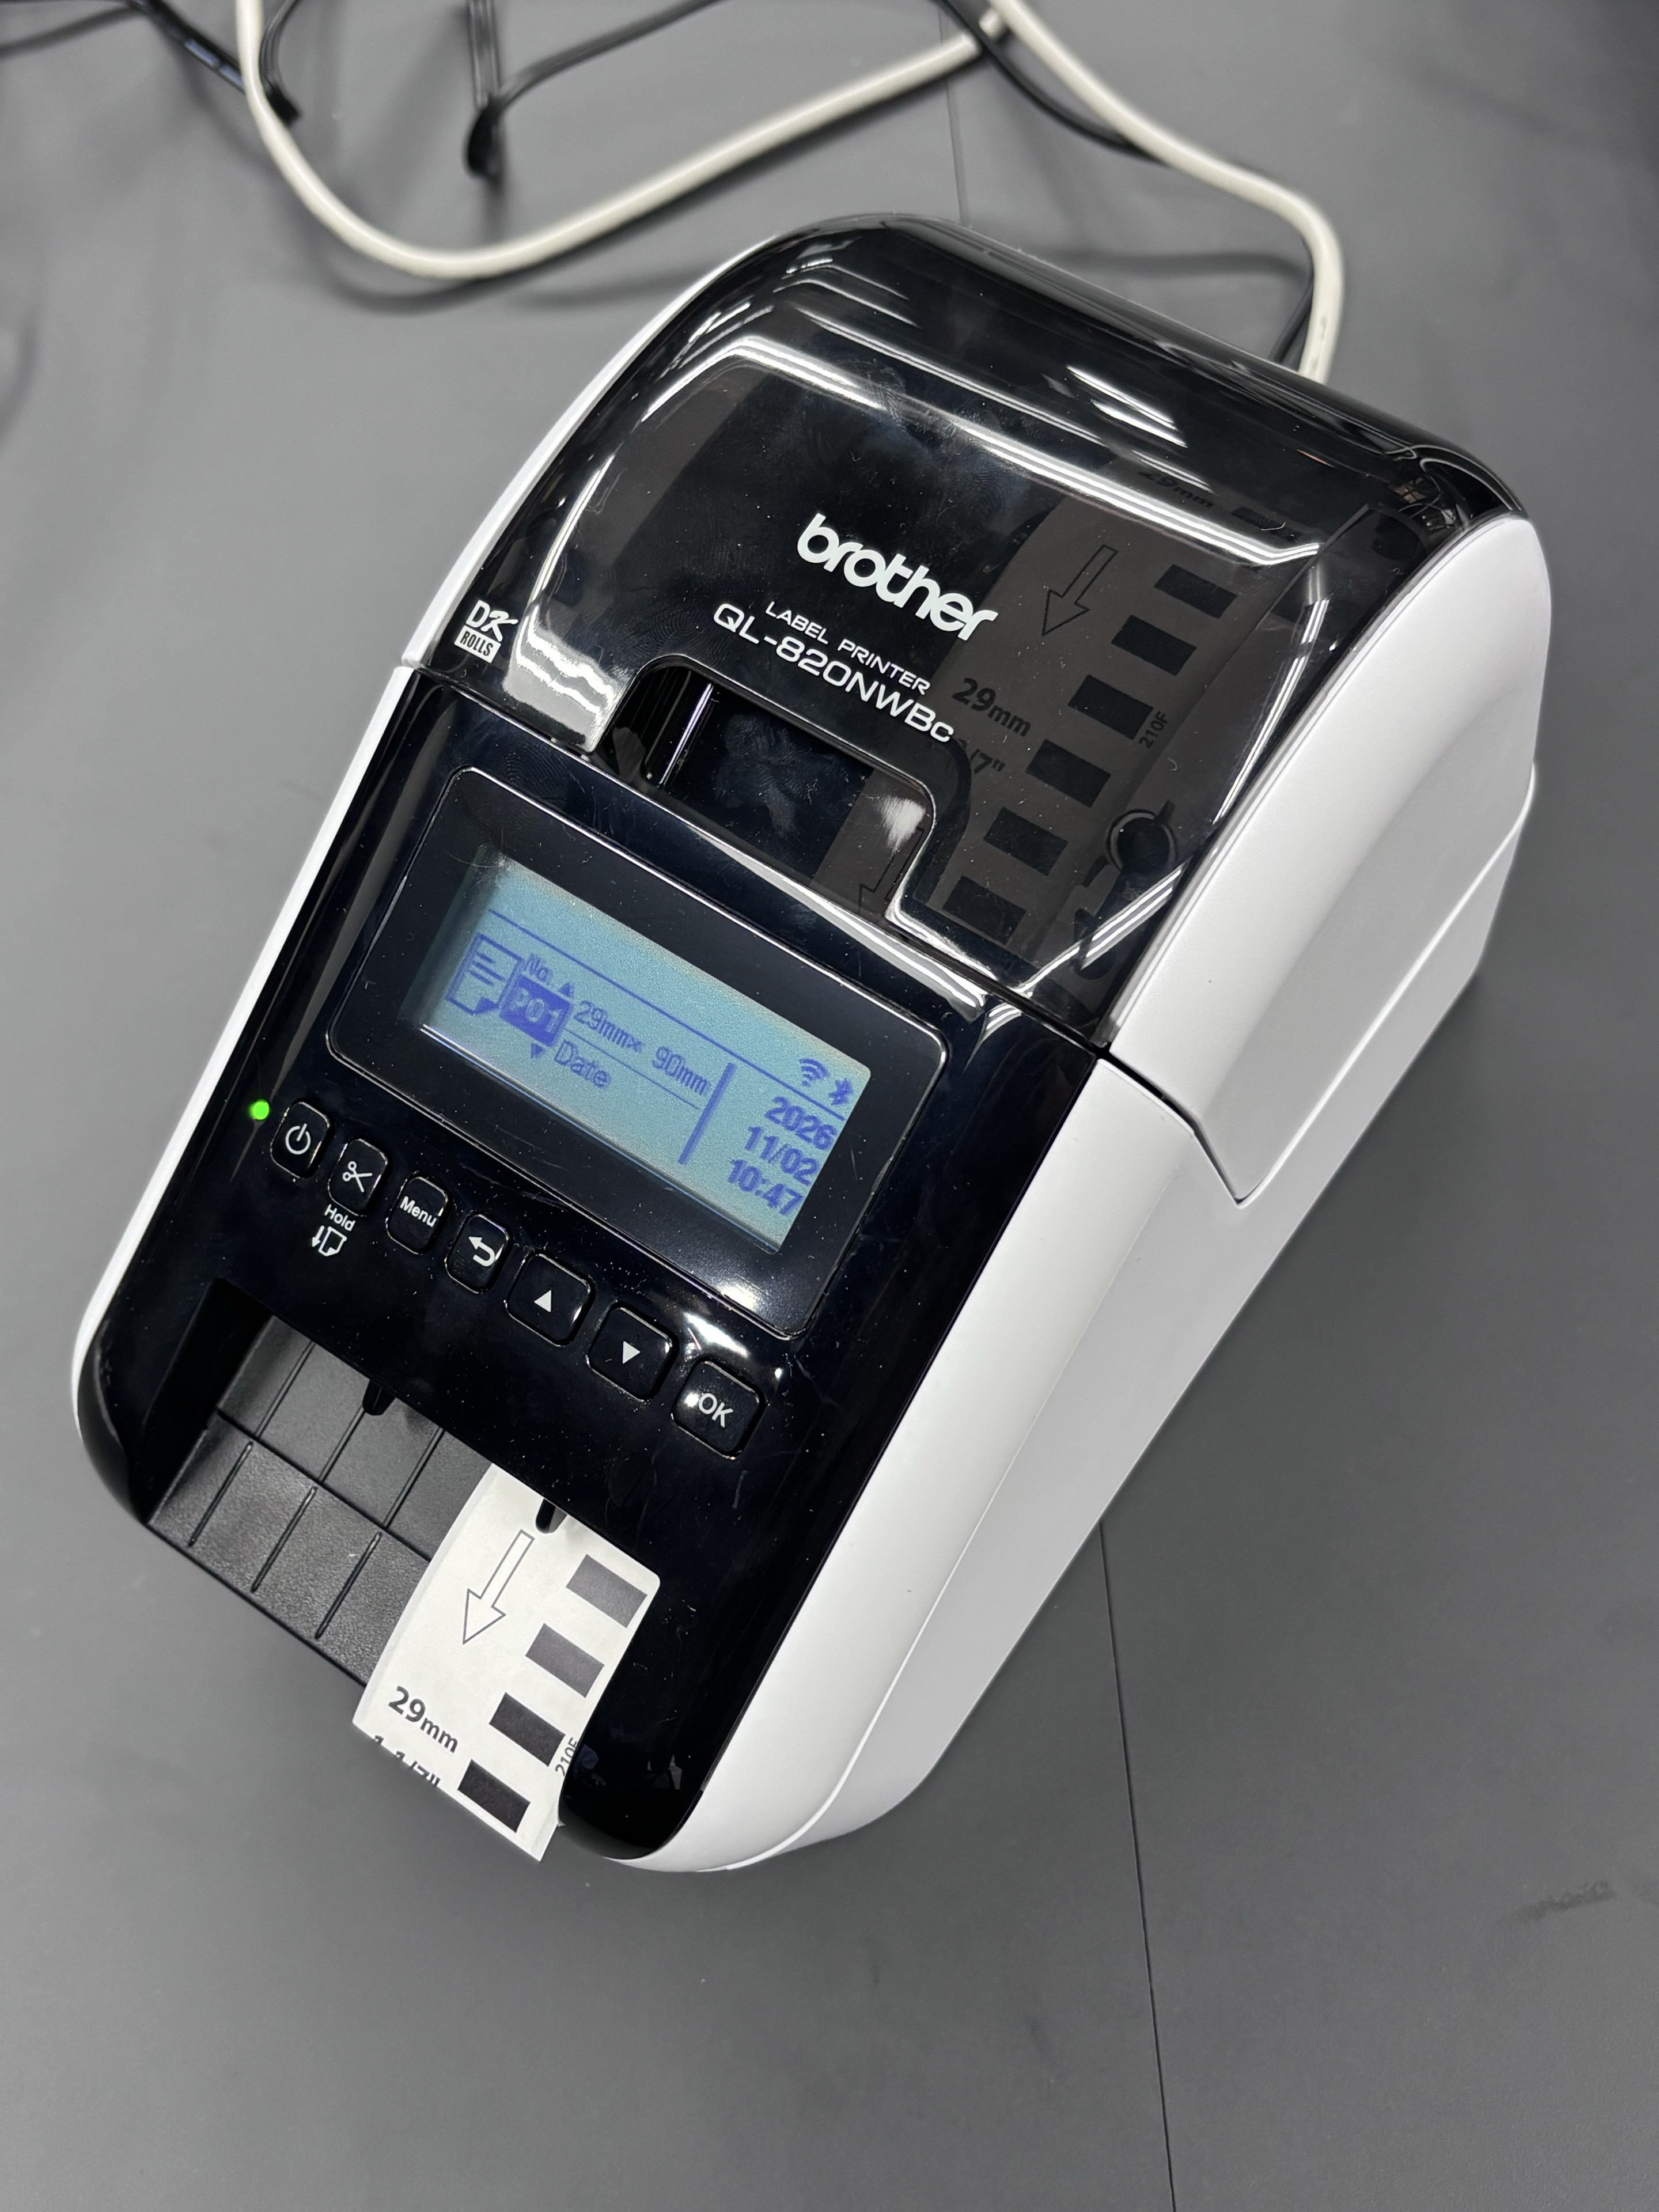 Brother QL-820NWBc (paper: DK-2210)
For the label printer, choose **Brother DK-2210**. Match certificate and asset numbers under **Print order and item matching** to the physical cards, then check placement in **Preview**.
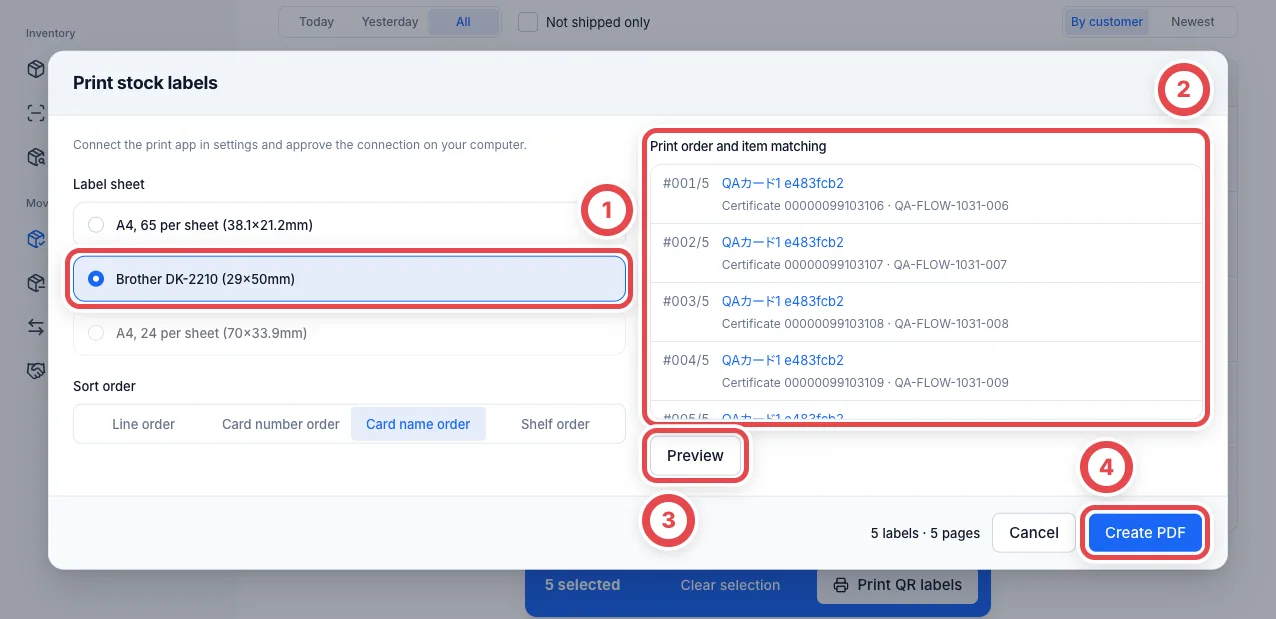 Click **Print** at ④ to print on the connected printer. For the initial connection, see [Install and use the print app](/en/guides/inventory/desktop-print-app).
If the button shows **Create PDF**, create and open the PDF, then print at **Actual size (100%)**.
### If you use A4 sheets
Choose **A4, 65 per sheet**. For a partly used sheet, set **Start position** to the first empty label, then follow the same matching and preview steps before printing.
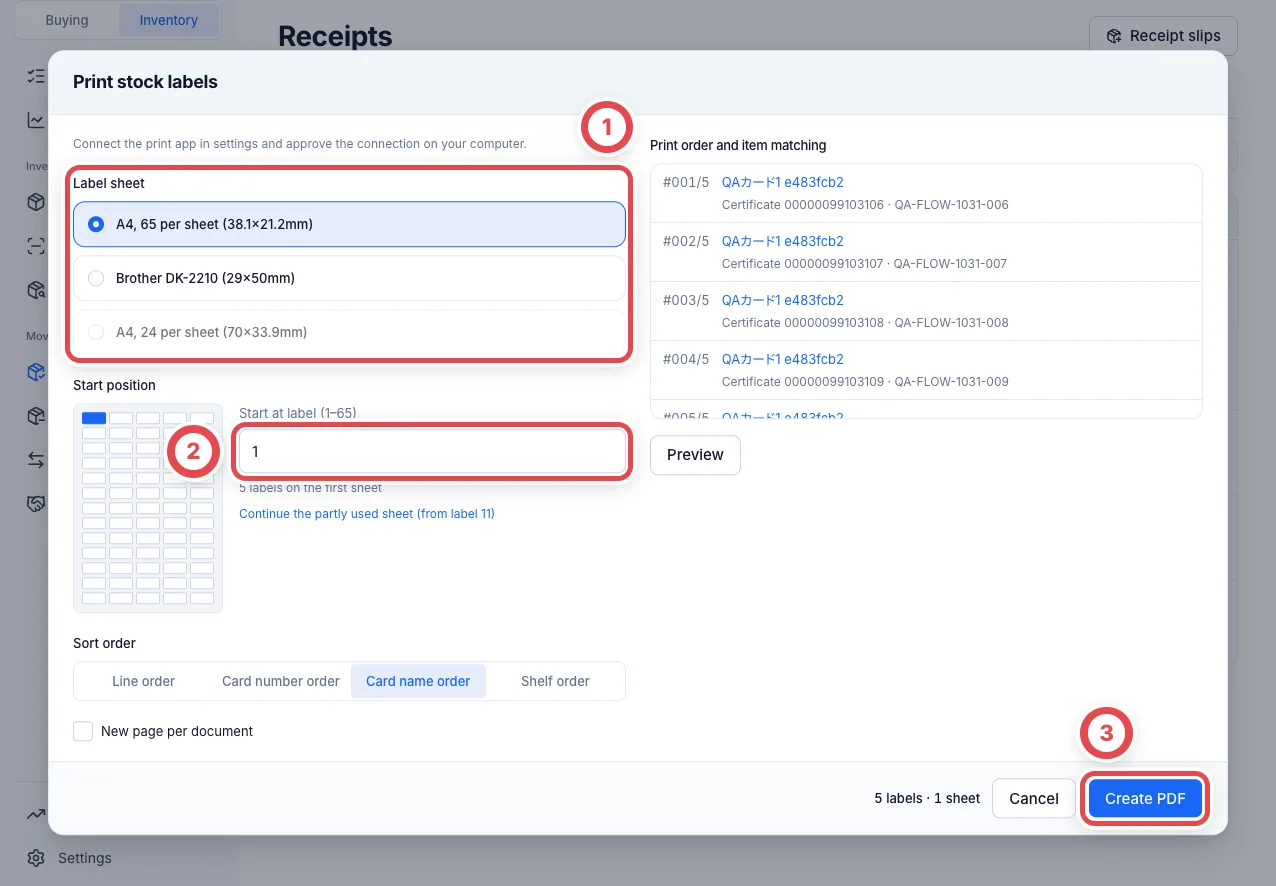 ## 4. Attach the labels to the cards
Match the printed labels to the physical cards and attach them to the cards or sleeves.
If alignment is off, use **Print test sheet** under **Settings → Label printing**. Add the scale values at the sheet's cut lines to **Offset X** and **Offset Y**, then save (right and down are positive). Ask an admin if you cannot change these settings.
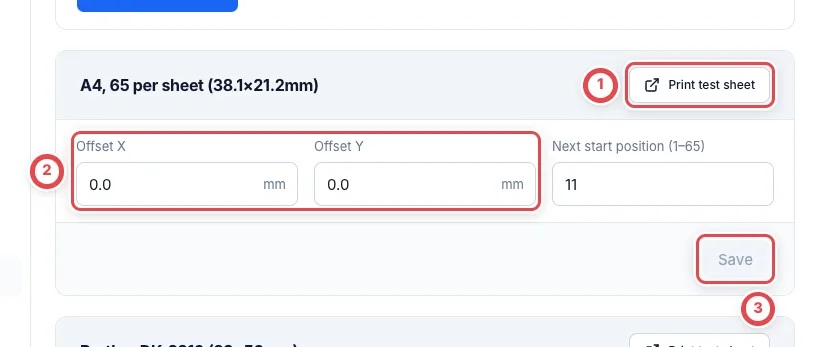 ## 5. Check progress in print batches
Open the batch under **Putaway → Print batches** to check the remaining cards. Use certificate and asset numbers in the details to match the physical items.
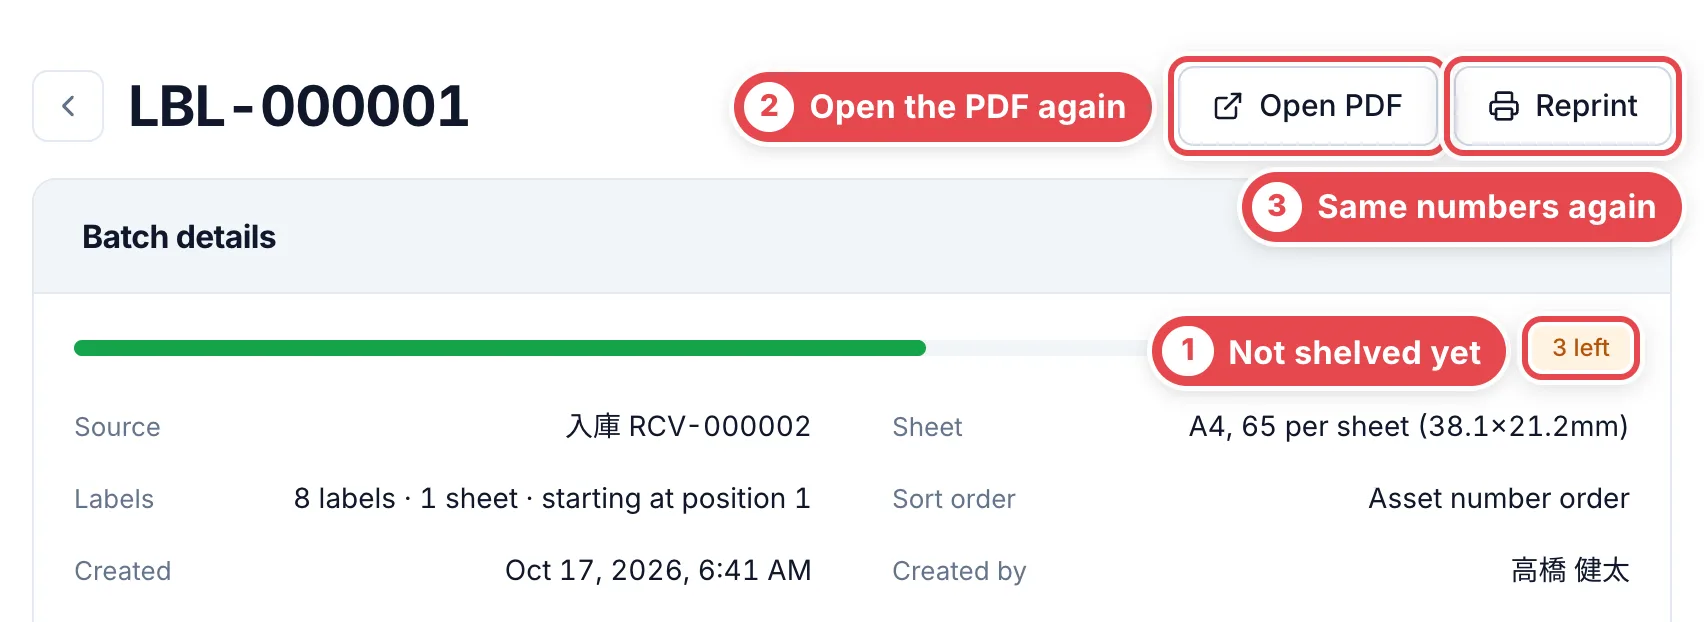 Labels are issued when the PDF is created. If printing fails, reprint from this batch using the same numbers.
## 6. Prepare shelf labels
For shelves without labels, print from **Settings → Sites and locations** on A4 24-label sheets and attach each label to its shelf.
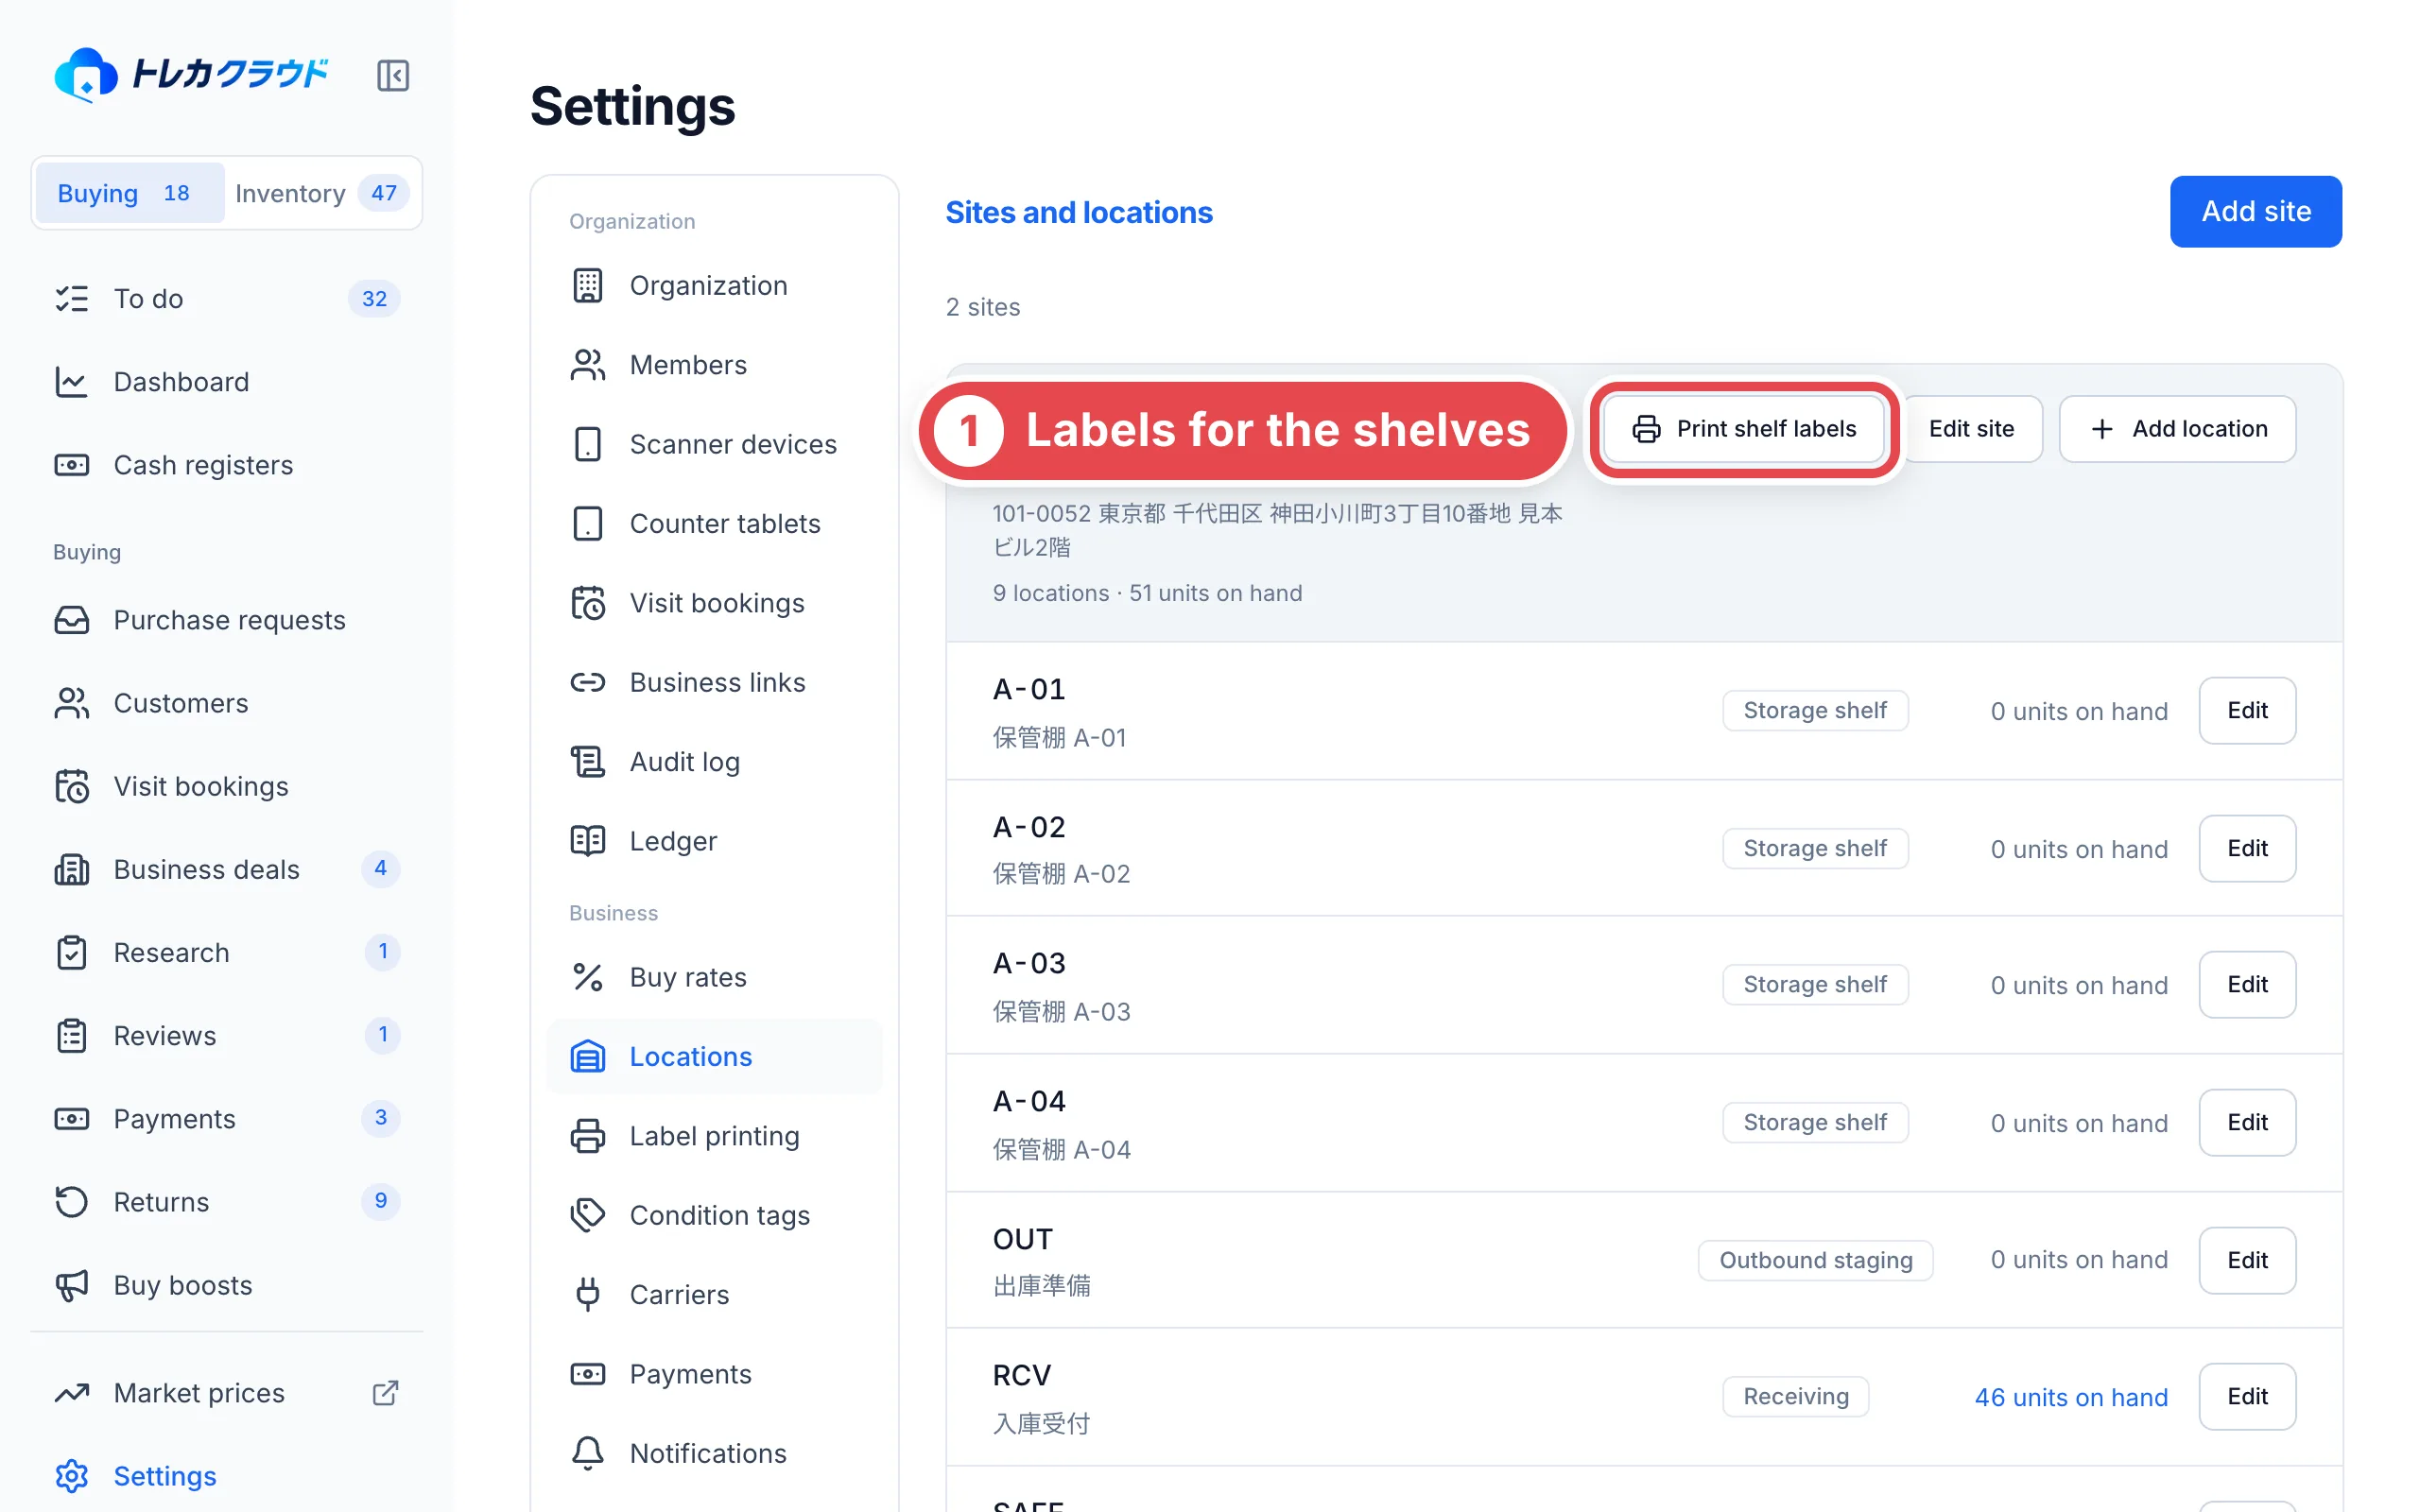 ## 7. Put cards away with the app
The app is in Japanese; button names below include their English meanings.
1. **Sign in**
Tap 「ログイン」 (Sign in), sign in with your own account, choose the store
and tap 「許可する」 (Allow).
2. **Check the site and start putaway**
Check 「作業する拠点」 (Site to work at), then tap 「格納を始める」 (Start
putaway). To track unscanned labels by print batch, select the batch under
「印刷済みの束(予定リスト)」 (Printed batches, planned list).
3. **Scan the shelf label**
Scan the destination shelf label, or choose from the list if it will not
scan. Receiving shelves cannot be used as destinations.
4. **Scan cards and place them on the shelf**
Scan each stock label and check for 「格納しました」 (Put away) or
「移動しました」 (Moved) before shelving the card. Set red results aside for
Needs action. Scan the next shelf's label when changing shelves.
5. **Finish the operation**
Choose 「作業を終了」 (Finish operation), then 「格納を終了」 (Finish
putaway). To undo this operation's scans, choose
「読み取りを取り消して終了」 (Undo scans and finish). Units received through
site transfers cannot be undone this way; check the received count on the
confirmation.
### Prioritize physical stock and fix the destination
Use this mode to correct records to the shelf where the goods are present. **It may restock shipped-out units, so confirm that each label matches the physical item before starting.**
In 「格納を始める」 (Start putaway), enable 「現物優先で格納先を固定」 (Prioritize physical stock and fix the destination) and choose the shelf.
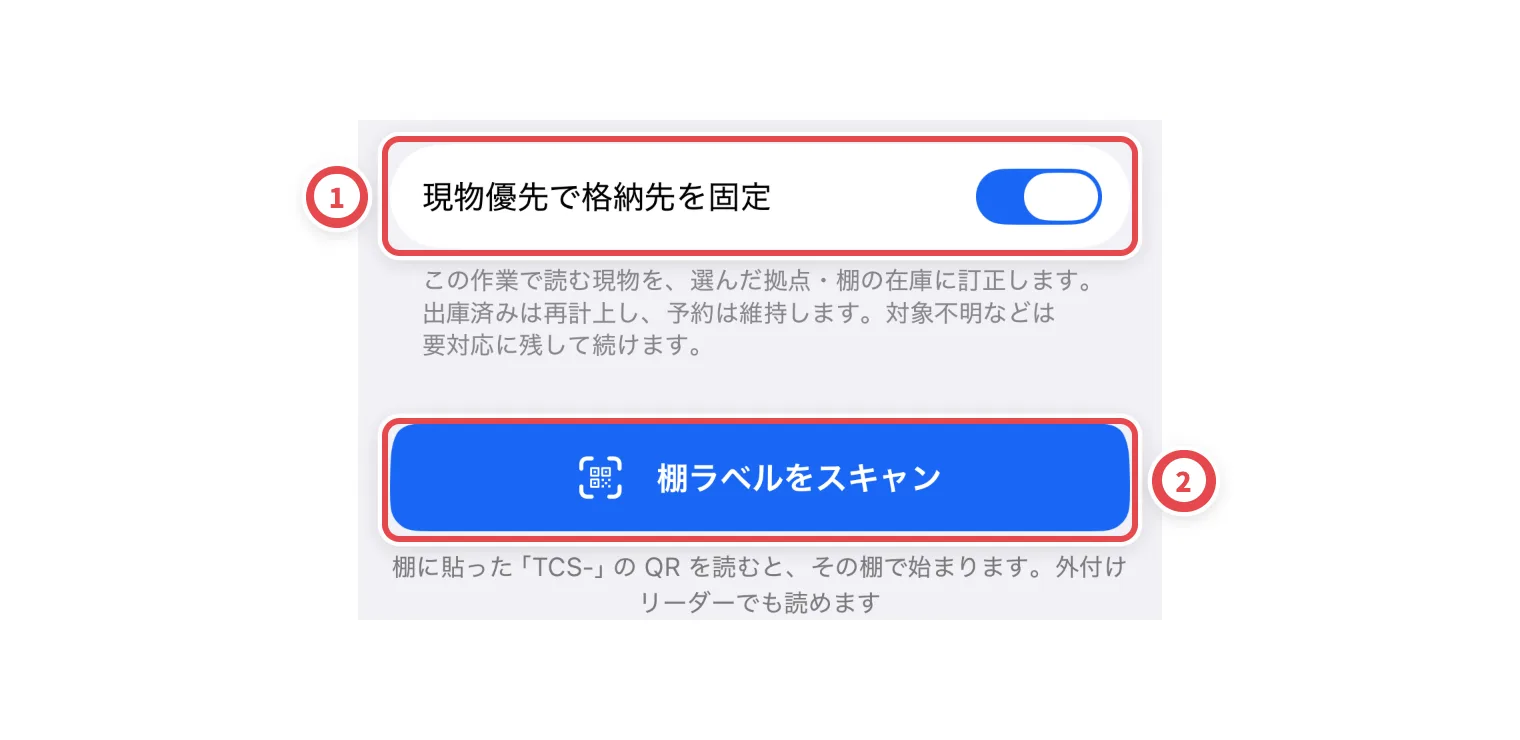 Check the site, shelf and correction scope, then tap 「この格納先で開始」 (Start with this destination).
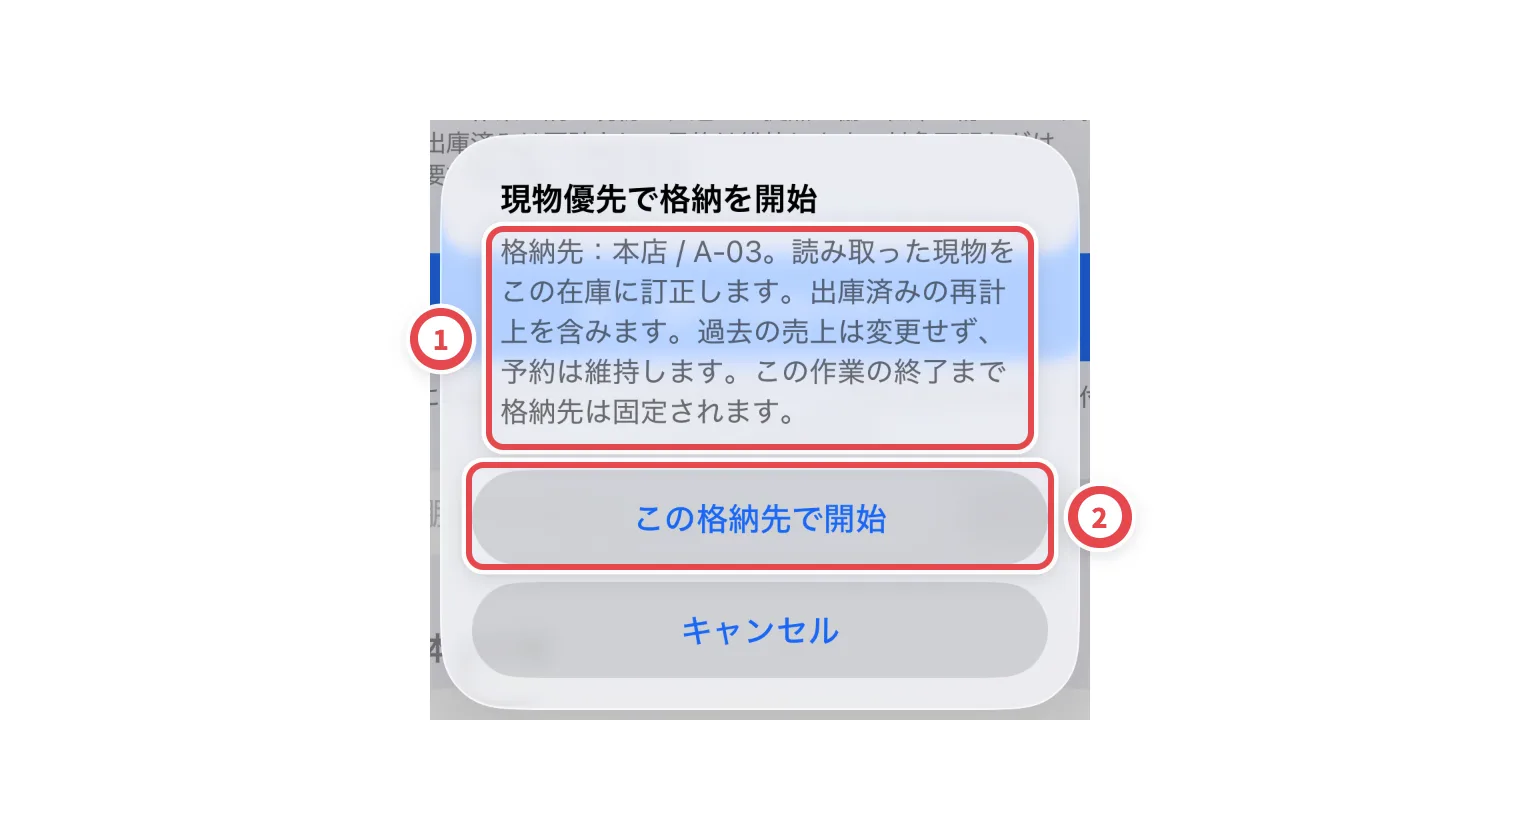 Scan the stock labels continuously. To change shelves, finish the operation and start another at the next shelf.
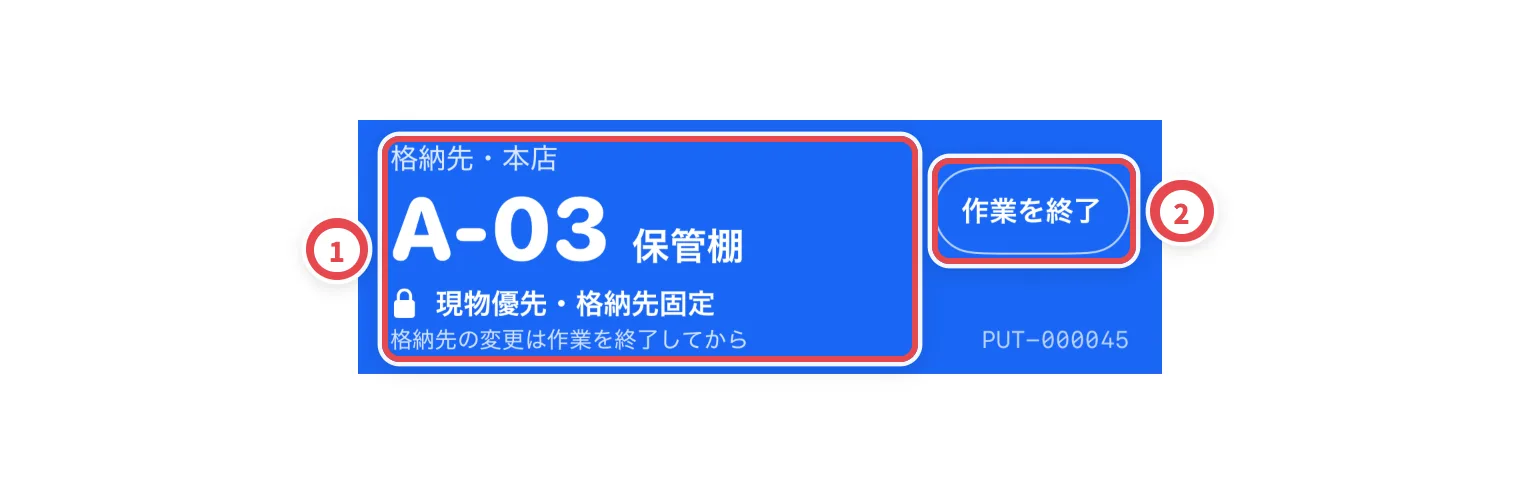 ### When imported records or labels are mixed up
Physical priority corrects the location and stock state of the unit identified by the QR. Check labels or records first in these cases.
| Situation | Action |
| ----------------------------------------------- | -------------------------------------------------------------------------------------------------------------------------------------------------------------------------------------------------------------------------------------------- |
| An old label from before reissue is attached | For a reissue of the same unit, reprint the current number shown in the correction result and replace the label. If registered again as a different unit, use only the new registration's label. Scanning both may restock the old unit too. |
| Two physical cards carry the same QR | Match each unit to its label and replace the incorrect label. |
| Unknown QR or no stock label | Find the unit on the original receipt. If unregistered, register it through a [receipt slip](/en/guides/inventory/receipts) or purchase and issue its stock label. Receipt numbers (RCV) cannot be used for putaway. |
| Card, edition or grade differs | [Correct the unit's card or grade](/en/guides/inventory/corrections). Use the originating case for purchased units, or [product information corrections](/en/guides/inventory/product-and-market-corrections) for product-wide errors. |
| Records include stock that is no longer present | Verify missing units with a [stock count](/en/guides/inventory/counts). |
### Continuous scanning through locking
1. Use [physical priority](#prioritize-physical-stock-and-fix-the-destination) shelf by shelf, matching physical stock, labels and destinations.
2. When 「送信待ち」 (Pending) and 「確認中」 (Checking) are zero on every device, check results and counts under **Putaway → Sessions today**. Resolve issues and unscanned items, or keep them separate from the lock selection.
3. Pause physical moves, scans and corrections, then [preview and save a scan movement lock](/en/guides/inventory/shelf-protection#3-lock-stock-selected-by-scan-dates). Include both dates for work crossing midnight. Later syncs are not added automatically, so finish syncing every device first.
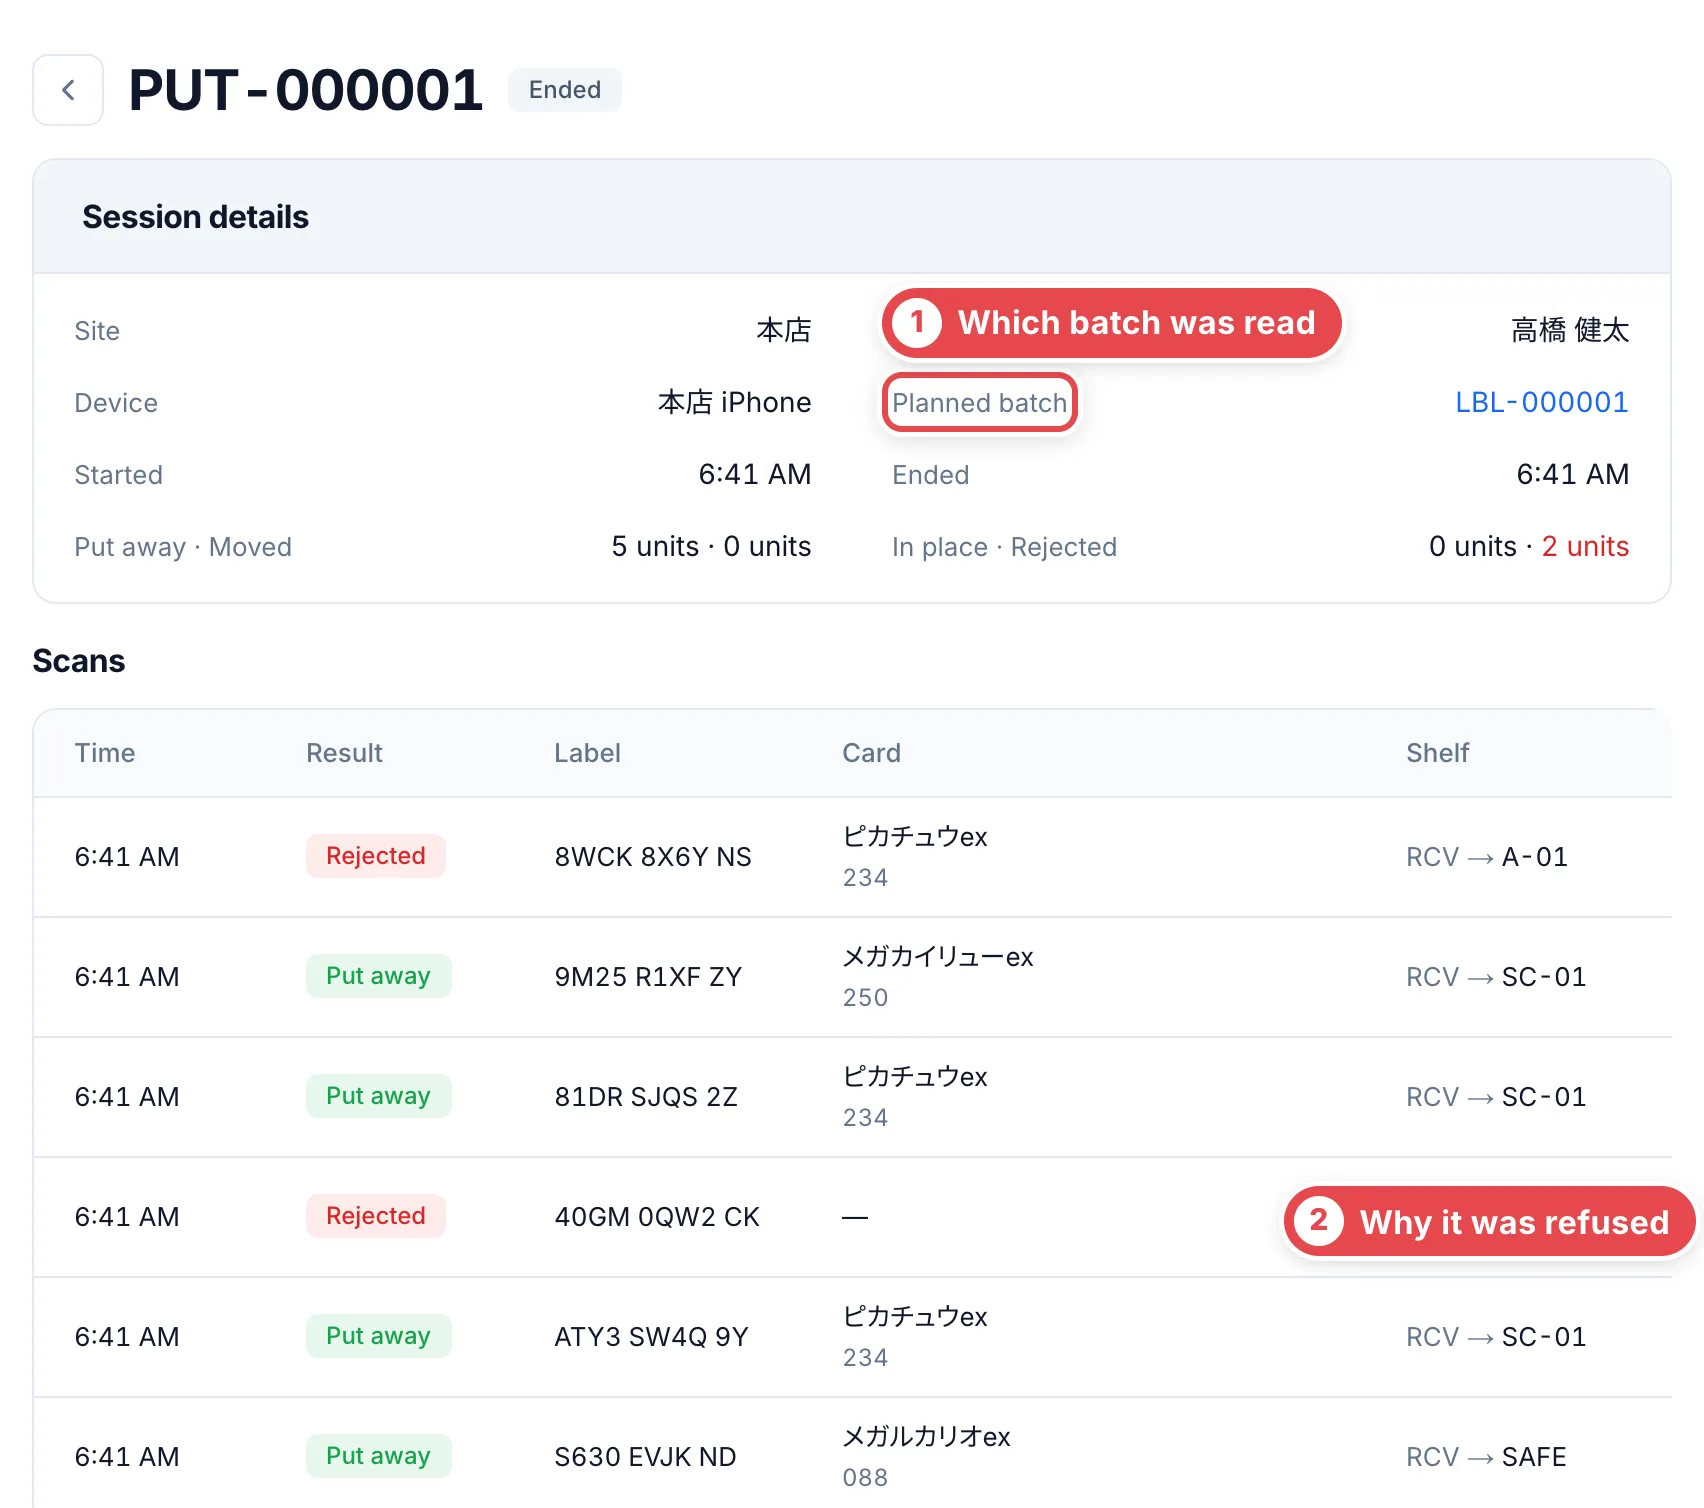 ### Confirm putaway delivery after being offline or restarting
Open the app, restore connectivity and resume unfinished work from the home screen. For completed work, open 「自分の格納の履歴」 (My putaway history) and check pending reads and errors. Do not delete the app or device data while reads are pending; wait for them to appear in the console. If sending is refused, check the displayed reason and device permissions.
## 8. Clear items that need action
Open **Putaway → Needs action** and match the physical item to its label before acting. Use **Dismiss** for misreads or another shop's labels.
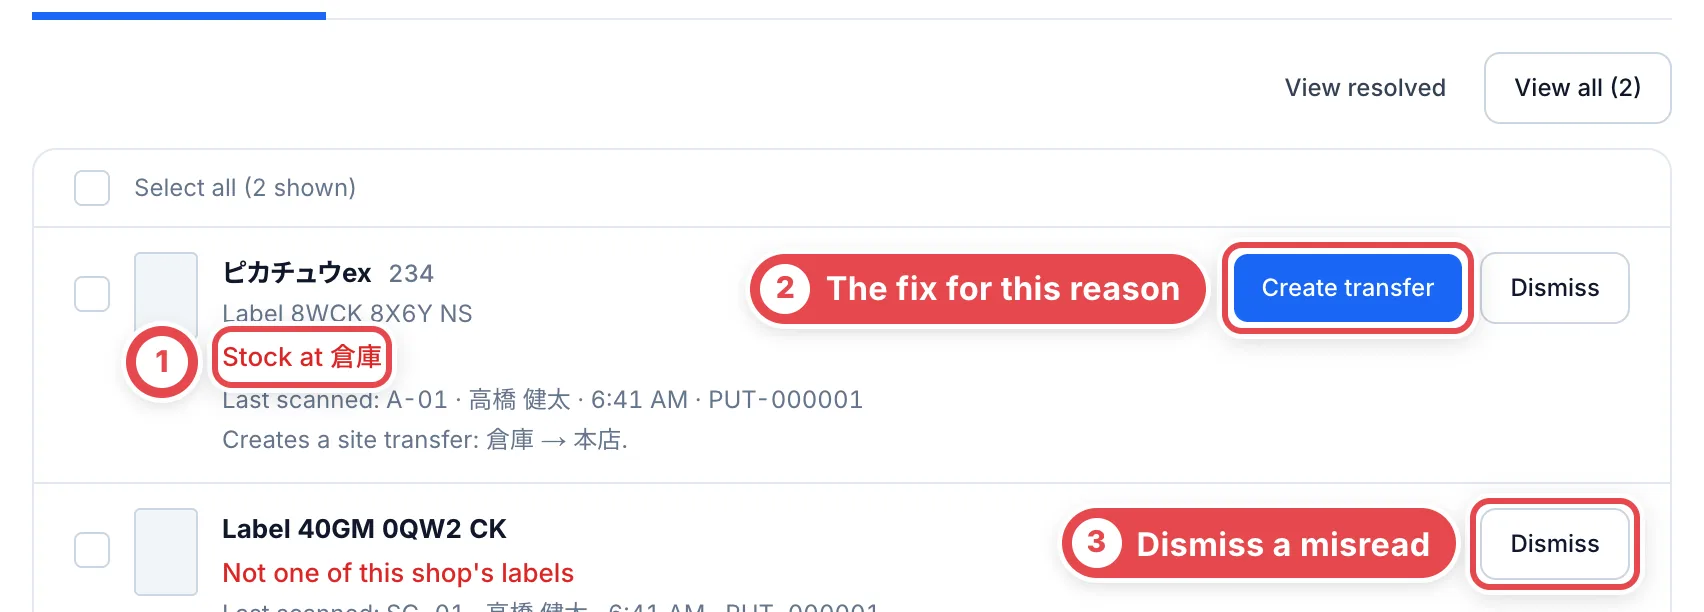 | Reason | Action |
| ------------------ | ------------------------------------------------------------------------------------------------------------------------- |
| Other site | **Create transfer** records a transfer to this site. |
| Lost | **Mark as found here** returns the unit to stock. |
| In transit | Use **Receive here** if this is the destination site; otherwise scan at the destination site's shelf. |
| Voided label | Scan the replacement label. |
| Inactive shelf | Scan again at an available shelf. |
| Not in stock | Check for a misplaced label and correct the unit's status. |
| Scan movement lock | Ask an admin to check the [protected shelf and units](/en/guides/inventory/shelf-protection). Scan again after unlocking. |
For bulk actions, check the selected count before processing, then review rows left as failed or excluded.
## 9. Check or reprint one label
Open **Stock label** on the unit's page. Use **Reprint this label** for dirt or damage, or **Reissue label** to change its number. After reissuing, remove the old label and attach the new one.
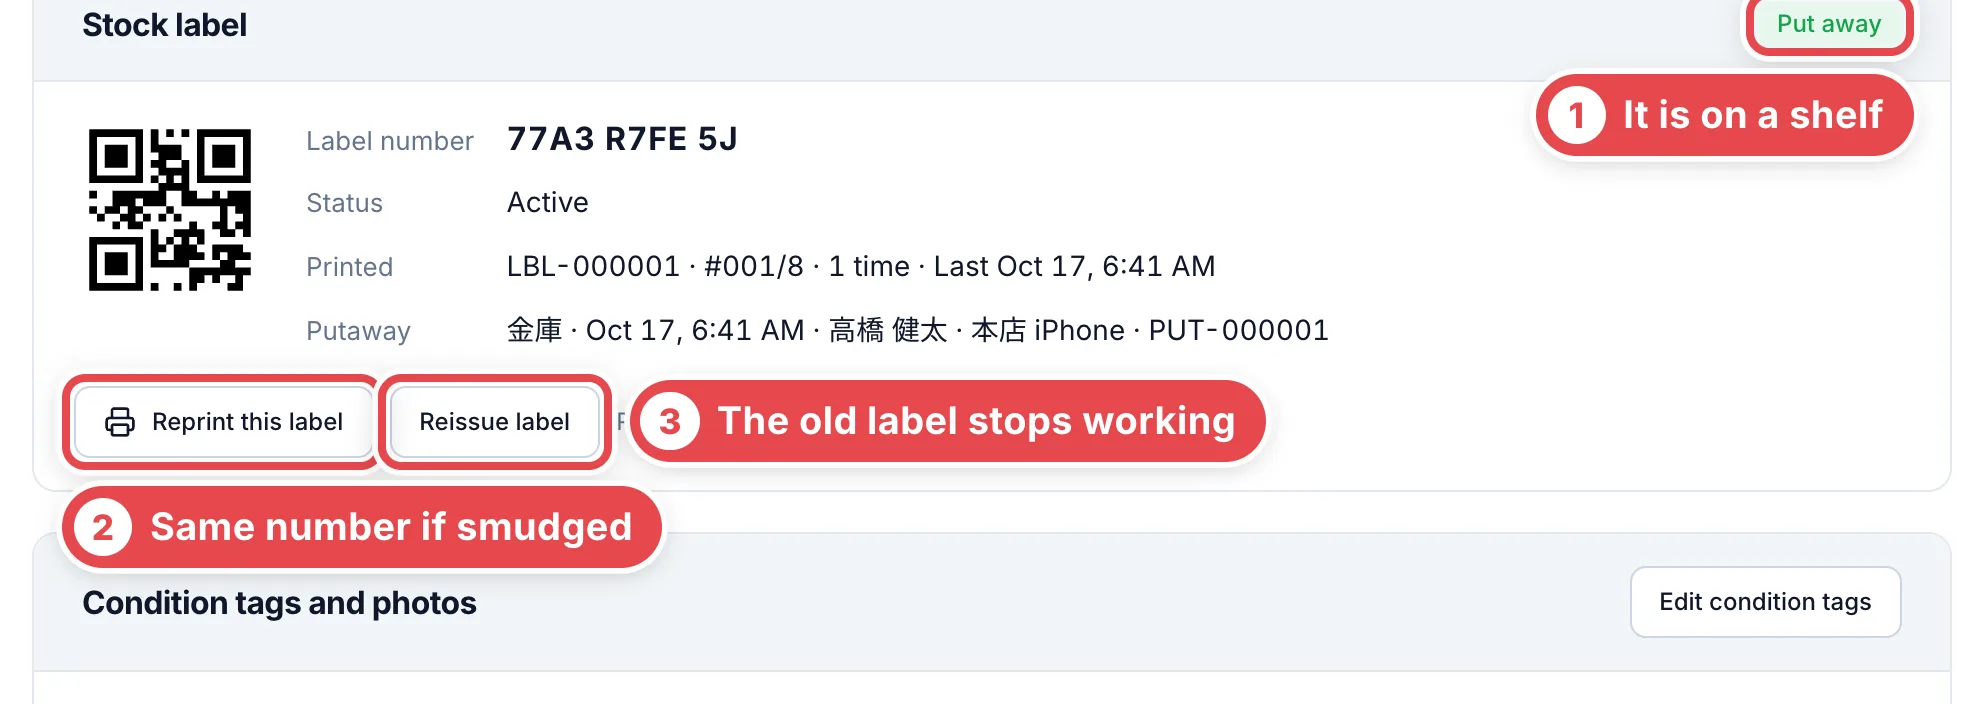 ## Paper and printer setup
| Use | Paper |
| ---------------------- | --------------------------------------------- |
| Roll stock labels | Brother DK-2210 |
| Stock labels for cards | A4 65-label sheets (A-One 64265, 28974, etc.) |
| Shelf labels | A4 24-label sheets (A-One 72324, etc.) |
For a Brother QL-820NWBc, check the paper in [printer setup](/en/guides/inventory/brother-printer). To print directly from the PC, complete connection and test printing in [Install and use the print app](/en/guides/inventory/desktop-print-app).
## Troubleshooting
| Situation | Action |
| ------------------------------------------------------------------------------------------------ | --------------------------------------------------------------------------------------------------------------------------------------------------------------------------------- |
| Print buttons are missing | Ask an admin to check permissions to change inventory and view cards. |
| Print alignment is off | Check [alignment](#4-attach-the-labels-to-the-cards). |
| Printing failed after creating the PDF | Reprint from the [print batch](#5-check-progress-in-print-batches). |
| A count appears under Needs reprint | Card or grade details changed, or a label number was reissued. [Reprint and replace the label](#9-check-or-reprint-one-label). |
| Scanned on the wrong shelf | Swipe left under 「最近の読み取り」 (Recent scans) and tap 「取消」 (Undo), then scan at the correct shelf. After finishing, undo from 「自分の格納の履歴」 (My putaway history). |
| 「ラベル番号が正しくありません」 (Invalid label number) | Check the unit's stock label, replace it if needed and scan again. |
| Cannot sign in, or 「この店舗ではスキャナーを使っていません」 (This store does not use scanners) | Ask the Toreca Cloud team to check store access. Also check that the device has not been revoked under **Settings → Scanner devices**. |
## Related workflows
- [Recover unsent iPhone stock counts and picking](/en/guides/inventory/scanner-recovery)
---
# Receiving stock
Source: https://docs.toreca-cloud.com/en/guides/inventory/receipts
| Stock source | Registration action | Page |
| --------------------------------------- | --------------------------- | ------------ |
| Cards bought from a customer | **Create stock and payout** | Deal |
| Opening stock or cards found in a count | **Receive stock** | Receipt slip |
Switch to **Inventory** at ① and open **Receipts** under **Movements** at ②. Open **Receipt slips** at the top right at ③.
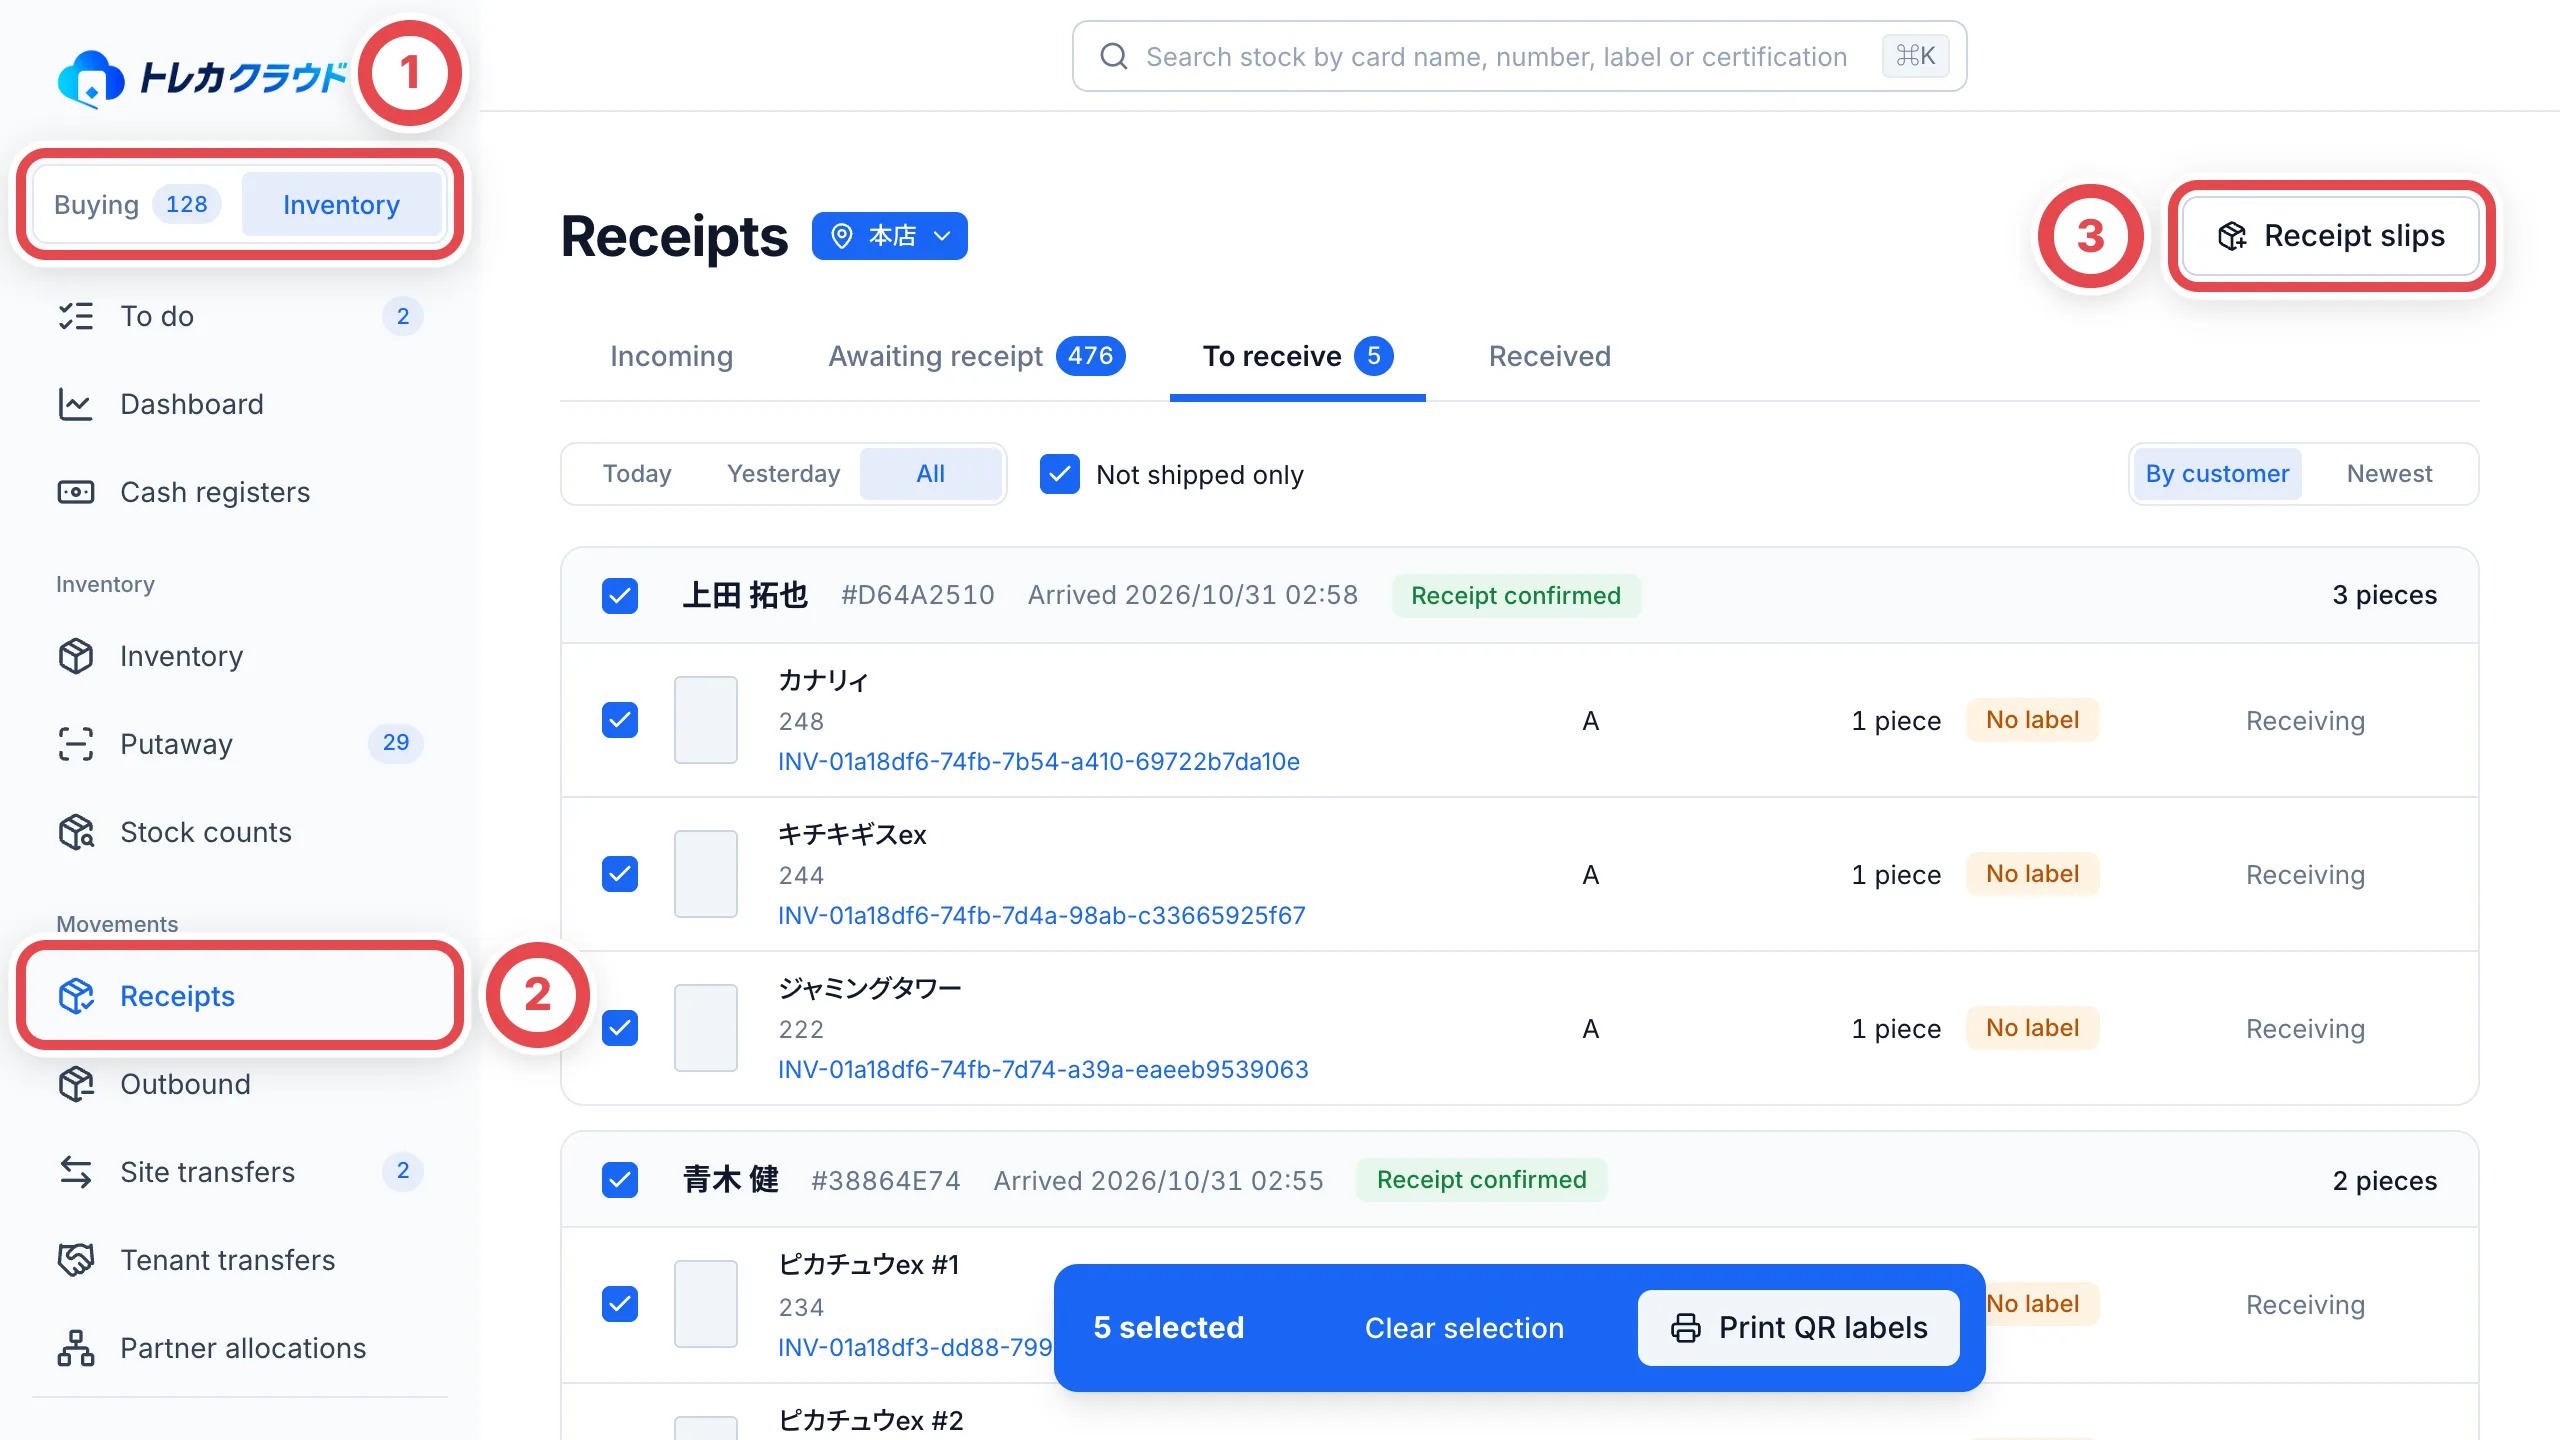 ## Check progress on the Receipts page
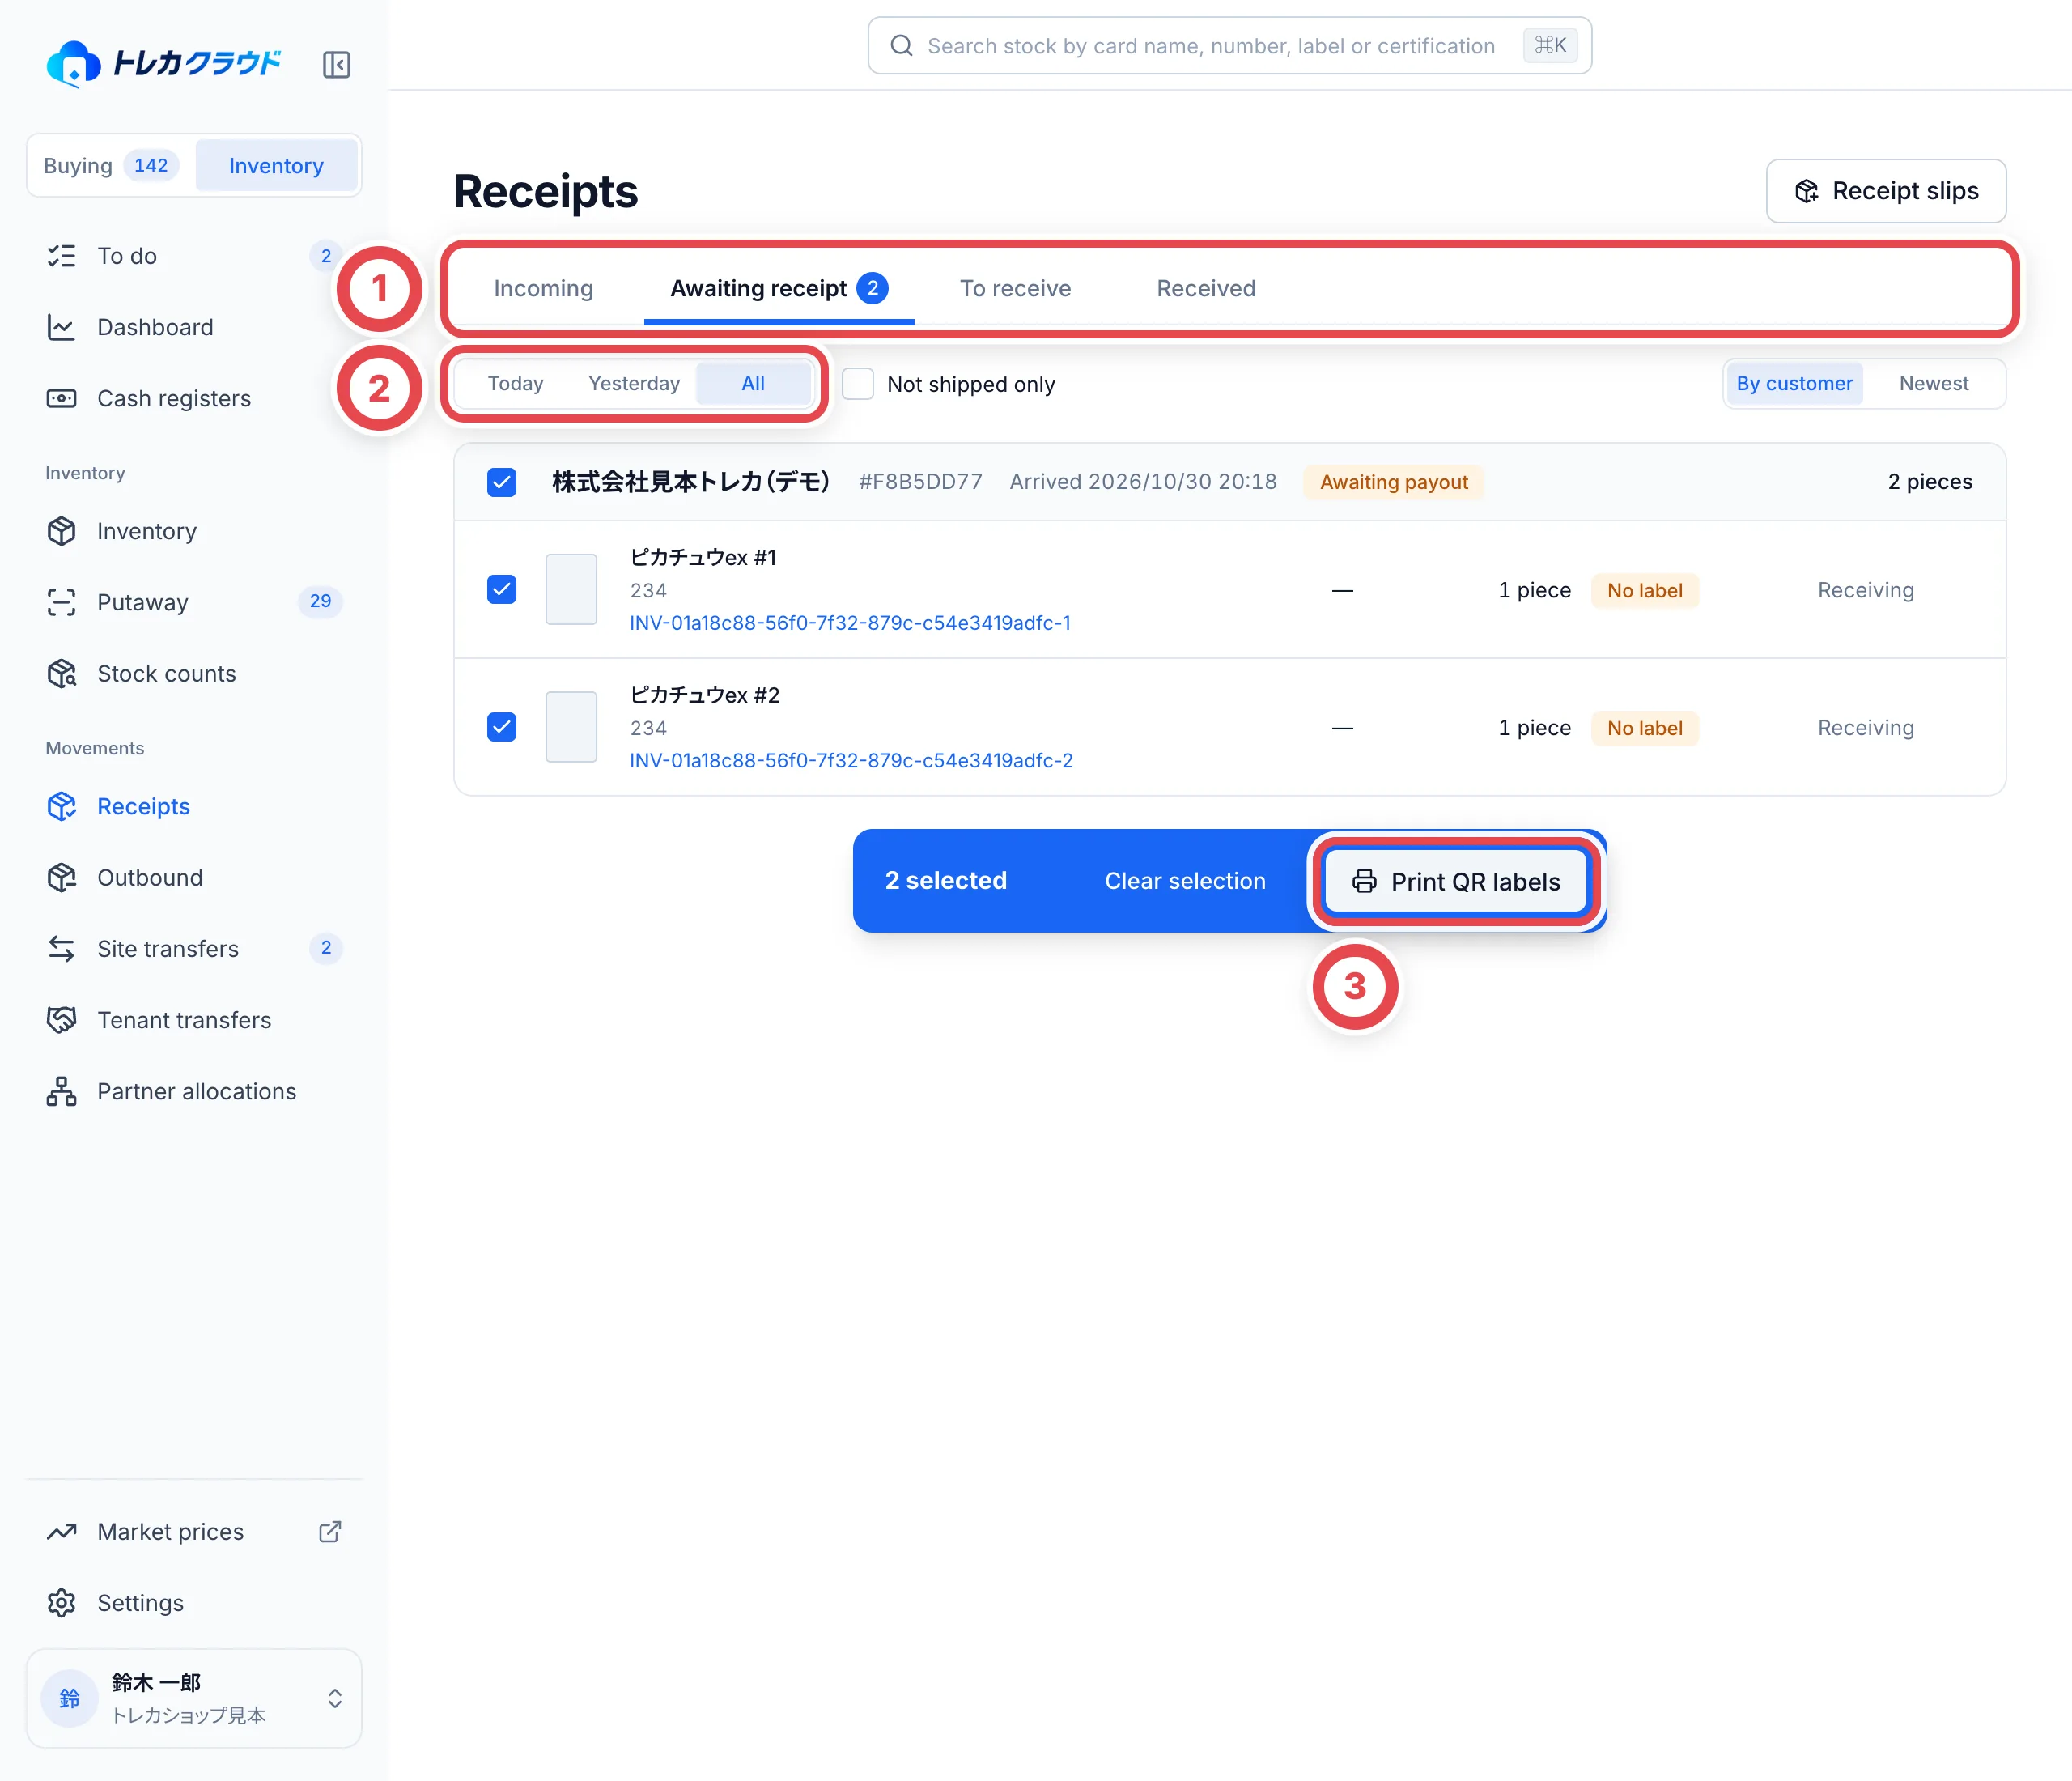 | Tab at ① | Cards shown |
| ---------------- | --------------------------------------------------------------------------------- |
| Incoming | Parcels the customer has sent that haven't arrived yet |
| Awaiting receipt | Cards that have arrived but aren't purchased yet, or whose payout isn't confirmed |
| To receive | Payout confirmed, but the label isn't stuck on or the card isn't put away yet |
| Received | Labeled and put away on a storage shelf |
- At ②, **Arrival date** switches between **Today**, **Yesterday** and **All**.
- You can also filter with the **Not shipped only** checkbox. At the top right, switch between **By customer** and **Newest**
Click a case number for the deal, or its certificate/label information for the unit. **Back to inbound** restores the stage, dates, site and sort order. If the page is restricted to a case, use **Show all purchases** to return to the full list.
## Print QR labels
Select the cards, check the selected count against the physical items and click **Print QR labels**.
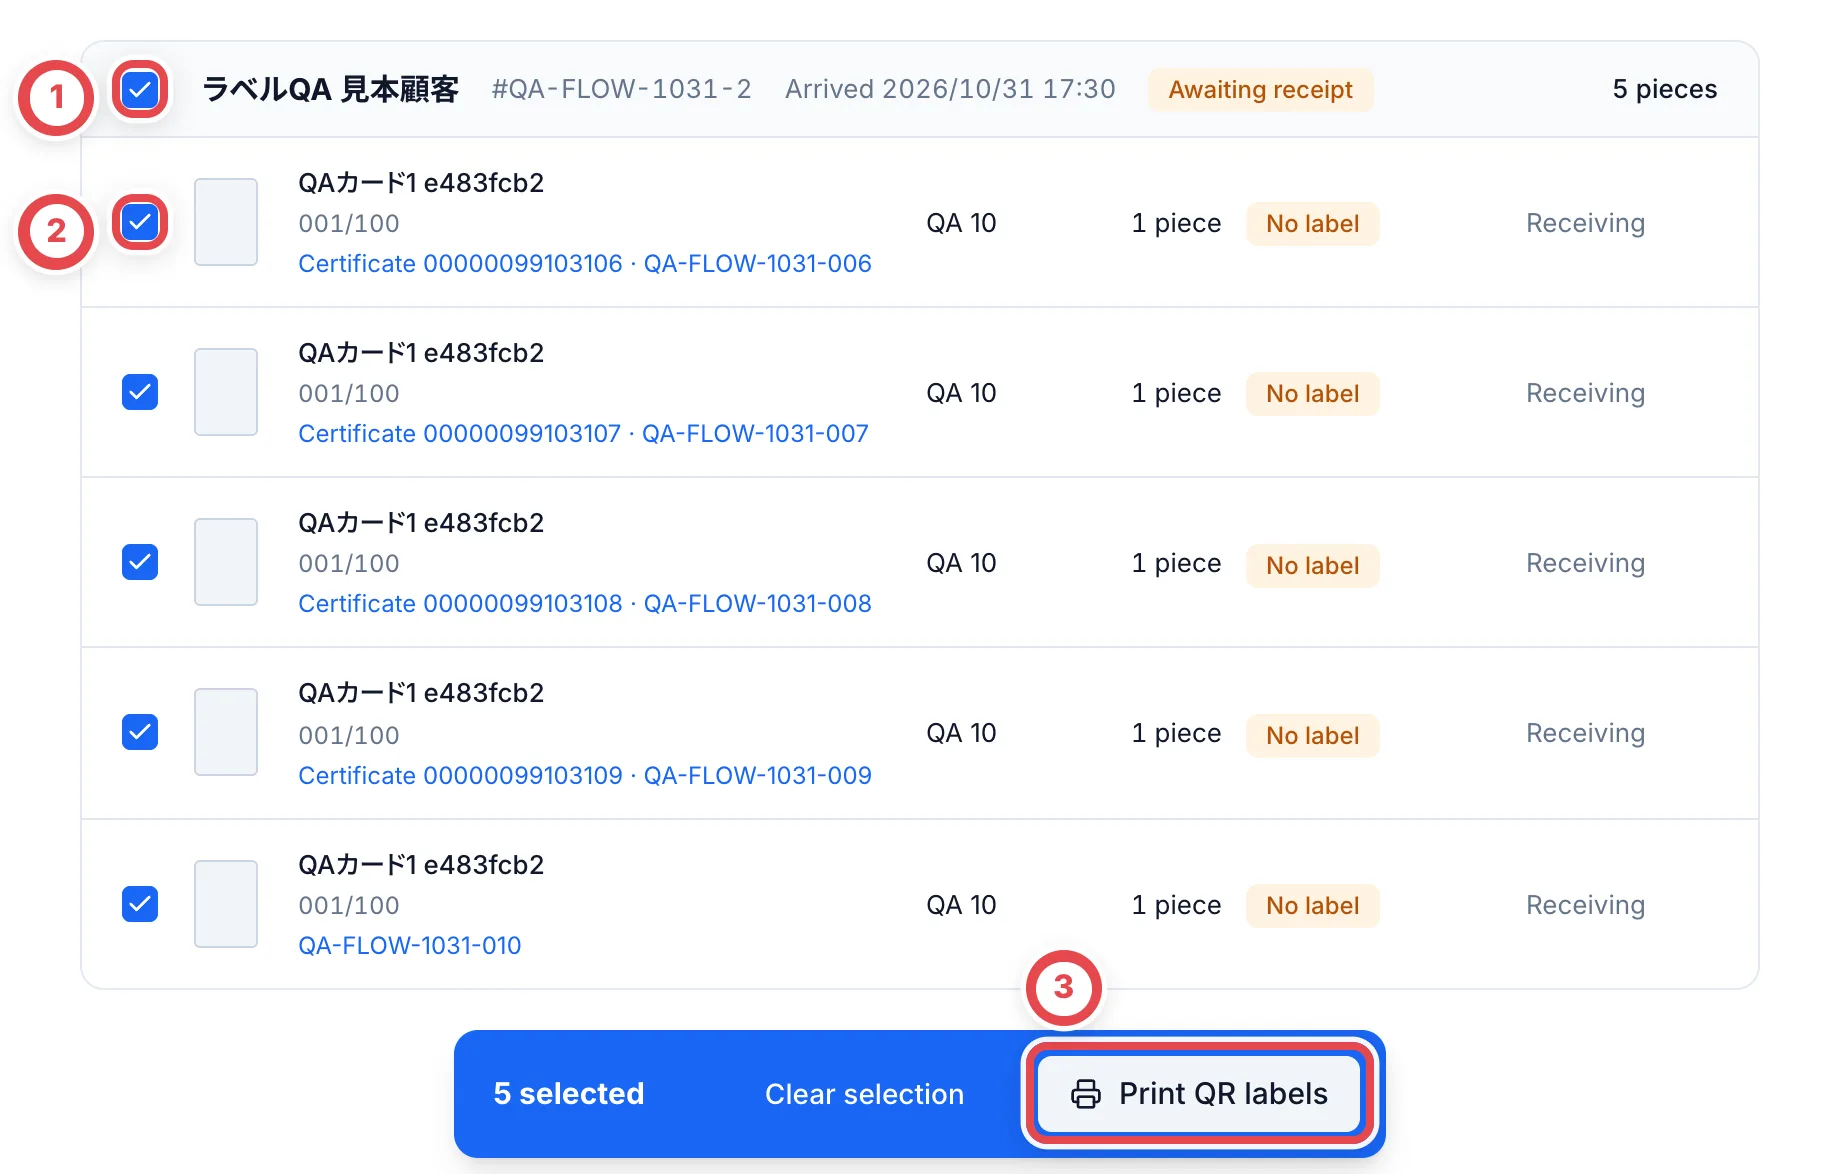 Continue to [Print the labels](/en/guides/inventory/putaway#3-print-the-labels).
## Record stock that didn't come from a purchase
To record mailed goods as a purchase, see [Putting cards that arrive by post into stock](/en/guides/purchase/mail-in-to-stock).
### 1. Start a receipt slip
Open **Receipts** and click **Receipt slips** at the top right to see the slips you've made so far. Click **Receive stock** at ①.
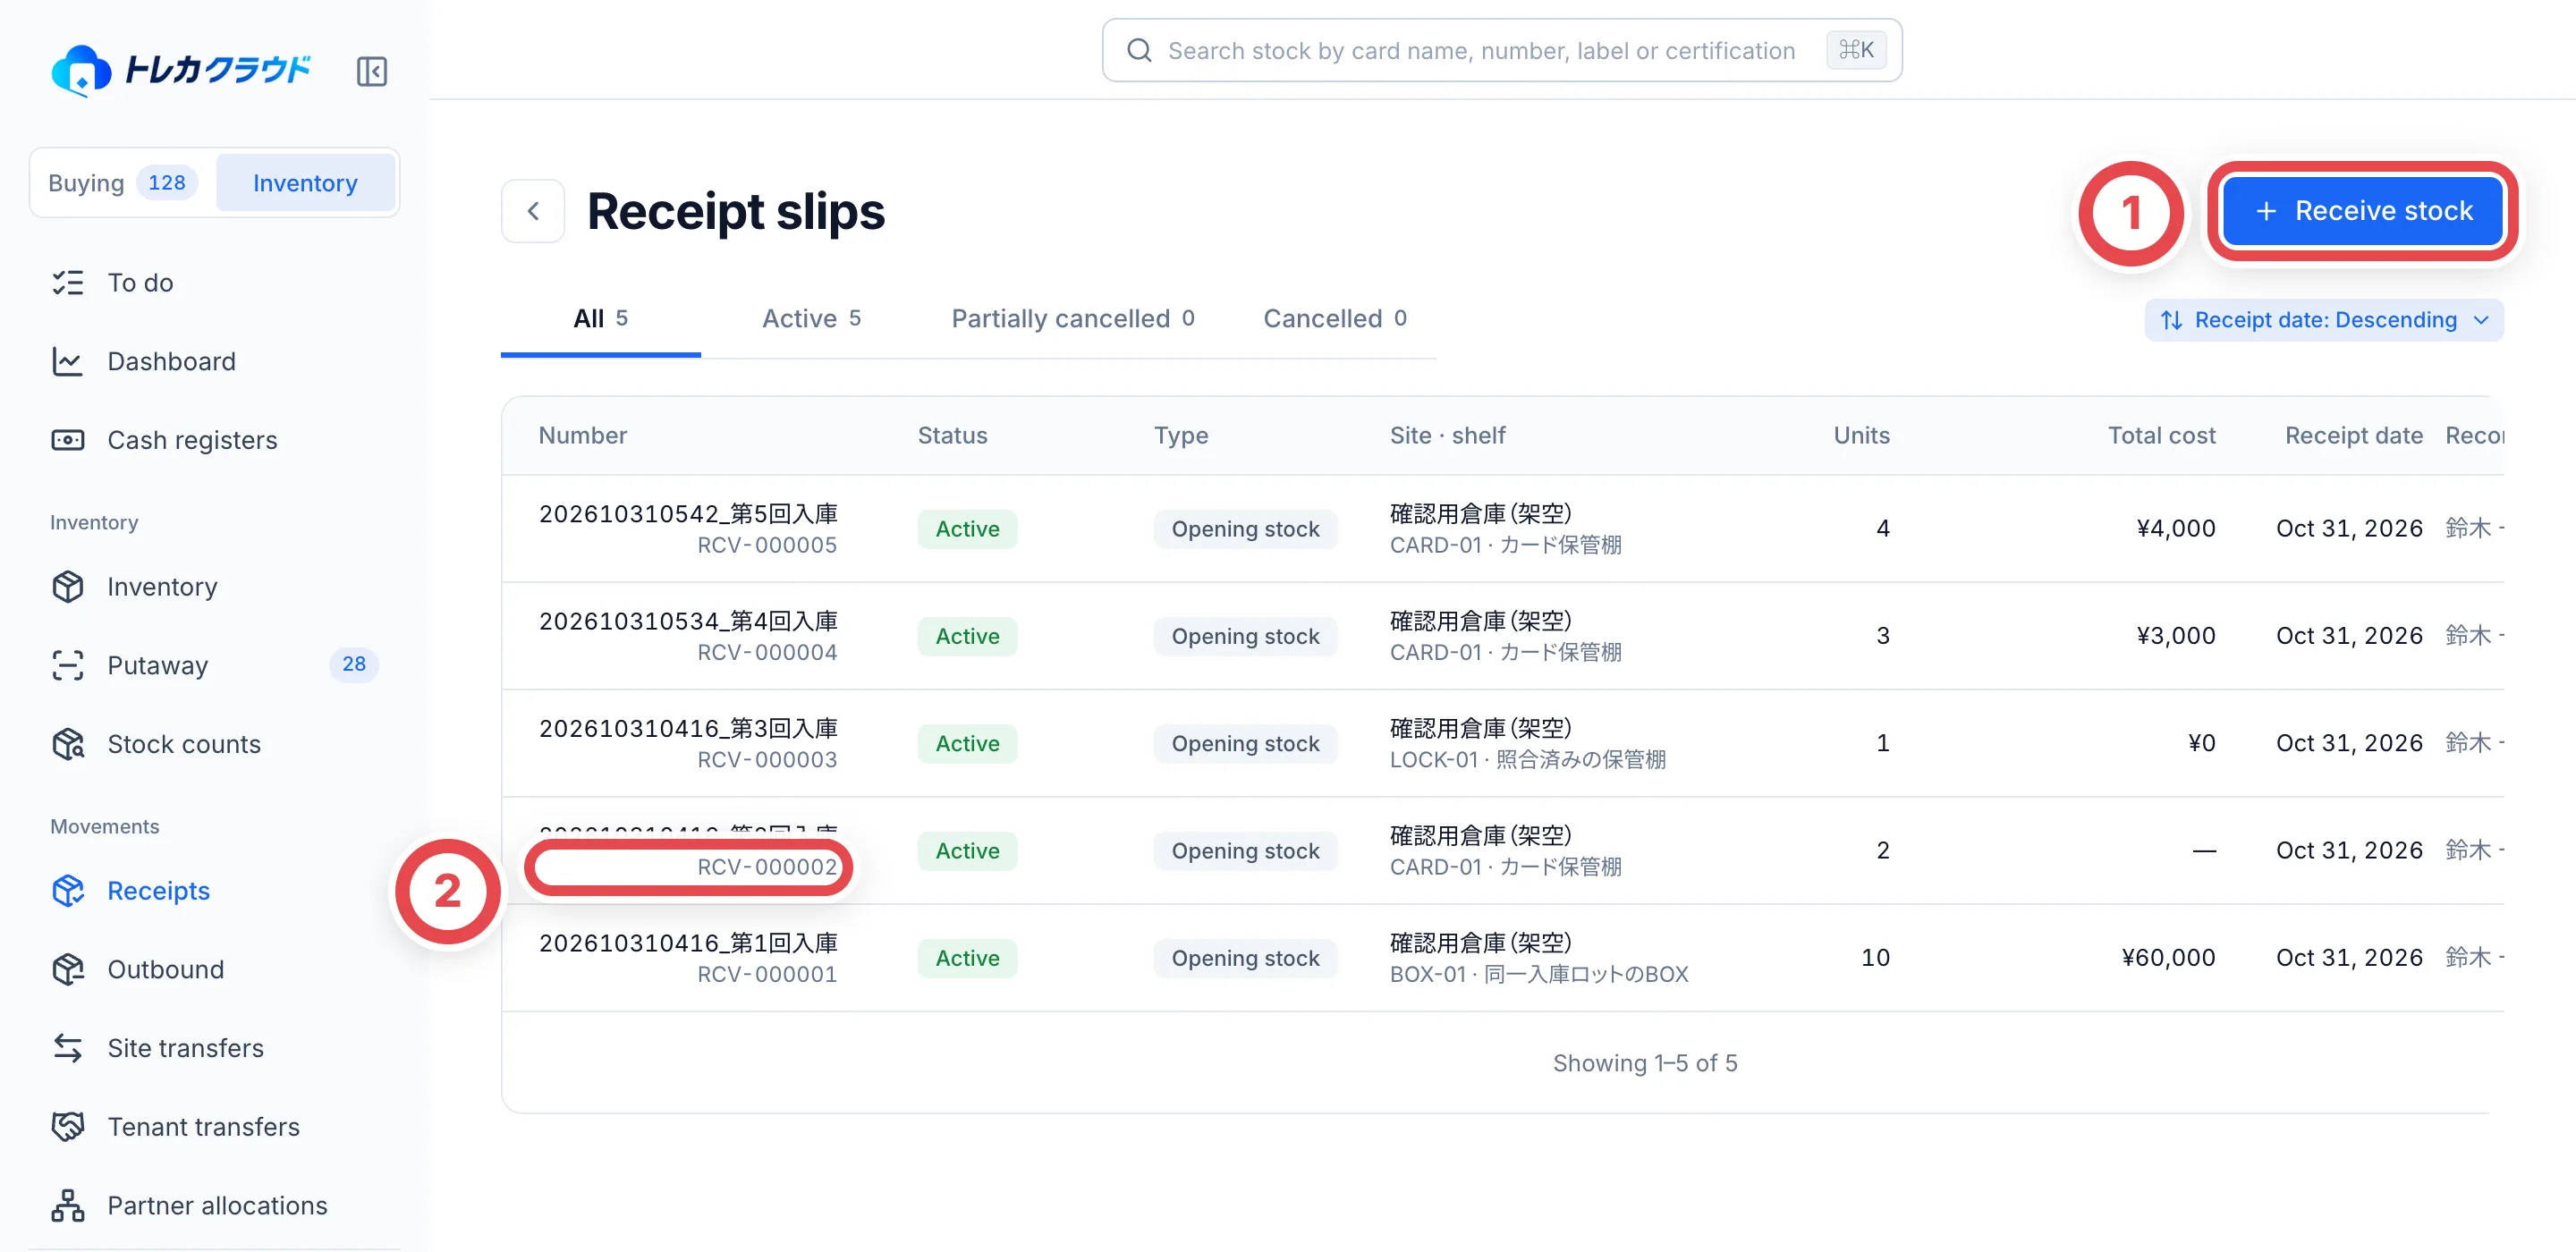 ### 2. Enter the receipt details
Choose a **Type** at ①: **Opening stock**, **Found in stock count** or **Other**. Check the **Shelf** at ②, the **Receipt date** and the **Cost currency**, and enter a **Source or reason**. You can also pick a source or reason from the suggestions at ③.
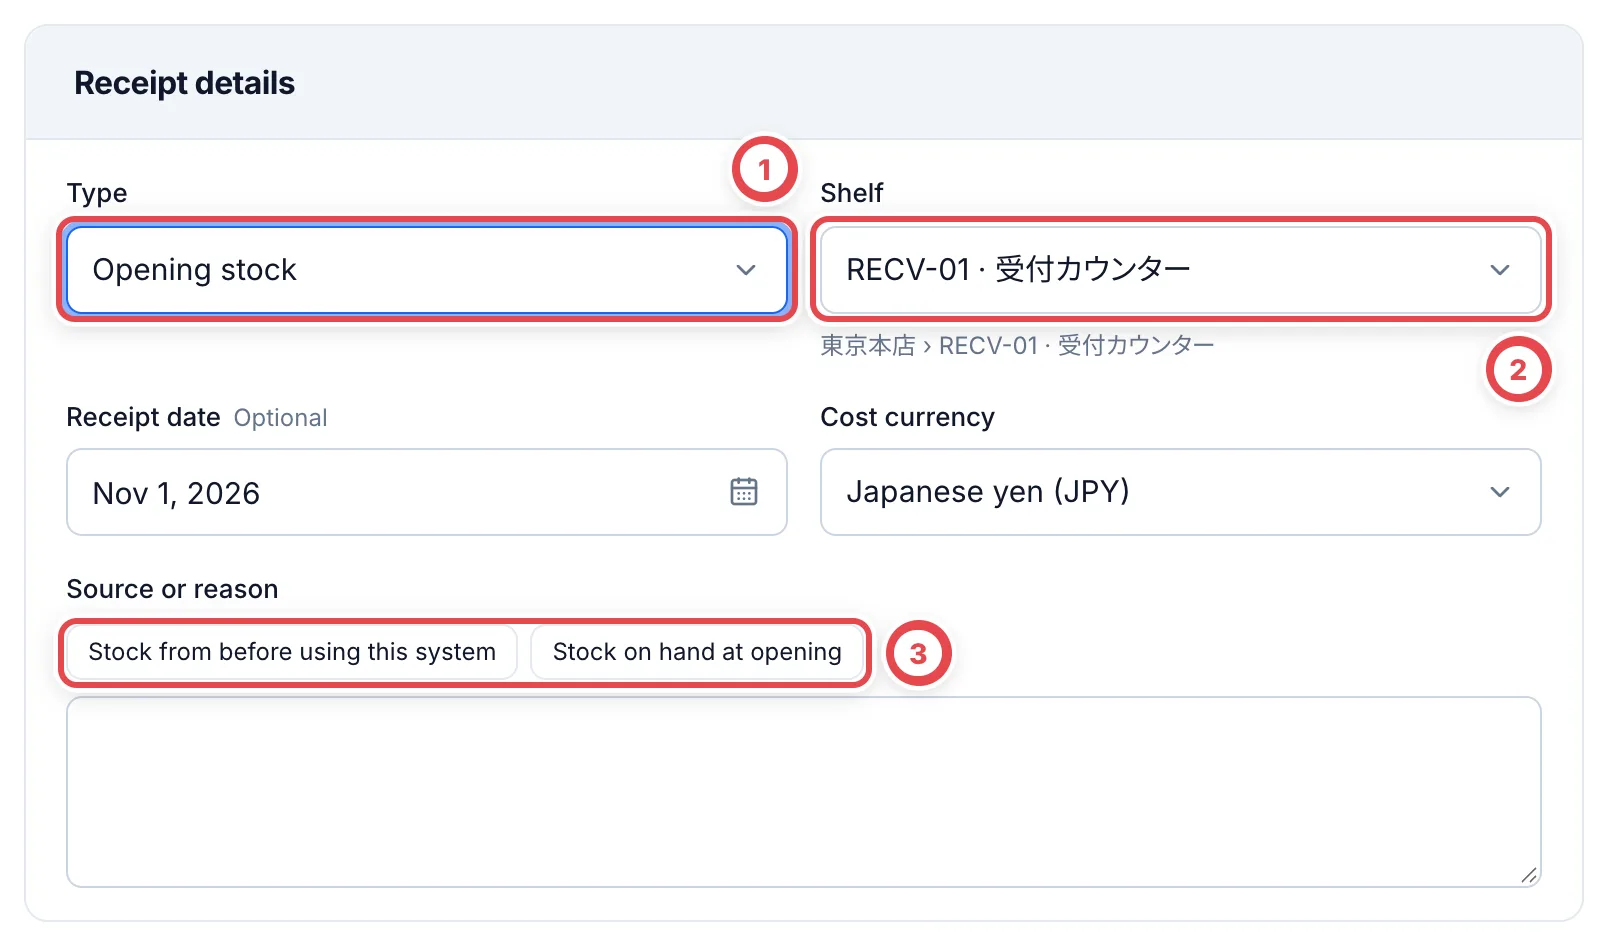 ### 3. Add the cards
Use **Search for a card** at ④ to choose a card from the catalog, then enter **Quantity** and **Cost per unit** at ⑤. **Leave the cost blank if it is unknown. Enter 0 only when you have confirmed that the stock was acquired free of charge.** Fill in the grade, certification number and condition at ⑥ as needed. Use **Add card** at ⑦ for another line.
To change a selected card, use **Change** in the product field. Match its name, card number and edition to the physical item. Include leading zeros when entering its certification number.
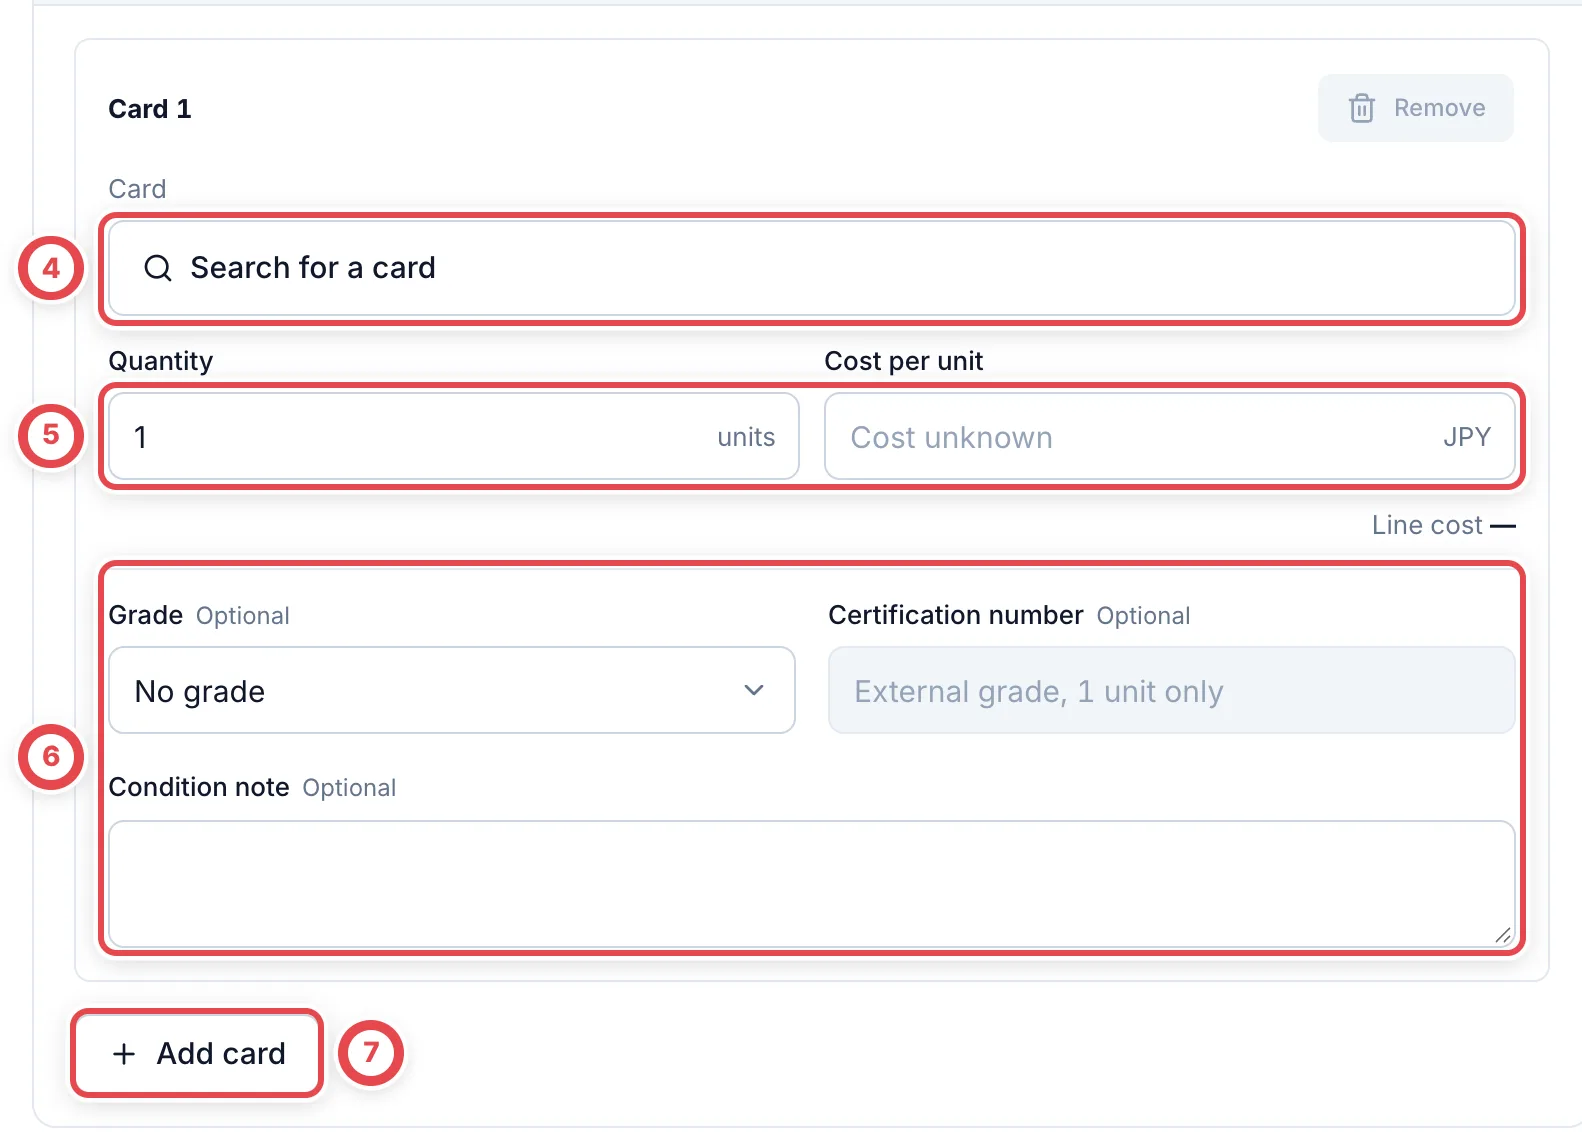 | Rule | Details |
| ----------------------------- | ---------------------------------------------------------------- |
| Size of one slip | Up to 100 lines and 500 units in total (1 to 200 units per line) |
| Certification number | Only on a line with a quantity of 1 and a third-party grade |
| Cards not in the card catalog | Can't be received |
### 4. Review and confirm
Check the totals under **Summary** on the right, then click **Review**. On the confirmation screen, check the type, shelf, card details and totals, then click **Receive stock** at ②.
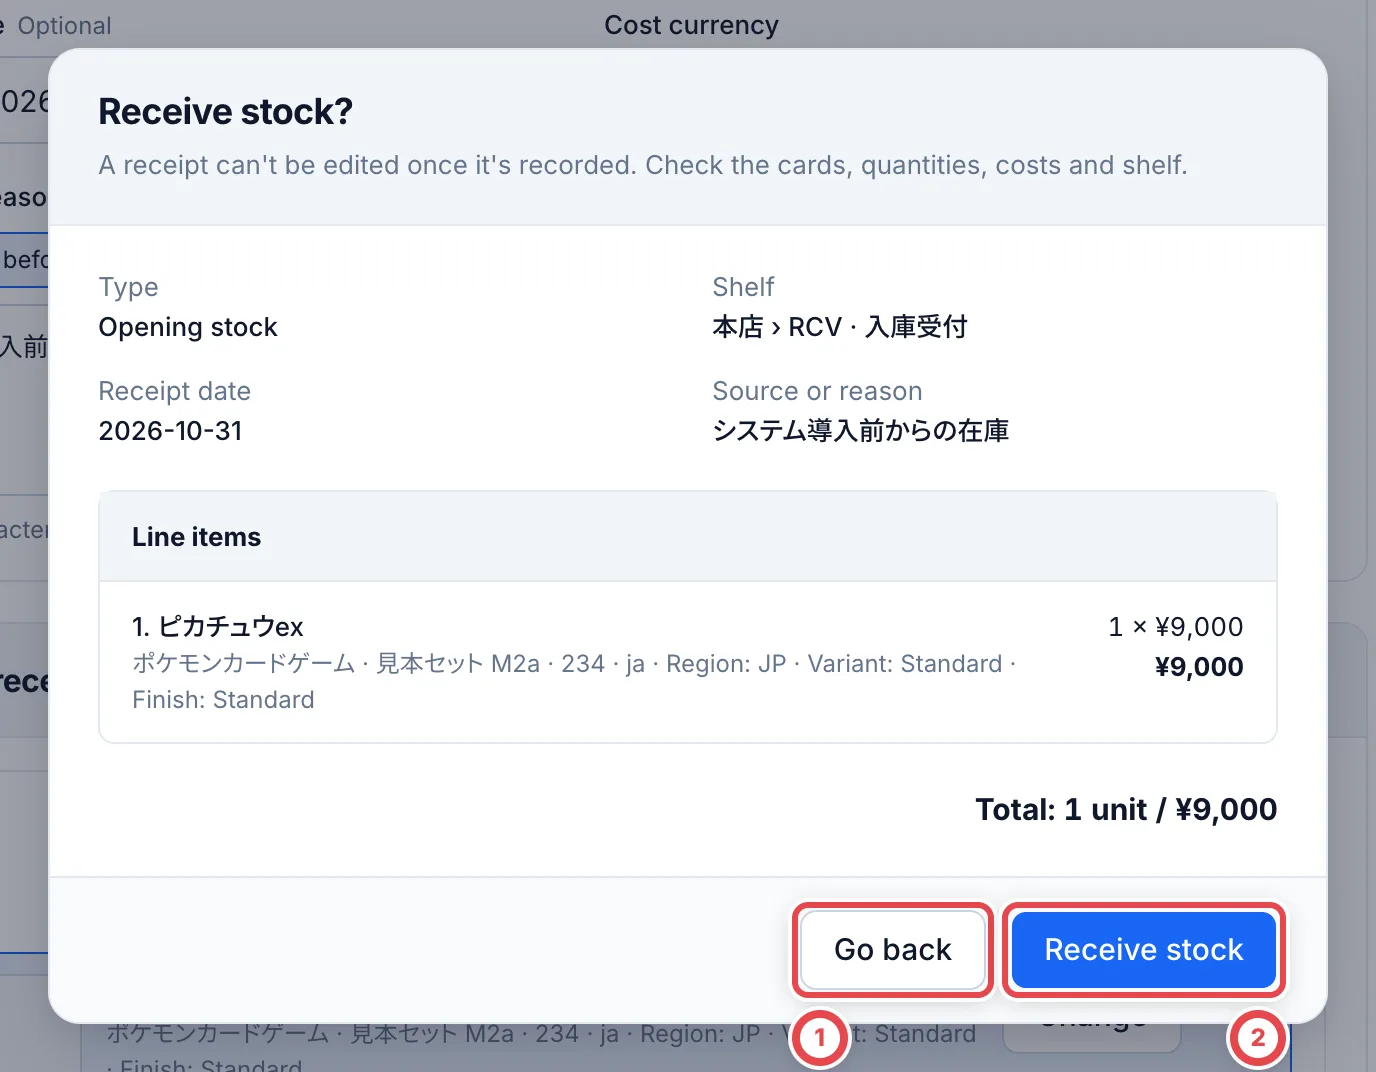 **Once you confirm, each card becomes its own unit and is In stock right away.** The ordinary receipt form cannot edit or delete it. Use [**Correct record**](/en/guides/inventory/record-corrections) for its receiving location or registration cancellation for incorrectly registered units; both retain history.
### 5. Print labels and put away
Click a number in the list of receipt slips to open that slip. **Stock labels and putaway** at ① shows how many labels have been issued and how many cards have been put away.
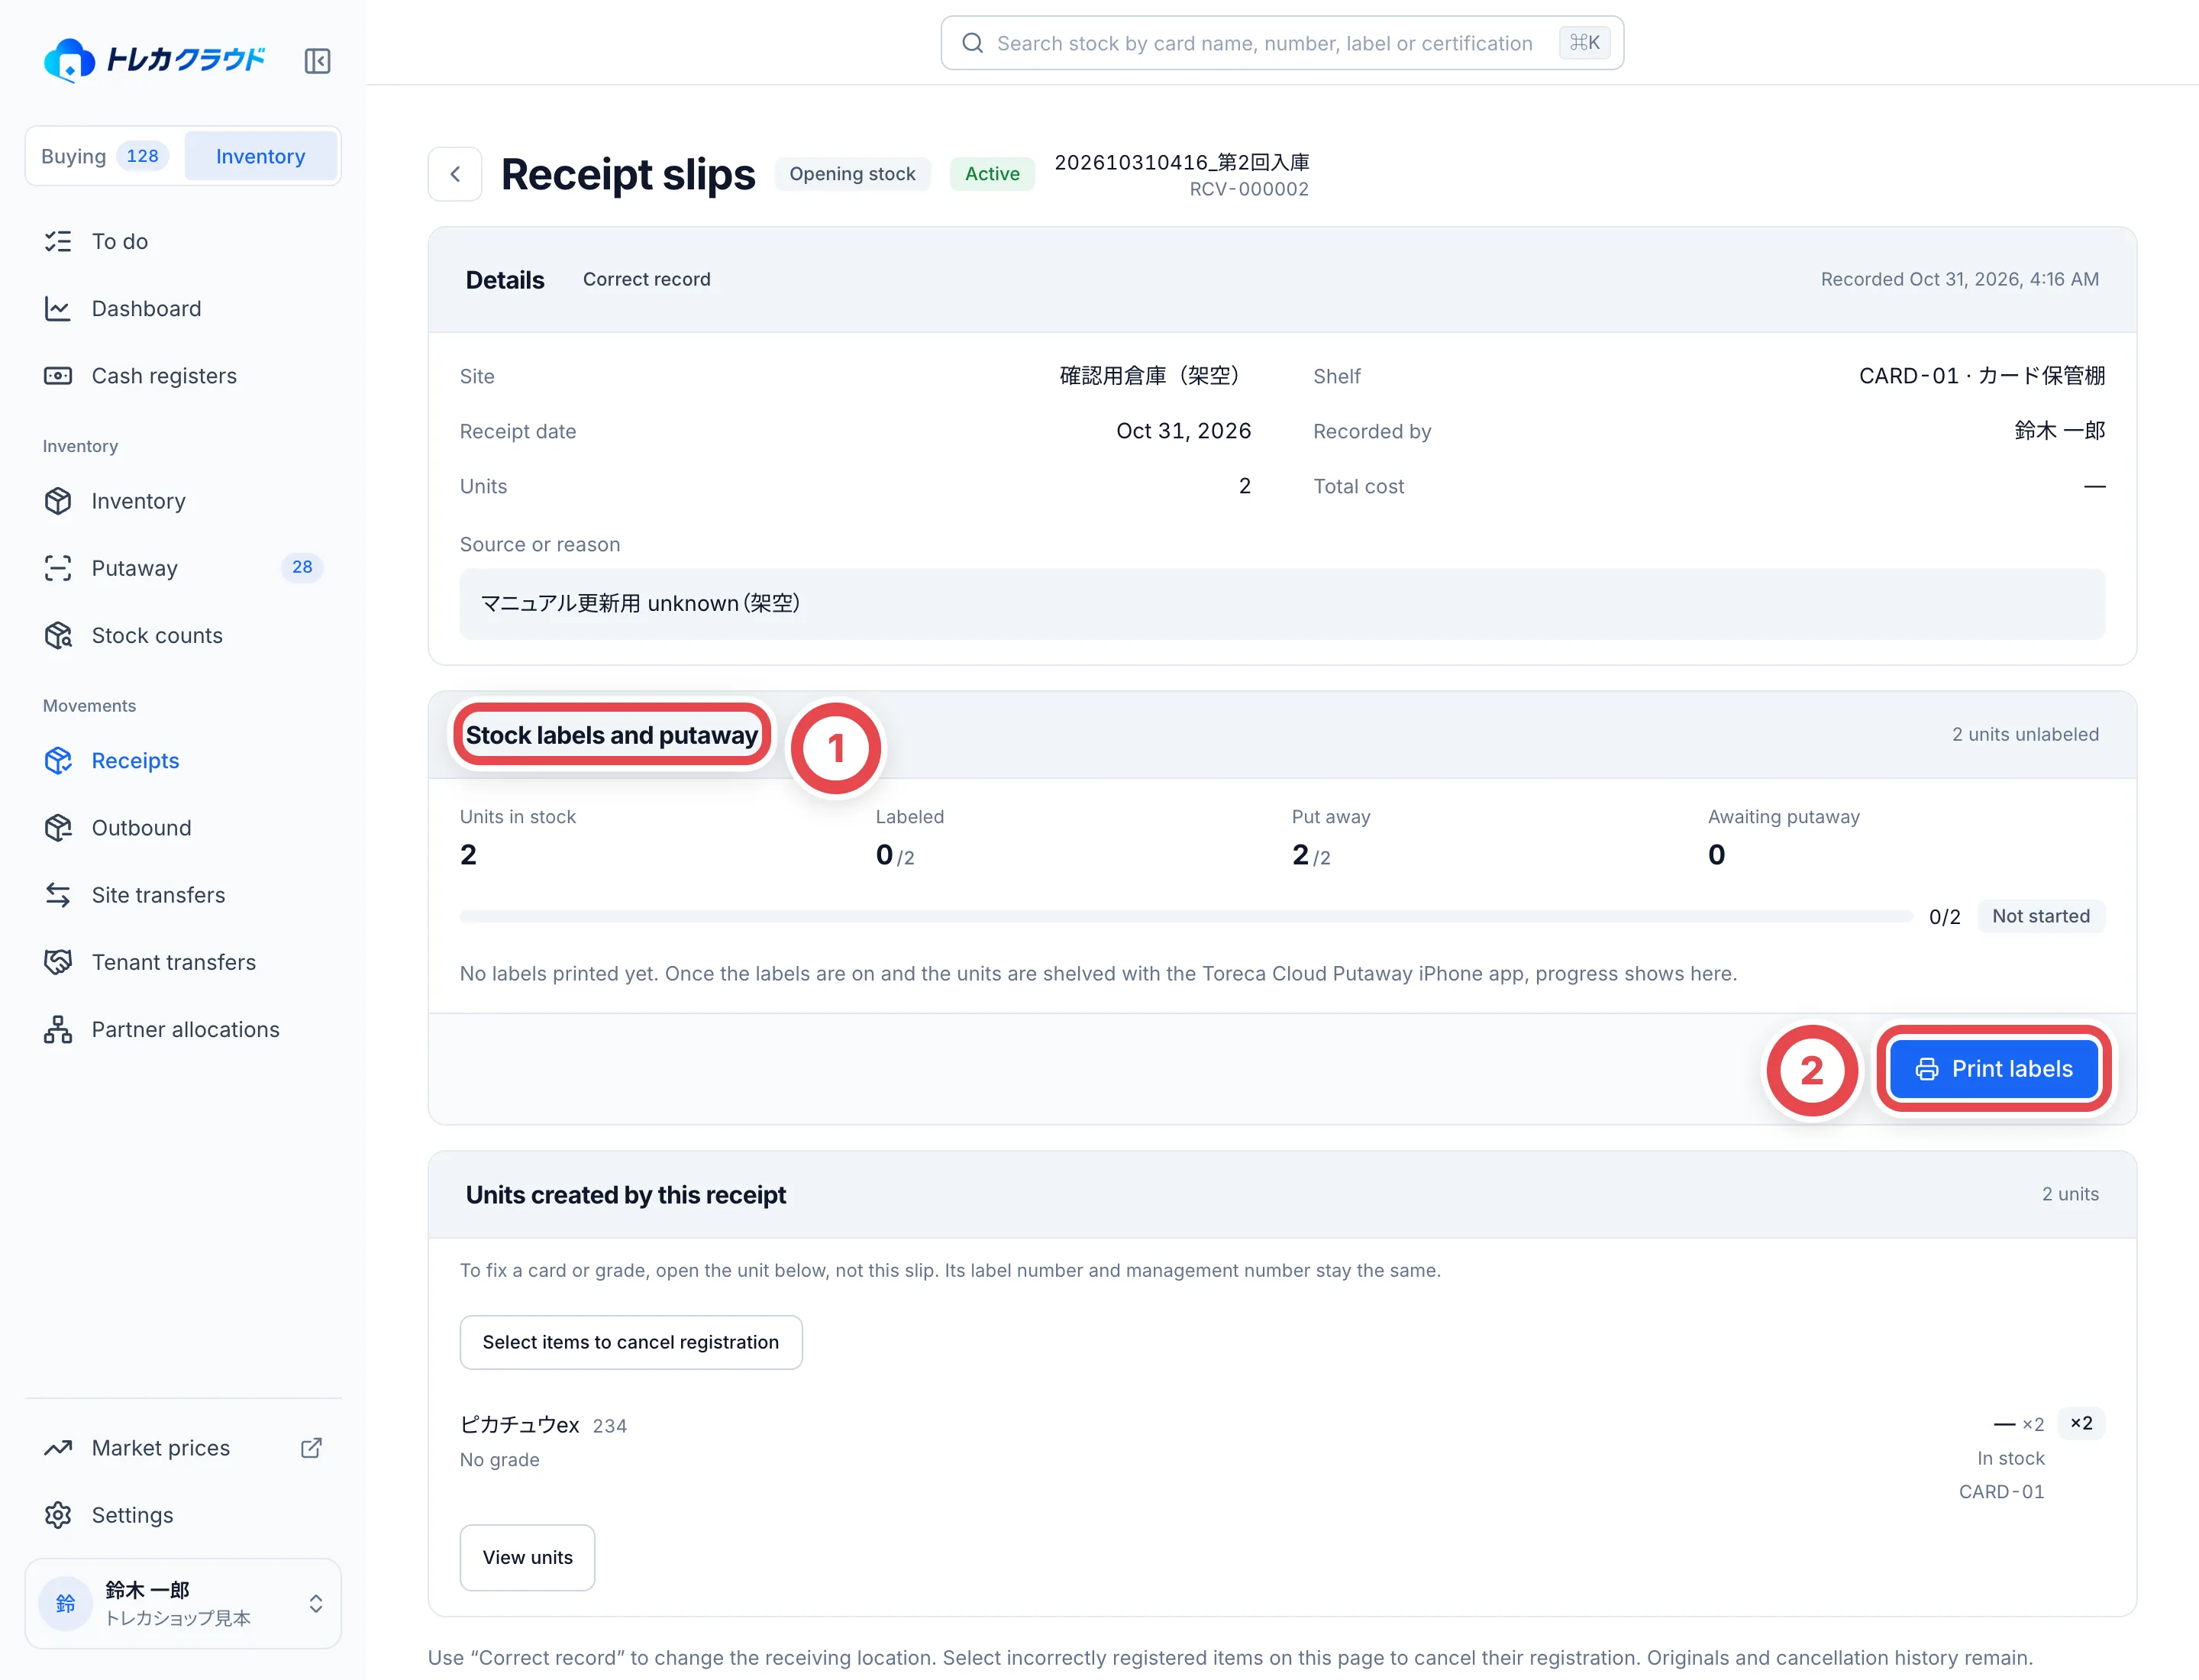 Click **Print labels** at ② to print stock labels, stick them on the cards, then put the cards away with the iPhone app 「トレカクラウド 格納」 (Toreca Cloud Putaway). Under **Units created by this receipt** below, you can check each card's status and shelf.
## Cancel selected registrations
1. Under **Units created by this receipt**, click **Select items to cancel registration**. Nothing is selected initially.
2. Check the affected items. Select a group of identical items, then expand it to adjust individual units. Reserved, sold and other unavailable units cannot be selected.
3. Click **Cancel registration of N selected items**, check the cards, asset numbers and certification numbers, then enter a reason.
4. Confirm with **Cancel registration of N items**. The same receipt updates its status and history; unselected items remain in stock.
This cannot be undone. Registering items again creates new units and inventory labels. If a selected unit changes before confirmation, the whole operation is refused with an explanation. Use **Refresh stock** to select again from the latest state. If the result is unknown after a connection failure, keep the details and use **Check result again** to recover the same operation's result.
## Find receipts by status
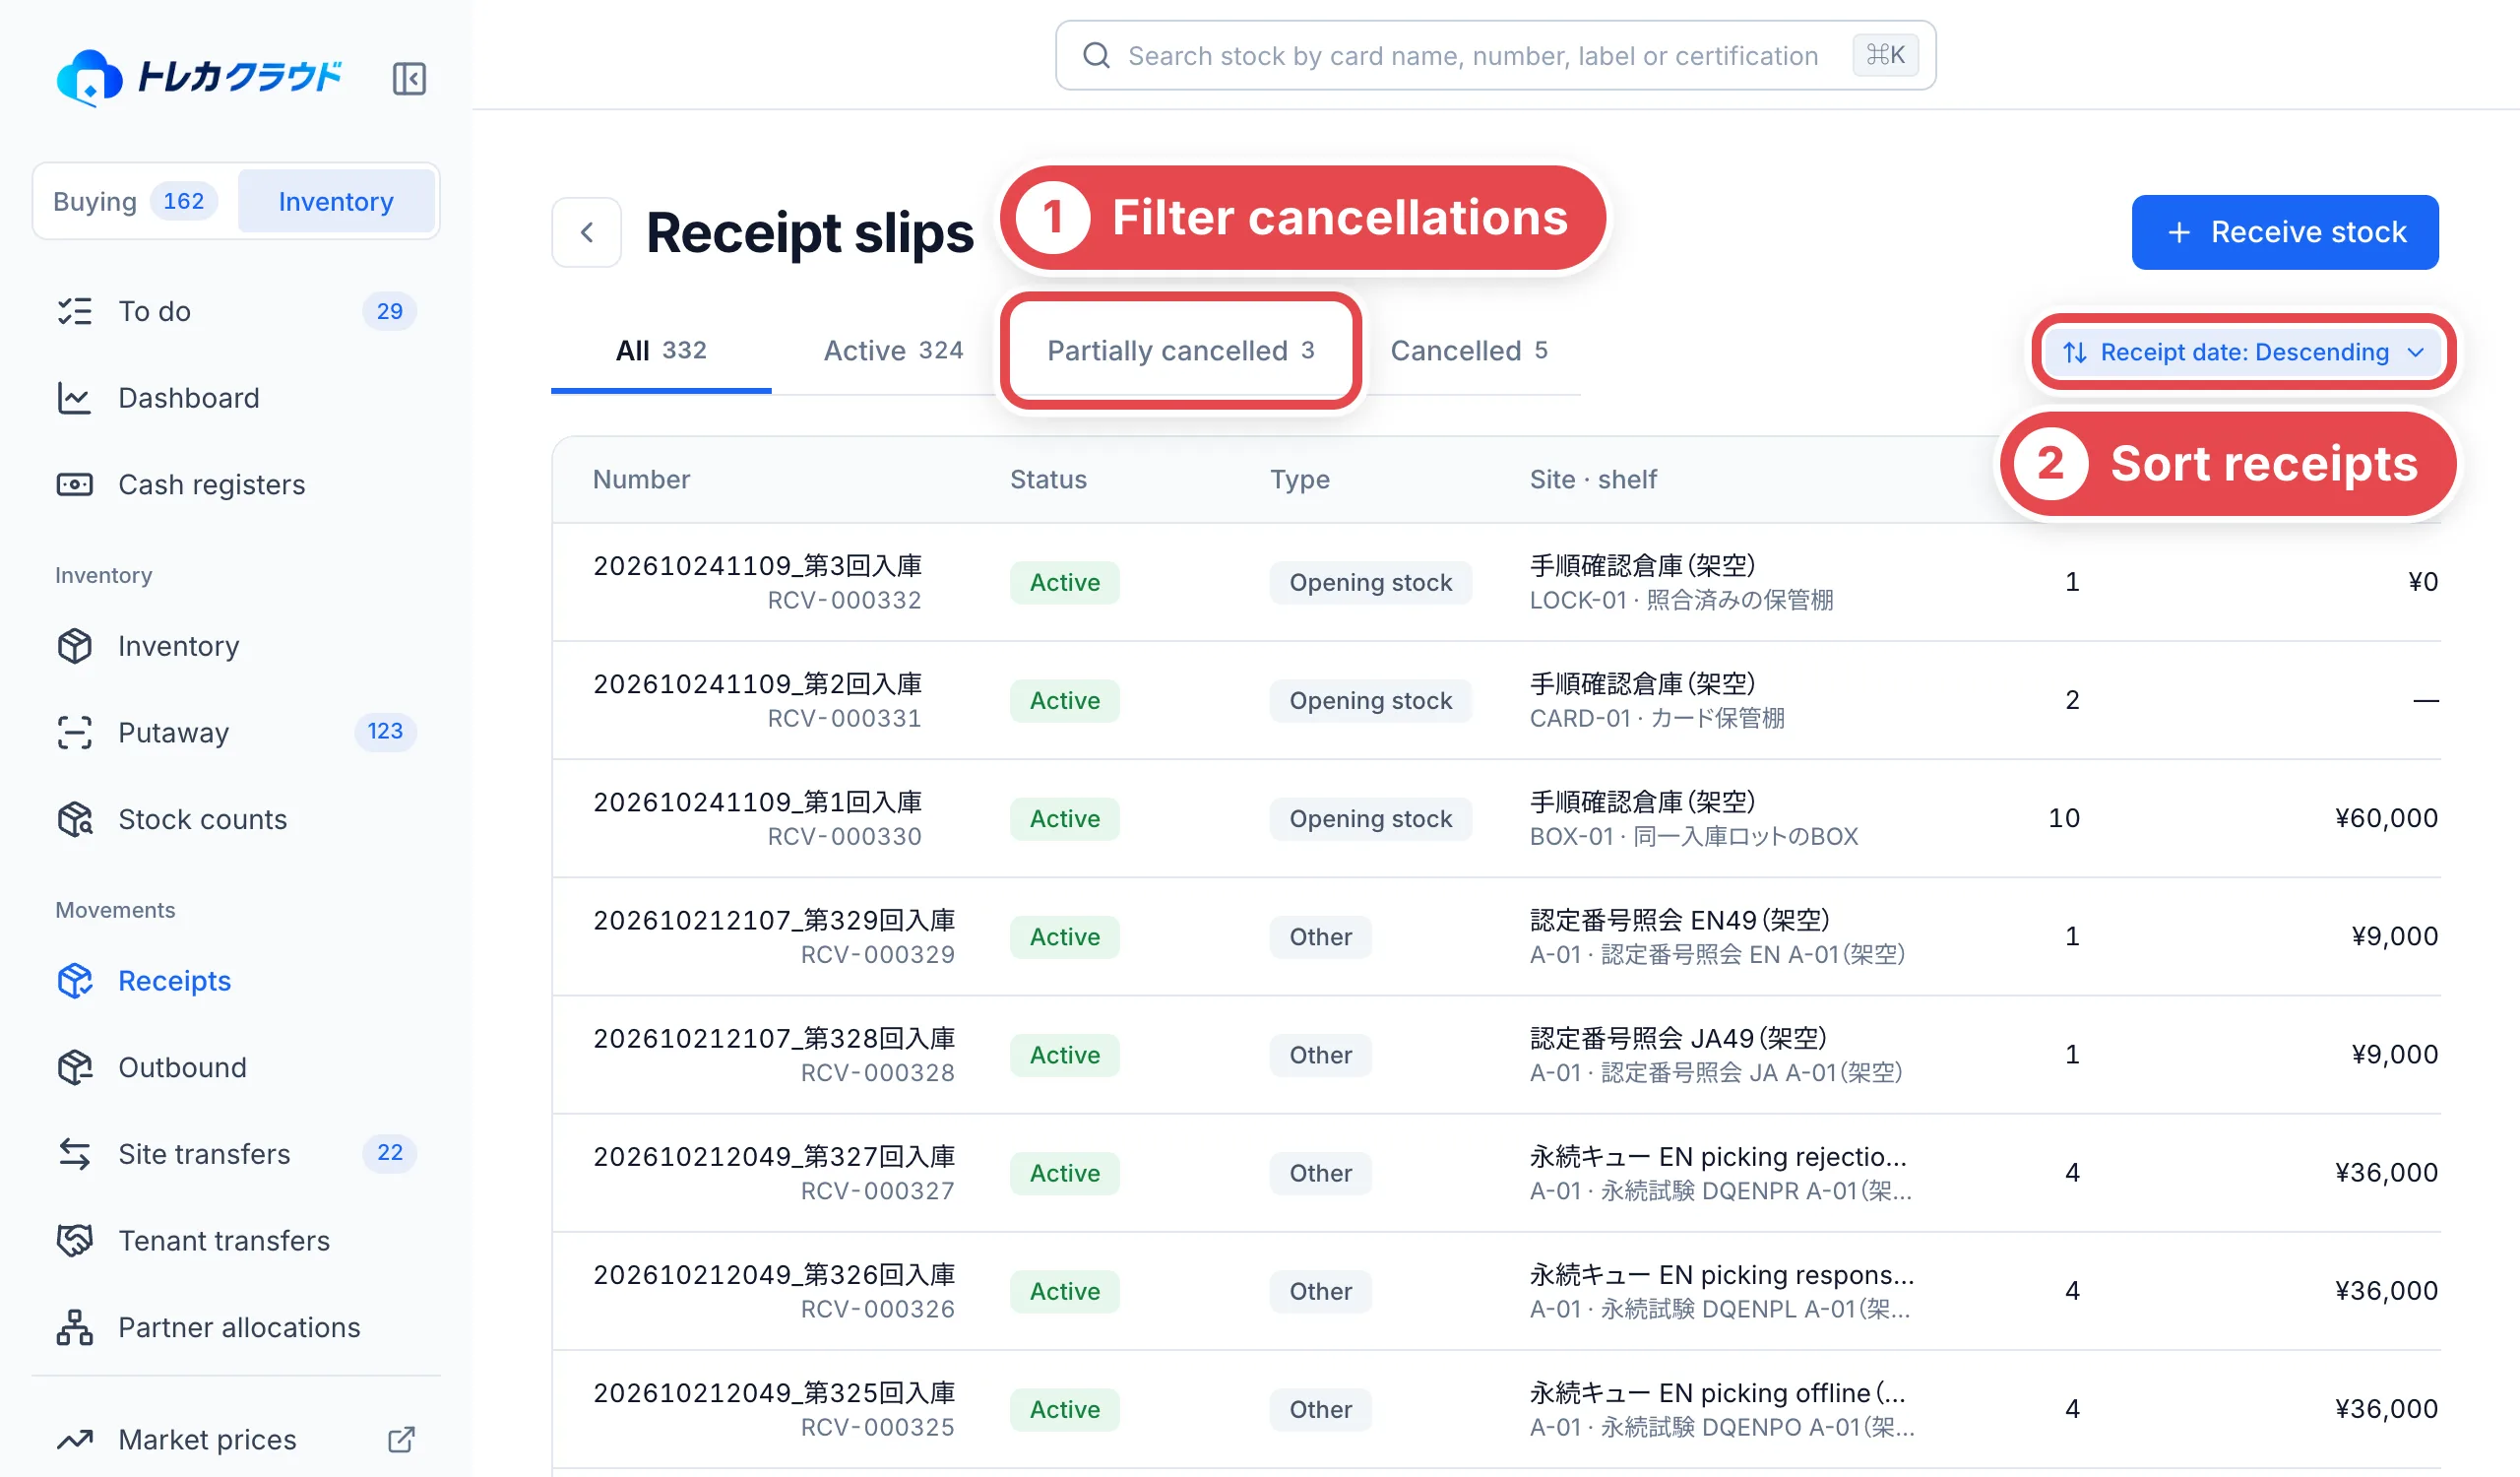 | Status | Meaning |
| ------------------- | ------------------------------------------------------------------------------------------- |
| Active | No registrations have been cancelled. A sale or normal take-out does not cancel the receipt |
| Partially cancelled | Some units were taken out using the Correction purpose |
| Cancelled | All units were taken out using the Correction purpose |
Filter cancellation status at ①. Use ② to sort by receipt date, receipt number or status.
In the details, **Registration cancellations** shows the related outbound orders, dates, members and reasons. Cancelled receipts cannot print labels. Partially cancelled receipts count only the remaining printable stock. If no stock remains because of sales or other movements, the panel explains that no stock is available for label printing.
## Troubleshooting
You can print labels and put away unknown-cost stock. A “—” total at ① means the cost is pending. When the cost becomes known, record it from the unit details. This does not rewrite the original receipt.
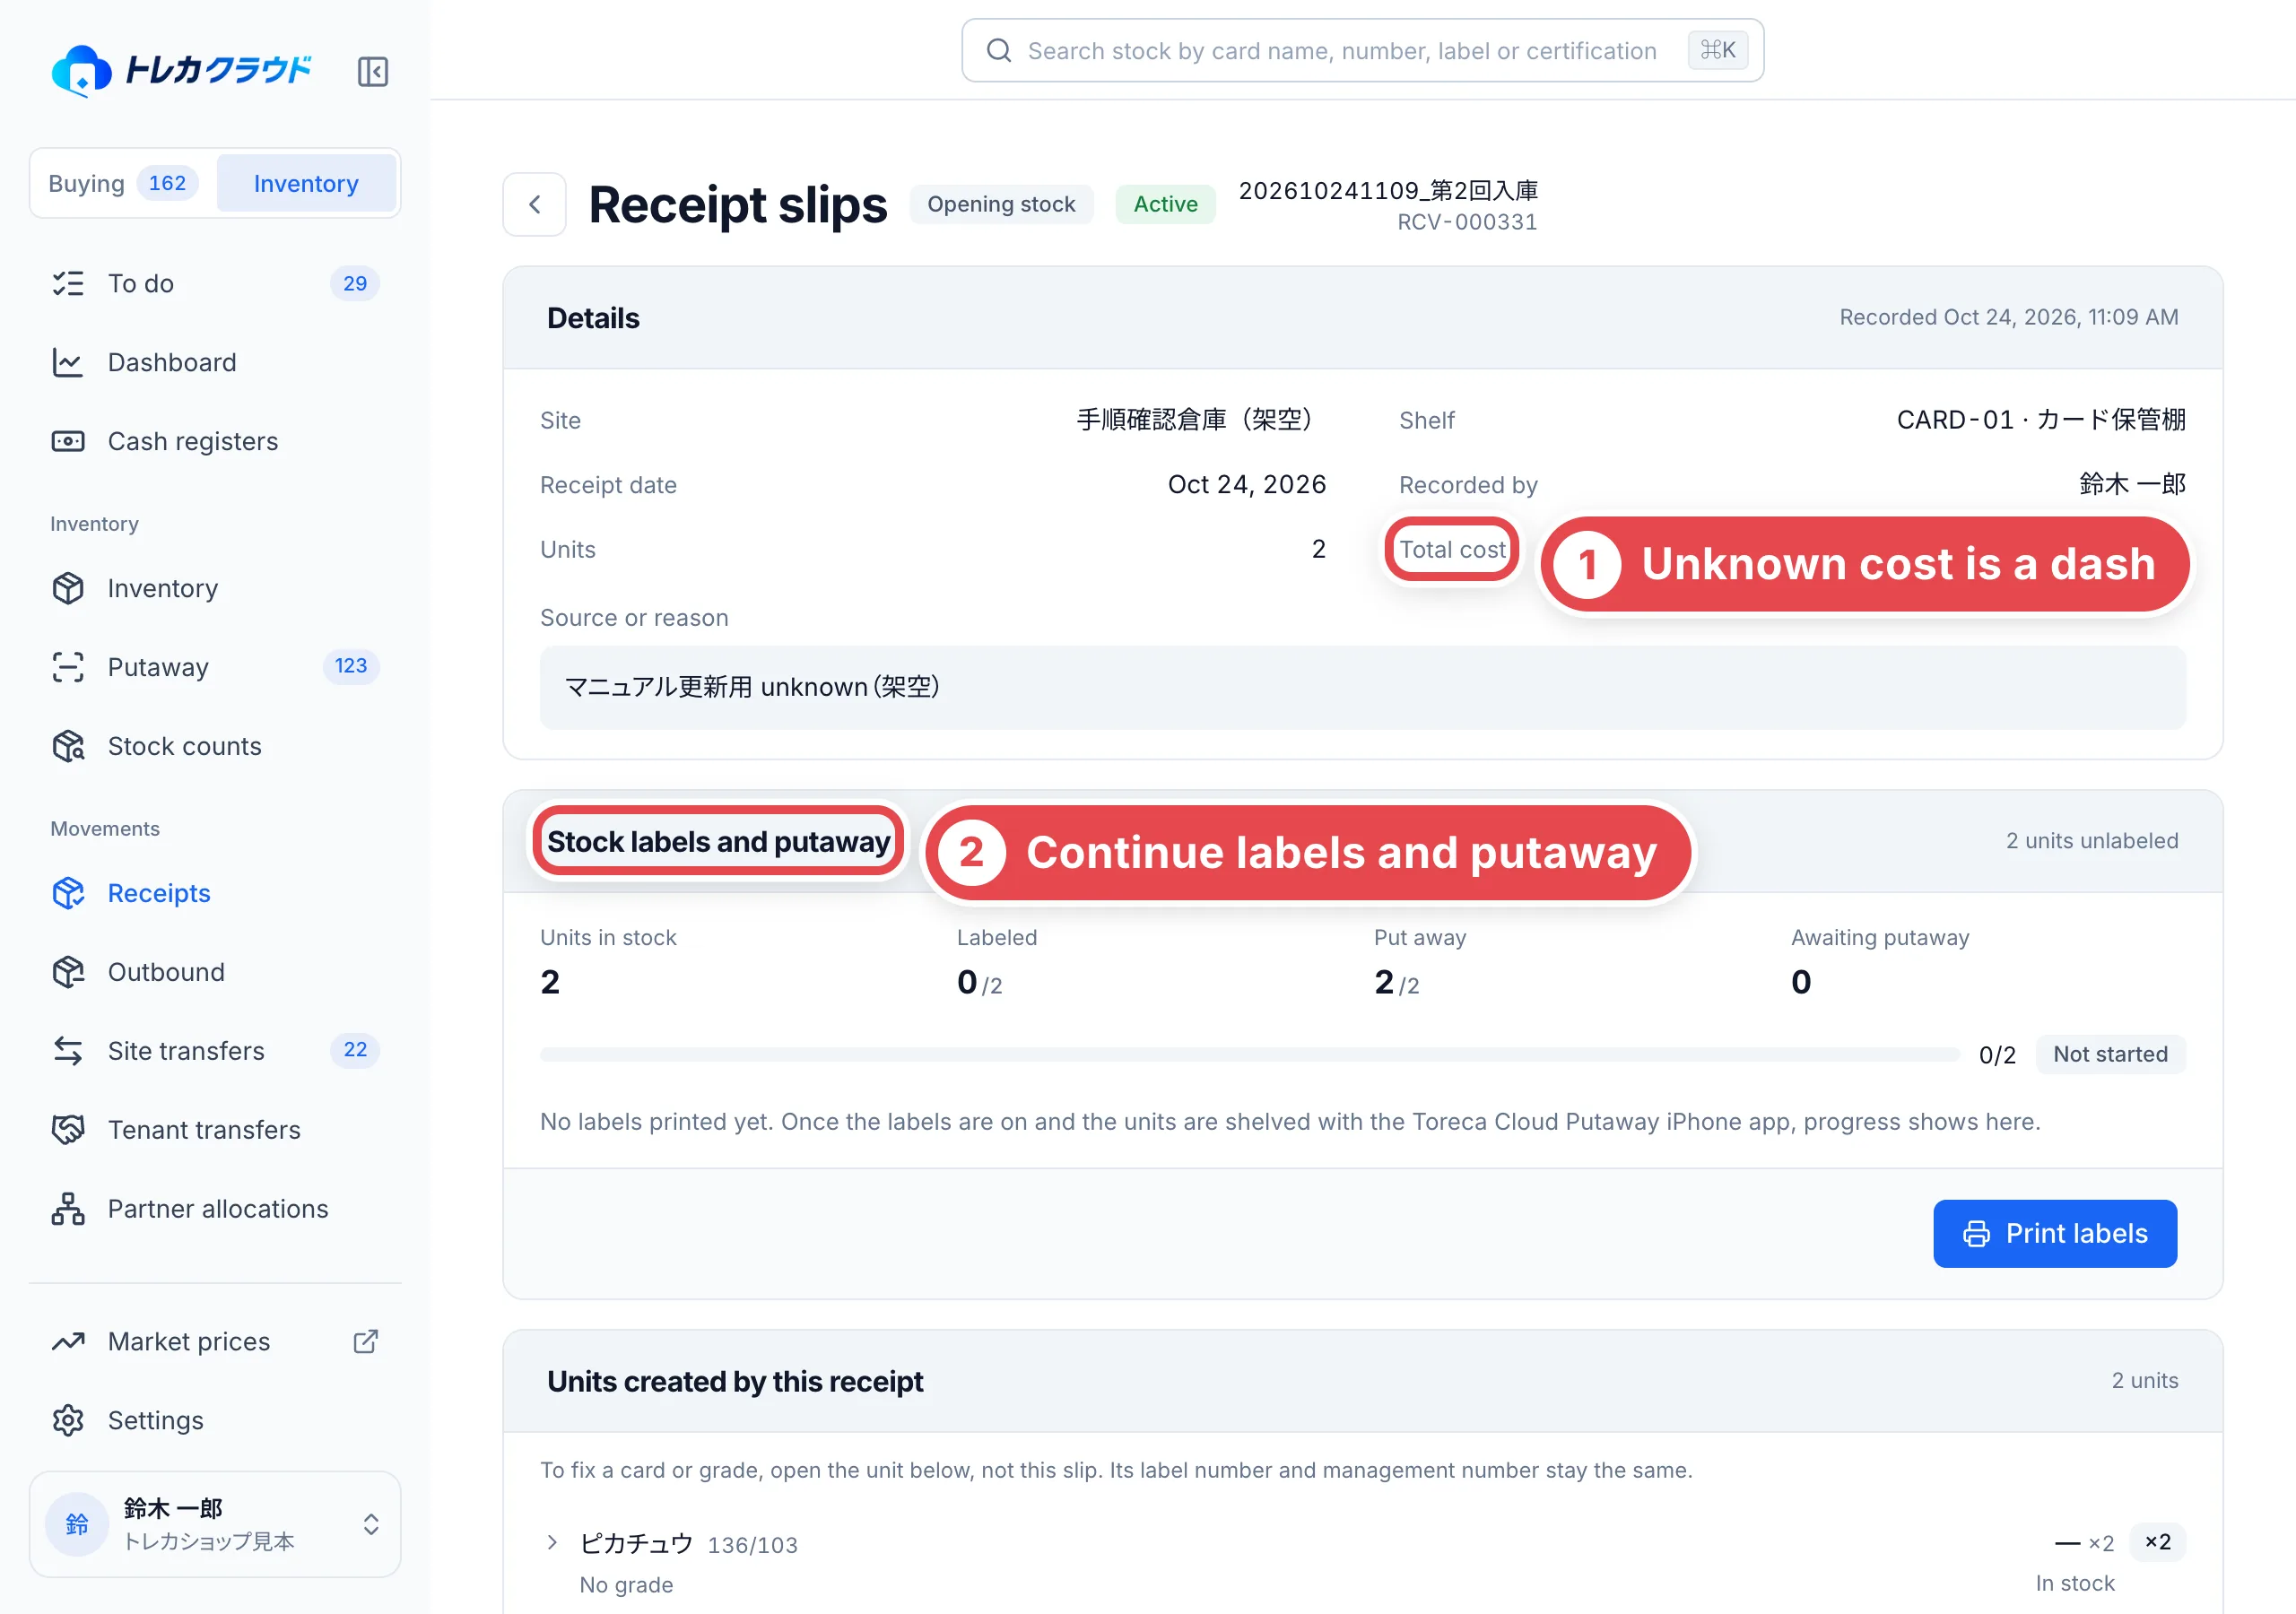 | What's happening | What to check and how to fix it |
| ----------------------------------------------------------------- | -------------------------------------------------------------------------------------------------------------------------------- |
| A card doesn't show on the Receipts page | Check arrival date, site, stage, unshipped-only and deal filters. Reset the date to **All** |
| A purchased card doesn't reach **To receive** | Check **Awaiting receipt**, then record bank-transfer receipt or the in-store cash handover |
| You can't ship out a card awaiting receipt | Shipping out and cross-site transfers require payment confirmation. Printing, putaway and same-site shelf moves remain available |
| There's no **Receipt slips** in the sidebar | Open **Receipts** and click **Receipt slips** at the top right |
| You can't find a card on the receipt slip | Search by another name or card number. If unlisted, [register the product](/en/guides/inventory/product-and-market-corrections) |
| You noticed a mistake after clicking **Receive stock** | Select the affected items on this page, enter a reason and cancel their registration |
| You can't enter a certification number | Only a line with a quantity of 1 and a third-party grade accepts one |
| The purchase amount or quantity is wrong after stock registration | [Correct the originating purchase case](/en/guides/purchase/amount-and-quantity-corrections) |
---
# Correct receipt, movement and historical records
Source: https://docs.toreca-cloud.com/en/guides/inventory/record-corrections
Use **Correct record** on the affected record. Normal screens display corrected values while revision history retains originals, the operator, time and correction reason.
| What to correct | Where to open it | Editable information |
| ------------------------------------------ | ----------------------------------------------- | ----------------------------------------------------------------------------------------------- |
| A receipt slip’s receiving location | Inventory → Receipts → Receipt slips → the slip | Receiving location |
| A unit’s movement record | The relevant movement in unit history | Destination for eligible movements; reason / note; time where offered |
| A purchase history description | History on the originating purchase | Summary, internal note and time |
| External acquisition information | The unit’s acquisition record | Purchase note and acquisition time |
| Purchase amount, quantity or related costs | The originating purchase case | [Purchase amount and quantity corrections](/en/guides/purchase/amount-and-quantity-corrections) |
Inventory records require inventory history correction permission. Purchase history and acquisition records require purchase history correction permission, along with access to read/edit the affected records. Ask an administrator if an action is missing.
## 1. Choose the corrected field and reason
For a receipt slip, open the slip and **Correct record**. Choose the correct **Receiving location** at ① and **Correction reason** at ②. Add **Note (optional)** when helpful; **Other** requires details. Click **Review changes** at ③.
:::note
This receipt dialog corrects the receiving location. It does not offer editing of the original receipt reason or date. Record why you are correcting it in the dedicated Correction reason selector.
:::
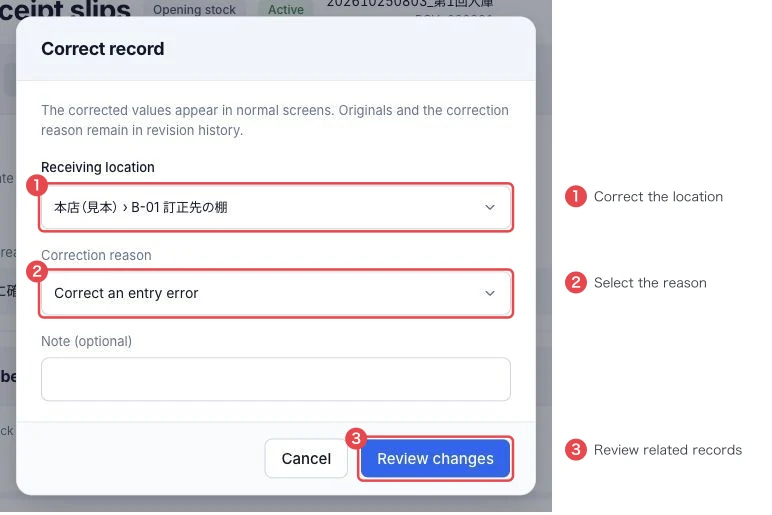 ## 2. Match related history and inventory, then save
Review before/after values, the related-record count at ① and **Related changes**. The example has two units, each with its original receipt movement and current location: four related updates. Actual counts depend on the record.
:::warning
Inventory still at the original receipt location may have its current location corrected too. This does not force stock that subsequently moved or shipped back to its earlier location. For a physical move, use normal shelf movement or a site transfer.
:::
Match the units and shelves, then click **Apply correction** at ②. Reopen the slip and units and verify locations and history.
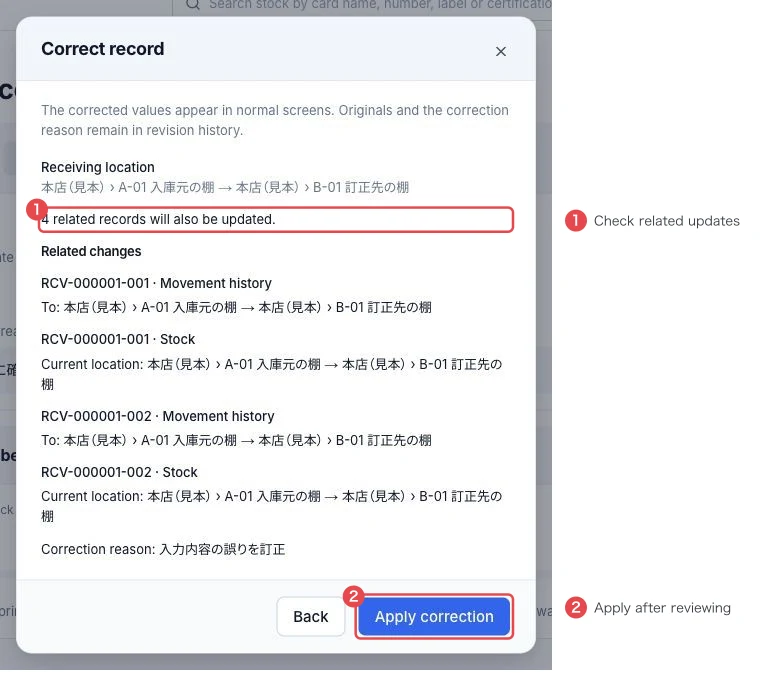 ## 3. Review history and load earlier values if needed
Reopen **Correct record**. **Revision history** at ① shows the operator, time, reason and before/after values. Use **Restore previous values** at ② to load a revision’s earlier values into the form.
Loading values does not save them. Select a reason such as **Restore previous values**, click **Review changes**, check the current linked records, then **Apply correction**. Restoration is another revision; previous revisions remain.
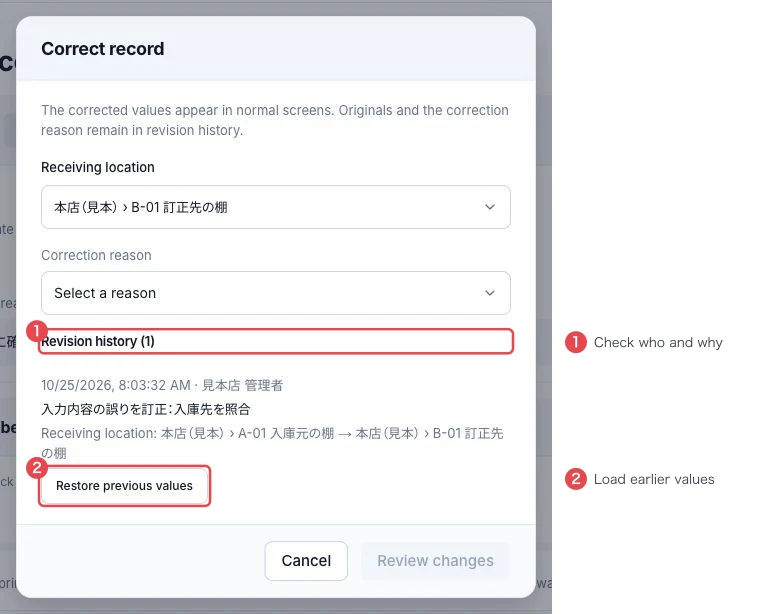 ## Correct movements, purchase history and acquisition records
Open **Correct record** on the specific entry and edit only the fields offered. Fields vary by record type. For example, a receipt movement created from a receipt slip does not offer editing of its time.
Receipt reasons and acquisition notes describe the business event; the correction reason explains this edit. Enter the correct business content in the edited fields and use the dedicated correction reason selector. Review changed values and linked records before confirming, then reopen to verify the result.
## Troubleshooting
| What you see | What to check |
| --------------------------------------------- | --------------------------------------------------------------------------------------------------------------------------- |
| Review is disabled | Check that values differ and required fields / correction reason are supplied |
| A shelf is missing | Check that it is active and eligible for this record |
| Loading old values did not restore the record | Loading only fills the form; select a reason, review, then apply |
| Another member changed the record | Close the dialog, reopen the latest record and reconsider the correction |
| Save outcome is uncertain | Read the record and history before saving the same correction again |
| No amount or quantity fields | Use [purchase amount and quantity corrections](/en/guides/purchase/amount-and-quantity-corrections) on the originating case |
---
# Receive returns of sold inventory
Source: https://docs.toreca-cloud.com/en/guides/inventory/sales-returns
Accept returns of stock your shop sold and shipped. To send declined purchase items back to a customer, use [Purchase returns](/en/guides/purchase/returns).
Inventory editing permission and a shipped sale or oripa order with returnable units are required. Partner-controlled shipments and tenant transfers do not use the same ordinary return action.
## 1. Choose returned items from the sale
Open the original sale under **Outbound**, then its receive-return action. Match the physical cards at ① and choose quantity or individual-unit selection at ②. For identical cards, still verify that the selected units are the ones actually returned.
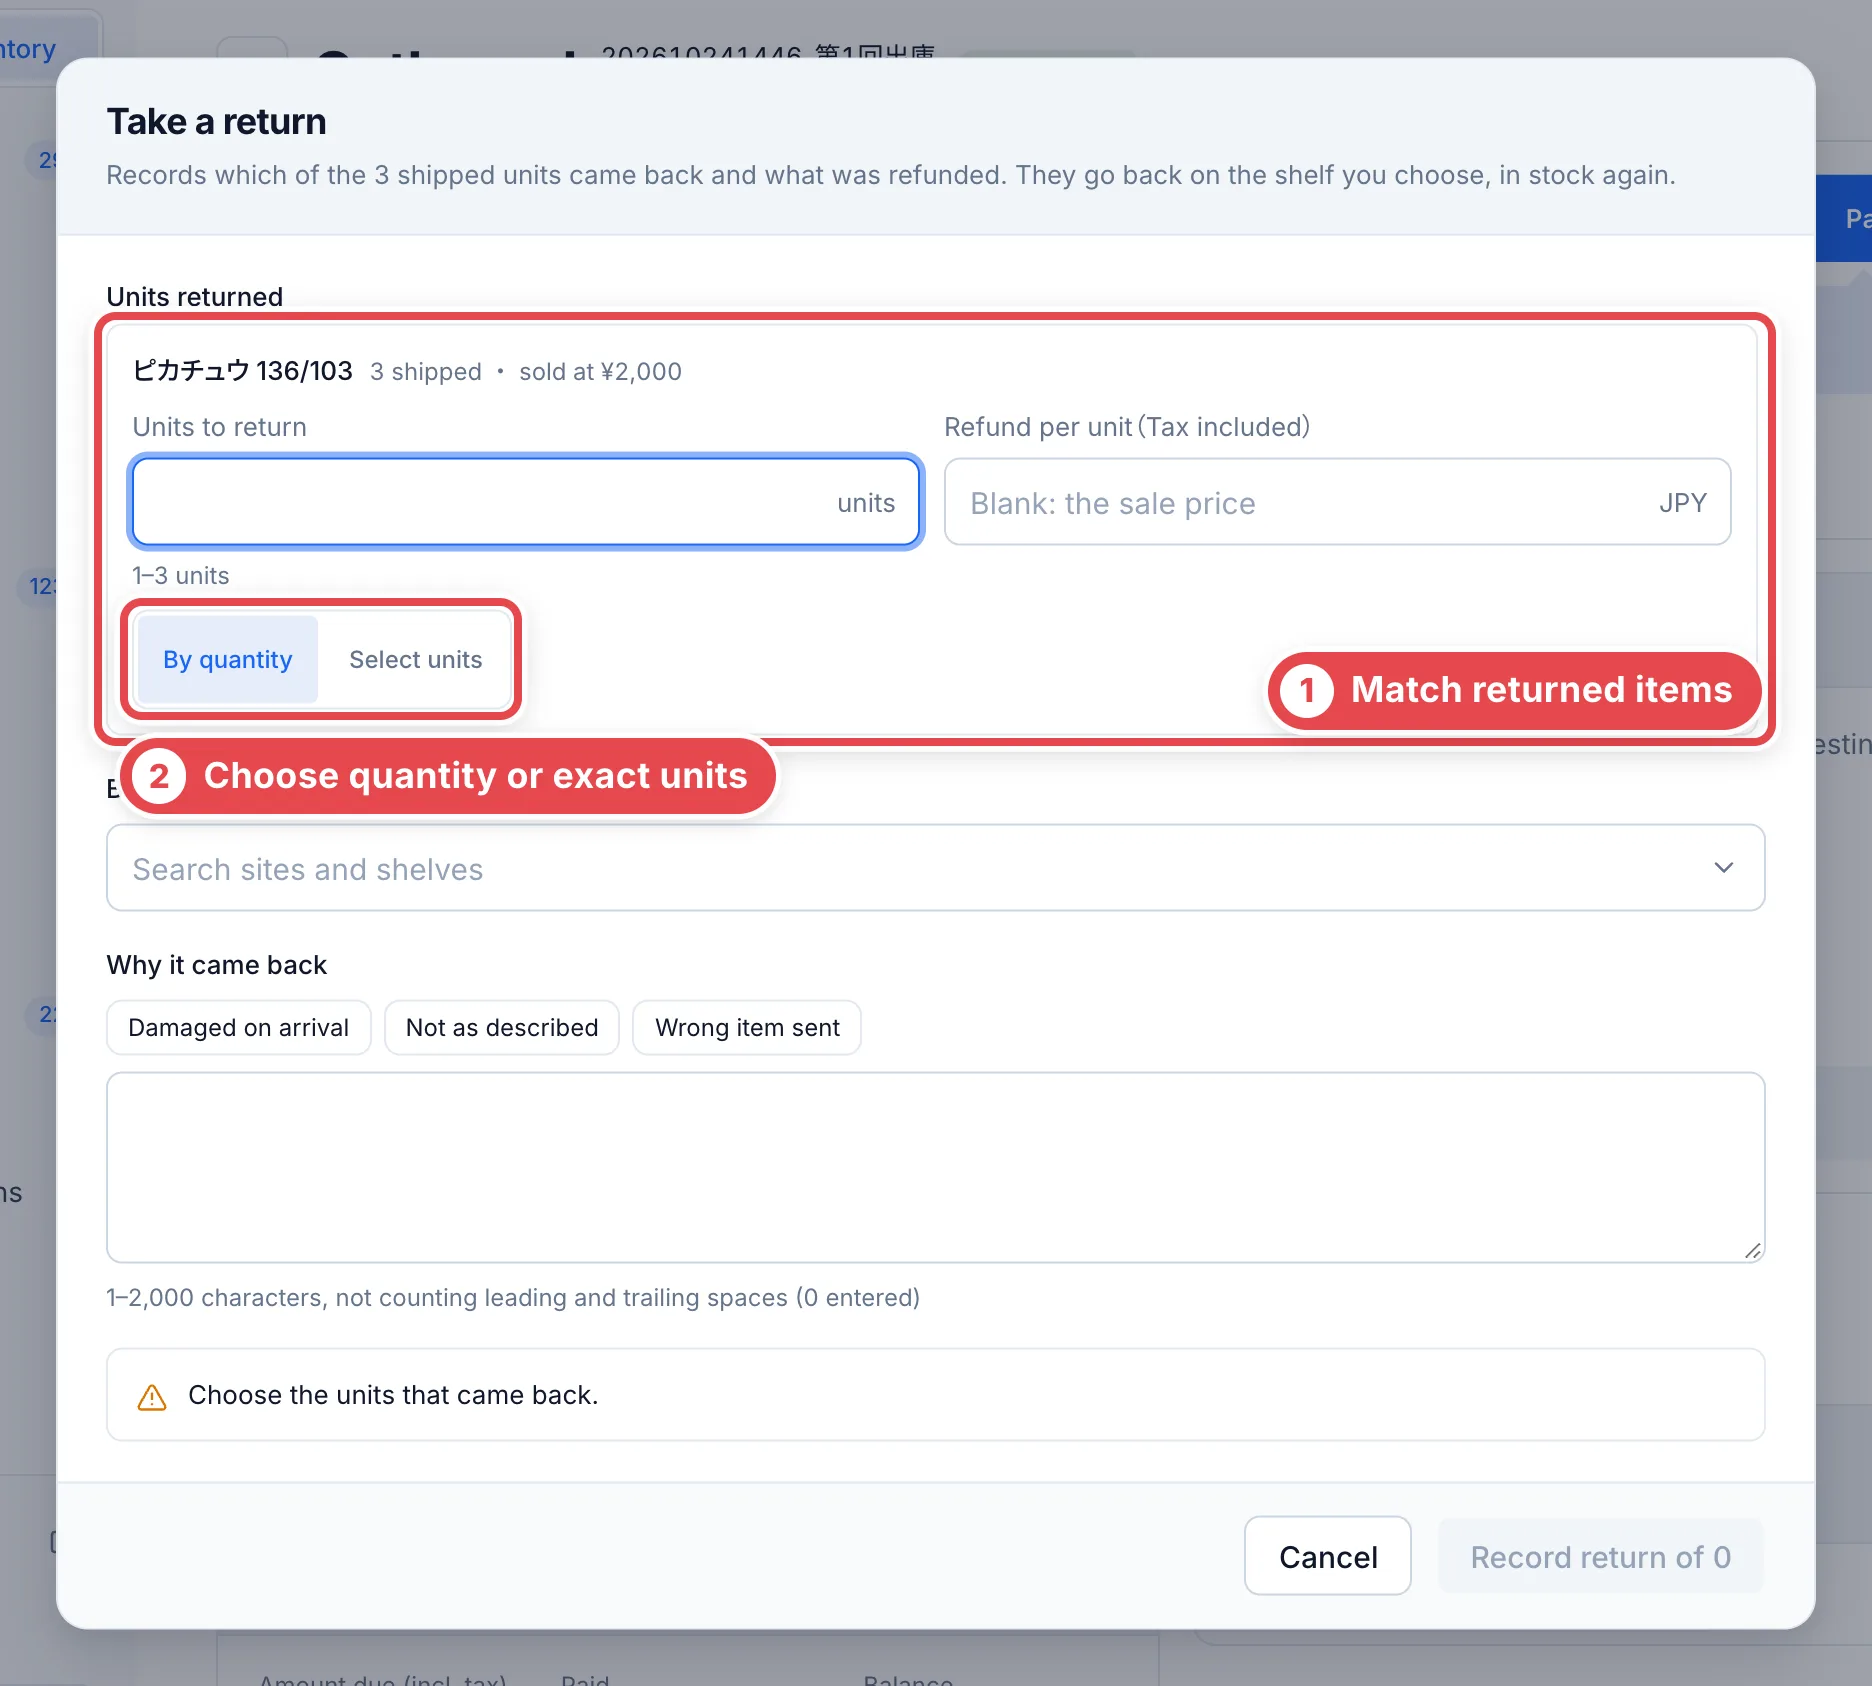 ## 2. Identify unlabeled units from management details
Select units individually at ①. For an unissued label, use **Management details** at ② to open the unit in another tab and match its asset/certification number, source and condition. Several units can share the same unissued-label wording; that wording alone is not an identifier. Return to the form and select only the correct units.
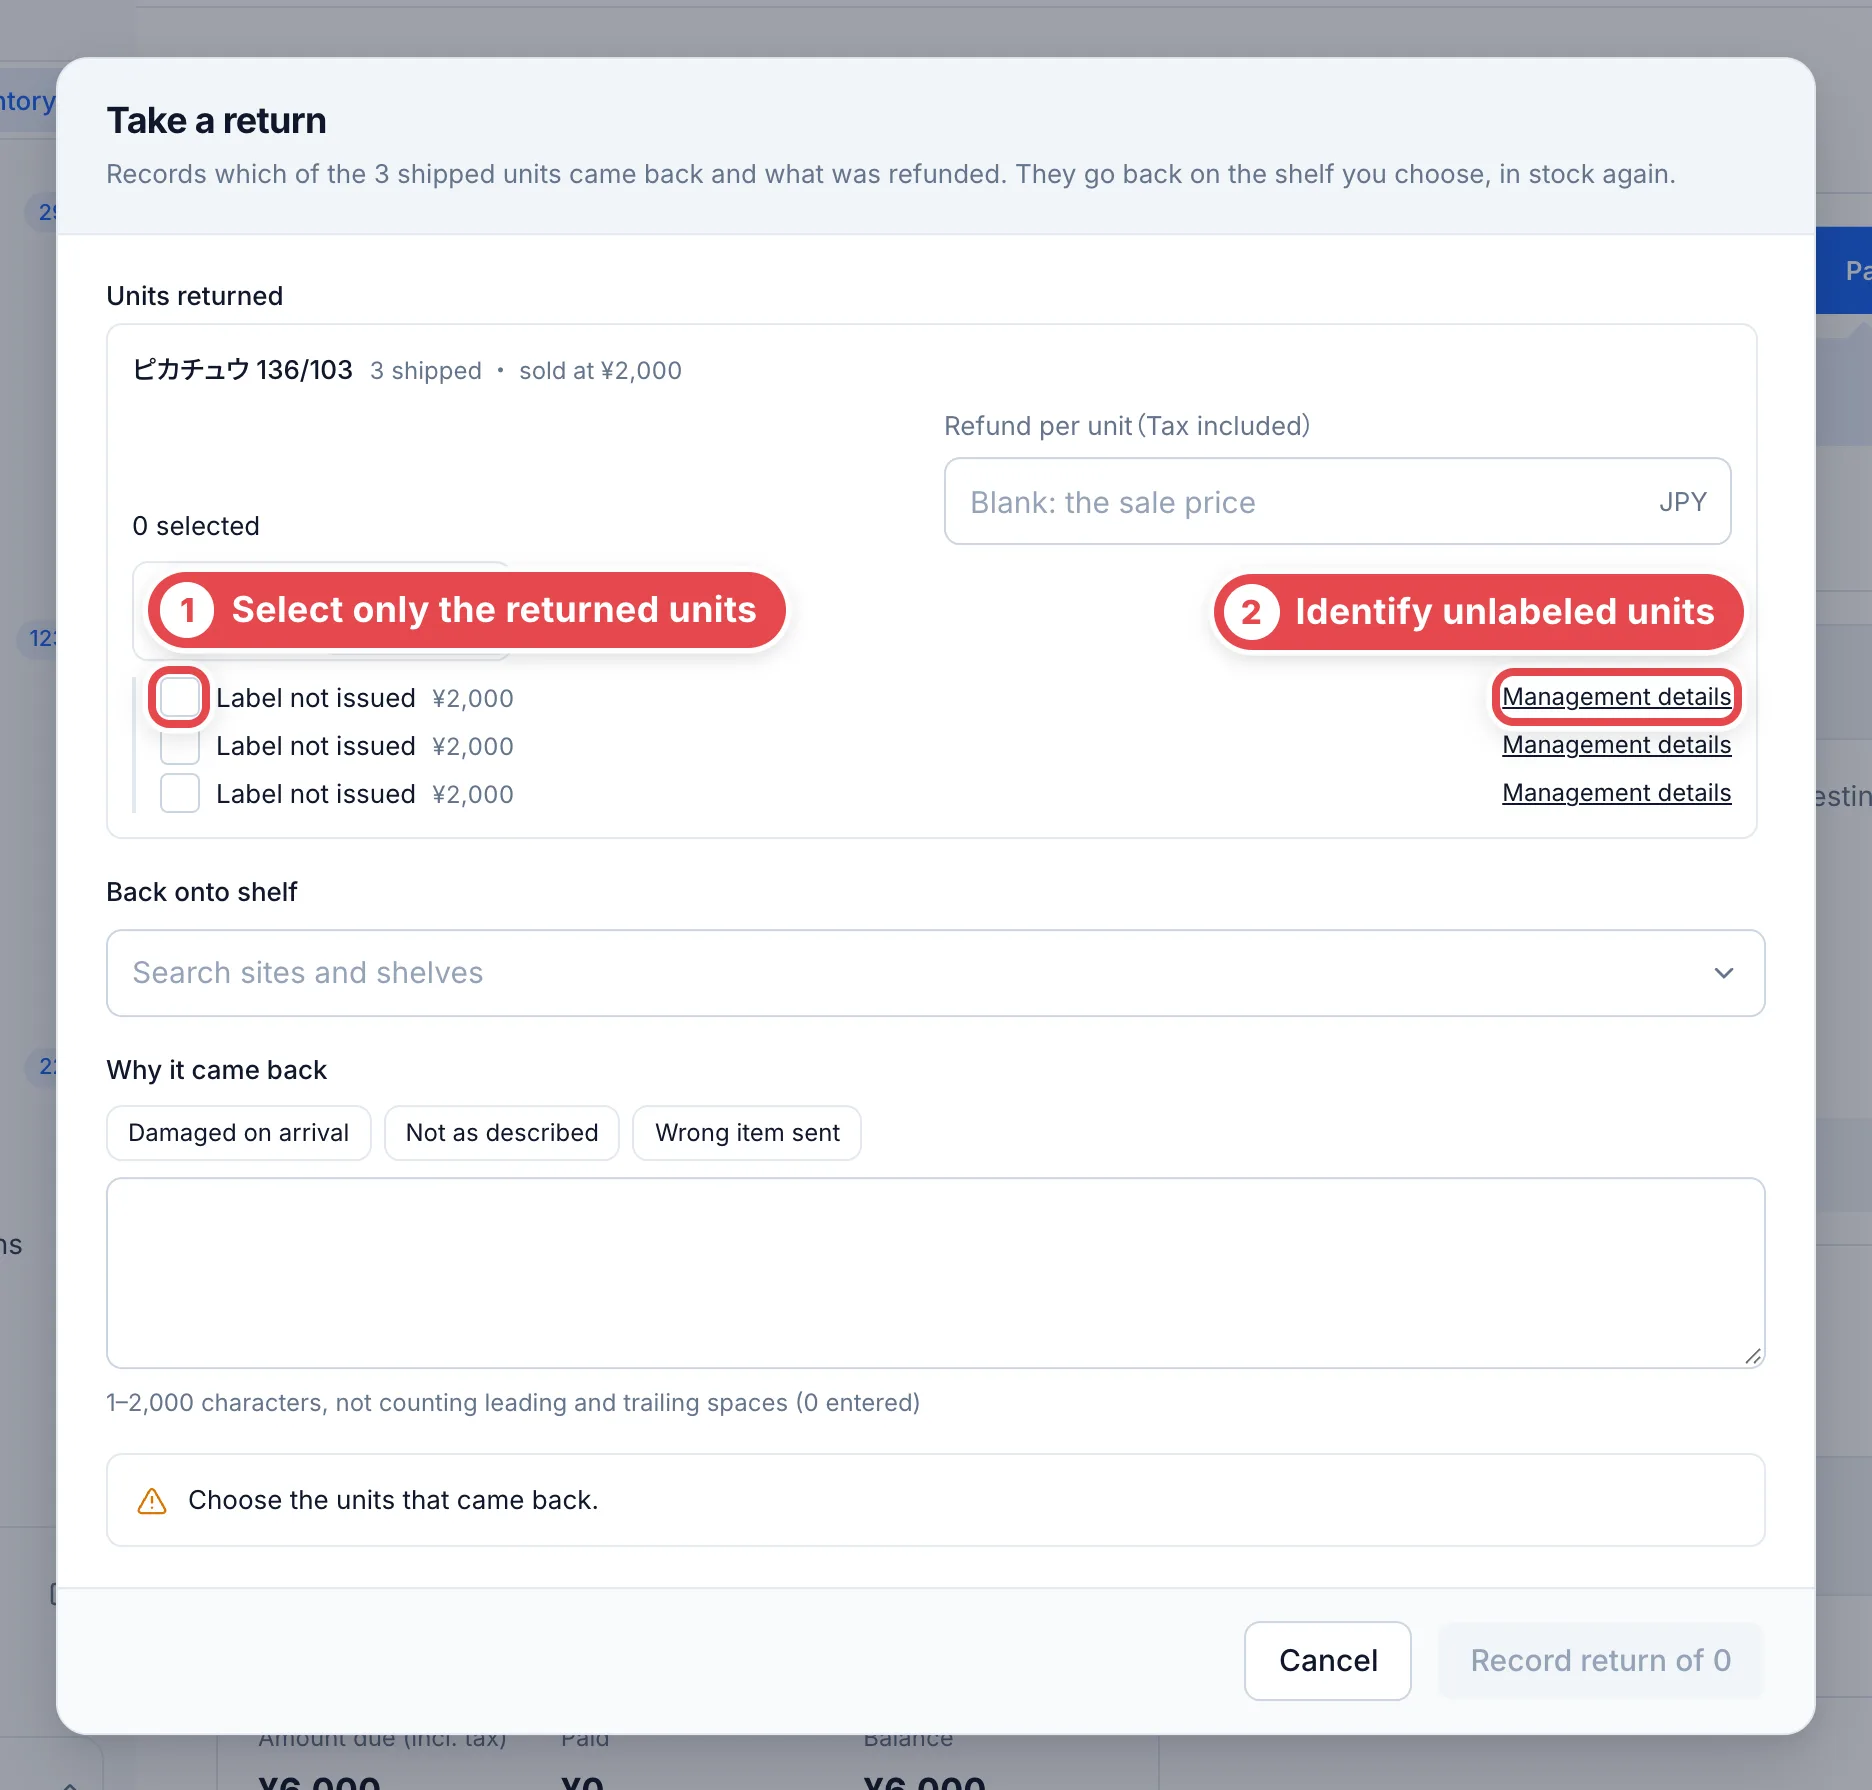 ## 3. Record refund, shelf and reason
Check the refund at ①. Leaving it blank uses the unit’s sale amount; an explicit zero has a different meaning. It cannot exceed the original sale amount. Select the destination shelf at ② and provide a reason at ③. Review scope and total before confirming the return.
Reload the order and check the return record, units, amount and shelf. Recording a refund amount is separate from actually refunding money through a bank/provider. For an unknown save result, inspect the existing record before submitting again.
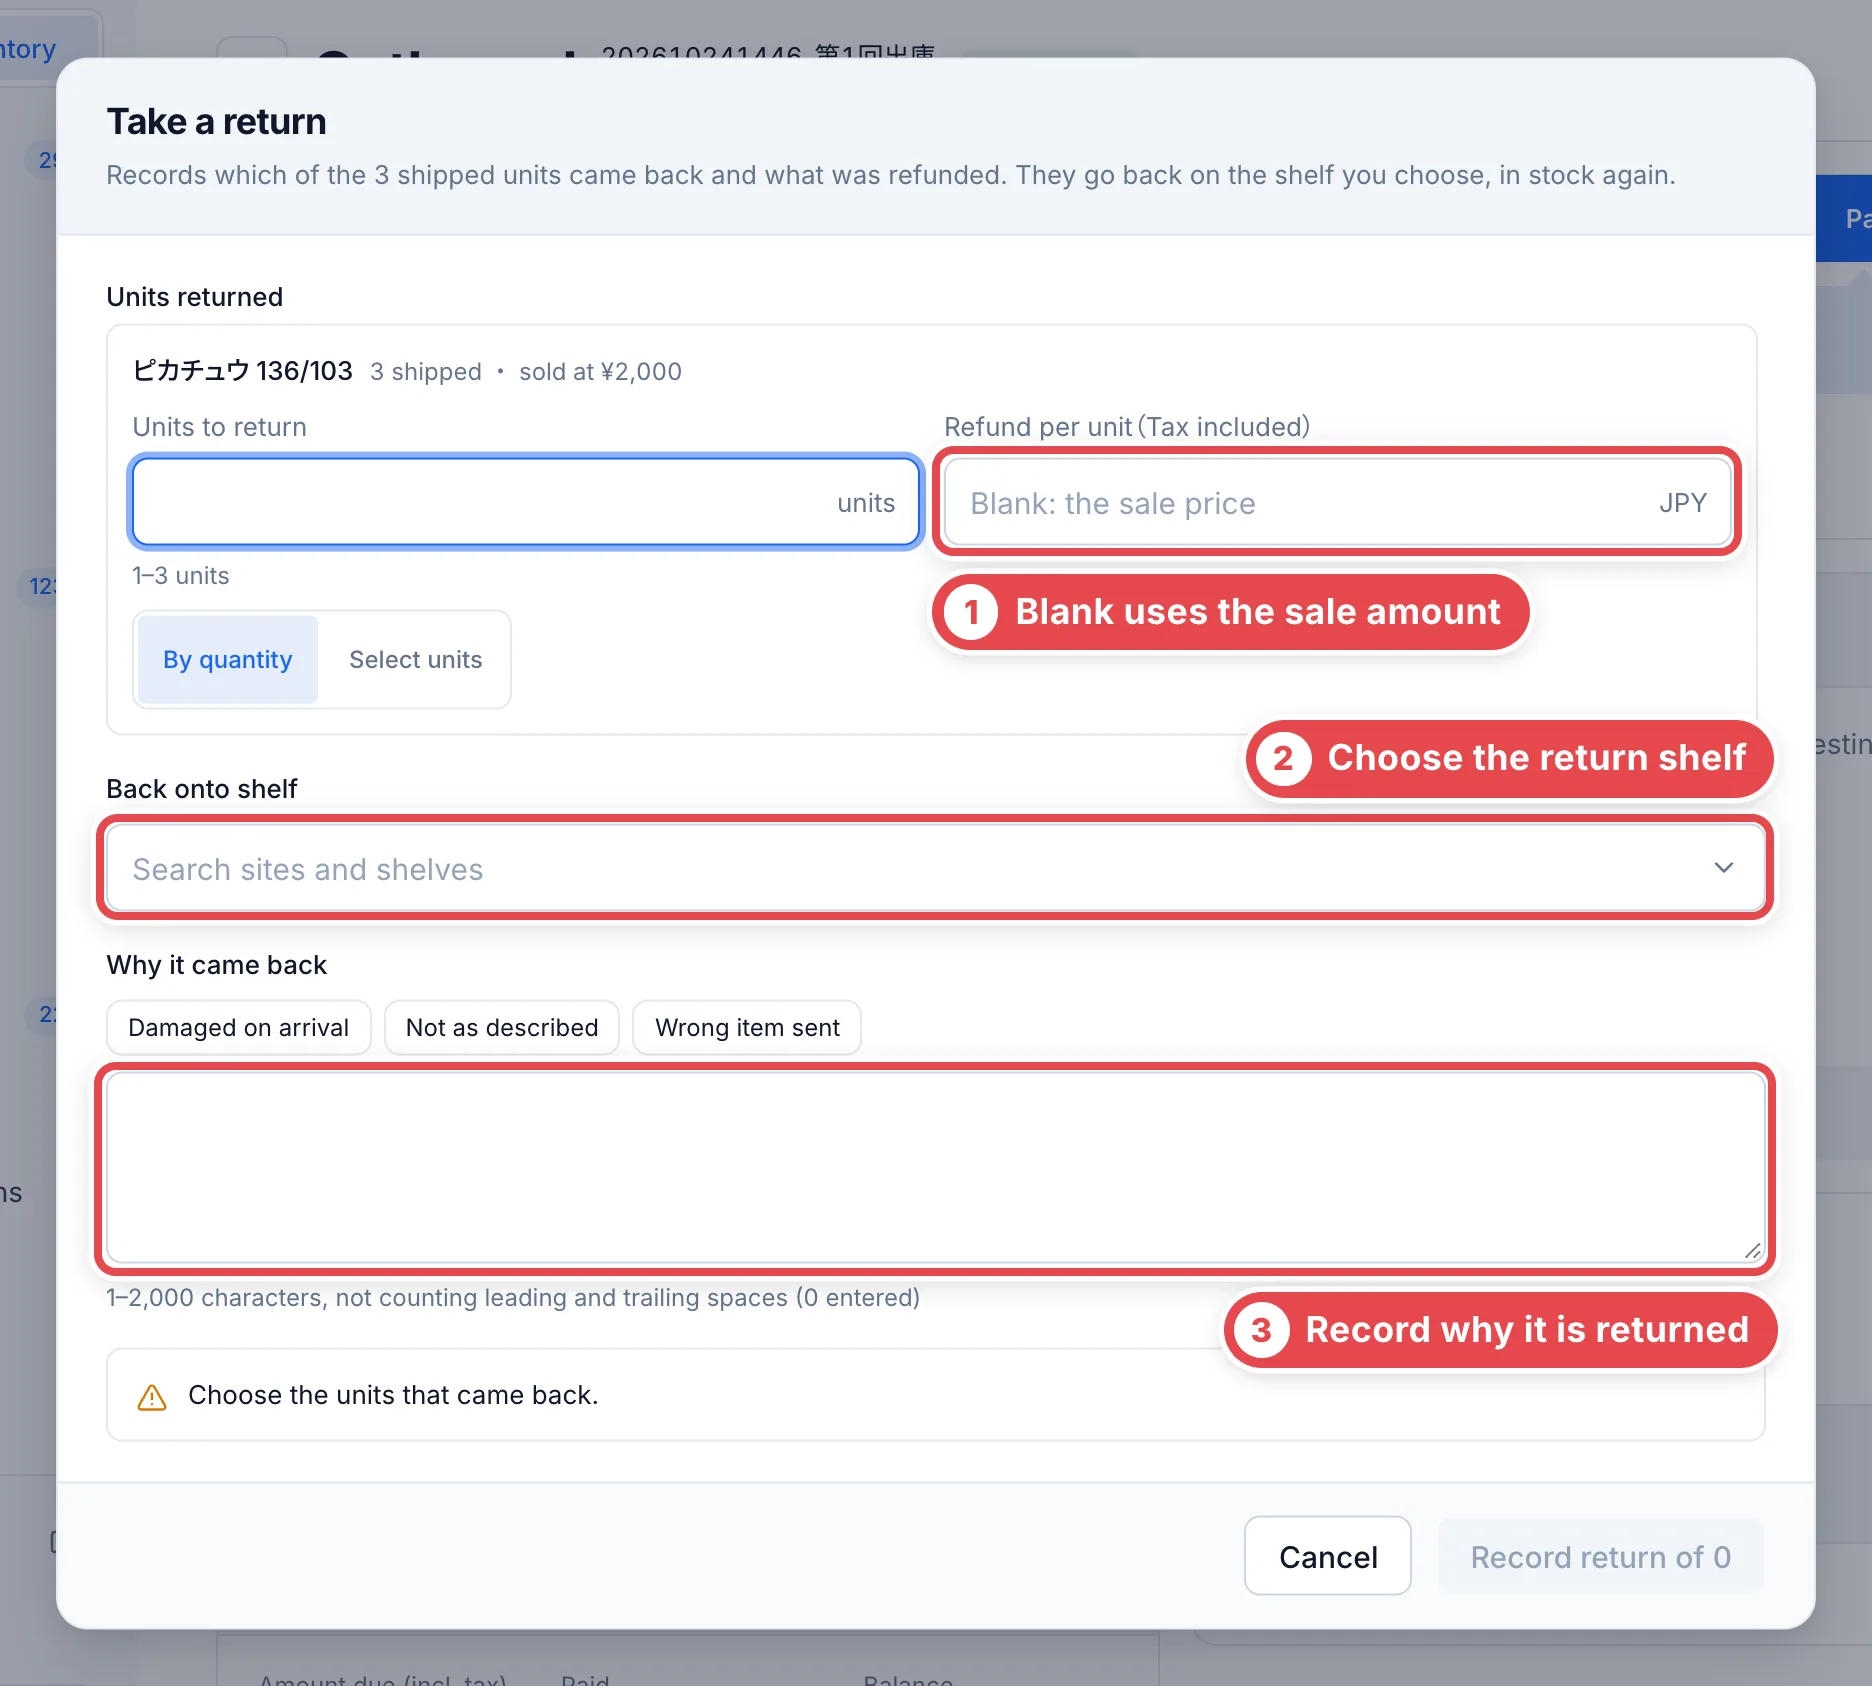 ## Troubleshooting
| What you see | What to check |
| ------------------------------ | -------------------------------------------------------------------------------- |
| No receive-return action | Check shipped/returnable units, permission and partner/transfer ownership. |
| Unlabeled units look identical | Match management details to the physical unit; avoid selecting by display order. |
| Invalid refund | Check that it is within the sale amount and uses the correct per-unit basis. |
| State changed on save | Reload order/units and check for an already recorded return. |
---
# Recover unsent iPhone stock counts and picking
Source: https://docs.toreca-cloud.com/en/guides/inventory/scanner-recovery
The iPhone app stores unsent stock-count and picking operations on the device when communication fails. Device storage is separate from server confirmation. Inspect the saved task instead of repeatedly scanning the same card.
This guide applies to versions with **保存した棚卸し・ピッキング** (Saved stock counts and picking) in Settings. Ask your distributor which version supports it if the option is absent. The iPhone app is in Japanese.
## 1. Check unsent stock-count operations
Match locally saved reads at ① and the retry action at ②. Restore connectivity, retry and check that the unsent state clears. Extra scans do not substitute for a successful send.
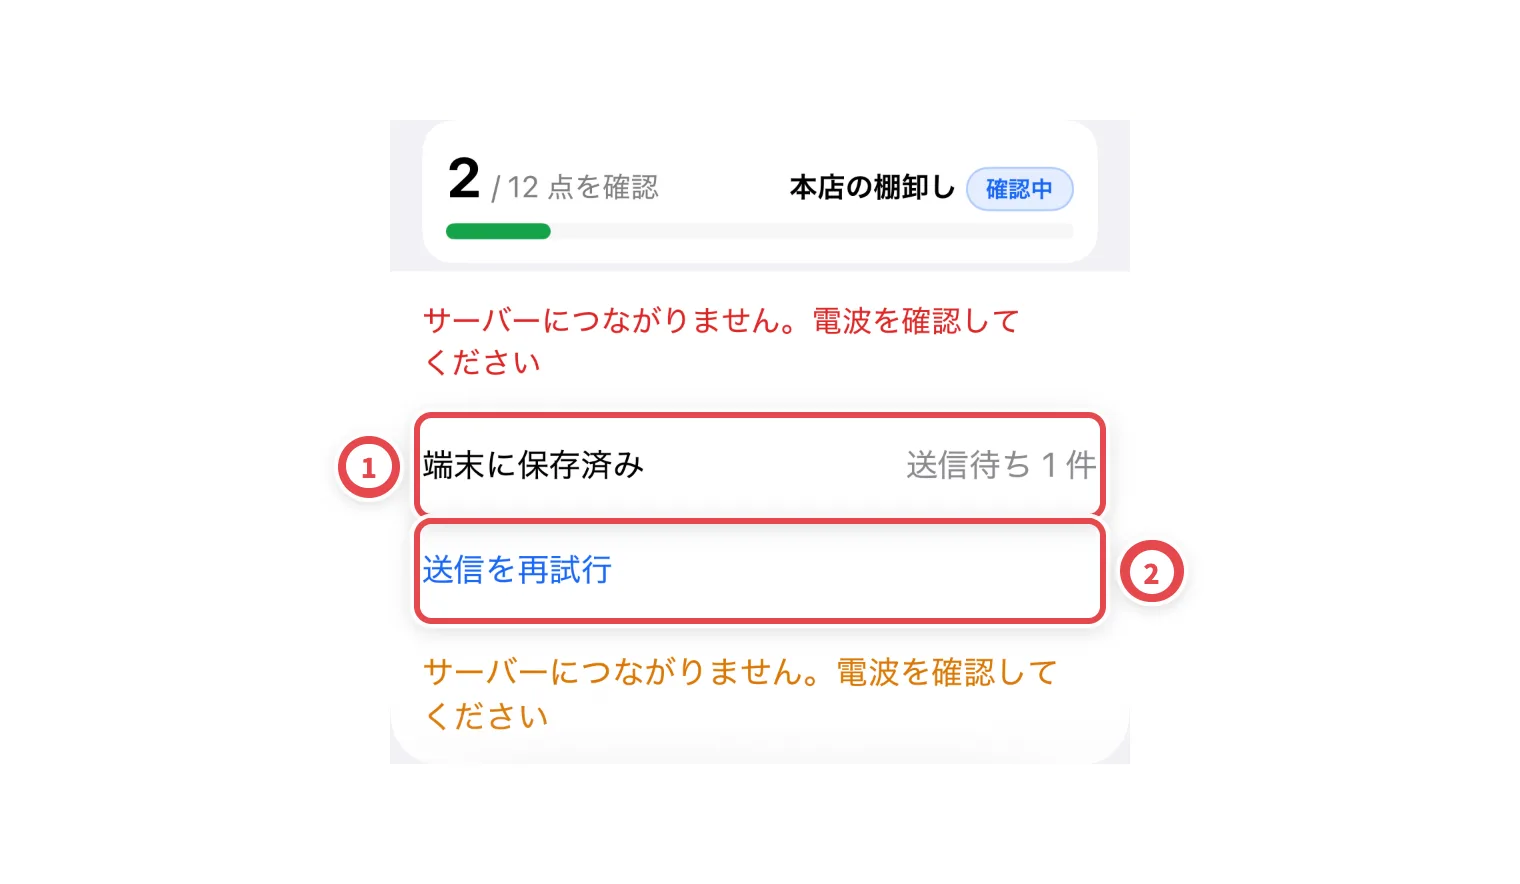 ## 2. Reopen the same task from Settings
Find **保存した棚卸し・ピッキング** at ①. Match the task, site, shelf and unsent count at ②, then reopen it. This entry also recovers saved work after restarting the app.
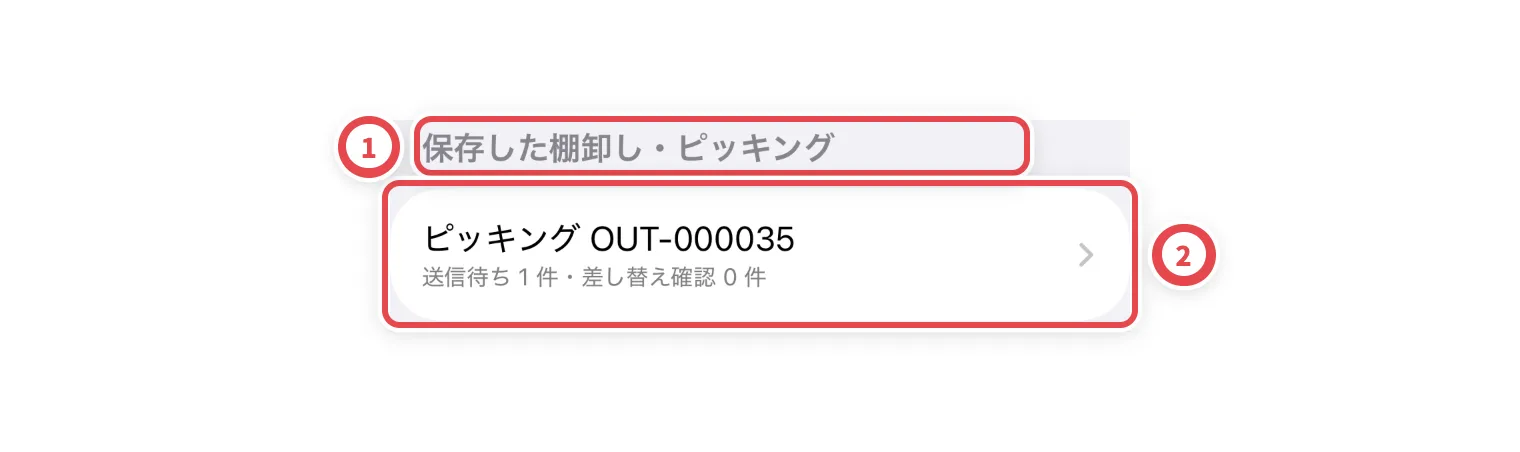 ## 3. Check unsent picking operations
Match the outbound order and unsent count at ①. After restoring connectivity, retry at ②. For a replacement unit, distinguish a proposal from completed approval. Review a saved proposal instead of creating a duplicate.
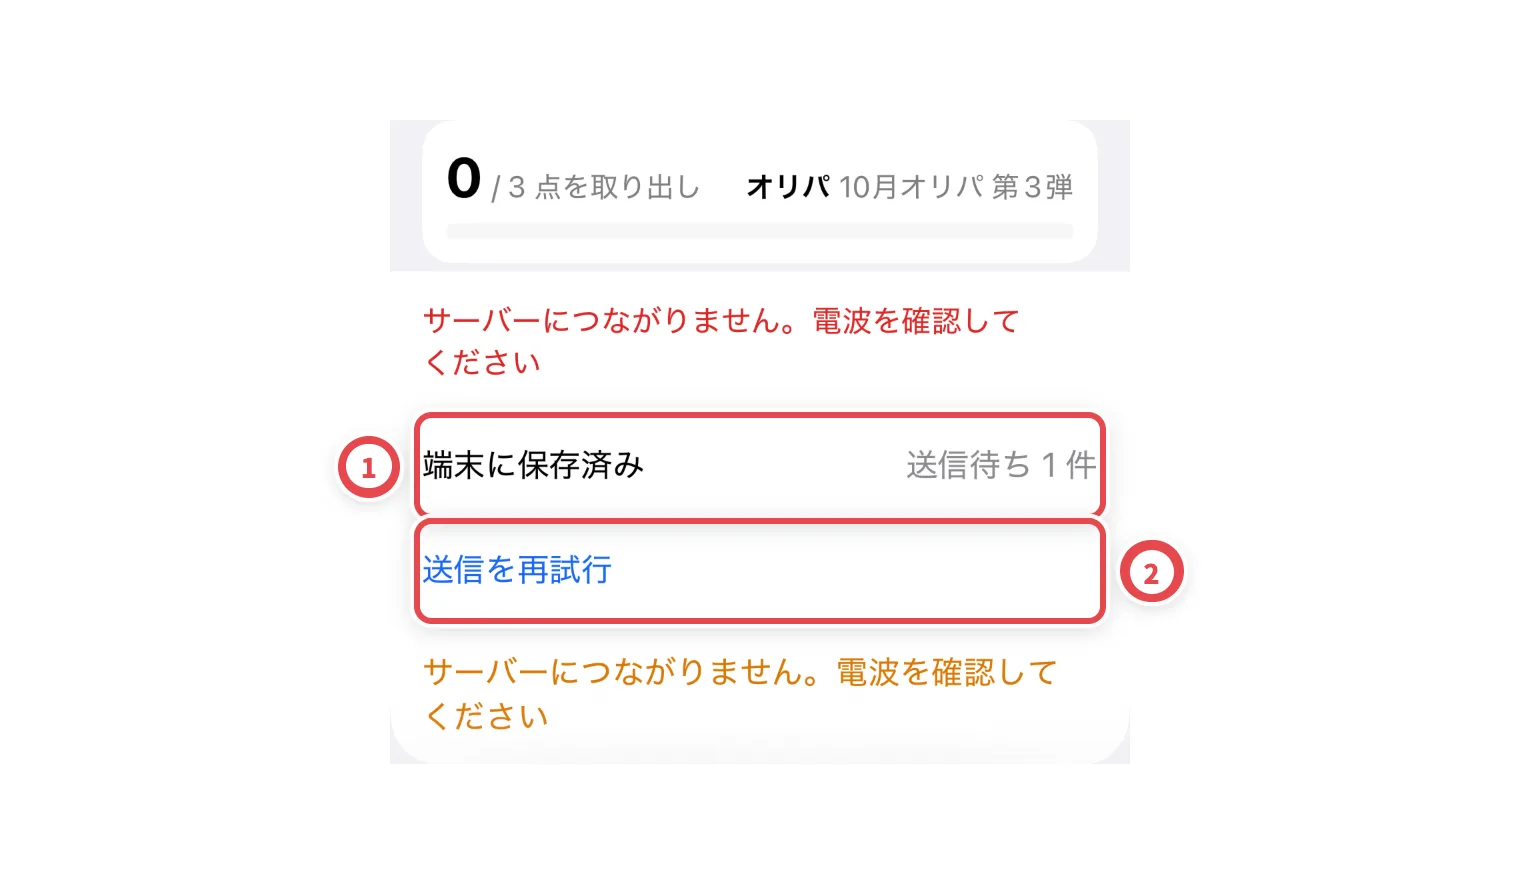 ## 4. Verify server confirmation
Check that the unsent indicator clears at ① and the confirmed record appears at ②. If permission, task completion or another operator’s update prevents retry, reload the current state. Keep the app installed while unsent work remains and read any sign-out warning.
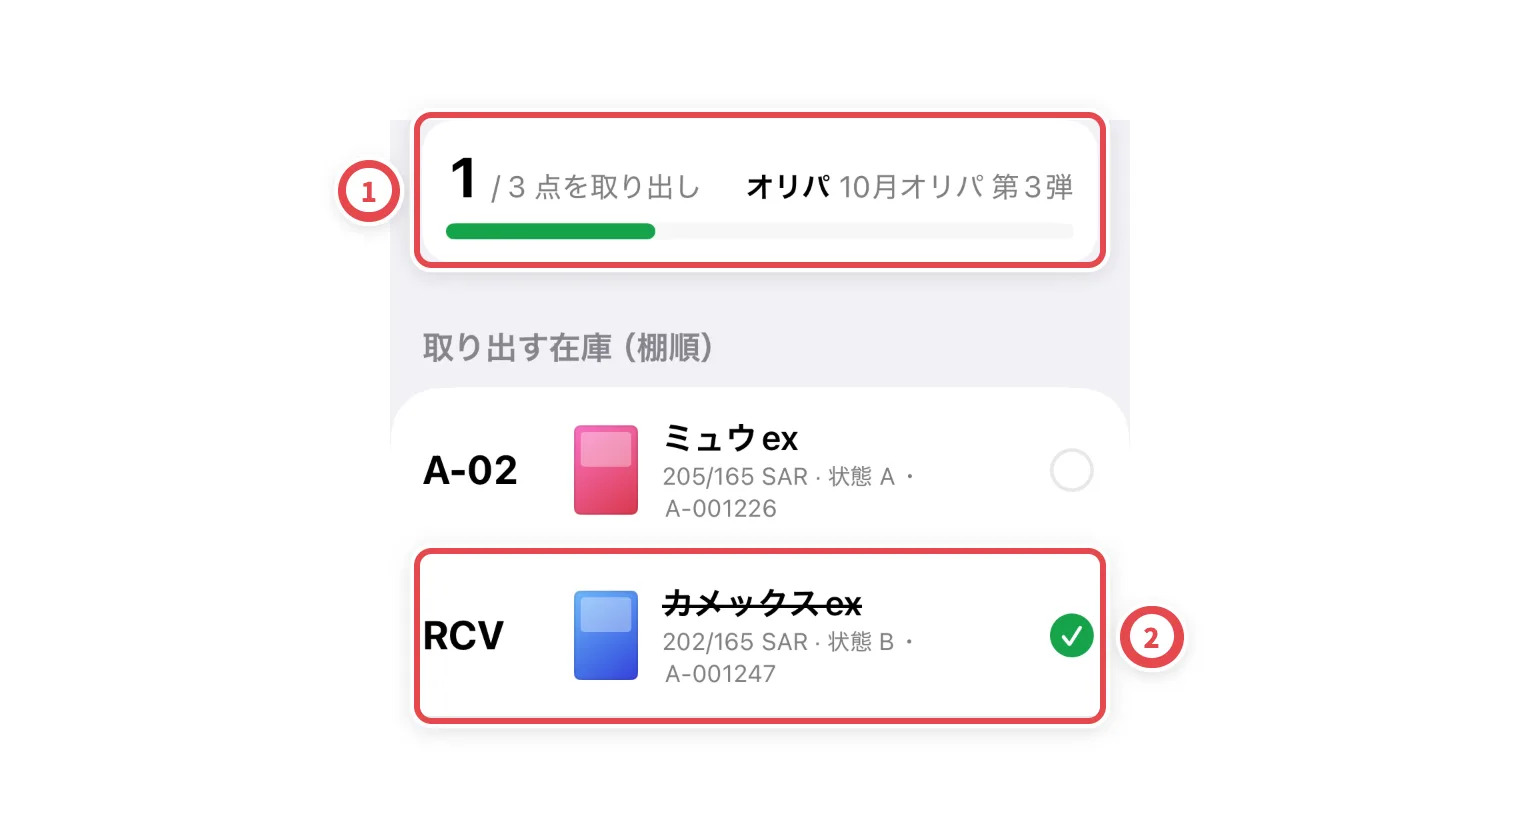 ## Troubleshooting
| What you see | What to check |
| ---------------------------- | --------------------------------------------------------------------- |
| Task absent after restarting | Open saved work in Settings; verify shop, account and device. |
| Retry fails | Check connectivity, sign-in, permission and the task’s current state. |
| Replacement proposal remains | Check the proposal and approval status; avoid duplicates. |
| Sign-out warning | Inspect unsent work before clearing local data. |
---
# Manage sealed products on single-lot shelves
Source: https://docs.toreca-cloud.com/en/guides/inventory/sealed-lot-shelves
The same product can have different receipt sources and costs. Mixing them makes it difficult to match physical stock to its cost. A **Single-lot shelf** holds boxes, packs or decks from one receipt lot.
| What you want | Method | Record kept |
| ----------------------------------------------- | --------------------------------------------------------------- | --------------------------------------- |
| Match physical stock to its receipt lot | Configure a single-lot shelf, then receive or put away that lot | Each unit's source, cost and location |
| Count identical stock from that lot | Use **Count by quantity** during a stock count | Target units and counted quantity |
| Protect checked locations from scan corrections | Use [Scan movement lock](/en/guides/inventory/shelf-protection) | Whole-shelf or selected-unit protection |
A single-lot shelf and a scan movement lock are separate settings. Enabling a single-lot shelf does not lock scan corrections.
## What you need first
- **Manage settings** permission to configure the shelf, and inventory write permission to receive, move or count stock.
- Physically separate stock by receipt source, product, cost, currency, packaging, condition and grade. Two receipts are different lots even if their costs match.
- Single cards cannot use these shelves. Use boxes, packs or decks.
## 1. Choose an empty shelf or one containing only one lot
Open **Settings** → **Sites and locations** and find the site and shelf. If stock is mixed, separate it physically and record its [location changes](/en/guides/inventory/overview) before enabling the setting.
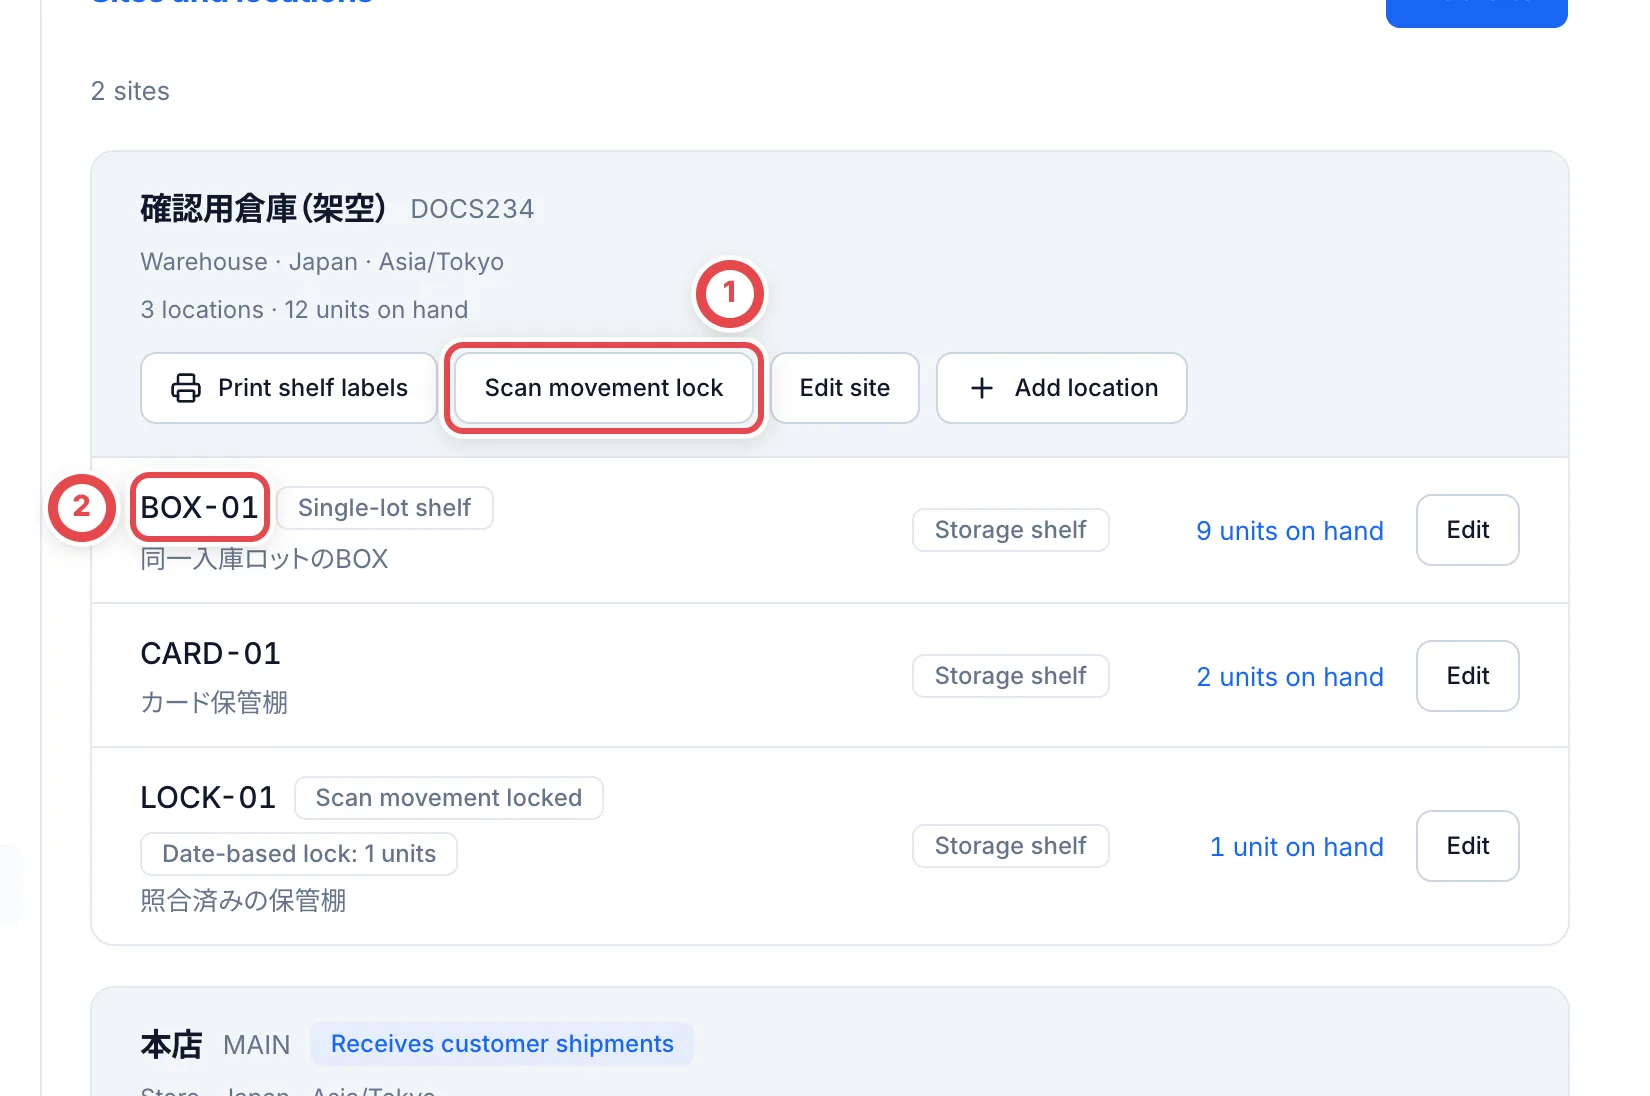 ① opens the site's protection settings. Prepare separate shelves for each lot, as in ②.
Held, listed and allocated units physically on the shelf are included when checking for mixed lots. Do not check only the ordinary stock.
## 2. Enable Single-lot shelf and save
Click the shelf's **Edit** button. Check its name and shelf code at ①, enable **Single-lot shelf** at ②, and save with ③. Reopen the settings to confirm they were saved.
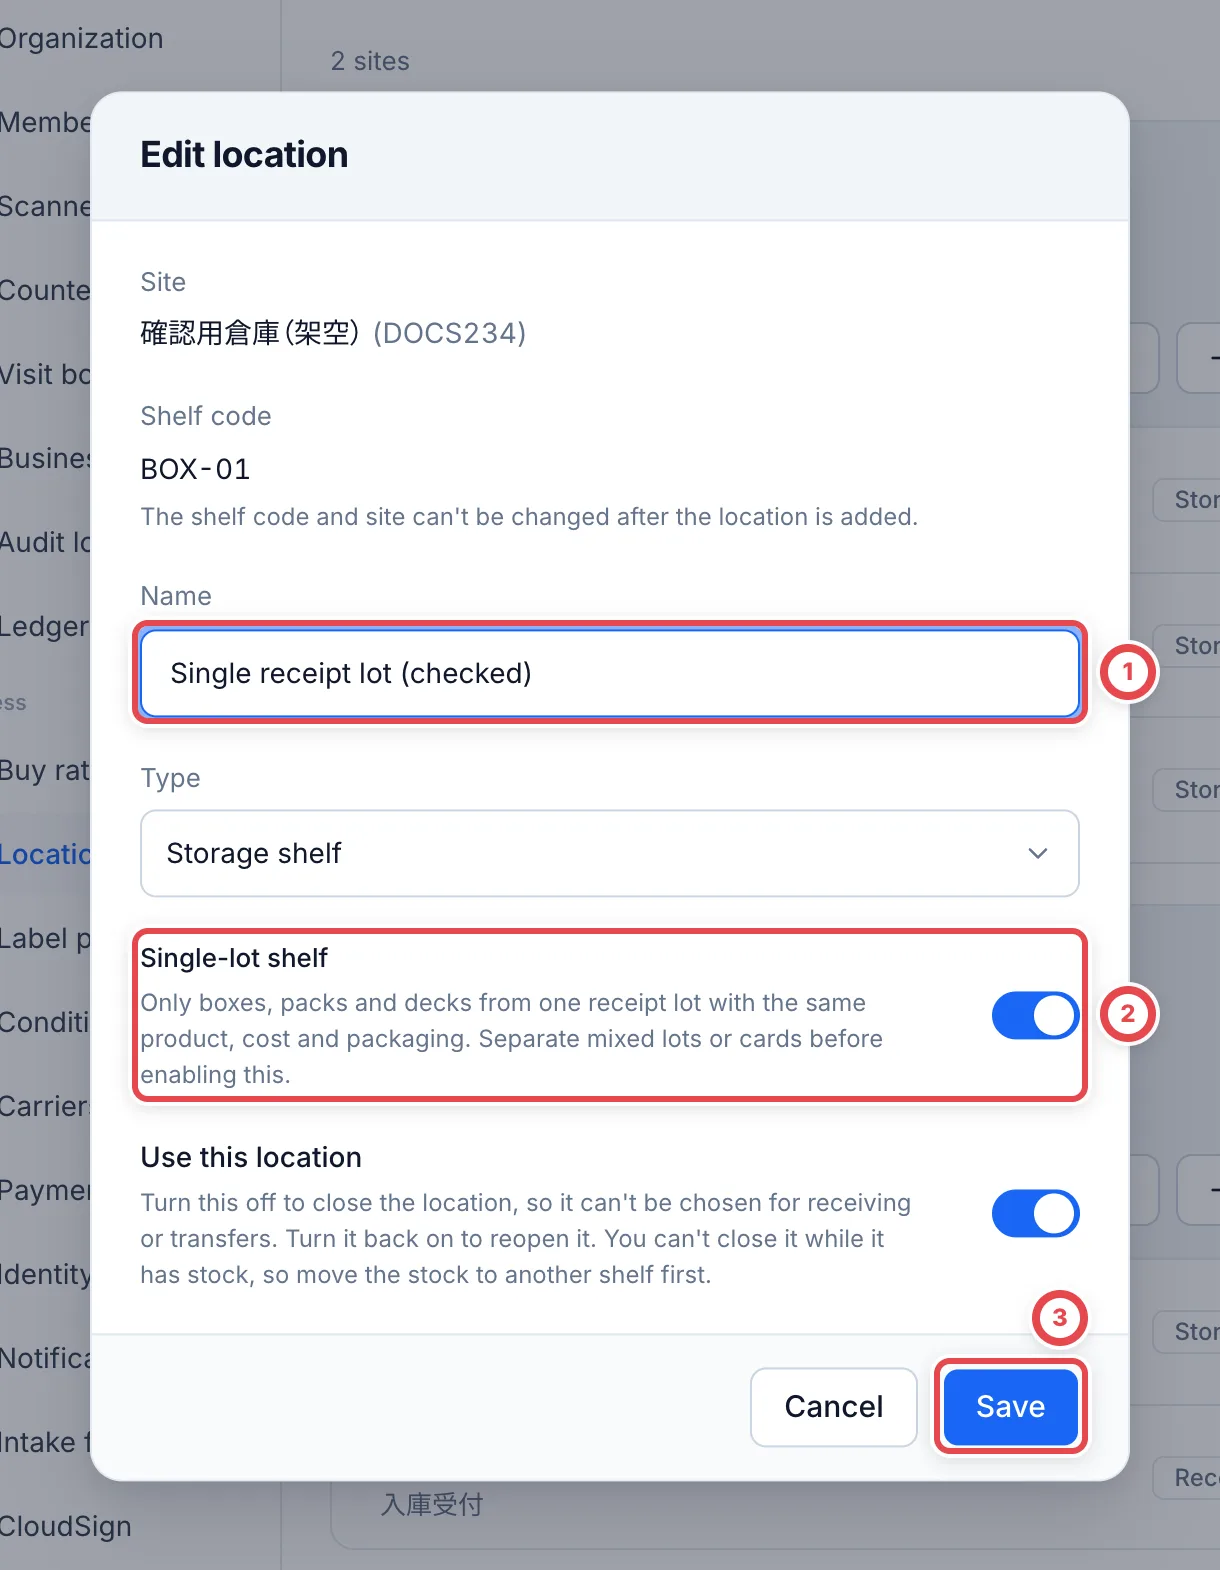 You cannot save while different lots or single cards are mixed. Separate them first. This setting is not automatically enabled on existing shelves.
## 3. Receive or put away only that receipt lot
Choose the shelf on a [receipt slip](/en/guides/inventory/receipts), or put stock away using the [inventory app](/en/guides/inventory/putaway). Match the receipt source, cost, currency and packaging as well as the product. A different lot is refused; prepare another shelf.
An empty shelf can receive a new lot. If units from the previous lot are later returned or found, receive them on another shelf. Turning off the single-lot setting allows mixed stock, so keep physical shelf labels consistent too.
## 4. Count eligible stock by quantity
Open **Stock counts** → **Start stock count**, then select the site and shelf. On **All**, click **Count by quantity**, count the physical units, and enter the result. See [Stock counts](/en/guides/inventory/counts) for the full steps.
Match the expected stock in ① and enter the physical count in ②. ③ replaces the counted quantity.
Quantity entry requires known-cost ordinary stock from one lot. Recording the count does not change stock quantity, cost or loss status. Review shortages separately when completing the count.
## Troubleshooting
| What's happening | What to check and how to recover |
| ---------------------------------------------------- | --------------------------------------------------------------------------------------------------------------------------------- |
| You cannot enable the setting | Separate different lots, cards, costs or packaging in both the physical shelves and the records. |
| A receipt or movement is refused | Choose an empty shelf or the shelf holding the same receipt lot. Matching product names and prices alone are insufficient. |
| Count by quantity is missing | Select **All** and check known cost, ordinary stock and complete coverage of one receipt lot. Otherwise check units individually. |
| Some stock is held or listed | It is included in lot checks but cannot use quantity entry. Check those units individually. |
| You find more than expected | Check for mixed lots or unrecorded receipts rather than increasing stock through quantity entry. |
| Old stock returns after a new lot occupies the shelf | Receive the previous lot on another shelf. Do not mix it with the new lot. |
---
# Lock locations against scan movements
Source: https://docs.toreca-cloud.com/en/guides/inventory/shelf-protection
After matching physical stock to its recorded locations, use **Scan movement lock** to prevent scan movements, restocking and corrections from changing those checked locations.
| Scope to protect | Choose | Stock added later |
| --------------------------------------------------------- | ------------------ | ----------------------------------------------------------------------------------------- |
| Entire shelves | **Entire shelves** | Protected too |
| Stock scanned into selected shelves during specific dates | **By scan dates** | Only the previewed and saved units are protected. Later syncs are not added automatically |
**Regular receipt, outbound and movement documents remain available.** Stock-count checks and checking stock already on the same shelf remain possible. This setting does not stop all inventory operations.
For a large batch, first follow [continuous scanning through locking](/en/guides/inventory/putaway#continuous-scanning-through-locking) to finish syncing all devices and reconcile the physical stock.
## What you need first
- **Manage settings** permission. Inventory write permission alone cannot lock or unlock shelves.
- Check physical stock, labels and the recorded site and shelf.
- For date-based selection, finish syncing pending scans first. Dates use the **site's timezone**, not the viewer's timezone.
## 1. Open the site's settings
Open **Settings** → **Sites and locations**, find the site, and click **Scan movement lock** at ①.
Check the site and click ①. Match the shelf codes, including ②, to the physical shelves.
## 2. Lock entire shelves
Choose **Entire shelves** at ① and **Lock shelves** as the action. Select shelves at ②, check the selected shelf and stock counts, and enter the reason at ③.
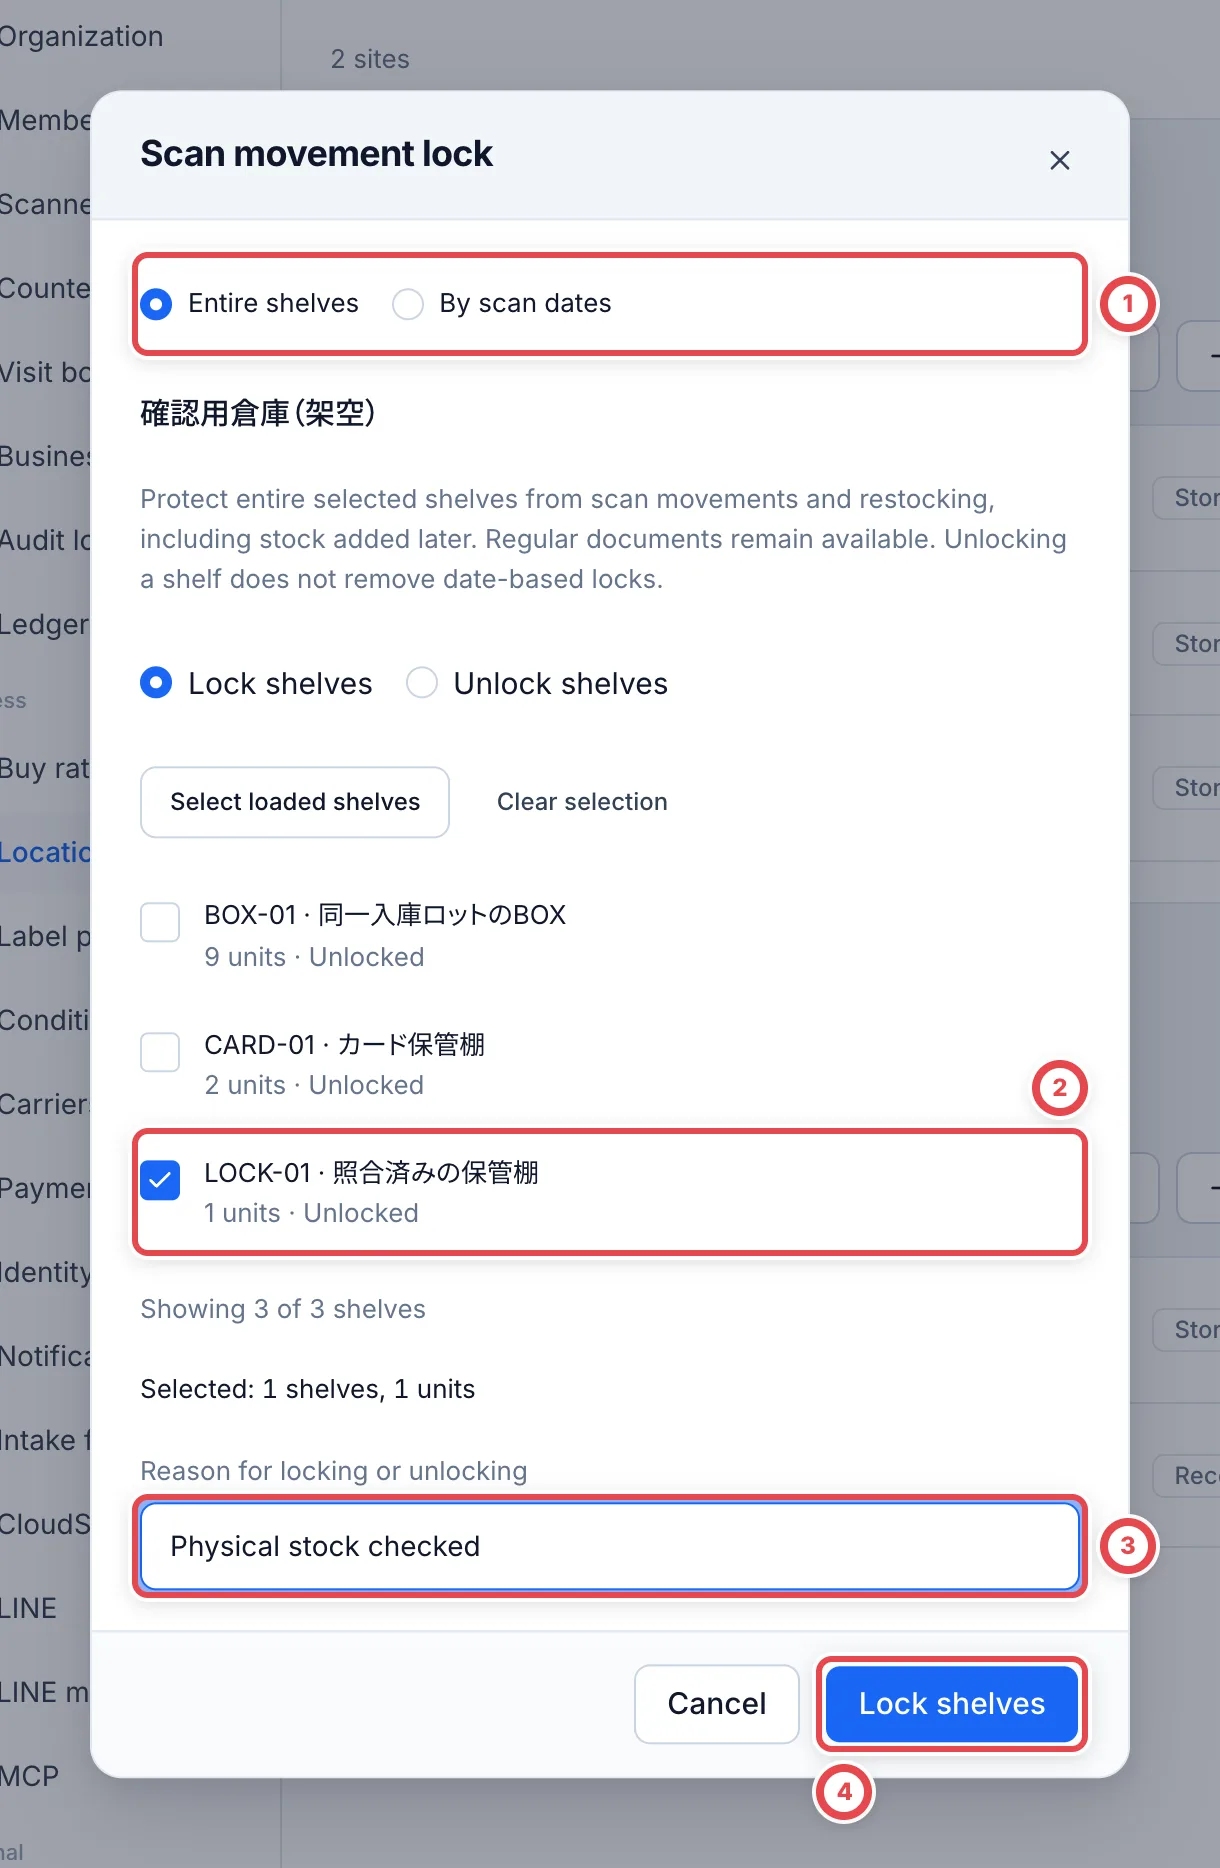 **Select loaded shelves** only selects shelves already loaded. Use **Load more shelves** for the next page. You can select up to 500 shelves at once.
Save with ④. Reopen the dialog and confirm **Scan movement locked** and the reason on the selected shelves.
## 3. Lock stock selected by scan dates
Choose **By scan dates** at ① and select the shelves. Enter **First scan date** and **Last scan date** at ②. Both dates are included. Check the displayed site timezone, then click **Preview stock** at ③.
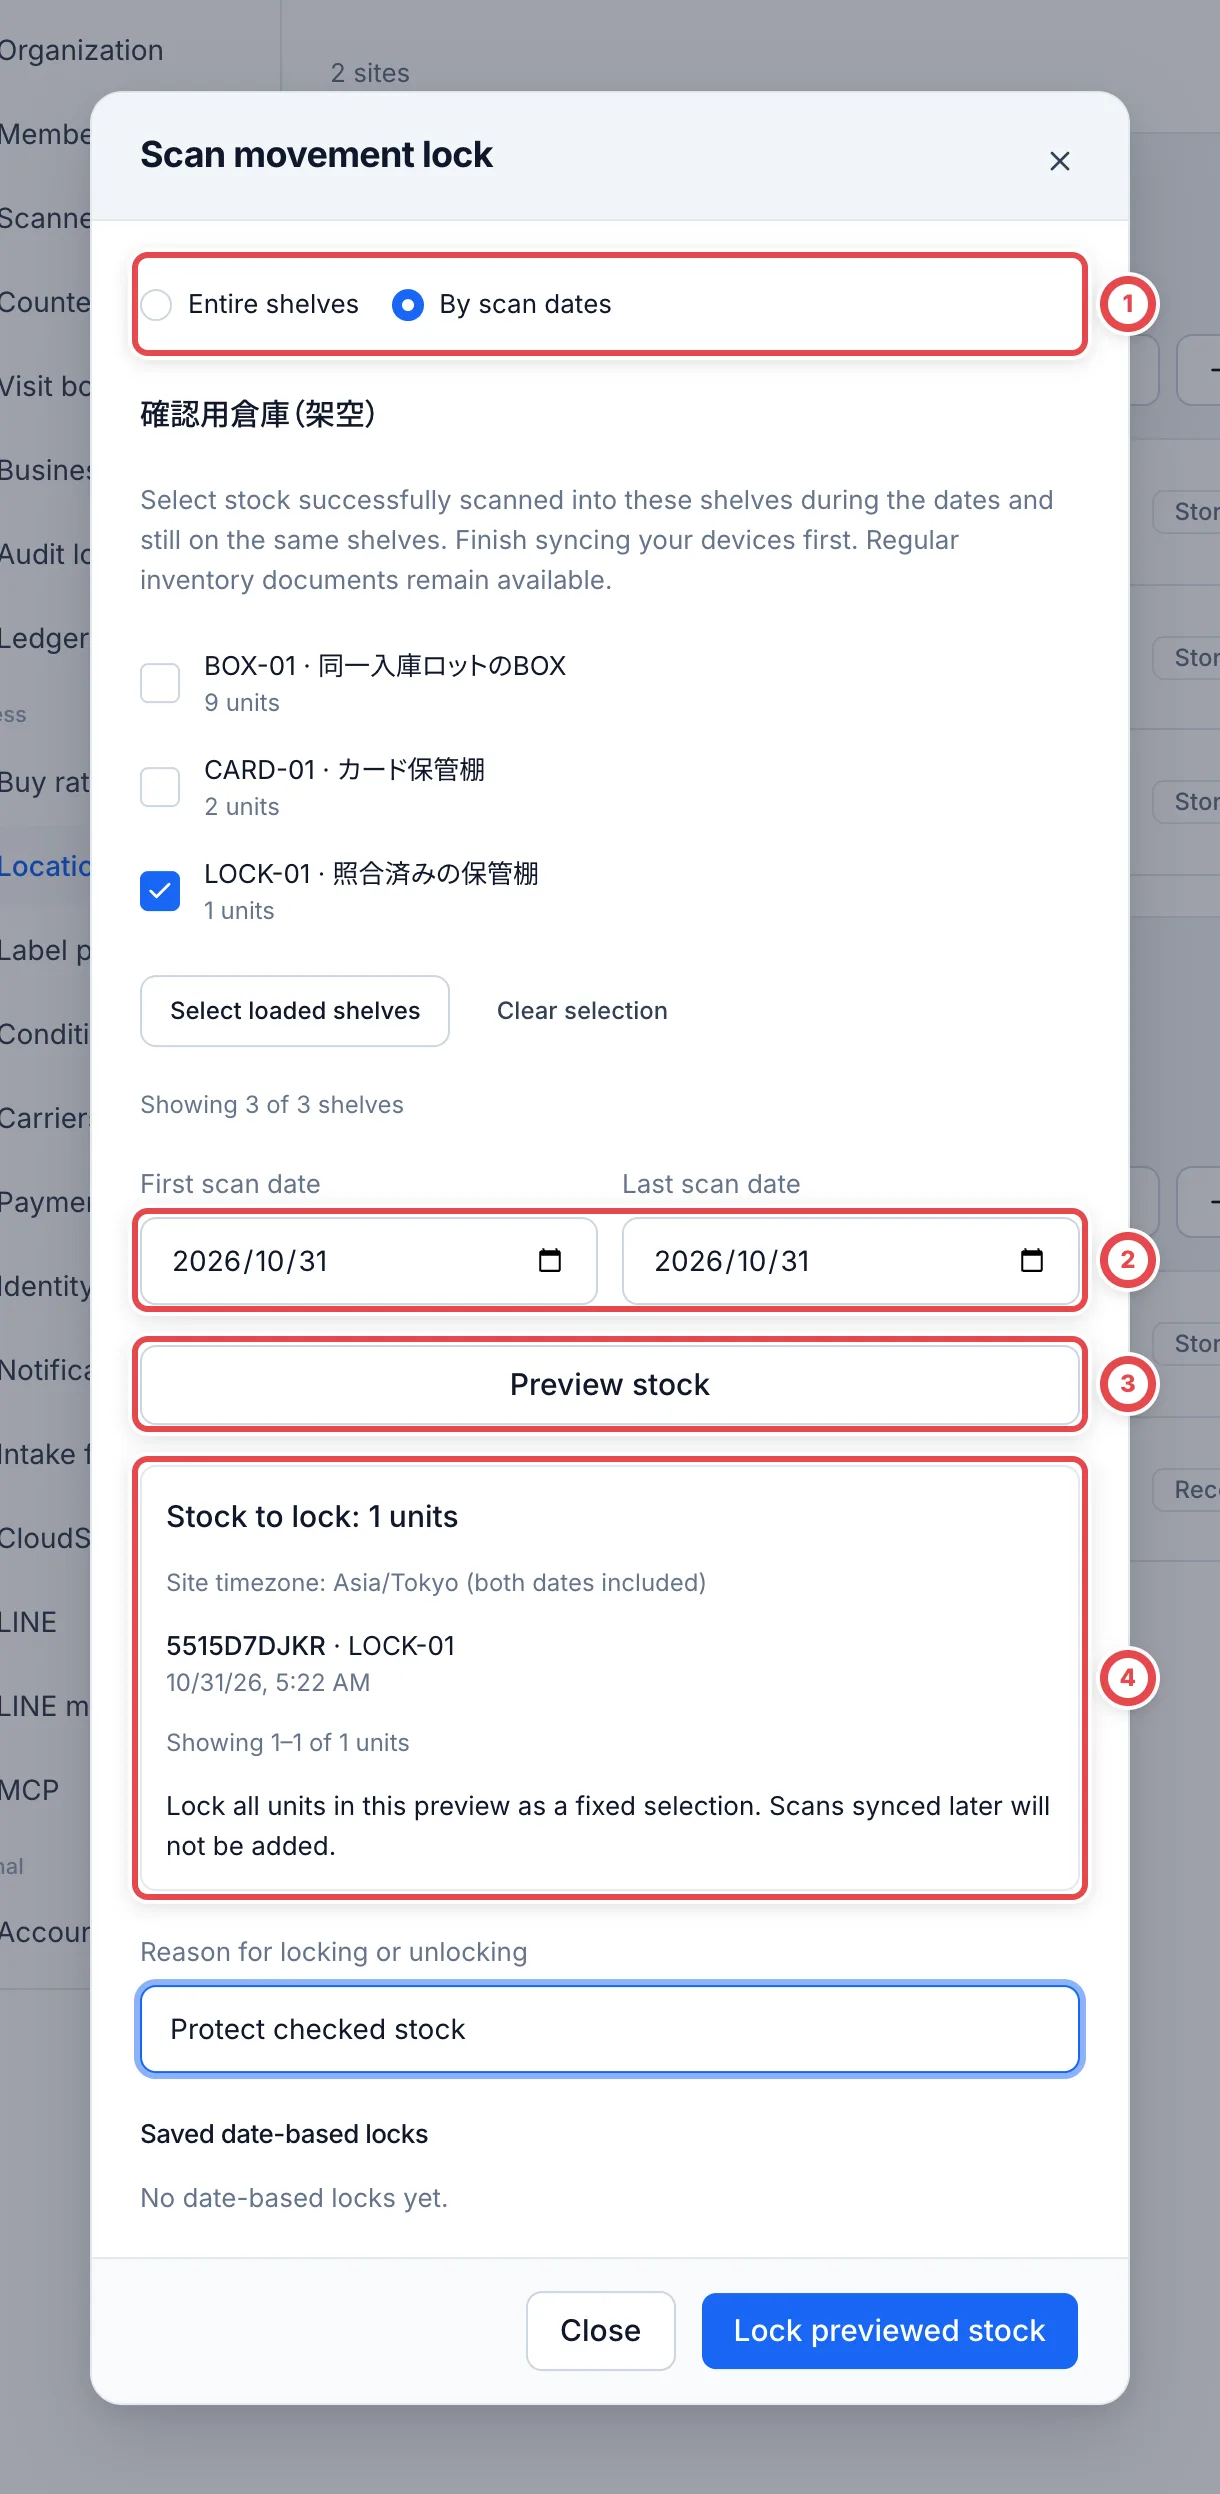 Candidates must have a valid putaway, check or correction into those shelves during the dates and still be on the same shelves. Units moved elsewhere, refused scans and undone scans are excluded.
Check the quantity, shelves and label numbers at ④, enter a reason, and click **Lock previewed stock**. **All previewed units are saved as a fixed selection. Later syncs are not added automatically.** To protect more stock, finish syncing, preview again and save the additional selection.
Targets are displayed 100 at a time. Use **Next units** to check subsequent pages. Saving protects the whole preview, including units on other pages. The limit is 10,000 units and 500 shelves per selection; split larger selections by shelf or dates. Dates refer to when the phone read the code, not when the server received it. An hour-based cutoff is not supported.
After saving, check **Saved date-based locks** and open **View saved units**. If stock changes before saving, preview the targets again.
## 4. Unlock
| Setting | Steps |
| ---------------- | --------------------------------------------------------------------------------------------------------------- |
| Whole-shelf lock | Under **Entire shelves**, select the shelves, choose **Unlock shelves**, enter a reason and save |
| Date-based lock | Open **Unlock this selection** on the saved selection, check its dates and quantity, enter a reason and confirm |
Unlocking one setting does not remove another overlapping date-based or whole-shelf lock. Reopen the settings and check both scopes.
## 5. Recover from a refused scan
A scan that moves protected stock out of its recorded shelf, or an undo that reverses that location, is refused, including physical-stock-priority corrections. Match the physical stock and label to the protection shown for the refusal, then ask a settings manager to review it.
**Additional putaway into a locked shelf is allowed.** A whole-shelf lock also protects the added units from later scan movements and undos. A date-based lock protects only the saved selection; newly added units are not included automatically.
Unlocking does not automatically apply an earlier refused scan. After any required settings change, scan it again as a new read. Retrying the old request is not a new scan.
## Troubleshooting
| What's happening | What to check and how to recover |
| ----------------------------------------- | -------------------------------------------------------------------------------------------------------------------- |
| Settings are missing or cannot be changed | Ask an admin to check **Manage settings** permission. |
| The date preview has no targets | Check the site, shelf, timezone and scan dates. Finish syncing devices and confirm units are still on those shelves. |
| Stock changed before saving | Preview again and match the current targets and quantities to physical stock. |
| A scan is still refused after unlocking | Check both whole-shelf and overlapping date-based locks. Make a new scan instead of replaying the old refusal. |
| Select loaded shelves missed some shelves | Load the next page and select the additional shelves. Only loaded rows are selected. |
| A regular document still moved stock | The lock protects scan-originated changes. Regular inventory documents remain available. |
---
# Purchase workflows
Source: https://docs.toreca-cloud.com/en/guides/purchase
Choose the workflow by whether the customer brings the goods to your shop or sends them by post.
**[Online purchases](/en/guides/purchase/overview)**
Intake → Preliminary quote → Shipping and arrival → Final appraisal and
acceptance → Transfer
**[In-store purchases](/en/guides/purchase/counter)**
Arrival and intake → Physical appraisal → Review, signature and ID check →
Cash or transfer
The workflow depends on how you receive the goods and complete the purchase, rather than whether the customer contacted you through LINE or a form. A customer who asks on LINE and then visits uses the in-store workflow. In the console, this intake method is **In store**.
## Continue from your current stage
| Current situation | Continue with |
| ----------------------------------------------------------------------- | ------------------------------------------------------------------------------------------------------------------------- |
| Take an online request | [Intake form](/en/guides/purchase/intake-form) or [LINE intake](/en/guides/purchase/line-intake) |
| Take a phone or email request, or start with cards that already arrived | [Manual mail-in intake through completion](/en/guides/purchase/mail-in-to-stock#method-2-record-it-as-a-purchase-request) |
| The preliminary quote is accepted; continue with shipping or arrival | [Shipping and final appraisal](/en/guides/purchase/shipping-and-final) |
| Check who is due to visit | [Reservations](/en/guides/purchase/reservations) |
| Appraise cards at the counter | [In-store appraisal](/en/guides/purchase/counter#2-appraise-the-cards-and-save) |
| Hand back cards the customer keeps at the counter | [Partial acceptance, full decline and handing cards back](/en/guides/purchase/counter#when-the-customer-keeps-cards) |
| Ship back cards you did not buy online | [Returns](/en/guides/purchase/returns) |
## Find instructions for recent changes
- Use [Shipping and final appraisal](/en/guides/purchase/shipping-and-final) to enter amounts, numbers and ineligible reasons for each card.
- Use [Business deals and invoices](/en/guides/purchase/corporate-deals) to compare invoice drafts with the goods received.
- Ask the customer to [review and correct registered information](/en/guides/purchase/registered-information).
- Use [Amount and quantity corrections](/en/guides/purchase/amount-and-quantity-corrections) to review the effects of a correction after settlement.
## Find a shared task
Use [Shared purchase tasks](/en/guides/purchase/common-operations) for customers and deals, research, documents, transfers, corrections and undo. Each workflow also links to these instructions at the relevant stage.
For purchases from a business settled by invoice, follow [Business deals and invoices](/en/guides/purchase/corporate-deals).
If the purchase and payment are managed elsewhere and you only need to register inventory, use [a receipt slip](/en/guides/purchase/mail-in-to-stock#method-1-use-a-receipt-slip). A receipt slip alone does not create purchase, identity-verification or payout records in Toreca Cloud.
---
# Correct settled purchase amounts, quantities and linked records
Source: https://docs.toreca-cloud.com/en/guides/purchase/amount-and-quantity-corrections
Correct errors found after stock registration from the originating purchase case. The correction retains original records while updating purchase totals, inventory, unit costs, the secondhand ledger and linked records.
This workflow covers purchases settled and registered as line-level amounts. Purchases settled from individual-card appraisals are excluded, and **Correct purchase amount and quantity** is not shown. Have an administrator review the original case, payments and documents before taking further action.
| Situation | Route |
| ------------------------------------------------------ | ------------------------------------------------------------------------------------------------------- |
| The appraisal has not created stock yet | Use normal appraisal / quote editing |
| Correct an amount or quantity after stock registration | Use Correct purchase amount and quantity below |
| Undo an earlier appraisal operation | Check [Restore an operation from history](/en/guides/purchase/history-and-undo) for eligible operations |
| Correct a product’s name, number or valuation | Use [shop product and valuation corrections](/en/guides/inventory/product-and-market-corrections) |
Purchase history correction permission and access to read/edit the affected records are required. For store transfers, your current membership and inventory editing / history correction permissions must cover every affected shop. A connection between shops alone is not enough.
## 1. Open the originating case’s menu
Open the case from Purchase requests or Business deals. Click **…** (**Actions for this request**) at the top and select **Correct purchase amount and quantity** at ①. This example shows a business deal.
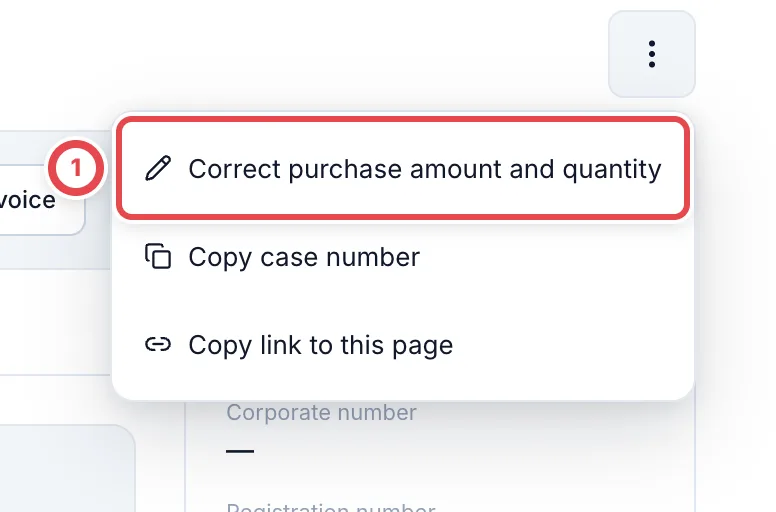 ## 2. Enter quantities and line totals
For each line, enter **Quantity** at ① and **Line total (JPY)** at ②. **The amount is the total for the whole line, not a unit price.** Select a correction reason and add context if needed. **Other** requires details.
For cards, boxes, packs and decks, reducing a quantity requires selecting the exact units to remove. Increasing it requires a receiving location. Eligible units removed by an earlier correction are restored first; additional units are then created if needed. A bulk appraisal’s bundle holds a contents quantity and does not use the same per-card removal selection.
 ## 3. Choose units to take over linked records
When a removed unit is reserved, sold, returned, transferred or used by a partner application, choose an available replacement of the same product, grade and packaging conditions. ① shows a transfer; ② shows a partner listing. A replacement cannot be reused for multiple removed units. Match the selected label number (or asset number if no label has been issued) and shelf to the physical item.
A previously confirmed picking scan may need checking again after relinking. Confirm the updated reservation or outbound order with its operator.
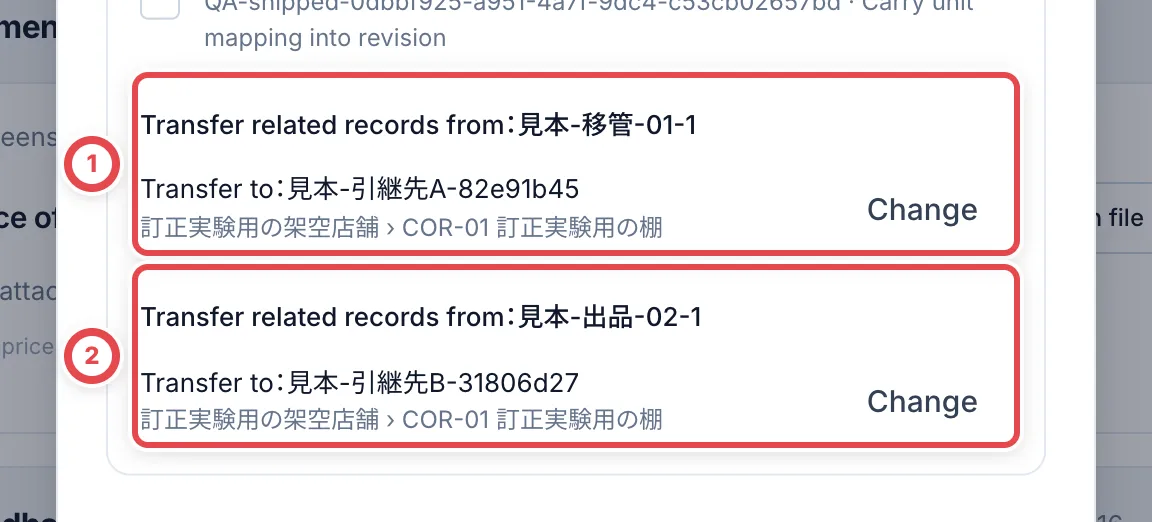 ## 4. Review the purchase total and payment difference
Click **Review changes**. Check purchase totals, quantities, costs and the difference from the recorded payment basis at ①. A positive difference needs additional payment review; a negative difference needs refund review.
:::warning
**Save correction** at ② does not send or refund money. Original payment records, issued documents, acceptance and signatures are retained. Separately review any settlement, document reissue or renewed acceptance that is needed.
:::
Review all linked records in the following steps before using ② to save. For checks after saving, note the affected outbound / transfer numbers, external references, and the original and replacement label or asset numbers.
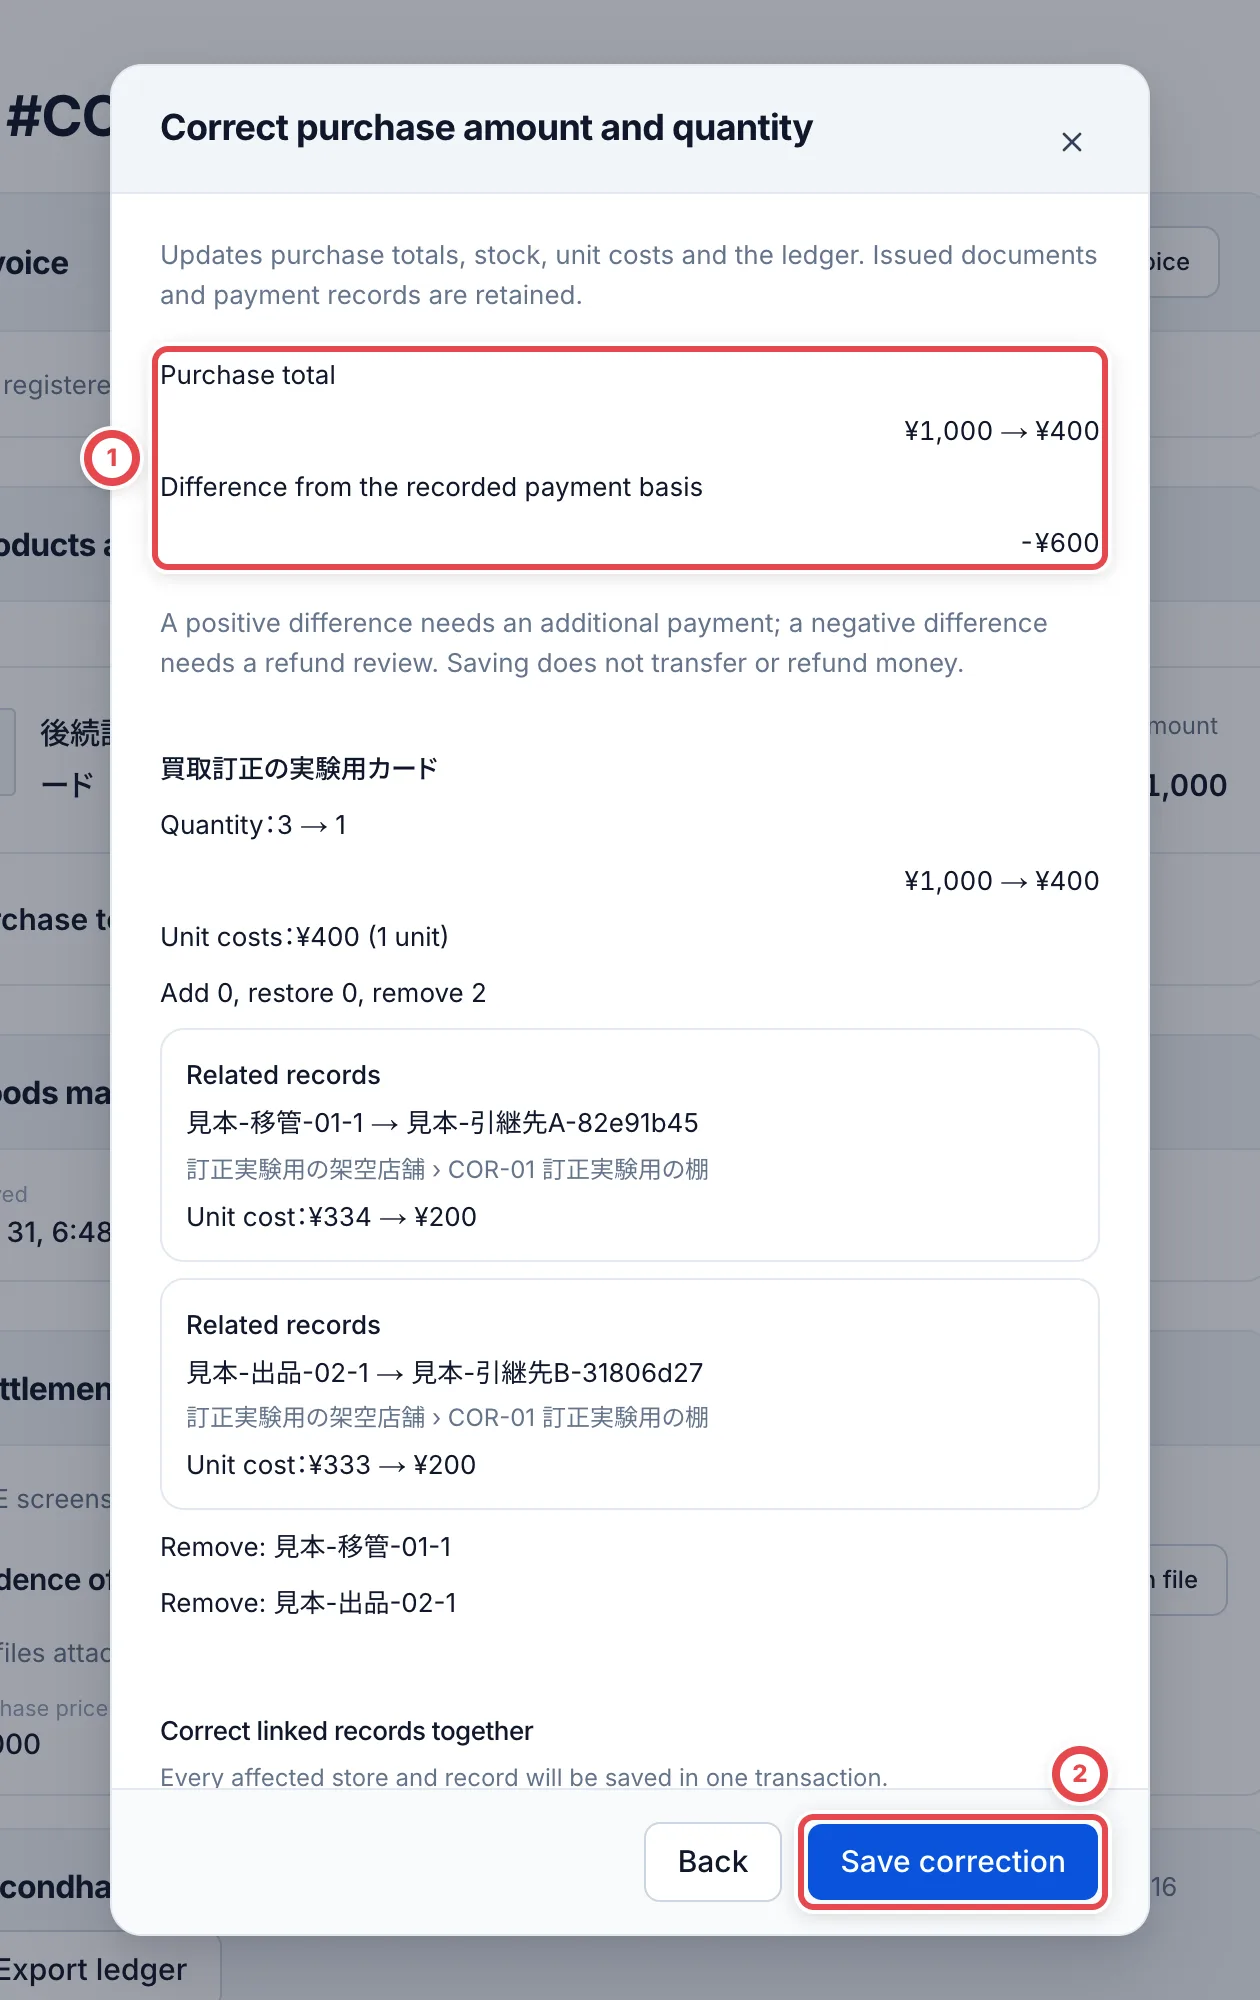 ## 5. Review store transfers and partner records
Scroll down in the same preview. At ①, check **Store transfers**: sending shop, receiving shop, units and amounts. A received unit keeps its identity while related costs are updated. An agreed transfer amount linked to a sale may be retained.
At ②, check **Partner commitments** and the application allocations below them. Match each original unit to its replacement. External references, commitment / allocation identities and expiry are retained. This purchase correction does not change sale prices or return refund amounts.
:::note
The preview describes corrections inside Toreca Cloud. Check the receiving application after notifications or synchronization. Saving does not by itself prove that the external application received the update.
:::
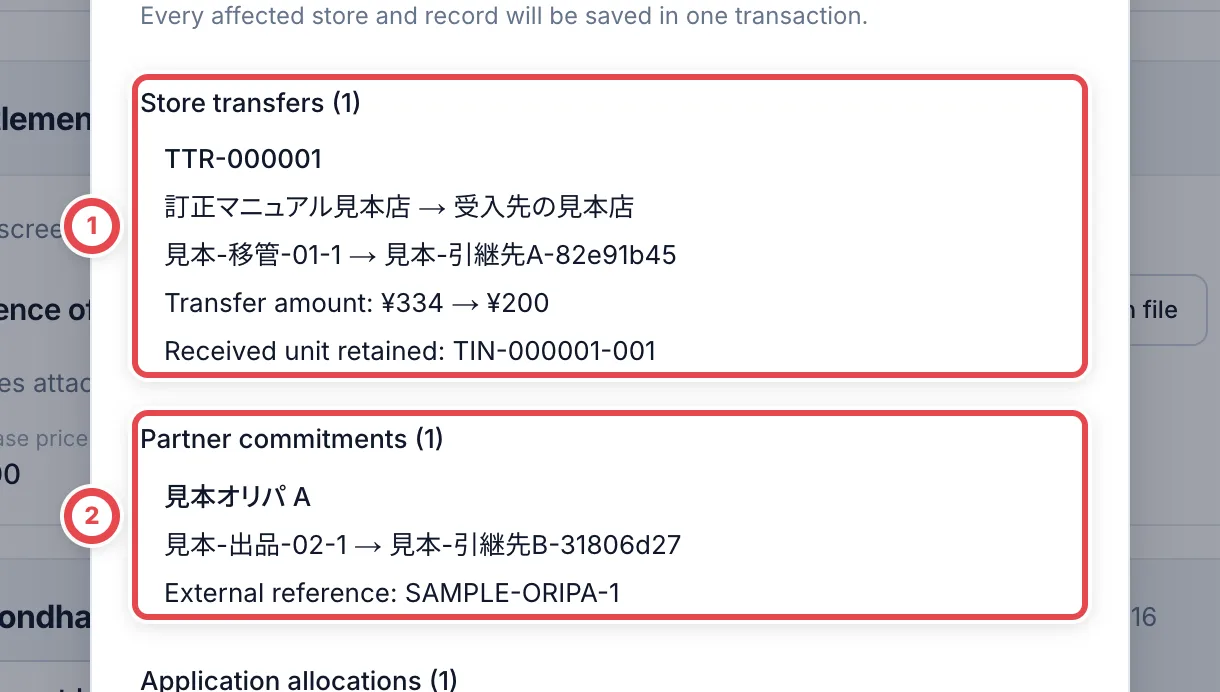 ## 6. Review scan replacements and received costs
Check **Scan replacements** at ① against the unit that actually shipped. At ②, check **Received inventory** for the receiving shop’s unit and corrected cost.
:::warning
Taking a scan replacement into this revision retains its original evidence and finalizes the related business records. Its independent undo is closed. Check the actual shipped unit before saving.
:::
After reviewing the whole preview, click **Save correction**. Affected shops and records are saved together. If current state or permission checks fail, reload the latest record and reconsider the correction.
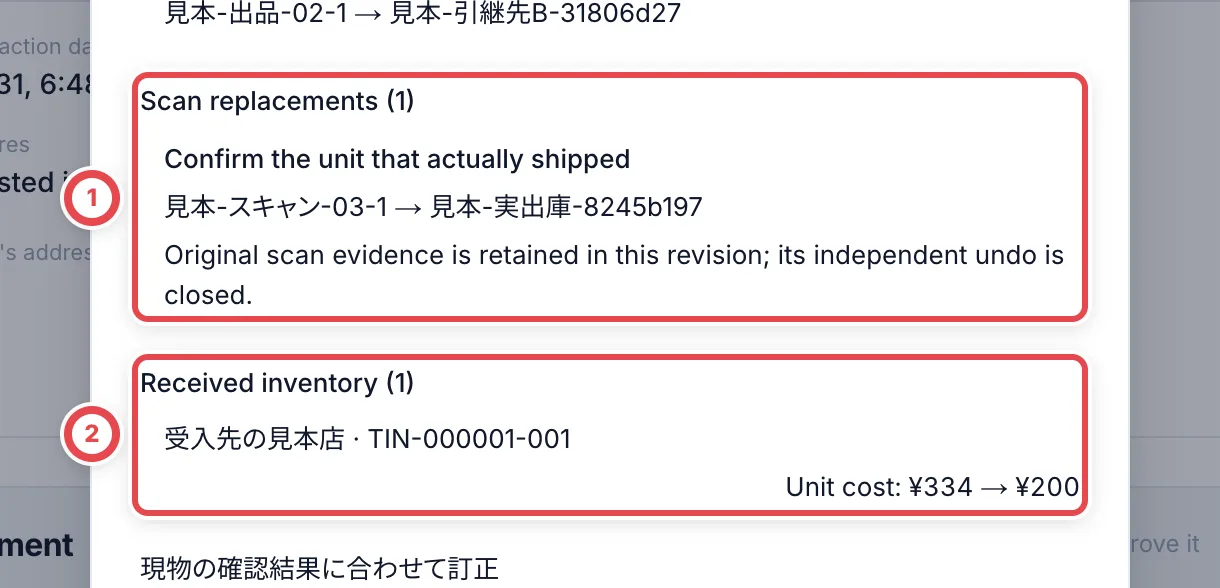 ## 7. Reopen the case and inspect revision history
Reopen the case and check its corrected total, quantity and payment difference. Reopen the correction dialog: **Revision history** at ① records when, who, why and the changed amount. Use the following routes to match linked records against the identifiers you noted before saving.
| Record | Where to open it and what to check |
| ----------------------------------------- | ------------------------------------------------------------------------------------------------------------------------------------------------------------------------------------------------------------------------------------------------------------------------------------------------------------------------------------------------------------------------------------------------------------------------------ |
| Inventory units | **Inventory** → the product. Press the row to open it if needed, then open the unit. Match its asset number under **Management details**, status, acquisition cost and shelf. |
| Reservations, sales and scan replacements | **Inventory** → **Outbound**. Search the outbound number, open the order and press a line to open it. If labels are unissued, open the unit link and match its asset number. Removed lines remain as history; check the reserved / shipped line. Check sale price, acquisition cost and the picked count. Have the outbound operator rescan units that need confirmation. |
| Sale returns | On the same outbound order, check the return number, quantity, refund and receiving shelf under **Returns**. Open the line to check the returned replacement. The sales summary is net of returns; distinguish it from the original sale price on the unit line. |
| Store transfers | **Inventory** → **Tenant transfers** → **Outgoing**. Open the transfer number and check status, quantity, acquisition total and original asset number. If you have access to the receiving shop, switch shops in the account menu and open the same transfer under **Incoming**. Click **Open accepted unit** and check its retained asset number and corrected acquisition cost. Switch back to the original shop afterwards. |
| Partner commitments and allocations | Open the product from Inventory, then its replacement unit. Check status, partner, listing name, external reference and partner allocation. Check receipt and display in the partner application separately. |
See [outbound orders and transfers](/en/guides/inventory/outbound-and-transfers), [sale returns](/en/guides/inventory/sales-returns), and [partner sales and shipments](/en/guides/inventory/partner-sales) for each screen.
To return to an earlier purchase amount, enter the intended amount and quantity as a new correction and review current linked records again. Increasing the quantity may restore previously removed units, but it does not automatically move sales or reservations back from their replacements. Check restored units separately from the current linked replacements. If another member has changed the case, use **Reload current record** at ② before entering the correction again.
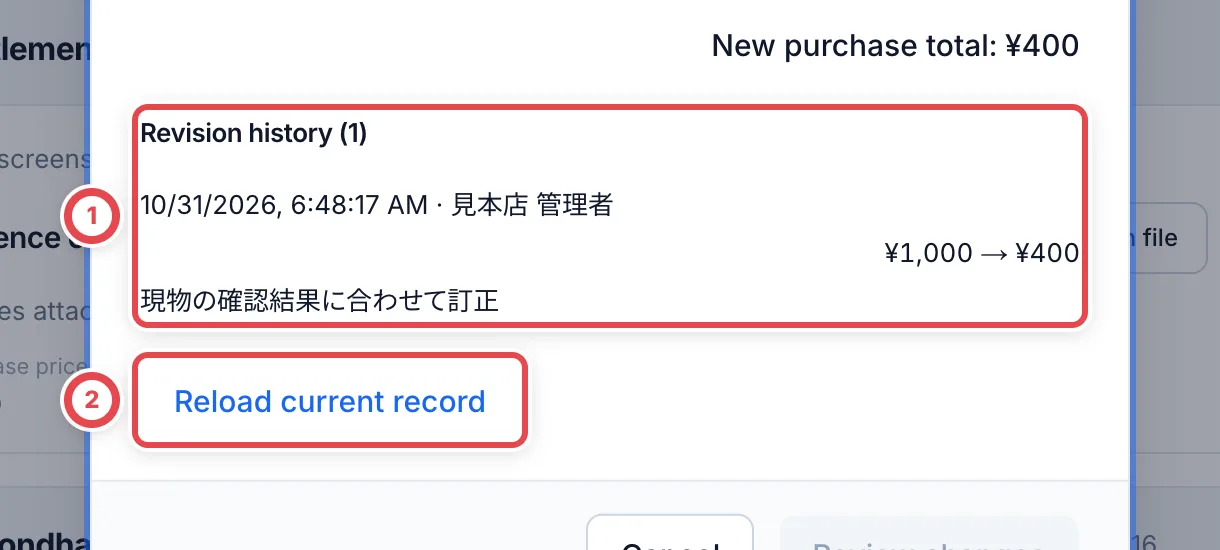 ## Troubleshooting
| What you see | What to check |
| ------------------------------------------------- | ------------------------------------------------------------------------------------------------------------- |
| No correction action | Check that stock registration is complete and that you have purchase history correction permission |
| Review is disabled | Check quantities, amounts, reason, removal count, replacement selections and receiving location for increases |
| No replacement candidates | Check available units of the same product, grade and other required conditions |
| Another shop prevents saving | Ask an administrator to verify current permissions in every affected shop |
| Record changed | Use Reload current record and reconsider inputs and selected units |
| Save outcome is uncertain | Read the case and revision history first; do not stack another correction with changed inputs |
| Payment or issued document still shows old values | Originals are retained. Match the corrected total to the payment difference and review settlement separately |
---
# Preliminary appraisals and quotes
Source: https://docs.toreca-cloud.com/en/guides/purchase/appraisal
This is the preliminary appraisal and quote procedure for online purchases. To appraise physical cards at the counter and have the customer review and sign there, follow [In-store appraisal](/en/guides/purchase/counter#2-appraise-the-cards-and-save).
In the preliminary appraisal, you identify the cards from the photos and description the customer sent, and set an amount for each. You present those amounts to the customer as a quote and record their answer. The final appraisal on the cards that arrive is covered in [Shipping and final appraisal](/en/guides/purchase/shipping-and-final).
Expand or collapse each product with its heading. **Save and check** in Appraisal requests and **Review inputs and close** in quote editing have different save behavior; see [Common item-card operations](/en/guides/purchase/common-operations#open-and-check-item-cards).
## What you need
- Permission to change purchases (Owner, Admin, Staff, Staff & researcher)
- Buy rate settings ([Buy rates](/en/guides/settings/pricing)). The buy rate for each appraisal fills in from here automatically
- To make a quote PDF, your business details under **Organization** settings
## Overview
| Step | What you do | Screen | Deal status |
| ---- | ------------------------------------------ | --------------------------------------------- | ------------------- |
| 1 | Identify the cards | **Appraisal requests** on the customer's page | New |
| 2 | Set amounts and make a quote | **Appraisal requests** and **Quotes** | Appraising |
| 3 | (If needed) Market research, second review | **Quotes** | Appraising |
| 4 | Present the quote | **Quotes** | Quote sent |
| 5 | Record the customer's answer | **Quotes** | Accepted, and so on |
## 1. Identify the cards
Cards read from a LINE chat or declared on a form appear on the customer's **Appraisal requests** tab. A card that isn't yet matched to a card shows **Identify** (①) under its name.
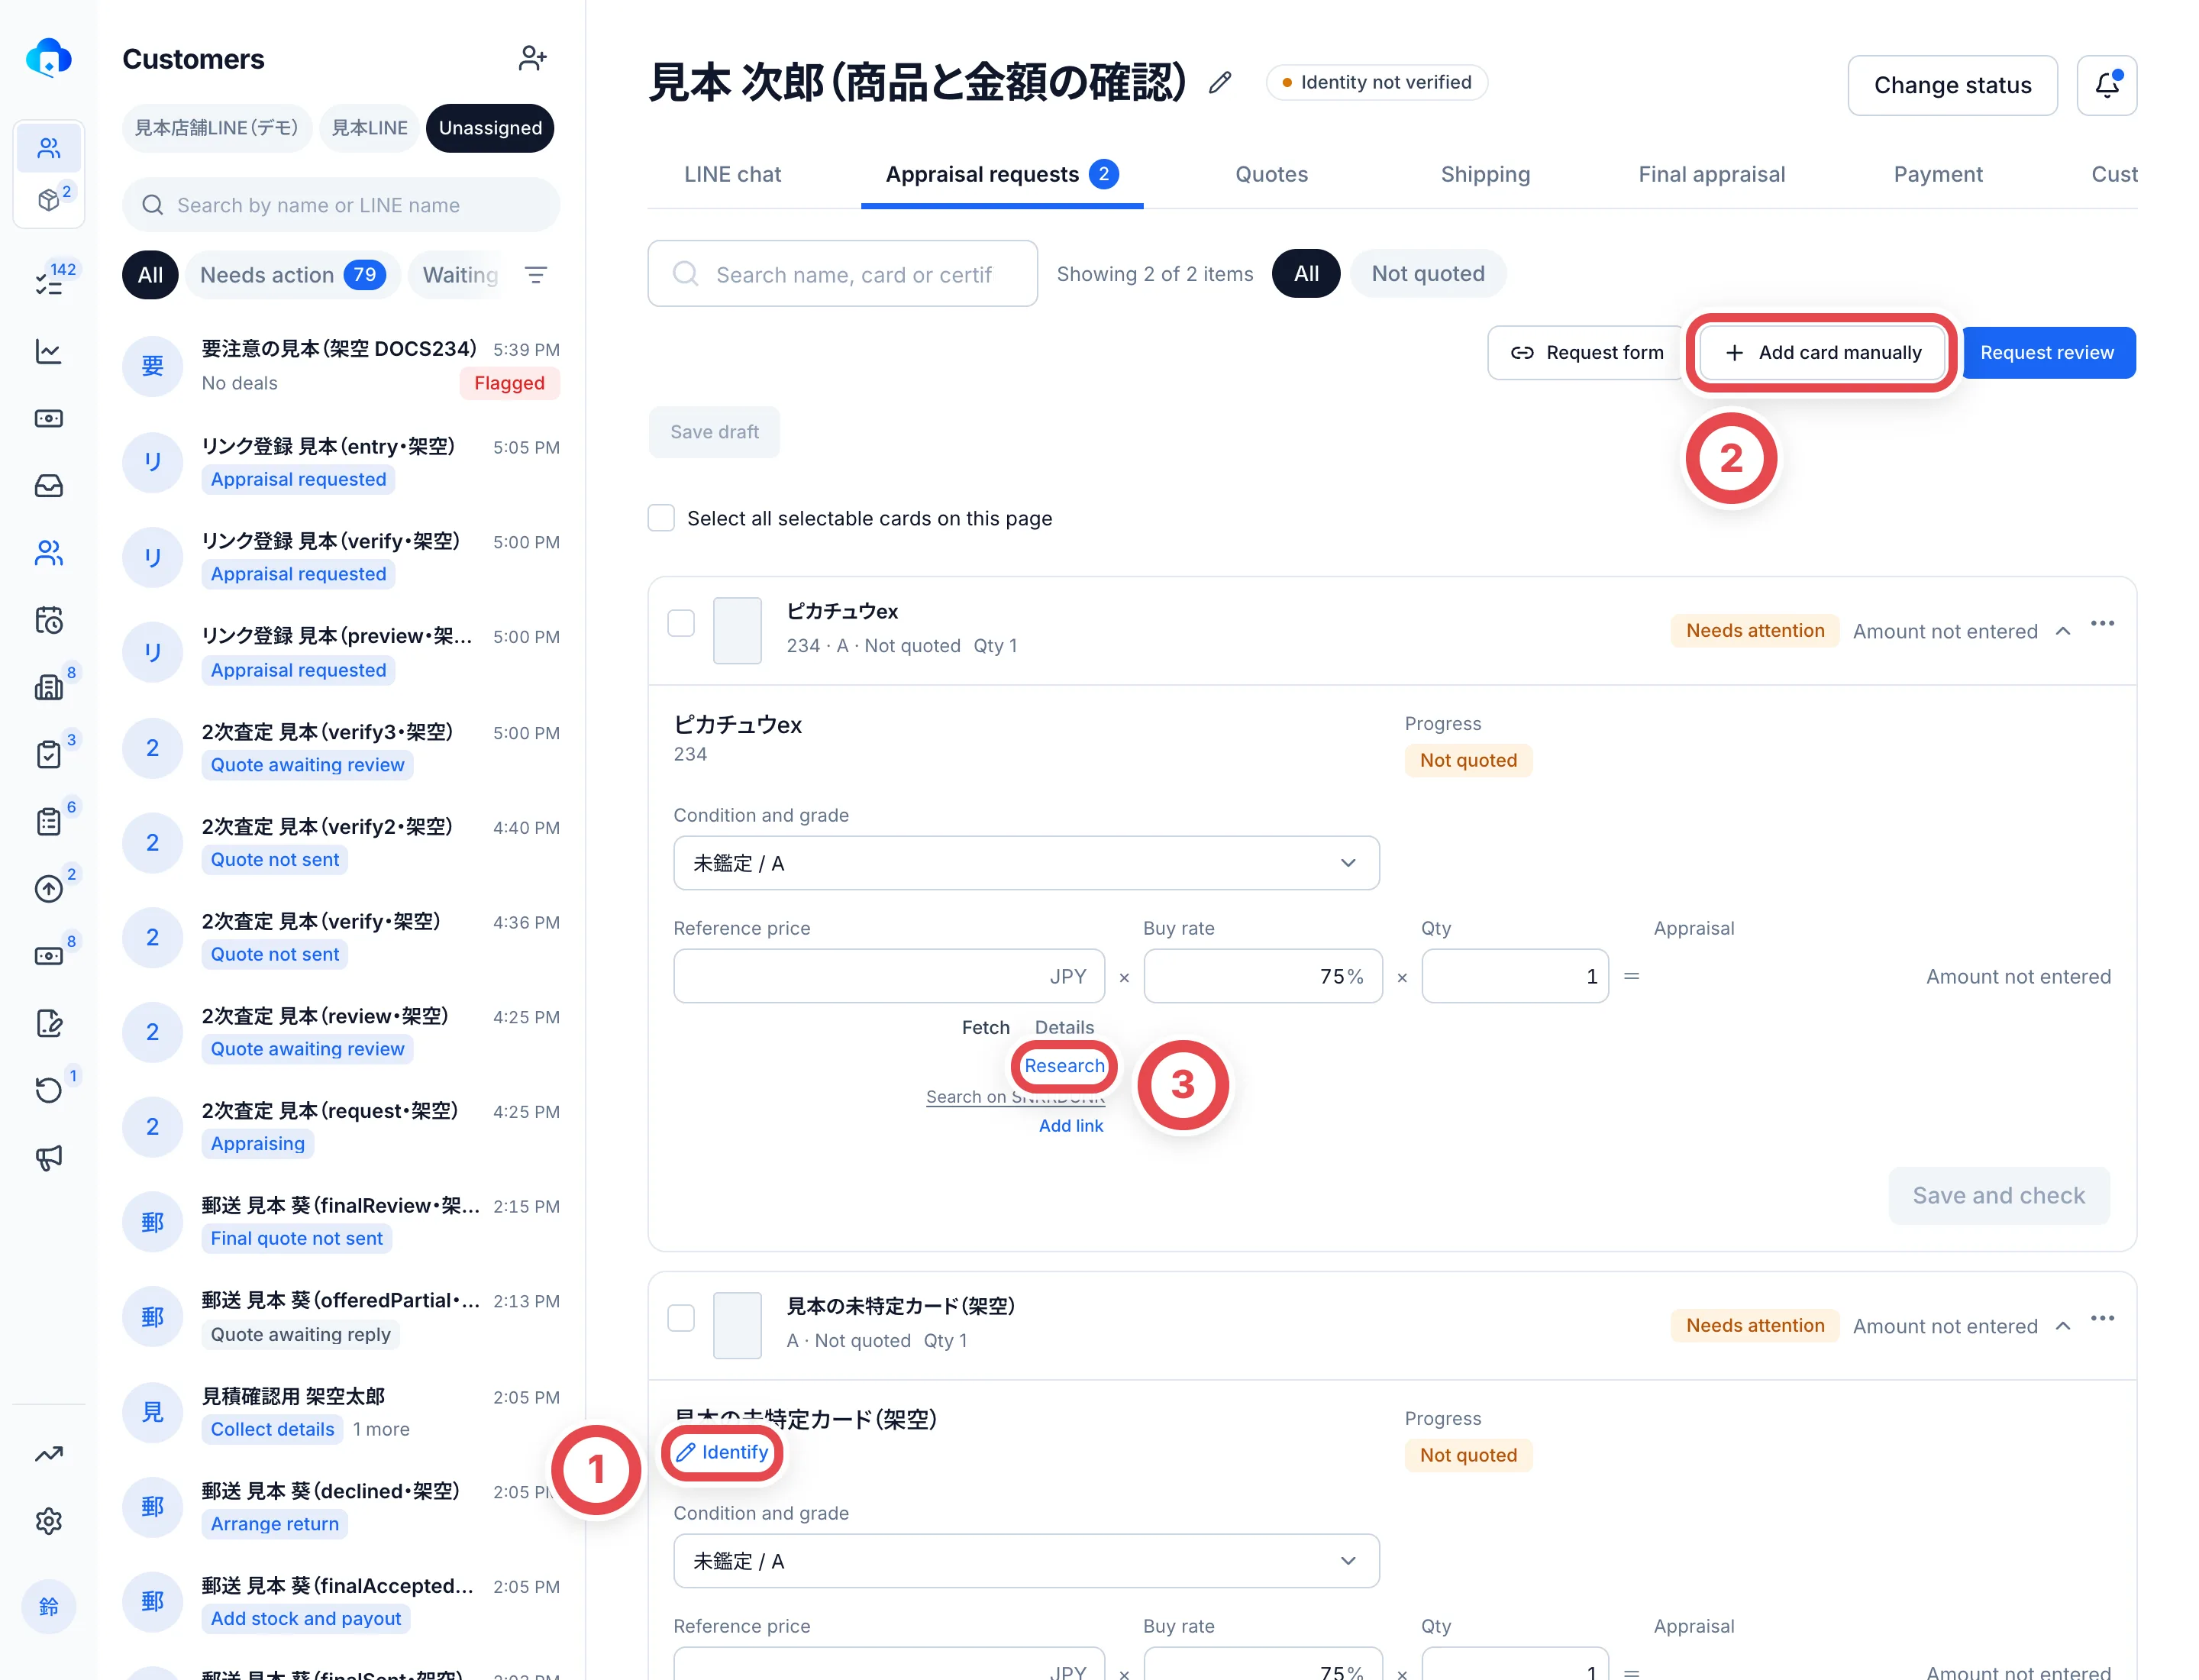 Choose which card it is at ①. Add a card that wasn't declared at ②. ③ is the link to ask for research when the market price is unknown.
Click **Identify** (①) to open **Select a card**. It first searches by the name the customer wrote. If nothing turns up, use fewer words, or search by card number or set name. You can also filter by game, set, rarity and language.
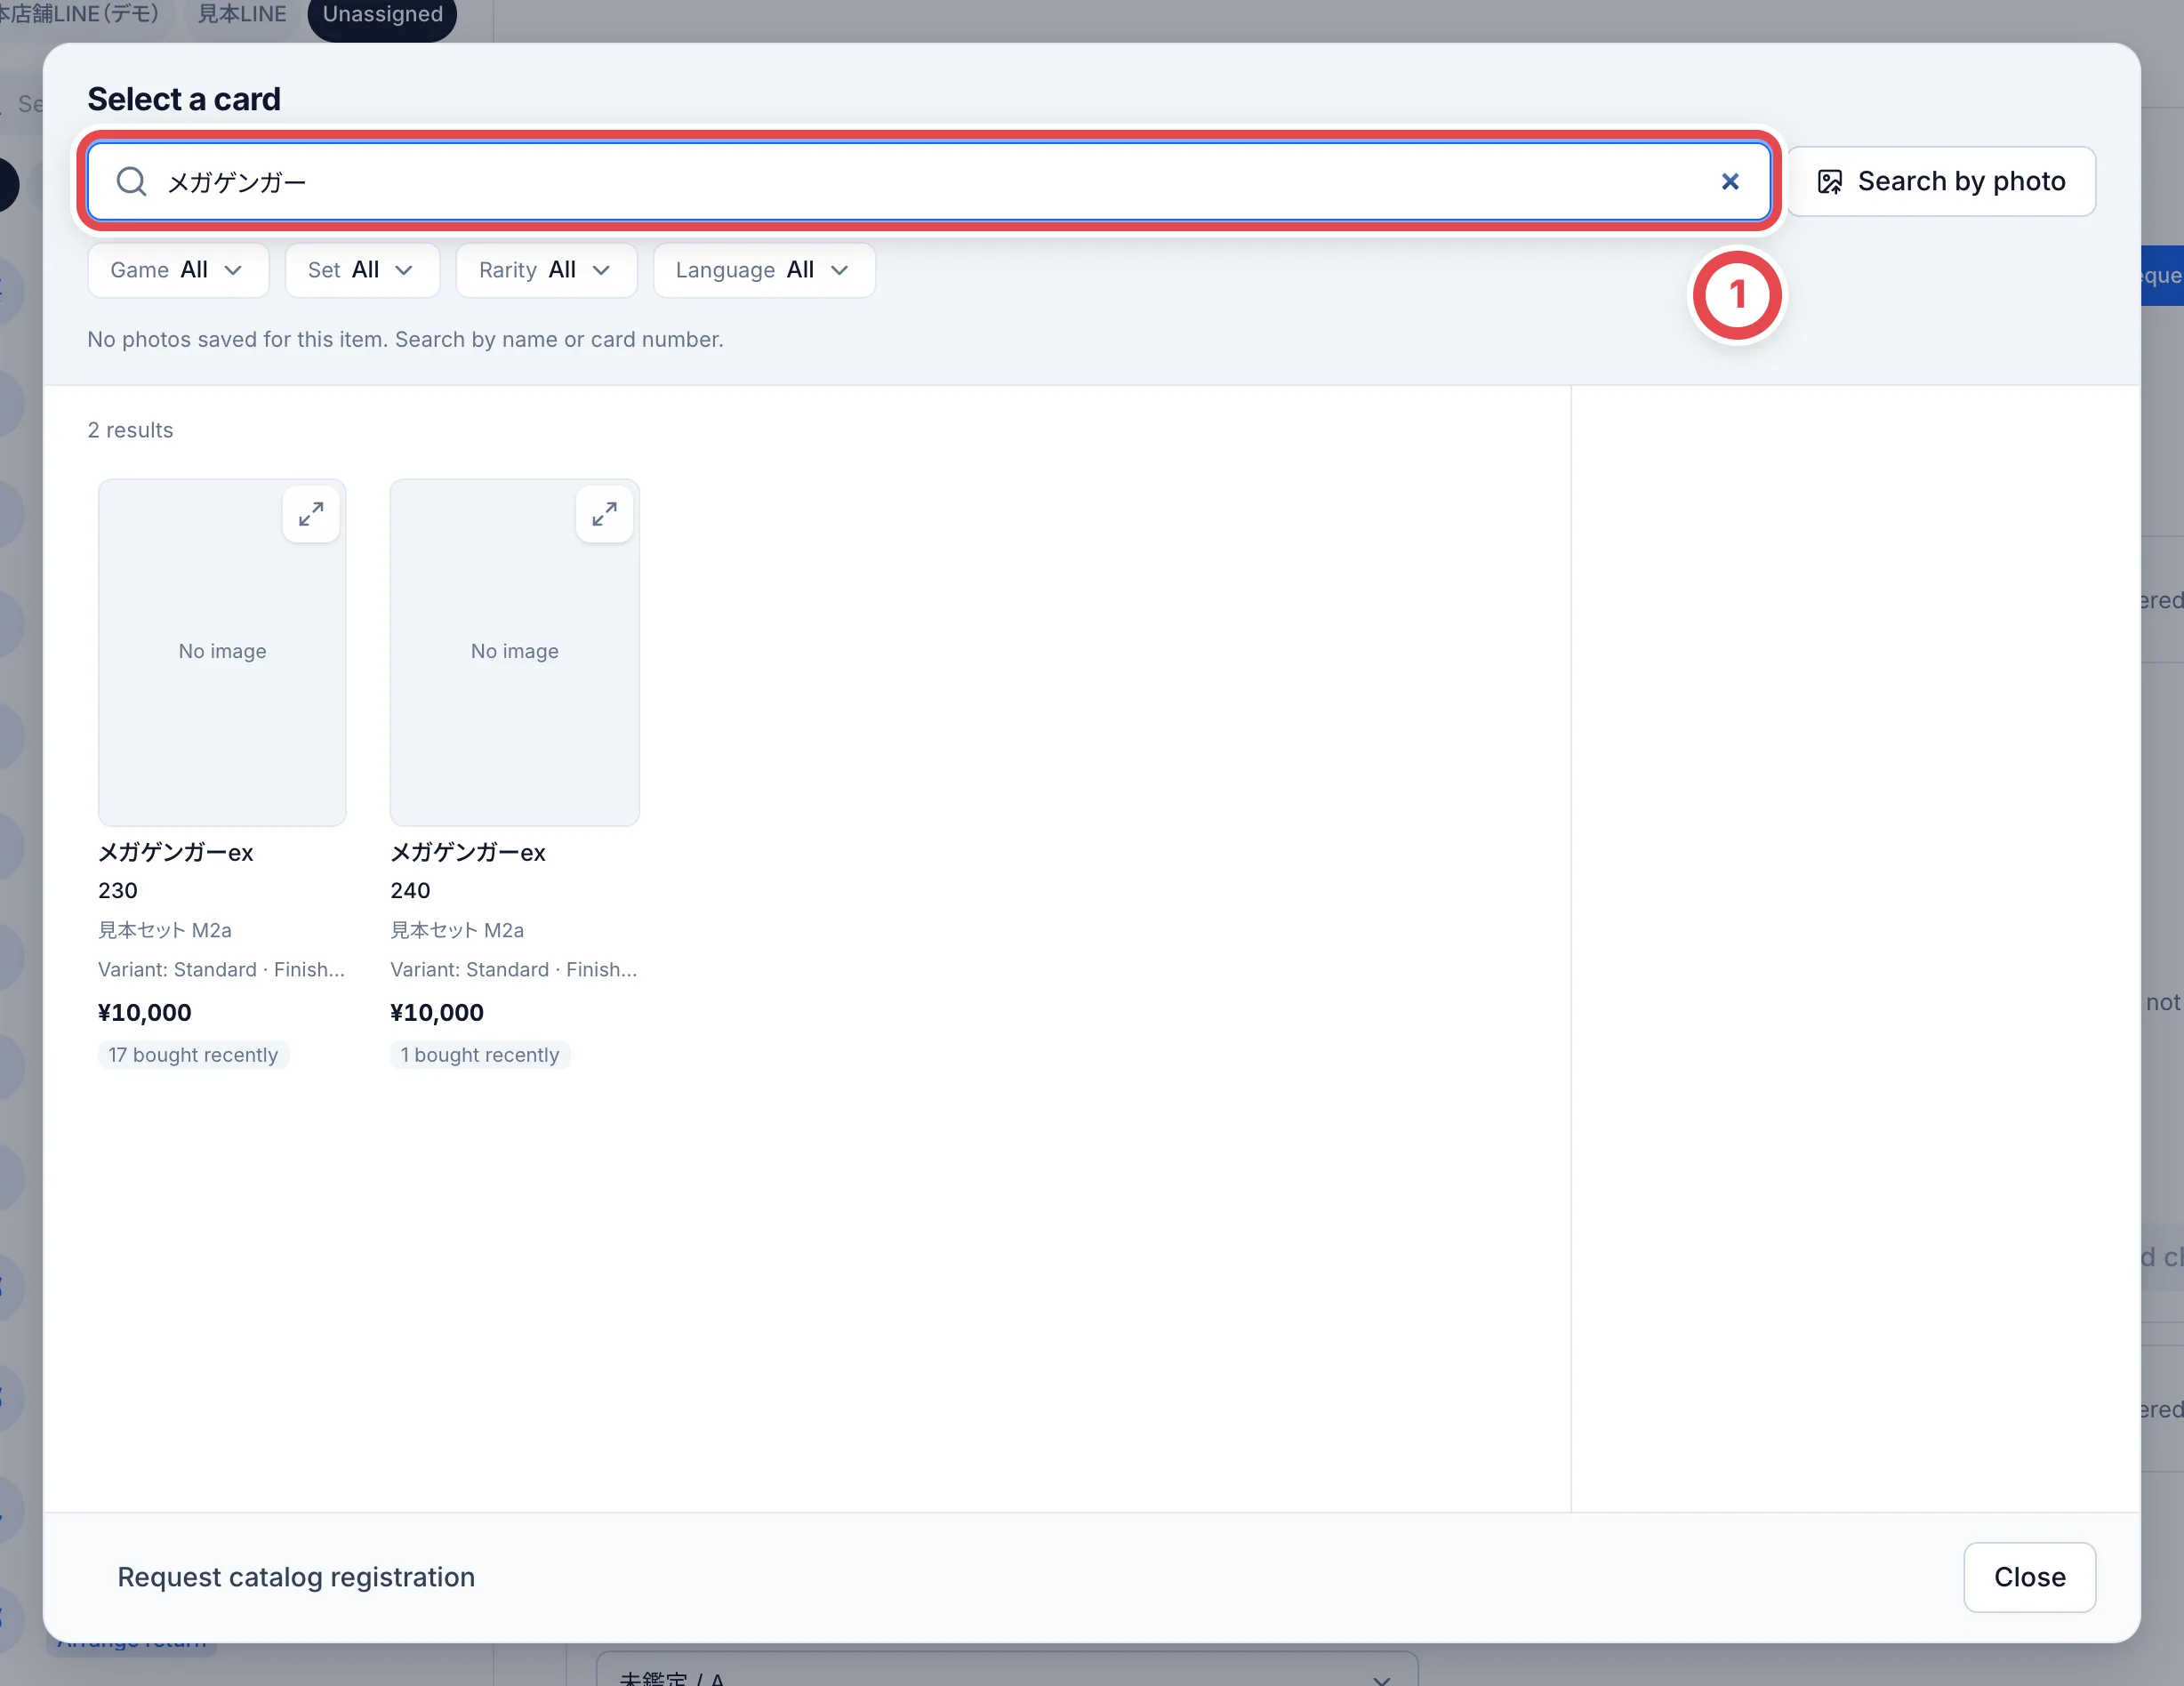 - On the **Appraisal requests** tab, **clicking a card identifies it right away**
- When you identify a card from a deal's appraisal items, choose the card and then confirm with **Use this card**
- Choosing a card fills in its image, and its market price too when the conditions are met (see the table below for how market prices are decided)
### Add a card that wasn't declared
Click **Add card manually** (②) to open **Add item**.
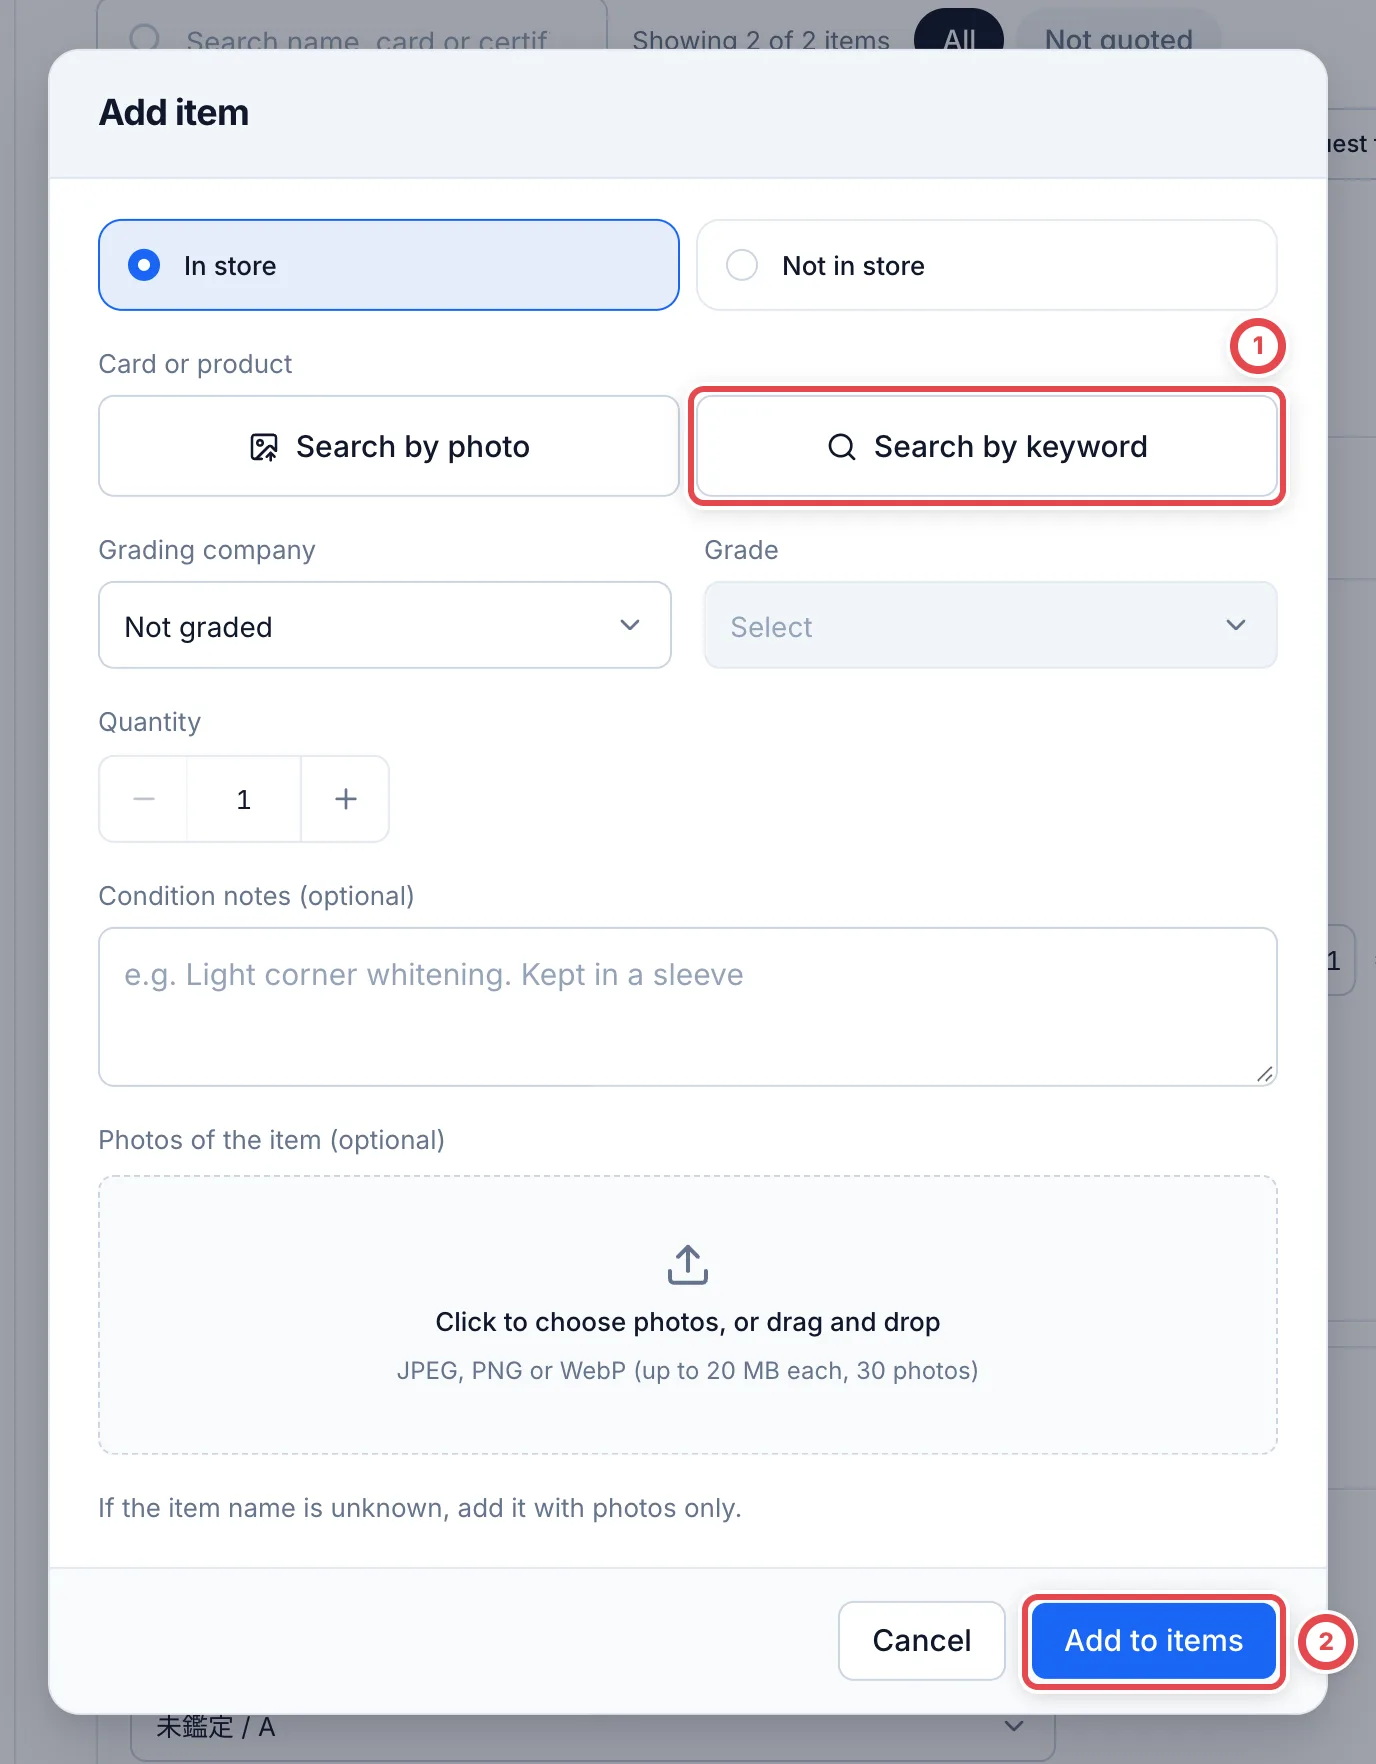 1. When you add from the customer's page, choose the intake channel (**In store** or **Not in store**) at the top
2. Choose the card with **Search by photo** or **Search by keyword** (①)
3. For a graded card, choose the grading company and grade. For one item, you can optionally enter its certification number. Check and save it against the item when it arrives
4. Enter the quantity and, if needed, a note on condition and photos of the item, then click **Add to items** (②)
With a photo, you can add an item without a card name. It stays as a **Card not identified** item and you identify it later.
To correct the declared grading company, grade or certification number, choose **Edit grading** from the line’s three-dot menu. See [Correct declared grading information](/en/guides/purchase/common-operations#correct-declared-grading-information) for availability after offer acceptance and the effect on drafts.
## 2. Set amounts and make a quote
On each row of the **Appraisal requests** tab, enter **Condition and grade**, **Reference price**, **Buy rate** and **Quantity**, and the appraisal amount is calculated on the right (reference price × buy rate × quantity). The reference price fills in from the market, and the buy rate from your buy rate settings.
Changes to **Condition and grade**, **Reference price** and **Buy rate** stay once you click **Save draft** above the table. Other members see the same values, and leaving the page while a research answer is pending doesn't mean entering them again. If you try to leave with unsaved changes, you're asked first (not with the browser's back and forward buttons). Putting a card into a quote removes its draft.
### How market prices are decided
Automatic market prices and **Check market prices** first use domestic SNKRDUNK sales of the same card and grade within the last 30 days. Asking prices and PriceCharting are not used. If those sales cannot produce a price, an active shop reference price confirmed within 30 days is a fallback.
| Sales in the last 30 days | Market price that fills in |
| ------------------------- | ----------------------------------------------------------------------------------------------- |
| 0 or 1 | No domestic calculation. Request research if no active shop reference price is available either |
| 2 | The average of the 2 sales |
| 3 or more | The average of the latest 3. If those 3 fell in price one after another, the latest sale price |
Averages are rounded to the nearest yen.
### Make a revision of the quote
Once the amounts are set, make a revision of the quote on the deal's **Quotes** tab. To change a saved revision, click **Edit appraisal**. A revision approved or waived in the second review cannot be edited directly. Use **Requote** to create a new revision and complete any required review again.
To add cards while editing an appraisal, click ① **Add item** above the lines. An addition with the same card, grade and condition note, and no certification number increases the matching line's quantity. Different grades or notes, additions with individual photos, and lines with individual appraisal notes or splits remain separate. This does not automatically consolidate duplicate saved lines. Additions and quantity changes take effect when you save the revision.
After clicking ② **Exclude from appraisal**, select the removal reason and save. Before saving, **Undo** restores the line. Use **Cancel addition** to remove a line that has not yet been saved.
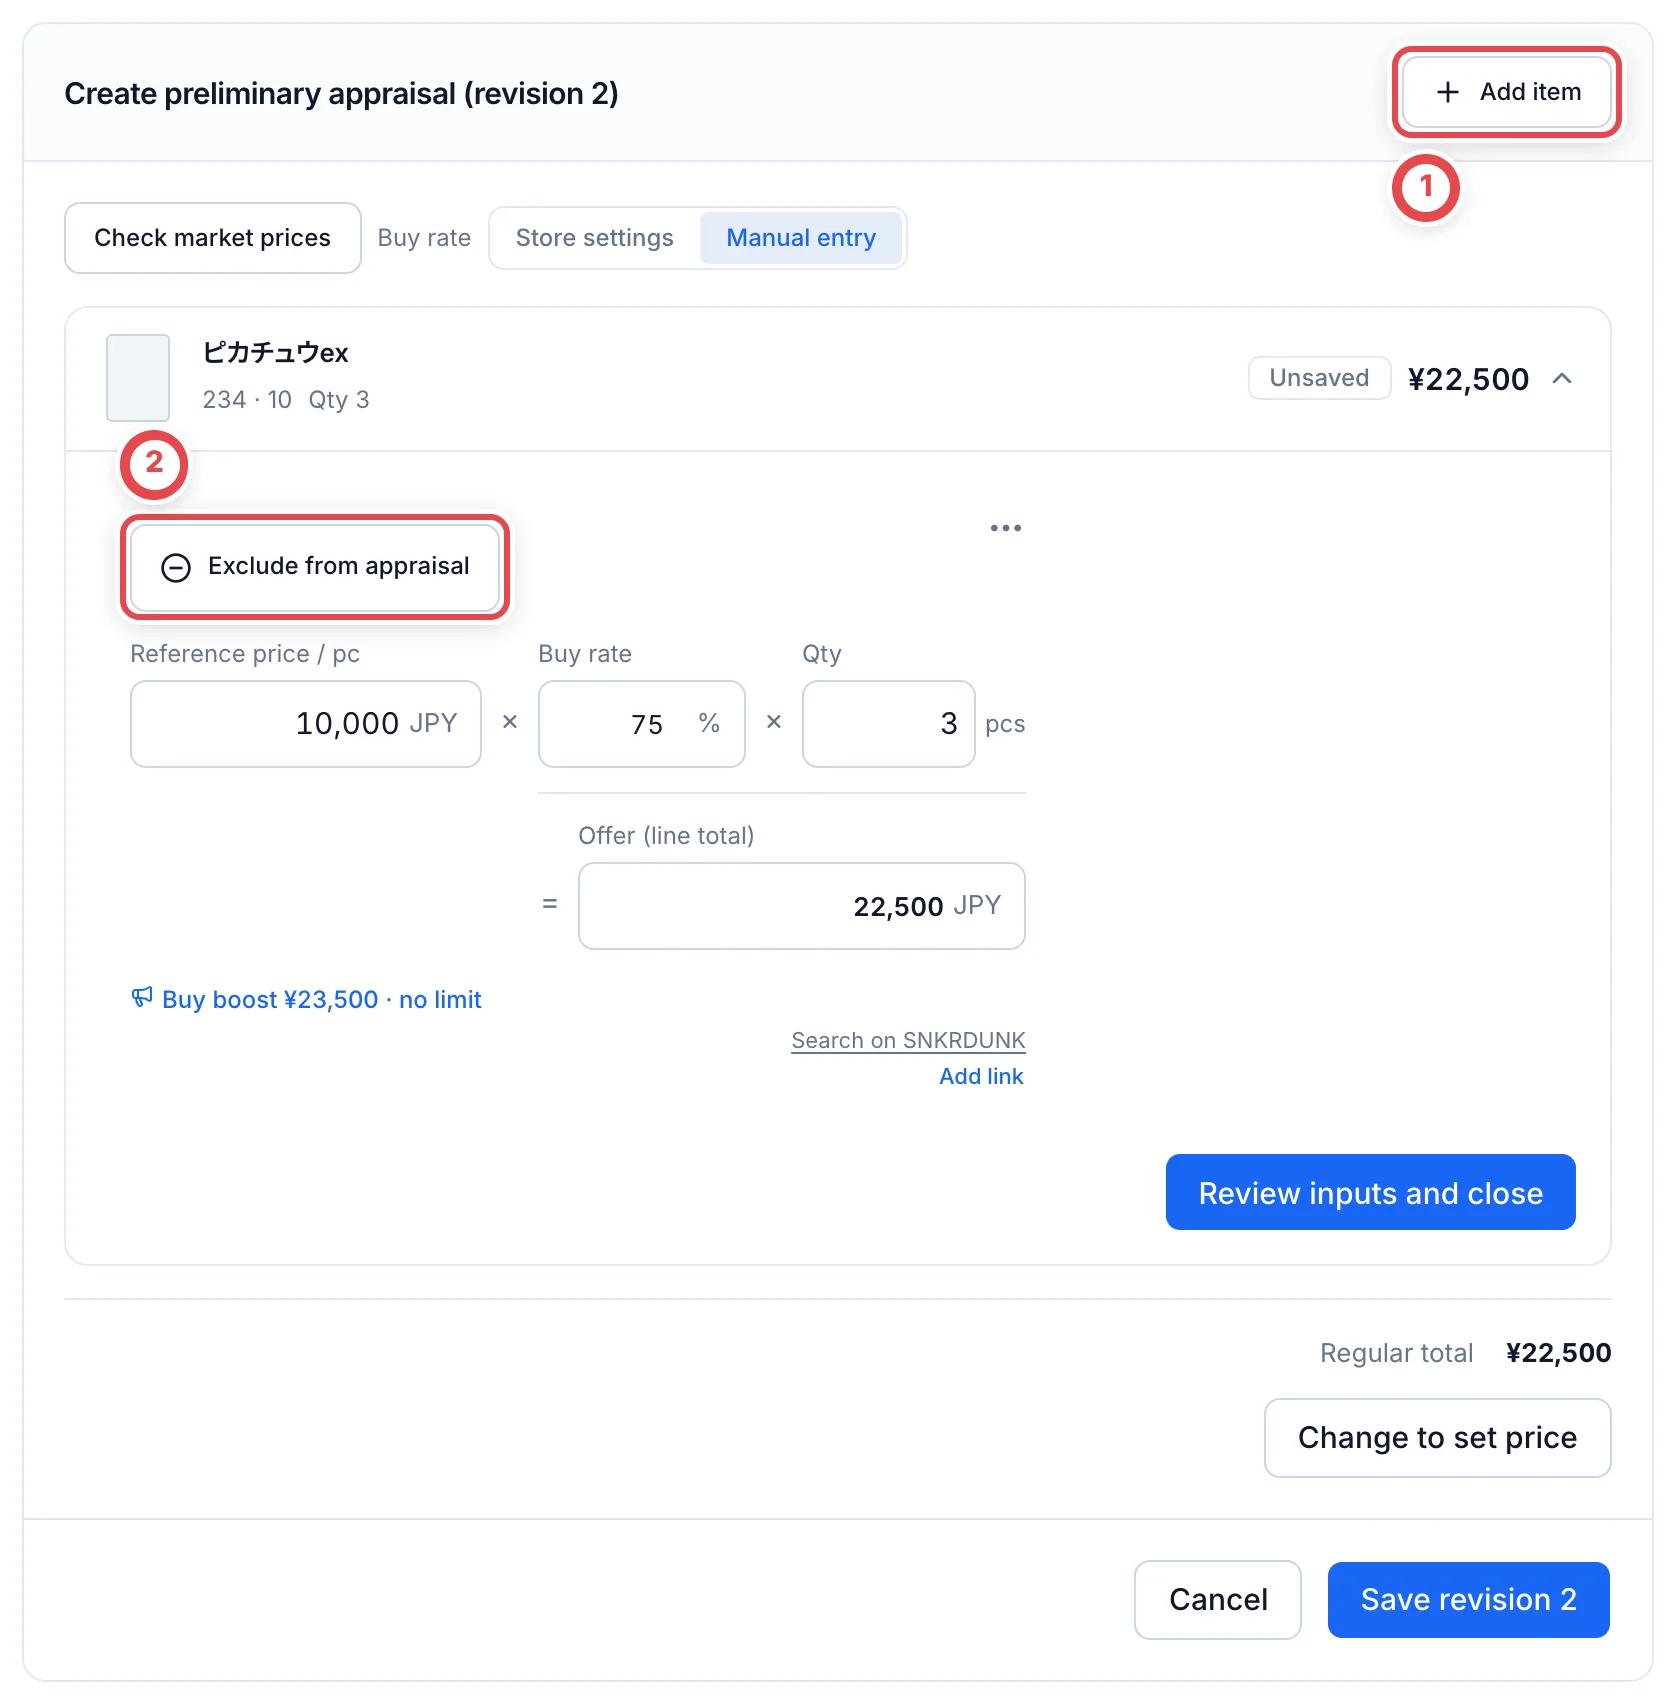 New appraisals start with **Store settings** selected at ① and display the default buy rate at ② before you enter a market price. Once all prices are entered, applicable price bands and rounding rules are calculated automatically. Editing a price or quantity also recalculates the offer.
Select **Manual entry** at ① to edit the rates directly. Manual rates stay unchanged when you edit market prices or reopen a saved appraisal. Selecting **Store settings** again recalculates using the shop's settings. If no store rate is configured, enter rates manually.
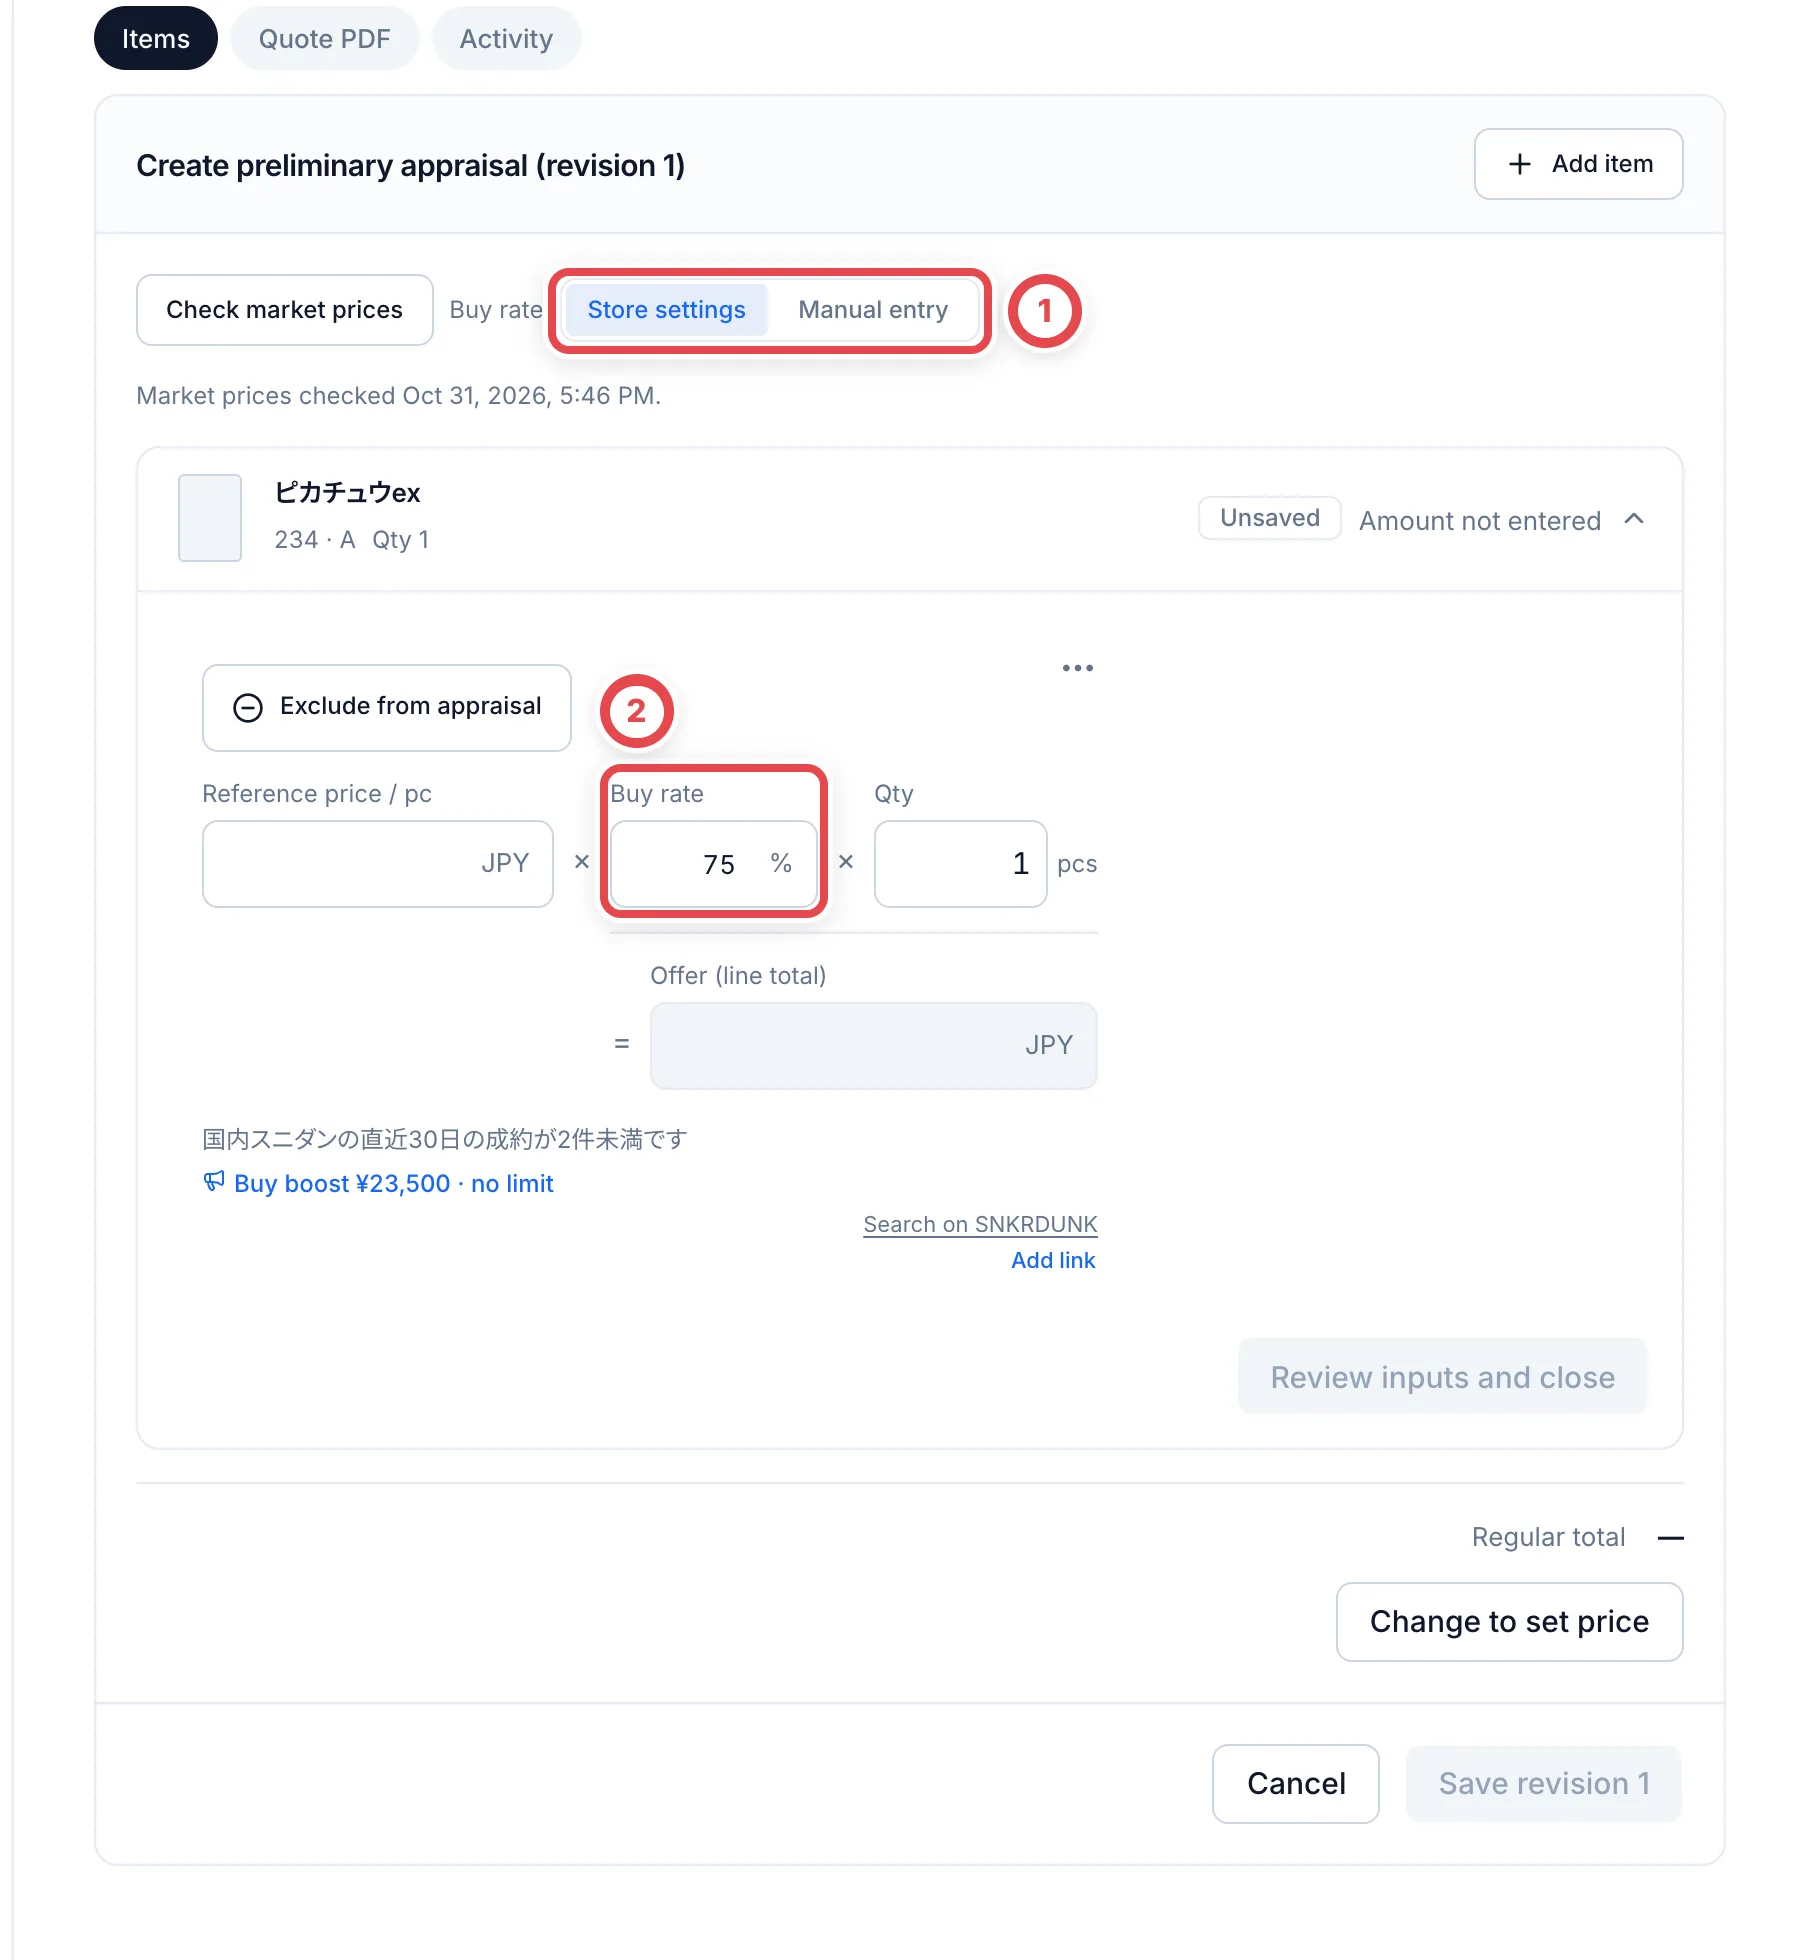
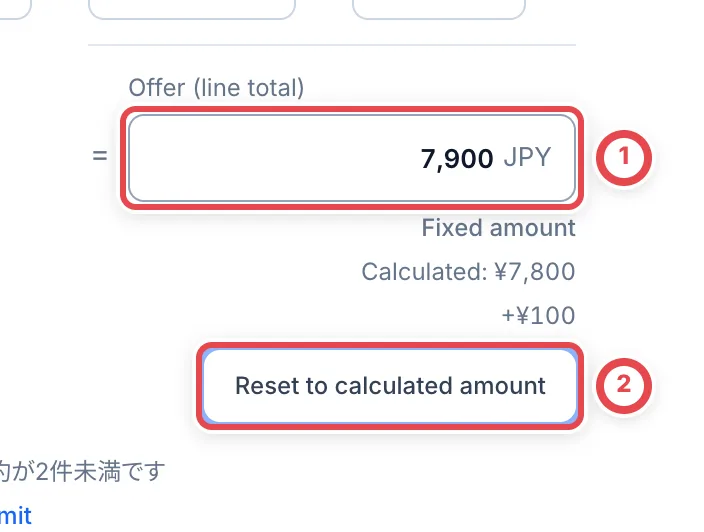 | Button | What it does |
| --------------------------- | ------------------------------------------------------------------------------------------------------------------------------------------------------------------------------- |
| Check market prices | Fetches market prices and reports how many lines were available or unavailable. Each line shows the reason when no price is available |
| Buy rate: Store settings | Shows default rates immediately, then automatically calculates applicable conditions once all prices are entered. Recalculates after edits. |
| Buy rate: Manual entry | Lets you enter rates directly and keeps them when market prices change. |
| ① Offer | Enter the total for the entire line. The entered amount stays fixed when reference price, rate or quantity changes. The difference is shown and an editable reason is filled in |
| ② Reset to appraised amount | Removes the fixed amount or previous adjustment and restores the calculation |
| Change to set price | Sets the offered amount for the whole quote. The appraisal for each card stays ([Change to a set price](/en/guides/purchase/set-price)) |
| Save revision N | Saves it as a revision of the quote |
:::tip
Cards on your buy boost list show the boosted price and how many are left under the market price, such as **Buy boost ¥35,000 · 4 left**. **The boosted price isn't applied to the appraisal amount automatically**, so adjust the amount as needed. See [Buy boosts](/en/guides/purchase/purchase-boosts).
:::
### Search and select appraisal requests
Search the **Appraisal requests** tab by product name, card number, certification number and so on. Space-separated words must all match. You can select unquoted and appraising cards together and move on to a quote or a second review. **Changing the search clears the selection.**
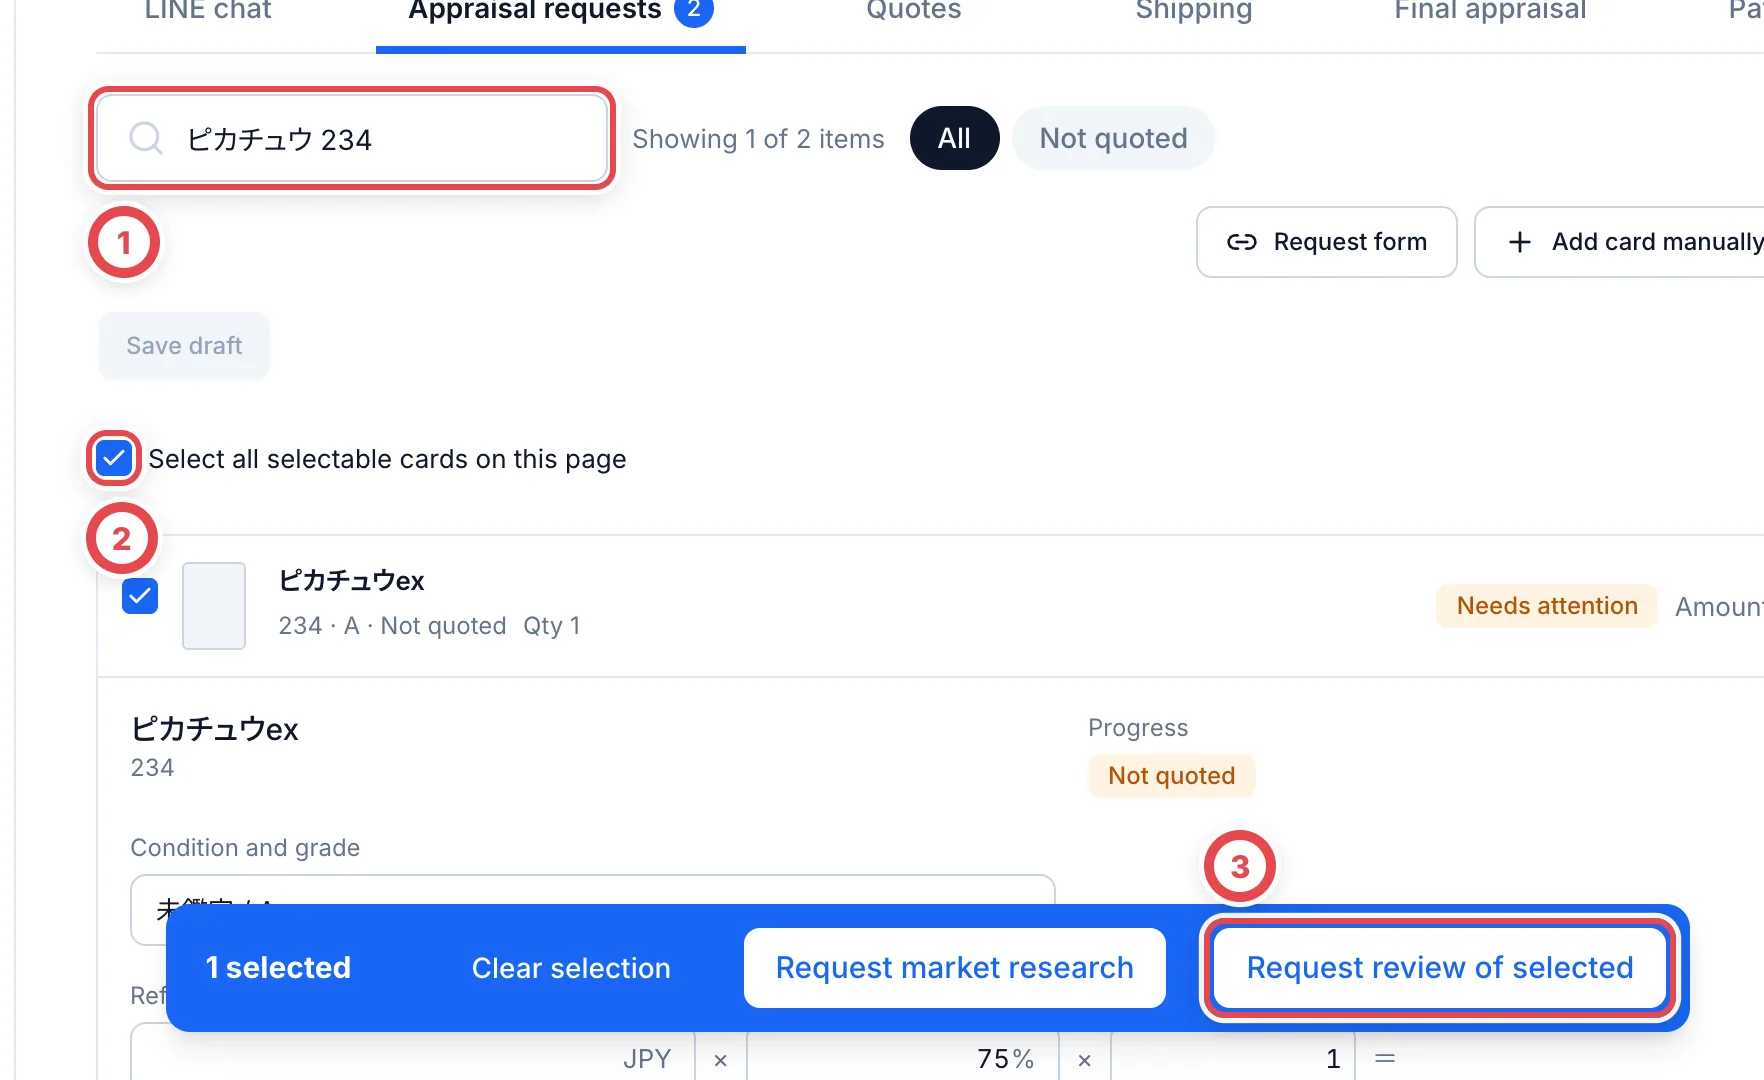 Filter with several words at ①, select the cards on screen at ②, check the amounts, then go to the second review from ③.
### Fetch SNKRDUNK sales for one card
Use **Fetch** under **Reference price** to collect the sales for that card and grade from SNKRDUNK. After it's collected, check when it was collected and the market price from the sales count or **Details**. **The appraisal and the quote don't change until you click Use reference price.**
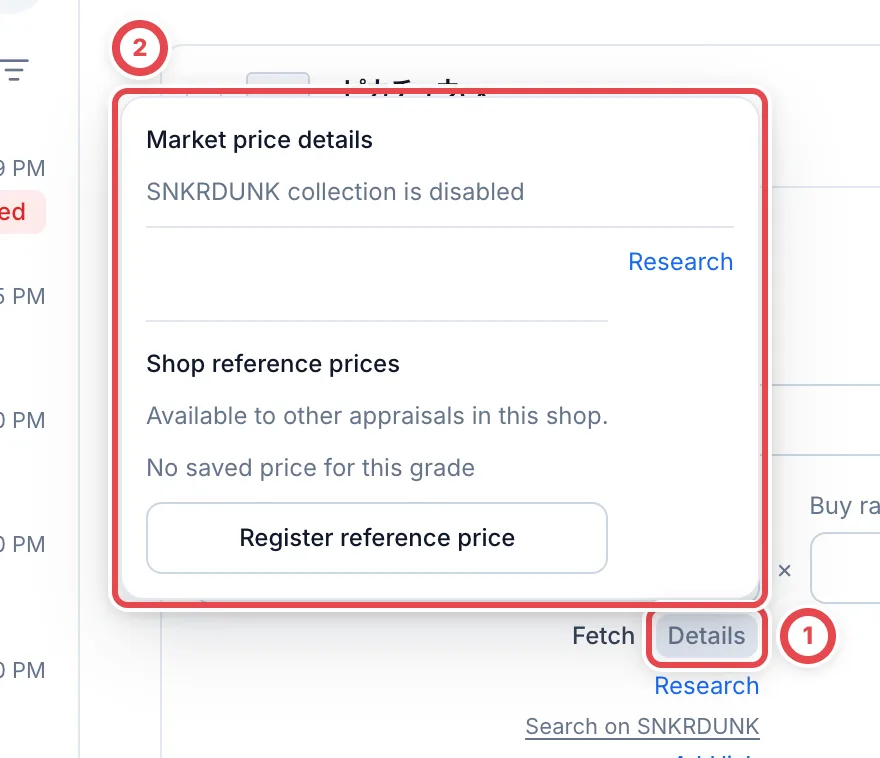 Open Details at ① and check the collection status at ②. In this example automatic collection is stopped.
While it's waiting, use **Check** to see where it is. If there are fewer than 2 sales, the product isn't supported, the card isn't covered by automatic collection, or collection failed, request market research. **View on SNKRDUNK** opens the product page. If the product isn't identified, it opens search results, so check that the card, printing and grade match.
### Register and reuse a shop reference price
Members with purchase-write and card-read access can choose a card and grade, open **Details**, and use **Shop reference prices**. These prices are available to other cases for the same card and grade in the same shop. Registering, correcting or invalidating a price does not change saved appraisal amounts.
1. Click **Register reference price** and check the card and grade.
2. Enter a positive **Reference price** at ①, the actual confirmation date and time at ②, and **Source and evidence** at ③. Times use Japan time; future confirmation times are rejected.
3. Click **Register price** at ④. History records the member, confirmation time and evidence.
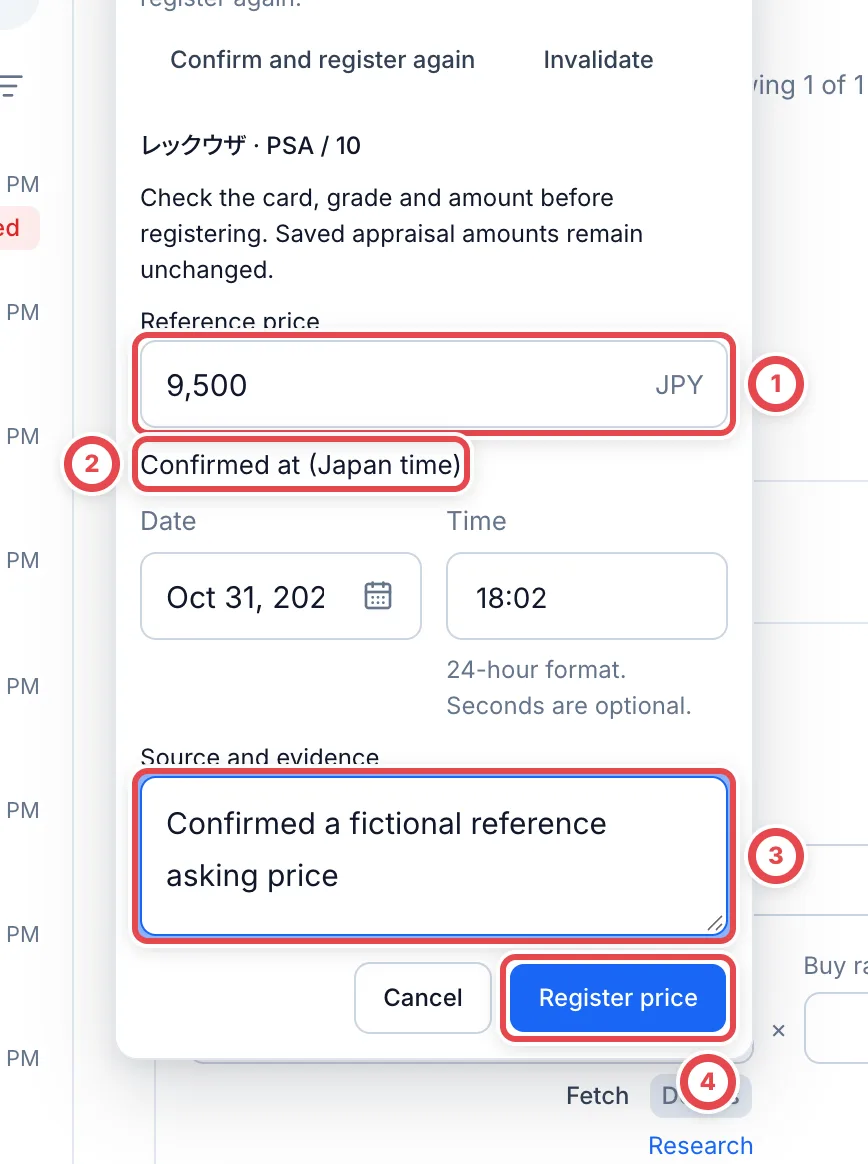 History shows up to 10 entries, newest confirmation first. Click ① **Use reference price** for an active entry, then save the appraisal draft or quote revision to commit the choice. Automatic pricing gives domestic sales priority when they produce a valid price. Shop prices do not increase domestic sale counts.
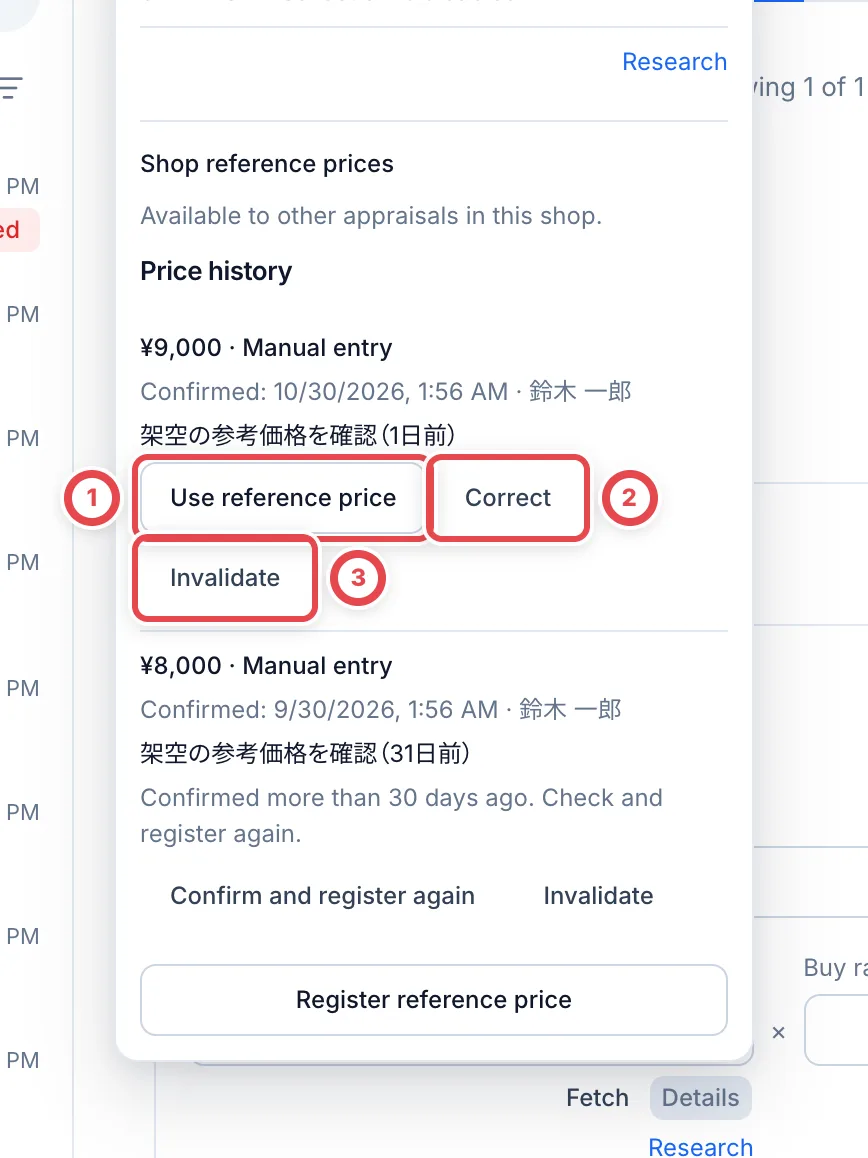 - **Correct** registers a new price, confirmation time and evidence while retaining history.
- **Prices confirmed more than 30 days ago** require **Confirm and register again** before a new appraisal can use them.
- **Invalidate** asks for confirmation. Click **Invalidate** again to remove the entry from future suggestions. History and saved appraisals that used it remain.
- **Research answers** also register a shop price when they include a card, grade, evidence and positive amount. Zero or ungrounded answers remain case-specific.
- **Changed case state** requires reloading the case and checking its current card, grade and version before retrying.
## 3. Market research and second review
For a card whose market price is unknown, click **Research** on its row to send it to a researcher. If any card's appraisal is at or above the **Review threshold**, click **Request review** to have another member check it.
 While ① Awaiting shows, you can't present the quote. When the answer arrives, it goes into the appraisal.
**While you're waiting for a research answer or a second review, you can't present the quote.** **Next step** on the deal also shows what you're waiting for. Select items on the **Appraisal requests** tab and click **Go on with selected** to open the confirmation. Unidentified and unpriced items can be handed over. With research in between, the selected cards become one second appraisal request once the answers are in. Save quantity changes before proceeding. The reviewer finishes identification and pricing on the preparation page, then checks and approves. Do not enter zero merely to fill an empty field. See [Research and reviews](/en/guides/purchase/research-and-reviews) for details.
## 4. Present the quote
Once a quote has been reviewed, or doesn't need a review, the **Present quote** section appears.
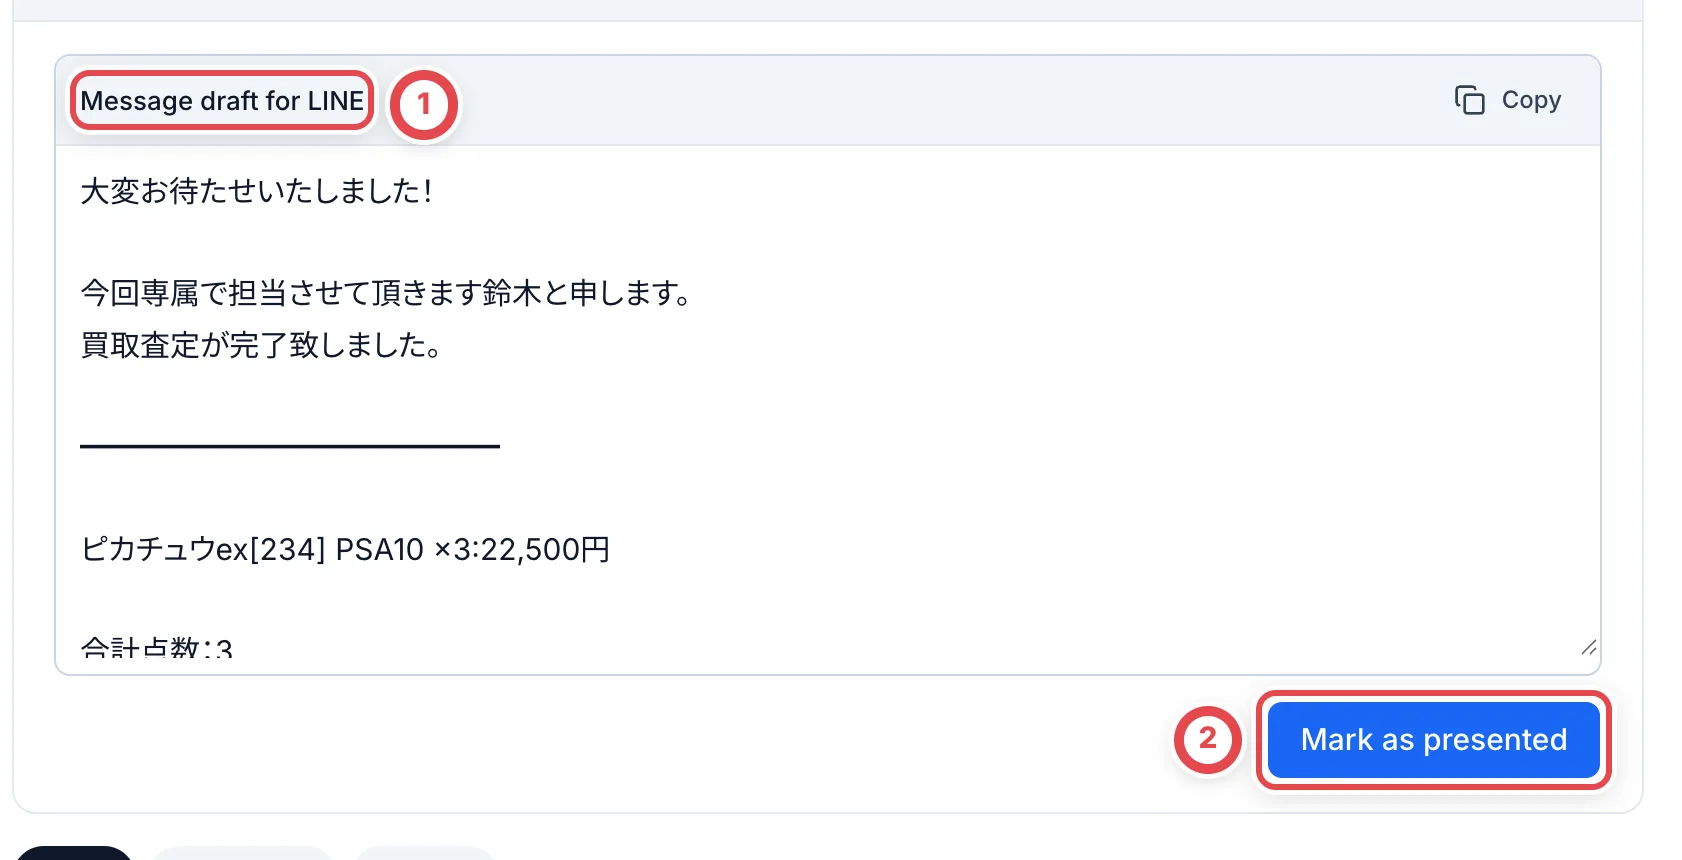 **Tell them another way**
Copy the **Message draft for LINE** (①) and send it on LINE from Liny or a
similar tool. After you send it, click **Mark as presented** (②). **A prompt
asks "Mark the quote as presented?" Click Mark as presented again to record
it, and the deal moves to the next stage.** If a record of the quote being
sent is found in the chat, you'll see a prompt such as **Did you present the
quote in this LINE message? (90% match)**. You can also record it with
**Yes, mark as presented**.
**Send on LINE**
Click **Send quote on LINE**, check the contents, and click **Send on
LINE**. This button appears only for shops that set **Quote delivery** to
**Sent automatically when the quote is presented** in the LINE settings. A
successful send doesn't mean the customer has read or accepted the quote.
Save a PDF of the quote with **Download quote PDF**.
If a reviewed quote is changed only by removing cards or changing quantities, you can present the requote without another review. If you change unit prices, buy rates, grades or adjustments, or the quote uses a set price, the usual review rules decide whether a review is needed.
## 5. Record the customer's response
When the customer replies, record it under **Record customer response**.
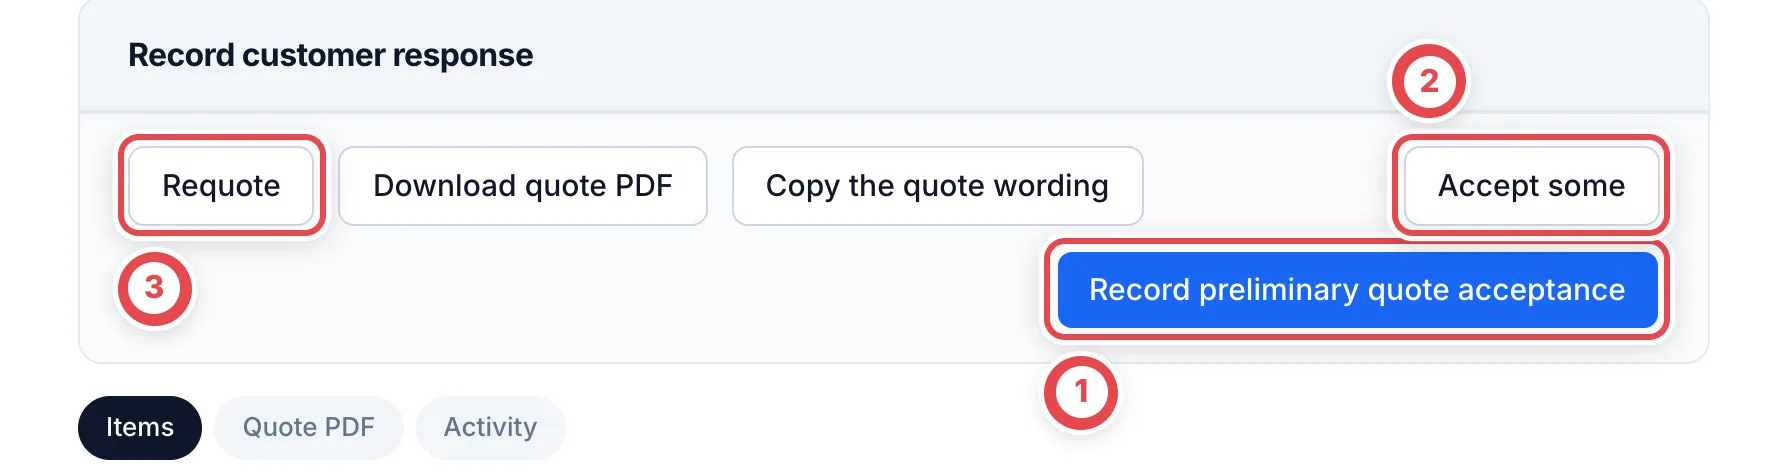 | The customer's answer | Button to click | What happens |
| ----------------------- | ----------------------------------------- | ---------------------------------------------------------------------------------------------------- |
| Accepts everything | ① **Record preliminary quote acceptance** | Click **Record** in the confirmation and the deal becomes **Accepted** and moves on to shipping |
| Accepts only some | ② **Accept some** | Choose the accepted cards. Cards that were passed over go back to unquoted on **Appraisal requests** |
| The amount doesn't work | ③ **Requote** | Make the quote again and present it again |
Partial acceptance selects whole rows, including every unit in each selected row. A set-price quote cannot be partially accepted; select the intended items and requote instead.
## Troubleshooting
| What's happening | What to check and how to fix it |
| ------------------------------------------------------------------- | ------------------------------------------------------------------------------------------------------------------------------ |
| **Identify** shows no candidates | The name the customer wrote may not match. Use fewer words, or search by card number or set name |
| The reference price stays empty | Domestic sales may be insufficient and no active shop price available. Check **Details**, then request **Research** if needed |
| **Present quote** doesn't appear | You're waiting for a market research answer or a second review. Check **Next step** on the deal to see what you're waiting for |
| "This quote includes N unidentified items" and you can't present it | Some items in the quote aren't identified yet. Identify them in the item list, then present the quote |
| You fetched a price with **Fetch**, but the amount didn't change | Fetching alone doesn't change it. Open **Details** and click **Use reference price** |
| The buy boost price isn't there | The boosted price doesn't fill in automatically. Enter the total for the line in **Offer** |
| You can't make a quote PDF | Your business details aren't filled in under **Organization** settings |
## Related workflows
- [Request a missing card in the catalogue](/en/guides/purchase/card-registration-requests)
- [Record and handle price-increase requests](/en/guides/purchase/price-increase-requests)
- [Undo an operation from history](/en/guides/purchase/history-and-undo)
---
# Bulk lots and set prices
Source: https://docs.toreca-cloud.com/en/guides/purchase/bulk-and-set-price
| When | Use | What is recorded |
| ----------------------------------------------------------- | --------- | -------------------------------------------------------------------------------------- |
| You buy 300 normal cards together for ¥100 | Bulk lot | The bundle becomes one line, with its card count and the amount for the whole lot |
| You appraised each card and offer ¥50,000 for them together | Set price | Each card's appraisal stays, and the offered total for the whole quote becomes ¥50,000 |
**A bulk lot is one amount for the bundle. A set price is the offered total for the whole quote.** For 300 cards at ¥100, the ¥100 is not multiplied by 300.
## Bulk lots
Use a bulk lot in the final appraisal, after you receive the goods. Add it before you finalize and present the final quote.
### 1. Click Add a bulk lot
If you are viewing the final appraisal, click **Edit appraisal**. **Add a bulk lot** (①) is above the lines in the editor.
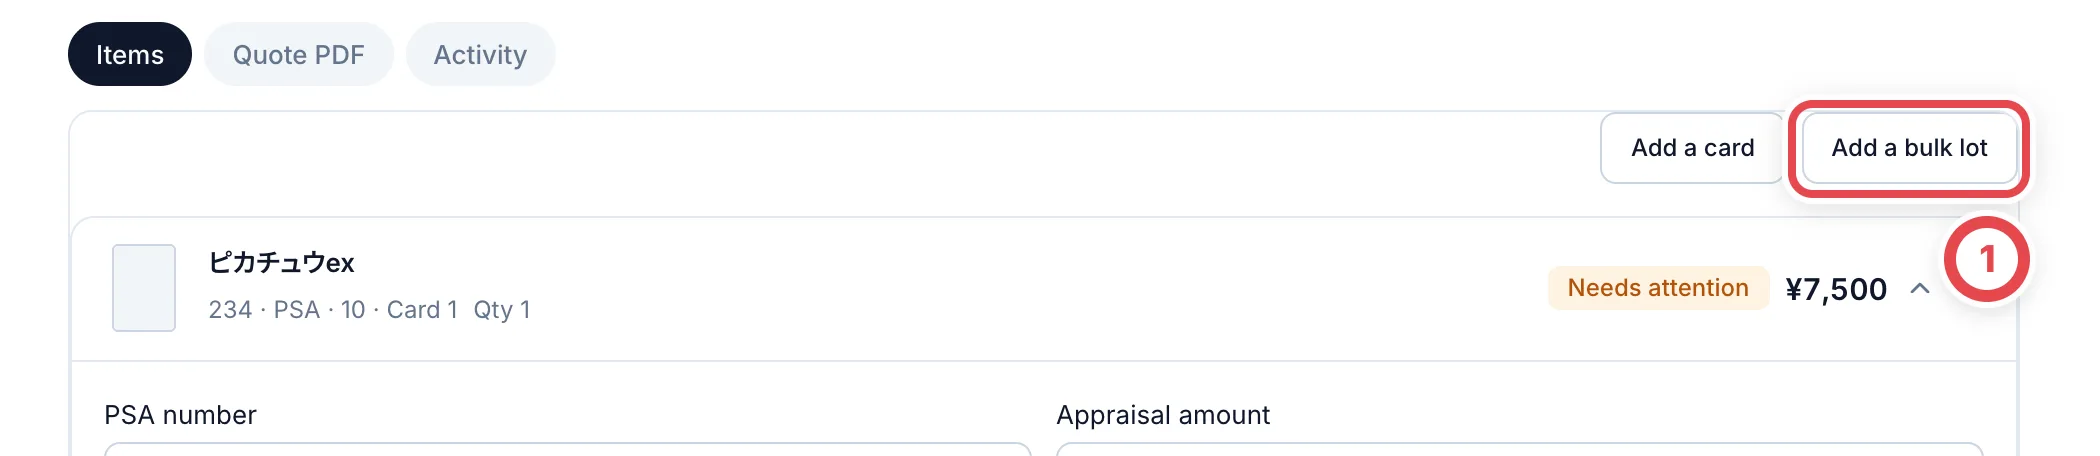 In the individual final editor, save any changes to amounts, numbers or purchase decisions before adding a bulk lot. Save changes to the set total first as well.
### 2. Enter the name, count and amount
Enter a name such as "Normal cards" in **Line name** (①), the number of cards in the bundle in **Number of cards** (②), and the amount for the whole bundle in **Appraised amount for the whole lot** (③). If needed, write a **Note (optional)** too, then click **Add** (④).
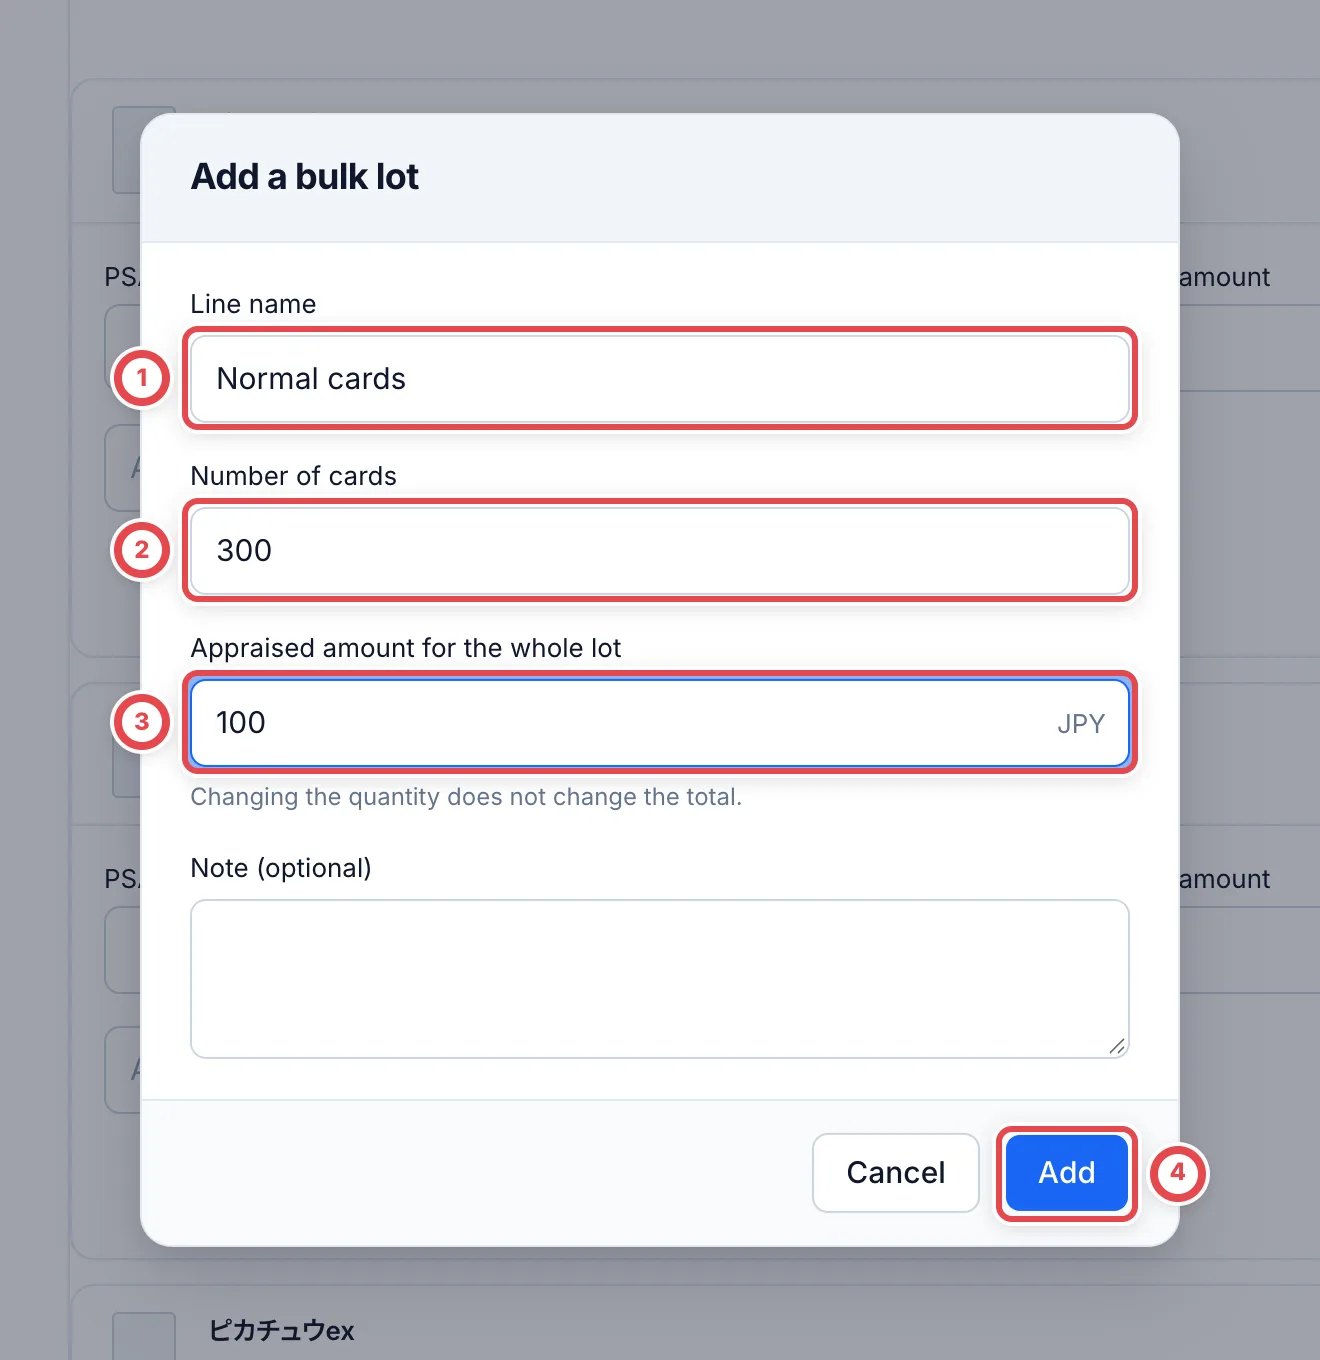 :::note
For 300 cards at ¥100, **Number of cards** is 300 and **Appraised amount for the whole lot** is 100. **Changing the count does not change the amount for the whole lot.** If you change the amount too, edit it separately.
:::
### 3. Check the line and move on
Check the count and the amount on the line you added. After saving the final appraisal, continue to presenting the final quote. Online purchases may require a second review first, depending on the amount. In-store purchases do not request second reviews.
### Stock and returns
| Case | What happens |
| ------- | -------------------------------------------------------------------------------------------------------------- |
| Stock | The bundle becomes one unit and keeps its card count. The 300 cards do not each get their own unit or QR label |
| Returns | If you don't buy the bundle, the whole bundle line becomes a return item |
If you want to appraise and manage cards one by one, don't use a bulk lot. Register them as ordinary card lines.
## Set prices
A set price keeps each card's appraisal and sets the total offered for the whole quote.
See [Change to a set price](/en/guides/purchase/set-price) to set or change the total.
## Troubleshooting
| What's happening | What to check and how to fix it |
| -------------------------------------------------------- | ---------------------------------------------------------------------------------------------------------------------------------------------------------------------------------------------------- |
| You can't find **Add a bulk lot** | Open **Edit appraisal** in the final appraisal. It is not on the preliminary quote screen |
| You think the bulk lot amount is multiplied by the count | The amount is for the whole bundle. Changing the count does not change the amount |
| You want each card in the bundle in stock one by one | A bulk lot becomes one unit. To manage cards one by one, register them as ordinary card lines |
| You can't use **Accept some** on a set-price quote | Requote a preliminary set-price offer with the intended items. Individual online final quotes allow selecting units and checking their shares; in-store purchases require requoting before signature |
| You want to stop using the set price | In the individual final editor, clear **Set total (optional)** and save. Elsewhere use **Remove set price** and save ([steps](/en/guides/purchase/set-price)) |
---
# Request a missing card in the catalogue
Source: https://docs.toreca-cloud.com/en/guides/purchase/card-registration-requests
When searches by name, number and set cannot find the correct card, request registration. Open it from an unidentified line, item addition or AI-reading review. Purchase editing permission is required.
The current request form creates a shop-only provisional card when you select its game, allowing the purchase to continue. Shared catalog registration is a separate review. For older requests without a provisional card, apply the card to the line after the operator registers it. This action is not offered by every picker, such as the receipt form’s search.
## 1. Open the request from an unidentified line
On the customer’s **Appraisal requests**, select **Identify** for the correct line. Check search terms and game, set, rarity and language at ①. Avoid choosing a different variant. If the card is absent, use **Request catalogue registration** at ②.
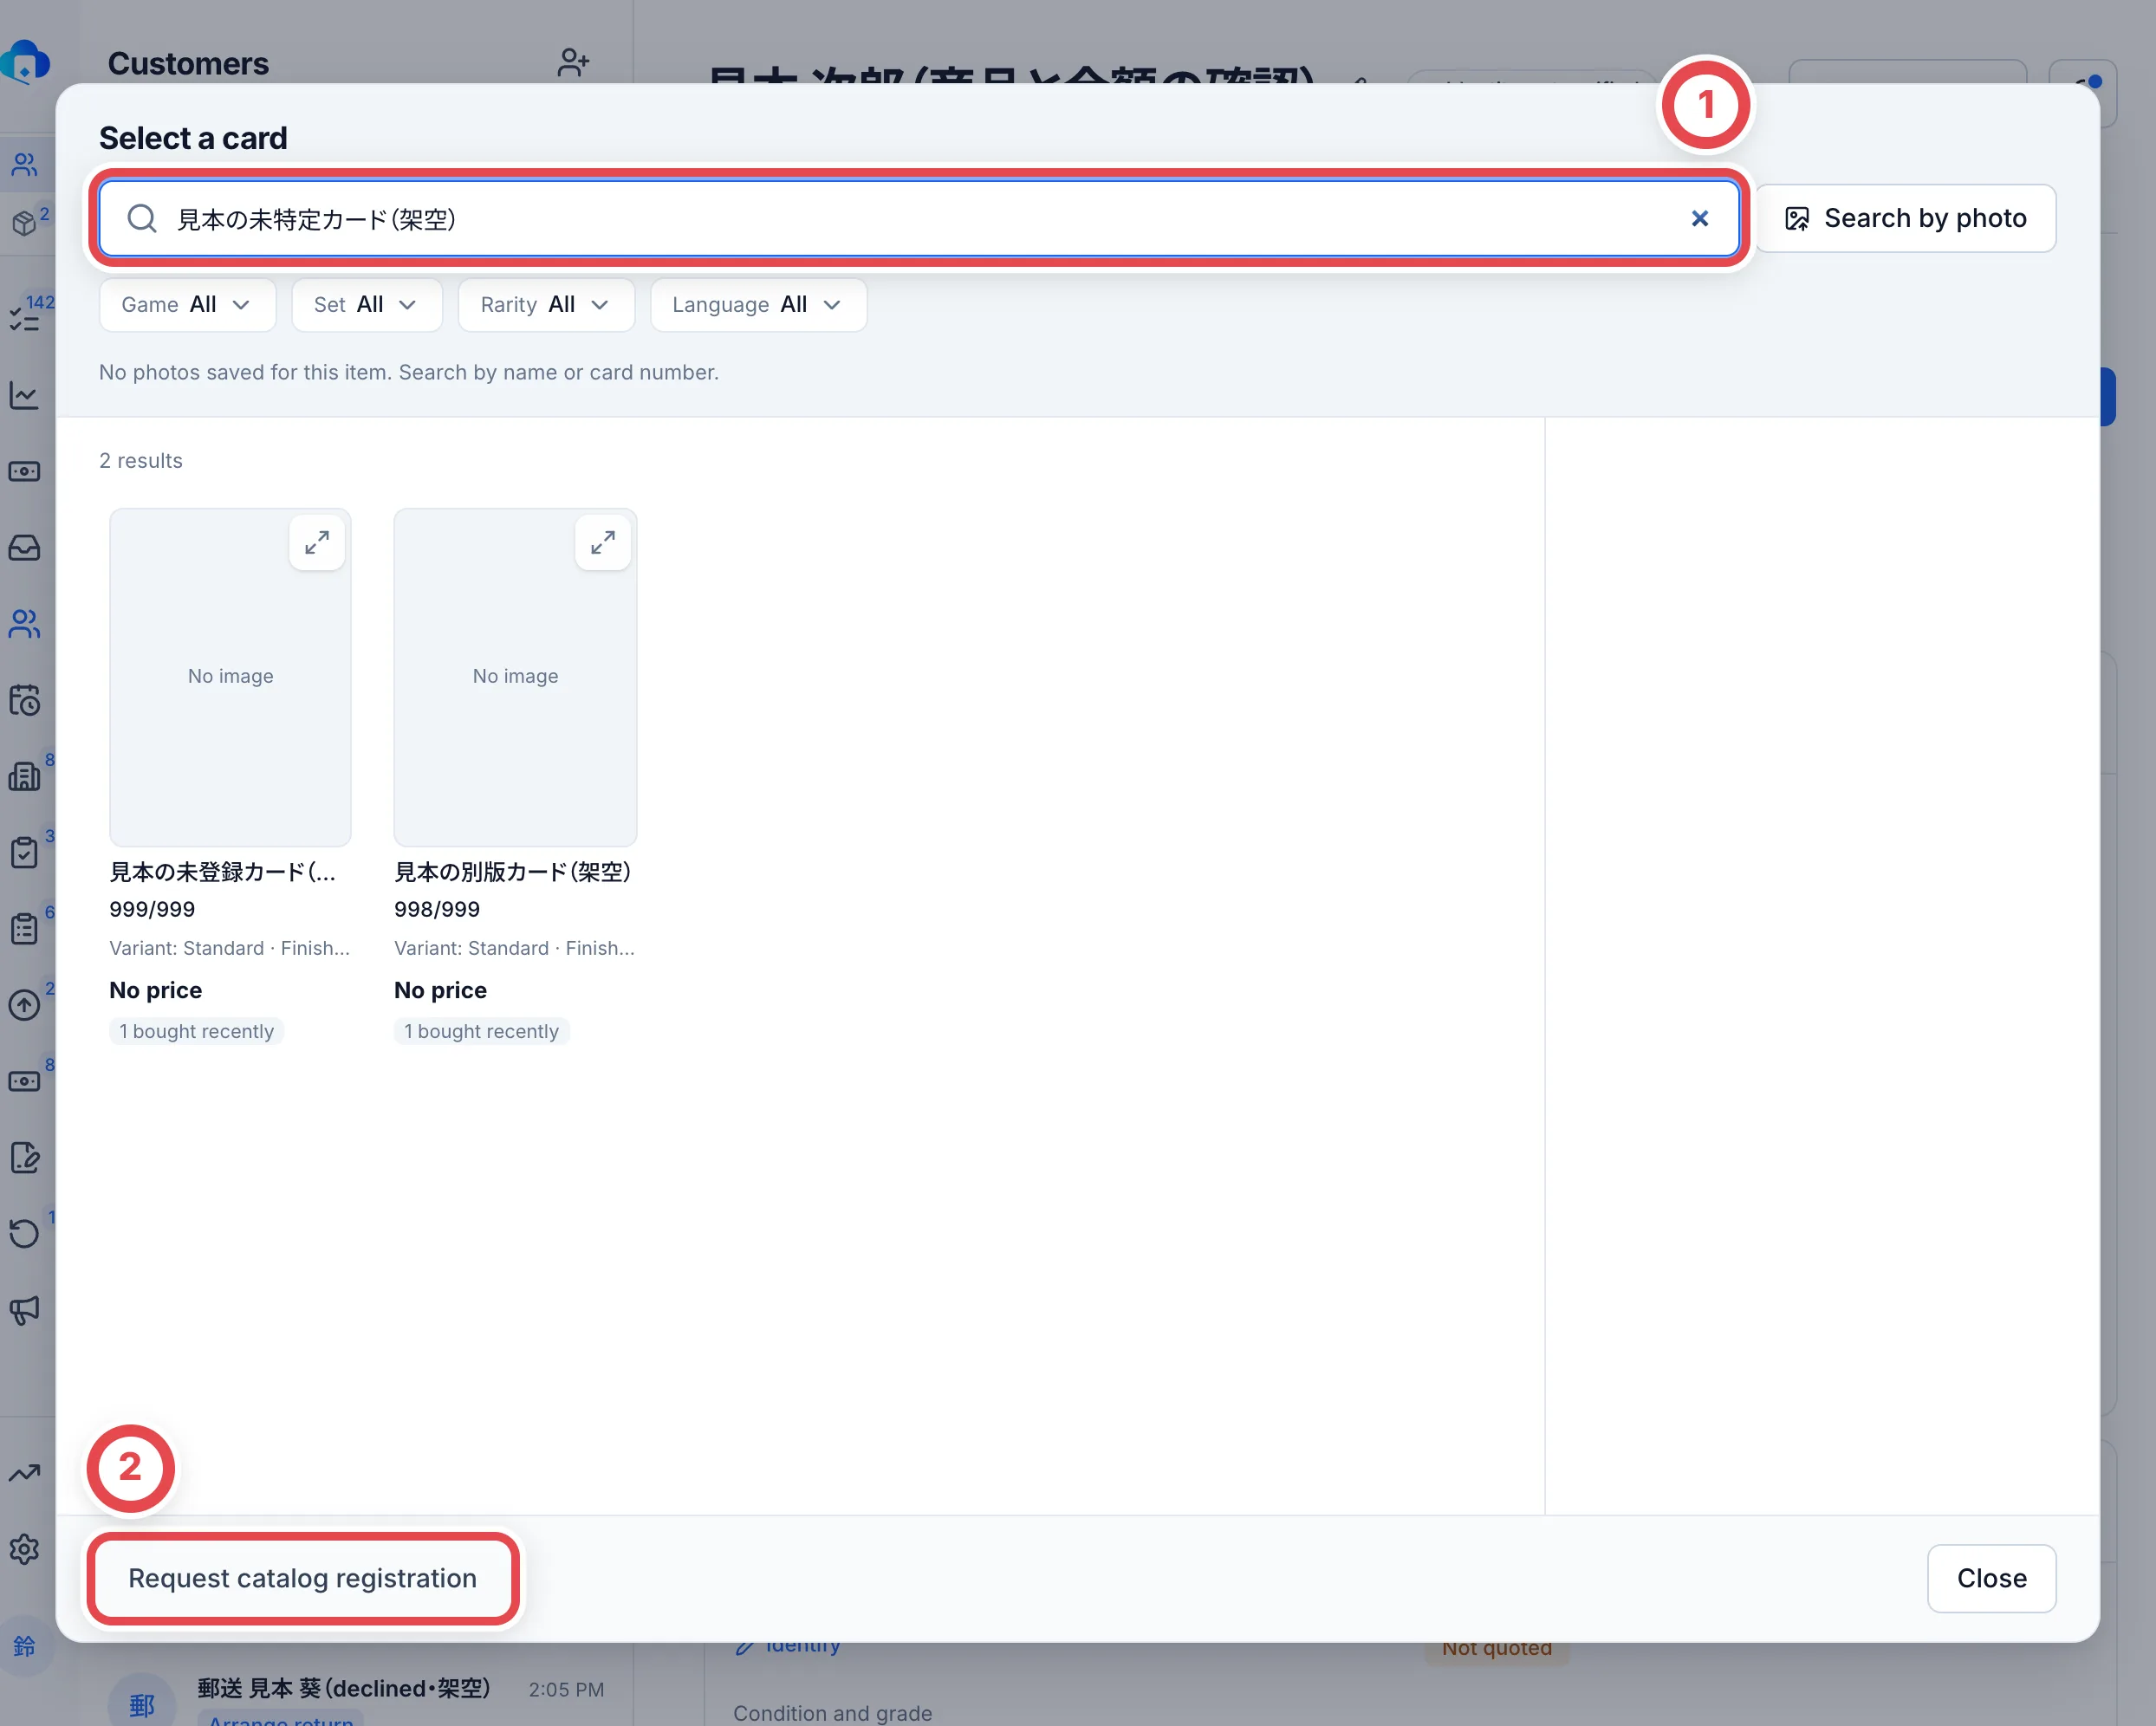 ## 2. Check card details and shared photos
Check the game and card name at ①; the name is required. Include the denominator in the card number, and add set and edition details where known. Check the photos selected at ②. Internal appraisal photos are excluded from this request.
:::warning
The request button at ③ saves the selected details and photos as a registration request. Check that they belong to this line and contain no unnecessary personal information.
:::
If you know the SNKRDUNK product URL, select the physical item’s grading company and grade (or condition for ungraded cards), then use **Fetch product details**. If the result differs from existing input, review whether to retain the input or use the candidate. If lookup fails, you can enter the required details manually. Fetching does not confirm registration.
A request can be submitted without photos. If more visual detail is needed, add suitable photos to the line first.
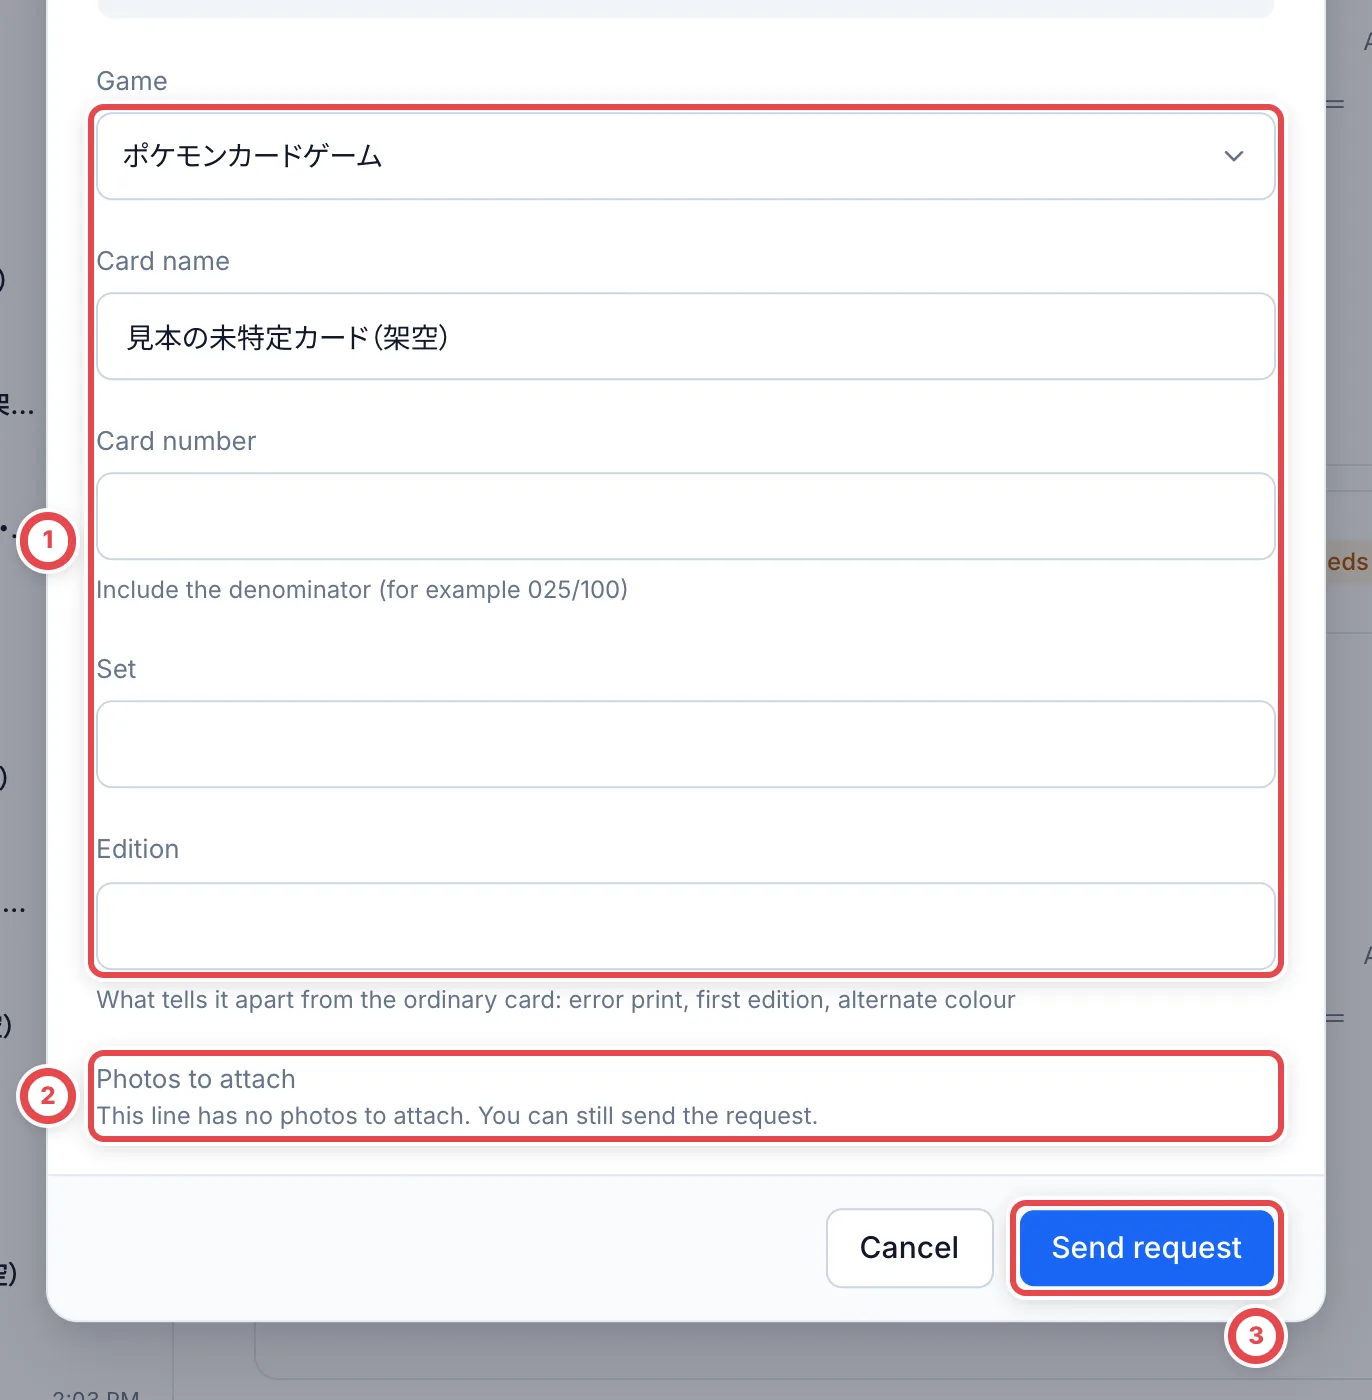 ## 3. Read the response and apply the registered card
Reopen the original line and check its request status at ①. A notice that you can continue with a provisional card means you can appraise that shop-only card while catalog review is pending. See the next section for shop review.
| Status | Next action |
| ----------------------------------------------- | ------------------------------------------------------------------------------------------------------------------------------ |
| Registration requested, with a provisional card | Continue appraisal with the provisional card; use shop review below for shared catalog registration. Avoid duplicate requests. |
| Registration requested, older request | Wait for the operator; avoid duplicate requests. |
| Registered, older request | Verify name, number and edition, then use the offered button to identify this line with that card. |
| Declined | Read the operator’s note, correct details and request again, or search again. |
After applying the card, reload the line and check card, edition and quantity before pricing.
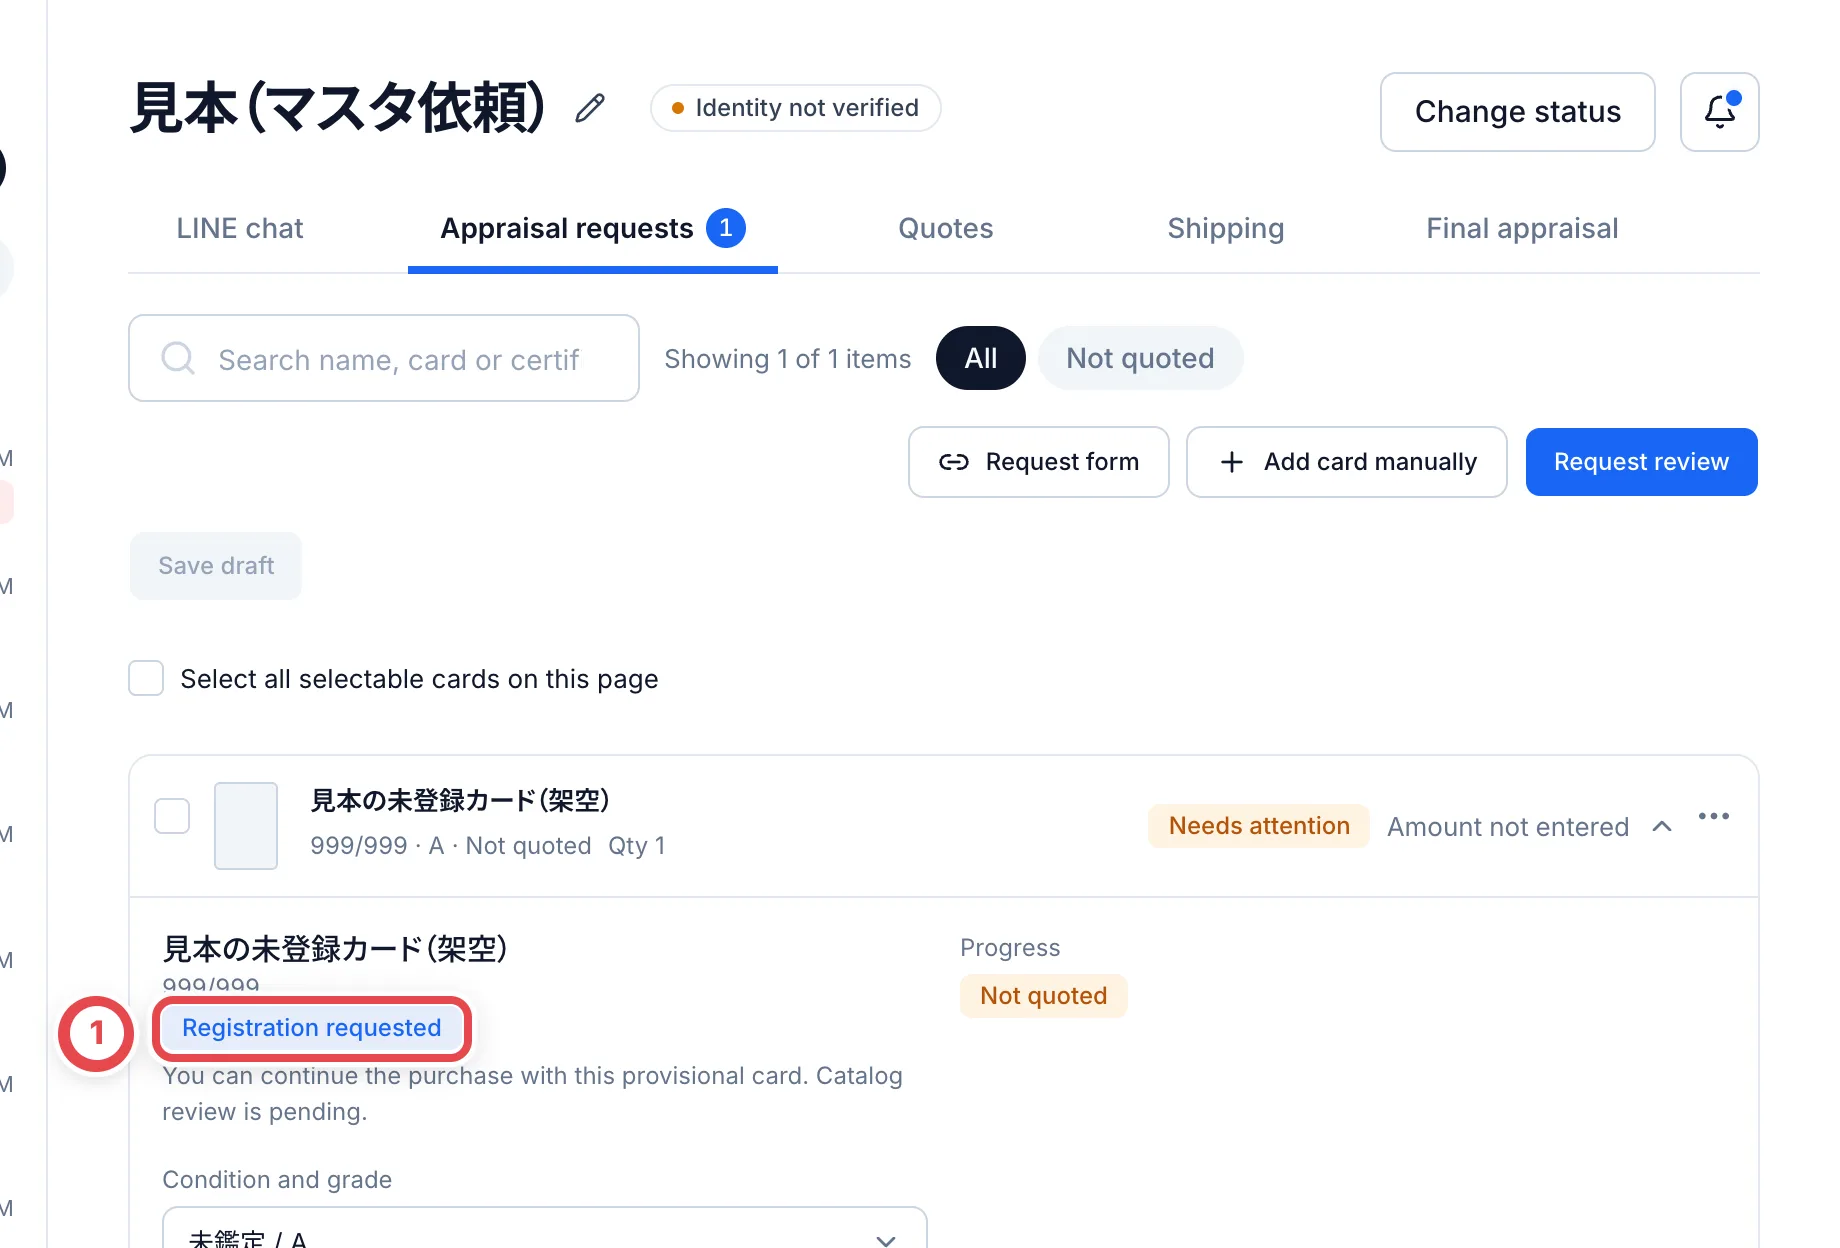 ## 4. Review a provisional card in the shop
Open **Market prices** → **Catalog requests**. Requests marked ① **Shop review** show ② **Review request** for authorized members. **Operator review** requests cannot be confirmed here.
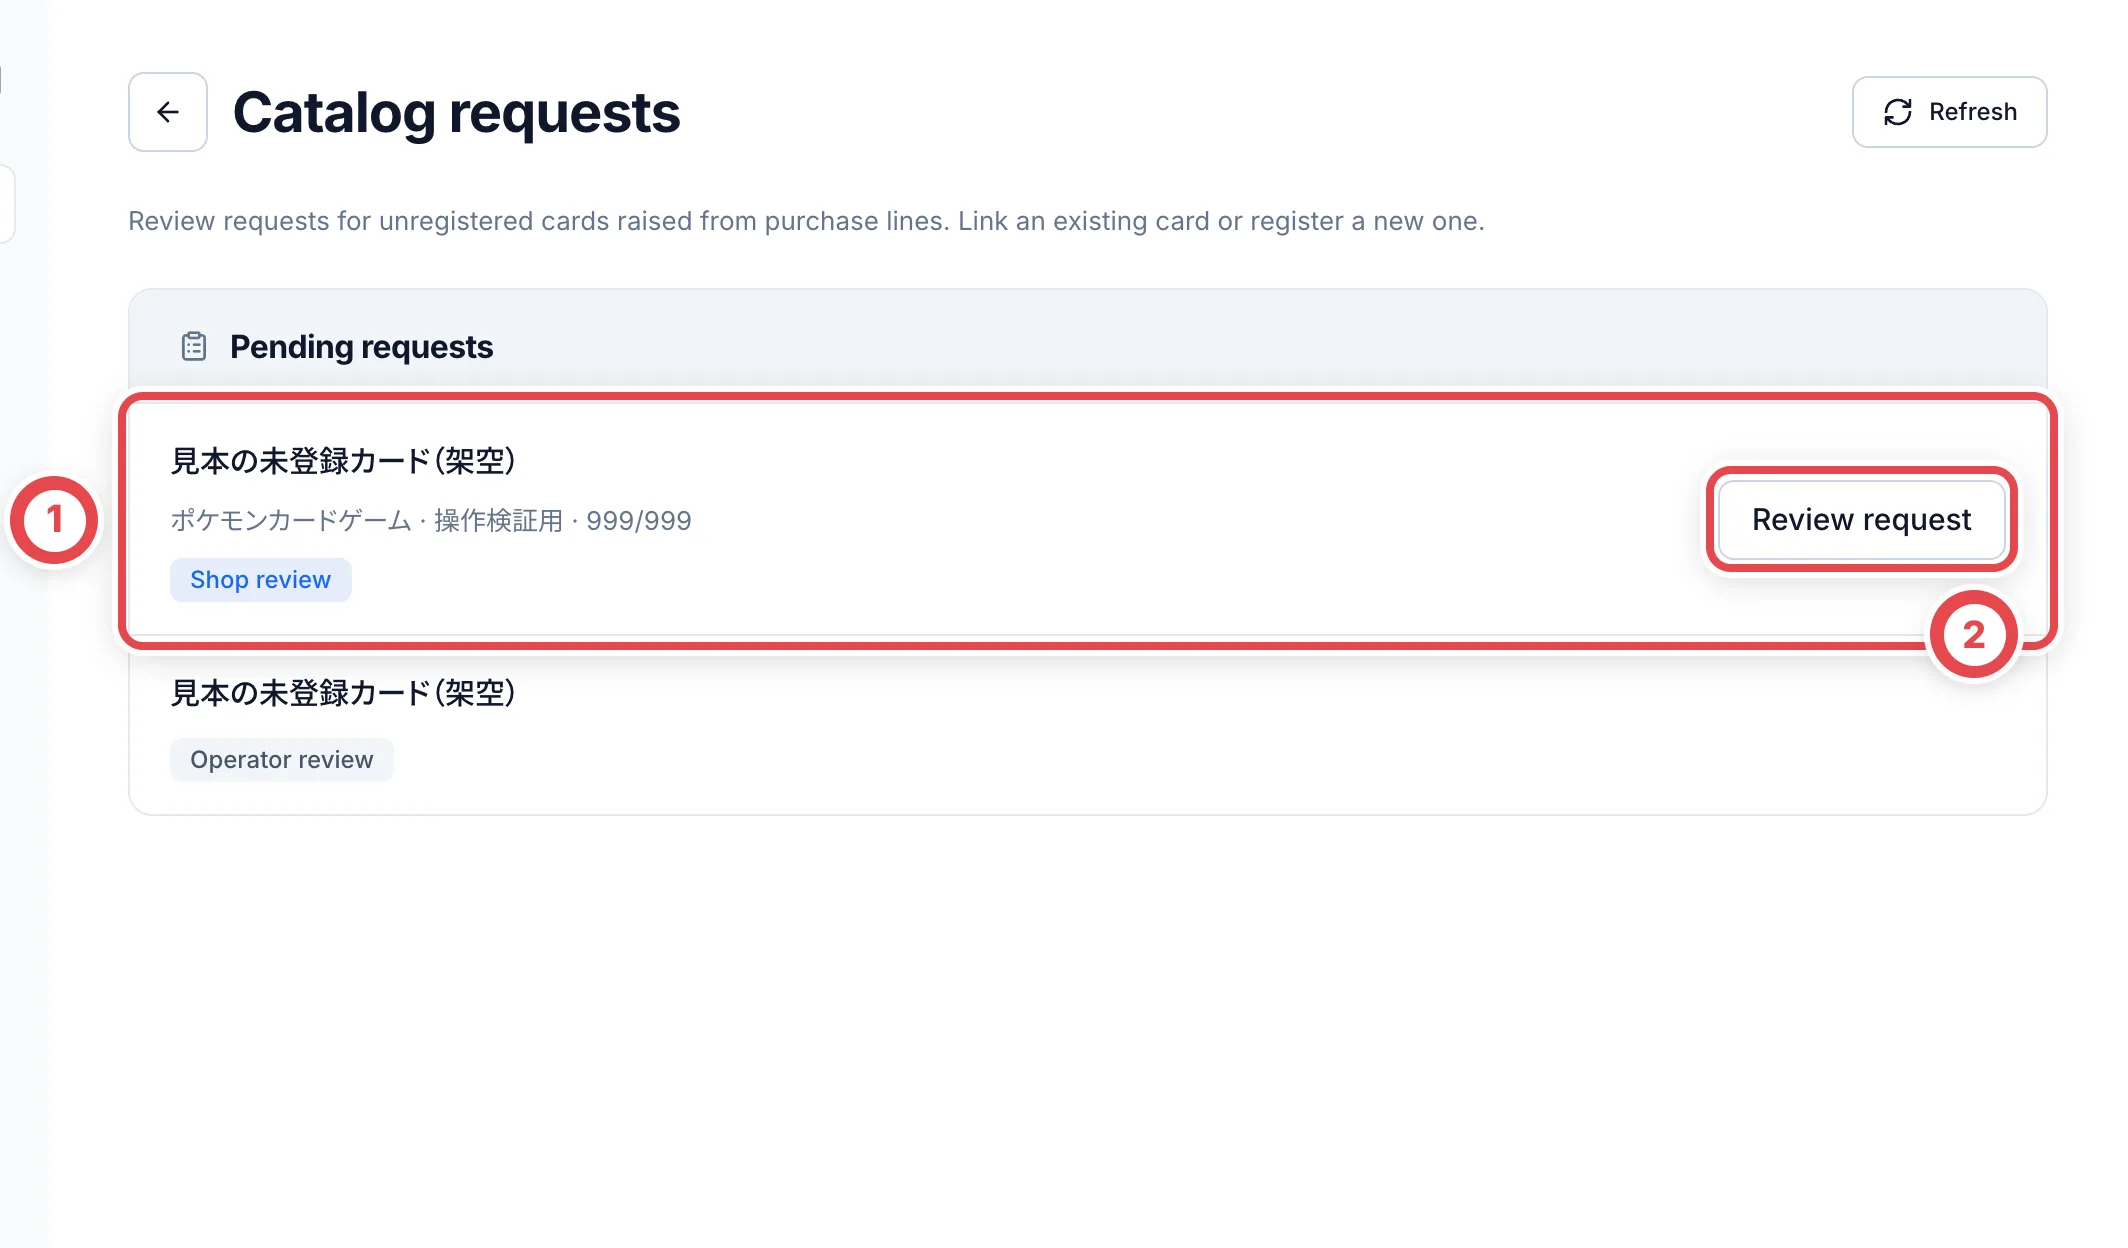 Choose the method at ①. If the card already exists, use **Link existing card** → **Find existing card** and match its game, number and printing. Otherwise choose **Register new card** and check its name, number and Edition region. Do not guess Japan when the region is unknown.
Check any image selected for use. If the option to use a SNKRDUNK product as the market source appears for a Japanese card, verify that URL too. Enter ② **Reason**, then click ③ **Review changes**.
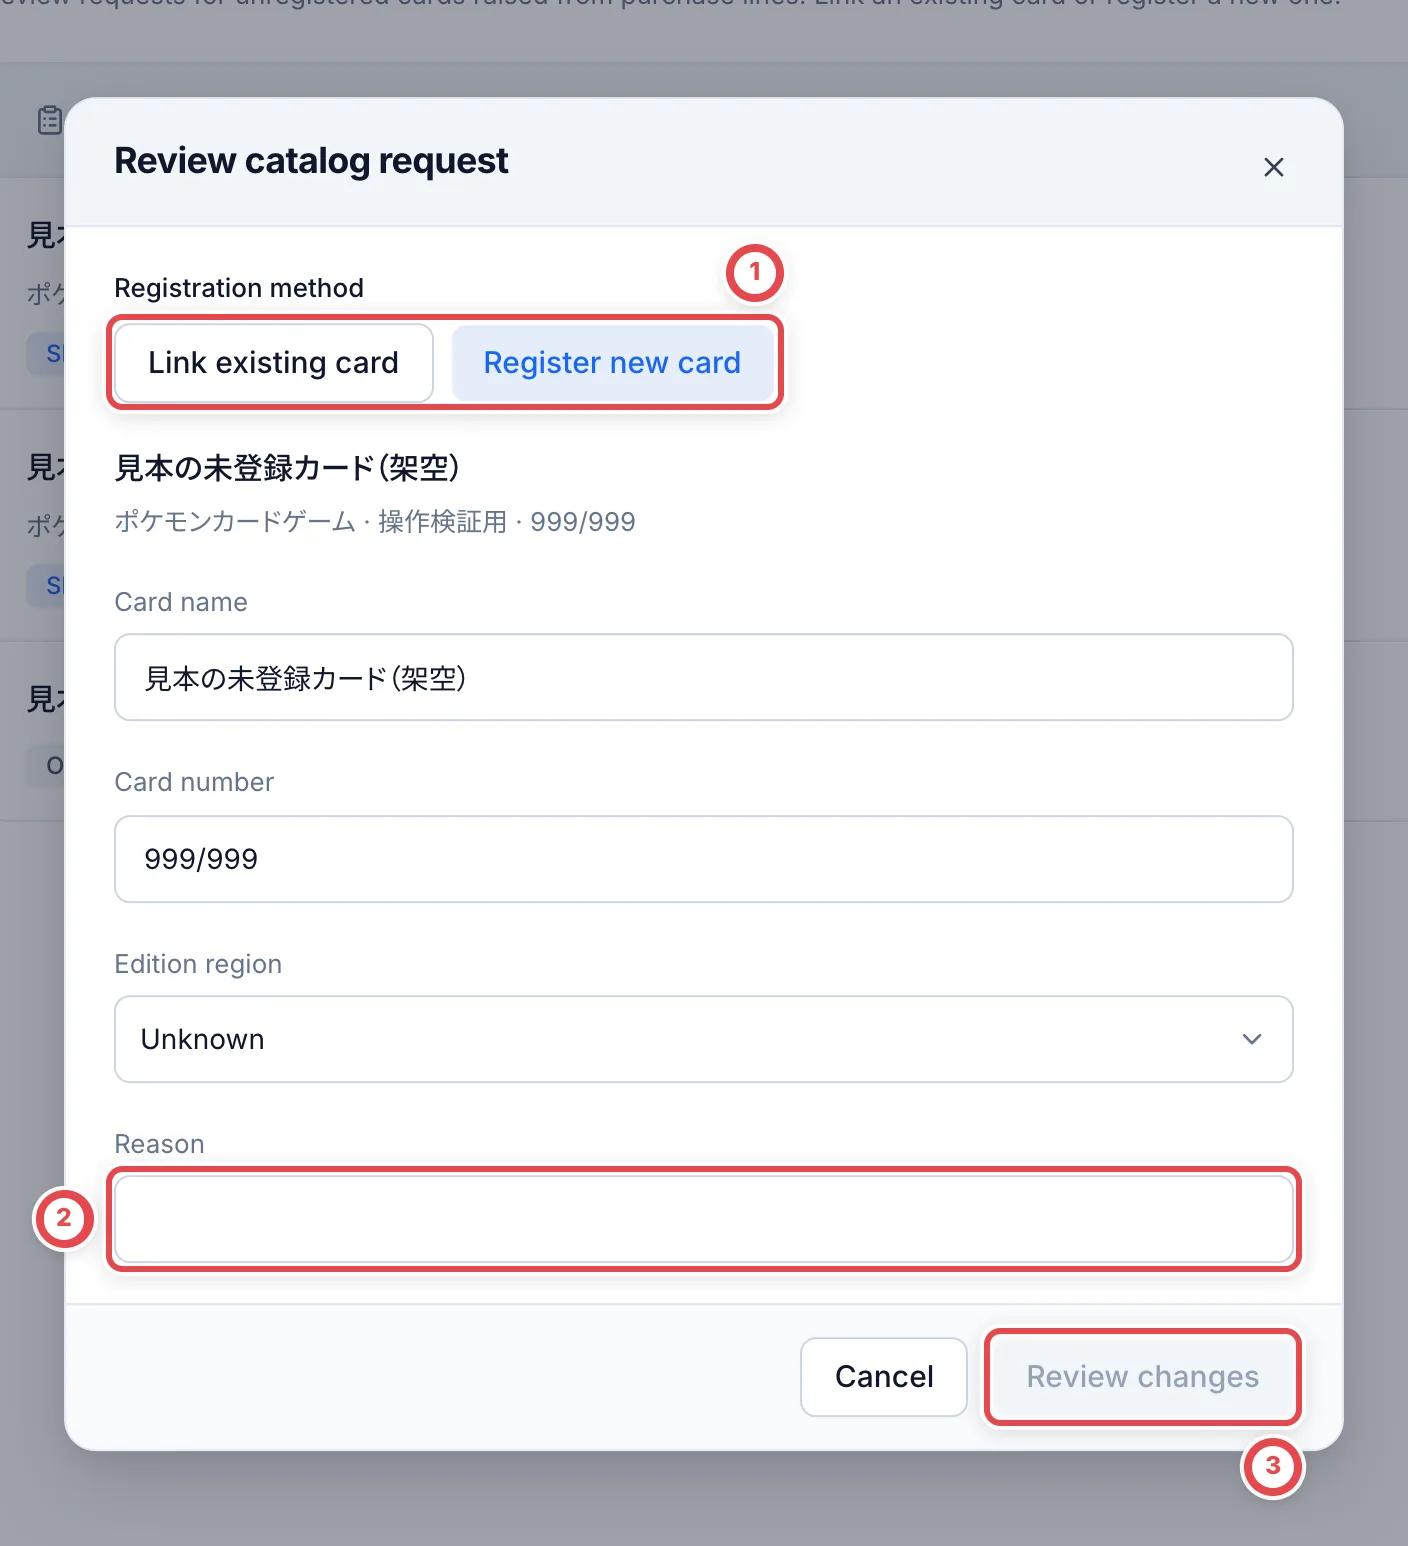 Check the registration details and the affected purchase-line and inventory counts in the preview. Use **Back** to correct them.
:::warning
**Confirm registration** registers the shared card or links an existing card and applies the change to related purchase and inventory records. Opening the preview does not commit it. Check the target, impact and reason before confirming.
:::
Refresh the list, then check the original line and stock for the correct card, number and printing. Approval requires catalog-approval and purchase-history correction permissions, plus inventory-history correction permission if stock exists. If the records have changed, reopen the request and review the latest impact.
## 5. Add a SNKRDUNK link for an identified product
If the card or sealed product is already identified but has no shared SNKRDUNK link, use **Add link** on the appraisal item. The shop must have SNKRDUNK links enabled, and you need purchase editing permission. Identify an unknown product first or use the catalog registration request above.
1. Compare the displayed product name, number and language with the physical item
2. Enter a product URL in the form `https://snkrdunk.com/apparels/…` under **SNKRDUNK product URL**. Use **Check product page** to confirm the product and printing. **Get product details** can retrieve its name and image. If retrieval fails, check the product page before saving
3. Click **Save and request approval**. **This saves a provisional link for this purchase and requests shared catalog registration.** It does not yet set the shared link for all shops
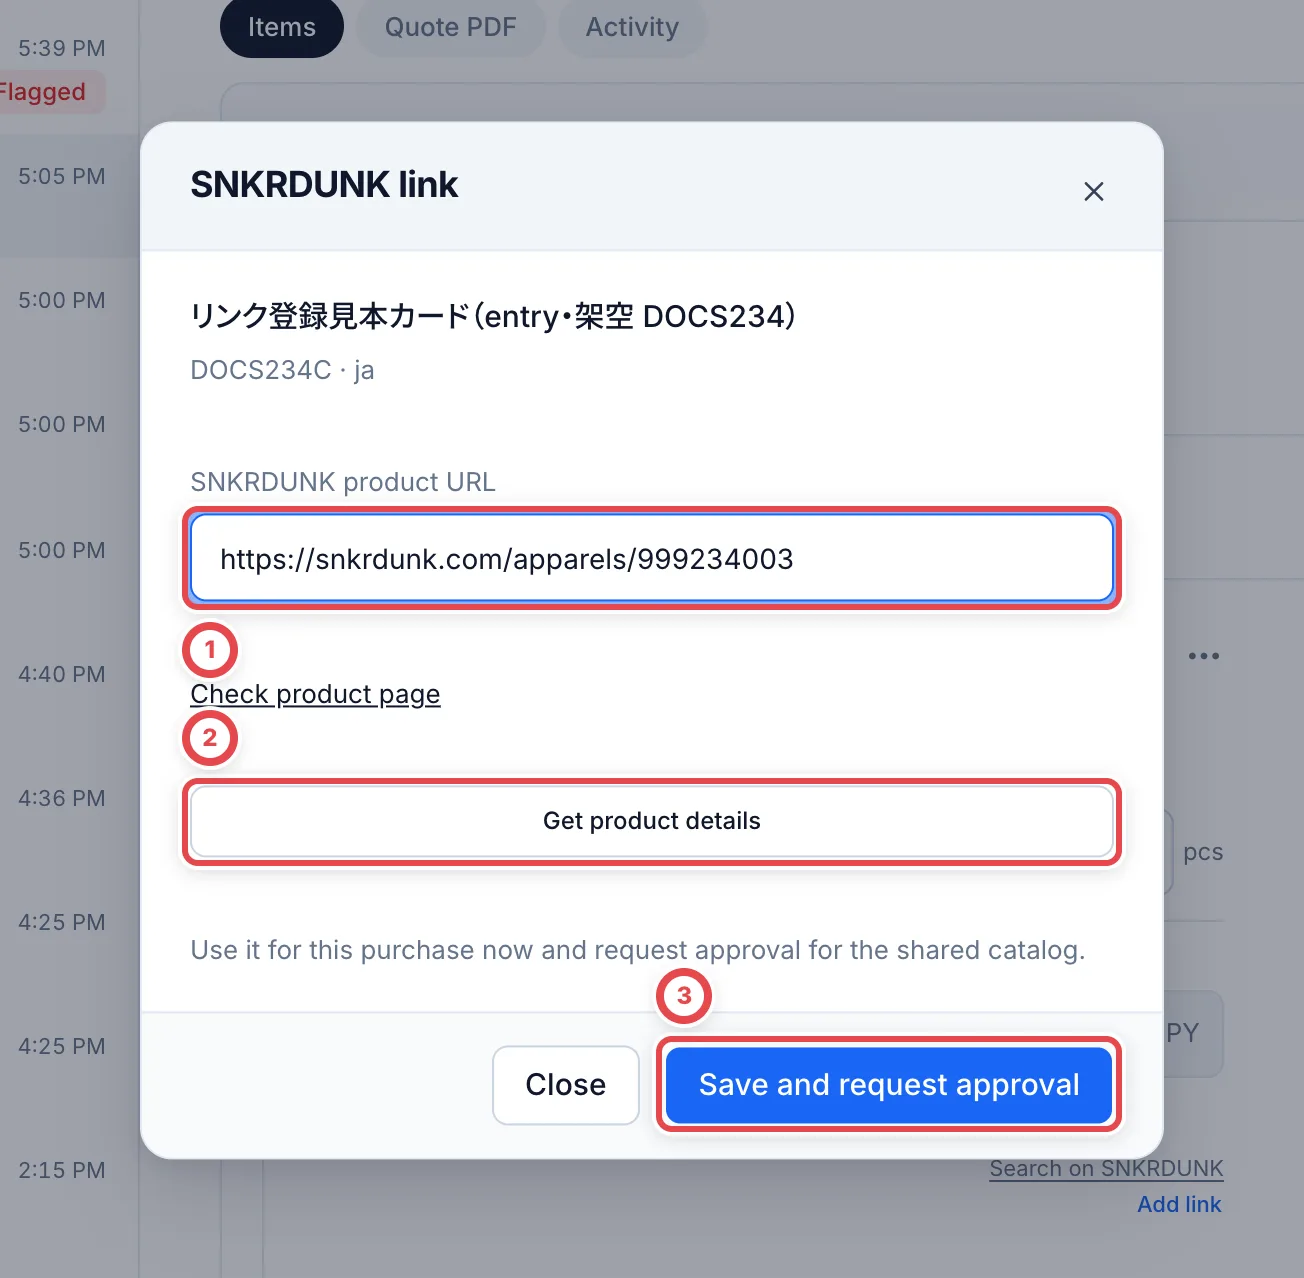 Enter the URL at ①, optionally retrieve details at ② and request registration at ③.
While pending, **Link status** shows the URL and state. If product identification changes, withdraw the existing request before adding the correct one. Products with a shared link, an operator-disabled link or a non-editable appraisal cannot receive a new link here.
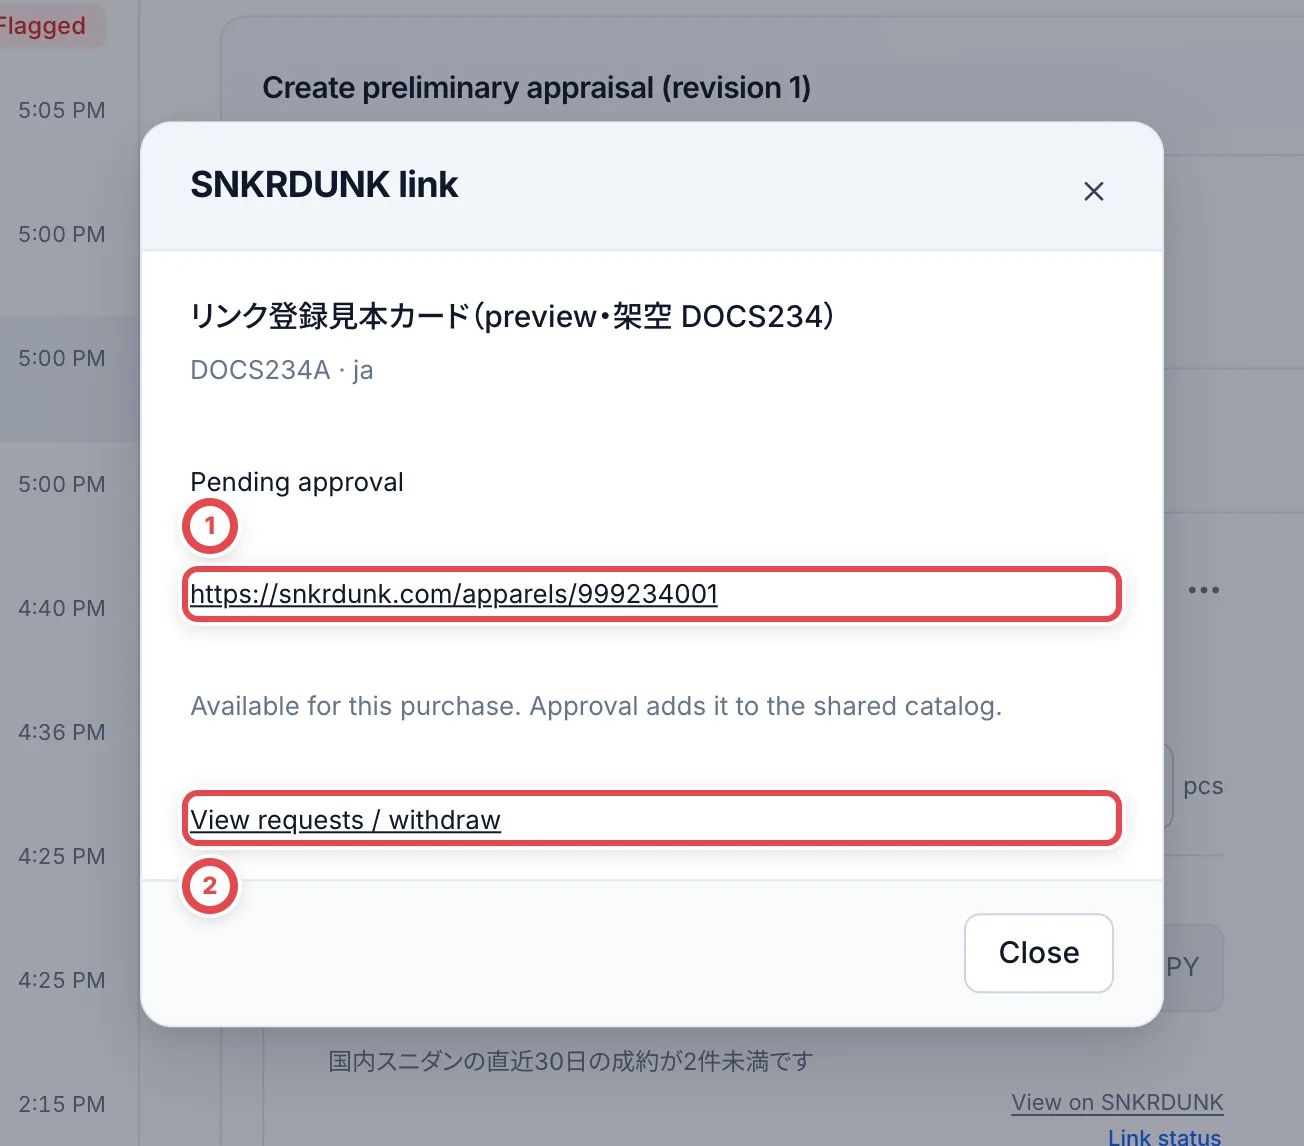 ① is the provisional link for this purchase. Open the request list or withdraw it with ②.
### Approve the shared link in the shop
Open **Market prices** → **Catalog requests** → **SNKRDUNK link requests**. Members with catalog approval permission see **Approve** and **Reject**; purchase editors see **Withdraw**.
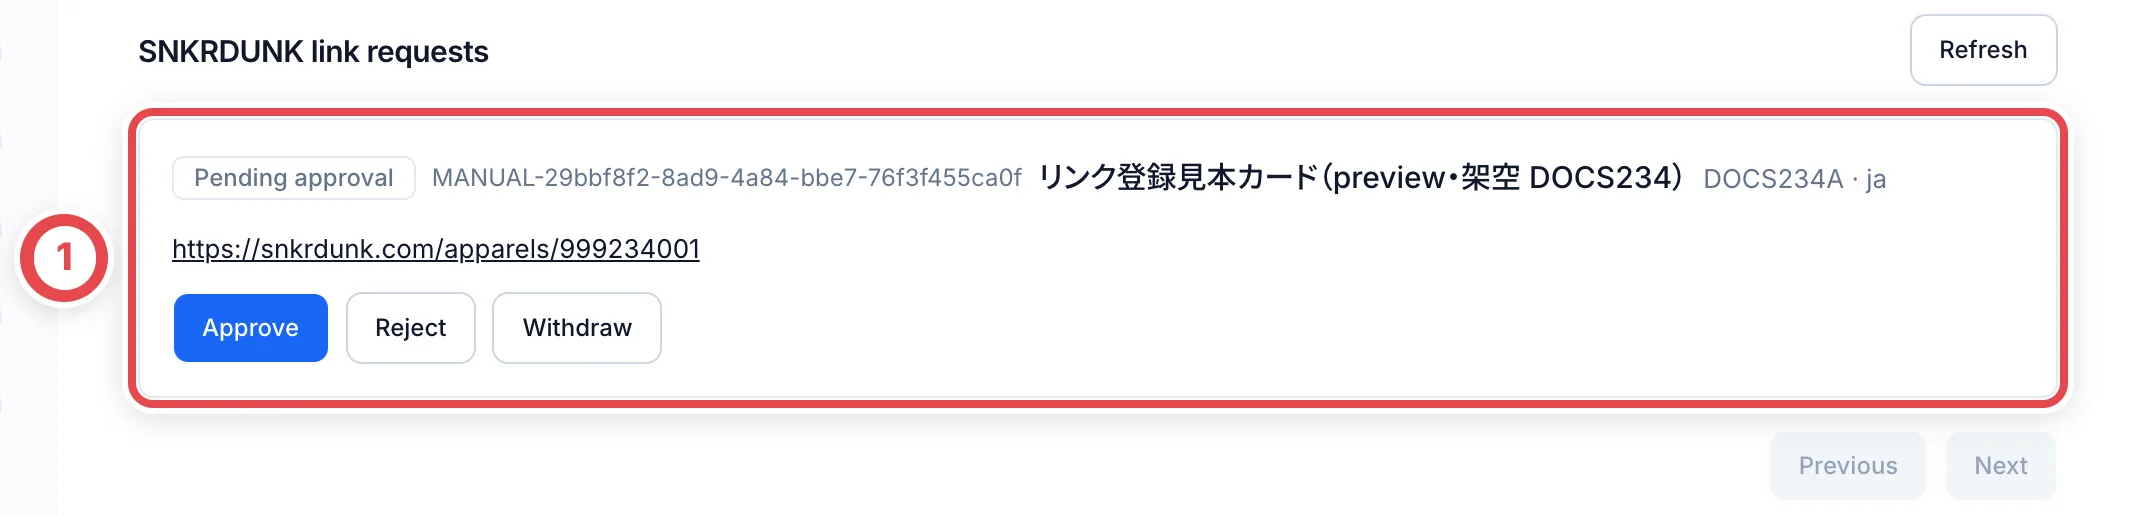 Match the product and URL in ① before choosing Approve, Reject or Withdraw.
Compare the product name, number, language and URL, plus the current shared link when shown. Use **Approve** to open the confirmation and enter a reason.
:::warning
**Confirm** in **Approve shared link** applies the URL to the shared catalog for all shops. Check the exact product and printing before confirming; this is more than a note for the current deal.
:::
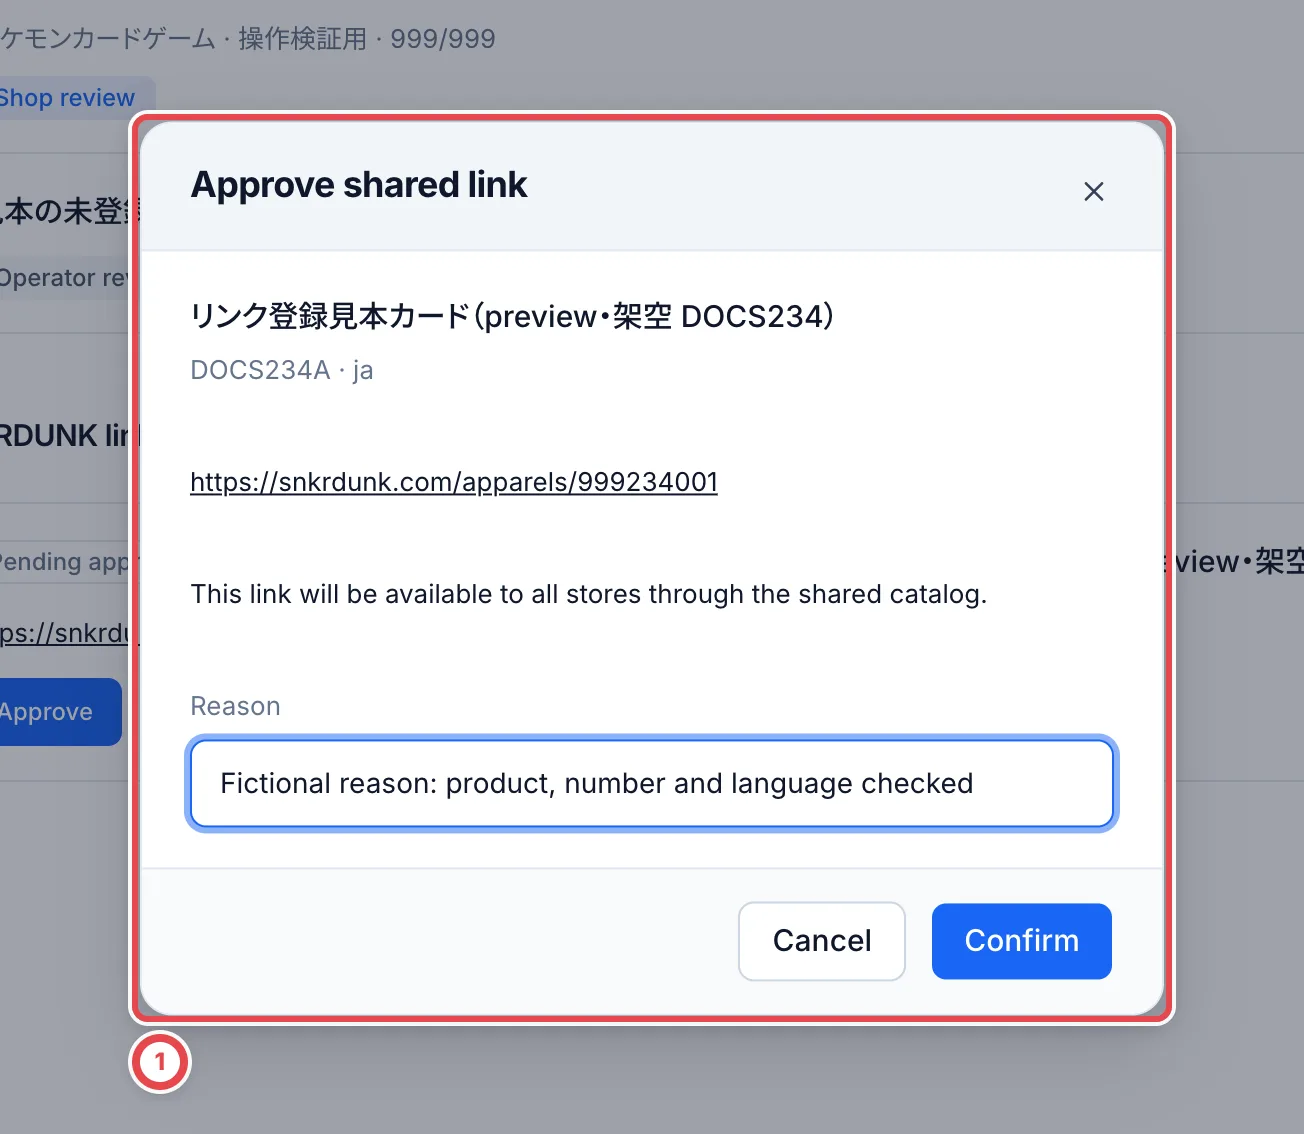 Check the shared-catalog impact and reason in ① before confirming.
Rejecting or withdrawing stops use of the provisional link for this purchase. Refresh the list and verify the request status and link on the original appraisal. If the product changed, reopen and compare the latest target.
## Troubleshooting
| What you see | What to check |
| --------------------------- | ---------------------------------------------------------------------------------------------------------------- |
| No request action | Check that the appraisal line is unidentified, editable and not already waiting/registered. |
| Photos cannot load | Reload, or submit the details without photos if suitable. |
| Still waiting | Check with the shop reviewer for a provisional card, or the operator for an older request; reopen the same line. |
| Registered but cannot quote | Apply the registered card to the line first. |
For a researcher’s registration route, see [Research and reviews](/en/guides/purchase/research-and-reviews).
---
# Cash registers and closing
Source: https://docs.toreca-cloud.com/en/guides/purchase/cash
Cash handed to customers for purchases is recorded in the register automatically. You only record shipping costs, top-ups, take-home cash, and similar items by hand.
The cash-management screens appear in Japanese even when the English console is selected. Their labels are shown here in Japanese, with an English gloss in parentheses the first time each one appears in a section.
## What you need
- Cash management must be turned on. Only the Toreca Cloud operator can turn it on. If **Cash registers** doesn't appear in the sidebar, ask your administrator.
- A register. Only people with cash-management admin permission can add one (see [Add a register](#add-a-register)).
- Someone who can close the register when there is a discrepancy. Closing with a discrepancy needs admin permission.
## Terms on this screen
- **レジ** (Register): a place where cash is kept. Records are kept separately for each register. Register a safe as a register too.
- **記録上の現金** (Recorded cash): the opening cash, plus recorded inflows, minus recorded outflows. It is the cash that should be in the register right now.
- **点検** (Cash count): counting the notes and coins in the register during the session. The session stays open after a count.
- **締め** (Closing): counting the cash at the end of the day, checking it against the records, and ending the session.
- **繰越** (Carryover): the cash left in the register for the next session after closing. It is filled in automatically the next time you start the register.
## A day's workflow
| Step | What you do | Register status |
| ---- | ----------------------------------------------------------- | ------------------------ |
| 1 | Open cash management and choose a register | **未開始** (Not started) |
| 2 | Count the cash and start the register | **営業中** (Open) |
| 3 | Check the recorded cash on the open register screen | **営業中** (Open) |
| 4 | Record shipping, top-ups, and similar items by hand | **営業中** (Open) |
| 5 | (If needed) Count the cash during the session | **営業中** (Open) |
| 6 | Count the cash at the end of the day and close the register | **締め済み** (Closed) |
| 7 | Copy the daily report and share it with your team | **締め済み** (Closed) |
| 8 | Check the closed session in the history | **締め済み** (Closed) |
Registers do not close automatically when the date changes. If a previous session is still open, close it before you start the next one.
## 1. Open cash management and choose a register
Click ① **Cash registers** in the sidebar. The registers are listed by shop. ② **営業中** (Open) marks a register that is open right now. A register never opened shows **未開始** (Not started); one closed after a previous session shows **次回開始前** (Before next opening). Click a register name to open its screen.
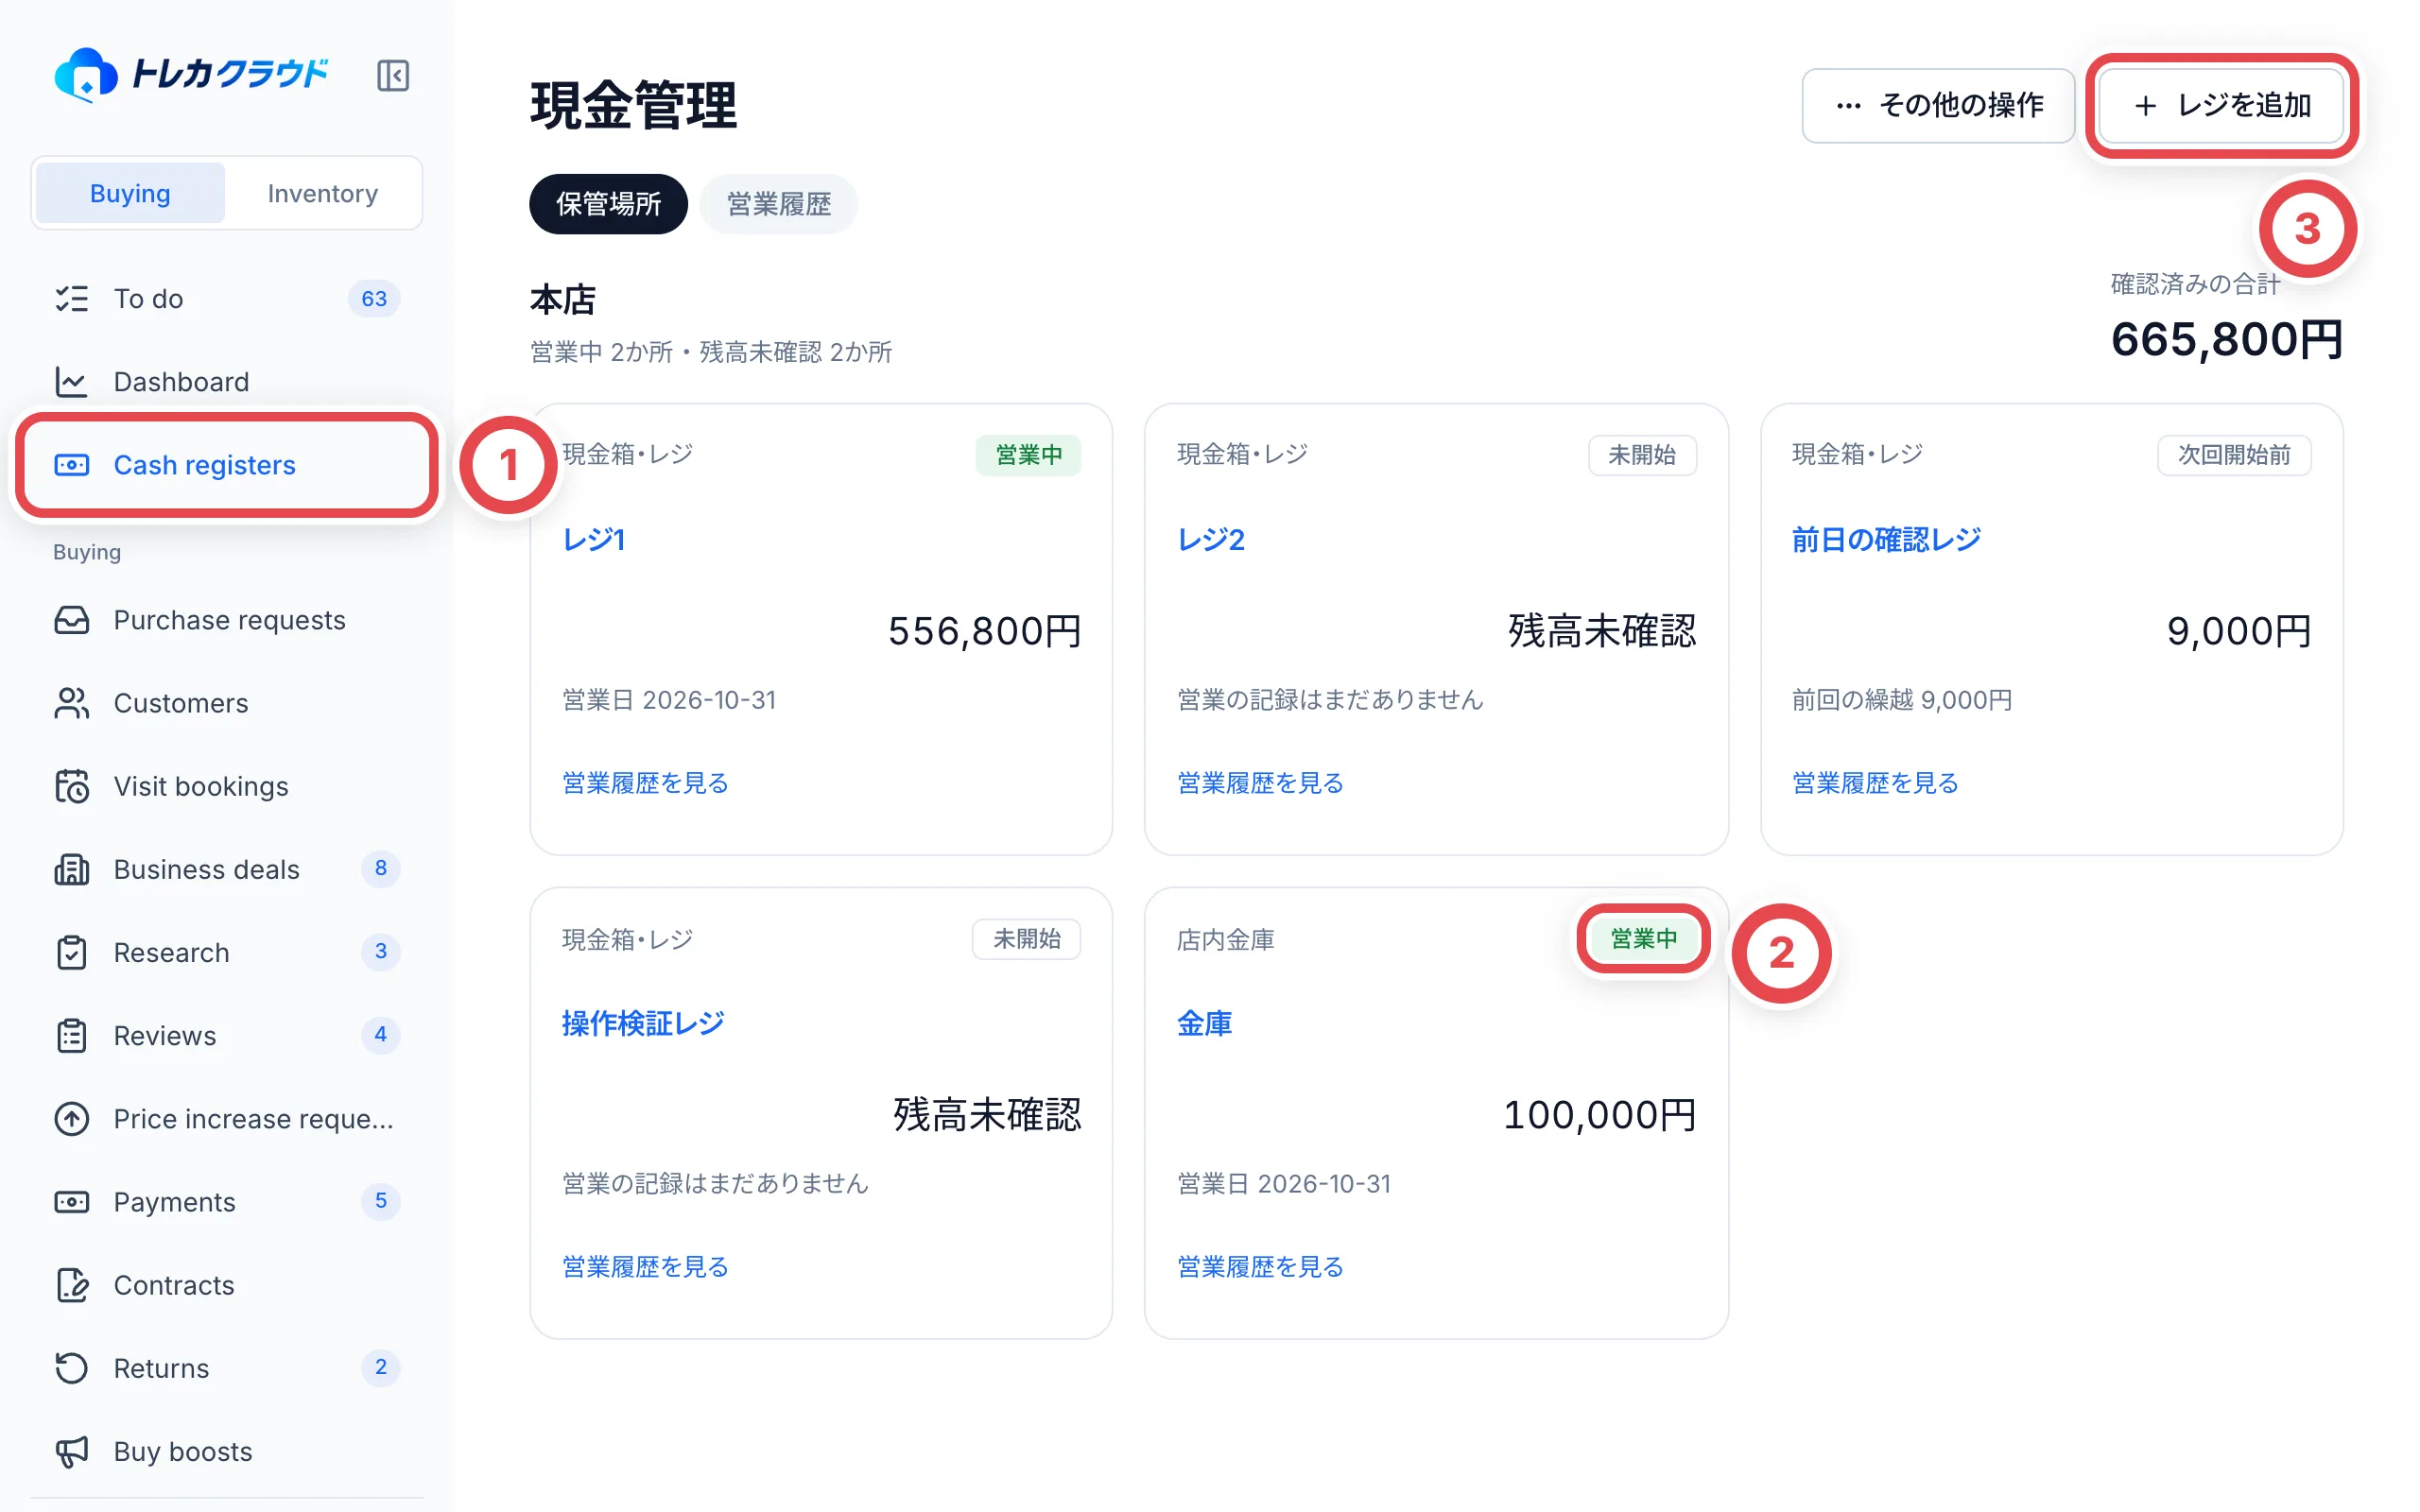 Open cash management at ①. ② is an open register. ③ lets you add registers.
## 2. Count the cash and start the register
In the register list, click **レジを開始** (Start register) on the card of a register that is not started. You can also start it from the page that opens when you click the register name. ① The business date is filled in with today's date. Count the cash in the register and enter it at ② **開始時の現金** (Opening cash). Empty denominations count as 0. The total appears in the last row of the table.
If the amount differs from last time's carryover, for example because you added funds you brought in, write the reason in the notes field at ③, labeled **繰越と金額が違う理由** (Why the opening differs from carryover) when the amounts differ. Then click **レジを開始** (Start register) to open the register.
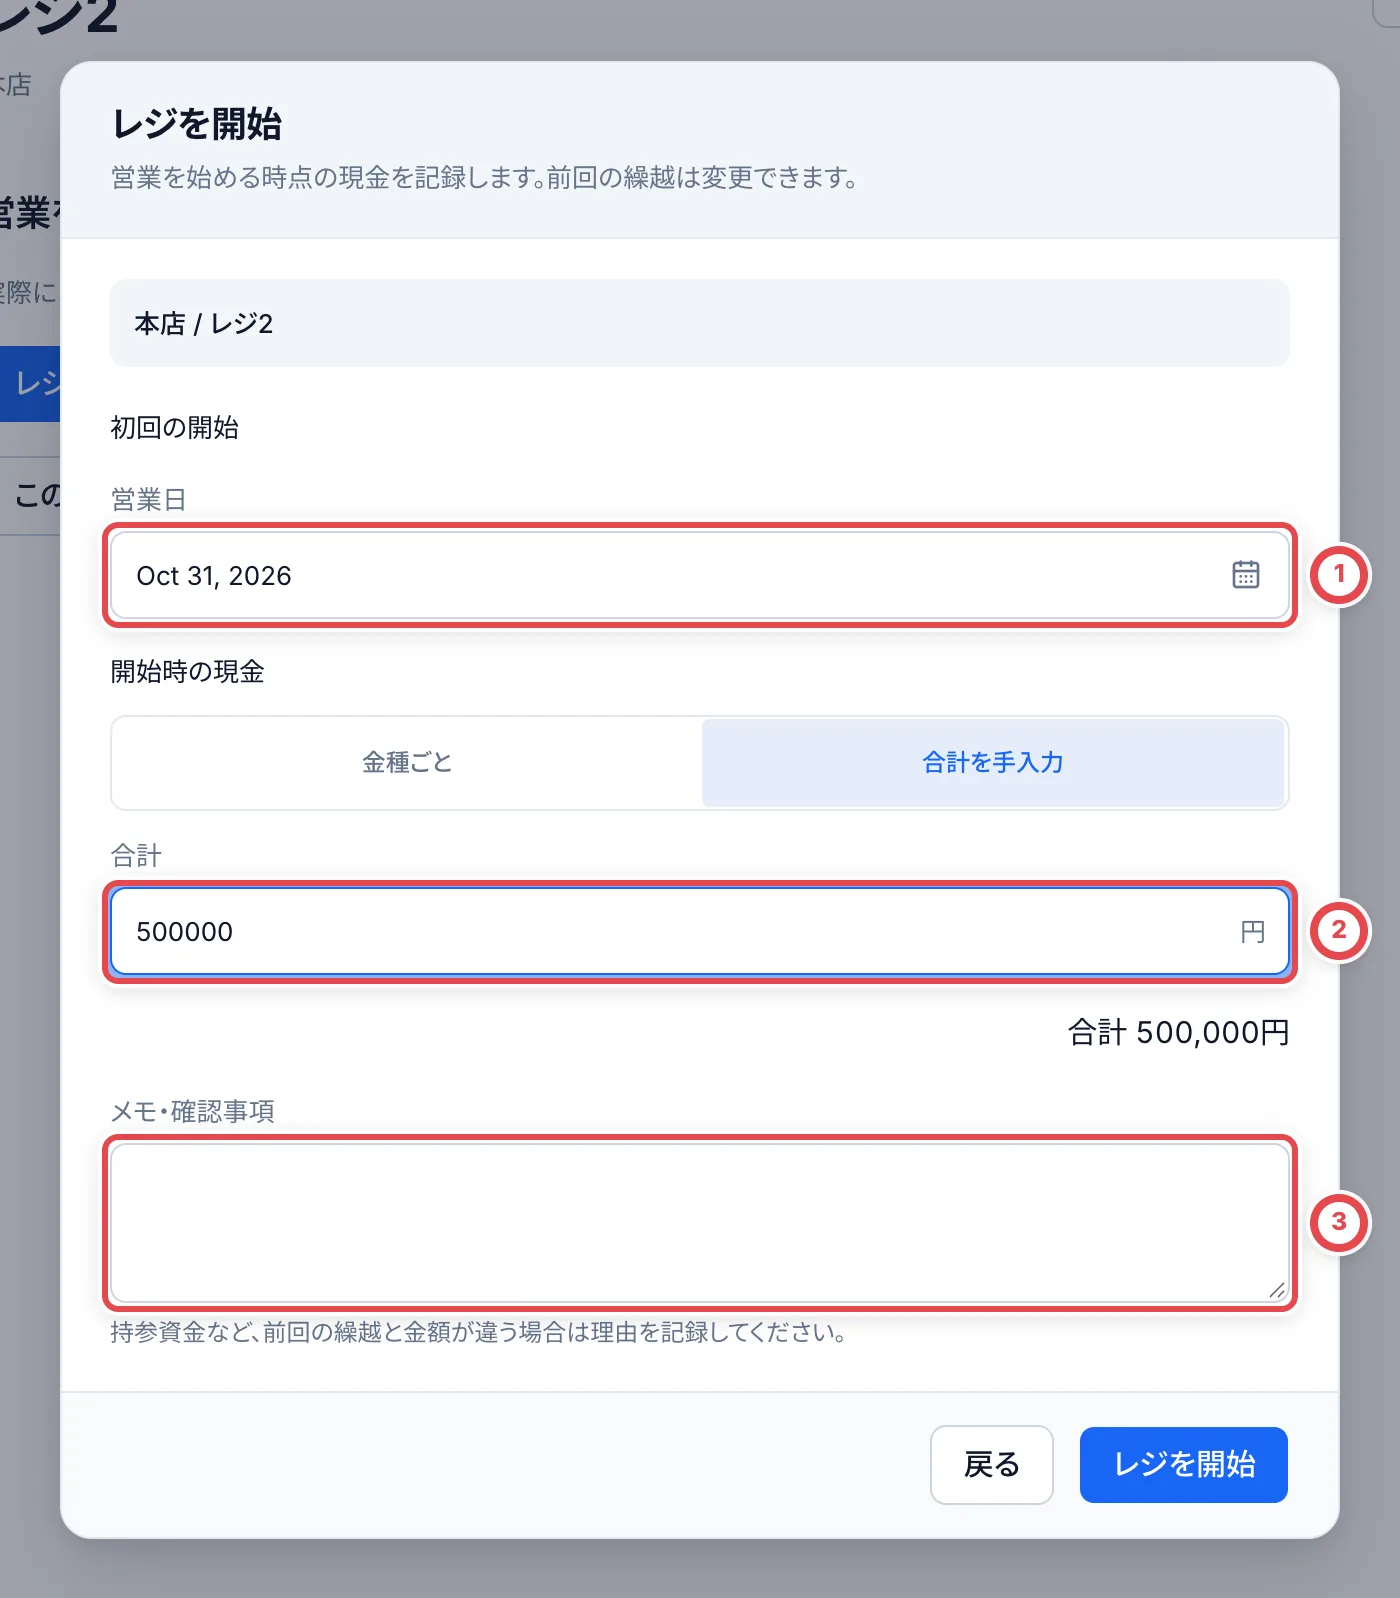 ## 3. Check the recorded cash on the open register screen
When you open a register that is open, ① the recorded cash appears in large type. If it goes over the storage guideline, a warning appears below it. The storage guideline only triggers the warning. It is not a buying limit.
Click ② **入出金を記録** (Record cash in or out) to record shipping or top-ups. Click ③ **レジを締める** (Close register) at the end of the day. In the **入出金** (Cash movements) list below, cash handed over for purchases appears automatically, marked **買取から自動** (Automatic from purchase). **Do not record cash handed over for a purchase by hand.** It would be withdrawn twice.
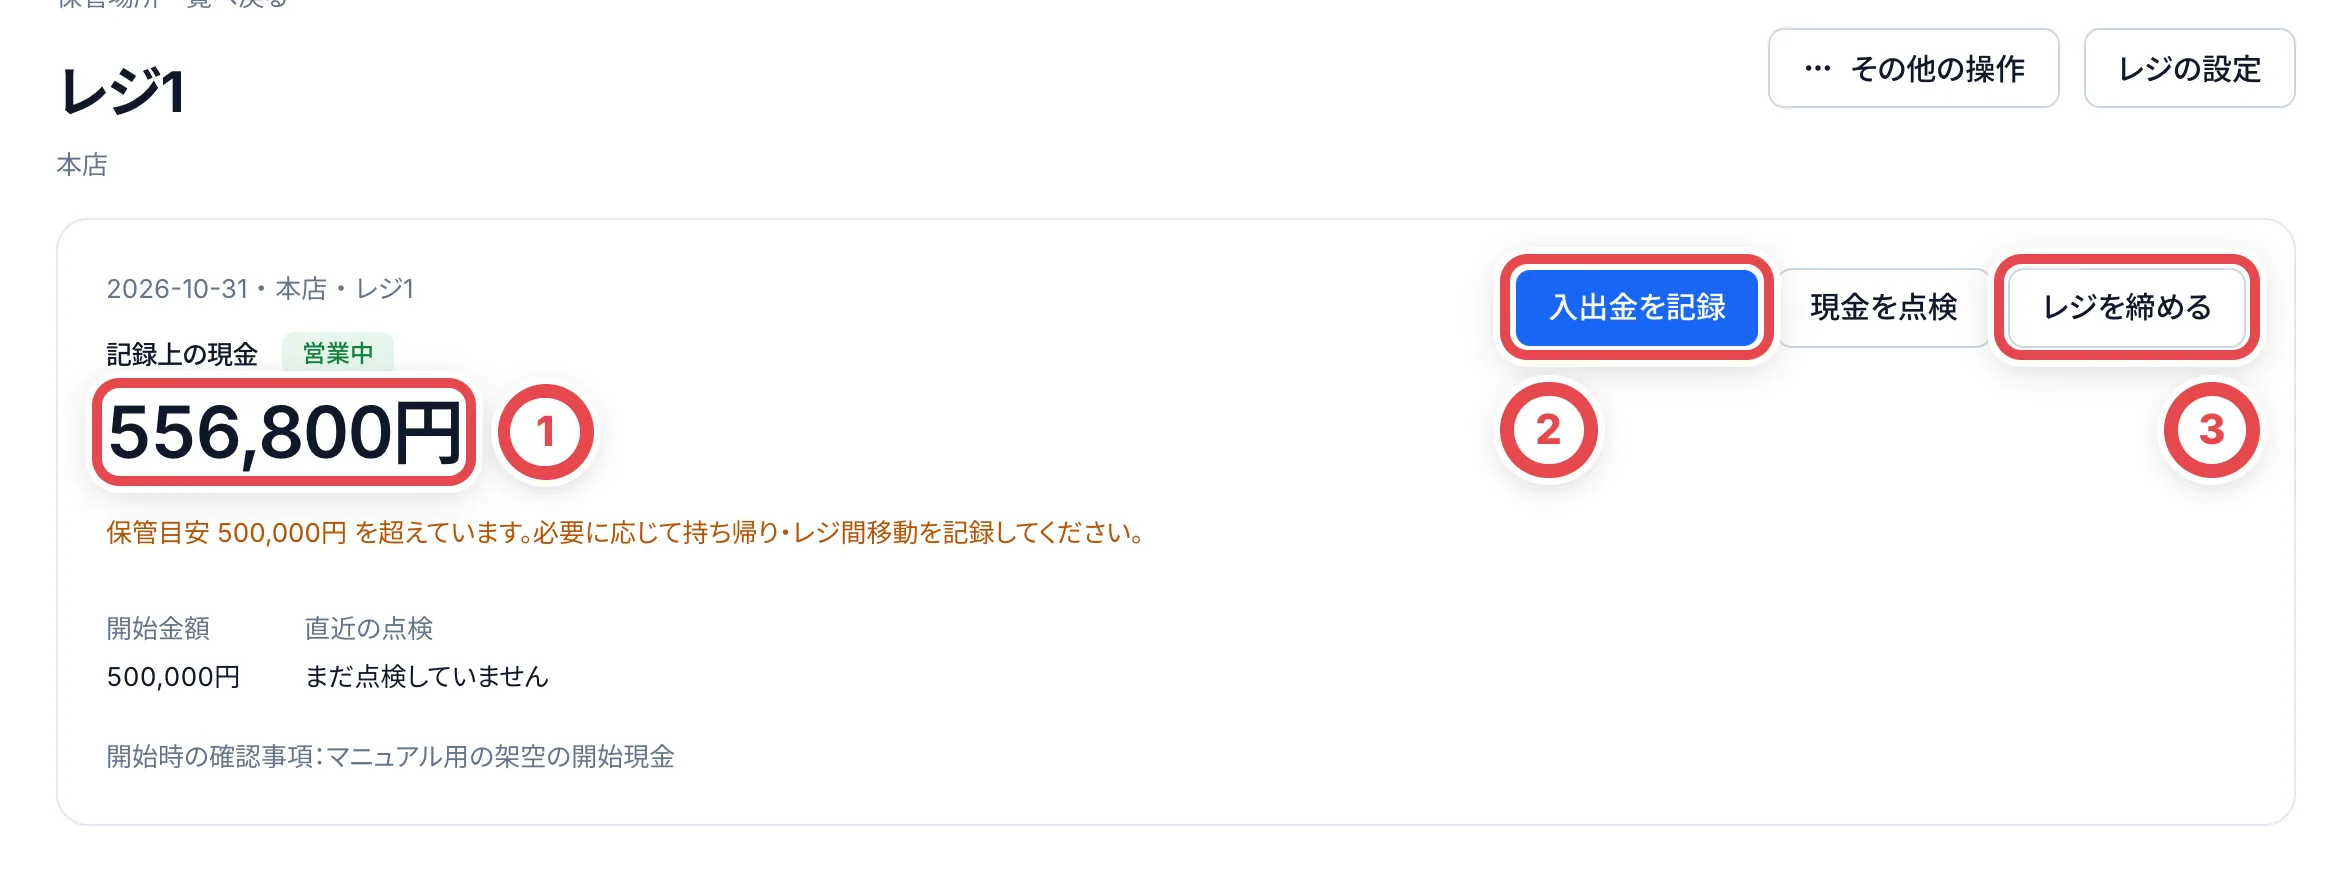 If a purchase's total payment includes a shipping subsidy, that amount is already included in the automatic withdrawal. Do not record the same shipping cost again.
## 4. Record shipping, top-ups, and similar items by hand
Click **入出金を記録** (Record cash in or out). At ①, choose **入金(現金が増える)** (Inflow: cash increases) or **出金(現金が減る)** (Outflow: cash decreases), and enter the amount. At ②, click one of the suggestions below the field to fill in the category. The suggestions are **送料** (Shipping), **現金補充** (Cash top-up), **持ち帰り** (Take-home), **梱包資材** (Packaging materials), **返金** (Refund), and **その他** (Other). You can edit the text after you choose one.
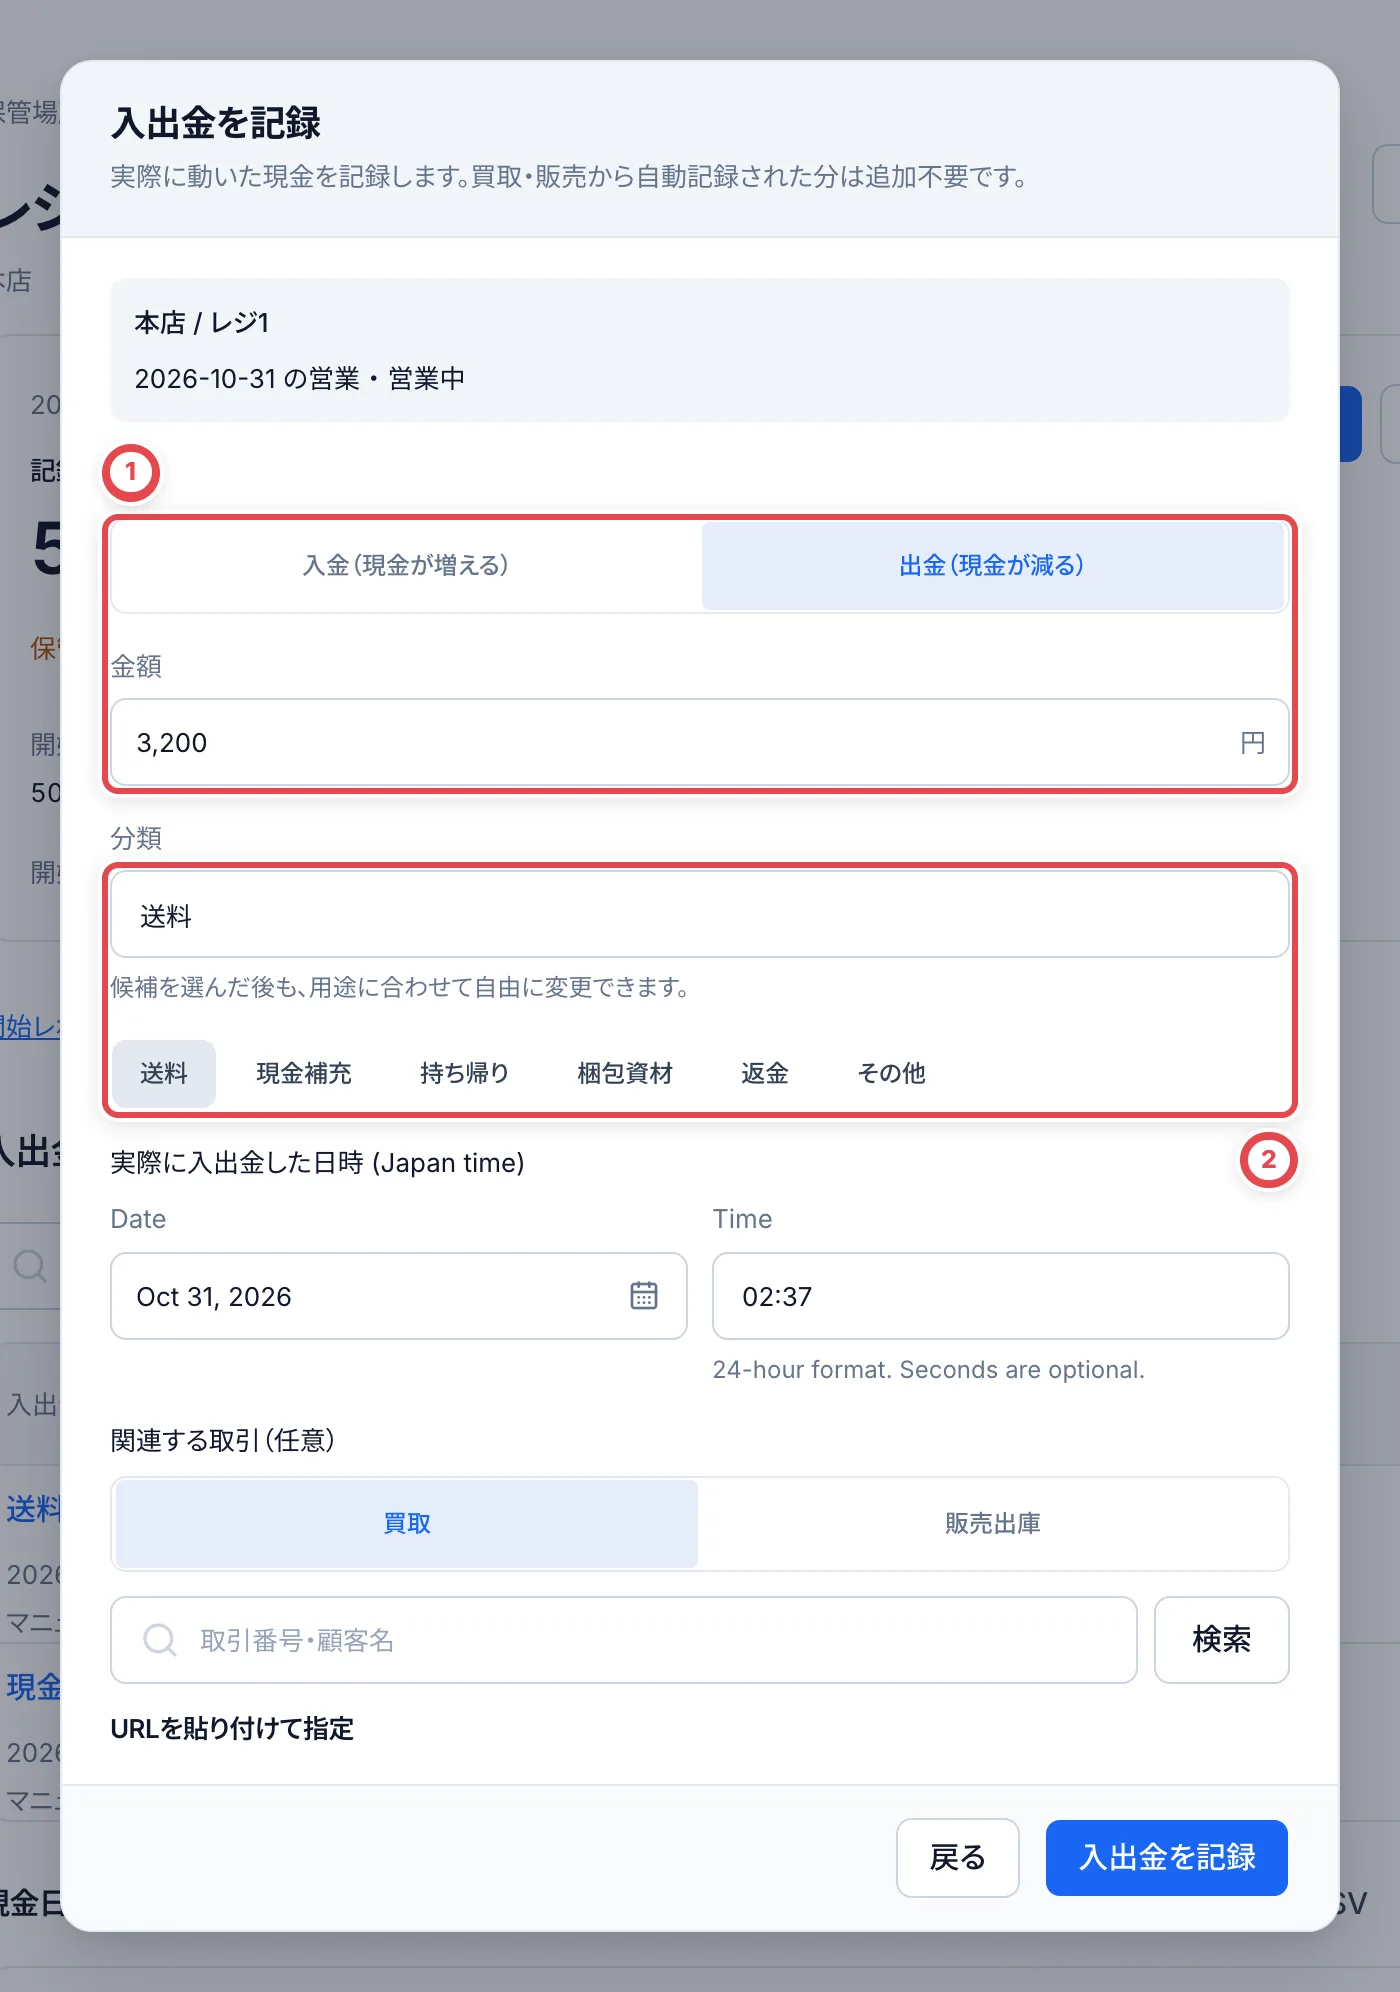 **実際に入出金した日時** (Date and time of the movement) is filled in with the current time. If you are recording it later, change it to when the money actually moved. If a purchase or sales issue is related, choose it at **関連する取引** (Related transaction) by transaction number or customer name. You can also paste the URL of the transaction page. Then click **入出金を記録** (Record cash in or out).
To move cash to another register or a safe, use **レジ間で現金を移動** (Transfer cash between registers) instead. The outflow from the source and the inflow to the destination are recorded together. The destination register must also be started.
## 5. If needed, count the cash during the session
To count the cash during the session, click **現金を点検** (Count cash). Enter the number of notes and coins for each denomination, or enter a total amount, and click **点検を保存** (Save count). The recorded cash does not change, and the session stays open. The result of the last count appears under **直近の点検** (Latest count) on the open register screen.
## 6. Count the cash at the end of the day and close the register
Click **レジを締める** (Close register). Count the cash **before you take any away**. At ①, enter the number of notes and coins in the table. Empty denominations count as 0.
On the right, the recorded cash, the counted cash, and the difference appear. At ②, under **締め後に持ち帰る現金** (Cash to take away after closing), enter the amount you are taking outside the store. The next carryover appears below it. Select the checkbox **実際に現金を数え、入力した金額を確認しました** (I counted the cash and checked the amounts I entered), then click ③ **締めを確定** (Confirm closing).
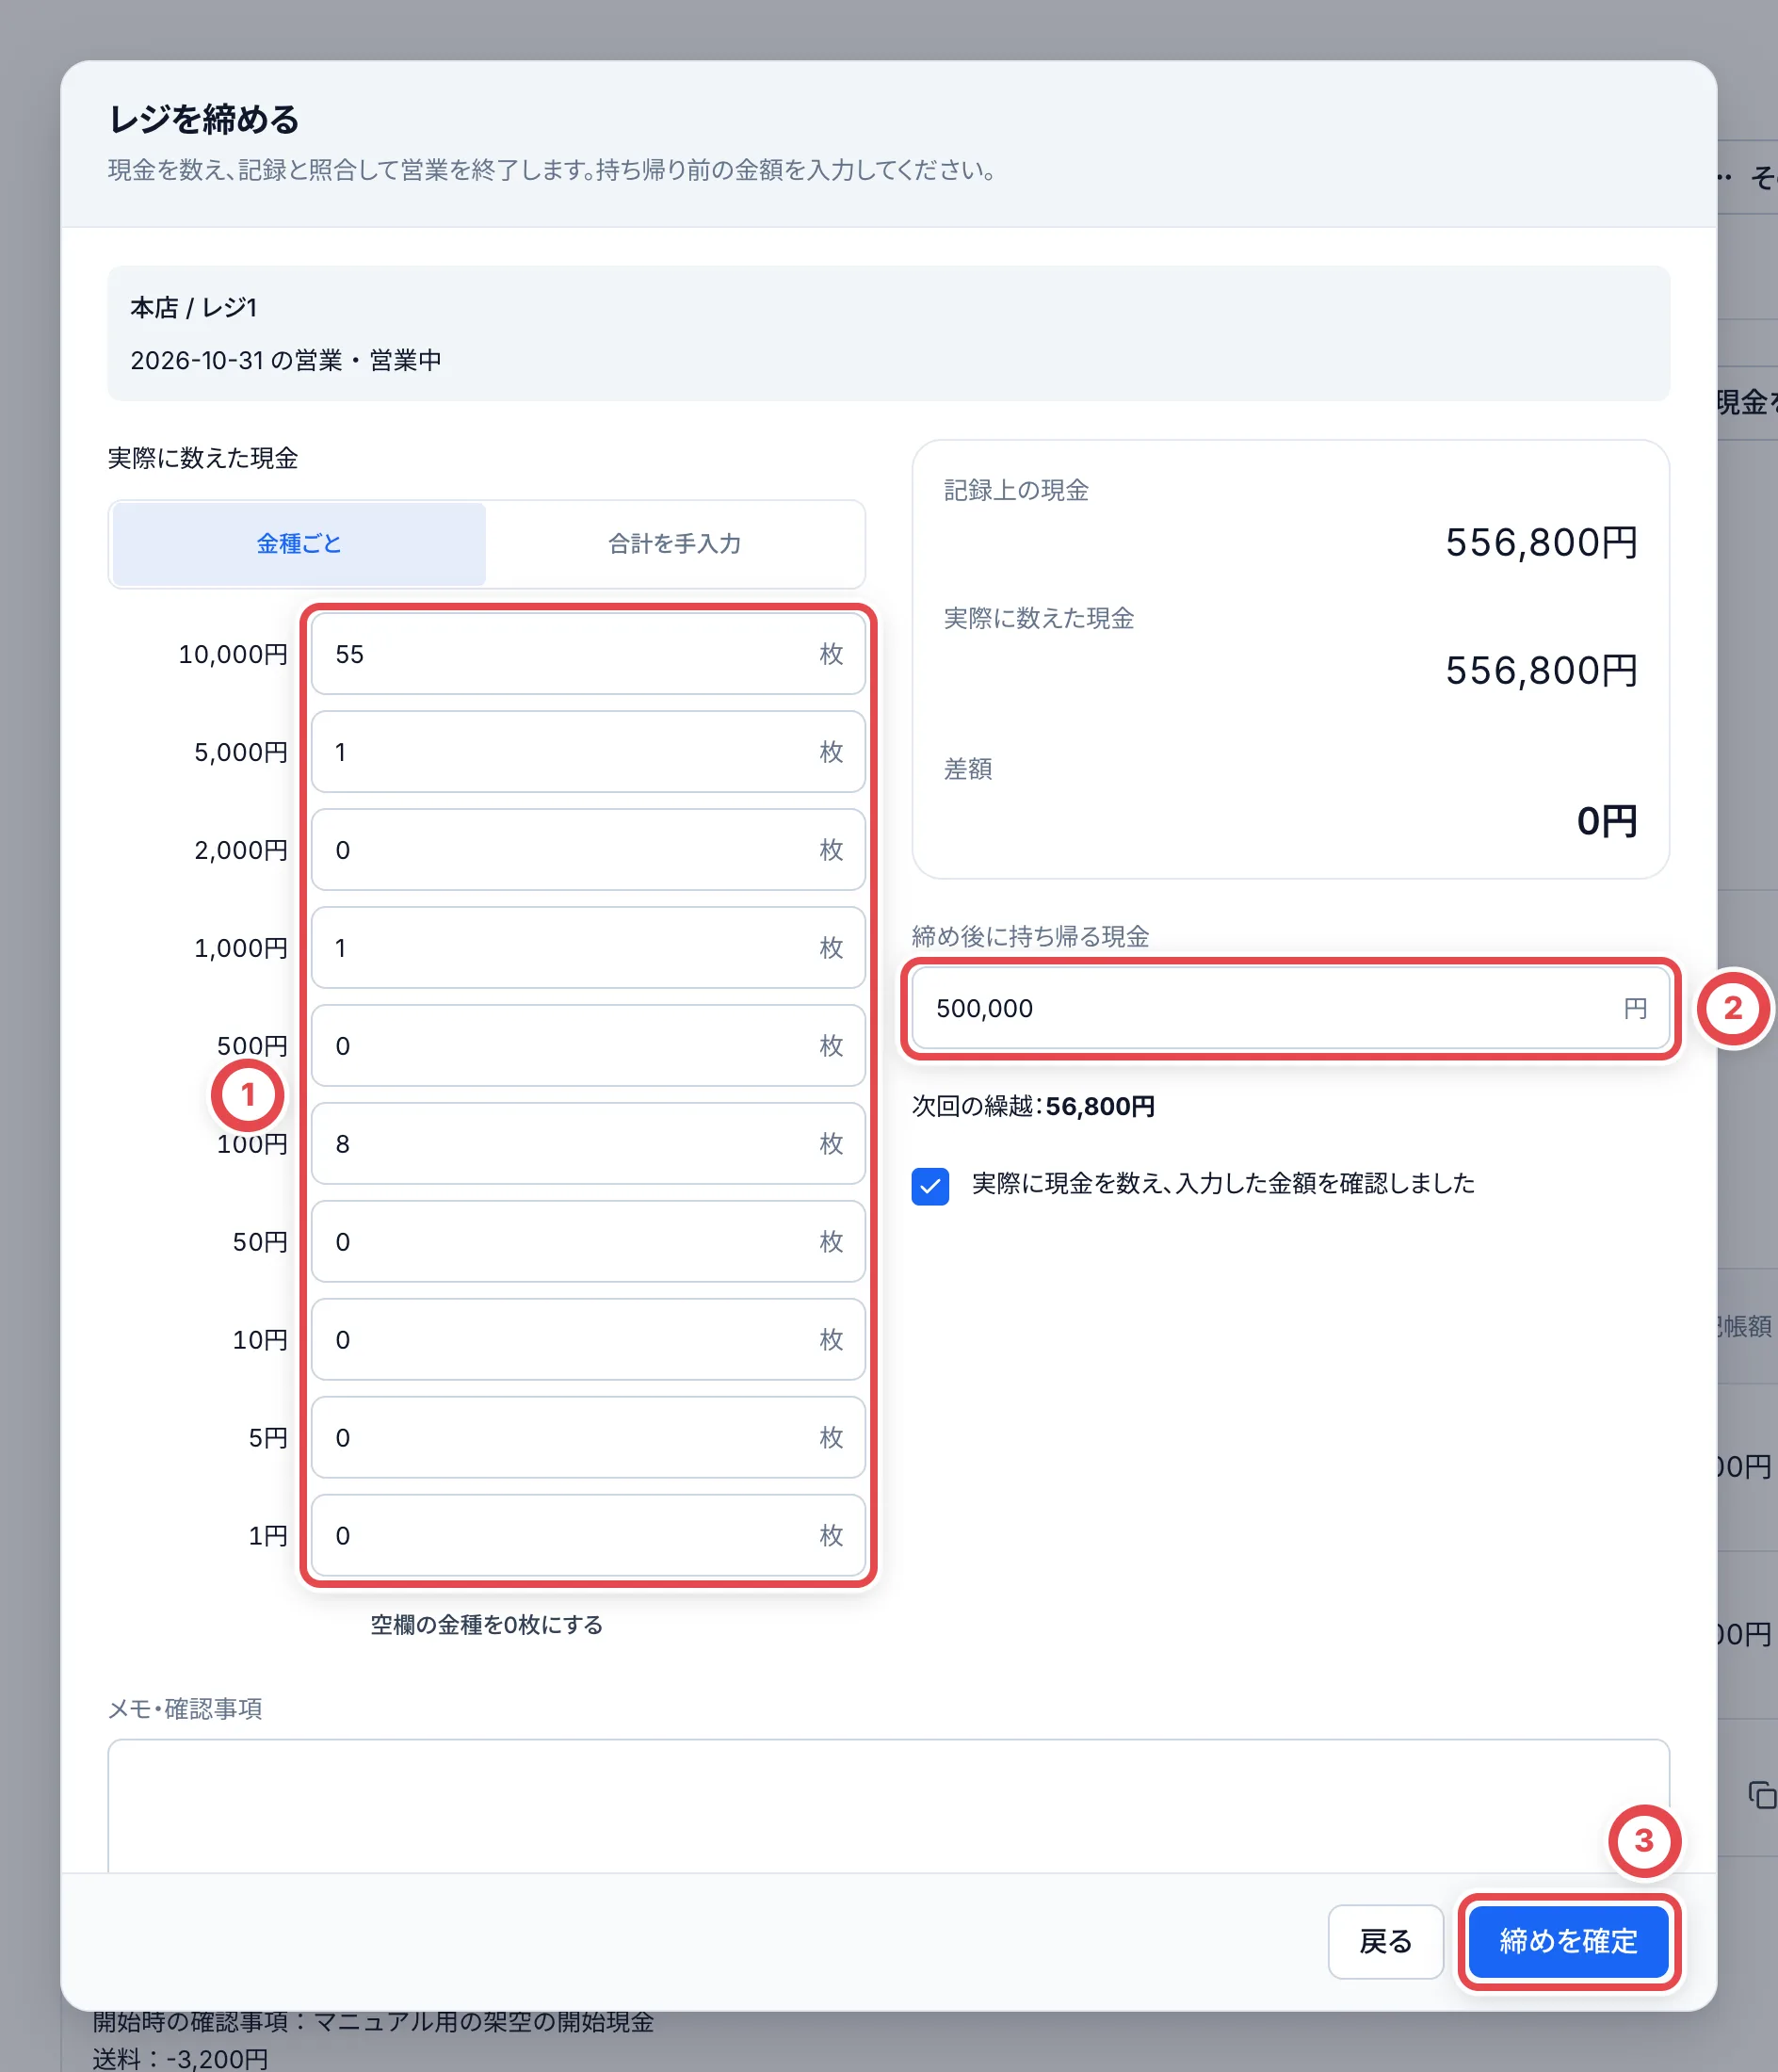 If there is a discrepancy, write the reason in **差額の理由・確認した内容** (Reason for the difference and what you checked). Only people with admin permission can close a register that has a discrepancy. If you don't have permission, click **点検として保存** (Save as count) to keep your count and ask an administrator to close.
## 7. Copy the daily report and share it with your team
Scroll down the register screen to **現金日報** (Daily cash report). Click ① **日報をコピー** (Copy report) to copy a text summary. It has the opening amount, the totals of cash in and out by category, and the recorded cash. If you copy it after closing, it also includes the counted cash, the difference, the take-home amount, and the carryover. Before closing, it is labeled **締め前の記録** (Record before closing). Paste it into your team's group chat to share it. Toreca Cloud does not send it for you.
To keep the data in a spreadsheet, export it with ② **CSV**.
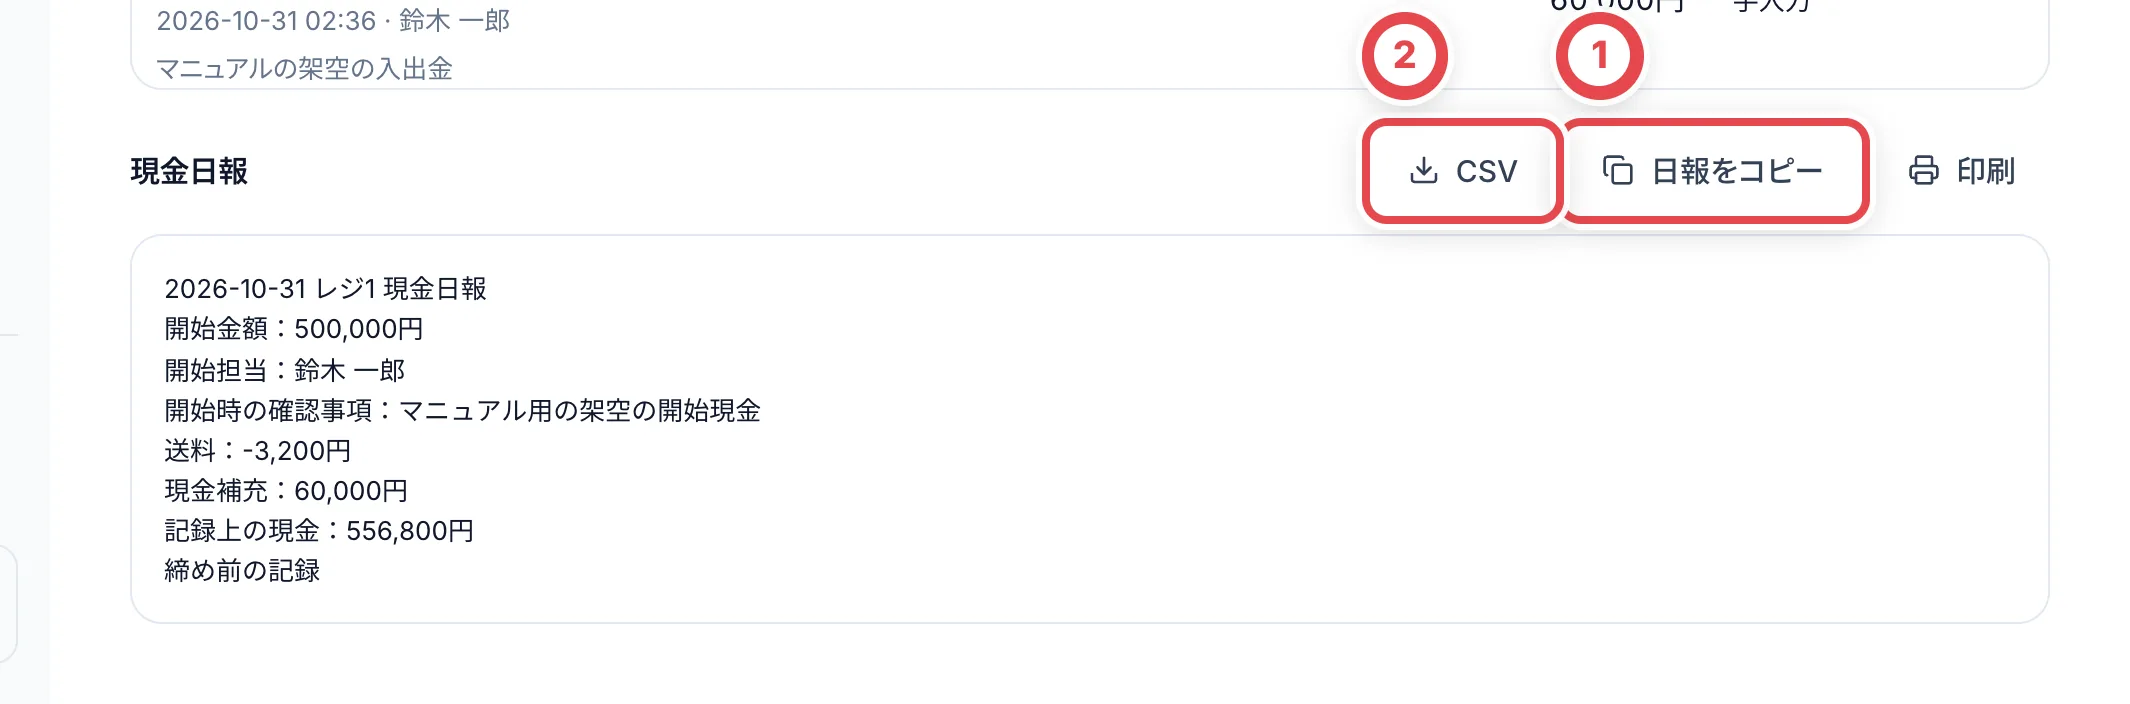 The CSV puts cash movements, correction history, and the closing reconciliation figures in separate columns. **Do not add the corrected-amount column or the reconciliation figures to the cash movements.** That would count the same money twice.
## 8. Check the closed session in the history
Open the **営業履歴** (Session history) tab in cash management. The records are listed by business date. ① **締め済み** (Closed) is a closed session. **営業中** (Open) is a session that has not been closed yet. You can filter by register and by a range of business dates. Click a business date to open that day's cash movements and closing details. The filters stay as they were when you come back from an opened session.
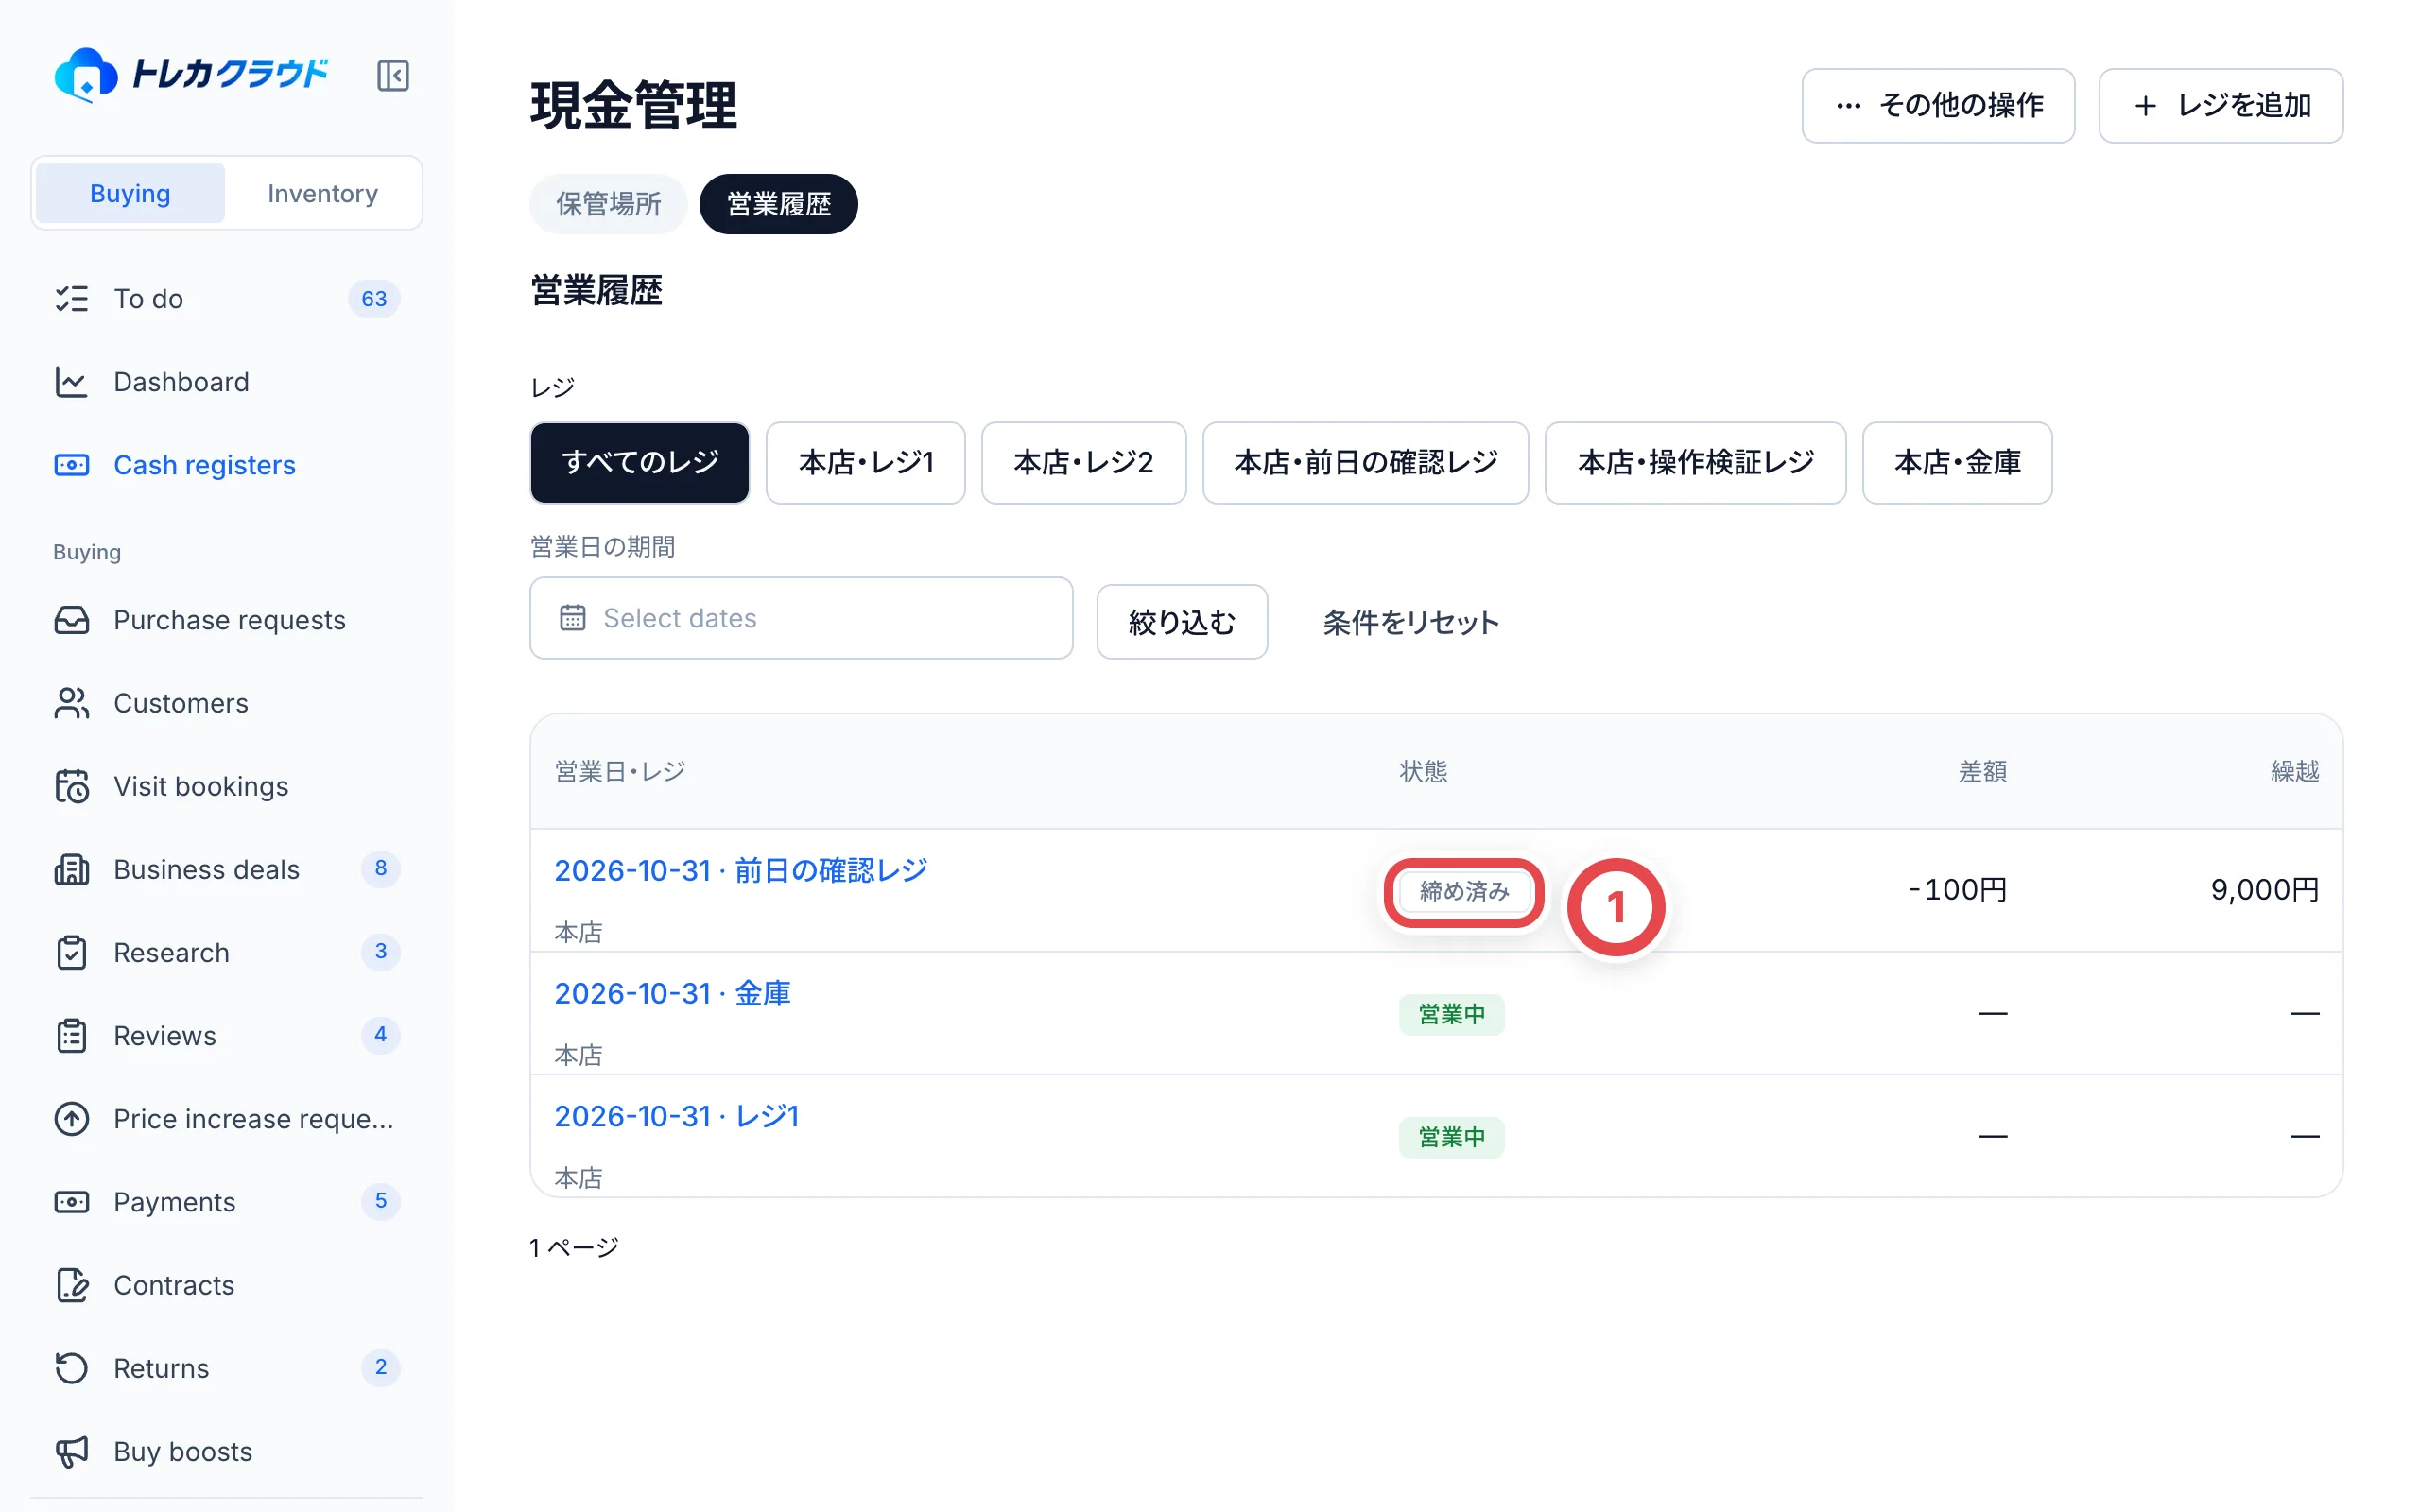 ## Add a register
At the top right of the cash-management screen, click **レジを追加** (Add register). At ①, choose the shop where the register is, select **現金箱・レジ** (Cash drawer/register) or **店内金庫** (In-store safe) under **保管場所** (Container type), and at ② enter the name in **保管場所の名前** (Container name). The storage guideline is optional. It only triggers a warning when exceeded. It is not a buying limit.
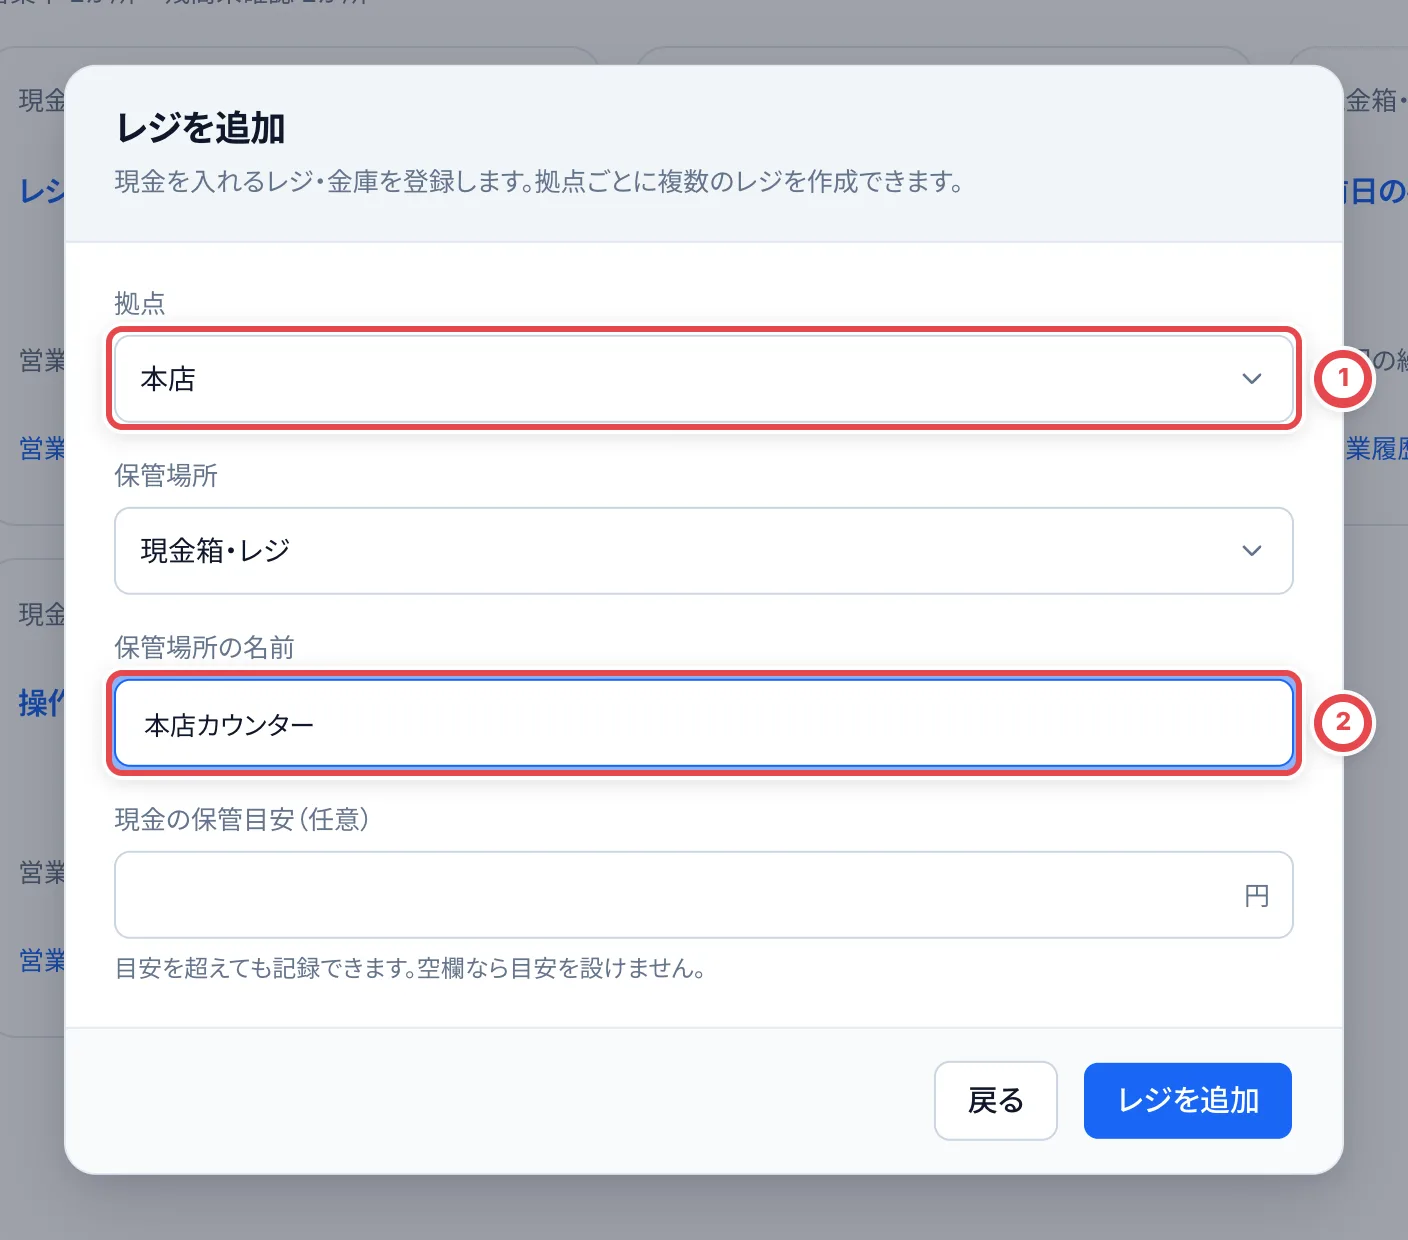 To change the register name or the storage guideline, open the register and click **レジの設定** (Register settings).
## If you recorded something wrong
- **You recorded the wrong amount or category**: Click the category name in the list of movements to open its details. Click **記録を訂正** (Correct record) and enter the right details and a reason. Enter 0 to cancel the record. The original record and the correction history remain. You can correct a correction again.
- **You forgot to record something**: Click **入出金を記録** (Record cash in or out) and record it later, with the time it actually happened and a note. For a movement from before the session started, leave a reason for recording it later.
- **You notice a mistake after closing**: You can still add a correction history after closing. The confirmed counted cash, the carryover, and the current cash do not change.
- **You actually refunded money, or received a refund**: Don't use a correction. Click **入出金を記録** (Record cash in or out) and record the real cash movement separately. Correcting a cash record does not cancel the purchase contract or the stock.
## Attach a receipt
In a movement's details, use **領収書** (Receipt) to attach an image or a PDF (up to 20 MB per file). You can add one even after closing. Attached files stay in the history, and anyone who can view cash management can download them.
## If something goes wrong
| What is happening | What to check and how to fix it |
| ------------------------------------------------------------------------ | ----------------------------------------------------------------------------------------------------------------------------------------------------------------------------- |
| **Cash registers** doesn't appear in the sidebar | Ask your administrator whether cash management is turned on. Only the Toreca Cloud operator can turn it on. |
| **レジを追加** (Add register) doesn't appear | You need cash-management admin permission. Ask an administrator. |
| **レジを開始** (Start register) doesn't appear | A register that is suspended can't be started. Resume it in **レジの設定** (Register settings). |
| A purchase shows **営業中のレジがありません** (No register is open) | Start the register, then click **開始したレジを再読み込み** (Reload started registers) on the purchase screen. |
| You see **記録上の現金が不足しています** (Recorded cash is short) | Check whether a top-up is missing from the records. If the cash has already changed hands, an administrator can record it with a reason for the shortfall. |
| You can't click **締めを確定** (Confirm closing) because of a difference | Closing with a difference needs admin permission. Click **点検として保存** (Save as count) to keep your count and ask an administrator to close. |
| You see **新しい記録があります** (There are new records) | Someone else recorded a movement. Check the amount shown, click **最新の金額を確認した** (I checked the latest amount), and continue. |
| You see **記録できませんでした** (Couldn't record) | The request failed. What you entered is kept, so click the button again. |
| You withdrew a shipping cost twice | The shipping subsidy of a purchase is already in the automatic withdrawal. Click **記録を訂正** (Correct record) on the one you entered by hand and set it to 0 to cancel it. |
| You want to turn off cash management or stop using a register | You can't while any register is still open. Close all registers first. After you turn it off, people with permission can still view past records. |
## Containers, stores and staff
Create one register per physical cash drawer or in-store safe, choosing its container type. Share the container among staff. Opening and closing are counted by denomination. The **保管場所** (Containers) list groups the total and containers by store. Store balances combine open-session ledger balances and closed-session carryovers. A container never opened is unknown, not zero. When any balances are unknown, the known subtotal and number of unknown containers are shown separately. Start both containers and use a paired transfer for cash moved to the in-store safe. Closing withdrawals record cash taken outside the store.
Under **その他の操作** (More actions), **店舗の割当** assigns all stores or selected stores to a member. Changing this requires member management, cash management and access to all stores. Assigning a store does not grant cash permissions. New members have no cash access until assigned; owners retain access to all stores. Admins reach all stores until they are assigned selected stores, and then only those.
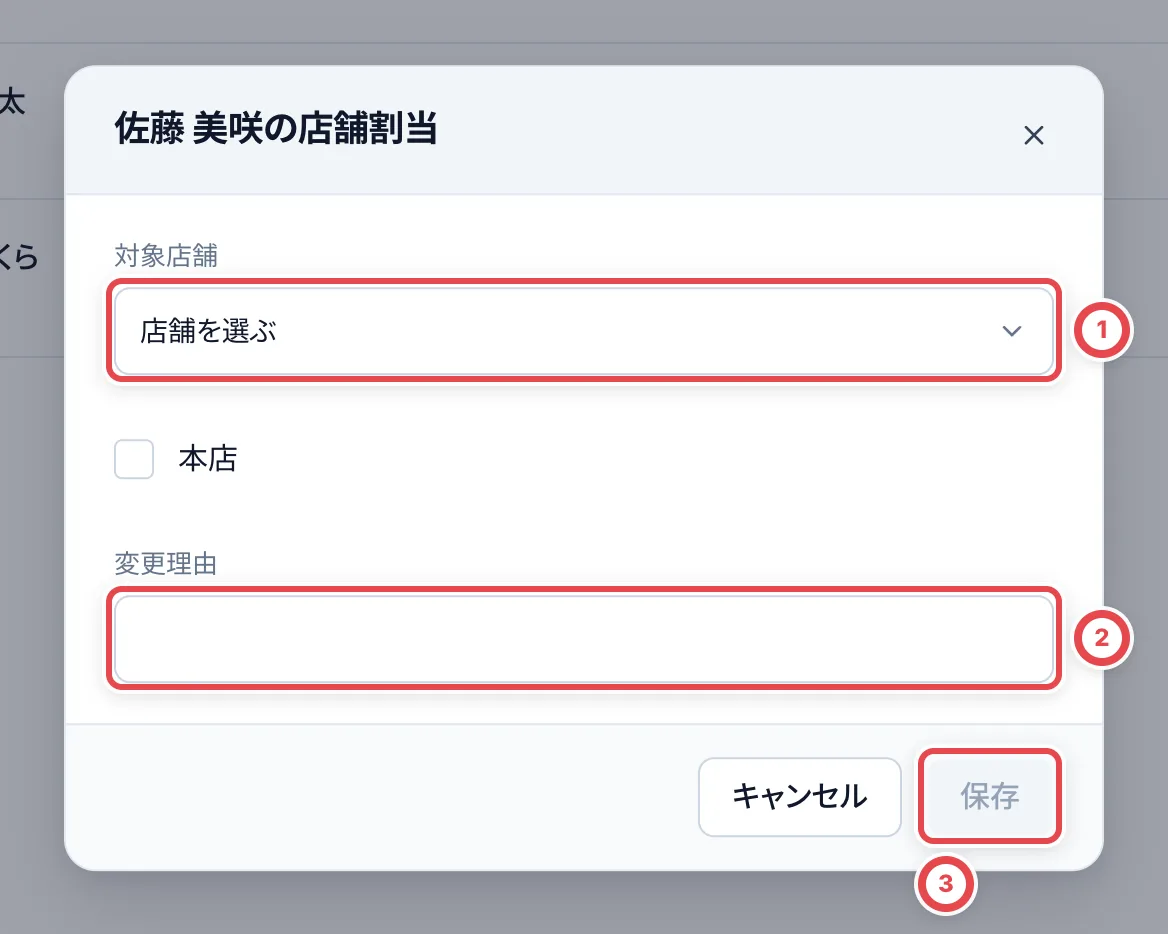 ① chooses all stores or selected stores. Record a reason at ② and save at ③. Assignment does not grant cash permissions.
## Investigate a closing discrepancy
Recount and compare the opening balance, original purchase or sale, entries, transfers and receipts. A manager may close with a reason while investigation continues. Open **その他の操作** (More actions) → **差額の確認**, then **確認内容を記録** to save the status, eligible store manager, notes and related entries or corrections. Search includes other sessions in the same store. Completing requires an identified or unidentified outcome, a cause and notes. An unknown cause may be completed with the checks performed. Reopen as investigating when more evidence appears. The list shows the assigned reviewer and last review time. Every update keeps its actor, timestamp and notes under **差額の確認履歴** (Investigation history).
Investigation updates never change the closed count, discrepancy, withdrawal or carryover. Correct mistaken entries from their details. Record any real later movement as a separate entry in the session when cash changes hands.
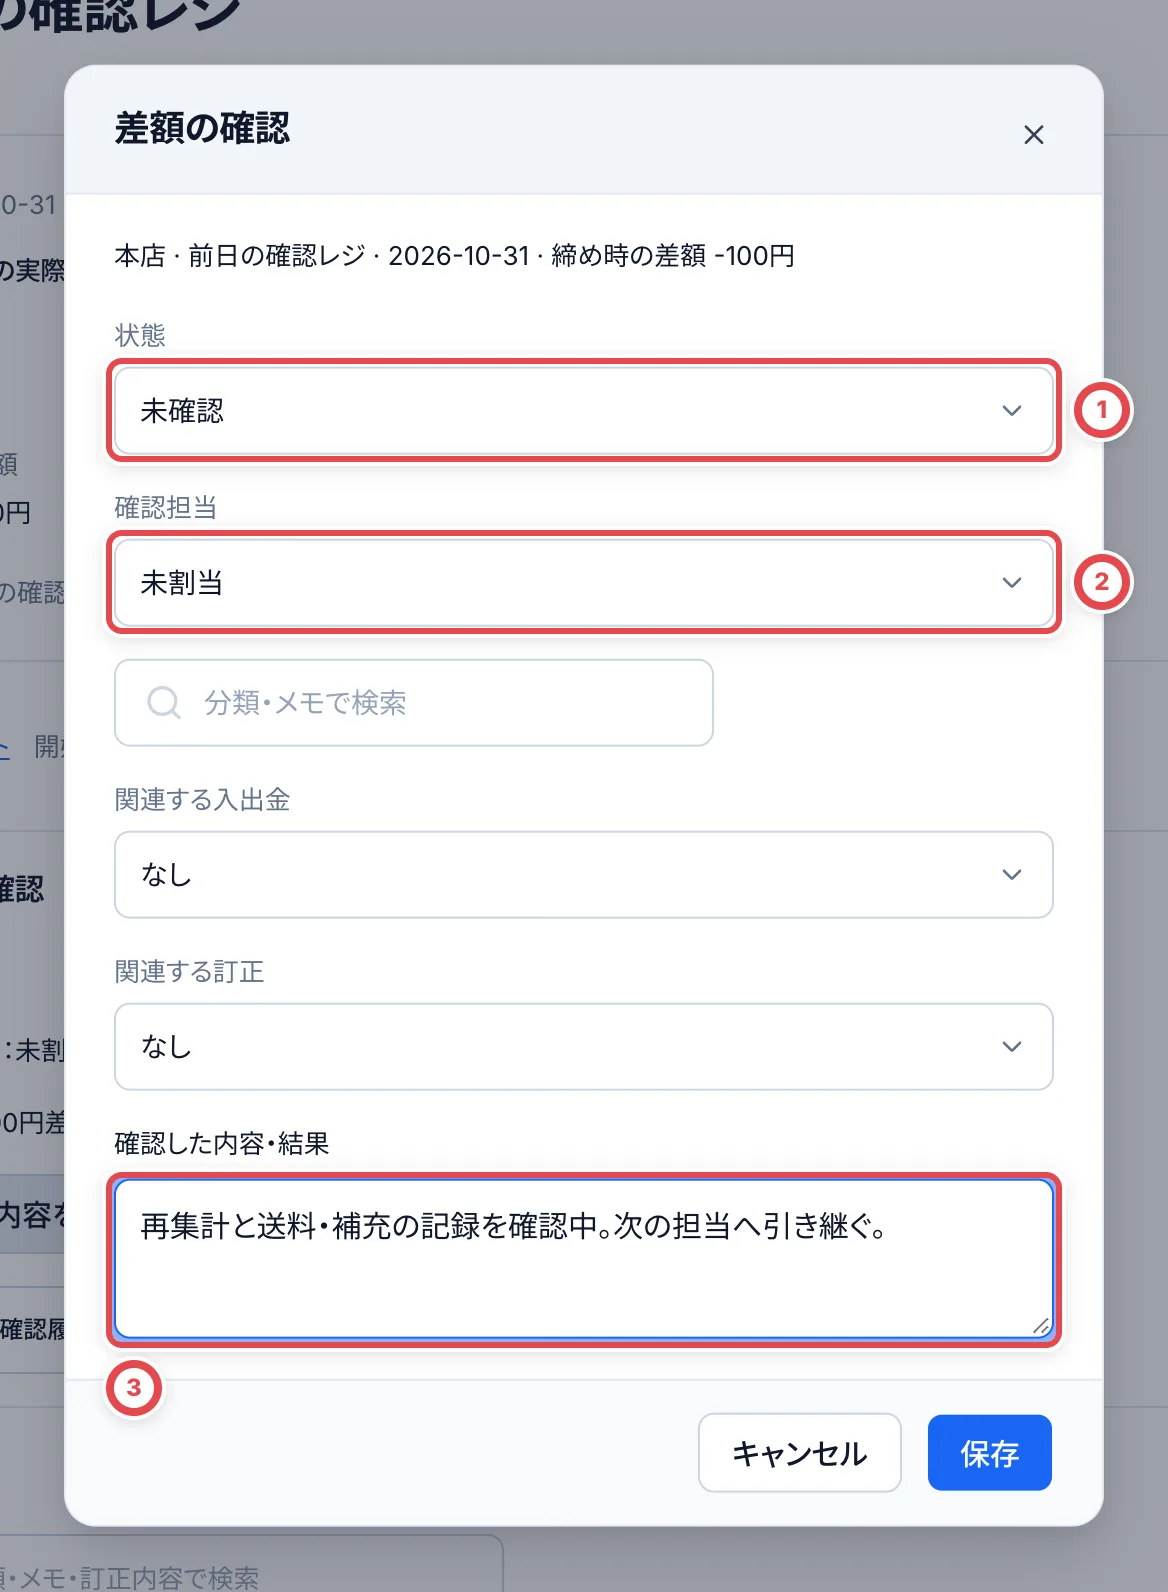 ① records the investigation status, ② the eligible store manager and ③ the checks performed. Completing also asks for the result and cause.
## Point-in-time and store reports
Opening, intermediate count and closing reports show the amounts, denominations, actor and time at that point, with Excel and print output. Later movements do not change an earlier count's breakdown. Legacy records with no captured breakdown or name are labeled unavailable. Later corrections and investigation notes remain separate annotations.
Under **その他の操作** (More actions), **店舗レポート** filters assigned stores and business dates up to 366 days. It exports daily/store sales, purchases, other receipts and payments, transfers, closing withdrawals, ledger movement, open-session counts and discrepancy counts. All amounts are yen. Sales and purchases are net of reversals. Ledger movement excludes opening cash and physical counting differences, so it is not the change in actual cash balances. Transfers within a store appear on both sides and net to zero.
Open **開始レポート** (Opening report) in the session details, or **レポート** (Report) under **点検・締めの履歴** (Count and closing history). Save a spreadsheet with ① **Excel**, or open the print dialog with ② **印刷** (Print).
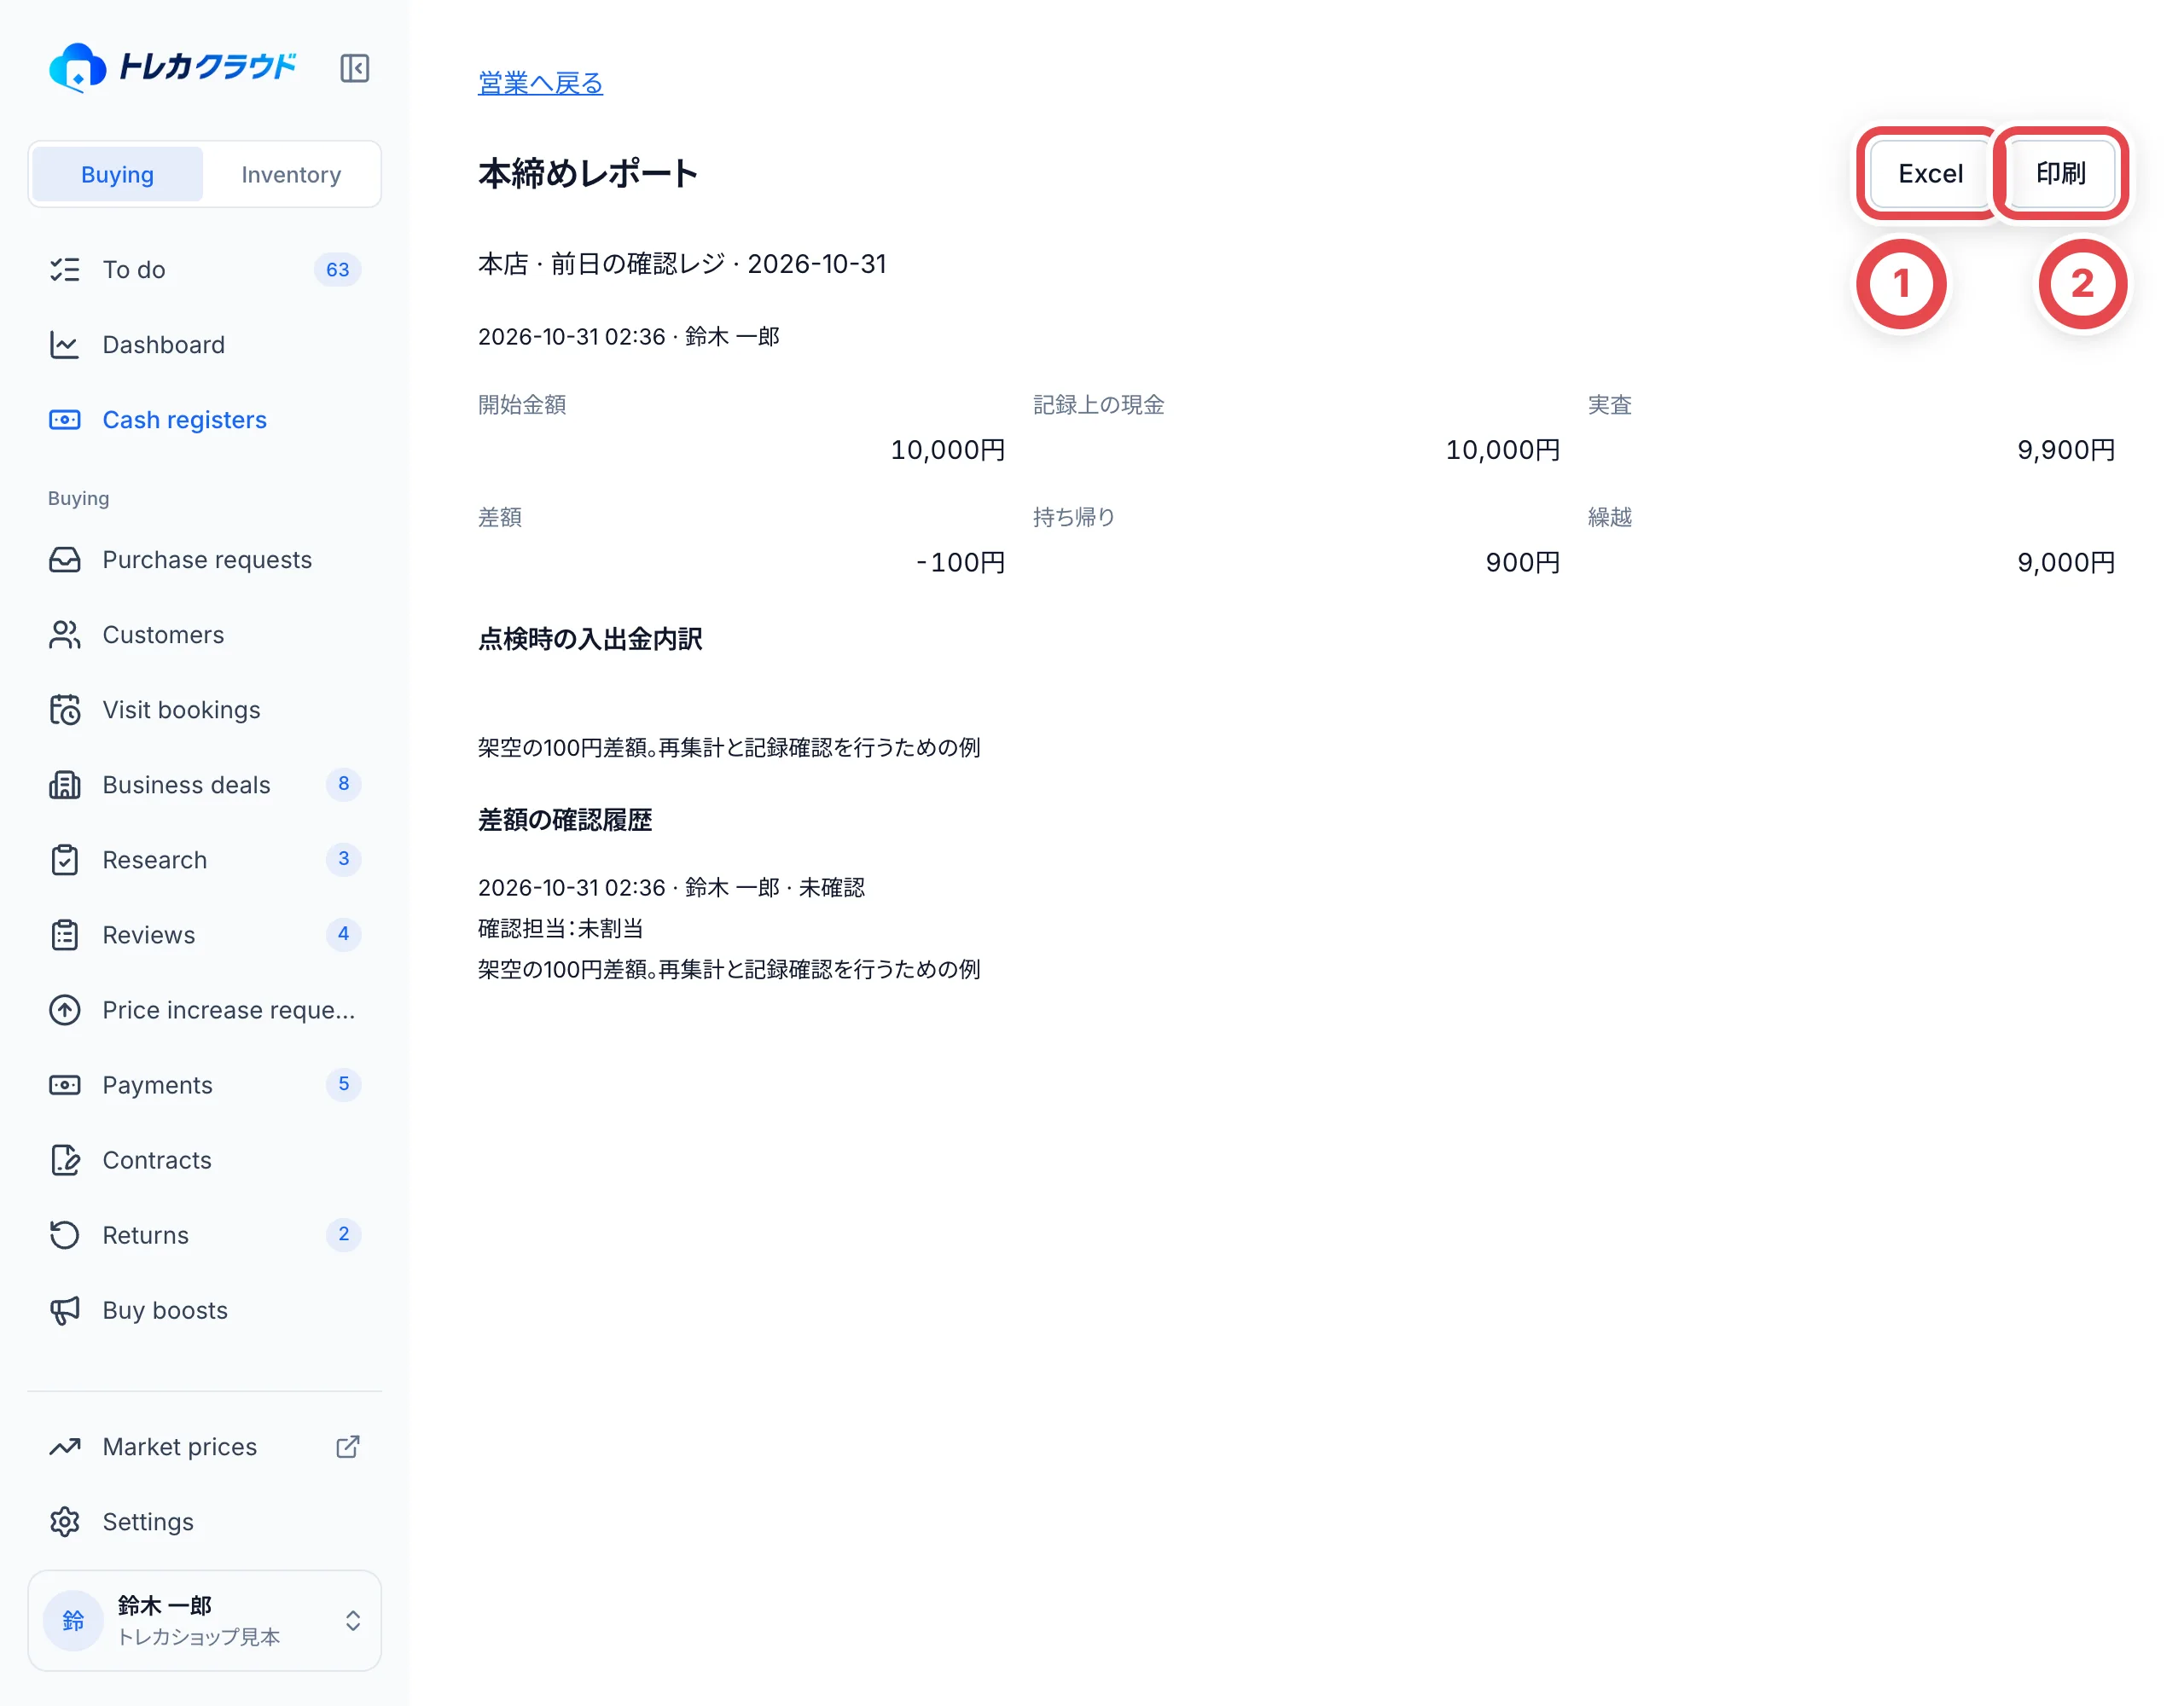 On the store report, choose assigned stores at ① and the business-date range, then apply them with ② **絞り込む** (Filter). Export the current selection with ③ **Excel**.
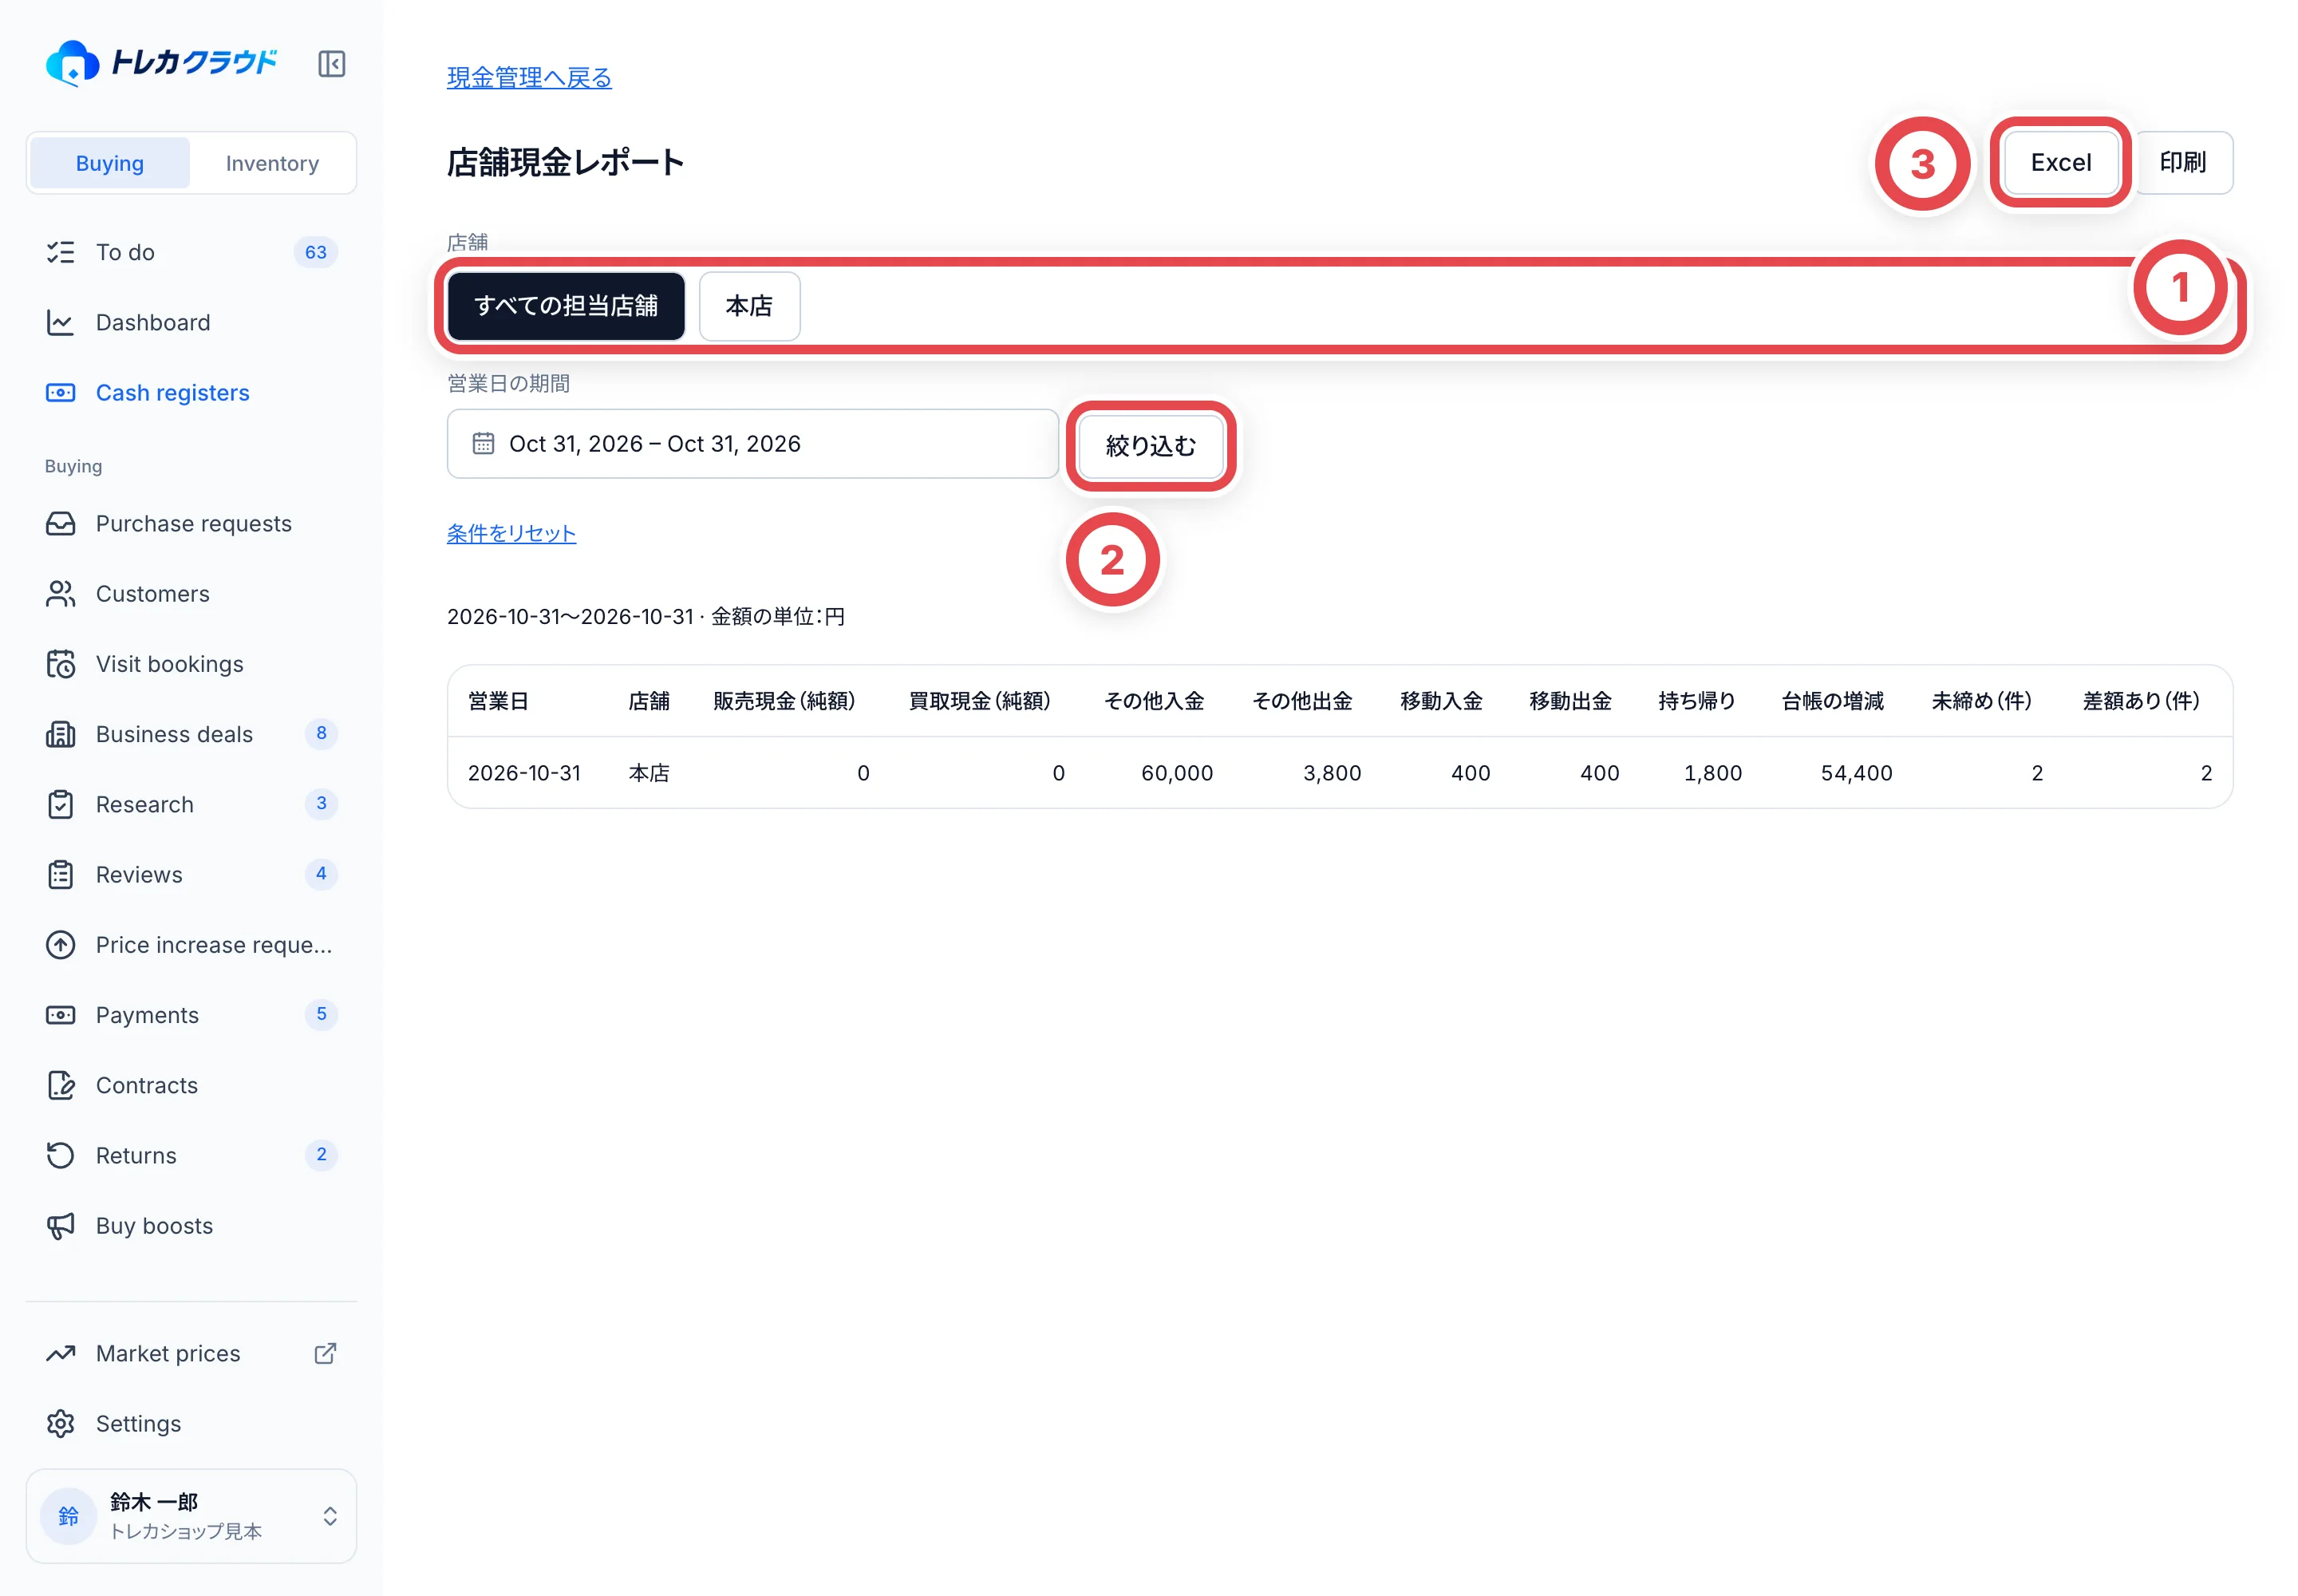 ---
# Shared purchase tasks
Source: https://docs.toreca-cloud.com/en/guides/purchase/common-operations
For the complete workflow, start with [Online purchases](/en/guides/purchase/overview) or [In-store purchases](/en/guides/purchase/counter).
## Open and check item cards
Appraisal requests, quote items, individual final appraisals and second reviews use expandable item cards. Click the product heading to open inputs and details; click again to collapse them. Selection checkboxes and three-dot menus are separate controls.
- **Save and check** saves that screen’s line or review draft, then collapses the card and moves to the next unchecked item when available. Review approval and presenting the quote remain separate actions
- **Review inputs and close** checks the input and collapses the card. Screens such as final appraisal still require their overall **Save** action. Check for an **Unsaved** badge before leaving
- **Checked** refers to the saved values. Use **Uncheck** to reopen a confirmed line for correction. Open changed lines or those marked **Needs attention** or **Amount not entered** and check their values. An invalid input prevents closing the card
**Inputs reviewed** means the inputs were checked and folded in the current screen. It differs from the saved **Checked** status and is not a persistent checking record after reopening.
## Change the selected product
Search from the product field when adding an item. Screens that accept photos show **Search by photo** and **Search by keyword**. After selection, use the change button in the product field to choose again. Receipt slips accept cards from the catalog only; an unlisted name alone cannot be confirmed as stock.
## Correct declared grading information
On the customer's **Appraisal requests** tab, open the card's three-dot menu and choose **Edit grading**. Check the grading company, grade and certification number, then click **Save**. Enter the number as printed on the physical item, including leading zeros.
You need permission to change purchases. Declared or received cards can be corrected after acceptance of the preliminary offer or presentation of the final offer, up until the final offer is accepted. The action is unavailable after settlement, for removed cards, and for BOX, pack or deck products. Its availability differs from the removal action.
Changing the declared grade invalidates the quote draft in progress. Review the appraisal amount and recreate the draft. This action does not rewrite saved quote revisions or the per-unit certification numbers recorded on arrival. For received items, see [Final appraisal](/en/guides/purchase/final-appraisal). After stock registration, see [Correct purchase amounts, quantities and related records](/en/guides/purchase/amount-and-quantity-corrections).
## Customers and appraisal
| Task | Guide |
| ------------------------------------------------------- | ------------------------------------------------------------------------ |
| Find customers and register deals | [Customers and deals](/en/guides/purchase/customers) |
| Record individual final prices, numbers and eligibility | [Final appraisal](/en/guides/purchase/final-appraisal) |
| Price a bulk lot or a whole quote | [Bulk appraisals and set prices](/en/guides/purchase/bulk-and-set-price) |
| Set, edit or remove the total offer for a quote | [Change to a set price](/en/guides/purchase/set-price) |
| Request market research or a quote review | [Research and reviews](/en/guides/purchase/research-and-reviews) |
| Manage boosted cards and prices | [Purchase boosts](/en/guides/purchase/purchase-boosts) |
| See which cards your oripa partners are short of | [Oripa demand](/en/guides/purchase/oripa-demand) |
| Request a card missing from the catalog | [Missing-card requests](/en/guides/purchase/card-registration-requests) |
| Record a customer's request for a higher price | [Price increase requests](/en/guides/purchase/price-increase-requests) |
Features and permissions determine which operations are available. Check each article's requirements and the instructions shown in the console.
## Identity checks, documents and payment
| Task | Guide |
| --------------------------------------- | ----------------------------------------------------------------------------------------------------------------------------------------------- |
| Receive and approve ID documents online | [Online identity verification](/en/guides/purchase/identity) |
| Check original documents at the counter | [In-store ID checks](/en/guides/purchase/counter-identity) or [Customer photography and original-ID checks](/en/guides/purchase/counter-photos) |
| Find contracts or powers of attorney | [Contracts and customer documents](/en/guides/purchase/contracts) |
| Prepare and send CloudSign documents | [CloudSign](/en/guides/settings/cloudsign) |
| Pay for a purchase by bank transfer | [Payouts](/en/guides/purchase/payouts) |
| Buy from a business using an invoice | [Business deals and invoices](/en/guides/purchase/corporate-deals) |
For cash at the counter, use [the in-store payment steps](/en/guides/purchase/counter#7-register-stock-and-payment). For opening, checking and closing the register, use [Cash registers and closing](/en/guides/purchase/cash).
## Leave an internal note
From the **⋯** at the top right of a deal, choose **Write internal note** to leave a note only your shop's members can see. Notes can be up to 2,000 characters, with up to five JPEG, PNG, WebP or PDF attachments (20 MB each); attachments alone are fine too. **Save note** adds it to the deal's **Activity** with who wrote it and when. Customers never see it.
If sending fails, choose **Retry with same content**. To avoid saving a note twice, the text and attachments can't be changed once sent. Fix a wrong note with [Record corrections](/en/guides/inventory/record-corrections).
## Returns, corrections and undo
| Task | Guide |
| --------------------------------------------------------------- | -------------------------------------------------------------------------------------------------------------- |
| Hand back cards you did not buy at the counter | [Partial acceptance and decline in store](/en/guides/purchase/counter#when-the-customer-keeps-cards) |
| Ship back cards you did not buy online | [Returns](/en/guides/purchase/returns) |
| Undo a recorded action or go back a stage | [Undo from history](/en/guides/purchase/history-and-undo) |
| Correct purchase amounts or quantities after stock registration | [Purchase amount, quantity and linked-record corrections](/en/guides/purchase/amount-and-quantity-corrections) |
| Put purchased cards away | [QR labels and putaway](/en/guides/inventory/putaway) |
## Export purchases by source and month settled
On the **Purchases** list, **+ Filter** offers **Source** and **Month settled**. The source is the LINE account a deal came in through (including a Liny connected to that LINE). Deals that did not come through LINE are **Not via LINE (unassigned)**. The month settled is the day the purchase was recorded in the secondhand ledger (Japan time). With a month settled chosen, called-off deals are left out.
Choose **Purchases (CSV)** from **Export** next to the search box to save every deal matching the conditions shown, across all pages, as a CSV. It contains customers' names, so you need permission to view both customers and purchases.
The CSV has the settled time, ledger number, deal number, status, how it was received, source, customer number, customer name, LINE display name, number of items, latest quote, settled amount, currency and received time. The settled amount is the ledger's, the latest one if it was corrected. The last row gives the count and the settled total (called-off deals are not added). One export holds up to 5,000 deals.
Reports of the fees you pay a referrer are made from **Referral fee report…** in the same **Export** menu ([Referral fee reports](/en/guides/settings/referral-reports)).
After the task, return to [Online purchases](/en/guides/purchase/overview) or [In-store purchases](/en/guides/purchase/counter) to check the next stage and completion conditions.
---
# Find contracts and powers of attorney
Source: https://docs.toreca-cloud.com/en/guides/purchase/contracts
Use **Contracts** in the sidebar to find purchase contracts and powers of attorney across deals. Customer and purchase read permissions are required. Reading PDFs saved by the API integration also requires the CloudSign feature.
## 1. Open and filter the list
Use status tabs at ① for attention needed, sent, signed, waived and canceled documents. **All** excludes canceled records; use their own tab. Match customer and case in the list at ②. Use search and kind/date filters to narrow the list. Also check whether test sends are included.
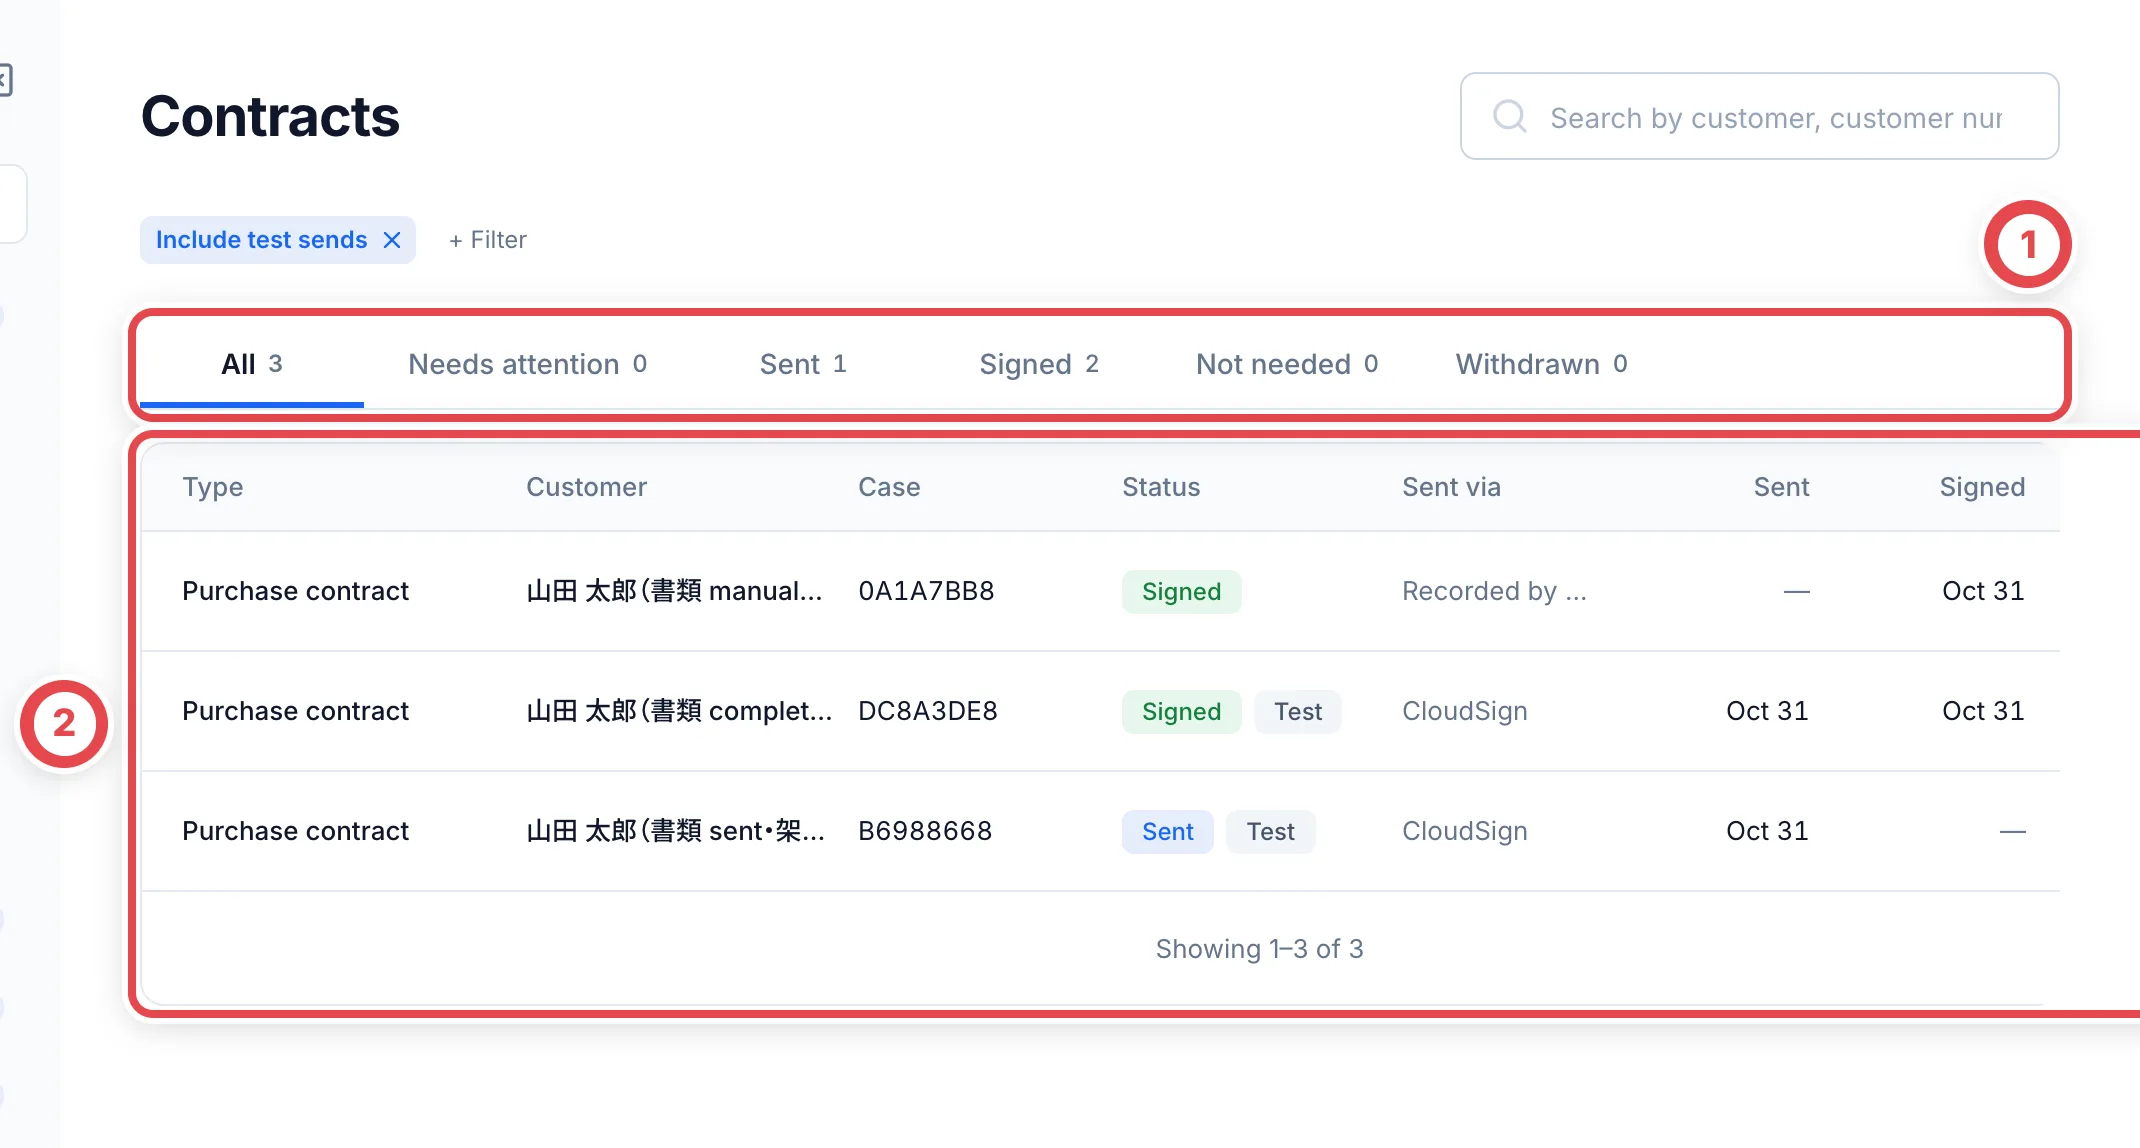 ## 2. Inspect the PDF and source deal
Open **View PDF** on a row. Review the signed file at ① and switch between the document and agreement certificate at ②. The case number on the list opens the original deal. API documents also offer a link to CloudSign.
A manual status record does not automatically attach a provider PDF. If no PDF is available, inspect the original deal or provider record.
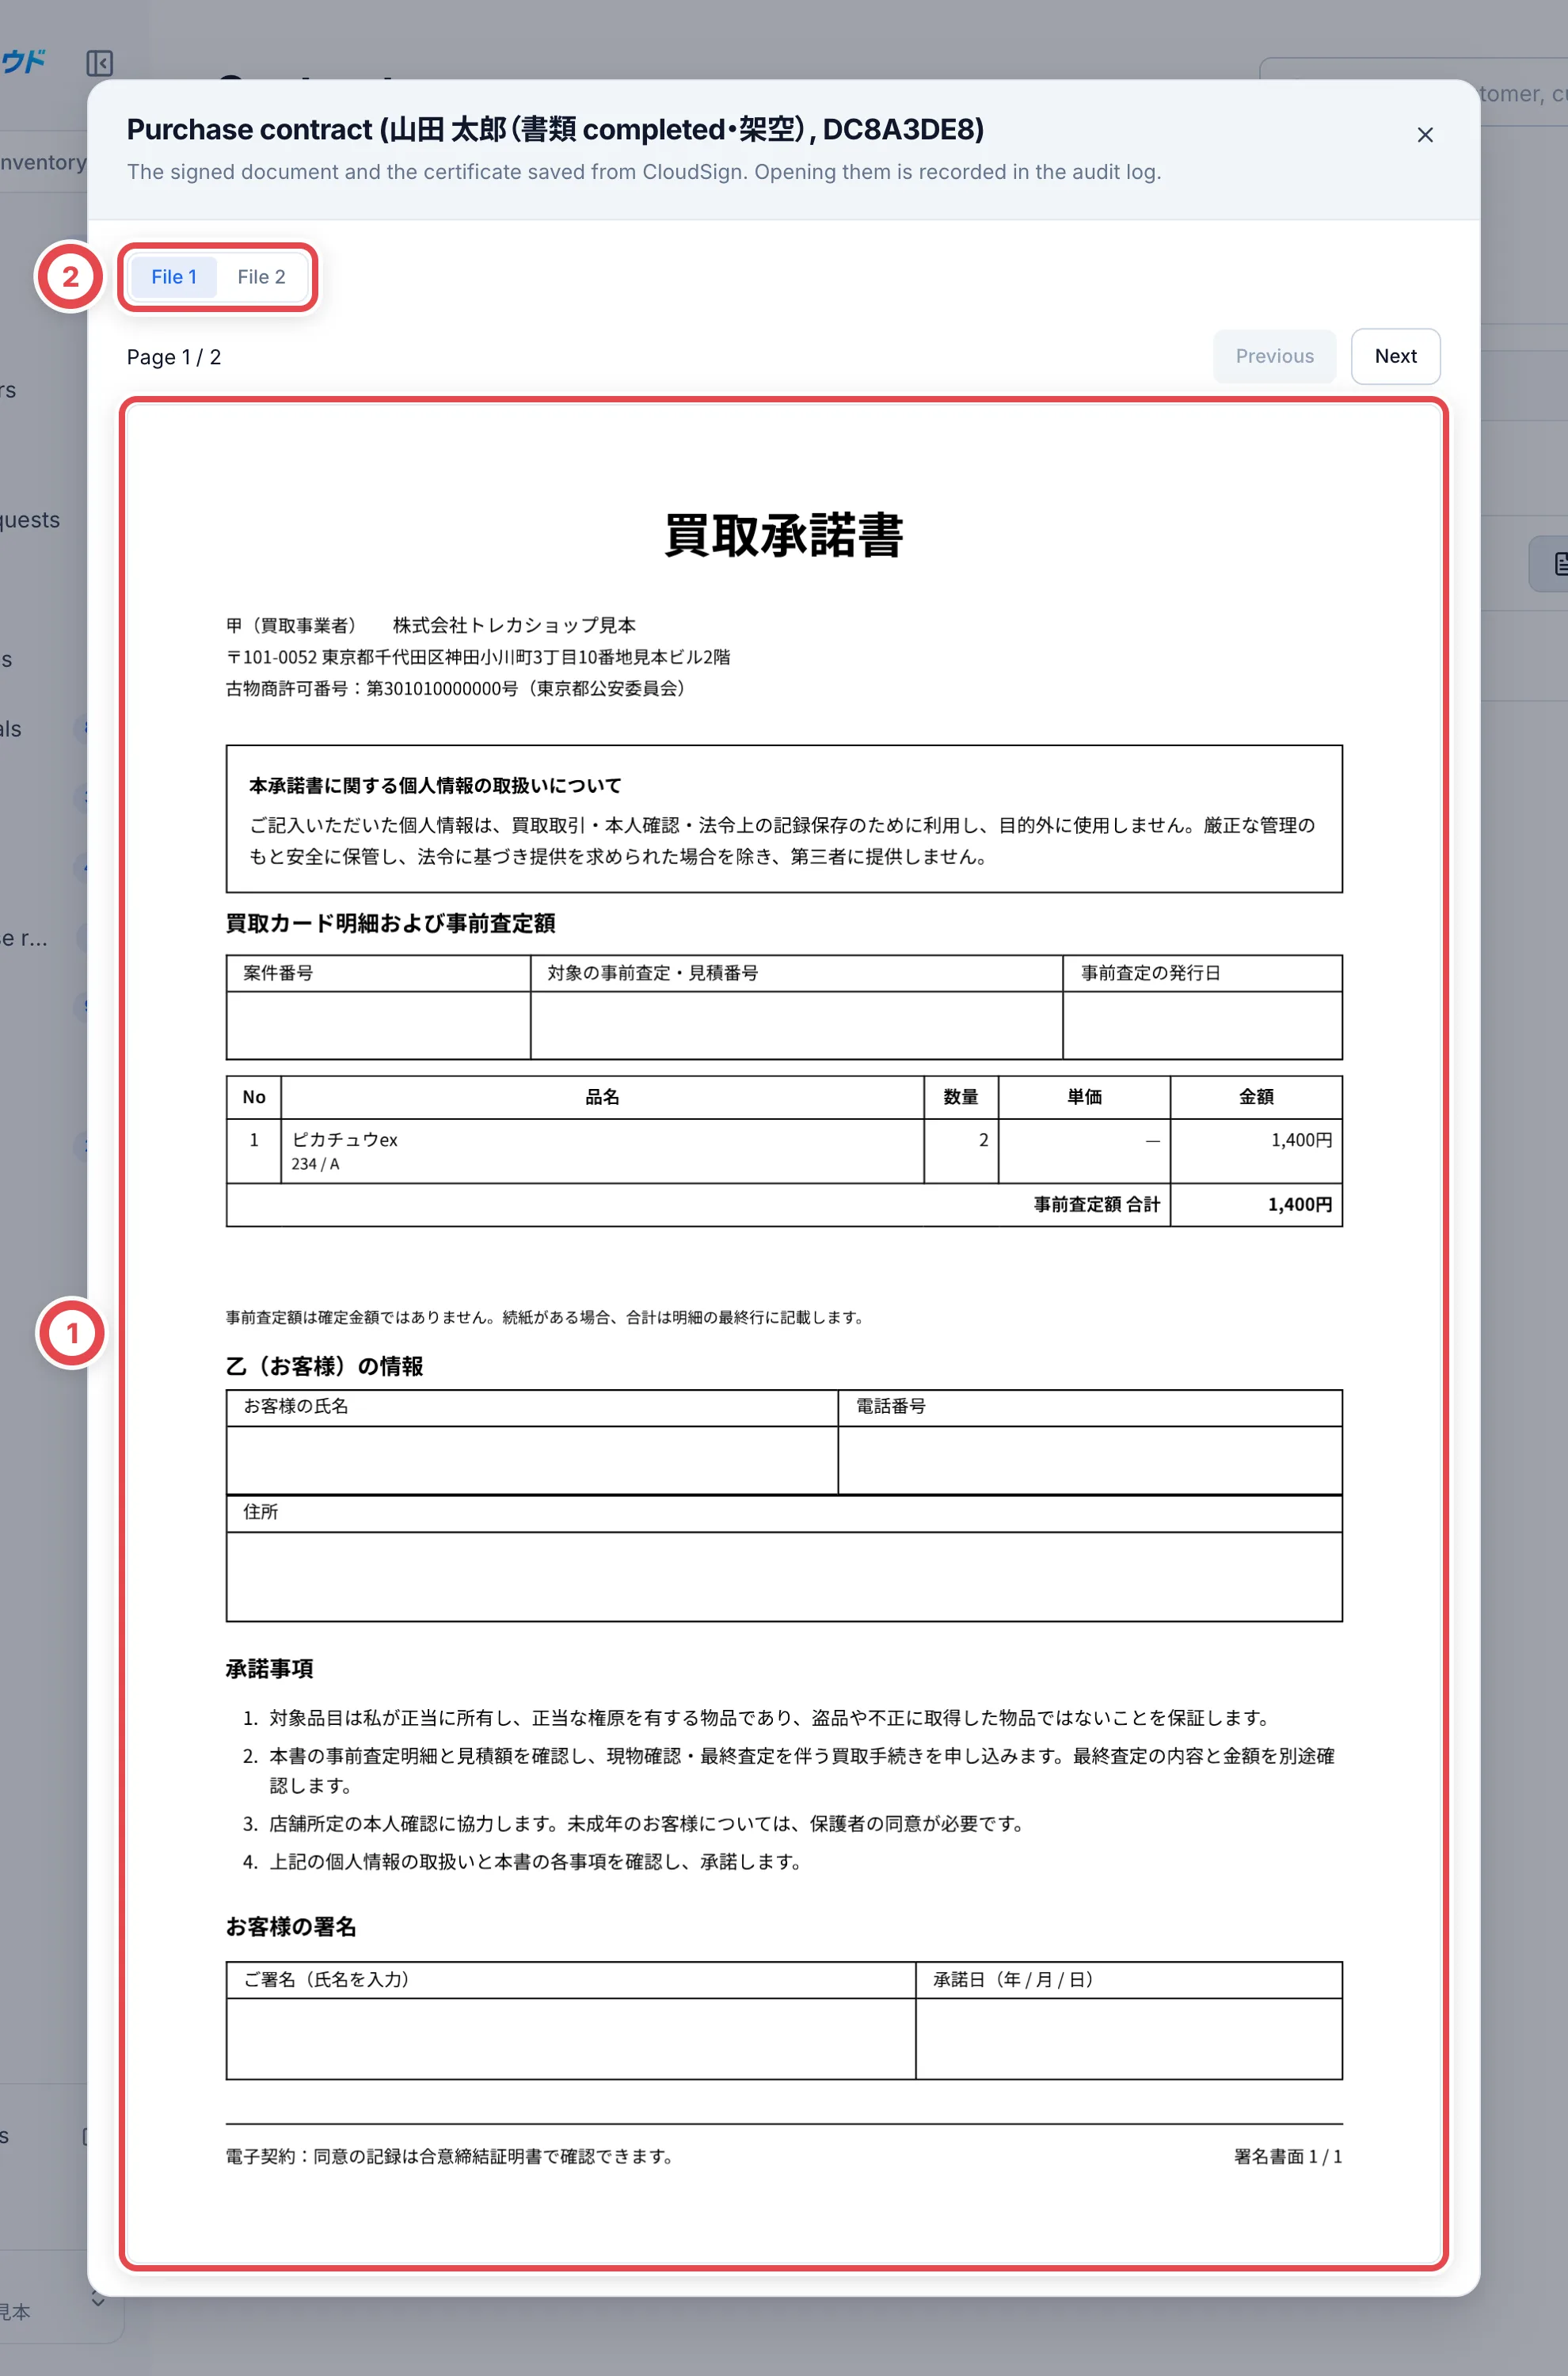 ## 3. Start from a customer
Open the customer’s **Customer details**. Recent documents appear in the contracts panel at ①. **See all** at ② opens the list filtered to that customer. Clear the customer filter to search across customers again.
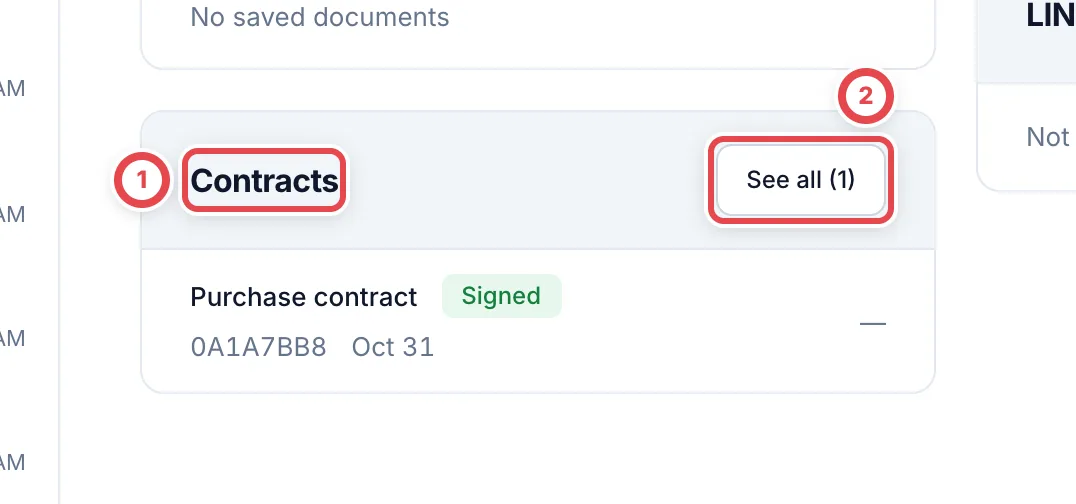 ## Troubleshooting
| What you see | What to check |
| ------------------------- | --------------------------------------------------------------------------- |
| Canceled document missing | Use the canceled tab instead of All. |
| Document cannot be found | Clear customer, kind, period, status and test-send filters. |
| PDF unavailable | Check manual/API source, saved files, permissions and feature availability. |
To send a new document, see [CloudSign](/en/guides/settings/cloudsign).
---
# Business deals and invoices
Source: https://docs.toreca-cloud.com/en/guides/purchase/corporate-deals
After stock registration, use the case’s three-dot menu for [purchase amount, quantity and linked-record corrections](/en/guides/purchase/amount-and-quantity-corrections). The original invoice and payment records are retained.
Handle business deals under **Business deals** in the sidebar. **They run on the invoice.** Unlike individual deals, they don't ask you to send a quote, record acceptance of a quote, or verify identity.
When you submit a payout, you attach evidence that the seller agreed, such as a screenshot of an email or chat. This is the same as for individual deals.
## What you need
- The seller's company name, furigana, corporate number and address (for a first-time seller)
- The PDF of the invoice the seller issued
- The seller's bank account for the payout, and your shop's secondhand dealer license
## The steps and the list tabs
| Step | What you do | List tab | Deal status |
| ---- | ------------------------------------------------------- | -------------------- | ----------------------- |
| 1 | Create the business deal | Awaiting invoice | Awaiting goods matching |
| 2 | Register the invoice | Matching & appraisal | Awaiting goods matching |
| 3 | Review the product, quantity and unit-price draft | Matching & appraisal | Awaiting goods matching |
| 4 | Check the goods, adjustments and reasons | Matching & appraisal | Awaiting goods matching |
| 5 | Confirm the goods and continue to payout | Payout | Awaiting payout |
| 6 | Check the invoice and payout amounts, then go to payout | Payout | Awaiting payout |
The **Next step** column of the list shows the button to click next for each deal, such as **Register invoice**, **Match received goods**, **Enter appraisal**, **Record settlement** or **Open in payouts**.
## 1. Create the business deal
Open **Business deals** in the sidebar and click **New business deal** at ①. Use the tabs at ② to find deals by stage. You can also search by company name, corporate number or case number.
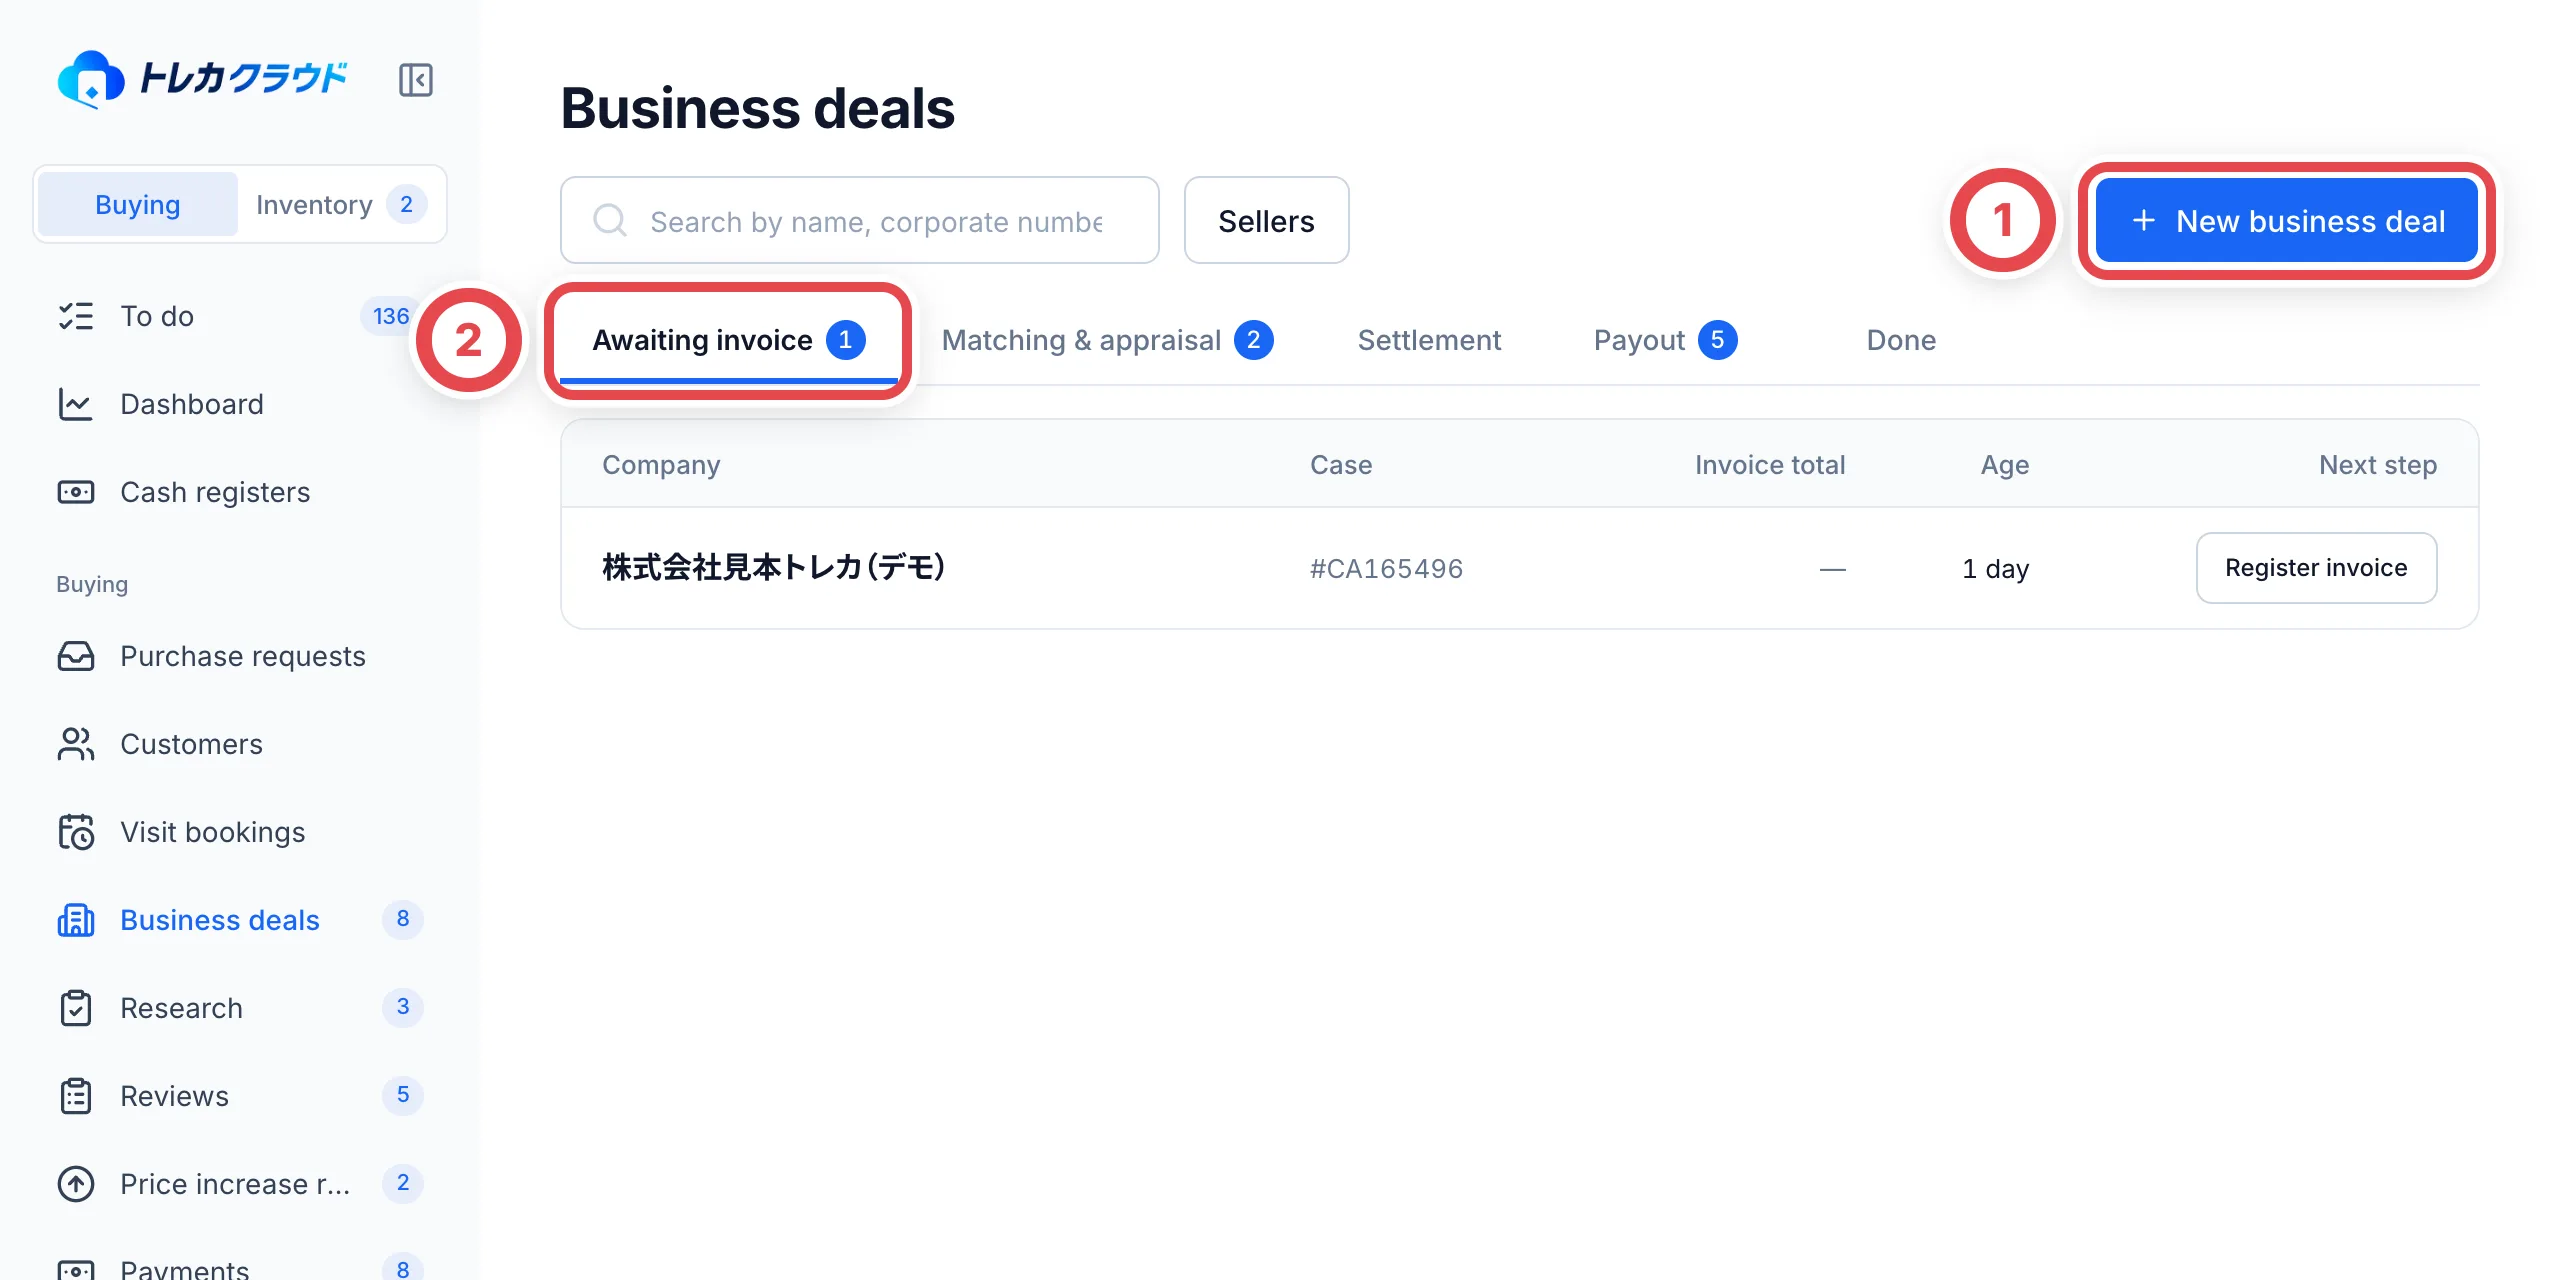 In the **Seller** field at ①, enter the company name or corporate number and choose a registered seller. For a first-time seller, choose **Add a new seller** and enter the company name, furigana, corporate number, address and so on (the registration number and building name are optional). Click **Create** at ②. The deal is created and its page opens. **Clicking it creates the deal right away.**
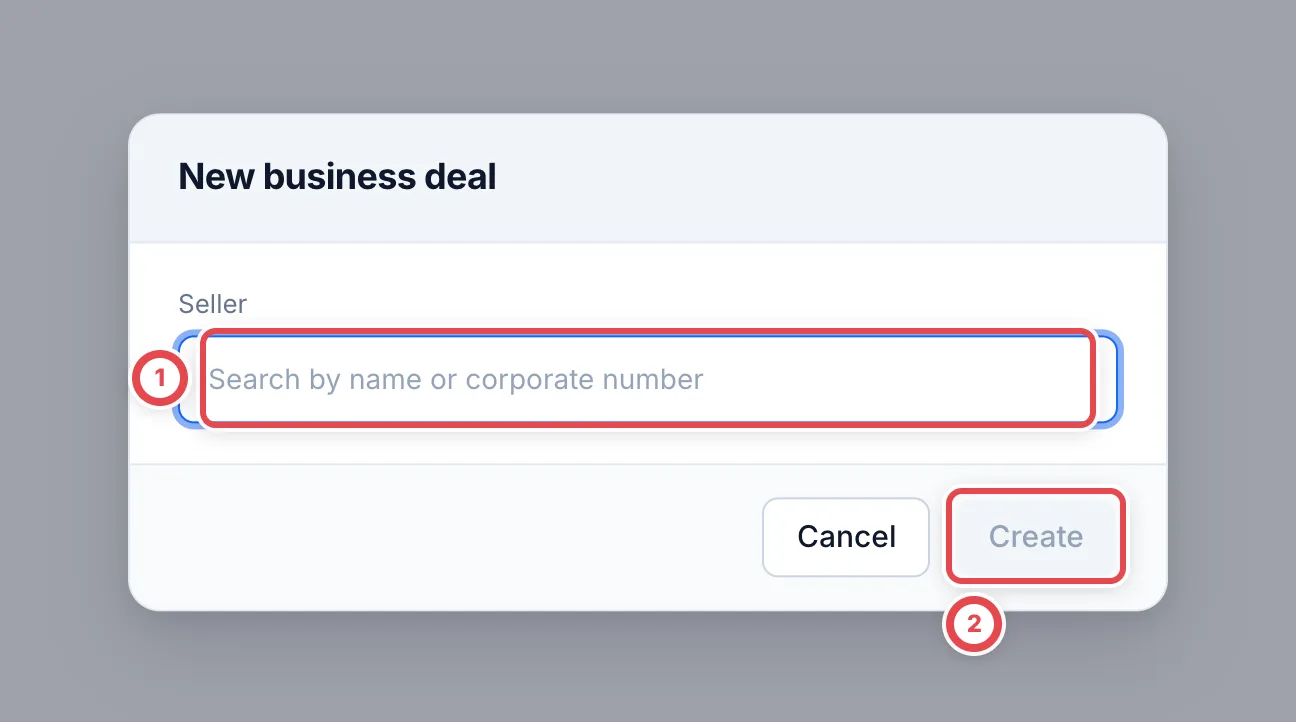 Enter the company’s reading without the legal entity type, such as カブシキガイシャ, in furigana. You can also check and edit seller details from **Sellers** on the list page.
## 2. Register the invoice
On the deal page, click **Register invoice** under **Invoice**. Choose the invoice PDF at ①. The issuer, registration number, invoice number, issue date, total and the product lines are read automatically with AI.
Compare the basic details at ② with the original and correct the fields directly. Enter them manually if extraction fails. Last, tick the checkbox to say you compared it with the original, and click **Register and review products** at ③. **Clicking it registers the invoice right away**, and you continue to the draft under **Products and purchase amounts**.
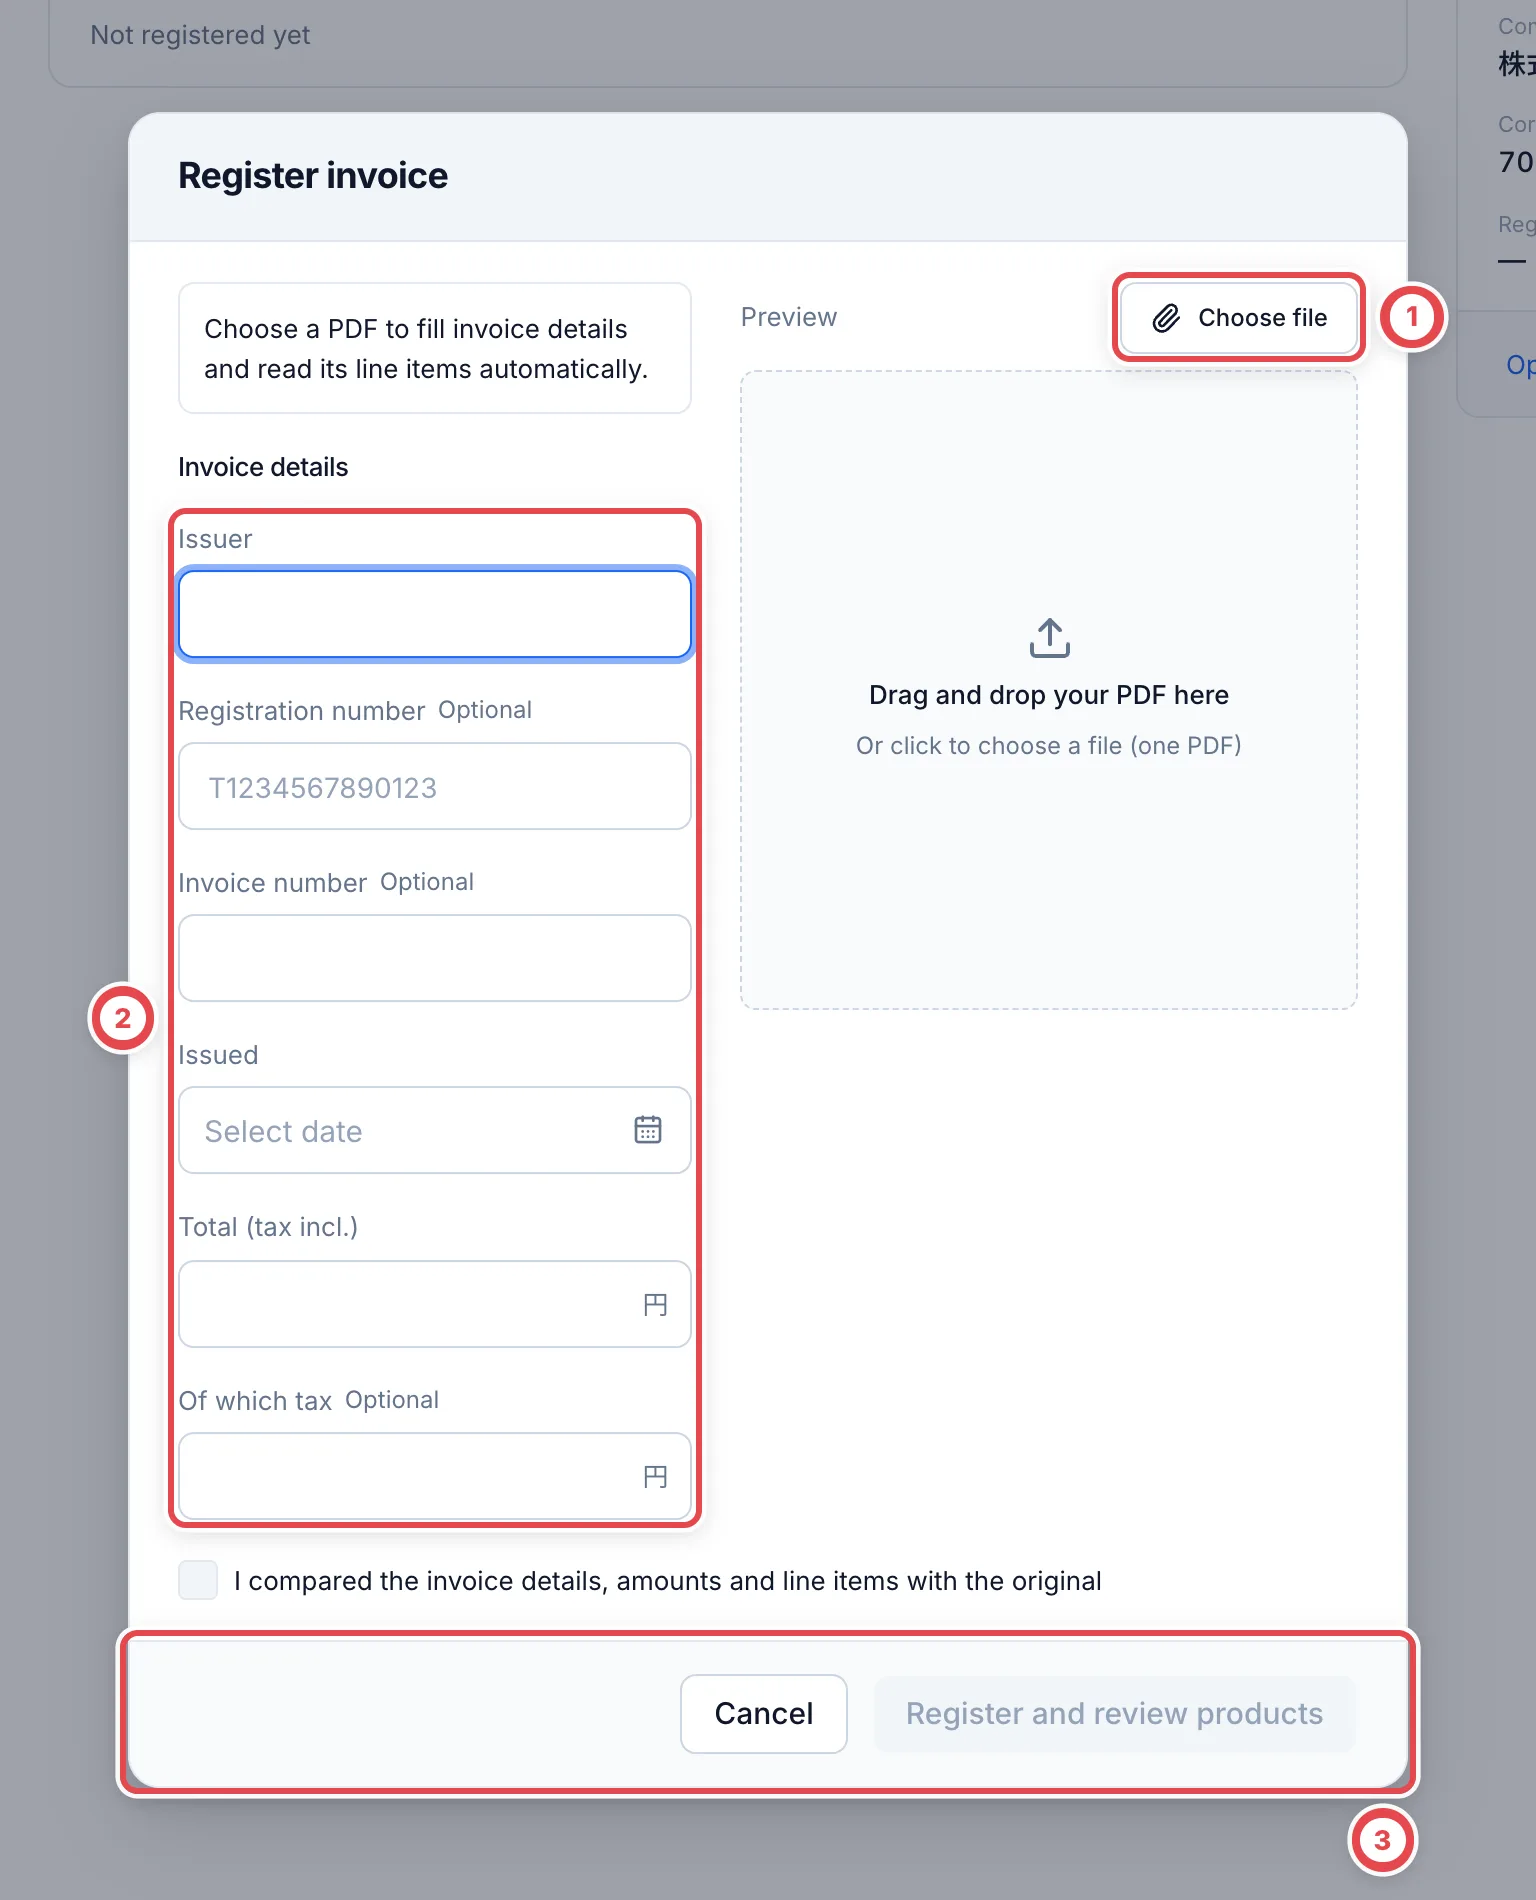 If the invoice has a registration number, use **Check registration** under **Invoice** to record the result of comparing it with the National Tax Agency's public register. If the seller issues the invoice again, click **Replace** and register it again.
## 3. Check the invoice lines and register them
After invoice registration, the extraction appears as a draft under **Products and purchase amounts**. Compare the original invoice with the physical goods in this order. The draft currently uses Japanese labels even when the console language is English; the labels below match the screen.
1. Use ① **商品を変更** (change product) to choose the correct product and printing. An unidentified line shows **商品を検索** (search products). Check the number, set and physical card as well as the name
2. Check ② **買取単価** (purchase unit price) and ③ **現物数量** (physical quantity). **The product’s purchase amount is unit price × physical quantity.** Business deals do not require market prices or buying rates. Also check **鑑定グレード** for graded cards and **包装の状態** for sealed products
3. For missing goods, returns or duplicate lines you will not purchase, tick ④ **買取対象から除外** (exclude from purchase) and enter the reason. Use **商品を追加** to add products missed by extraction
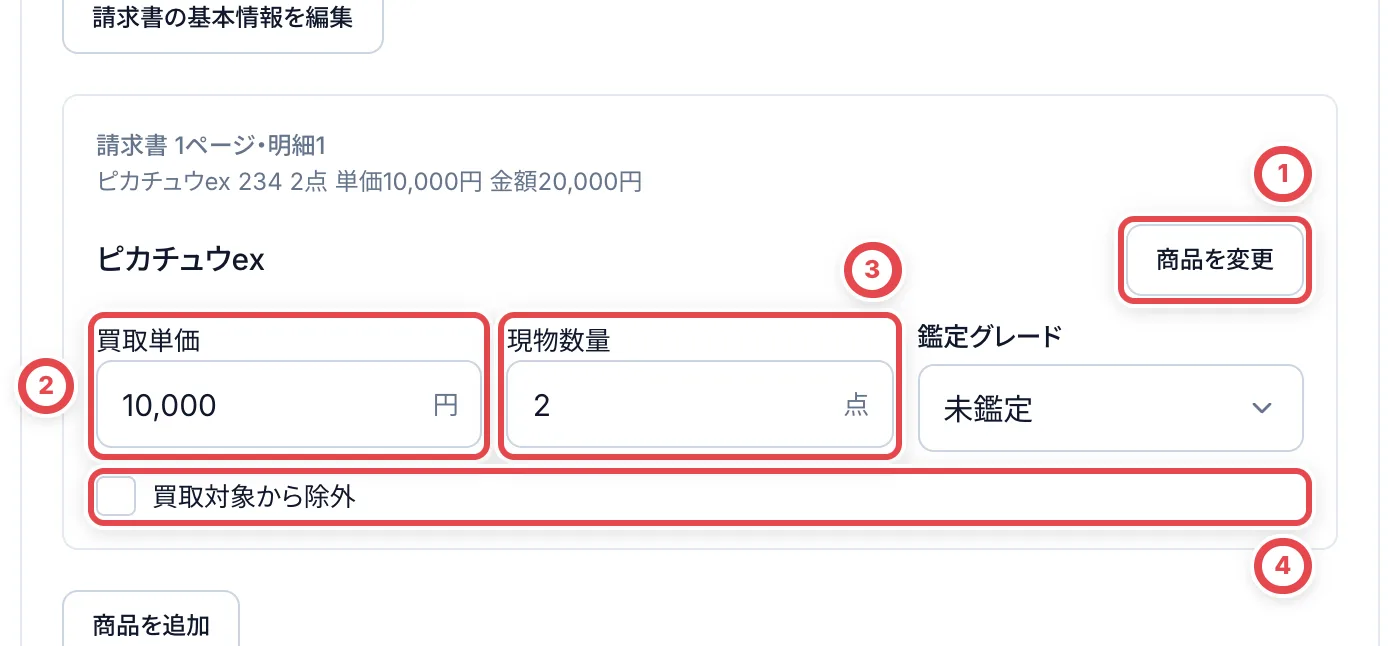 Use **下書きを保存** (save draft) when pausing. Quantities and unit prices survive a reload. **Saving a draft does not register receipt, stock or a payout.**
A different screen can appear if extraction is pending or failed, or if receipt or quote processing has already progressed. See [Deals following the earlier steps](#deals-following-the-earlier-steps).
## 4. Match the cards that arrived and enter amounts
Compare the physical goods with the invoice: product, quantity, grade, packaging and condition. Correct the draft’s quantities and unit prices to match.
At ① compare **請求額** (invoice amount), **買取合計** (purchase total) and **差額** (difference), when shown. At ③ **税・送料・値引き** (tax, shipping and discounts), check which lines are included and their amounts. Discounts appear as negative amounts. Compare with the original and avoid counting tax or shipping twice.
If you change unit prices, quantities, the invoice amount or adjustments, enter the agreement with the seller at ② **差額理由** (reason for the difference). **A reason can be required even when the totals match, if original line amounts or adjustments changed.**
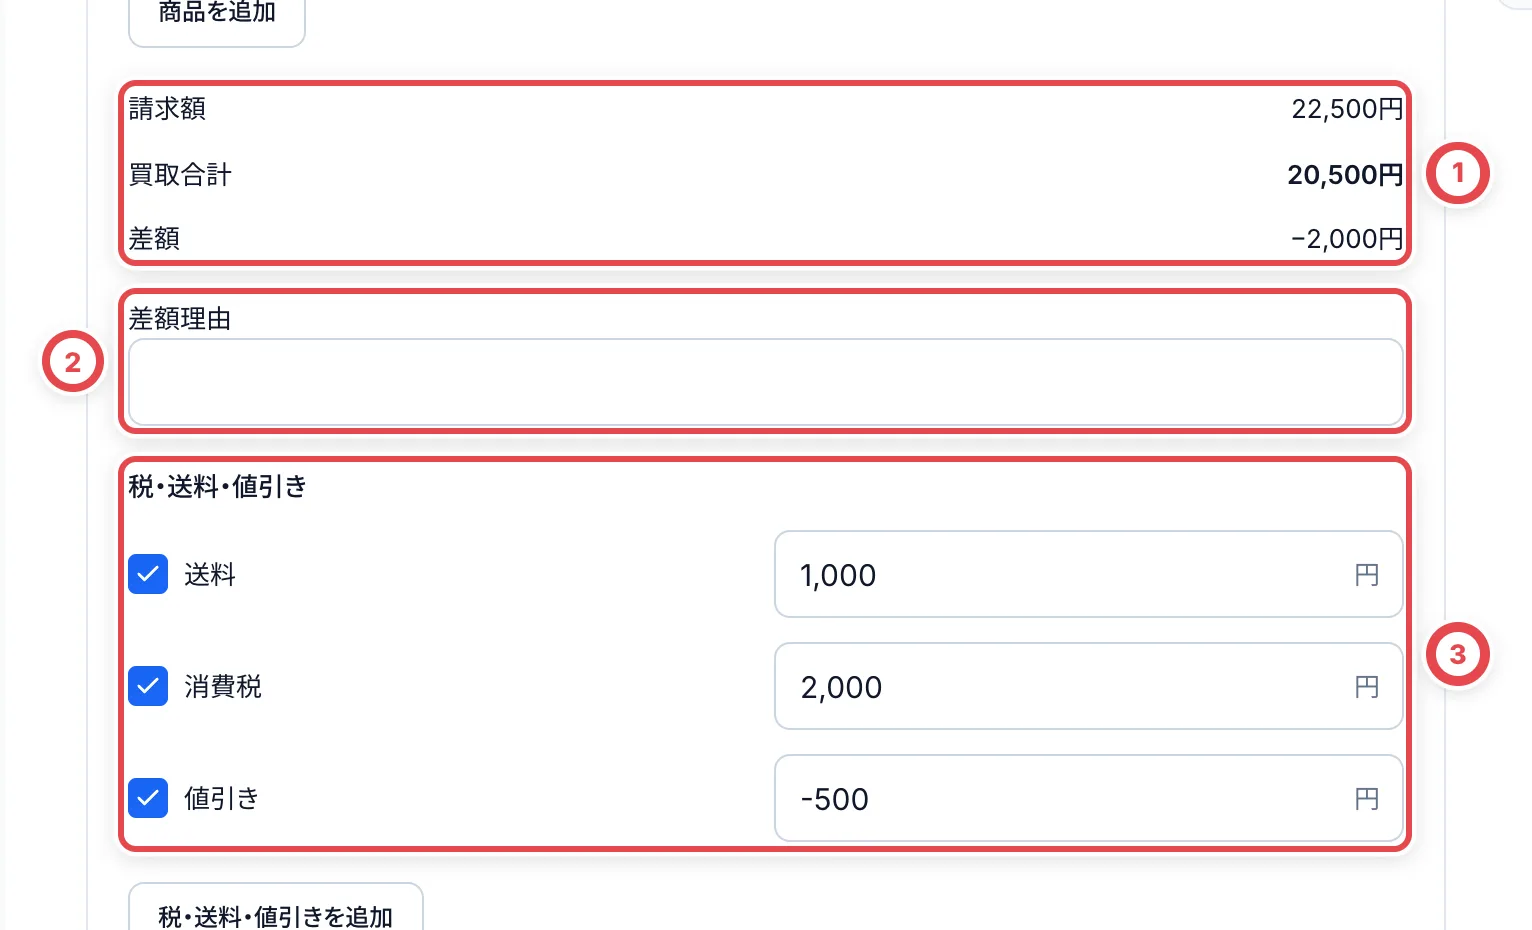 Use **請求書の基本情報を編集** (edit invoice information) to correct misread invoice details. The original invoice and correction history are retained.
If extraction is incomplete, ① **読取が不完全なため、原本の全ページと明細を確認・補完した** appears. Tick it only after checking every page and supplying missing products and amounts. While unfinished, save the draft at ② and leave ③ for later.
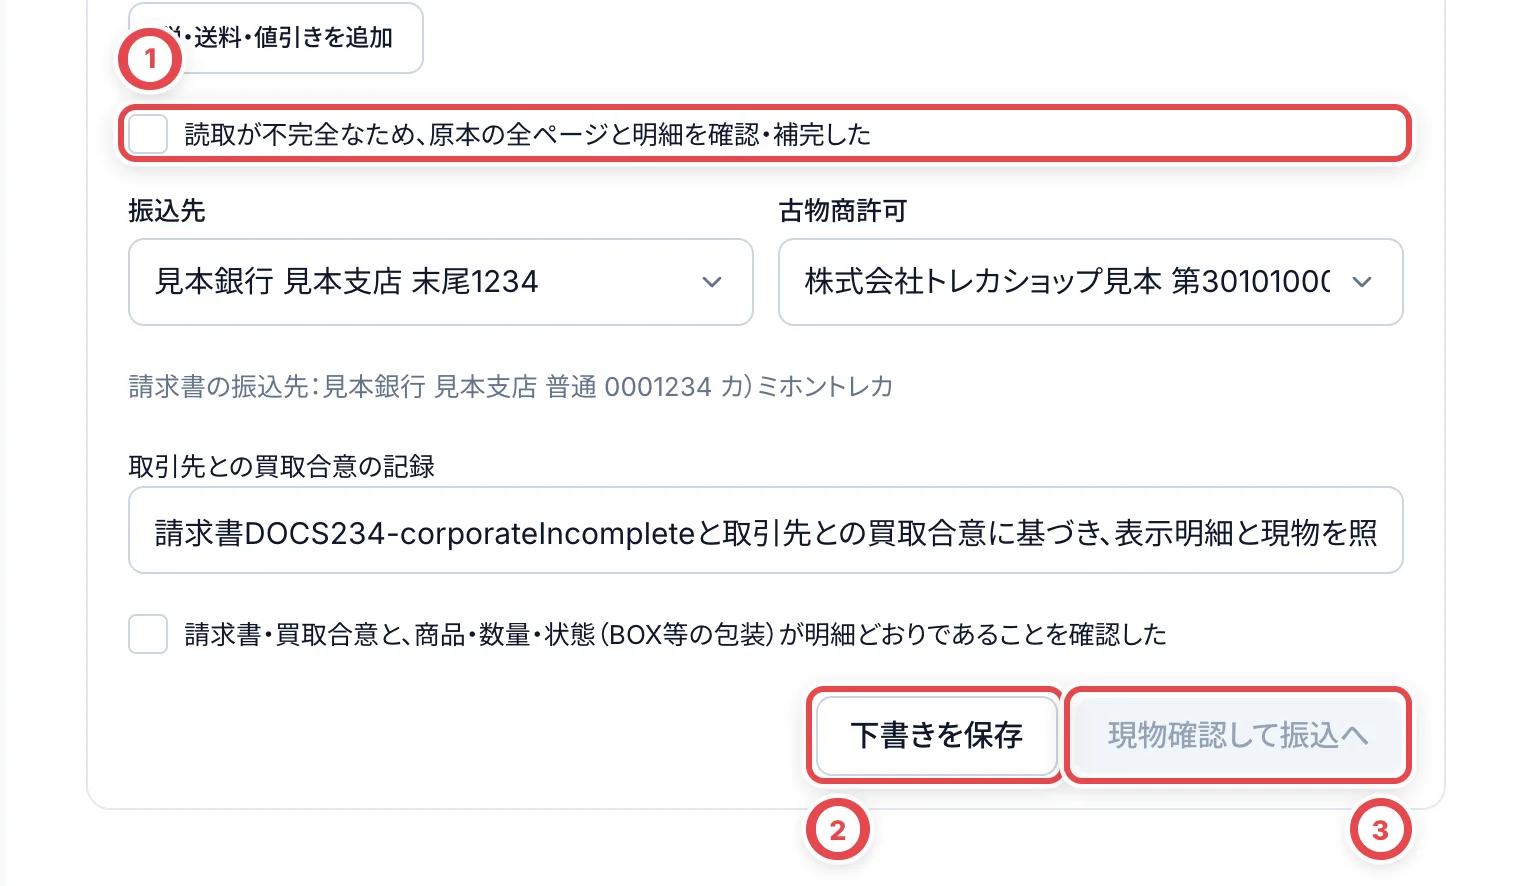 If products are already registered, an additional checkbox asks you to check for duplicates and missing lines against the invoice.
## 5. Record settlement
Check ① **振込先** (payout account) and **古物商許可** (secondhand dealer license). If the invoice includes bank details, compare the source text shown below. If no account is available, follow **取引先の振込先を登録してください** to register one, then return.
At ② **取引先との買取合意の記録** (purchase agreement record), record what was agreed, when and how. After checking the goods and agreement, tick ③ to confirm the products, quantities and condition match. If you change any details, check them against the goods again.
:::warning
⑤ **現物確認して振込へ** (confirm goods and continue to payout) registers receipt, final appraisal, settlement, stock, the secondhand ledger and a payout request together. Proceed only after the goods arrive and you confirm the agreement with the seller. It does not send money from the bank.
:::
Use ④ **下書きを保存** for unfinished work; click ⑤ when all checks are complete. This route continues to payout submission and approval without a separate second-review request or settlement dialog.
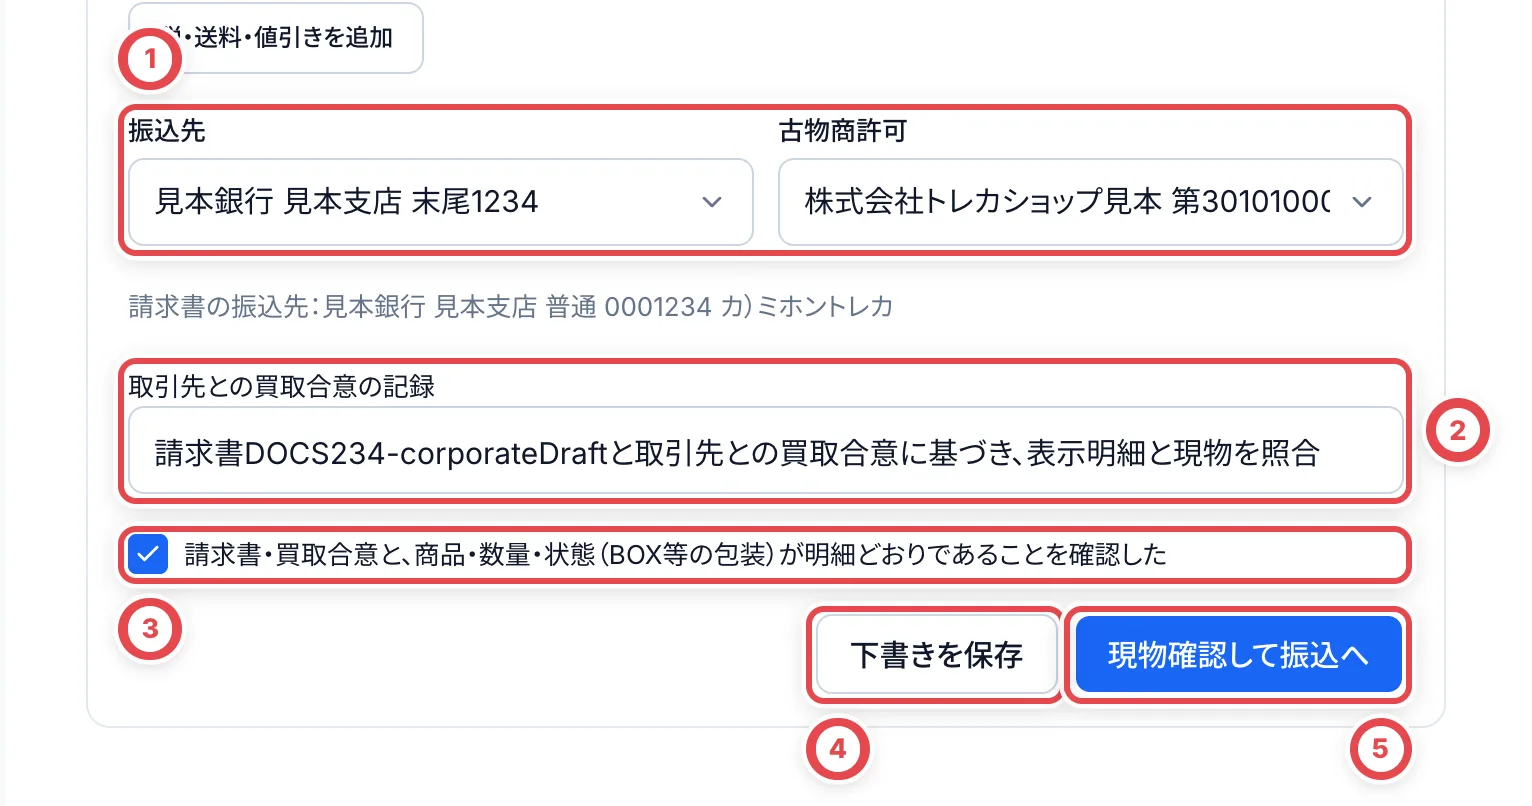 ## 6. Check the invoice and payout amounts, then go to payout
After confirmation, the relevant deal opens under **Payments**. Check that it is awaiting payout, confirm the total, account and consent evidence, then follow [Payout submission and approval](/en/guides/purchase/payouts). Use **Open in payouts** from the business-deal list to return.
The purchase agreement text and the consent-evidence attachment checked at submission are separate records. If email or chat evidence is missing, add it in the payout submission screen. Confirmation and submission do not send money from the bank.
### Recheck the difference from the payout amount
Under **Invoice and payout**, compare the amounts and difference at ①. Check that any recorded reason applies to the current amounts. If a reason is needed, click ② **Record the reason**.
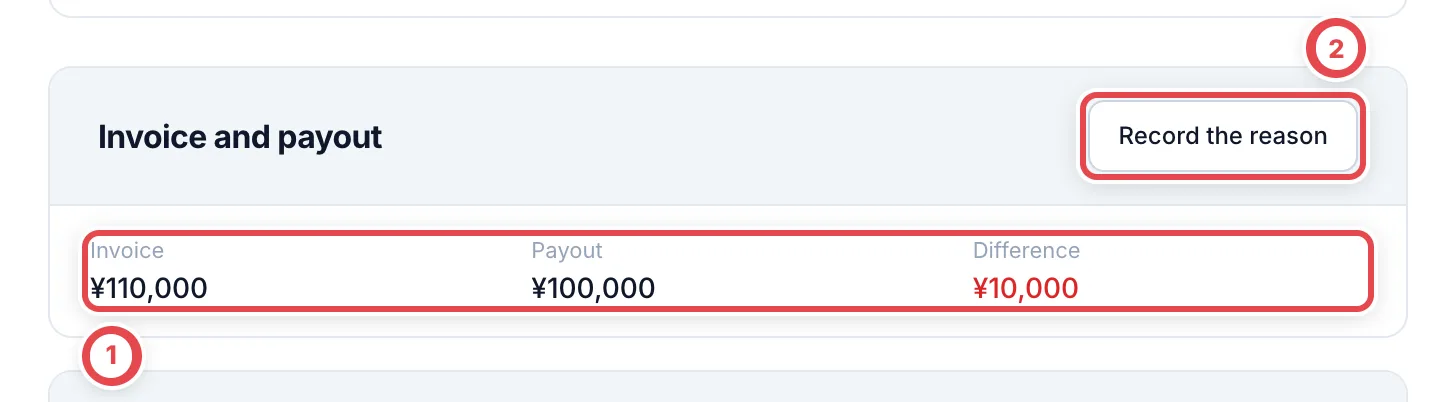 Write the reason at ① and save with ② **Record N difference**. If either amount changes afterwards, record the reason again for those amounts.
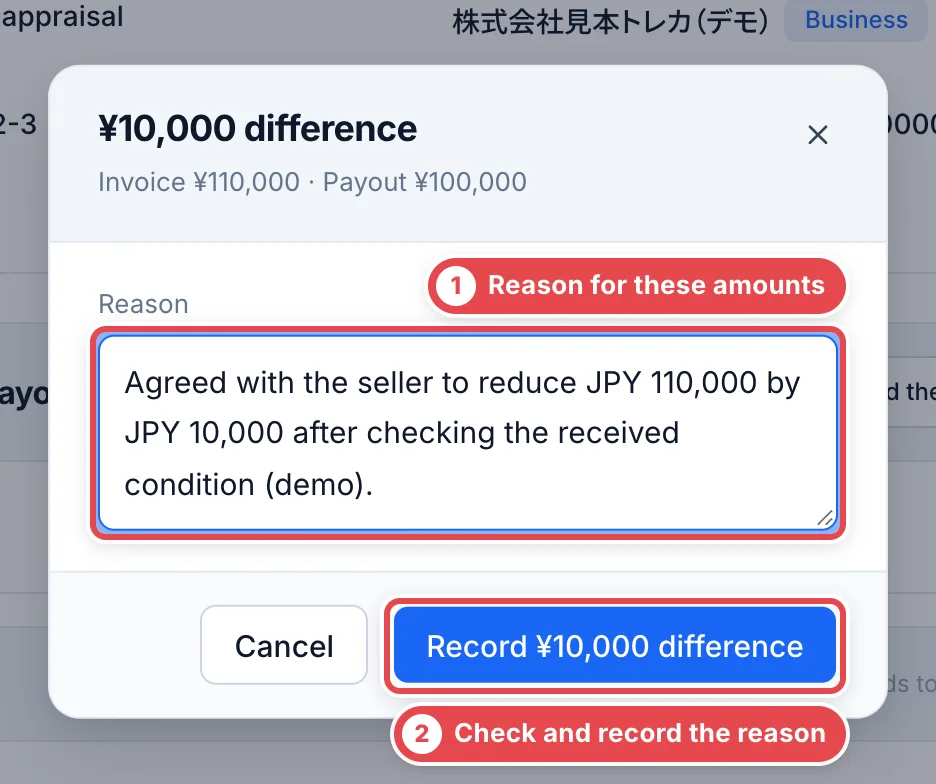 ## Deals following the earlier steps
Deals already past product registration, receipt, inspection, quote presentation or a second-review request may not use the invoice draft’s combined confirmation. Continue from the deal’s **Next step**.
If **Confirm invoice lines** opens, compare the source text with product candidates and correct them. Tick **I confirmed this product, printing and quantity**, then click **Register confirmed lines**. Goods matching and settlement wait until no unconfirmed product rows remain.
### Match the goods and save purchase amounts
When the cards arrive, click **Match received goods** at ① under **Goods matching**. **Clicking it records receipt and arrival right away.** Click it only after the cards are in your hands. The button appears only on deals that have lines and haven't been received yet.
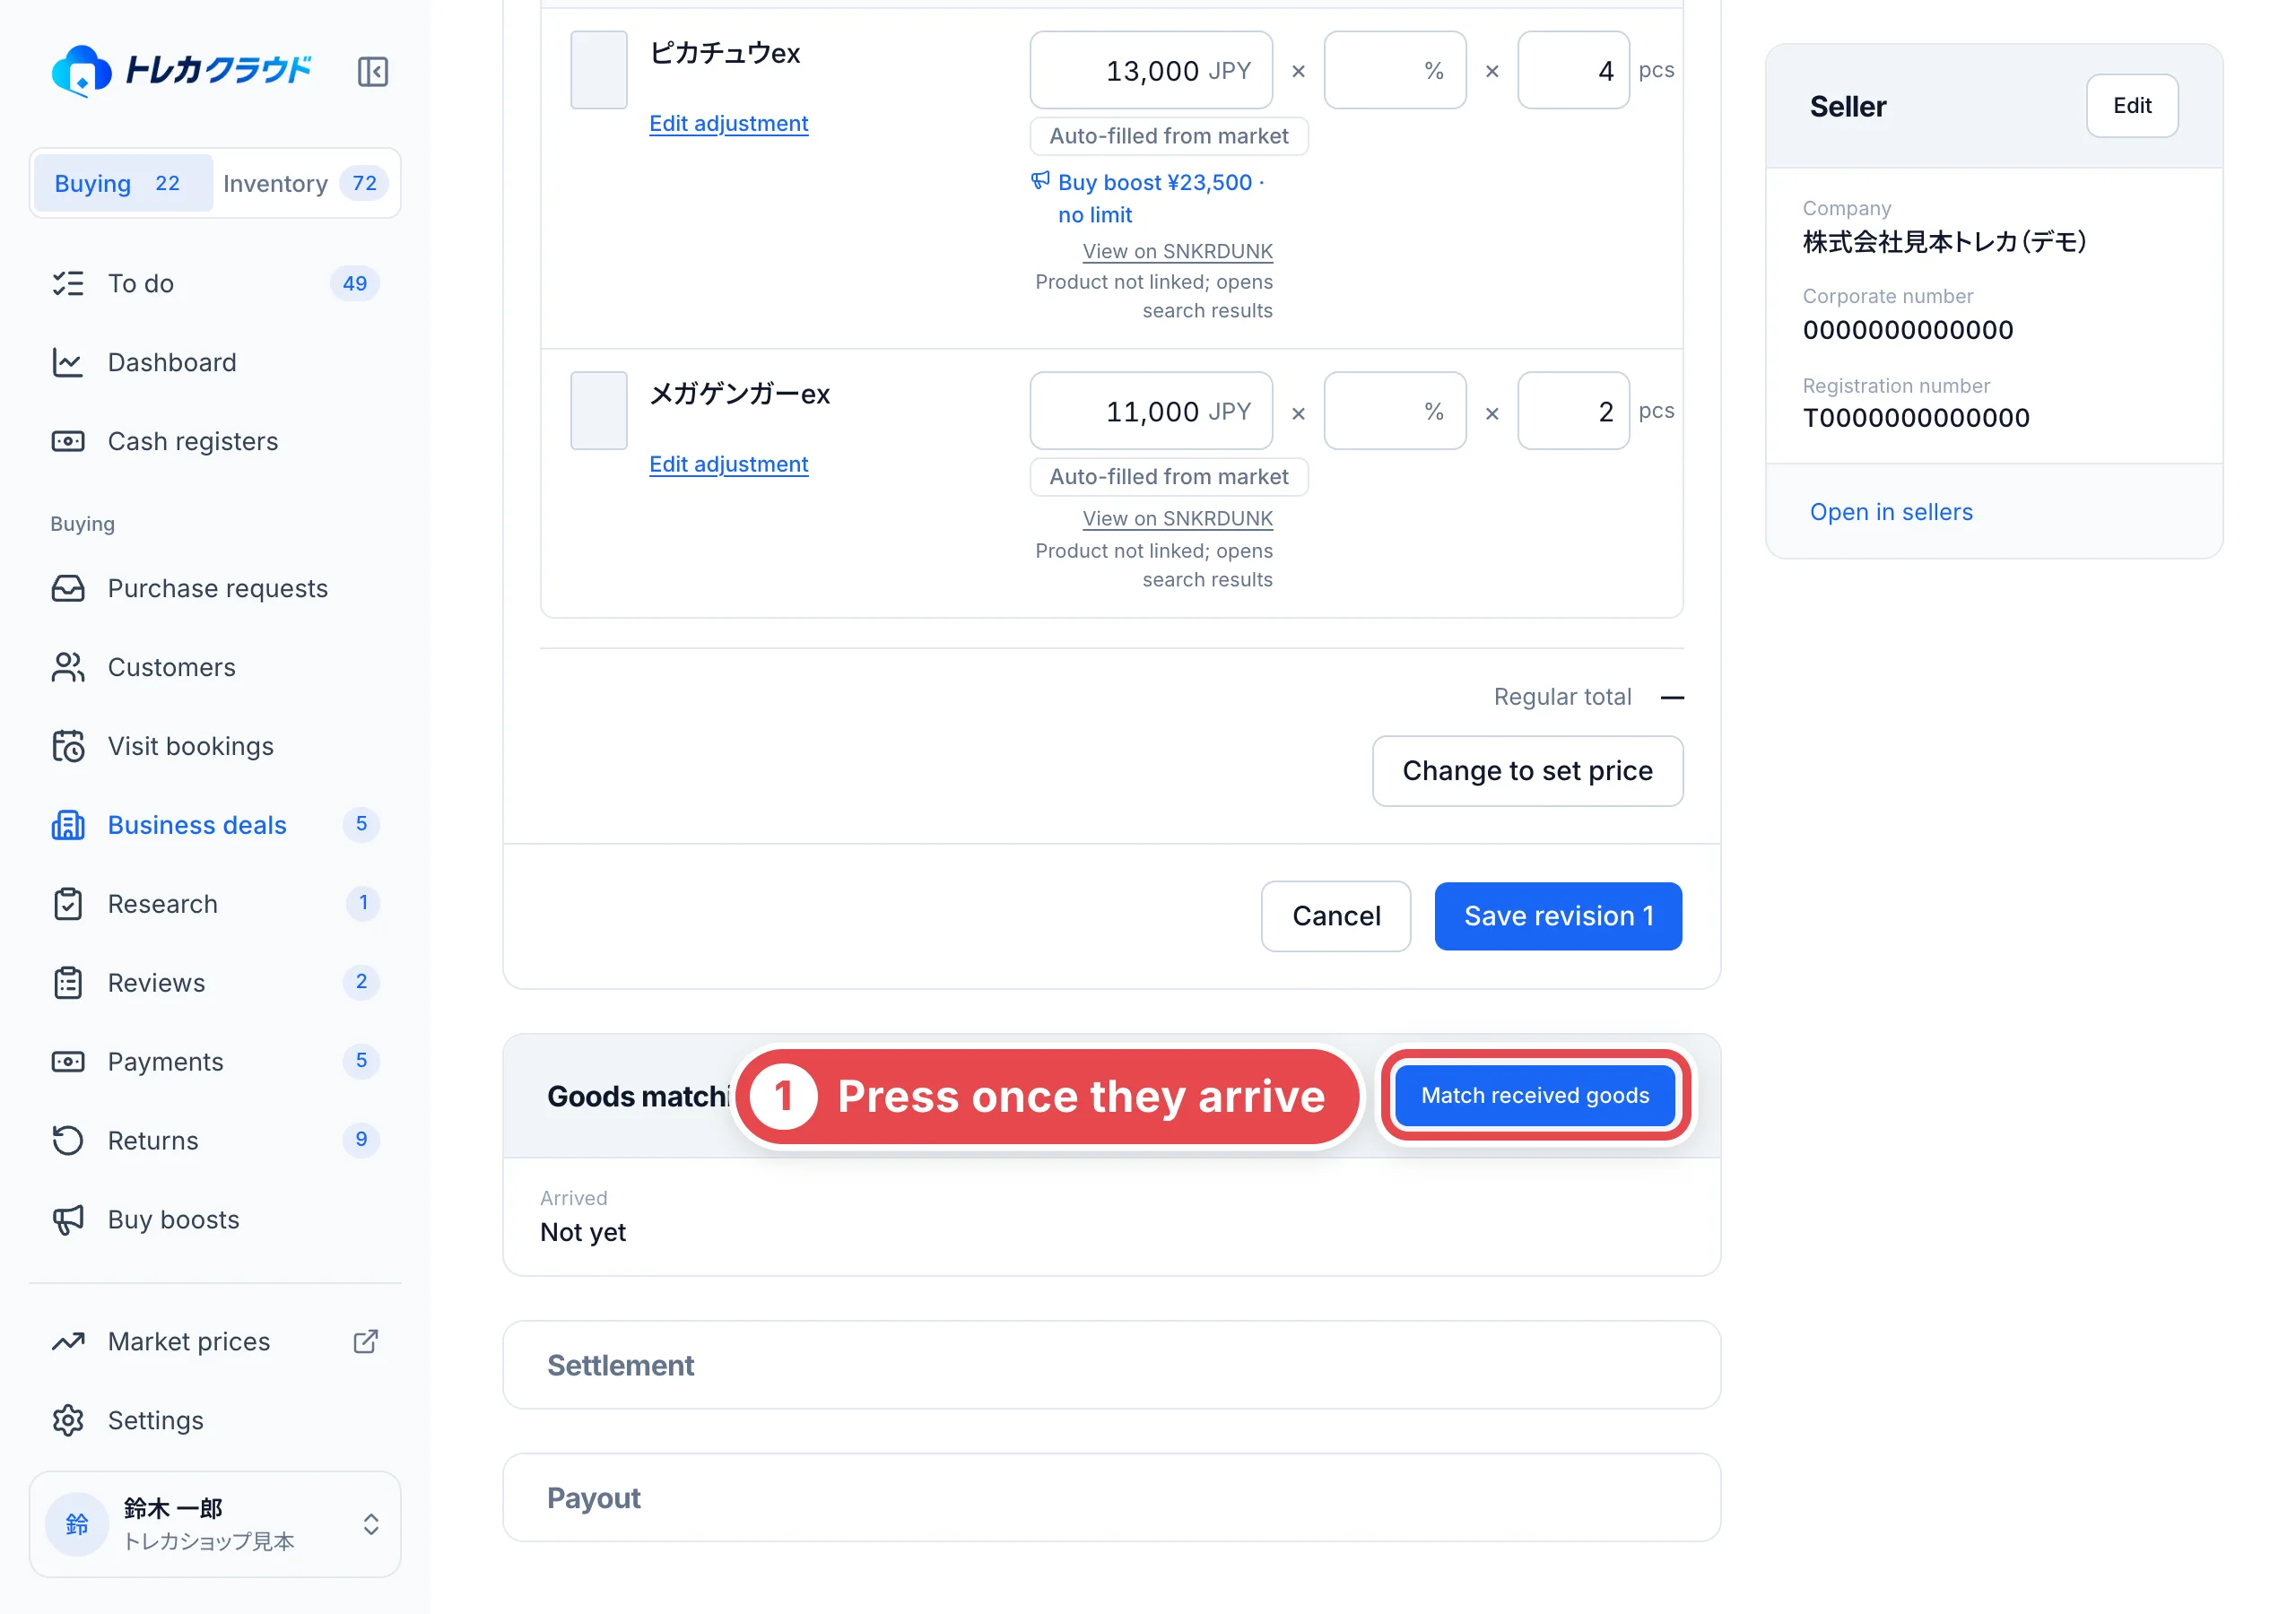 Under **Products and purchase amounts**, check each product’s **Physical quantity** and **Purchase unit price**, then click **Save purchase amounts**. **Business deals do not require market prices or buying rates. The purchase amount is the unit price multiplied by the physical quantity.** Confirmed invoice unit prices are used as initial values. They are displayed as values before goods matching and become editable afterwards.
For sealed products, record their condition and quantity first. Unregistered invoice products remain visible in the list; use **Confirm products** to select and register them. Goods matching waits until these rows have been confirmed.
Saving lets you continue to settlement without sending a quote. If your shop requires a second review, complete it first.
### Register through the earlier settlement dialog
Click **Record settlement** under **Settlement**. Check the purchase price, the cards to buy and the payout account, then click **Record settlement** at ①. **Clicking it registers stock, the secondhand ledger and the payout right away.** The cards go to receiving. Registering doesn't send money from your bank.
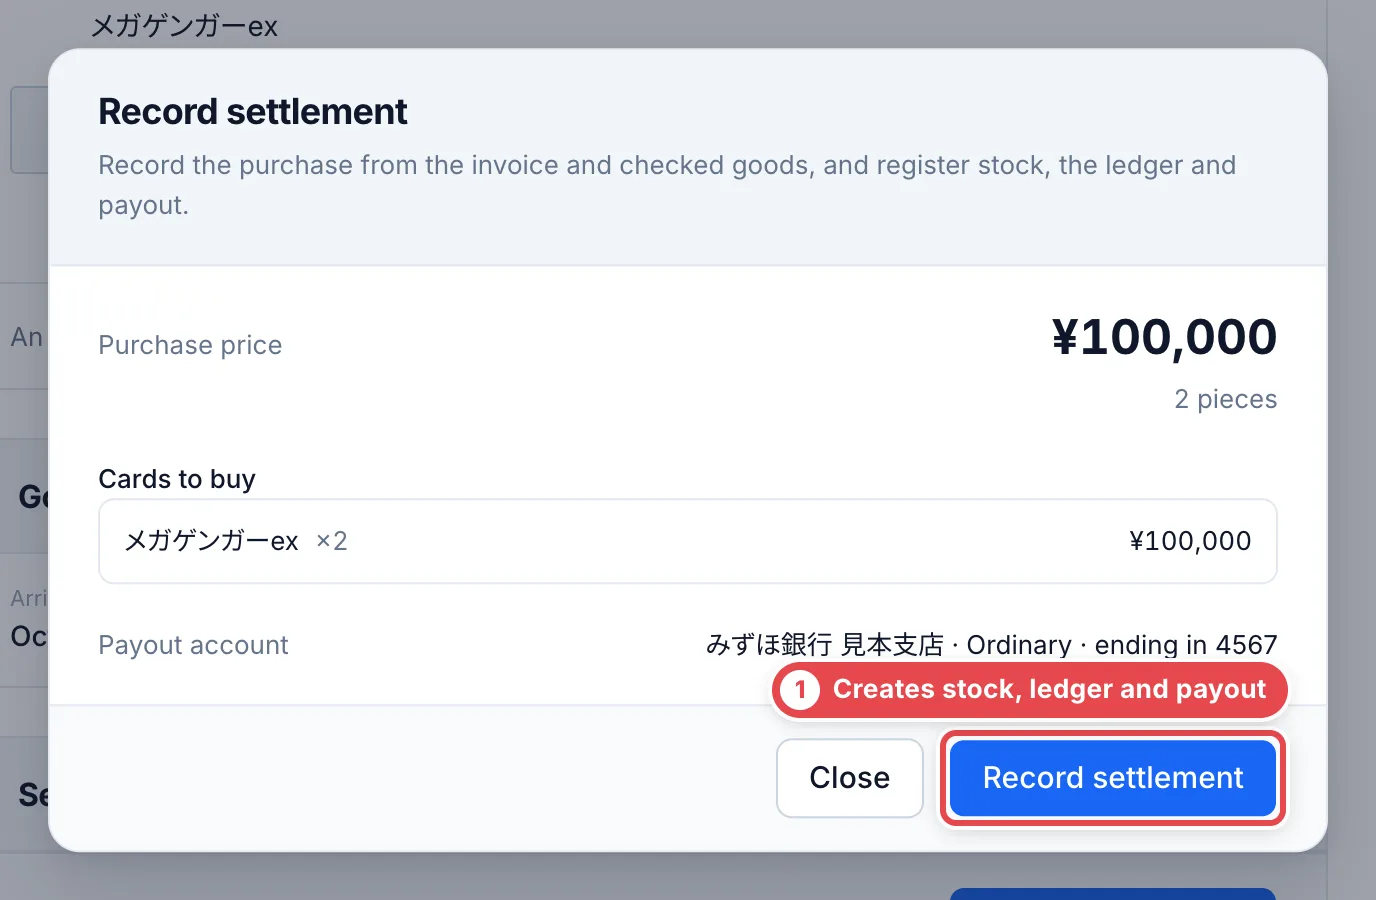 To record settlement, the invoice (PDF) must be registered, the amounts from goods matching must be saved, and the payout account, secondhand dealer license and site must all be set. If something is missing, the dialog tells you why.
Continue to [Payouts](/en/guides/purchase/payouts) for consent evidence, submission and approval.
## When something goes wrong
| What is happening | What to check and how to fix it |
| ----------------------------------------------------- | ----------------------------------------------------------------------------------------------------------------------------------------------------------------------------------- |
| The PDF is not read after selection | Retry extraction, or enter invoice information while comparing the original. If the PDF was saved but line extraction failed, retry from the invoice |
| A product is unidentified | Use **商品を検索** to choose the product and printing. Exclude unpurchased lines and enter a reason |
| **現物確認して振込へ** is disabled | Check products, quantities, unit prices, packaging, difference reasons, incomplete pages, existing-product duplicates, account, license, agreement text and physical-goods checkbox |
| The draft saves but the confirmation button is absent | Settlement and related permissions are required. Hand over to an authorized member |
| The draft could not be loaded | Reload. Do not register a read invoice again from an outdated screen |
| Another member updated the deal | Keep a copy of your input, reopen the deal and compare it with the latest invoice and lines |
| **Match received goods** is absent | The new draft uses **現物確認して振込へ**. For an earlier deal, check unconfirmed lines and receipt status |
| Payout approval is blocked | Check the reason for the current invoice/payout amounts, consent evidence, account and separate submitter/approver |
| A reason is requested again | An amount changed after saving. Record the reason against the current amounts |
| **Check registration** is absent | Check that the invoice includes a registration number |
---
# In-store purchase workflow
Source: https://docs.toreca-cloud.com/en/guides/purchase/counter
Follow this page beside the console from intake at the counter through payment in cash or by bank transfer. The console calls this intake method **In store**. Staff operate the console; the customer reviews and signs on their smartphone or a shop tablet.
## The order of work
For cash, follow steps 1–8. For a transfer, follow steps 1–6, then [Pay by bank transfer](#pay-by-bank-transfer). If the customer keeps cards or asks for help, use the relevant section below.
:::note[Before you start]
- If your shop uses cash management, start a register in **現金管理** (Cash management) when you open. Otherwise step 7 shows 「営業中のレジがありません」 (No register is open) while the customer waits ([Opening, counts and closing](/en/guides/purchase/cash)).
- To load market prices for ungraded cards in step 2, set the **単品カードの既定グレード** (Default grade for single cards) under **Settings** → **買取掛け率** (Buy rates). Without it, you can still enter the reference price by hand.
:::
1. [Add the purchase request and add the
cards](#1-add-the-purchase-request-and-add-the-cards)
2. [Appraise the cards and save](#2-appraise-the-cards-and-save)
3. [Check the quote PDF](#3-check-the-quote-pdf)
4. [Show it on the customer's screen](#4-show-it-on-the-customers-screen)
5. [The customer reviews, agrees, and
signs](#5-the-customer-reviews-agrees-and-signs)
6. [Check the customer's ID in person](#6-check-the-customers-id-in-person)
7. [Register stock and payment](#7-register-stock-and-payment)
8. [Check completion and put the cards
away](#8-check-completion-and-put-the-cards-away)
The status stays at **Final quote presented** even after the customer signs. **Next step** at the top of the deal page always shows what to do next.
## 1. Add the purchase request and add the cards
Open **Purchase requests** at ① in the sidebar, then click **Add purchase request** at ② at the top right.
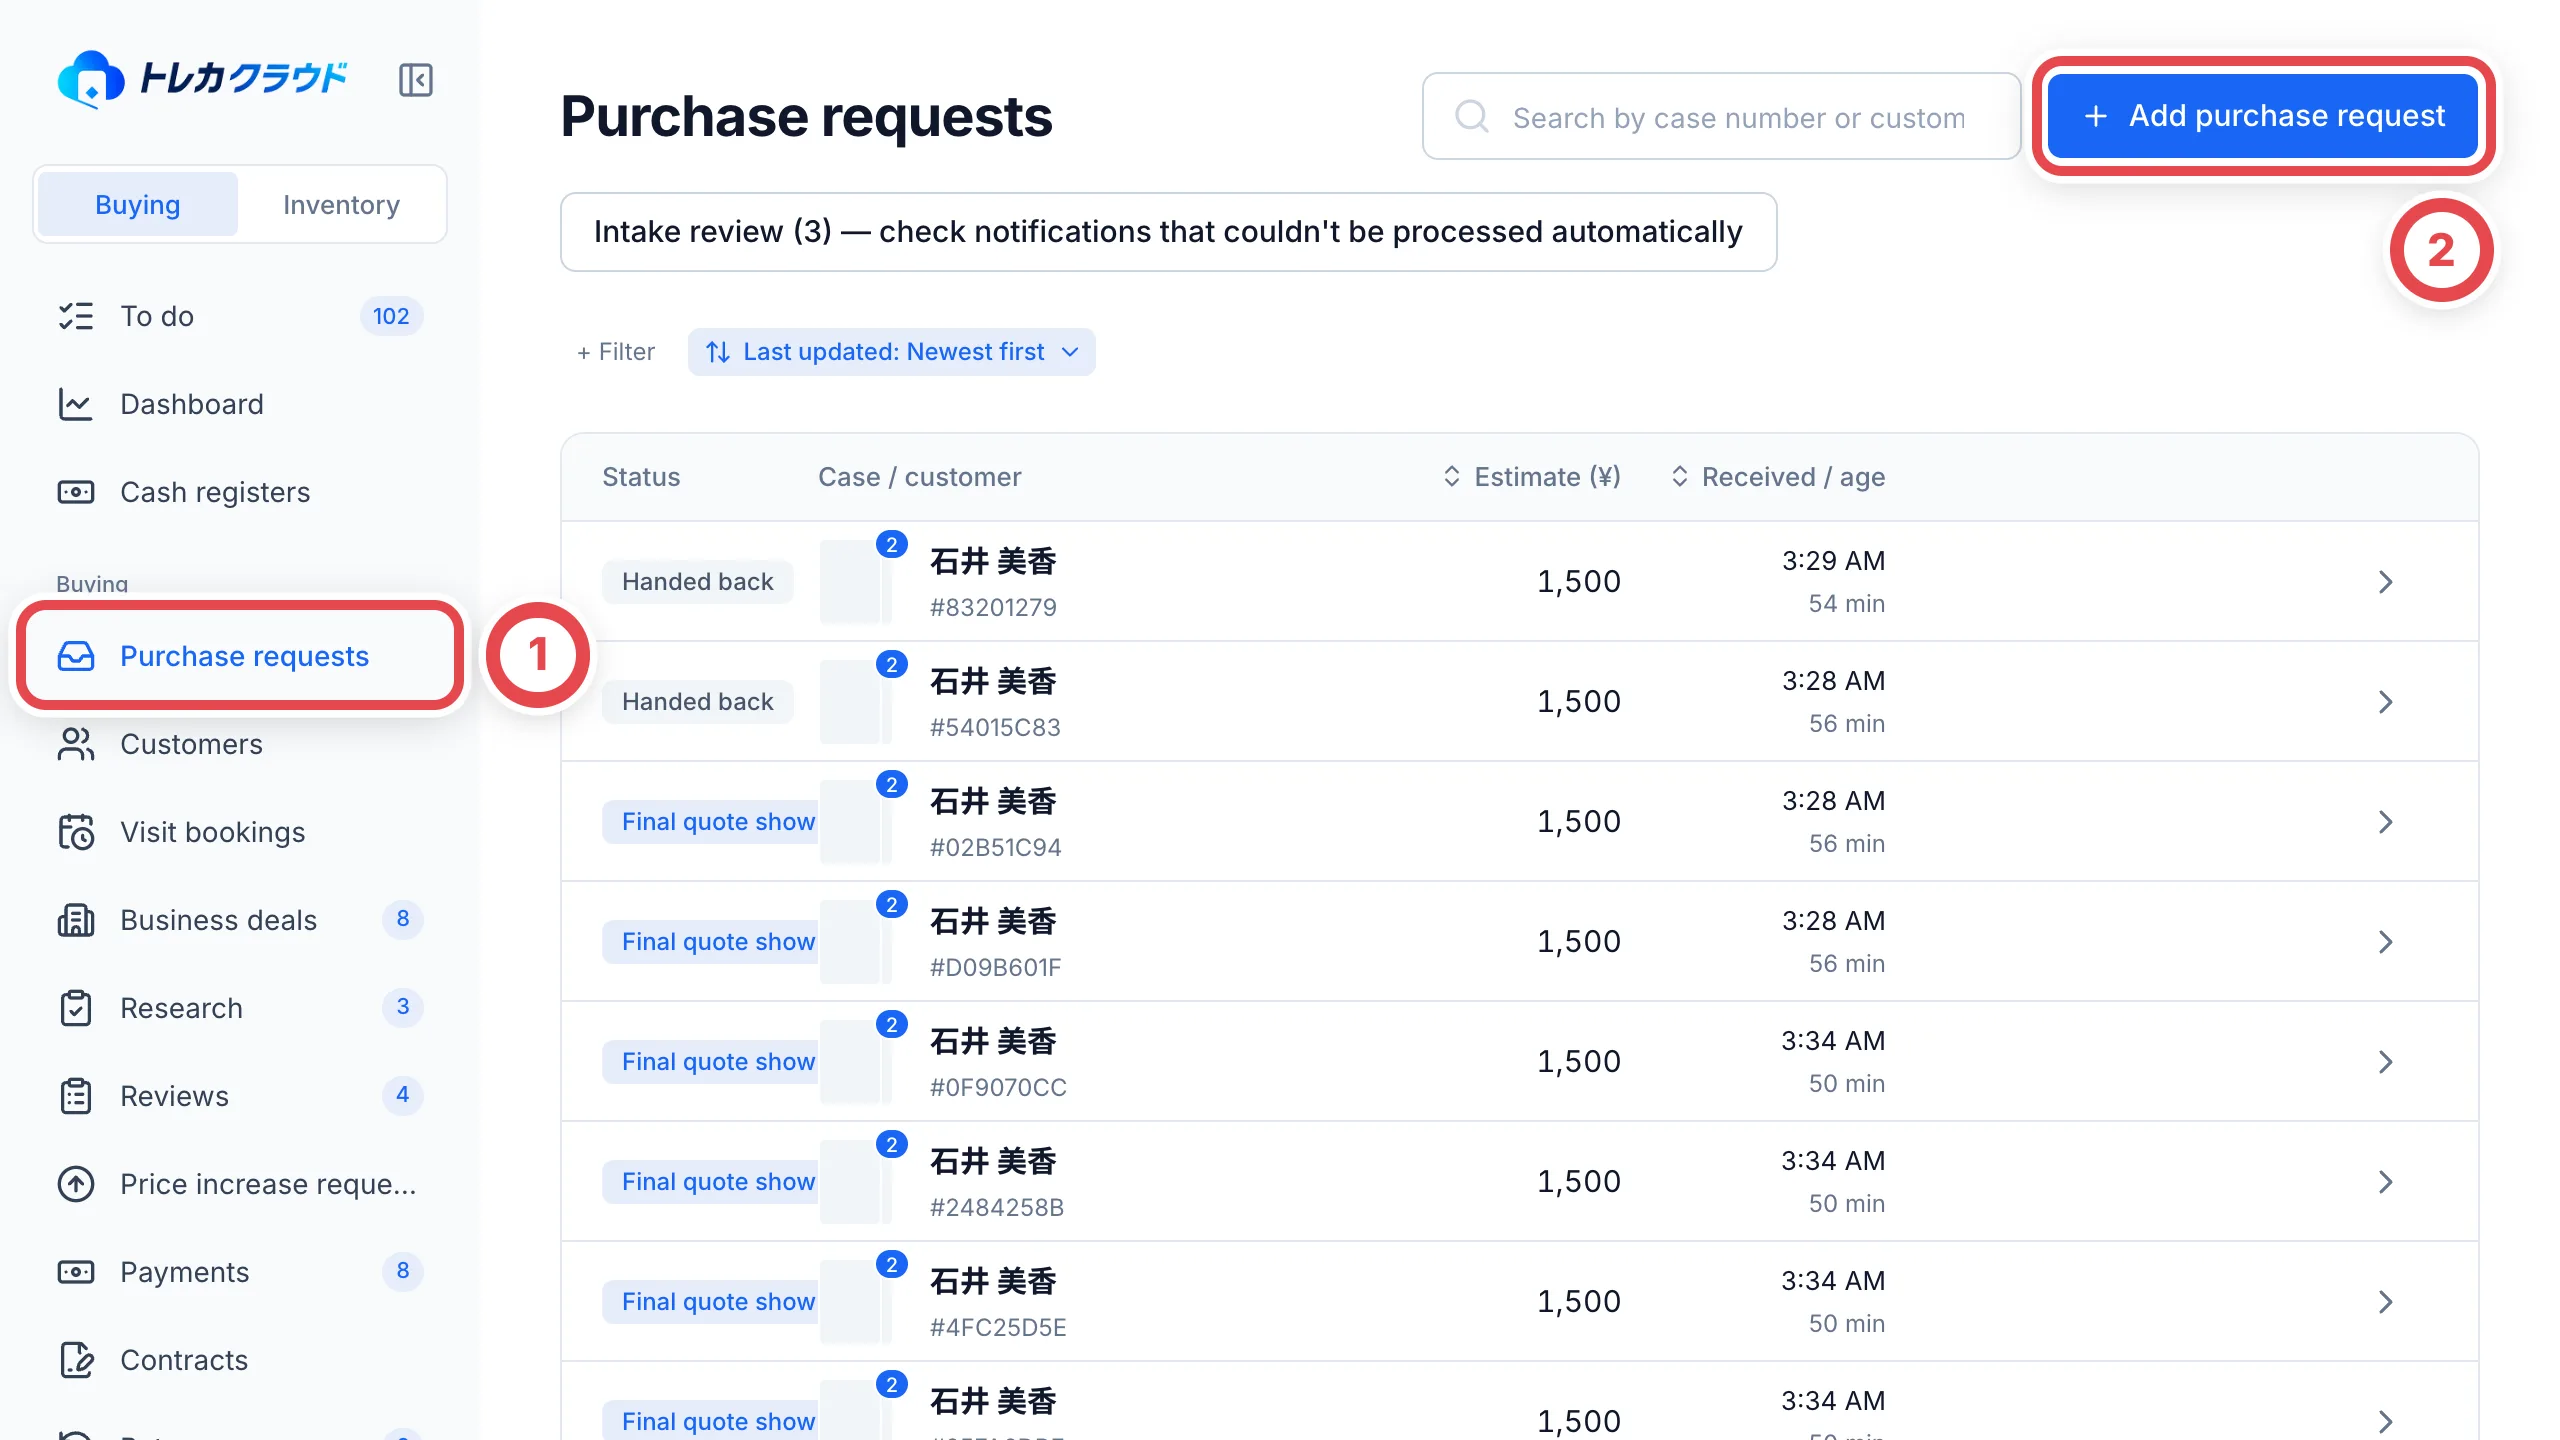 In the dialog, select **In store** at ③. Shops that do not use online purchases do not see ③; the request is registered as in store. For a first-time customer, keep **New customer** and enter their name at ④. For a returning customer, select **Existing customer** and search. Click **Add purchase request** at ⑤ to create the deal. The deal page opens.
For a customer who booked a visit, the deal already exists from the booking. Checking them in under **Visit bookings** opens the deal, so start from adding the cards (see [Visit bookings](/en/guides/purchase/reservations)).
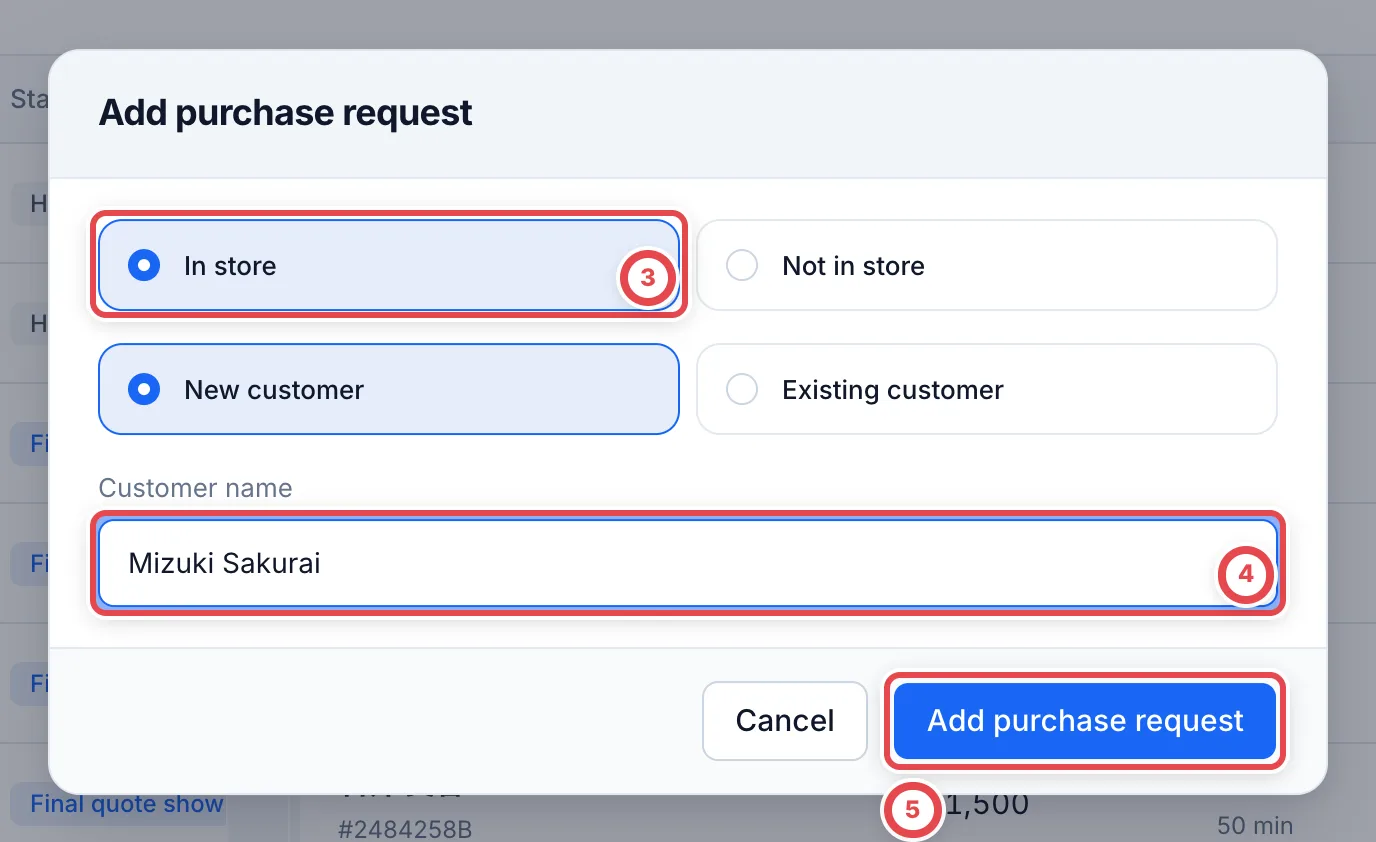 If your shop only buys in store, the intake channel field does not appear and the deal is set to in store automatically.
### Open the item dialog
At the top of the deal page, ① shows the current task. Click **Add cards** at ② to open **Add item**. Continue to [Search for and select the card](#search-for-and-select-the-card).
To register another card, click **Add item** at ① at the top right of the appraisal details.
 In **Add item**, use **Search by photo** at ① on the left to choose a photo on your device. On a smartphone or similar device, you can also take a photo. To search by name or card number, click **Search by keyword** at ② on the right.
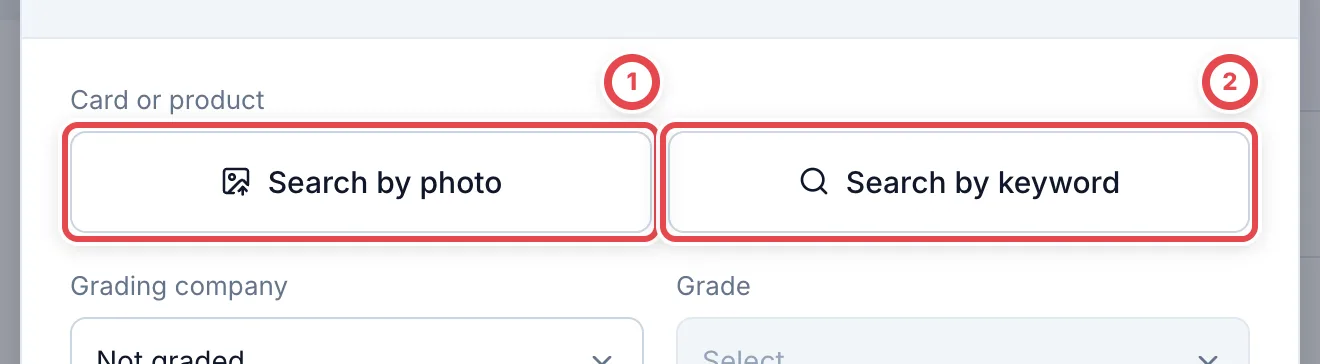 ### Search for and select the card
Enter the card name or number at ③ in the card and product picker. Compare each result's name, number and set with the physical card, then click the matching card at ④. You return to **Add item**, with the selected card shown.
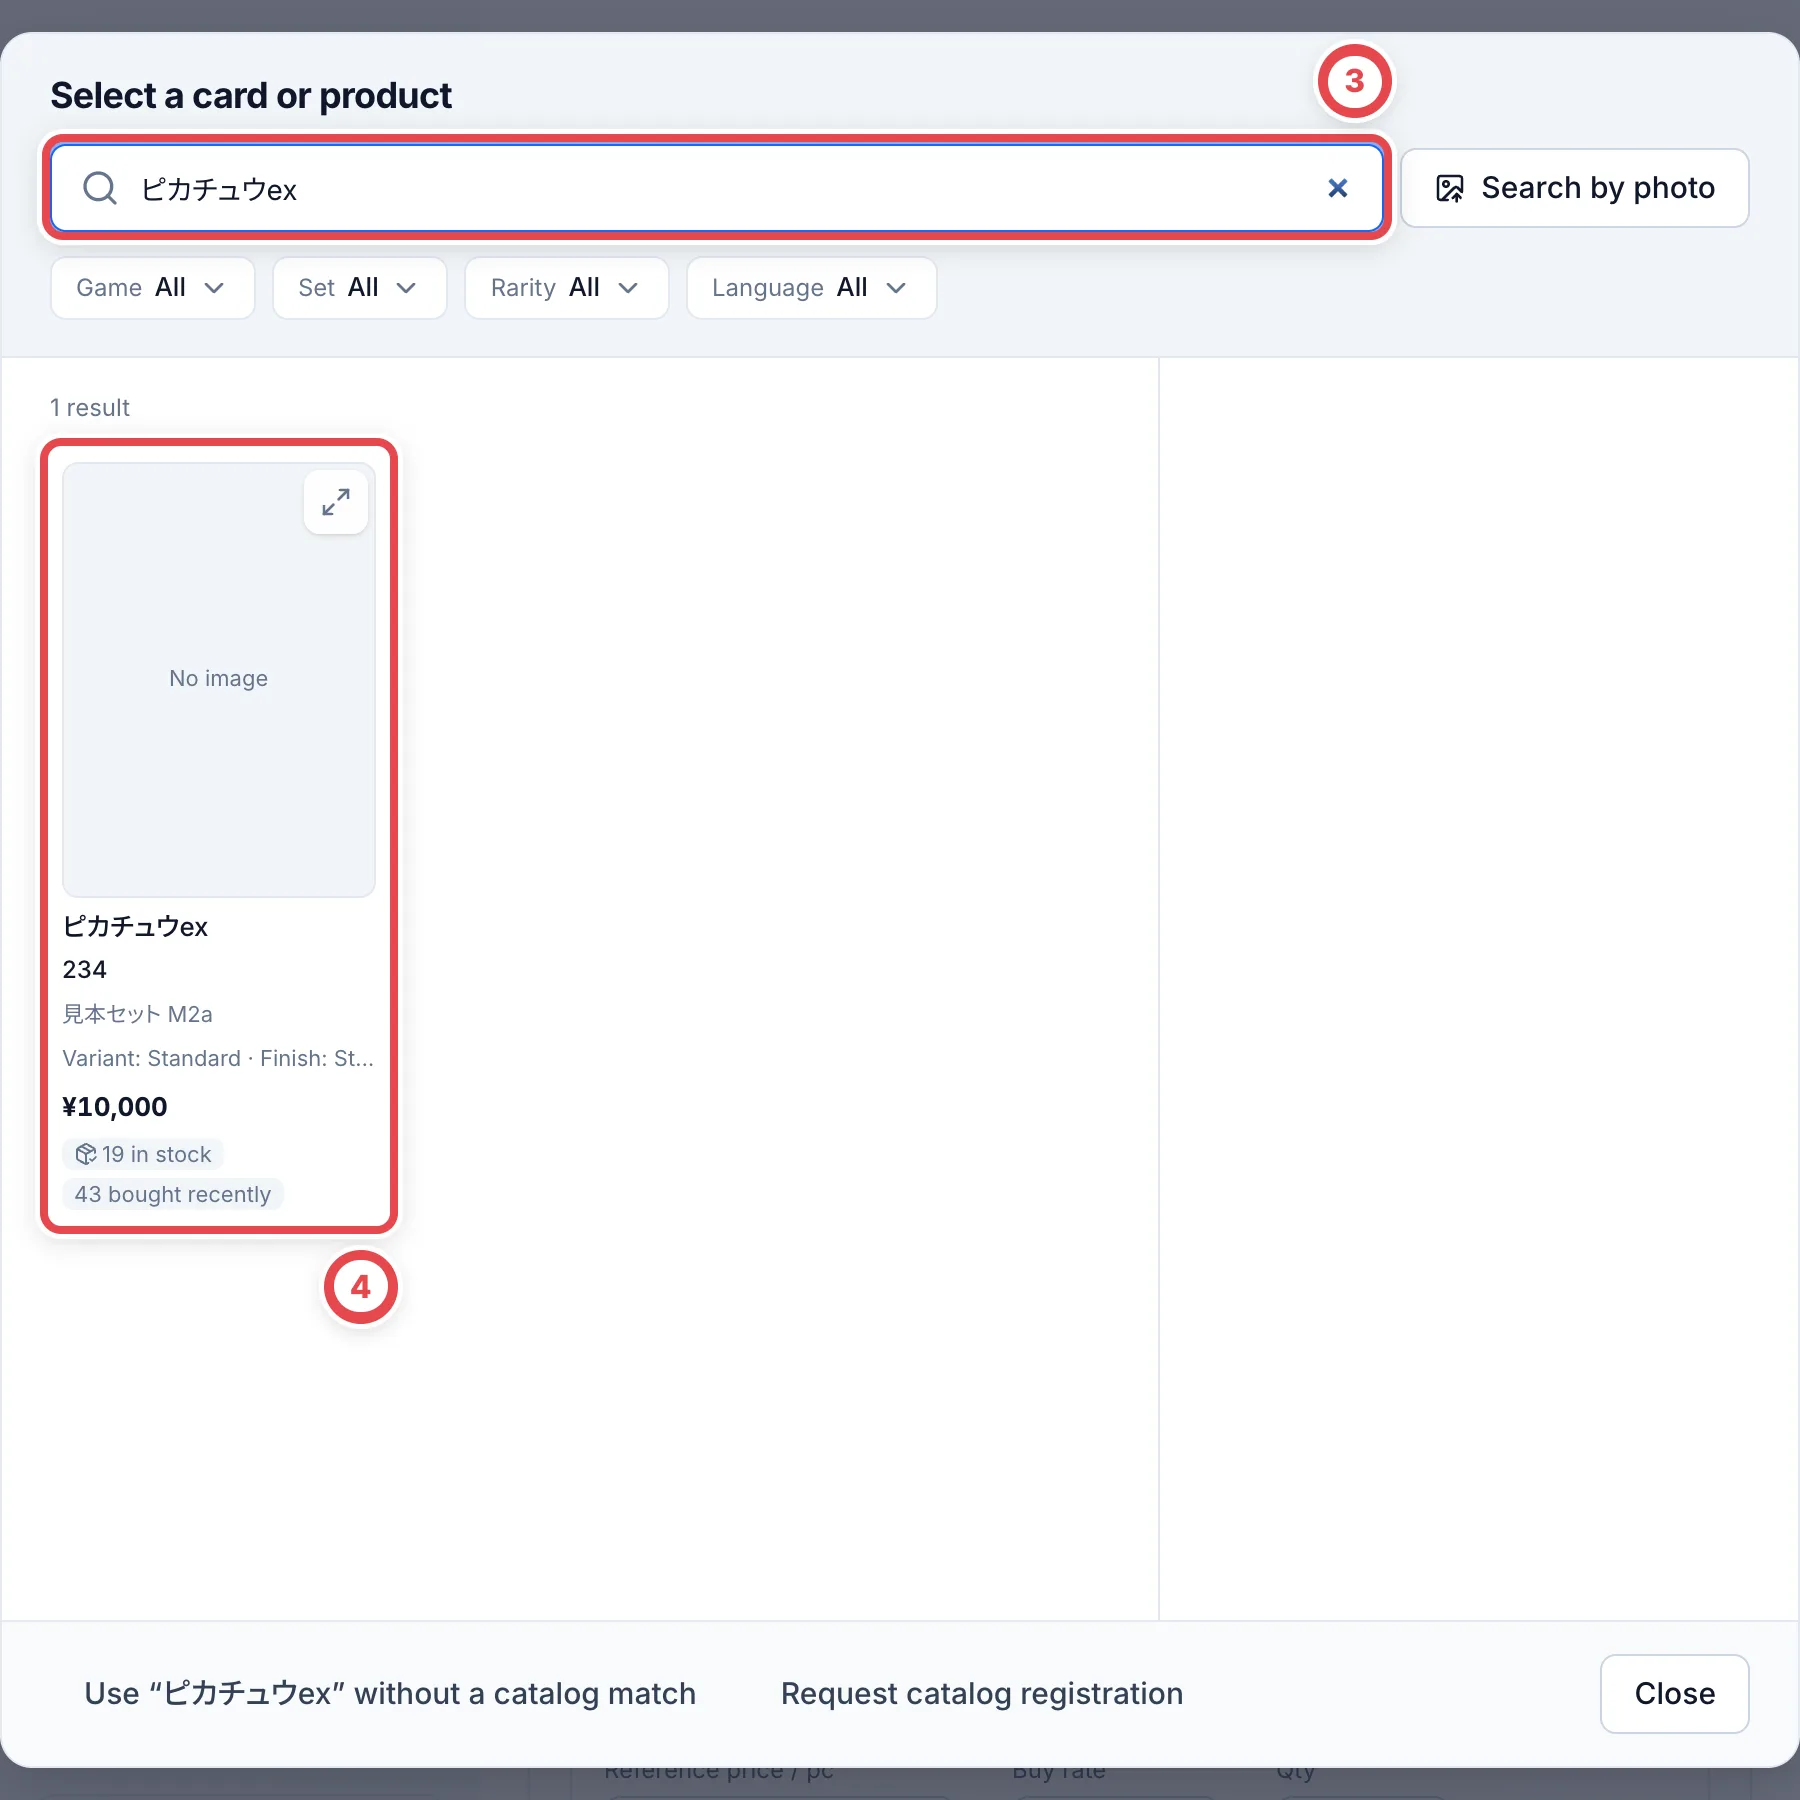 For photo search, check the suggested matches against the physical cards before selecting them. If the photo contains several cards, check which ones to include and click **Add N cards** (the button shows the count). If the photo cannot be read, search by name or number instead. Check any grading details read from the photo against the slab label too.
If you cannot find a match, shorten the search term or search by card number. For a card missing from the catalog, click **Use “…” without a catalog match** (the button shows the entered name). To keep only a photo and identify the card later, close the search dialog and add a photo under **Photos of the item (optional)**.
### Enter the quantity and add the item
Check the selected card. For a graded card, match **Grading company** at ① and **Grade** at ② to the slab label. For one item, you can optionally enter the certification number. Otherwise, leave **Not graded** selected. Enter the quantity and any notes or photos, then click **Add to items**. Check and save the PSA number against the item before payment.
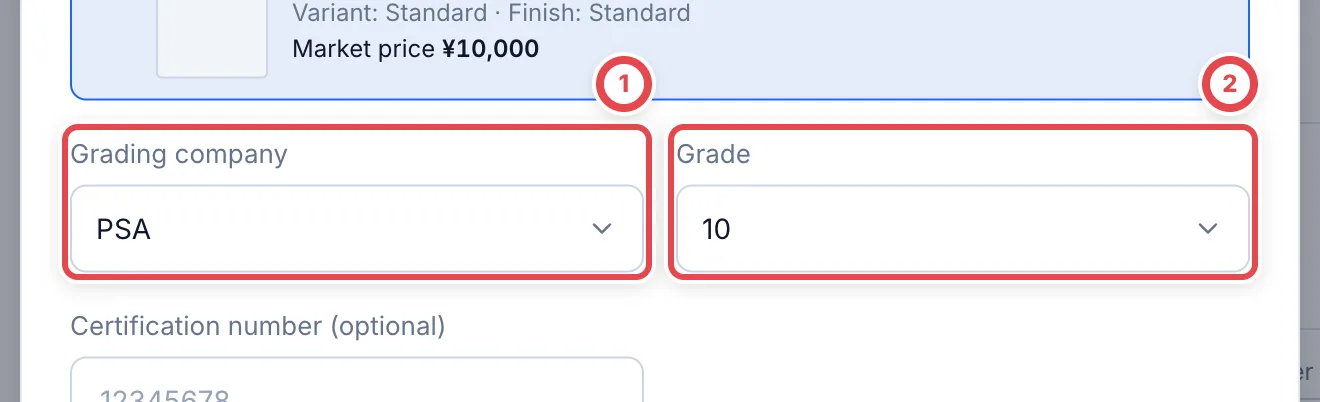 For multiple copies, enter each number in the final appraisal. If a number is missing or incorrect before payment, use **Check / correct PSA numbers** on the Payment card.
Back in the appraisal details, check the card and quantity. Repeat from **Add item** for another card. Cards and quantities added while editing an appraisal are committed when you save the appraisal in the next step.
### Register multiple copies of the same card
While editing an appraisal, adding the **same card with the same condition rank or grading company and grade** through **Add item** increases the existing line's quantity. Adding two copies to a line with one copy produces one line with quantity three. You can also edit **Quantity** directly on the existing line.
Different ranks, condition notes or certification numbers remain separate. Items added with photos, and lines with individual appraisal notes or splits, also stay separate to preserve their details. This does not automatically consolidate duplicate lines that were already saved.
## 2. Appraise the cards and save
If the appraisal editor is not already open, click **Enter appraisal** in **Next step**. Click **Check market prices** at ⑤ to load the latest prices. If an ungraded card shows 「グレードが決まっていないため相場を取り込めません」 (No grade is set, so the market price cannot be loaded), enter the verified amount as the reference price, or set the default grade for single cards under **Settings** → **買取掛け率** and load prices again. With **Store settings** selected at ⑥, the default buy rate appears before you enter a market price. Once all prices are entered, applicable conditions are calculated automatically. Select **Manual entry** to edit the rates directly. Adjust the amounts at ⑦ to match each card's condition, then save at ⑧.
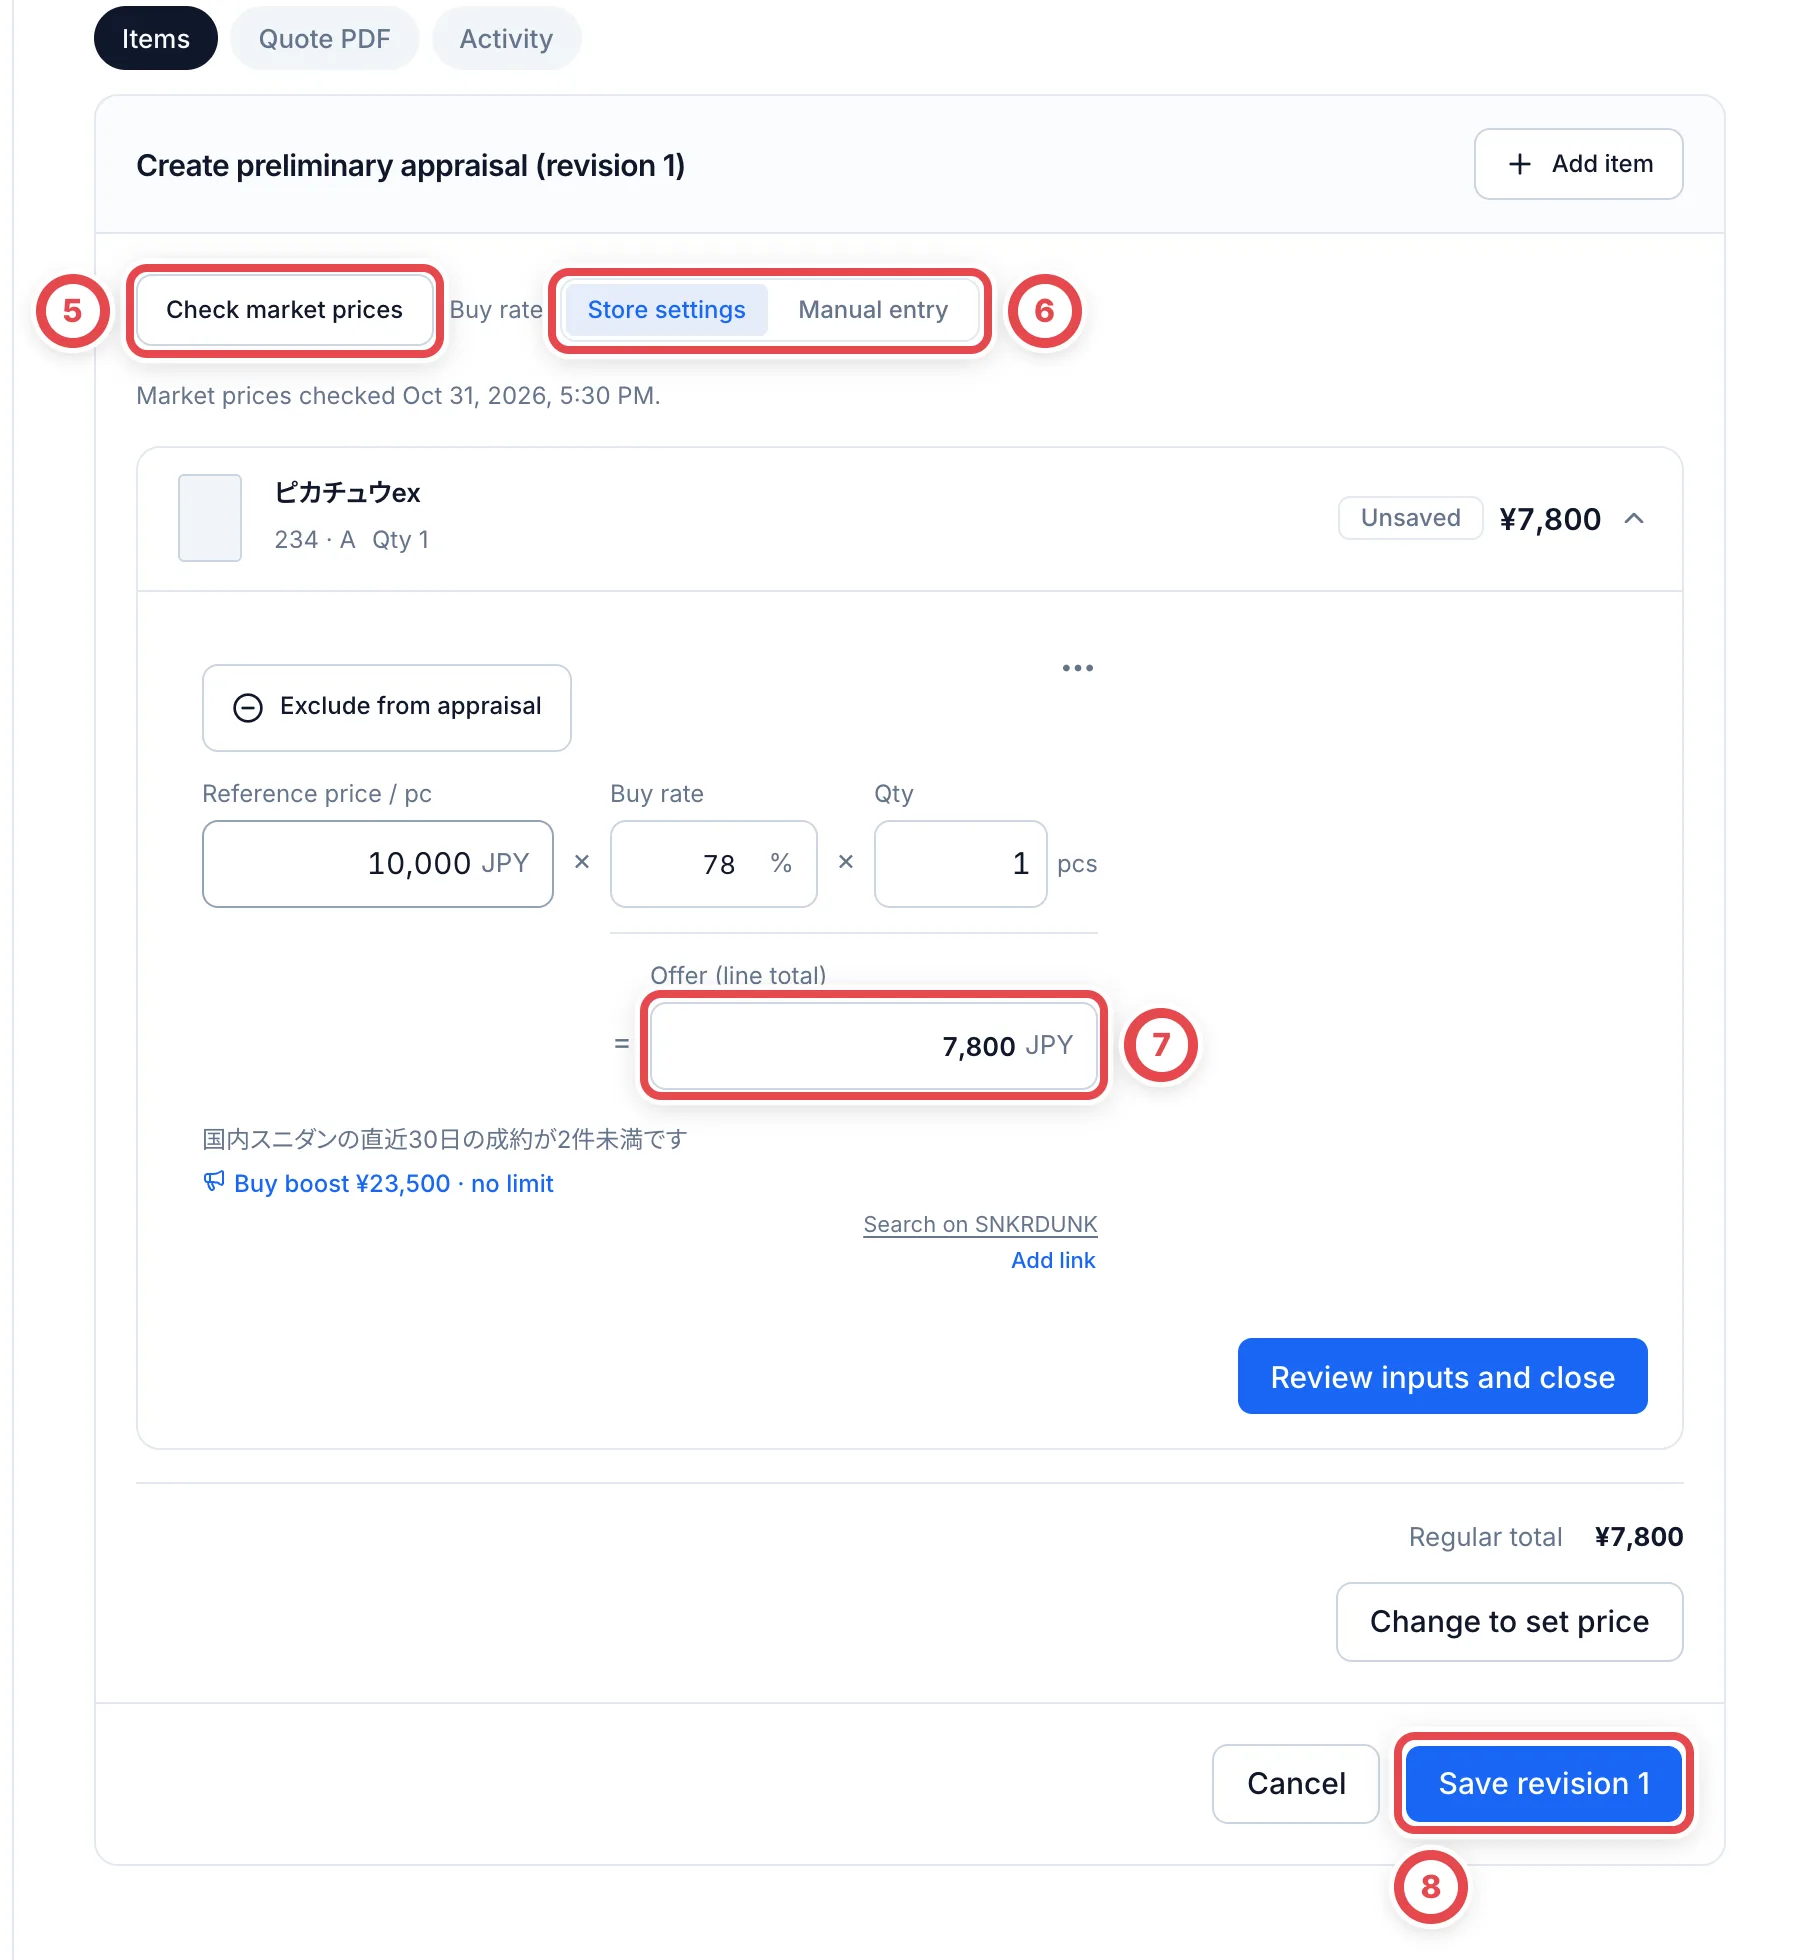 To offer one total while keeping each card's appraisal, use **Change to set price** below the lines before saving. See [Change to a set price](/en/guides/purchase/set-price) for the entry point, saving and restoring the regular total.
In-store purchases do not request a second review. Save the appraisal to open the final quote.
### Check quantities and line totals
In-store purchases do not offer market research requests. If a price cannot be retrieved, enter the amount you have verified in **Reference market price**. The offer is the total for that line's quantity. After the first save, the final appraisal shows each physical card separately. Check the card, grade and copy at ① and its own amount at ②. Use **Edit appraisal** to change its amount, number or eligibility; see [Final appraisal card by card](/en/guides/purchase/final-appraisal).
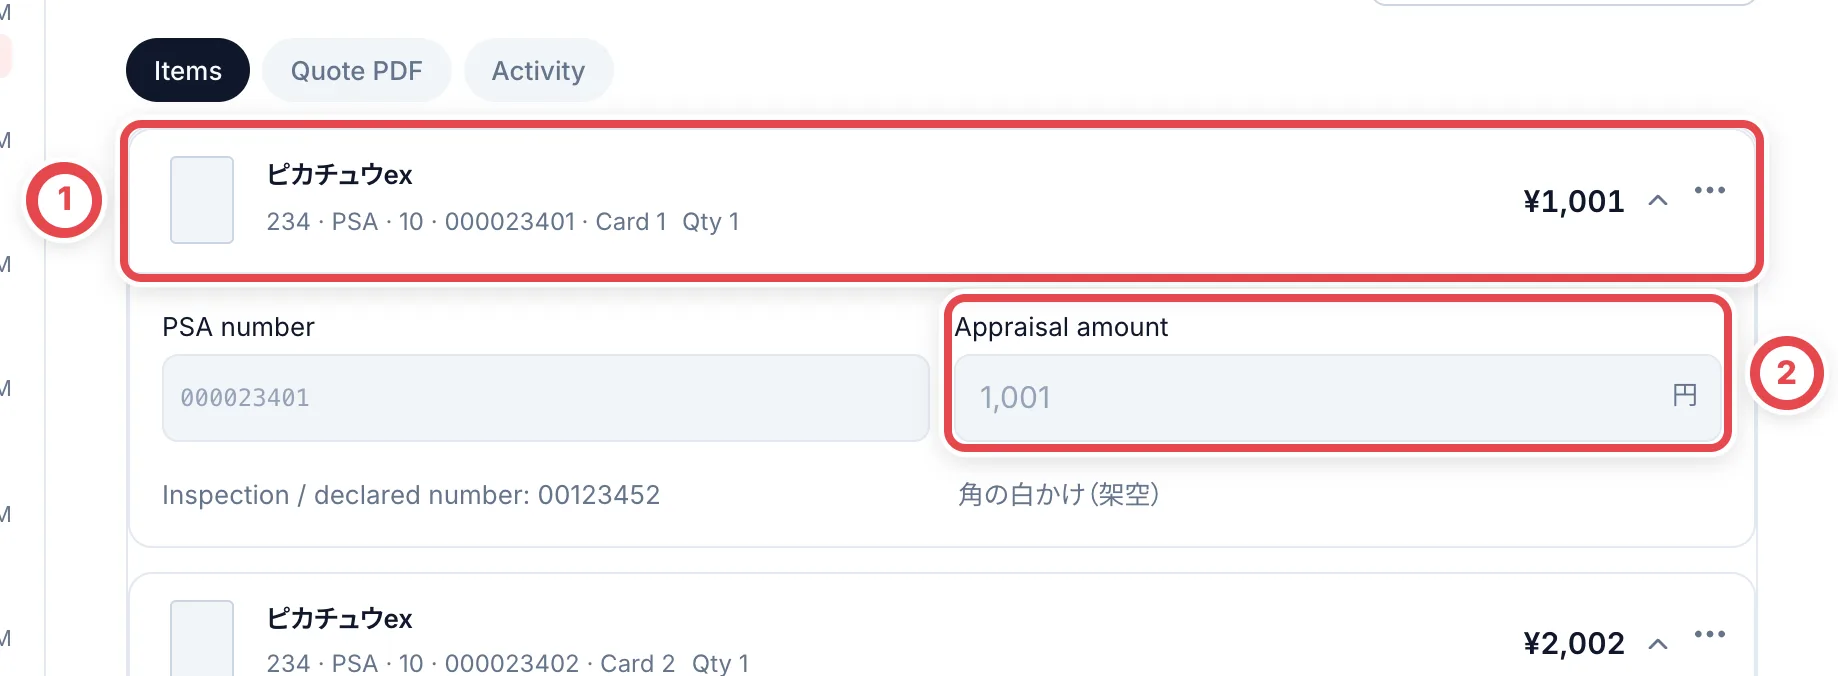 ### Exclude a card or undo before saving
Before saving the first appraisal, use **Exclude from appraisal** at ①. In the final editor that shows each physical card, use **Mark not purchasable** in its three-dot menu instead; see [Final appraisal](/en/guides/purchase/final-appraisal).
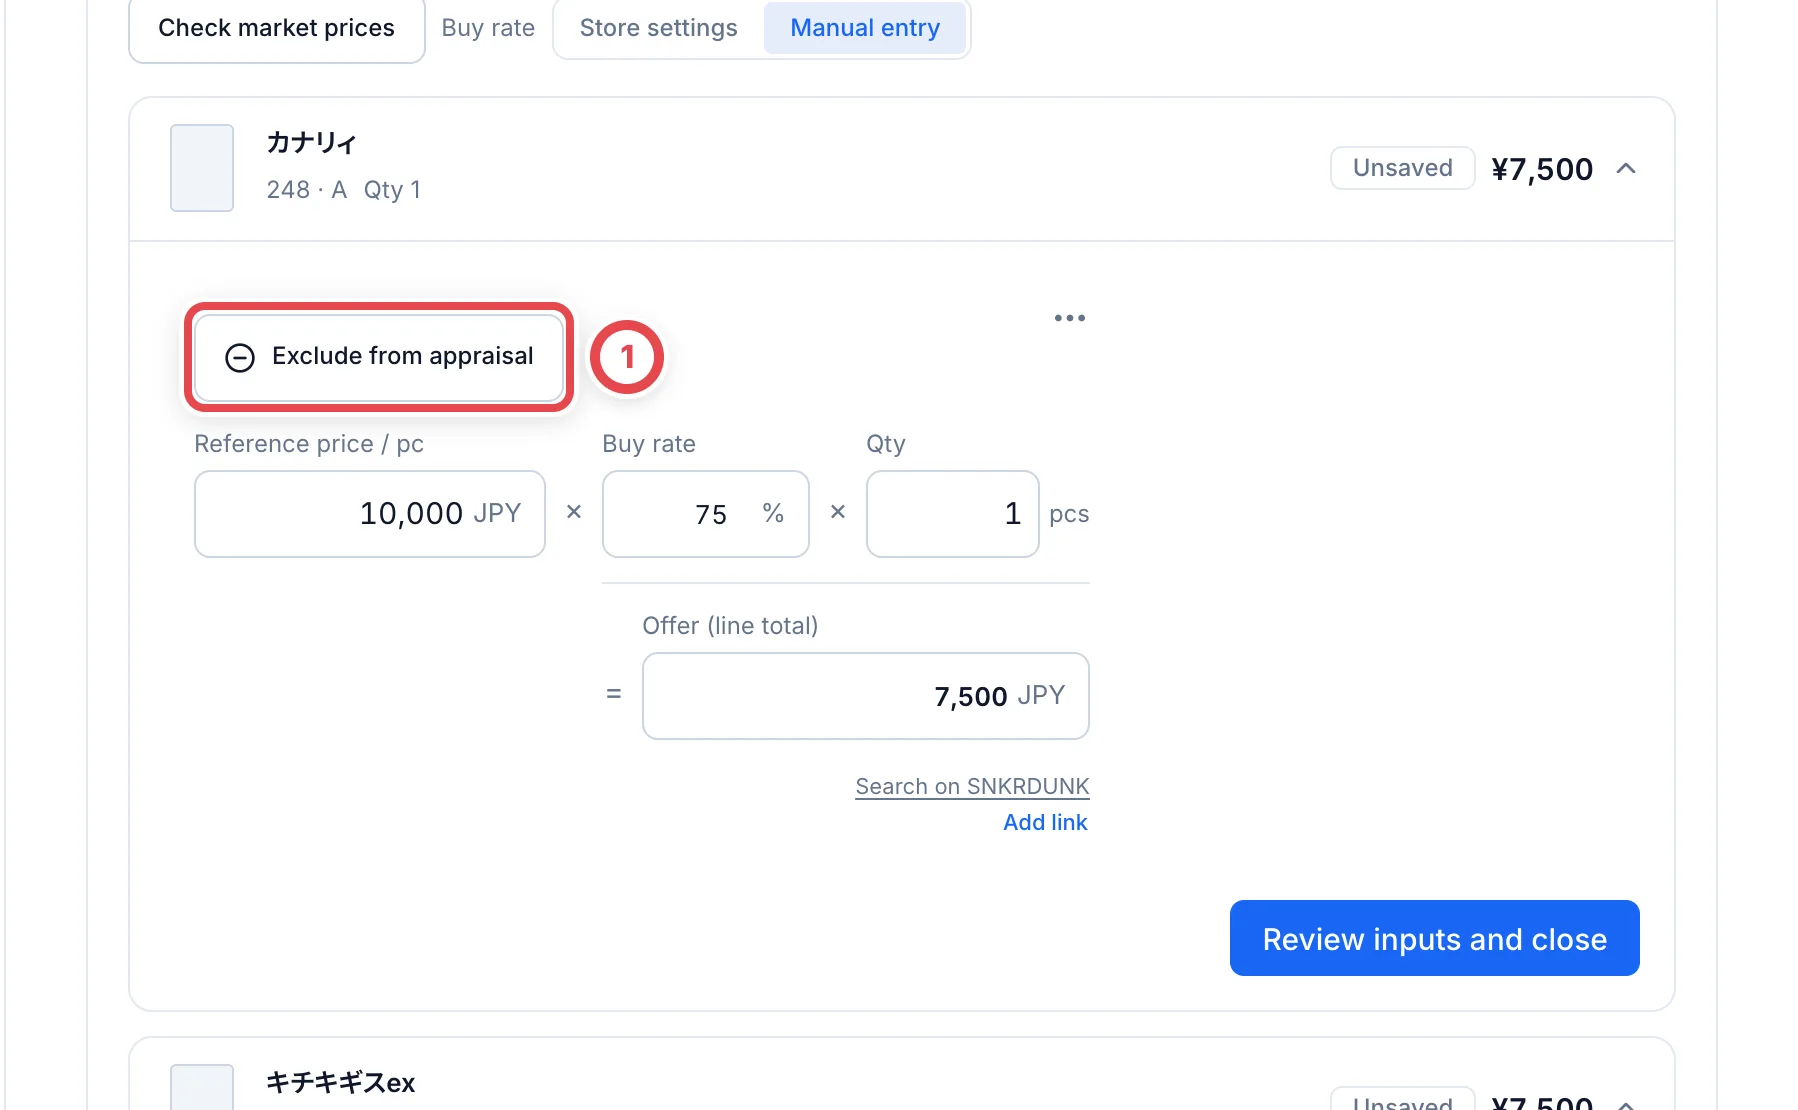 Choose the reason at ②. If you choose **Other**, enter the reason as well. Before saving, click **Undo** at ③ to restore the line. A newly added card instead shows **Cancel addition**.
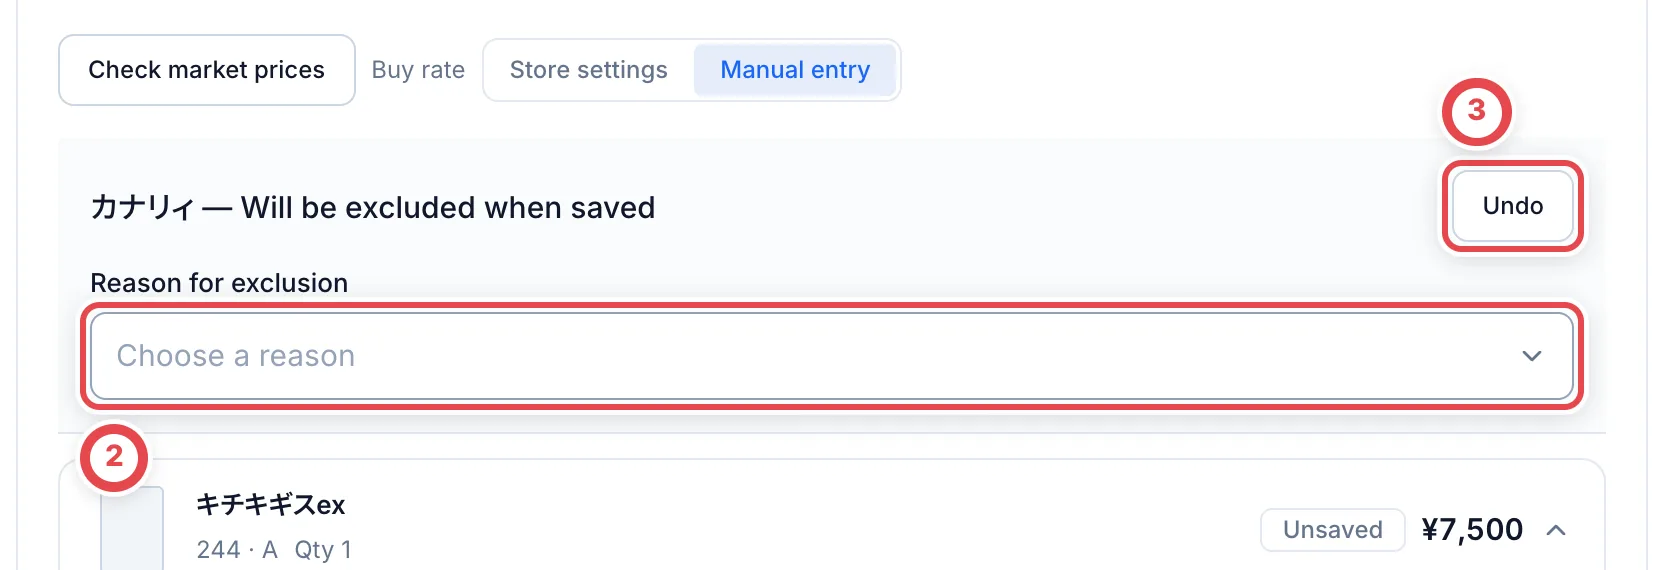 ### Internal appraisal photos
Where a line shows **Internal appraisal photos**, open it to add or review photos. Use the trash button beside a photo to delete it, and confirm the deletion. These photos are for staff and are not sent to the customer. Where the whole-quote photos section is shown, use **Add photos** above the lines. Click a saved photo thumbnail to review it. The current card-by-card final editor and saved view do not show photo controls. Ask your manager if the photo entry is missing.
## 3. Check the quote PDF
Saving the appraisal revision opens the final quote PDF. Custody of the appraised items is recorded at this point; there is no separate receipt confirmation.
Check the items, quantities and amounts in **Quote PDF** at ①. To continue from an already saved appraisal, click **Review quote** in **Next step**.
If a second review, sealed-product condition check or further appraisal is required, complete the work shown in **Next step** first. Saving does not record presentation to the customer or their acceptance.
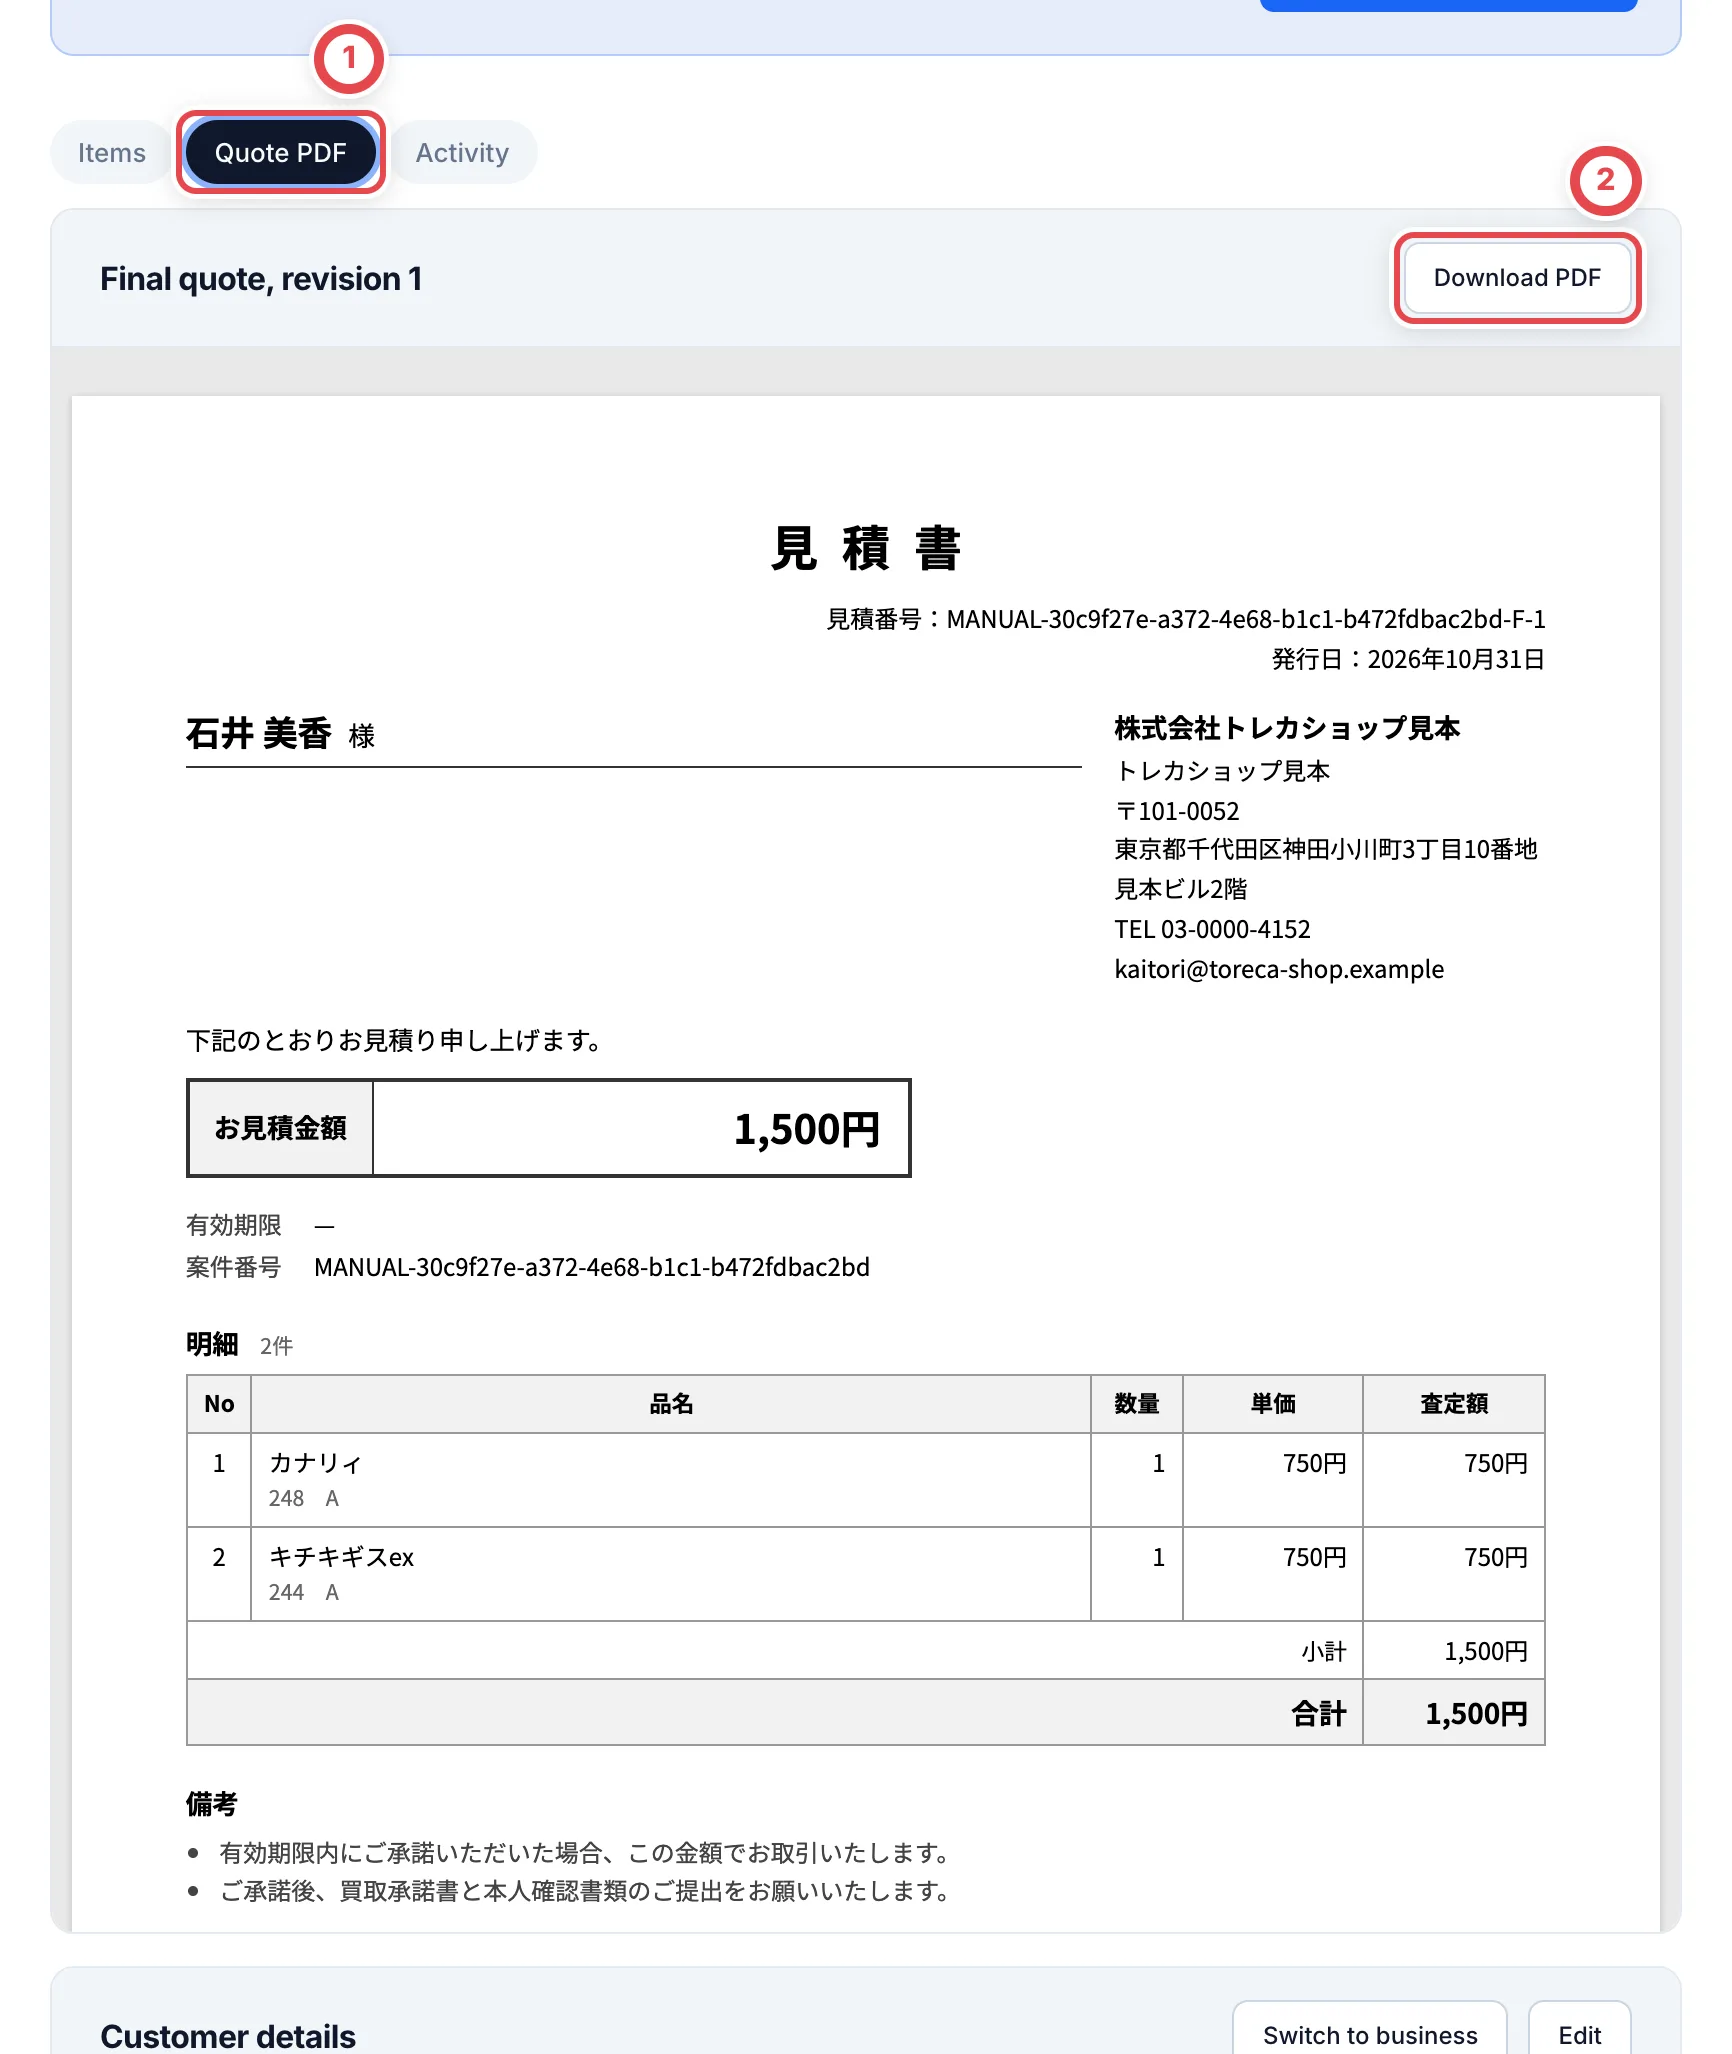 Open the final quote PDF at ①, check its contents, and save a copy with ② if needed.
Use **Download PDF** to save a copy. To correct an amount, switch to **Items** and click **Edit appraisal**. Save the changes and check the PDF again. **Condition note** is also visible to the customer.
The final appraisal's items view is read-only. Open **Edit appraisal** to change quantities, market prices, rates, or offers, add products or bulk appraisals, or set a package price. Save the revision to apply your changes. Cancel returns to the saved items.
## 4. Show it on the customer's screen
If the quote is correct, click **Show to the customer** at ②.
In the dialog, select **Customer's phone** or a registered shop tablet at ①, then click **Show** at ②.
The customer now reviews the quote, checks or enters their details, agrees and signs. If using a shop tablet, staff check that the quote is displayed before handing it to the customer. For device registration, see [Counter tablets](/en/guides/purchase/counter-tablets).
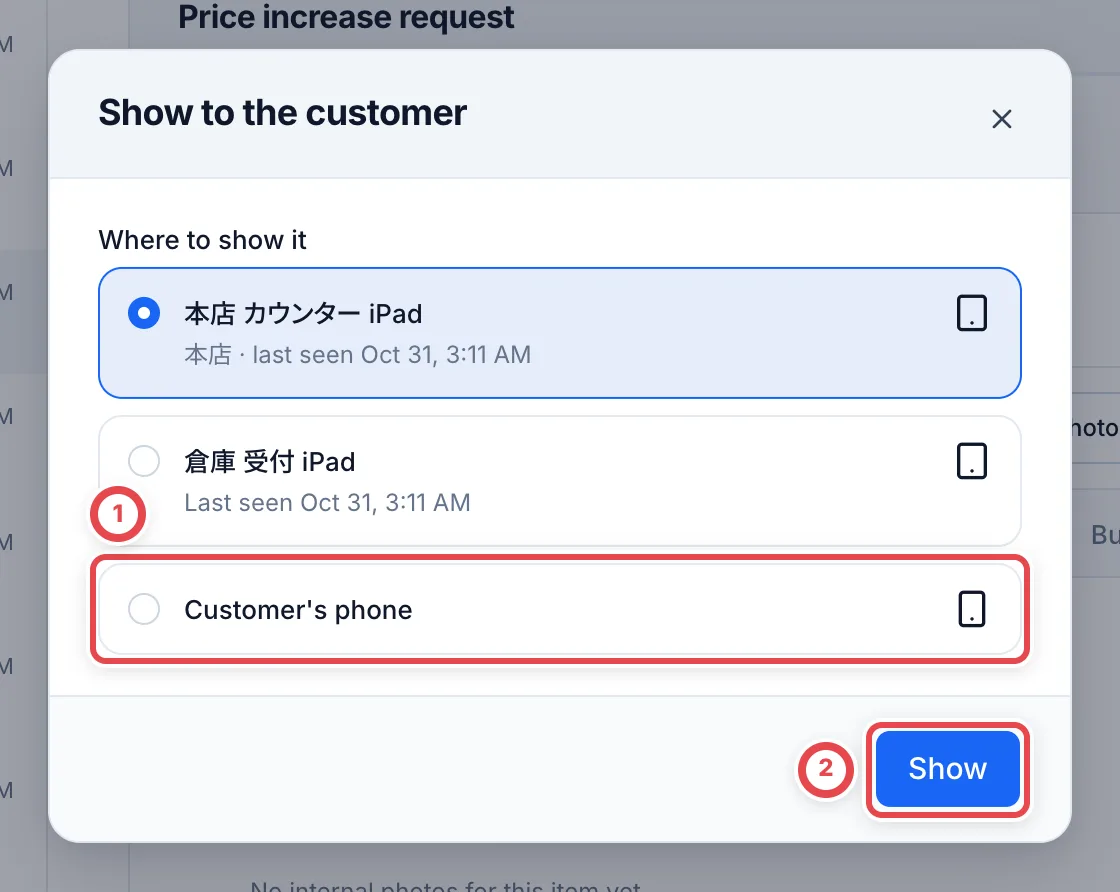 Clicking **Show** records presentation of the final quote. For a smartphone, ask the customer to scan the QR code now: it appears on the staff screen. The first phone’s browser can reopen the same URL or QR within 20 minutes of issue (30 minutes for a registered tablet). Reopening does not extend the expiry. The QR code remains visible after scanning. Reopening it in the same browser restores saved in-progress input. If browser storage is unavailable, enter the information again; signatures must also be entered again.
A different device or browser sees a used-QR error. Clearing browser data or blocking storage can also prevent reopening; issue a new QR in that case or after expiry.
Ask the customer to scan ①. Use ② **Regenerate QR code** when a new QR is needed, then confirm. The old QR and screen become invalid. Closing the dialog does not require regeneration: reopen it with **Show QR code** (**See progress** after scanning).
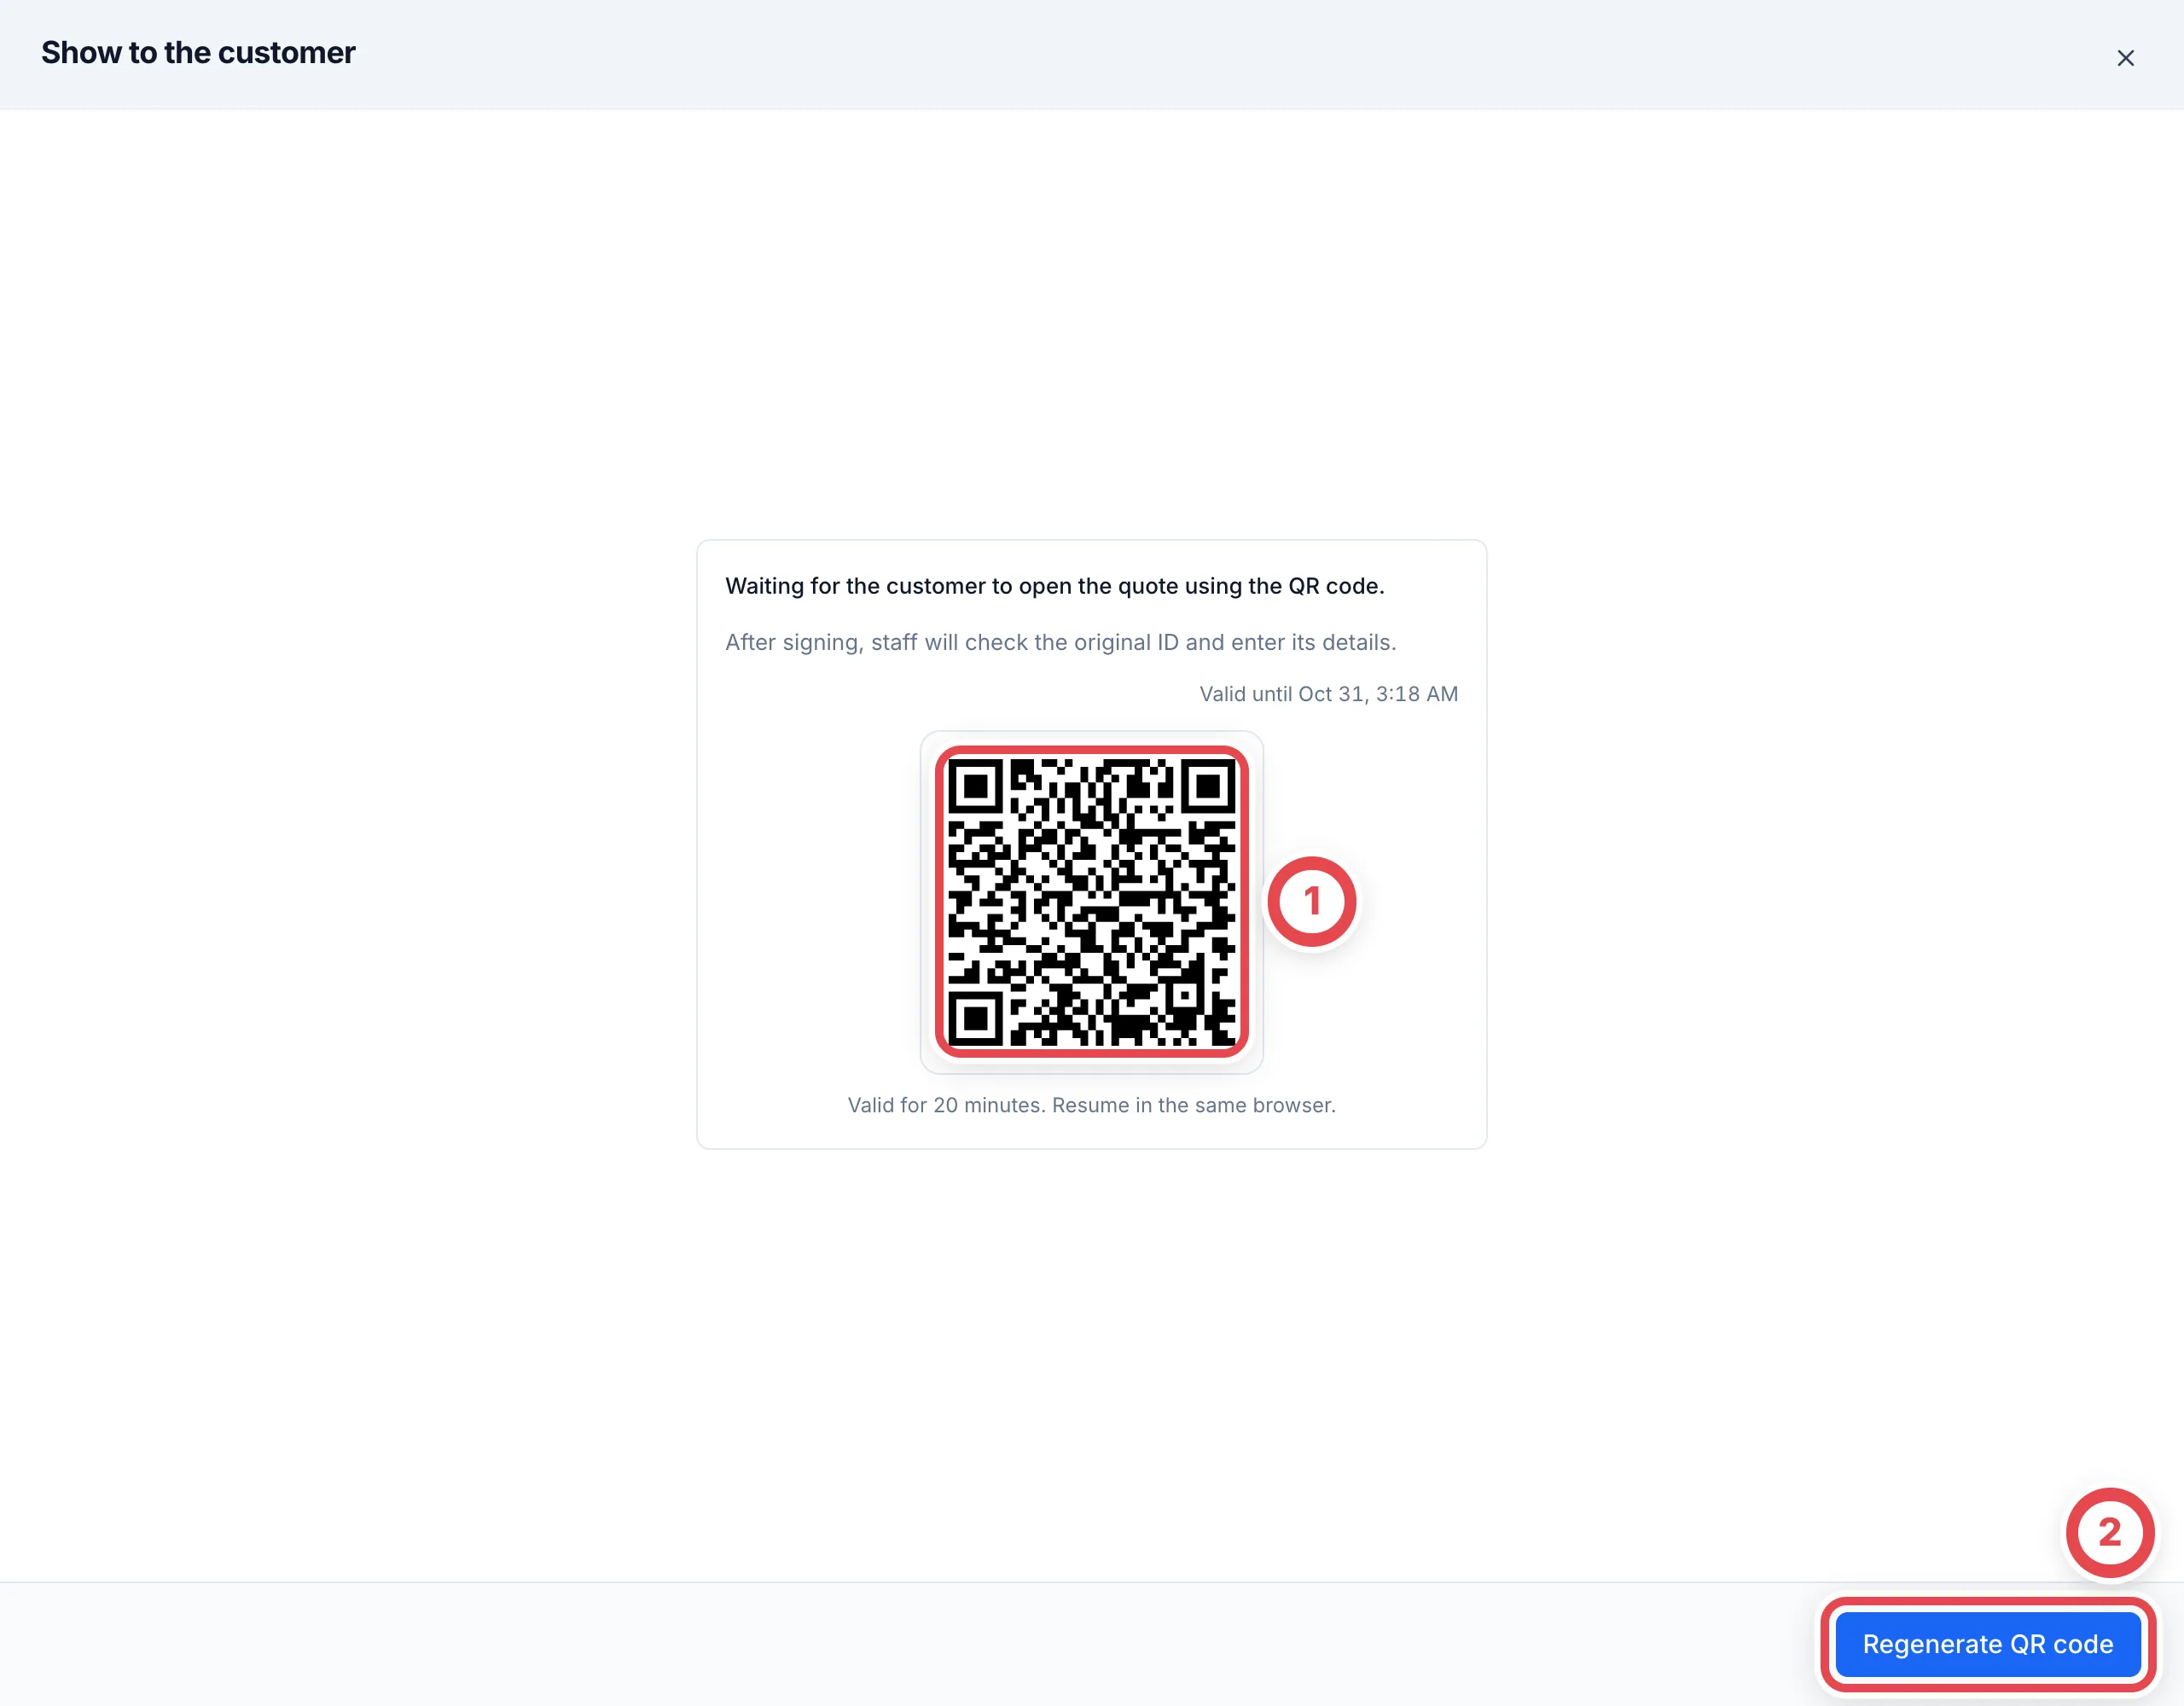 ## 5. The customer reviews, agrees, and signs
Ask the customer to check the quote, enter their details, and sign. The customer screens are Japanese only. If the ID photography screen appears after their details, follow [the photography steps](#when-the-customer-is-asked-to-photograph-id), then continue to the signature.
1. **「買取内容のご確認」 (Confirm the purchase details)**: The customer checks the total at ① and the cards. They also read the notice below the total. Lines with two or more copies show the unit price and quantity; a single-copy line shows only its amount. If something is wrong or there are cards they don't want to sell, they tap 「スタッフに相談する」 (Talk to staff) at ③. If it looks right, they tap 「査定内容を承諾する」 (Accept the appraisal) at ②.
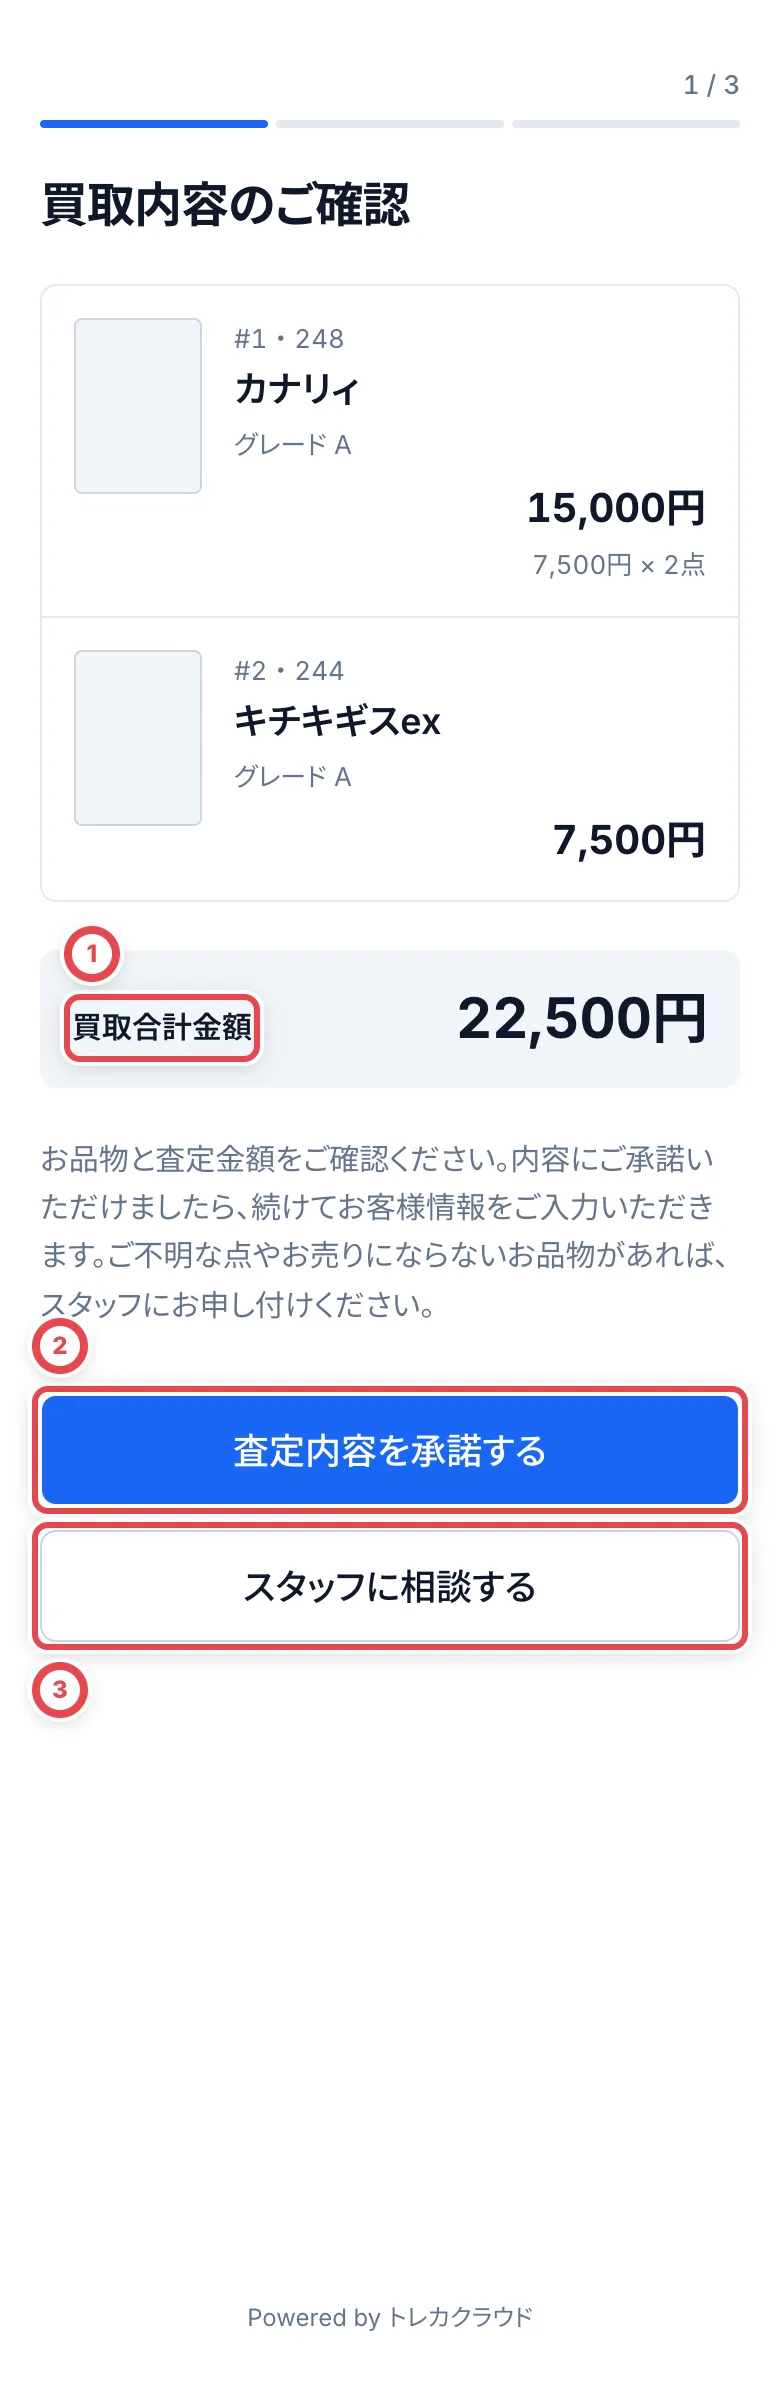 2. **「お客様情報のご確認」 (Confirm your details)**: A returning customer sees their registered details, partly hidden. If nothing has changed, they tap 「この内容で進む」 (Continue with these details) at ①. To correct their address or other details, they tap 「内容を修正する」 (Edit details) at ② and enter them again. A first-time customer enters their name, date of birth, occupation, address, and other details here. The name entered at intake is already filled in; the customer corrects it if needed.
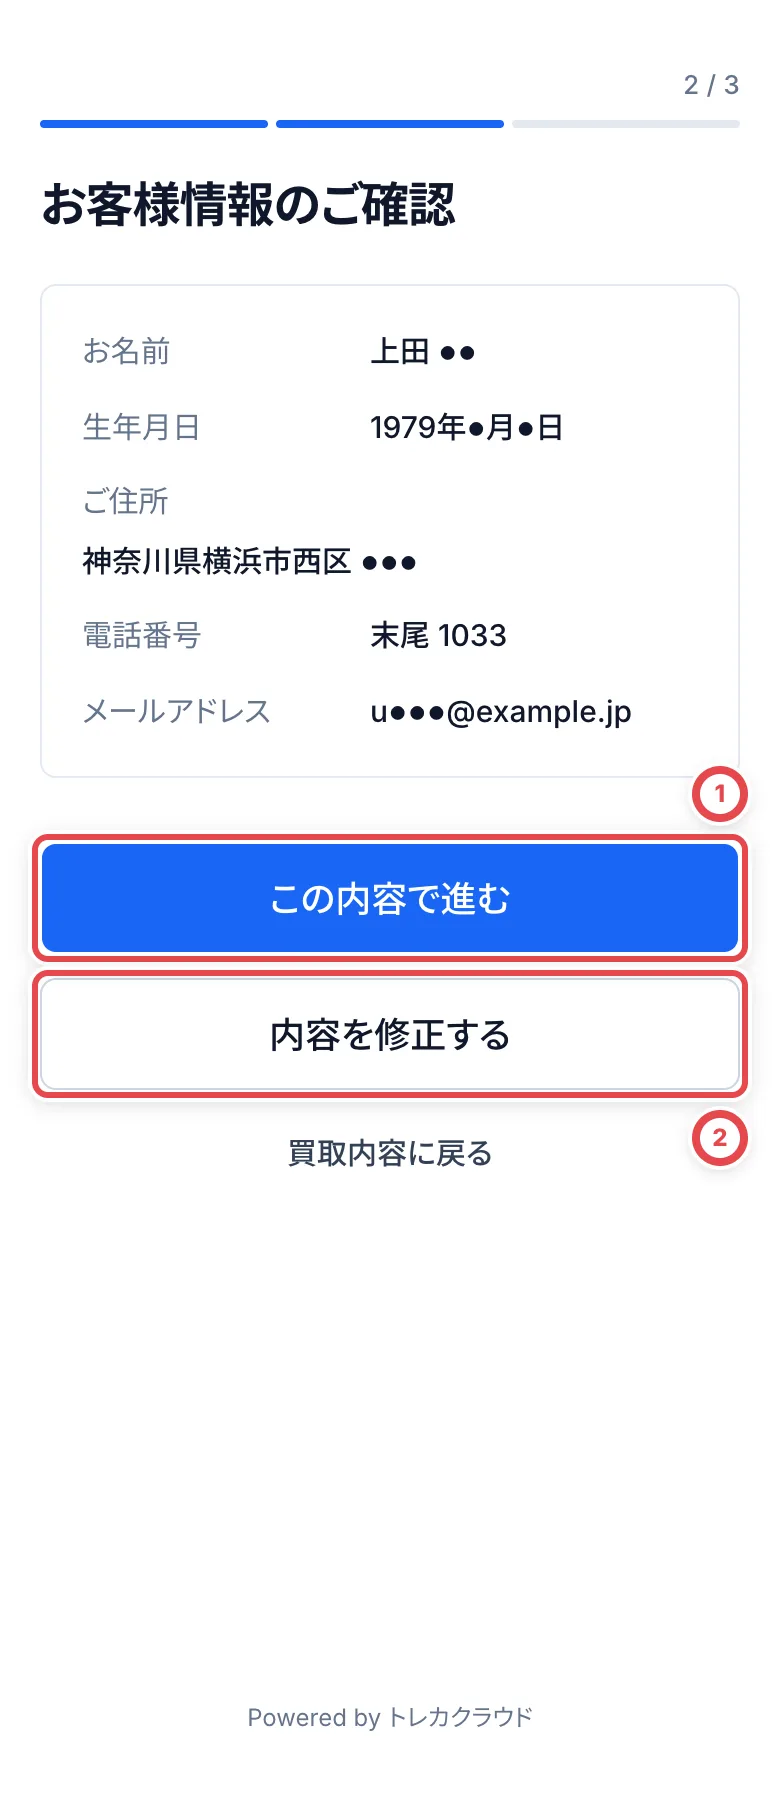 Enter the family and given name separately at ①, and their full-width katakana readings at ②. Continue with date of birth, occupation and address. Phone and email are optional. Editing existing details also asks the customer to re-enter the required fields.
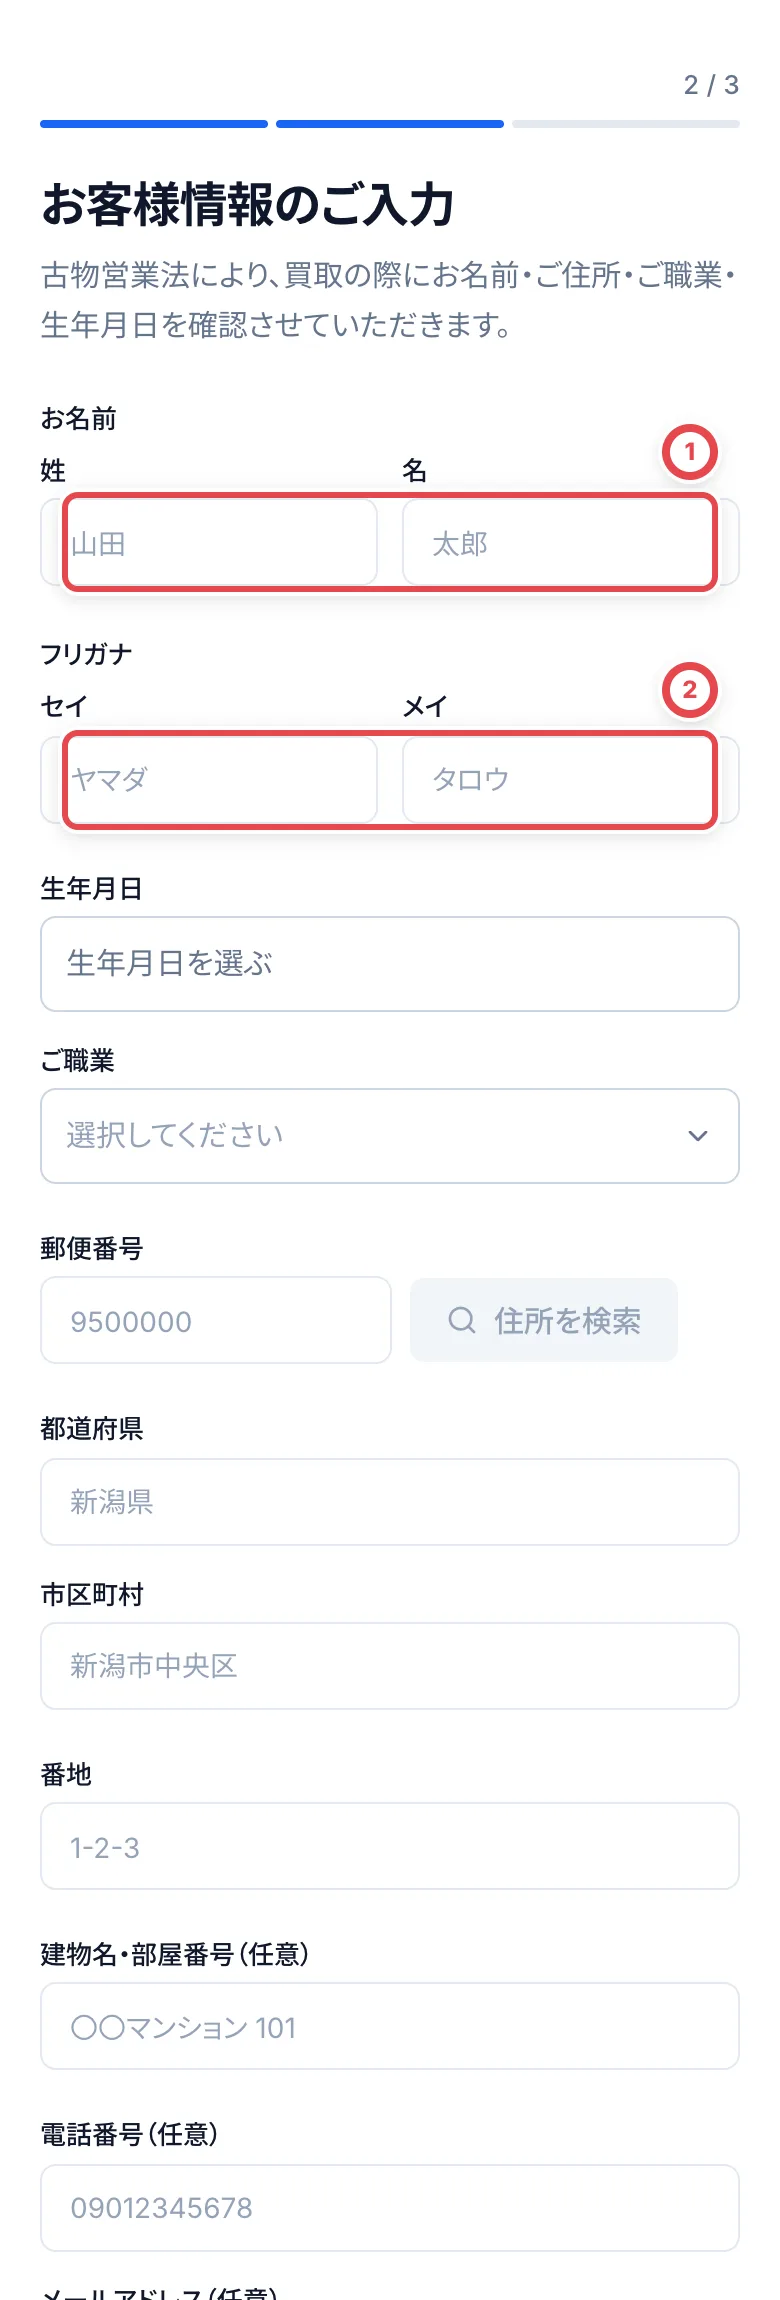 3. **「ご同意とご署名」 (Agreement and signature)**: The customer reviews the purchase details, total, and terms, then selects the checkbox at ① to enable signing. Before selecting it, they can scroll over the signature area without drawing. After signing, they tap 「同意して送信する」 (Agree and send) at ② to send it to the staff screen.
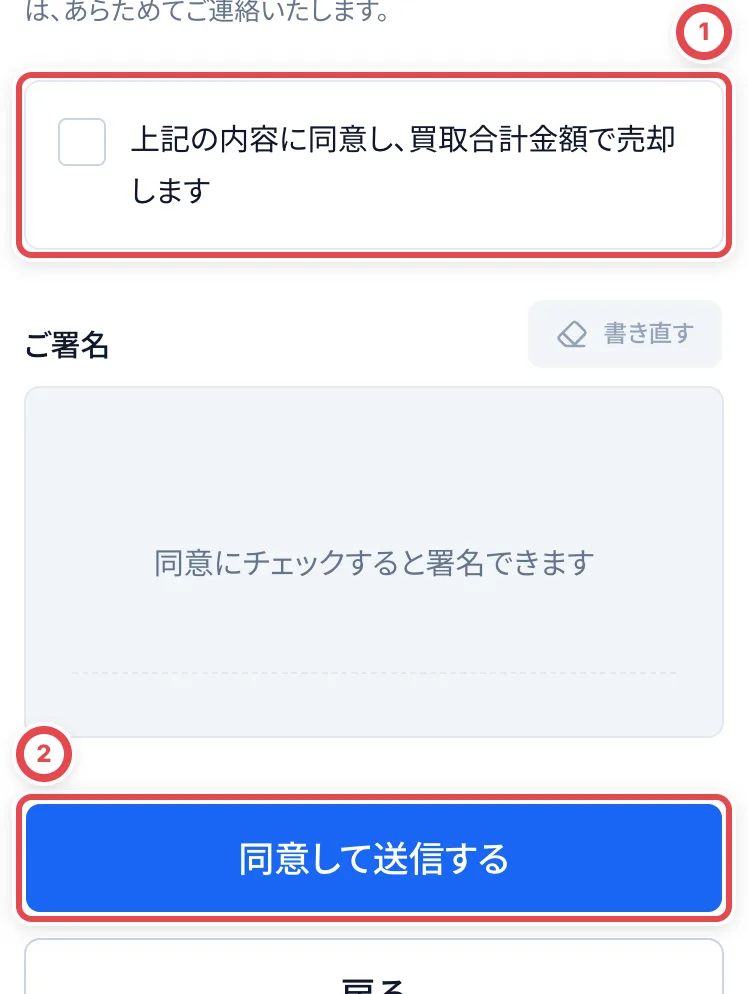 A customer under 18 stops at the details step and is told to ask staff.
For each document's capture, the staff photo review and the saved result, follow [Counter ID photos and the original-ID check](/en/guides/purchase/counter-photos).
## 6. Check the customer's ID in person
Once the signature arrives, **Next step** on the staff screen changes according to the identity check for this deal:
| Identity check | Next action |
| -------------------------------------- | -------------------------------------------------------------------------------------------------- |
| Not recorded; no customer photos | **Check in person**. Inspect the original and enter and record its details. |
| Not recorded; customer photos received | **Check in person**. Compare the photos with the original and the customer, then record the check. |
| Already recorded for this deal | **Register the purchase**. Open the registration dialog in step 7 directly. |
**Check in person** opens the identity form directly. Skipping photography does not skip this check. An active identity check recorded for this deal does not need to be repeated. A record from another deal or an unbound record alone does not count as checked.
 You can also open **In-person identity verification** from the customer's **Appraisal requests** or **Customer details** tab. Check the target deal at ① and click **Check in person** at ②.
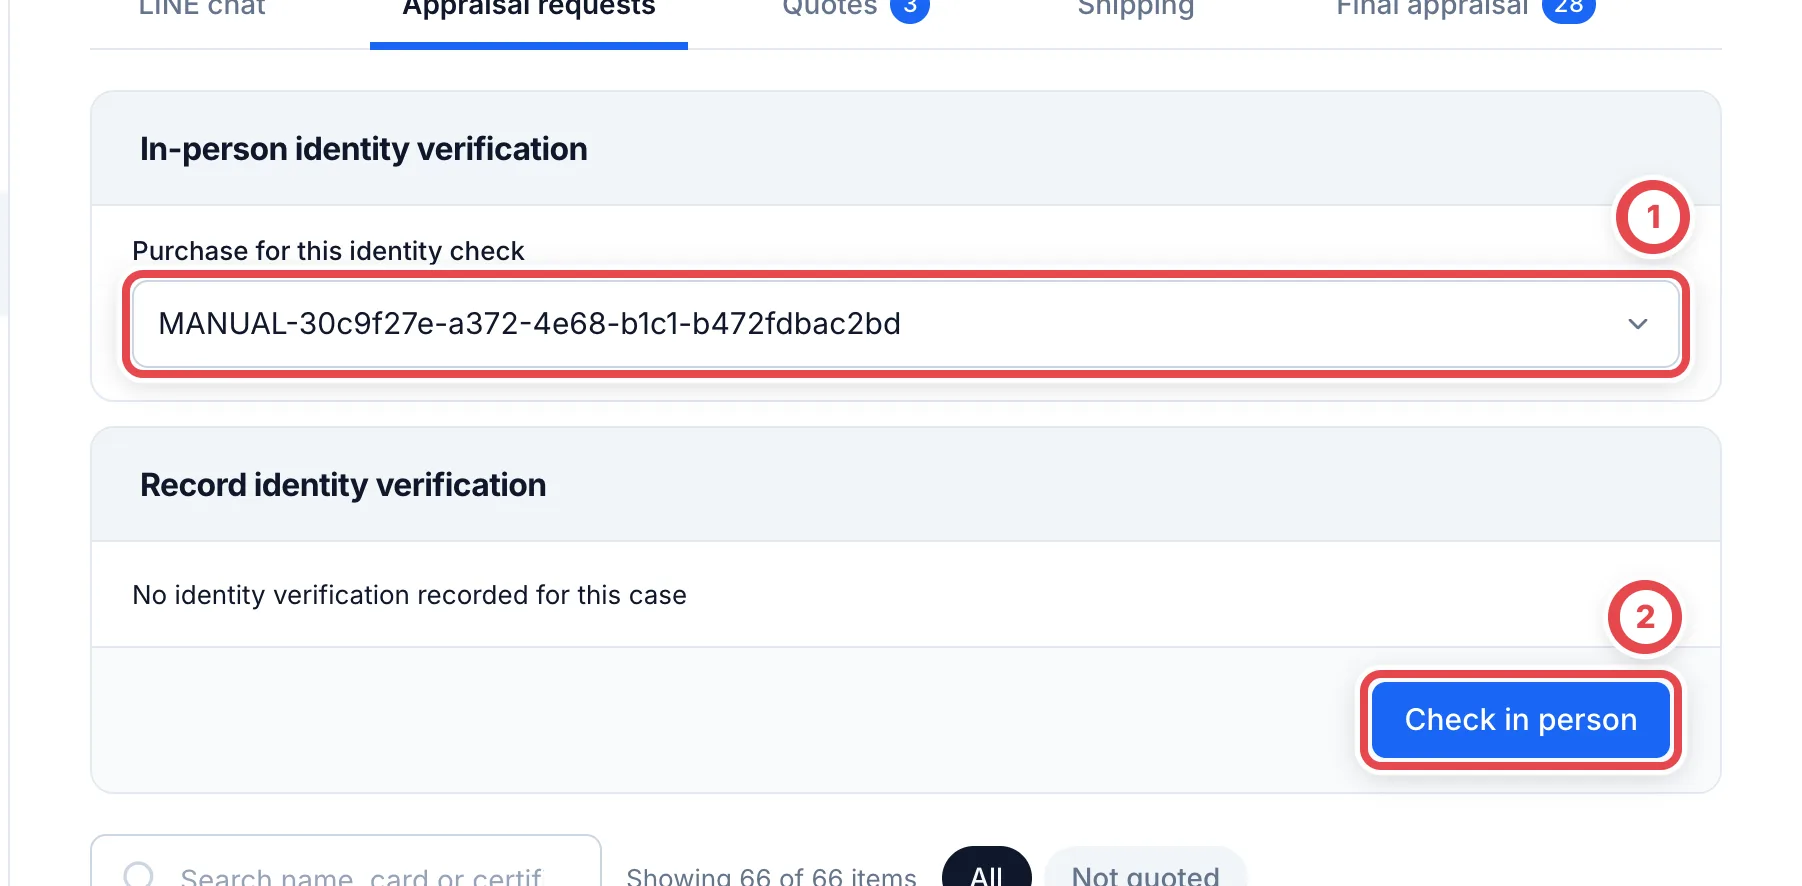 Ask to see the original ID. In the next screen, choose the type at ①, enter the number at ② and the expiry date below it. Check that the original matches the customer's details, select ③, then click **Record as checked** at ④. Open **Fill from an ID image (optional)** only when using image-assisted entry.
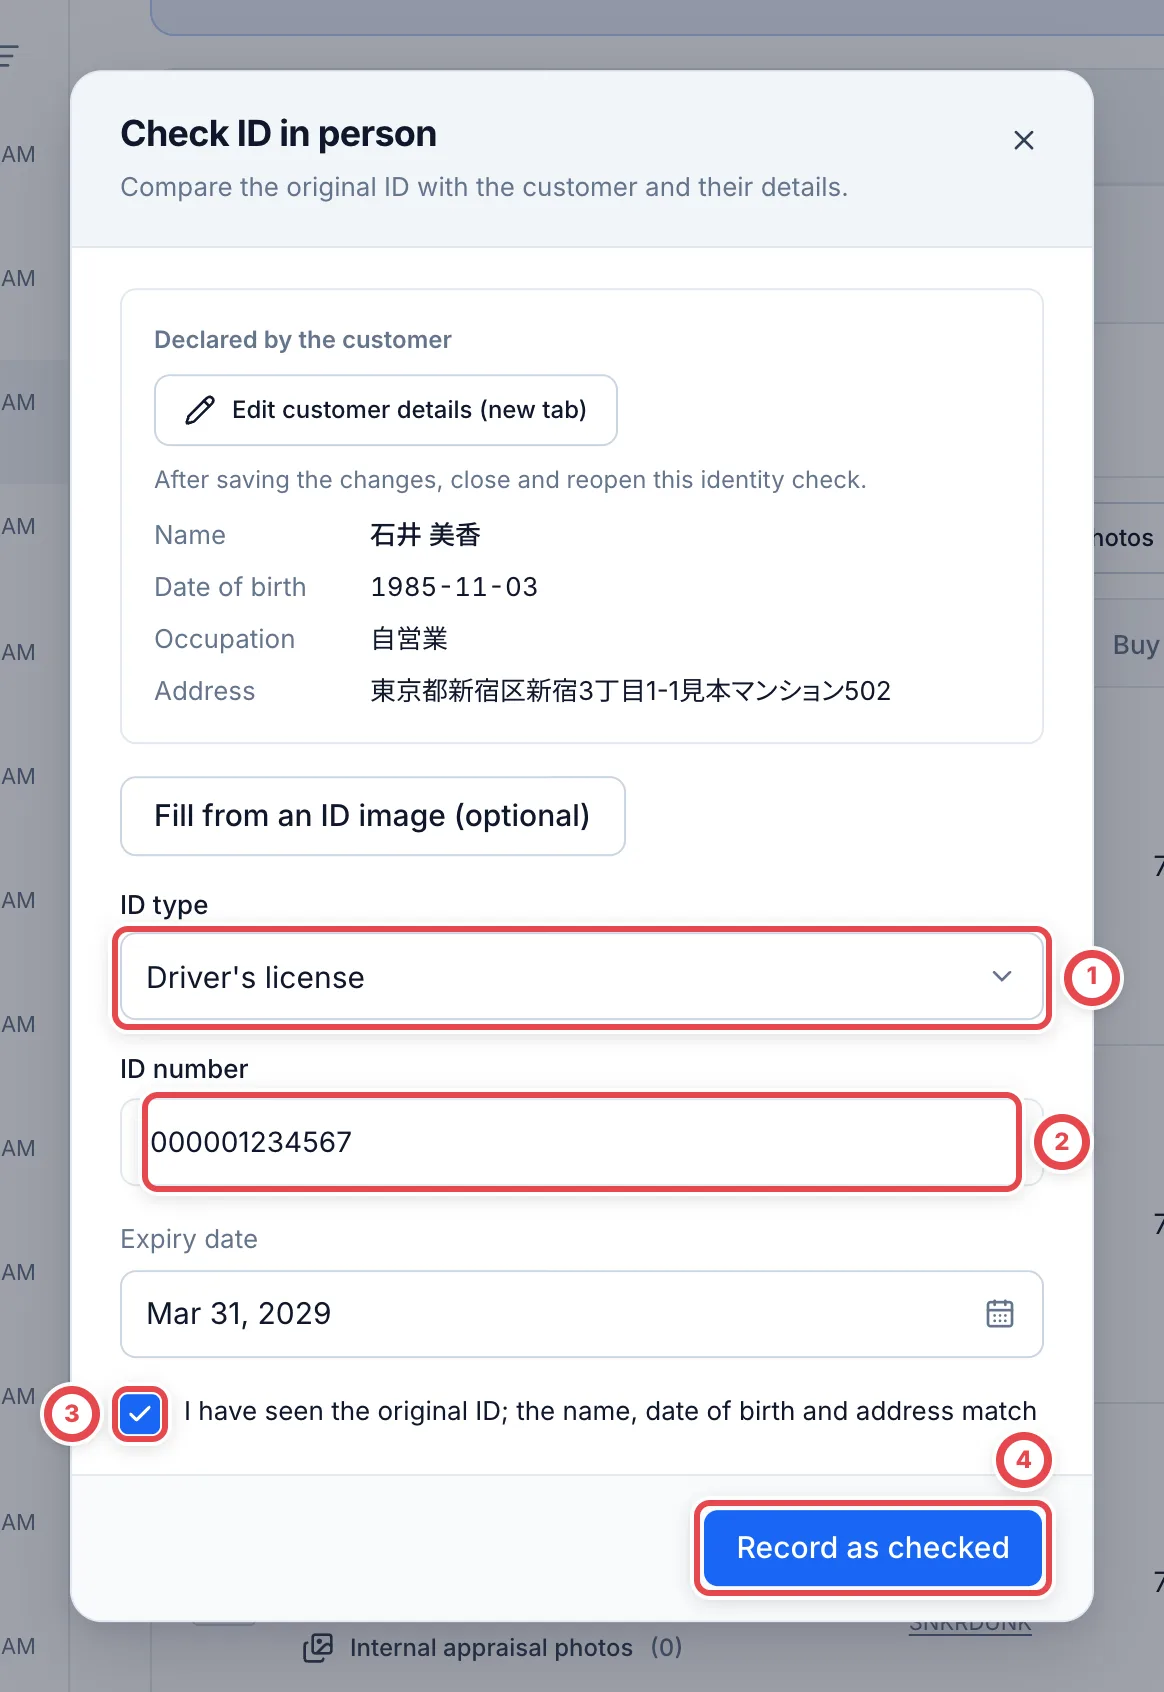 With customer photography, the dialog shows **ID photos submitted by the customer**. Compare them with the original, the person present, and the declared name, birth date and address. **Fill from the submitted photos** assists entry; check and correct the values before recording. A reading result alone is not verification.
Never enter a My Number card's personal number. If the document type is wrong, start a new session with the correct document instead of changing the type alone. If the photos no longer open, close and reopen the dialog. Record the ID check before registering stock and payment.
The ID number is stored encrypted, and only the last four digits appear on screen. You can't record the check until the customer's name, date of birth, occupation, and address are all filled in.
If the save result cannot be confirmed, wait for the automatic retry, then click **Retry with the same details** if it appears. Your input is retained. See [When the save result cannot be confirmed](/en/guides/purchase/counter-identity#when-the-save-result-cannot-be-confirmed).
## 7. Register stock and payment
:::warning
**Buy N pieces and hand over cash** records the cash handover as well as the purchase. Click it only when you are ready to give the customer the cash.
:::
**Next step** becomes **Register stock and payout**. Click **Register the purchase** to open the purchase amount, cards and payment method directly. Staff do not need to record the customer's signed acceptance a second time. Under **Payment method**, select **Pay in cash** at ①. If your shop uses cash management, choose the register the cash comes from at ②. That field is 「現金を扱うレジ」 (Register that handles cash). The cash-management screens are Japanese only, so their labels appear here in Japanese with an English gloss. Check the details and click ③.
The choices under **Payment method** depend on your shop's setting (**Settings** › **Payments** › **In-store payment methods**). A shop that pays only in cash sees only **Pay in cash**. To pay by bank transfer, go to [Pay by bank transfer](#pay-by-bank-transfer).
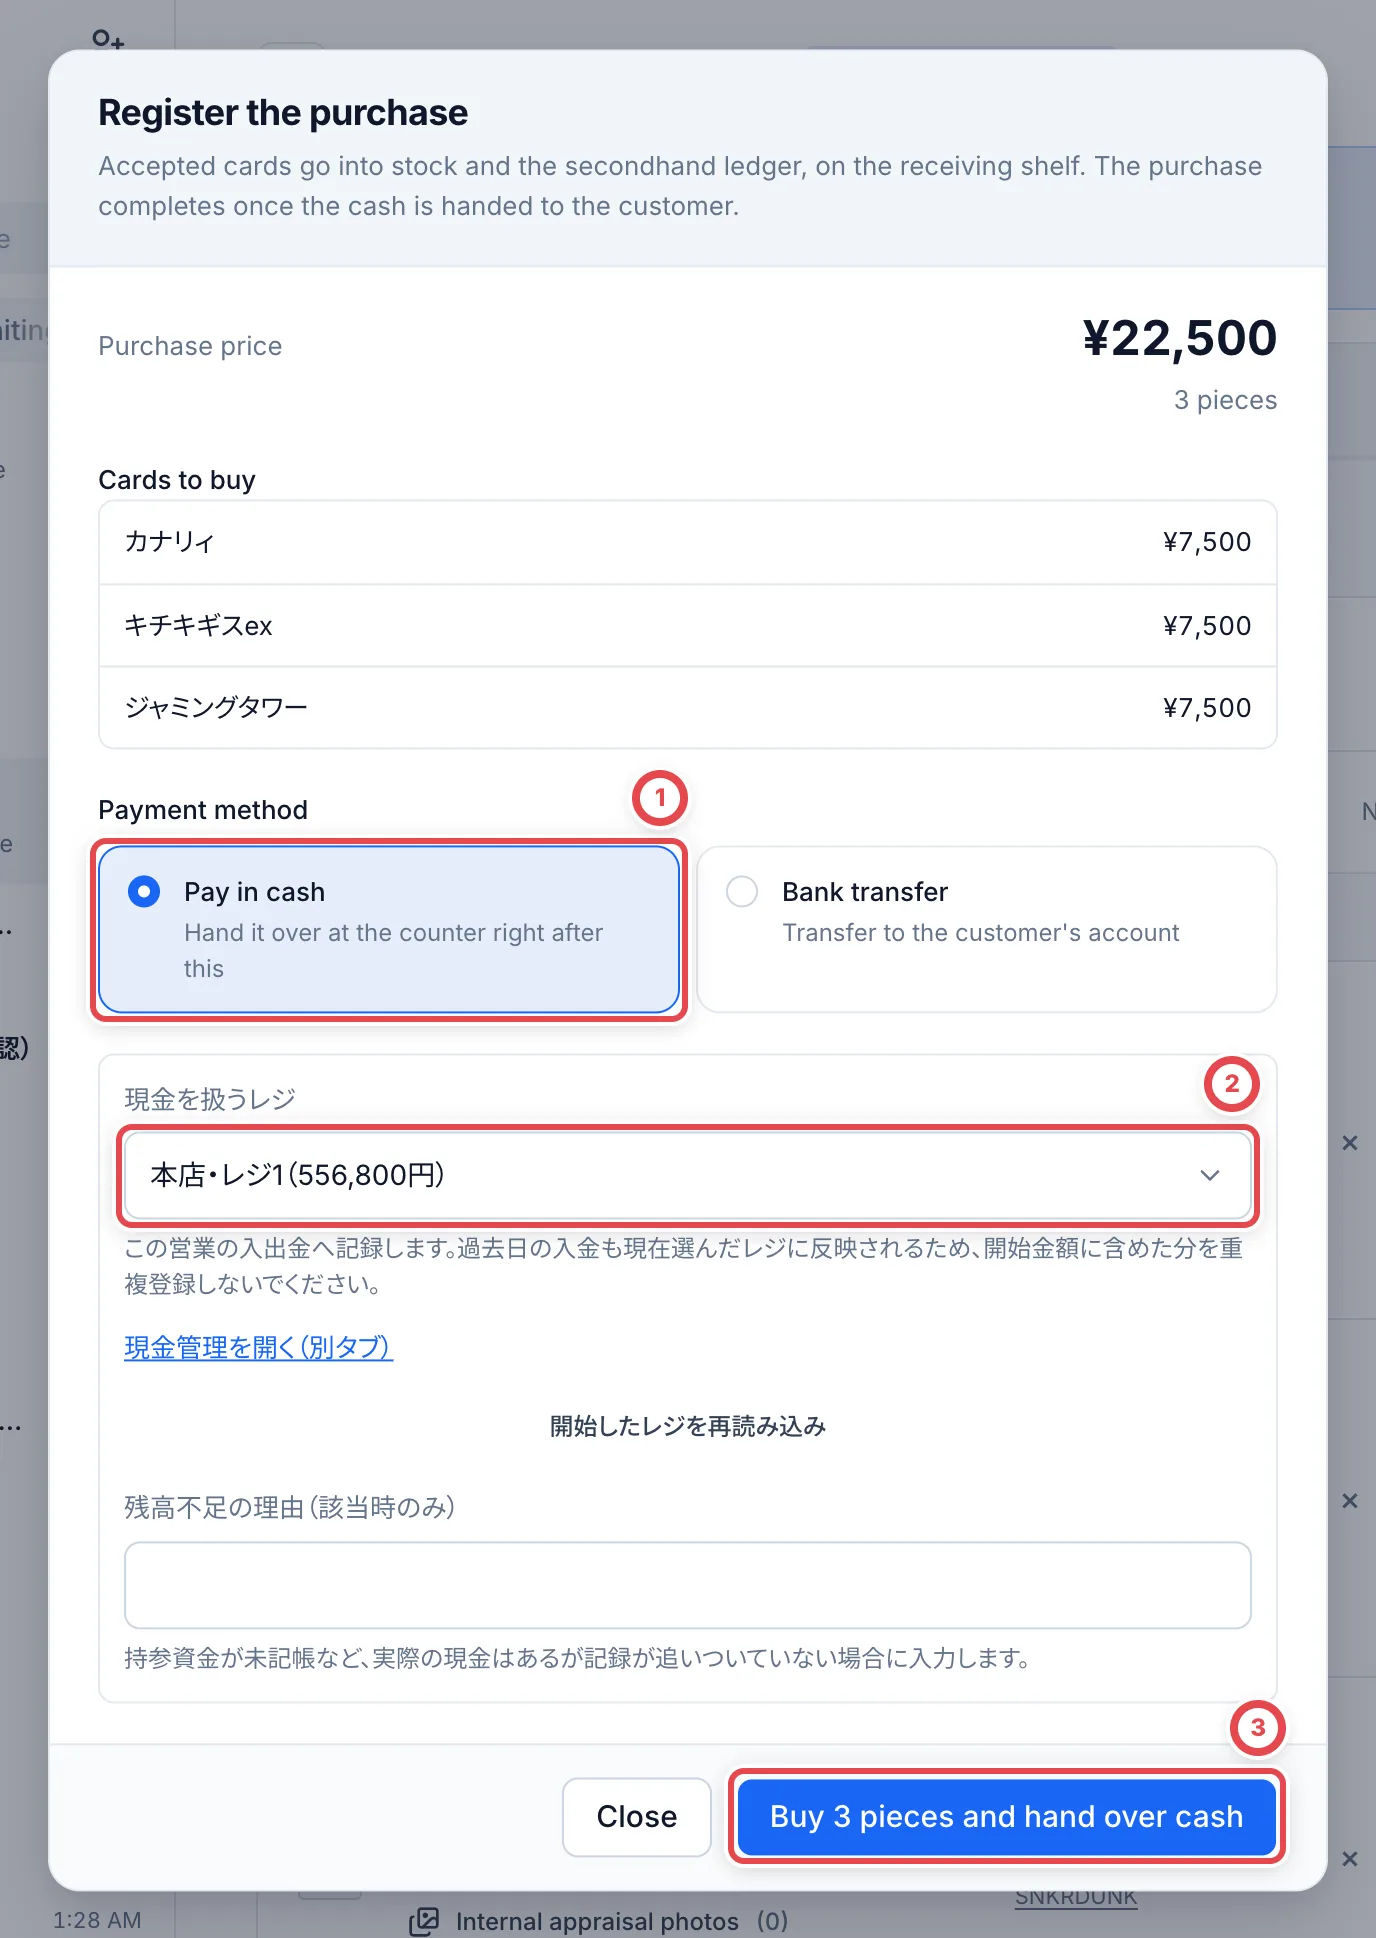 After ③, stock is registered, followed by the cash handover, and the deal becomes **Purchased**. Confirm the handover was recorded before step 8. No approval from another member is needed for an in-store cash payment.
If missing PSA numbers or another issue prevents recording the handover, stock is already registered and the Payment page opens. Do not register the purchase again. Complete the missing numbers, then use **Record cash handover**. If cash was already handed over, finish the record without paying a second time.
### Enter or correct PSA numbers
Before payment, open **Check / correct PSA numbers** if numbers are missing. Match each card’s name, grade and image to the physical card, then enter its slab number. Use ① **Edit** to correct a saved number. Enter the correct number in the input at ② and click **Save this number**. Images identify the card design and are not necessarily photos of the purchased copy.
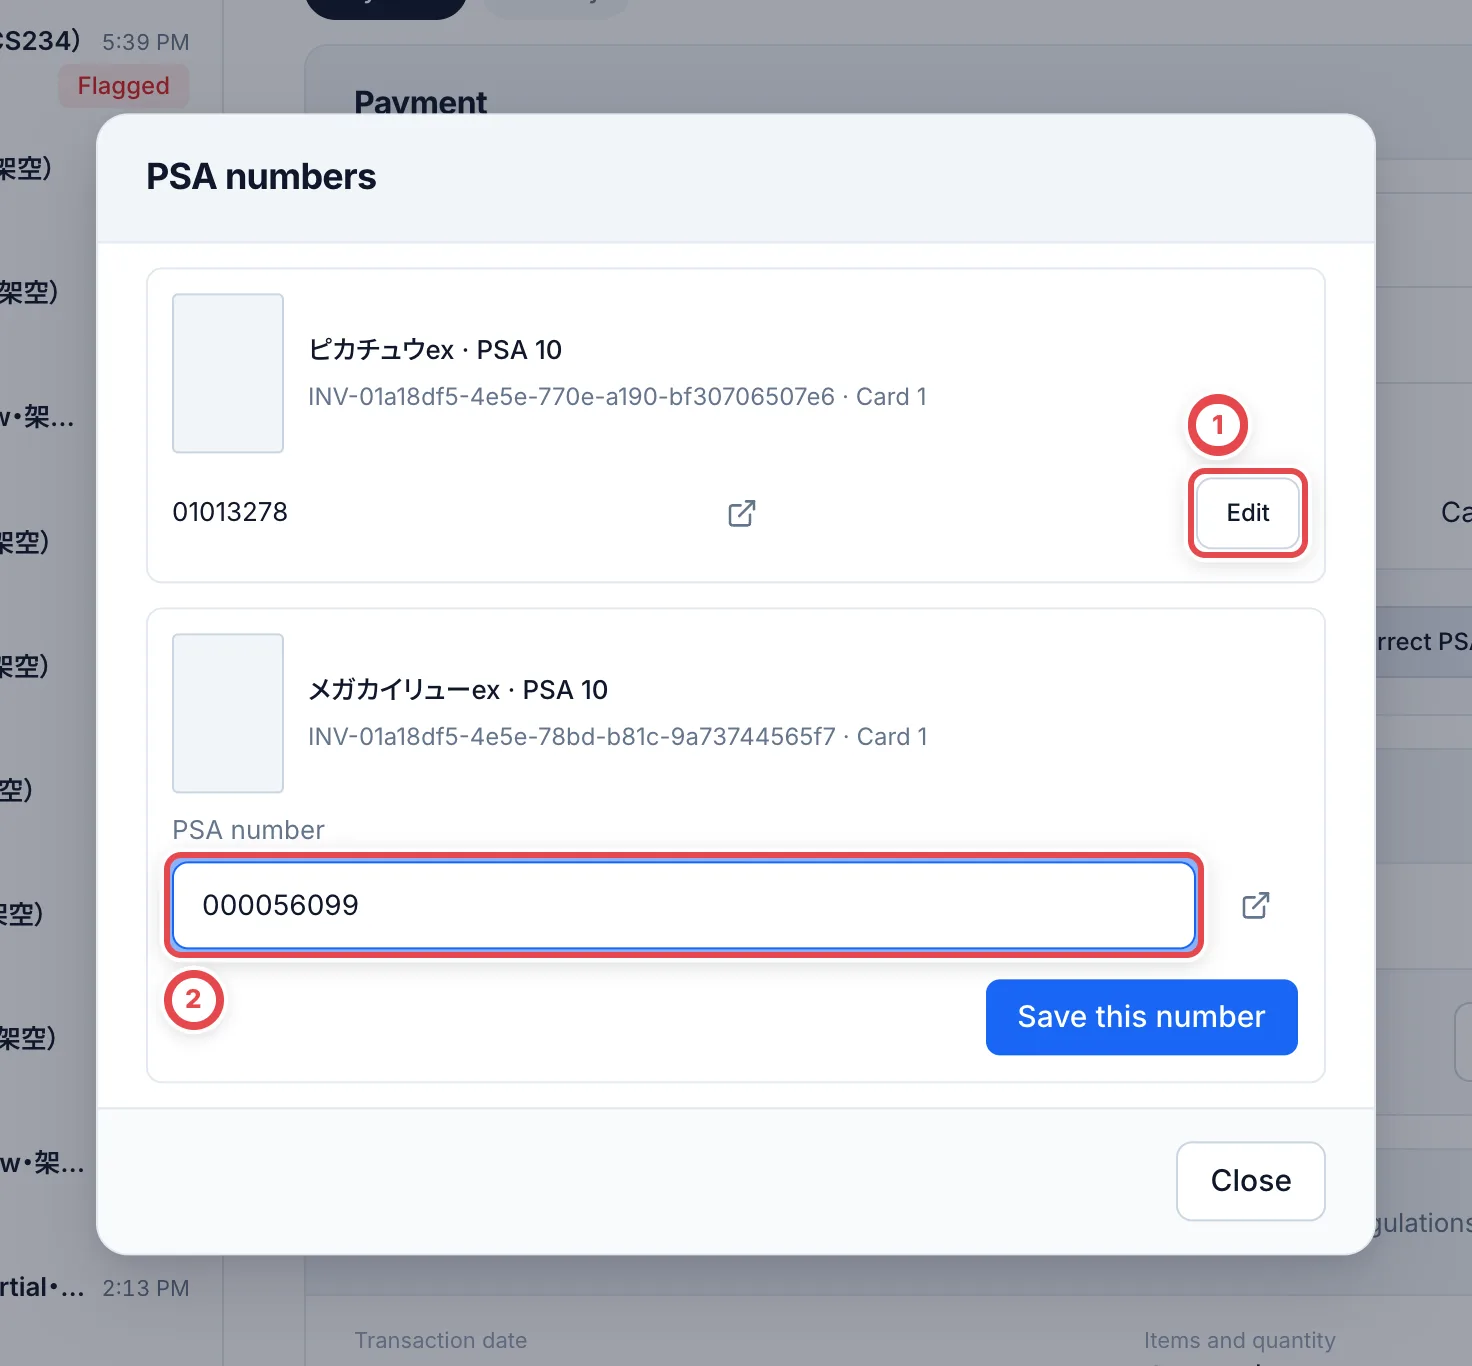 The entry remains in the Payment card after saving. Numbers cannot be edited here during or after payment processing, or when linked to a grading certificate.
## 8. Check completion and put the cards away
After you record the cash handover, **Purchase completed** appears with the amount handed over. Check the amount, customer and deal number, then click **View deal details** to see the payment result and purchase statement. To label the purchased cards and put them on the shelf, click **入庫・ラベル作業へ** (Go to receiving and labels) next to it. Receiving opens with only this deal's cards; click **すべての取引を表示** (Show all deals) to see the others.
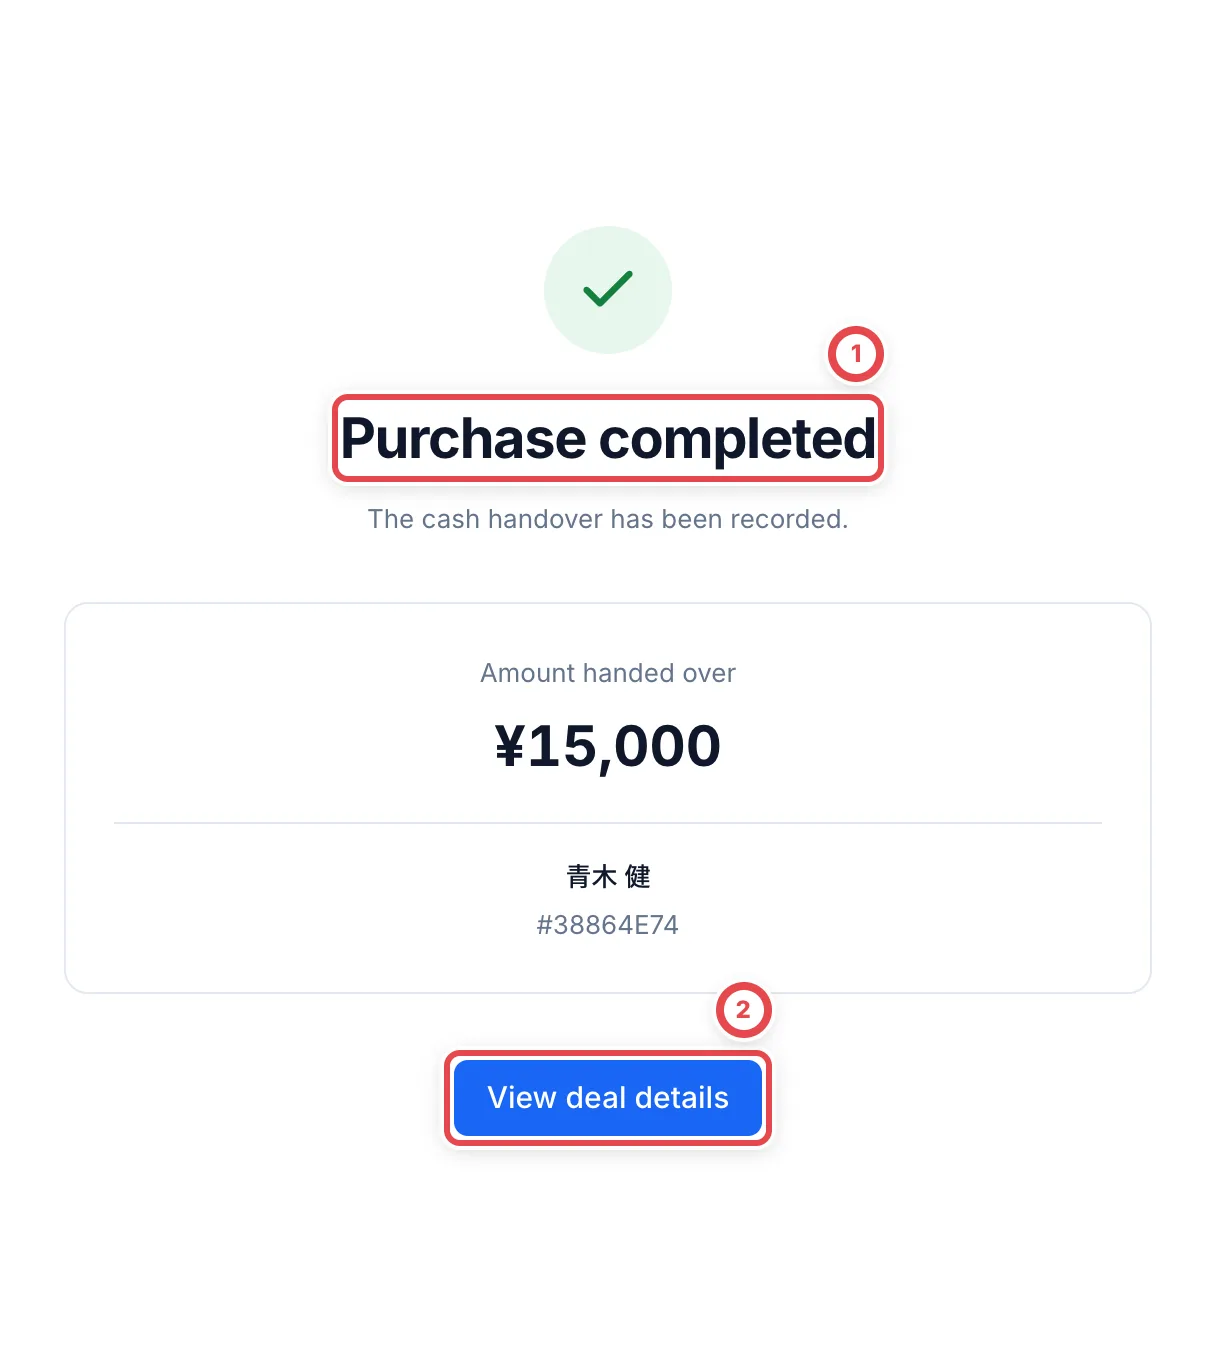 Check the completion and amount at ①; use ② for payment details and the statement.
**Checks before finishing with the customer**
Staff should check each item below. If anything is still outstanding, return to the relevant step and complete it.
- The customer agreed and signed the latest quote.
- Staff inspected the original and recorded the ID check; photos alone were not treated as verification.
- The customer confirmed the cards, quantities, amount and any cards being returned.
- Stock and payment are registered, and recorded cash/transfer status matches what actually happened.
- The statement recipient and email history were checked, using the shop's automatic-email setting.
- The shared tablet returned to its waiting screen without the previous customer's inputs.
Once cash is handed over and recorded, check that the deal is **Purchased**. Continue to [QR labels and putaway](/en/guides/inventory/putaway) to label the purchased cards and store them on the shelf. If cash handover is still pending, follow [When you record the cash handover later](#when-you-record-the-cash-handover-later).
## When the customer is asked to photograph ID
Photography is skipped in staff-entry mode and when this deal already has a recorded identity check. The same rules apply to QR links and shop tablets. After sending the photos, continue to [agreement and signature](#5-the-customer-reviews-agrees-and-signs).
**「本人確認書類の撮影」 (Photograph your ID, customer-photo mode only)**: Choose the document at ① and photograph the required sides. Confirm that no personal My Number appears, tick the checkbox, and tap 「写真を送信して次へ」 (Send photos and continue). Wait while the photos are checked.
| Document | Required photos | What to check |
| ---------------- | --------------- | ------------------------------------------------------------------ |
| Driver's license | Front and back | Both sides, even when there are no changes on the back |
| My Number card | Front only | **Never send the back, notification card, personal number or PIN** |
| Passport | Photo page | All corners and text must be readable |
| Residence card | Front and back | Use a different photo for each side |
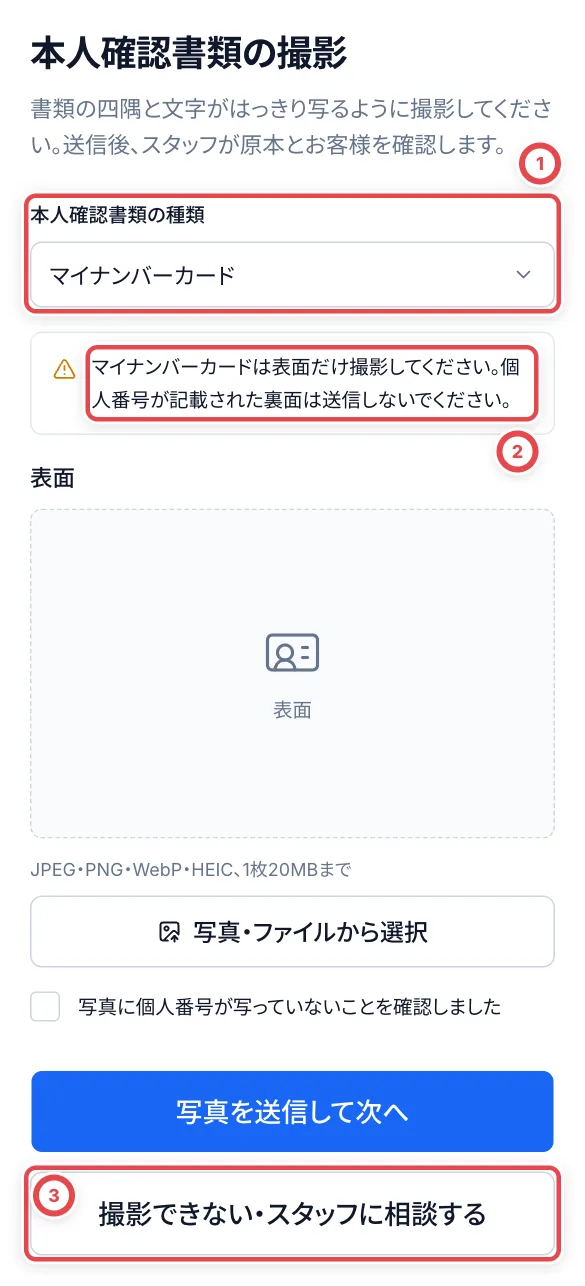 Choose the document at ①. Read ②: send only the front of a My Number card. Ask staff for help with ③.
Use JPEG, PNG or WebP, up to 20 MB in total. The screen attempts to convert HEIC; if conversion fails, take a JPEG instead. Photos whose type, side or contents cannot be checked are refused. Do not use the same photo for both sides.
If sending fails, follow the inline message and retry with the same photos. When photos are already submitted, continue without resending or choose the document again to replace them. Photos cannot be replaced after signing; ask staff to start a new session.
## Choose how to check identity
**Staff can check the original ID in person without changing settings first.** Open **In-person identity verification** from the customer's **Appraisal requests** or **Customer details** tab, including immediately after reception. See [Record an in-store ID check and add documents](/en/guides/purchase/counter-identity).
To ask the customer to photograph their ID on their own device, configure the collection method below.
Open **Settings → Payments → Change**, choose **In-store ID check** at ①, then save. You need permission to manage settings.
| Setting | Customer steps | Staff steps |
| ------------------------------------------------------- | -------------------------------------------------------------- | -------------------------------------------------------------------------------- |
| Staff receive the ID in person and record it | Quote → Customer details → Agreement and signature | Inspect the original, enter the type, number and expiry, and record the check |
| Customer photographs their ID on a tablet or smartphone | Quote → Customer details → ID photos → Agreement and signature | Compare the submitted photos, original and person present, then record the check |
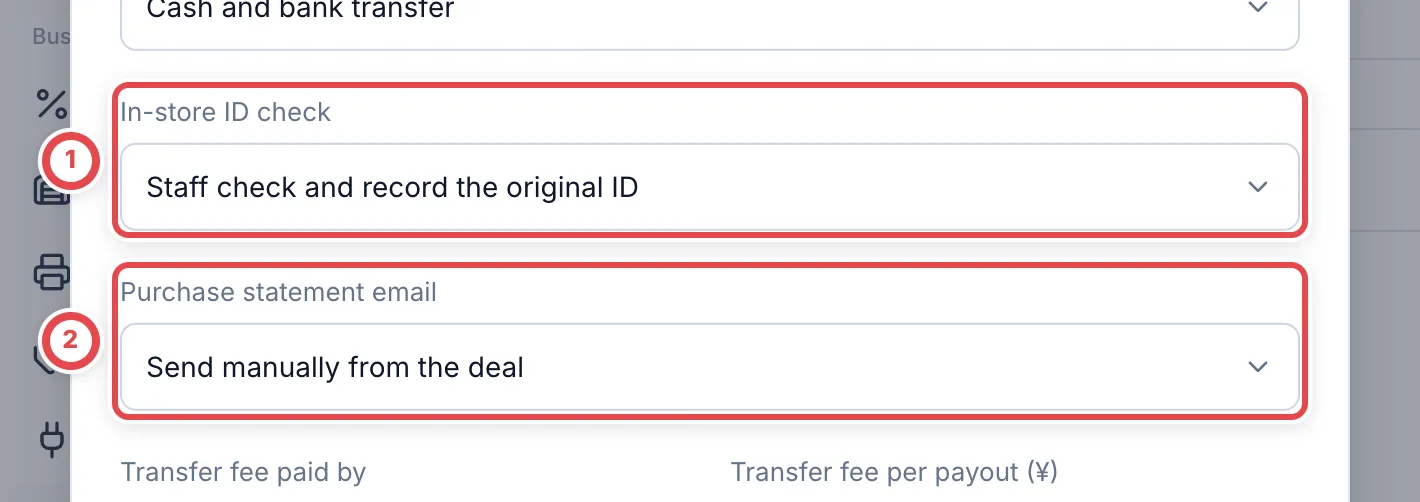 ① selects how to collect ID. ② selects whether to email the statement after payment completes.
Changes apply to sessions started afterward with **Show**. A customer already reviewing a quote keeps the previous setting. If this deal already has a recorded ID check, the customer is not asked for another set of photos. This does not automatically carry a check over to a different deal.
**Neither photos nor a signature completes identity verification.** Staff must inspect the original and the person, then record the check. Viewing photos requires identity-read permission. Recording the check or switching to staff entry also requires identity-write permission.
## Switch to staff entry when photography is unavailable
1. Ask the customer to tap 「撮影できない・スタッフに相談する」 (Unable to photograph; ask staff).
2. Open **See progress → Unable to photograph the ID?** on the staff screen.
3. Enter a **Reason for switching** at ①, such as a camera that cannot be used.
4. Click **Switch to staff entry** at ②. This changes only this session and keeps the shop setting unchanged. The reason is recorded in the deal history.
5. Once the customer's screen updates, they tap 「入力を続ける」 (Continue) and proceed to agreement and signature. Staff inspect and record the original afterward.
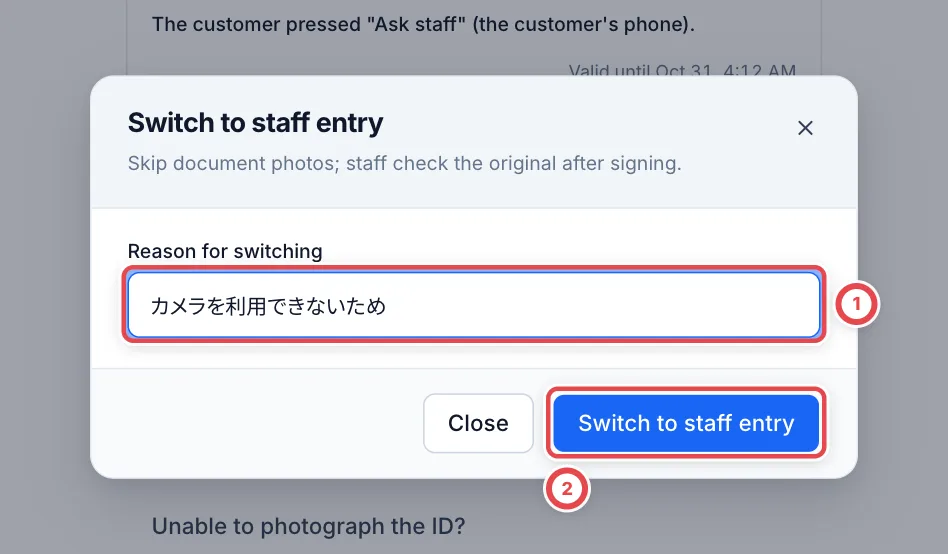 Switch while the session is active and unsigned. For an expired or cancelled session, start a new one from **Show to the customer**. After signing, inspect the original ID and record verification. To restart an active phone session, use **Regenerate QR code**; for a registered tablet, use **Show again**.
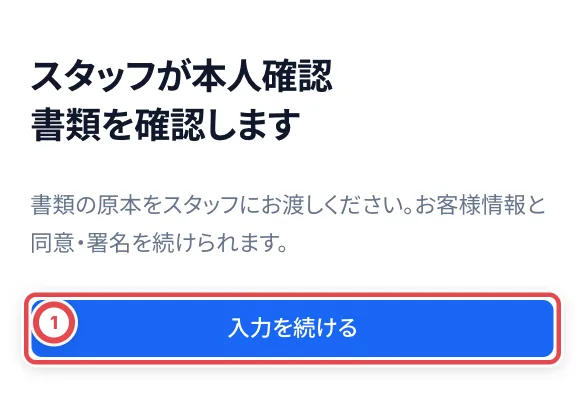 ## When you record the cash handover later
If the handover could not be recorded with the purchase (for example while PSA numbers are missing), or a payment is still waiting for approval from the old setting, continue from the payment page. Move a payment waiting for approval on with 「受渡し待ちに進める」 (Move to handover). No other member's approval is needed.
Hand the cash to the customer and click 「お金を渡した」 (Cash handed over) on the payment page. Choose the register the cash came from at ①, and click 「手渡しを記録」 (Record handover) at ②. The deal becomes **Purchased**, and the register records the purchase payment as an outflow.
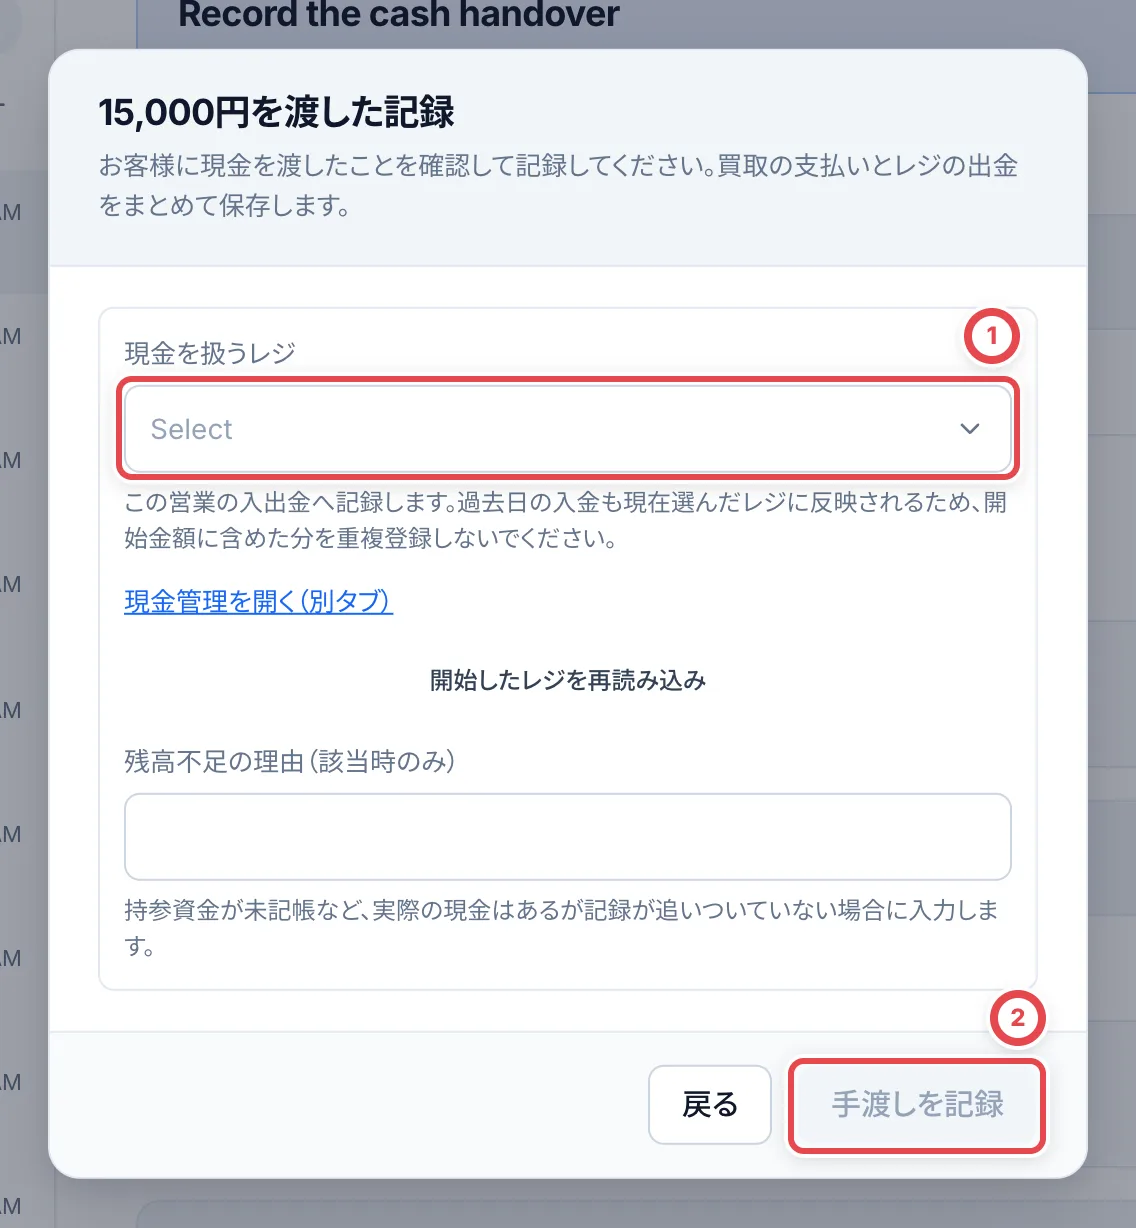 If your shop doesn't use cash management, the button is **Record cash handover** and the confirm button is **Record handover**. You don't choose a register.
:::warning
Don't enter the same purchase payment again under 「入出金を記録」 (Record cash in or out) in cash management. That records the outflow twice.
:::
## Pay by bank transfer
If your shop's setting allows bank transfer, you can choose it instead of cash in step 7. Steps 1–6 (up to the ID check) are the same. For a transfer, you attach the contract the customer signed on the counter screen as the customer consent evidence.
### 1. Choose bank transfer and add the payout account
Under **Stock and payout**, click **Register the purchase**. Under **Payment method**, choose **Bank transfer** at ①. If **Payout account** at ② shows **Not added**, click **Add payout account** and add the customer's account.
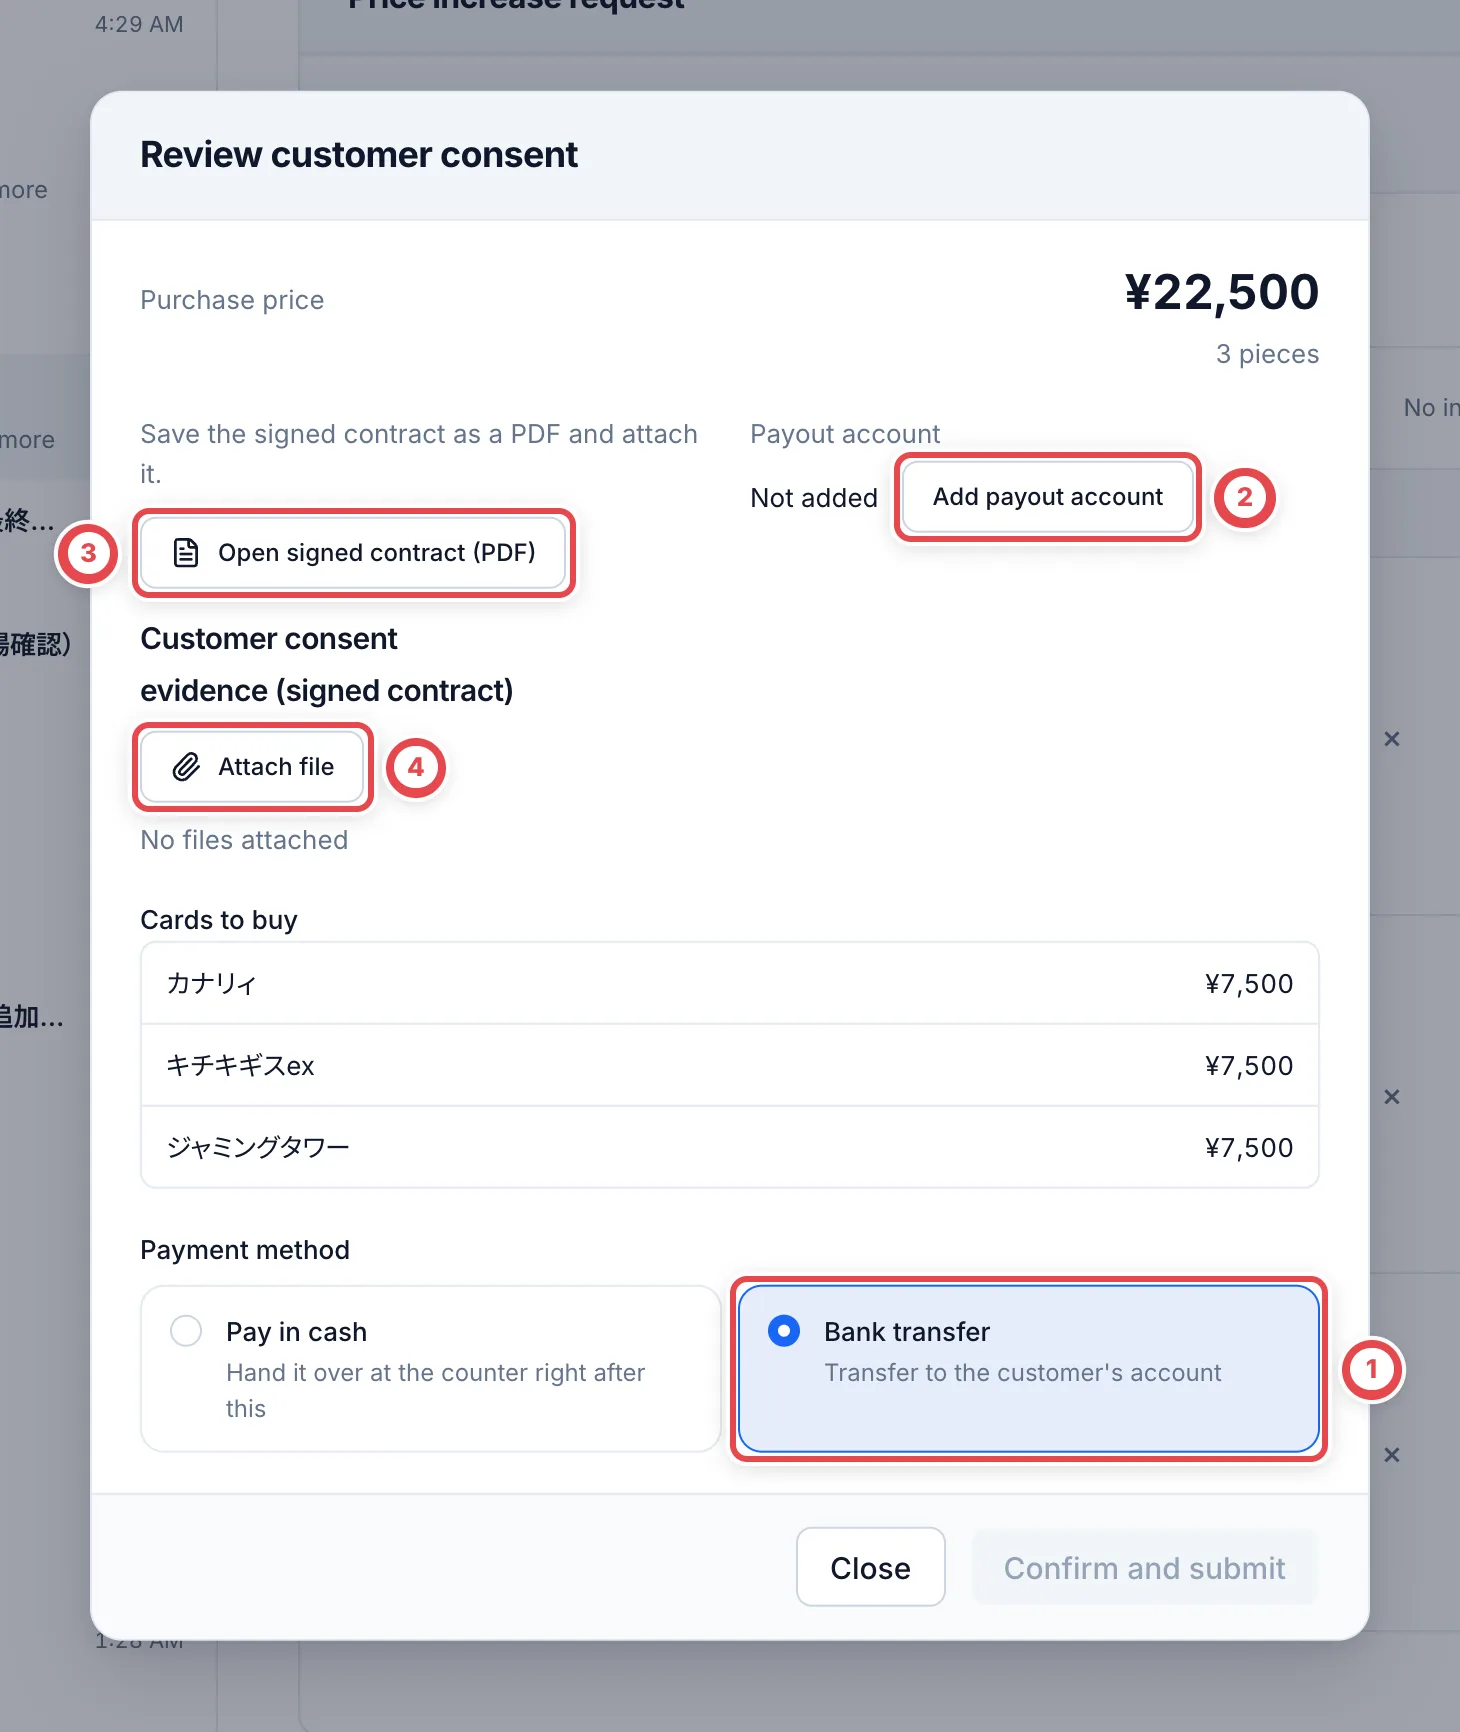 Choose Bank transfer at ① and add the account at ②. Open and save the contract at ③ and attach it at ④.
When **Add payout account** opens, copy **銀行名** (bank name), **支店** (branch), **口座番号** (account number), **口座種別** (account type: 普通 / Ordinary, 当座 / Current, 貯蓄 / Savings), and **口座名義(カナ)** (holder in katakana) at ① from the customer's passbook or bank card. These fields currently appear in Japanese. For Japan Post Bank, choose **ゆうちょ銀行** at the top first, then enter the symbol and number. Click **Add account** at ② to go back to the previous dialog, where **Payout account** now shows the account.
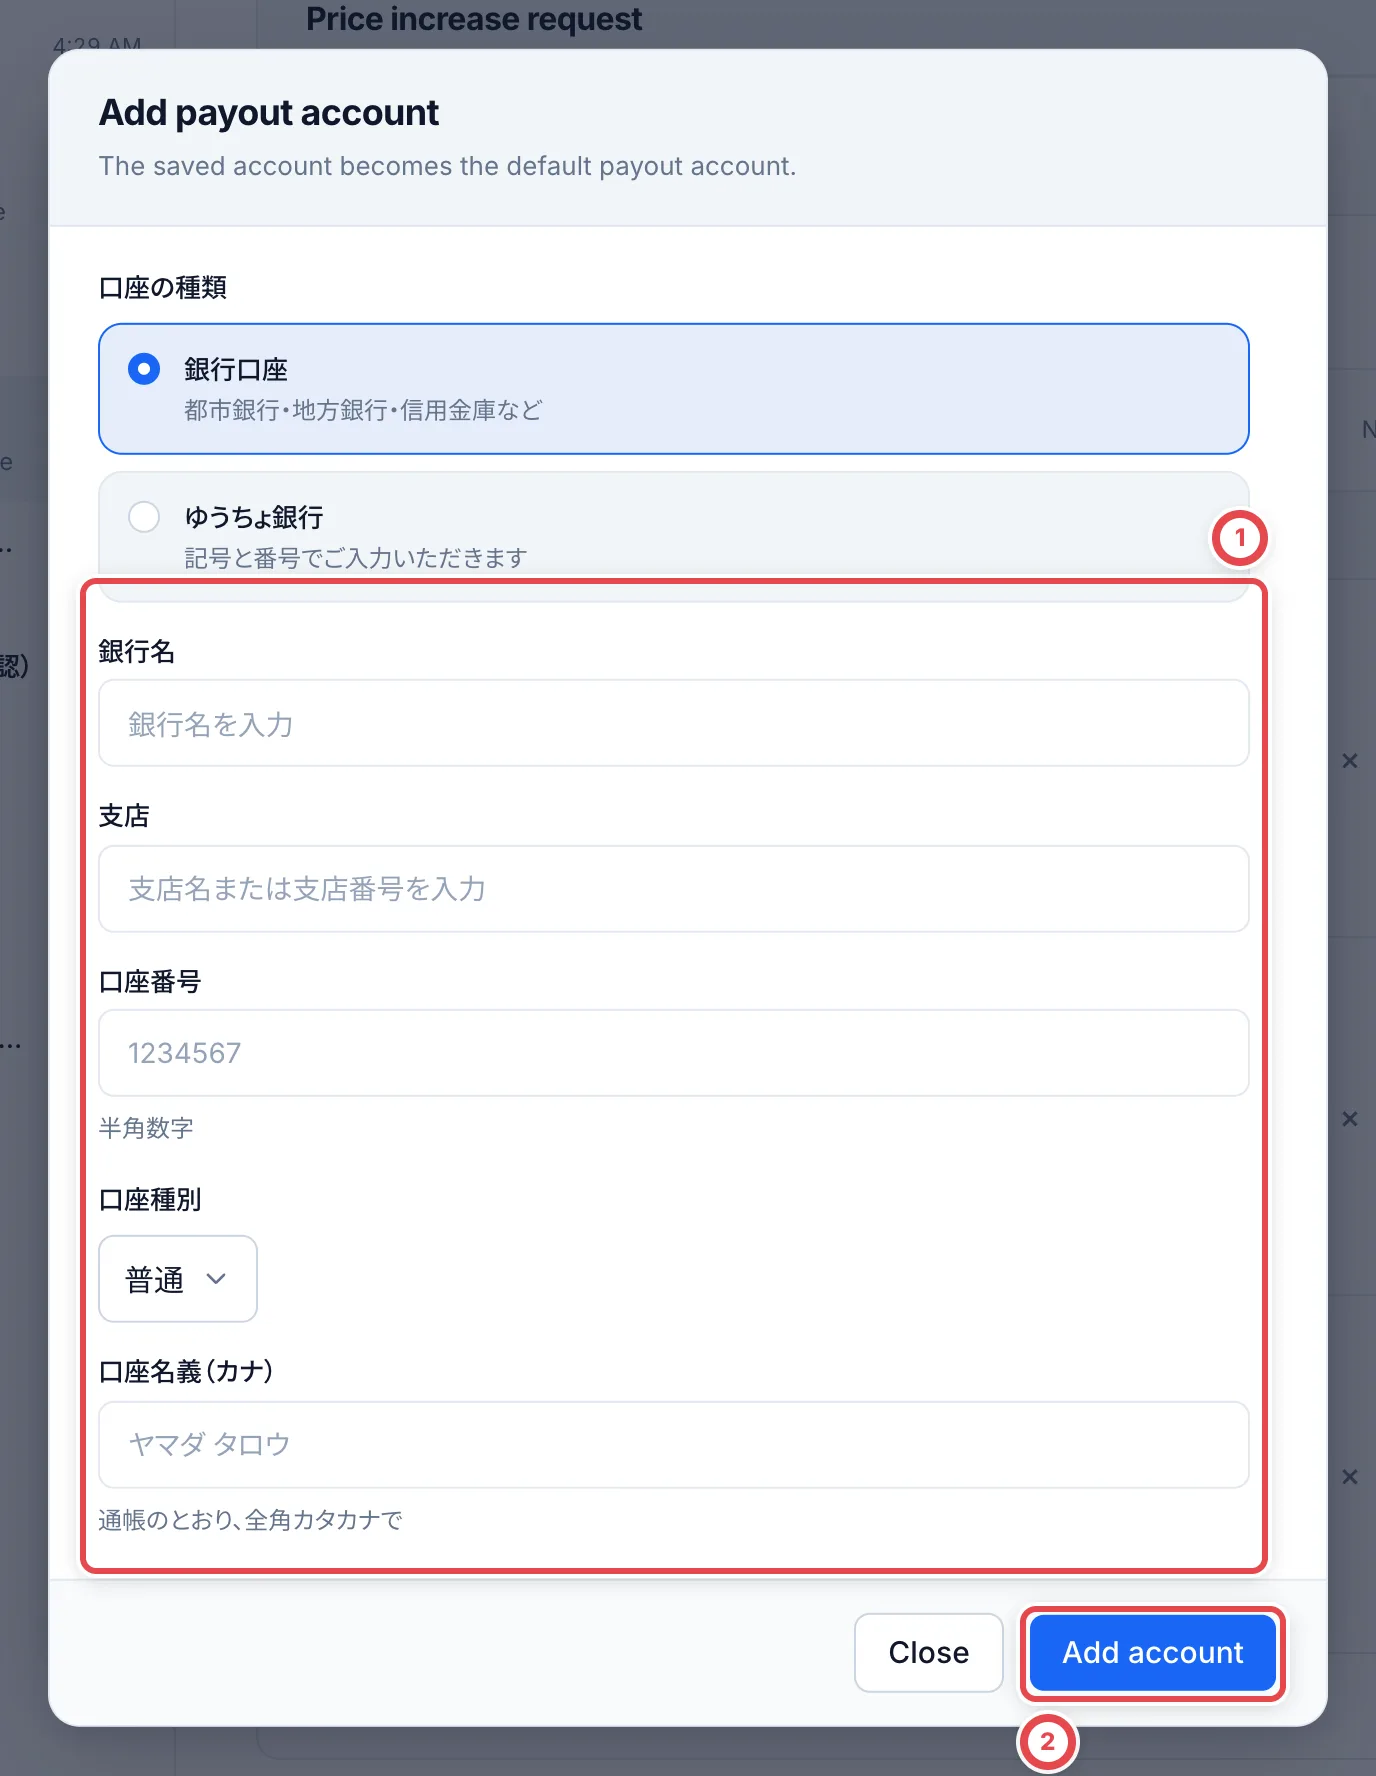 If the account holder's name differs from the customer's, you need a power of attorney before the transfer (see "When a power of attorney is needed" in [Identity verification](/en/guides/purchase/identity)).
### 2. Check the contract and account, then submit
In the same dialog, click **Open signed contract (PDF)** at ③. The contract opens in a new tab; save it to your computer. Then click **Attach file** at ④ and choose the saved contract. When "No files attached" changes to the contract's file name, it is attached.
Members who can submit payouts see the account check and **Confirm and submit**. Click **Show account number and holder**, then compare the bank, branch, account type, full number and holder with the identity document or passbook. Check the items and amount in the attached signed contract, then click **Confirm and submit**. **This records the purchase and submits the payout together.** Once submitted, do not submit the same payment again.
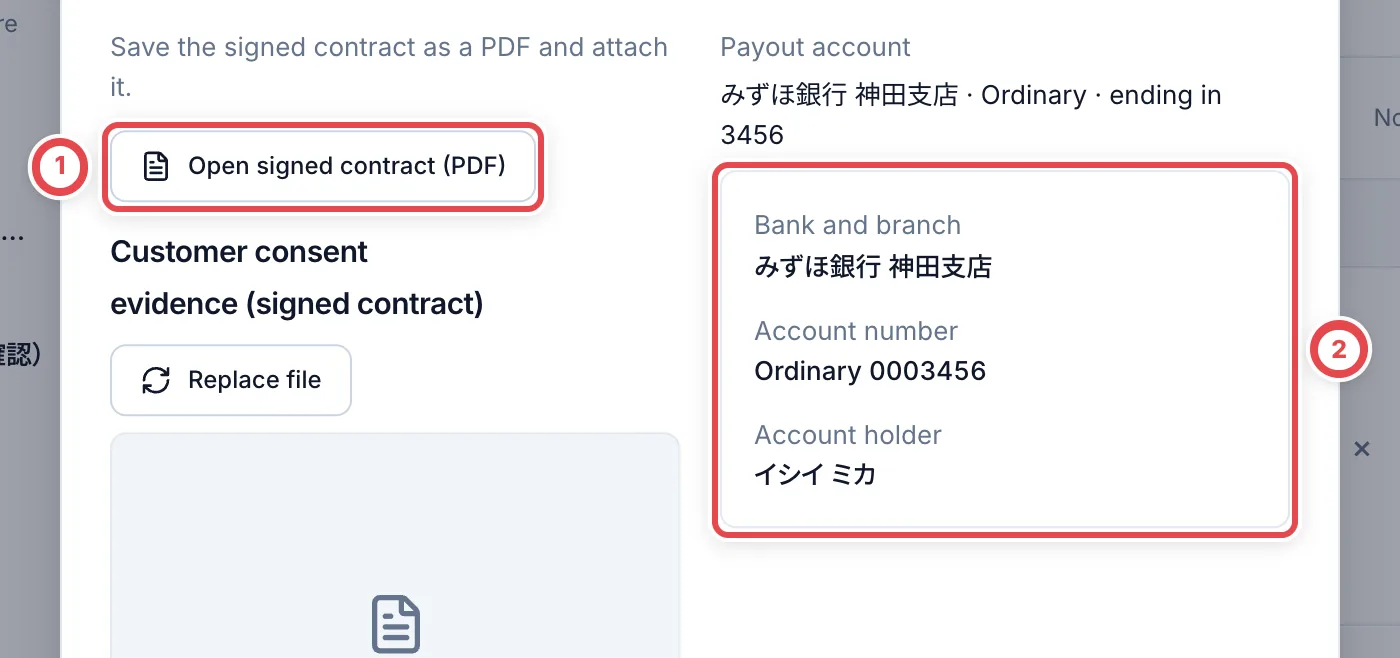 Open the signed contract at ① and check the account at ②.
 If the button instead records only the purchase, such as **Record acceptance of N pieces**, the payout member submits it in the next step. Attaching the contract alone does not submit a payout. If you change the account, show its details again and check the current account.
### 3. Continue the payment
If the payout is not submitted, **Next step** shows ① **Submit the payout request**. Open submission with ②, check the signed contract, amount and account, and submit. If **Confirm and submit** already submitted it, follow the payment's current status. When approval is required, another member approves it; then come the bank transfer, recording the result and recording receipt. See steps 2–5 of [Payouts](/en/guides/purchase/payouts).
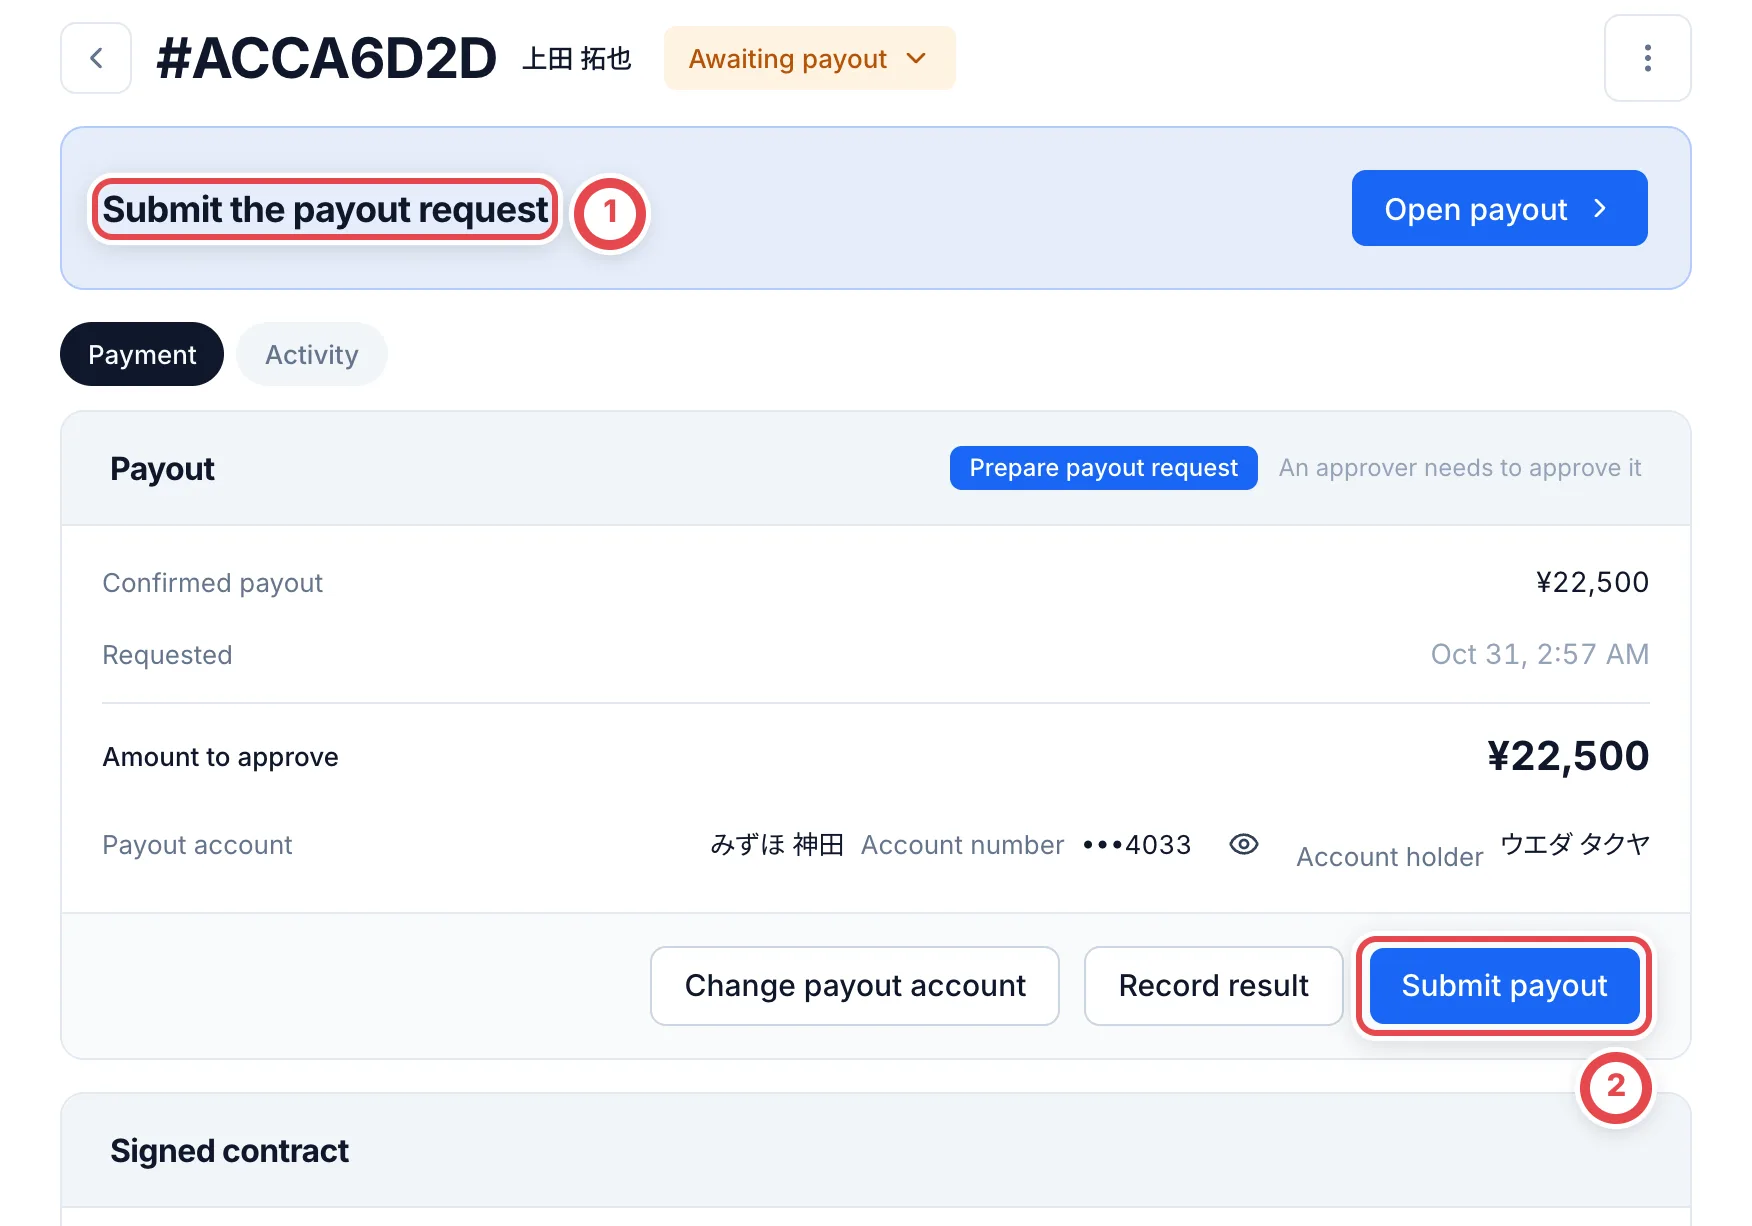 A deal paid by bank transfer becomes **Purchased** when you record the transfer result as successful. Tell the customer at the counter when to expect the transfer.
## When the customer calls for staff
When the customer taps 「スタッフに相談する」 (Talk to staff) on their screen, their screen stops at 「スタッフがまいります」 (Staff will be with you shortly) and they can't go further. On the staff screen, **Next step** becomes **The customer is asking for staff**. Go to the customer and hear what they need.
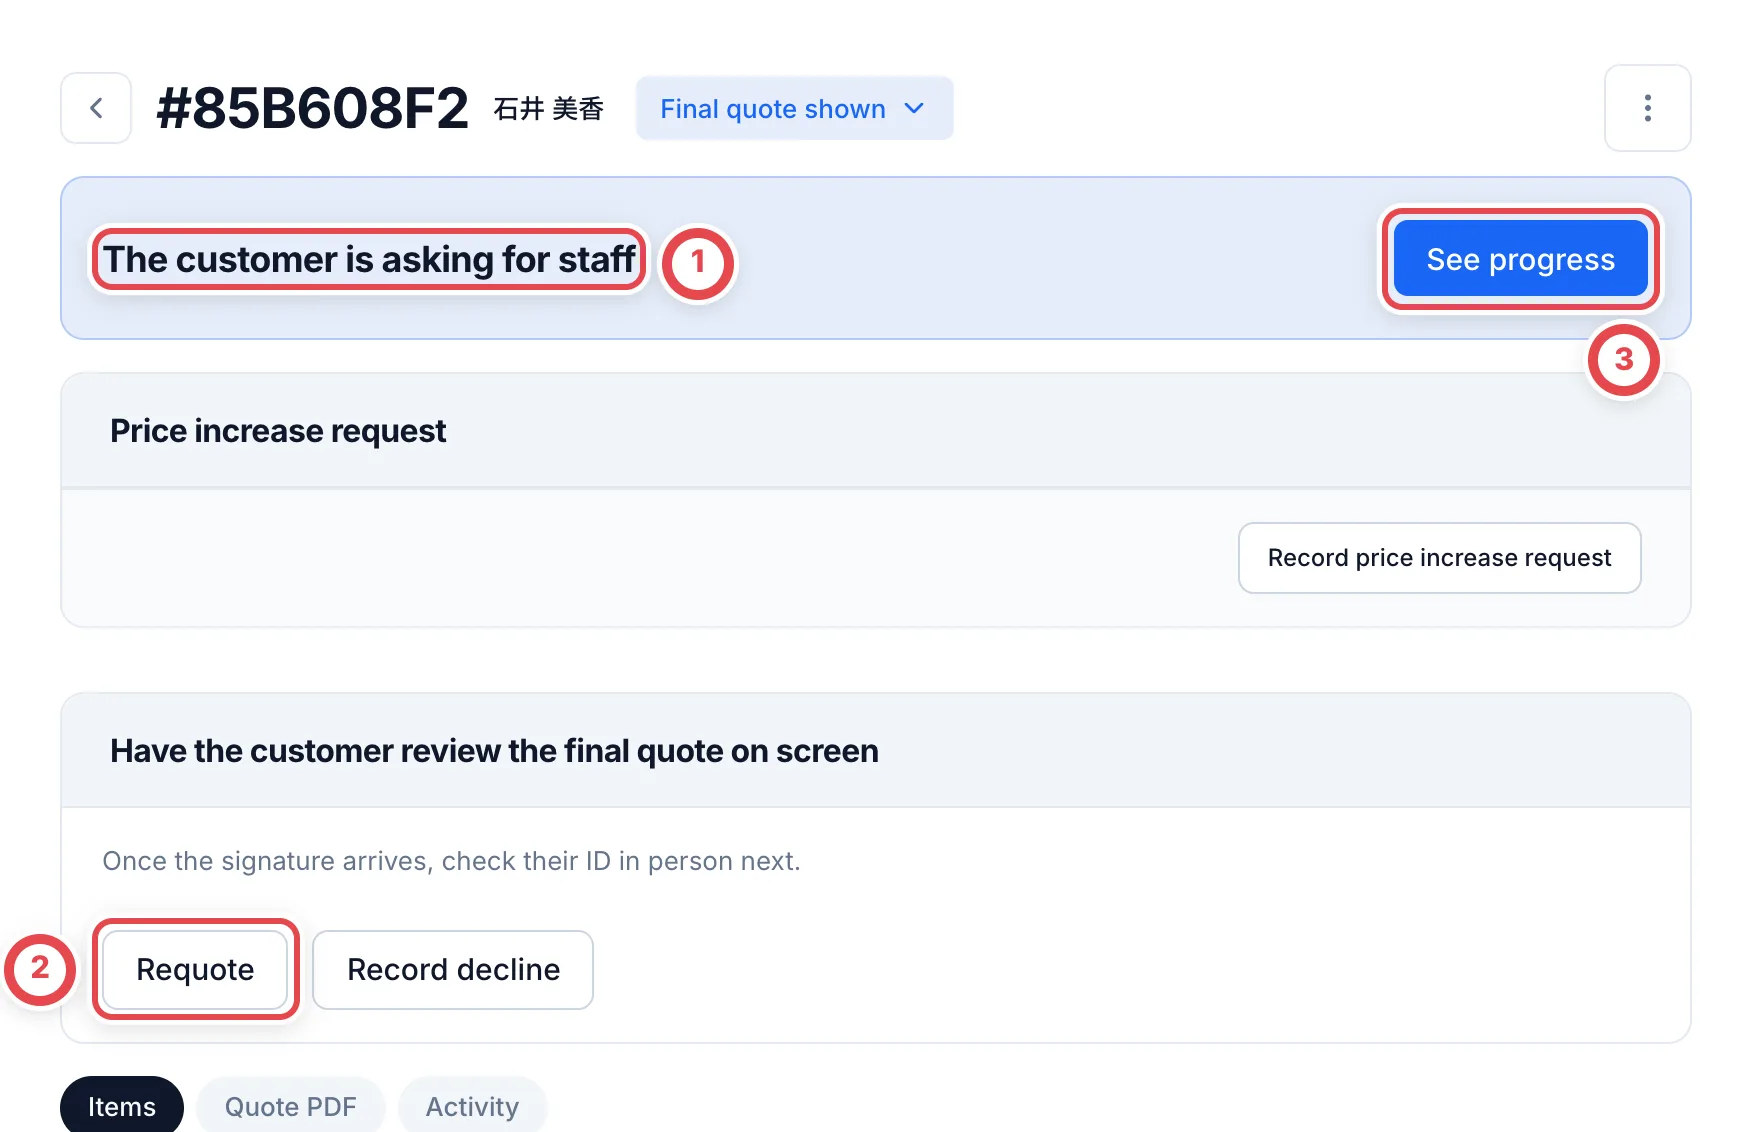 When ① appears, speak to the customer. Use Requote at ② to change the quote or ③ to see progress.
| What the customer says | What to do |
| ----------------------------------------------- | ----------------------------------------------------------------------------------------------------------------------------------------------------- |
| They don’t accept an amount or a condition note | Use **Requote** to change the final appraisal and present a new quote (steps below). |
| They want to keep some of the cards | Exclude those cards in a requote, then obtain agreement and a signature for the revised quote. |
| They are fine after your explanation | A consulting session cannot continue as-is. Under **See progress**, use **Regenerate QR code** for a phone or **Show again** for a registered tablet. |
| They won’t sell today | Follow “When the customer keeps all the cards” below: return the items and record the decline. |
To change the amounts:
:::warning
**Requote** creates a draft of the final appraisal as soon as you click it. No confirmation appears. Click it only once you have decided to change the amounts.
:::
1. Ask the customer to pause. For a registered tablet, use **See progress → Cancel the screen** to return it to standby.
2. Click **Requote** and edit the final appraisal. Condition notes also appear on the customer’s screen.
3. Confirm the saved amounts and quantities and the final quote PDF.
4. Present the new quote with **Show to the customer**, as in step 4. For a phone, ask the customer to scan the new QR.
5. Have the customer check the new quote and agree and sign again.
## When the customer keeps cards
:::warning
Confirm item changes or a full decline before the customer agrees and signs. The signed in-store screen does not show **Requote** or **Record decline**. If a change or decline is needed after signing, stop before registering the purchase or payment and consult the shop manager.
:::
### When the customer keeps some of the cards
The registration dialog does not let you remove cards after the customer has signed. If the purchased items change, return to **Requote** before the customer agrees and signs.
In the final editor, use **Mark not purchasable** from each kept card’s three-dot menu, save, and present the revised items, quantities and amount. Obtain agreement and a signature for that quote before steps 6–7. Hand the kept cards back and check the items with the customer.
### When the customer keeps all the cards
When the customer decides not to sell today, hand all the cards back. Ask the customer to stop and close their screen. For a registered tablet, use **See progress → Cancel the screen** to return it to standby.
Click **Record decline**. If you use the **Record another response** menu, choose **Record a full decline and hand everything back**. Enter the reason at ①, confirm at ② that every item has been handed back, then click ③, **Record full decline**. This records both the full decline and the in-store hand-back and ends the deal. Shops that do not use online purchasing can also record it.
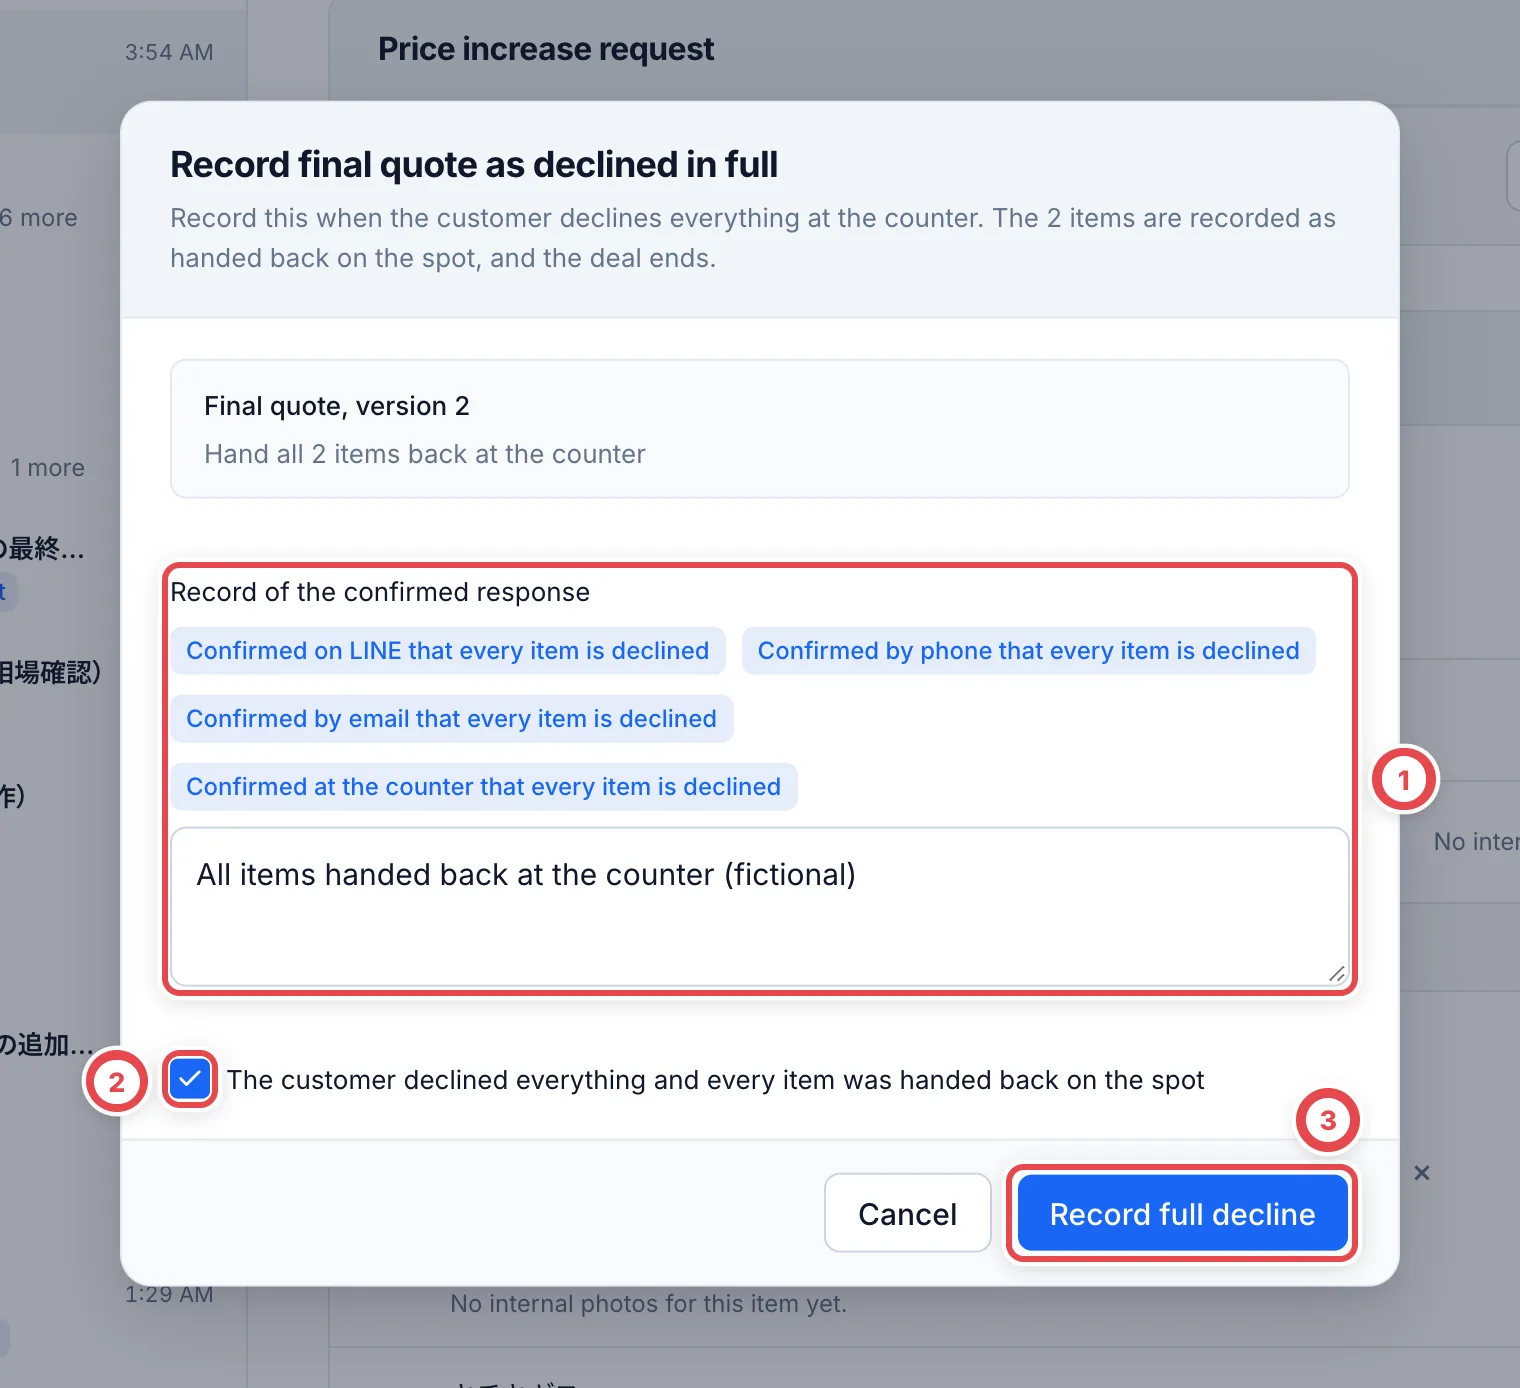 Reopen the deal and confirm it has ended with no next action. This operation creates no inventory or payout.
 ## Customers under 18
When a customer enters a date of birth under 18 on their screen, it stops at ① 「スタッフにお声がけください」 (Please speak to staff). On the staff screen, **Next step** becomes **The customer is asking for staff**.
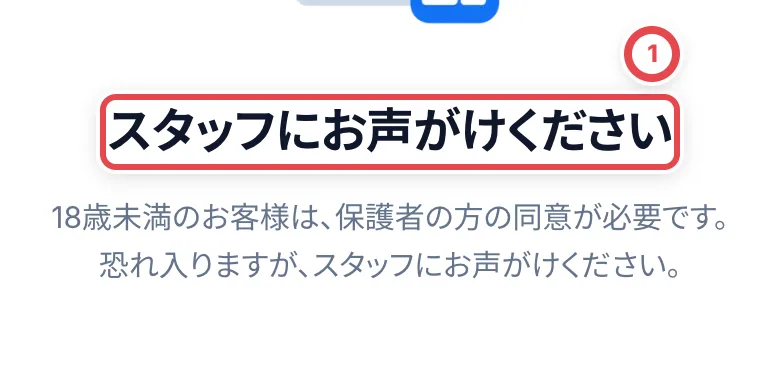 The counter screen in Toreca Cloud can't take a purchase from a customer under 18, and it has no steps for getting a guardian's consent. Hand the cards back and record the decline as described under [When the customer keeps all the cards](#when-the-customer-keeps-all-the-cards). Follow your shop's own rules for buying from customers under 18, and check with your admin.
## Business customers
When a company or shop brings cards in, you can't use the counter screen (the customer's smartphone or a shop tablet). If they try to send it, their screen shows 「法人のお取引は、この画面ではお受けできません。スタッフにお声がけください」 (Business deals can't be taken on this screen. Please speak to staff). The in-person ID check can't be used for business customers either.
Buy from business customers with the steps for buying with an invoice. See [Business deals and invoices](/en/guides/purchase/corporate-deals).
## When email is sent and how to check it
| Action or timing | Customer email | Staff check |
| ------------------------------------------------------------------ | --------------------------------------------------------------------------------------------------------------- | ------------------------------------------------------------------------------------- |
| Visit booking, change or cancellation | Booking notices follow the booking notification settings and recipient | Check the booking and address; see [Visit bookings](/en/guides/purchase/reservations) |
| Displaying a store quote, photographing ID, agreement or signature | These actions do not send email | Check progress and the signed contract on screen |
| Recording cash handover or a completed transfer payment | Issues a purchase statement; queues email if automatic sending is enabled and the customer has an email address | Check the recipient and history under **Purchase statement** |
| **Email → confirm recipient → Send** | Queues an email with the statement PDF to that recipient | Verify the address before sending |
| Reissuing with corrected records | Does not automatically resend it | Check the new statement, then email it explicitly |
In **Settings → Payments → Purchase statement email**, choose automatic sending after payment or manual sending from the deal. Customer email is optional. Entering an address does not send anything by itself, and the signed contract is not automatically attached to the email.
### If an email has not arrived
1. Confirm payment is complete and a statement exists. Signing alone does not trigger a statement email.
2. If there is no history, check the customer address and automatic-email setting. Adding an address or changing the setting later does not resend past statements automatically; send the required statement manually.
3. If pending or sending, avoid sending another copy. If it stays unchanged, give an admin the deal number, statement number and displayed status.
4. If failed, check the recipient. Temporary service failures are retried; an invalid address needs correction. Ask an admin about persistent failures.
5. **Sent** means the email service accepted it, not that it reached the inbox. Check the recipient, spam folder and receiving restrictions; confirm with the customer before resending.
Do not record payment again to fix a missing statement or email. Issue and send a missing statement from the paid deal's **Purchase statement** section.
### Applying corrections after a statement was issued
Reissuing is not part of the normal completion steps. If you correct a name or item details in the secondhand ledger, or a mistake in the shop information, open **More purchase statement actions** at the top right of **Purchase statement**, then choose **Reissue with corrected records**. Correct the source record first, then enter the reason for reissuing.
The previous statement is withdrawn and a new number is issued. The payment record stays unchanged. To give the customer another copy without changing its contents, use **Save PDF** or **Email** instead of reissuing.
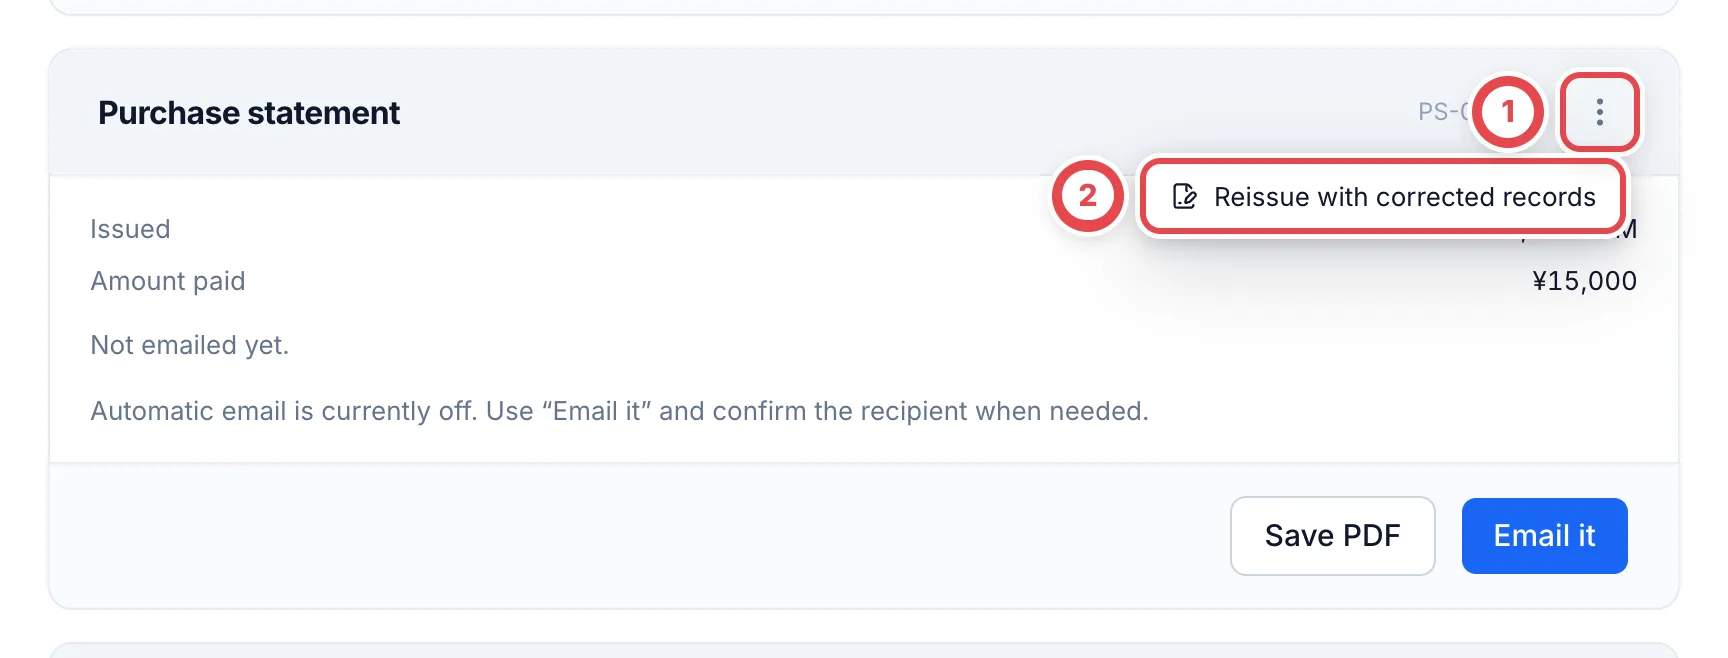 Use ① to open the menu; ② reissues after correcting the source records.
## If something goes wrong
| What is happening | What to check and how to fix it |
| ------------------------------------------------------------------------------------------------------------ | --------------------------------------------------------------------------------------------------------------------------------------------------------------------------------------------------------------------- |
| **In store** doesn't appear under **Intake channel** | Ask your admin whether counter purchasing is enabled for your shop. |
| You can't choose a tablet under **Show to the customer** | Register the tablet under **Settings** › **Counter tablets** (see [Counter tablets](/en/guides/purchase/counter-tablets)). You need the **Manage settings** permission. Until then, you can use **Customer's phone**. |
| The customer sees an invalid link or QR message | It has expired or been invalidated by regeneration or a deal/quote change. Check the current deal and start a new confirmation with **Show to the customer**. |
| The customer sees 「このQRコードは使用済みです」 (This QR code has already been used) | Open it in the first phone’s browser. To switch devices or browsers, ask staff to regenerate the QR. |
| 「この端末では別のお客様が確認中です」 (Another customer is reviewing on this device) | Wait until the previous customer finishes, then send it again. If it never finishes, click **Cancel the screen** on the previous deal. |
| The customer's screen shows 「見積の内容が更新されました」 (The quote was updated) | You edited the final appraisal after showing it. Show it again from the staff screen. |
| You can't record the ID check | You need the ID type, number, expiry date, and the confirmation checkbox. Also check that the customer's name, date of birth, occupation, and address are all filled in. |
| **Register the purchase** is missing | Check **Next step** at the top. Registration becomes available after the customer signs and staff complete the ID check in section 6. |
| 「営業中のレジがありません」 (No register is open) and you can't click | Start a register in cash management, then click 「開始したレジを再読み込み」 (Reload started registers). |
| 「グレードが決まっていないため相場を取り込めません」 (No grade is set, so the market price cannot be loaded) | The ungraded card has no grade. Enter the reference price by hand, or set the default grade for single cards under **Settings** → **買取掛け率** (Buy rates). |
| 「記録上の現金が不足しています」 (Recorded cash is short) | The register's recorded cash is less than the payment. Add cash and record the deposit, or ask an admin to record an exception. |
| The customer wants to sell only some of the cards | Follow [When the customer keeps cards](#when-the-customer-keeps-cards) and record only the cards you buy. |
| **Bank transfer** doesn't appear under **Payment method** | Your shop is set to cash only. Ask your admin to change **Settings** › **Payments** › **In-store payment methods** to **Cash and bank transfer** or **Bank transfer only**. |
| With bank transfer chosen, **Record acceptance of N pieces** can't be clicked | **Payout account** shows **Not added**. Add the customer's account with **Add payout account**. |
| **Open signed contract (PDF)** doesn't appear | The customer hasn't signed on the counter screen yet. Have them sign in steps 4 and 5. |
| **Submit payout** can't be clicked | The consent evidence (the signed contract) isn't attached. Attach it with step 2 of [Pay by bank transfer](#pay-by-bank-transfer). |
| The customer's screen stays at 「スタッフがまいります」 (Staff will be with you shortly) | The customer tapped 「スタッフに相談する」 (Talk to staff). Go to [When the customer calls for staff](#when-the-customer-calls-for-staff). |
| The photography step is missing | Check the ID collection setting when the session started. A later setting change does not alter an active session; the same deal with an existing ID check does not request more photos. |
| Photos cannot be sent | Check the document type, required sides, absence of a personal My Number, and the 20 MB total. Switch to staff entry if camera, connection or reading-service problems persist. |
| The ID-check button is unavailable after signing | Check identity read/write permissions, a signature for the latest quote, and missing customer details. |
| An unstable connection is reported | Wait for connectivity. If the link expires, show it again. Reloading the page can lose unsent input. |
| The back of a My Number card was selected | Do not send it. Choose the front only, and never copy the personal number into notes. |
## Before and after an in-store purchase
Before a visit, check [Reservations](/en/guides/purchase/reservations). Shops using cash management also follow [opening, checking and closing registers](/en/guides/purchase/cash). For transfers, complete [submission through confirmation of receipt](/en/guides/purchase/payouts) before checking completion.
Market research requests are not used for store purchases. If a market price cannot be fetched, enter a reference price you have checked. In-store purchases do not request second reviews either. Find documents and record corrections under [Shared purchase tasks](/en/guides/purchase/common-operations). For a separate deal whose goods arrive by post, use [Online purchases](/en/guides/purchase/overview).
---
# Record an in-store ID check and add documents
Source: https://docs.toreca-cloud.com/en/guides/purchase/counter-identity
Staff can record an in-person check of the original ID without configuring an identity method first. After reception, open the customer's **Appraisal requests** or **Customer details** tab.
To allow document review for online deals, see [Identity verification methods](/en/guides/settings/identity). This setting is separate from in-person checks at the counter.
| Current situation | Next step |
| ---------------------------------------------------- | ------------------------------------------------------------------------------- |
| Just received the request and can check the original | Select the deal and click **Check in person** |
| The customer is photographing their ID or signing | Wait for completion, or switch to staff entry from **View confirmation status** |
| Verification is already recorded | Review the record and use **View or add documents** |
## 1. Select the customer and in-store deal
Open the customer from **Purchase requests** or **Customers**. Find **In-person identity verification** on **Appraisal requests** or **Customer details**. Select **Purchase for this identity check** at ①.
A single eligible deal is selected automatically. With multiple deals, match the deal number before choosing. Click **Check in person** at ②.
Viewing requires purchase, customer and identity read permissions; recording also requires purchase and identity write permissions. The section is absent for businesses, archived customers or customers without an eligible in-store deal.
## 2. Compare the declaration with the original ID
Check the name, date of birth, occupation and address against the original. If details are missing or wrong, use **Edit customer details (new tab)**, save, then close and reopen this dialog.
Choose **ID type** at ①. Enter **ID number** at ② and the expiry date below it. Never enter the personal number on a My Number card. Use the no-expiry option only when the residence card itself states it has no expiry.
Choose the type in ① and enter the number in ②. Confirm the original check at ③ and record it with ④.
### Optional entry from images
Use the optional image-entry section to choose photos or files: JPEG, PNG or WebP, up to 20 MB in total. For a My Number card, use the front only. Do not select the back or images containing its personal number or QR code.
Check the image confirmation and read the images to assist entry of the ID type, number and expiry date. **Compare and correct the results against the original before recording.** If reading fails, remove the images and enter the details manually. Reading an image alone does not complete verification.
## 3. Record as checked
Once you have compared the original with the person present, select the confirmation at ③ and click **Record as checked** at ④. The verification is linked to the selected deal. Reopen the page and check its timestamp and target deal.
The ID number is encrypted; only its last four characters appear in the record opened with **View or add documents**.
The expiry in the record's details is the verification result's expiry under the shop's identity policy. It is separate from the document expiry entered from the original ID. Check that verification is recorded for the correct deal when serving the same customer again.
### When the save result cannot be confirmed
If a connection interruption or similar problem prevents confirmation, the app automatically retries once with the same details. Wait while it is processing.
If the result still cannot be confirmed, your input is retained and **Retry with the same details** appears. Click that button. The fields remain locked so the same registration can be checked safely. You do not need to close the dialog and create another registration. After completion, check the record's timestamp and target deal.
If an input error is shown instead, correct the indicated field before recording again.
## 4. Review or add document images
After recording, **View or add documents** appears. Open that record to check its details, timestamp and documents. You can add images here even if you originally entered the check manually.
Match the documents to the same customer and verification before adding them. Never add a My Number card's back. Adding images does not automatically verify another deal.
For photos submitted on the customer's device, follow [Counter ID photos and the original-ID check](/en/guides/purchase/counter-photos).
Continue with [In-store purchases](/en/guides/purchase/counter). For approval of documents received online, see [Identity verification](/en/guides/purchase/identity).
## Troubleshooting
| What's happening | What to check and how to recover |
| ---------------------------------------------- | ---------------------------------------------------------------------------------------------------------------------------------------------- |
| The in-person section is missing | Check that this is an active individual customer with an eligible in-store deal and the required read permissions. |
| No deal is selected | Select by deal number. A stale link does not silently switch to another deal. |
| The customer is still photographing or signing | Wait, or use the photography fallback from the confirmation status to switch to staff entry. |
| Edited customer details still look old | Save the other tab, then close and reopen the identity dialog. |
| Images cannot be read | Retry or remove them and enter the details from the original. Images can be added after recording. |
| Image reading is busy | Wait before retrying. You can remove the images and enter details from the original manually. |
| Record is disabled | Check the required profile, ID type, number, expiry, original-check confirmation and write permissions. |
| The save result is unknown | Wait for the automatic retry, then use **Retry with the same details** if shown. Check the saved record without creating another registration. |
---
# Counter ID photos and the original-ID check
Source: https://docs.toreca-cloud.com/en/guides/purchase/counter-photos
Use this guide when customers photograph their ID on their phone or a shop tablet. When staff enter the original document's details themselves, use [Record counter identity checks and add documents](/en/guides/purchase/counter-identity).
Complete the collection setting and display the quote using steps 1–4 of [Start a counter purchase](/en/guides/purchase/counter). The customer accepts the quote and checks or enters their details before reaching document capture. Customer screens are in Japanese.
## 1. Choose the document and prepare the required sides
Choose the document under 「本人確認書類の種類」 (ID document type). Use still JPEG, PNG or WebP images, no more than 20MB in total for both sides. If HEIC conversion fails, take a new JPEG photo.
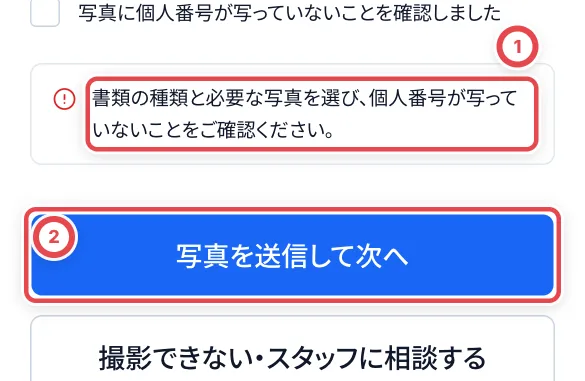 If ① appears, select the document and photos, check the confirmation and retry with ②.
| Document | Required photos | What to check |
| ---------------- | --------------- | ------------------------------------------------------------------- |
| Driver's licence | Front and back | Both sides even if the back has no amendments; use different images |
| My Number card | Front only | Never send the back, personal number, notification card or PIN |
| Passport | Photo page | Keep all four corners, the portrait and the text visible |
| Residence card | Front and back | Prepare a separate image of each side |
## 2. Check and submit the photos
Use 「写真・ファイルから選択」 (Choose a photo or file), or the device camera. Check the corners and text in each preview. Remove an incorrect photo with 「画像を削除」 (Remove image) and choose again. At ②, confirm 「写真に個人番号が写っていないことを確認しました」 (I have checked that no personal My Number is visible). Press ③, 「写真を送信して次へ」 (Submit photos and continue).
:::warning
Choose only the front of a My Number card. Do not submit an image containing the personal number; replace it first. Changing the document type clears the selected photos and the confirmation checkbox.
:::
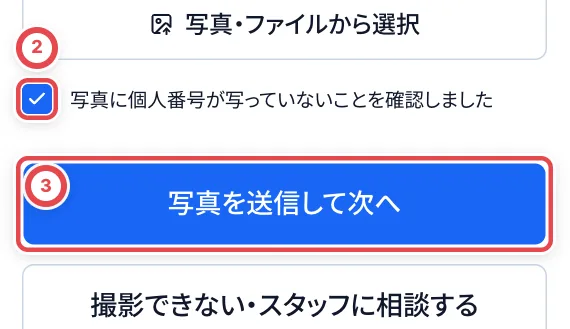 ### Driver's licence
Choose 「運転免許証」 at ① and select the front and back separately. Use ② and ③ above after checking the photos.
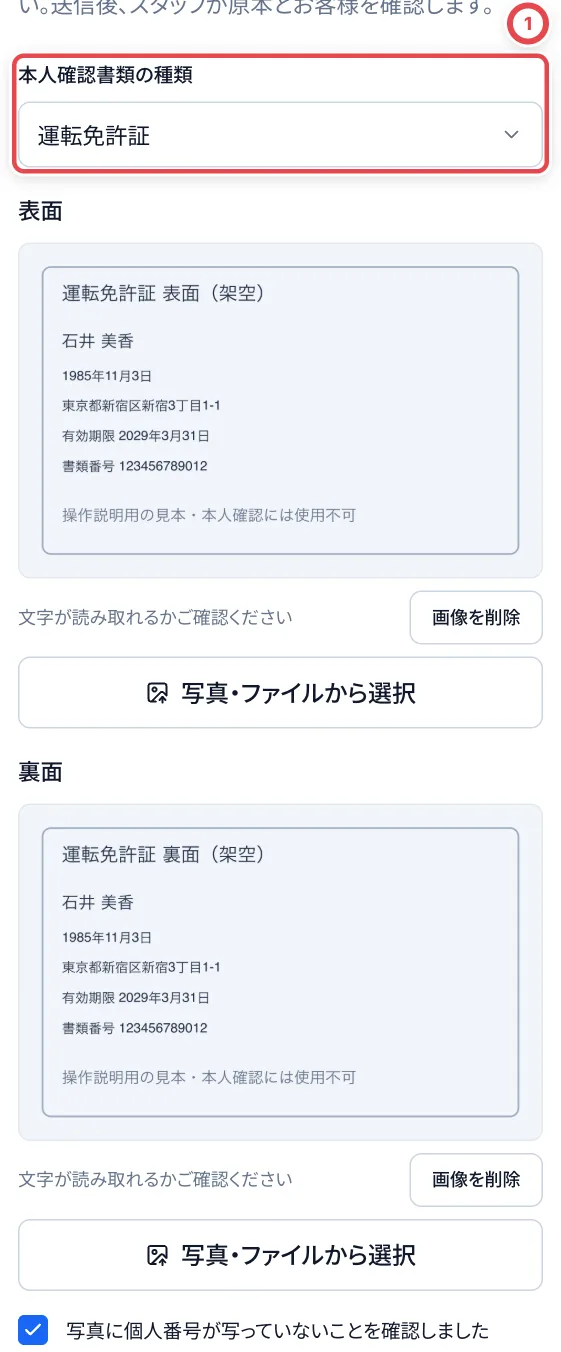 ### My Number card
Choose 「マイナンバーカード」 at ①. Only the front photo is requested; there is no back-side input. Use ② and ③ above after checking the photos.
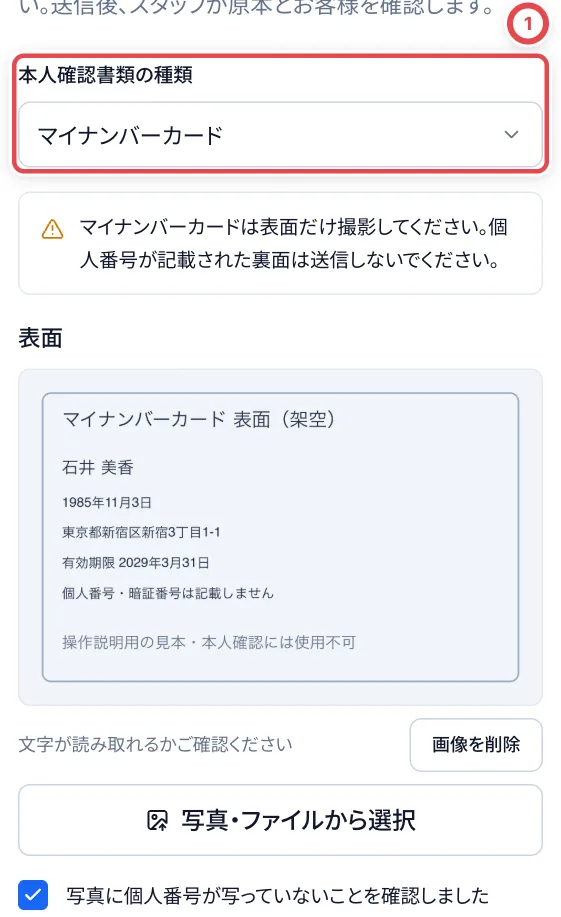 ### Passport
Choose 「パスポート」 at ① and select the photo under 「顔写真のページ」 (Photo page). Use ② and ③ above after checking the photos.
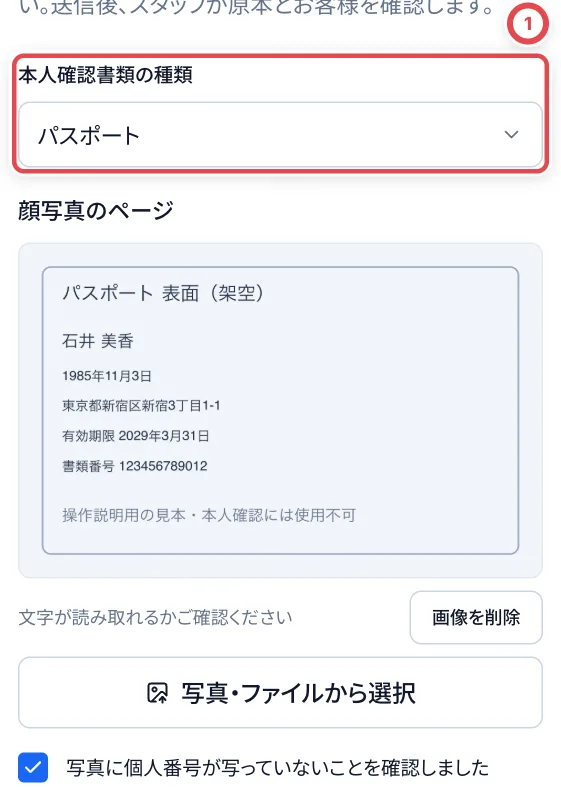 ### Residence card
Choose 「在留カード」 at ① and select separate front and back photos. Use ② and ③ above after checking the photos.
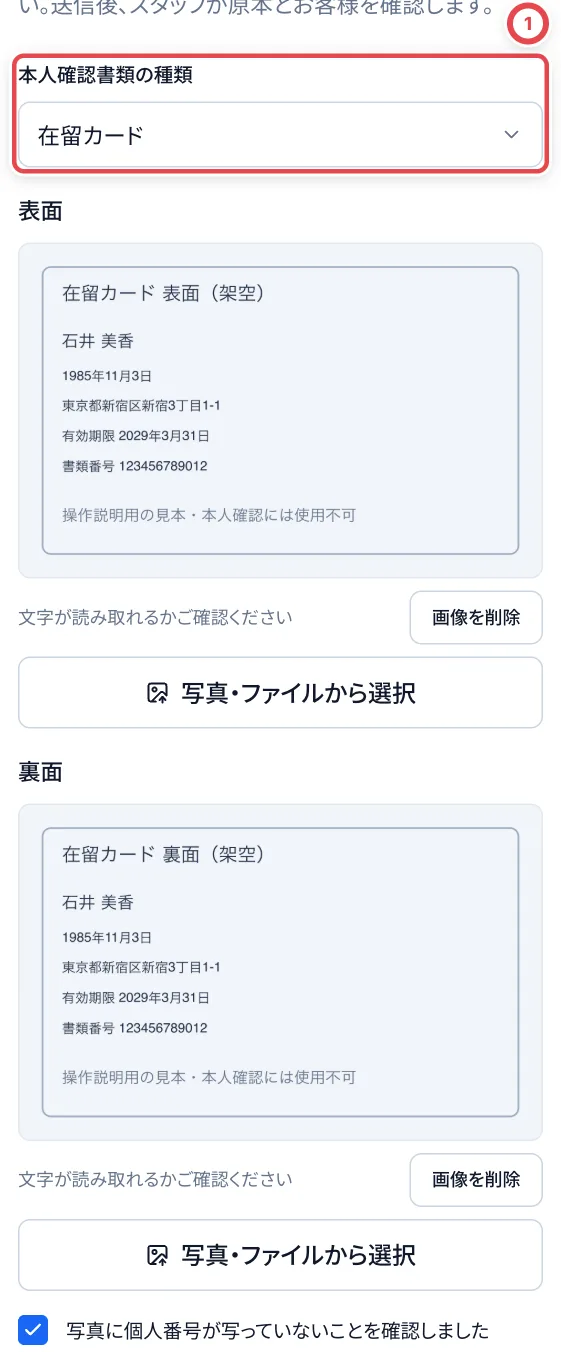 ### When the photos exceed 20MB in total
The error at ① means the photos have not been submitted. Remove the images, choose smaller photos, check the confirmation again and retry with ②. The 20MB limit applies to both sides together, not to each photo separately.
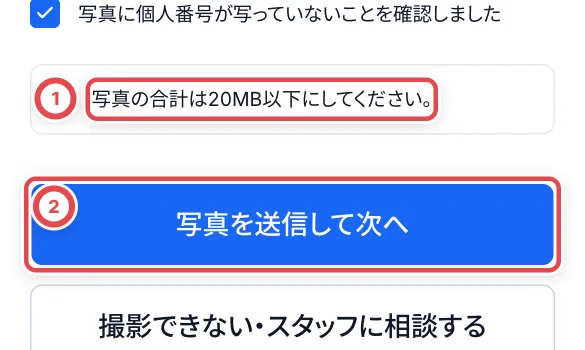 ## 3. Ask the customer to agree and sign
After submission, 「ご同意とご署名」 (Agreement and signature) opens. The customer reads the agreement, checks the checkbox and signs their name at ①. To start again, use 「書き直す」 (Clear and rewrite). Press ②, 「同意して送信する」 (Agree and submit).
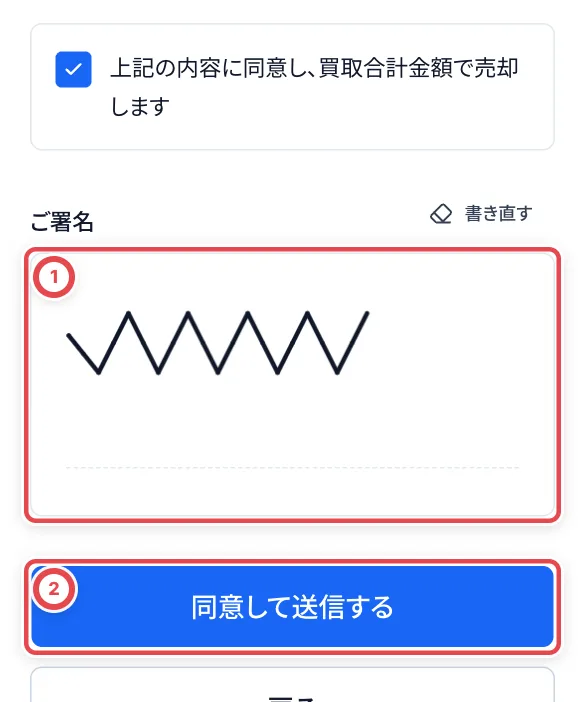 「送信しました」 (Submitted) completes the customer's entry. **Staff have not yet completed the identity check.** Ask the customer to show the original document.
 ## 4. Staff compare the photos, original ID and customer
Open **Check in person** on the correct deal. At ①, **ID photos submitted by the customer**, compare the photos with the original document, the person present and their declared name and address. Button ②, **Fill from the submitted photos**, helps fill the document type, number and expiry date. Check and correct every reading against the original.
### Check a driver's licence
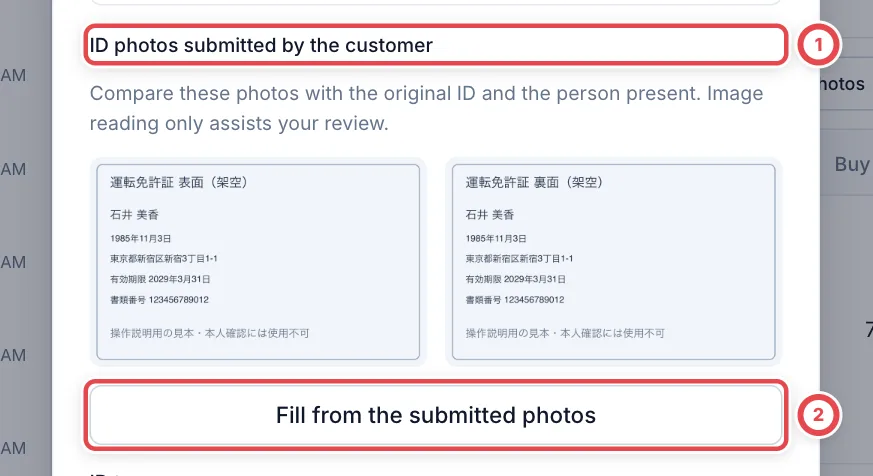 ① shows both submitted sides. ② assists data entry; it does not complete the identity check.
### Check a My Number card
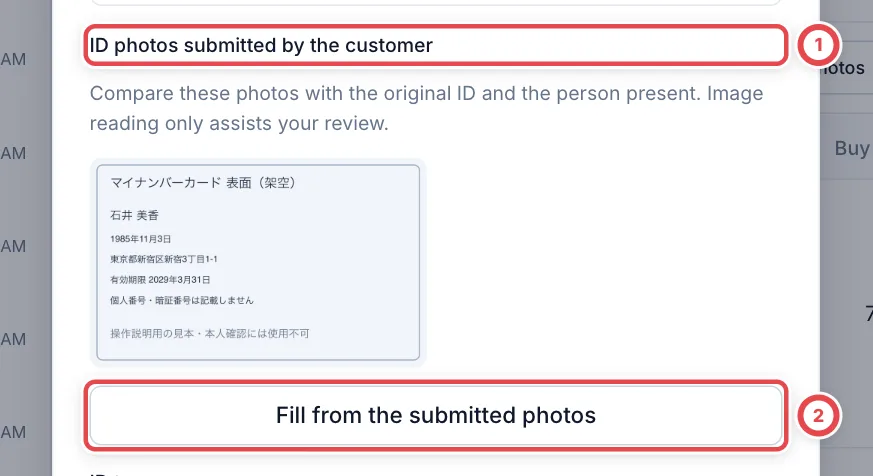 ① shows only the front. Using ② does not add a field for the personal My Number.
### Check a passport
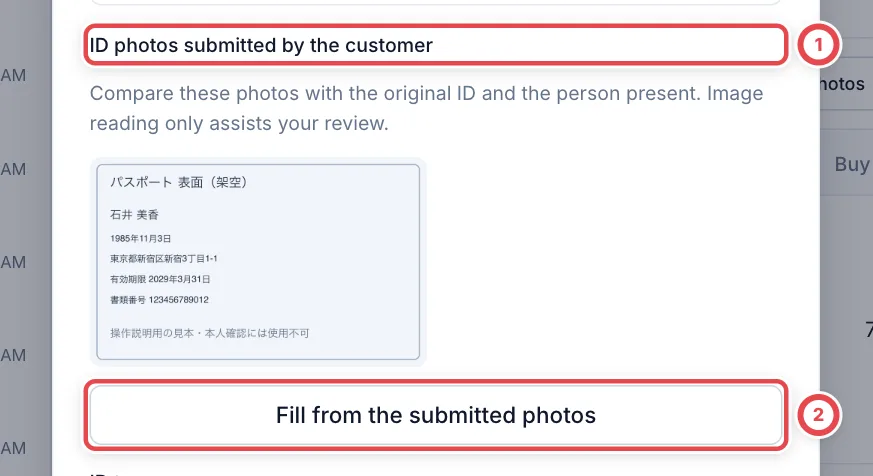 Compare the photo page at ① with the original, and check the reading from ②.
### Check a residence card
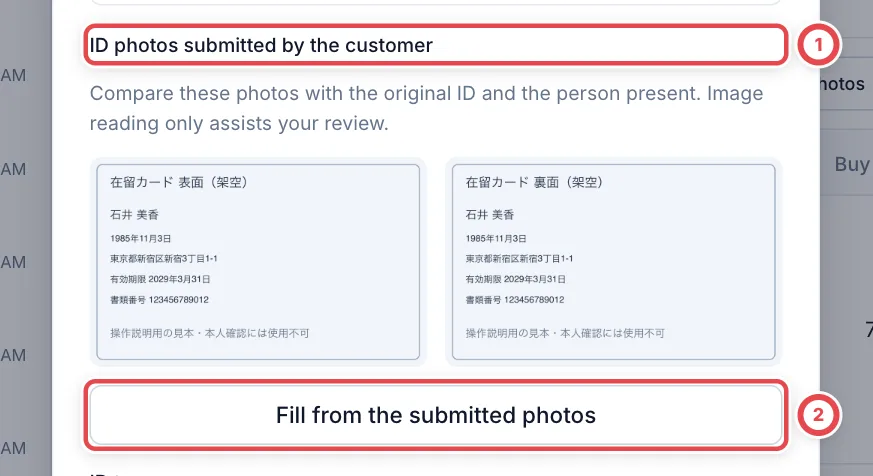 Compare both sides at ① with the original. Also check the expiry date read by ②.
## 5. Record the check and continue the purchase
Check the type at ① and the number and expiry date below it against the original ID. For a residence card, select the no-expiry confirmation only when the card itself explicitly has indefinite validity. Once the details match, check ② and press ③, **Record as checked**.
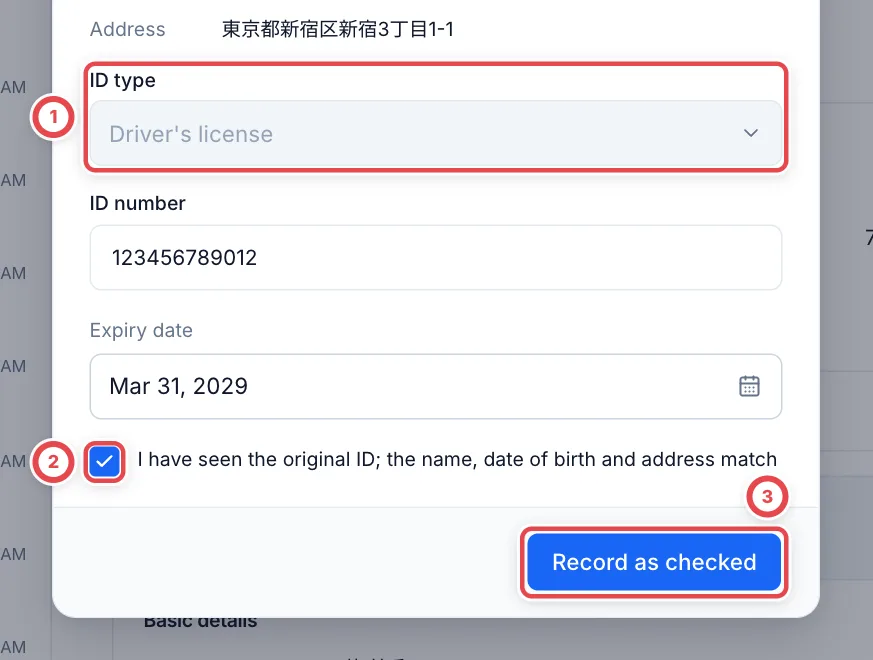 If the save result cannot be confirmed, wait for the automatic retry. If **Retry with the same details** appears, use that button to continue. Your input and selected images are retained. See [When the save result cannot be confirmed](/en/guides/purchase/counter-identity#when-the-save-result-cannot-be-confirmed).
Reopen the deal and confirm the recorded identity check and the next step for inventory and payment. Return to step 7 of [Start a counter purchase](/en/guides/purchase/counter).
 ## Troubleshooting
| What happens | What to check and how to continue |
| -------------------------------------- | ---------------------------------------------------------------------------------------------------------------------------------------------------------------------------------------------------------------------------------------------------------------------------------------------------------------- |
| Photos cannot be submitted | Check the type, required sides, 20MB total limit and confirmation checkbox. Use different images for front and back |
| Text is unreadable | Remove the image and take another photo. Check that text remains readable when enlarged |
| Connection or reading error | Keep the input and retry with the same photos. If the page says the photos are already submitted, continue to signing without submitting them again |
| The camera cannot be used | Press 「撮影できない・スタッフに相談する」 (Unable to photograph; ask staff). Staff open **See progress → Unable to photograph the ID?**, record a reason and switch this session to staff entry. Follow [the fallback steps](/en/guides/purchase/counter#switch-to-staff-entry-when-photography-is-unavailable) |
| Staff see an incorrect reading | Correct the fields against the original. If the customer's details are wrong, use **Edit customer details (new tab)**, save, then reopen the identity check |
| Wrong document type | Before signing, choose the type again and retake the photos. After signing, staff start a new session so the customer can photograph the correct document and sign again |
| Photos do not open | Close and reopen the identity check. Do not mark the check complete without seeing the photos |
| Signed, but cannot record the purchase | Check the staff identity record, signature for the latest quote, customer details and required permissions |
| Image reading is busy | Wait before retrying on the same screen. Avoid repeated clicks; enter the details from the original manually when appropriate |
| The same customer's next deal | Verification does not automatically complete another deal. Check the deal number before recording its identity check |
---
# Before serving customers
Source: https://docs.toreca-cloud.com/en/guides/purchase/counter-preparation
Before accepting an in-store purchase, check the shop you are working in, the device staff will use and the register used for cash payments. When ready, continue to the [In-store purchase workflow](/en/guides/purchase/counter).
## 1. Sign in and check the shop
[Sign in](/en/guides/getting-started/login), then click your name and shop name at the bottom of the sidebar. In ① **Organizations**, check that the shop you are working in has a checkmark. Select the correct shop if a different one is active.
To change the display language, use ② **Language** in the same menu.
## 2. Prepare the device staff will use
Open the console on the PC or tablet staff will use and check its internet connection. Staff use this console for intake, card registration, appraisal, recording the ID check and payment.
## 3. Open the register if your shop uses cash management
Open **Cash registers** in the sidebar and choose the register used for payment. If it shows **営業中** (Open), it is ready. If it shows **未開始** (Not started) or **次回開始前** (Before next opening), click **レジを開始** (Start register).
1. Check ① **営業日** (Business date).
2. Count the cash in the register and enter the count for each denomination in ② **開始時の現金** (Opening cash). Empty denominations count as 0, and the total appears in the last row of the table.
3. If the amount differs from the previous carryover, explain why in ③ **メモ・確認事項** (Notes).
4. Click **レジを開始** (Start register) and check that the register shows **営業中** (Open).
You do not need to restart an open register for each customer. If a previous business day is still open, close that session first. If there is no register, cash management is missing or you need to top up cash, see [Cash management and closing](/en/guides/purchase/cash).
## When using in-store purchases for the first time
If the shop has not been set up, ask the manager to confirm:
- The secondhand dealer license information is registered.
- In-store purchases are enabled and the payment methods have been chosen.
- If the shop uses bank transfers, someone is responsible for approval, execution and recording results after submission.
Standard staff can complete cash handover once the shop's approval rules are satisfied. For bank transfers, staff prepare the account, postage, consent evidence and PSA numbers and submit the request. Ask an authorized colleague to return a submitted request before changing its contents.
## When ready
Continue to **Add the purchase request and add the cards** in the [In-store purchase workflow](/en/guides/purchase/counter). For customers with a reservation, check them in through [Visit reservations](/en/guides/purchase/reservations) to open the transaction already created for them.
## If something goes wrong
| What you see | What to check |
| -------------------------------------- | ------------------------------------------------------------------------------------------------------------------------------------------------------------------------ |
| The shop is missing from Organizations | Ask the manager whether your invitation and membership are complete |
| You cannot open the register | Check for a previous session that is still open and whether you have permission to operate cash management (see [Cash management and closing](/en/guides/purchase/cash)) |
---
# Counter tablets
Source: https://docs.toreca-cloud.com/en/guides/purchase/counter-tablets
A counter tablet is an iPad or similar device you keep in the shop so customers can review the final quote during a counter purchase. The customer checks the purchase on the tablet, then enters their details, agrees and signs. You can also use the customer's own smartphone, so you can run counter purchases without registering a tablet.
For how to run a deal itself, see [Start a counter purchase](/en/guides/purchase/counter).
## What you need
- Only members who can manage settings (owners and admins) can register or change tablets. Other members can view the list
- An iPad or similar device with a camera, and an internet connection to Toreca Cloud
- The site where you will keep the tablet (optional)
## The steps and tablet statuses
| Step | What you do | Tablet status |
| ---- | ---------------------------------------------- | ----------------- |
| 1 | Register the tablet and show the QR code | Awaiting scan |
| 2 | Scan the QR code with the tablet's camera | In use |
| 3 | Show the final quote on the tablet from a deal | In use |
| 4 | Register again or stop it (if needed) | In use or Stopped |
If 10 minutes pass without the QR code being scanned, the status becomes **Not registered**. Click **Register again** to show a new QR code.
## 1. Register the tablet and show the QR code
Use **Copy** beside **Standby screen link** to reopen a registered tablet. If copying is blocked, select the URL and copy it manually. Opening this link on a different tablet does not register it.
Under **Settings** › **Counter tablets**, click **Register a tablet** at ①.
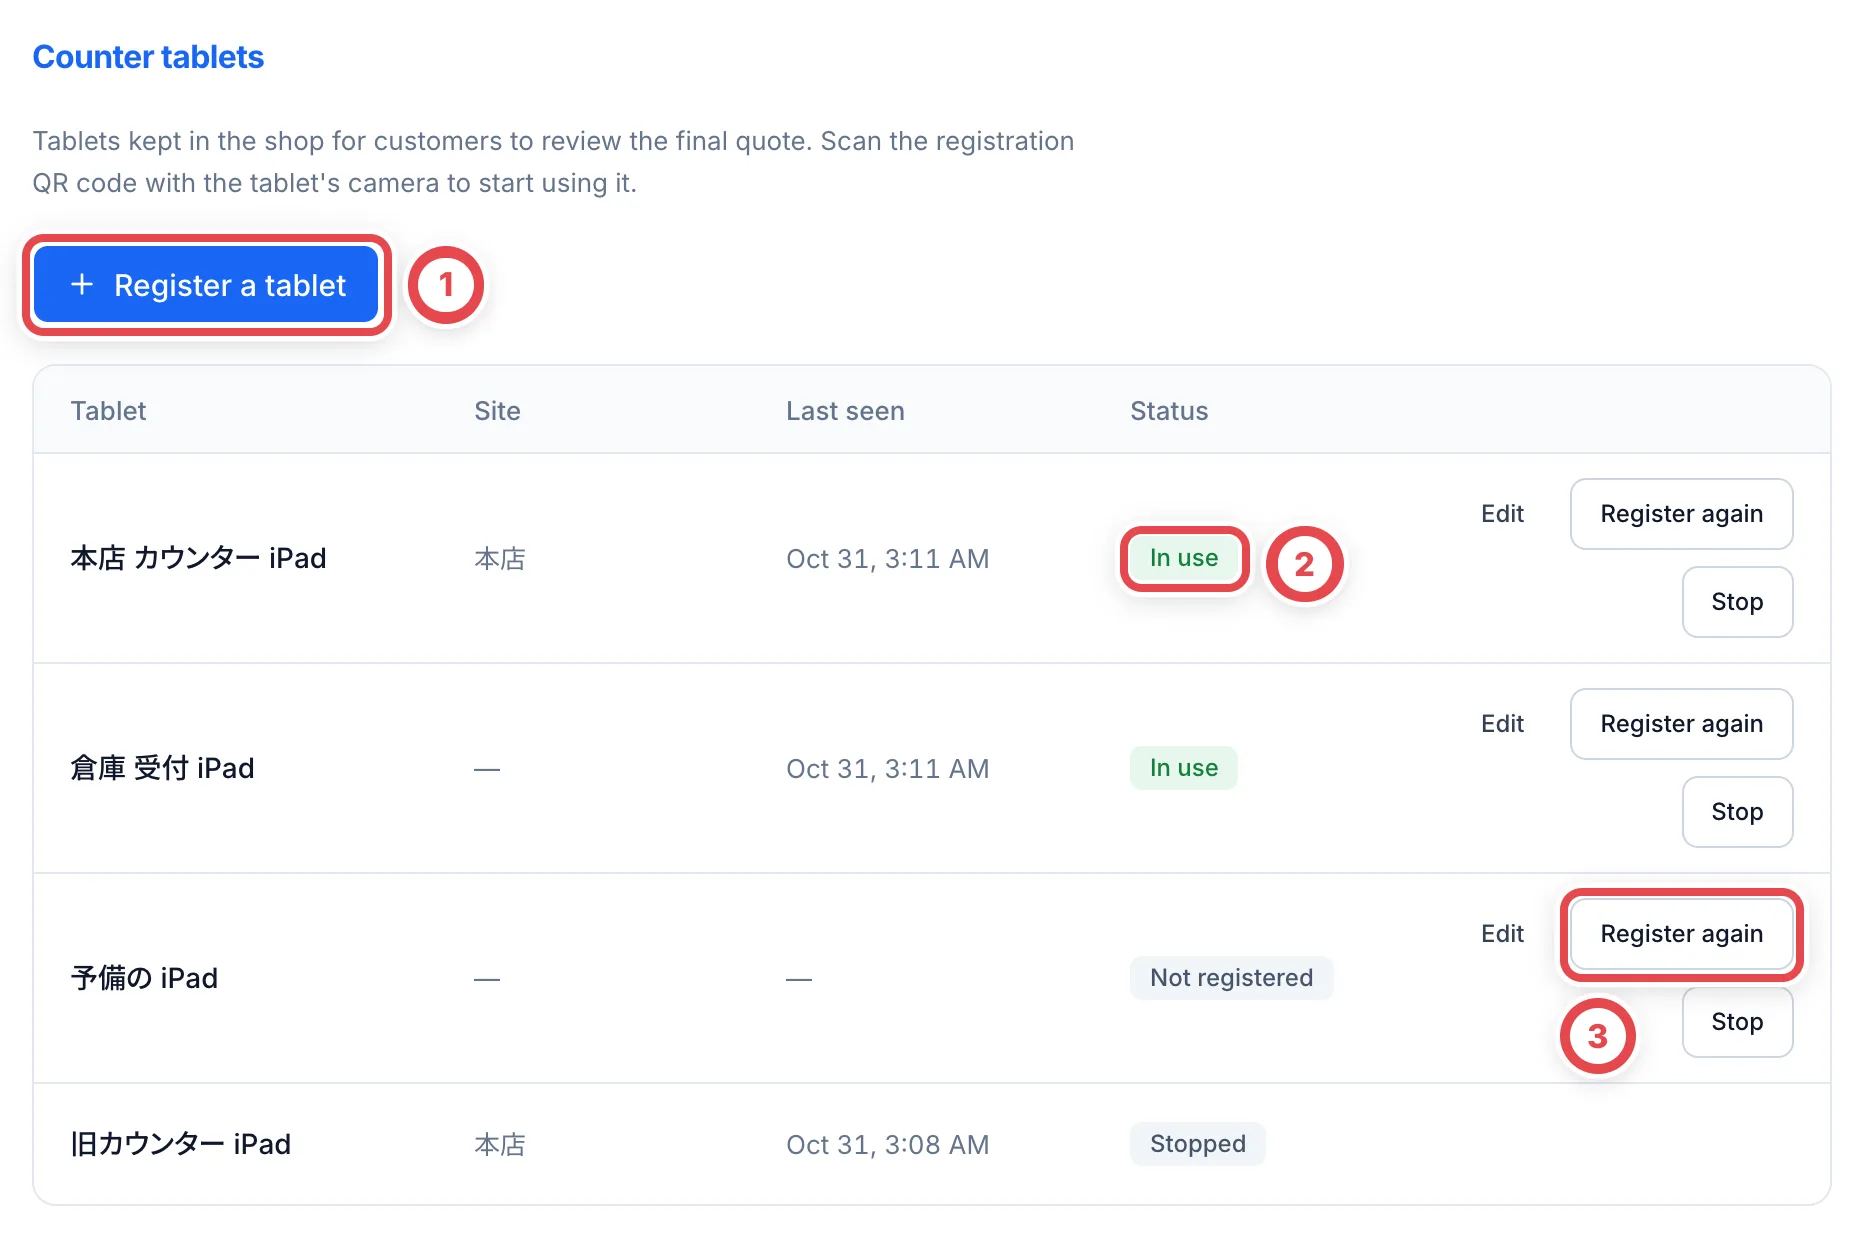 When **Register a counter tablet** opens, enter a **Tablet name** at ① (up to 60 characters) and a **Site** at ② (optional). The name appears when staff choose where to send a quote from a deal, so use one that tells them where the tablet is. Click **Show the registration QR code** at ③.
:::warning
**Show the registration QR code** adds the tablet to the list immediately.
:::
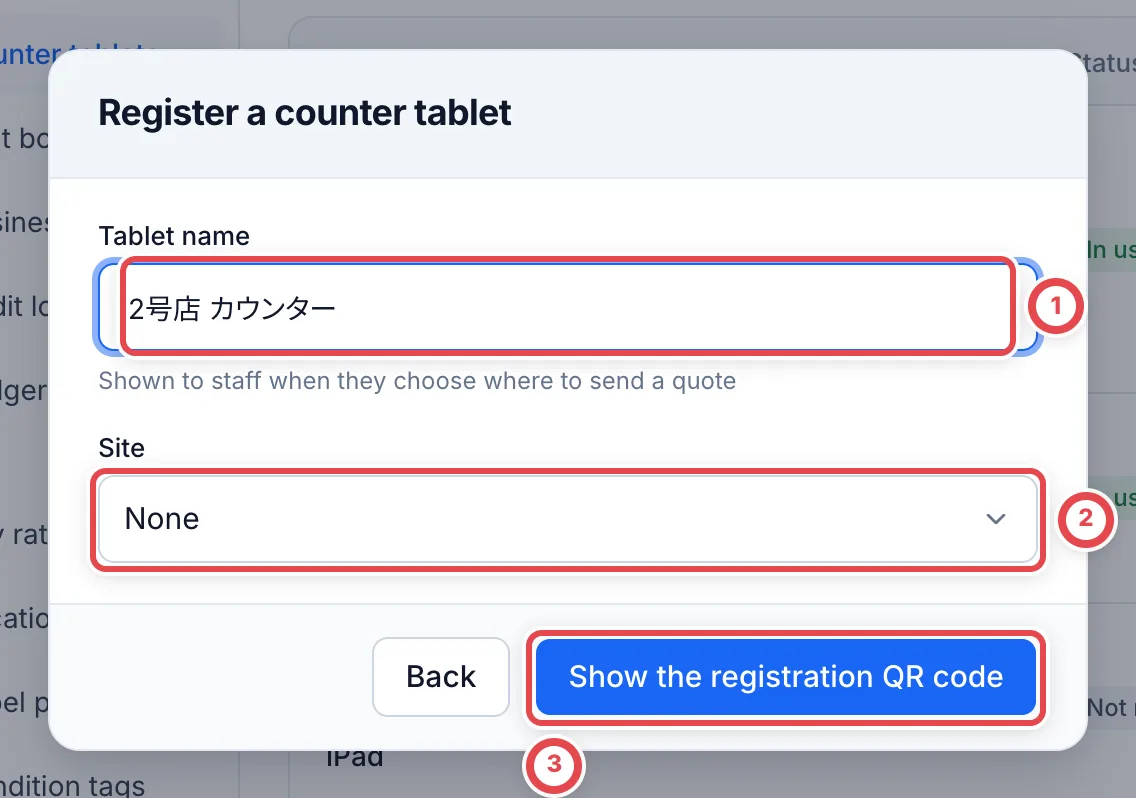 ## 2. Scan the QR code with the tablet's camera
**Scan with the tablet's camera** opens. Scan the QR code at ① with the camera of the iPad you are registering, and leave the page that opens on screen. That finishes the registration. Within a few seconds of the scan, this dialog closes by itself, a message confirms the tablet is registered, and the status in the list becomes **In use**.
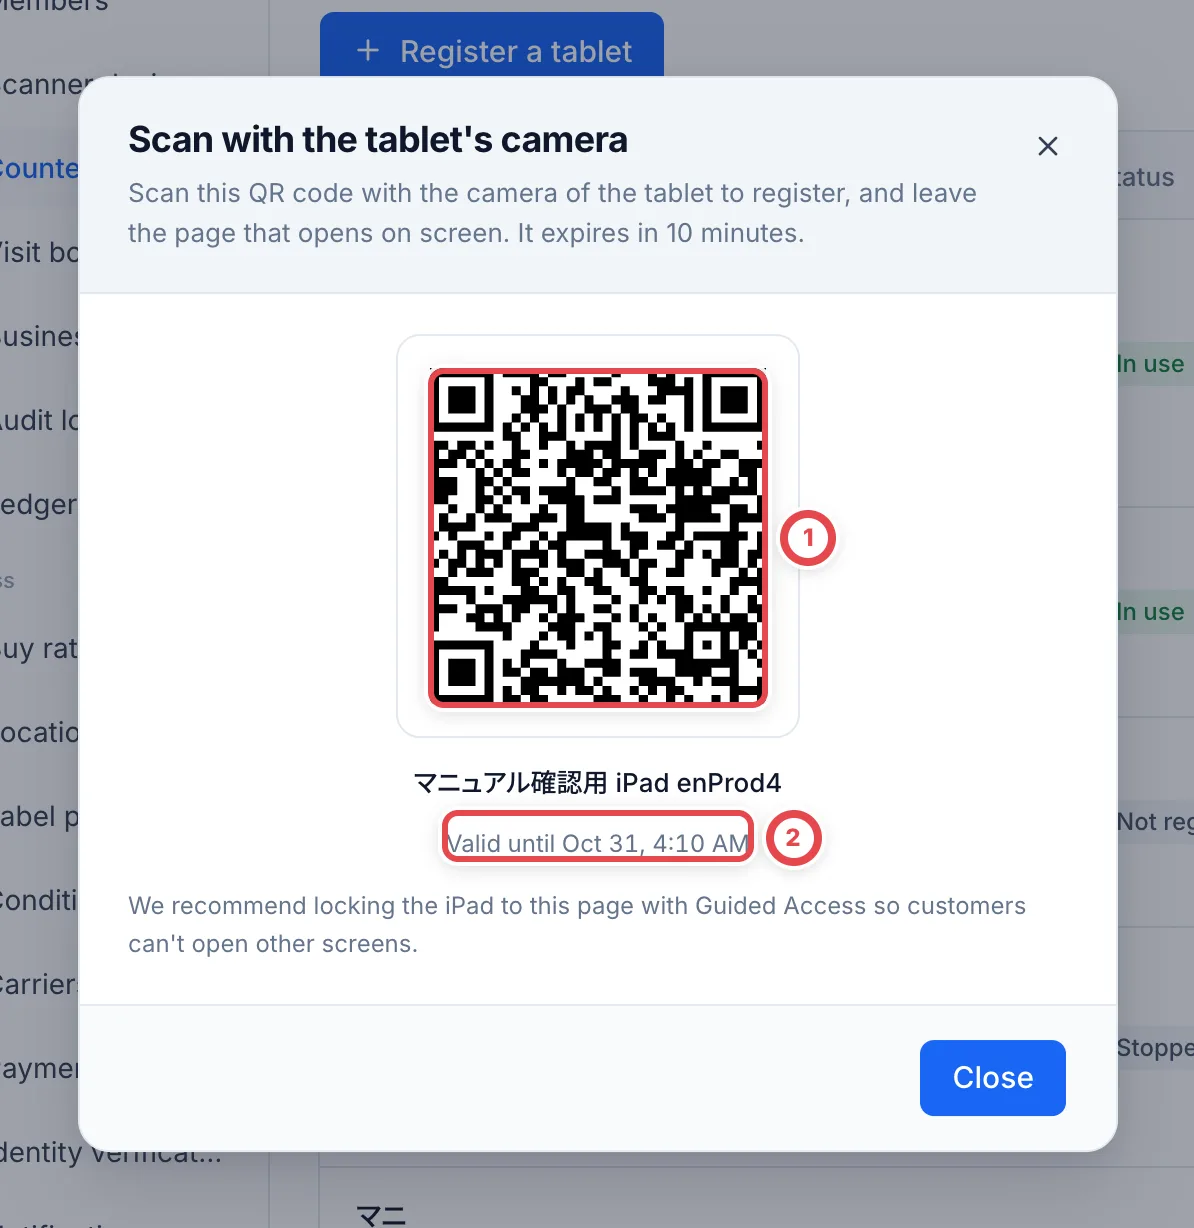 Scan ① with the iPad's camera. The code stops working after the time at ②.
- The QR code stops working 10 minutes after it is shown. It can be scanned only once
- If scanning is unavailable, copy the **Registration link** and open it in the tablet’s browser. It has the same expiry and single-use limit as the QR code
- If you close this dialog, the same QR code can't be shown again. If you close it before scanning, click **Register again** in the list to show a new one
- To stop customers from opening other screens, we recommend locking the iPad to this page with Guided Access
Once registered, the tablet shows 「いらっしゃいませ」 (Welcome) until a deal arrives.
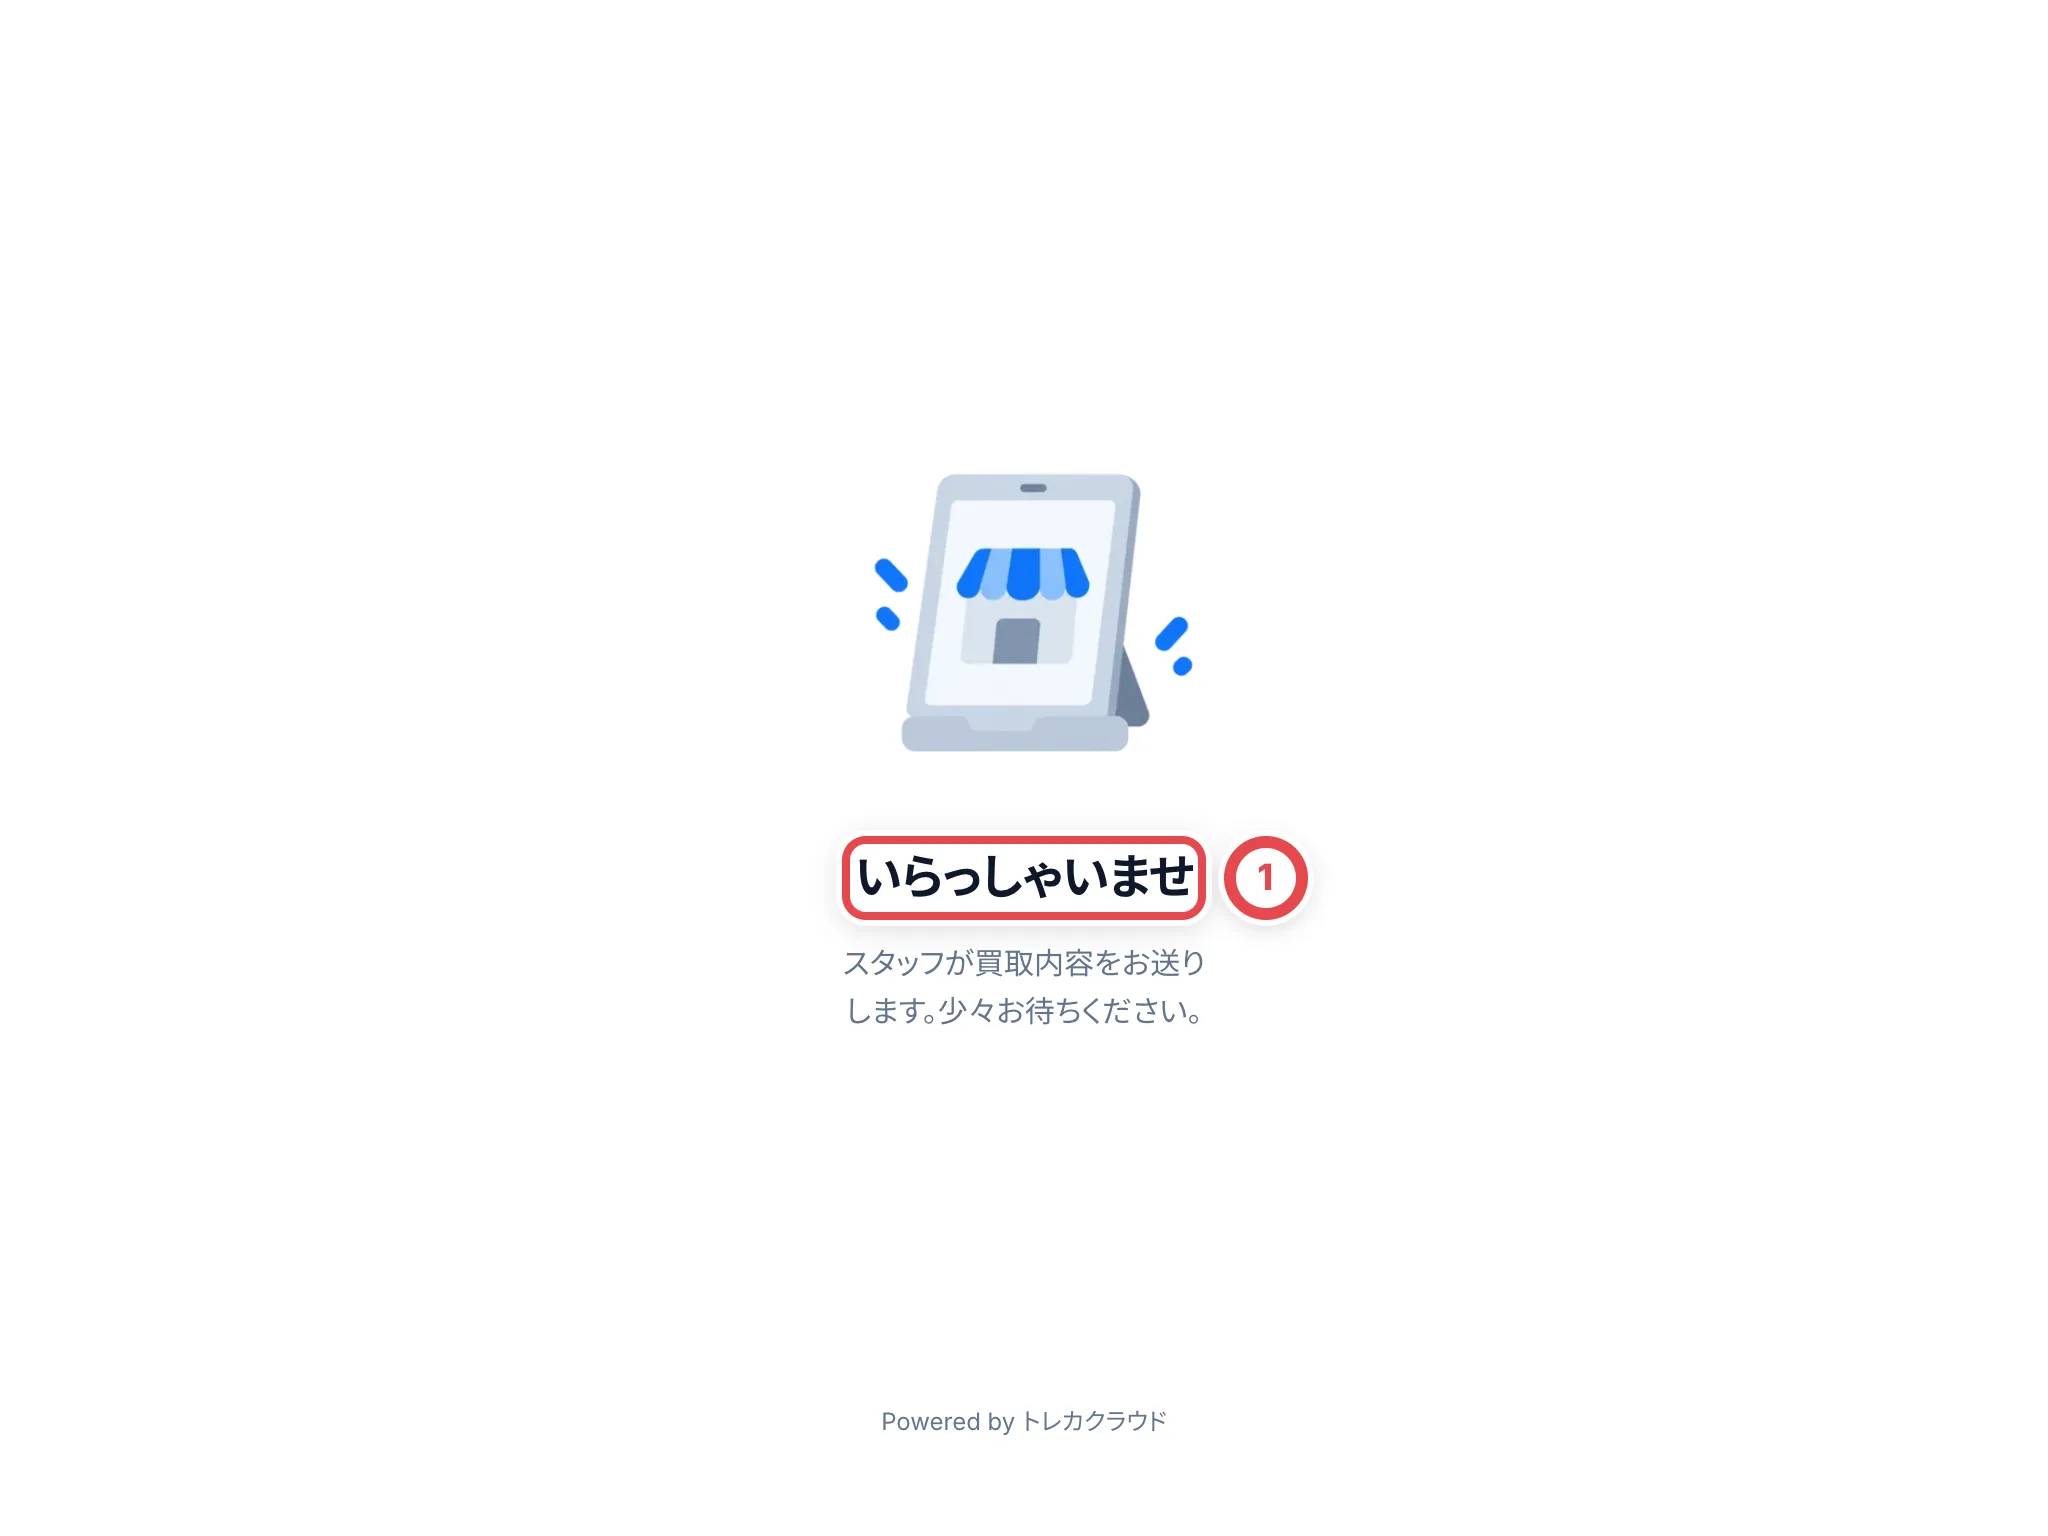 :::note
The customer screens are Japanese only.
:::
### Staff actions on the standby screen
Open **For staff** and choose **Sign in as staff** to open the sign-in screen. Tablet registration is separate from the staff account; signing in alone does not register a tablet.
Choose **Disconnect this tablet** and confirm to invalidate this browser’s connection. To use it again, choose **Register again** in settings and open its new QR code or registration link on this tablet. If a customer is reviewing a quote, finish that review from the deal before disconnecting.
## 3. Show the final quote on the tablet from a deal
Saving the appraisal revision opens the final quote PDF without a separate receipt confirmation. Check the items, quantities and amounts, then use **Show to the customer** to choose a destination. Saving does not record customer acceptance.
When you save the final appraisal on a counter deal, **Show to the customer** appears in **Next step** on the deal page. Click it to open **Show to the customer**. **Where to show it** lists your tablets that are In use and the **Customer's phone**.
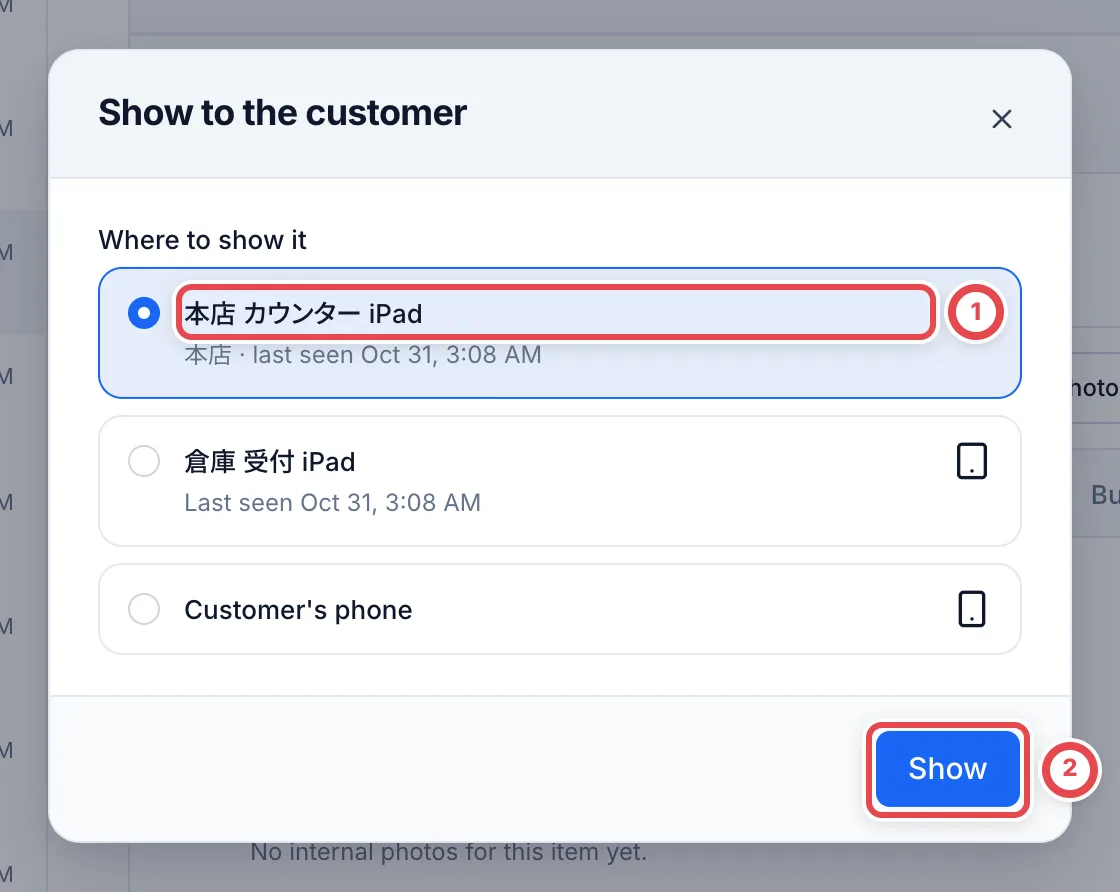 Choose a tablet at ①, then click **Show** at ②. **It appears on the tablet right away, and the final quote is recorded as presented.** The tablet shows the total amount and 「内容を確認する」 (Review the details). Hand the tablet to the customer.
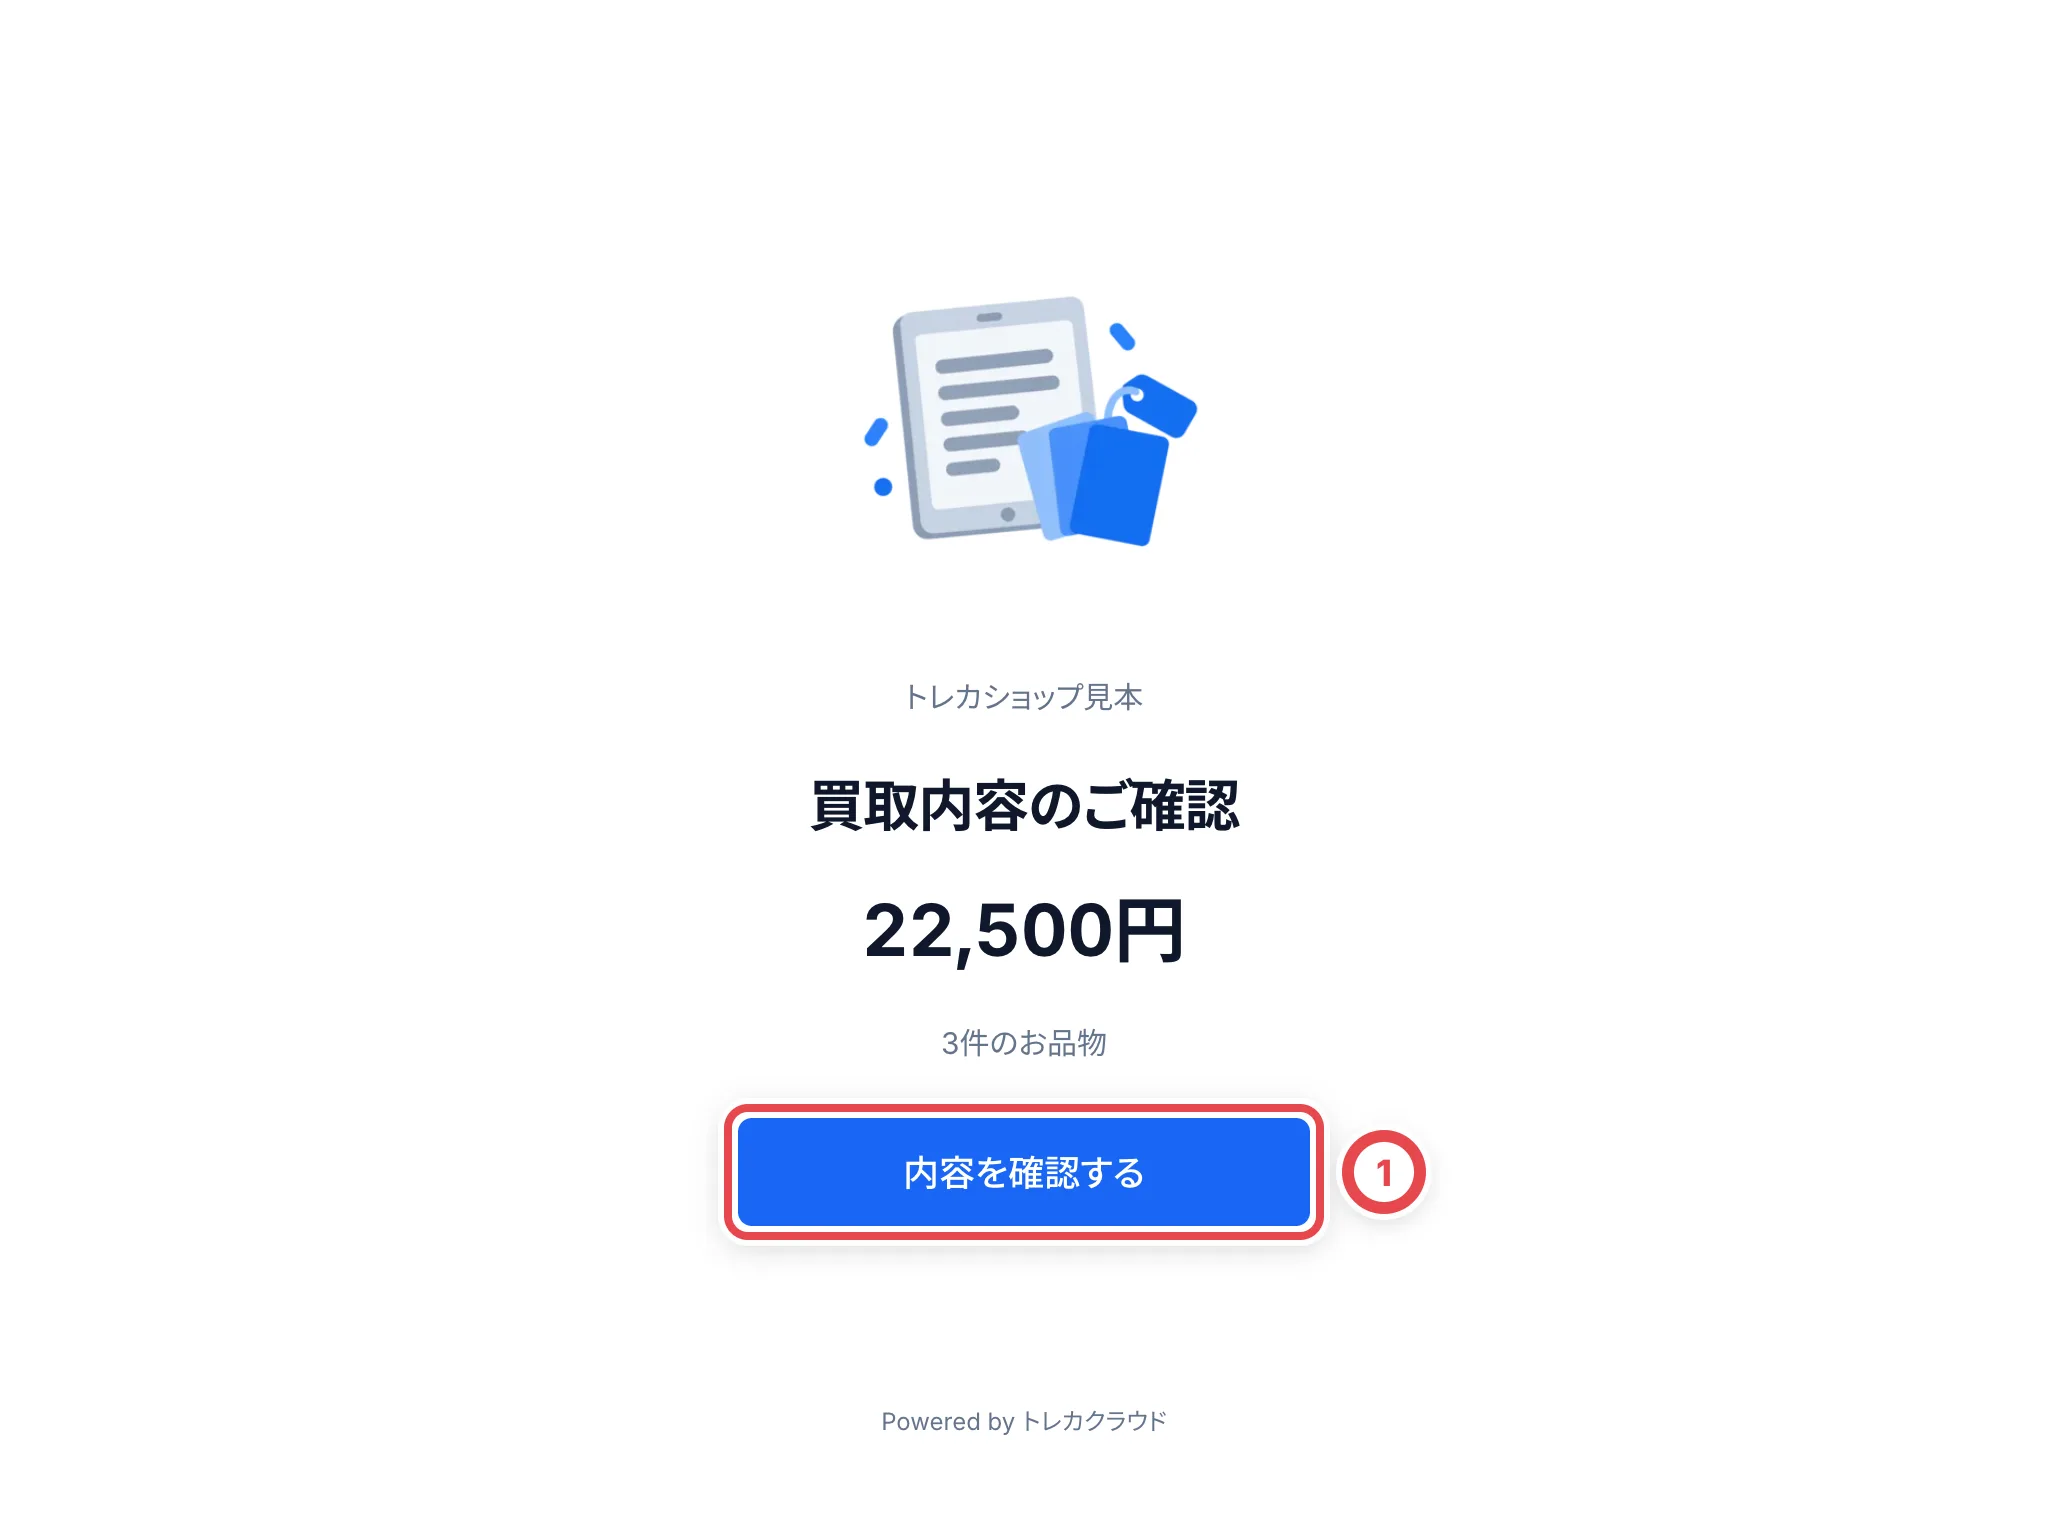 The customer then reviews the purchase, enters their details, and agrees and signs. With customer photography enabled, an ID photography screen appears before agreement. For what is on each screen and how to follow progress on the staff side, see step 5 of [Start a counter purchase](/en/guides/purchase/counter). After the customer submits, the tablet goes back to the waiting screen after 12 seconds.
- What is shown on the tablet expires after 30 minutes. If it expires, show it again from the deal page
- A tablet can show one deal at a time. You can't send to it while another customer is reviewing
## 4. Register again or stop it (if needed)
### Change the name or site
Click **Edit** in the list to change the tablet's name and site. Click **Save changes** and it is saved right away. The tablet stays connected.
### Register again
If you lose a tablet, replace it, or the QR code expires, click **Register again** in the list.
:::warning
Clicking **Register again** at ① disconnects the current tablet and cancels anything showing on it.
:::
Scan the new QR code with the tablet you want to use.
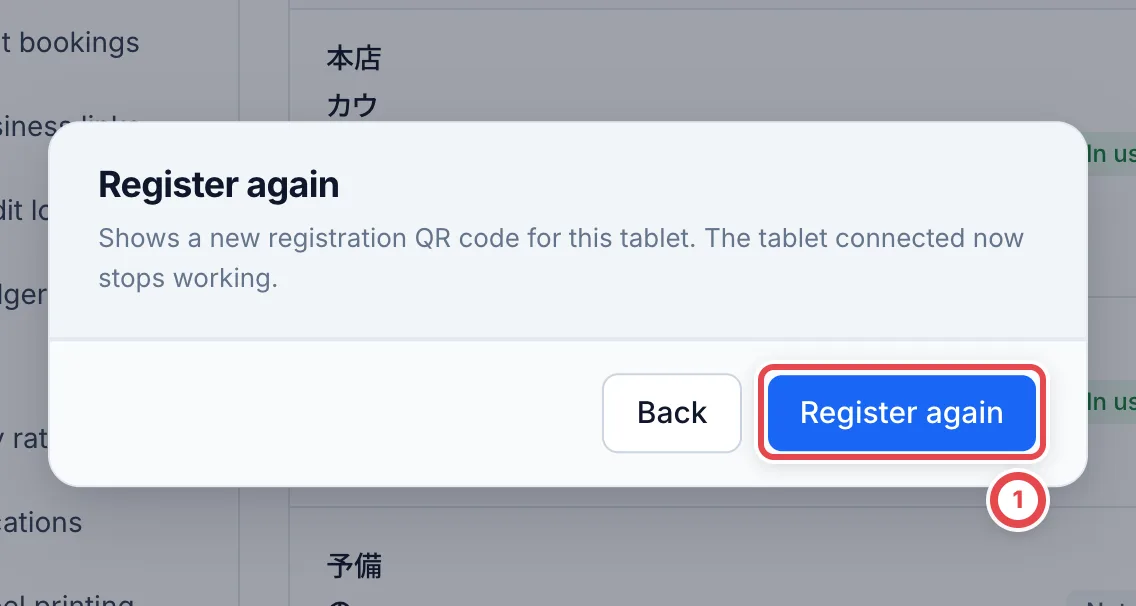 ### Stop using a tablet
For a tablet you no longer use, click **Stop** in the list.
:::warning
You cannot undo **Stop using it** at ① in the confirmation.
:::
The customer screen can't be shown on that tablet any more, and anything showing on it is cancelled. **You can't undo stopping a tablet.** To use it again, register it as a new tablet. A stopped tablet stays in the list as **Stopped**.
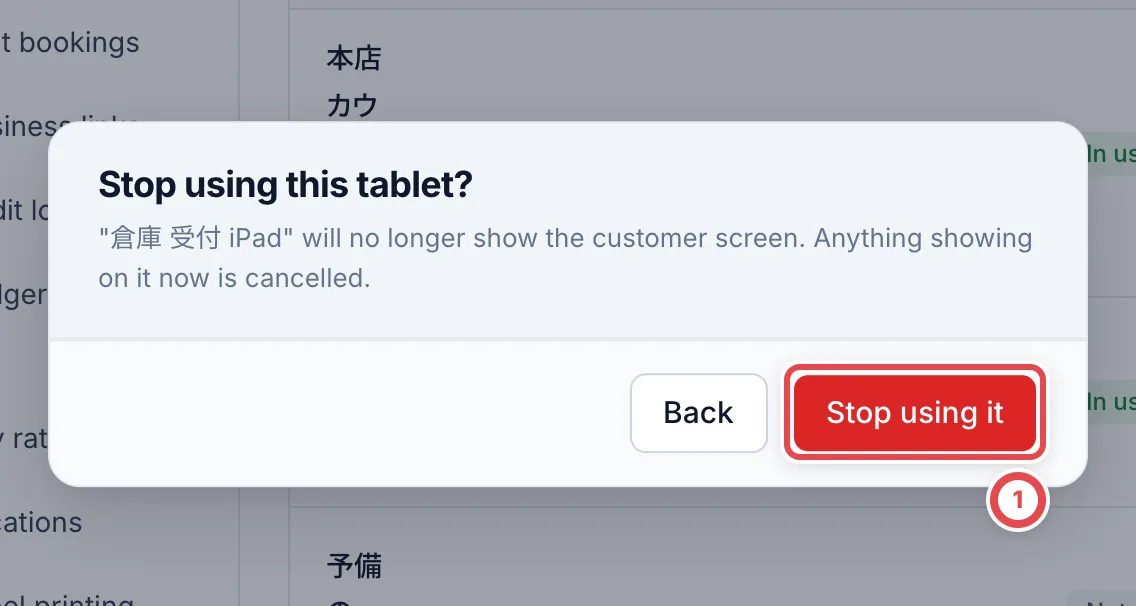 If you open the page on a tablet that isn't registered, or on one you stopped, it shows 「この端末は登録されていません」 (This tablet is not registered).
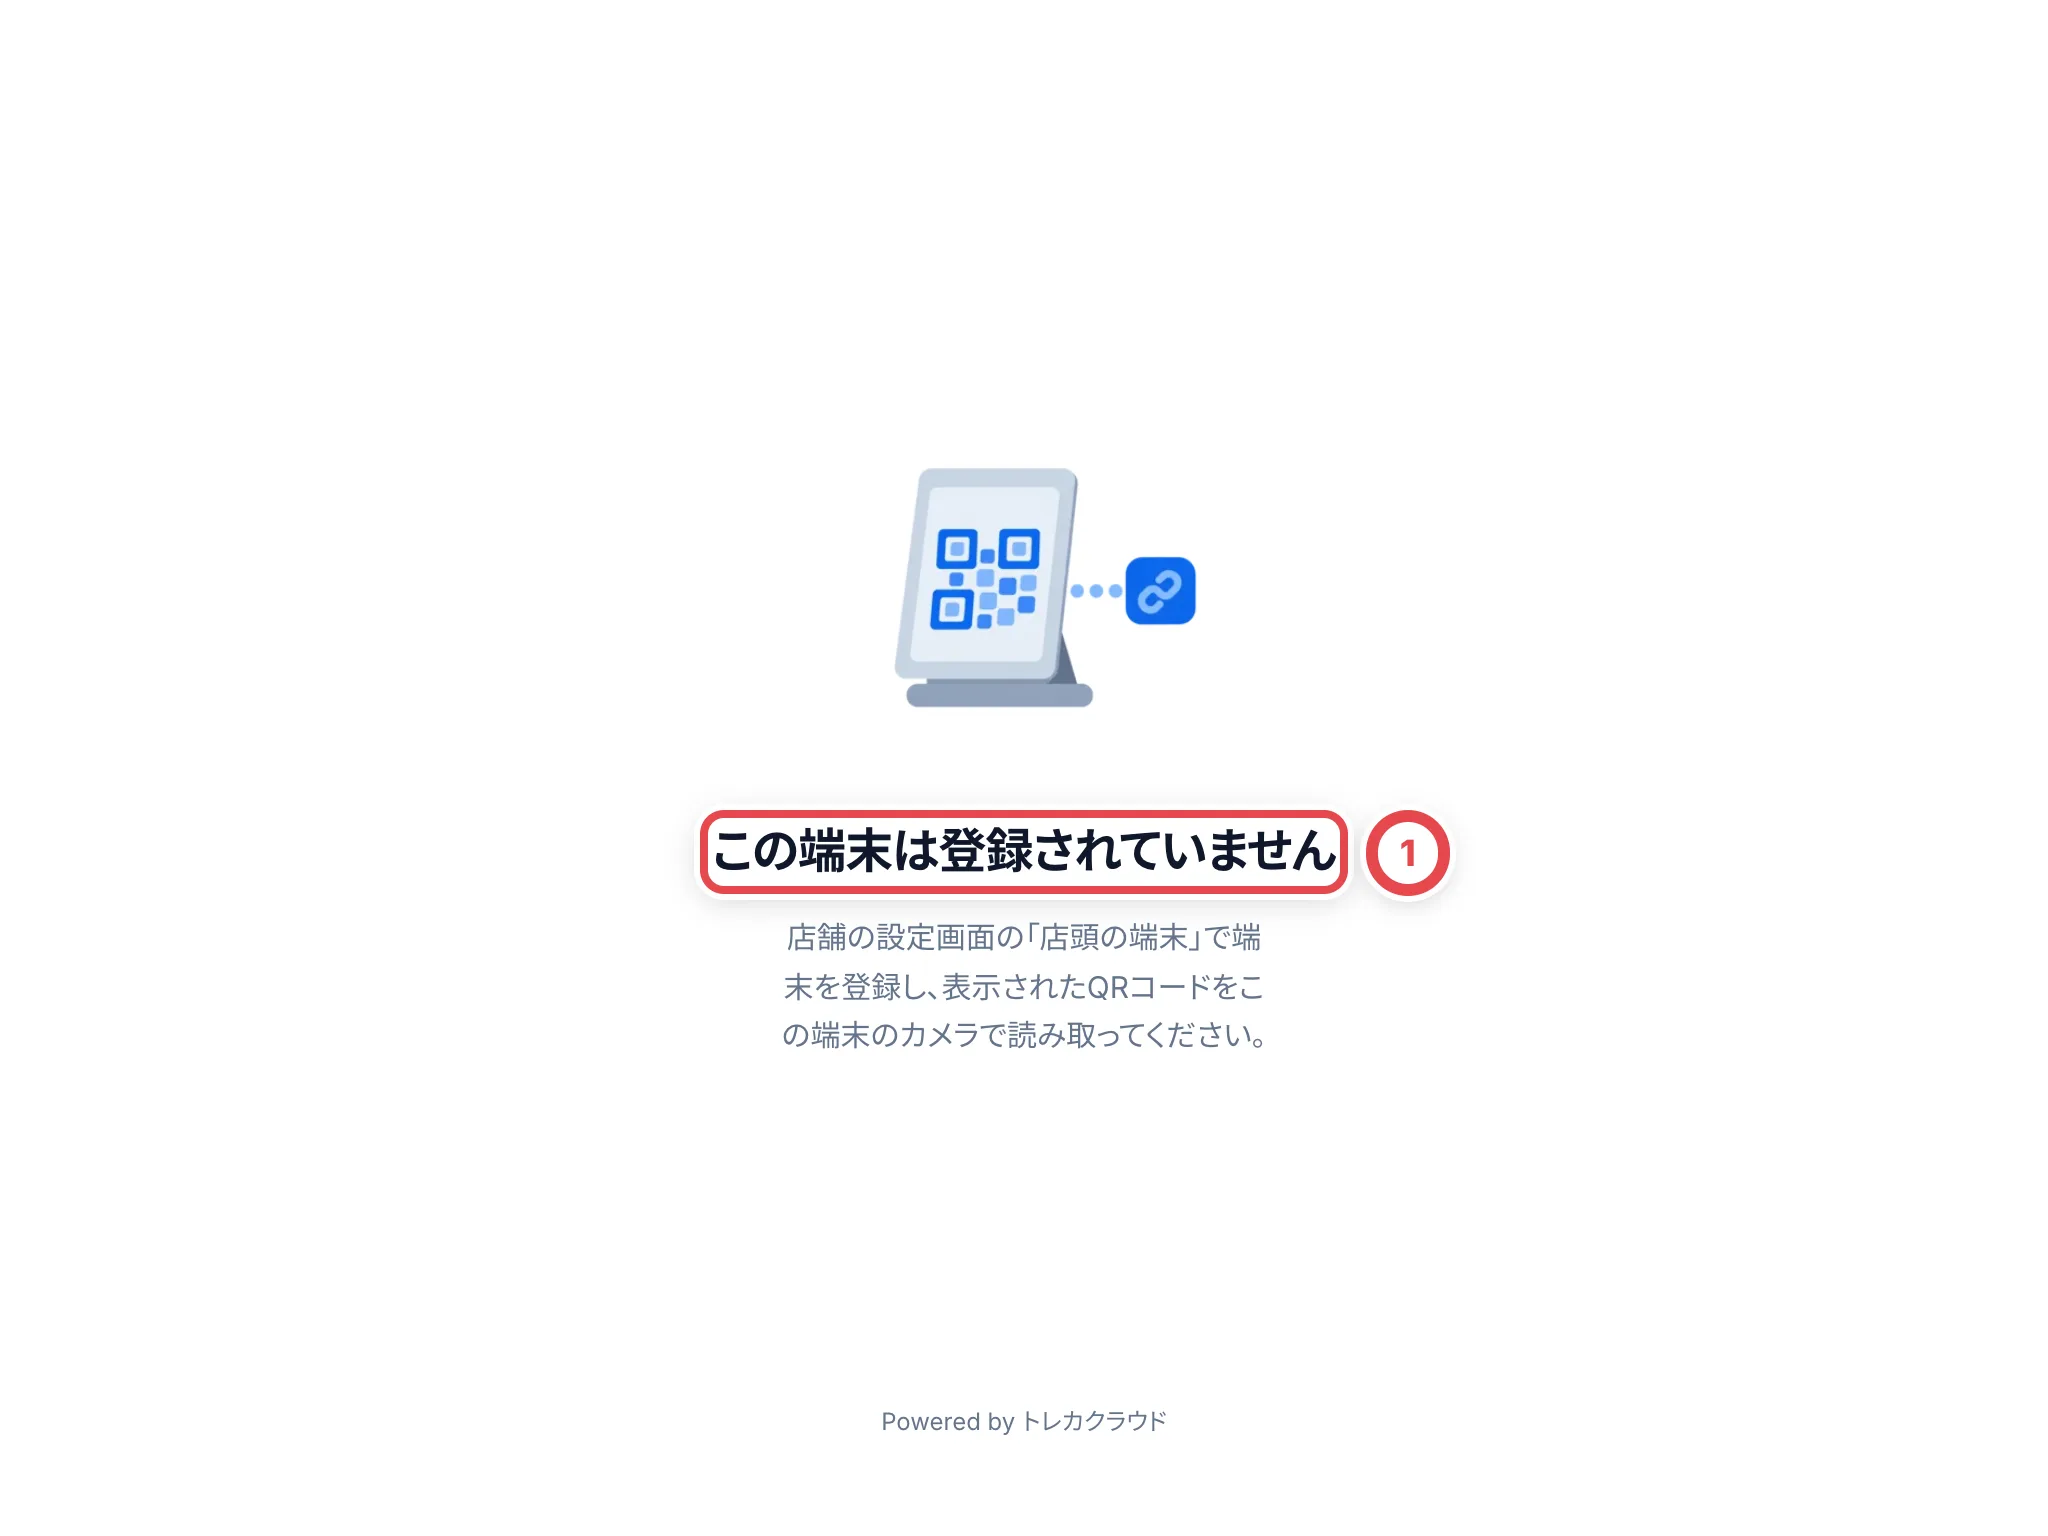 ## If something goes wrong
| What is happening | What to check and how to fix it |
| ------------------------------------------------------------------------------------------------------------------------------------------------- | ------------------------------------------------------------------------------------------------------------------------------- |
| There's no **Register a tablet** button | You don't have permission to manage settings. Ask an owner or admin. |
| The tablet shows 「登録用のQRコードの期限が切れています」 (The registration QR code has expired) | 10 minutes have passed since it was shown. Click **Register again** in the list and scan the new code right away. |
| The status is **Not registered** | 10 minutes passed without the QR code being scanned. Click **Register again** to show a new one. |
| The tablet doesn't appear under **Where to show it** in a deal | Only tablets that are **In use** are listed. Check the status in the list, and register again if needed. |
| You see 「この端末では別のお客様が確認中です。終わってから送ってください」 (Another customer is reviewing on this tablet. Send after they finish) | Another customer is reviewing on that tablet. Wait until they finish, or show it on another tablet or the **Customer's phone**. |
| The tablet shows 「この端末は登録されていません」 (This tablet is not registered) | The tablet was registered again or stopped, so it can't be used. Register it once more and scan the new QR code. |
| The tablet shows 「通信が不安定です。接続が戻るまでお待ちください。」 (The connection is unstable. Please wait until it is back) | Check the tablet's internet connection. |
---
# Customers and deals
Source: https://docs.toreca-cloud.com/en/guides/purchase/customers
Keep repeat purchases under the same customer, with a separate deal for each purchase. Appraisal, quotes and payouts are managed per deal.
## What you need
- To see the customer pages, you need permission to view customers and deals
- To add a customer, edit a name, change a status or edit notes, you need permission to manage customers
- The **LINE chat** tab, the LINE card under **Customer details** and **Intake review** only appear for shops that use the LINE integration ([LINE and notifications](/en/guides/settings/line-and-notifications))
## What you do on this page
| Step | What you do | When |
| ---- | -------------------------------------- | --------------------------------------------------------------- |
| 1 | Find a customer | A customer contacts you, or you go back to your work |
| 2 | Add a customer | A first-time customer |
| 3 | Open a work tab on the customer's page | You move appraisal, quotes, payouts and so on forward |
| 4 | Fix a name | The name is still the LINE name and hard to recognize |
| 5 | Check the customer details | You want to see the address, payout account or LINE notes |
| 6 | Set a customer to Flagged or Archived | A customer needs care, or you won't deal with them again |
| 7 | Clear the Intake review list | A message arrives that can't be matched to anyone automatically |
| 8 | Add a purchase request | You took the request in store, by phone or any way but LINE |
| 9 | Write a note | There's something the next person to help them should know |
## 1. Find a customer
Click **Customers** in the sidebar. The customer page opens with the list of customers on the left. (When the screen is narrow, open the list with **Back to customers** at the top of the customer's page.)
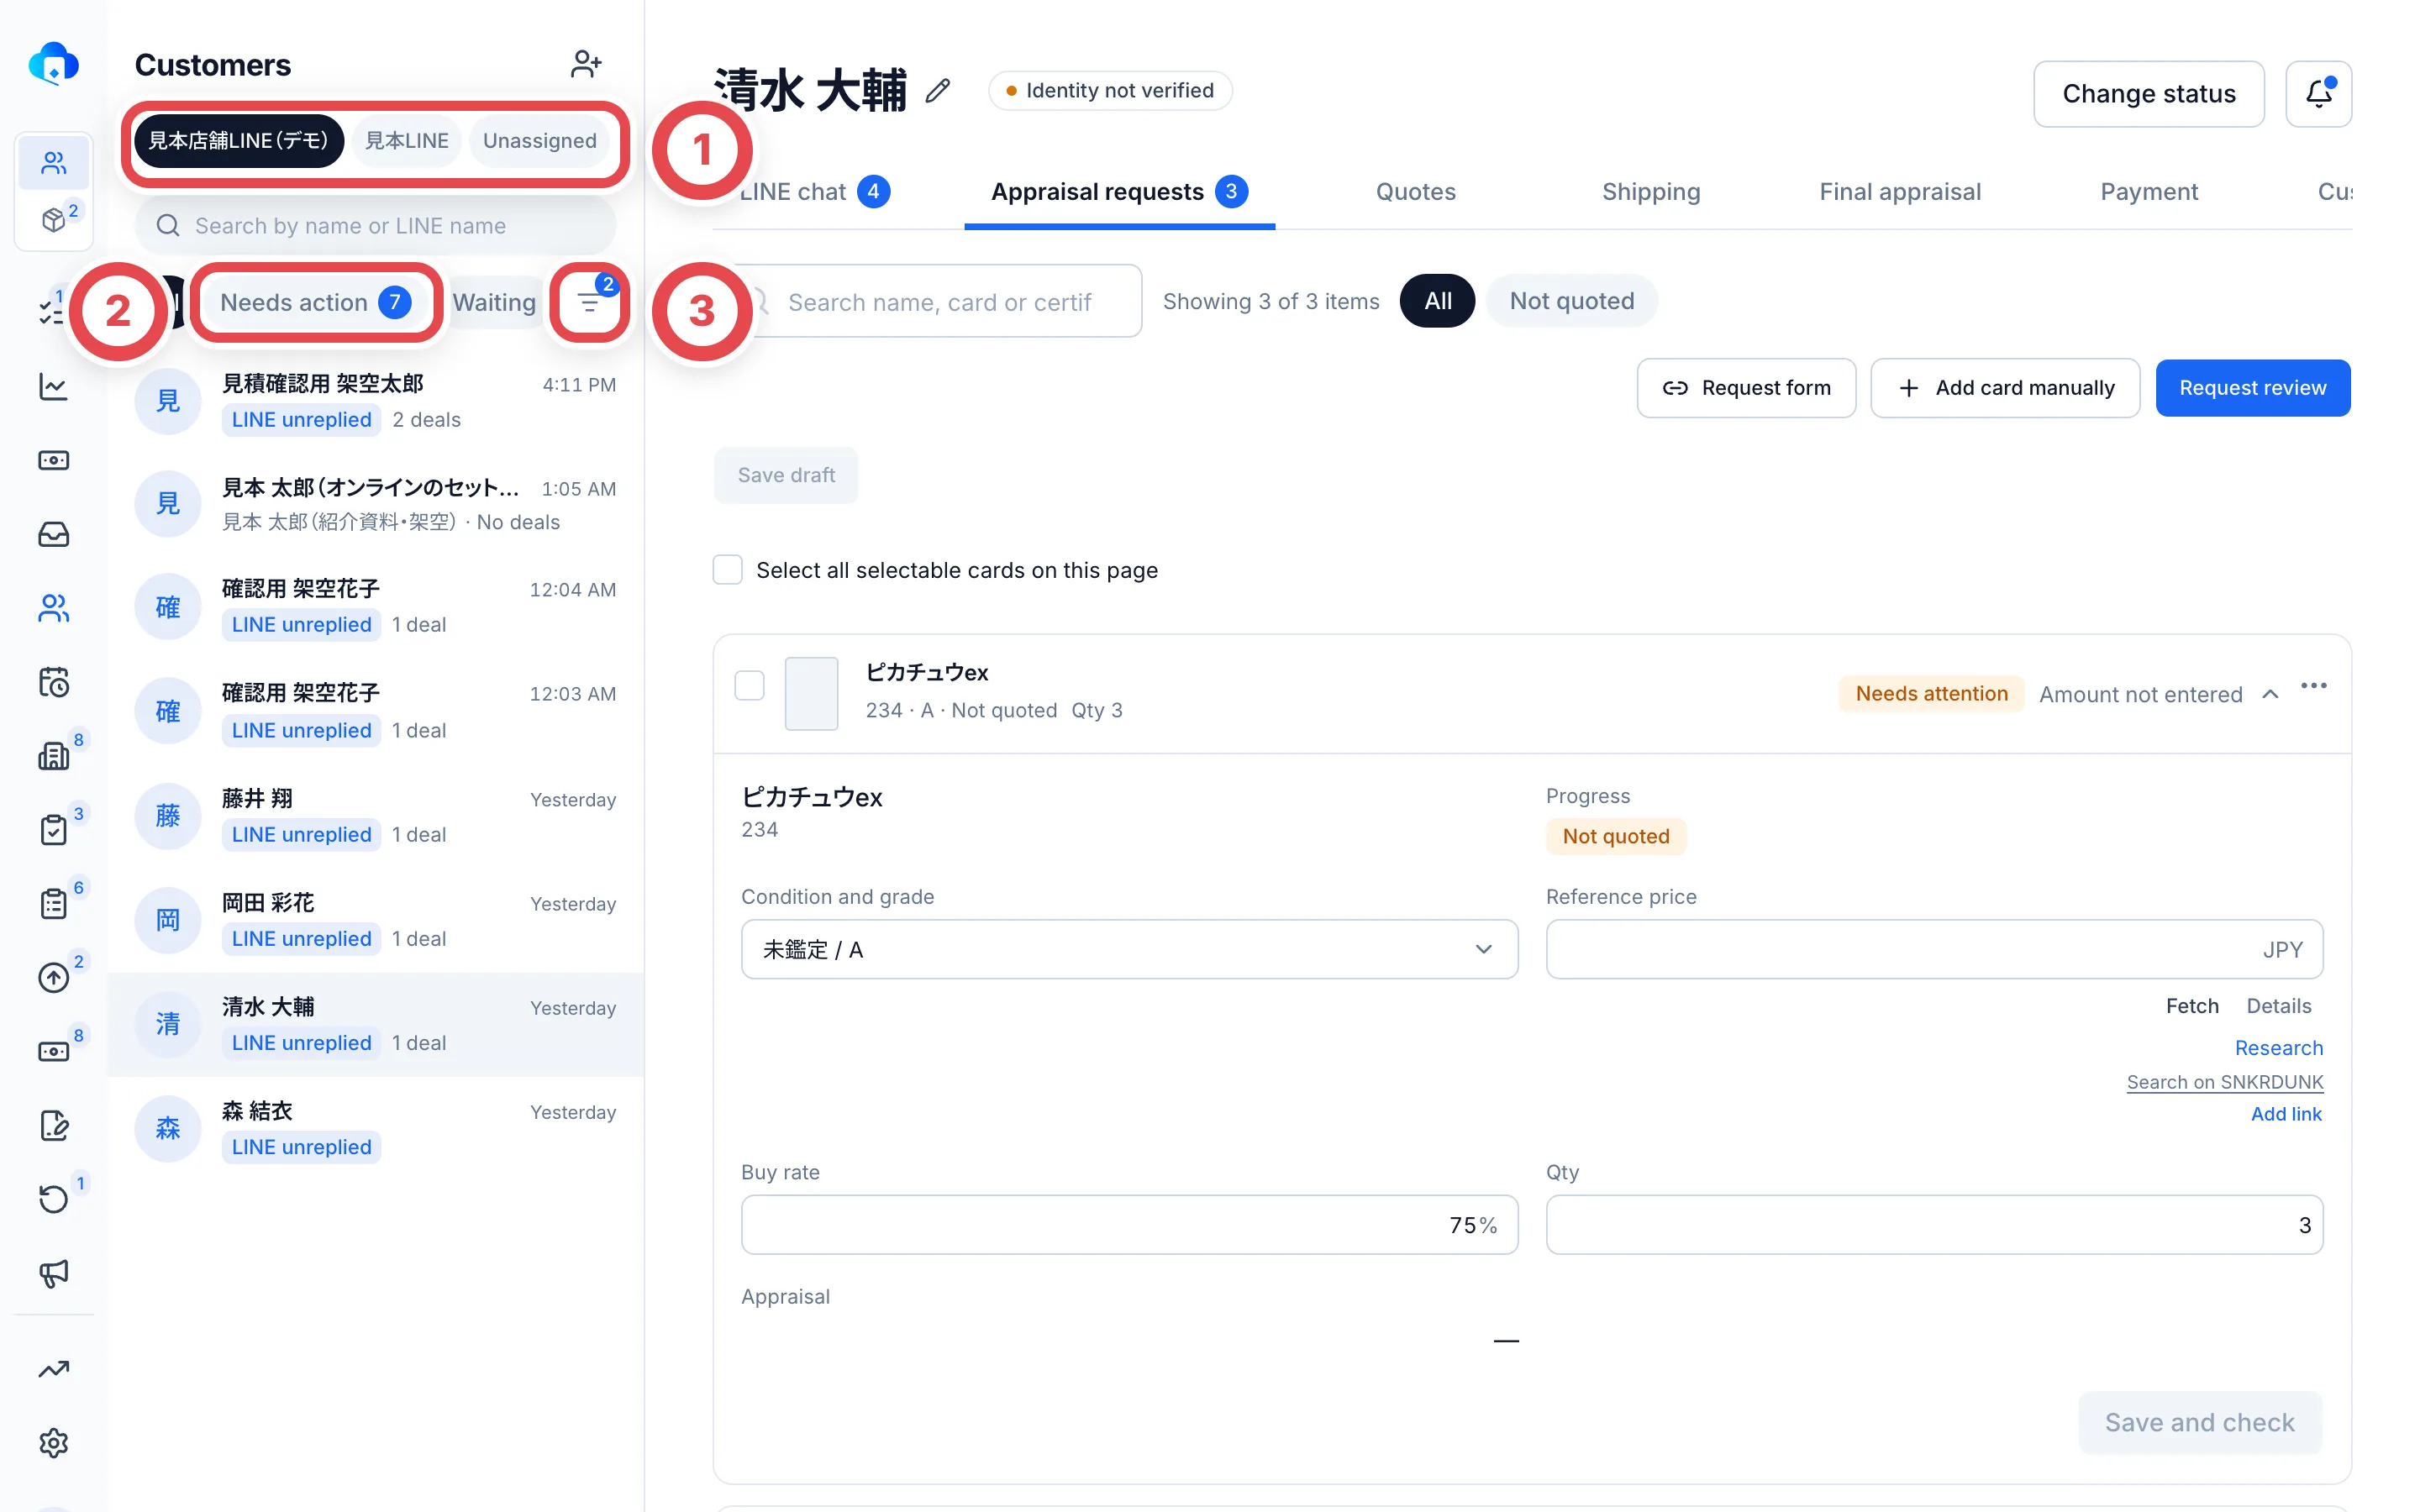 | Where | How to use it |
| ---------------------------- | ------------------------------------------------------------------------------------------------------------------------------------------------------------------------ |
| ① Account tabs | Customers are split by LINE official account. Customers who didn't come through LINE and in-store customers are under **Unassigned** |
| Search | Enter part of the name or the LINE name |
| All, ② Needs action, Waiting | **Needs action** is customers where it's your shop's turn to reply or appraise. **Waiting** is customers whose reply or parcel you're waiting for. The number is a count |
| ③ More filters | Tick **Unregistered LINE friends** to list people who messaged you on LINE but aren't customers yet |
Each row shows the current situation, such as **LINE unreplied**, and the number of deals that person has (for example **2 deals**). Archived customers stay in the list.
## 2. Add a customer
Click the person icon (Add customer) to the right of **Customers** above the list.
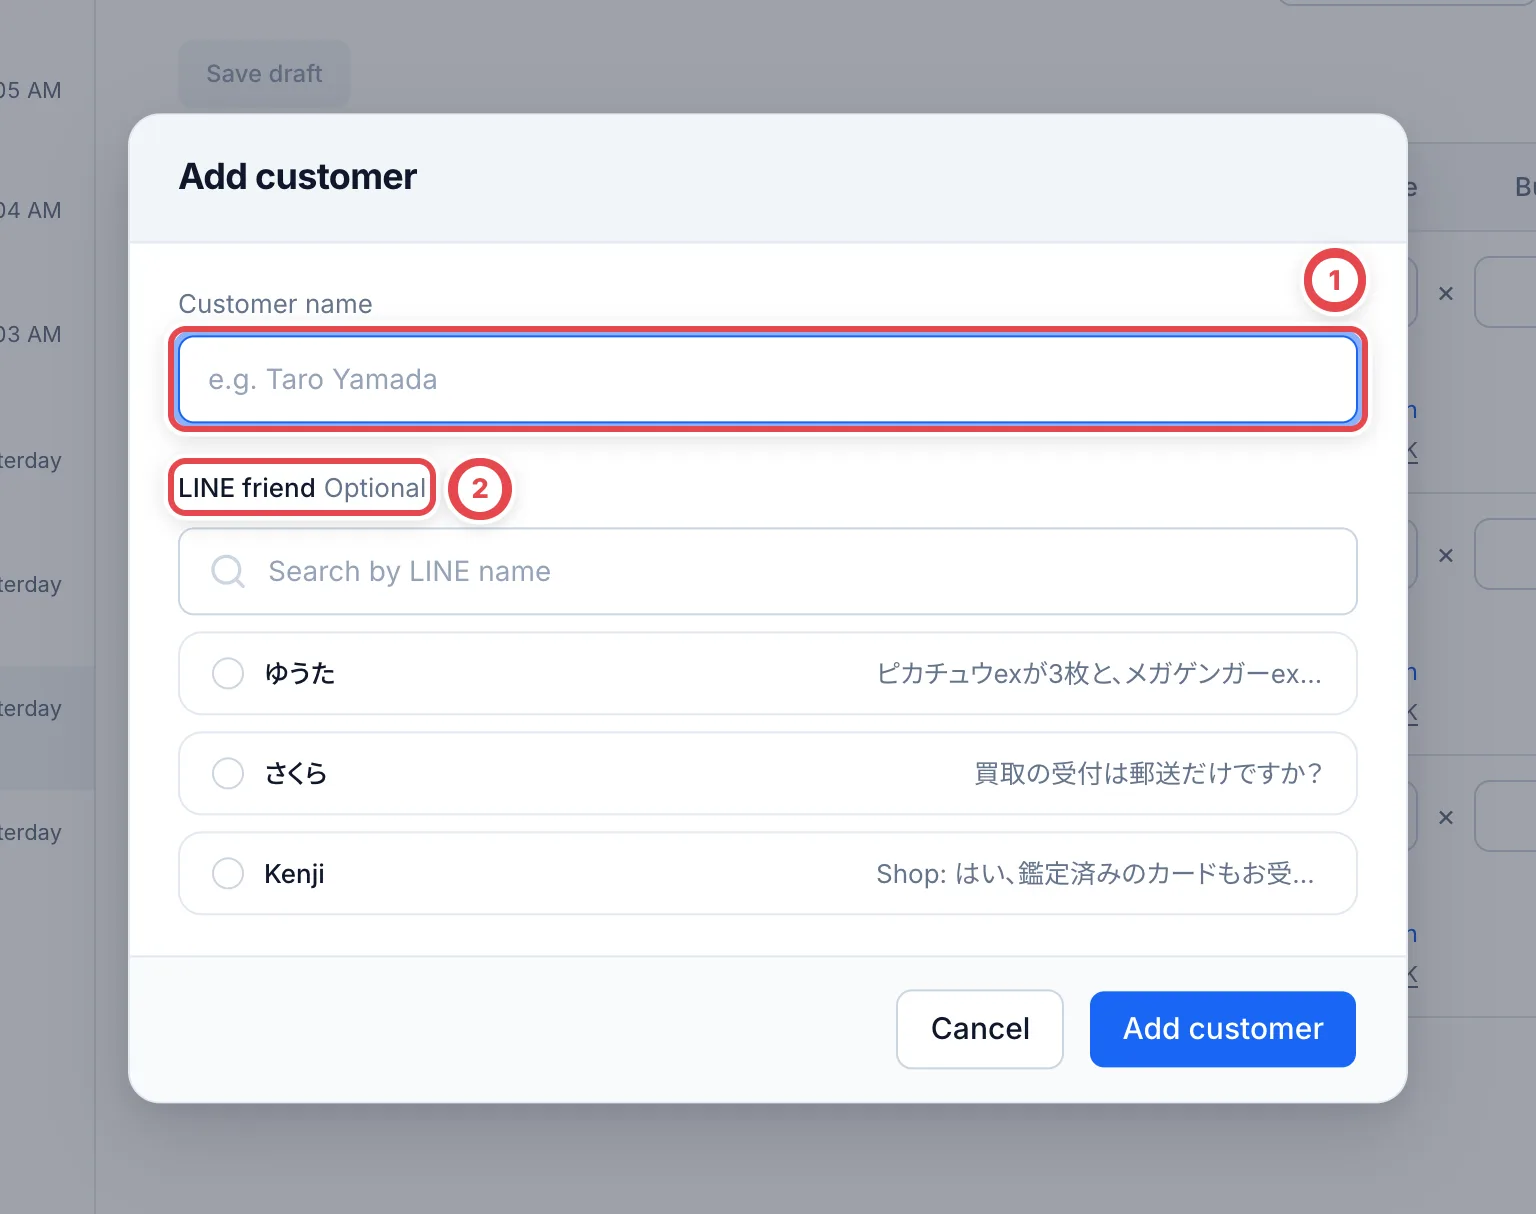 Enter the **Customer name** at ①. If the customer is coming through LINE, choose them from the list at ②. Then click **Add customer**. You don't have to choose a LINE friend.
- If a customer with a similar name already exists, **Customers with a similar name** appears under the field. If it's the same person, don't add them. Open that customer instead
- Adding a customer doesn't create a deal yet. Once you take the cards in, add them on the **Appraisal requests** tab, or create the deal with **Add purchase request** in step 8
## 3. Read a customer's page
Click a customer to open their page. Next to the name you can see whether their identity is checked (**Identity verified** or **Identity not verified**).
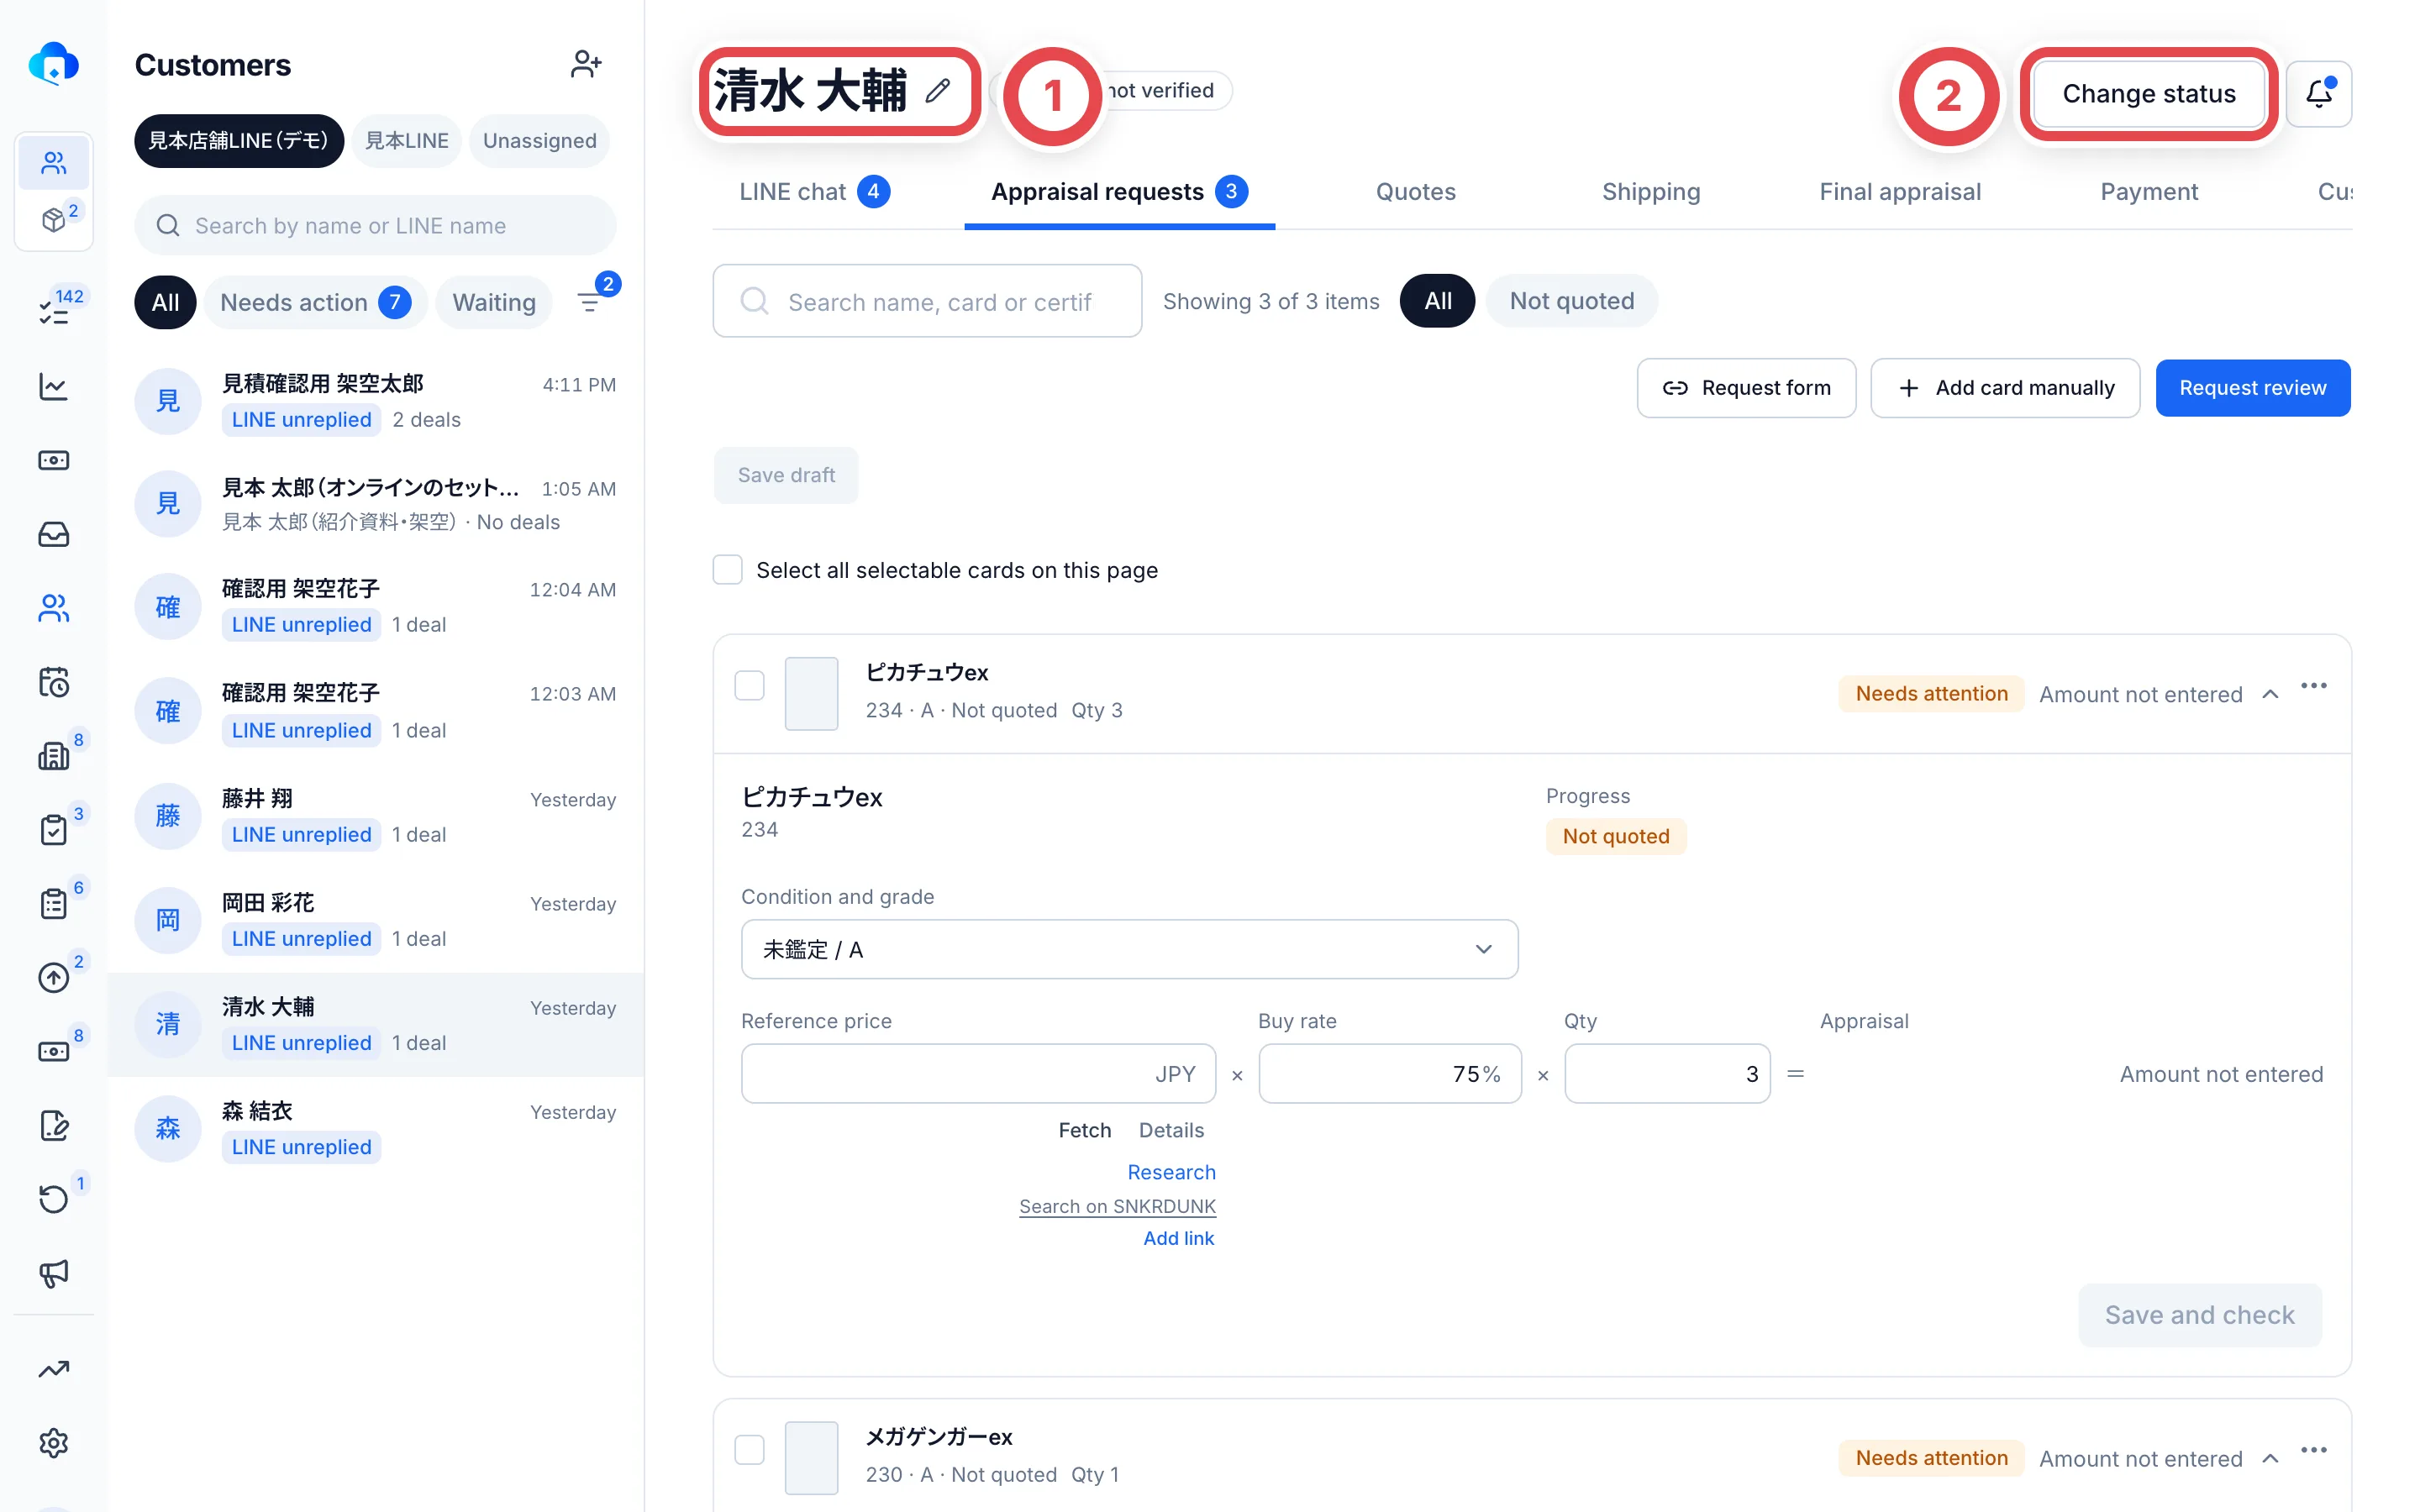 The pencil at ① fixes the name (step 4). Use ② Change status to set Flagged or Archived (step 6).
Tab numbers show items awaiting action.
| Tab | What's in it | What the number means |
| ------------------ | -------------------------------------------------------------------------------- | ------------------------------- |
| LINE chat | The LINE chat with the customer, and the photos they sent | Messages you haven't replied to |
| Appraisal requests | The list of cards the customer asked you to appraise | Cards you haven't quoted yet |
| Quotes | The quotes you sent the customer | |
| Shipping | Shipments from the customer, and returns (only for shops that use online buying) | |
| Final appraisal | The final appraisal of the cards that arrived | |
| Payment | Payment by bank transfer or cash | |
| Customer details | Name, address, identity verification, payout account and LINE | |
The bell at the top right shows notifications for this customer.
## 4. Fix a name
A customer who came from LINE first shows up under their LINE name (for example "だいすけ"). To change it to the name your shop uses, click the pencil next to the name.
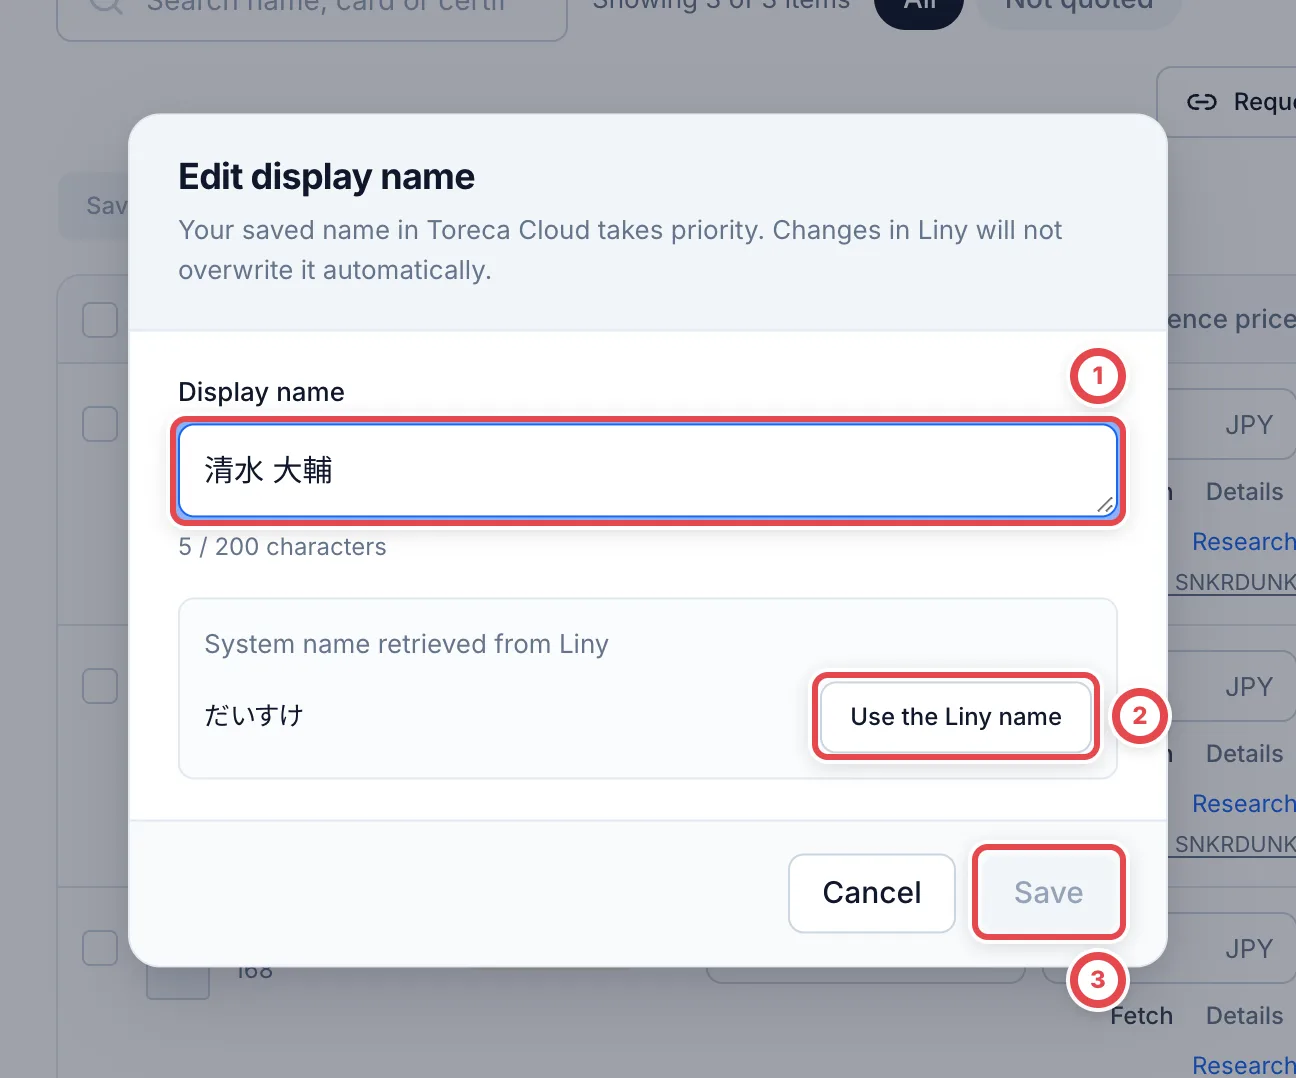 Change the name at ①, then click **Save** at ③. **The name changes as soon as you click.**
- Once you save a name here, it stays the same even if the customer later changes their LINE name. If the text at the top of the dialog says "Your saved name in Toreca Cloud takes priority," this is the case
- A customer you've never saved a name for follows the Liny name automatically
- **Use the Liny name** (②) only puts the Liny name into ①. To go back, click ②, then save at ③. After you save, the name no longer follows Liny automatically
- Changing the name here doesn't change the name in Liny
- The pencil doesn't appear for an archived customer
## 5. Check the customer details
For an in-store original-ID check, use **In-person identity verification** on Appraisal requests or Customer details. See [Record an in-store ID check and add documents](/en/guides/purchase/counter-identity).
To let an existing customer review or change saved details, provide the [deal-specific registration review link](/en/guides/purchase/registered-information). Authentication precedes access to the profile, selected payout account and documents.
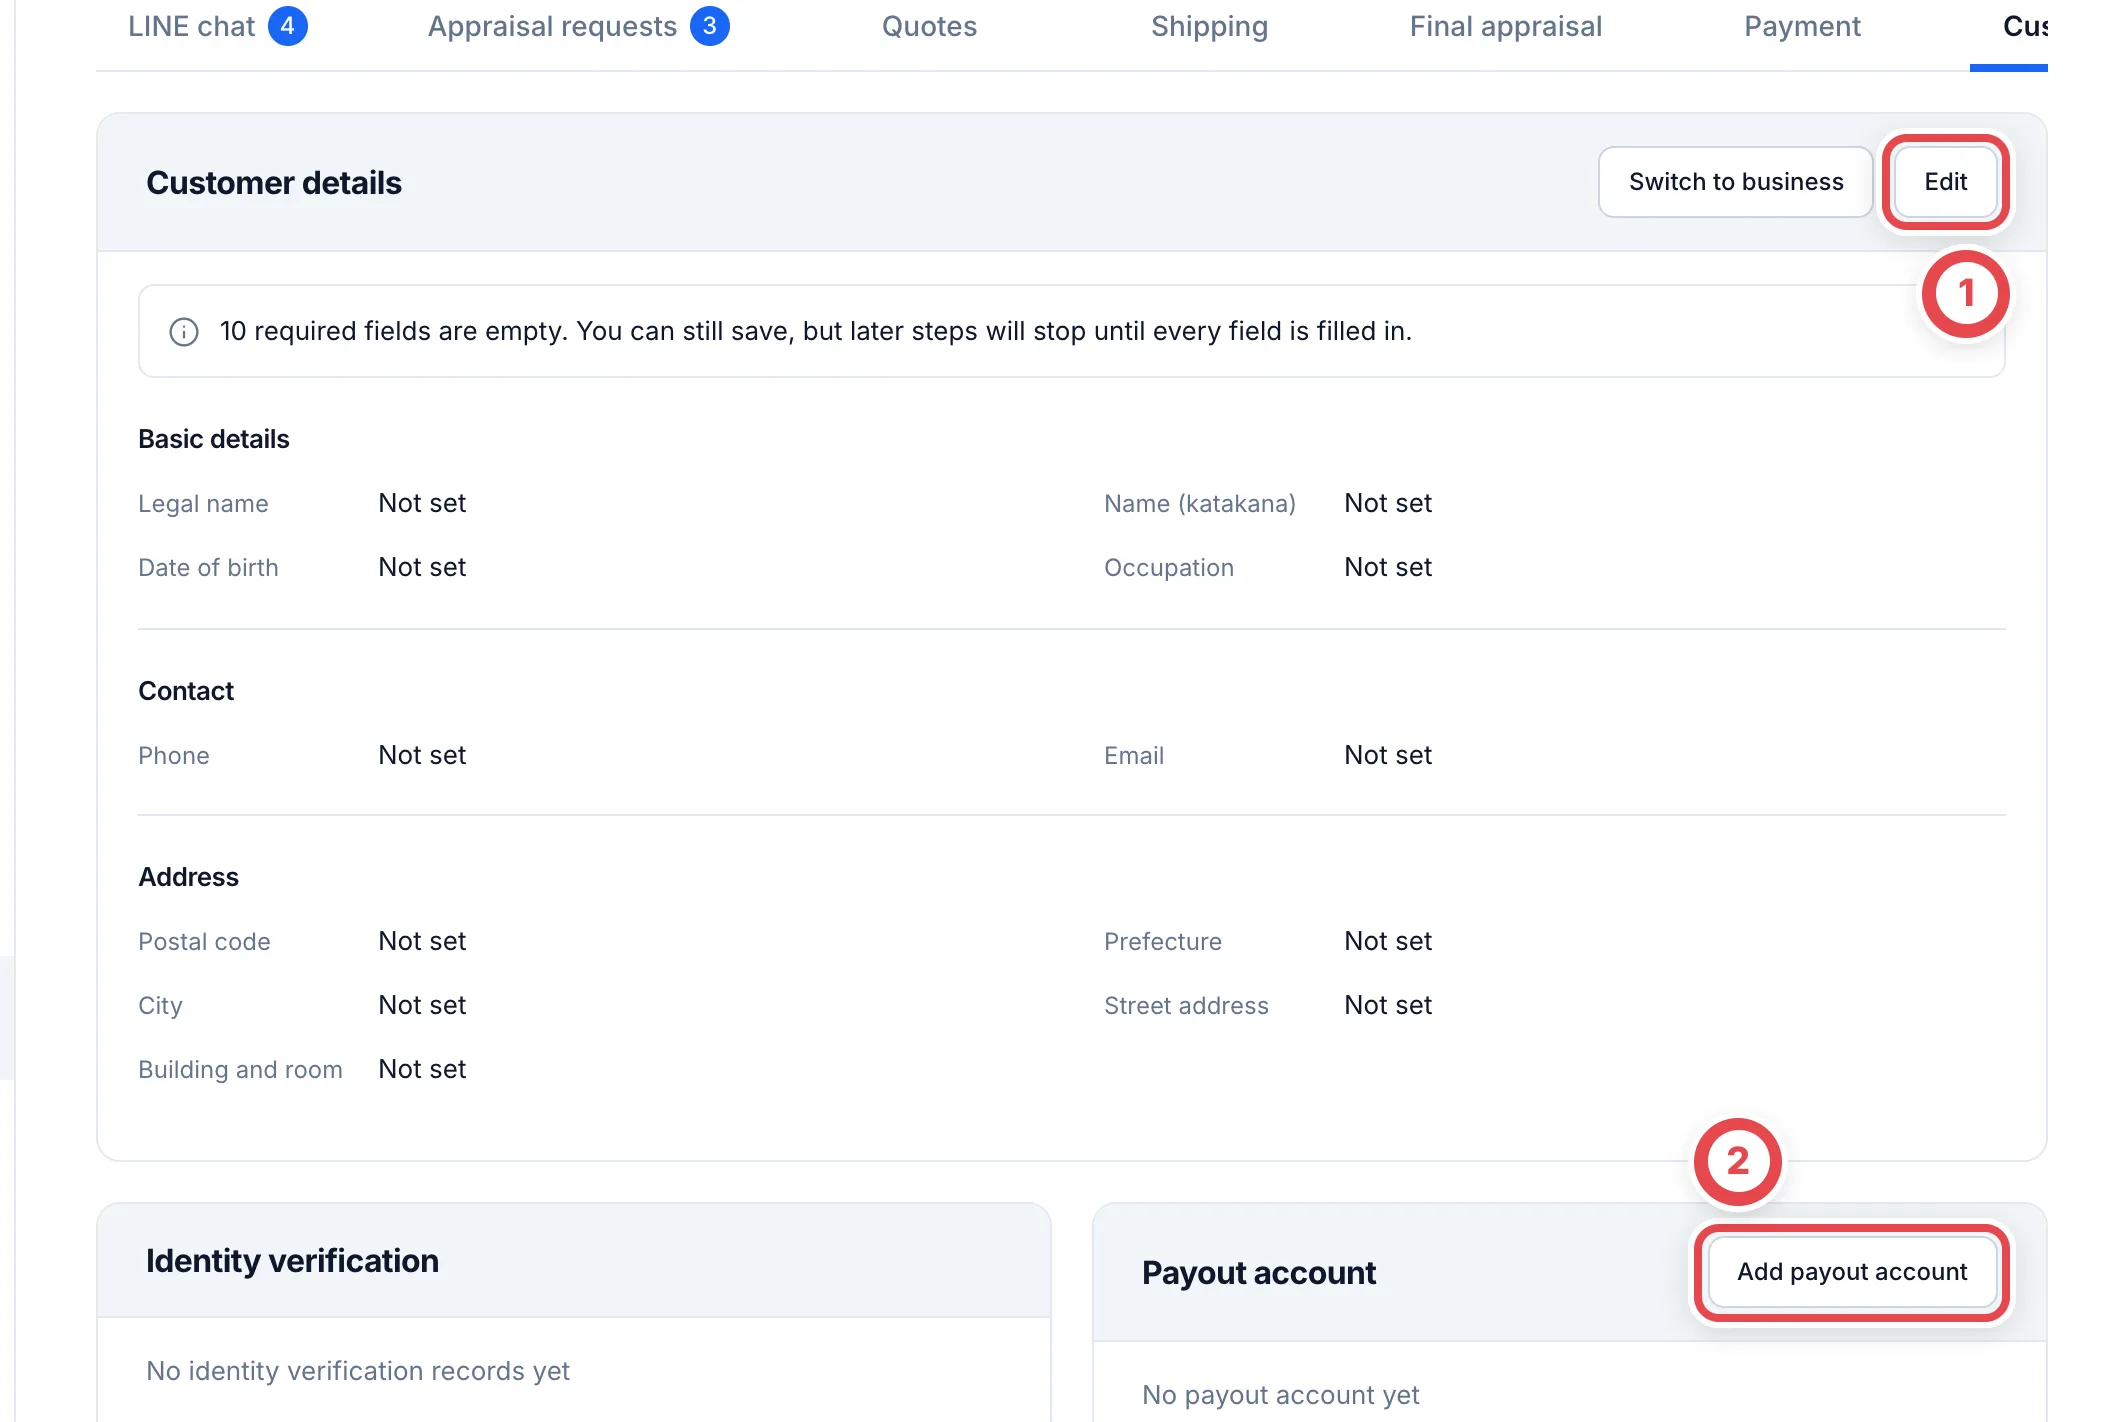 | Card | What's in it |
| --------------------- | -------------------------------------------------------------------------------------------------------------------------------------------------- |
| Customer details | Name, name (kana), date of birth, contact details and address. Enter them with **Edit** (①). For a business customer, click **Switch to business** |
| Identity verification | Verification records and documents saved for later review |
| Payout account | The account used for payments. Register it with **Add payout account** (②) |
| LINE | The LINE friend linked to this customer, and what came from Liny |
For an individual customer, **Add identity documents** saves images before there is a deal. Use JPEG, PNG or WebP up to 20 MB total; a driver's license or residence card needs both sides. For a My Number card, use only the front and do not include the individual number or QR code. Saving does not complete identity verification, and the saved documents are not automatically deleted. Viewing needs identity read permission; adding needs identity write permission. Archived customers cannot receive new documents.
For an online deal, open **Review saved documents** under **Record identity verification** on the Shipping screen. Open the images, compare them with the customer details, and confirm the check to record verification against the deal. For an in-store deal, continue to check the original ID in person.
You can save customer information while fields remain empty. Check the missing-field count at ①, enter known details at ② and save. **Saving does not mean the information required for verification or settlement is complete.** Fill in the missing details before that stage.
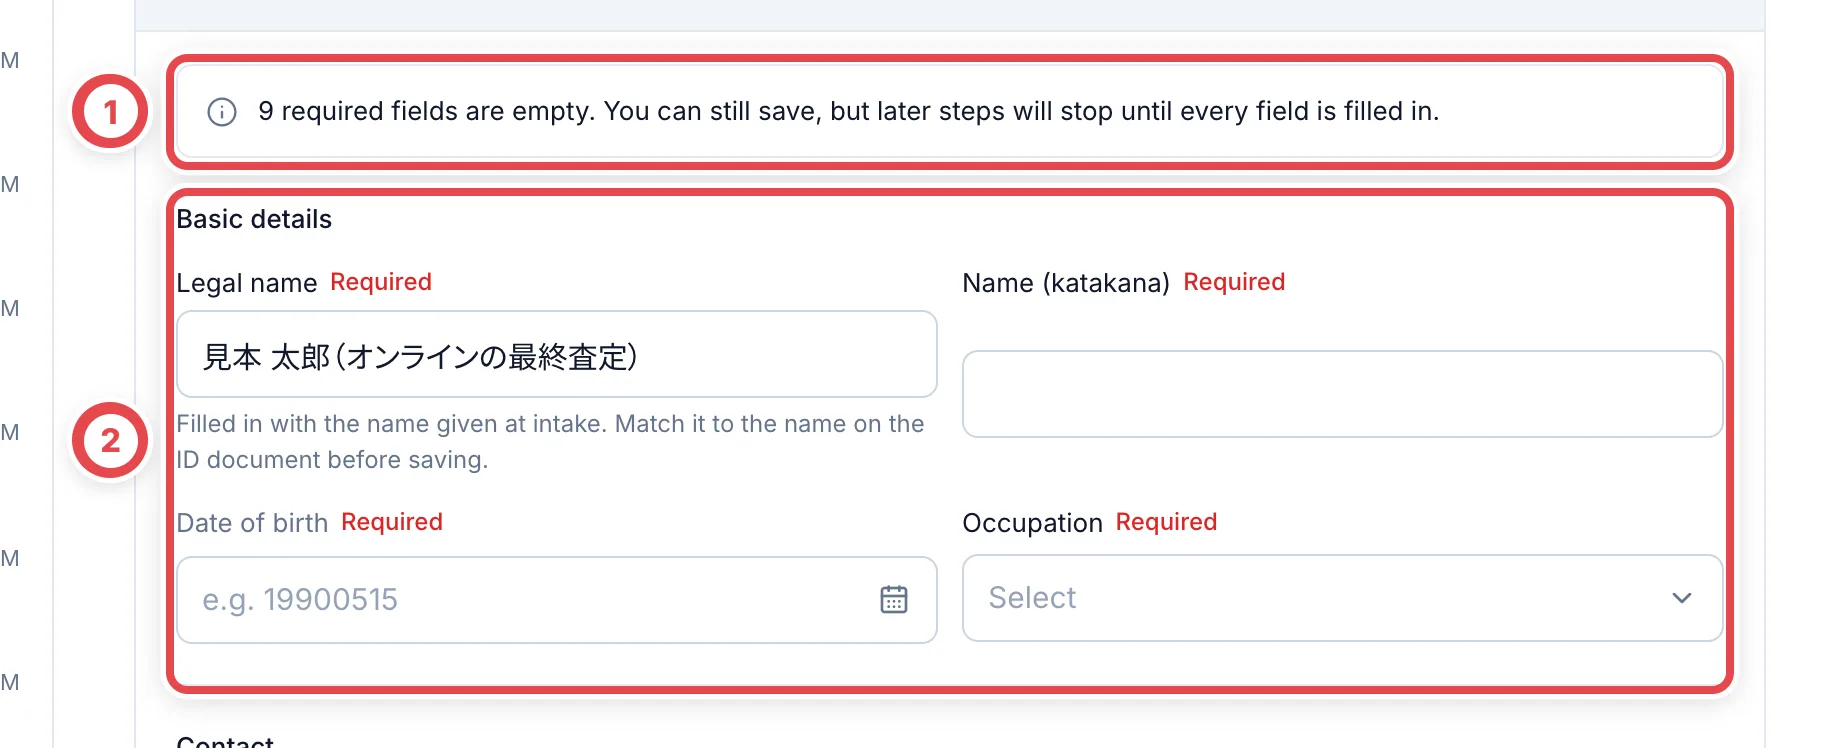
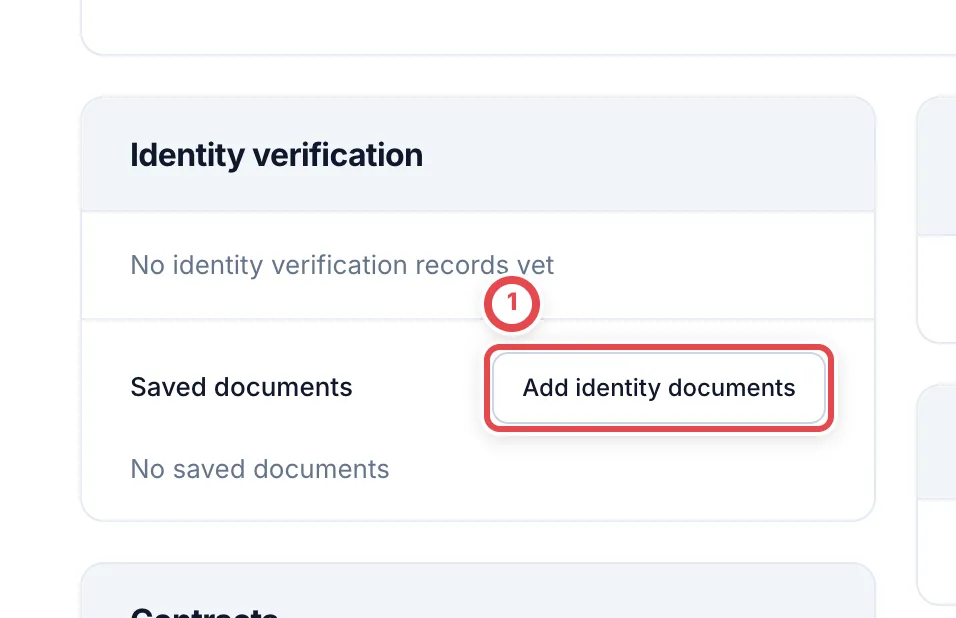 Choose the document type at ① and its required sides at ②. Complete the safety confirmation at ③ and click ④ **Save**. Check that the upload appears in Saved documents. It is awaiting review and does not mark the customer verified.
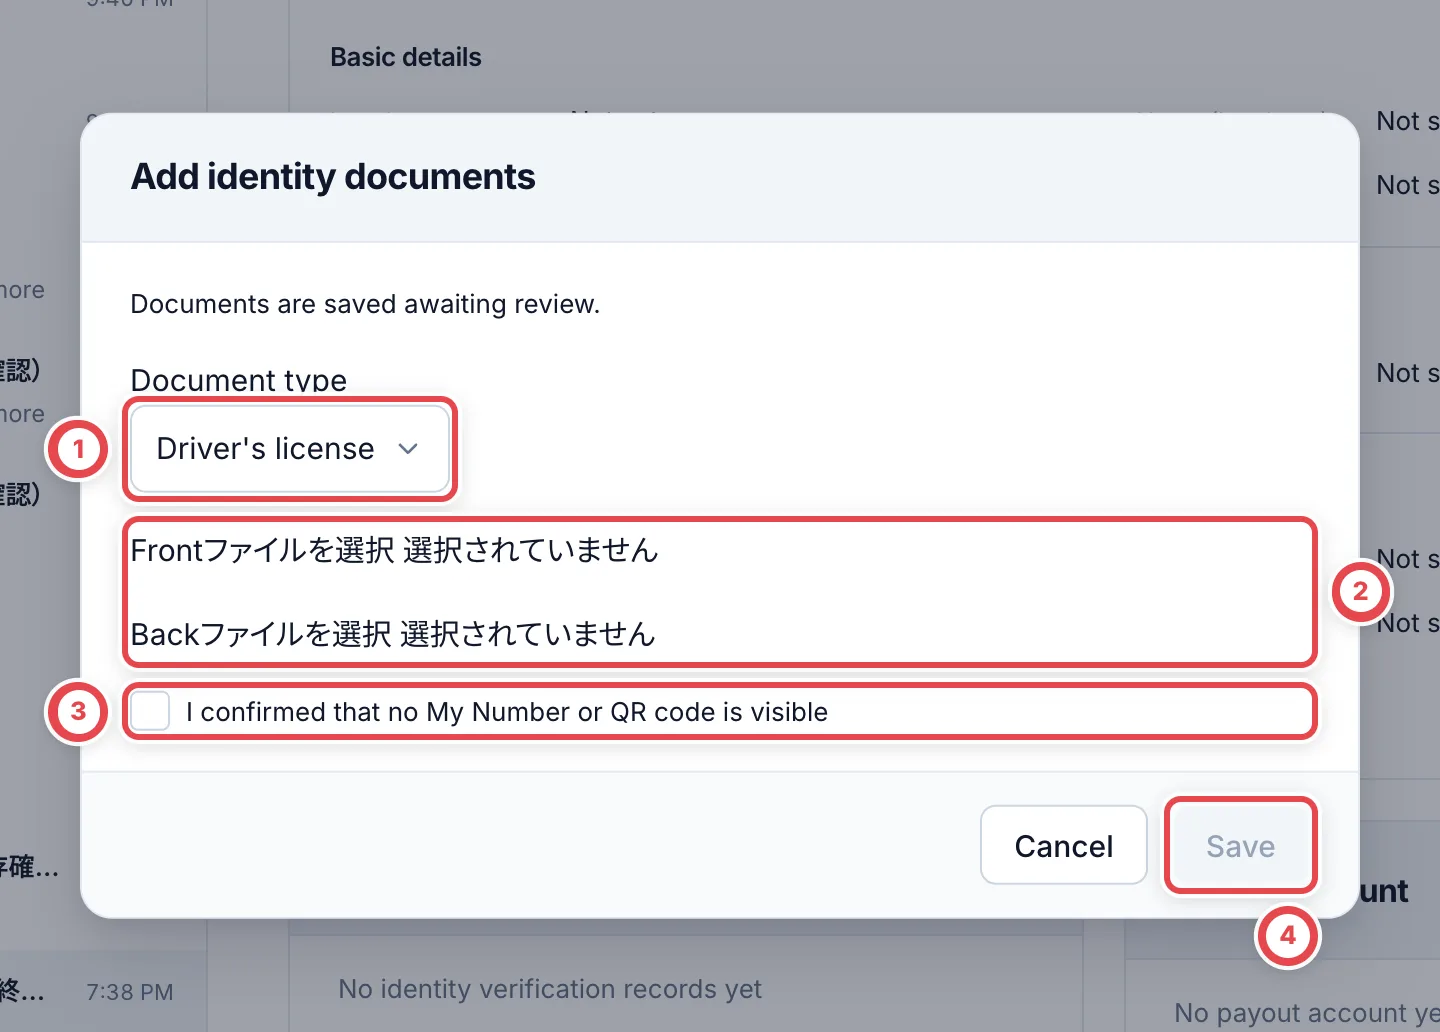 ### How to read the Liny information
The **Liny information** in the LINE card is a copy of the tags, memo and friend information from Liny. **You can't change it in Toreca Cloud.** To change it, change it in Liny and it will update here on the next import.
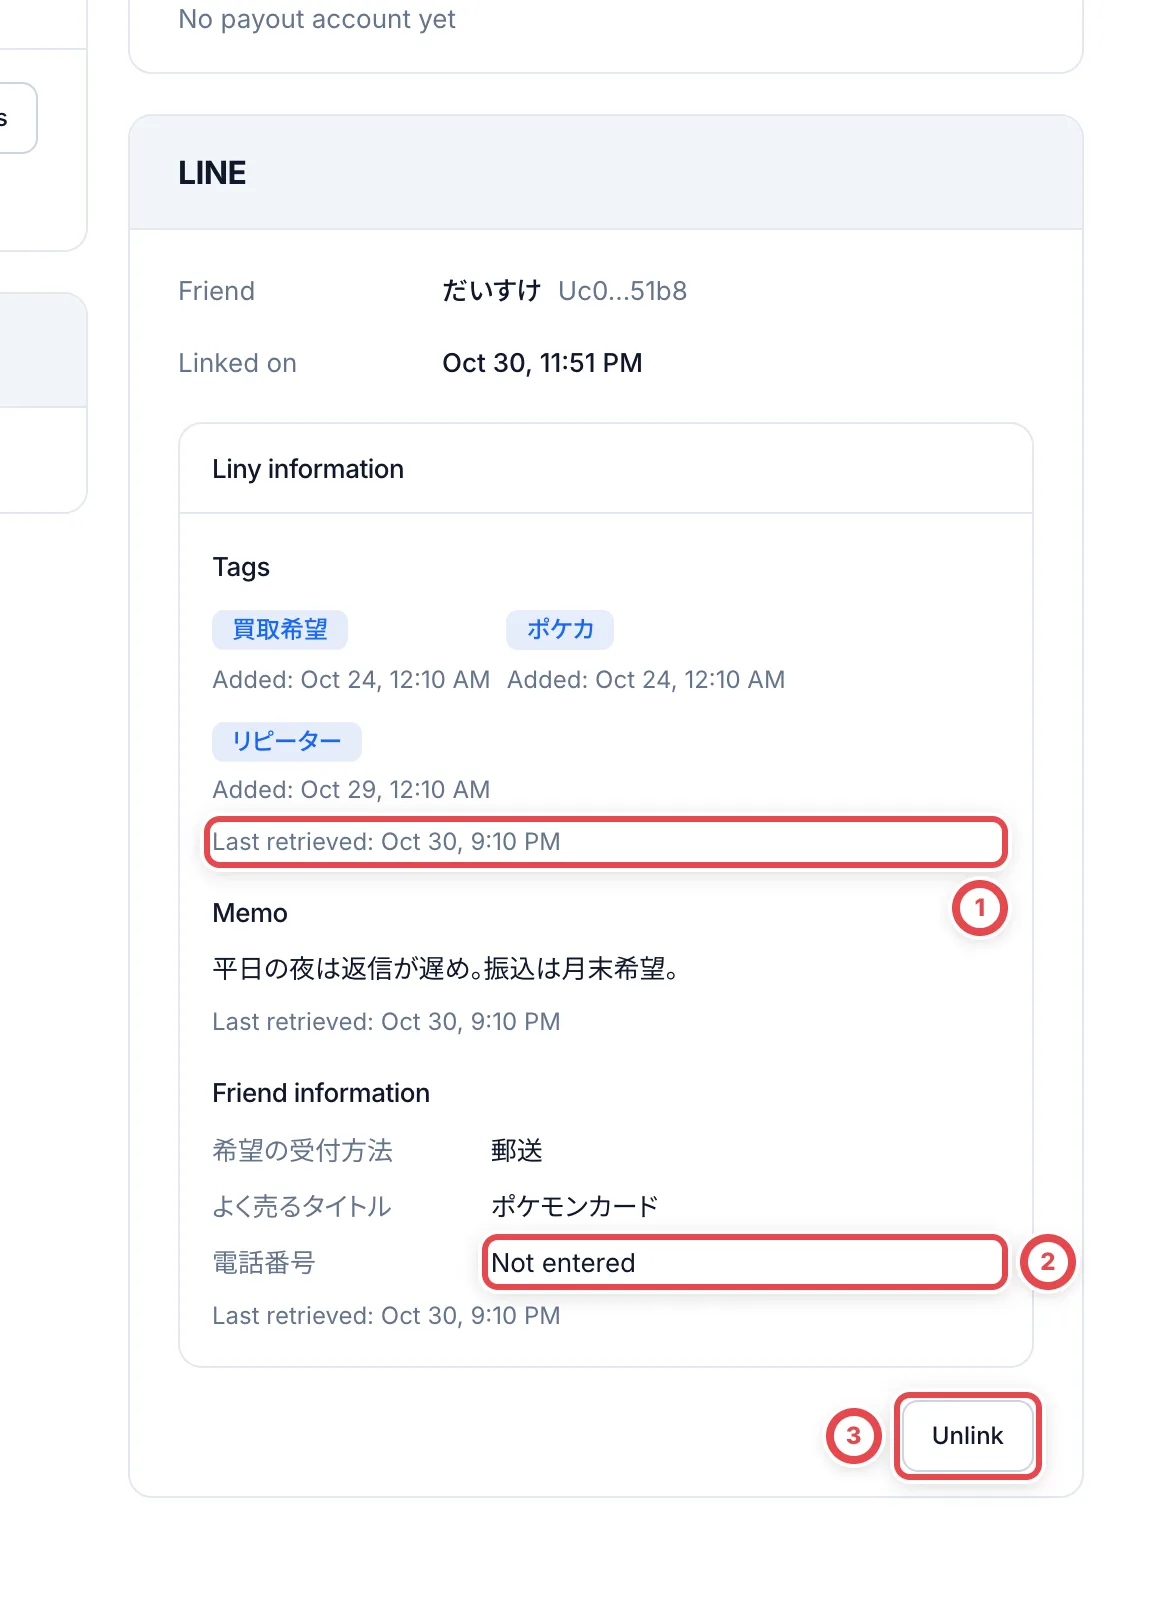 When automatic synchronization is running, tags, memo and friend information are each copied from Liny about once a day. Right after you change something in Liny, the old content may still show. Check the time at ① to see how recent it is.
| What you see | What it means |
| --------------------------------------------------- | ----------------------------------------------------------------------- |
| **Not retrieved**, **Retrieval date unknown** | Nothing has been copied from Liny yet. We can't tell whether it's blank |
| **No tags**, **No memo**, **No friend information** | It was copied from Liny, and nothing is set in Liny either |
| ② **Not entered** | The friend information field exists, but that field is blank in Liny |
**Not retrieved** and **No tags** are different. With **Not retrieved**, you may have tags in Liny that just haven't arrived here yet.
**Unlink** (③) removes the link between this LINE friend and the customer. You must enter a reason. Use it when you linked the wrong person.
## 6. Set a customer to Flagged or Archived
Click **Change status** at the top right of the page.
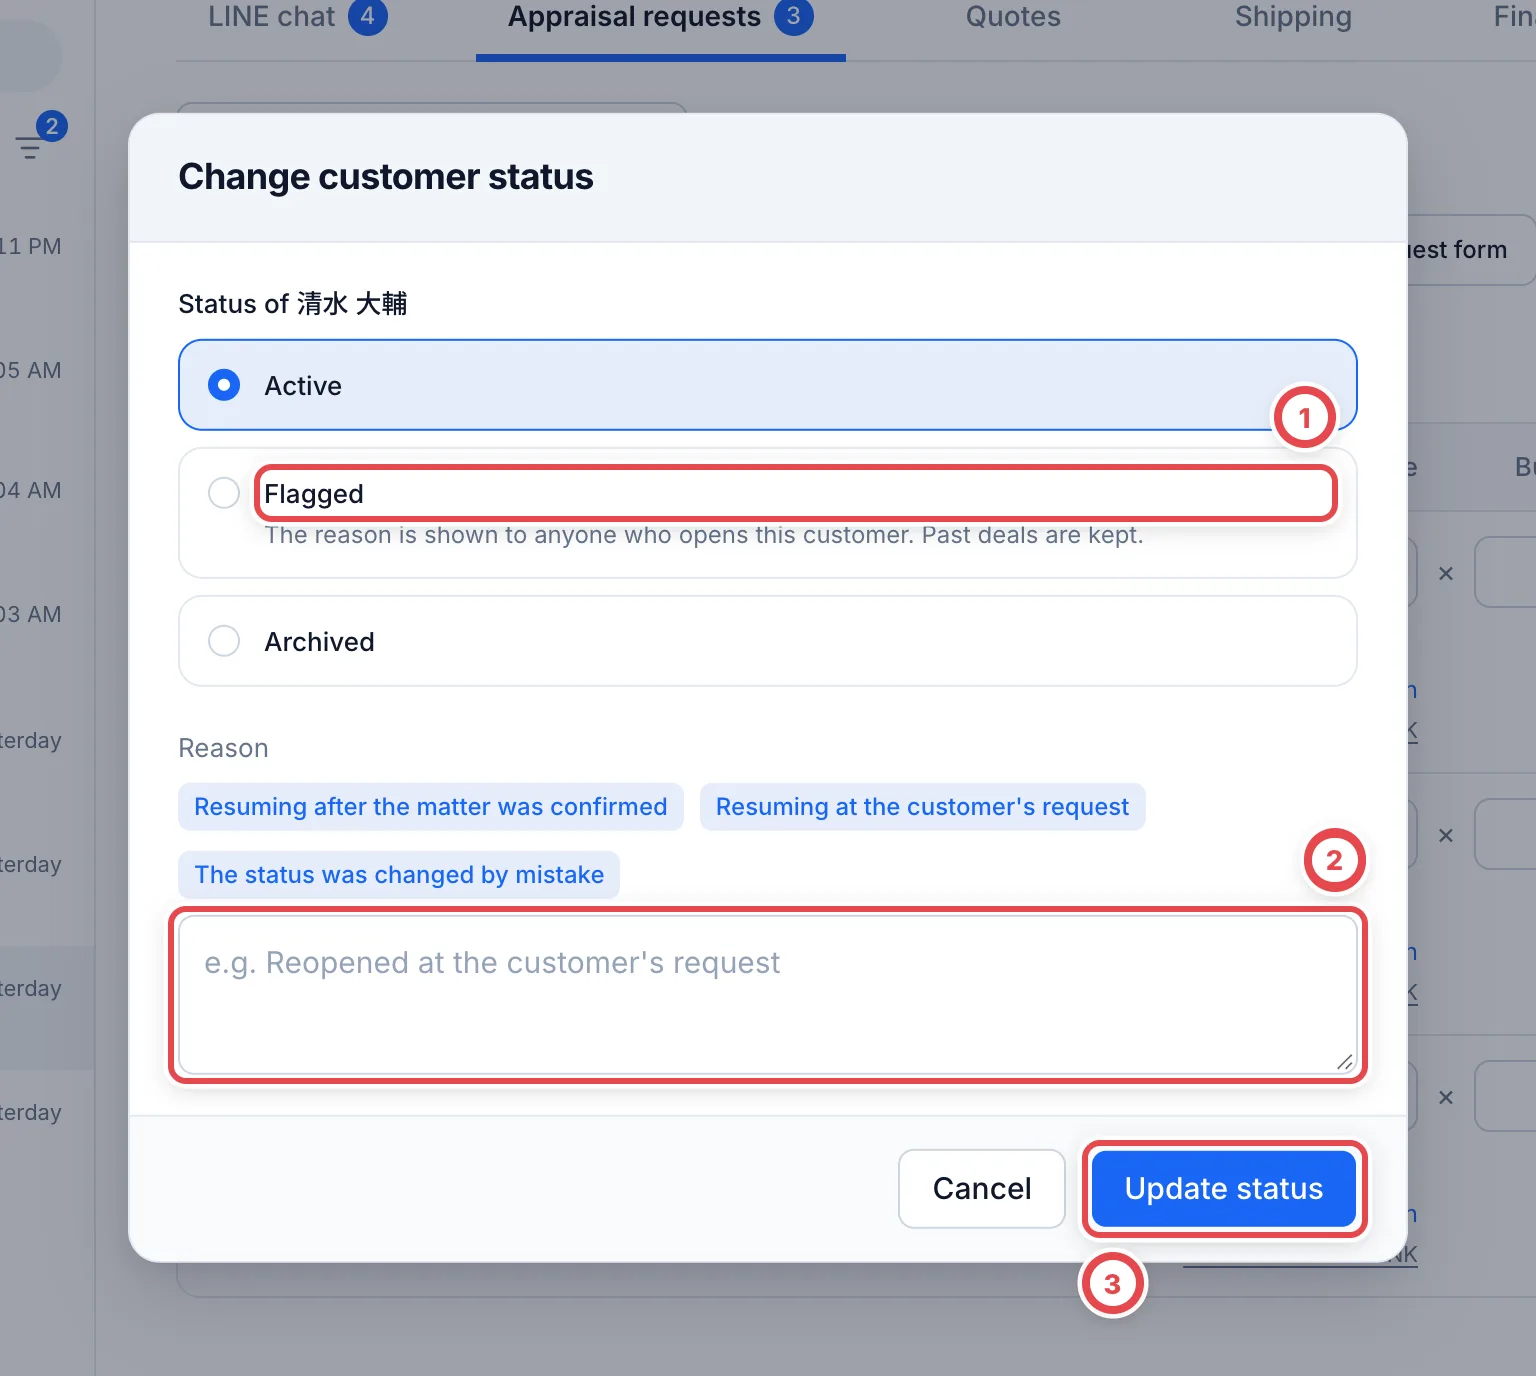 Choose a status at ①, write a reason at ②, and click **Update status** at ③. **It changes as soon as you click, and the reason is recorded along with who changed it.** To undo it, open the same dialog, choose **Active**, write a reason and save.
| Status | When to use it | What happens |
| -------- | --------------------------------------------------------------------------------------------------- | ----------------------------------------------------------------------------------------------------------------------------------------------------------------------------------------------------------------------------------------------------------------------------------------------------- |
| Active | Normally | Nothing is stopped |
| Flagged | A customer you want to be careful with, for example what they declared and what arrived don't match | **Flagged** shows next to the name, and a red bar with the reason shows at the top of the page. **Appraisal, quotes and payments on deals already in progress aren't stopped.** You can no longer edit the customer details, switch to business, or add Intake review items or form answers to a deal |
| Archived | A customer you won't deal with again | They stay in the list. On top of what Flagged stops, you can no longer create a new quote, add a purchase request, read LINE photos, change the name, register a payout account or link LINE. Past deals are kept |
When anyone opens a Flagged customer, the reason shows at the top of the page.
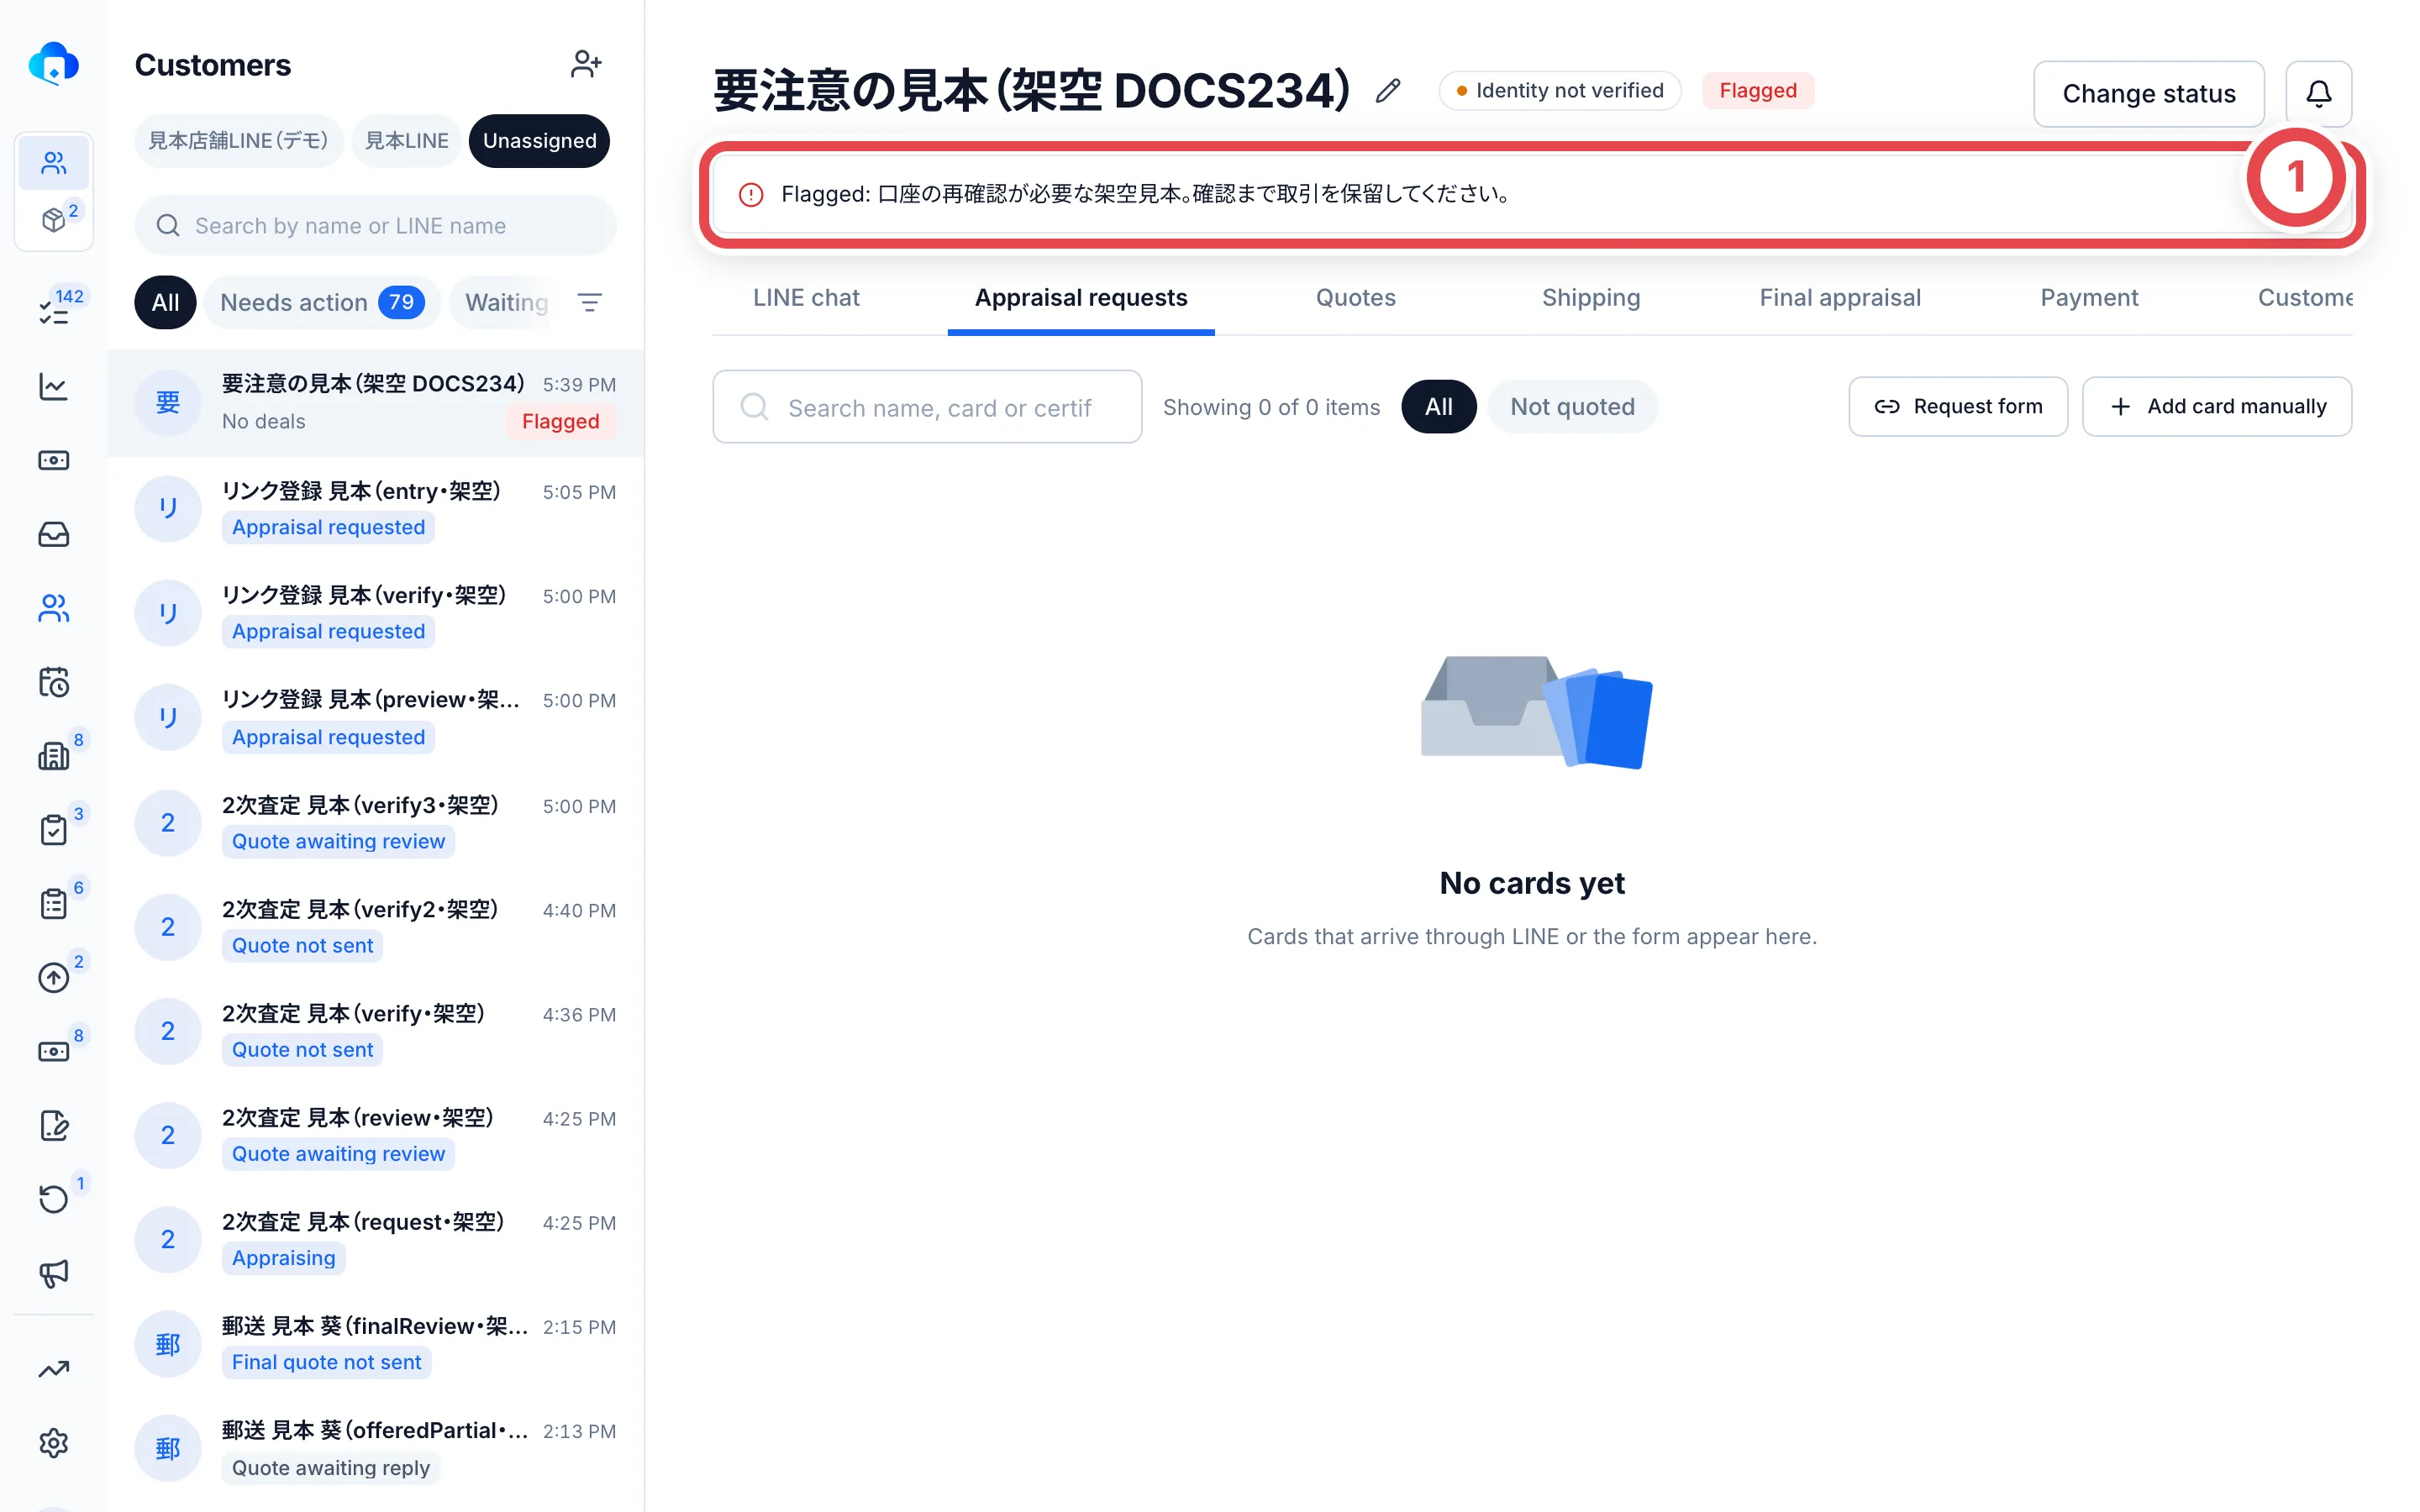 ## 7. Clear the Intake review list
When someone submits a Liny form (such as the buying application), the response goes into the right deal automatically if it's clear whose it is and which deal it belongs to. Only the ones that aren't clear pile up in **Intake review**.
There are two ways to open it. Use the button on the **Purchase requests** page, or the **Intake check** row on the **To do** page.
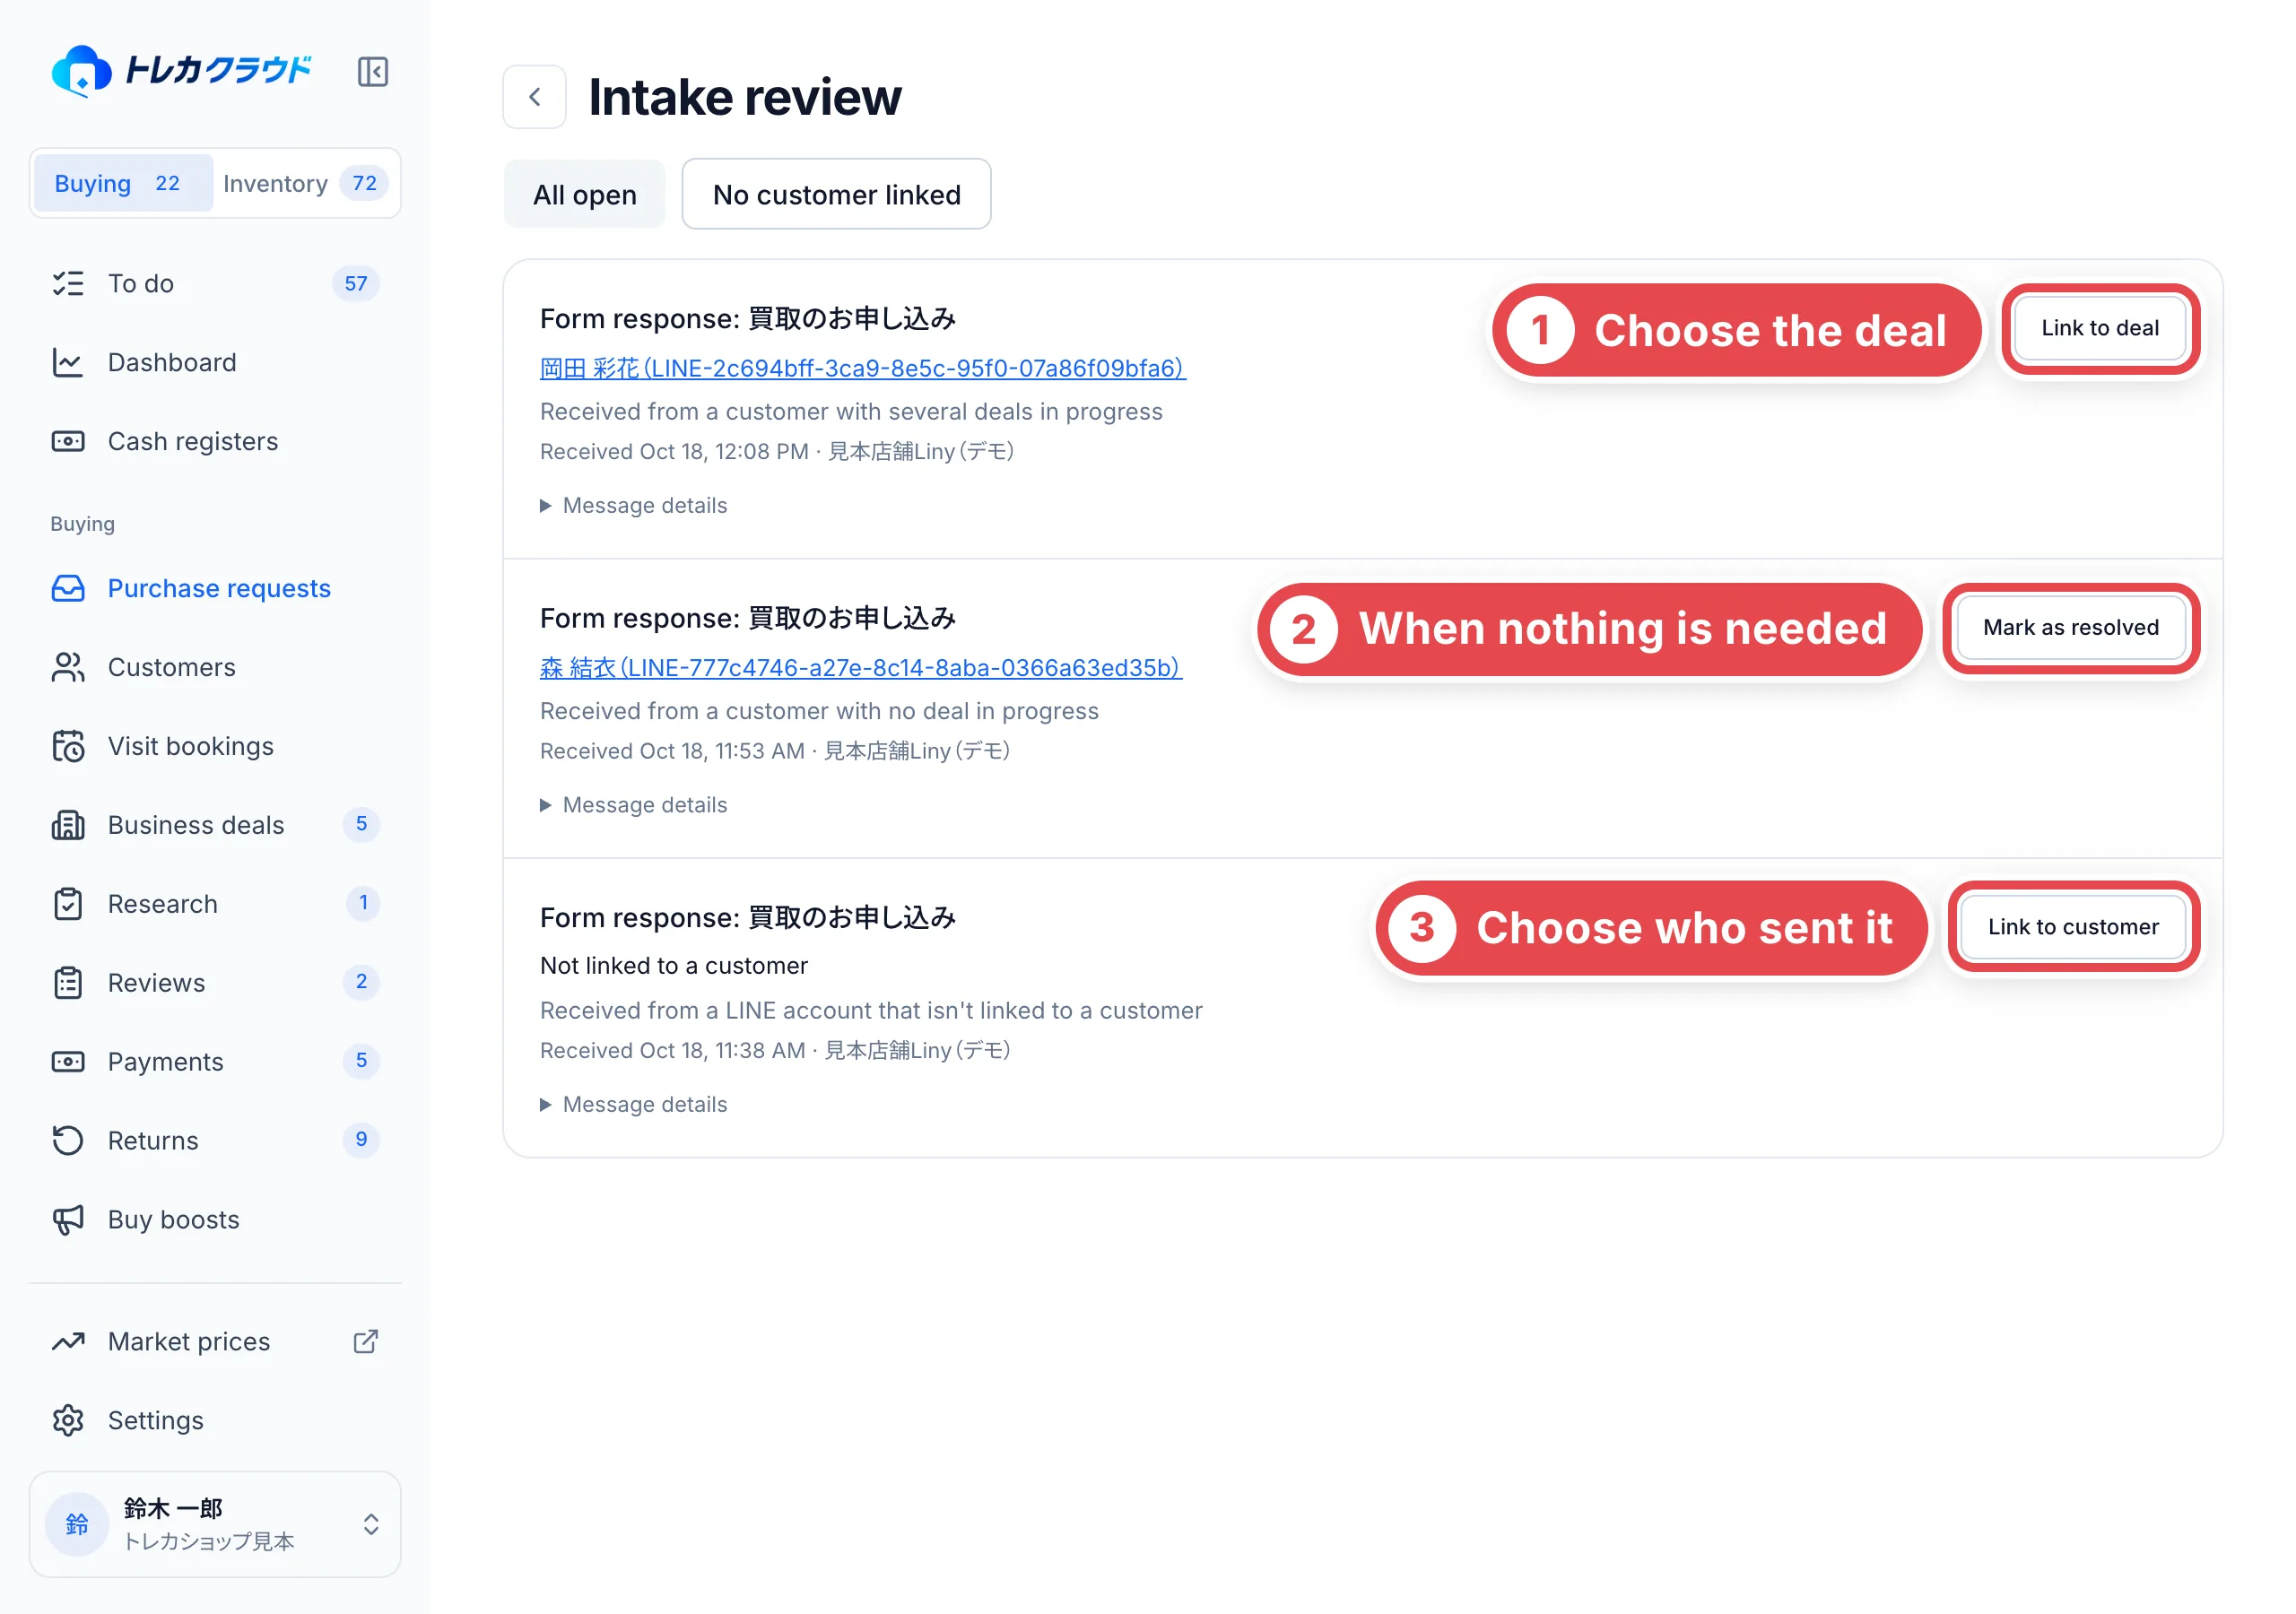 | Description | What's happening | Button to click | What happens next |
| ------------------------------------------------------------ | ------------------------------------------------------------- | ---------------------- | -------------------------------------------------------------------------------------------------------------------------------------------------------------------------------------------------------------------- |
| Received from a LINE account that isn't linked to a customer | The LINE friend who sent it isn't a customer yet | ③ **Link to customer** | Search for a customer and choose one, and that LINE friend is linked to them. If they have one deal in progress, the message goes into that deal. With none or several, the row changes to one of the two rows below |
| Received from a customer with several deals in progress | There are several deals, and we can't tell which one it's for | ① **Link to deal** | Choose one deal in progress and click **Link**. This only works while the customer is **Active** |
| Received from a customer with no deal in progress | There's no deal to put it in | ② **Mark as resolved** | Click **Mark as resolved** and it disappears from the list. If it contains a card request, read it from the LINE chat and add it |
Click a customer's name in a row to open their page. **Message details** shows the Liny friend ID and the answer ID. Use them when you check the content of the response in Liny.
## 8. Add a purchase request
For a purchase you took in some way other than LINE, such as someone bringing cards to the store or calling you, add it as a purchase request. The **Purchase requests** page lists every deal. Open it from **Purchase requests** in the sidebar, or from the count under **Stalled work** on the dashboard.
1. **Start adding**
On the **Purchase requests** page, click **Add purchase request**.
2. **Choose the intake channel and the customer**
At ①, choose **In store** or **Not in store** as the **Intake channel**,
then choose **New customer** or **Existing customer**. For **New customer**,
enter the **Customer name** at ②. For **Existing customer**, search for them
and choose one.
3. **Add the cards**
Adding the request creates an empty deal and opens its page. Add the cards
you're taking in on the deal page.
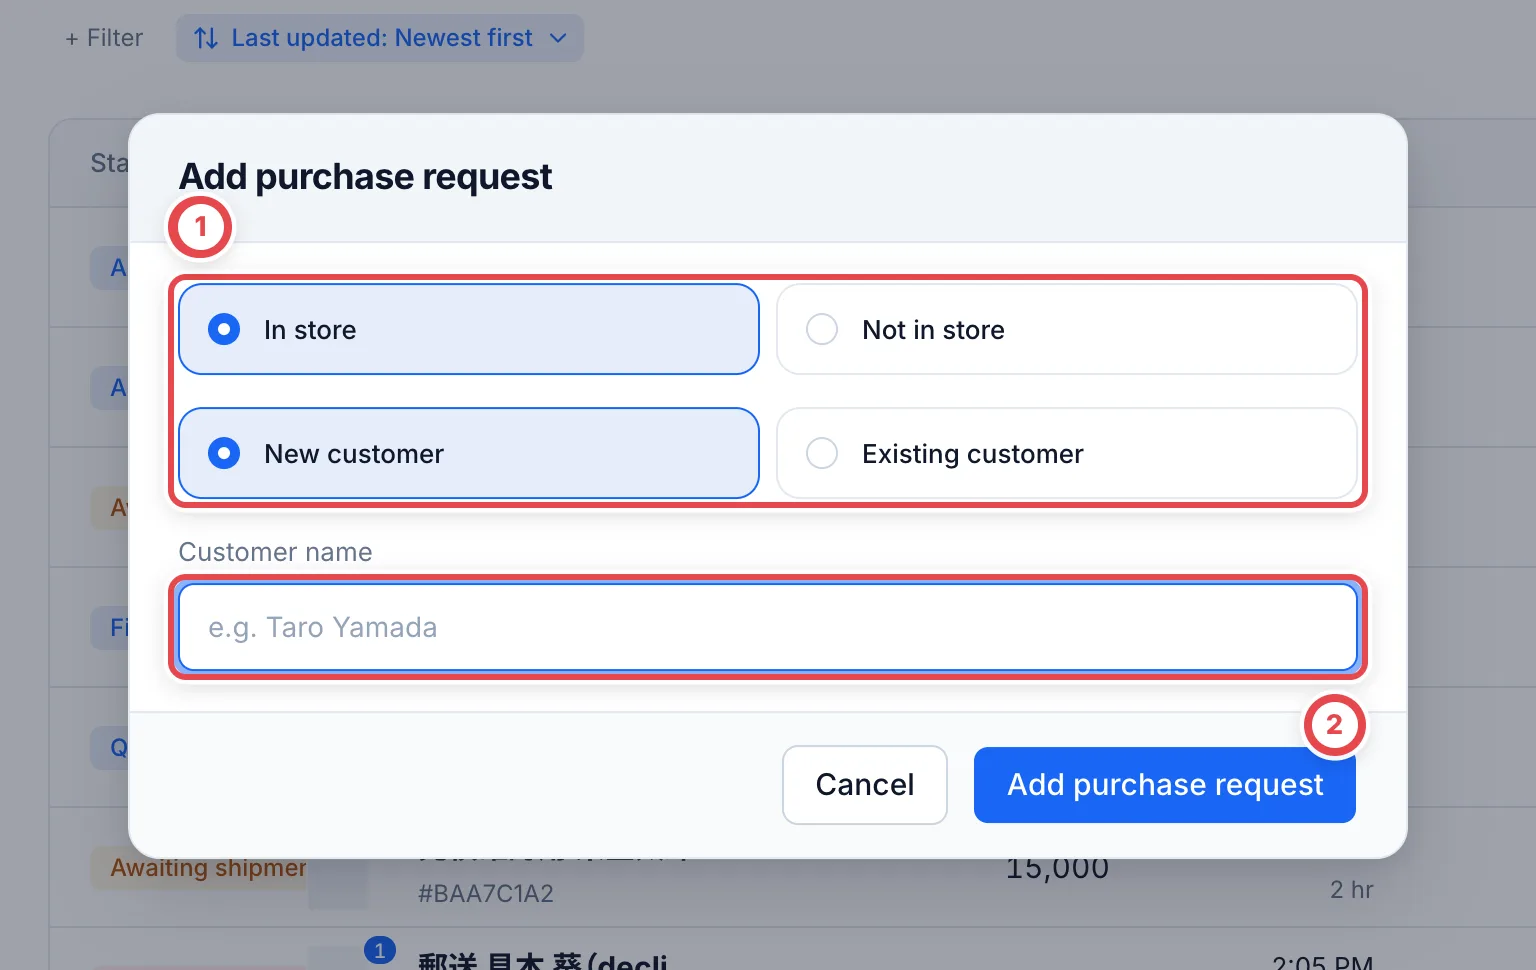 When an existing customer asks for a new appraisal, you can also click **Add card manually** on the **Appraisal requests** tab of their page. You can also create an appraisal request form link with **Request form** and send it to the customer.
For the steps from a LINE inquiry through to sending the quote, see [Take a LINE inquiry through to a quote](/en/guides/purchase/line-intake). LINE replies are sent from Liny or the LINE admin screen. Copy the text made in Toreca Cloud and use it there.
## 9. Write a note
**Notes**, inside **Customer details** on the **Overview** tab, is free text for what to remember about this customer. Each customer has one, and the customer never sees it.
1. Click **Edit** next to **Notes**
2. Write the date and the note, such as "2026/11/06 Has sent a fake box before". The date isn't added for you
3. Click **Save**
- To remove something, delete that part and save. Deleting everything leaves the card empty
- If someone else saved in the meantime, your save is refused rather than overwriting theirs. Copy what you wrote, then reload the page
- An archived customer's notes can be read, but not edited
## Troubleshooting
| What's happening | What to check and how to fix it |
| --------------------------------------------------------------------------- | -------------------------------------------------------------------------------------------------------------------------------------------------------------------------------- |
| The customer you're looking for isn't in the list | Check that the account tab at the top is the right one. Customers who didn't come through LINE are under **Unassigned**. If you filtered by **Needs action**, go back to **All** |
| A person who messaged you on LINE isn't in the list | They aren't a customer yet. Open **More filters** (③), show **Unregistered LINE friends**, and add them as a customer from there |
| The pencil doesn't show next to the name | The customer is Archived. To fix the name, set them back to **Active** first |
| You fixed the name, but it doesn't go back to the Liny name | A name you've saved doesn't follow Liny automatically. Click **Use the Liny name**, then save |
| A tag you added in Liny doesn't show up | It's copied from Liny about once a day. Check the **Last retrieved** time. If you added the tag after that, wait for the next import |
| You can't link a LINE friend to a customer | The customer is Archived. Set them back to **Active**, then link them (you can link a Flagged customer) |
| You can't save with **Edit** under Customer details | The customer is Flagged or Archived. You can only change customer details while they're **Active** |
| **Link to deal** or **Mark as resolved** fails in Intake review | The customer is Flagged or Archived. Check the content, and if the deal can go on, set them back to **Active** before you click |
| You can't create a quote or add a purchase request for an Archived customer | You can't start new work for an Archived customer. If you'll deal with them again, set them back to **Active** with **Change status** |
| The Intake review list doesn't get shorter | Messages from customers with no deal in progress don't disappear by themselves. Check the content and click **Mark as resolved** |
## Related workflows
- [Find contracts and powers of attorney](/en/guides/purchase/contracts)
---
# Record the final appraisal card by card
Source: https://docs.toreca-cloud.com/en/guides/purchase/final-appraisal
The final appraisal records each physical card separately, including multiple copies of the same card. Its certification number, appraisal amount and purchase eligibility are together on one row labelled **Card 1**, **Card 2**, and so on.
| Task | Where to start or continue |
| ---------------------------------------------- | ------------------------------------------------------------------------------------------------------ |
| Cards have arrived by mail | Start with the arrival check in [Shipping and final appraisal](/en/guides/purchase/shipping-and-final) |
| You saved the first in-store appraisal | Open **Items** in [In-store purchases](/en/guides/purchase/counter) |
| An invoice-based business purchase | First check the invoice and received goods in [Business deals](/en/guides/purchase/corporate-deals) |
| Correct amounts or quantities after settlement | Use [Post-settlement corrections](/en/guides/purchase/amount-and-quantity-corrections) |
## 1. Open the final appraisal editor
Open the deal's final appraisal items. The inputs open when you create the first final appraisal. To change a saved appraisal, choose **Edit appraisal**.
Click the product heading to expand or collapse that card. **Review inputs and close** folds it; save the records with the overall **Save** action in step 4.
Match the name, card number, grading service, grade and individual card index to the physical card. Put identical copies in a consistent order before entering their details.
If a box, pack or deck has a **Check condition** action, first record its actual condition and quantity. Unchecked goods remain in the condition-check view before the price editor opens.
## 2. Enter this card's number, amount and note
1. For a graded card, compare **PSA number** or **Certification number** at ① with its physical label. **Unconfirmed** means the number came from a declaration or inspection. Re-enter the checked number and save it. Do not copy one number across all copies
2. At ② **Appraisal amount**, enter the amount in yen for this one card. Identical cards may have different amounts when their condition differs
3. Enter any explanation, such as a reduction, at ③ **Appraisal note (visible to customer)**. It also appears on the customer's quote
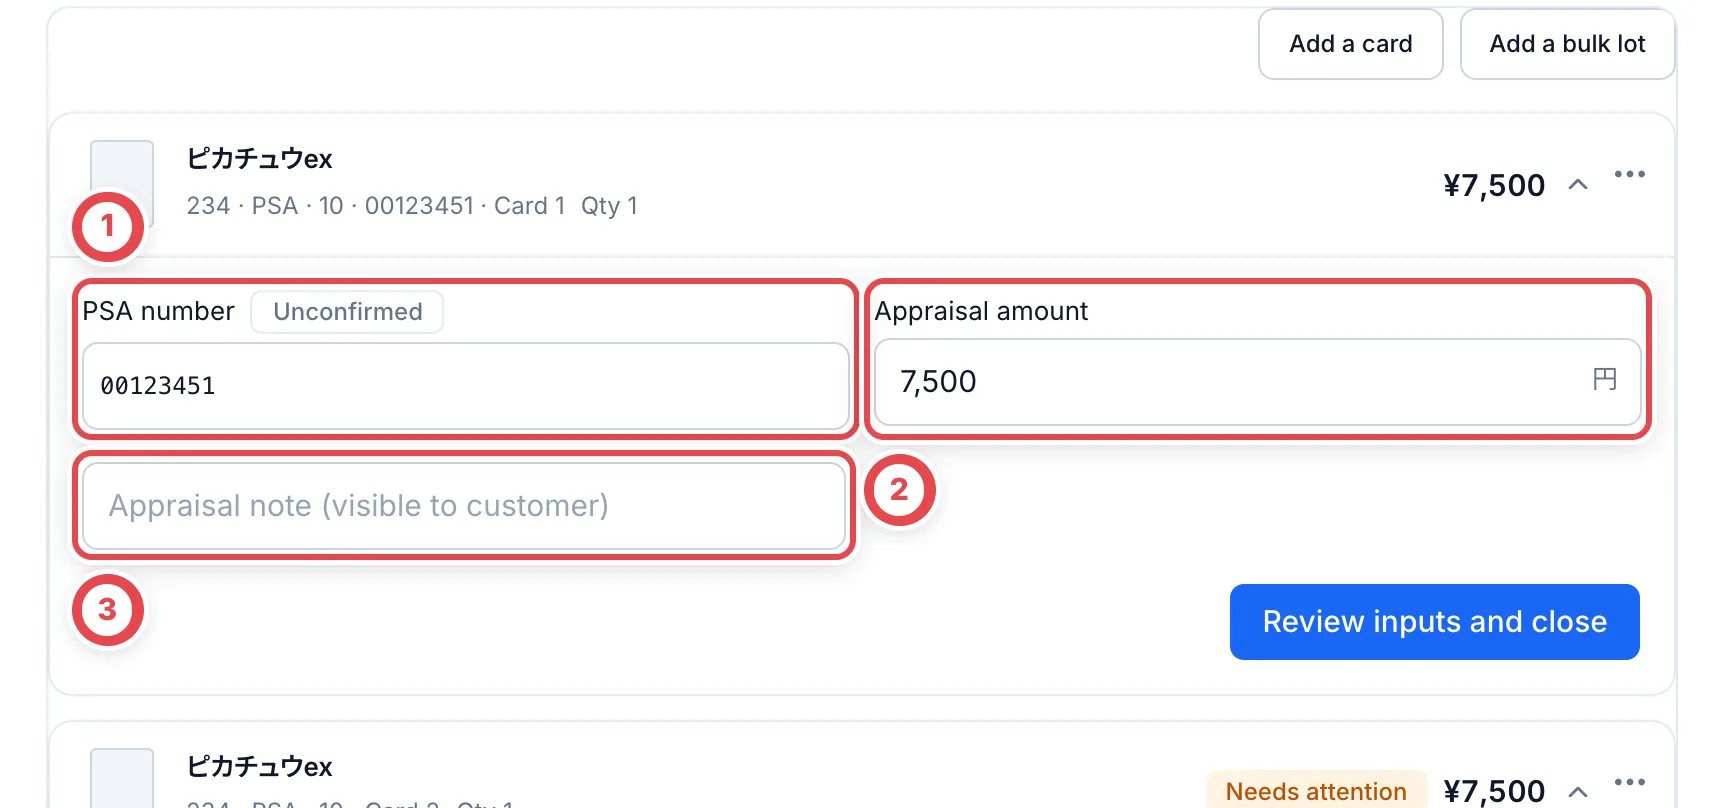 Keep leading zeroes in certification numbers. The same number cannot be saved on multiple cards in this appraisal.
A zero-yen appraisal, a card you cannot purchase, and a missing card are different records. Mark cards you will not buy using the next step. Correct the arrival record for cards that did not arrive.
## 3. Record purchase eligibility and internal notes
For a card you cannot buy, open its three-dot menu at ① and choose ② **Mark not purchasable**. The **Management note** at ③ is an internal record, separate from the customer-visible appraisal note.
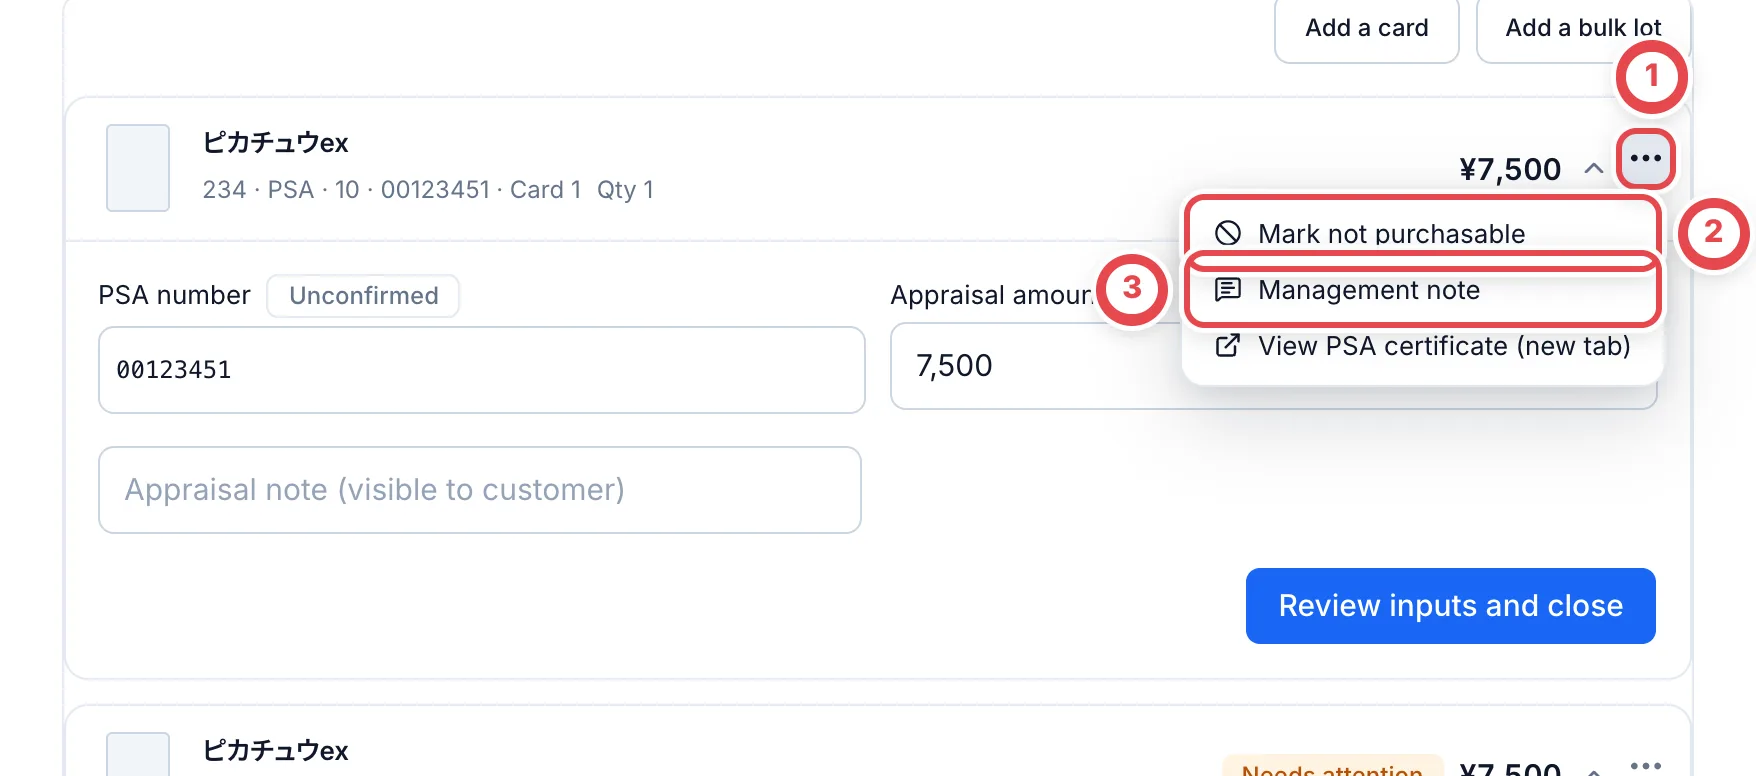 Choose **Condition**, **Ineligible product** or **Other** in **Reason** at ①. For **Other**, enter a detailed reason too. The price field is disabled for a rejected card. The change takes effect when you click **Save**.
To undo the choice, use **Restore eligibility** from the same menu at ②. Restoring a card whose rejection was already saved also requires a **Reason for restoring**.
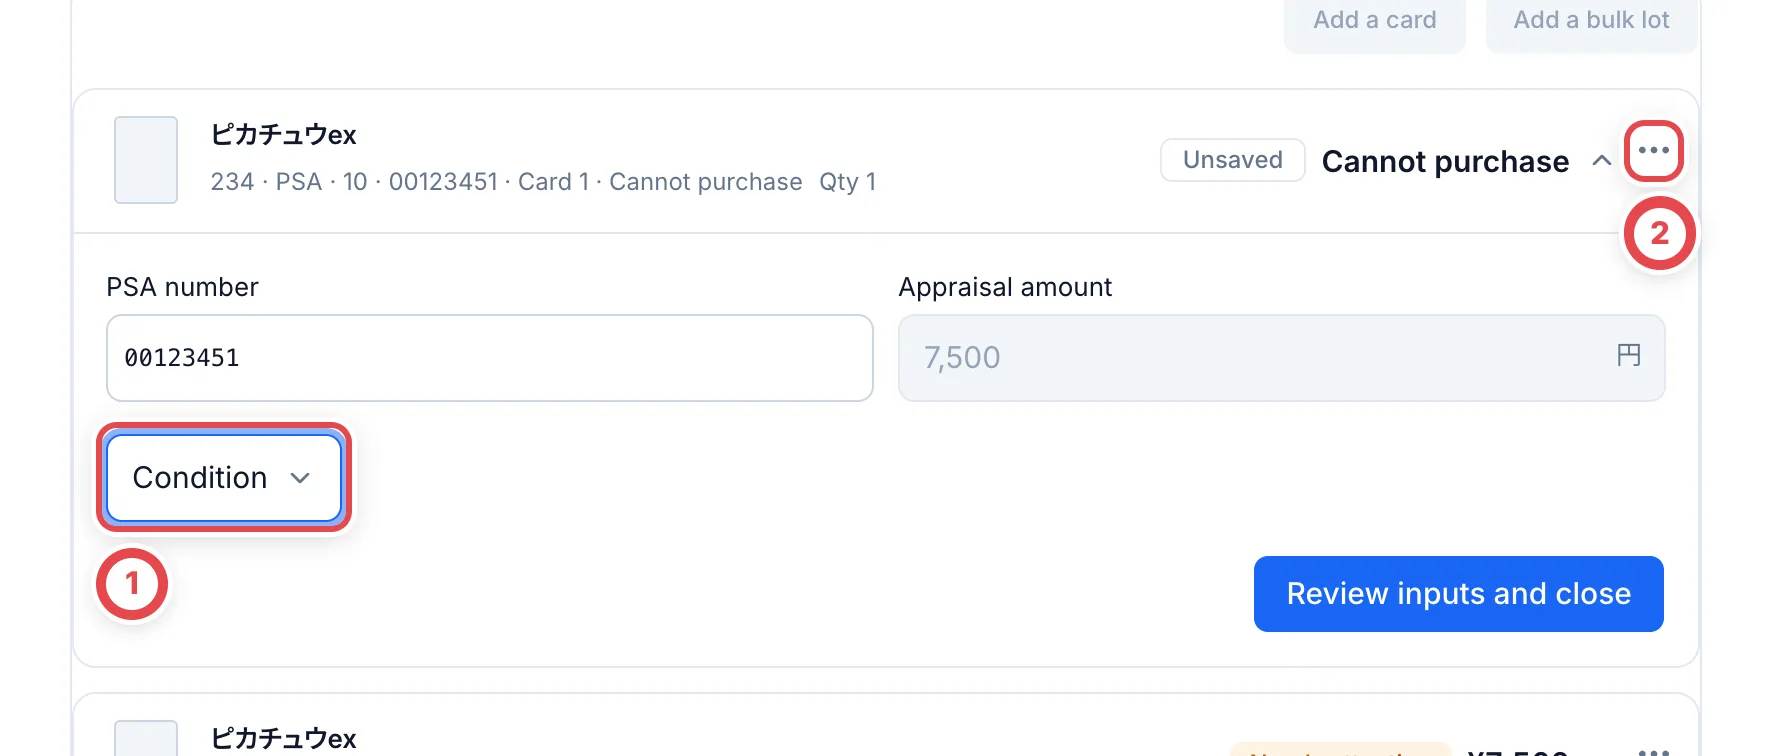 When a PSA number is entered, **View PSA certificate (new tab)** opens its certificate information. Compare it with the physical card.
## 4. Check every card and save
For more than 50 cards, use **Next** and **Previous** to check every page. Unsaved edits remain while you move between pages; **Save** saves them together.
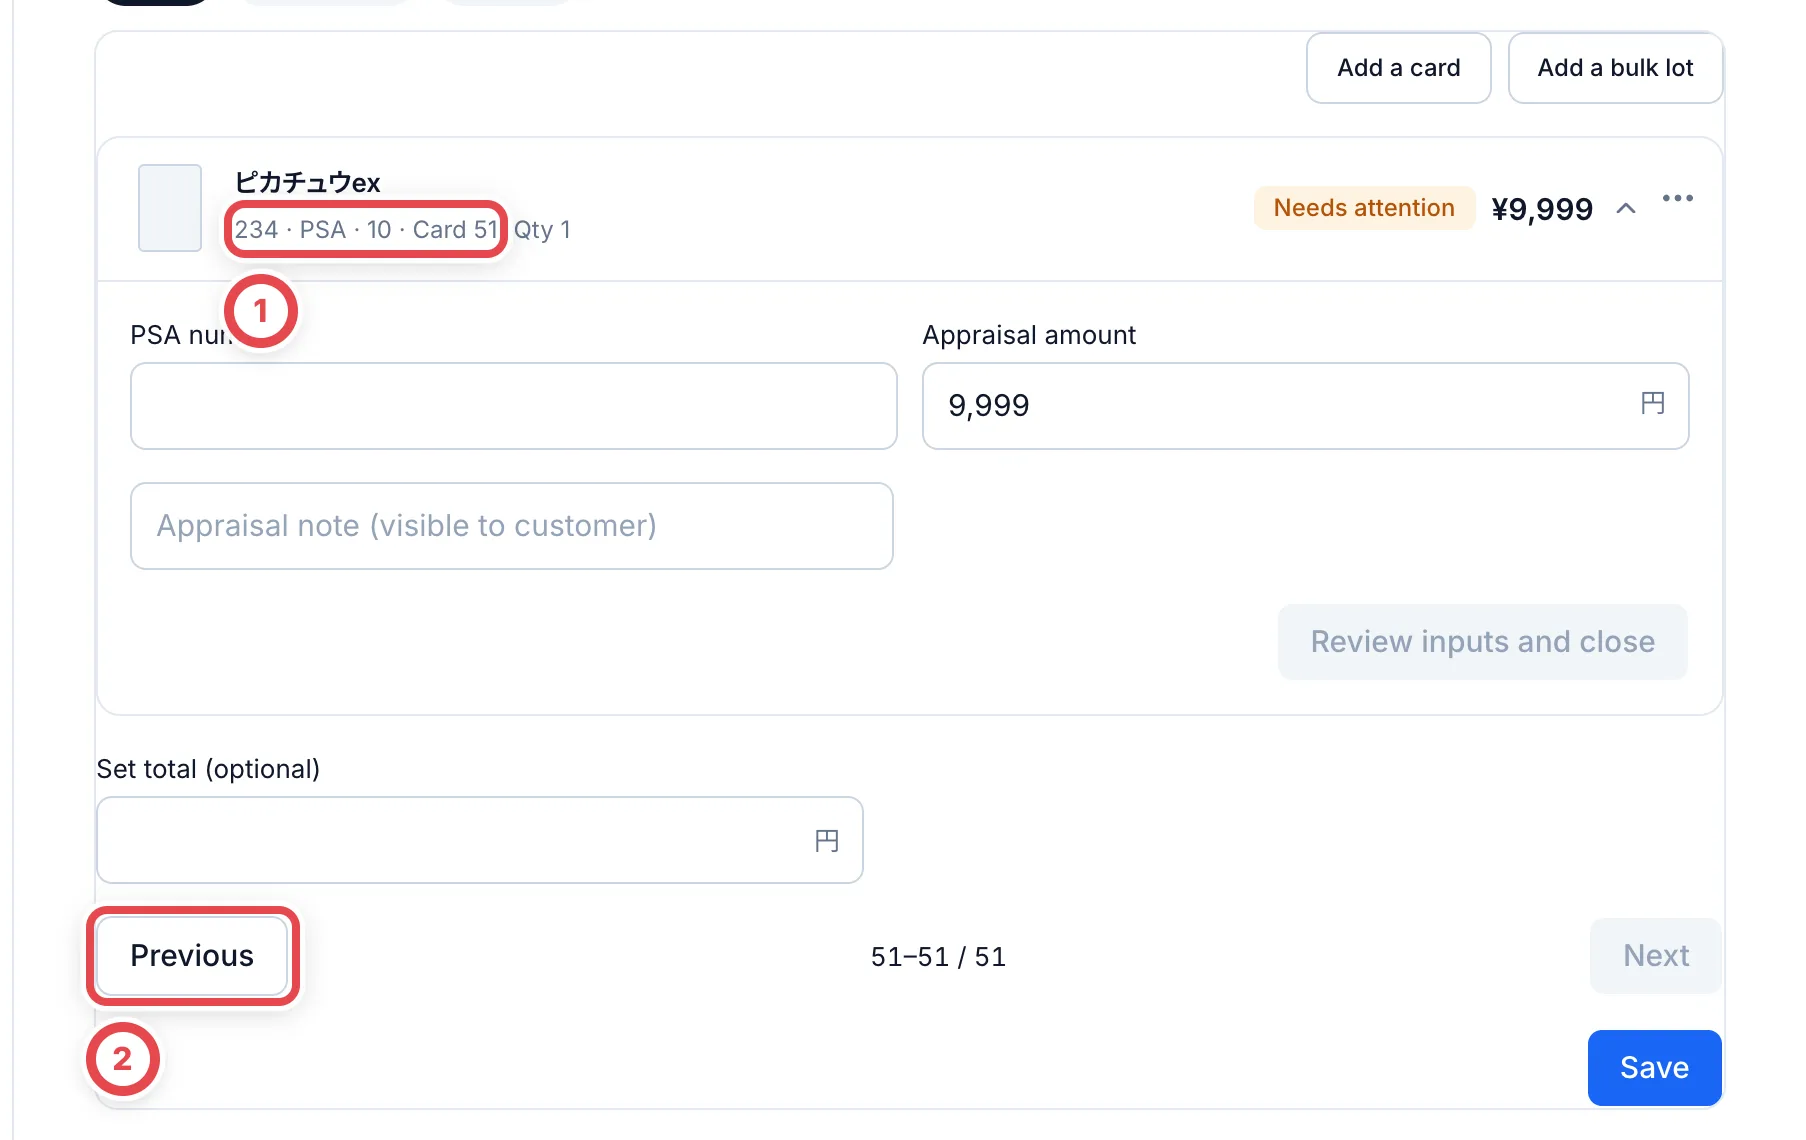 Only enter ① **Set total (optional)** when you want a package total instead of the sum of individual prices. Clear it to return to the normal sum. See [Set prices](/en/guides/purchase/set-price).
When all cards are checked, click ② **Save**. Numbers, amounts, eligibility and reasons are saved together. Saving alone does not send a message to the customer or execute a payment.
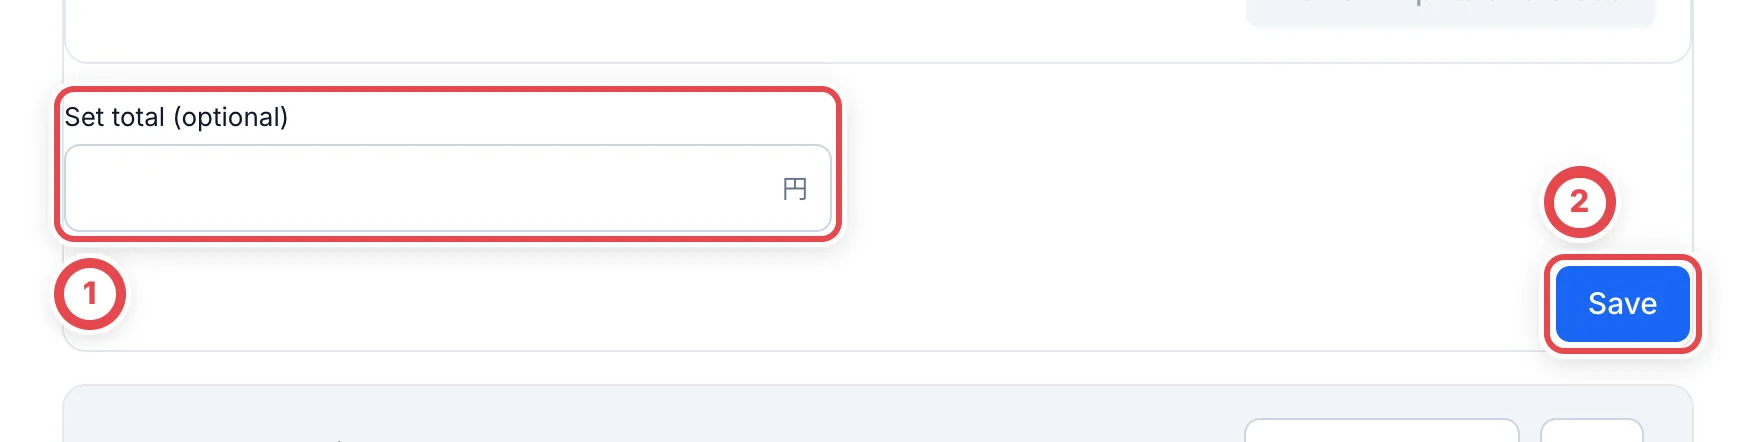 ## 5. Check the saved result and continue
Check the saved card count, amounts and rejection reasons, then open the final quote PDF to review what the customer will see. Rejected cards are excluded from the purchase total.
- For an in-store purchase, continue to [Show the quote on the customer's screen](/en/guides/purchase/counter)
- For an online purchase, complete any required [second review](/en/guides/purchase/research-and-reviews), then [present the final quote](/en/guides/purchase/shipping-and-final)
- For an online purchase of only some cards, confirm the selected cards and allocated amounts against the presented quote. See [Partial set-price acceptance](/en/guides/purchase/set-price#buy-only-some-cards-in-an-online-purchase)
- If the included items change at the counter, [requote](/en/guides/purchase/counter) and get agreement and a signature for the new contents
Rejected and declined physical cards are returned; missing cards are not. Continue with in-store handback or [mail returns](/en/guides/purchase/returns).
Changing a saved appraisal may require a new second review. Follow **Next step** for the current revision. If the final quote has already been presented, use the requote workflow rather than editing the presented version.
## Troubleshooting
| What's happening | What to do |
| --------------------------------------------------- | ------------------------------------------------------------------------------------------------------------------------------------------------- |
| A number remains **Unconfirmed** | Check the physical card, re-enter the number and save. Displaying the inherited number does not confirm it |
| The same certification number is on multiple cards | Find the duplicates and enter each physical card's own number |
| Restoring eligibility will not save | Enter both the reason for restoring and this card's appraisal amount |
| A card that did not arrive is included | Check the arrival and missing-item records rather than setting only a zero price. A **Missing** card cannot be changed to received in this editor |
| **Add a card** or **Add a bulk lot** is disabled | Save your current final-appraisal edits first. After adding, check the new items' amounts and condition |
| Research must be applied or withdrawn before saving | Apply the research answer or withdraw the unnecessary request, then reopen the final appraisal |
| An inspection must be completed before saving | Finish the ongoing inspection, then return |
| The case or individual cards have changed | Keep a copy of your input, reopen the page and compare it with the latest rows before saving |
| The edit action is missing | Check purchase write permission, the deal status, review and presentation status. Use corrections after settlement |
---
# Undo an operation from history
Source: https://docs.toreca-cloud.com/en/guides/purchase/history-and-undo
Use [purchase corrections](/en/guides/purchase/amount-and-quantity-corrections) for amounts or quantities after stock registration. Use [record corrections](/en/guides/inventory/record-corrections) for historical descriptions or internal notes. These are separate from undoing an operation.
Appraisal saves, acceptance and arrival operations can be undone when recovery information was recorded. This does not reverse external messages, signatures, payments or settled transactions. Combined counter handovers are excluded.
| Situation | Action |
| ----------------------------------------------- | ----------------------------------------------------------------------------------------------------------------------- |
| Just saved; nothing changed afterwards | Use **Undo** in the completion message |
| Choose an earlier point after reviewing history | Use the before/after restoration actions in **Activity** |
| Reverse the latest acceptance/arrival stage | Use the status menu’s stage-reversal action; see [Shipping and final appraisal](/en/guides/purchase/shipping-and-final) |
## 1. Choose the deal and saved operation
Open **Activity** on the correct deal. Check the saved operation, timestamp, staff member, amount and quantity at ①. At ②, restoring before an operation selects its preceding state; restoring to that point selects its following state. Later eligible operations may also be reversed, so review the preview.
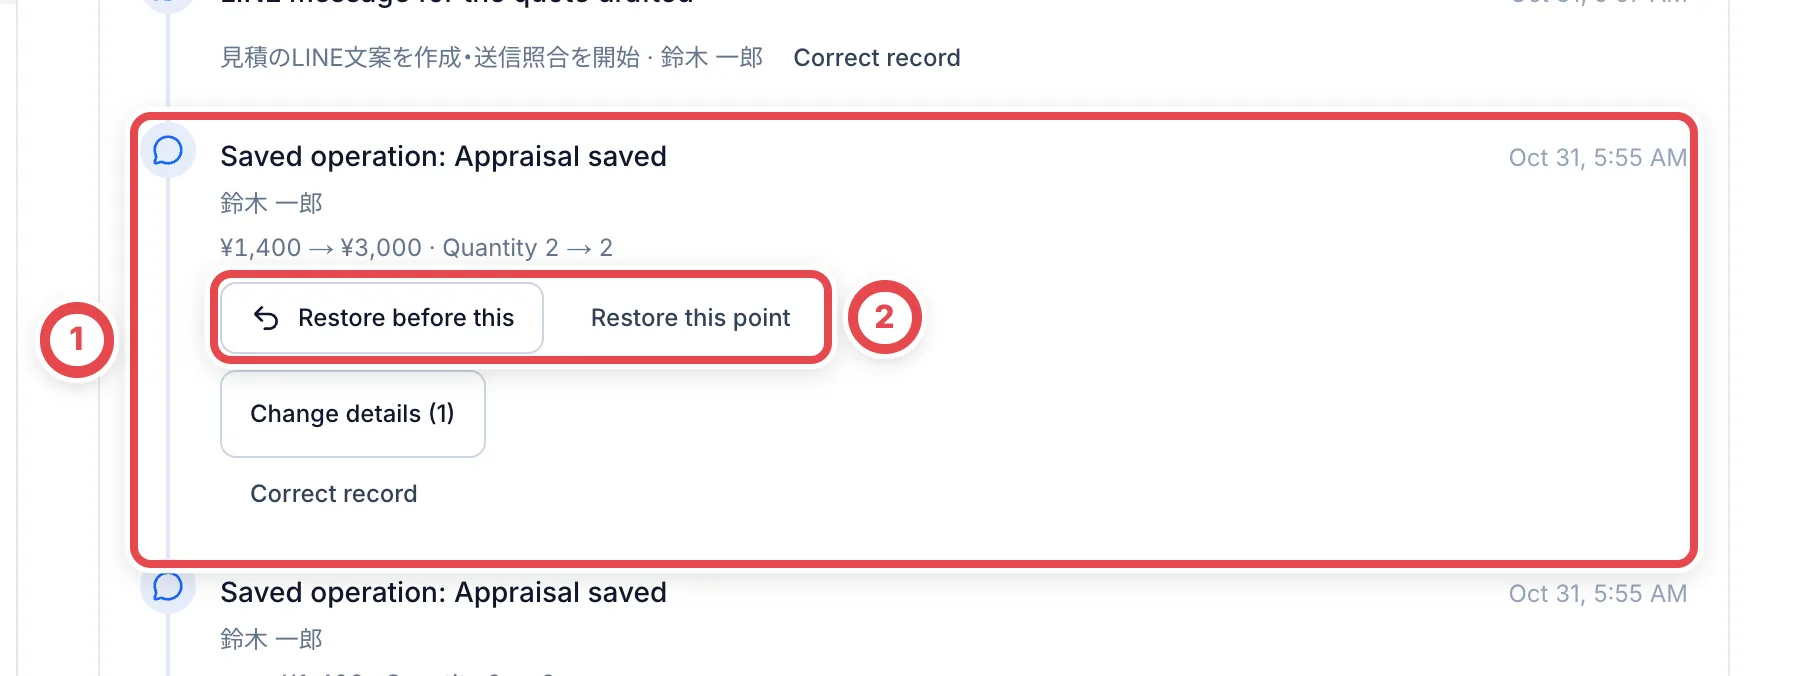 ## 2. Review the change and supply a reason
At ①, compare current and restored progress, draft amount, quantity and affected operations. Enter a reason at ② and confirm at ③. Original history, notes, photos and attachments remain. Previous approval is not carried forward automatically; appraisals become new drafts.
After saving, reopen history and verify both the restoration record and resulting lines. If restoration is blocked, inspect the named dependency and use the appropriate correction workflow.
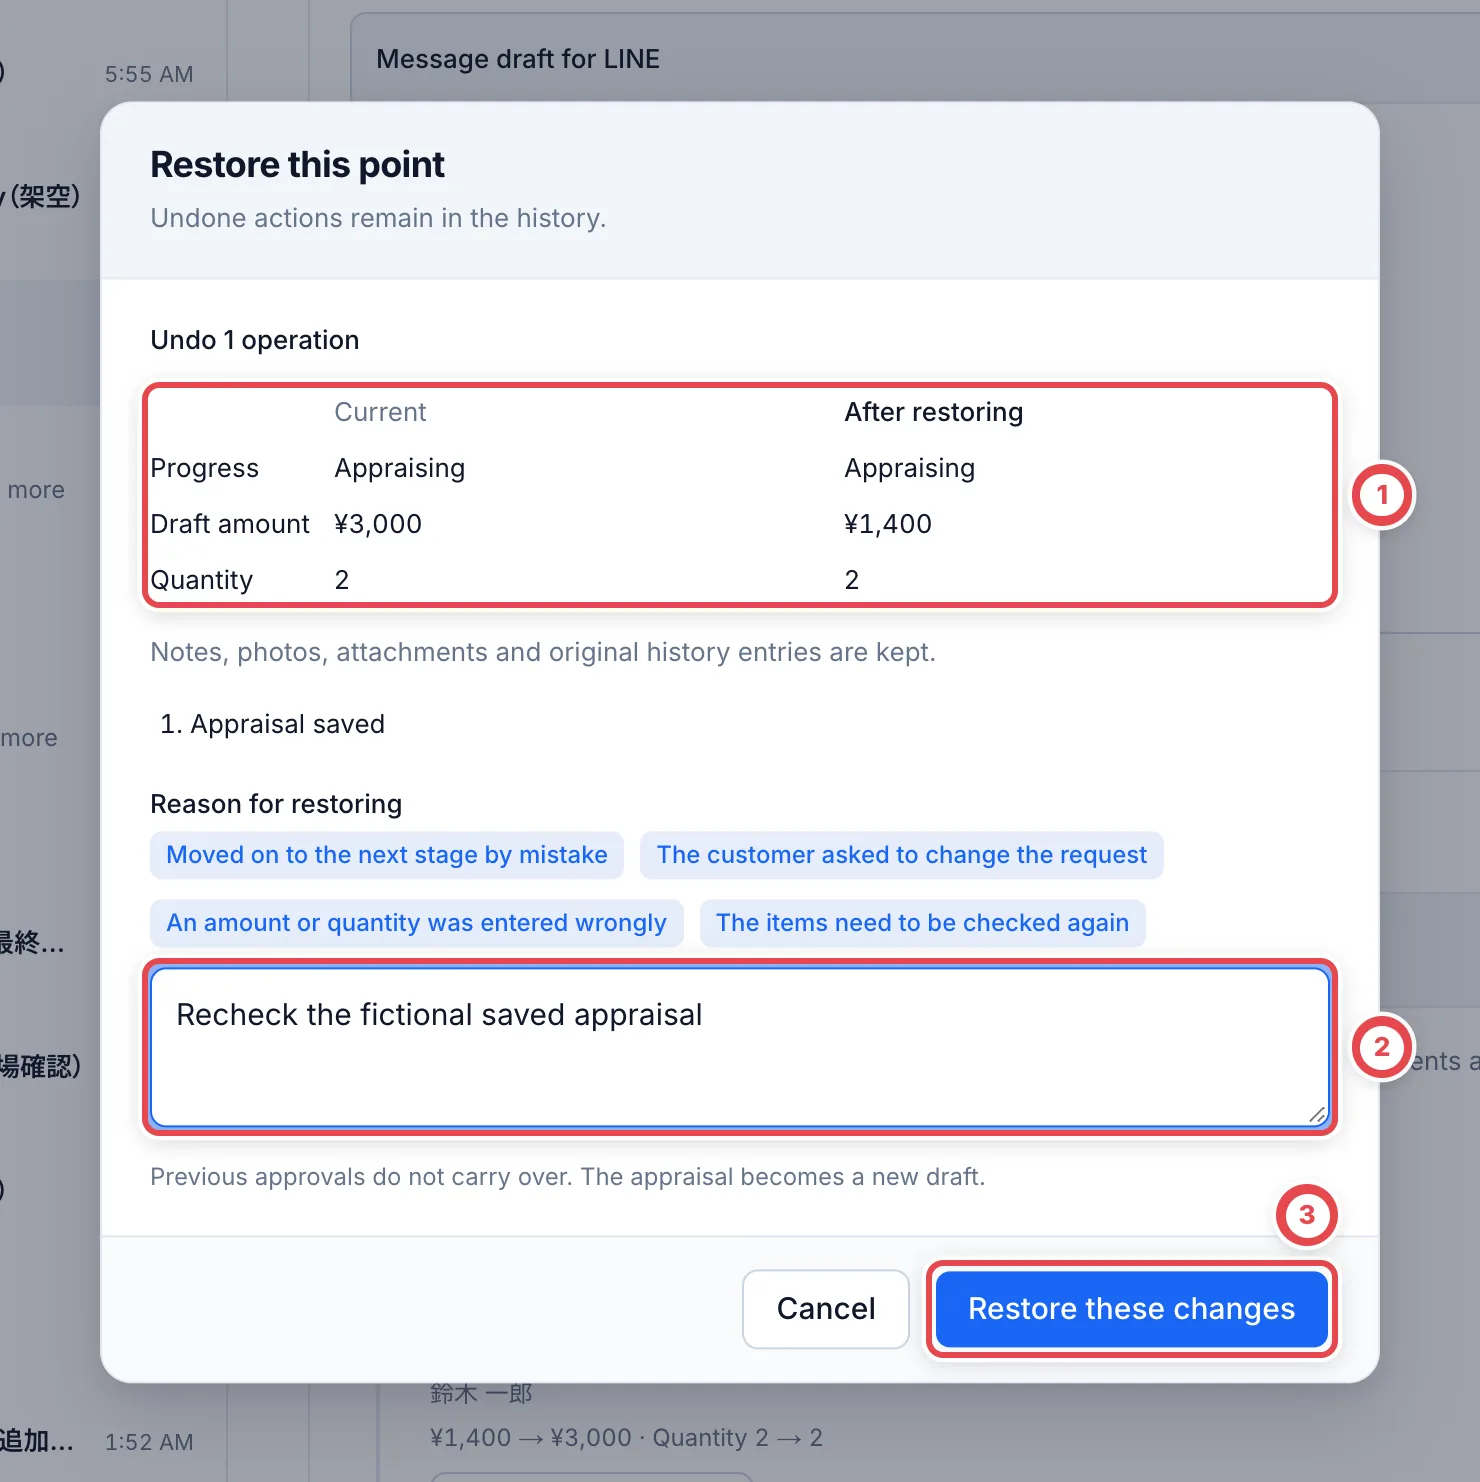 ## 3. Use immediate undo
After a supported save, the completion message at ① offers **Undo** for about ten seconds. Use it to reverse the latest eligible operation. If it disappears or another operation occurred, inspect history instead.
Without the required permission, the message offers a history action. For an unknown network result, retry the same operation or inspect its history rather than starting a different restoration.
 ## Troubleshooting
| What you see | What to check |
| ----------------------- | -------------------------------------------------------------------------------------- |
| No restore action | The operation may be unsupported or lack recovery information. |
| Later operations exist | Choose the intended point in current history. |
| Related records changed | Inspect responses, signatures, documents, stock and open review/research dependencies. |
| Deal is settled | Use payment, inventory and statutory-ledger corrections. |
| Missing permission | Purchase editing and the operation’s specific restoration permission are required. |
---
# Online identity verification
Source: https://docs.toreca-cloud.com/en/guides/purchase/identity
Buying secondhand goods requires verifying the customer's identity. In Toreca Cloud, **you can't create stock and payout until identity verification is recorded** (it's needed for the secondhand ledger).
For original documents checked at the counter, use [In-store ID checks](/en/guides/purchase/counter-identity). For photography on the counter customer screen, use [Customer photography and original-ID checks](/en/guides/purchase/counter-photos).
Existing customers reviewing details online use [Authentication and registered-information review](/en/guides/purchase/registered-information). The [power-of-attorney requirements](#when-a-power-of-attorney-is-needed) also apply to transfers for in-store purchases.
## What you need
- Owners, admins, Staff and Staff & researcher members can record and approve identity verification
- The customer record has a name, date of birth, occupation and address (you can't approve without them)
## Have the customer submit documents through a form
| Step | What you do | Who |
| ---- | ----------------------------------------- | -------- |
| 1 | Send the form link | The shop |
| 2 | Choose a document type and submit photos | Customer |
| 3 | Check the submitted documents and approve | The shop |
### 1. Send the form link
Under **Request shipment** on the deal's **Shipping** tab is a link to one form where the customer enters their details, identity verification and shipping label. The link is in the **LINE message draft**, so copy the whole draft and send it on LINE. **The link isn't sent automatically.**
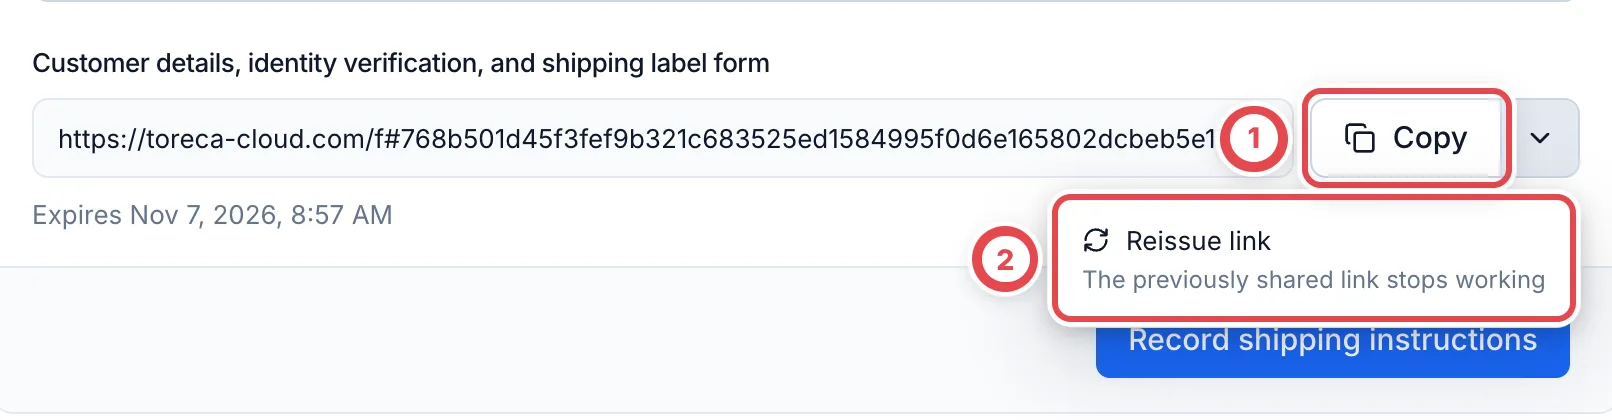 To send just the link, use **Copy** at ①. To make a new link, click the arrow beside it and choose **Reissue link** at ②. **When you reissue, the old link stops working right away.** The link has an expiry date, shown under the link.
### 2. The customer submits documents
When the customer opens the link, the form guides them through the items they haven't submitted yet, in order. If identity verification is still needed, it starts at ① **提出を開始する** (Start submission). The form is in Japanese only.
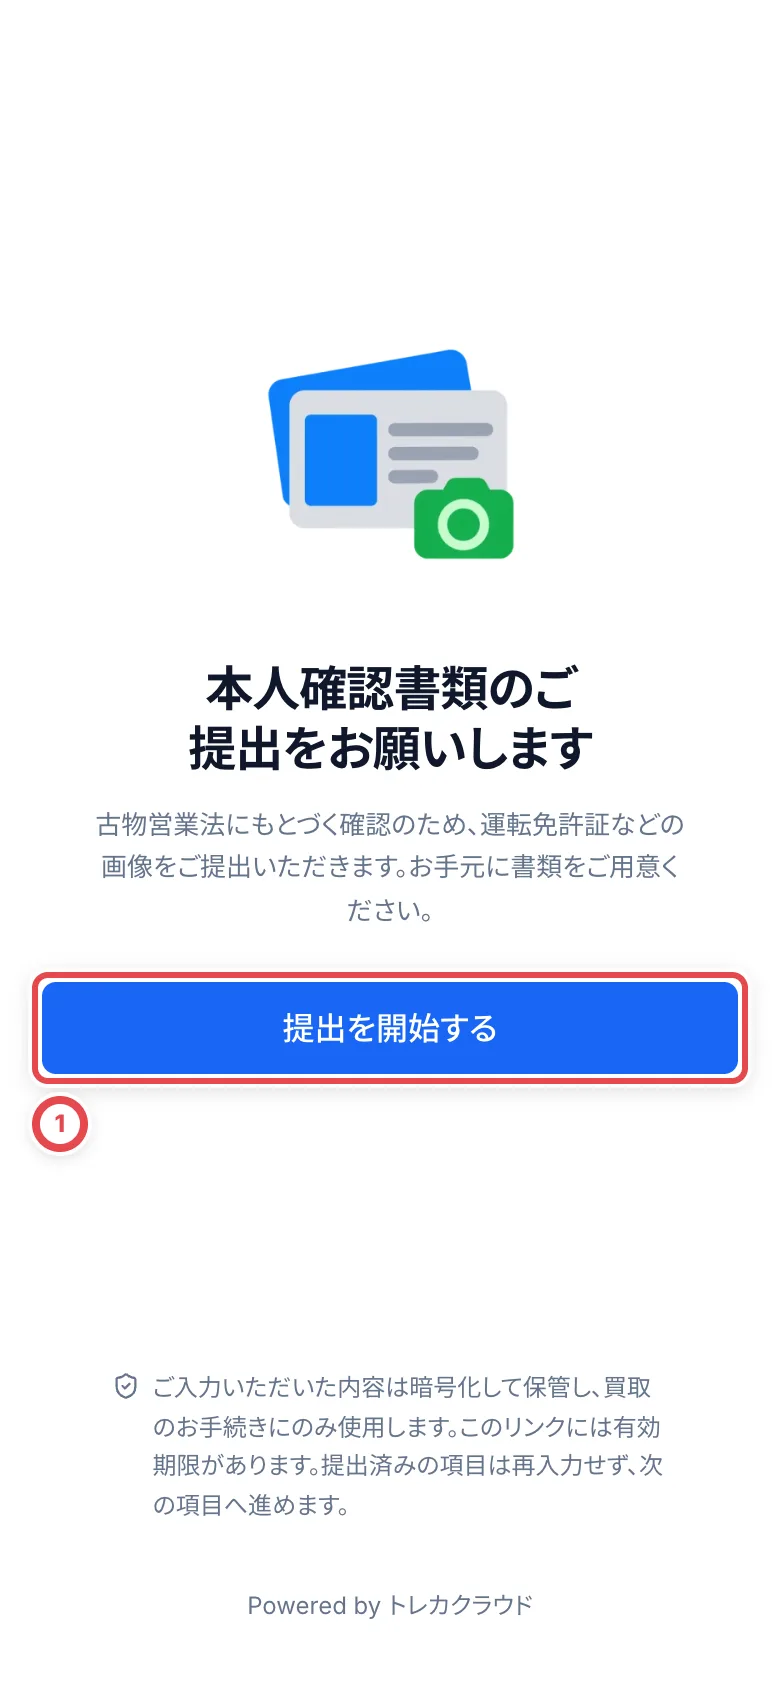 Next, the customer chooses the document they have. The number of photos depends on the document.
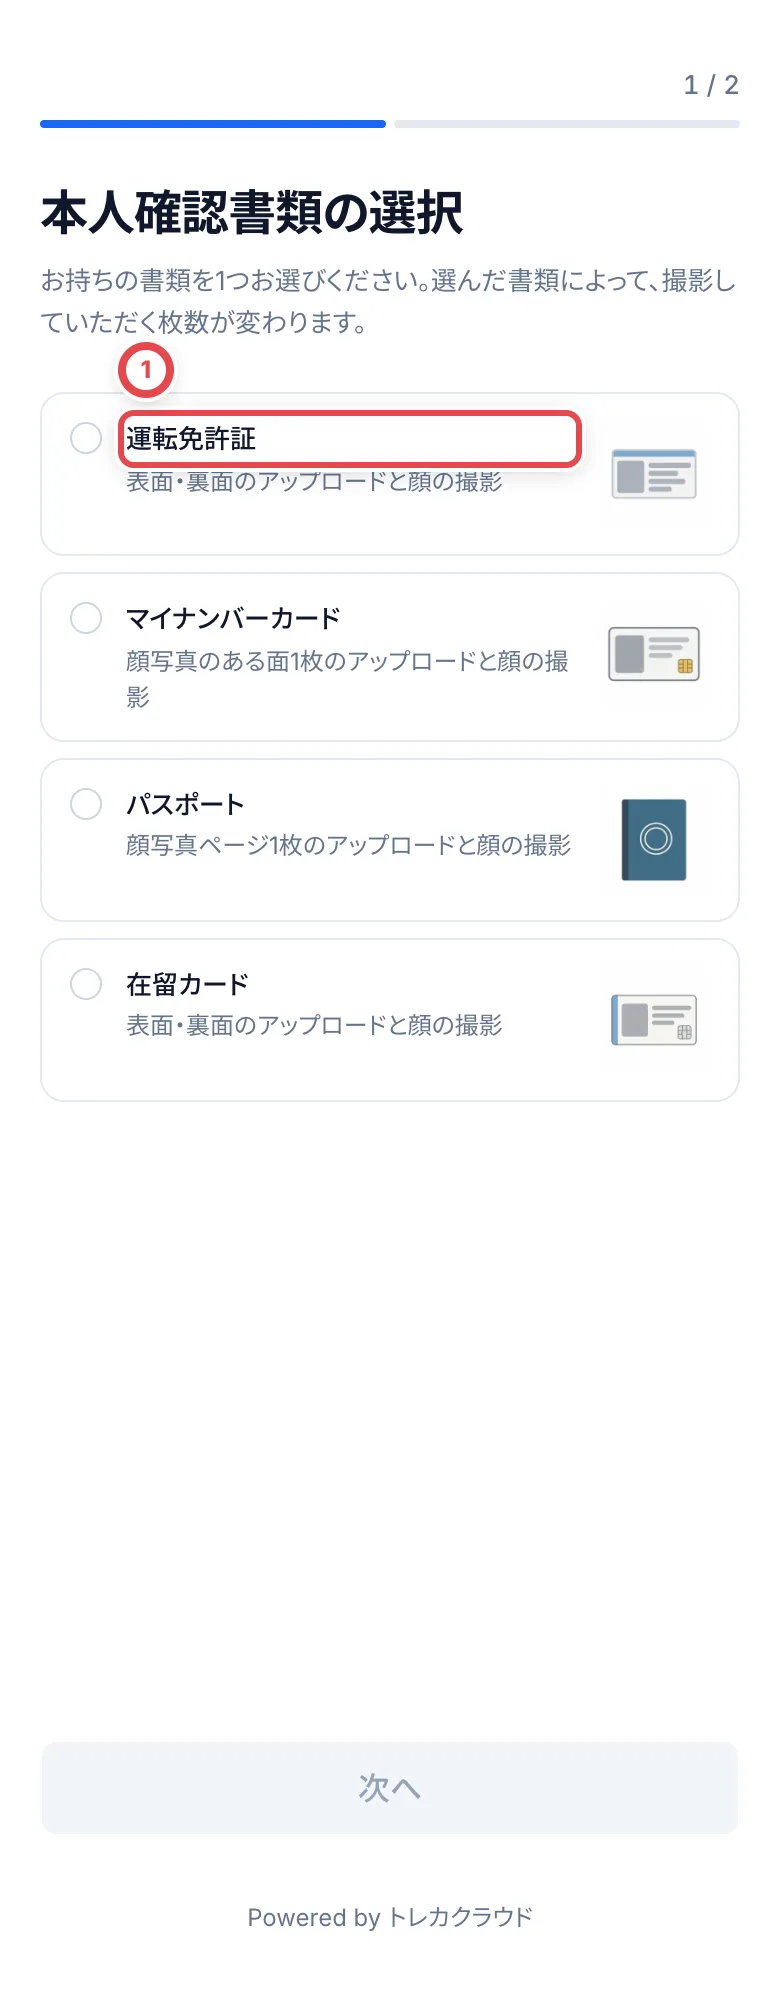 | Document | What the customer submits |
| ----------------------------------- | -------------------------------------------- |
| 運転免許証 (driver's license) | Front and back, plus three face photos |
| マイナンバーカード (My Number card) | Front only, plus three face photos (no back) |
| パスポート (passport) | Photo page only, plus three face photos |
| 在留カード (residence card) | Front and back, plus three face photos |
### 3. Check the submitted documents and approve
When documents arrive, they show up in To do as a **Form response**, and the count appears under **ID documents awaiting review** on the Dashboard. Click the count to open the identity verification list. You can filter it by **Pending approval**, **Needs resubmission**, **Approved and recorded** and so on.
1. In the list, click **Review documents** to open the screen for checking the documents
2. Compare the document images with the name, date of birth, occupation and address in the customer record
3. If everything matches, click **Approve**, then **Confirm approval**. The identity verification is recorded and linked to the deal
**Submitting a document doesn't finish identity verification.** Always check and approve it in the shop.
If a photo is blurry, a document is cut off or expired, or something else is wrong, click **Request resubmission**, choose a reason, and click **Request resubmission** to confirm. The customer can resubmit from the same link.
:::note
You can't approve if the customer record is missing a name, date of birth, occupation or address. Check the customer details first.
:::
### Face capture when the customer starts on a computer
When 「スマートフォンで本人確認を完了」 appears, scan its QR code with a camera-equipped phone. Capture the face from the front, right and left, review the document and face images, and **finish submission on the phone**. Completing face capture alone is not submission.
The computer updates after submission. If the QR code expires, display a new one. Retakes are available on the phone too. Review normalized phone and postal-code values, including leading zeros, on the confirmation screen.
## Register document images received by the shop
The shop must allow **Document review by staff**. If an error says document checks are not allowed for the shop, ask a member who can manage settings to follow [Identity verification methods](/en/guides/settings/identity), then reopen document registration.
For an in-store original-ID check, use [Record an in-store ID check and add documents](/en/guides/purchase/counter-identity). The following steps cover document images supplied to the shop for a non-counter deal.
Open **Record identity verification** at the bottom of the deal's **Shipping** tab.
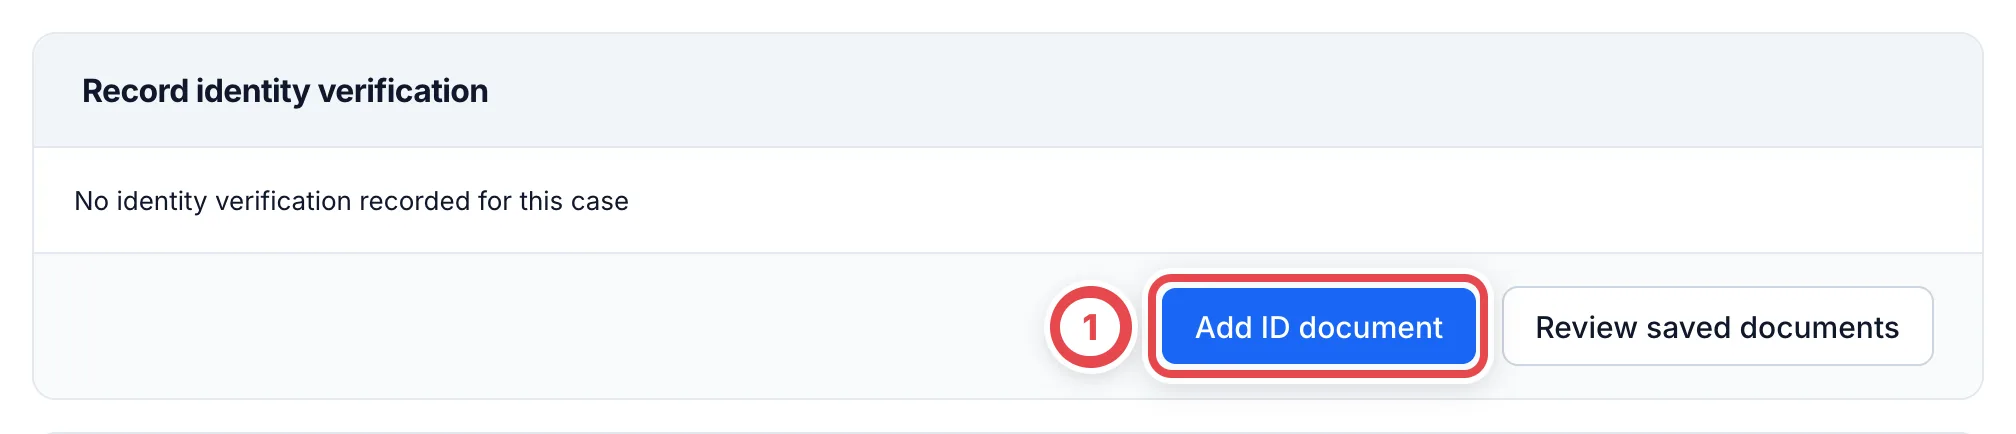 In the dialog that opens, compare the customer record at ① with the document, choose the document type at ②, and add the images of the document at ③. For a driver's license or residence card, add the back as well. Click **Add** at ④ and **the identity verification is recorded on the spot** (there's no approval step).
Use JPEG, PNG or WebP images, up to 20MB for both sides combined. Select different images for the front and back. **Add** stays disabled until all required images are selected.
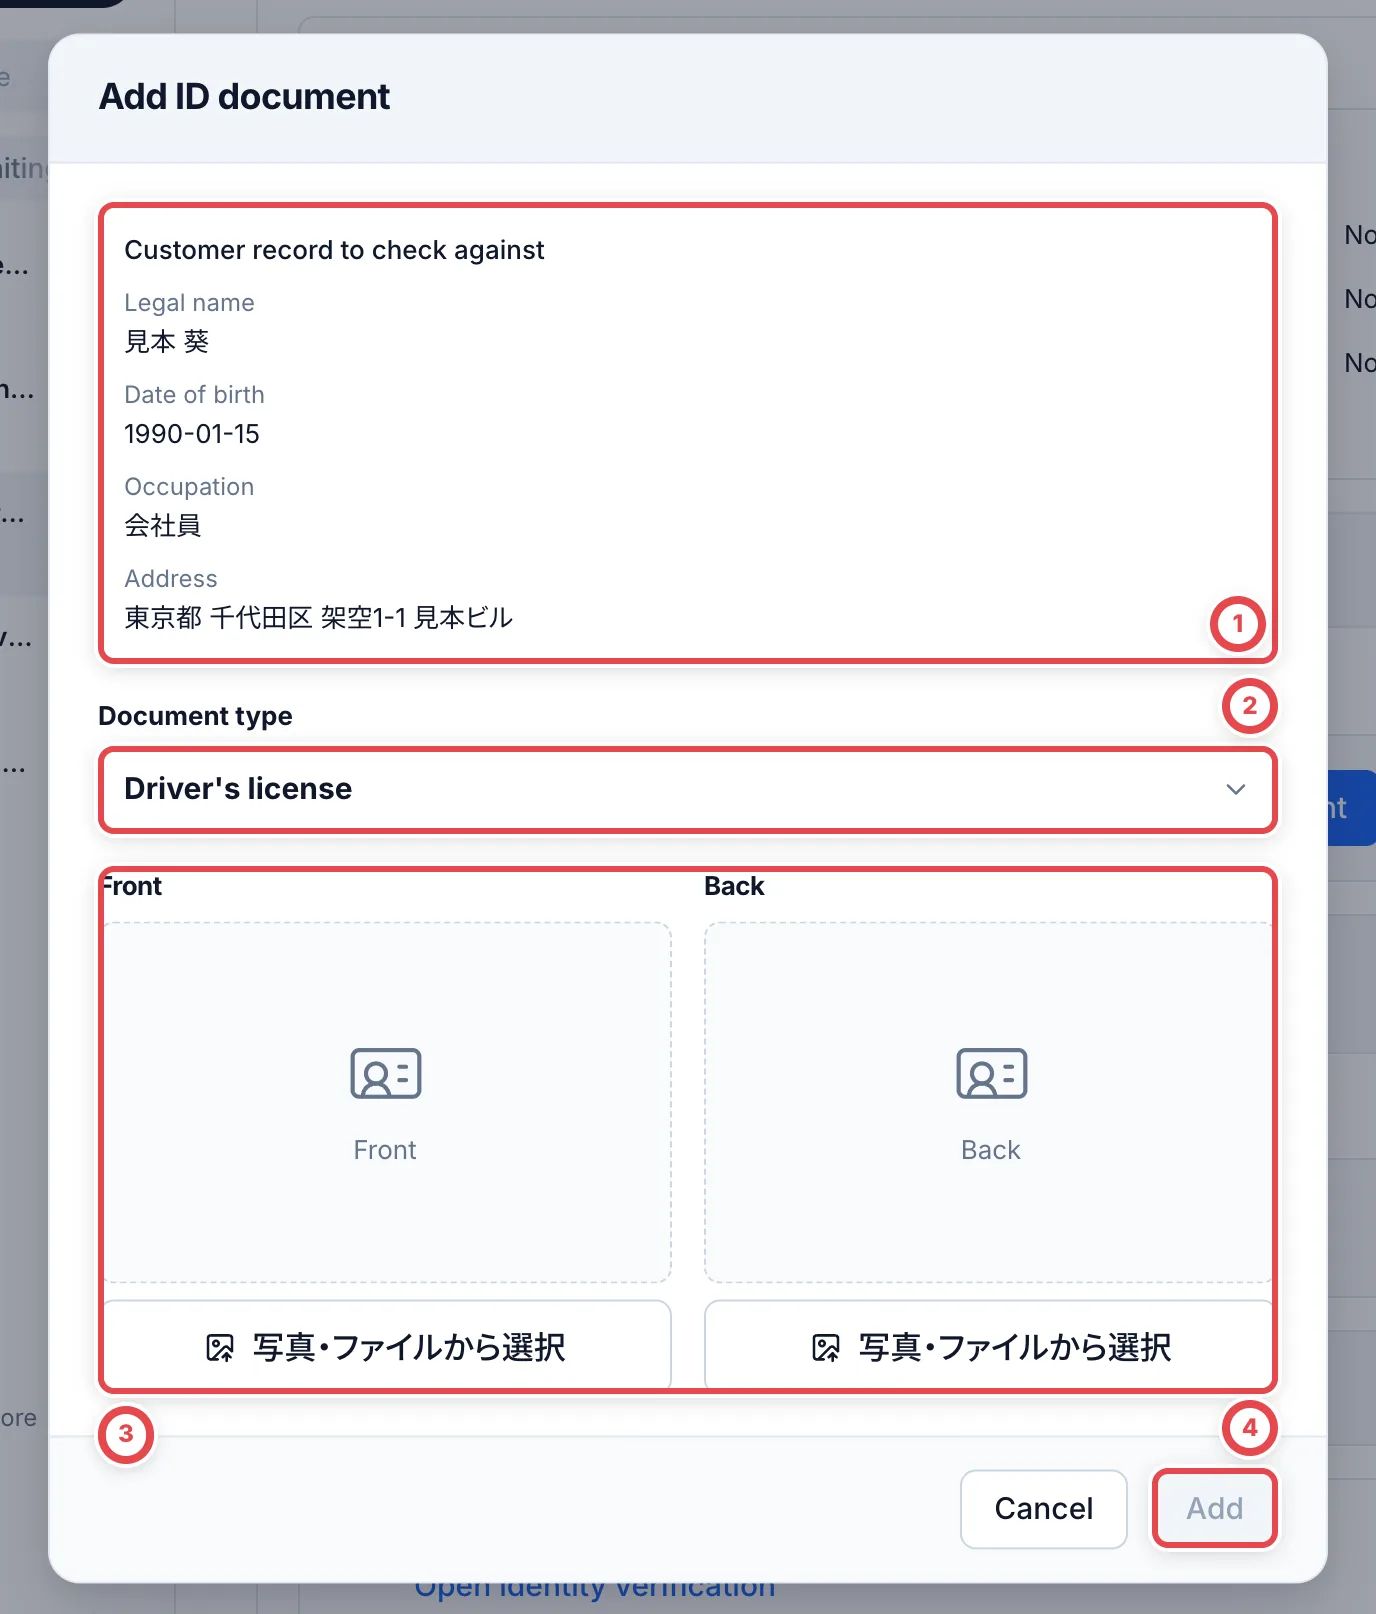 ## After it's recorded
Once identity verification is recorded, the customer's page shows ① **Identity verified** next to the name, and the record appears in the identity verification card under **Customer details**.
Once the deal is linked to a verification, its new-registration entry disappears. Open **View or add documents** on Shipping, or **Details** for the customer's verification, then use **Show document** to view saved images. Add further documents within that existing record.
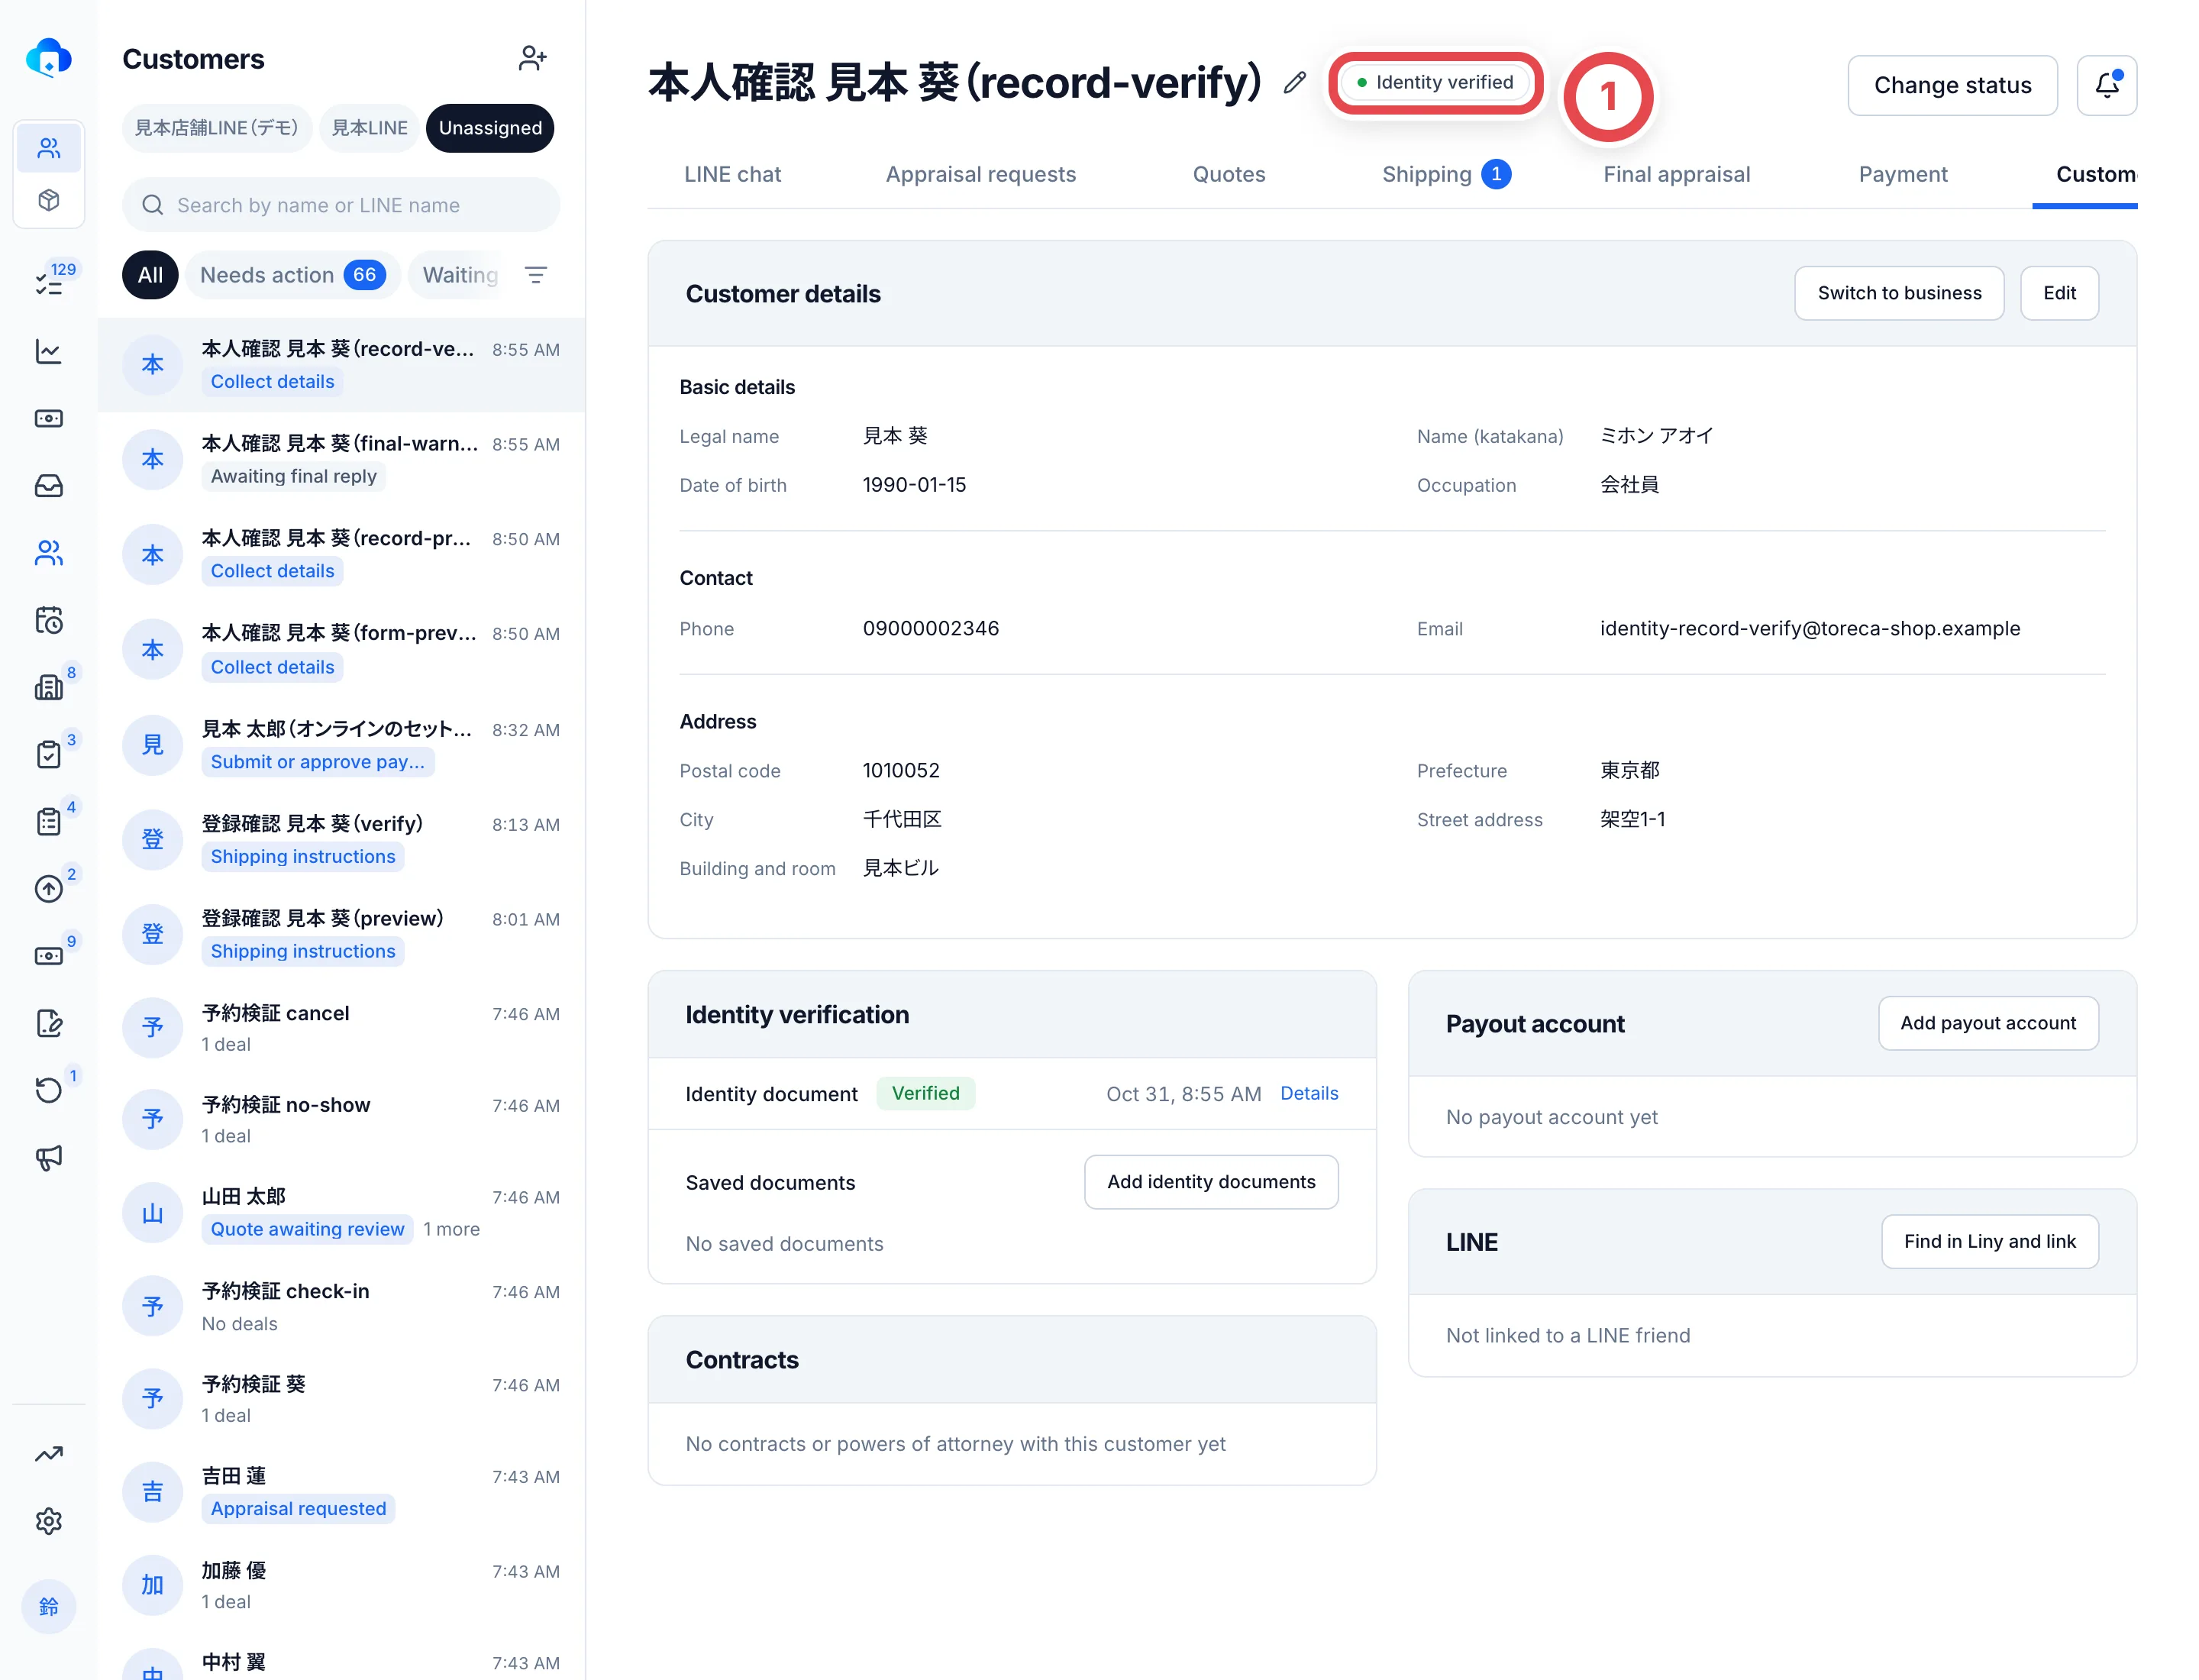 ## Identity verification and acceptance
Identity verification is normally done before you record acceptance of the final quote. If it isn't done yet, the **Customer response** section of the final appraisal shows "No identity verification is recorded."
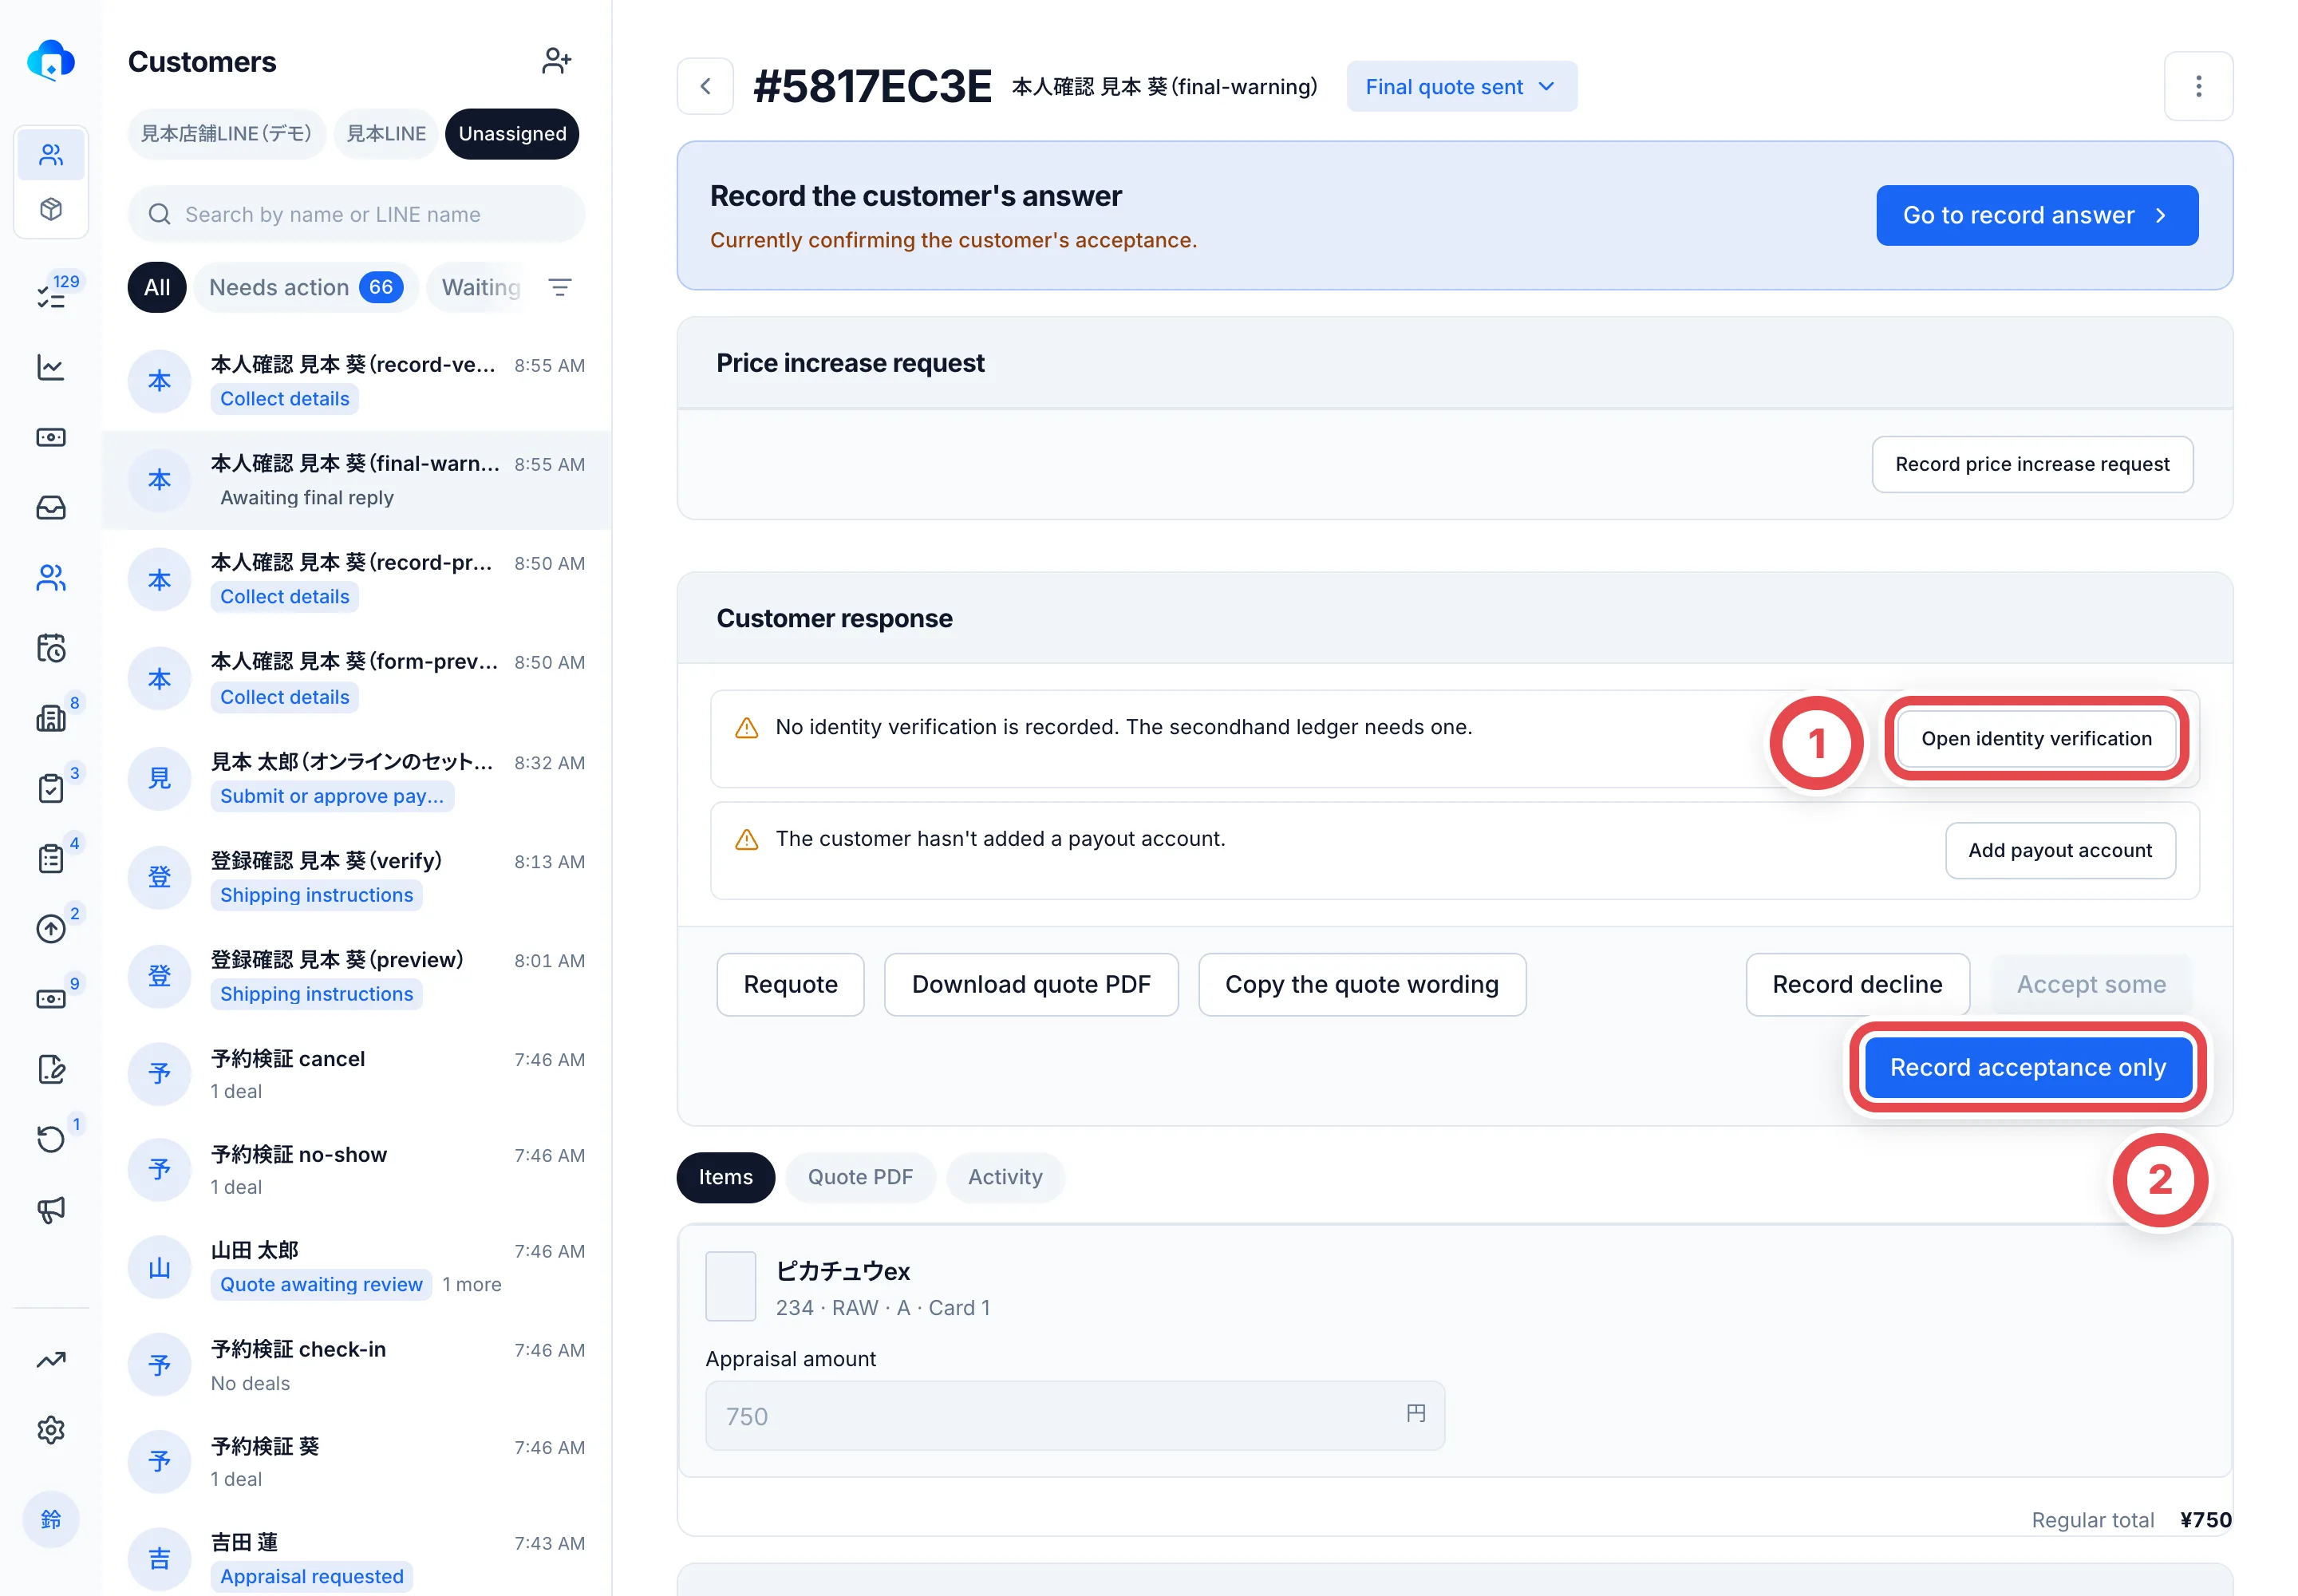 Go to recording identity verification from ①. You can also record just the acceptance first with ② Record acceptance only.
Even without identity verification, you can record just the acceptance first with ② **Record acceptance only**. Then record identity verification and continue to **Create stock and payout**. For the steps, see [Shipping and final appraisal](/en/guides/purchase/shipping-and-final).
## When a power of attorney is needed
If the payout account isn't in the customer's name, a power of attorney is needed before the payout. The deal page shows a **Power of attorney** section, and the account holder is marked **Different from customer**.
| What you do | Steps |
| -------------------------------------------------------------------------- | ------------------------------------------------------------------------------------------------------------------------------------------------------------------------------- |
| Sign a power of attorney in CloudSign | For the API connection, use **Prepare document**, review PDF/recipients, send and sync status. In the legacy workflow, send in CloudSign and record sent/signed status manually |
| It turns out to be the customer's own account (for example, a former name) | Check the customer's declaration and the documents, then use **Confirm as customer's own account** to make the power of attorney unnecessary |
| Continue without a power of attorney | An owner or admin chooses **Mark as not needed** (a reason is optional; the record stays in the deal history and the audit log) |
**You can't approve that payout until the power of attorney is signed or marked as not needed.**
## Troubleshooting
| What's happening | What to check and how to fix it |
| ---------------------------------------------------------------- | ---------------------------------------------------------------------------------------------------------------------------------------------------------- |
| You can't create stock and payout | No identity verification is recorded. Approve the form's documents, or record it in the shop |
| A document arrived, but the customer isn't **Identity verified** | A document submitted through the form isn't recorded until you approve it. Approve it from **Pending approval** in the identity verification list |
| You can't approve | The customer record is missing a name, date of birth, occupation or address. Click **Edit** to fill them in, then approve |
| The customer says the link won't open | The link has expired, or it was reissued and the old one stopped working. Reissue the link and send it again |
| A document arrived with photos you can't read | Choose a reason with **Request resubmission** and send it. The customer can resubmit from the same link |
| You can't approve a payout | The account holder isn't the customer, and the power of attorney isn't done. Settle it in one of the ways under "When a power of attorney is needed" above |
## Related workflows
- [Prepare and send documents with CloudSign](/en/guides/settings/cloudsign)
## After identity is recorded
Return to [Shipping and final appraisal](/en/guides/purchase/shipping-and-final) for the final quote response and stock and payment registration. See [Online purchases](/en/guides/purchase/overview) for the complete sequence.
---
# Intake form
Source: https://docs.toreca-cloud.com/en/guides/purchase/intake-form
The intake form is one shared form per shop for receiving online buying requests. The link never changes, so you can put it in your LINE rich menu or greeting message. Each new submission of personal details creates a new customer and deal.
## How it differs from per-deal input links
| | Intake form (this page) | Per-deal input link |
| ---------------- | ----------------------------------------------------------- | -------------------------------------------------------------------------------------------------------------- |
| When to use | For customers with no deal yet, to make their first request | For customers who already have a deal, to fill in what's missing (appraisal request, ID, shipping label, etc.) |
| Link | One per shop. Never changes | One per deal. Stops working after 7 days, and you can reissue it |
| When submitted | A new customer and deal are created | It's applied to that deal |
| Where you get it | **Settings** › **Intake form** | **Request form** on the customer screen, or **Request shipment** on the **Shipping** tab |
Per-deal input links are covered in [Customers and deals](/en/guides/purchase/customers) and [Shipping and final appraisal](/en/guides/purchase/shipping-and-final).
## What you need
- Only members with permission to manage integrations (owners and admins) can change the intake form settings. To save them, you also need permission to view and edit customers and deals
- The LINE Official Account (or Liny / L Step) you use to reach customers
## The steps and deal statuses
| Step | What you do | Who | Deal status |
| ---- | ----------------------------------------- | -------- | ----------- |
| 1 | Publish the intake form and copy the link | The shop | ― |
| 2 | Share the link on LINE or elsewhere | The shop | ― |
| 3 | Enter their details and submit | Customer | New |
| 4 | Declare their items and apply | Customer | New |
| 5 | Appraise the request that arrived | The shop | Appraising |
## 1. Publish the intake form and copy the link
Open **Settings** › **Intake form** and click **Change** next to **Intake form delivery**. Set **Status** (①) to **Live**, decide on a **Form heading** (1 to 100 characters), and click **Save changes**. **It applies to the form as soon as you save.** The shared link is created the first time you save (until then it shows **Not issued yet**).
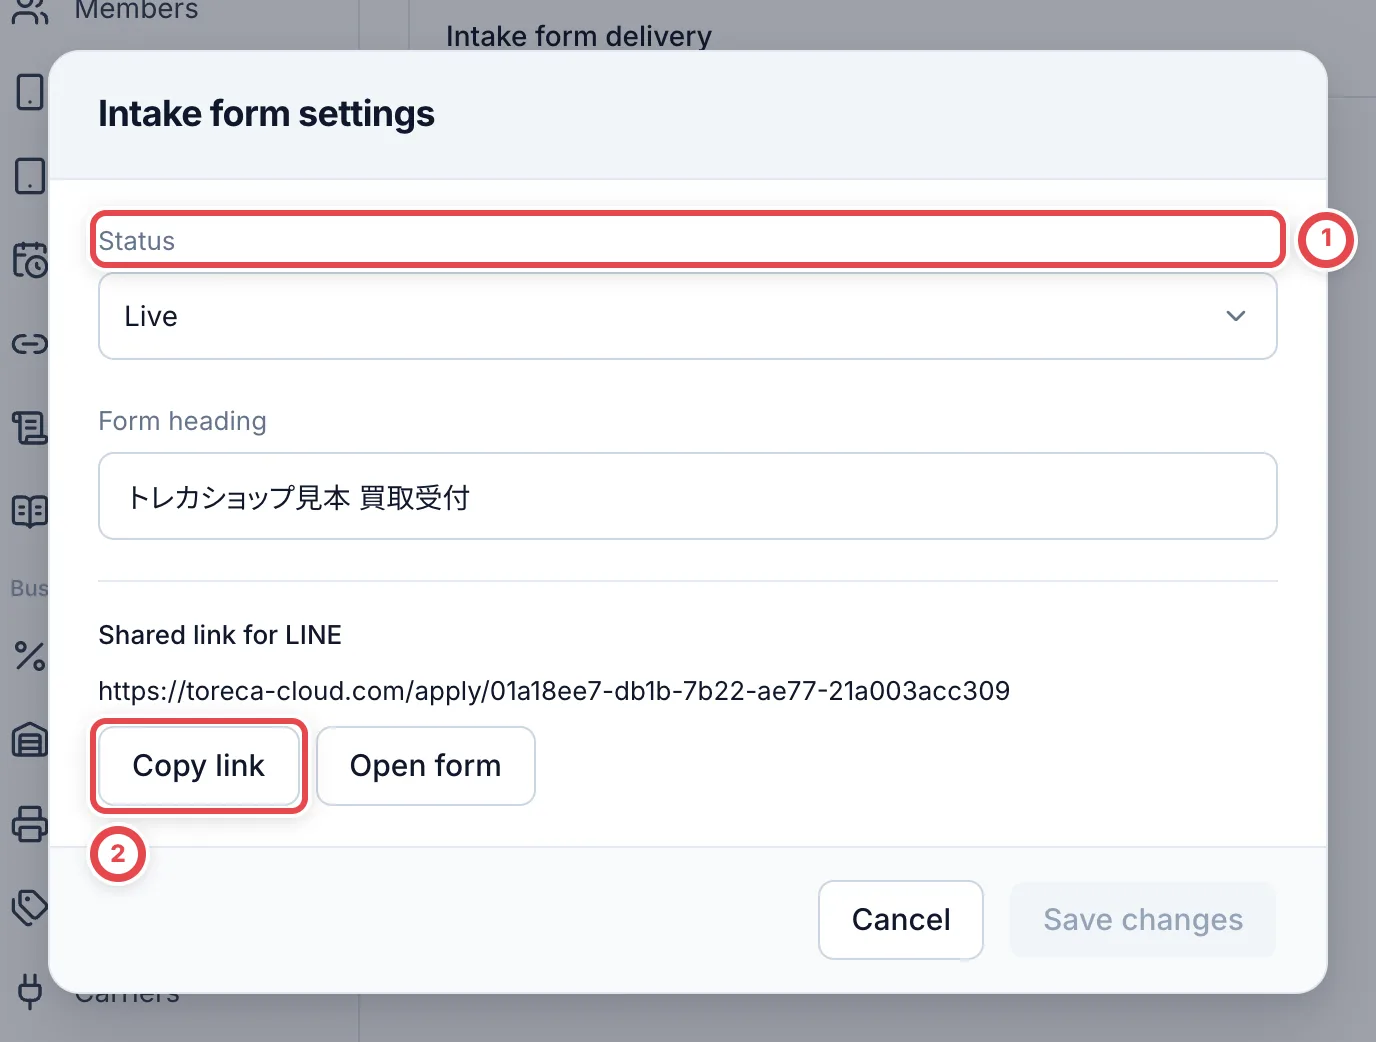 Click **Copy link** (②) to copy the link. The link doesn't change when you change the heading or the status. Setting **Status** to **Paused** stops new requests from coming in (per-deal input links you already issued keep working).
## 2. Share the link on LINE or elsewhere
Put the copied link in your LINE Official Account or Liny / L Step rich menu, your greeting message, or similar. Toreca Cloud never sends it to LINE automatically.
## 3. Enter their details and submit (customer)
When the customer opens the link, the heading you set appears at ①. They start from 「お客様情報を入力する」 (Enter your details) at ②.
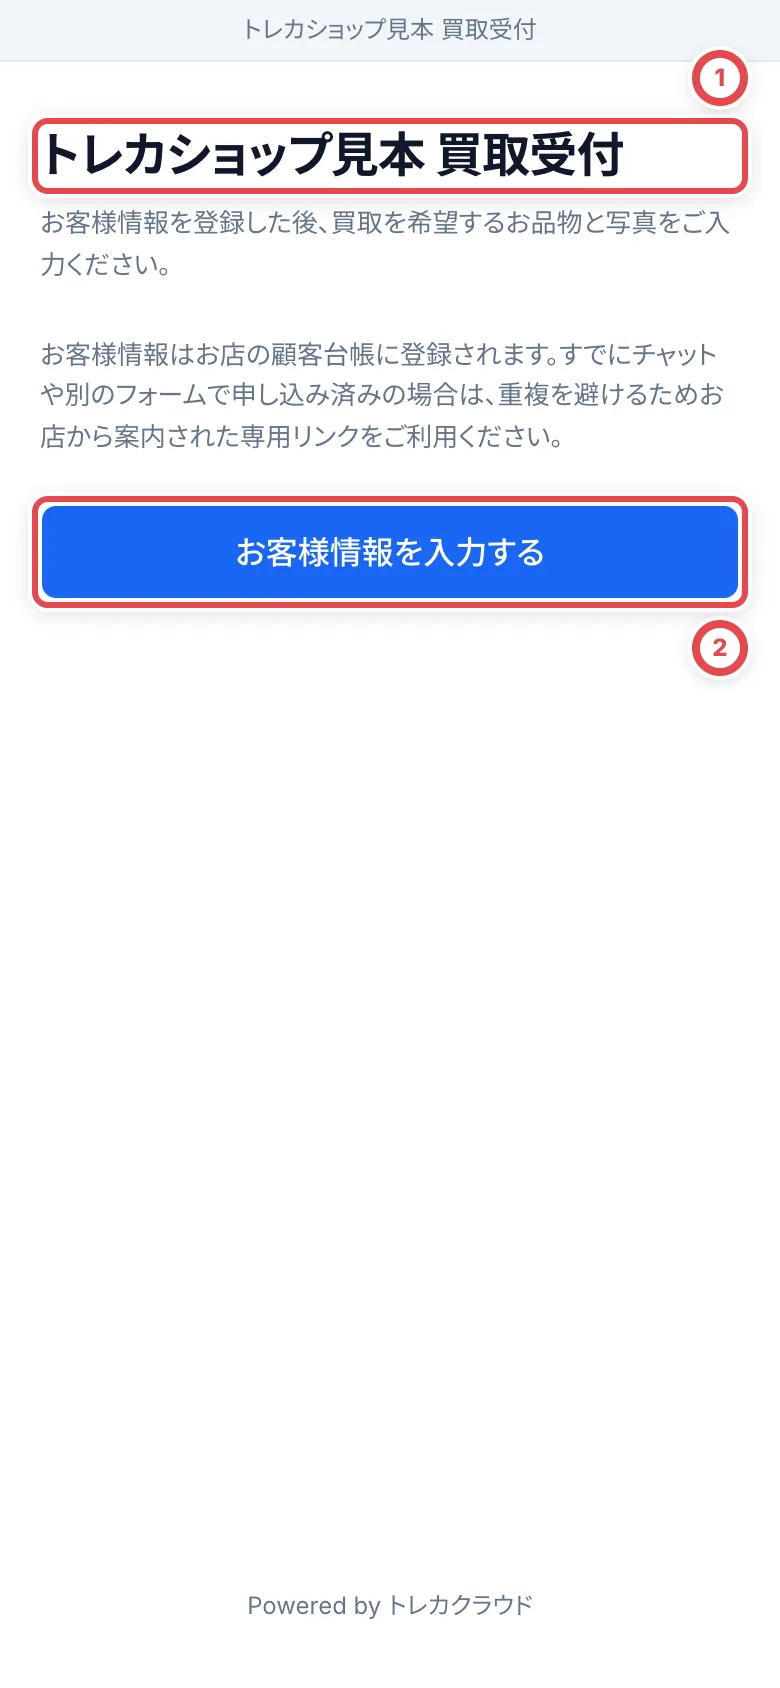 The customer enters their details over five screens, as shown at ①.
1. ご本人の情報 (Your details): name and furigana
2. 生年月日とご職業 (Date of birth and occupation): items that must be checked under the Antique Dealings Act
3. ご連絡先 (Contact details): phone number and email address
4. ご住所 (Address)
5. 入力内容の確認 (Review your entries)
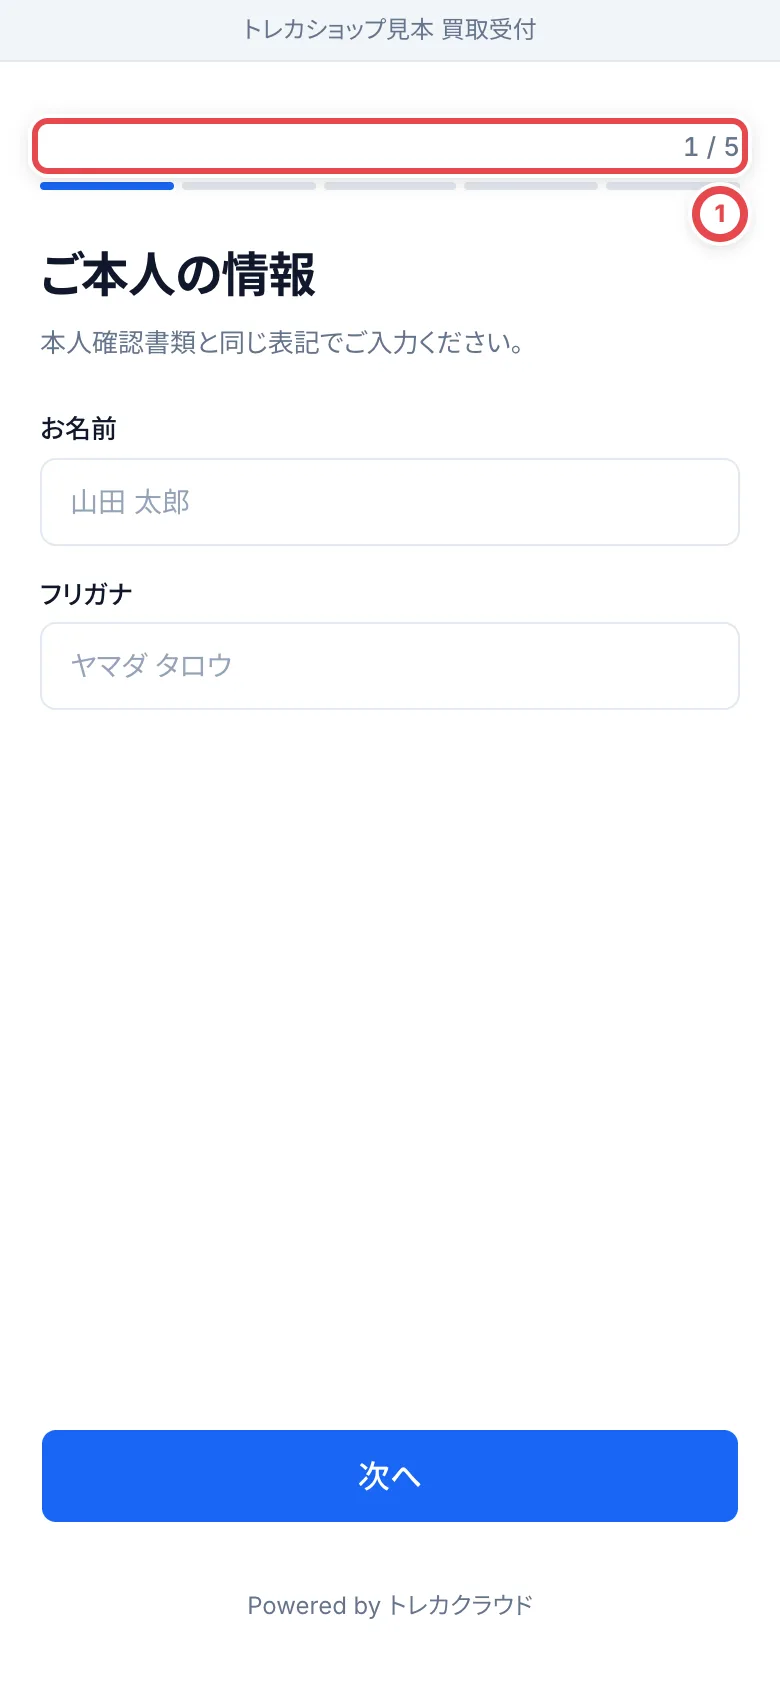 When they press 「この内容で提出する」 (Submit these details) on the last screen, **a new customer and deal (with the status New) are created at that moment.** Even if a customer with the same name or phone number already exists, they aren't merged, and a separate customer is created. Bank account and ID documents aren't asked for here (you ask for them later with a per-deal input link).
:::note
The customer's screens are in Japanese only.
:::
## 4. Declare their items and apply (customer)
After submitting their details, the customer goes straight on to declaring their items. The screens from here on are the same as the per-deal input link for an appraisal request. They press 「申し込みを始める」 (Start your application) at ①.
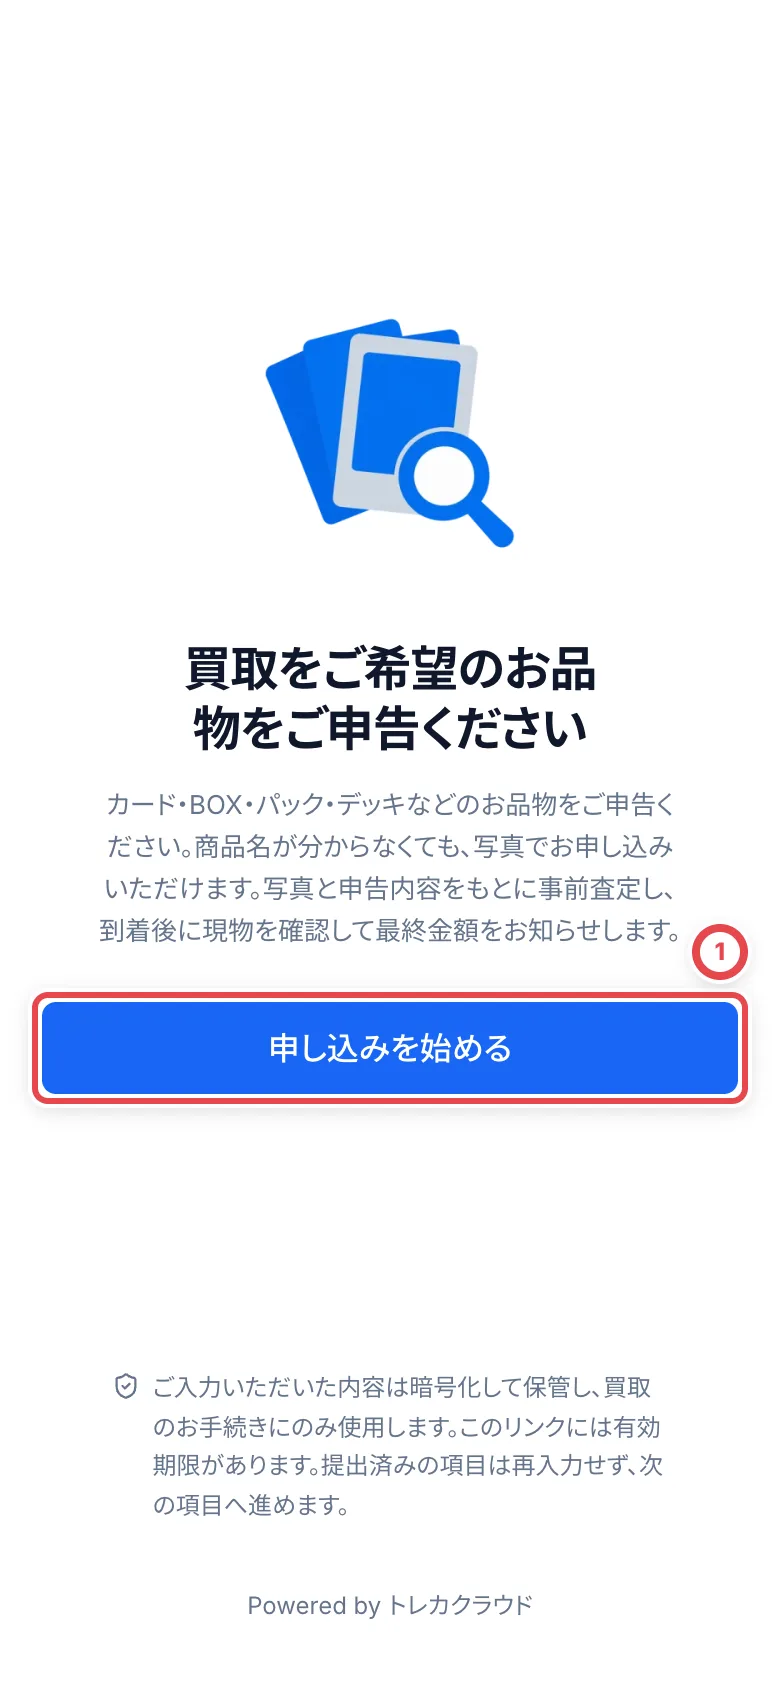 On the 「お品物のご登録」 (Register your items) screen, they press 「お品物を追加する」 (Add an item) at ① and add items one at a time. A bulk lot can be entered as a single item. To stop partway, they press 「一時保存する」 (Save for later) and keep the resume link.
Opening the shared link again in the tab where they submitted their details shows 「前回のお申し込み」 (Previous application). Use 「前回の申し込みを開く」 (Open previous application) to continue. 「別のお品物で新しく申し込む」 starts a separate intake. Another tab or device may not retain the same session, so use the saved resume link to continue there.
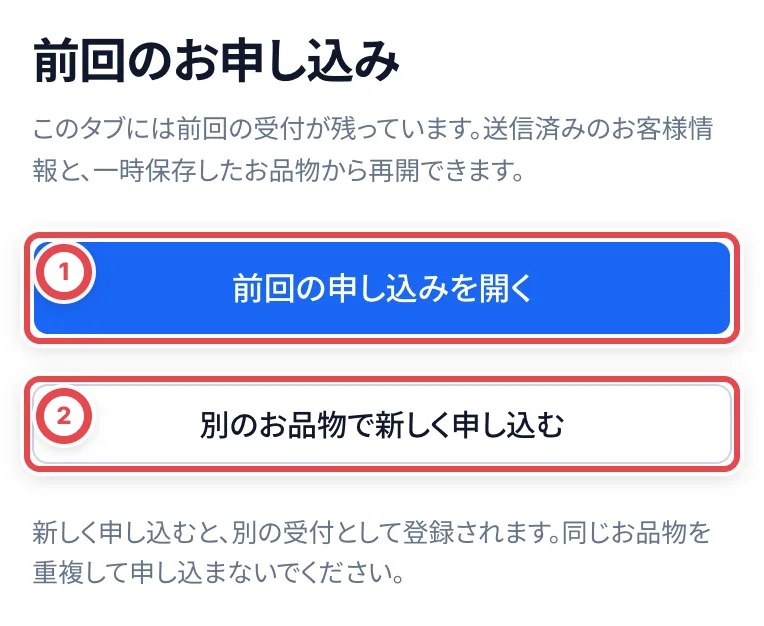
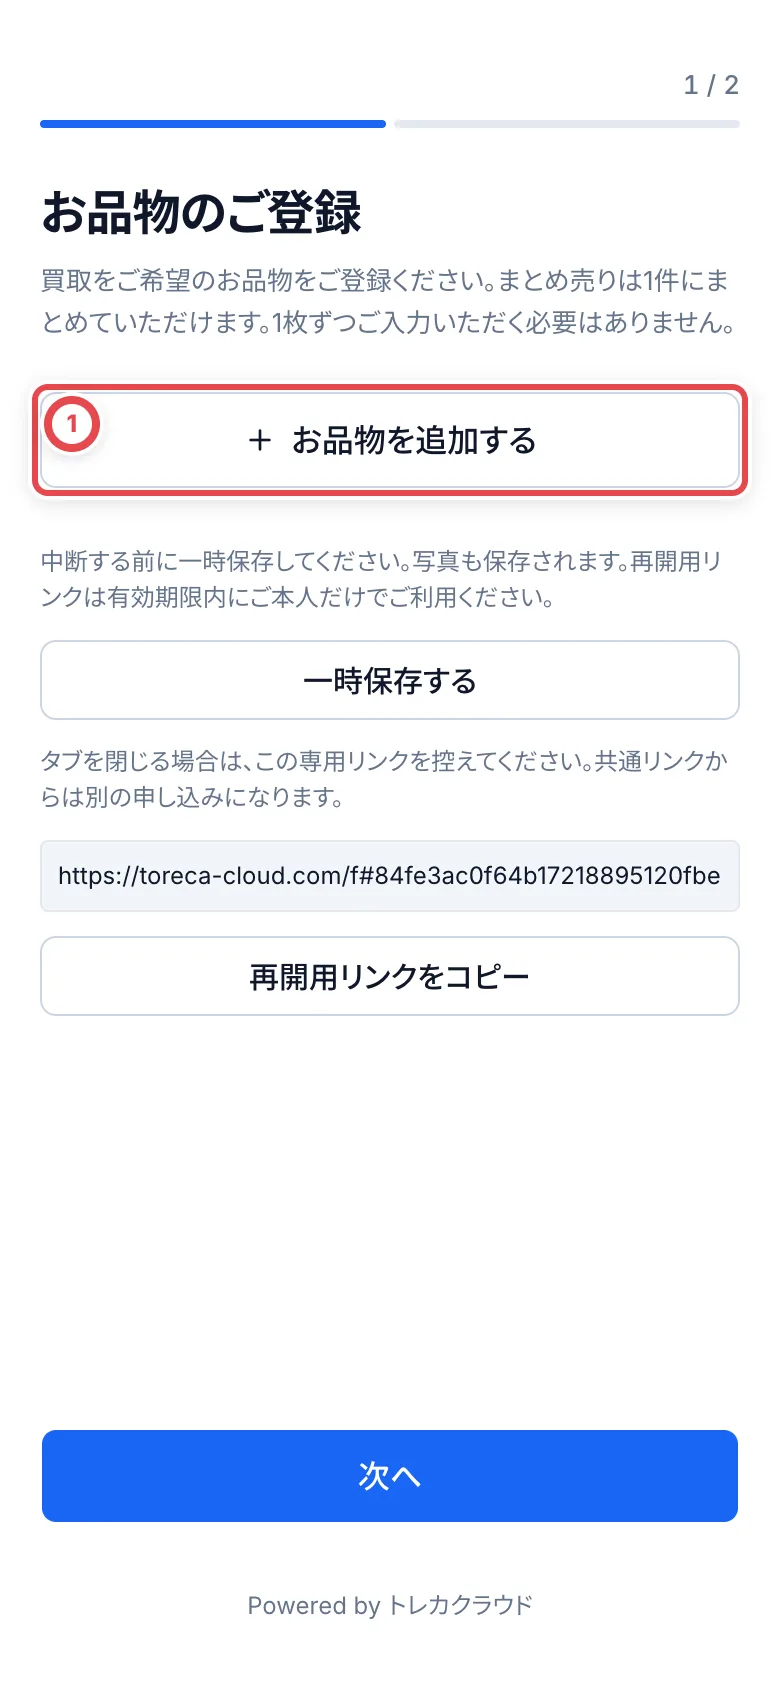 They choose the item type from カード(単体) (single card), BOX, パック (pack), 構築済みデッキ (preconstructed deck) and まとめ売り (bulk lot). The questions change with the type.
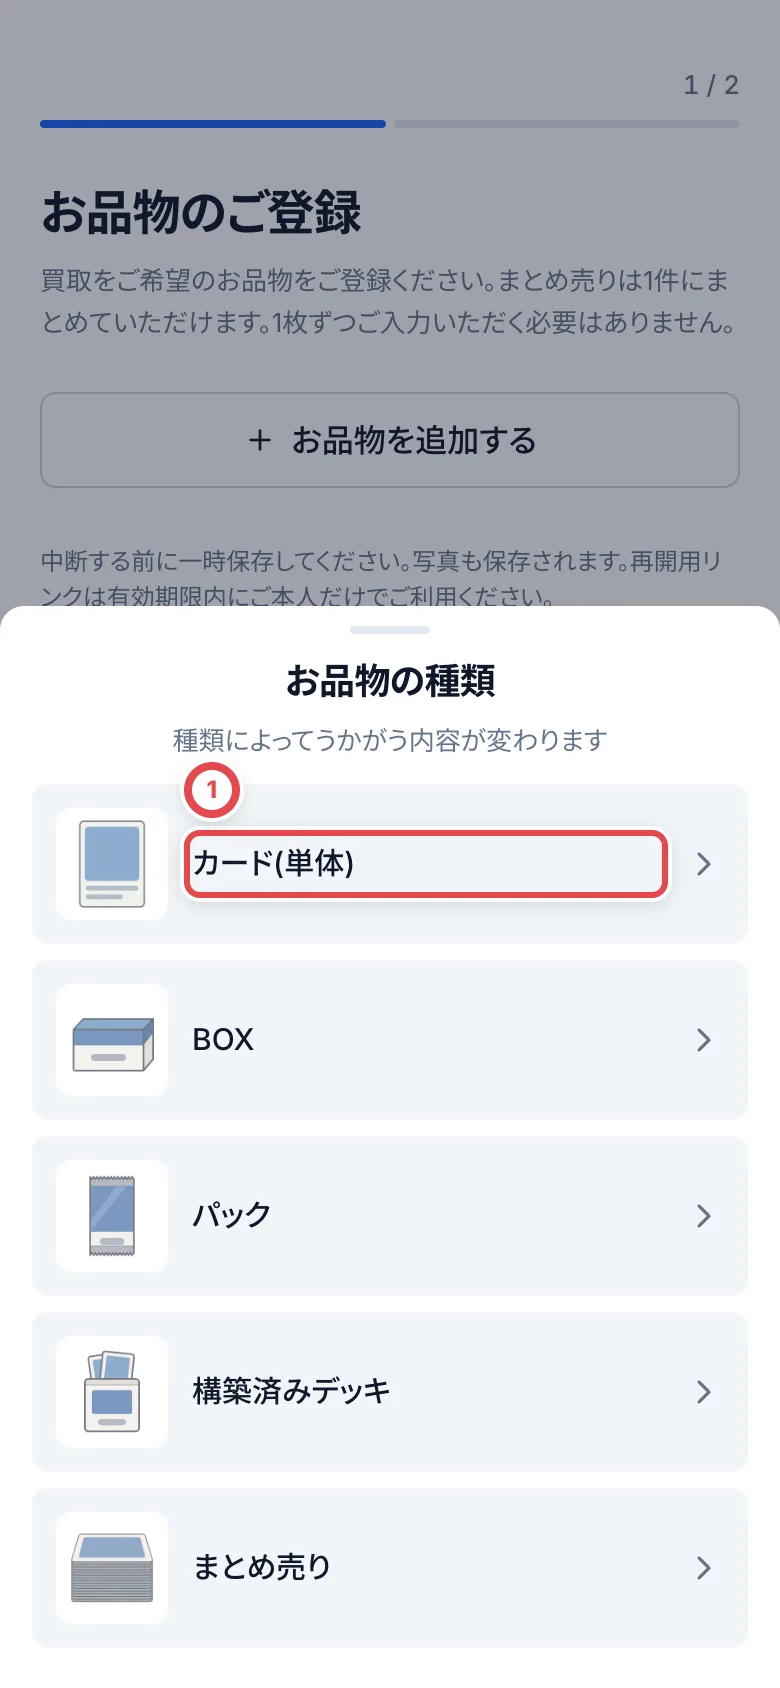 On the item screen, if they don't know the name, they can attach photos with 「写真を選ぶ」 (Choose photos) at ① (up to 3 per item). At ②, they enter the card or product name as far as they know it. With either a name or a photo, they can press 「この内容で追加する」 (Add with these details) at ③.
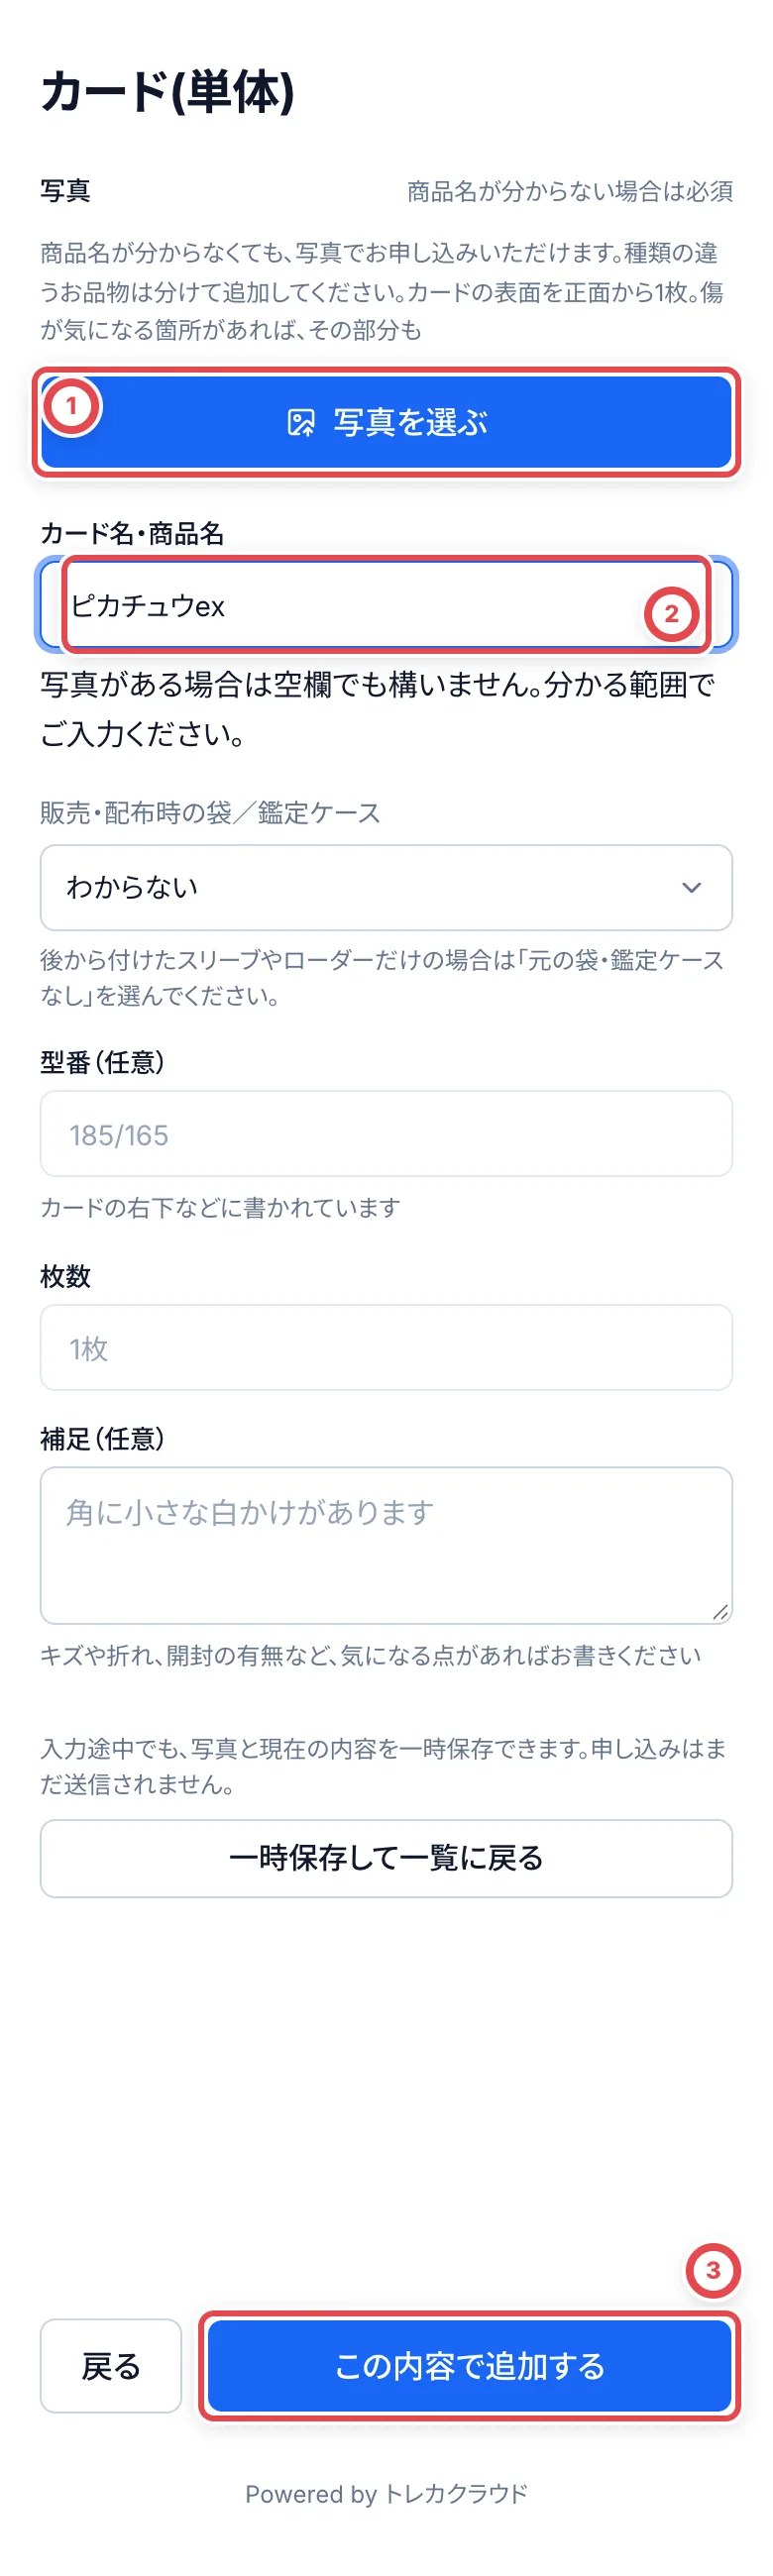 For cards, also choose 「販売・配布時の袋/鑑定ケース」 (Original bag or grading case). A sleeve or loader added later counts as 「元の袋・鑑定ケースなし」 (No original bag or grading case). Selecting 「鑑定ケース(PSAなど)」 reveals the optional grading service and grade field. Use 「わからない」 if unsure. For boxes, packs and preconstructed decks, check packaging and quantity.
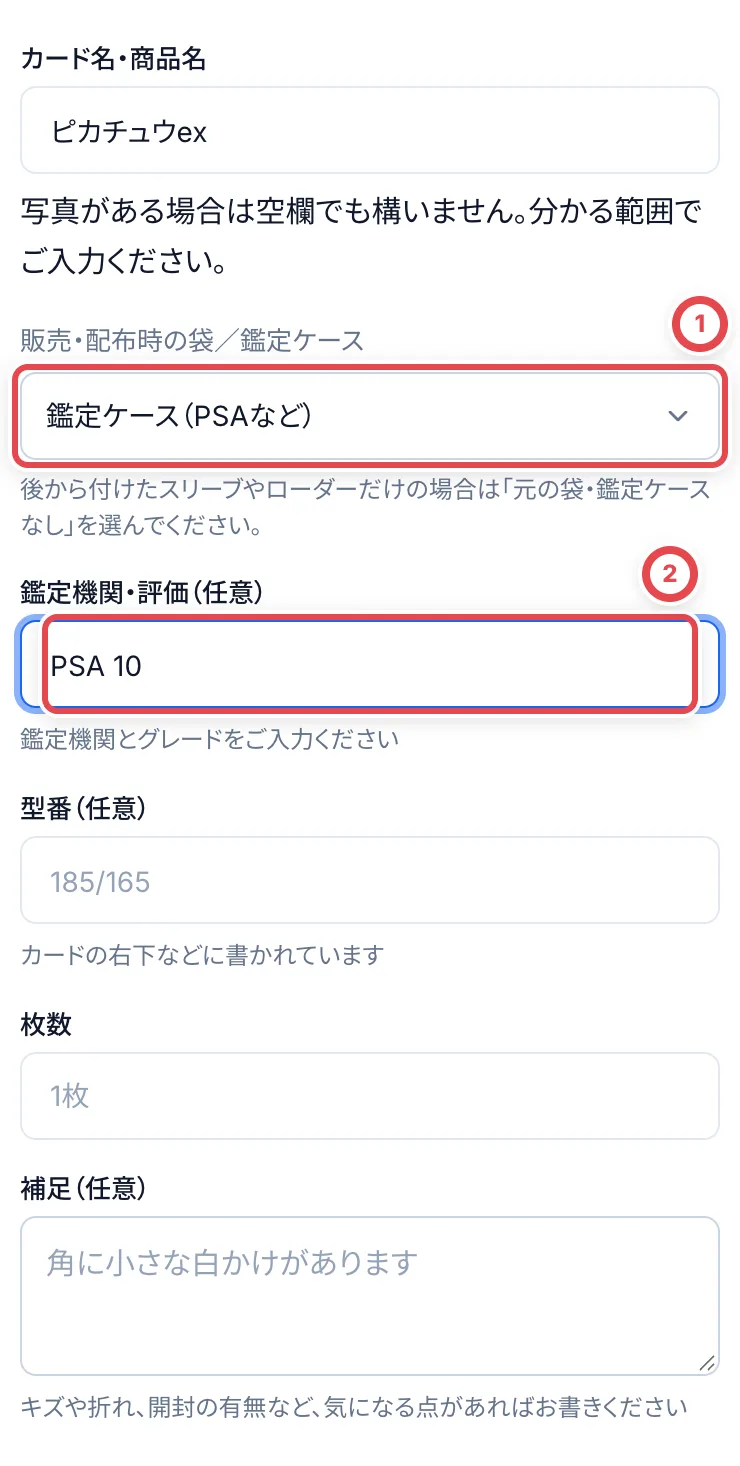 When they press 「次へ」 (Next) on the list, 「お申し込み内容の確認」 (Review your application) appears. When they press 「この内容で申し込む」 (Apply with these details) at ①, **the items go into that deal's declaration and a notification reaches the shop.** The customer's last screen reads 「ご入力ありがとうございました」 (Thank you for your entry).
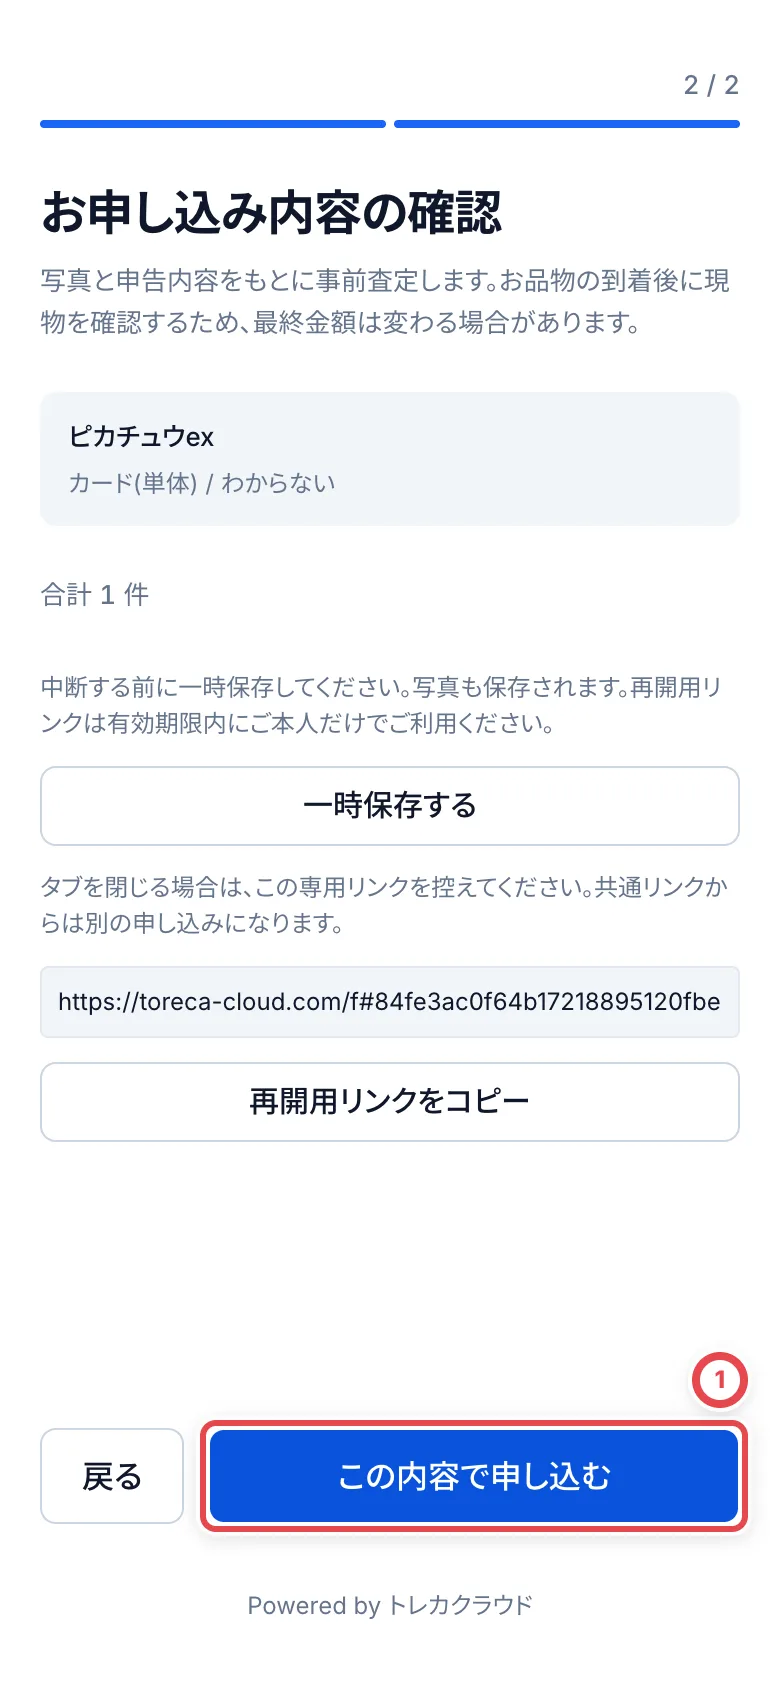 - A request can have 1 to 20 items and up to 20 photos in total. Photos must be JPEG, PNG or WebP, up to 20 MB each
- The item names and photos are used for the preliminary appraisal. The final amount is decided after you check the items that actually arrive
## 5. Appraise the request that arrived
You'll know a request has arrived in these ways.
- Notifications: **New buying request** (when the customer submits their details) and **Form submitted** (when they apply with their items). Choose who receives them in [LINE and notifications](/en/guides/settings/line-and-notifications)
- The **Purchase requests** list: it appears as a deal with the status **New**
- The deal's history records 「共通フォームから顧客情報を受付(LINE未照合)」 (Customer information received through the shared form; not matched to LINE)
From here it's the same as a regular online buy: appraise the declared items and send a quote. The flow is covered in [How buying works](/en/guides/purchase/overview) and [Appraisals and quotes](/en/guides/purchase/appraisal).
## When something goes wrong
| What's happening | What to check and how to fix it |
| --------------------------------------------------------------------------------------------------------------------------------------------------------------------- | --------------------------------------------------------------------------------------------------------------------------------------------------------------------------------------------------------------------------- |
| **Intake form** isn't under **Settings** | Online buying isn't switched on for your shop. Contact Toreca Cloud support. |
| The shared link says **Not issued yet** | Click **Save changes** once in **Intake form settings** and it's issued. |
| You can't click **Change** | You need permission to view and edit customers and deals. Ask an owner or admin. |
| The customer sees 「この受付フォームは現在利用できません」 (This intake form isn't available right now) | **Status** is **Paused**. If it shows when they open the link, set it to **Live** and save. If you paused it while they were filling it in, it shows when they send; set it back to **Live** and ask them to send it again. |
| The customer sees 「受付フォームを開けませんでした。再試行するか、お店へお問い合わせください。」 (The intake form couldn't be opened. Try again or contact the shop.) | The connection failed. Ask them to tap 「再試行」 (Try again) somewhere with a better signal. |
| The customer sees 「この受付は送信済みか、受付設定が変わりました」 (This request was already sent, or the intake settings changed) | The settings changed while they were submitting. Ask the customer to send the same details again. |
| Two customers were created for the same person | Submitting personal details for a separate intake creates another customer and deal. Continue through Open previous application in the same tab, or use the saved resume link. |
---
# Take a LINE inquiry through to a quote
Source: https://docs.toreca-cloud.com/en/guides/purchase/line-intake
This procedure is for online purchases taken through LINE, with goods sent by post. If the LINE conversation is before a visit, continue with [In-store purchases](/en/guides/purchase/counter) when the customer arrives.
After you present the quote (the customer accepts, ships the cards, you do the final appraisal, and you pay), continue with [Shipping and final appraisal](/en/guides/purchase/shipping-and-final) and [Payouts](/en/guides/purchase/payouts).
## What you need
- A connection to Liny or L Step. LINE friends and chats are imported about every 5 minutes. For setup, see [LINE and notifications](/en/guides/settings/line-and-notifications).
- A second member who can review the quote. The person who made the appraisal can't approve it.
- Liny or the LINE admin screen. You paste the quote text made in Toreca Cloud there to send it.
## The steps and the deal status
| Step | What you do | Where | Deal status |
| ---- | ---------------------------------------------------- | ------------------------------ | ----------- |
| 1 | Open the unregistered LINE friends | Customers | (No deal) |
| 2 | Check the photos and chat, then add them as customer | LINE friend | (No deal) |
| 3 | Read the cards from the photos | Customers › LINE chat | (No deal) |
| 4 | Check the cards that were read and add them | Review detected items | New |
| 5 | Check condition and amounts, then request a review | Customers › Appraisal requests | Appraising |
| 6 | Another member checks the quote and approves it | Reviews | Appraising |
| 7 | Copy the quote text, send it on LINE, and record it | Customers › Quotes | Quote sent |
## 1. Open the unregistered LINE friends
Click **Customers** in the sidebar. At ①, choose your LINE official account from the tabs above the list. Customers that aren't linked to LINE are in **Unassigned**.
To see friends who aren't customers yet, click **More filters** (the funnel icon) under the search box, and choose **Unregistered LINE friends** at ②. The number on the icon is how many of those friends you haven't replied to.
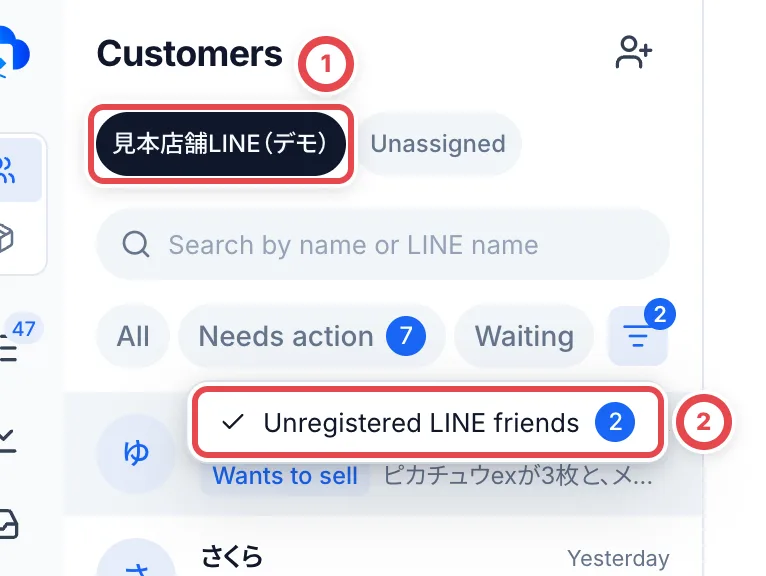 Each friend in the list has a status. **Wants to sell** means the customer said they want to sell. **LINE reply** means the last message is still the customer's. **Replied** means your shop sent the last message.
## 2. Check the photos and chat, then add them as a customer
Choose a friend at ① and the chat opens on the right. The photos they sent are listed as at ②. Click a photo to open the enlarged viewer. Move between photos with its arrow buttons or the keyboard arrow keys. The viewer also offers an option to open the image in a new tab.
Once you know it's a buying inquiry, click **Add as customer** at ③.
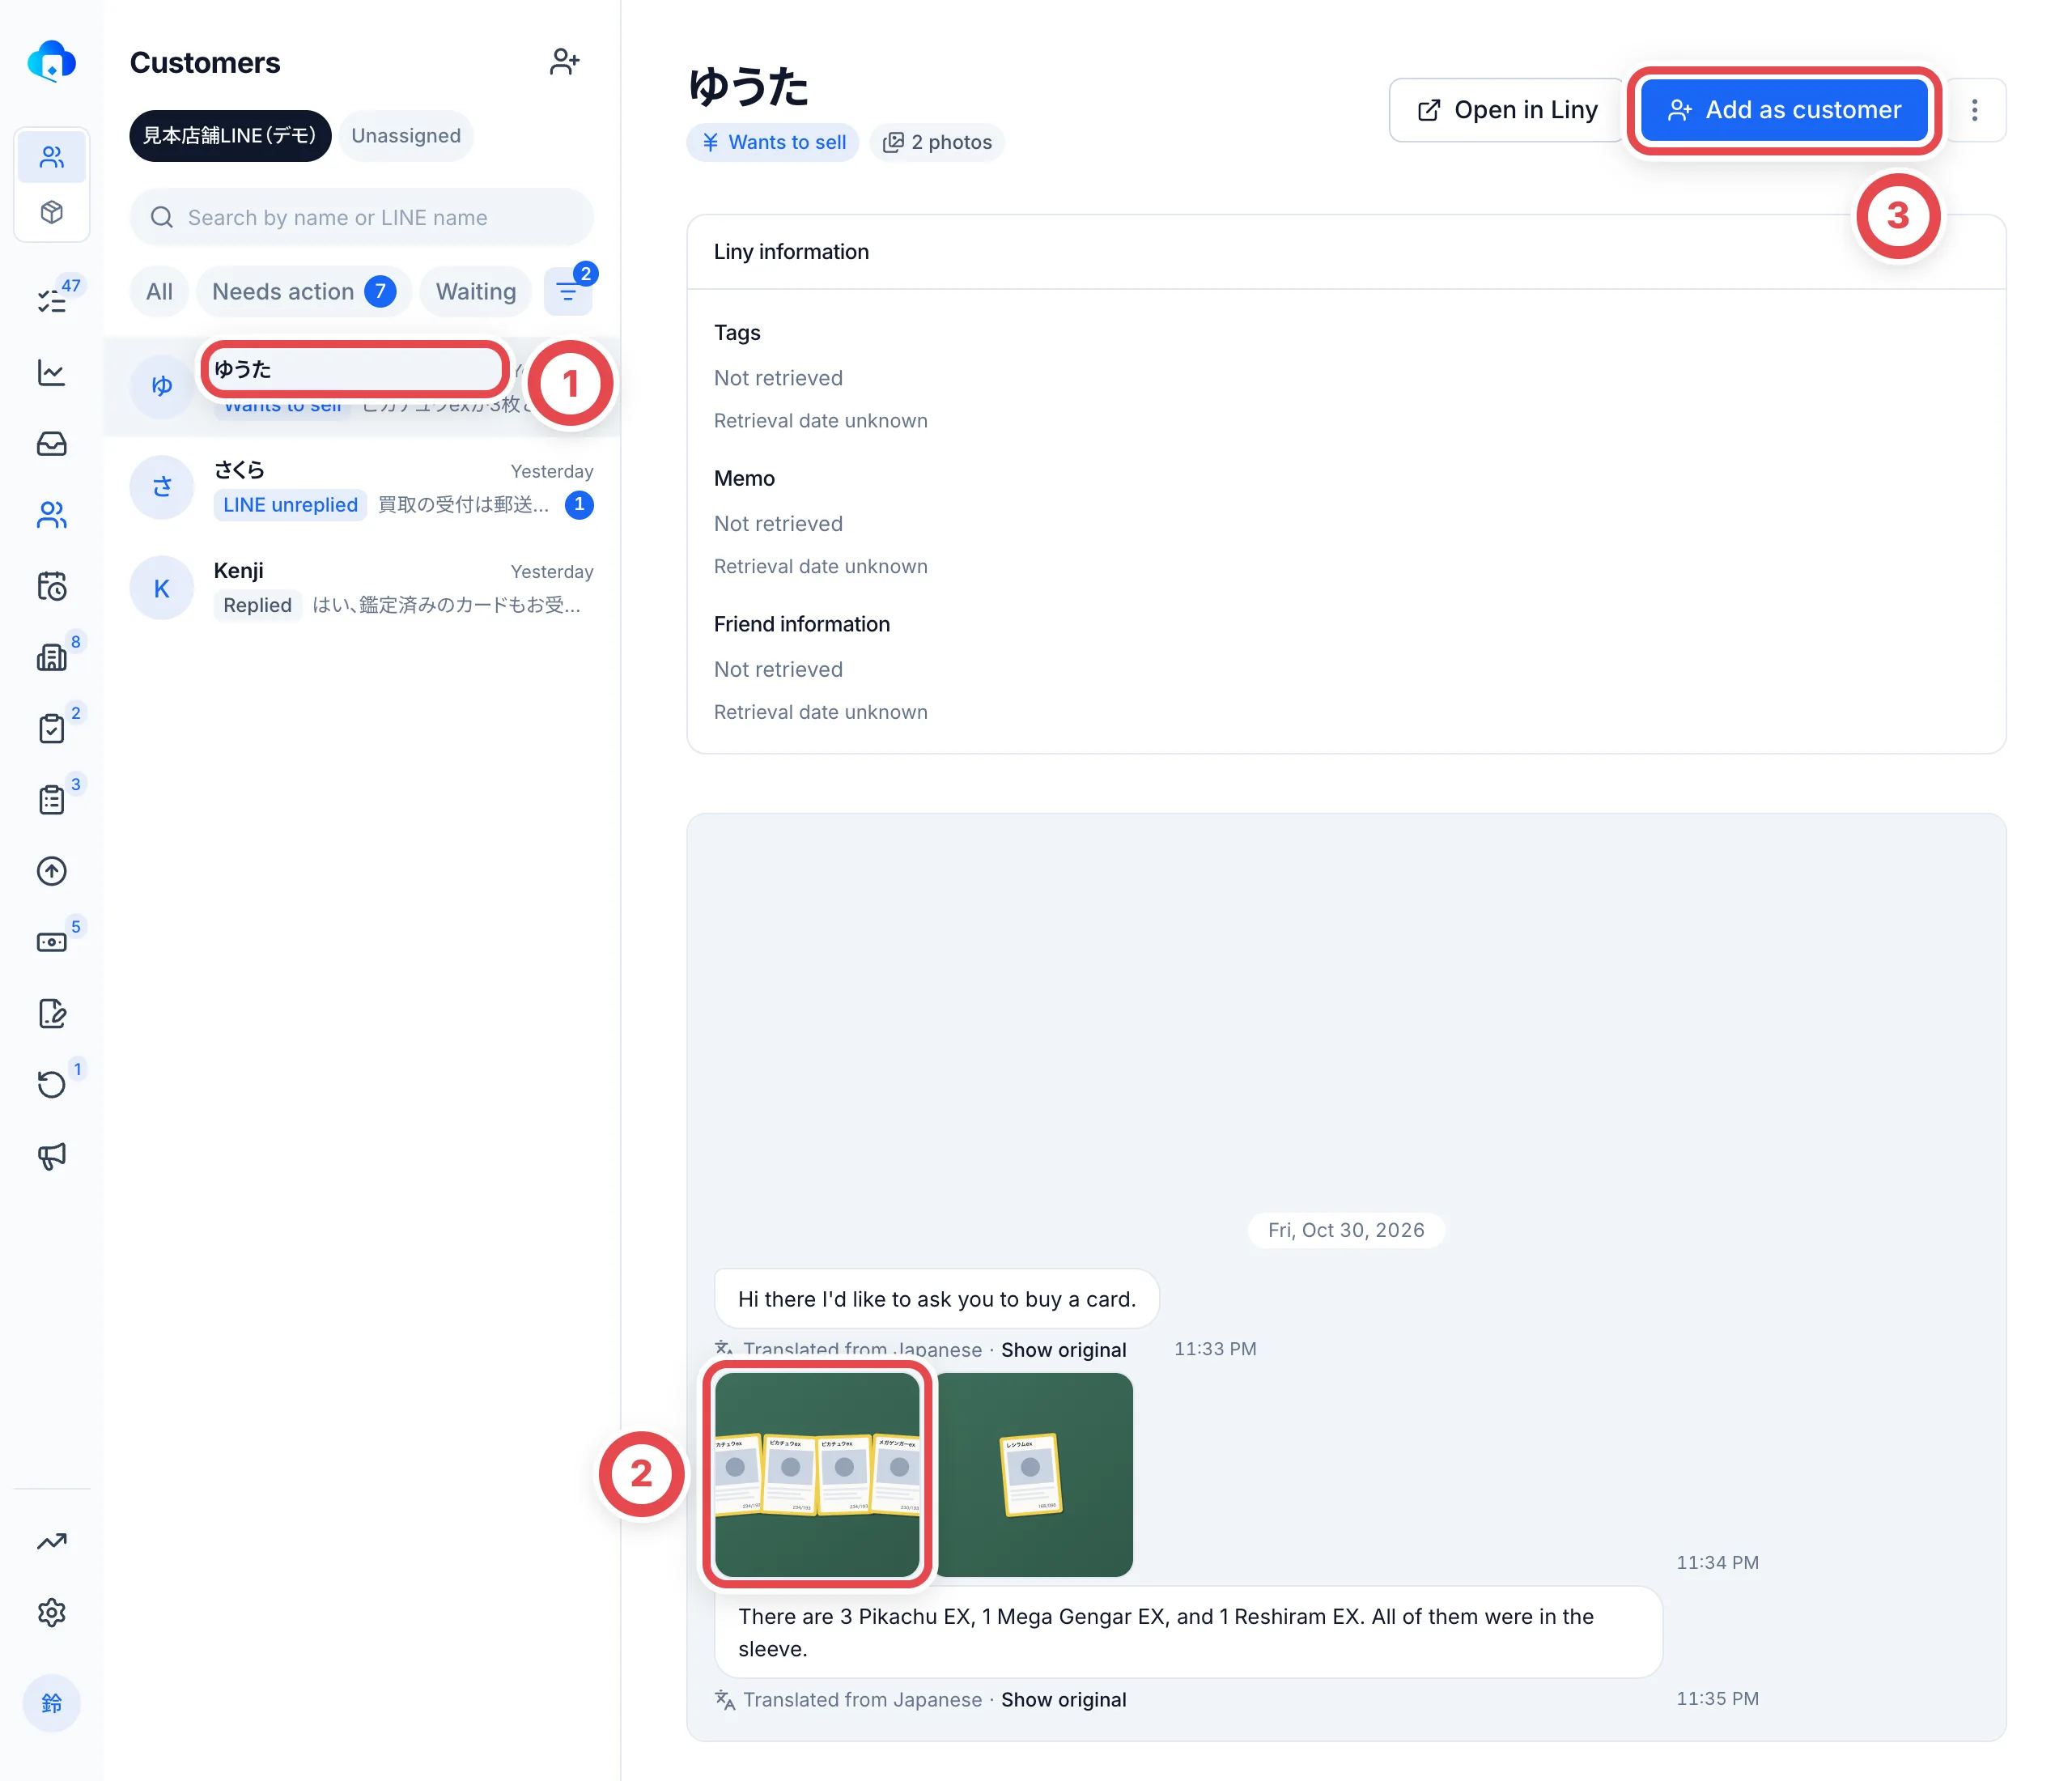
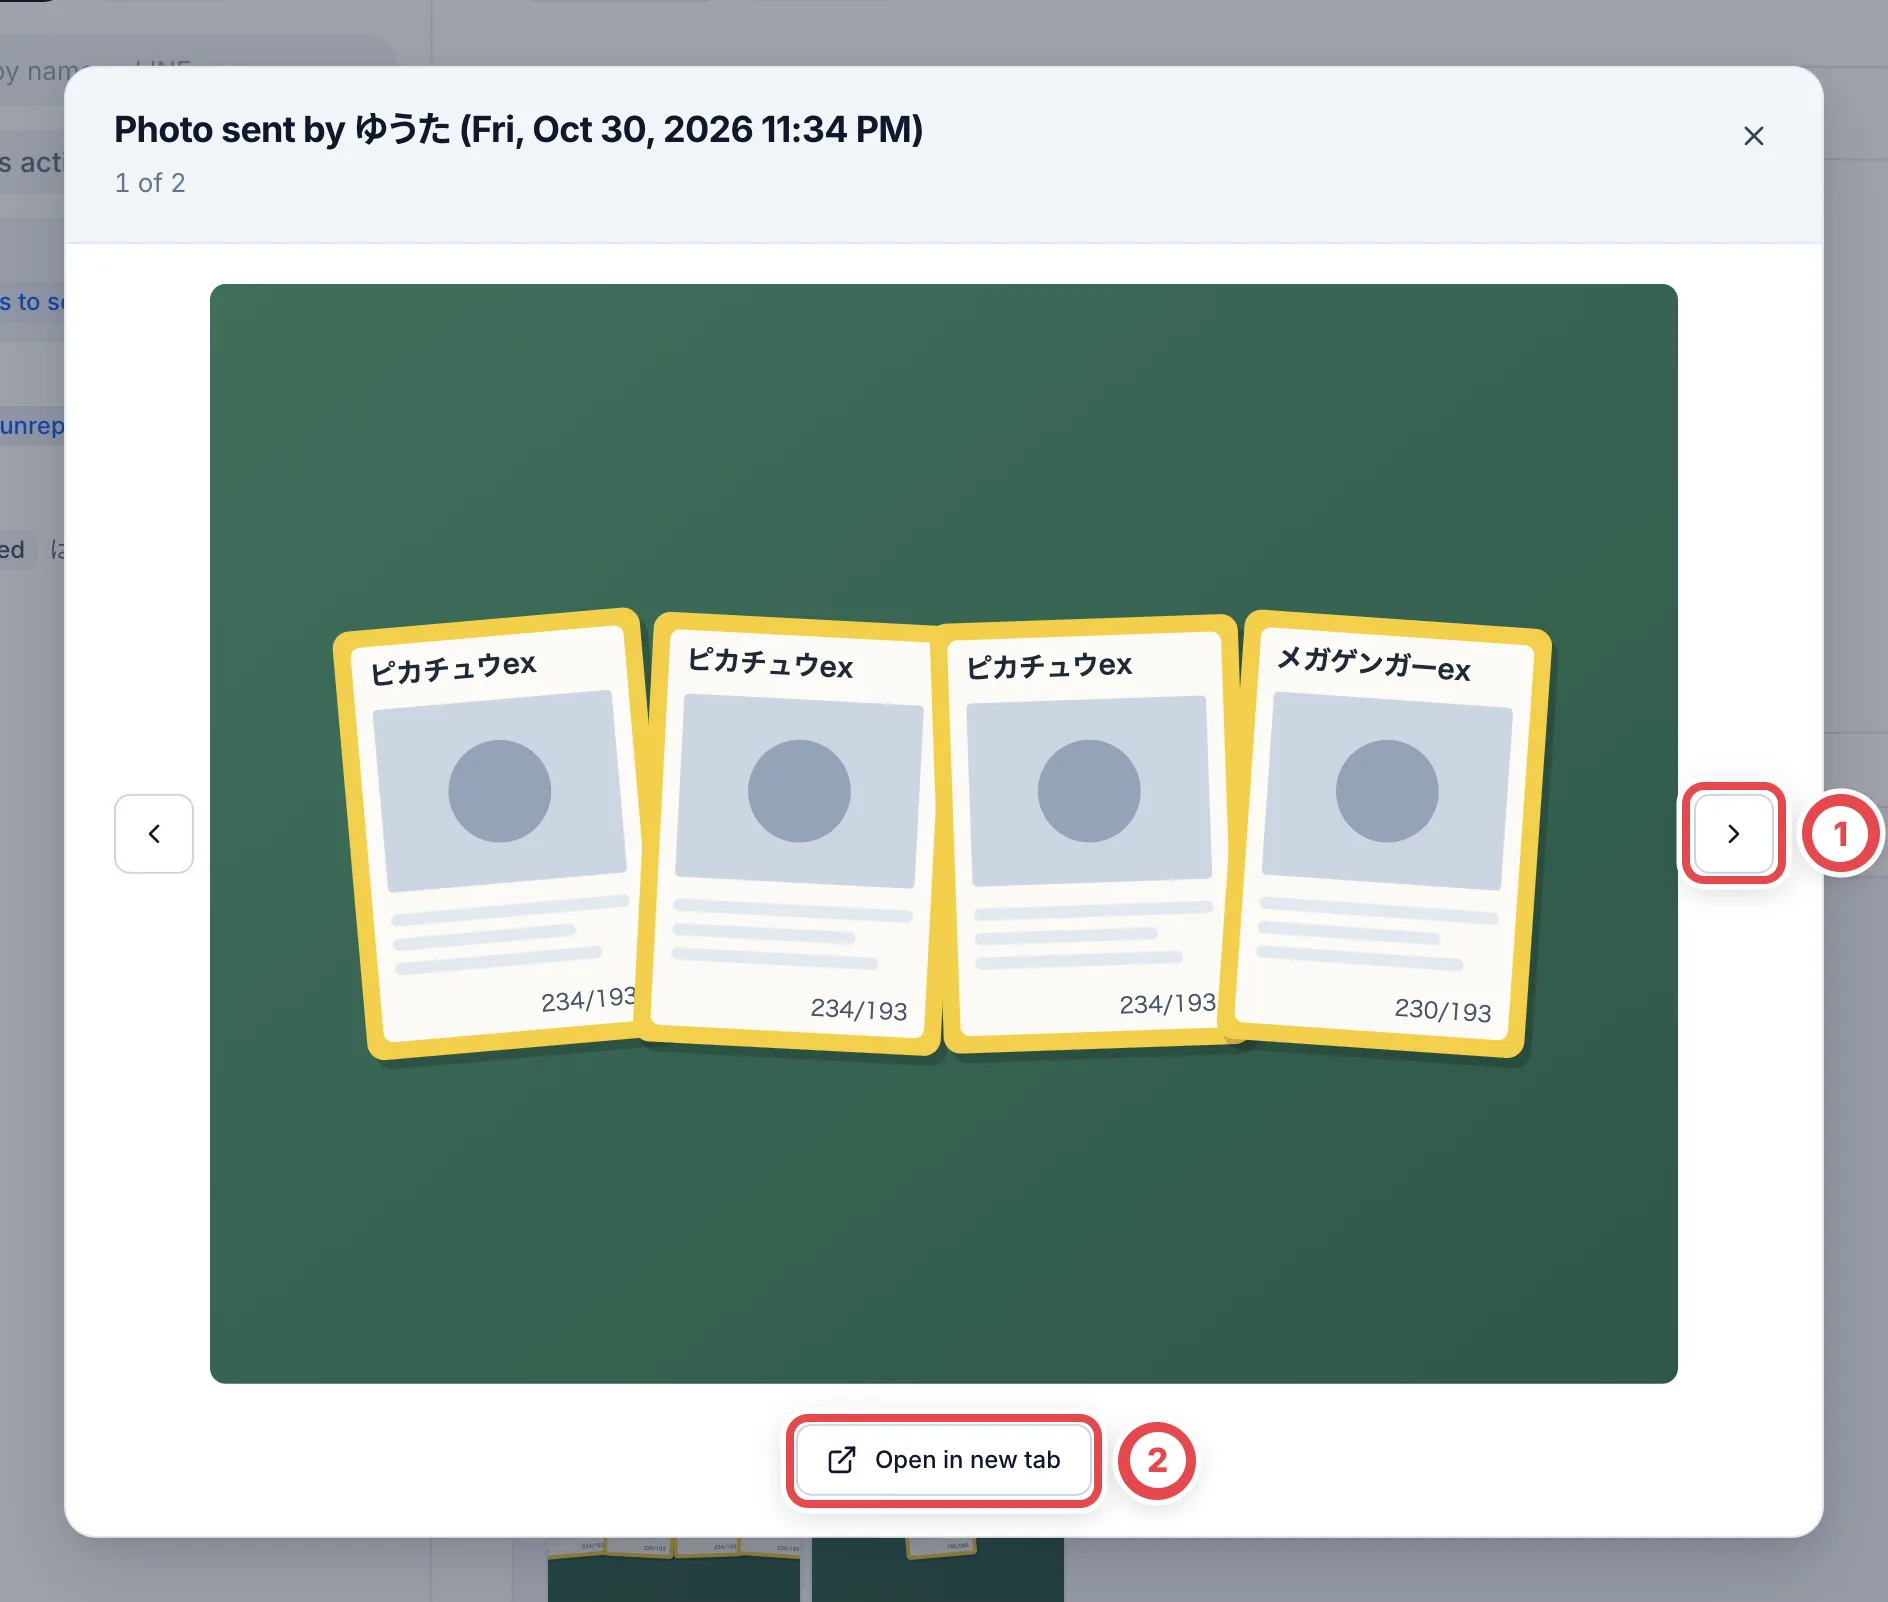 For a first-time customer, keep **New customer** at ①. The **Customer name** at ② is filled with their LINE name. Change it to their real name if you know it. Click **Add as customer** at ③ to create the customer. Their **LINE chat** tab opens. No deal exists yet.
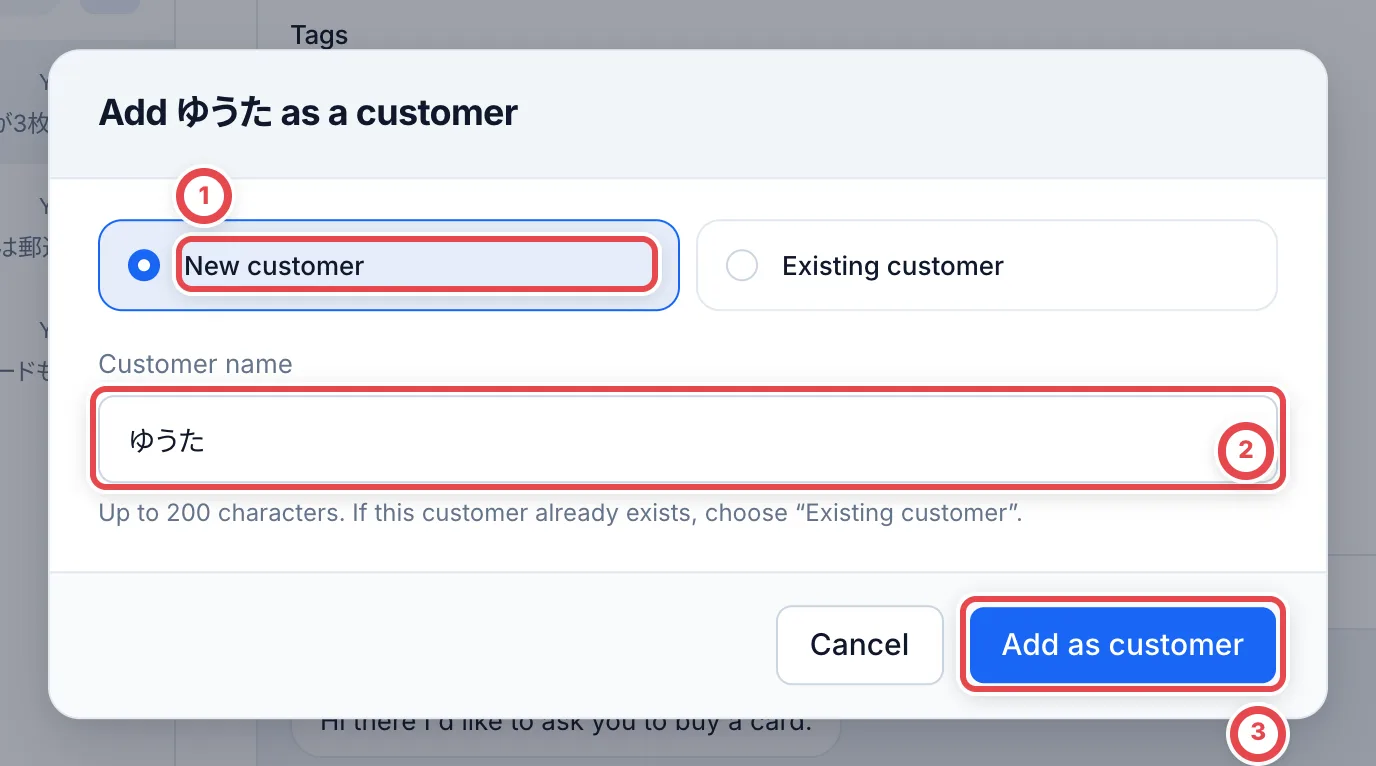 If a returning customer is contacting you from a different LINE account, choose **Existing customer**, then search for them and link. For friends who aren't selling, open the menu (︙) at the top right and click **Dismiss** to take them off the list.
In the English console, supported browsers translate Japanese chat on the device. Use **Show original** to check the original wording. Preparing the translator can take time on first use; unsupported browsers or a failed setup leave the original text visible. This display translation is separate from reading cards from photos below.
## 3. Read the cards from the photos
On the customer's **LINE chat** tab, AI reads the cards and quantities from the photos and messages the customer sent. When reading is done, a bar such as "Found 3 items from 2 photos and 4 messages" appears above the chat. Click **Review** at ① to check the result.
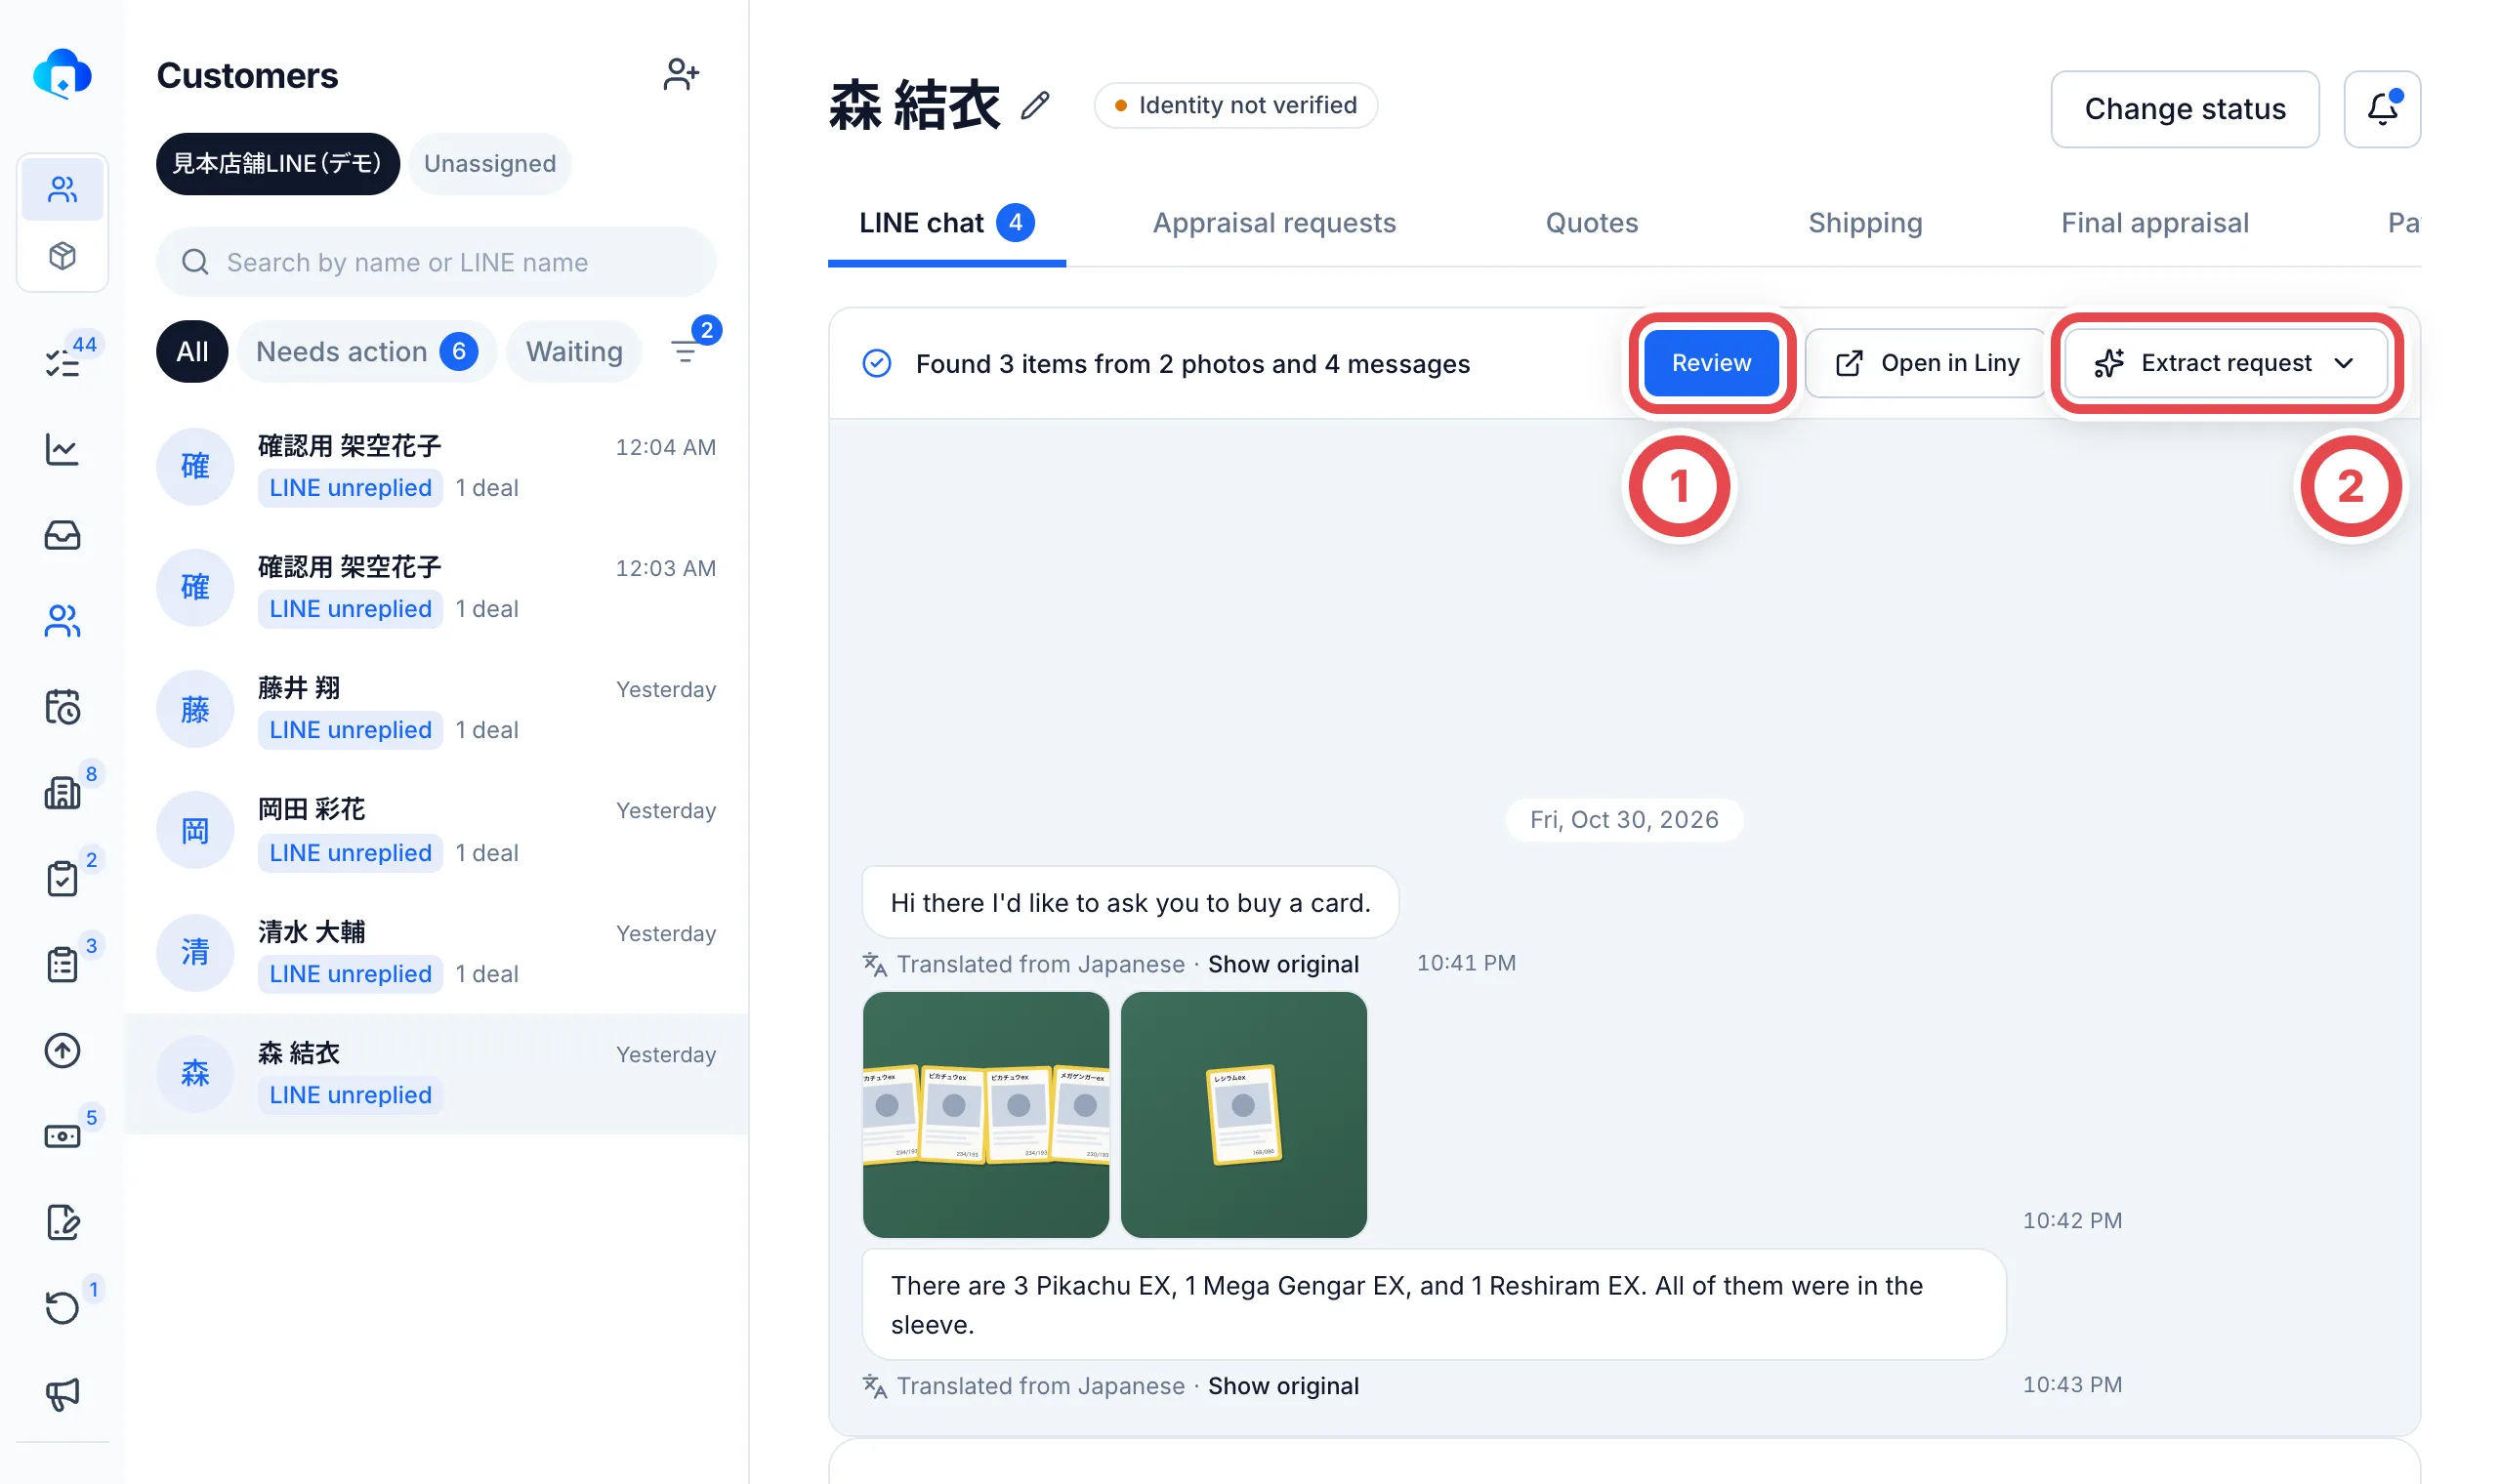 If the bar isn't there, or you want to read again after new photos arrive, click **Extract request** at ②. To read the whole chat, choose **Extract from entire chat**. To read only certain photos or messages, choose **Select messages to extract**, pick the messages, and click **Extract from selected messages**. Reading takes a little while. It continues after you leave the page; return to check the result.
Reading the entire chat uses up to the latest 16 photos and 80 text messages. Explicit selection allows up to 64 photos and 80 text messages, with at most 300 selected messages overall. Select an entire album or individual photos within it. Remove excess items and wait for pending photos; photos that could not be retrieved cannot be read.
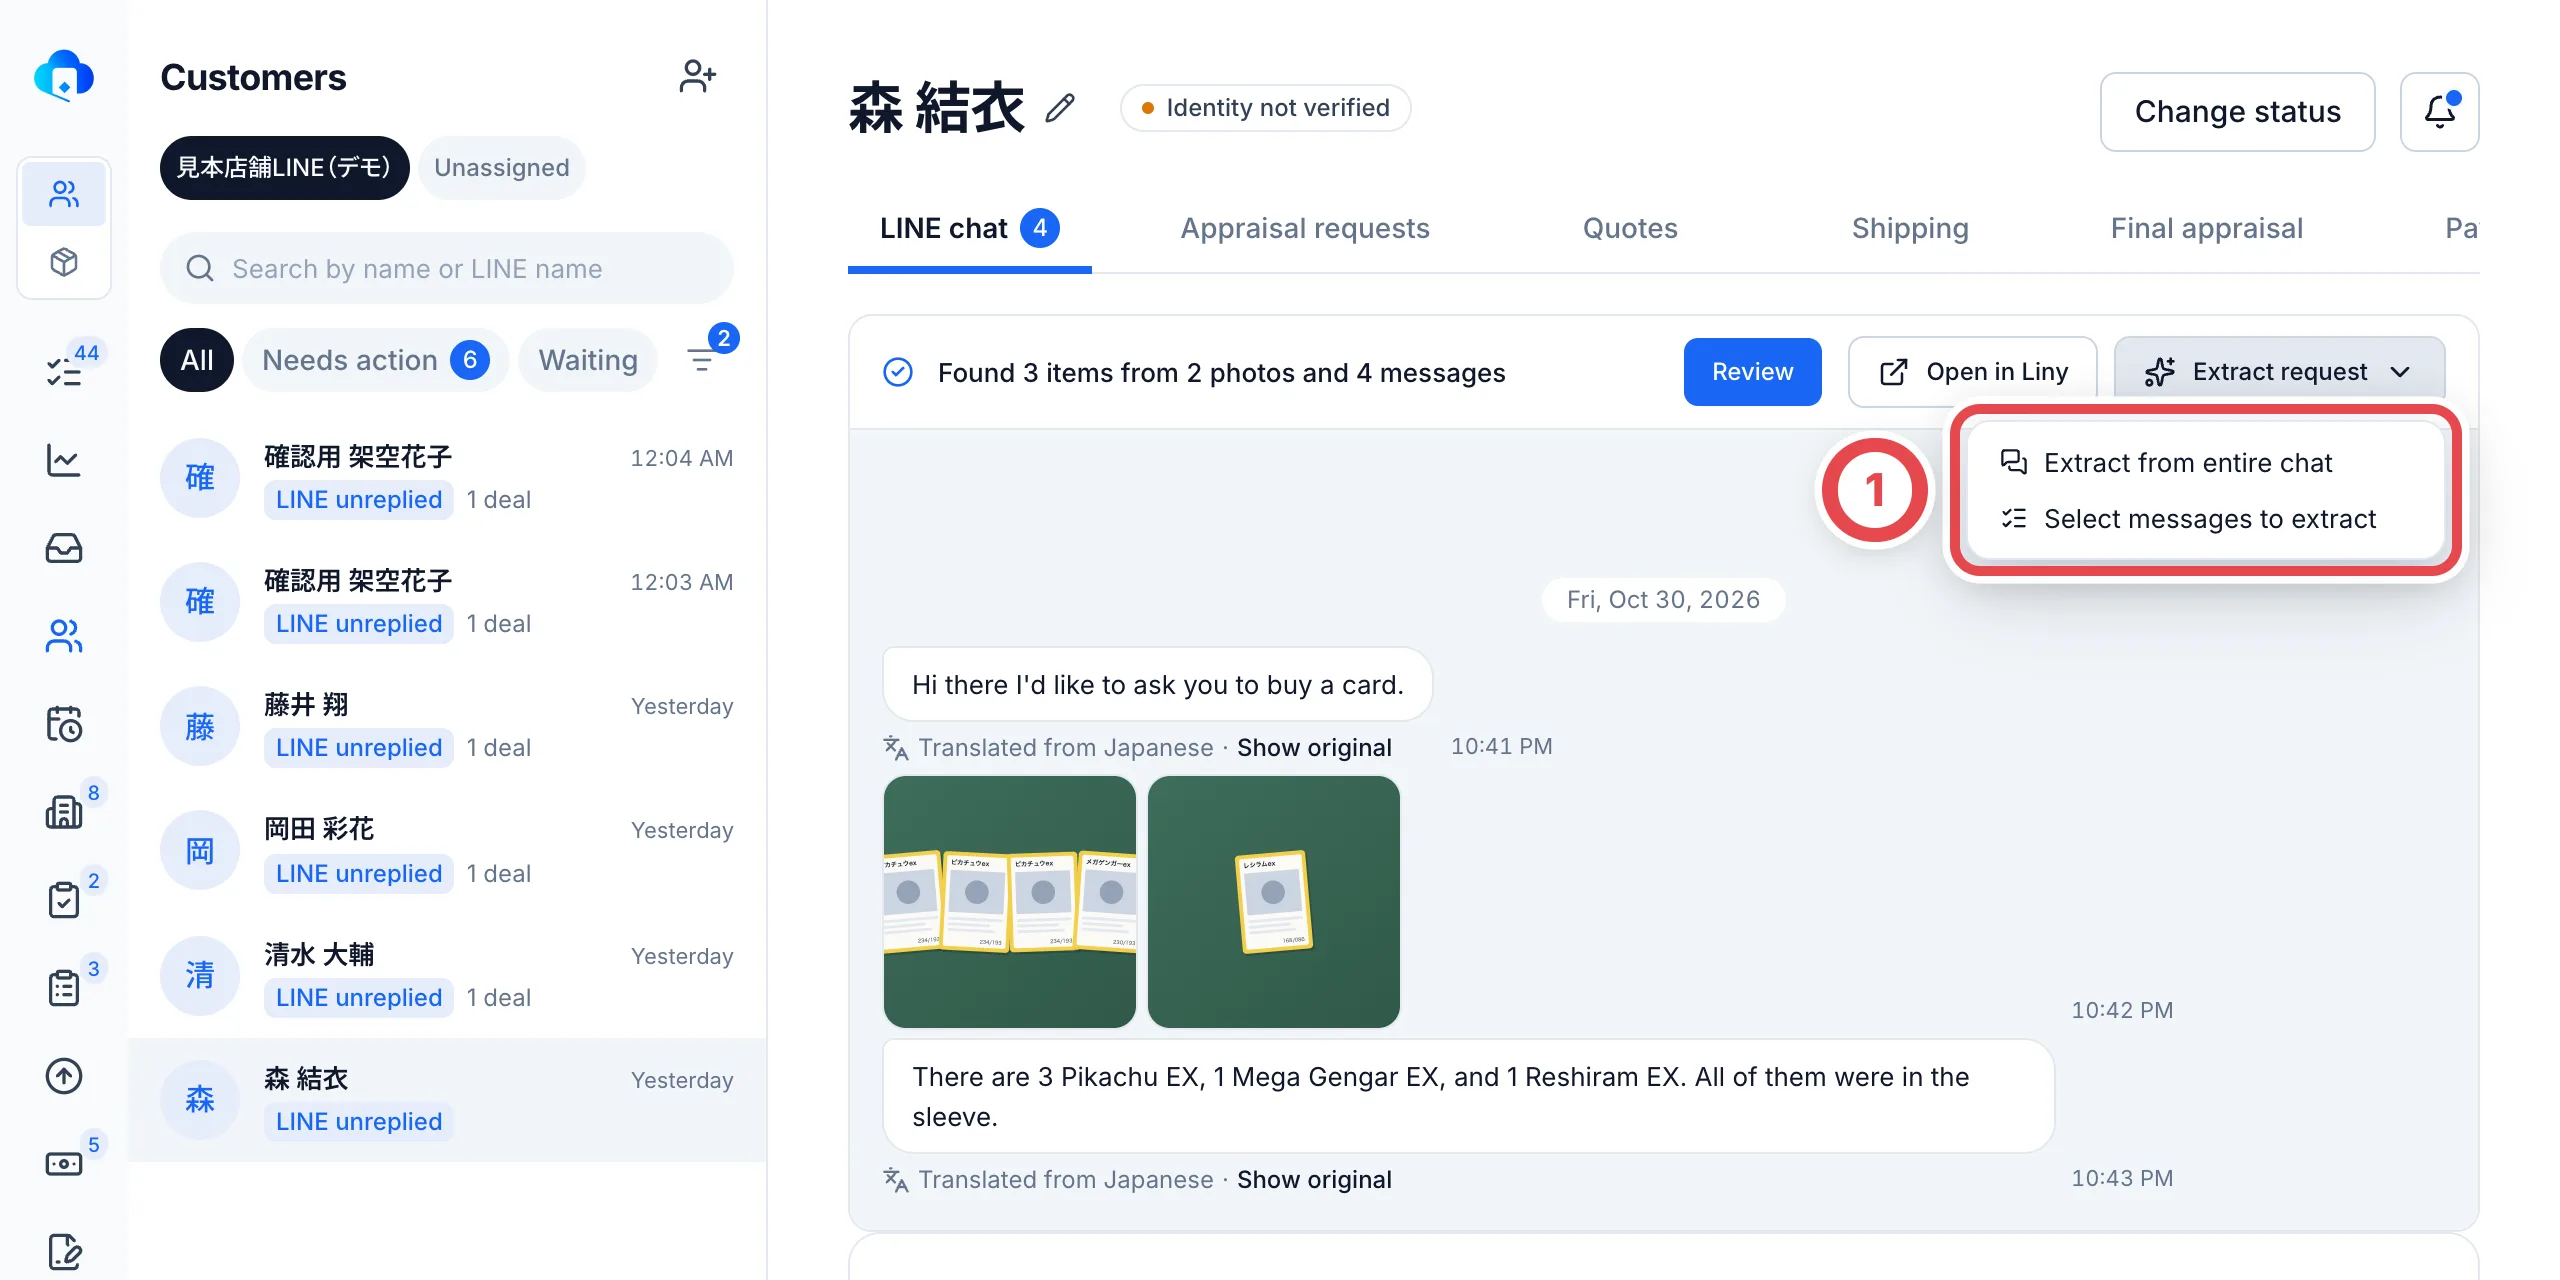
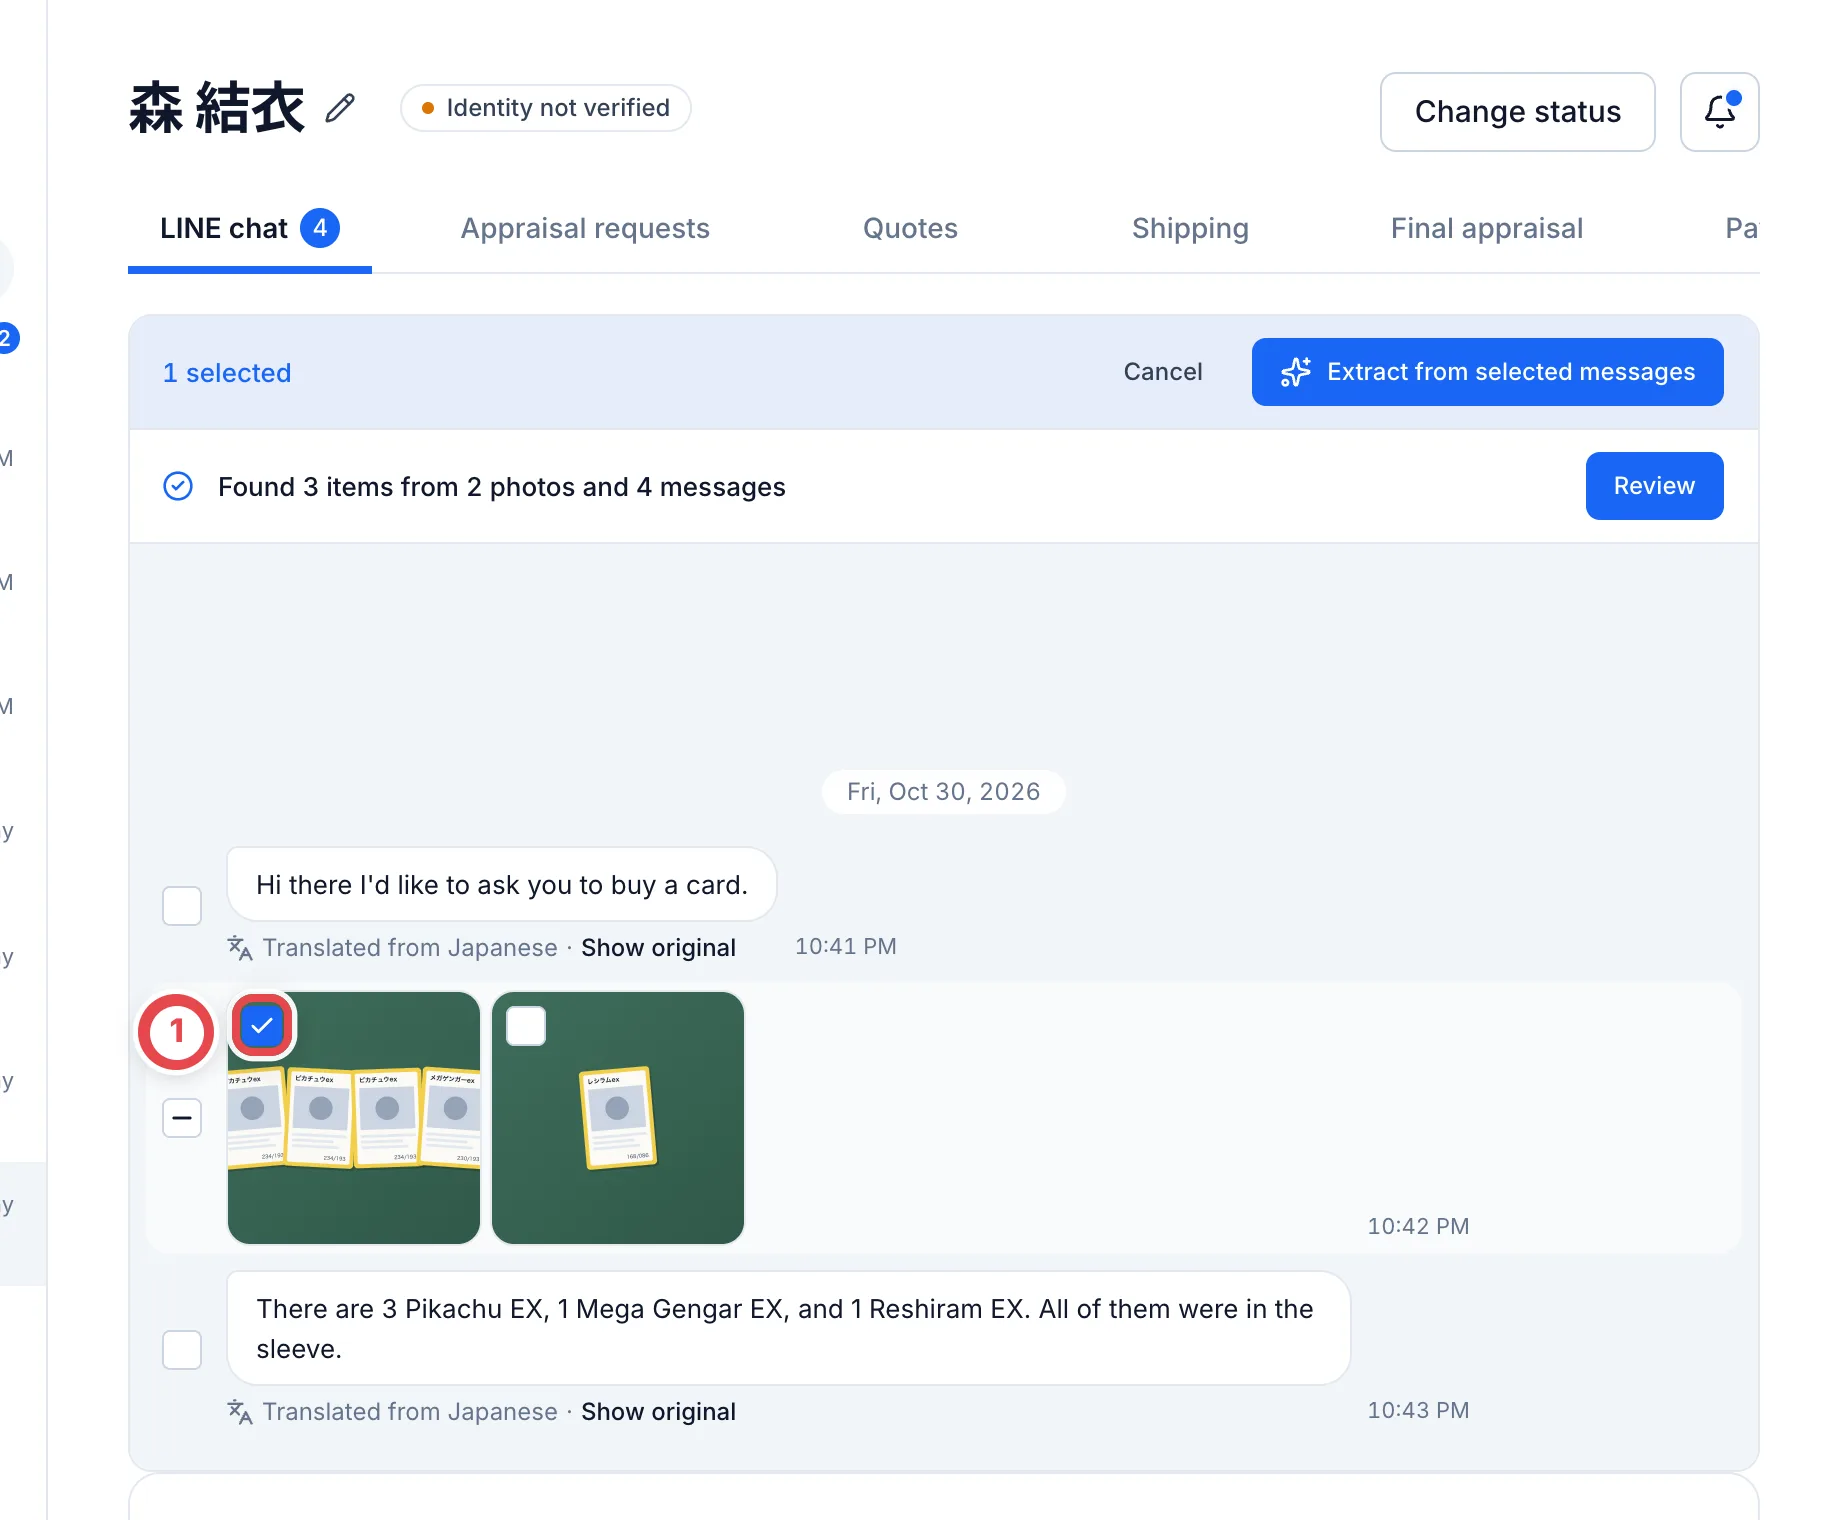 ## 4. Check the cards and add them to the appraisal request
**Review detected items** opens, and you check each item one by one. ① is the customer's photo and ② is the card the AI read. Compare them with the photo. Check that the card name and number match, and that the quantity at ③ matches the photo and messages.
If the master has no registered image, it shows **No image**; compare the name, number and edition information too.
If it matches, click **Confirm and continue** at ④. For anything that isn't a card, such as only sleeves or a box, click **Exclude** at ⑤. These decisions do not add items to the appraisal request yet. Management notes, opened from the item’s top-right menu, are saved separately and remain if you close the review.
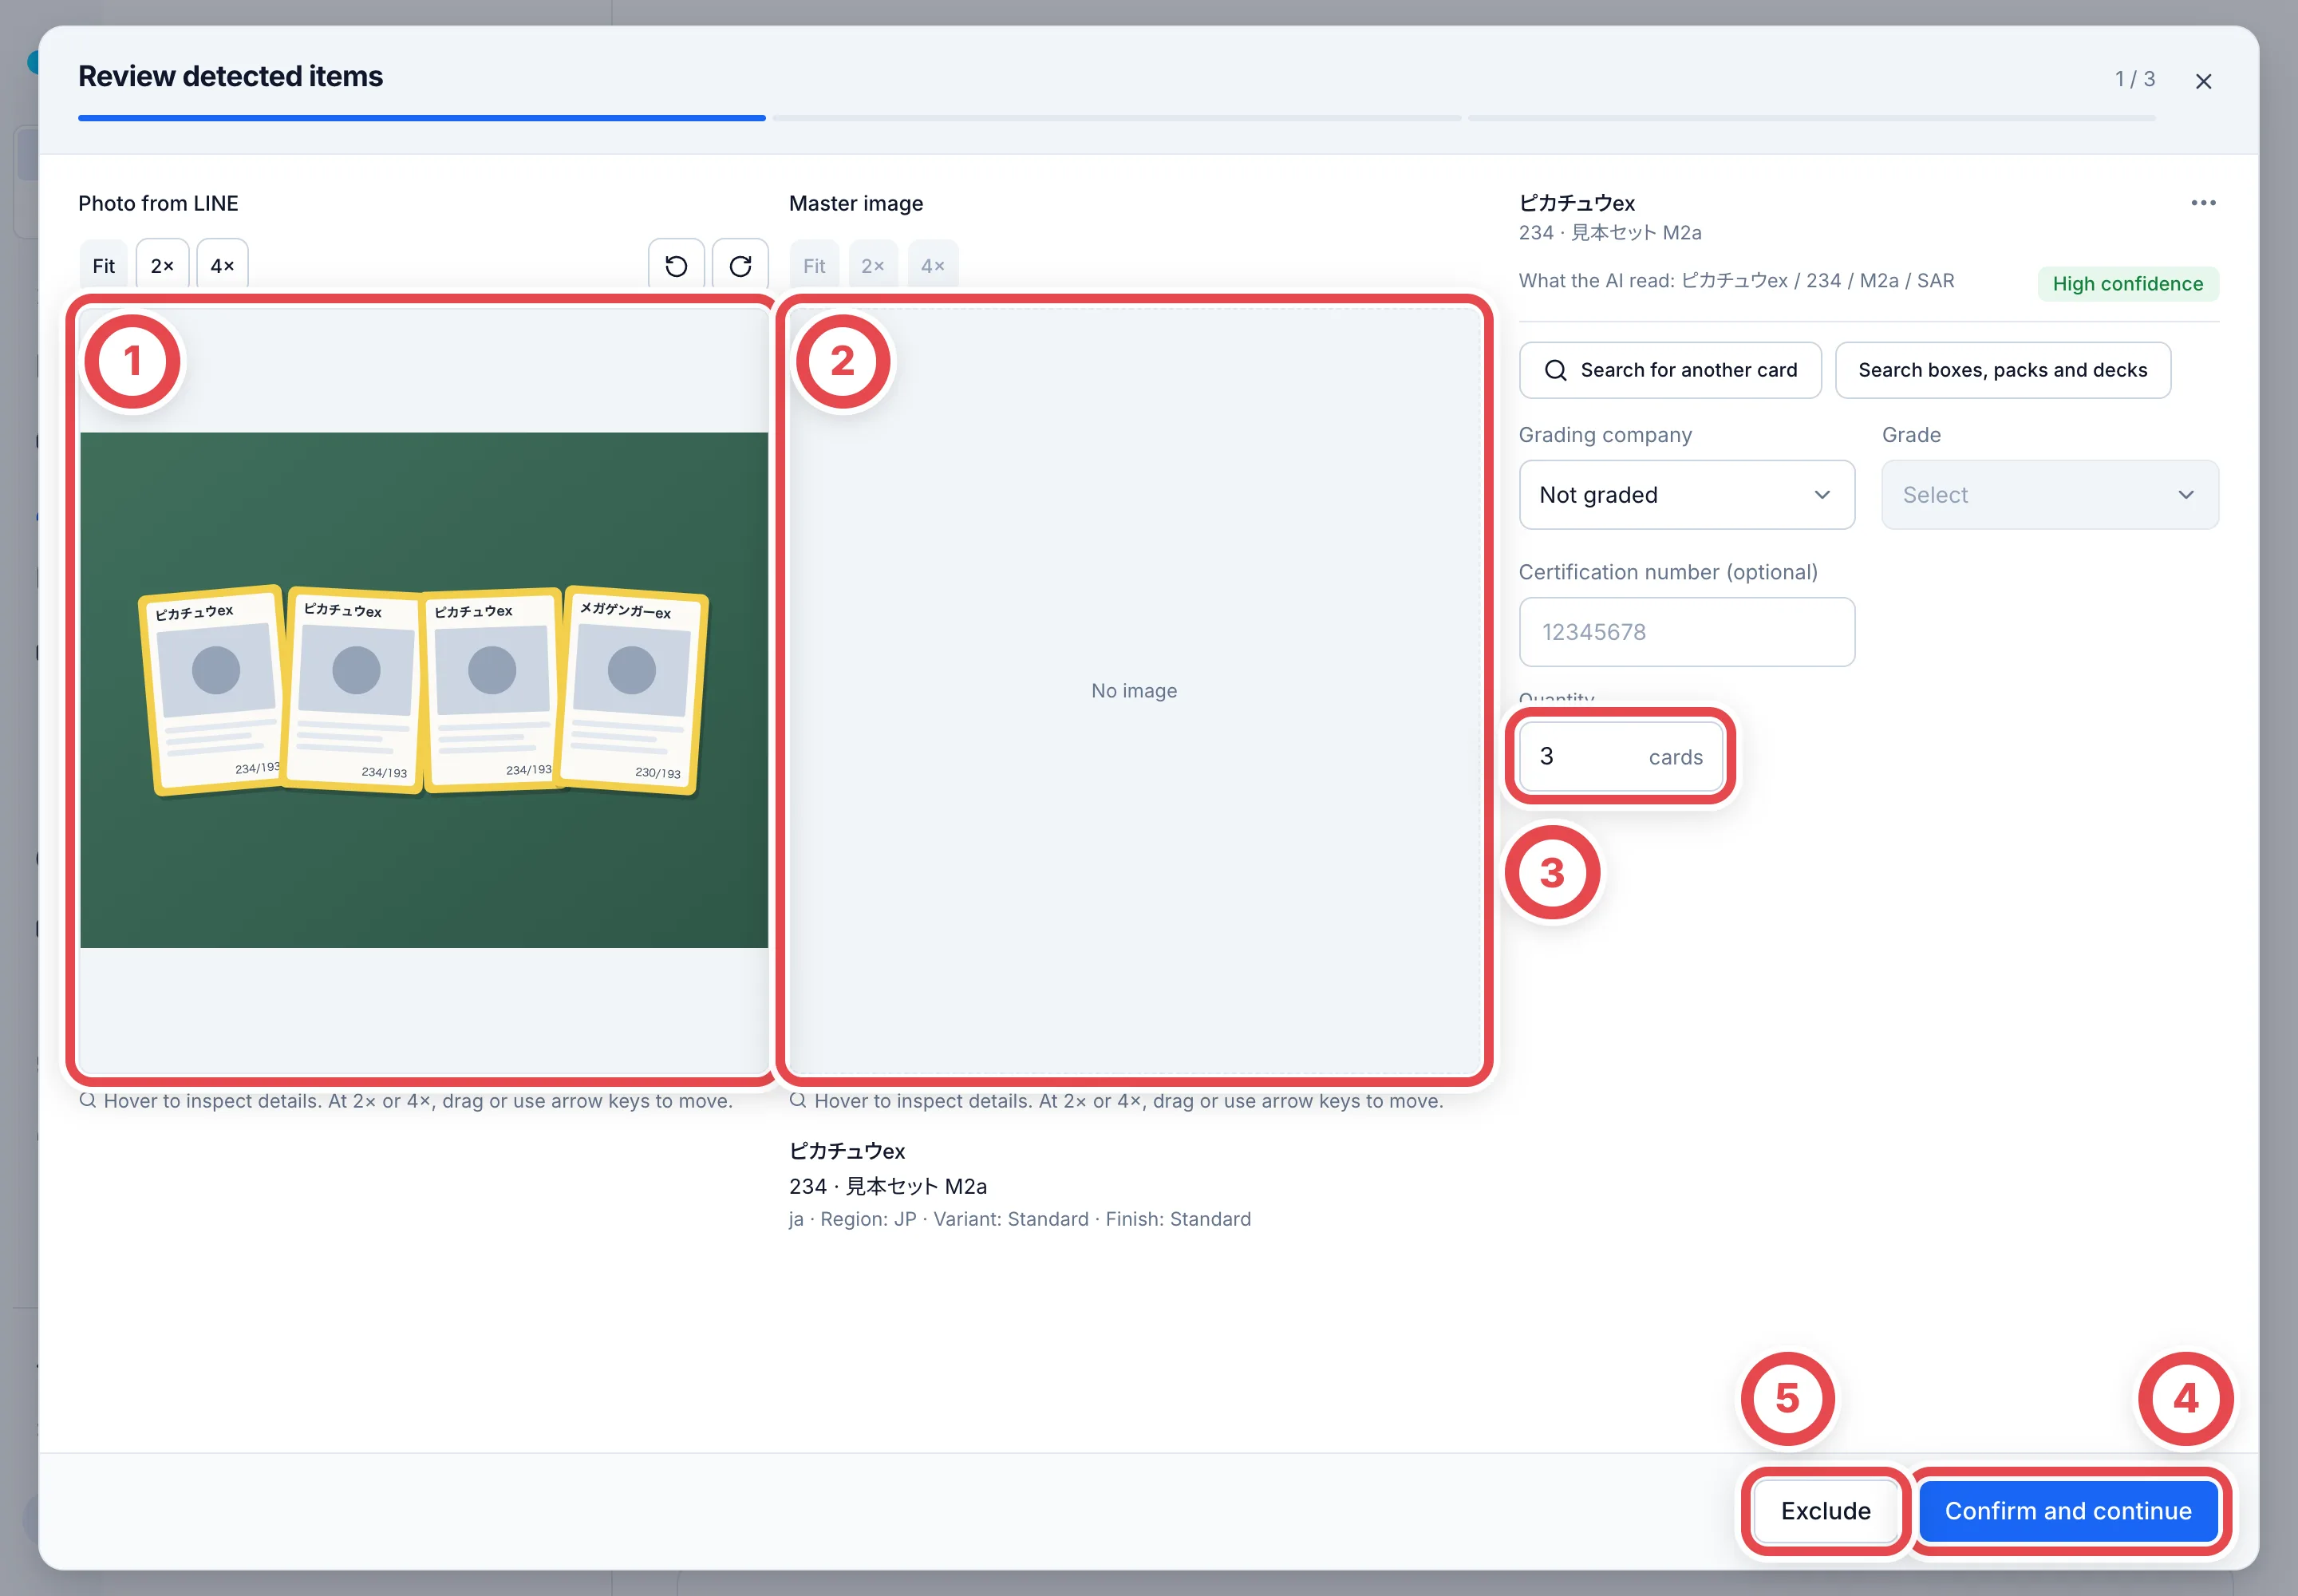 For an item the AI isn't sure about, a badge such as ① **Medium confidence** appears with the reason. At ②, select an illustrated candidate under **Choose from matches**, or **Search for another card** to find the right one. Use **2×** or **4×** to zoom the photo and master image on the same screen. If a photo arrives sideways, turn it 90° at a time with the buttons at the top right of **Photo from LINE**.
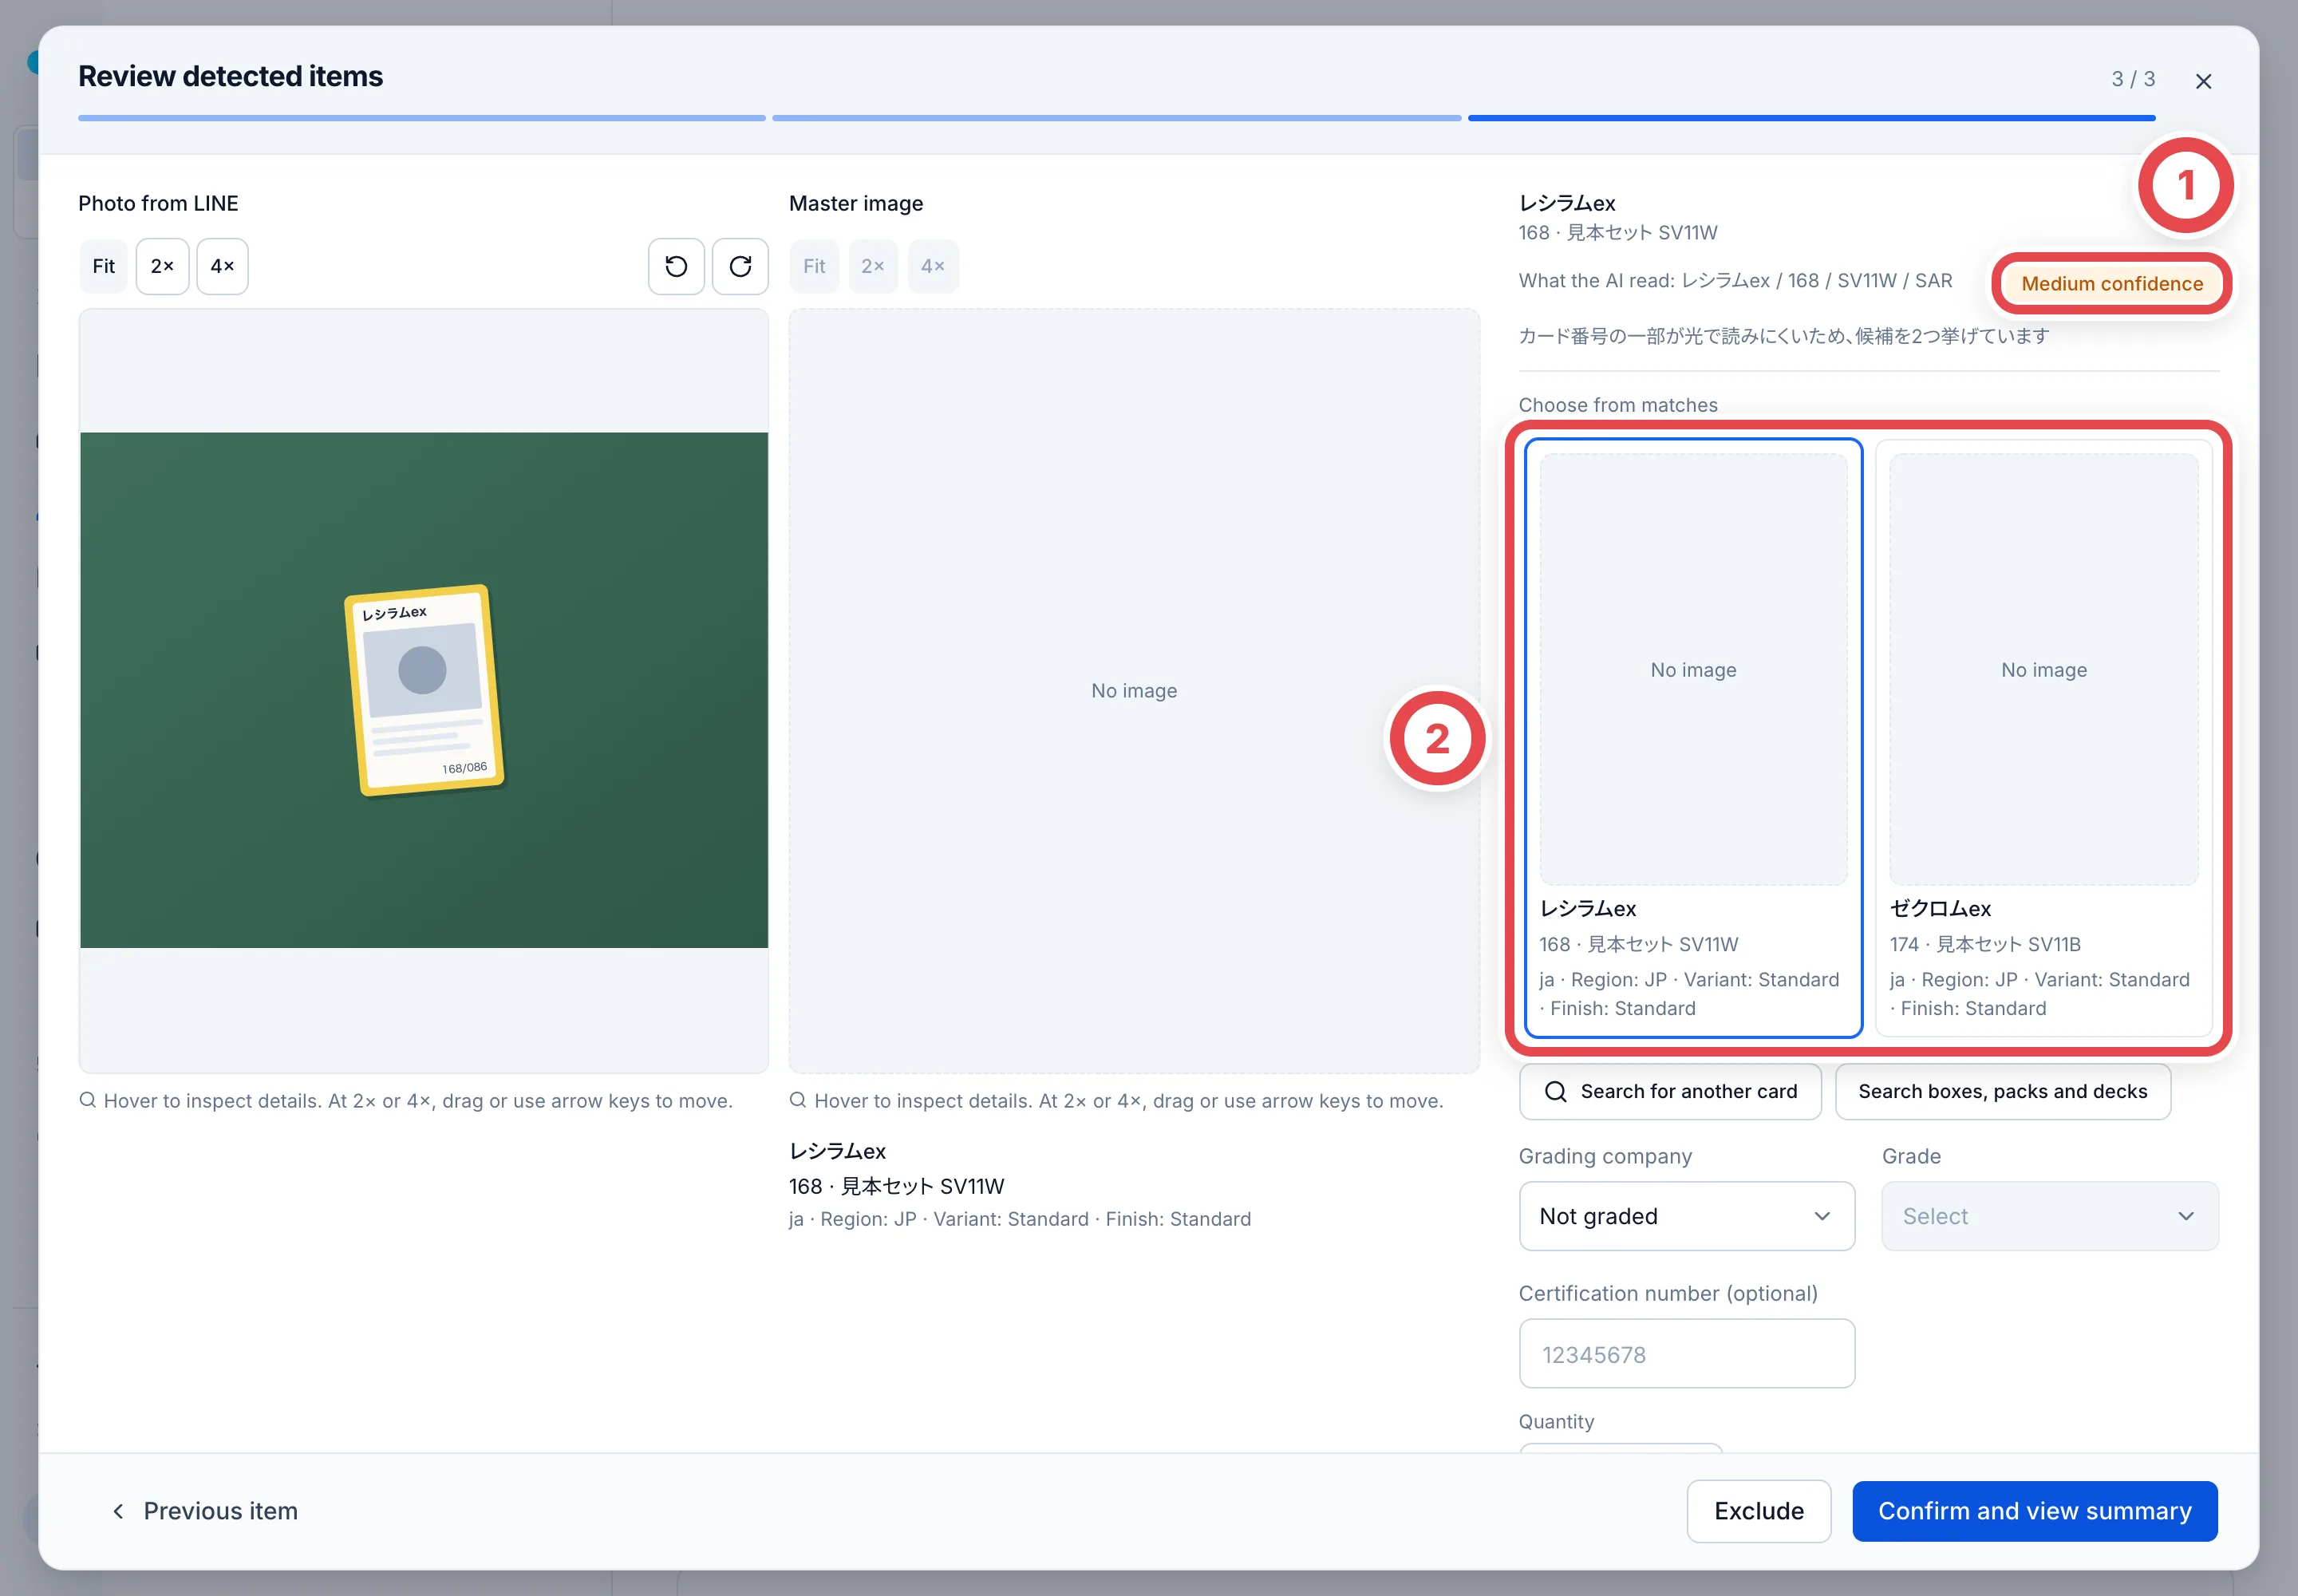
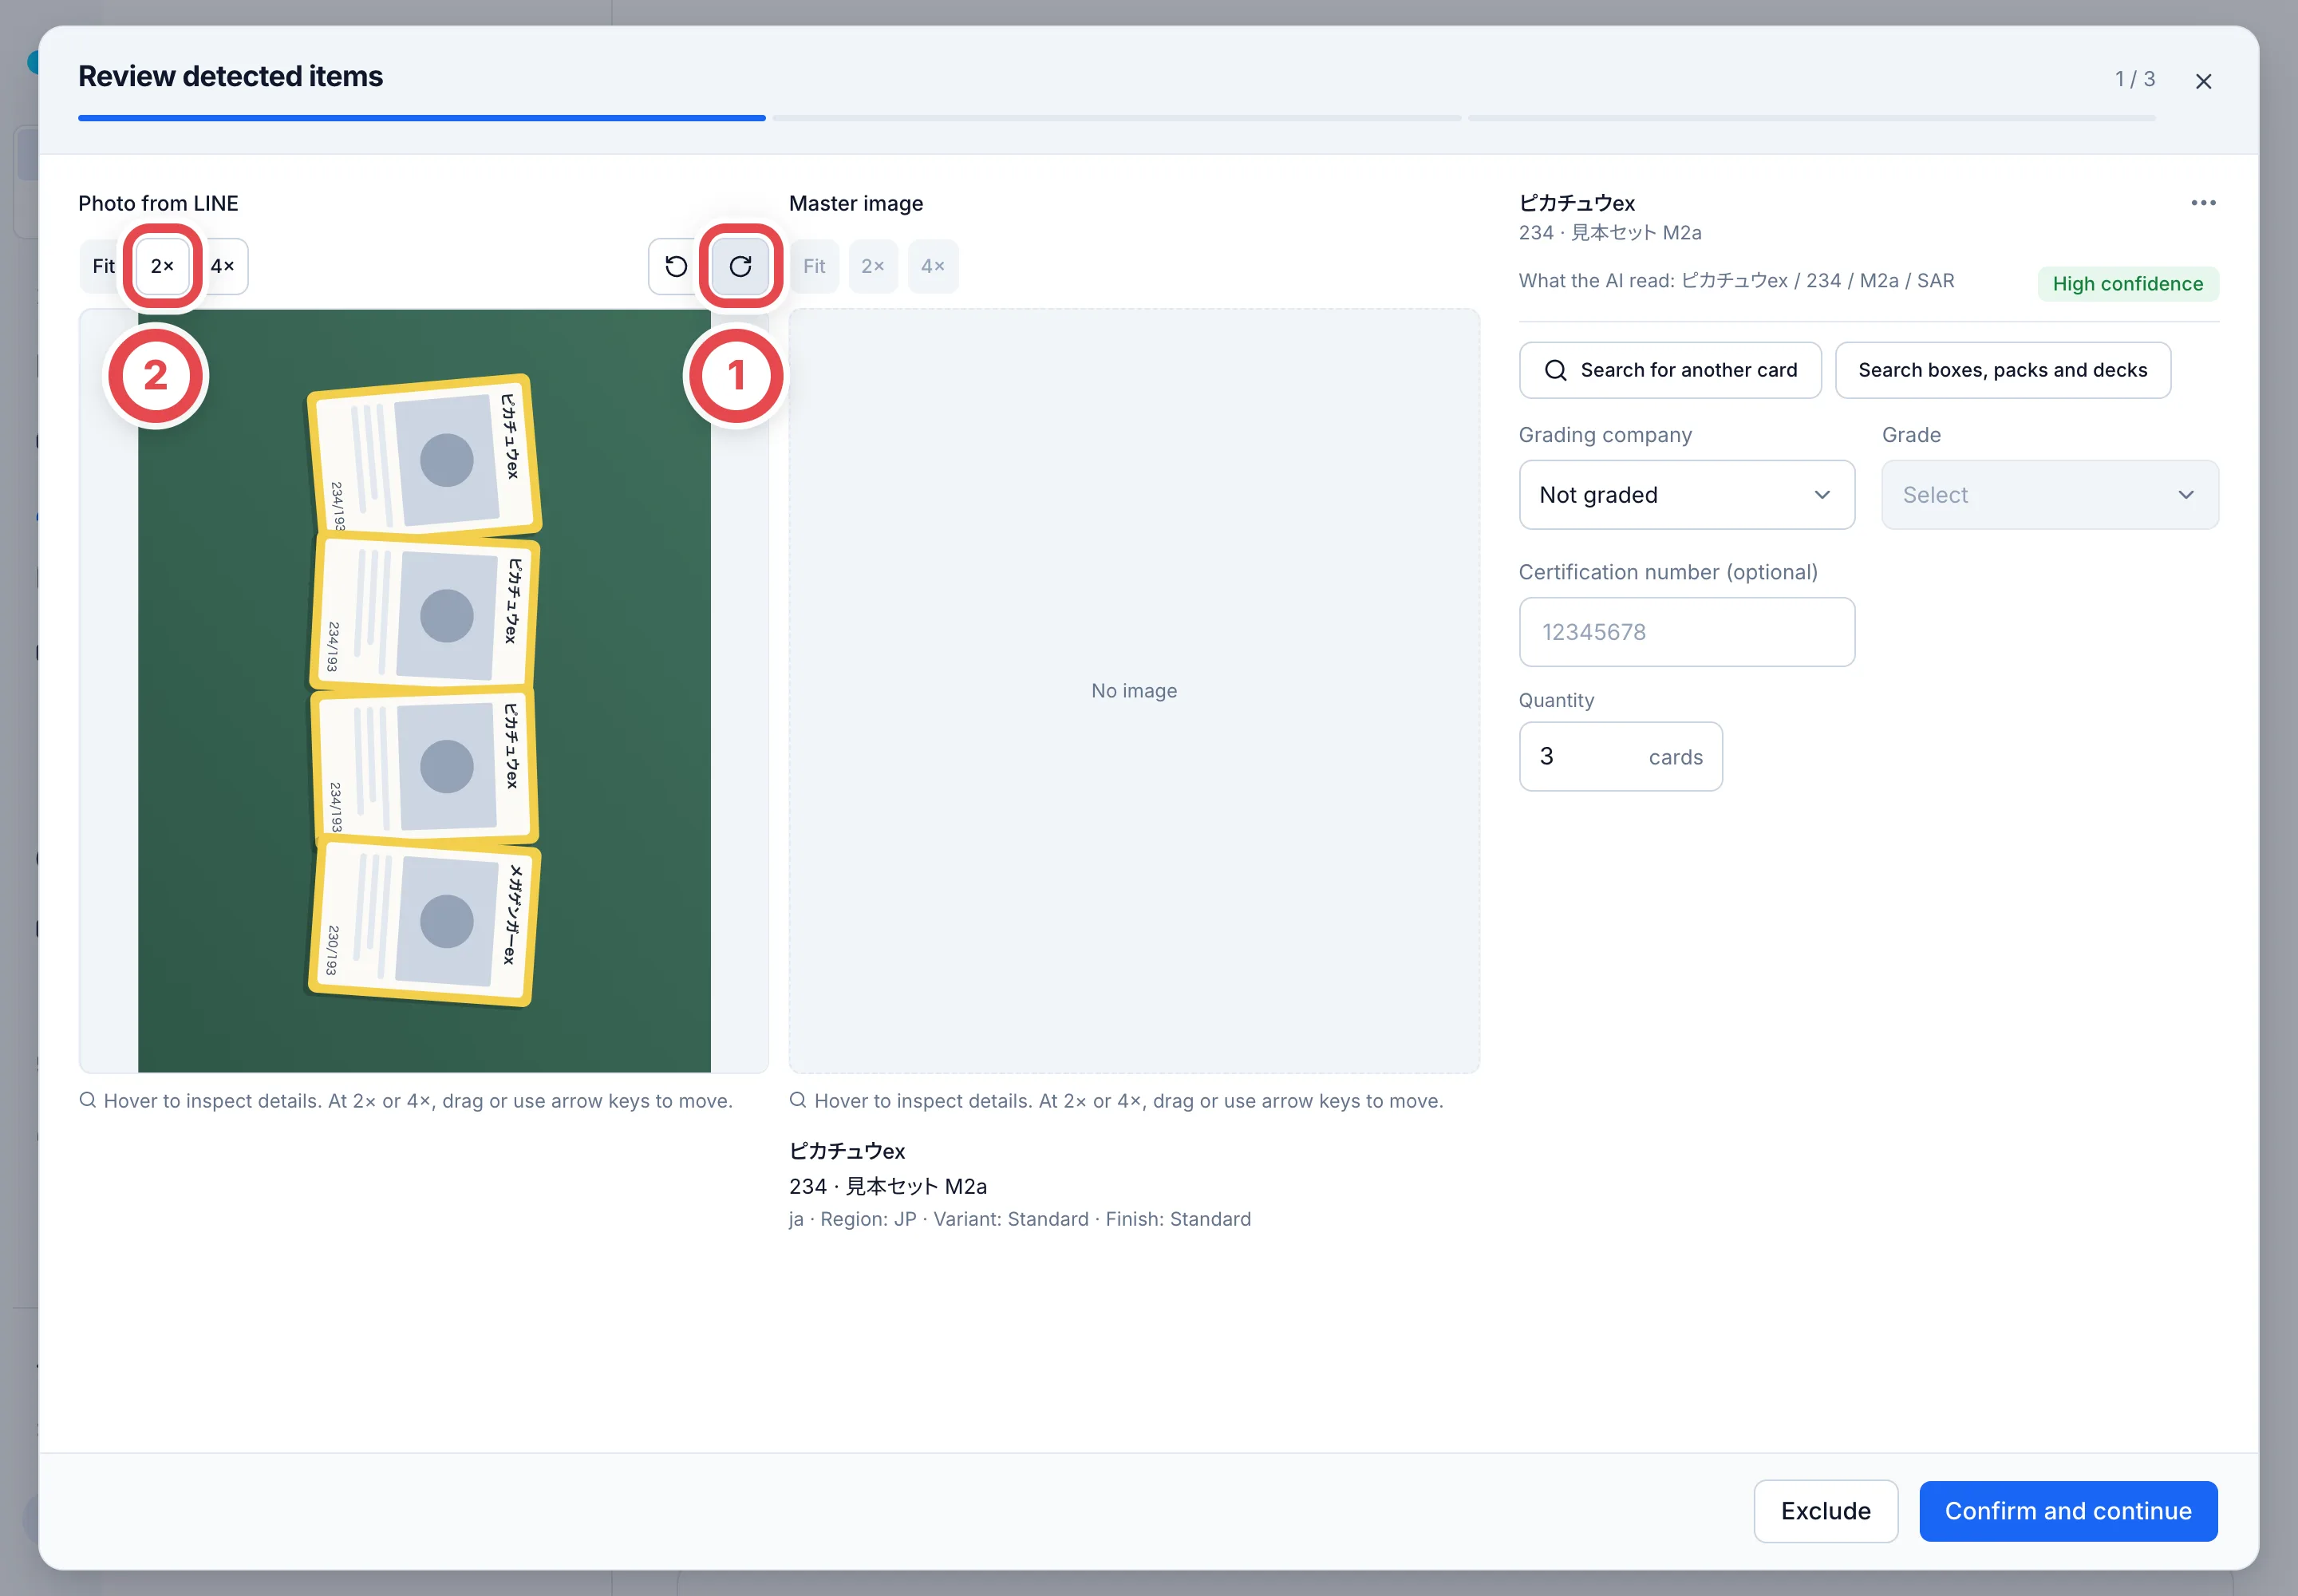 For graded cards, the grading company and certification number are read too. Check and correct them against the photo of the actual card. Different certification numbers remain separate units even for the same card. If one number is read for multiple units, confirm its use as a representative number. Check the edition, language and card number below the image too. Select a BOX or other product when appropriate. For a missing card master, prepare a registration request; it is applied when you finally click **Add to appraisal request**.
On the last item, click **Confirm and view summary**. The list appears under **Items to add**. Check the items and quantities at ①. To change one, click the pencil icon. Click **Add to appraisal request** at ②. This creates the deal and puts the cards on the customer's **Appraisal requests** tab.
 Reading doesn't set any prices. You decide the amounts in the next step.
## 5. Check condition and amounts, then request a review
The cards you added are listed under **Not quoted** on the customer's **Appraisal requests** tab. For each card, choose the condition and grade at ①. The reference price and buy rate are filled in from the market price and your shop's rates. Adjust them to match the condition of the card in the photo. The amount for each line appears at the far right.
Select the cards to quote with the checkboxes at ② (the checkbox in the header selects them all). Then click **Go on with selected** at ③, which appears at the bottom of the screen. If a card has no reference price, the confirmation asks you to request research or **Go on without research**. If the inputs are complete, the confirmation shows the amounts; check the amounts and click **Request second review**. You can set a total set price there when needed. Apply the answer or withdraw any open research request first, and save quantity changes before proceeding. Do not enter zero merely to fill an empty field. See [Research requests and quote reviews](/en/guides/purchase/research-and-reviews).
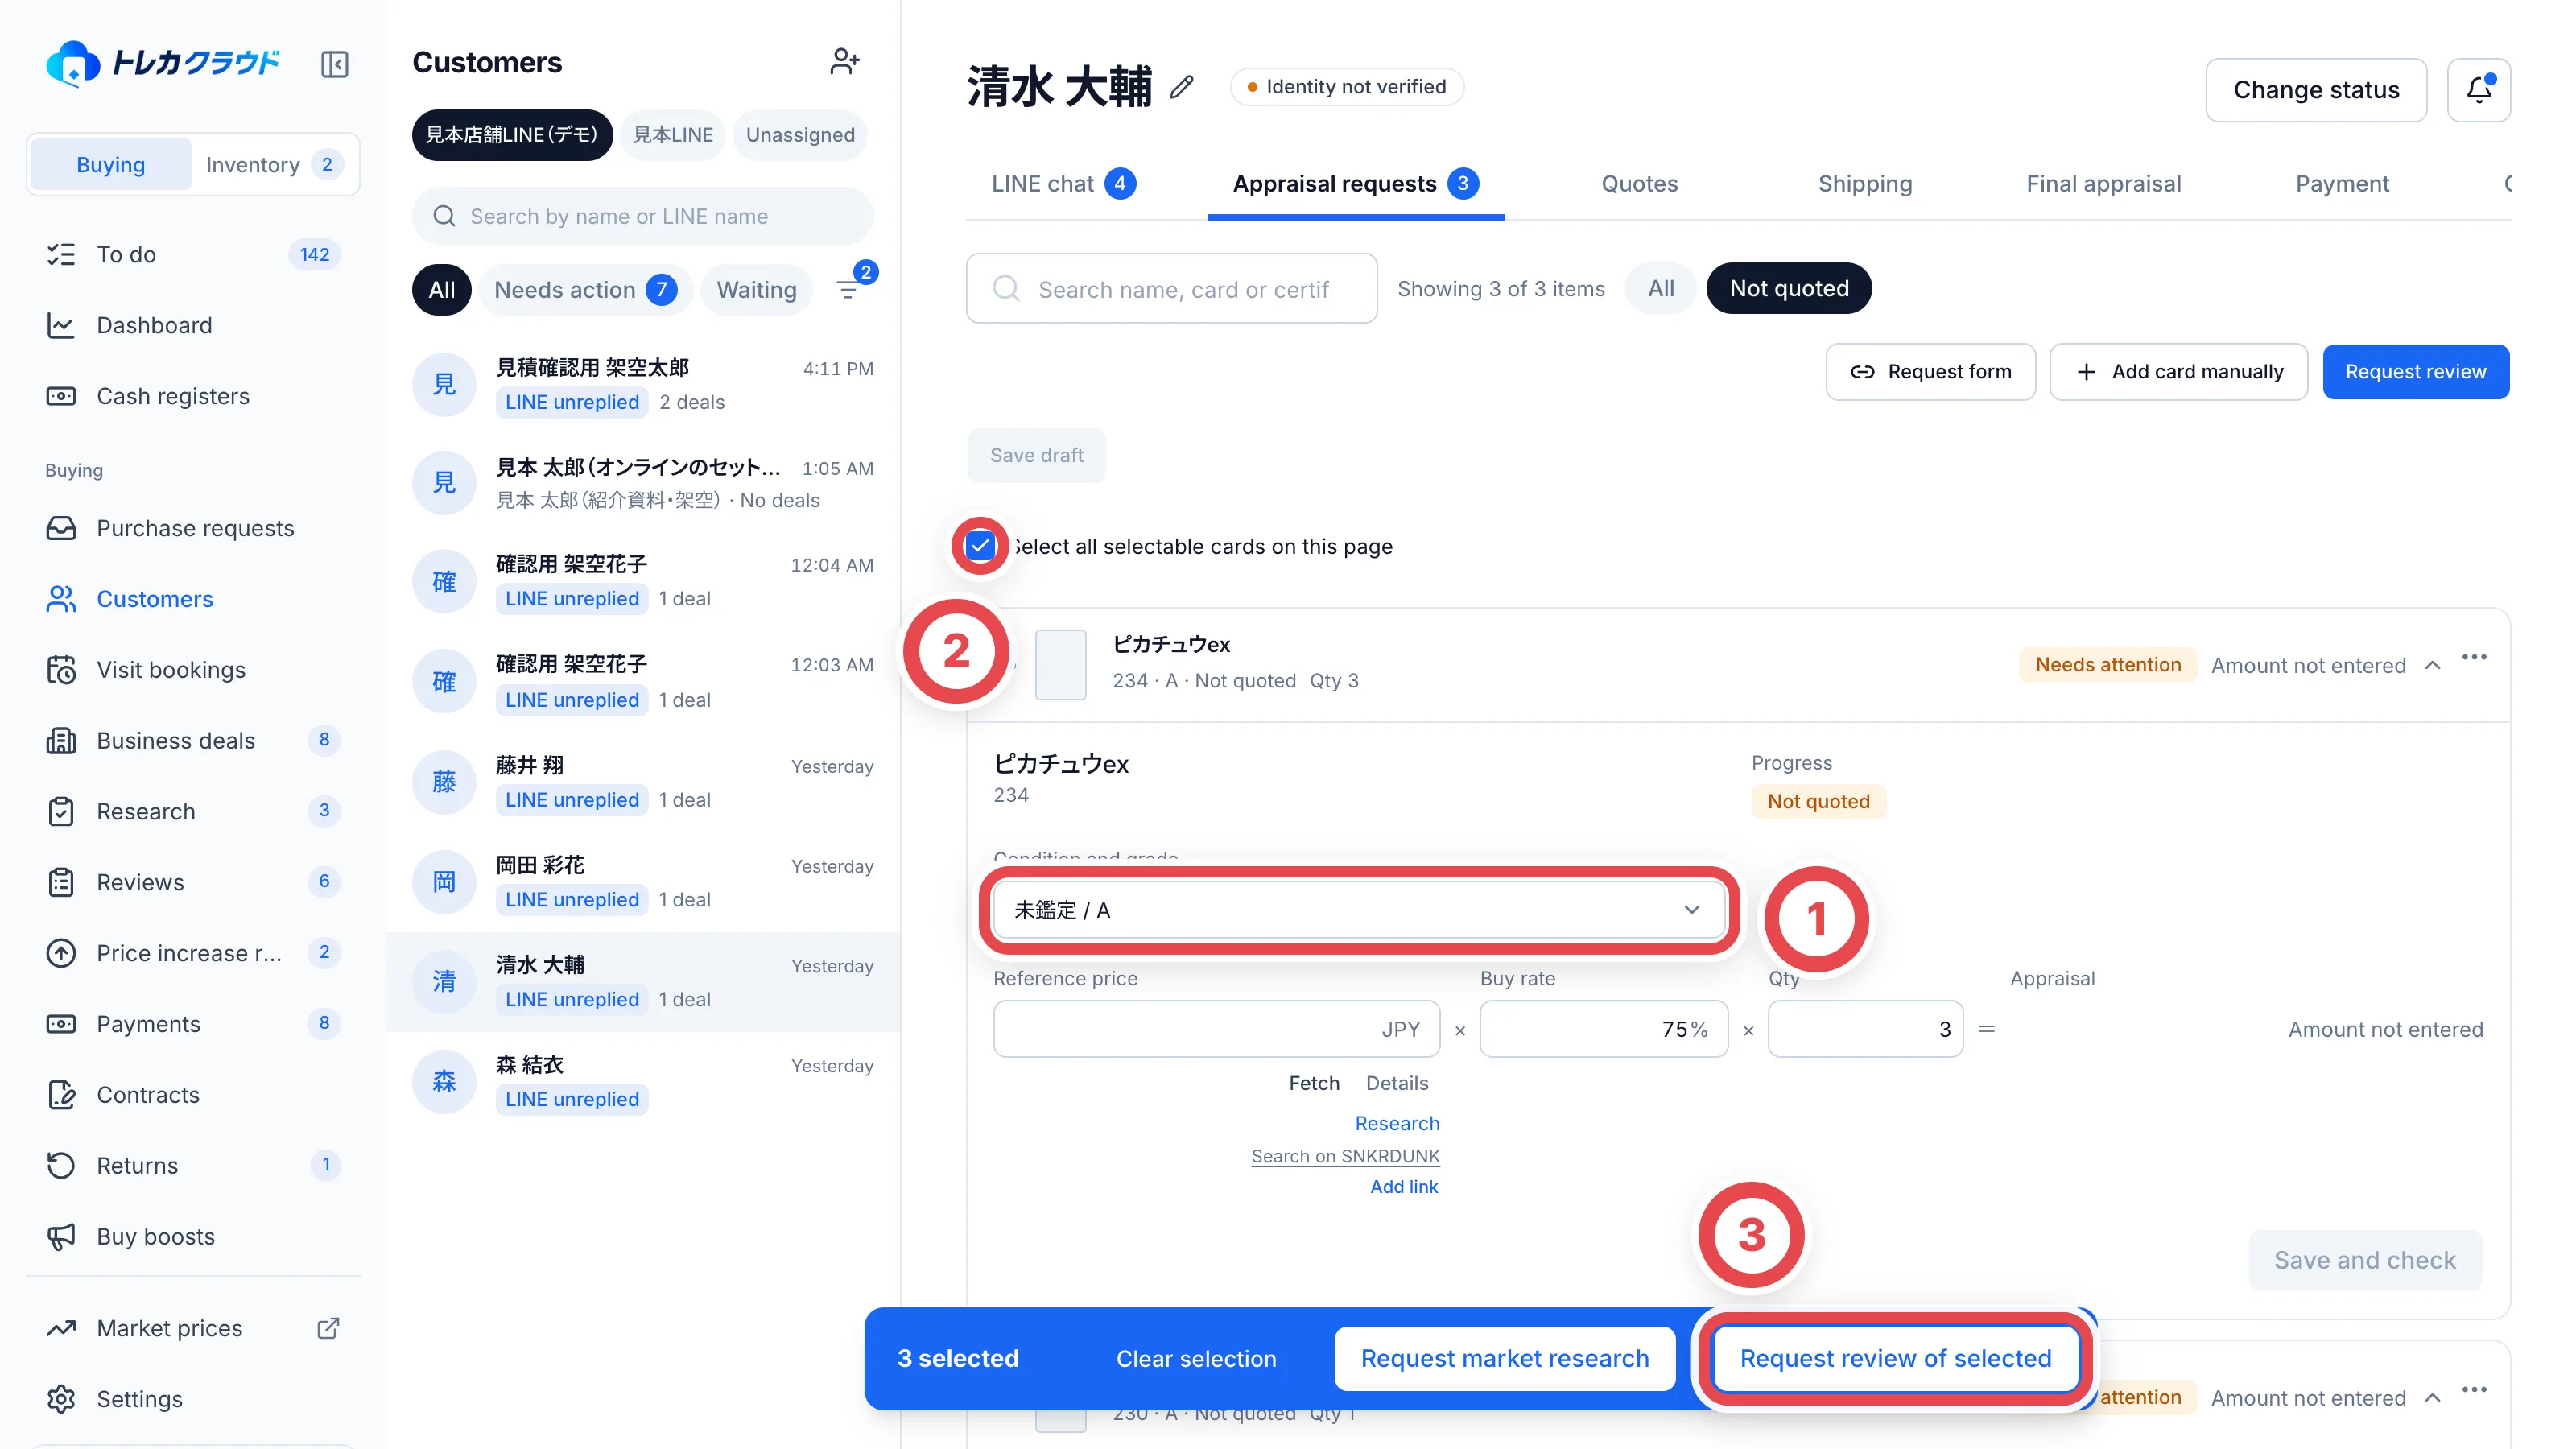 If there's no market price for a card, the reference price is empty. Click **Research** under it to have it looked up, or enter an amount yourself. The research is for the grade chosen at ①. When the answer arrives, the grade the researcher confirmed fills in ①. A grade chosen at ① or saved in the draft stays. When ① differs from the answer's grade, the answer's grade and price show under the reference price. Changing ① away from a researched grade asks first, then lets you request research for the new grade straight away. For how to request research, see [Research requests and quote reviews](/en/guides/purchase/research-and-reviews).
After changing a condition and grade, reference price or buy rate, click **Save draft** above the table. Saved values stay when you leave the page, and other members see the same values. When a card is waiting for a research answer, save the other cards' values, leave, and request the review for all of them together once the answer arrives.
- Values you changed but haven't saved show next to the button, as in **3 unsaved changes**. Reloading the page before saving brings back the last saved values
- If you move to another tab or page through the page's tabs or links with unsaved changes, you're asked first. **Discard changes and leave** puts the changed values back. The browser's back and forward buttons don't ask; the changed values go back
- Fields you didn't change aren't saved; they're filled in again from the market or the research answer each time. Saving a reference price also saves the condition and grade the row shows at that moment. A saved reference price and grade stay when a research answer arrives later, and the answer shows under the field as **Research answer: ¥…**
- Requesting the review removes the card's draft; its values move to the quote
- When a draft's reference price came from a saved shop price that was confirmed more than 30 days ago or invalidated, the field says so. Selecting the card and requesting the review or combining it into a quote asks whether to go on with the price as entered by hand. **Proceed as entered by hand** puts the same amount into the quote as a reference price entered by hand. To use it as the saved shop price, confirm and register the price again
- Identifying the card as another card after saving removes the draft's reference price. Identifying it as a BOX or other product removes the whole draft
A different member opens the request from **Reviews**. For a review of an already saved quote, its page shows **Open review** at ①.
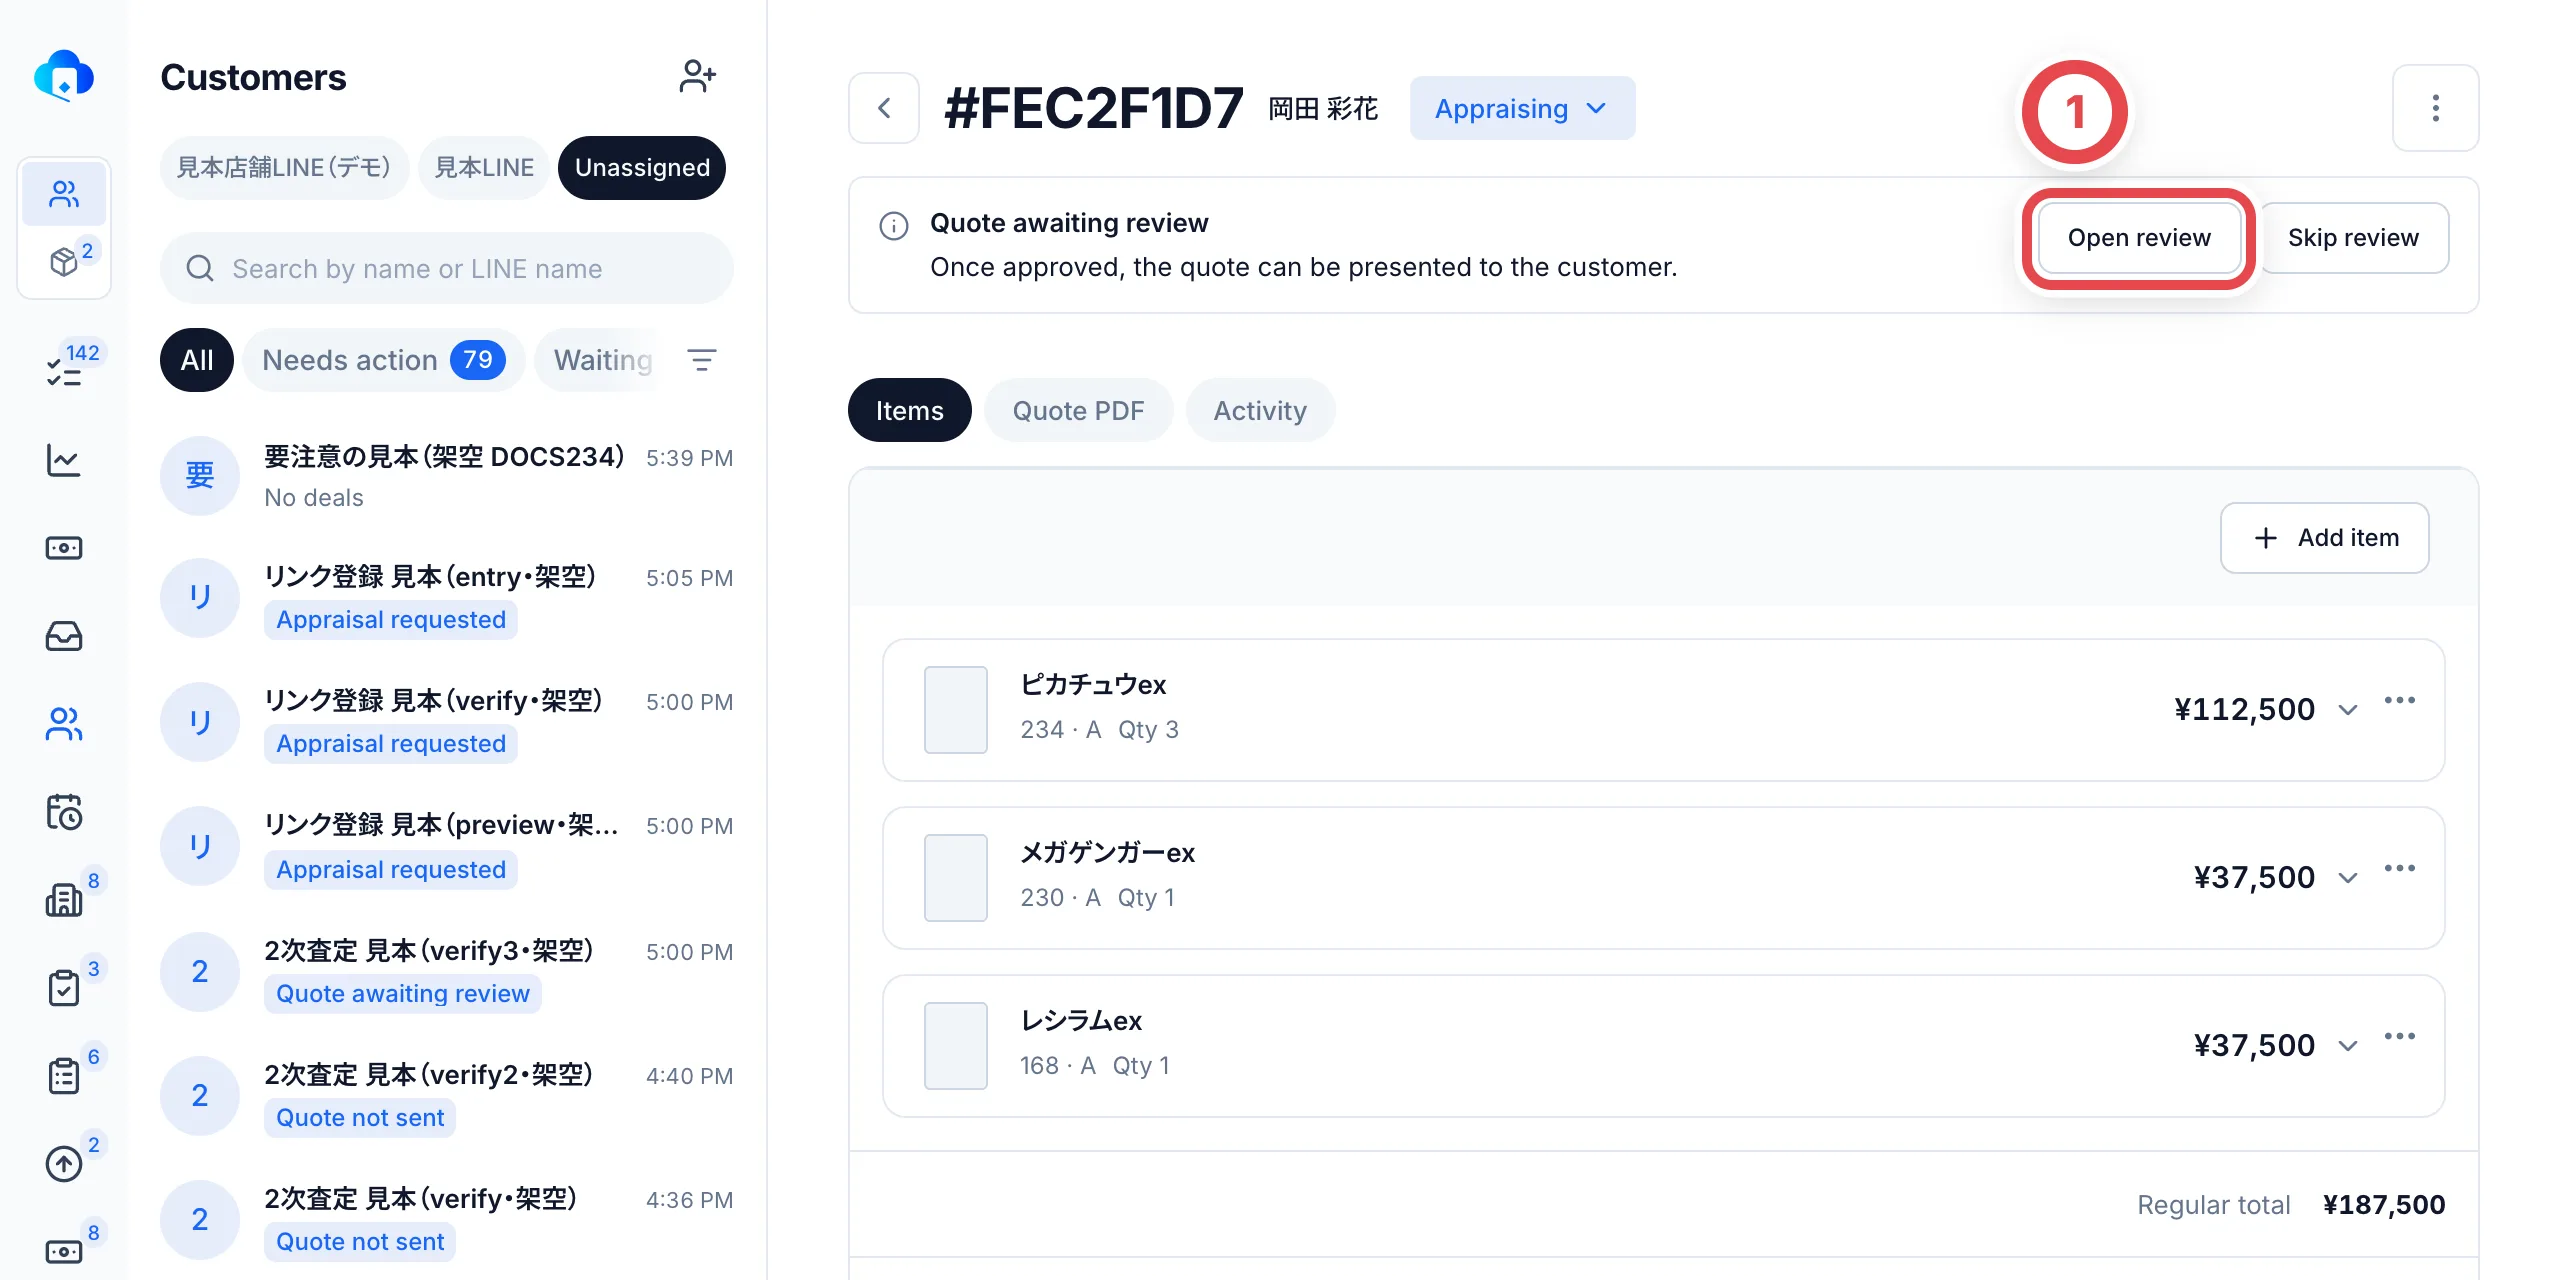 ## 6. Another member checks the quote and approves it
Items handed over from appraisal requests open in the [preparation review](/en/guides/purchase/research-and-reviews). Identify the cards and complete the grade, reference price and buy rate, then review and approve.
For an already saved quote, the reviewer opens **Review preliminary quote**, either from **Reviews** in the sidebar or from **Open review** on the quote page. Check the offer amounts at ① against the market price and quantity. If you want to change an amount, you can edit it there (once you edit it, the approval is recorded as approved with changes). Leave anything you noticed in **Review comment** at ②, then click **Confirm** at ③ to approve.
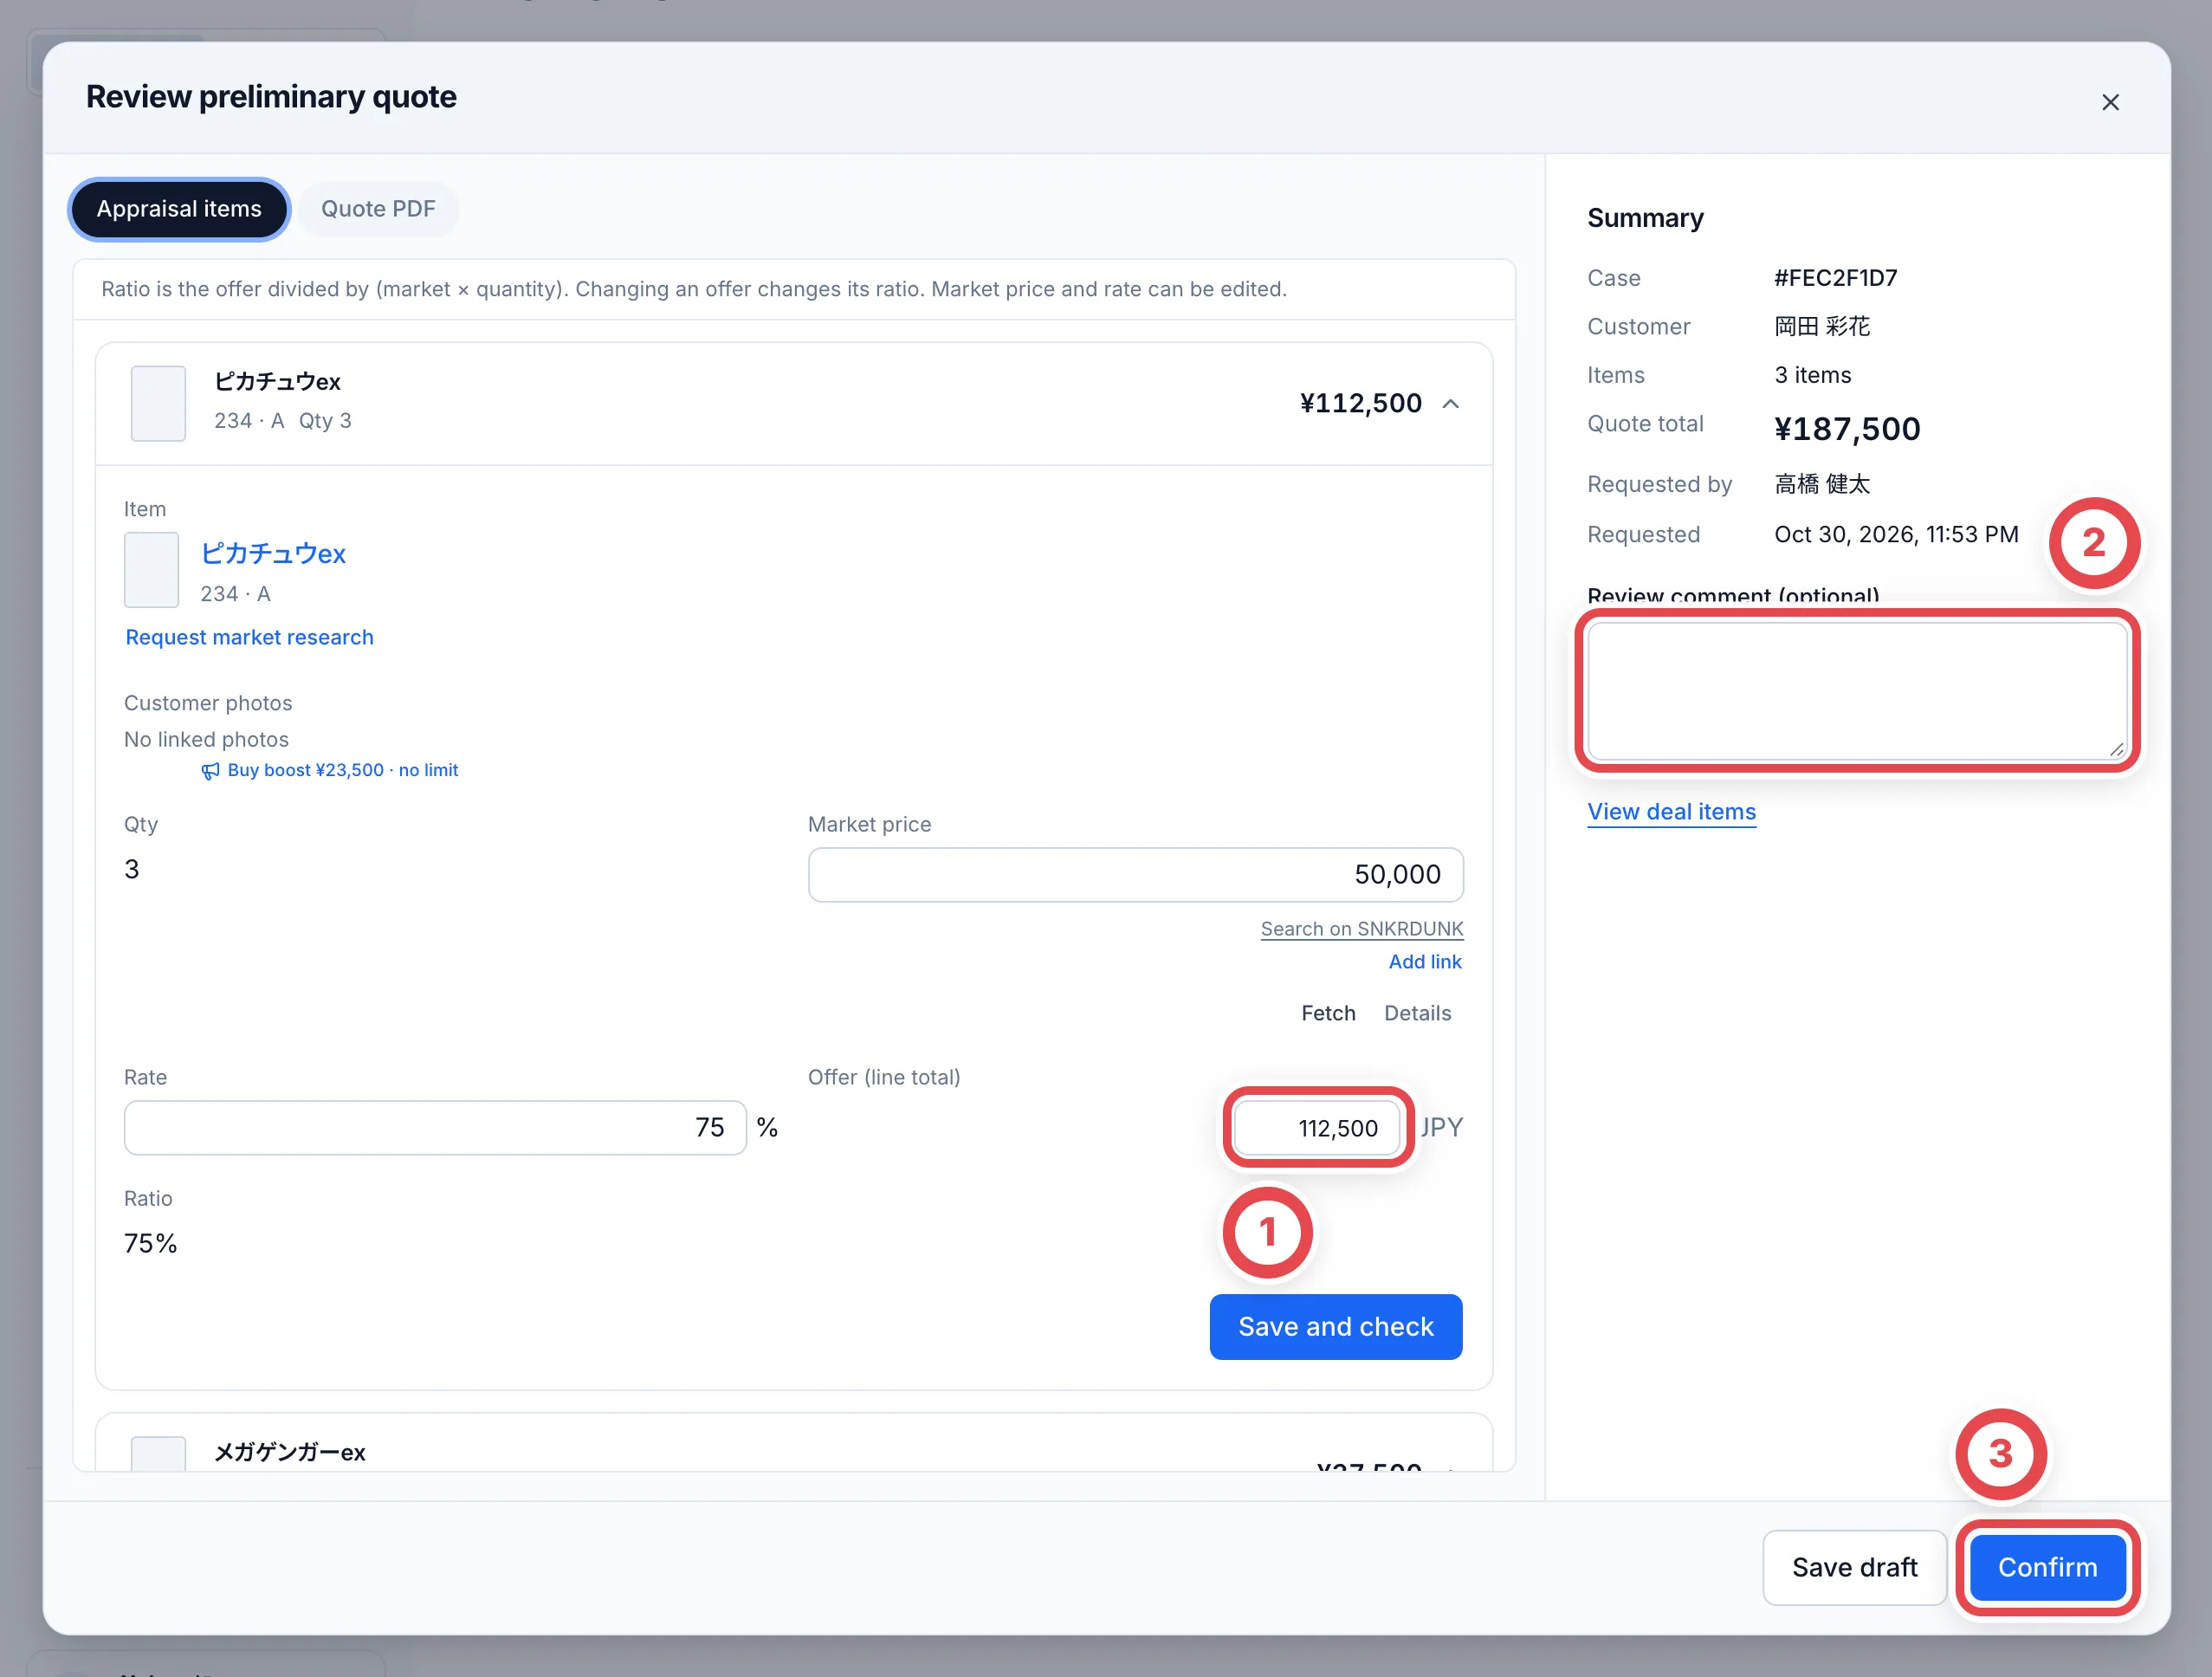 The person who made the appraisal can't approve their own quote. If you're in a hurry and need to skip the review, click **Skip review** on the quote page. The skip is recorded, and you can't change the amounts when you skip.
## 7. Copy the quote text, send it on LINE, and record it
On the approved quote page, **Present quote** appears. The text to send to the customer is in **Message draft for LINE** at ① (it uses the wording your shop set in **Settings › LINE messages**). Click **Copy** at ②, then paste it into the chat in Liny or the LINE admin screen and send it. If your shop has templates, switch between them with **Template** above the draft. You can edit the draft there; the message you send is matched against the edited text.
After you send it, click **Mark as presented** at ③. On the deal page, confirm the prompt after checking that you have presented the quote. In the dedicated action dialog, the final button after choosing **Presented another way** records it. Don't click it before you send the message to the customer.
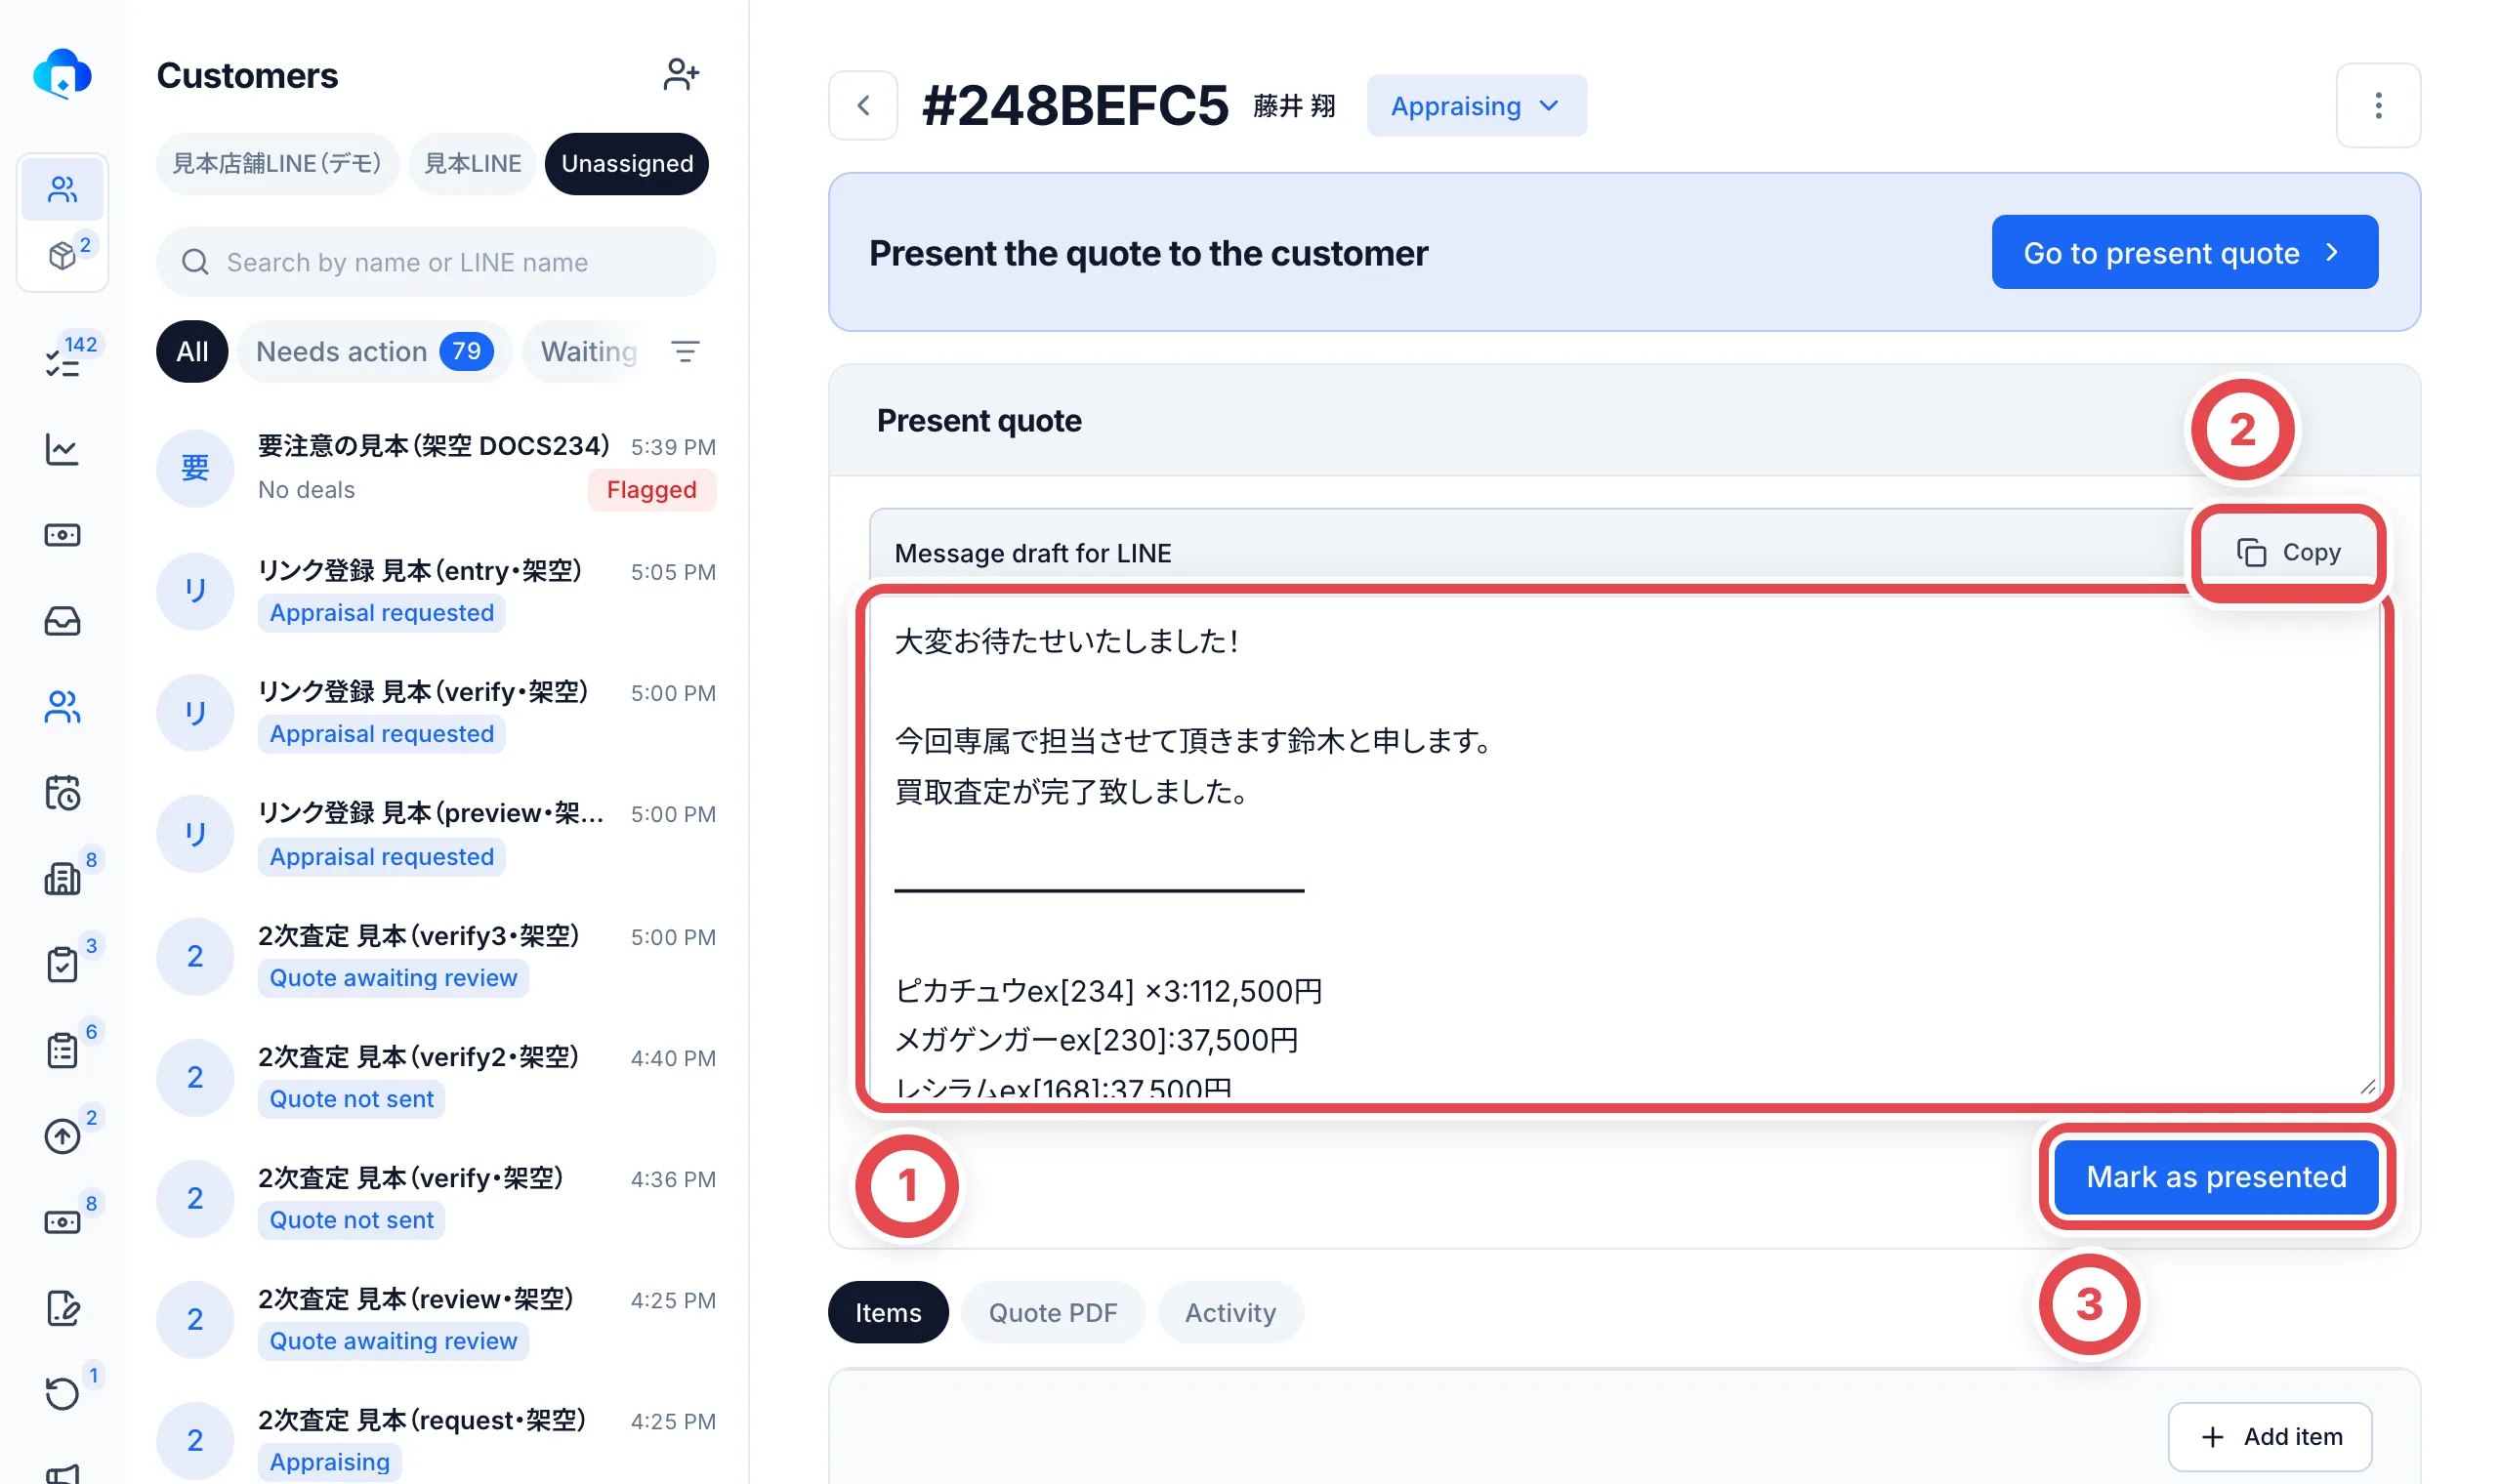 The amounts in the text must match the quote total. If you add an earlier amount or similar, don't put "appraisal" or "total" next to it. The check against the quote total will no longer match.
If your shop has Liny set to send **Present quote** automatically, **Send quote on LINE** also appears. In that case you can send straight from the button.
After this, record the customer's reply (accepted, partly accepted, or declined) and move on to the shipping instructions. For the next steps, see [Shipping and final appraisal](/en/guides/purchase/shipping-and-final).
## Troubleshooting
| What's happening | What to check and how to fix it |
| ------------------------------------------------------------------------------ | ----------------------------------------------------------------------------------------------------------------------------------------------------------------------------------------------------------------------------------------------- |
| A friend who should be there isn't in **Unregistered LINE friends** | Check that you chose that friend's LINE account in the tabs at the top. Imports run about every 5 minutes. Friends who are already customers don't appear. |
| A photo stays on **Fetching from LINE…** | The photo is still being imported from LINE. Wait a moment and reopen it. If it says **LINE setup needed**, check [LINE and notifications](/en/guides/settings/line-and-notifications). |
| A photo says **Couldn't get the image.** | The photo couldn't be imported from LINE. Ask the customer to send it again. |
| The reading bar doesn't appear | The chat hasn't been read yet, or it was read more than 7 days ago. Read it again with **Extract request**. |
| The card that was read is wrong | Change it to the right card with **Choose from matches** or **Search for another card**. Remove anything that isn't a card with **Exclude**. |
| The same photo's card might be added twice | Reading the entire chat skips photos already filed into appraisal requests. Explicitly selecting messages can read them again. Check existing-request warnings and quantities in the review to avoid duplicates. |
| **Go on with selected** stops with a message | Check the selection and the confirmation’s message. Unidentified and unpriced items can be handed over. Save quantity changes before proceeding. The reviewer must finish identification and pricing before approving and presenting the quote. |
| **You created this appraisal, so you can't approve it.** appears in the review | Ask a different member to confirm it. If you're in a hurry, use **Skip review** on the quote page. |
| You clicked **Mark as presented** before sending | The record stays in **Activity** on the deal page. Ask an admin. |
## Related workflows
- [Record and handle price-increase requests](/en/guides/purchase/price-increase-requests)
---
# Putting cards that arrive by post into stock
Source: https://docs.toreca-cloud.com/en/guides/purchase/mail-in-to-stock
Register stock for purchases received without LINE or goods that have already arrived.
Standard staff can collect customer details through forms and carry out the usual purchase workflow through transfer preparation and submission. An authorized colleague handles approval, execution and recording the result. Ask a manager to check access if your shop has customized its roles.
## Which method to use
| What you want | Method to use | What Toreca Cloud keeps |
| ---------------------------------------------------------------------------------------------------- | ----------------------------------------- | ------------------------------------------------------------------------- |
| Put the cards into stock and keep the cost. You manage the customer and payment outside Toreca Cloud | Method 1: Use a receipt slip | A receipt slip and stock with a cost |
| Keep the whole purchase, including the customer, amounts, identity verification and payout | Method 2: Record it as a purchase request | The deal, identity verification and payout records, and stock with a cost |
Method 2 requires customer details, a payout account and identity verification. Confirm which method to use with your shop admin.
## Method 1: Use a receipt slip
### 1. Open Receipt slips
Switch the sidebar to **Inventory** at ① and open **Receipts** at ②. Click **Receipt slips** at ③ to open the list of slips, then click **Receive stock** at the top right. The page for creating a receipt slip opens.
### 2. Enter the type, shelf and source
Choose **Other** under **Type** at ①. Under **Shelf** at ②, choose **Receiving** at the site where you will keep the cards. At ③, write in **Source or reason** when the cards arrived and what they are. This lets anyone who opens the slip later see why the stock went up.
Example: "Bought by post, arrived 10/16 (purchase recorded elsewhere)"
**Receipt date** is filled in with today's date. Change it if the parcel arrived on a different day.
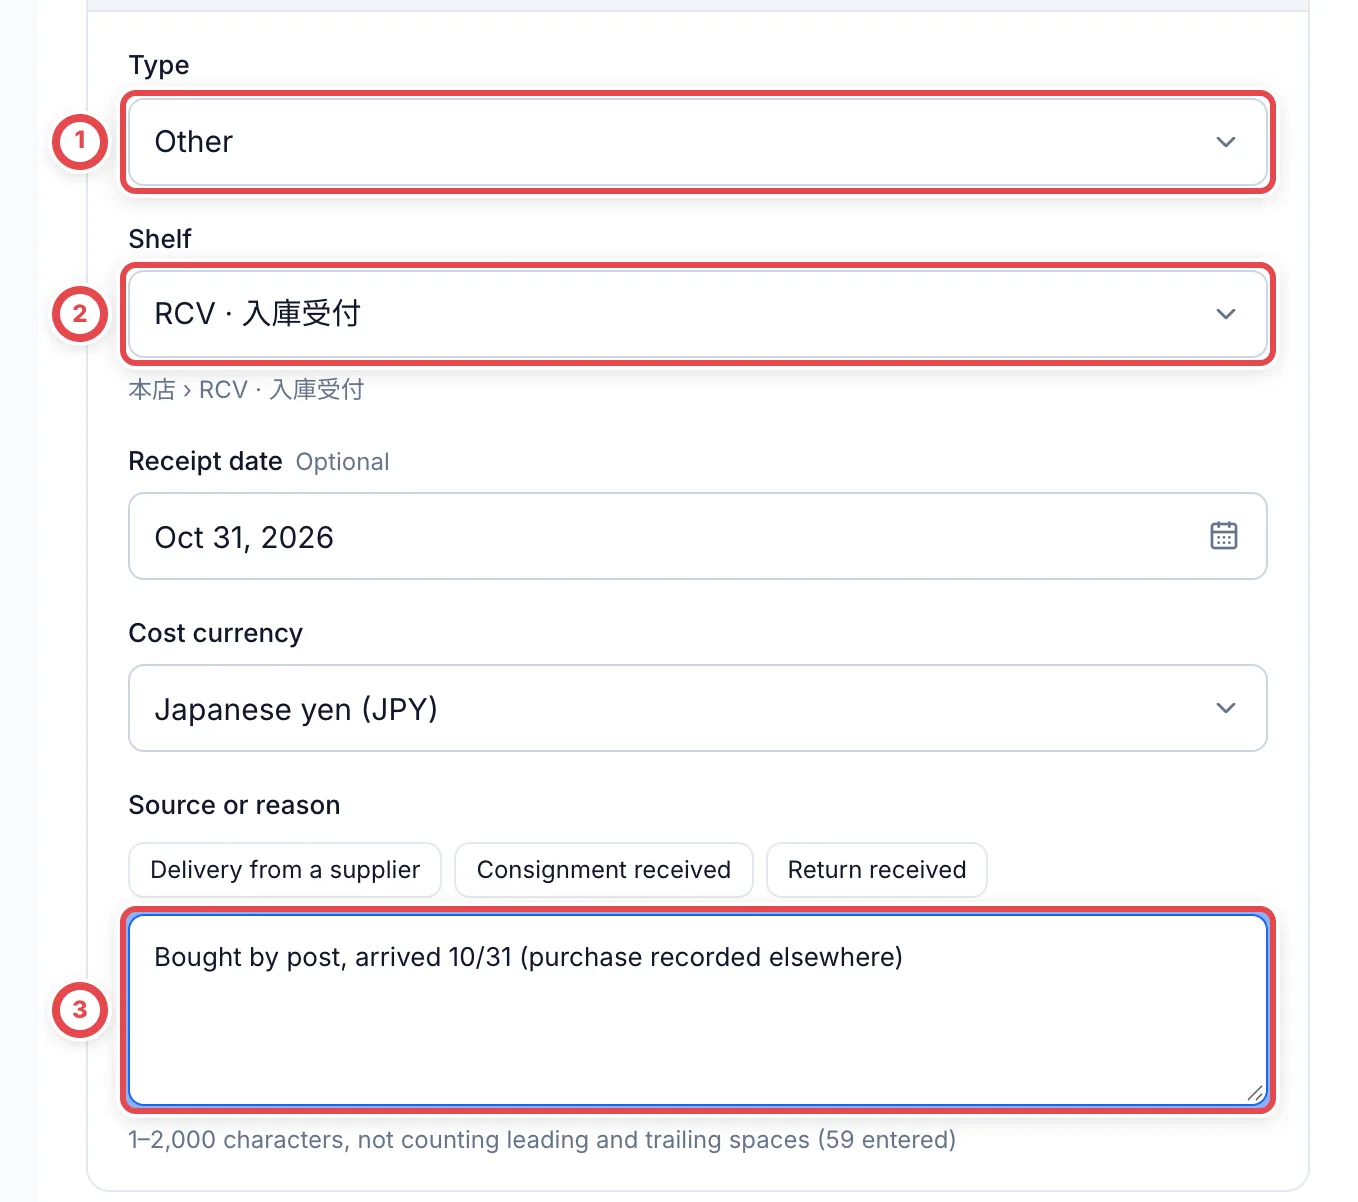 The shelf list is split by site. Check the site name at ①, then choose that site's **Receiving** shelf at ②. If you choose the wrong site, the cards become stock at another site.
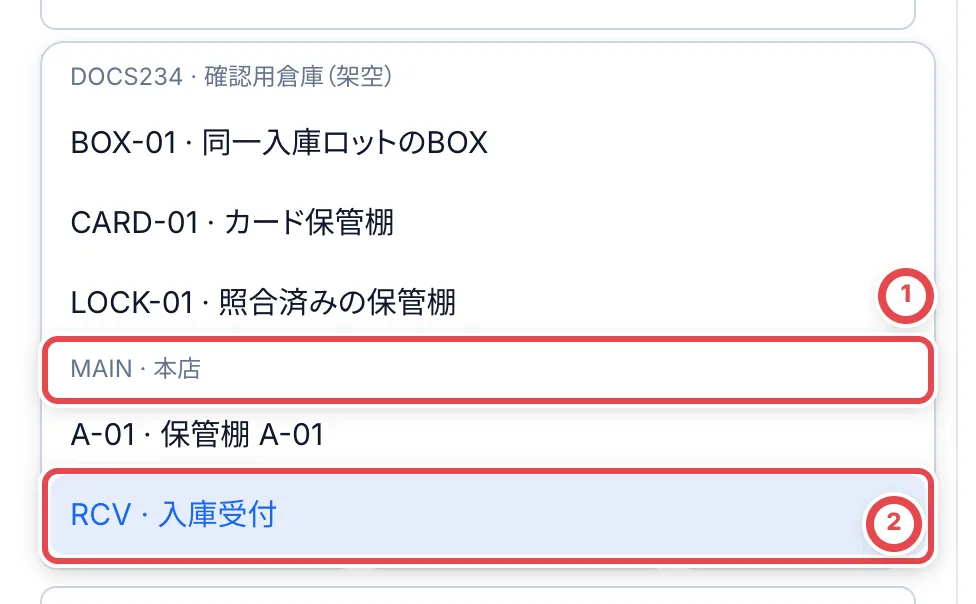 ### 3. Choose the card
Under **Cards to receive**, click **Search for a card**. Enter the card name or number at ①, then check the number and set in the candidates at ② and choose one. Many cards share the same name, so check the number before you choose.
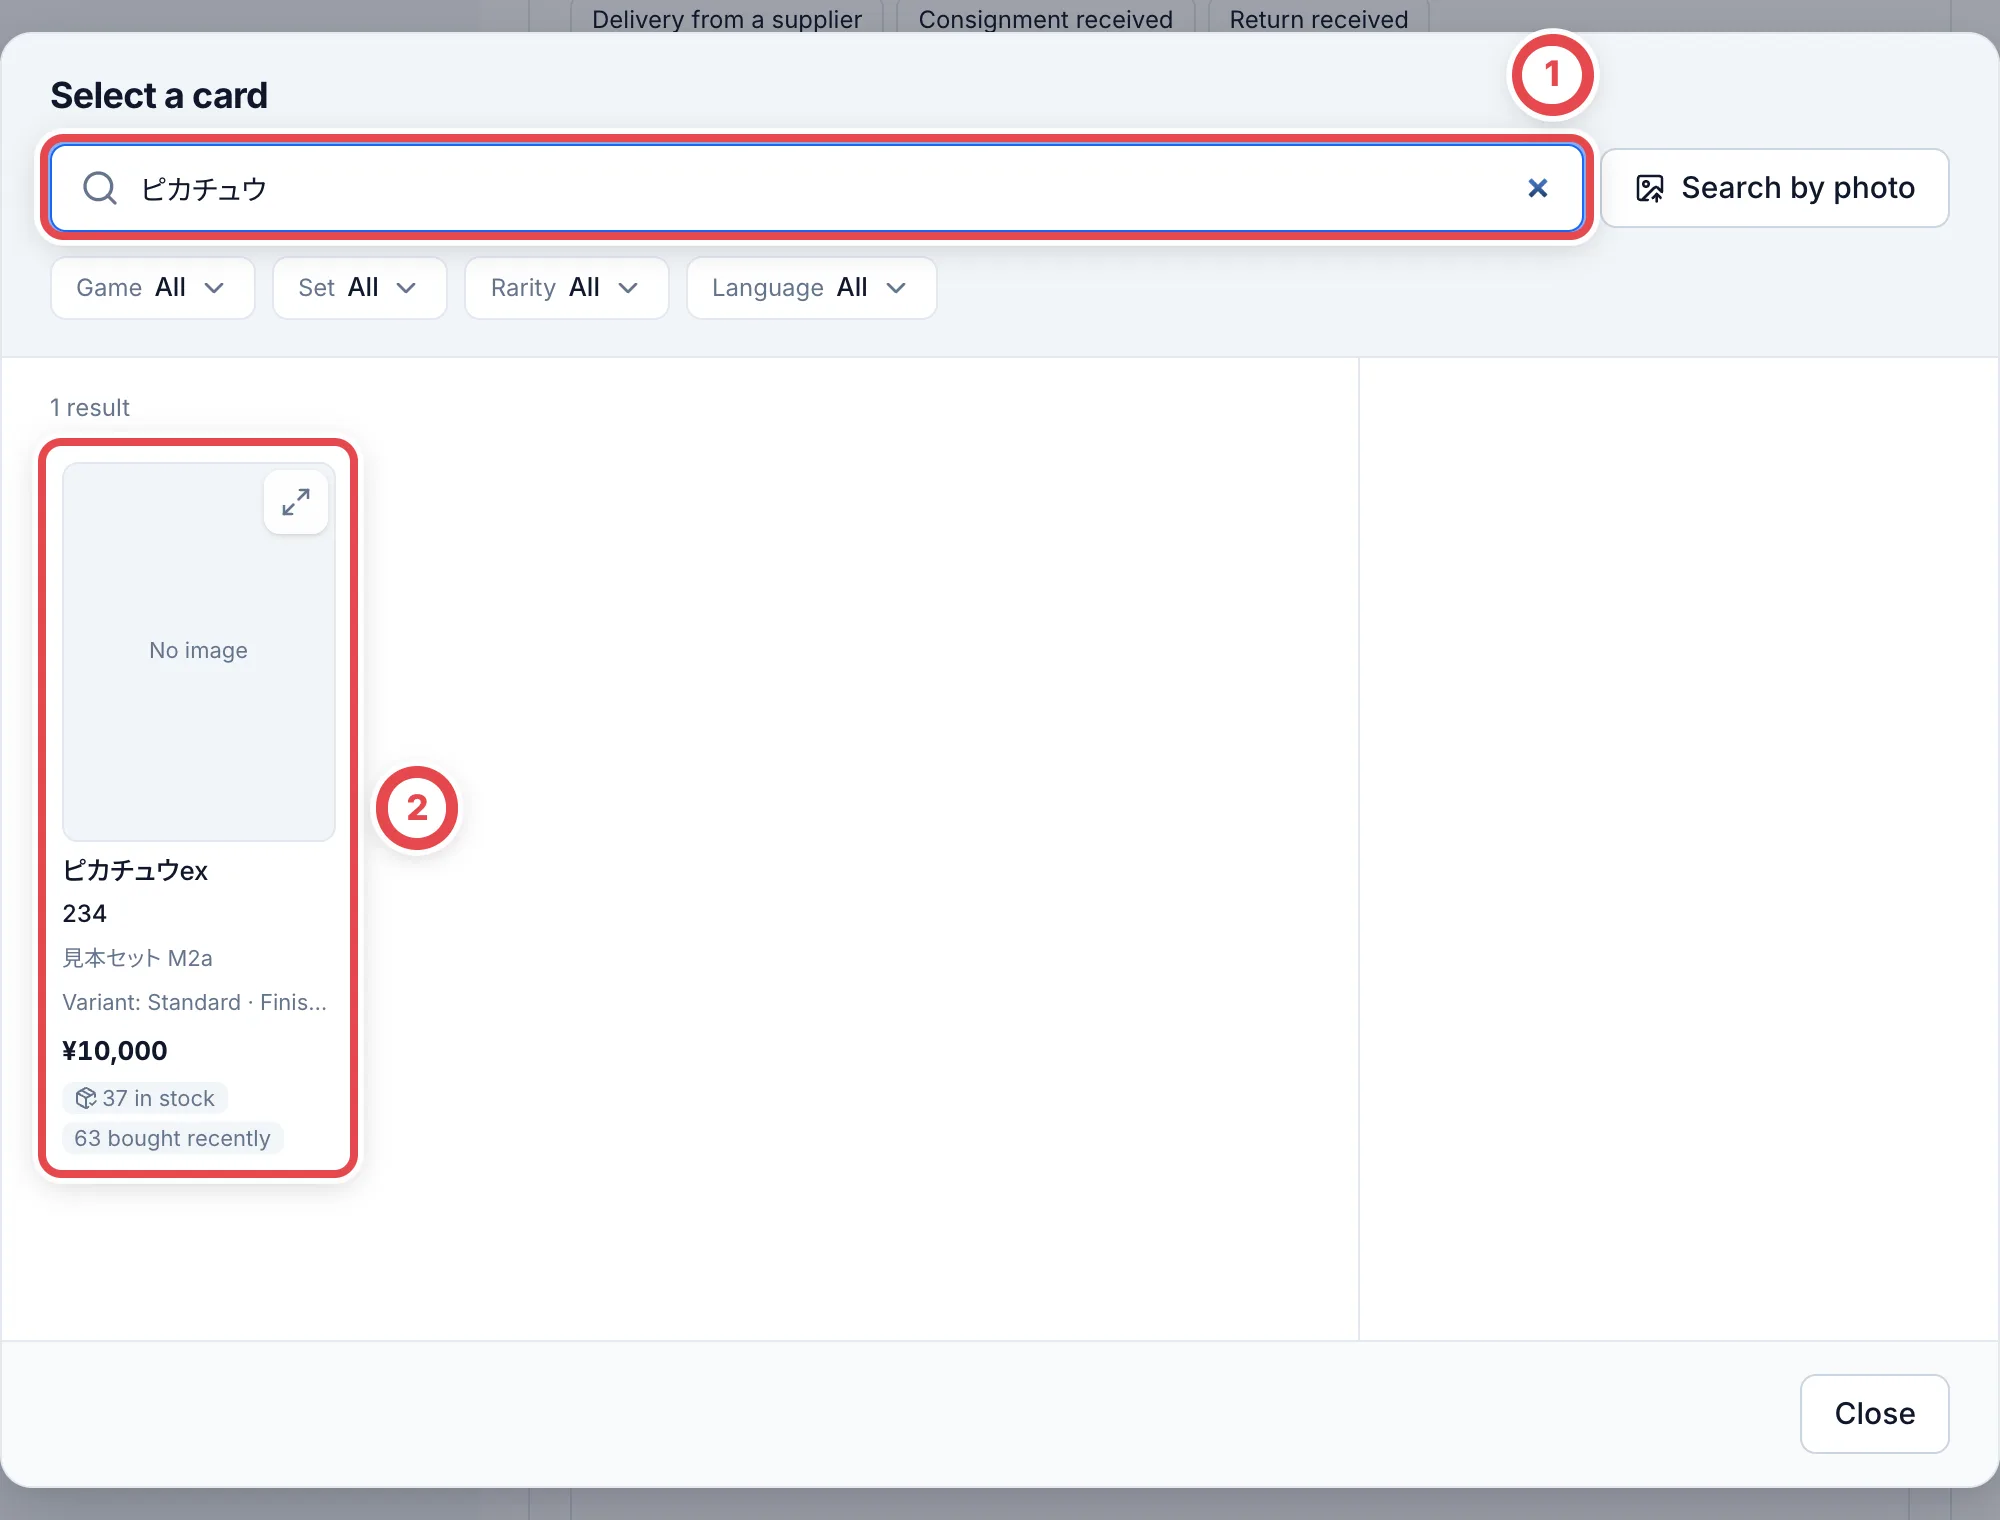 ### 4. Enter the quantity and cost
Enter the **Quantity** at ① and the **Cost per unit** at ②. For the cost, enter what you paid the customer for each unit. Leave the cost blank if it is still unknown. Enter 0 only for a confirmed free acquisition; blank and zero are recorded separately.
Put each graded card, such as a PSA card, on its own line. In the grade field shown on the line at ③, choose the grading company and grade, then enter the certification number from the case label at ④. Certification numbers require a quantity of 1 and a third-party grade. The condition note is also available on the same line.
To receive more cards, click **Add card** to add a line. One receipt slip can hold up to 100 lines and 500 units in total.
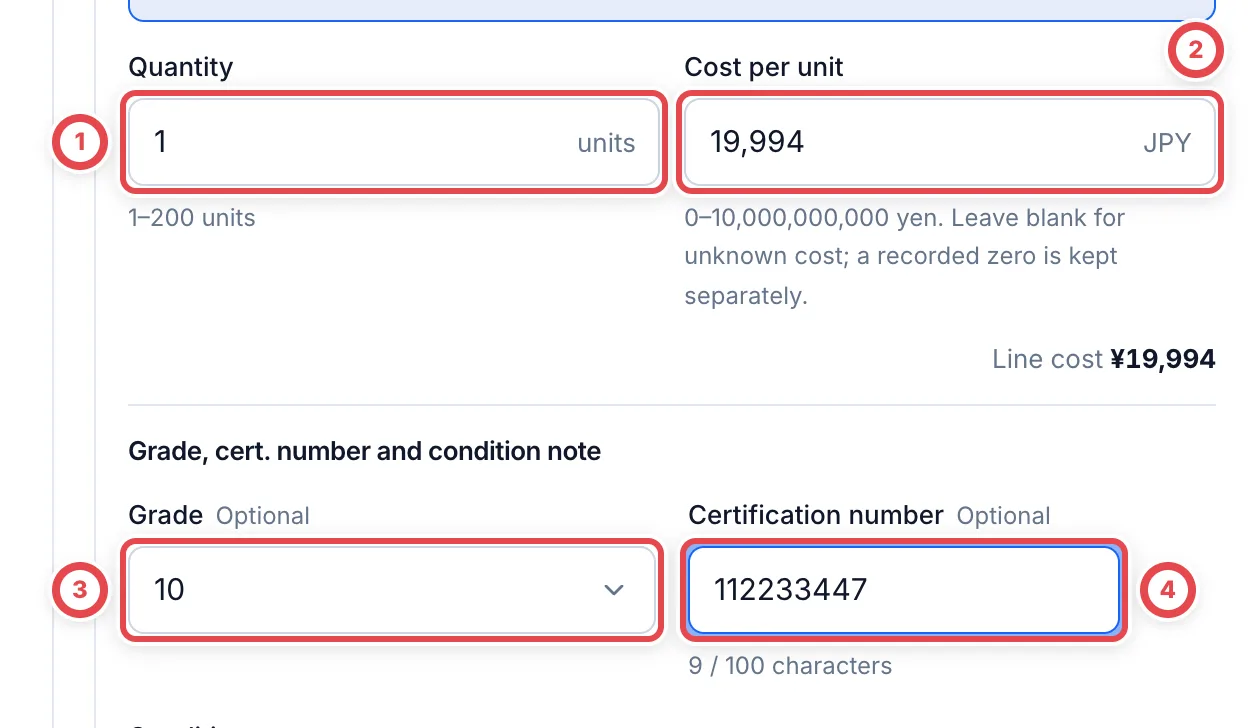 ### 5. Review and confirm
Click **Review** to open the check before you confirm. Look over the type, shelf, source and the card lines, then click **Receive stock** at ①. To fix something, click **Go back**.
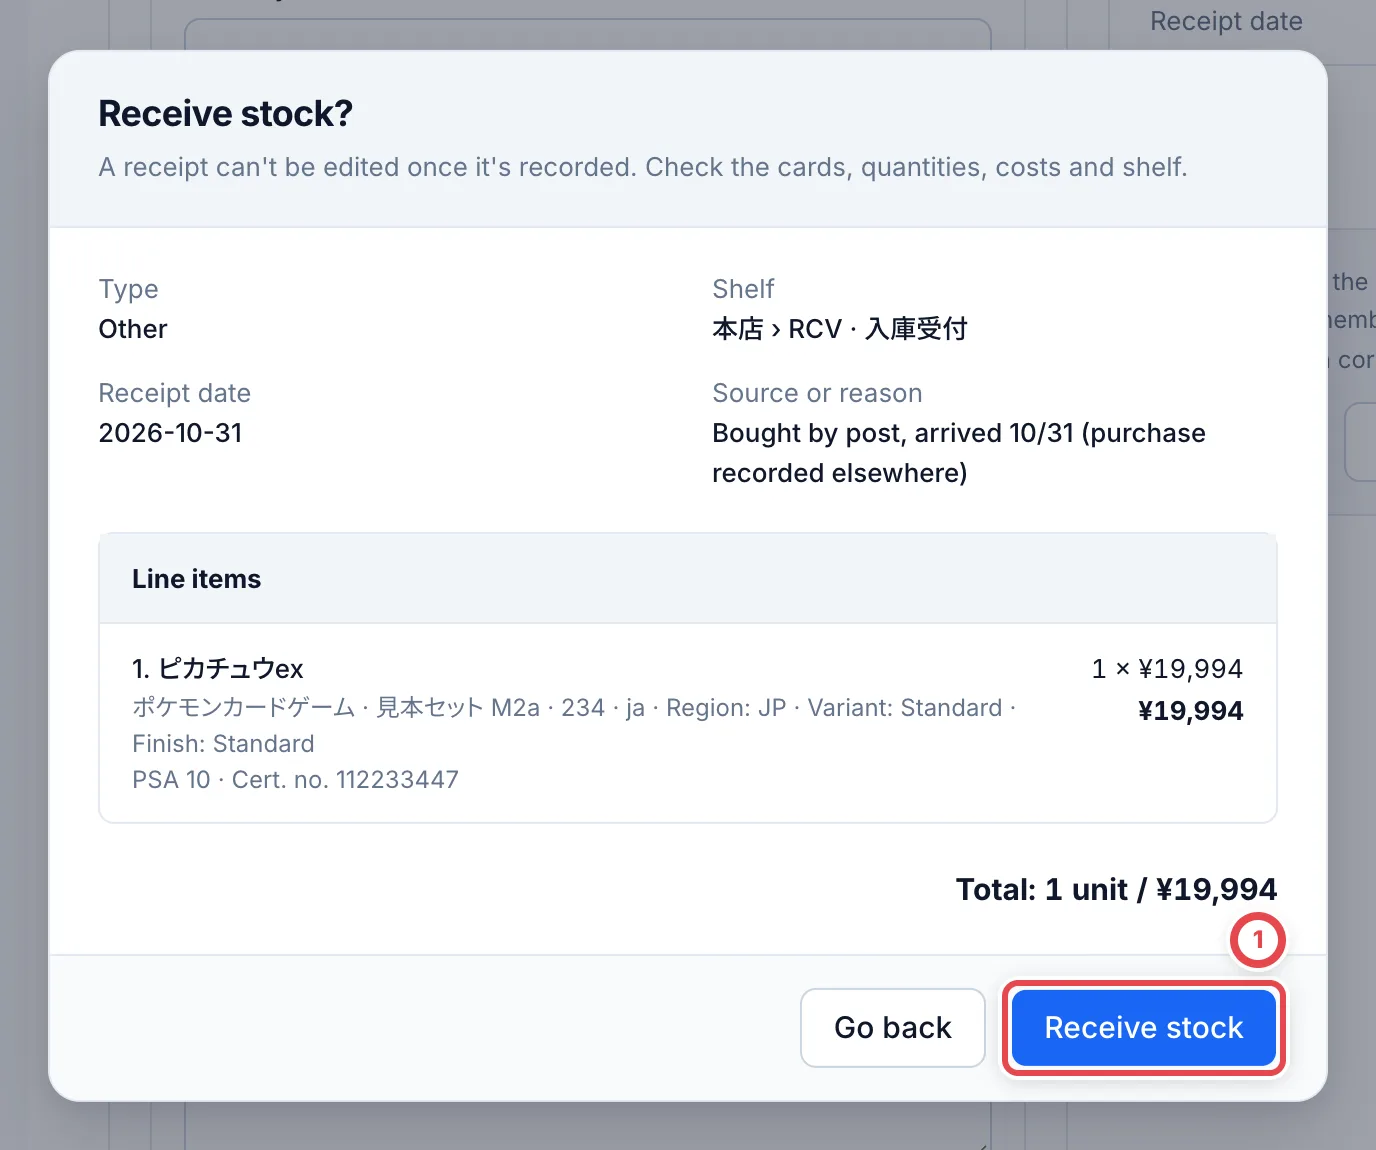 :::warning
For cards registered by mistake, click **Select items to cancel registration** on the receipt, select only the affected cards, enter a reason and confirm. The original record and cancellation history remain. Registering them again creates new units and labels.
:::
### 6. Print labels and put the cards away
After you confirm, the receipt slip opens and the source stays at ①. Each card becomes its own unit of stock; open its number at ③ to check the details. For units grouped together, press the row to open it. Click **Print labels** at ② to print stock labels, stick them on the cards and put the cards on a shelf. For printing and putaway, see [Putaway and QR labels](/en/guides/inventory/putaway).
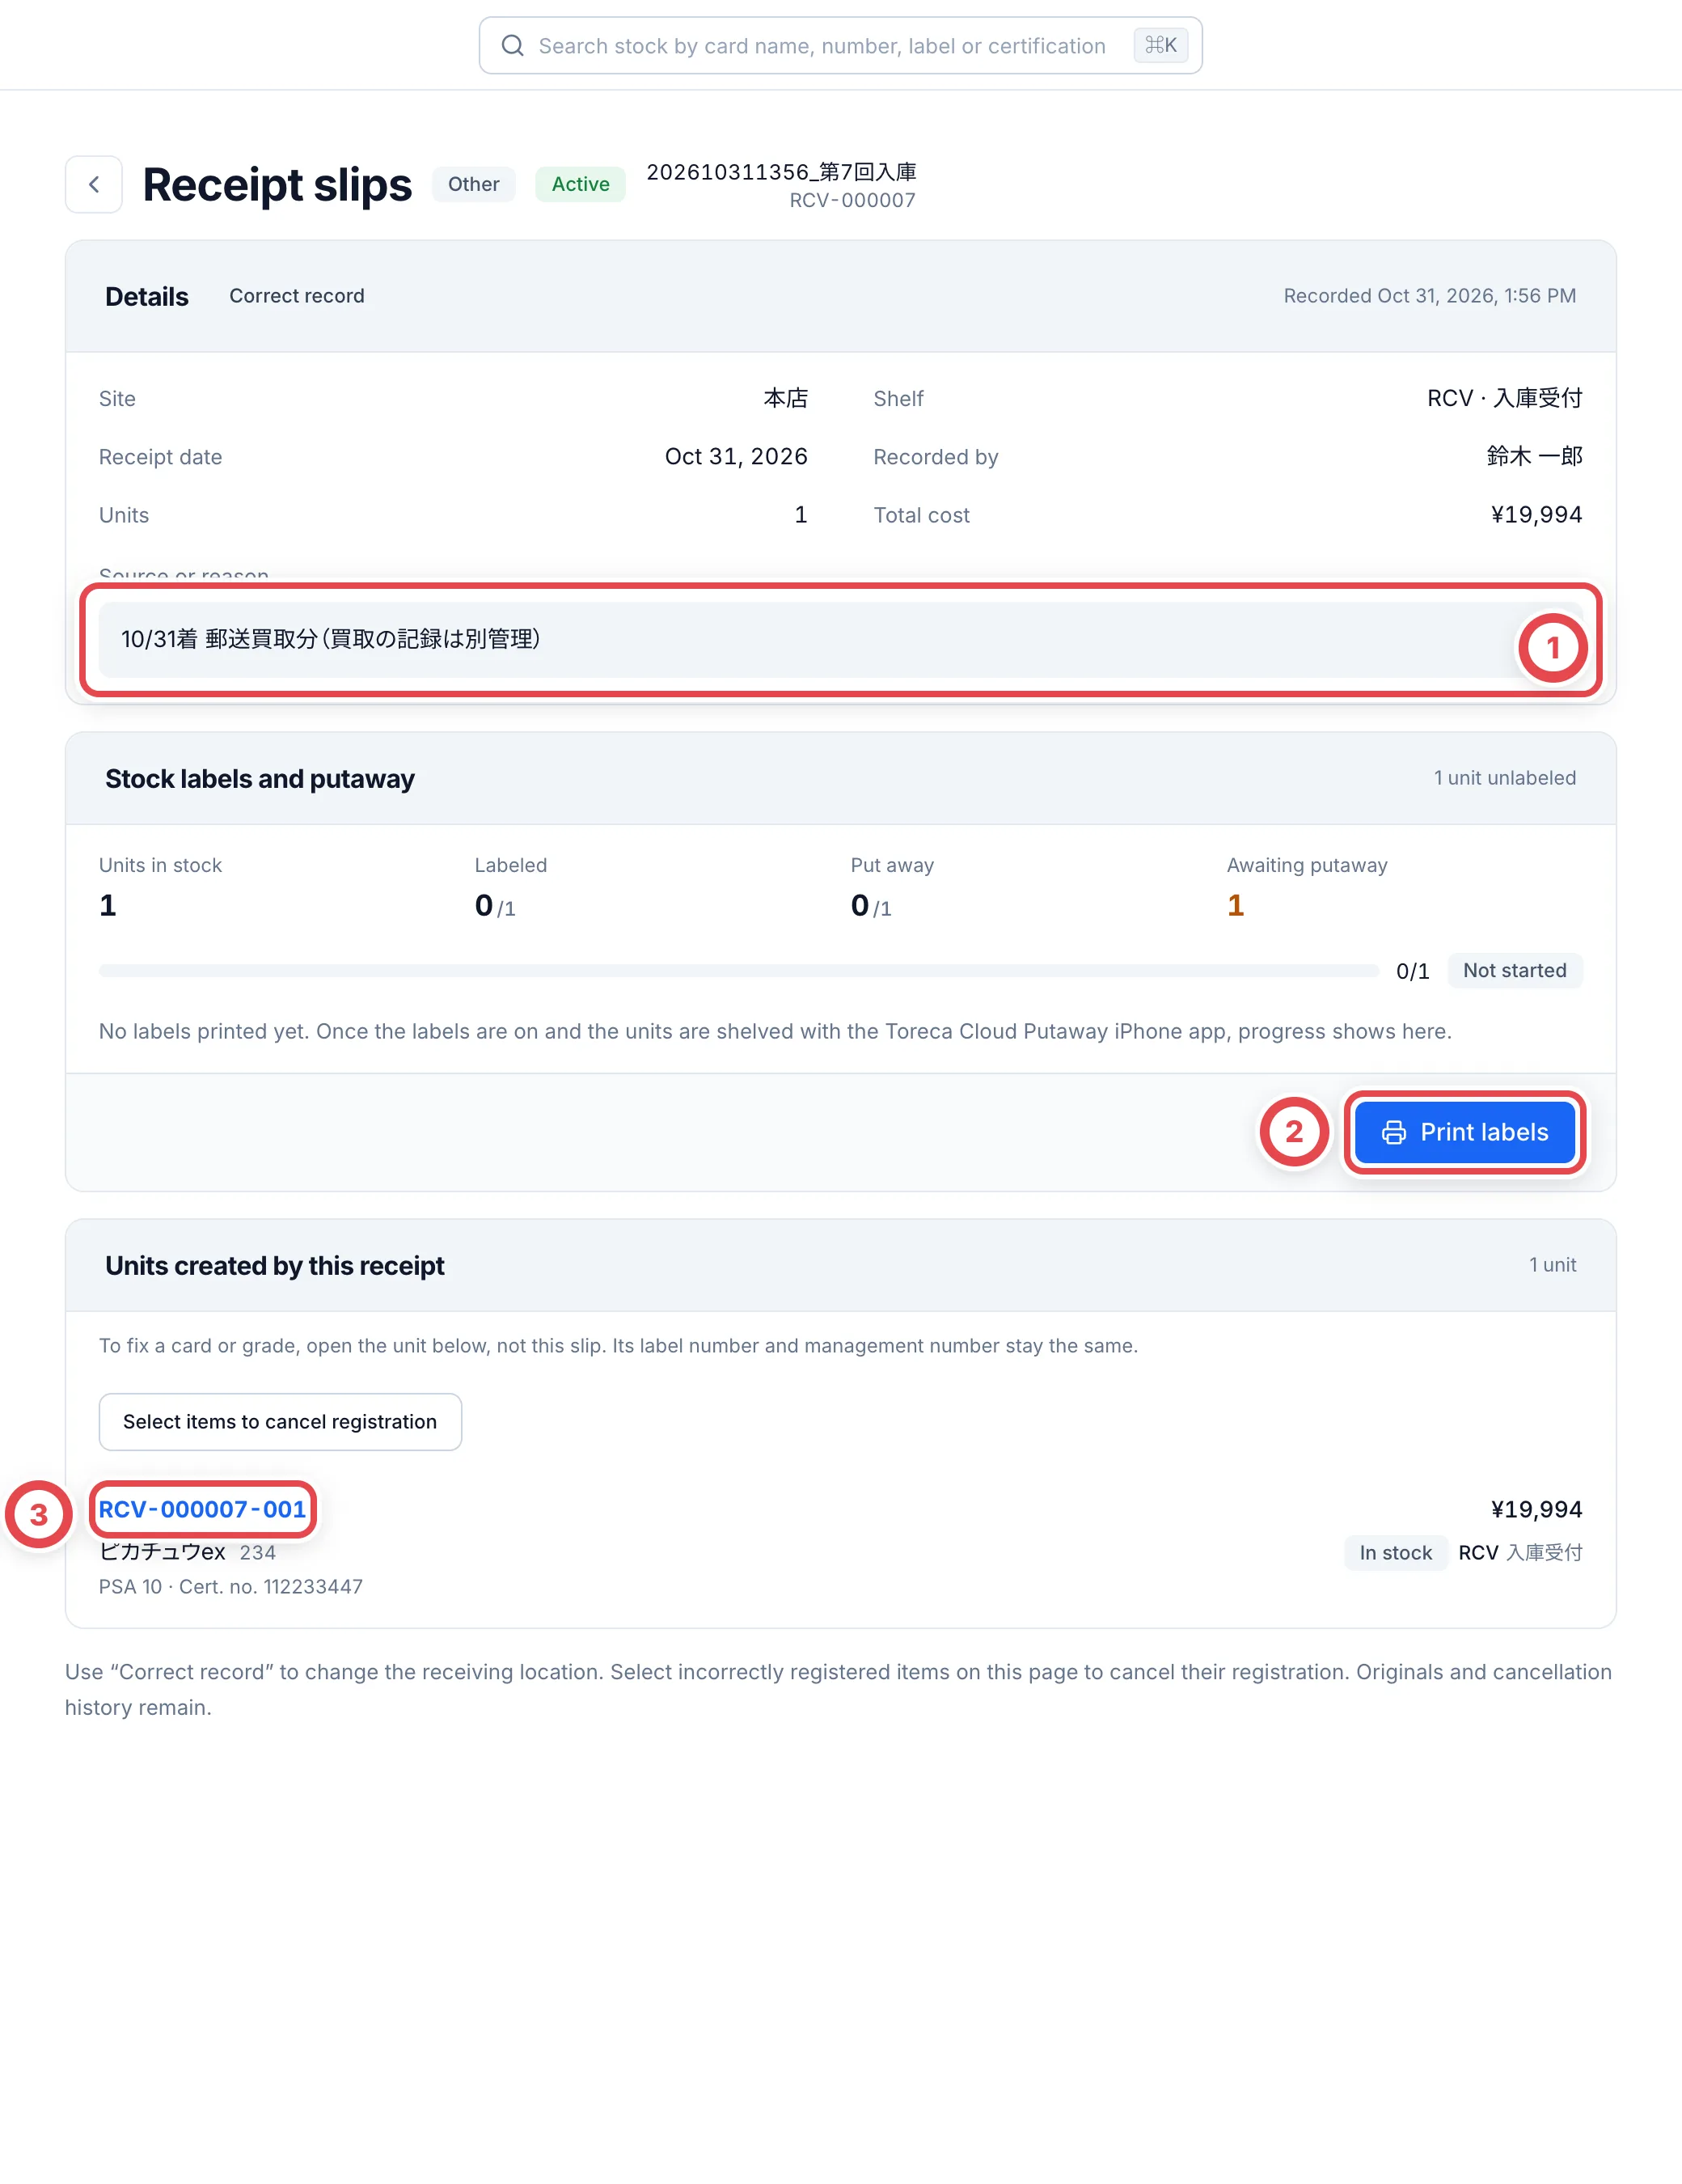 ## Method 2: Record it as a purchase request
Create one deal for each customer and move it through the quote, acceptance, final appraisal, and stock and payout. You don't use LINE. Staff record the exchanges with the customer as they go.
**Next step** at the top of the deal shows what to do at that point. If you're not sure what comes next, click the button under **Next step**.
| Step | What to do | Deal status |
| ---- | ------------------------------------------------------------------ | ---------------------------------- |
| 1 | Add the purchase request and add the cards | New |
| 2 | Save the preliminary appraisal amounts | Appraising |
| 3 | Tell the customer the quote and mark it as presented | Quote sent |
| 4 | Record acceptance of the preliminary quote | Accepted |
| 5 | Record the shipping instructions | Awaiting shipment |
| 6 | Enter the final appraisal and present the final quote | Final appraisal → Final quote sent |
| 7 | Fill in the customer's details, payout account and identity check | Final quote sent |
| 8 | Record acceptance of the final quote, then create stock and payout | Awaiting payout |
| 9 | Submit and approve the payout, then record the result | Awaiting payout → Purchased |
| 10 | Record receipt | Done |
:::note
Record the shipping instructions in step 5 even if the parcel has already arrived. You can't go on to the final appraisal until you do. You don't need to send the customer new instructions.
:::
### 1. Add the purchase request and add the cards
Switch the sidebar to **Buying**, open **Purchase requests** and click **Add purchase request**.
Choose **Not in store** at ①. For a first-time customer, leave **New customer** selected and enter the name at ②. For a customer you've bought from before, choose **Existing customer** and search. Click **Add purchase request** at ③ to create the deal, and the deal opens.
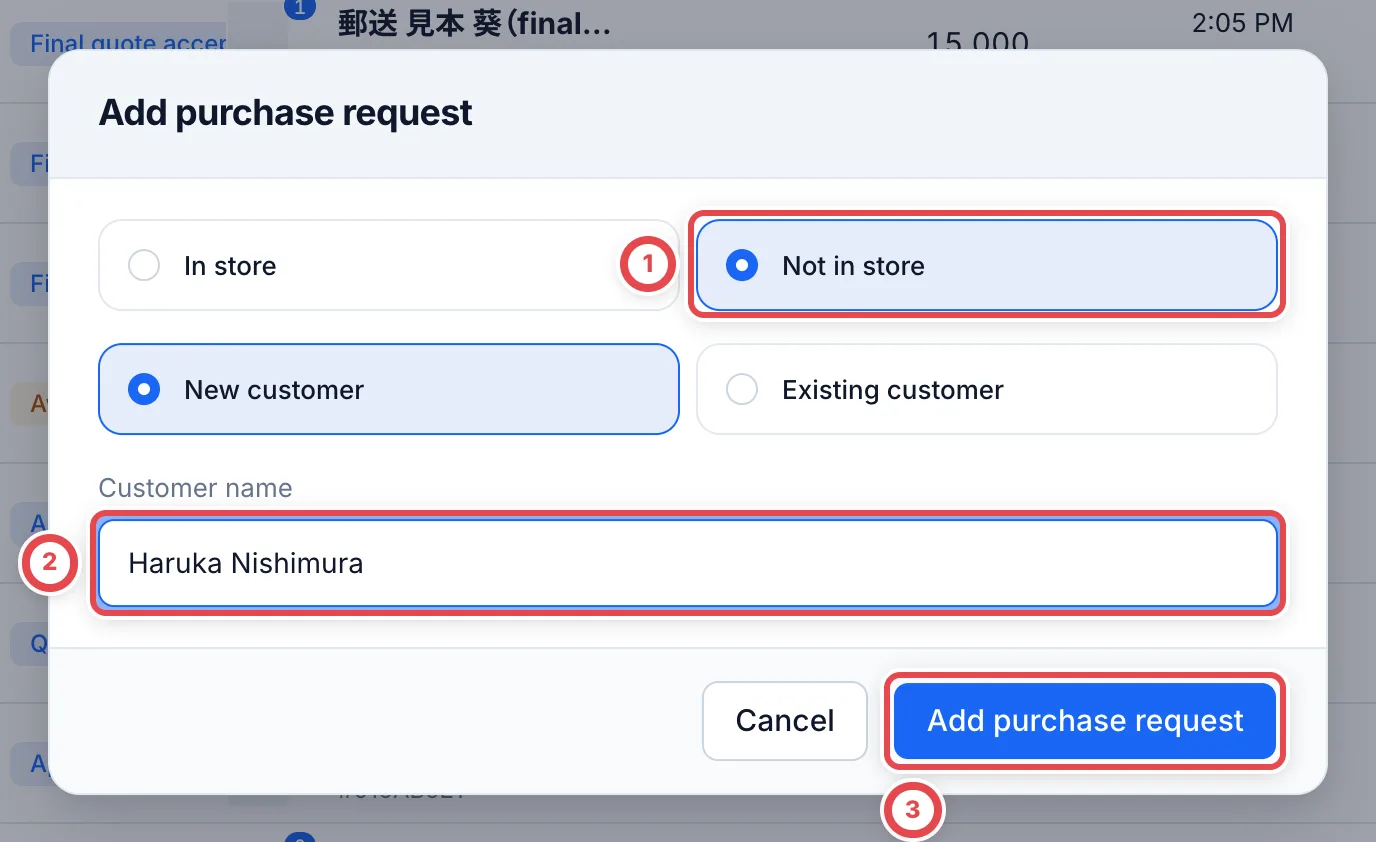 If **Not in store** isn't shown, online buying is turned off for your shop. Ask your shop admin.
On the deal, ① under **Next step** shows what to do now. Click **Add cards** at ② to reach the appraisal items, then open **Add item**.
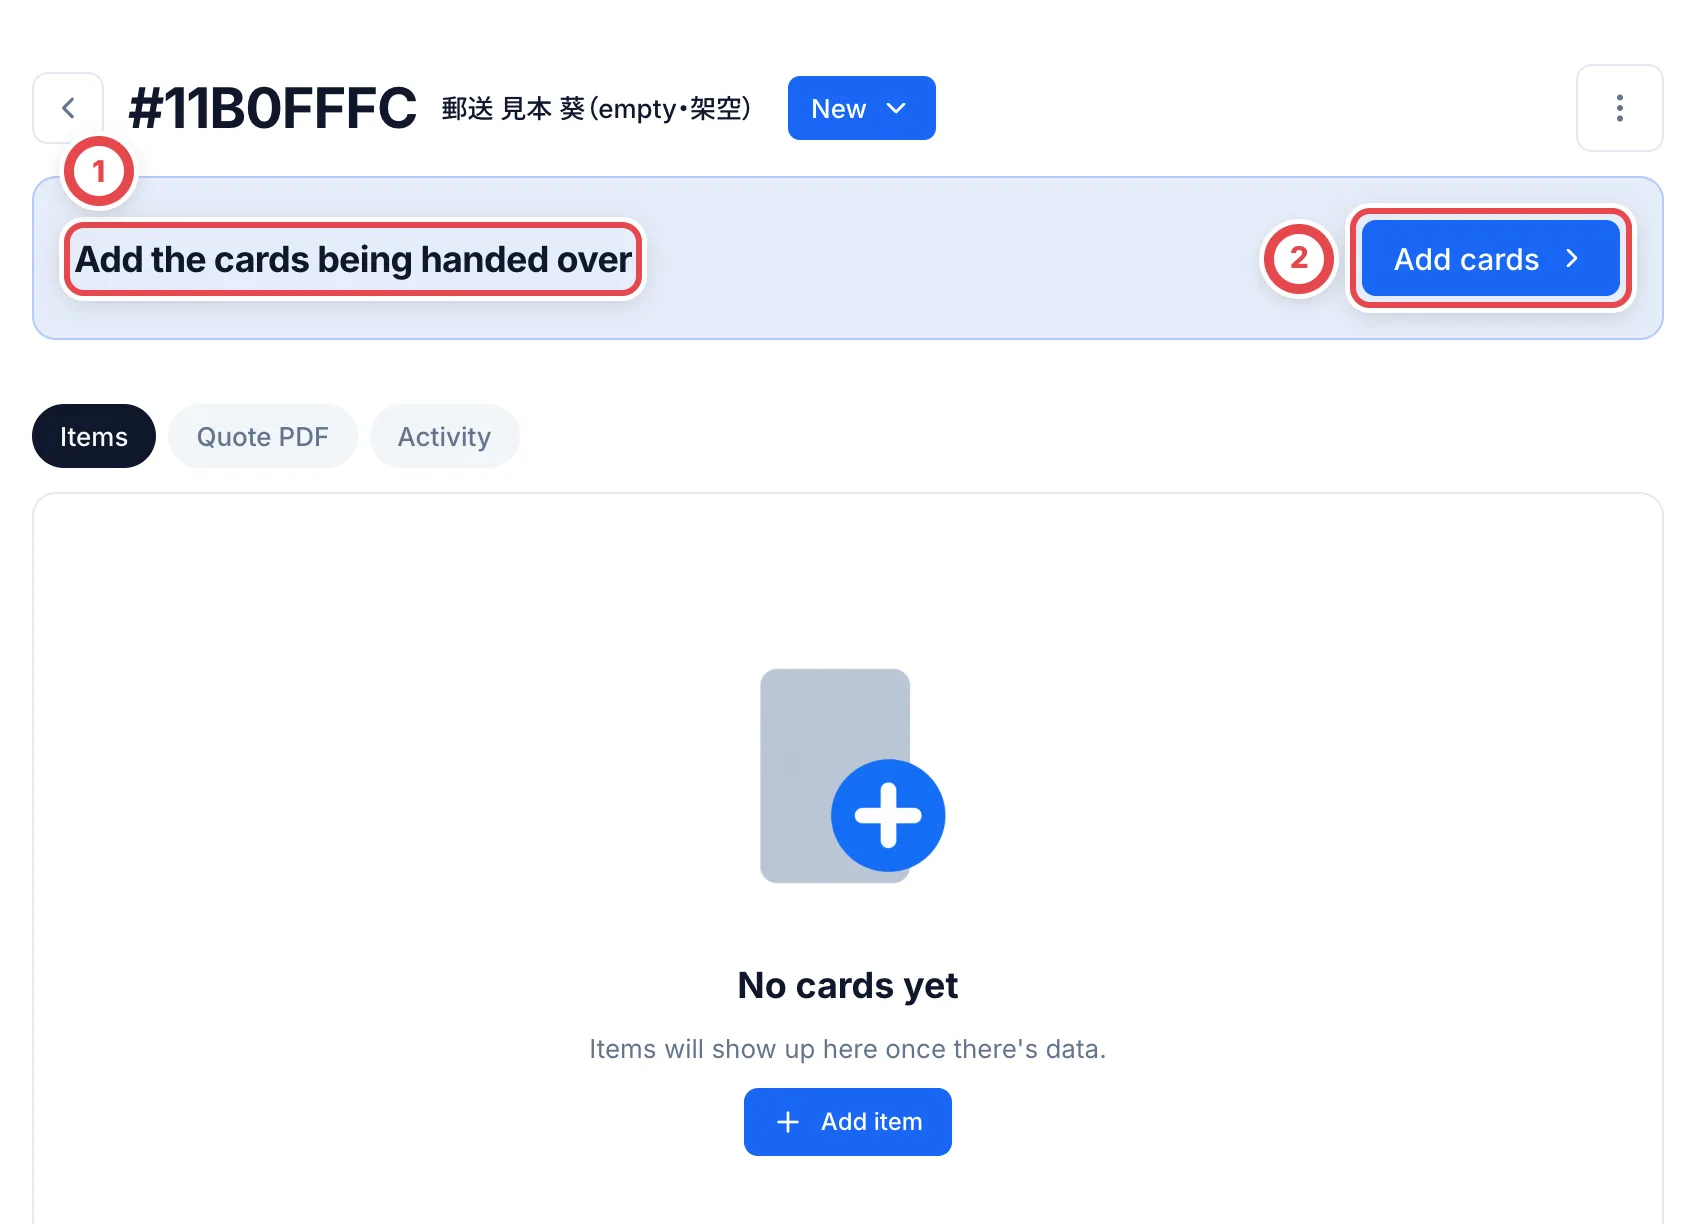 Choose a card with **Search by keyword** at ①. For a graded card, choose the **Grading company** at ②. Enter the number of cards that arrived at ③ and click **Add to items** at ④. Repeat this for each kind of card.
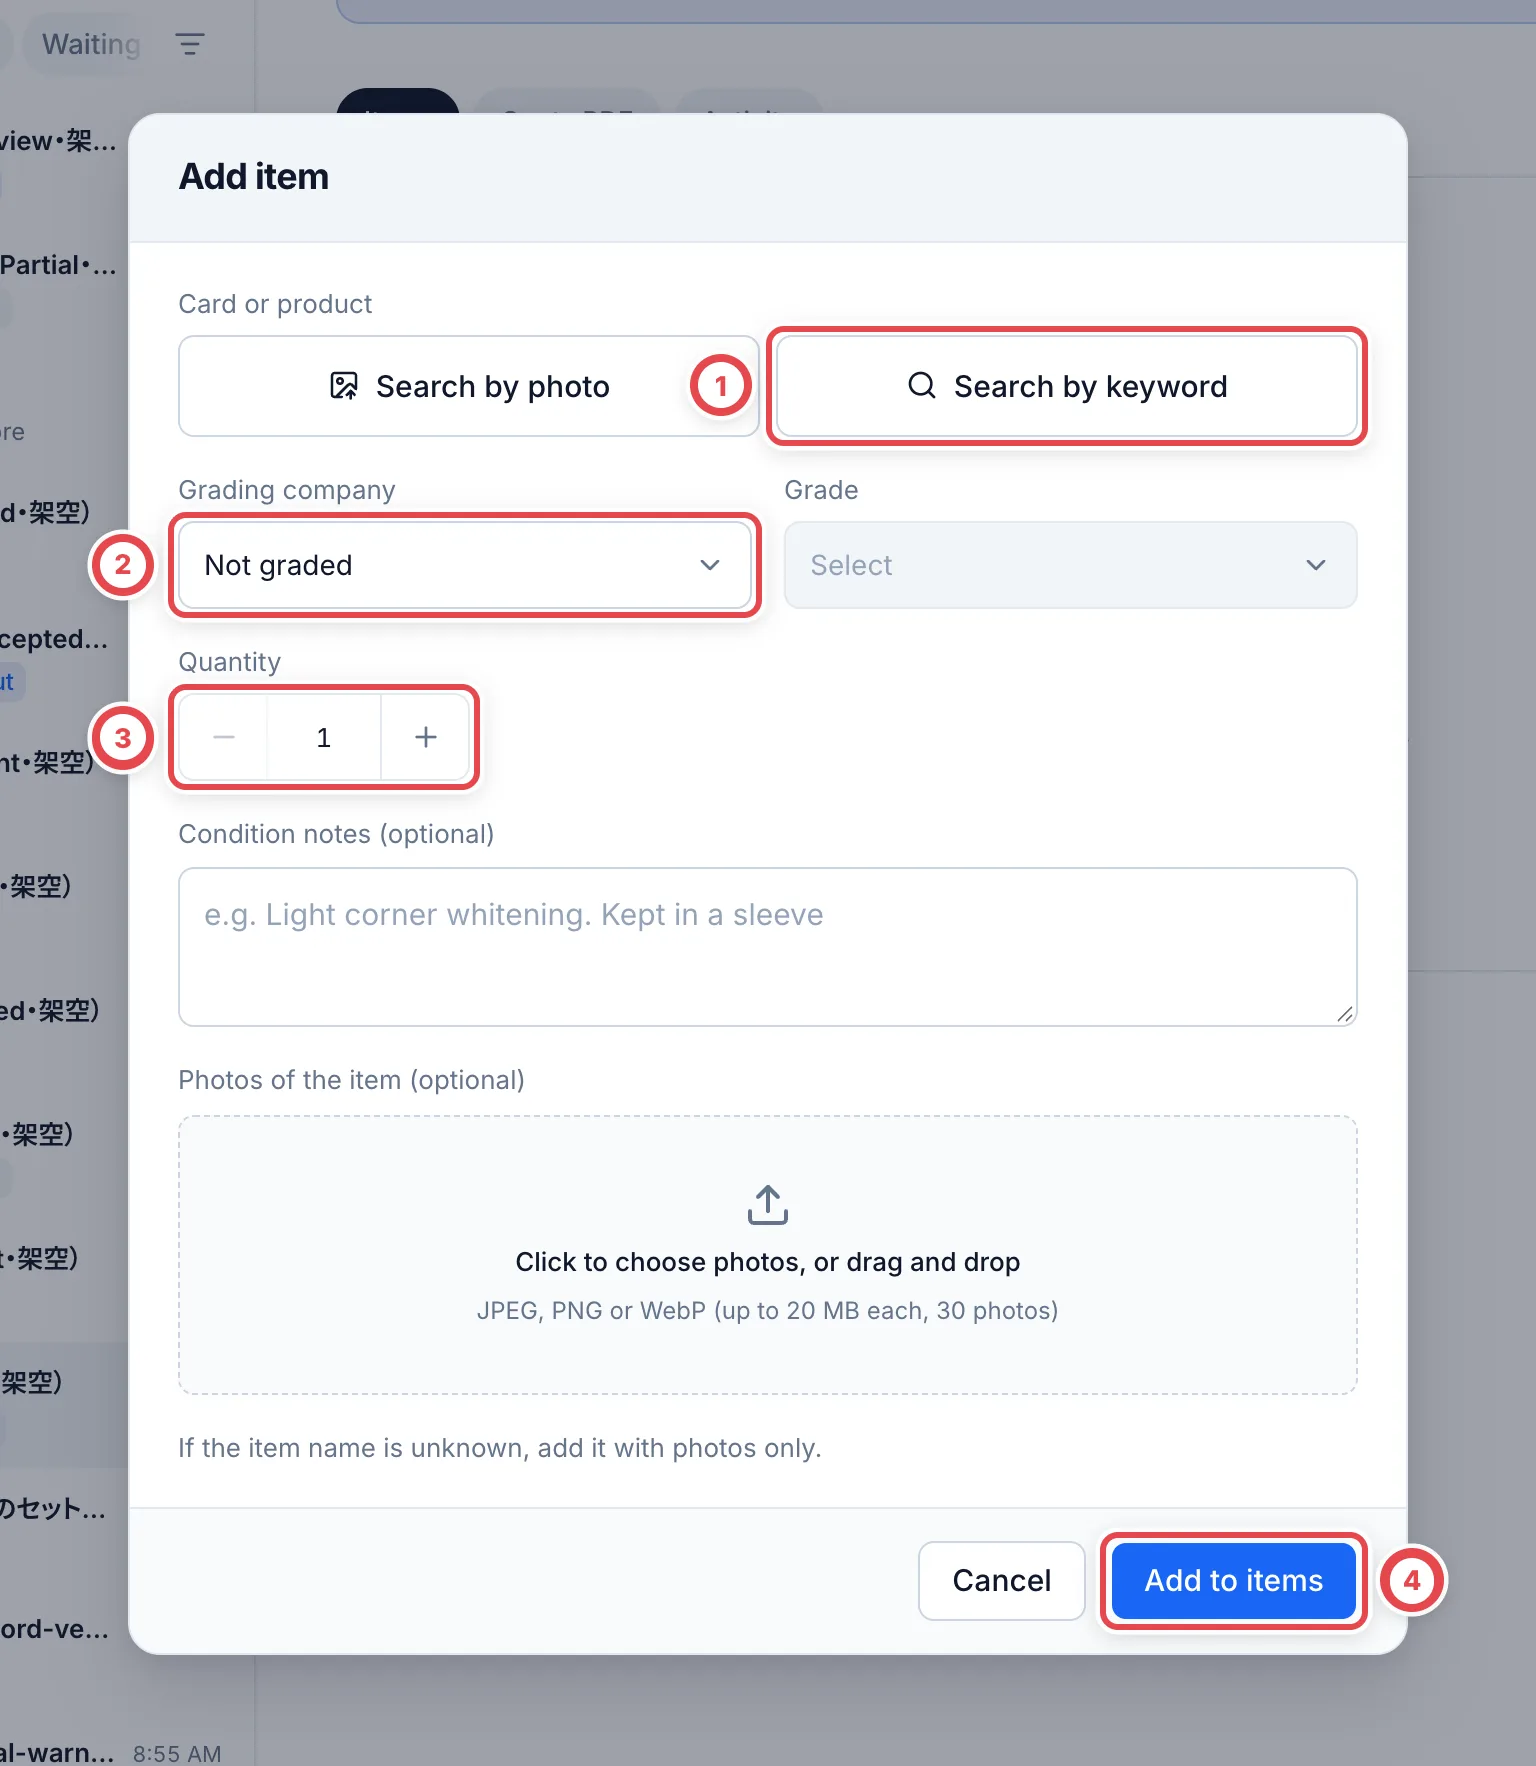 ### 2. Save the preliminary appraisal amounts
Once you add the cards, you can enter amounts in the appraisal items. Click **Check market prices** at ⑤ to load the latest prices. With **Store settings** selected at ⑥, default rates appear immediately and applicable conditions are calculated once all prices are entered. Choose **Manual entry** to edit the rates directly. If you've agreed an amount with the customer, adjust each card's amount at ⑦. When the amounts are right, save at ⑧.
To set only the total offer, use **Change to set price** below the lines before saving. See [Change to a set price](/en/guides/purchase/set-price) for entering, saving and removing it.
When **Request a review of the quote** appears under **Next step**, ask another member to check the amounts. You can't present the quote until it is approved. See [Research and reviews](/en/guides/purchase/research-and-reviews).
### 3. Tell the customer the quote and mark it as presented
When **Next step** becomes **Present the quote to the customer**, use the **Present quote** section. Copy the message with **Copy** at ① and tell the customer by email, phone or another way. Once you've told them, click **Mark as presented** at ② and record it in the confirmation dialog.
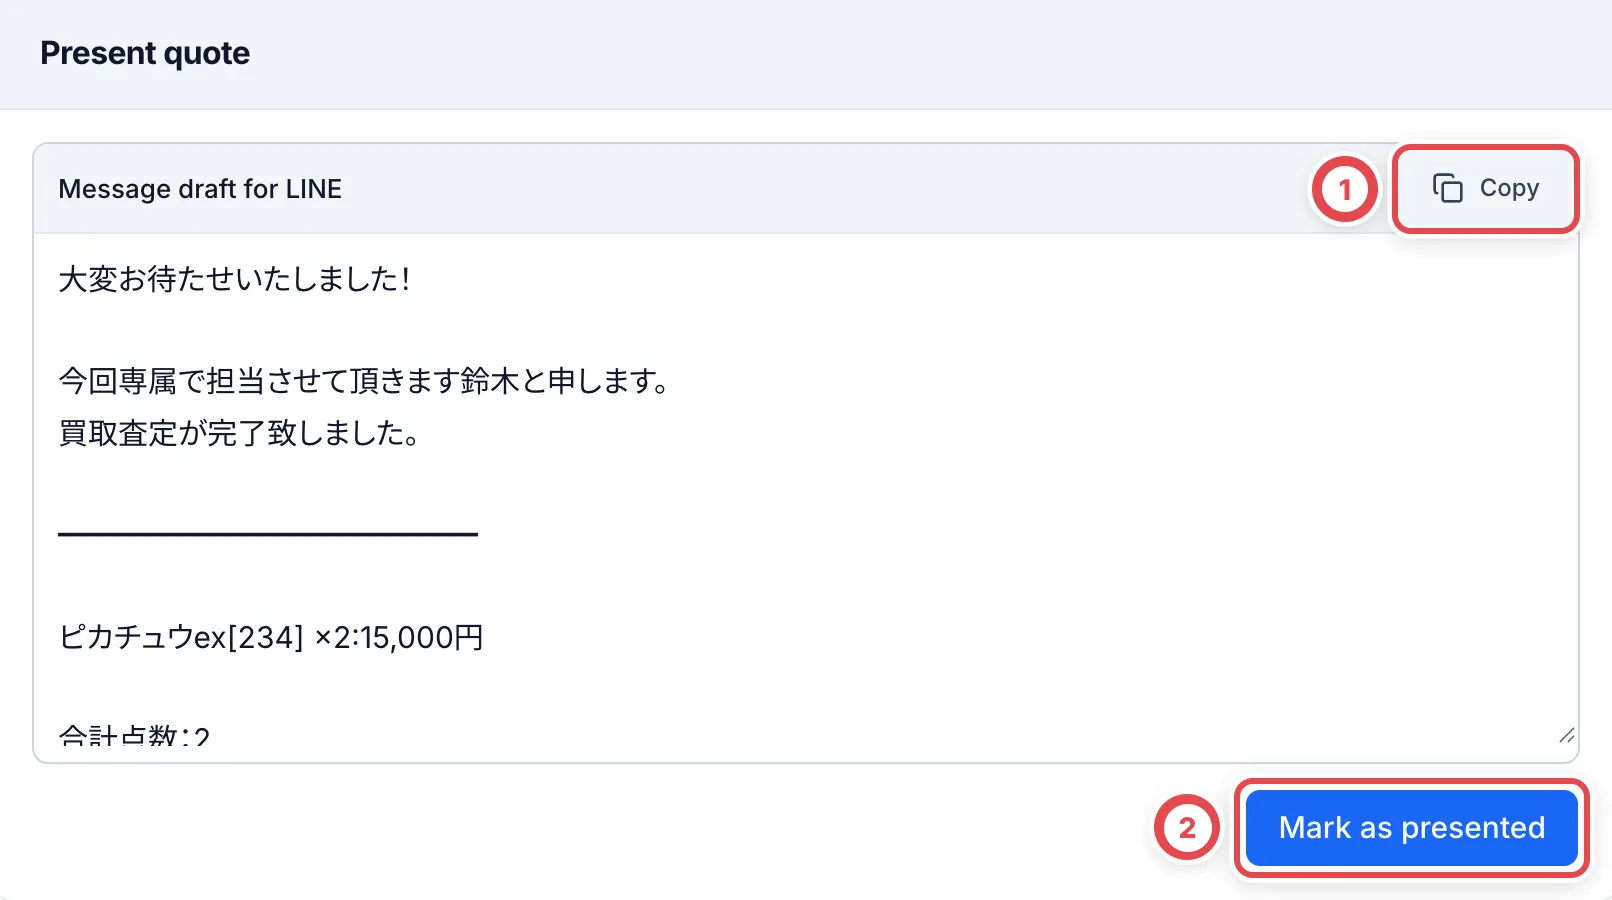 :::warning
The deal page asks for confirmation before recording. From a To do dialog, choosing **Presented another way** makes the final **Mark as presented** button the confirmation. Record it only after you have told the customer.
:::
### 4. Record acceptance of the preliminary quote
When the customer replies, record it with **Record customer response**. If they accept every card, click **Record preliminary quote acceptance** at ① and record it in the confirmation. If they accept only some cards, use **Accept some** at ②. If the amount didn't work for them, use **Requote** at ③.
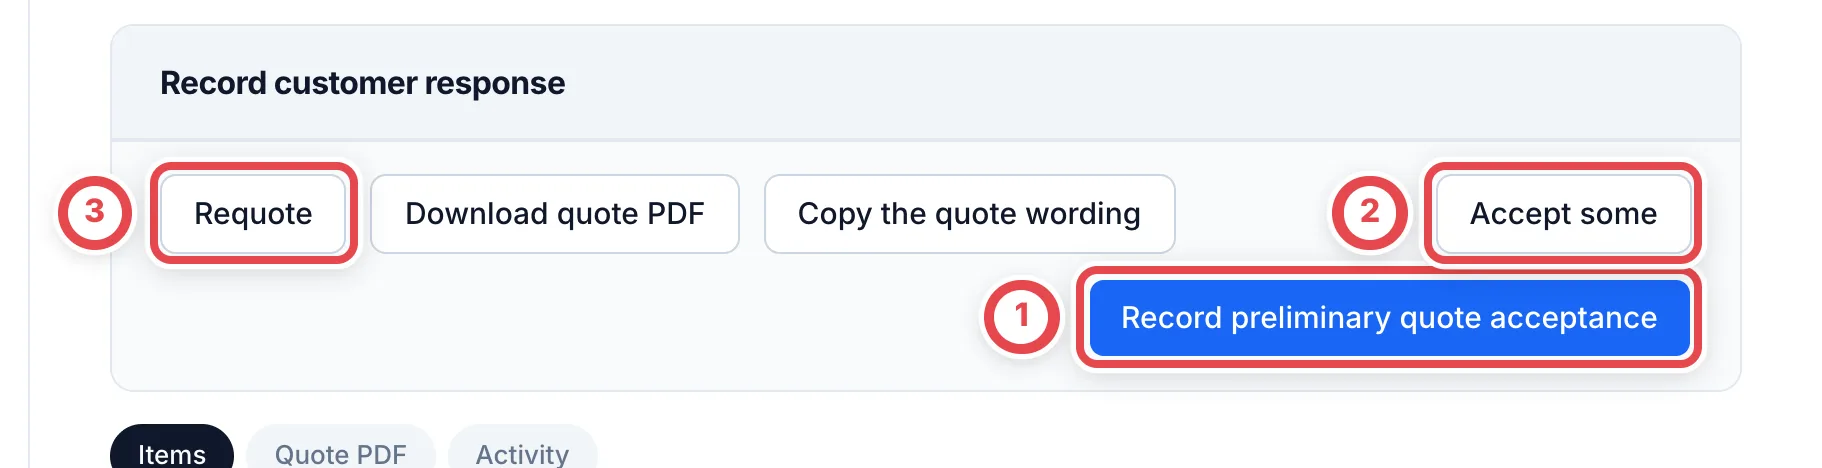 ### 5. Record the shipping instructions
When the deal becomes **Accepted**, the shipping screen opens. Click **Record shipping instructions** at ① and click **Record** in the confirmation.
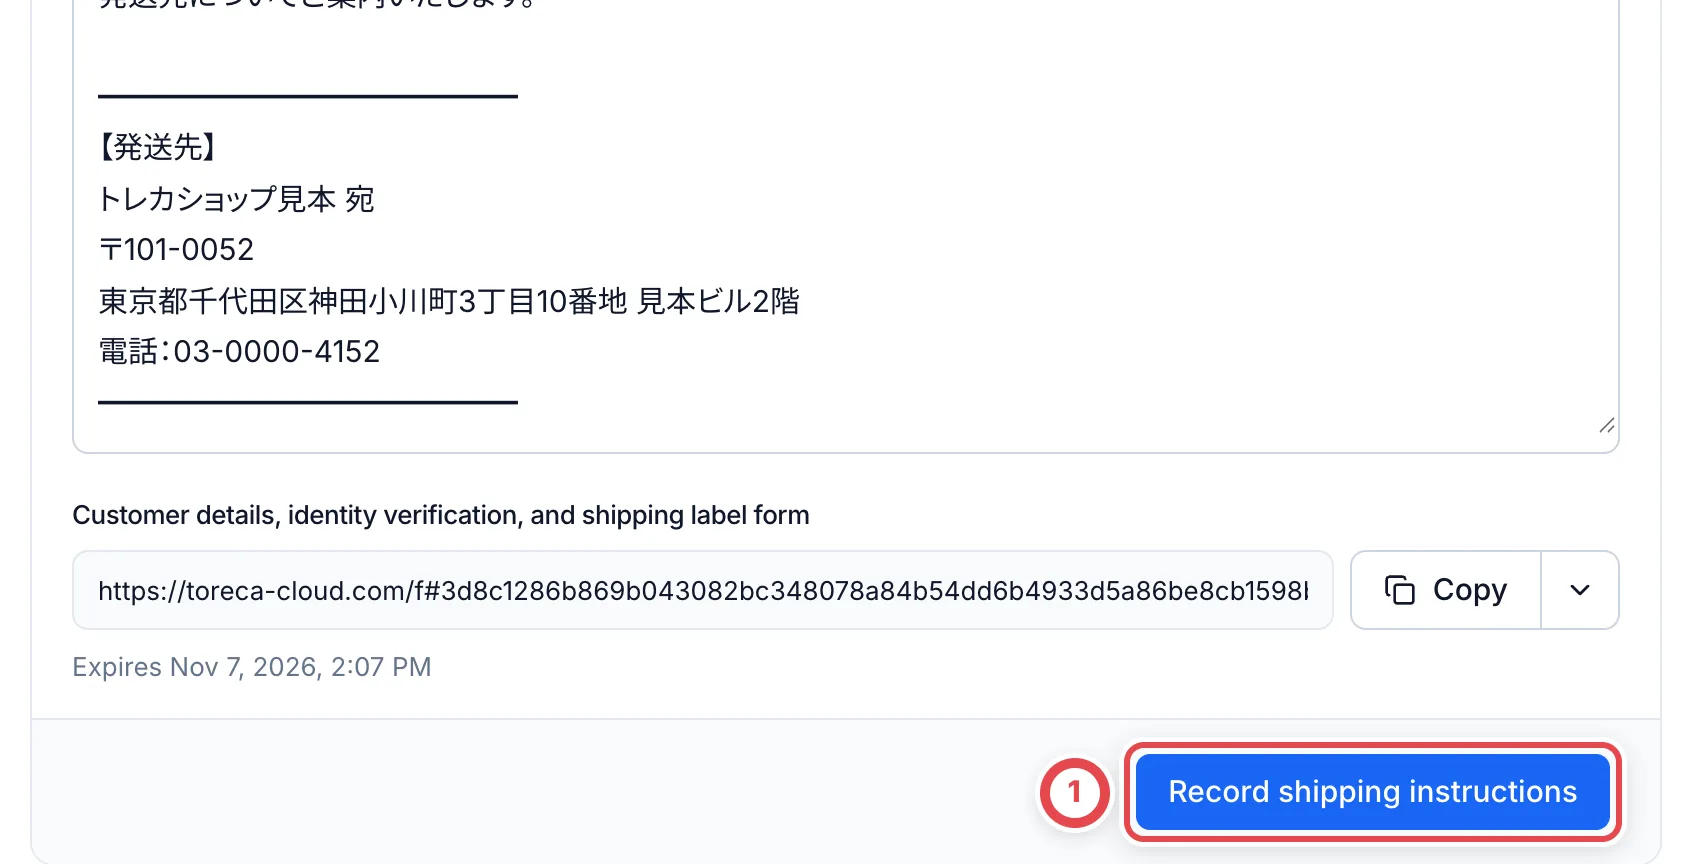 ### 6. Enter the final appraisal and present the final quote
**Next step** becomes ① **Start the final appraisal with the delivered cards**. Click **Enter final appraisal** at ②, then check the rows that arrived in **Select arrived items**. **Continue to appraisal** records receipt and opens the appraisal for received items only.
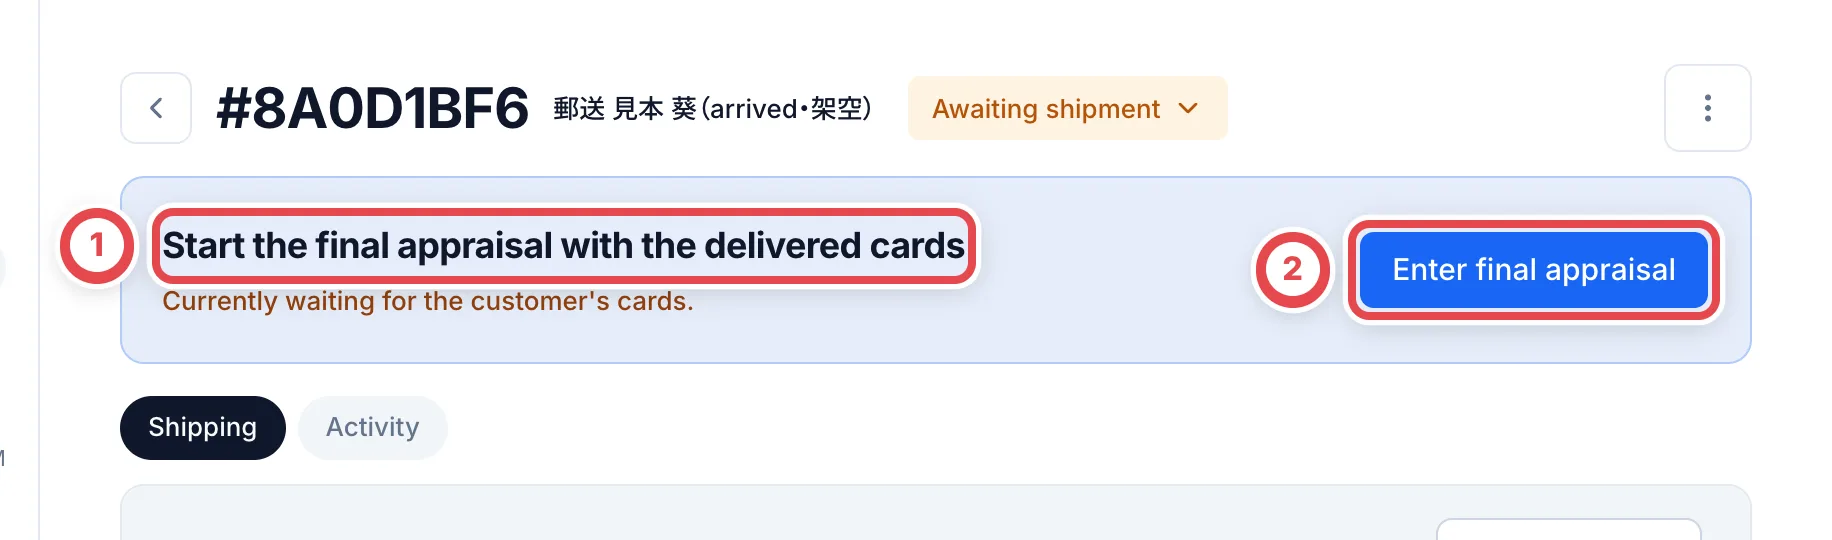 :::note
Unselected rows remain awaiting arrival and are excluded from appraisal, inventory, the secondhand ledger and returns. Save any current edits, then use **Add arrivals** when more items arrive. Save the appraisal again with those items before presenting it. If the final quote has already been presented, return to reappraisal first. Arrivals after settlement require a separate transaction.
:::
The final appraisal records **Card 1**, **Card 2**, and so on individually. Check the certification number at ①, enter the amount for this one card in ② **Appraisal amount**, and explain the price at ③ **Appraisal note (visible to customer)**. See [Final appraisal](/en/guides/purchase/final-appraisal) for rejection, missing cards, saving and checking the result.
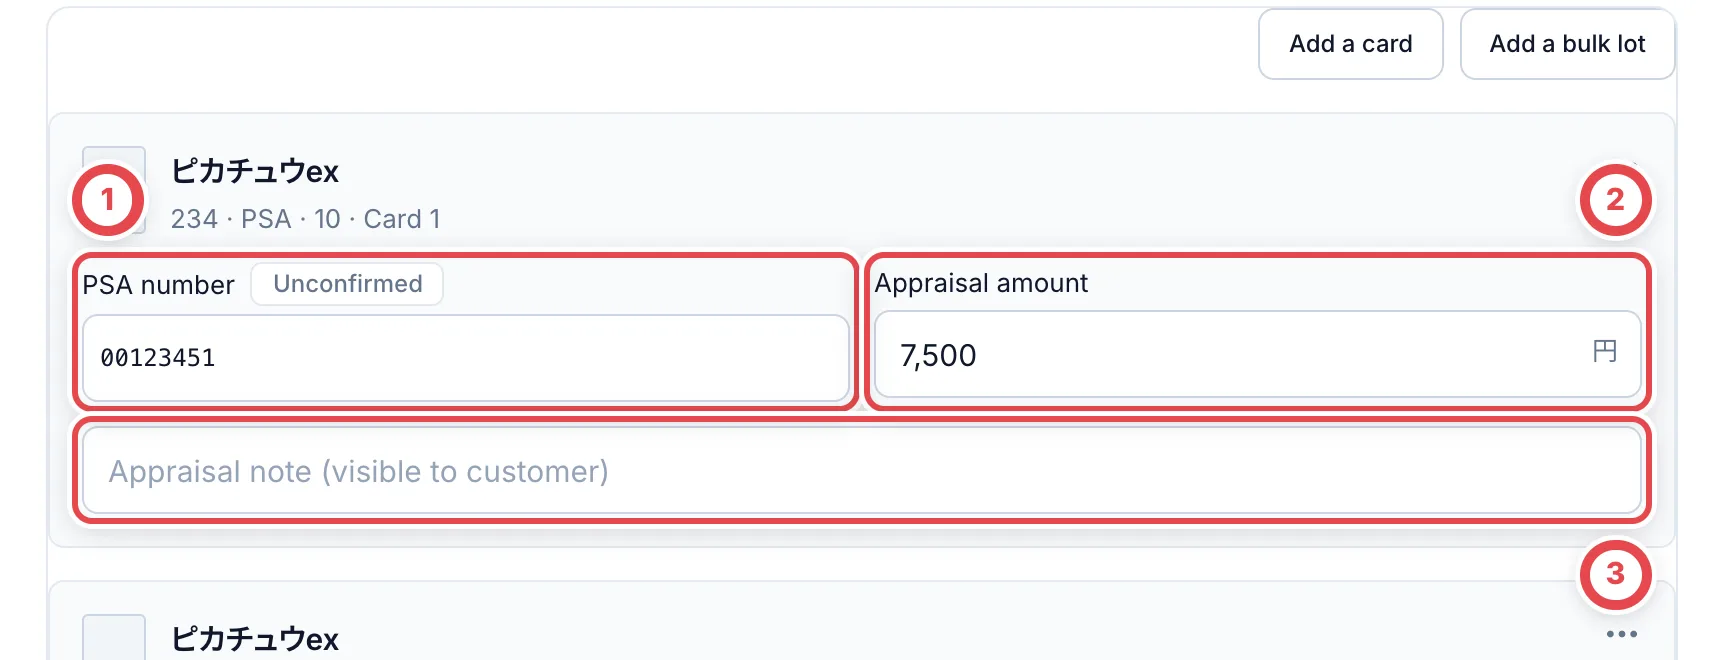 After you save, get a review if you need one, as with the preliminary appraisal. Then tell the customer the final quote and click **Mark as presented**, as in step 3.
### 7. Fill in the customer's details, payout account and identity check
To create stock and payout, you need the customer's details, a payout account and an identity record. Scroll down the shipping screen. Under **Customer details** at ①, click **Edit** and enter the name, address, date of birth and occupation. Click **Add payout account** at ② to register the account. Click **Add ID document** at ③ to record identity verification.
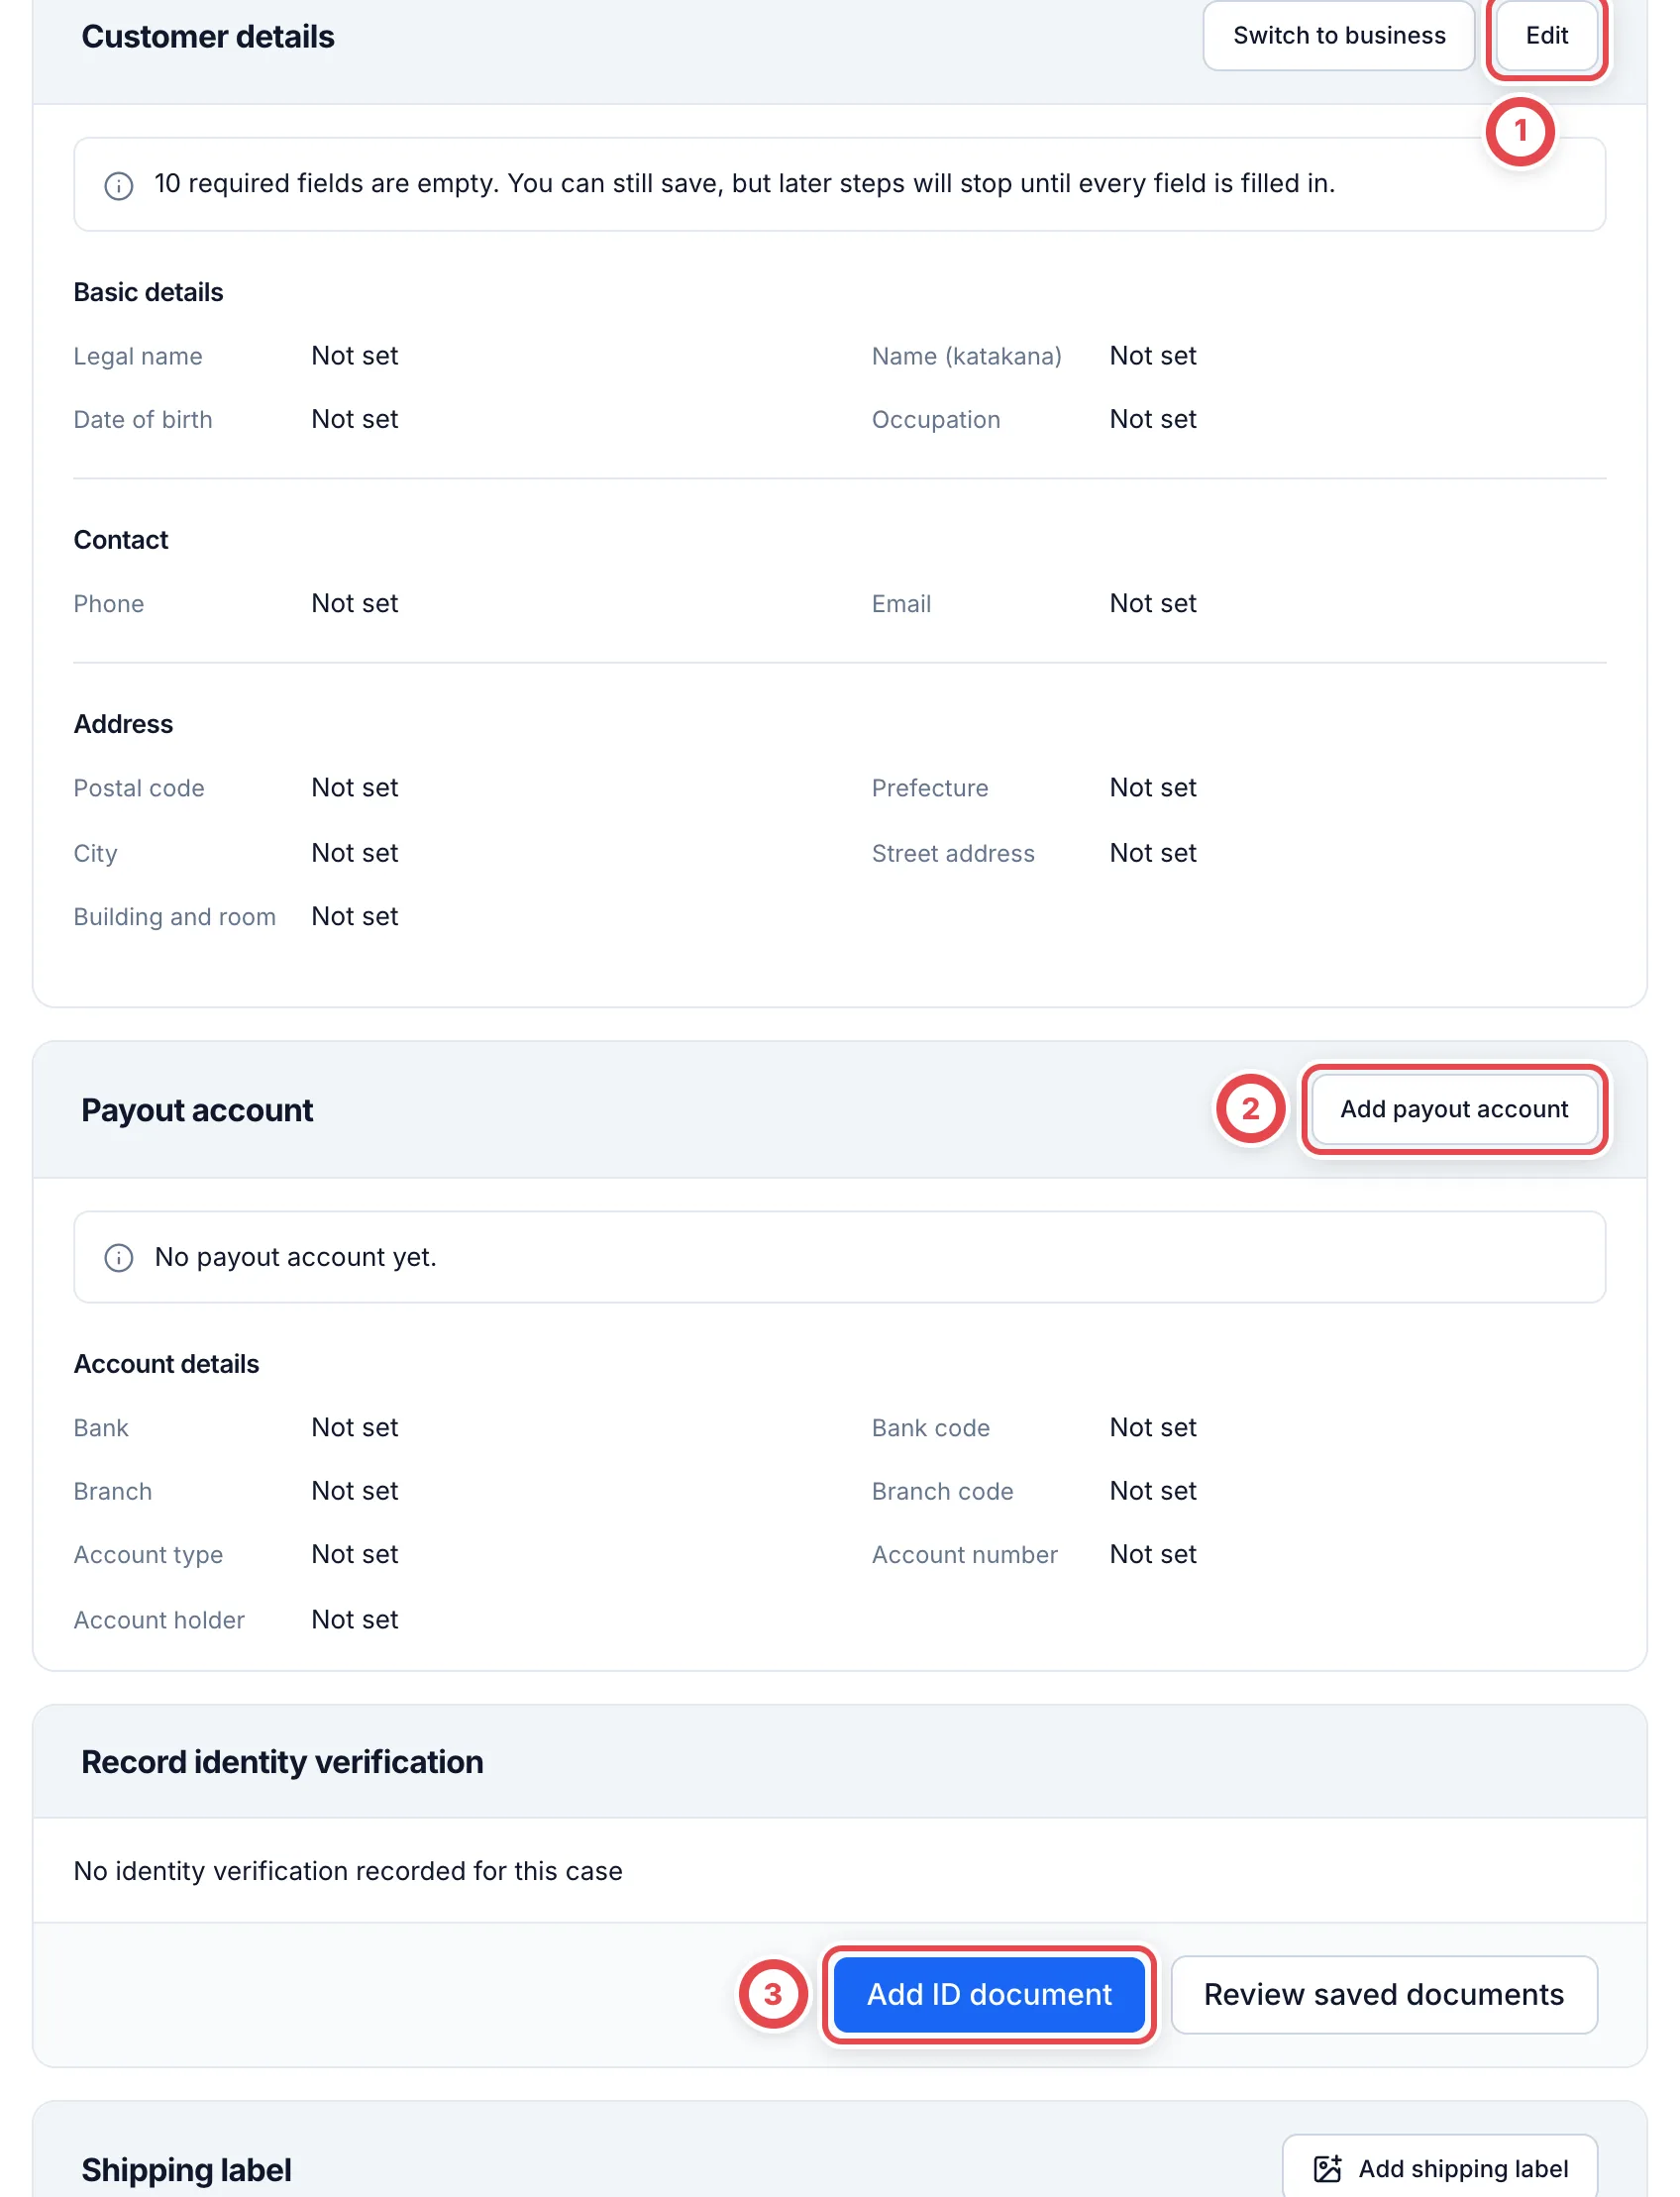 In the dialog for adding an ID document, compare the customer record at ① with the document. Choose the document type at ②, and add images of the front and back of the document at ③. Click **Add** at ④ to record it. For details, see [Identity verification](/en/guides/purchase/identity).
### 8. Record acceptance of the final quote, then create stock and payout
When the customer accepts the final quote, record it under **Customer response**. In the dialog for recording acceptance, use **Attach file** at ① to save a screenshot of the customer's reply, such as an email or message. You need this image when you submit the payout in step 9.
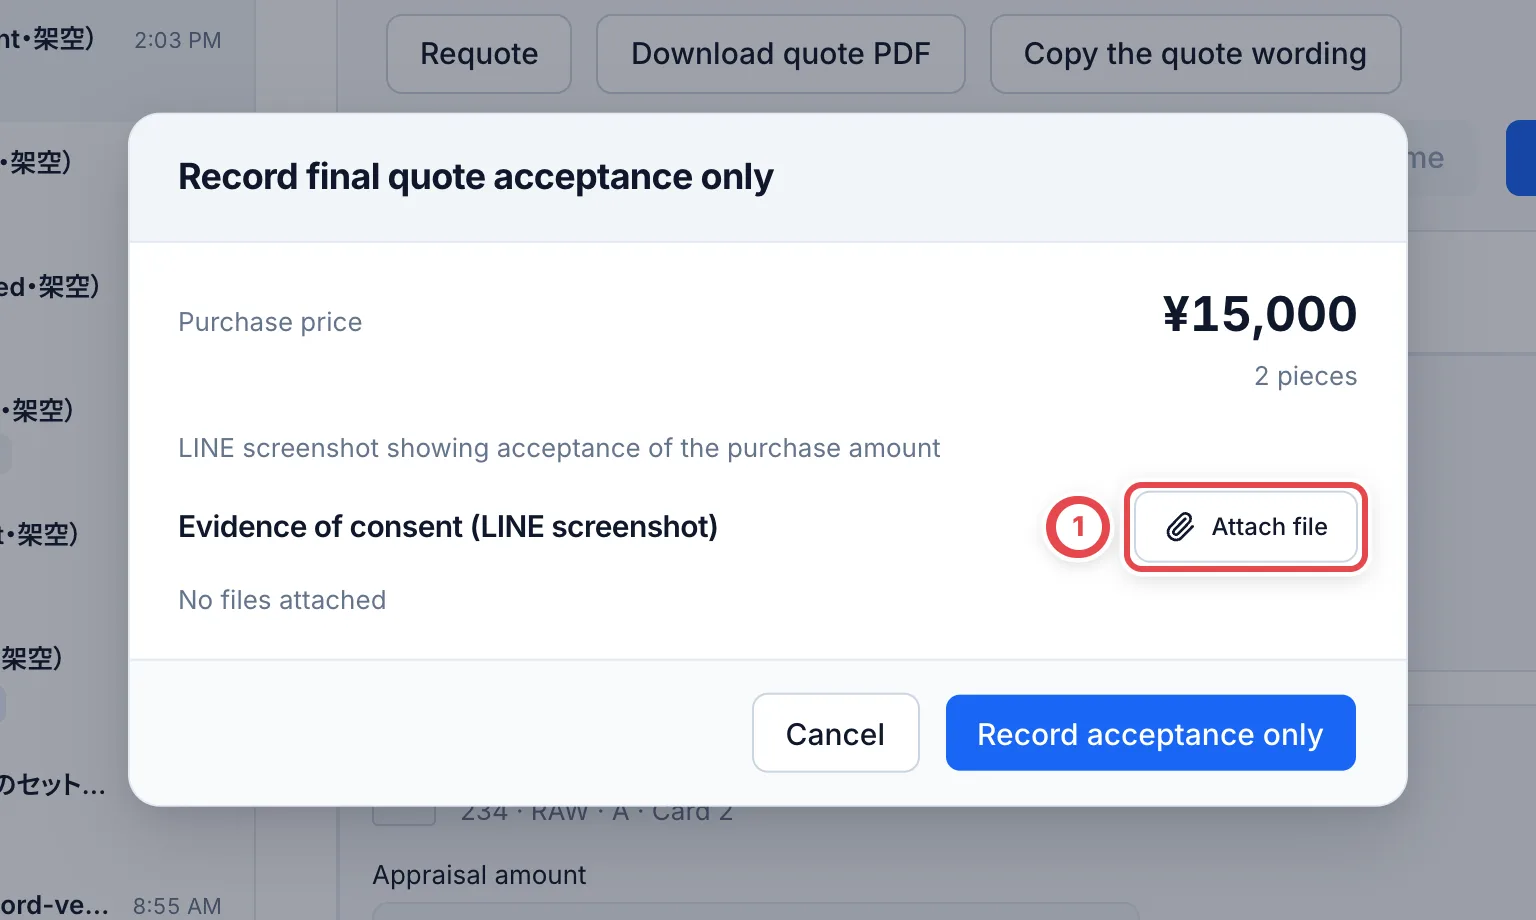 **Identity verified**
Click **Record final quote acceptance** and confirm. At the same moment, the
purchased cards are added to stock and a payout request is created.
**Identity not yet verified**
Click **Record acceptance only** at ② and confirm. After you record identity
verification in step 7, click **Create stock and payout** under **Stock and
payout**.
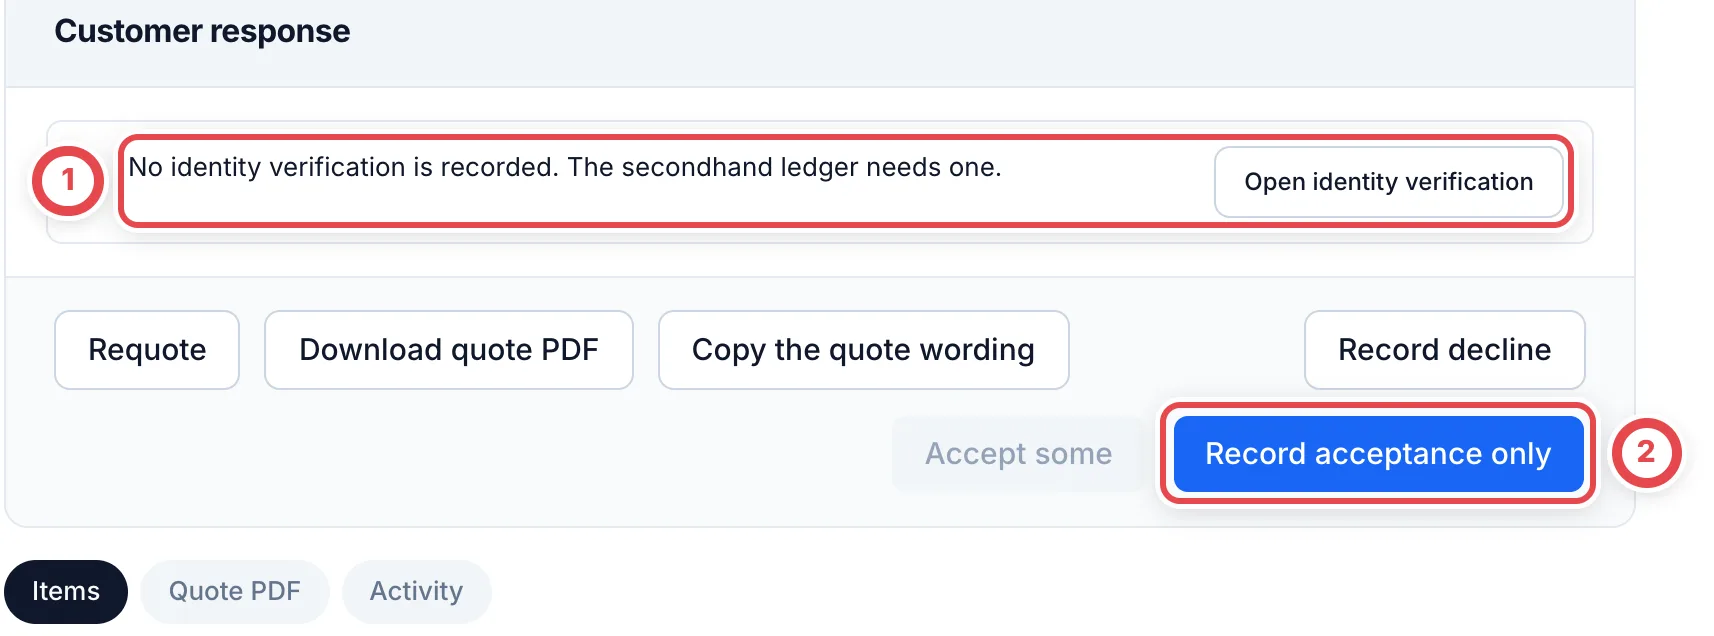 ### 9. Submit and approve the payout, then record the result
After you create stock and payout, the payout screen opens. Click **Submit payout** at ①.
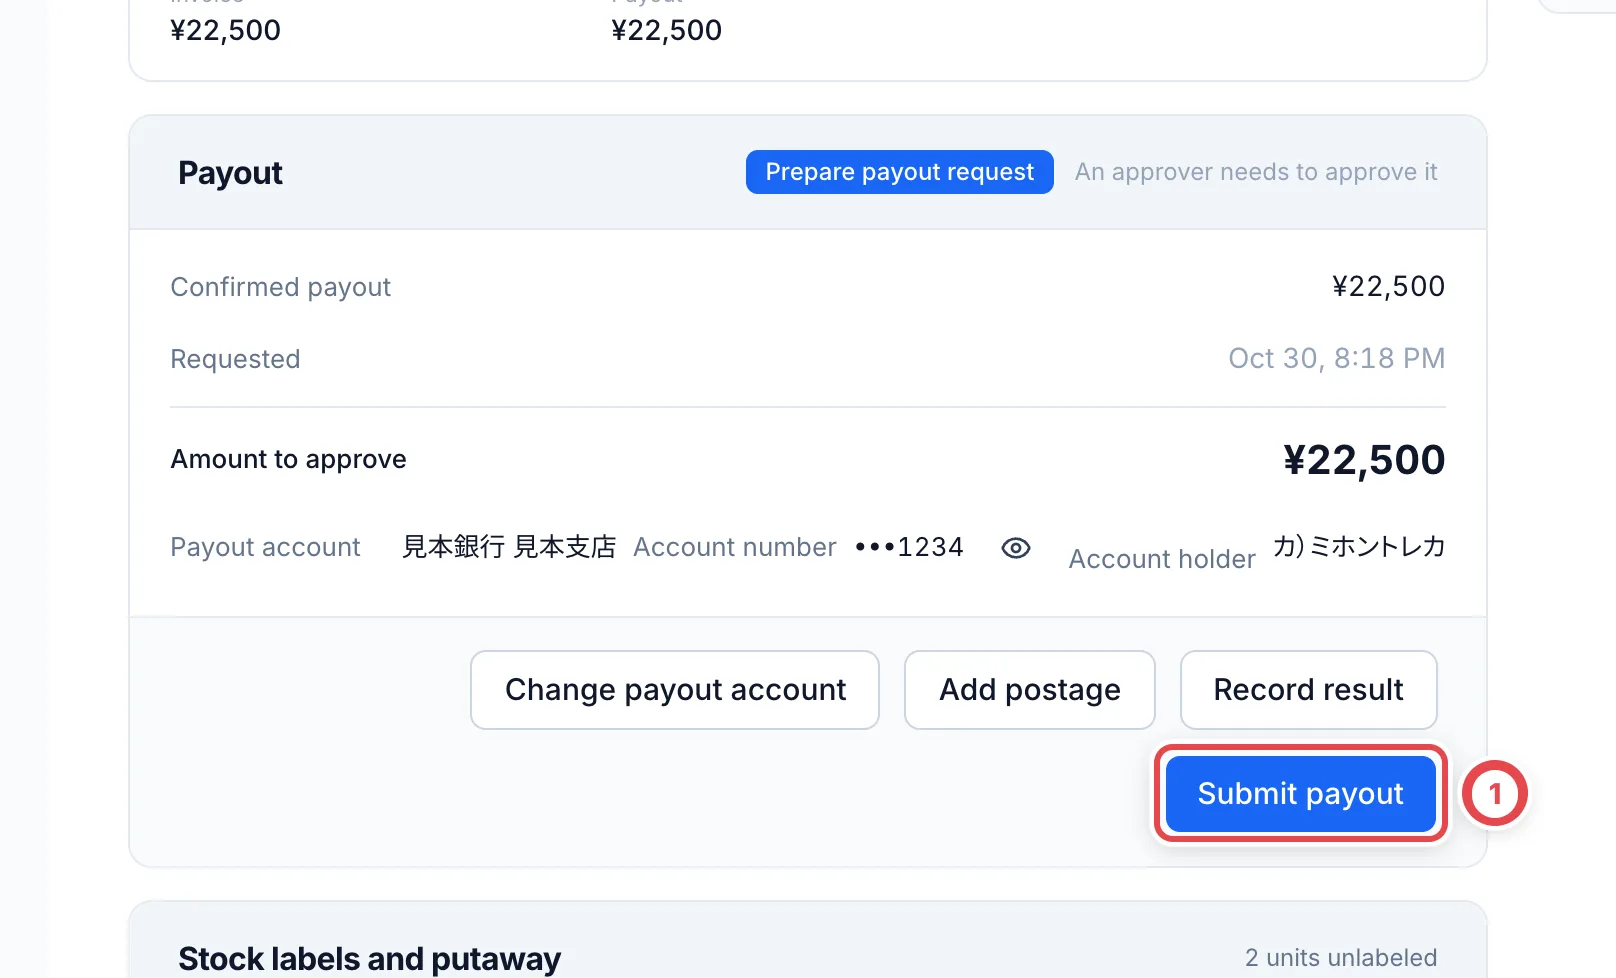 On the submission screen, open the saved image at ① and check the consent and the amount. If everything is right, click **Submit payout** at ②.
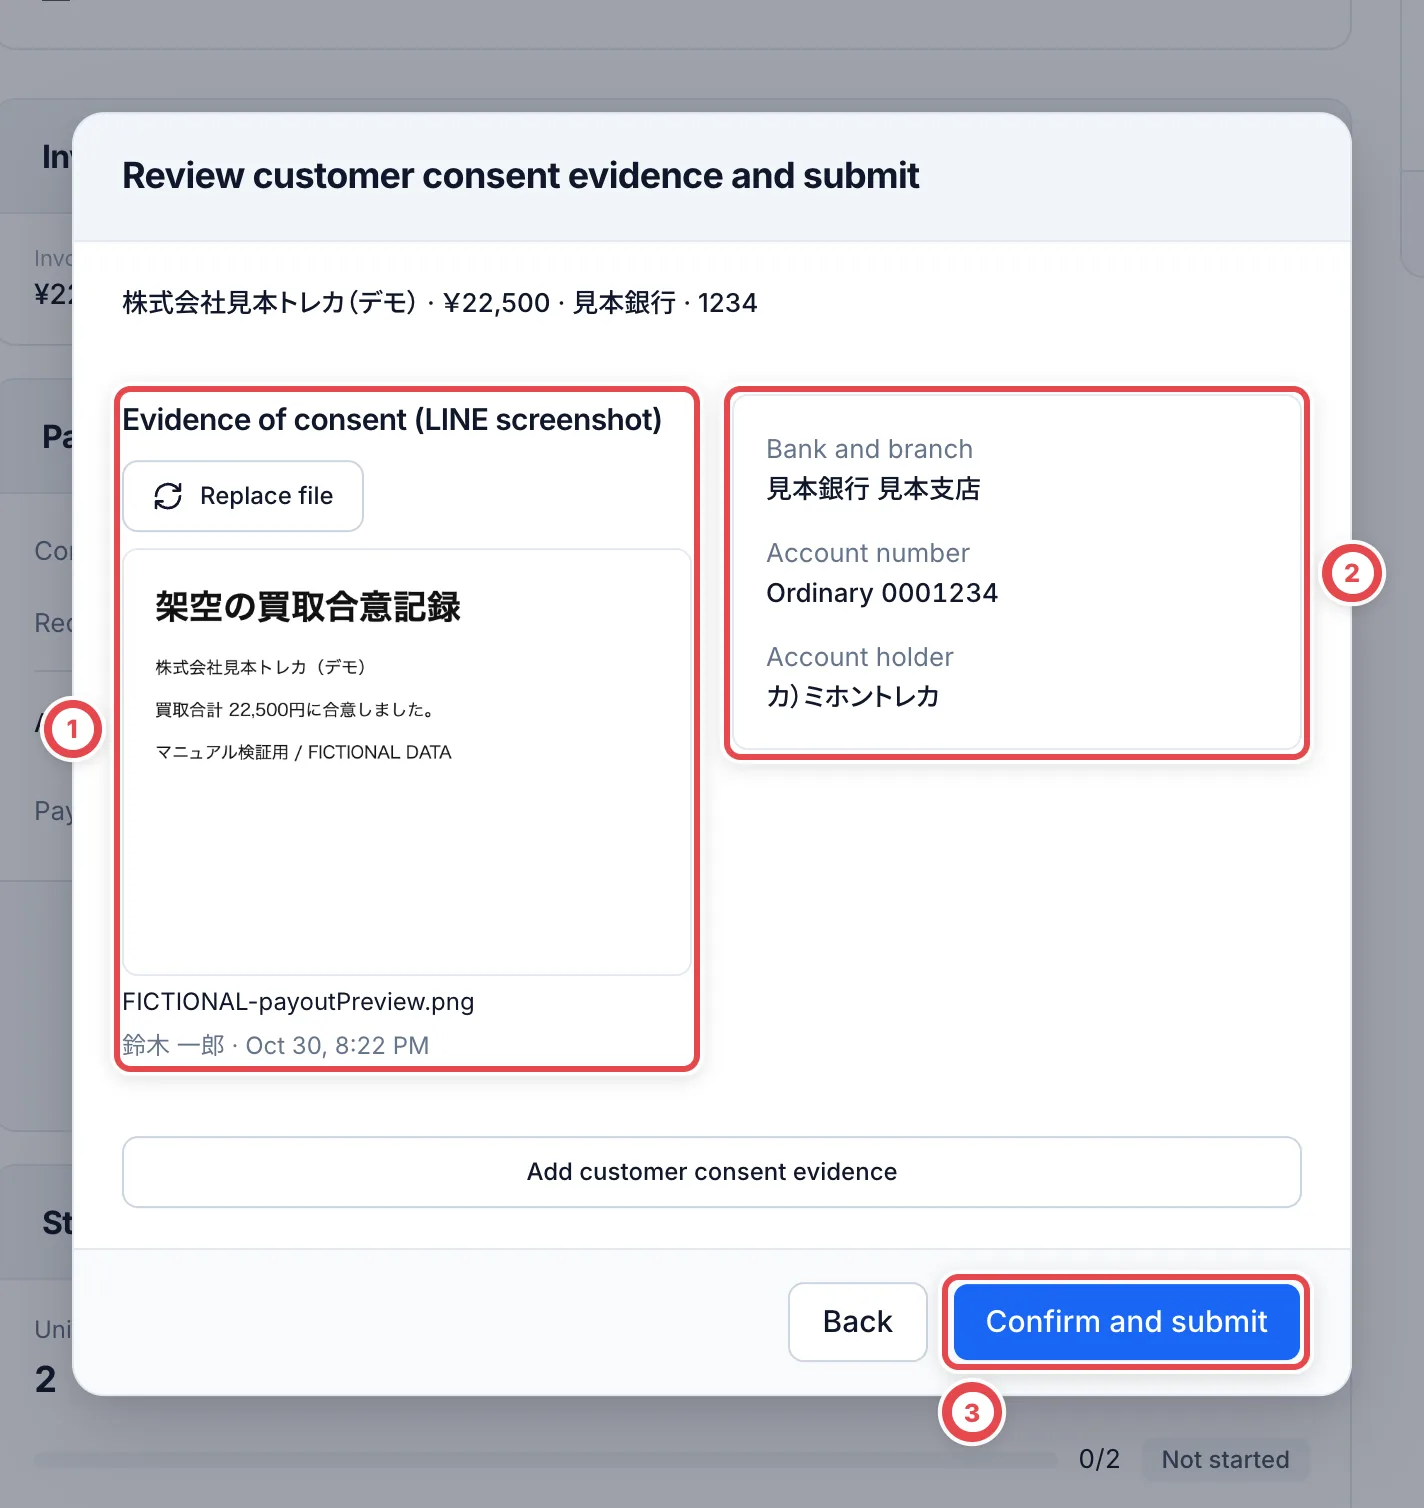 An owner or admin other than the applicant approves it from **Pending approval** under **Payments** in the sidebar. Check the evidence of consent, amount and payout account at ①, then tick the box at ② and approve.
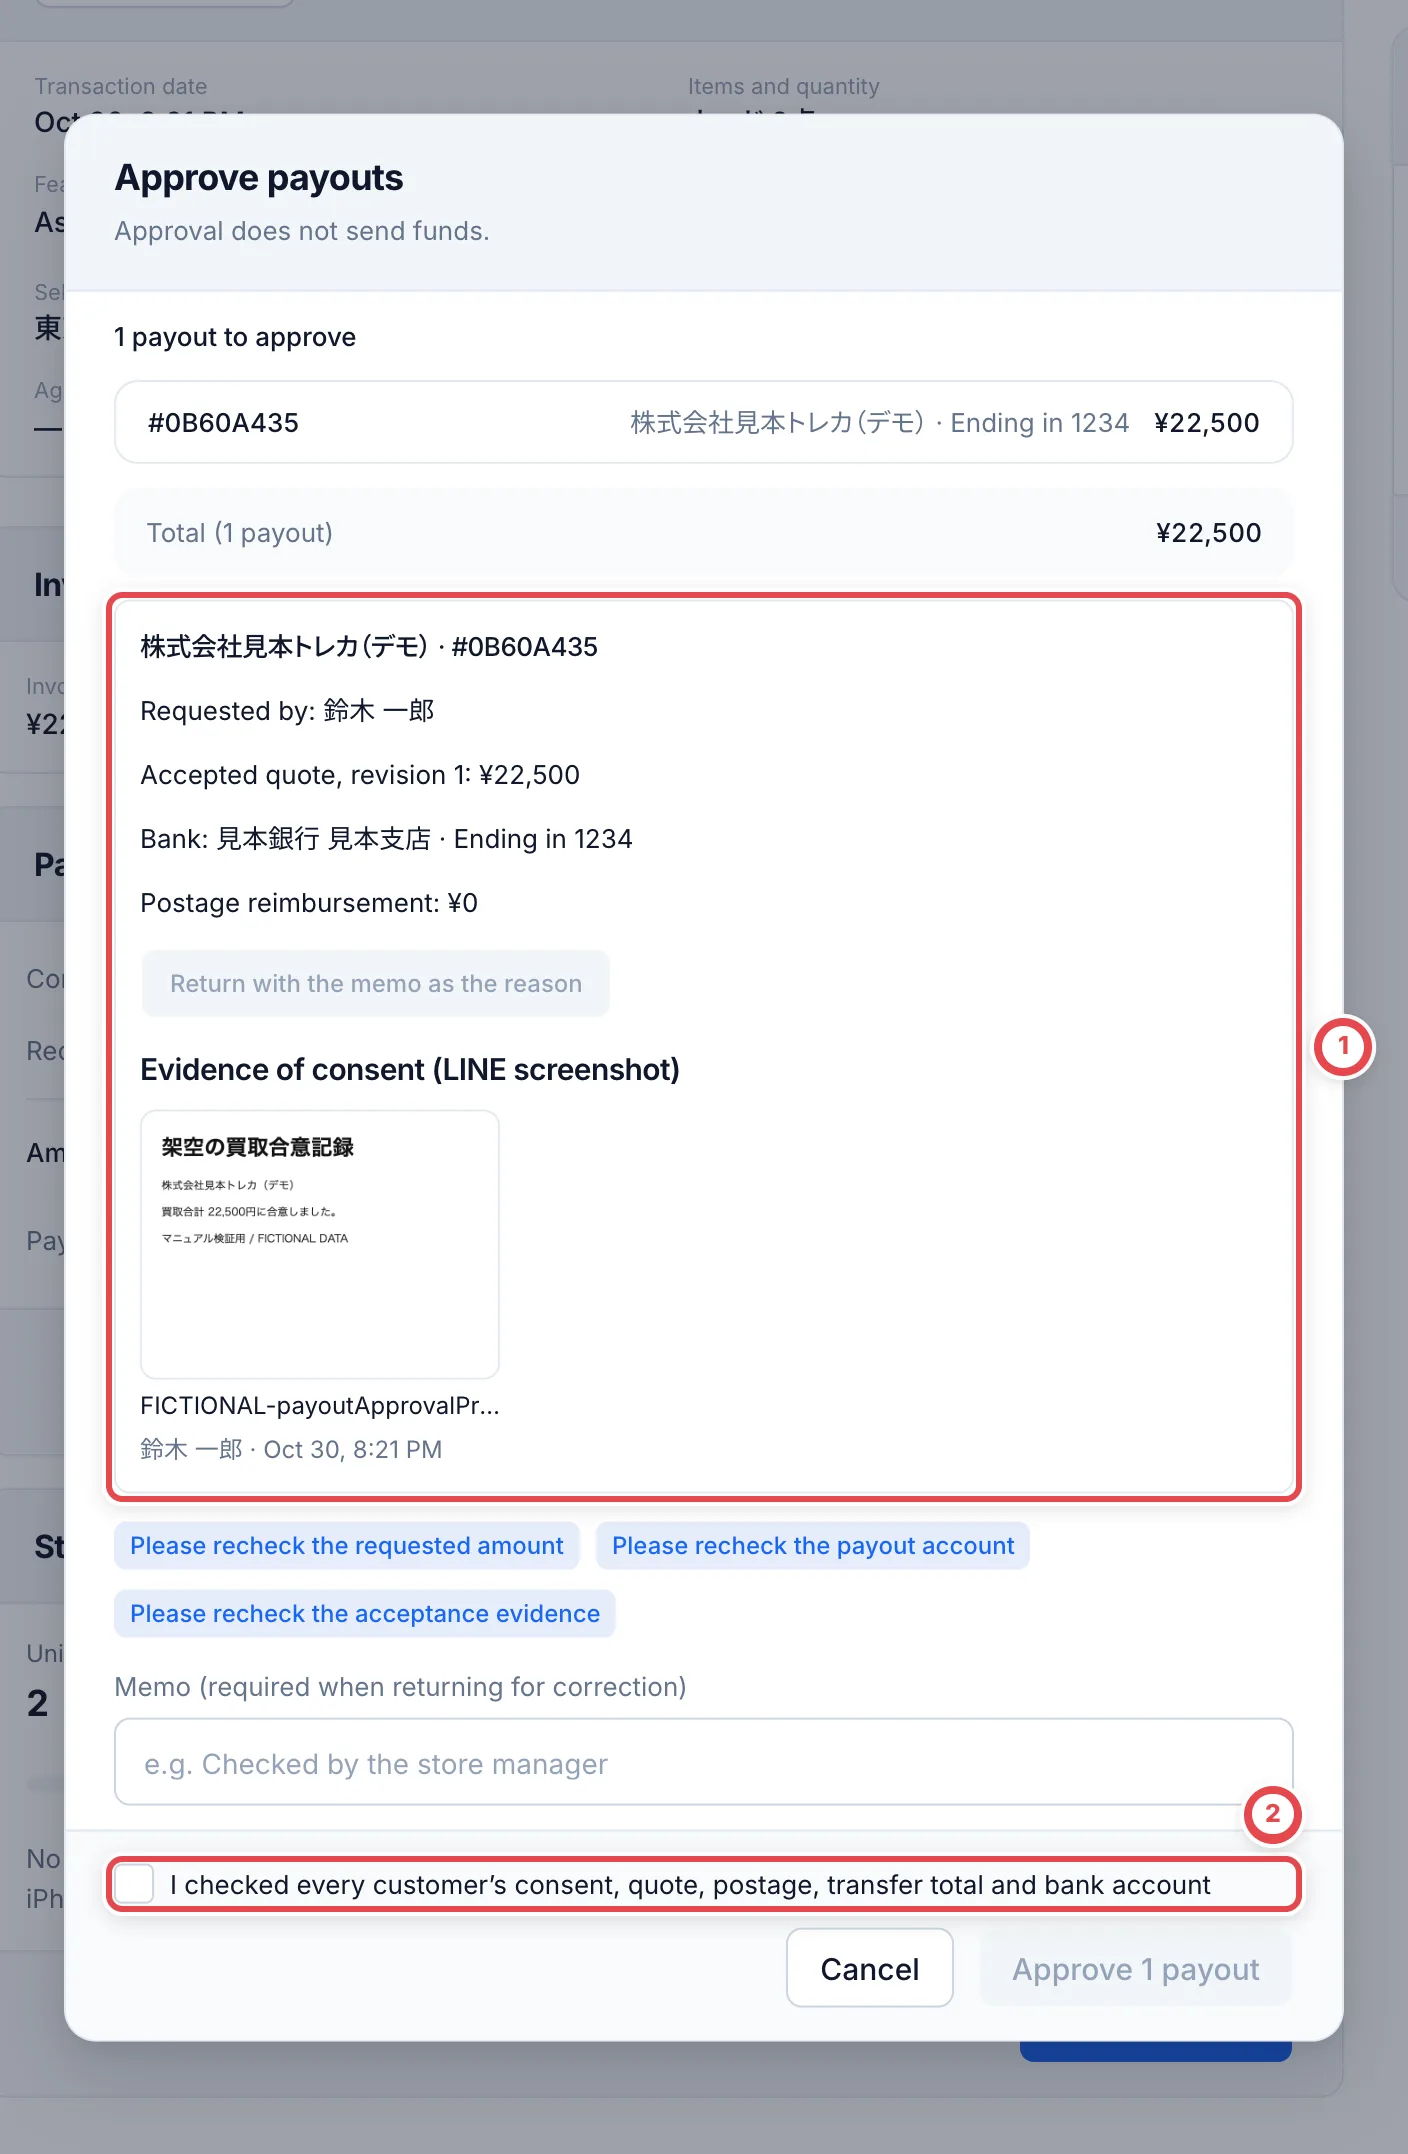 After you make the transfer at your bank, open **Record result** on the deal's payout screen. If the transfer went through, choose **Succeeded** at ① and click **Record result**. If it didn't, choose **Failed**.
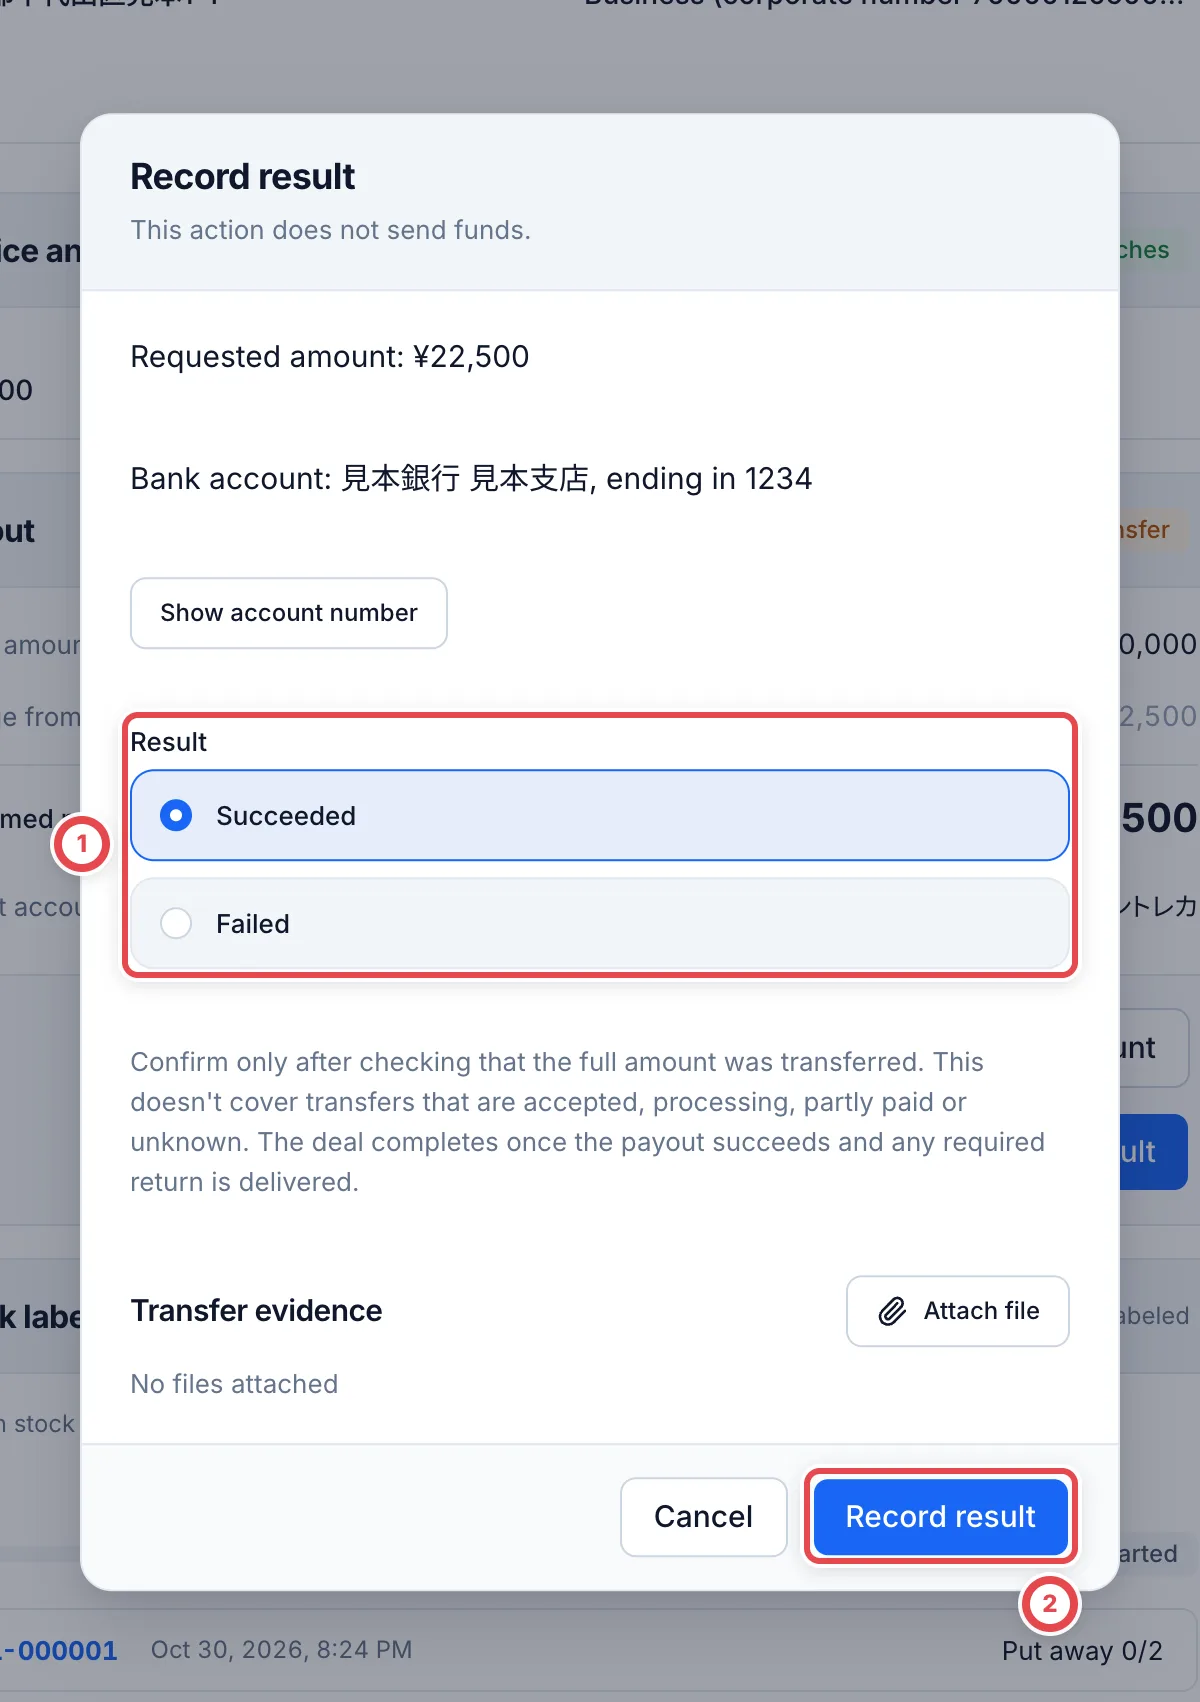 :::note
If you've already paid the customer outside Toreca Cloud, submit and approve the payout in the same way and record the result as **Succeeded**. This doesn't send any money.
:::
### 10. Record receipt
Under **Payments** in the sidebar, open **Awaiting receipt** and click **Record receipt** on the deal. Copy the payout message with **Copy** at ① and send it to the customer. When you've confirmed the customer received the money, click **Record** at ②.
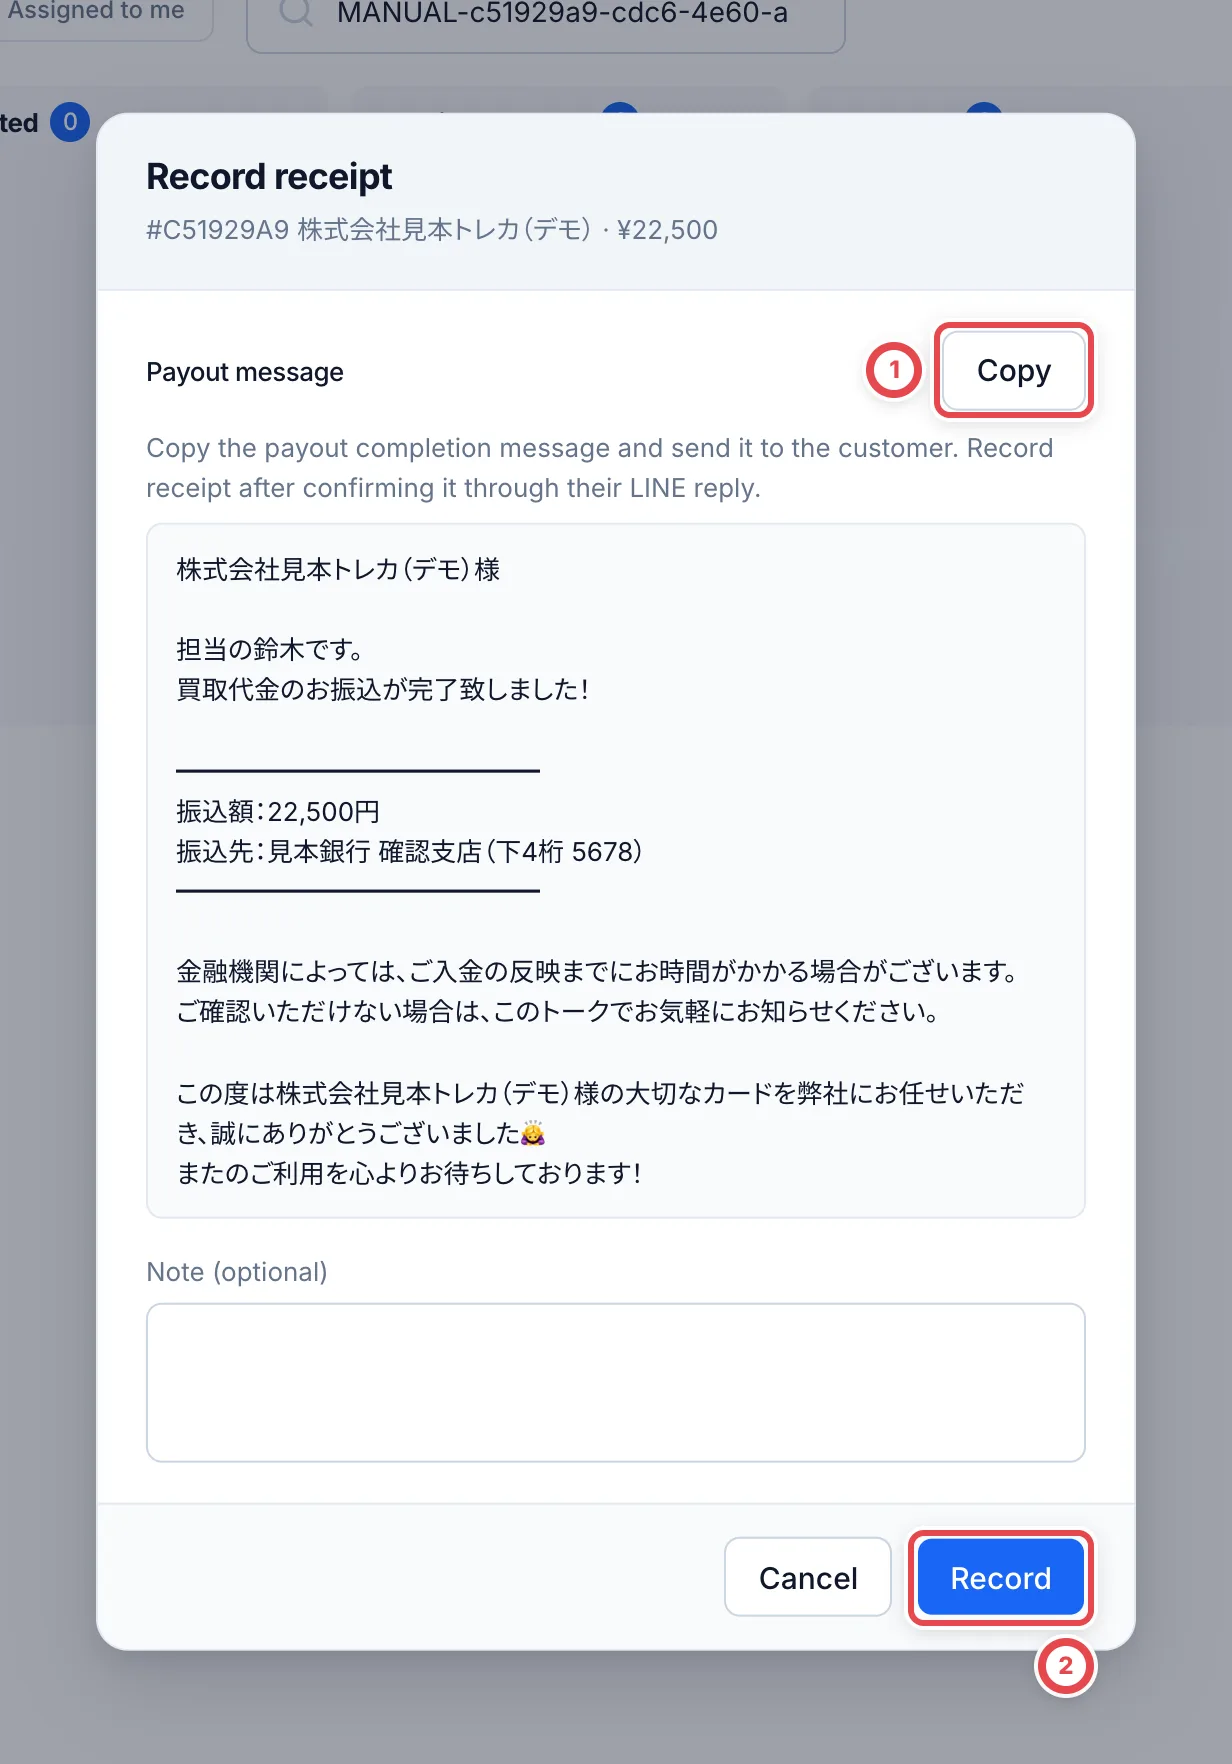 Until you record receipt, the purchased cards stay **Awaiting receipt** in Inventory. You can still print labels, put the cards away and move them between shelves at the same site. Shipping out and transfers to another site become available after you record receipt.
### Check the cards are in stock
Switch the sidebar to **Inventory** and open **Receipts**. Use the tabs at ① to see which stage each card is at. Cards whose receipt you recorded move to **To receive**. Print labels with **Print QR labels** at ③ and put the cards away.
Choose a stage with the tabs in ① and filter in ②. Print labels for the selected cards with ③.
## When something goes wrong
| What's happening | What to check and how to fix it |
| ------------------------------------------------------------------------------ | -------------------------------------------------------------------------------------------------------------------------------------------------------------------------- |
| You can't find the card in the search | Search again with part of the card name or just the number. If it still doesn't appear, it isn't in the card catalog. You can't receive or buy it, so contact your admin. |
| You can't enter a certification number | Set the line's quantity to 1, and choose a third-party grade such as PSA 10 under the grade. |
| You confirmed a receipt slip by mistake | Select the affected cards on the receipt and cancel their registration. Registering them again creates new units and labels. |
| **Not in store** isn't shown | Online buying is turned off for your shop. Ask your admin. |
| **Enter final appraisal** doesn't appear | Check that you recorded the shipping instructions. You also can't go on while there are unidentified items or unresolved discrepancy records. |
| The quote has expired | This only happens on deals that were given a deadline earlier. The deadline can't be changed on screen; contact the Toreca Cloud team. |
| You can't click **Create stock and payout** | ① in the image below shows what's missing. You can click it once you have identity verification, the customer's payout account, a dealer license and a site for the cards. |
| You can't approve a payout yourself | The applicant can't approve it. Ask another owner or admin to approve. |
| You can't use purchased cards for outbound orders or transfers to another site | They stay **Awaiting receipt** until you record receipt in step 10. You can move them between shelves at the same site before that. |
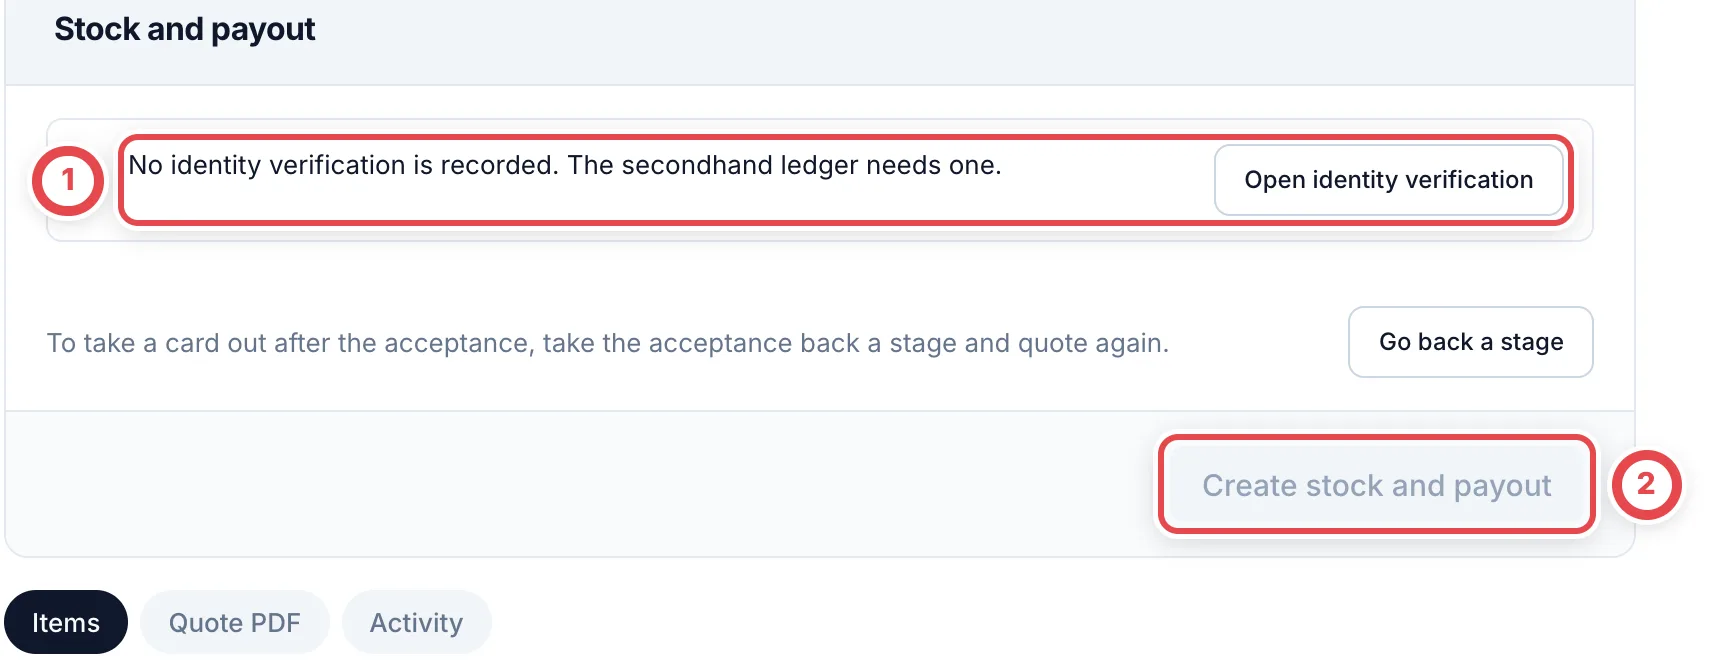 A deal without identity verification. Once everything in ① is done, you can click ②.
## Check purchase completion
After method 2, check [online purchase completion](/en/guides/purchase/overview#confirm-completion-and-continue). For partial acceptance or full decline, follow [final quote responses and returns](/en/guides/purchase/shipping-and-final). Method 1's receipt slip alone does not record purchase completion.
---
# Oripa demand
Source: https://docs.toreca-cloud.com/en/guides/purchase/oripa-demand
Oripa demand lists the cards that customers of your connected oripa apps have won but not yet received. Each line shows your stock and buy boosts next to the demand, so you can see which cards to buy and how many. You can add a buy boost for a missing card from this screen.
## What you need
- Integrations turned on, with an oripa app connected and sending its demand. See [Integrations](/en/guides/settings/partners) for connecting apps
- Permission to view buy boosts
- To add a buy boost, permission to work on purchases
Shops with integrations turned off, and members who can't view buy boosts, don't see **Oripa demand** in the sidebar.
## 1. Open the list
Open **Oripa demand**, below **Buy boosts** in the sidebar.
At the top, each partner shows when its demand last arrived, such as **FLIPONE · received Nov 8, 12:30 PM**. If a partner hasn't sent anything for 24 hours or more, a warning says **Nothing from (partner) for over 24 hours**. That partner's numbers may be out of date, so check with the partner that its sending hasn't stopped.
The list is sorted **Most short first**. Lines with the same shortage are sorted by the oldest request to ship.
## 2. Reading the columns
| Column | What it shows |
| --------------- | ------------------------------------------------------------------------------------------------------------------- |
| Card | Card name, number, set and rarity. With two or more partners, the line also shows which partner it came from |
| Grade | The quality the partner asks for, read as a Toreca Cloud grade (see the table below) |
| To ship | Cards customers asked to have shipped that have no card assigned yet. **since Nov 2** is the oldest request to ship |
| Held | Cards customers hold in the app that have no card assigned yet |
| Undrawn | Slots left in packs on sale that have no card reserved |
| Won 7d/30d | Wins in the last 7 days and the last 30 days |
| Stock | Your units in stock. Units held on an outbound order and sold units aren't counted |
| Short | To ship minus stock (never below 0). Shown in red when it's 1 or more |
| Restock request | The partner's request to restock: the quantity, the date it asked and its note |
| Buy boost | The card's buy boosts that haven't ended: the price, grade, quantity left and dates |
Grades are read like this, and stock is counted by the same grade.
| Quality the partner asks for | Grade shown | Stock counted |
| ---------------------------------------------------------------- | ----------------------------------------------- | ----------------------------------- |
| Raw Near Mint, Lightly Played, Moderately Played, Heavily Played | 未鑑定 A, B, C, D | Units of that grade |
| Graded (such as PSA 10) | PSA 10 and so on | Units of the same company and grade |
| None | Any grade | Every unit of the card |
| A quality Toreca Cloud doesn't have (Mint, Damaged, TAG 10…) | **Grade not matched** and the partner's quality | Every unit of the card |
Lines without a single card carry one of these labels. Neither counts stock, and their shortage equals **To ship**.
- **Any card**: the partner set only conditions, such as "Any SAR". The conditions appear under the name
- **Unlinked**: the card the partner sent isn't in the Toreca Cloud card master
## 3. Filter the list
Use **Filter** to narrow the list by game, **Short** (**Short only**) and **Restock request** (**Requested only**). The list shows 100 lines per page.
## 4. Add a buy boost
On the line for a missing card, press **Add buy boost** to open **Add a buy boost**. These fields start filled in:
- **Item**: the line's card
- **Grade**: only when the line matches exactly one grade. With **Any grade**, **Grade not matched** or two or more matching grades, it stays at **Any grade**
- **How many more to buy**: the shortage or the restock request quantity, whichever is larger, or 1 when both are 0
Enter **Boosted price (per piece)** and **Dates (Japan time)**, and check the filled-in values.
:::warning
Pressing **Add** lists the boost right away. The Oripa demand screen never adds a buy boost on its own.
:::
After adding, edit, pause or end the boost like any other. See [Buy boosts](/en/guides/purchase/purchase-boosts).
## Troubleshooting
| What you see | What to check and how to fix it |
| -------------------------------------------------------- | ------------------------------------------------------------------------------------------------------------------------------------------------------ |
| **Oripa demand** isn't in the sidebar | Integrations are turned off, or you don't have permission to view buy boosts. |
| **No oripa demand has arrived yet** | Your connected partners haven't sent their demand. Check with the partner. |
| **No demand right now** | The partners send their demand, but no card is missing. |
| **Nothing from (partner) for over 24 hours** | The partner has stopped sending. Check with the partner. Demand from a partner you disconnect disappears from the list. |
| **Add buy boost** is greyed out | It's an **Any card** or **Unlinked** line. Decide the card, then add it in [Buy boosts](/en/guides/purchase/purchase-boosts). |
| **Add buy boost** is missing | You don't have permission to work on purchases, or buy boosts are turned off. |
| There's no **Grade** field | Members who can't view settings can't choose a grade. The boost is added for every grade. |
| **There is already a buy boost for this card and grade** | A boost for the same card and grade hasn't ended. Edit the one in the **Buy boost** column in [Buy boosts](/en/guides/purchase/purchase-boosts). |
| You have stock but the shortage doesn't go down | Only units in stock count. Units held on an outbound order and units of another grade don't. **Grade not matched** lines count every unit of the card. |
---
# Online purchase workflow
Source: https://docs.toreca-cloud.com/en/guides/purchase/overview
Follow this workflow when customers send goods by post and respond to quotes and identity requests remotely.
## Which guide to read
| Current situation | Start here |
| ----------------------------------------------------------------------- | ------------------------------------------------------------------------------------------------------------------- |
| Ask the customer to submit a new request | [Intake form](/en/guides/purchase/intake-form) |
| Receive a LINE inquiry with photos | [Take a LINE inquiry through to a quote](/en/guides/purchase/line-intake) |
| Take a phone or email request, or start with goods already received | [Record a mail-in purchase manually](/en/guides/purchase/mail-in-to-stock#method-2-record-it-as-a-purchase-request) |
| The preliminary quote is presented; continue with the customer's answer | [Shipping and final appraisal](/en/guides/purchase/shipping-and-final) |
If the customer visits for a physical appraisal, use [In-store purchases](/en/guides/purchase/counter). A prior LINE inquiry does not change an in-person purchase into an online one.
## How an online purchase goes
| Step | What you do | Who | Deal status (main ones) | Screen you work on |
| ---- | ------------------------------------------------ | ----------------- | --------------------------------------------------------- | ------------------ |
| 1 | Take the request | The shop | New | Purchase requests |
| 2 | Appraise from photos and present a quote | The shop | Appraising → Quote sent | Quotes |
| 3 | The customer answers the quote | Customer | Accepted | Quotes |
| 4 | Check identity and ask for the cards | Customer and shop | Awaiting ID verification → Awaiting shipment → In transit | Shipping |
| 5 | Do the final appraisal on the cards that arrived | The shop | Received → Final appraisal → Final quote sent | Final appraisal |
| 6 | The customer answers the final quote | Customer | Final quote accepted | Final appraisal |
| 7 | Create stock and payout, then pay | The shop | Awaiting payout → Payout processing | Payment |
| 8 | Record the payout result | The shop | Purchased | Payment |
You don't pick a deal's status by hand. It moves to the next status as the result of what you do, such as presenting a quote or recording acceptance.
## 1. Take the request
The [Intake form](/en/guides/purchase/intake-form) creates a deal when submitted. For LINE inquiries, follow [LINE intake](/en/guides/purchase/line-intake) to link the friend to a customer and deal. For phone or email requests, select **Not in store** in **Add purchase request**. For goods already received, follow [method 2 of manual mail-in intake](/en/guides/purchase/mail-in-to-stock#method-2-record-it-as-a-purchase-request) to record the required stages.
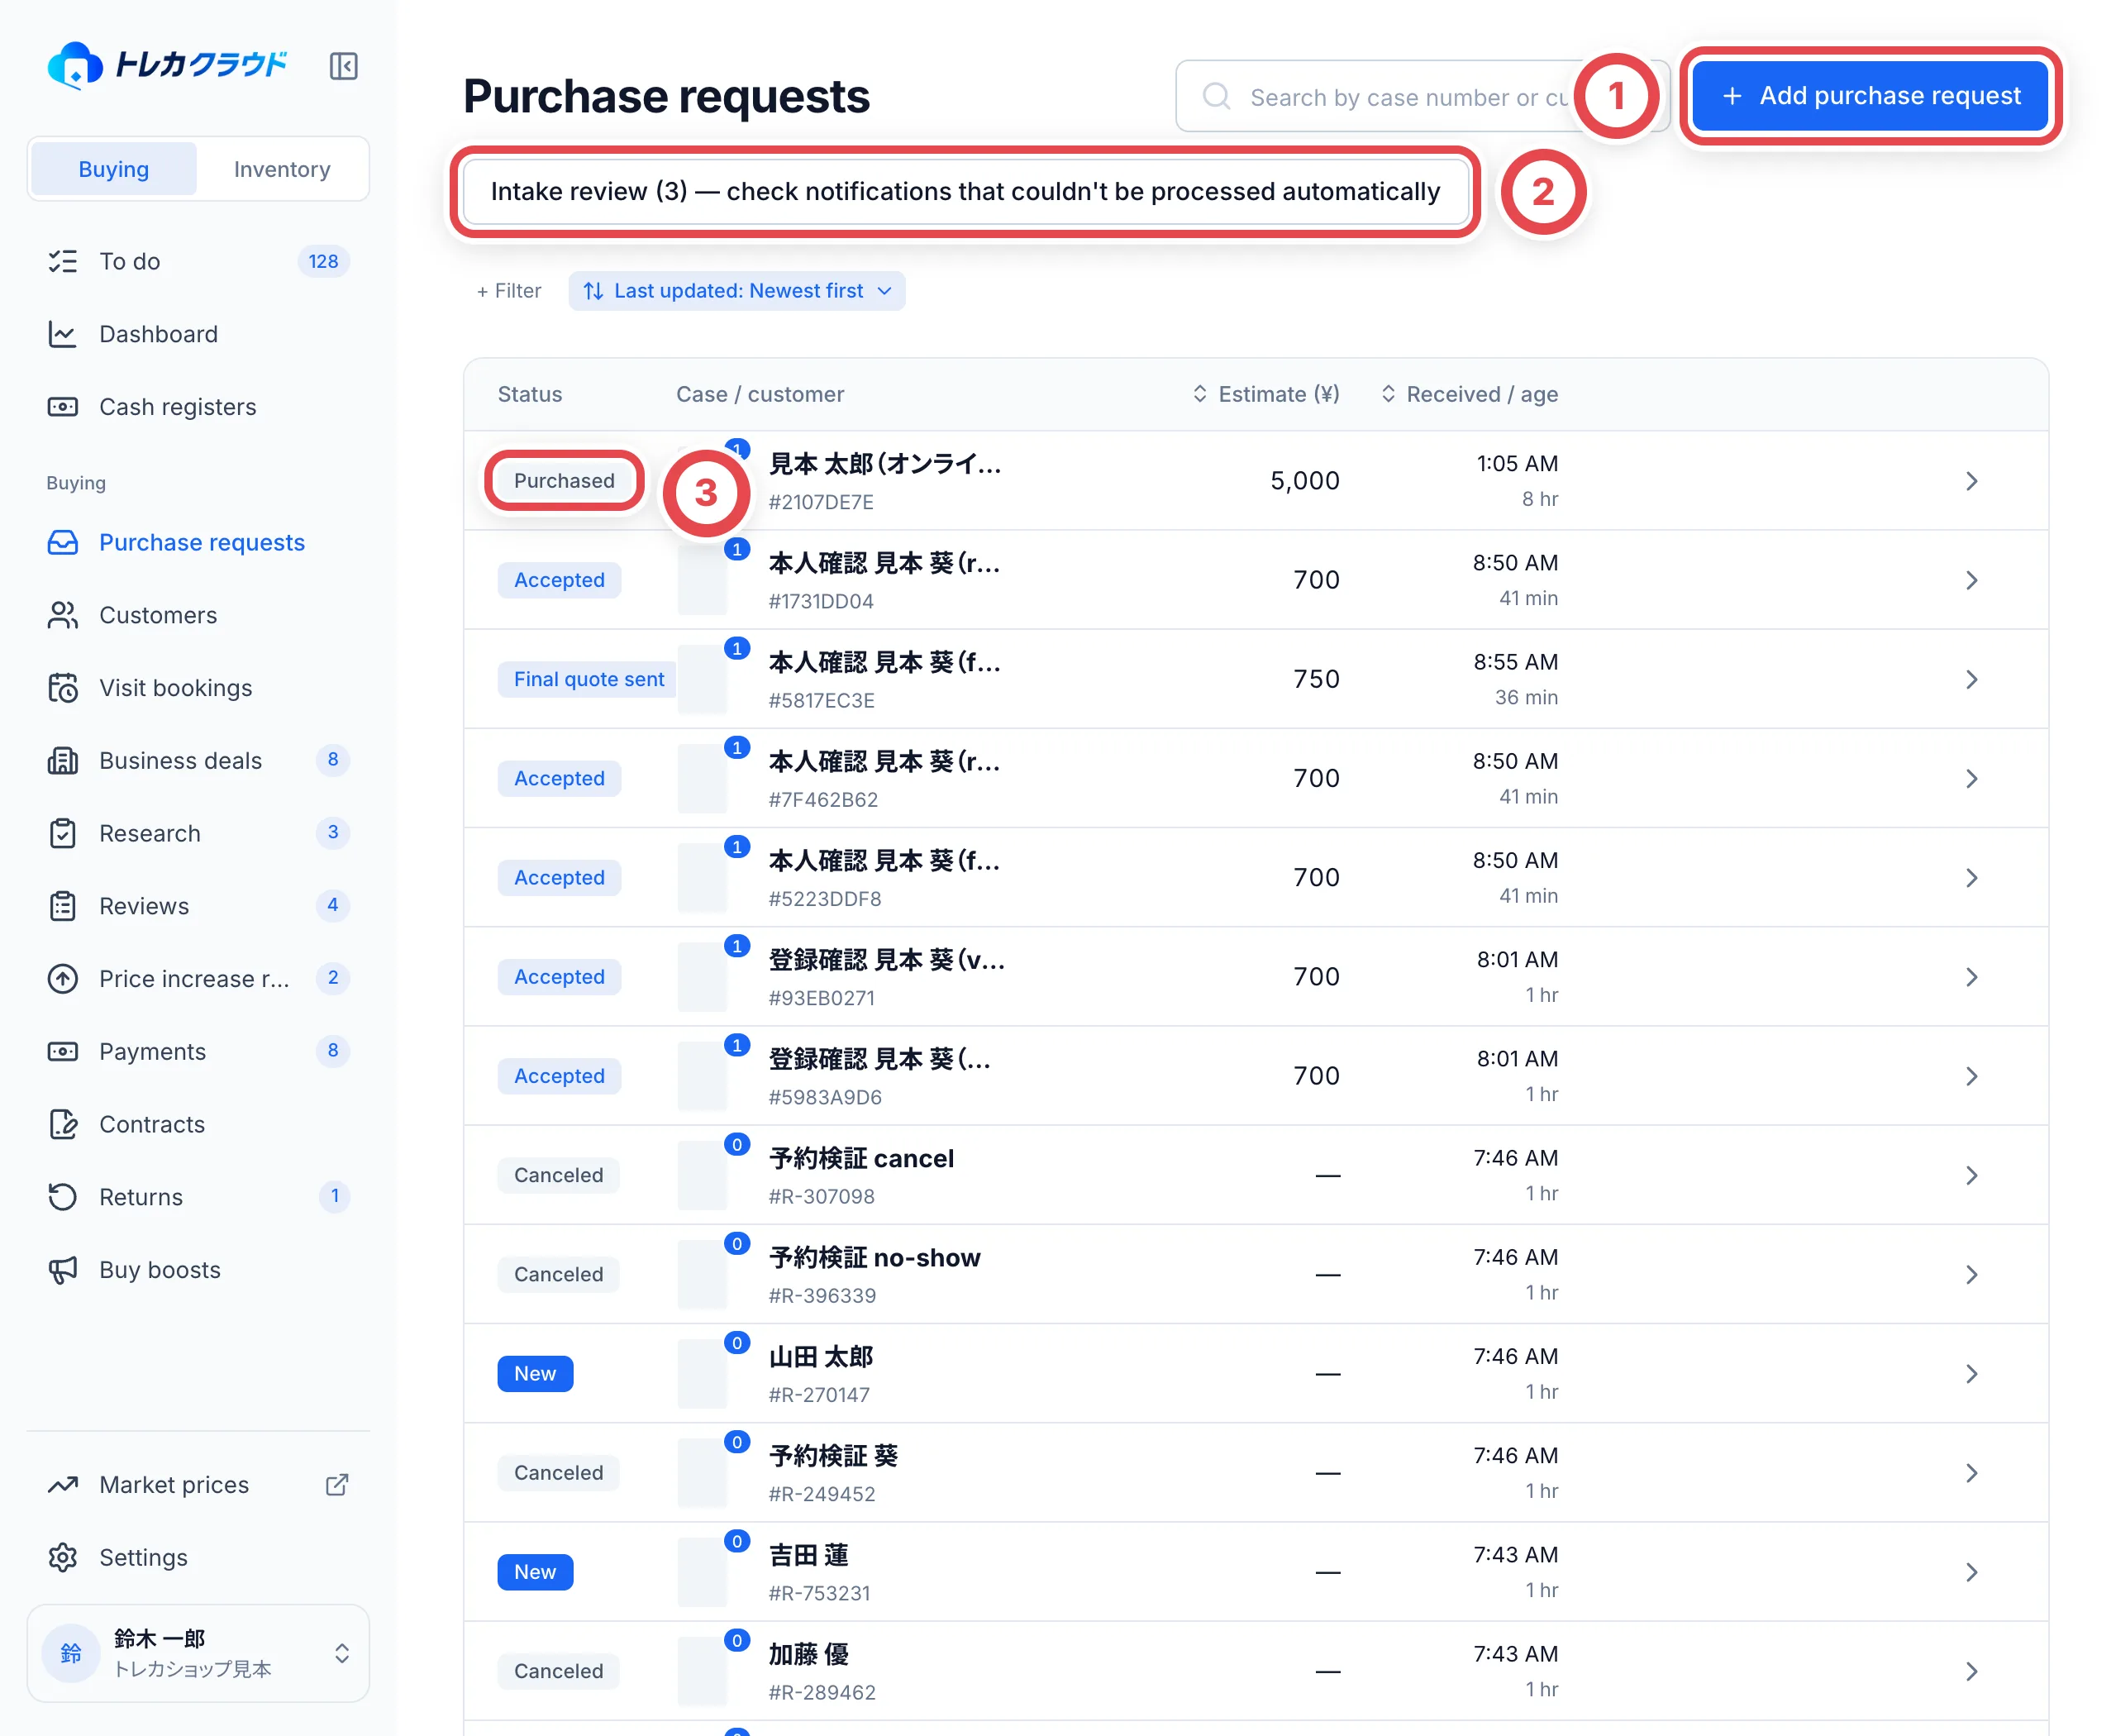 Add a manually received request, such as by phone, at ①. ② collects notifications that could not be processed automatically. The column at ③ shows the status each deal is in.
**Purchase requests** lists your shop’s deals, most recently updated first by default. Open it from **Purchase requests** in the sidebar. Click a row to open that deal's page.
→ For details, see [Customers and deals](/en/guides/purchase/customers)
## 2. How to read a deal page
A deal page looks the same at every stage. At the top are the deal number and the customer's name, with the deal status (①) next to it. Below that is the blue **Next step** box.
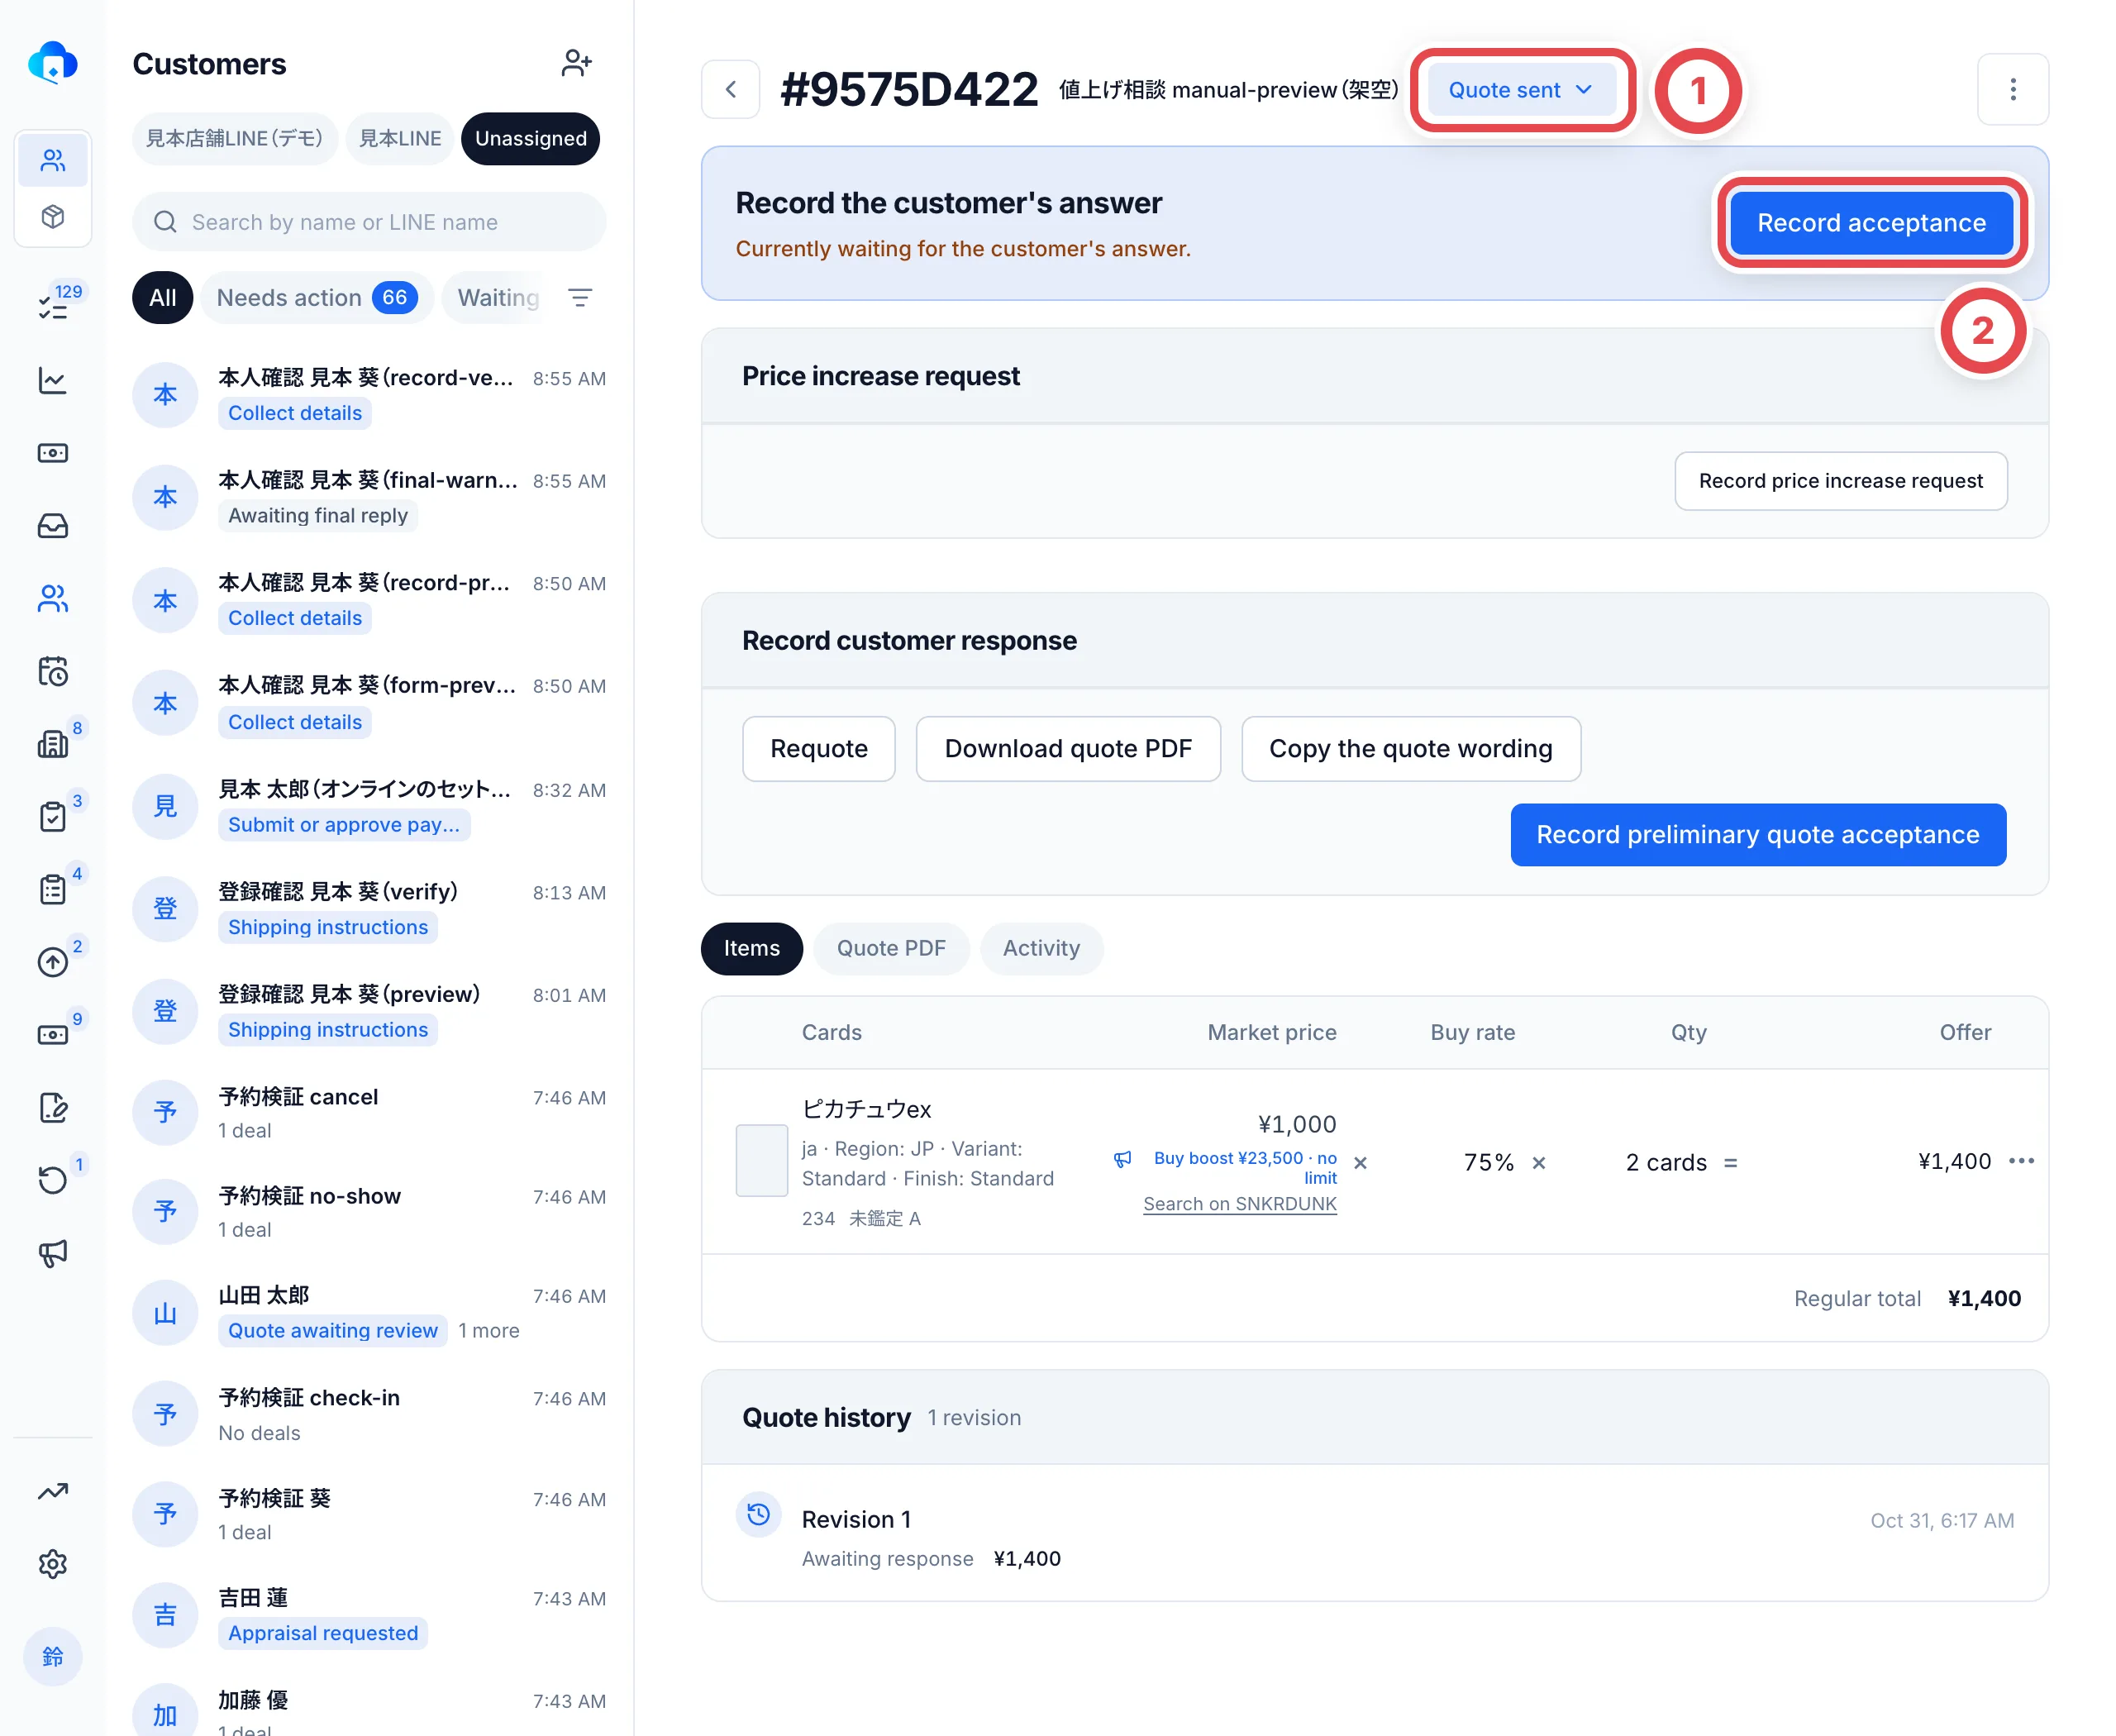 Click the status at ① to see what you can do next on this deal. Use the button in Next step at ② to go to the screen for the work you're doing now.
**When in doubt, look at Next step first.** It names the current task and provides a control to open it. If you are waiting for the customer or researcher, it names who you are waiting for. A prerequisite such as identity verification becomes the next task when it is needed.
 A preliminary quote waiting for the customer’s answer. ① is the next task, ② names who you are waiting for, and ③ opens acceptance recording.
Click the status at ① to see a list of what you can do next on this deal. An action you can record here, such as recording acceptance, opens a recording screen when you click it. For an action done on another screen, the list says where to do it.
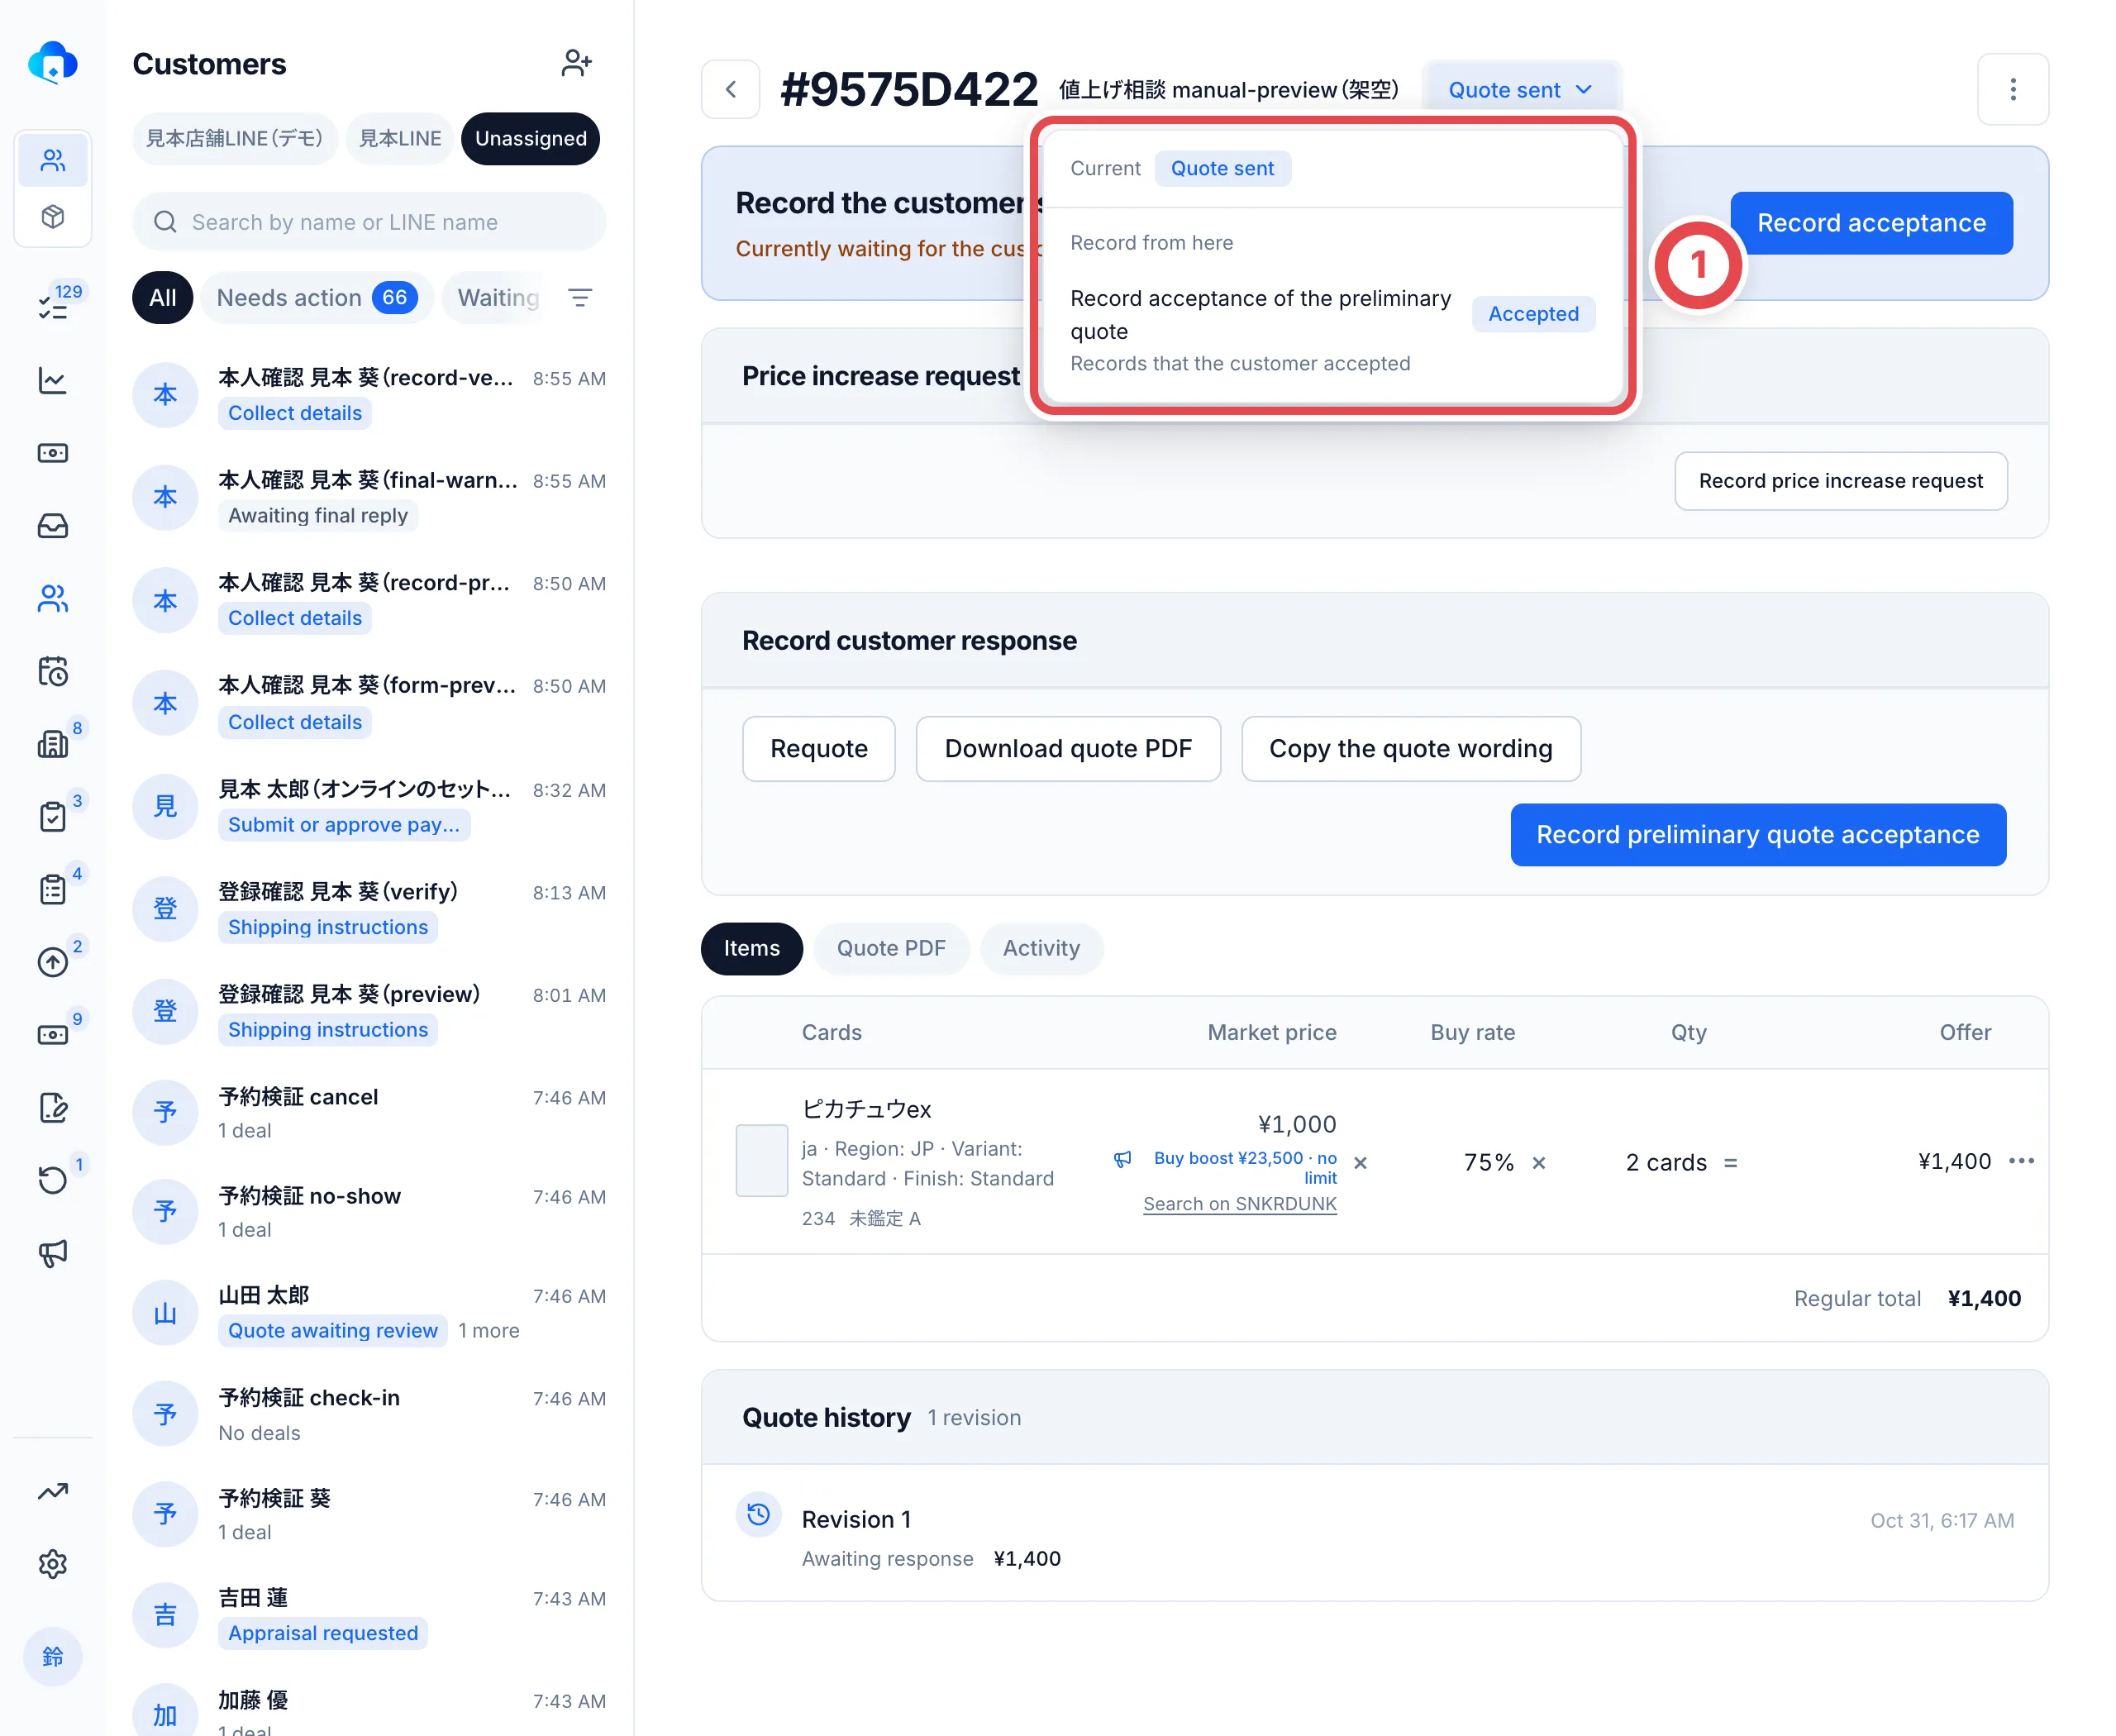 ## 3. Appraise from photos and present a quote
From the photos and description the customer sent, identify the cards, set an amount for each and present a quote. Send the quote on LINE, or tell the customer another way and click **Mark as presented**. When the customer accepts, record it at ①.
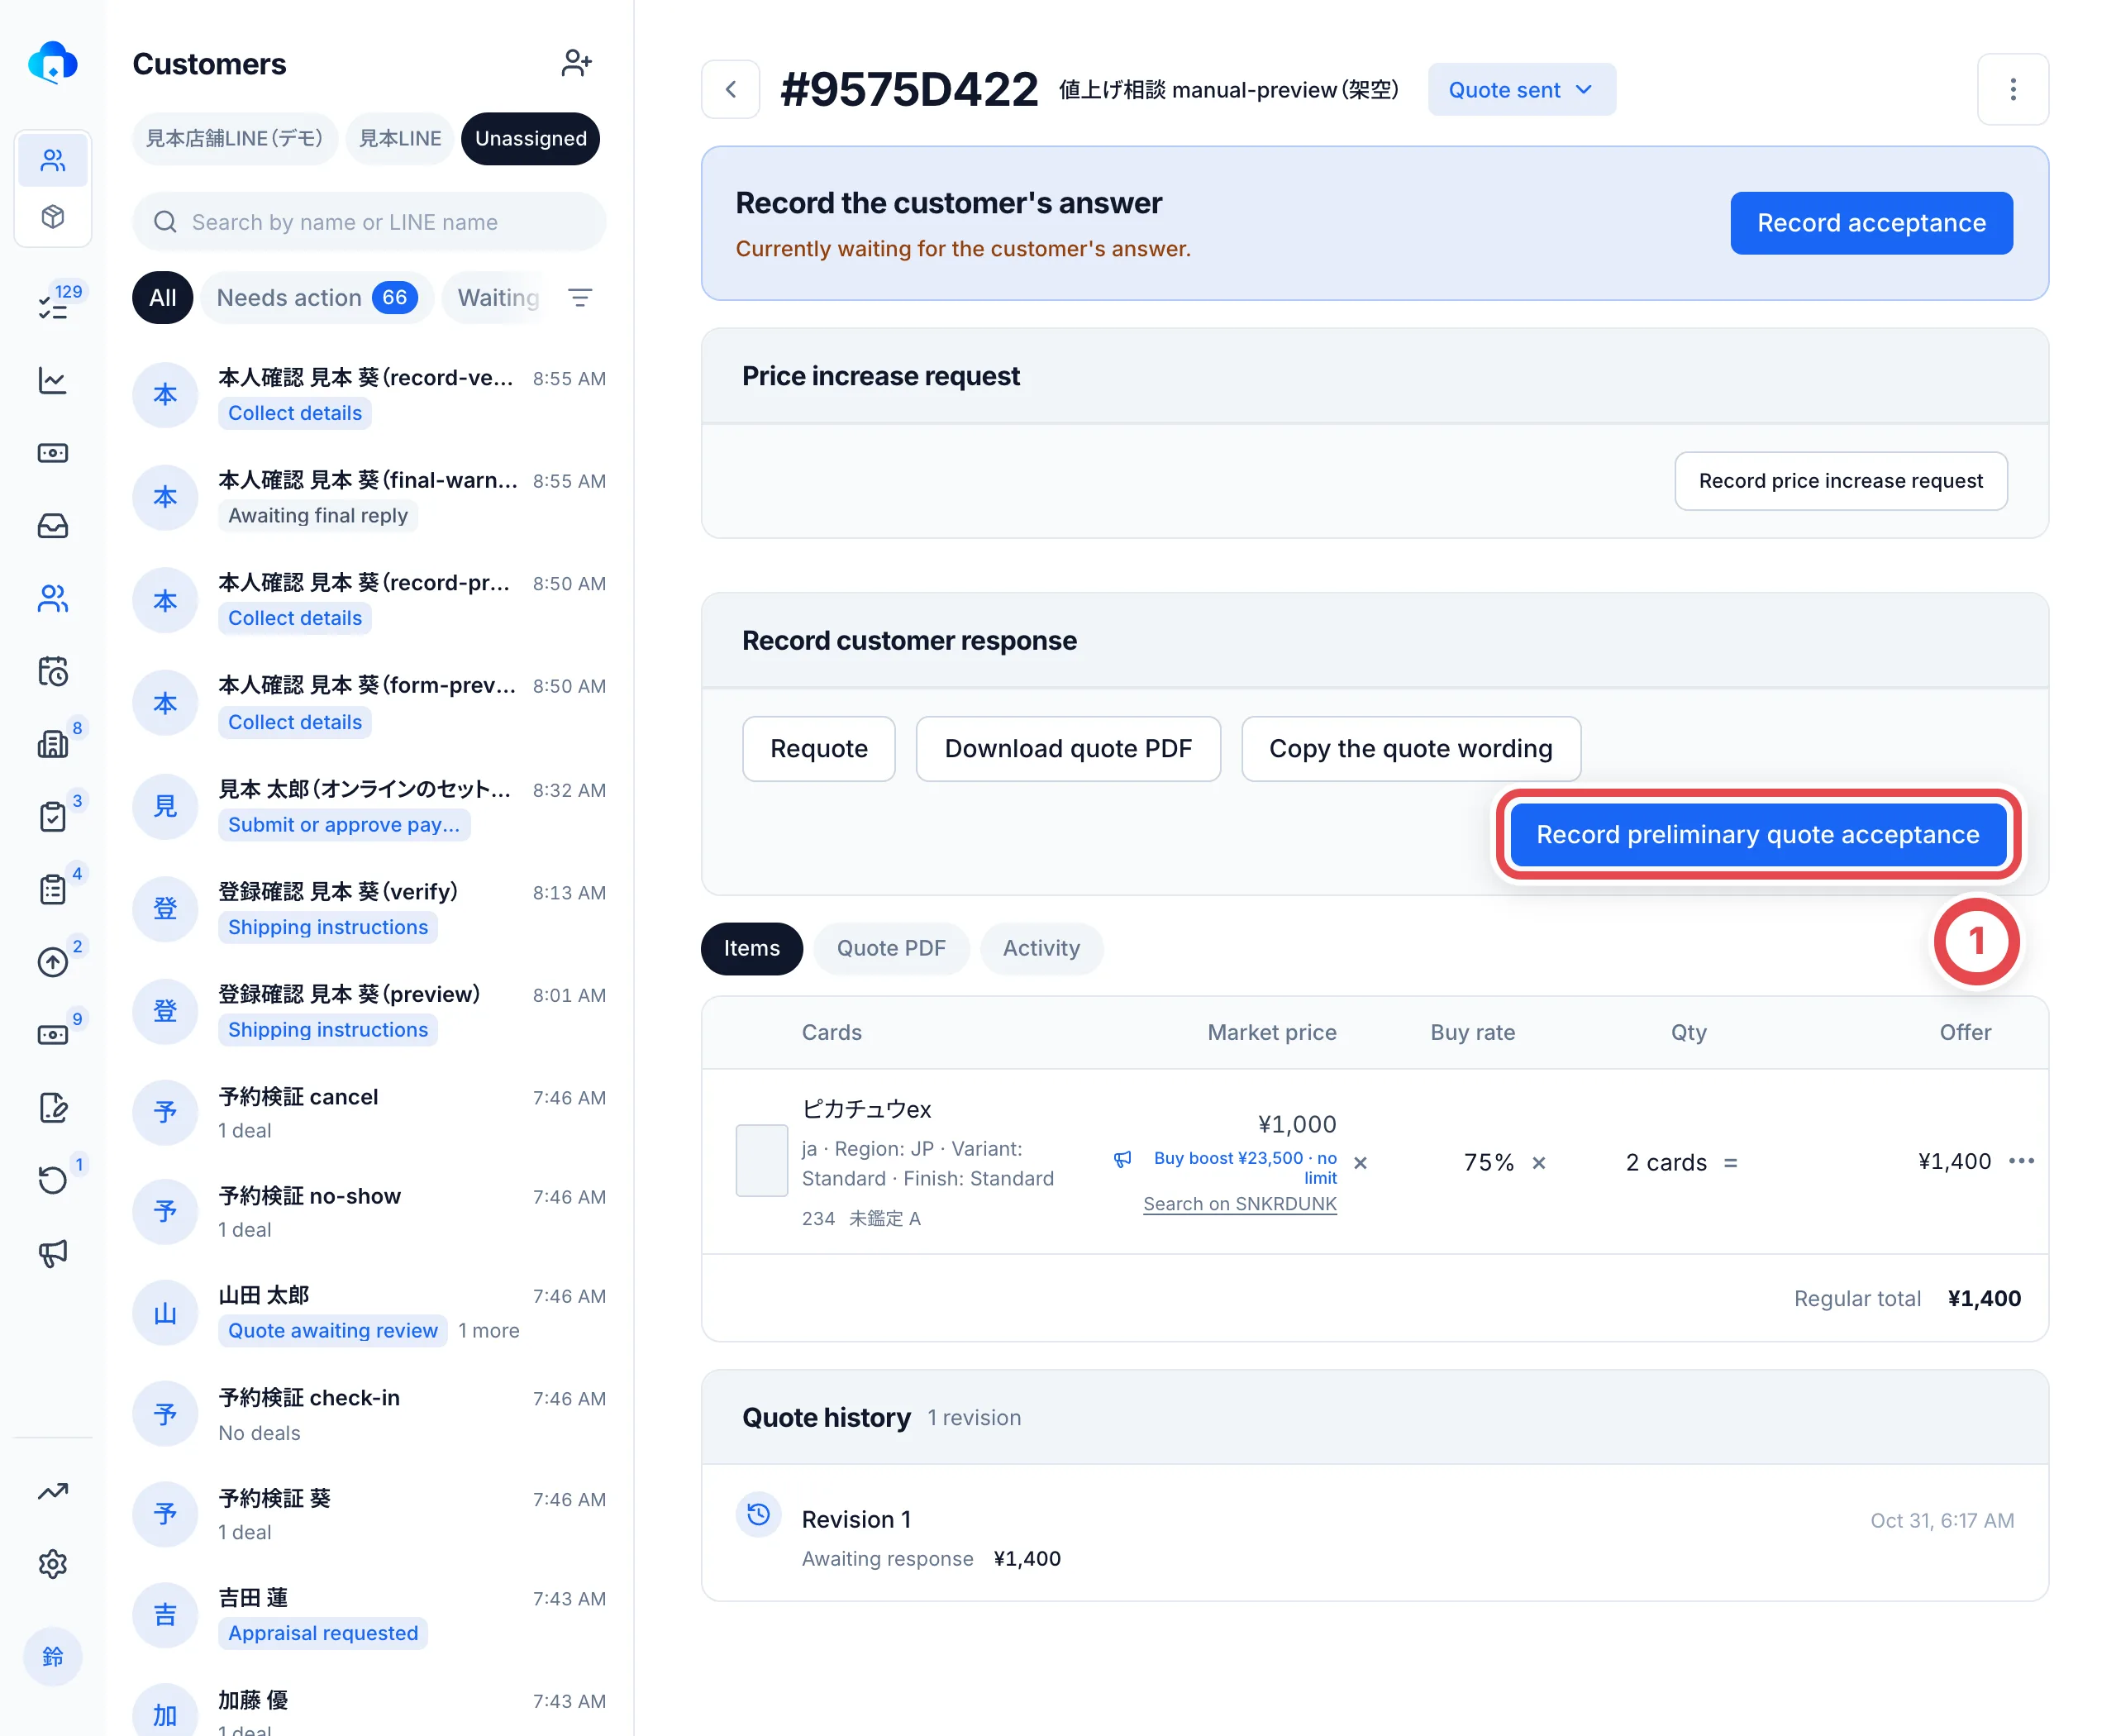 Cards with no clear market price go to a research request, and high-value cards are checked by another member in a review. You can also set an amount for a whole lot, or decide an amount for a group of cards together.
→ For details, see [Appraisals and quotes](/en/guides/purchase/appraisal), [Research and reviews](/en/guides/purchase/research-and-reviews) and [Change to a set price](/en/guides/purchase/set-price)
## 4. Check identity and ask the customer to send the cards
Give the customer who accepted the shipping address and the identity and shipping slip form. Shops using LINE can copy the message at ② and send it there. Otherwise, follow the [manual mail-in shipping instructions](/en/guides/purchase/mail-in-to-stock). After sending the instructions, click **Record shipping instructions** at ①. When the cards arrive, use **Enter final appraisal**, shown at that stage, to record receipt and arrival.
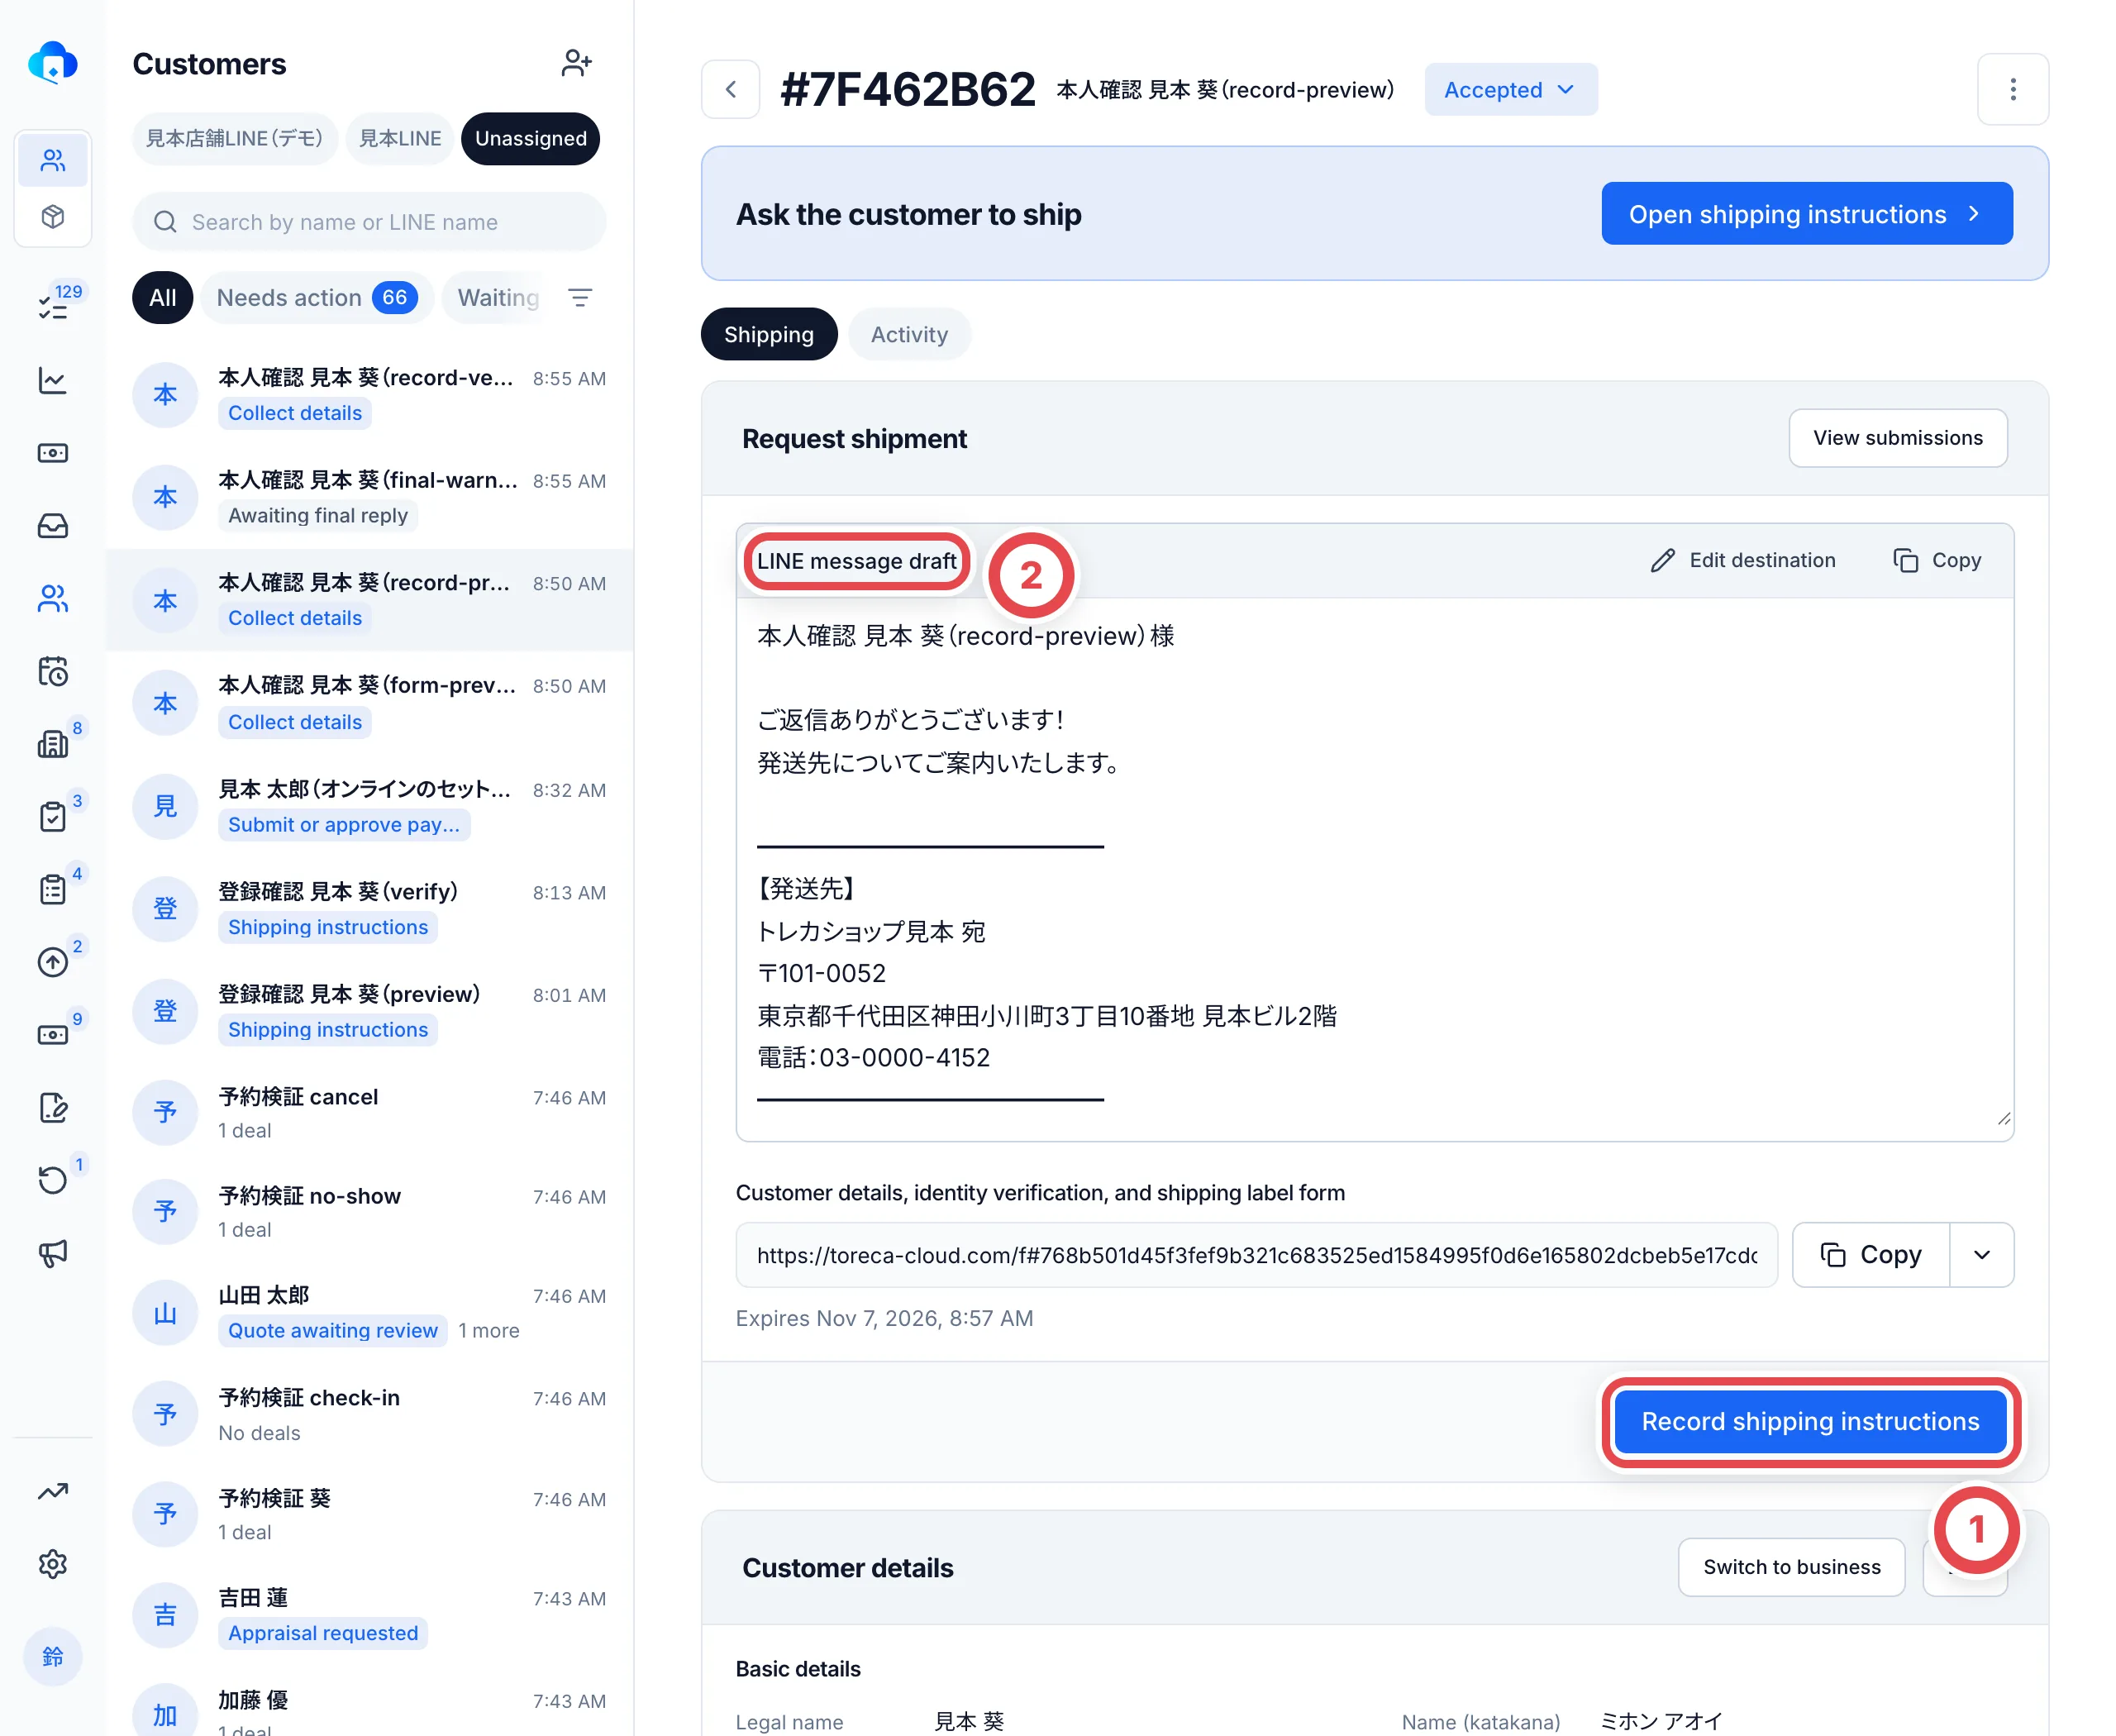 You check the documents the customer submitted through the form and record the identity verification. It can be done before or after the final quote is accepted.
→ For details, see [Shipping and final appraisal](/en/guides/purchase/shipping-and-final) and [Identity verification](/en/guides/purchase/identity)
## 5. Do the final appraisal on the cards that arrived
Check each card that arrived, enter its final amount, grade and number, save, and present the final quote. For missing cards, review arrival discrepancies and shortage records rather than entering a zero-price appraisal. For an individual card you cannot buy, use its row menu to mark it ineligible and record a reason. When the customer accepts, record it at ②. If something is missing, such as at ① (identity verification or a payout account), the screen tells you right there.
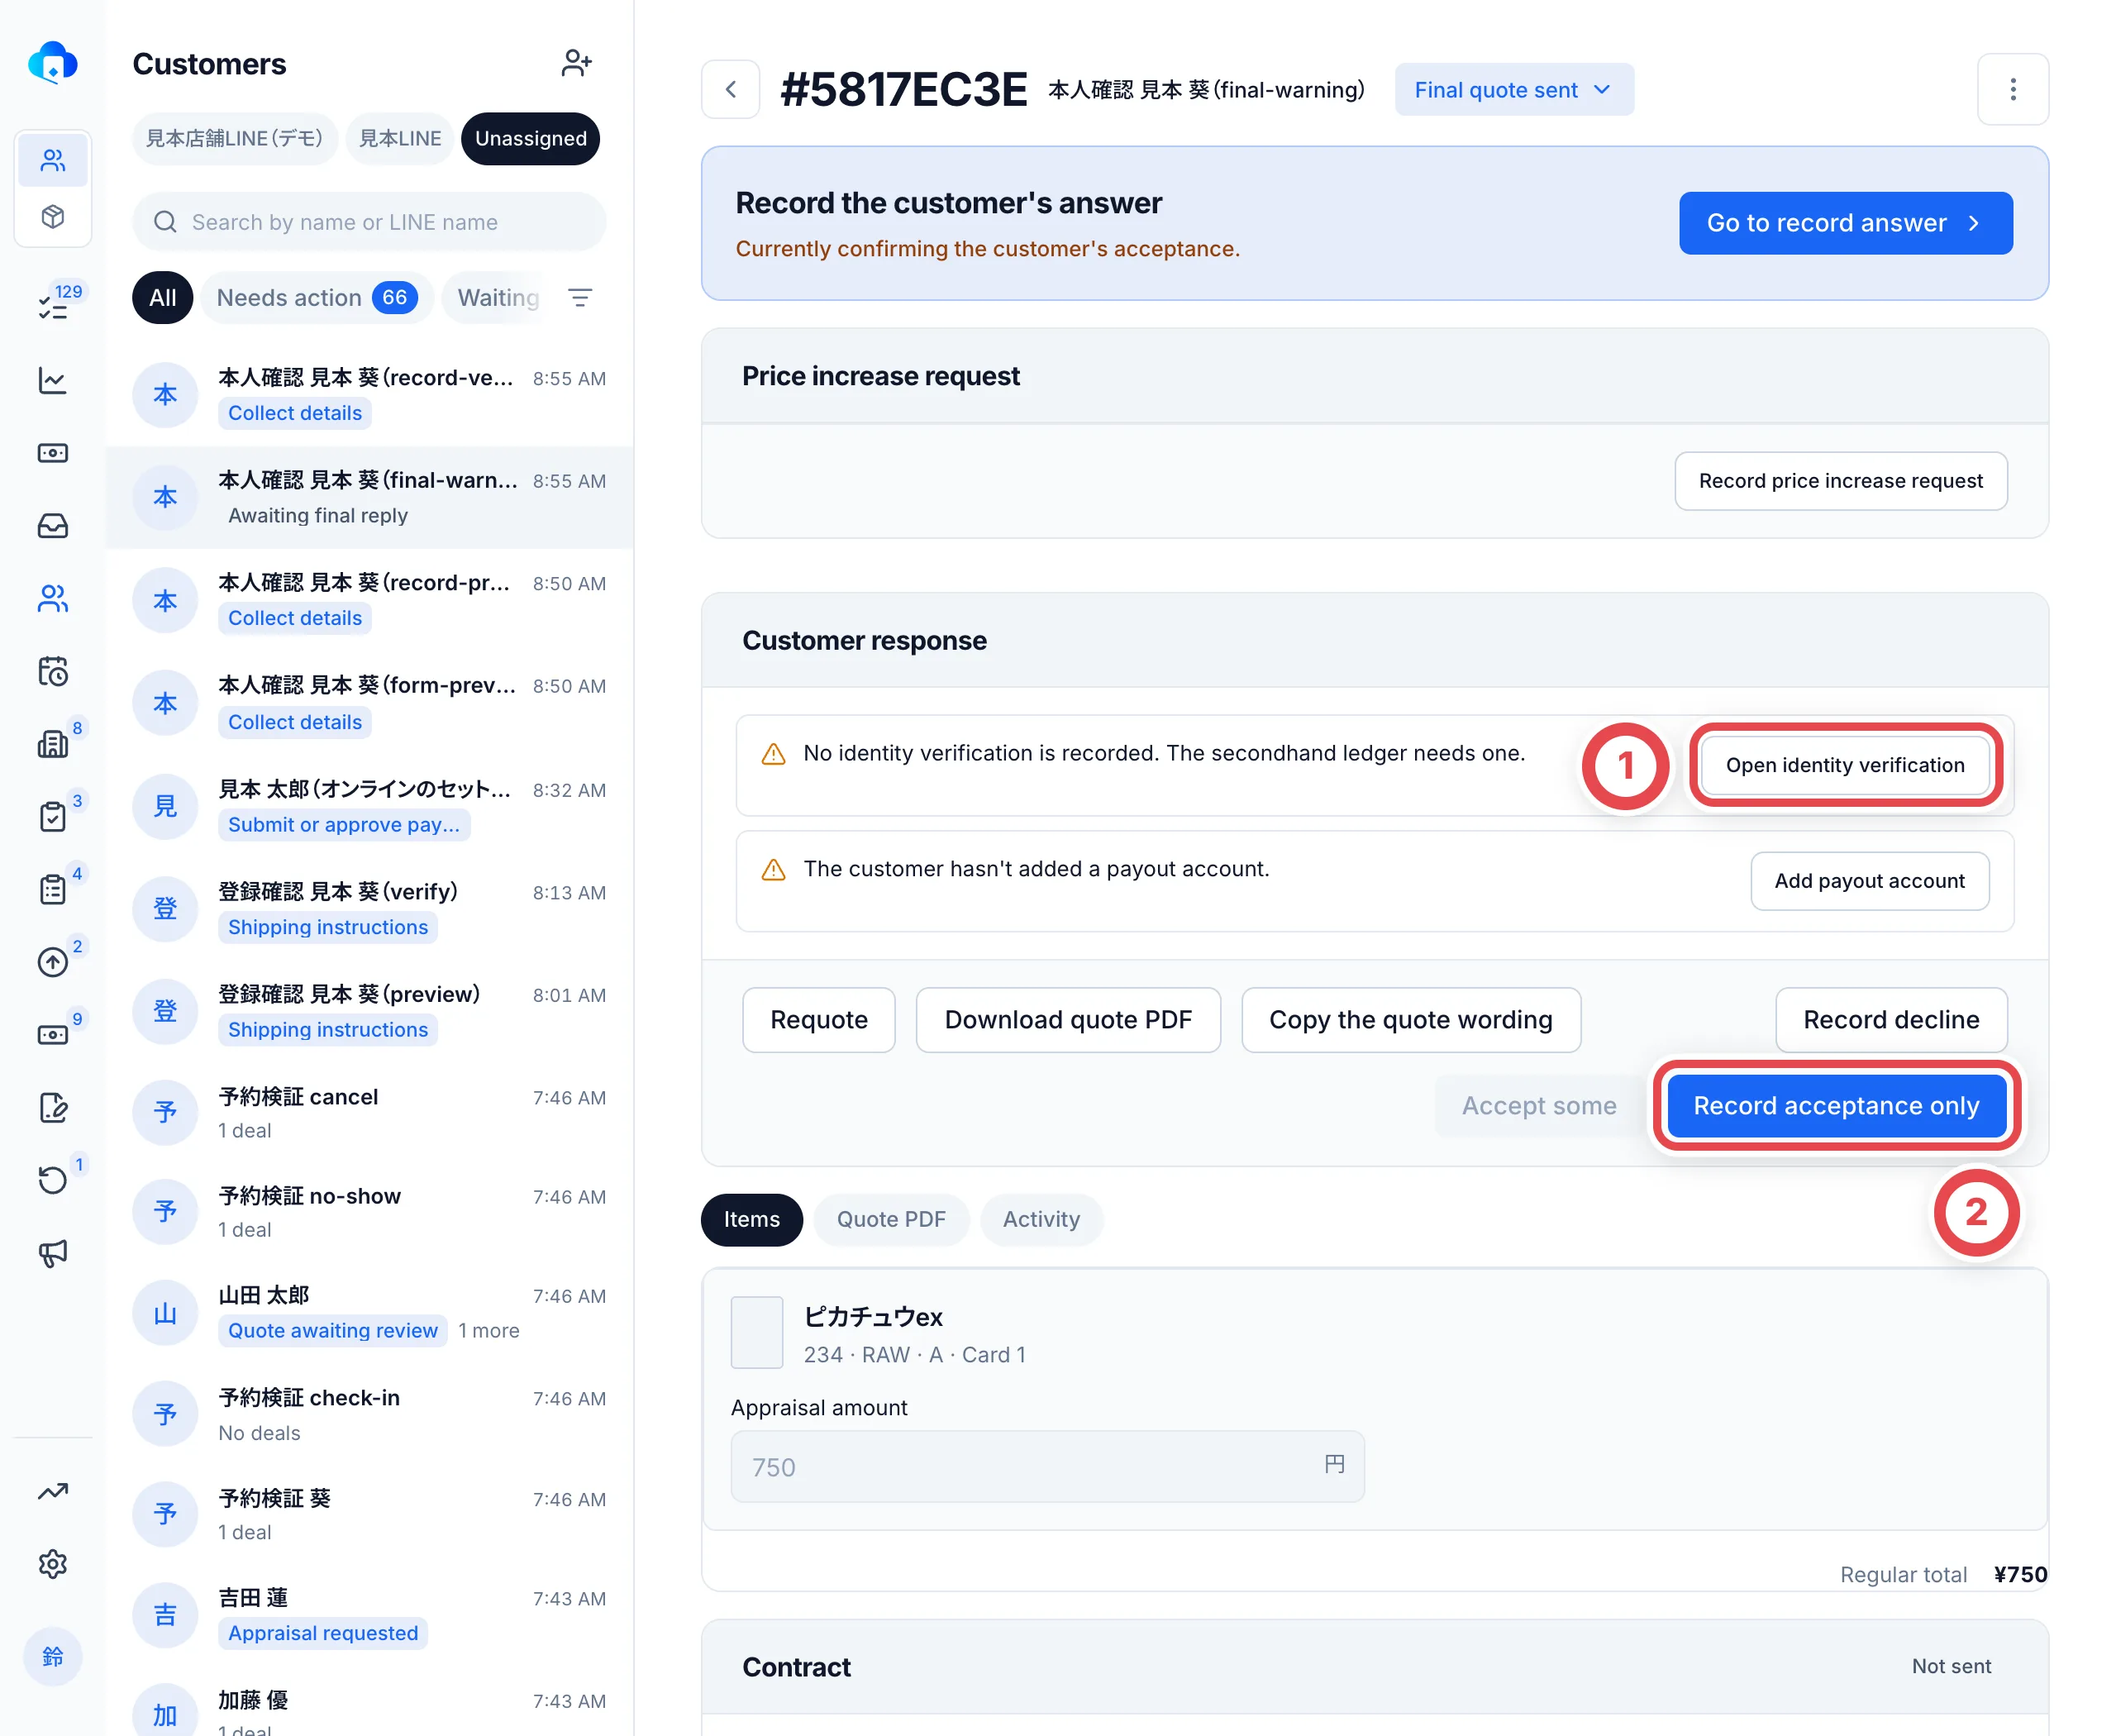 Once acceptance, identity verification and a payout account are in place, click **Create stock and payout**. The purchased cards go into stock, they're recorded in the secondhand ledger, and the payout is ready. Cards you didn't buy at final appraisal are sent back to the customer. See [Returns](/en/guides/purchase/returns).
→ For details, see [Shipping and final appraisal](/en/guides/purchase/shipping-and-final)
## 6. Pay the customer
On the **Payment** screen, check the amount and the payout account, then click **Submit payout** at ①. **After you submit, a different member approves it.** Once it's approved, make the transfer and record the result.
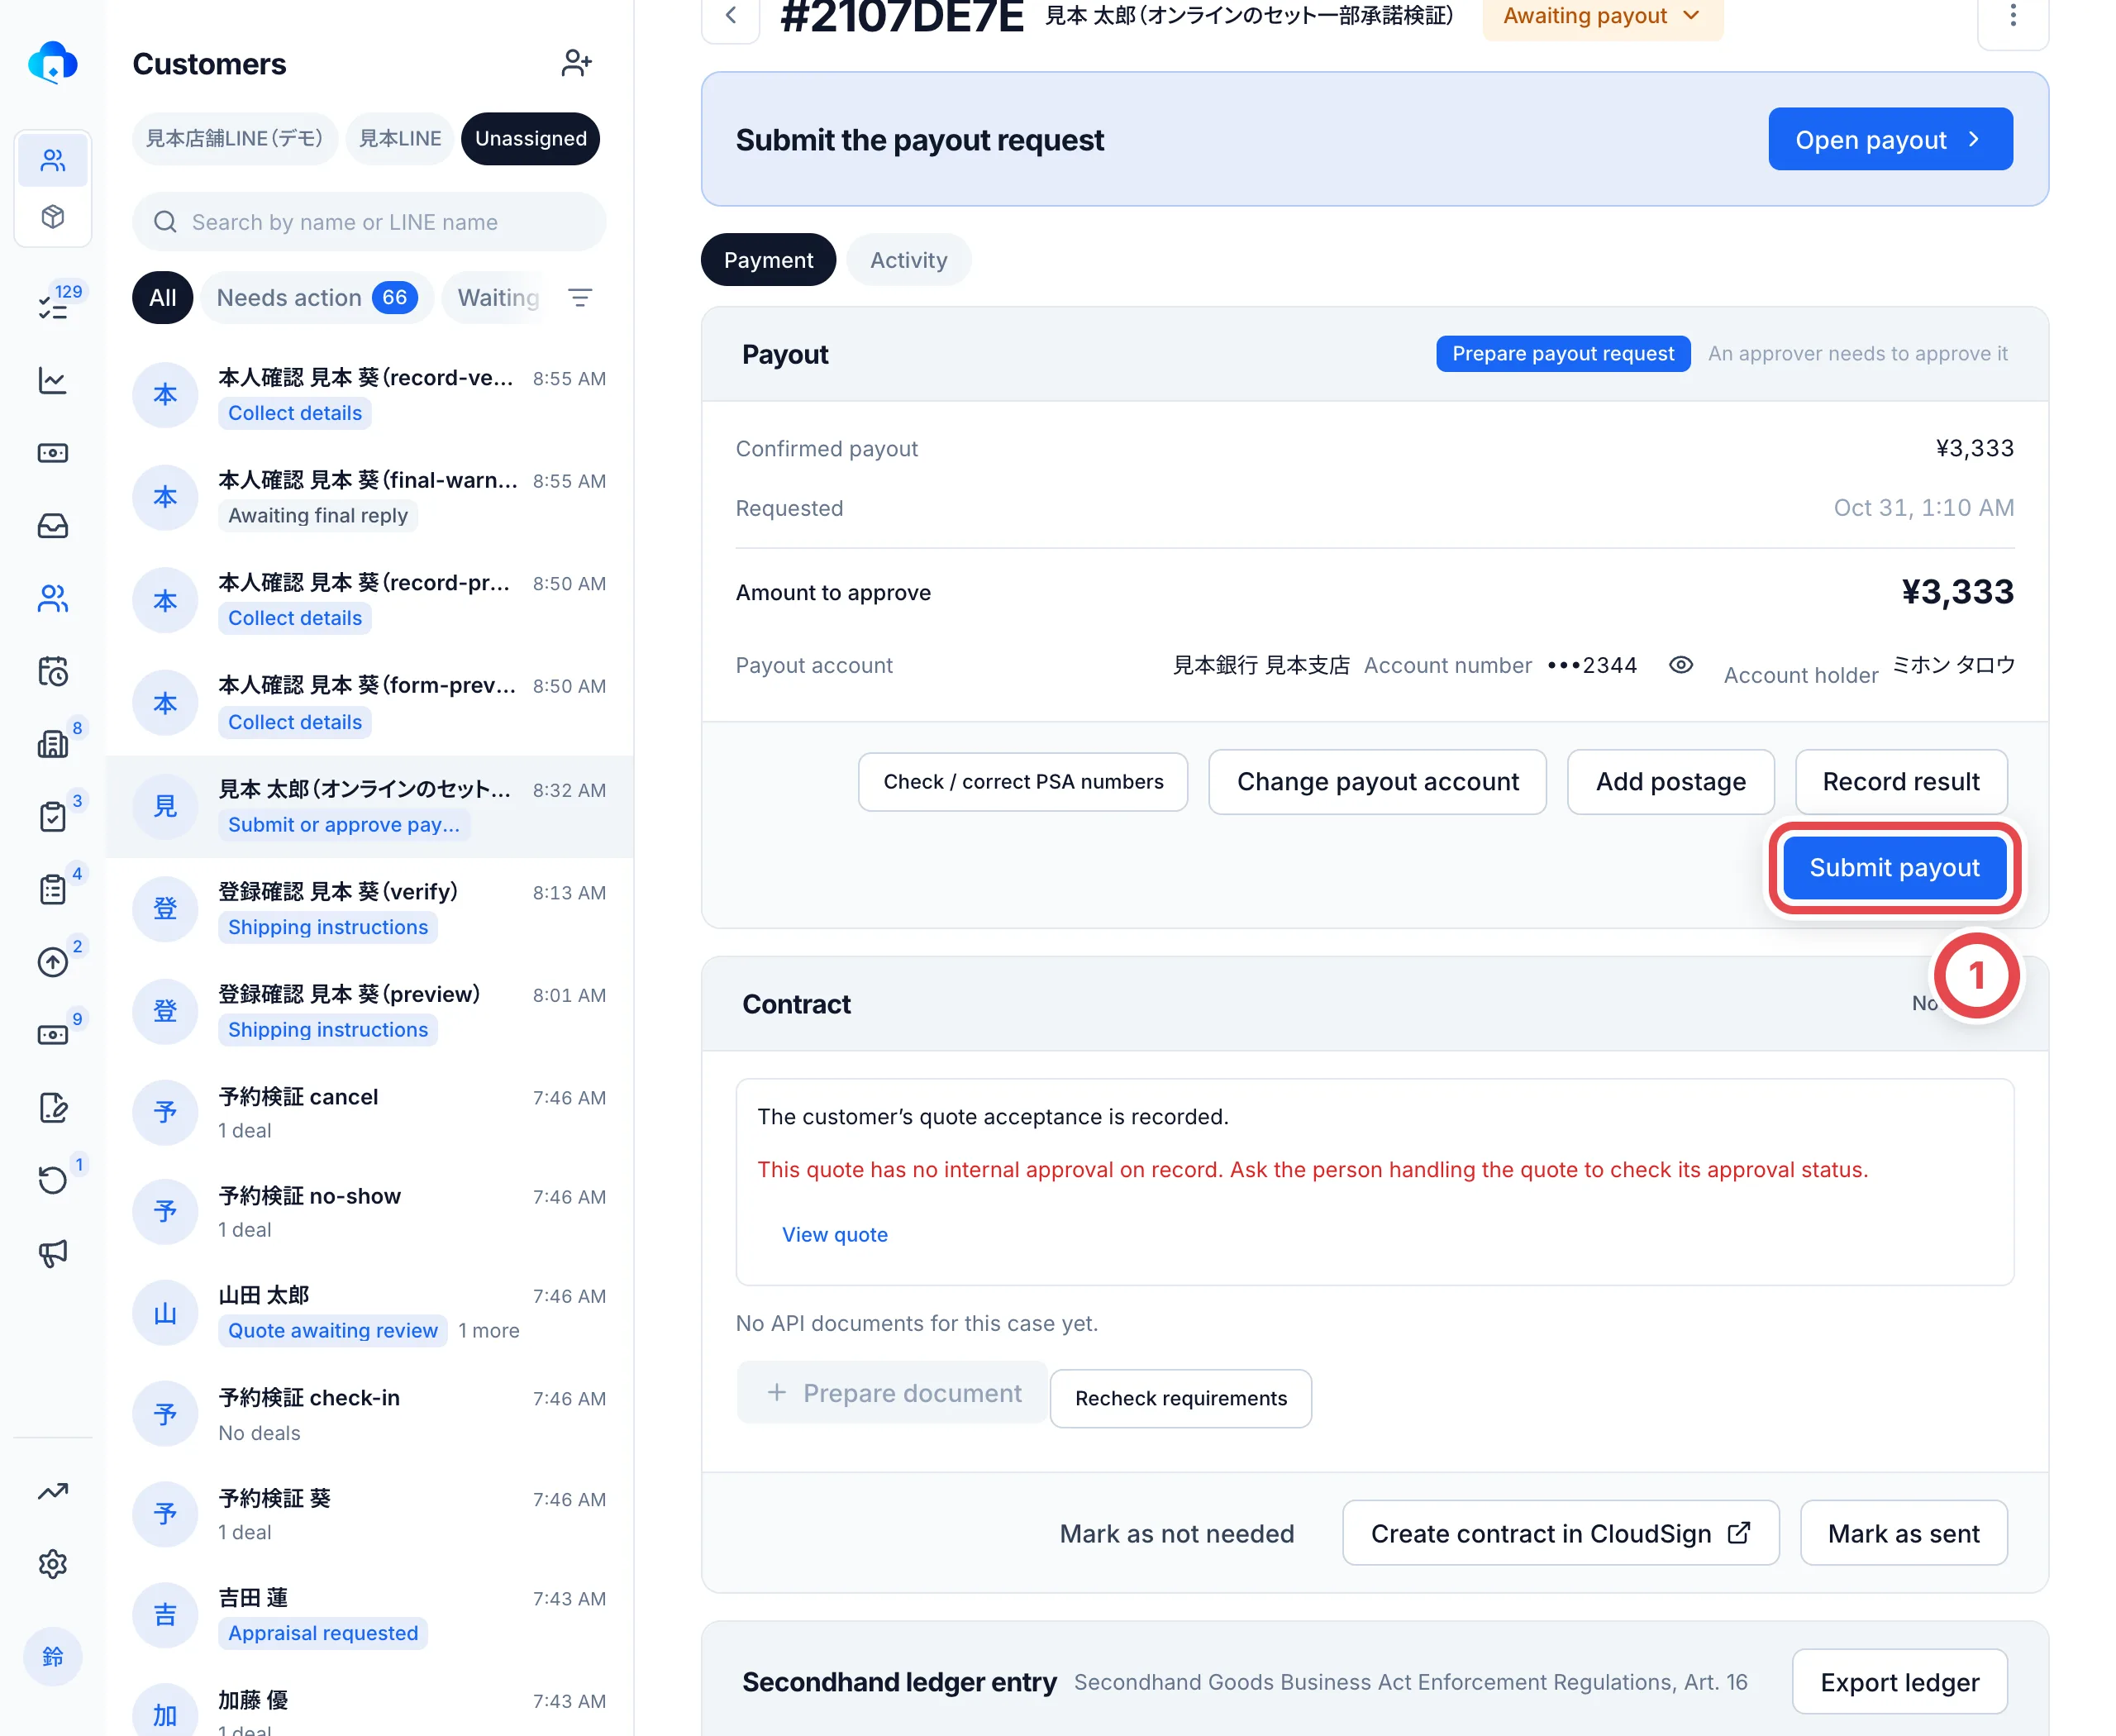 → For details, see [Payouts](/en/guides/purchase/payouts)
## 7. Purchased, and confirming receipt
When you record the payout result as **Succeeded**, the status at ① becomes **Purchased**. Last, record that the customer confirmed they received the money, using **Open payout** at ②. Once you record the receipt, the cards you bought can be sold or shipped out.
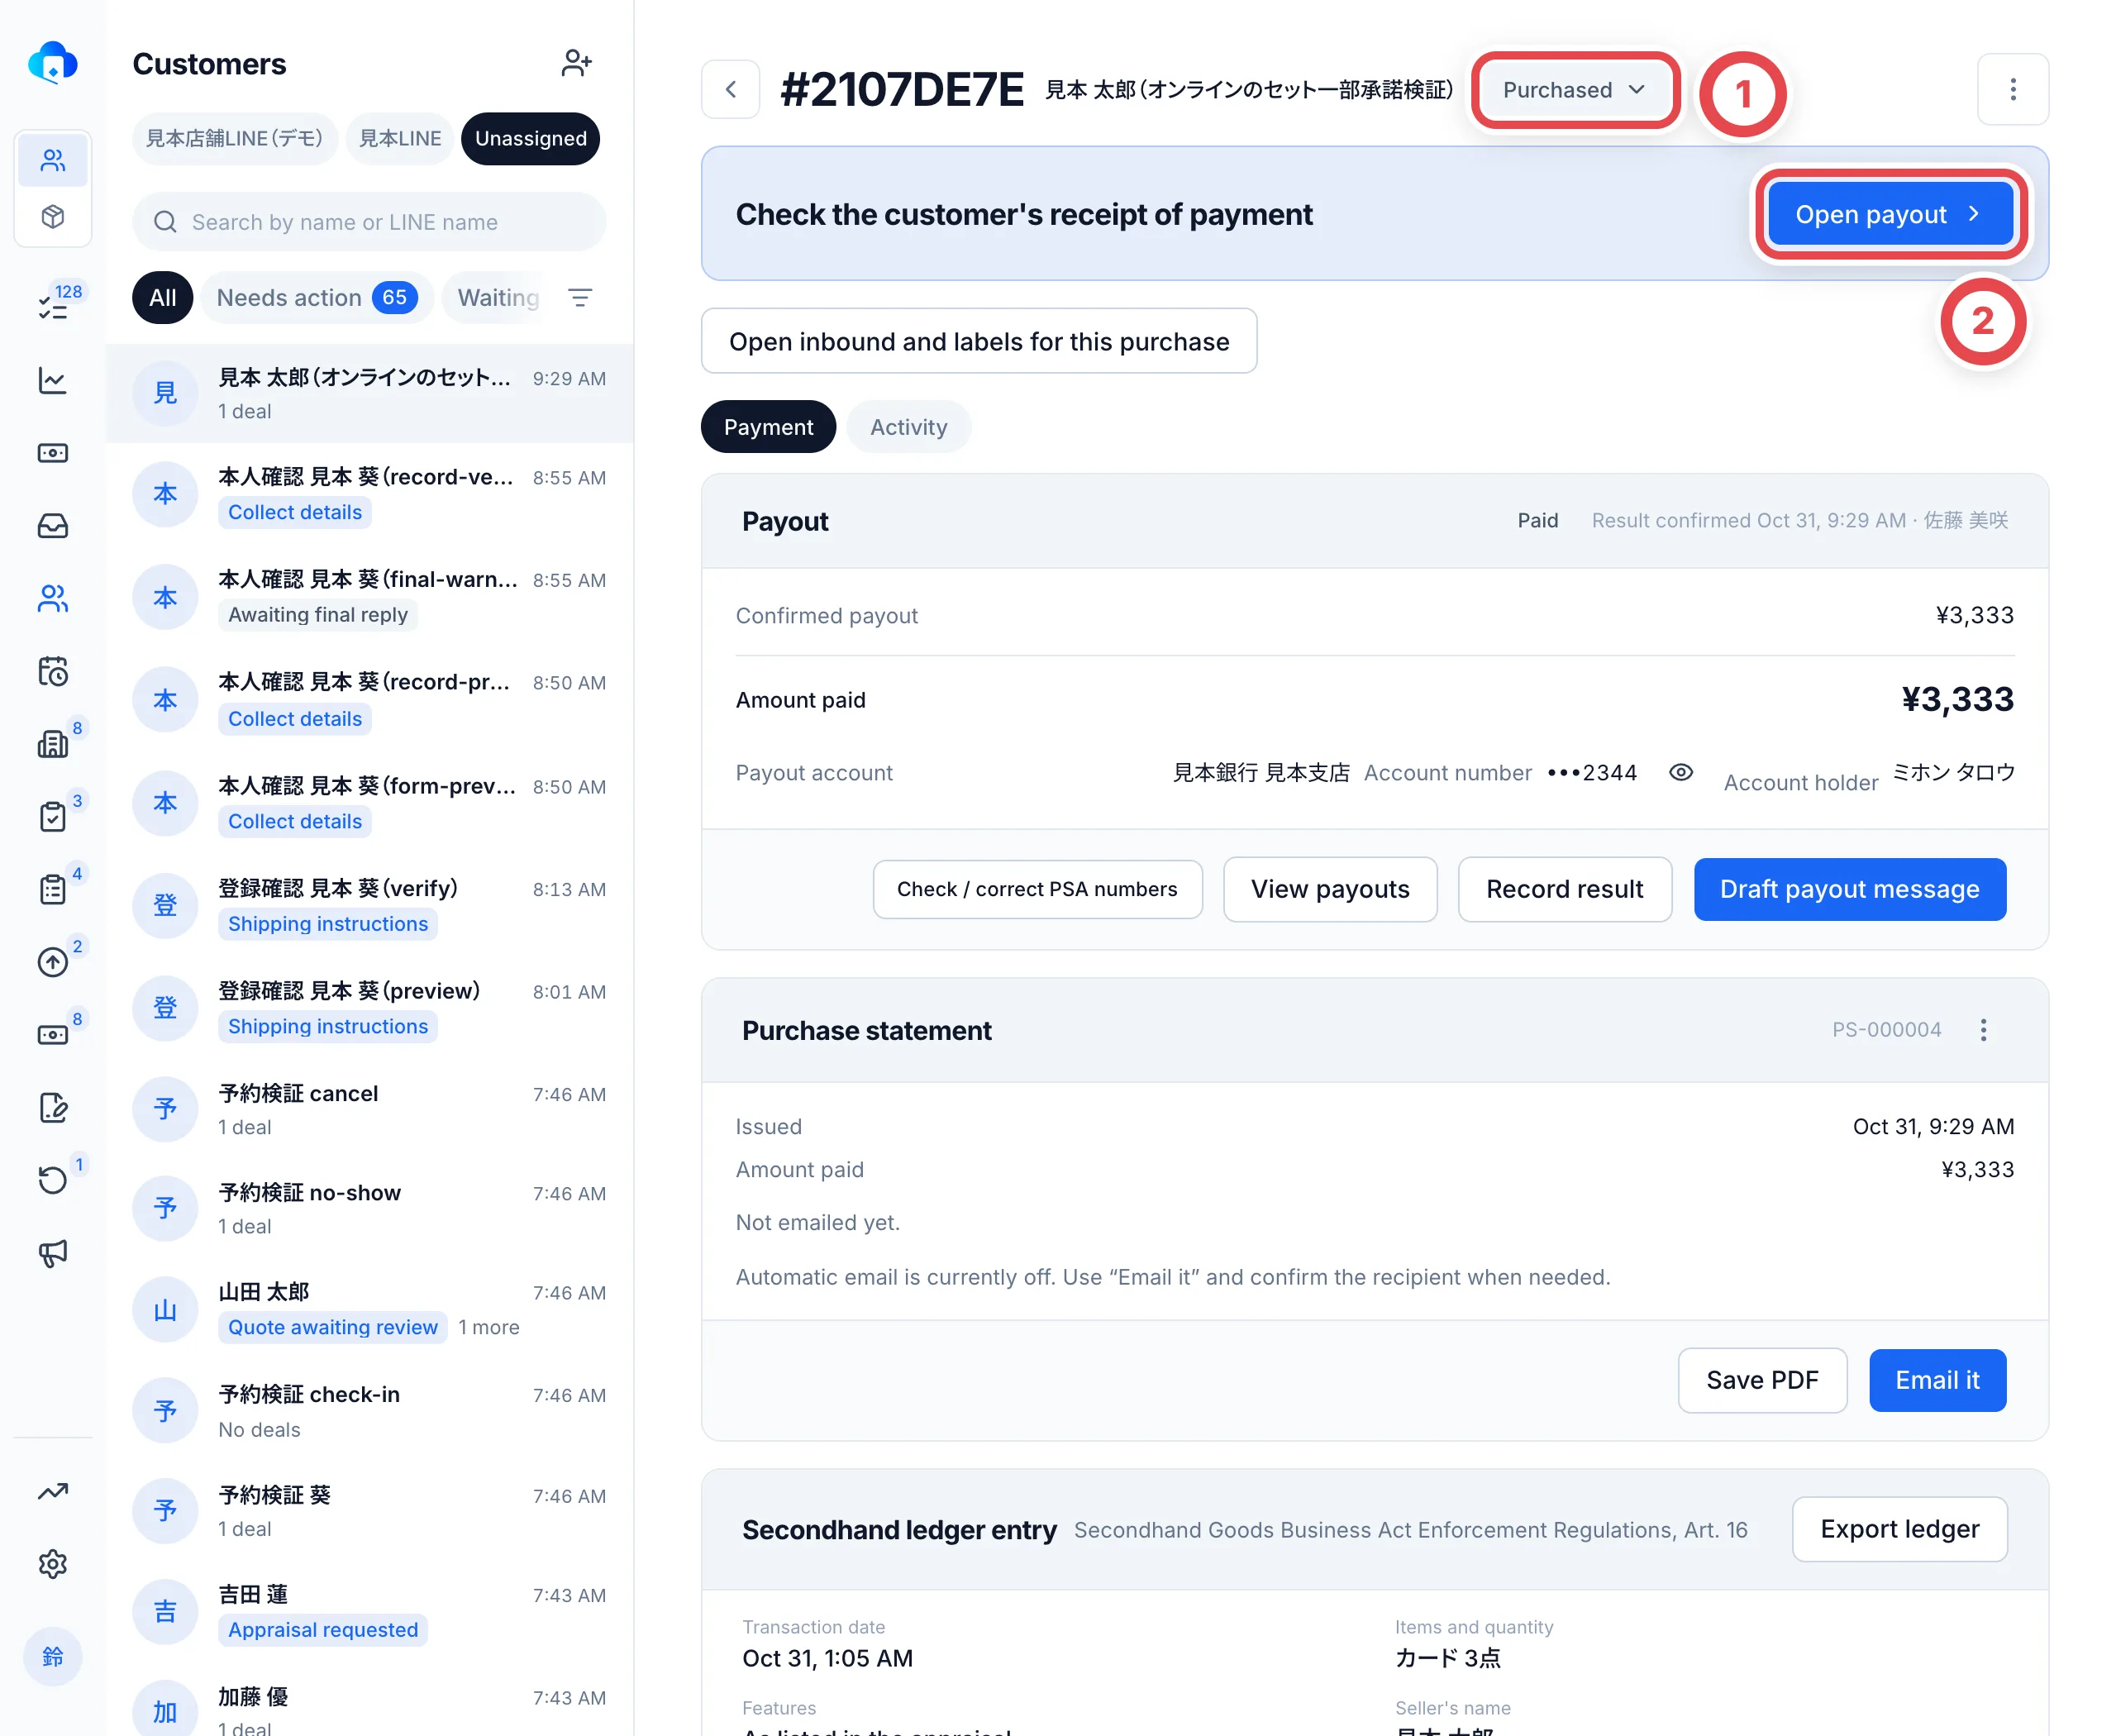 :::note
For online purchases, recording acceptance of the final quote does not complete the purchase. The deal becomes **Purchased** when you record the payout result as **Succeeded**. For a deal that needs a return, both shipment notice and return delivery must also be recorded before it completes.
:::
## Deal statuses and tabs
| Tab | Deal statuses that appear there |
| ------------------ | ------------------------------------------------------------------------------------------------------------------- |
| Appraisal requests | Requests just taken, where appraisal hasn't started yet |
| Quotes | New, Appraising, Quote sent |
| Shipping | Accepted, Awaiting ID verification, Awaiting shipment, In transit, Final quote declined, Arranging return, Returned |
| Final appraisal | Received, Inspecting, Reviewing discrepancies, Final appraisal, Final quote sent, Final quote accepted |
| Payment | Awaiting payout, Payout processing, Purchased |
A deal whose final quote was declined (Final quote declined) or that is being returned appears on **Shipping**, because you have to send the cards back to the customer.
## Troubleshooting
| What's happening | What to check and how to fix it |
| ------------------------------------------------------------- | ------------------------------------------------------------------------------------------------------------------------------------------------------------------- |
| You don't know what to do next | Look at **Next step** on the deal page. Follow the task shown, or check who you are waiting for |
| You want to change the status by hand | The status moves as the result of what you do. Click the status to open the list, then choose the action you can record next |
| You accepted the final quote but the deal isn't **Purchased** | Creating stock and payout, submitting and approving the payout, and recording the payout result are still to do. Check **Next step** for what comes next |
| You can't go on to **Create stock and payout** | Identity verification or the payout account is missing. Clear the items shown under **Customer response** on the Final appraisal screen |
| You can't approve your own payout request | A member other than the person who submitted it has to approve it |
| You don't know which stage a deal is at | Look at the status column in the **Purchase requests** list, or the status at the top of the deal page. The table in "Deal statuses and tabs" above shows the stage |
## Confirm completion and continue
- Acceptance, identity verification, stock and payment are recorded for the cards you buy.
- The transfer result and the customer's confirmation of receipt are recorded.
- If partial acceptance or full decline requires a return, [record return delivery](/en/guides/purchase/returns) too.
Continue to [QR labels and putaway](/en/guides/inventory/putaway) for purchased cards. For a failed transfer, use [payout recovery](/en/guides/purchase/payouts#when-a-transfer-fails). For a mistaken record, use [corrections and undo](/en/guides/purchase/common-operations#returns-corrections-and-undo).
---
# Payouts
Source: https://docs.toreca-cloud.com/en/guides/purchase/payouts
Request a bank transfer after registering stock and payment.
| Workflow used so far | Finish before the transfer |
| -------------------- | -------------------------------------------------------------------------------------------------------------------------------------------- |
| Online purchase | Stock and payment registration in [Shipping and final appraisal](/en/guides/purchase/shipping-and-final) |
| Business deal | Goods confirmation and settlement in [Business deals and invoices](/en/guides/purchase/corporate-deals) |
| In-store purchase | Account registration, signed-contract evidence and acceptance under [Pay by bank transfer](/en/guides/purchase/counter#pay-by-bank-transfer) |
For cash at the counter, follow [In-store purchases](/en/guides/purchase/counter) and [Cash registers and closing](/en/guides/purchase/cash).
Toreca Cloud handles submitting and approving payouts, and recording the result. **The shop moves the money itself, through internet banking or similar.**
## What you need
- A deal with stock and payment registered (deal status **Awaiting payout**)
- Evidence showing acceptance of the purchase amount (you can also attach it in the submission dialog), such as a LINE screenshot or the signed in-store contract
- One person to submit and another to approve. Submission requires payout preparation or management permission; approval requires payout management and approval permissions. **Applicants cannot approve their own payout**
## The steps and the Payments columns
Open **Payments** in the sidebar.
| Step | What you do | Who | Column |
| ---- | --------------------------------------------------- | ------------------------------------------------------- | ------------------------------------ |
| 1 | See what to do next on the payment board | Anyone | All |
| 2 | Submit the payout | Member with payout preparation or management permission | Pending approval (before submitting) |
| 3 | Another member approves it | Owner or admin other than the applicant | Pending approval → Approved |
| 4 | Transfer at your bank, then record the result | Owner or admin | Approved → Awaiting receipt |
| 5 | Confirm with the customer, then record receipt | Staff who handle deals | Awaiting receipt → Done |
| ― | (If it fails) Fix the bank account and submit again | Owner or admin | Failed → Pending approval |
The **Ready to transfer** and **Transferring** columns are used only by shops that use Zengin data (a file you upload to your bank's bulk transfer service). Zengin data is off to begin with ([Shops that use Zengin data](#shops-that-use-zengin-data)).
## 1. See what to do next on the payment board
**Accepted** ① holds deals whose final quote was accepted and that don't have stock and payment registered yet. **Pending approval** ② holds payouts before submission and payouts that were submitted and are waiting for approval. **Approved** ③ holds payouts that are approved and waiting to be transferred.
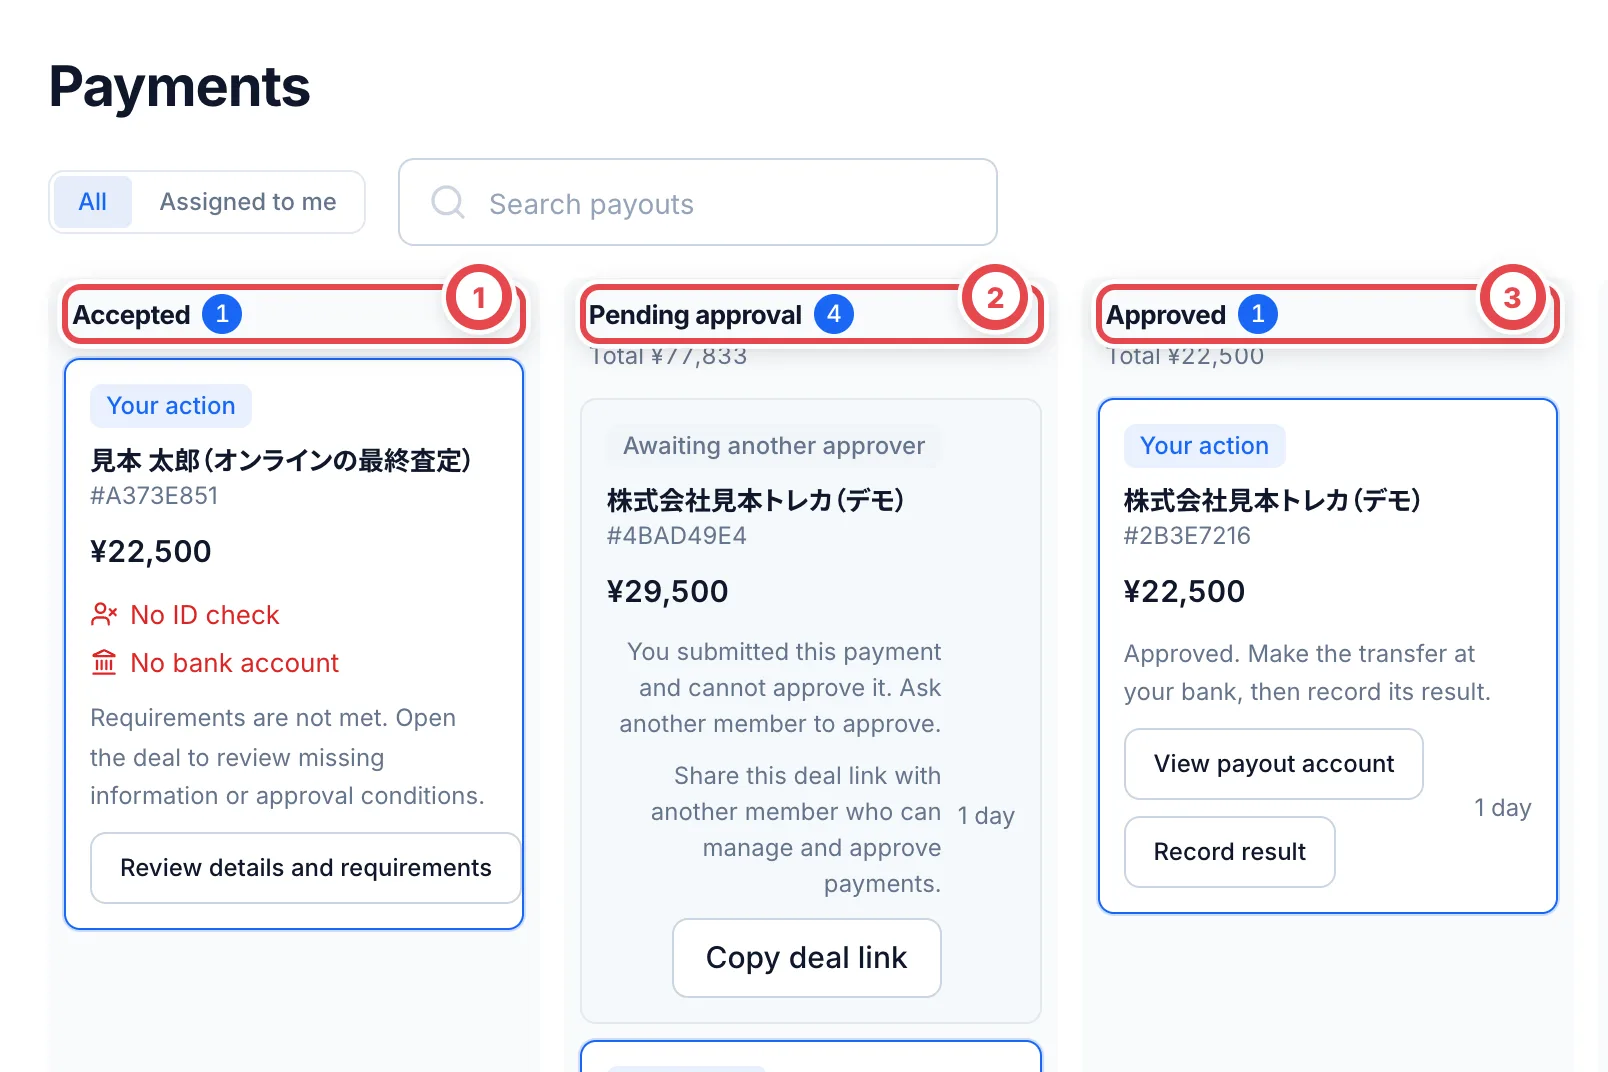 Each card shows the customer's name, case number, amount and what to do next. It also shows what's holding it up ①, such as **No ID check**, **No bank account** or **No power of attorney**. The card's button ② takes you to its next step. Choose **Assigned to me** ③ to see only the cards you can act on.
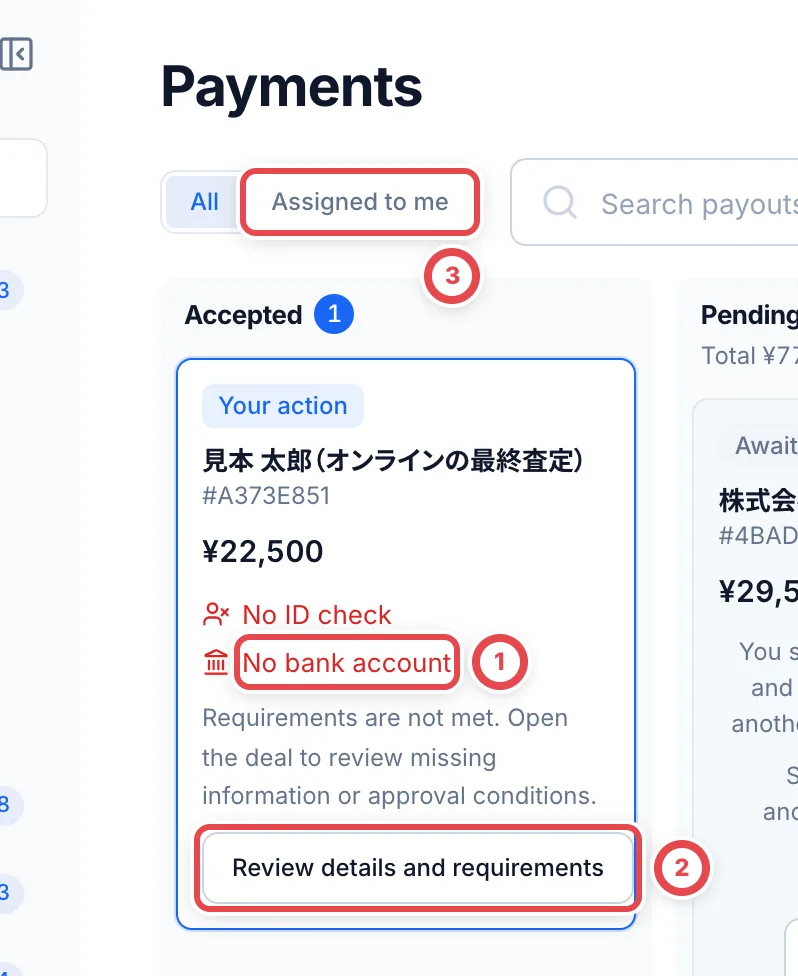 On a computer, dragging a card to the next column opens the dialog for that step. The drop alone changes nothing. The card moves only when you confirm the dialog.
## 2. Submit the payout
Open the deal's **Payment** tab. You can also click **Submit payout** on the deal's card on the board. Check that the **Payout** section shows **Prepare payout request**. Check **Confirmed payout**, **Amount to approve** and the bank account, then click **Submit payout** ①.
**Review customer consent evidence and submit** opens. If evidence is missing, use ① **Attach file** to choose an image or PDF showing acceptance of the purchase amount. If a saved file exists, use **Replace file**. Compare the customer, agreement and amount in ②; click an image to enlarge it. JPEG, PNG, WebP and PDF are supported, up to 20MB per file. Finish uploads or retries before submitting.
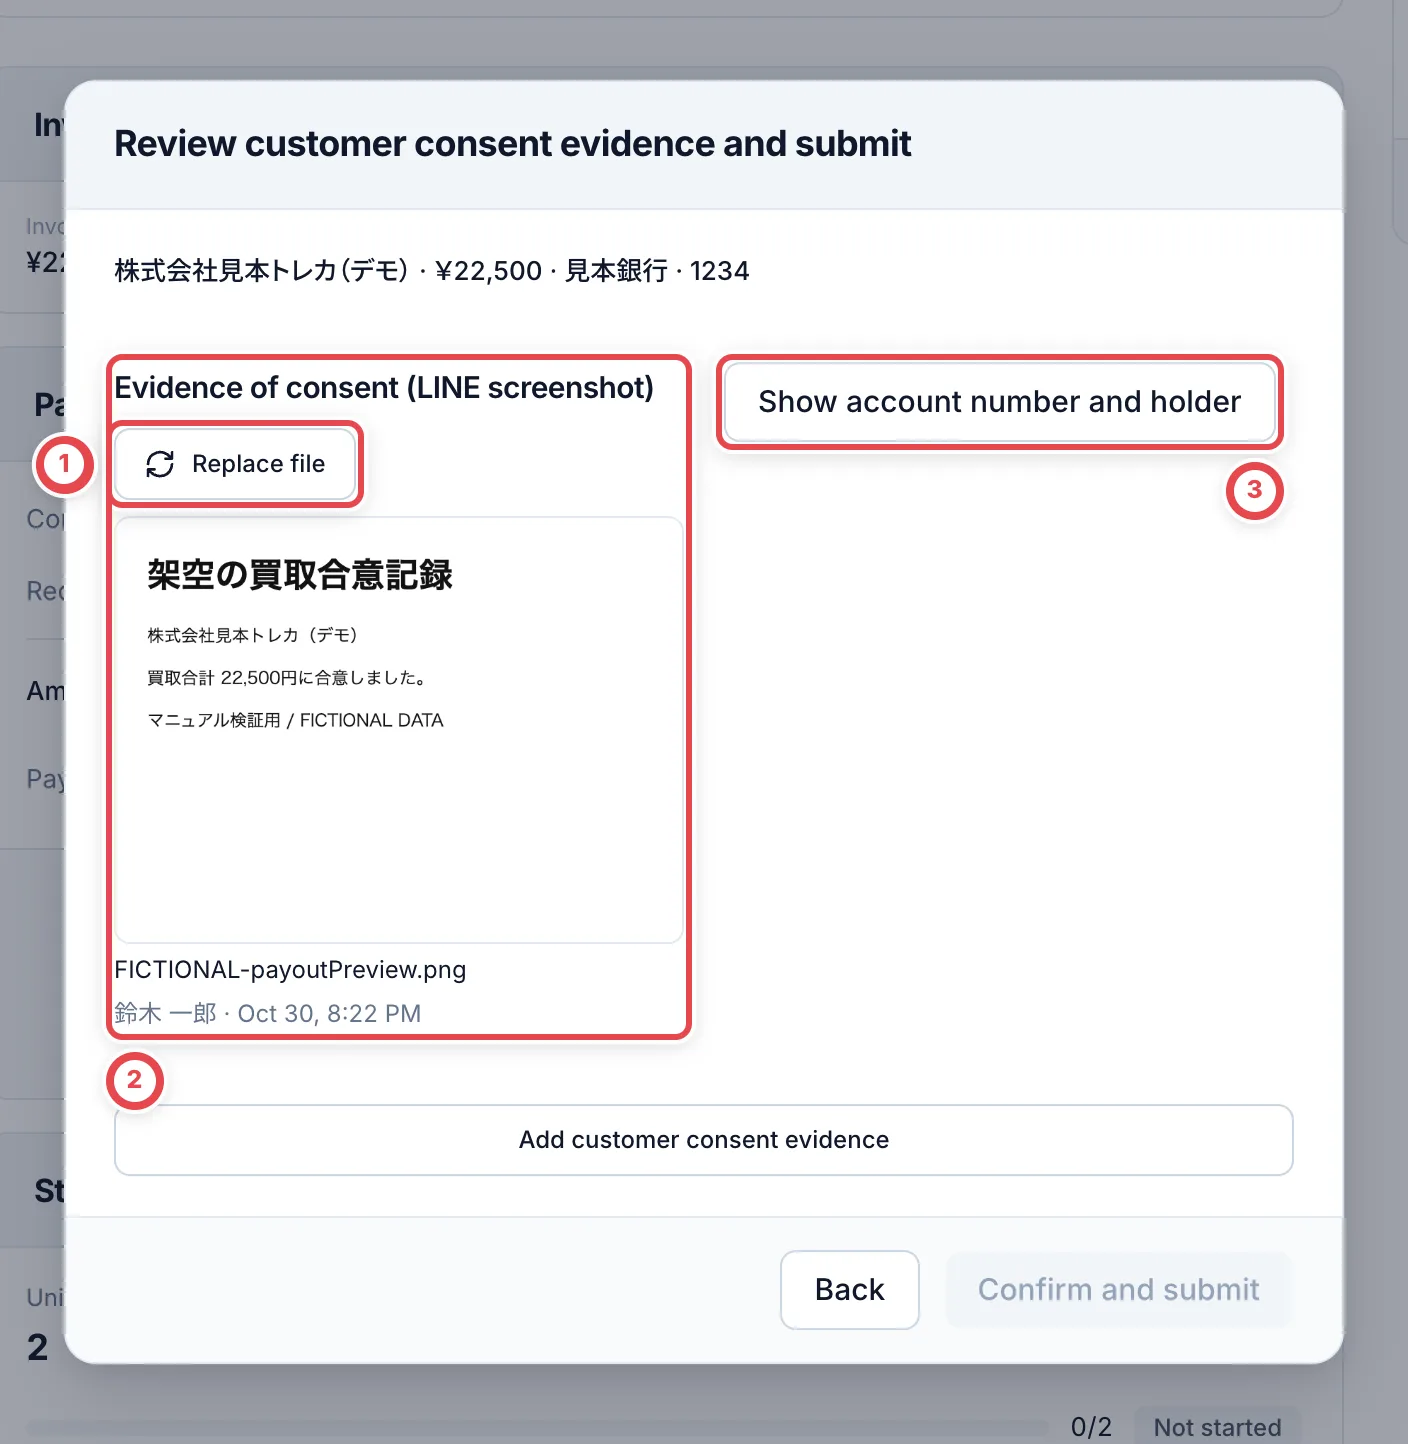 Members with payout management permission click **Show account number and holder**, then compare the bank, branch, account type, full number and holder at ② with the original. Check ①, the customer name and transfer total, then click ③ **Confirm and submit**. **Clicking submits immediately.** If the account or request changes, reopen the dialog and review it again.
Members with payout preparation permission only can attach evidence and hand over with **Submit payout**. An authorized manager checks the full account. Use **Add customer consent evidence** when you need to return to the deal’s acceptance record.
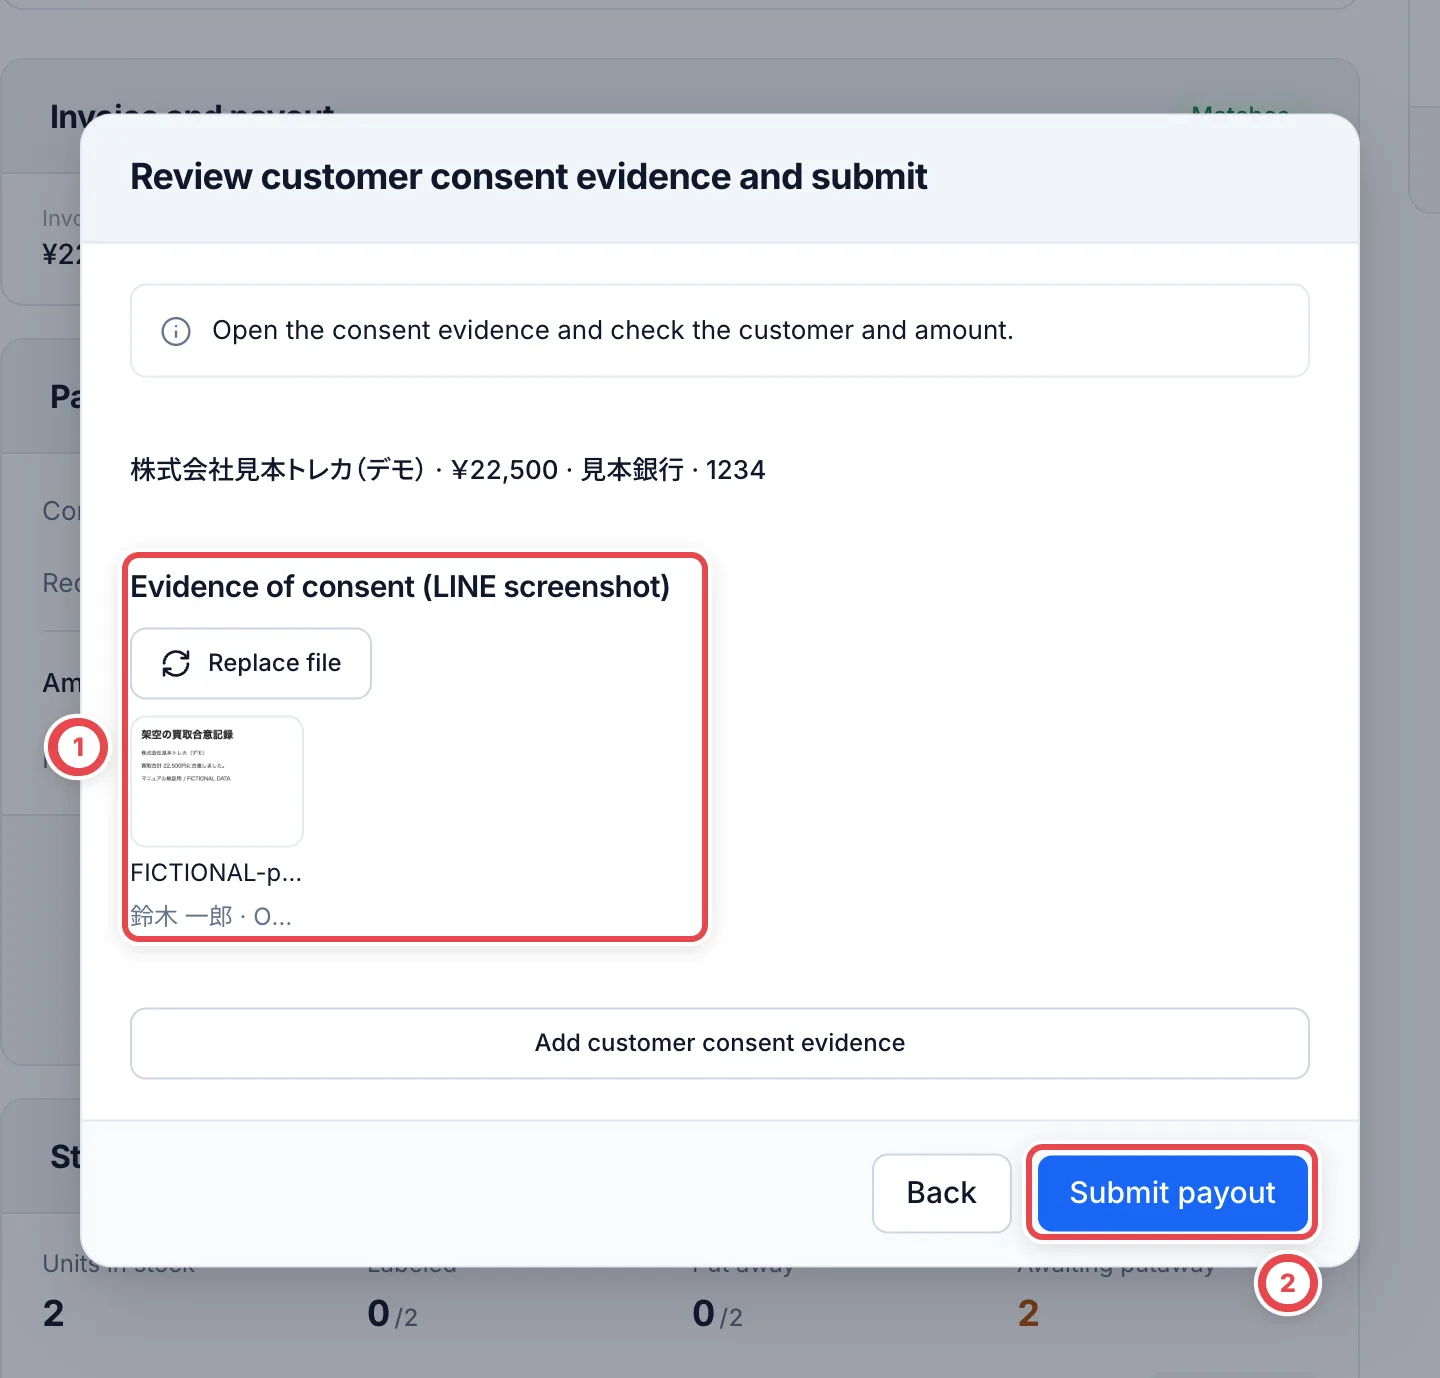 ### Check and copy the current payout account
The current payout account under the deal’s **Payment** normally shows only the ending digits. Members with payout read, result-recording and management permissions can reveal the full number with the eye button at ① and use ② **Copy**. Hide it again with the same eye button after checking. To select another registered account, use **Change payout account** and complete any required submission and approval again.
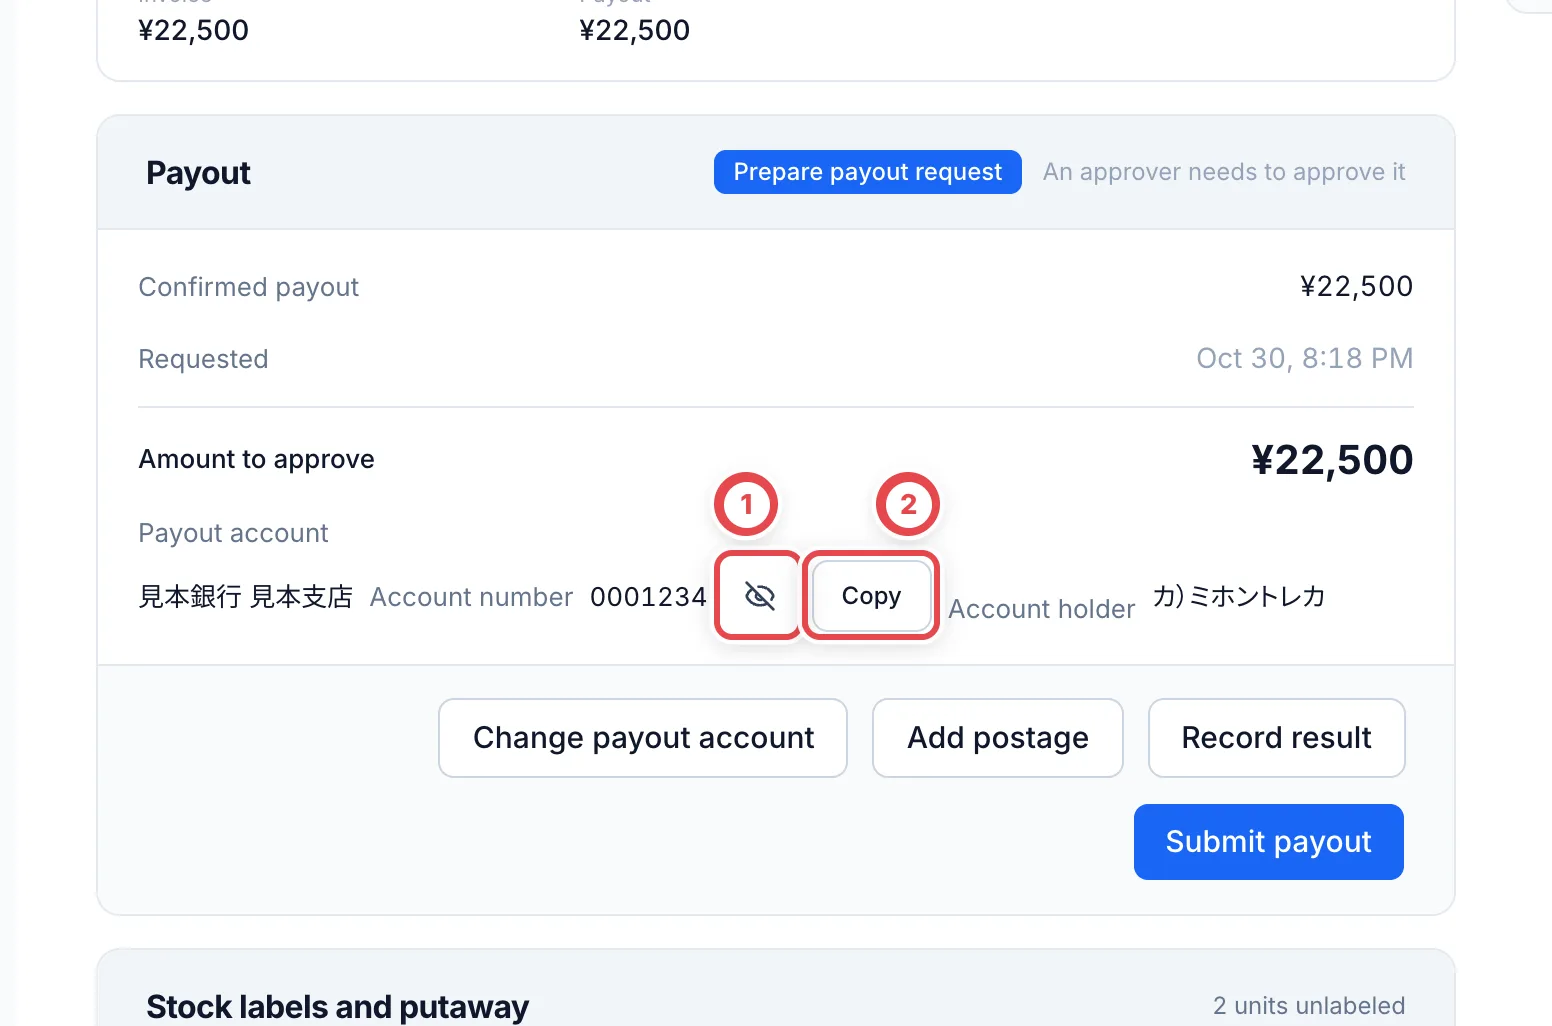 If you bought any PSA cards, first save each card's number with **Check / correct PSA numbers**. You can't submit or approve while numbers are missing. A number can have up to 40 digits, including leading zeroes, and a number already used by another unit can't be saved. The entry stays in the deal’s Payment card after all numbers are saved. Before payment, click Edit on the relevant card and save the corrected number. Numbers cannot be changed here during or after payment processing.
## 3. Another member approves
An owner or admin other than the applicant clicks **Approve** on a card under **Pending approval** on the board. At ①, check the applicant, the accepted quote version and amount, the bank account and the postage. Open the consent evidence and compare it with the amount being paid.
After checking everything, tick **I checked every customer’s consent, quote, postage, transfer total and bank account** at ②, then click the button with the count, such as **Approve 1 payout**. **Clicking it approves the payout right away.** Approving doesn't send any money to the bank.
If something is missing, write the reason in the memo and click **Return with the memo as the reason**. The payout goes back to before submission, and the applicant fixes it and submits again. You can also select several cards and click **Approve selected**.
Payouts over the **Approval required above** amount under **Settings** › **Payments** can't be approved from the board. Their cards say something like **Over [amount]: approve it on the deal page**. Approve them with **Approve** on the deal's **Payment** tab.
If you pay into an account that isn't in the customer's name, you can't approve until the power of attorney is signed. See [Identity verification](/en/guides/purchase/identity).
## 4. Transfer at your bank and record the result
Transfer the approved payout through internet banking or similar. When you have done it, click **Record result** on the card under **Approved**. Use **Show account number** to check the full destination and **Copy** to copy its number.
Choose the result at ①. Check that the full amount was transferred, choose **Succeeded**, and click **Record result**. Do not record success while a transfer is merely accepted, processing, partially paid or unknown. You can also attach the bank's completion screen under **Transfer evidence** (optional). Once you record a success, the card moves to **Awaiting receipt** and the deal becomes **Purchased**.
Once the money is sent, choose Succeeded at ① and record the result at ②.
You can also import the transfer list (CSV) from your internet banking and record several results at once. Use **Import bank transfer list** at the top of the page.
## 5. Confirm with the customer and record receipt
Click **Record receipt** on a card under **Awaiting receipt**. Click **Copy** at ① to copy the payout message and send it to the customer on LINE. When the customer replies that they received it, add a note if you need to, then click **Record** at ②. The card moves to **Done**.
:::warning
Until receipt is recorded, the cards bought in that deal show **Awaiting receipt** in Inventory. They can't go on outbound orders, site transfers or tenant transfers, or be allocated to partners.
:::
If you recorded receipt by mistake, open **View record** on the card under **Done**, enter a reason and click **Undo**. The card goes back to **Awaiting receipt**. **Done** shows the last 7 days. Open earlier ones from **View history**.
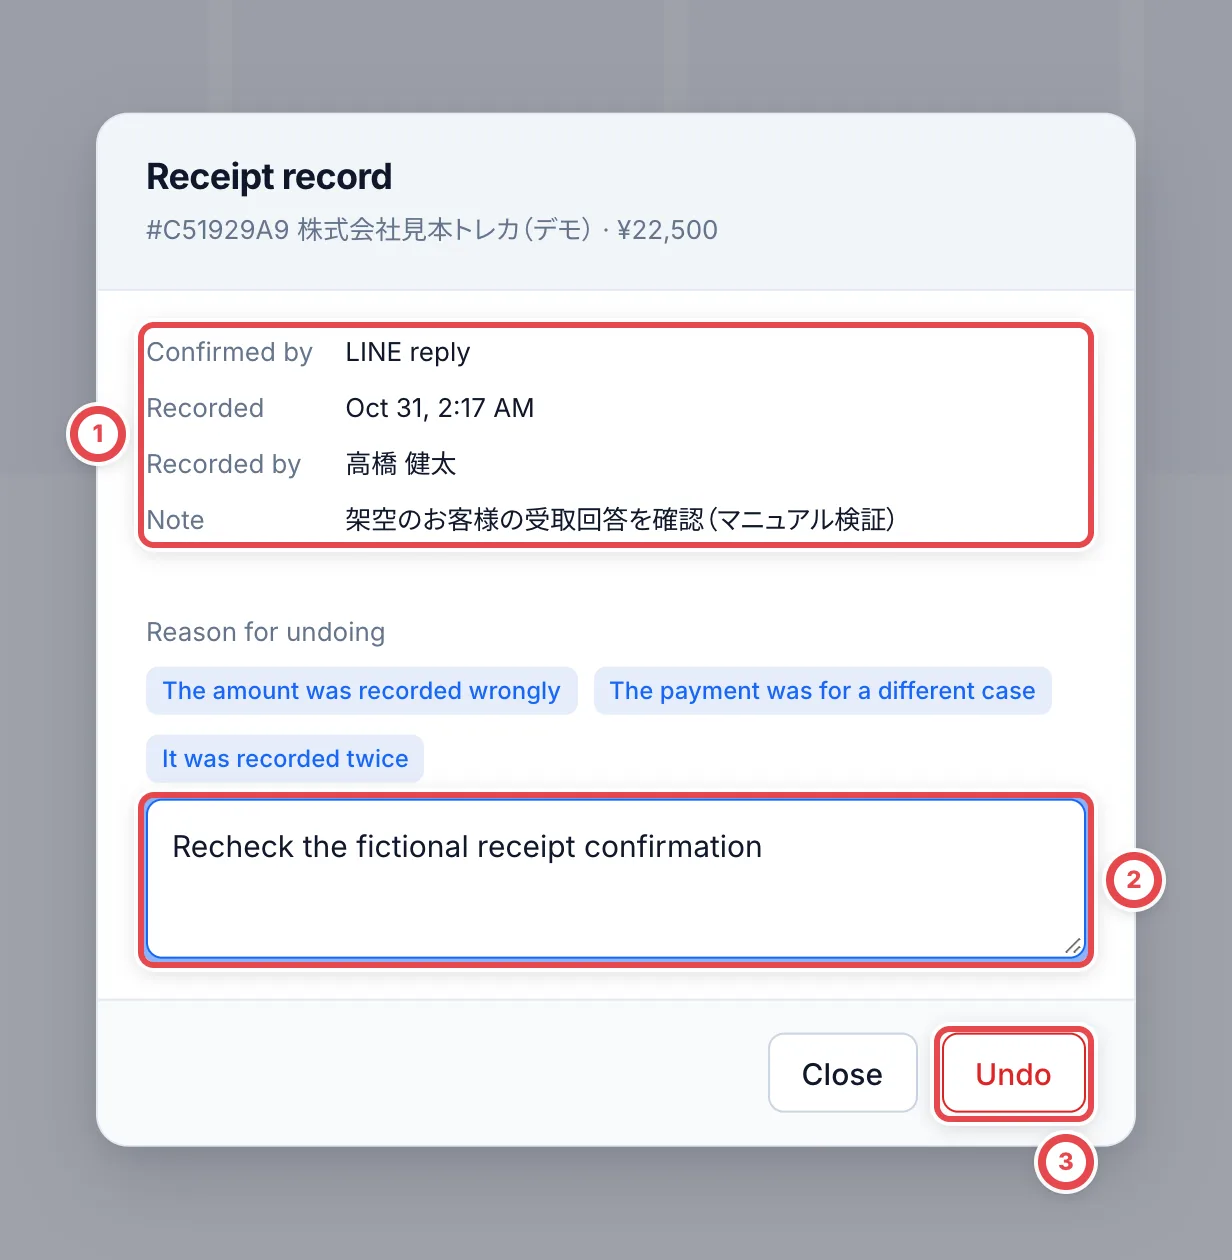 Check the saved record at ①, enter the reason at ②, and use ③ to return it to Awaiting receipt. This does not reverse a bank transfer.
## When a transfer fails
A payout whose failure you've recorded moves to the **Failed** column. To pay into a different account, such as when the account was wrong, click **Fix bank account** ①.
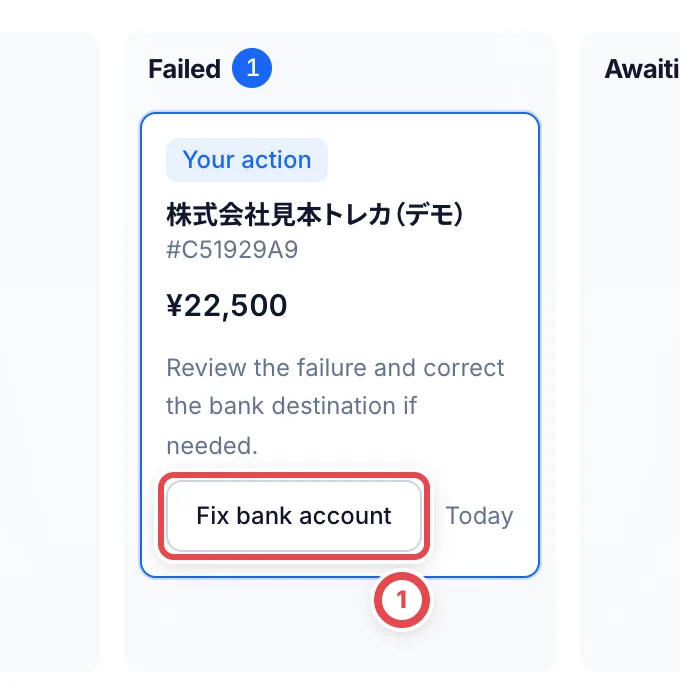 **Change payout account** opens, and the payout account ① shows the current account. Click ① and choose the new account. If the right account isn't added yet, use **Add payout account** at the end of the list to add it right there; the added account is chosen. Write the reason for the change, check the confirmation that it matches the customer’s account and requires re-approval, then click **Change and send for re-approval** ②. The payout goes back to before submission, so submit it again and have another member approve it.
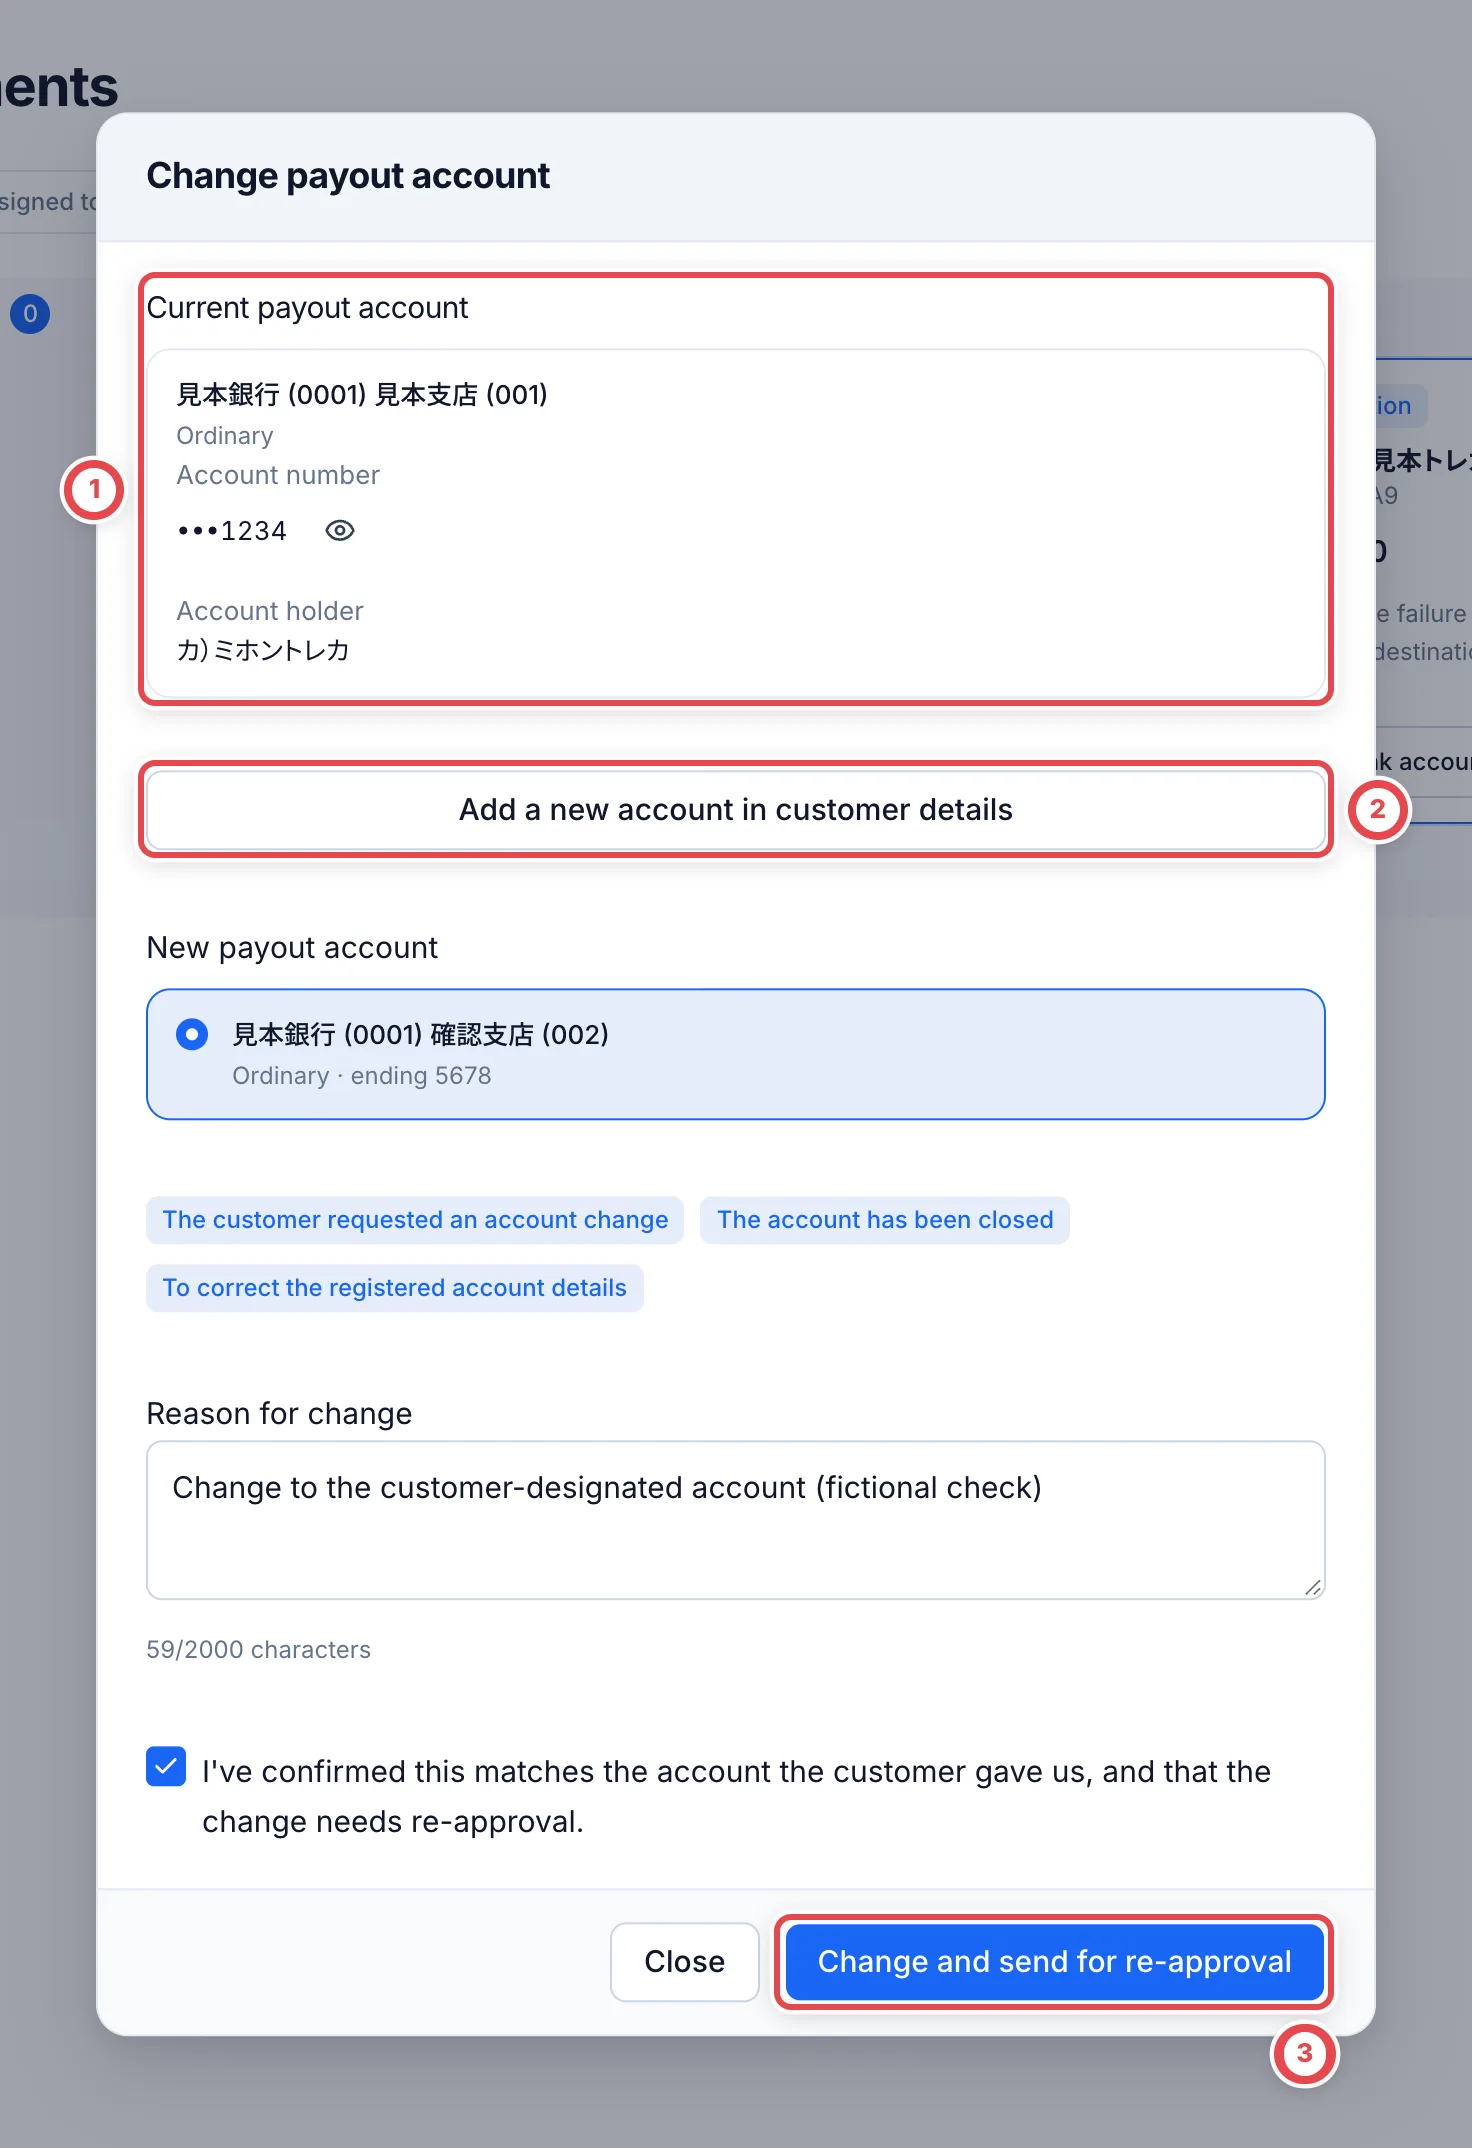 To pay into the same account again, transfer it again, then record **Succeeded** with **Record result** on the deal's **Payment** tab. On the board, dragging the card from **Failed** to **Awaiting receipt** opens the same dialog.
To recall a transfer, ask your bank. When you import a bank transfer list, set a "funds returned" row to **Reopen (returned)** to turn a payout you recorded as a success back into a failure.
## Shops that use Zengin data
Zengin data puts approved payouts into one file that you upload to your bank's bulk transfer service. It's a feature enabled shop by shop, and it's off to begin with. Before you use it, register your originator code, originator name and paying account under **Settings** › **Payments**.
1. Select the **Approved** cards and click **Create payout file**. Check the **Transfer date** (the suggestion skips weekends, public holidays and year-end closures), then click **Create and download**. The cards move to **Ready to transfer**
2. Check the file with **Review transfer**, upload it to your bank's bulk transfer service, and once the bank has the request, click **Record as submitted to bank**. The cards move to **Transferring**
3. When the bank has finished, click **Record transfer result** on a card under **Transferring**, choose the payout file, tick the payouts that weren't paid, and click **Record results**. Unticked payouts are recorded as paid
You can download a file again or cancel it from **Payout files** at the top of the page.
## Troubleshooting
| What's happening | What to check and how to fix it |
| ------------------------------------------------------------------------ | --------------------------------------------------------------------------------------------------------------------------------------------------- |
| **Submit payout** doesn't appear or can't be clicked | Payout preparation or management permission is required. If the card shows **No ID check** or **No bank account**, set those up first. |
| Submitting says the consent evidence is missing | Save evidence with **Attach file** in the submission dialog and wait for the upload to finish. |
| **Confirm and submit** is disabled | Wait for the evidence upload to finish and, if you have management permission, display the account number and holder. Reopen if the request changed |
| **Approve** can't be clicked, or it says **Awaiting another approver** | The person who submitted can't approve. Ask another owner or admin. |
| You can't approve from the board and it says to approve on the deal page | The payout is over the **Approval required above** amount. Approve it with **Approve** on the deal's **Payment** tab. |
| You're stuck on missing PSA numbers | Save the number of each PSA card you're buying, one by one, with **Check / correct PSA numbers**. |
| It shows **No power of attorney** | The account isn't in the customer's name. Get the power of attorney signed ([Identity verification](/en/guides/purchase/identity)). |
| There's no account to choose when fixing the bank account | Use **Add payout account** at the end of the payout account list to add the right account right there. |
| You recorded **Succeeded** by mistake | Use **Reopen (returned)** when you import a bank transfer list, or ask an admin. |
| A card in Inventory is **Awaiting receipt** and won't move | It can't be used for outbound orders or transfers until receipt is recorded. Finish **Record receipt**. |
| The **Ready to transfer** and **Transferring** columns are always empty | Shops that don't use Zengin data don't use them. Go from **Approved** straight to **Record transfer result**. |
## Return to the workflow after payment
For online purchases, return to [completion and returns](/en/guides/purchase/overview#confirm-completion-and-continue). For in-store purchases, return to [completion and putaway](/en/guides/purchase/counter#8-check-completion-and-put-the-cards-away). Use [QR labels and putaway](/en/guides/inventory/putaway) for the purchased cards.
---
# Record and handle price-increase requests
Source: https://docs.toreca-cloud.com/en/guides/purchase/price-increase-requests
When a customer asks for a higher price on a presented quote, attach a price-increase request to the deal. This is separate from changing prices or sending a customer response.
| Source | Action |
| --------------------------------------- | -------------------------------------------------------------------- |
| A consultation received by staff | Attach a request from the deal |
| A new LINE message produces a candidate | Review evidence under **Price-increase requests → LINE suggestions** |
| The consultation has been answered | Mark the request resolved from its deal |
The required shop features and read permissions must be enabled. Registration, dismissal and resolution require purchase editing permission.
## 1. Find requests waiting for a response
Open **Price-increase requests** in the sidebar. At ①, switch between LINE suggestions, open requests and resolved requests. Match the customer, deal and quote at ② before opening the deal. Suggestions and registered requests have separate counts.
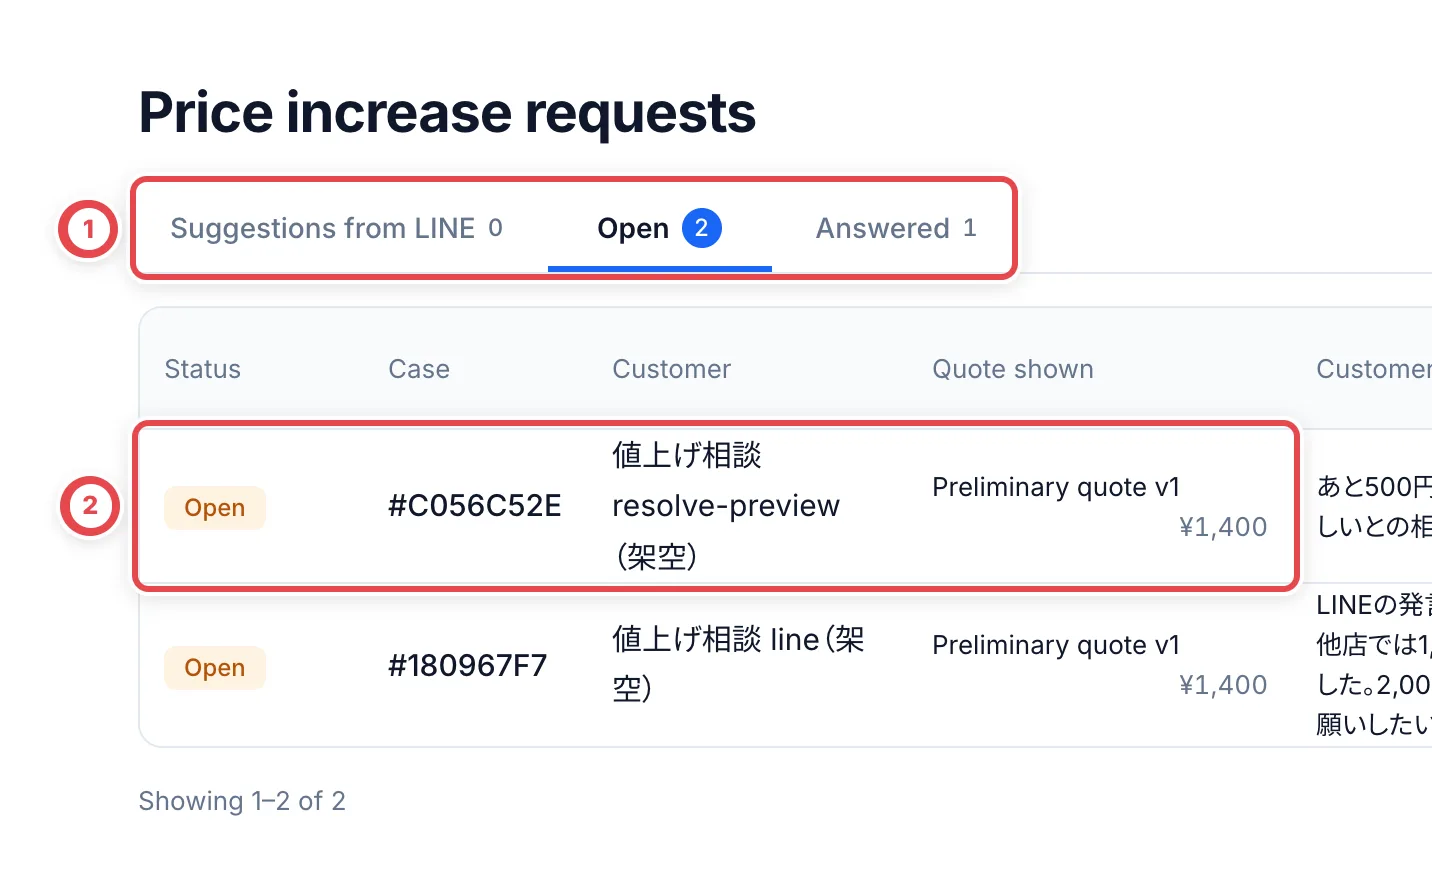 ## 2. Review LINE evidence and register the candidate
Read the customer statement and any explicit requested/competitor amount at ①. A candidate does not decide the price. Open the conversation and deal if needed. Select the target deal/quote at ②, then register at ③. Dismiss candidates that do not apply.
Registration changes neither the quote price nor the customer’s messages. Candidates are processed after LINE synchronization, so they can appear later. The feature does not turn all historical messages into candidates.
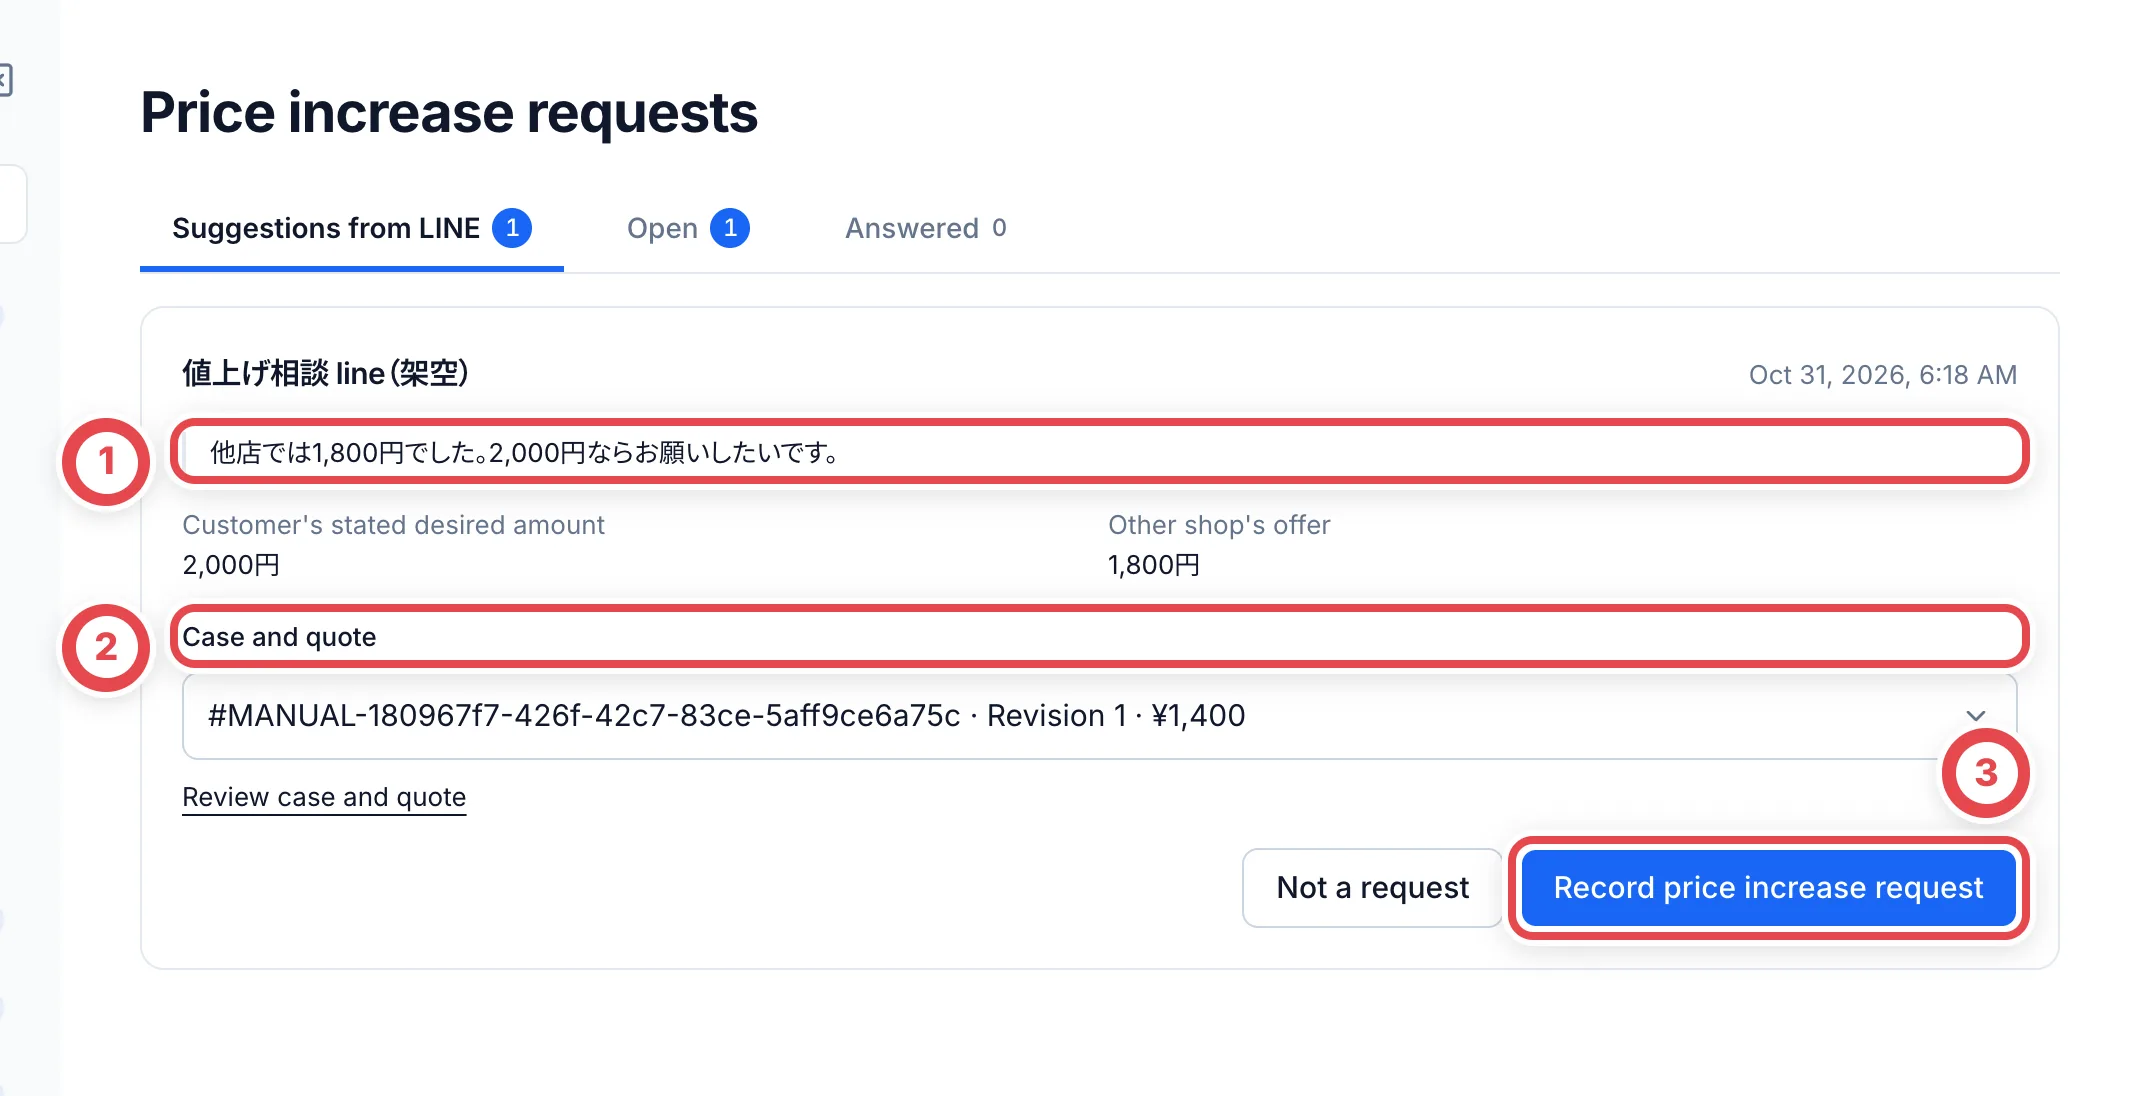 ## 3. Attach a request manually
From the correct deal, open the action to attach a price-increase request. Record the customer’s request at ① and confirm at ②. It is associated with the presented quote and creates internal notification/history. If attached by mistake, remove it using the deal’s mistaken-request action.
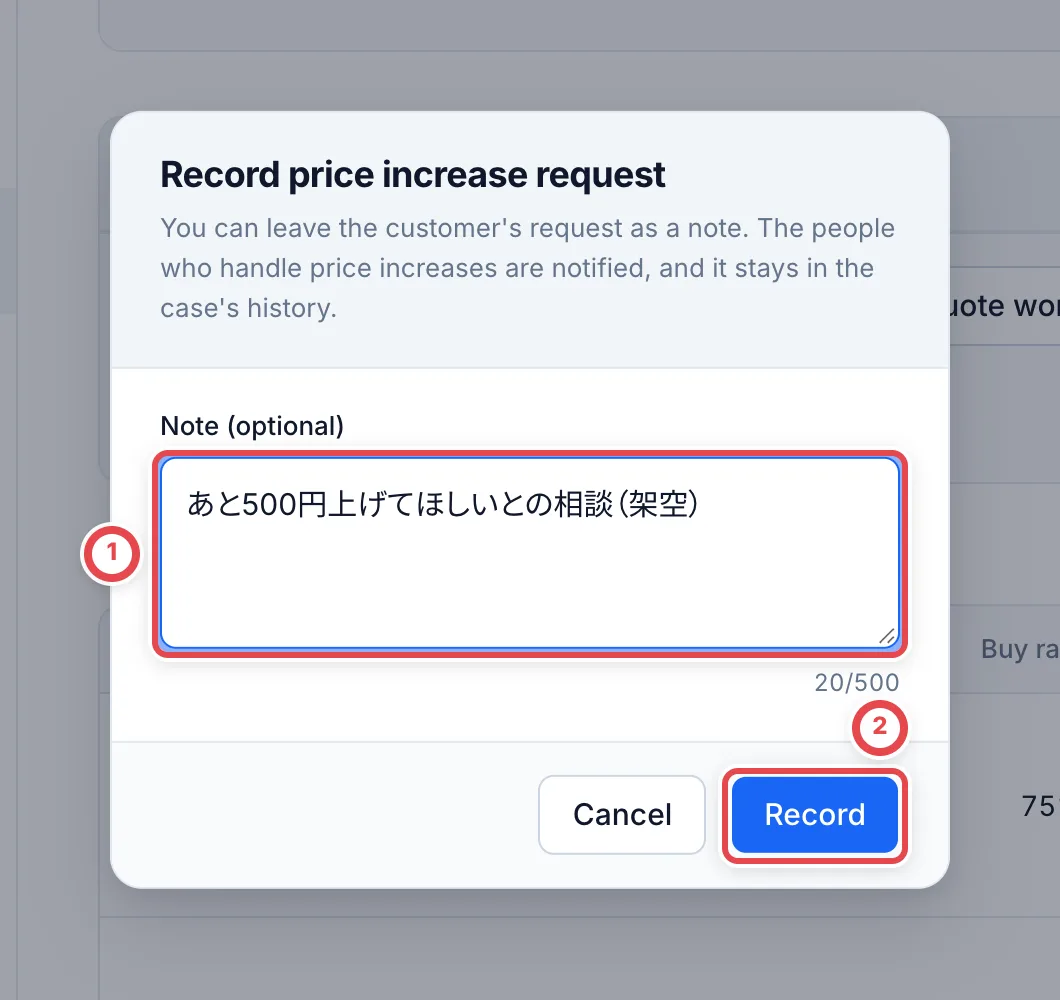 ## 4. Resolve after actually responding
Consider the quote and actually communicate a revised quote or a decision to keep the price. Then open the resolution action at ①, record the response at ② and confirm. The request moves to resolved and remains in history. Resolving a request does not itself send a quote or record customer acceptance.
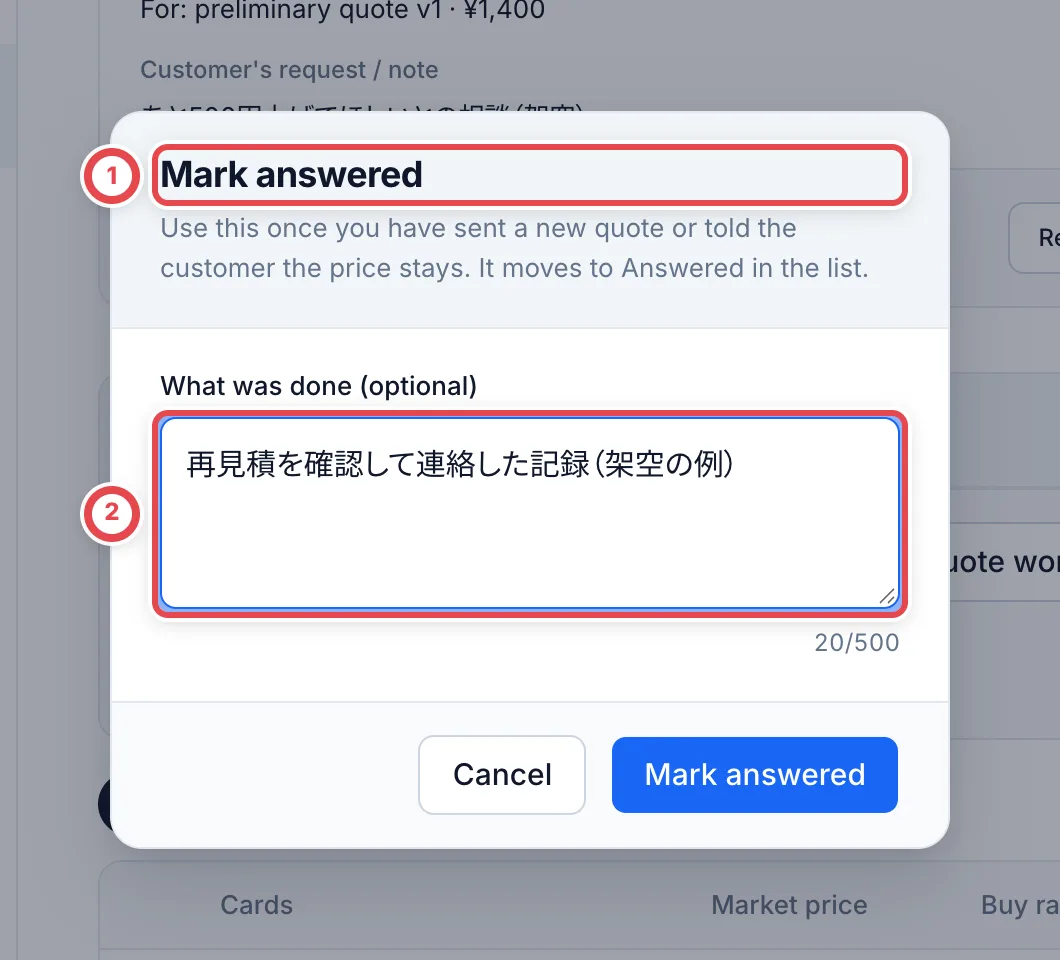 ## Troubleshooting
| What you see | What to check |
| --------------------------------- | ----------------------------------------------------------------------------------- |
| No candidates | Check LINE sync, AI setup and presented quotes; register manually when needed. |
| Detection failed | Queue a retry and return later to check candidates and counts. |
| No eligible quote | Check revisions, acceptance, closure or prior resolution; dismiss stale candidates. |
| State changed during registration | Reload the deal and verify the current quote. |
| Read-only access | Editing permission is needed to register, dismiss or resolve. |
---
# Buy boosts
Source: https://docs.toreca-cloud.com/en/guides/purchase/purchase-boosts
Buy boosts are the cards and boxes your shop wants to buy at a higher price than usual. For each one you set a boosted price per piece and how many more you'll buy. Boosts show up during appraisals, and with an integration you can also show them in connected apps, such as landing pages.
## What you need
- Permission to work on purchases. Members who can only view see **View only** and can't add or edit boosts
- The card to boost, plus the boosted price per piece, how many you'll buy and the dates
## The steps and statuses
| Step | What you do | Status |
| ---- | ---------------------------- | --------------- |
| 1 | Open the list | ― |
| 2 | Add a buy boost | Upcoming → Live |
| 3 | Check it in the appraisal | Live |
| 4 | (If needed) Edit or pause it | Live, Paused |
| 5 | End it when you're done | Ended |
There are six statuses: **Live** (within its dates and accepting), **Upcoming** (its start date hasn't arrived), **Limit reached** (the remaining quantity is 0), **Expired** (its end date has passed), **Paused** (paused) and **Ended**.
## 1. Open the list
Open **Buy boosts** from the sidebar. Use the tabs at ② to switch between **Active & upcoming** and **Ended**. **Active & upcoming** also lists boosts that are paused, have reached their limit or have expired. You can also search by card name, number or product name. The status badges at ③ show each boost's status at a glance.
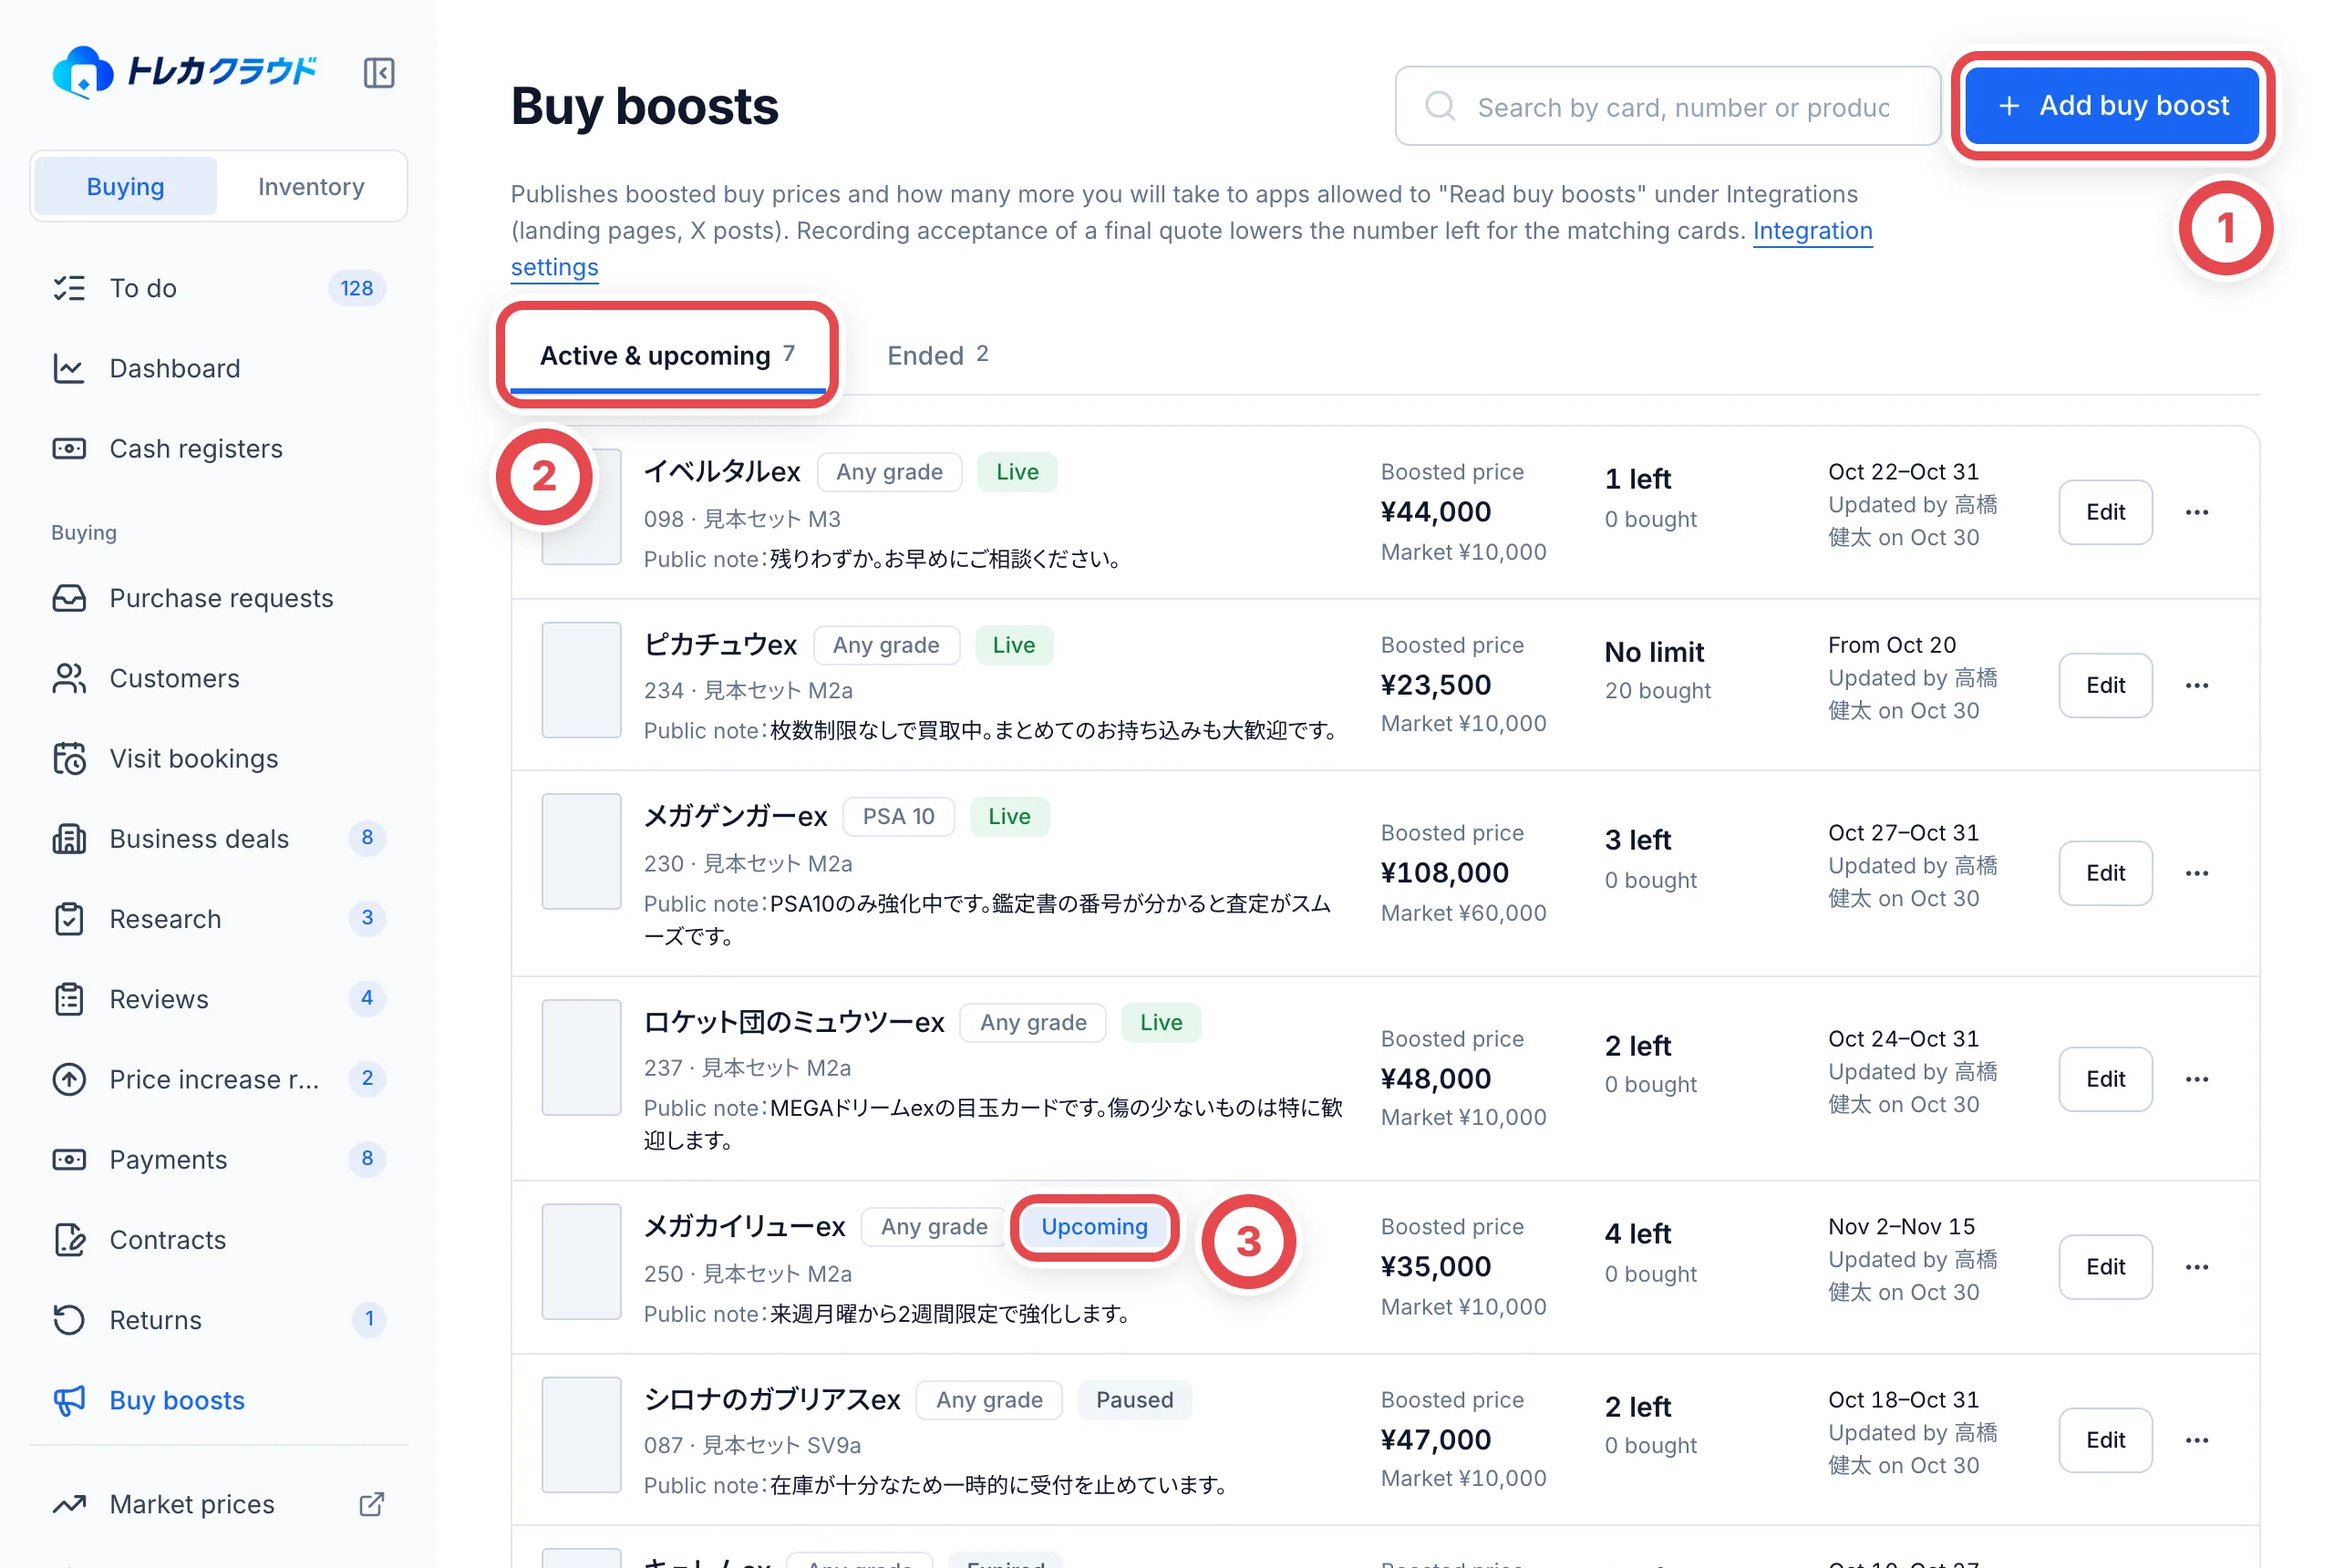 Add a boost with ①. Switch tabs with ② and check the status with ③.
Each row shows the boosted price, market price, how many are left (or **No limit**), how many have been bought, the dates and the public note.
## 2. Add a buy boost
Click **Add buy boost** ① and **Add a buy boost** opens.
1. Under **Find a card or BOX** ①, choose the card to boost. Boxes, packs and decks can be chosen too
2. To boost only PSA 10, for example, set a **Grade**. Leave it unset to cover every grade
3. Enter the **Boosted price (per piece)** at ② and **How many more to buy** at ③. If you don't want a limit, check **No limit**
4. Under **Dates (Japan time)**, enter a start and end date. A blank start date begins now, and a blank end date has no end. At ④ you can quickly pick an end date with **Today**, **3 days**, **1 week** or **No end**
5. If you want a line shown in connected apps, write it in **Public note (optional)**, then click **Add** ⑤. **Clicking it makes the boost live right away**
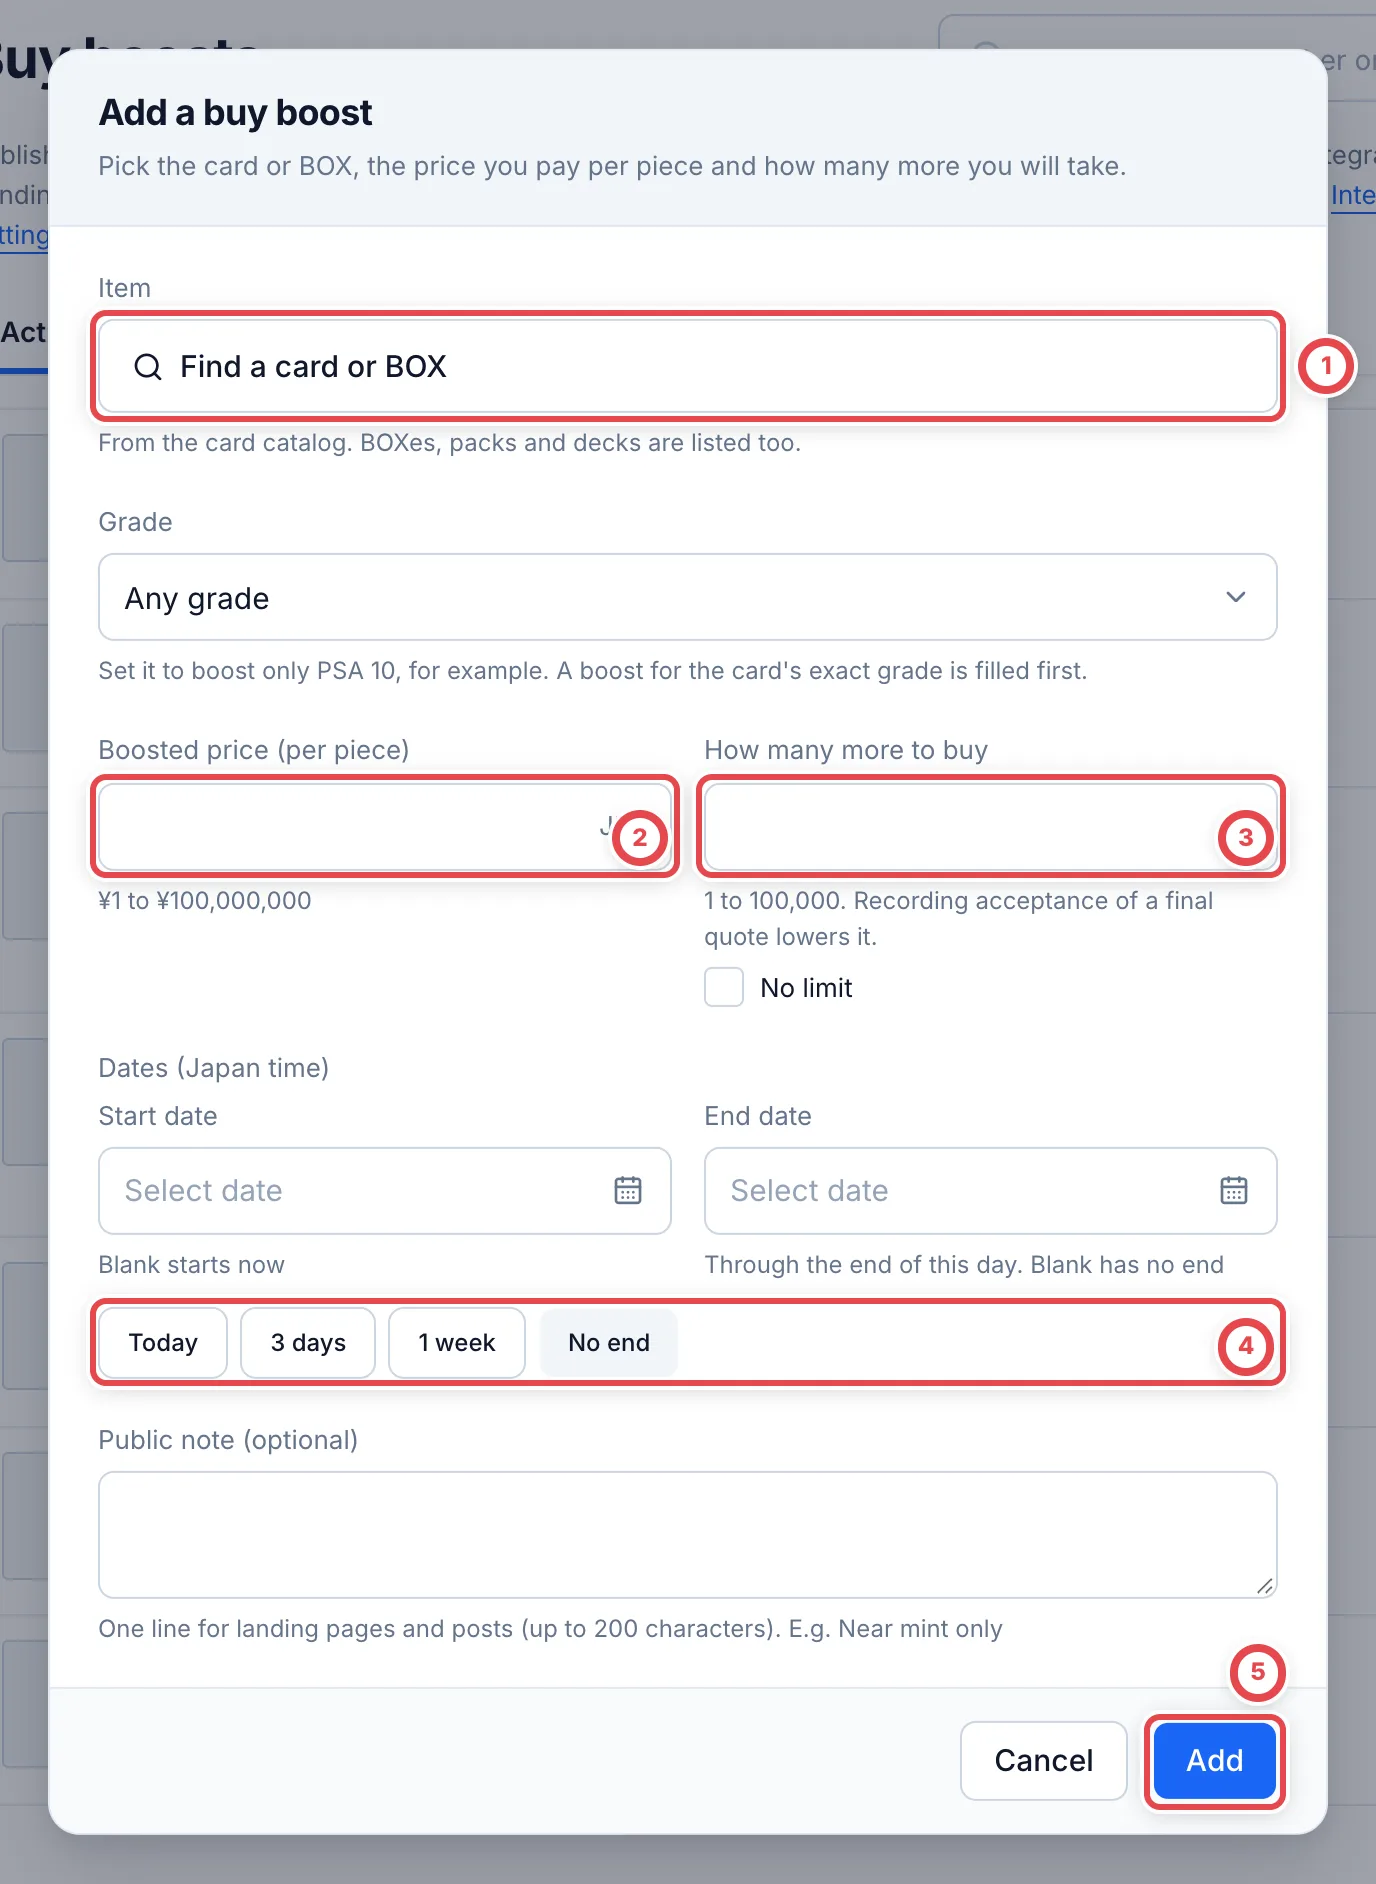 You can have only one buy boost that hasn't ended for each card and grade. You can register up to 500 boosts.
For cards your oripa partners are short of, you can also press **Add buy boost** in [Oripa demand](/en/guides/purchase/oripa-demand). The dialog opens with the card, grade and quantity filled in.
## 3. Check it in the appraisal
In the appraisal items, a card that matches a buy boost shows something like "Buy boost ¥23,500 · no limit" ① under its market price. The review dialog shows it the same way. A boost that isn't live shows its status, for example "(Paused)".
:::note
The boosted price isn't applied to the appraisal amount automatically. To buy at the boosted price, adjust the amount in the appraisal. In the picture below, ② is the saved offer of ¥1,400, separate from the boosted ¥23,500.
:::
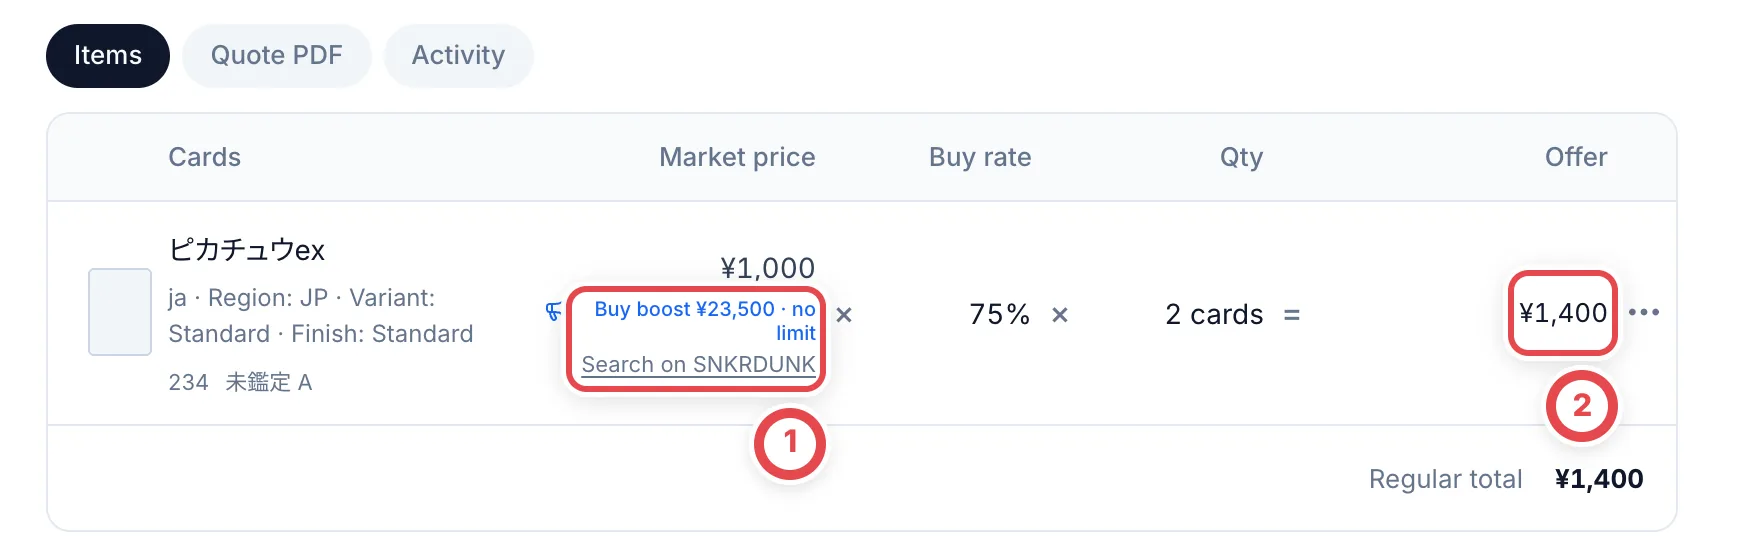 The remaining quantity drops by the number of pieces in the quote when you record acceptance of the final quote. If a purchase completes without acceptance being recorded, it drops at that point instead. Only live boosts count down. When a card matches both a grade-specific boost and an any-grade boost, the grade-specific one is used first. If you record the acceptance and then leave some cards out, their pieces are added back to the remaining quantity.
## 4. (If needed) Edit or pause
Click **Edit** on a row to change the boosted price, remaining quantity, dates and public note. The remaining quantity means how many more you'll buy from now on. Setting it to 0 closes the boost. The item can't be changed; to change it, end the boost and add a new one.
You can also pause with **Paused (hidden from connected apps)** ①. The **Purchases** section ② lists which deals bought how many pieces. After you make changes, click **Save**.
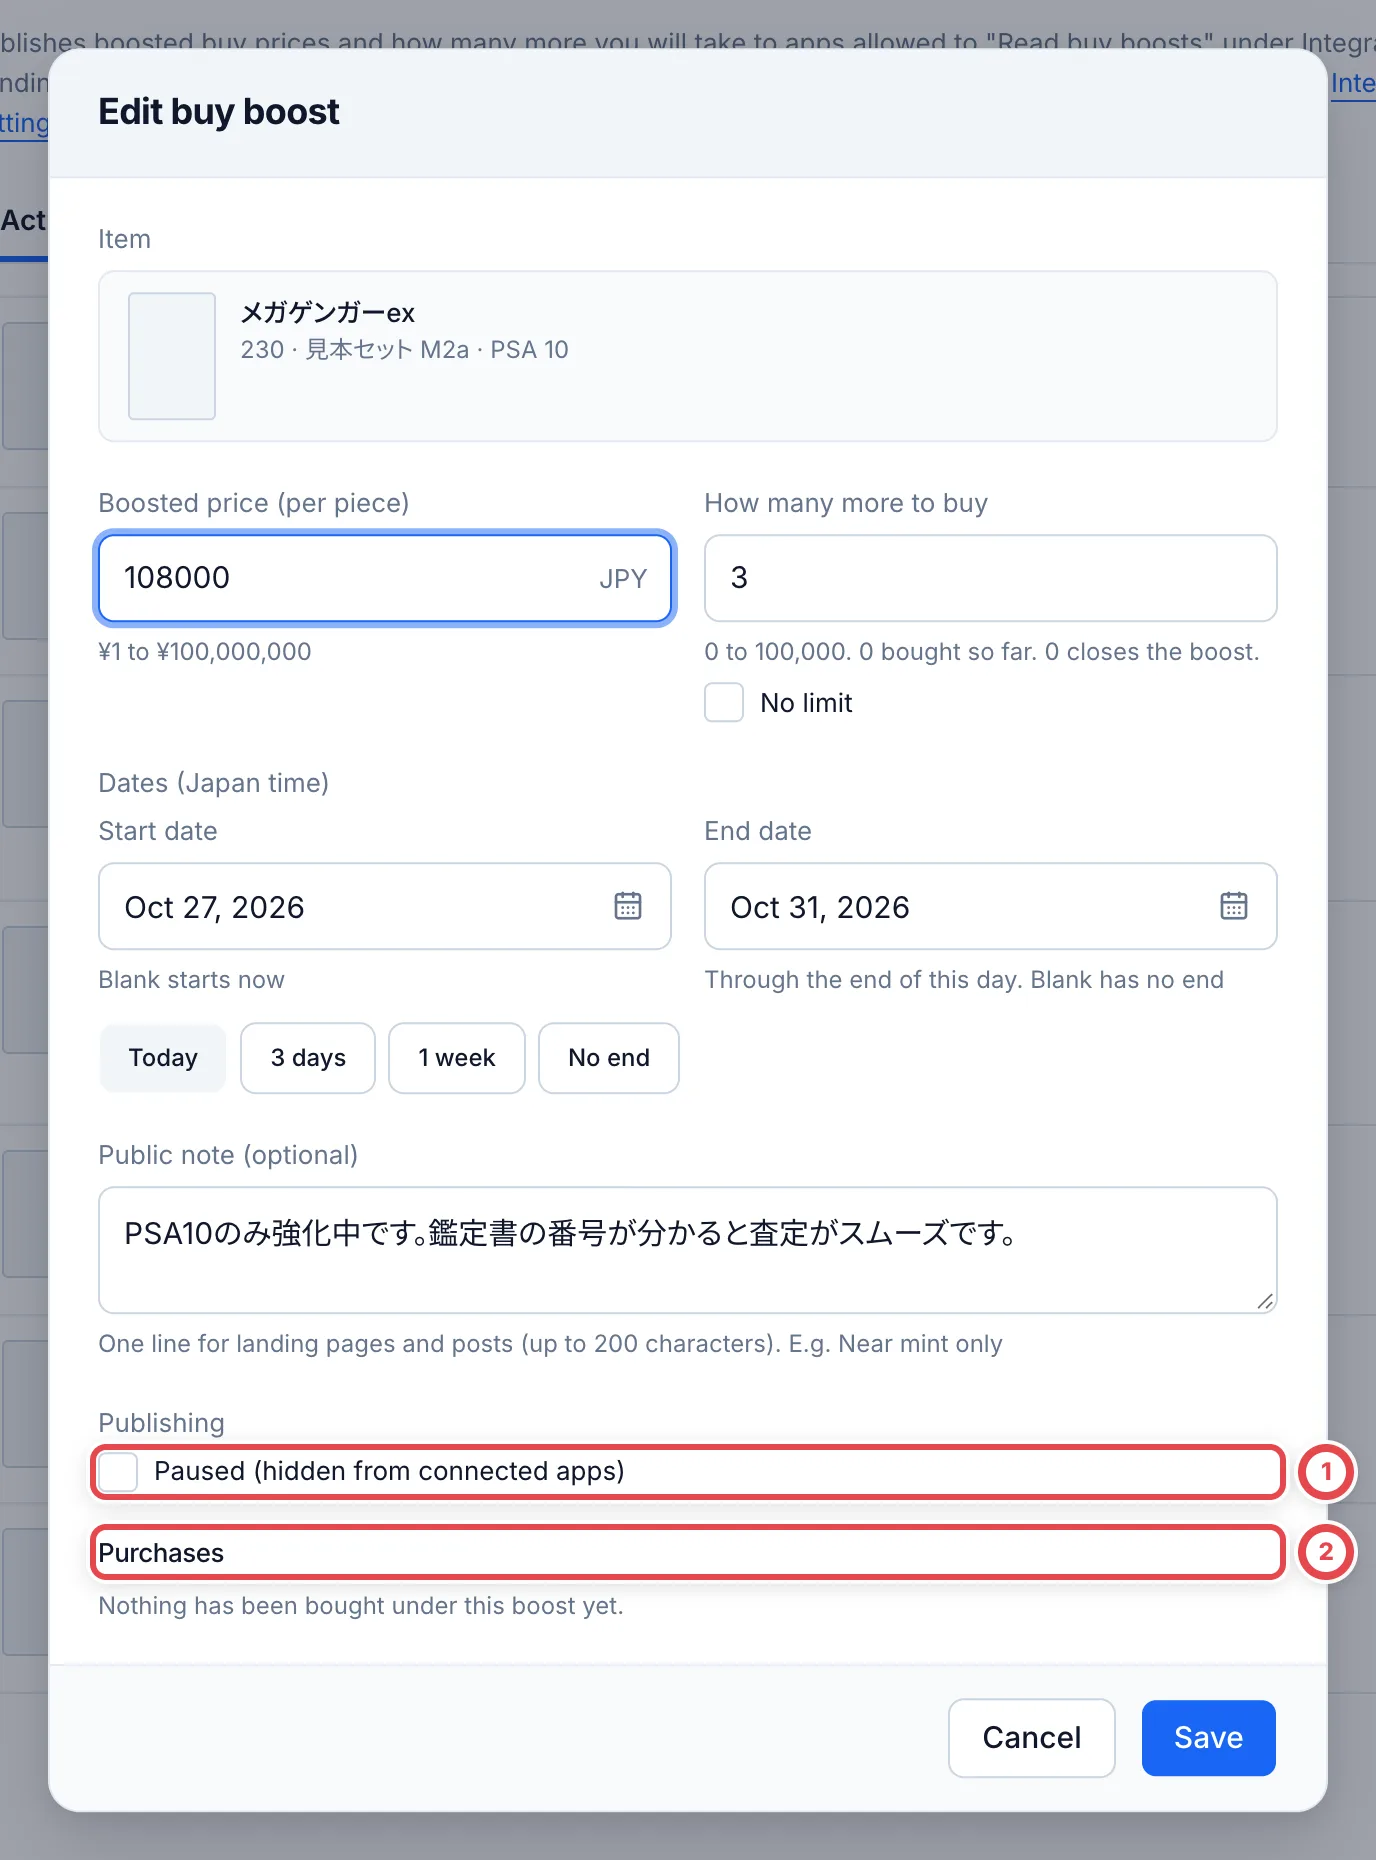 The **…** button at the end of a row opens the menu at ① with **Pause** and **End**. **Pause takes effect as soon as you click it** (there's no confirmation). To bring a paused boost back, use **Resume** in the same place.
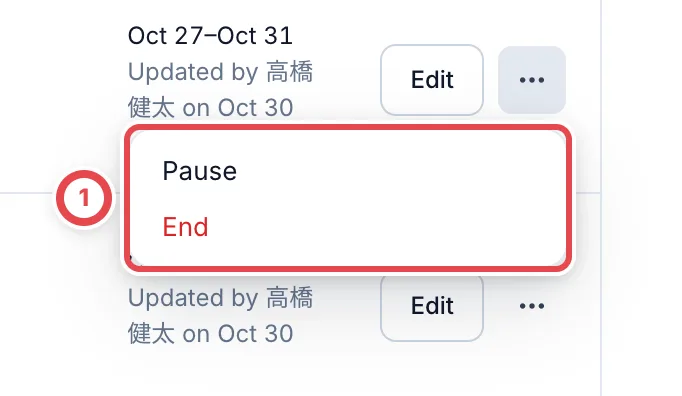 ## 5. End it when you're done
Click **End** under **…** and a confirmation opens. Click **End** ① and the boost disappears from connected apps too. **Ending can't be undone.** Its purchase records stay.
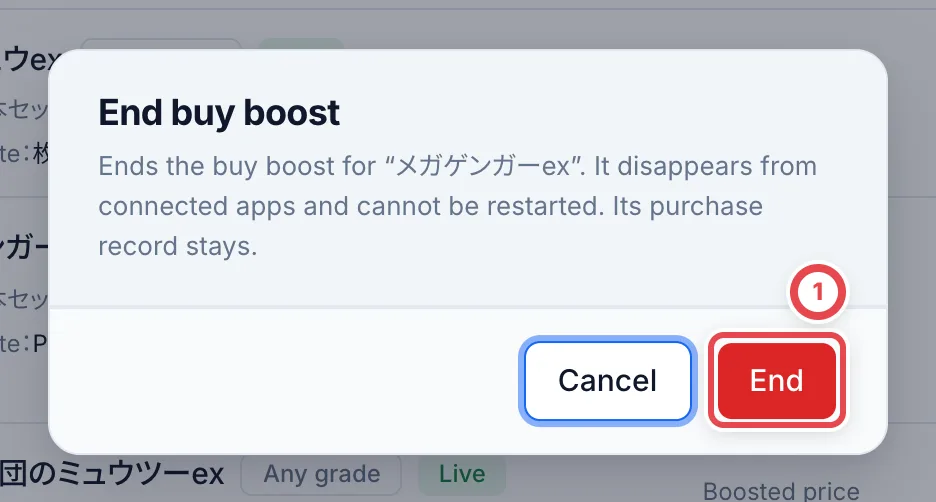 Ended boosts stay under the **Ended** tab ① with their purchase records.
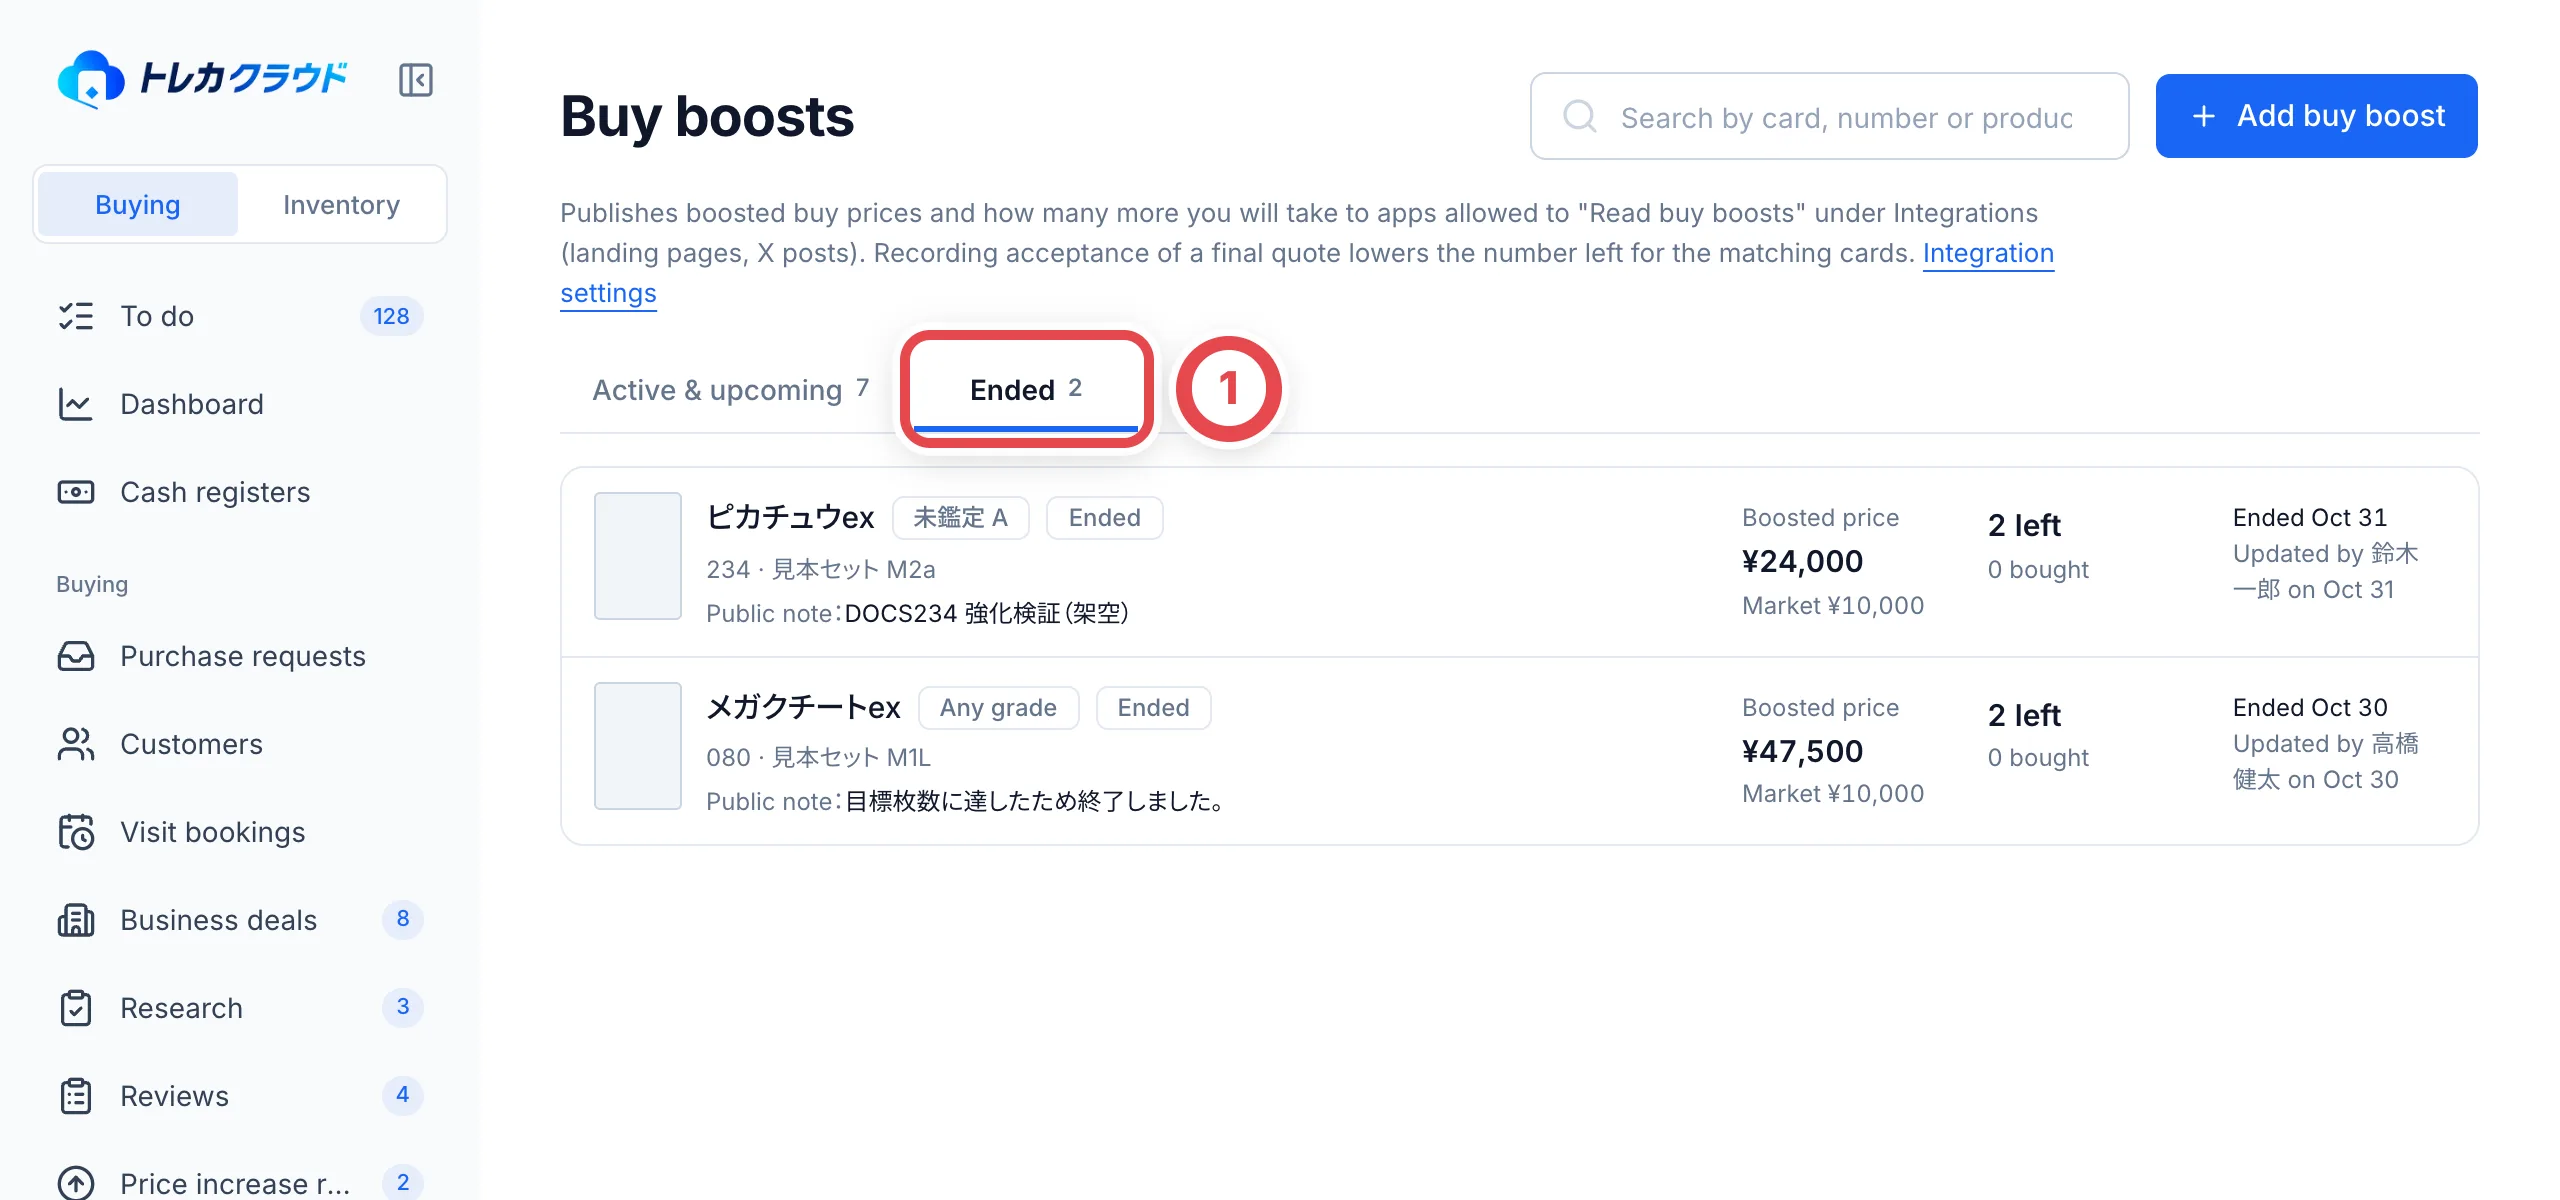 ## Show boosts in connected apps
Under Integrations, allow a partner app to **Read buy boosts** and your live boosts can appear in that app, such as a landing page. Pausing or ending a boost removes it from connected apps too. For integration settings, see [Integrations](/en/guides/settings/partners).
## Troubleshooting
| What's happening | What to check and how to fix it |
| -------------------------------------------------------------- | ------------------------------------------------------------------------------------------------------------------------------------ |
| You see "There is already a buy boost for this card and grade" | A boost with the same card and grade hasn't ended. Edit that one instead. |
| **Add buy boost** isn't there | You have view-only permission, or you've reached 500 boosts. End the ones you no longer use. |
| The boosted price isn't in the appraisal amount | The boosted price isn't applied automatically. Adjust the amount in the appraisal. |
| The remaining quantity doesn't go down | It drops only for a live boost, when acceptance of the final quote (or the deal completing) is recorded. Check its dates and status. |
| You paused one by mistake | Bring it back with **Resume** under **…**. |
| You ended one by mistake | Ending can't be undone. Add it again with the same details. |
---
# Review and edit registered details
Source: https://docs.toreca-cloud.com/en/guides/purchase/registered-information
Existing individual customers can review their registered details from the registration link after accepting a preliminary quote, or from a shipping-information link. They can continue unchanged or edit only the sections that need correction.
| Entry | When to use it | Result |
| --------------------------------------------- | ------------------------------------------------------------------- | ------------------------------- |
| A deal-specific registration or shipping link | Review an existing customer's details, payout account and documents | Updates that customer and deal |
| The shop's shared intake form | A new customer starts a purchase request | Creates a new customer and deal |
Business deals and appraisal-request-only links do not use this individual review.
:::note
Customer-facing forms are Japanese. The screenshots retain their actual Japanese controls, with numbered markers and English captions. Changing the staff console language does not translate these forms.
:::
## 1. The shop provides the deal-specific link
Open the correct customer and deal. Copy the registration link offered after acceptance of the latest preliminary quote, or the deal-specific link in shipping guidance. See [Shipping and final appraisal](/en/guides/purchase/shipping-and-final).
Check the customer and deal number so you do not send a shared intake form or another deal's link. Displaying or copying a link does not send it to the customer.
Standard staff can copy and reissue links and review and apply answers with customer form management and the required purchase, customer and identity permissions. Payout management is not required. If your shop has customized its roles, ask a manager to check the permissions in Settings → Members.
## 2. The customer authenticates
If a shipping-label photo is needed, the customer can send it first or select 「あとで送る」 (Send later). They then see 「ご本人の確認」 (Verify your identity) at ①. When no label is needed, the link opens this screen directly. Click 「登録済みメールに確認コードを送る」 (Send a code to the registered email) at ②. The code goes to the email already registered with the shop. This screen cannot change its destination to a newly entered address.
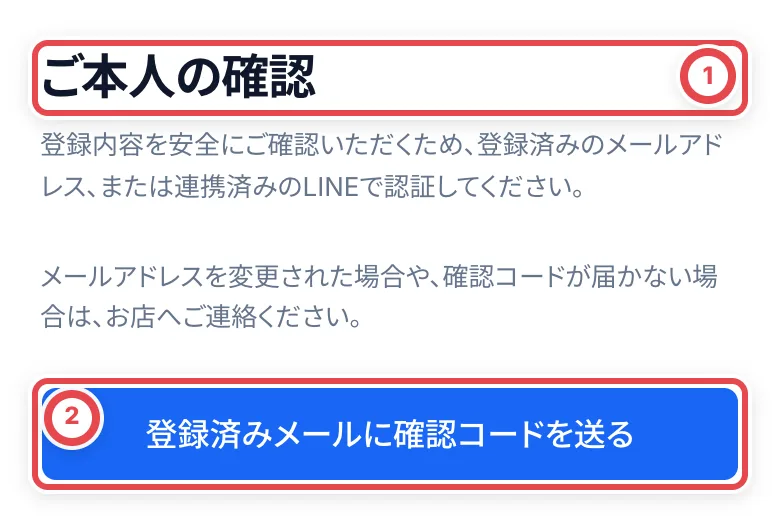 「LINEで認証する」 (Authenticate with LINE) is available when the shop has configured LINE login and the customer has a linked LINE identity. Returning from LINE opens the same review. Shops without that setup do not show the option.
Enter the six-digit code at ① and click 「認証して登録内容を確認する」 (Authenticate and review details) at ②. Codes expire after 10 minutes. Resending is available after one minute and invalidates the previous code.
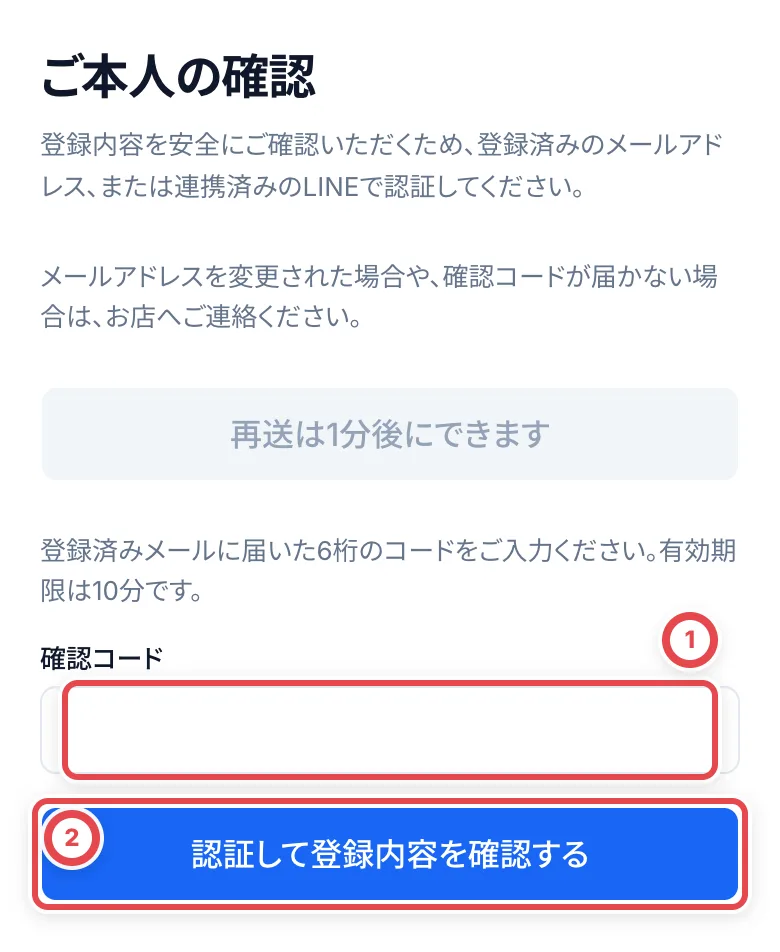 If the registered email is inaccessible, no email is registered, or LINE authentication fails, the customer should contact the shop. The link alone does not reveal the address or bank details.
## 3. Review personal details
Check the name, kana, date of birth, occupation, phone, email and address at ①. For a change, click 「修正する」 (Edit) at ②.
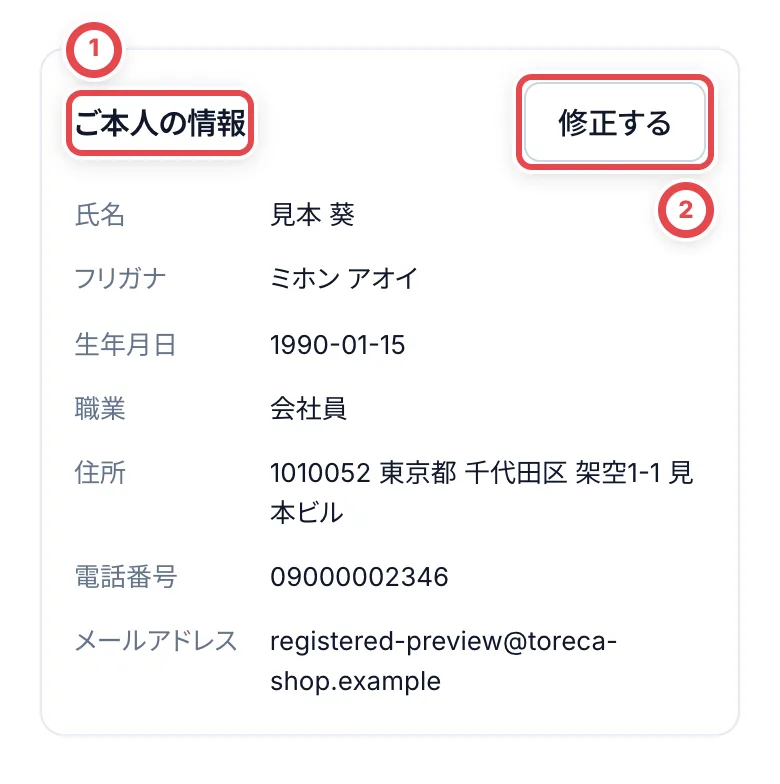 ## 4. Edit and submit the section
The form opens with saved values. Change the relevant fields at ① and use 「次へ」 (Next) at ② to reach the confirmation screen. Phone and postal-code input accepts pasted full-width digits and hyphens and normalizes them to half-width digits. Check the final values, including leading zeros.
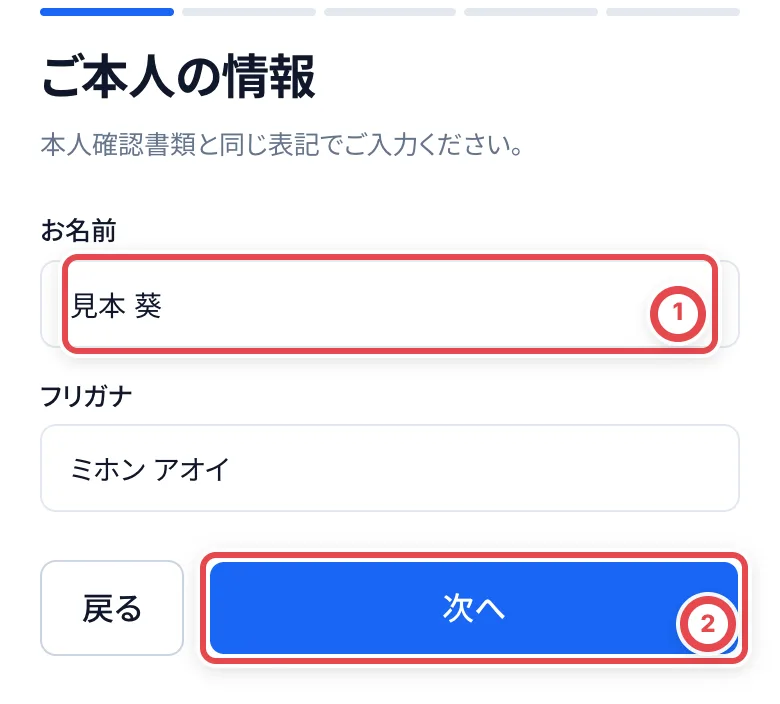 「この内容で提出する」 (Submit these details) saves the changes and returns to the list. **Review the changes before submitting.** Typing alone does not save. Use 「戻る」 (Back) to leave the edit without submitting.
Check the updated list. Changes to identity-related information such as name or address require current ID documents. These changes do not rewrite past deals or previously issued documents.
## 5. Check this deal's payout account and documents
Under 「お振込先」 at ①, match the bank, branch, account type and last four digits. If there are multiple accounts, select the one for this deal. **Selecting an account records that choice immediately.** Reveal the full number only when necessary.
Use this section’s Edit action to review the detailed input and confirmation screens, including the account holder. Submit at the end to save any changes. Changing only a bank account does not always require new ID photos, but holder mismatches and powers of attorney remain separate checks. Follow the explanation when an already requested payout prevents a change.
Under 「本人確認書類」 at ②, check the document type, submission or verification date and status. Review available document images. Face-capture images are not shown here.
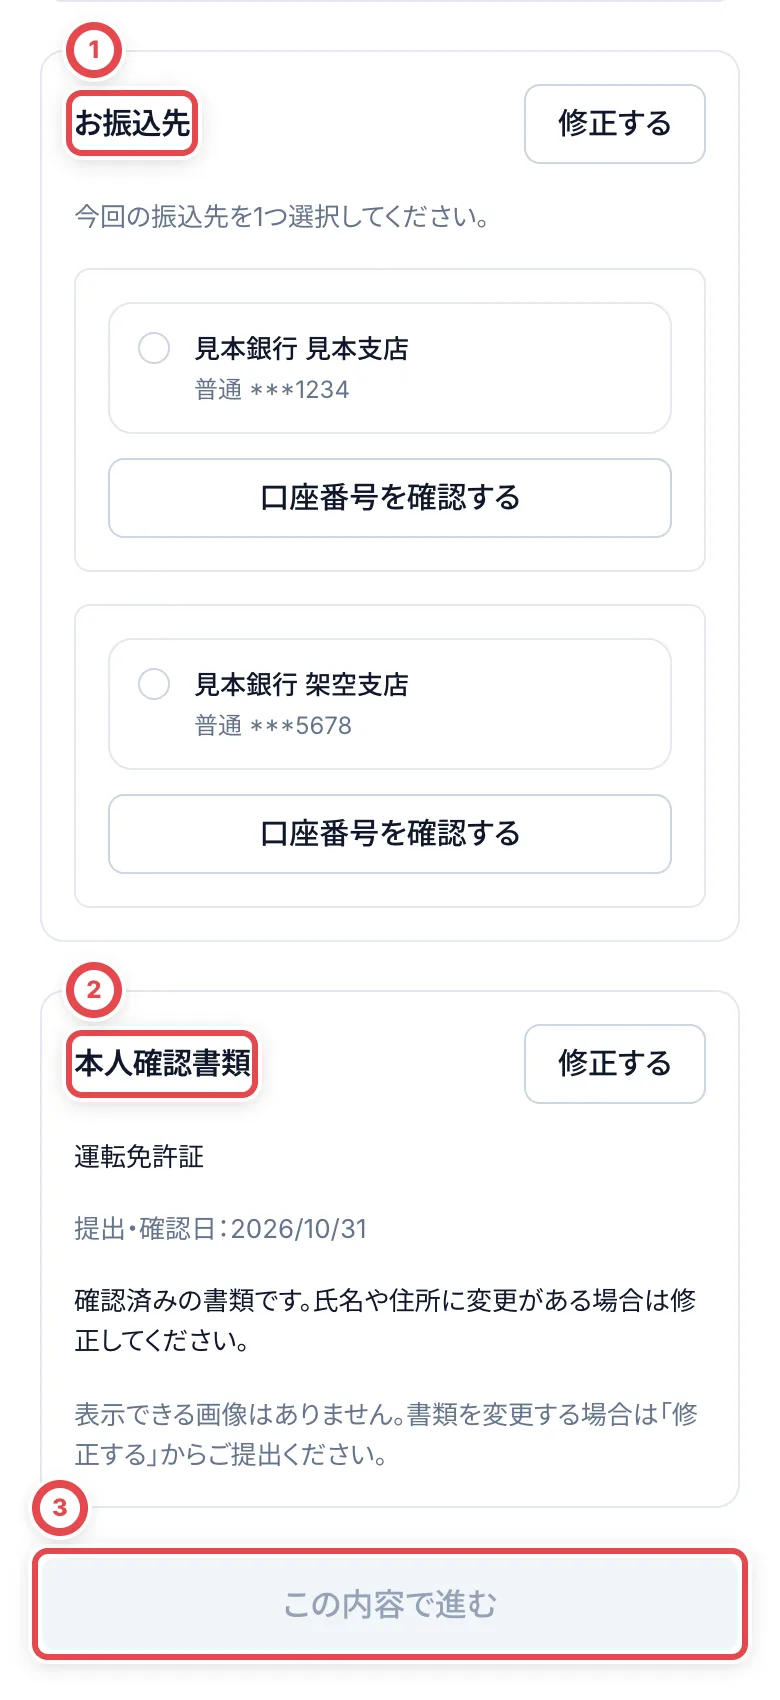 Check the payout account at ① and document status at ②. Continue with ③ after the required information is ready.
If current documents are requested, use that section's 「修正する」 to submit them. An old approval cannot satisfy a new-document requirement. The shop reviews the latest submission using [Identity verification](/en/guides/purchase/identity).
## 6. Confirm and continue
After reviewing the profile, selected payout account and documents, click 「この内容で進む」 (Continue with these details) at ③. The review is recorded and the remaining required sections open. If the customer chose to send the label later, they can reopen the same link while it is valid to submit the photo.
The confirmation for this deal survives a reload. If another screen or shop member changes the registered data afterward, the customer must review the current values again.
## Troubleshooting
| What's happening | What to check and how to recover |
| ---------------------------------------- | ------------------------------------------------------------------------------------------------------------------------------- |
| The code does not arrive | Check the registered inbox and spam folder. Contact the shop rather than trying to send to another address. |
| The code is incorrect or expired | Use the newest six-digit code. Request a new code if 10 minutes have passed; do not use the old code after resending. |
| Resending or verification is limited | Follow the wait time. Resends require one minute and are limited to five per hour; each code allows five verification attempts. |
| Continue is disabled | Select this deal's payout account and satisfy any current-document requirement. |
| Only part of the account number is shown | The default is the last four digits. Reveal the number only when needed. |
| No document images are available | Some manually recorded checks have no displayable images. If documents need changing, submit them from Edit. |
| Another screen changed the data | Use 「最新の登録内容を読み直す」 to reload and review the current values before editing or confirming. |
| The link does not open | Ask the shop to check expiry or reissuance. Do not use another deal's link. |
---
# Research requests and review requests
Source: https://docs.toreca-cloud.com/en/guides/purchase/research-and-reviews
| Feature | What you ask for | When to use it | Who answers |
| -------------- | ---------------------------------- | ----------------------------------------------------------------------------------------------------------------------------------------------------------- | --------------------------------- |
| Research | Have a card's market price checked | For online purchases when the market price doesn't fill in automatically (fewer than 2 SNKRDUNK sales in the last 30 days, or the card can't be identified) | A researcher |
| Review request | Have a quote's contents checked | When the quote includes a card at or above the **Review threshold** | A member other than the appraiser |
**For online purchases, you cannot present a quote while waiting for research or a review. In-store purchases do not request market research or second reviews.** Both have a list under **Buying** in the sidebar.
## Research
Research requests are for online purchases. Store purchases do not show individual or batch research actions. If a market price cannot be fetched, enter a reference price you have checked. Quote review requests are also used for online purchases.
### 1. Request research (the person appraising)
On the quote screen of a deal, click ① **Request market research** on the card's row. On a row where the card hasn't been identified, it reads **Request card and price research**. On the customer's **Appraisal requests** tab, nothing is asked on the spot: you add cards to research and ask about them together with **Go on with selected** (see "Add cards to research on the Appraisal requests tab" below).
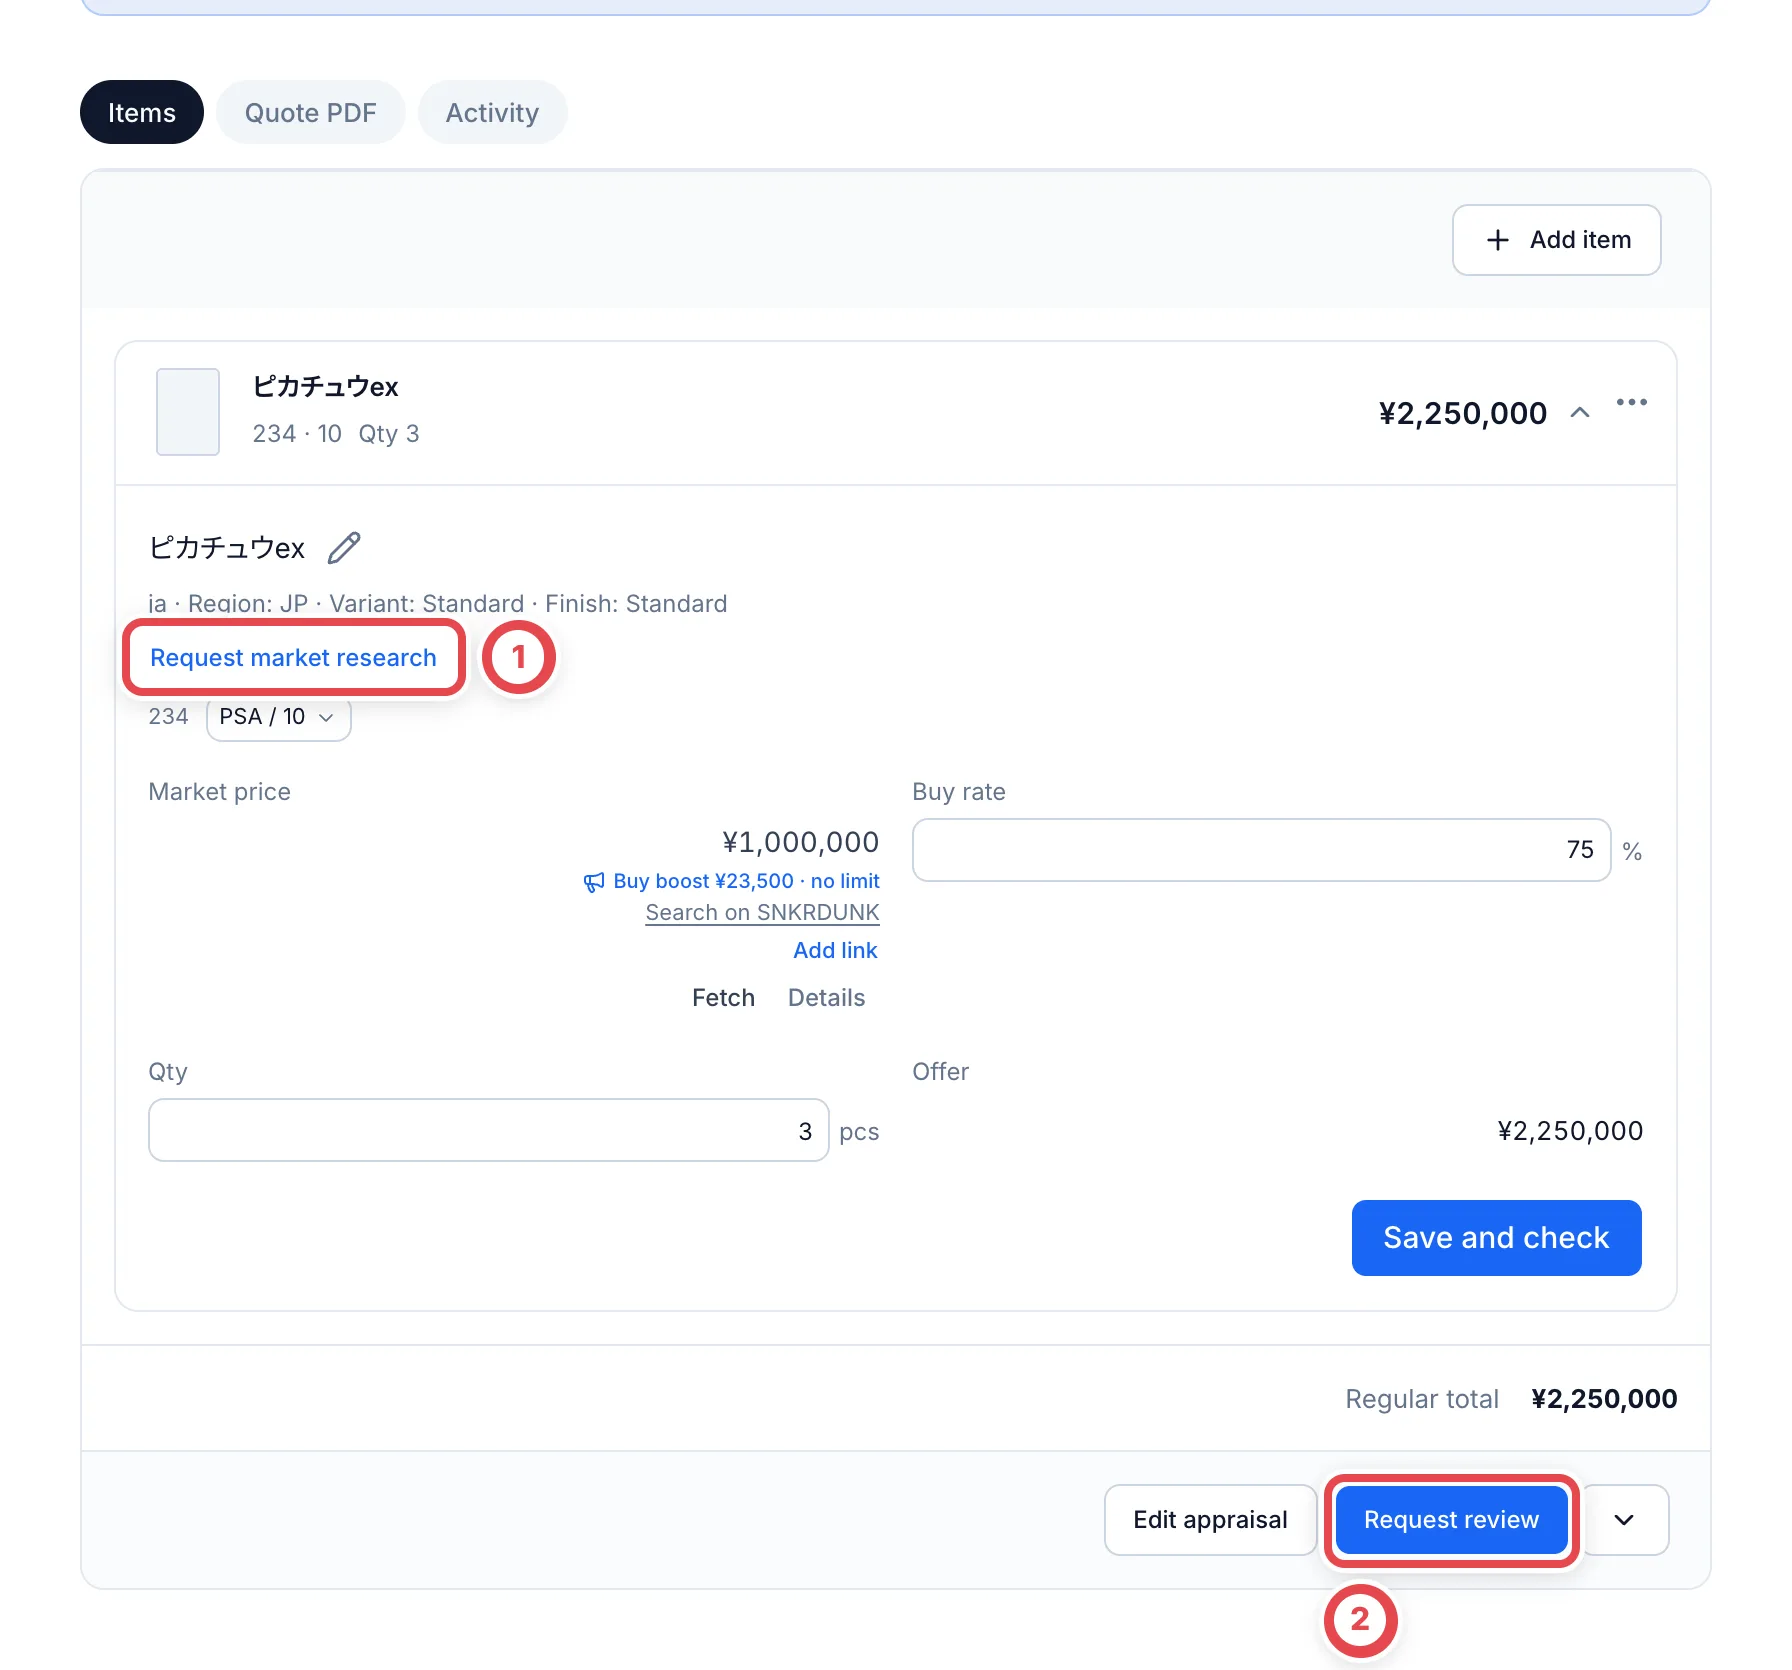 In the dialog that opens, check ① **Reason and details**. Click a suggestion to fill in a reason, then add to it in the box. To choose who handles it, pick under ② **Researcher (optional)**. If you don't, any available researcher takes it. Finally, click **Request research**.
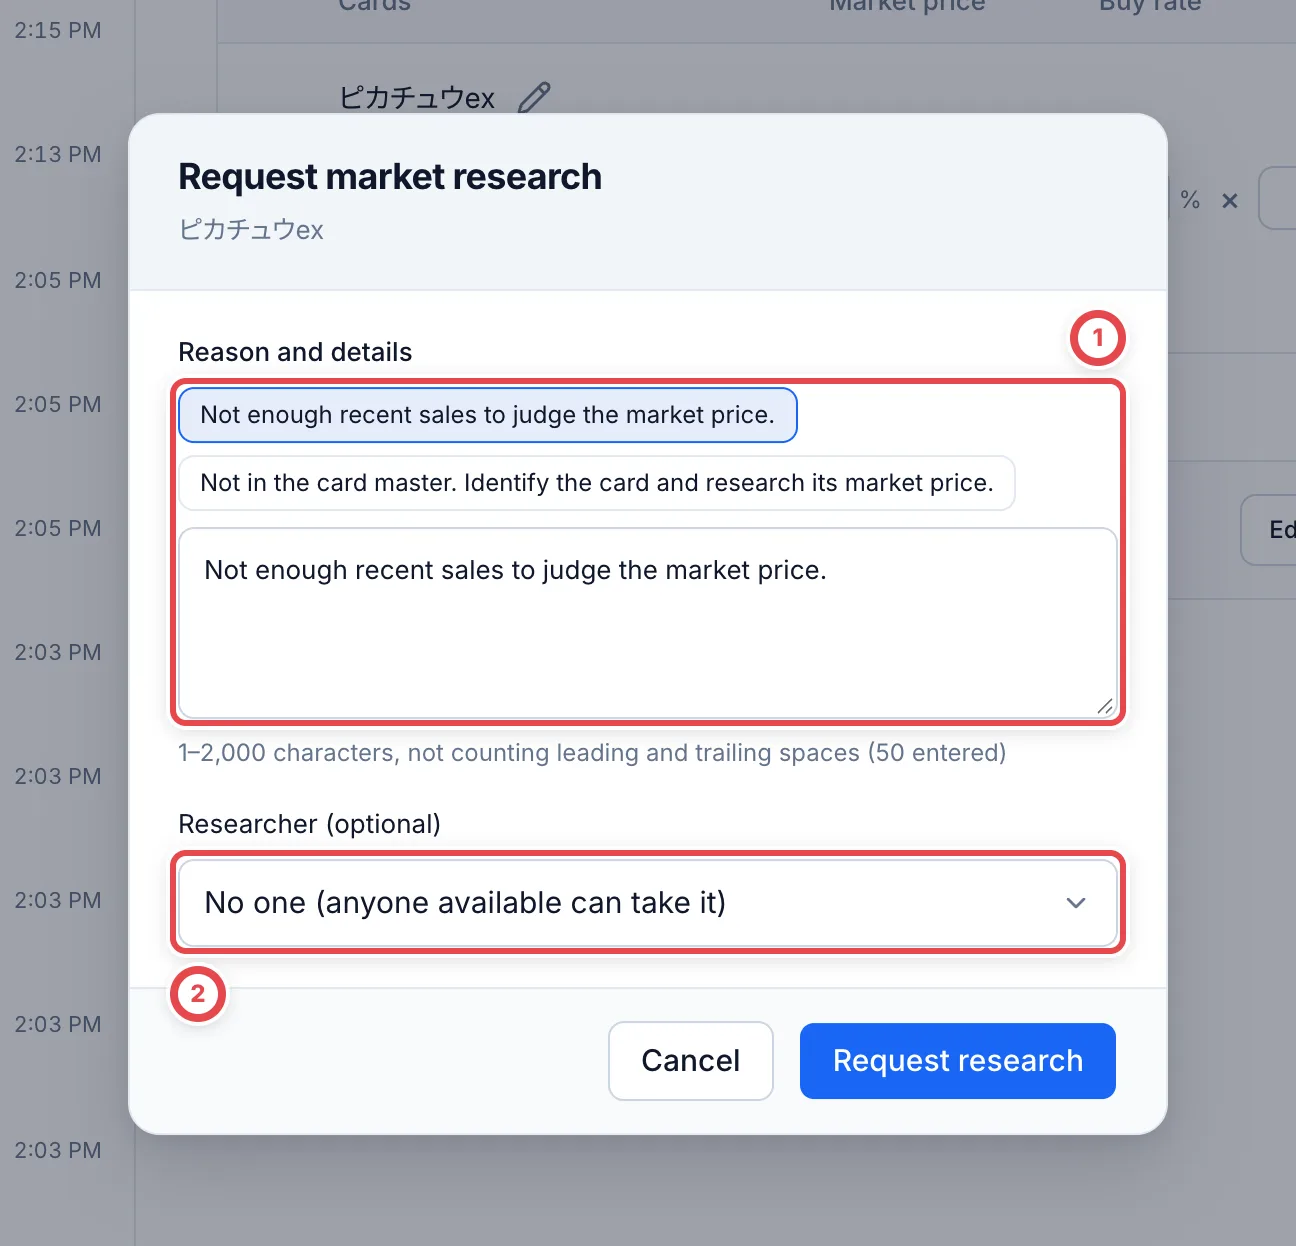 To ask about several cards at once, use **Request market research in bulk**; the action reads **Request research in bulk** when unidentified lines are selected. Check the target lines, reason and assignee before requesting. One request supports up to 100 lines. If lines are skipped or only some cases succeed, already-created requests remain. Check the reported count and remaining lines against the latest state.
### Add cards to research on the Appraisal requests tab
On the customer's **Appraisal requests** tab, click **Add to research** below a card, fill in **Reason and details** and **Researcher (optional)**, and click **Add to research**. Nothing reaches a researcher yet. The card gets a **Research planned** tag, which stays after a reload and is visible to other members.
Click the tag to change the reason or researcher and **Save**, or to **Take off research**. From the **Appraisal requests** tab, the research is for the grade chosen in the row's **Condition and grade**. You can add a card even when no grade is chosen.
### Sending cards to second appraisal together once research is done
Select cards on the customer's **Appraisal requests** tab and click **Go on with selected**. Research is requested together, and once the answers are in the selected cards become one second appraisal request and one quote. Of the selected cards, these go to research:
- Cards with the **Research planned** tag, each with the reason and researcher it was added with
- Cards without the tag whose reference price is empty. The dialog lists them apart under "Not added to research, but going to research because the market price is empty", and asks for **Reason and notes**
The **Research planned** tag stays on cards you didn't select. The dialog also asks two things.
| Choice | Option | What happens |
| ---------------------------- | ----------------------------------------------------------- | -------------------------------------------------------------------------------------- |
| When research is done | Go to second appraisal automatically | The selected cards become one request and go on by themselves once the answers are in |
| When research is done | Let me check the answer and request second appraisal myself | Only research is requested. After reading the answer, select the cards and go on again |
| If research returns no price | Stop, and I will deal with it | The request stops until you choose what to do in its frame |
| If research returns no price | Go to second appraisal with the price empty | It goes on empty, and the reviewer checks the amount |
**Go on without research** sends the cards on with their price empty, without asking for research. It isn't offered while a selected card is **Research planned**; to go on without researching a card, open its tag and choose **Take off research**. Only online purchase cards can be researched. A box, pack or deck with no price goes on empty. If no card is **Research planned** and every card has a reference price, no research is involved.
On the tab, the selected cards then sit in a frame such as **Request · 3 cards**, and can't go into any other research or second appraisal request. Cards not being researched show **On hold**, and their reference price and rate can still be changed. **Cancel request** puts the cards back and withdraws research still waiting for an answer.
Research returns no price when the answer is a send-back or **not in the card master**, or when the request is withdrawn. A request set to stop then offers these choices:
- Request research again
- Go on with all the cards, leaving the price empty
- Take that card out and go on. It returns to the tab. If other research is still open, the rest wait for its answer
- Cancel the request
If every card then comes to less than the second appraisal threshold, the request stops at a quote draft and returns to whoever asked instead of going to second appraisal. The same happens when nobody else in the shop can do a second appraisal. A card left empty can't be judged, so those go to second appraisal.
### 2. Answer research (the researcher)
Researchers open **Research** in the sidebar. Requests that haven't been answered are listed on the ③ **Awaiting** tab. Filter them with ④ **Assigned to me** or **Unassigned**.
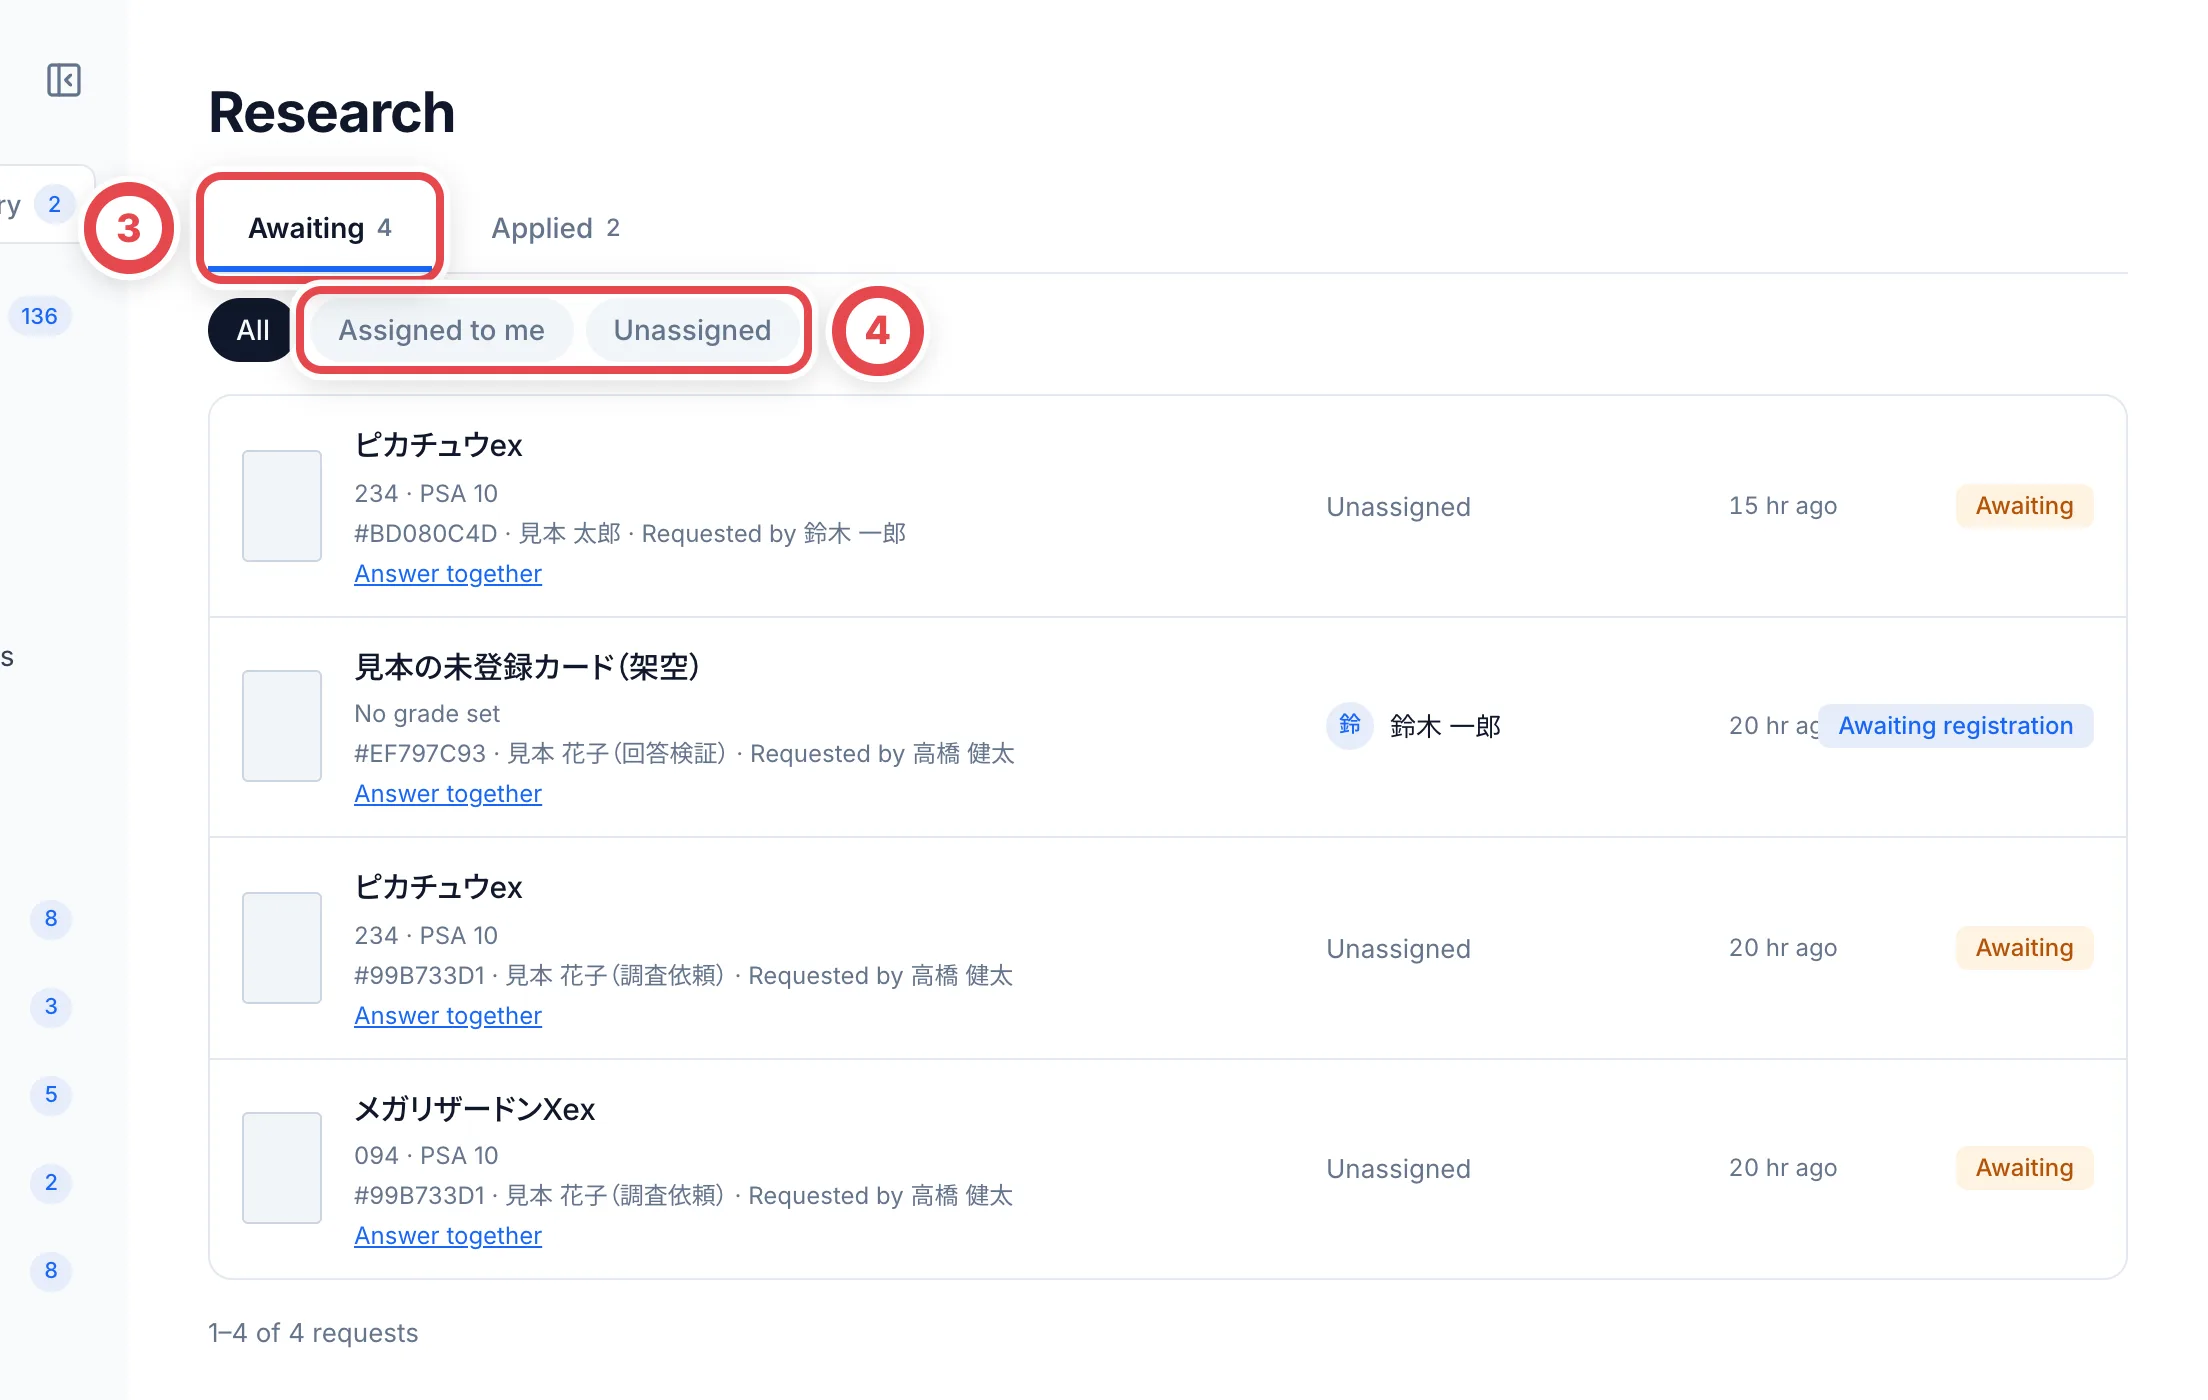 Click a request to see the card's photos, the customer's notes, ⑤ the reason for the request and **Price history**.
1. If **Price history** has a useful record, click **Use this price**. The price and its source fill in the answer, and the record's grade fills in **Grade**
2. Under **Grade**, check the grade you researched. It starts at the grade asked about. If the request has no grade, or you researched another grade, choose it. A market price needs a grade
3. Enter ⑥ **Market price (per card)** and, if needed, ⑦ **Note (optional, add reference URLs here)**
4. Click ⑧ **Send result**
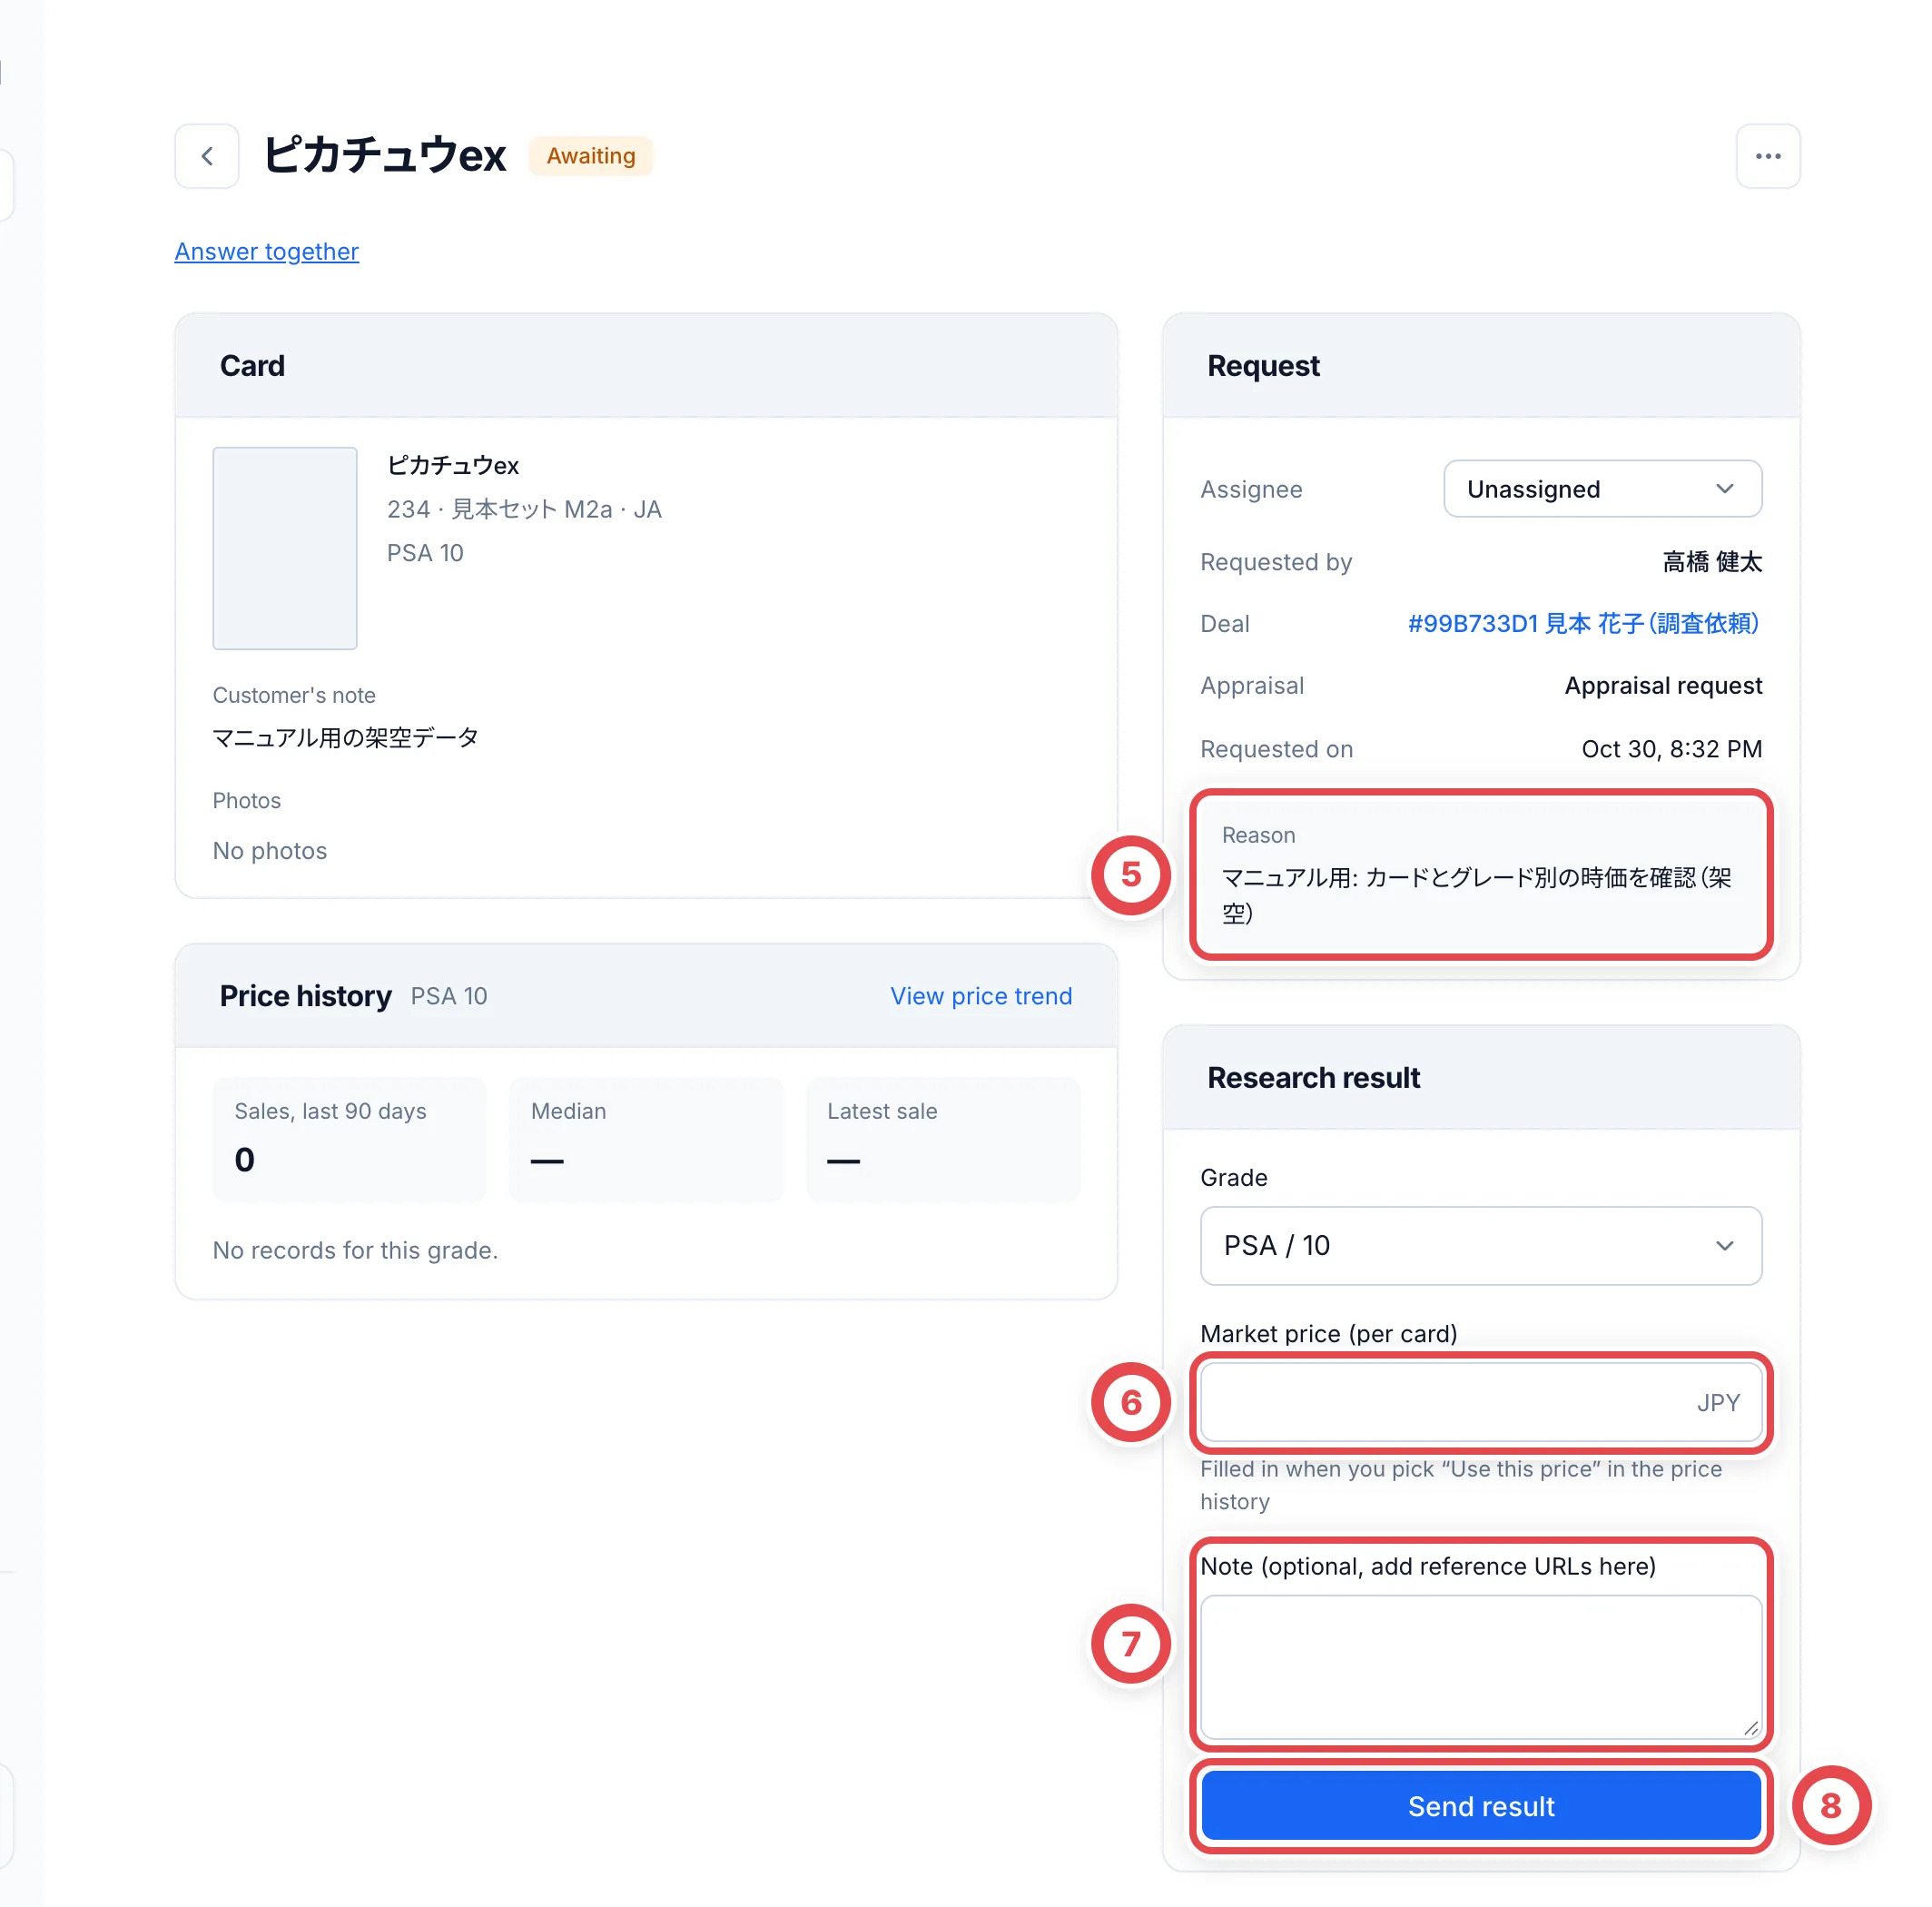 An answer with a card, grade, evidence and positive price also becomes a reference price for other cases in the same shop. Zero or ungrounded answers are not registered. See [Register and reuse a shop reference price](/en/guides/purchase/appraisal#register-and-reuse-a-shop-reference-price) for checking, correction and invalidation.
### Answer several requests together
For a batch request, use **Answer together** at the top of its detail page to open the cards from the same request round. Only checked rows at ① are saved. Confirm ② **Grade**, ③ **Market price (per card)** and the source/reference URL in ④ **Note**.
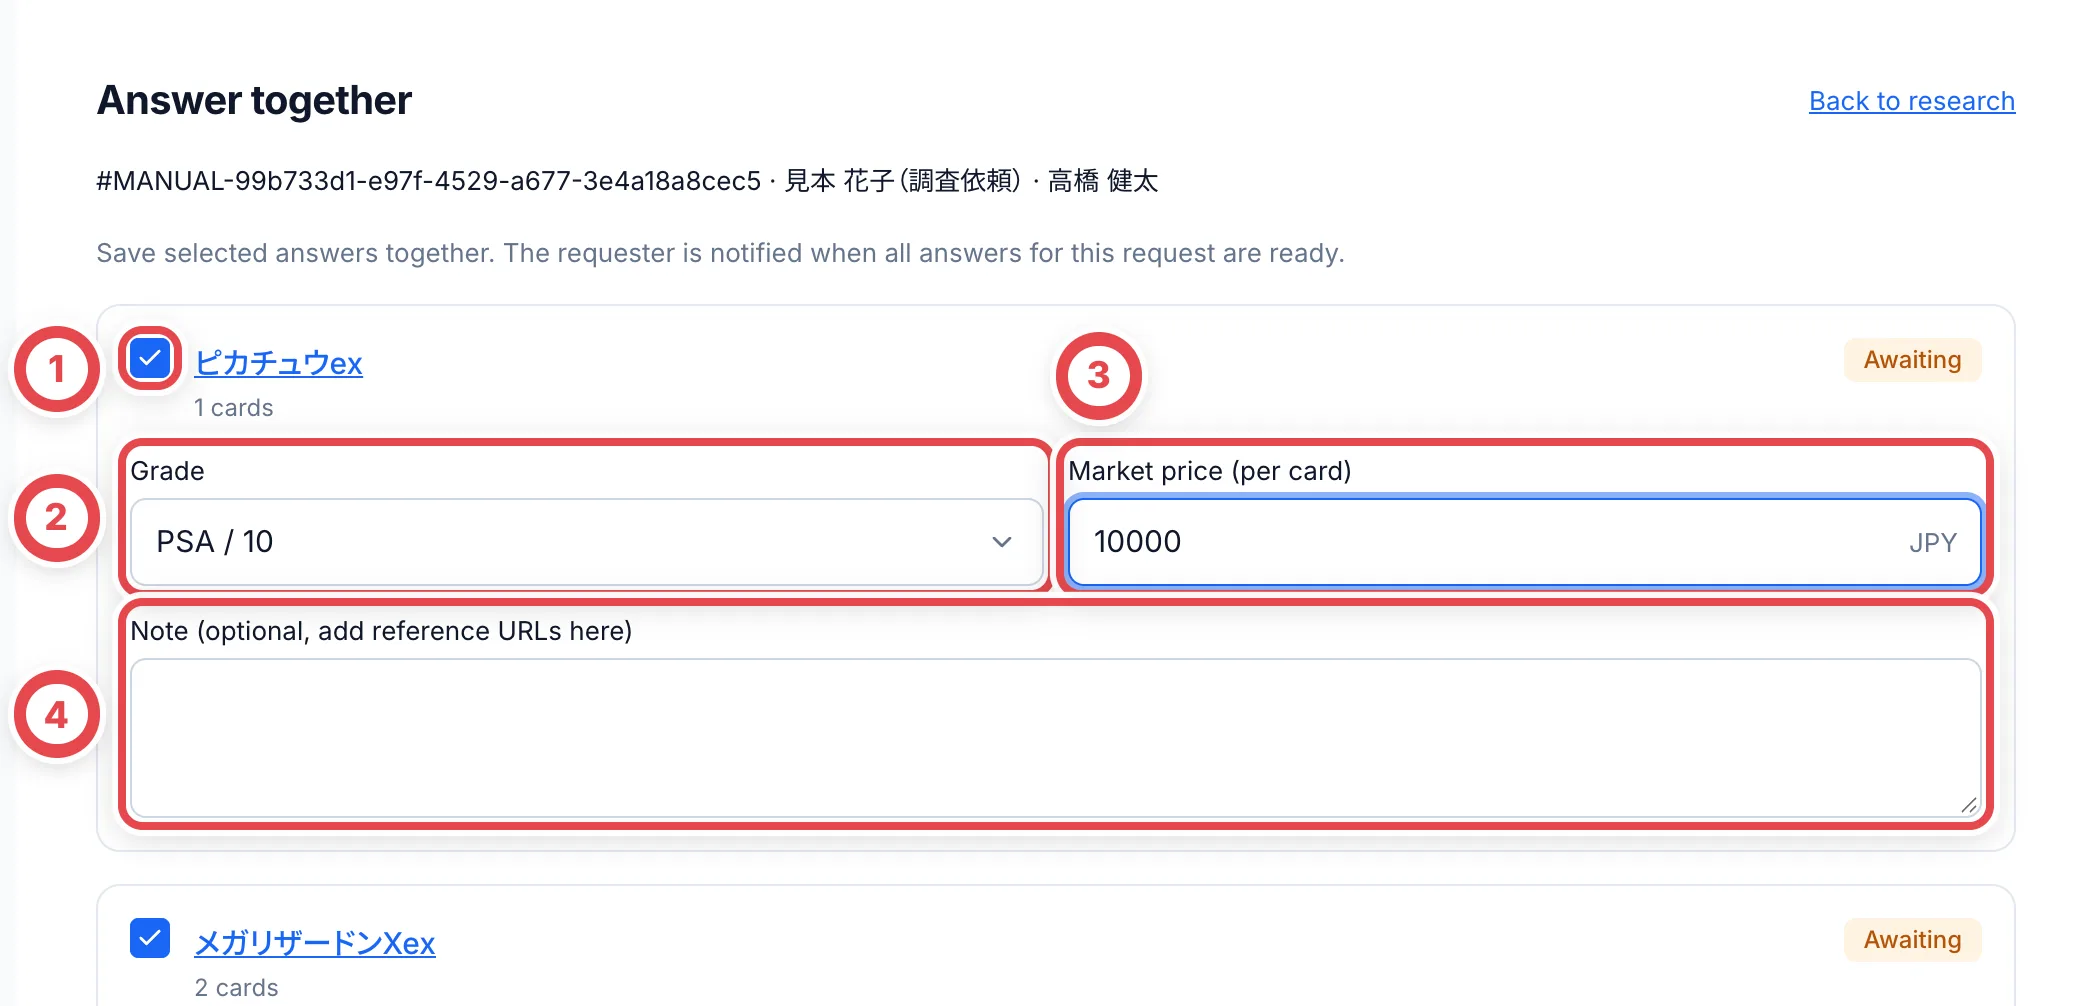 For an unidentified card, **Answer type** can be **Not in card master**. Check the card name and number. Enter a price and grade only if a price was found; do not invent a zero price when it is unknown.
Use ① **Submit N answers** to save the selected rows. You can answer part of a batch and continue later. **The requester is notified when the answers for that request round are complete.** Withdrawn rows are accounted for separately. Older individual requests continue to notify per answer.
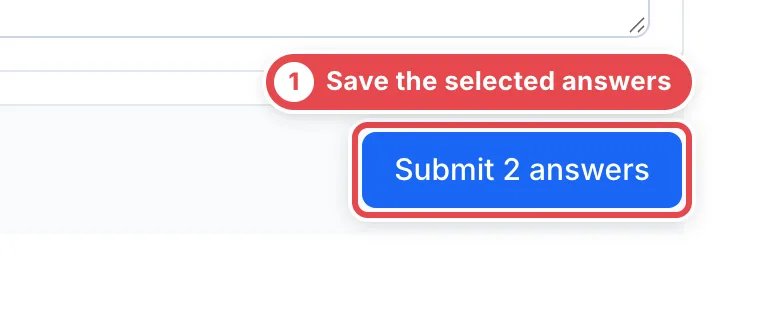 Rows assigned to another researcher, moved to another round or marked read-only cannot be edited. If saving reports a change, copy your input before loading the latest state; reloading resets the fields.
### 3. Receive the answer (the person appraising)
After an answer, compare its card, grade, price and source. The destination of the price depends on the current grade and quote draft. Open **Research result** in To do, then continue to quotation or review.
The grade the researcher confirmed in the answer becomes the row's **Condition and grade** on the **Appraisal requests** tab. A grade chosen on the screen, saved in the draft or from the previous quote stays instead. The answer's price fills the reference price only when the row's grade is the answer's grade. Otherwise, the answer's grade and price show under the reference price, such as **Research answer: PSA 9 · ¥9,000**. For a card on a quote draft, the draft's grade changes to the answer's grade too.
### Research again at another grade (the person appraising)
On the **Appraisal requests** tab, changing the **Condition and grade** of a card researched at its current grade asks **This card was already researched at its current grade. Change the grade?** first. **Change and request research** changes the grade and opens the research request for the new grade straight away. **Cancel** changes nothing.
| State of the research | Researching again |
| ----------------------- | ------------------------------------------------------------------------- |
| Awaiting or in progress | The same request moves to the new grade, and its researcher is notified |
| Answered or applied | Research is requested again for the new grade. The earlier answer is kept |
Earlier answers (price, grade, who answered, note and time) are shown under **Earlier answers** on the research request.
### For a card that isn't in the card master
For a request where the card can't be identified, the researcher can choose **Not in card master** under **Answer type**. When they send it with the card name and card number, Toreca Cloud is asked to add the card. Once it's added, the requester clicks **Use added card and research again** to redo the research.
### Withdraw or decline
| When | Who | What to do |
| ------------------------------- | -------------- | ------------------------ |
| The request is no longer needed | The requester | **Withdraw request** |
| You can't look into it yourself | The researcher | **Decline and unassign** |
## Review requests
A review is a check by a member other than the appraiser, made before the quote goes to the customer. Set the **Review threshold** in [Buy rates](/en/guides/settings/pricing).
### 1. Request a review (the person appraising)
On the customer’s **Appraisal requests** tab, you can select unidentified cards or rows without a grade/price and use **Go on with selected**. If none can be researched, check the selected count in ①, then confirm ② **Request** to hand over identification and pricing. If some can, **Go on without research** in the dialog does the same. Any prices already entered are carried across. Save quantity changes first.
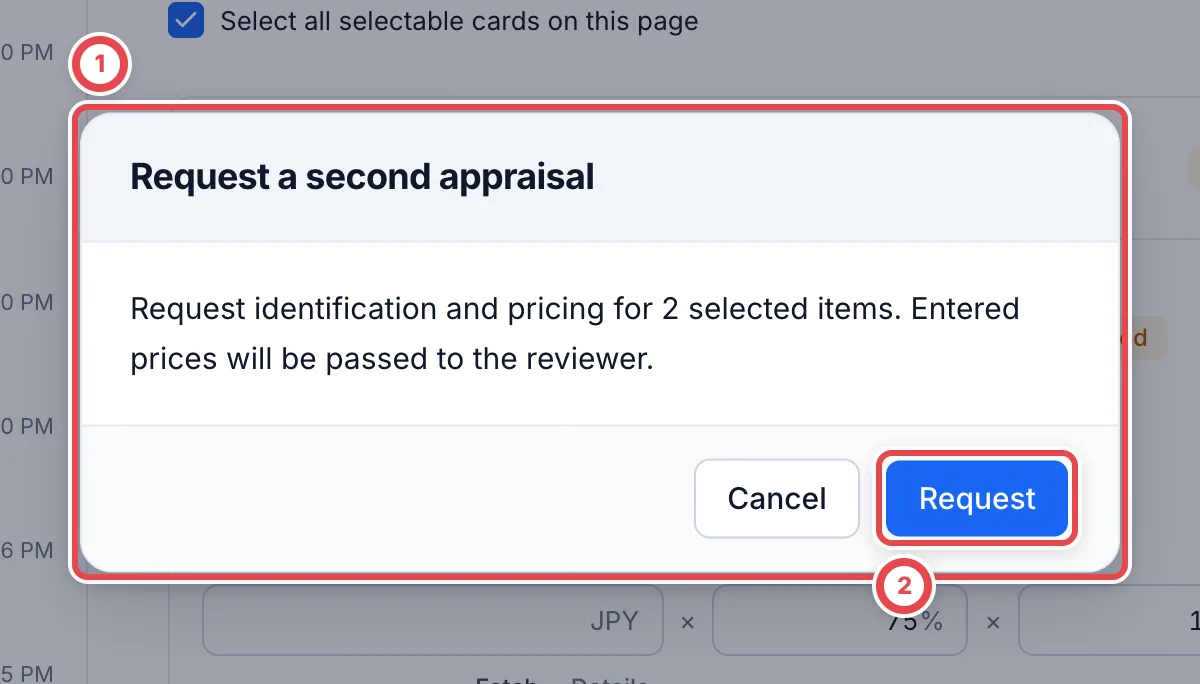 For an already-priced quote, use the following procedure.
Save every appraisal amount, then click ② **Request review** below the items (② in the image above). **Once requested, the quote's contents are locked.** If you change its pricing conditions and save it, you may need to request the review again, depending on the threshold.
To skip the review without requesting it, click **Skip review** beside **Request review** in the final appraisal, or choose it from the button's menu in the preliminary appraisal, and enter a reason. You need permission to skip reviews. No review request notification is sent; the reason and person are recorded, and the quote becomes available to present. Presenting it is a separate step.
A requote needs no review when you only remove cards or change their quantities. If the market prices, buy rates, grades and offer adjustments match the original quote, save and present it directly. If you add a card or change pricing conditions, a review is required according to the threshold.
### Review a request awaiting identification or pricing
Under **Awaiting identification and pricing**, click **Review**. This opens a separate second-appraisal page.
1. Use ① **Identify card** or **Identify product** to check the product and printing. Choose packaging for sealed products. Identifying a product saves that selection immediately
2. Check ② the card’s grade, and ③ reference price and buy rate. For bulk lots, check **Lot appraisal**
3. Once every product and price is complete, compare the total and click **Review and approve**. Click **Review and approve** again in the confirmation to save approval
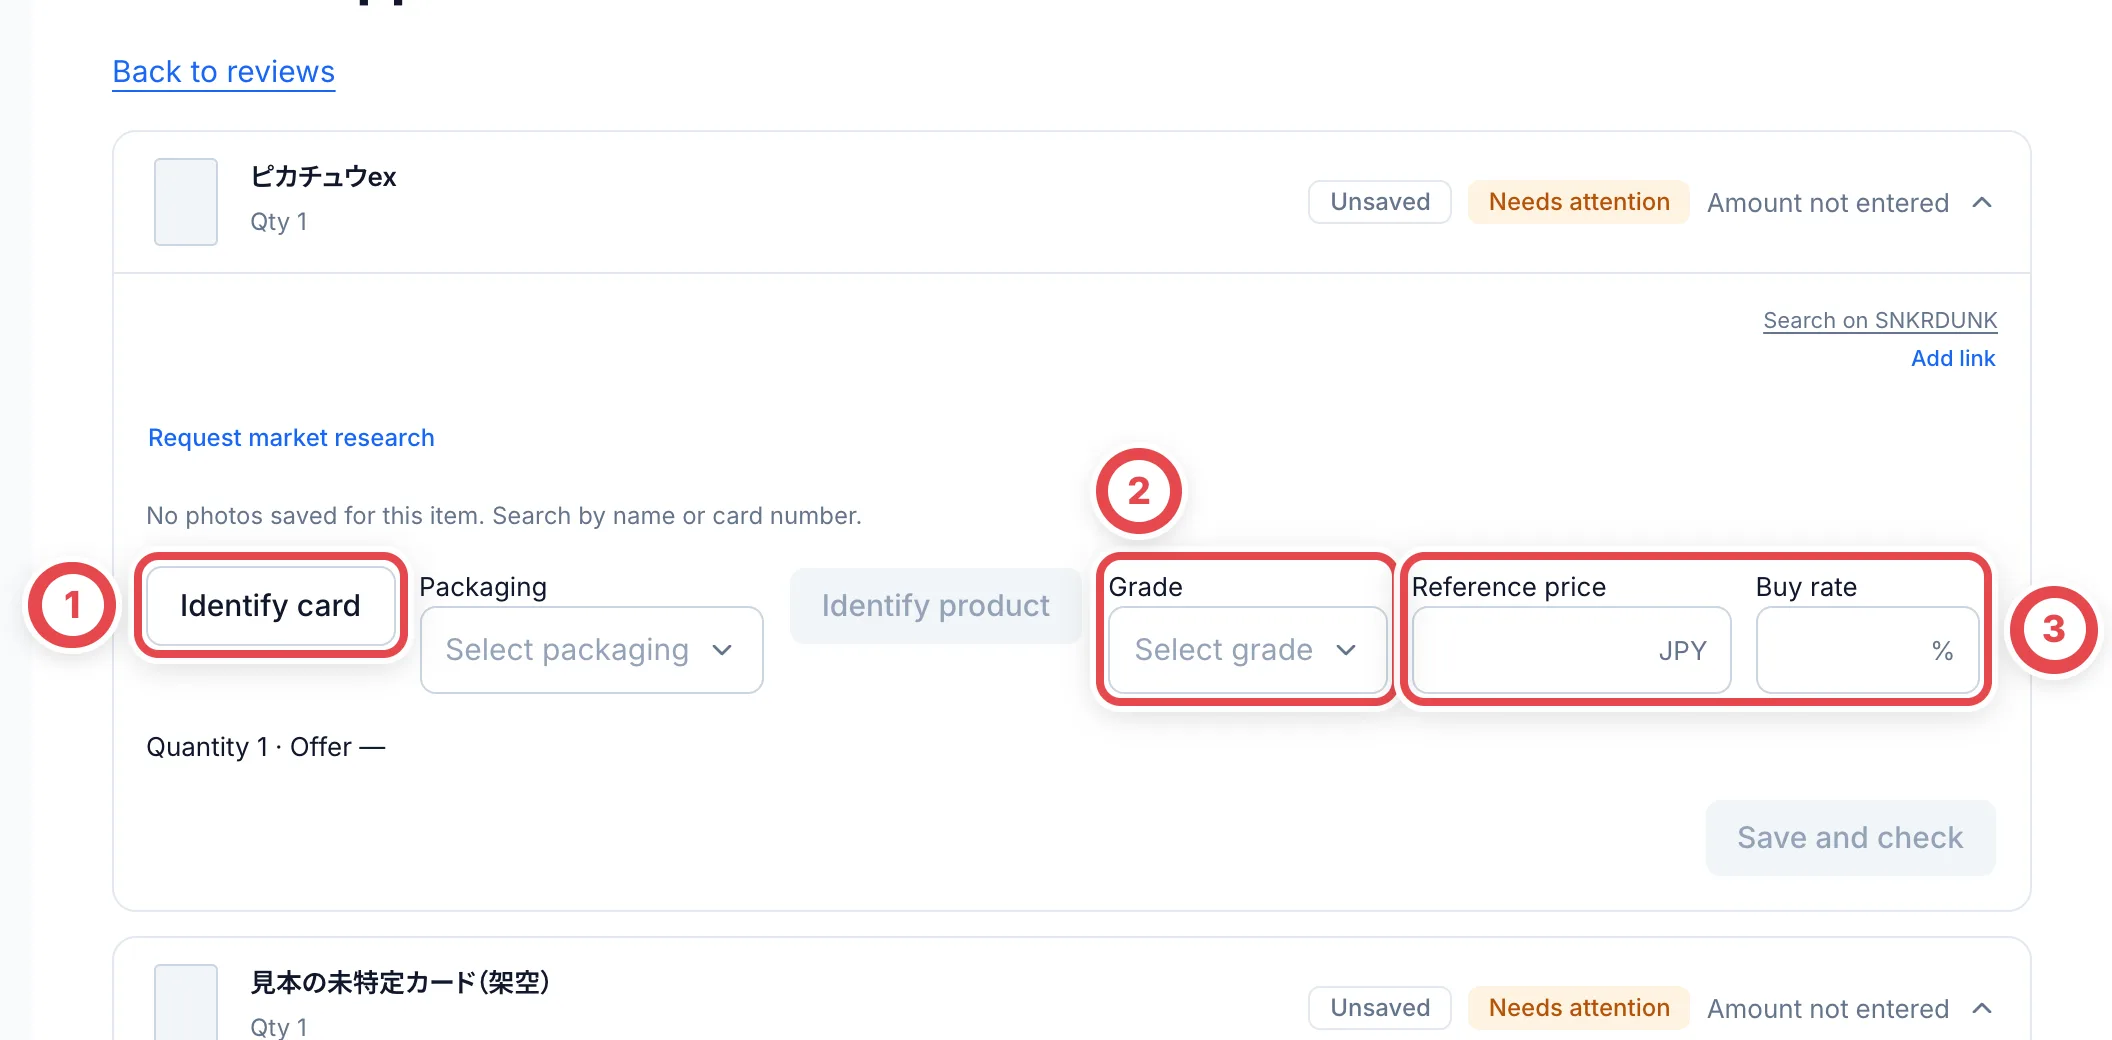 ① **Review and approve** stays disabled until every product and price is complete. The requester also cannot approve their own review. ② **Withdraw request** asks for confirmation and keeps the quote items. Presenting the approved quote is a separate step.
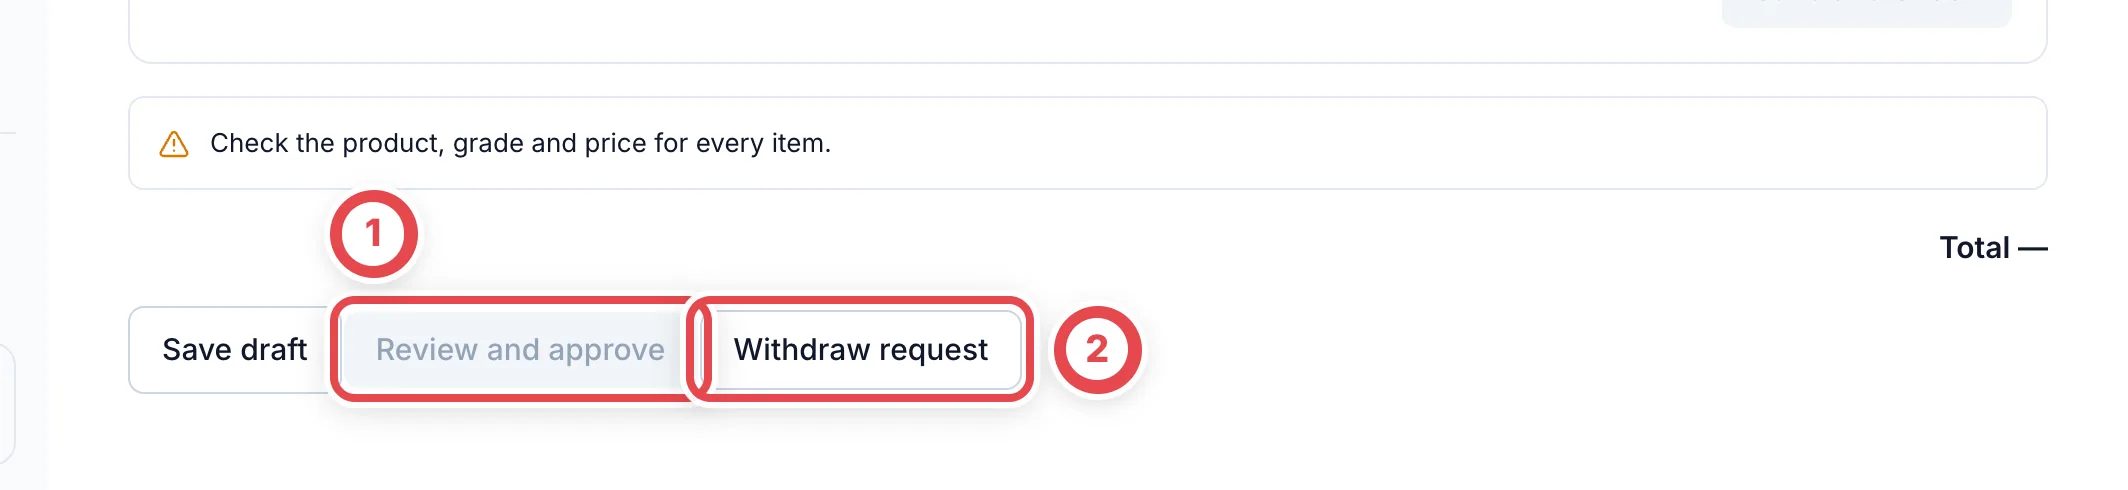 ### 2. Check the quote (the reviewer)
Review requests appear in To do and under **Reviews** in the sidebar.
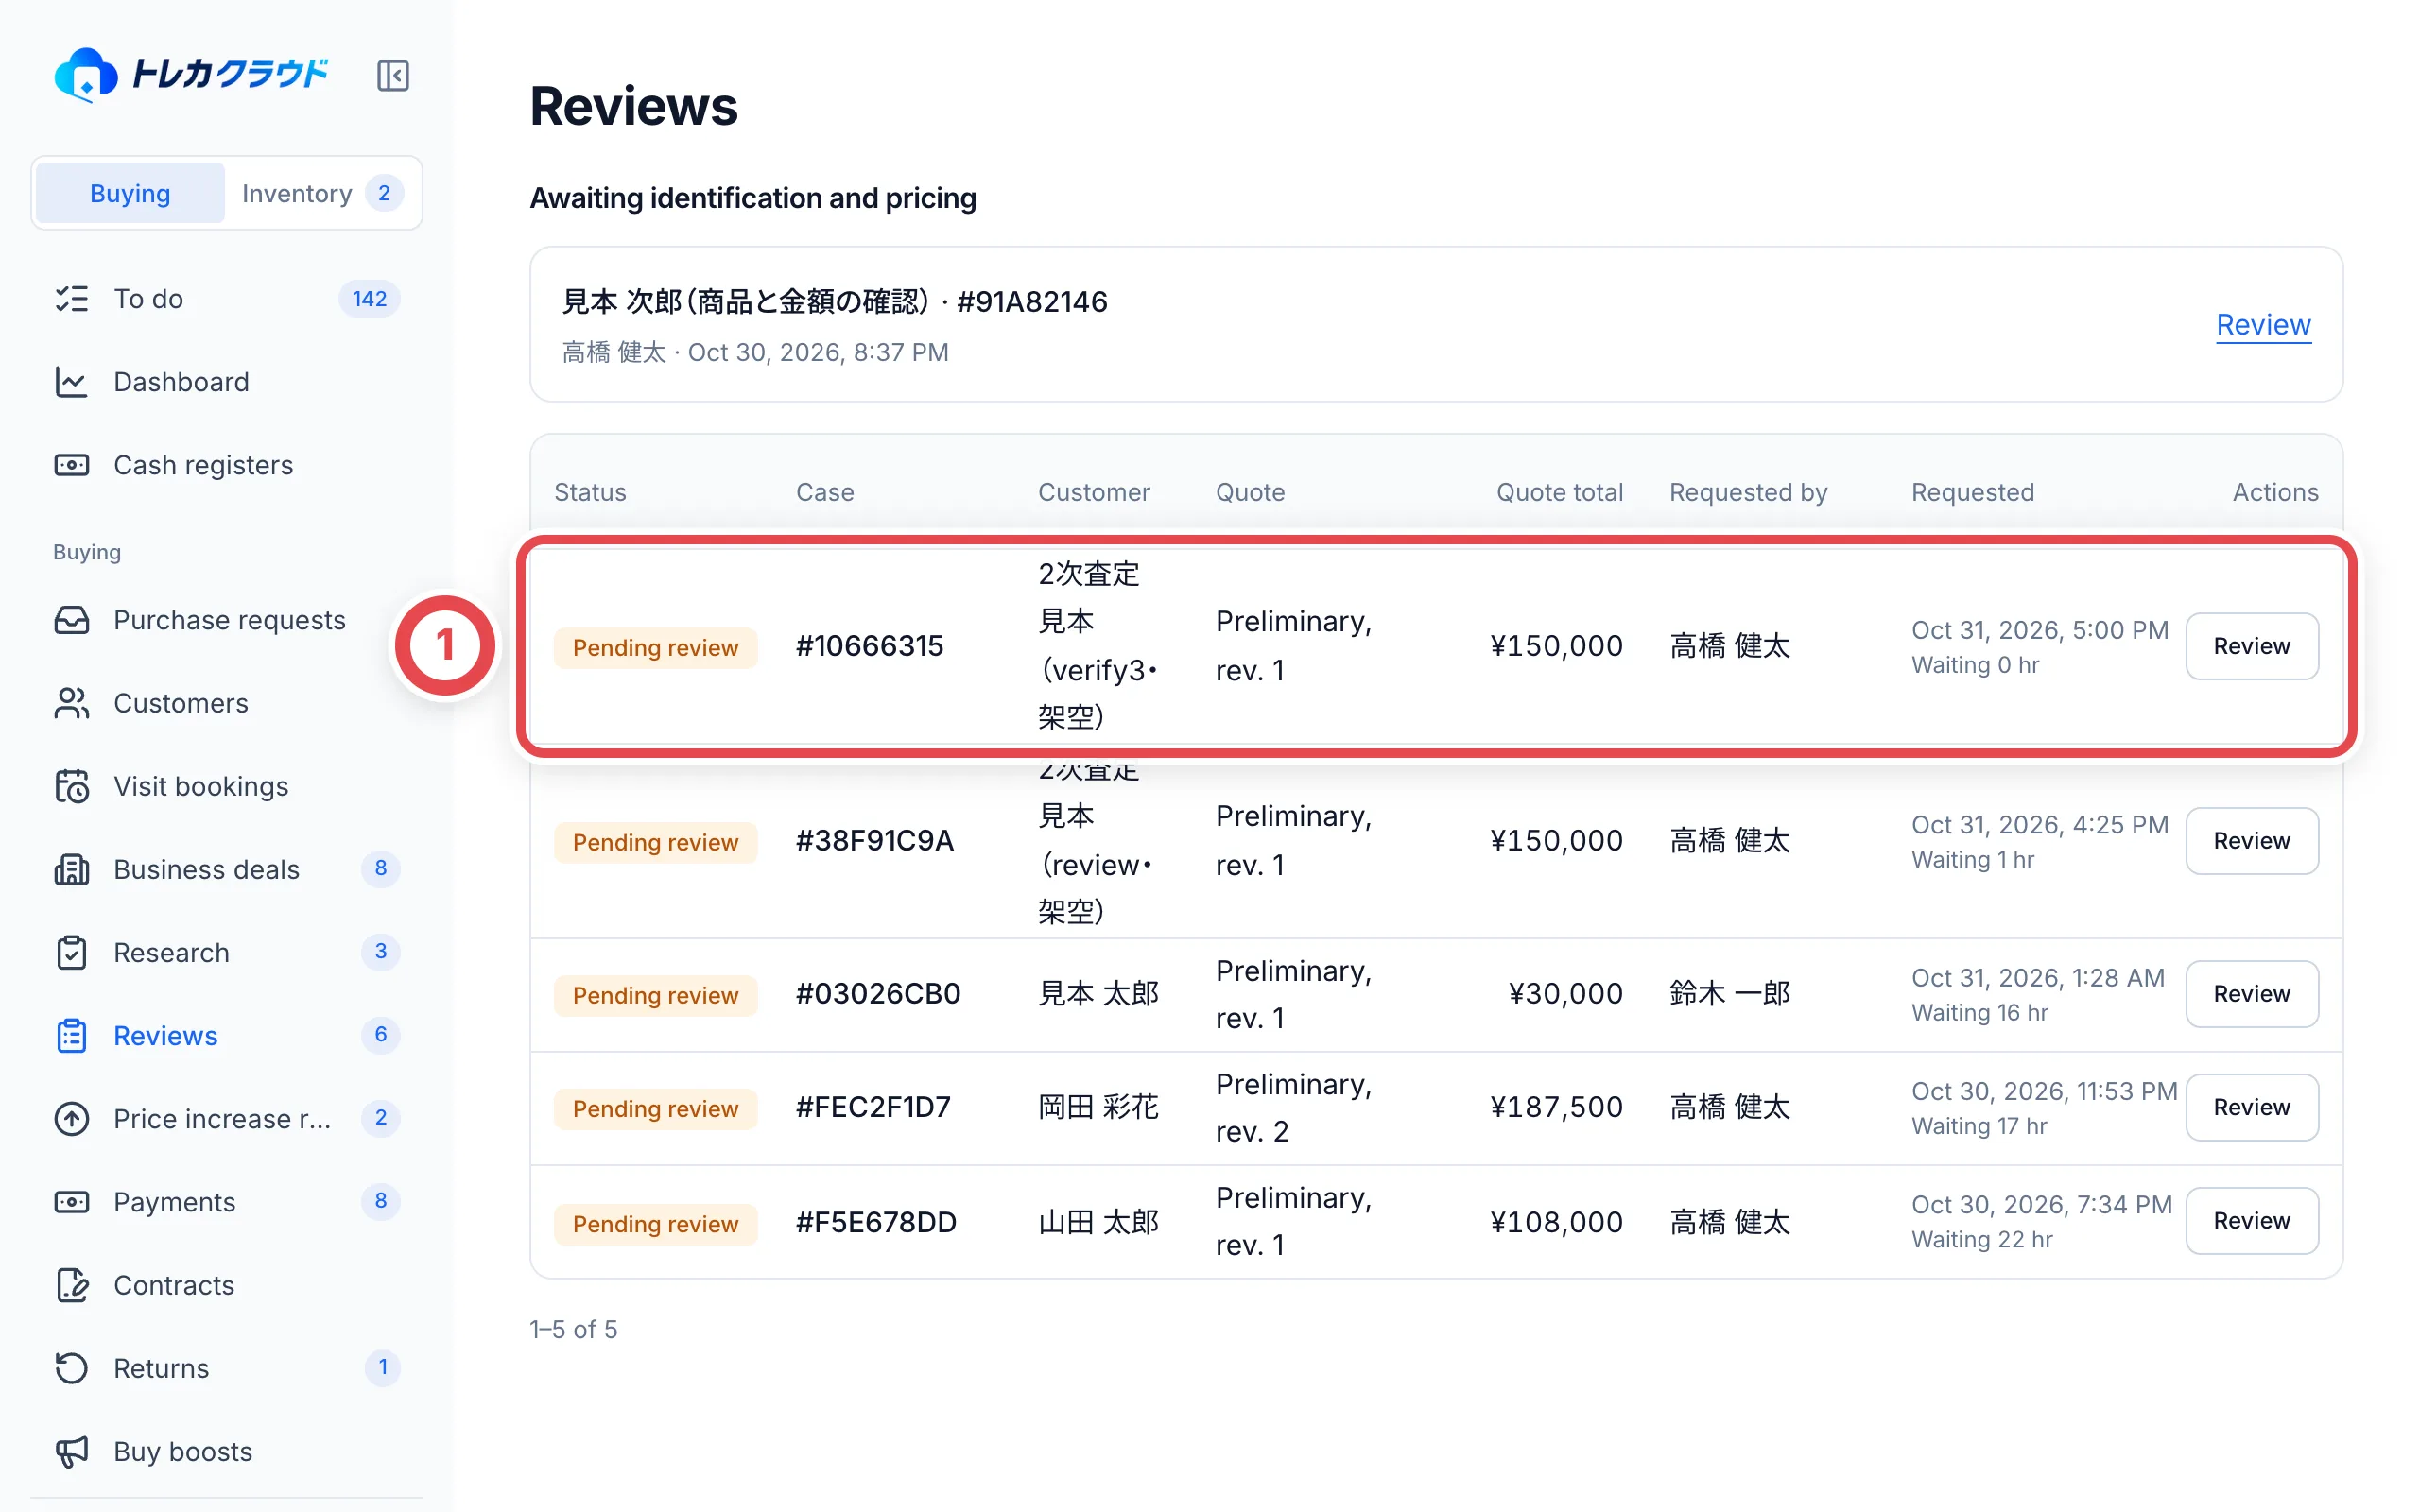 Click **Review** to open the screen for checking the quote.
1. Check the contents on the ① **Appraisal items** and **Quote PDF** tabs. Clicking a card name opens the card's details in a new tab. Under each market price is where it came from: **SNKRDUNK**, **Research answer**, **Registered price** or **Entered by hand**. Clicking **Research answer** opens the research request in a new tab
2. To change an amount, edit the ② **Offer (line total)** on that line. It is the total for that line's quantity. Regular card lines also let you edit the market price and buy rate; check the recalculated total
3. If needed, write a ③ **Review comment (optional)**. The comment is recorded when you confirm
4. If it looks right, click ④ **Confirm**, then click **Confirm** again in the confirmation. If you changed any line, the confirmation lists the amounts before and after, so compare them before you confirm
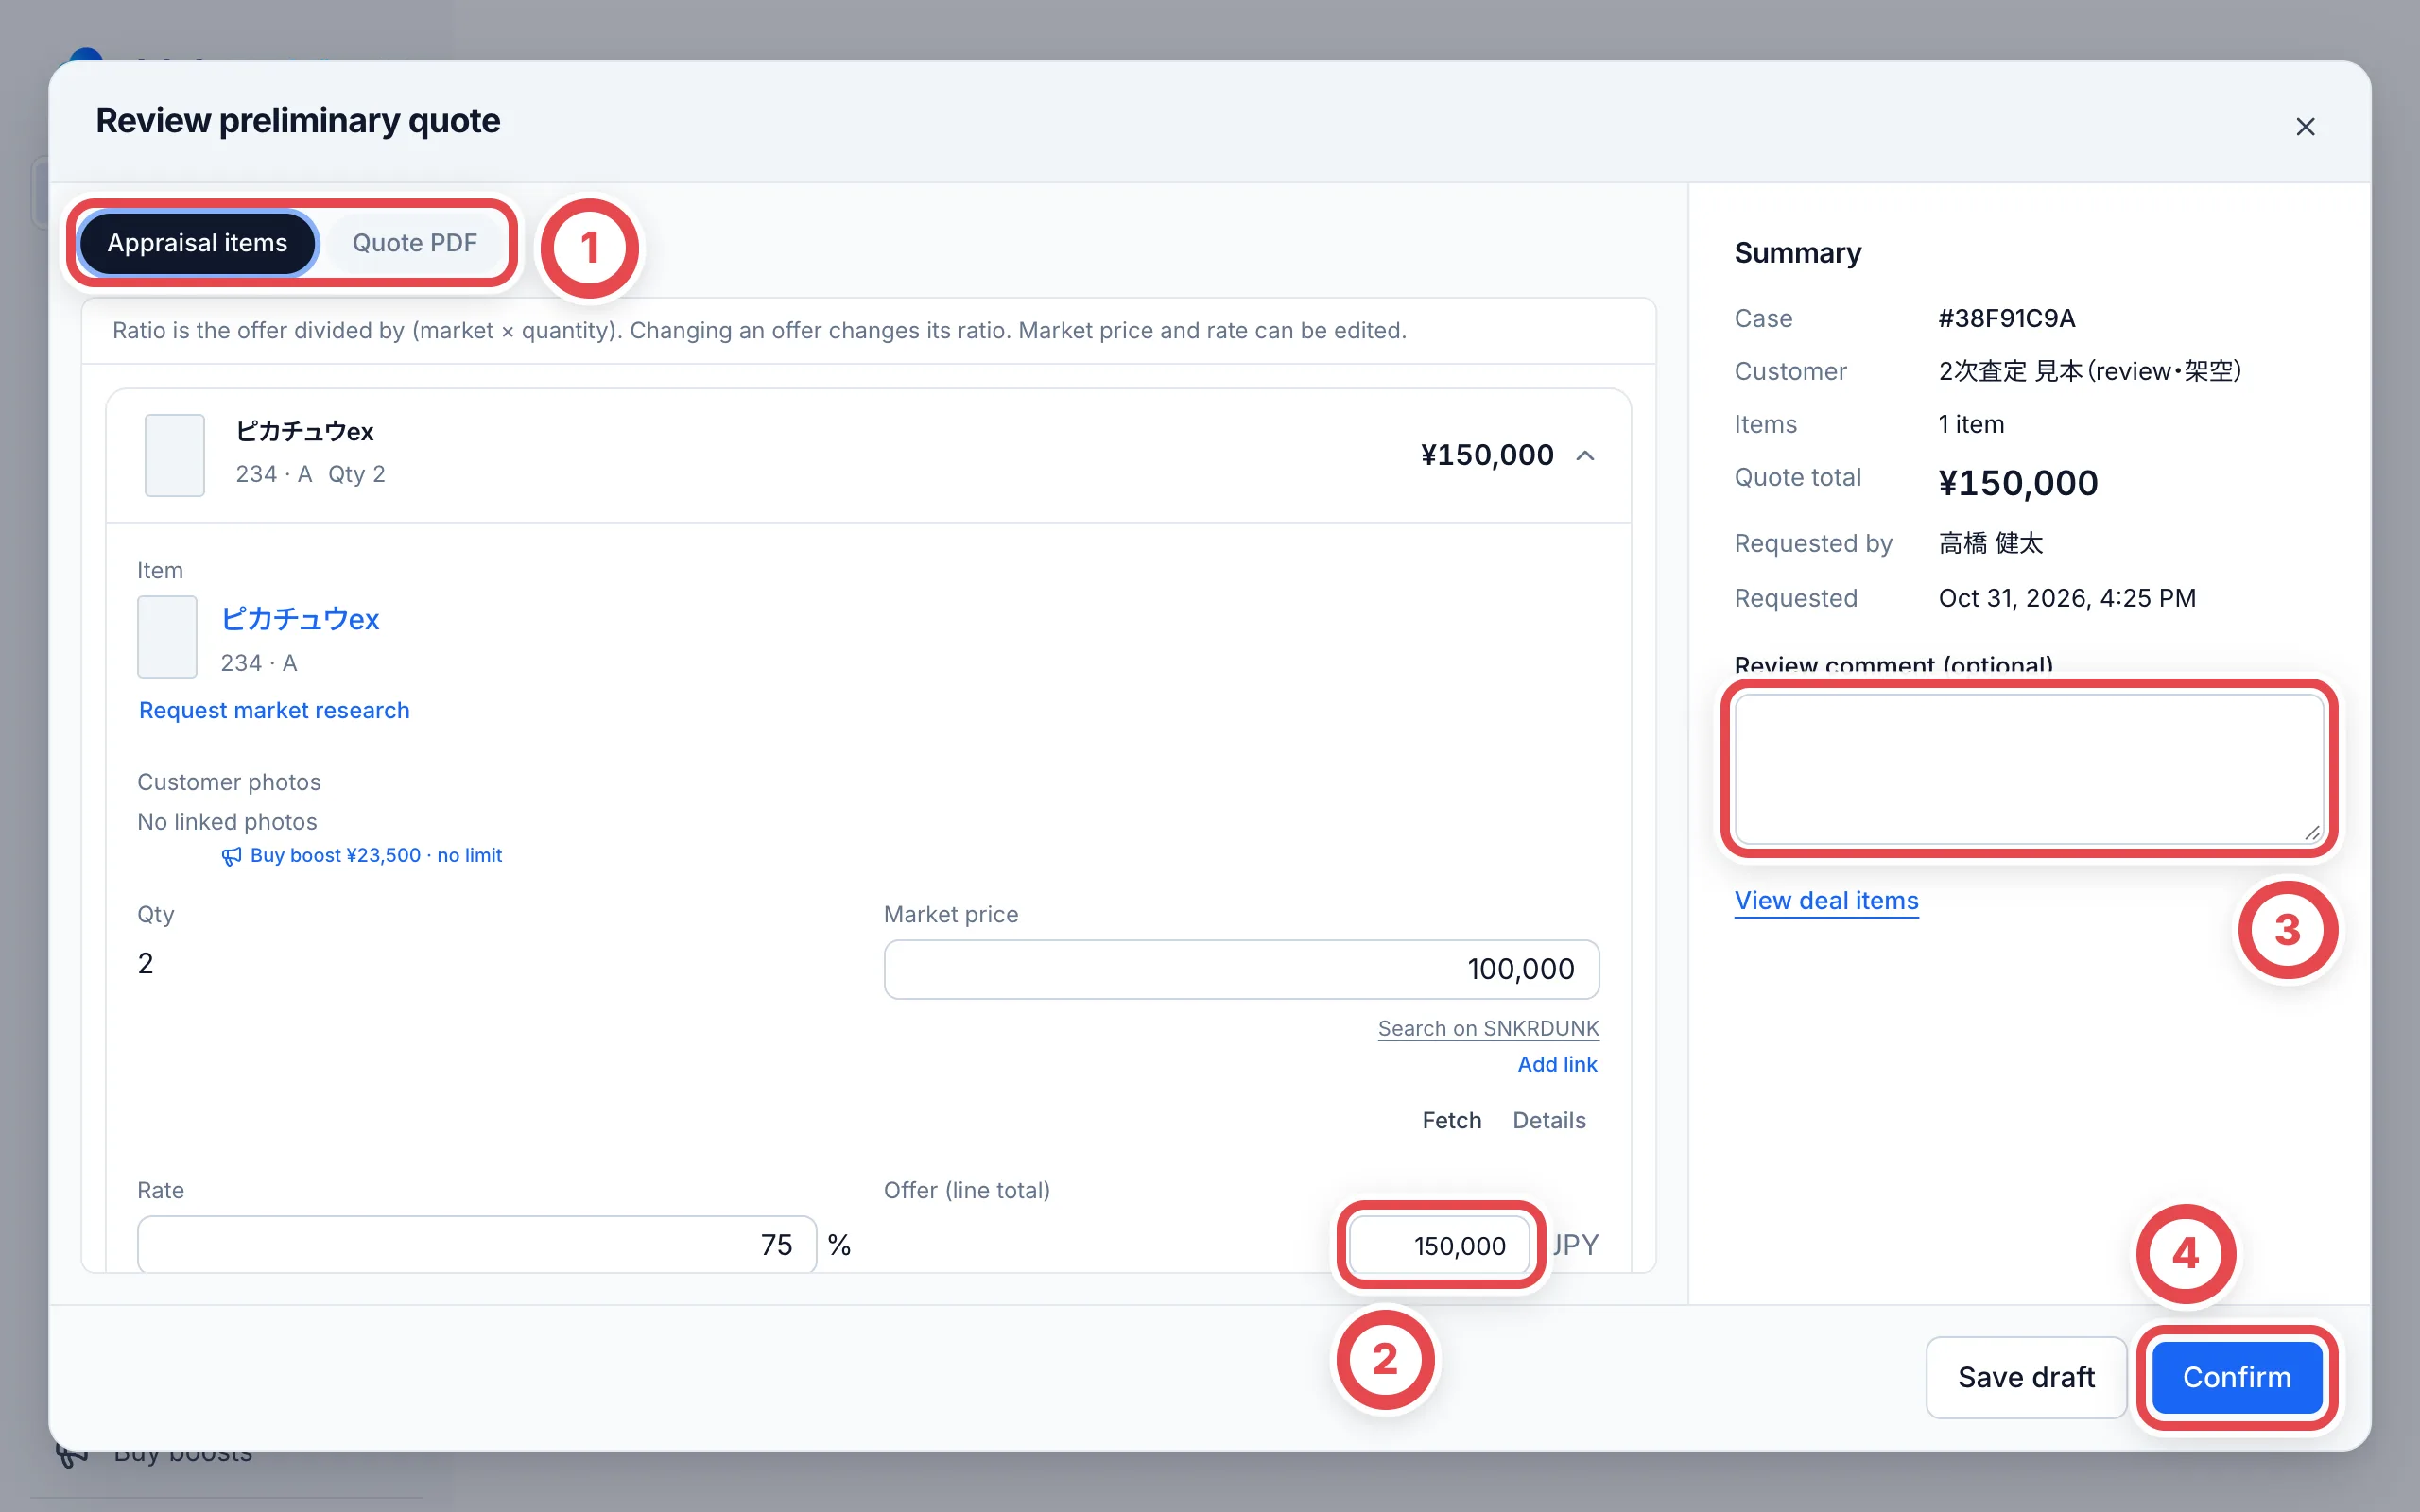 For a per-card final appraisal, compare each card’s certificate number and amount. These amounts are read-only in the review. Correct them from the deal’s final appraisal and request review again when needed.
Once confirmed, the quote can be presented.
:::note
The person who made the appraisal can't confirm its quote. Choosing **Skip review** lets the quote be presented without a review. The name of whoever skipped it is recorded.
:::
### Save a draft and checking progress
Use **Save draft** when pausing a second review. A regular quote review retains market prices, buy rates, offers and comments; an identification/pricing review retains grades, prices, rates and packaging inputs. **Saving the draft neither approves the review nor presents the quote.**
An item’s **Save and check** saves the draft and that item’s checking status, then collapses the card. Reopen the review to continue. Changing a line clears its check. If another reviewer updates the same draft, copy your input before reopening and reviewing the latest values. If the source appraisal changes, older drafts and checks are not applied automatically.
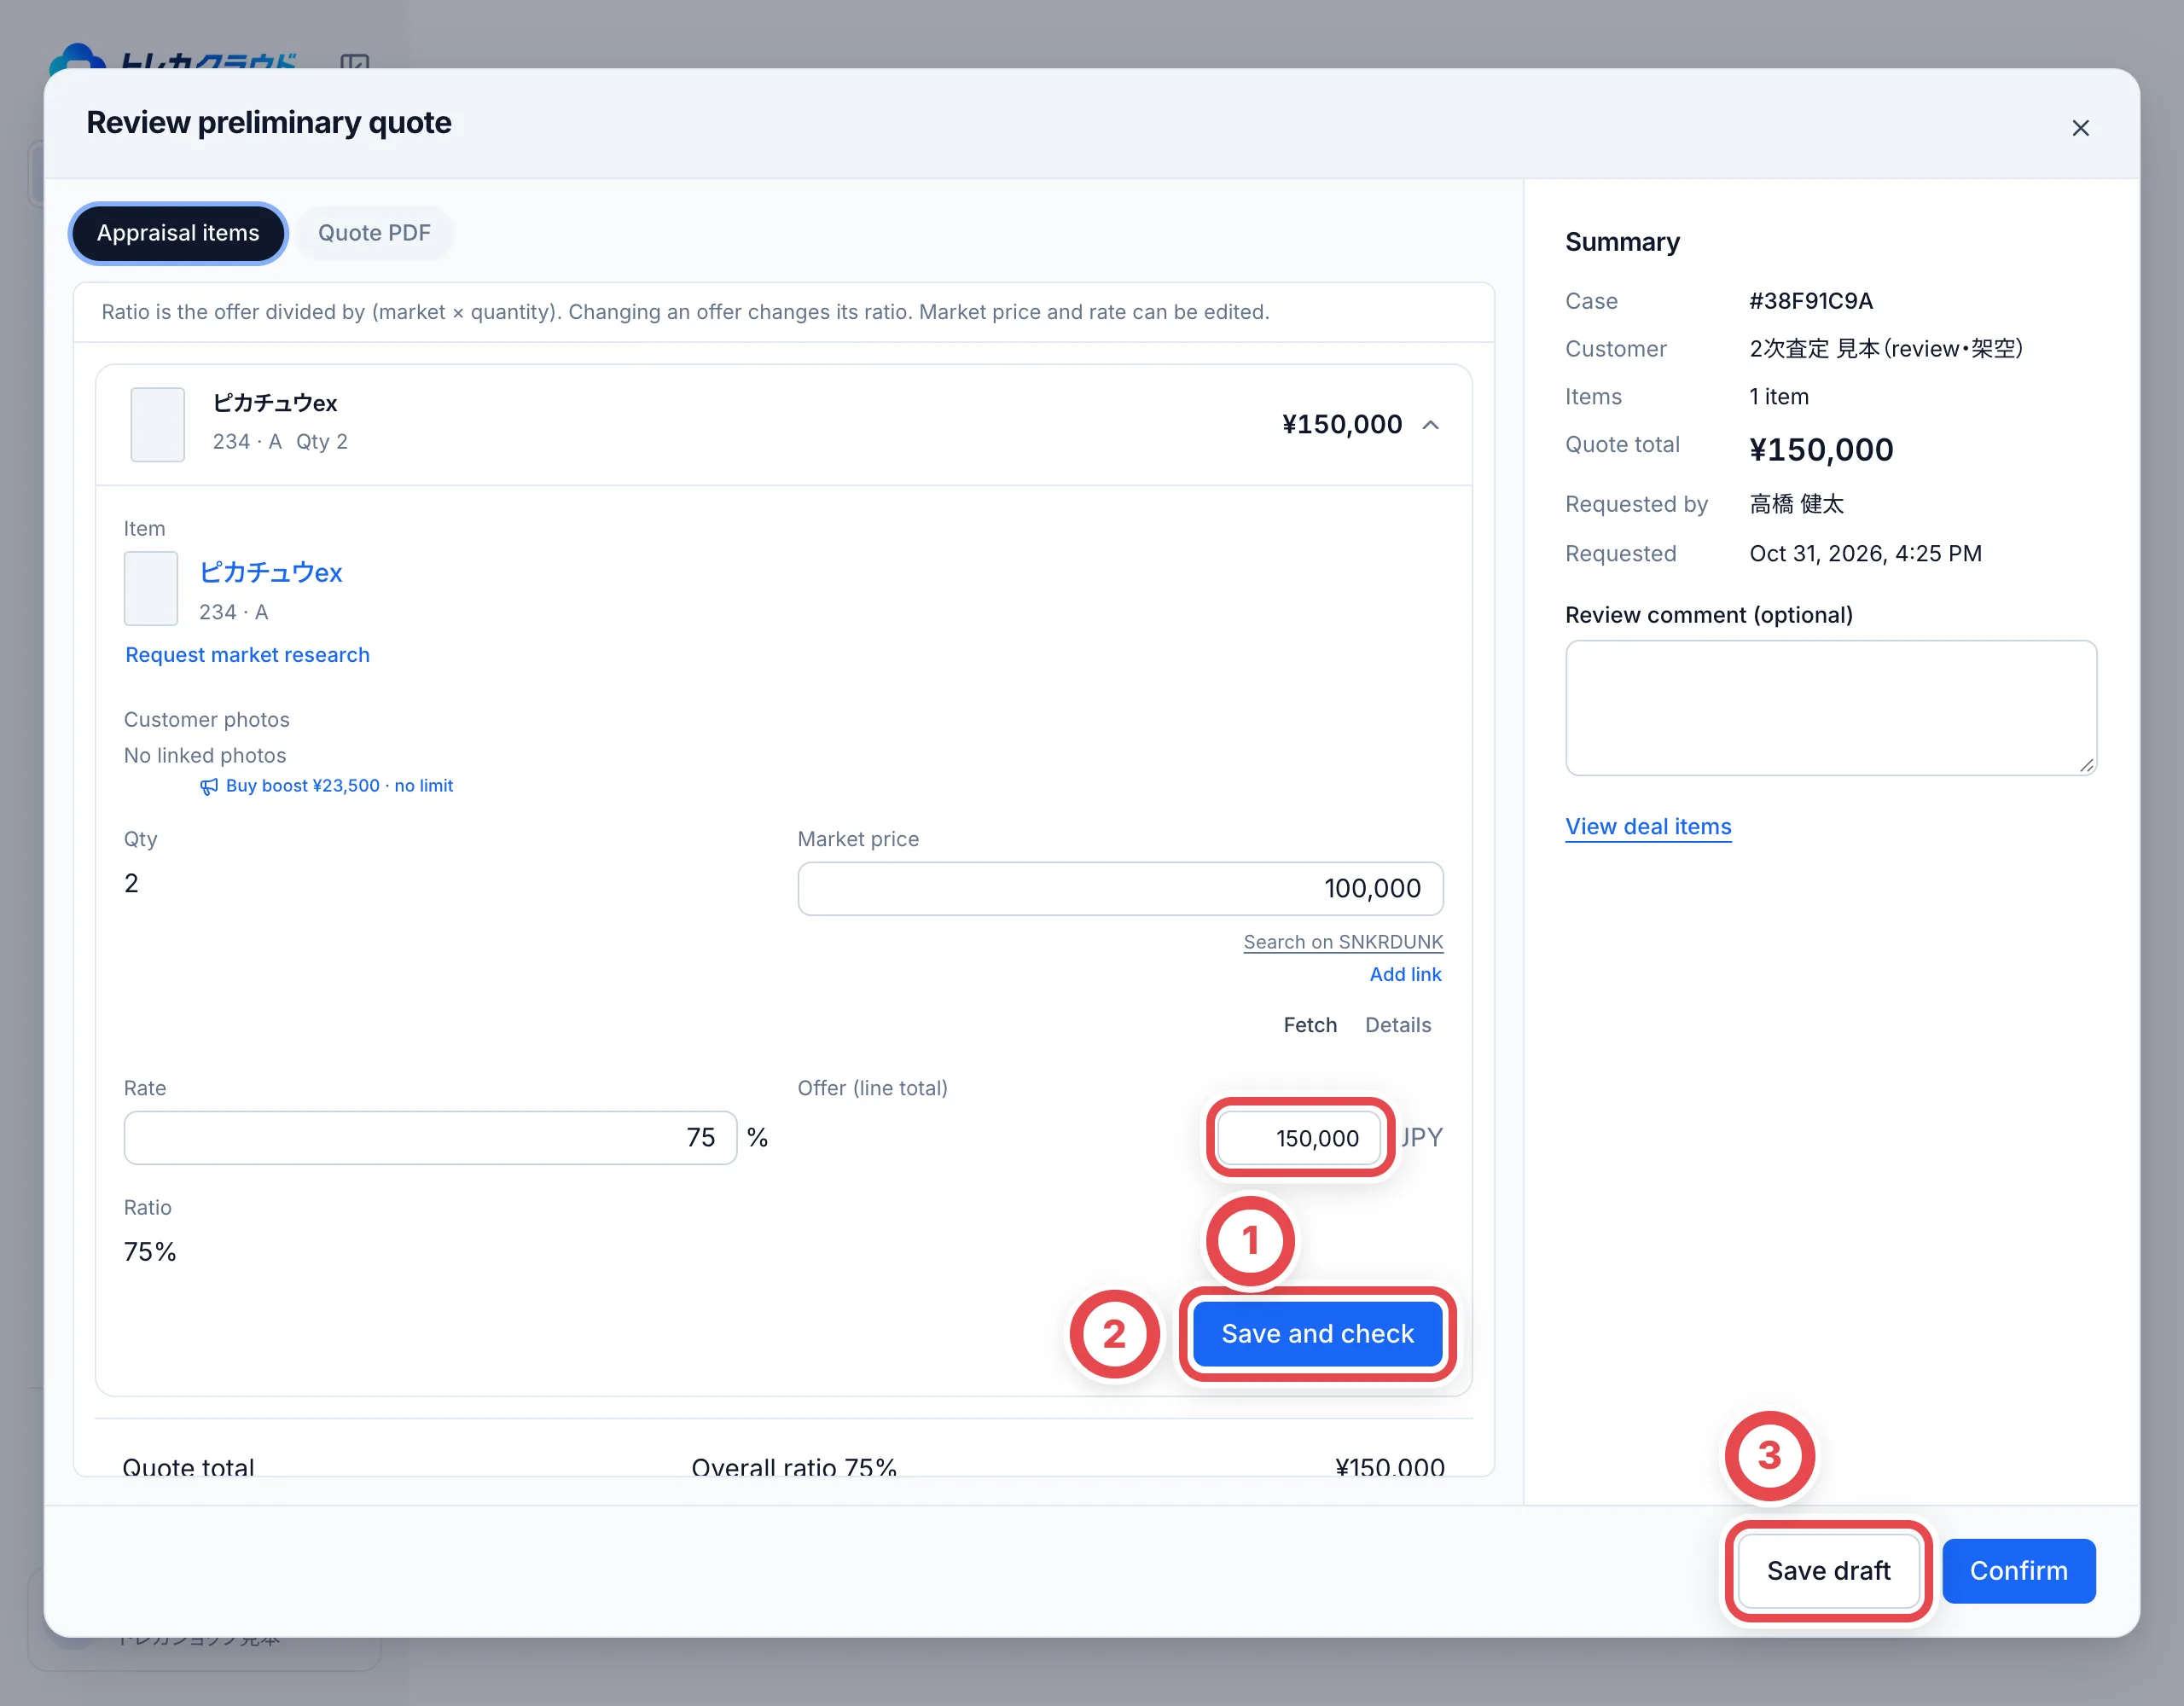 Edit the offer at ①, save this item’s check at ② or save the draft at ③. Confirming approval is separate.
 ① shows the saved Checked status. Click the heading to reopen the collapsed details.
### Request research from a second review
You can open **Request market research** from a review item. Save unfinished input first, then check the reason, target grade and assignee before requesting. A research answer does not approve the second review.
Follow the deal link from the research result back to the review. Check the returned grade/price, retained buy rate and other lines. During an identification/pricing review, the answer returns to its draft and clears checking progress. For individual final appraisal, a researched market price is not automatically used as every card’s purchase price. Enter and save each final amount, then request review again.
## Troubleshooting
| What's happening | What to check and how to fix it |
| ----------------------------------------------------- | ------------------------------------------------------------------------------------------------------------------------------------------------------------------------------------------------------------------------------------------------------------------------------------------------------------ |
| You can't present the quote | For online purchases, check for pending research or a review. In-store purchases do not wait for research or second reviews. Check **Next step** on the deal |
| You asked for research, but no one takes it | If you didn't name a researcher, any available researcher takes it. If it's urgent, choose a researcher under **Assignee** on the request |
| You can't confirm your own quote | The person who made the appraisal can't confirm it. Ask another member to check it, or choose **Skip review** |
| You want to change an amount after requesting | The quote is locked once requested. If you change it and save, you may need to request the review again, depending on the threshold |
| A market price shows no source | BOX and bulk lines show none. A card line shows none when its source can't be confirmed, such as when the SNKRDUNK price changed before the line was saved, or an older line saved without one. Changing the market price in the review removes its source, and confirming records it as **Entered by hand** |
| **Request review** doesn't appear or can't be clicked | The customer’s Appraisal requests tab accepts incomplete identification/pricing. Save quantity changes and resolve pending research. For a saved quote, check the threshold, status, request permission and Next step |
## Related workflows
- [Request a missing card in the catalogue](/en/guides/purchase/card-registration-requests)
---
# Visit bookings
Source: https://docs.toreca-cloud.com/en/guides/purchase/reservations
Visit bookings let customers book, from a booking page, the time they will bring their cards to your shop. When a booking comes in, that customer's counter deal is created. When they arrive, you check them in and carry on with the steps in [Start a counter purchase](/en/guides/purchase/counter).
## What you need
- Only members who manage settings (owners and admins) can change booking settings
- Checking in, marking no-shows and cancelling need permission to view and change customers and deals
- A location of type **Store** (create it under **Settings** › **Locations**)
## The steps and booking statuses
| Step | What you do | Who | Booking status |
| ---- | -------------------------------------- | -------- | ----------------- |
| 1 | Create a booking page | The shop | ― |
| 2 | Book from the booking page | Customer | Booked |
| 3 | (If needed) change the time or cancel | Customer | Booked, Cancelled |
| 4 | See the schedule under Visit bookings | The shop | Booked |
| 5 | Check the customer in when they arrive | The shop | Checked in |
| 6 | Mark as no-show if they don't come | The shop | No-show |
As soon as a booking comes in, a customer record (provisional) and a counter deal (status **New**) are created. The deal number is the same as the booking number (`R-` followed by 6 digits).
## 1. Create a booking page
Open **Settings** › **Visit bookings** to see one card for each store. The first time, click **Create booking page**. After that, click **Change settings** (③).
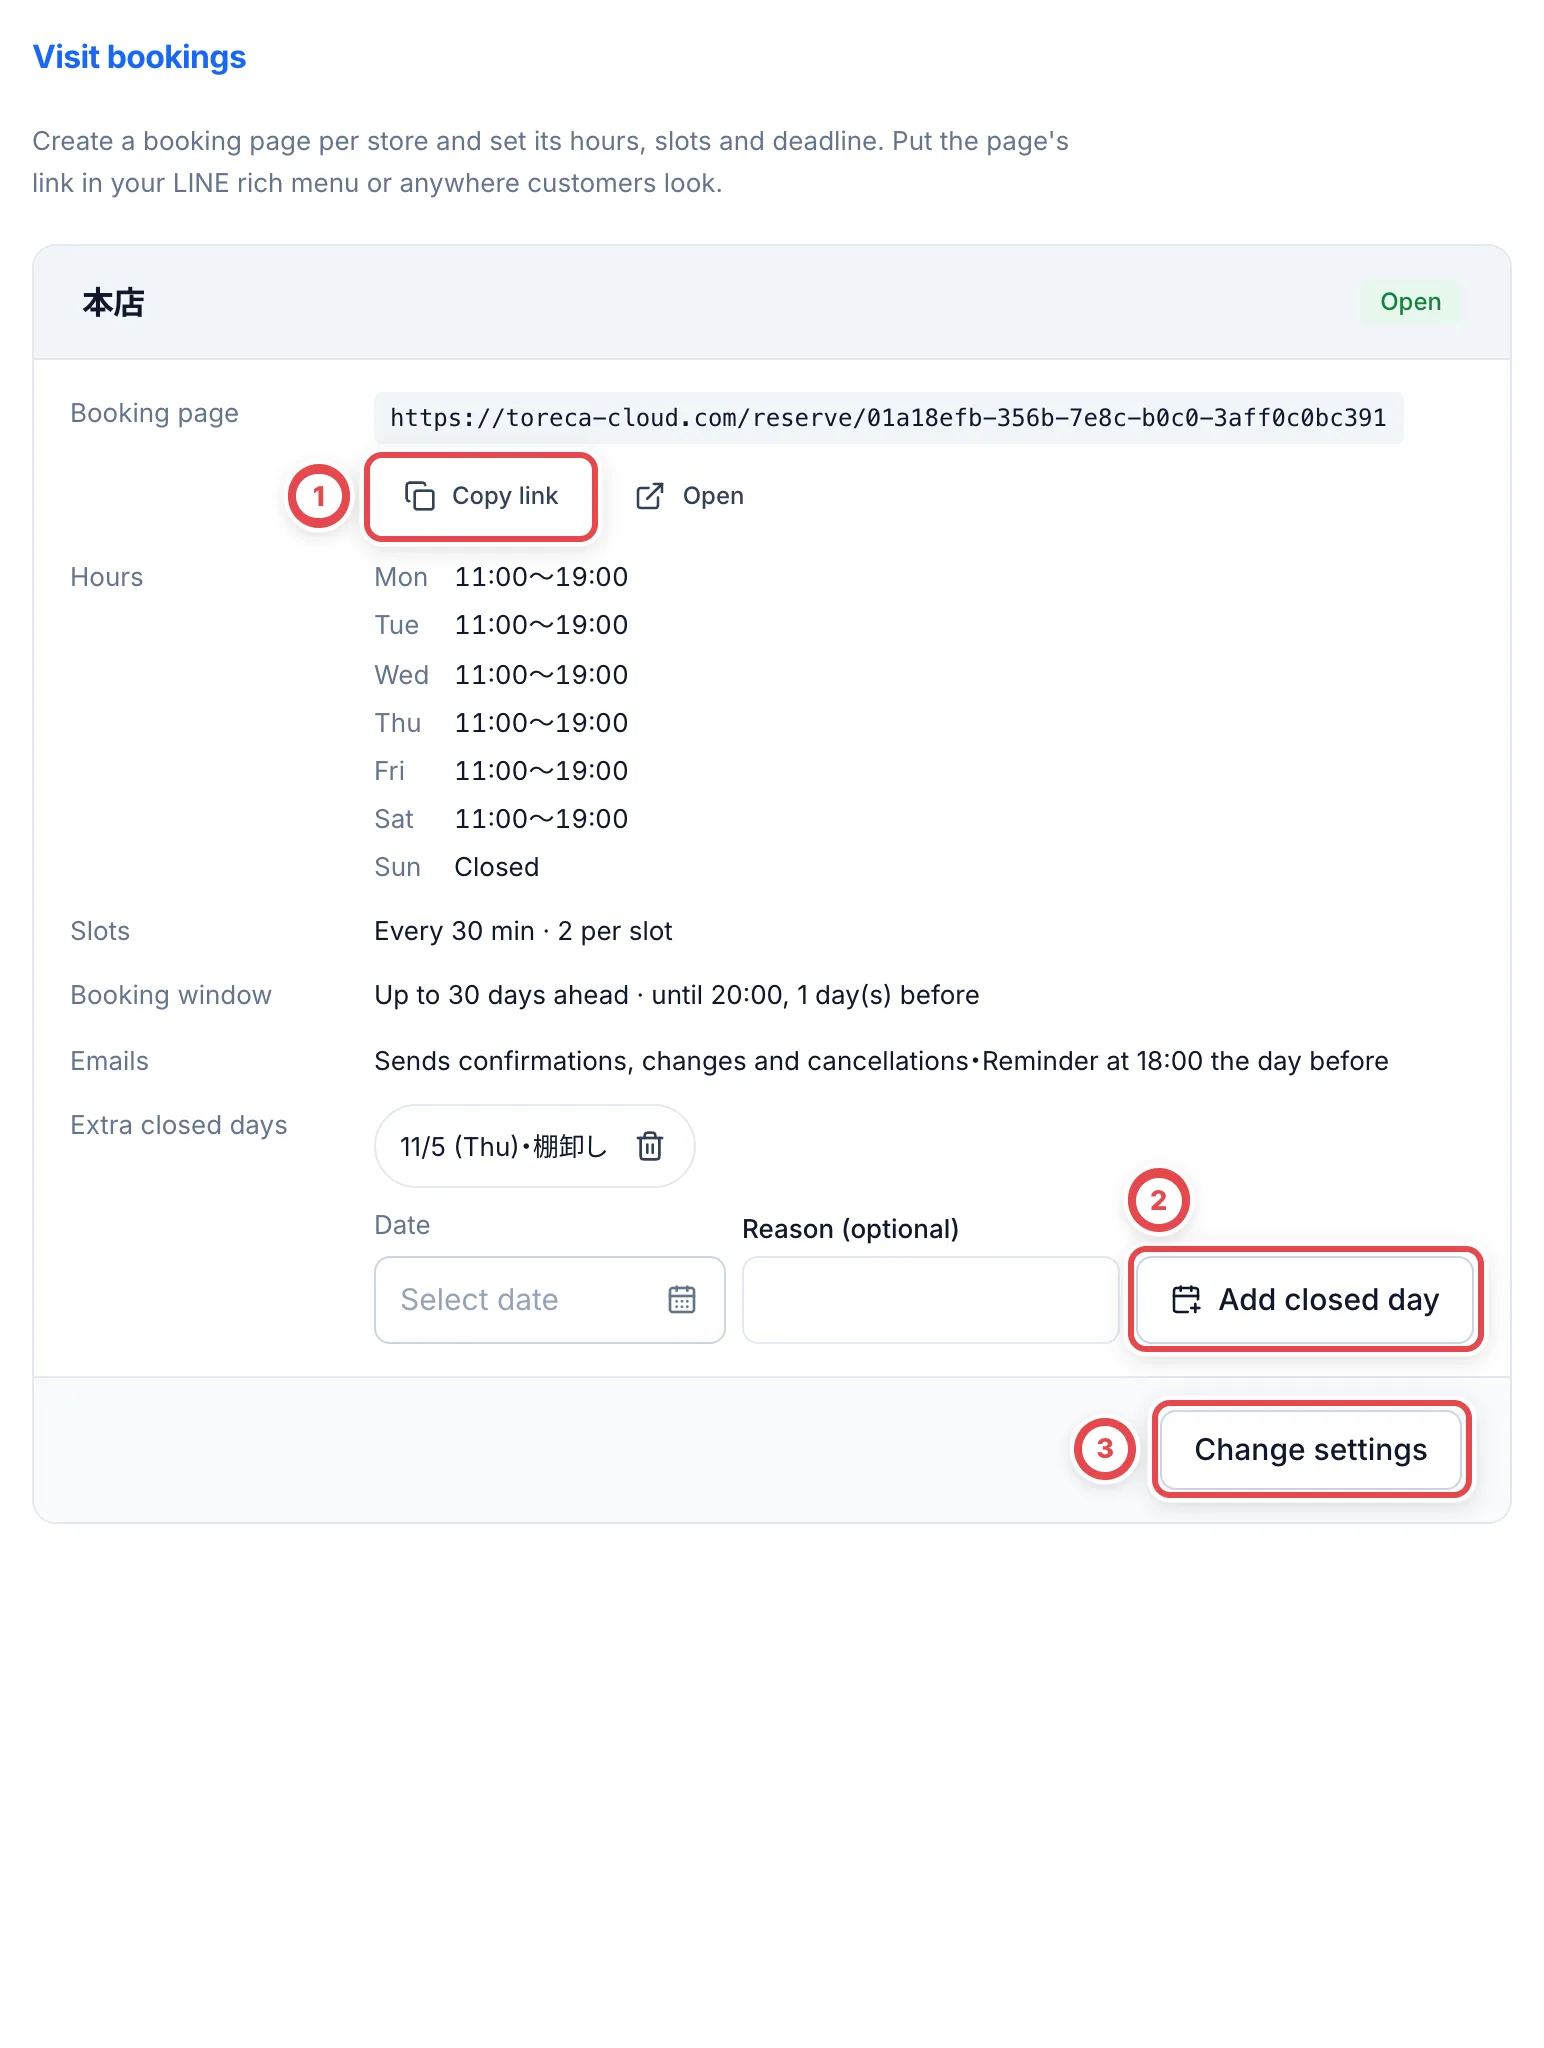 In the settings dialog, decide the items below, then click **Save settings** (④). **Saving updates the booking page right away.**
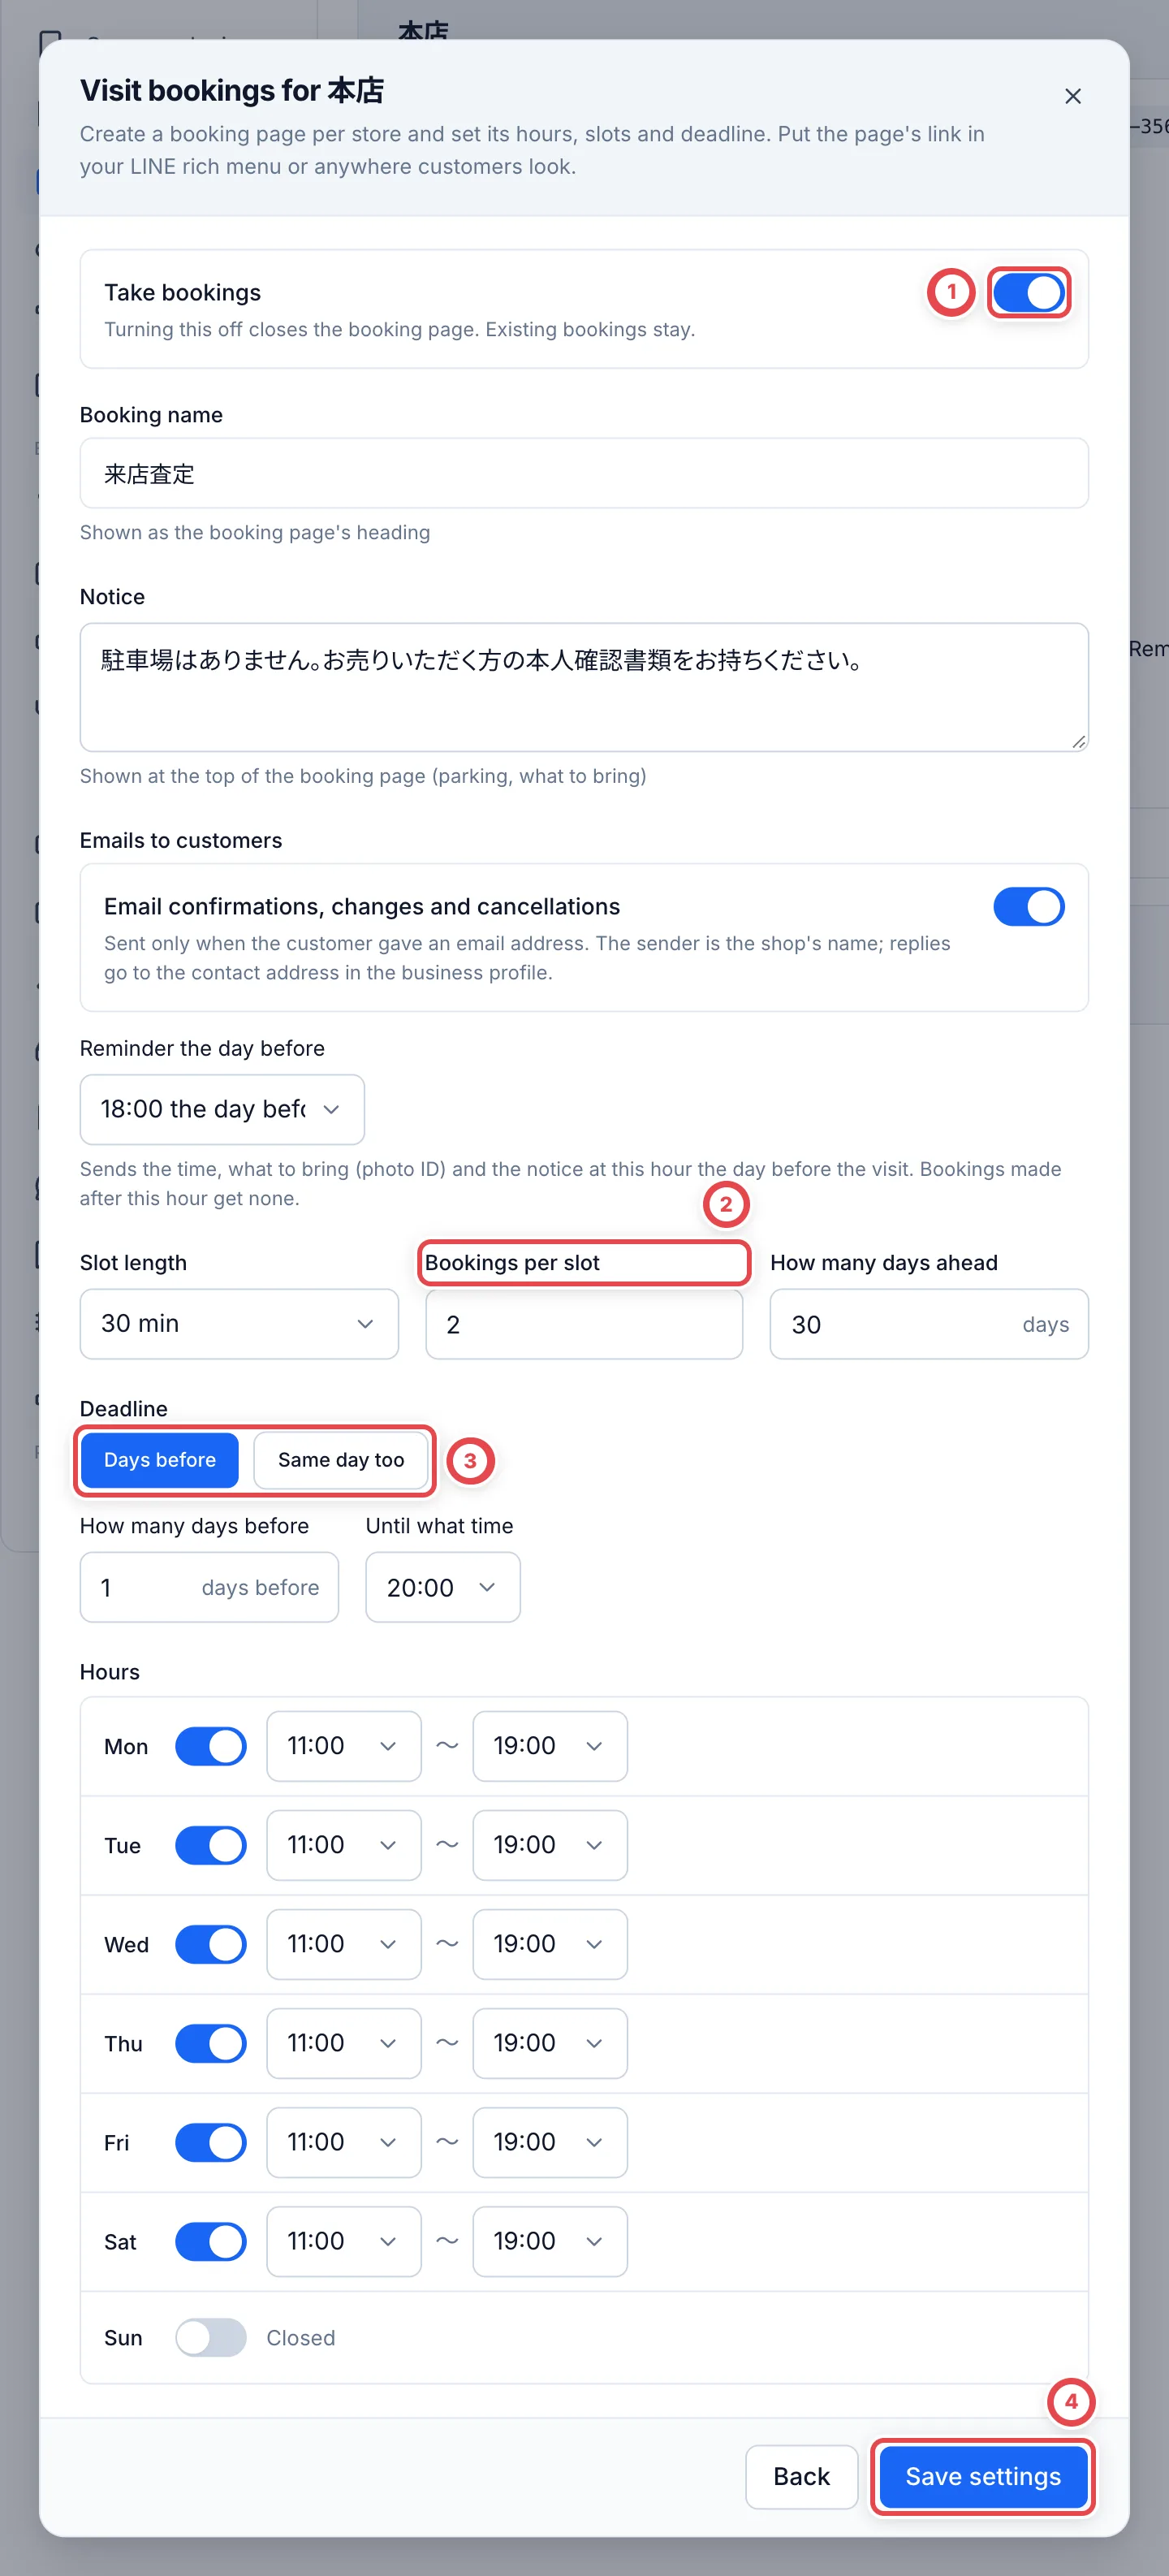 | Item | What to decide |
| ---------------------------------------- | ------------------------------------------------------------------------------------------------------------------------------------------------------------------- |
| ① **Take bookings** | Turning this off closes the booking page. Existing bookings stay |
| **Booking name**, **Notice** | The heading of the booking page, and the notice shown at the top (parking, what to bring) |
| **Emails to customers** | Whether to email confirmations, changes and cancellations, and what time to send the reminder the day before. Only customers who gave an email address receive them |
| **Slot length**, ② **Bookings per slot** | How many minutes each slot lasts, and how many bookings you take in the same slot (1 to 20) |
| **How many days ahead** | How many days ahead customers can book, counting today as day 1 (1 to 90 days) |
| ③ **Deadline** | **Days before** (how many days before, and until what time) or **Same day too** (until how many minutes before the slot starts) |
| **Hours** | Opening and closing times for each day of the week. Only days that are switched on take bookings |
Copy the booking page link with **Copy link** (①) and put it in your LINE rich menu or wherever customers will see it.
While bookings are turned off, customers cannot see the buttons to change or cancel. An issued private booking link still shows the details; the shop handles changes during that time. Looking up a booking by number and phone requires an active booking page.
To add an extra closed day, choose a date and a reason (optional) below the card, then click **Add closed day** (②). **The day stops taking bookings right away** (existing bookings stay). To remove it, click the trash icon on the closed day.
## 2. Book from the booking page (customer)
On the booking page, the customer clicks an open slot (○ or △) at ①. △ means one booking left, and × means the slot is full or past its deadline.
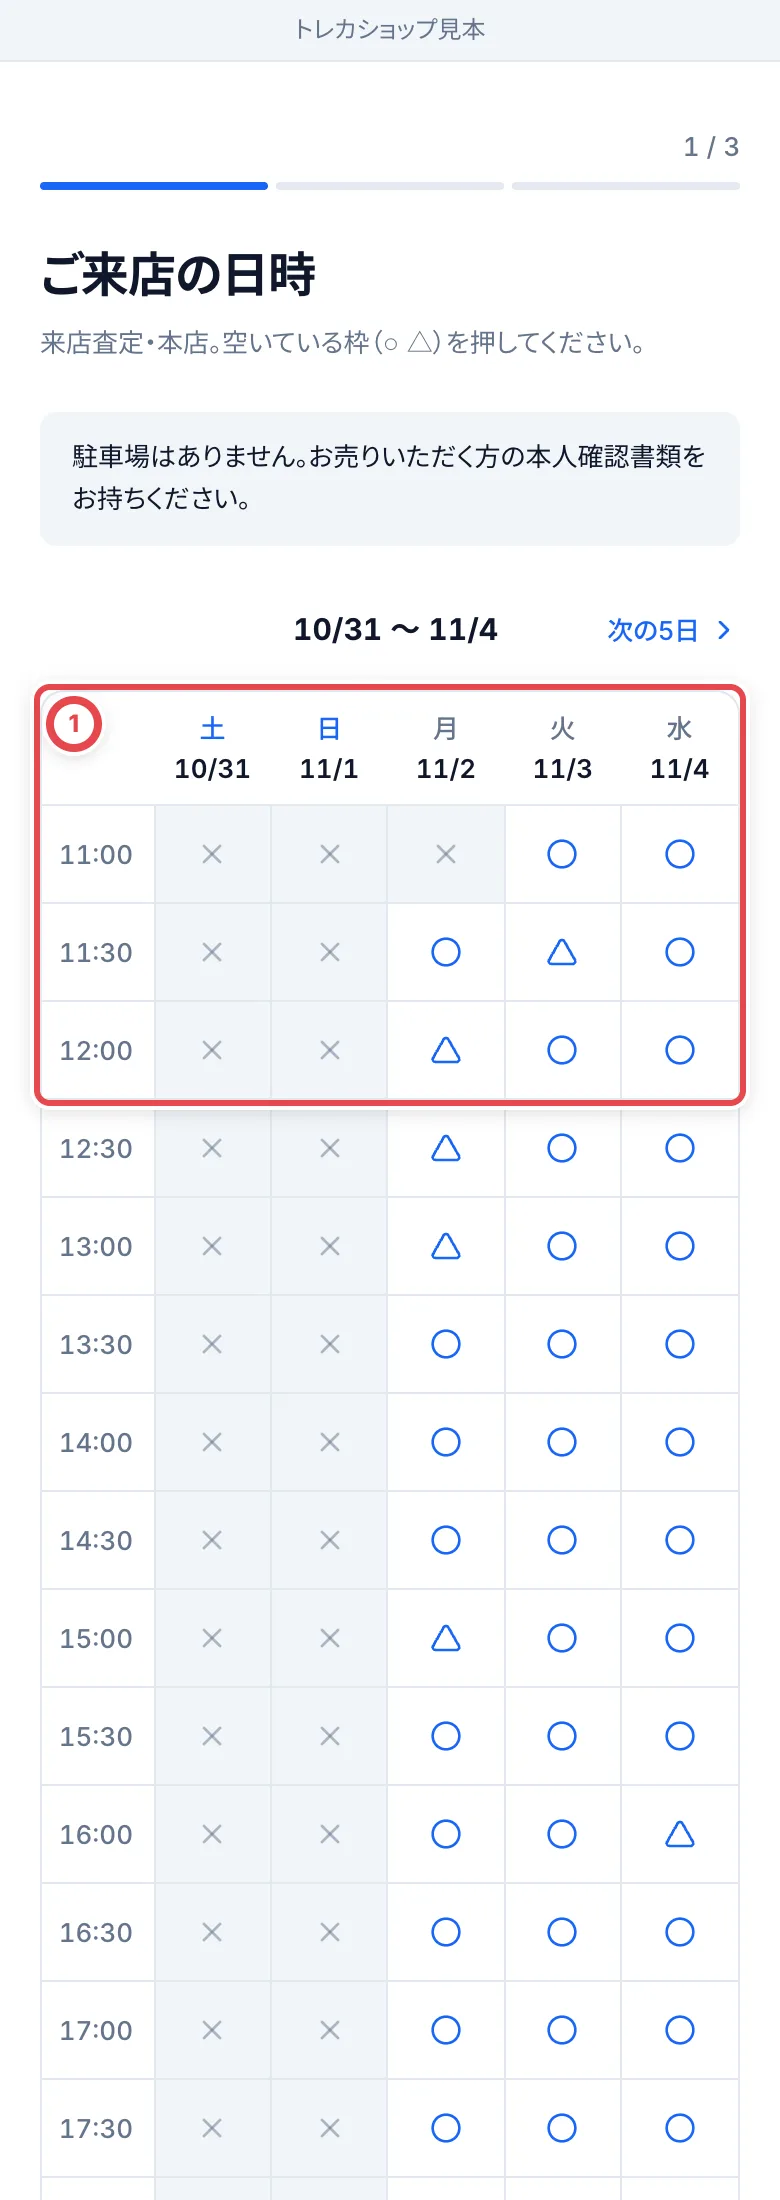 Next, the customer enters their name, the reading of their name (furigana), phone number, email address (optional), the type of cards they will bring and roughly how many. They click 「確認へ進む」 (Continue to confirmation) at ③, then 「予約する」 (Book), and a booking number appears.
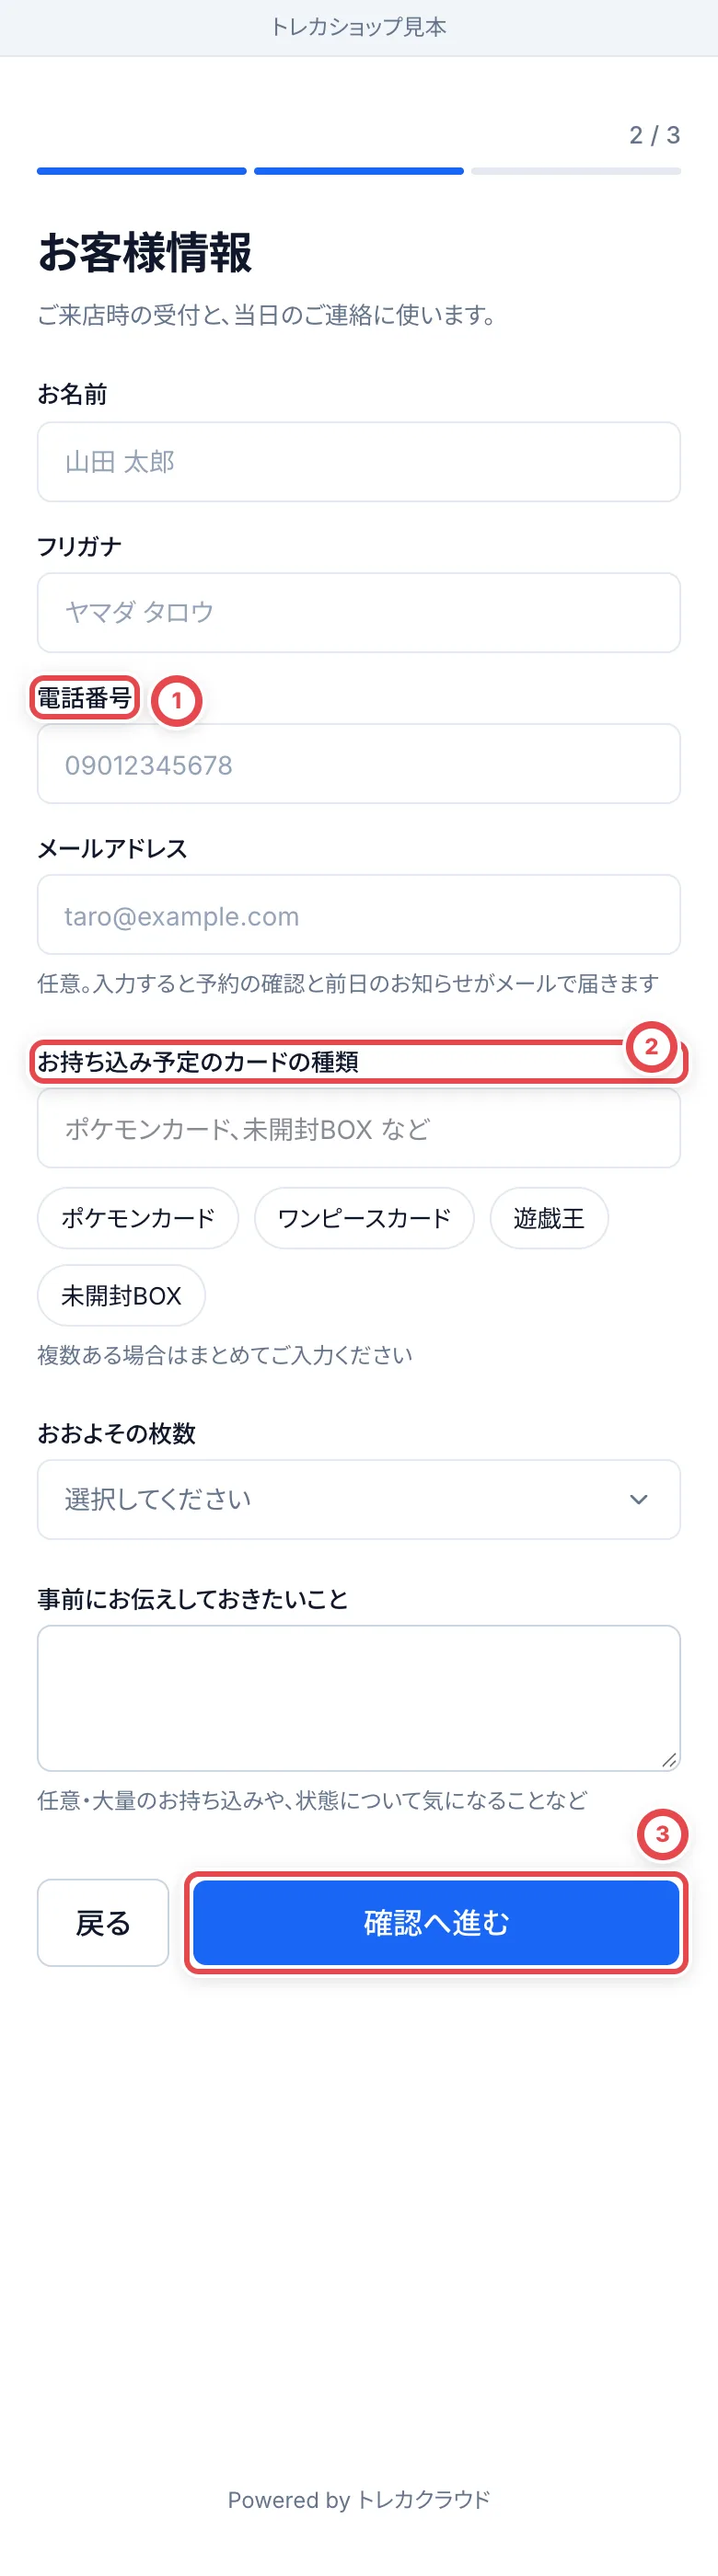 The phone number at ① is used for contact on the day. Enter the cards they will bring at ②, then continue to confirmation at ③.
On a phone, tapping 「おおよその枚数」 (Approximate quantity) opens choices at the bottom of the screen. Choose a quantity, then check the date, store and contact details before booking. Ask the customer to keep the booking number and the management link from the completion screen. Opening the booking page again in the same tab retains that completion screen; 「別の日時でもう1件予約する」 (Book another visit) starts a separate booking.
:::note
The customer's screens are in Japanese only.
:::
## 3. Change the time or cancel (customer)
Customers can open their booking with the booking number and phone number. They can use the link on the booking confirmation screen or in the email, or 「予約の確認・変更・キャンセルはこちら」 (Check, change or cancel your booking here) on the booking page. 「日時を変更する」 (Change the date and time) at ① moves the booking to an open slot. 「キャンセル」 (Cancel) at ② can't be undone.
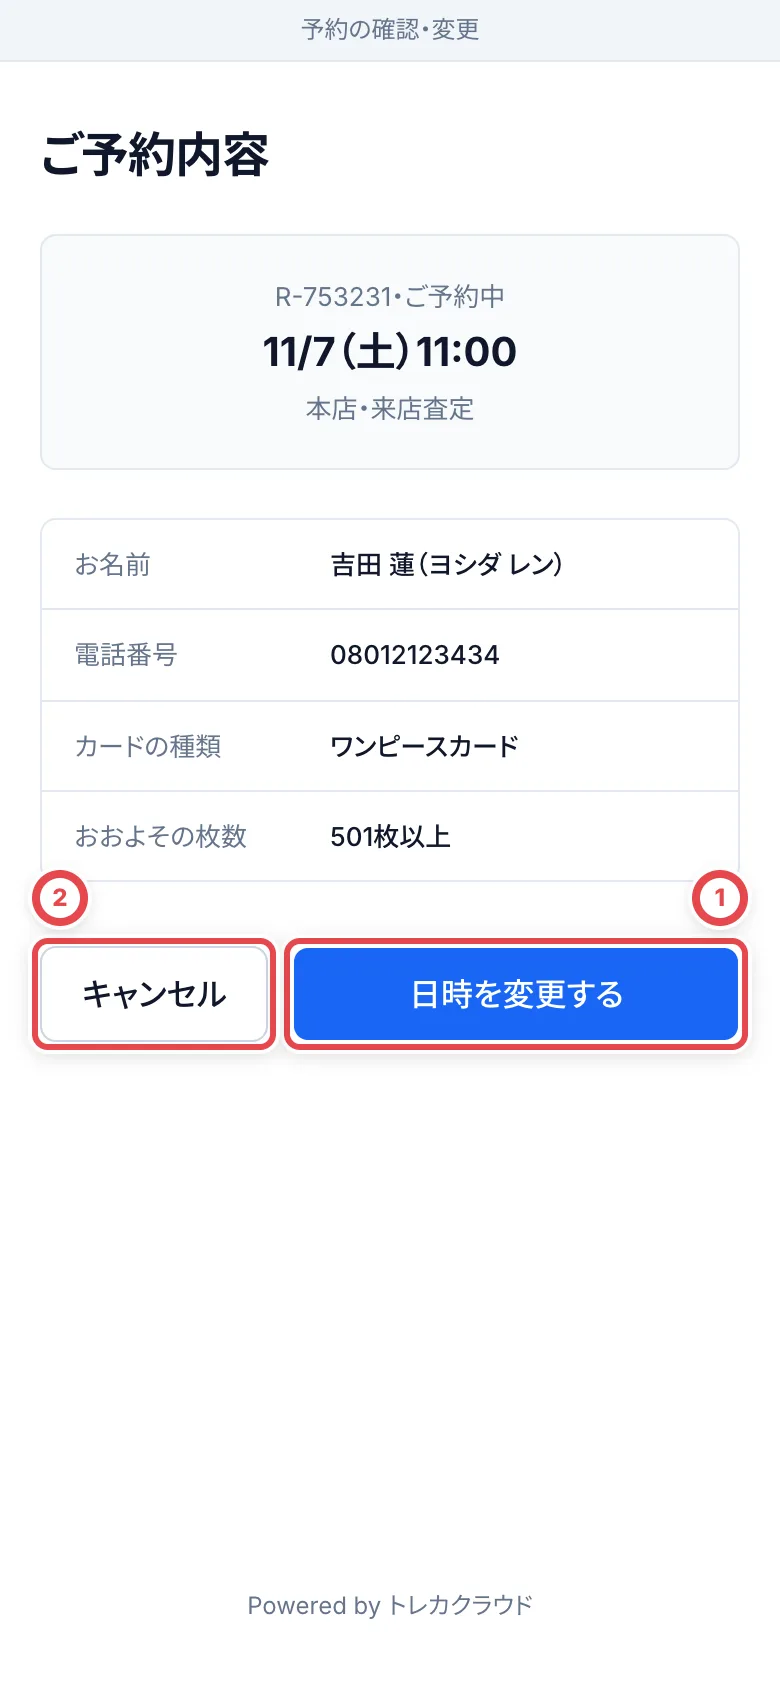 - While the booking is **Booked** and the booking page is active, customers can change or cancel before their visit starts. A replacement slot must still be before its booking deadline
- When a customer changes the time or cancels, your staff get a notification (notification type 「来店予約の変更・キャンセル」, Visit booking changed or cancelled). The deal of a cancelled booking is withdrawn
## 4. See the schedule under Visit bookings
Open **Visit bookings** in the sidebar to see a weekly calendar. Bookings are listed by name and rough number of cards. Click one, as at ①, to see its details. Extra closed days show **Closed** (②) in their column.
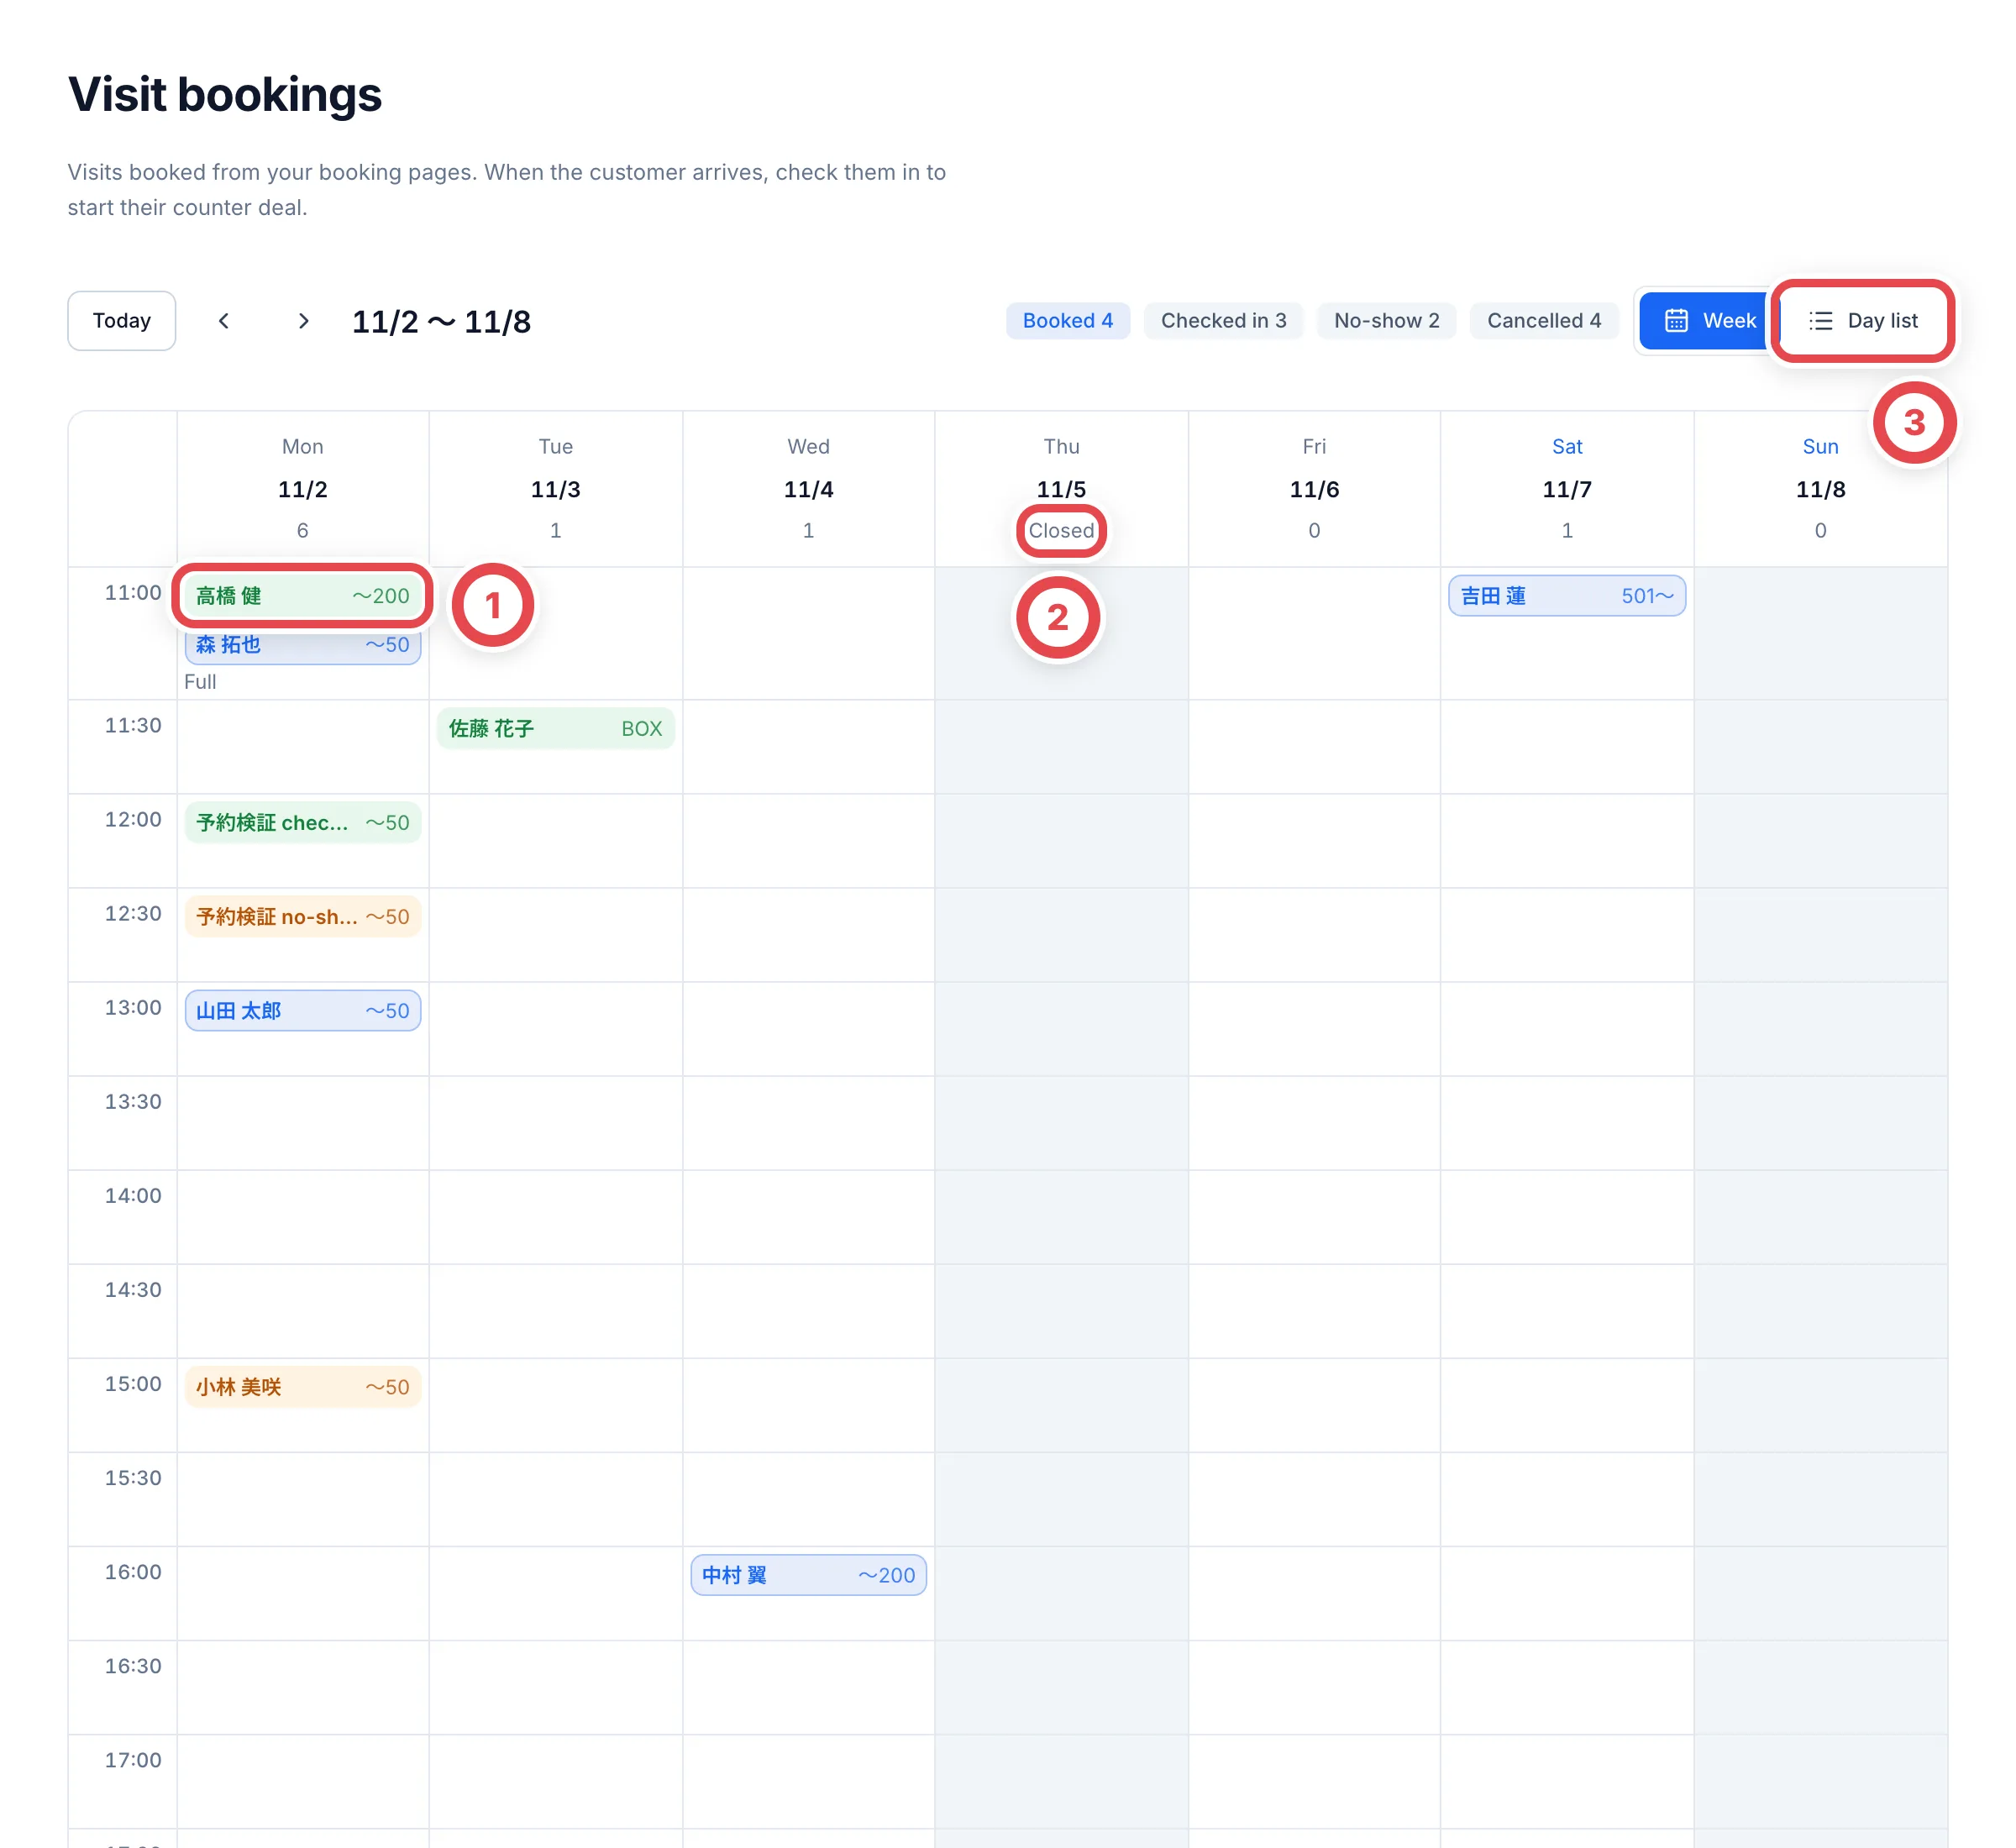 Switch to **Day list** (③) to see that day's bookings as cards, with the card types, phone number, note and booking number. The bar at the top also counts bookings in the next two weeks, including checked-in visits and no-shows, and excluding cancellations. Cancelled bookings appear only in the day list.
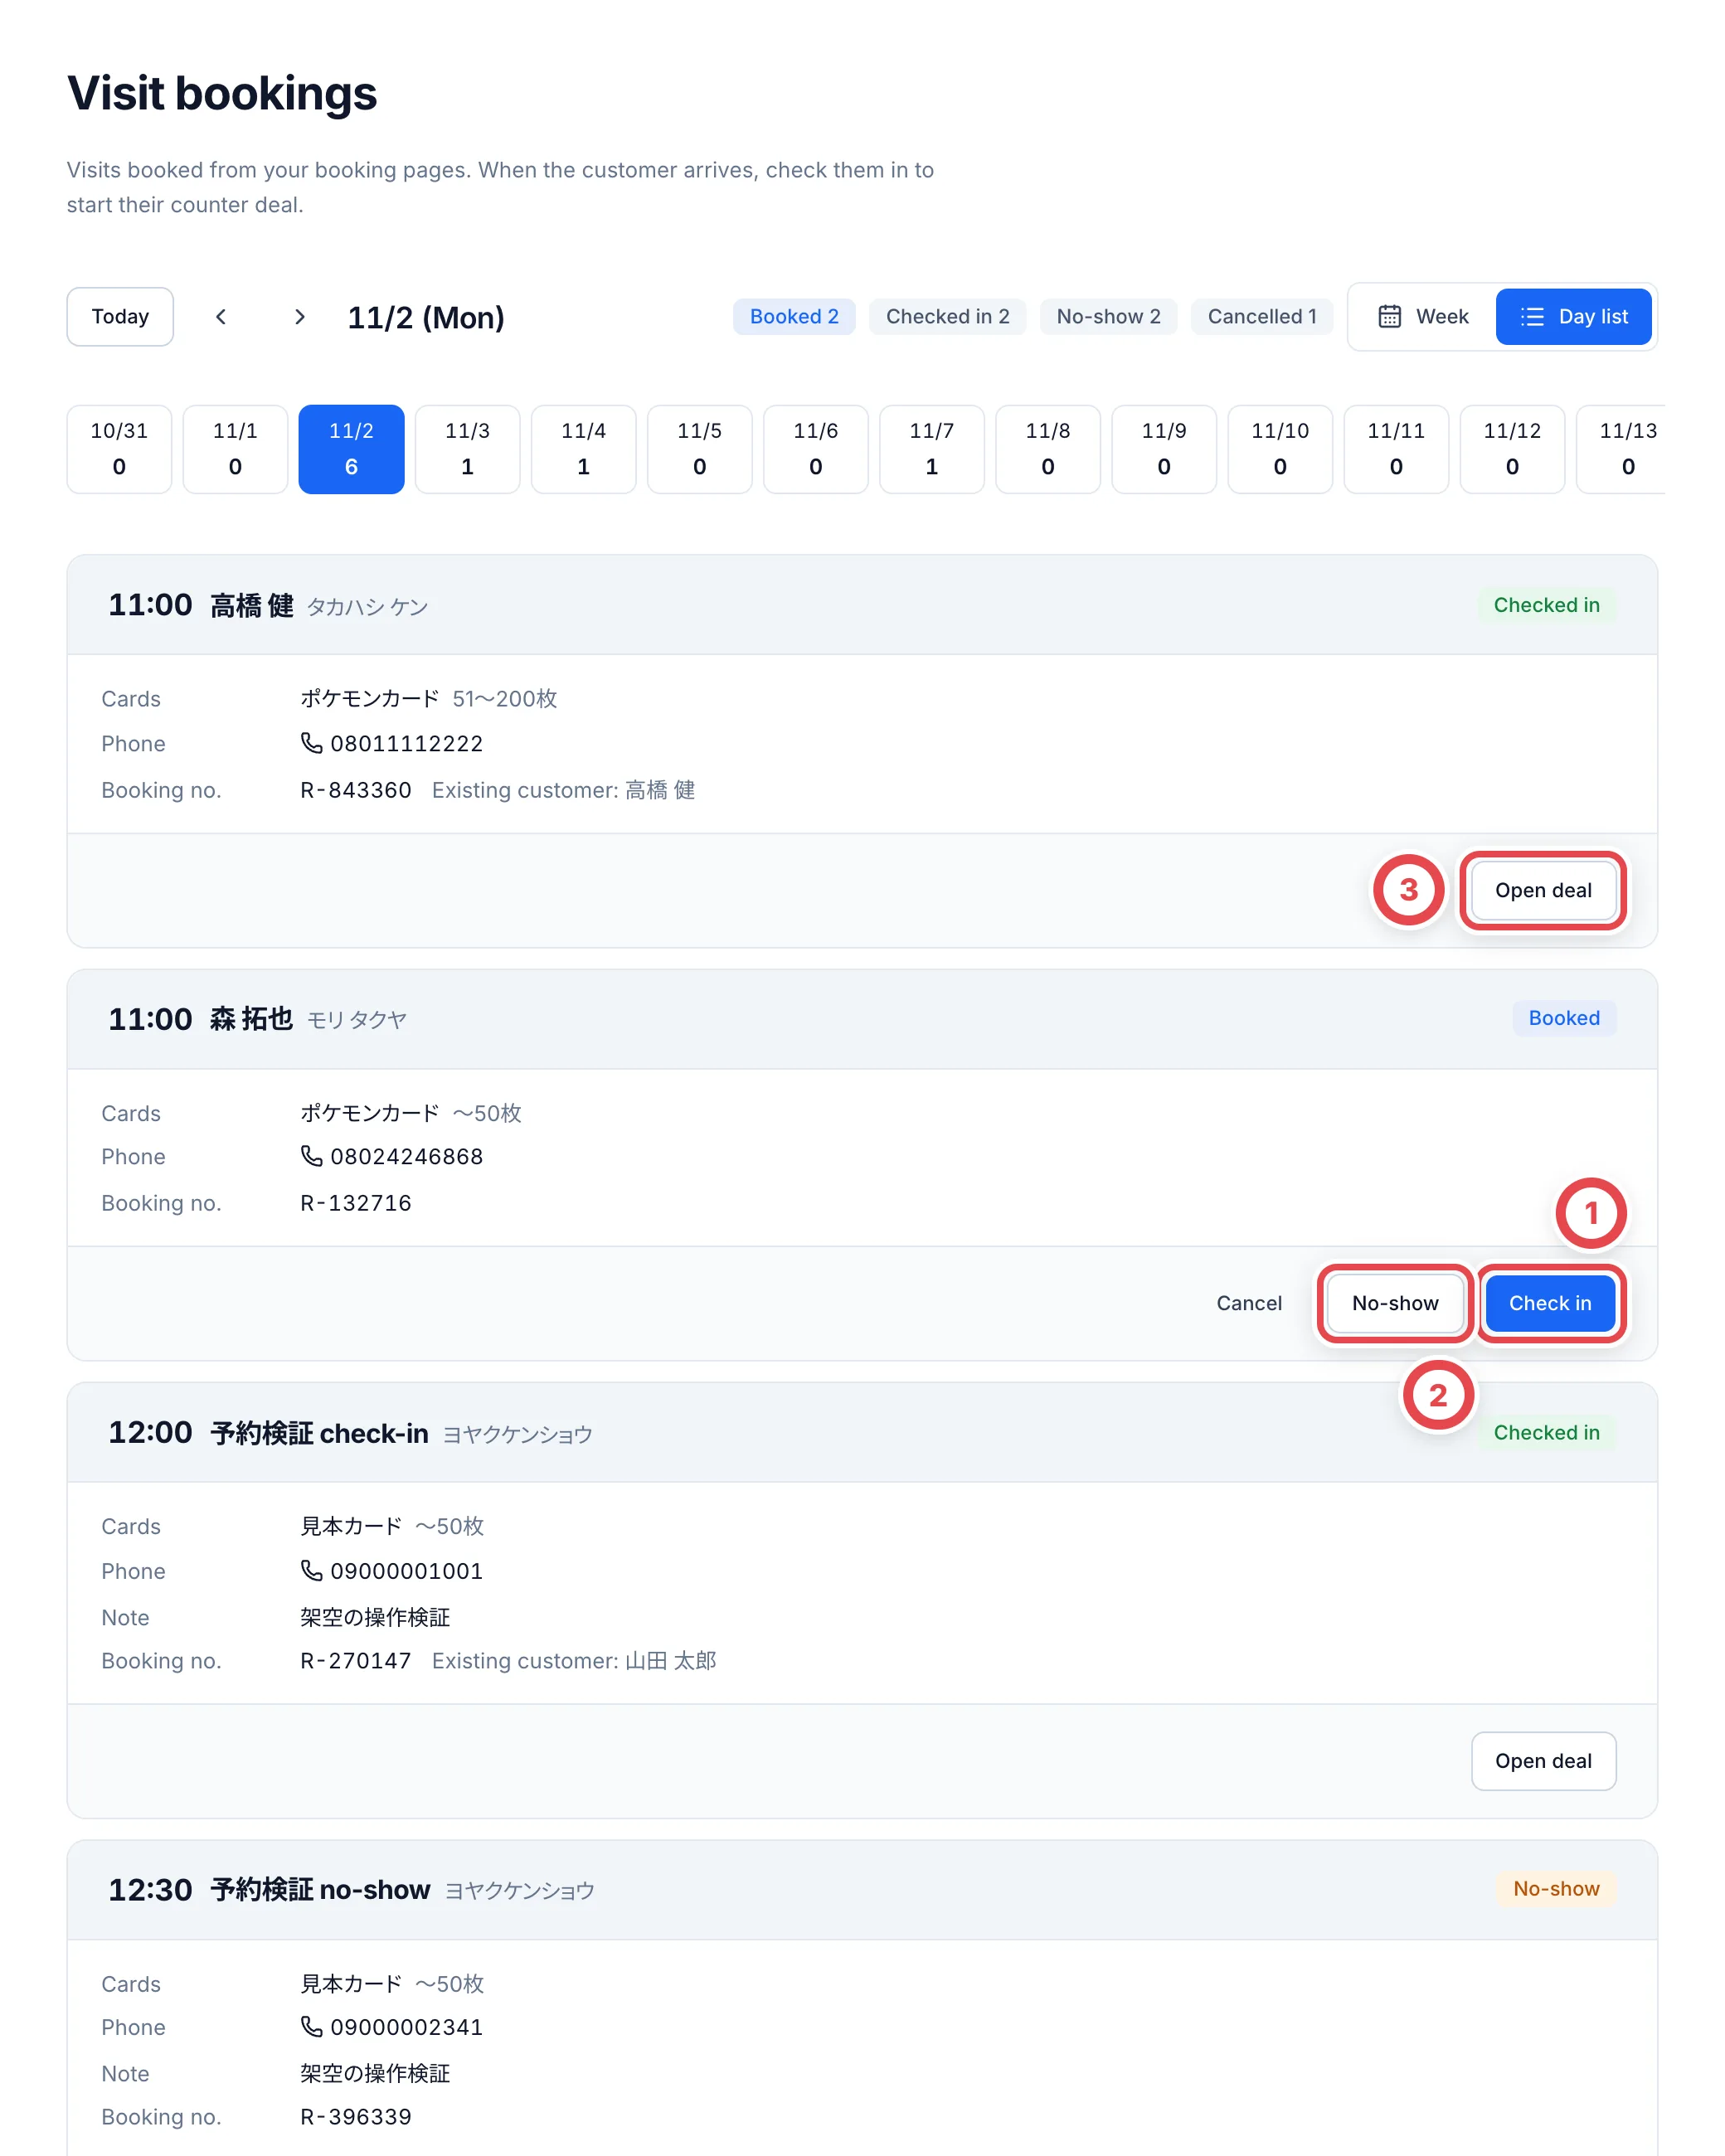 ## 5. Check the customer in when they arrive
When the customer arrives, click **Check in** (①) on their booking. A **Check in** dialog with their name opens, where you choose which customer this visitor is.
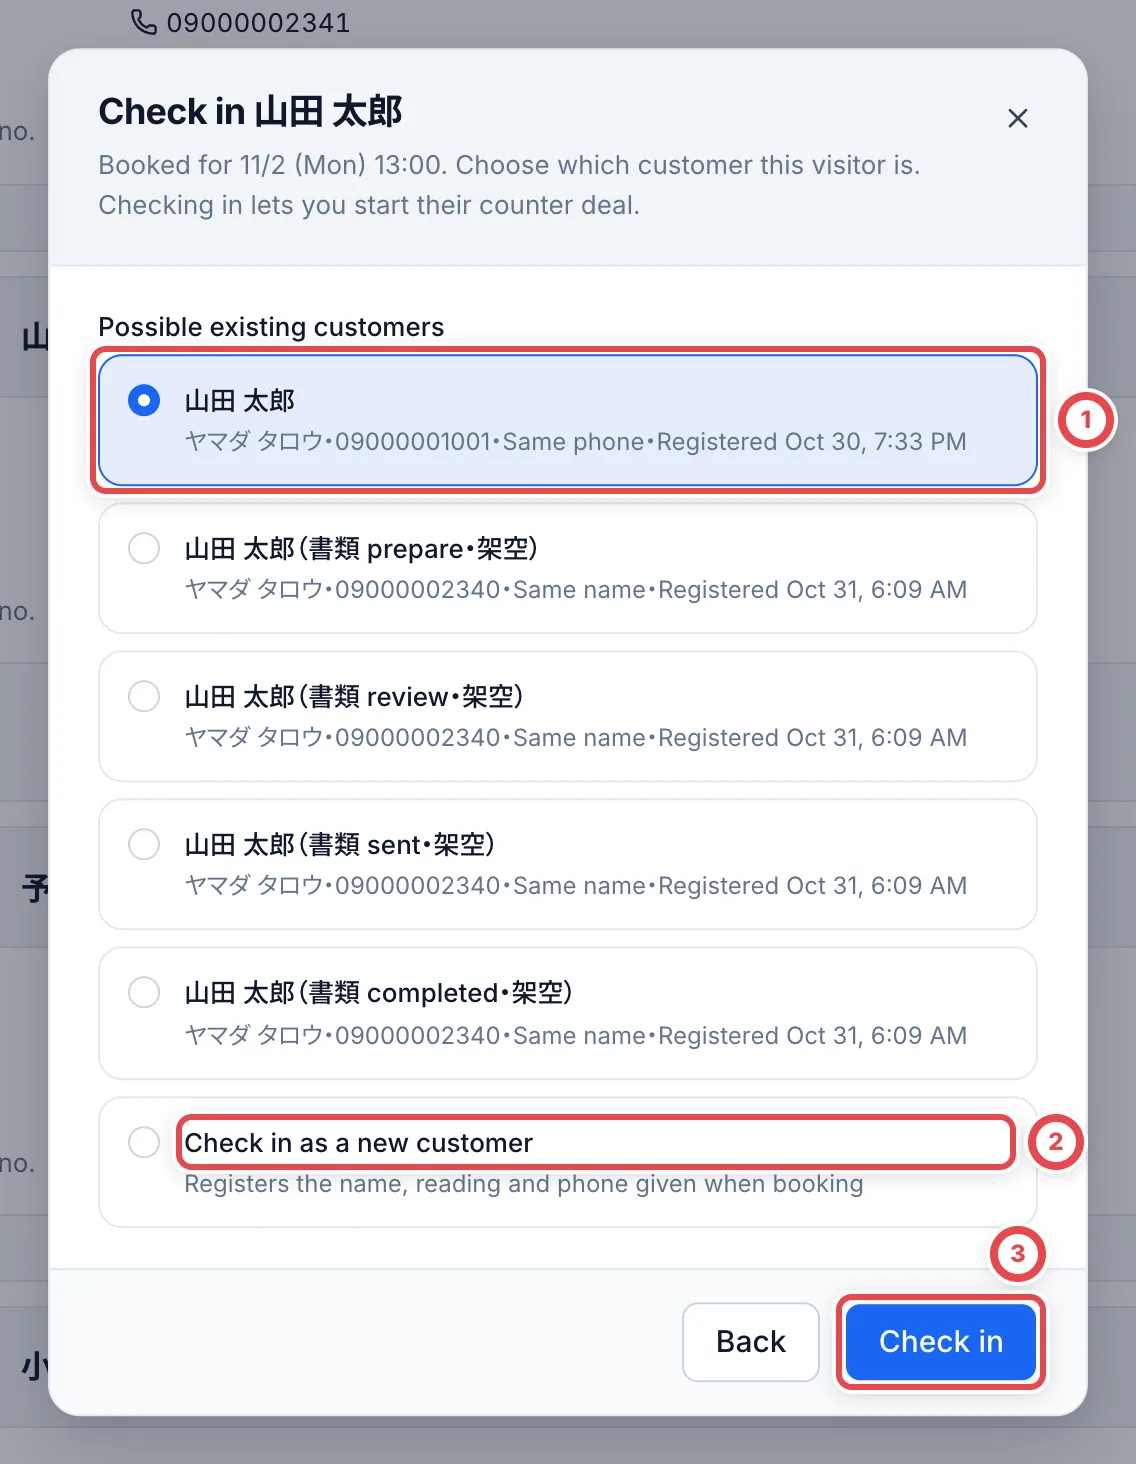 - If an existing customer has the same phone number or name, they appear as a candidate, as at ①. Choose them and the deal moves to that customer. The provisional customer created by the booking is no longer used
- For a first-time customer, choose **Check in as a new customer** (②). They are registered with the name, reading and phone number entered when booking
Click **Check in** (③) and the booking becomes **Checked in**, and the customer's deal page opens. From here, follow the steps in [Start a counter purchase](/en/guides/purchase/counter) to add cards and appraise them (you don't need to add the purchase request again). **Checking in can't be undone.**
## 6. Mark as no-show if they don't come
For a booking where the customer didn't come, click **No-show**, enter a reason (optional), and click **Mark as no-show** (①). **The booking's deal is also withdrawn, and this can't be undone.** The slot of a no-show stays taken.
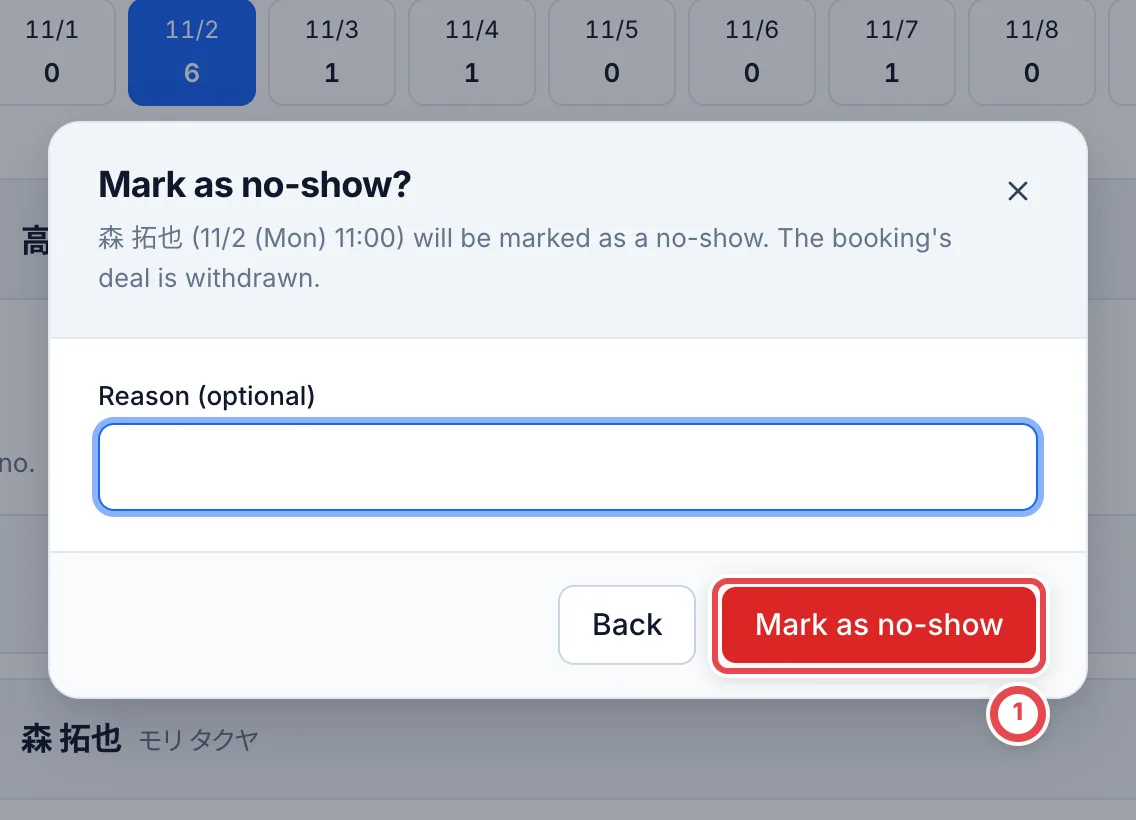 To cancel a booking because the shop can't take it, click **Cancel** on the booking. The deal is withdrawn and the slot opens up again. If the customer gave an email address, they get a cancellation email (the reason isn't included).
Checking in, no-show and cancel only work while the booking is **Booked**. A booking whose deal work has already started can't be handled from Visit bookings, so handle it from the deal page.
## When something goes wrong
| What's happening | What to check or how to fix it |
| ------------------------------------------------------------------------------------------------------------------------------------------------------------ | ----------------------------------------------------------------------------------------------------------------------------------------- |
| You see "There is no store location" | Under **Settings** › **Locations**, create a location of type **Store**. |
| The booking page shows 「この予約ページは現在利用できません」 (This booking page isn't available right now) | **Take bookings** is off, or you haven't created the booking page yet. Check the settings. |
| You can't choose today's slots | If the deadline is **Days before**, today's slots can't be booked. To take bookings on the same day, choose **Same day too**. |
| Every slot on the booking page shows × | Check the hours, closed days and how many days ahead you take bookings. |
| The customer who arrived isn't listed as a candidate when checking in | If neither the phone number nor the name matches, they won't appear. Choose **Check in as a new customer** and merge the customers later. |
| You see 「この予約の取引は作業が進んでいるため、取引の画面から扱ってください」 (This booking's deal is already in progress, so handle it from the deal page) | Work on the deal has started. Withdraw it or handle it from the deal page. |
| You see 「予約が更新されています。画面を開き直してください」 (The booking has been updated. Reopen the screen) | Another member or the customer changed it first. Reopen the screen. |
---
# Returns
Source: https://docs.toreca-cloud.com/en/guides/purchase/returns
This procedure covers shipping goods back after an online purchase. To hand goods back at the counter, follow [Partial acceptance and full decline in store](/en/guides/purchase/counter#when-the-customer-keeps-cards).
**The shop itself contacts the customer, gets their approval, arranges pickup and ships the parcel. Toreca Cloud only "records" each of these.** The step-recording buttons do not send customer messages or book a pickup. Photo delivery through LINE is a separate action in step 2.
You can arrange a return for these cards. Cards you bought are not included.
- Cards left out when the customer accepted only part of the final quote
- Cards from a final quote the customer declined in full
- Items, such as boxes, that you marked for return after a condition check
Accepting only part of a preliminary quote, or declining it, doesn't create a return, because you haven't received the goods yet. Recording a decline is covered in step 10 of [Shipping and final appraisal](/en/guides/purchase/shipping-and-final).
## The steps and the return stages
After shipment, the tracking-notice and delivery buttons may both appear.
| Step | What you do | Return stage |
| ---- | ----------------------------------------------------- | --------------------------- |
| 1 | Open the return | ― |
| 2 | (If needed) Save photos of the cards you're returning | ― |
| 3 | Check the return address and save it | Confirm address |
| 4 | Send the address confirmation, then record it | Confirm address |
| 5 | Record the customer's approval | Awaiting address approval |
| 6 | Arrange pickup, then record it | Arrange pickup and shipping |
| 7 | Record shipment | Arrange pickup and shipping |
| 8 | Send the tracking number, then record it | Send tracking number |
| 9 | Record delivery | Returning → Completed |
## 1. Open the return
Open **Returns** in the sidebar. At ①, you can narrow the list by stage: **Pending**, **Confirm address**, **Awaiting address approval**, **Arrange pickup and shipping**, **Send tracking number**, **Returning**, **Completed** and **All**. You can also search by customer name, deal number or tracking number. Click **Open return** at ② to open that return.
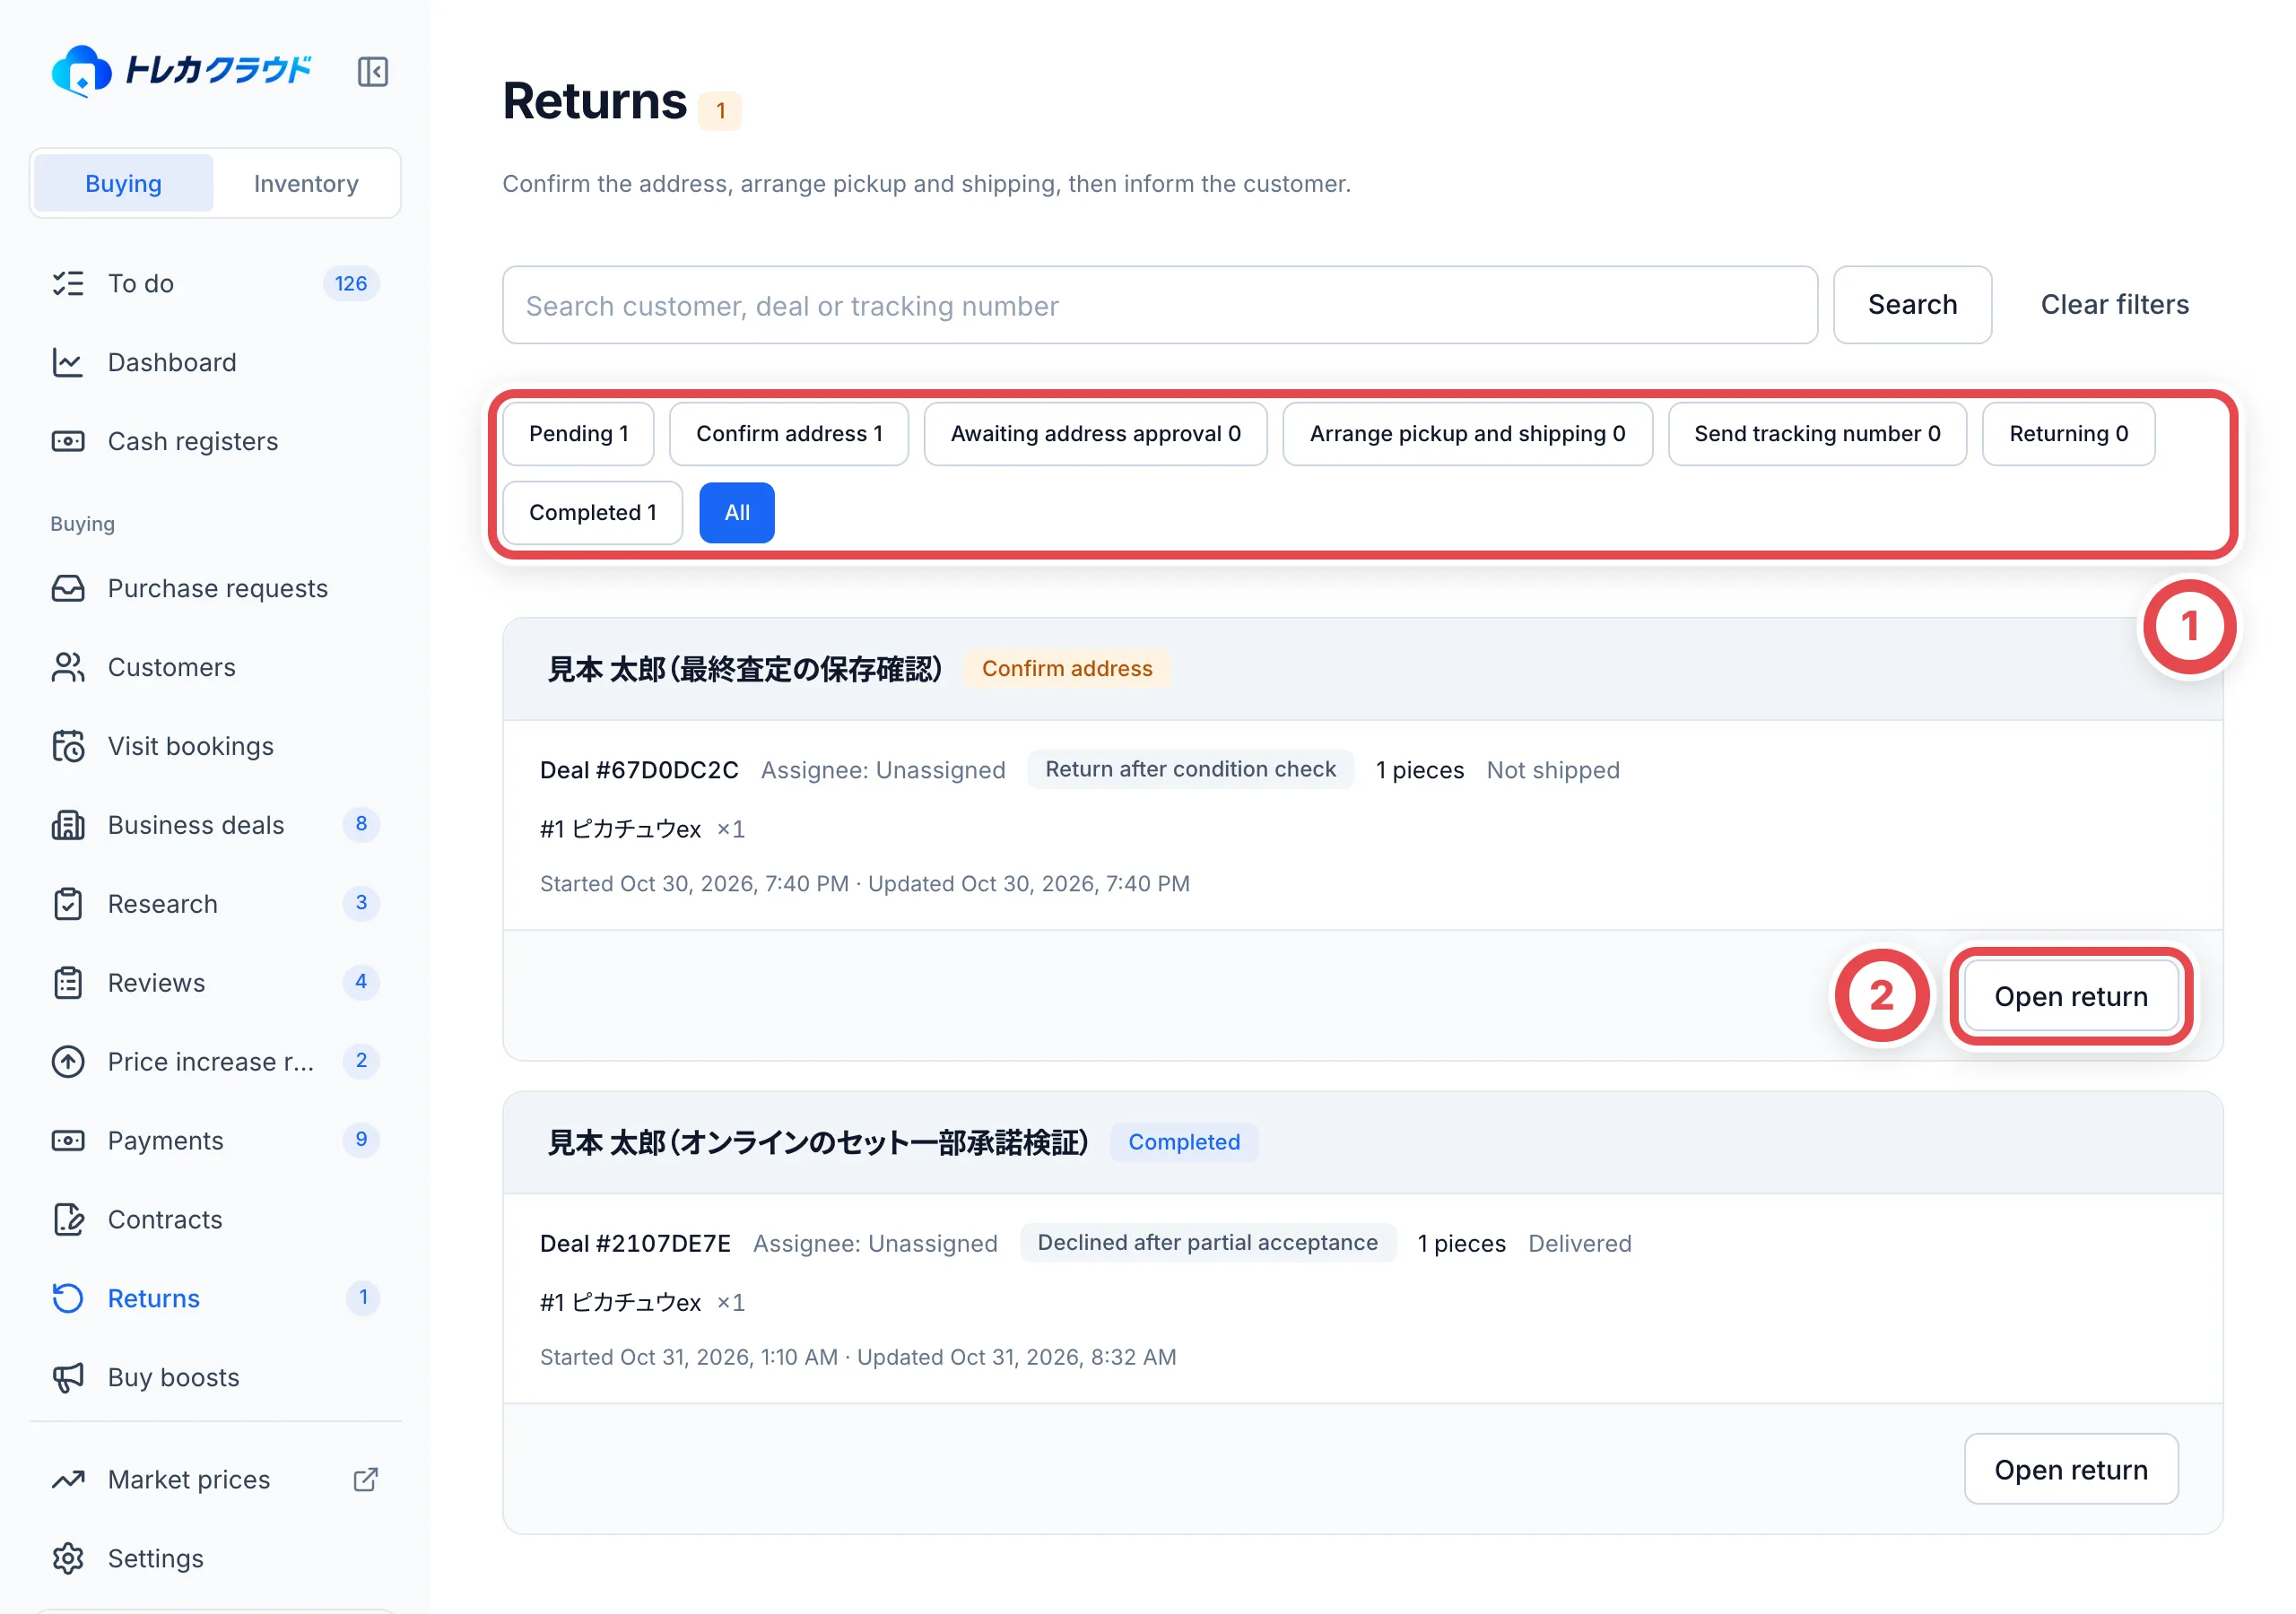 You can also open it from the deal. On the **Shipping** tab, click **Open return** under **Next step**, or click **Returns** under **Arrange and record return**. On the **Payment** tab, click **Arrange return** under **Return of declined items**. Once it's open, check the cards and quantities to send back under **Items to return** on the right.
## 2. (If needed) Save photos of the cards you're returning
To keep photos of the cards and packing before you send them back, click **Add photos** at ① under **Return item and packing photos**. Choose JPEG, PNG or WebP photos (up to 20MB each, 30 at a time), then click **Save photos**. Saving alone doesn't send anything to the customer.
If your shop uses LINE and this customer's LINE account is linked to the deal, choose the photos to send at ② (up to 4). Then click **Review customer message** at ③, check the message, and click **Send to LINE**. **Clicking Send to LINE sends it right away.** The review screen is the same as for arrival photos (step 4 of [Shipping and final appraisal](/en/guides/purchase/shipping-and-final)).
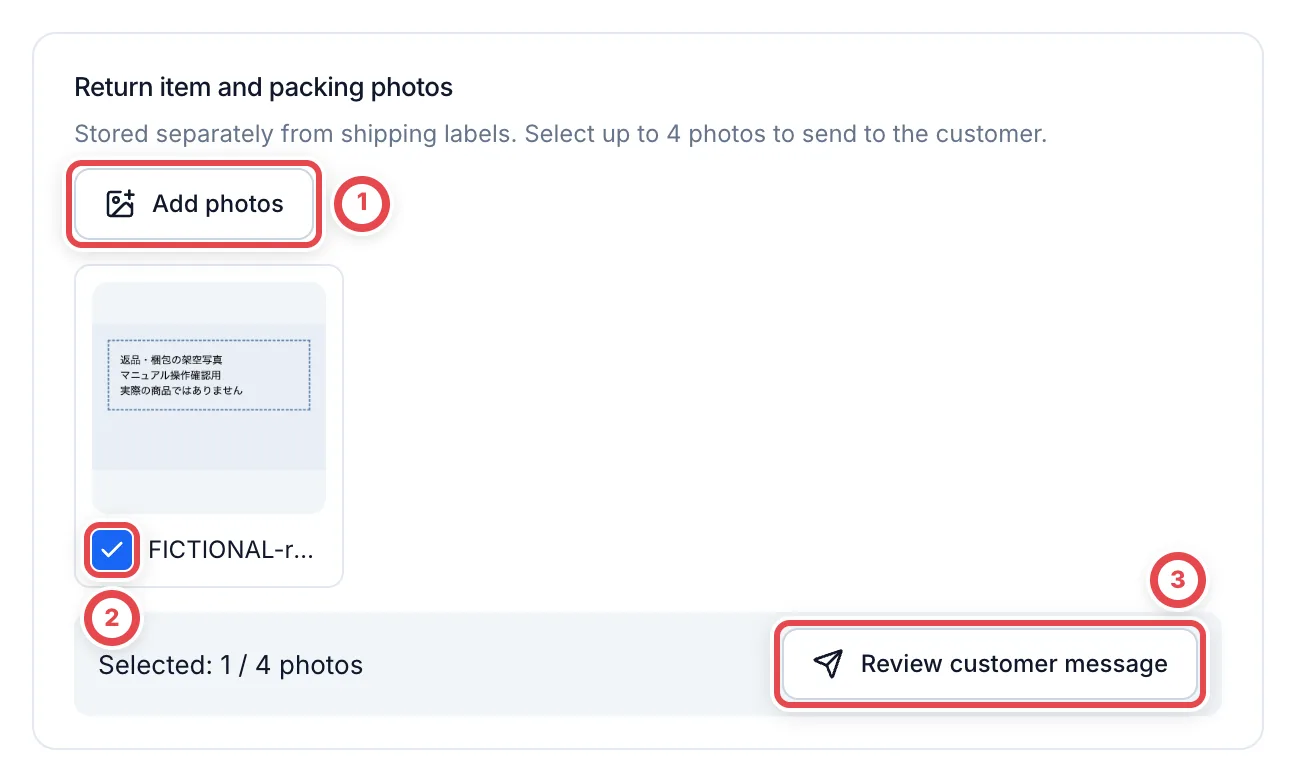 Saving or sending photos doesn't move the address confirmation or shipping records forward. Do the steps below in order.
## 3. Check the return address and save it
**Return address** is filled in from the customer's details with the recipient, postal code, address and phone number. Check and correct them at ①, then click **Save return address** at ②.
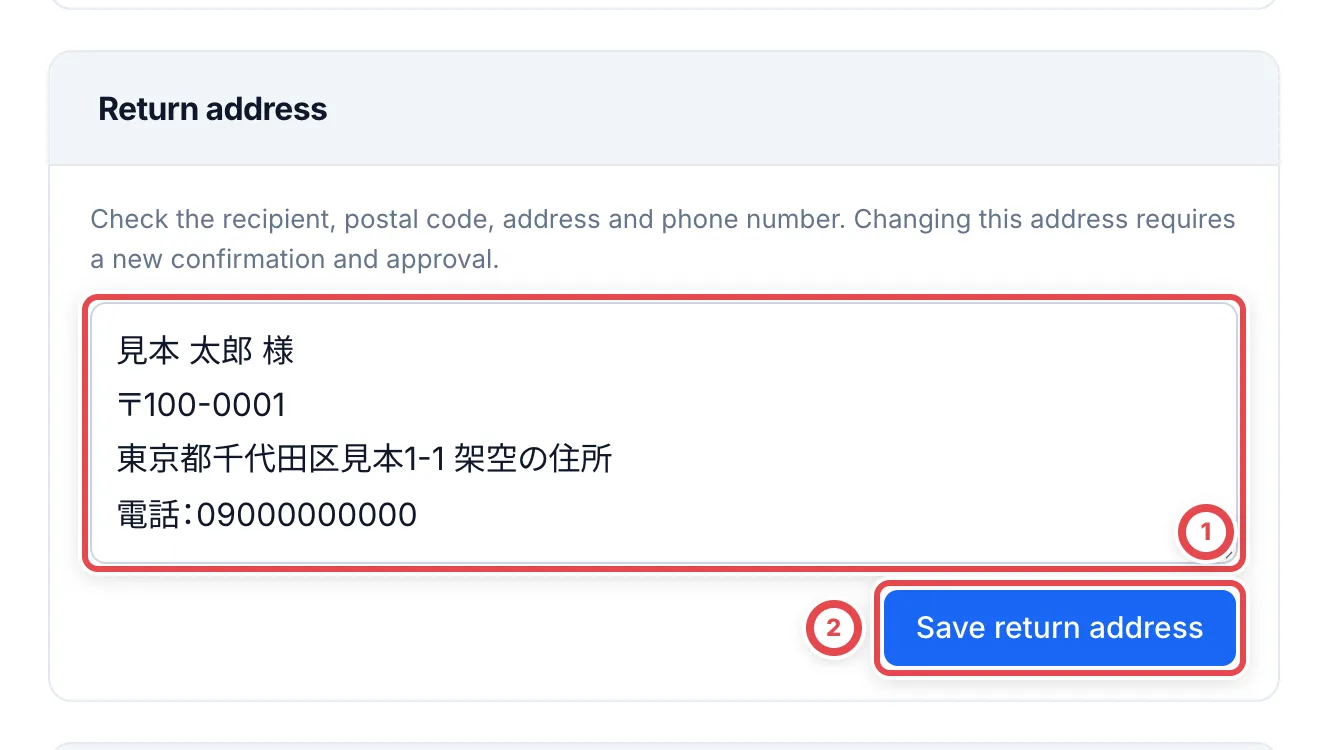 ## 4. Send the address confirmation, then record it
**1. Confirm the address** has a message with the saved return address in it. Click **Copy message** at ① and send it to the customer on LINE or another channel. After you send it, click **Record address contact** at ②.
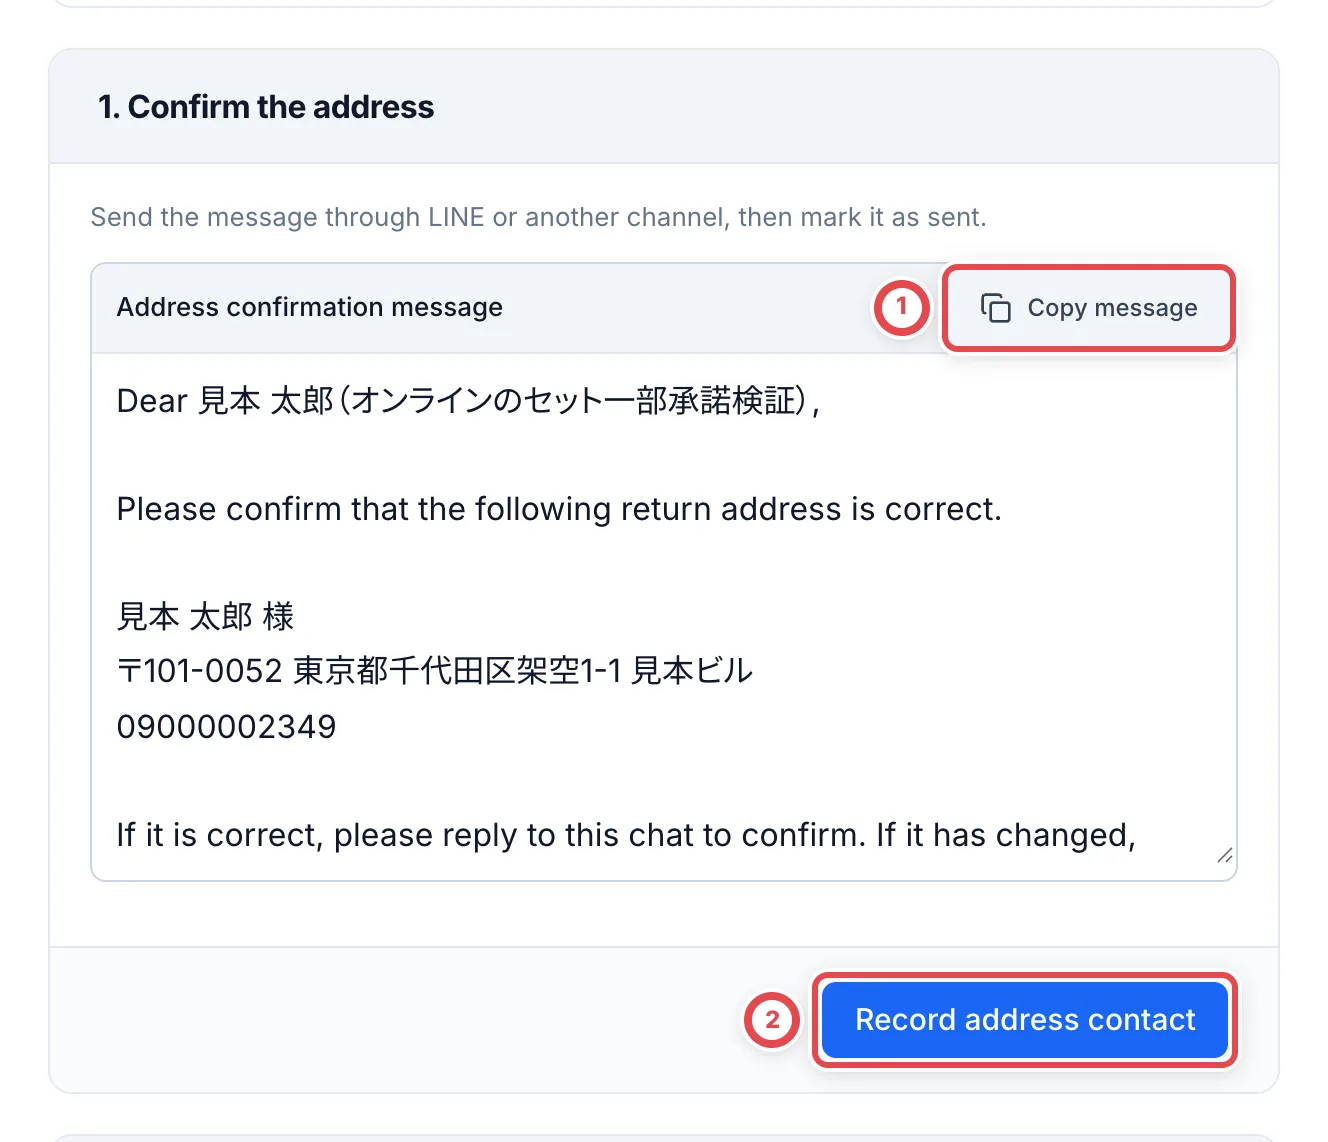 ## 5. Record the customer's approval
When the customer replies that the address is fine, click **Record address approval** at ① under **2. Customer address approval**. **You can't go on to pickup or shipping until you record approval.**
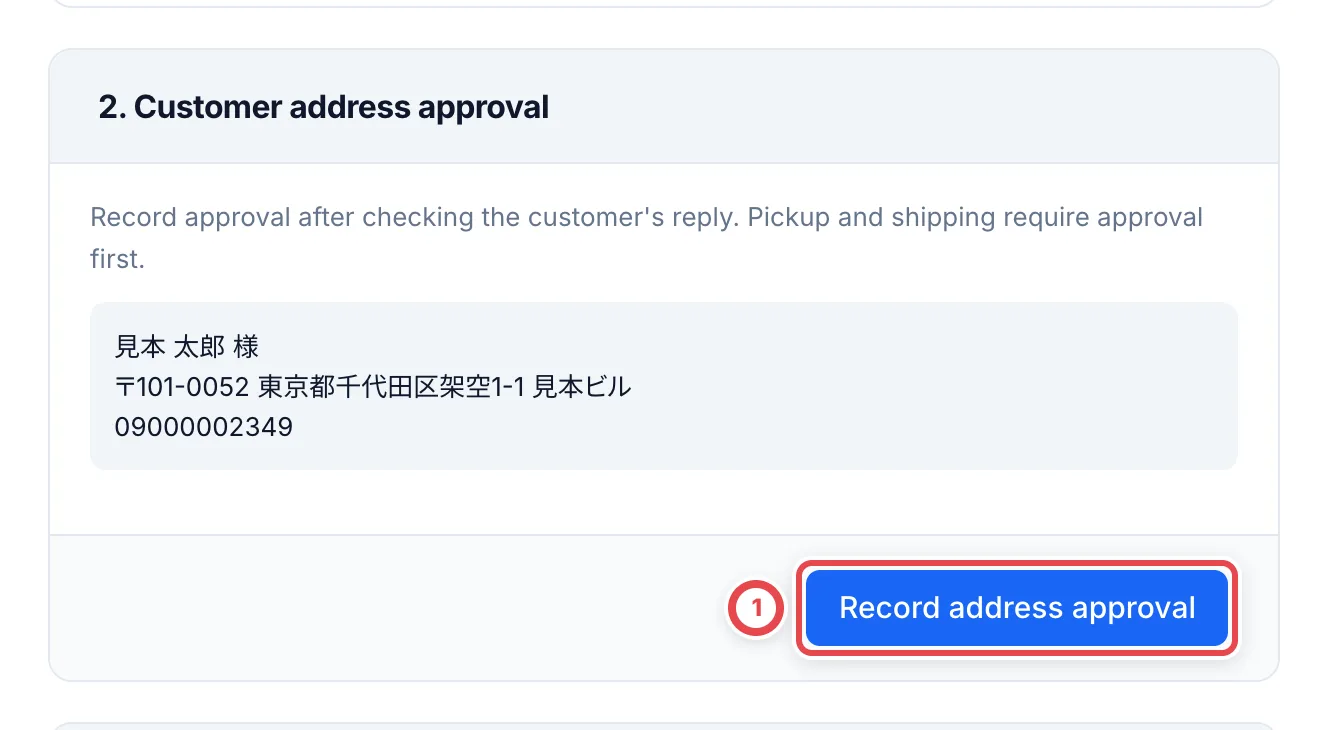 ## 6. Arrange pickup, then record it
After you ask the carrier (Yamato Transport, for example) to pick up the parcel, click **Record pickup request** at ① under **3. Request pickup**.
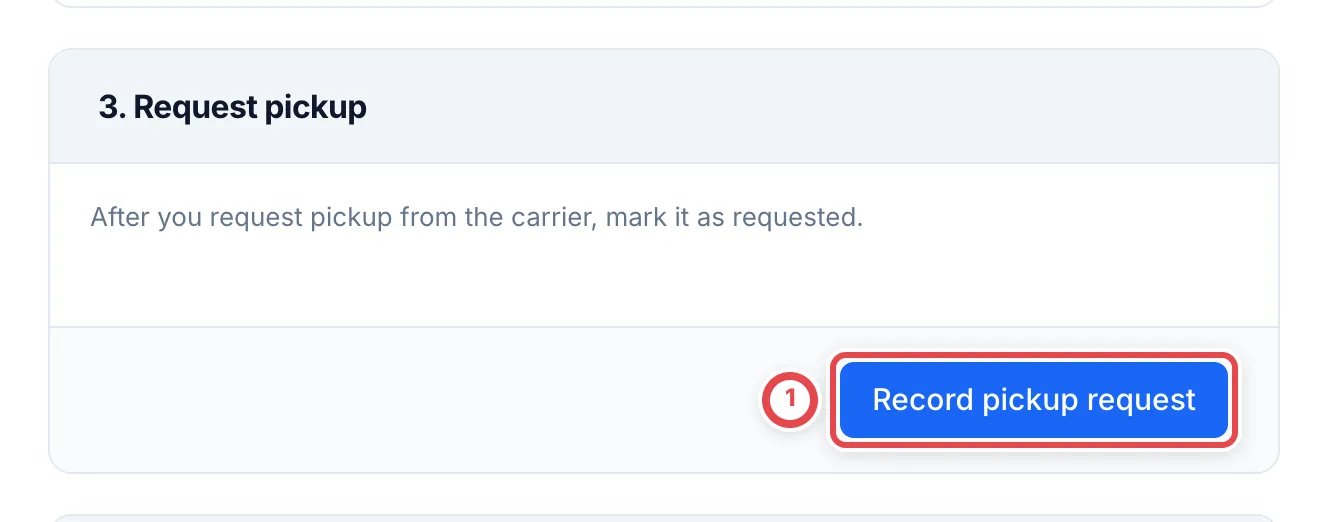 ## 7. Record shipment
After you hand over the parcel, enter the carrier at ① and the tracking number at ② under **4. Record pickup and shipping** (both are required). Also check the sender name and address, who pays the shipping fee and the return shipping fee, then click **Record shipment** at ③.
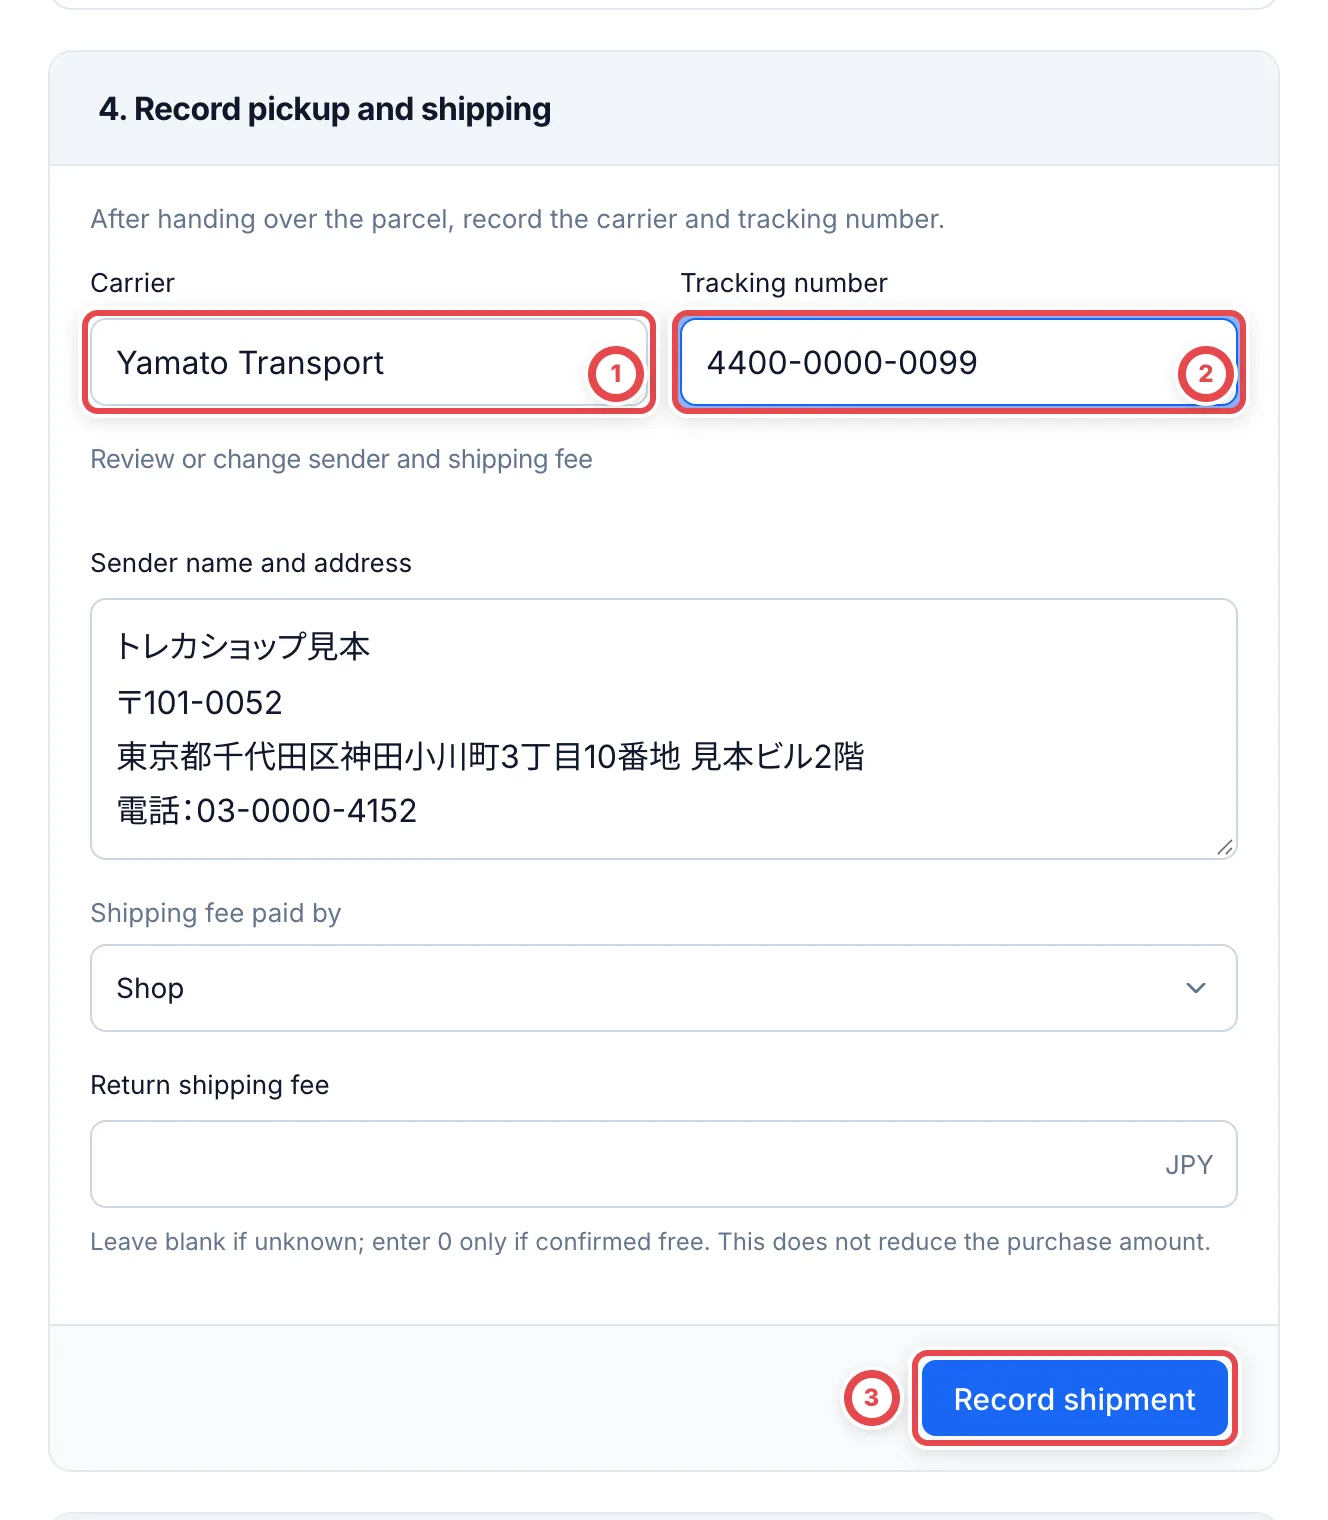 Leave **Return shipping fee** blank if you don't know the amount yet. Enter 0 only if you've confirmed it's free. Choose **Shop** or **Customer** under **Shipping fee paid by**. The fee you record isn't deducted from the purchase amount or the payout automatically.
## 8. Send the tracking number, then record it
**5. Inform the customer** has a message with the carrier and tracking number in it. Click **Copy message** at ① and send it to the customer. After you send it, click **Record shipment notice** at ②.
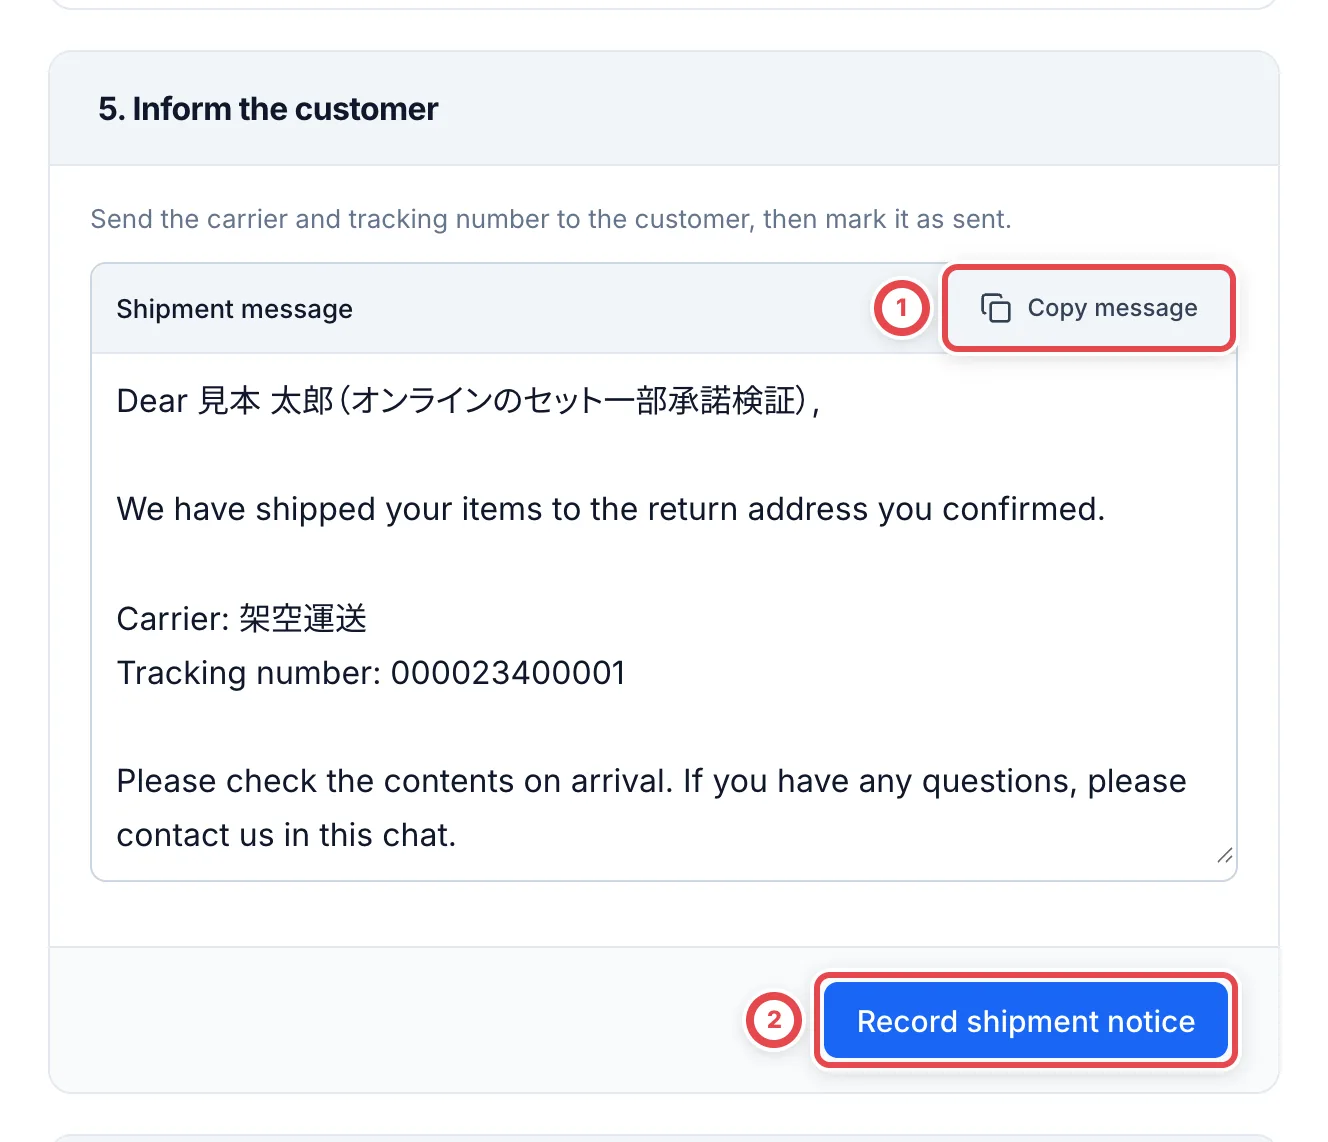 ## 9. Record delivery
When you've confirmed on the carrier's site or similar that the parcel was delivered, click **Record delivery** at ① under **6. Confirm delivery**. The return becomes **Completed** once the tracking notice is also recorded. Otherwise it remains **Send tracking number**; finish step 8.
 **Return history** lists each action you recorded, with its time and who recorded it, newest first, as at ①.
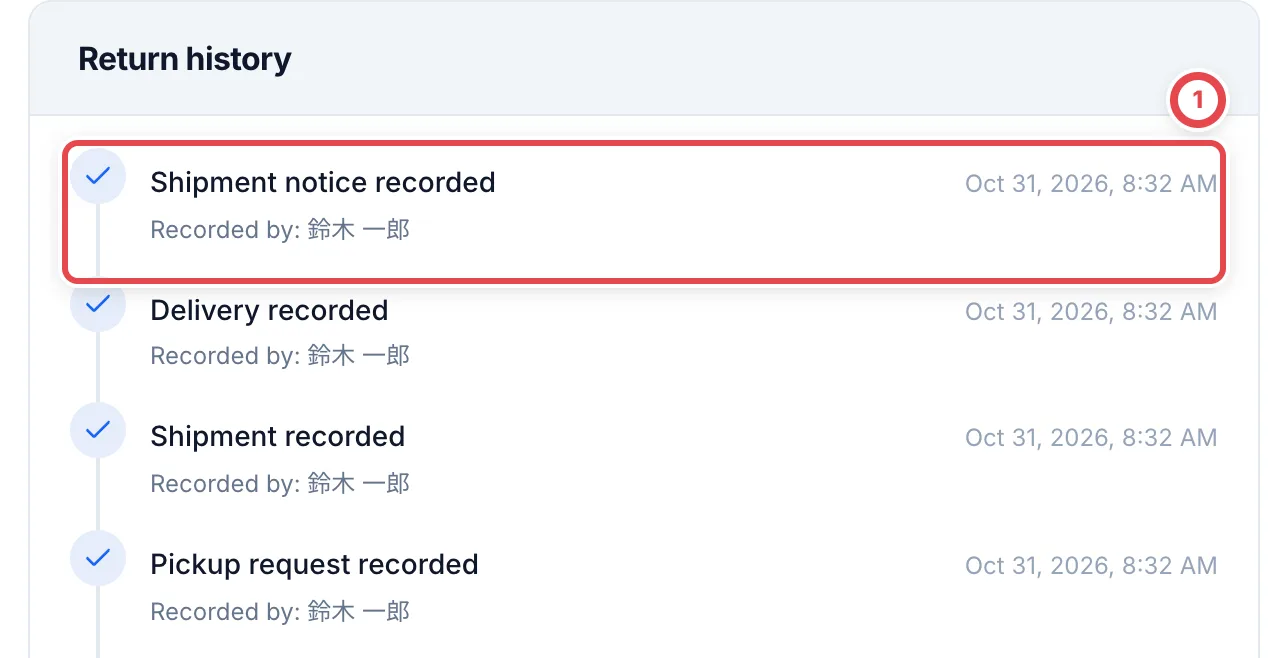 :::warning
Copying a message doesn't record a contact or a notice. Click each button only after you've actually contacted the customer or arranged the shipment. Clicking it records the time and the person right away.
:::
## When you change the address
Before shipping, you can change the address with **Change address** under **Return address**. After a change, you need to record the address confirmation, the customer's approval and the pickup request again. You can't record shipment until the approval and the pickup request for the latest address are both recorded. You can't change the address after shipping.
## A deal with both a return and a payout
When the customer accepted only part of the quote, you can do the payout and the return in either order. For the payout steps, see [Payouts](/en/guides/purchase/payouts).
If the message with the tracking number hasn't been recorded, the return stays under **Pending** as **Send tracking number**, even after delivery or payout. Don't go by the deal's status alone. Check the next task left on the return.
## Troubleshooting
| What's happening | What to check and how to fix it |
| --------------------------------------------------------------------------------------------------------------------------------------------------------------------------- | ------------------------------------------------------------------------------------------------------------------------------------------------------------------------- |
| The return isn't in the list | Declining or partly accepting a preliminary quote doesn't create one. Check that you recorded the customer's response to the final quote (decline or partial acceptance). |
| You see 「返品対応で住所の承諾と集荷依頼を記録してから発送してください」 (Record address approval and pickup request on the return before shipping; shown in Japanese only) | The approval for the latest address and the pickup request aren't both recorded. Record steps 5 and 6, then ship. |
| You fixed the address and the approval and pickup request disappeared | Changing the address means recording them again. Do steps 4 to 6 again with the new address. |
| **Review customer message** doesn't appear for photos | You haven't chosen at least one photo, or your shop doesn't use LINE. You can still save the photos. |
| The return is still **Pending** after delivery and payout | The tracking number message (step 8) isn't recorded. Send it and click **Record shipment notice** under 5. |
| You want to deduct the return shipping fee from the purchase amount | The fee isn't deducted automatically. To deduct it, include it in the final quote amount and get the customer's approval. |
## When another person updates the return
If a conflict message appears, click **Load the latest state** and check which actions are already recorded. Avoid recording the same contact or shipment again while the result of the previous save is uncertain.
## After the return
After recording delivery, check [online purchase completion](/en/guides/purchase/overview#confirm-completion-and-continue). If a partial purchase still needs payment, continue with [Payouts](/en/guides/purchase/payouts). Goods declined in full are not put away as purchased inventory.
---
# Change to a set price
Source: https://docs.toreca-cloud.com/en/guides/purchase/set-price
Use a **set price** to decide the amount you offer for the whole quote while keeping each card's appraisal. For example, a quote with a regular total of ¥207,000 can be saved with a set total of ¥200,000. You do not need to change the individual amounts or quantities.
| What you want to do | Where to go |
| -------------------------------------------------------------- | ---------------------------------------------------------------------------------------------- |
| Set the total while entering an appraisal | [Change to set price and save](#set-a-price-in-the-quote-editor) |
| Change or remove a saved set price | [Edit the appraisal and save the change](#edit-a-saved-set-price-or-restore-the-regular-total) |
| Send selected appraisal requests to second review at one total | [Turn on Show set price](#set-a-price-when-requesting-second-review) |
To appraise a bundle as one line, such as 300 normal cards for ¥100, use a [bulk lot](/en/guides/purchase/bulk-and-set-price#bulk-lots).
:::warning
For partial acceptance of an individual final appraisal in an online purchase, check the selected cards and their allocated amounts in the acceptance screen. The set total is allocated across all eligible cards in proportion to their individual appraisals; the selected shares become the purchase amount. It is not redistributed over the selected subset. At the counter, agree on the included items before customer review and signature; requote and ask for confirmation again when they change. A preliminary set-price quote cannot be partially accepted: select the intended items and requote. Present a new quote if you agree on a different total with the customer.
:::
## Set a total in the individual final appraisal
When the final editor shows **Card 1**, **Card 2**, and so on, enter the package total at ① **Set total (optional)** below the cards, then click ② **Save**. Edit the same field to change it; clear it and save to return to the regular sum.
See [Final appraisal](/en/guides/purchase/final-appraisal) for individual amounts and eligibility. For preliminary appraisals and other editors showing **Change to set price**, use the following steps.
## Buy only some cards in an online purchase
Open **Accept some** for the final quote, then deselect the units the customer is not selling at ②. Check the purchase amount at ① and the share shown beside each card.
For individual appraisals of ¥1,000, ¥2,000 and ¥3,000 with a ¥5,000 set total, the shares are ¥833, ¥1,667 and ¥2,500. Buying the first and third cards costs ¥3,333. The amount is not automatically adjusted back to ¥5,000 after selection.
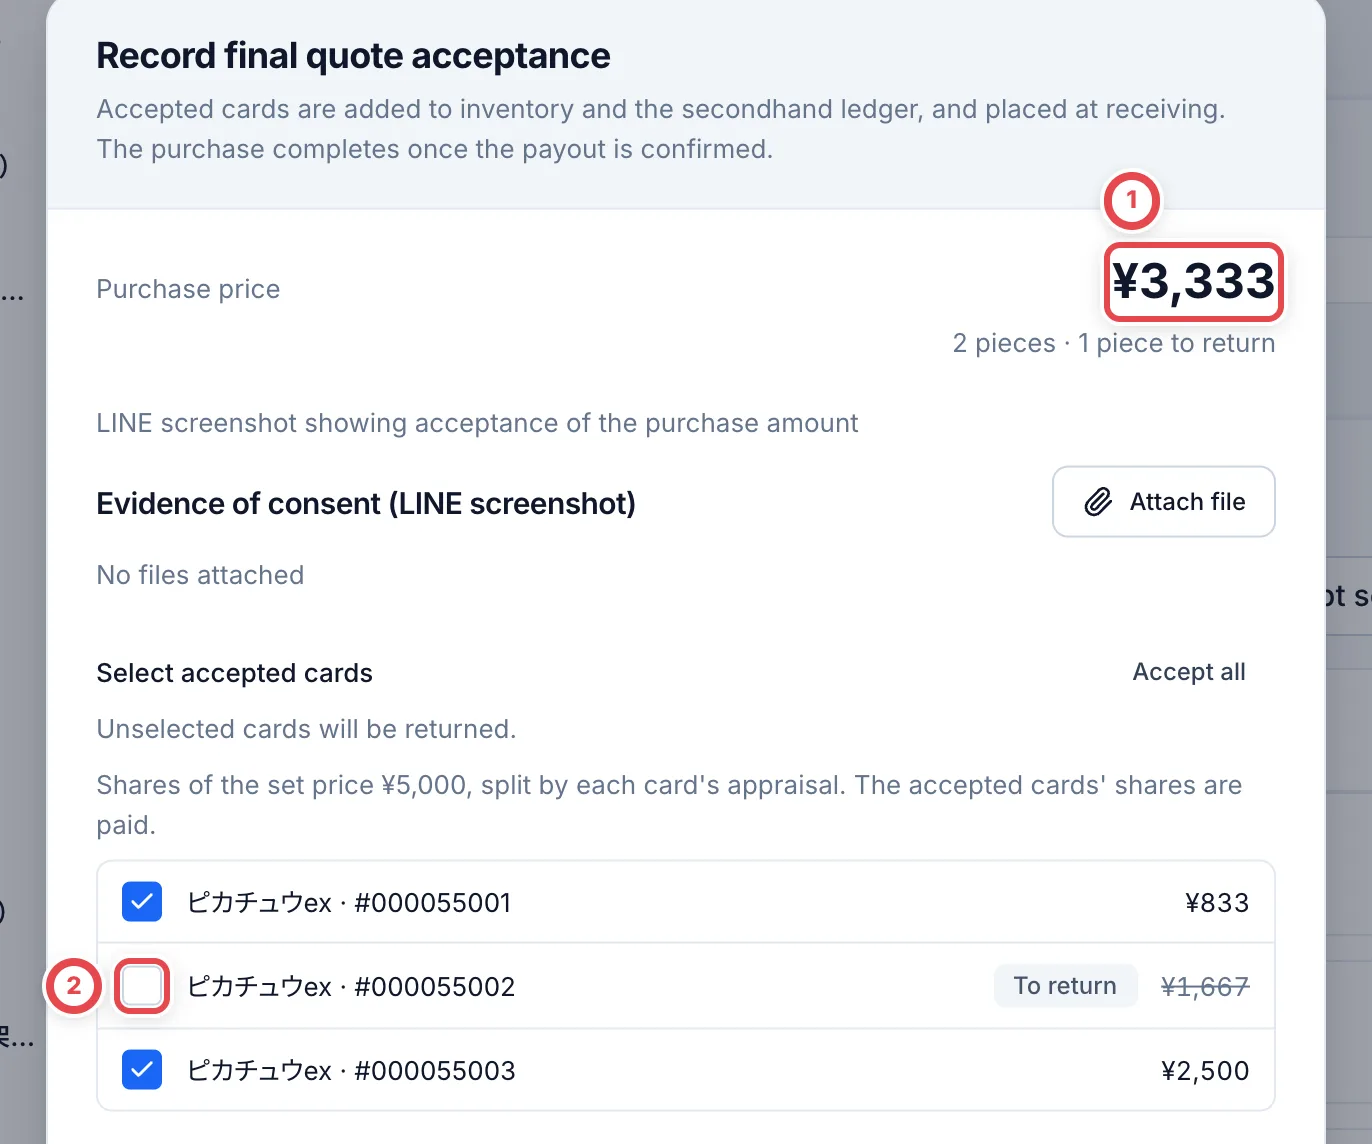 Continue with [Payouts](/en/guides/purchase/payouts) and [Returns](/en/guides/purchase/returns). Recording acceptance and inventory does not execute a bank transfer.
## Set a price in the quote editor
### 1. Check the regular total and click Change to set price
Enter each card's amount and quantity in an editor showing **Change to set price**. To change a saved appraisal, open **Edit appraisal** from its appraisal details.
Scroll below the lines, check **Regular total** at ①, then click **Change to set price** at ②. This does not save yet.
 ### 2. Enter the set total and save
Enter the amount to offer for the whole quote in **Set total** at ③. The screenshot shows a regular total of ¥7,800 and a set total of ¥7,000.
Check the amount and click **Save as set price** at ④. The set total and your other edits to the appraisal lines are saved together as a revision. Individual appraisal amounts remain recorded.
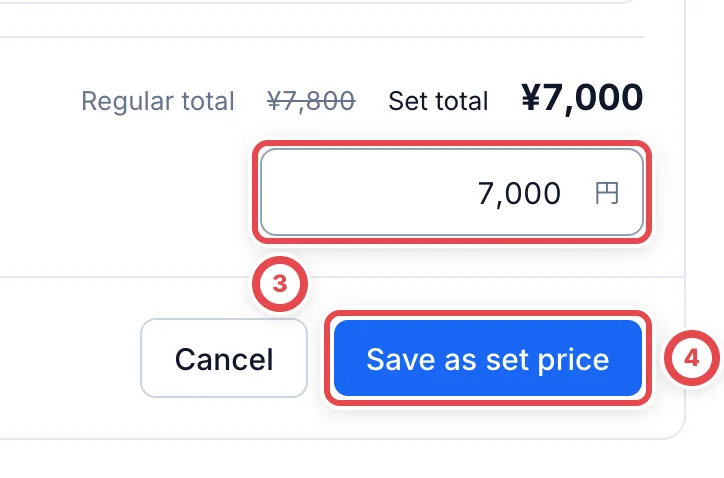 Clicking **Cancel** while entering the set total discards that set-price change and returns to the appraisal editor.
Saving does not complete presentation to the customer or record their acceptance. Follow **Next step** to check and present the quote. Online purchases may require a second review first, depending on the amount. Continue with [Store purchases](/en/guides/purchase/counter#3-check-the-quote-pdf), or [Appraisals and quotes](/en/guides/purchase/appraisal) for online purchases.
## Edit a saved set price or restore the regular total
Open **Edit appraisal** for the appraisal, then go to the total below its lines.
| What you want to do | Steps | After saving |
| ---------------------- | -------------------------------------------------------------------- | -------------------------------------------------- |
| Change the set total | **Edit set price** → enter **Set total** → **Save as set price** | The new set total is saved |
| Stop using a set price | **Remove set price** → check the regular total → **Save revision N** | The sum of the individual appraisals is used again |
**Clicking Remove set price does not save the change.** It does not delete the card lines. Click the save button with the revision number shown on screen to commit the change.
## Set a price when requesting second review
For online purchases, select the cards on the customer's **Appraisal requests** tab and click **Go on with selected**. If every card has a reference price, this opens the confirmation.
Turn on **Show set price** at ① and enter the total offer in **Set total** at ②. Check the selected cards and amount, then click **Go to second appraisal** to send them for review at that total.
If you have permission to waive the review, select **Skip review** on the same screen, enter a reason and confirm. No review request notification is sent. Presenting the quote to the customer is a separate step.
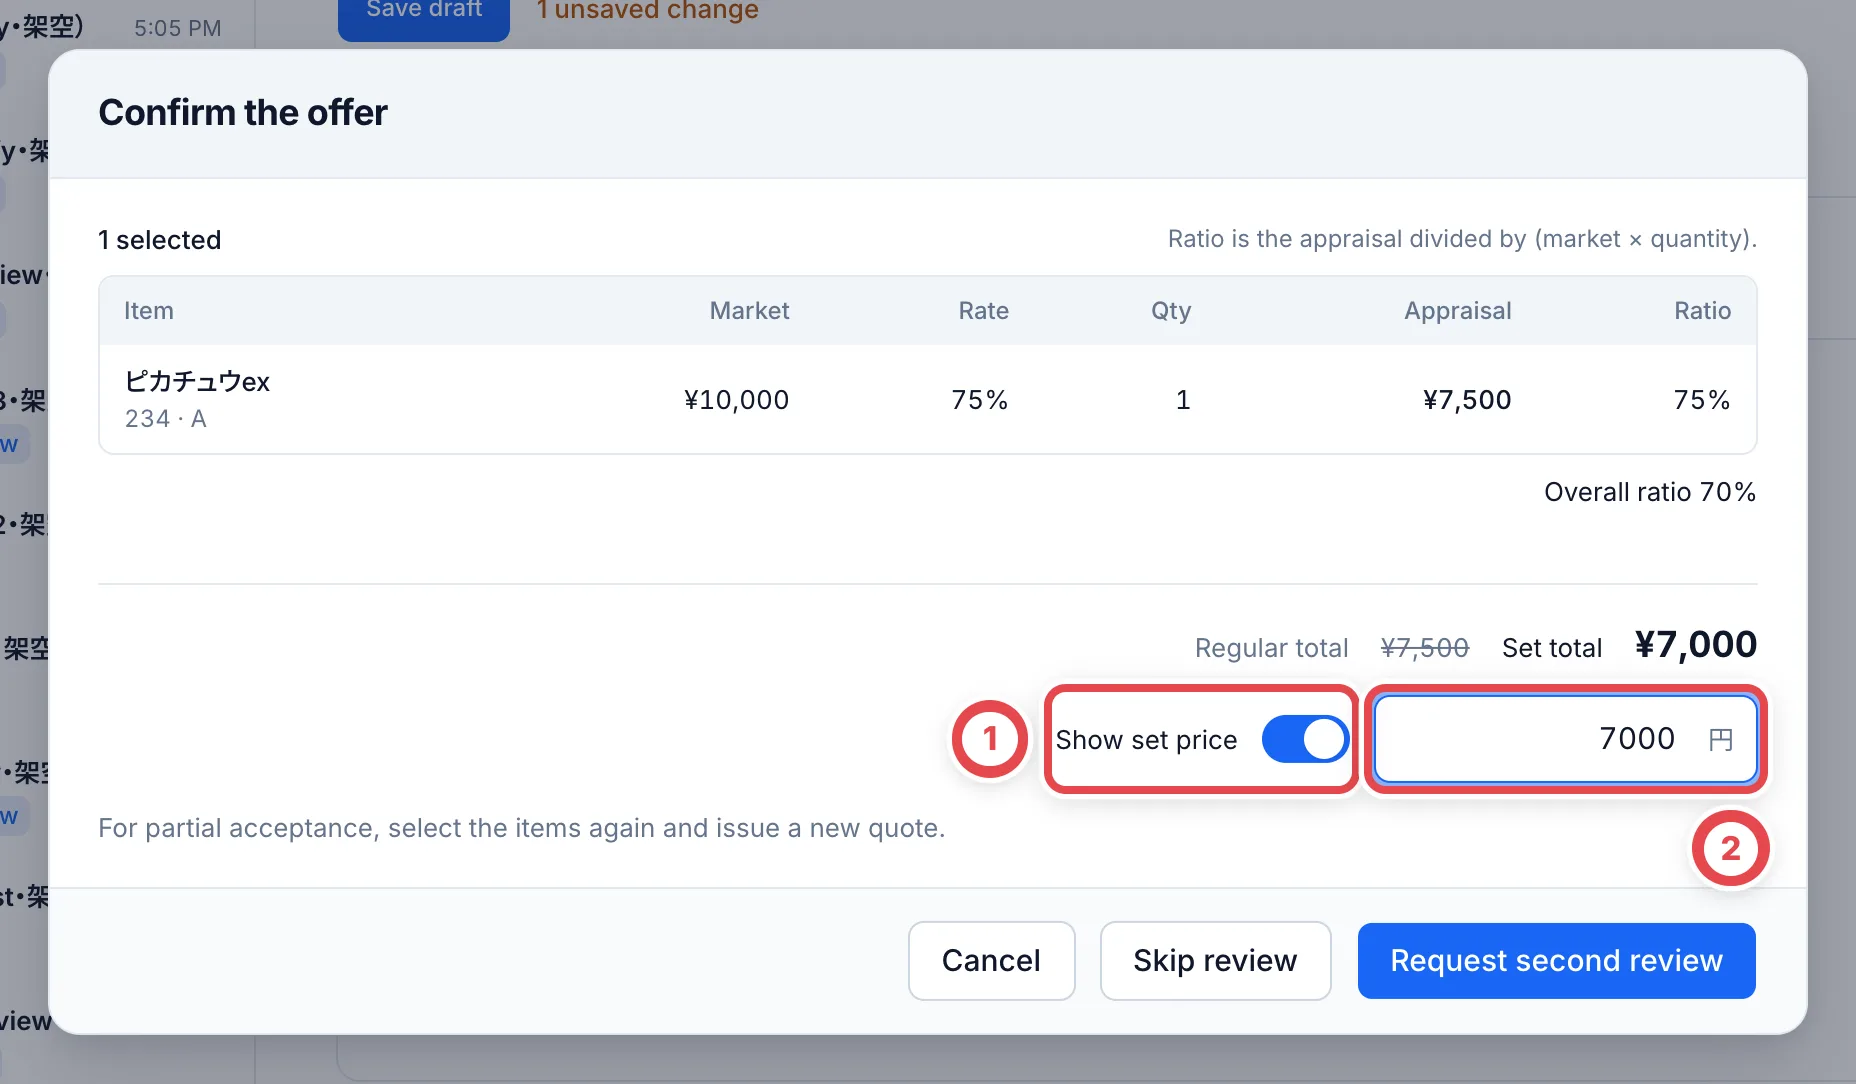 For approval steps, see [Research requests and quote reviews](/en/guides/purchase/research-and-reviews).
## Troubleshooting
| What you see | What to check or do |
| ---------------------------------------------- | -------------------------------------------------------------------------------------------------------------------------------------------------- |
| You cannot find Change to set price | Open the appraisal editor and scroll below the lines. If a set price is already configured, the button reads **Edit set price** |
| Save as set price is disabled | Enter a whole number of at least ¥1. Check that there are card lines, there are no input errors and calculation has finished |
| You want to enter zero to remove the set price | Zero is not accepted. In the individual final editor, clear **Set total (optional)** and save. In other editors, use **Remove set price** and save |
| You want to buy only some cards | Check the selected cards and their allocated amounts in the acceptance screen. Requote if agreeing on a different total |
| You changed line amounts or quantities | The set total is separate from individual appraisal amounts. Check both the regular total and set total before saving |
---
# Shipping and final appraisal
Source: https://docs.toreca-cloud.com/en/guides/purchase/shipping-and-final
Use these steps for shipping and arrival in an online purchase. Without LINE, or if goods arrived before a preliminary quote was recorded, start with [method 2 of manual mail-in intake](/en/guides/purchase/mail-in-to-stock#method-2-record-it-as-a-purchase-request). For goods brought to the counter, use [In-store purchases](/en/guides/purchase/counter).
For everything up to sending the quote, see [Take a LINE inquiry through to a quote](/en/guides/purchase/line-intake). For the payout that follows, see [Payouts](/en/guides/purchase/payouts).
Purchases from companies are handled on the **Business deals** screen. See [Business deals and invoices](/en/guides/purchase/corporate-deals).
## What you need
- A deal with the preliminary quote presented (deal status **Quote sent**)
- A site to use as the shipping destination. Register it under Settings › **Locations**
- The customer's identity verification and payout account. Have both ready before you record acceptance of the final quote ([Identity verification](/en/guides/purchase/identity))
## The steps and the deal status
| Step | What you do | Tab | Deal status |
| ---- | ------------------------------------------------------------------ | --------------- | --------------------------------------- |
| 1 | Record the customer's answer to the preliminary quote | Quotes | Quote sent → Accepted |
| 2 | Send shipping instructions and record them | Shipping | Awaiting shipment |
| 3 | (If needed) Record the shipping label that arrived | Shipping | Awaiting shipment, In transit |
| 4 | (If needed) Send the customer photos of the received items | Shipping | Awaiting shipment, In transit |
| 5 | Enter the final appraisal for the cards that arrived | Final appraisal | Final appraisal |
| 6 | (If needed) Keep internal appraisal photos | Final appraisal | Final appraisal |
| 7 | Send the final quote for a second check, then present it | Final appraisal | Final quote sent |
| 8 | Record the customer's answer to the final quote | Final appraisal | Final quote accepted / Awaiting payout |
| 9 | Create stock and payout | Final appraisal | Awaiting payout |
| 10 | (If the customer declines) Record the decline and arrange a return | Final appraisal | Final quote declined → Arranging return |
**Next step** at the top of the deal page always shows what to do next. If you're not sure, look there.
## 1. Record the customer's answer to the preliminary quote
On the **Quotes** tab, use **Record customer response** to record the answer you got on LINE or elsewhere. If the customer will sell everything, click **Record preliminary quote acceptance** at ①, then click **Record** in the confirmation screen. Once recorded, the deal moves to the **Shipping** tab.
If the customer will sell only some cards, click **Accept some** at ② and choose the cards they're selling. Cards you leave out go back to **Not quoted** in the appraisal requests. They are not returned.
The preliminary quote has no decline button. If the amount doesn't suit them, click **Requote** at ③ to redo the quote. **Requote is recorded as soon as you click it** (no confirmation screen appears).
## 2. Send shipping instructions and record them
Under **Request shipment** on the **Shipping** tab, you'll find a message with the destination and how to send the cards. Click **Copy** at ① and send it to the customer from Liny or the LINE admin screen.
The message includes the link at ②. It's the **Customer details, identity verification, and shipping label form** if the customer's details or identity verification aren't done yet, and the **Shipping label form** if they are. It's created automatically when you open the tab.
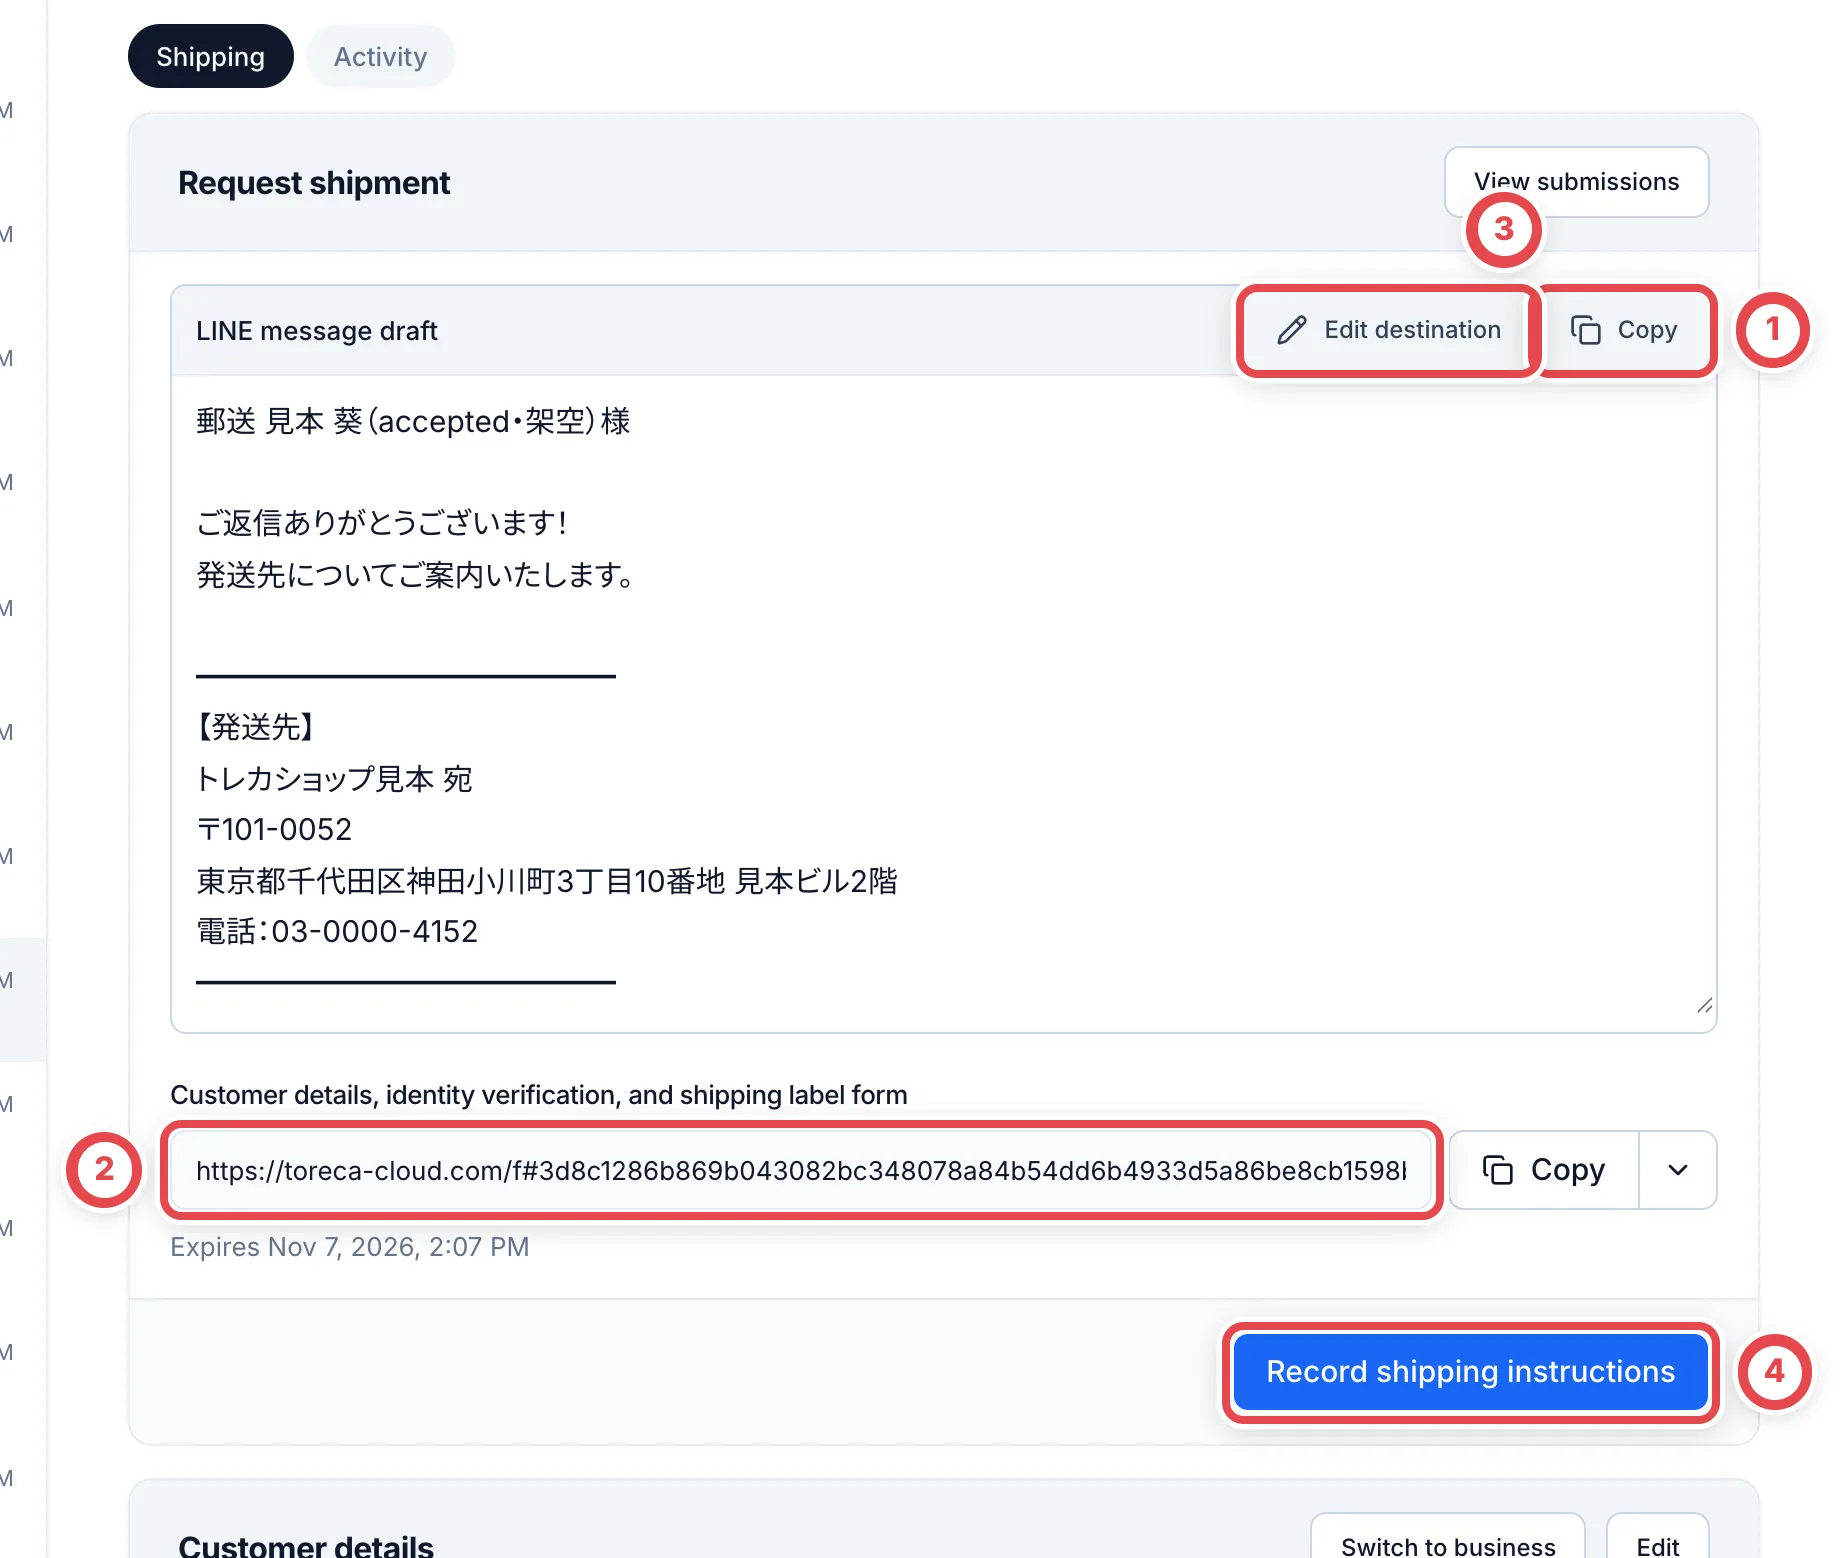 Copy the message at ① and send it. ② is the link to the form the customer fills in. Change the destination site at ③. After sending, record it at ④.
After sending, click **Record shipping instructions** at ④, then click **Record** in the confirmation screen. The deal becomes **Awaiting shipment**.
Existing individual customers can submit the shipping-label photo or choose to send it later, then proceed to [authentication and registered-details review](/en/guides/purchase/registered-information). If current ID documents are required, the customer must submit them.
## 3. (If needed) Record the shipping label that arrived
When the customer submits a shipping label through the form, its photo appears under the shipping labels. If you got the tracking number by phone or on LINE, record it with **Add shipping label** at ①. The label photo is required and the tracking number is optional. The tracking number and carrier appear at ② (a label added by the shop shows **Carrier not confirmed**).
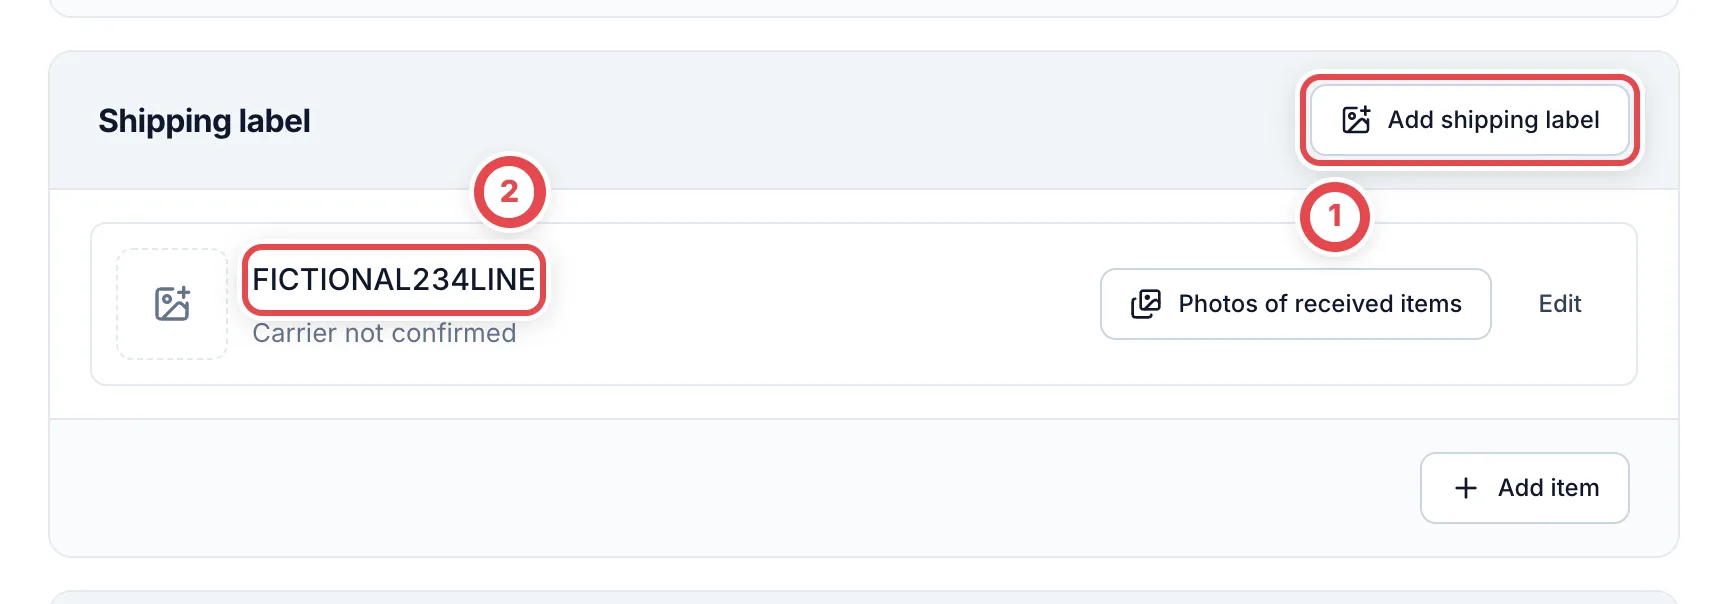 ## 4. (If needed) Send the customer photos of the received items
To tell the customer by photo that their cards arrived, click **Photos of received items** on the shipping label's row. Click **Add photos** at ①, choose the photos and save. The photos are kept separately from the shipping label.
Choose the photos to send with the checkboxes at ② next to the filenames (up to 4). Click **Review customer message** at ③ to open the screen that checks everything before sending.
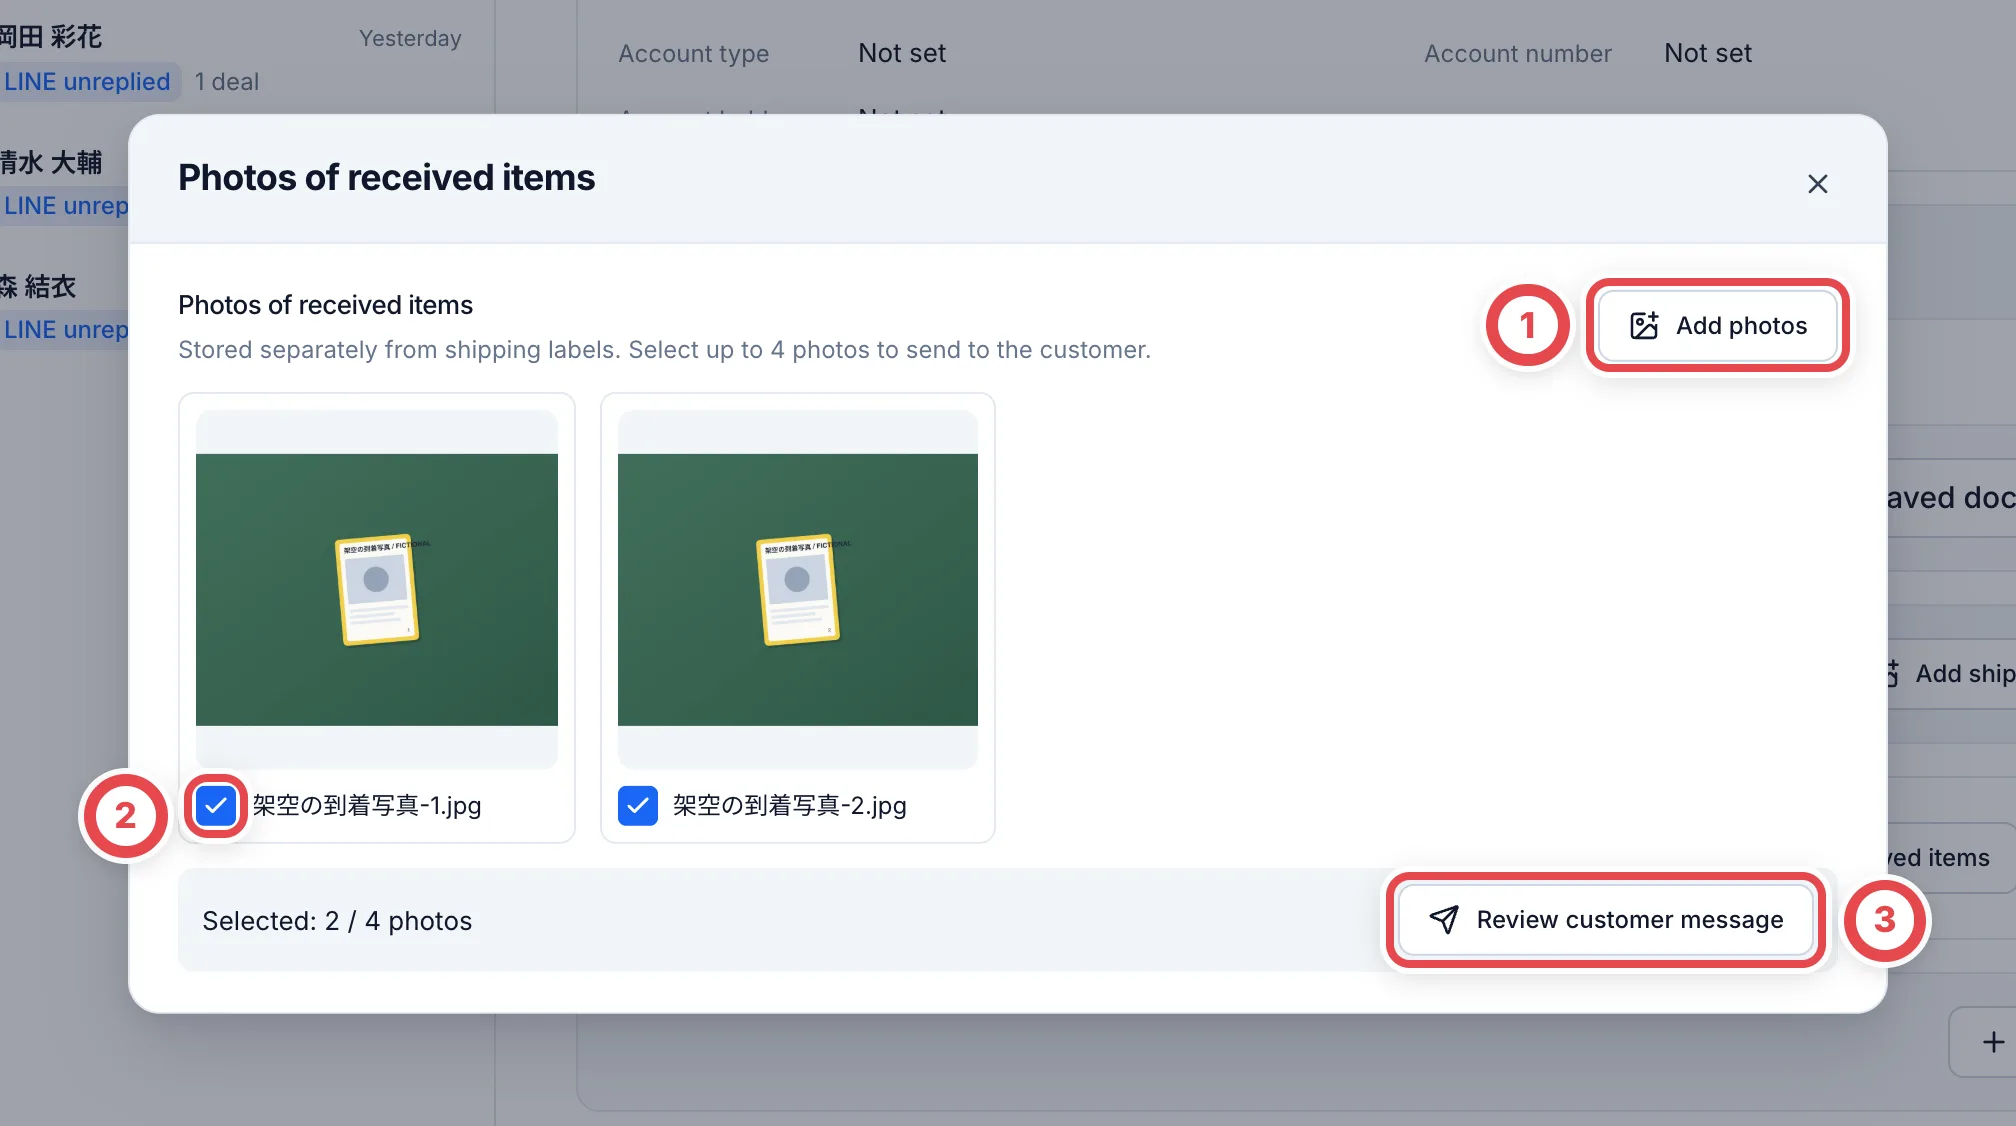 The review screen shows the customer who will receive it and the photos. You can edit the message at ①. Click **Send to LINE** at ② and **it's sent to the customer's LINE right away**. Internal appraisal photos are not included.
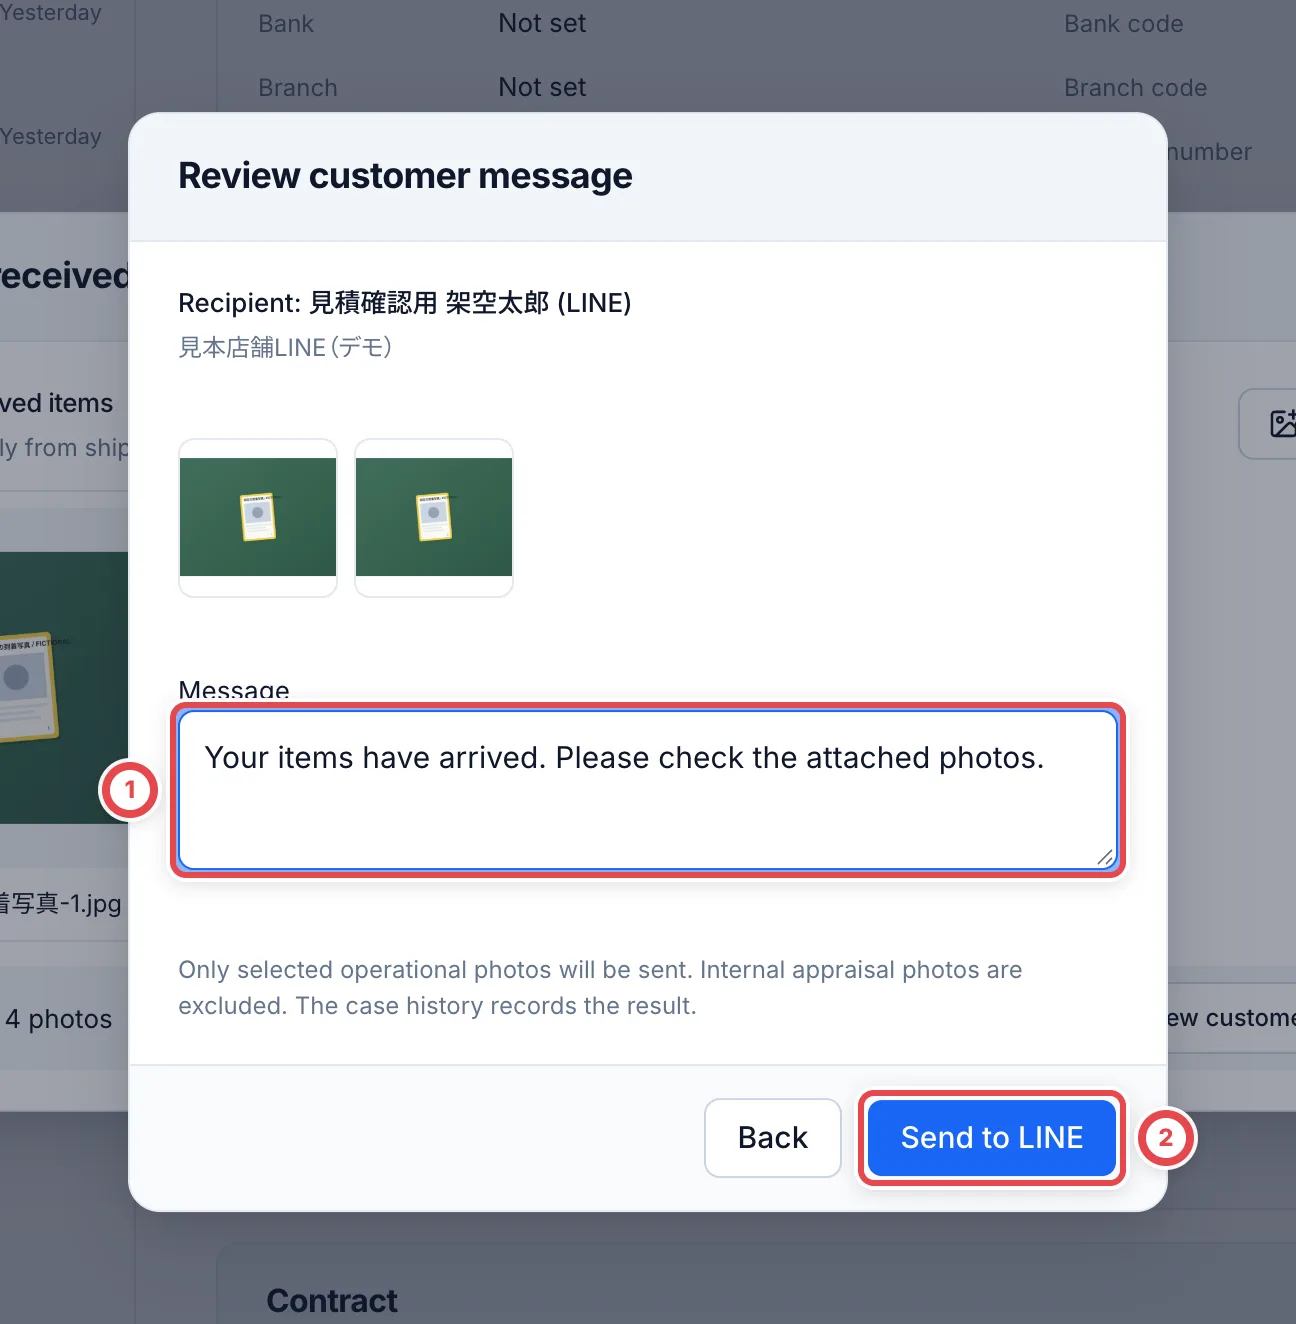 You can choose photos and send them only if your shop uses the LINE connection.
The customer must be linked to the LINE Official Account used for delivery. This screen cannot resolve a recipient for a customer who isn't linked to LINE. Use your shop's other contact method in that case.
If the send result cannot be confirmed, follow the screen's check or retry guidance before changing the photos or message and starting another send. Resolve the same send first to avoid duplicates. If the recipient information has changed, review the latest recipient before sending.
## 5. Enter the final appraisal for the cards that arrived
When the cards arrive, click **Enter final appraisal** in ① **Start the final appraisal with the delivered cards** under **Next step**. This button appears only after you record the shipping instructions (**Awaiting shipment** or **In transit**).
In **Select arrived items**, check the rows that arrived and click **Continue to appraisal**. Only those rows and previously received items enter final appraisal. Unselected rows remain awaiting arrival. Save any current edits, then use **Add arrivals** for later deliveries and save the updated appraisal. If the final quote was presented, return to reappraisal before adding arrivals. Arrivals after settlement require a separate transaction.
The final appraisal lists each physical copy separately as **Card 1**, **Card 2**, and so on. Compare the **PSA number** or **Certification number** at ① with its physical label. Enter the price for this one card in ② **Appraisal amount**, and explain any reduction in ③ **Appraisal note (visible to customer)**.
For a card you cannot buy, choose **Mark not purchasable** from its three-dot menu and enter a reason. **Do not replace a missing-item record with a zero-yen appraisal.** Check arrival discrepancies and record what is missing. A **Missing** card cannot be changed to received in this editor.
Use **Add a card** for an undeclared card, or **Add a bulk lot** for a bundle. Save current edits first if the add buttons are disabled. For a graded card, choose its PSA or other grade under **Observed grade**, and enter its number after adding it. After adding, check the new goods, condition and amount.
Check every page, enter **Set total (optional)** only when needed, and click **Save**. See [Record the final appraisal card by card](/en/guides/purchase/final-appraisal) for numbers, prices, eligibility, internal notes, saved results and recovery. Saving alone does not send anything to the customer.
## 6. (If needed) Keep internal appraisal photos
Where the item row shows **Internal appraisal photos**, open that button and use **Add photos** to save them. Saved photos can be seen only inside your shop. They aren't used for sending to the customer or for searching products.
The current card-by-card final editor and saved view do not show photo controls. Ask your manager if the photo entry is missing. Arrival photos and internal appraisal photos have different purposes; check carefully which photos are selected for customer delivery.
## 7. Send the final quote for a second check, then present it
After you save the final appraisal, **Request a review of the final quote** appears at ① under **Next step** (when your shop settings require a second check). Click **Go to review request** at ② to ask another member to check it.
 Approving the second check, sending the quote text on LINE and clicking **Mark as presented** work the same as for the preliminary quote. See steps 6 and 7 of [Take a LINE inquiry through to a quote](/en/guides/purchase/line-intake). Once you mark it as presented, the deal becomes **Final quote sent**.
## 8. Record the customer's answer to the final quote
When the customer replies, record it under **Customer response** on the **Final appraisal** tab. The buttons you see depend on whether identity verification has been recorded.
- **Identity not yet verified**: The notice at ① appears and the button at ② is **Record acceptance only**. It records only the acceptance, and the deal becomes **Final quote accepted**. Record identity verification first, then create stock and payout in step 9
- **Identity verified**: The same place is **Record acceptance**. Clicking it creates stock and payout along with the acceptance, and the deal becomes **Awaiting payout**. You can't click it until the payout account, the secondhand dealer license and the site to put the cards are all set
If the customer will sell only some cards, use **Accept some**. It's available once identity verification is recorded. For a set-price quote, also check the allocated amount for the selected cards. Cards they aren't selling are returned later.
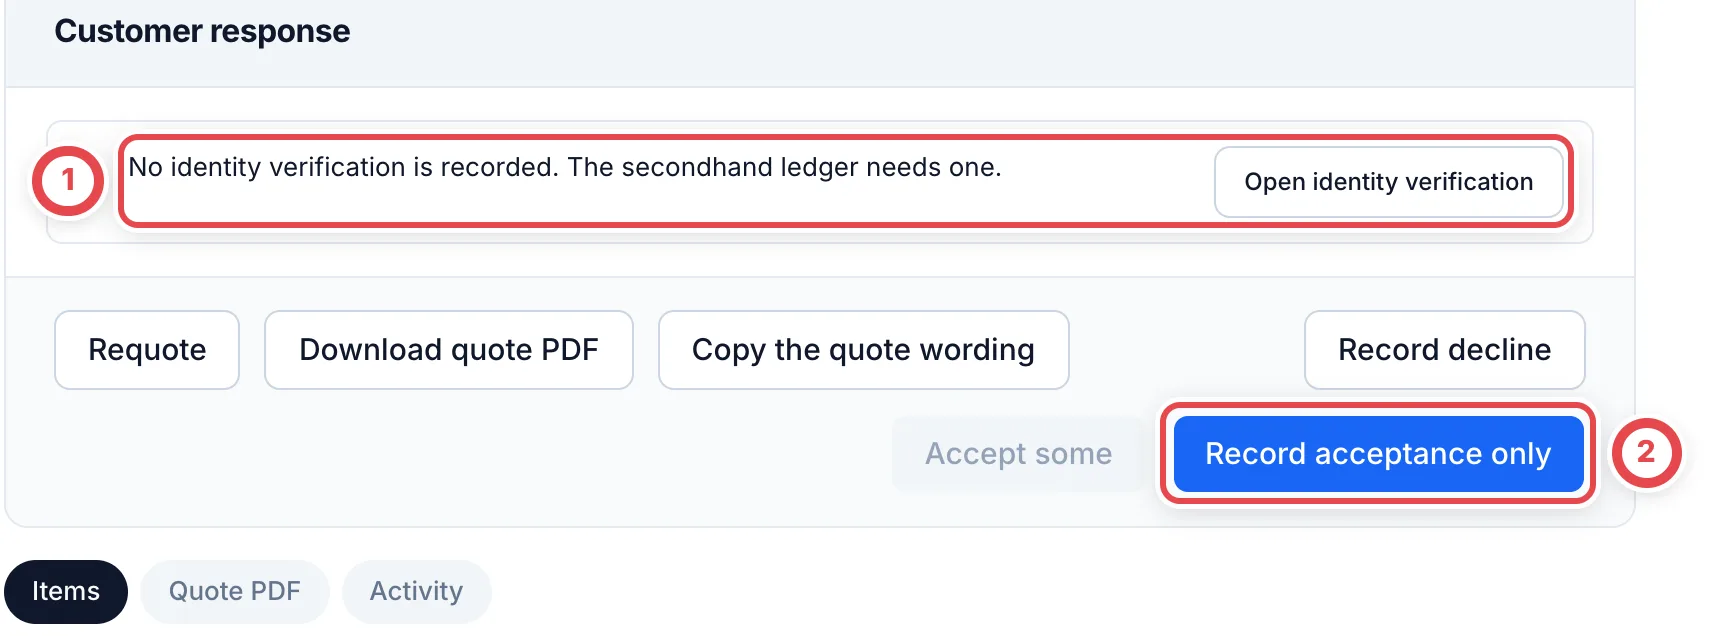 When you pay by bank transfer, use **Attach file** at ① **Evidence of consent** in the recording screen to attach a screenshot of the customer's LINE message accepting (it becomes **Replace file** once attached). The evidence is checked when you submit the payout (you can't submit without it).
## 9. Create stock and payout
For a deal where you recorded only the acceptance, **Stock and payout** lists what's missing, as at ①. Once identity verification and the payout account are set, **Create stock and payout** at ② can be clicked. Check the contents in the screen that opens, then click **Add N pieces to stock and payout**.
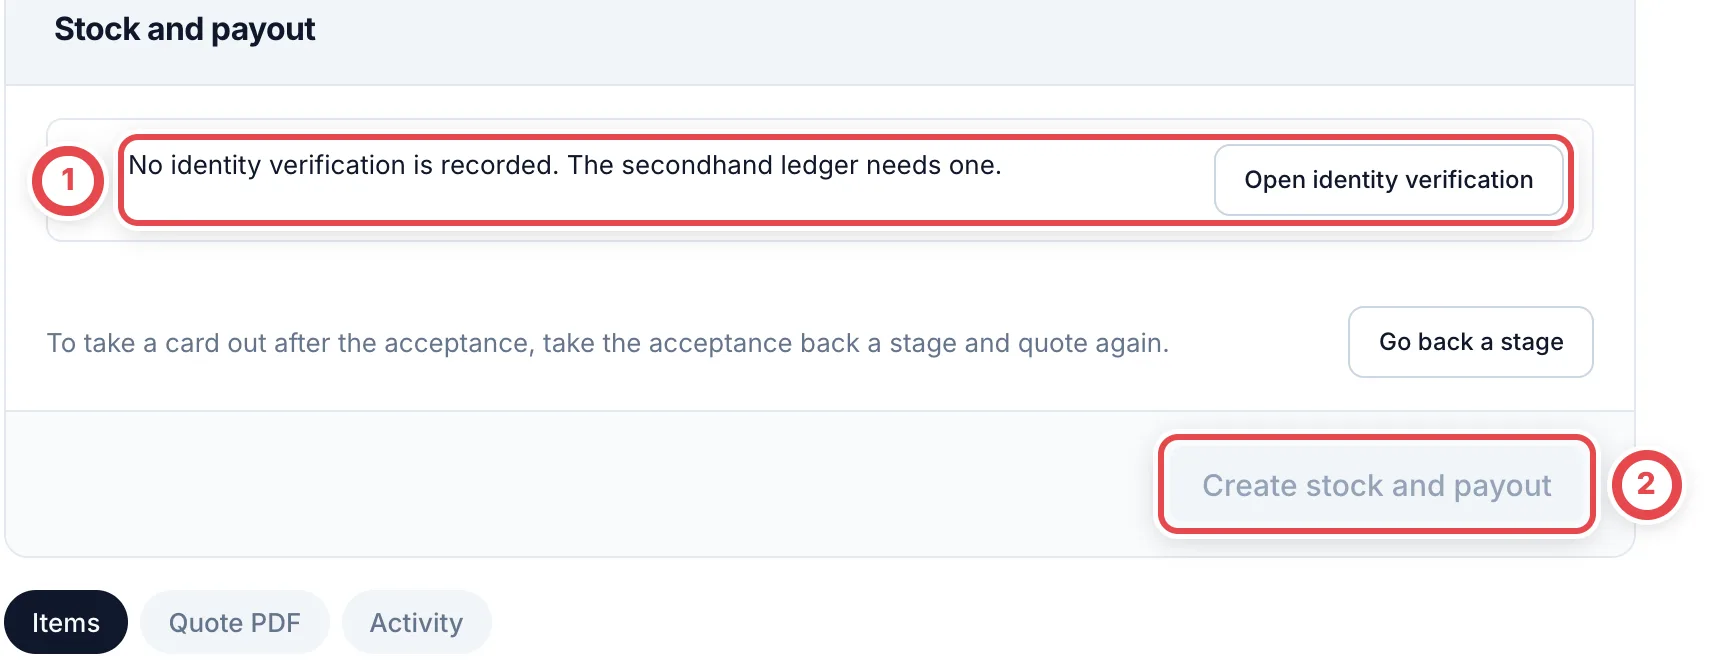 After you create them, the cards go into stock and the deal moves to the **Payment** tab (**Awaiting payout**). For how to run the payout, see [Payouts](/en/guides/purchase/payouts).
## 10. (If the customer declines) Record the decline and arrange a return
If the customer turns down the whole final quote, click **Record decline** under **Customer response**. Write how you confirmed it (for example, "Customer declined everything on LINE") in **Record of the confirmed response** at ①, tick the checkbox at ②, and click **Record full decline** at ③. You can use it only when all the cards that arrived have been received.
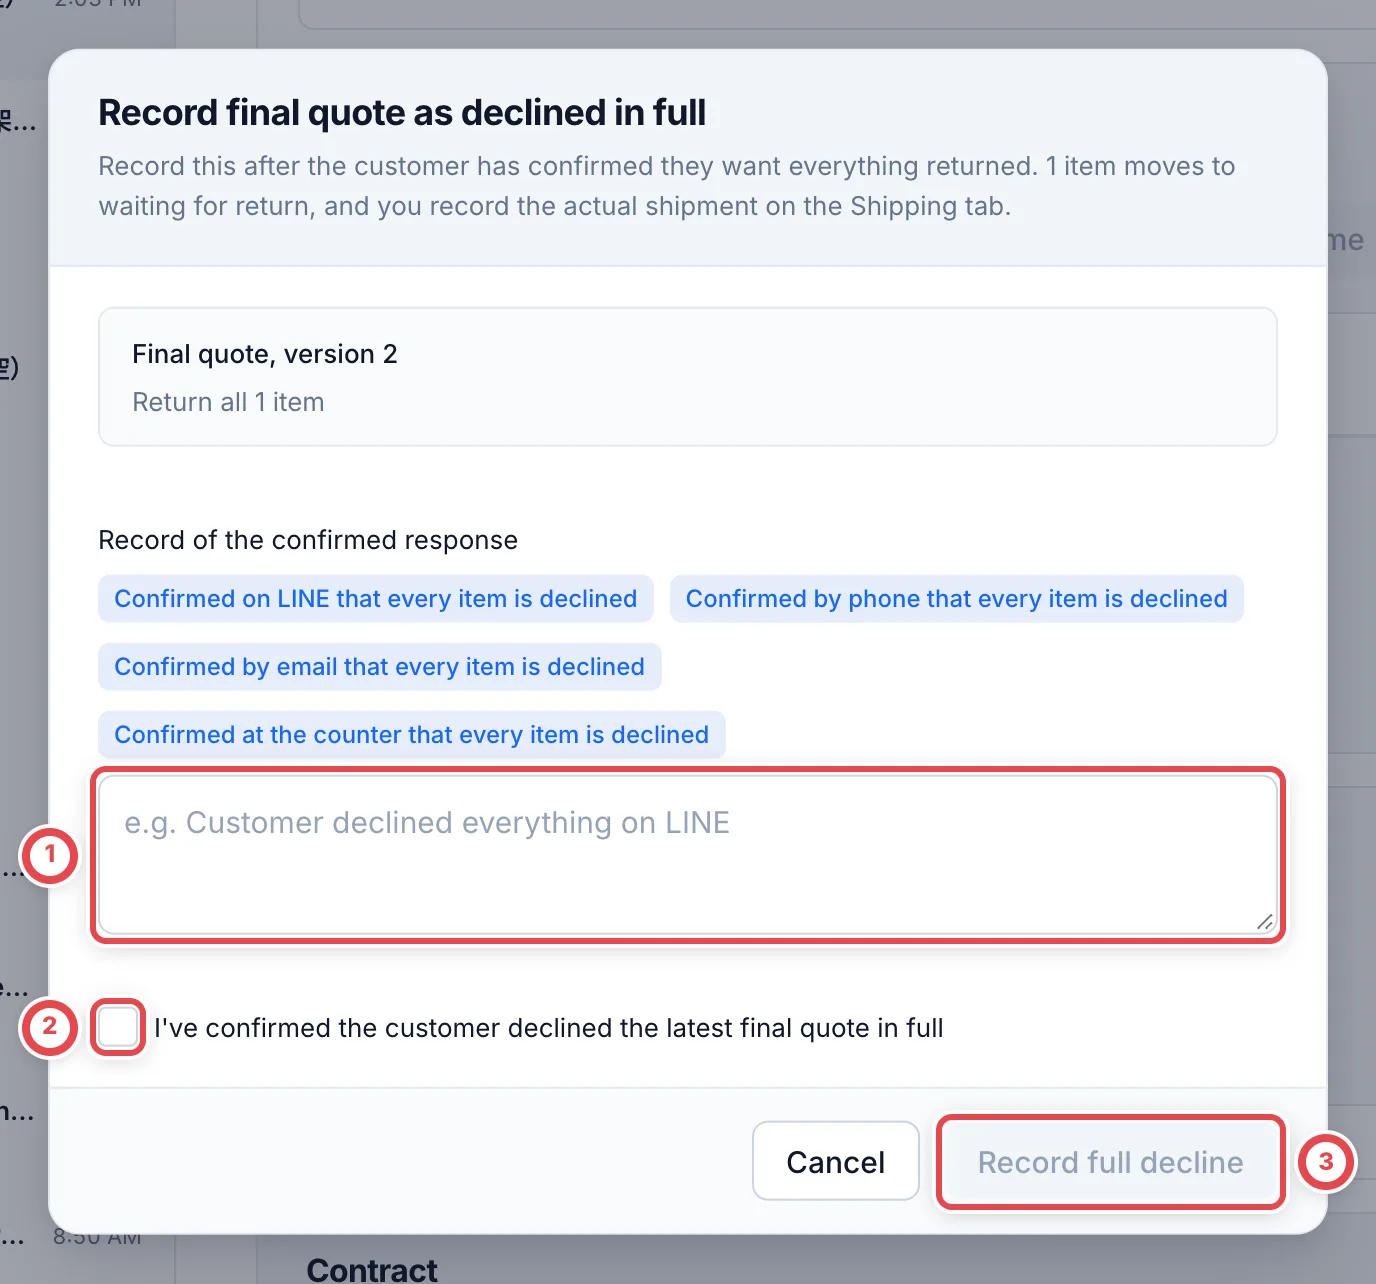 The deal becomes **Final quote declined**, and **Record the return** appears under **Next step** at ①. Use **Open return** at ② to check the units and return address, then record shipping and arrival in Returns. For what comes next, see [Returns](/en/guides/purchase/returns).
 ## Go back to an earlier stage
If you pressed acceptance, arrival or the final appraisal by mistake, open the status menu at the top of the deal (the ▾ beside the current status) and choose **Go back a stage…**.
1. **Check what can be undone**
**Go back a stage…** shows the stage that can be undone from the current
status and the status it goes back to. **What will change** lists the
records that are cancelled.
2. **Enter a reason and go back**
Enter the **Reason for going back** and click **Go back**. The reason is
kept with the deal's history and in the audit log.
3. **Record it again**
The stage you went back from can be recorded again from the start.
| Action | Current status | Status afterwards |
| ------------------------------ | --------------------------------------------------------------------- | ------------------------------------------------------------------------------------------------ |
| Undo the customer's acceptance | Preliminary or final quote accepted | Preliminary or final quote sent |
| Undo the arrival | Received (including partly received) | The status before it was recorded (such as Awaiting shipment). The cards go back to Not received |
| Undo the final appraisal stage | Final appraisal (after arrival is confirmed, before a quote is shown) | Received. The entered final appraisal is cancelled |
- Only the most recent stage can be undone, one at a time. Only stages before the purchase is completed (ledger entries, stock and payout request created) can be undone; after that you correct instead — add a correction entry to the secondhand ledger, and adjust stock on the inventory screen
- When a stage can't be undone, **Can't be undone right now** gives the reason and how to correct it instead. Examples: the customer answered a form after accepting, there is a signature or a signed CloudSign document, an inspection or difference is recorded, or stock is registered
- Each undo has its own permission. When you don't have it, the screen names the permission. At first only the owner and admin can undo ([Members and roles](/en/guides/getting-started/members-and-roles) explains how to change this)
- If the quote's validity has passed, the quote has to be remade to record the acceptance again
## Troubleshooting
| What's happening | What to check and how to fix it |
| ------------------------------------------------------------------------------------ | ------------------------------------------------------------------------------------------------------------------------------------------------------------------------------------------------------------------------------------------------------------------- |
| **Enter final appraisal** doesn't appear | The shipping instructions aren't recorded. Click **Record shipping instructions** on the **Shipping** tab first. |
| You clicked **Enter final appraisal** before the cards arrived | You can undo the arrival from **Go back a stage…** in the status menu (it needs a permission), as long as the purchase isn't completed yet. For cards that did not arrive, check the arrival discrepancies and missing-item records and correct the receipt status. |
| You clicked it but the deal stays **Received** and doesn't reach the final appraisal | There's a card that isn't identified, or an unresolved discrepancy. Clear it from **Identify the cards** or **Resolve arrival discrepancies** under **Next step**. |
| A card arrived that the customer didn't declare | Save current edits, then use **Add a card**, or **Add a bulk lot** for a bundle. |
| **Discrepancy records** appeared | What arrived differs from what was declared (Missing, Unexpected item, Wrong card, Condition mismatch, Damaged and so on). Check with the customer, then record it with **Record resolution**. |
| **Review customer message** for photos doesn't appear | No photo is checked, or your shop doesn't use the LINE connection. You can still save the photos. |
| You can't click **Record acceptance** | The payout account, the secondhand dealer license or the site to put the cards is missing. Set up the items shown under **Next step**. If identity isn't verified yet, use **Record acceptance only**. |
| You can't click **Accept some** | Complete identity verification, the bank account and other settlement requirements. For a set-price quote, also check the amount allocated to each selected card. |
| **Record decline** doesn't appear | It works once all the cards that arrived have been received. |
| You're asked for consent evidence when submitting a payout | No evidence was attached when you recorded acceptance of the final quote. You can add it from the submit screen on the **Payment** tab. |
| The preliminary quote has expired | This only happens on deals that were given a deadline earlier. The deadline can't be changed on screen; contact the Toreca Cloud team. |
## Related workflows
- [Undo an operation from history](/en/guides/purchase/history-and-undo)
- [Prepare and send documents with CloudSign](/en/guides/settings/cloudsign)
---
# Prepare and send documents with CloudSign
Source: https://docs.toreca-cloud.com/en/guides/settings/cloudsign
| Workflow | Where to work | How to confirm completion |
| ---------------------- | ------------------------------------- | ------------------------------------------------- |
| API integration | Prepare the document from the deal | Synchronize its sending and signing status |
| Legacy manual workflow | Open the saved CloudSign template URL | Record sent/signed only after it actually happens |
Settings management and document preparation/sending have separate permissions.
## 1. Check the connection and readiness
Open **Settings → CloudSign**. Match the sandbox or production environment at ①. Use **Add API key** or **Update API key** for that environment’s client ID. Check the key-update action at ② and readiness further down the page. Before replacing a key, verify the provider account and shop.
Follow the **Webhook and return URLs** instructions on the provider side too. On-screen signing needs the required provider SMS setup. Saving settings does not send a document.
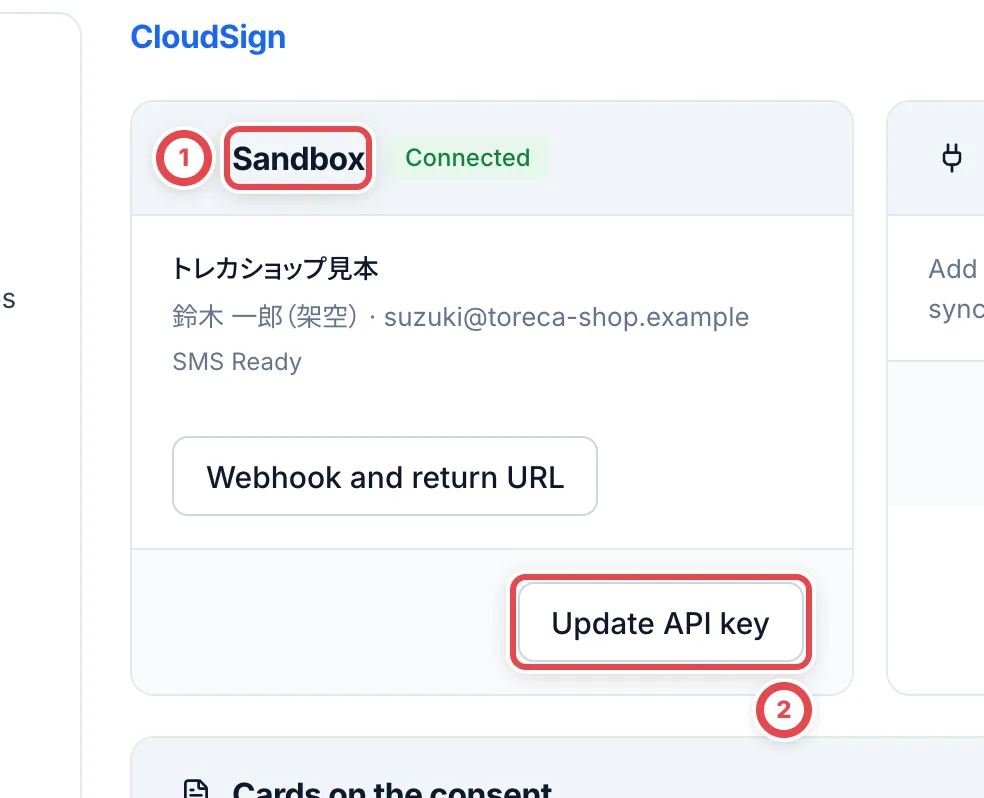 ## 2. Choose standard wording and initial item selection
At ①, choose whether all items or only PSA10 items start selected, and whether a per-item amount excludes items from the initial selection. Review the actual selection again when preparing each document.
At ②, set the standard form’s amount wording and title. Confirmed-price wording is for operations that guarantee a price before physical arrival. Preview the business information, dealer permit, seal and item table using PDF preview. Changes apply to newly prepared documents; existing documents retain their original content.
Under **Document templates**, set a document title format for each template. Add the case number, customer name and document type using the buttons, review the example and save. A blank format uses the case number and document type. Selecting a template fills the title, which can still be edited before creating the document. This title is separate from the heading inside the PDF. Changes do not alter existing documents.
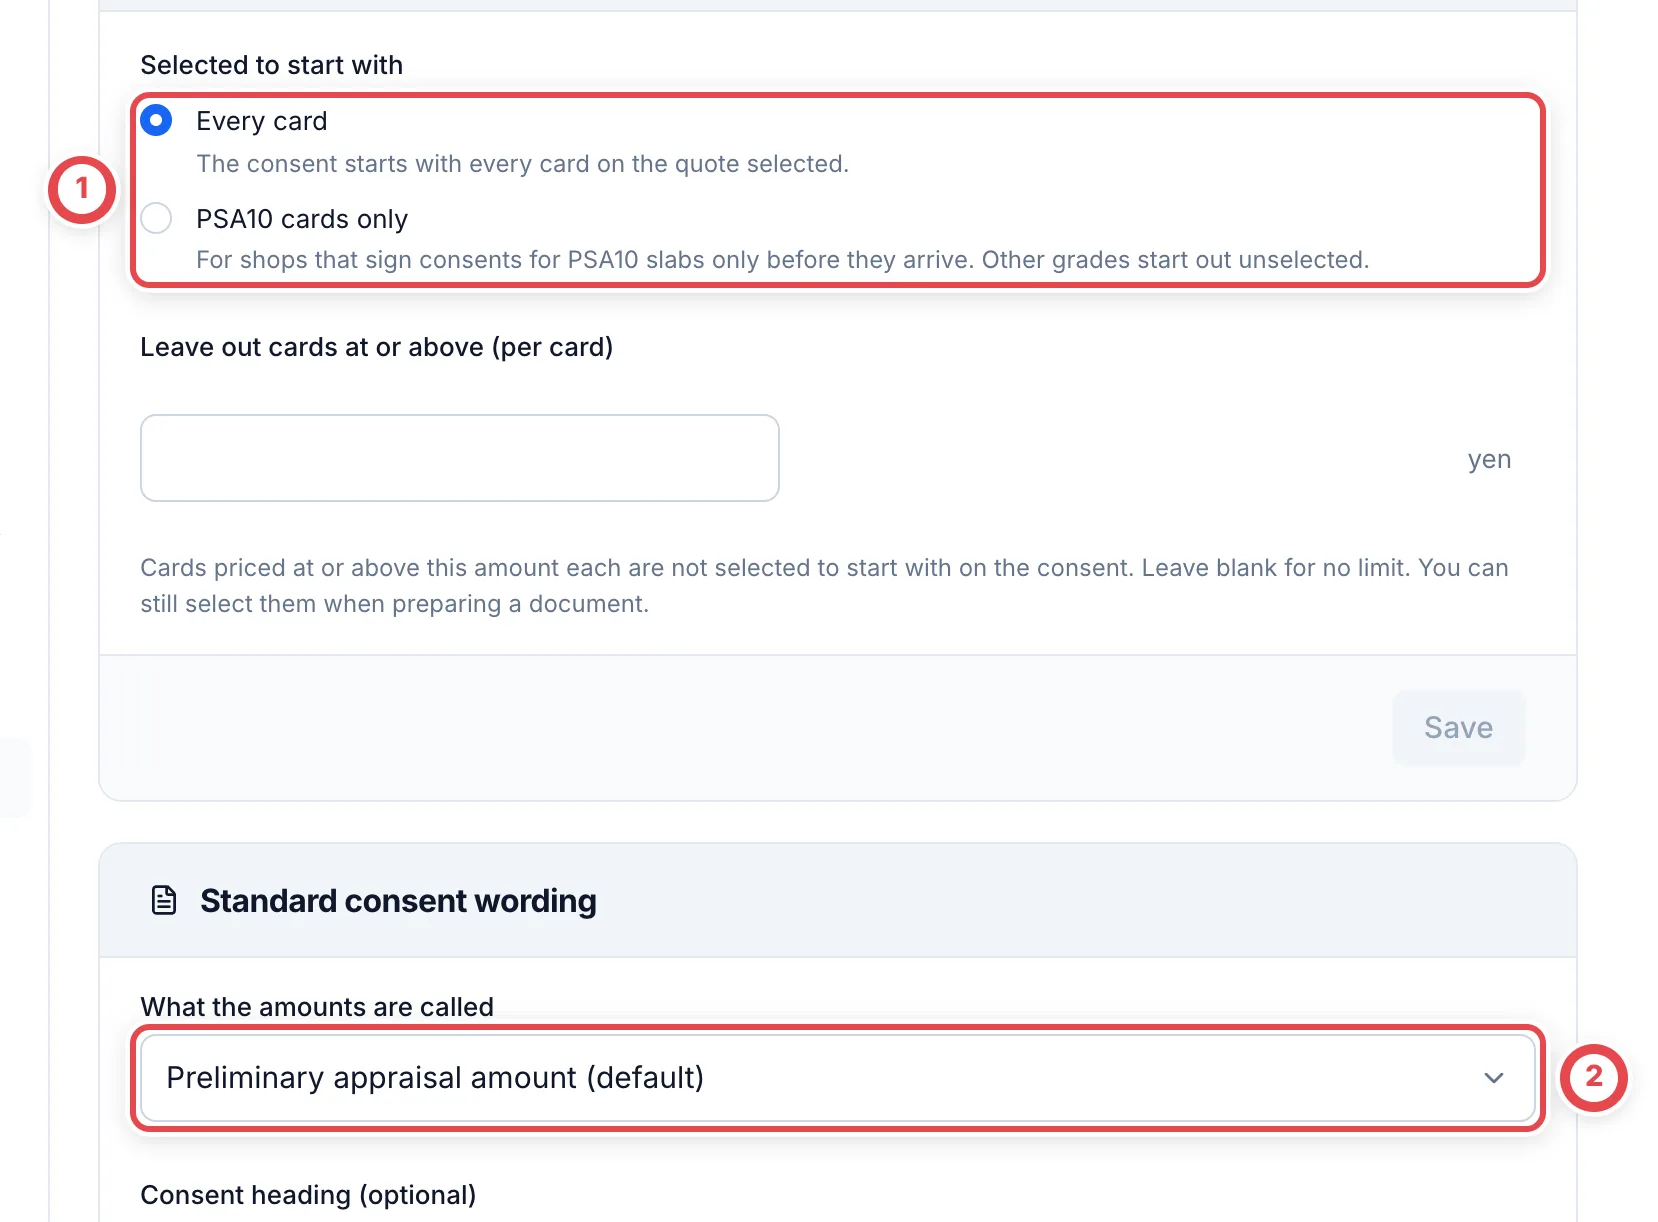
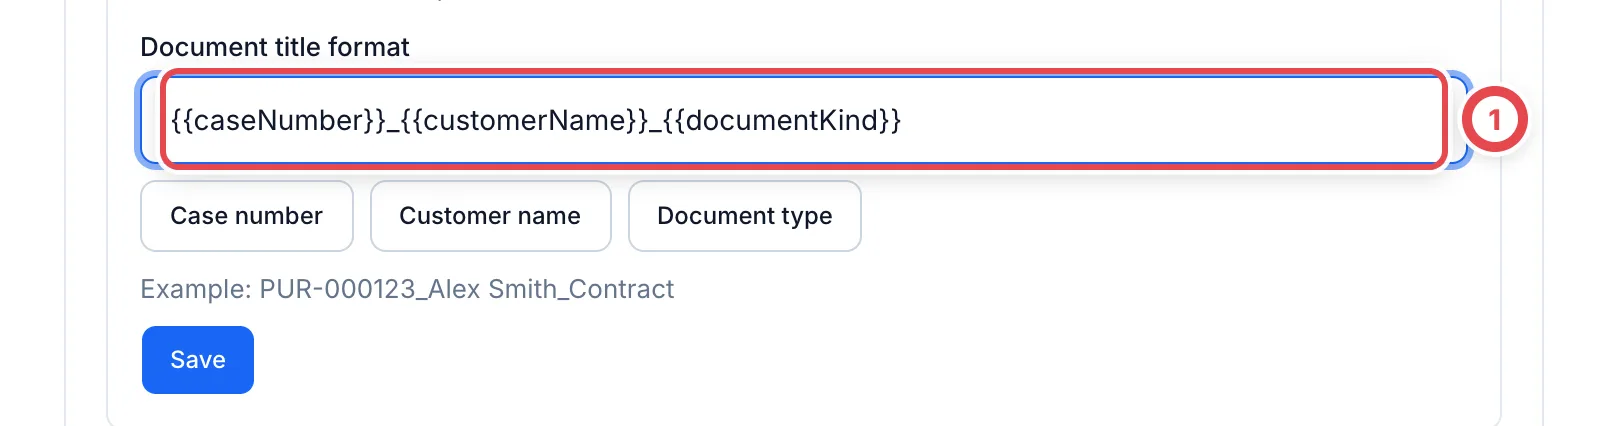 ## 3. Choose items, destination and recipients
Open **Shipping** for the correct customer and deal, then **Prepare document** under the purchase contract or power of attorney. Match the connection/environment at ① and select the template. For a supported template, choose the product shipping destination at ②. Manage addresses in **Settings → Sites and locations**.
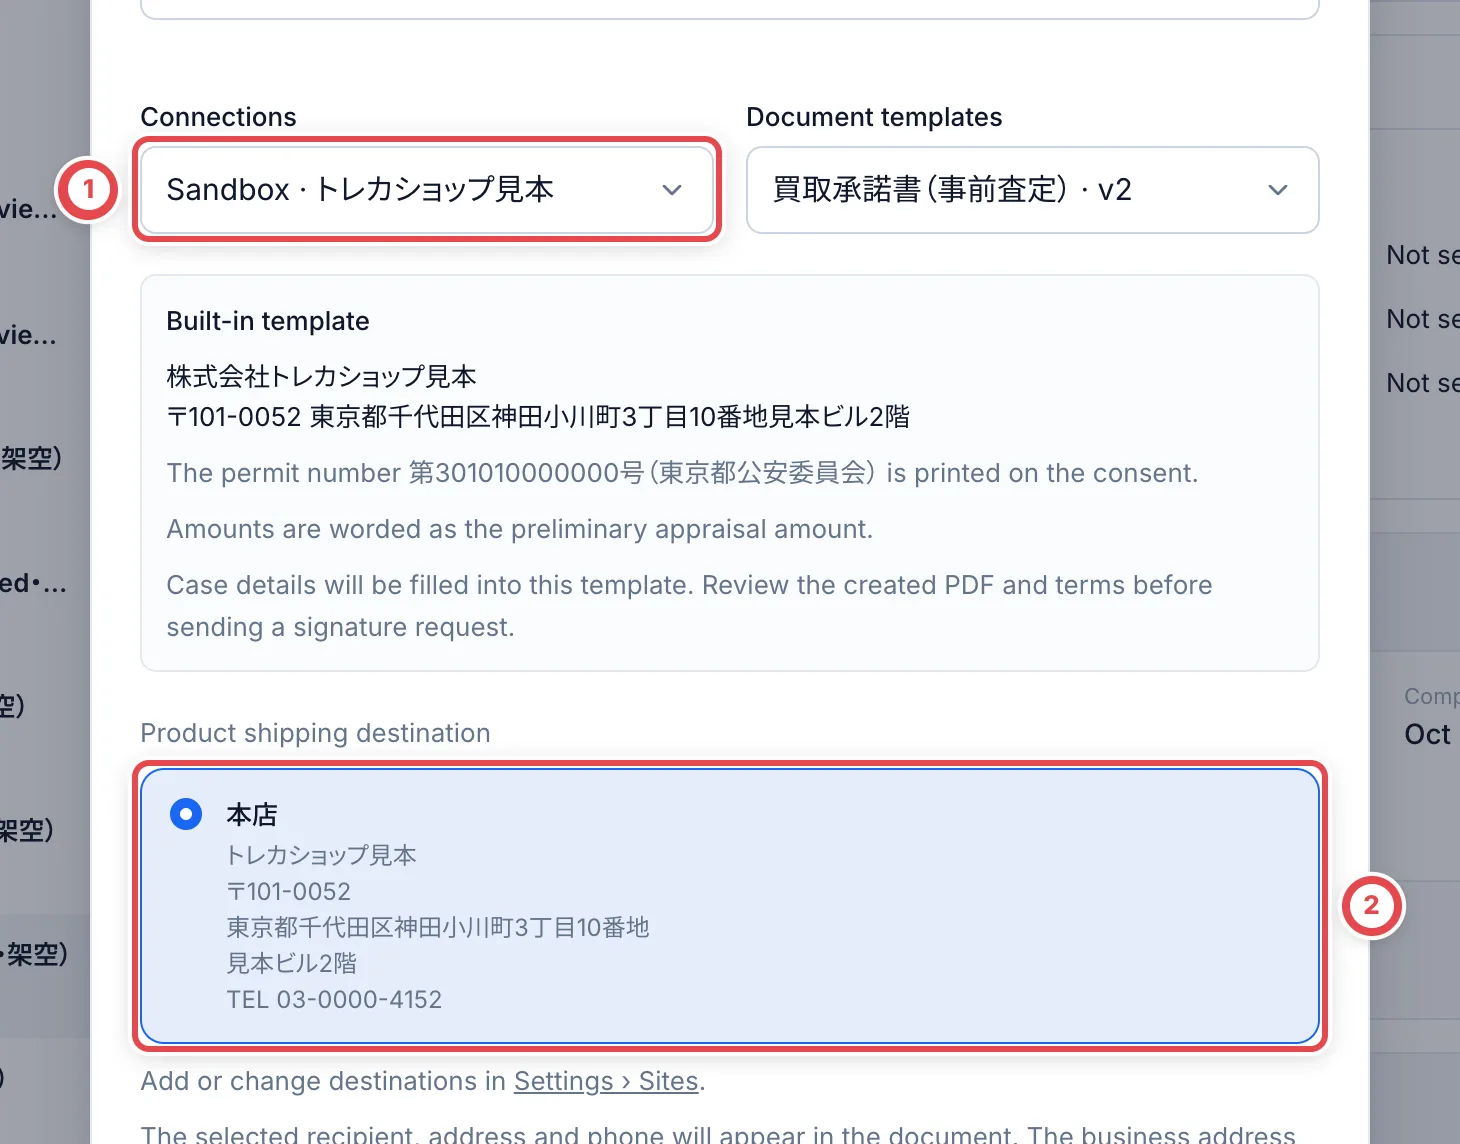 Scroll down and match selected items, quantity and total at ① to the quote. A set price covers the entire set. Check the recipient’s name, email and any required phone number at ②. Do not reuse another customer’s recipient details. Preparation alone does not send a document.
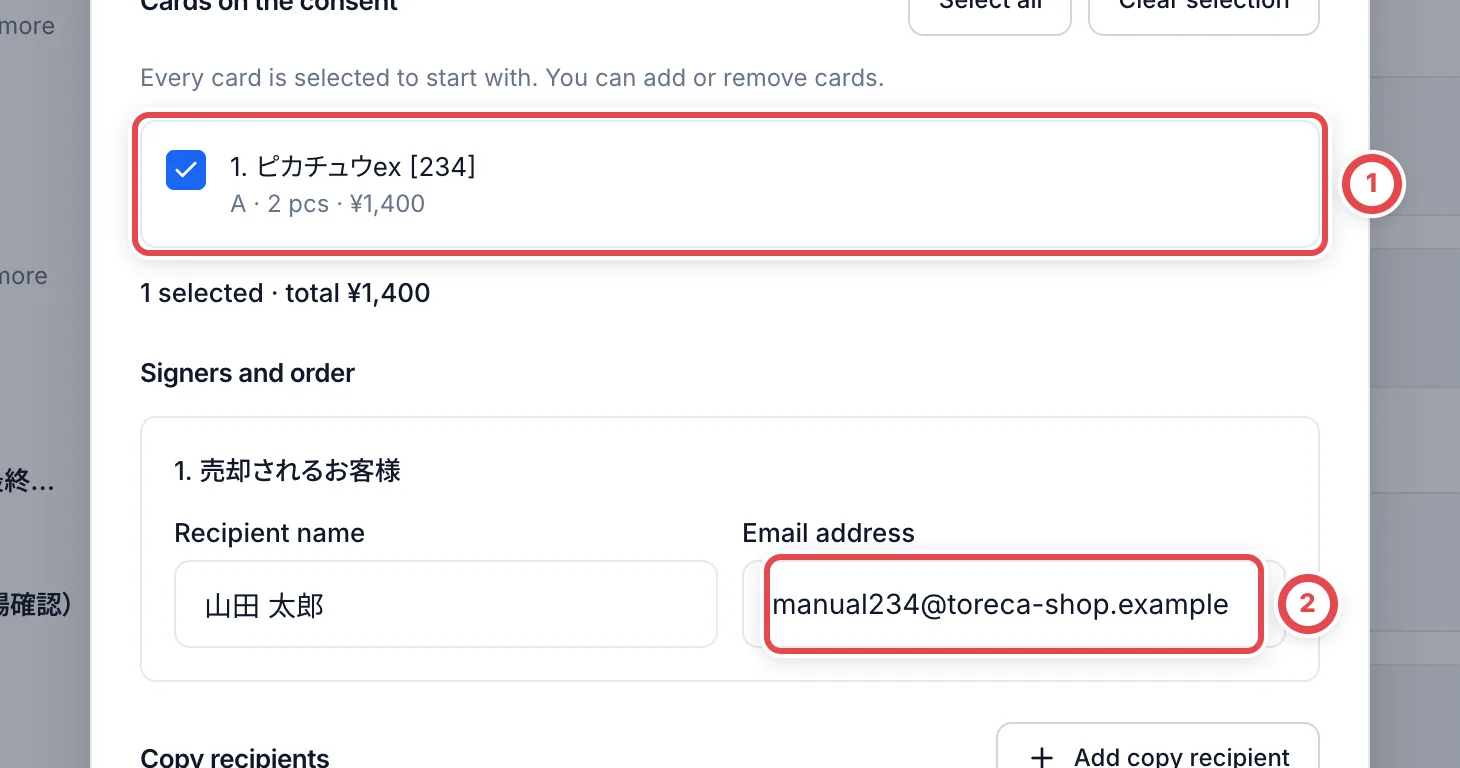 ## 4. Review the PDF and send
Open the prepared PDF at ①. Check the title, customer, issuer, items, quantities, amount and destination, then verify recipients and delivery method. Scroll down and select the confirmation checkbox for the document, recipients and operation before pressing **Send this document**.
:::warning
Confirming the send action at ② starts a real CloudSign delivery. Check the environment, recipients and PDF before confirming.
:::
If the quote or recipient has changed, prepare and review current content instead of sending the stale version.
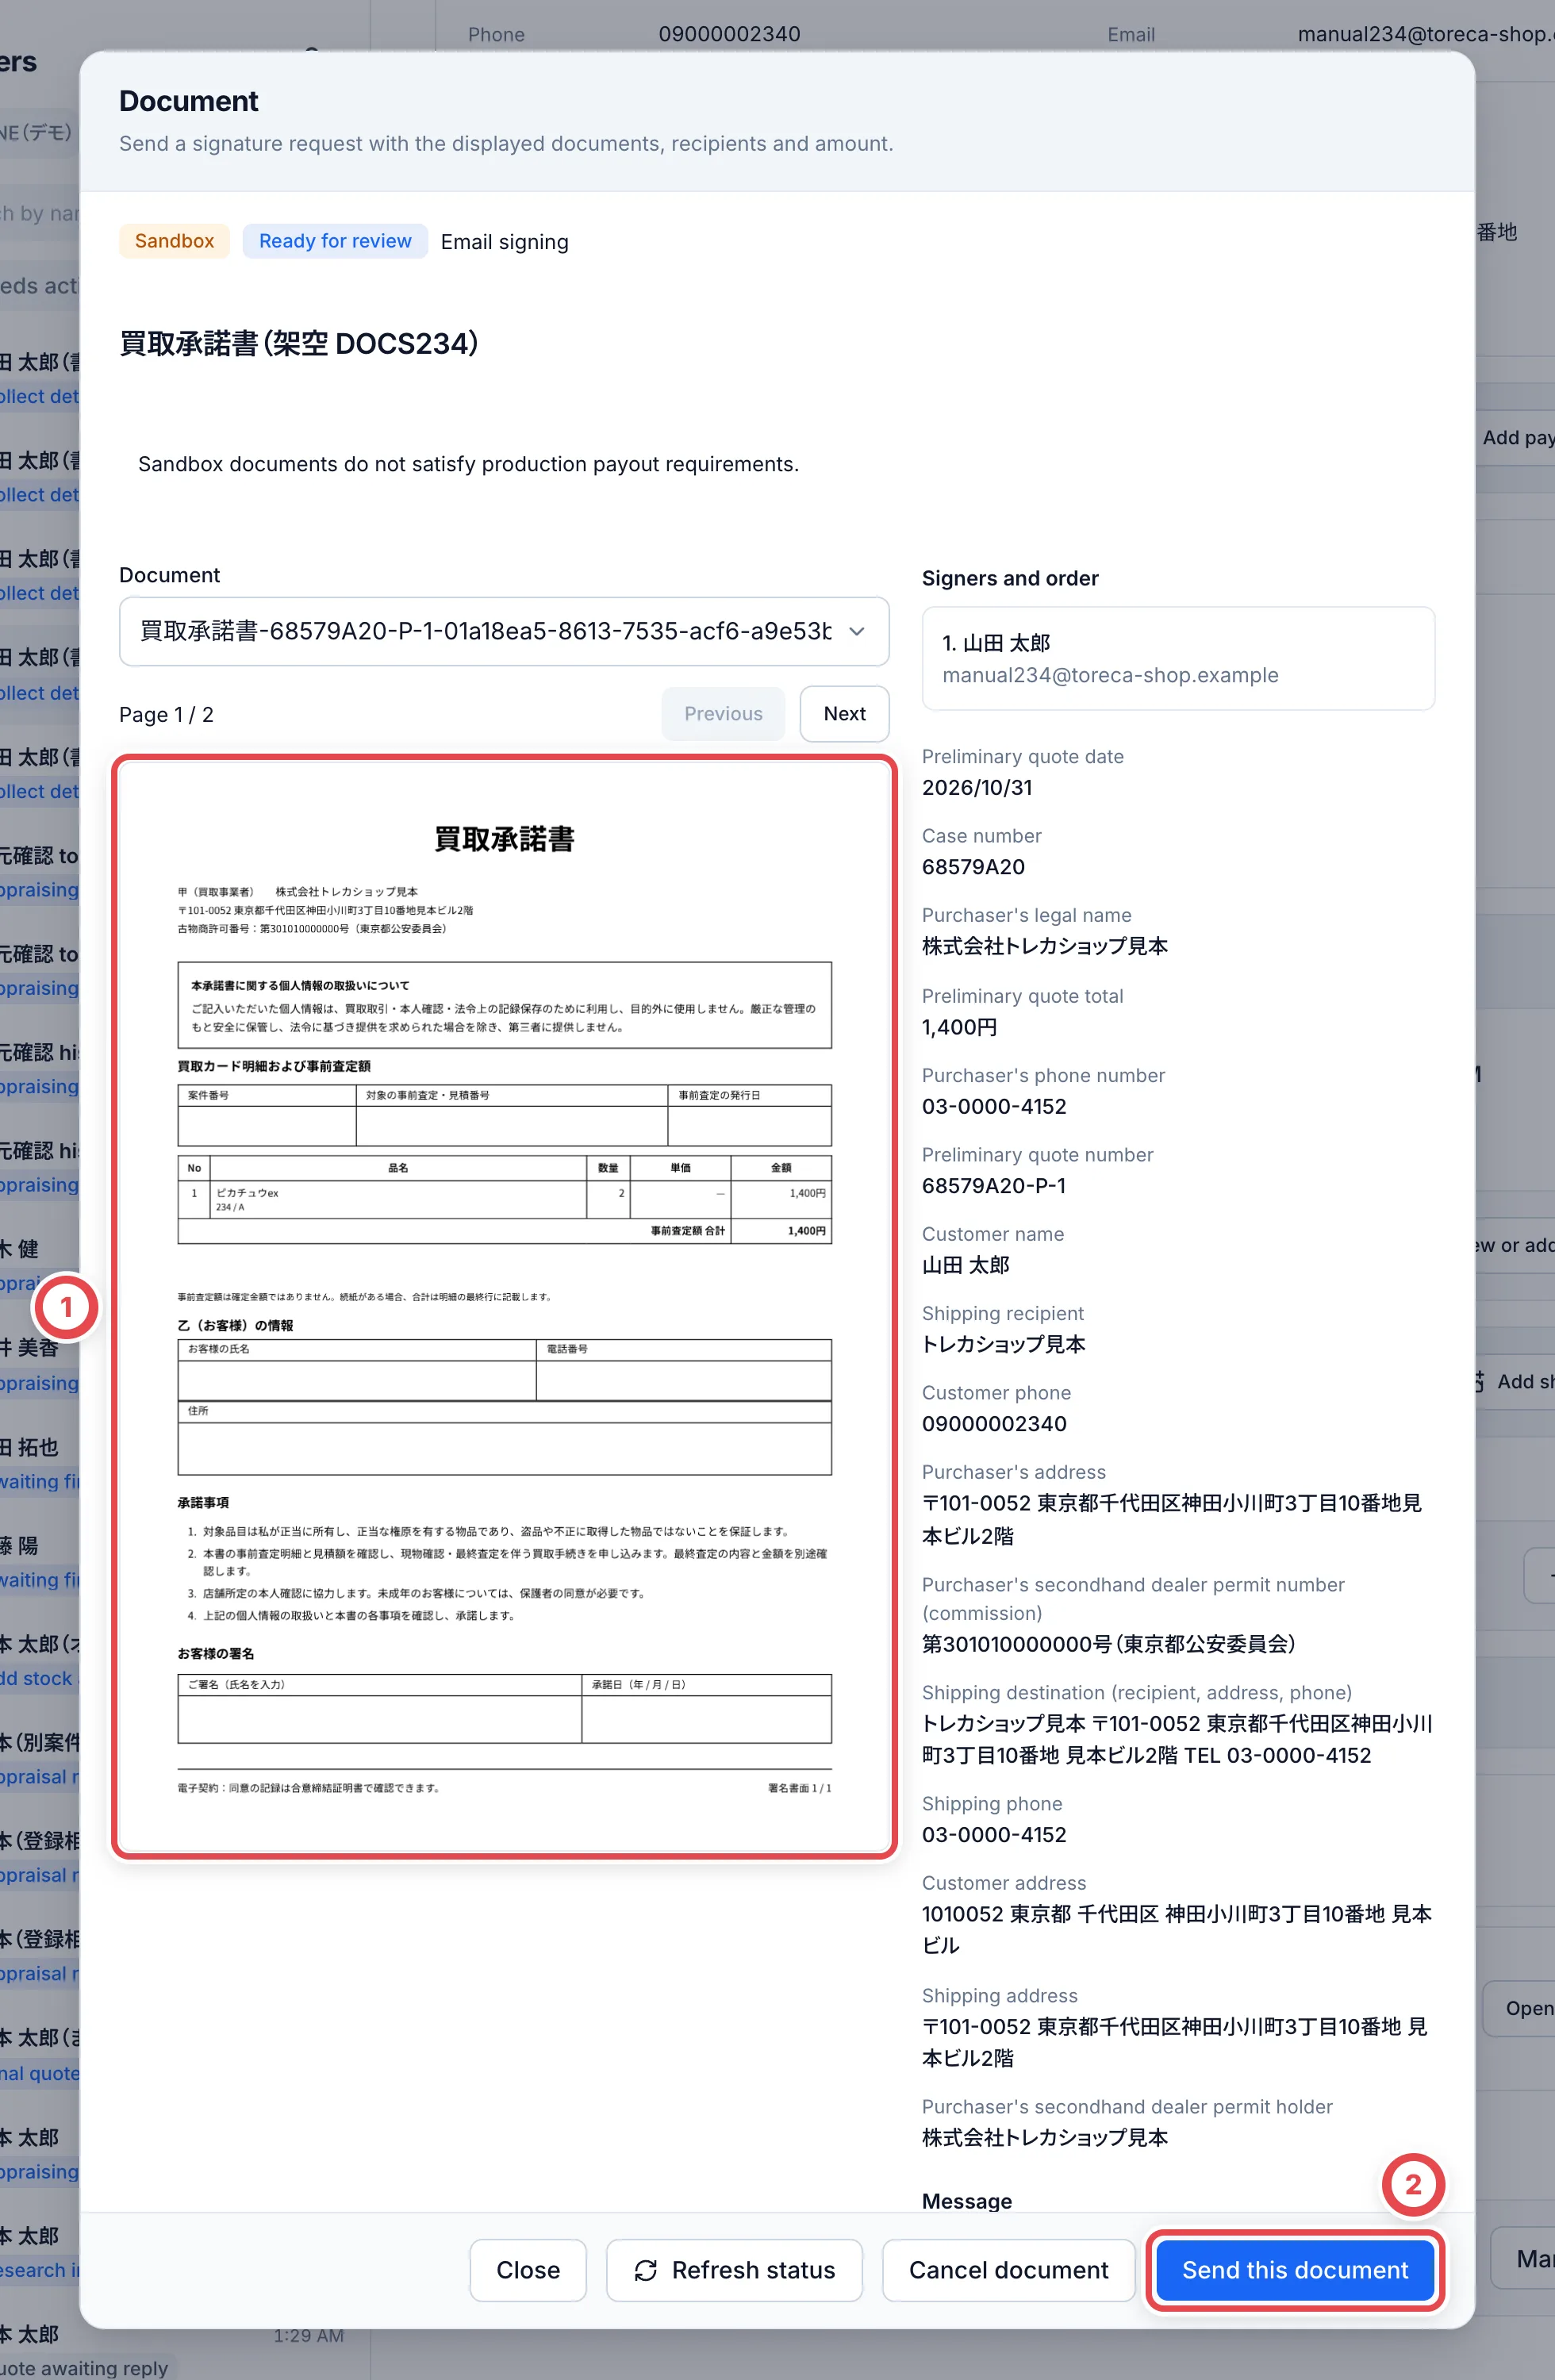
 ## 5. Confirm sending and signing status
Check the document status and activity at ①. Wait while sending is in progress. Completed documents provide the signed PDF and agreement certificate. They are also available in [Contracts](/en/guides/purchase/contracts).
For an unknown outcome or sync error, follow the existing document’s status/sync action at ②. Confirm whether that document was already sent or signed before creating another. Reminders and cancellation also perform provider operations.
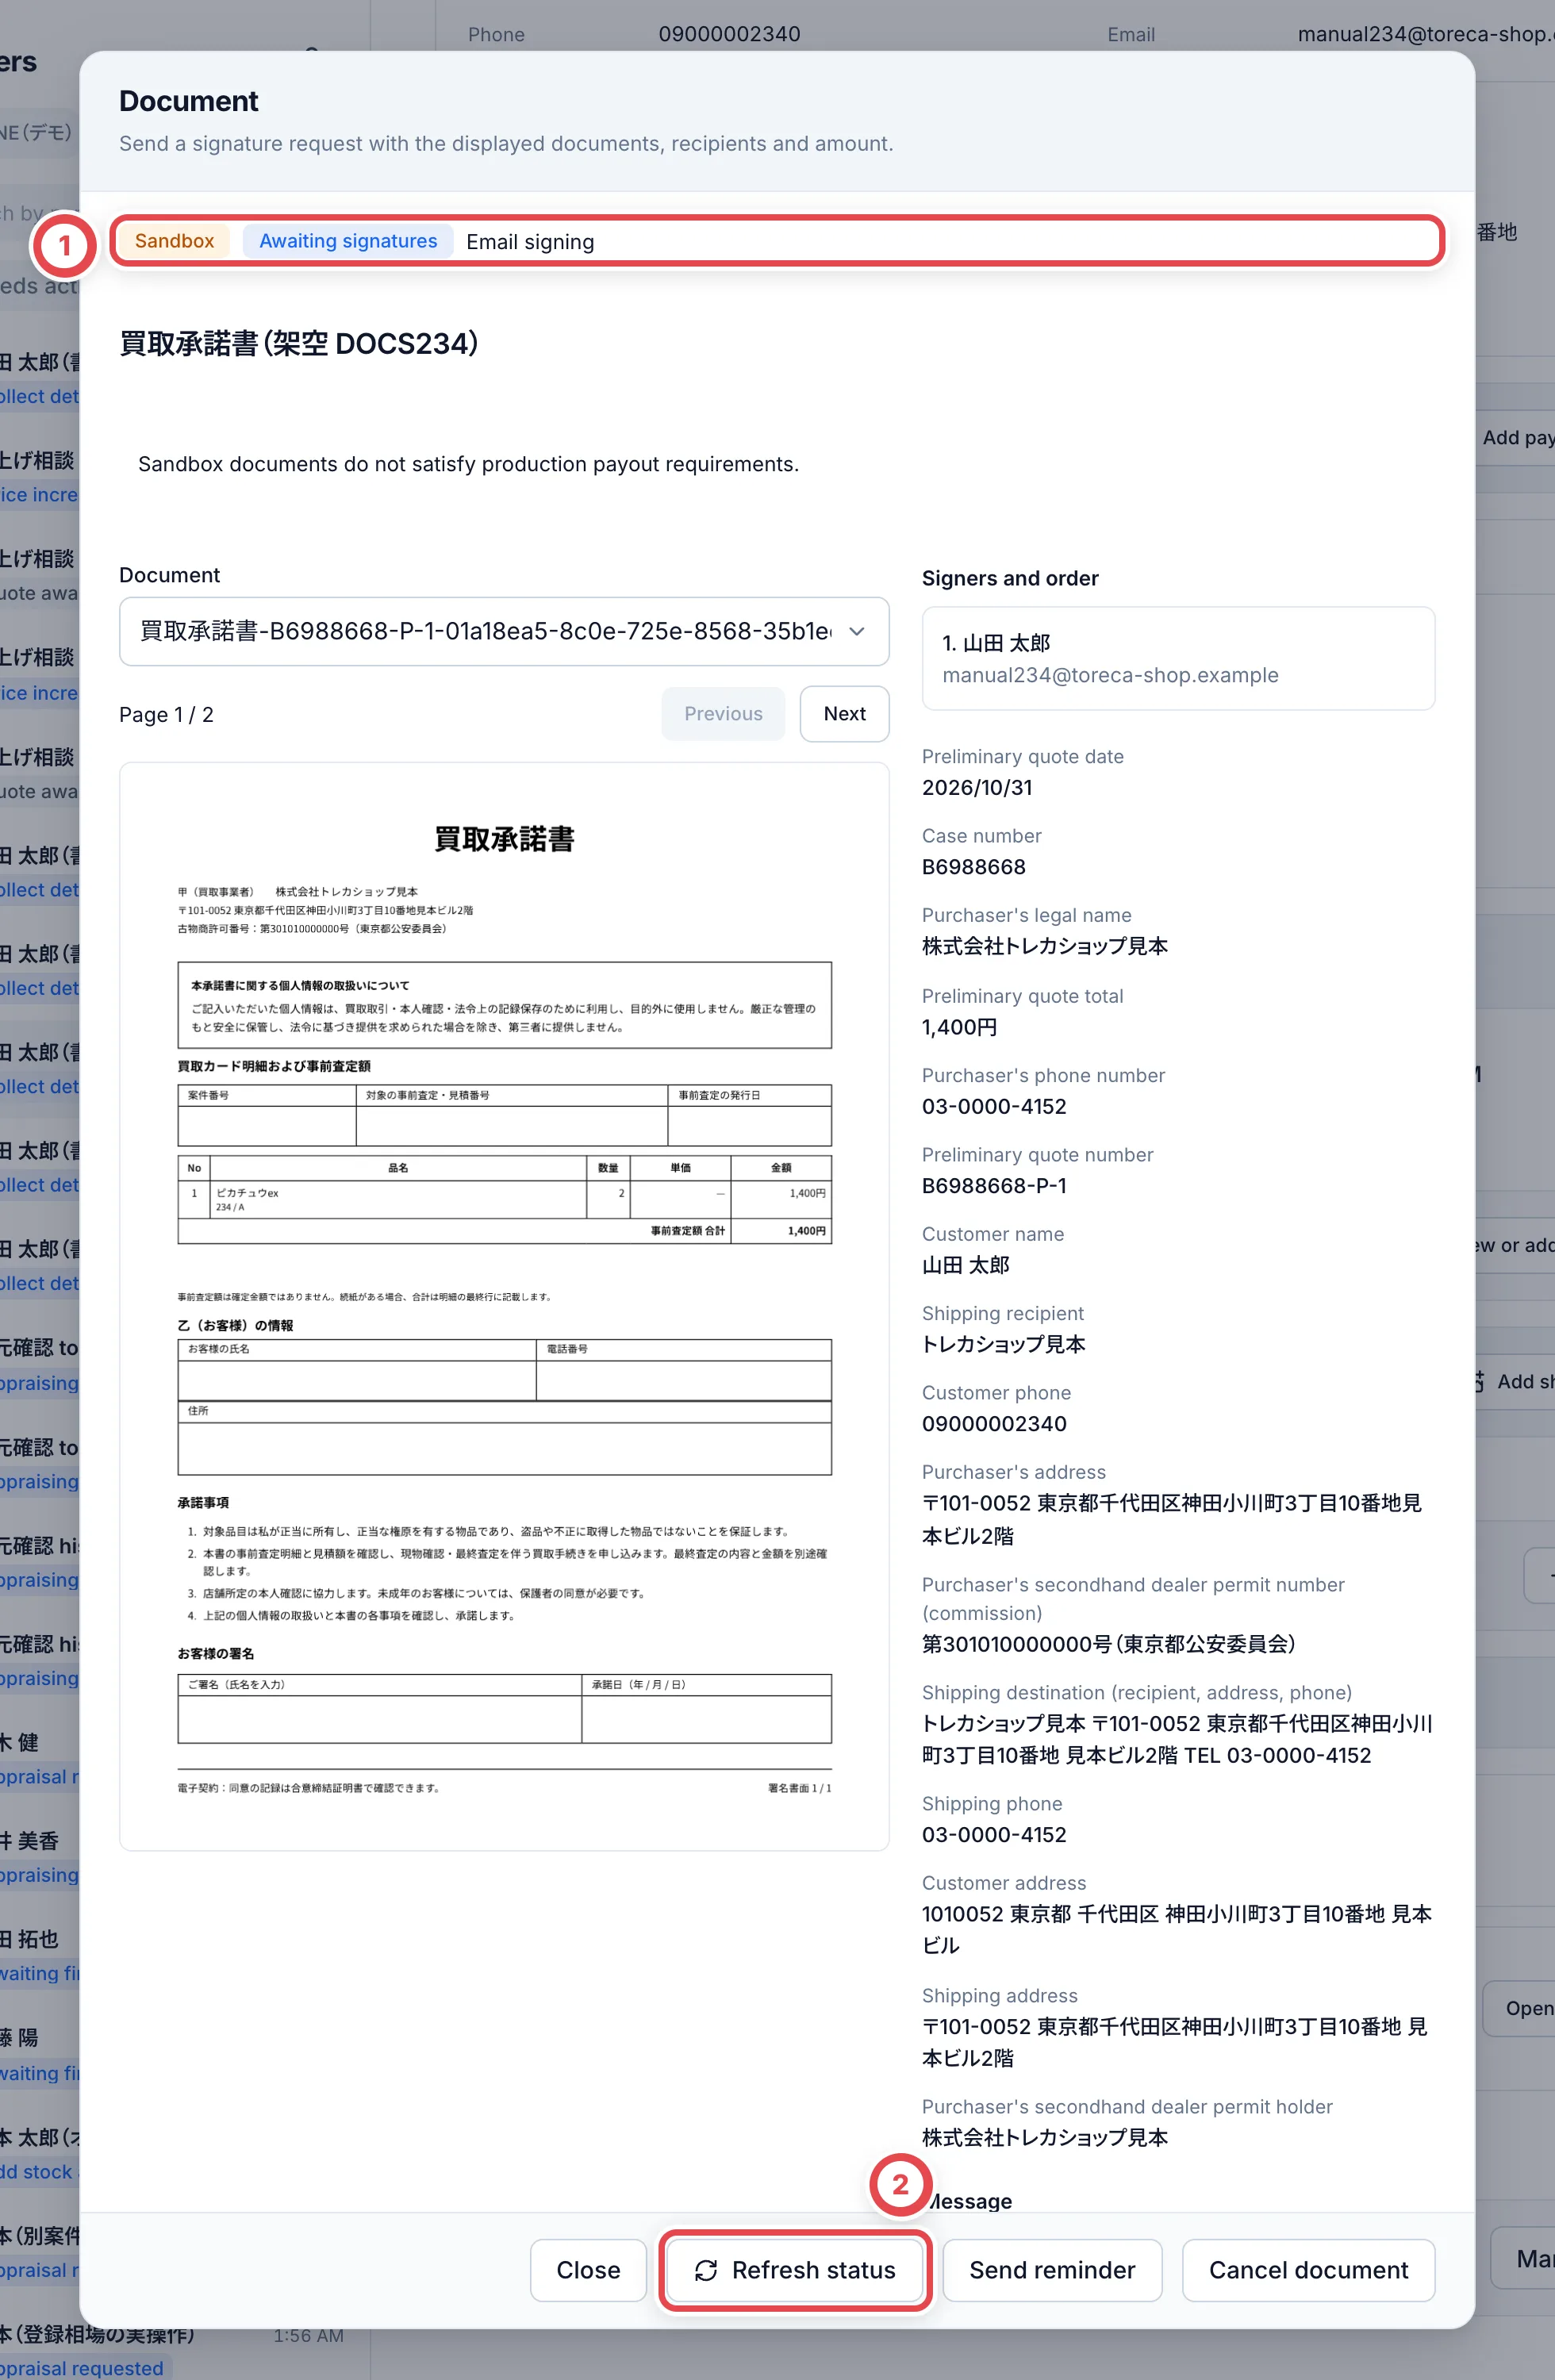 ## Troubleshooting
| What you see | What to check |
| ------------------------------------- | ---------------------------------------------------------------------------------------------- |
| Cannot prepare a document | Check connection, permissions, readiness and deal prerequisites such as identity verification. |
| Cannot select a destination | Check template support and the registered shipping sites. |
| Quote contents have changed | Recheck the quote and prepare current document content. |
| Sending result is unknown | Check/synchronize the same document; avoid duplicate sending. |
| Manual sent/signed buttons are absent | API-managed documents use their synchronized state. Keep the two workflows separate. |
---
# Identity verification methods
Source: https://docs.toreca-cloud.com/en/guides/settings/identity
To register document images received by the shop for an online purchase, allow **Document review by staff** in the shop's settings. **Allowing a method does not mark any customer as verified.** Staff must separately compare the documents with the customer details and record the check on the deal.
## Choose the right procedure
| What you want to do | Procedure |
| ---------------------------------------------------------------- | -------------------------------------------------------------------------------------------------------------------------------------------------------------------------------- |
| Register document images received by the shop for an online deal | Allow **Document review by staff** here, then follow [Register document images received by the shop](/en/guides/purchase/identity#register-document-images-received-by-the-shop) |
| Approve documents the customer submitted through a form | Follow [Customer submission and shop approval](/en/guides/purchase/identity#have-the-customer-submit-documents-through-a-form) |
| Record a check of the original ID at the counter | Follow [In-store ID checks](/en/guides/purchase/counter-identity). In-person checks are available by default |
| Have the customer photograph ID on the counter screen | Follow [Customer photography and original-ID checks](/en/guides/purchase/counter-photos). Choose this mode under **Settings → Payments** |
:::warning
External eKYC is currently unavailable in production. **Allowed** beside **External eKYC** does not mean an external service is connected. **If your shop registers documents for online purchases, do not leave External eKYC as the only selected method by clearing Document review by staff.**
:::
## Before changing settings
- The person making the change needs permission to manage settings. Standard owners and admins have this permission. For custom roles, check [Members and roles](/en/guides/getting-started/members-and-roles).
- Permission to review or record identity documents is separate from permission to change the shop's verification methods. If **Change** is missing, ask a member who can manage settings.
- Check the shop shown in the account menu. The change applies to that shop.
## 1. Open Identity verification
Open **Settings** in the sidebar, then choose **Identity verification** at ① in the settings list. The page shows the current methods, validity and reuse settings. Click **Change** at ② to edit the methods.
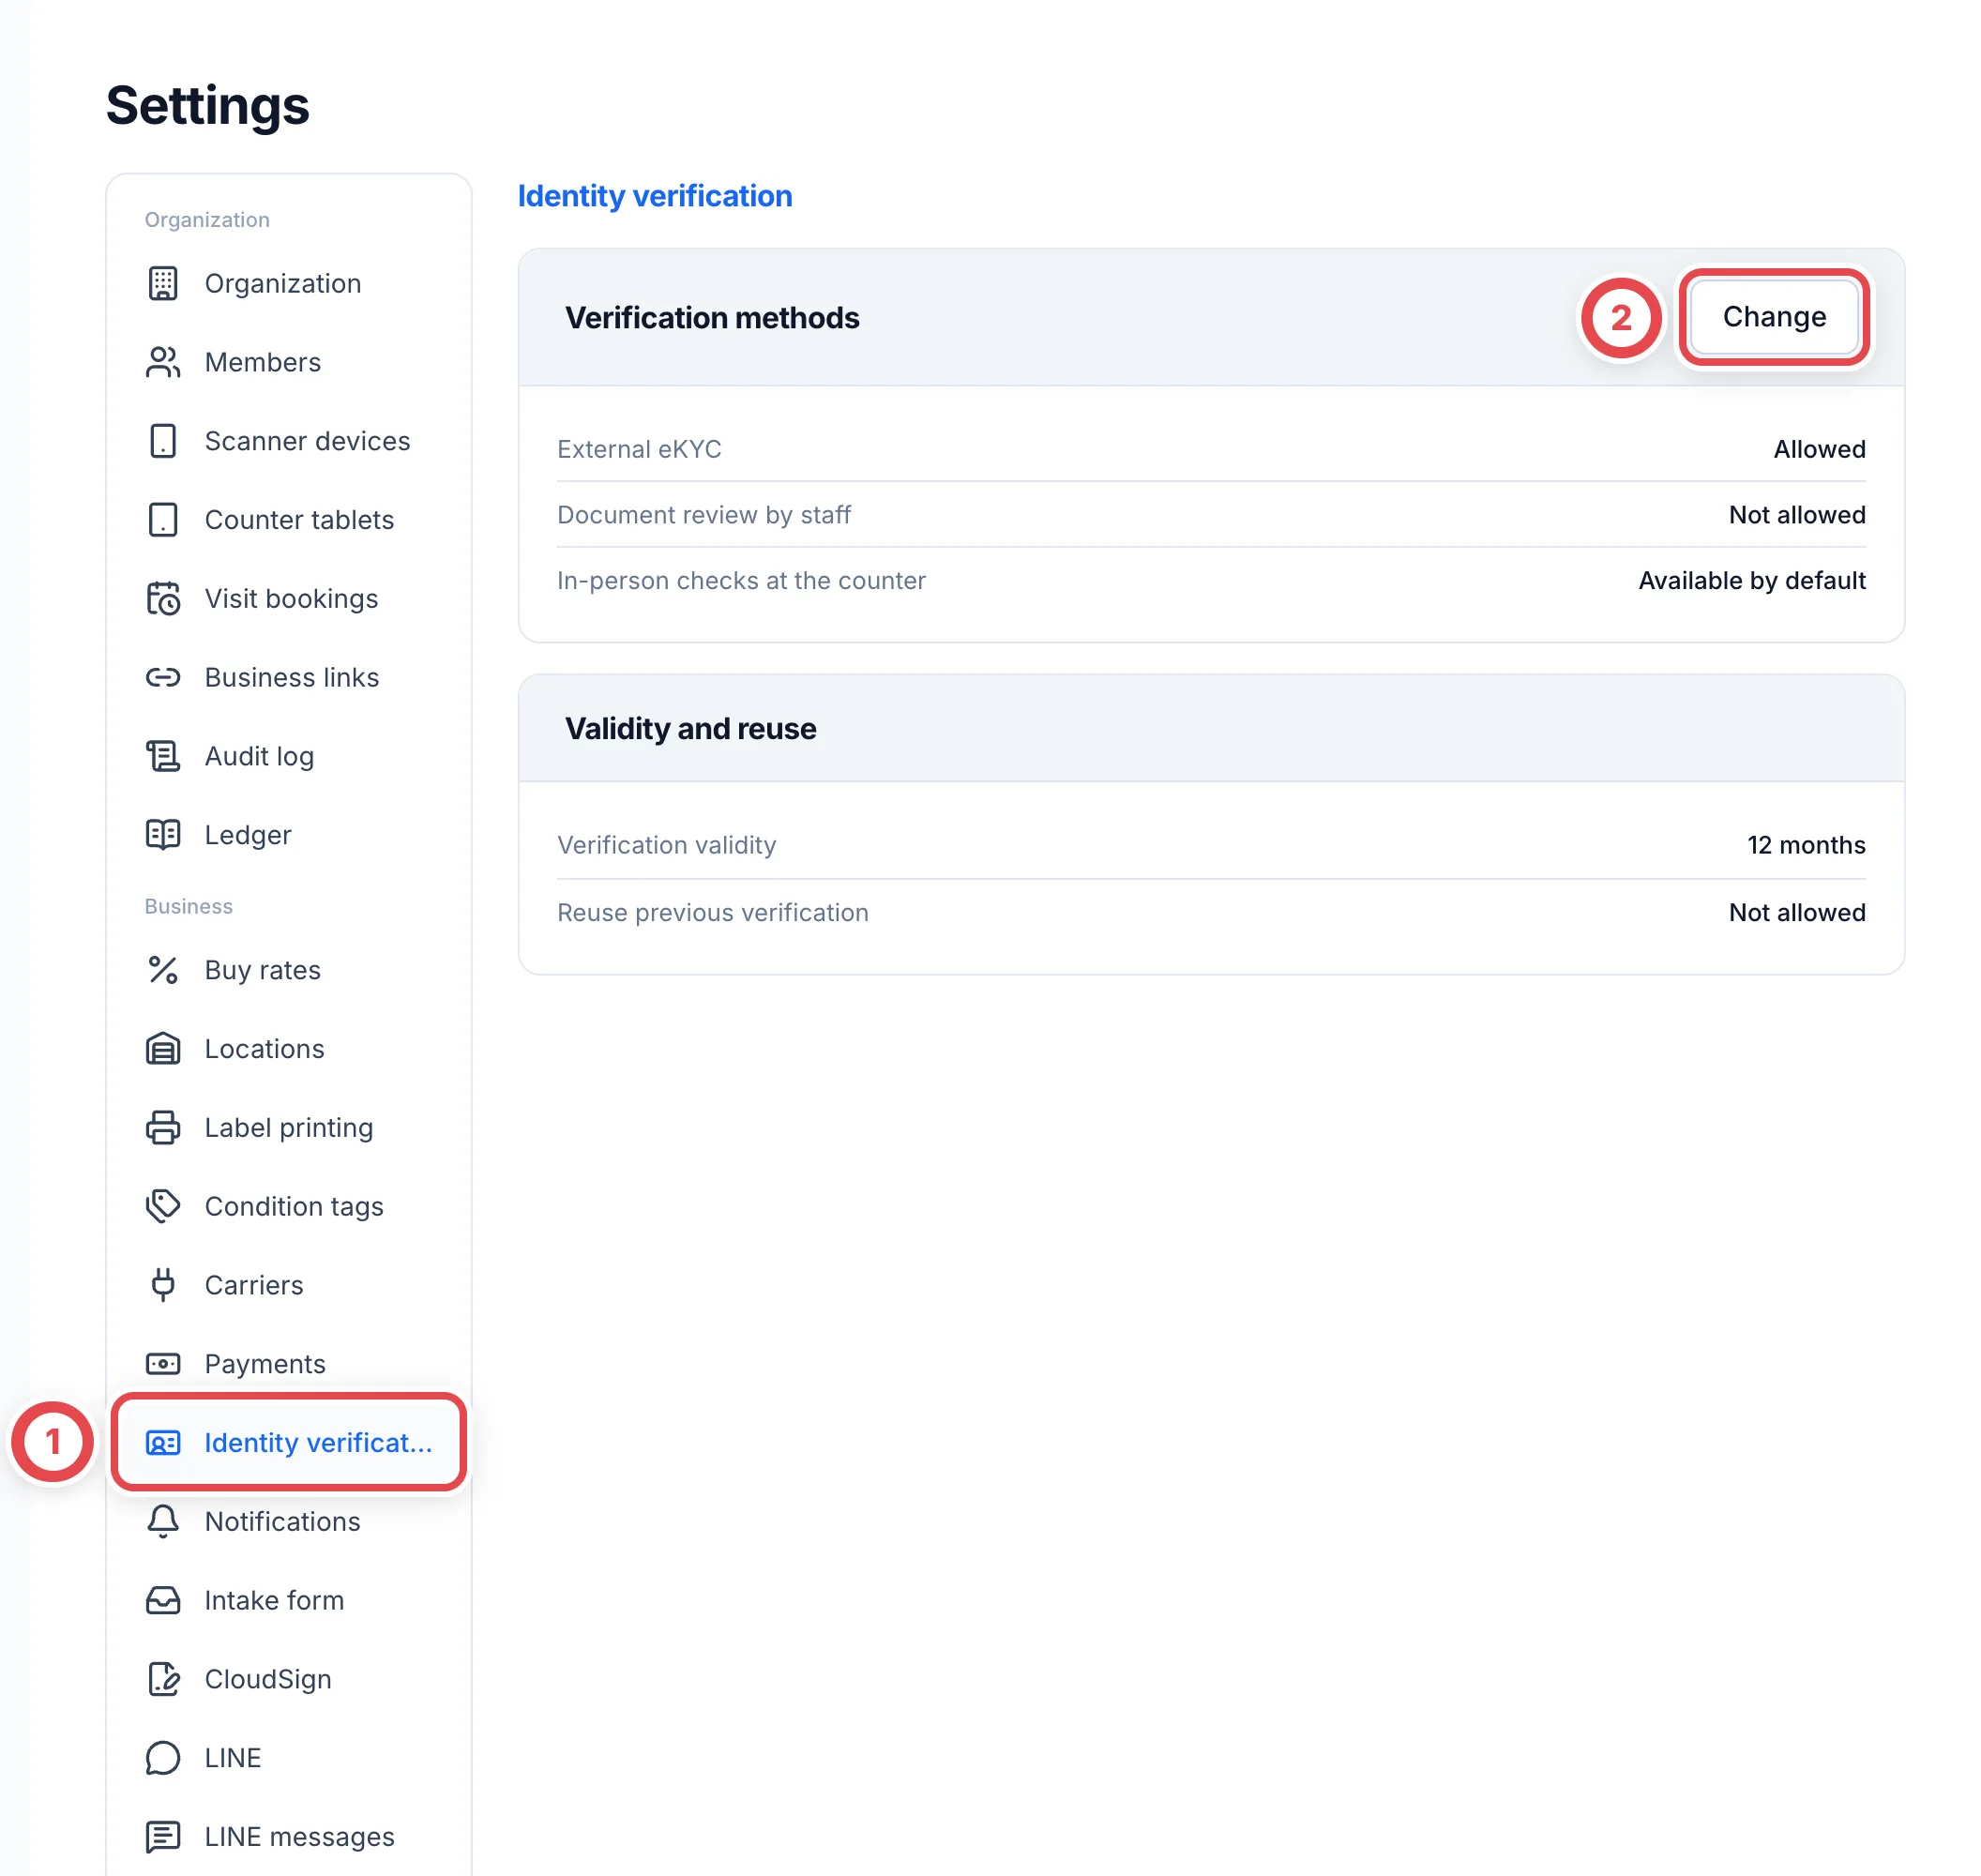 Where **In-person checks at the counter** is shown, it reads **Available by default**. This is separate from the editable online methods. You do not need to change online document-review settings to use in-person checks.
## 2. Allow staff document review and save
Select **Document review by staff** at ①. When you enable it, the dialog explains that staff who compare documents with the customer details will be able to record the customer as verified.
:::warning
**Save** changes the shop's policy so staff can use document review. Confirm that staff review is part of the shop's procedure before saving.
:::
Click **Save** at ②. Use **Cancel** to leave without saving. **Save** is not shown when nothing has changed.
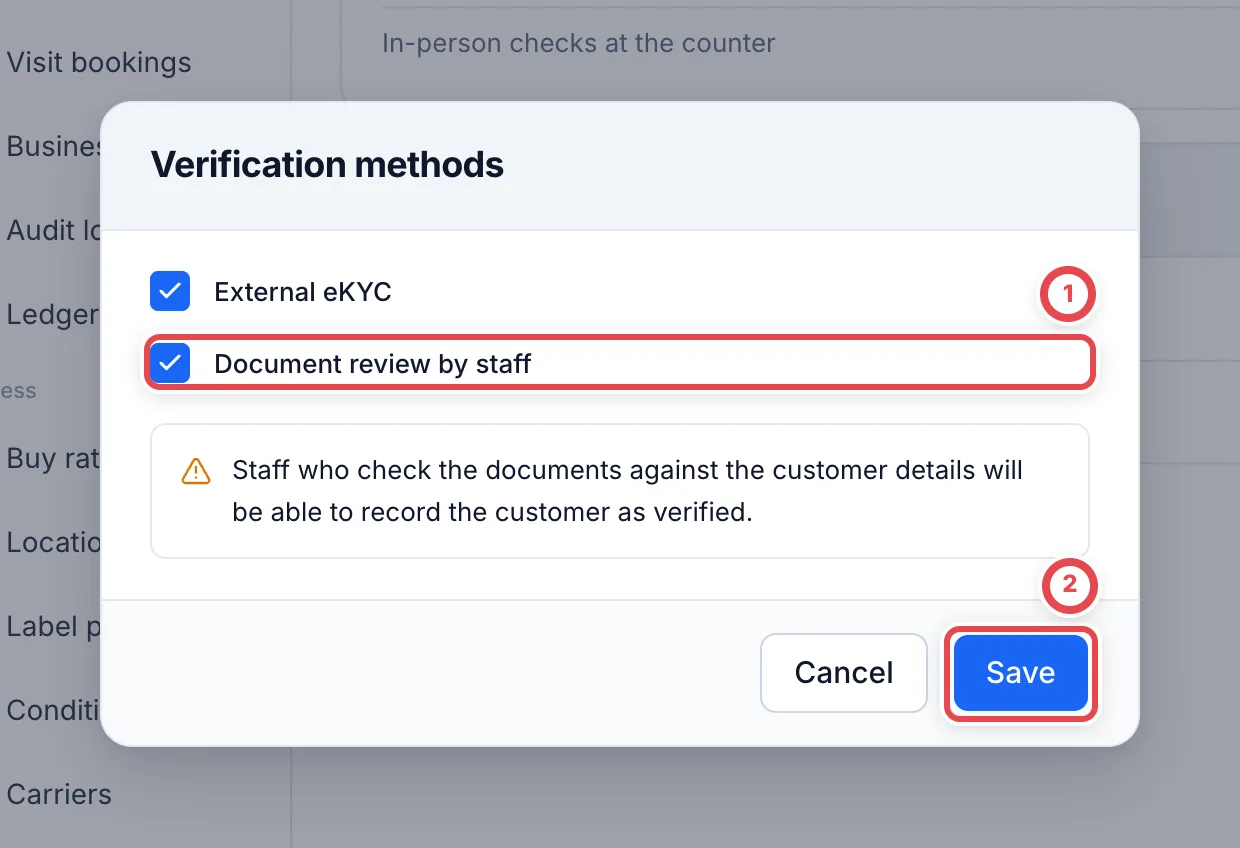 ## 3. Check the saved setting and return to the deal
Back on the page, confirm that **Document review by staff** reads **Allowed**. Reopen the page if needed to check that the setting persists.
Return to the online deal's **Shipping** tab and reopen **Add ID document** under **Record identity verification**. Follow [Register document images received by the shop](/en/guides/purchase/identity#register-document-images-received-by-the-shop). **The staff member recording the check must compare the documents with the customer's name, date of birth, occupation and address first.**
Changing the methods does not rewrite previous verification records. The existing validity and reuse settings are also preserved.
## Validity and reuse
**Verification validity** and **Reuse previous verification** display the values already saved. **The current screen does not let you change these values.** The example shows 12 months of validity with reuse not allowed; your shop's settings may differ.
If validity reads **Not set**, saving the methods again may still leave online document registration blocked. Contact Toreca Cloud support with the shop name and the displayed error and ask them to check the settings. You do not need to attach identity-document images or numbers to the enquiry.
## Troubleshooting
| Message or situation | What to check and do next |
| ----------------------------------------------------------------------------- | ------------------------------------------------------------------------------------------------------------------------------------------- |
| An error says document checks are not allowed for this shop | Open **Settings → Identity verification → Change**, allow **Document review by staff**, save, then reopen document registration on the deal |
| **Change** is missing | Ask a member who can manage settings. Permission to record identity checks alone does not allow changing settings |
| **Select at least one verification method.** | Select a method the shop uses. Do not leave only external eKYC selected; keep staff document review selected if your shop uses it |
| **The verification settings have changed. Reopen this screen before saving.** | Another member may have updated the settings. Cancel, reload the page and review the latest values before editing |
| An error says verification validity in months is not set | Check the validity row and contact support. Saving the methods again does not fill in a missing validity period |
| The method is allowed but the customer is still unverified | A settings change does not record a check. Register the documents or approve the submitted documents on the deal |
| You want to record an in-person check | Follow [In-store ID checks](/en/guides/purchase/counter-identity) rather than changing methods here |
## Related procedures
- [Online identity verification](/en/guides/purchase/identity)
- [In-store ID checks and document attachments](/en/guides/purchase/counter-identity)
- [Settings at a glance](/en/guides/settings/overview)
---
# LINE and notifications
Source: https://docs.toreca-cloud.com/en/guides/settings/line-and-notifications
The settings for talking with customers on LINE, and for the notifications your staff receive, are under **Settings** › **Business**.
| Screen | What you decide |
| ----------------- | ------------------------------------------------------------------------------------ |
| **LINE** | How your LINE Official Account connects to your operations tool (Liny / L Step) |
| **Intake form** | Whether the online buying intake form is live, and the shared link you share on LINE |
| **LINE messages** | The templates for the LINE messages you send customers |
| **Notifications** | Where staff notifications go, and which events trigger them |
## What you need
- Changing **LINE** requires **Manage integrations**. Changing **LINE messages** and **Notifications** requires **Manage settings**. Owners and admins have these in the standard roles; custom roles depend on their assigned permissions
- Changing **Intake form** delivery also requires all four permissions to view and edit purchases and customers
- The **Channel ID** and **Channel secret** of your Messaging API channel in LINE Developers
- If you use Liny or L Step, an API token issued in its admin screen (you can add it later)
## LINE
Open **Settings** › **LINE**. Each card is one operations tool paired with its LINE Official Account.
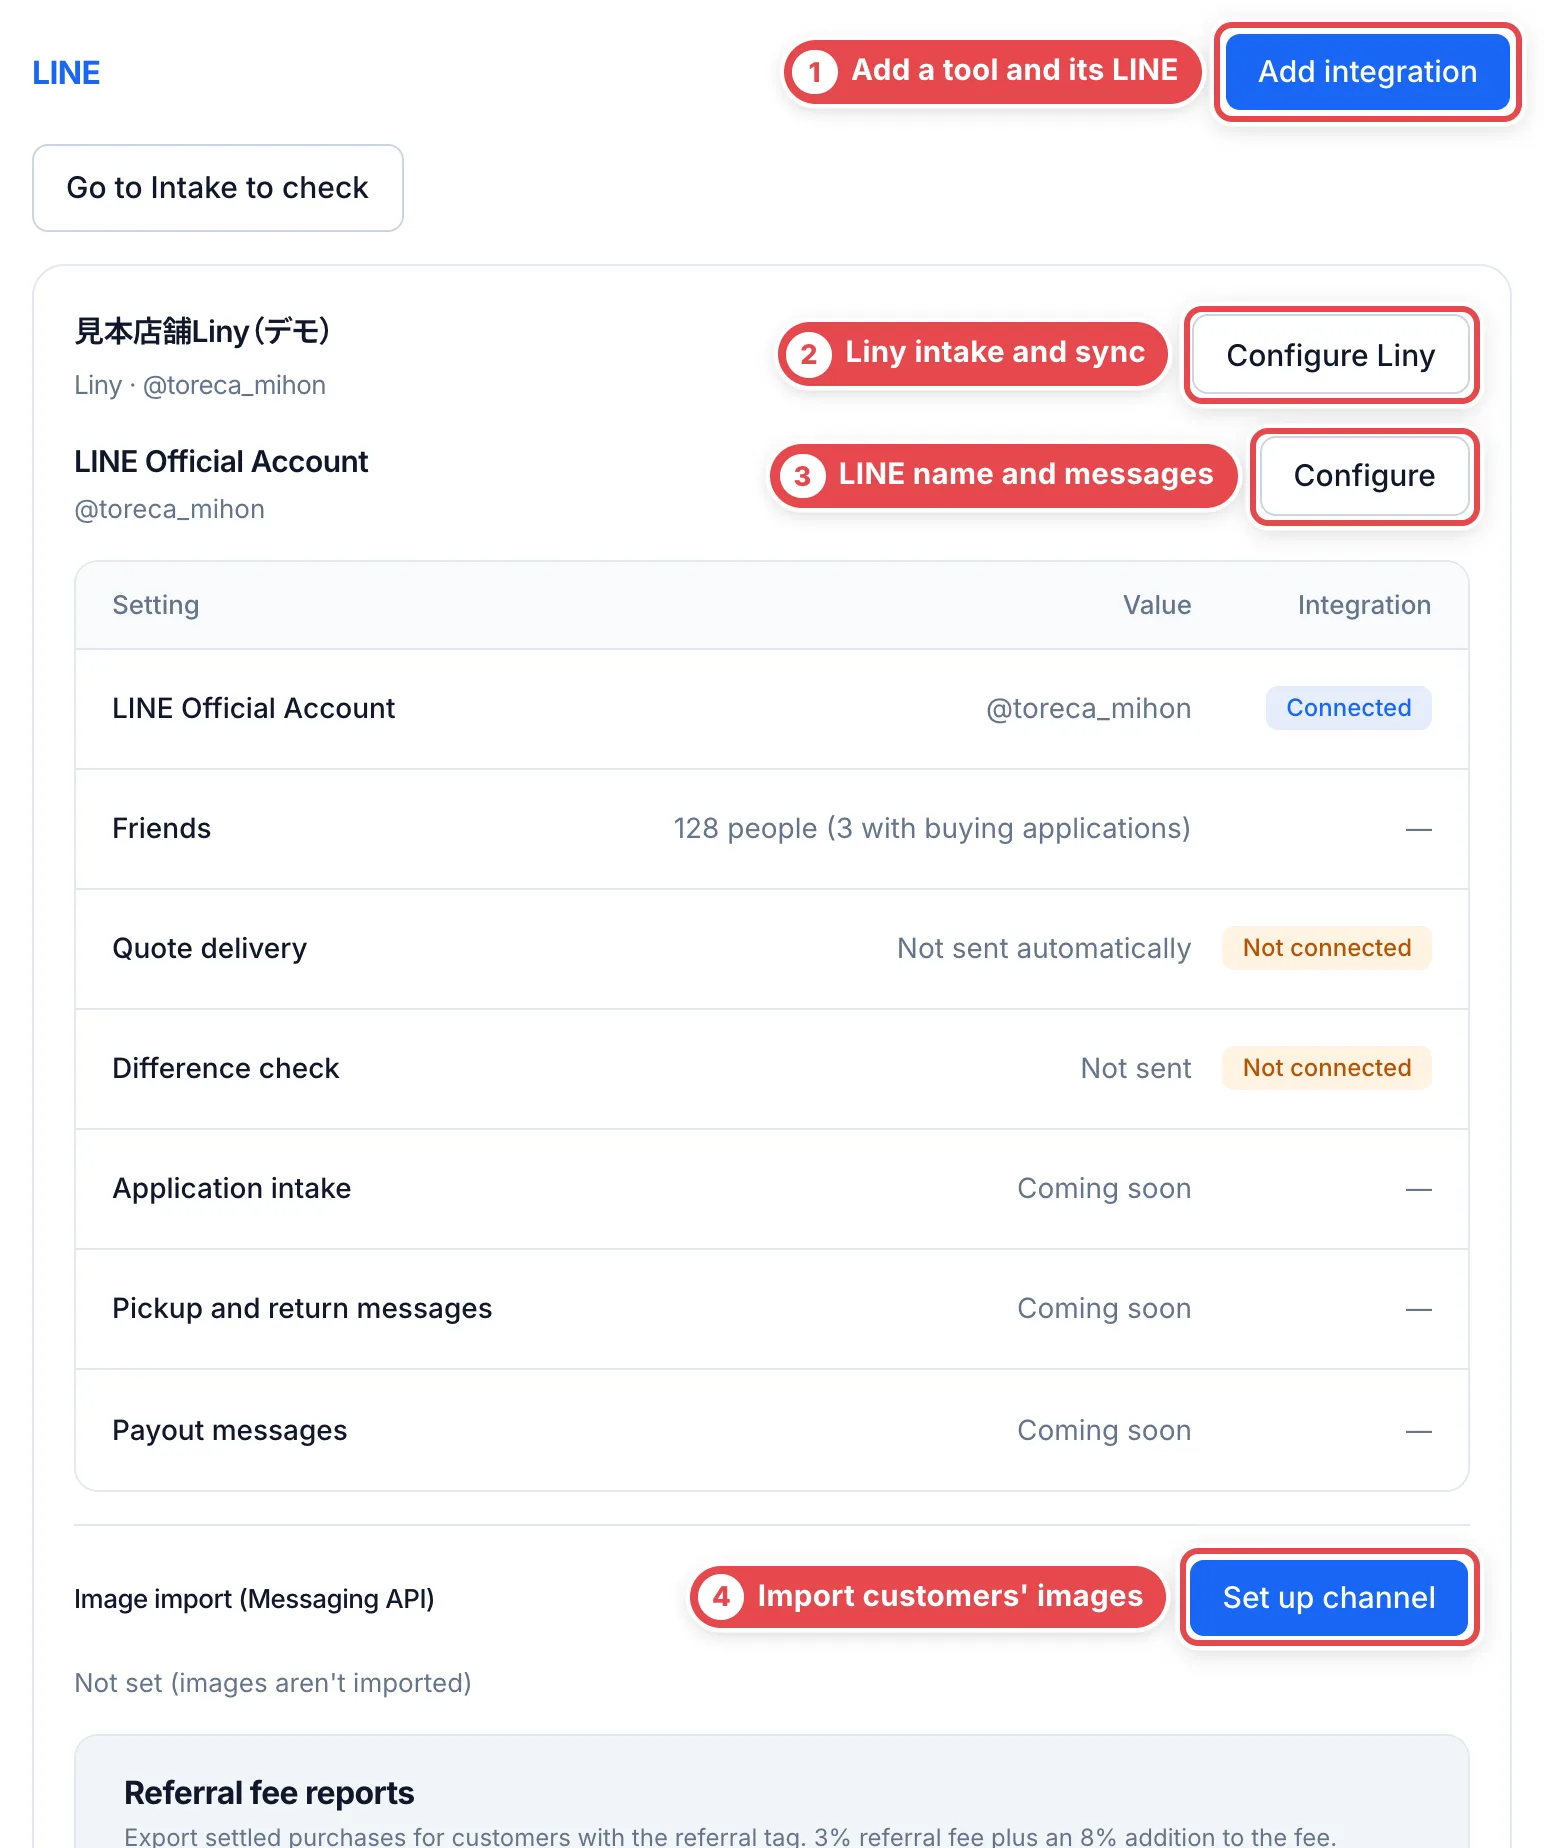 Add an operations tool and LINE at ①. ② is Liny intake and sync, ③ is the LINE account name and messages to send, and ④ is the setting for importing customer images.
Each card shows the LINE Official Account ID, **Friends** (people with a buying application), and the **Quote delivery** and **Difference check** settings. **Application intake**, **Pickup and return messages** and **Payout messages** are **Coming soon**.
### 1. Add an integration
Click **Add integration** ① to open the **Add integration** dialog.
1. Under **1. Operations tool**, choose a **Tool** (Liny or L Step) and enter an **Integration name** that your shop can tell apart
2. At ①, enter the token you issued in the operations tool in **API token (optional)**. If you haven't issued one yet, you can register with it blank, and the operations tool stays pending
3. Under **2. LINE Official Account**, use **Linked LINE integration** ② to choose **Register a new account**, or a registered LINE account that has no operations tool yet. For a new LINE account, also enter its **Official account ID**
4. Enter the **Channel ID** and **Channel secret** from LINE Developers, then click **Register and check connection** ③. To use the saved channel of a registered LINE account, leave both Channel ID and Channel secret blank
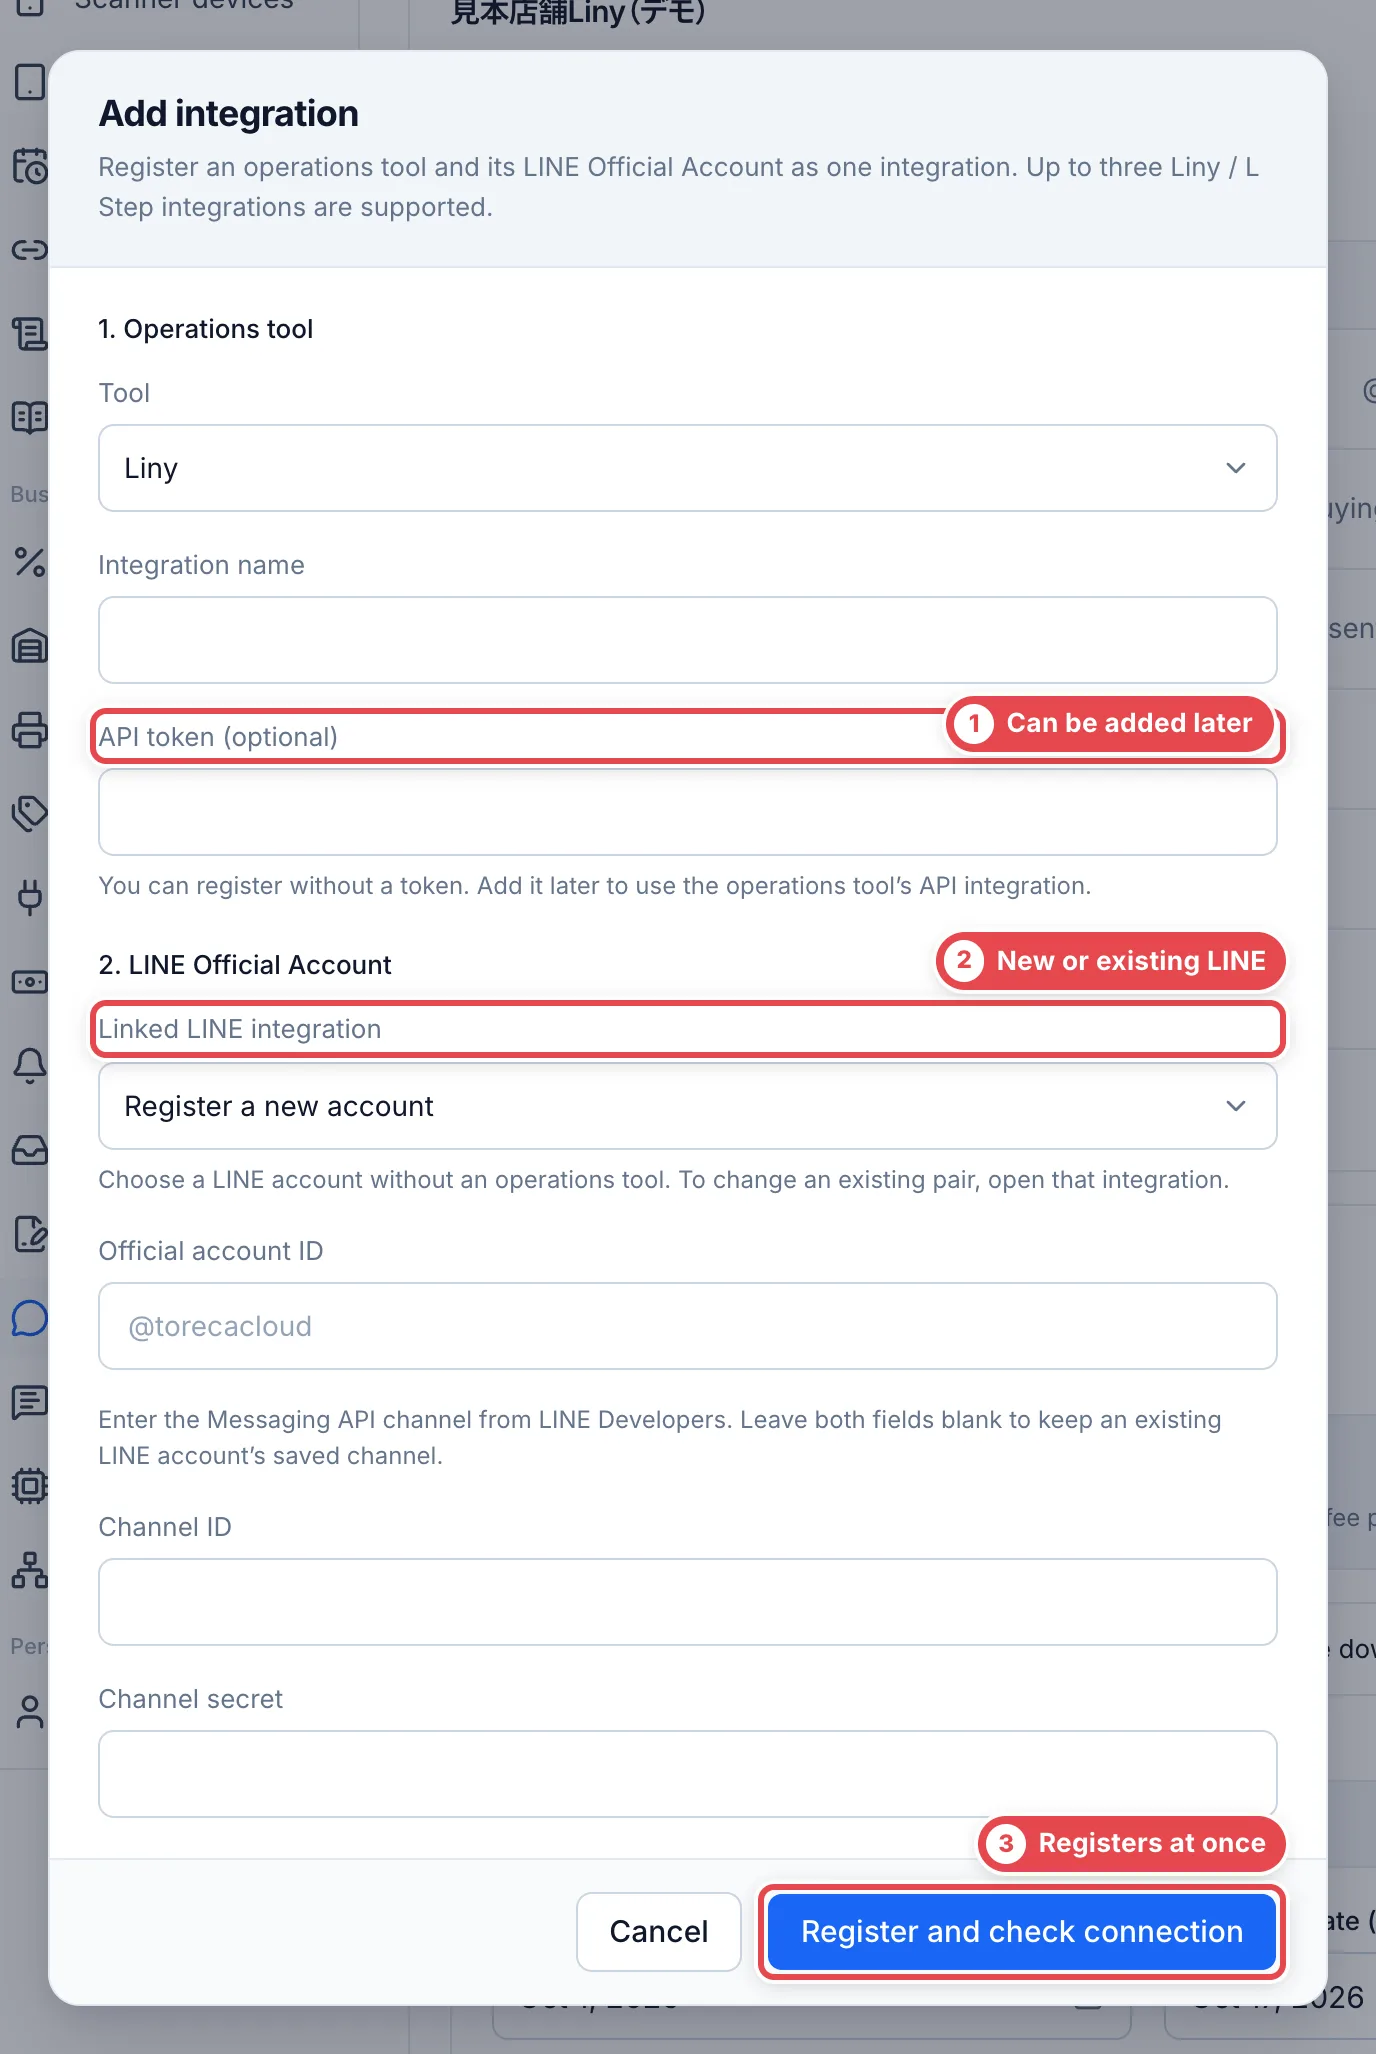 **Clicking Register and check connection registers it right away.** If the connection check fails, what you entered stays registered. Fix your input in the dialog and click again, or close it and continue from **Set up channel** or **Configure Liny** on the card. API tokens and channel secrets are stored encrypted and aren't shown after saving.
LINE accounts that don't have an operations tool yet are listed under **LINE accounts without an operations tool**. You can set up the tool from **Add integration** there. A LINE account that already has a tool can't be chosen in a new integration.
### 2. Set the LINE account name and messages to send
Click **Configure** on **LINE Official Account** to open the **LINE settings** dialog. Set the **Account name**, the **Official account ID** and the **Messages to send** ①, then click **Save changes** ②.
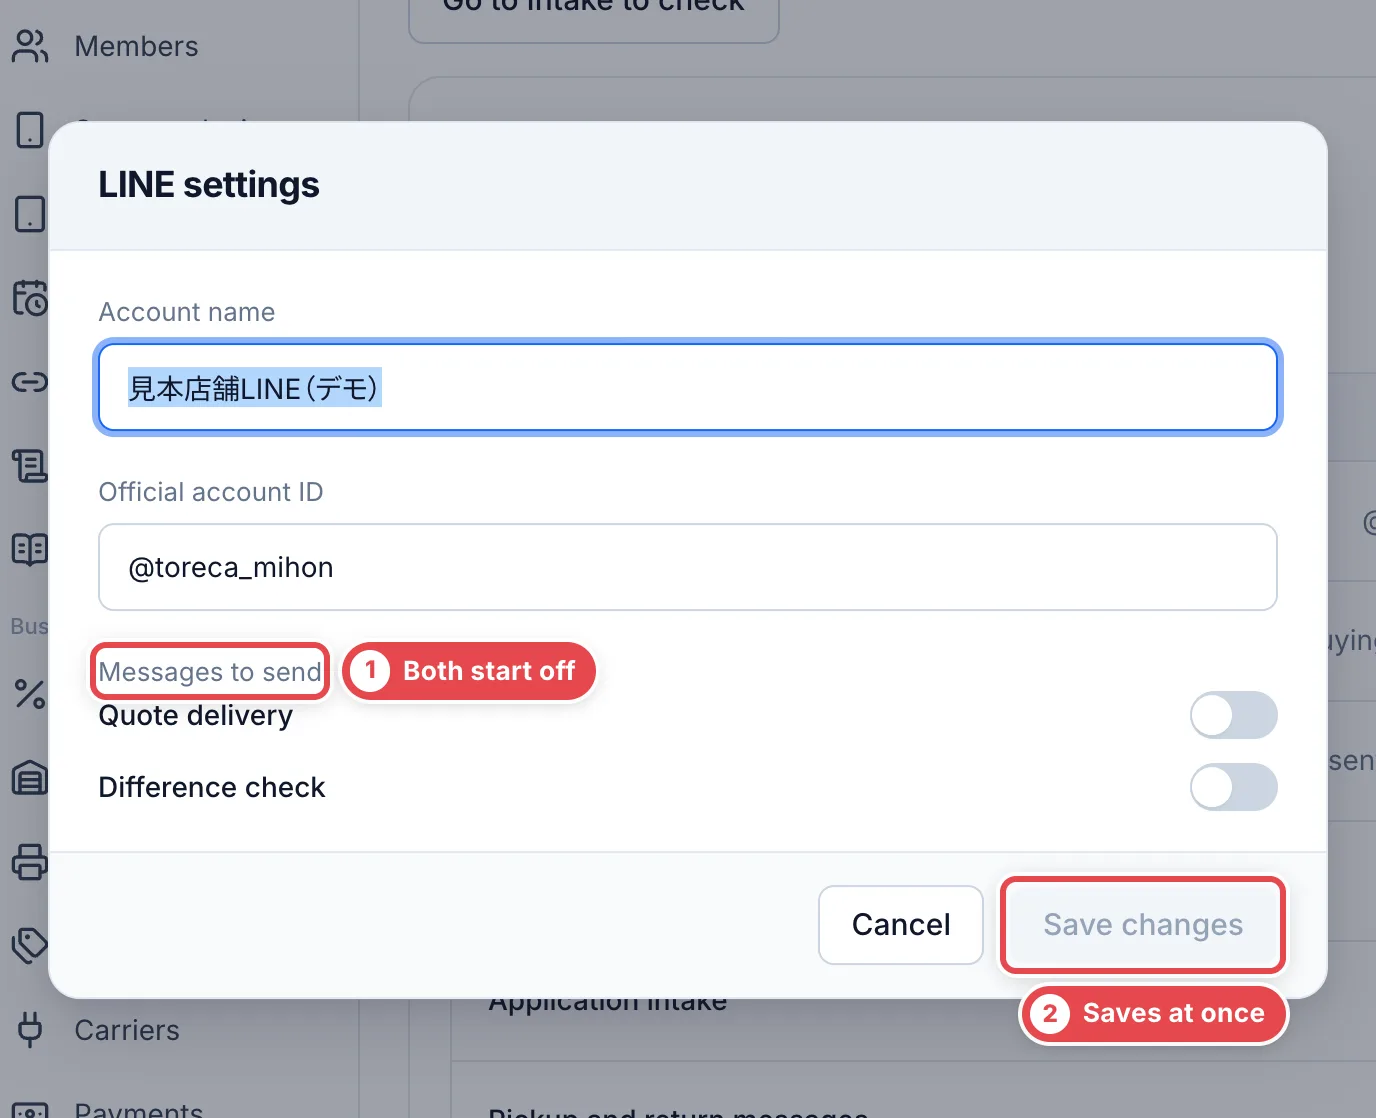 - With **Quote delivery** on, **Send quote on LINE** appears on the quote screen (only when the LINE integration is **Connected**)
- With **Difference check** on, staff can confirm differences between the arrived cards and what the customer declared on LINE, from the deal
Arrival photos and return photos are sent by choosing 1 to 4 photos in each photo list and confirming before you send. See [Shipping and final appraisal](/en/guides/purchase/shipping-and-final) and [Returns](/en/guides/purchase/returns) for the steps.
:::note
Replies in regular chats are sent from Liny or the LINE admin screen. In Toreca Cloud, you can build a message from the templates under **LINE messages** below and copy it.
:::
### 3. Import customer images
To import the images customers send on LINE into Toreca Cloud, click **Set up channel** under **Image import (Messaging API)**. Enter the **Channel ID** (6–20 digits) and the **Channel secret** (32 characters), then click **Verify and save**. The channel secret isn't shown after saving.
After saving, the same place says **Change channel**. **Clicking Delete in the dialog removes the saved channel right away** (there is no confirmation screen). To undo it, enter the channel secret again.
### 4. Set up Liny / L Step intake and sync
Click **Configure Liny** on the card (**Configure L Step** for L Step) to open the operations tool settings. Once **Status** is **Connected**, LINE friends and chats are imported about every 5 minutes in environments where automatic synchronization is running.
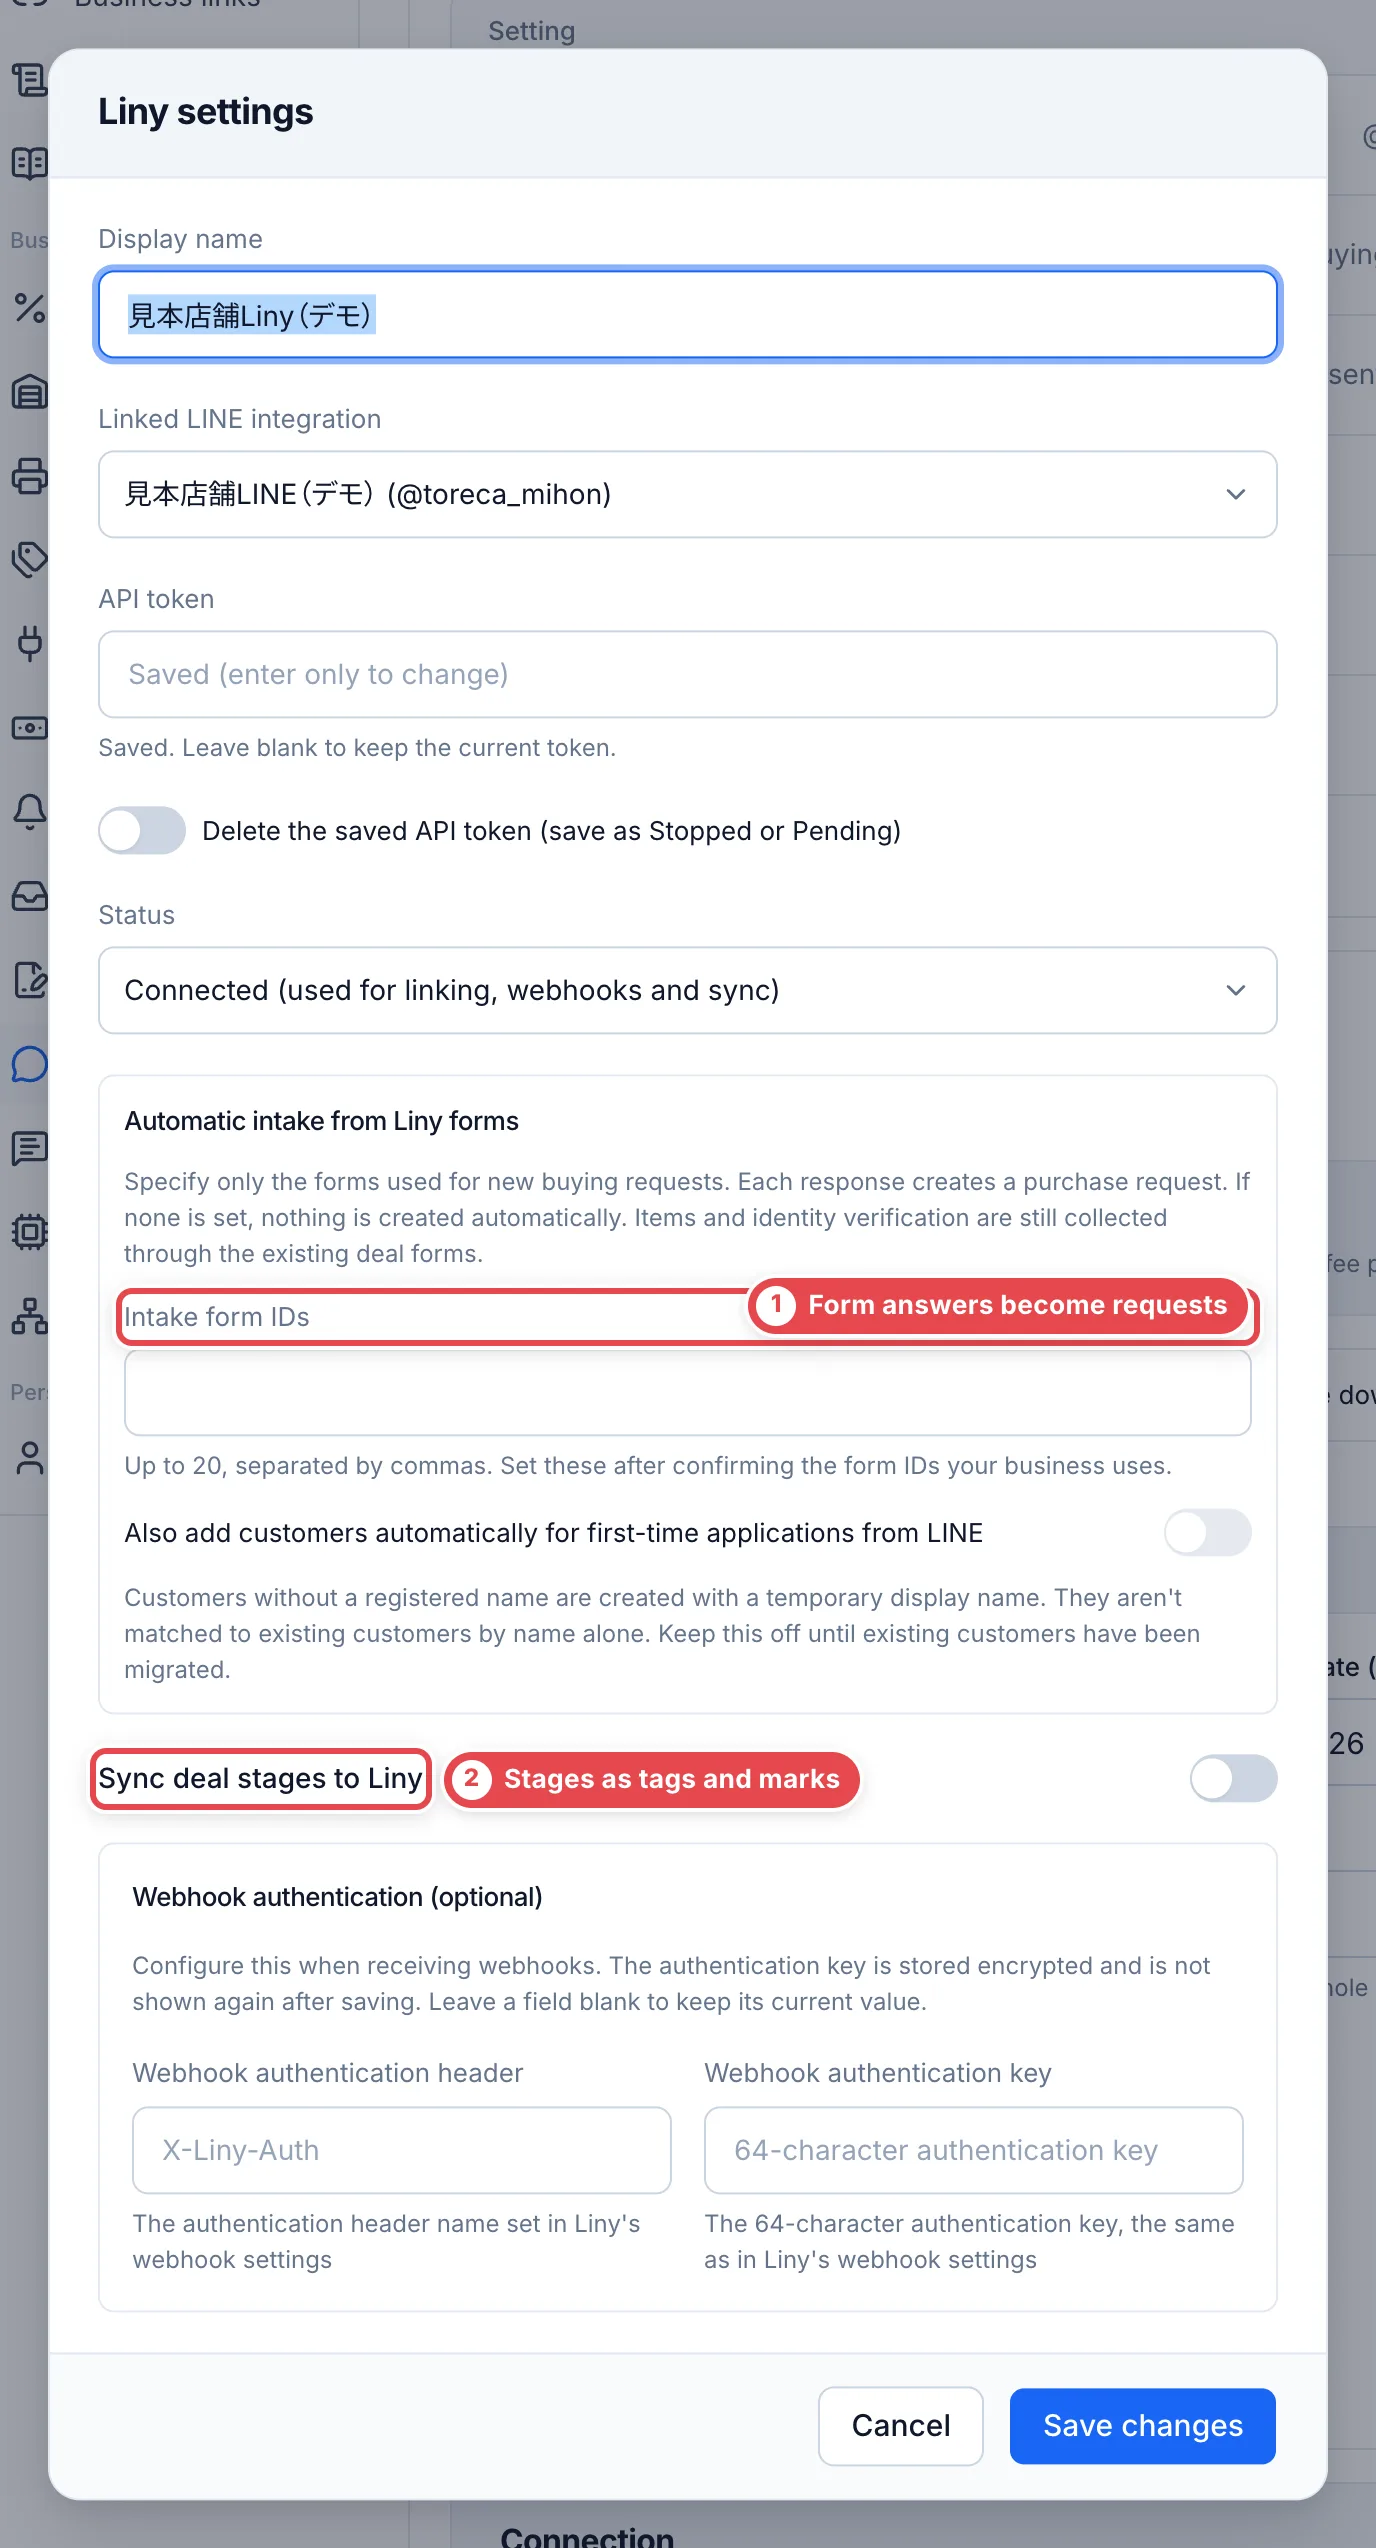 - For **API token**, enter the token issued in Liny under API integration › Authentication. If one is already saved, leave it blank to keep using it
- **Status** is one of **Pending** (not in use yet), **Connected** (used for linking, receiving and syncing) or **Stopped**
- Under **Automatic intake from Liny forms**, enter up to 20 **Intake form IDs** ①, separated by commas, and a buying request is registered for each form answer. Turn on **Also add customers automatically for first-time applications from LINE** to register first-time applicants as customers
- Turn on **Sync deal stages to Liny** ② to reflect deal progress in the Liny tag and status mark you choose for each stage (you can choose them after saving the API token)
- To receive webhooks, enter the **Webhook authentication header** and **Webhook authentication key** you set in Liny under **Webhook authentication (optional)**
Click **Save changes** when you're done. Open **Details and connection diagnostics** on the card to check the token status, the **Webhook URL** and the **Sync diagnostics history** (latest 30). **Check connection** and **Run sync now** are here too. **Run sync now sends the update to Liny right away.**
Referral fee reports are made from **Export** on the purchases list. See [Referral fee reports](/en/guides/settings/referral-reports).
## Intake form
Under **Settings** › **Intake form**, you set whether the online buying intake form is live and get the shared link you share on LINE. Click **Change** next to **Intake form delivery** to open **Intake form settings**. What customers see and how to handle what arrives are covered in [Intake form](/en/guides/purchase/intake-form).
Set the **Status** and **Form heading** (1–100 characters) at ①, then click **Save changes**. **Copy link** ② copies the link you share with customers on LINE. The link appears after you save once (until then it says **Not issued yet**).
## LINE messages
Under **Settings** › **LINE messages**, you prepare templates for the LINE messages you send customers. The templates are used when you click **Draft LINE message** on a deal or present a quote, and the deal's amounts and names are filled in.
Each message can have up to 20 named templates (for example, **Ungraded** and **PSA** for the final quote). The one marked **Default** is what a message starts from; you can switch to another where you send it.
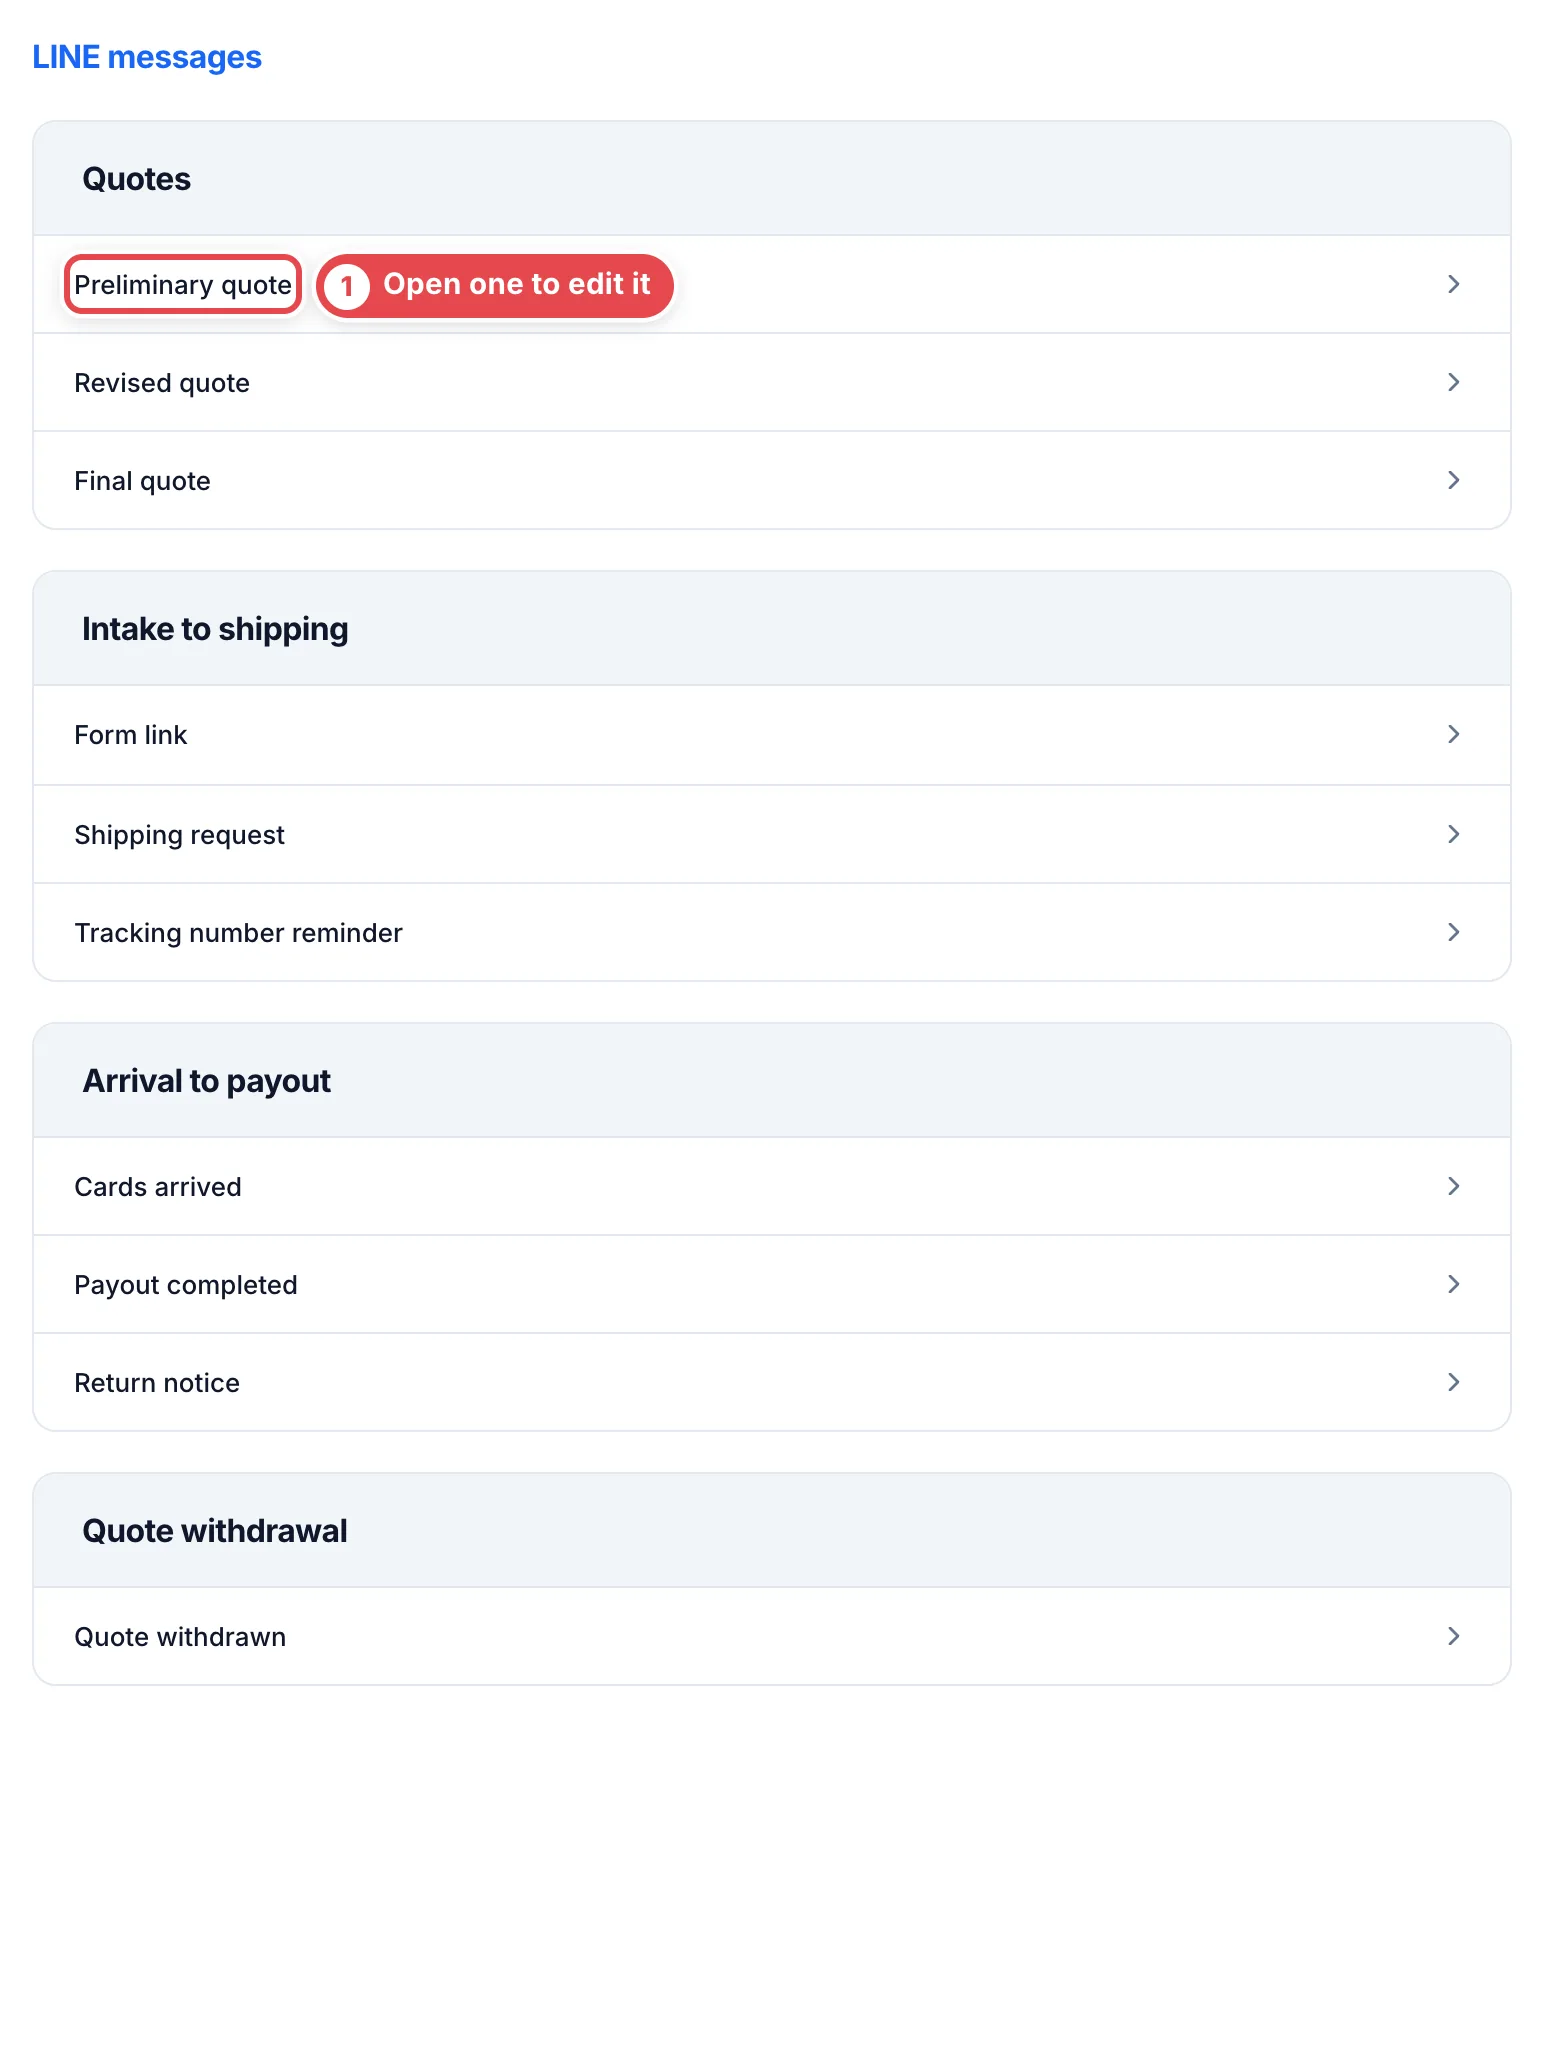 Messages are listed in four groups, in the order of the buying flow. Open one like ① to see its templates.
| Group | Messages |
| ------------------ | ----------------------------------------------------- |
| Quotes | Preliminary quote, Revised quote, Final quote |
| Intake to shipping | Form link, Shipping request, Tracking number reminder |
| Arrival to payout | Cards arrived, Payout completed, Return notice |
| Quote withdrawal | Quote withdrawn |
The list shows how many templates each message has and which one is the default.
### Add a template
An open message lists the **Standard wording** (provided by Toreca Cloud; it cannot be edited) and your own templates.
1. Click **Add template**. **Copy as new** on a template or on the standard wording opens with its text already in
2. Under **Template name**, enter the name you'll pick it by (up to 40 characters, unique within the message)
3. Rewrite the body at ① (up to 3,000 characters). Type `{` to see the values you can insert
4. Under **Values you can insert** ③, click **Insert** to put a value such as the customer's name or an amount at the cursor
5. Click **Sample** ② to see how it looks with values filled in
6. Click **Add template** ④. Check **Make this the default template** to make it the default as it is added
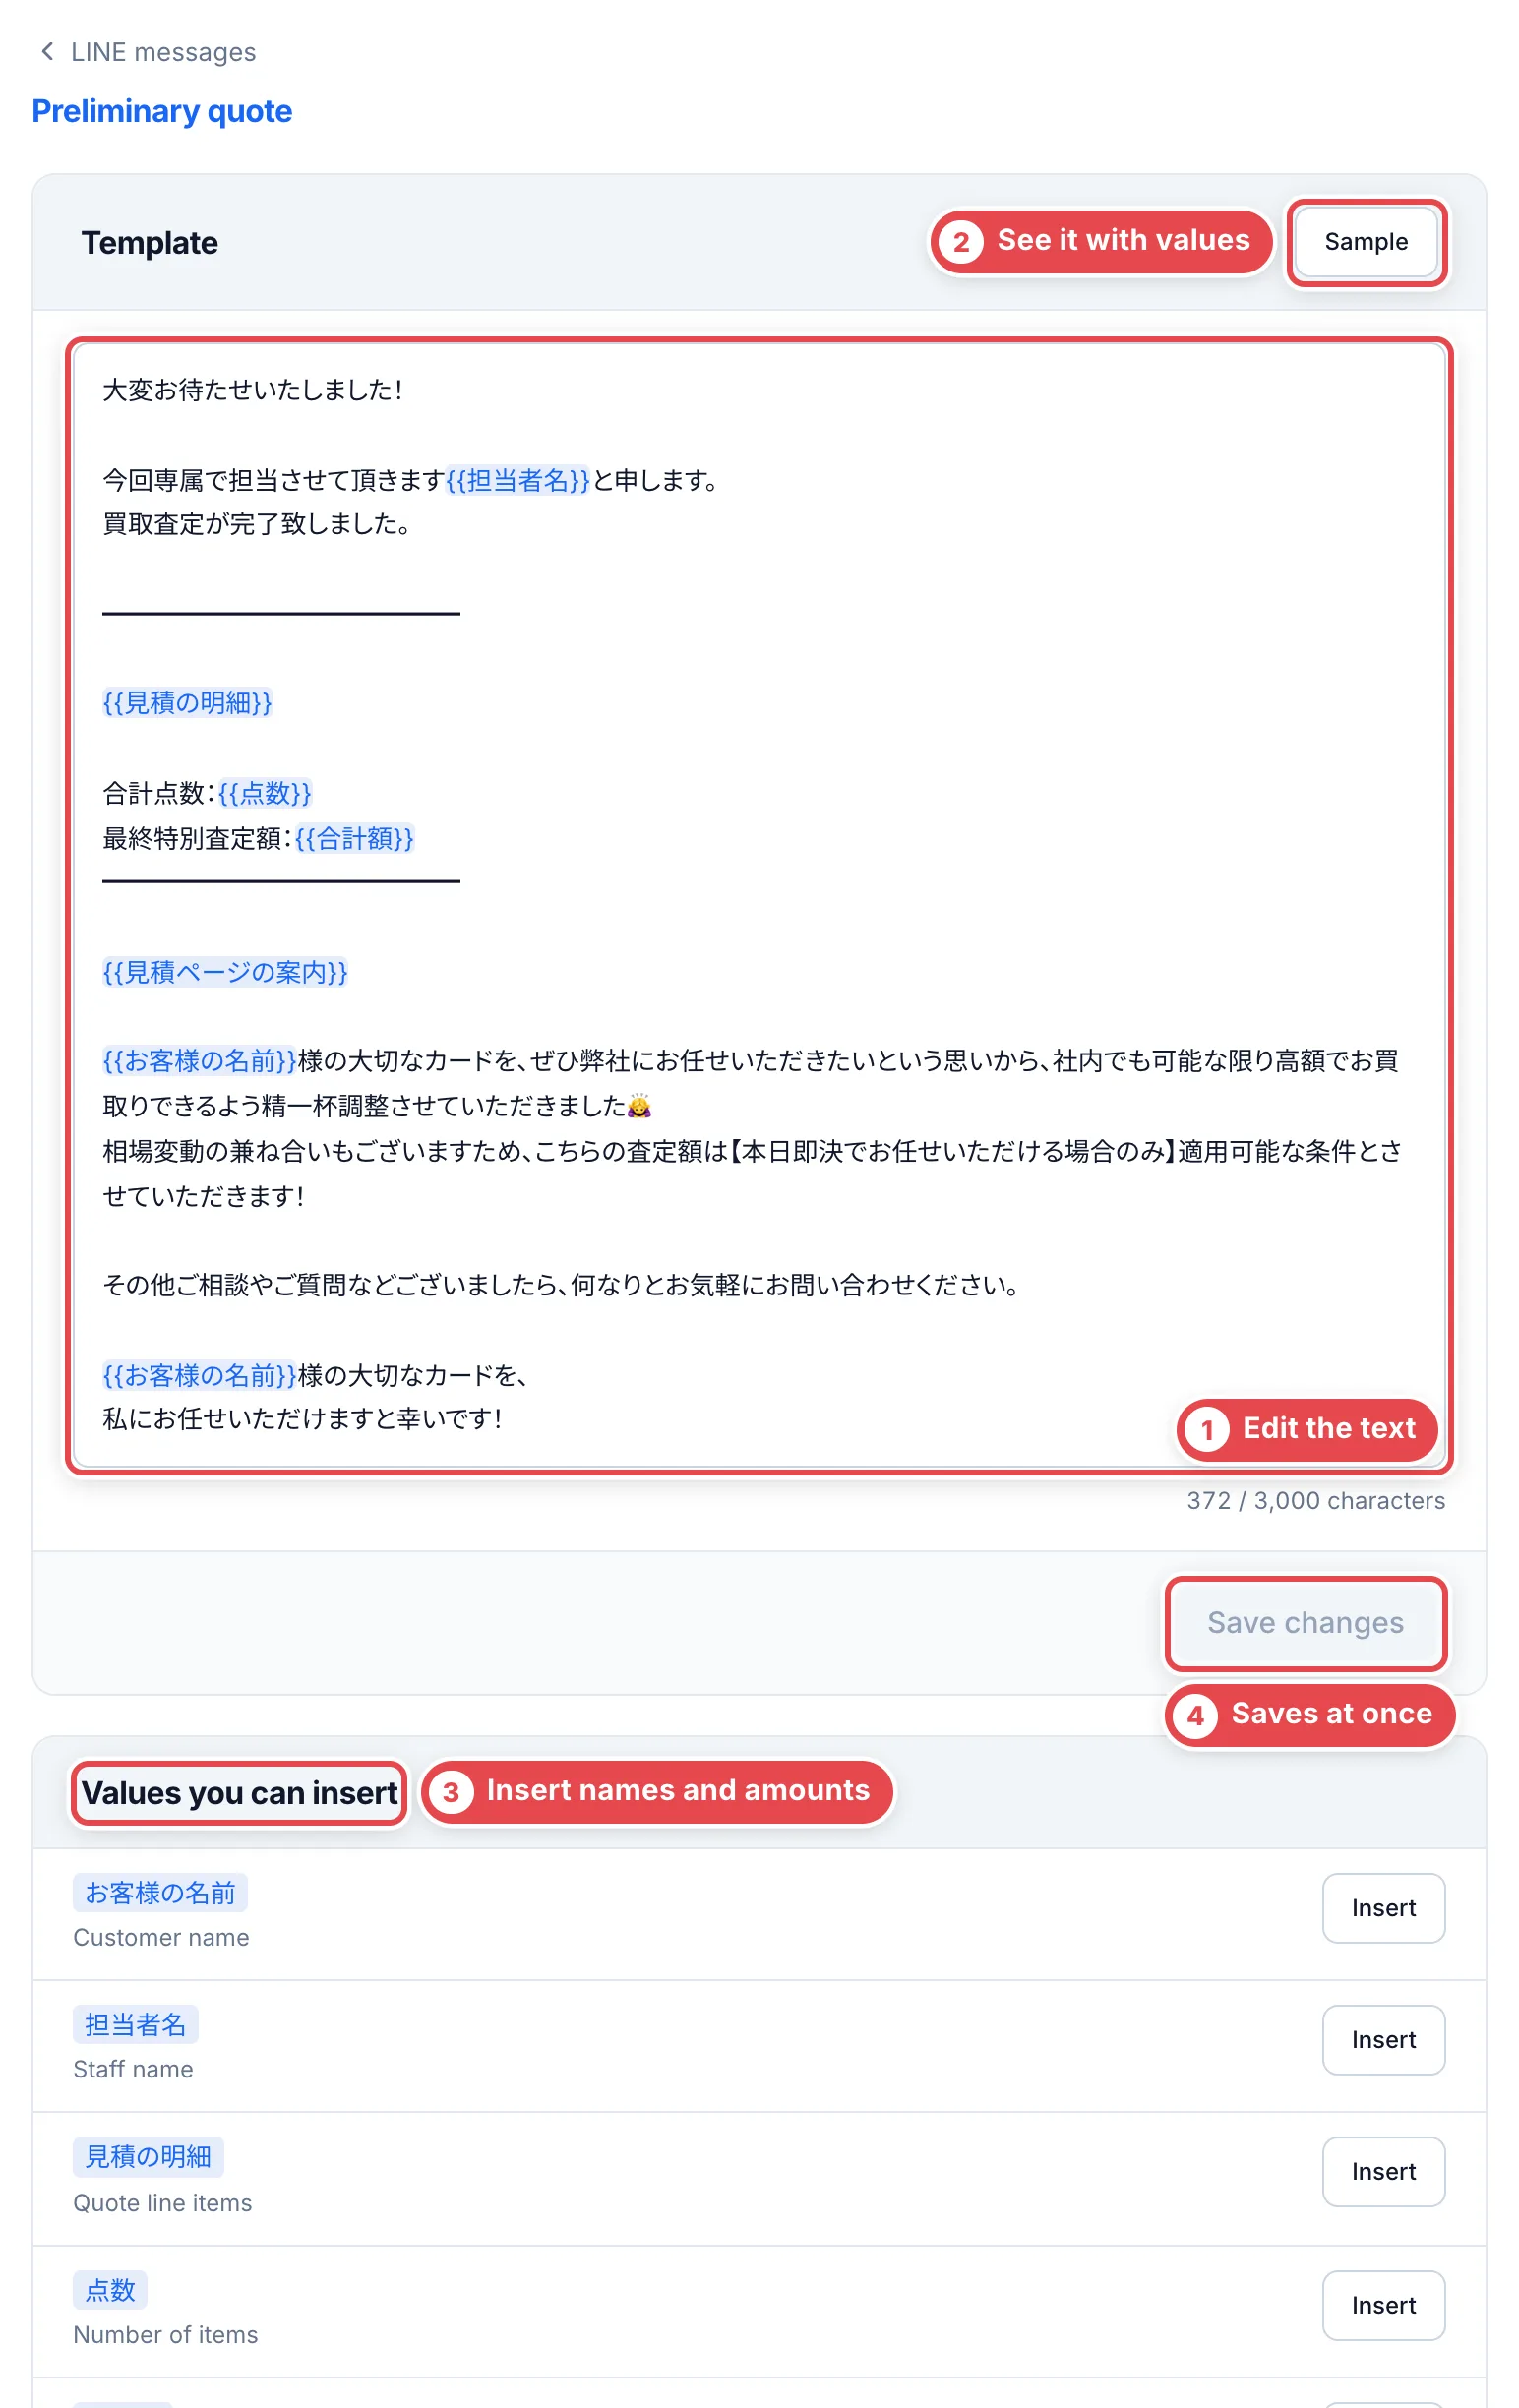 **Sample** shows your message with sample values filled in, and its character count against the LINE limit (5,000 characters).
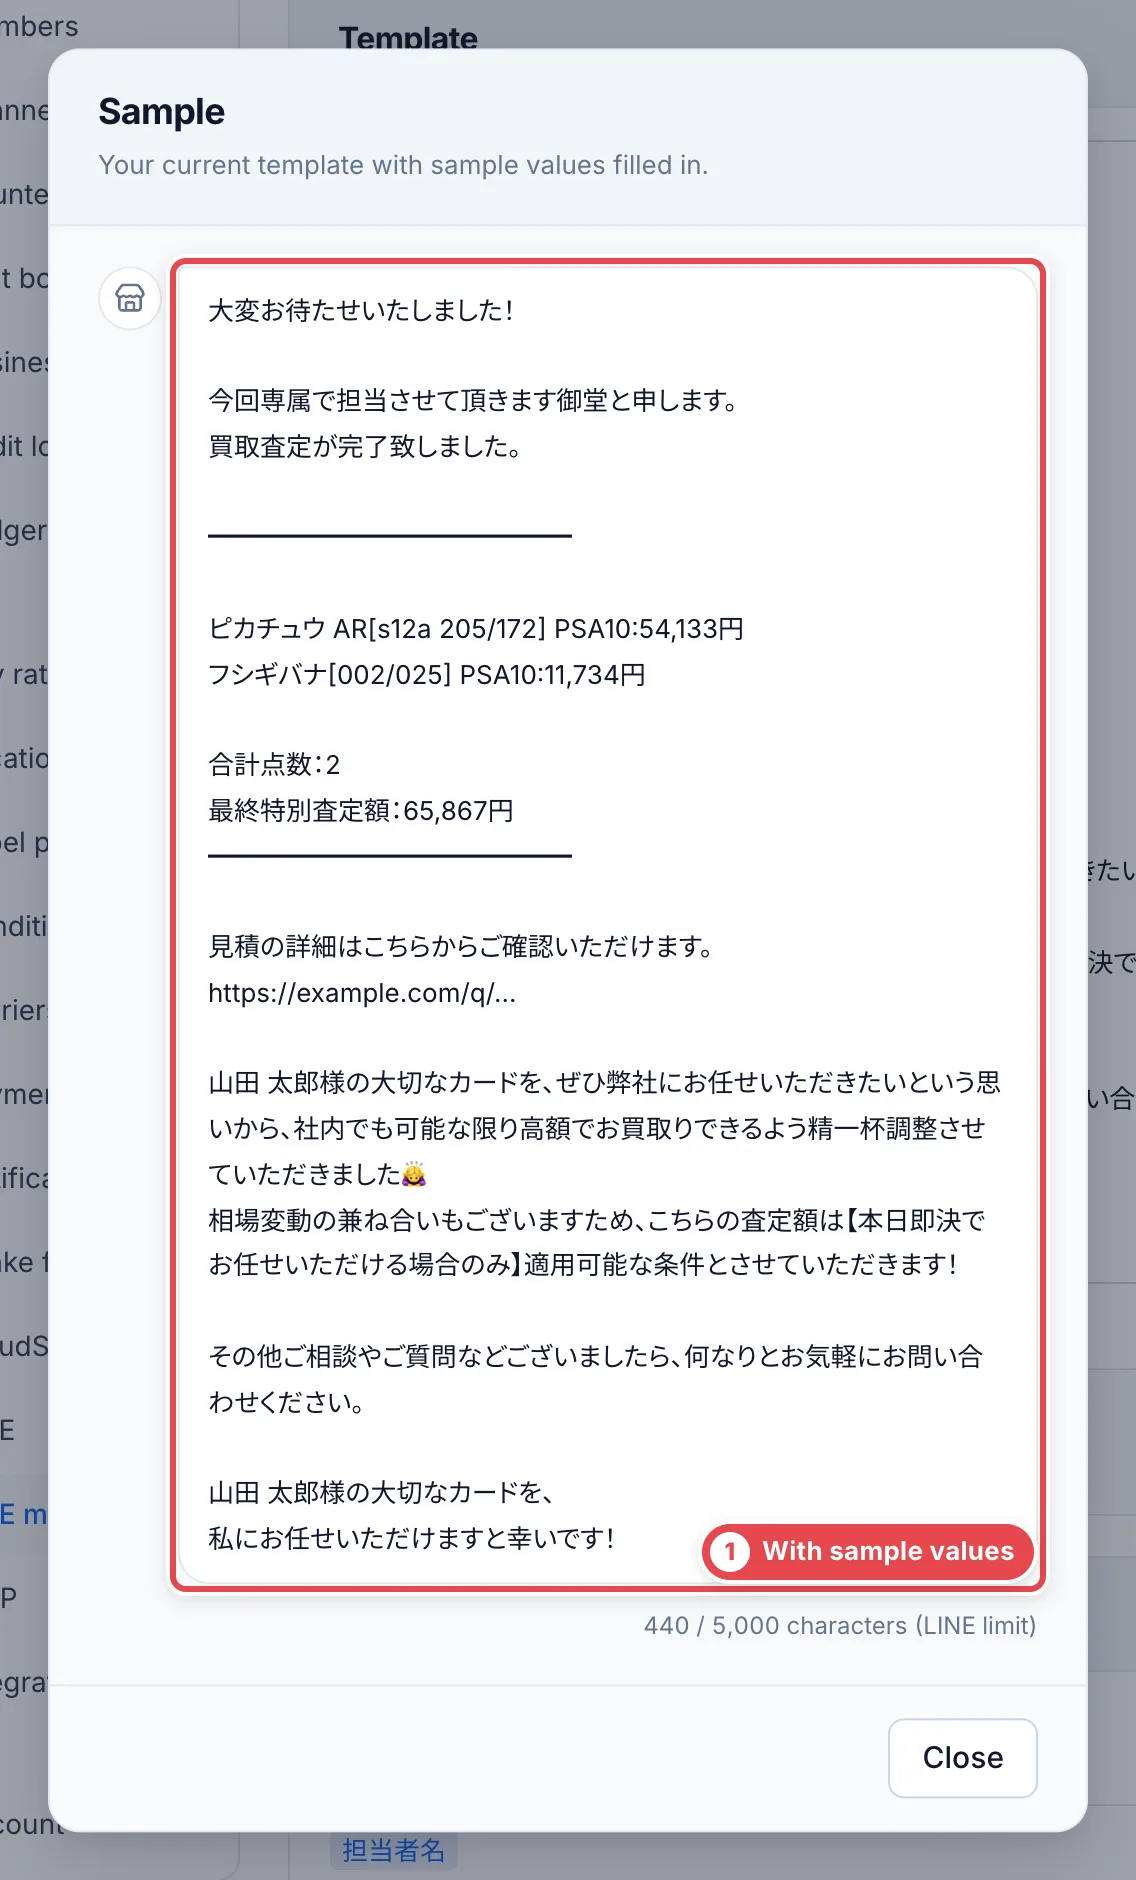 In a quote, you can insert 買取不可のカード. The cards you marked as not purchasable are listed under the heading 【買取不可のカード】, without the reason. In a quote with no such card, that line is left out.
### Change the default or edit a template
- In the message's list, click **Make default** on a template to switch the default at once. To go back to the standard wording, click **Make default** on **Standard wording**
- Open a saved template to change its name and body, then click **Save changes**. To put just the body back to the standard wording, click **Restore default** and save
- **Delete** removes it. Drafts already made and messages already sent are not affected. Deleting the default template makes the standard wording the default
### Pick or edit when sending
Where you present a quote or click **Draft LINE message**, **Template** lets you pick the wording (it appears once you have a template of your own). The default is marked **(default)**.
You can edit the message there before copying it. Picking a template again, or **Back to the template's wording**, discards the edit.
:::note
When you edit a quote, keep the total right after 査定額 or 合計, as in 合計査定額:12,000円. The message you send is matched to the quote by that total. A message without it, or with 査定額 or 合計 on another amount, is stopped before it's copied.
:::
## Notifications
Under **Settings** › **Notifications**, you decide where staff notifications go and which kinds they get.
### 1. Choose destinations
There are three destinations: email, Telegram and desktop notifications.
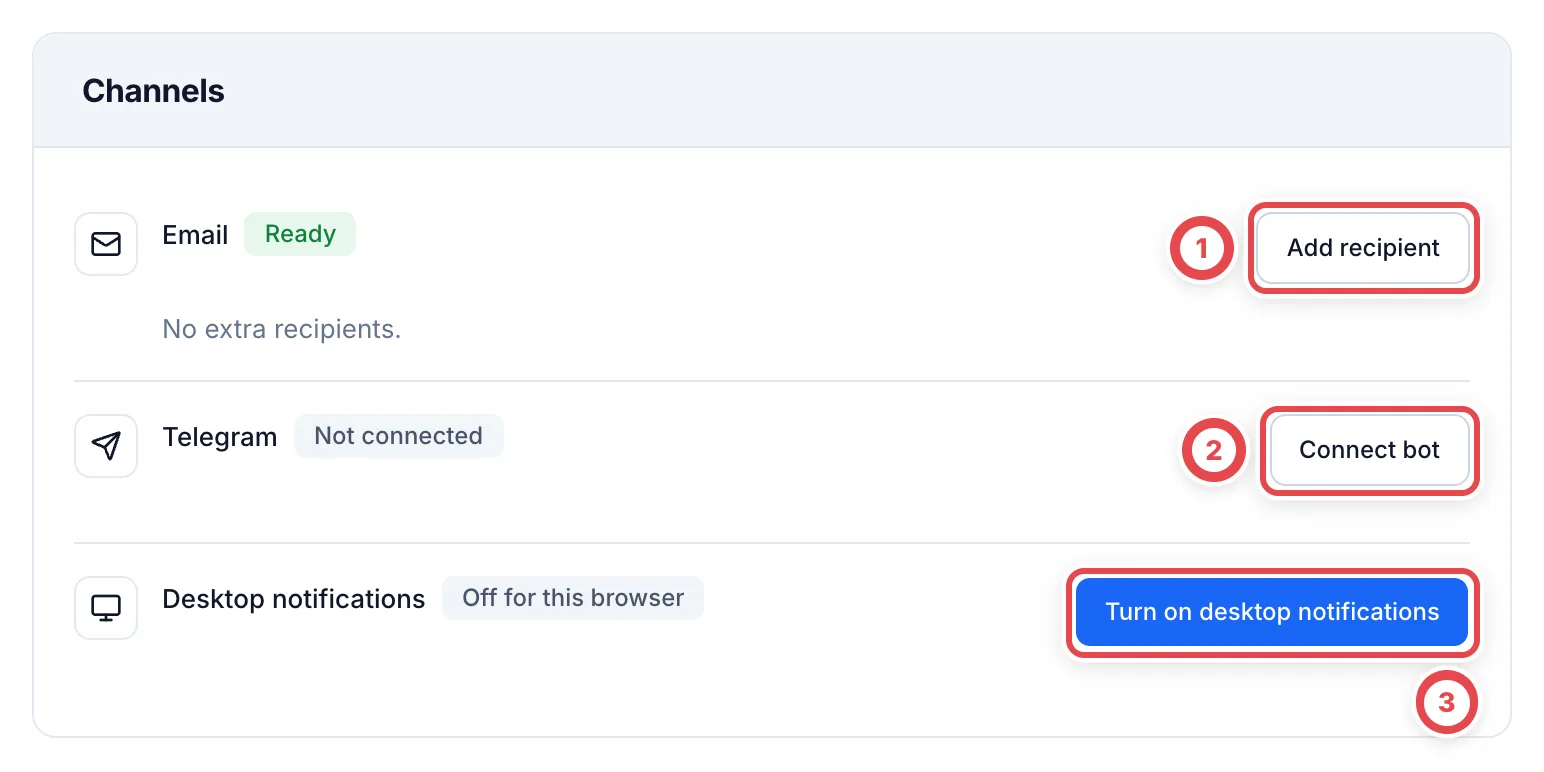 - **Email**: goes to the members set for each event. Click **Add recipient** ① to add up to 10 addresses that aren't members. **Extra recipients are saved right away when you click Add** (separate from **Save changes** below). To remove one, click the "×" next to the address, then click **Remove** in the confirmation
- **Telegram**: click **Connect bot** ② and register the bot's token, then click **Add group** to choose the groups to send to. **Send test** checks that it arrives (it really is sent to the group)
- **Desktop notifications**: click **Turn on desktop notifications** ③ and allow it in the browser, and notifications arrive in this browser. Members set this up themselves, and can also do it from the **Account** screen
### 2. Choose notification types
In the **Notification types** table, choose which events notify which destinations.
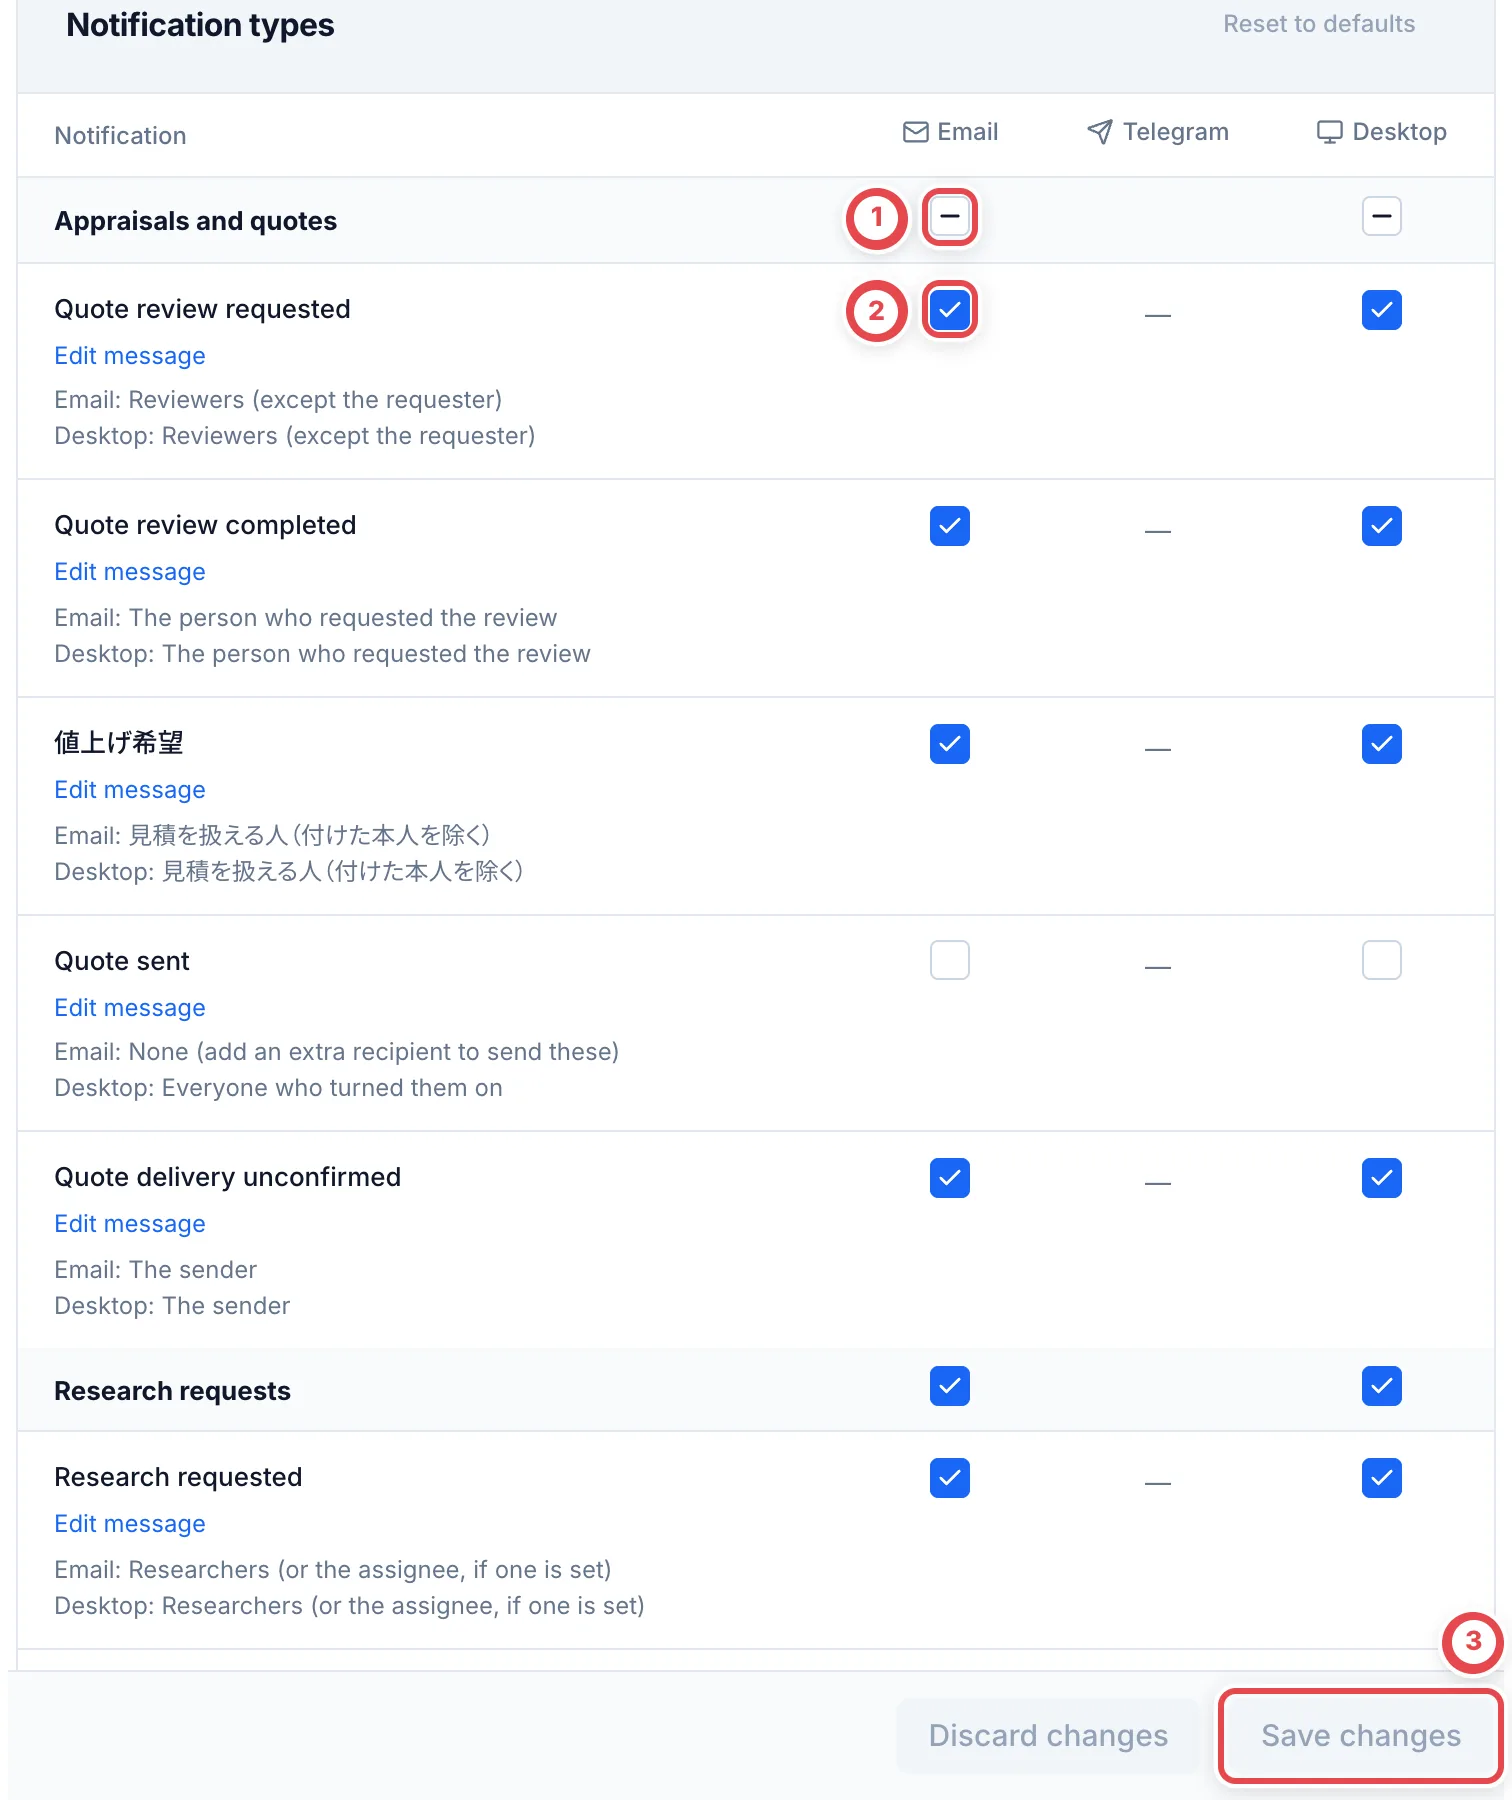 Events are split into eight groups: Appraisals and quotes, Research requests, Intake and LINE, Customer activity, Arrivals and inspections, Settlements and payouts, Inventory, and Sales and payments. Each row says who receives the email and desktop notifications.
- The checkbox on a group row ① selects all the events in that group
- The checkbox on an event row ② selects that event
- When you're done, click **Save changes** ③. **Discard changes** goes back to the state before you saved. **Reset to defaults** returns the table to its default choices (nothing changes until you save)
You don't receive email or desktop notifications for actions you take yourself (they do reach Telegram groups and extra recipients). If a notification doesn't arrive, check the last 30 deliveries under **Recent deliveries** at the bottom of the page.
### Edit notification messages
**Edit message** is hidden while notification-type changes are unsaved. Save or discard those changes first.
Open **Edit message** to change ① **Notification title** (up to 120 characters) and ② **Notification body** (up to 1,000 characters). Insert the available values, review ③ **Sample**, then click ④ **Save changes**. Required values must remain in the message. Details and links are included automatically. To restore the default, click **Restore default** and save.
The saved wording applies to newly created email, Telegram and desktop notifications. Messages already queued are unchanged. If the filled message exceeds notification limits, the default wording is sent. Editing requires the **Manage settings** permission. Notifications without **Edit message** use the default wording.
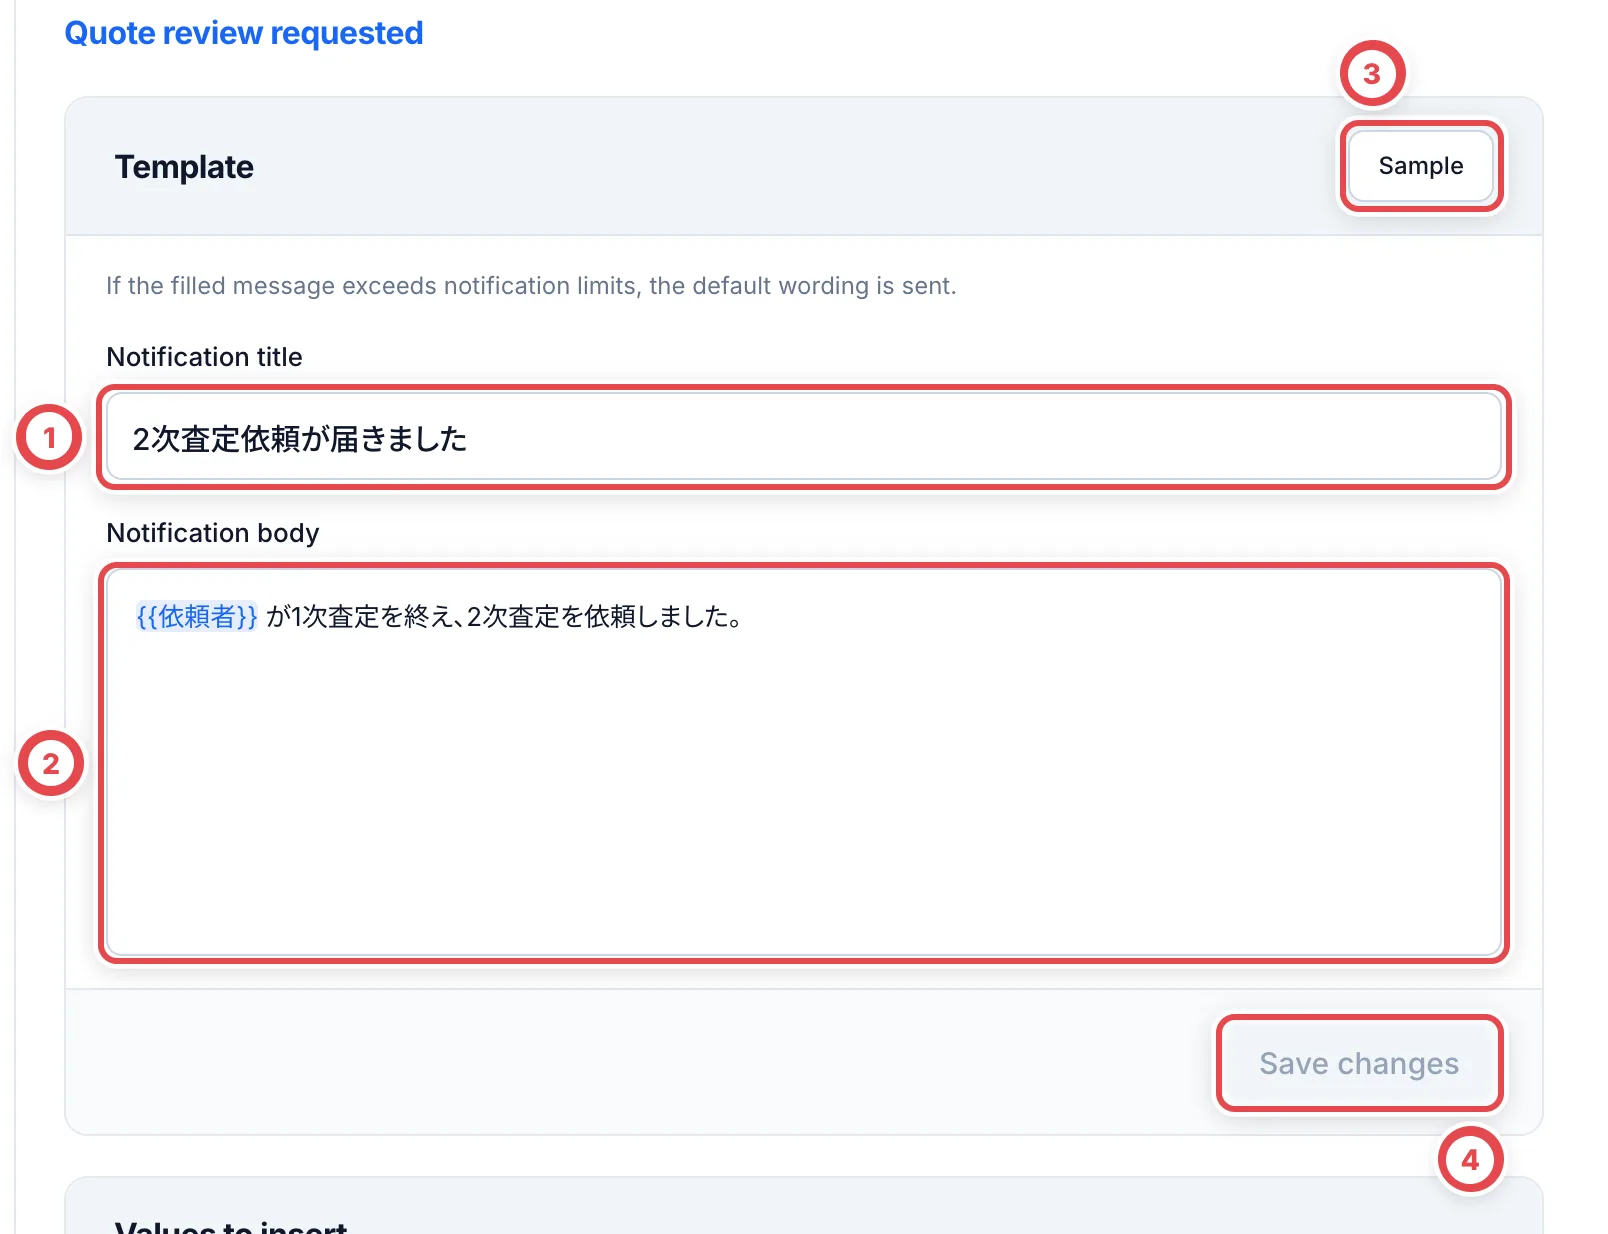 ### 3. Receive CloudSign completion notifications
Under **Customer activity**, select **CloudSign signing completed** at ①. It is off by default. If you have connected multiple Telegram groups, select the destinations at ② and click **Save changes**. You can use the same group as identity document submissions and discrepancy responses.
 The notification is sent when signing is confirmed for a contract or power of attorney linked through the production API. Email and desktop notifications go to active members who can send CloudSign documents and view deals and customers. Extra email recipients also receive it. The person who created the document is included.
Manual signing records, in-store signatures and the sandbox are excluded. This notification does not confirm that the PDF has been saved. Synchronization and delivery take time, so it may not arrive immediately after signing.
Previously confirmed completions, including those observed while notifications were off or no destination was available, are not sent retroactively when you turn this on. A document already signed externally may notify when Toreca Cloud first confirms its completion. The row is hidden when the CloudSign feature is disabled.
## When something goes wrong
| What's happening | What to check or how to fix it |
| --------------------------------------------------------------------------------------------------------------------------------------------- | ------------------------------------------------------------------------------------------------------------------------------------- |
| You see 「チャネルIDまたはチャネルシークレットが正しくありません」 (The channel ID or channel secret is incorrect) | Check the values of your Messaging API channel in LINE Developers and enter them again. |
| The operations tool stays **Pending** | The API token is missing, or **Status** is **Pending**. Enter the token under **Configure Liny** and set **Status** to **Connected**. |
| **Send quote on LINE** doesn't appear | **Quote delivery** is off, or the LINE integration isn't **Connected**. Check it from **Configure**. |
| The intake form's shared link says **Not issued yet** | Click **Save changes** once in **Intake form settings** and it's issued. |
| The Email column shows "—" and can't be selected | Email sending isn't set up in this environment. Contact Toreca Cloud support. |
| You see 「ほかの人が通知設定を変更しました。画面を読み込み直してください」 (Someone else changed the notification settings. Reload the page.) | Another member saved first. Reload the page, then choose again. |
| Notifications don't arrive | Check **Recent deliveries** for failures. For desktop notifications, also check that the browser allows notifications. |
---
# Settings at a glance
Source: https://docs.toreca-cloud.com/en/guides/settings/overview
Open **Settings** ① from the bottom of the sidebar.
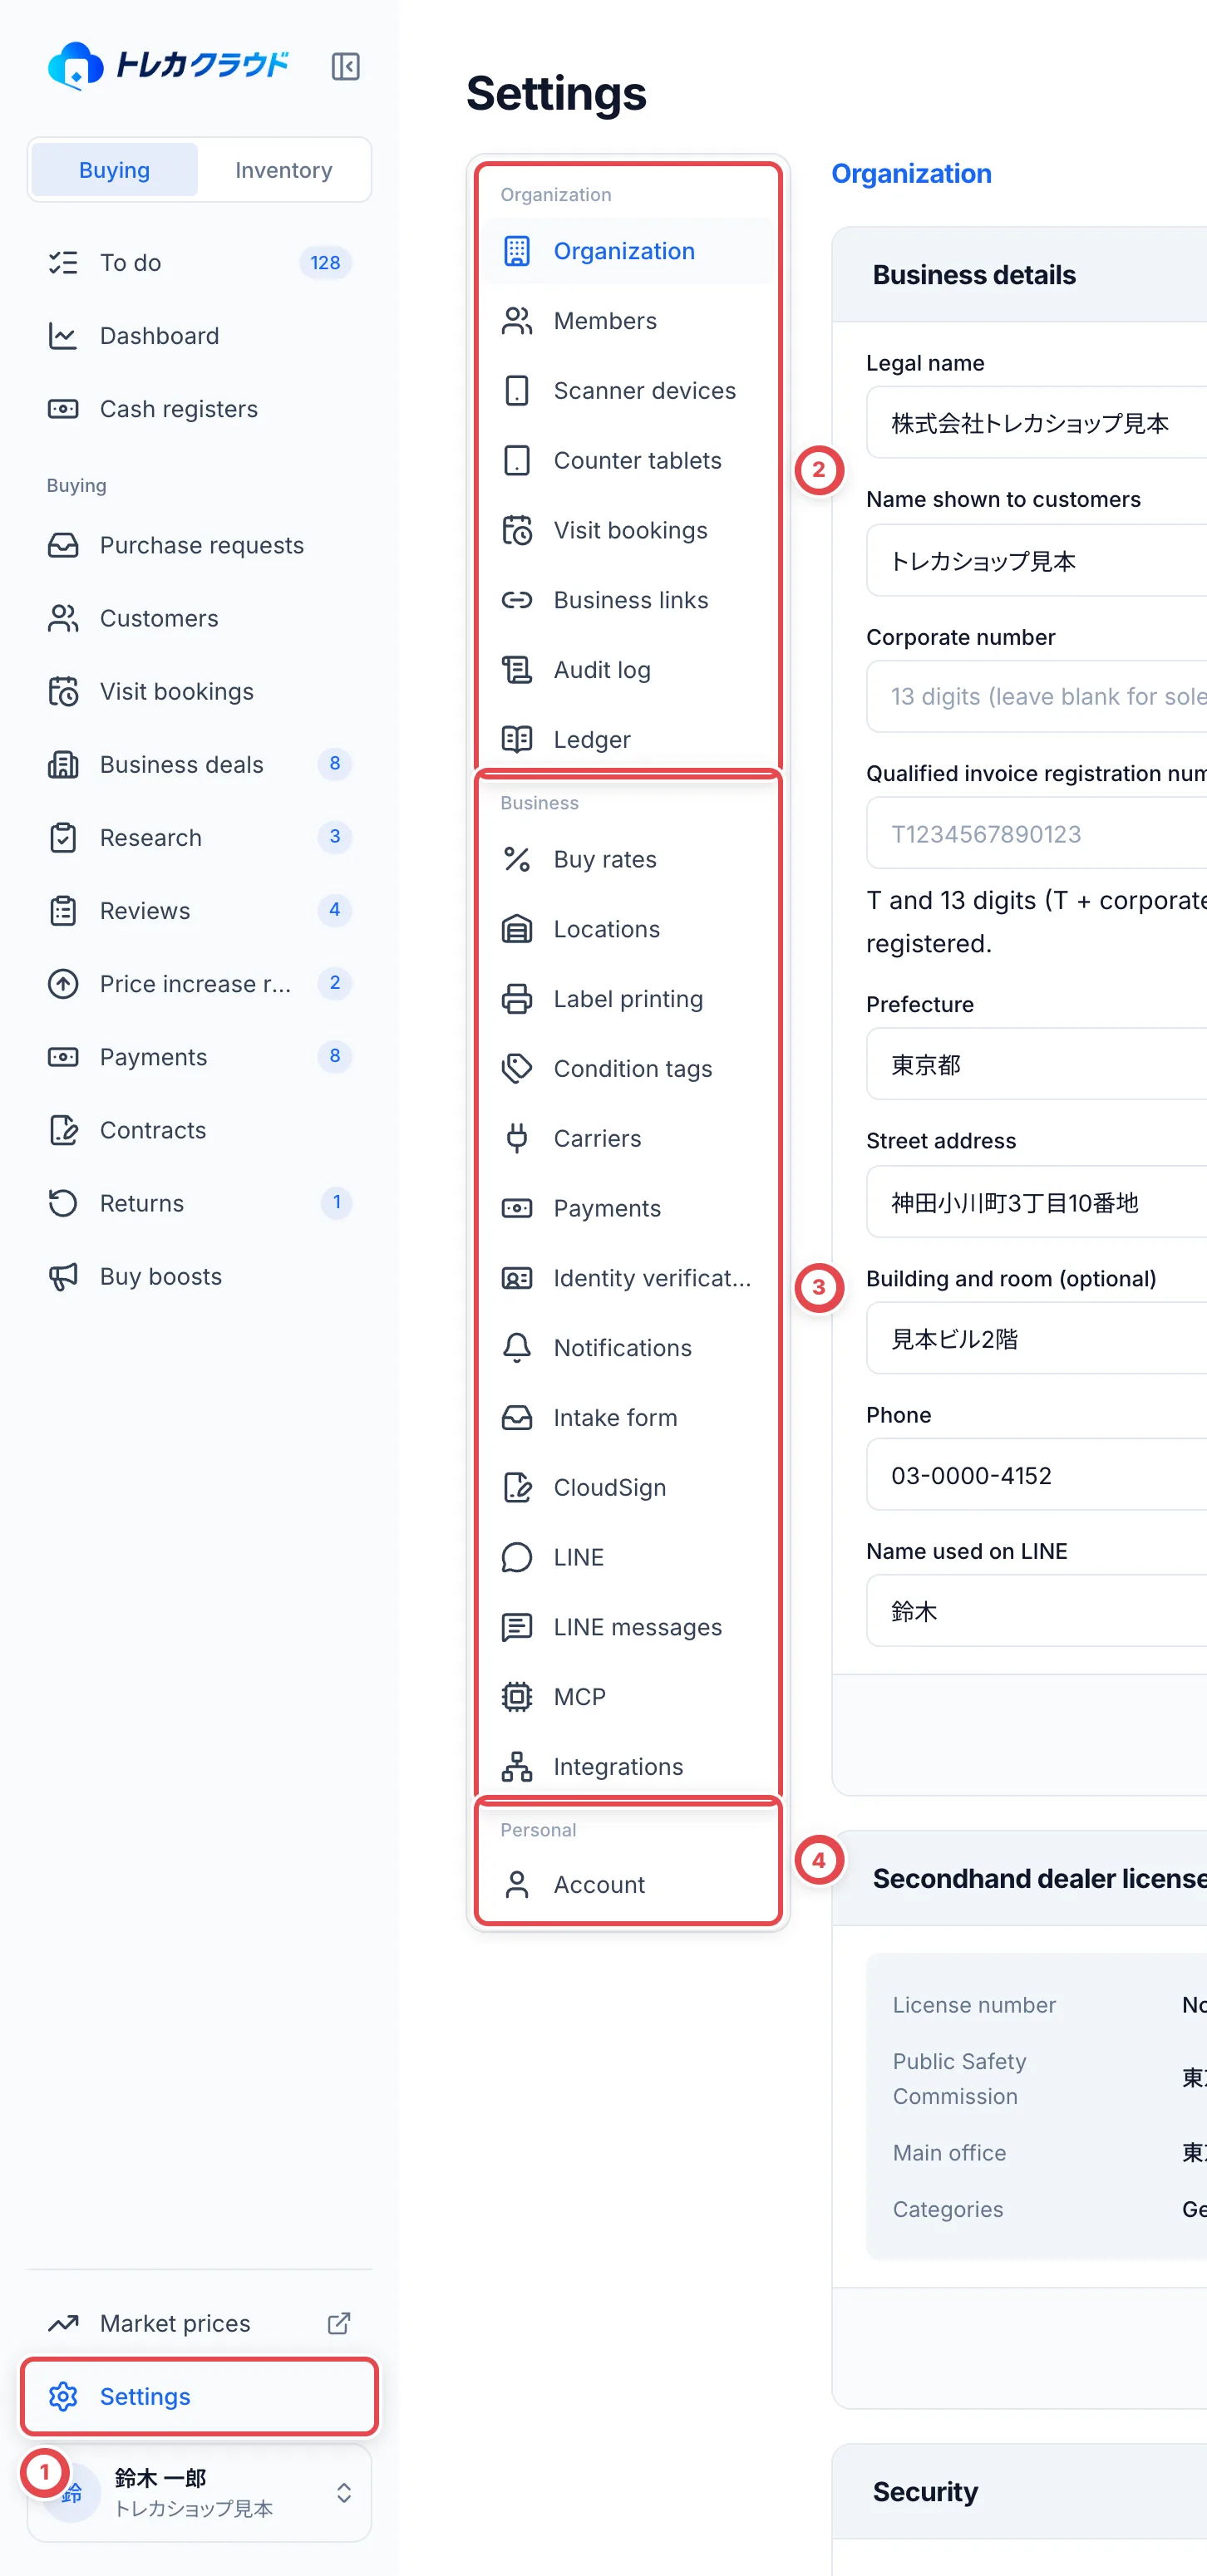 In general, only owners and admins can change settings. Other members see most settings as view only.
## Organization
| Item | What it's for |
| --------------- | -------------------------------------------------------------------------------------------------------------------------------------------------------------------------------------------------------------------- |
| Organization | Your business name, address, contact details, secondhand dealer license and company seal. These appear on quotes and in the secondhand ledger |
| Members | Invite members, change roles and suspend access. See [Members and roles](/en/guides/getting-started/members-and-roles) |
| Scanner devices | The iPhones signed in to the putaway app. Use **Revoke** to shut off a device you no longer use |
| Counter tablets | Tablets kept in the shop for customers to review the final quote. Scan the QR code from **Register a tablet** with the tablet's camera to start using it. See [Counter tablets](/en/guides/purchase/counter-tablets) |
| Visit bookings | Create a booking page per store and set its hours, slots and deadline. Put the page's link in your LINE rich menu. See [Visit bookings](/en/guides/purchase/reservations) |
| Business links | Link with other businesses so you can transfer stock to each other |
| Audit log | Who did what and when. Filter by period or action, and export to CSV |
| Ledger | The secondhand ledger of goods you bought. Download as CSV or print |
### Organization
Under **Business details**, enter your legal name, the name shown to customers, address, phone and support email. Under **Secondhand dealer license**, add your license number and Public Safety Commission. Until a license is added, its number can't appear in the ledger or on documents you give customers.
Upload an image under **Company seal** to print your seal in the issuer box of quote PDFs. Use a PNG or JPEG of 1 MB or less.
The **Require two-factor authentication** switch under **Security** records the shop’s policy. It currently does not enforce two-factor authentication at login. Each member sets it up under **Account**, and the shop can check each member’s setup under **Members**.
### Scanner devices and business links
Revoking a scanner device stops putaway, stock counts and picking on it. A revoke can't be undone.
To link with another business, share **Your organization ID** with them, or click **Request link** and enter **Their organization ID**. Once they approve, you're linked and can transfer stock to each other. Customers, cases and inventory lists are not shared. The transfer steps are in [Outbound, transfers and handovers](/en/guides/inventory/outbound-and-transfers).
### Audit log and ledger
The audit log lets you filter member actions separately from actions taken by integrated apps. **Export CSV** lets you choose the period and CSV or JSON Lines, up to 10,000 entries at a time. It also keeps the member, action and integration filters applied on the page.
The ledger entry is created together with stock and payment when you use **Create stock and payout** online or settle an in-store purchase. **Record acceptance only** does not create it. Use **Download CSV** to export it and **Print** to keep a paper copy. Among the standard roles, owners and admins can view the ledger. A custom role needs all four read permissions: audit, purchases, customers and identity. CSV and printing are limited to 5,000 item lines at a time. Narrow the period or other filters if there are more.
## Business
| Item | What it's for |
| --------------------- | --------------------------------------------------------------------------------------------------------------------------------------------------------- |
| Buy rates | The rate applied to market prices to get buy prices, and how amounts are rounded. See [Buy rates](/en/guides/settings/pricing) |
| Locations | Your sites, such as stores and warehouses, and the shelves inside them. See [Inventory overview](/en/guides/inventory/overview) |
| Label printing | Alignment for printed QR labels. See [Putaway and QR labels](/en/guides/inventory/putaway) |
| Condition tags | Tags you attach to stock units to note their condition |
| Carriers | The carriers you use and your contract numbers |
| Payments | The in-store payment method, the paying account for Zengin files, and the payment approval rule |
| Identity verification | Allow staff document review and distinguish it from in-store checks. See [Identity verification methods](/en/guides/settings/identity) |
| Notifications | Where notifications go and which events trigger them |
| Intake form | Whether the online buying intake form is live and its heading. Copy the shared link for LINE here too. See [Intake form](/en/guides/purchase/intake-form) |
| CloudSign | Your contract and power of attorney templates |
| LINE, LINE messages | Your LINE Official Account connection and the messages you send customers |
| MCP | AI assistants connected to your shop |
| Integrations | Let external apps read your stock or buy boosts. See [Integrations](/en/guides/settings/partners) |
Notifications, the intake form, LINE and LINE messages are covered in [LINE and notifications](/en/guides/settings/line-and-notifications).
**Sites and locations** also configures [single-lot shelves](/en/guides/inventory/sealed-lot-shelves) and [scan movement locks](/en/guides/inventory/shelf-protection). Use **Label printing** to [download and connect the print app and register a printer](/en/guides/inventory/desktop-print-app).
### Condition tags
Condition tags record a card's condition on a stock unit. Create them with **Add condition tag**, and use **Rename** or **Archive** as needed. Renaming a tag also renames it on units that already carry it and in the stock data sent to integrations. An archived tag can't be added to new units, but it stays on units that already have it. Use **Restore** to make the tag available for new units again.
### Carriers
Record the carriers you use, with your contract number or customer code. Toreca Cloud doesn't connect to carriers' systems. Book pickups and create shipping labels with the carrier directly, then record the tracking number and label image on the deal.
### Payments
**Payments** sets how you pay for what you buy. Change it with **Change** at the top right.
- **In-store payment methods** ① sets how you pay at the counter: **Cash only**, **Bank transfer only** or **Cash and bank transfer**. It starts as **Cash only**. Deals settled before a change keep their payment method
- **Approval required above** ② is for shops that pay by bank transfer. Transfers over this amount cannot be approved together from the payout list; approve each one from its deal. In-store cash payments need no approval from another member
- **Purchase statement email** ③ sets whether the statement goes to the customer automatically when a payment completes, or is sent from the deal
- **Transfer fee paid by** sets whether the shop or the customer pays the transfer fee
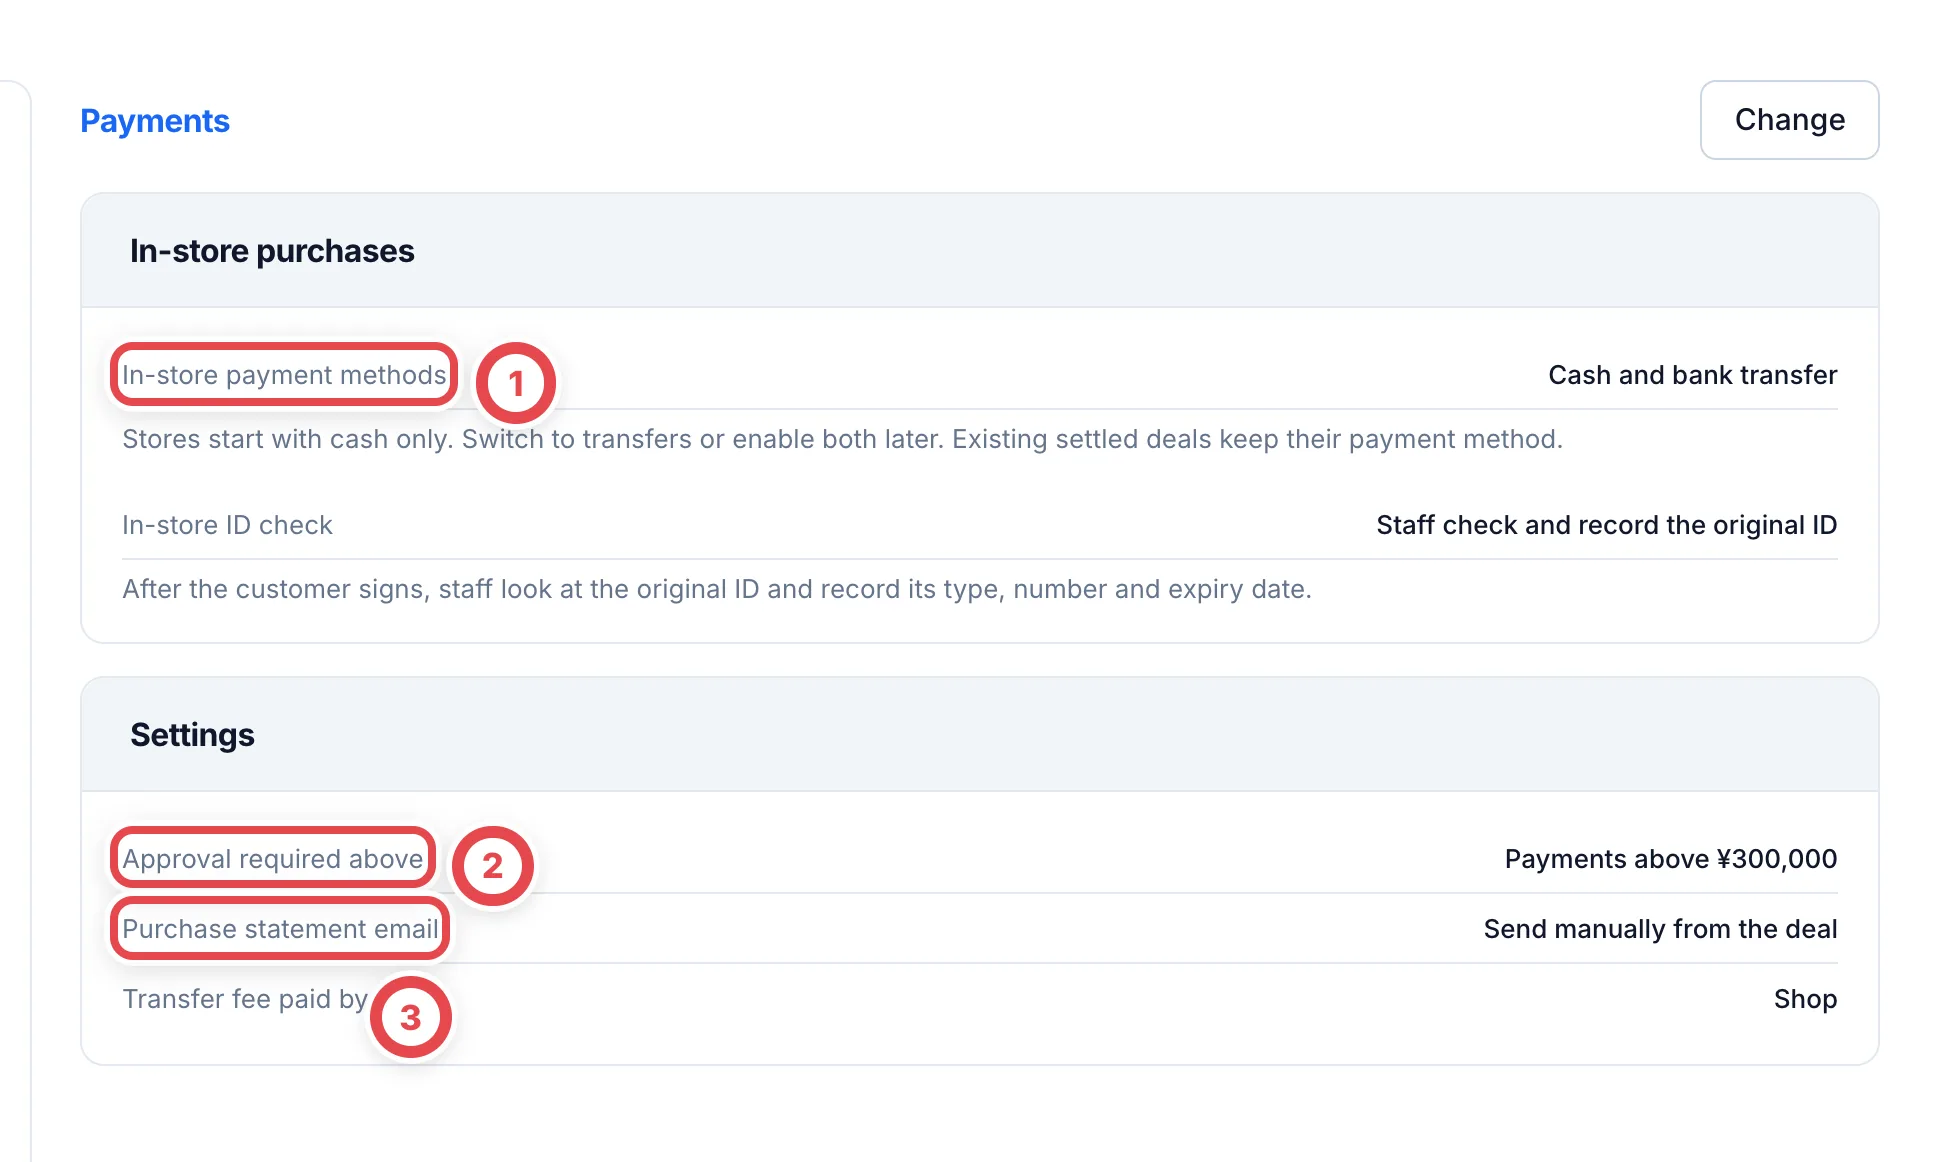 Shops that use Zengin data (Zengin file export) also register the originator code (10 digits), the originator name in kana, the paying account and the default transfer date here. Japan Post Bank accounts can't be used as the paying account. Zengin data is turned on per shop; ask the Toreca Cloud team whether you can use it.
The payment work itself is covered in [Payouts](/en/guides/purchase/payouts).
### CloudSign
With an API connection, prepare documents from a case, review the PDF and recipients, then send. See [CloudSign setup and sending](/en/guides/settings/cloudsign) for connections, standard documents and default item selection. The legacy template-URL workflow still sends in CloudSign and records results manually. A power of attorney is needed when the payout account is not in the customer’s own name.
### MCP
The MCP page shows how to connect AI assistants such as Claude to your shop, and lists the assistants currently connected. For how to connect, see [AI agents (MCP)](/en/mcp).
## Personal
Under **Account**, set your display name and profile photo, password, two-factor authentication, passkeys and desktop notifications. See [Signing in and choosing a shop](/en/guides/getting-started/login) for details.
---
# Integrations
Source: https://docs.toreca-cloud.com/en/guides/settings/partners
Integrations let external apps read your shop's stock or buy boosts. For example, you can sync stock to an oripa site, or show boosted buy prices on a landing page or in X posts. Customer details, purchase cases and appraisal notes are never shared with any partner.
:::note
Integrations have to be switched on for each shop before you can use them. If you don't see **Integrations** under **Settings**, contact Toreca Cloud support.
:::
## What you need
- Only owners and admins can add, pause or disconnect partners. Other members can view connection status
- The redirect URLs (starting with https) that the partner's developer gave you
- A decision on what the partner should read (stock or buy boosts)
## The steps and statuses
| Step | What you do | Who | Partner status |
| ---- | --------------------------------------------- | -------------------- | -------------------------- |
| 1 | Add the partner | The shop | Active (not connected yet) |
| 2 | Give the secret to the partner's developer | The shop | Active (not connected yet) |
| 3 | Approve the connection from the partner's app | A member of the shop | Connected |
| 4 | Pause or disconnect it (if needed) | The shop | Paused or Disconnected |
The screen lists **Connected partners** and **Partners added by this business** separately. Adding a partner doesn't connect it. It becomes connected when you approve it in step 3.
## 1. Add a partner
Under **Settings** › **Integrations**, click **Add partner** to open the **Add partner** dialog.
1. Enter a **Display name** (①). It appears on the approval screen and in lists (up to 100 characters)
2. Choose a **Type** from Oripa, Marketplace, Business system or Other, and enter a **Contact email**
3. Under **Redirect URLs** (②), enter the URLs the partner's developer gave you, one per line (up to 10, and only URLs starting with https)
4. Under **What it may do** (③), choose what the partner can read (see the table below)
5. Click **Add partner** (④)
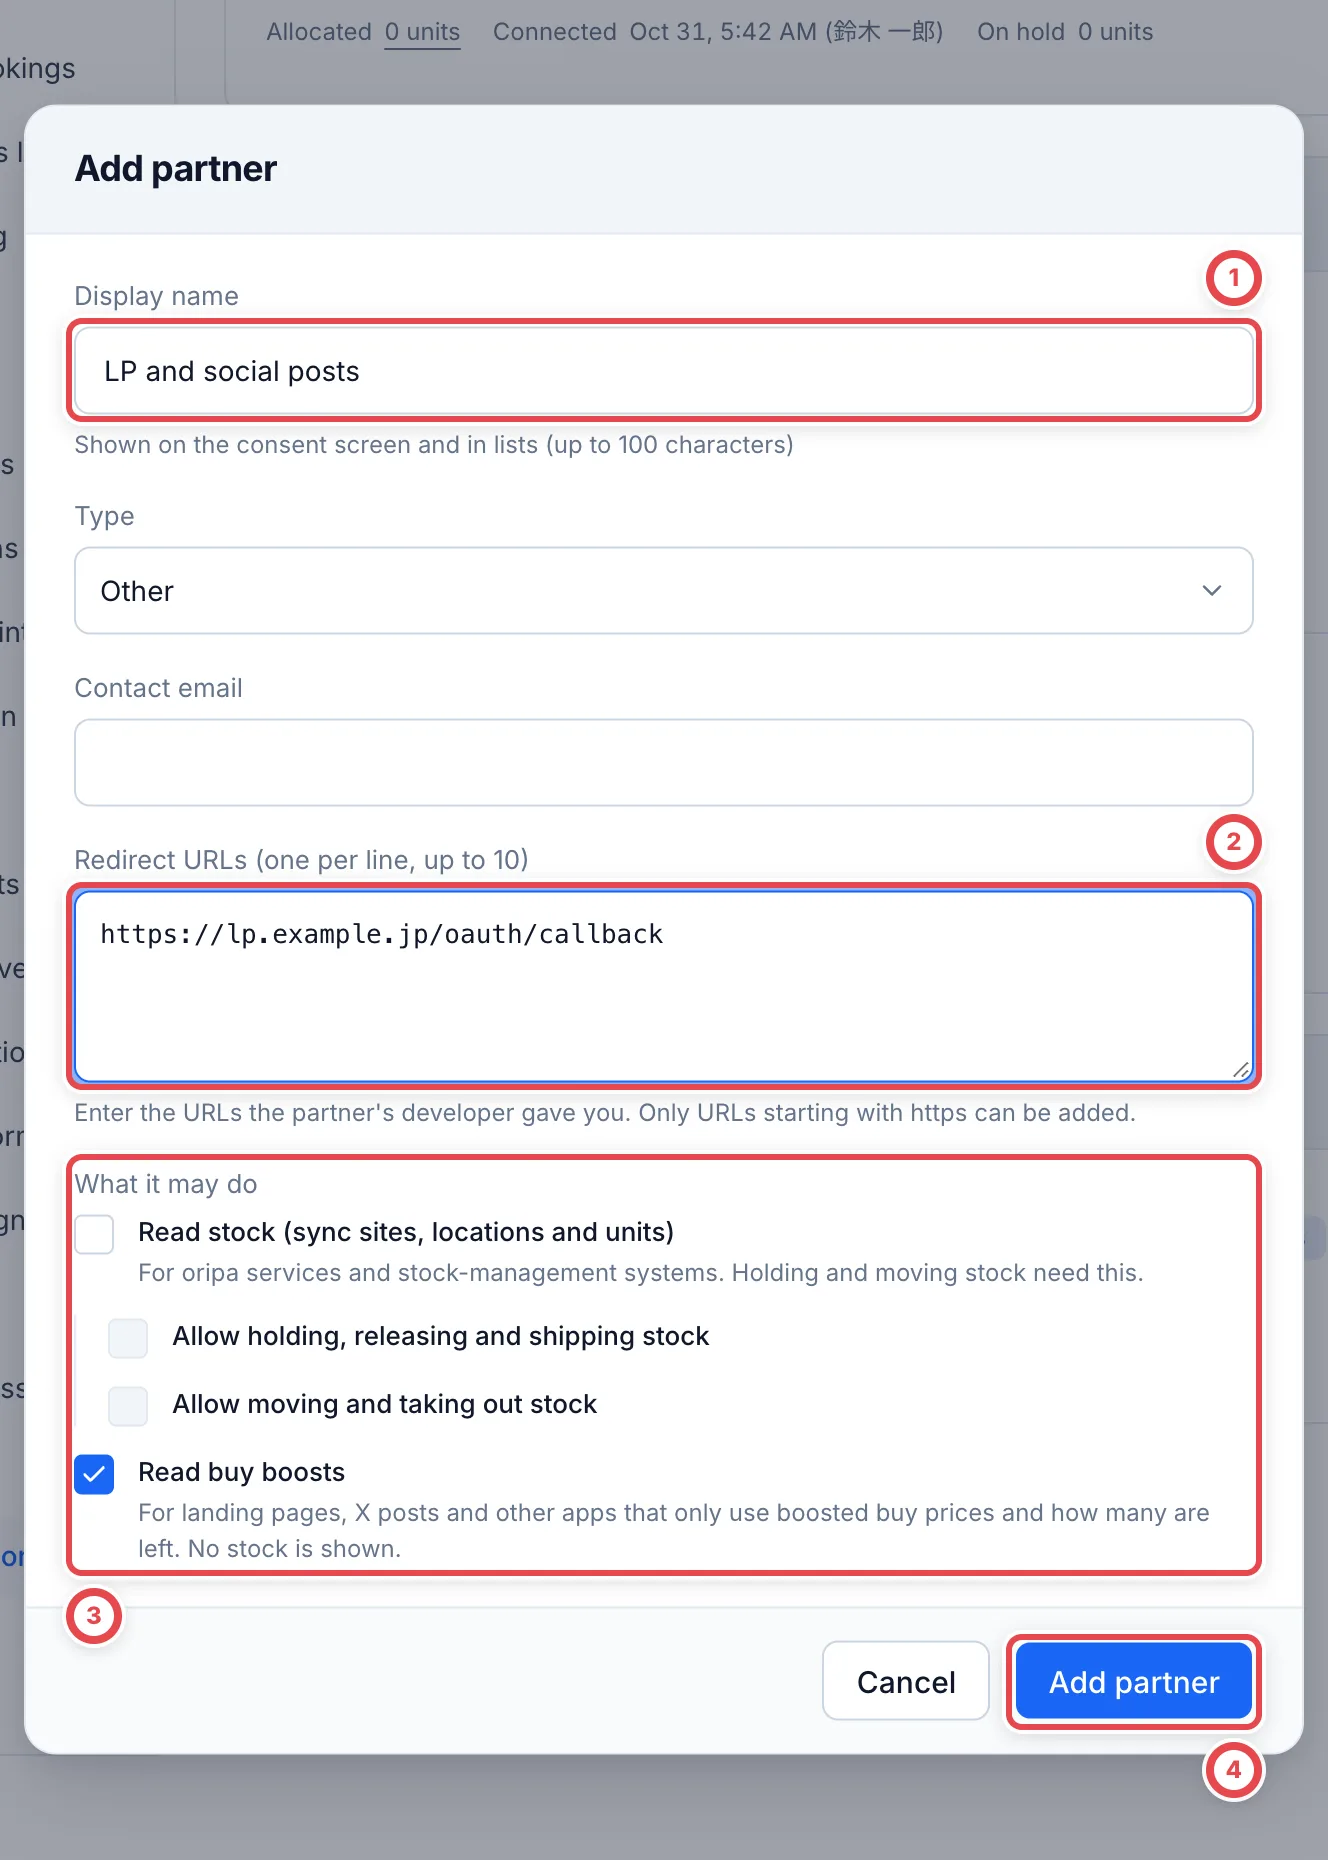 You must allow reading stock, buy boosts, or both.
| Option | What it allows |
| -------------------------------------------- | ----------------------------------------------------------------------------------------------------------- |
| Read stock (sync sites, locations and units) | Syncs your sites, locations and stock units to the partner. For oripa services and stock-management systems |
| Allow holding, releasing and shipping stock | Lets the partner hold stock and take it through to shipping. Available only while reading stock is allowed |
| Allow moving and taking out stock | Lets the partner move stock or take it out. Available only while reading stock is allowed |
| Read buy boosts | Publishes boosted buy prices and how many are left. No stock is shown |
For apps that only use buy boosts, such as landing pages and X posts, allow **Read buy boosts** only. You can check what partners receive in [Buy boosts](/en/guides/purchase/purchase-boosts).
For an oripa app to send the demand for the cards its customers won, also allow **Allow holding, releasing and shipping stock**. The demand it sends appears in [Oripa demand](/en/guides/purchase/oripa-demand).
## 2. Give the secret to the partner's developer
Once the partner is added, the **Client ID**, **Client secret** and **Resource** are shown. Pass these to the partner's developer in a secure way.
:::warning
The client secret isn't shown again once you close this screen. If it's lost, create a new one with **Regenerate secret** for that partner.
:::
Click **Regenerate secret** and a confirmation appears. Click **Regenerate** (①) and a new secret is shown, and **the old secret stops working immediately.** Ask the partner to switch to the new one.
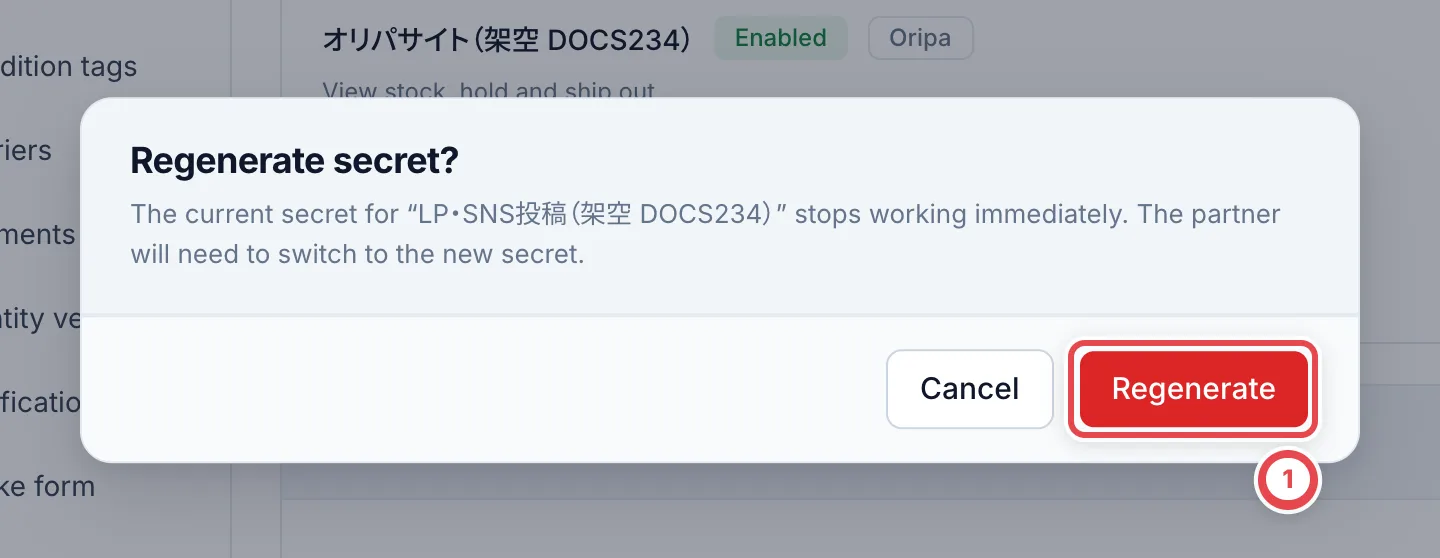 How to build the partner app is covered in the developer [API reference](/en/api).
## 3. Approve the connection from the partner's app
When the partner app starts a connection, Toreca Cloud's approval screen opens. A member of the shop signs in, checks what's requested and clicks **Allow** to finish connecting.
Once connected, the partner appears under **Connected partners** (①). Each partner shows what it's allowed to do, and when and by whom it was connected.
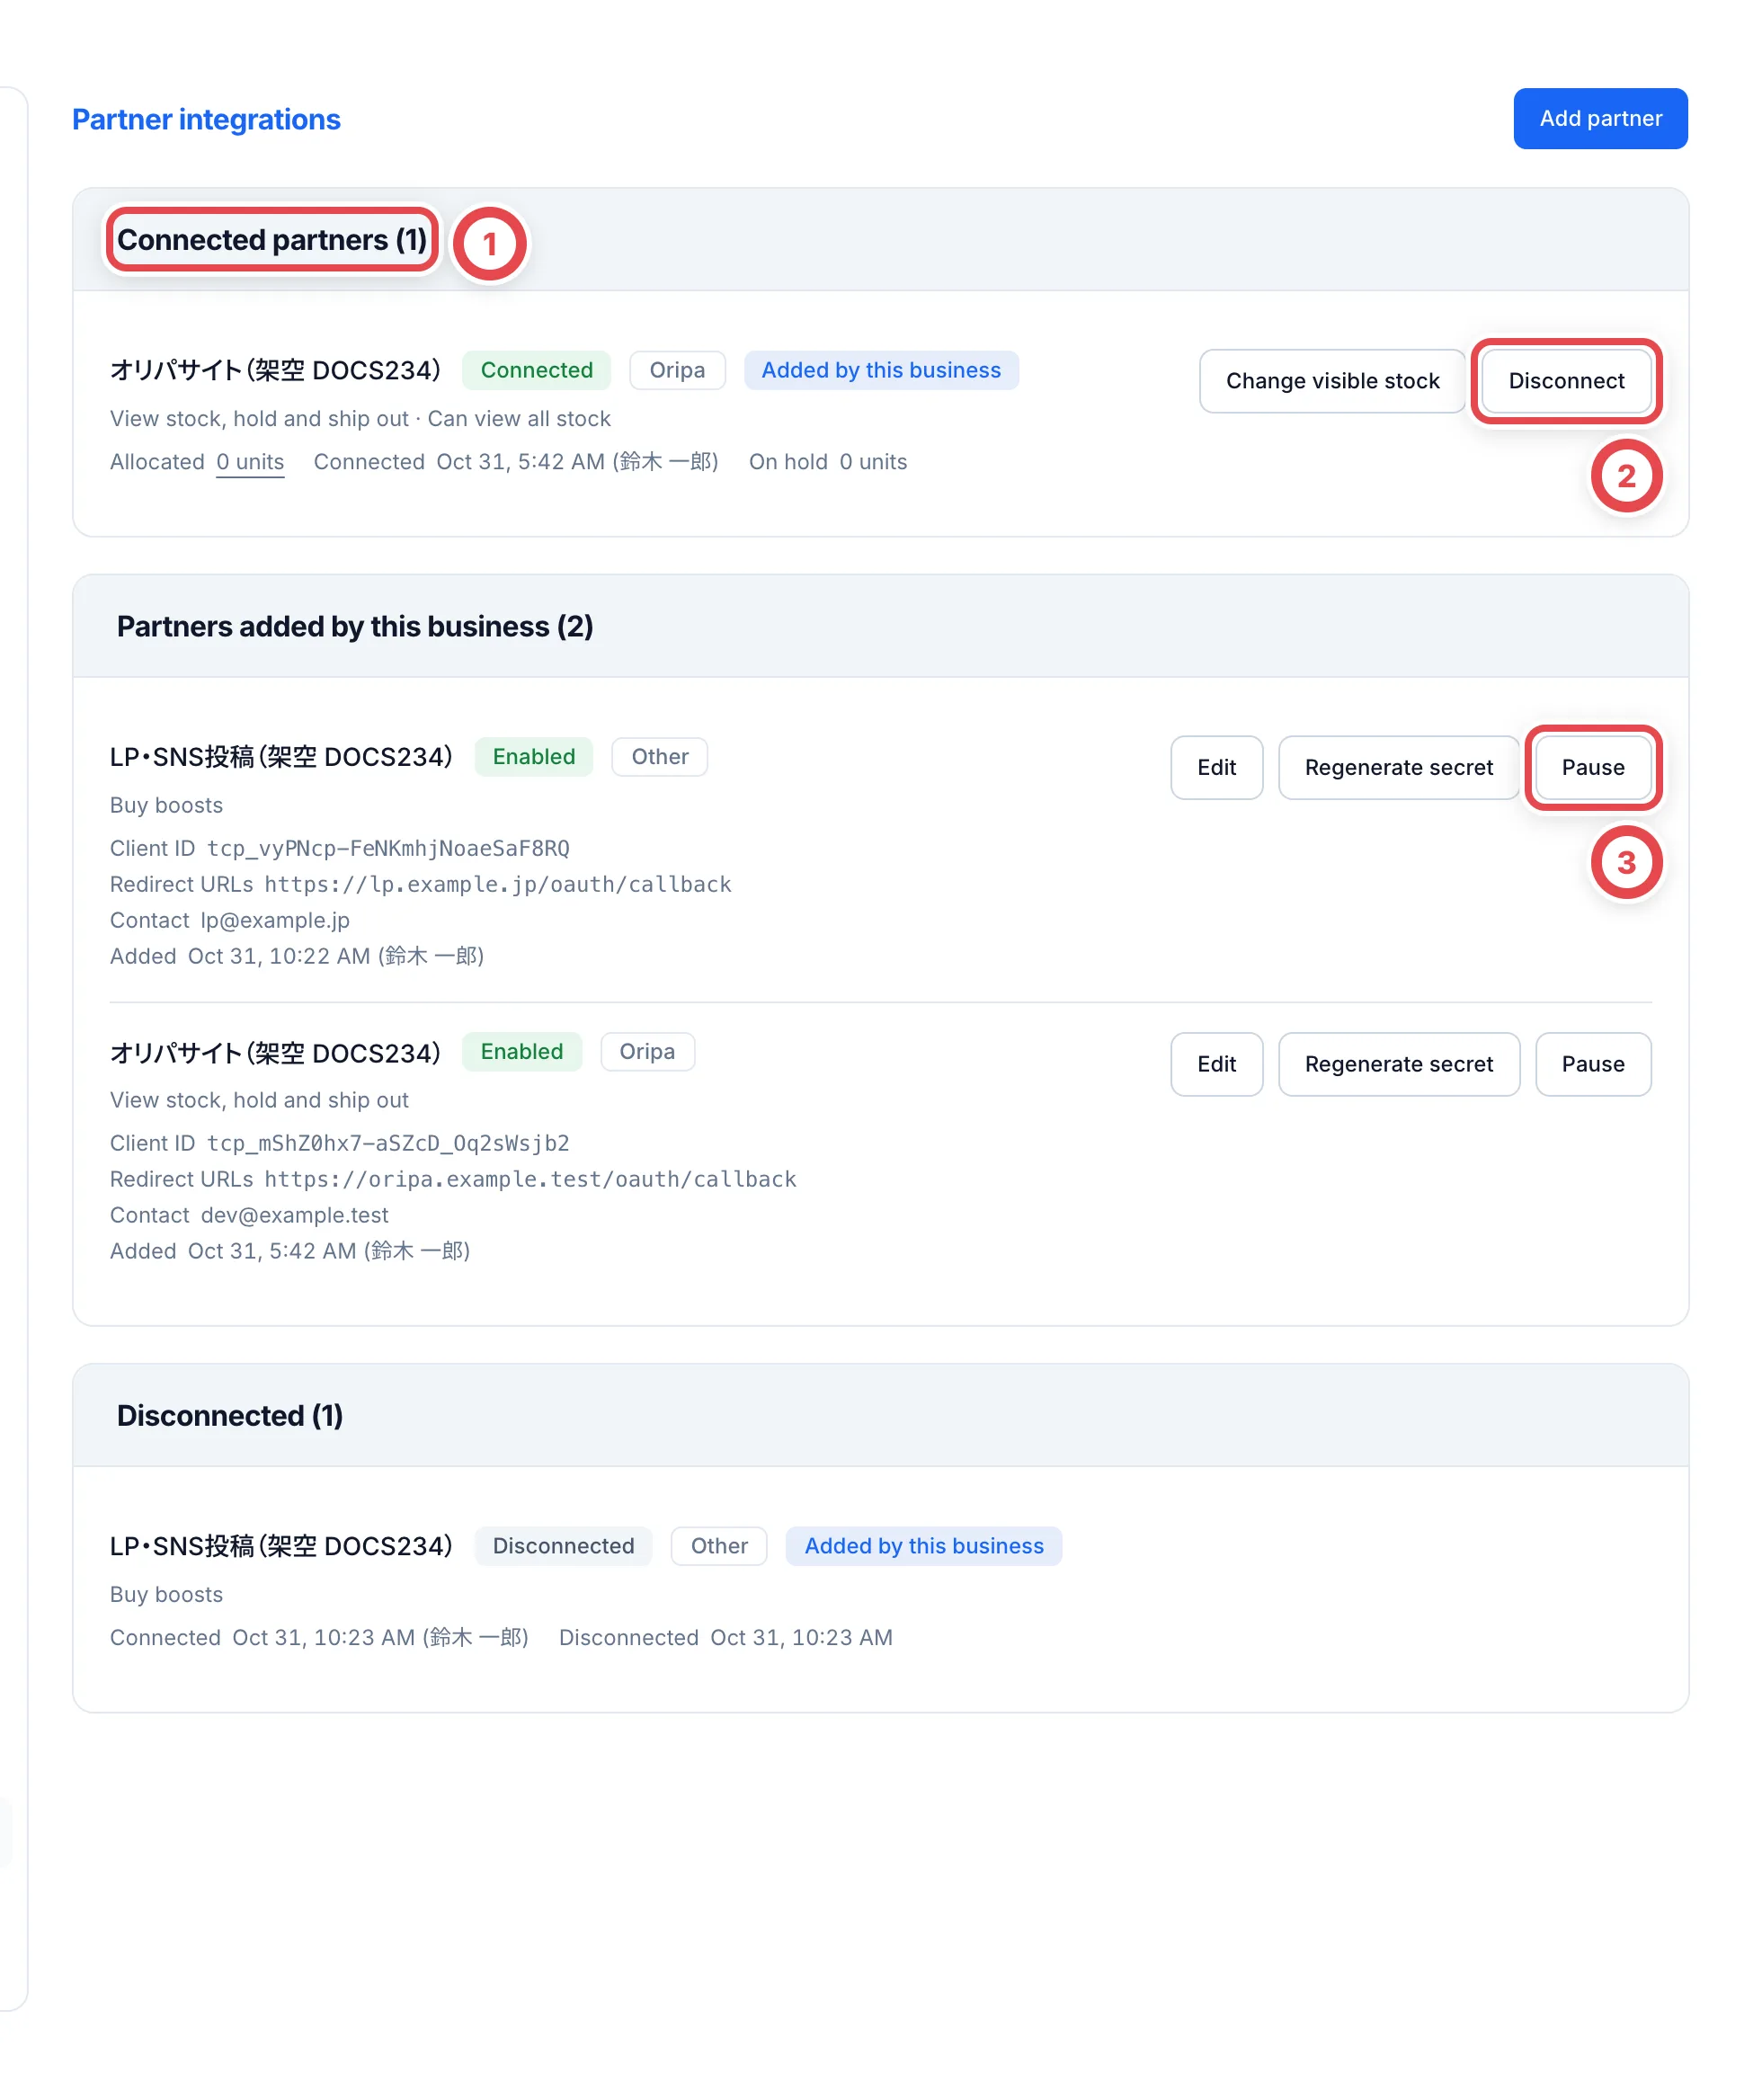 ① lists connected partners. ② disconnects one, and ③ pauses a partner for now.
Partners with a registered webhook also show its latest successful delivery, or a failure time and error. If a failure is shown, ask the partner developer to check the receiving endpoint.
For partners that read stock, you can limit what they see. Click **Change visible stock**, choose **All stock** or **Allocated stock only**, and click **Save**. With **Allocated stock only**, the partner can read and hold only the units you allocated in **Partner allocations** under **Inventory**.
## 4. Pause or disconnect (if needed)
### Pause a partner
Click **Pause** (③ in the screen above) for a partner you added, and a confirmation appears. Click **Pause partner** (①), and even while connected the partner can't read stock or buy boosts, or hold and ship stock. Units it already holds stay on hold. Click **Resume** in the same place to undo.
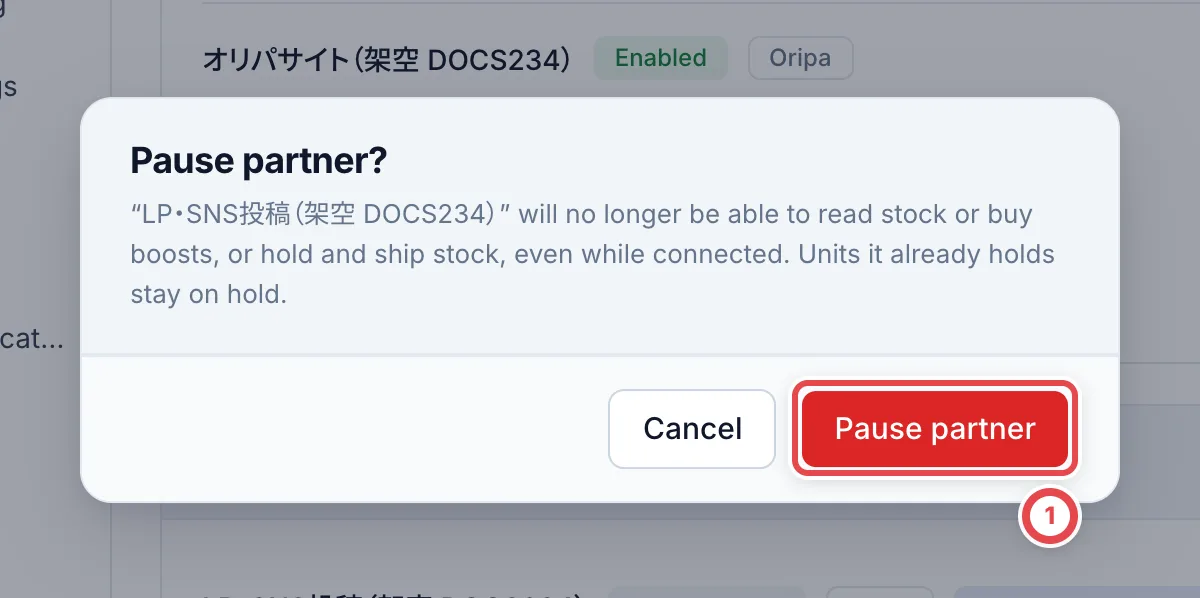 ### Disconnect a partner
Click **Disconnect** (② in the screen above) under **Connected partners**, and **Disconnect partner?** opens. Enter a reason for disconnecting in ①, then click **Disconnect** (②).
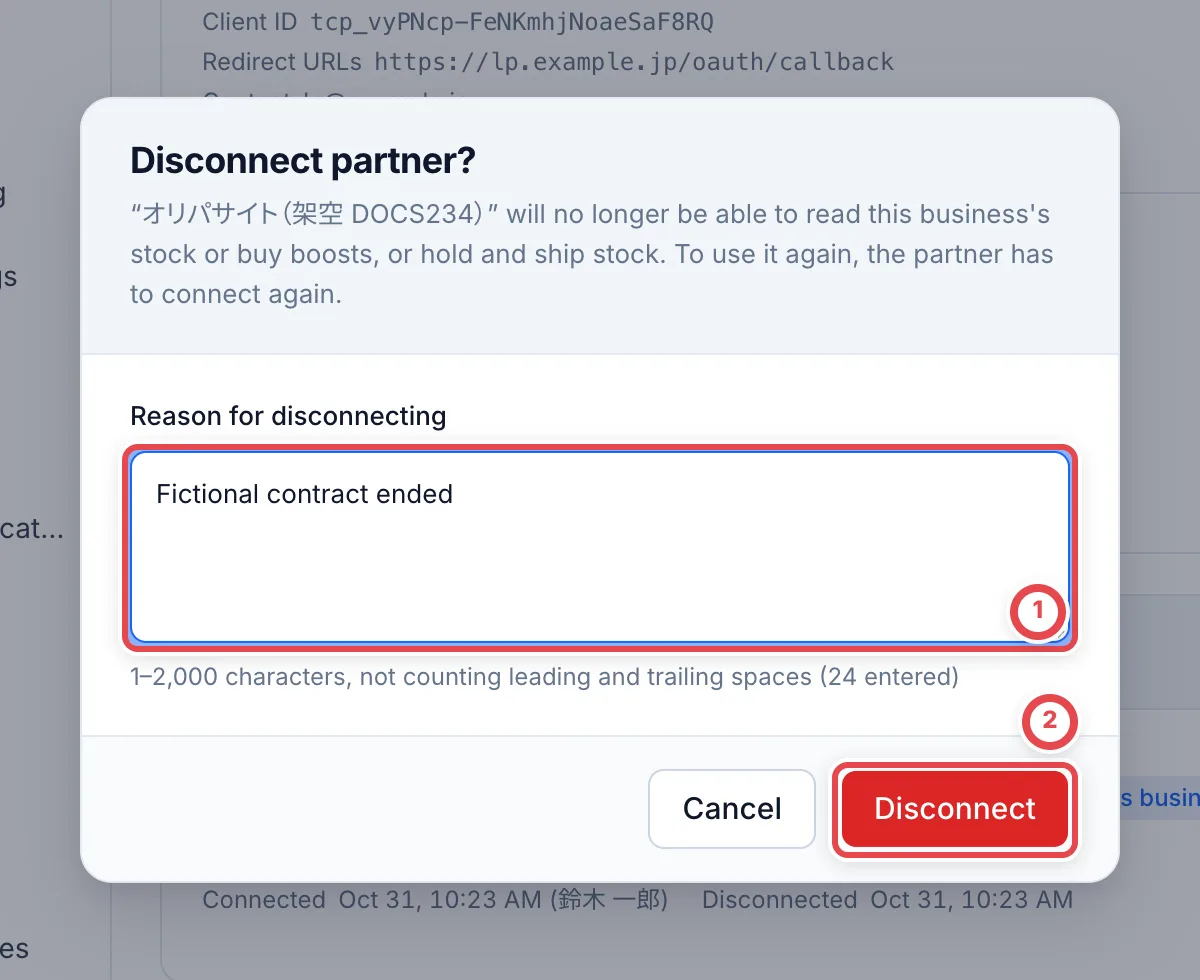 Once disconnected, the partner can no longer read this shop's stock or buy boosts, or hold and ship stock. **Disconnecting can't be undone.** To use the partner again, ask it to connect again.
:::warning
Holds the partner made stay after you disconnect. If any units are on hold, the disconnect screen shows how many. Ship them out or cancel them from **Outbound orders**.
:::
Adding, editing, regenerating secrets, pausing and disconnecting are all recorded in the audit log. In the audit log, filter by **Integration actions (all)** to see them.
## Troubleshooting
| What's happening | What to check or how to fix it |
| -------------------------------------------------------------------- | ------------------------------------------------------------------------------------------------------------------------- |
| There's no **Integrations** under **Settings** | Integrations aren't switched on for your shop. Contact Toreca Cloud support. |
| There's no **Add partner** button | You have view-only access. Ask an owner or admin. |
| You see “Allow reading stock, buy boosts, or both” | Under **What it may do**, choose at least one of **Read stock (sync sites, locations and units)** or **Read buy boosts**. |
| A redirect URL can't be added | Only URLs starting with https can be added. Check with the partner's developer. |
| You lost the secret | Create a new one with **Regenerate secret** and pass it to the partner. The current secret stops working immediately. |
| A partner can't read stock | The partner is paused, or **Visible stock** is set to **Allocated stock only**. Check **Resume** and the allocations. |
| You see “This connection is already disconnected. Refresh the page.” | Another member disconnected it first. Refresh the page. |
---
# Buy rates
Source: https://docs.toreca-cloud.com/en/guides/settings/pricing
A buy rate is the percentage of a card's market price that you pay for it. New appraisals start with **Store settings** selected and show the default rate before market prices are entered. Once all prices are entered, the configured conditions are calculated automatically. Changing settings does not rewrite saved appraisals. To use the latest settings, edit the appraisal, check that **Store settings** is selected, and save. Appraisals in **Manual entry** keep the rates entered by staff.
## What you need
- Permission to manage settings (owners and admins). Other members only see the values and don't get **Change**
- The default rates for single cards, boxes and so on, plus any rates you want to change by price range
## The steps
| Step | What you do |
| ---- | ------------------------------------------ |
| 1 | Set the default rate and the default grade |
| 2 | (If needed) Create rules for price ranges |
| 3 | Set the rounding and the review threshold |
## How a buy price is worked out
An appraisal amount is the card's reference market price multiplied by the buy rate, then rounded. For example, a card with a market price of ¥10,000 at an 80% rate is appraised at ¥8,000.
The rate is chosen in this order:
1. For boxes, packs and decks, if you've set a **Box, pack & deck rate**, that rate is used (price-range rules aren't checked)
2. Enabled rules are checked in order, lowest number first. A rule matches when the market price falls inside its price range and the card also meets any conditions the rule has (such as "graded cards only"). The buy rate of **the first rule that matches** is used
3. If no rule matches, the **Default buy rate** is used
## 1. Set the default rate and the default grade
Open **Settings** › **Buy rates**. Use each of the top three **Change** buttons to change its value.
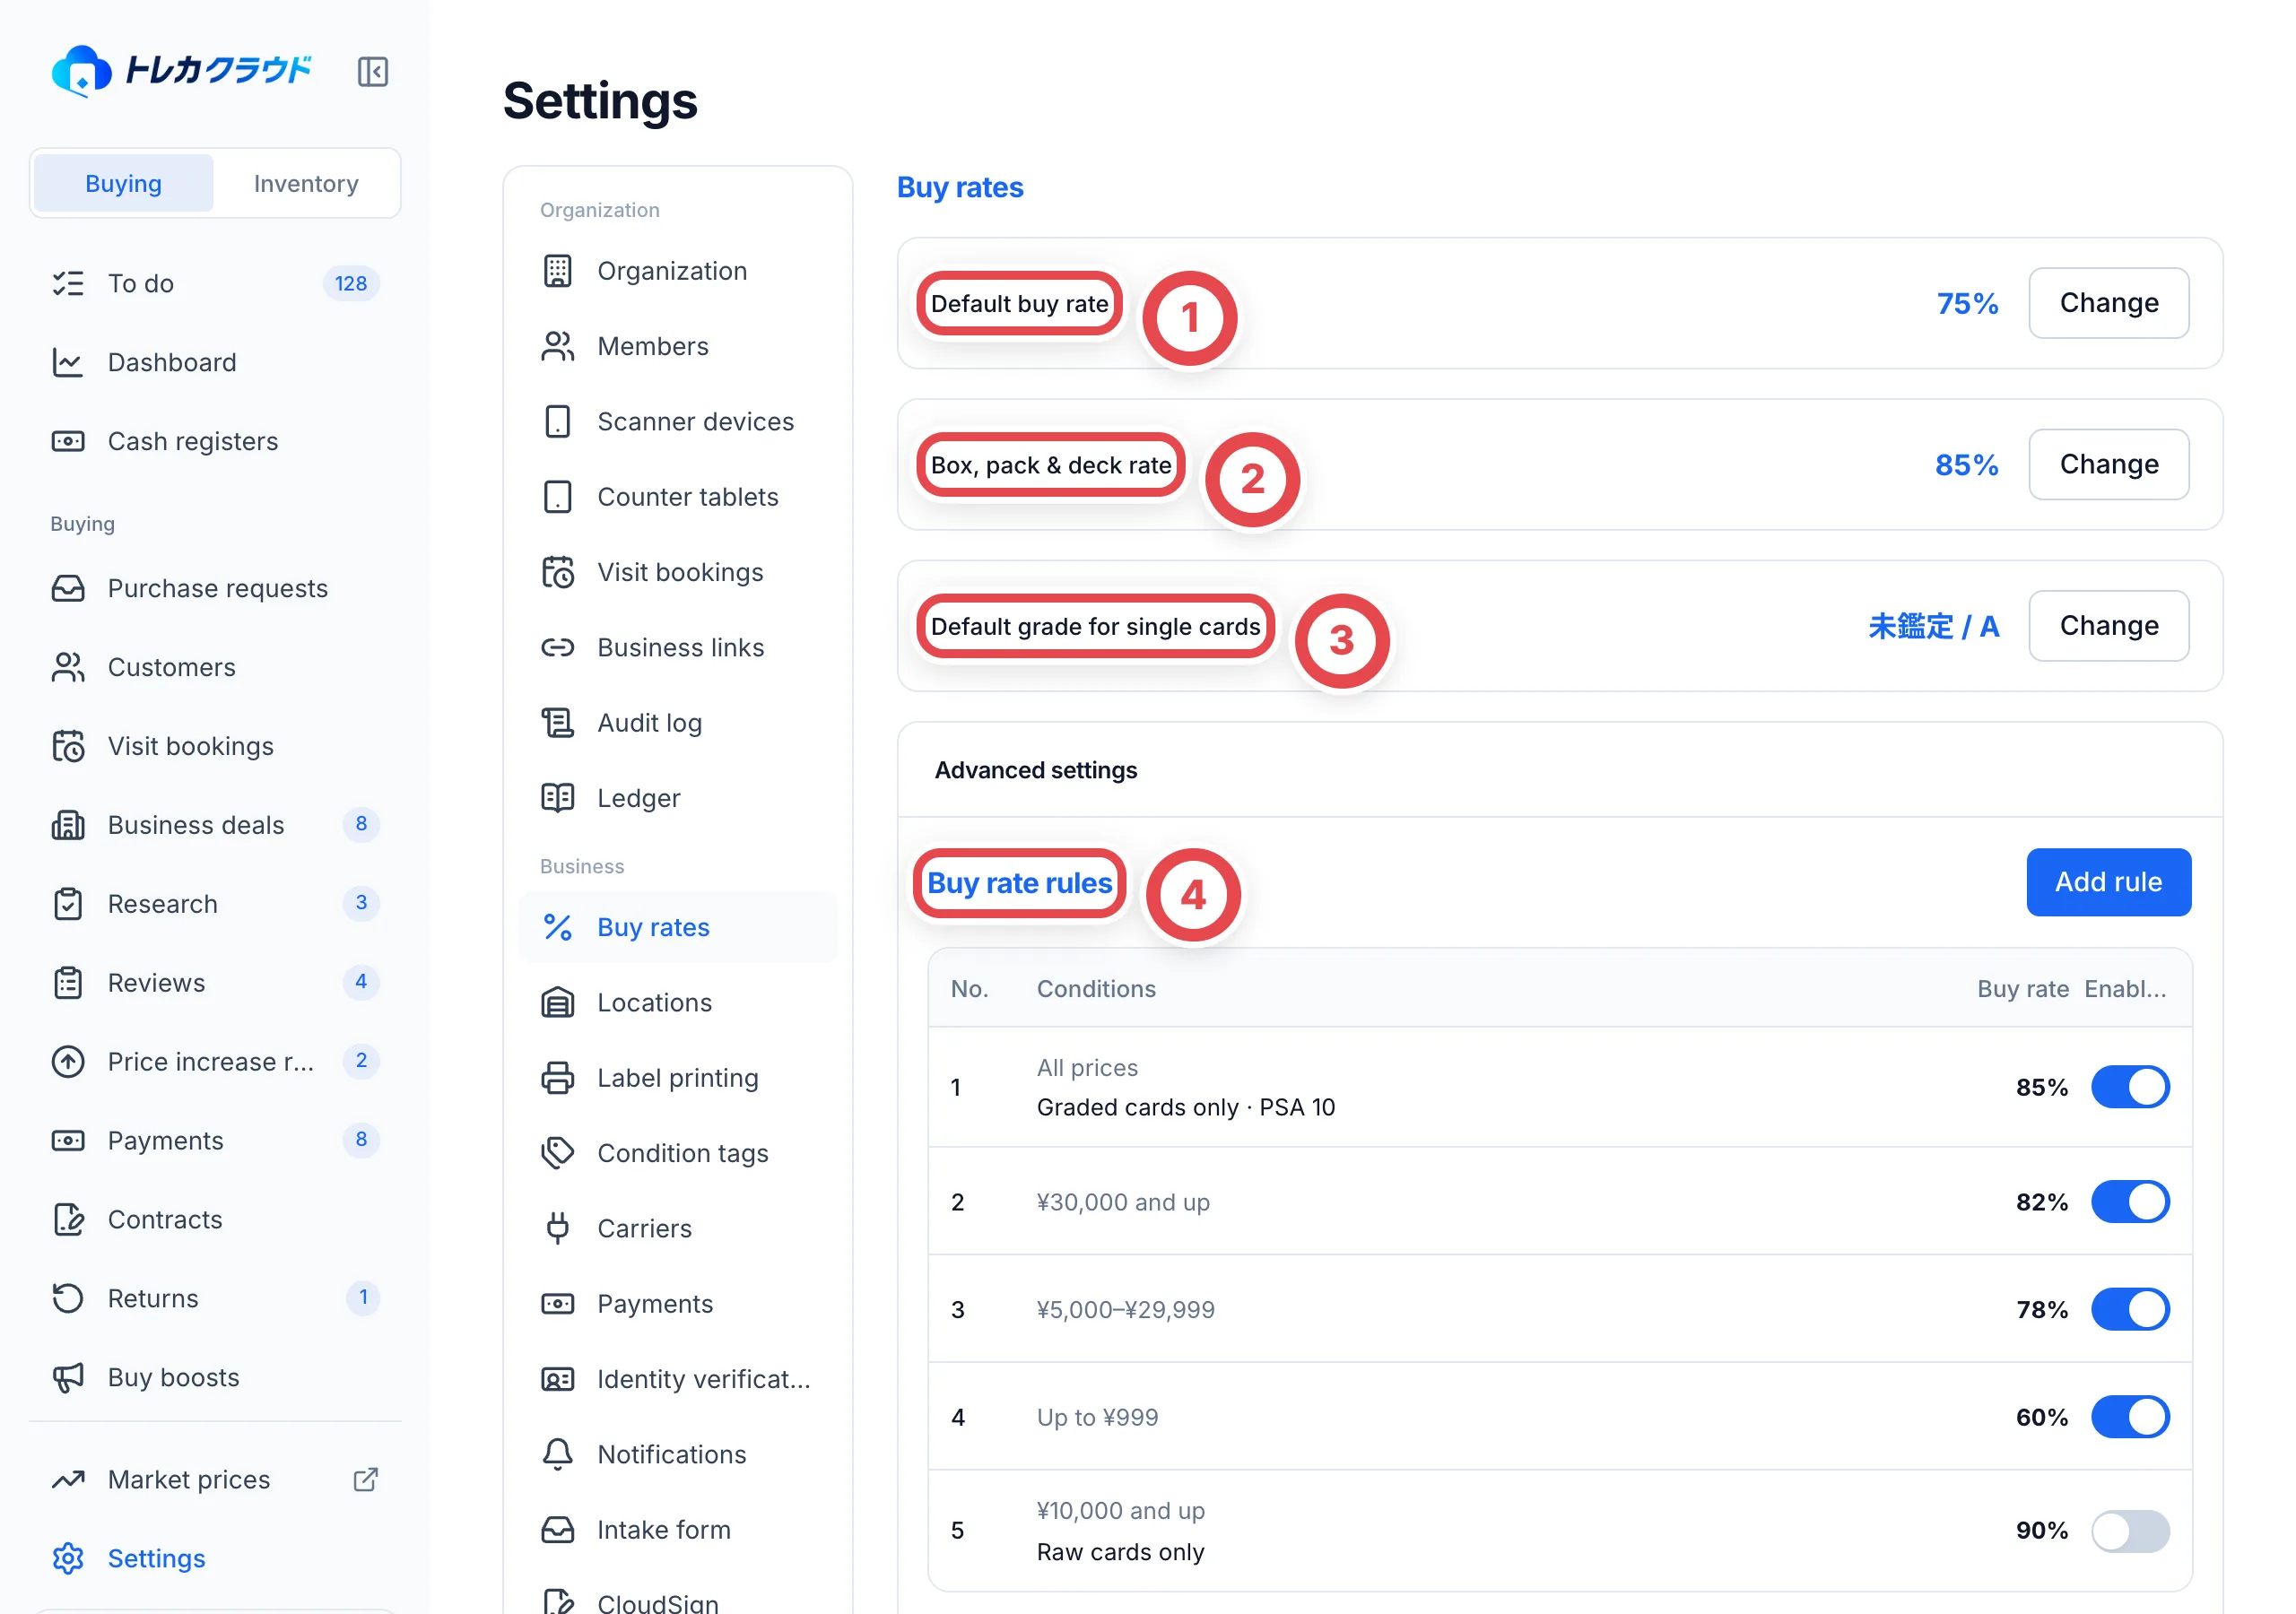 ① is the rate for cards no rule matches, ② is the rate for sealed products and ③ is the grade selected first in an appraisal. The rules at ④ are visible on the same page.
| Setting | What it does |
| -------------------------------- | ------------------------------------------------------------------------------------------------------ |
| ① Default buy rate | The rate for cards no rule matches. 0–100%, up to 2 decimal places |
| ② Box, pack & deck rate | The rate for sealed products. Leave it blank to use **Same as default**, and rules apply to them too |
| ③ Default grade for single cards | The grade selected first when a card is added to an appraisal. Can also be **None (choose each time)** |
Click **Change** for **Default buy rate** and ① shows the current rate. Enter the new rate as a percentage and click **Save changes** at ②. **The rate switches over as soon as you click.**
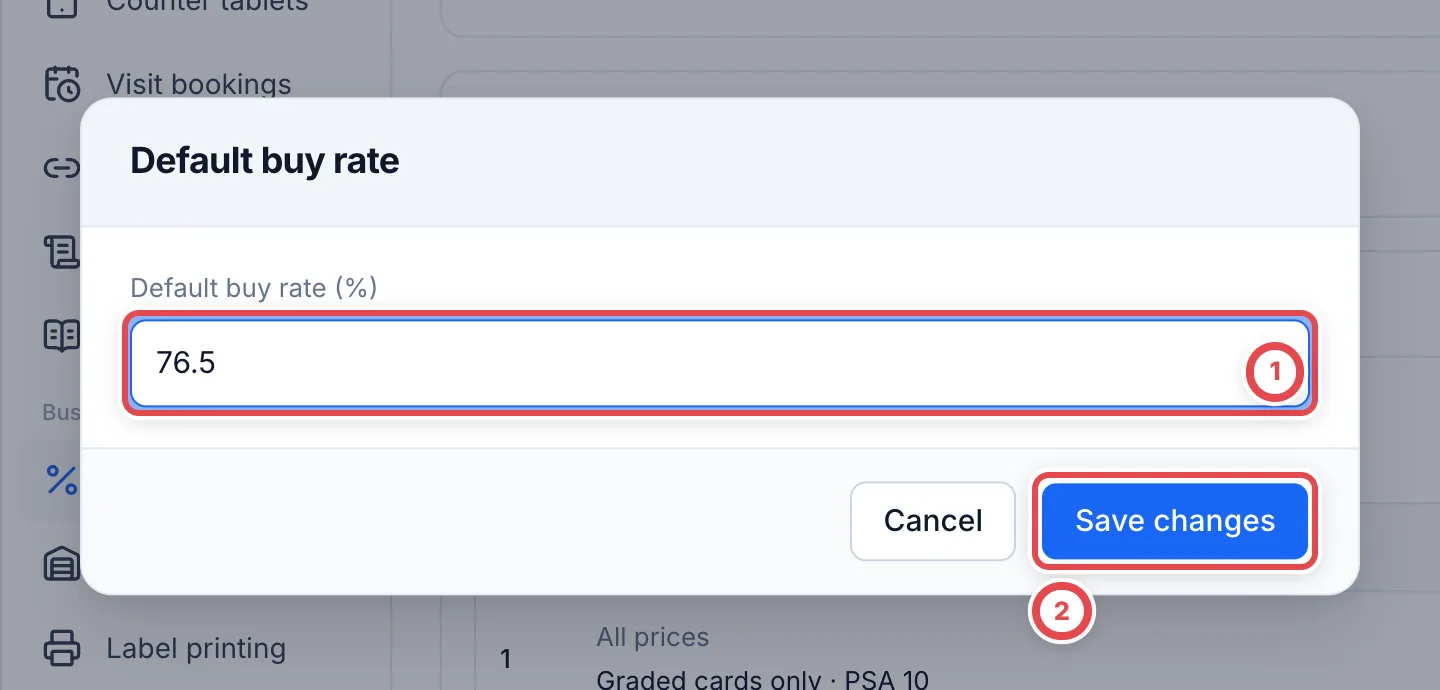 ## 2. (If needed) Create rules for price ranges
**Buy rate rules** are always visible toward the bottom of the page. The table shows each rule's number, conditions and buy rate, plus a switch for whether it's on. **Conditions** shows the price range, and for a rule with other conditions as well, a line such as "Graded cards only · PSA 10" underneath.
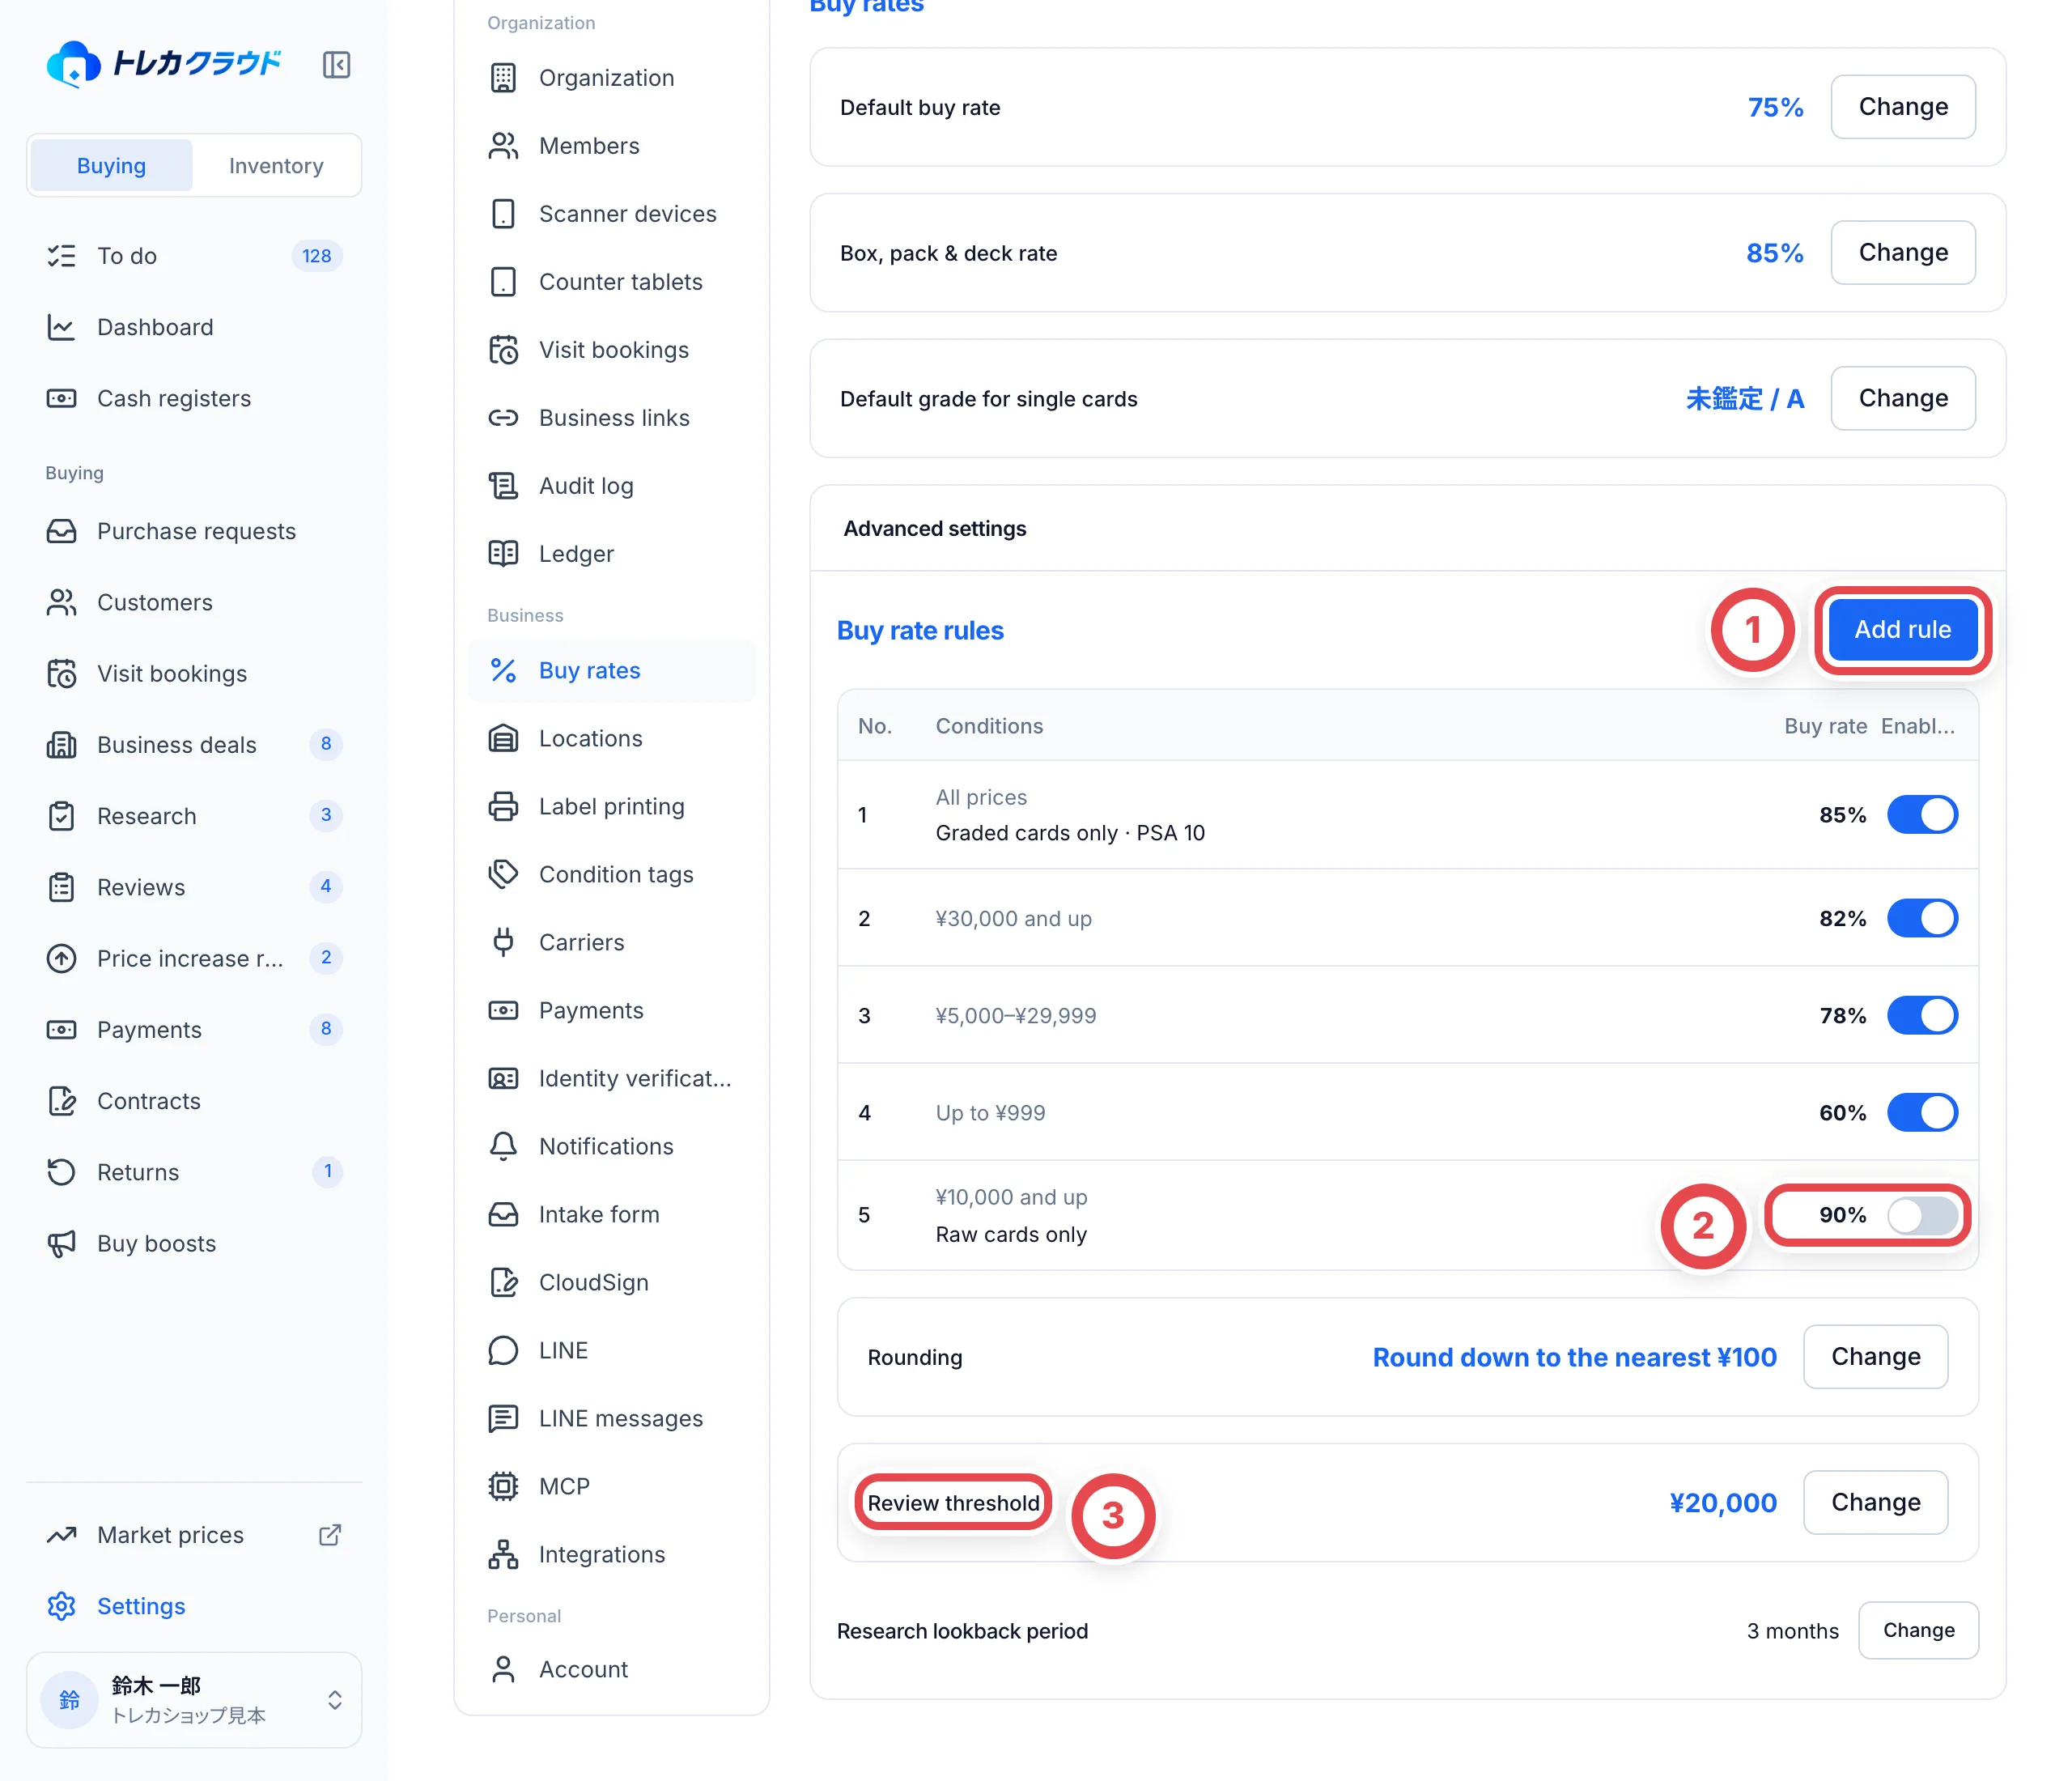 - **Add rule** at ① adds a new rule at the bottom
- The switch at ② turns a rule on or off. **It saves as soon as you click it** (there's no confirmation screen). A rule that's off isn't part of the order above
- Click a rule's number to edit it
In the rule dialog, enter the **Minimum price (¥)** and **Maximum price (¥)** at ①, and the **Buy rate (%)** at ②, then click **Save changes**. Both the minimum and the maximum are included in the range. A blank side has no limit.
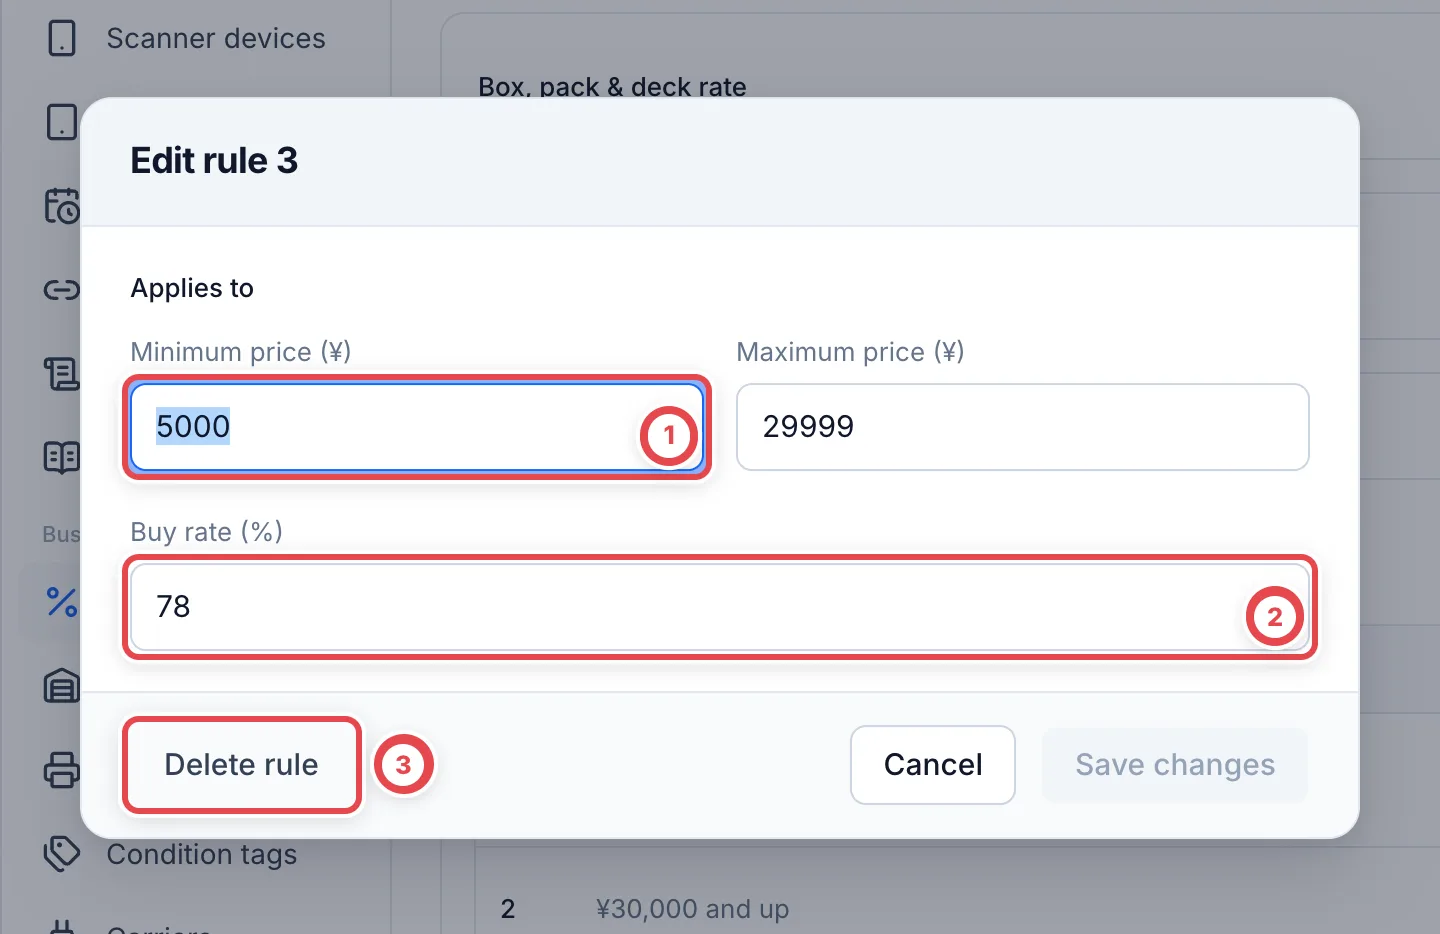 **Clicking ③, Delete rule, deletes the rule right away** (there's no confirmation screen). The remaining rules are renumbered.
Rules are checked from the top, and the first one that matches is used. For example, if you put an **All prices** rule at number 1, rules 2 and below are never used. Put narrower ranges higher up.
### Edit a rule that has conditions
Rules made with an older setup or through MCP can have conditions besides the price range, such as "graded cards only" or "PSA 10". Rules you create on this screen use a price range only, and can't have conditions.
When you open a rule that has conditions, they're shown at ①. If you change the price range and buy rate and save, **the conditions stay as they are**.
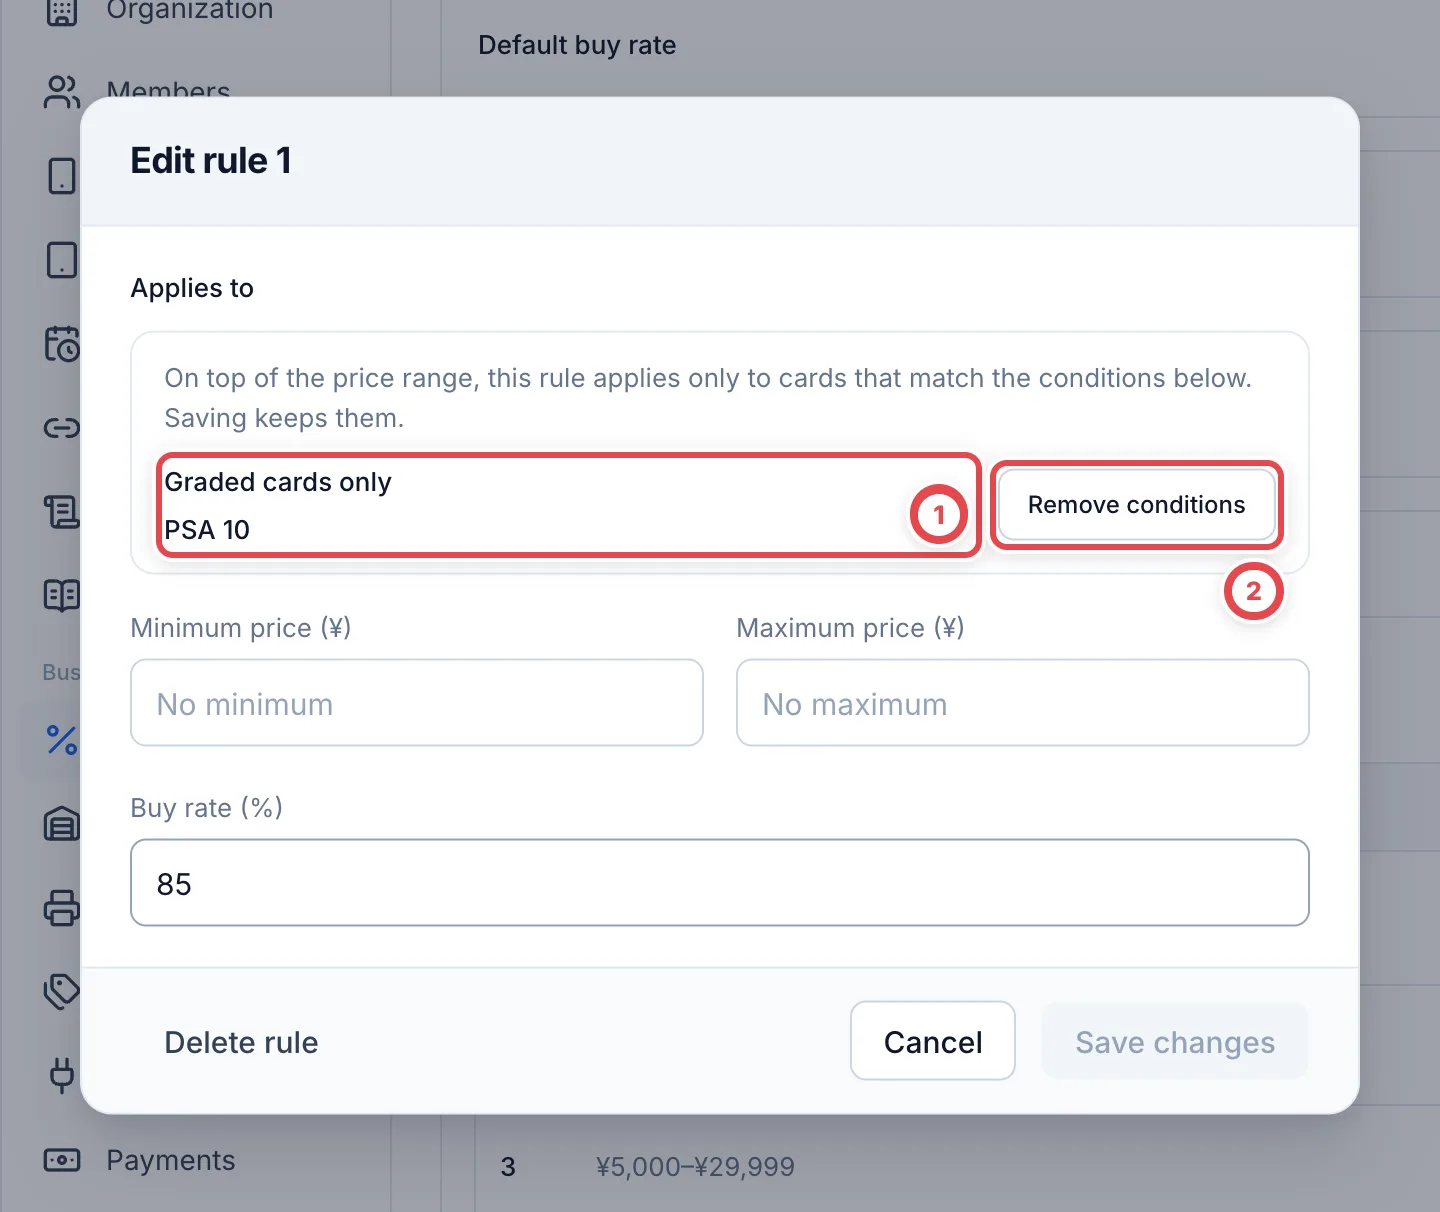 If a rule says its conditions cannot be handled by the console, automatic rates are unavailable while that rule is on. Ask the settings manager to review the conditions. Do not remove them without checking which cards the rule should cover.
To drop the conditions, click **Remove conditions** at ② and then **Save changes**. If you clicked it by mistake, **Undo** puts them back before you save.
:::caution
A rule without conditions applies to every card in its price range. If its price range is blank too, it becomes an **All prices** rule, and the rules below it are no longer used. Check the rule's number before you remove its conditions. Once removed, conditions can't be added back on this screen.
:::
## 3. Set the rounding and the review threshold
Further down on the page, set the following three. Use **Change** for each.
| Setting | What it does |
| ------------------------ | --------------------------------------------------------------------------------------------------------------------------------------------------------------------------------------- |
| Rounding | Choose how to handle fractions in appraisal amounts: **Round down**, **Round up**, **Round to nearest** or **Don't round**. Then choose the unit to round to: ¥1, ¥10, ¥100 or ¥1,000 |
| Review threshold | For online purchases, cards appraised at or above this amount need a review before the quote goes out. At ¥0, every card needs a review |
| Research lookback period | How far back, from 1 to 121 months, price records are displayed in research details. Automatic card appraisal prices always use sales from the last 30 days, regardless of this setting |
In-store purchases do not request second reviews. If your shop uses neither online purchases nor business deals, the review threshold and the research lookback period are not shown, and the sidebar has no **Research** or **Reviews**. The online purchase review process is covered in [Research and reviews](/en/guides/purchase/research-and-reviews).
:::note
If your shop has only one member besides view-only members, there's nobody to ask for a review, so quotes can go out without waiting for one.
:::
## When something goes wrong
| What's happening | What to check and how to fix it |
| ---------------------------------------------------------------------- | ------------------------------------------------------------------------------------------------------------------------------------------------ |
| **Change** doesn't appear | You don't have permission to manage settings. Ask an owner or admin. |
| You changed a rate but appraisal amounts didn't change | Settings changes do not rewrite saved appraisals. Edit the appraisal, select **Store settings**, review the recalculated amounts, and save. |
| A price-range rule isn't being used | A rule above it matches first. Check the order of the numbers and whether there's an **All prices** rule. Rules that are off aren't used either. |
| Rules don't apply to boxes | If you've set a **Box, pack & deck rate**, boxes and similar products use that rate and skip the rules. |
| You see "The maximum price must be at least the minimum price." | Make the maximum price equal to or greater than the minimum price. |
| You see "Enter a buy rate from 0 to 100, with up to 2 decimal places." | Enter a number from 0 to 100, with up to 2 decimal places. |
| You deleted a rule by mistake | It can't be undone. Click **Add rule** and create the same rule again. |
---
# Referral fee reports
Source: https://docs.toreca-cloud.com/en/guides/settings/referral-reports
Referral fee reports pull the settled purchases of customers you tagged with a referral tag in Liny, calculate the referral fee owed to the referrer, and put it in a CSV. **Creating a report doesn't send money to the referrer or contact them.** The shop makes the payment itself.
## What you need
- A working connection to Liny under **Settings** › **LINE** (without a working connection you can't create a report, but you can still download saved ones)
- Permission to view customers and deals, and permission to view integrations
- A referral tag already attached in Liny to each referred customer
## The steps
| Step | What you do |
| ---- | ------------------------------------------------- |
| 1 | Load the referral tags and choose one |
| 2 | Choose the dates and rounding, then create report |
| 3 | Check the result and download the CSV |
## 1. Load the referral tags and choose one
Open the **Purchases** list and choose **Referral fee report…** from **Export** next to the search box (it used to be under **Settings** › **LINE**). If you have more than one Liny account, choose the account first. Click **Load tags** at ①, and your Liny tags appear in the **Referral tag** field (you can't choose one until you've loaded them). Choose the tag you use for referrals: the tag you put on friends who came from the referrer in Liny.
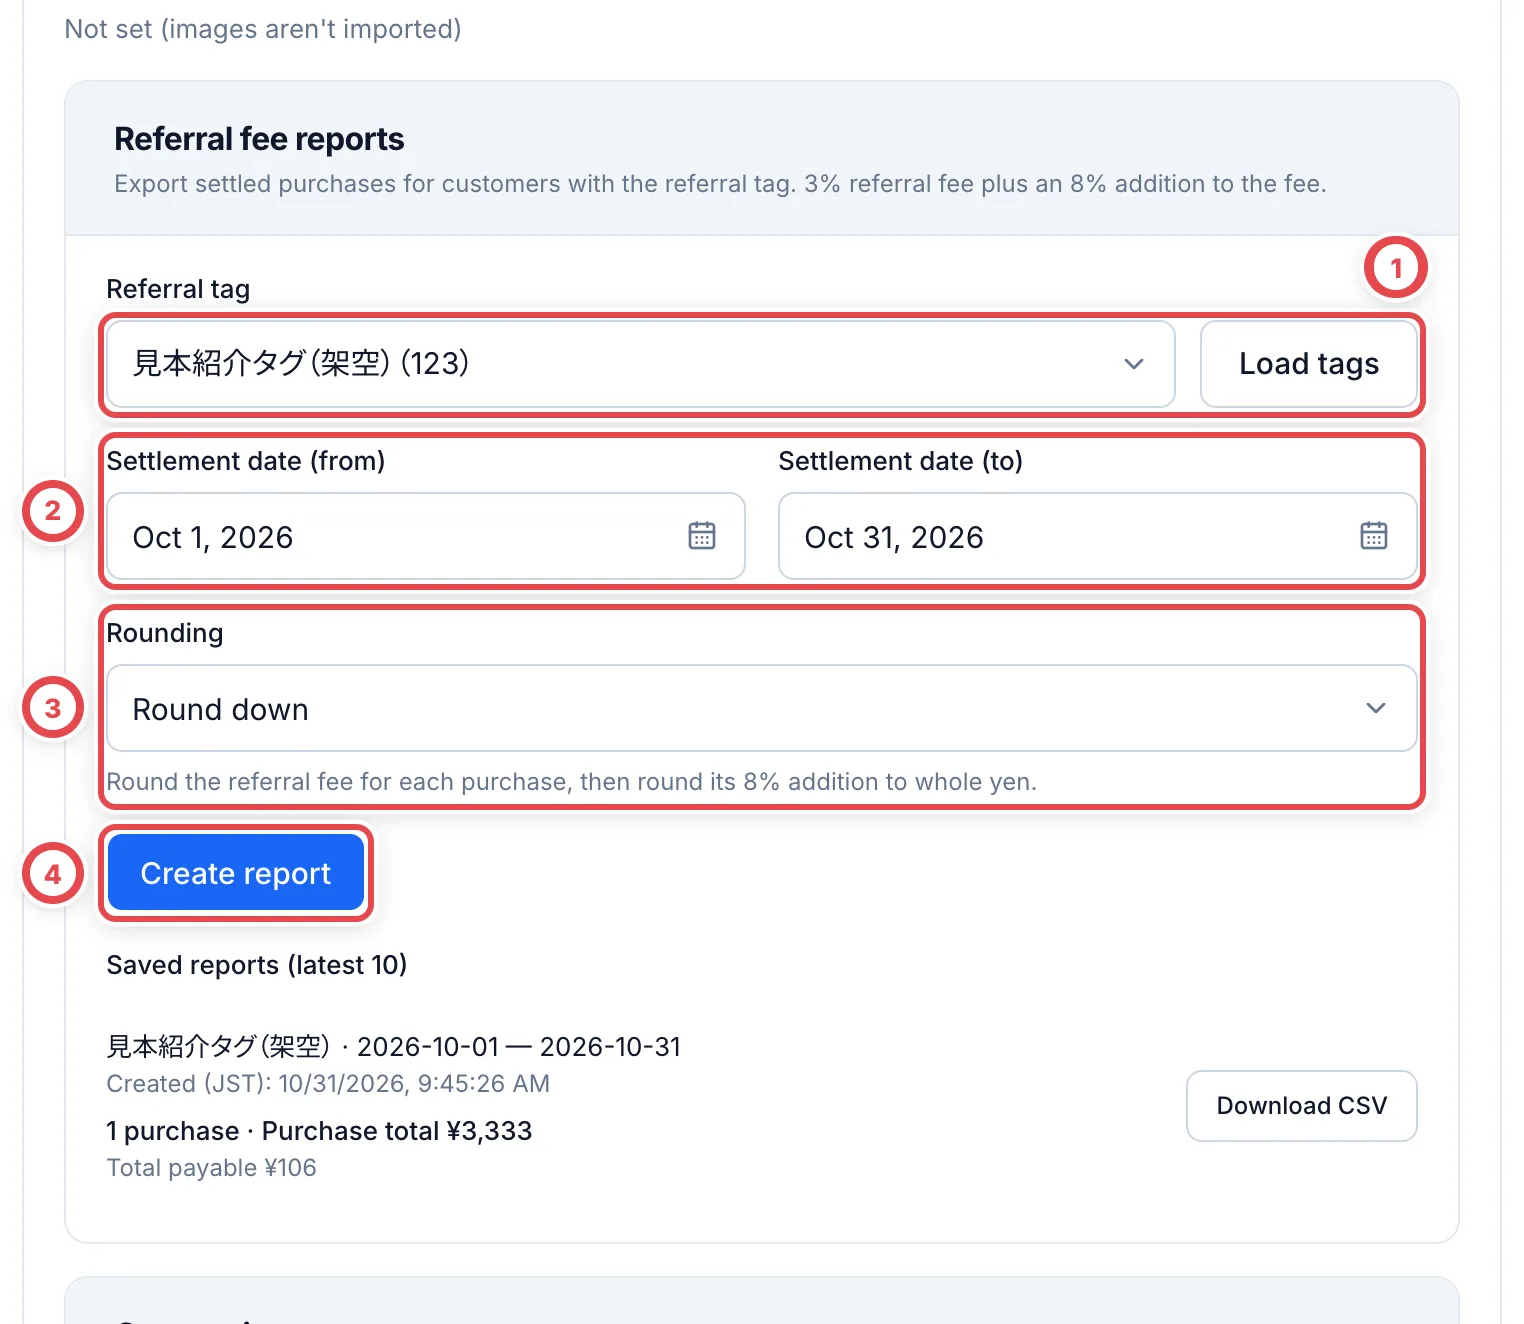 Load and choose a referral tag at ①, choose the settlement dates at ② and the rounding at ③, then create the report at ④.
The list shows only the first 1,000 tags. You can't choose a tag that isn't in the list.
## 2. Choose the dates and rounding, then create report
At ②, enter the period in **Settlement date (from)** and **Settlement date (to)** (it starts as the 1st of this month through today). The period is in Japan time and includes both days. At ③, choose a method under **Rounding**: **Round down**, **Round to nearest yen** or **Round up**.
Once the tag, dates and rounding are set, click **Create report** at ④. **Clicking it saves the report right away** (no money moves). It checks each customer with Liny, so it takes a little while.
## 3. Check the result and download the CSV
When it finishes, you see the number of purchases and the purchase total, then **Referral fee (3%)**, **Tax equivalent (8% of the fee)** and **Total payable**. Click **Download CSV** to save the file.
Reports you've created are listed under **Saved reports (latest 10)**. Check the tag, the period and the total payable at ①, and click **Download CSV** at ② to save the file again whenever you need it.
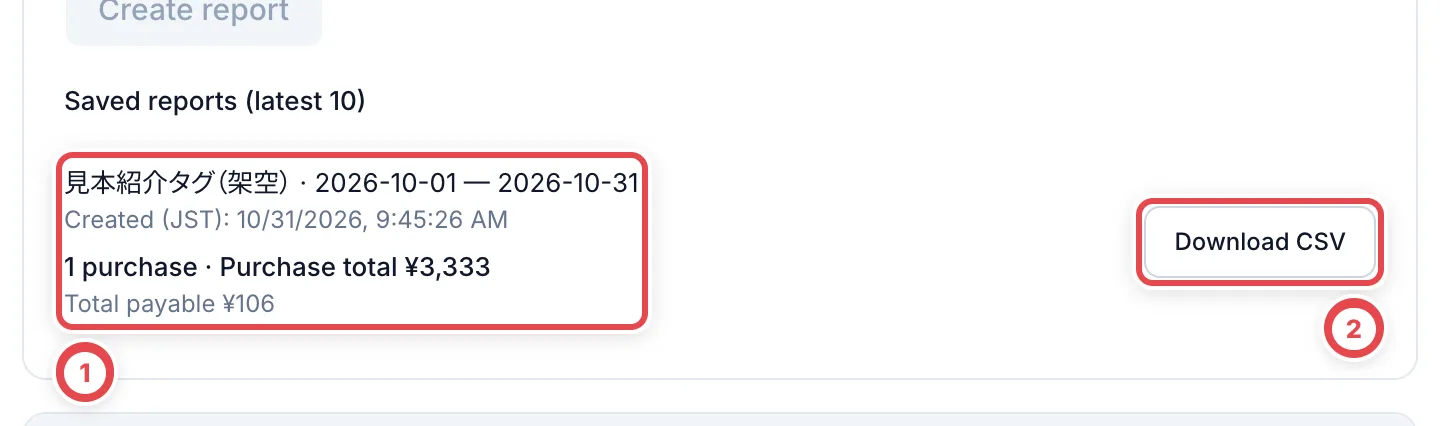 A saved report doesn't update on its own when tags or purchase amounts change later. If you need the latest figures, create a new report.
Purchases with unverified referral tags are reported as a warning count, but are excluded from both totals and the shared CSV rows. A Liny request failure or UID mismatch produces an error without saving a partial report.
The CSV column names are written in Japanese in the file itself. The columns are: 紹介日時 (referral date and time), 顧客ID (customer ID), 顧客番号 (customer number), 取引番号 (deal number), 買取成立日時 (settlement date and time), 買取金額 (purchase amount), 紹介料率 (referral rate), 紹介手数料 (referral fee), 加算率 (addition rate), 消費税相当額 (tax equivalent) and 支払合計 (total payable). A row of totals (合計) comes last. The referral date and time is when the tag was attached in Liny. Rows where it isn't known show 日時未確認 (date and time not confirmed).
## What's included and how amounts are calculated
The report covers purchases in yen that settled within the period, judged by the settlement date and time in the secondhand goods ledger. For a purchase whose amount was corrected, the latest corrected amount is used, and cancelled deals aren't included. First-time and repeat purchases aren't treated differently. Customers are selected by their referral tag at report creation. Purchases made before the tag was attached are also included when their ledger settlement date falls in the chosen period; the referral timestamp does not filter the period.
The referral fee is 3% of the purchase amount. An 8% addition (the tax equivalent) is then added on that referral fee. For each deal, the referral fee is rounded to whole yen first, then the tax equivalent is rounded, both using the rounding method you chose. The totals are the sum of the results for each deal.
For example, for a purchase of ¥100,000, the referral fee is ¥3,000, the tax equivalent is ¥240 and the total payable is ¥3,240. The 8% applies to the referral fee, not to the whole purchase amount. You can't change the rates on this screen.
## When something goes wrong
| What's happening | What to check and how to fix it |
| ------------------------------------------------------------------------------------------------------------ | ------------------------------------------------------------------------------------------------------------------------------------------------------ |
| You can't click **Load tags** or **Create report** | The Liny connection isn't working. Under **Settings** › **LINE**, check the state of the Liny connection and the LINE connection it belongs to. |
| You see "N purchases have unverified referral tags and are excluded from the report and total." | For some deals, Liny couldn't confirm the customer's LINE link, or the friend or tag on the Liny side. Fix the link and the tag, then create it again. |
| You see 「5000取引を超えています。成立期間を短くしてください」 (More than 5,000 deals. Shorten the period.) | There are too many deals in the period, whether or not they have the tag. Shorten the period and create the report in parts. |
| You see 「500顧客を超えています。成立期間を短くしてください」 (More than 500 customers. Shorten the period.) | Too many customers had a purchase settle in the period. Shorten the period and create the report in parts. |
| You see 「Linyへの同期を実行中です」 (Syncing with Liny is in progress.) | Wait a little, then click again. |
| You see 「成立買取またはLINEの紐付けが変更されました」 (Settled purchases or LINE links changed.) | Something changed while the report was being created. Create it again. |
---
# How AI agents connect (MCP)
Source: https://docs.toreca-cloud.com/en/mcp
Toreca Cloud has an MCP (Model Context Protocol) endpoint for AI agents. Your app must support remote HTTP and this server’s OAuth method. See [connect your app](/en/mcp/connect) for Claude Code, Claude, Cursor and authentication requirements.
Once connected, you can simply ask your agent "Which shelf holds our Pikachu stock?" and it looks it up in Toreca Cloud. Within the access you grant, it can also move stock or record receipts for you.
## Connection details
If you only want an AI to look up instructions, see [Read help with AI](/en/mcp/help-center). The connection below is for working with your shop's stock and purchases.
| Item | Value |
| ------------------- | ----------------------------------------------------------- |
| MCP URL | `https://api.toreca-cloud.com/mcp` |
| Authentication | OAuth (sign in to Toreca Cloud in your browser and approve) |
| Connection lifetime | Chosen at approval (1 day to No end; 1 day by default) |
There is no API key to issue. Add the URL to your app and a browser opens on first use. Sign in to Toreca Cloud and pick a work role to finish connecting.
## Built-in safeguards
- You pick a work role every time you connect. The role decides which operations the agent can see ([work roles and connection lifetime](/en/mcp/roles)).
- The agent never goes beyond the signed-in member's permissions. Anything your role in the shop forbids is forbidden over MCP too.
- Every operation runs through the same logic as the console and is recorded in the audit log.
- Identity document images and full bank account numbers are never handed to MCP.
## Next
**[Connect your app](/en/mcp/connect)**
Setup for Claude Code, Claude and Cursor.
**[Example requests](/en/mcp/examples)**
How to ask for stock lookups, moves and counts.
---
# Connect your app
Source: https://docs.toreca-cloud.com/en/mcp/connect
Whatever the app, the only thing you register is the MCP URL `https://api.toreca-cloud.com/mcp`. The first connection then asks you to approve in your browser.
**Claude Code**
Run this in your terminal:
```bash
claude mcp add --transport http torecacloud https://api.toreca-cloud.com/mcp
```
Open `/mcp` in Claude Code, select `torecacloud` and authenticate. When the browser opens, sign in to Toreca Cloud and approve.
**Claude (claude.ai and desktop)**
Open **Customize** › **Connectors** and add a custom connector with `https://api.toreca-cloud.com/mcp`. Enable sign-in and choose **Use Claude’s published identity (Recommended)** when asked for the OAuth client. After adding it, connect and authorize Toreca Cloud, then enable the connector in the conversation. Organization plans may require an administrator to add it.
**Cursor**
Add this to `~/.cursor/mcp.json` (or your project's `.cursor/mcp.json`):
```json
{
"mcpServers": {
"torecacloud": { "url": "https://api.toreca-cloud.com/mcp" }
}
}
```
Open the MCP list in Cursor's settings and authenticate `torecacloud`.
## Approve in your browser
1. **Sign in**
Sign in with your Toreca Cloud account. If you belong to several shops,
switch to the shop you want to use first. ① on the approval screen shows the
shop you are connecting.
2. **Pick a work role**
In ②, choose the role that fits the work at hand. If unsure, start with View
only ([work roles](/en/mcp/roles)).
3. **Approve**
Press Allow (③) to return to your app. The connection appears under Settings
› MCP; you're done when its status shows Connected.
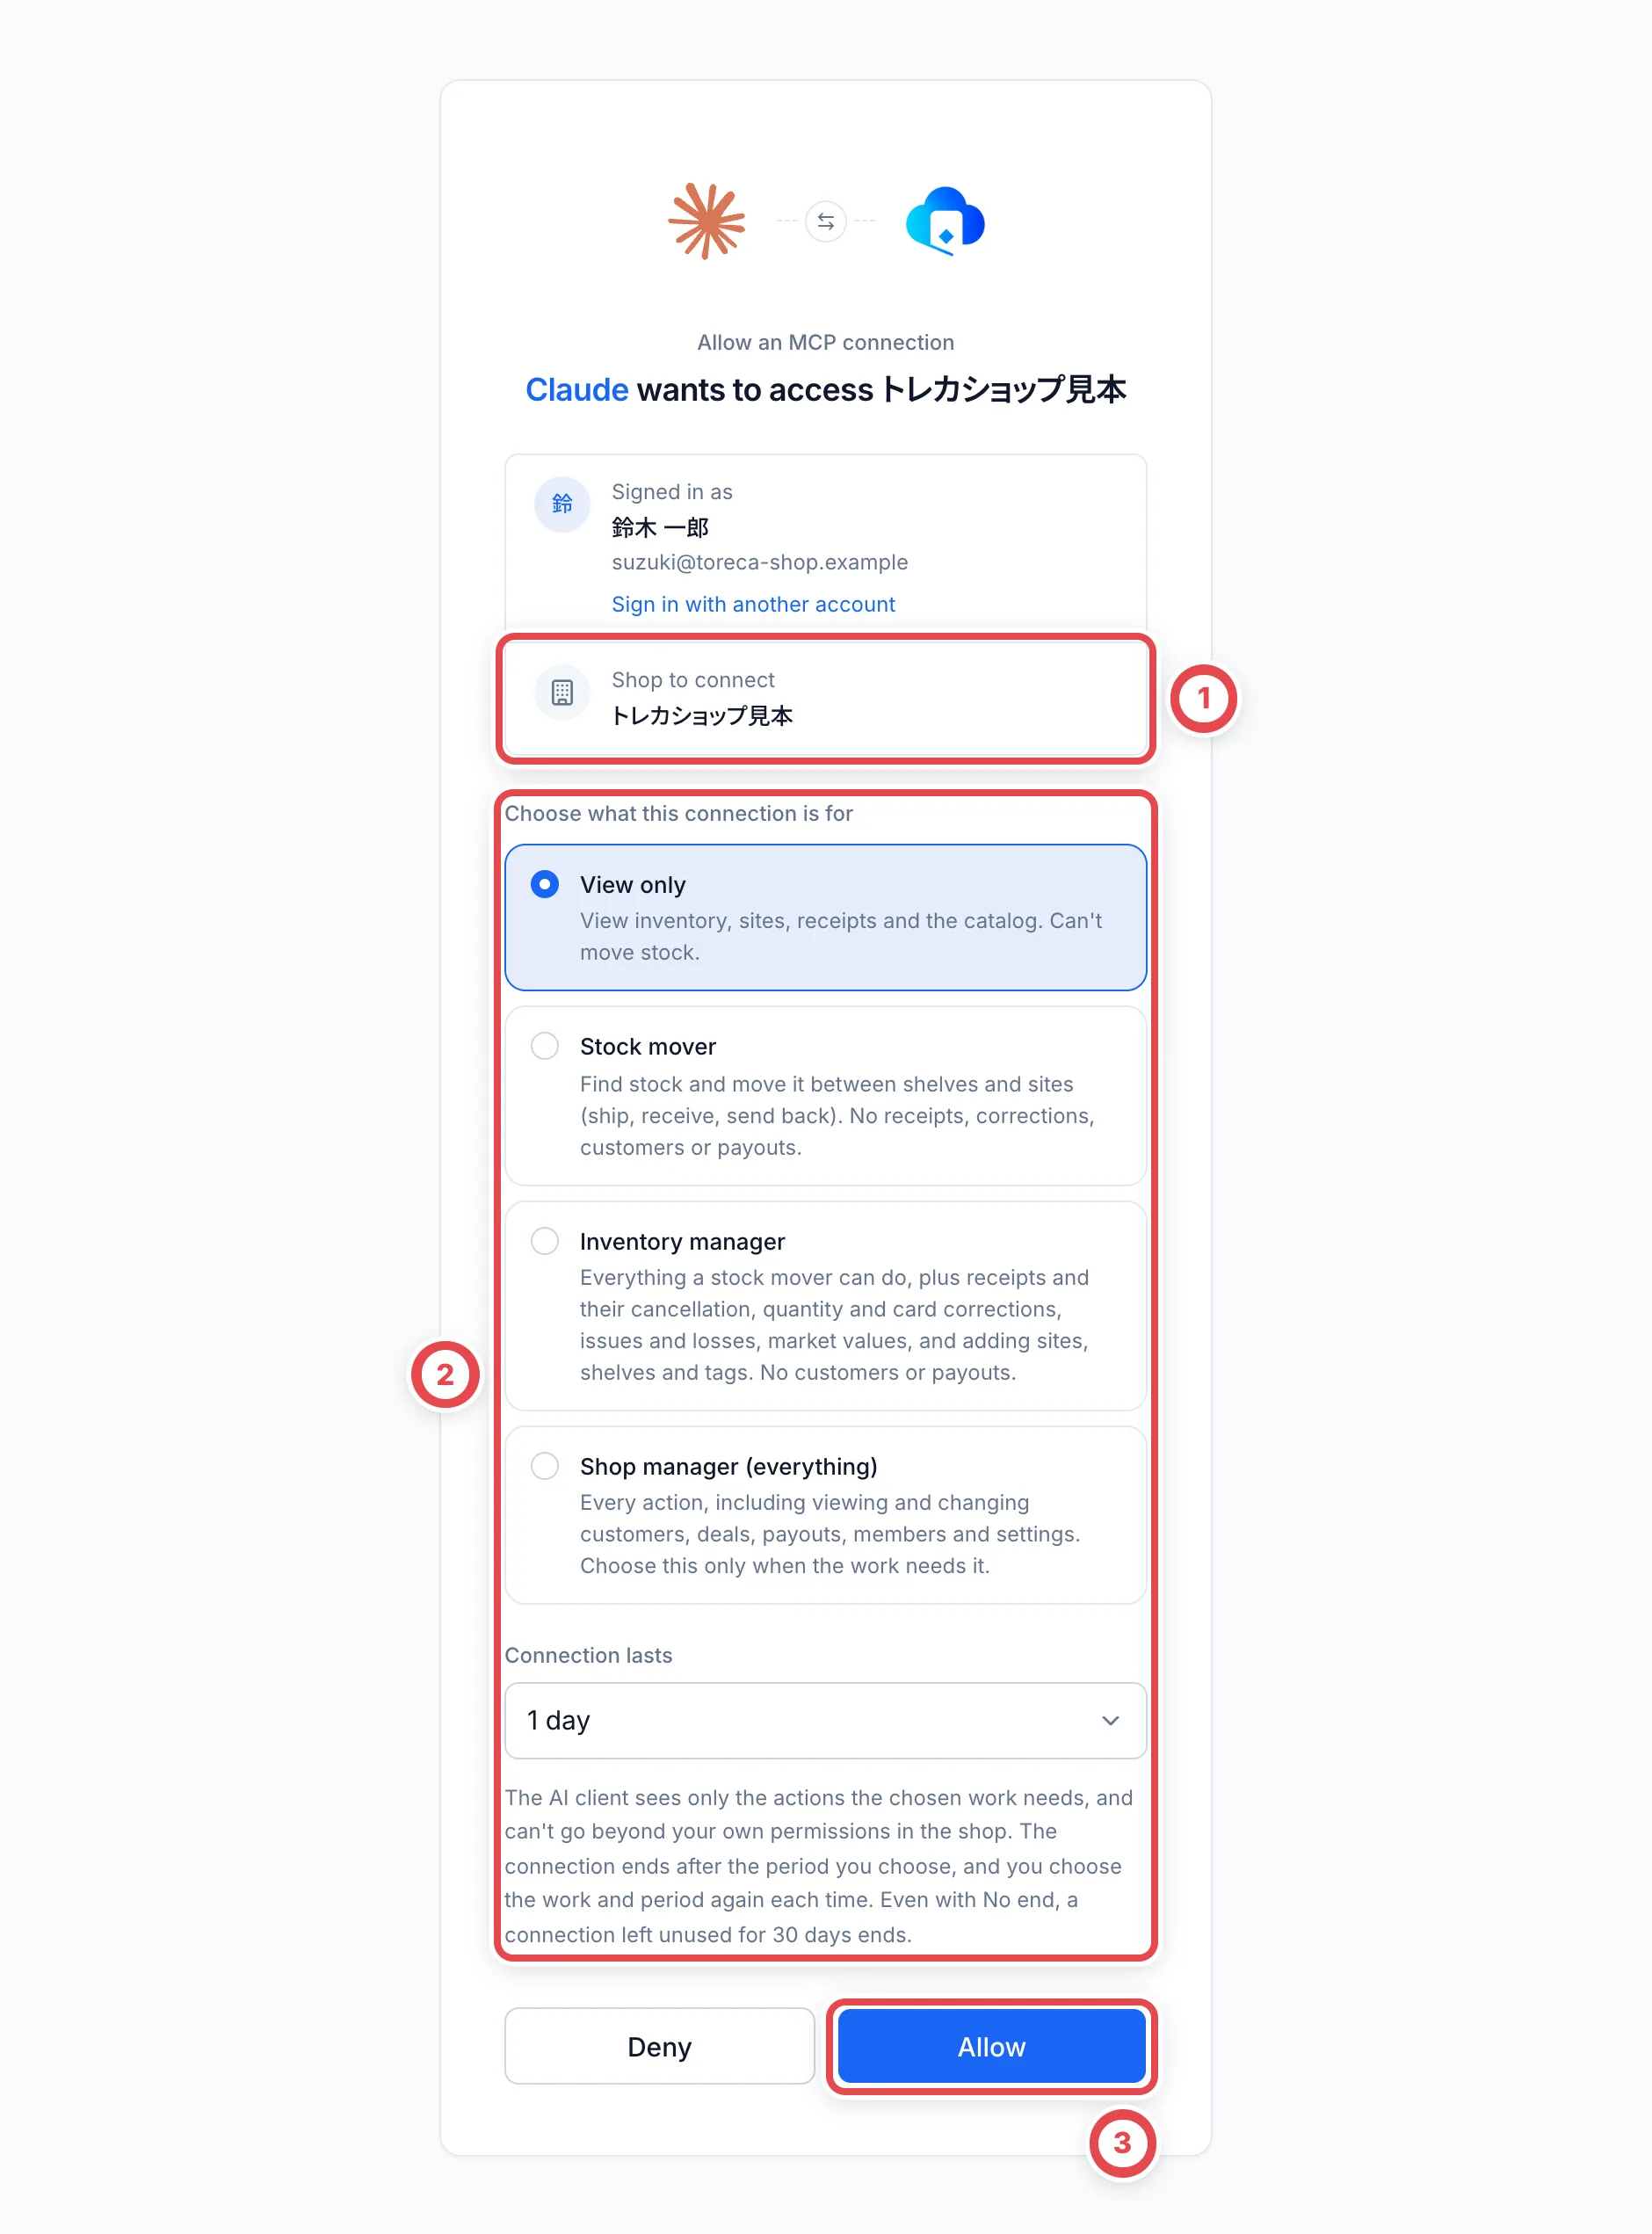 Check the shop in ①, choose a work role in ②, then press ③.
## Check the connection
Ask your agent to "run whoami on Toreca Cloud". If it returns your account, your shop and the permissions you can use, you're connected.
:::tip
A connection ends after the period you choose when you approve it (1 day to No end; 1 day to start with). When it does, re-authenticate from `/mcp` in Claude Code, or reconnect the same way in other apps.
:::
## If your app shows different settings
Menus and authentication choices depend on the app version and organization settings. Consult the official guides for [Claude Code](https://code.claude.com/docs/en/mcp), [Claude custom connectors](https://support.claude.com/en/articles/11175166-get-started-with-custom-connectors-using-remote-mcp) and [Cursor MCP](https://cursor.com/docs/mcp).
If connection fails, share the error, app name and version with support. Do not put your shop login or an access token directly in the configuration file.
---
# Example requests
Source: https://docs.toreca-cloud.com/en/mcp/examples
Ask the agent in the same words you'd use to search the console. Card names, card numbers and shelf names get you to the answer faster.
## Find stock (View only)
- "Count our Charizard ex SAR stock by site and shelf."
- "Where is unit 000123 now? Show its history too."
- "Is the slab with PSA cert number 12345678 in stock?"
- "List the stock on shelf A-01 at the Tokyo store."
## Move stock (Stock mover)
- "Move every PSA 10 on shelf A-01 to B-03."
- "Create a transfer from the Tokyo store to the Osaka store for the BOXes received yesterday."
For anything that changes stock, the agent confirms the targets and counts before it runs. Check them, then let it continue.
## Receive and correct (Inventory manager)
- "Turn this list into a receipt. Validate it first without saving."
- "Correct the grade of unit 000456 to PSA 9. Reason: misread certificate."
Receipts can start with a validation that saves nothing. Check the counts and amounts, then ask for the real one.
- (With photos of slabs attached) "Link the cert numbers on these slabs to units of the same card and grade in the Singapore stock. Validate first."
A cert number belongs to one unit in stock. If another unit already has it, the agent is told which unit and where it is, and nothing changes.
## Run a count
- "Start a count of shelf B."
- "Show the units not yet confirmed in the open count."
## Check purchases and payouts (Shop manager)
- "What's on today's action items?"
- "List payouts waiting for approval, largest first."
:::note
The agent's answers come from what it fetched from Toreca Cloud. Confirm amounts and quantities in the console before you finalise them.
:::
---
# Read help with AI
Source: https://docs.toreca-cloud.com/en/mcp/help-center
Use these resources to ask an AI about instructions. You do not need to connect it to your shop's stock or purchase data.
## Search the help center with MCP
Add this URL as a server in an MCP-capable app:
```text
https://docs.toreca-cloud.com/docs-mcp
```
No Toreca Cloud login is required to read the public help center. This server can search the help, read pages, list pages and retrieve navigation. It cannot change stock or register purchases.
For example, ask: "Look up what I should do after identity verification in a counter purchase, and include a link to the help page."
The "Connect to MCP" action on this page can also copy the server URL or help you register it in supported apps. "Open in chat" provides an entry point for referring to this page. It does not grant access to shop data.
## Read the help from URLs
If your AI can read URLs, you can give it these links without using MCP:
| Link | Contents |
| --------------------------------------------------- | --------------------------------------------------------------------------------------------- |
| [Help index (llms.txt)](/llms.txt) | An index for finding the pages you need |
| [Full help text (llms-full.txt)](/llms-full.txt) | The help in one text file. It is long; usually start with the index and read individual pages |
| [Agent discovery manifest](/agent-readability.json) | Published Markdown, MCP and other resources |
| [MCP discovery document](/.well-known/mcp.json) | Connection information for the help MCP server |
Add `.md` to a guide's URL to read it as Markdown. For example, share the [counter purchase guide in Markdown](/en/guides/purchase/counter.md) with your AI.
## Working with shop data
Stock queries and purchase operations require a separate [business MCP connection](/en/mcp/connect). Its URL is `https://api.toreca-cloud.com/mcp`, and it requires sign-in and authorization.
---
# Work roles and connection lifetime
Source: https://docs.toreca-cloud.com/en/mcp/roles
A work role is the scope of work you hand to the agent. You pick it on the approval screen each time you connect, and the agent only sees that role's operations.
| Work role | What it can do |
| ------------------------- | ------------------------------------------------------------------------------------------------------------------------------------------------------------ |
| View only | Look at stock, sites, receipts and the catalog. Can't move stock. |
| Stock mover | Find stock and move it between shelves and sites (ship, receive, send back). No receipts, corrections, customers or payments. |
| Inventory manager | Moves plus receipts and voids, quantity and card corrections, shipping out and losses, market prices, and sites, shelves and tags. No customers or payments. |
| Shop manager (everything) | All MCP-supported operations, including viewing and changing customers, purchases, payments, members and settings. Choose it only when the task needs it. |
Not every console operation has an MCP tool. Check the tools exposed by the connected server; use the relevant console screen when an operation is unavailable.
## Roles and member permissions
A work role only narrows what the agent sees; it never widens a member's permissions. A member who can't approve payouts can't approve them over MCP either, even with Shop manager.
## Connection lifetime
You pick how long a connection lasts on the approval screen, together with the work role: 1 day, 3 days, 7 days, 1 month, 3 months, 1 year or No end. 1 day is selected to start with. When the period ends, the agent's calls fail authentication and Settings › MCP shows the connection as Disconnected. Reconnect from your app and pick the role and period that fit the work at hand.
Even with No end, a connection that goes unused for 30 days ends.
To keep a wide role from staying connected longer than needed, pick a shorter period for wider roles.
## Review connections
Settings › MCP lists connected apps with the member who connected each, its permissions, last access and status (Connected or Disconnected) (①). If you see a connection you don't recognise, contact your shop's admin.
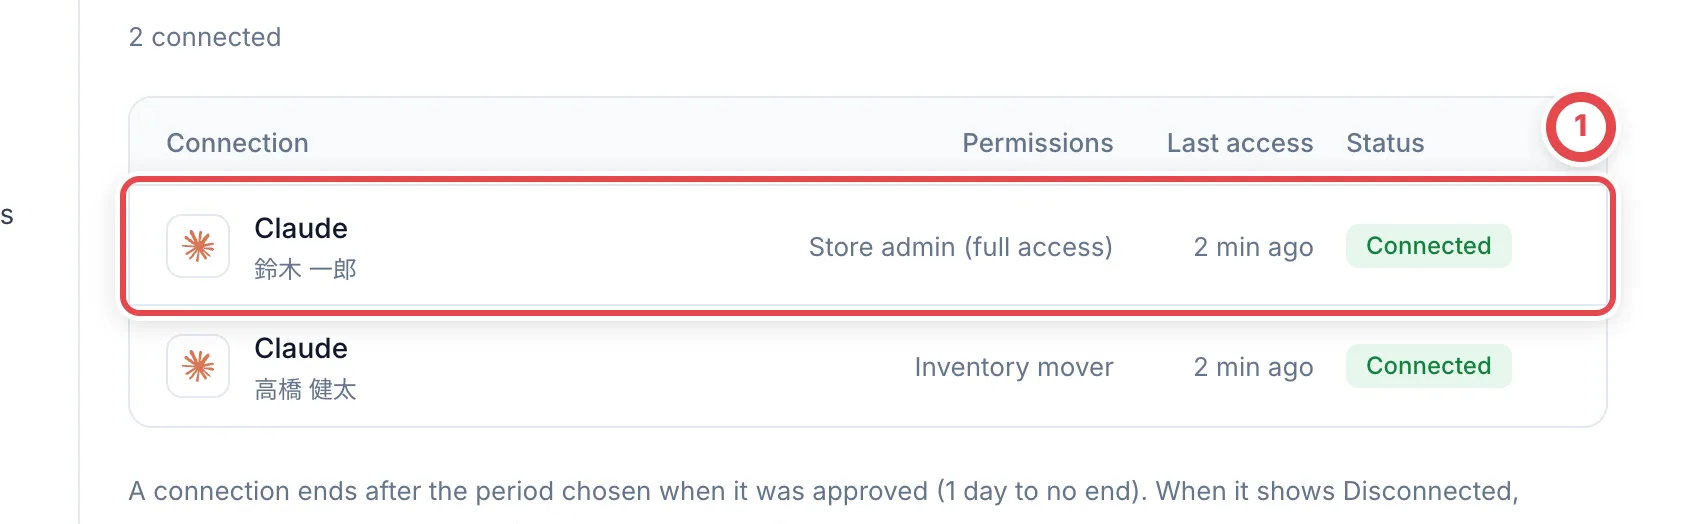 ① lists the connected apps and the work role chosen for each.
---
# Troubleshooting
Source: https://docs.toreca-cloud.com/en/mcp/troubleshooting
## Authentication errors
A connection ends after the period chosen at approval (1 day unless you pick another). Reconnect from your app and pick a work role and period again. In Claude Code, open `/mcp`, select `torecacloud` and authenticate.
## The agent says an operation isn't available
Your work role probably doesn't include it. Reconnect and choose a role that fits ([work roles](/en/mcp/roles)).
If it still fails with a wider role, ask your shop's admin to check your member permissions. An operation with no MCP tool does not appear by widening the role. Check the connected server’s tool list and use the console for actions such as final appraisal and physical BOX-condition checks.
## Another shop's data appears
The agent works with the shop that was selected when you approved. To work with another shop, switch shops in Toreca Cloud and reconnect.
## The approval screen doesn't open
If your app can't open a browser, copy the URL it shows and open it yourself. Also check that your network doesn't block `api.toreca-cloud.com`.
---
# よくある質問
Source: https://docs.toreca-cloud.com/faq
## アカウントと店舗
**複数の店舗に所属しています。店舗を切り替えるには?**
画面左下のアカウントメニューを開き、「組織」から使う店舗を選びます。表示中の店舗にだけ操作が反映されます。
**画面の言語を英語にできますか?**
できます。アカウントメニューの「言語」で「English」を選んでください。
**メニューに表示されない画面があります**
メンバーの役割によって、使える画面と操作が変わります。必要な操作ができないときは、店舗のオーナーか管理者に役割を確認してもらってください([メンバーと権限](/guides/getting-started/members-and-roles))。
## 買取
**買取強化対象の残り枚数はいつ減りますか?**
最終見積の承諾を記録したときに減ります。承諾を記録せずに買取成立を登録した場合は、成立の時点で減ります。買取成立で一部の明細を見送ったときは、その分が戻ります([買取強化対象](/guides/purchase/purchase-boosts))。
**買取強化の価格は査定額に自動で入りますか?**
自動では入りません。査定画面で同じカードの明細の時価の下に「買取強化」と強化価格、残り枚数が出るので、それを見て査定額を決めてください。
**同じカードでPSA10だけ価格を変えられますか?**
できます。グレードを指定した強化と、グレードを指定しない強化を並べて登録できます。グレードが合う明細は、グレードを指定した強化が先に使われます。
**300枚まとめて100円で買い取るときは?**
最終査定の「まとめ査定を追加」で枚数を300、まとめての査定額を100にします。金額は束全体の100円で、枚数を掛けません。個別の査定額を残して合計だけ変える場合はセット価格を使います([まとめ査定とセット価格](/guides/purchase/bulk-and-set-price))。
**返品はどこから進めますか?**
サイドバーの「返品対応」か、取引の「返送を開く」「返品手続きへ」から開けます。住所の承諾と集荷依頼を記録してから発送します。文面をコピーしただけでは記録されないので、送ったあとに「住所確認の連絡を記録」などを押します([返品対応](/guides/purchase/returns))。
**スニダンから取得しても参考時価が変わりません**
「取得」は成約を確認する操作です。件数や「詳細」から結果を開き、「参考時価に反映」を押して使います。成約が2件未満などで価格が出ないときは、相場調査を依頼してください([査定と見積](/guides/purchase/appraisal))。
**PSA番号がないと振込できませんか?**
買取対象のPSAカードは1枚ずつ番号が必要です。最終査定の1枚ごとの番号欄で現物と照合して保存します。支払い前の不足・訂正は「PSA番号を確認・修正」から補い、振込を進めてください([振込](/guides/purchase/payouts))。
**同じカードを3枚買い取るとき、番号と金額はどこに入れますか?**
最終査定の「1枚目」「2枚目」の各行に、その1枚の鑑定番号・査定金額を入力します。買取不可は三点メニューから理由を記録し、全ページを確かめて保存します([1枚ごとの最終査定](/guides/purchase/final-appraisal))。
**相場調査を一部だけ回答しても完了通知が来ません**
一括で依頼した調査は全件の回答がそろった時点で完了通知の対象になります。一部だけ保存した場合は、残りを同じ一括回答画面から続けます([相場調査の一括回答](/guides/purchase/research-and-reviews))。
**法人の請求書を下書き保存しただけで在庫に入りますか?**
入りません。商品・現物数量・単価・送料などを確認し、現物照合と必要事項をそろえて「現物確認して振込へ」を押します。下書き保存と成立は別の操作です([法人取引](/guides/purchase/corporate-deals))。
**振込の承諾証拠はどこで添付しますか?**
取引の「支払い」で「振込を申請する」を開き、証拠を添付して内容を確認します。口座を確認する権限がある担当者は、その申請画面で番号全体を表示して照合してから申請します([振込](/guides/purchase/payouts))。
**法人の買取にも本人確認や見積の承諾が必要ですか?**
法人取引は請求書の登録、現物照合、成立、振込の順に進みます。本人確認・法人確認・見積の承諾・委任状は求めません([法人取引と請求書](/guides/purchase/corporate-deals))。
**明細を閉じると保存されますか?**
「保存して確認」は明細やレビュー下書きを保存します。「入力を確認して閉じる」は折りたたむ操作で、最終査定などでは画面全体の「保存」が必要です([明細カードの共通操作](/guides/purchase/common-operations))。
**2次査定を途中で止めて、あとから続けられますか?**
「下書きを保存」で入力を残せます。「保存して確認」は明細の確認状態も保存します。どちらも承認や見積提示ではありません。金額や元の査定が変わった場合は、確認状態を見直してください([下書きと確認の進捗](/guides/purchase/research-and-reviews))。
**追加したスニダンリンクは他の店舗でも使えますか?**
「保存して登録を依頼」した時点では今回の買取の仮リンクです。マスタ承認権限のある担当者が商品・版・URLを照合し、理由を付けて承認すると共通マスタへ反映されます([スニダンリンクの追加と承認](/guides/purchase/card-registration-requests))。
## ラベル印刷
**本体ボタンで1枚ずつカットできません**
印刷アプリ0.1.5以降、対応するネットワーク接続と用紙が必要です。設定で配布中の版と接続方式を確認し、未対応ならPDF印刷を使います。送信結果が不明なときは重ねて印刷せず、紙と印刷キューを確認してください([印刷アプリ](/guides/inventory/desktop-print-app))。
## AI連携(MCP)
**AIエージェントにどこまで操作させられますか?**
接続のたびに選ぶ作業ロールの範囲までです。閲覧のみ、在庫移動担当、在庫管理者、店舗管理者(すべて)から選べます。メンバー自身の権限を超える操作はできません([作業ロール](/mcp/roles))。
**毎日つなぎ直す必要がありますか?**
いいえ。接続の期限は許可するときに1日・3日・7日・1ヶ月・3ヶ月・1年・無期限から選べます。設定の「MCP」で「切断」になっていたら、つなぎ直してください。つなぎ直すときに作業ロールと期限を選び直せます。
## 外部連携API
**LPに買取強化対象を載せたいです。在庫まで見えてしまいませんか?**
連携先の登録で「買取強化対象を読み取る」だけを許可すれば、在庫は一切見えません。APIも在庫のエンドポイントを
`insufficient_scope`
で拒否します([買取強化対象を取得する](/api/purchase-boosts))。
**アクセストークンの有効期限は?**
アクセストークンは15分、リフレッシュトークンは90日です。リフレッシュトークンは使うたびに入れ替わります([トークンの保管と有効期限](/api/tokens))。
**外部連携の画面が設定に見当たりません**
外部連携の画面は、トレカクラウドの運営が店舗ごとに有効にします。使いたいときは運営にご連絡ください。
## このヘルプセンター
**AIエージェントからこのヘルプセンターを検索できますか?**
できます。MCPに対応したアプリに `https://docs.toreca-cloud.com/docs-mcp`
を登録すると、ヘルプセンターの検索とページの読み込みができます。認証は要りません。
**新しい機能はどこで確かめられますか?**
[変更履歴](/changelog)に、本番に出た日ごとの新機能と修正をまとめています。
---
# 使い方
Source: https://docs.toreca-cloud.com/guides
初めて使う方は、[ログインして店舗を確認](/guides/getting-started/login)してから、担当する作業へ進んでください。
## 買取を始める
**[店舗買取](/guides/purchase/counter)**
受付 → 査定 → お客様の確認・署名 → 本人確認 → 現金/振込
**[オンライン買取](/guides/purchase/overview)**
受付 → 事前見積 → 発送・到着 → 最終査定・承諾 → 振込
[買取方法を選ぶ](/guides/purchase)から、途中の工程や[共通操作](/guides/purchase/common-operations)も探せます。
## 途中の作業を続ける
「買取依頼」で対象の取引を開き、①の「次の操作」を確認します。右側のボタンから作業を進めます。下の例では、②の「カードを追加する」を押します。
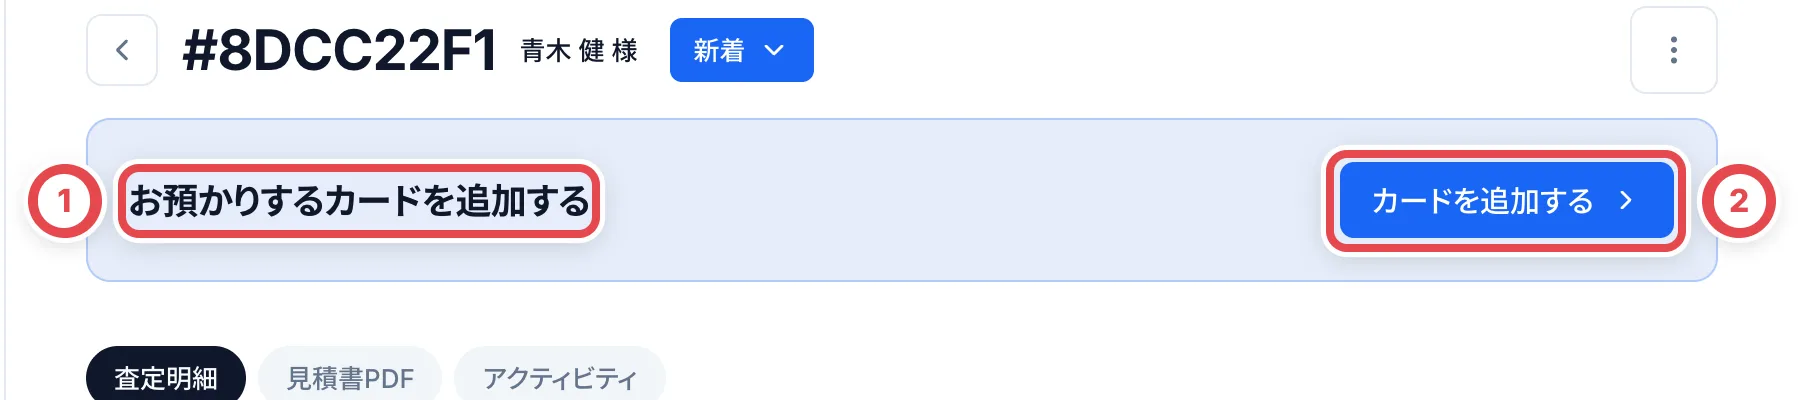 | いま行う作業 | 手順 |
| ------------------------------------------ | --------------------------------------------------------------- |
| お客様の原本を見て本人確認を記録する | [店頭本人確認](/guides/purchase/counter-identity) |
| お客様に住所・振込先・書類を確認してもらう | [登録内容の確認・修正](/guides/purchase/registered-information) |
| 買取代金を振り込む | [振込](/guides/purchase/payouts) |
| 買い取ったカードにラベルを貼り、棚にしまう | [格納とQRラベル](/guides/inventory/putaway) |
| 棚のカードを数える | [棚卸し](/guides/inventory/counts) |
| レジの現金を確認して営業を終える | [現金管理とレジ締め](/guides/purchase/cash) |
## 画面や設定を確認する
**[画面の見かた](/guides/getting-started/console)**
サイドバーと、対応が必要な作業の探し方。
**[買取の進め方](/guides/purchase)**
オンライン買取・店舗買取と共通操作。
**[在庫](/guides/inventory/overview)**
入庫・格納・出庫・移動の手順。
**[店舗の設定](/guides/settings/overview)**
管理者向けの初期設定と変更。
その他の操作は左のメニューから選べます。AIアシスタントから操作する場合は[AI連携(MCP)](/mcp)、外部アプリの開発は[APIリファレンス](/api)を参照してください。
## 追加された操作の手順
- [クラウドサインで書類を作成・送信する](/guides/settings/cloudsign)
- [未登録カードの登録依頼](/guides/purchase/card-registration-requests)
- [値上げ希望の確認と回答記録](/guides/purchase/price-increase-requests)
- [履歴から案件を戻す・操作を取り消す](/guides/purchase/history-and-undo)
- [契約書一覧と顧客の書類](/guides/purchase/contracts)
- [個体情報の訂正](/guides/inventory/corrections)
- [販売した在庫の返品](/guides/inventory/sales-returns)
- [外部販売・当選・配送依頼](/guides/inventory/partner-sales)
- [iPhoneの未送信データ復旧](/guides/inventory/scanner-recovery)
- [相場の検索・絞り込み・グレード別価格](/guides/getting-started/market)
- [最終査定を1枚ずつ記録する](/guides/purchase/final-appraisal)
- [ロット専用棚](/guides/inventory/sealed-lot-shelves)
- [スキャン移動のロック](/guides/inventory/shelf-protection)
- [役割と権限の設定](/guides/getting-started/members-and-roles)
- [紹介実績の確認](/guides/settings/referral-reports)
- [明細カードの確認と保存](/guides/purchase/common-operations)
- [2次査定の下書きと確認進捗](/guides/purchase/research-and-reviews)
- [スニダンリンクの追加・承認](/guides/purchase/card-registration-requests)
---
# 画面の見かた
Source: https://docs.toreca-cloud.com/guides/getting-started/console
## サイドバー
サイドバーのいちばん上に、①の「買取」「在庫」の切り替えがあります。押した側の画面がサイドバーに並びます。横の数字は、それぞれの側でまだ片づいていない件数です。
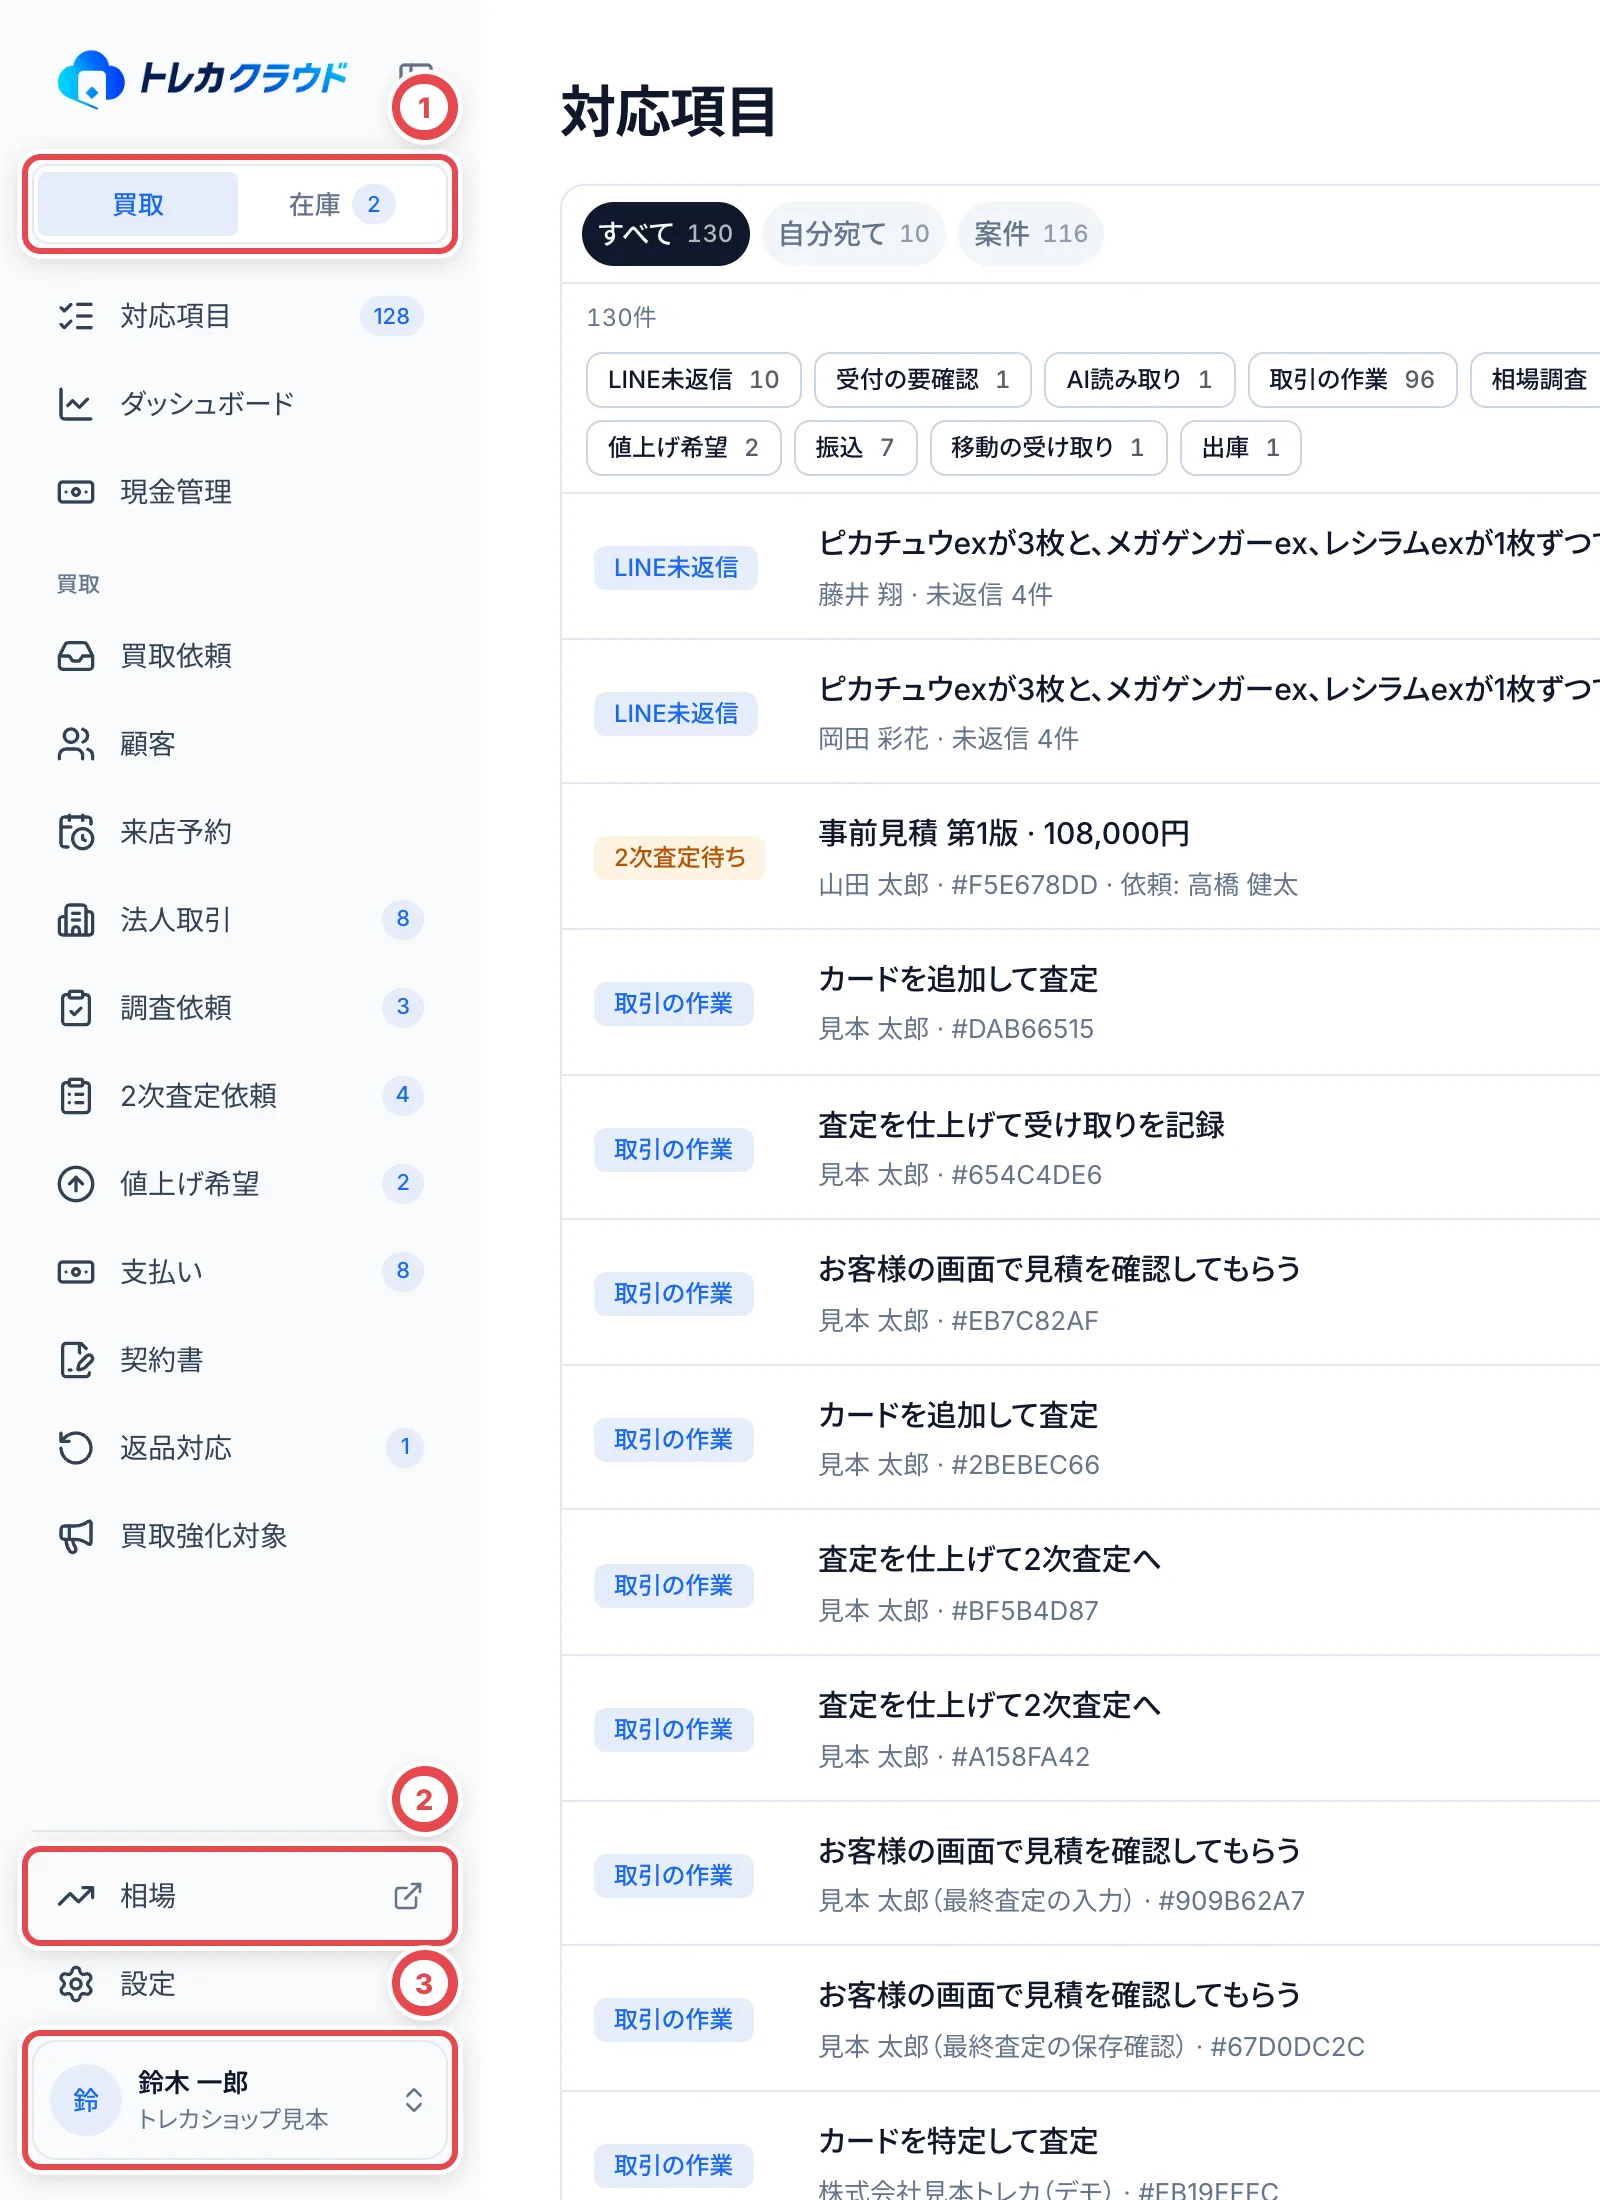 | 側 | 区分 | 項目 | 使う場面 |
| ---- | ------ | ------------------------------------------------------------------------------------------------------------- | ------------------------------------ |
| 両方 | 上段 | 対応項目、ダッシュボード、現金管理 | 今日やることと店舗の数字、レジの現金 |
| 買取 | 買取 | 買取依頼、顧客、来店予約、法人取引、調査依頼、2次査定依頼、値上げ希望、契約書、支払い、返品対応、買取強化対象 | 受付から支払い・返品までの買取の作業 |
| 在庫 | 在庫 | 在庫一覧、格納、棚卸し | 手元の在庫を探す・しまう・数える |
| 在庫 | 入出庫 | 入庫、出庫、拠点間移動、テナント間移管、連携先への割り当て | 在庫を入れる・出す・動かす |
| 両方 | 下段 | 相場、設定 | 相場の確認と店舗の設定 |
店舗の設定で使っていない機能(来店予約・法人取引など)の項目は出ません。調査依頼と2次査定依頼は、オンライン買取か法人取引を使う店舗にだけ出ます(店頭買取では使いません)。
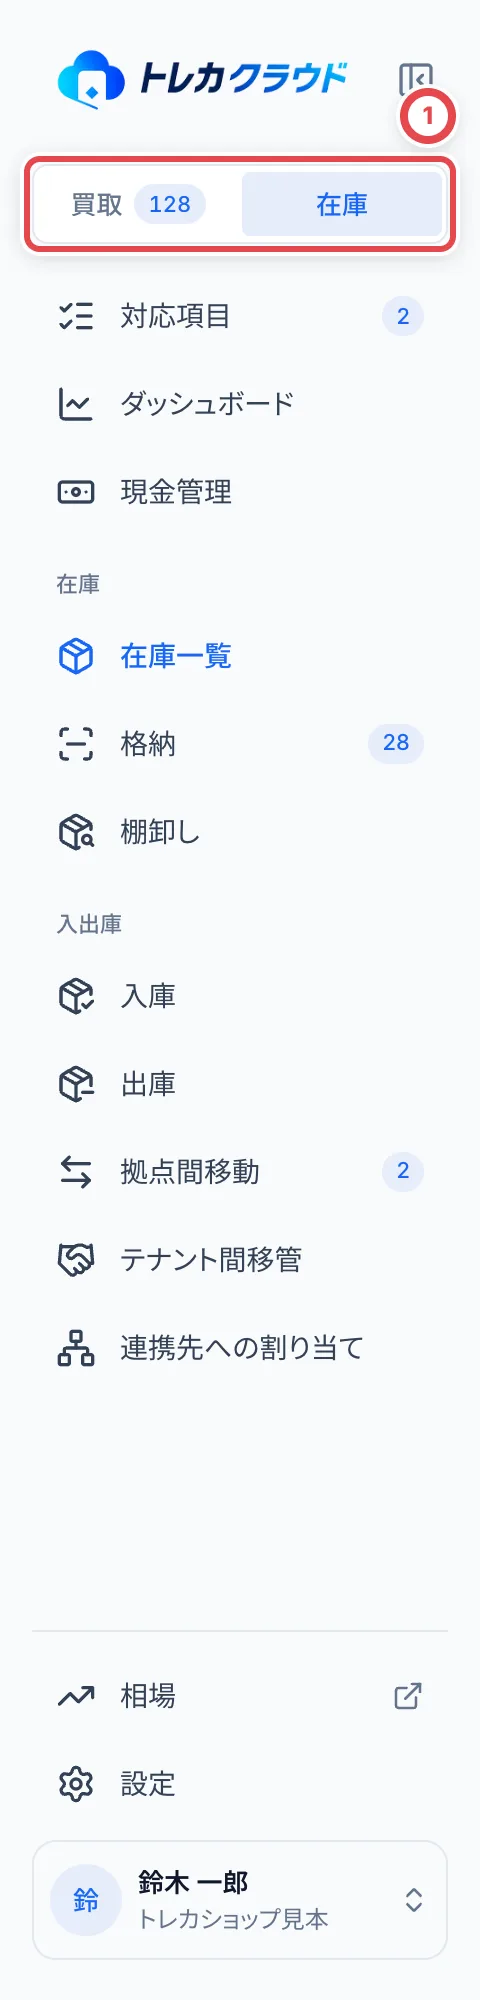 項目の横に出る数字は、まだ片づいていない件数です。0件になると数字は消えます。②の「相場」は、作業中の画面を残したまま見られるよう、新しいタブで開きます。
サイドバーは、ロゴの横のボタンで折りたためます。折りたたむとアイコンだけの表示になり、この状態はブラウザに記憶されます。
いちばん下にある③がアカウントメニューです。自分のアカウント設定と店舗・言語の切り替え、「ログアウト」がここにまとまっています。
:::note
本人確認の項目はサイドバーにはありません。お客様から届いた本人確認書類は、対応項目に表示されます。
:::
## 対応項目
対応項目には、いま手を付けるべき作業が1件ずつ並びます。上の①のタブで、表示する範囲を切り替えます。
- 「すべて」は、店舗全体の対応項目です。
- 「自分宛て」は、2次査定の依頼や戻ってきた見積など、自分に割り当てられたものです。
- 「案件」は、買取案件に紐づく作業だけを案件ごとにまとめた表示です。待ち時間の長い案件が上に来ます。
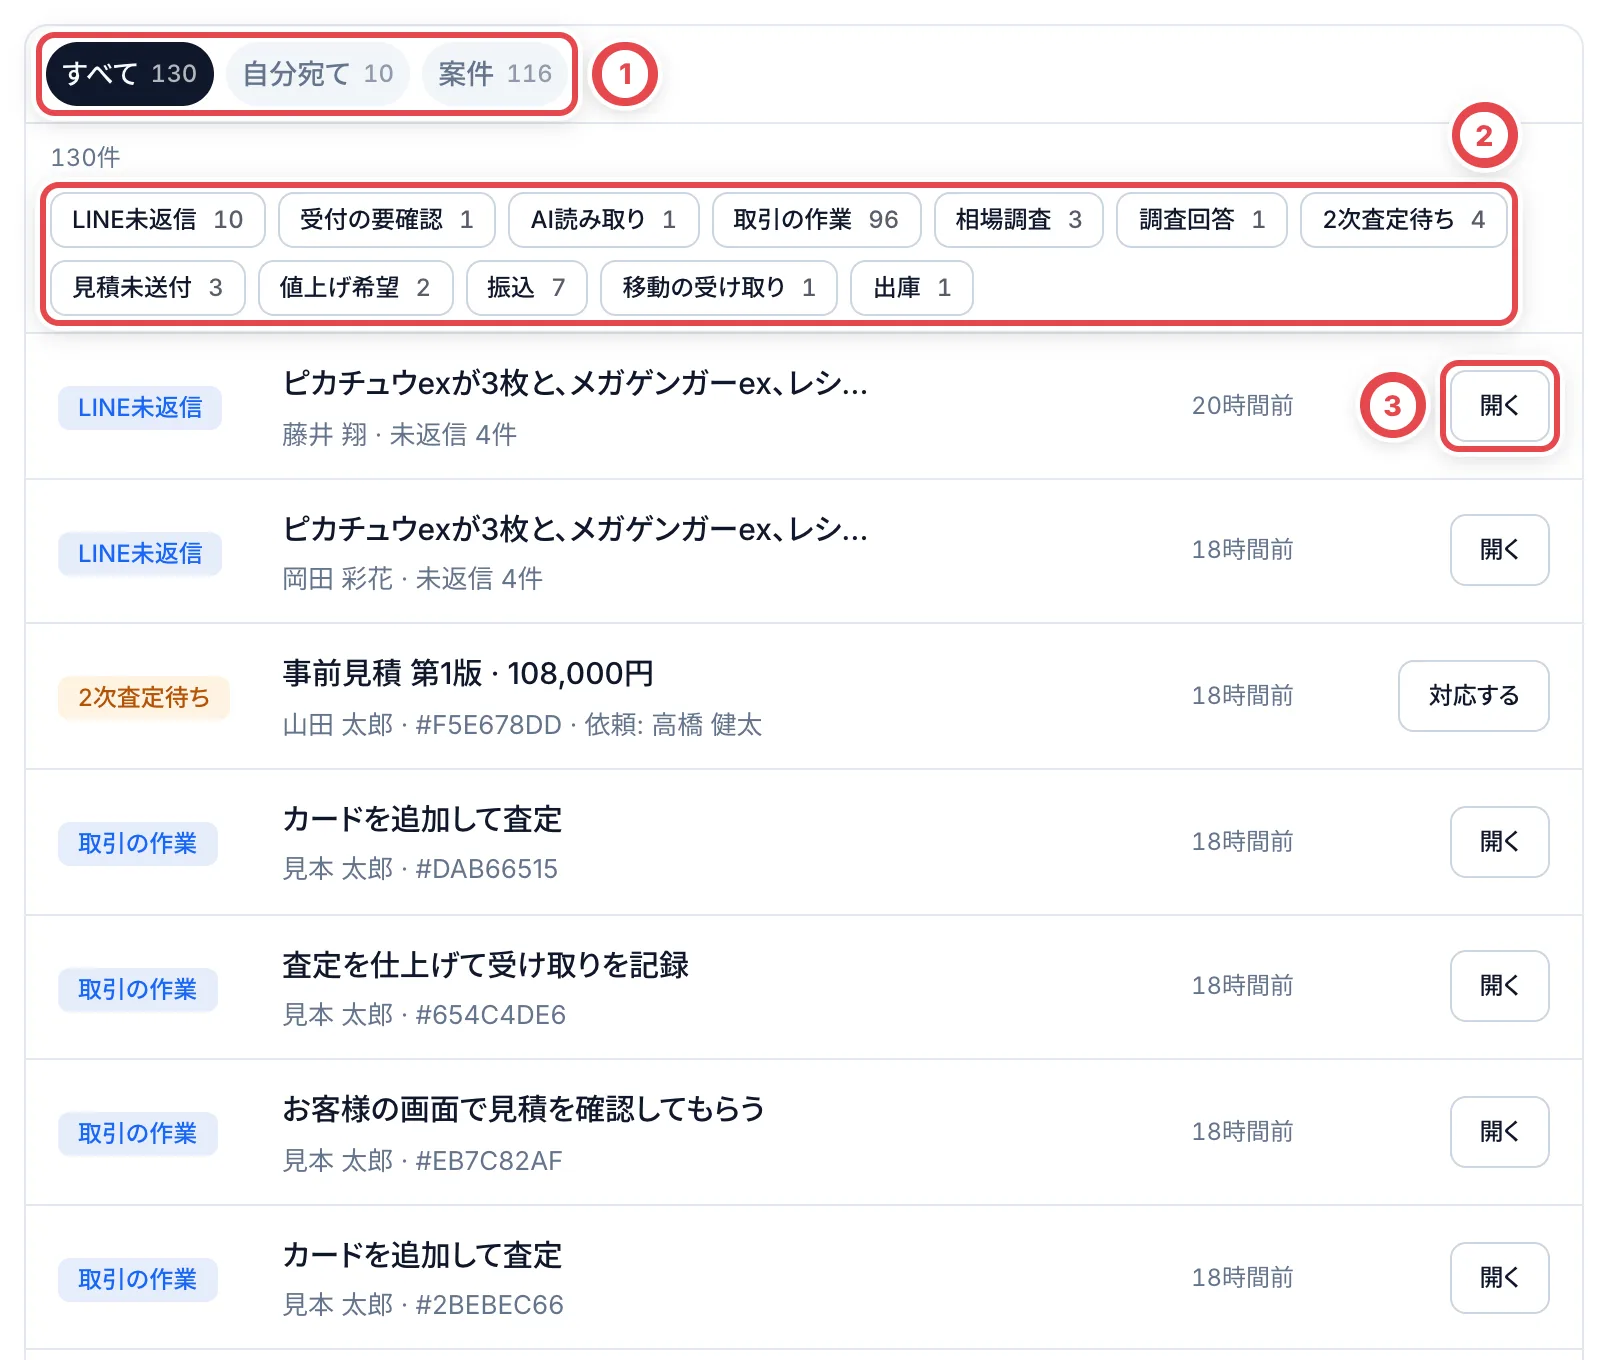 タブの下の②には、いまある対応項目の種類が件数つきのボタンで並びます。ボタンを押すと、その種類だけに絞り込めます。もう一度押すと解除されます。主な種類は次のとおりです。
| 場面 | 種類 |
| ------------ | ------------------------------------------------------- |
| 受付 | LINE未返信、受付の要確認、AI読み取り |
| 査定と見積 | 取引の作業、相場調査、調査回答、2次査定待ち、見積未送付 |
| お客様の対応 | フォーム回答、本人確認、返答待ち、委任状 |
| 振込 | 振込 |
| 在庫 | 移動の受け取り、格納の要対応、出庫、取置の期限 |
各行には、種類・内容・宛先・待っている時間が表示されます。右端のボタンで作業を進めます。
- ③の「開く」は、作業する画面へ移動します。たとえば取引の作業なら取引の画面、LINE未返信ならお客様とのトークが開きます。
- 「確認する」は、相場調査の依頼を開きます。
- 「対応する」は、その場で処理できるダイアログを開きます。2次査定の承認、見積の提示、フォーム回答や本人確認の結果の確認がこれにあたります。
:::note
査定を作成した本人は、その査定の2次査定を承認できません。自分が作成した査定には「確認する」だけが表示されます。
:::
## ダッシュボード
ダッシュボードでは、店舗の買取の実績と、止まっている作業を確かめます。上部で期間を「今日」「今週」「今月」「先月」から選びます。最初は「今月」が選ばれています。
対象は選んだ期間に作成された、取り消されていない案件です。買取総額は有効な査定明細の金額で集計し、成立後の訂正がある場合は訂正後の金額を使います。入金日・支払完了日だけを集計する数字ではありません。グラフも案件の作成日ごとの金額です。
画面の上段には「買取件数」「買取総額」「想定粗利」「想定粗利率」の4つの数字が並びます。買取件数・買取総額・想定粗利には、前の期間との比較が付きます。想定粗利率は、売価が登録されていない明細を除いて計算します。その下の「買取総額の推移」のグラフで、期間中の動きを確かめられます。
①の「いま止まっているもの」には、3日以上手が付いていない案件や、見積を出したまま返答がない案件などの件数が並びます。件数を押すと、該当する一覧が開きます。
使い始めの店舗には、②の「セットアップ」の欄も表示されます。LINE公式アカウントと配送業者の連携、買取掛け率、振込依頼の設定などが並びます。メンバーの招待とパスキーの登録も含まれ、すべて終わると欄は消えます。
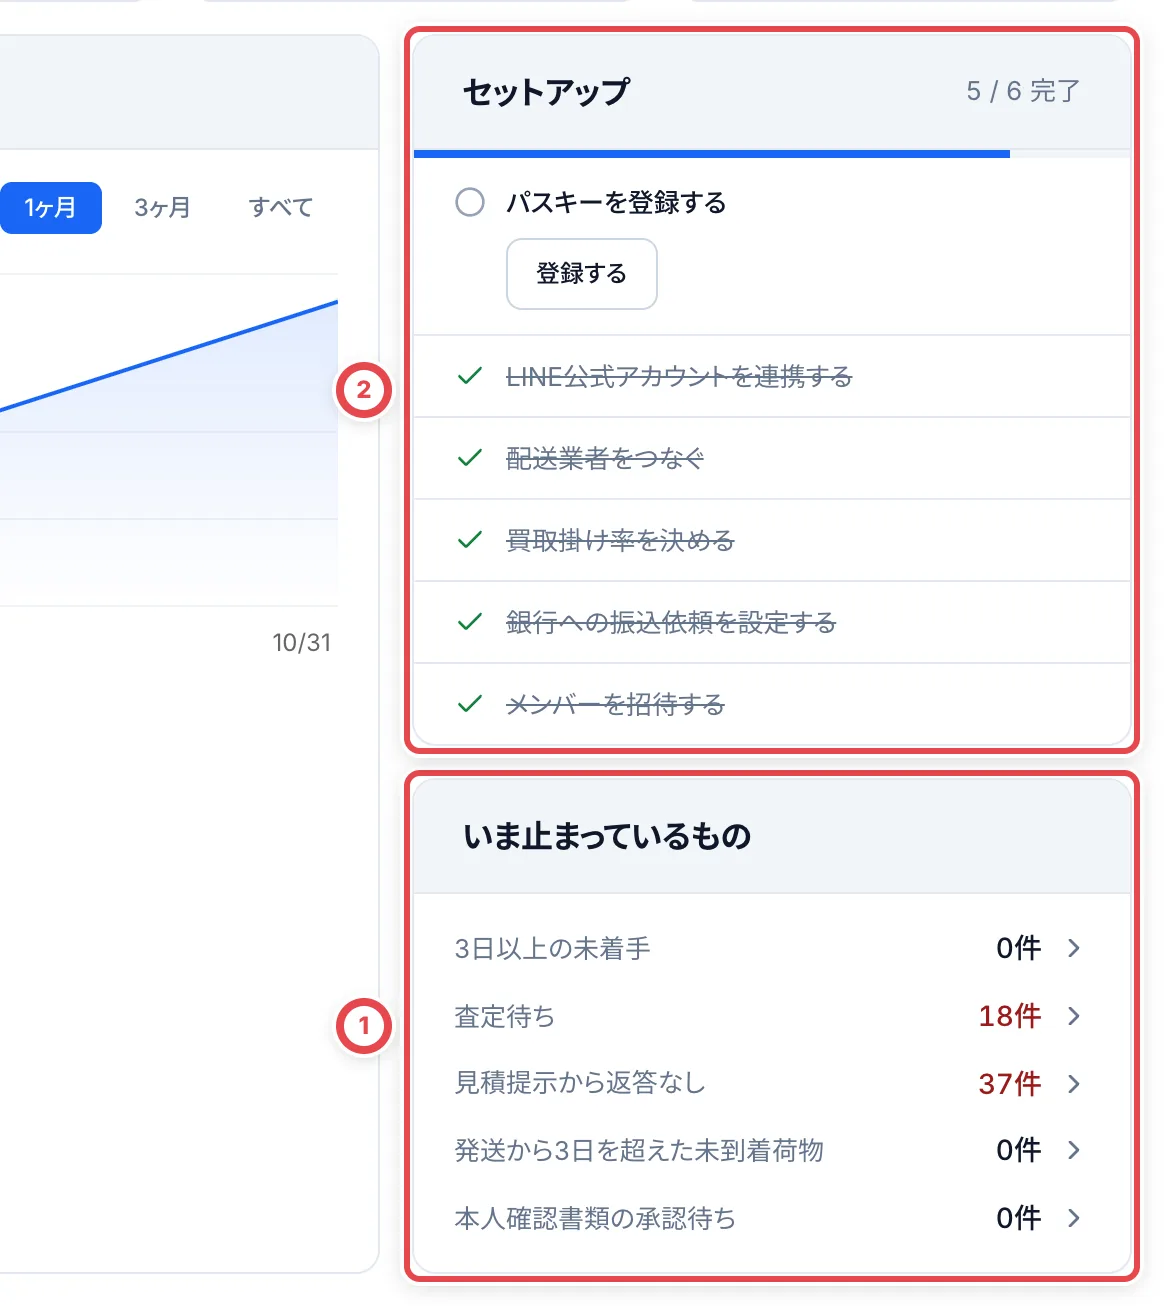 ## 困ったとき
| こんなとき | 確かめること・やること |
| ------------------------------------ | ------------------------------------------------------------------------------ |
| 在庫の項目がサイドバーに見当たらない | いちばん上の切り替えで「在庫」を選びます |
| 買取依頼や顧客の項目が見当たらない | いちばん上の切り替えで「買取」を選びます |
| 来店予約などの項目が出ない | 店舗の設定で、その機能を使っていません |
| 本人確認の画面がサイドバーにない | 本人確認の項目はサイドバーにありません。お客様から届いた書類は対応項目に出ます |
| サイドバーがアイコンだけになった | ロゴの横のボタンで折りたたまれています。もう一度押すと元に戻ります |
値上げ相談は[値上げ希望](/guides/purchase/price-increase-requests)、顧客をまたいだ書類確認は[契約書](/guides/purchase/contracts)から進めます。
相場の検索・絞り込み・並び替えは[相場を探して確認する](/guides/getting-started/market)を参照してください。
---
# ログインと店舗の選択
Source: https://docs.toreca-cloud.com/guides/getting-started/login
トレカクラウドには、メールアドレスとパスワードでログインします。パスキーを登録していれば、パスワードを入力せずにログインできます。
## ログインする
1. **メールアドレスとパスワードを入力する**
ログイン画面でメールアドレスとパスワードを入力し、「ログイン」を押します。パスキーを使う場合は①の「パスキーでログイン」を押します。Googleログインは現在利用できません。
2. **2段階認証のコードを入力する**
2段階認証を設定している場合は、認証アプリに表示される6桁のコードを入力します。6桁そろうと自動で次へ進みます。パスキーでログインしたときは、この手順はありません。
3. **店舗を選ぶ**
所属している店舗が1つなら、その店舗の画面がそのまま開きます。複数の店舗に所属している場合は「店舗を選ぶ」が表示されるので、作業する店舗を選びます。
ログイン後はダッシュボードが開きます。権限が調査担当のメンバーは、調査依頼の画面から始まります。
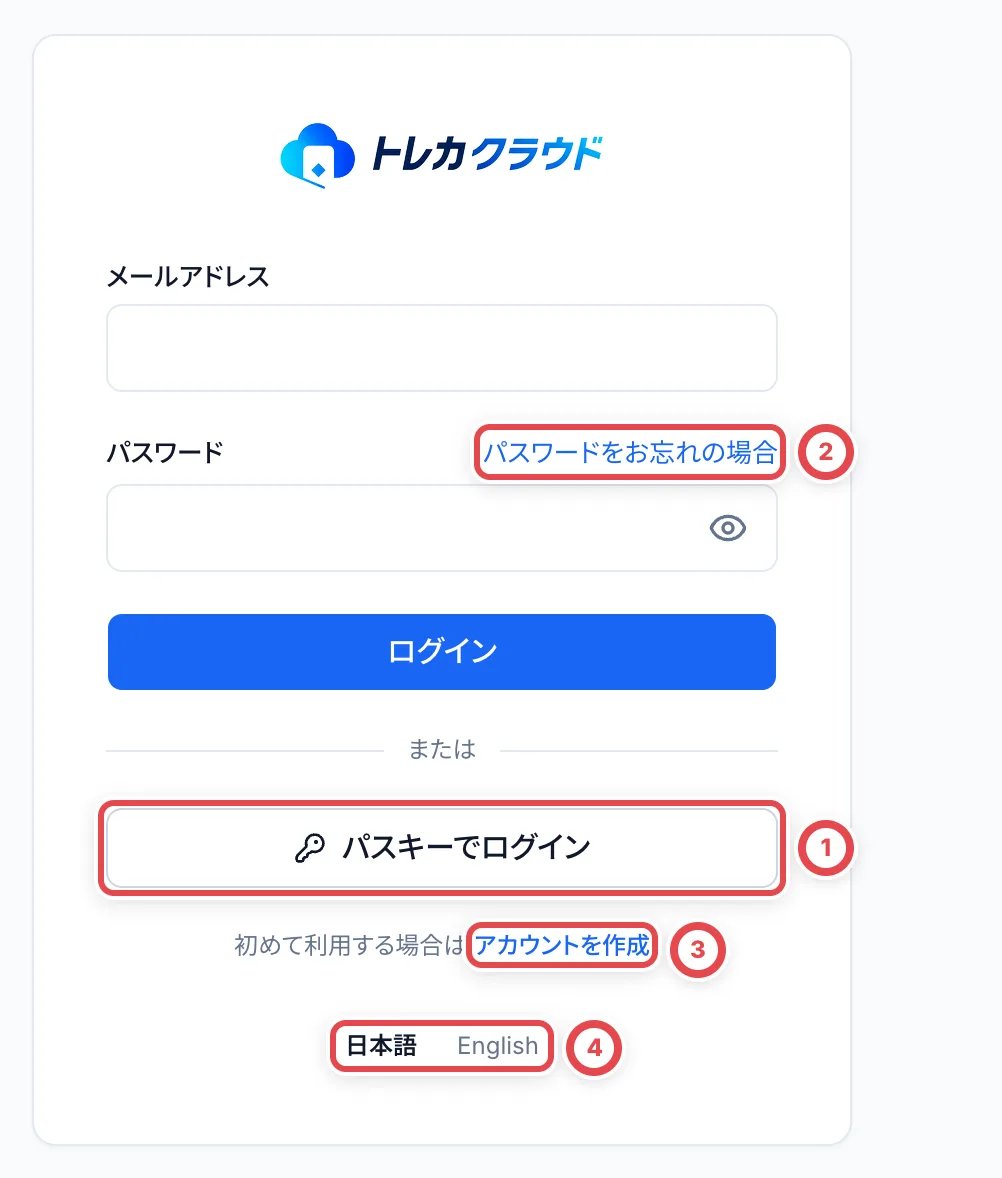 ①はパスキーでのログイン、②はパスワードの再設定です。③は新しい店舗を開くときだけ使います。④でログイン前の表示言語を選びます。
### 認証アプリを使えないとき
コードの入力画面で「認証アプリを使えないとき」を押すと、リカバリコードでログインできます。リカバリコードは、2段階認証を設定したときに保存した10個のコードです。
### パスワードを忘れたとき
1. **再設定のリンクを受け取る**
ログイン画面の②の「パスワードをお忘れの場合」を押します。①にログインのメールアドレスを入力して「再設定のリンクを送る」を押すと、再設定用のメールが届きます。
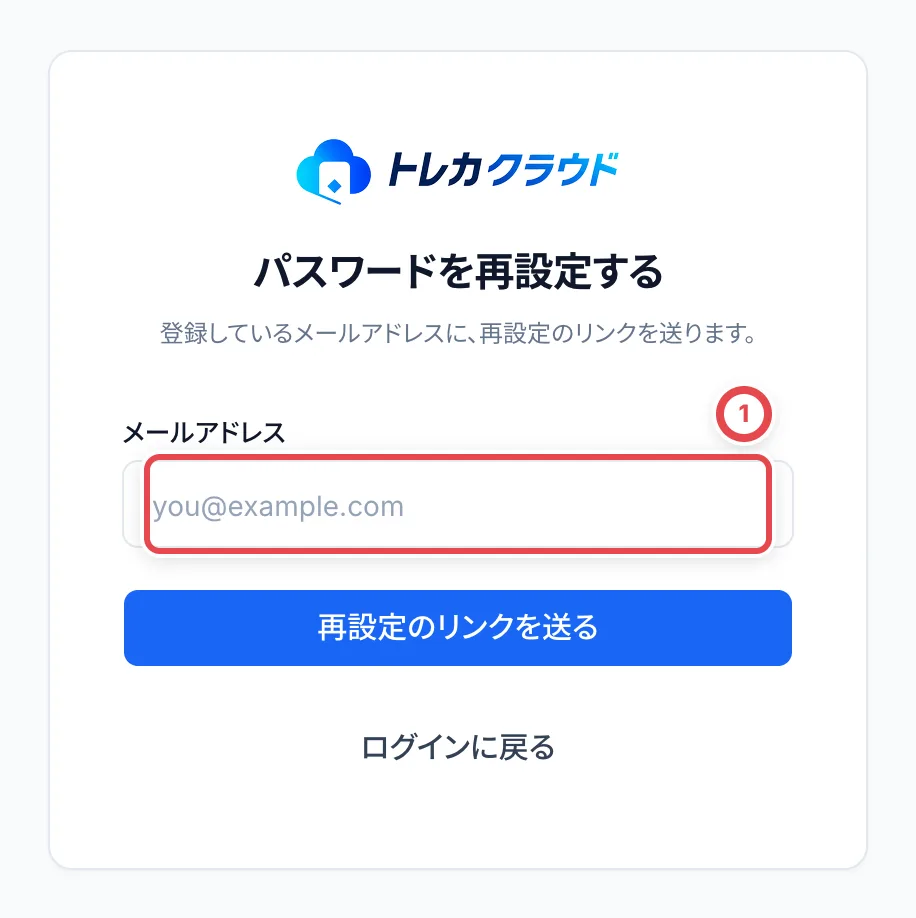 2. **新しいパスワードを設定する**
メールのリンクを開き、12文字以上の新しいパスワードを設定します。リンクの有効期限は1時間です。期限が切れたときは、最初からやり直してください。
## 招待を受けて店舗に参加する
店舗のオーナーや管理者がメンバーを招待すると、招待メールが届きます。メールのリンクを開くと、参加する店舗と権限が表示されます。
- 初めて使う場合は、表示名とパスワードを入力して「アカウントを登録」を押します。届いた確認メールのリンクを開き、招待の画面に戻って「この事業者に参加する」を押します。
- すでにアカウントがある場合は「登録済みの方はログインして参加」からログインし、参加します。
招待の有効期限は7日間です。期限切れのときは「招待リンクが使えません」と表示されます。招待した人に再送を頼んでください。
:::warning
ログイン画面の③の「アカウントを作成」は、新しい店舗を開設するための入口です。いまある店舗に加わるときは、招待メールのリンクから登録してください。
:::
## 店舗を切り替える
複数の店舗に所属している場合は、サイドバーのアカウントメニューから店舗を切り替えます。
1. **アカウントメニューを開く**
サイドバーのいちばん下にある、自分の名前と店舗名のボタンを押します。
2. **店舗を選ぶ**
①の「組織」の欄に、所属しているすべての店舗が並びます。いま開いている店舗にはチェックマークが付きます。別の店舗を選ぶと、その店舗のホーム画面に切り替わります。
切り替える前に開いていた画面は引き継がれません。切り替えたあとで、目的の画面を開き直してください。
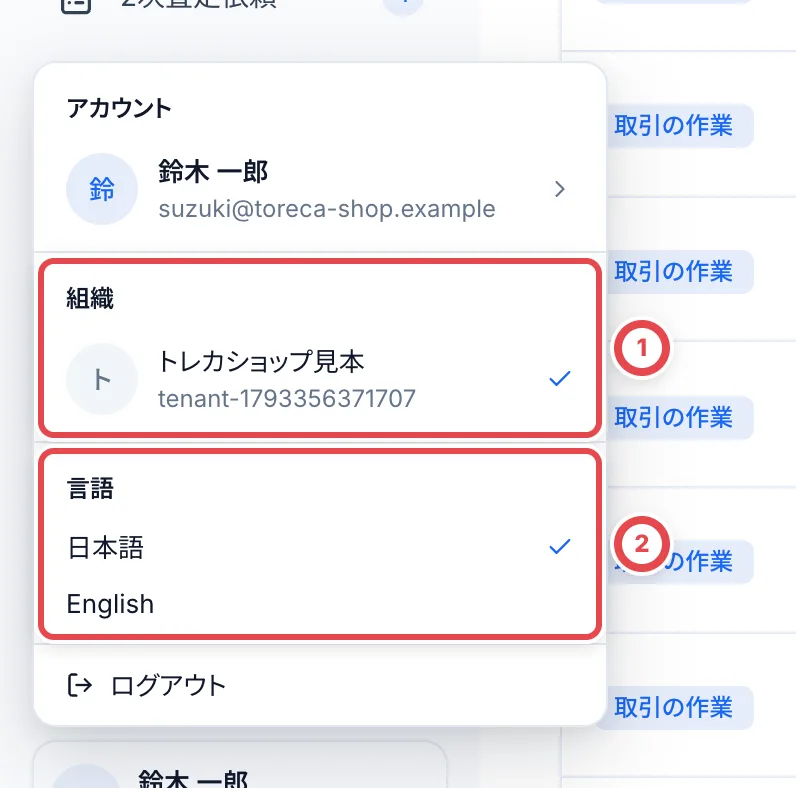 ①で作業する店舗を、②で表示する言語を選びます。いま選ばれているものにはチェックマークが付きます。
## 表示言語を切り替える
アカウントメニューの②の「言語」で「日本語」か「English」を選びます。選んだ言語はアカウントに保存されるため、別の端末でログインしても同じ言語で表示されます。ログイン前は、ログイン画面の下にある切り替えで言語を選べます。
## ログインの安全性を高める
「設定」の「アカウント」にある「ログインとセキュリティ」で、次の設定ができます。
- ①のパスワードの変更。「他の端末をすべてサインアウトする」を選ぶと、ほかの端末のログインも終わります。
- ②の「2段階認証を設定する」。認証アプリでQRコードを読み取り、6桁のコードを入力します。最後に表示される10個のリカバリコードは、必ず保存してください。
- ③の「パスキーを追加する」。指紋や顔認証、PINでログインできるようになります。
- 「ログイン中の端末」の確認。見覚えのない端末があれば、④の「サインアウト」でその端末のログインを終わらせます。
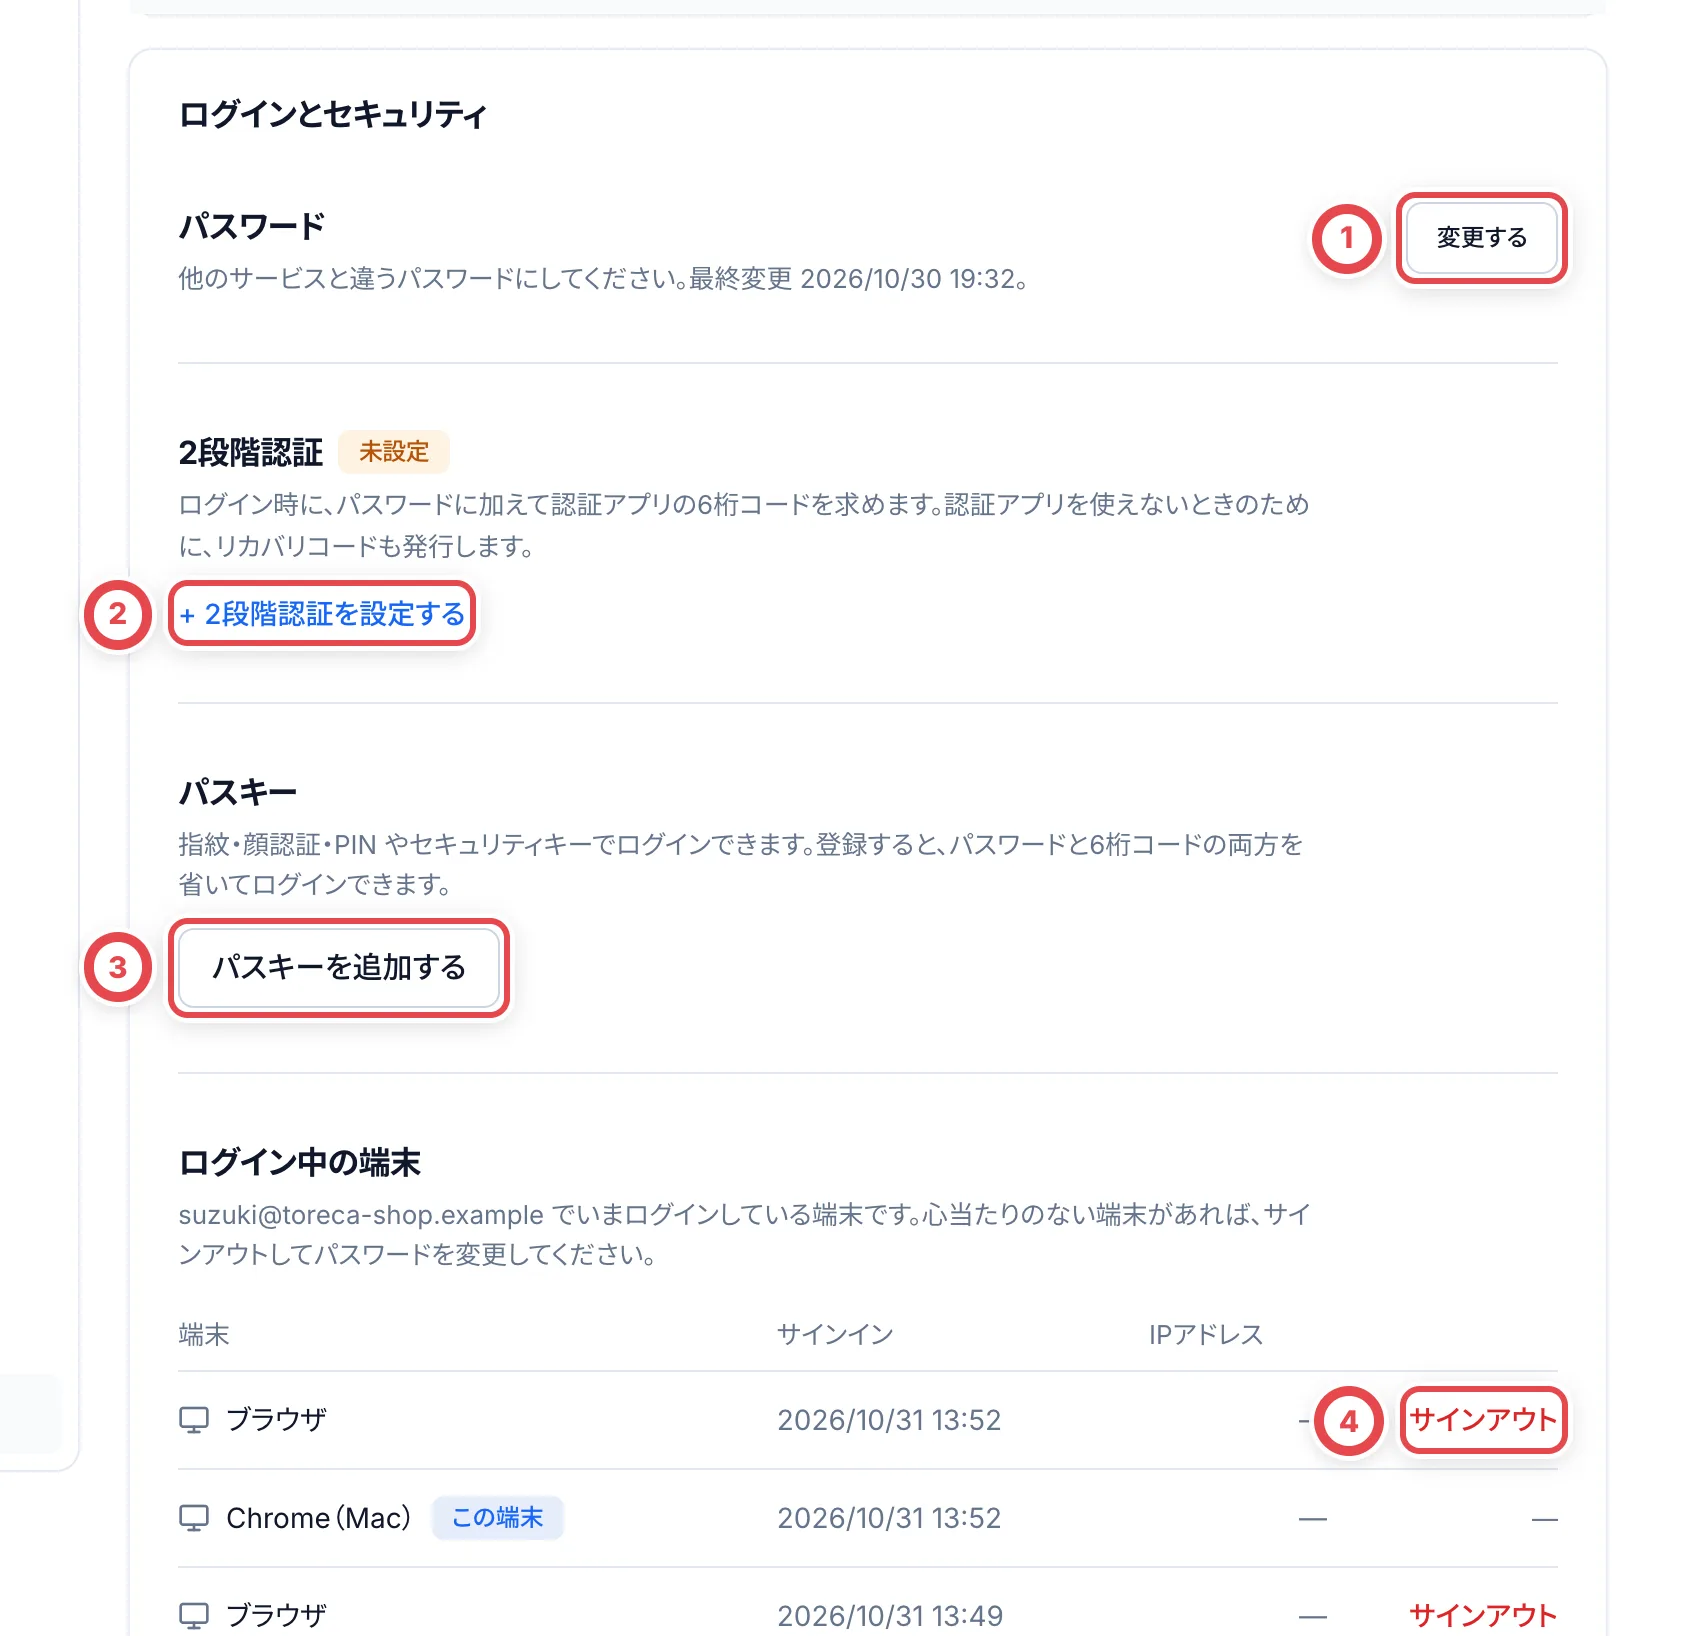 ## 困ったとき
| こんなとき | 確かめること・やること |
| ---------------------------------------- | ------------------------------------------------------------------------------------------------------- |
| パスワードを忘れた | ログイン画面の「パスワードをお忘れの場合」から再設定のリンクを受け取ります。リンクの有効期限は1時間です |
| 認証アプリが手元にない | コードの入力画面の「認証アプリを使えないとき」から、保存したリカバリコードでログインします |
| 招待のリンクで「招待リンクが使えません」 | 招待の有効期限(7日間)が切れています。招待した人に再送を頼みます |
| 別の店舗の画面を開きたい | サイドバーのいちばん下のアカウントメニューの「組織」で、店舗を切り替えます |
| 英語の画面にしたい | アカウントメニューの「言語」で「English」を選びます。ほかの端末でも同じ言語になります |
---
# 相場を探して確認する
Source: https://docs.toreca-cloud.com/guides/getting-started/market
サイドバー下の「相場」は新しいタブで開きます。査定の作業画面を残したまま、カードやBOX・パック・デッキを調べられます。
## 1. 名前・型番で検索する
①「カードを検索」にカード名・型番・商品名を入力し、Enterを押します。初期表示は、日本のポケモンカードで相場を取得できているものです。ほかのゲーム・海外版・相場のない商品を探す場合は、次の手順で条件を変更します。
「タイルで表示」「表で表示」を切り替えます。並び順には、更新が新しい順・相場が高い順/安い順・名前順・発売が新しい順があります。検索語を入れた場合は関連度順も選べます。検索・条件・並び順の変更後は最初のページから表示され、表示中の件数と全件数は一覧の下で確認できます。
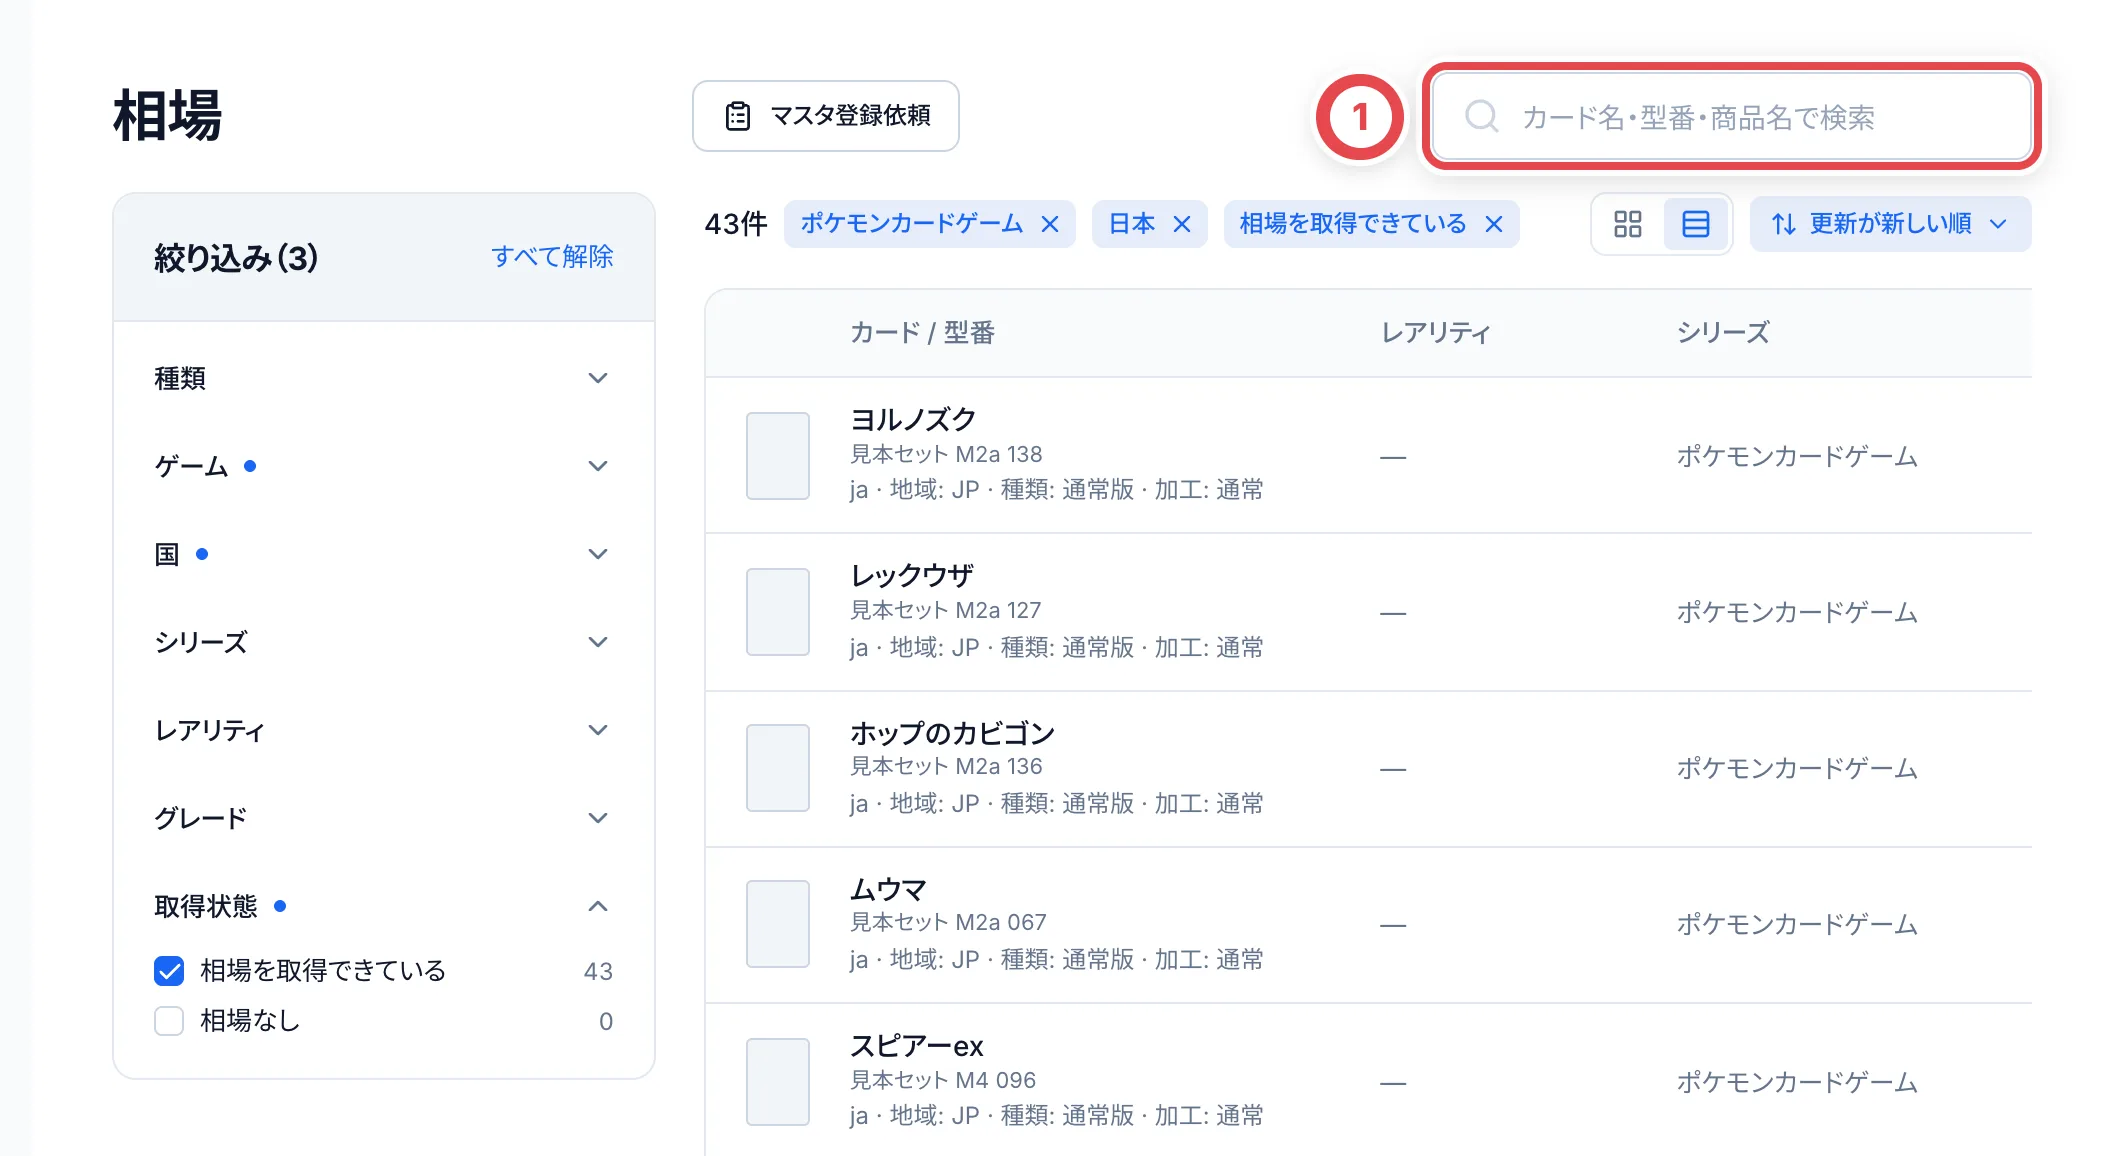 検索語に一致する候補が少ない場合は、意味の近い候補も表示されたという案内が出ます。名前だけで採用せず、型番・収録弾・地域・グレードを現物と照合します。
## 2. 絞り込みを変更する
iPadなど横幅が限られる画面では、①「絞り込み」を押して条件を開きます。広い画面では一覧の左に表示されます。
種類・ゲーム・国・シリーズ・レアリティ・グレード・取得状態から選びます。相場帯が表示される場合は価格の範囲も指定できます。条件名の横の件数と、一覧上の選択済み条件を確認してください。条件の「×」でその条件を外し、②「すべて解除」でまとめて外します。相場帯の解除では下限・上限が一緒に解除されます。
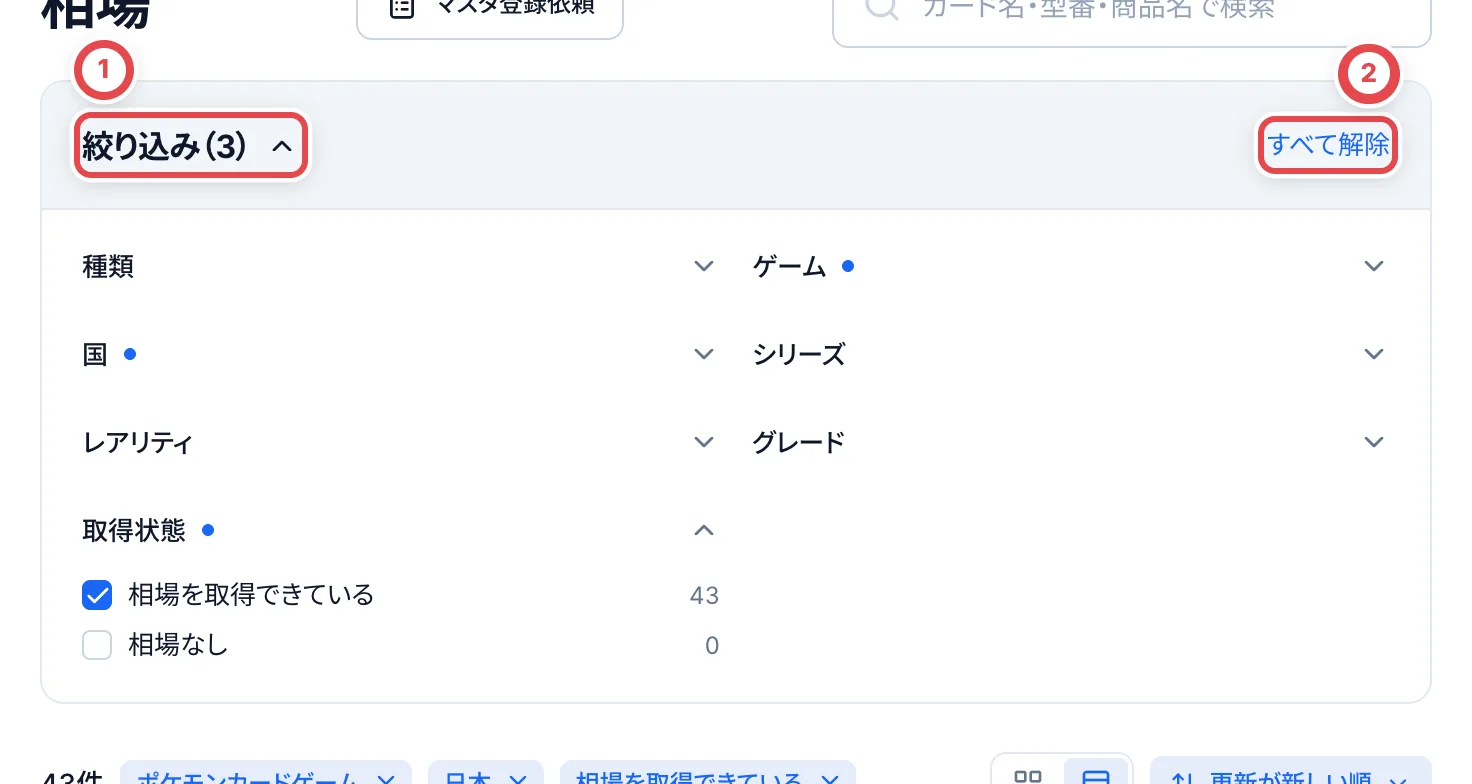 相場なしのカードは「取得状態」の「相場なし」を選びます。画面の「すべて解除」と、アドレスを指定せず相場を開き直す操作は異なります。開き直すと初期条件で始まります。
## 3. グレードと取得状況を確認する
候補の商品名を押して詳細を開き、名前・型番・収録弾・言語・版を確認します。①「グレード別の買取価格」で対象の鑑定会社・グレードを確かめます。
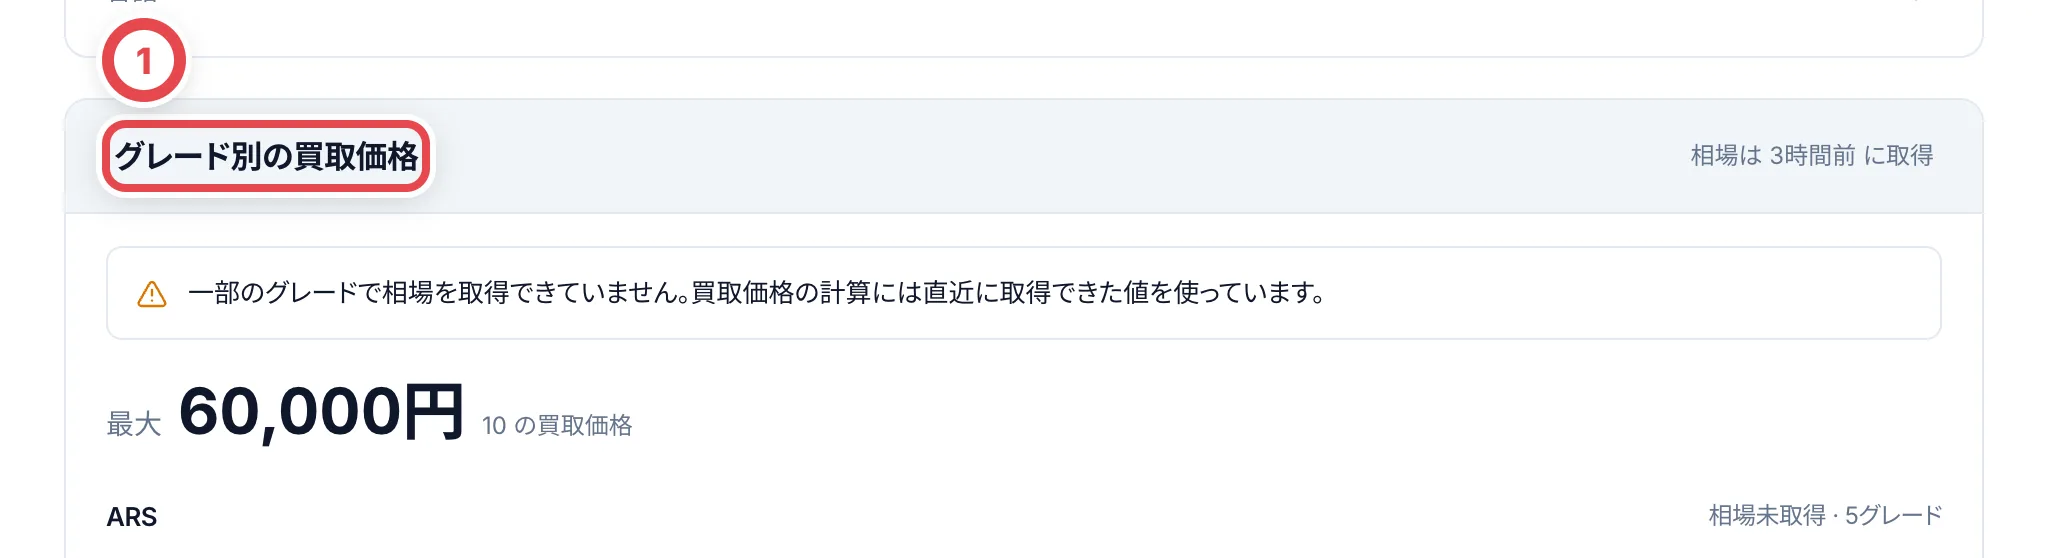
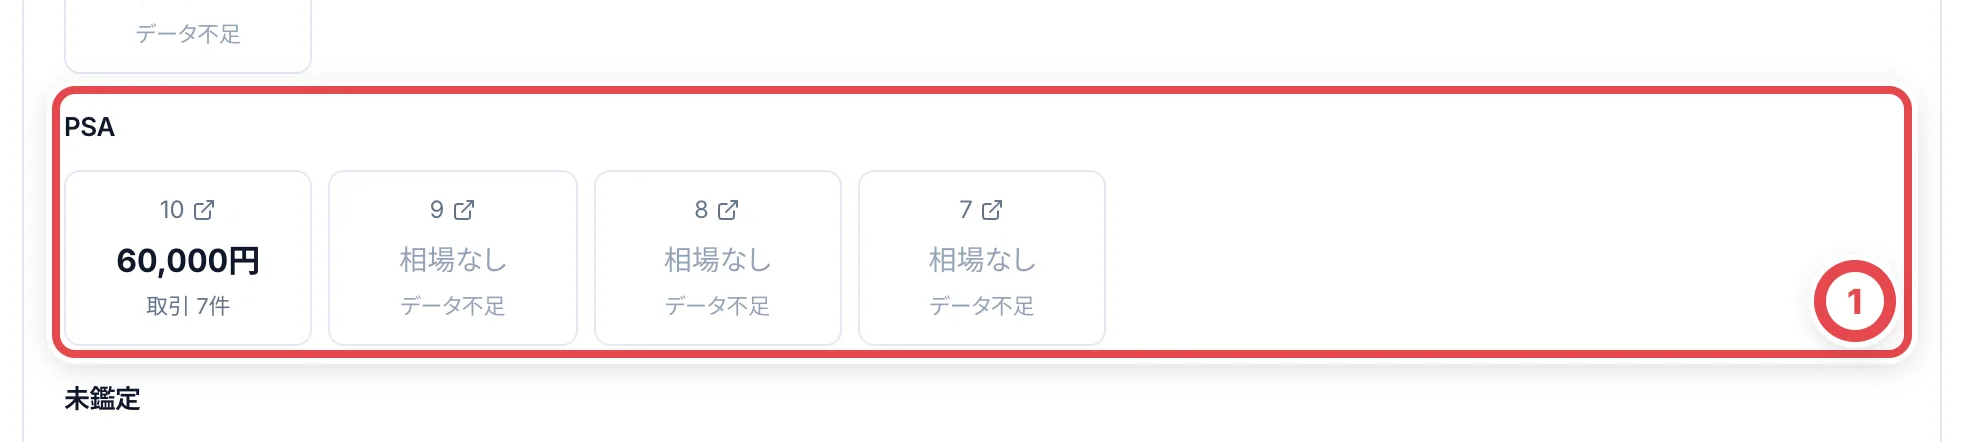 「集計前」は取得した記録があっても自動査定にはまだ使われない状態です。「データ不足」「まだ取得していません」は0円を意味しません。一部のグレードが取得できていない案内が出た場合は、直近に取得できた値が使われていることと、対象グレードを確認します。「相場の推移」「取得履歴」も合わせて確認してください。
相場の確認だけでは、作成中の査定金額は変わりません。査定への反映は[査定と見積](/guides/purchase/appraisal)、判断に必要な価格がない場合は[相場調査](/guides/purchase/research-and-reviews)へ進みます。商品・時価の誤りは[商品と時価の訂正](/guides/inventory/product-and-market-corrections)を使います。
## 困ったとき
| 表示・状態 | 確認すること・次の操作 |
| ------------------------------ | ----------------------------------------------------------------------------------------------------------------------- |
| 知っているカードが出ない | 初期条件のゲーム・国・取得状態、種類と検索語を確認し、必要な条件を外す |
| BOX・パックが出ない | 「種類」を確認する。ほかの条件で0件になっていないかも確認する |
| 表の右側が見えない | 表の領域を横にスクロールするか、タイル表示へ切り替える |
| 金額が「—」やデータ不足 | 0円として査定せず、取得状況とグレードを確認し、相場調査や手動入力へ進む |
| マスタにないカードを登録したい | [登録依頼](/guides/purchase/card-registration-requests)へ進む。「相場」の「マスタ登録依頼」で確認待ちの依頼も確認できる |
---
# メンバーと権限
Source: https://docs.toreca-cloud.com/guides/getting-started/members-and-roles
店舗で一緒に作業するスタッフは、「設定」の「メンバーと権限」から招待します。メンバーごとに役割を決め、役割によって使える操作が変わります。
## 役割とできること
役割ごとにできる操作は、「メンバーと権限」の画面下部にある「権限マトリクス」で確かめ、店舗ごとに変えられます。変えられるのは役割単位で、メンバー単位で細かく変えることはできません。下の表は、はじめに設定されている内容です。
| 役割 | 主にできること |
| ------------------ | -------------------------------------------------------------------------------------------- |
| オーナー | すべての操作。店舗を開設した人がオーナーになります |
| 管理者 | オーナーと同じく、すべての操作。振込の承認、設定の変更、メンバーの管理もできます |
| スタッフ | 顧客・取引・本人確認・在庫など日々の作業。振込の承認、設定の変更、メンバーの管理はできません |
| スタッフ・調査兼務 | スタッフの作業に加えて、相場の調査依頼に回答できます |
| 調査担当 | 相場の調査依頼への回答が中心です。ほかの業務の情報は閲覧のみです |
| 閲覧のみ | 情報の閲覧だけができます。在庫の変更もできません |
メンバーの招待や権限の変更、アクセスの停止、権限マトリクスの変更ができるのは、「メンバー管理」の権限をもつ役割だけです。はじめに設定されているのは、オーナーと管理者です。ほかのメンバーには、この画面が閲覧のみで表示されます。
役割ごとの細かい違いは、「メンバーと権限」の画面のいちばん下にある「権限マトリクス」で確かめます。行が操作、列が役割で、チェックの付いた役割がその操作をできます。
## 店舗独自の役割(副管理者など)を作る
標準の役割に当てはまらないときは、店舗独自の役割を追加できます。「メンバーと権限」の「役割」の欄で操作します。
1. **役割を追加する**
「役割を追加」を押し、「役割名」を入力します。「権限のコピー元」に標準の役割(たとえば管理者)を選ぶと、その権限から始められます。「コピーしない」を選ぶと、権限なしで始まります。
2. **権限を調整する**
追加した役割は「権限マトリクス」に列として並びます。チェックを付け外しして、できる操作を決めます。
3. **メンバーに割り当てる**
メンバー一覧の「権限」の列で、追加した役割を選びます。
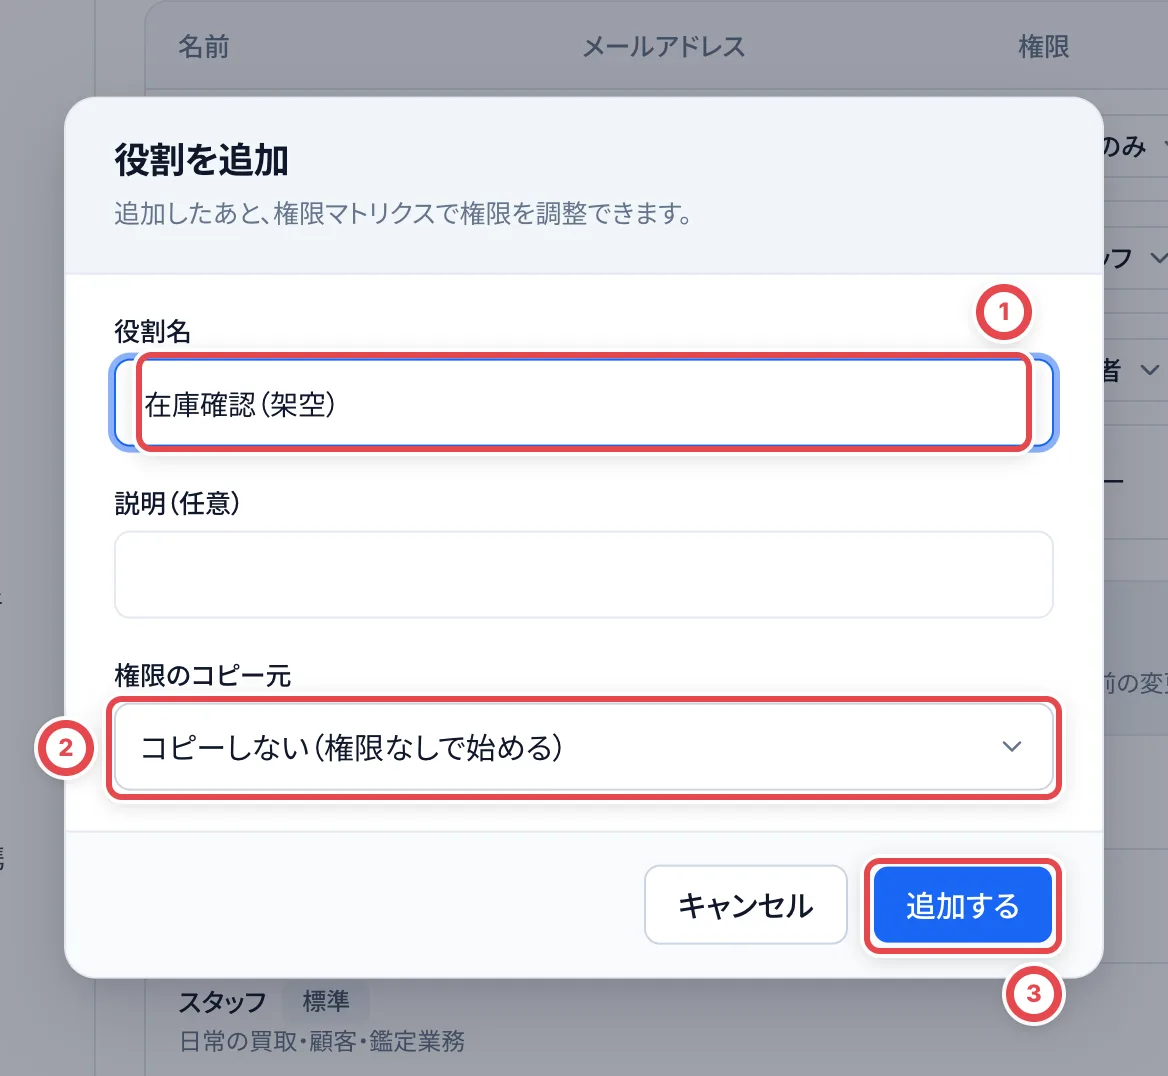 ①に役割名を入れ、②で権限のコピー元を選び、③で追加します。
- 独自の役割は、行の「…」から名前と説明の変更、並び順の変更、停止ができます。並び順は独自の役割どうしでだけ変えられ、標準の役割は先頭に並びます
- 標準の役割(オーナー・管理者・スタッフ・調査担当・スタッフ・調査兼務・閲覧のみ)は、名前の変更も停止もできません
- 標準の役割と同じ名前は付けられません。同じ名前の役割も作れません
- 独自の役割は20件までです
- 停止する役割にメンバーがいるときは、「メンバーの移し先」の役割を選びます。メンバーはまとめて移り、移し先の権限になります。あなた自身が持っている役割は、ほかのメンバーが停止します
- 停止した役割は「停止中の役割」に並び、「再開」で戻せます。再開するときに同じ名前の役割があると戻せません
- 「メンバー管理」を許可した役割のメンバーは、招待や権限の変更ができます。役割を変えると、その権限に合わせてメンバーの区分も自動で揃います
- 招待で選べるのは、これまでどおりスタッフ・閲覧のみ・管理者です。独自の役割にするときは、参加後に権限を変更します
## 権限マトリクスを変更する
承諾の記録、到着の記録、最終査定の確定、買取の成立、2次査定の依頼・承認・省略、振込の承認と結果の記録、クラウドサインの書類の送信と取消などは、操作ごとに権限を分けられます。たとえば「振込の承認は管理者まで」「2次査定の省略はオーナーだけ」のように決められます。
1. **チェックを付け外しする**
「権限マトリクス」で、役割の列と操作の行が交わるチェックを付け外しします。カテゴリの行のチェックを押すと、そのカテゴリの操作をまとめて切り替えられます。
2. **変更内容を確認する**
「変更内容を確認して保存」を押すと、役割ごとに「許可する」「許可しない」操作の一覧が表示されます。
3. **理由を入力して保存する**
「変更の理由」を入力して保存します。変更はすぐに反映され、監査ログに前後の内容と理由が残ります。
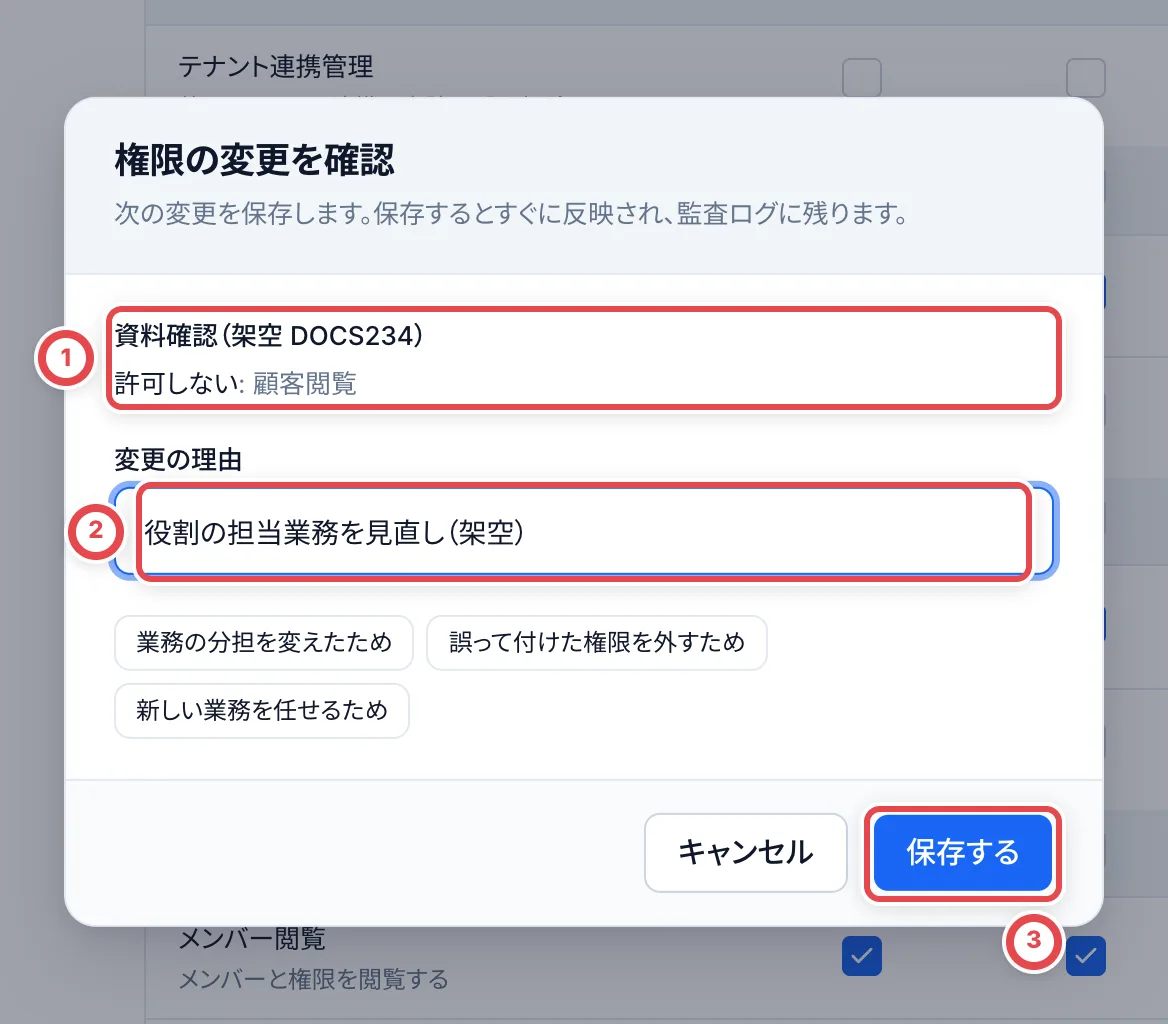 ①で許可する・許可しない操作を確かめ、②に理由を入れ、③で保存します。保存前は変更されません。
- オーナーの列は、すべての操作が許可されたままで、変更できません
- 「メンバー管理」を許可した役割は、このマトリクスを変更できます。メンバー管理ができる人がいなくなる変更は保存できません
- ほかの人が同じ役割を先に変更したときは、画面を読み込み直してからやり直します
- 承諾・到着・最終査定を「戻す」権限は、はじめはオーナーと管理者だけに設定されています。戻す操作は、取引の状態のメニューの「前の段階に戻す…」から行います([取引の発送から最終査定まで](/guides/purchase/shipping-and-final)を参照)
- 新しい操作の権限は、はじめは「その操作を今できる役割」すべてに設定されているため、設定を変えるまで押せなくなる操作はありません
- 押せない操作は、画面に必要な権限の名前が表示されます
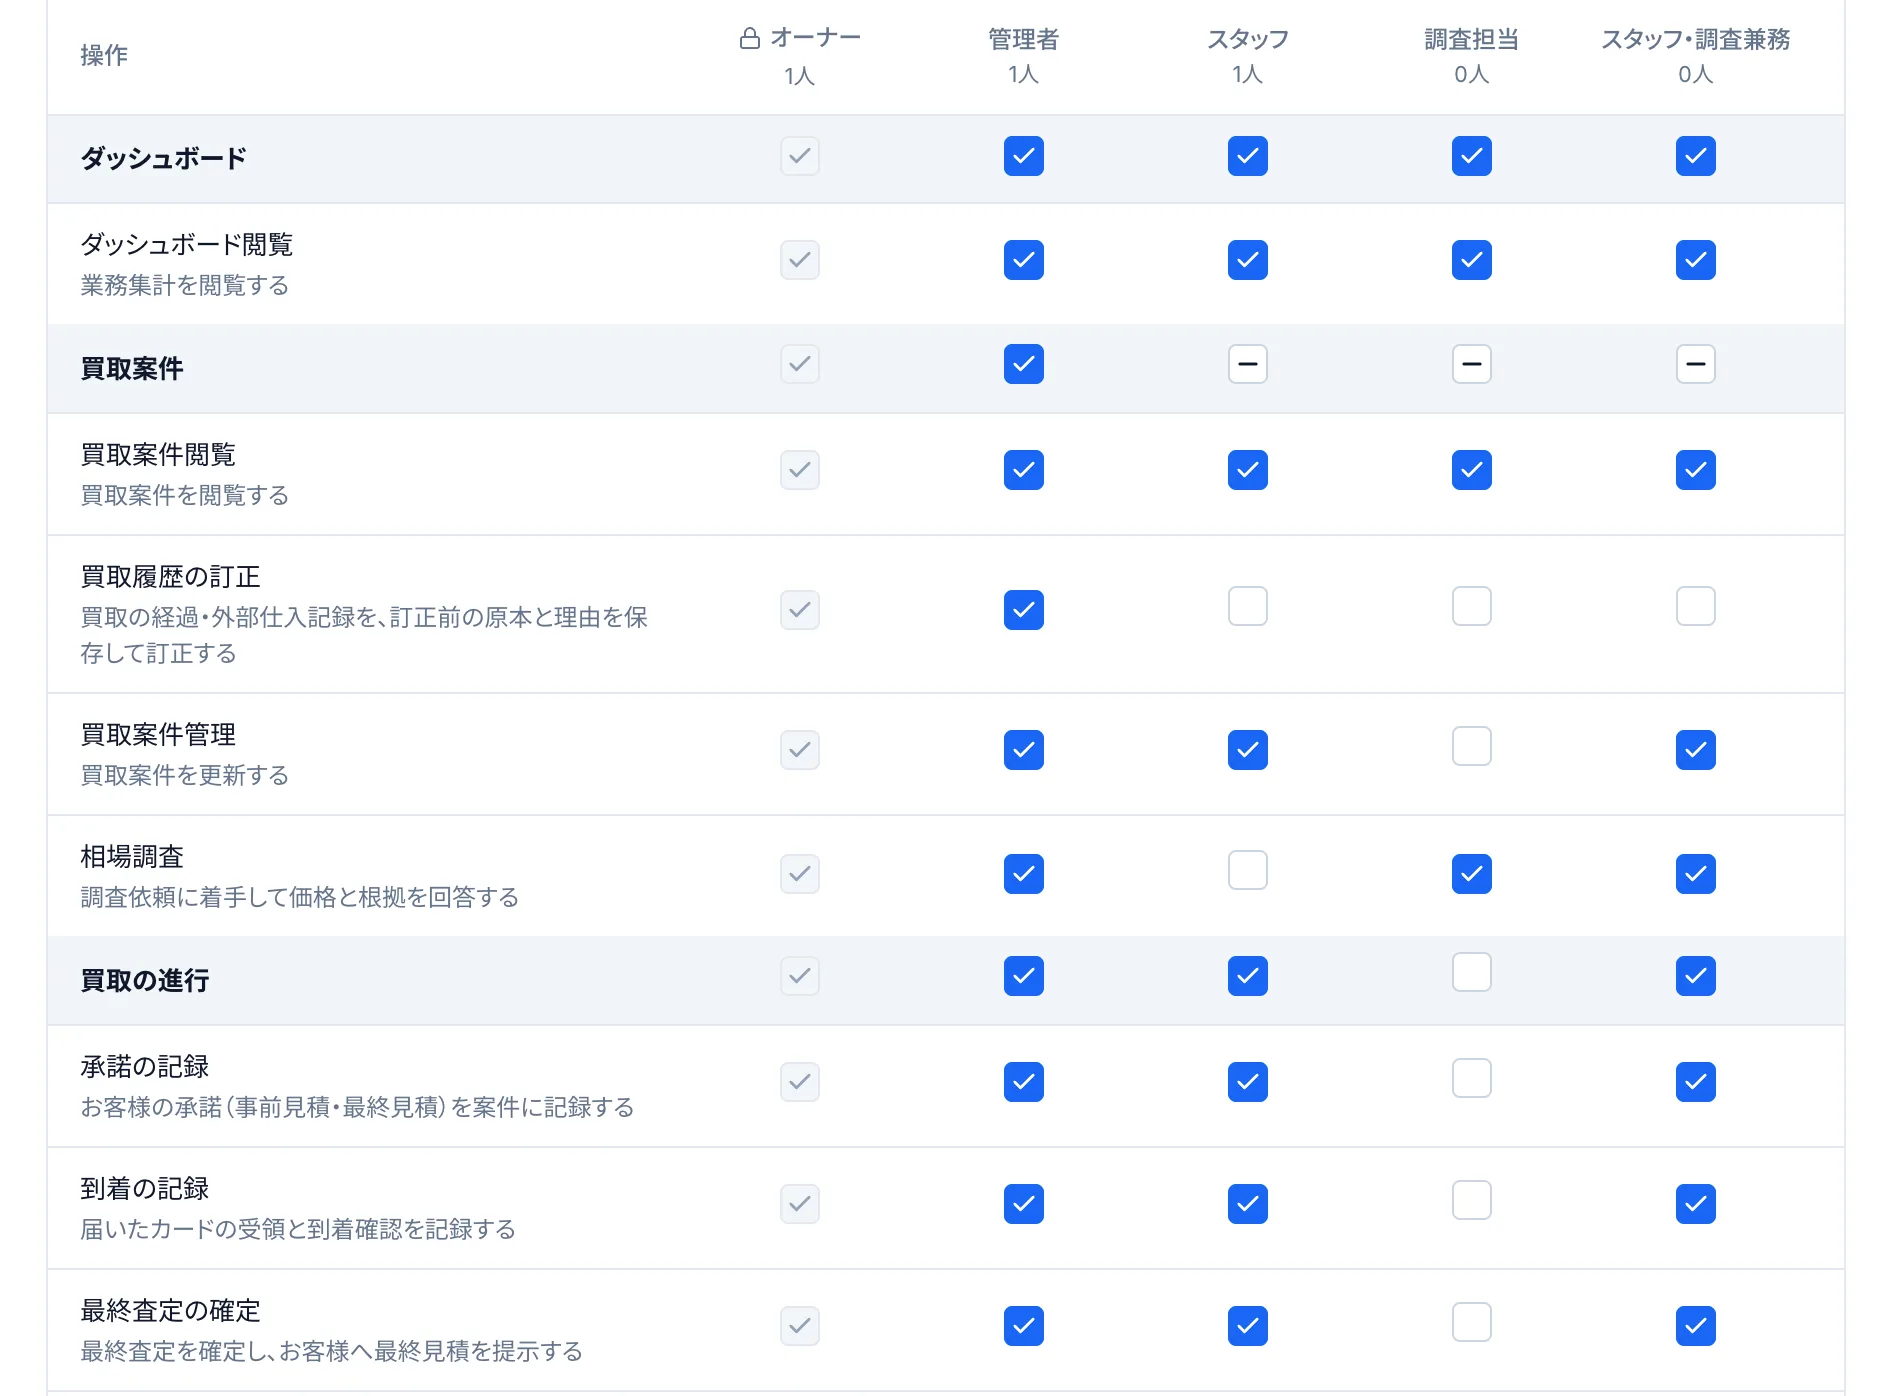 表の右側の役割が見えない場合は、表の中を横にスクロールします。メンバー一覧も同じように操作できます。
## メンバーを招待する
1. **招待のダイアログを開く**
「設定」の「メンバーと権限」を開き、①の「メンバーを招待」を押します。
2. **メールアドレスと権限を入力する**
②の「招待先のメールアドレス」を入力し、③の「権限」をスタッフ・閲覧のみ・管理者から選びます。最初はスタッフが選ばれています。
3. **招待メールを送る**
④の「招待メールを送信」を押すと、相手に招待メールが届きます。招待は一覧の「招待中」の欄に表示されます。
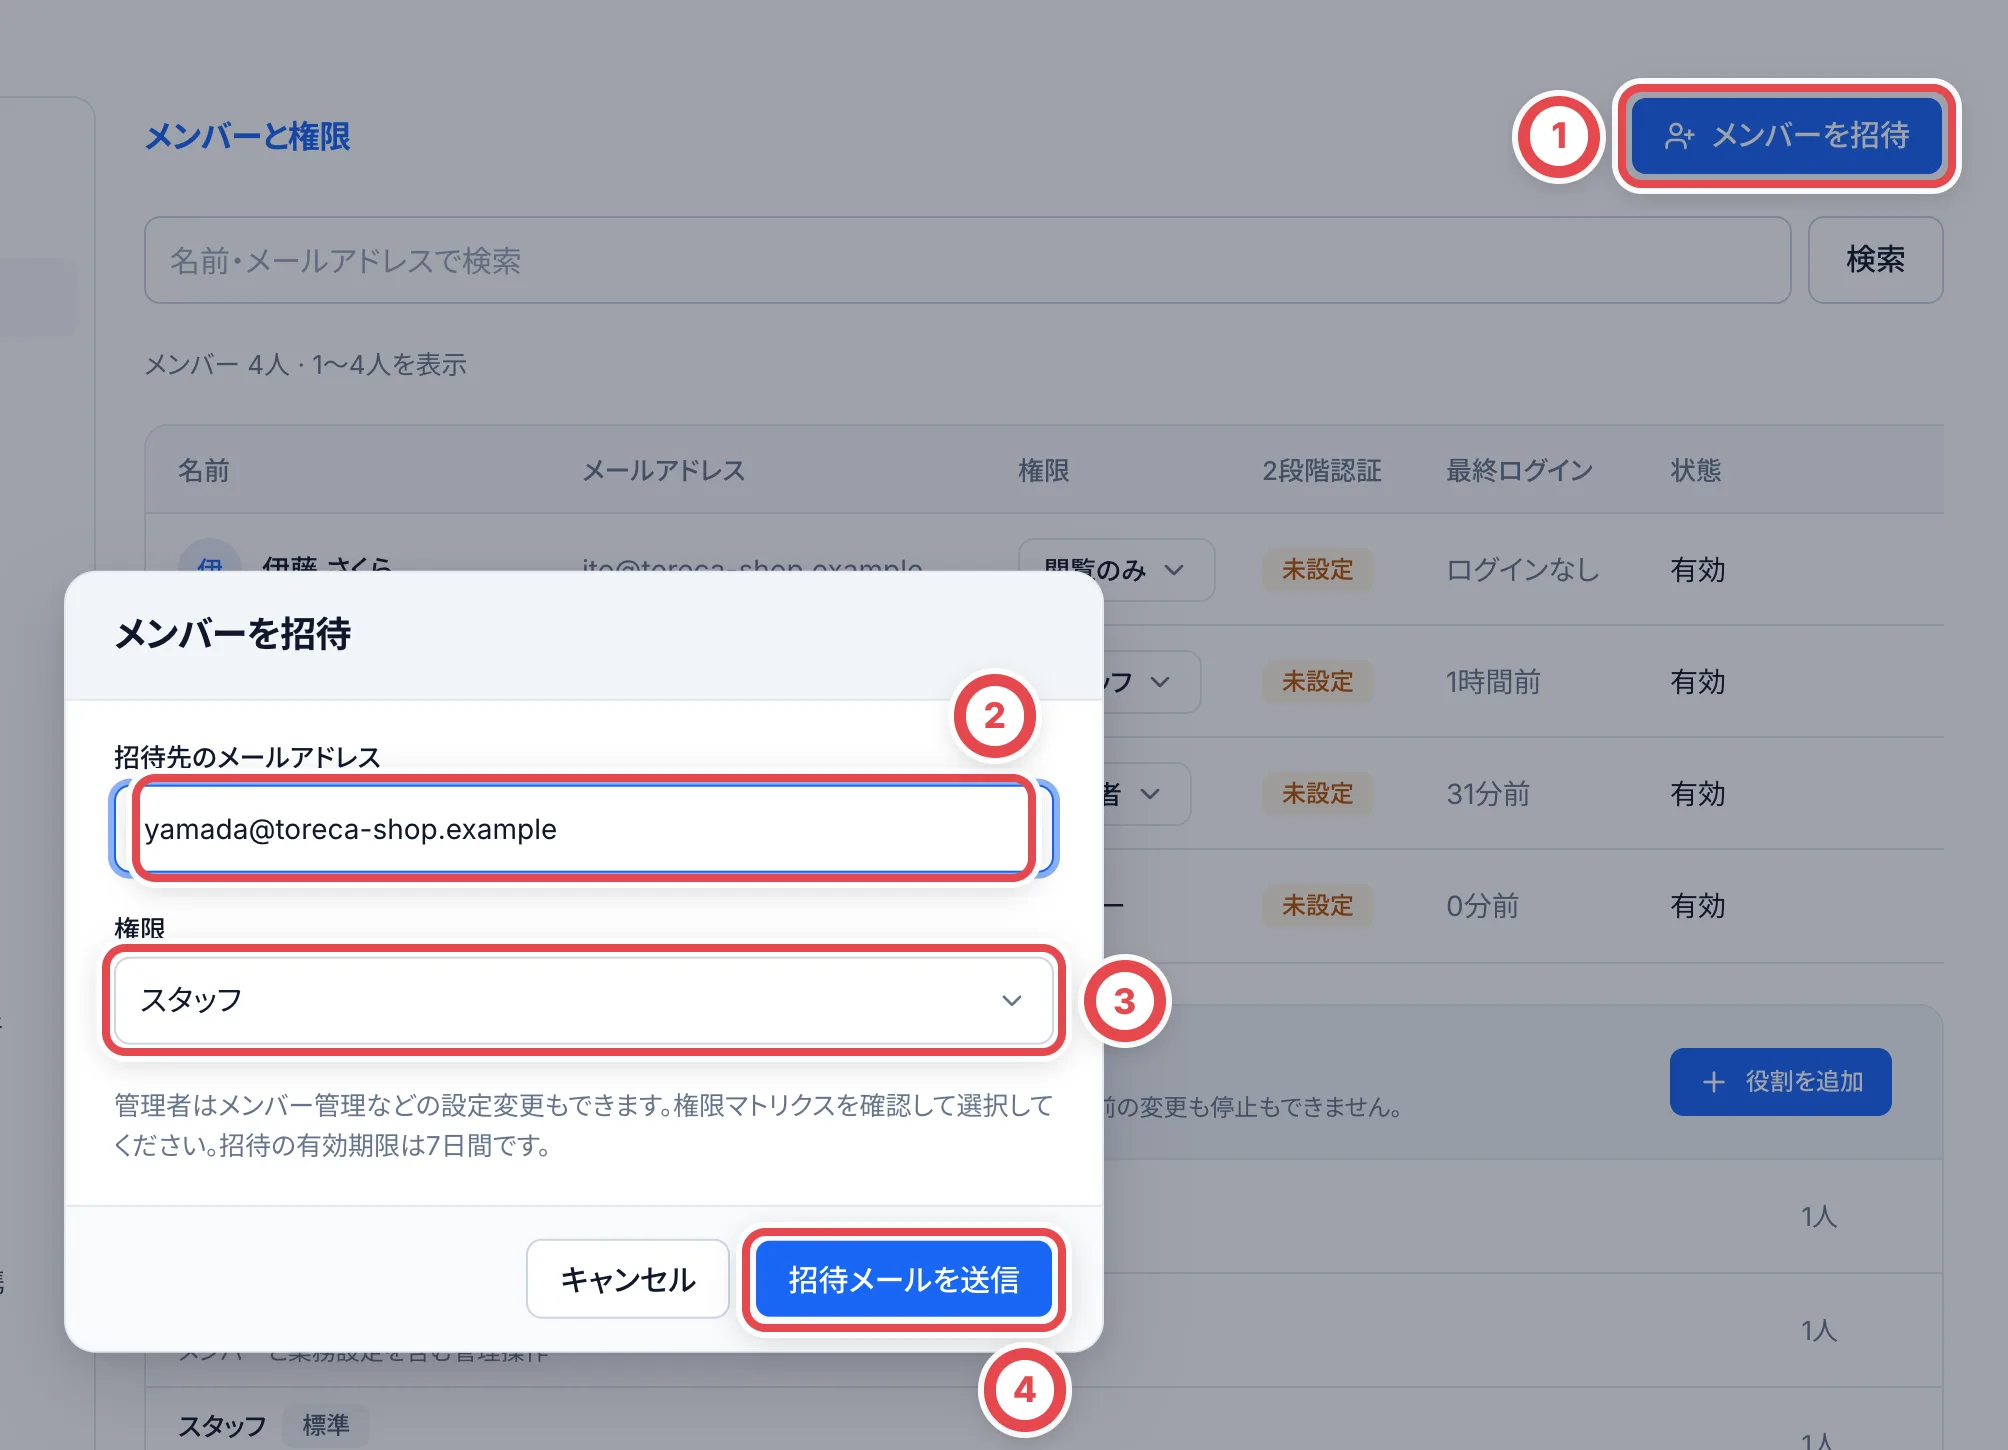 招待の有効期限は7日間です。相手がまだ参加していない招待は、行の「…」から「招待メールを再送」か「招待を取り消す」を選べます。再送すると有効期限が延びます。招待された側の手順は、[ログインと店舗の選択](/guides/getting-started/login)を参照してください。
:::note
招待のときに選べるのは、スタッフ・閲覧のみ・管理者の3つです。調査担当やスタッフ・調査兼務、店舗独自の役割にするときは、参加後に権限を変更します。
:::
## 権限を変更する
メンバー一覧の①の「権限」の列で、新しい役割を選びます。変更はすぐに反映されます。オーナーの権限と、自分自身の権限は変更できません。
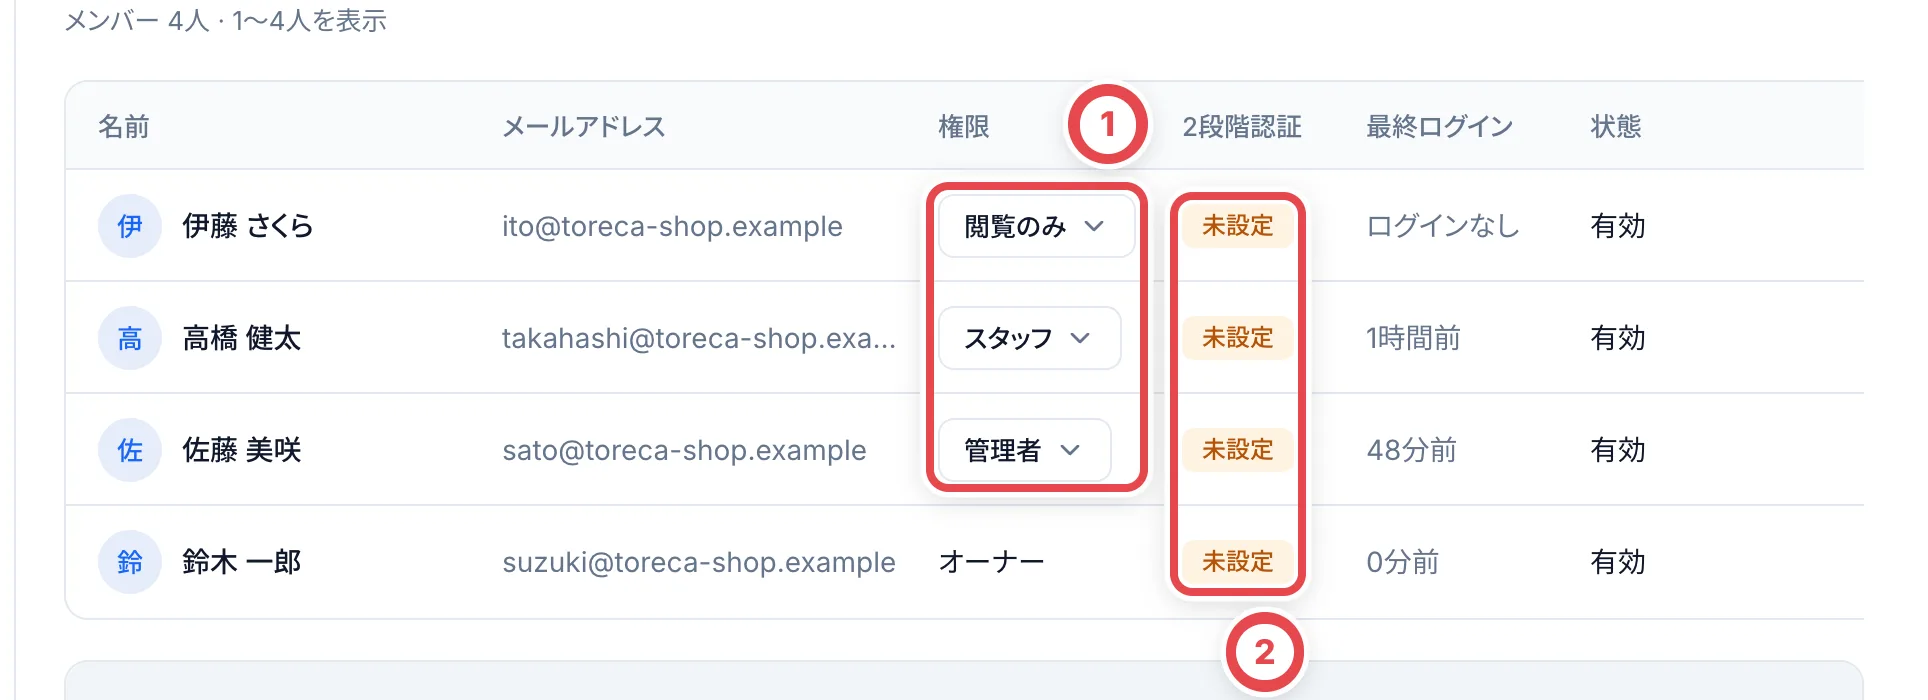 ①で役割を選び直します。②の2段階認証が「未設定」のメンバーには、設定をすすめてください。
## アクセスを停止する
退職などで使わなくなったメンバーは、削除せずにアクセスを停止します。
1. **停止の操作を選ぶ**
メンバーの行の①の「⋯」を押し、②の「アクセスを停止」を選びます。
2. **理由を入力して停止する**
「理由」を入力して確定します。停止したメンバーは、この店舗の画面・API・MCPを使えなくなります。
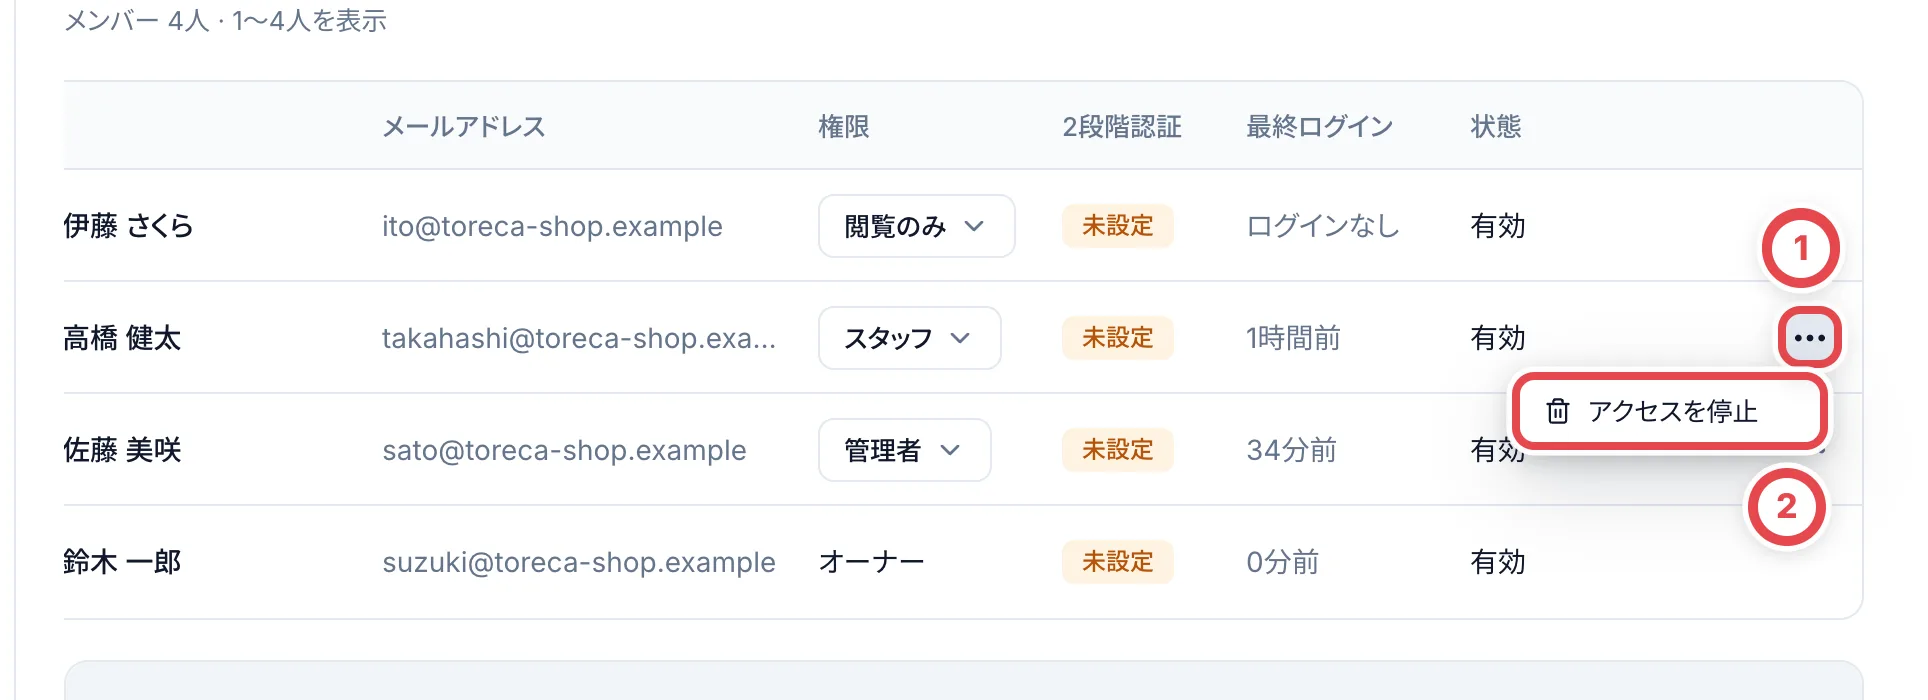 停止しても、そのメンバーが残した記録は消えません。担当していた案件は自動で引き継がれないため、必要に応じてほかのメンバーが担当してください。再び使えるようにするときは、同じメニューの「アクセスを再開」を選びます。オーナーと自分自身は停止できません。
## メンバー一覧で確かめられること
一覧には、名前・メールアドレス・権限・2段階認証の設定状況・最終ログイン・状態が並びます。2段階認証が「未設定」のメンバーには、設定をすすめてください。設定の手順は[ログインと店舗の選択](/guides/getting-started/login)にあります。
## 困ったとき
| こんなとき | 確かめること・やること |
| ------------------------------------ | -------------------------------------------------------------------------------------------------------- |
| 「メンバーを招待」が押せない・出ない | 招待できるのは「メンバー管理」の権限をもつ役割だけです。はじめはオーナーと管理者です |
| 操作が押せず、必要な権限が表示される | 権限マトリクスで自分の役割にその操作が許可されているか確かめます。変更はメンバー管理ができる人に頼みます |
| 招待で調査担当を選べない | 招待で選べるのはスタッフ・閲覧のみ・管理者です。参加してから権限を変えます |
| 招待したのに相手が参加できない | 招待の有効期限は7日間です。行の「…」から「招待メールを再送」を選びます |
| オーナーや自分の権限を変えられない | オーナーの権限と、自分自身の権限は変えられません |
| 辞めたスタッフをメンバーから消したい | 削除はできません。「アクセスを停止」を選びます。記録は残り、あとで「アクセスを再開」もできます |
---
# Brother QL-820NWBcのセットアップ
Source: https://docs.toreca-cloud.com/guides/inventory/brother-printer
トレカクラウドでは、在庫ラベルのPDFを使って印刷します。OSの印刷画面から送る方法と、専用アプリから直接送る方法があります。まずプリンター単体で印刷できる状態にしてから、在庫ラベルを確認してください。
[写真の出典: Brother公式製品ページ](https://www.brother.co.jp/product/labelprinter/ql820nwbc/index.aspx)
PDFを毎回開かずに印刷したい場合は、[専用印刷アプリのインストールと使い方](/guides/inventory/desktop-print-app)を参照してください。
## 最初に用紙の品番を確認する
QL-820NWBcはDKラベル・DKテープを使います。ロールの品番と寸法を、[公式の消耗品一覧](https://www.brother.co.jp/product/labelprinter/ql820nwbc/accessory/index.aspx)で確認してください。
### DK-2210を使う場合
[DK-2210の公式仕様](https://direct.brother.co.jp/shop/g/g5V791C2F251/)は、幅29mm・長さ30.48mの長尺紙テープです。ラベルごとの切れ目はなく、送り方向の長さを決めてカットします。
トレカクラウドの用紙で「Brother DK-2210用(29×50mm)」を選びます。PDFは幅29mm×送り方向50mm、1ページ1枚です。PDF内の配置を給紙方向へ合わせているため、手動で回転する必要はありません。
| 項目 | 設定 |
| ---------------- | ------------------------------------------------------ |
| ドライバーの用紙 | 幅29mmの長尺紙テープ(DK-2210) |
| 送り方向の長さ | 50mm |
| 向き | 縦向き。PDFの回転は不要 |
| 倍率 | 実際のサイズ(100%)。用紙に合わせる拡大縮小は使わない |
| カット | 複数枚は自動カットをオフ、最後にカットをオン |
横長に見た紙の仕上がりは**50×29mm**です。文字とQRは、紙の左右から2mm・送り方向の前後から3mm離した25×44mmの領域へ配置されます。QR本体は17mmです。
[Brother公式の印字領域](https://download.brother.com/welcome/docp100306/cv_ql820_eng_escp_101.pdf)では、29mm長尺紙の印字幅は約25.9mmです。用紙幅29mmいっぱいに印刷する設計にはしていません。
:::note
新規印刷で選べる用紙はDK-2210、A4 65面、A4 24面です。従来の「ロール紙 1枚ずつ(50×25mm)」は選択肢から外していますが、過去バッチのPDFは引き続き利用できます。DK-2210では「Brother DK-2210用」を選んでください。過去に作成したPDFは自動で新形式へ変わりません。同じラベル番号を新しい用紙で刷り直せます。番号を変える再発行は不要です。
:::
## 1. 電源とDKロールを用意する
### 1-1. カバーを開く
電源を切り、前面のDKロールカバーを持ち上げます。初回はプラテン保護シートと時計用コイン電池の絶縁シートも取り外します。
### 1-2. DKロールを取り付ける
スプールアームをガイドに合わせ、しっかり差し込みます。ロールの向きを図と照らし合わせてください。
### 1-3. 先端を出力スロットへ通す
テープの先端をラベル出力スロットへ差し込み、出口の端まで引き出します。そのあとカバーを閉じ、ACアダプターと電源コードを接続します。
図の出典: [Brother公式FAQ「DKロールのセット/交換方法」](https://faq.brother.co.jp/app/answers/detail/a_id/11034)。このFAQはQL-820NWBcを対象に含みます。
取り付け方向の図は[かんたん設置ガイドの「DKロールをセットする」](https://download.brother.com/welcome/docp100285/ql820nwb_jpn_qsg_d017p8001_02.pdf)を参照してください。
BrotherはQL-820NWBcの設置にQL-820NWBのマニュアルを参照するよう案内しています。ただし、c付きモデルにはUSBホスト端子がなく、アドホック接続にも対応しません。[QL-820NWBcの相違点(公式PDF)](https://download.brother.com/welcome/docp100714/d02jdw001a_balder_insertion_ql_jp.pdf)も確認してください。
## 2. ドライバーを入れる
1. [Brother公式のソフトウェアダウンロード](https://www.brother.co.jp/download/software/index.aspx)で「QL-820NWB/820NWBc」を選びます。
2. 使用しているWindowsまたはmacOSのバージョンを選び、対応OSと提供ソフトを確認します。
3. そのOS向けのインストーラー・プリンタードライバーを導入します。接続するタイミングは、インストーラーの案内に従ってください。
Brotherのラベル作成・接続確認にはP-touch Editorを使えます。トレカクラウドのラベル内容は、トレカクラウドから出力したPDFを使います。
## 3. パソコンにつなぐ
### USBで使う
インストーラーの案内に合わせて、本体背面のUSBポートとパソコンをUSBケーブルでつなぎ、電源を入れます。OSのプリンター一覧にQL-820NWB/820NWBcが追加されていることを確認します。
### 店舗のWi-Fiで使う
パソコン、プリンター、無線ルーター、設定用USBケーブル、接続先のSSIDとパスワードを用意します。
1. ドライバーのインストーラーで「無線LAN接続」を選びます。
2. USBケーブルを持っているか聞かれたら「はい」を選び、ケーブルを使って接続先を設定します。
3. 設定が終わったら、プリンターとパソコンが店舗のネットワーク経由で通信できることを確認します。USBを外すタイミングはインストーラーの案内に従ってください。
**QL-820NWBcはWPS接続に対応していません。** WPSボタンを使うQL-820NWB向けの手順を、そのまま使わないでください。Windows・Macそれぞれの動画とWPA3の設定は[公式のWi-Fi接続手順](https://faq.brother.co.jp/app/answers/detail/a_id/13471/related/1)を参照してください。
有線LANを使う場合は、本体背面のLANポートを店舗のネットワークにつなぎ、[かんたん設置ガイド](https://download.brother.com/welcome/docp100285/ql820nwb_jpn_qsg_d017p8001_02.pdf)の有線LANの手順に従って設定します。
## 4. プリンター単体で印刷を確かめる
P-touch Editorなどで、装着したDKロールと同じ用紙を選んで試し刷りします。用紙エラーが出る、給紙できない、印刷先に出てこない場合は、先に接続とロールの設定を直してください。
## 5. トレカクラウドのテストPDFを確かめる
1. トレカクラウドの「設定」›「ラベル印刷」で、「Brother DK-2210用」の「テスト印刷」を開きます。
2. PDFの印刷先にQL-820NWB/820NWBcを選び、29mm長尺紙・長さ50mm・縦向き・倍率100%にします。複数枚をつなげて出す場合は、ドライバーの自動カットをオフ、最後にカットをオンにします。
3. 40mmの目盛りを定規で測ります。紙上の枠は幅25×送り方向44mmです。枠や文字が欠けていないことも確認します。
4. 大きさが正しく、位置だけずれる場合に「位置合わせ X・Y」で調整して保存します(0.1mm単位、±3.0mm)。XはPDFの右方向、YはPDFの下方向です。大きく動かすと印字可能範囲から外れるため、少量で確認してください。
5. 印刷ダイアログの用紙で「Brother DK-2210用」を選び、少量の在庫ラベルを印刷します。続けて2枚刷り、カットが文字やQRを切らないこと、2枚目で位置がずれないこと、格納アプリで両方のQRを読めることを確認してから、まとめて印刷します。
在庫ラベルのPDF作成と刷り直しは[格納とQRラベル](/guides/inventory/putaway)を参照してください。開始位置は常に1です。
PDFからプリンタードライバーの用紙やカット設定を強制することはできません。上記の設定と、実機での給紙・切れ位置・QR読み取りの確認を行ってください。
## 困ったとき
| 起きていること | 確認すること |
| ------------------------ | ---------------------------------------------------------------------------------------------------------------------- |
| Wi-Fiにつながらない | QL-820NWBcでWPSを使っていないか、SSIDとパスワード、USBを使った設定が完了したかを確認します |
| 用紙エラーになる | ロール品番とドライバーの用紙設定が一致しているかを確認します。TDシリーズ向けの「用紙サイズ設定」を流用しないでください |
| 50×25mmを選べない | DK-2210では「Brother DK-2210用」を選び、ドライバーには29mm長尺紙・長さ50mmを指定します |
| 小さくなる・一部が切れる | 倍率、PDFと用紙の寸法、向き、印刷可能領域を確認します |
| 印刷だけ失敗した | 「印刷バッチ」から同じ番号で刷り直します。番号を変える再発行は不要です |
実機の印刷結果とQRの読み取り確認が終わるまでは、セットアップ完了として扱わないでください。
## 約10枚をつなげて印刷する
1. 入庫で対象の個体を選び、「QRを印刷」を開きます。初期表示は到着日「すべて」です。
2. 用紙をDK-2210にし、「印刷順・個体照合」で認定番号・個体番号・順番を照合します。同名カードでも別の個体として表示します。
3. 印刷アプリ0.1.5以降では「つなげて印刷」を選びます。Mac・Windowsとも、ネットワーク接続のQL-820NWB・DK-2210で利用します。PDFを別のアプリで印刷する場合は、その印刷設定で「自動カット」をオフ、「最後にカット」をオンにします。
4. 一度だけ送信します。専用印刷アプリはPDFの全ページを1つのジョブにまとめ、最後だけカットします。「つなげて印刷」は200枚・1 PDFまでです。複数PDFをまたいでつながることは保証しません。
5. 実紙の枚数、`#001/10`などの連番、ラベル番号、認定番号をバッチ明細と照合します。個体詳細を開いた後も「印刷バッチに戻る」で照合を続けられます。
QL-820NWBのカッターはフルカット方式です。DK-2210は切れ目のない長尺紙で、この設定はハーフカットやミシン目を作りません。つながった紙はハサミなどで切り離してください。
専用印刷アプリは今回のジョブへ排出方法を指定し、OSの既定カット設定は変更しません。使うPCで1枚・10枚・再起動後を実紙で確認してください。途中停止や送信結果不明の場合は、プリンター本体・OSのキュー・実紙を先に確認します。再印刷は既存バッチから行い、番号を新しく発行し直さないでください。
参考資料: [Brotherの連続印刷・末尾カットの案内](https://help.brother-usa.com/app/answers/detail/a_id/144132/~/chain-or-continuous-printing-and-not-cutting-every-label)、[QLシリーズ公式仕様(full cut)](https://www.brother.eu/-/media/product-downloads/devices/nordics/eu_en/labelling-machines/ql_800_leaflet_english_single_pages.pdf)、[QL-820NWB対応用紙](https://www.brother.co.jp/product/labelprinter/ql820nwb/accessory/index.aspx)。
---
# カード別の在庫から個体を選んで訂正する
Source: https://docs.toreca-cloud.com/guides/inventory/corrections
商品名・型番を同じ商品の在庫全体で直す場合は[店内の商品情報と時価の訂正](/guides/inventory/product-and-market-corrections)、買取金額・数量を直す場合は[元の買取案件の訂正](/guides/purchase/amount-and-quantity-corrections)を使います。
カード別の在庫画面では、対象の個体だけを選んで、その場で所在・グレード・カードの特定を直せます。在庫を編集する権限が必要です。
グレード・カードの訂正は入庫伝票由来の個体が対象です。買取由来の個体は、元の買取案件側の訂正が必要です。すべての入庫元を同じ方法で変更できるわけではありません。
## 1. 対象の個体を選ぶ
在庫一覧からカードを開きます。①のチェックで対象を選びます。まとめた行は行を押して開き、ラベル番号・状態・棚を確認し、必要な個体だけ選びます。②の操作帯の件数を照合します。「すべて選択」を使った場合も、訂正したい個体だけか確認してください。
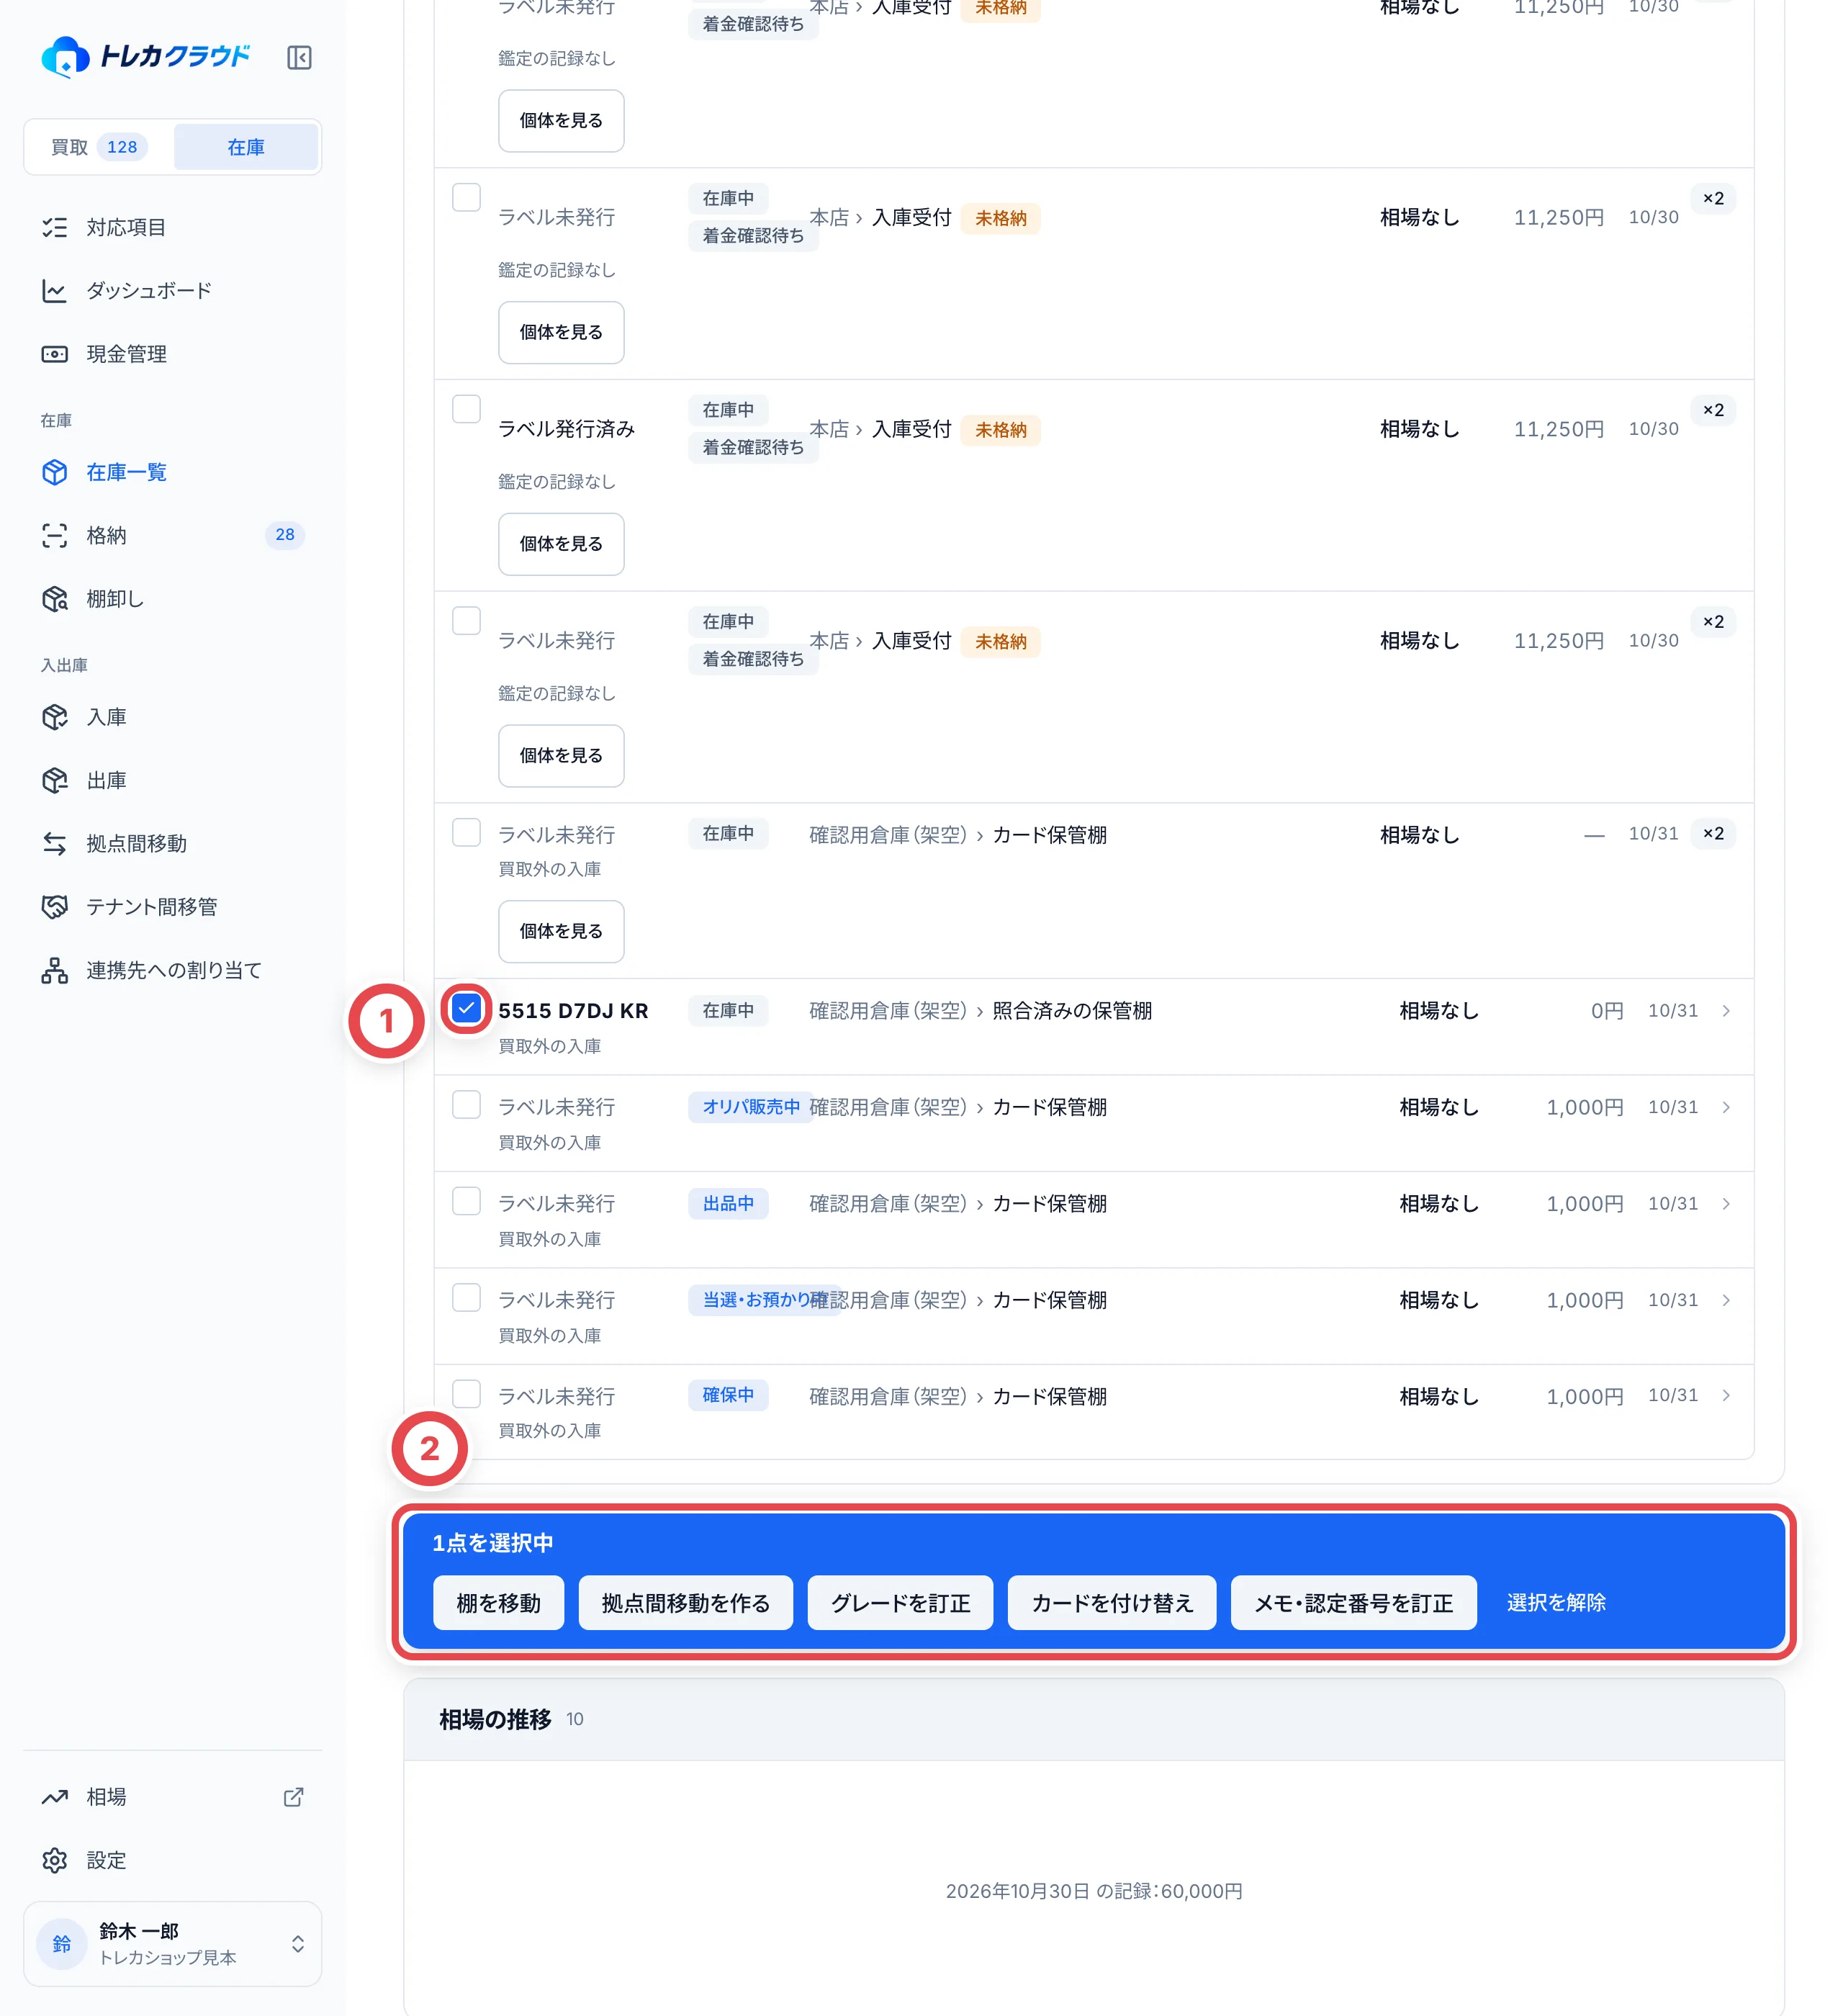 ## 2. 所在を移す
①の「棚を移動」から移動先と理由を入力します。現在の所在と対象件数を照合して確定します。別拠点へ運ぶ作業は「拠点間移動を作る」で伝票を作り、受領まで記録します。画面の指定だけで現物が動くわけではありません。保存後はカードと個体を開き直し、所在と履歴を確認します。
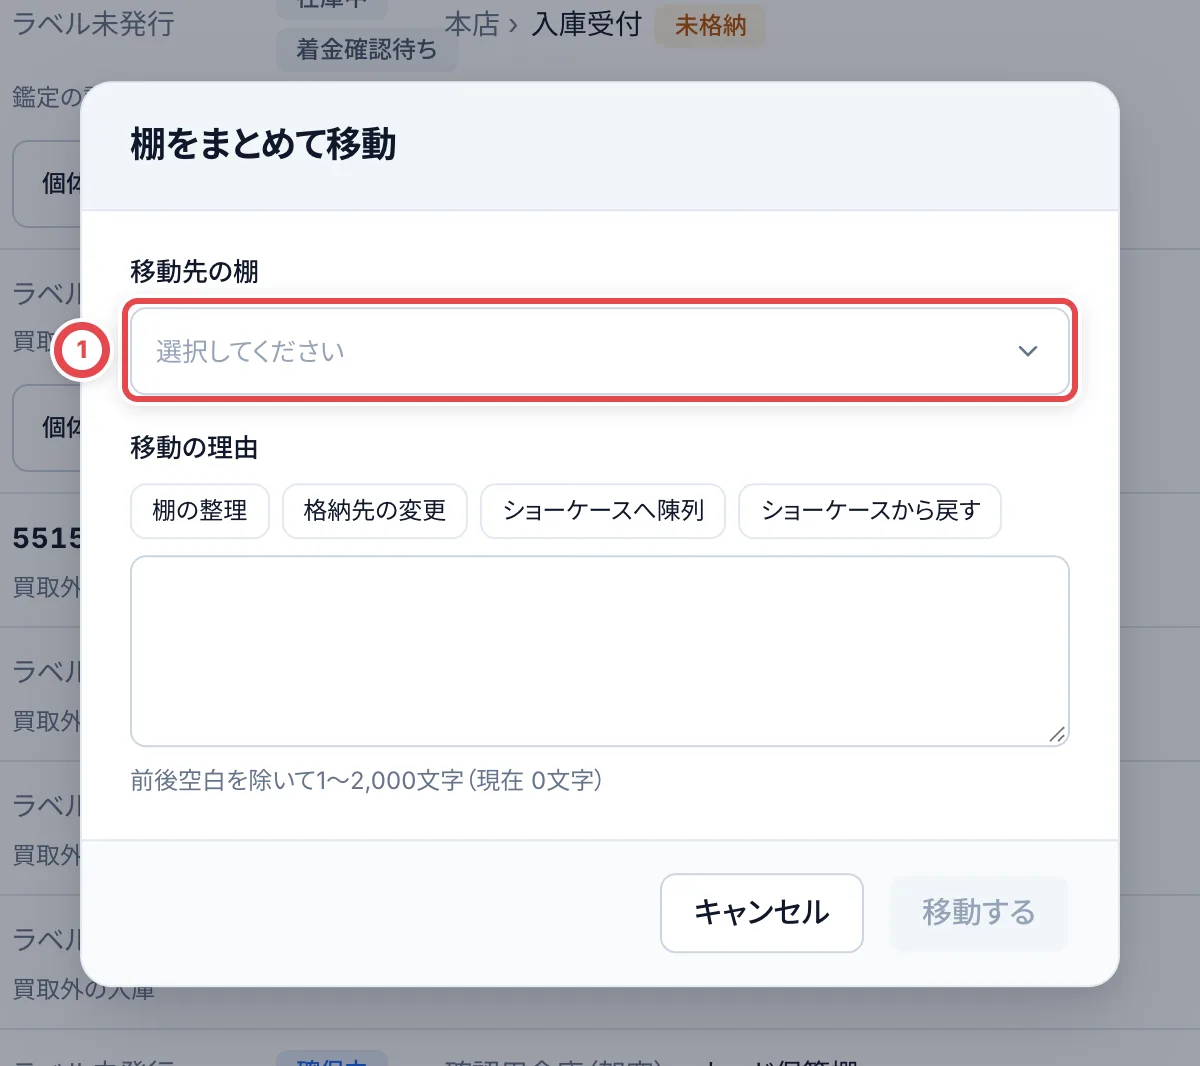 ## 3. グレードを訂正する
「グレードを訂正」を開き、①で正しいグレードと、必要なら認定番号を入力します。②の理由を記入し、対象と変更内容を確認して保存します。鑑定会社の番号は現物と照合してください。店舗内のグレードへ戻す場合は、外部鑑定の認定番号をそのまま残す扱いにはなりません。
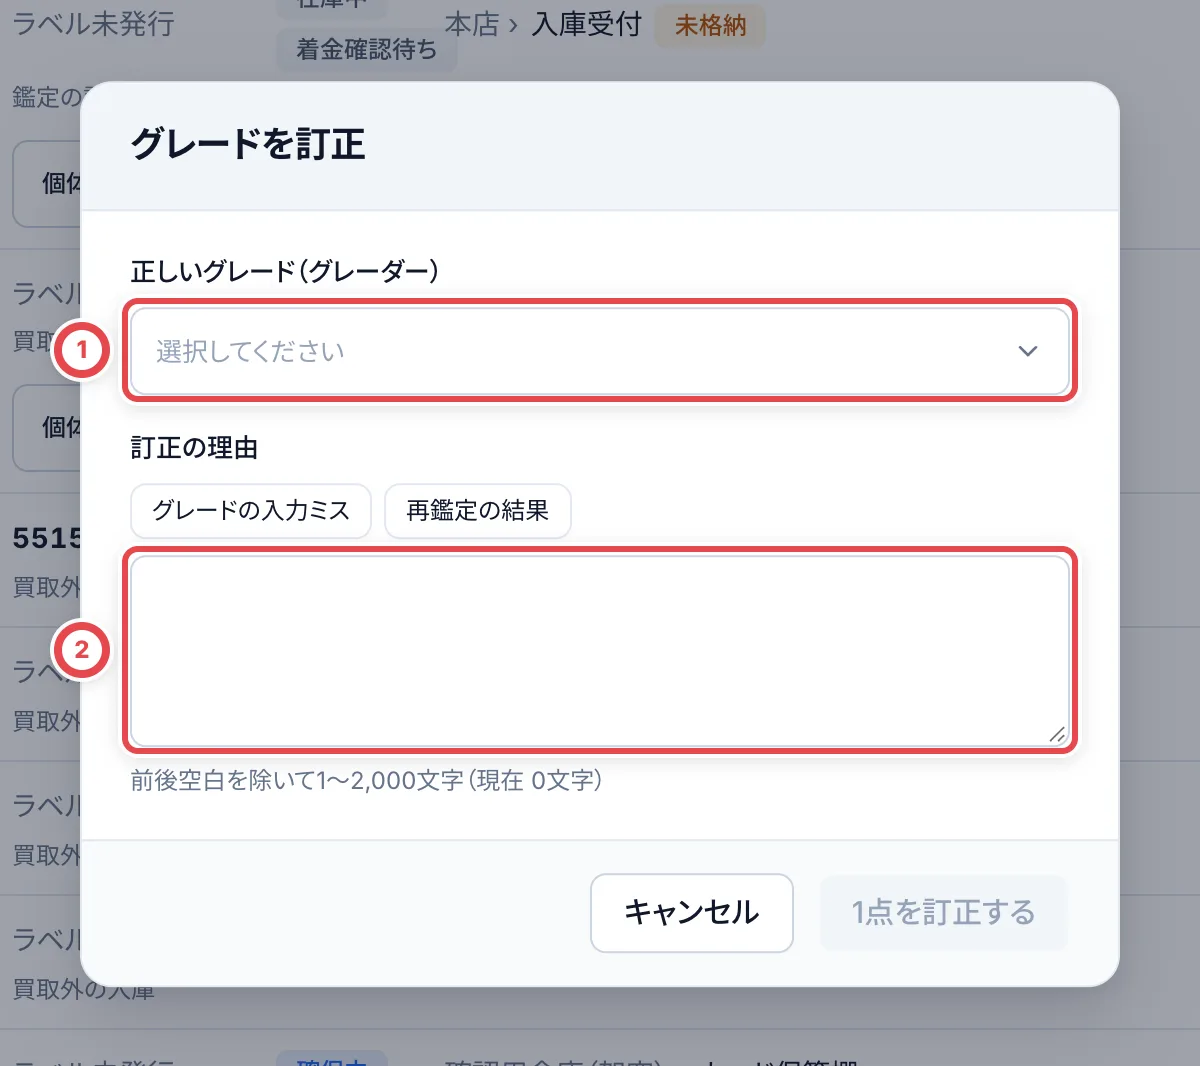 ## 4. カードを付け替える
「カードを付け替え」を開き、①で正しいカード・版を選び、②に理由を残します。対象の個体だけが変わることを確認して保存します。変更後は新しいカードの在庫と個体の履歴を確認します。ラベルの再印刷が必要になった場合は[格納とQRラベル](/guides/inventory/putaway)から刷り直します。
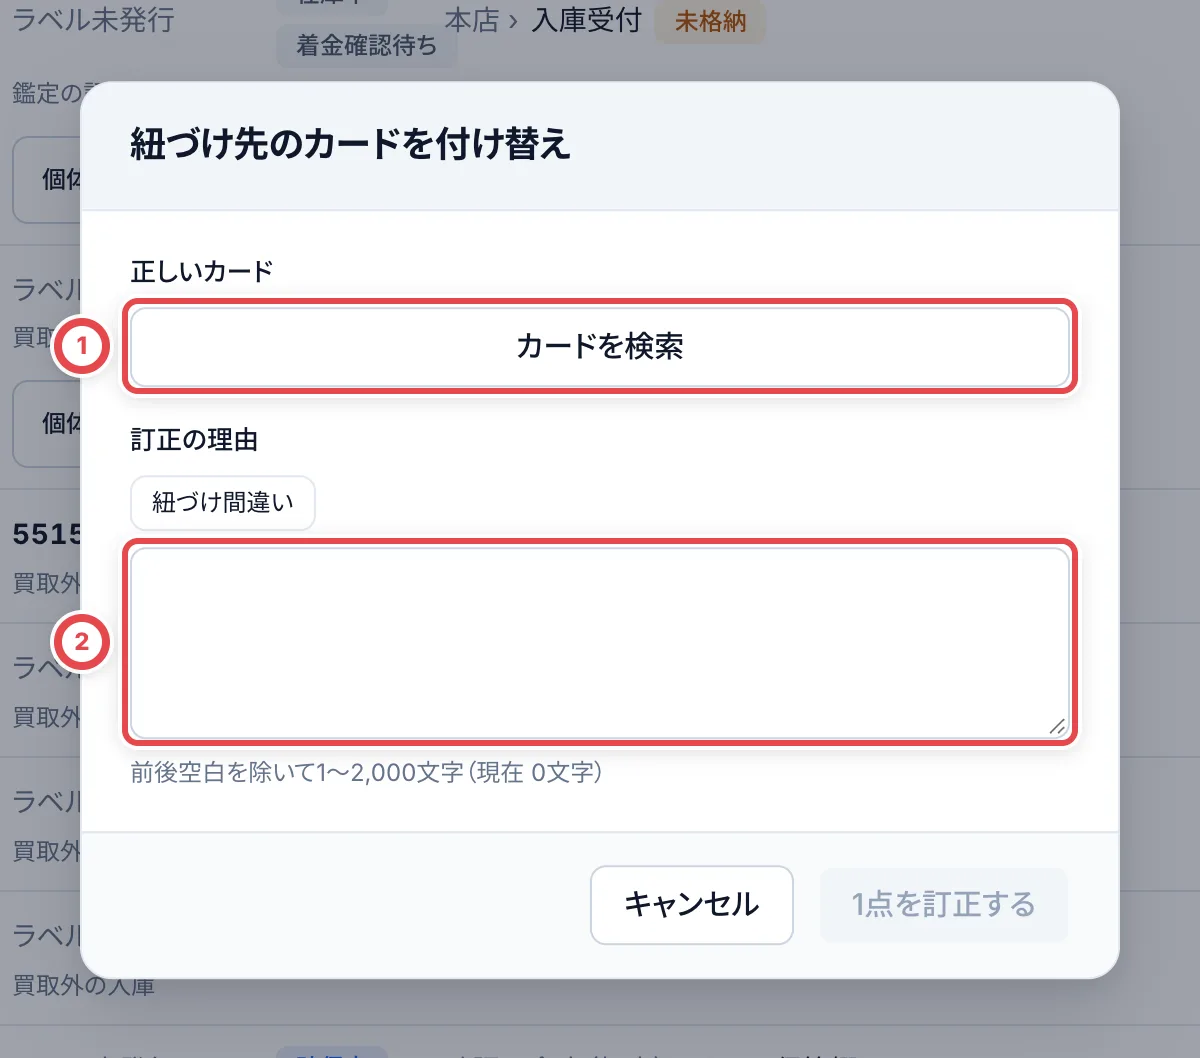 ## 5. 状態メモ・認定番号を訂正する
「メモ・認定番号を訂正」を開きます。①の状態メモは入力内容で置き換わり、空欄のままなら変わりません。削除する場合は「状態メモを空にする」を選びます。上限は1,000文字です。
認定番号は個体を1点だけ選んだ場合に②へ入力できます。外部鑑定(PSAなど)の個体が対象で、空欄なら変わりません。番号を現物と照合し、訂正理由と対象を確認して保存します。保存後は個体を開き直してメモ・番号を確認します。
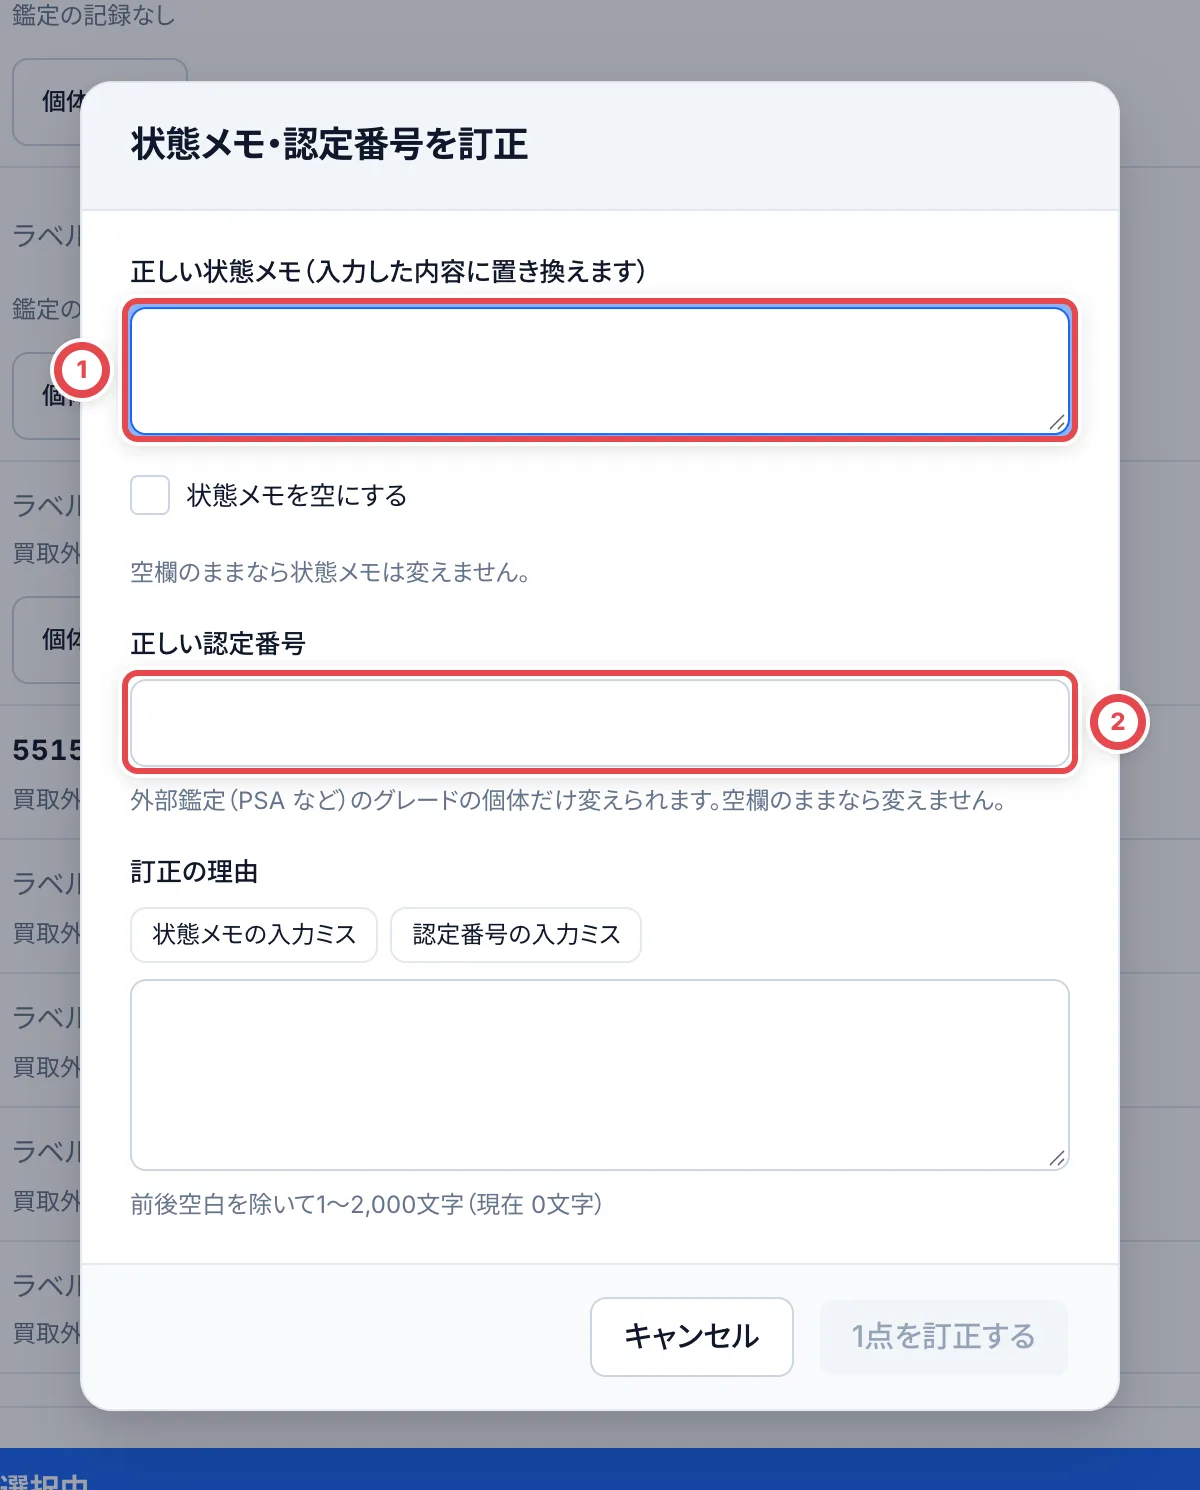 ## 困ったとき
| 起きていること | 確認すること |
| ------------------------ | -------------------------------------------------------------------------------------- |
| 訂正できない入庫元と出る | 買取由来の個体は元の案件を確認します。 |
| グレードを選べない | グレード一覧を読む権限を確認します。 |
| 状態が変わったと出る | 最新の個体を読み直し、対象を選び直します。 |
| 選択数が変わった | 訂正で別のカードや対象外の状態になった個体は、元の画面の選択から外れることがあります。 |
---
# 棚卸し
Source: https://docs.toreca-cloud.com/guides/inventory/counts
棚卸しは、記録上の在庫と棚にある現物が合っているかを確かめる作業です。拠点全体、またはその中の1つの棚・区画を選べます。**始めた時点で、選んだ範囲にある在庫**(在庫中・確保中・オリパ販売中・出品中・当選や発送の確保中)が対象になります。移動中の個体は入りません。
## 最初に用意するもの
- 在庫を変更できる権限。閲覧のみのメンバーには「閲覧専用」と出て、結果を見ることだけができます
- 在庫ラベルが貼られていること。ラベルがない個体は資産番号で確認します
- (必要なら)格納アプリ。アプリで続けて読み取ると早く進みます
## 流れと状態
| 順番 | やること | 棚卸しの状態 |
| ---- | -------------------------------- | ------------ |
| 1 | 棚卸しを始める | 確認中 |
| 2 | 棚の現物を確認する | 確認中 |
| 3 | 結果を確定する | 完了 |
| 4 | (必要なら)見つからない分を外す | 完了 |
| ― | (やめるとき)中止する | 中止 |
## 1. 棚卸しを始める
サイドバーの「棚卸し」を開きます。これまでの棚卸しが並び、確認中のものは②から続きを開けます。新しく始めるときは、①の「棚卸しを始める」を押します。
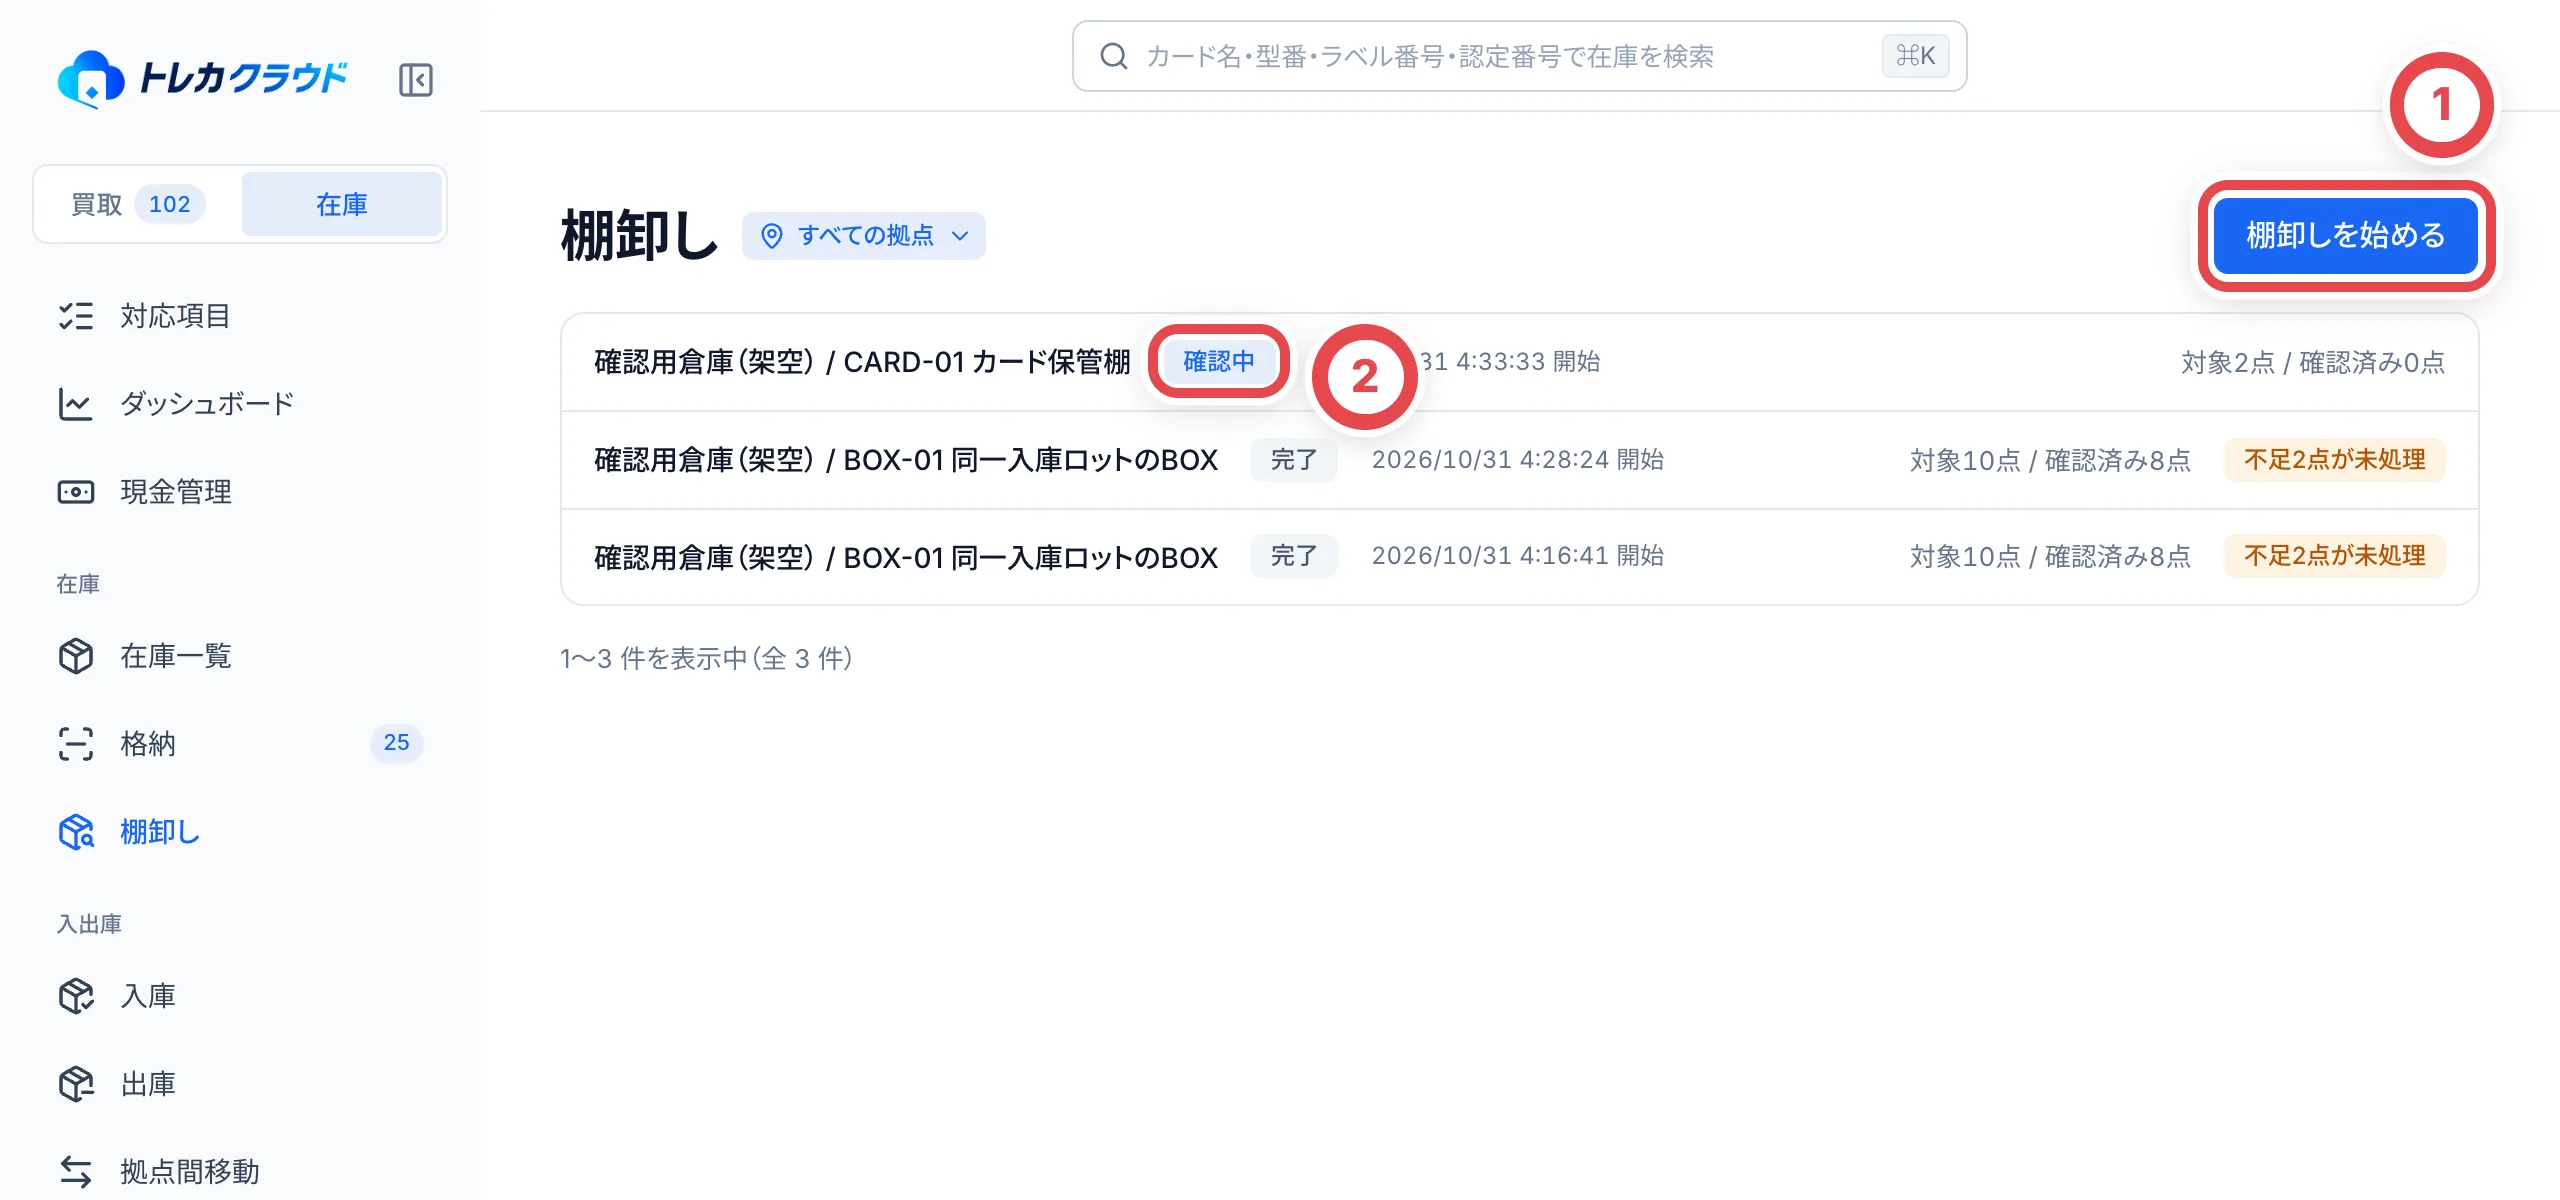 ①で数える拠点を選び、②の「棚・区画」で「拠点内のすべての棚」か、数える棚を選びます。対象の現在庫が表示されるので、現物を数える範囲と合っているか確認します。③の開始理由を確かめて、④の「棚卸しを始める」を押します。**押すとその場で始まり**、棚卸しの画面が開きます。
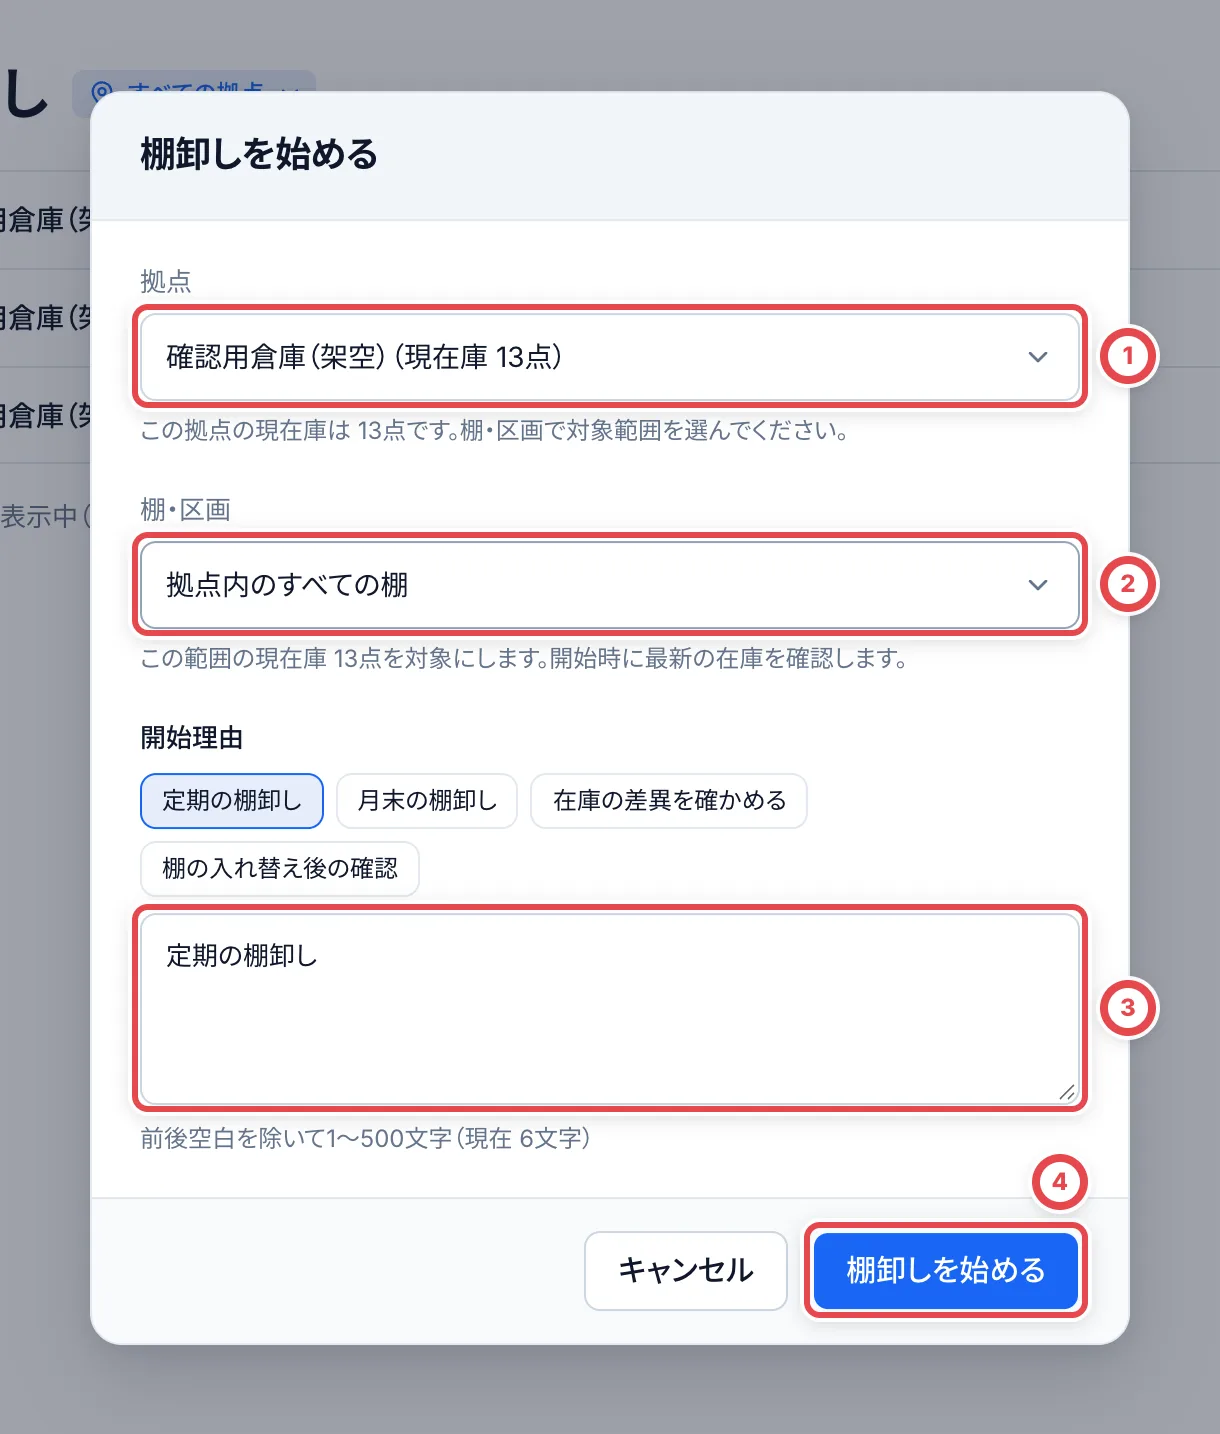 1回の対象は5,000点までです。拠点全体が上限を超える場合は、棚を選んで分けて行います。同じ拠点・同じ範囲で確認中の棚卸しがあると、その続きが開きます。別の範囲が進行中なら開始できません。「棚卸しの履歴を見る」で対象を確認し、先に完了または中止します。
棚卸しを始めた後の「棚・区画」表示も確認してください。明細を棚で絞り込むだけでは、すでに始めた棚卸しの対象範囲は変わりません。
## 2. 棚の現物を確認する
棚にあるカードの在庫ラベルを読み取って、確認済みにしていきます。①の「現物のラベル番号」の欄でラベルを読み取るか番号を入れて、「現物を確認」を押します(バーコードリーダーならそのまま確定します)。画面上部に、対象・確認済み・未確認の点数が出ます。
同じ棚の同じカードは1行にまとまり、「N点をまとめて確認」で一度に確認できます。1点ずつ確認するときは、行を押して個体の一覧を開きます。**どちらも押すとその場で記録されます。** 間違えたときは「確認を取り消す」(まとめた行は「まとめて取り消す」)で戻します。
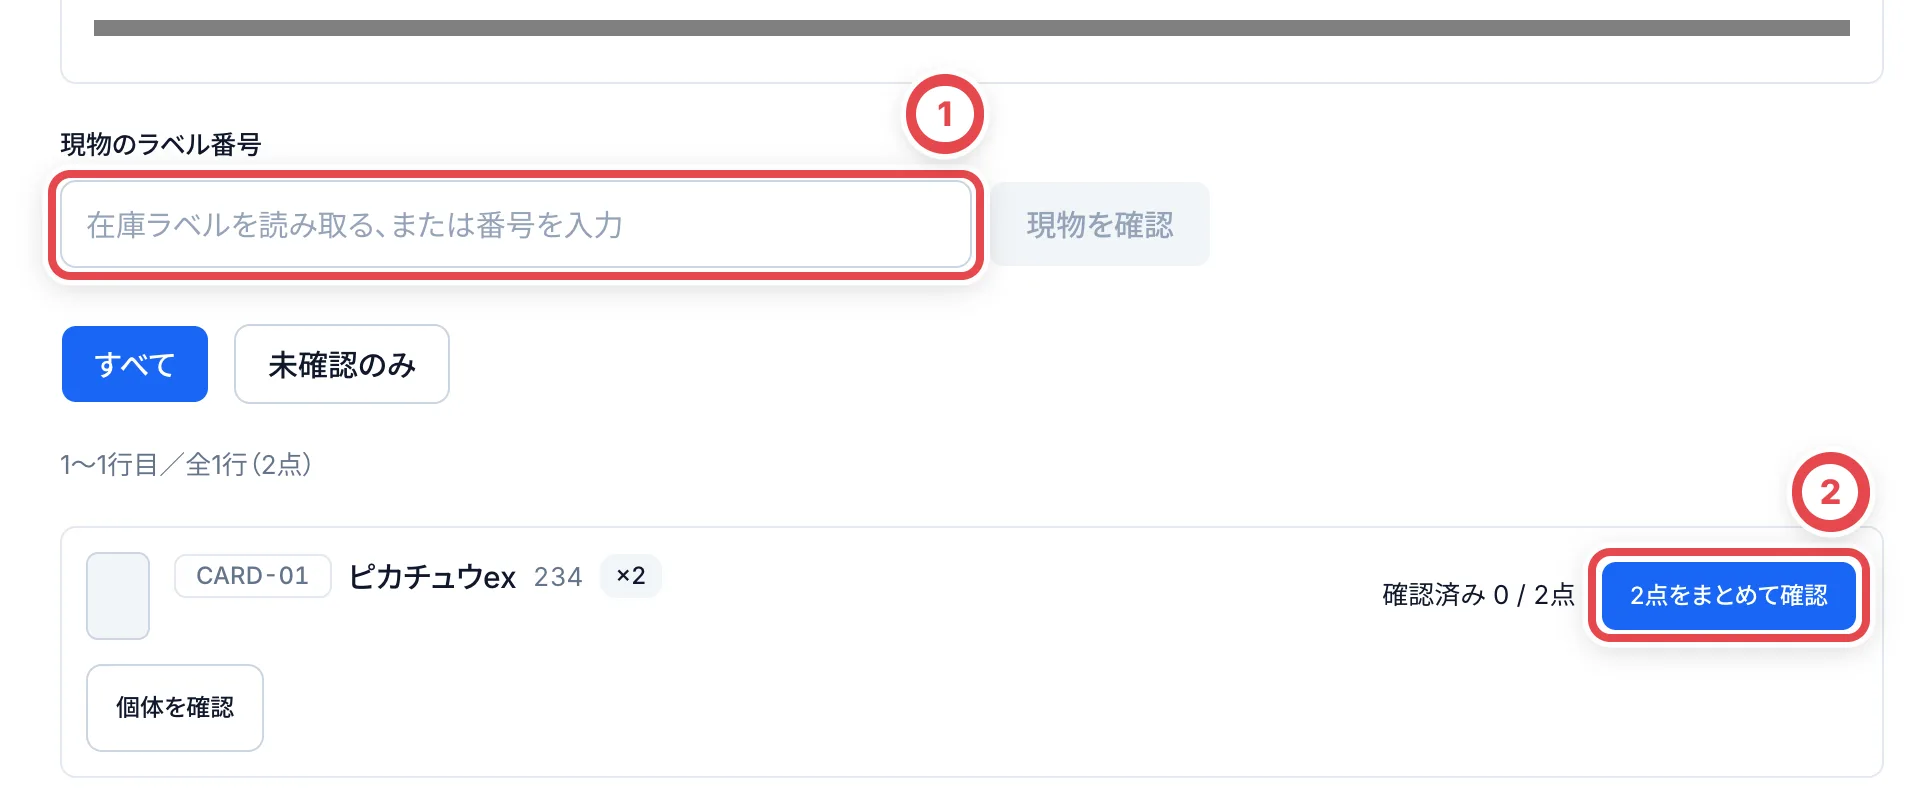 ①にラベルを読み取り、または番号を入力します。同じカードは②でまとめて確認できます。
一覧は「すべて」「未確認のみ」と、棚で絞り込めます(棚が2つ以上あるとき)。
### 同じ入庫ロットのBOX・パック・デッキを数量で確認する
[ロット専用棚](/guides/inventory/sealed-lot-shelves)で、原価が確定した同一入庫ロットの通常在庫だけを保管している場合は、「すべて」表示の行から「数量で確認」を使えます。
1. 対象の棚・商品と、①の帳簿数量を照合します。
2. 現物を数え、②の「実際に確認した数量」に入力します。例では帳簿10点に対して8点です。0点も入力できます。
3. ③の「数量を記録」を押します。**その棚の確認済み数量を、入力した数量で置き換えます。** 前の確認に加算する操作ではありません。
4. 確認済み・未確認の点数を確かめます。この例では確認済み8点・未確認2点です。不足の紛失計上は次の「結果を確定する」で別に判断します。
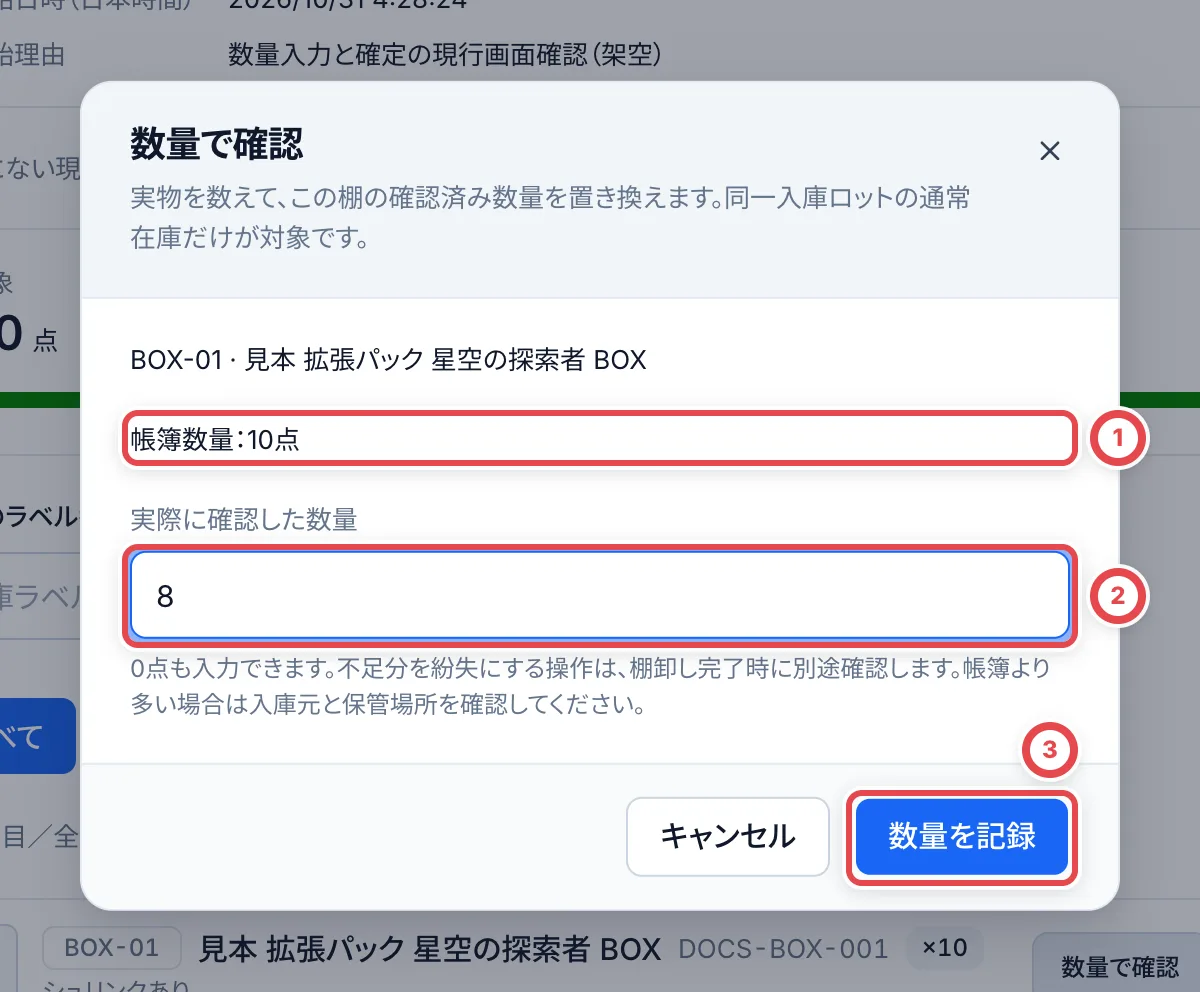 確保・出品・引当・紛失・原価未確定の在庫、別ロットや対象外の個体が混ざる棚では数量確認を使えません。通常の個体確認へ戻ります。帳簿より多かった場合も、この画面で在庫を増やさず、入庫元と保管場所を確認してください。
格納アプリの「作業」の「棚卸し」でも、在庫ラベルを続けて読み取れます。アプリの棚卸しは、コンソールで棚卸しを始めたあとに使えます。読み取った結果は、コンソールの画面にもそのまま反映されます。
## 3. 結果を確定する
確認が終わったら、画面の下の「棚卸しを完了する」を押します。確認済みと未確認の点数が出ます。
①の「不足を紛失として在庫から外す」は、最初からオンになっています。オンのまま②の「確定して不足を外す」を押すと、見つからなかった個体が紛失として在庫から外れます。外さずに確定するときはオフにして「結果を確定」を押します(あとから外せます)。**確定したあとは、現物の確認を変えられません。**
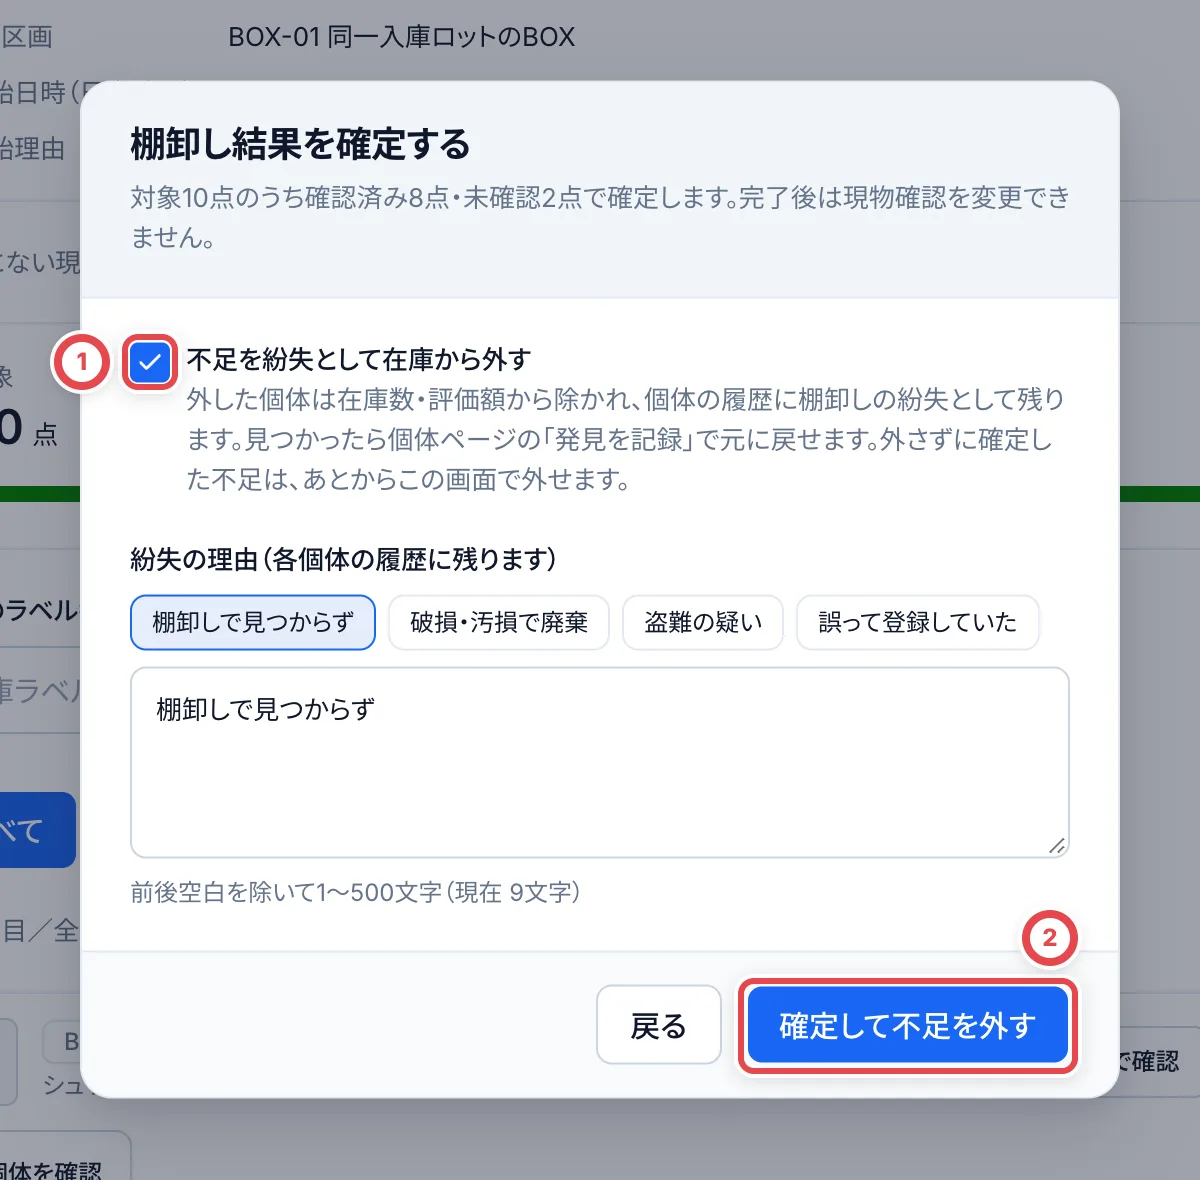
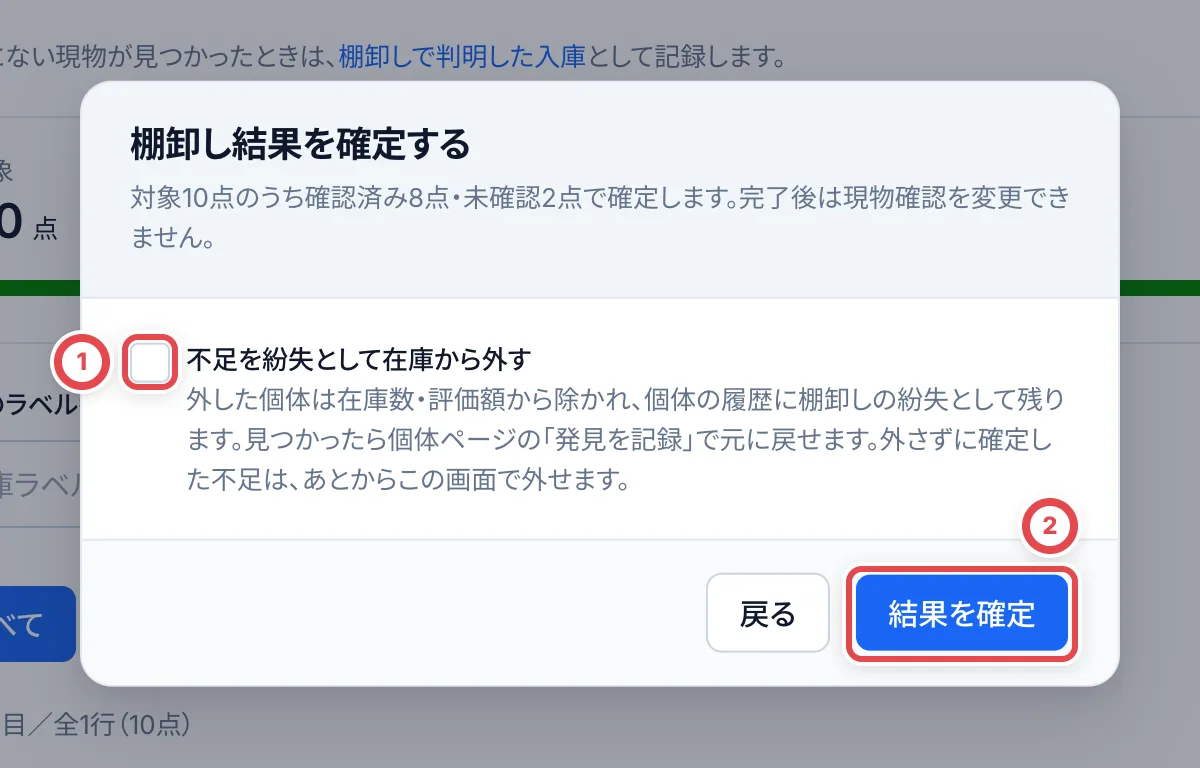 棚卸しのあいだに出庫や移動をした個体は、確定したときに「棚卸し中に出庫・移動済み」になり、不足には数えません(確認中のあいだは未確認のまま見えます)。
## 4. (必要なら)見つからない分を外す
外さずに確定した棚卸しを開くと、見つからなかった個体が「不足(未処理)」として残っています。②の「確認できなかった個体」で、その個体だけを表示できます。全部をまとめて外すときは、①の「不足N点を紛失として外す」を押します(行ごとの「不足N点を外す」や、個体ごとの「紛失として外す」もあります)。
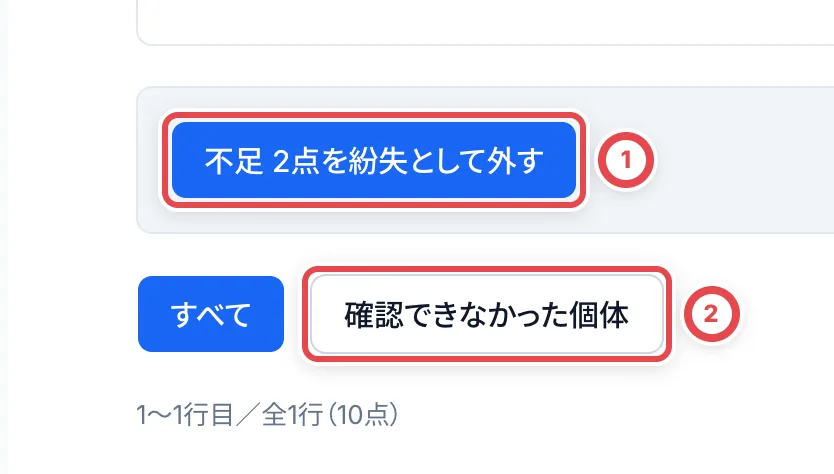 「不足を紛失として在庫から外す」が開きます。①の紛失の理由は、外す個体それぞれの履歴に残ります。②の「紛失として外す」を押すと、在庫数と評価額から外れます。
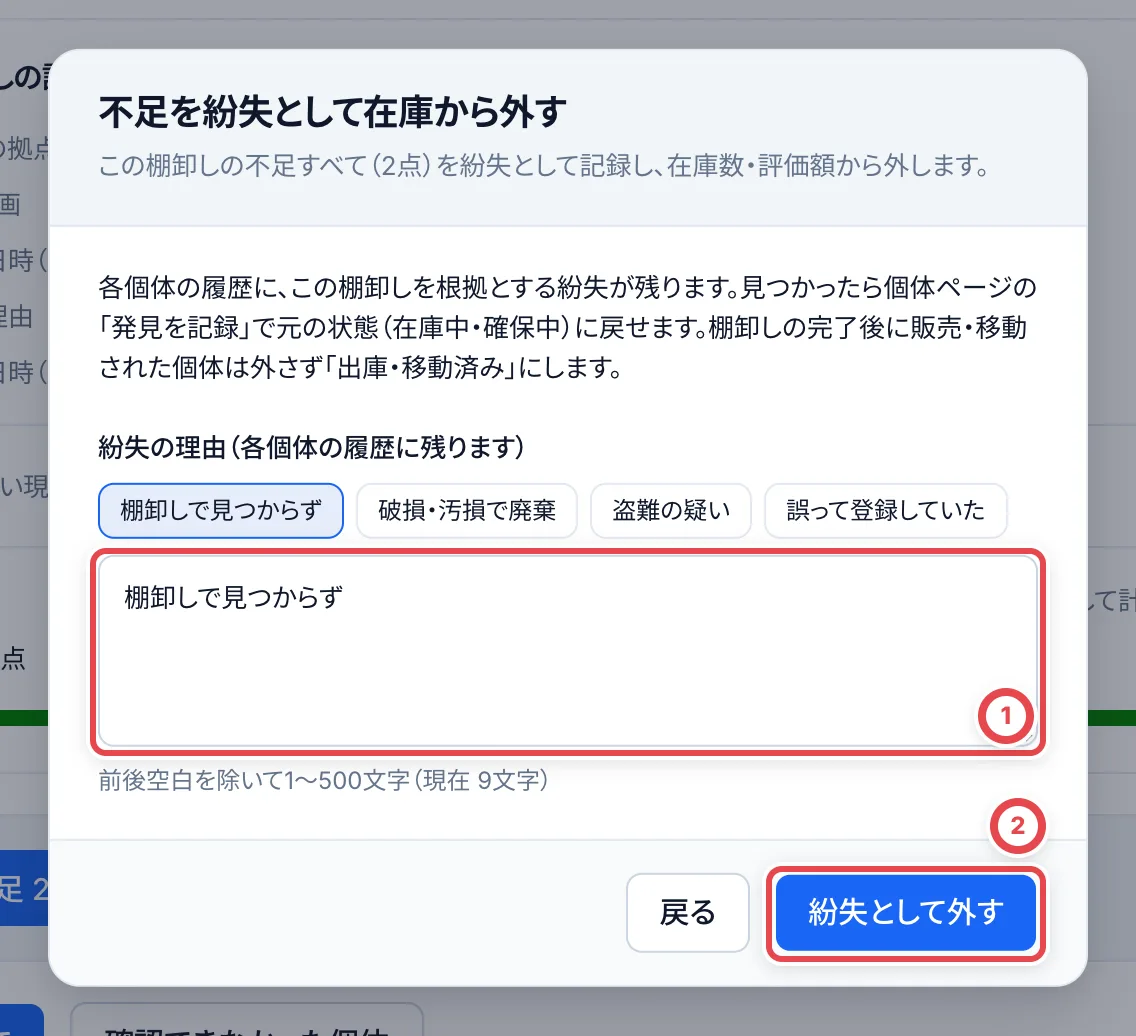 ## 途中でやめるとき
「棚卸しを中止する」を押し、①に中止理由を書いて、②の「中止を記録」を押します。**「中止を記録」を押すまでは中止されません。** それまでの確認の記録は残ります。新しく棚卸しを始めると、その時点の在庫から数え直しになります。
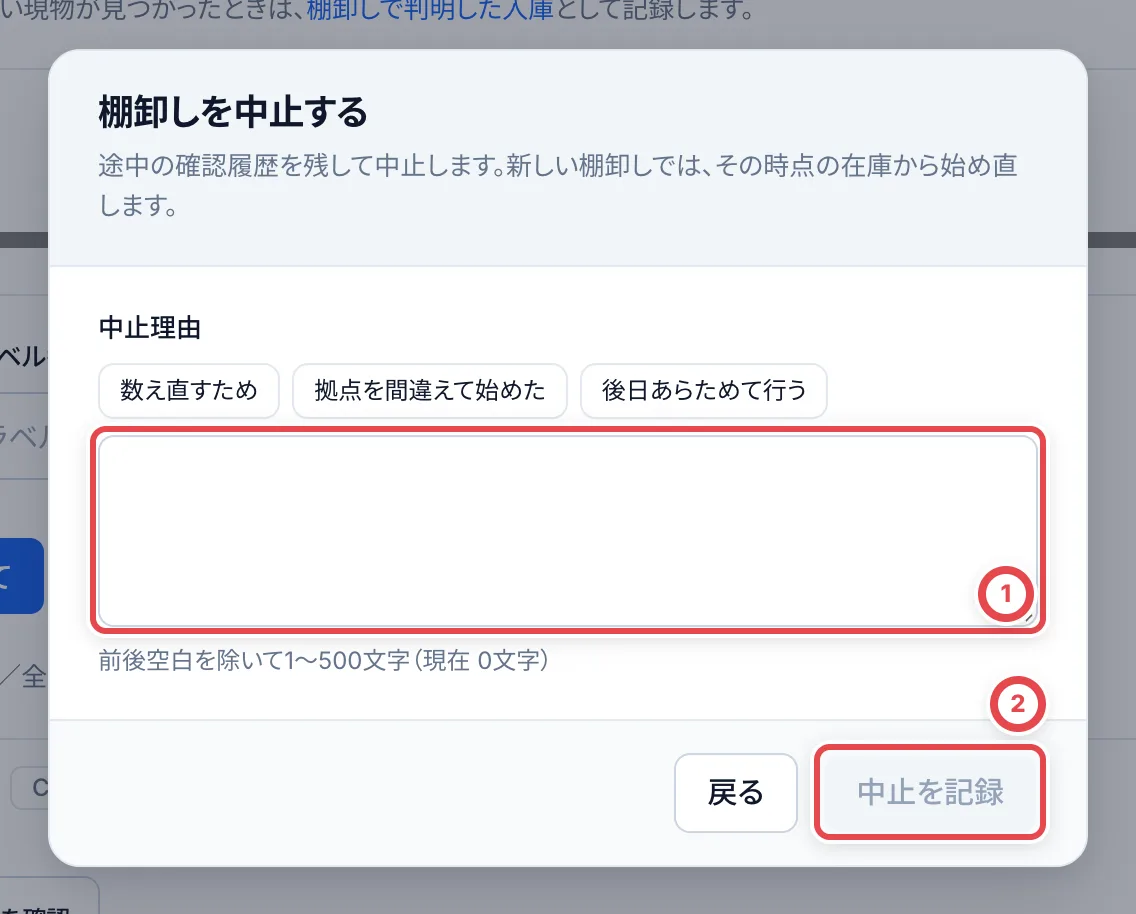 ## 見つかった在庫を戻す
紛失として外した個体があとで見つかったら、個体の詳細の画面を開き、右上の「…」のメニューから「発見を記録」を選びます。戻す棚と理由を選ぶと、元の状態に戻ります。紛失の前に確保中だった個体は、確保中に戻ります。
記録にないカードが棚卸しで見つかったときは、棚卸しの画面にある「棚卸しで判明した入庫」から入庫伝票を作ります。入庫伝票の書き方は[入庫](/guides/inventory/receipts)を参照してください。
## 困ったとき
| 起きていること | 確かめること・直し方 |
| -------------------------------------------------------------------------- | -------------------------------------------------------------------------------------------------------------------------------- |
| 「棚卸しを始める」がなく「閲覧専用」と出る | 在庫を変更できる権限がありません。管理者に確認してください。 |
| 始めようとすると断られる | その拠点に在庫がないか、5,000点を超えているか、拠点の利用を止めています。 |
| 新しく始めたつもりが、前の棚卸しが開いた | 同じ拠点・範囲の確認中の棚卸しを再開しています。記録を確認して続けます。別の範囲を始めたい場合は、先に完了または中止します。 |
| 別の範囲の棚卸しが進行中と出る | 「棚卸しの履歴を見る」で進行中の範囲を確認します。同じ拠点で範囲を重ねて開始できません。 |
| 「数量で確認」が出ない | 「すべて」表示か、ロット専用棚か、同一ロット・原価確定済み・通常在庫だけかを確認します。条件に合わなければ個体ごとに確認します。 |
| 数量の保存時に他の更新があったと出る | 最新の棚卸しと在庫を読み直し、現物を数え直して入力します。古い画面の数量をそのまま再送しません。 |
| 「この棚卸しの対象に、このラベル番号の個体はありません」と出る | 始めた時点でこの拠点の棚になかった個体です。移動中の個体や、ほかの拠点の個体は対象外です。 |
| 格納アプリで「無効ラベル」と出る | 貼り替える前の古いラベルです。新しく貼ったラベルを読み取ります。 |
| 「ほかの操作(格納アプリの棚卸しなど)で棚卸しが更新されていました」と出る | 格納アプリやほかの人の操作と重なりました。最新の状態に読み直されるので、もう一度操作します。 |
| 確定したあとで確認を直したい | 確定後は変えられません。紛失計上した個体が見つかった場合だけ「発見を記録」で戻し、新しく棚卸しを始めます。 |
| 「中止」を押したのに中止されていない | ダイアログの「中止を記録」まで押す必要があります。 |
## 関連する操作
- [iPhoneの棚卸し・ピッキングで未送信データを復旧する](/guides/inventory/scanner-recovery)
---
# 印刷アプリのインストールと使い方
Source: https://docs.toreca-cloud.com/guides/inventory/desktop-print-app
「トレカクラウド印刷」は、ブラウザで開いたトレカクラウドから、**同じパソコンのプリンター**へ在庫ラベルを送る専用アプリです。最初にアプリの接続とテスト印刷を済ませると、毎回PDFを保存して開く操作を省けます。
プリンター本体の準備は[Brother QL-820NWBcのセットアップ](/guides/inventory/brother-printer)、ラベルを付ける在庫の選び方は[格納とQRラベル](/guides/inventory/putaway)を参照してください。
:::note[ダウンロード]
トレカクラウドの「設定」›「ラベル印刷」›「このPCから直接印刷」から、Mac用DMGまたはWindows用セットアップEXEをダウンロードします。Mac版は署名・Apple公証済みです。Windows版は未署名の検証版です。「配布準備中」と表示される場合は、[PDFを開いて印刷する方法](/guides/inventory/putaway#4-100で印刷してカードに貼る)を使えます。
:::
## 1. パソコンとプリンターを用意する
| 確認すること | 内容 |
| ------------ | ---------------------------------------------------------------------------------------------------- |
| パソコン | Apple Silicon搭載Mac、Windows x64 |
| プリンター | 同じパソコンのOSにドライバーを入れ、通常の試し刷りができる状態にします |
| 用紙 | DK-2210なら幅29mmの長尺紙を装着します |
| ブラウザ | アプリと同じパソコンでトレカクラウドにログインします。別のパソコン・iPhoneへの遠隔印刷には使えません |
### 別のWindows PCでも使う場合
各PCに印刷アプリとBrother純正ドライバーを入れ、Windowsにプリンターを登録します。USB・Bluetooth・Wi-Fiは別の登録になっている場合があるため、Wi-Fiで使うときはネットワーク側のプリンターを選びます。Microsoft IPP Class Driverではなく、Brother QL-820NWB/NWBcのドライバーを使ってください。
PCとプリンターが通信できるネットワークへ接続します。2.4GHzと5GHz、SSIDの違い自体は問題ではありませんが、ゲストWi-Fiやネットワーク分離によって通信できない場合があります。プリンターの現在のIPアドレスとWindowsに登録した接続先を照合してください。
印刷アプリ0.1.3以降は、ロール印刷前にドライバー・印刷キュー・用紙設定と、標準TCP/IPポートの到達性を確認します。用紙が違う場合はテスト印刷時にPC側の「設定してテスト」で29mm長尺紙・指定の長さ・縦向きへ合わせられます。他のアプリにも適用されるプリンターの既定値を変更し、変更前の設定は保存します。通常の在庫印刷からは変更しません。
この検査には印刷アプリ0.1.3以降が必要です。各PC・ブラウザ・アカウントで接続許可とテスト印刷を行ってください。
## 2. アプリをインストールして起動する
### Mac
DMG版を受け取った場合は、次の順番で操作します。
1. 配布元と対象機種を確認し、DMGファイルを開きます。
2. 中の「Toreca Cloud Print.app」を「Applications」へドラッグします。
3. コピー先のアプリケーションフォルダーから起動します。DMGの中から直接使い続けないでください。
4. メニューバーに「トレカクラウド印刷」が常駐していることを確認します。通常の作業ウインドウが出ていなくても、起動している場合があります。
ZIP版を受け取った場合は、展開したアプリをアプリケーションフォルダーへ移して起動します。
### Windows
インストーラー版を受け取った場合は、次の順番で操作します。
1. 配布元と対象機種を確認し、セットアップ用のexeファイルを実行します。
2. インストーラーの案内に従います。
3. スタートメニューの「トレカクラウド印刷」から起動します。
4. システムトレイにアプリが常駐していることを確認します。見つからないときは、隠れているアイコンも確認してください。
ZIP版は、フォルダー全体を展開したまま使います。アプリ本体のexeだけを別の場所へ取り出さないでください。
:::warning
署名・公証や発行元を確認できない警告が出た場合は、配布元へ確認してください。OSの保護機能を無効にする手順は案内していません。
:::
## 3. ブラウザとアプリを初めて接続する
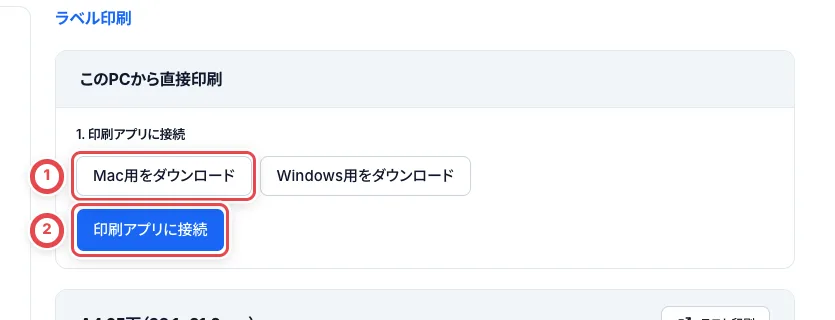 ①でこのPC用のアプリをダウンロードし、起動してから②で接続します。
1. トレカクラウドの「設定」›「ラベル印刷」を開きます。
2. 「このPCから直接印刷」で「印刷アプリに接続」を押します。
3. ブラウザがローカルネットワークへの接続許可を求めた場合は、この操作によるものか確認して許可します。
4. パソコン側の「トレカクラウド印刷への接続」で、接続元が `https://toreca-cloud.com` であること、アカウントと店舗が正しいことを確認し、「接続を許可」を押します。
5. Web画面に接続完了が表示され、用紙とプリンターを選べることを確認します。
自分で「印刷アプリに接続」を押していないときに確認画面が出た場合は、キャンセルしてください。別のパソコン・ブラウザ・アカウント・店舗で使う場合は、その組み合わせで接続してください。
「接続状態を確認」で印刷アプリとの通信を確認します。失敗した場合は、アプリを起動して再確認してください。印刷の準備には、用紙・プリンターの登録と実紙の確認も必要です。
## 4. 用紙・プリンターを登録する
1. 「用紙」と「プリンター」を選びます。
2. 「この設定で1ページをテスト印刷」を押します。
3. 実際に出た紙の寸法と文字欠けを確認します。DK-2210のテスト用紙は40mmの目盛りで測ります。
4. 問題がなければ「実紙を確認して、直接印刷に登録」を押します。「登録済み: プリンター名」が表示されたら準備完了です。
テスト用PDFにQRがない場合は、少量の在庫ラベルをPDFから印刷してQRの読み取りも確認します。登録後の初回直接印刷でも、続けて2枚のカット位置とQRを確認してください。
登録ボタンは、この画面でテスト送信が成功すると押せます。テスト前や、実際の出力を確認していない状態で登録しないでください。再テストすると登録が未確認に戻るため、もう一度実紙を確認して登録してください。プリンターや用紙を替えたときも、選び直してテストしてください。
### DK-2210の場合
設定の「用紙」は「DK-2210:幅29×送り50mm(推奨)」、在庫ラベルのダイアログは「Brother DK-2210用(29×50mm)」を選びます。29×50mmの縦向きPDFを回転・拡大縮小せずに送ります。OS側は29mm長尺紙・長さ50mm・縦向き・100%を確認してください。1枚ずつ切る場合は各枚カット、複数枚をつなぐ場合は自動カットをオフ・最後にカットをオンにします([連続印刷](/guides/inventory/brother-printer#約10枚をつなげて印刷する))。
「従来形式:幅29×送り56mm(内容50×25mm)」は別形式です。DK-2210用29×50mmと混同しないでください。A4 65面・24面を使う場合は、対応する用紙とプリンターを別に登録します。
## 5. 普段のラベル印刷
1. アプリを起動したまま、在庫・入庫伝票などの「ラベルを印刷」を開きます。
2. 用紙を選びます。登録済みプリンターが利用できる場合は、確認ボタンが「印刷」になります。利用できない場合は理由が表示され、PDF印刷に切り替わります。プリンターの登録・位置合わせは設定画面の「ラベル印刷」で行います。
3. 件数とプレビューを確認して印刷します。
4. 送信済みと表示されたら、実際の紙の出力も確認します。
**送信成功は、紙の出力完了を意味しません。** 紙切れ・カバー開き・接続切れなどはプリンターとOSの印刷キューも確認してください。
### 排出方法を選ぶ
設定からダウンロードできる版が0.1.5未満の場合は、新しい排出方法の配布開始を待ち、対応する方式またはPDF印刷を使います。
印刷アプリ0.1.5以降では、Mac・Windowsで同じ3方式を選べます。ネットワーク接続のQL-820NWB/NWBc・DK-2210を使い、Windowsでは標準TCP/IPポート(RAW 9100)のプリンターを登録します。PCからプリンターのTCP 9100とSNMPへ通信できることが必要です。共通のネットワーク方式ではUSB・Bluetooth・WSDの登録は使えません。MacのUSB接続では、従来の自動カット・つなげて印刷を引き続き利用できます。本体ボタンとの連動には両OSともネットワーク接続が必要です。
- **1枚ずつ自動カット**: ラベルごとに切り離します。
- **つなげて印刷**: 最後だけ切り離します。200枚・1 PDFまでです。
- **本体ボタンでカット**: 1枚出力した後、カット待ちになってから本体ボタンを短く押すと次の1枚を送ります。最後のカットで完了します。PC・ブラウザ・印刷アプリを起動したまま使います。
旧アプリでは利用可能な方式だけを選べます。アプリ対象外のPCや接続方式では、下のPDF印刷で作業を続けられます。
発行済みのバッチは「このPDFを直接印刷」で同じラベル番号を印刷できます。PDF作成時点でラベルが発行されるため、印刷だけ失敗した場合に番号を変える再発行は不要です。
直接印刷を利用できない場合は「PDFを作成」から進めます。大量のバッチで上限が出た場合は、小さく分けるか発行済みバッチのPDFから印刷してください。
直接印刷に失敗しても、ラベル発行が完了していればPDFとバッチは残ります。失敗後は同じ完了画面の「このPDFを直接印刷」は表示されません。「プリンターを登録・確認」で設定を見直し、出力済みの紙とキューを確認してから、PDFまたは「格納」→「印刷バッチ」の既存バッチから同じ番号で刷り直します。新しい番号の再発行は不要です。
## 6. 送信結果が分からない・途中で止まった
「送信結果を確認できません」と表示された場合は、**すぐに新しい印刷を始めないでください。** すでにOSへ渡っている可能性があります。
1. 出た紙とOSの印刷キューを確認します。
2. 必要に応じてアプリメニューの「接続と送信状況」を確認します。
3. 複数PDFのバッチは、どこまで送られたかを確認します。送信済みの分を重ねて印刷しないでください。
4. 出力されていないことを確認できた分だけ、同じラベル番号で意図的に刷り直します。
アプリを再起動しても、結果不明のジョブは自動で再送されません。
## 7. 起動・更新・接続解除
- **毎回の起動を省く:** アプリメニューの「ログイン時に起動」をオンにします。
- **設定を開く:** アプリメニューの「プリンター設定を開く」でWebの設定へ移動します。
- **更新する:** アプリメニューの「終了」で閉じてから、案内された新しい配布物へ置き換えます。自動更新はありません。更新後は接続状態を確認し、テスト印刷します。
- **この接続を解除する:** Webの「接続を解除」を押します。
- **共有PCの利用を終える:** アプリメニューの「すべての接続を解除」で、このPCに許可した接続を解除します。再利用時は接続からやり直します。
接続を解除しても、すでにOSへ渡した印刷は取り消されません。停止が必要な場合はOSの印刷キューも確認してください。
## 困ったとき
| 起きていること | 確認すること |
| ------------------------ | -------------------------------------------------------------------------------------------------------------------------------- |
| アプリにつながらない | アプリが同じPCで起動しているか、ブラウザのローカルネットワーク許可、現在のアカウント・店舗を確認し、「接続状態を確認」を押します |
| プリンターが出ない | OSのプリンター一覧とドライバー・USB/Wi-Fi接続を確認し、設定を開き直します。別のプリンターへ自動で切り替わることはありません |
| 直接印刷が選べない | 選択中の用紙でテスト印刷と「実紙を確認して、直接印刷に登録」が済んでいるか確認します |
| 用紙が合わない・欠ける | DK-2210用と従来ロールの選択、ドライバーの用紙長・倍率・カット、位置合わせを確認します |
| 送信中・別の印刷が処理中 | 先のジョブの完了を待ちます。連打せず、結果不明なら紙とOSキューを先に確認します |
| 大量のラベルを送れない | 直接印刷のページ数・データ量上限です。バッチを小さくするか、PDFを開いて印刷します |
| 起動時にポートのエラー | アプリの重複起動や、ほかの印刷アプリとの競合を担当者に確認します |
プリンター本体や用紙の装着は[Brotherのセットアップガイド](/guides/inventory/brother-printer)も参照してください。
---
# 出庫と移動・移管
Source: https://docs.toreca-cloud.com/guides/inventory/outbound-and-transfers
在庫を店舗の外に出すときや、別の拠点へ動かすときは、サイドバーの「入出庫」で伝票を作ります。用途で使う伝票が変わります。
| 伝票 | 使う場面 | 進み方 |
| -------------------- | ---------------------------------------------------------- | ---------------------------------------- |
| 出庫予約(販売) | 取引先に売るとき | 下書き → 販売額 → 販売契約 → 出庫 → 入金 |
| 出庫予約(販売以外) | オリパへの投入・廃棄・登録の取消・イベントへの持ち出しなど | 予約中 → (発送待ち)→ 出庫 |
| 拠点間移動 | 自分の店舗の拠点から拠点へ動かすとき | 移動中 → 受領 |
| テナント間移管 | 連携しているほかの店舗へ引き渡すとき | 受入待ち → 受入済 |
同じ拠点の中で棚を移すだけなら、伝票は要りません。個体の「所在を移動」か、在庫一覧の「棚を移動」で記録します。
:::note
買い取ったカードのうち支払いの確認がまだの個体は、出庫予約・拠点間移動・テナント間移管に入れられません。振込の着金確認、または店頭現金の手渡しを記録してから使います([振込](/guides/purchase/payouts)・[店頭買取](/guides/purchase/counter))。
:::
## 1. 出庫予約を作る
サイドバーの「出庫」を開き、①の「出庫予約を作成」を押します。上の②のタブで「下書き」「予約中」「発送待ち」などに絞って、作った伝票を探せます。
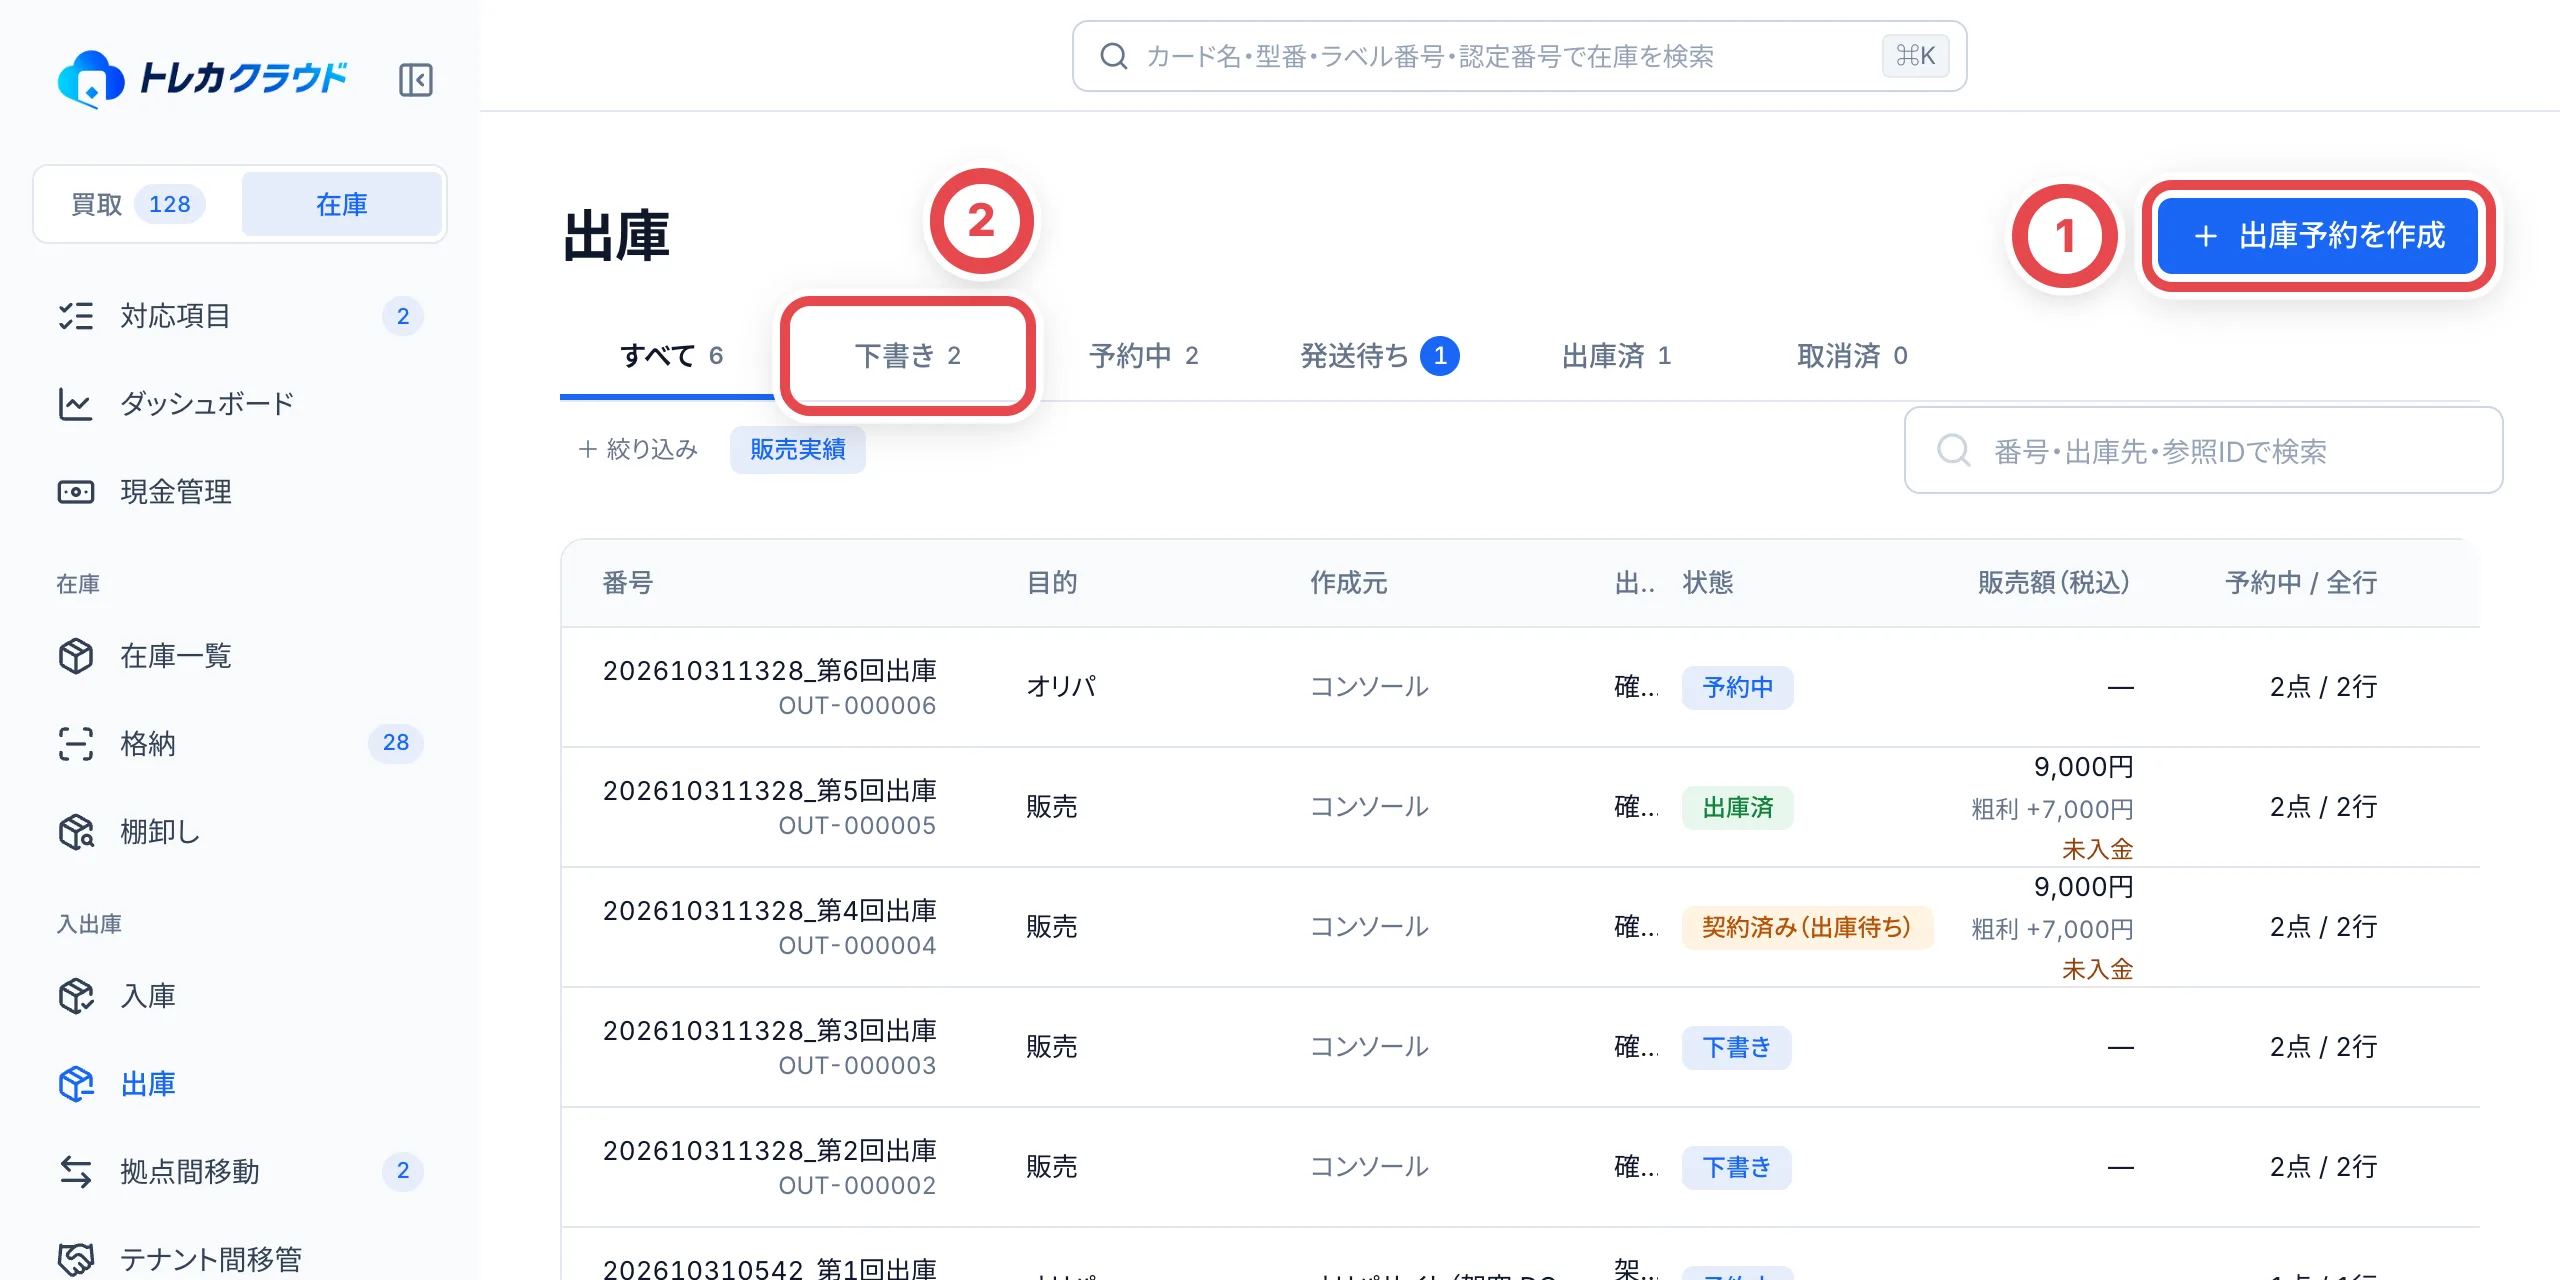 ①の「目的」を選びます(オリパ・販売・廃棄・登録の取消・その他の持ち出し)。販売とオリパでは、②の「取引先」で売り先の顧客を選べます(任意)。③の理由は候補を押すと入ります(必須)。出庫予定日と出庫先は任意です。
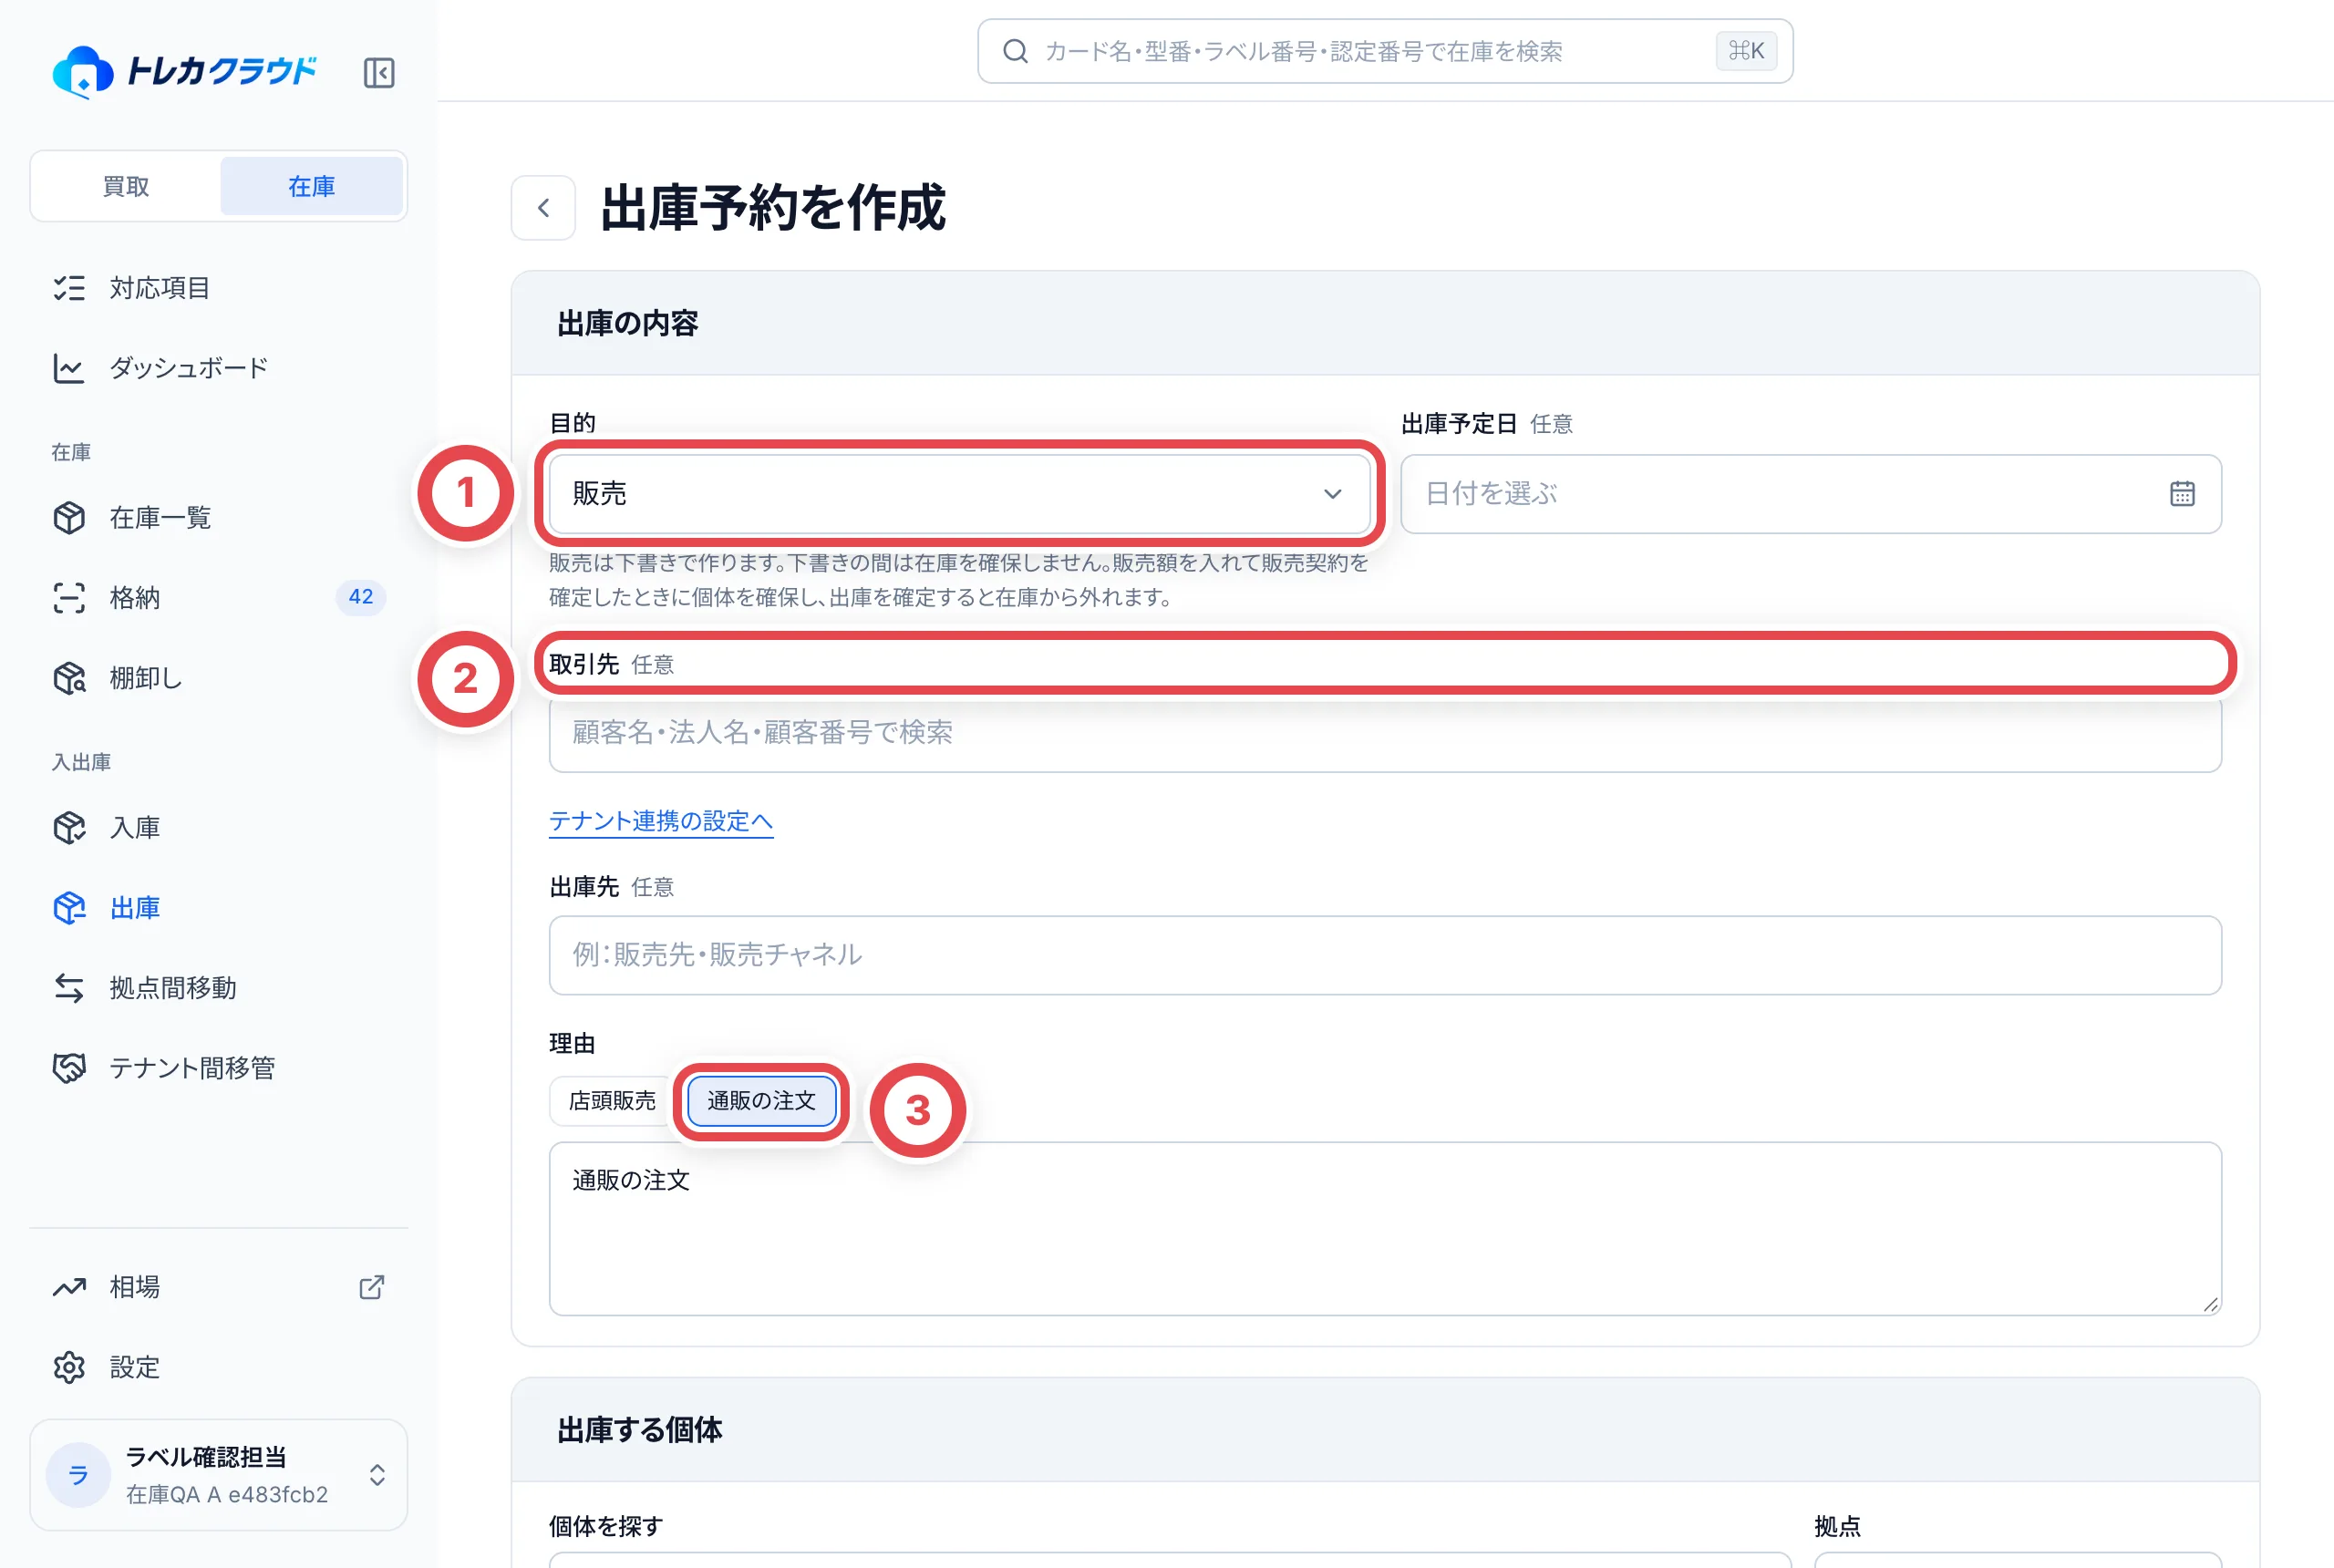 下の「出庫する個体」で、カード名や型番で個体を探し、②で点数を決めて「追加」を押します。①の「着金確認待ち」の個体は追加できません。全部選んだら、③のボタンで保存します。**押すとその場で保存されます。**
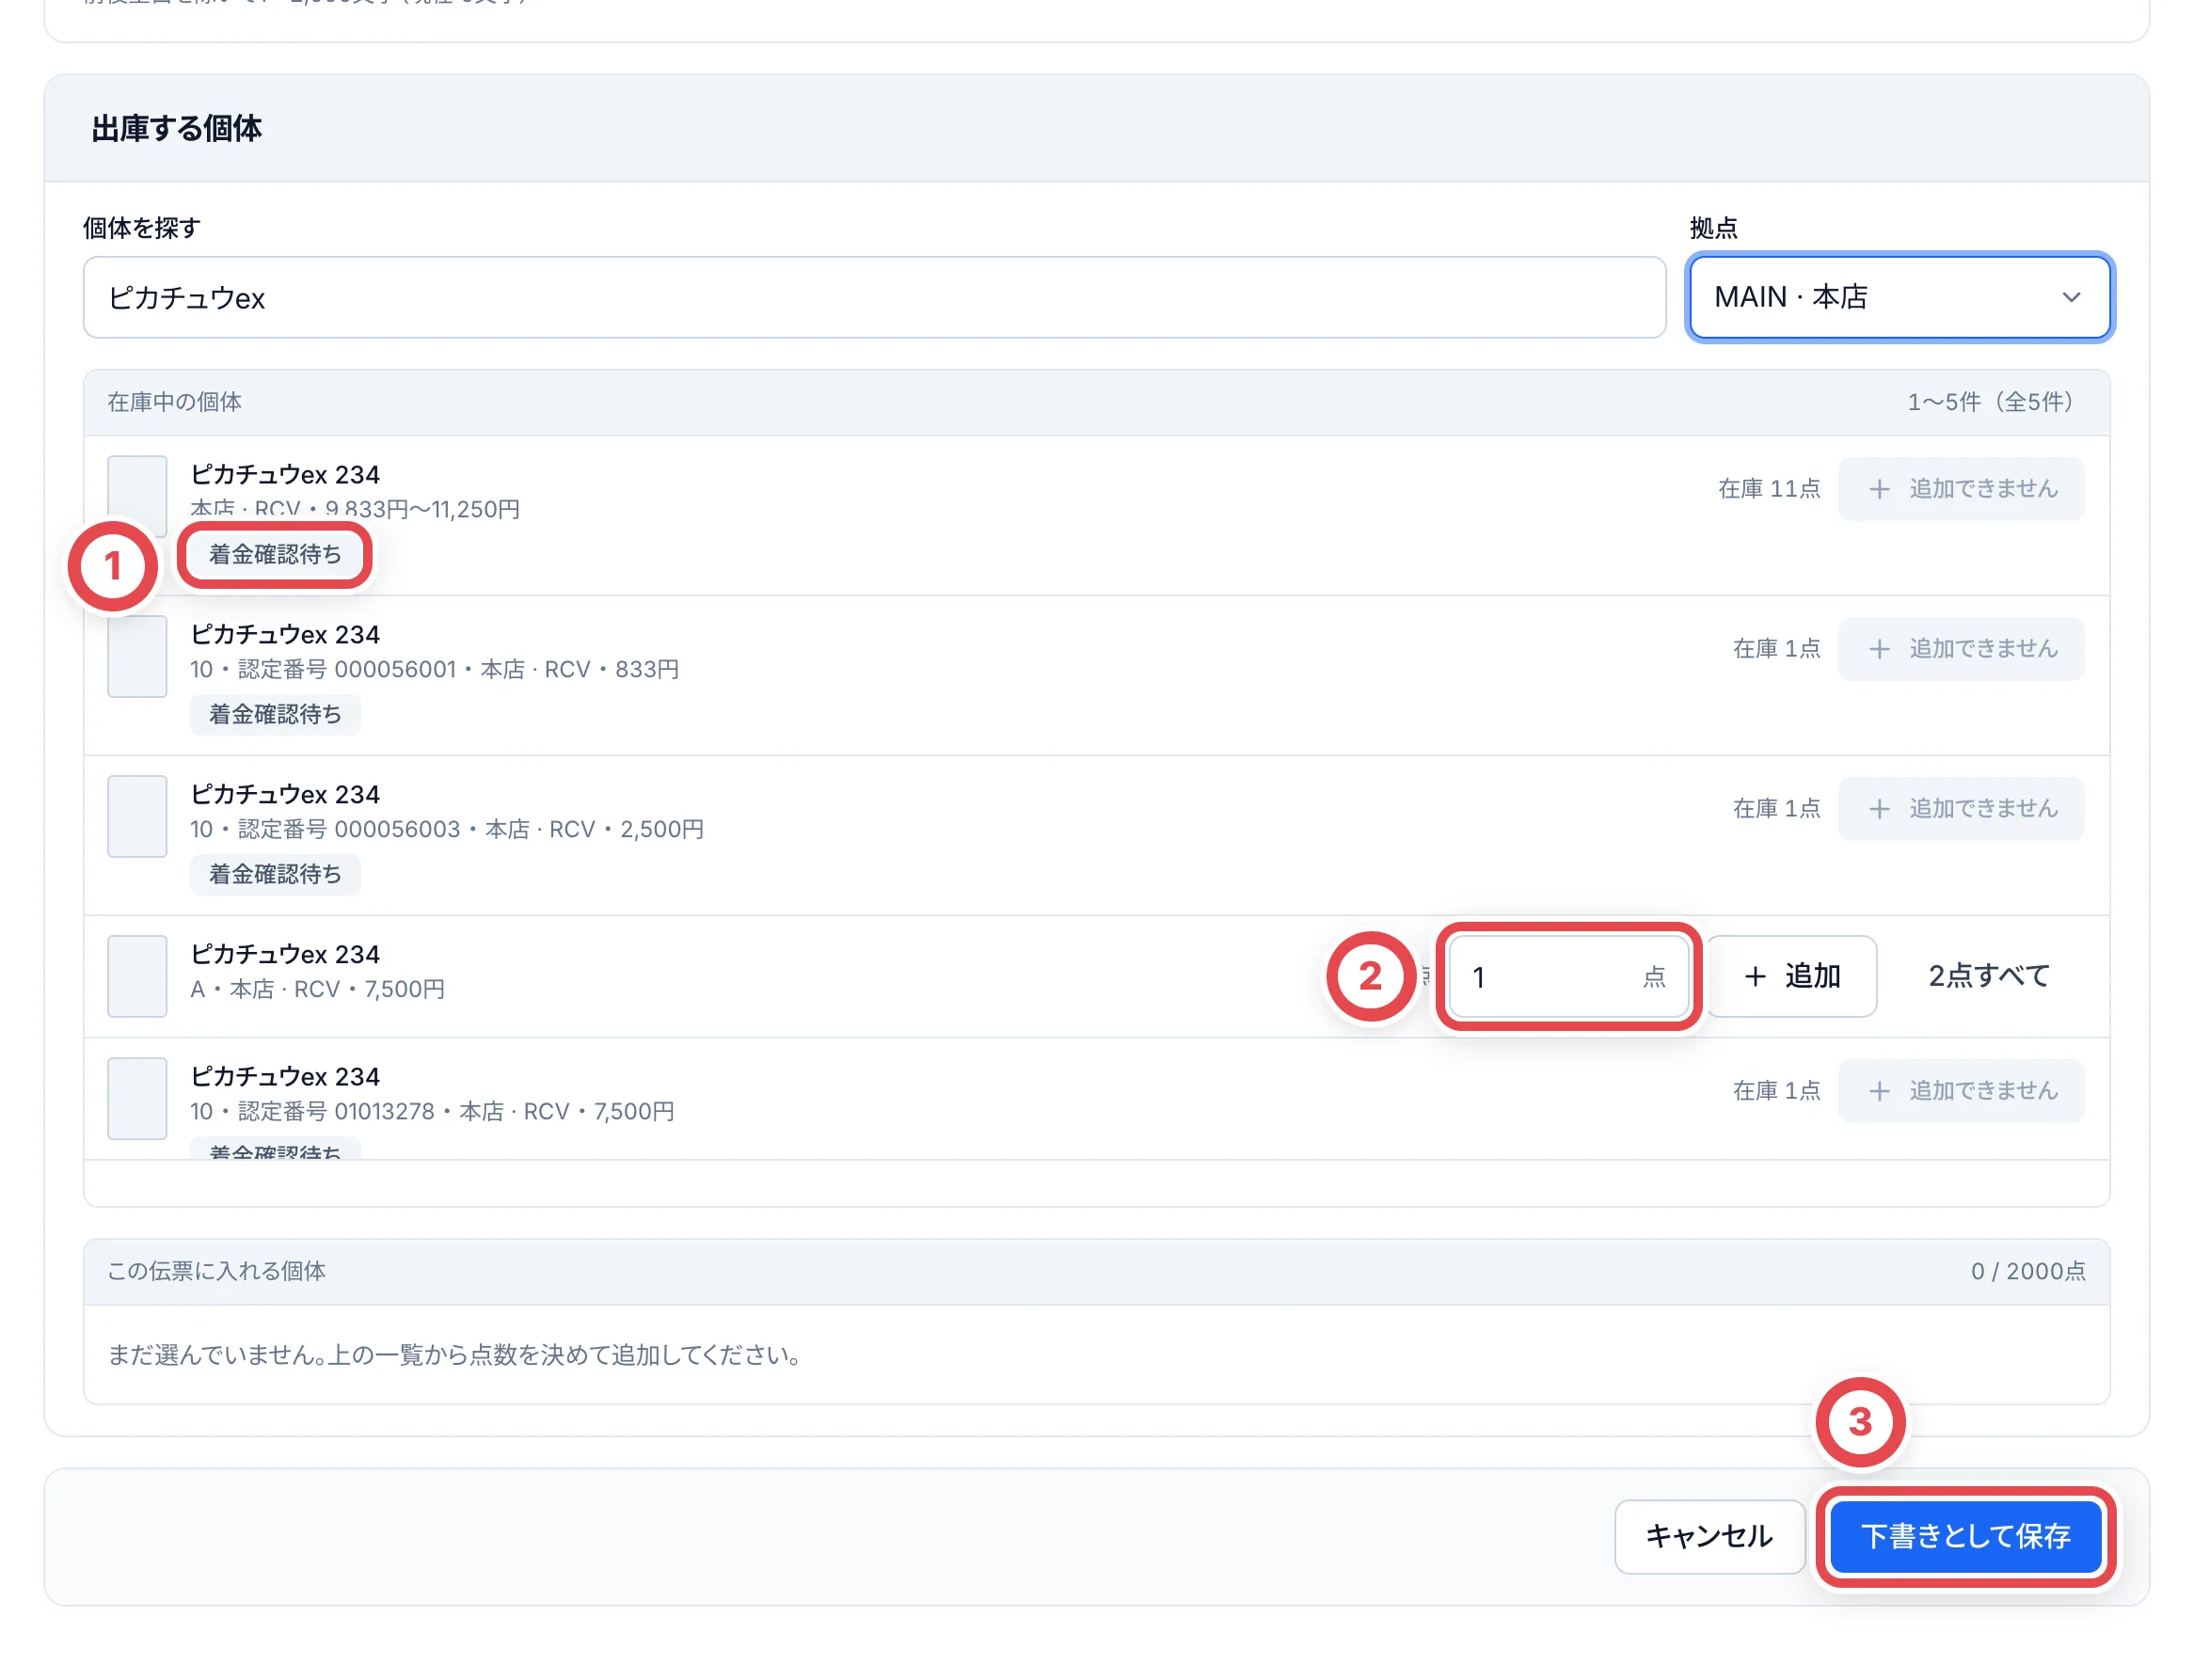 目的が「販売」のときは、ボタンが「下書きとして保存」になり、**下書きのあいだは在庫を確保しません**(ほかの伝票でも使えます)。販売以外は「保存」で、保存した時点で個体を確保します(予約中)。
在庫一覧で個体を選んでから「出庫予約を作る」を押すと、選んだ個体が入った状態で始められます。
既存の伝票へ足すときは、選択帯の追加操作から対象の伝票を選びます。1回の作成・追加は2,000点、1伝票は外した明細を含め5,000点までです。大量の選択を渡すときは同じブラウザのタブで続け、追加後に件数と個体を照合してください。
## 2. (販売)販売額を入れる
販売の下書きを開くと、上の「進み具合と次の操作」に、下書き・見積 → 販売契約 → 出庫 → 入金 の順番が出ます。まず①の「販売額を入力」を押します。
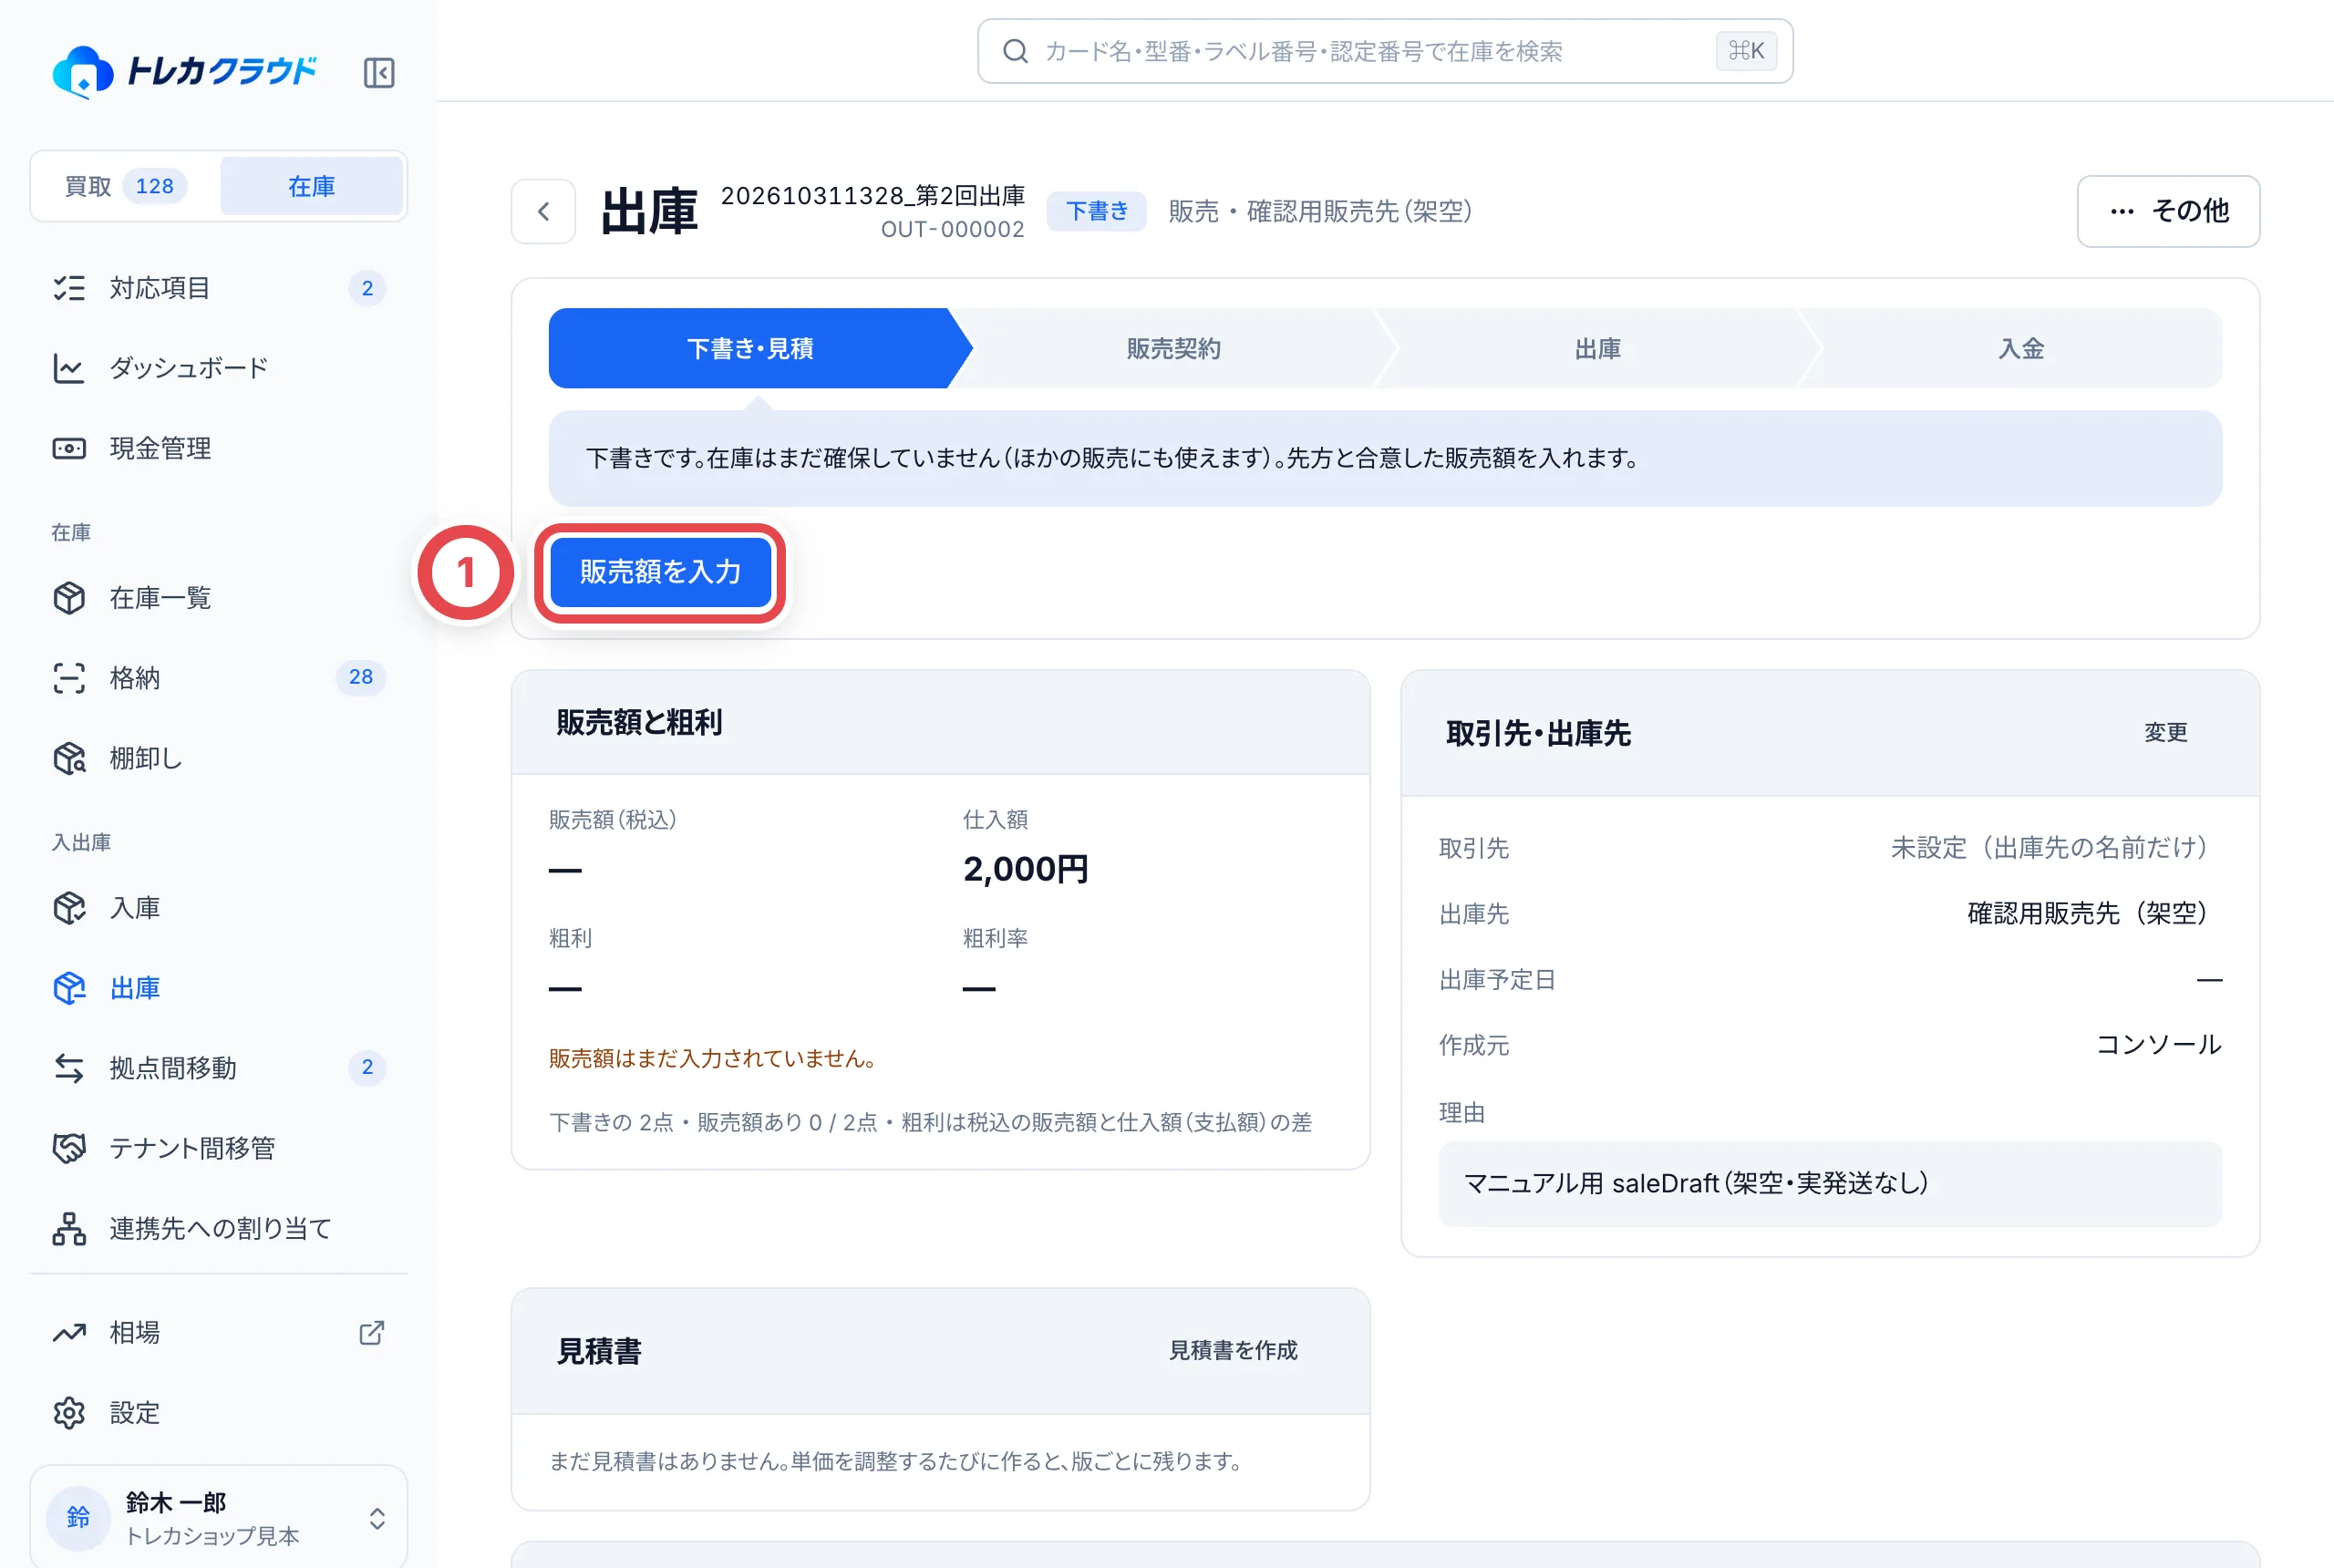 ①の「入力のしかた」で、合計額を個体に割り振る「総額を按分」か、1点ずつ入れる「単価で入力」を選びます。総額を按分するときは、按分の基準(仕入額の比率・時価の比率・均等)と税区分を選びます。②の「試算する」で、保存の前に1点ずつの金額と粗利を確かめられます。よければ「保存」を押します。
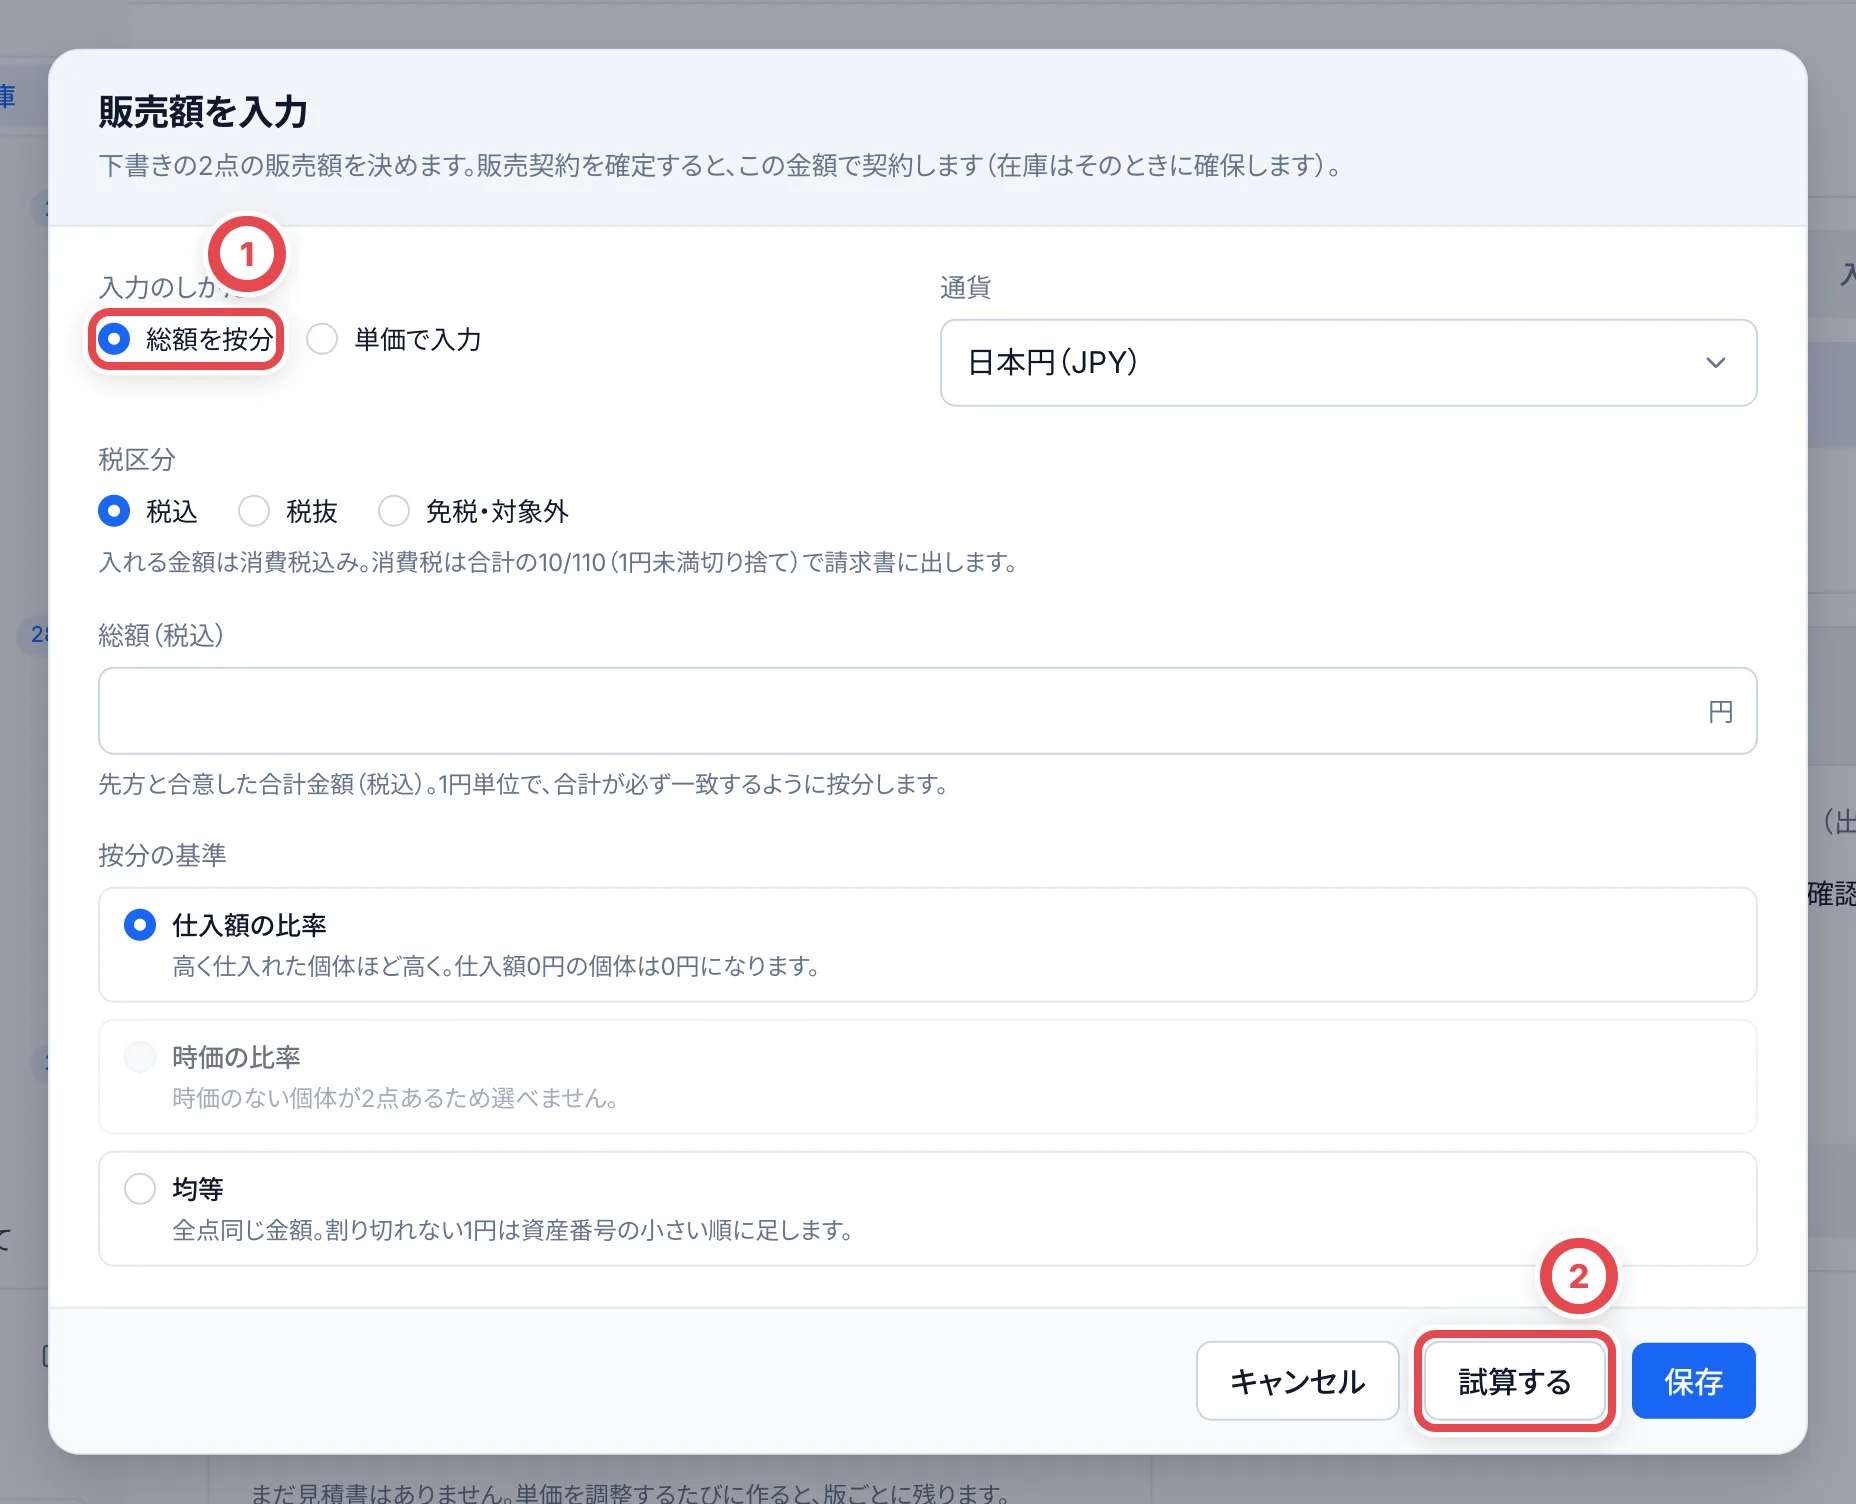 見積書が要るときは、「見積書を作成」で作れます(任意)。
## 3. (販売)販売契約を確定する
先方と合意したら、「販売契約を確定」を押します。①の販売額(税込)と粗利の見込みを確かめ、②の「N点で契約を確定」を押します。
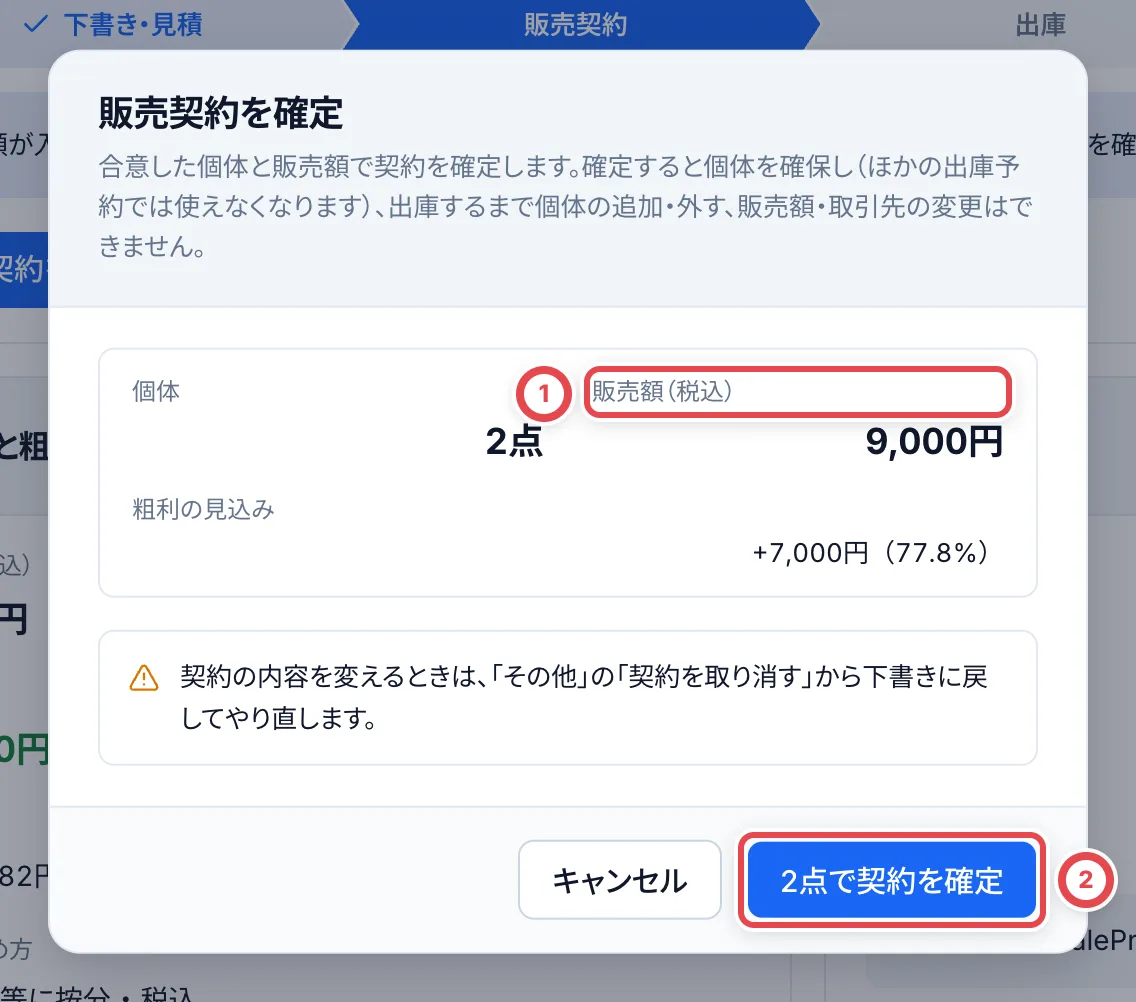 確定すると個体を確保し(ほかの伝票では使えなくなります)、伝票は「契約済み(出庫待ち)」になります。**出庫するまで、個体の追加・外す、販売額・取引先の変更はできません。** 直すときは、右上の「その他」の「契約を取り消す」で下書きに戻します。
## 4. (販売)出庫を確定する
カードを送ったら(渡したら)、「出庫を確定」を押します。①に追跡番号を入れ(任意)、②の「N点の出庫を確定」を押します。個体は「販売済」になり、棚から外れます。**この操作は取り消せません。** 現物を出したことを確かめてから押してください。
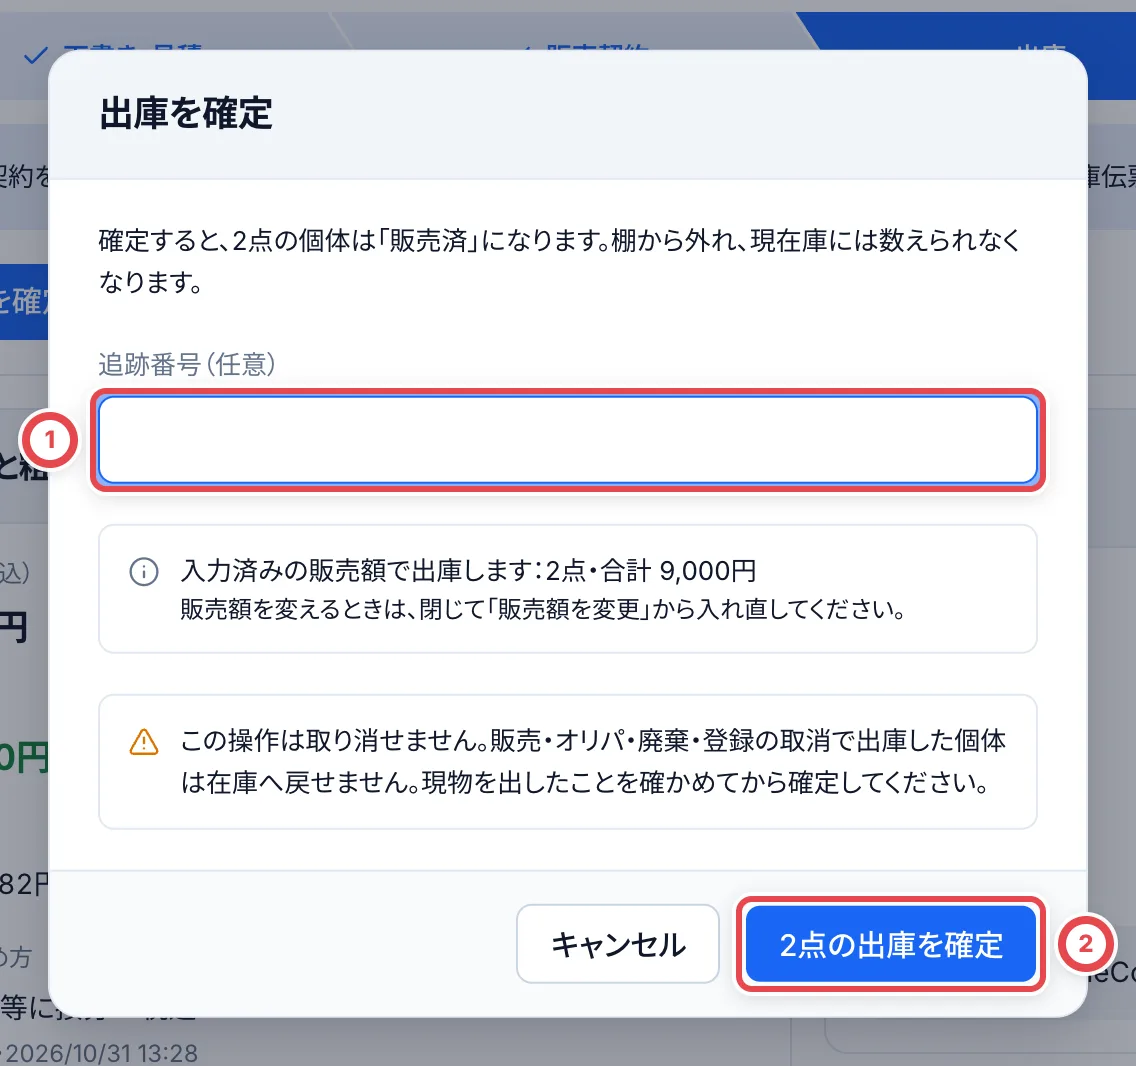 取引先がトレカクラウドを使う連携先のときは、このダイアログで「テナント間移管として送る」を選べます。送った個体は移動中になり、相手の店舗が受け入れた時点で相手の在庫になります。
## 5. (販売)請求書を出して、入金を記録する
出庫したあとは、「請求・入金」で請求書を発行し、代金を受け取ったら①の「入金を記録」で記録します(振込・現金・カード)。納品書と出庫伝票(ピッキングリスト)は「帳票」からPDFで出せます。返品を受けたときは「返品を受ける」で記録します。
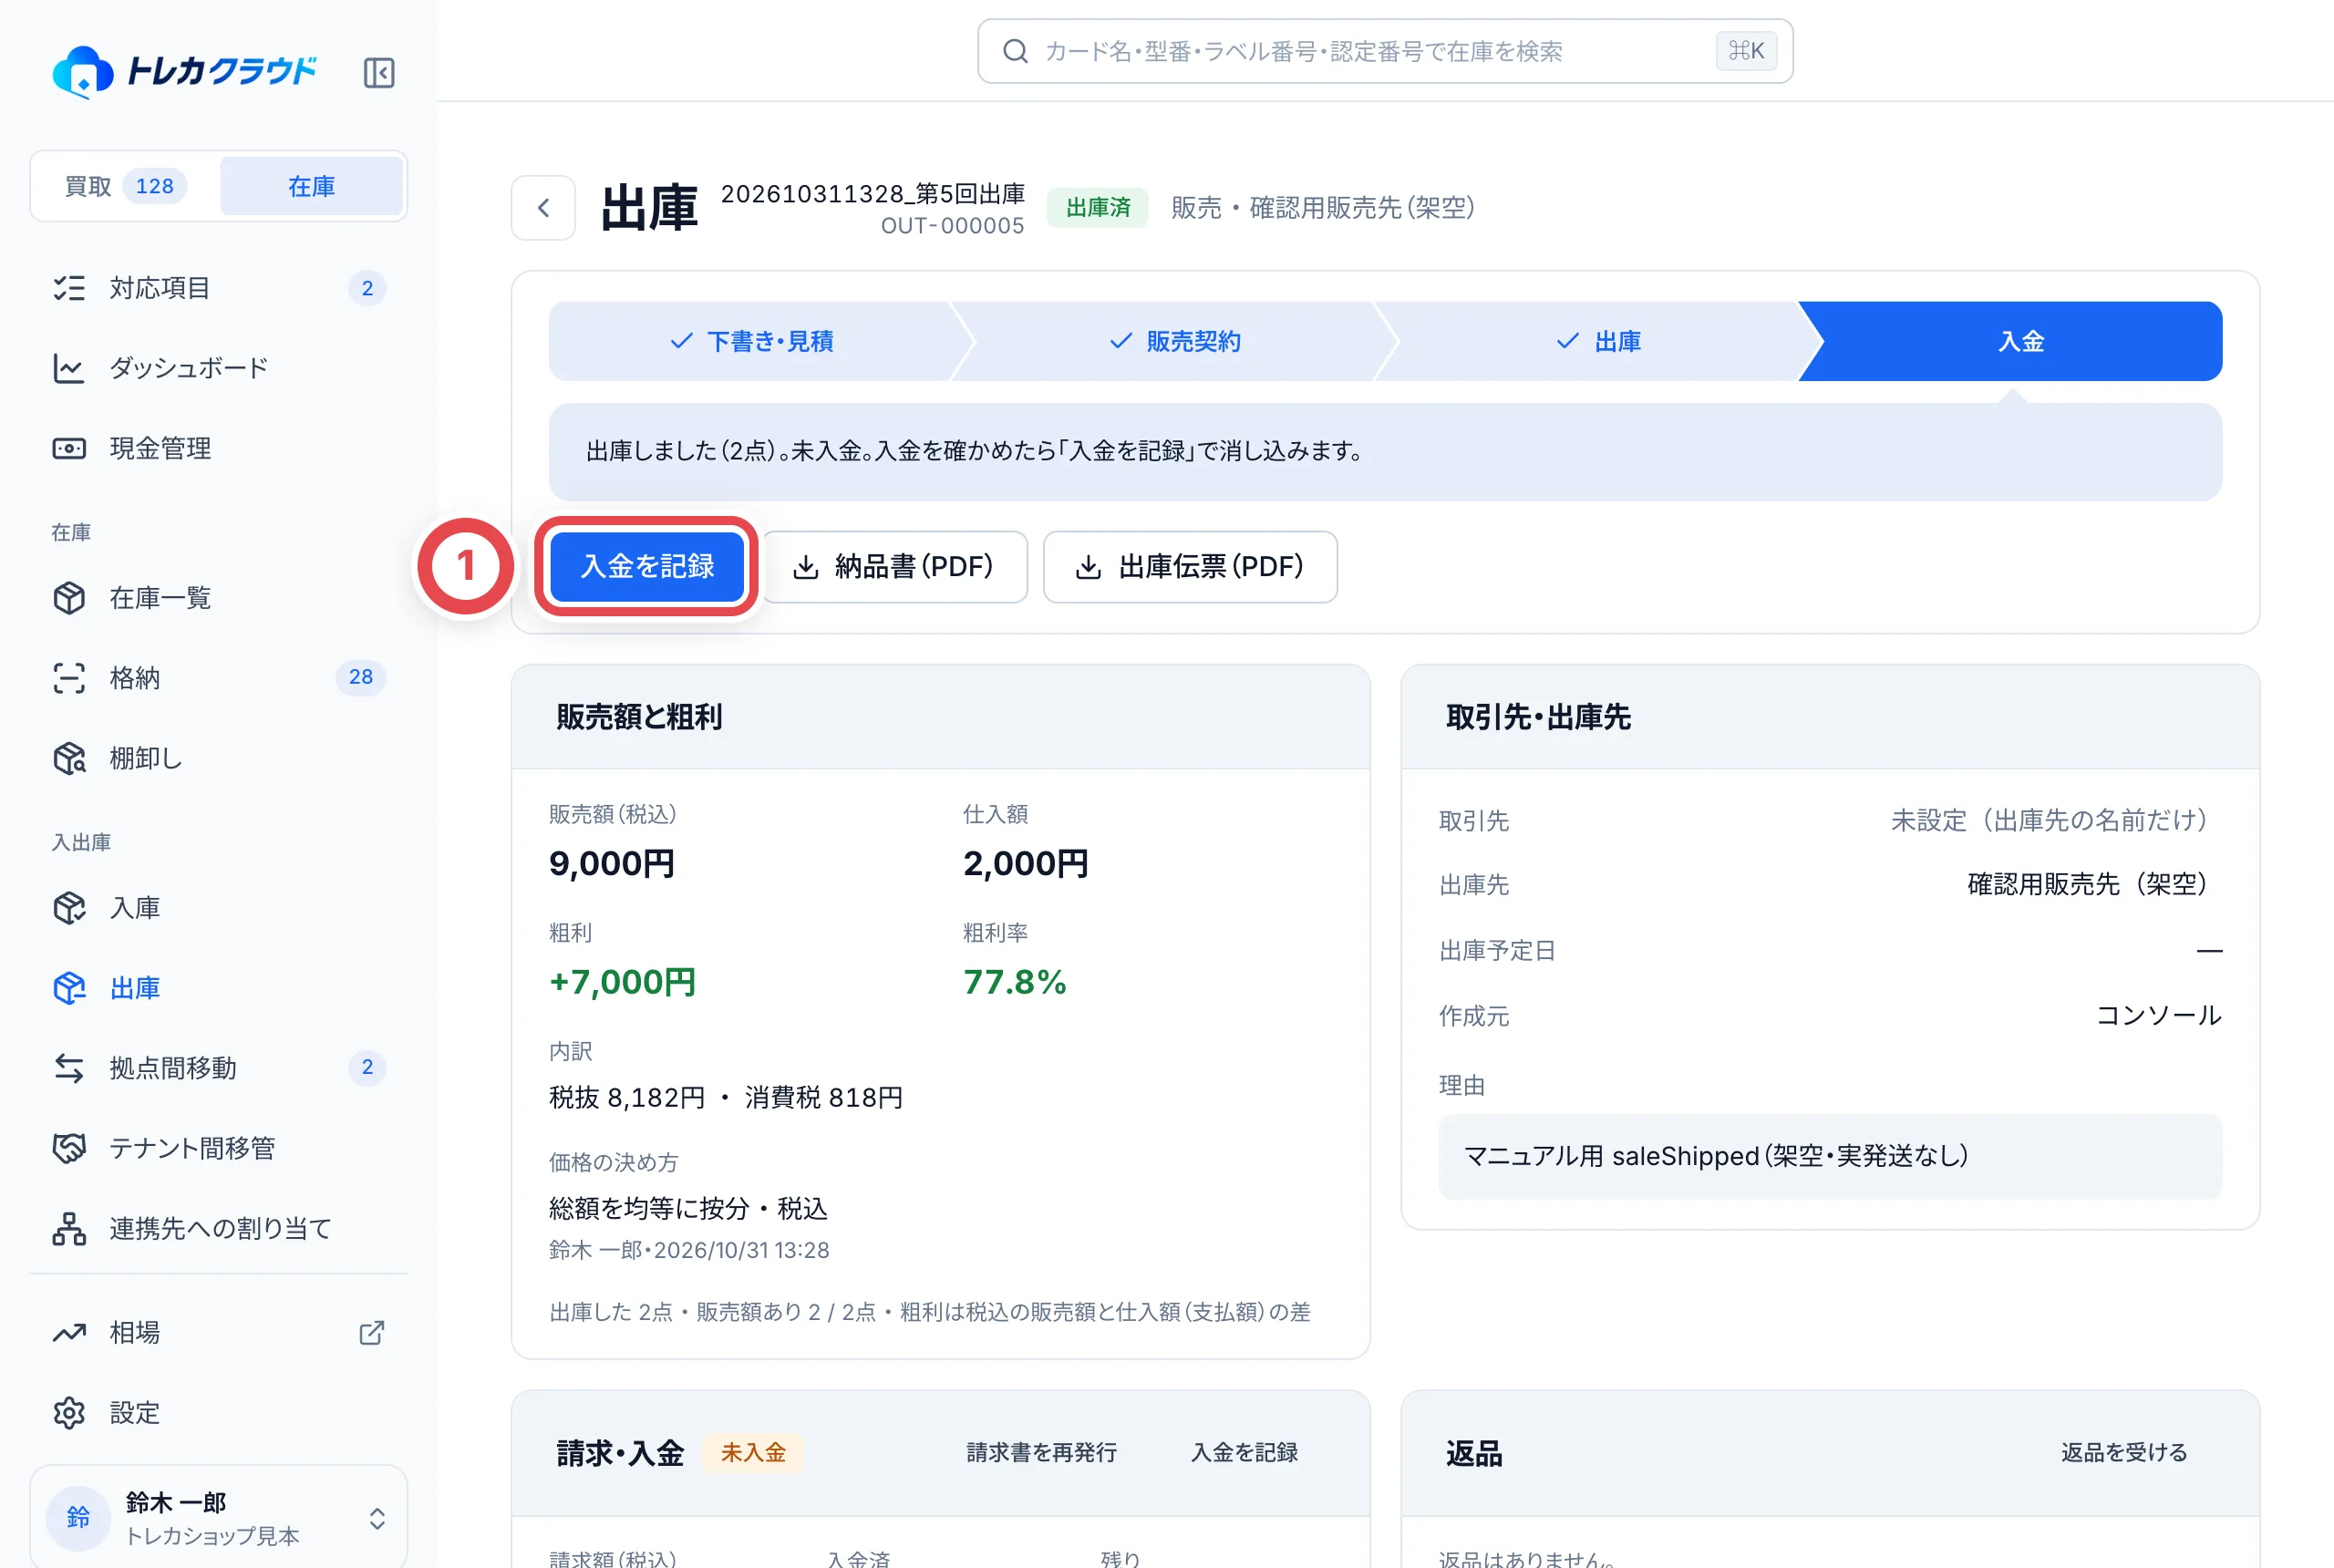 請求書を再発行すると以前の請求書は取消になります。入金の取消には理由が必要です。入金予定日・請求書の支払期限と、未入金・一部入金・入金済み・過入金の状態を確認します。記録だけで銀行や決済サービスから入出金されるわけではありません。
### 相手もトレカクラウドを使っている販売
1. 販売の作成時に取引先の「連携先(トレカクラウド)」を選び、有効な連携先を指定します。販売額を入れ、契約を確定します。
2. 出庫時に「テナント間移管として送る」を確認します。受け入れる側は移管の購入額・請求書・支払期限を照合し、届いた個体を受け入れます。仕入額は税込の販売額です。
3. 買った側は実際に支払ったあと、移管の「支払いを報告」で日付・金額を記録します。報告だけでは入金確認になりません。
4. 売った側は出庫伝票の「連携先からの支払いの報告」を照合し、実際の着金に合わせて「入金として記録」します。確認できない報告は理由を残して「記録しない」を選びます。
受入を拒否した個体や、受入前に送り手が移管を取り消した個体は元の棚へ戻り、販売側には返品として反映されます。通常の販売返品を重ねて登録しないでください。
## 6. 販売以外の出庫(オリパ・廃棄・持ち出しなど)
販売以外の伝票は、保存した時点で「予約中」になり、個体を確保しています。画面の「進み具合と次の操作」に、その目的で次にできるボタンが出ます。オリパは①の「販売額を入力」でオリパとしての販売額を入れられます。出したら②の「出庫を確定」を押します。
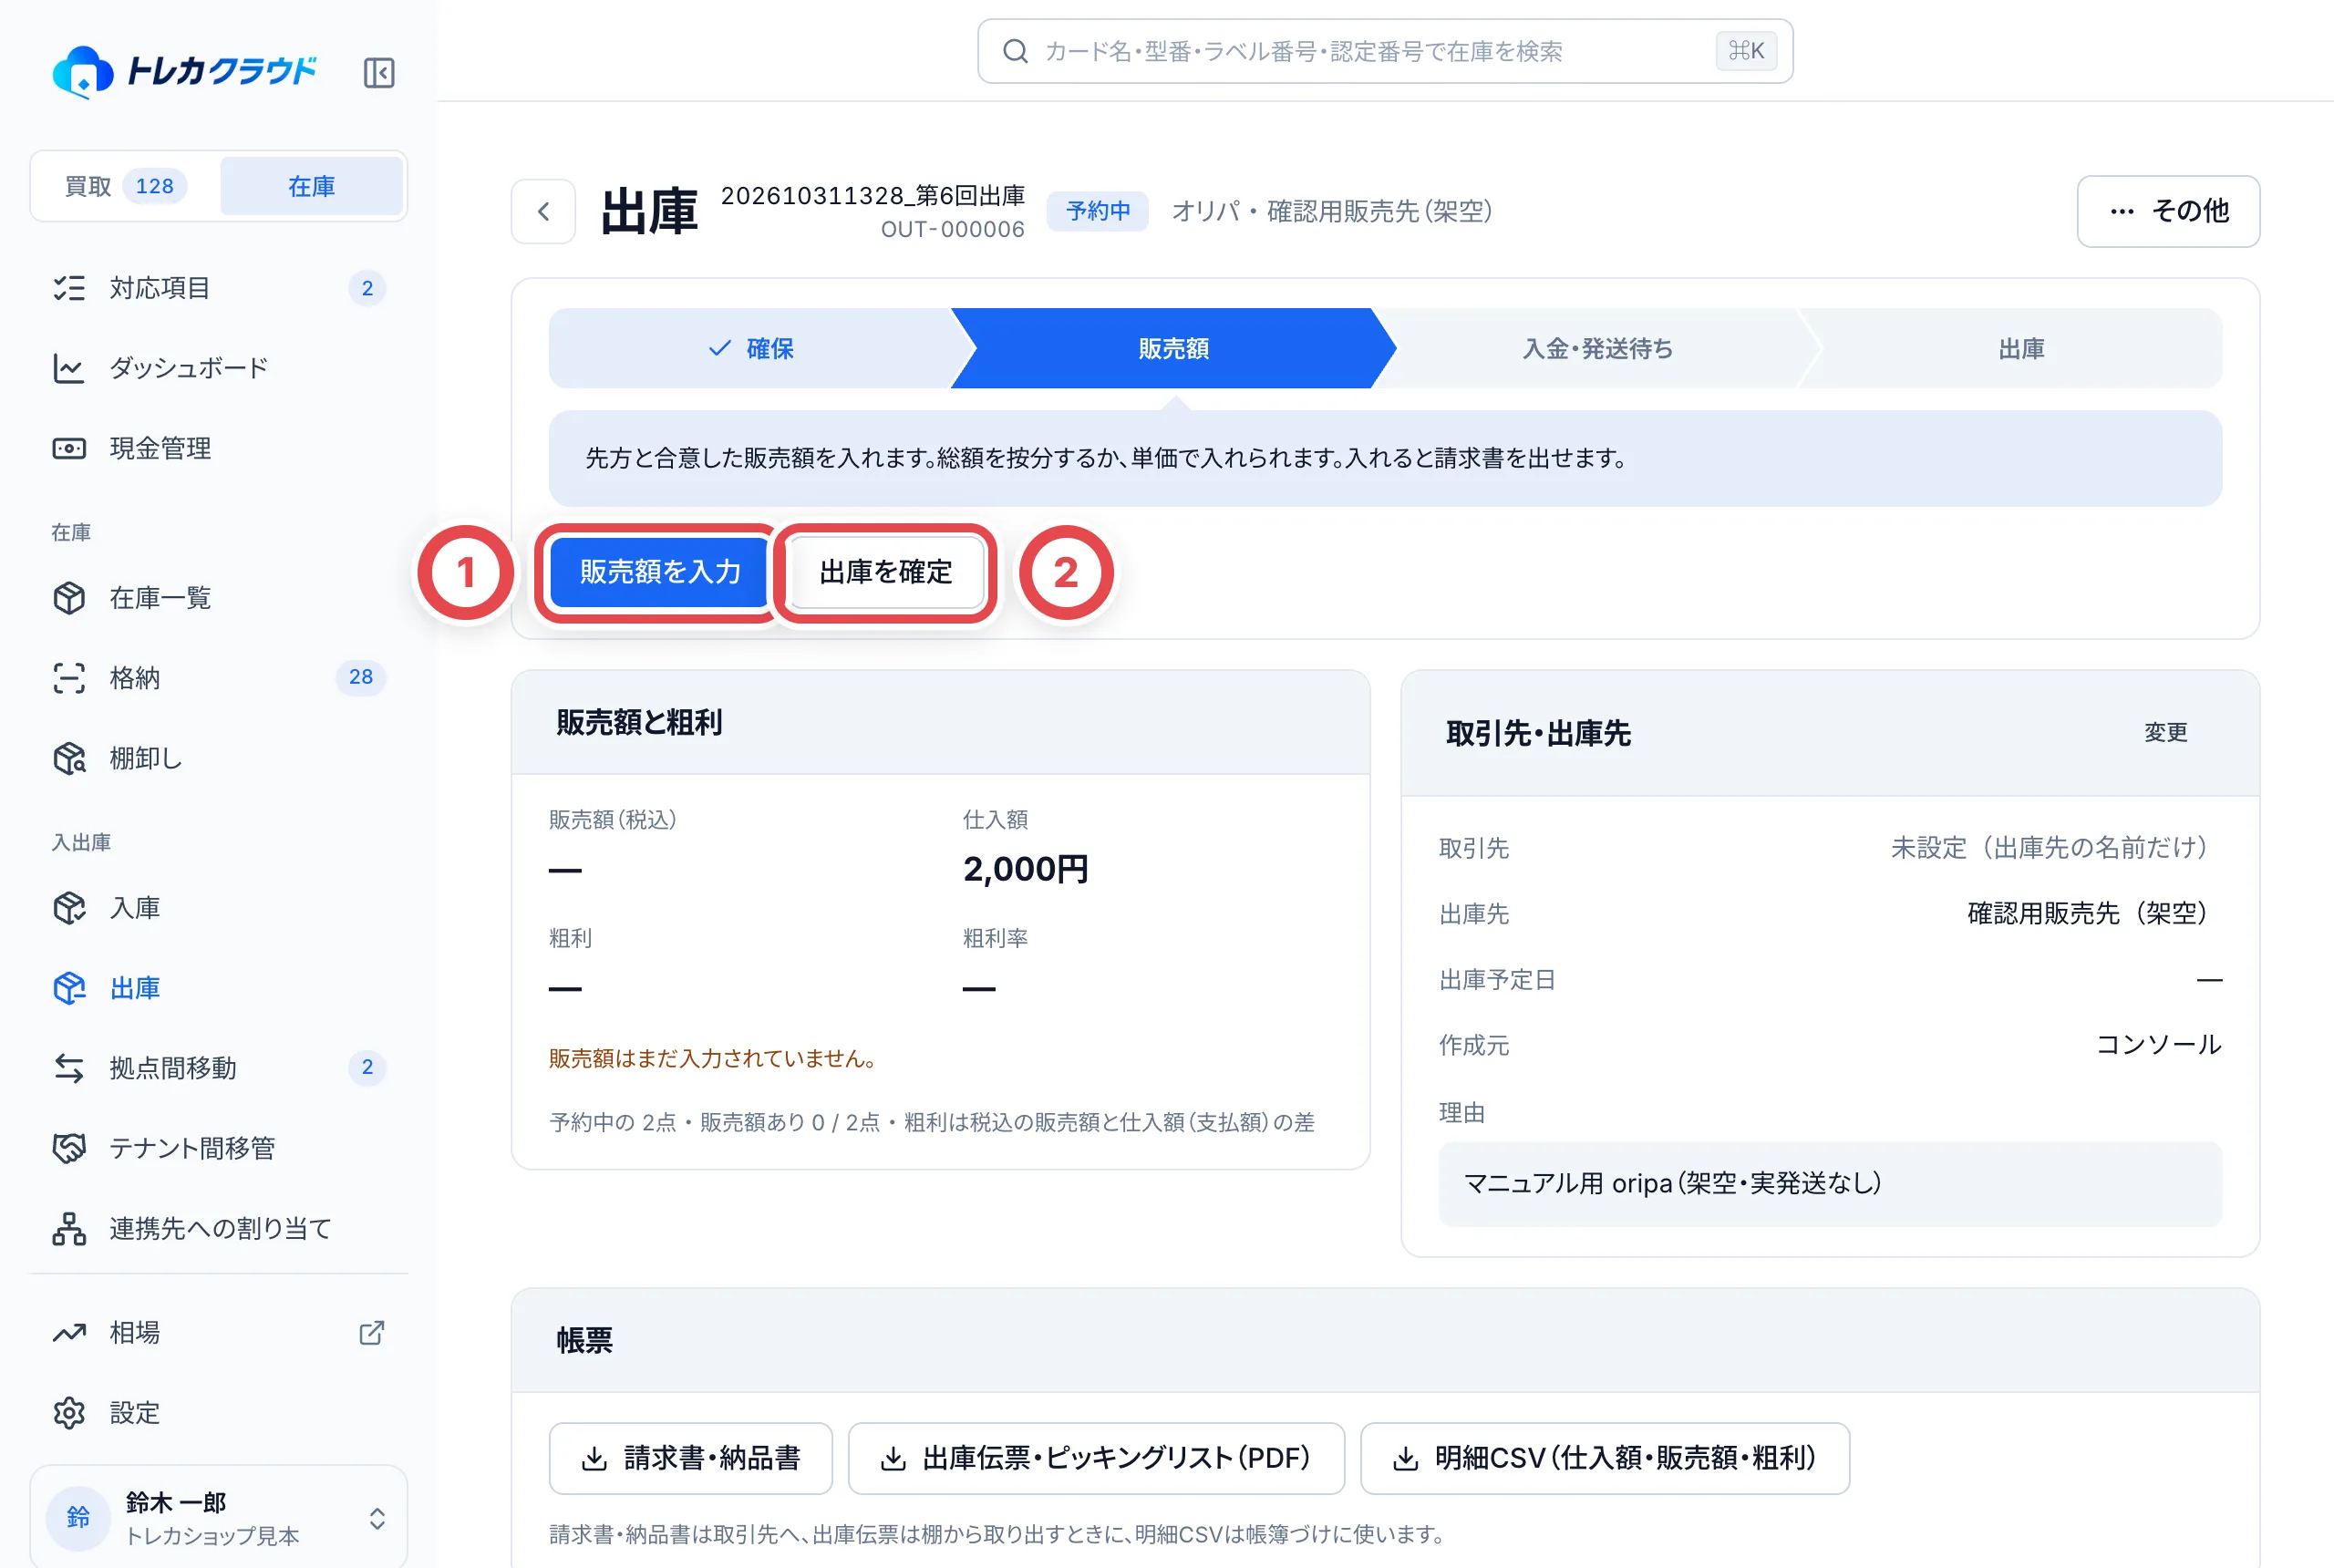 出す個体を先に固めたいときは「発送待ちにする」を使います(廃棄と登録の取消にはありません)。個体を1点だけ外すときは、個体の行の「外す」を押し、理由(注文の数量変更・別の個体と入れ替えなど)を選びます。
出庫を確定したあとの個体は、オリパは「販売済」、廃棄は「処分済」、登録の取消とその他の持ち出しは「持ち出し済」になります。目的が「その他の持ち出し」の個体は、あとで行の「再入庫」から、戻す棚と理由を選んで在庫に戻せます。
伝票ごとやめるときは、右上の「その他」を開き、①の「予約を取り消す」を押して理由を選びます。販売の下書きでは「下書きを削除」、契約済みの販売では「契約を取り消す」になります。
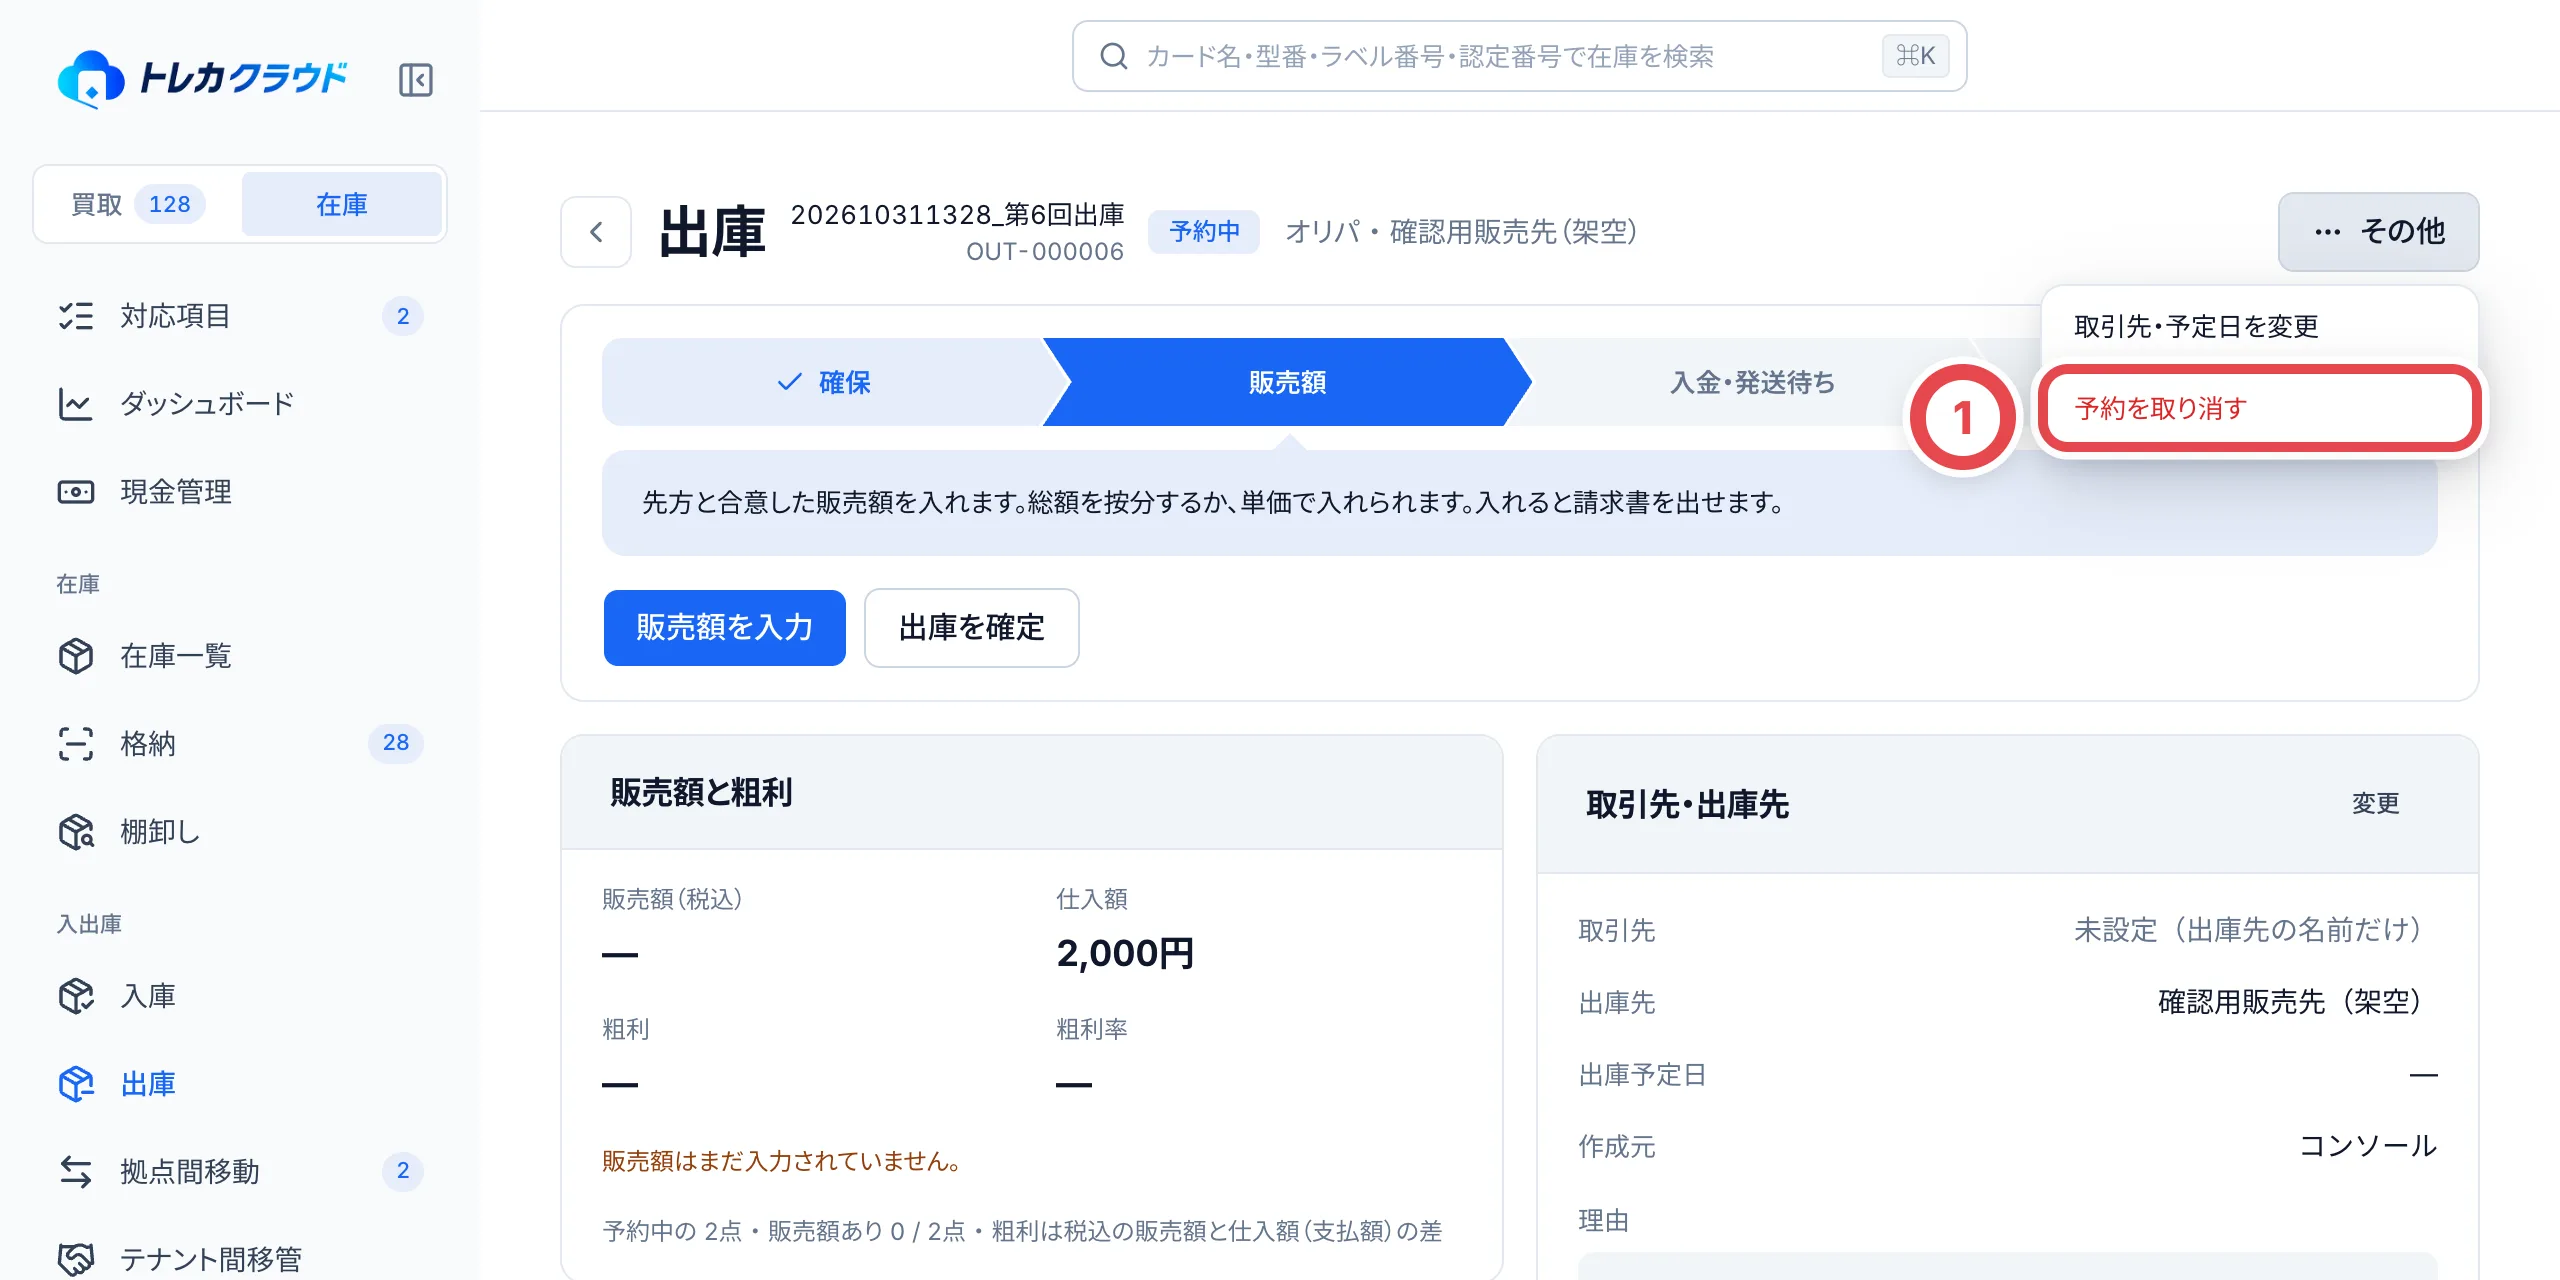 :::tip
入庫伝票で誤登録した個体は、[入庫伝票の詳細](/guides/inventory/receipts)で選択して登録を取り消せます。
:::
## 7. 格納アプリでピッキングする
格納アプリの「作業」から「ピッキング」を開き、出庫予約(予約中・契約済み)を選んで在庫ラベルを読み取ると、取り出した個体に印が付きます。伝票の画面にも「取り出し済み」と出ます。
同じカード・同じグレードの在庫が何枚もあるとき(PSA 10 が10枚など)は、予約した個体と別の1枚を棚から取っても構いません。予約と違う個体を読むと、アプリが予約の個体と読んだ個体を並べて見せ、認定番号・状態タグ・状態メモの違いを目立たせます。「差し替えて取り出す」を押すと、読んだ個体がこの伝票に入り、予約していた個体は在庫に戻ります。「今回は使わない」を押したら、読んだ個体は棚に戻します。
確認の画面で「この出庫では、同じカード・同じグレードなら確認せずに差し替える」をオンにすると、その画面を閉じるまで確認なしで差し替えます。差し替えた明細には、伝票の画面で「差し替え」と、代わりに外した個体の資産番号が出ます。
確認して差し替えるときは、別の拠点に登録されている個体も使えます(同じ拠点の明細が優先されます)。着金確認待ちの個体と、連携先に割り当て済みの個体は差し替えに使えません。
## 8. 拠点間移動を作って、出荷を記録する
拠点間移動は、出荷元の拠点から移動先の拠点へ在庫を送る伝票です。利用中の拠点が2つ以上あるときに使えます。
サイドバーの「拠点間移動」で「拠点間移動を作成」を押します。①の「出荷元の拠点」と②の「移動先の拠点」を選び、移動する個体を選びます。配送業者と追跡番号は任意、移動の理由は必須です(候補から選べます)。送ったら③の「出荷を記録」を押します。**押すとその場で記録され**、個体は「移動中」になって棚から外れます。
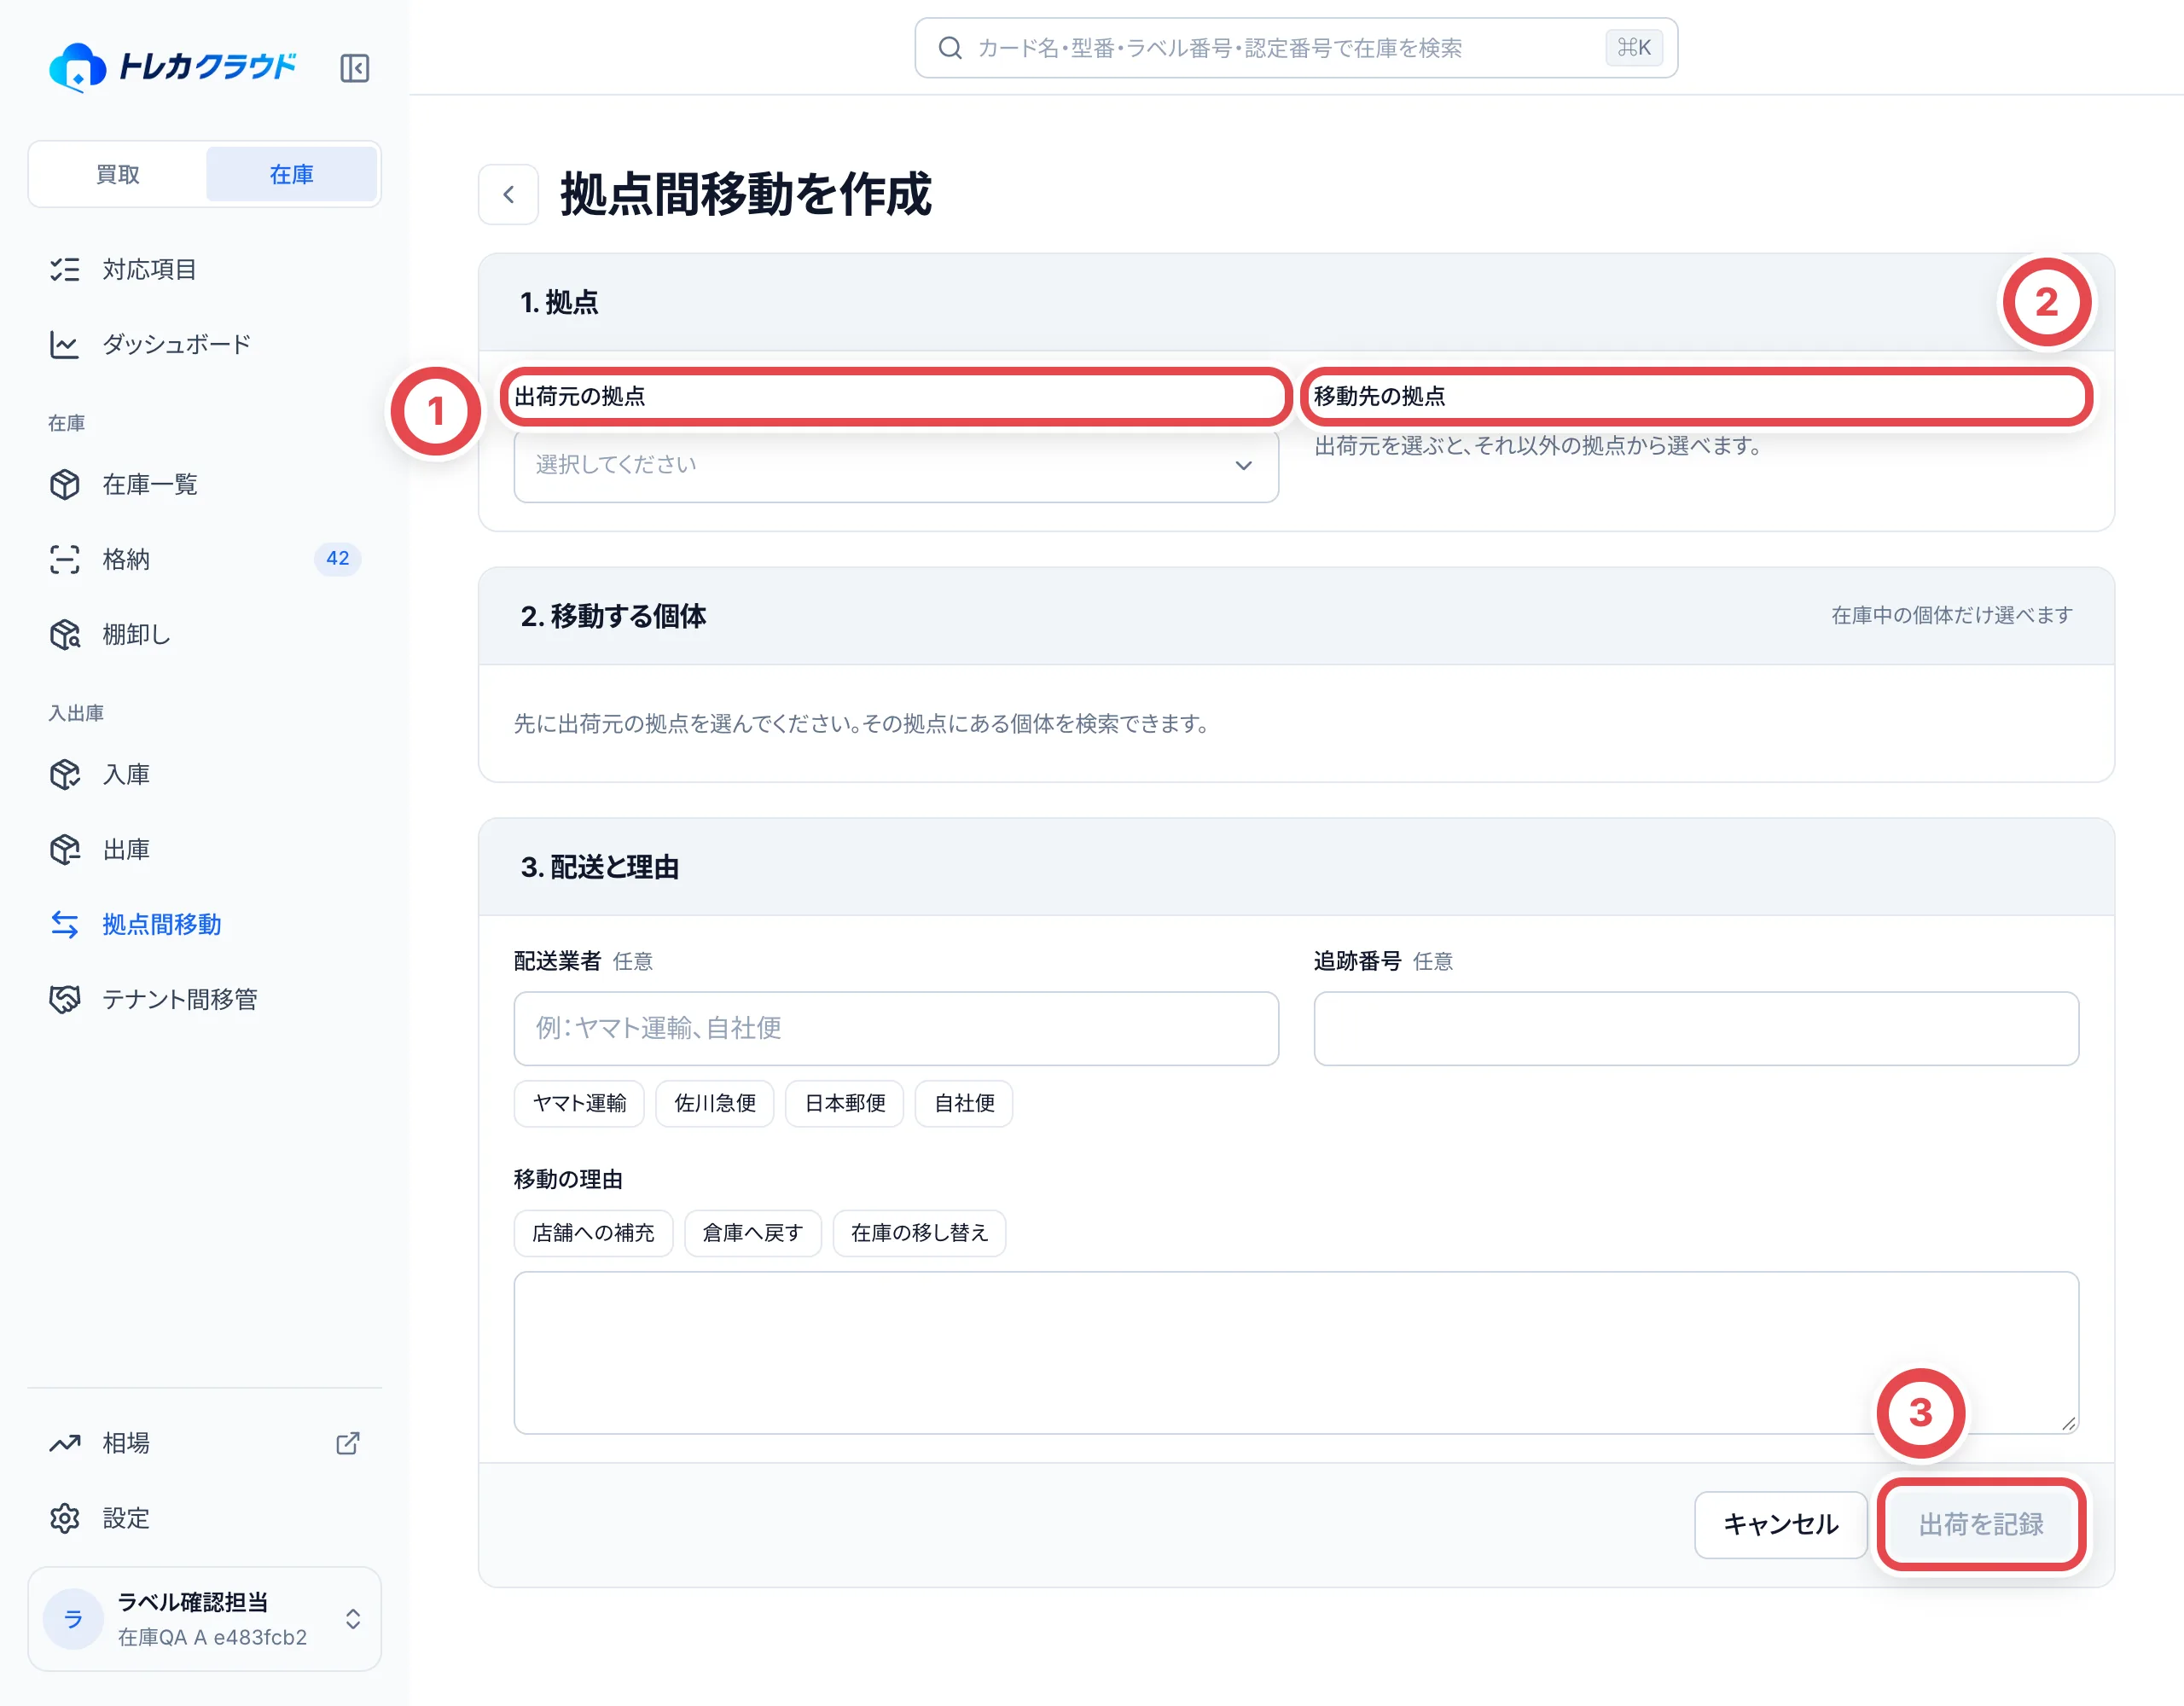 ## 9. 移動先で受領する
移動先の拠点で伝票を開き、①の「受領する」を押します。届かなかった個体は、②の「元の棚へ戻す」で、理由を選んで出荷元に戻します。
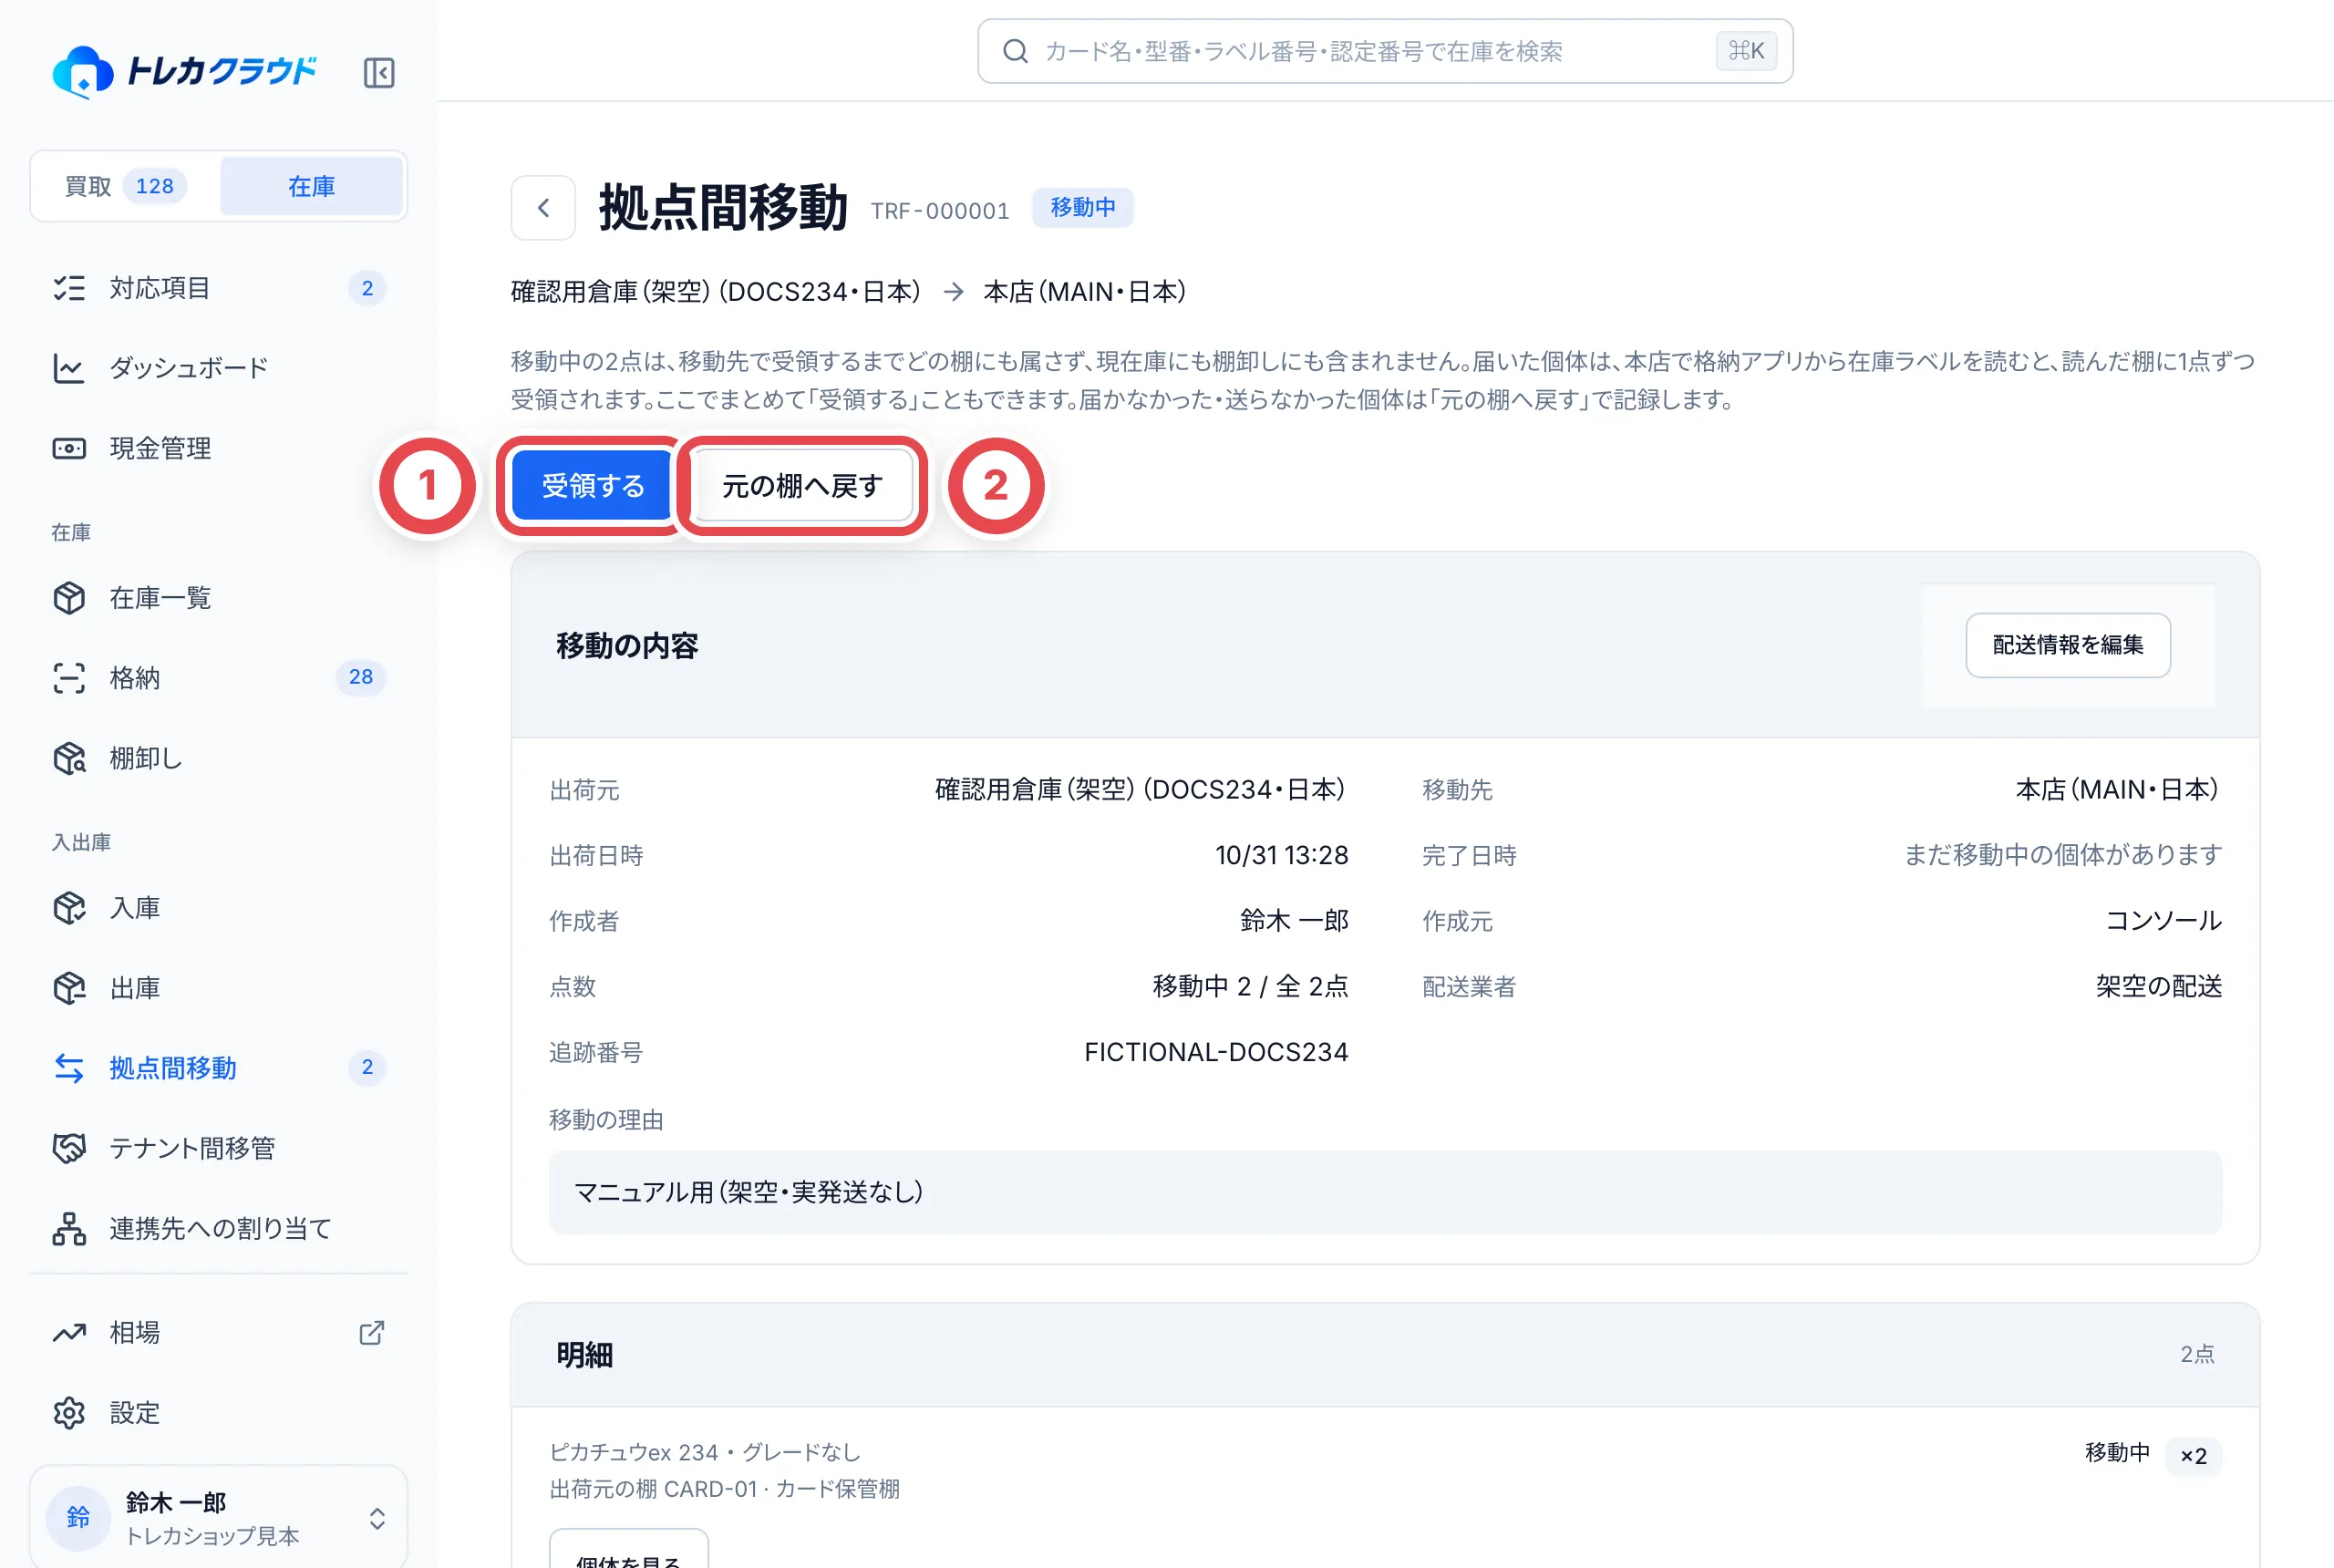 「受領を記録」で、①の受け取る棚を選び、届いた個体だけにチェックを入れて、②の「N点を受領」を押します。
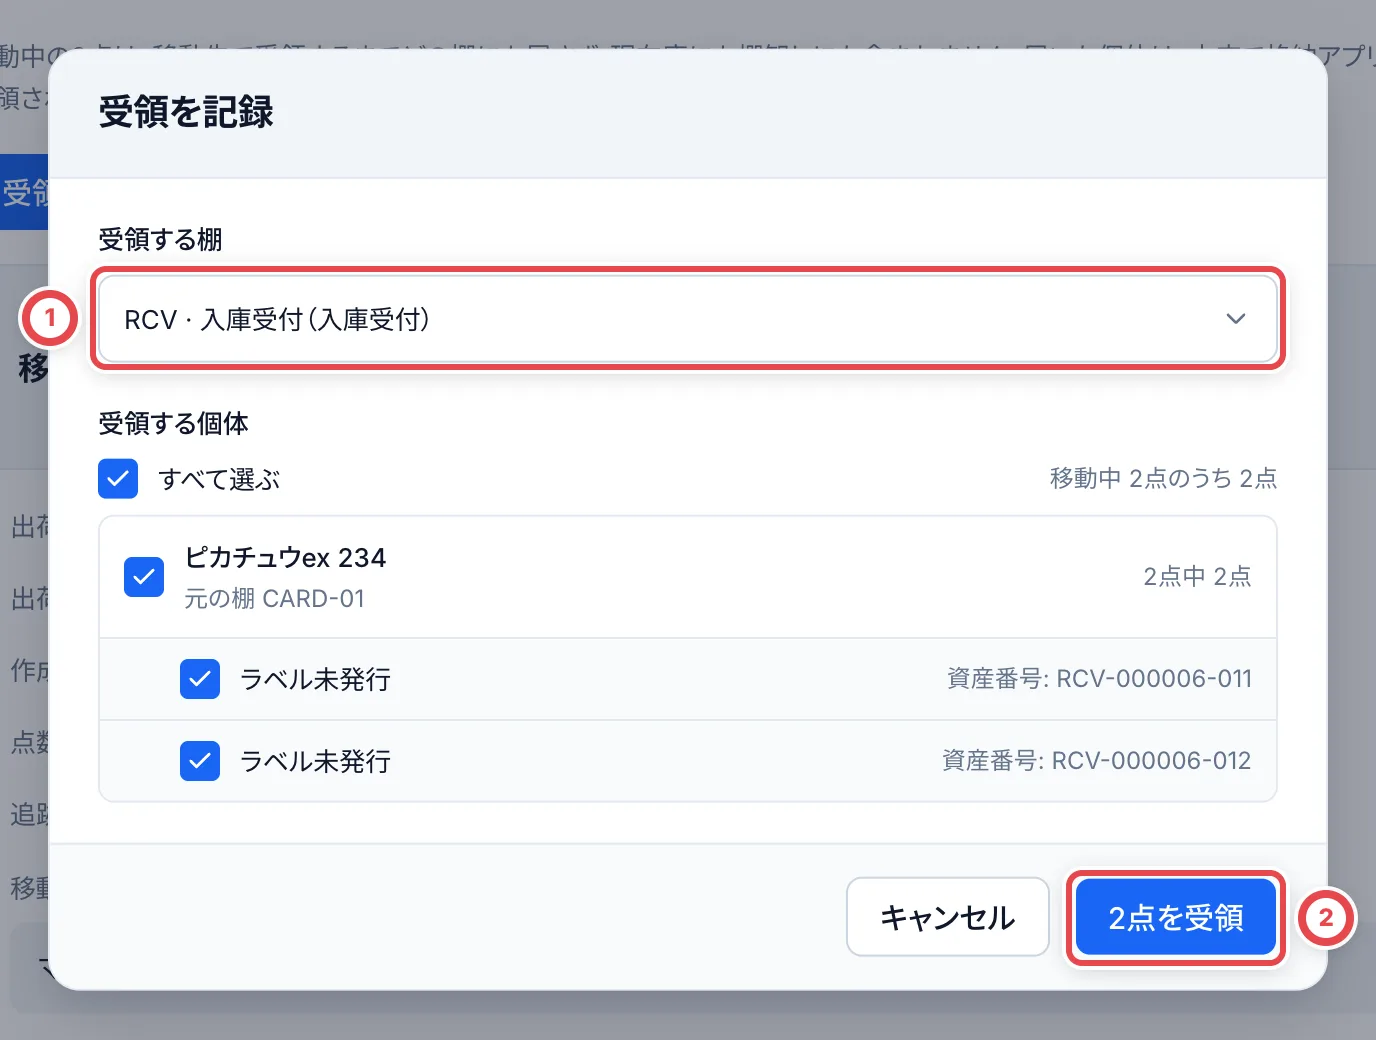 移動中の伝票では「配送情報を編集」から配送業者・追跡番号を補足できます。新しい伝票を重ねず、保存後に同じ伝票を開き直して確認します。
格納アプリの「入荷」で受け取ることもできます。先に受け取る棚を選び、届いた在庫ラベルを読み取ると、その棚に受領されます。
## テナント間移管
テナント間移管は、同じトレカクラウドを使うほかの店舗へ在庫を引き渡す伝票です。使う前に、「設定」の「テナント連携」で相手の店舗と連携しておきます(申請・承認には「テナント連携管理」の権限が必要です。標準のオーナー・管理者には含まれます)。サイドバーに「テナント間移管」が出ていない店舗では使えません。
1. 「テナント間移管」で「移管を送る」を押し、移管先の店舗を選んで、メモを入力します(必須・相手にも表示されます)
2. 在庫中の個体を選んで「移管を送る」を押します。**押すとその場で送られ**、個体は移動中になります
3. 相手の店舗が、受け入れる棚と個体を選んで「受け入れる」を押します。受け入れられた個体は、送った側では「移管済」になります
相手の店舗は、届いていないときや内容が違うときに「拒否する」を選べます。拒否された個体は、送った側の元の棚に戻ります。送った側は、まだ受け入れられていない移管を「取り消す」で取り消せます。
相手に引き継がれるのは、カード・グレード・認定番号・状態メモ・仕入額です。お客様の情報や買取案件は引き継がれません。別の事業者どうしの移管では、両方の古物台帳に記録が残り、受け入れる側には有効な古物商許可が要ります。
## 連携先への割り当て
外部連携を使っている店舗では、「連携先への割り当て」で、どの個体を連携先に見せて確保させるかを決められます。連携先を選び、個体を選んで「割り当てる」を押します。外部連携の設定は[外部連携](/guides/settings/partners)を参照してください。
## 困ったとき
| 起きていること | 確かめること・直し方 |
| -------------------------------------------------------------- | ------------------------------------------------------------------------------------------------------------------------------------------------------------------------------------------------------------------------- |
| 個体が「追加できません」になっている | 着金確認待ちか、ほかの伝票で確保されている個体です。着金を記録するか、その伝票から外します。 |
| 販売の下書きなのに、ほかの伝票でその個体が使われた | 下書きのあいだは在庫を確保しません。早く押さえたいときは、販売額を入れて販売契約を確定します。 |
| 「販売契約を確定」が押せない | 販売額が入っていない個体があります。「販売額を入力」で全部の個体に金額を入れます。 |
| 契約したあとで個体や金額を変えたい | 「その他」の「契約を取り消す」で下書きに戻してから直します。 |
| 出庫を確定したあとで、現物が戻った・出していなかったと気づいた | 出庫の確定自体は取り消せません。通常の販売・オリパは[販売返品](/guides/inventory/sales-returns)、その他の持ち出しは「再入庫」を使います。連携先配送・テナント間移管は各伝票の経路を確認し、重複する入庫伝票を作りません。 |
| 「発送待ちにする」が出ない | 販売では使いません(販売契約が同じ役目です)。廃棄と登録の取消にもありません。 |
| 「拠点間移動を作成」が使えない | 利用中の拠点が1つだけです。「設定 › 拠点と保管場所」で拠点を足します。 |
| 拠点間移動で一部が届かなかった | 届いた個体だけ受領し、残りは「元の棚へ戻す」で理由を選んで戻します。 |
| 「テナント間移管」がサイドバーにない | テナント連携が使える状態になっていません。管理者に確認してください。 |
## 関連する操作
- [連携先の販売・当選と配送を確認する](/guides/inventory/partner-sales)
- [販売した在庫の返品を受ける](/guides/inventory/sales-returns)
---
# 在庫の全体像
Source: https://docs.toreca-cloud.com/guides/inventory/overview
商品名・型番・時価は[店内の商品情報と時価の訂正](/guides/inventory/product-and-market-corrections)、入庫先や過去の記録は[記録の訂正](/guides/inventory/record-corrections)、買取金額・数量は[元の買取案件の訂正](/guides/purchase/amount-and-quantity-corrections)で直します。
買い取ったカードは、1枚ずつ「個体」として在庫に記録されます。個体にはQRラベルを貼り、どの拠点のどの棚にあるかまで管理します。
まとめ査定で買い取った束は1つの個体になり、中の枚数を持ちます。1枚ずつのカードとは扱いが違います。詳しくは[まとめ査定とセット価格](/guides/purchase/bulk-and-set-price)を参照してください。
## 最初に用意するもの
- 在庫を見るにはカードの閲覧権限が必要です。標準の閲覧のみの役割でも確認できます
- 在庫を変える(棚の移動・確保・紛失の記録・状態タグなど)には、カードの閲覧と在庫の編集の権限が必要です。標準のオーナー・管理者・スタッフは操作できます。独自の役割は、割り当てられた権限で変わります
- 拠点と保管場所を登録するには、設定を管理する権限が要ります(オーナーと管理者)
## 在庫の画面の開き方
サイドバーの上の「買取」「在庫」の切り替えで「在庫」を押すと、サイドバーが在庫の項目に変わります。
| サイドバーの項目 | 使うとき |
| -------------------------------- | ---------------------------------------------------------------------------------------------------------------- |
| 在庫一覧 | 手元の在庫を探す・確かめる(このページ) |
| 格納 | 入庫受付の棚から、保管棚へしまう([格納とQRラベル](/guides/inventory/putaway)) |
| 棚卸し | 棚の在庫を数えて合わせる([棚卸し](/guides/inventory/counts)) |
| 入庫 | 入ってくる在庫を受け入れる。買取以外の入庫は、入庫の中の入庫伝票で記録する([入庫](/guides/inventory/receipts)) |
| 出庫・拠点間移動・テナント間移管 | 在庫を出す・ほかの拠点や店舗へ動かす([出庫と移動](/guides/inventory/outbound-and-transfers)) |
| 連携先への割り当て | 外部の販売先に在庫を割り当てる(外部連携を使う店舗だけ) |
## 1. 拠点と保管場所を用意する
在庫の置き場所は、「拠点」と「保管場所」の2段階で管理します。
- **拠点**は、店舗や倉庫などの建物の単位です。種類は店舗・倉庫・事務所・委託先・その他から選びます
- **保管場所**は、拠点の中の棚です。「棚番号」で区別し、種類は入庫受付・保管棚・ショーケース・金庫・出庫準備・その他から選びます
「設定」の「拠点と保管場所」で登録します。
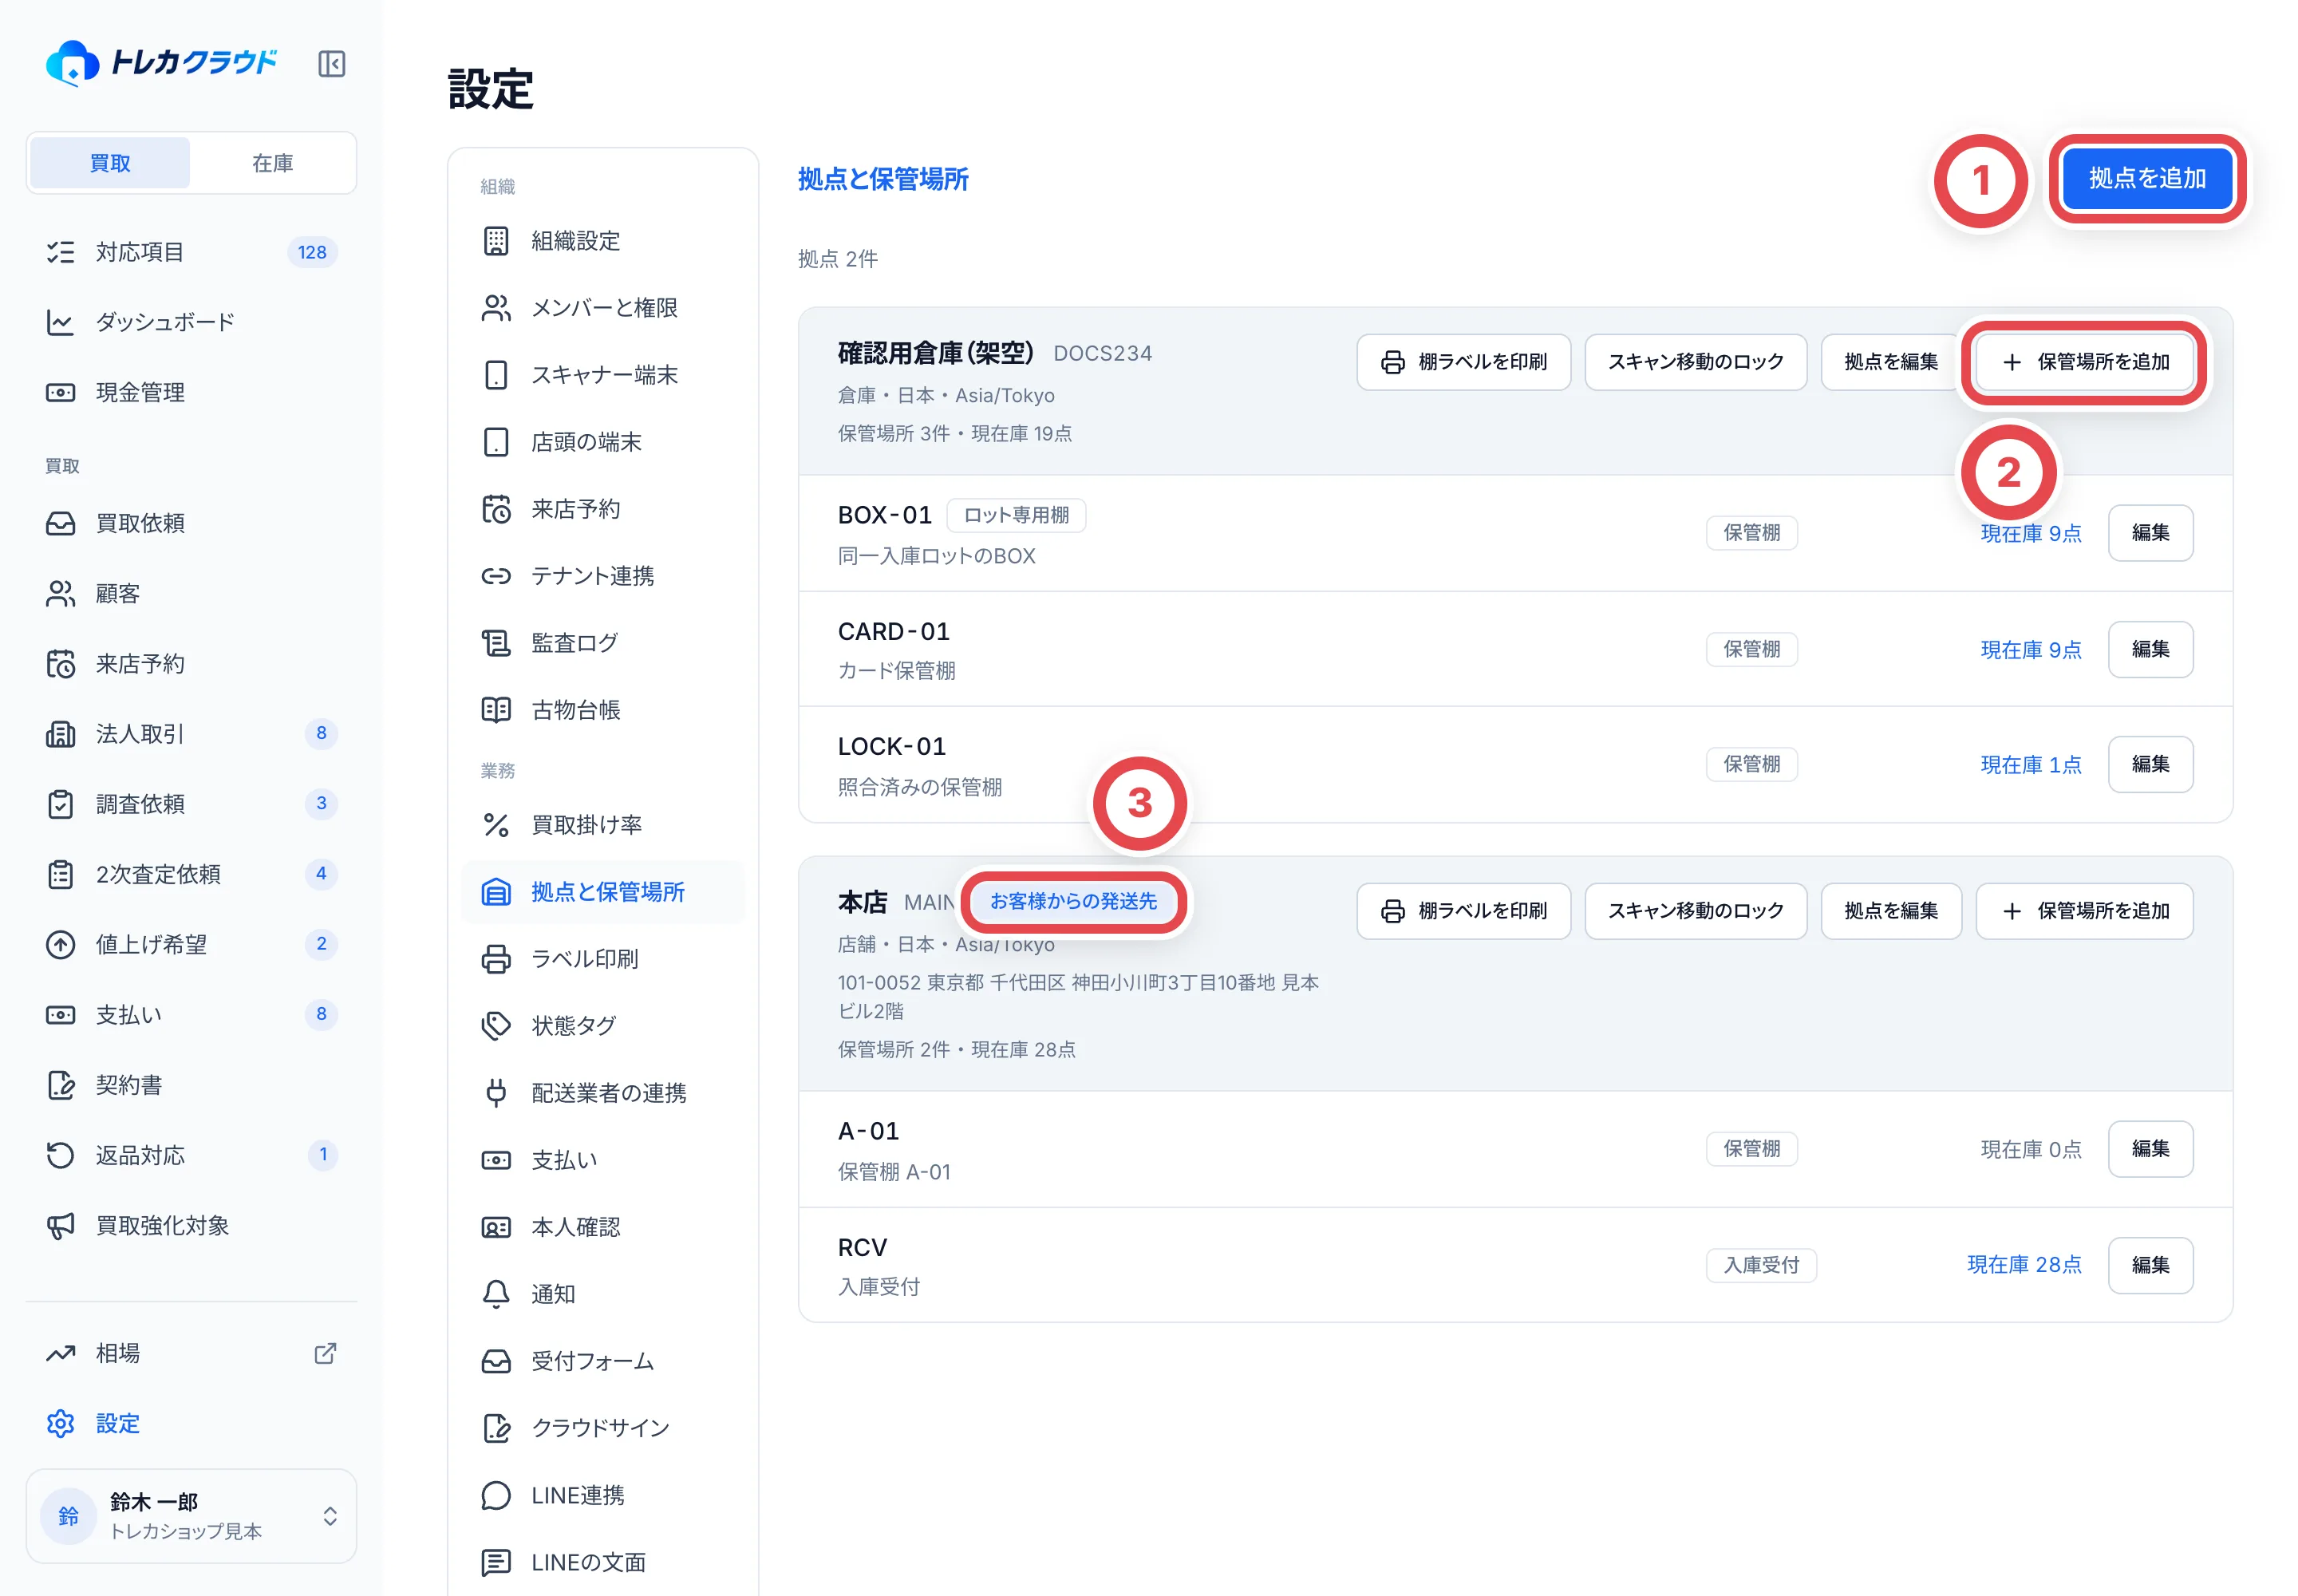 ①で店舗や倉庫を足します。②で、その拠点の中に棚を足します。③の印が付いた拠点が、お客様にカードを送ってもらう先です。
- まだ拠点がないときは、「本店と入庫受付を作る」を押すと、本店の拠点に入庫受付と保管棚が1つずつできます
- 買い取ったカードは、まず拠点の「入庫受付」の棚に入ります。そこからQRラベルを貼って、保管棚にしまうのが基本の流れです
- 拠点の編集で「お客様からの発送先にする」をオンにすると、③の印が付き、お客様への発送の案内でその住所を選べます
- 各棚の行には、棚の種類と、いまその棚にある在庫の点数が出ます
同じ入庫元のBOX・パック・デッキを混ぜずに保管したい場合は、[ロット専用棚](/guides/inventory/sealed-lot-shelves)を使います。照合済みの所在をスキャン訂正から保護する場合は、同じ画面の[スキャン移動のロック](/guides/inventory/shelf-protection)を設定します。
:::note
拠点や保管場所は消せません。使わなくなったら、編集で「この拠点を利用する」「この保管場所を利用する」をオフにします(一覧に「利用停止」と出ます)。在庫が残っている拠点や棚は、利用を止められません。
:::
## 2. 在庫一覧で探す
在庫一覧には、手元の在庫がカードごとにまとまって並びます。
商品種類のタブで、カード・BOX・パック・デッキ・まとめ査定を切り替えます。在庫がある種類と、いま開いている種類だけが表示されます。1種類だけなら切り替えは出ません。BOX・パック・デッキは商品ごと、まとめ査定は束ごとに確認します。
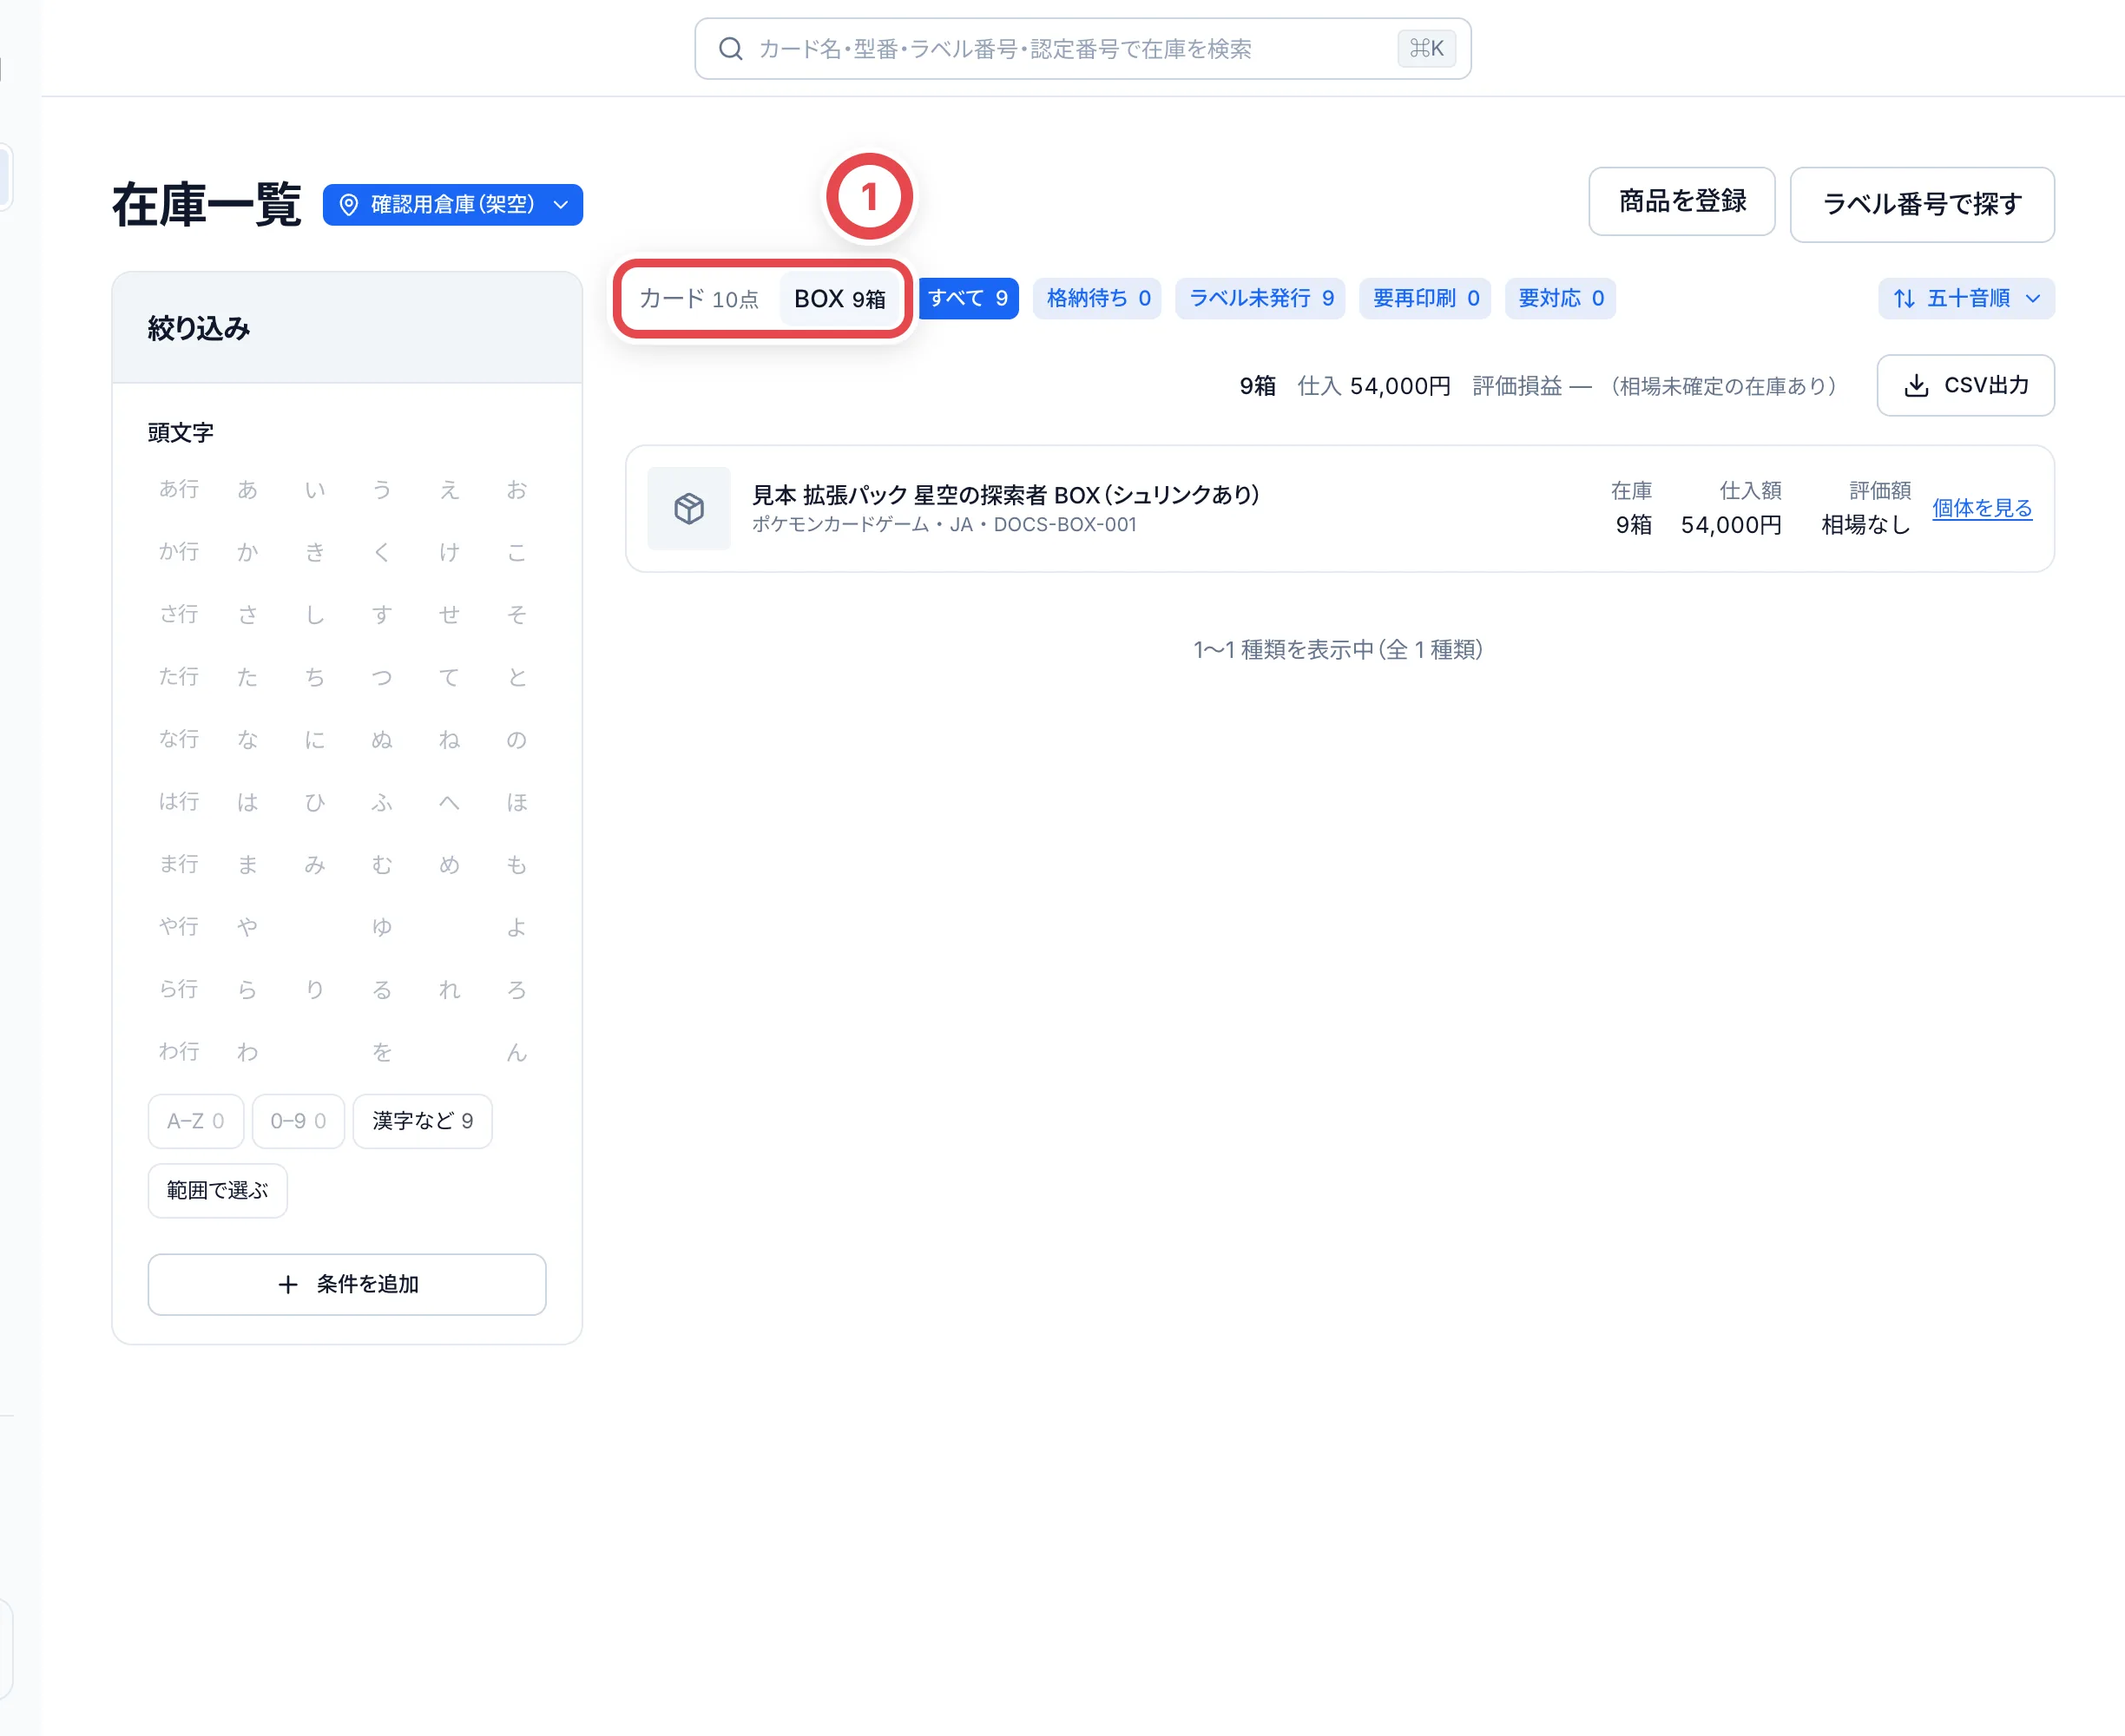
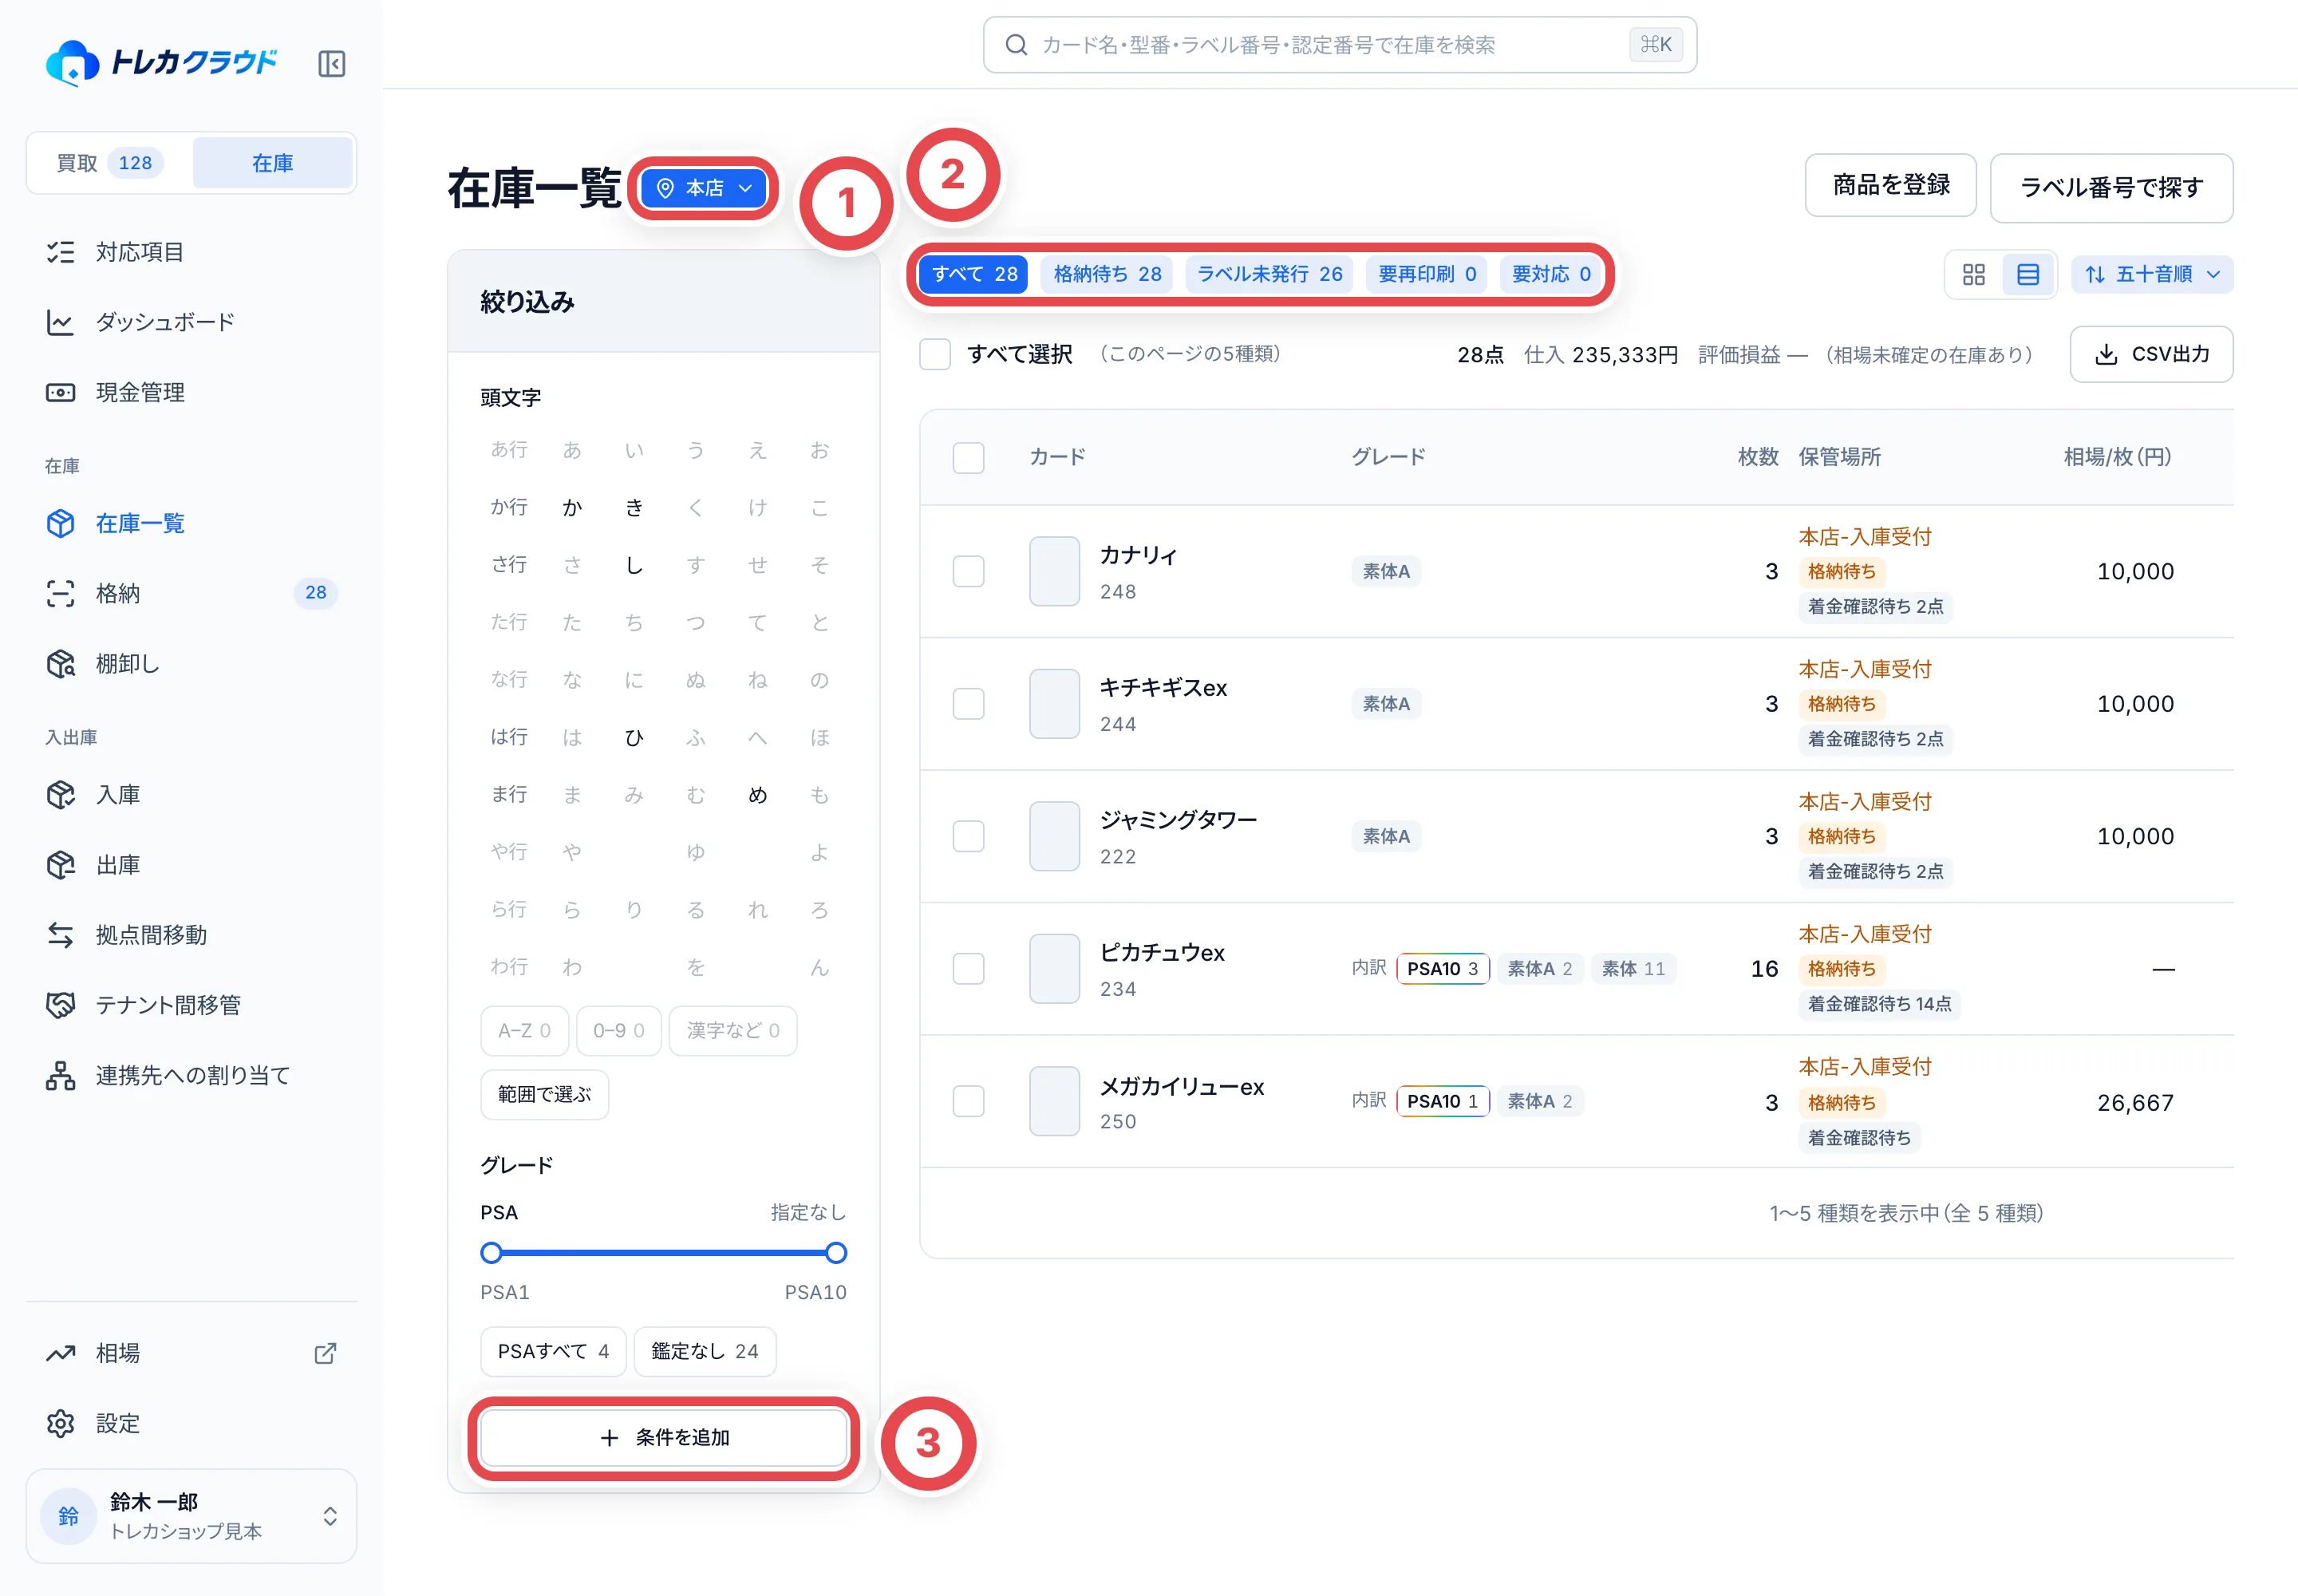 | 場所 | 使い方 |
| ---------------- | -------------------------------------------------------------------------------------------------------------------------- |
| ①拠点 | 表示する拠点を選びます。選んだ拠点は覚えておき、次に開いたときや、入庫・棚卸しを始めるときの初めの値になります |
| ②在庫の状況 | 「格納待ち」「ラベル未発行」「要再印刷」「要対応」に絞ります。数字は件数です |
| 左の「絞り込み」 | カード名の頭文字や、PSAのグレードで絞ります。③の「条件を追加」で、棚・シリーズ・レアリティ・入庫時期・相場帯なども選べます |
| 右上の並び順 | 1枚の相場・枚数・最終入庫日・名前(五十音順)から選びます。相場順は保有枚数を掛けた合計ではなく、1枚あたりの相場順です |
| 表示の切り替え | 並び順の左のボタンで、タイル表示と表の表示を切り替えます |
画面の上の検索欄には、カード名・型番・ラベル番号・スラブの認定番号を入れられます。在庫ラベルの番号を入れるとその個体が開き、棚ラベルの番号を入れるとその棚の在庫に絞り込みます。右上の「ラベル番号で探す」でも現物の番号から個体を開けます。資産番号で調べる場合の案内は、そのダイアログ内に折りたたんであります。
一覧の合計の行には、表示中の在庫の点数・仕入の合計・評価損益が出ます。
原価や相場が未確定の在庫を含むと、評価損益は「—」になります。金額がそろっている一部だけで全体の損益を計算することはありません。まとめ査定では評価損益を表示しません。
### CSVで書き出す
合計の行の右にある「CSV出力」を押し、書き出し方を選びます。**いま表示している条件(拠点・検索・絞り込み)の在庫を、全ページ分すべて書き出します。**
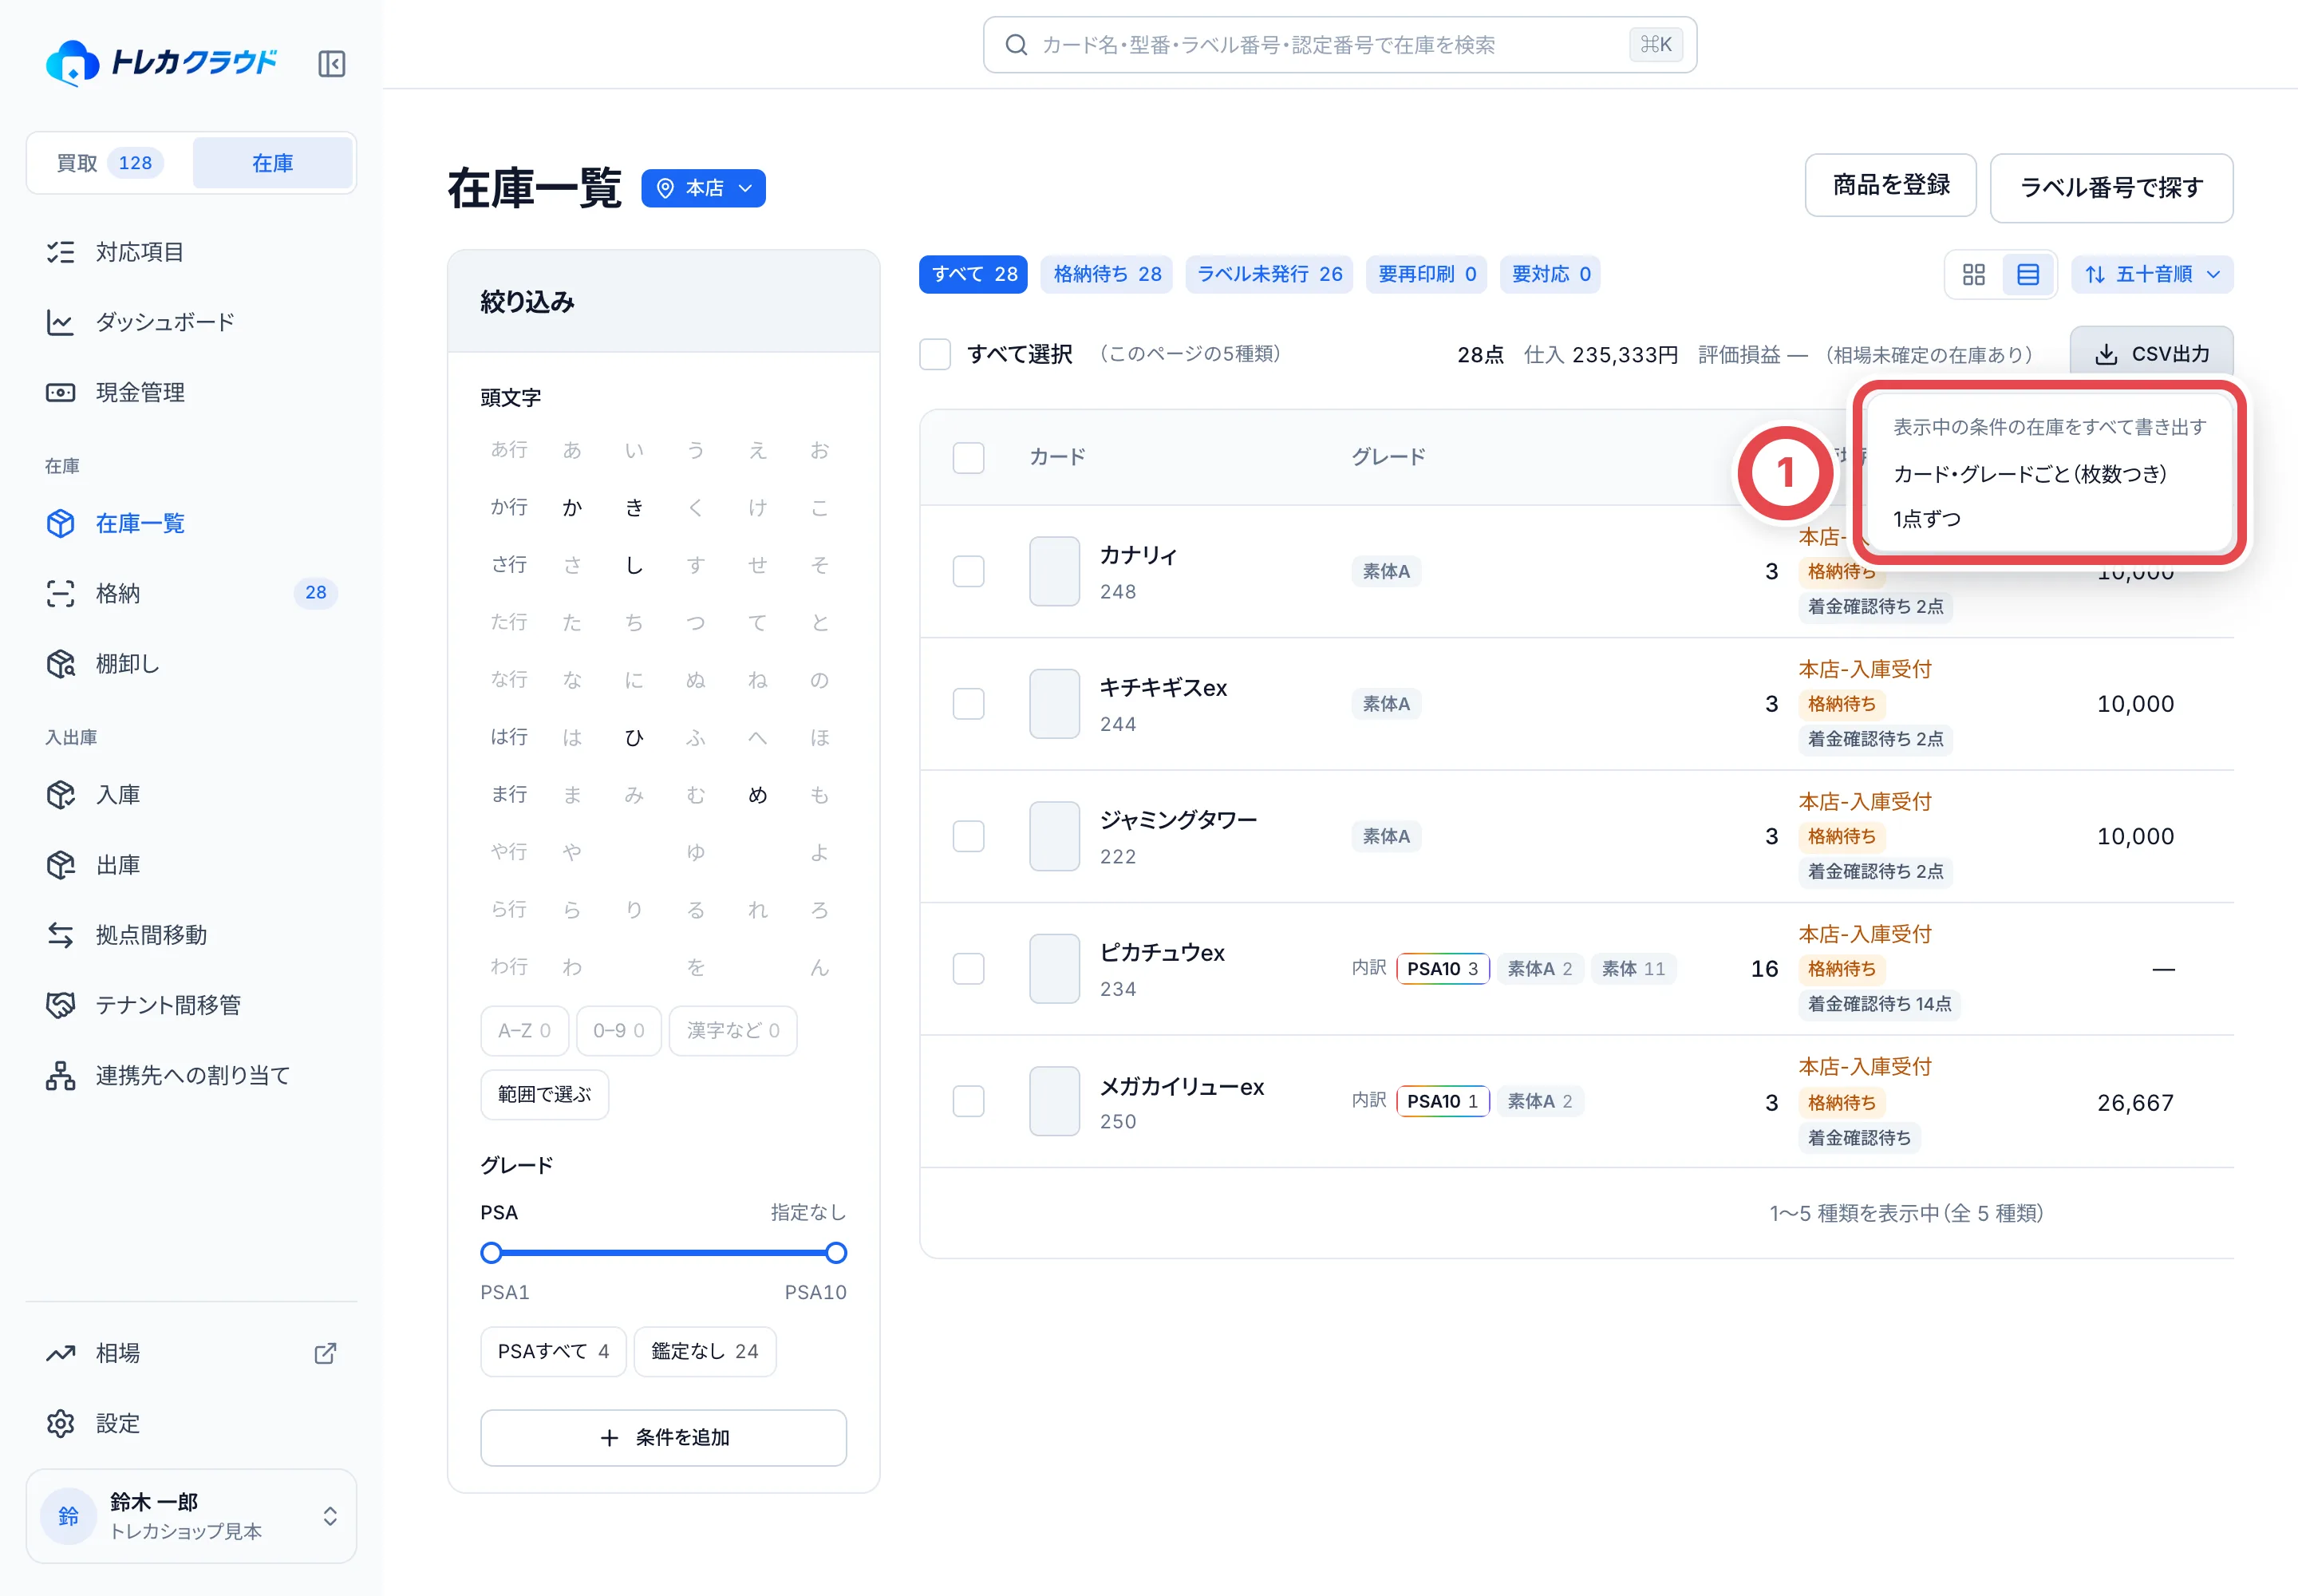 ①で、カード・グレードごとにまとめるか、1点ずつにするかを選びます。
- 「カード・グレードごと(枚数つき)」は、同じカード・グレードで仕入額の区分が同じ在庫を1行にまとめ、枚数・仕入額の合計・平均単価を出します
- 「1点ずつ」は、個体ごとに資産番号・棚・仕入額を出します
| 区分 | 意味 |
| ------ | ---------------------------------------------------------------------------- |
| 実際 | トレカクラウドでの買取の金額か、外部の買取の記録を実物と照合して確定した金額 |
| 推定 | 外部の買取の記録から推定した金額(同じカードの平均単価を含みます) |
| 登録額 | 入庫伝票や訂正で入力した金額で、買取の記録とは照合していません |
| 未設定 | 原価未確定など、仕入額がまだ決まっていません。確認済みの0円とは区別します |
原価未確定の仕入額はCSVでも空欄です。未確定分を0円として集計しません。実際に0円で仕入れた個体は、0円が記録されます。登録後に原価が分かった場合は、個体の詳細から仕入額を記録します。
相場は在庫一覧と同じ値で、相場がないカードは空欄です。「相場の出どころ」と「相場の時点」で、どのサイトのいつの値かを確かめられます。
### スニダンの商品ページを確認する
スニダンへのリンクが有効な店舗では、在庫一覧の表・タイルや商品詳細に「スニダン」が表示されます。リンクを押すと、別のウインドウまたはタブで商品ページが開き、元の在庫画面はそのまま残ります。相場のカード詳細にも商品ページへの入口があります。
在庫では、対応する商品ページが登録されている商品だけにリンクが出ます。表示されない場合に、別商品へのリンクを代用しないでください。外部ページの価格と、一覧が参照した時点の相場は異なる場合があります。
### まとめて操作する
タイルの左上のチェックを押すと、在庫を選べます。選ぶと、画面の下に操作の帯が出ます。
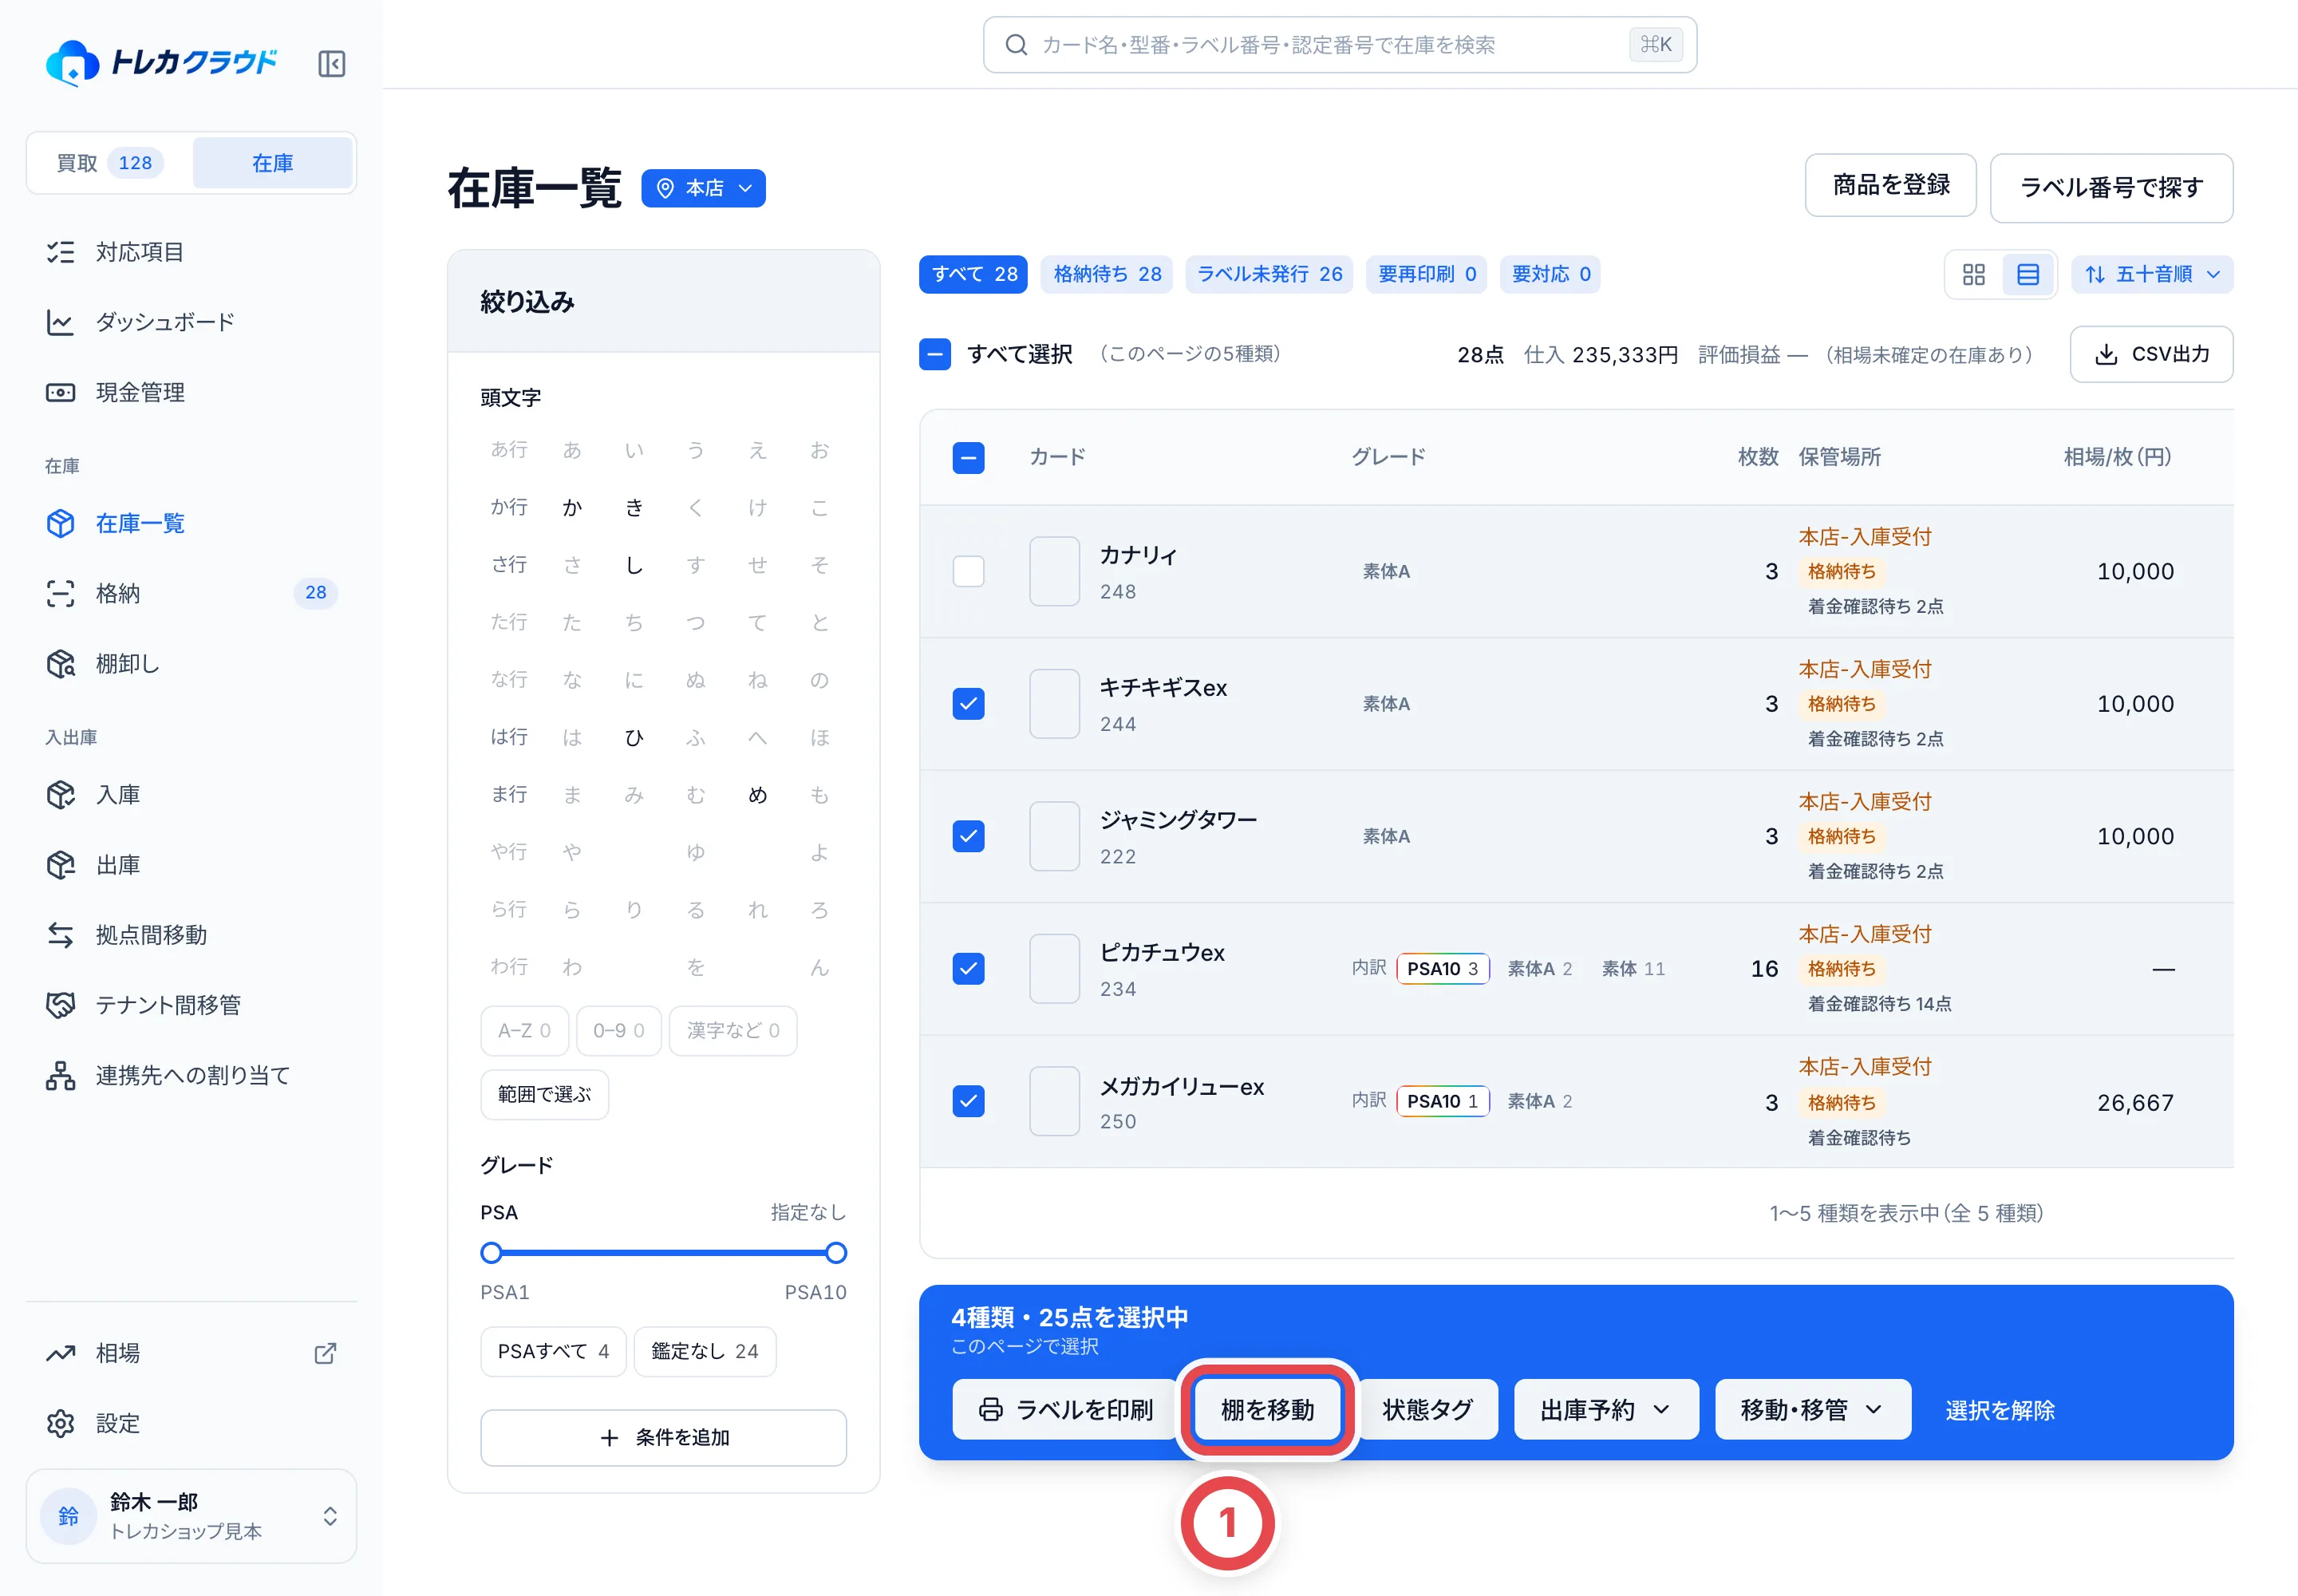 ①の「棚を移動」など、帯のボタンで選んだ在庫をまとめて操作します。
帯からは、ラベルの印刷・棚の移動・状態タグの変更・出庫予約・拠点間移動ができます。選んだ在庫がすべて着金確認待ちのときは、出庫予約と拠点間移動は押せません。帯の文でその旨が出ます。
このページの選択と「条件に合うすべて」は別です。後者は、画面に出ていないページも対象にします。出庫や移動では、確保済み・着金確認待ちなどの対象外の個体が除かれるので、開いた画面で件数と個体を確認してください。
## 3. カードの在庫を確かめる
在庫一覧でカードを押すと、そのカードの在庫の画面が開きます。
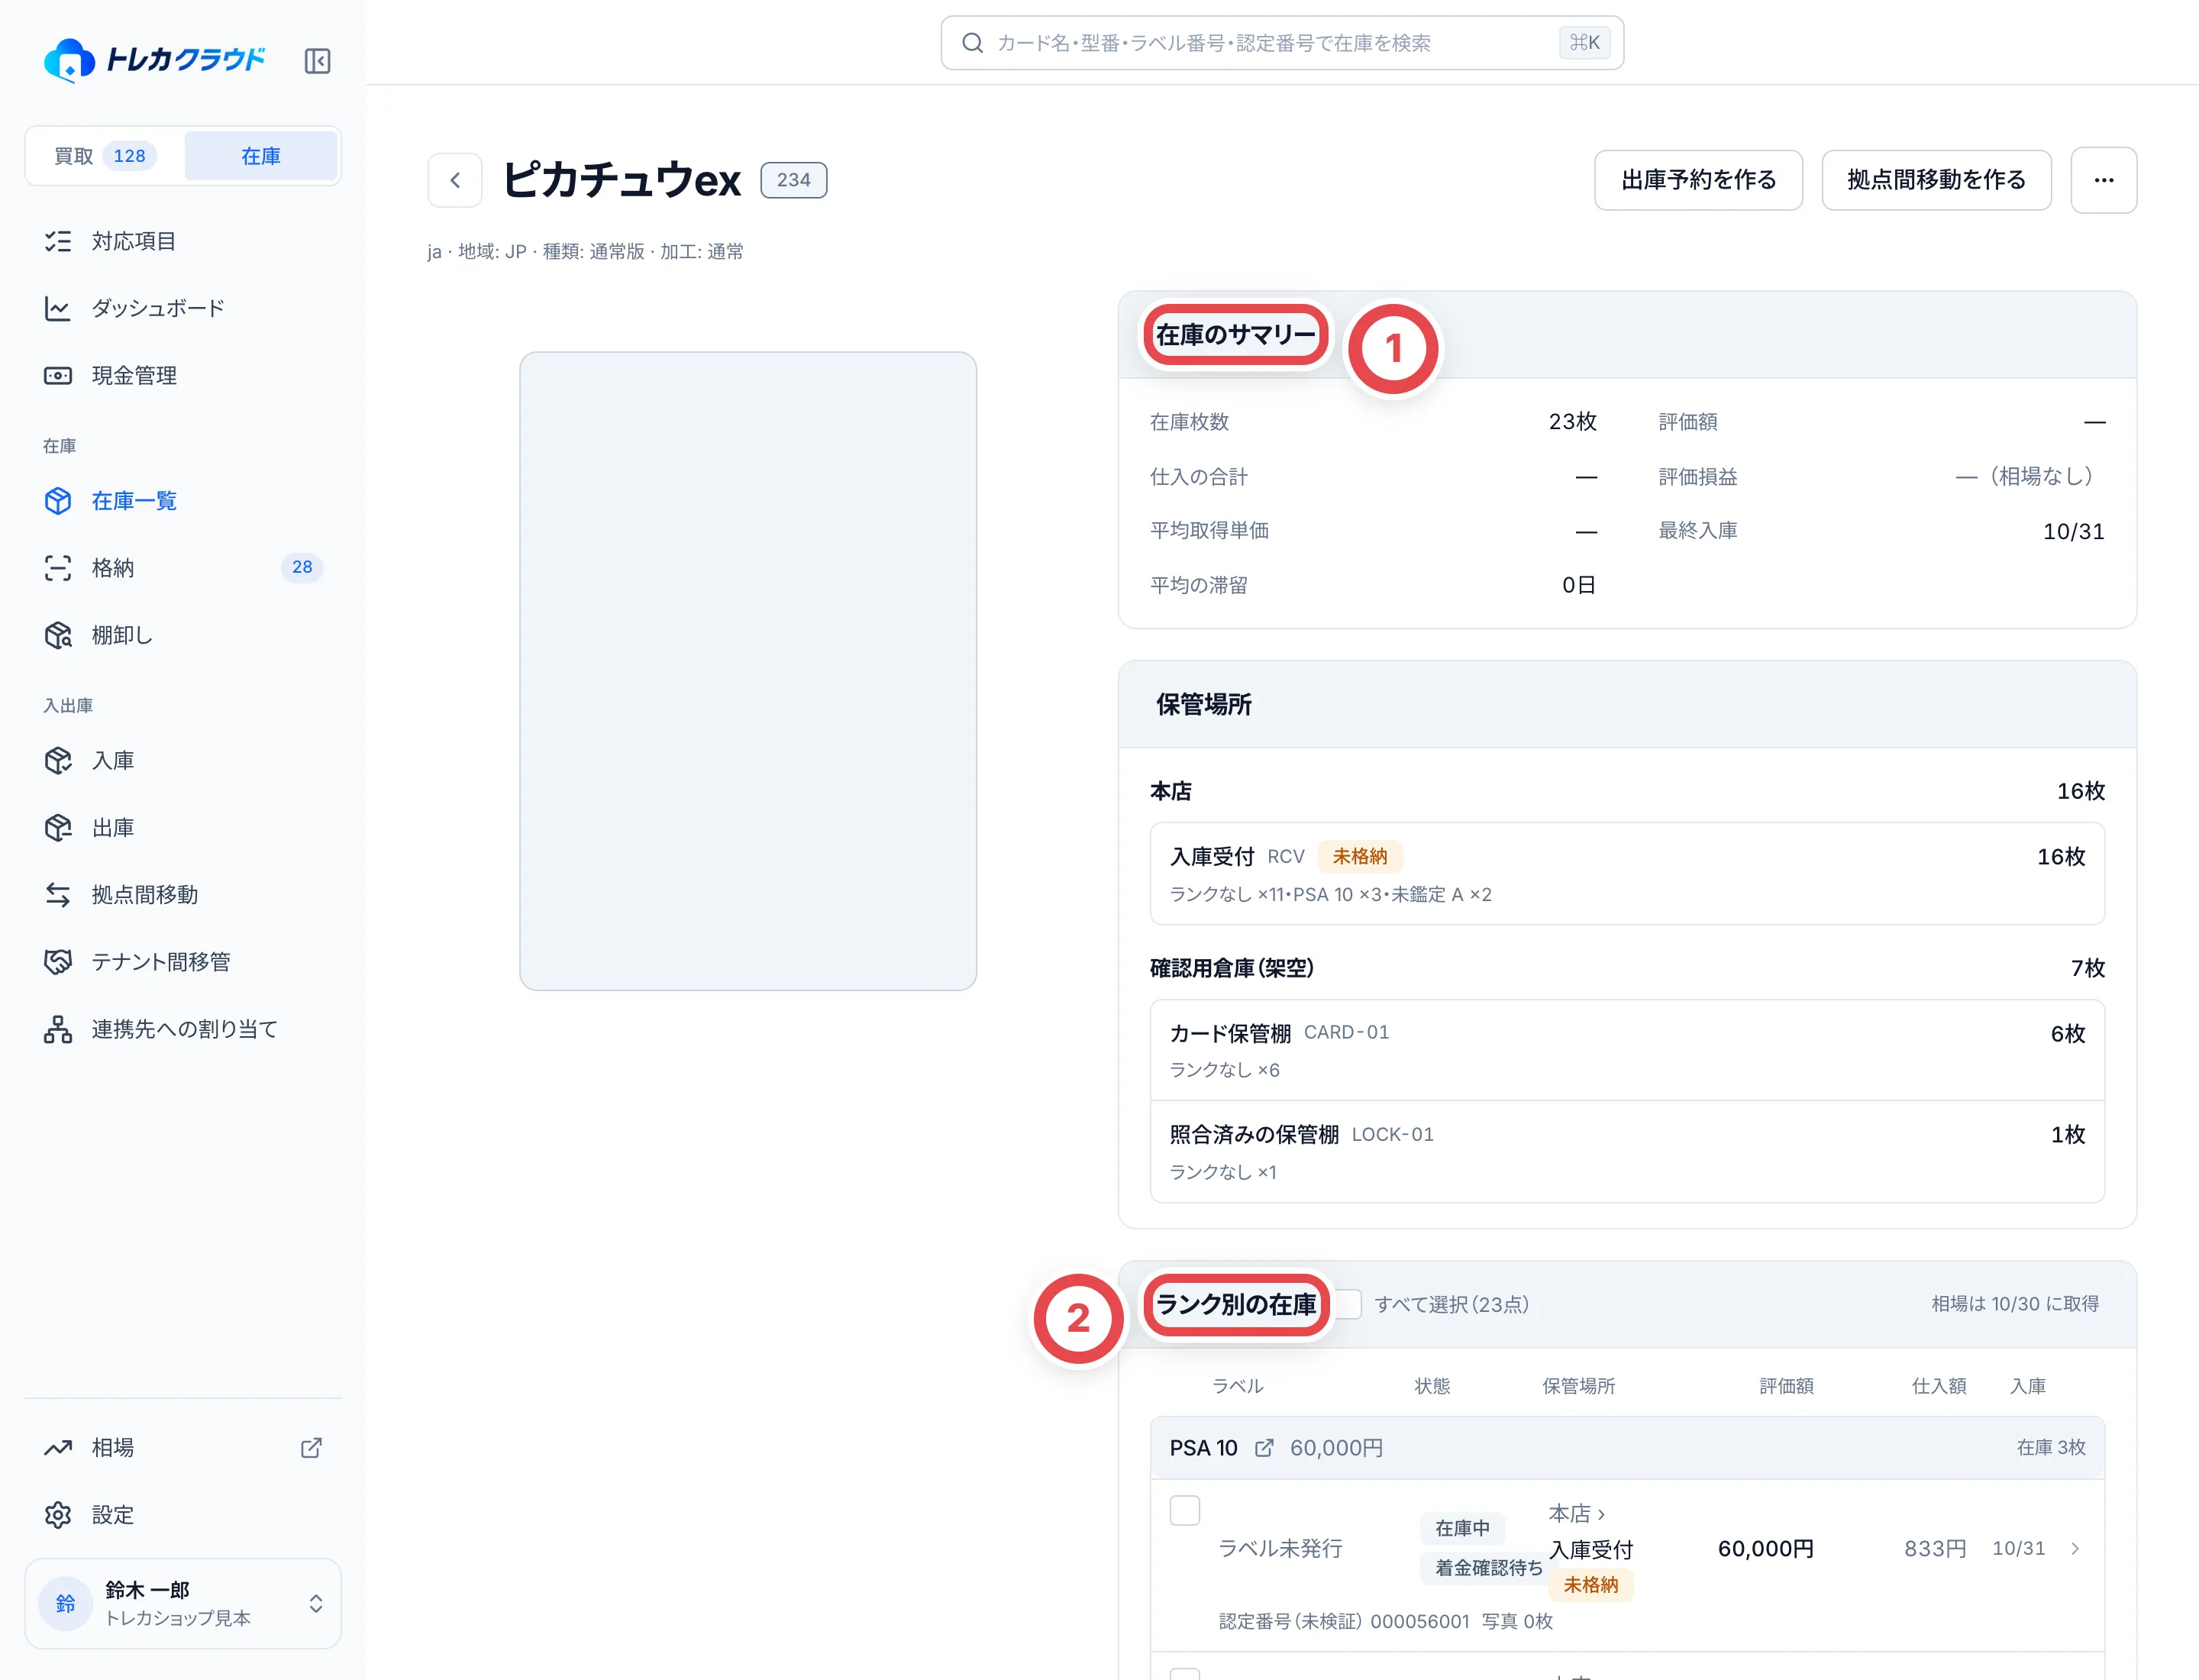 | 欄 | 中身 |
| --------------- | ----------------------------------------------------------------------------------------------- |
| ①在庫のサマリー | 在庫の枚数・評価額・仕入の合計・評価損益・平均の取得単価・最終入庫日・平均の滞留日数 |
| 保管場所 | どの拠点のどの棚に何枚あるか。格納していないものには「未格納」が付きます |
| ②ランク別の在庫 | グレードごとに、1枚ずつのラベル・状態・棚・評価額・仕入額。行を押すと、その個体の画面が開きます |
| 相場の推移 | このカードの相場の動き |
右上の「出庫予約を作る」「拠点間移動を作る」で、このカードの在庫を出す・動かす作業を始められます。
## 4. 個体を確かめて操作する
ランク別の在庫の行を押すと、個体の画面が開きます。名前の下にラベル番号、「在庫情報」に状態・拠点・保管場所・仕入額・評価額が出ます。資産番号は「在庫情報」の「管理情報」を開いて確認します。ラベルがない在庫は「ラベル未発行」と表示します。買い取った個体なら、右上の「買取案件を開く」で元の取引に戻れます。
右上の「…」(在庫の操作)を押すと、操作のメニューが開きます。
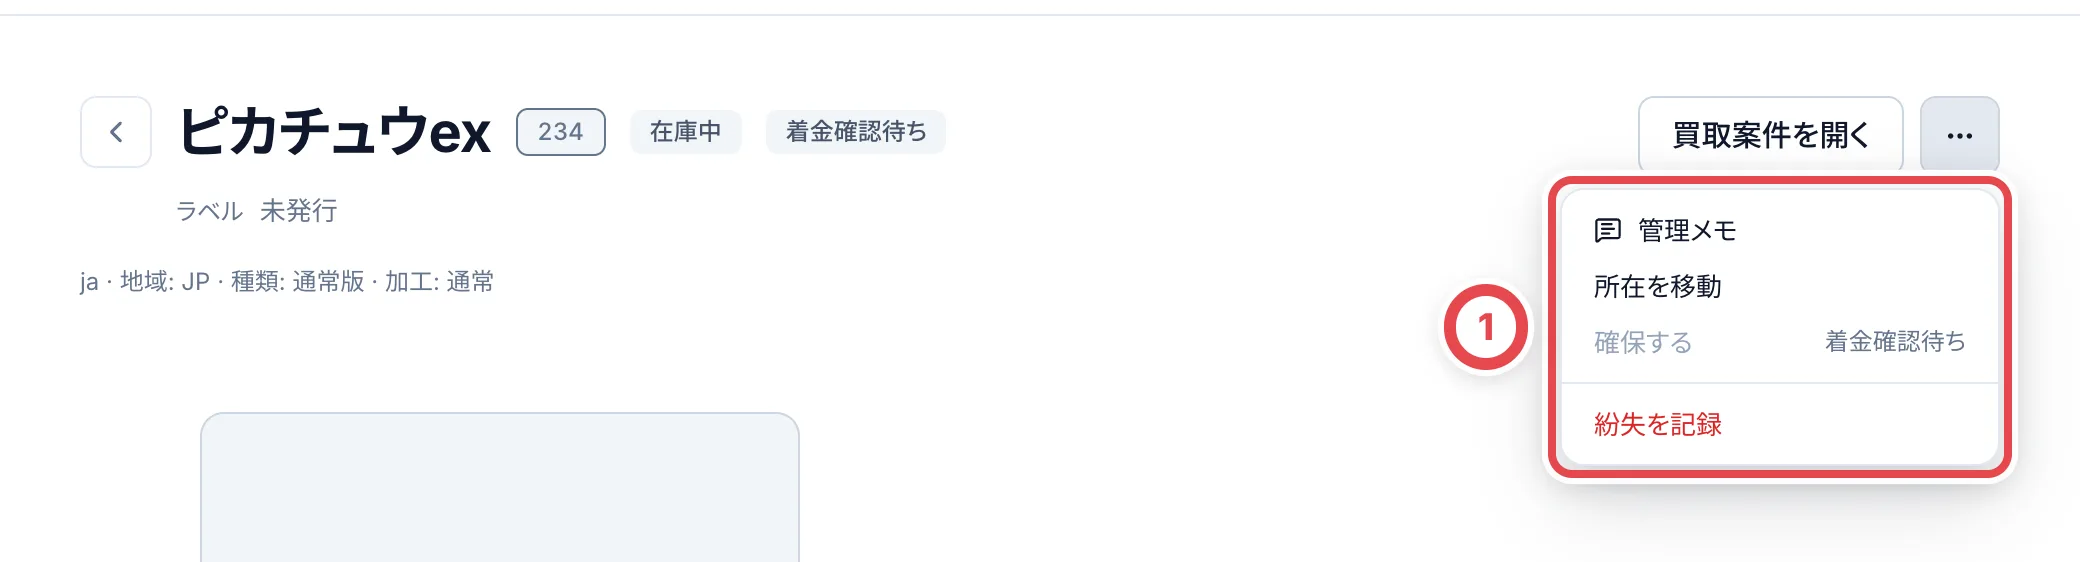 ①のメニューから、棚の移動・確保・紛失の記録を選びます。
| メニュー | すること |
| ---------- | ---------------------------------------------------------------------------- |
| 所在を移動 | 同じ拠点の別の棚に移したことを記録します |
| 確保する | この個体だけの出庫予約を作って押さえます |
| 紛失を記録 | 見つからない個体を在庫から外します。見つかったら「発見を記録」で元に戻します |
| 管理メモ | 社内だけで使うメモを確認・編集します。買取の参照権限も必要です |
### 管理メモ
同じメニューの「管理メモ」で①に入力し、②の「保存」を押します。上限は2,000文字です。保存後に開き直して確認します。顧客へ見せる査定メモ・状態タグ・写真とは別の情報です。
買取から在庫になった個体では、その個体のメモを扱います。複数の個体に分かれた場合は、それぞれの個体を開いて編集してください。読み取りだけの権限では保存できません。他の担当者の更新と競合した場合は、開き直して最新の内容を確認します。
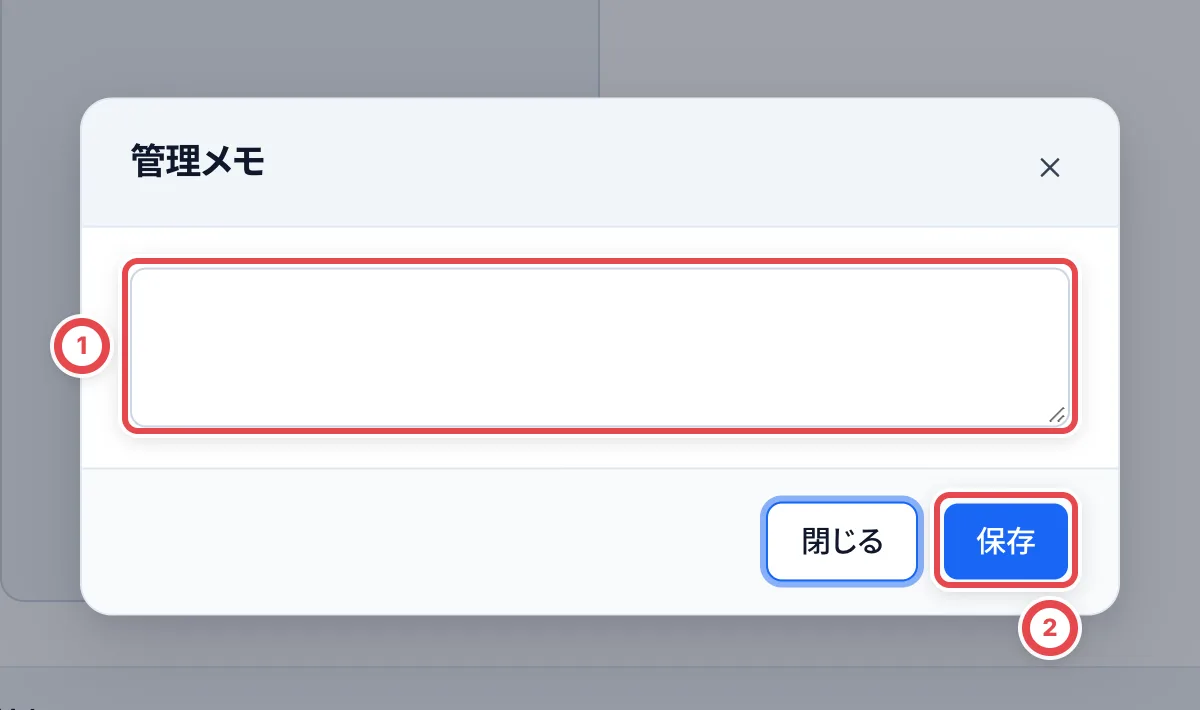 ### 着金確認待ちの個体
支払いを登録した買取の個体は、お客様が受け取った記録が付くまで、名前の横に①「着金確認待ち」と出ます。振込では着金確認を記録し、店頭の現金払いでは現金の手渡しを記録すると解除されます。
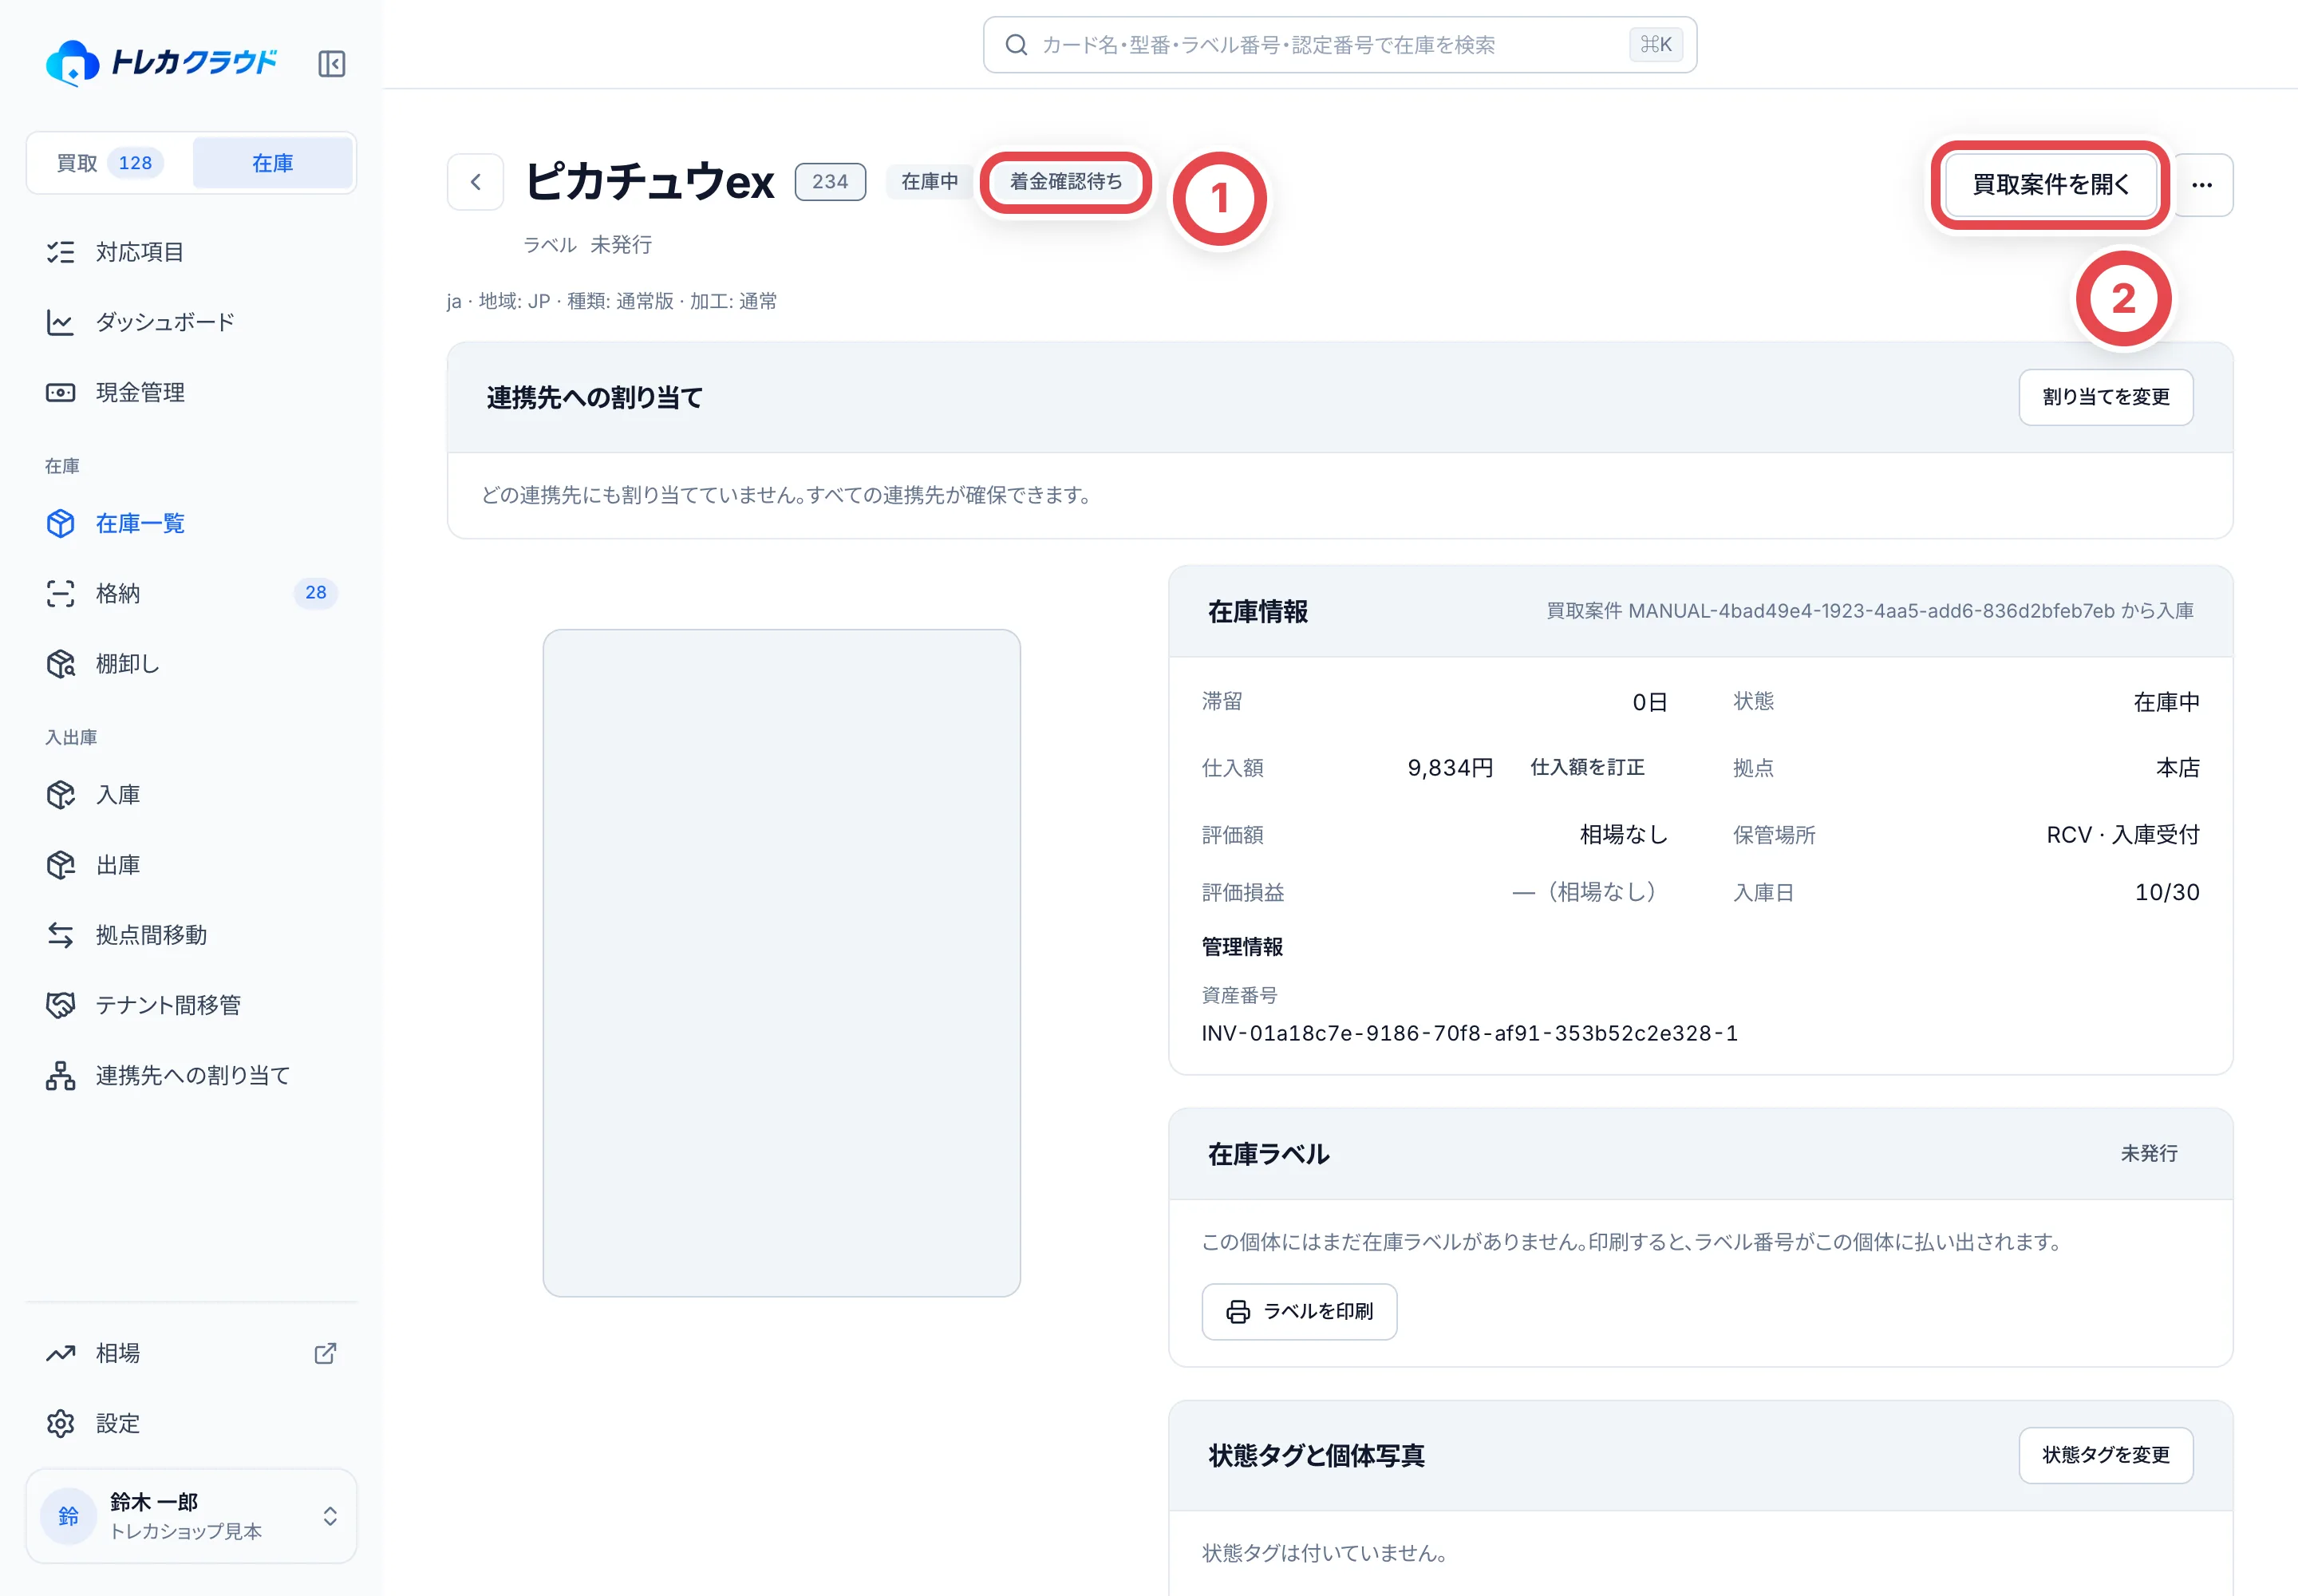 ①の「着金確認待ち」の間は、出庫や確保ができません。②から元の取引を開き、着金の確認を記録します。
| 着金確認待ちの間にできないこと | できること |
| ---------------------------------------------------------- | ---------------------------------------------------- |
| 確保・出庫・拠点間移動・テナント間移管・連携先への割り当て | ラベルの印刷・格納・同じ拠点の中での棚の移動・棚卸し |
振込の着金確認は、取引の「支払い」の画面で記録します([振込](/guides/purchase/payouts))。現金の手渡しは[店頭買取](/guides/purchase/counter)を参照してください。
### 状態タグと写真
「状態タグと個体写真」の欄では、カードの状態(白欠け・角折れなど)のタグを付けたり、表と裏の写真を登録したりできます。「状態タグを変更」を押し、当てはまるものにチェックを入れて「保存する」を押します。
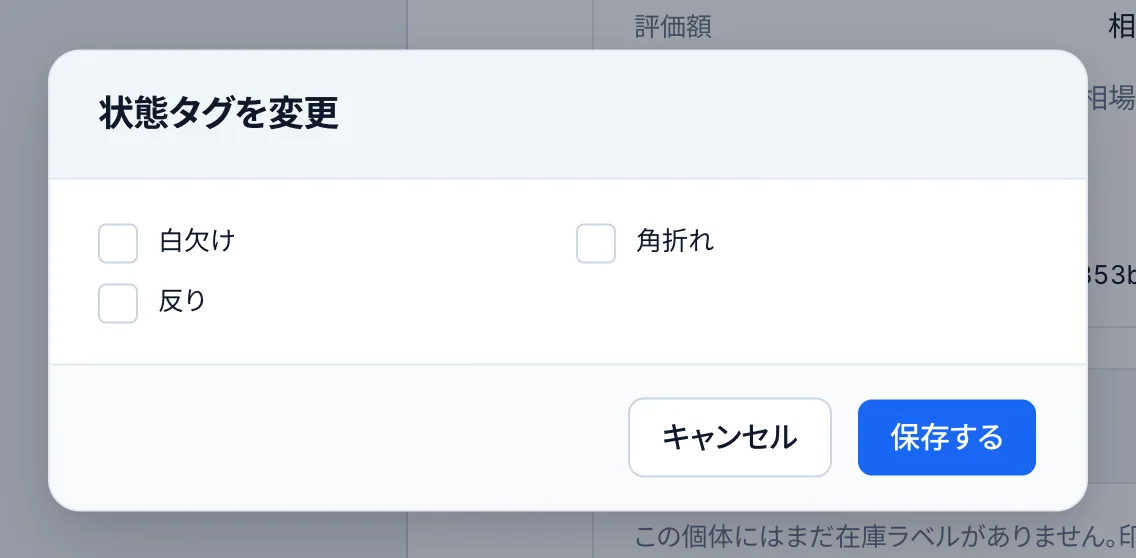 ## 個体の状態
在庫一覧に出るのは、棚にある個体(在庫中・確保中など)だけです。移動中・出庫済み・紛失の個体は出ません。
| 状態 | 意味 |
| -------------------------- | ------------------------------------------ |
| 在庫中 | 棚にあり、出庫や移動に使えます |
| 確保中 | 出庫予約などで押さえられています |
| 移動中 | 拠点間移動やテナント間移管の途中です |
| 販売済、処分済、持ち出し済 | 出庫を確定し、在庫から外れました |
| 移管済 | テナント間移管でほかの店舗に引き渡しました |
| 紛失 | 紛失を記録し、在庫から外しています |
## 困ったとき
| こんなとき | 確かめること・やること |
| -------------------------------------------------------- | ---------------------------------------------------------------------------------------------------------------------- |
| あるはずの在庫が一覧に出ない | 上の拠点が合っているか、在庫の状況や絞り込みが残っていないかを確かめます。移動中・出庫済み・紛失の個体は一覧に出ません |
| 出庫予約や拠点間移動が押せない | 選んだ個体がすべて支払いの確認待ちです。振込の着金確認、または店頭現金の手渡しを記録します |
| 個体を確保できない | 着金確認待ちか、すでに確保中です。個体の画面の状態と、名前の横の印を確かめます |
| CSVが「在庫が多すぎて1つのファイルに収まりません」と出る | 拠点や絞り込みで在庫を減らしてから書き出します |
| 棚の利用を止められない | その棚にまだ在庫があります。先にほかの棚へ移します |
| 在庫を変える操作のボタンが出ない | カードの閲覧と在庫の更新の両権限が必要です。役割の権限を管理者に確かめてもらいます |
## 関連する操作
- [カード別の在庫から個体を選んで訂正する](/guides/inventory/corrections)
- [連携先の販売・当選と配送を確認する](/guides/inventory/partner-sales)
---
# 連携先の販売・当選と配送を確認する
Source: https://docs.toreca-cloud.com/guides/inventory/partner-sales
外部の販売サービスに渡した在庫には、通常の出庫予約とは異なる状態があります。店舗が作った出庫伝票と、連携先のお客様の配送申請で作られた伝票を区別して扱ってください。
接続と見せる在庫の設定は[外部連携](/guides/settings/partners)、通常の出庫は[出庫と移動・移管](/guides/inventory/outbound-and-transfers)を参照してください。
## 1. 個体の販売状態を確認する
在庫の個体を開き、①の状態と連携先の案内を確認します。
| 状態 | 意味 |
| -------------------------- | ---------------------------------------- |
| オリパに入っている | 連携先のオリパに使われています。 |
| 出品中 | 連携先で販売に出ています。 |
| 当選・購入後の配送申請待ち | お客様が獲得し、配送申請を待っています。 |
②の連携先名・参照番号・割り当て情報を照合します。これらの状態の個体を、店舗の別販売へ流用しないでください。
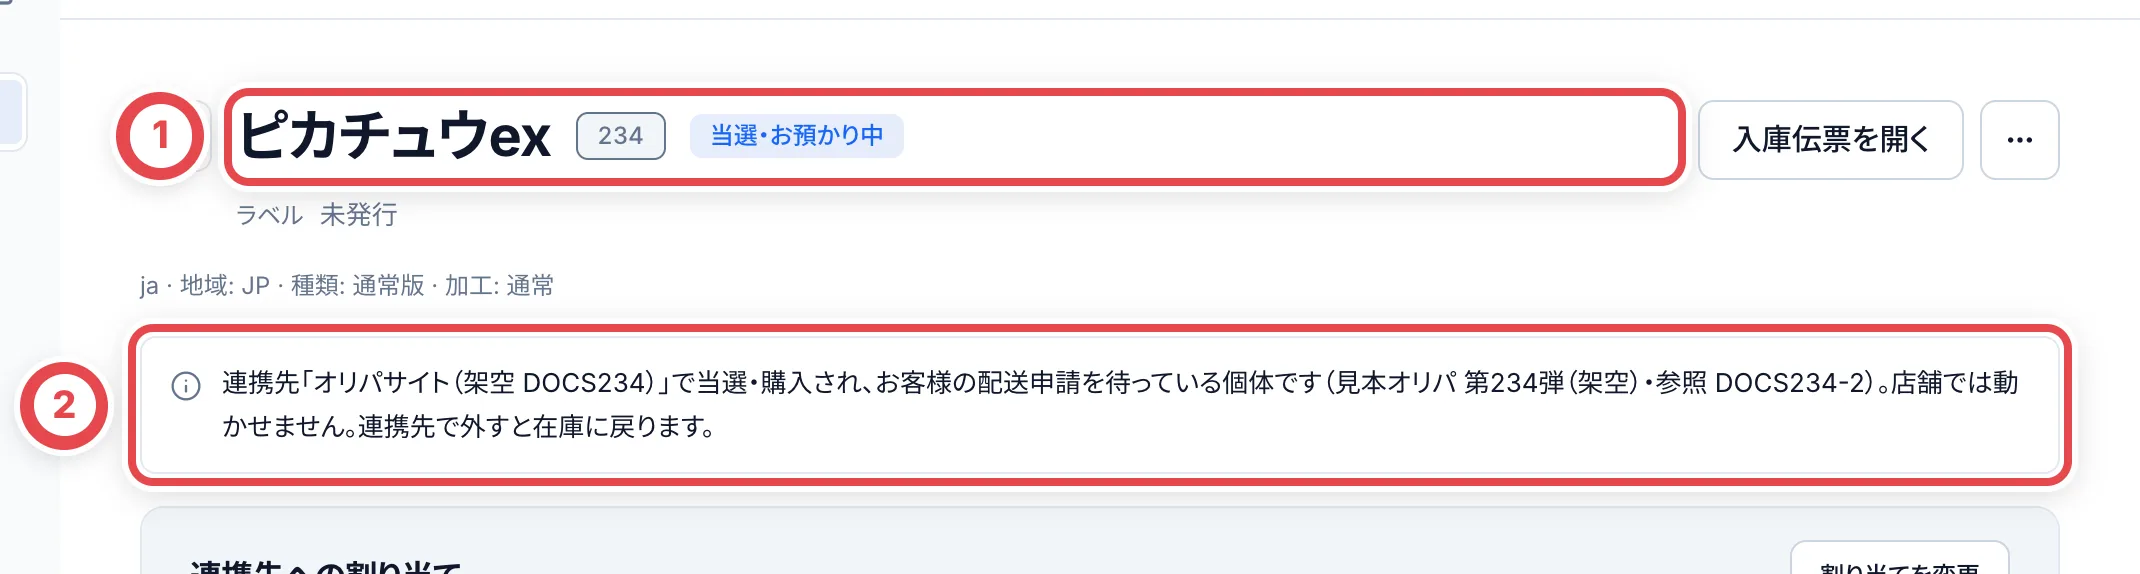 ## 2. 配送申請の伝票を確認する
配送申請ごとに作られた出庫伝票を開きます。①で連携先の配送依頼であること、②で作成元・参照IDを照合します。対象の個体は、その下の明細で現物と照合します。連携先の配送では、取消・個体の変更・出庫の確定は連携先で行います。店舗の通常伝票と同じ操作が出なくても、権限不足とは限りません。
格納アプリで取り出すときも、対象伝票と現物を照合します。連携先の配送に、通常の個体差し替えをそのまま適用しないでください。
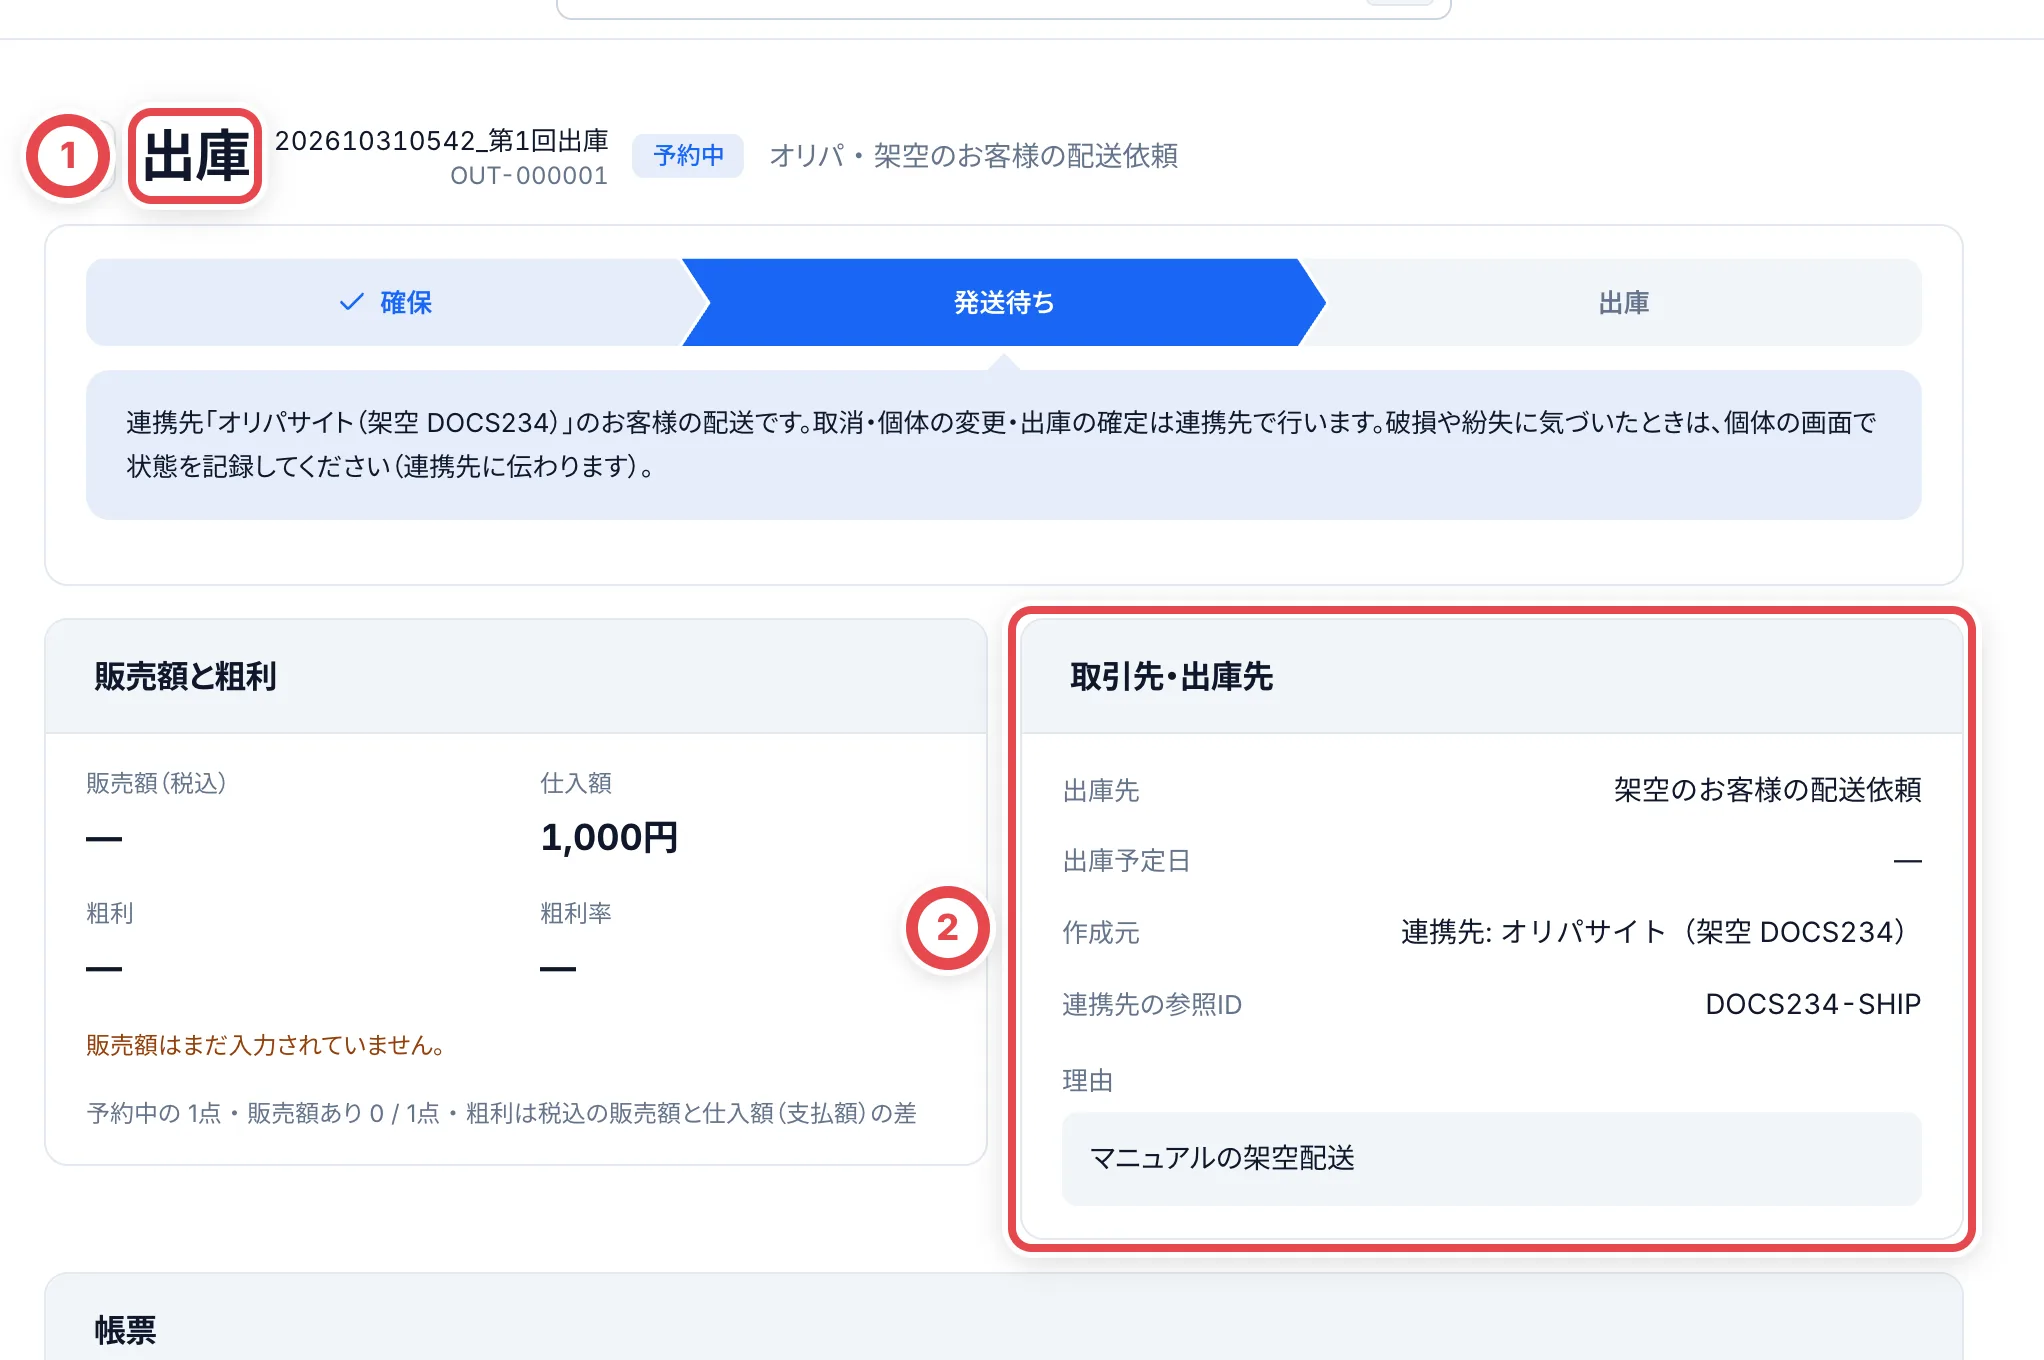 ## 3. 現物が見つからない・破損していた場合
対象個体の詳細を開き、①のカード名・型番を照合します。棚・ラベル番号・認定番号を現物と照合し、紛失や状態の問題は、②の個体の操作メニューから事実を記録します。連携先へ状態が伝わるため、別の個体を無断で代わりに使ったり、店舗側で配送伝票を取り消したりしません。
変更・解除が必要な場合は、対象の連携先と参照番号を確認して連携先側で処理します。処理後は個体と配送伝票を開き直して確認します。
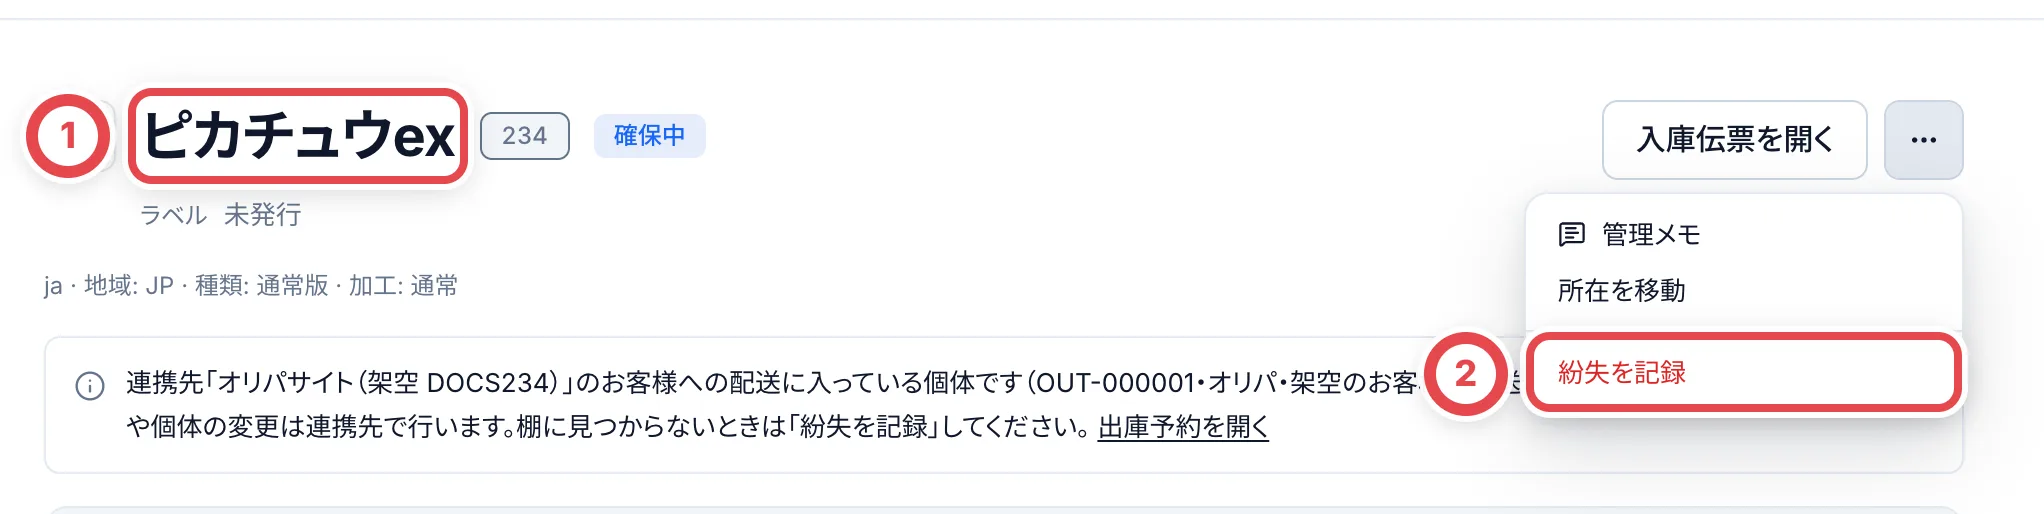 紛失後に現物が見つかったら、個体の「発見を記録」で復帰先の棚と理由を記録します。連携先の販売・当選・配送が続いている間は、その確保状態へ戻ります。通常在庫へ自由に戻ったと判断せず、個体の状態と連携先の参照番号を開き直して確認してください。
## 困ったとき
| 起きていること | 確認すること |
| ------------------------------ | ---------------------------------------------------------------------------------- |
| 移動や出庫のボタンがない | 連携先の販売・引当・配送中かを確認します。 |
| 配送の取消や差し替えができない | 連携先が管理する配送は、連携先側で変更します。 |
| 解除したのに確保が残る | 接続解除と、個体の確保・販売・配送の解除は別です。対象の状態と連携先を確認します。 |
| 当選したカードが棚にない | 対象個体の所在と履歴を確認し、事実に応じて紛失などを記録します。 |
---
# 店内の商品情報と時価を訂正する
Source: https://docs.toreca-cloud.com/guides/inventory/product-and-market-corrections
商品名や型番を直すときは、商品の在庫画面の三点メニューを使います。この店舗での表示を訂正し、商品IDと元の情報は保持します。同じ商品の在庫全体に反映されるため、対象の商品を確認してから操作してください。
| したいこと | 使う操作 | 保存後の扱い |
| -------------------------------- | ------------------------------------------- | -------------------------------------------------------- |
| 同じ商品の名前・型番・属性を直す | 「商品情報を訂正」 | この店舗の商品情報に反映。共通マスタや他店は変更しません |
| 店舗で確認した価格を採用する | 「時価を変更」 | グレード・包装状態に対応する手動時価を採用します |
| 自動取得の価格に戻す | 「時価を変更」内の「手動時価の採用を解除」 | 手動値の採用をやめ、自動時価を参照します |
| 一覧にない商品を店内用に追加する | 在庫一覧の「商品を登録」 | 商品を登録します。在庫数は増えません |
| 一部の個体だけ別のカードへ直す | [個体の訂正](/guides/inventory/corrections) | 選んだ個体の参照先を変更します |
## 操作できるメンバー
商品情報の訂正・登録には「店内の商品情報の訂正」、手動時価には「在庫の手動時価の管理」の権限が必要です。在庫・商品を参照する権限も必要です。初期設定ではオーナー・管理者が対象です。ボタンがない場合は、管理者に現在の権限を確認してください。
## 商品情報を訂正する
### 1. 商品の三点メニューを開く
在庫一覧から対象の商品を開き、商品名の横の「…」(商品のその他の操作)を押します。①の「商品情報を訂正」を選びます。②は時価の変更で使います。
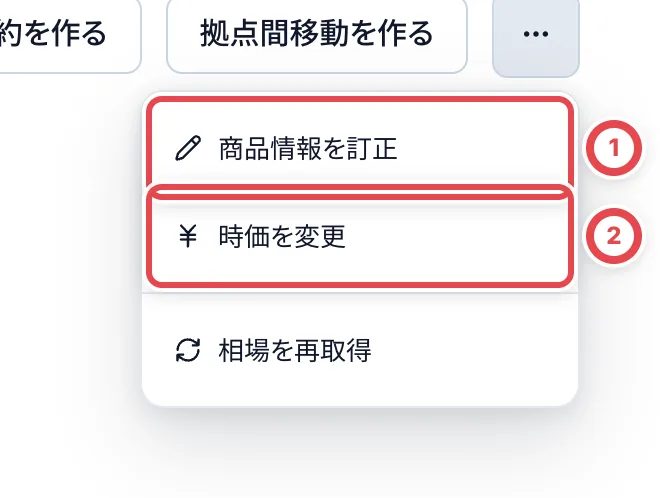 ### 2. 正しい商品情報を入力する
現物と照合して、①の商品名、②の型番などを直します。収録セット・シリーズ・レアリティ・版・加工・言語・画像URLも、画面に出る項目を変更できます。カードの「スニダンの商品URL」も変更できます。`https://snkrdunk.com/apparels/商品番号` 形式の商品ページを指定すると、この店舗の在庫・査定・カード詳細の「スニダンで見る」がそのページを開きます。空欄にするとリンクを非表示にします。相場の取得先は変わりません。別の商品を指す個体の誤登録は、この操作ではなく個体の付け替えを使います。
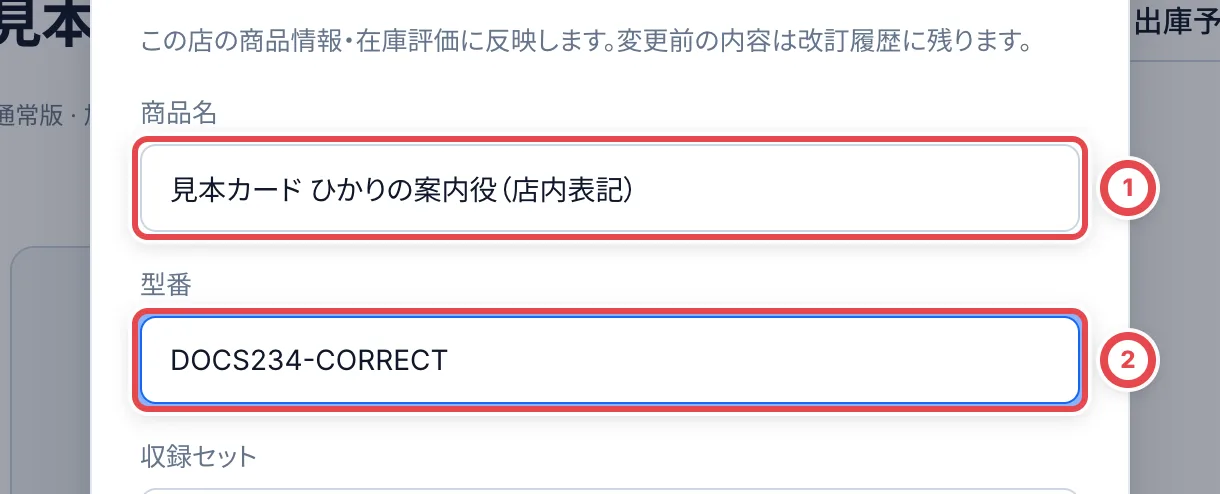
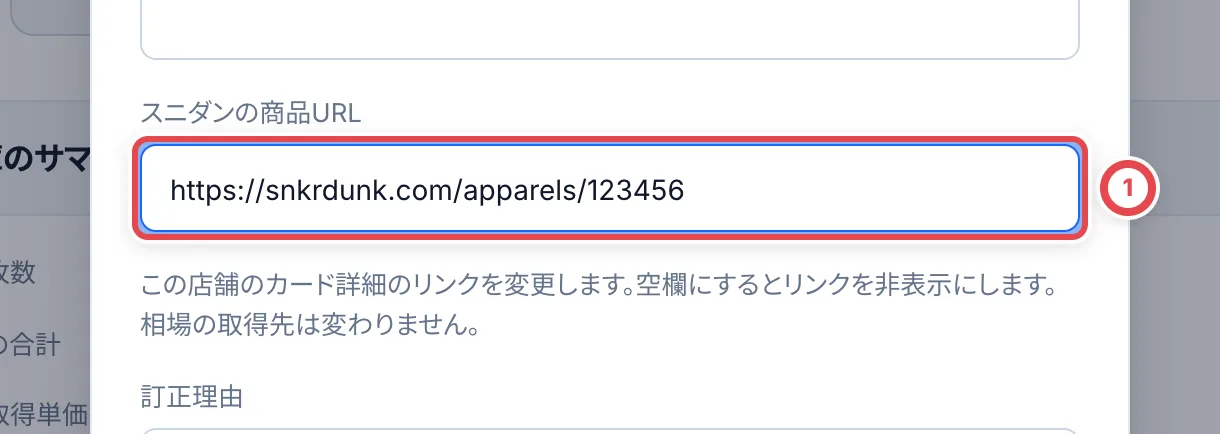 ### 3. 訂正理由を選ぶ
①の「訂正理由」で、入力誤り・現物との照合・過去の値への復元・その他から選びます。②の「補足(任意)」には照合した資料などを残せます。「その他」の場合は理由の詳細が必須です。「変更内容を確認」を押します。
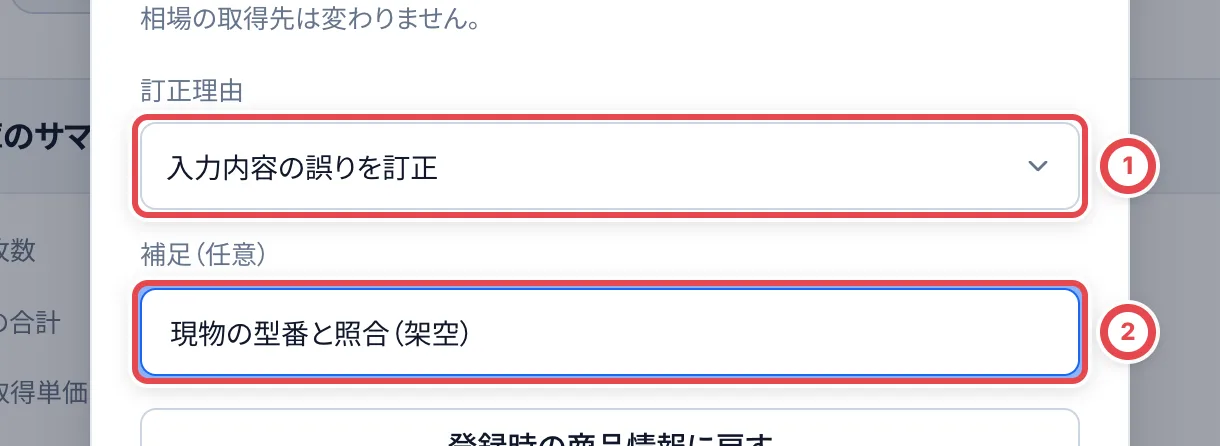 ### 4. 変更前後と対象件数を確認して保存する
①の変更前後と「関連する在庫」を照合します。違う場合は「入力に戻る」で直します。
:::warning
同じ商品の在庫全体に店内の訂正値が適用されます。商品IDは変わらず、元の情報は改訂履歴に残ります。
:::
②の「変更を保存」を押します。商品を開き直し、商品名・型番と改訂履歴を確認します。
店内の訂正を解除するときは、もう一度「商品情報を訂正」を開き、先に「訂正理由」を選びます。共通商品では「商品情報の訂正を解除」、店内登録の商品では「登録時の商品情報に戻す」を押します。変更前後を確認し、「変更を保存」で新しい改訂として保存します。共通商品は現在の共通マスタ、店内登録の商品は登録時の値に戻ります。
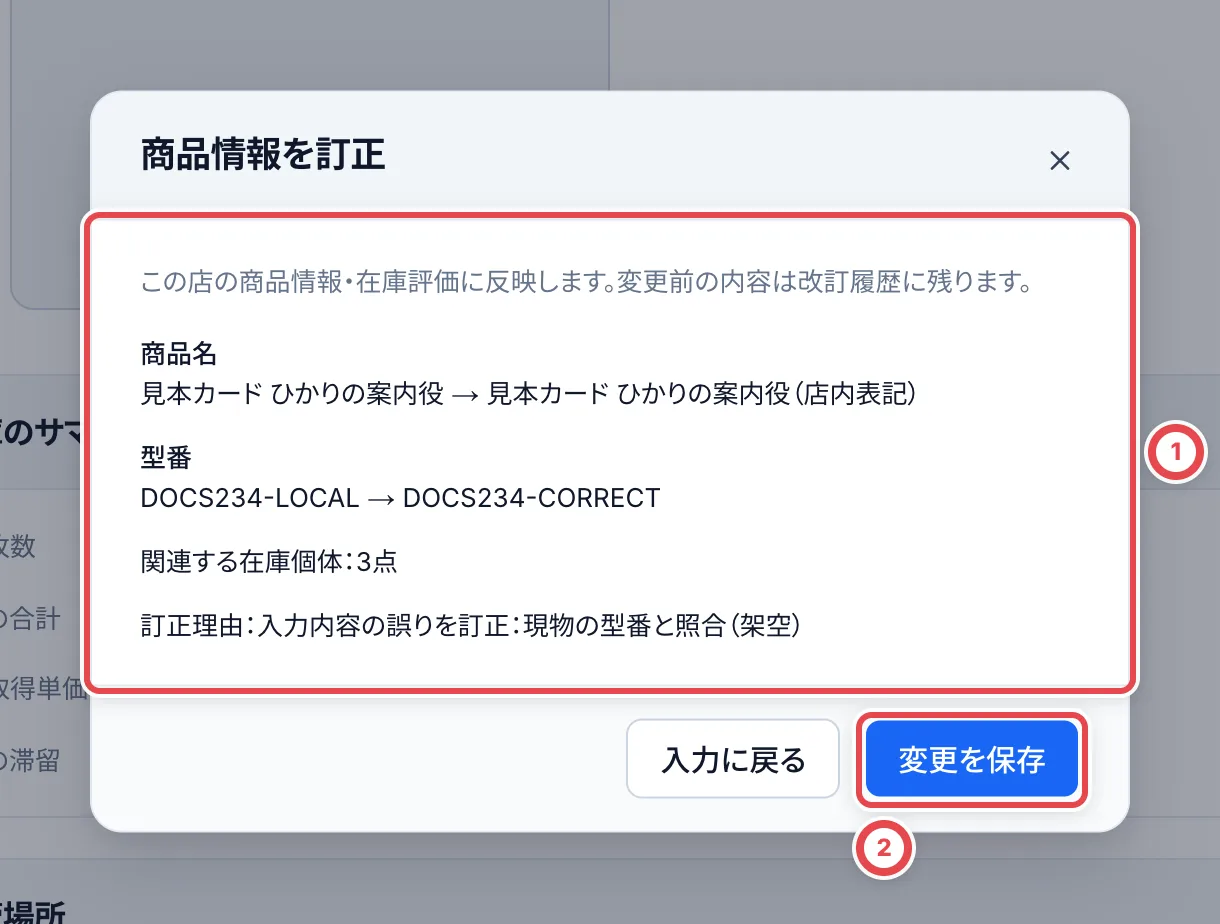 ## 手動時価を変更する
### 1. 対象のグレードと価格を入力する
商品の三点メニューで「時価を変更」を選びます。①のグレード、BOX・パック・デッキでは包装状態も確認し、②に変更後の円価格を入力します。0円と未設定は別の扱いです。③の「時価の出典・根拠」と、必要なら出典URLを入力します。価格の根拠と訂正理由は別々に記録します。
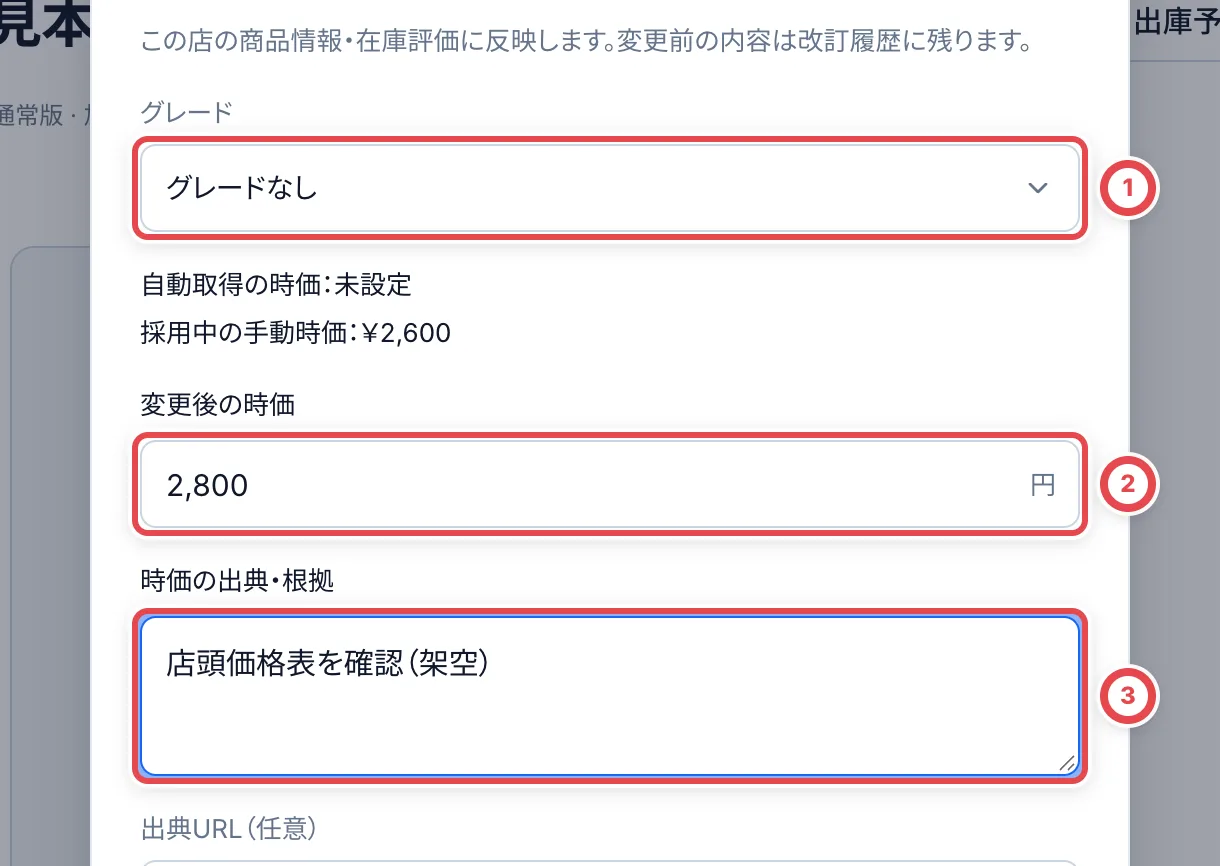 ### 2. 訂正理由を選び、保存する
「訂正理由」を選んで「変更内容を確認」を押します。①の価格と対象条件を確認し、②の「変更を保存」を押します。商品を開き直し、評価額と改訂履歴を確認します。
手動時価を採用している間は、その値を評価に使います。「相場を再取得」だけでは手動値の採用は解除されません。
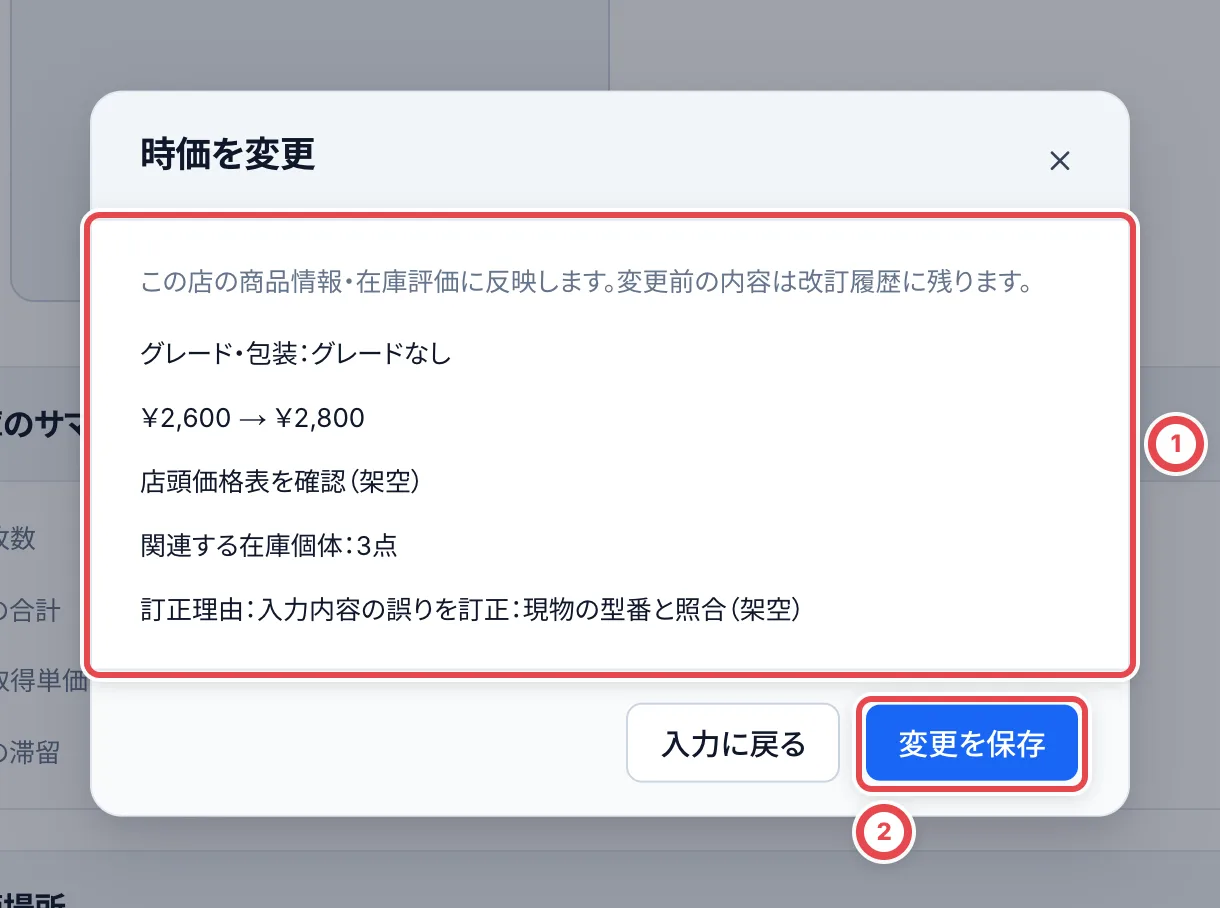 ### 3. 自動時価に戻す
「時価を変更」で同じグレード・包装状態を選び、訂正理由を選択して「手動時価の採用を解除」を押します。①が「自動時価へ戻す」になっていることを確認し、②の「変更を保存」を押します。自動時価がなければ未設定になります。
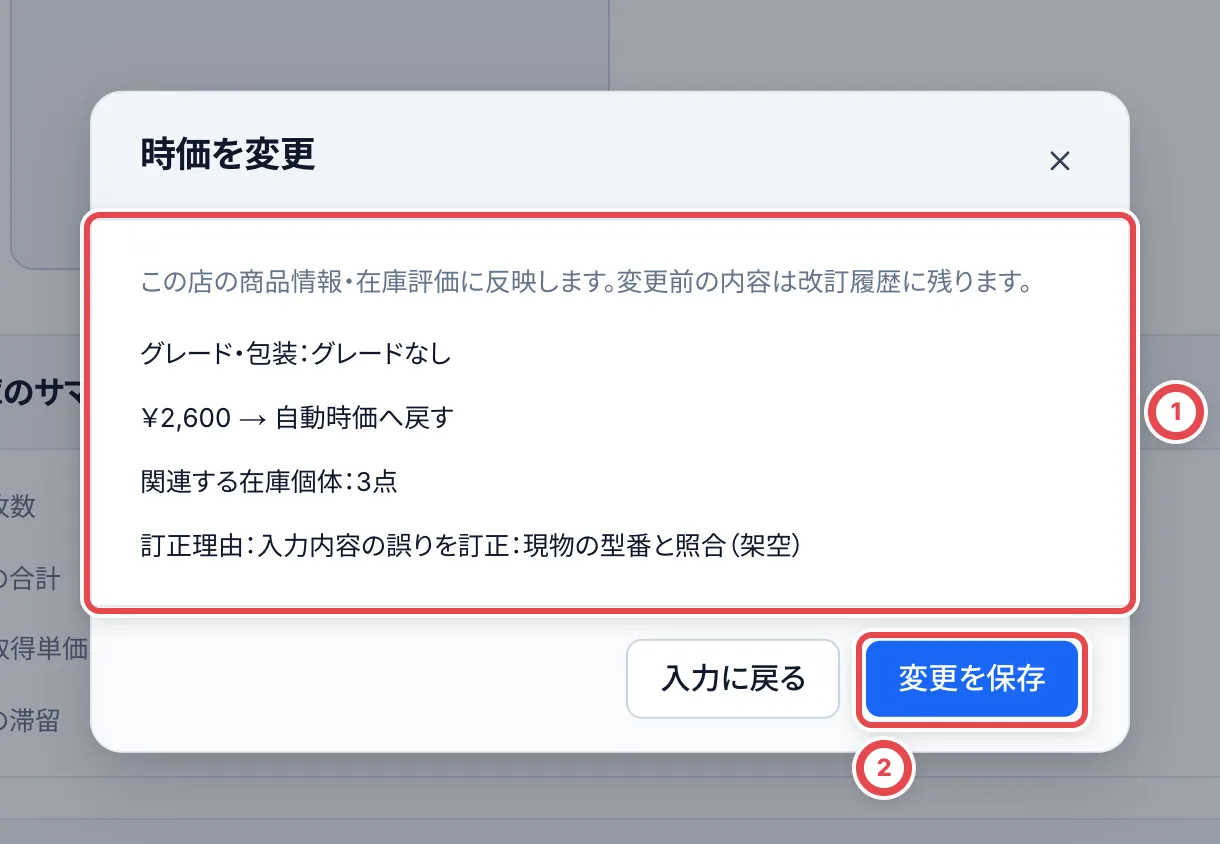 ## 相場を再取得する
カード詳細または在庫詳細で、右上の三点メニューから「相場を再取得」を押します。オンライン買取の査定の「スニダンから取得」と同じく、スニダンの成約からそのカードの相場を取り直します。
1. 「グレード」で取り直すグレードを選びます。今の取得状況と、最後に算出した相場が表示されます。
2. 「スニダンから取得」を押します。「取得を依頼」「順番待ち」「成約を取得」「相場を確認」の順に進みます。順番待ちの間は、ボタンが「取得状況を確認」に変わります。
3. 取得が終わると、確認に使った成約と算出した相場が表示されます。取り直した成約は、相場の欄の「取得履歴」に加わります。
「グレード別の買取価格」の金額は相場の集計で更新されるため、取り直した直後には変わりません。集計される前は、相場の欄に取得した記録の件数と最新の価格が表示されます。
取得できるのは、公開中の国内版のカードだけです。買取の作成・編集とカードの閲覧の両方の権限がある人に表示されます。手動時価を採用している間は、取り直しても手動時価が評価に使われます。
## 未登録の商品を店内用に登録する
### 1. 商品の情報と登録理由を入力する
在庫一覧の「商品を登録」を開きます。①の商品種類とゲームを選び、②の商品名・型番などを入力します。「登録理由」を選び、③の「登録内容を確認」を押します。
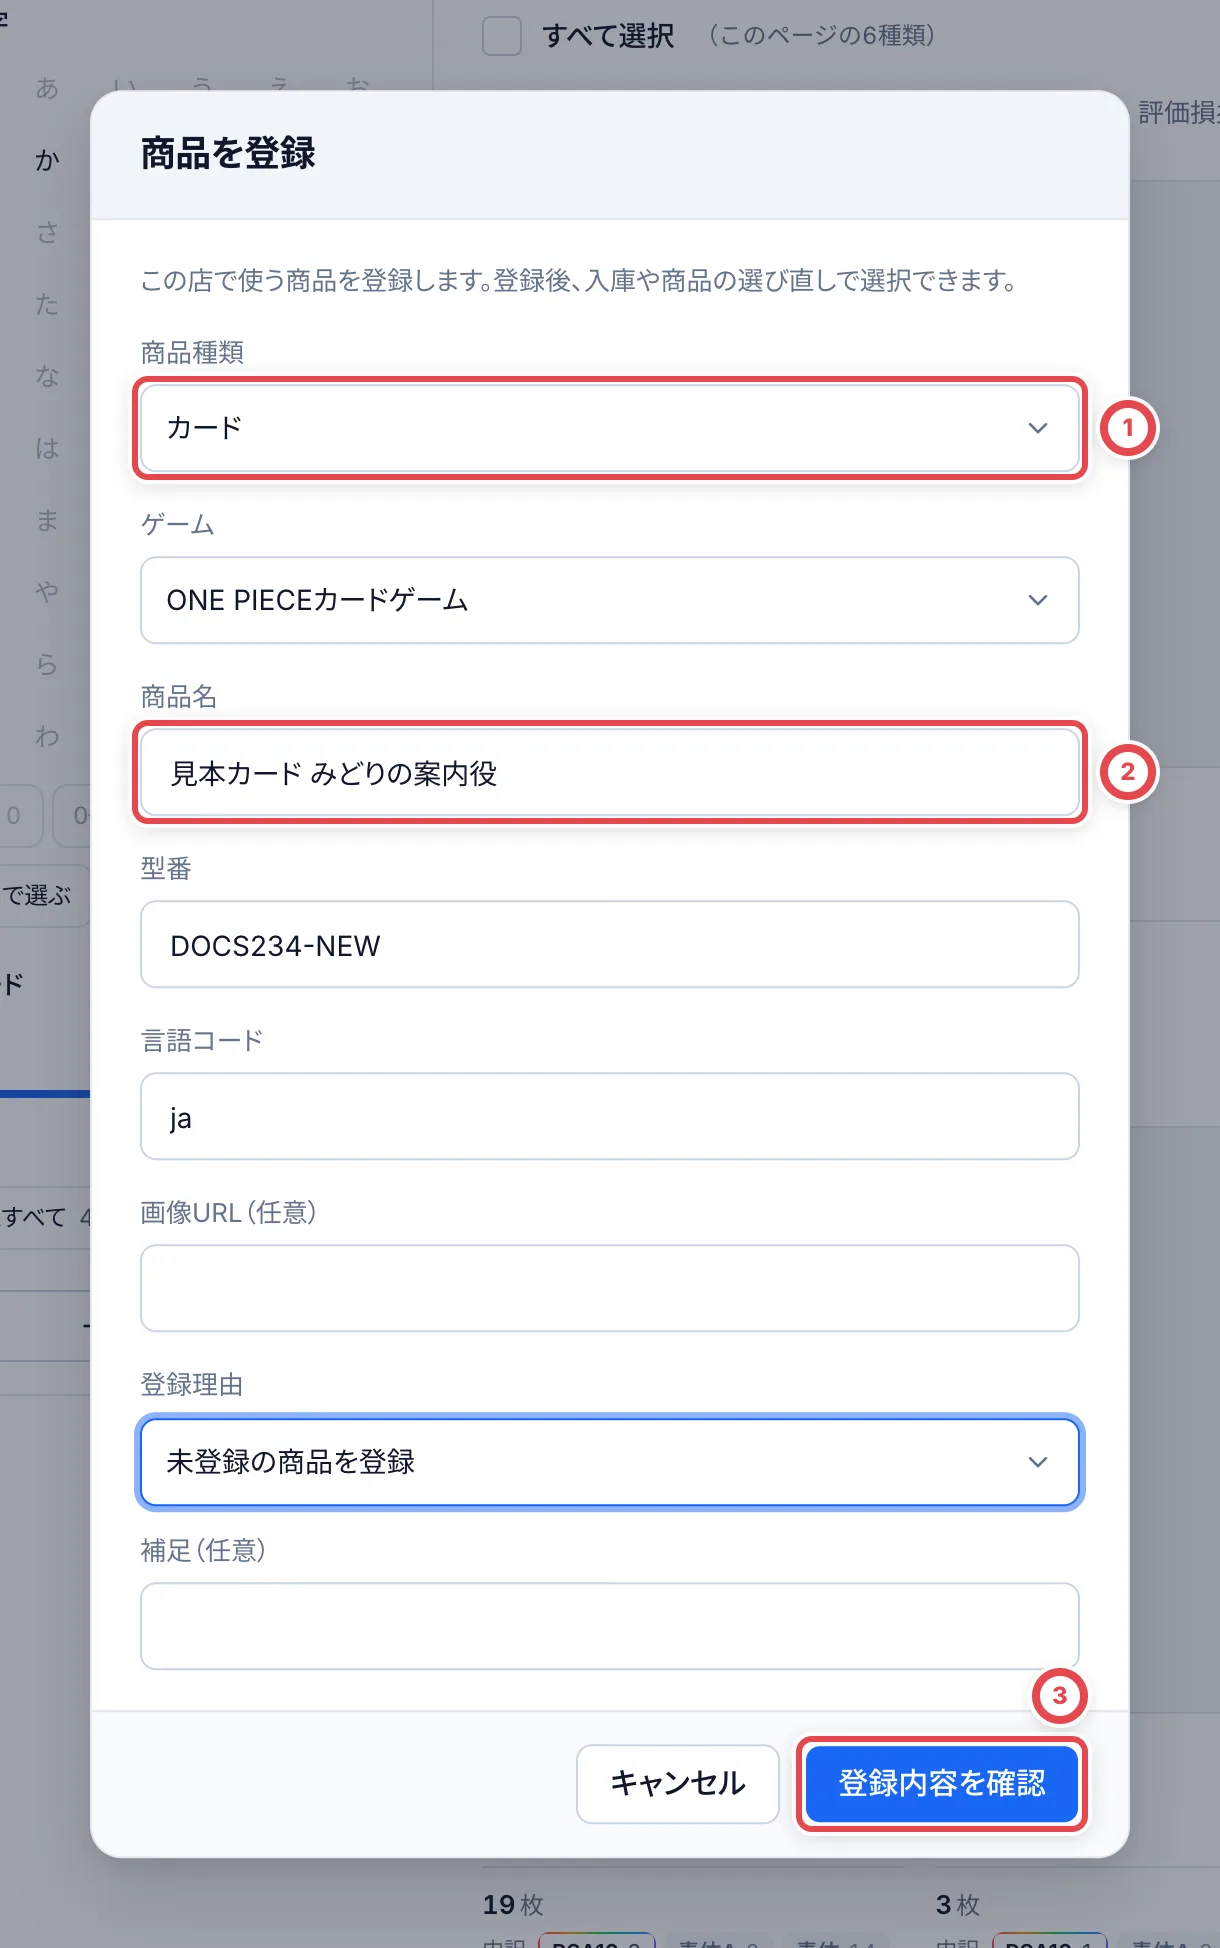 ### 2. 商品を登録してから入庫する
①の商品と型番を照合し、②の「商品を登録」を押します。登録後は「相場」の商品詳細が開きます。商品名・型番を確認してください。
現物を入庫するには、サイドバー上部の「在庫」から「入庫」→「入庫伝票」→「入庫を記録」と進みます。「カードを検索して選ぶ」で登録した商品名または型番を検索し、対象を選びます。
:::note
商品登録だけでは在庫は増えません。現物の受入は[入庫伝票](/guides/inventory/receipts)で記録します。
:::
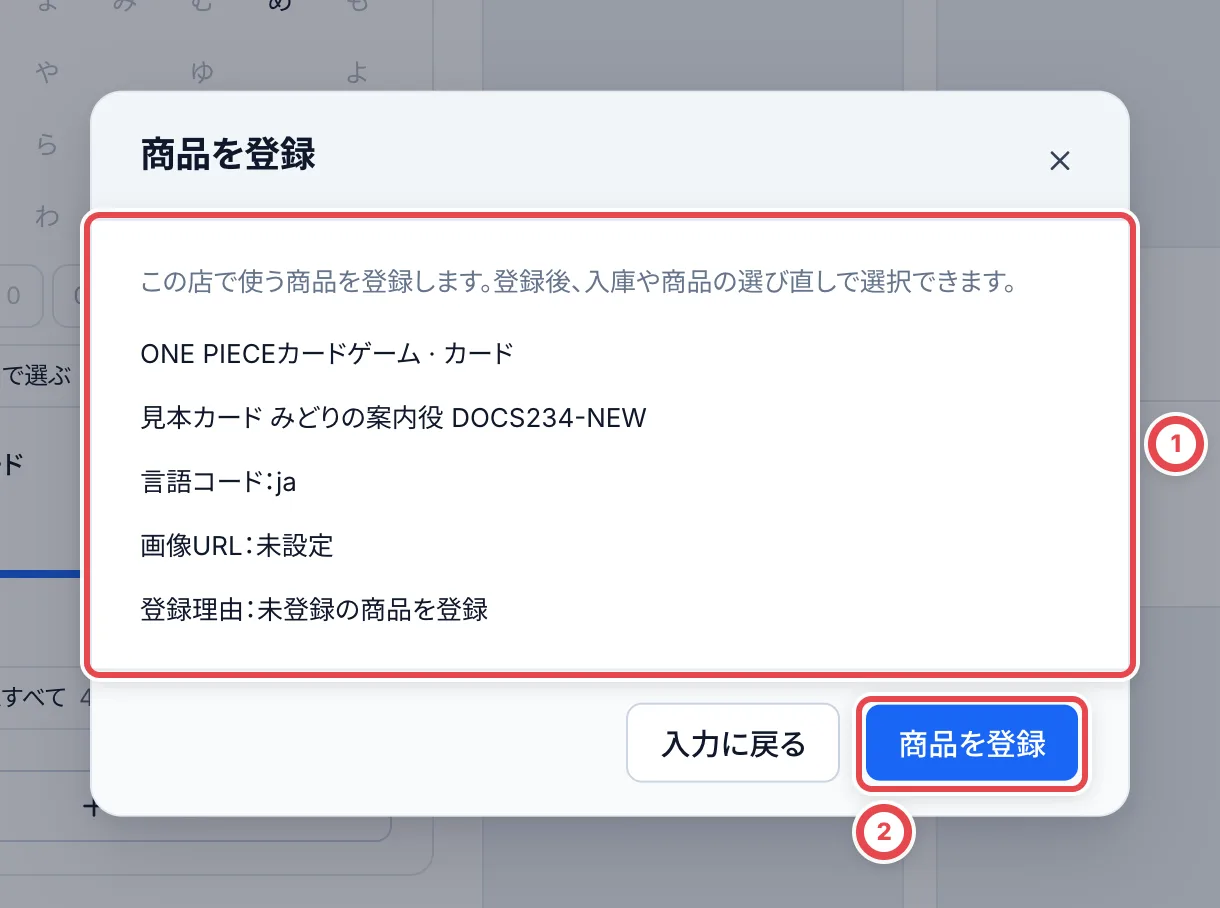 ## 困ったとき
| 起きていること | 確認すること |
| ------------------------------ | -------------------------------------------------------------------------- |
| 変更内容の確認に進めない | 変更があるか、必須項目・訂正理由・その他の詳細が入力されているか確認します |
| 別の個体だけ直したい | 商品情報ではなく[個体の訂正](/guides/inventory/corrections)を使います |
| 再取得しても評価額が変わらない | 対象条件の手動時価が採用中か確認します。自動値へ戻すには採用解除が必要です |
| 古い情報を開いていたと出る | 最新の商品を開き直し、変更内容を確認し直します |
| 保存できたか分からない | 商品と改訂履歴を開き直し、同じ訂正が記録済みか先に確認します |
---
# 格納とQRラベル
Source: https://docs.toreca-cloud.com/guides/inventory/putaway
コンソールでQRラベルを印刷してカードに貼り、iPhoneアプリ「トレカクラウド 格納」で棚への格納を記録します。
- 初めて印刷する:[用紙とプリンターの準備](#用紙とプリンターの準備)
- ラベルが印刷済み:[格納アプリで棚に入れる](#7-格納アプリで棚に入れる)
- 読み取りが赤になった:[要対応を片づける](#8-要対応を片づける)
## 1. 格納の画面を開く
「在庫」→「格納」を開きます。未発行分をまとめて印刷するときは、③から[ラベルの印刷](#3-ラベルを印刷する)へ進みます。対象を選んで印刷するときは、次の手順へ進みます。
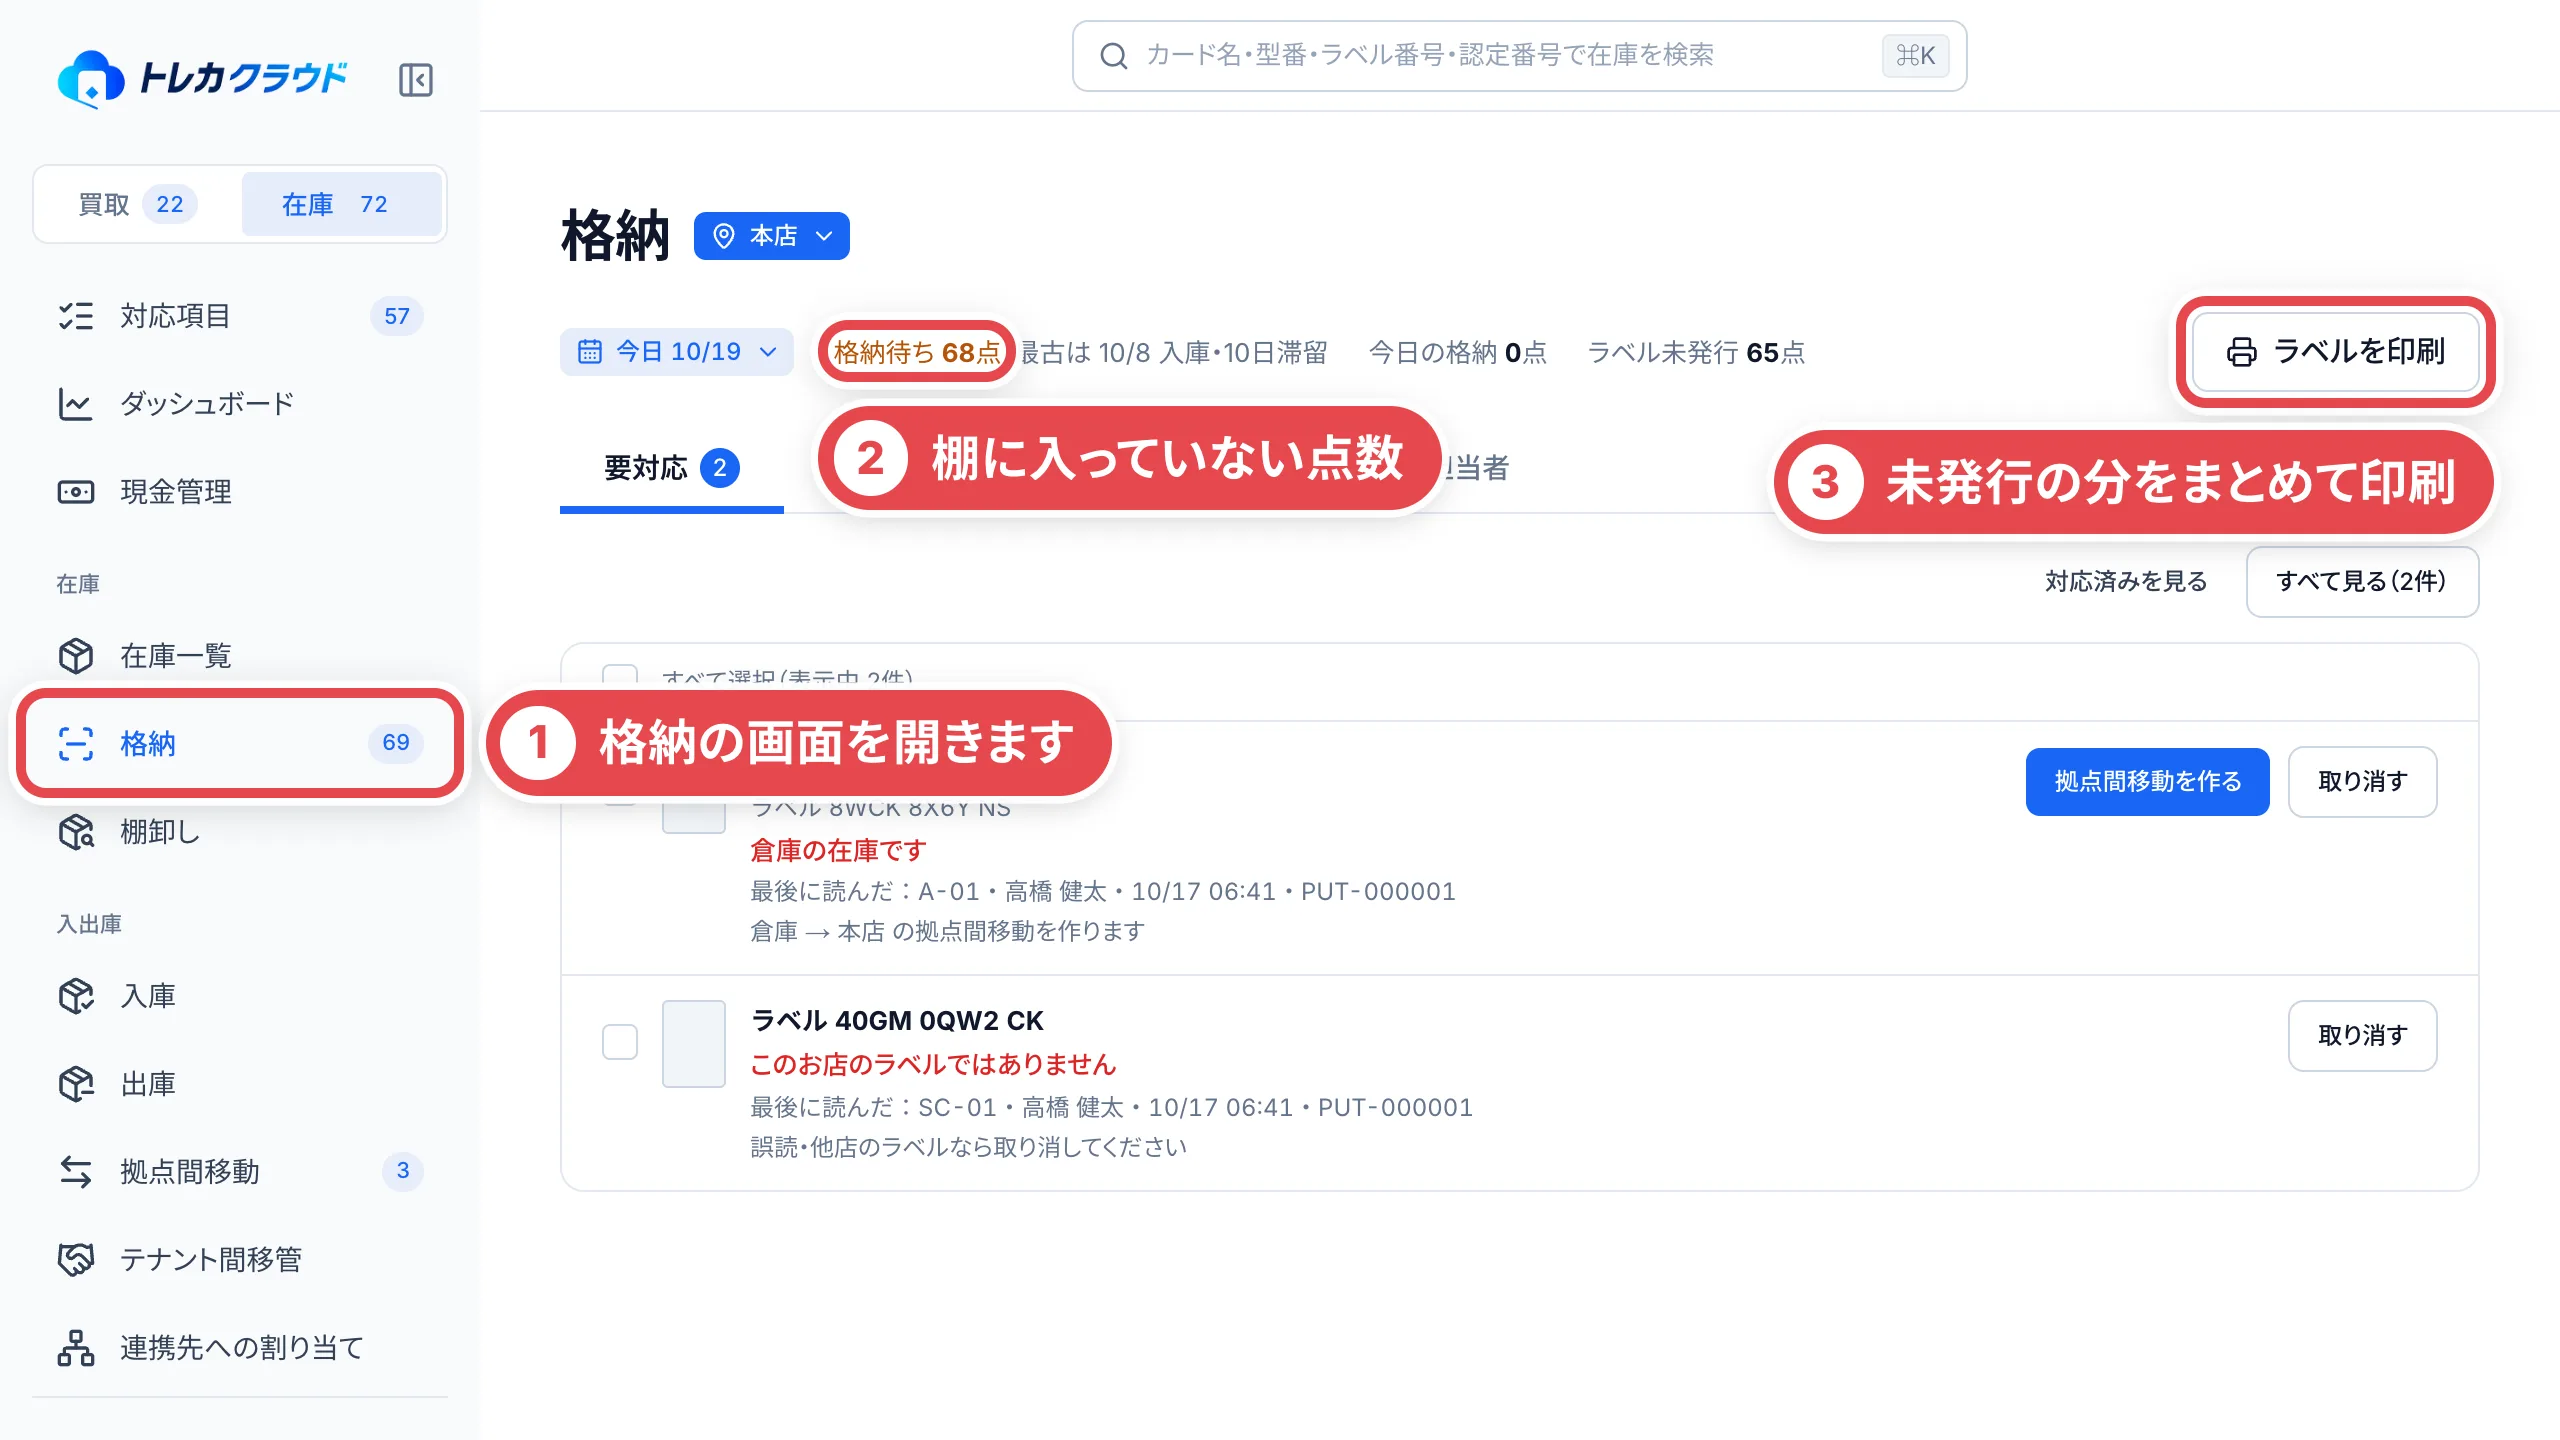 ## 2. 印刷するカードを選ぶ
「入出庫」→「入庫」を開き、対象のカードを選んで「QRを印刷」を押します。支払いの受け取りが未確認の取引は「到着・着金確認待ち」、確認済みの取引は「入庫待ち」で探します。
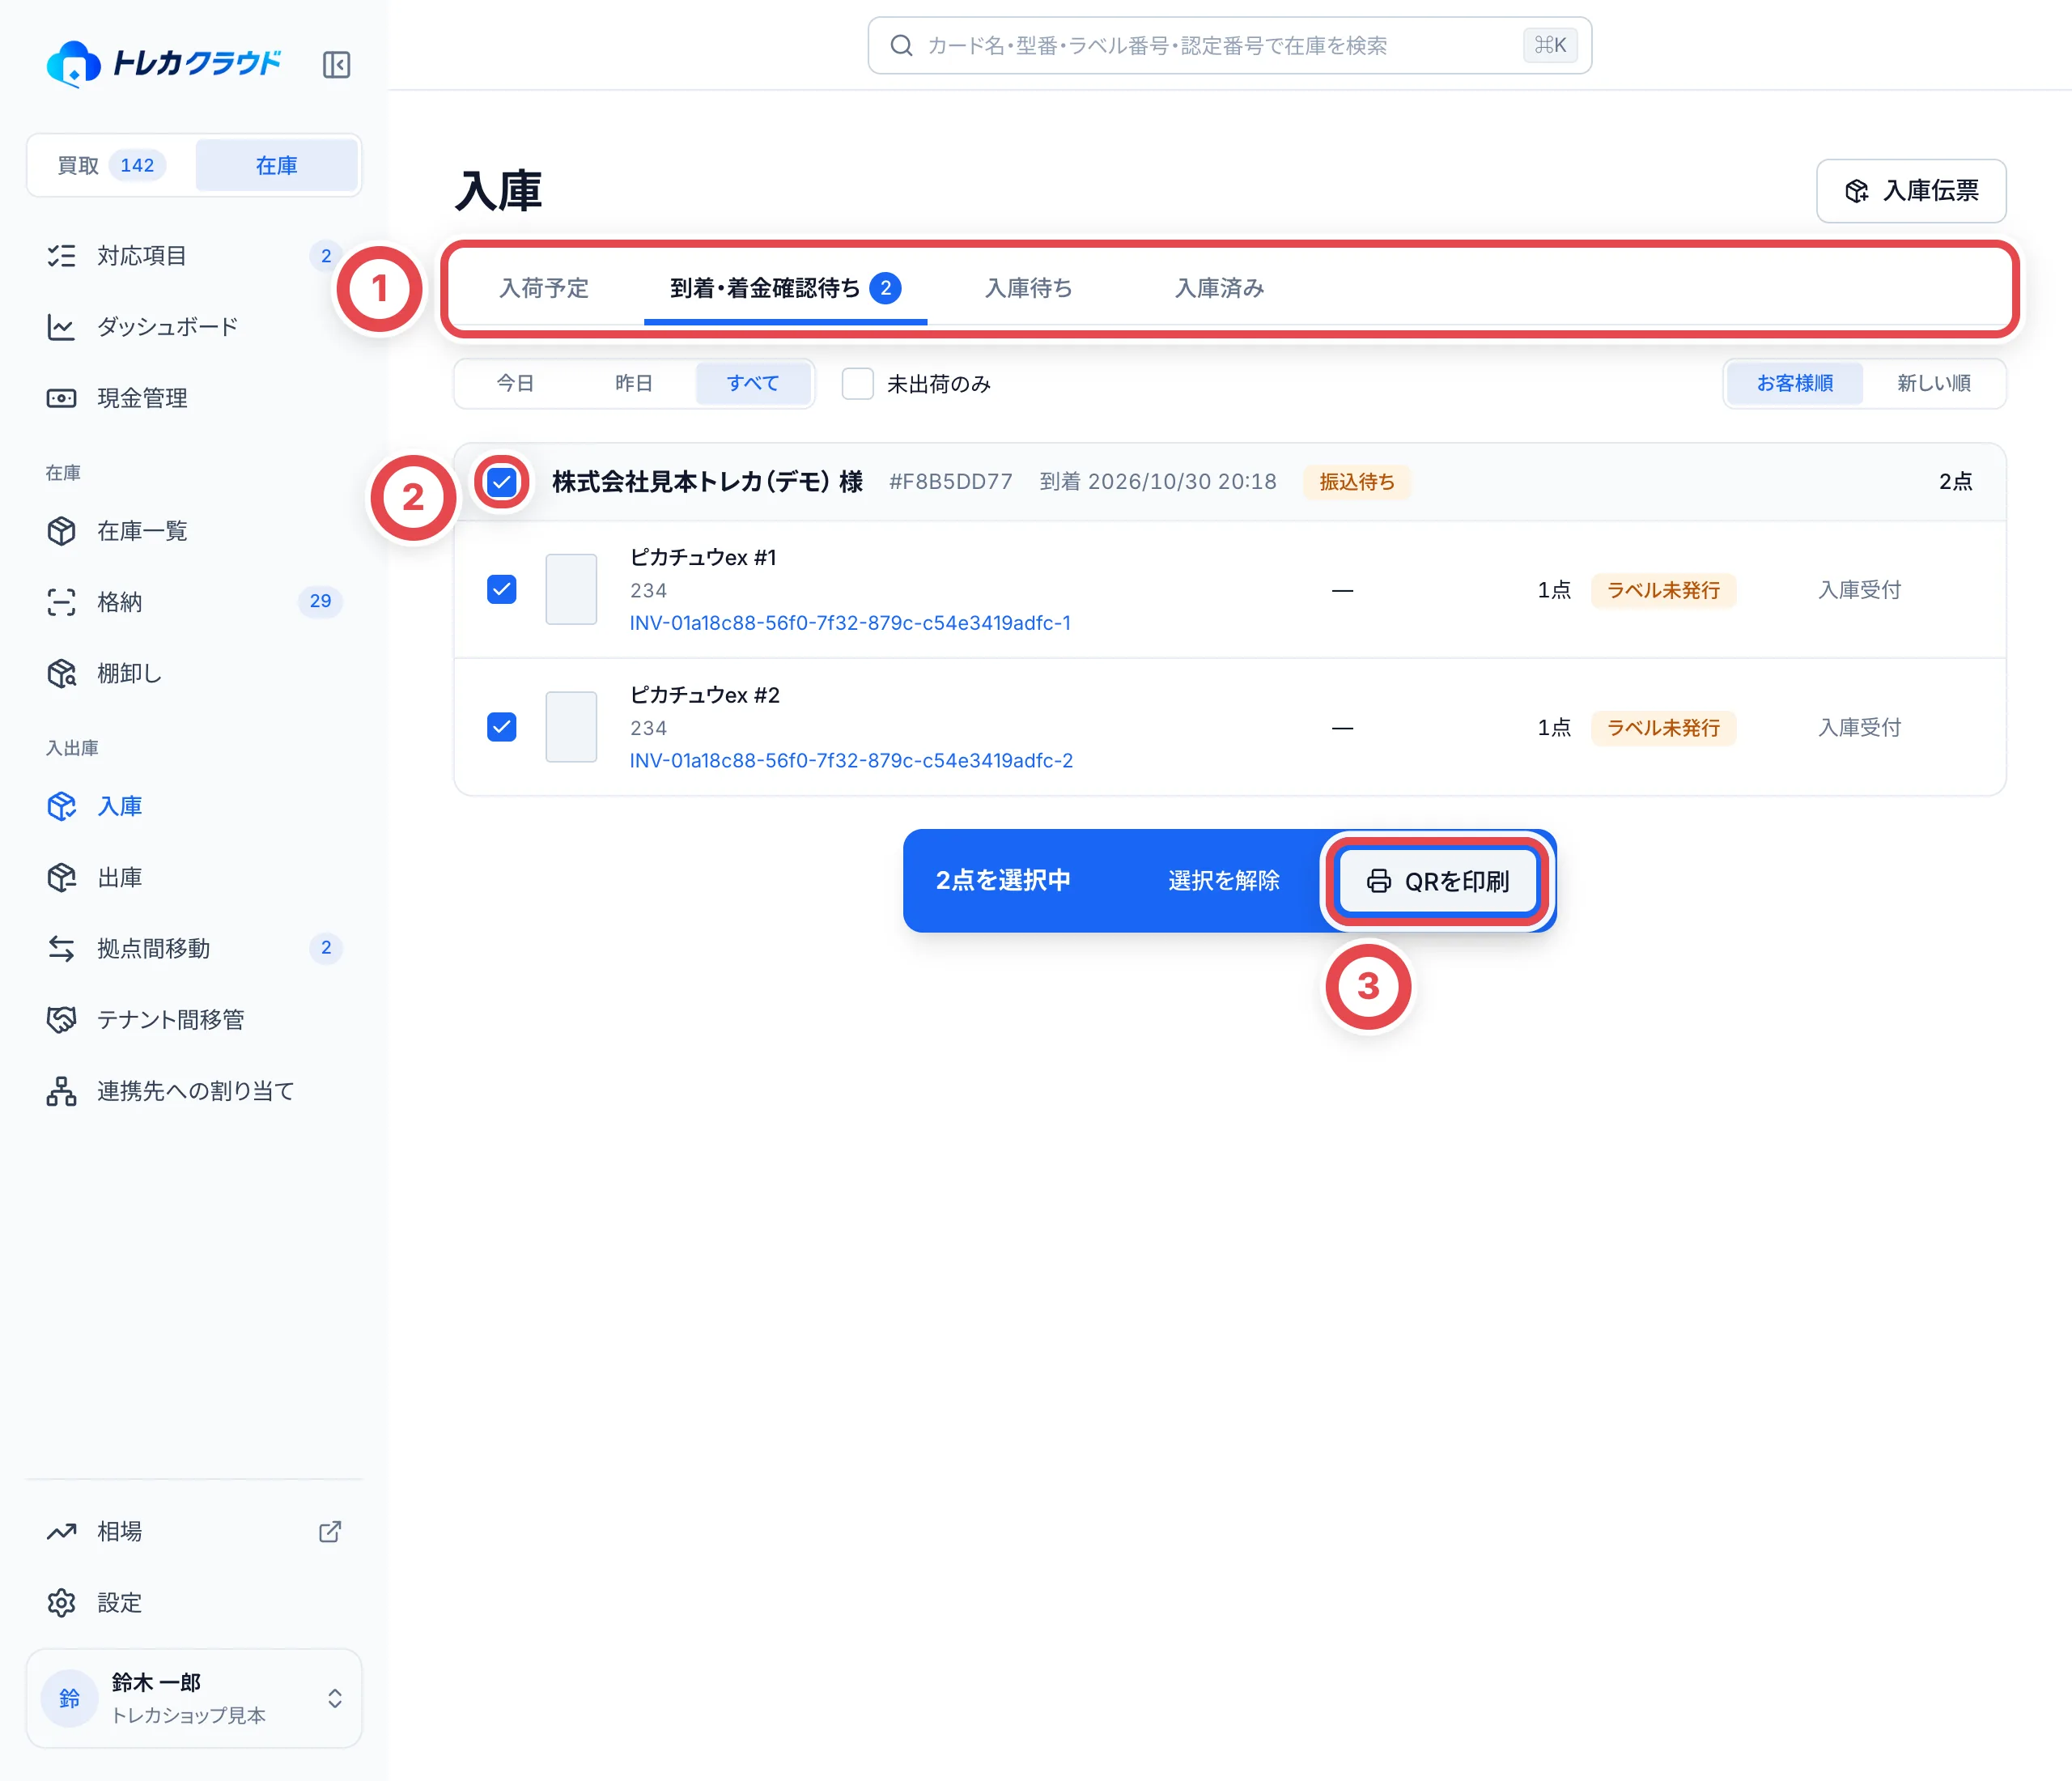 入庫伝票から印刷する場合は、その伝票の「ラベルを印刷」を押します。
## 3. ラベルを印刷する
### ラベルプリンターで印刷する
Brother QL-820NWBc(用紙:DK-2210)
ラベルプリンターの用紙は「Brother DK-2210用」を選びます。「印刷順・個体照合」の認定番号・管理番号を現物と照合し、「プレビュー」で配置を確認します。
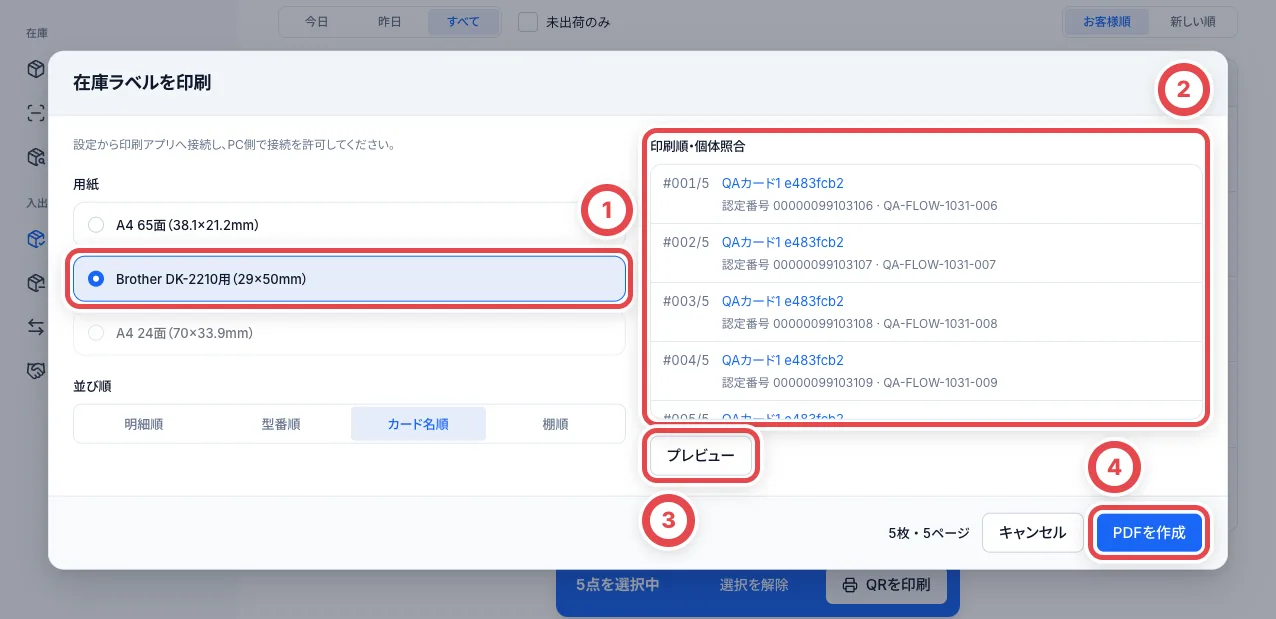 ④の「印刷」を押すと、接続済みのプリンターから印刷できます。初回の接続は[印刷アプリの使い方](/guides/inventory/desktop-print-app)を参照してください。
「PDFを作成」が表示されている場合は、作成したPDFを開き、「実際のサイズ(100%)」で印刷します。
### A4シートを使う場合
用紙で「A4 65面」を選びます。使いかけのシートなら最初の空き面を「開始位置」に指定し、同じ手順で現物と配置を確認して印刷します。
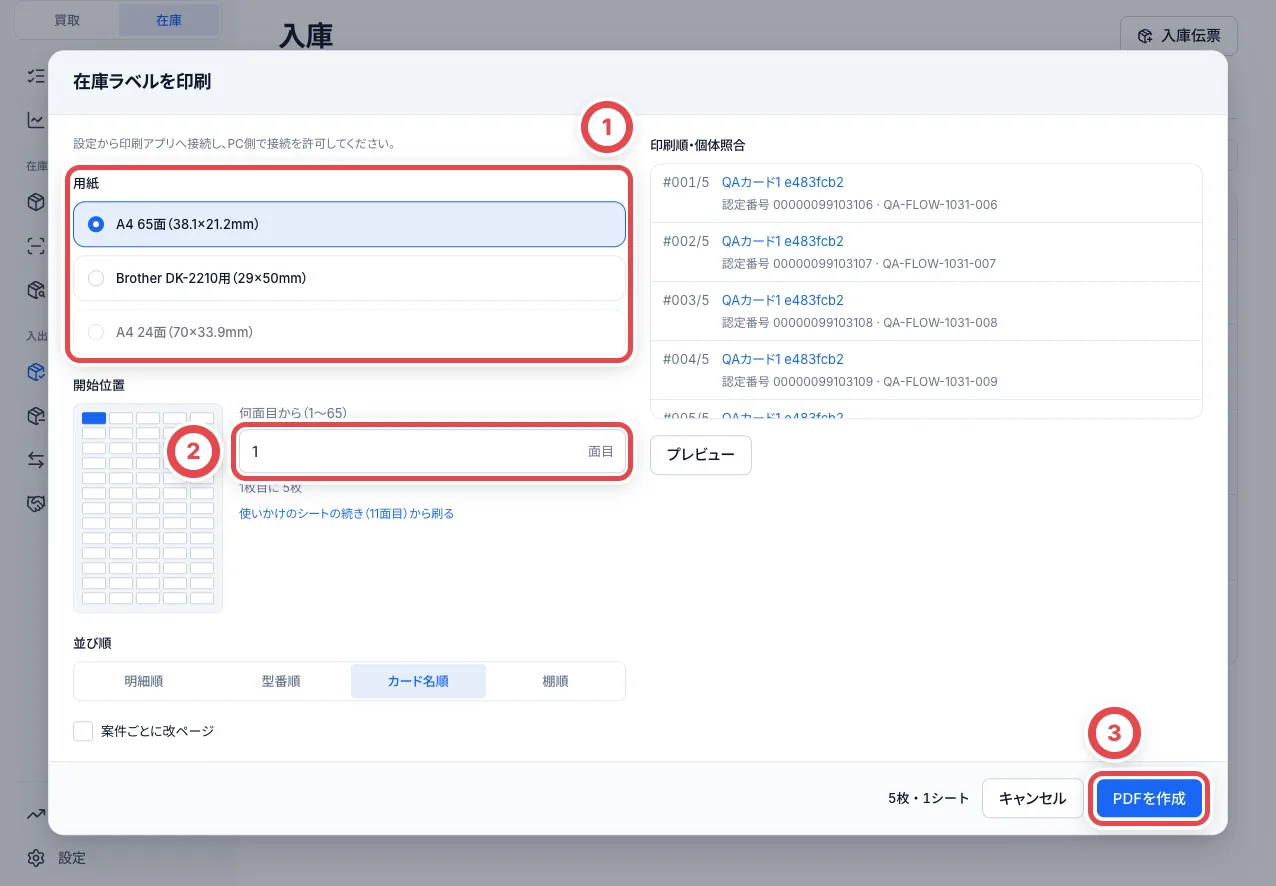 ## 4. ラベルをカードに貼る
印刷したラベルを現物と照合し、カードやスリーブに貼ります。
印刷がずれるときは「設定」→「ラベル印刷」で「テスト印刷」を行います。用紙の切れ目が通る目盛りの値を「位置合わせ X」「位置合わせ Y」に足して保存します(右・下が+)。設定を変更できない場合は、管理者に依頼してください。
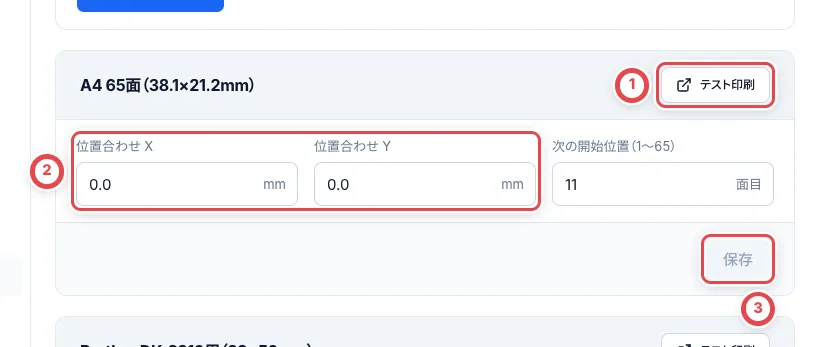 ## 5. 印刷バッチで進み具合を見る
「格納」→「印刷バッチ」で対象を開き、残っているカードを確認します。明細の認定番号・個体番号で現物を照合できます。
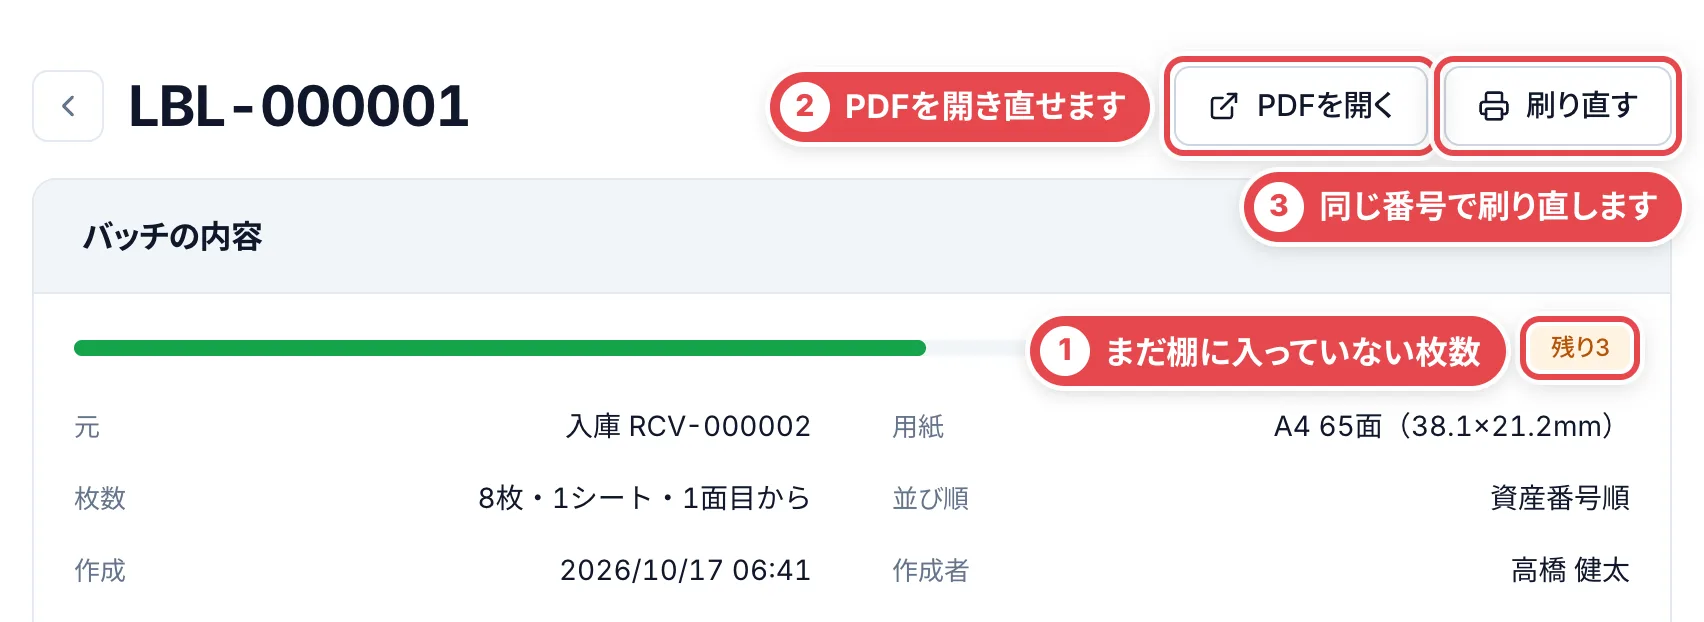 PDFを作成した時点でラベルは発行済みです。印刷に失敗した場合は、このバッチから同じ番号で刷り直します。
## 6. 棚ラベルを用意する
棚ラベルがない場合は、「設定」→「拠点と保管場所」からA4 24面に印刷し、対象の棚に貼ります。
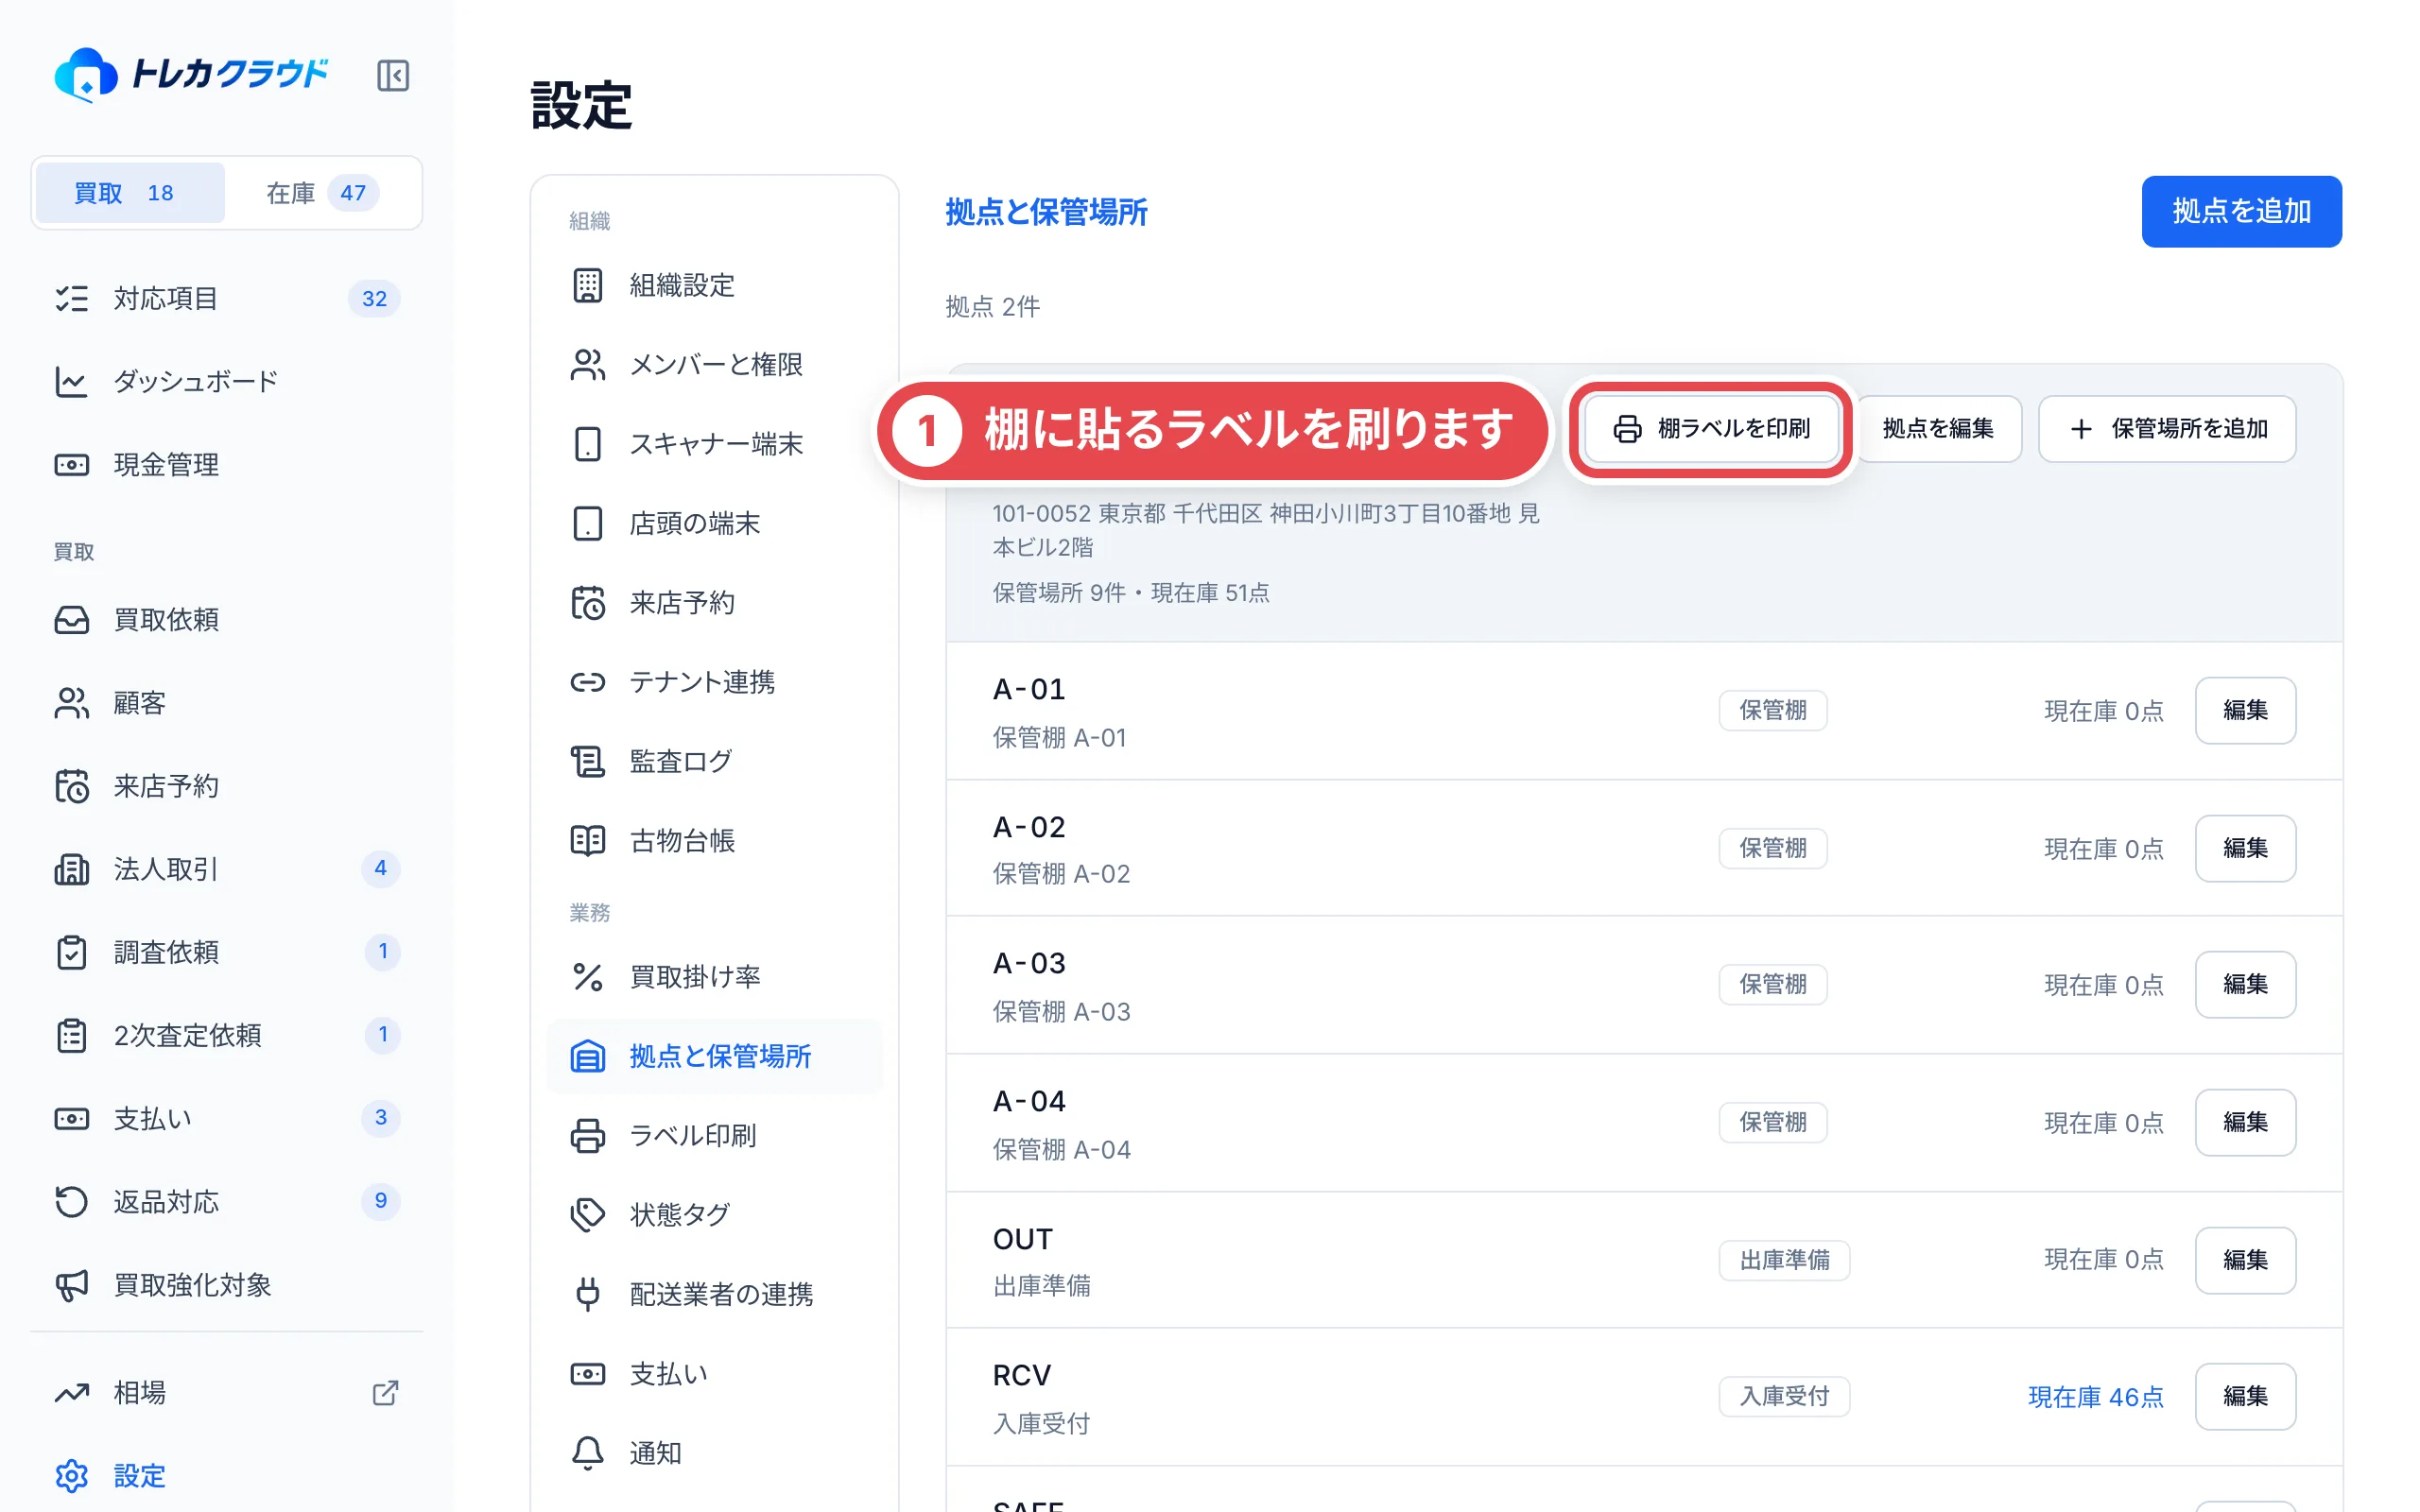 ## 7. 格納アプリで棚に入れる
1. **ログインする**
iPhoneアプリの「ログイン」から自分のアカウントでログインし、店舗を選んで「許可する」を押します。
2. **拠点を確かめて、格納を始める**
「作業する拠点」を確認し、「格納を始める」を押します。印刷バッチ単位で読み残しを確認したい場合は、「印刷済みの束(予定リスト)」から対象を選びます。
3. **棚ラベルを読む**
格納先の棚ラベルを読み取ります。読めないときは一覧から選びます。入庫受付の棚は格納先にできません。
4. **カードを読み取って棚に入れる**
カードの在庫ラベルを読み、「格納しました」または「移動しました」を確認して棚に入れます。赤になったカードは脇によけ、あとで「要対応」を確認します。棚を変えるときは、次の棚ラベルを読みます。
5. **作業を終える**
「作業を終了」→「格納を終了」を選びます。今回の読み取りを取り消す場合は「読み取りを取り消して終了」を選びます。拠点間移動で受領した個体は取消の対象外なので、確認画面の受領件数を確かめてください。
### 現物を優先して、格納先を固定する
現物がある棚に記録を訂正する場合に使います。**出庫済みの個体を再計上する場合があるため、現物とラベルの一致を確認してから始めてください。**
「格納を始める」で「現物優先で格納先を固定」をオンにし、格納先の棚を選びます。
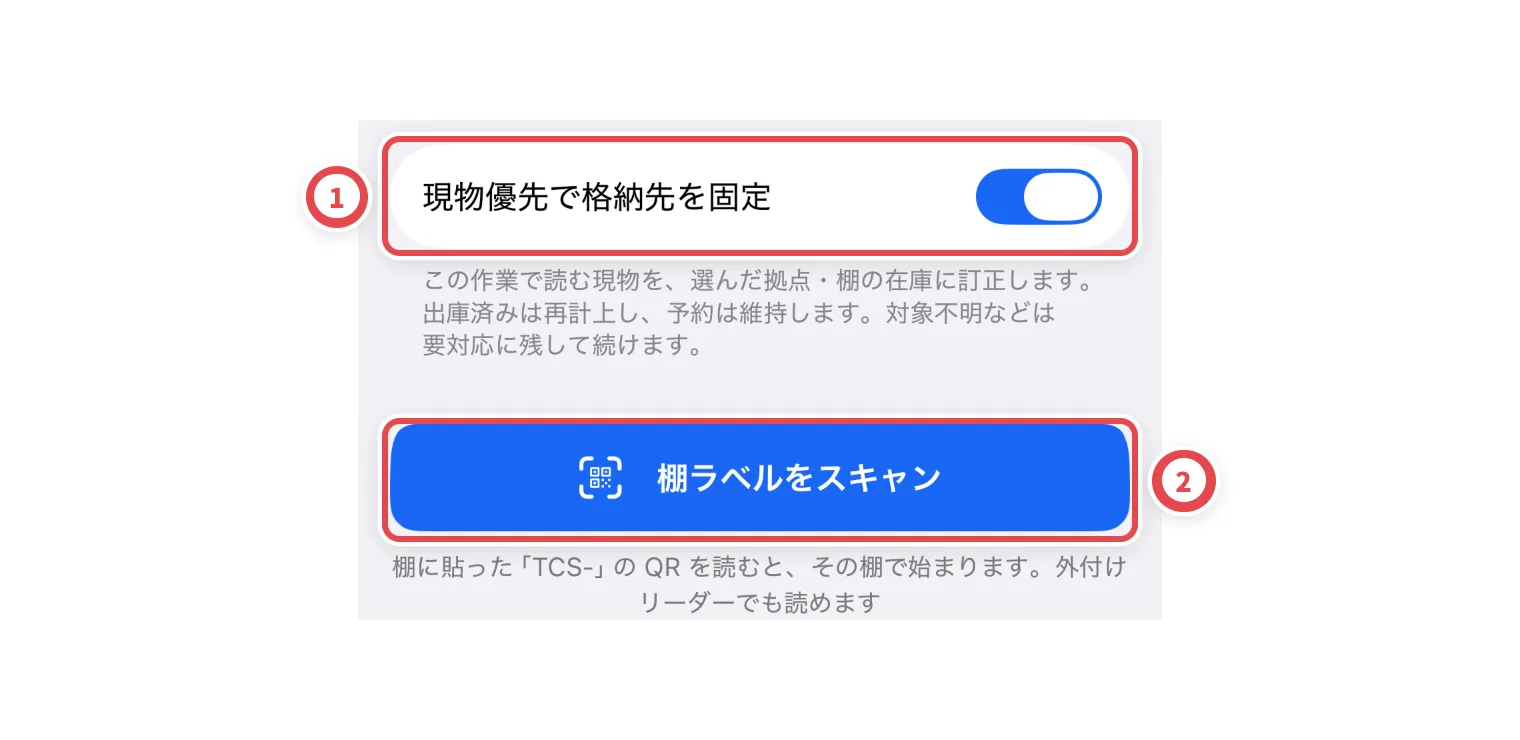 拠点・棚と訂正範囲を確かめ、「この格納先で開始」を押します。
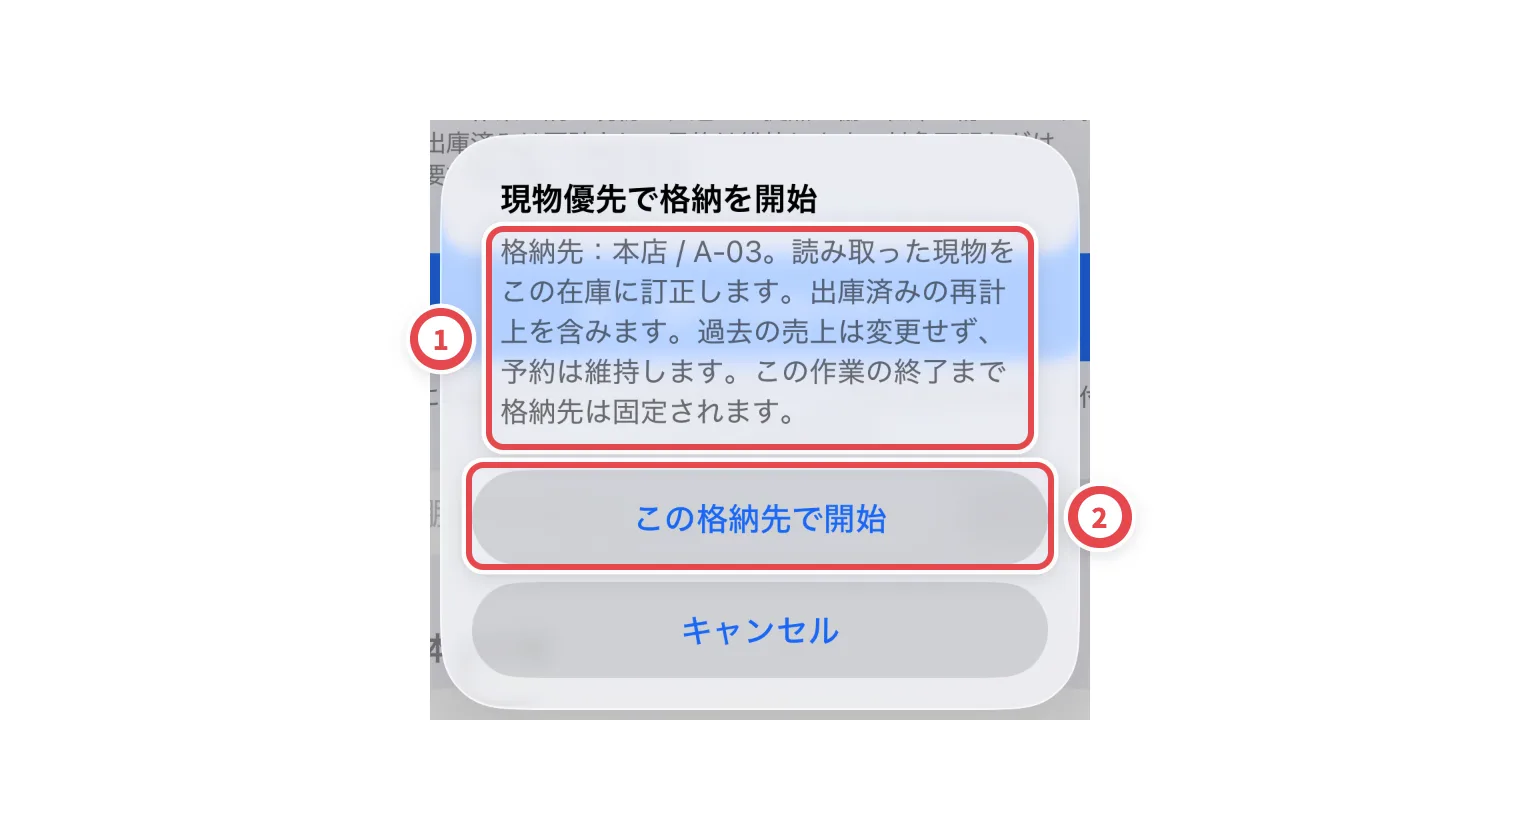 在庫ラベルを続けて読み取ります。棚を変えるときは作業を終了し、次の棚で始め直します。
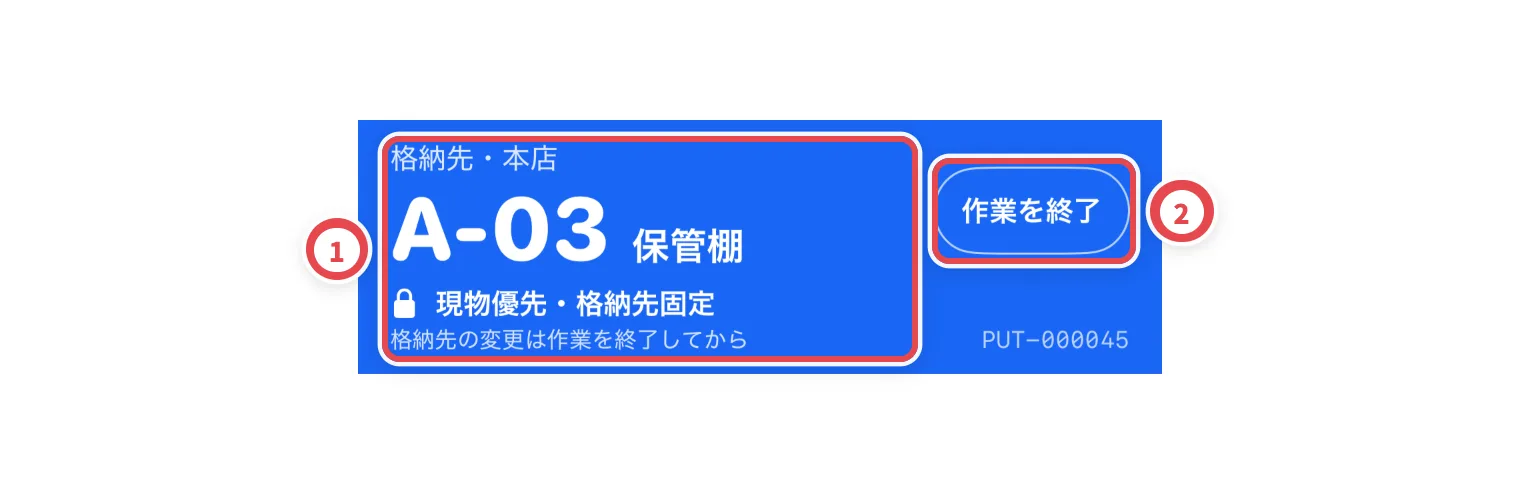 ### 過去の登録やラベルが混線しているとき
現物優先で訂正するのは、QRが指す個体の所在と在庫状態です。次の場合は、ラベルや登録内容を先に確認します。
| 状況 | 対応 |
| -------------------------------- | ----------------------------------------------------------------------------------------------------------------------------------------------------------------------------------------------- |
| 再発行前のラベルが貼られている | 同じ個体の再発行なら、訂正結果の現在の番号で刷り直して貼り替えます。別の個体として登録し直した場合は、新登録のラベルだけを使います。新旧の両方を読むと旧個体も再計上する場合があります。 |
| 2枚の現物に同じQRが貼られている | 個体とラベルを照合し、それぞれ正しいラベルに貼り替えます。 |
| QRが不明・在庫ラベルがない | 元の伝票から個体を確認します。未登録なら[入庫伝票](/guides/inventory/receipts)などで登録し、個体ごとのラベルを発行します。伝票番号(RCV)は格納に使えません。 |
| カード・版・グレードが違う | [個体のカード・グレードを訂正](/guides/inventory/corrections)します。買取由来なら元の案件で、商品全体の誤りなら[商品情報の訂正](/guides/inventory/product-and-market-corrections)で対応します。 |
| 現物がない在庫が記録に残っている | [棚卸し](/guides/inventory/counts)で不足を確認します。 |
### 連続スキャンからロックまで
1. [現物優先](#現物を優先して格納先を固定する)で棚ごとに読み取り、現物・ラベル・格納先を照合します。
2. 全端末の「送信待ち」「確認中」が0になったら、「格納」→「今日のセッション」で結果と件数を確認します。要対応・読み残しは解消するか、ロック対象から分けておきます。
3. 現物の移動・スキャン・訂正をいったん止め、[スキャン移動のロック](/guides/inventory/shelf-protection#3-スキャン期間で在庫を選んでロックする)で対象を確認して保存します。日付をまたいだ作業は両日を指定します。後から同期した分は自動追加されないため、全端末の送信を終えてから設定してください。
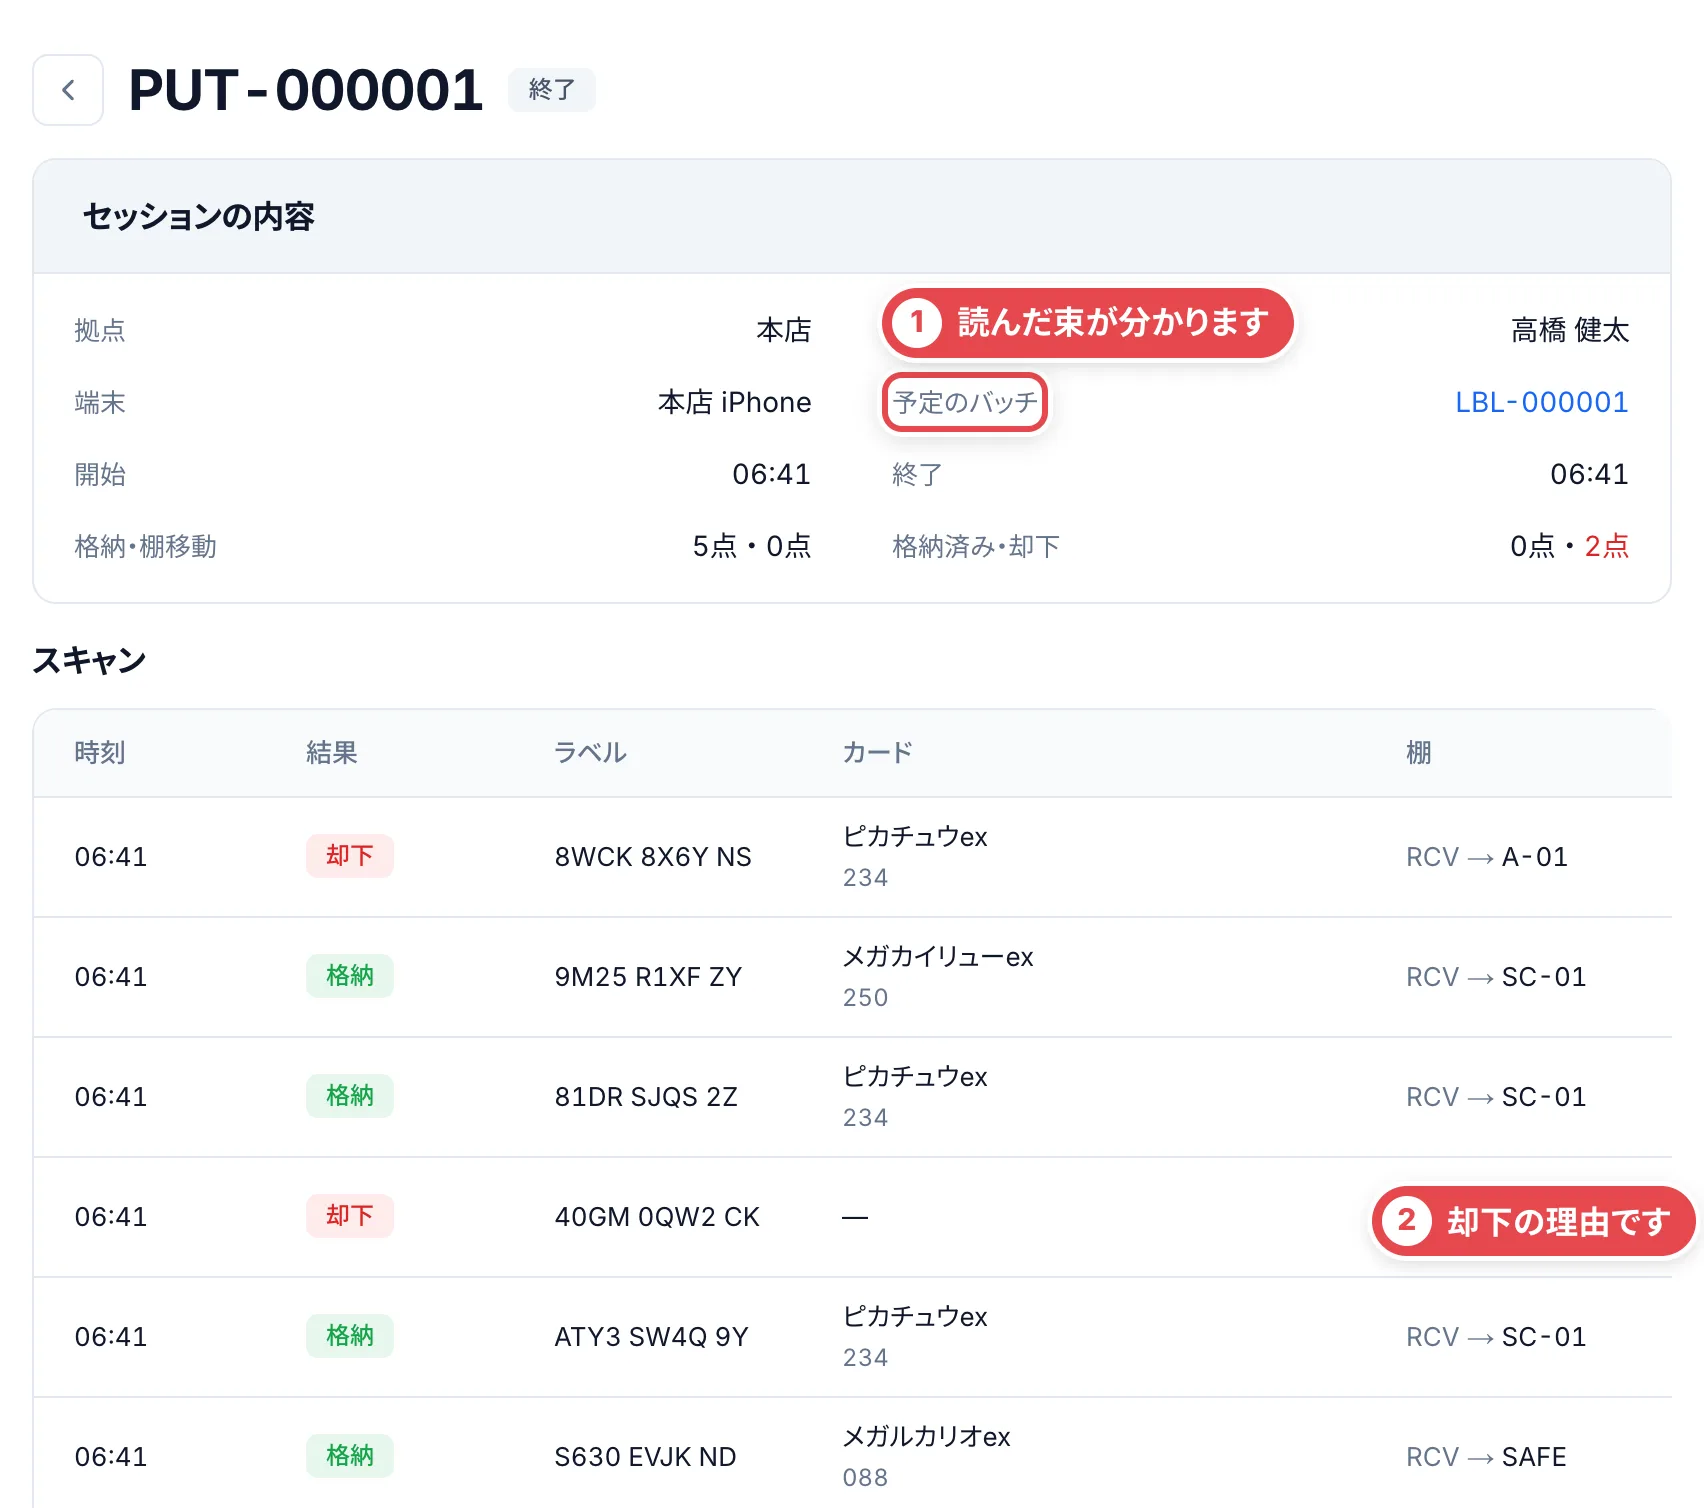 ### 圏外や再起動後に格納の送信を確認する
アプリを開いて通信を戻し、途中の作業はホームから再開します。終了済みなら「自分の格納の履歴」を開き、送信待ち・エラーを確認します。送信待ちが残る間はアプリや端末のデータを削除せず、コンソールに反映されるまで待ってください。送信が拒否された場合は、表示された理由と端末の利用権限を確認します。
## 8. 要対応を片づける
「格納」→「要対応」を開き、現物とラベルを照合して対応します。読み間違いや他店のラベルは「取り消す」を選びます。
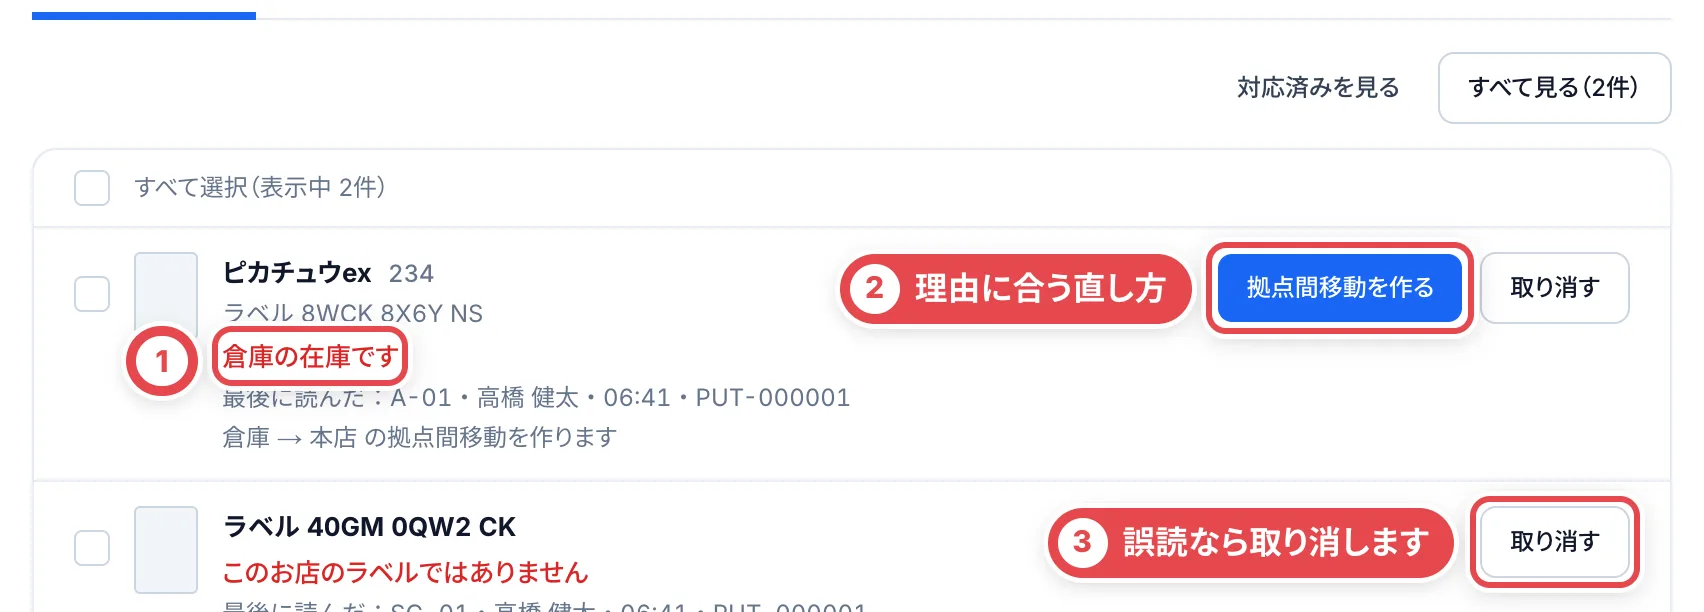 | 理由 | 対応 |
| ------------------ | ----------------------------------------------------------------------------------------------------------------------------------- |
| 別拠点 | 「拠点間移動を作る」で、この拠点への移動を記録する |
| 紛失中 | 「この棚で見つかった」で在庫に戻す |
| 移動中 | 移動先がこの拠点なら「この棚で受領」。別拠点なら、その拠点の棚で読み直す |
| 無効にしたラベル | 貼り替えた新しいラベルを読み直す |
| 利用停止の棚 | 利用できる棚で読み直す |
| 在庫にない | 貼り間違いを確認し、個体の画面で状態を直す |
| スキャン移動ロック | 管理者に[保護した棚と対象在庫](/guides/inventory/shelf-protection#5-スキャンが拒否されたら)の確認を依頼する。解除後は新しく読み取る |
まとめて処理する場合は対象件数を確かめ、処理後に失敗・対象外として残った行を確認します。
## 9. 1枚ずつ確かめる・刷り直す
個体の画面で「在庫ラベル」を開きます。汚れ・破れは「1枚だけ再印刷」、番号を変える場合は「番号を変えて再発行」を使います。再発行後は古いラベルを剥がし、新しいラベルに貼り替えてください。
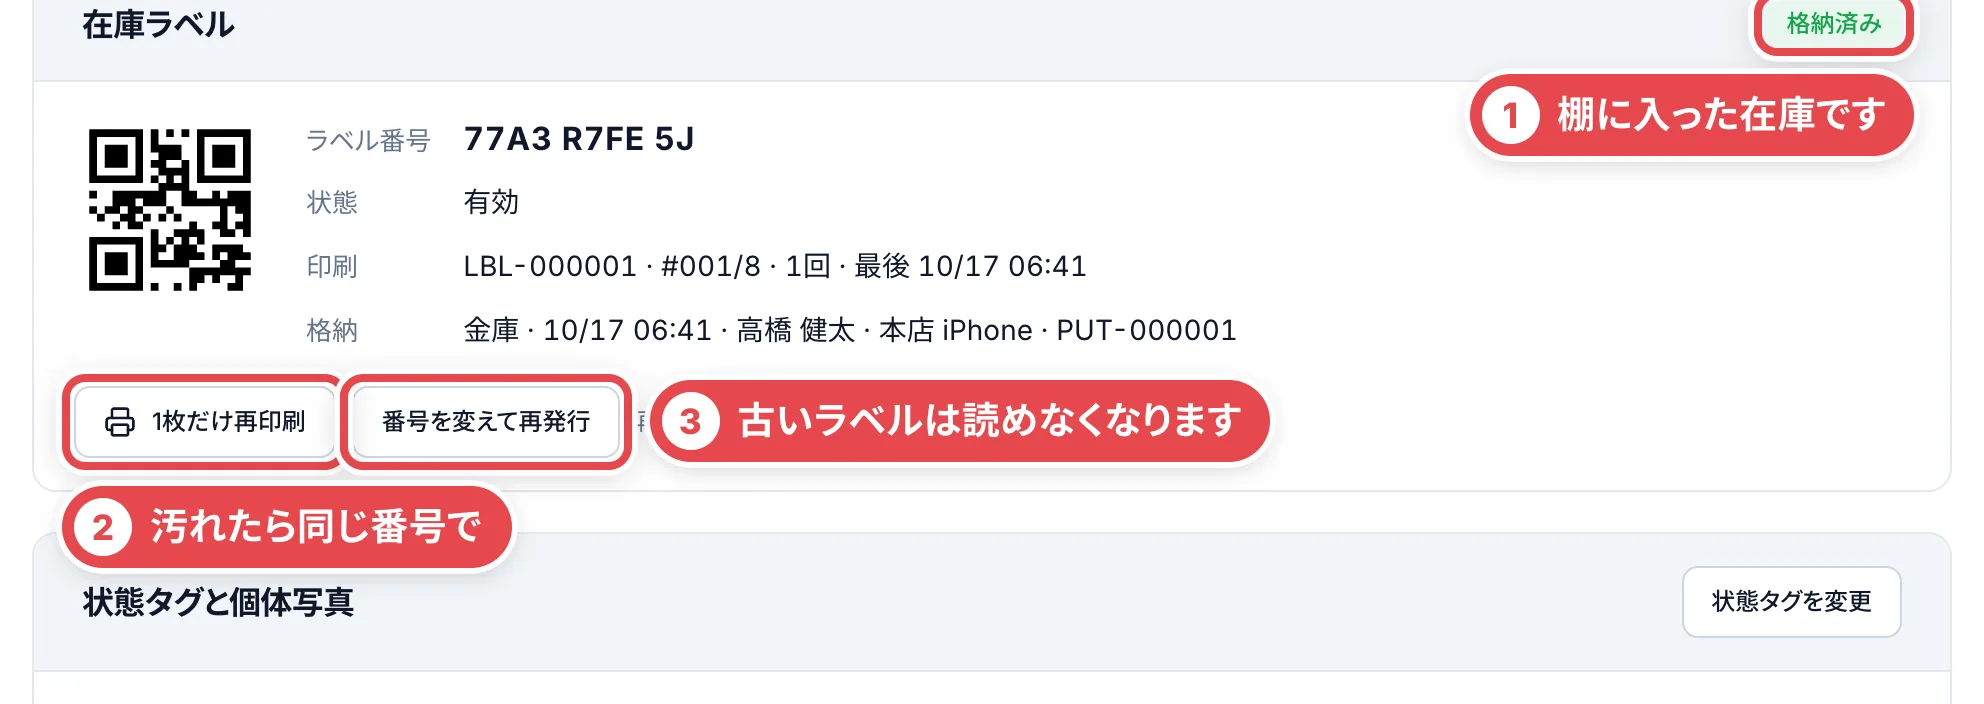 ## 用紙とプリンターの準備
| 用途 | 用紙 |
| ---------------------- | ------------------------------------ |
| ロール紙の在庫ラベル | Brother DK-2210用 |
| カードに貼る在庫ラベル | A4 65面(エーワン 64265・28974など) |
| 棚ラベル | A4 24面(エーワン 72324など) |
Brother QL-820NWBcは[プリンターのセットアップ](/guides/inventory/brother-printer)で用紙を確認します。PCから直接印刷する場合は、[印刷アプリの使い方](/guides/inventory/desktop-print-app)に沿って接続とテスト印刷を済ませます。
## 困ったとき
| 状況 | 対応 |
| ------------------------------------------------------------------ | ---------------------------------------------------------------------------------------------------------------------- |
| 印刷ボタンが出ない | 在庫を変更する権限とカードを見る権限を、管理者に確認します。 |
| 印刷がずれる | [位置合わせ](#4-ラベルをカードに貼る)を確認します。 |
| PDFを作ったが印刷に失敗した | [印刷バッチ](#5-印刷バッチで進み具合を見る)から刷り直します。 |
| 「要再印刷」に数が出ている | カード・グレードの変更や番号の再発行があった個体です。[ラベルを刷り直して](#9-1枚ずつ確かめる刷り直す)貼り替えます。 |
| 間違った棚で読んだ | 「最近の読み取り」を左にスワイプして「取消」し、正しい棚で読み直します。終了後は「自分の格納の履歴」から取り消します。 |
| 「ラベル番号が正しくありません」と出る | 個体の在庫ラベルを確認し、必要なら貼り替えて読み直します。 |
| ログインできない・「この店舗ではスキャナーを使っていません」と出る | 店舗での利用設定を運営に確認します。「設定」→「スキャナー端末」で端末が失効していないかも確認します。 |
## 関連する操作
- [iPhoneの棚卸し・ピッキングで未送信データを復旧する](/guides/inventory/scanner-recovery)
---
# 入庫
Source: https://docs.toreca-cloud.com/guides/inventory/receipts
| 入庫するもの | 登録する操作 | 使う画面 |
| ---------------------------------- | ---------------------- | -------- |
| お客様から買い取ったカード | 「在庫と支払いを登録」 | 取引 |
| 初期在庫・棚卸しで見つかったカード | 「入庫を確定」 | 入庫伝票 |
①「在庫」に切り替え、「入出庫」の②「入庫」を開きます。入庫伝票は右上の③「入庫伝票」から開きます。
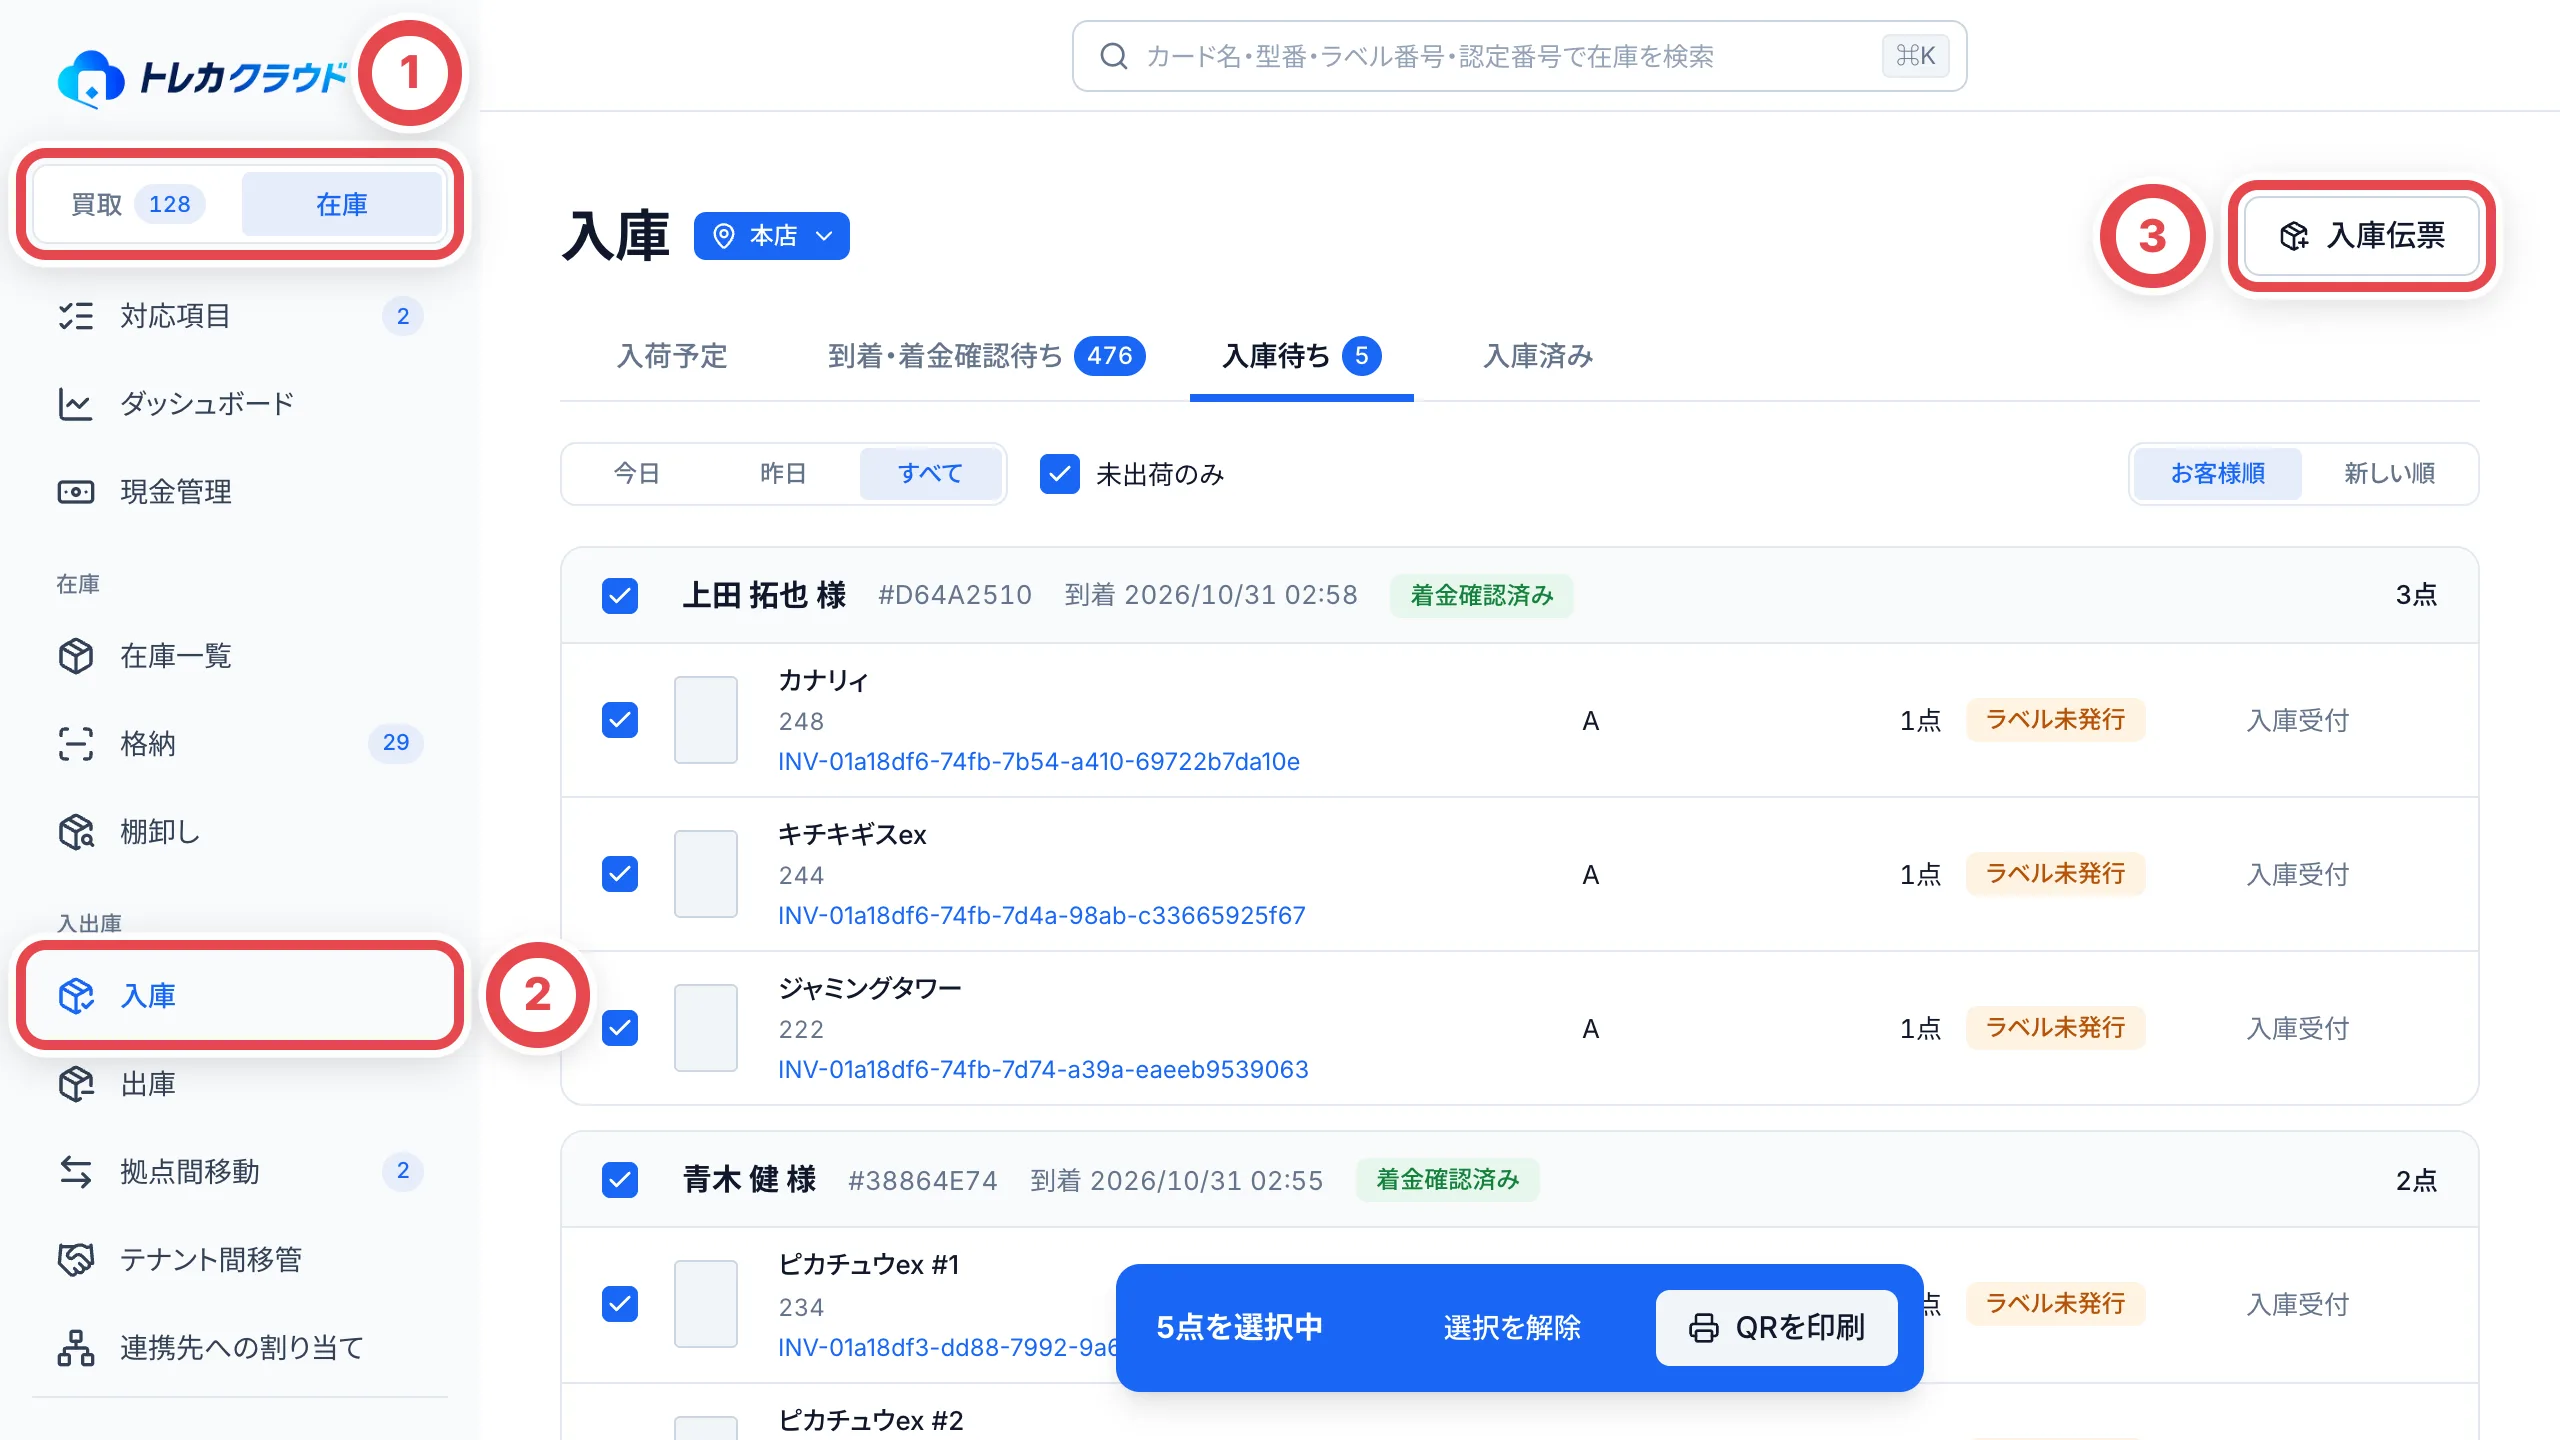 ## 入庫の画面で進み具合を見る
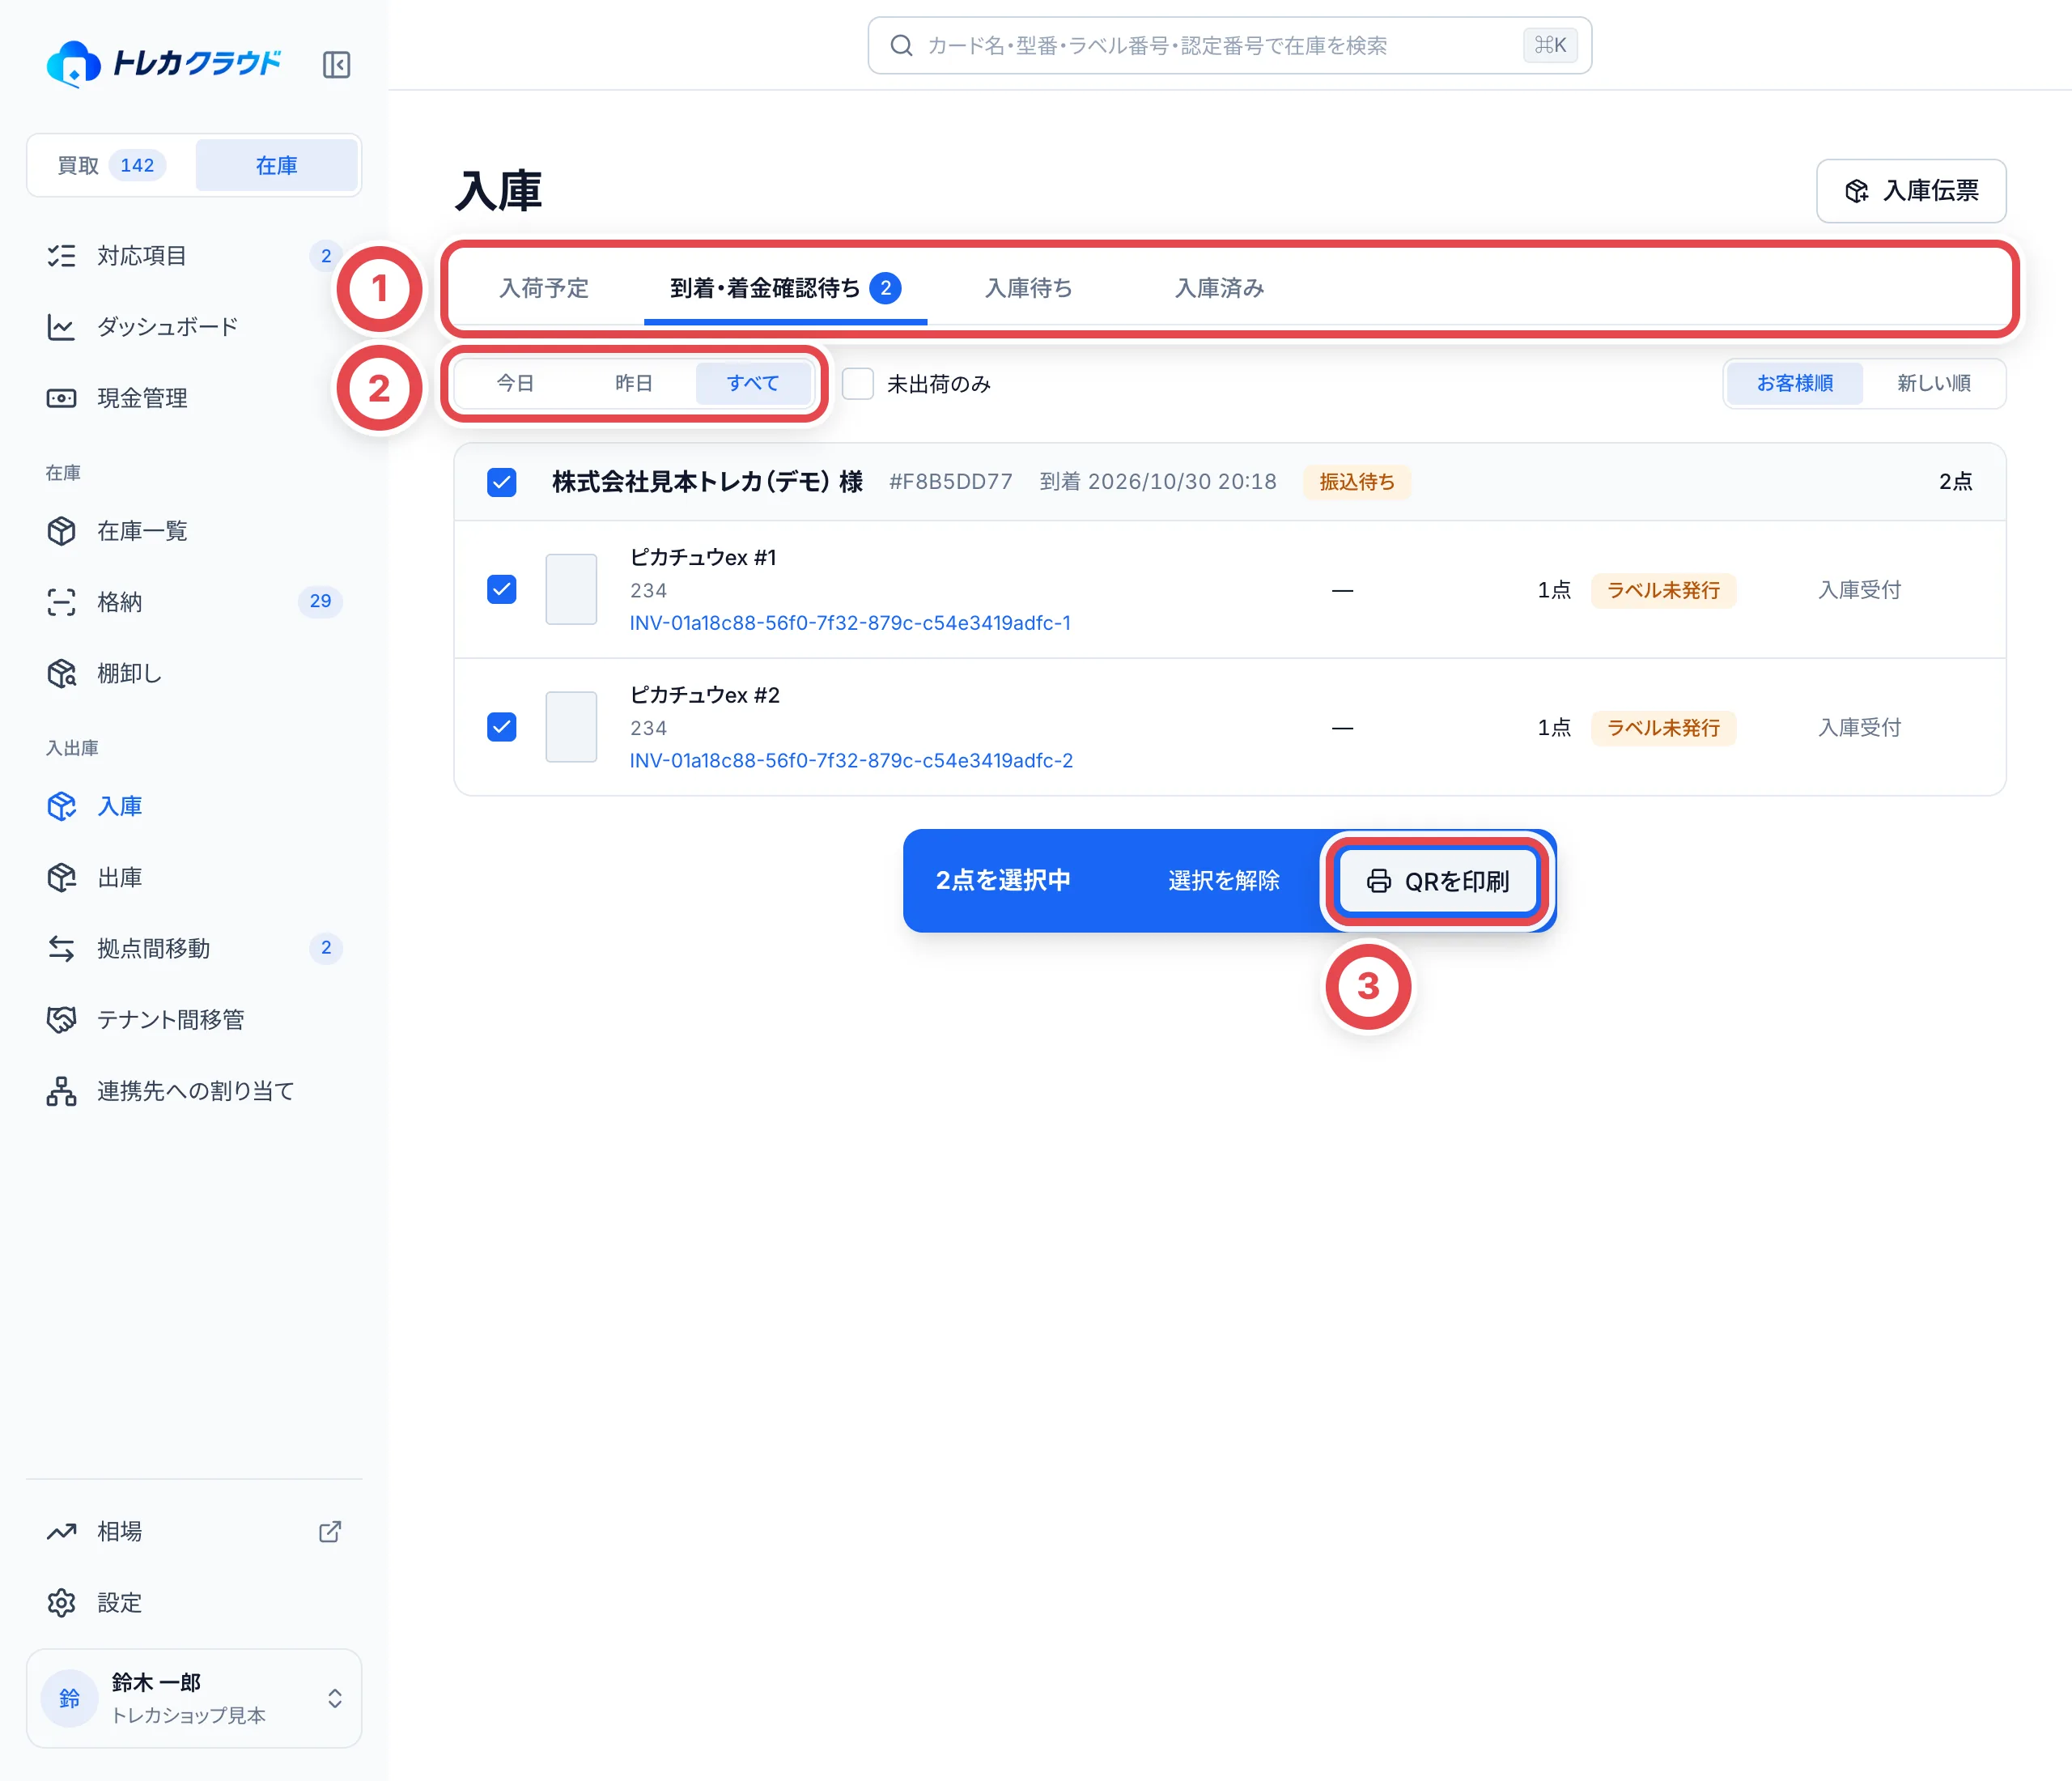 | ①のタブ | 並ぶカード |
| ------------------ | -------------------------------------------------------------------- |
| 入荷予定 | お客様が発送して、届くのを待っている荷物 |
| 到着・着金確認待ち | 届いたけれど買取がまだ成立していないカードや、着金確認がまだのカード |
| 入庫待ち | 着金確認が済み、ラベルの貼り付けや格納がまだのカード |
| 入庫済み | ラベルを貼り、保管棚に格納したカード |
- ②の「到着日」で「今日」「昨日」「すべて」を切り替えます。
- 「未出荷のみ」のチェックでも絞り込めます。右上で「お客様順」と「新しい順」を切り替えます
案件番号を押して取引へ、認定番号・ラベル番号などを押して個体へ進めます。「入庫に戻る」で元の段階・期間・拠点・並び順へ戻ります。特定の案件に絞られているときは「すべての取引を表示」で全体へ戻します。
## QRラベルを印刷する
対象のカードを選び、現物の点数と選択件数を確認して「QRを印刷」を押します。
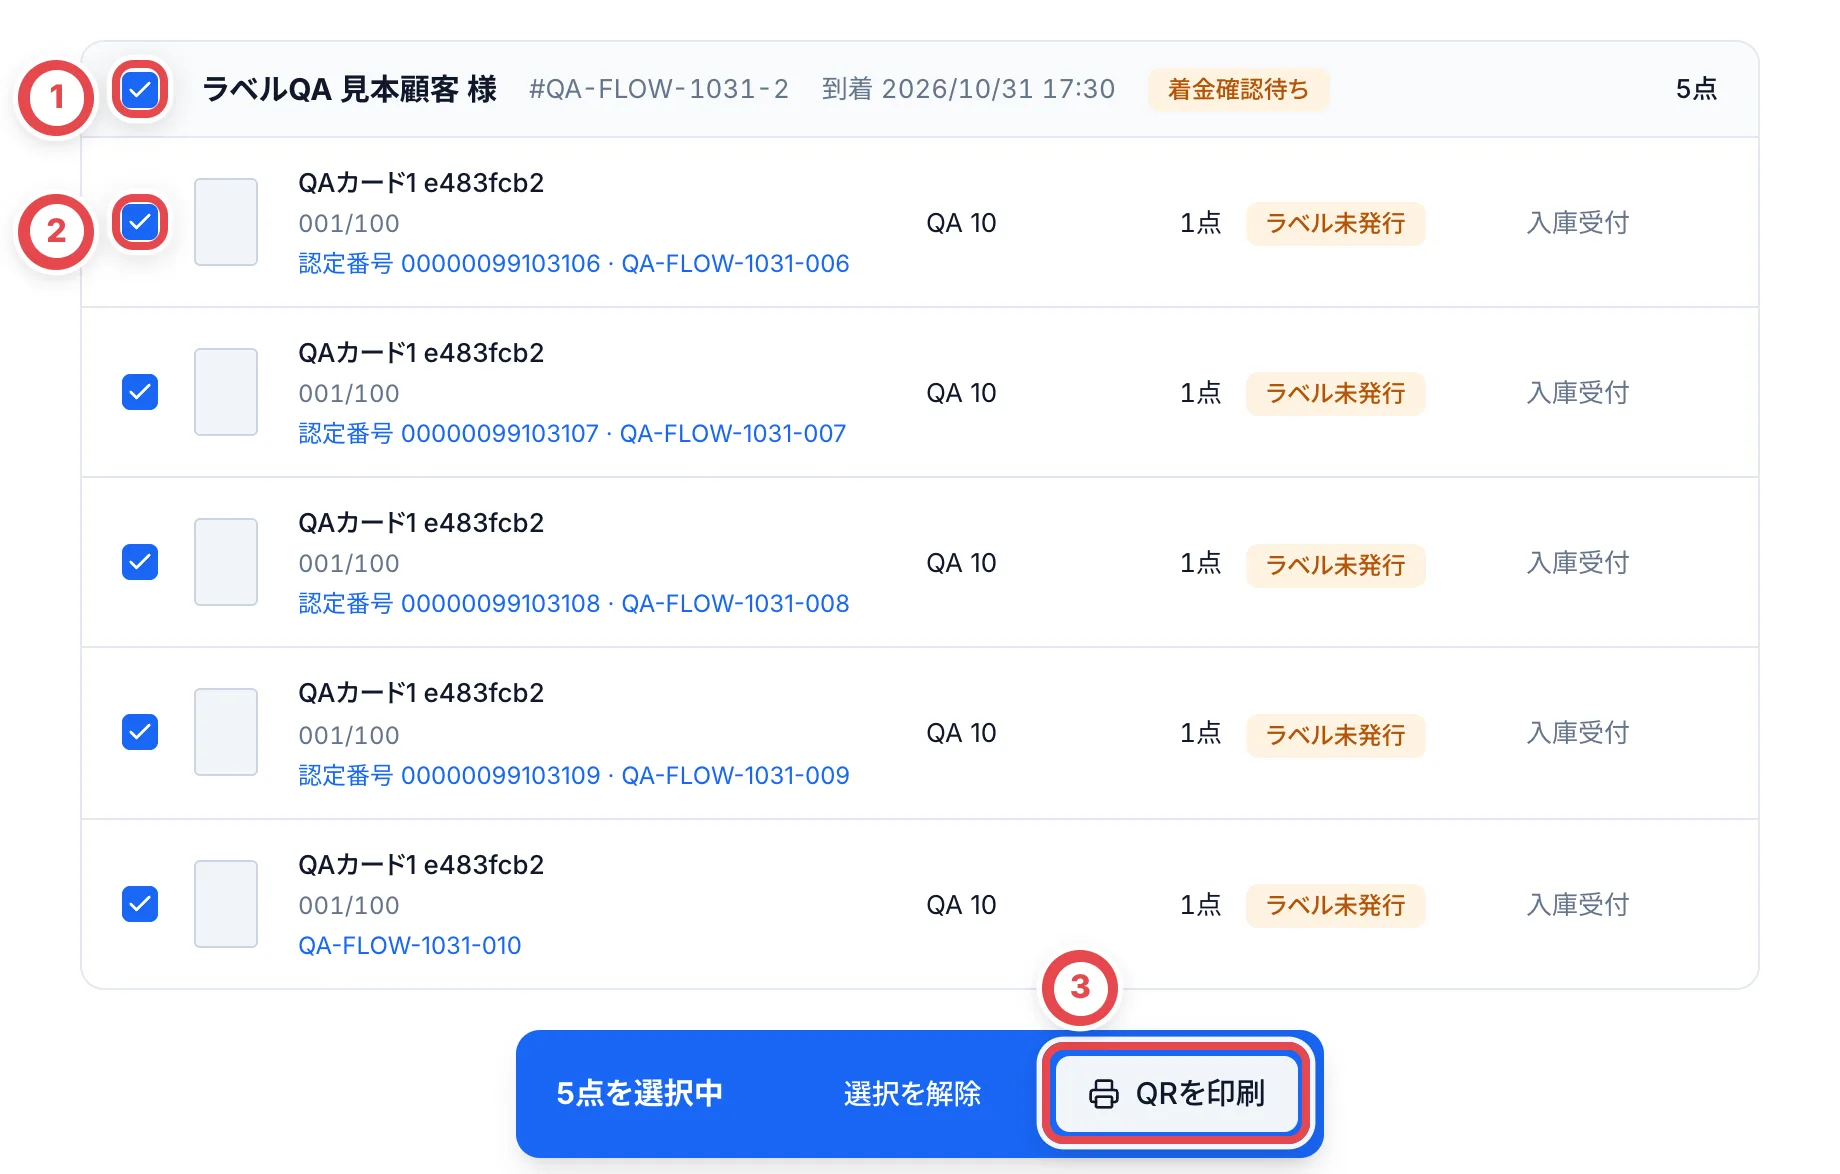 続いて、[ラベルを印刷する](/guides/inventory/putaway#3-ラベルを印刷する)へ進みます。
## 買取以外の入庫を記録する
郵送で届いた品物を買取として記録する場合は、[郵送で届いたカードを在庫に入れる](/guides/purchase/mail-in-to-stock)を参照してください。
### 1. 入庫伝票を作り始める
「入庫」を開き、右上の「入庫伝票」を押すと、これまでの伝票が並びます。①の「入庫を記録」を押します。
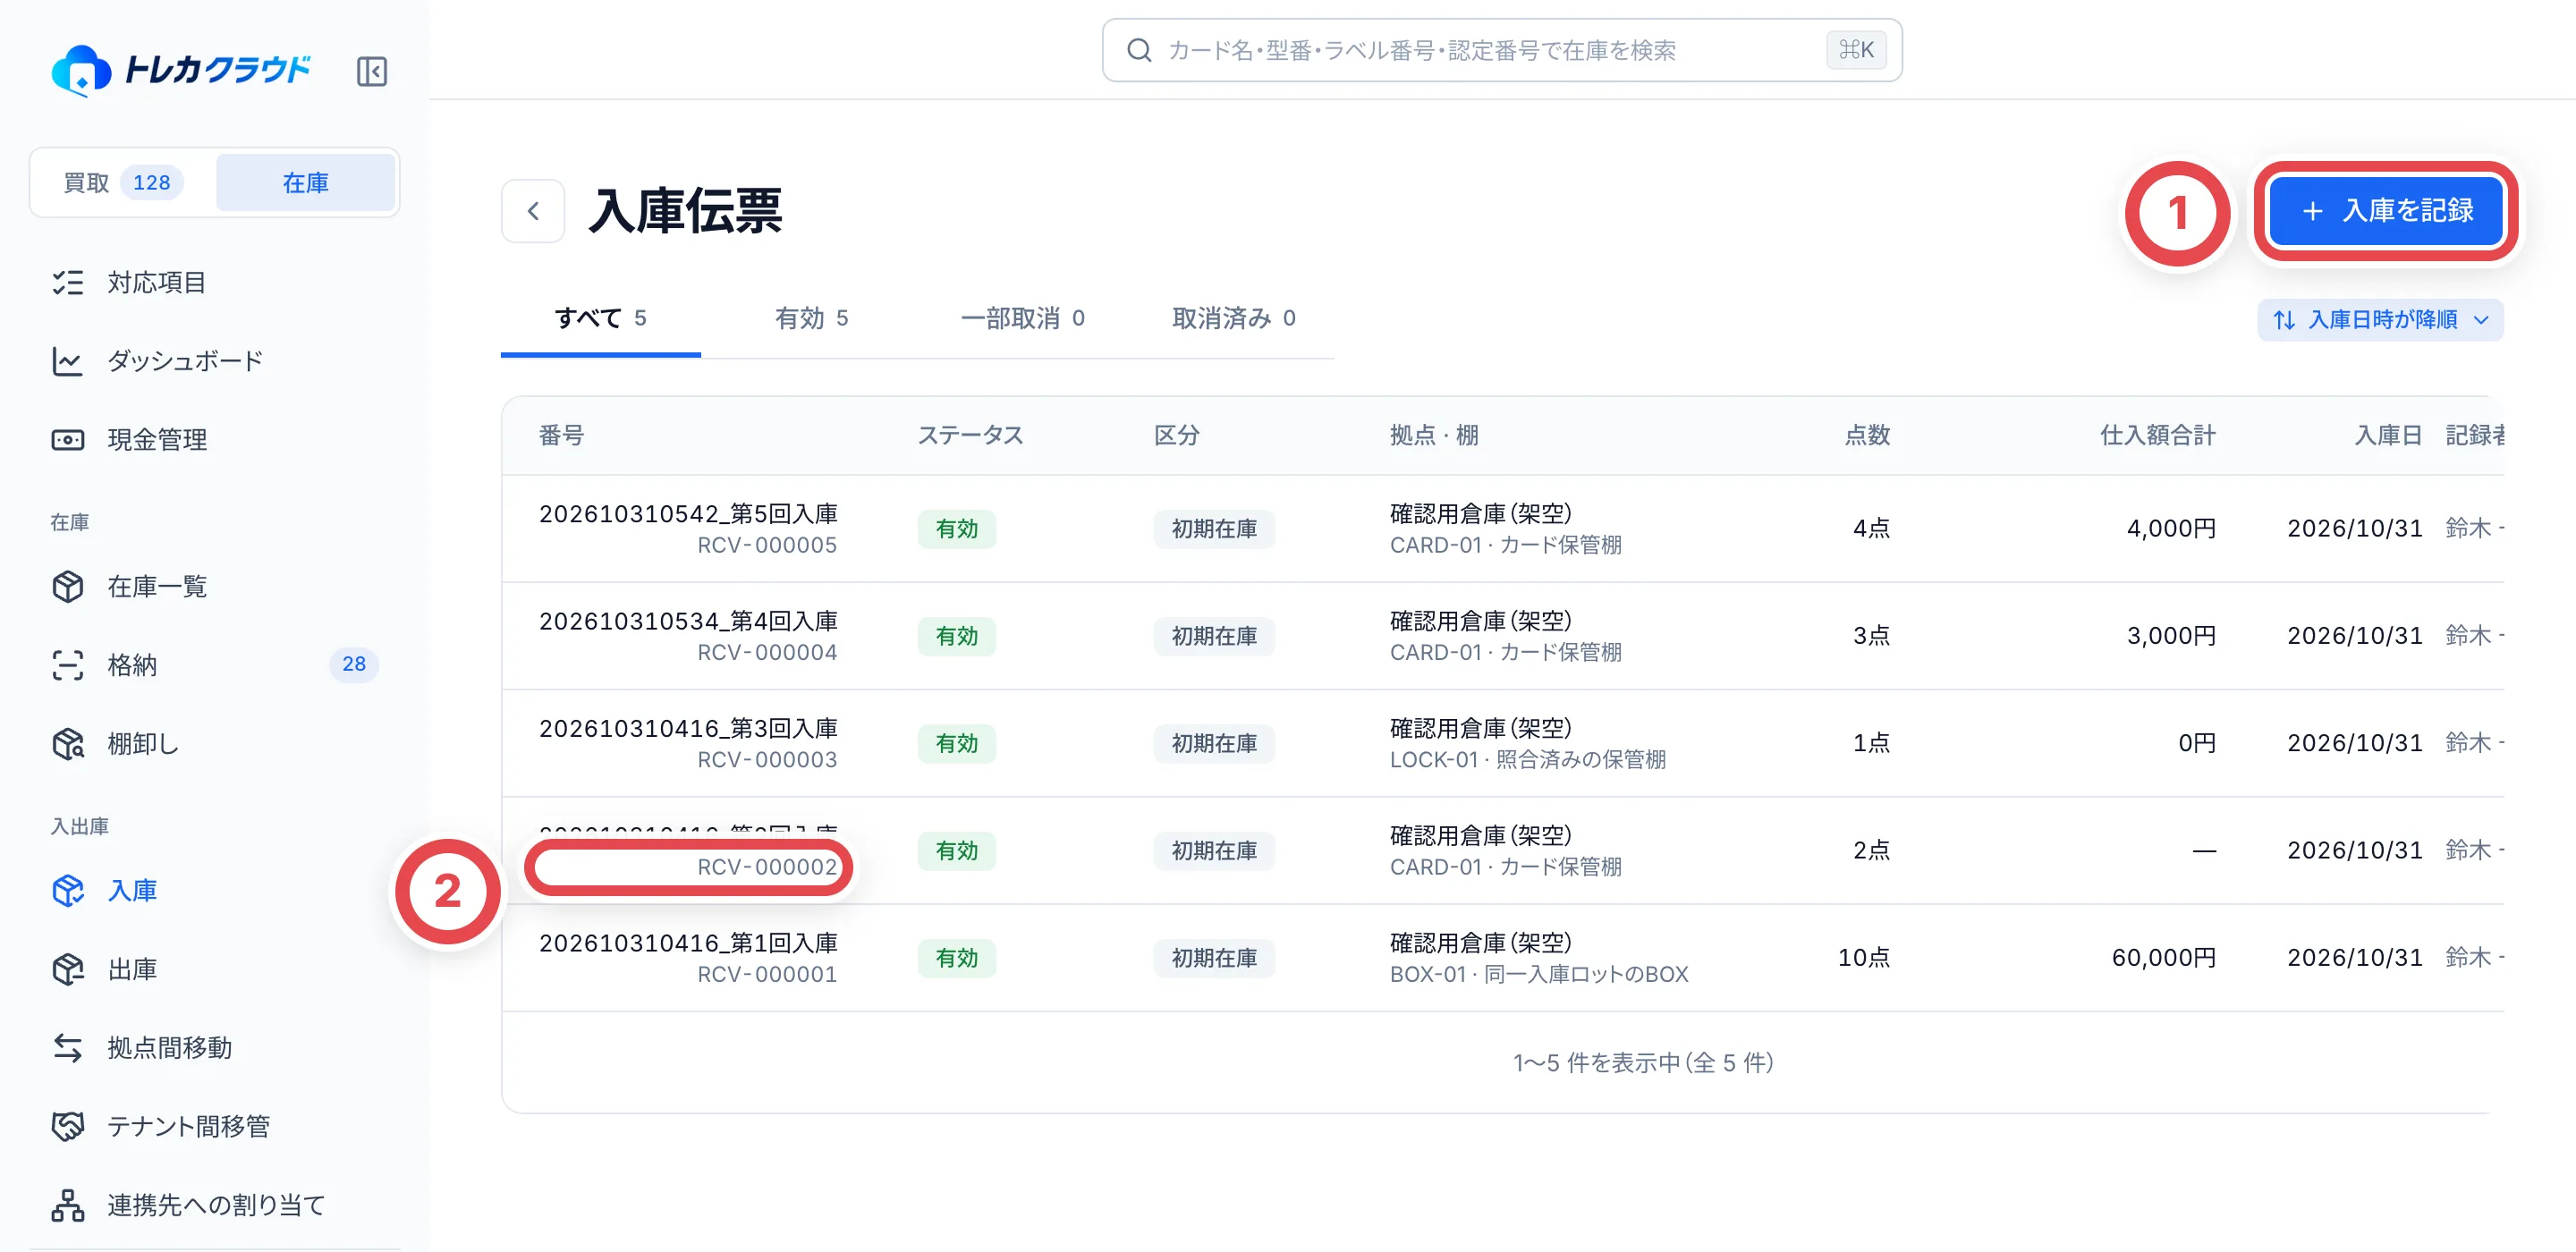 ### 2. 入庫の基本情報を入れる
①の「区分」を、初期在庫・棚卸しで判明・その他から選びます。②の「入庫先の棚」と、「入庫日」「仕入額の通貨」を確かめ、「由来・理由」を入れます。由来・理由は、③の候補からも選べます。
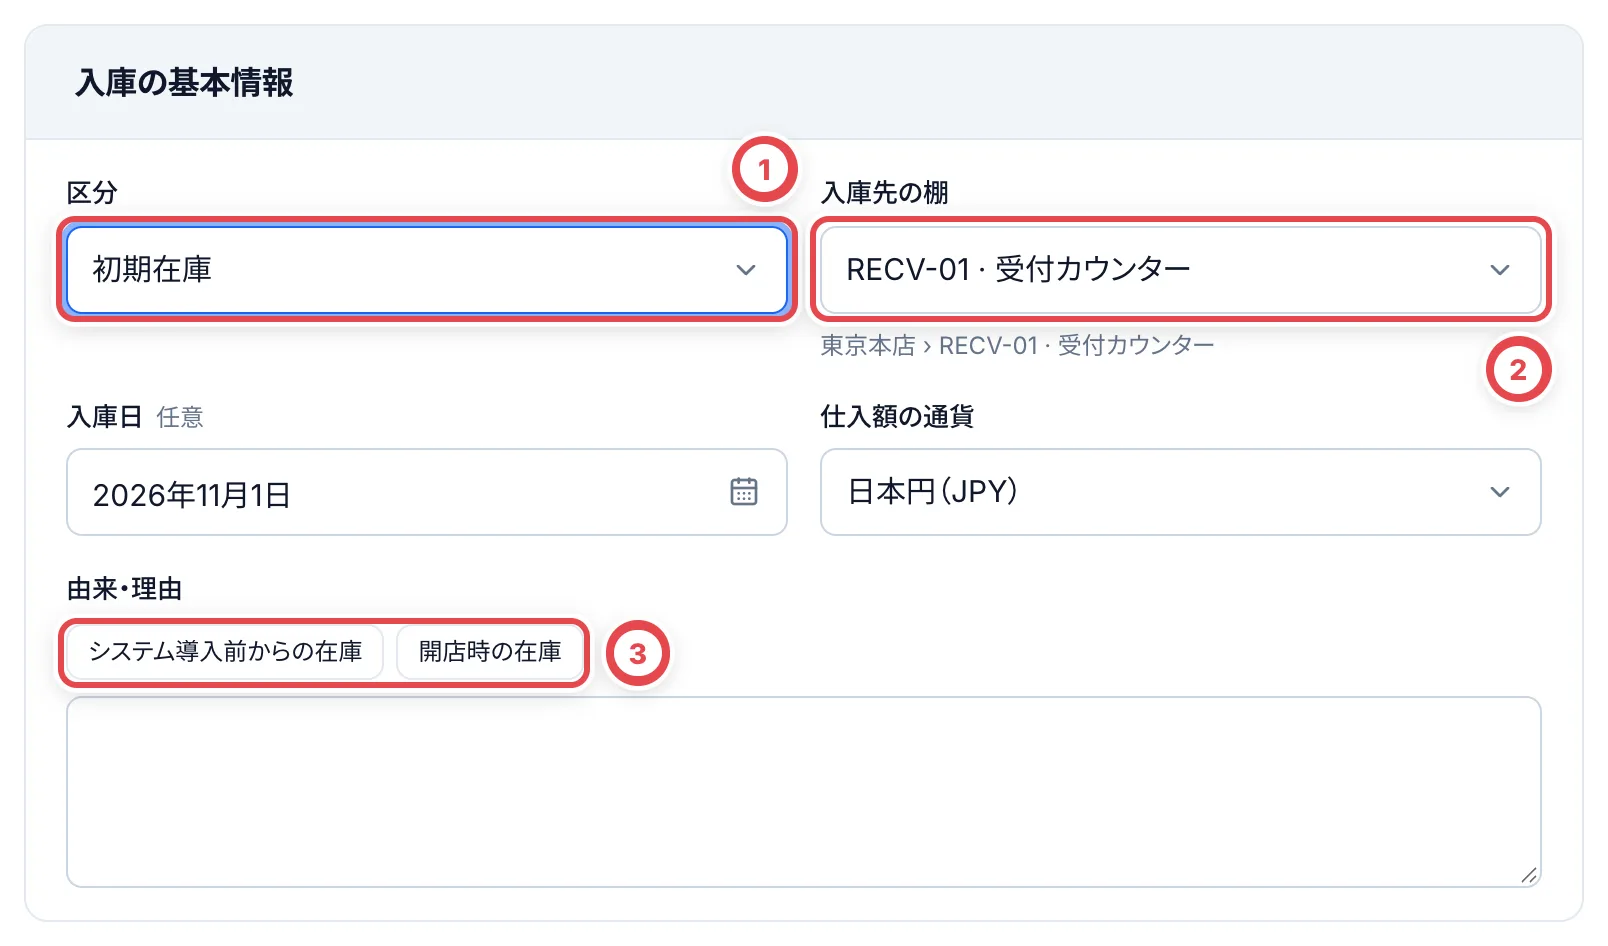 ### 3. 入庫するカードを足す
④の「カードを検索して選ぶ」でカードマスタからカードを選び、⑤の「数量」と「1点あたりの仕入額」を入れます。**原価がまだ分からない場合は仕入額を空欄にし、無料で仕入れたことが確認できている場合だけ0を入れます。** ⑥のグレード・認定番号・状態メモは必要に応じて入力します。カードを増やすときは、⑦の「カードを追加」で行を足します。
選択したカードを直すときは、商品欄の「変更」で選び直します。カードの名前・型番・版を現物と照合してください。認定番号は先頭の0も含めて入力します。
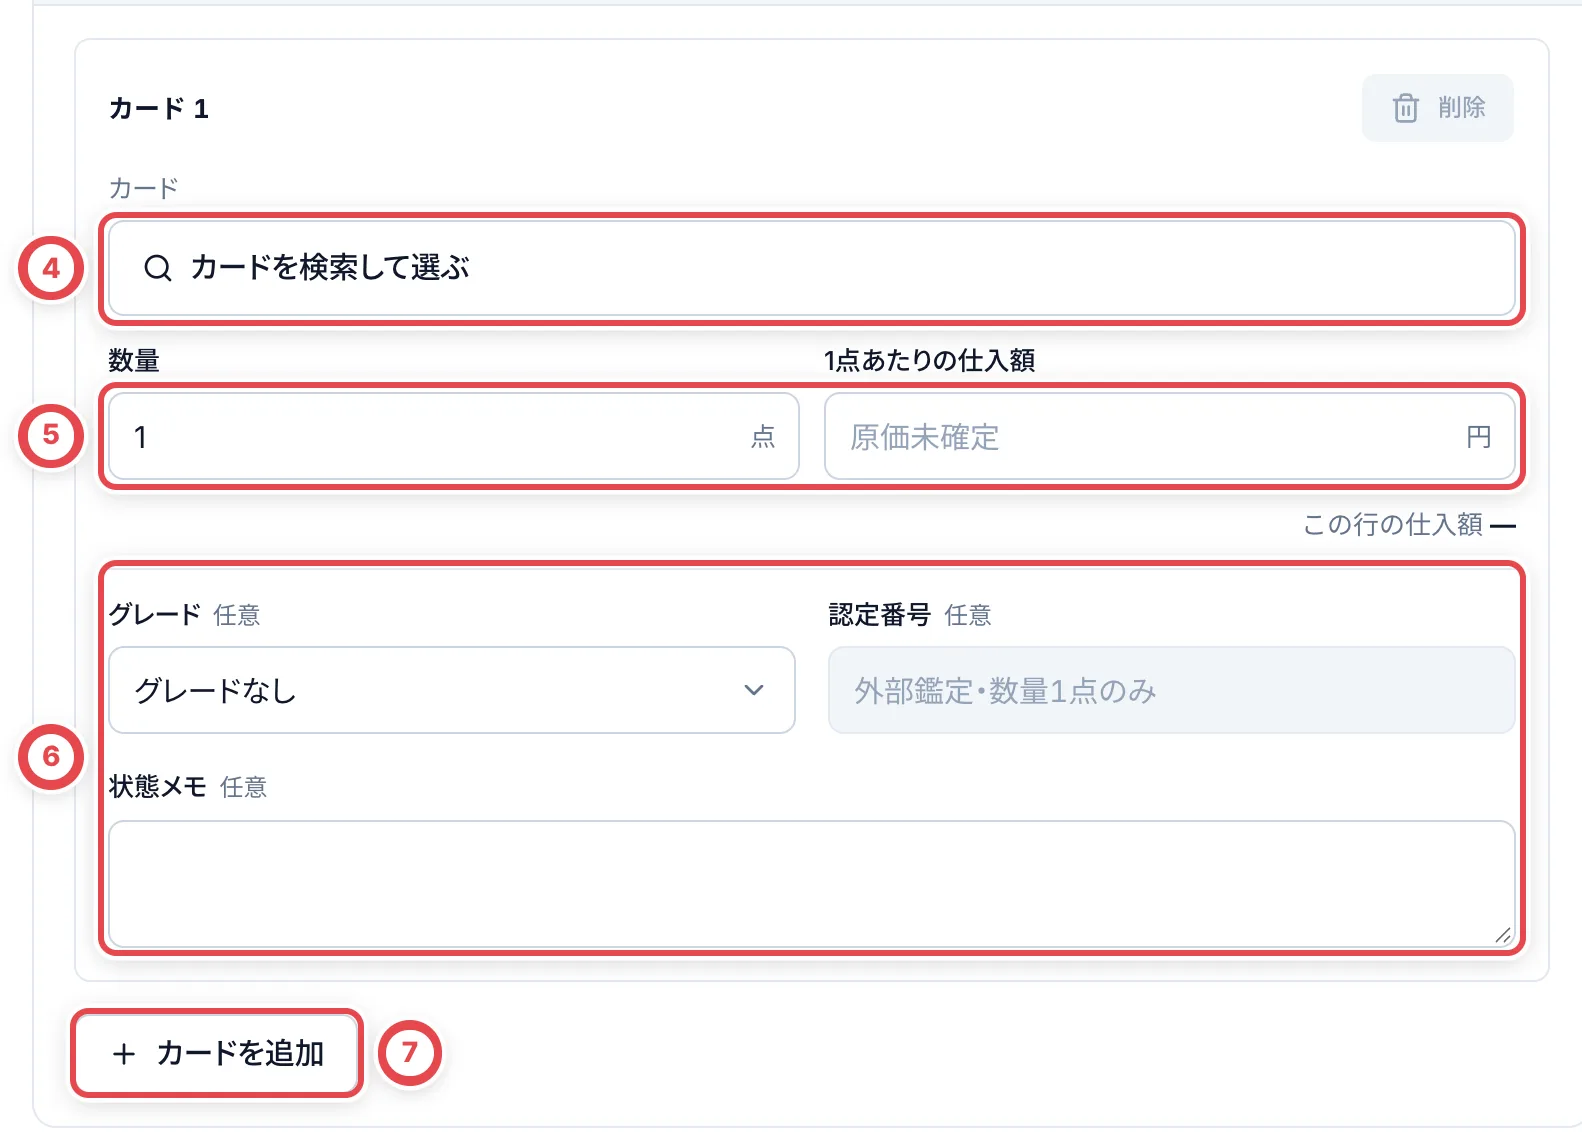 | 決まり | 中身 |
| ------------------------ | --------------------------------------------------------- |
| 1件の伝票に入れられる量 | 100行・合計500点まで(1行は1〜200点) |
| 認定番号 | 数量が1点で、外部鑑定のグレードを選んだ行だけ入れられます |
| カードマスタにないカード | 入庫できません |
### 4. 内容を確かめて確定する
右の「登録前の確認」で合計を確かめ、「内容を確認」を押します。確定の画面で、区分・入庫先・カードの明細・合計を見直し、②の「入庫を確定」を押します。
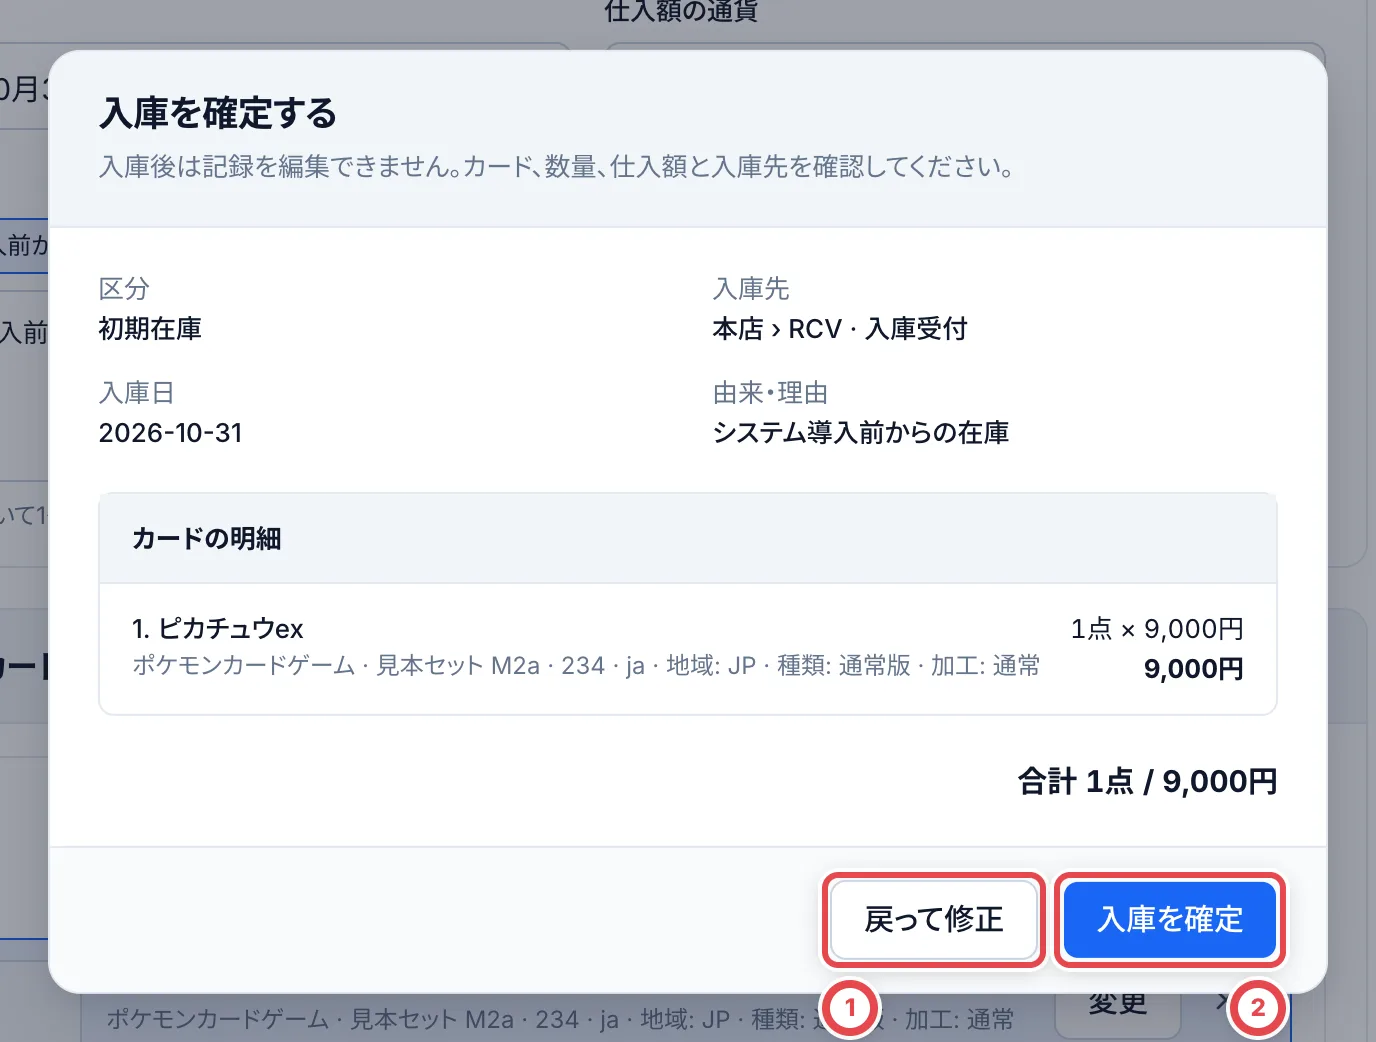 **確定すると、カード1枚ごとに個体ができ、すぐ「在庫中」になります。** 通常の入庫フォームでは編集・削除できません。入庫先の誤りは[「記録を訂正」](/guides/inventory/record-corrections)、誤って登録した個体は「登録の取消」で直し、履歴を残します。
### 5. ラベルを印刷して格納する
入庫伝票の一覧で番号を押すと、その伝票の画面が開きます。①の「在庫ラベルと格納」に、ラベルの発行と格納の進み具合が出ます。
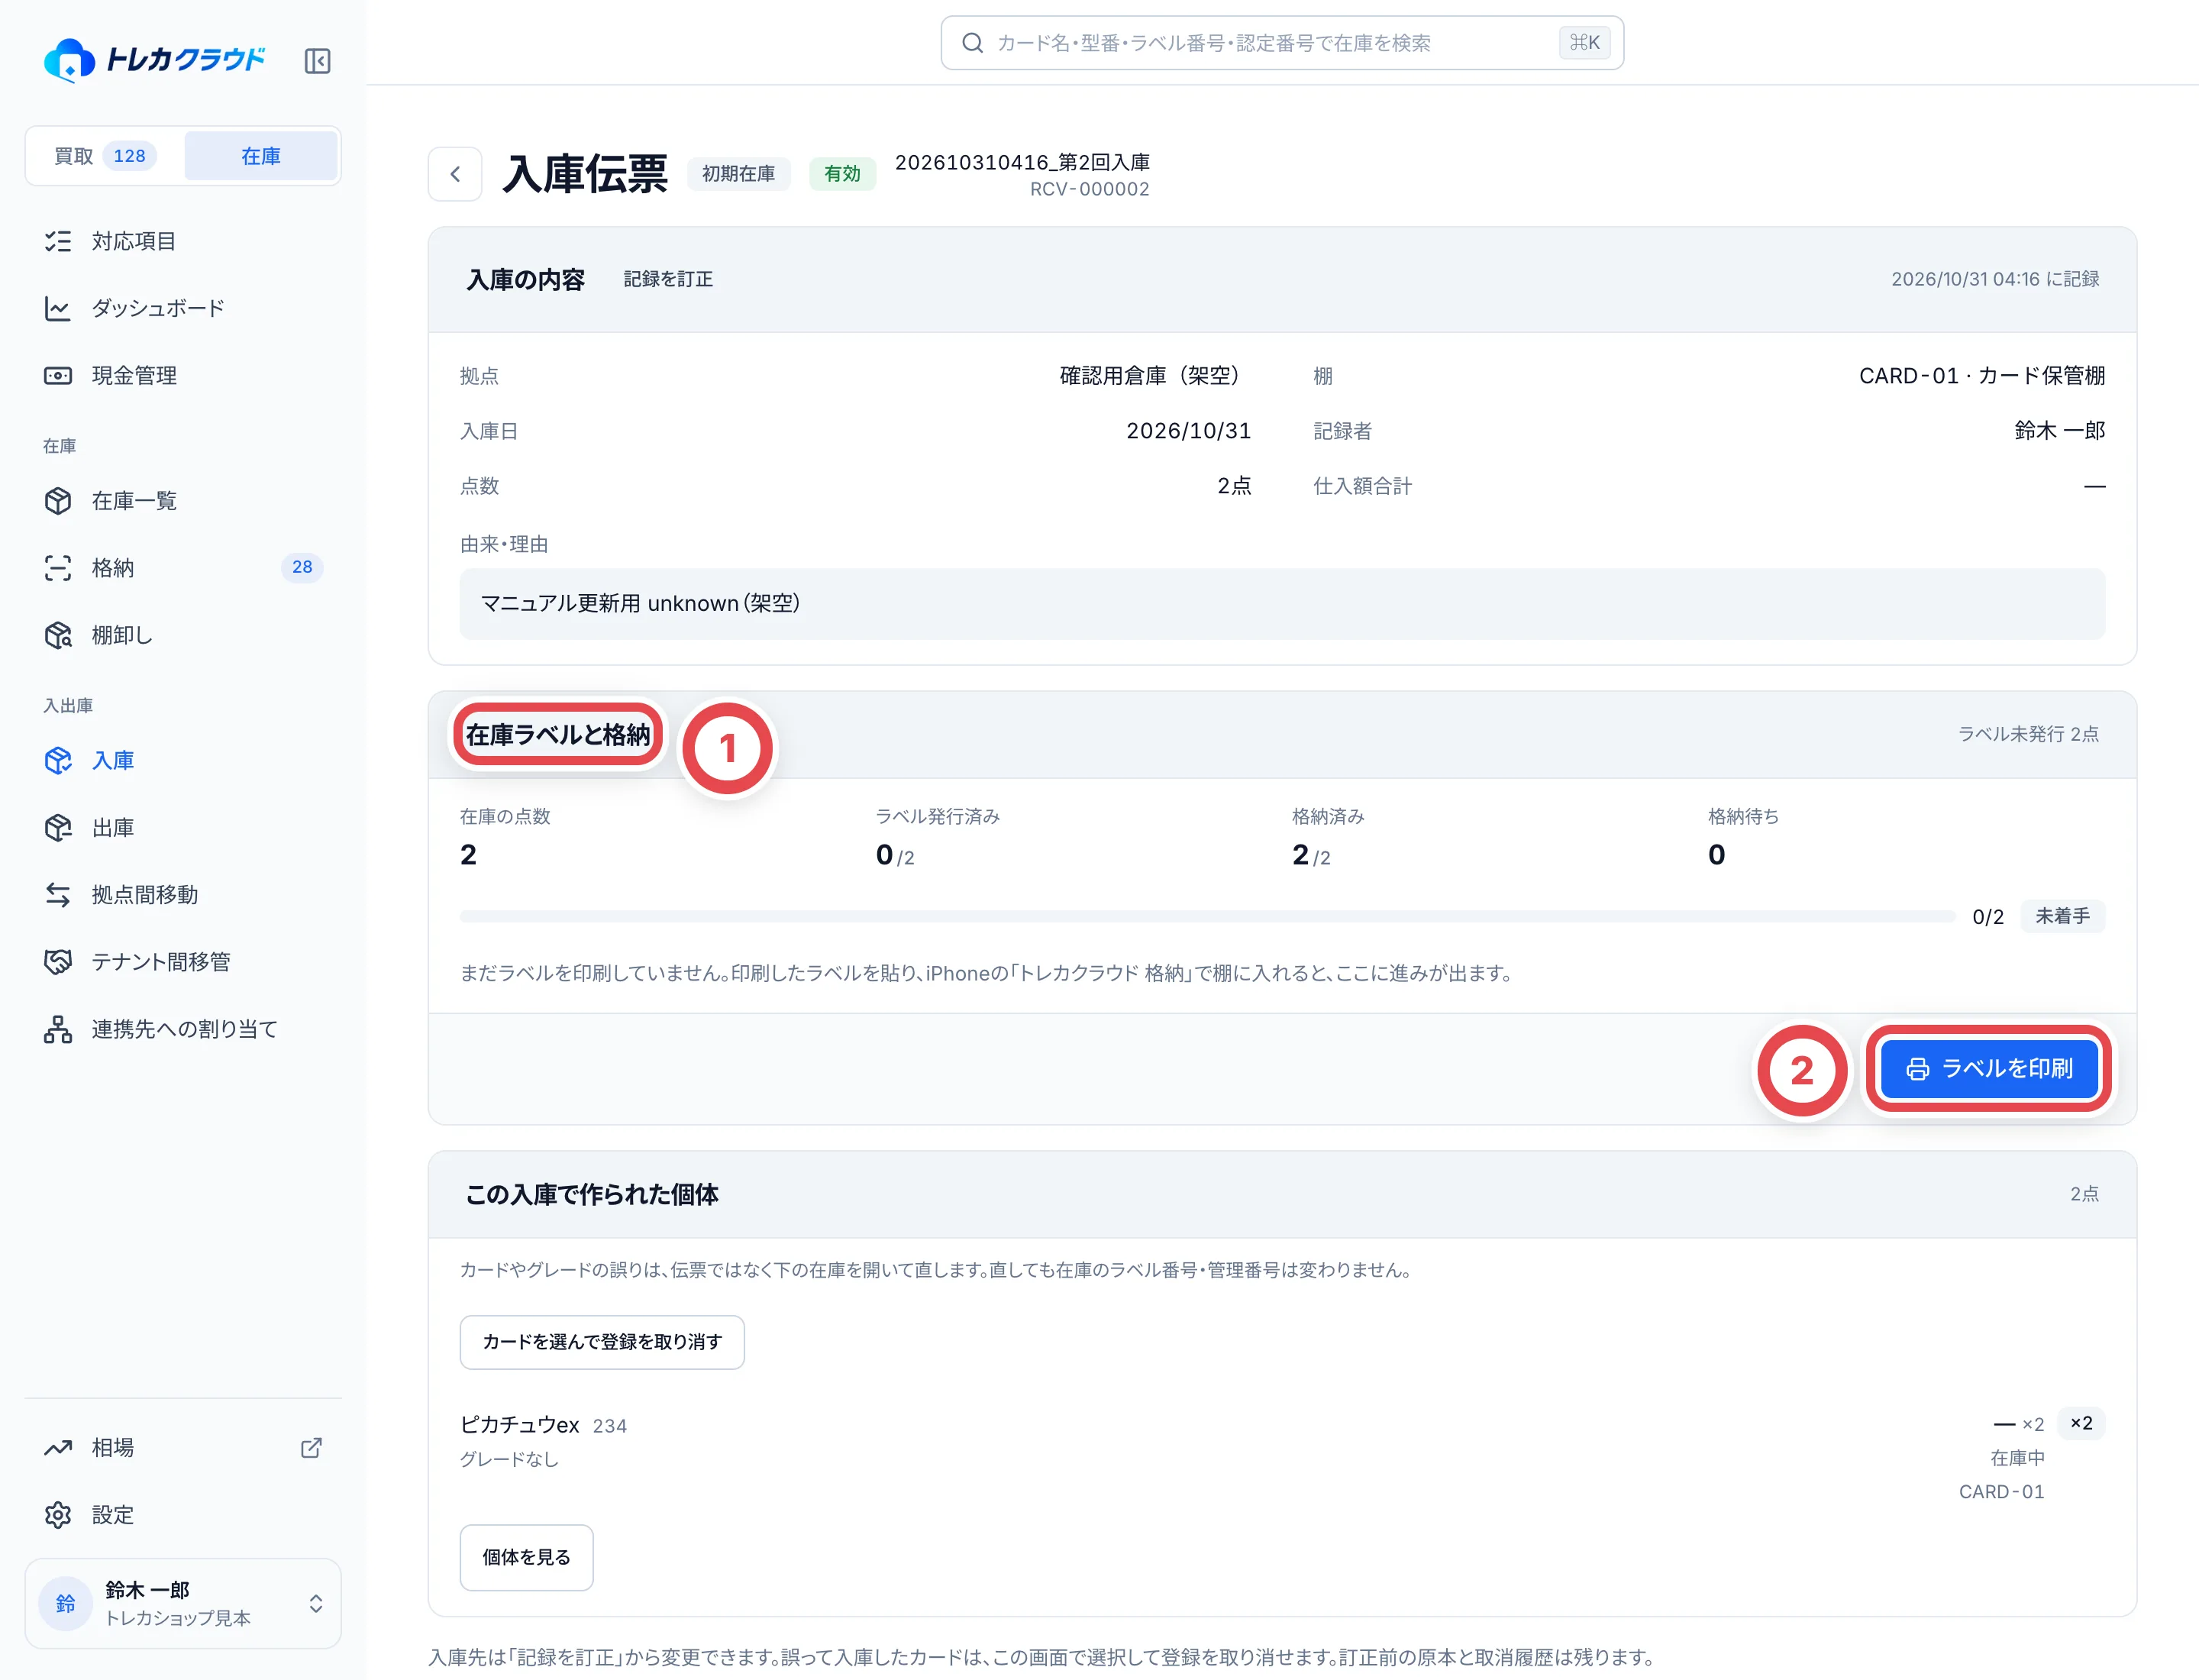 ②の「ラベルを印刷」で在庫ラベルを印刷し、貼ってから、iPhoneの「トレカクラウド 格納」で棚に入れます。下の「この入庫で作られた個体」で、カードごとの状態や棚を確かめられます。
## 一部のカードの登録を取り消す
1. 伝票詳細の「この入庫で作られた個体」で「カードを選んで登録を取り消す」を押します。初めは何も選ばれていません。
2. 取り消したいカードにチェックを付けます。同じカードのまとまりを選び、開いて1枚ずつ調整できます。確保中・販売済みなどの個体は選べません。
3. 「選択したN点の登録を取り消す」を押し、カード・管理番号・認定番号を確認して取消理由を入力します。
4. 「N点の登録を取り消す」で確定すると、同じ伝票に取消状況と履歴が反映されます。選ばなかったカードは残ります。
取消後は元の在庫に戻せません。入れ直す場合は新しい個体と在庫ラベルになります。状態が途中で変わったときは全点を変更せず、理由を表示します。「在庫を再確認」で最新状態を取得して選び直してください。通信の結果が不明な場合は、内容を変えず「結果を再確認」で同じ処理の結果を確認します。
## 伝票のステータスで探す
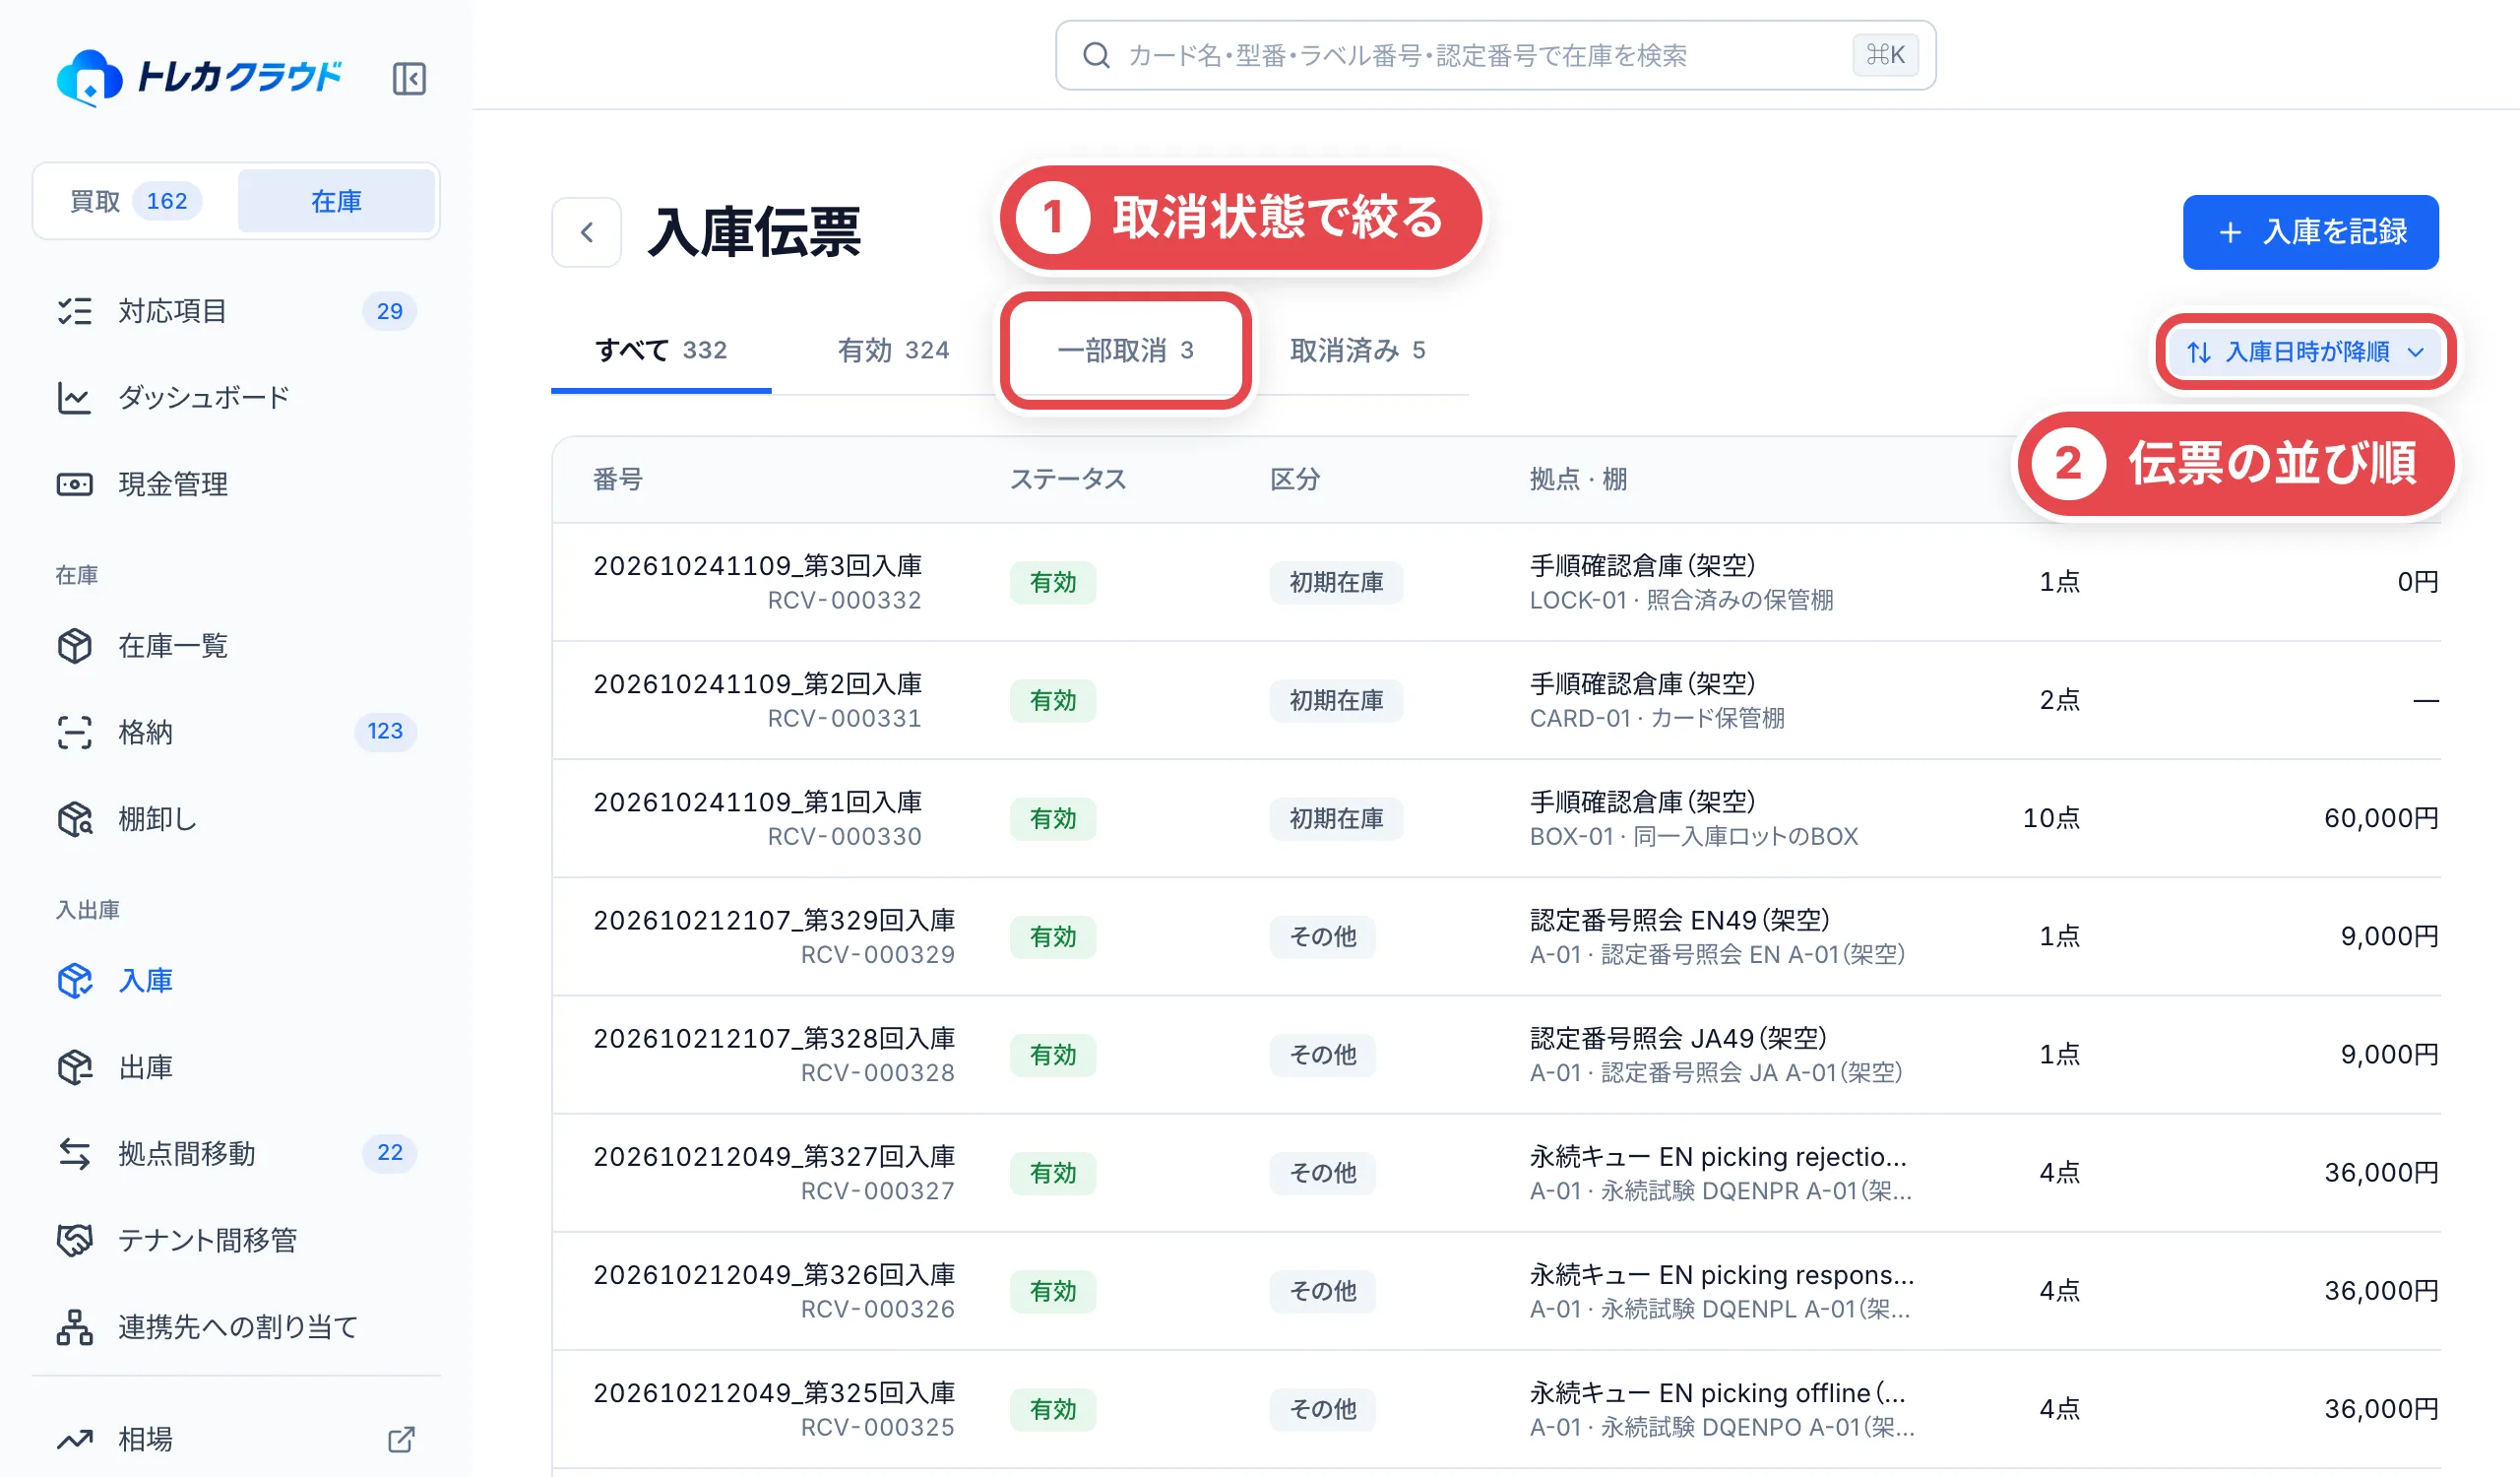 | ステータス | 意味 |
| ---------- | -------------------------------------------------------------------------------- |
| 有効 | 登録を取り消した個体がありません。販売や通常の持ち出しで現在庫がなくても有効です |
| 一部取消 | 入庫した個体の一部を「登録の取消」で在庫から外しています |
| 取消済み | 入庫した個体をすべて「登録の取消」で在庫から外しています |
①で取消状況を絞り込み、②で入庫日時・伝票番号・ステータスの並び順を選びます。
詳細の「登録の取消履歴」で、関連する出庫伝票・取消日時・担当者・理由を確認できます。取消済みの伝票ではラベルを印刷できません。一部取消では残っている印刷対象だけを数えます。販売などで対象がない場合は「印刷対象の在庫がありません」と表示されます。
## 困ったとき
原価未確定の入庫でも、ラベルの印刷と格納は進められます。①の仕入額合計が「—」の場合は原価未確定です。あとで原価が分かったら、個体の詳細から原価を確定します。元の入庫伝票を書き換える操作ではありません。
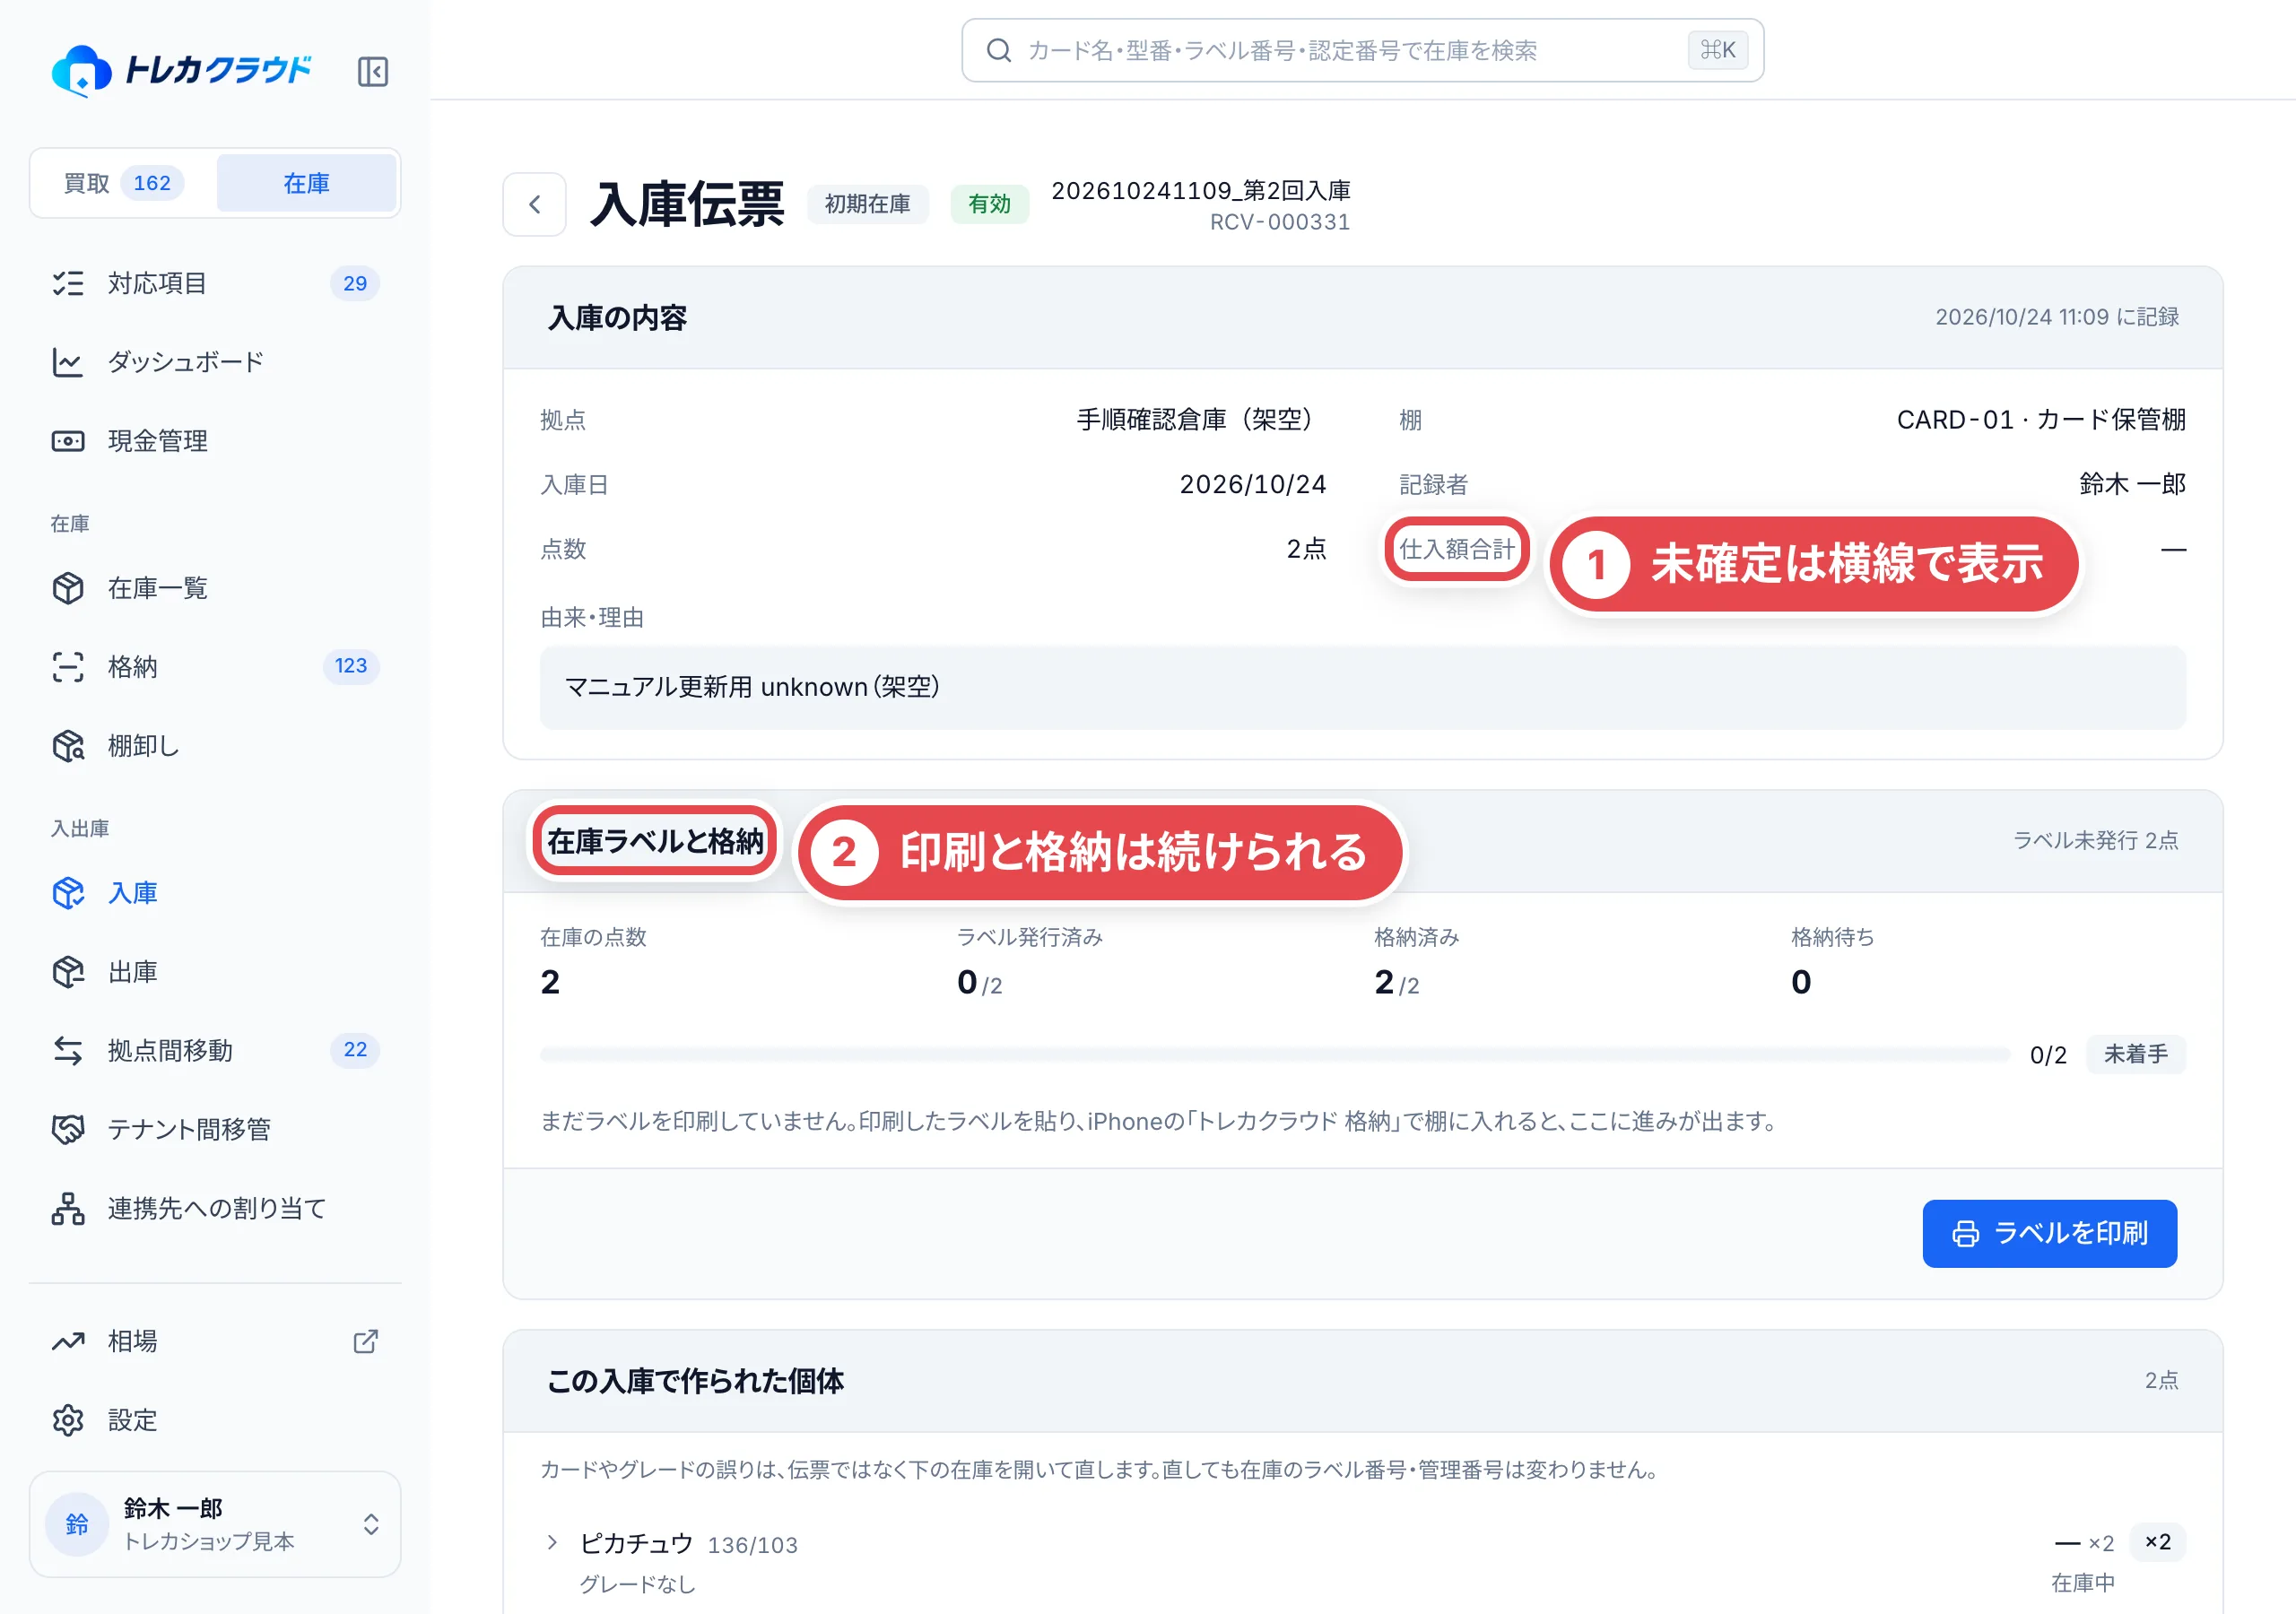 | こんなとき | 確かめること・やること |
| ---------------------------------------- | ---------------------------------------------------------------------------------------------------- |
| 入庫の画面にカードが出てこない | 到着日・拠点・段階・未出荷のみ・案件の絞り込みを確かめます。期間は「すべて」に戻します |
| 買い取ったカードが「入庫待ち」に来ない | 「到着・着金確認待ち」で確認し、振込の着金確認、または店頭現金の手渡しを記録します |
| 着金確認待ちのカードを出庫できない | 支払いの確認まで出庫・拠点間移動はできません。印刷・格納・同じ拠点内の棚移動はできます |
| サイドバーに「入庫伝票」がない | 「入庫」を開き、右上の「入庫伝票」を押します |
| 入庫伝票でカードが見つからない | 名前や型番で探し直し、未登録なら[商品を登録](/guides/inventory/product-and-market-corrections)します |
| 「入庫を確定」したあとに間違いに気付いた | この画面で対象のカードを選び、理由を入力して登録を取り消します |
| 認定番号が入れられない | 数量が1点で、外部鑑定のグレードを選んだ行だけ入れられます |
| 在庫登録後の買取金額・数量が違う | [元の買取案件から訂正](/guides/purchase/amount-and-quantity-corrections)します |
---
# 入庫・移動・過去の記録を訂正する
Source: https://docs.toreca-cloud.com/guides/inventory/record-corrections
記録の誤りは、対象の「記録を訂正」から直します。通常の画面には訂正後の値が表示され、元の値・担当者・日時・訂正理由は改訂履歴に残ります。
| 直したい内容 | 開く画面・対象 | 編集できる項目 |
| ---------------------------- | --------------------------------------- | ------------------------------------------------------------------------ |
| 入庫伝票の入庫先 | 「在庫」→「入庫」→「入庫伝票」→対象伝票 | 入庫先 |
| 個体の移動記録 | 個体の移動履歴の対象記録 | 移動先(対象の移動記録のみ)、理由・メモ、実施日時(対象の記録のみ) |
| 買取の過去の説明 | 元の買取案件の履歴 | 履歴の内容、社内メモ、実施日時 |
| 外部仕入の説明 | 個体の仕入記録 | 仕入メモ、仕入日時 |
| 買取金額・数量・関連する原価 | 元の買取案件 | [買取金額・数量の訂正](/guides/purchase/amount-and-quantity-corrections) |
在庫の記録には「入庫・移動履歴の訂正」、買取の履歴や仕入記録には「買取履歴の訂正」など、対象を参照・編集する権限が必要です。操作が表示されない場合は、対象と権限を管理者に確認してください。
## 1. 訂正する項目と理由を選ぶ
入庫伝票の例では、対象の伝票を開き「記録を訂正」を押します。①の「入庫先」を正しい棚へ変更し、②の「訂正理由」を選びます。必要なら「補足(任意)」を入力します。「その他」の場合は理由の詳細が必須です。③の「変更内容を確認」を押します。
:::note
入庫伝票では入庫先を訂正します。この画面には、元の入庫理由・入庫日時を編集する入力欄はありません。訂正理由は専用の選択欄に記録します。
:::
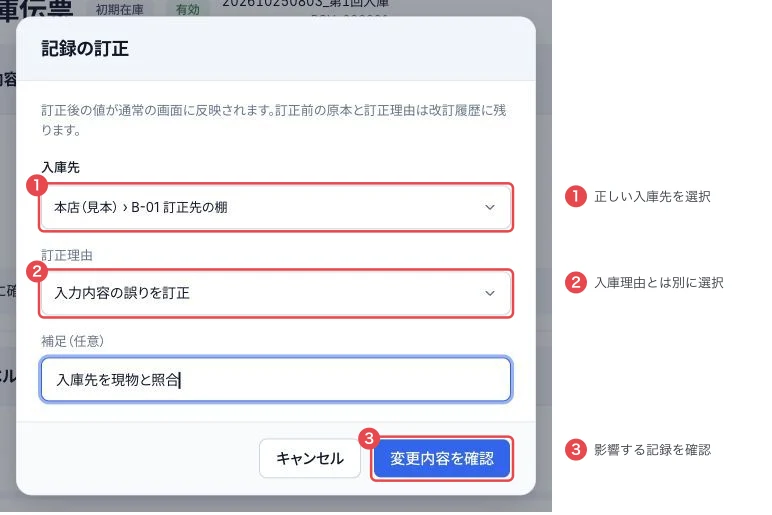 ## 2. 関連する履歴・在庫を照合して保存する
変更前後と、①の連動する件数・「連動する変更の詳細」を確認します。見本では2個体それぞれの入庫時の移動履歴と現在の所在、合計4件が対象です。実際の件数は記録により変わります。
:::warning
現在もその入庫先にある在庫は所在が連動する場合があります。その後に移動・出庫した在庫を、過去の入庫先へ強制的に戻す操作ではありません。現物を移す作業なら、通常の棚移動・拠点間移動を使ってください。
:::
対象と棚を照合して②の「訂正を確定」を押します。伝票と個体を開き直し、訂正後の所在と履歴を確認します。
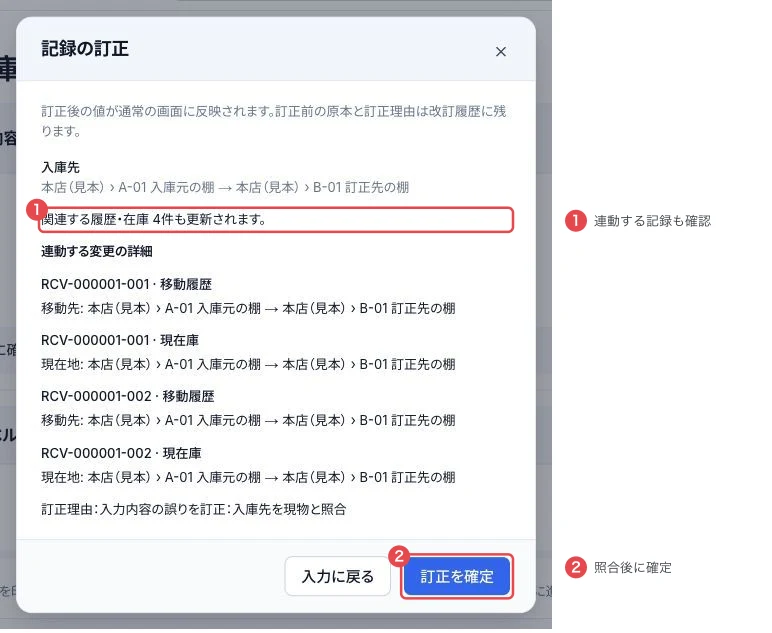 ## 3. 改訂履歴を確認し、必要なら以前の値を読み込む
同じ「記録を訂正」を開くと、①の「改訂履歴」に担当者・日時・理由・変更前後が表示されます。以前の内容に戻したい場合は、②の「この改訂前の値を入力」で入力欄に読み込みます。
読み込んだだけでは保存されません。「過去の値に戻す」などの訂正理由を選び、「変更内容を確認」で現在の関連記録を照合してから「訂正を確定」を押します。復元も新しい改訂として記録され、以前の改訂は残ります。
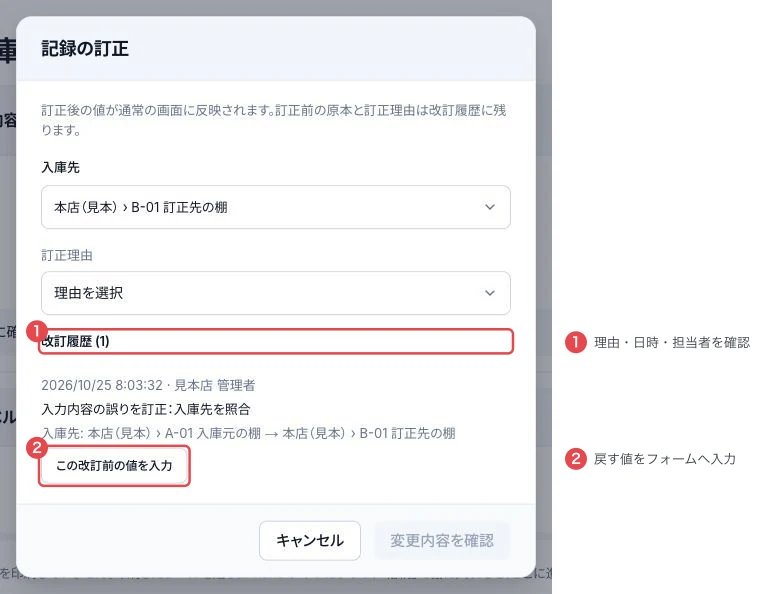 ## 移動・買取履歴・外部仕入記録を直すとき
対象の記録にある「記録を訂正」を開き、表示される項目だけを変更します。すべての記録に同じ項目が出るわけではありません。たとえば、入庫伝票に由来する入庫の移動履歴では実施日時の編集はできません。
入庫理由や仕入メモと、今回の訂正理由は別の情報です。変更する項目には正しい業務上の内容を入力し、訂正理由は専用の選択欄に記録します。確認画面で変更前後と連動対象を読んでから確定し、再表示で結果を確認してください。
## 困ったとき
| 起きていること | 確認すること |
| ---------------------------------- | ---------------------------------------------------------------------------------------------- |
| 確認ボタンが押せない | 元の値から変更があるか、訂正理由と必須項目を入力したか確認します |
| 選びたい棚がない | 利用中の棚か、対象の記録で選べる拠点・棚か確認します |
| 以前の値を入力したのに元に戻らない | 読み込みだけでは保存されません。理由の選択、変更内容の確認、確定が必要です |
| 途中で他の更新があった | 訂正画面を閉じ、最新の記録を開き直してやり直します |
| 保存結果が不明 | 対象の記録と改訂履歴を先に確認します。同じ内容を重ねて保存しないでください |
| 金額や数量が編集できない | 元の案件から[買取金額・数量の訂正](/guides/purchase/amount-and-quantity-corrections)を使います |
---
# 販売した在庫の返品を受ける
Source: https://docs.toreca-cloud.com/guides/inventory/sales-returns
販売・出庫した在庫を返品として受け入れます。買い取らなかった品物の返送は[買取の返品対応](/guides/purchase/returns)へ進みます。
在庫を編集する権限と、返品可能な出庫済みの販売・オリパ伝票が必要です。連携先が管理する配送やテナント間移管は、通常の販売返品と同じ操作では戻せません。
## 1. 販売伝票から返品対象を選ぶ
「出庫」で元の販売伝票を開き、返品の「返品を受ける」を押します。①で戻ってきたカードを照合し、②で数量指定か個体指定を選びます。同じカードが複数ある場合でも、返品された現物と違う個体を選ばないようにします。
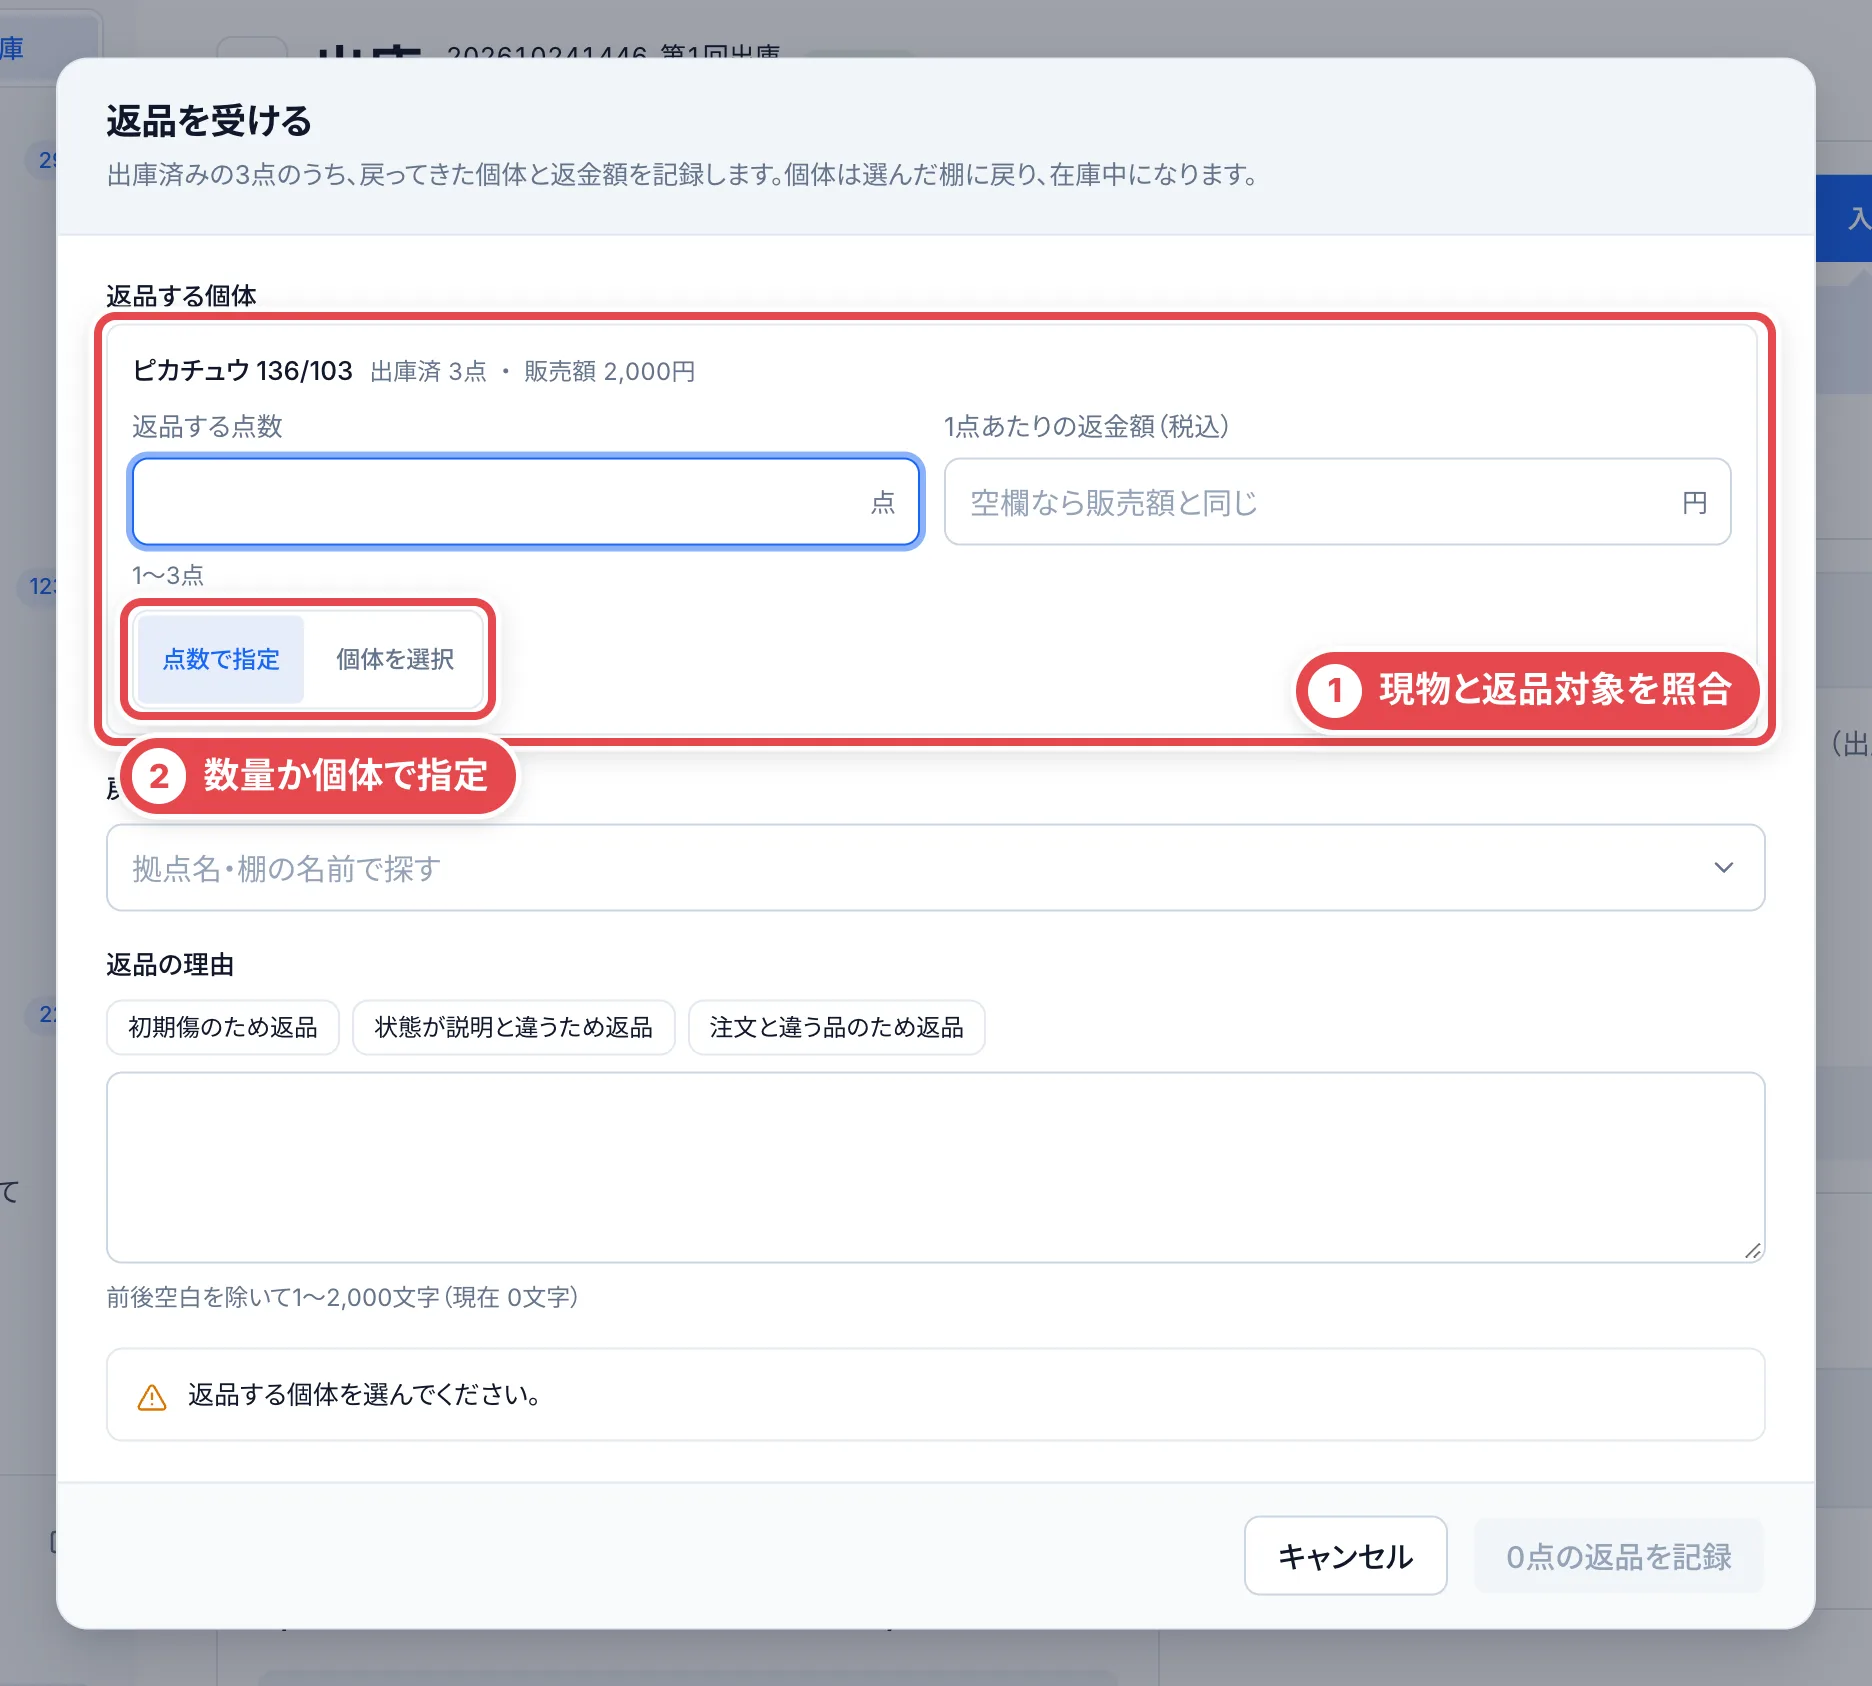 ## 2. ラベルがない個体は管理情報で照合する
①で個体を1点ずつ選びます。ラベル未発行のものは、②の「管理情報」から別タブで個体を開き、資産番号・認定番号・入庫元・状態などを照合します。同じ「ラベル未発行」の表示だけで個体を判断しないでください。元の返品画面へ戻って、対象だけを選びます。
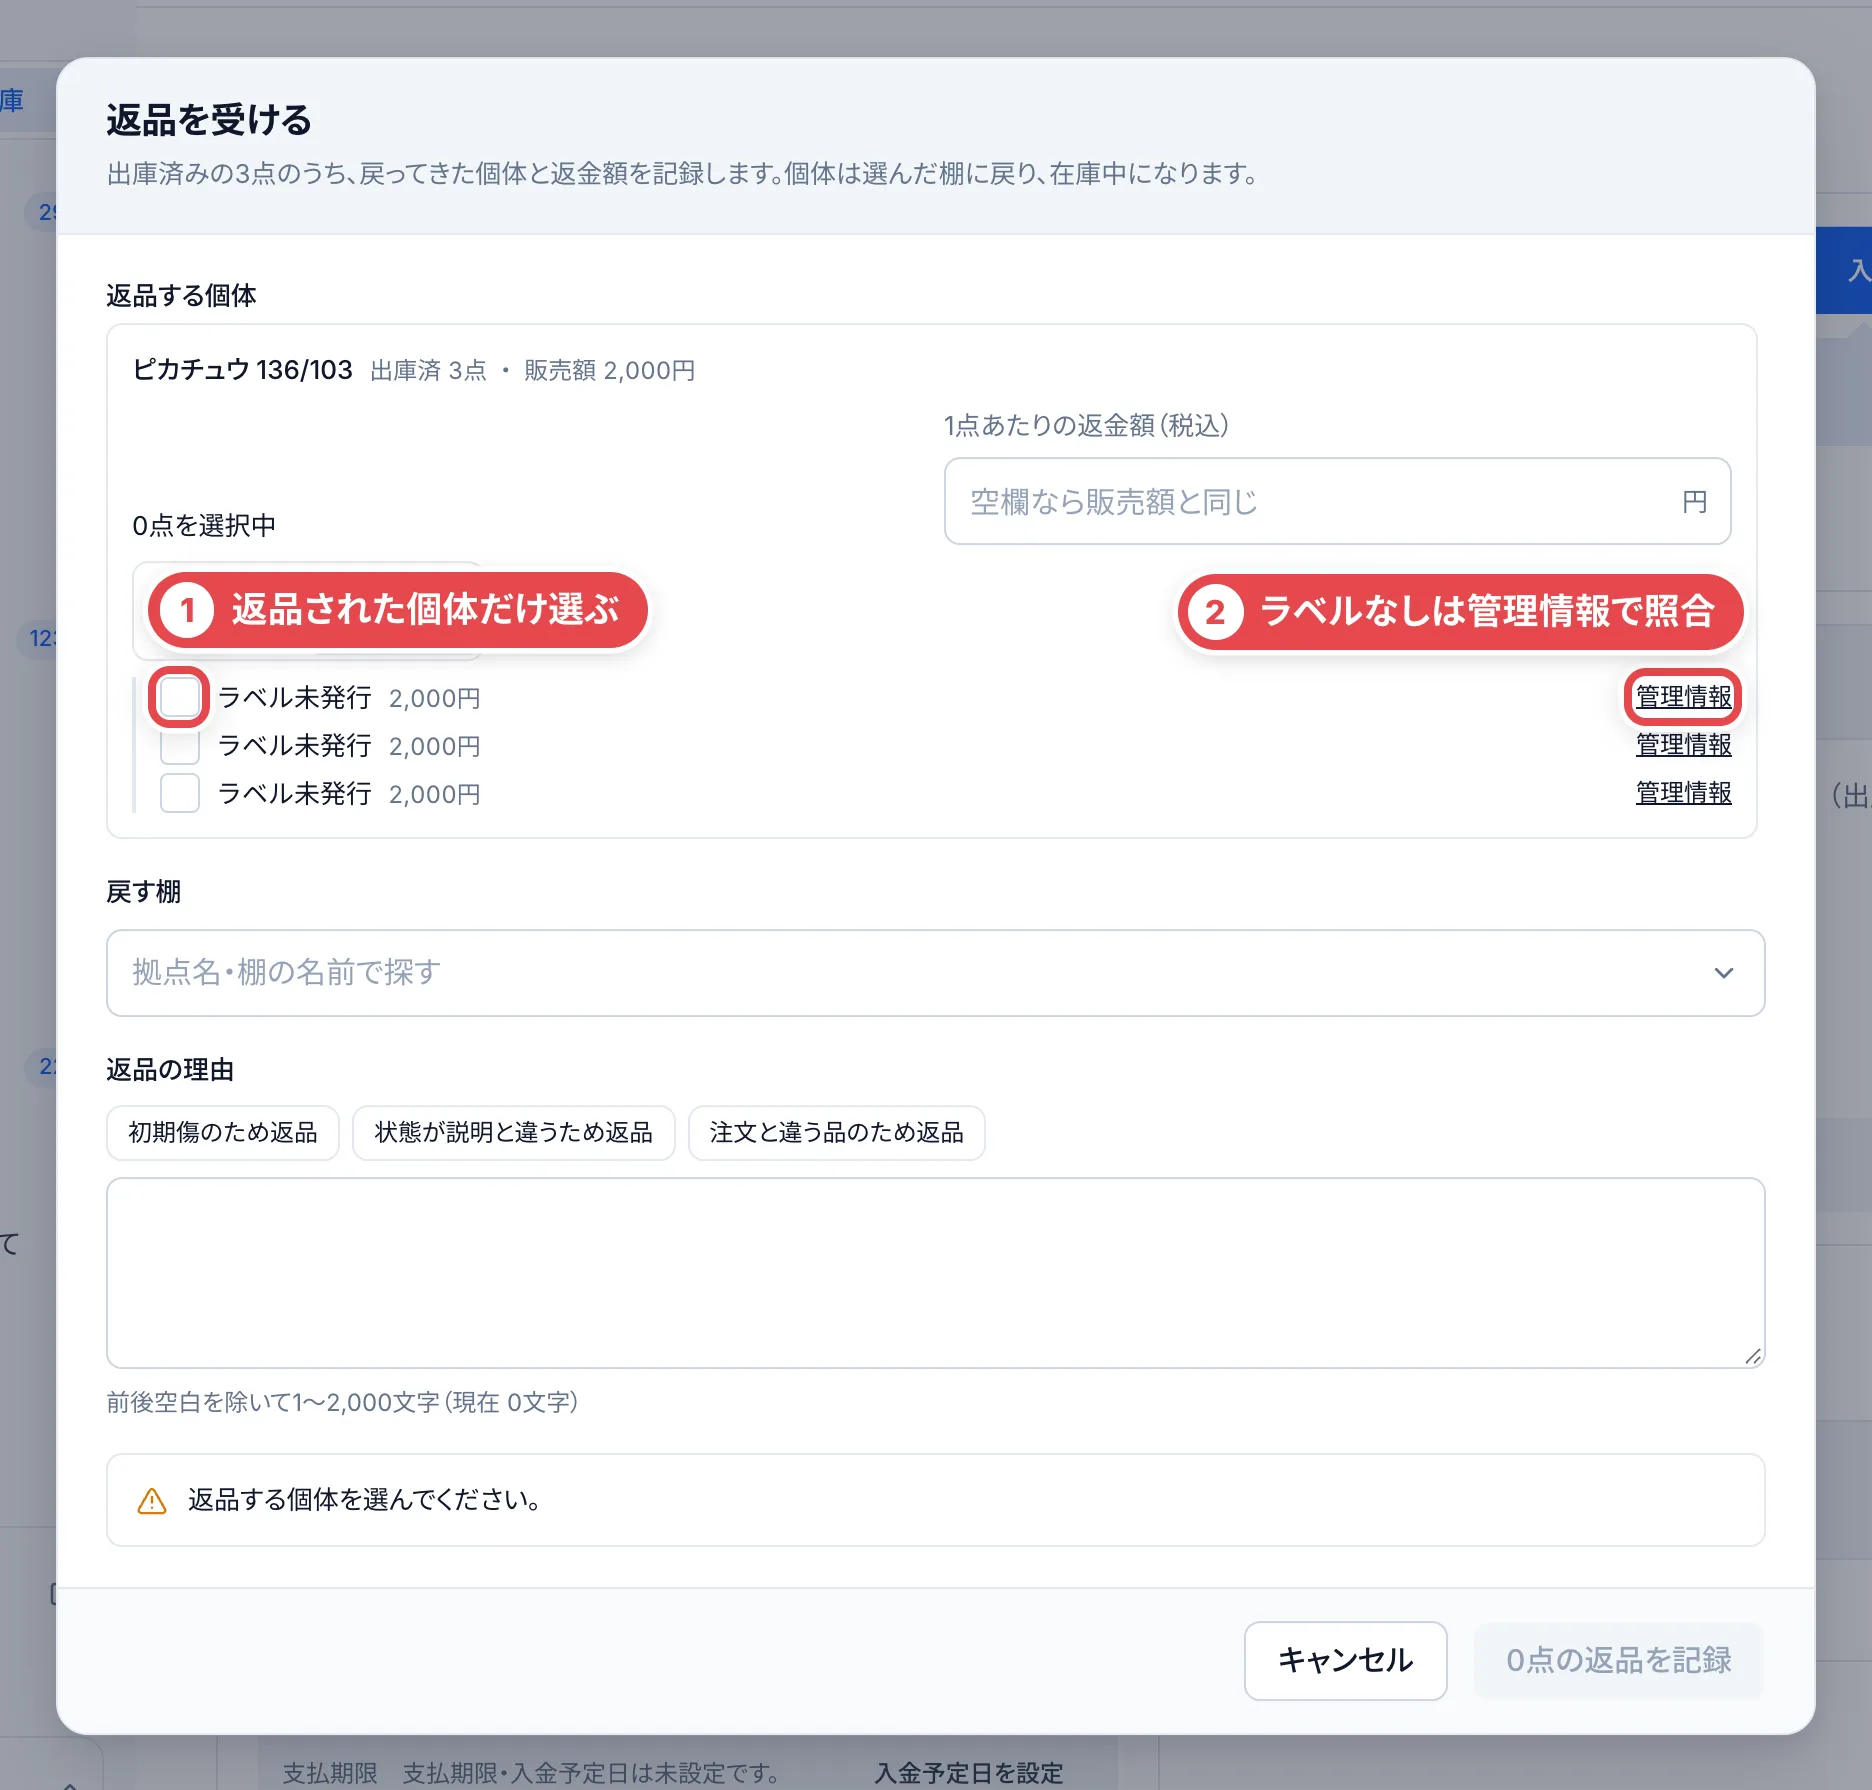 ## 3. 返金額・戻す棚・理由を記録する
①の返金額を確認します。空欄なら、その個体の販売額が使われます。任意の0円と空欄は同じではありません。返金額は元の販売額を超えられません。②の戻す棚と③の理由を入力し、対象と合計を見直して「返品を記録」で確定します。
保存後は伝票を開き直し、返品の記録・対象個体・返金額・戻した棚を確認します。ここで記録することと、実際に銀行などで返金することは別です。通信結果が分からない場合は、二重に登録せず既存の結果を確認します。
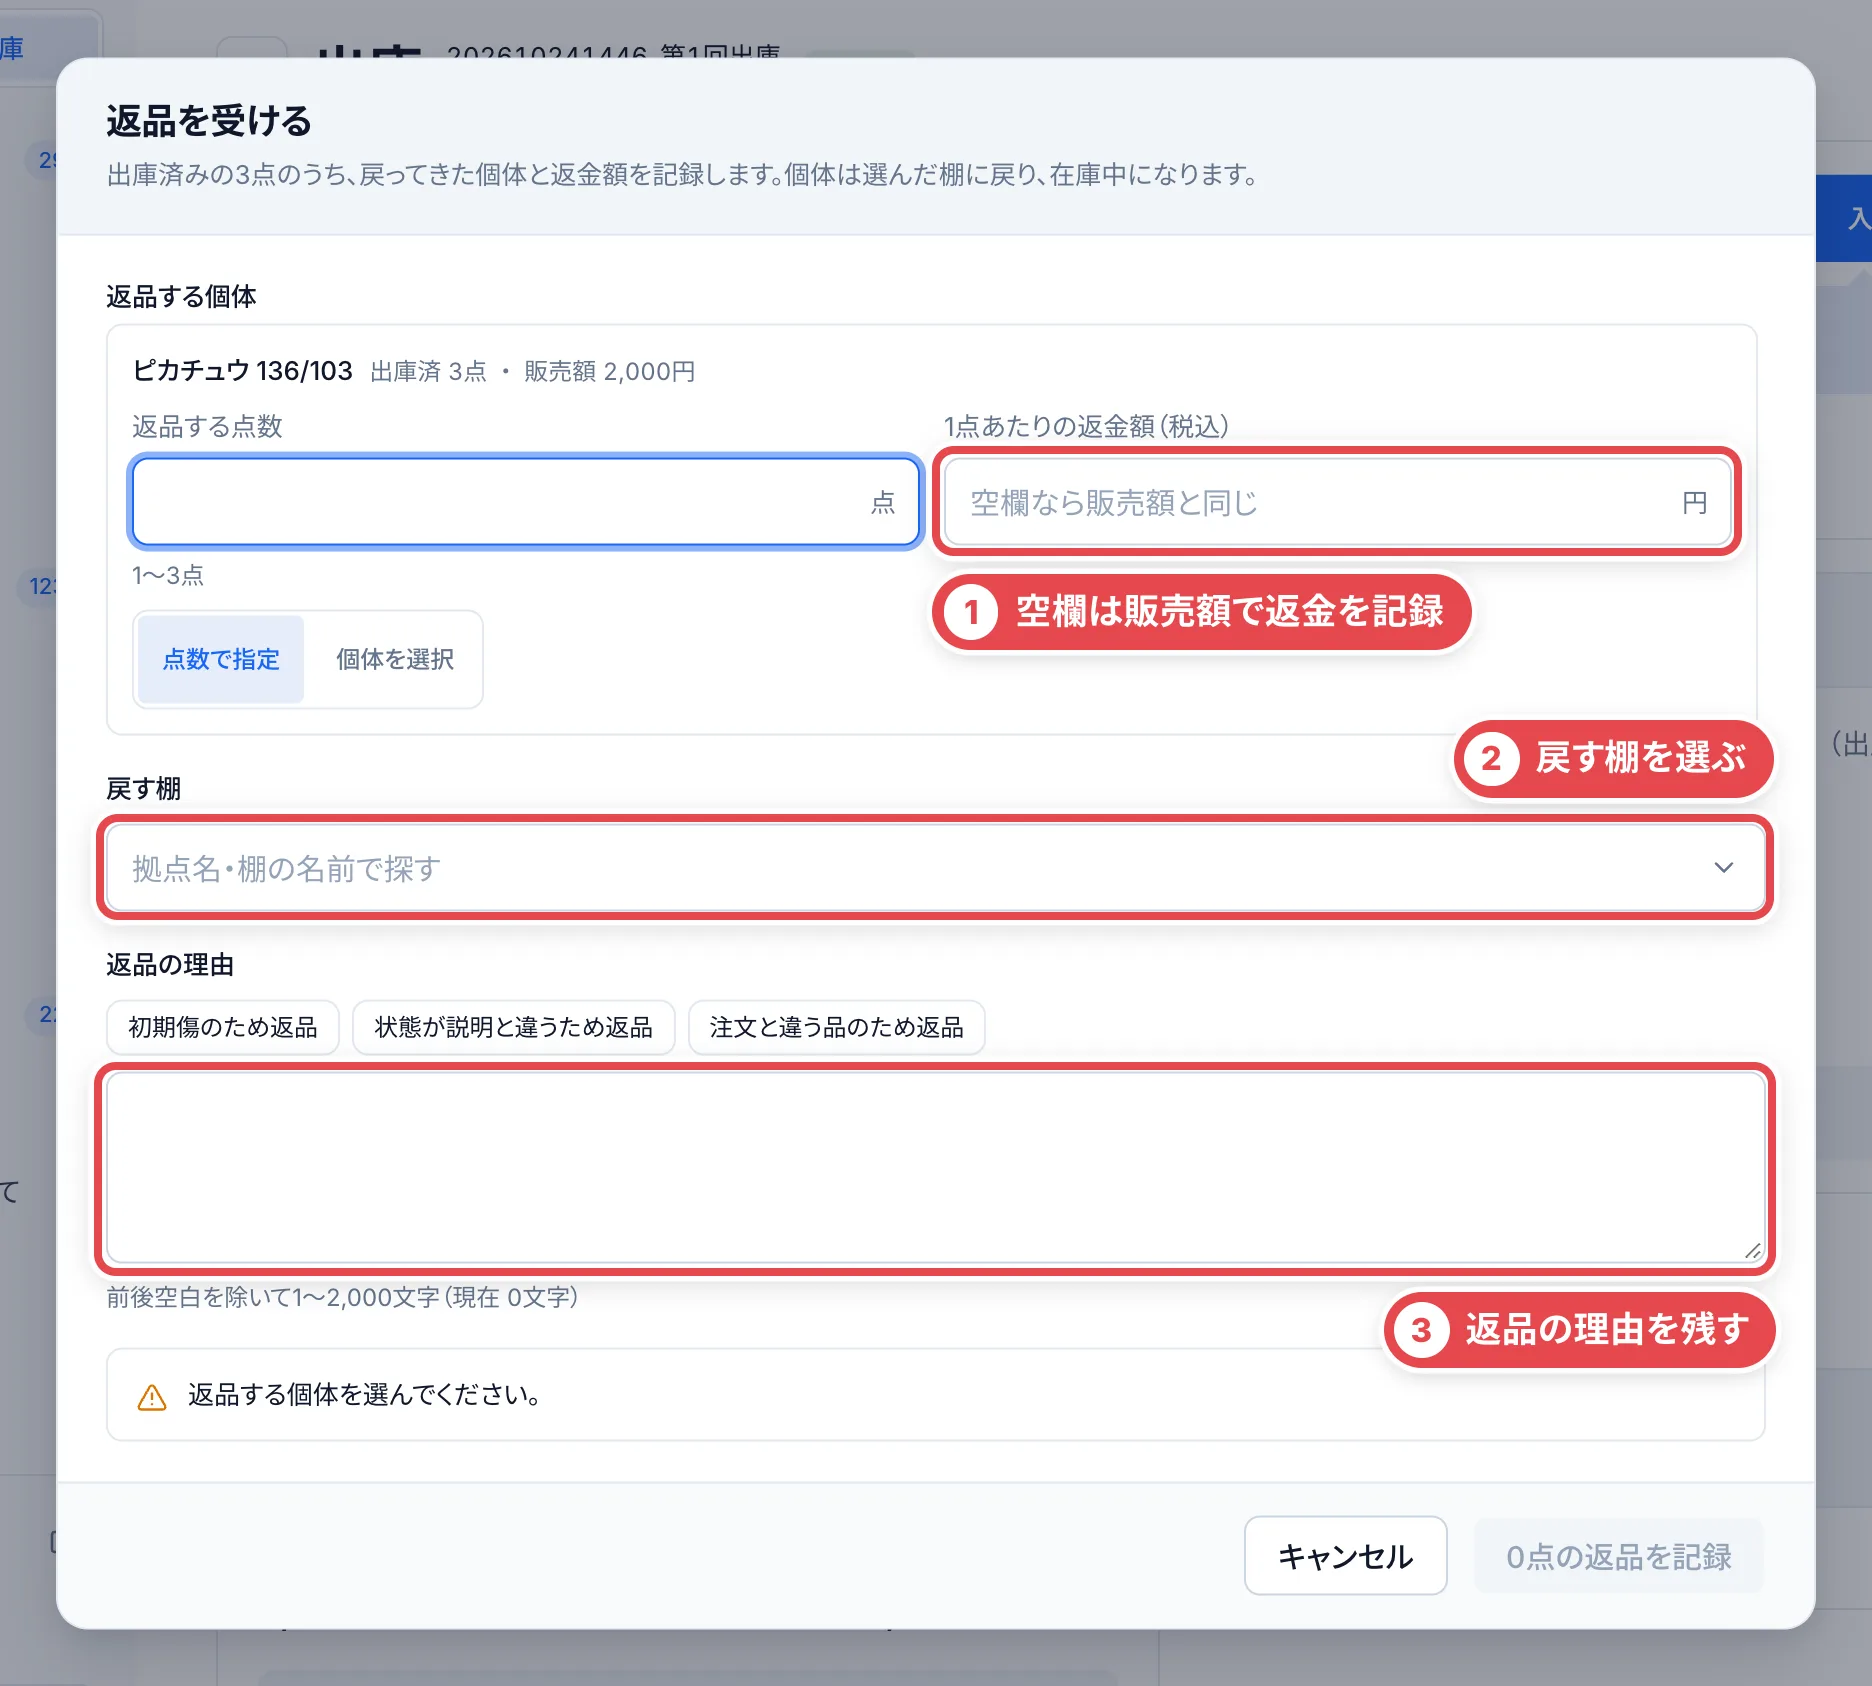 ## 困ったとき
| 起きていること | 確認すること |
| ------------------------------ | ------------------------------------------------------------------------------ |
| 返品を受けるボタンがない | 出庫済みで返品可能な個体があるか、権限、連携先配送・移管でないかを確認します。 |
| ラベルがない個体を区別できない | 個体の管理情報と現物を照合します。見た目の順番だけで選びません。 |
| 返金額が不正と出る | 元の販売額以下か、数量と金額の単位を確認します。 |
| 保存時に状態が変わったと出る | 最新の伝票・個体を開き直し、重複返品していないか確認します。 |
---
# iPhoneの棚卸し・ピッキングで未送信データを復旧する
Source: https://docs.toreca-cloud.com/guides/inventory/scanner-recovery
iPhoneアプリでは、通信に失敗した棚卸し・ピッキングの操作を端末に保存します。「端末に保存」と、サーバーでの確定は別です。未送信のまま同じカードを繰り返し読まず、保存済みの作業を開いて状態を確認します。
この手順は、設定に「保存した棚卸し・ピッキング」があるバージョンが対象です。見当たらない場合は配布担当者に対応バージョンを確認してください。
## 1. 棚卸しの未送信を確認する
①の端末に保存された読み取りと、②の再送操作を確認します。通信を戻して再送し、未送信が解消したか確認します。読み取り回数を増やして送信済みにしようとしないでください。
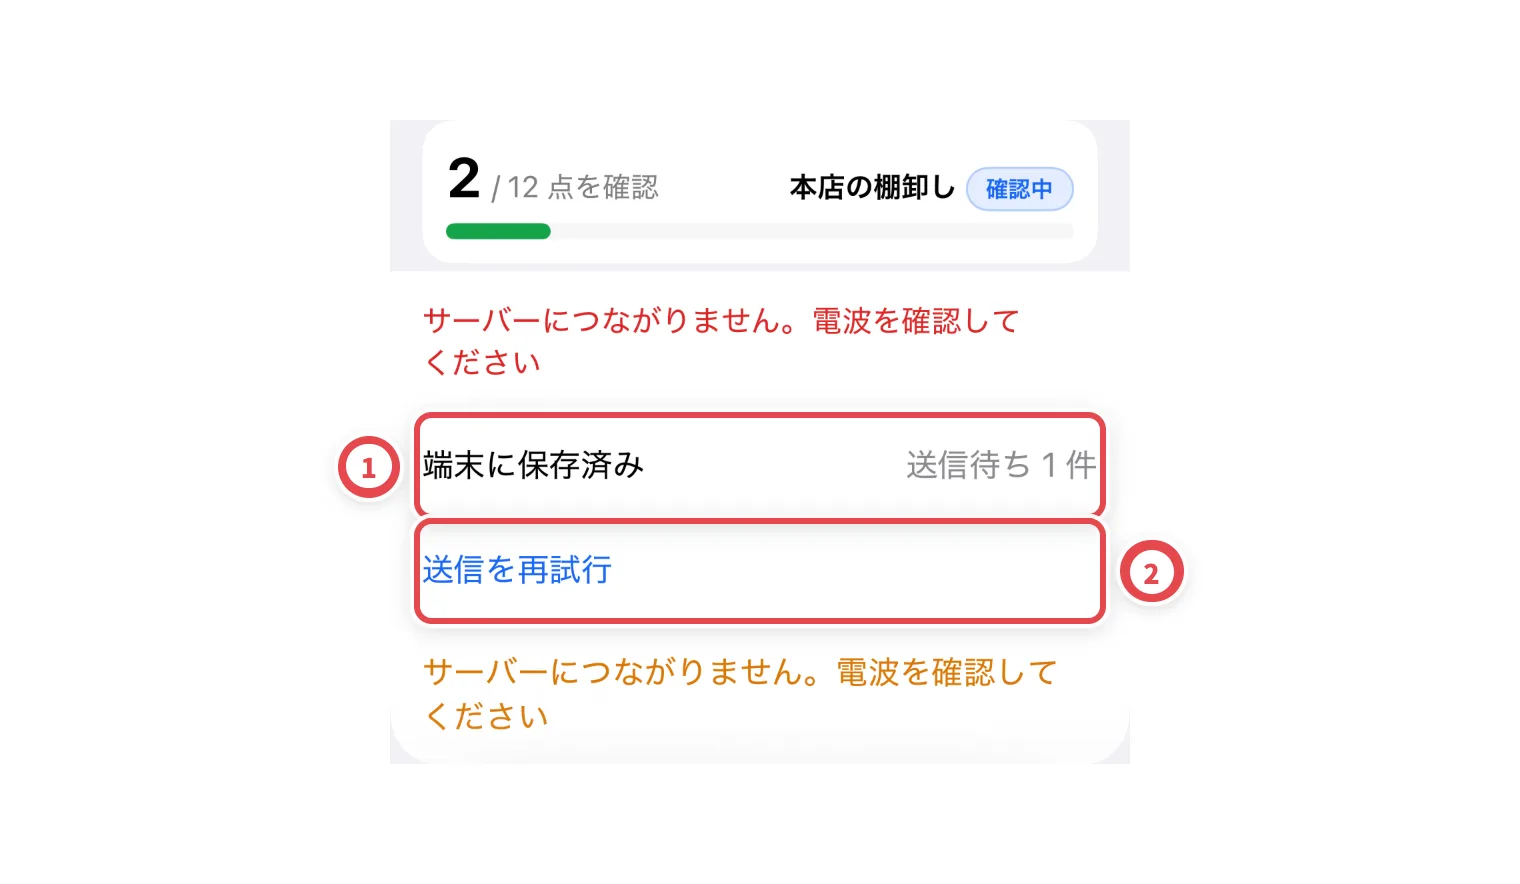 ## 2. 設定から同じ作業を開く
設定の①「保存した棚卸し・ピッキング」を確認します。②の作業名・拠点・棚・未送信数を照合し、対象を開きます。アプリを再起動したあとも、保存した作業から戻ります。
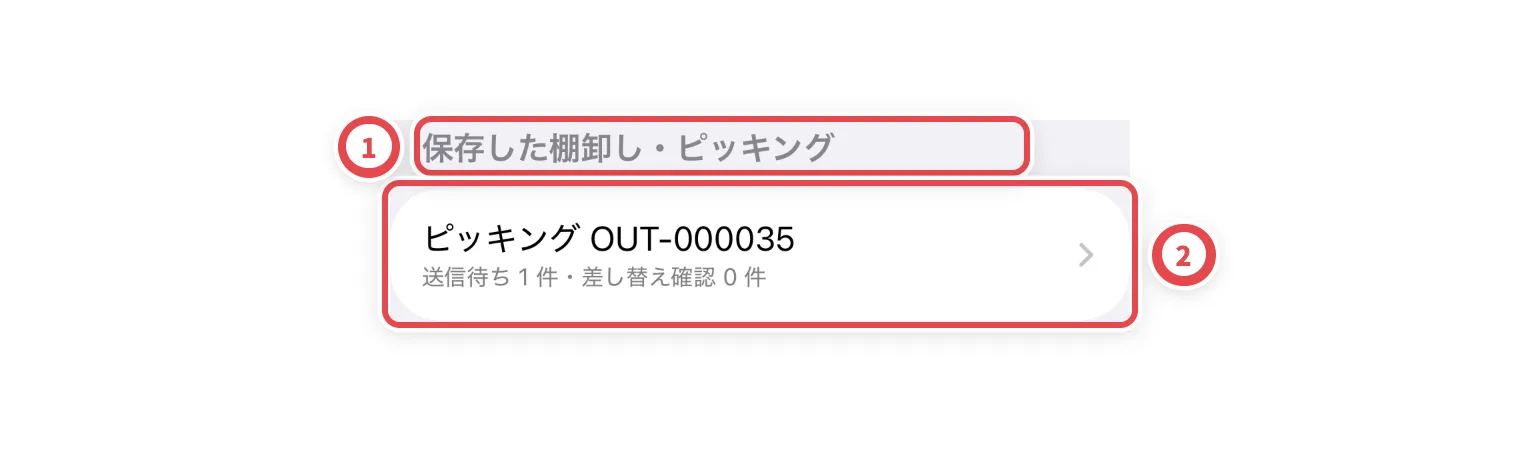 ## 3. ピッキングの未送信を確認する
①の未送信数と対象の出庫伝票を照合します。通信を回復したあと、②の再送を実行します。別の個体を提案した場合も、提案と承認完了を区別します。保存済みの提案があるときは、同じ提案を重ねず内容を確認します。
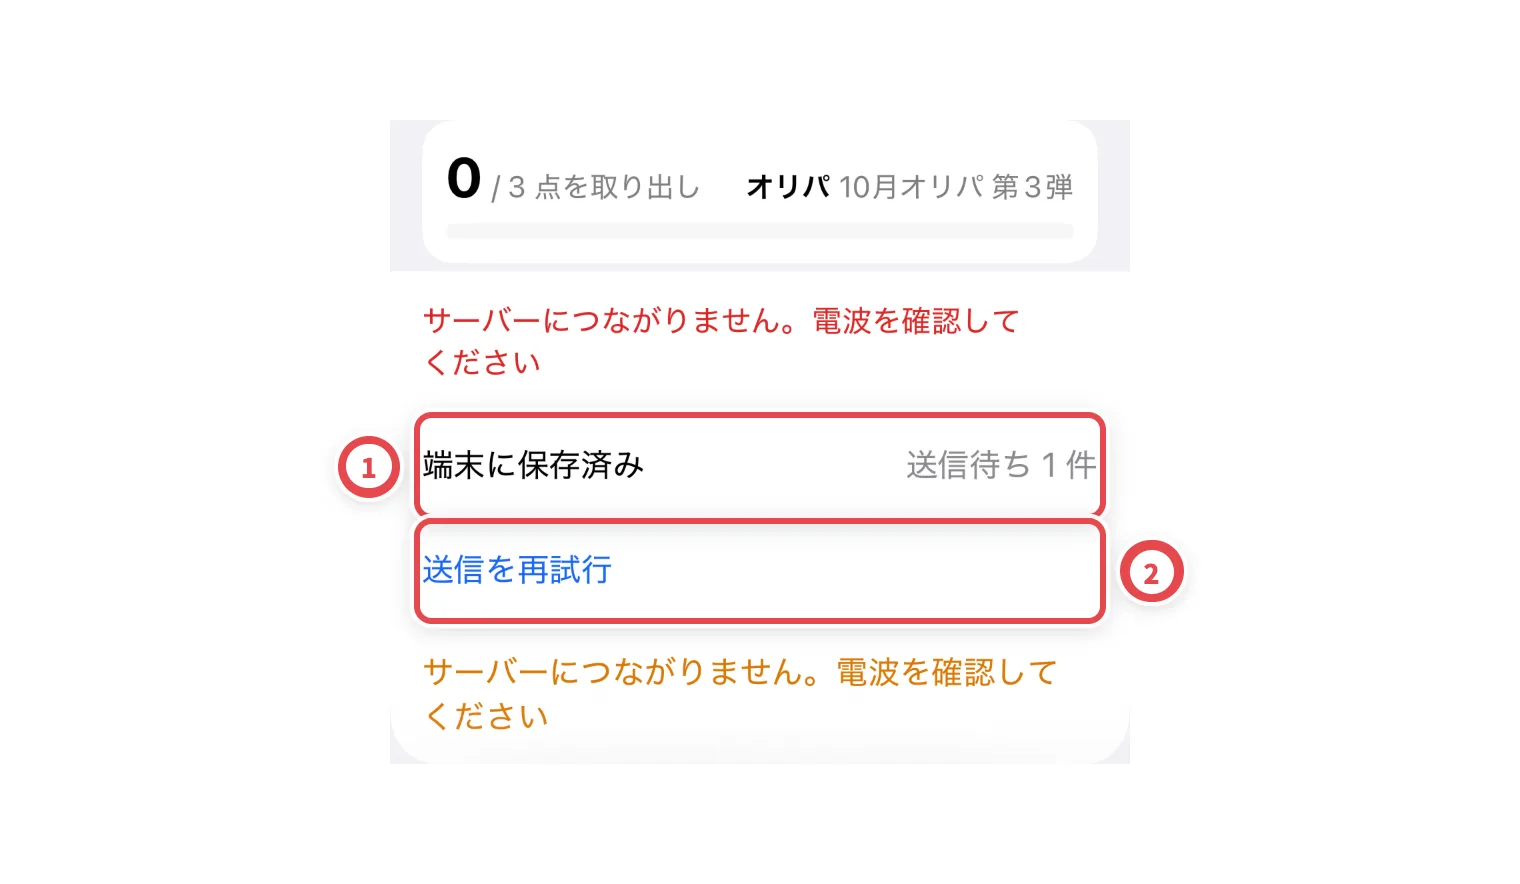 ## 4. サーバーへの反映を確認する
①の未送信表示が解消し、②のサーバー側の記録に反映されたことを確認します。権限変更・終了済み作業・他の人による更新がある場合は、最新状態を開き直して対応します。未送信が残る間はアプリを削除せず、ログアウトの警告も確認してください。
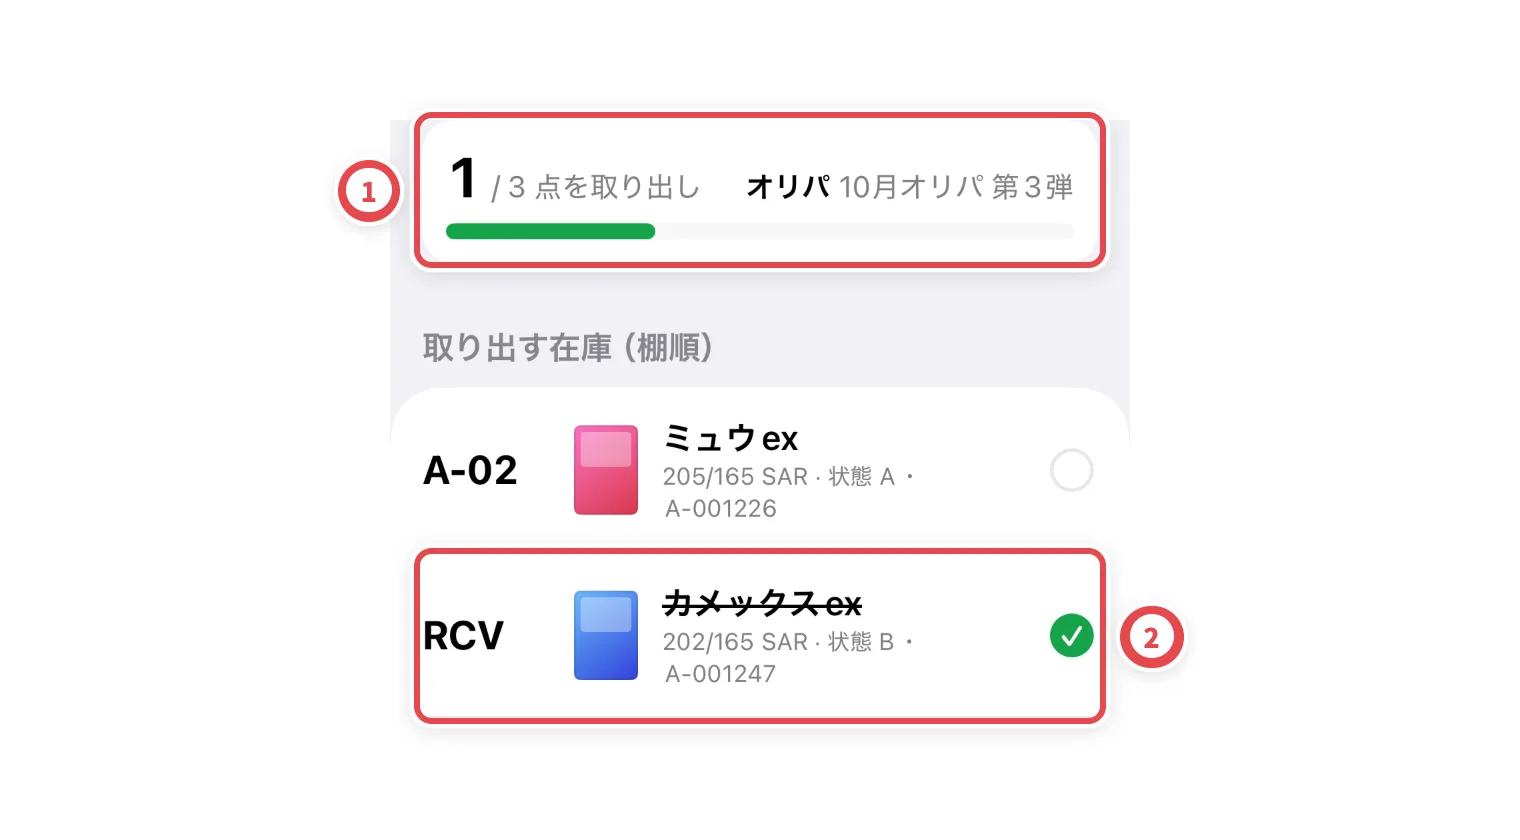 ## 困ったとき
| 起きていること | 確認すること |
| -------------------------- | -------------------------------------------------------------------------- |
| 再起動で元の作業が見えない | 設定の保存済み作業を開き、同じ店舗・アカウント・端末か確認します。 |
| 再送が失敗する | 通信、ログイン、権限、作業の最新状態を確認します。 |
| 別個体の提案が残っている | 提案内容と承認状況を確認し、同じ提案を重複して作りません。 |
| ログアウトに警告が出る | 未送信を先に確認します。サーバー反映前に端末のデータを消さないでください。 |
---
# ロット専用棚でBOX類を管理する
Source: https://docs.toreca-cloud.com/guides/inventory/sealed-lot-shelves
同じ商品でも、入庫元や仕入原価が違うものを同じ棚に混ぜると、どの原価の現物を取り出したか分からなくなります。「ロット専用棚」は、同じ入庫ロットのBOX・パック・デッキだけを置く棚です。
| やりたいこと | 使う方法 | 残る記録 |
| ---------------------------------- | ---------------------------------------------------------- | ---------------------------- |
| 入庫ロットと現物を対応させる | ロット専用棚を設定し、ロットごとに入庫・格納する | 個体ごとの入庫元・原価・所在 |
| 同じロットの現物を数える | 棚卸しの「数量で確認」 | 対象個体と確認済み数量 |
| 照合した所在をスキャン訂正から守る | [スキャン移動のロック](/guides/inventory/shelf-protection) | 棚全体または指定在庫の保護 |
ロット専用棚とスキャン移動のロックは別の設定です。専用棚にしただけでは、スキャンによる所在訂正をロックしません。
## 最初に用意するもの
- 棚を設定するメンバーには「設定管理」、入庫・移動・棚卸しを行うメンバーには在庫を変更する権限が必要です。
- 同じ入庫元・商品・仕入原価・通貨・包装状態・コンディション・グレードの現物を、物理的に分けて保管します。同額でも、別の入庫伝票から来た商品は別ロットです。
- カード単体は専用棚の対象外です。BOX・パック・デッキを使います。
## 1. 空の棚か、1ロットだけの棚を選ぶ
「設定」→「拠点と保管場所」を開き、対象の拠点と棚を確認します。混在している場合は、先に現物を区画ごとに分け、システム上でも[所在の移動](/guides/inventory/overview)を記録します。
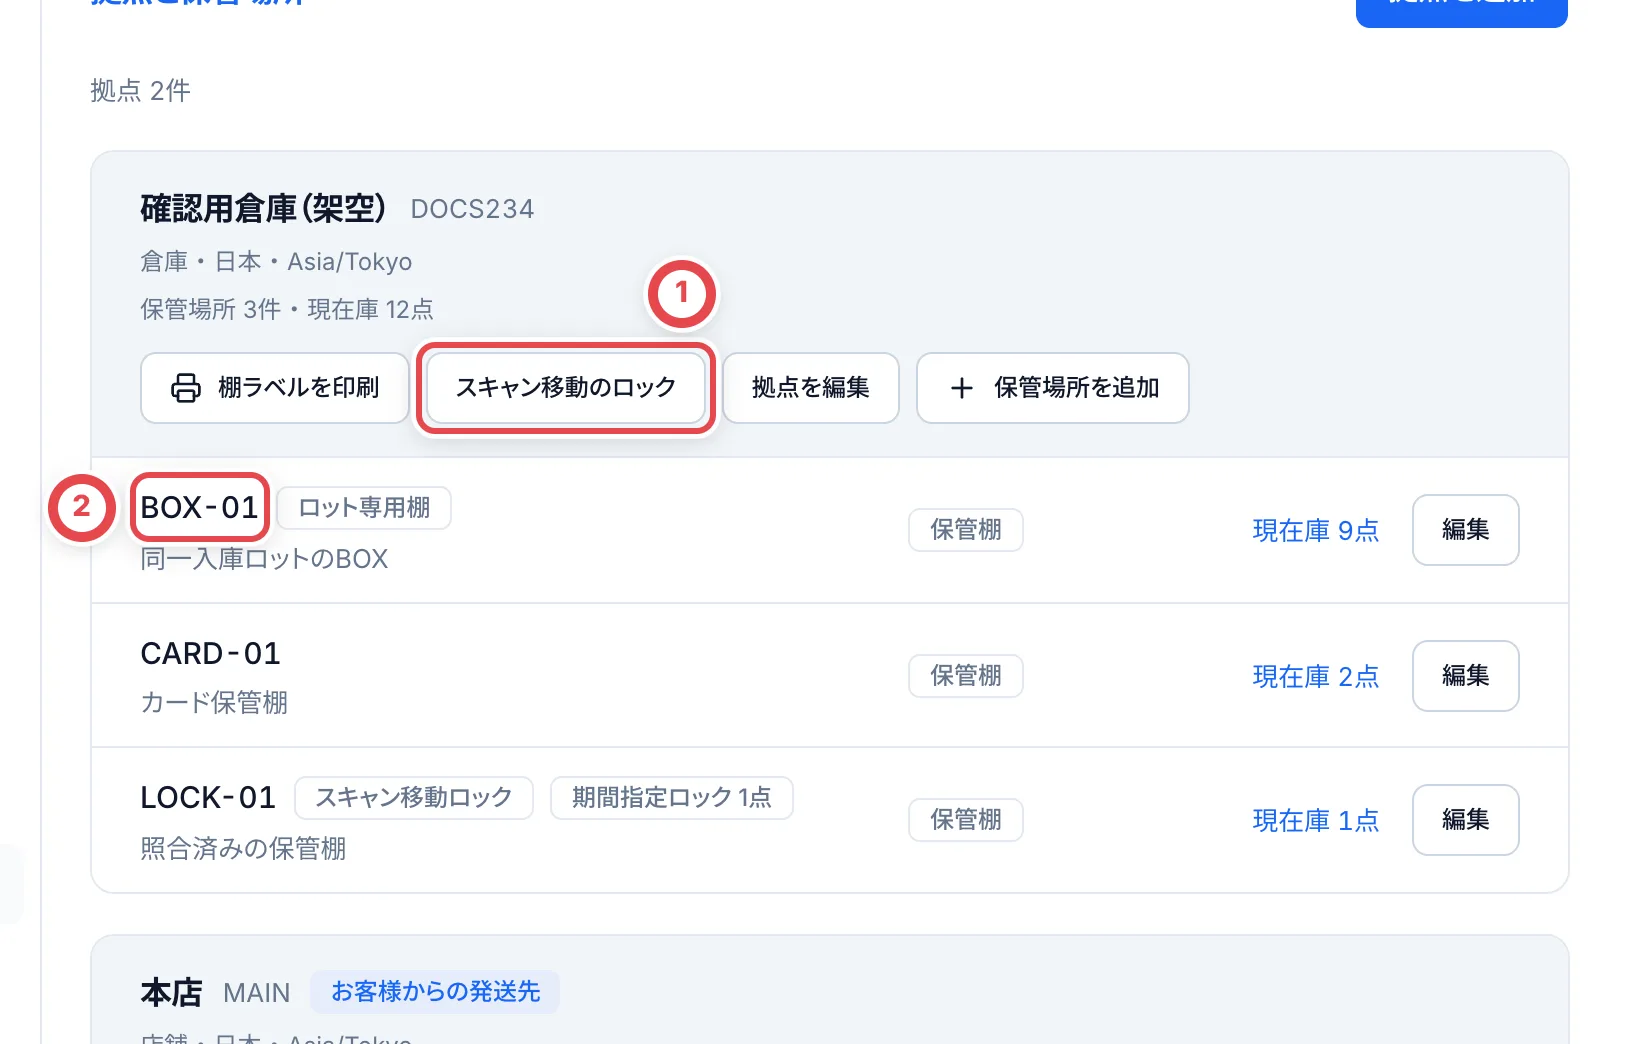 ①から対象拠点の保護設定を開けます。②のように、棚をロットごとに分けて用意します。
予約・出品・引当済みでも棚に残る現物は、ロットの混在判定に含まれます。見えている通常在庫だけで判断しないでください。
## 2. 「ロット専用棚」をオンにして保存する
棚の「編集」を押します。①の名称と棚番号を確認し、②の「ロット専用棚」をオンにします。③で保存し、画面を開き直して設定が残っていることを確認します。
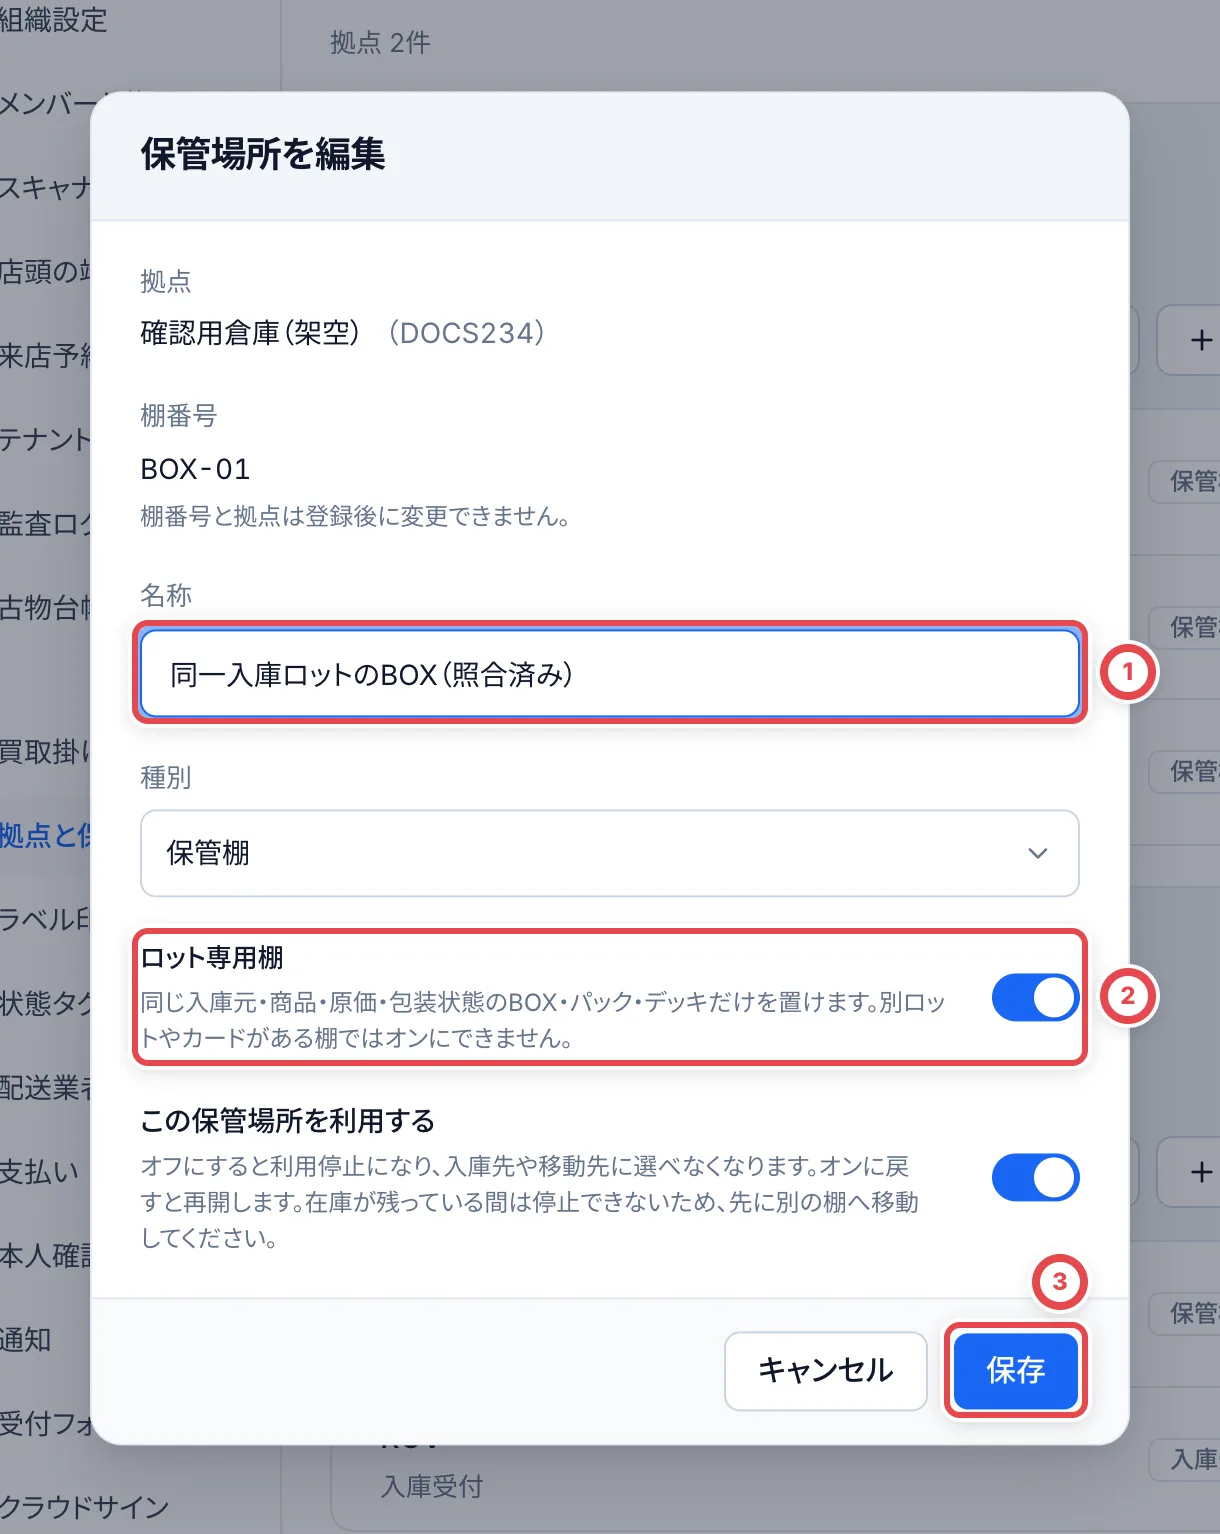 別ロットやカードが混在していると保存できません。先に区画を分けてから、もう一度設定します。既存の棚には自動では適用されません。
## 3. 同じ入庫ロットだけを入庫・格納する
[入庫伝票](/guides/inventory/receipts)で専用棚を入庫先にするか、[格納アプリ](/guides/inventory/putaway)で対象の棚へ格納します。商品名だけでなく、入庫元・原価・通貨・包装状態も照合します。別ロットを入れようとした場合は拒否されるため、別の棚を用意します。
棚が空になれば、次のロットを入れられます。ただし、元のロットが返品・発見された場合は、新しいロットに混ぜず別の棚で受け入れます。専用設定をオフにすれば混在可能になるので、現場の棚札も合わせて運用してください。
## 4. 「数量で確認」で棚卸しする
「棚卸し」→「棚卸しを始める」で、対象の拠点と棚を選びます。「すべて」表示で「数量で確認」を押し、実物を数えて入力します。詳しい操作は[棚卸し](/guides/inventory/counts)を参照してください。
①の帳簿数量と照合し、②に現物の数量を入れます。③は確認済み数量を置き換えます。
数量確認を使えるのは、原価が確定し、同一ロットの通常在庫だけが棚にある場合です。数量を記録しただけでは、在庫数・原価・紛失状態は変わりません。不足の紛失計上は棚卸し完了時に確認します。
## 困ったとき
| 起きていること | 確認すること・戻り方 |
| -------------------------------------------- | -------------------------------------------------------------------------------------------------------------------------- |
| 専用棚をオンにできない | 別ロット、カード、異なる原価・包装状態などが混ざっていないか確認します。現物と記録を分けてから設定します。 |
| 入庫や移動が拒否される | 空の棚か、同一入庫ロットの棚を選びます。同じ商品・同じ金額でも別の入庫なら混ぜられません。 |
| 「数量で確認」が出ない | 「すべて」表示、原価確定済み、通常在庫のみ、同一ロット全個体が対象という条件を確認します。条件外なら個体ごとに確認します。 |
| 予約や出品がある | 現物のロット判定には含まれますが、数量確認には使えません。個体ごとに確認します。 |
| 帳簿より多く見つかった | 数量確認で増やさず、別ロットの混入や未記録の入庫を確認します。 |
| 空になった棚へ別ロットを入れた後に返品された | 元のロットを受ける別棚を用意します。新しいロットへ混ぜません。 |
---
# スキャンによる所在変更をロックする
Source: https://docs.toreca-cloud.com/guides/inventory/shelf-protection
現物と所在の照合が終わった棚は、「スキャン移動のロック」で保護できます。スキャンを使った移動・再計上・訂正で、照合済みの所在が書き換わることを防ぎます。
| 守りたい範囲 | 選ぶ方法 | 後から入る在庫 |
| ------------------------------------ | ---------------------- | ------------------------------------------------------------ |
| 棚全体 | 「棚全体」 | 後から格納する在庫にも適用 |
| 特定期間にその棚で格納・照合した在庫 | 「スキャン期間で指定」 | 確認して保存した対象だけ。後から同期された分は自動追加しない |
**通常の入出庫・移動伝票は続けられます。** 棚卸しの確認や、同じ棚での照合も行えます。在庫全体の業務を停止する設定ではありません。
大量に読み取ってから保護する場合は、先に[連続スキャンからロックまで](/guides/inventory/putaway#連続スキャンからロックまで)で全端末の送信と現物の照合を終えてください。
## 最初に用意するもの
- 「設定管理」の権限が必要です。在庫を動かせる権限だけではロックを設定・解除できません。
- 現物・ラベル・現在の拠点と棚を照合します。
- 期間で指定する場合は、先に端末の未送信分を同期します。日付は閲覧している人ではなく、**拠点のタイムゾーン**で指定します。
## 1. 対象拠点の設定を開く
「設定」→「拠点と保管場所」で拠点を探し、①の「スキャン移動のロック」を押します。
対象の拠点を確かめて①を押します。②の棚番号も現物と照合します。
## 2. 棚全体をロックする
①の保護範囲を「棚全体」にし、ロック設定を「ロックする」にします。②で対象の棚にチェックを入れ、選択した棚数・在庫数を確認します。③に理由を入力します。
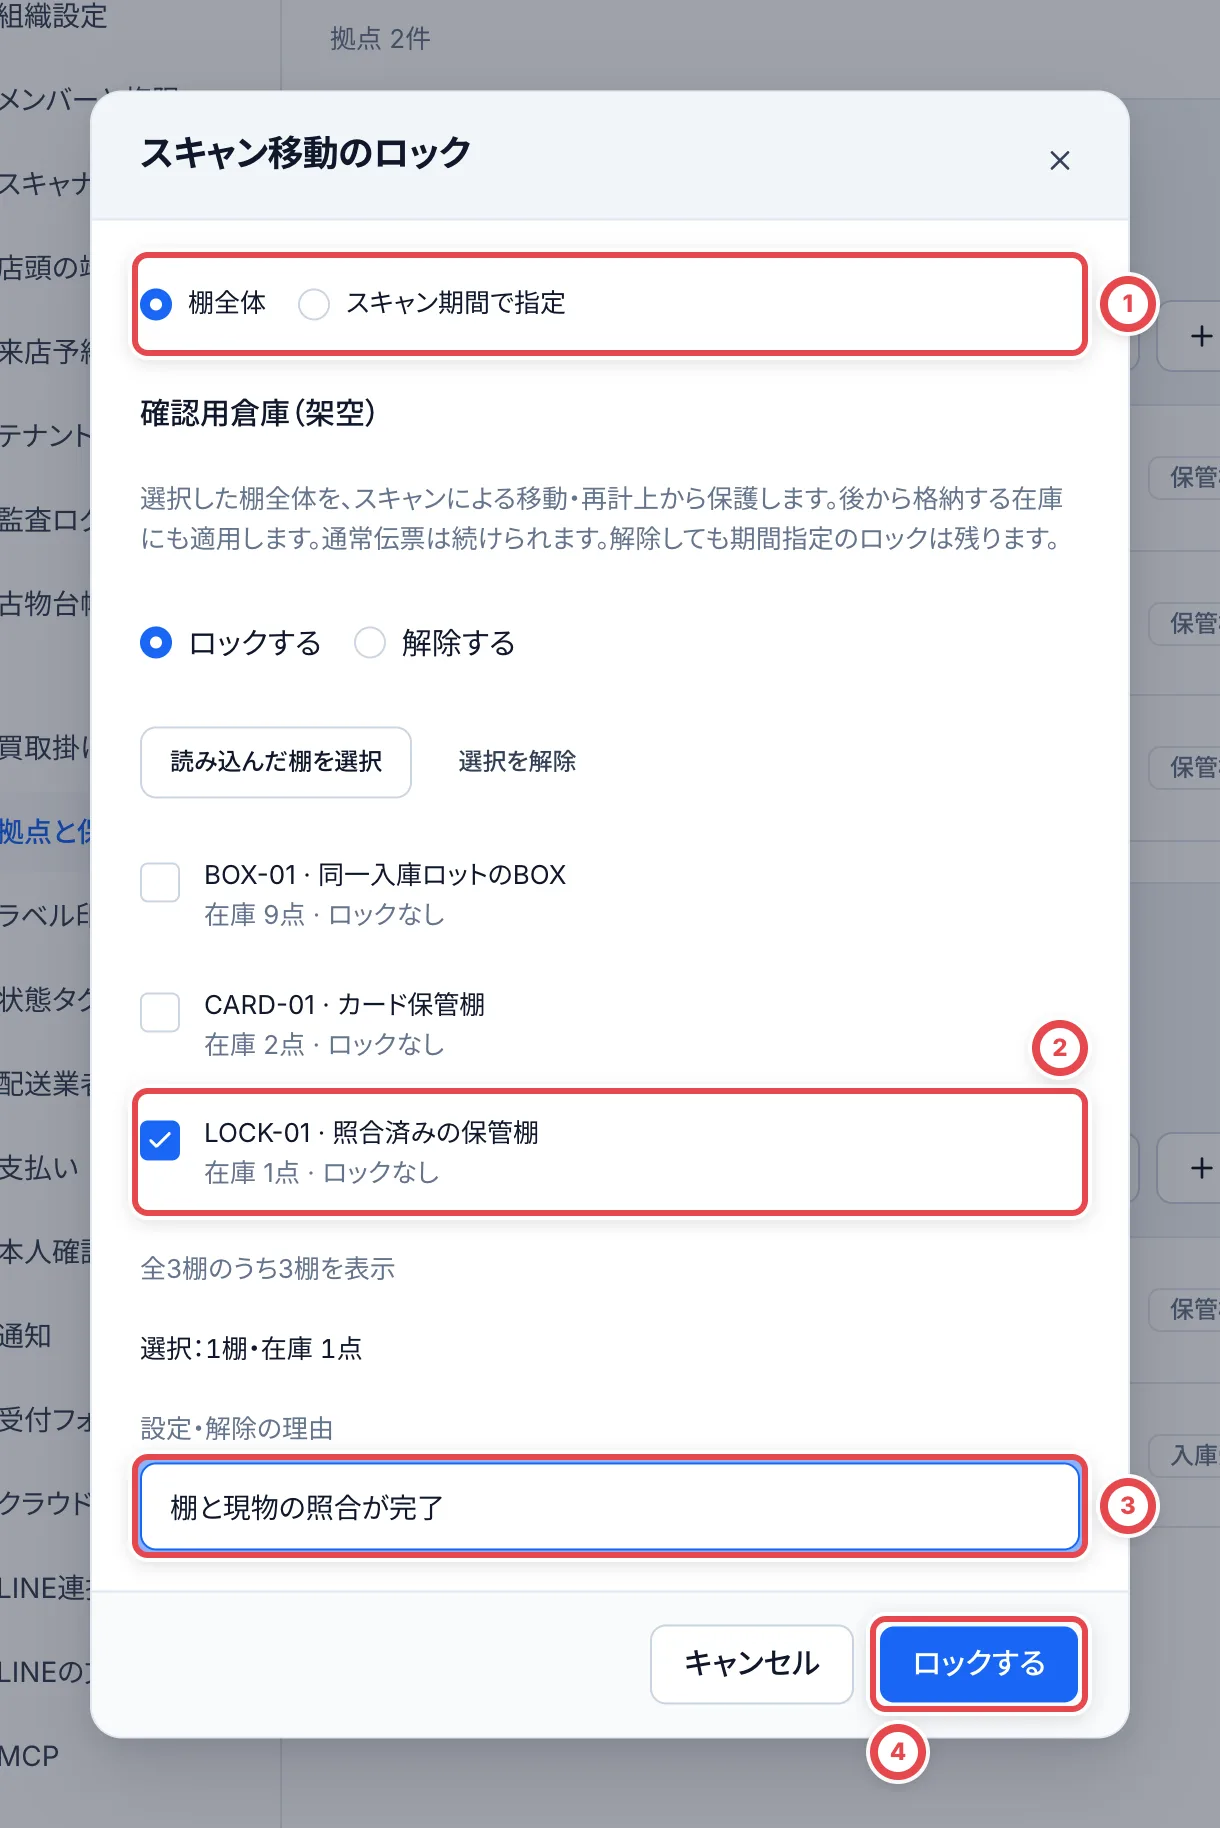 「読み込んだ棚を選択」は、いま読み込まれている棚だけを選びます。続きがあるときは「次の棚を読み込む」で追加します。1回に選べるのは500棚までです。
④で保存します。閉じた後に開き直し、対象の棚に「スキャン移動ロック」と理由が出ていることを確認します。
## 3. スキャン期間で在庫を選んでロックする
①の「スキャン期間で指定」を選び、対象の棚にチェックを入れます。②に読取日の開始日と終了日を入力します。両端の日を含みます。表示された拠点の時刻を確認し、③の「対象の在庫を確認」を押します。
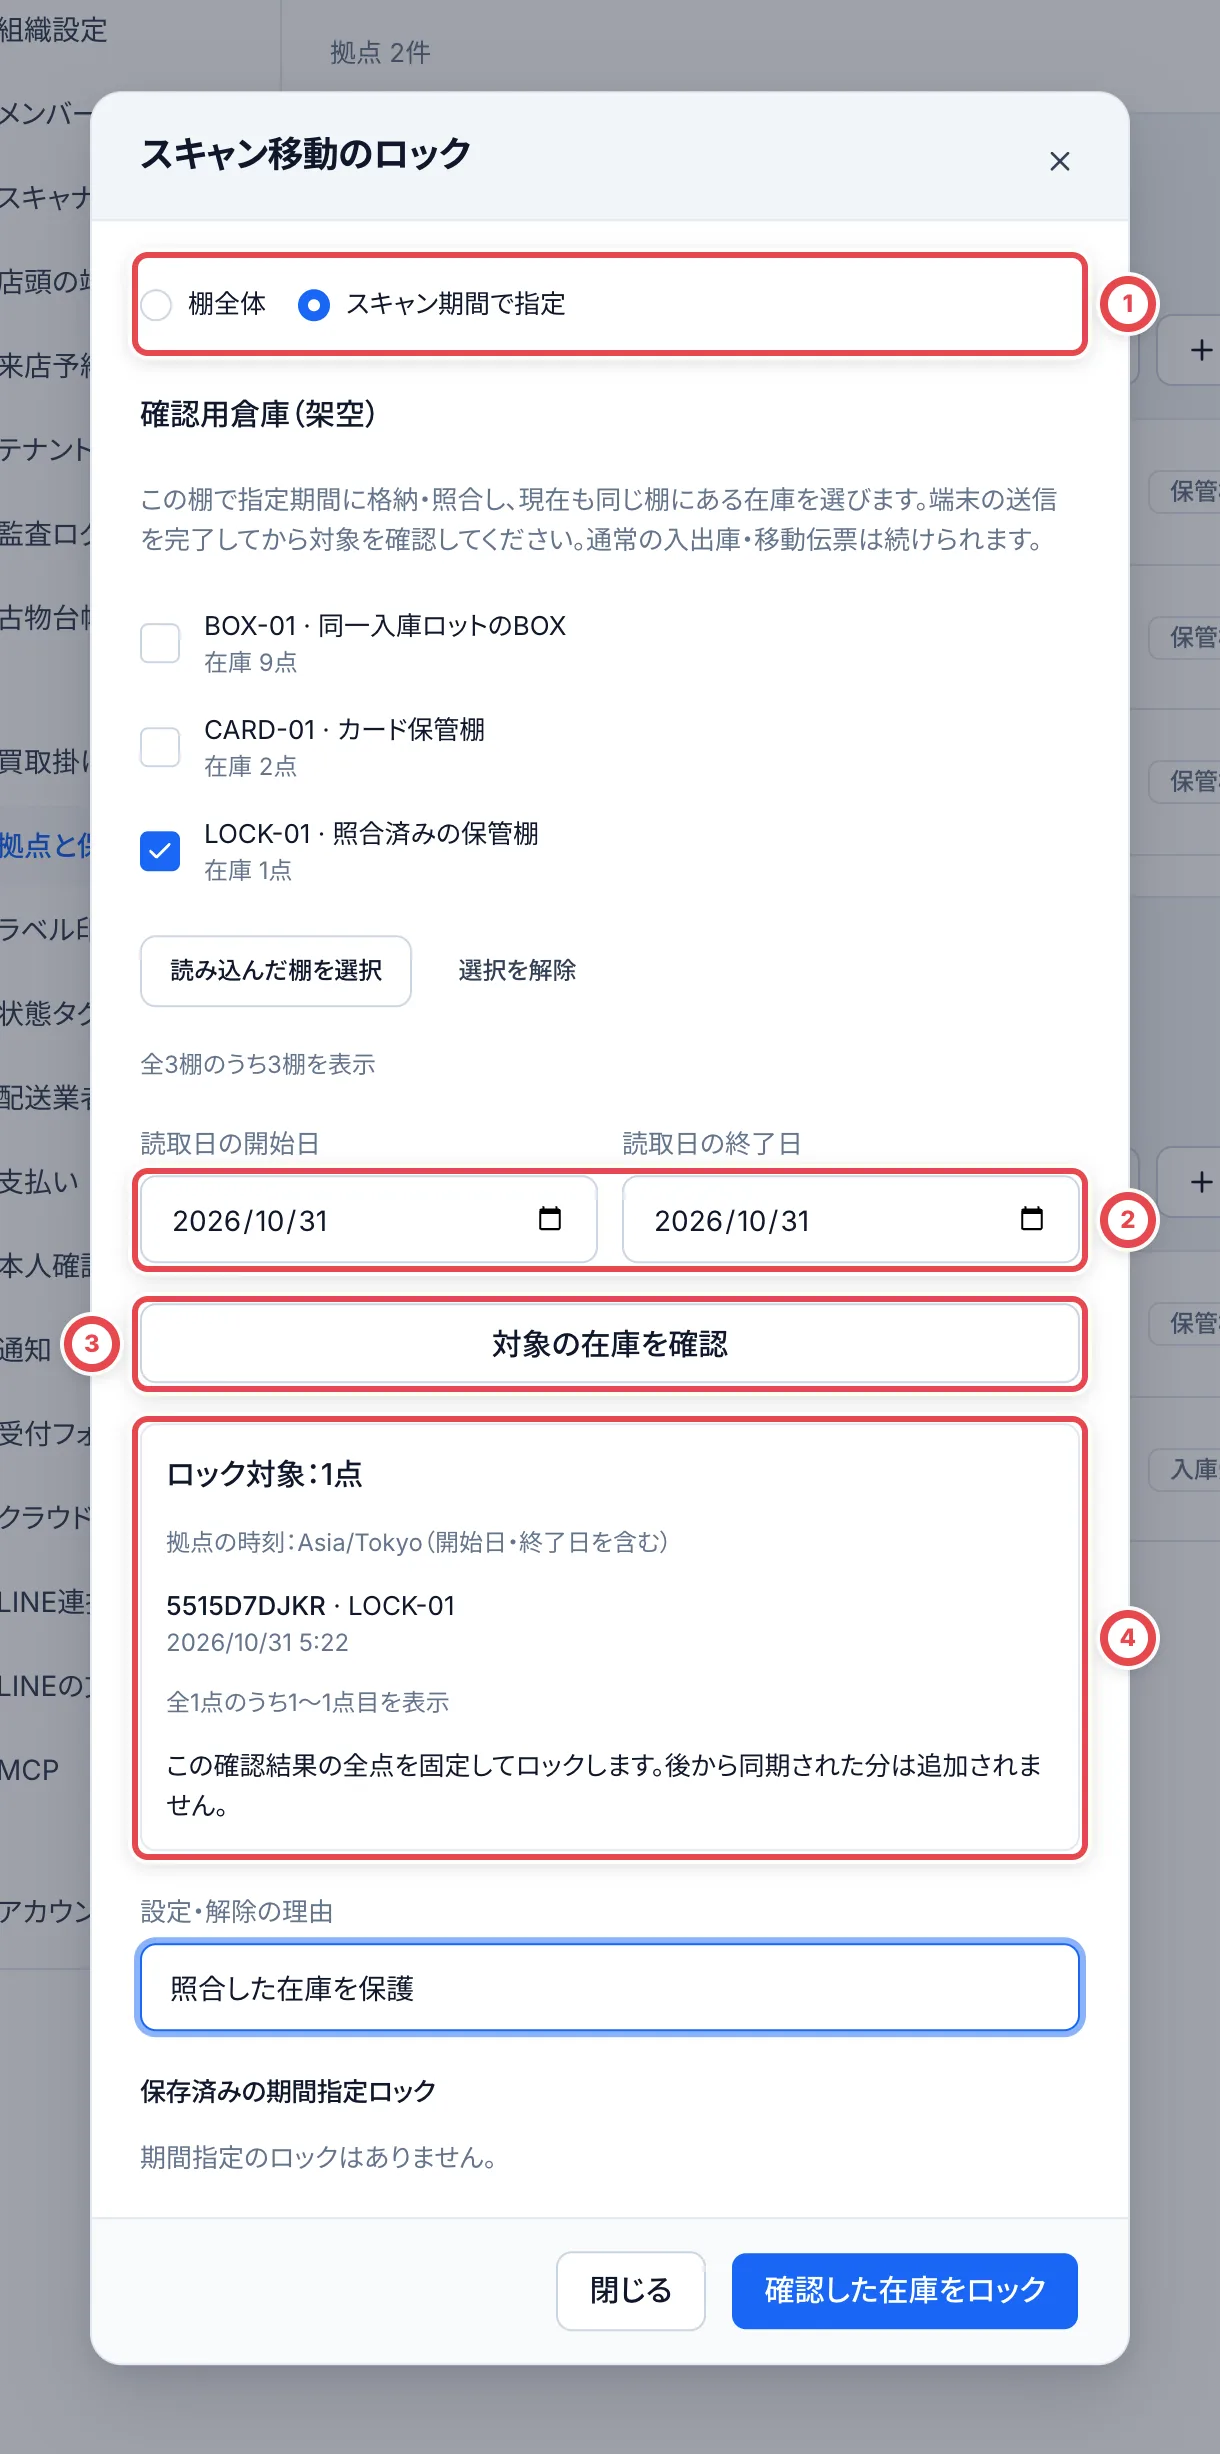 候補になるのは、その期間に指定棚への有効な格納・照合・訂正があり、現在も同じ棚にある個体です。別棚へ移動済み、拒否だけの読取、取り消した読取は含まれません。
④の対象件数・棚・ラベル番号を確認し、理由を入力して「確認した在庫をロック」を押します。**確認結果の全点が固定されます。後から同期した在庫は追加されません。** 対象を増やすときは、同期後に検索・確認・保存をやり直します。
対象は100点ずつ表示されます。「次の対象を表示」で続きも照合してください。保存されるのは表示中の100点だけではなく、プレビューの全点です。1回の上限は10,000点・500棚で、超える場合は棚または期間を分けます。日付は読取日で、サーバーへの送信日ではありません。時間単位の締切は指定できません。
保存後は「保存済みの期間指定ロック」で件数を確認し、「保存した対象を見る」から保存した個体を確認します。保存前に在庫が変わった場合は、対象を再確認してください。
## 4. 解除する
| 解除したい設定 | 操作 |
| ---------------- | -------------------------------------------------------------------------------------- |
| 棚全体のロック | 「棚全体」で対象棚を選び、「解除する」に切り替えて理由を入力し保存 |
| 期間指定のロック | 保存済みの対象から「この設定を解除」を開き、件数・期間を確かめ、理由を入れて解除を確定 |
片方を解除しても、もう片方や別の期間指定ロックが重なっていれば保護は残ります。解除後も画面を開き直し、棚全体と期間指定の両方を確認してください。
## 5. スキャンが拒否されたら
保護された在庫を元の棚から動かすスキャンや、その所在を戻す取消は拒否されます。現物優先でも自動では突破しません。現物・ラベル・拒否時の保護元を照合し、管理者が設定を確認します。
**ロックした棚への追加格納は可能です。** 棚全体のロックでは、追加した在庫もそこからのスキャン移動・取消から保護されます。期間指定では、保存済みの対象だけが保護され、追加した在庫は自動で対象になりません。
解除しても、過去に拒否された読取が自動適用されることはありません。必要な設定変更後に、新しく読み取ってください。通信の再送と、新しい読取は別の操作です。
## 困ったとき
| 起きていること | 確認すること・戻り方 |
| -------------------------------- | ---------------------------------------------------------------------------------------------------- |
| 設定ボタンがない・変更できない | 「設定管理」権限を管理者に確認します。 |
| 期間指定の候補が0点 | 拠点・棚・拠点の時刻・読取日を確認し、端末の送信を完了します。対象が現在も同じ棚にあるか確認します。 |
| 保存時に在庫の変更が出る | 最新の対象をもう一度表示し、件数と現物を照合してから保存します。 |
| 解除したのにまだ拒否される | 棚全体と重なる期間指定ロックを確認します。古い拒否の再送ではなく、新しい読取を行います。 |
| 読込済みを選んだのに棚が足りない | 「次の棚を読み込む」で追加して選択します。表示済みの棚だけが対象です。 |
| 通常伝票で移動できた | スキャン由来の変更を保護する設定です。通常の業務伝票は記録できます。 |
---
# 買取の進め方
Source: https://docs.toreca-cloud.com/guides/purchase
お客様が品物を店舗へ持ち込むか、郵送で送るかに合わせて手順を選びます。
**[オンライン買取](/guides/purchase/overview)**
受付 → 事前見積 → 発送・到着 → 最終査定・承諾 → 振込
**[店舗買取](/guides/purchase/counter)**
来店・受付 → 現物査定 → 確認・署名・本人確認 → 現金/振込
LINEやフォームを使ったかどうかではなく、品物を受け取って買取を進める方法で分けます。LINEで相談したあとに来店する場合は、店舗買取の手順を使います。店舗買取は、画面では「店頭」と表示されます。
## 途中から続ける
| 今の状況 | 進む手順 |
| -------------------------------------------------------- | ----------------------------------------------------------------------------------------------- |
| オンラインの申し込みを受け付ける | [受付フォーム](/guides/purchase/intake-form)/[LINEの受付](/guides/purchase/line-intake) |
| 電話・メールで受け付けた、またはカードがすでに届いている | [郵送買取の手動受付から完了まで](/guides/purchase/mail-in-to-stock#方法2買取依頼として記録する) |
| 事前見積に承諾があり、発送・到着から進める | [発送と最終査定](/guides/purchase/shipping-and-final) |
| 来店予定を確認する | [来店予約](/guides/purchase/reservations) |
| 店舗で現物を査定する | [店舗買取の査定](/guides/purchase/counter#2-査定して保存する) |
| 店舗で売らないカードをお返しする | [一部買取・全件辞退とその場でのお返し](/guides/purchase/counter#売らないカードがあるとき) |
| オンラインで買い取らないカードを返送する | [返品と返送](/guides/purchase/returns) |
## 新しい機能・変更の手順を探す
- [1枚ごとの最終査定](/guides/purchase/shipping-and-final)で金額・番号・買取不可を記録します
- [法人取引と請求書](/guides/purchase/corporate-deals)で請求書の下書きと現物を照合します
- [登録情報の確認・修正](/guides/purchase/registered-information)をお客様に依頼します
- [金額と数量の訂正](/guides/purchase/amount-and-quantity-corrections)で確定後の影響を確認します
## 共通の作業を調べる
顧客・取引、相場調査、書類、振込、訂正・取消は[買取の共通操作](/guides/purchase/common-operations)から探せます。各フローの該当する工程からも同じ手順へ進めます。
法人から請求書で仕入れる場合は、[法人取引と請求書](/guides/purchase/corporate-deals)の手順を使います。
買取の記録と支払いを別の仕組みで管理し、在庫だけを登録する場合は、[入庫伝票で入れる](/guides/purchase/mail-in-to-stock#方法1入庫伝票で入れる)へ進みます。入庫伝票だけでは、トレカクラウドに買取・本人確認・振込の記録は作られません。
---
# 成立後の買取金額・数量と関連記録を訂正する
Source: https://docs.toreca-cloud.com/guides/purchase/amount-and-quantity-corrections
在庫登録後の買取で金額や数量の誤りが分かったときは、元の買取案件から訂正します。元の記録を残したまま、買取合計・在庫・個体の原価・古物台帳と関連記録を更新します。
この手順は、明細単位で成立して在庫登録された買取が対象です。1枚ごとの査定で成立した買取は対象外で、「買取金額・数量を訂正」は表示されません。別の在庫操作で帳尻を合わせず、元の案件と支払い・書類を管理者に確認してください。
| 状況 | 進め方 |
| ------------------------------------ | ---------------------------------------------------------------------------------------- |
| 在庫登録前の査定を直したい | 通常の査定・見積の編集を使います |
| 在庫登録後の買取金額・数量を直したい | このページの「買取金額・数量を訂正」を使います |
| 以前の査定操作そのものを取り消したい | [履歴から操作を取り消す](/guides/purchase/history-and-undo)で対象と条件を確認します |
| 商品名・型番や時価を直したい | [店内の商品情報と時価の訂正](/guides/inventory/product-and-market-corrections)を使います |
「買取履歴の訂正」など、対象を参照・編集する権限が必要です。他店移管を含む場合は、影響する全店舗で現在のメンバー資格と在庫の編集・履歴訂正権限が必要です。店舗間の接続だけでは訂正できません。
## 1. 元の買取案件の三点メニューを開く
買取依頼または法人取引から対象の案件を開きます。右上の「…」(この依頼の操作)で①の「買取金額・数量を訂正」を選びます。見本の画面は法人取引です。
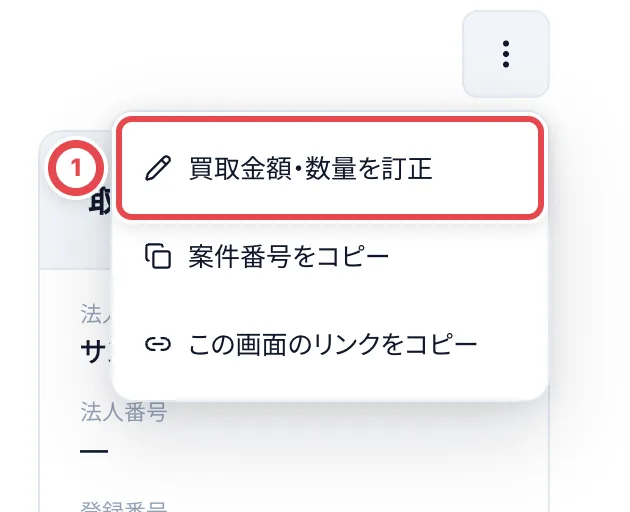 ## 2. 数量と明細合計を入力する
明細ごとに①の「数量」、②の「明細合計(円)」を入力します。**明細合計はその明細全体の金額で、1点の単価ではありません。** 訂正理由を選び、必要なら補足を残します。「その他」は詳細が必須です。
通常のカード・BOX・パック・デッキで数量を減らす場合は、減らす数だけ個体を選びます。数量を増やす場合は入庫先を選びます。以前の訂正で除外した個体を戻せる場合は復元を優先し、不足分の個体を作成します。まとめ査定の束は内容数量として扱うため、1枚ずつの個体選択とは異なります。
 ## 3. 後続記録を引き継ぐ個体を選ぶ
除外する個体が予約・販売・返品・他店移管・外部アプリに使われている場合は、同じ商品・グレード・包装状態の利用可能な個体を引継先に選びます。①は移管、②は外部出品の例です。同じ個体を複数の引継先に選ぶことはできません。選択後のラベル番号(未発行の場合は資産番号)と棚を現物と照合します。
出庫準備の確認済みスキャンは、付け替えにより再確認が必要になる場合があります。訂正後の予約・出庫を担当するメンバーにも確認してください。
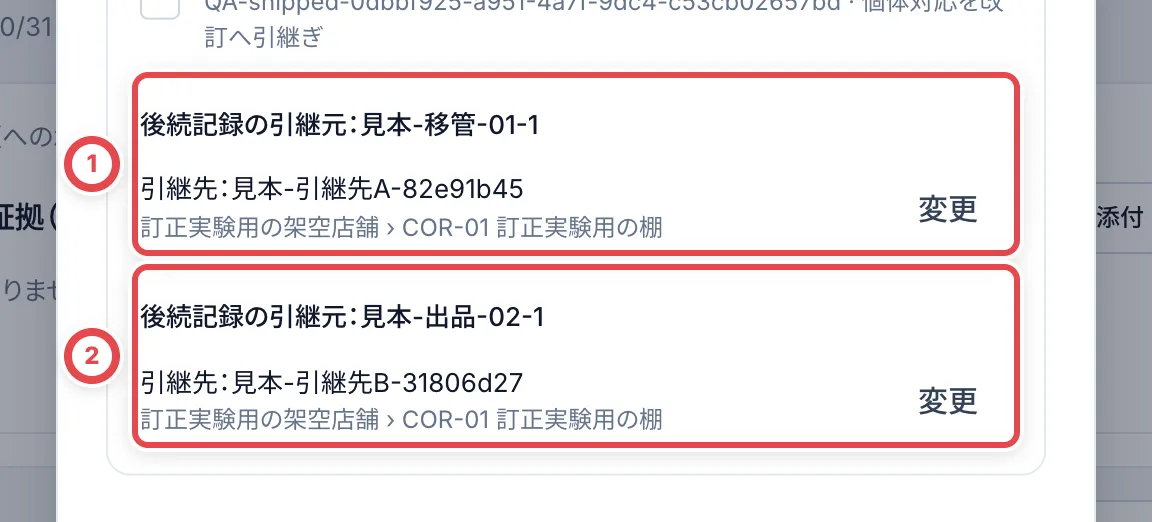 ## 4. 買取合計と支払いとの差額を確認する
「変更内容を確認」を押します。①の買取合計・数量・原価と、記録済み支払いとの差額を確認します。差額がプラスなら追加支払い、マイナスなら返金要否の確認が必要です。
:::warning
②の「訂正を保存」は送金や返金を実行しません。元の支払い記録・発行済み書類・承諾や署名は保持されます。必要な精算・書類の再発行・再承諾は、担当者が別途確認してください。
:::
関連記録を次の手順で確認してから、②で保存します。保存後にも照合できるよう、対象の出庫番号・移管番号・外部参照と、元の個体・引継先のラベル番号または資産番号を控えてください。
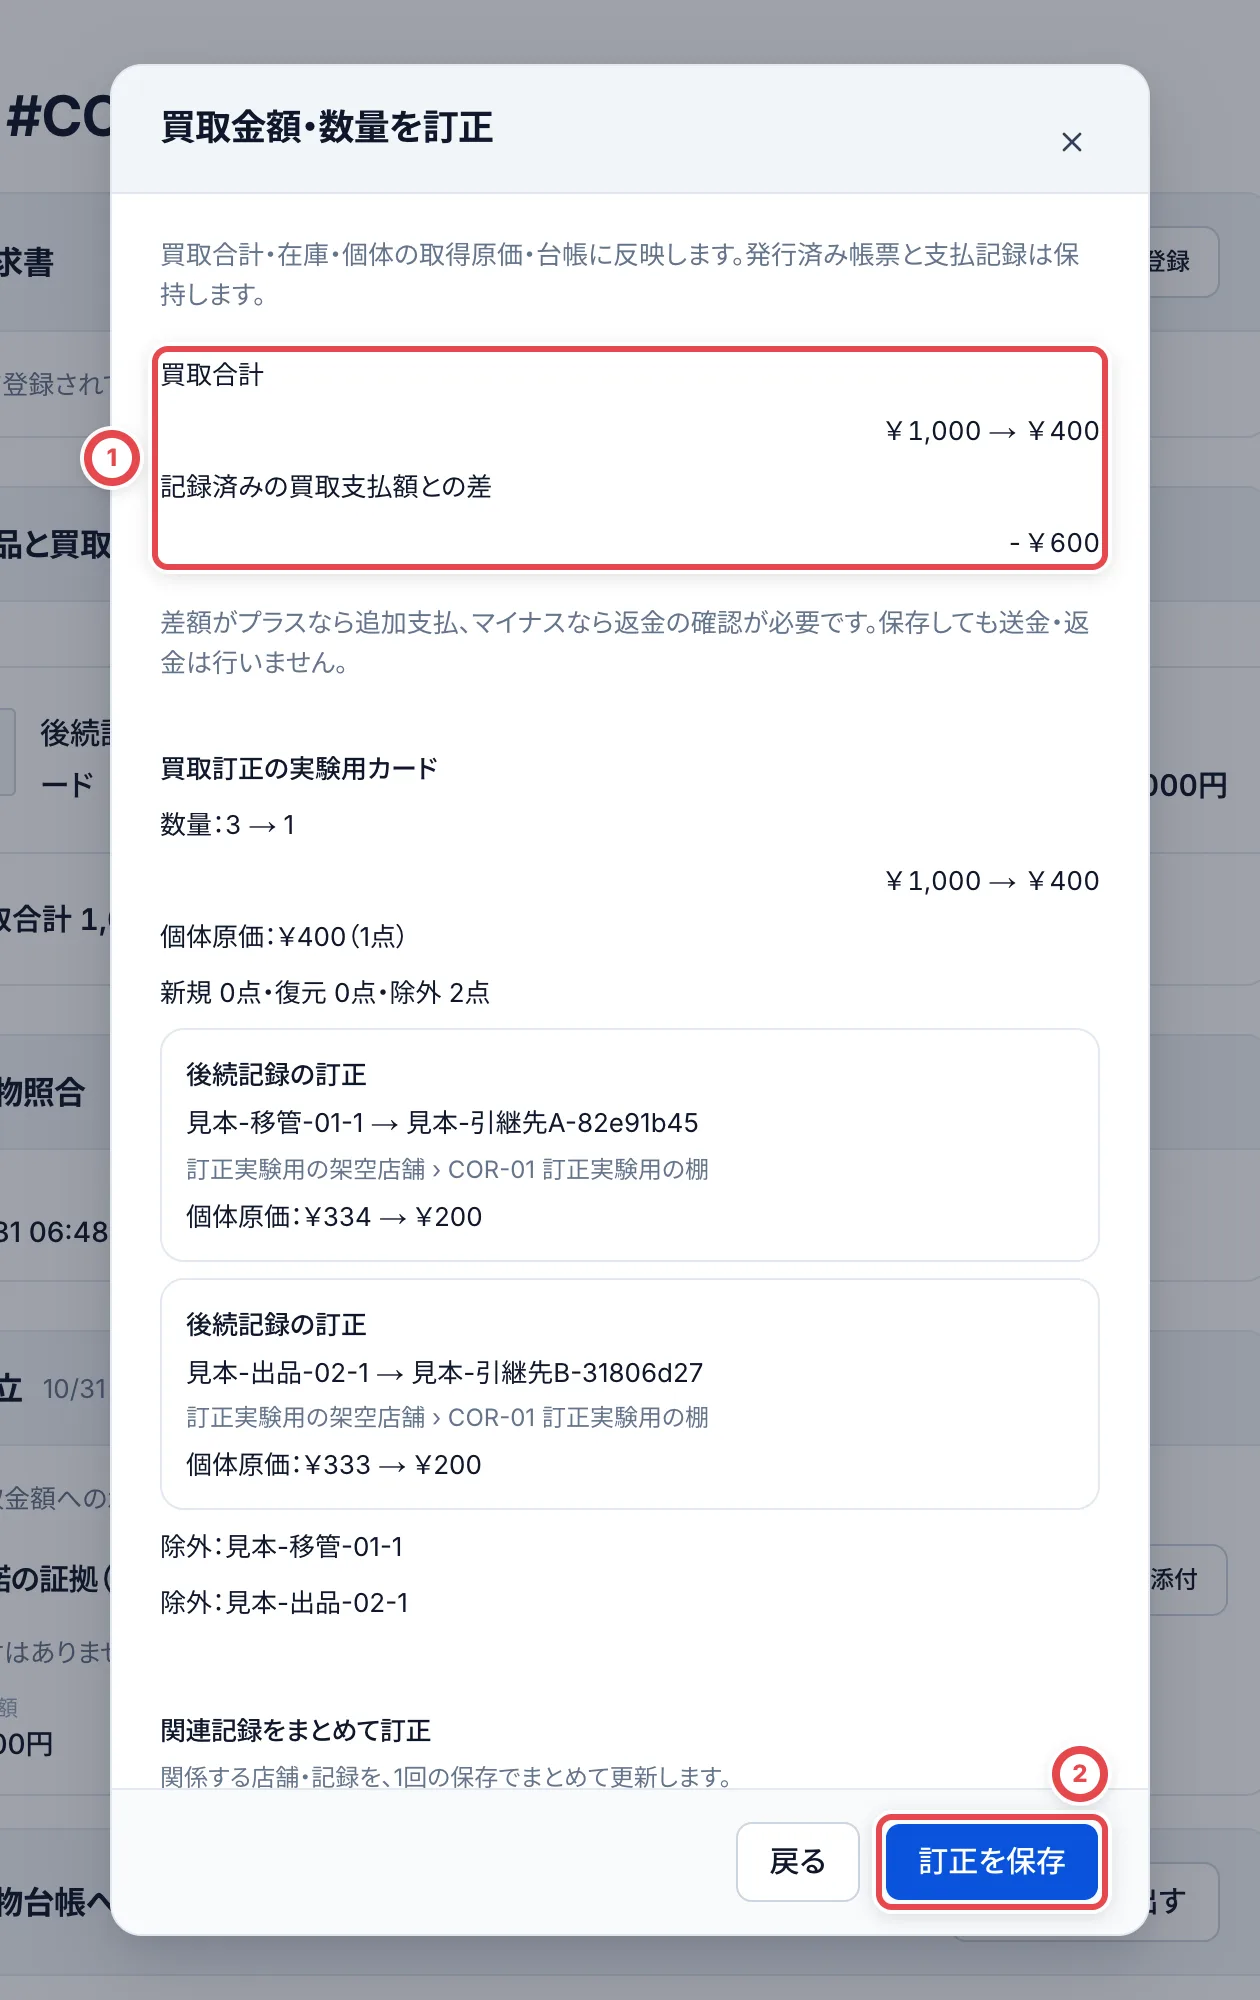 ## 5. 他店移管と外部アプリの関連記録を確認する
同じ確認画面を下へスクロールします。①の「他店移管」で移管元・受入先・個体・金額を確認します。受入済み個体の識別は保持し、原価などを連動させます。販売にひもづく移管の合意金額は、そのまま保持する場合があります。
②の外部アプリの出品と、その下の在庫割当では、元の個体と引継先を確認します。外部参照・出品や割当の識別・期限などは保持します。販売価格や返品の返金額を、この買取訂正で変更することはありません。
:::note
画面はトレカクラウド内の訂正対象を示します。外部アプリへの通知・同期後の表示は連携先でも確認してください。保存完了だけでは、外部アプリでの受信完了を保証しません。
:::
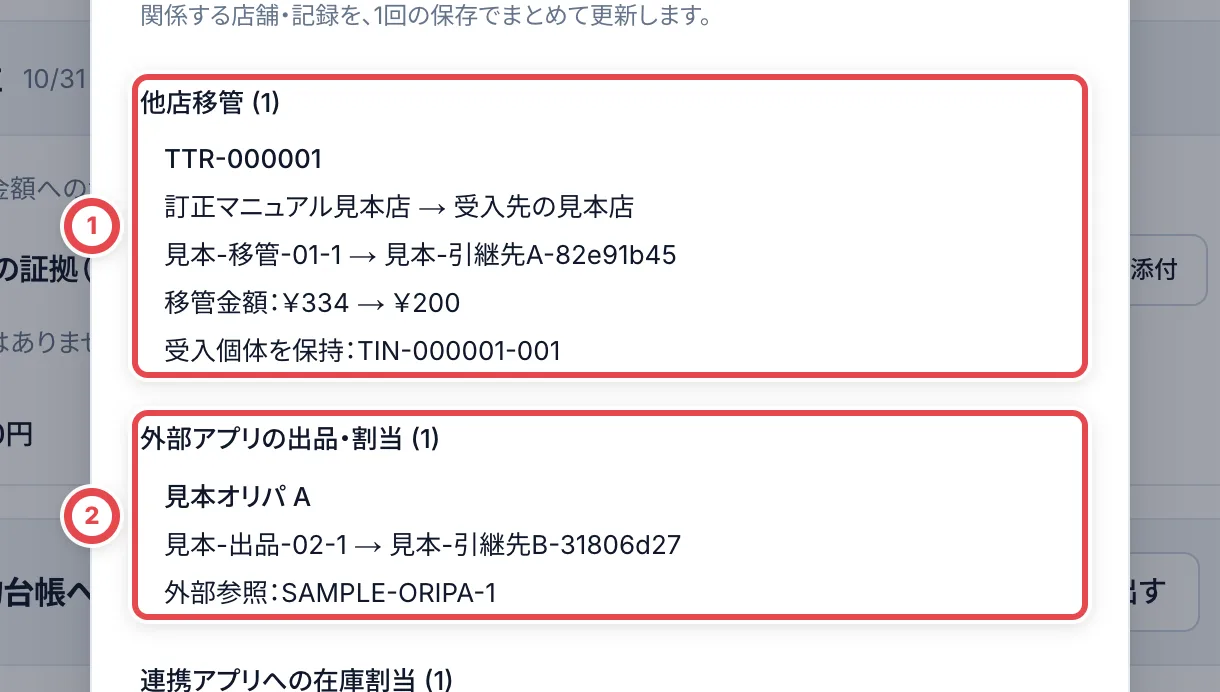 ## 6. スキャン差し替えと受入先の原価を確認する
①の「スキャン差し替え」で、実際に出庫した個体との対応を確認します。②の「受入先の個体」で、他店に渡した個体と訂正後の原価を確認します。
:::warning
スキャン差し替えをこの改訂に取り込むと、元のスキャン証跡を残したうえで関連記録を確定します。そのスキャン差し替えだけを独立して取り消す操作は終了します。実出庫した個体が正しいか、保存前に確認してください。
:::
確認画面の全項目を照合して「訂正を保存」を押します。影響する店舗・記録の訂正をまとめて保存します。競合や権限不足が出た場合は、最新の状態を読み直してやり直します。
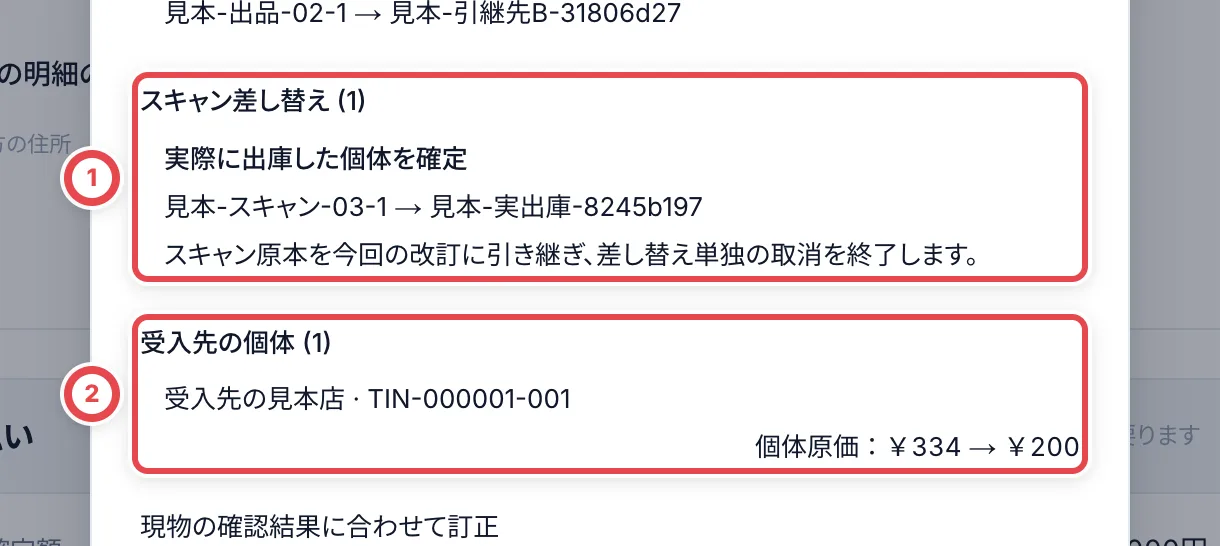 ## 7. 保存後の表示と改訂履歴を確認する
案件を開き直し、訂正後の買取合計と数量、支払いとの差額を確認します。同じ訂正画面を開くと①の改訂履歴に日時・担当者・理由・金額が残ります。次の表の順路で、保存前に控えた番号と関連記録を照合します。
| 確認する記録 | 保存後に開く画面と照合する内容 |
| ---------------------------- | ---------------------------------------------------------------------------------------------------------------------------------------------------------------------------------------------------------------------------------------------------------------------------------------------------------------------------------- |
| 在庫・個体 | 「在庫」→「在庫一覧」→対象商品。必要なら行を押して開き、個体を開いて、「管理情報」の資産番号、状態・仕入額・棚を照合します。 |
| 予約・販売・スキャン差し替え | 「在庫」→「出庫」で出庫番号を検索して伝票を開き、明細の行を押して引継先を確認します。ラベル未発行なら個体のリンクを開き、資産番号で照合します。「外した」行も履歴として残るため、予約中・出庫済の行を確認してください。販売額・仕入額と、予約の「取り出し済み」も確認します。再確認が必要な個体は、出庫担当者が再スキャンします。 |
| 販売の返品 | 同じ出庫伝票の「返品」で返品番号・点数・返金額・戻した棚を照合します。明細の行を開いた「返品済」行から引継先も確認します。販売額のサマリーは返品控除後の表示なので、個体行の元の売価と区別します。 |
| 他店移管 | 「在庫」→「テナント間移管」→「送付」で移管番号を開き、状態・点数・仕入額と「元の資産番号」を照合します。受入先の権限もある場合は、アカウントメニューで受入先へ切り替え、同じ移管を「受入」から開きます。「受け入れた個体を開く」で、受入個体の資産番号が保持され、仕入額が訂正されたことを確認します。確認後は元の店舗へ戻します。 |
| 外部アプリの出品・割当 | 在庫一覧から対象商品→引継先の個体を開き、状態・連携先名・出品名・外部参照と「連携先への割り当て」を照合します。連携先での受信・表示は、そのアプリでも確認します。 |
画面ごとの詳細は[出庫と移動・移管](/guides/inventory/outbound-and-transfers)、[販売した在庫の返品](/guides/inventory/sales-returns)、[連携先の販売・当選と配送](/guides/inventory/partner-sales)を参照してください。
以前の買取金額に戻す場合も、新しい訂正として正しい数量・金額を入力し、現在の関連記録を再確認します。数量を増やして除外済みの個体が復元されても、前の訂正で引き継いだ販売・予約などが自動で元の個体へ戻るわけではありません。復元した個体と、現在の引継先を別々に照合してください。ほかのメンバーが更新した場合は、②の「現在の記録を再読み込み」で最新の内容を取得してから入力し直します。
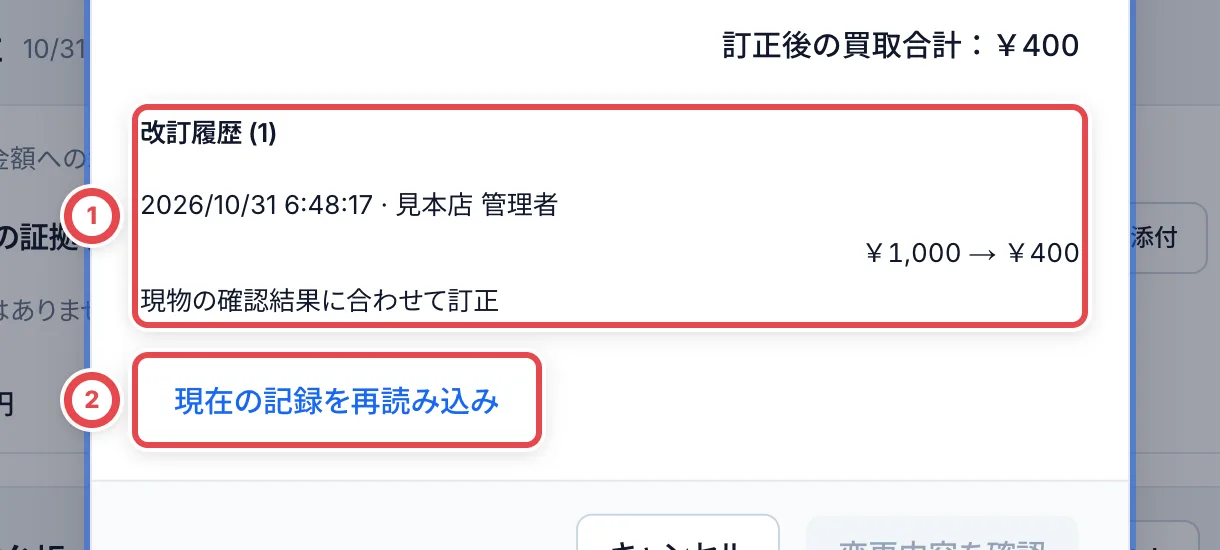 ## 困ったとき
| 起きていること | 確認すること |
| ---------------------------- | -------------------------------------------------------------------------------- |
| 訂正メニューがない | 在庫登録後の対象案件か、買取履歴を訂正する権限があるか確認します |
| 確認ボタンが押せない | 数量・金額・理由、除外する個体の数、引継先、増加時の入庫先を確認します |
| 引継先の候補が出ない | 同じ商品・グレードなどの条件で利用可能な個体があるか確認します |
| 他店を含むため保存できない | 影響する全店舗での現在の権限を管理者に確認します |
| 状態が変わったと出る | 「現在の記録を再読み込み」で入力と対象個体を見直します |
| 保存の結果が分からない | 案件と改訂履歴を先に読み直します。入力を変えた訂正を重ねないでください |
| 支払い・書類の値が以前のまま | 元の支払い・書類を残す仕様です。訂正後の合計と差額を照合し、別途精算を確認します |
---
# 事前査定と見積
Source: https://docs.toreca-cloud.com/guides/purchase/appraisal
オンライン買取の事前査定と見積提示の手順です。店舗で現物を査定し、お客様にその場で確認・署名してもらう場合は、[店舗買取の査定](/guides/purchase/counter#2-査定して保存する)へ進みます。
事前査定では、お客様から届いた写真や申告をもとにカードを特定し、金額を付けます。付けた金額を見積としてお客様に提示し、お客様の返事を記録します。届いた現物での最終査定は、[発送と最終査定](/guides/purchase/shipping-and-final)で説明しています。
商品ごとのカードは見出しで開閉できます。査定依頼の「保存して確認」と、見積編集の「入力を確認して閉じる」では保存の範囲が異なります。[明細カードの共通操作](/guides/purchase/common-operations#明細カードを開く確認する)を確認してください。
## 最初に用意するもの
- 買取を変える権限(オーナー・管理者・スタッフ・スタッフ(調査兼務))
- 掛け率の設定([買取掛け率](/guides/settings/pricing))。査定額の掛率は、ここから自動で入ります
- 見積書のPDFを作るなら、「組織設定」に事業者の情報
## 流れ
| 順番 | やること | 画面 | 取引の状態 |
| ---- | ----------------------------- | ------------------------ | ----------- |
| 1 | カードを特定する | 顧客の画面の「査定依頼」 | 新着 |
| 2 | 金額を付けて、見積を作る | 「査定依頼」・見積もり | 査定中 |
| 3 | (必要なら)相場調査・2次査定 | 見積もり | 査定中 |
| 4 | 見積を提示する | 見積もり | 見積送付済 |
| 5 | お客様の返事を記録する | 見積もり | 承諾済 など |
## 1. カードを特定する
LINEのトークから読み取ったカードや、フォームで申告されたカードは、顧客の画面の「査定依頼」タブに並びます。どのカードか決まっていないものは、名前の下に①の「特定する」が出ます。
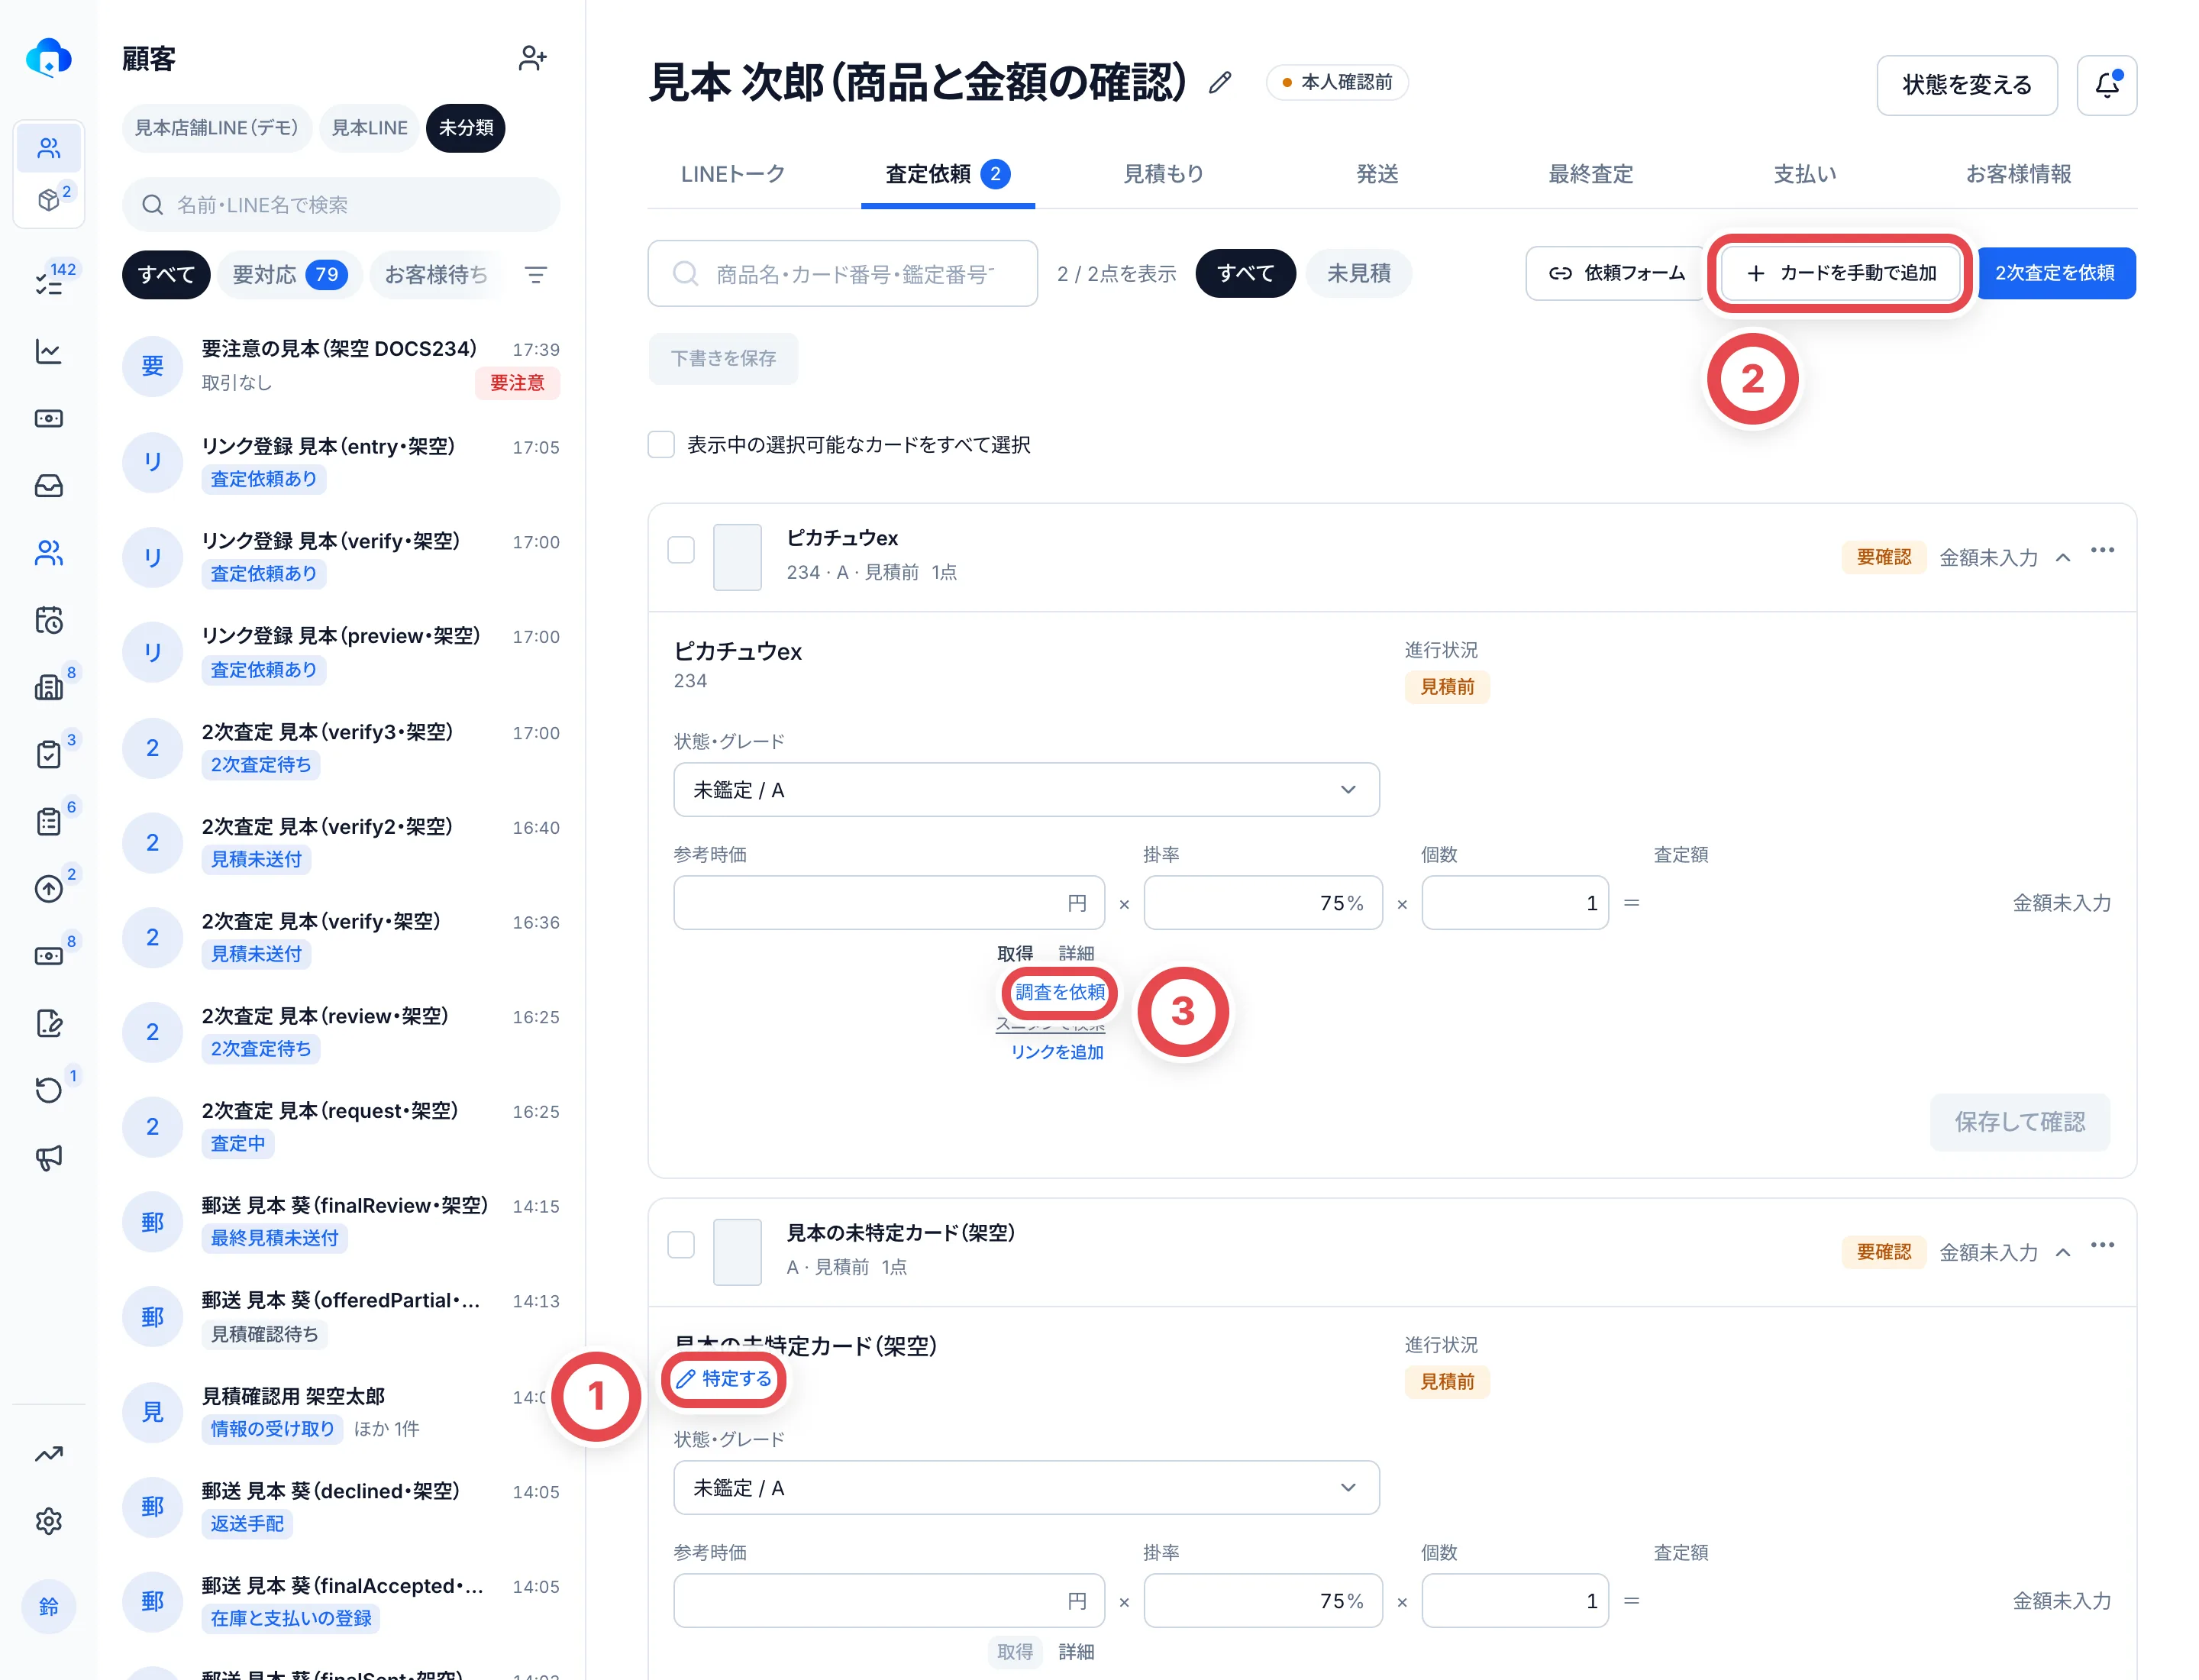 ①でどのカードか選びます。②で申告にないカードを足します。③は相場が分からないときに調査を頼むリンクです。
①の「特定する」を押すと、「カードを選ぶ」が開きます。初めはお客様の書いた名前で探すので、見つからないときは言葉を減らすか、型番やセット名で探し直します。ゲーム・セット・レアリティ・言語でも絞れます。
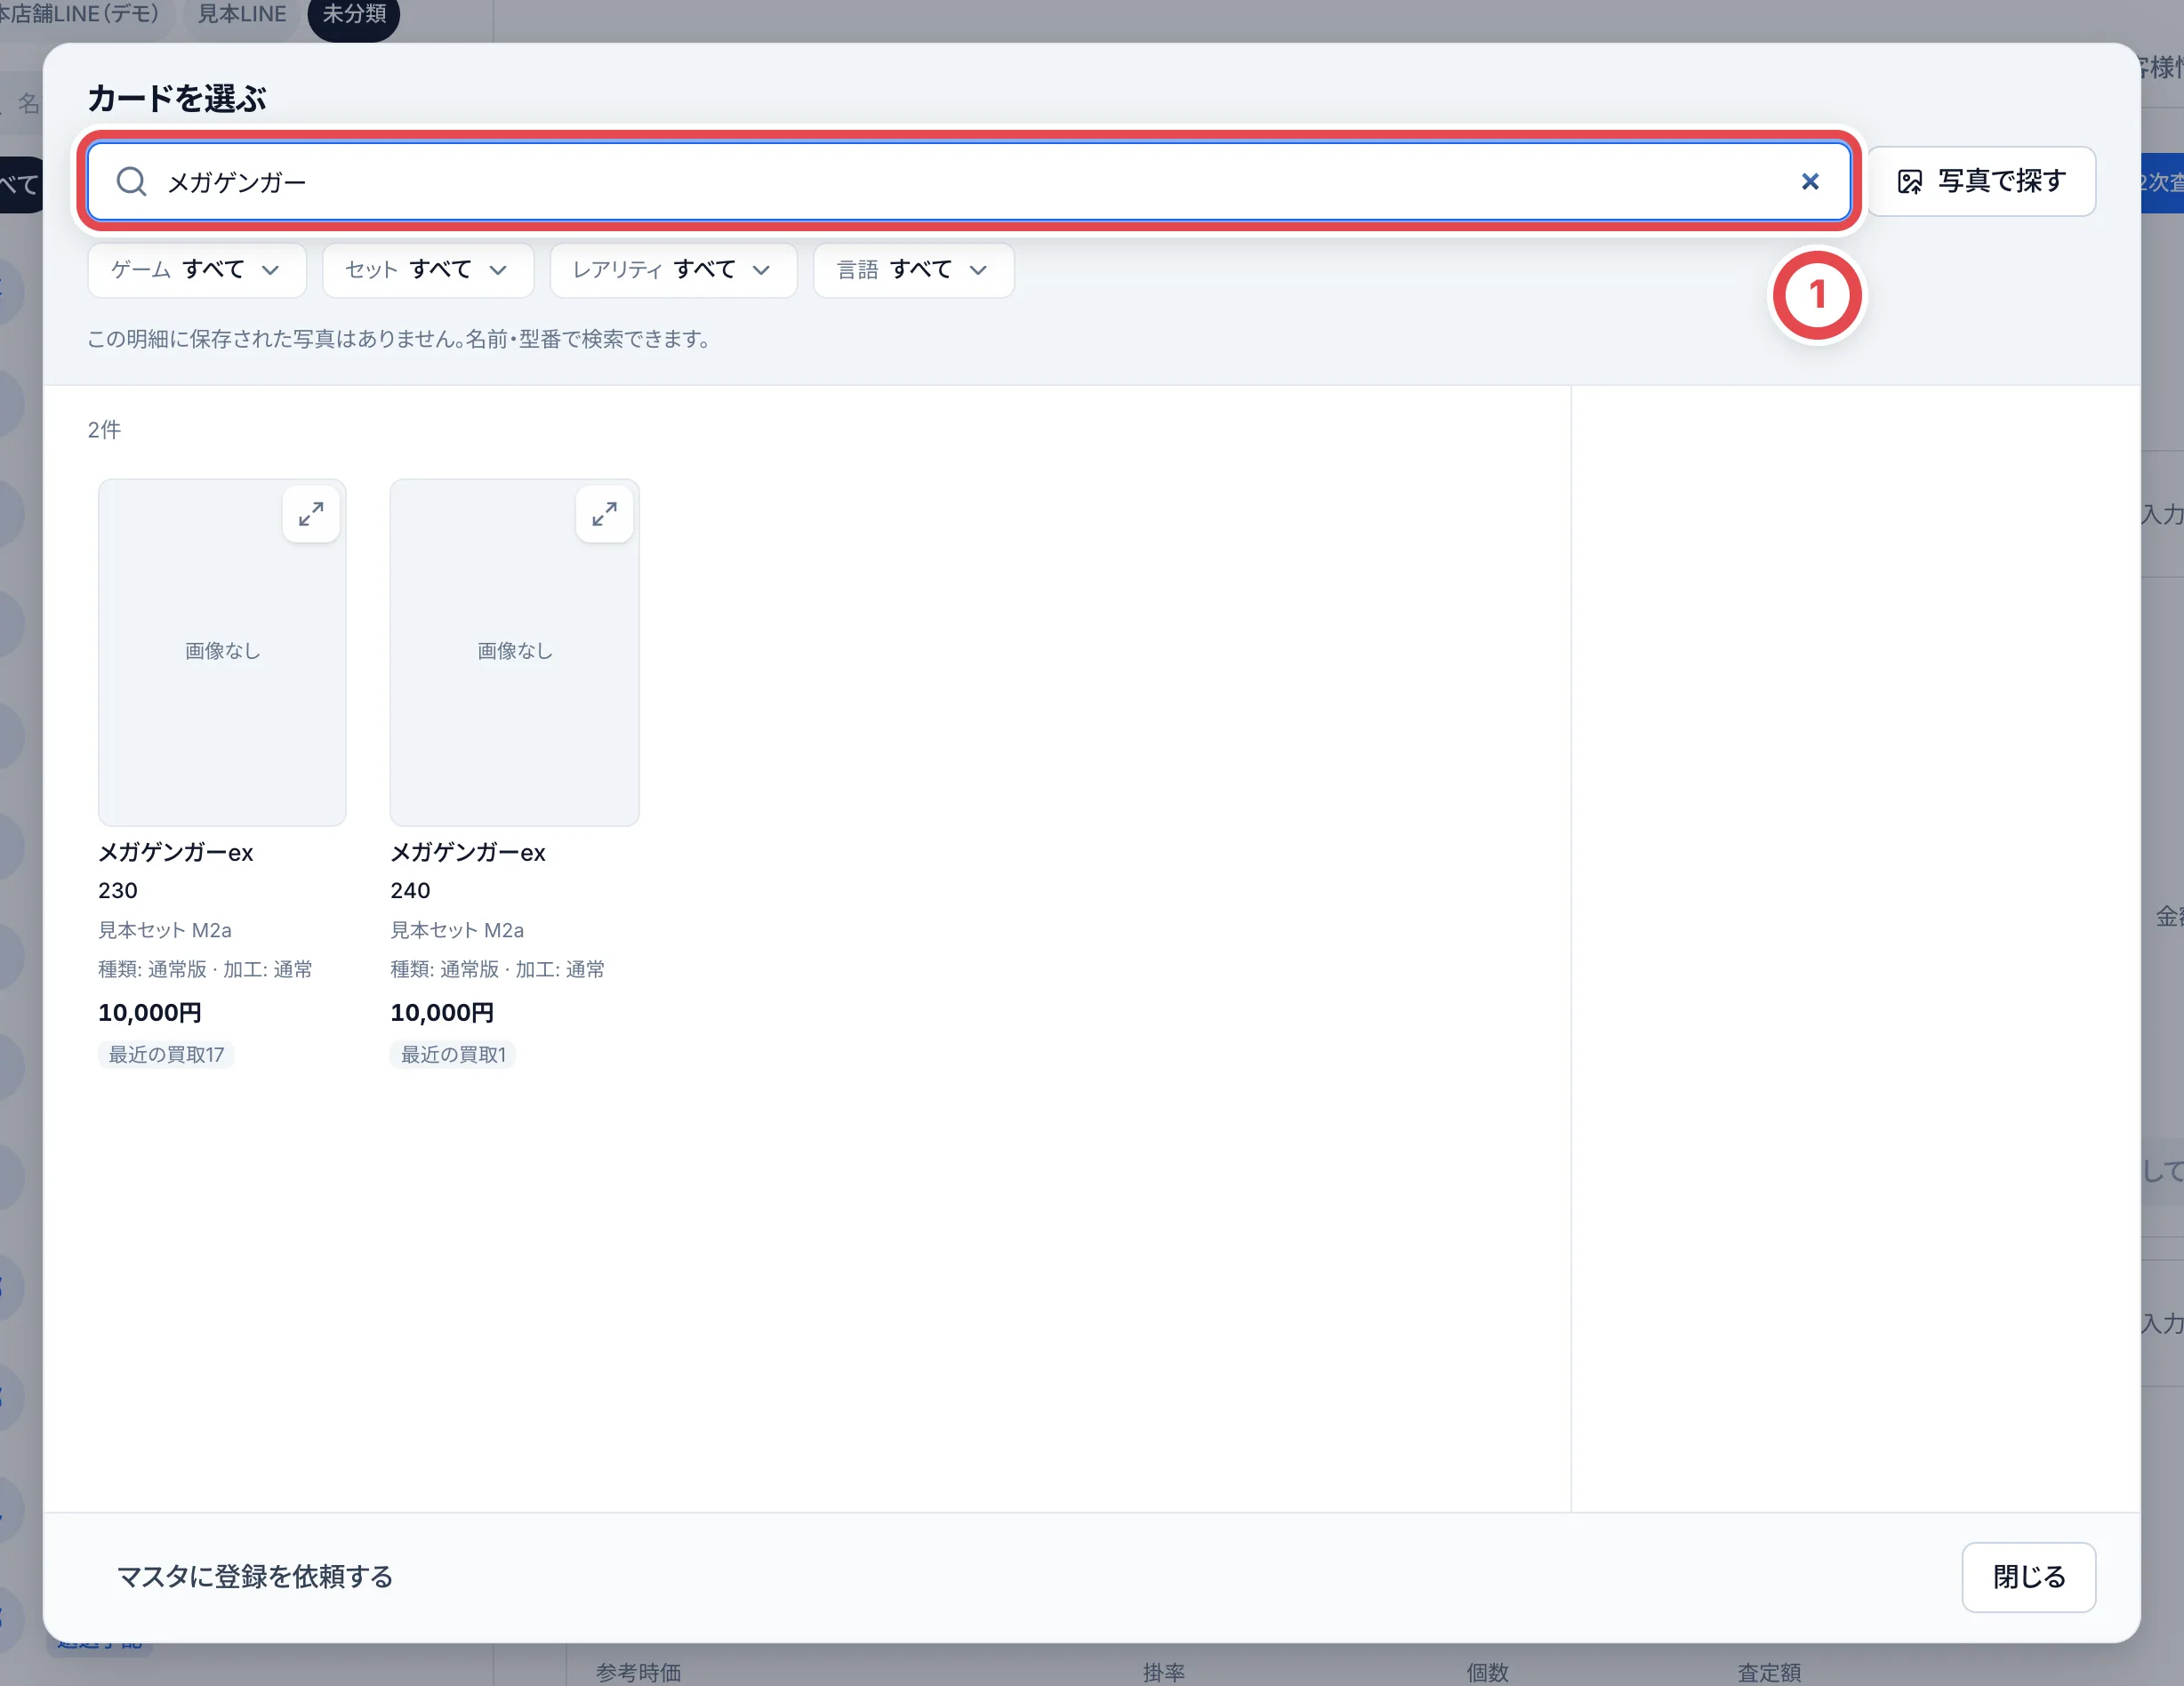 - 「査定依頼」タブでは、**カードを押した時点で特定されます**
- 取引の査定明細で特定するときは、カードを選んでから「このカードにする」で確定します
- カードを選ぶと、カードの画像が入り、条件を満たせば相場も自動で入ります(相場の決まり方は下の表)
### 申告にないカードを足す
②の「カードを手動で追加」を押すと、「商品を追加」が開きます。
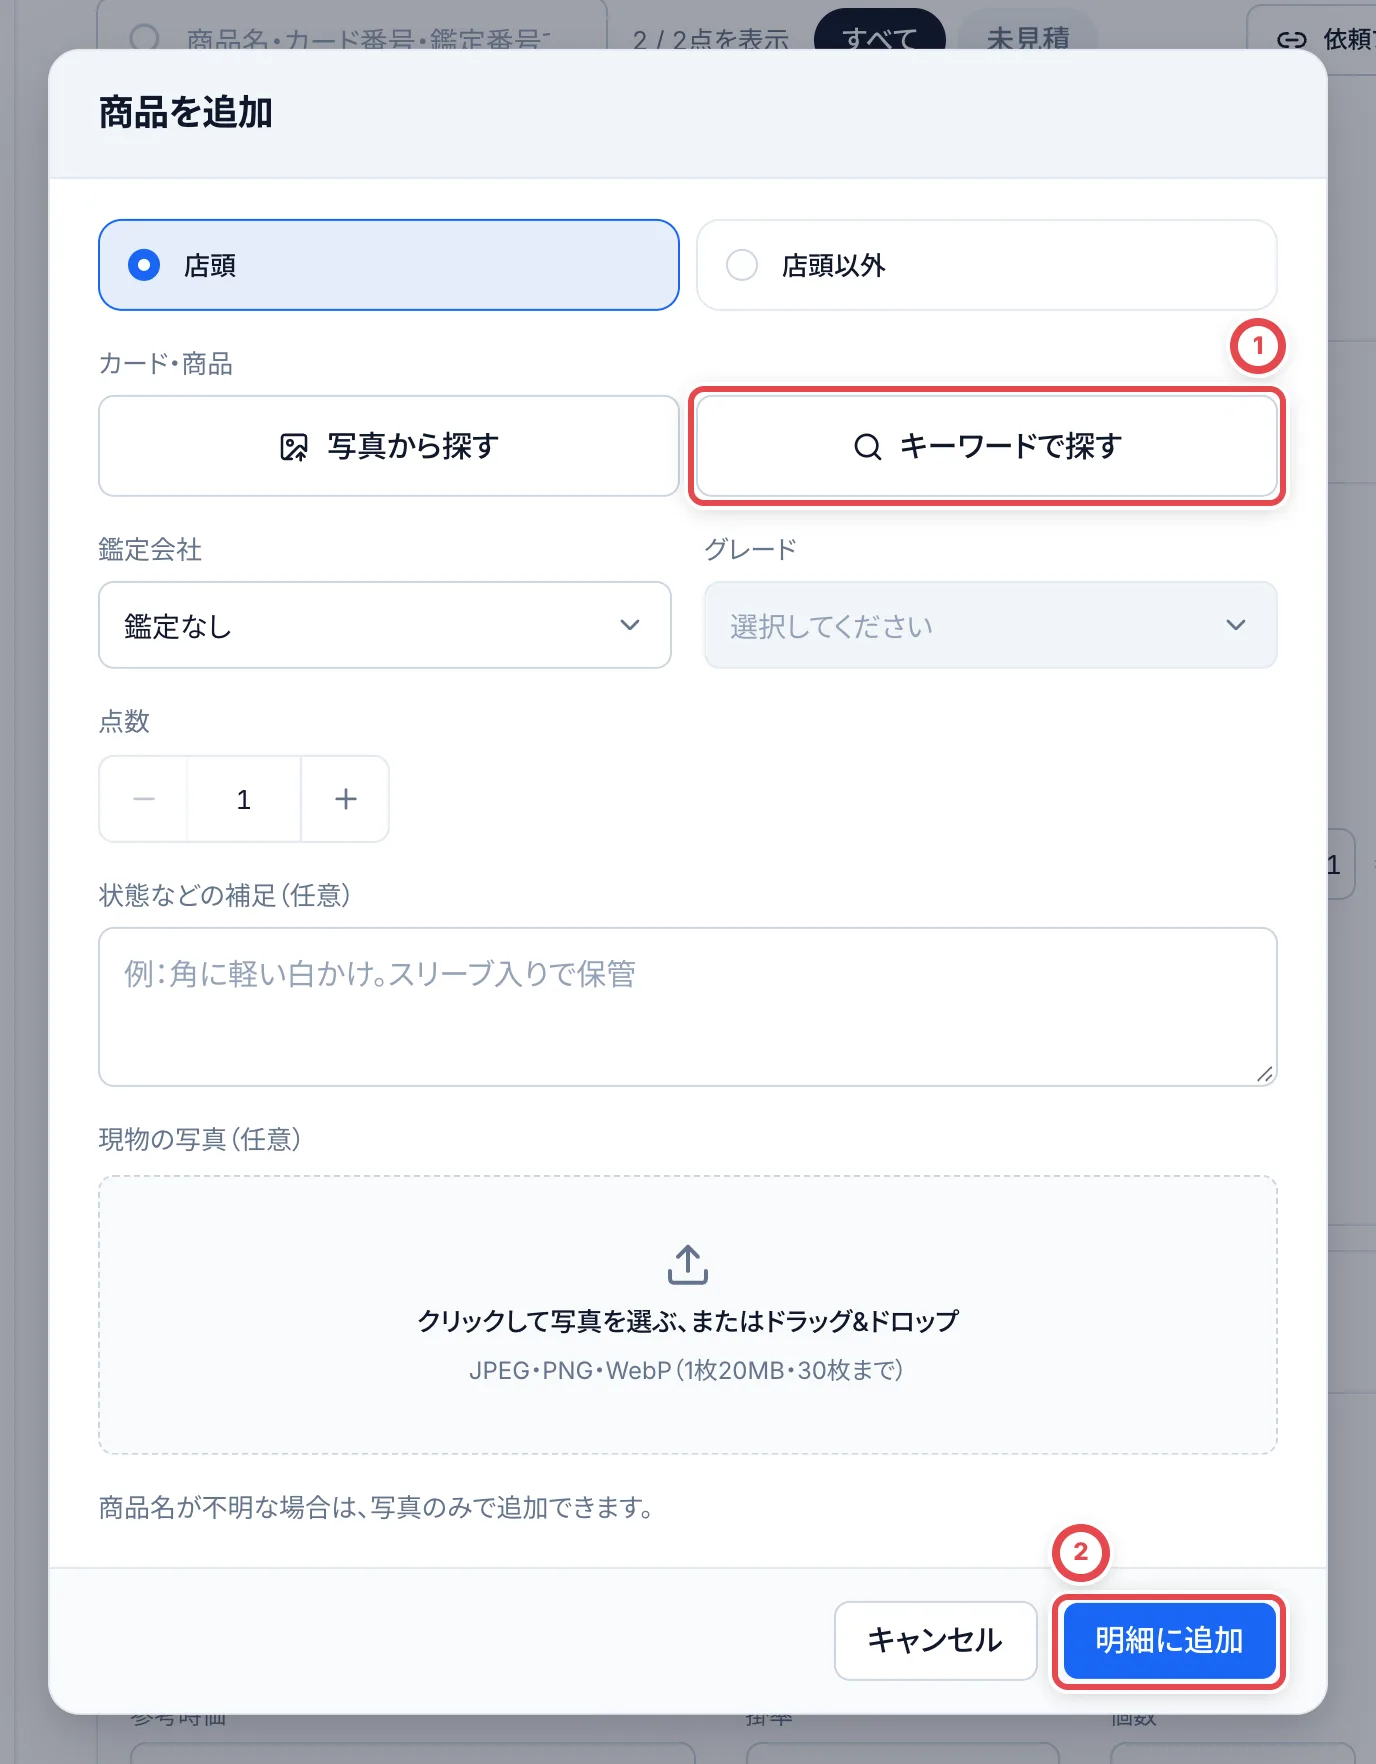 1. 顧客の画面から足すときは、いちばん上で受付の方法(店頭・店頭以外)を選びます
2. ①の「写真から探す」か「キーワードで探す」でカードを選びます
3. 鑑定済みのカードは、鑑定会社とグレードを選びます。1点の場合は、鑑定番号も任意で入力できます。現物が届いたら番号を照合して保存します
4. 点数と、必要なら状態の補足・現物の写真を入れて、②の「明細に追加」を押します
写真があれば、カード名がなくても追加できます。その場合は「カード未特定」の明細として残り、あとで特定します。
申告された鑑定会社・グレード・鑑定番号を直す場合は、明細の三点メニューから「鑑定情報を直す」を使います。見積の承諾後に使える範囲や下書きへの影響は、[申告された鑑定情報の訂正](/guides/purchase/common-operations#申告された鑑定情報を直す)を確認してください。
## 2. 金額を付けて、見積を作る
「査定依頼」タブの各行で、「状態・グレード」「参考時価」「掛率」「数量」を入れると、右に査定額が計算されます(参考時価 × 掛率 × 数量 = 査定額)。参考時価は相場から、掛率は掛け率の設定から自動で入ります。
変えた「状態・グレード」「参考時価」「掛率」は、表の上の「下書きを保存」を押すと残ります。画面を離れても、ほかのメンバーが開いても同じ値が出るので、相場調査の回答を待つあいだに離れても入れ直さずに済みます。保存していない変更があるまま画面を離れようとすると、確認が出ます(ブラウザの戻る・進むでは出ません)。見積に入れると、そのカードの下書きは消えます。
### 相場の決まり方
自動で入る相場と「相場を確認」は、まず同じカード・グレードの国内スニダンの直近30日の成約を使います(出品価格やPriceChartingは使いません)。国内成約から算出できない場合は、同じショップで確認から30日以内に登録された有効な相場を候補にします。
| 直近30日の成約 | 入る相場 |
| -------------- | ---------------------------------------------------------------------------------- |
| 0〜1件 | 国内成約からは算出しません。有効なショップの登録相場もなければ相場調査を依頼します |
| 2件 | 2件の平均 |
| 3件以上 | 新しい3件の平均。3件が続けて値下がりしているときは、いちばん新しい成約額 |
平均は1円単位で四捨五入します。
### 見積の版を作る
金額が決まったら、取引の見積もりの画面で見積の版を作ります。保存済みの版を直すときは「査定内容を修正」を押します。2次査定が承認・免除された版は直接変更できません。内容を変える場合は「再見積」で新しい版を作り、必要な2次査定を受け直します。
査定の編集中にカードを増やすときは、明細右上の①「商品を追加」を押します。同じカード・ランク・状態の補足で鑑定番号がない明細があれば、その数量に加算します。鑑定番号があるもの、ランクなどが異なるもの、個別写真付きの追加、個別の査定メモ・分割がある明細は別に扱います。保存済みの重複行を自動で統合する操作ではありません。追加・数量の変更は「第〇版を保存」で確定します。
②「査定から外す」を押した場合は、取り消しの理由を選んでから保存します。保存前なら「元に戻す」で復元できます。まだ保存していない追加行は「追加を取り消す」で取り消せます。
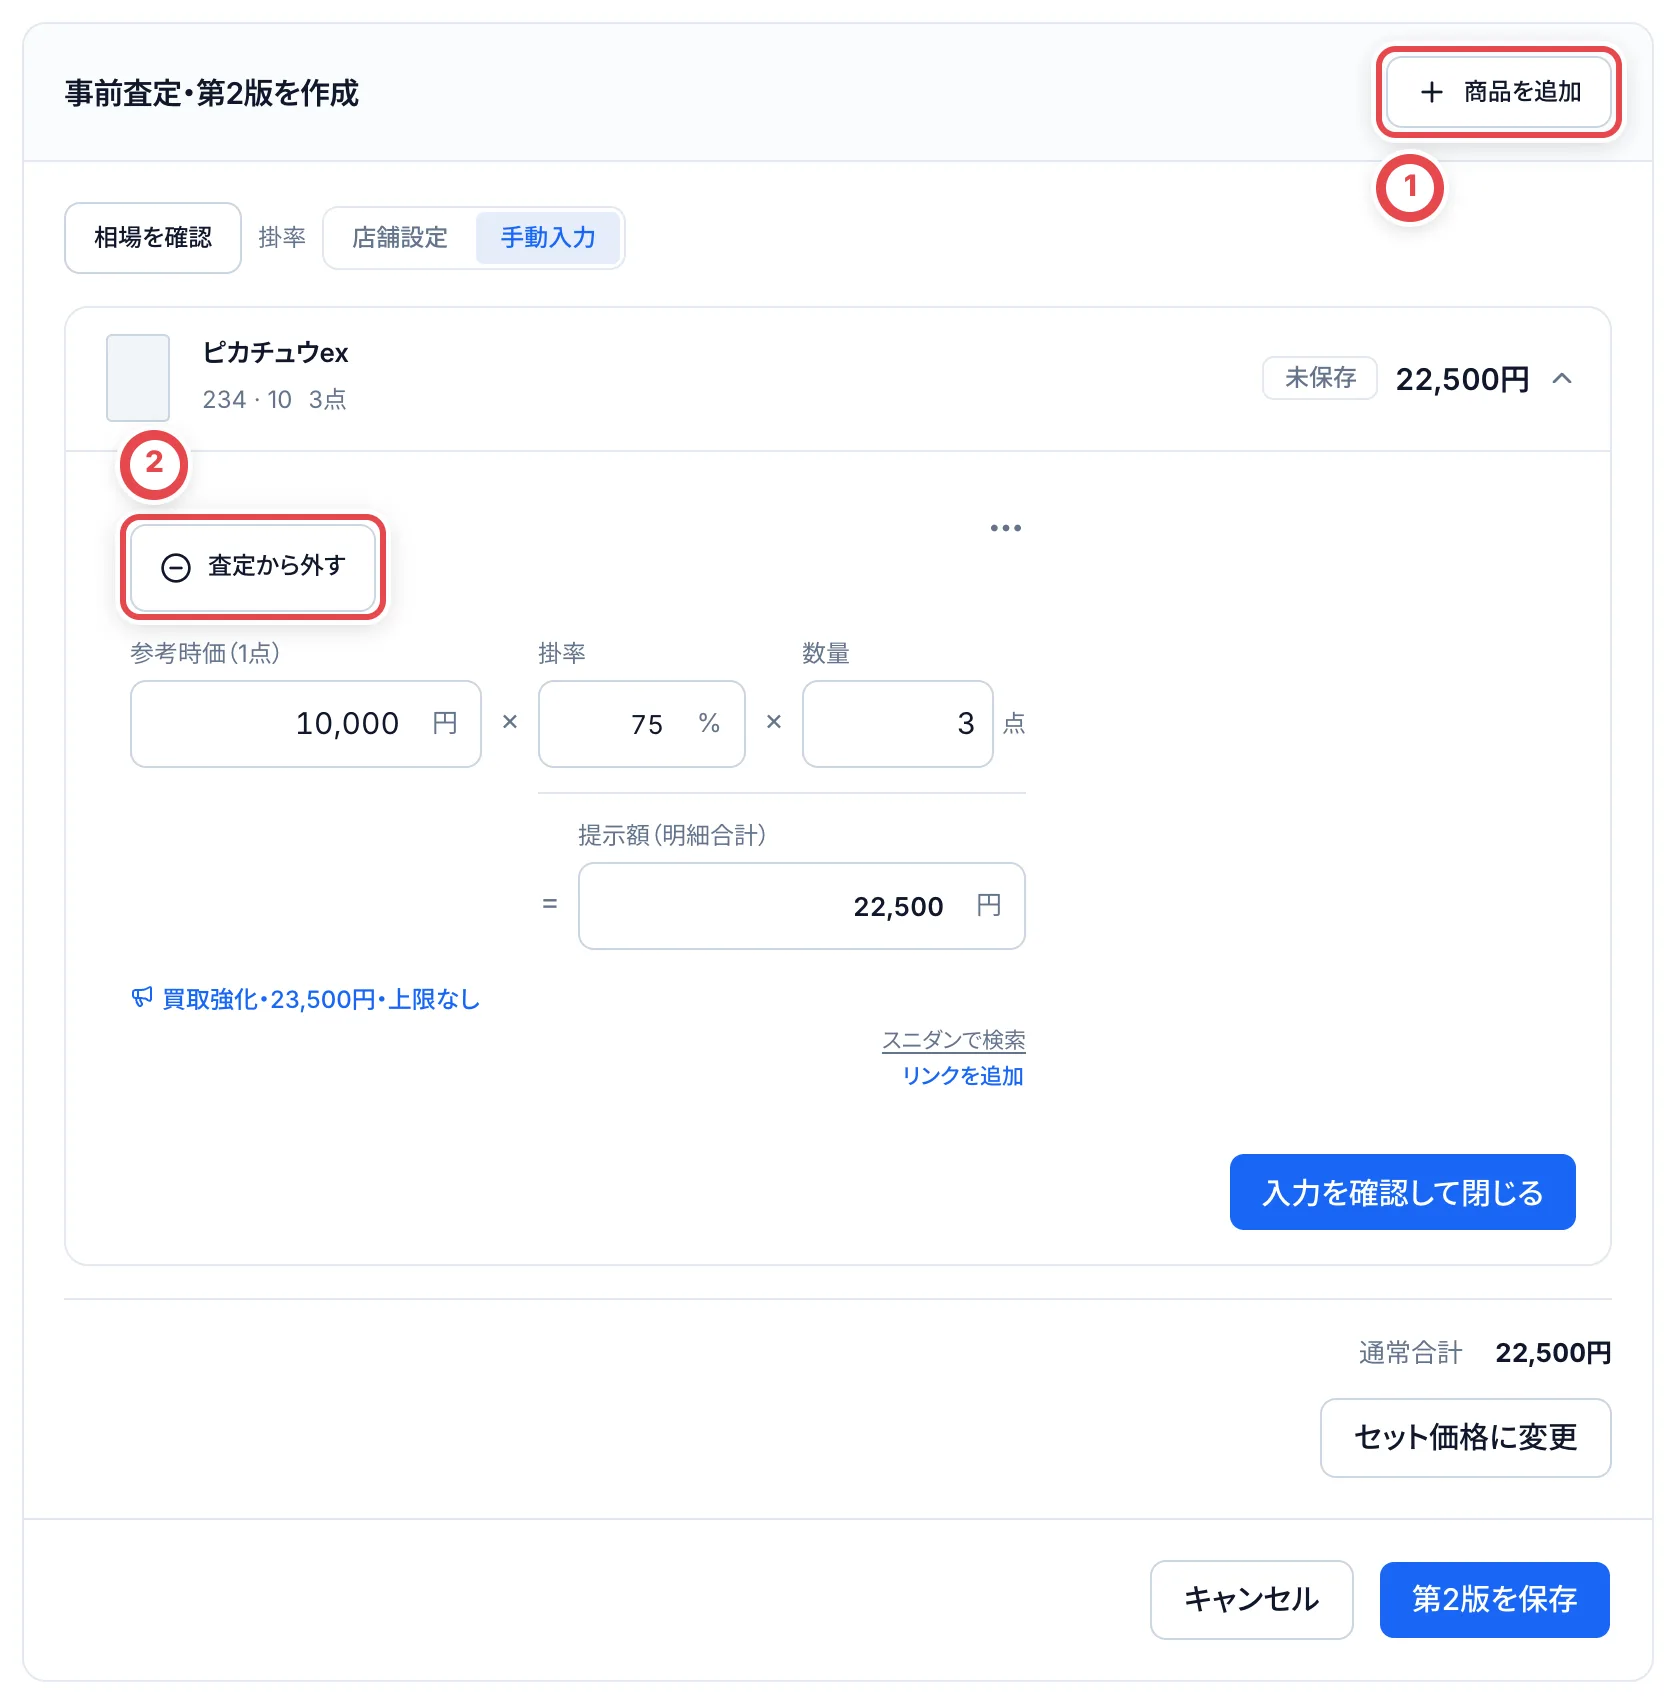 新規査定では、①の掛率が「店舗設定」になり、参考時価を入力する前から②に標準掛率が表示されます。時価がすべて揃うと、価格帯などの条件と端数の丸め方に合わせて自動計算します。時価・数量を変更した後も自動で計算し直します。
掛率を直接変更するときは①の「手動入力」を選びます。手入力した掛率は時価を変更しても維持され、保存後に開き直してもそのまま使えます。「店舗設定」に戻すと、店舗の設定で計算し直します。店舗掛率が未設定の場合は「手動入力」で入力してください。
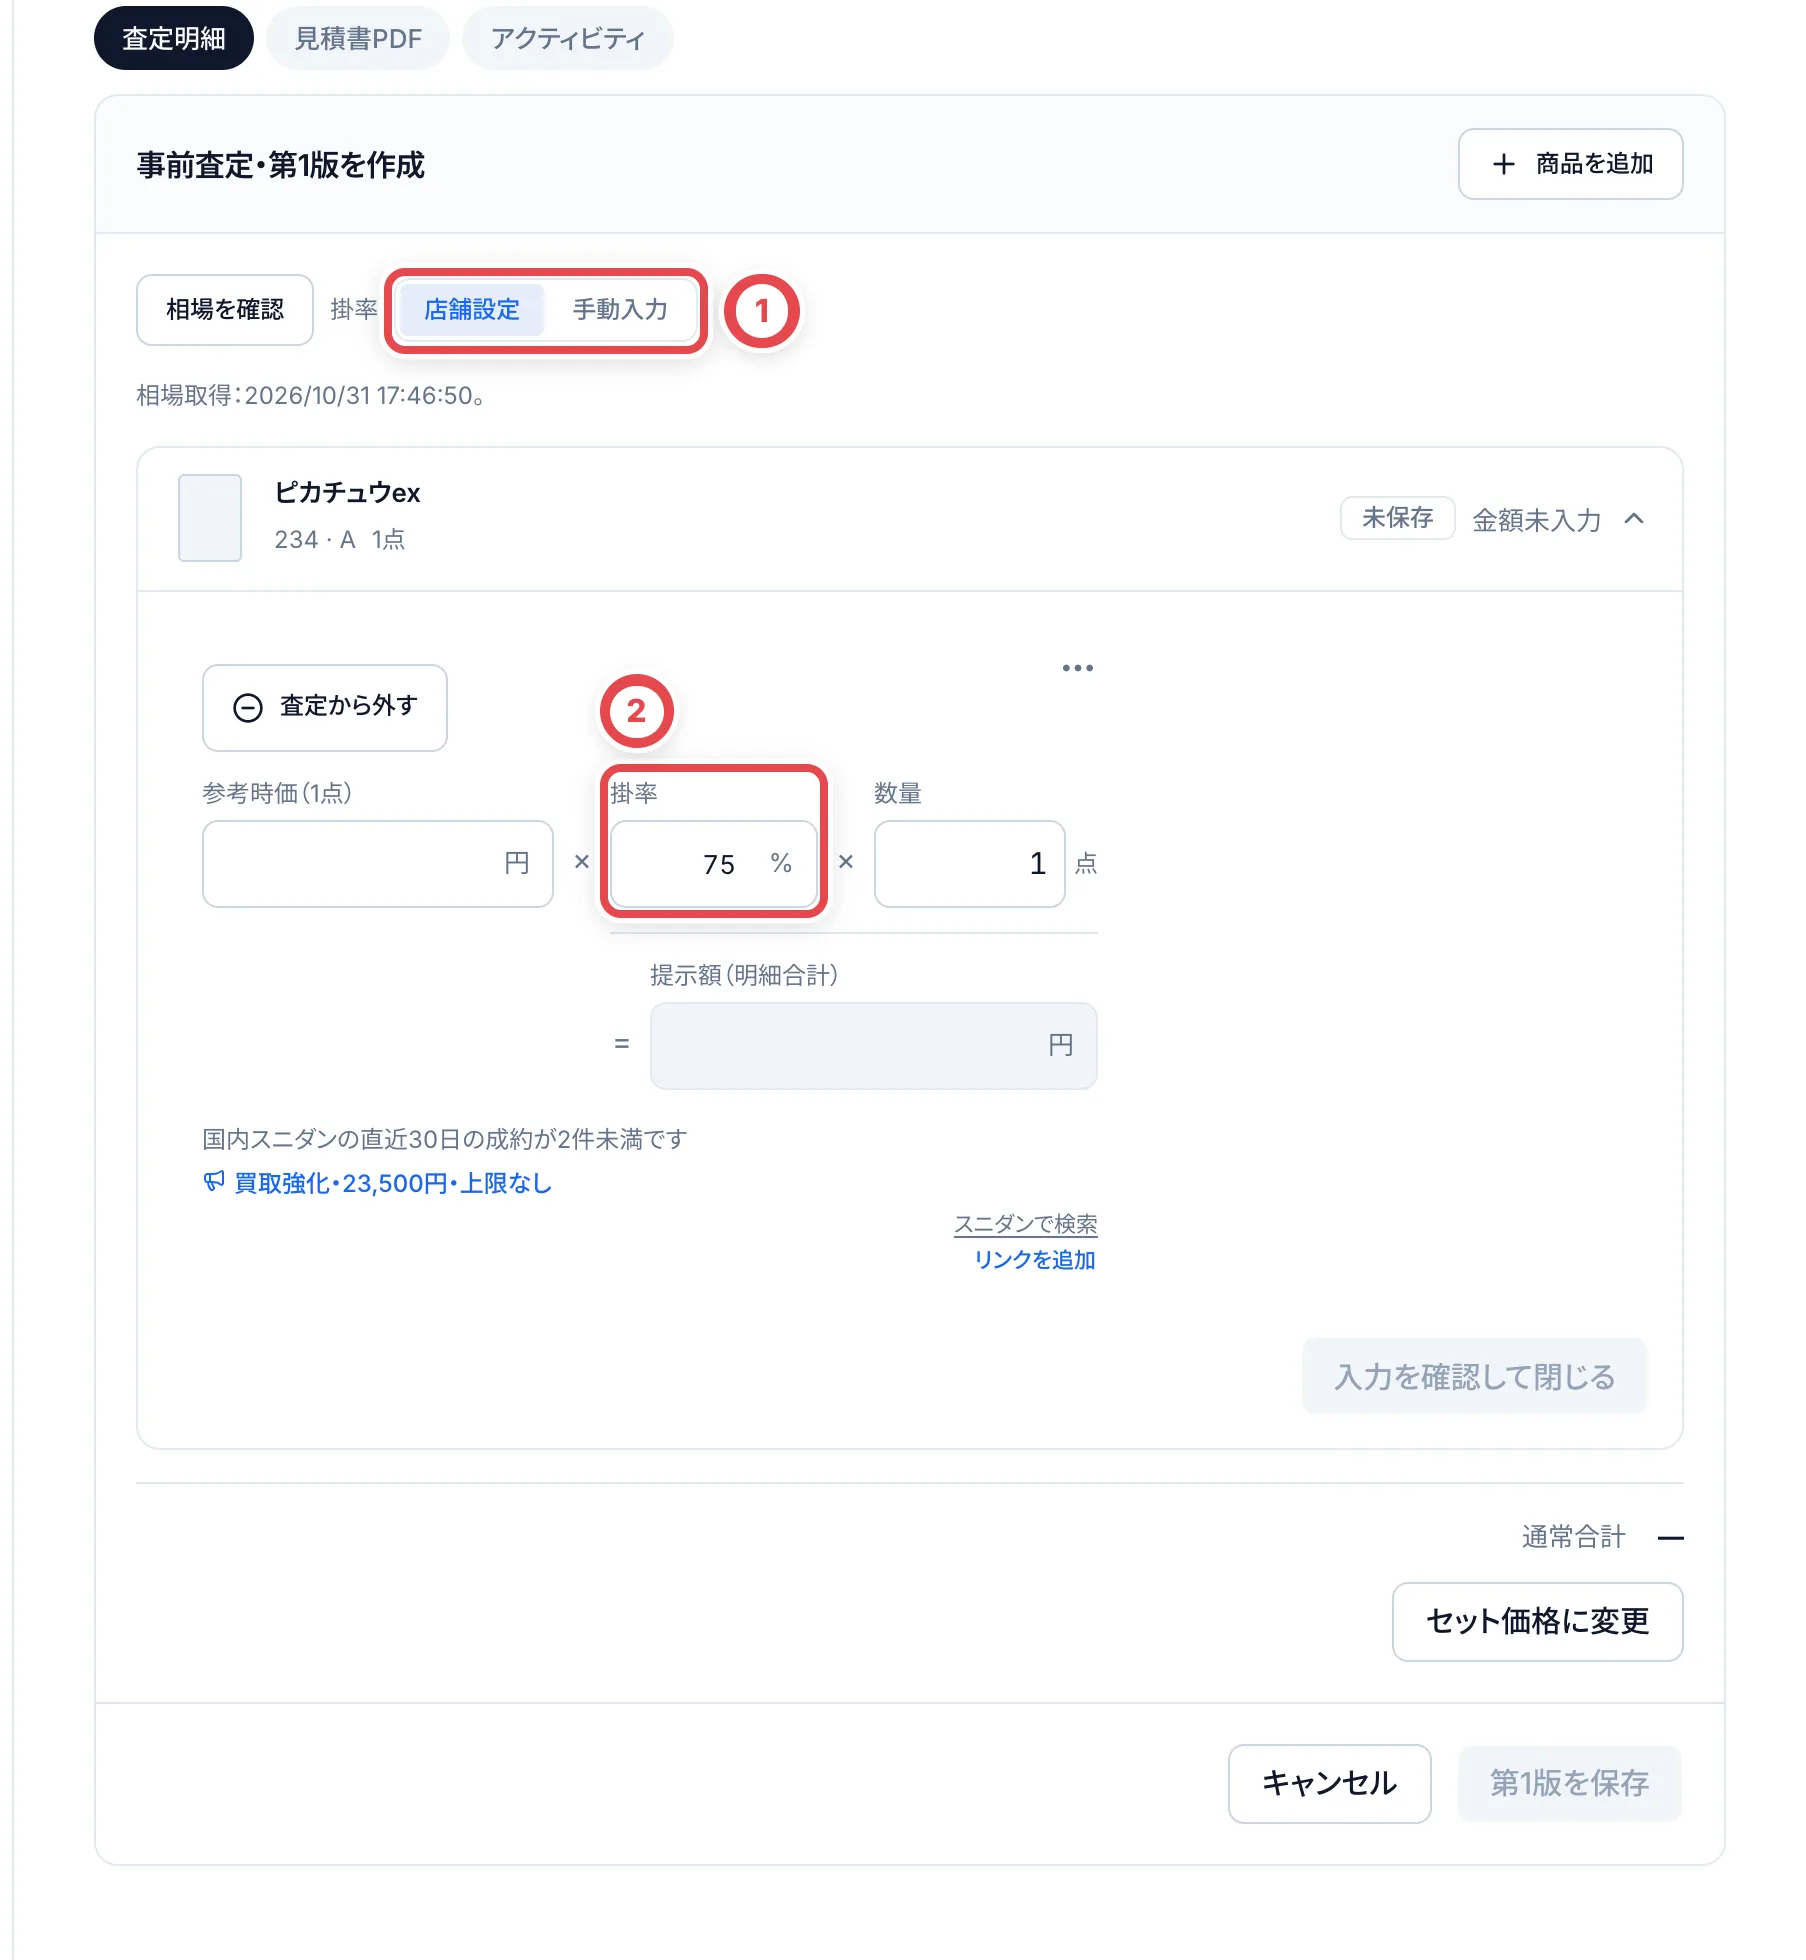
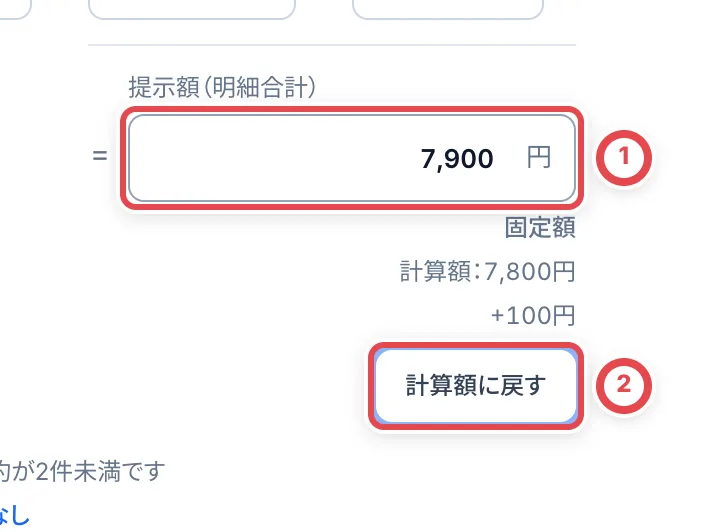 | ボタン | すること |
| ---------------- | ------------------------------------------------------------------------------------------------------------------------------------------------ |
| 相場を確認 | 相場を取り直し、取得できた件数・できなかった件数を通知します。取得できない理由は各明細に表示します |
| 掛率:店舗設定 | 標準掛率を最初から表示し、時価が揃うと店舗の条件で自動計算します。変更後も自動で再計算します |
| 掛率:手動入力 | 掛率を直接入力します。時価を変更しても入力した掛率を維持します |
| ①提示額 | 数量分の明細合計を直接入力します。入力額は参考時価・掛率・数量を変えても固定され、査定額との差額を表示します。調整理由は自動で入り、編集できます |
| ②査定額に戻す | 固定額や以前の調整を外し、参考時価・掛率・数量からの計算に戻します |
| セット価格に変更 | 見積全体の提示額を決めます。1枚ずつの査定額は残ります([セット価格に変更する](/guides/purchase/set-price)) |
| 第〇版を保存 | 見積の版として保存します |
:::tip
買取強化対象に入っているカードには、相場の下に「買取強化・35,000円・残り4枚」のように強化価格と残り枚数が出ます。**強化価格は査定額に自動では入らない**ので、必要なら調整します。詳しくは[買取強化対象](/guides/purchase/purchase-boosts)を参照してください。
:::
### 査定依頼を探してまとめて選ぶ
「査定依頼」タブの検索欄で、商品名・カード番号・鑑定番号などを探せます。空白で区切って複数の語を入れると、すべての語に合う明細が出ます。見積前と査定中のカードを一緒に選んで、見積や2次査定に進むこともできます。**検索の条件を変えると、選んだものは外れます。**
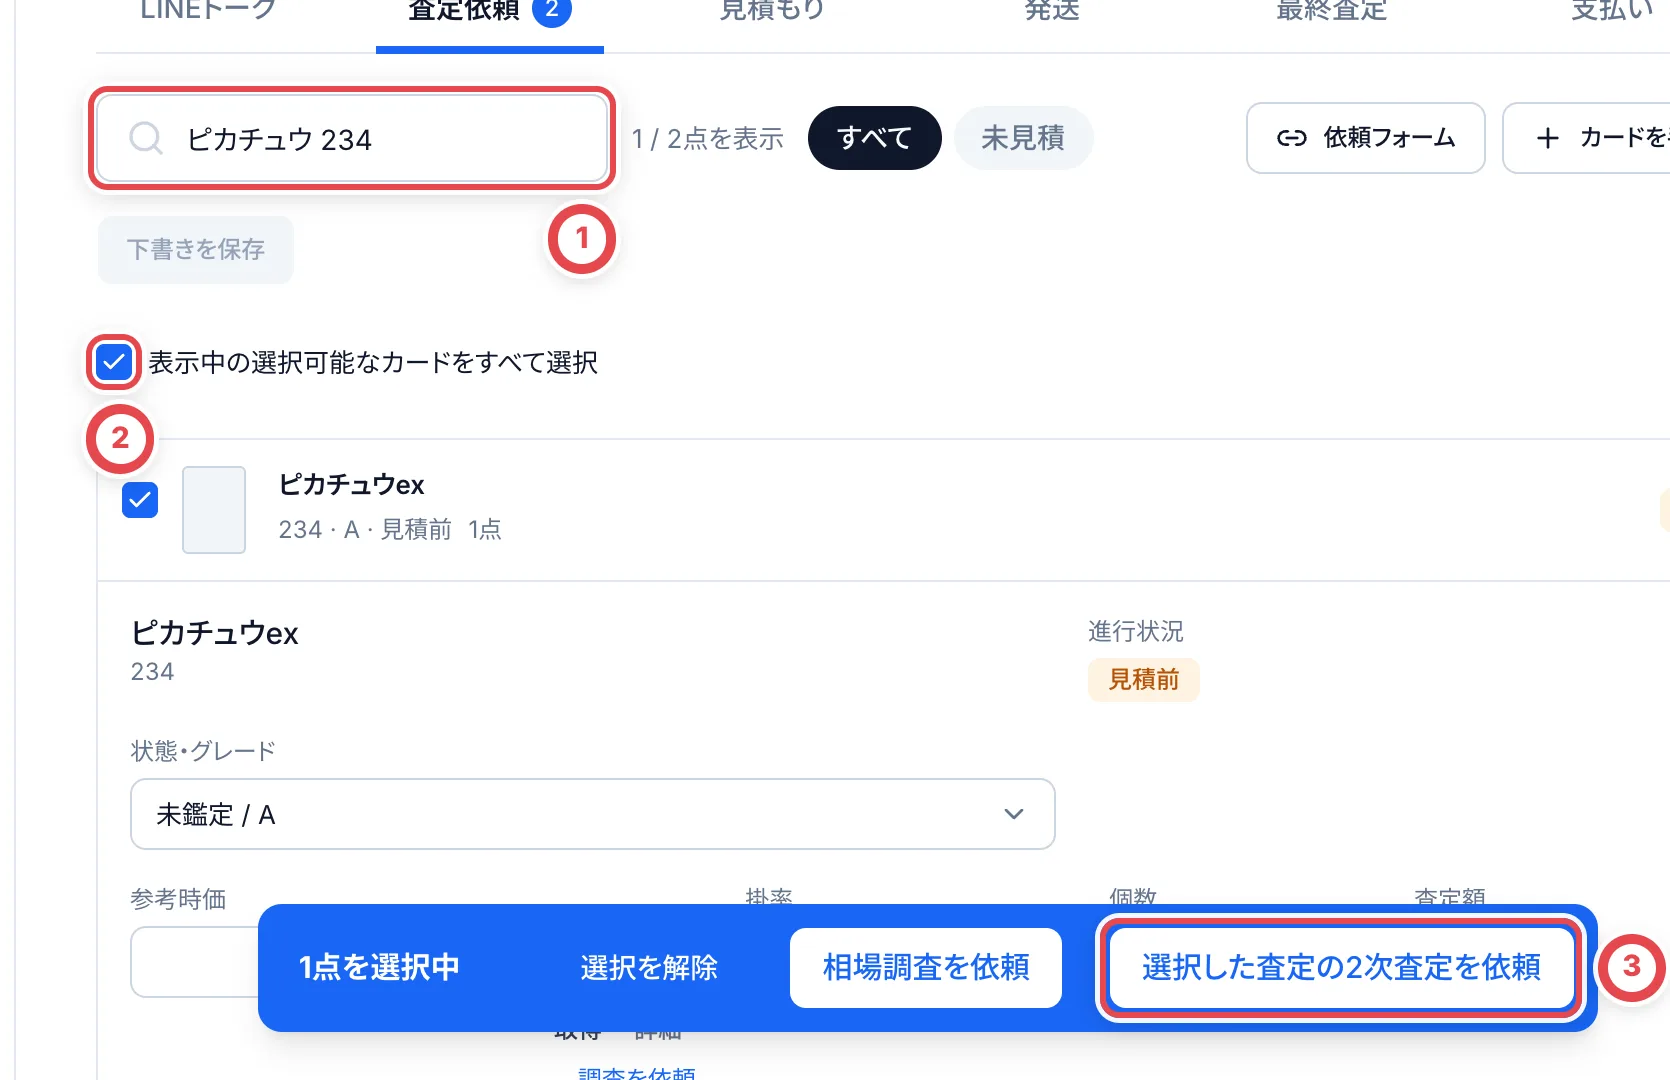 ①の複数の語で絞り込み、②で表示中のカードを選び、金額を確かめて③から2次査定に進みます。
### カードごとにスニダンの成約を取得する
「参考時価」の欄の「取得」で、そのカード・グレードの成約をスニダンから取得できます。取得したら、成約の件数や「詳細」で、確認日時と相場を確かめます。**「参考時価に反映」を押すまで、査定額や見積は変わりません。**
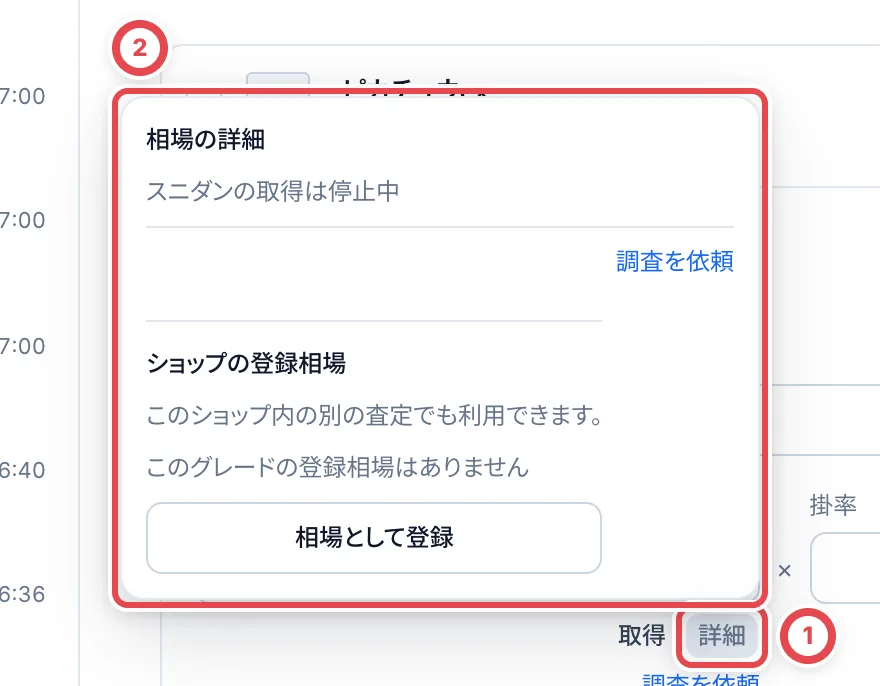 ①の「詳細」で②の取得の状態を確かめます。この例は自動取得が止まっている状態です。
取得待ちのときは「確認」で状況を見ます。成約が2件未満・商品が未対応・自動取得の対象外・取得の失敗のときは、相場調査を依頼してください。「スニダンで見る」から商品ページを開くこともできます。商品が特定できていないと検索結果が開くので、カード・版・グレードが合っているか確かめてください。
### ショップの相場を登録・再利用する
買取を変更する権限と相場を見る権限がある担当者は、カードとグレードを選んで「詳細」を開き、「ショップの登録相場」を使えます。同じショップの同じカード・グレードの別案件でも使える価格です。保存済みの査定金額は、登録・訂正・無効化だけでは変わりません。
1. 「相場として登録」を押し、カードとグレードを確認します。
2. ①の「相場価格」に1円以上の金額、②に実際に確認した日時、③に出典・確認した内容を入力します。確認日時は日本時間で、未来の日時は登録できません。
3. ④の「相場を登録」で保存します。登録した担当者・確認日時・根拠が履歴に残ります。
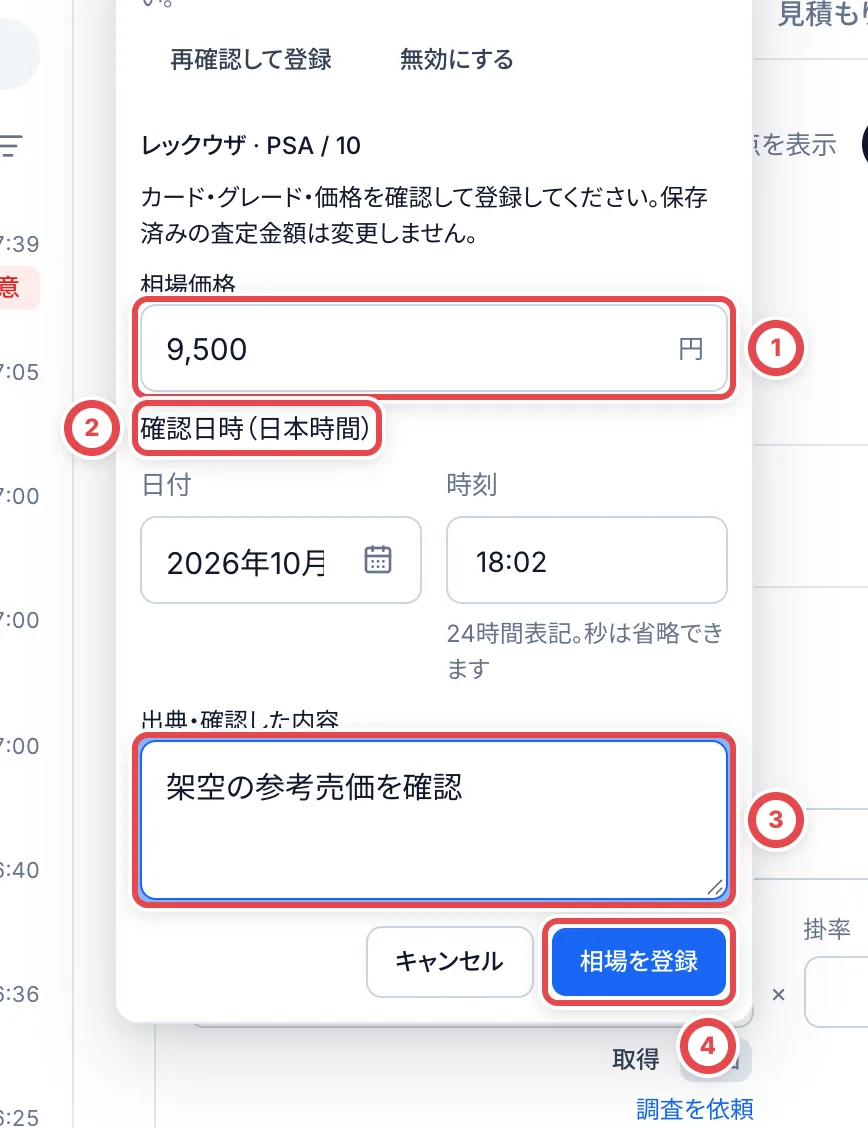 履歴は新しい確認日時の順に最大10件表示されます。有効な価格の①「参考時価に反映」で現在の入力へ採用し、査定の下書きや見積の版を保存して確定します。国内成約から相場が算出できる場合は、自動取得ではそちらが優先されます。ショップの価格は国内成約の件数には加算されません。
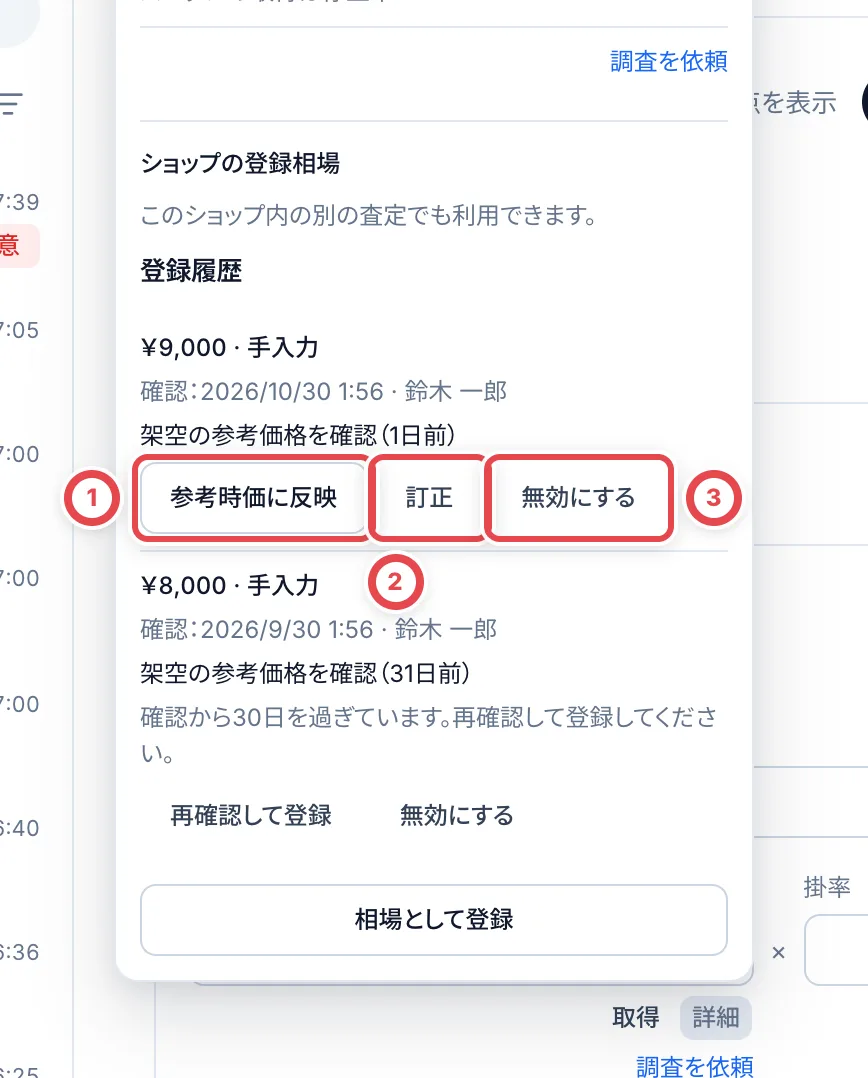 - **訂正**: 新しい価格・確認日時・根拠を登録します。過去の履歴は残ります。
- **確認から30日を過ぎた価格**: 「再確認して登録」で価格を確かめ直します。再登録するまで新しい査定の候補には使えません。
- **無効にする**: 確認画面でもう一度「無効にする」を押すと、今後の候補から外れます。履歴と、その価格を採用済みの査定金額は残ります。
- **調査回答**: カード・グレード・出典が揃い、1円以上で回答した価格も登録相場になります。0円や根拠がない回答は、その案件への回答に留まります。
- **状態が変わったと出る**: 案件を再読み込みし、カード・グレード・最新の版を確認してから登録し直します。
## 3. 相場調査と2次査定
相場が分からないカードは、行の「調査を依頼」で調査担当に回します。査定額が「2次査定が要る下限額」以上のカードがあるときは、「2次査定を依頼」で別のメンバーに確かめてもらいます。
 ①の「調査待ち」の間は、見積を提示できません。回答が来ると、査定に反映されます。
**調査の回答待ちや2次査定待ちのあいだは、見積を提示できません。** 取引の画面の「次の操作」にも、何を待っているかが出ます。「査定依頼」タブでカードを選んで「選択した査定を進める」を押すと、確認画面が開きます。未特定・価格未入力の品物も渡せます。相場調査を挟むときは、回答がそろってから選んだカードが1つの2次査定依頼になります。変更した数量は先に保存します。受けた担当者が準備画面で特定・価格を仕上げてから、内容を確認して承認します。未入力の代わりに0円を入れる必要はありません。詳しくは[調査依頼と2次査定依頼](/guides/purchase/research-and-reviews)を参照してください。
## 4. 見積を提示する
2次査定が済んだか要らない見積には、「見積を提示する」の欄が出ます。
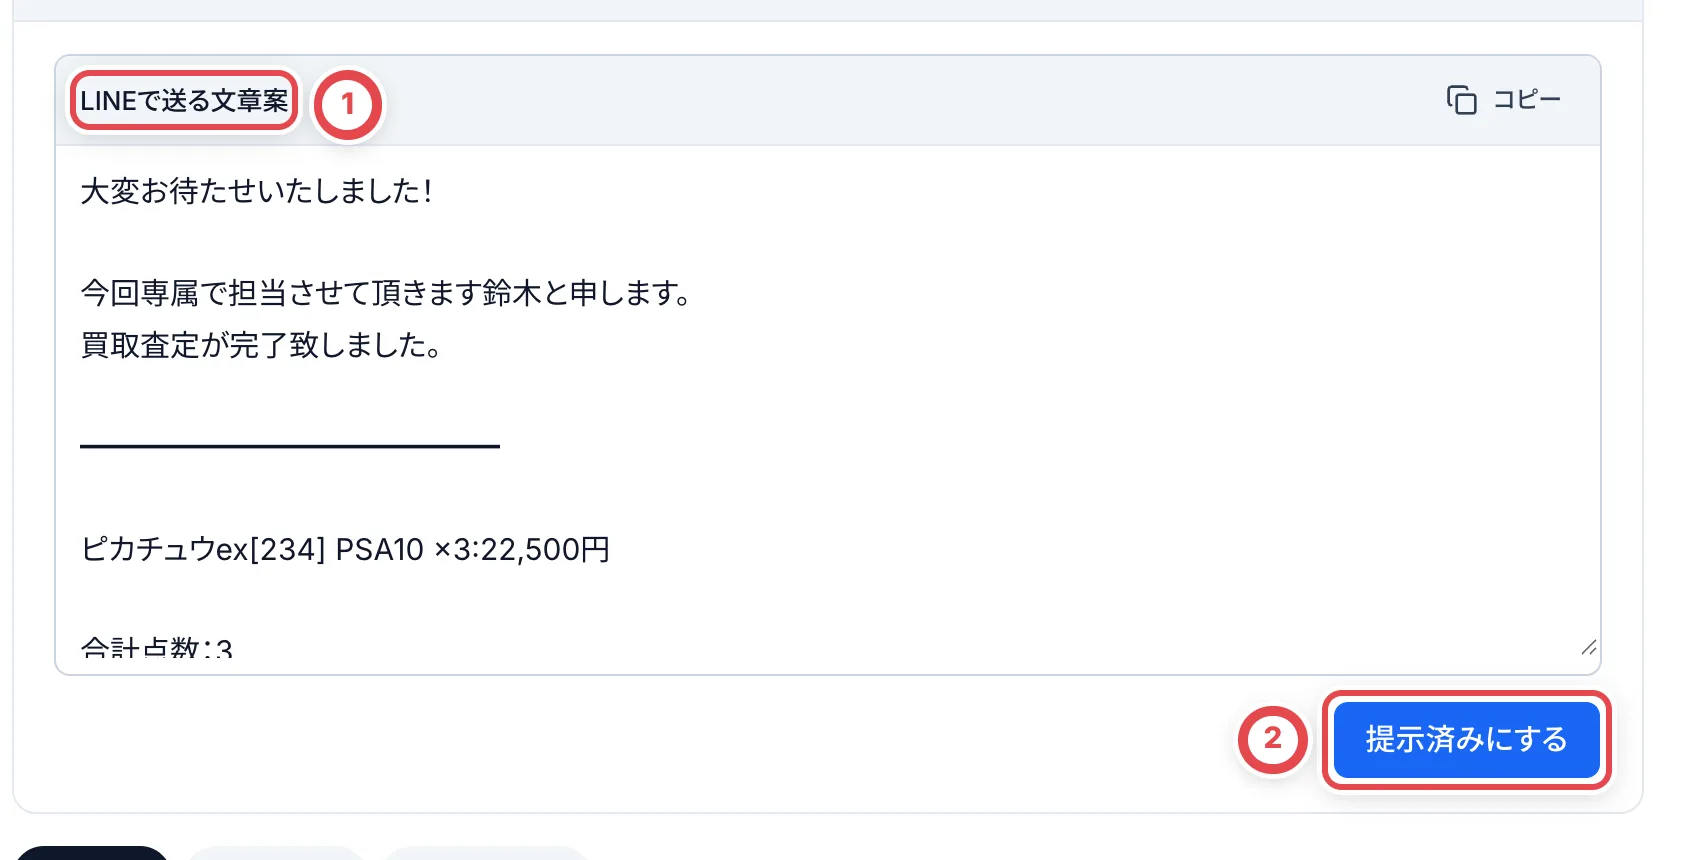 **ほかの方法で伝える**
①の「LINEで送る文章案」をコピーし、LinyなどからLINEで送ります。送ったら②の「提示済みにする」を押します。**「見積を提示済みにしますか?」と確認が出るので、もう一度「提示済みにする」を押すと記録され、取引が次の段階に進みます。**
トークに見積を送った記録が見つかると、「このLINEで見積を提示しましたか?(一致確度
90%)」のように出るので、「はい、提示済みにする」でも記録できます。
**LINEで送る**
「LINEで見積書を送る」を押し、内容を確かめて「LINEで見積を送る」を押します。このボタンは、LINE連携で「見積の提示」を「提示と同時に自動で送る」にしている店舗だけに出ます。送れても、お客様が読んだ・承諾したことにはなりません。
見積書のPDFは「見積書をPDF出力」で保存できます。
承認済みの見積で、カードを外す・数量を変えるだけの再見積は、2次査定をやり直さずに提示できます。単価・掛率・グレード・調整額を変えたときや、セット価格を使っている見積は、ふつうどおり2次査定が要るかどうかが判定されます。
## 5. お客様の返事を記録する
お客様から返事が来たら、「お客様の回答を記録する」の欄で記録します。
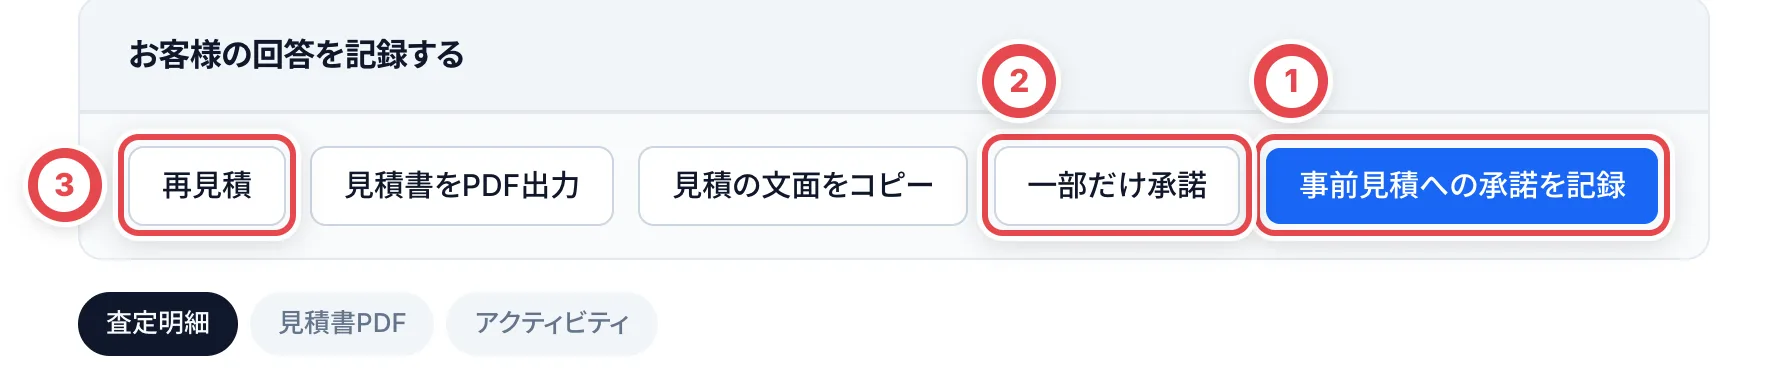 | お客様の返事 | 押すボタン | どうなるか |
| -------------- | --------------------------- | ---------------------------------------------------------------------------- |
| すべて承諾 | ①「事前見積への承諾を記録」 | 確認で「記録する」を押すと「承諾済」になり、発送の段階に進みます |
| 一部だけ承諾 | ②「一部だけ承諾」 | 承諾されたカードを選びます。見送られたカードは「査定依頼」の未見積に戻ります |
| 金額が合わない | ③「再見積」 | 見積を作り直して、もう一度提示します |
一部承諾は行単位で、その行の数量すべてを対象にします。セット価格の見積は一部承諾できないため、対象を選び直して再見積します。
## 困ったとき
| こんなとき | 確かめること・やること |
| ------------------------------------------------ | ---------------------------------------------------------------------------------------------------------------------- |
| 「特定する」で候補が出ない | お客様の書いた名前のままだと見つからないことがあります。言葉を減らすか、型番やセット名で探します |
| 参考時価が空のまま | 国内成約から算出できず、有効なショップ相場もない可能性があります。「詳細」で確認し、行の「調査を依頼」で調査を頼みます |
| 「見積を提示する」が出ない | 相場調査の回答待ちか、2次査定待ちです。取引の画面の「次の操作」で何を待っているかを確かめます |
| 「未特定の商品が〇件あります」と出て提示できない | 見積の中に、どのカードか決まっていない明細があります。明細で特定してから提示します |
| 「取得」で相場を取ったのに金額が変わらない | 取得しただけでは変わりません。「詳細」から「参考時価に反映」を押します |
| 買取強化の価格が入っていない | 強化価格は自動では入りません。「提示額」に数量分の金額を入力します |
| 見積書のPDFが作れない | 「組織設定」に事業者の情報が入っていません |
## 関連する操作
- [検索にないカードの登録を依頼する](/guides/purchase/card-registration-requests)
- [値上げ希望を記録して対応する](/guides/purchase/price-increase-requests)
- [履歴から操作を取り消す](/guides/purchase/history-and-undo)
---
# まとめ査定とセット価格
Source: https://docs.toreca-cloud.com/guides/purchase/bulk-and-set-price
| こんなとき | 使うもの | 記録されること |
| --------------------------------------------------- | ---------- | --------------------------------------------------------- |
| ノーマルカード300枚を、まとめて100円で買い取る | まとめ査定 | 束を1つの明細にし、中の枚数と束全体の金額を記録します |
| 1枚ずつ査定したカードを、合わせて50,000円で提示する | セット価格 | 1枚ずつの査定額を残し、見積全体の提示額を50,000円にします |
**まとめ査定は「束に1つの金額」、セット価格は「見積の合計の金額」です。** 300枚で100円なら、100円を300倍はしません。
## まとめ査定
まとめ査定は、現物を受け取ったあとの最終査定で使います。最終見積を確定・提示する前に足してください。
### 1. 「まとめ査定を追加」を押す
最終査定の明細が表示されている場合は「査定内容を修正」を押します。開いた入力画面の明細の上に、①の「まとめ査定を追加」があります。
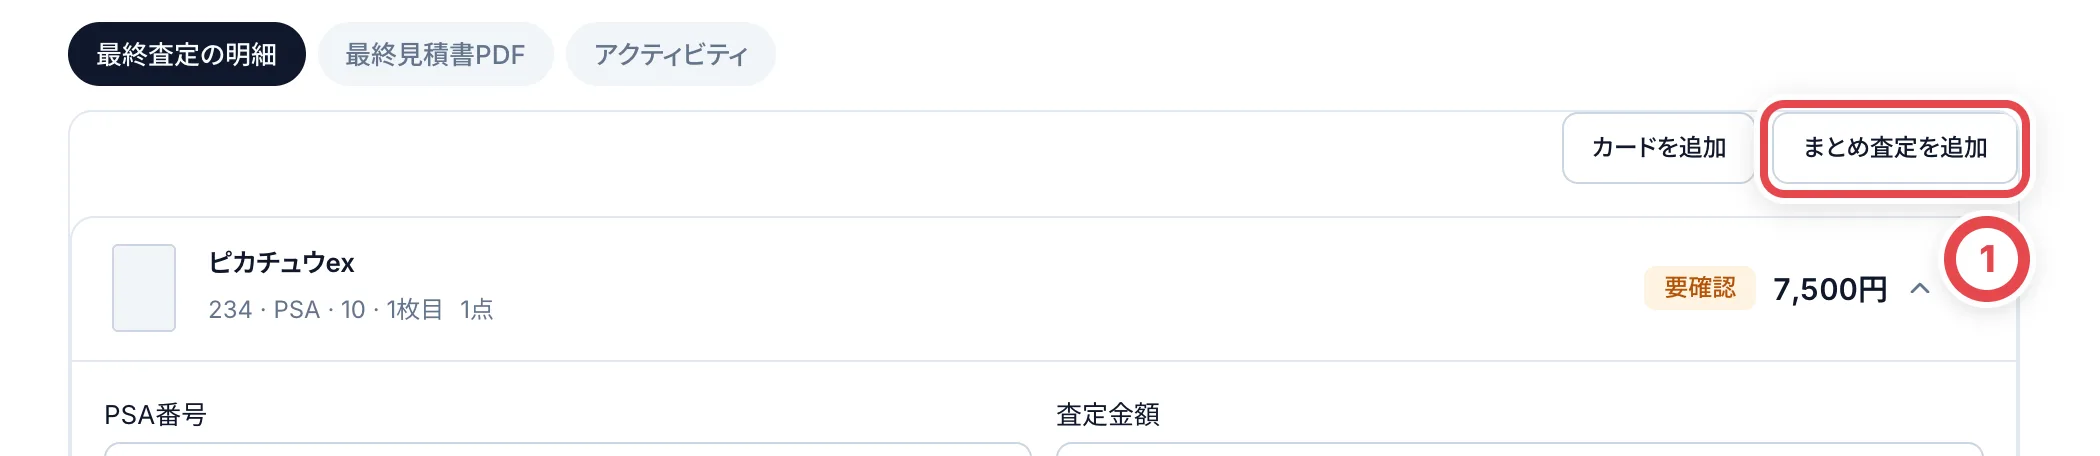 1枚ごとの入力画面で金額・番号・買取可否などを変更したときは、先に「保存」してからまとめ査定を足します。セット総額の変更中も追加できないため、総額を保存してから続けます。
### 2. 名前・枚数・金額を入れる
①の「明細名」に「ノーマルカード」などの名前、②の「枚数」に束の中の枚数、③の「まとめての査定額」に束全体の金額を入れます。必要なら「補足(任意)」も書いて、④の「追加する」を押します。
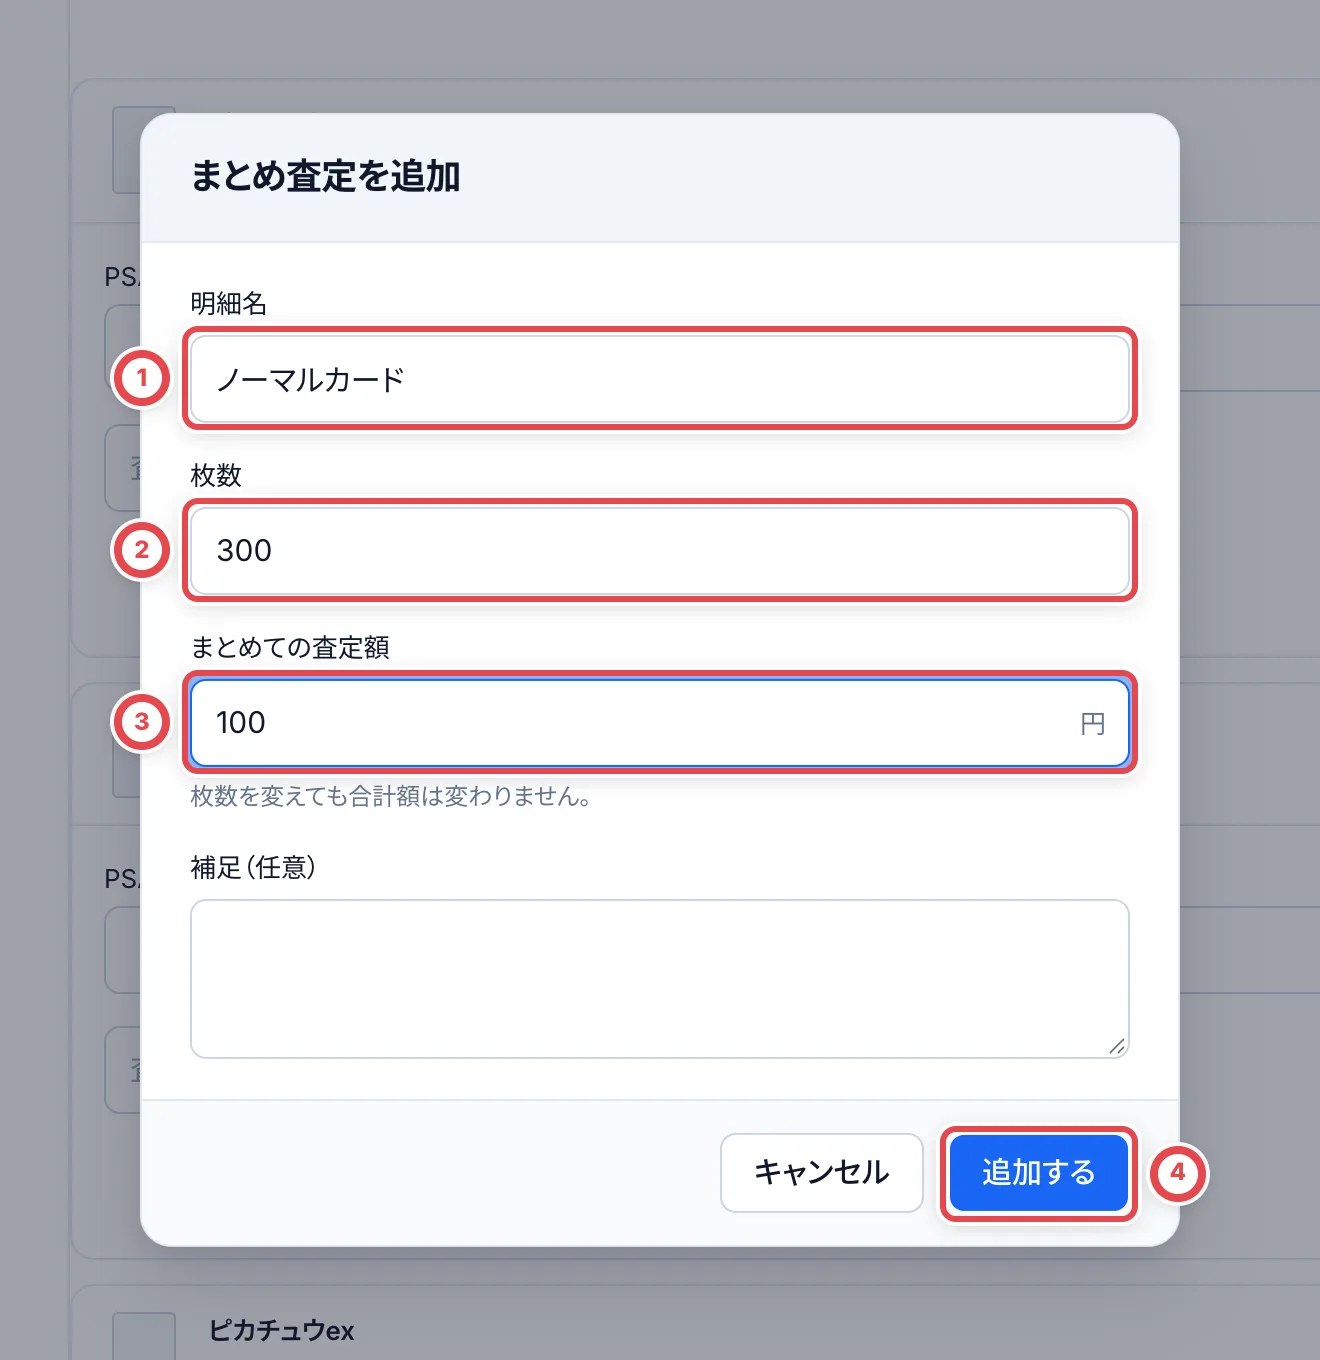 :::note
300枚で100円なら、「枚数」は300、「まとめての査定額」は100です。**枚数を変えても、束全体の査定額は変わりません。** 金額も変えるときは、別に直してください。
:::
### 3. 明細を確かめて次に進む
足した明細の枚数と金額を確かめます。最終査定を保存したら、最終見積の提示に進みます。オンライン買取では、金額に応じて先に2次査定が必要です。店頭買取では2次査定を依頼しません。
### 在庫や返品での扱い
| 場面 | どうなるか |
| ---- | ---------------------------------------------------------------------------------- |
| 在庫 | 束は1つの個体になり、中の枚数を持ちます。300枚それぞれに個体やQRラベルはできません |
| 返品 | 束を買い取らないときは、束の明細がまるごと返品の対象になります |
カードを1枚ずつ査定・管理したいときは、まとめ査定にせず、ふつうのカードの明細で登録してください。
## セット価格
セット価格は、1枚ずつの査定額を残したまま、見積全体の提示額を決めるものです。
設定・変更は[セット価格に変更する](/guides/purchase/set-price)を参照してください。
## 困ったとき
| こんなとき | 確かめること・やること |
| -------------------------------------------- | --------------------------------------------------------------------------------------------------------------------------------------------------- |
| 「まとめ査定を追加」が見当たらない | 最終査定の「査定内容を修正」を開きます。事前の見積の画面にはありません |
| まとめ査定の金額が枚数倍になっていると思った | 金額は束全体です。枚数を変えても金額は変わりません |
| 束の中のカードを1枚ずつ在庫に入れたい | まとめ査定では1つの個体になります。1枚ずつ管理するなら、ふつうのカードの明細で登録します |
| セット価格の見積で「一部だけ承諾」ができない | 事前見積は対象を選び直して再見積します。オンラインの1枚ごとの最終査定は承諾画面で対象と配分額を確認し、店頭は署名前に再見積します |
| セット価格をやめたい | 1枚ごとの最終査定は「セット総額(任意)」を空欄にして保存します。他の画面は「セット価格を削除」して保存します([手順](/guides/purchase/set-price)) |
---
# 検索にないカードの登録を依頼する
Source: https://docs.toreca-cloud.com/guides/purchase/card-registration-requests
名前・型番・収録弾を変えても見つからず、カードマスタにない場合は登録を依頼します。未特定の明細の「特定する」のほか、商品追加やAI読み取りの確認からも開けます。買取を編集する権限が必要です。
現在の依頼画面でゲームを選んで登録すると、店舗専用の仮カードが作られ、買取を進められます。共通マスタへの登録は別の確認です。従来の仮カードを作らない依頼は、運営が登録したあと店舗でそのカードを明細に採用します。入庫伝票の検索画面など、すべての検索欄にこの操作があるわけではありません。
## 1. 未特定の明細から登録依頼を開く
顧客の「査定依頼」で対象の明細の「特定する」を押します。①の検索語、ゲーム・セット・レアリティ・言語を確認し、別の版を誤って選ばないようにします。見つからなければ②の「マスタに登録を依頼する」を押します。
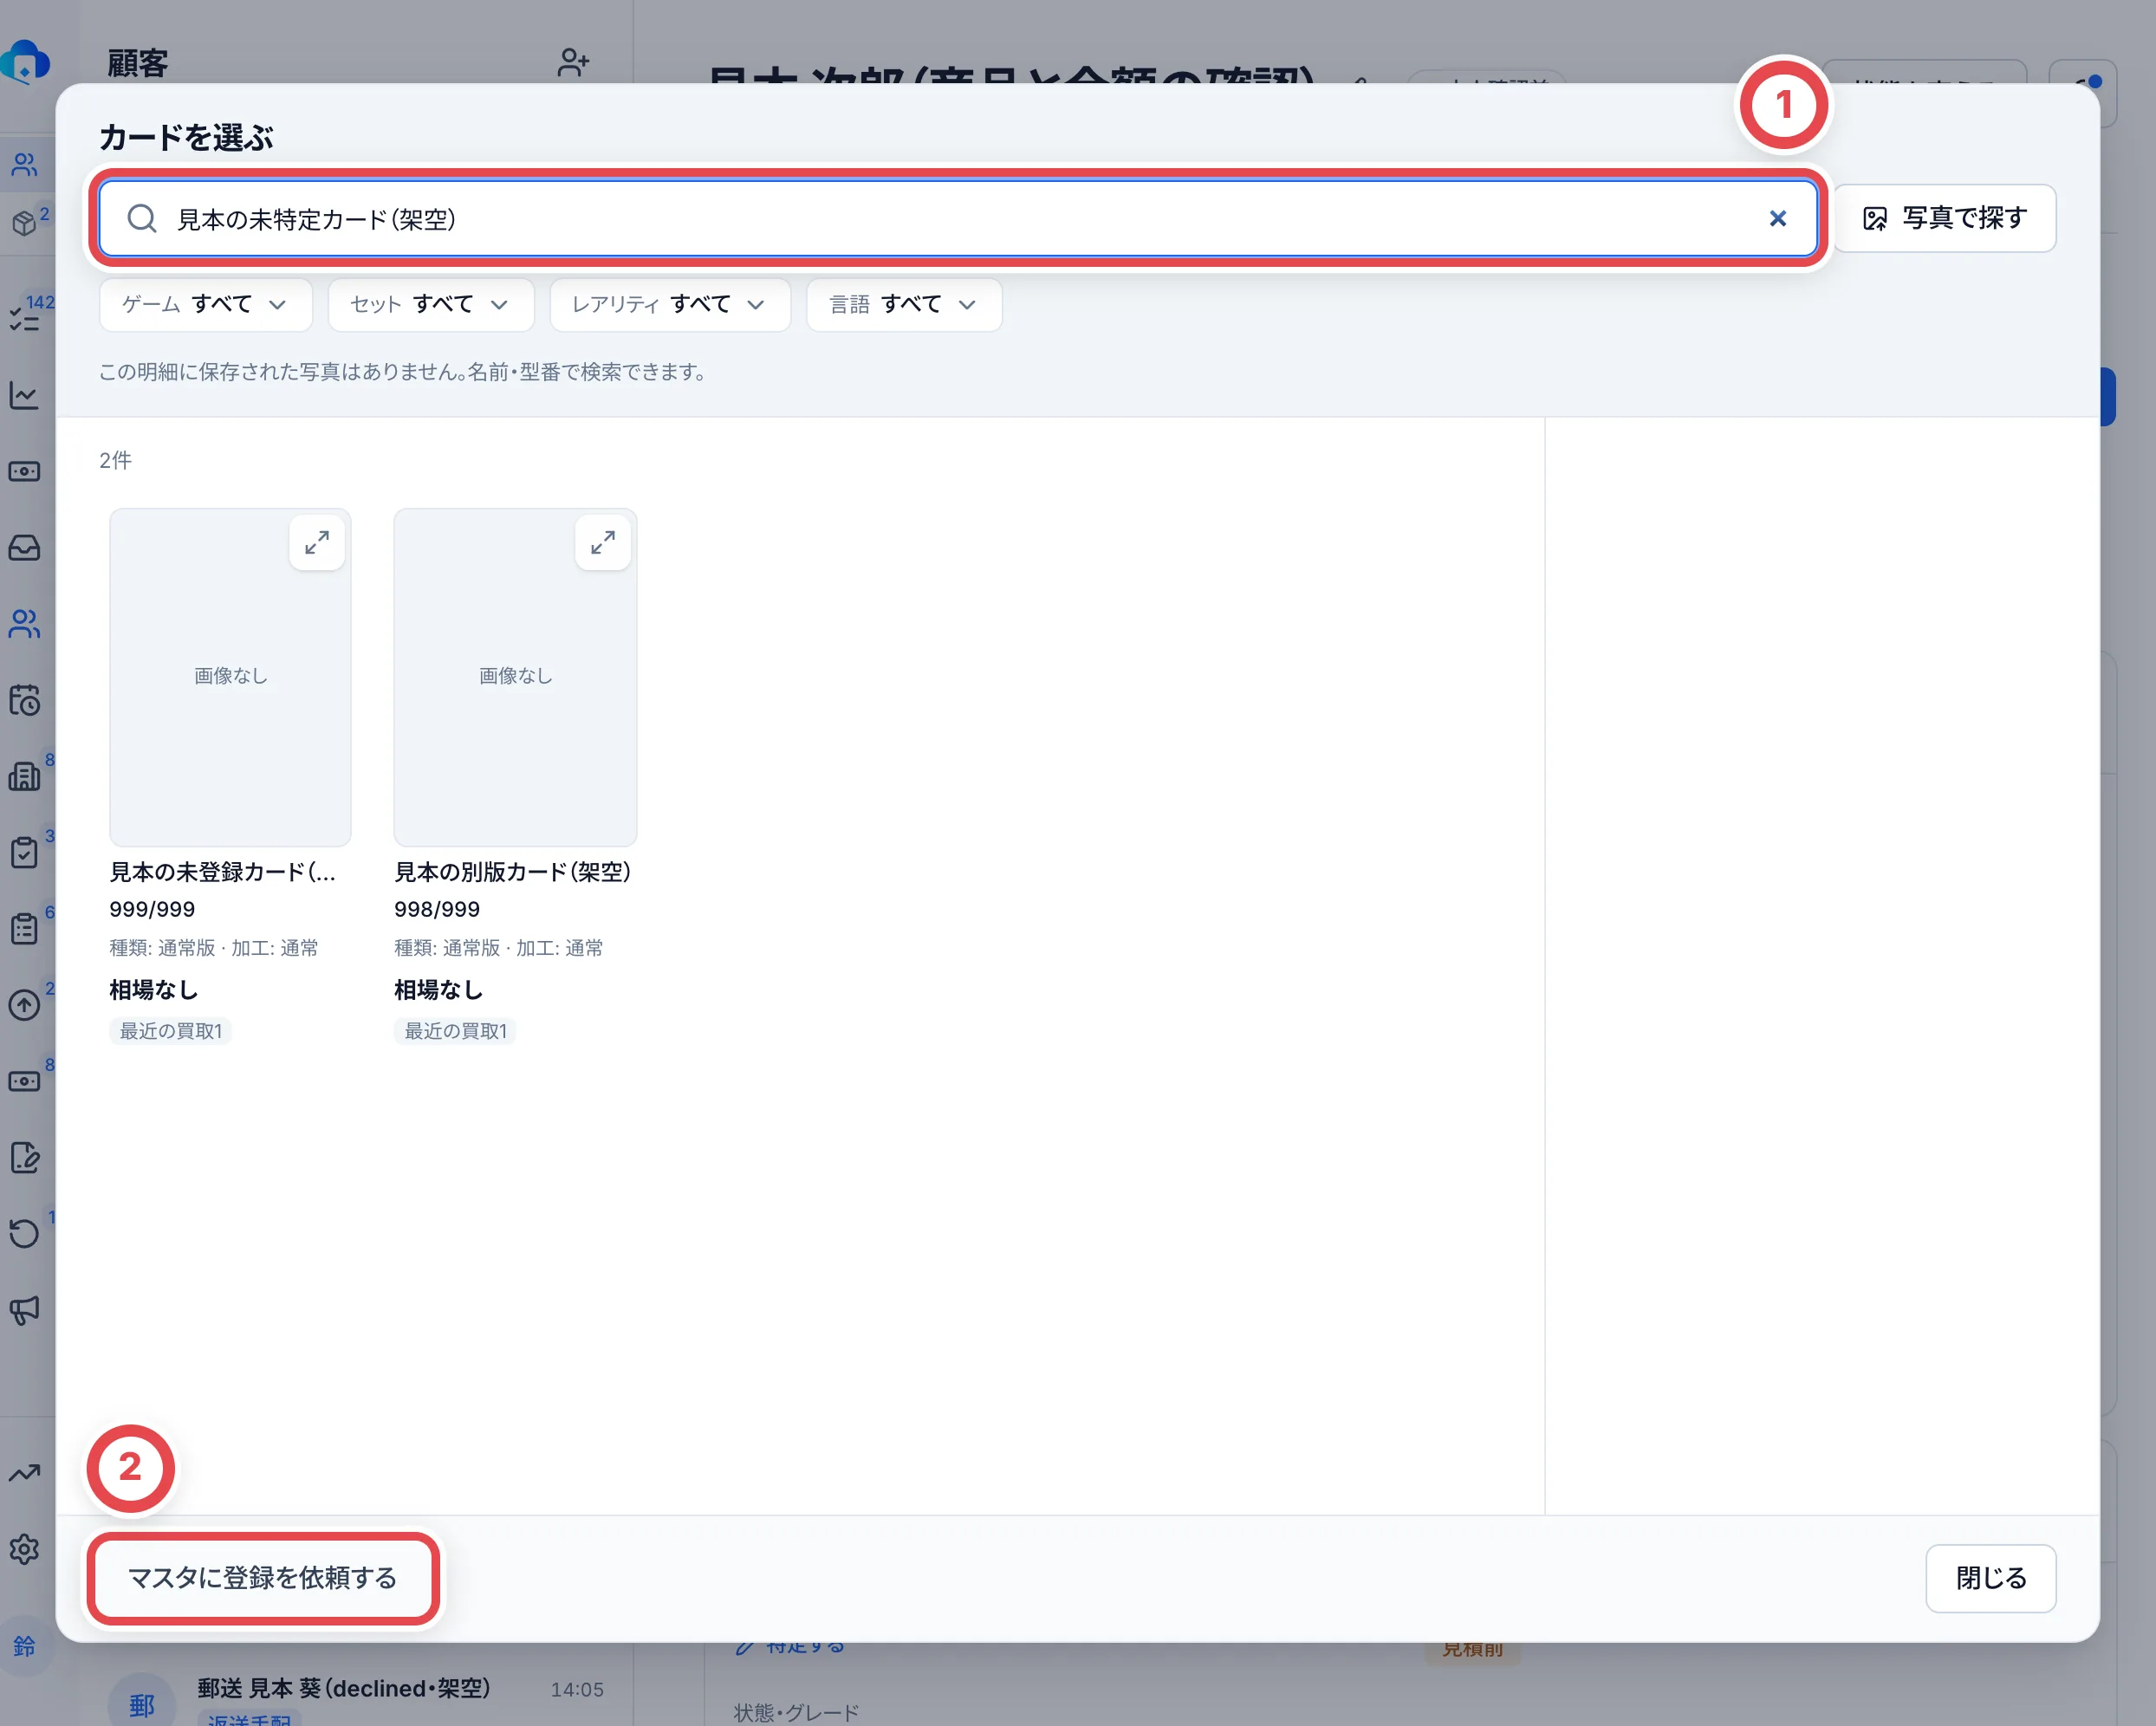 ## 2. カード情報と送る写真を確認して依頼する
①のゲームとカード名を確認します。カード名は必須です。カード番号は分母まで記入し、収録弾・セット、初版やエラー版など版の区別も分かる範囲で入れます。②の添付する写真を確認します。社内用の査定写真は送信対象に含まれません。
:::warning
③の「登録を依頼する」を押すと、選択した情報と写真を登録依頼として保存します。別の顧客の写真や不要な個人情報が含まれていないか確かめてください。
:::
スニダンの商品URLが分かる場合は、現物の鑑定会社・グレード(鑑定なしの場合は状態)を選び、「商品情報を取得」で候補を確認できます。入力済みの内容と違う場合は、そのまま上書きせず、入力を残すか取得内容を使うか確認します。取得できなくても、必要な情報を手動入力して依頼できます。取得は登録の確定ではありません。
写真がない場合も依頼できます。カードを見分ける情報が足りないときは、先に明細へ必要な写真を用意します。
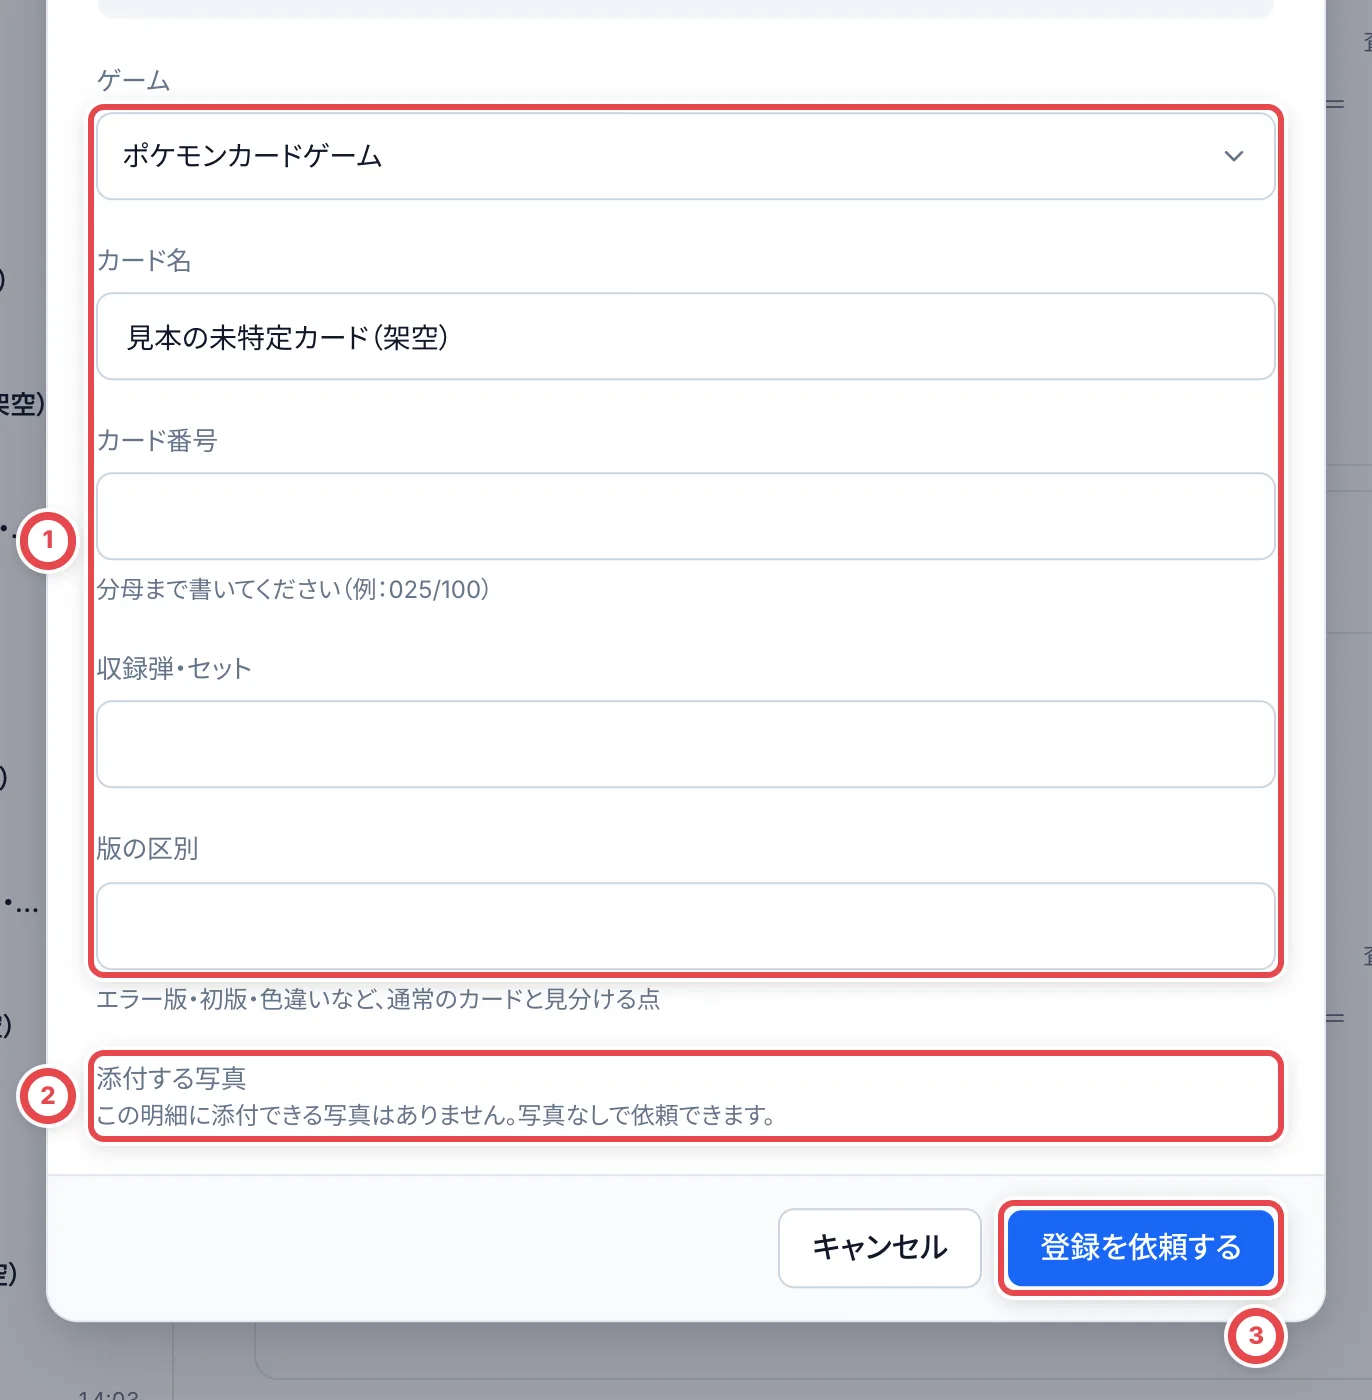 ## 3. 回答を確認し、登録されたカードを採用する
元の明細を開き直し、①の依頼状態を確認します。「仮カードとして買取を進められます。マスタの確認待ちです。」が表示される場合は、仮カードの明細として査定を進められます。店舗でマスタを確認する手順は次の節です。
| 状態 | 次の操作 |
| ------------------------------------ | -------------------------------------------------------------------------------------------- |
| マスタ登録を依頼済み(仮カードあり) | 仮カードで査定を進められます。共通マスタへの確認は次の節で行います。重ねて依頼しません。 |
| マスタ登録を依頼済み(従来の依頼) | 運営の登録を待ちます。重ねて依頼しません。 |
| マスタに登録されました(従来の依頼) | 登録されたカードの名前・型番・版を照合し、「登録されたカード名」で特定するボタンを押します。 |
| マスタ登録は見送りになりました | 運営のコメントを確認し、情報を直して再依頼するか検索し直します。 |
採用後に明細を再表示し、カード・版・数量を確認して査定に進みます。
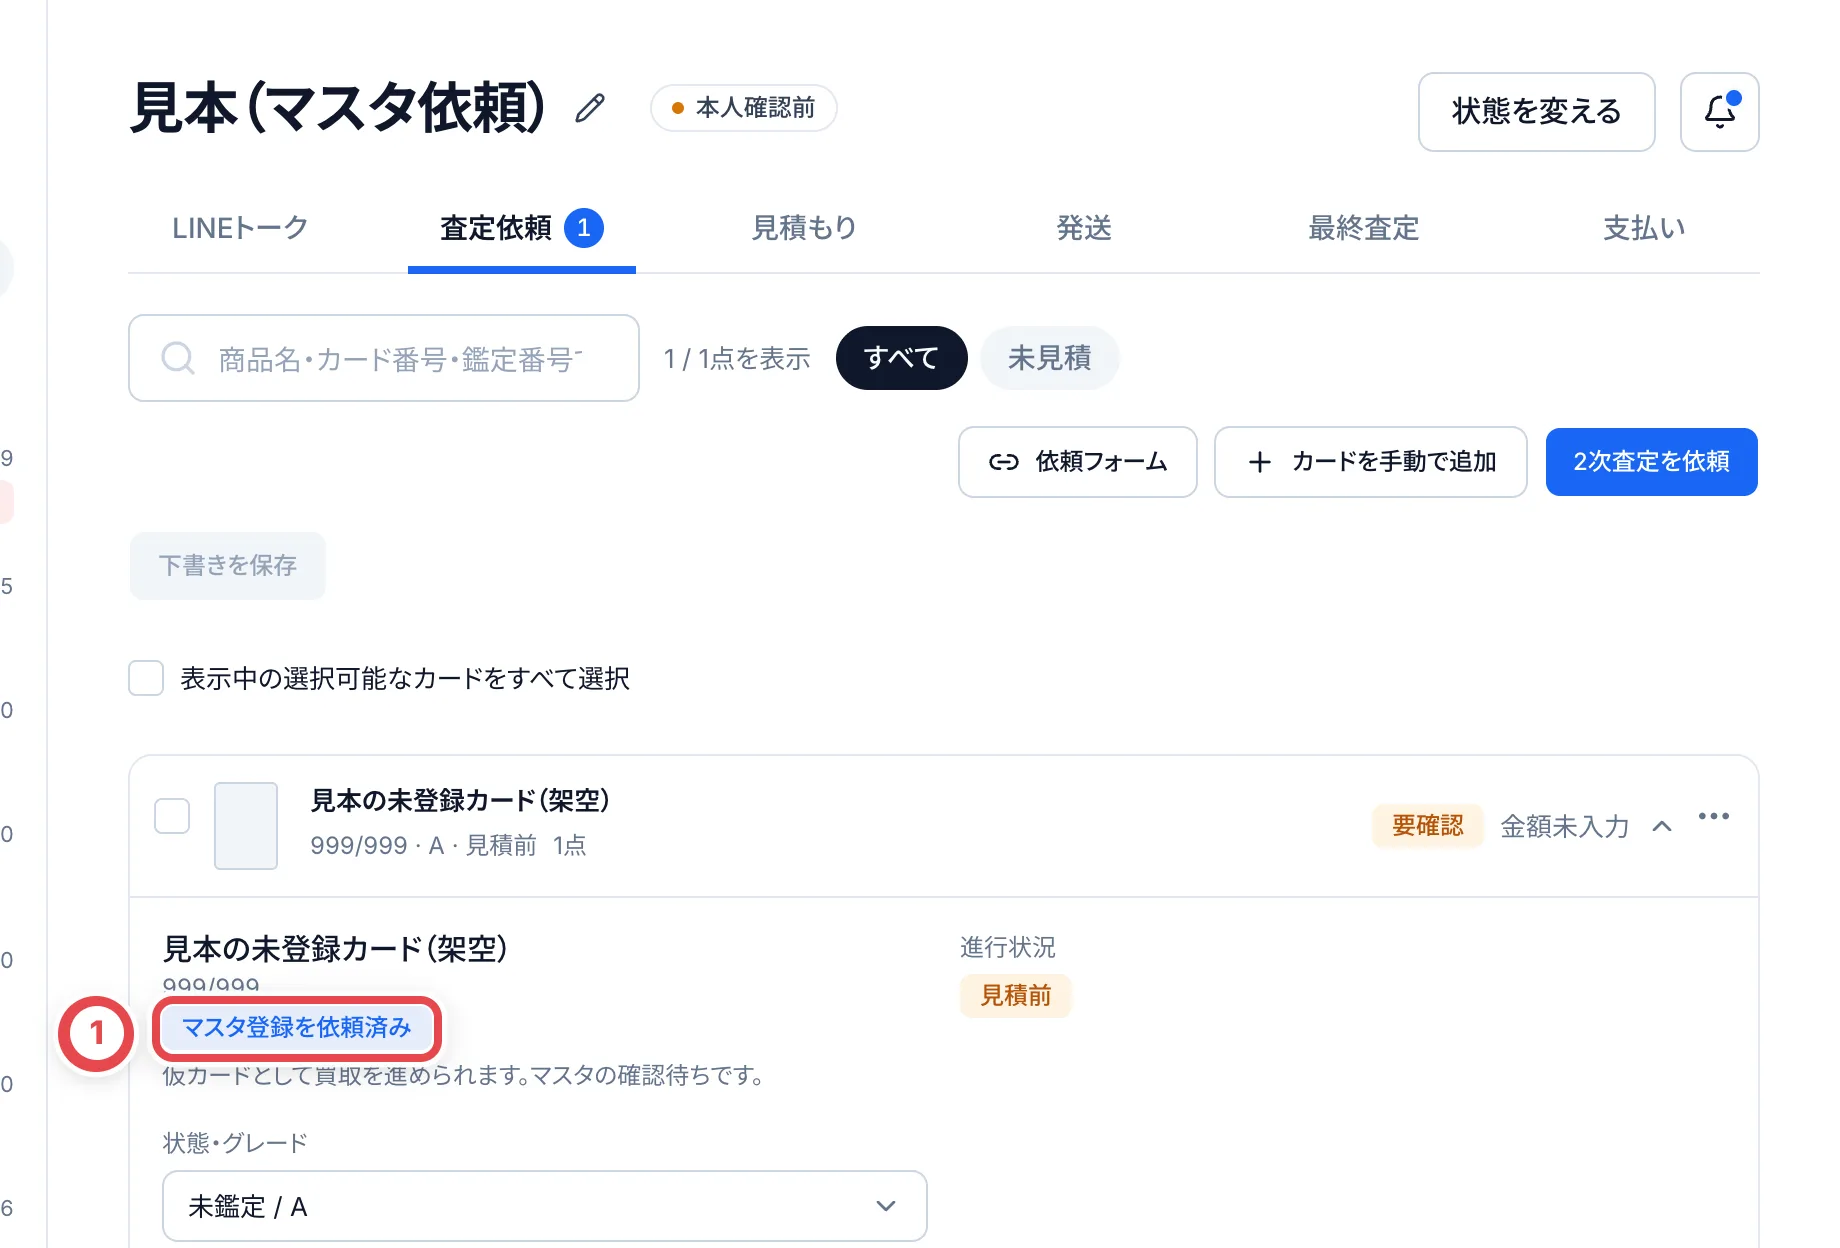 ## 4. 店舗で仮カードのマスタを確認する
「相場」→「マスタ登録依頼」を開きます。①の「店舗で確認」が付いた依頼では、権限のある担当者に②「依頼を確認」が表示されます。「運営の確認待ち」は店舗で確定する対象ではありません。
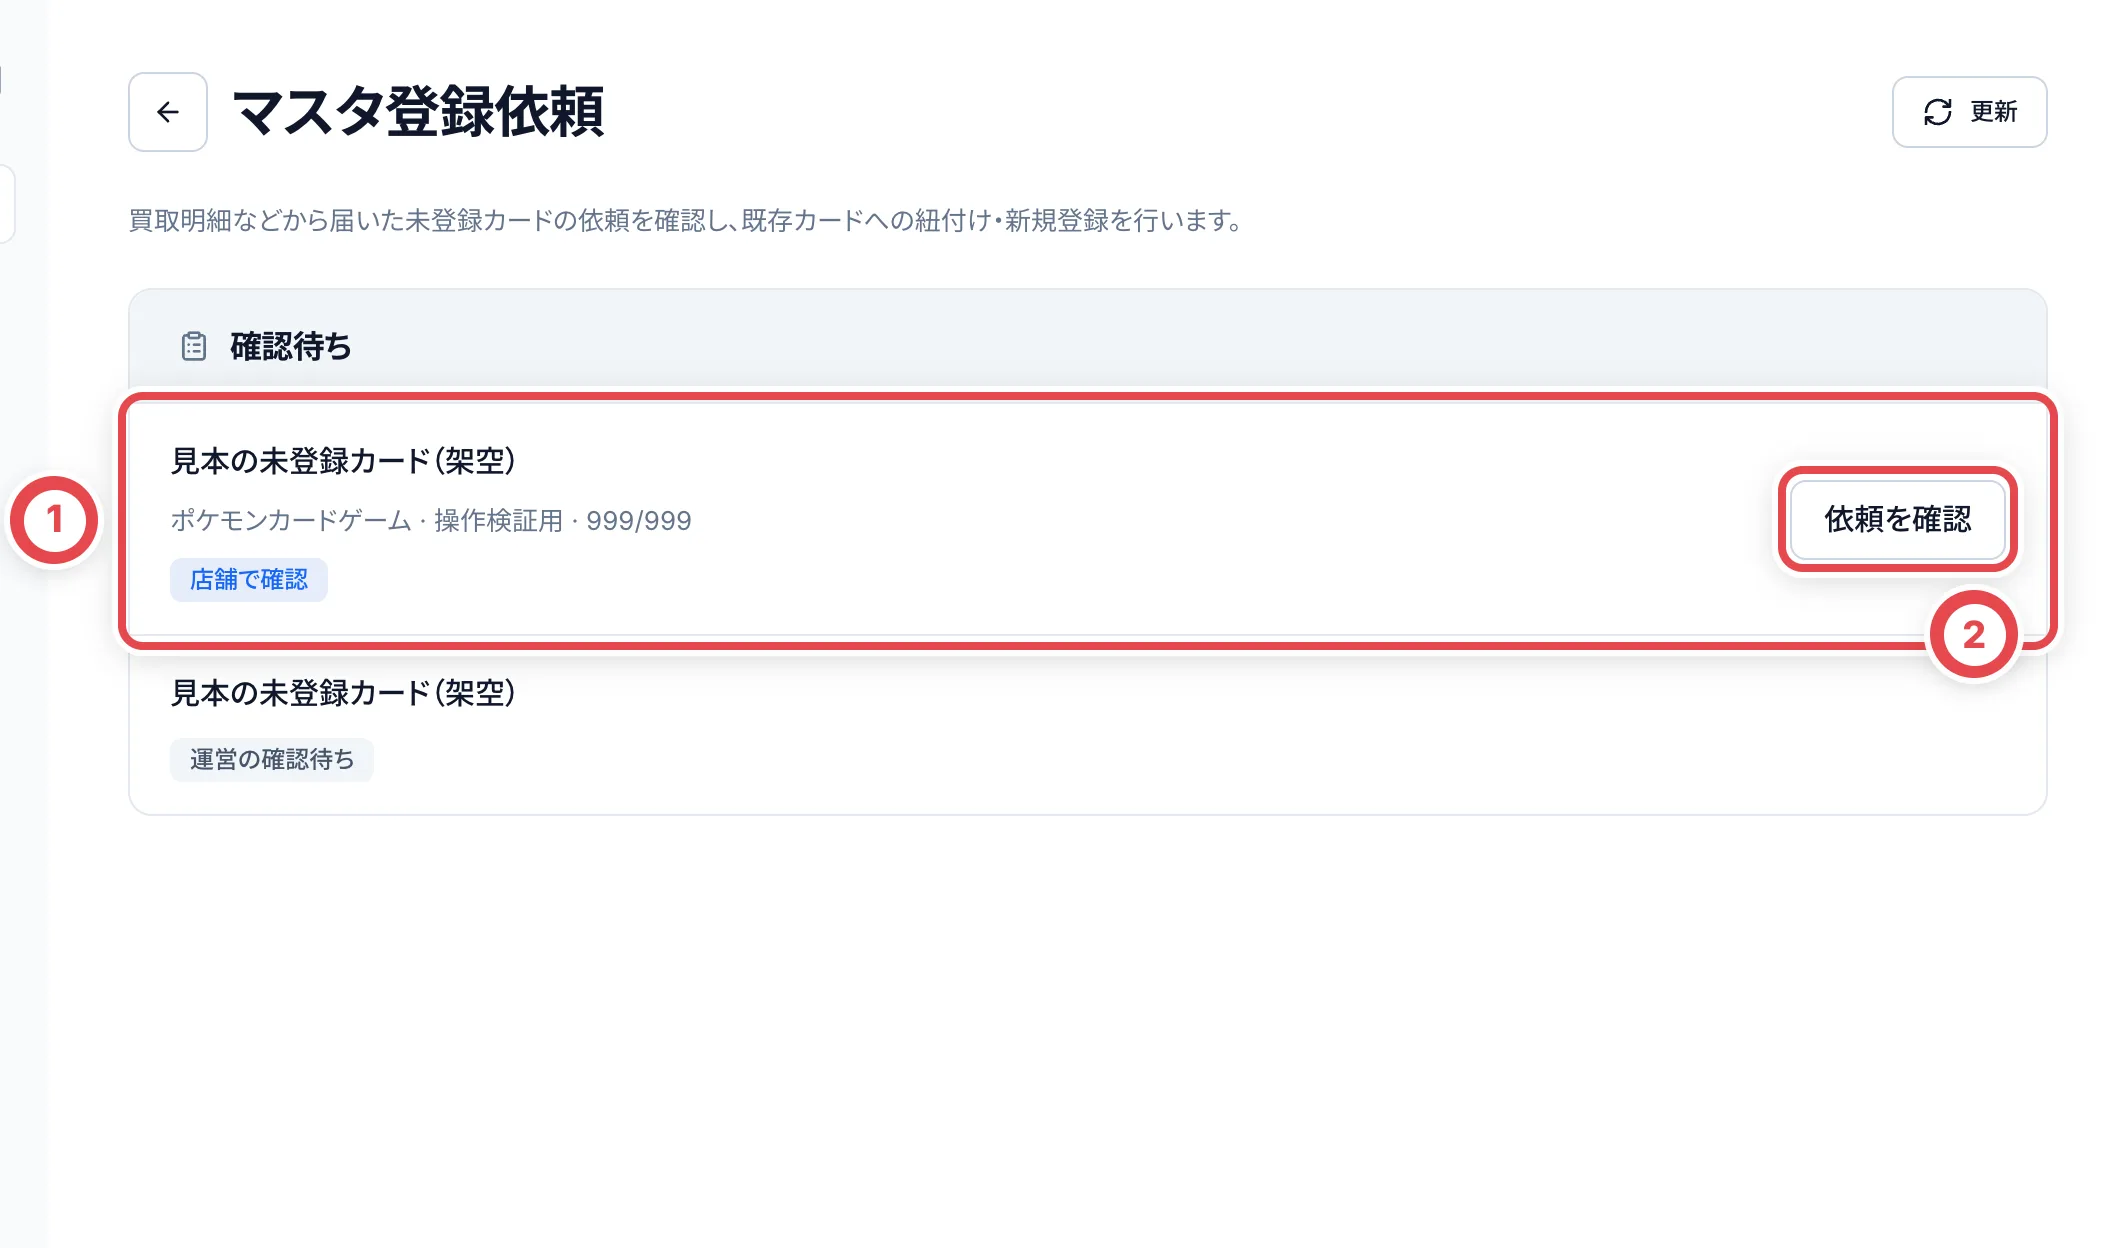 ①の登録方法を選びます。すでに同じカードがあるなら「既存カードに紐付け」→「既存カードを探す」から、同じゲーム・型番・版のカードを選びます。共通マスタにない場合は「新規登録」を選び、名前・番号・カードの地域を確認します。「不明」を推測で「日本」にしないでください。
画像がある場合は利用する画像を確認します。日本のカードでスニダンの出典を設定する選択が表示された場合は、同じ商品のURLかも照合します。②「確認理由」を入力して、③「変更内容を確認」を押します。
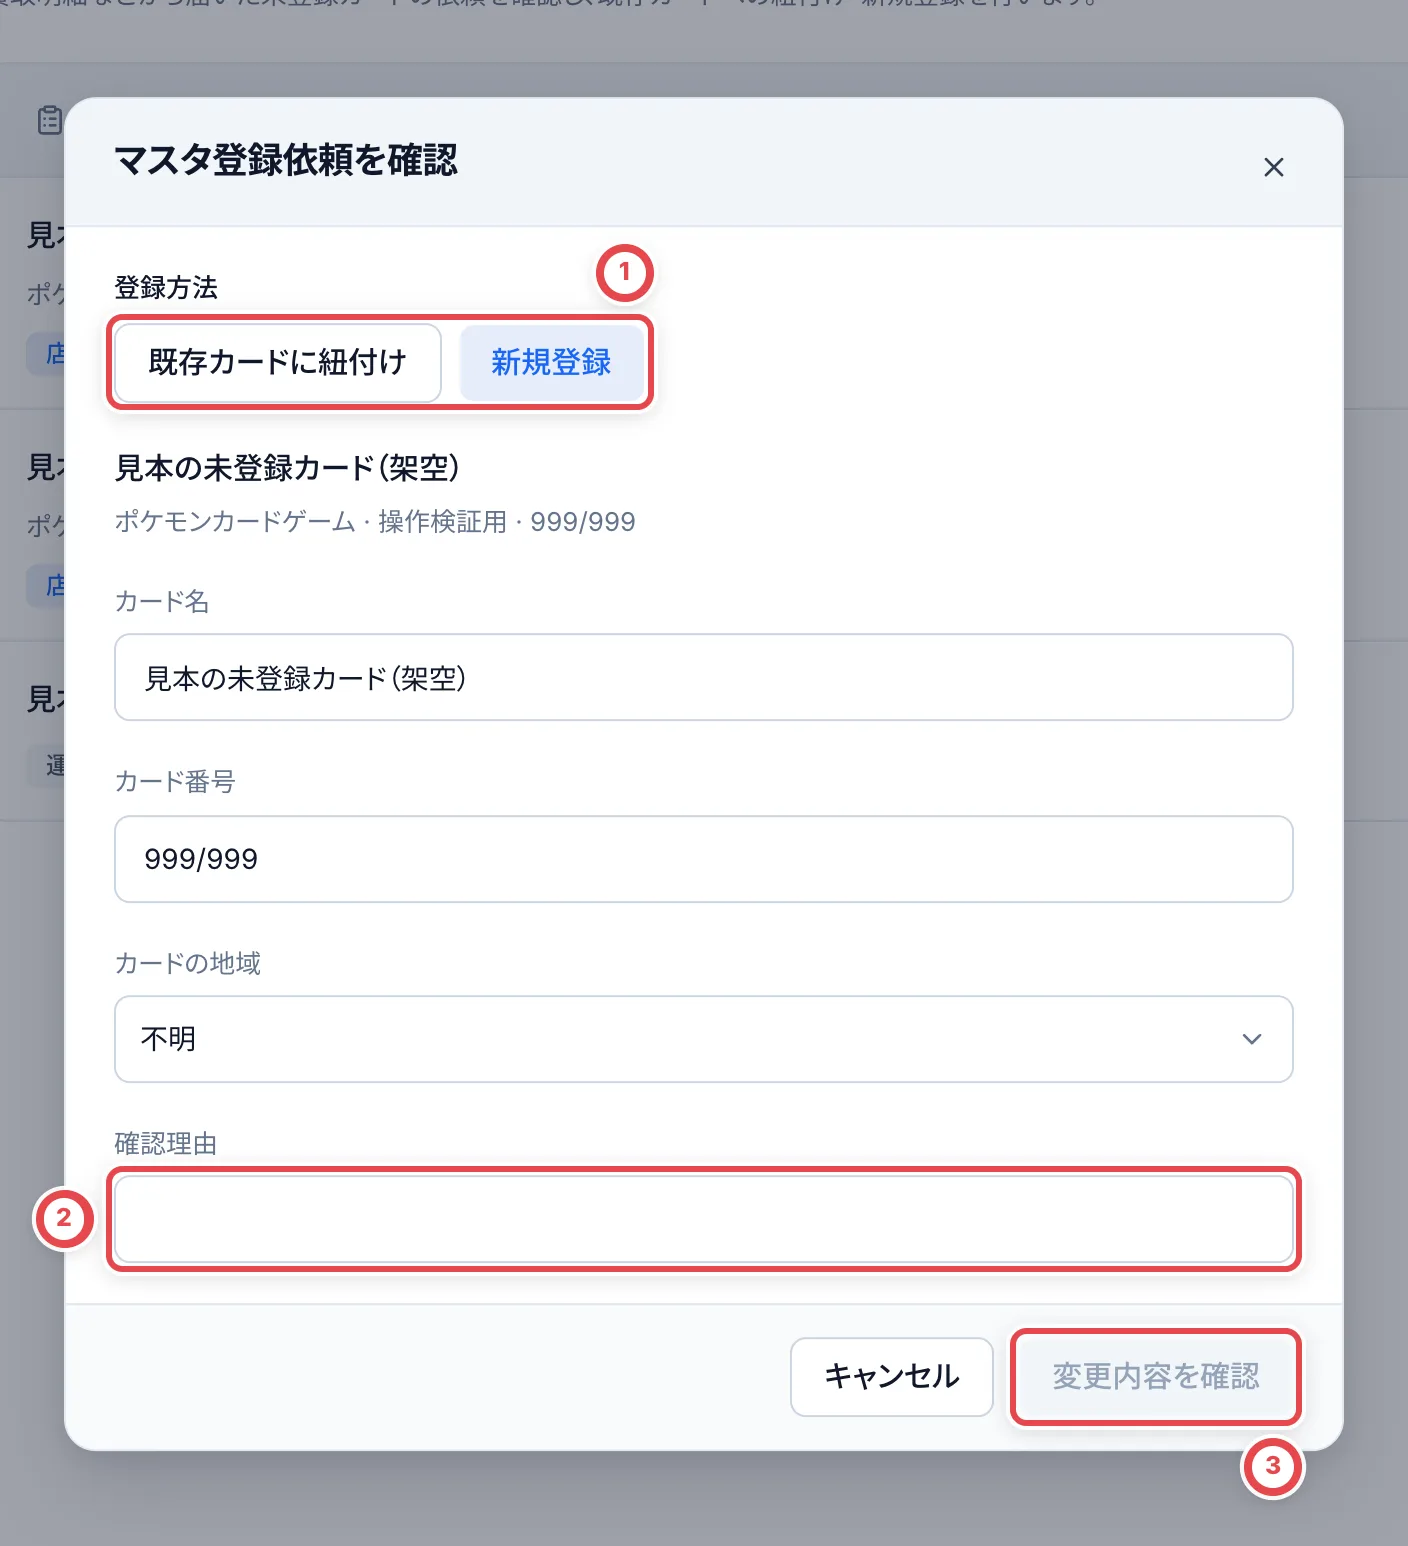 確認画面に出る登録内容・買取明細件数・在庫点数を照合します。直す場合は「戻る」を押します。
:::warning
「登録を確定」は、共通マスタへの登録または既存カードへの紐付けと、関連する買取・在庫の記録への反映を行います。プレビューを開いただけでは確定されません。対象・影響件数・理由を確認してから確定してください。
:::
確定後は一覧を更新し、元の明細と在庫のカード・型番・版を確認します。店舗での承認にはマスタ承認と買取履歴の訂正権限、在庫がある場合は在庫履歴の訂正権限も必要です。更新されたというエラーでは、一覧から開き直して最新の影響を確認します。
## 5. 既存商品のスニダンリンクを追加する
カードやBOXの商品は特定できているものの、スニダンの共通リンクがない場合は、査定明細の「リンクを追加」から登録できます。スニダンリンクを利用できる店舗で、買取を編集する権限が必要です。未特定の商品は、先に商品を特定するか、上のマスタ登録依頼を使います。
1. 表示された商品名・型番・言語を現物と照合します
2. 「スニダン商品URL」に `https://snkrdunk.com/apparels/…` 形式の商品URLを入力し、「商品ページを確認」で同じ商品・版か確認します。「商品情報を取得」で名前と画像を確認することもできます。取得に失敗しても、商品ページで確認してから保存できます
3. 「保存して登録を依頼」を押します。**今回の買取で使う仮リンクを保存すると同時に、共通マスタへの登録依頼を作ります。** この時点では、全店舗の共通リンクにはなりません
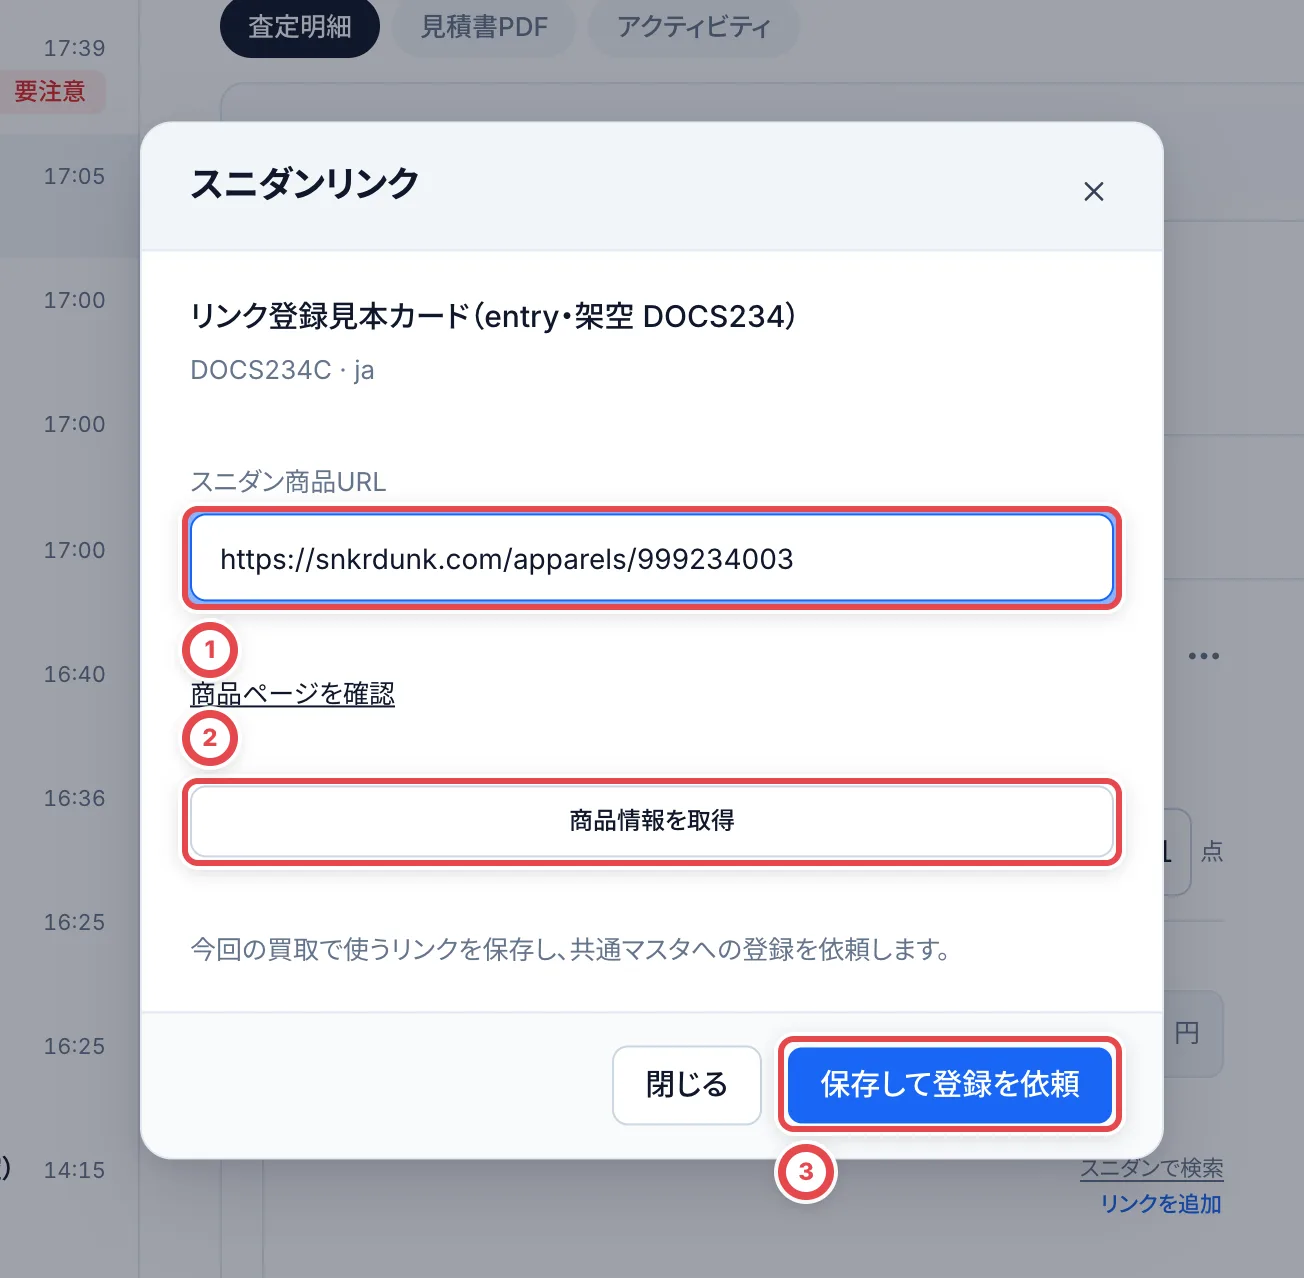 ①にURLを入力し、②で必要に応じて商品情報を確認してから③で依頼します。
依頼中は「リンクの登録状況」からURL・状態を確認できます。商品の特定を変えた場合は、依頼を取り下げてから正しい商品へ再登録します。既に共通リンクがある商品、運営がリンクを停止した商品、査定を編集できない状態では追加できません。
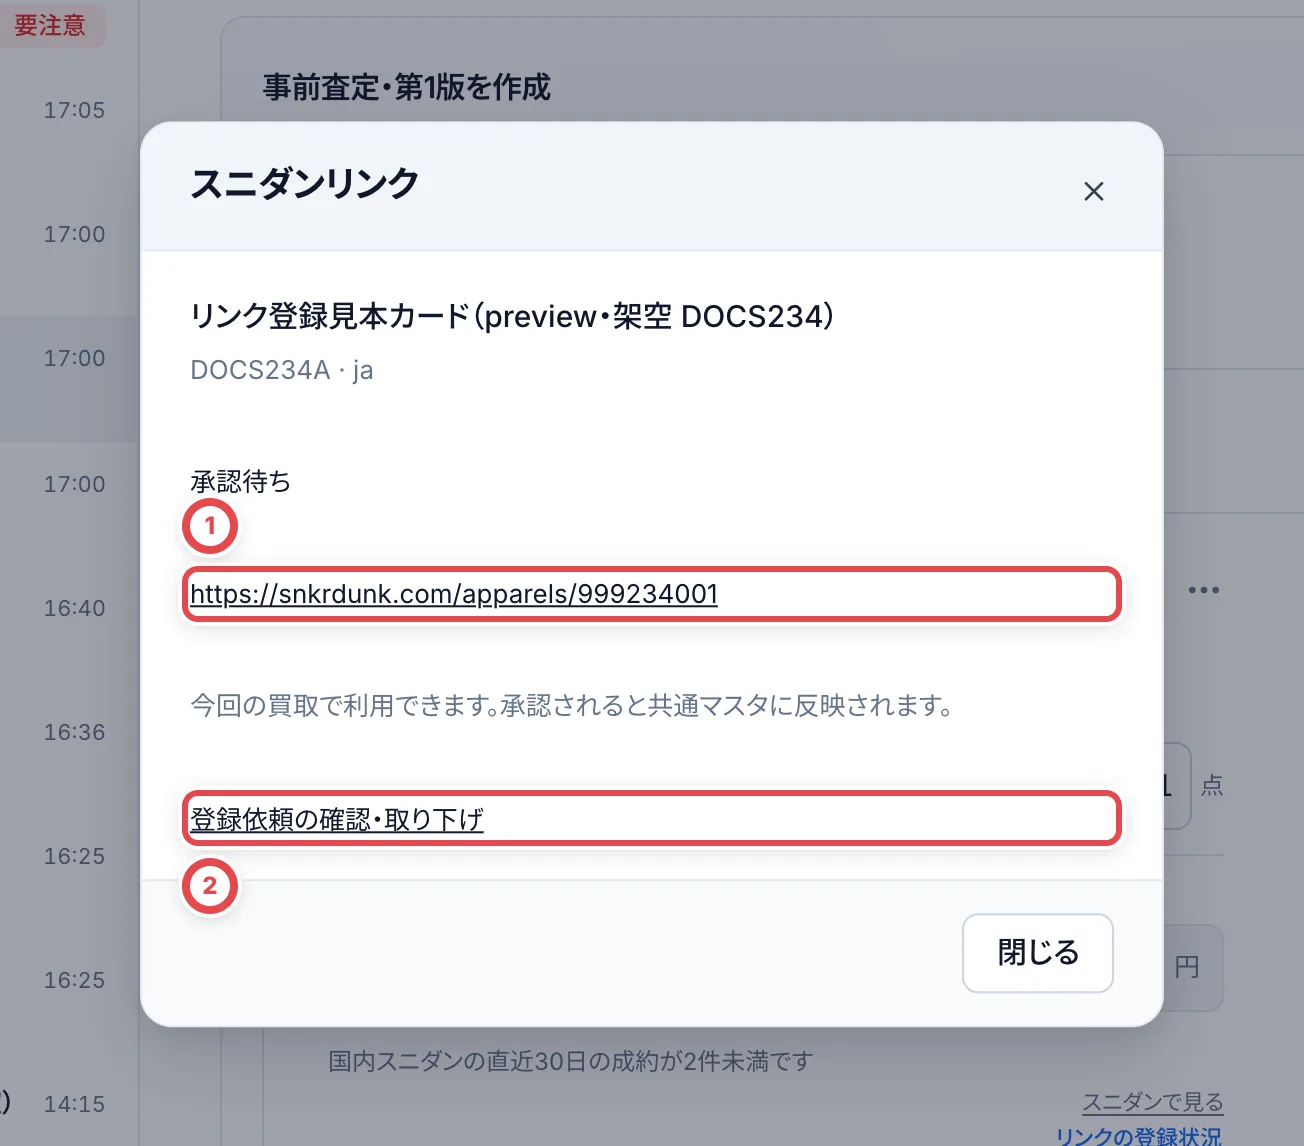 ①が今回の買取の仮リンクです。②から依頼の確認・取り下げへ進めます。
### 店舗で共通リンクを承認する
「相場」→「マスタ登録依頼」の「スニダンリンク登録依頼」を開きます。マスタ承認権限のある担当者には「承認」「却下」、買取編集権限のある担当者には「取り下げ」が表示されます。
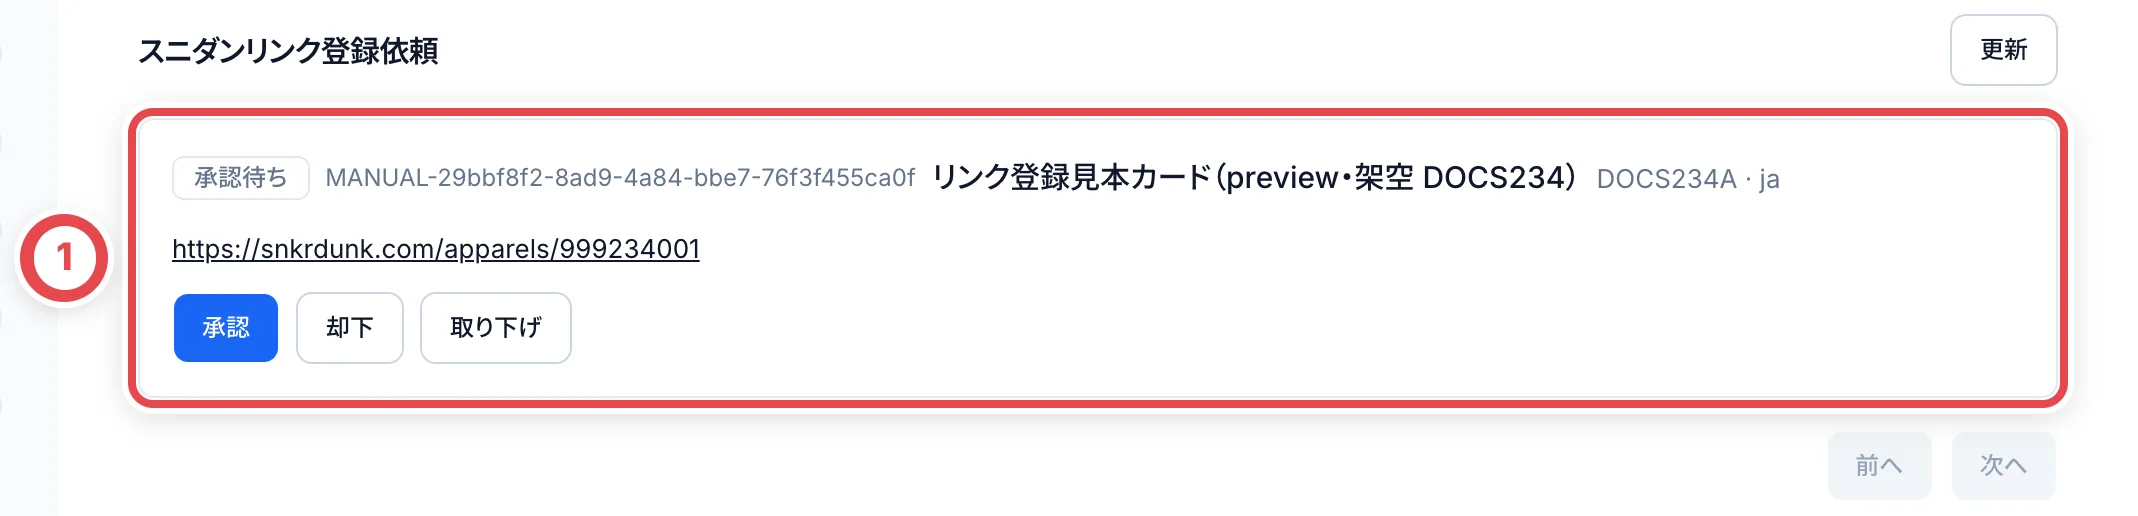 ①の対象商品とURLを照合して、承認・却下・取り下げを選びます。
商品名・型番・言語・URLと、表示される場合は現在の共通リンクを照合します。「承認」から確認画面を開き、理由を入力します。
:::warning
「共通リンクを承認」の「確定」は、URLを共通マスタへ反映し、全店舗で使えるリンクにします。今回の取引だけのメモではありません。商品・版が一致することを確認してから実行してください。
:::
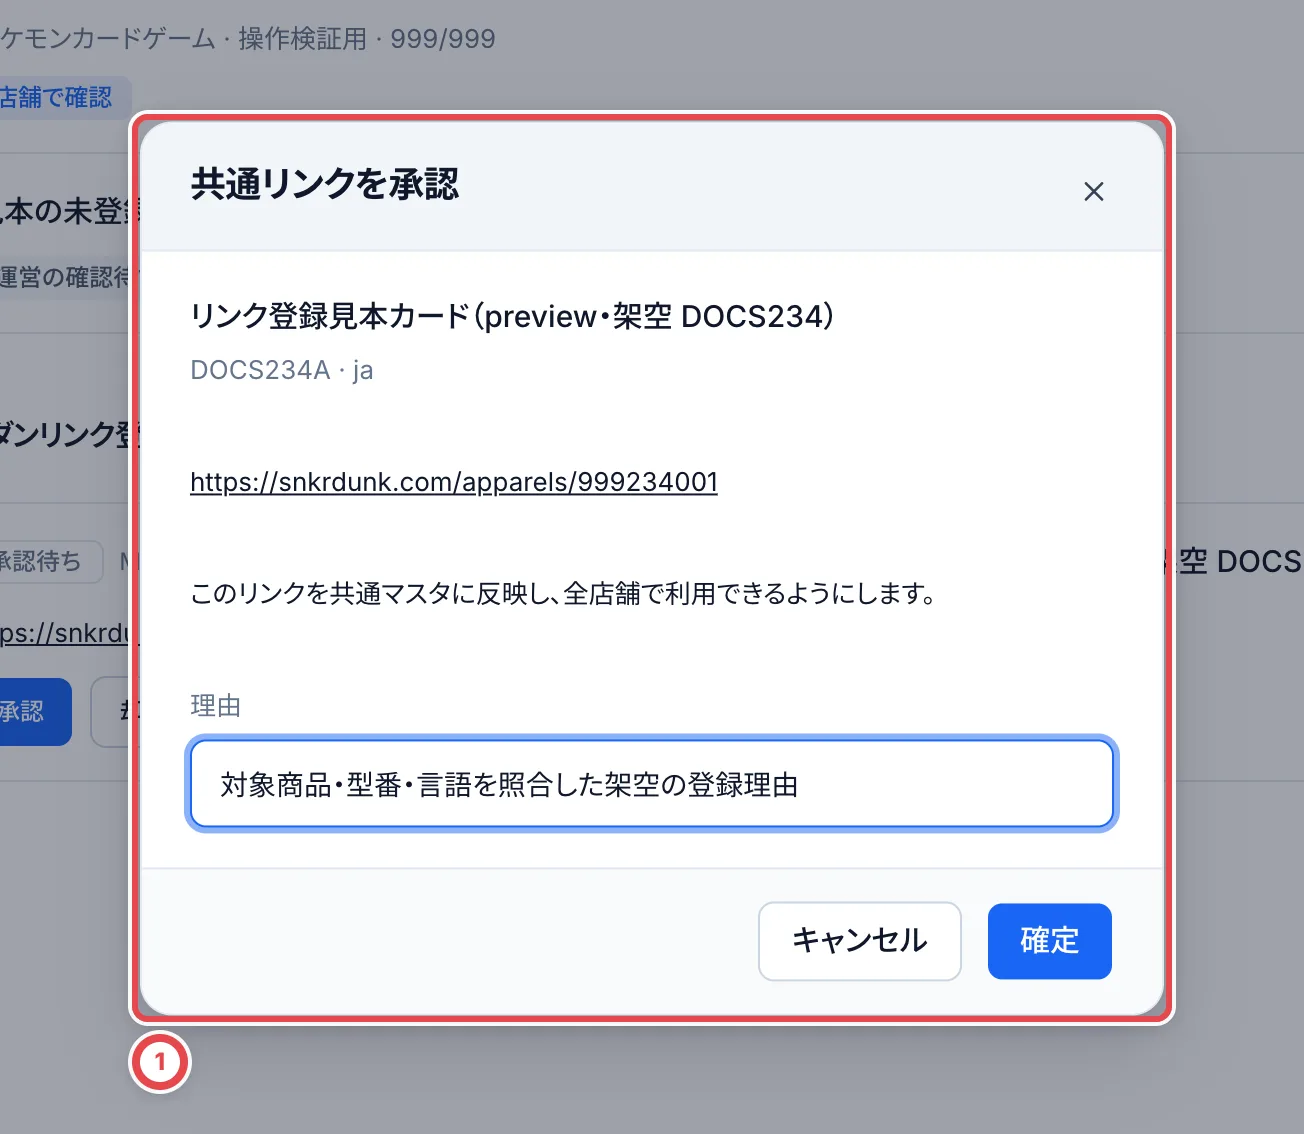 ①で全店舗への反映内容と理由を確認し、「確定」を押します。
却下・取り下げでは、今回の買取の仮リンクを使わなくなります。操作後は一覧を更新し、依頼の状態と元の査定明細のリンクを確認します。商品情報が更新されたエラーでは、画面を開き直して最新の対象を照合します。
## 困ったとき
| 起きていること | 確認すること |
| -------------------------- | ---------------------------------------------------------------------------------------- |
| 登録依頼の入口がない | 未特定の査定明細か、編集権限があるか、すでに依頼中・登録済みでないかを確認します。 |
| 写真を読み込めない | 読み直すか、必要な情報を入力して写真なしで依頼できます。 |
| 依頼済みのまま | 仮カードなら店舗の確認担当者、従来の依頼なら運営の回答を確認し、同じ明細を開き直します。 |
| 登録済みでも見積に進めない | 登録されたカードを明細に採用したか確認します。 |
調査担当から登録を依頼する場合は[調査依頼と2次査定](/guides/purchase/research-and-reviews)を参照してください。
---
# 現金管理とレジ締め
Source: https://docs.toreca-cloud.com/guides/purchase/cash
買取の現金のお渡しは自動でレジに記録されるので、手で記録するのは送料や補充、持ち帰りなどだけです。
## 最初に用意するもの
- 現金管理がオンになっていること。オンにできるのはトレカクラウドの運営です。サイドバーに「現金管理」が出ないときは、管理者に確認してください
- レジ。追加できるのは、現金管理の管理権限がある人です([レジを追加する](#レジを追加する))
- 閉店時に差額があったときに締められる人。差額があるときの締めは管理権限が必要です
## 画面の言葉
- **レジ**:現金を保管する場所です。レジごとに記録を分けます。現金箱・レジと店内金庫を区別して登録します。担当者ごとではなく、物理的な保管場所ごとに分けます。
- **記録上の現金**:開始時の現金に、記録済みの入金を足し、出金を引いた金額です。「いまレジにあるはずの現金」です。
- **点検**:営業の途中で、レジの紙幣と硬貨を実際に数えることです。点検しても営業は続きます。
- **締め**:閉店時に現金を数え、記録と照合して、その日の営業を終えることです。
- **繰越**:締めたあと、次の営業のためにレジに残す現金です。次にレジを開始するとき、最初から入っています。
## 1日の流れ
| 順番 | やること | レジの状態 |
| ---- | ------------------------------------------ | ---------- |
| 1 | 現金管理を開いて、レジを選ぶ | 未開始 |
| 2 | 現金を数えて、レジを開始する | 営業中 |
| 3 | 営業中の画面で、記録上の現金を確かめる | 営業中 |
| 4 | 送料や補充などを、手で入出金として記録する | 営業中 |
| 5 | (必要なら)途中で点検する | 営業中 |
| 6 | 閉店時に現金を数えて、レジを締める | 締め済み |
| 7 | 日報をコピーして、社内に共有する | 締め済み |
| 8 | 営業履歴で、締めた営業日を確かめる | 締め済み |
日付が変わっても、レジは自動では締まりません。前の営業が残っていたら、先にそれを締めてから次の営業を開始します。
## 1. 現金管理を開いて、レジを選ぶ
サイドバーの①「現金管理」を押します。店舗ごとに現金合計と保管場所が並びます。②の「営業中」が付いているのが、いま開いているレジです。初めて開始するレジには「未開始」、前回の締めが済んだレジには「次回開始前」が付きます。名前を押すと、その保管場所の画面が開きます。
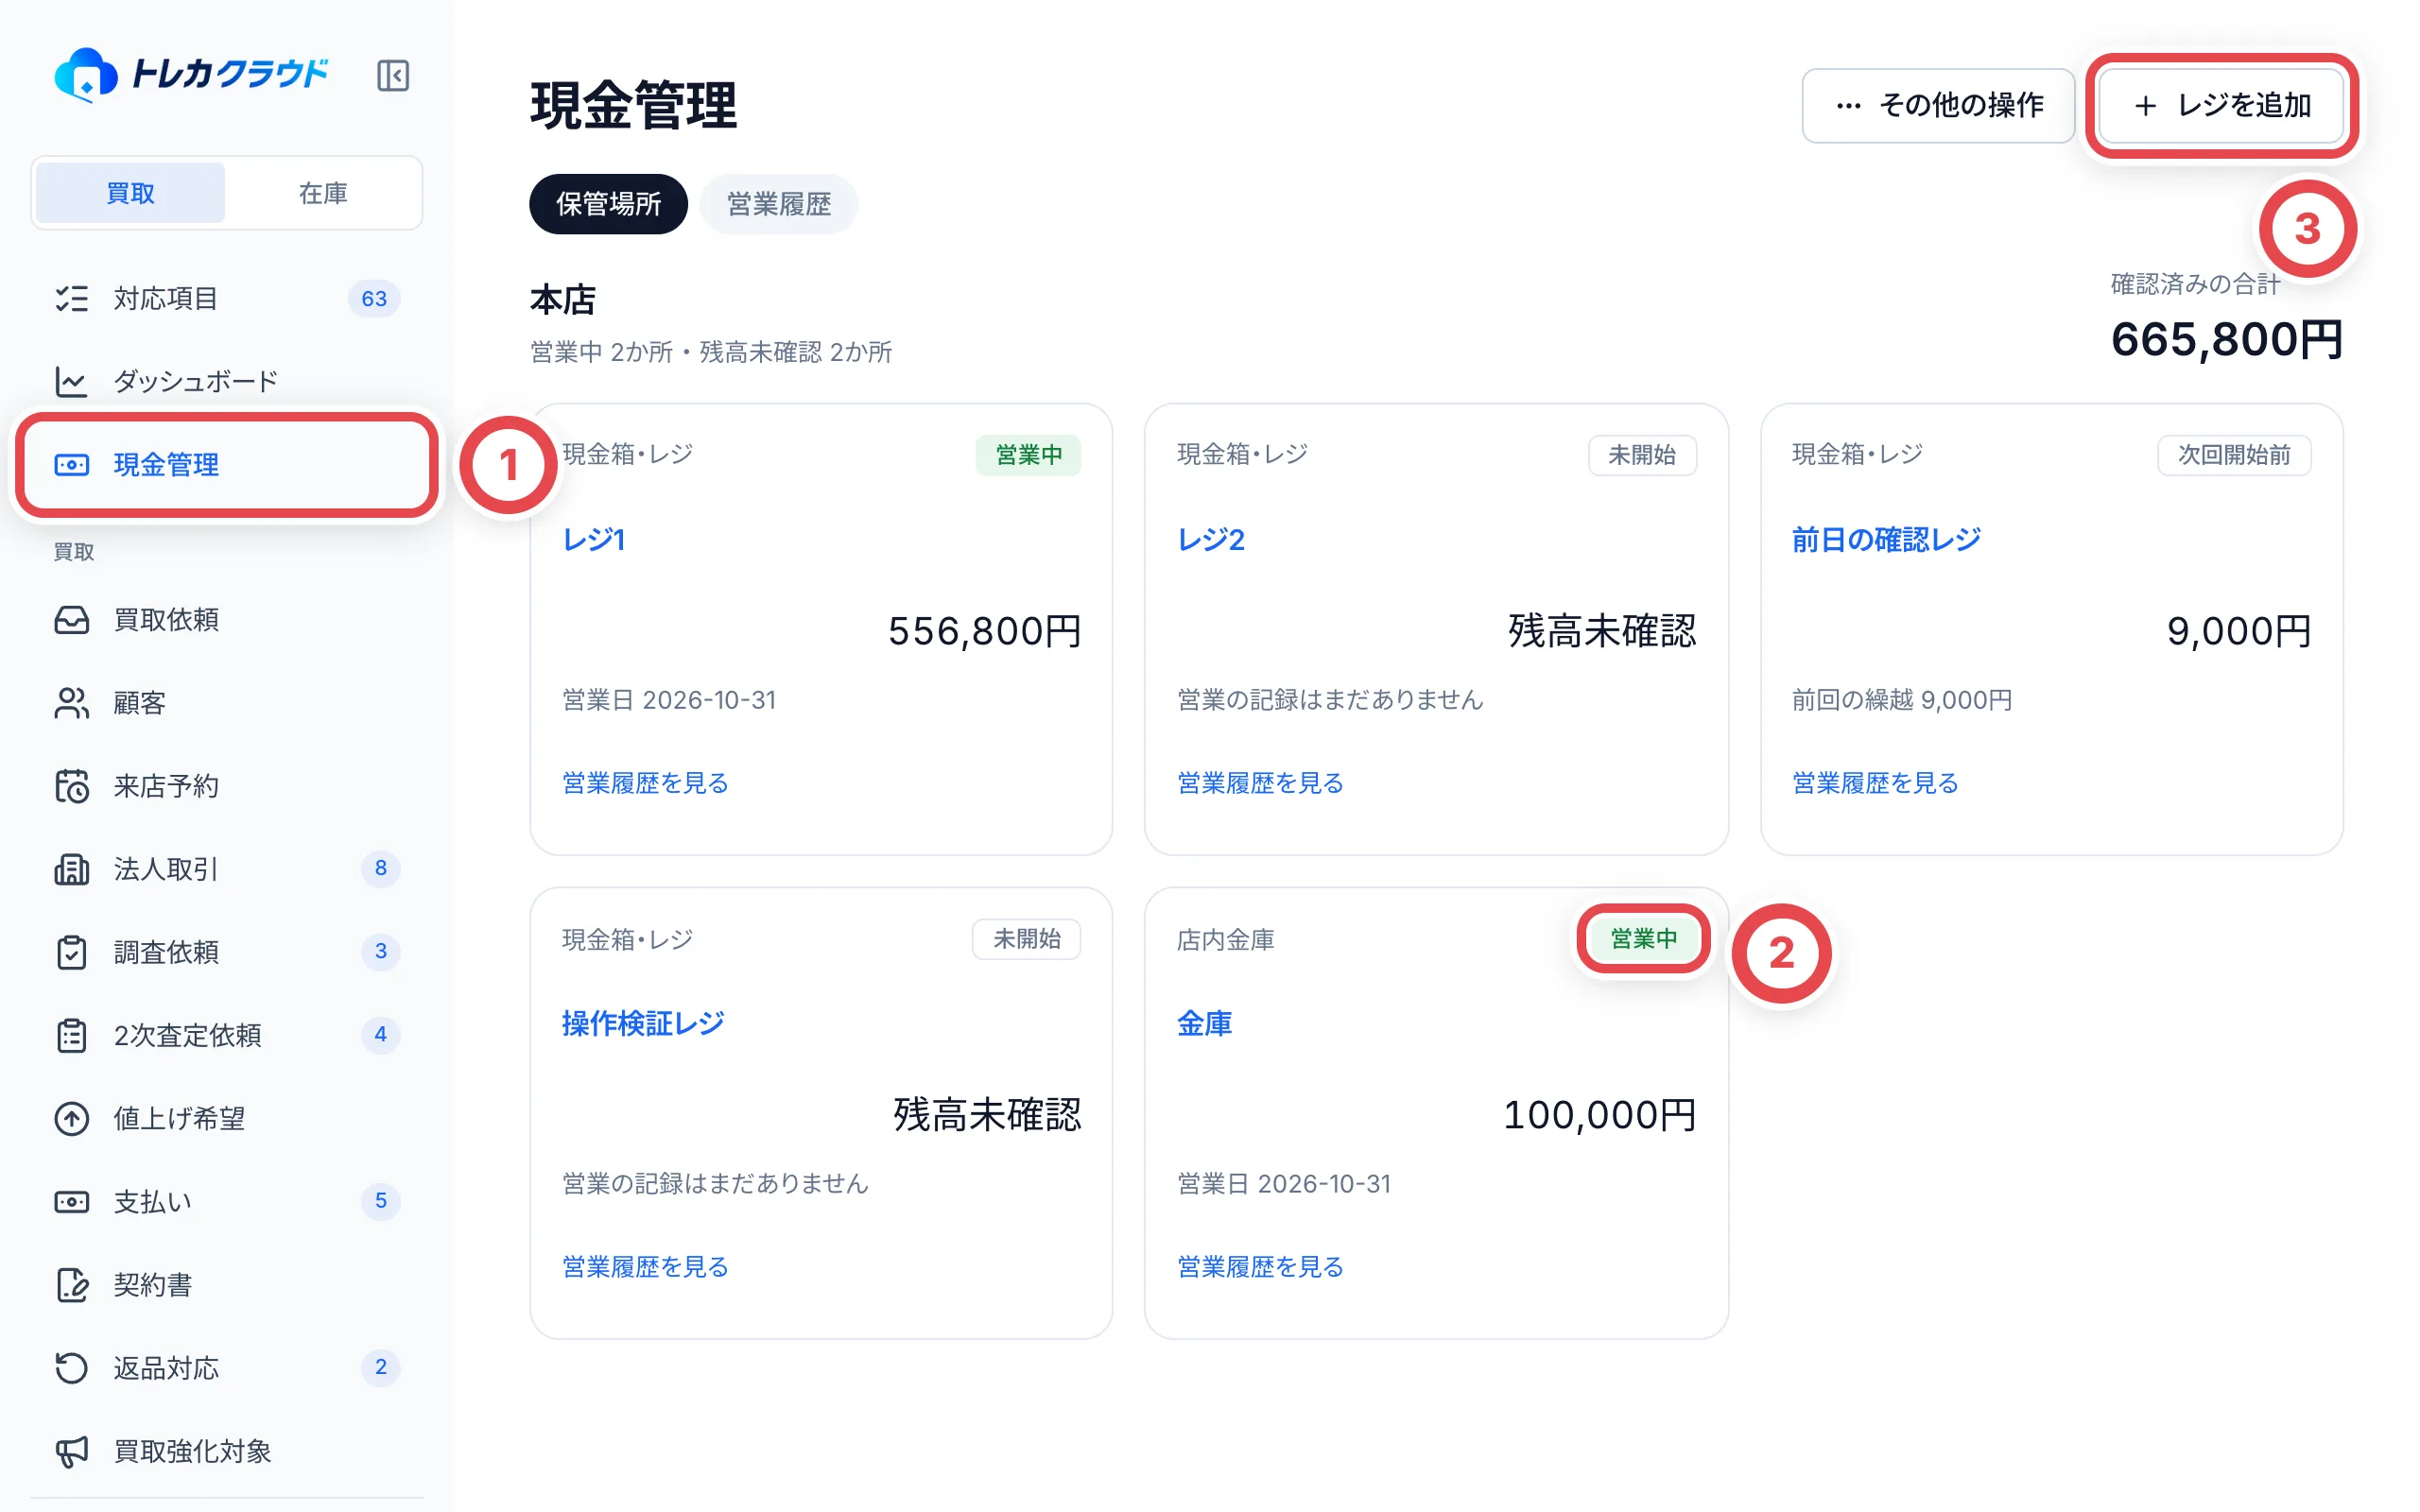 ①で現金管理を開きます。②が営業中のレジです。③でレジを増やせます。
## 2. 現金を数えて、レジを開始する
レジの一覧で、未開始のレジのカードにある「レジを開始」を押します(レジ名を押して開いた画面からも開始できます)。①の営業日には今日の日付が入っています。レジの現金を実際に数え、②の「開始時の現金」に金種ごとの枚数を入れます。空欄の金種は0枚として数えます。表の最後の行に合計が出ます。
持参資金を足したときなど、前回の繰越と金額が違うときは、③のメモ欄(繰越と違うときは「繰越と金額が違う理由」)に理由を書きます。最後に「レジを開始」を押すと、レジが営業中になります。
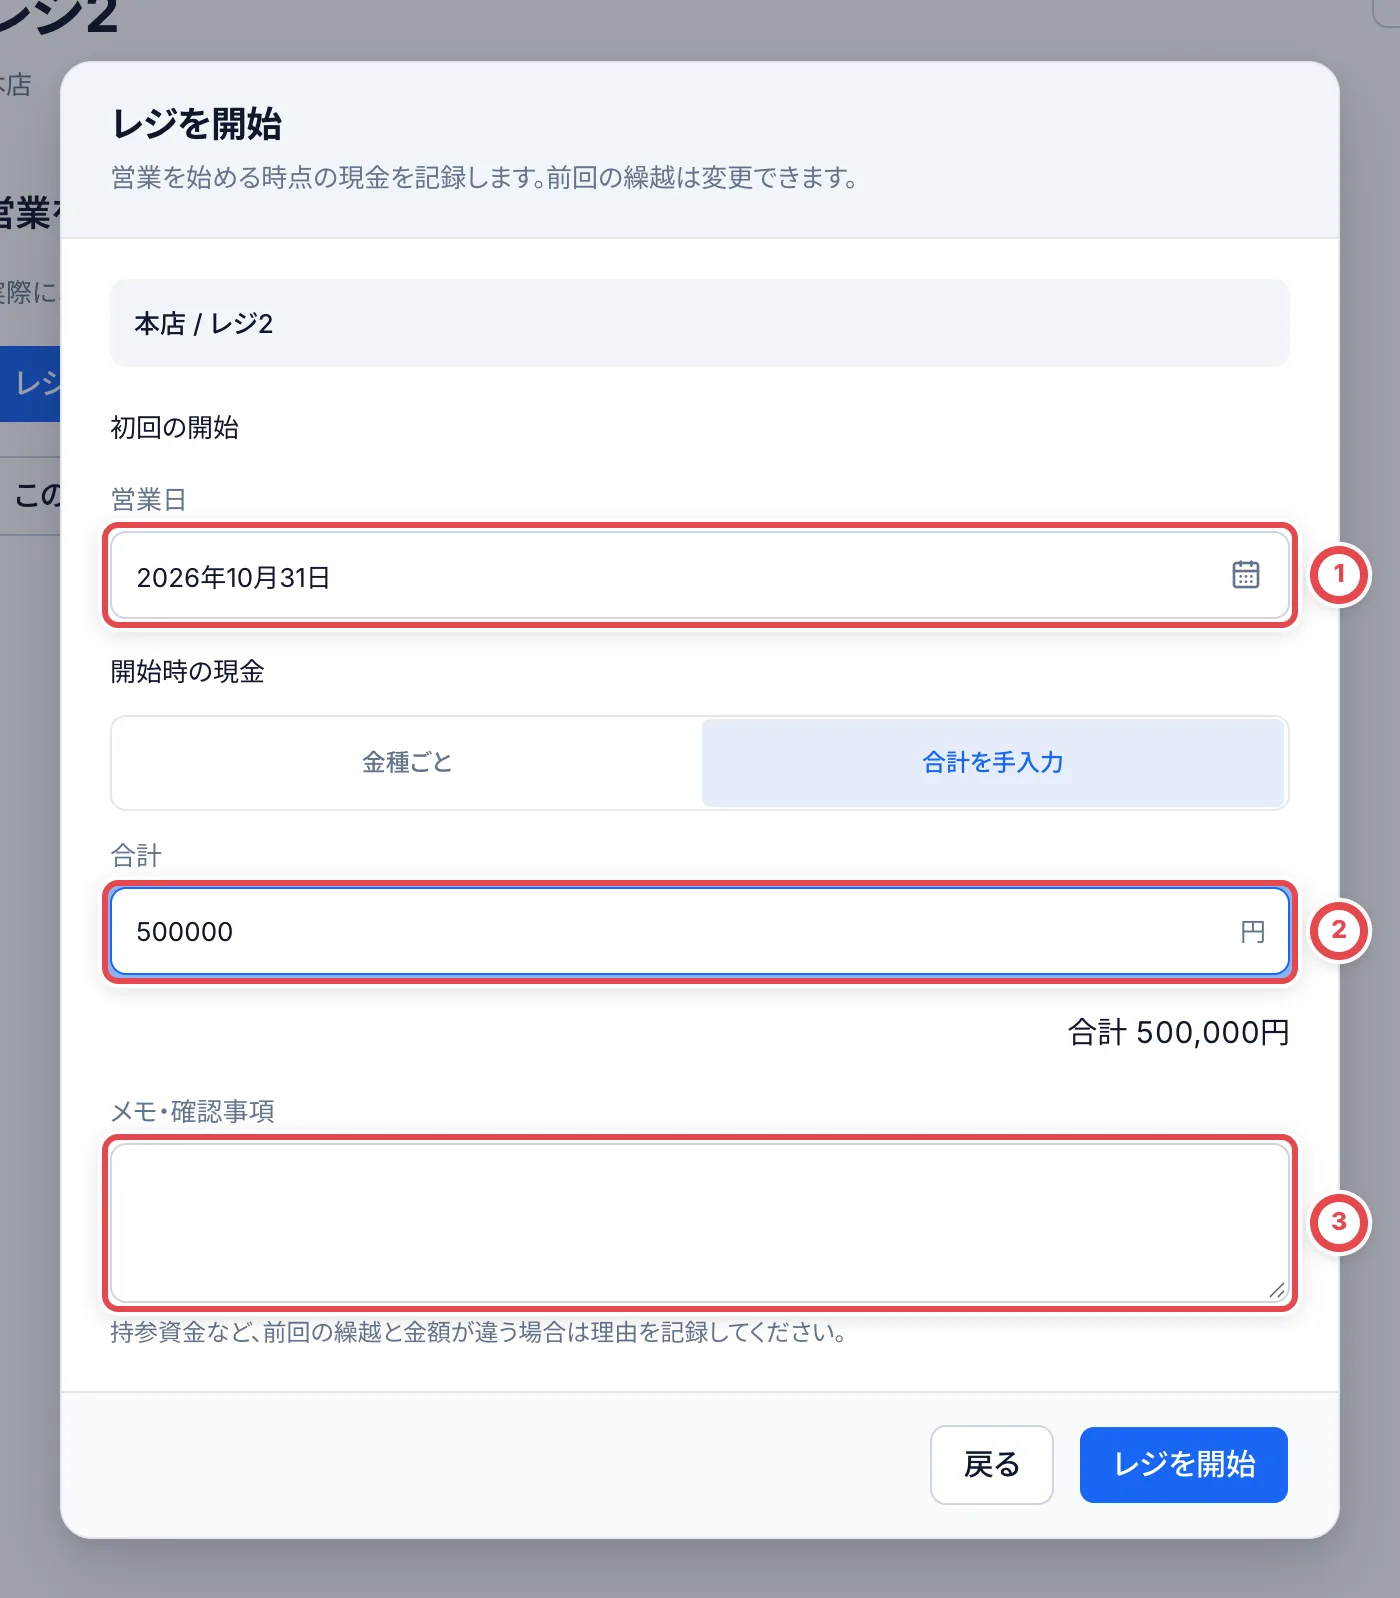 ## 3. 営業中の画面で、記録上の現金を確かめる
営業中のレジを開くと、①に記録上の現金が大きく出ます。保管目安を超えたときは、その下に注意が出ます(保管目安は注意を出すためのもので、買取金額の上限ではありません)。
送料や補充を記録するときは②の「入出金を記録」、閉店時は③の「レジを締める」を押します。下の「入出金」の一覧には、買取で現金を渡した分が「買取から自動」で入ります。**買取の現金のお渡しは、手で記録しないでください。**二重に出金されます。
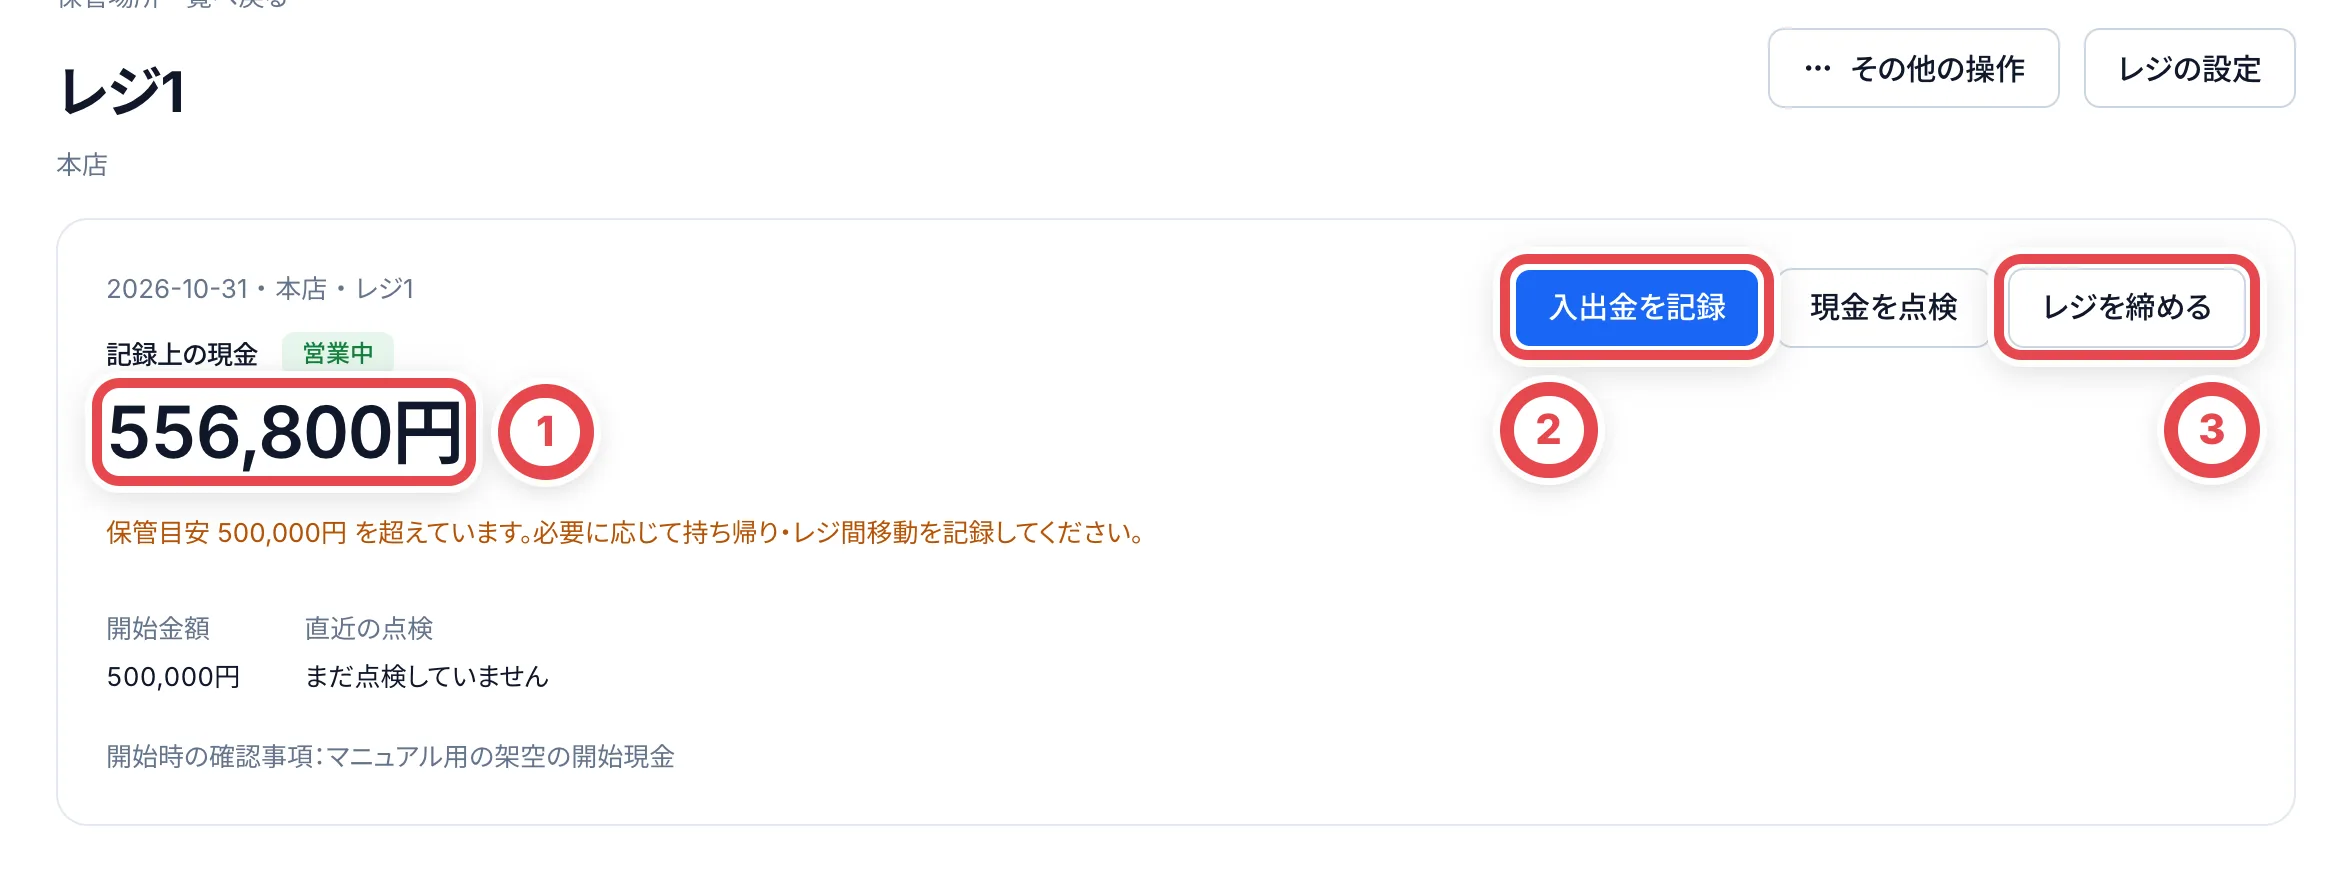 買取の支払総額に送料補助が含まれているときは、その分も自動の出金に入っています。同じ送料を重ねて記録しないでください。
## 4. 送料や補充などを、手で入出金として記録する
「入出金を記録」を押します。①で「入金(現金が増える)」か「出金(現金が減る)」を選び、金額を入れます。②の分類は、下の候補(送料・現金補充・持ち帰り・梱包資材・返金・その他)を押すと入ります。候補を選んだあとで書き換えてもかまいません。
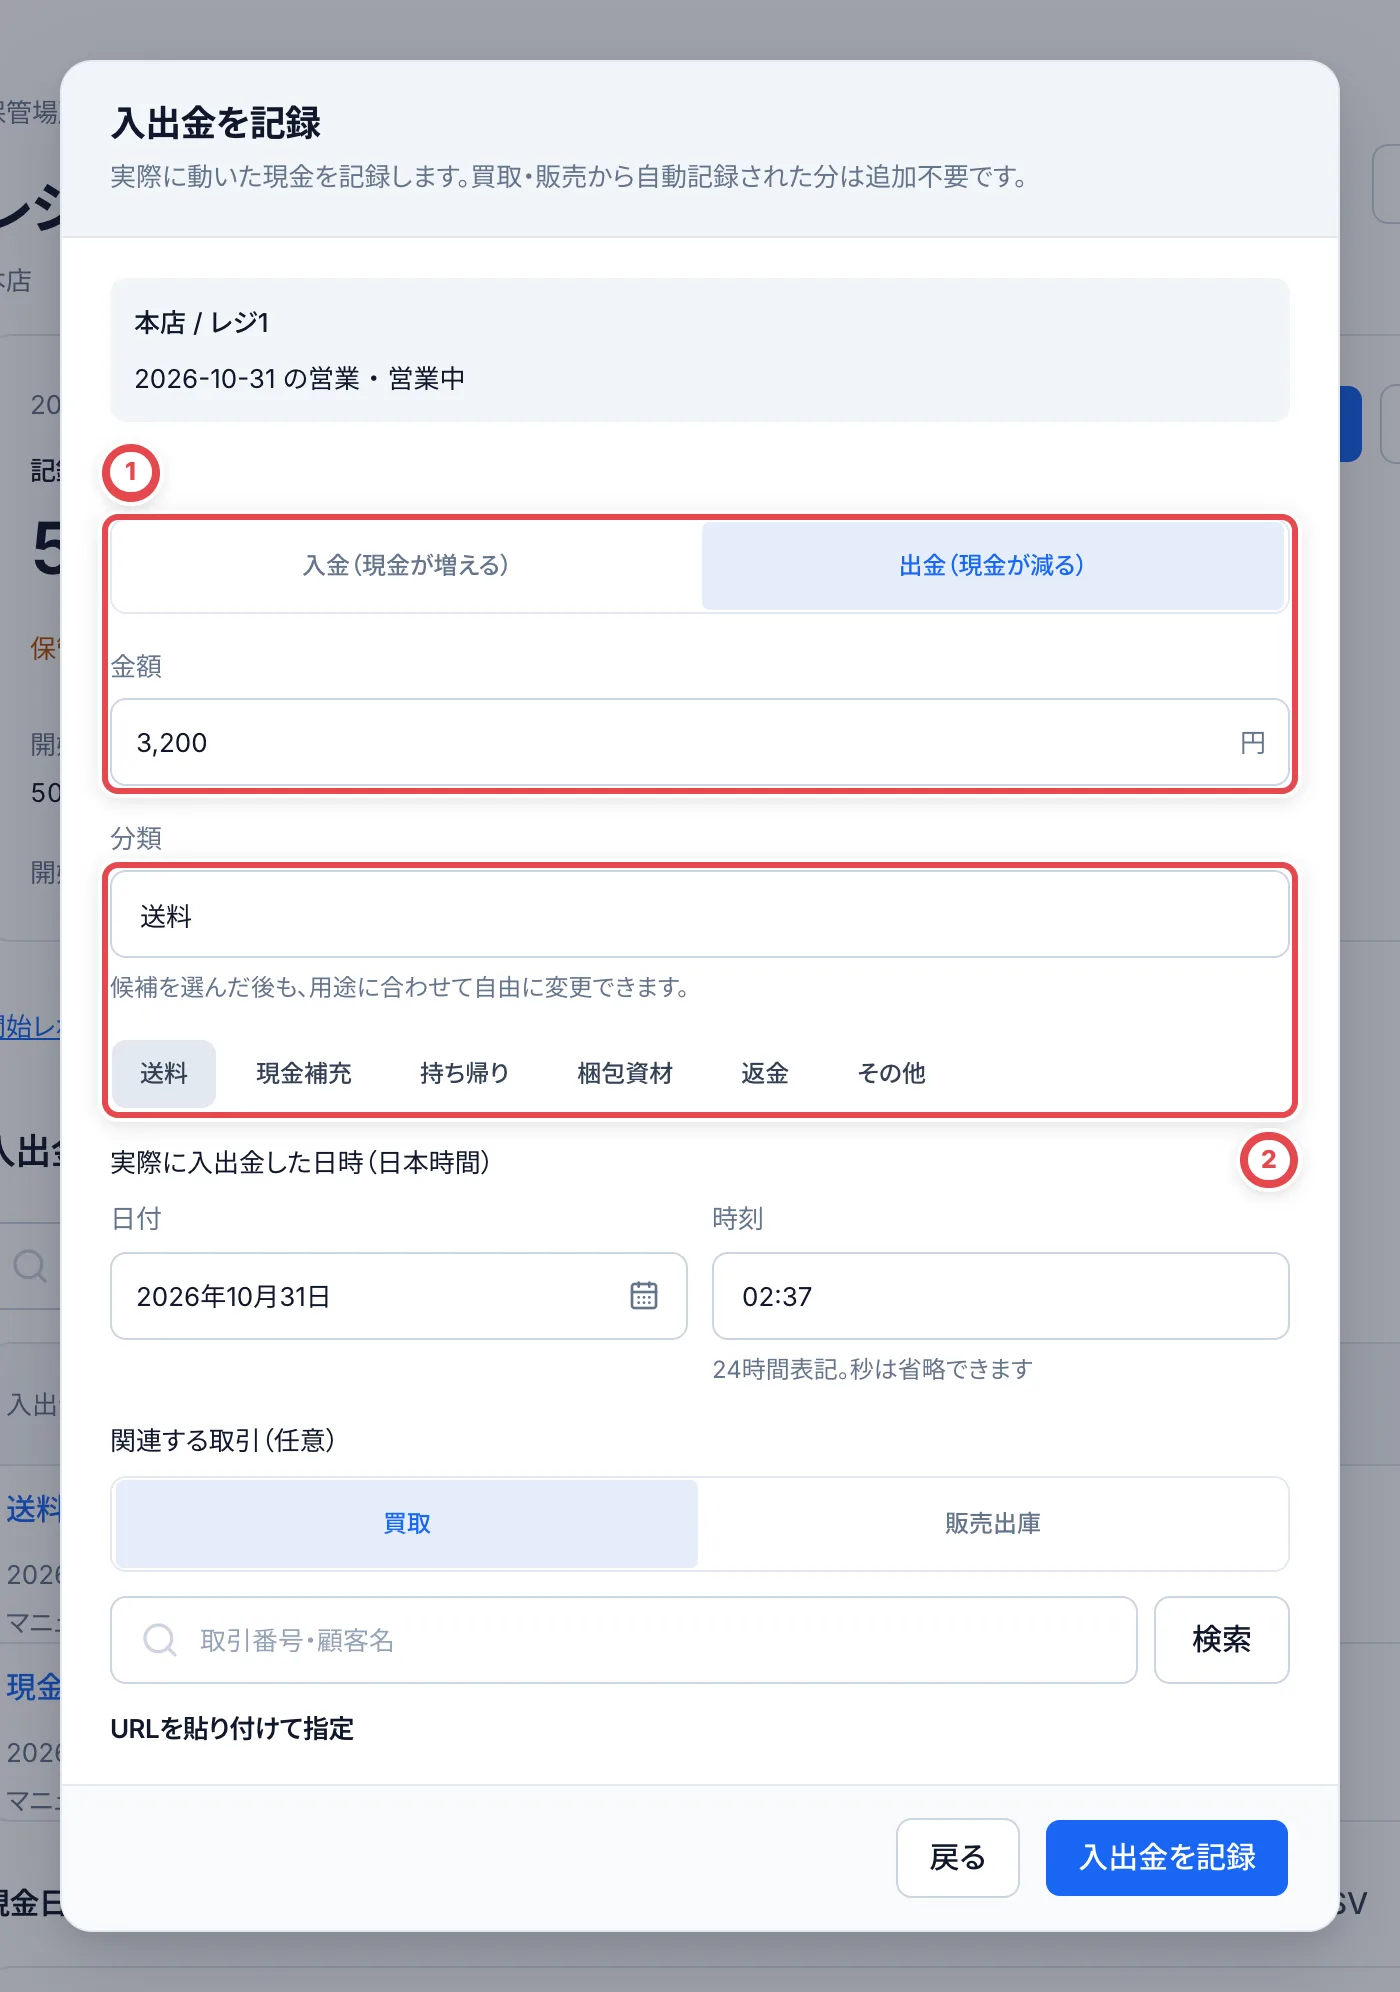 「実際に入出金した日時」は、今の日時が入っています。あとから記録するときは、実際にお金が動いた日時に直します。関係する買取や販売出庫があるときは、「関連する取引」で取引番号や顧客名から選びます。取引のページの URL を貼り付けて選ぶこともできます。最後に「入出金を記録」を押します。
別のレジや金庫へ現金を移すときは、入出金ではなく「レジ間で現金を移動」を使います。移動元の出金と移動先の入金がまとめて記録されます。移動先のレジも開始しておく必要があります。
## 5. 必要なら、途中で点検する
営業の途中で現金を数えたいときは、「現金を点検」を押します。金種ごとの枚数か、合計の金額を入れて「点検を保存」を押します。点検しても記録上の現金は変わらず、営業はそのまま続きます。最後に点検した結果は、営業中の画面の「直近の点検」に出ます。
## 6. 閉店時に現金を数えて、レジを締める
「レジを締める」を押します。**持ち帰る前の現金**を数えます。①の表に紙幣と硬貨の枚数を入れます。空欄の金種は0枚として数えます。
右側に、記録上の現金・実際に数えた現金・差額が出ます。②の「締め後に持ち帰る現金」に、店舗外へ持ち帰る額を入れると、その下に次回の繰越が出ます。「実際に現金を数え、入力した金額を確認しました」にチェックを入れ、③の「締めを確定」を押します。
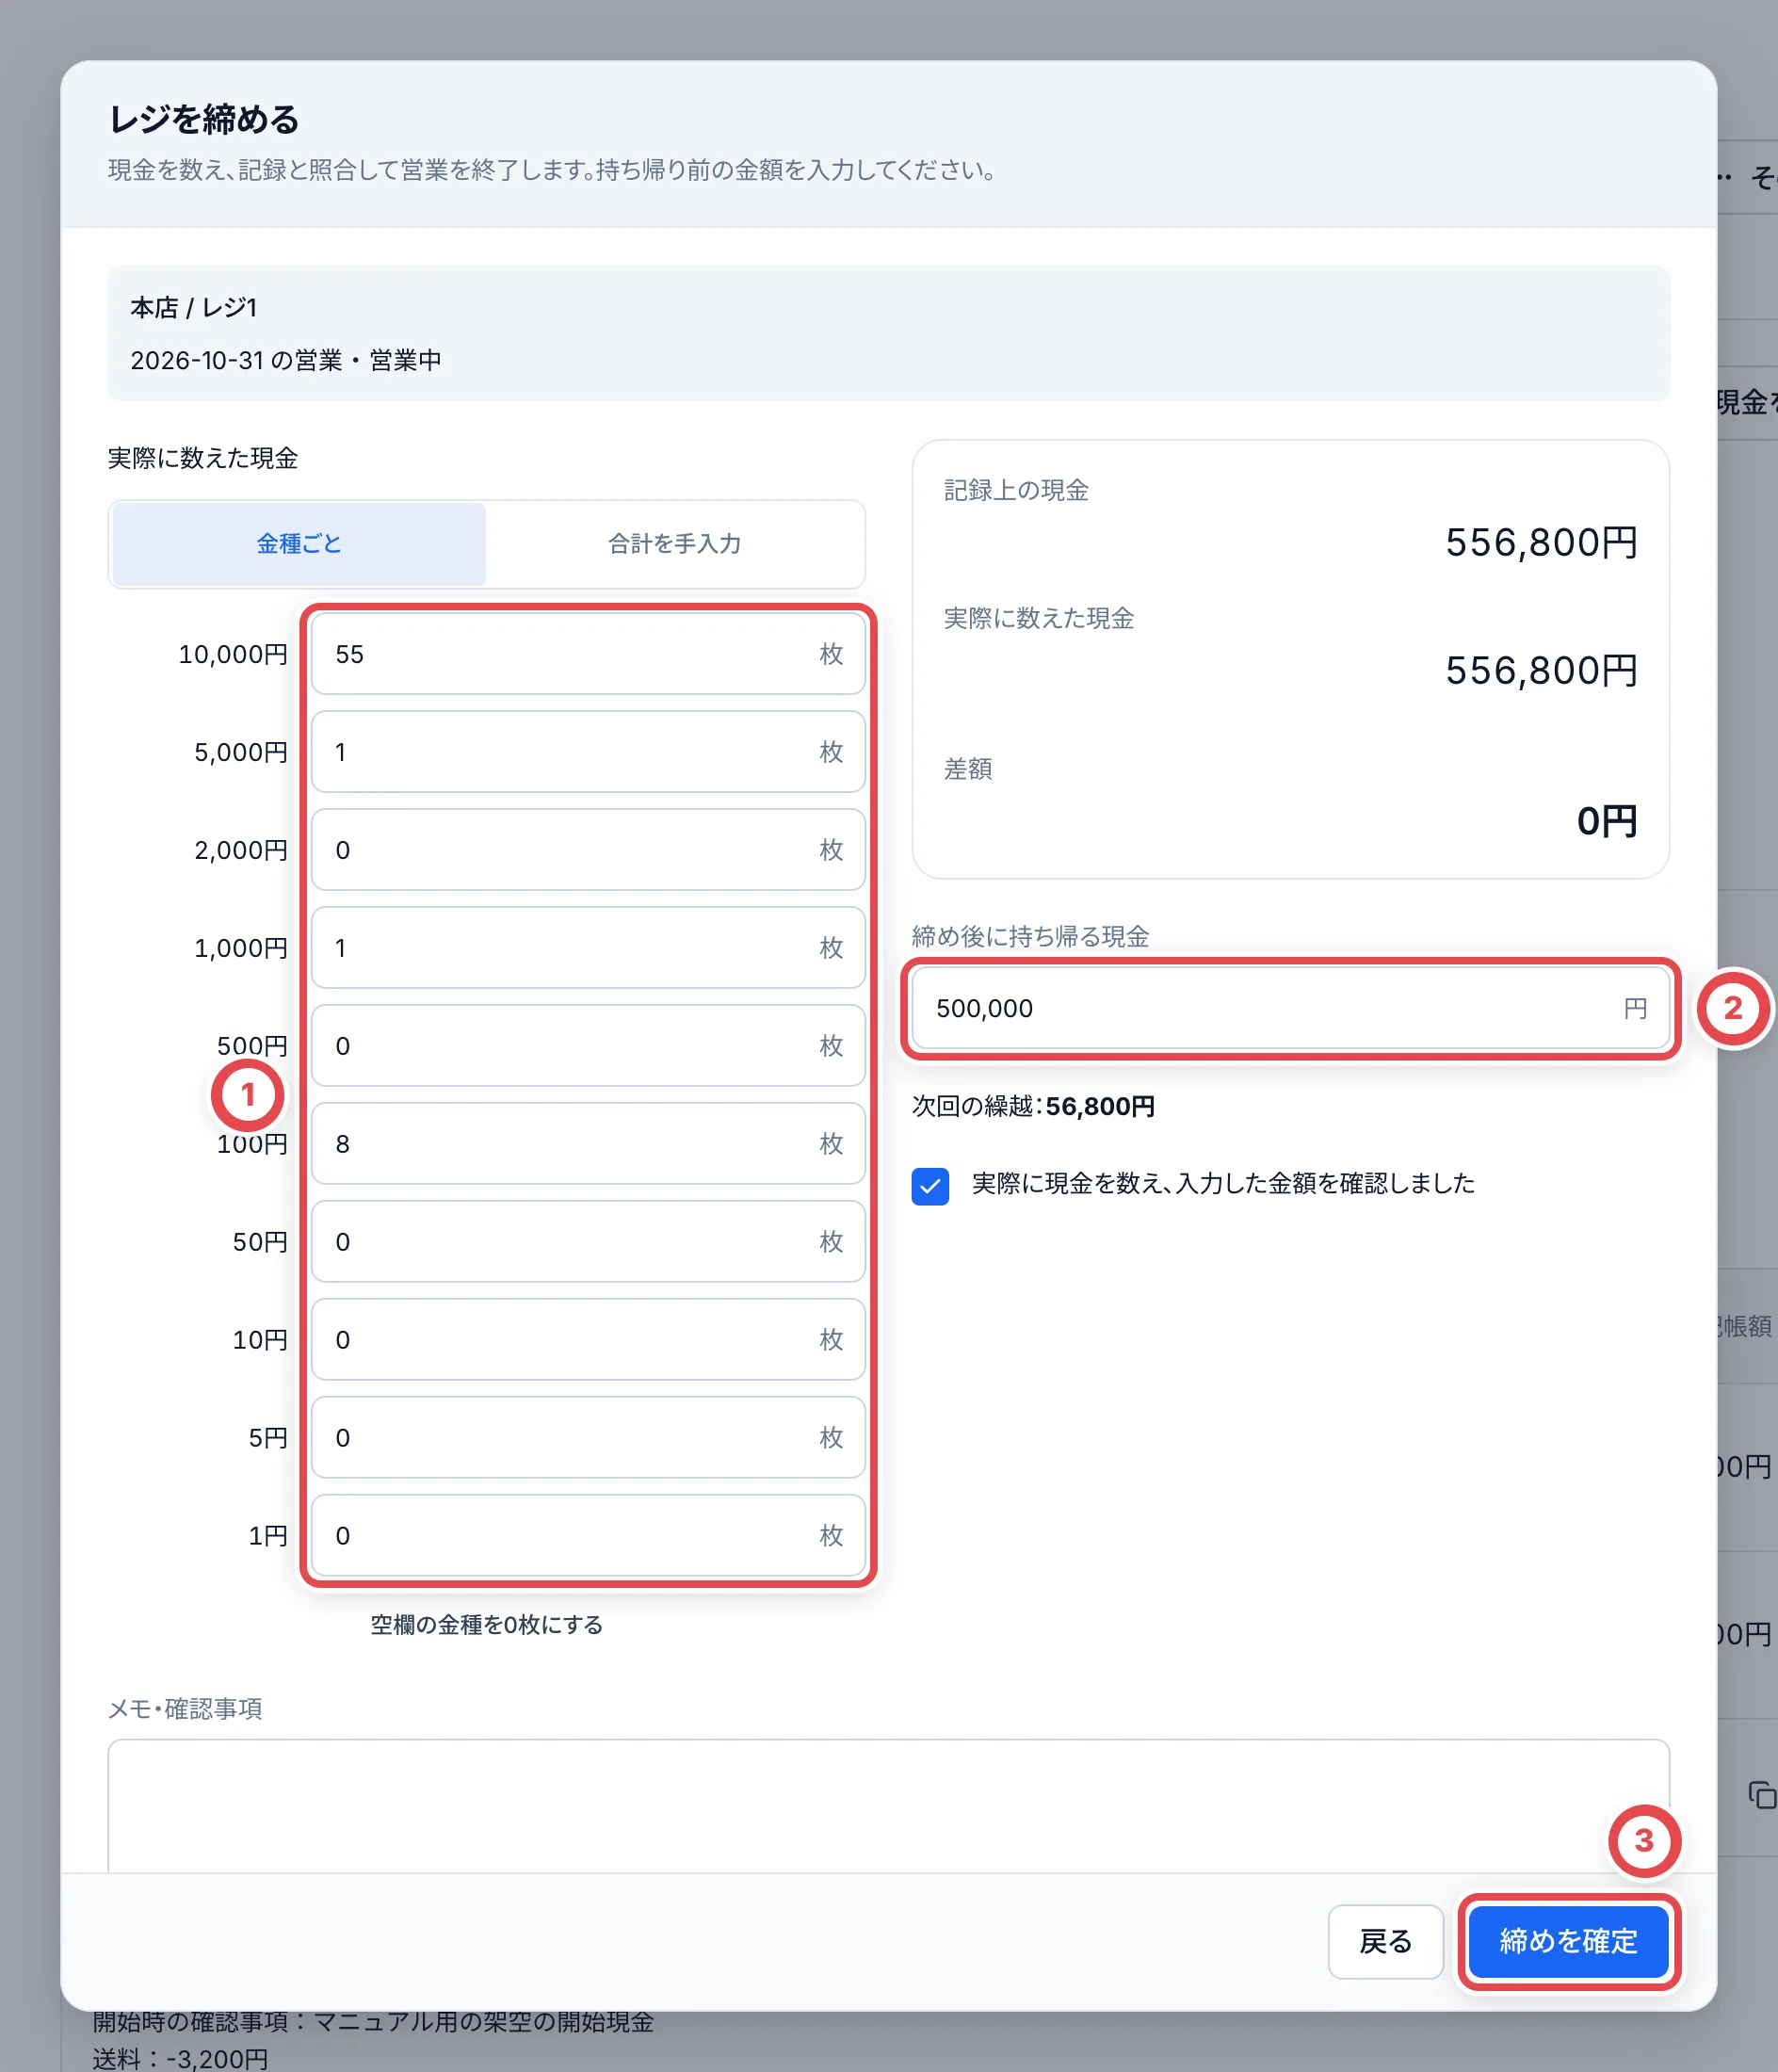 差額があるときは、「差額の理由・確認した内容」に理由を書きます。差額があるまま締められるのは管理権限がある人だけです。権限がない人は「点検として保存」で数えた結果を残し、管理者に締めを頼みます。
## 7. 日報をコピーして、社内に共有する
レジの画面を下へたどると、「現金日報」があります。①の「日報をコピー」を押すと、開始金額と分類ごとの入出金の合計、記録上の現金がまとまった文章がコピーされます。締めたあとにコピーすると、実際の現金・差額・持ち帰り・繰越まで入ります(締める前は「締め前の記録」と出ます)。社内のグループに貼り付けて共有します(トレカクラウドから送信はしません)。
表計算ソフトで残すときは、②の「CSV」で書き出します。
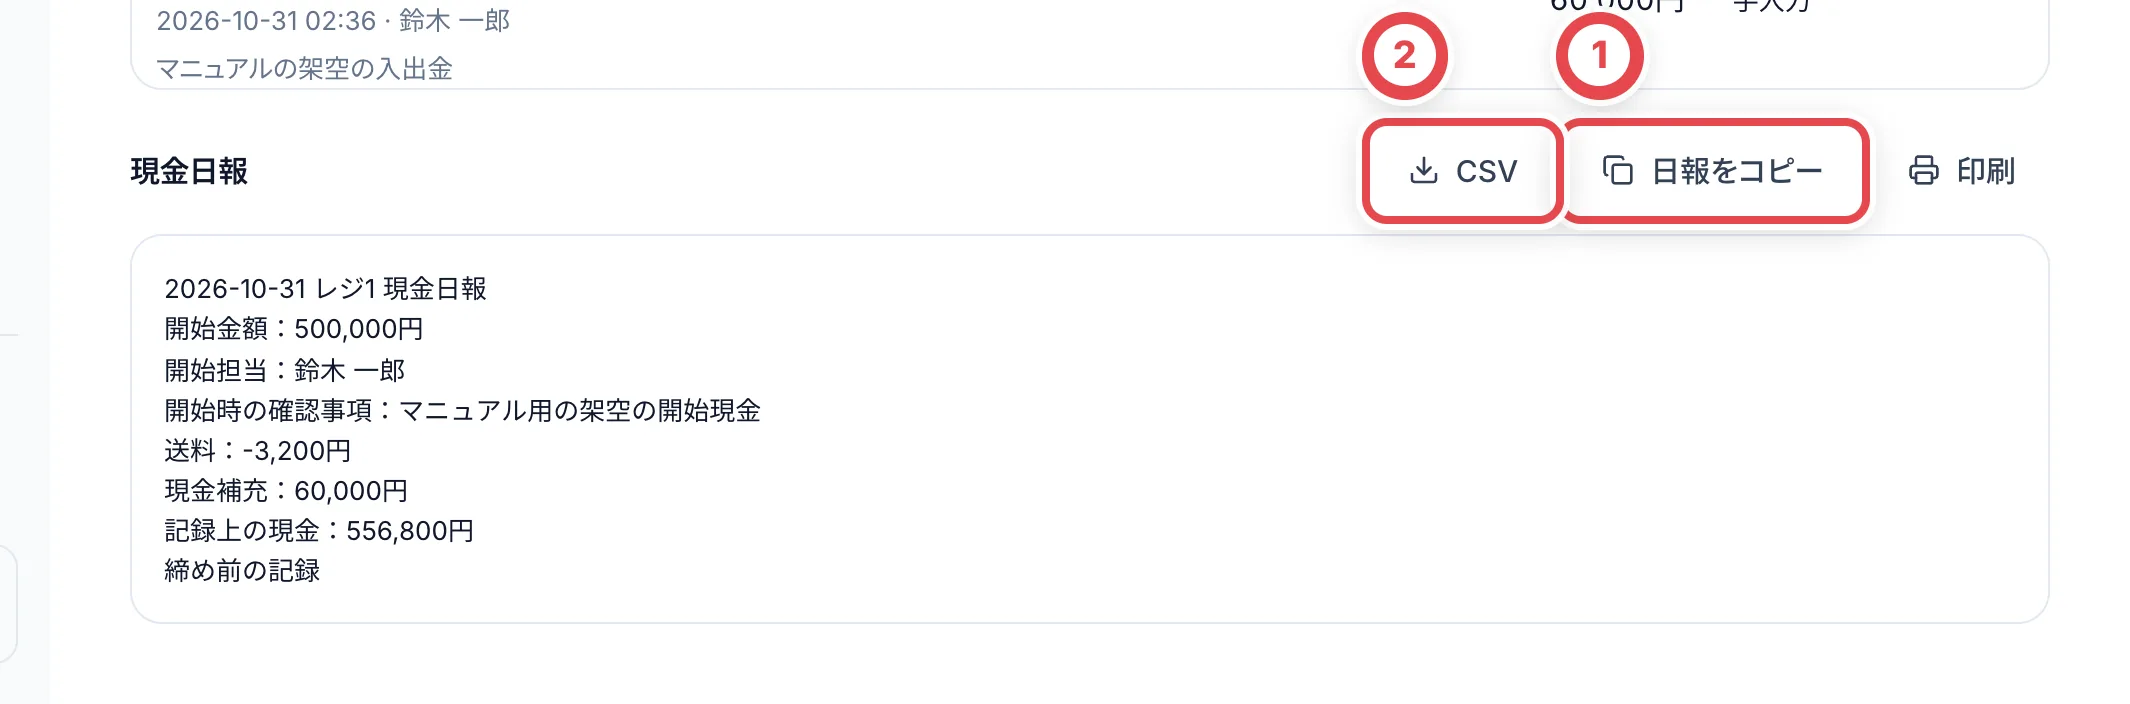 CSV には、入出金と、訂正の履歴と、締めの照合値が別の列で出ます。**「訂正後金額」や照合用の金額を、入出金額に足さないでください。**同じお金を二重に数えることになります。
## 8. 営業履歴で、締めた営業日を確かめる
現金管理の「営業履歴」タブを開くと、営業日ごとの記録が並びます。①の「締め済み」が締めた営業日、「営業中」がまだ締めていない営業日です。レジと営業日の期間で絞り込めます。営業日を押すと、その日の入出金と締めの内容が開きます。開いた営業から戻っても、絞り込みの条件は残ります。
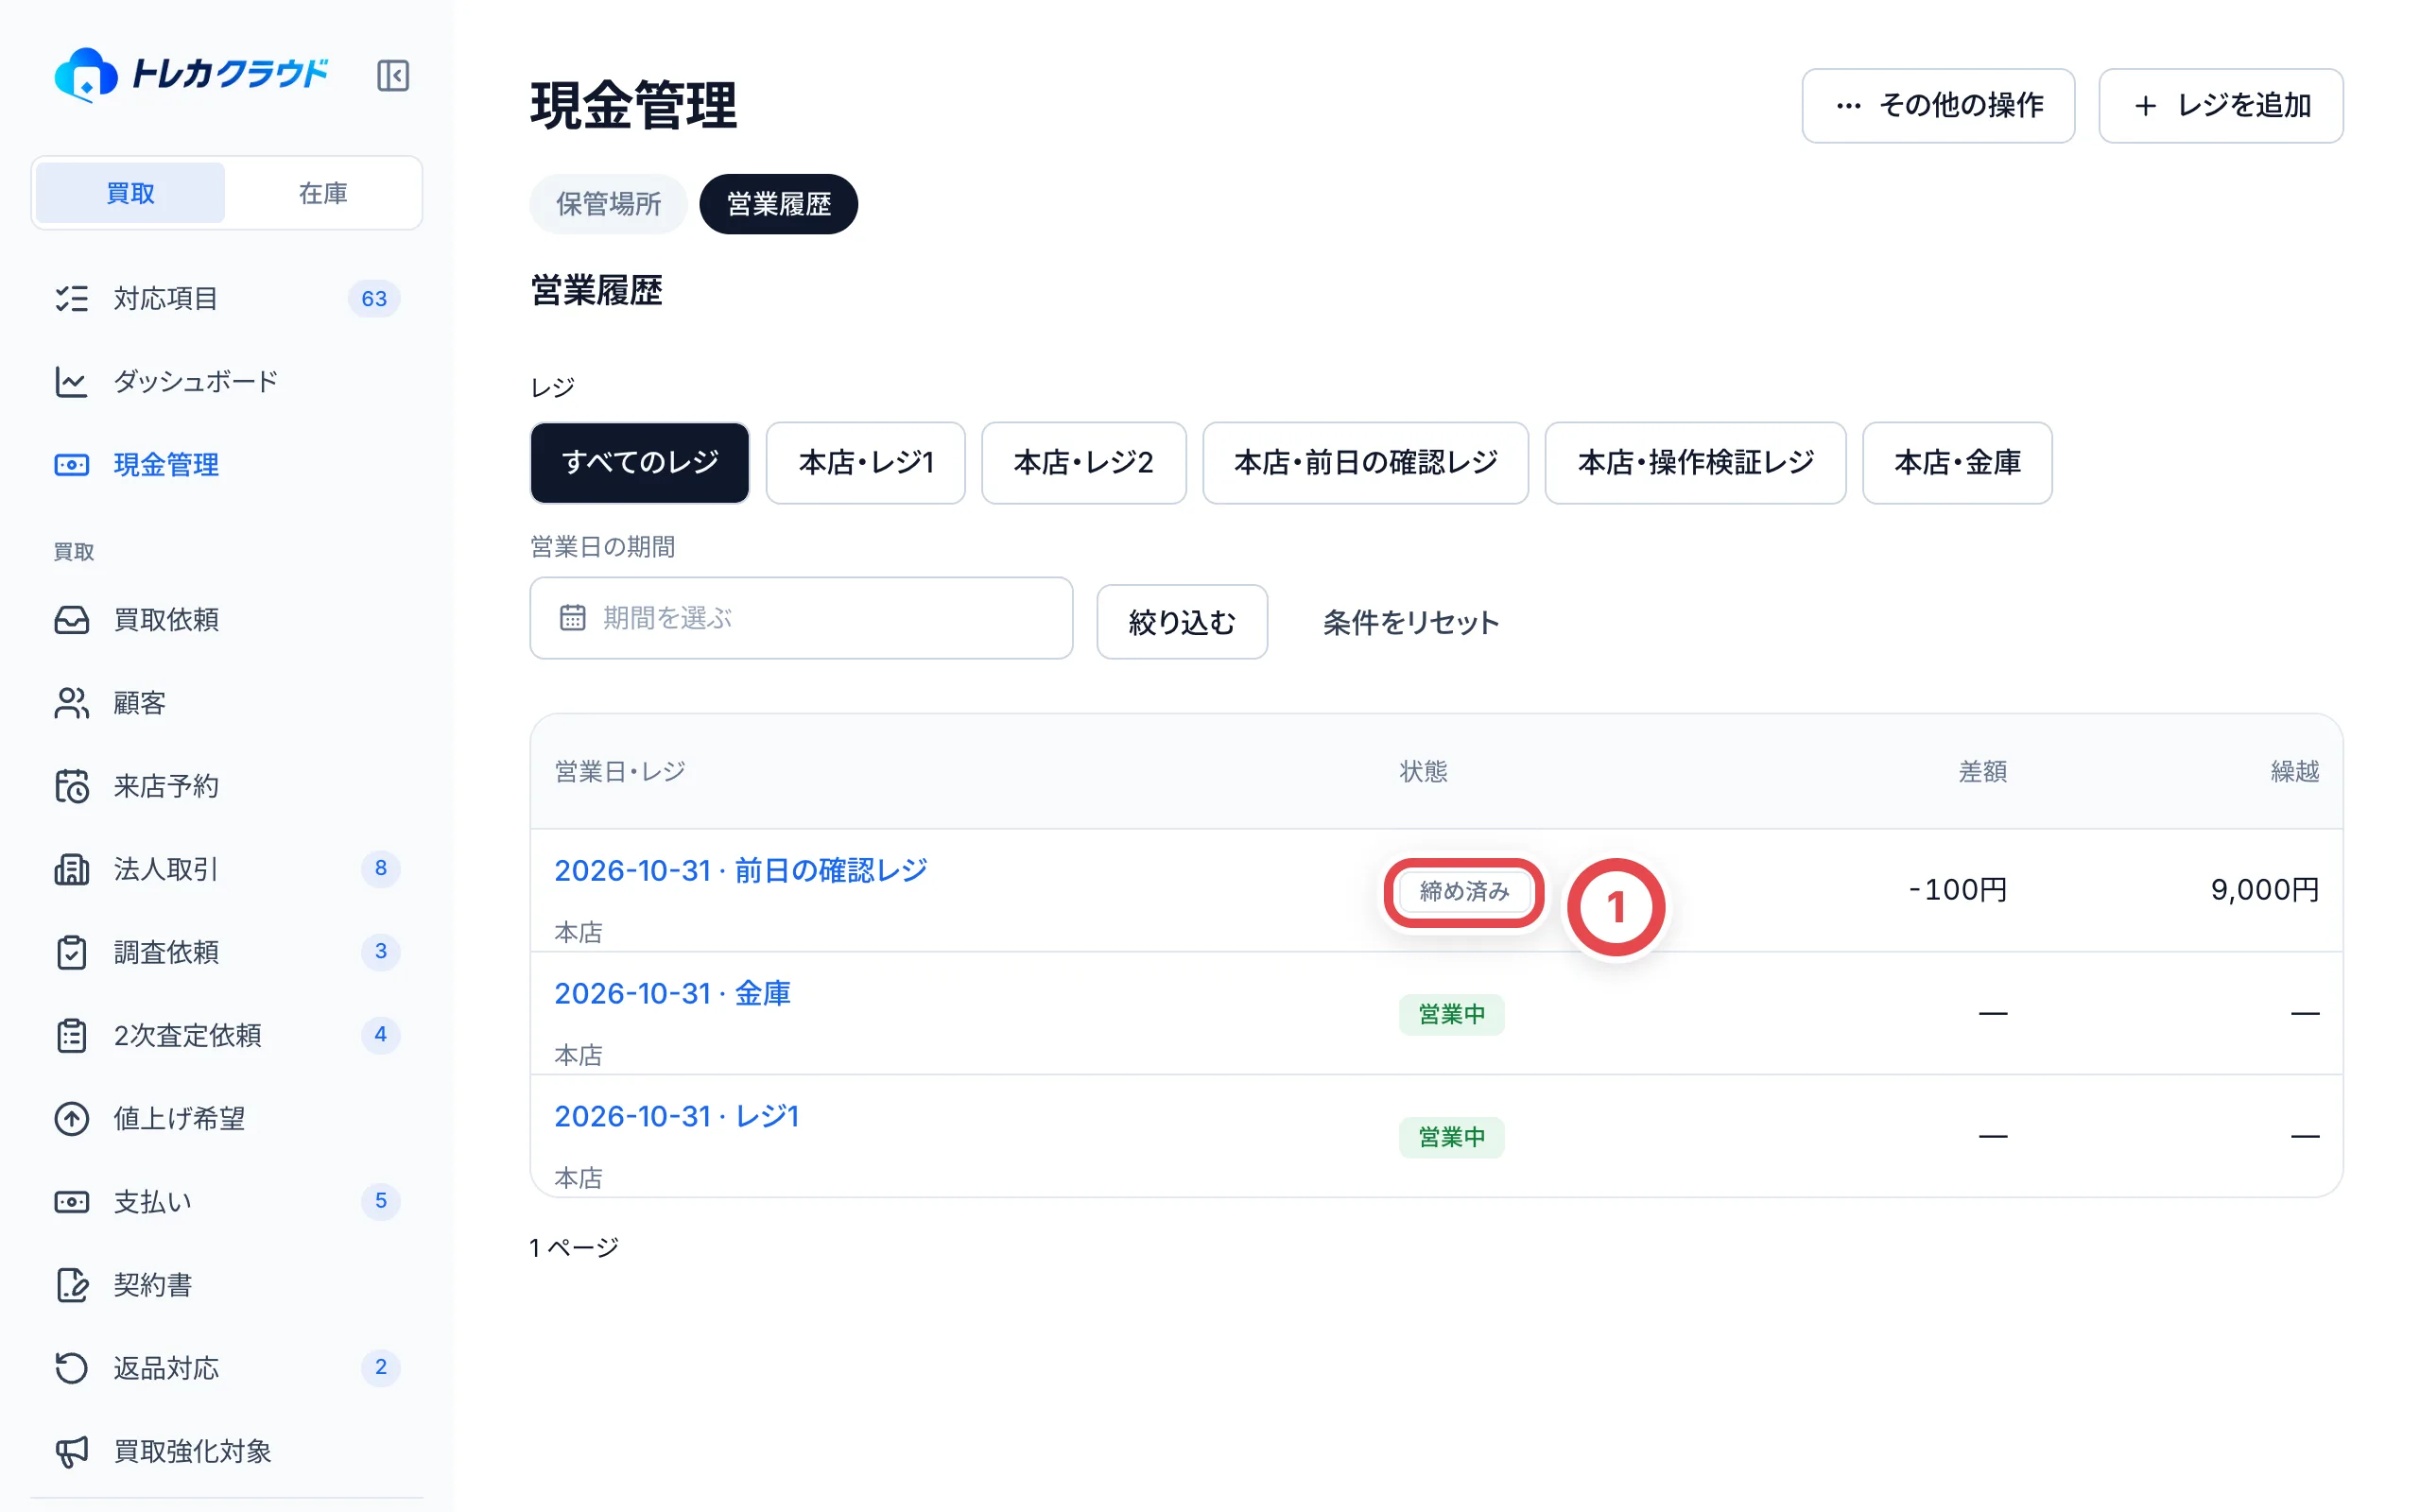 ## レジを追加する
現金管理の画面の右上で「レジを追加」を押します。①でレジのある拠点を選び、「保管場所」で現金箱・レジか店内金庫を選んで、②の「保管場所の名前」に名前を入れます。保管目安は任意です。超えたときに注意を出すためのもので、買取金額の上限にはなりません。
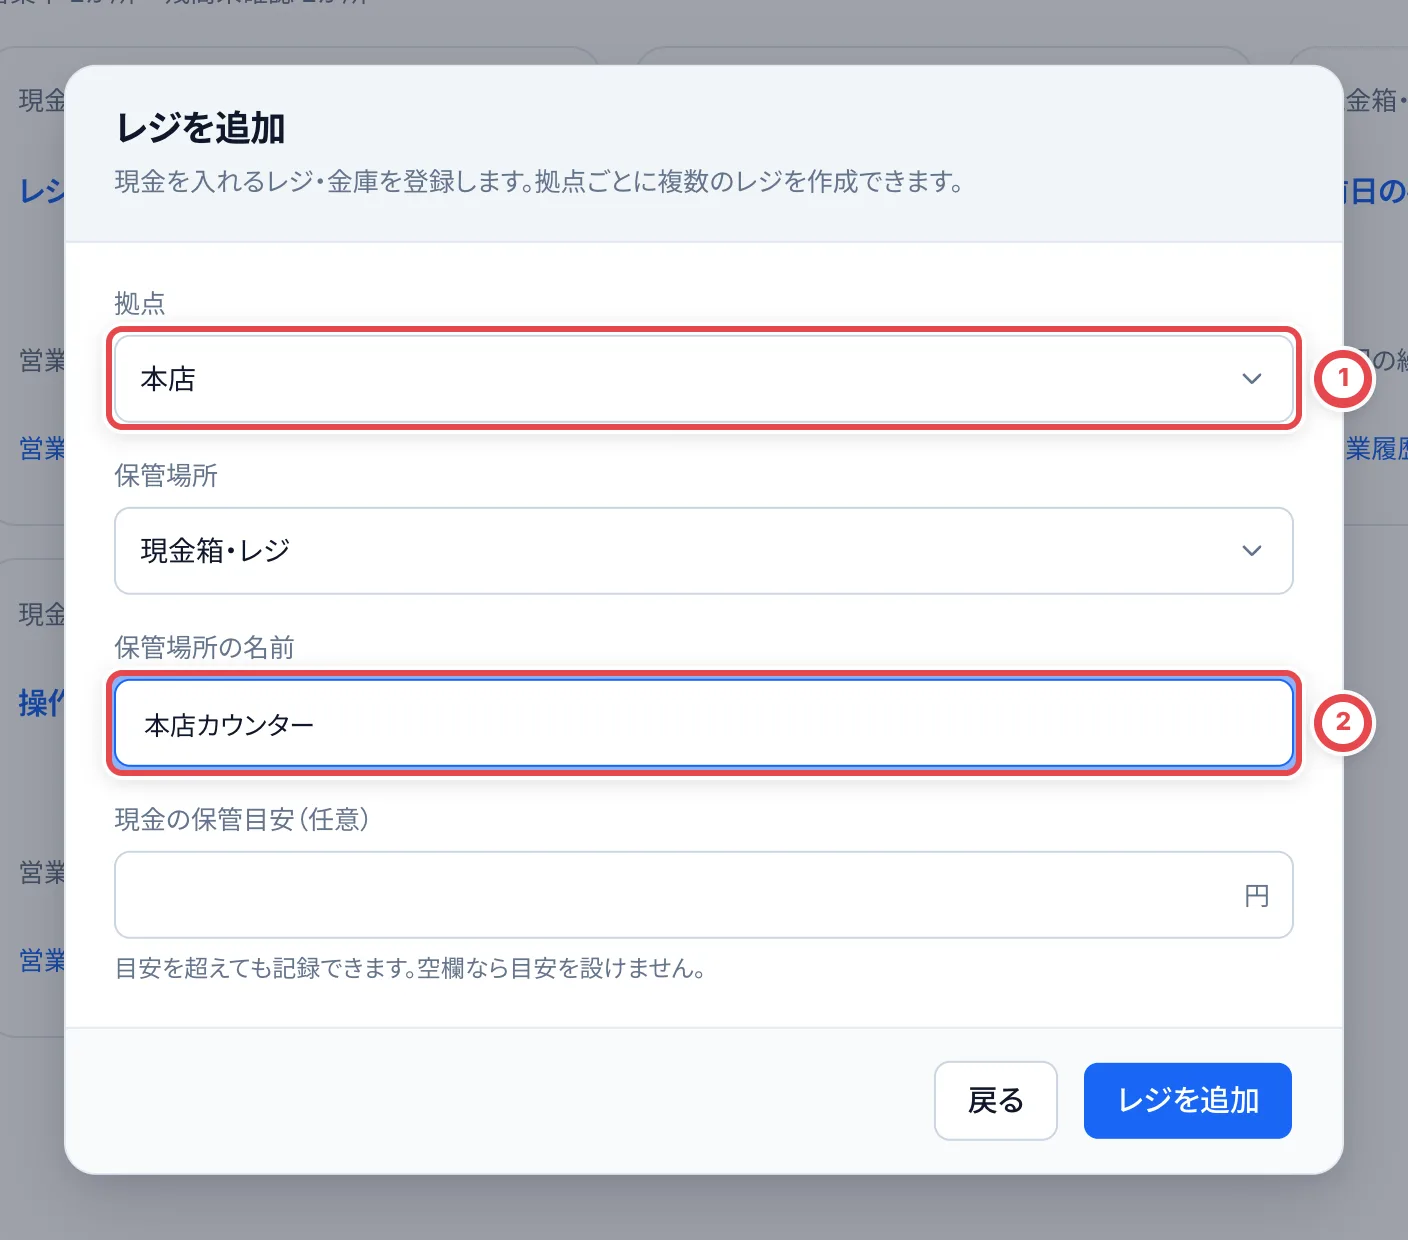 レジ名や保管目安を変えるときは、そのレジを開いて「レジの設定」を押します。
## 記録を間違えたとき
- **金額や分類を間違えて記録した**:入出金の一覧で分類名を押して詳細を開き、「記録を訂正」で正しい内容と理由を入れます。0円にすると、その記録を取り消せます。元の記録と訂正の履歴は残ります。訂正をもう一度直すこともできます。
- **記録し忘れた**:「入出金を記録」で、実際に動いた日時とメモを入れて、あとから記録します。営業を開始する前の入出金には、あとから記録する理由を残します。
- **締めたあとで間違いに気づいた**:締めたあとも訂正の履歴を残せます。確定した実際の現金・繰越・今の現金は変わりません。
- **実際に返金した・返金を受けた**:訂正ではなく、「入出金を記録」で実際の現金の動きを別に記録します。現金の記録を訂正しても、買取の契約や在庫は取り消されません。
## 領収書を添付する
入出金の詳細にある「領収書」から、画像か PDF を添付できます(1ファイル20MBまで)。締めたあとでも追加できます。添付したファイルは履歴として残り、現金管理を見られる人なら誰でも取り出せます。
## 困ったとき
| 起きていること | 確かめること・直し方 |
| -------------------------------------------- | -------------------------------------------------------------------------------------------------------------------------------- |
| サイドバーに「現金管理」が出ない | 現金管理がオンになっているか、管理者に確認してください。オンにできるのはトレカクラウドの運営です。 |
| 「レジを追加」が出ない | 現金管理の管理権限が必要です。管理者に頼みます。 |
| 「レジを開始」が出ない | レジの利用を停止していると開始できません。「レジの設定」で再開します。 |
| 買取で「営業中のレジがありません」と出る | レジを開始してから、買取の画面で「開始したレジを再読み込み」を押します。 |
| 「記録上の現金が不足しています」と出る | 補充の記録漏れがないか確かめます。実際のやり取りが済んでいるときは、管理者が不足の理由を入れて記録できます。 |
| 差額があって「締めを確定」が押せない | 差額があるときは管理権限が必要です。「点検として保存」で数えた結果を残し、管理者に締めを頼みます。 |
| 「新しい記録があります」と出る | 別の人が入出金を記録しました。表示された金額を確かめ、「最新の金額を確認した」を押してから続けます。 |
| 「記録できませんでした」と出る | 通信に失敗しました。入力した内容は残っているので、そのままもう一度押します。 |
| 送料を二重に出金してしまった | 買取の送料補助は自動で出金に入っています。手で記録した方を、「記録を訂正」で0円にして取り消します。 |
| 現金管理をオフにしたい・レジの利用をやめたい | 締めていないレジがある間はできません。全部のレジを締めてから操作します。オフにしたあとも、権限がある人は過去の記録を見られます。 |
## 店舗の現金と担当範囲
保管場所一覧の店舗合計は、営業中の記録上の現金と、締め済みの繰越を合算します。開始したことのない保管場所は「残高未確認」で、0円とみなしません。残高が未確認の場所がある店舗は、確認済みの合計と未確認の件数を分けて表示します。店内の金庫へ移すときは、金庫も開始して「レジ間で現金を移動」を使います。店舗外への持ち帰りとは分けて記録してください。
「その他の操作」→「店舗の割当」では、全店舗か担当店舗をメンバーごとに設定します。変更にはメンバー管理・現金管理の管理権限と全店舗へのアクセスが必要です。割当だけでは閲覧・記録・管理の権限は増えません。新規メンバーは担当店舗を割り当てるまで現金管理にアクセスできません。所有者は全店舗を確認できます。管理者は、店舗を割り当てていない間は全店舗を確認できます。担当店舗を選んで割り当てると、その店舗だけになります。
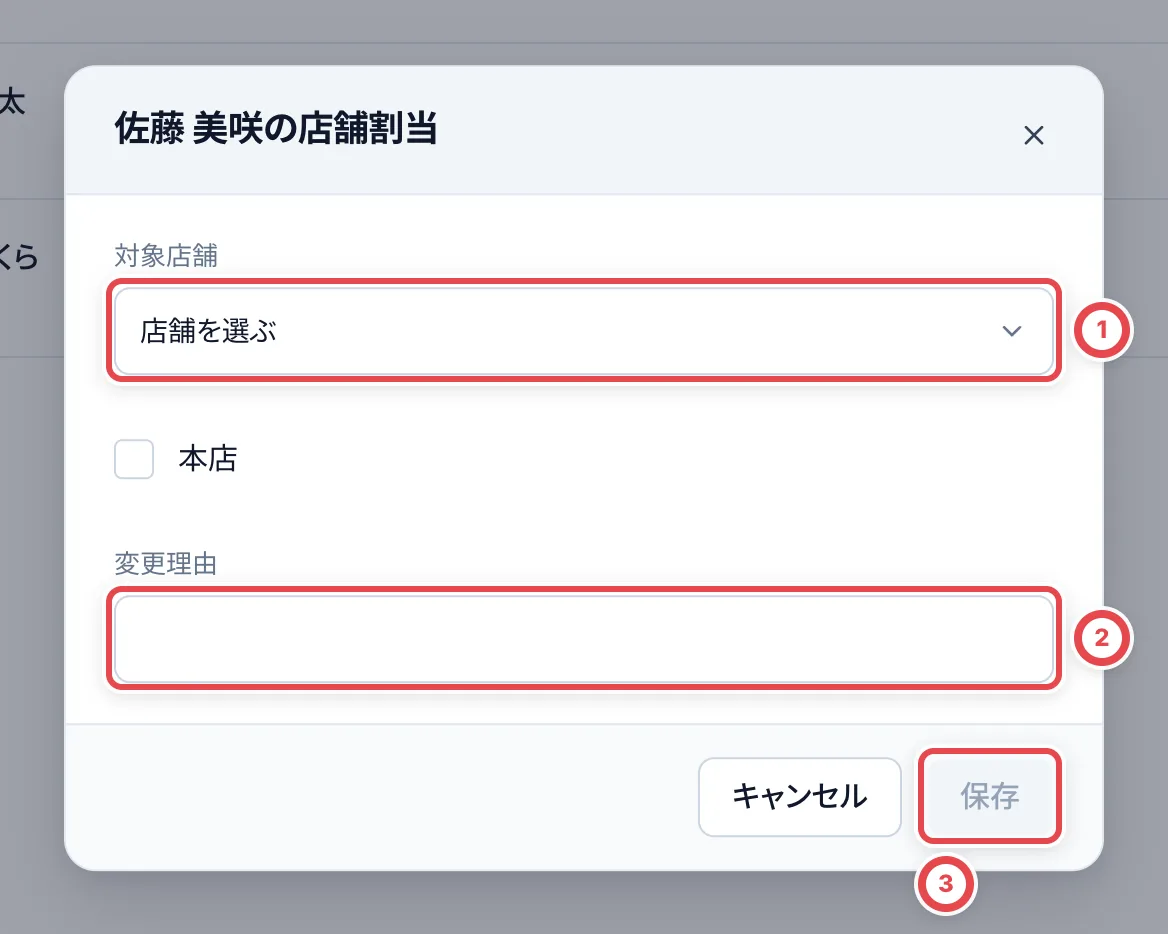 ①で全店舗か選択した店舗を指定し、②に理由を残して③で保存します。店舗の割当と操作権限は別です。
## 差額が出た後の確認
再実査し、開始金額、元の買取・販売、入出金、金庫との移動、領収書を照合します。差額が残る場合、管理者は確認内容を記録して締め、調査を続けられます。「その他の操作」→「差額の確認」から未確認・調査中の営業を開き、「確認内容を記録」で担当者、状況、確認内容を保存します。一覧には確認担当と最終確認日時が表示されます。「差額の確認履歴」で過去の記録も確認できます。
担当者は、その店舗を管理できるメンバーから選びます。同じ店舗の別の営業の入出金も検索し、関連する入出金・訂正を紐付けられます。確認完了には「原因判明/原因不明」と原因、確認内容が必要です。原因不明でも調べた内容を残して完了できます。再調査が必要なら調査中に戻します。変更者・日時・それぞれの確認内容は履歴に残ります。
調査を更新しても、締め時の実査・差額・持ち帰り・繰越は変わりません。誤記帳は元の明細から訂正し、後日に実際の現金が動いた場合は、その日の営業に入出金を別途記録します。
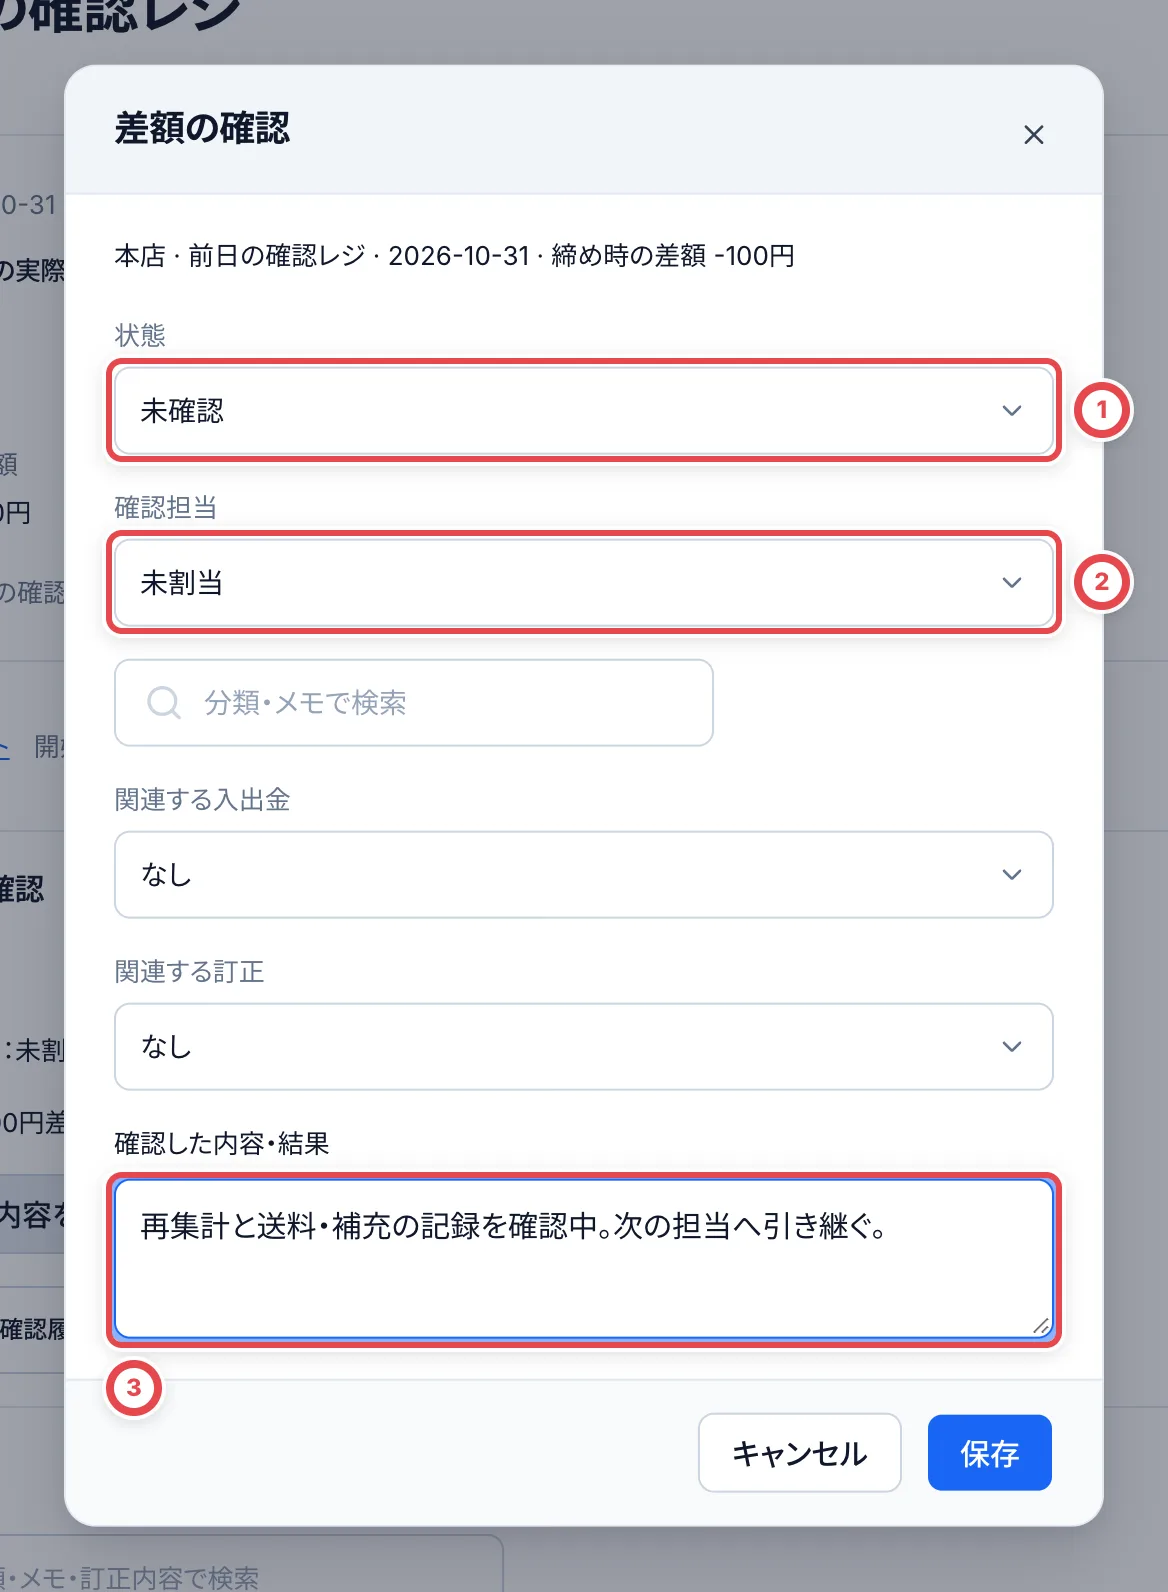 ①に確認状況、②にその店舗の管理担当、③に調べた内容を記録します。確認完了に切り替えると結果と原因を選べます。
## 開始・点検・締めのレポートとExcel
開始・点検・締めの各レポートから、その時点の金額・金種・担当者・日時を確認し、Excelまたは印刷で出力できます。点検後に入出金があっても、点検時の内訳は変わりません。過去の記録に内訳や氏名がない場合は、記録なしと表示します。締め後の訂正と差額調査は追記として表示し、確定時の数字に加算しません。
「その他の操作」→「店舗レポート」で担当店舗と営業日の期間(366日以内)を選ぶと、日別・店舗別の販売、買取、その他の入出金、移動、持ち帰り、台帳の増減、未締め件数、差額のある締め件数をExcel・印刷で出力できます。金額は円です。販売・買取は取消を差し引いた純額です。台帳の増減は開始金額や実査差額を含まないため、実際の残高の増減とは異なります。店内移動は同じ店舗の入金・出金に両方表示され、差引は0です。
営業の詳細にある「開始レポート」、または「点検・締めの履歴」の「レポート」から開きます。①の「Excel」で表を保存し、②の「印刷」で印刷画面を開きます。
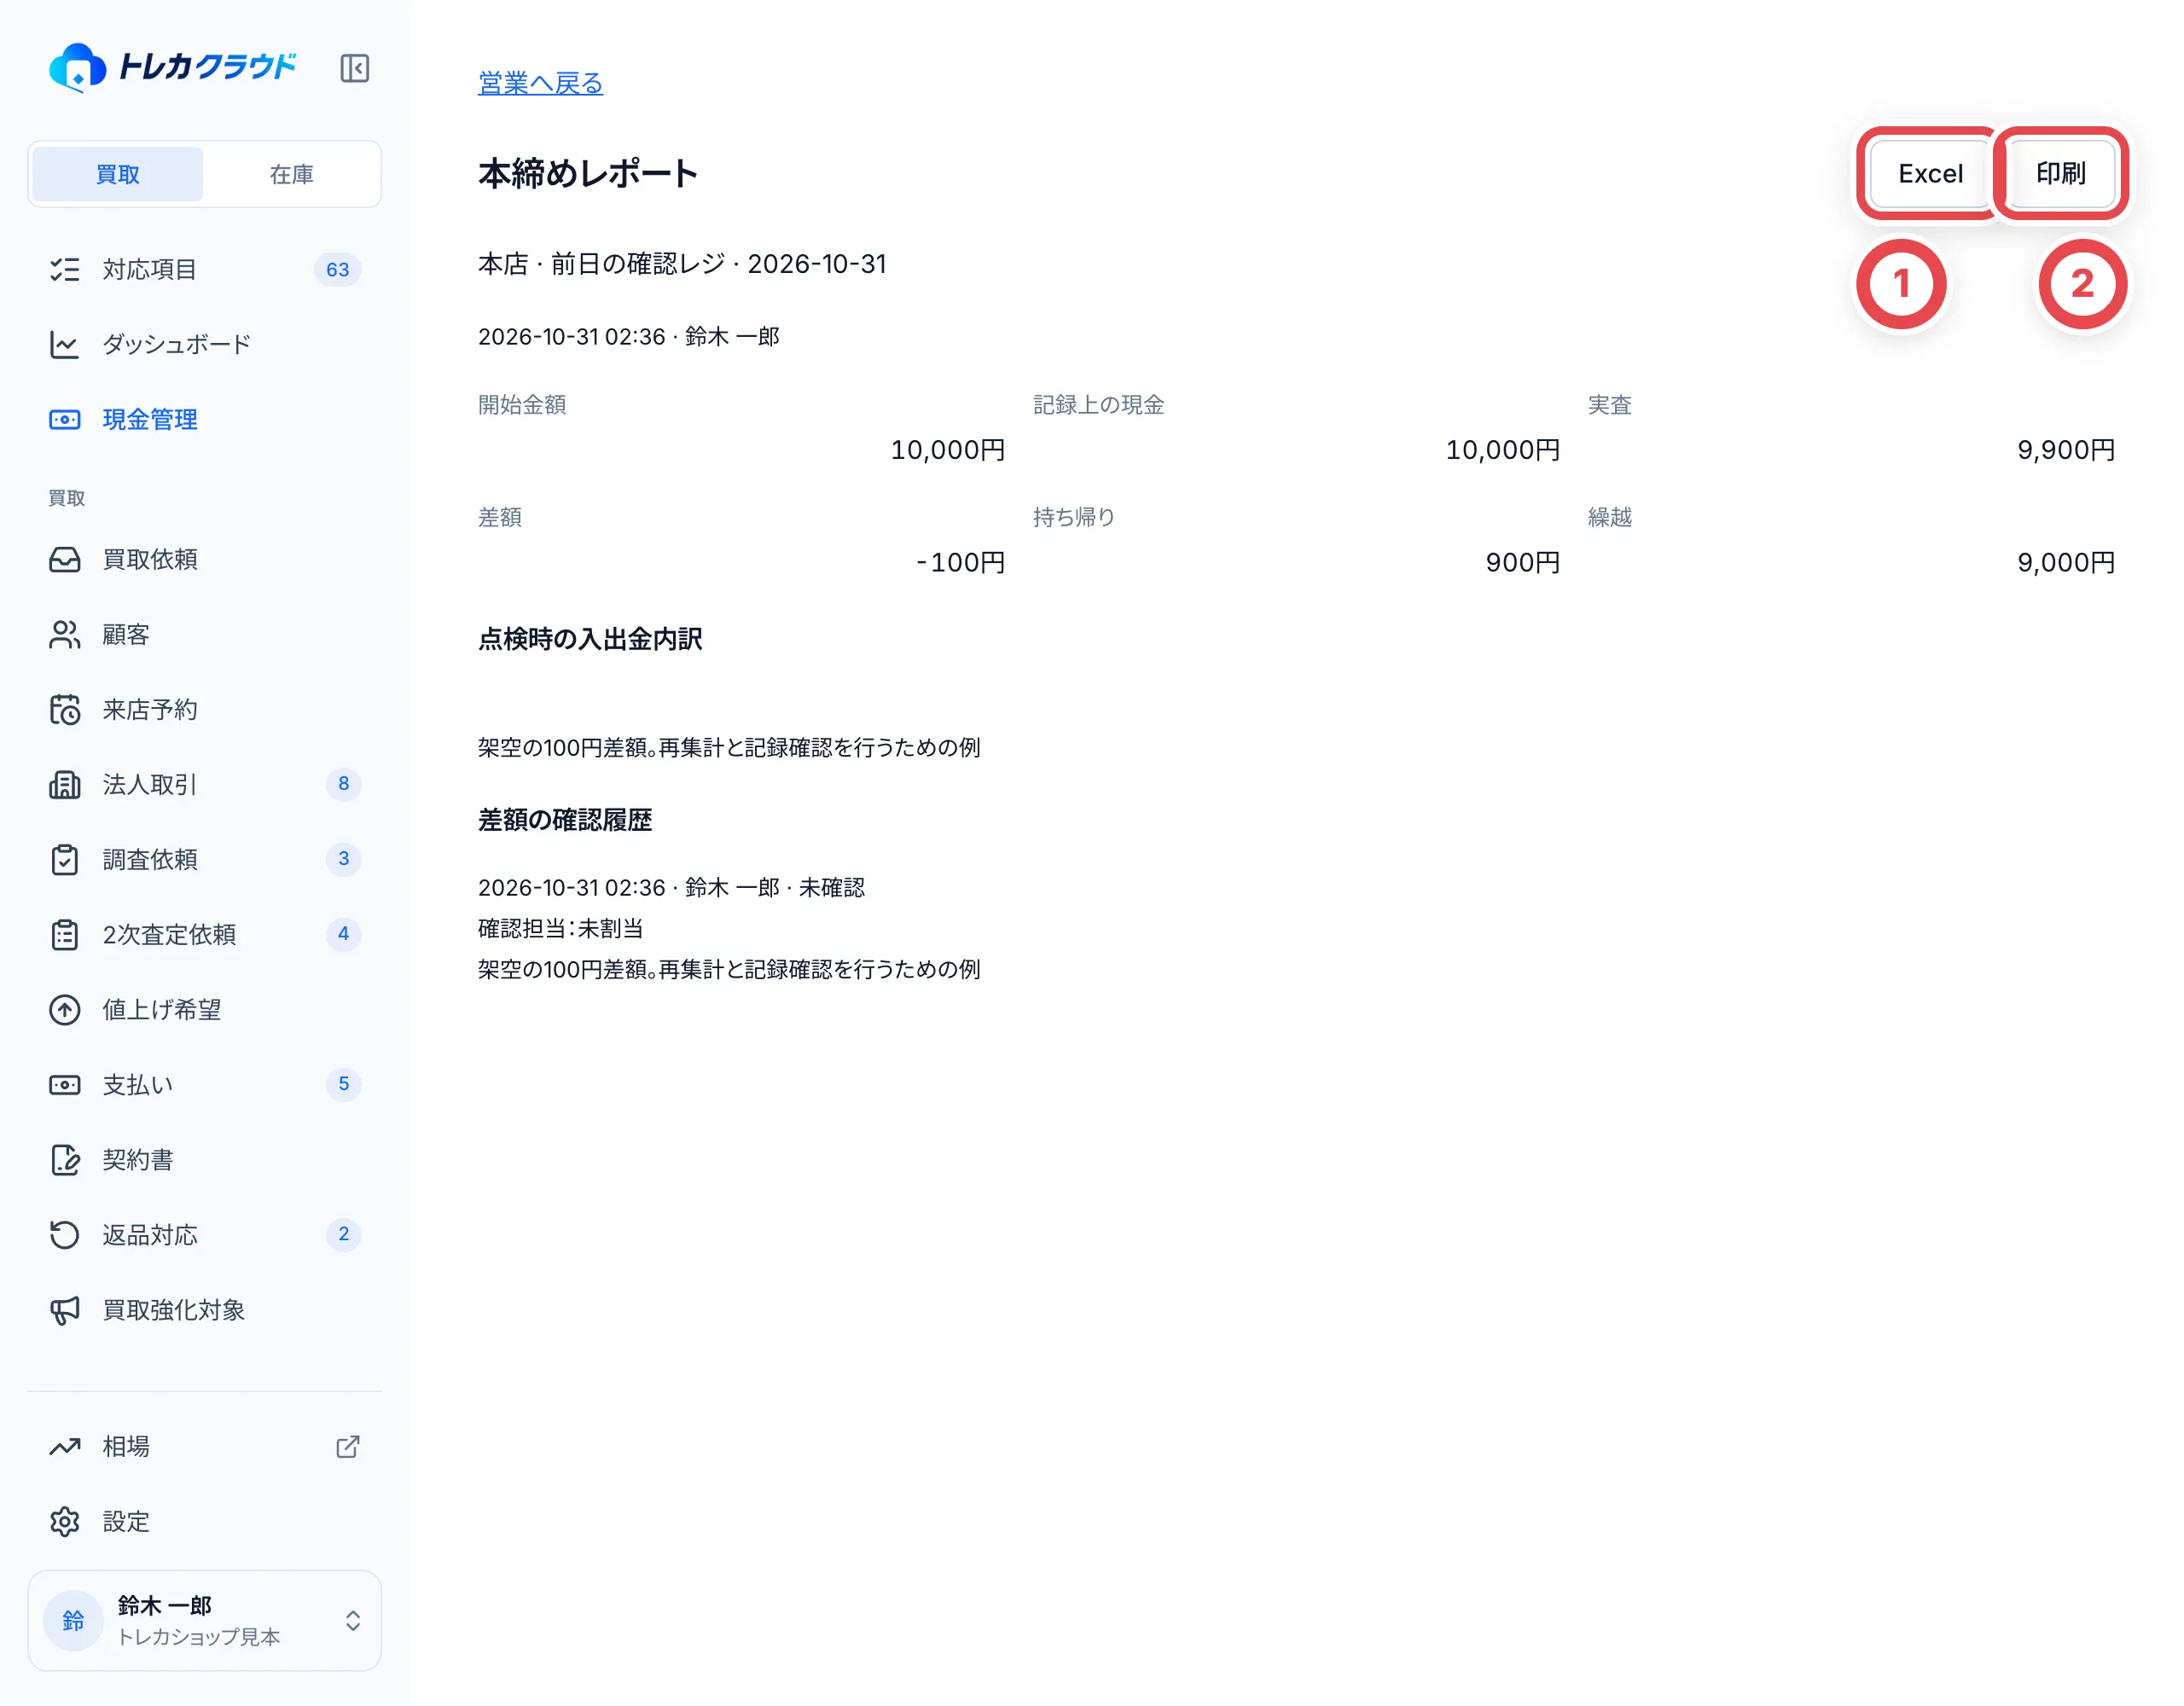 店舗レポートでは①で担当店舗、営業日の期間を選び、②の「絞り込む」で反映します。③の「Excel」で現在の条件を書き出します。
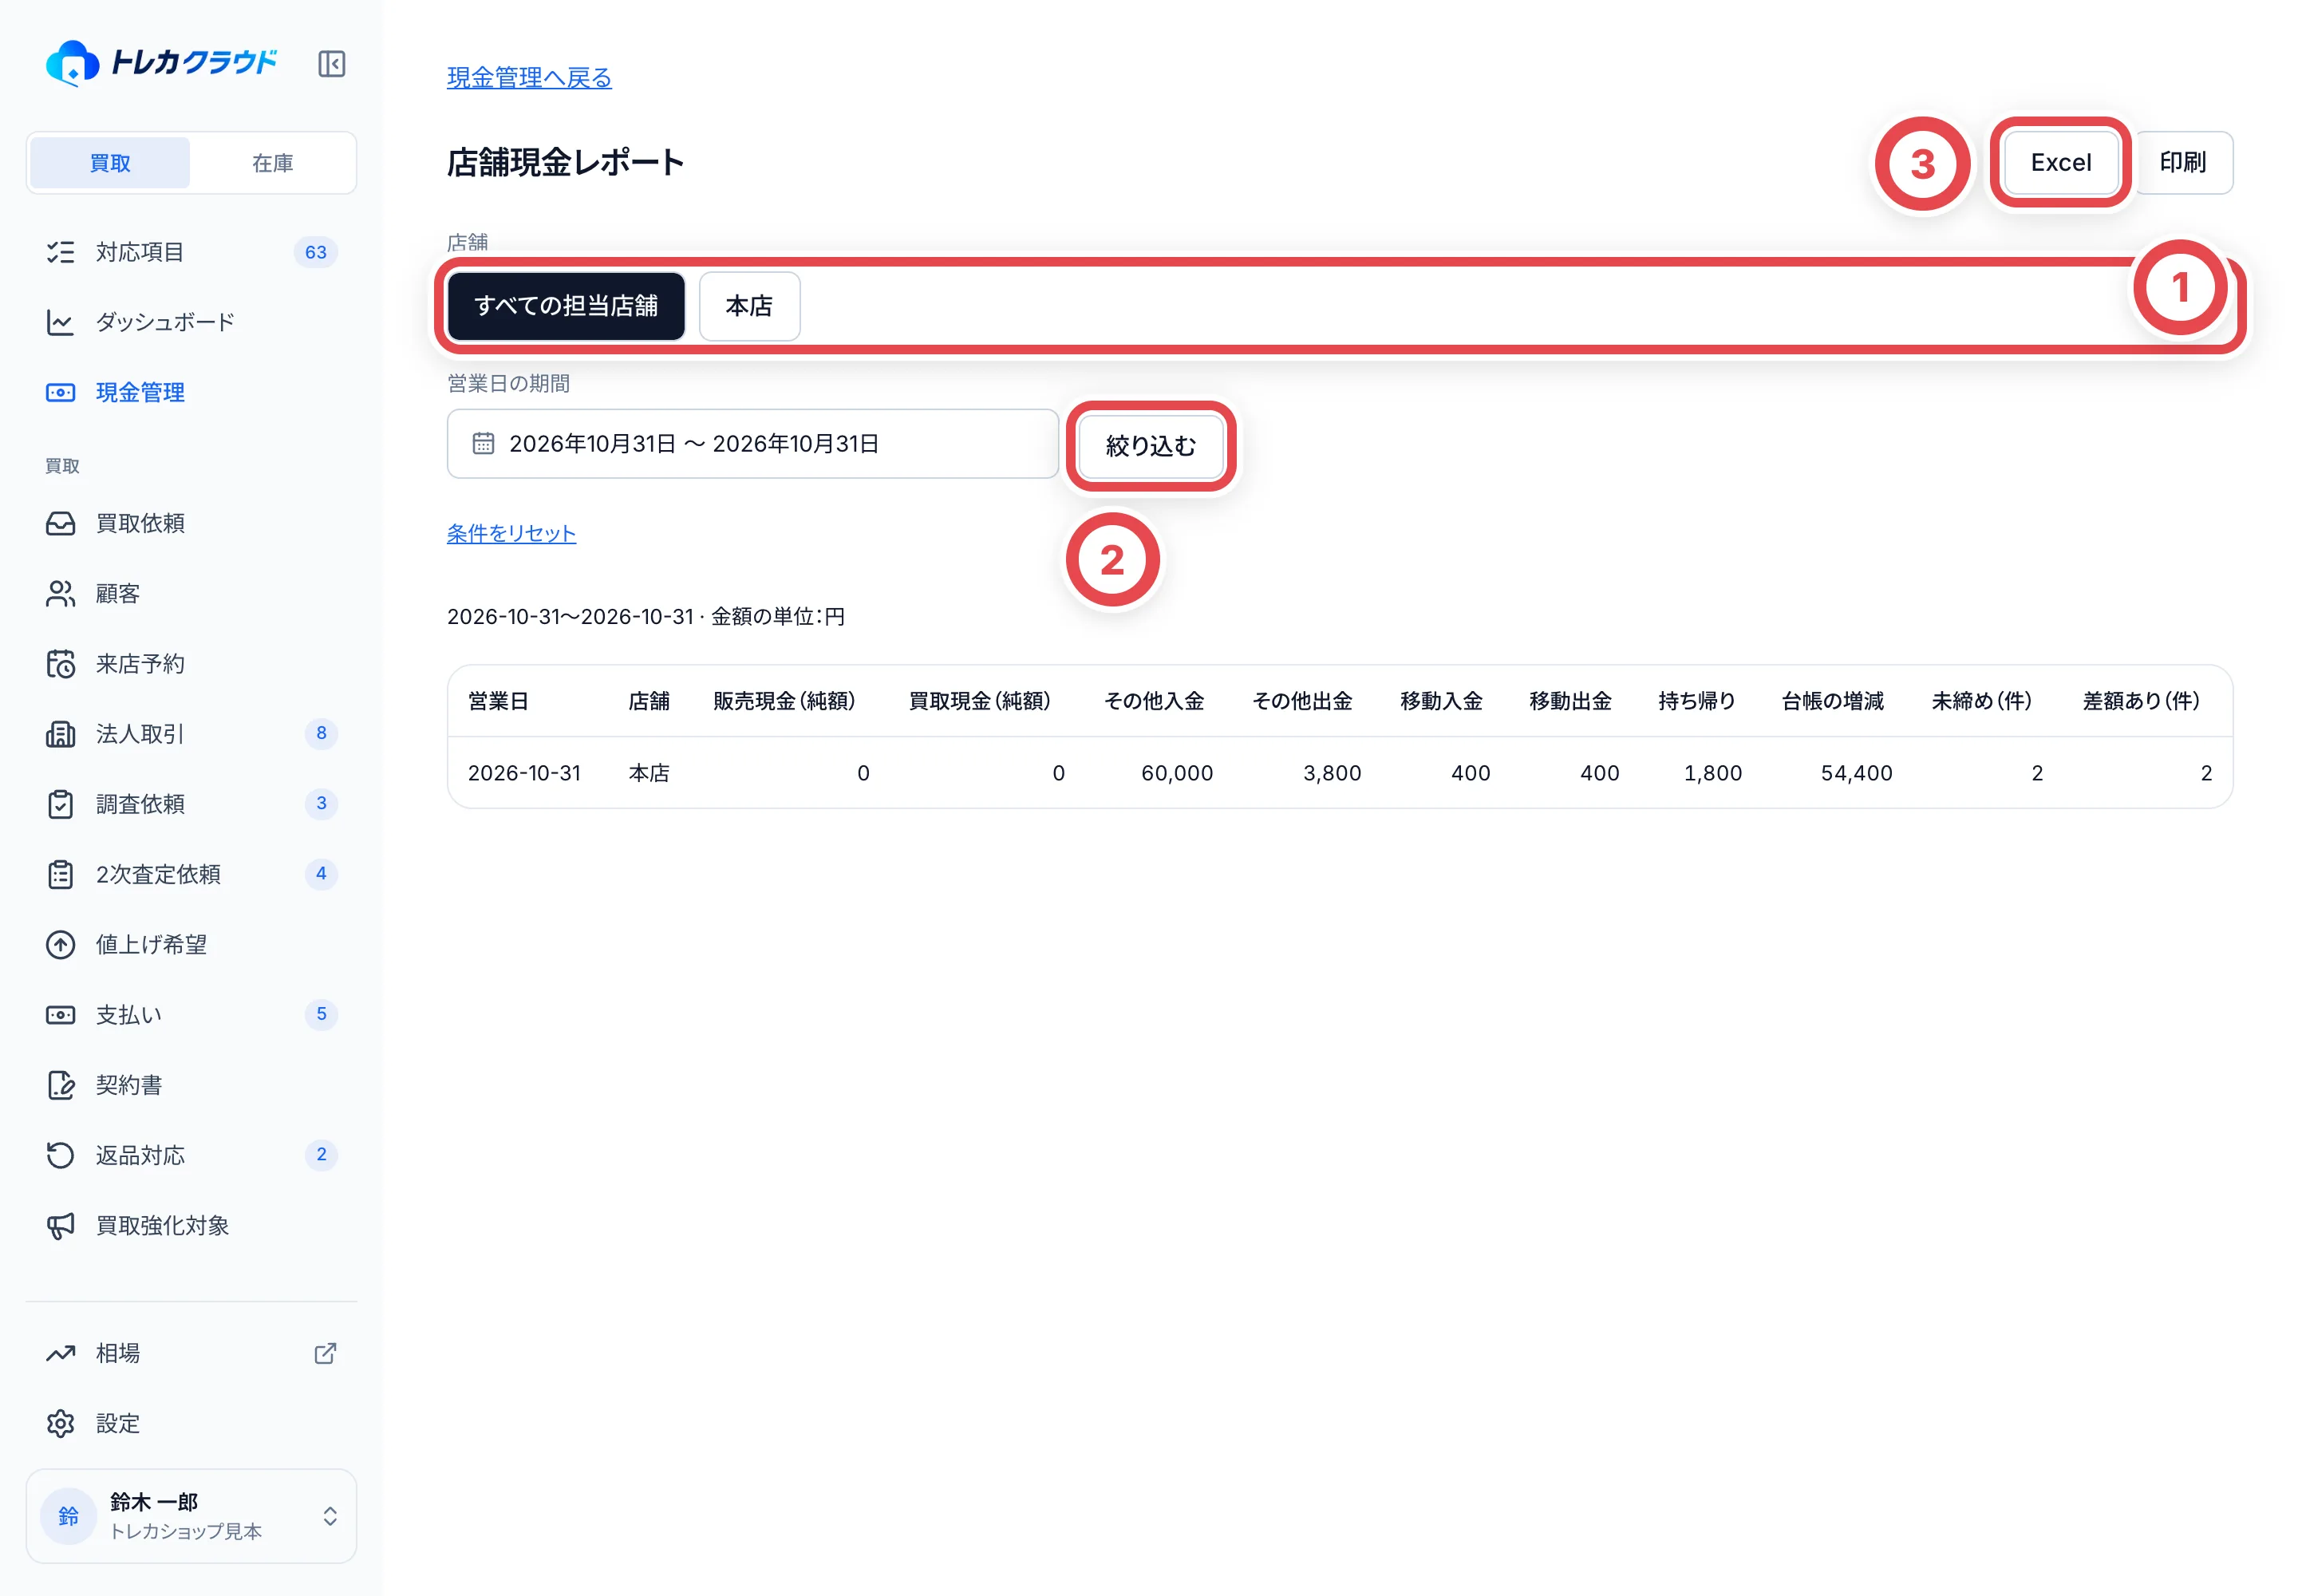 ---
# 買取の共通操作
Source: https://docs.toreca-cloud.com/guides/purchase/common-operations
通しの手順は[オンライン買取](/guides/purchase/overview)または[店舗買取](/guides/purchase/counter)から始めます。
## 明細カードを開く・確認する
査定依頼・見積の明細・個体ごとの最終査定・2次査定では、商品ごとのカードを開閉できます。商品名のある見出しを押すと入力・詳細が開き、もう一度押すと折りたたみます。選択チェックと三点メニューは、見出しの開閉とは別の操作です。
- 「保存して確認」は、その画面の明細または2次査定の下書きを保存して折りたたみます。次の未確認の明細があれば、そちらへ進みます。2次査定の承認や見積の提示は別の操作です
- 「入力を確認して閉じる」は、入力を確認して折りたたむ操作です。最終査定などでは、画面全体の「保存」が別に必要です。「未保存」が残っていないか確認してください
- 「確認済み」は保存した内容に対する確認です。「確認を解除」から戻して直せます。内容を変更した明細や「要確認」「金額未入力」の明細は、開いて値を確かめます。入力エラーがあるままでは閉じられません
「入力確認済み」は、その画面で入力を確かめて折りたたんだ印です。保存済みの「確認済み」とは異なり、画面を開き直しても残る確認記録ではありません。
## 商品を選び直す
商品を追加するときは、商品欄から検索して選びます。写真を使える画面には「写真から探す」と「キーワードで探す」が表示されます。選んだ後は商品欄の変更ボタンで選び直せます。入庫伝票ではカードマスタにあるカードだけを選び、未登録の名前だけで確定することはできません。
## 申告された鑑定情報を直す
顧客の「査定依頼」で対象カードの三点メニューを開き、「鑑定情報を直す」を選びます。鑑定会社・グレード・鑑定番号を確かめ、「保存」で反映します。鑑定番号は先頭の0も含め、現物どおりに入力してください。
この操作には買取を変更する権限が必要です。申告中・到着済みのカードは、事前見積への承諾後や最終見積の提示後でも、最終見積への承諾前なら修正できます。買取成立後や、取り消したカード、BOX・パック・デッキには表示されません。「査定から外す」とは利用できる段階が異なります。
申告のグレードを変えると、作成途中の見積の下書きが無効になります。査定額を確認して作り直してください。保存済みの見積や到着後の個体ごとの鑑定番号を、この操作だけで書き換えることはありません。到着した現物の番号は[最終査定](/guides/purchase/final-appraisal)、在庫登録後の訂正は[買取金額・数量と関連記録の訂正](/guides/purchase/amount-and-quantity-corrections)を確認します。
## 顧客・査定
| 作業 | 手順 |
| ------------------------------------------- | --------------------------------------------------------------------- |
| 顧客を探す・取引を登録する | [顧客と取引](/guides/purchase/customers) |
| 1枚ごとの最終査定・番号・買取可否を記録する | [最終査定](/guides/purchase/final-appraisal) |
| 束や見積全体に金額を付ける | [まとめ査定とセット価格](/guides/purchase/bulk-and-set-price) |
| 見積全体の提示額を設定・修正・解除する | [セット価格に変更する](/guides/purchase/set-price) |
| 相場の調査・見積の確認を頼む | [調査依頼と2次査定依頼](/guides/purchase/research-and-reviews) |
| 買取強化の対象と価格を管理する | [買取強化](/guides/purchase/purchase-boosts) |
| オリパの連携先で足りないカードを見る | [オリパ需要](/guides/purchase/oripa-demand) |
| マスタにないカードを登録してもらう | [未登録カードの登録依頼](/guides/purchase/card-registration-requests) |
| お客様からの値上げ相談を記録する | [値上げ希望](/guides/purchase/price-increase-requests) |
各操作には、店舗の機能設定や権限による利用条件があります。記事内の条件と実画面の案内を確認してください。
## 本人確認・書類・支払い
| 作業 | 手順 |
| -------------------------------------------- | ------------------------------------------------------------------------------------------------------------ |
| オンラインで本人確認書類を受け取り、承認する | [オンラインの本人確認](/guides/purchase/identity) |
| 店舗で原本を照合する | [店頭本人確認](/guides/purchase/counter-identity)/[お客様の撮影と原本照合](/guides/purchase/counter-photos) |
| 契約書や委任状を探す | [契約書一覧と顧客の書類](/guides/purchase/contracts) |
| クラウドサインの書類を作成・送信する | [クラウドサイン](/guides/settings/cloudsign) |
| 買取代金を銀行振込で支払う | [振込](/guides/purchase/payouts) |
| 法人から請求書で仕入れる | [法人取引と請求書](/guides/purchase/corporate-deals) |
店舗の現金払いは[店舗買取](/guides/purchase/counter#7-在庫と支払いを登録する)、レジの営業開始・点検・締めは[現金管理](/guides/purchase/cash)へ進みます。
## 社内メモを残す
取引の画面の右上の「⋯」から「社内メモを書く」を押すと、店のメンバーだけが見られるメモを残せます。本文は2,000文字まで、JPEG・PNG・WebP・PDF のファイルを5件まで(1件20MB)添付でき、添付だけでも残せます。「メモを残す」を押すと、取引の「アクティビティ」に、書いた人と日時とともに並びます。お客様の画面には表示されません。
送信に失敗したときは、同じ内容のまま「同じ内容で再試行」を押します。二重に残らないよう、送ったあとの本文と添付は変えられません。書いたメモの誤りは[記録の訂正](/guides/inventory/record-corrections)で直します。
## 返却・訂正・取消
| 作業 | 手順 |
| ---------------------------------------- | ---------------------------------------------------------------------------------- |
| 店舗で買い取らないカードをお返しする | [店舗買取の一部買取・辞退](/guides/purchase/counter#売らないカードがあるとき) |
| オンラインで買い取らないカードを返送する | [返品と返送](/guides/purchase/returns) |
| 記録した操作を取り消す・段階を戻す | [履歴から操作を取り消す](/guides/purchase/history-and-undo) |
| 在庫登録後の買取金額・数量を訂正する | [買取金額・数量と関連記録の訂正](/guides/purchase/amount-and-quantity-corrections) |
| 買い取ったカードを格納する | [格納とQRラベル](/guides/inventory/putaway) |
## 買取を流入元・成立月で書き出す
「買取」の一覧では、「+ 絞り込み」から「流入元」と「成立月」を選べます。流入元は、案件がどのLINEアカウント(そのLINEにつながるLinyを含む)から来たかです。LINEを通っていない案件は「LINE以外(未分類)」です。成立月は、古物台帳に買取が記録された日(日本時間)で絞ります。成立月を選ぶと、取り消した案件は出ません。
検索欄の隣の「書き出す」から「買取の一覧(CSV)」を選ぶと、いま表示している条件の案件を、ページに分かれている分もまとめてCSVにします。お客様の名前が入るので、顧客と買取の両方を見る権限が必要です。
CSVには、成立日時・古物台帳番号・案件番号・状態・受付方法・流入元・顧客番号・お客様名・LINEの表示名・品目数・最新の見積額・成立額・通貨・受付日時が入ります。成立額は古物台帳の金額で、訂正したときは最新の金額です。最後の行は件数と成立額の合計です(取り消した案件は合計に入りません)。1回に書き出せるのは5,000件までです。
紹介元に払う手数料の資料は、同じ「書き出す」の「紹介手数料の資料…」から作ります([紹介手数料の資料](/guides/settings/referral-reports))。
作業が終わったら、[オンライン買取の流れ](/guides/purchase/overview)または[店舗買取の手順](/guides/purchase/counter)で、次の工程と完了条件を確認します。
---
# 契約書・委任状を一覧から確認する
Source: https://docs.toreca-cloud.com/guides/purchase/contracts
買取契約書と委任状は、案件だけでなく、サイドバーの「契約書」からまとめて探せます。顧客と買取を閲覧する権限が必要です。API連携で保存されたPDFの閲覧には、クラウドサイン機能も必要です。
## 1. 契約書一覧を開いて対象を絞る
①の状態タブで「対応が要る」「送付中」「締結済み」「不要」「取消済み」などを切り替えます。「すべて」には取消済みを含みません。取消済みは専用のタブで探します。②の一覧でお客様と案件を照合します。検索欄でお客様名・顧客番号・案件番号を検索し、種類や締結・送付日の期間も確認します。「テスト送信」を含むかも確認してください。
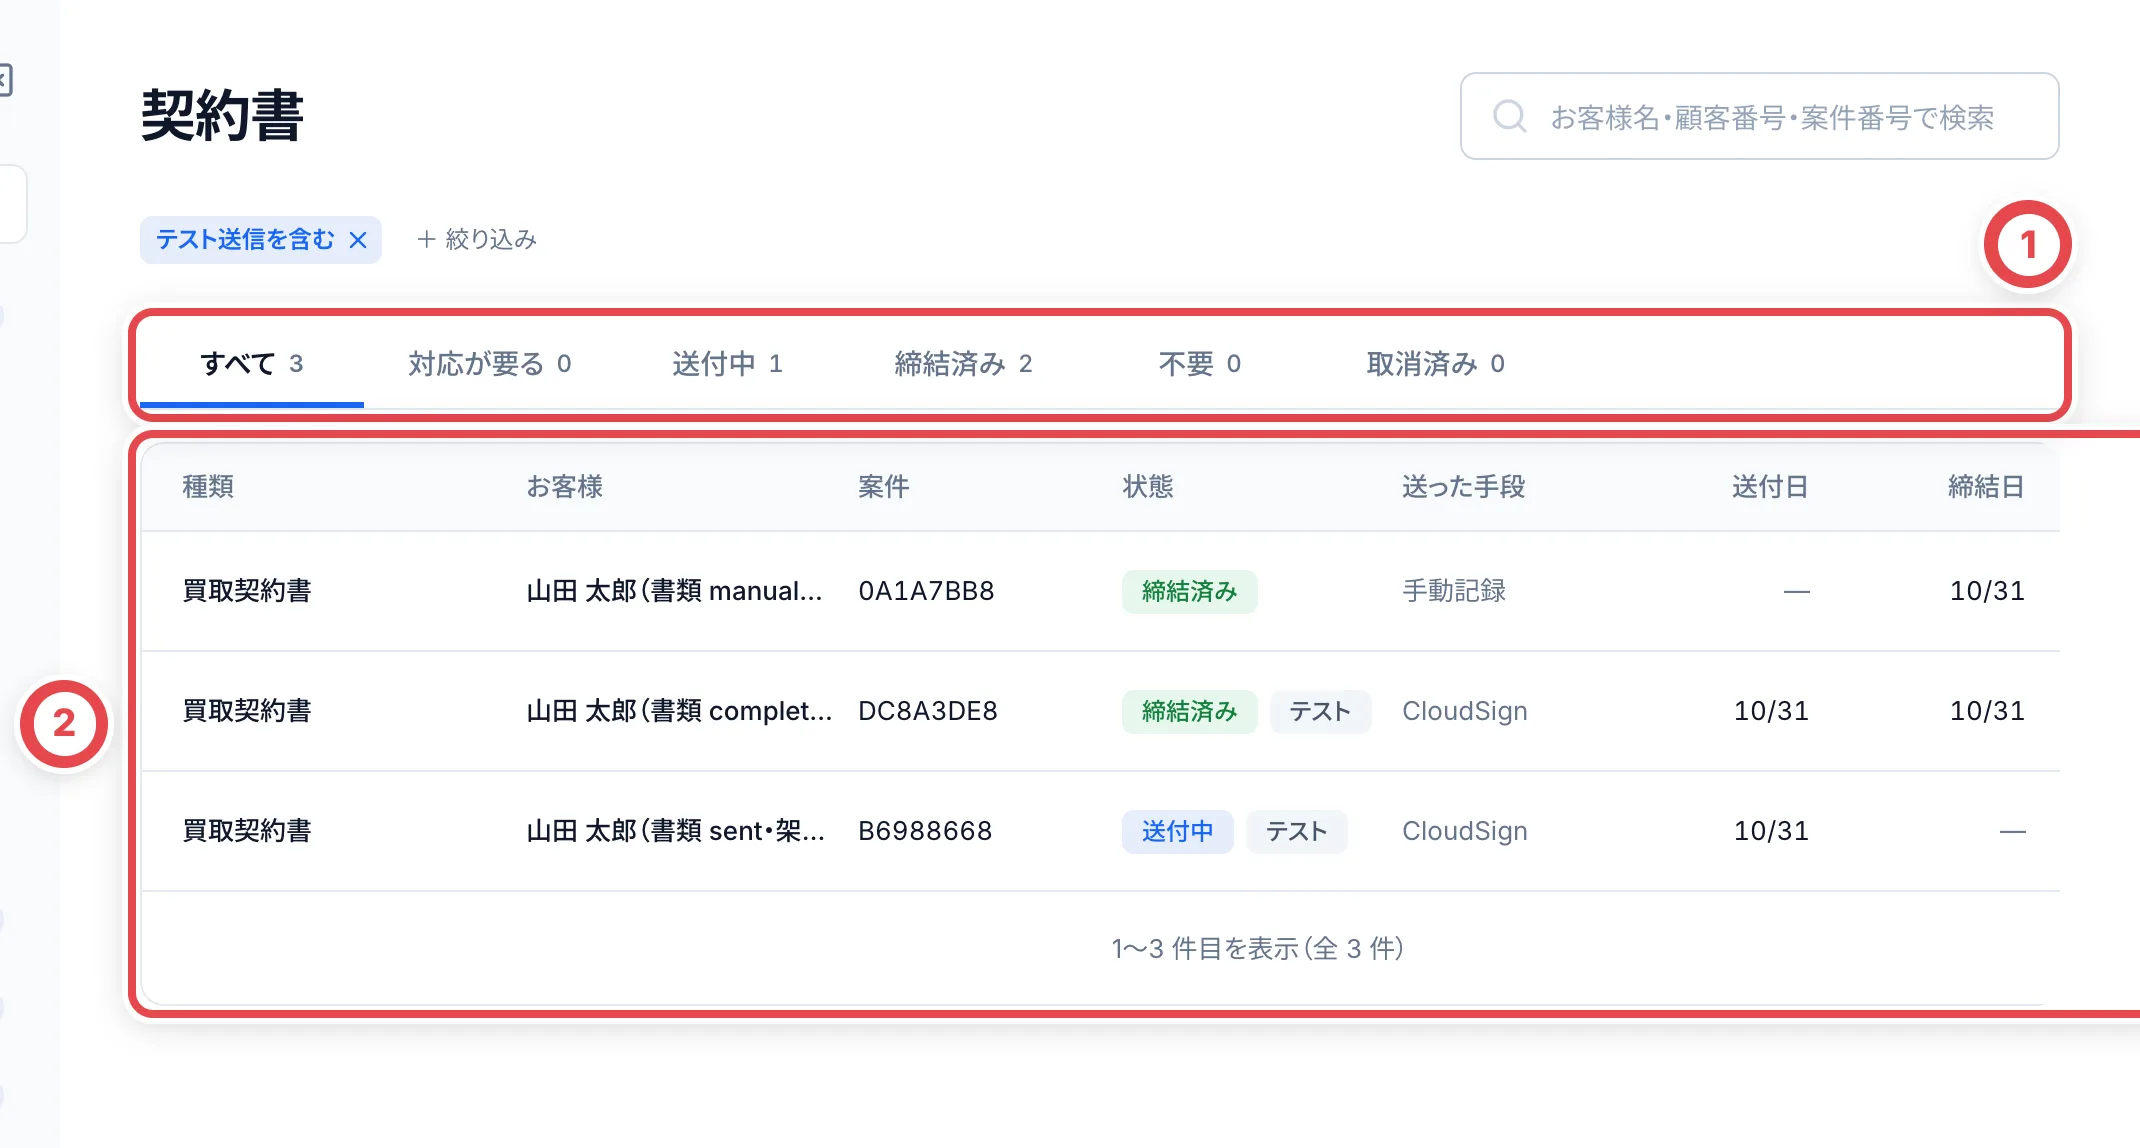 ## 2. PDFと元の案件を確認する
対象行の「PDFを見る」を押し、①で締結済みの書類を確認します。②で書類と合意締結証明書を切り替えます。複数ファイルがある場合は、表示する書類を切り替えます。一覧の案件番号で元の案件に戻れます。API連携の書類には「CloudSignで開く」も表示されます。
手動記録の書類に、APIで保管したPDFが自動で付くわけではありません。PDFがないときは元の案件やクラウドサイン側の記録を確認します。
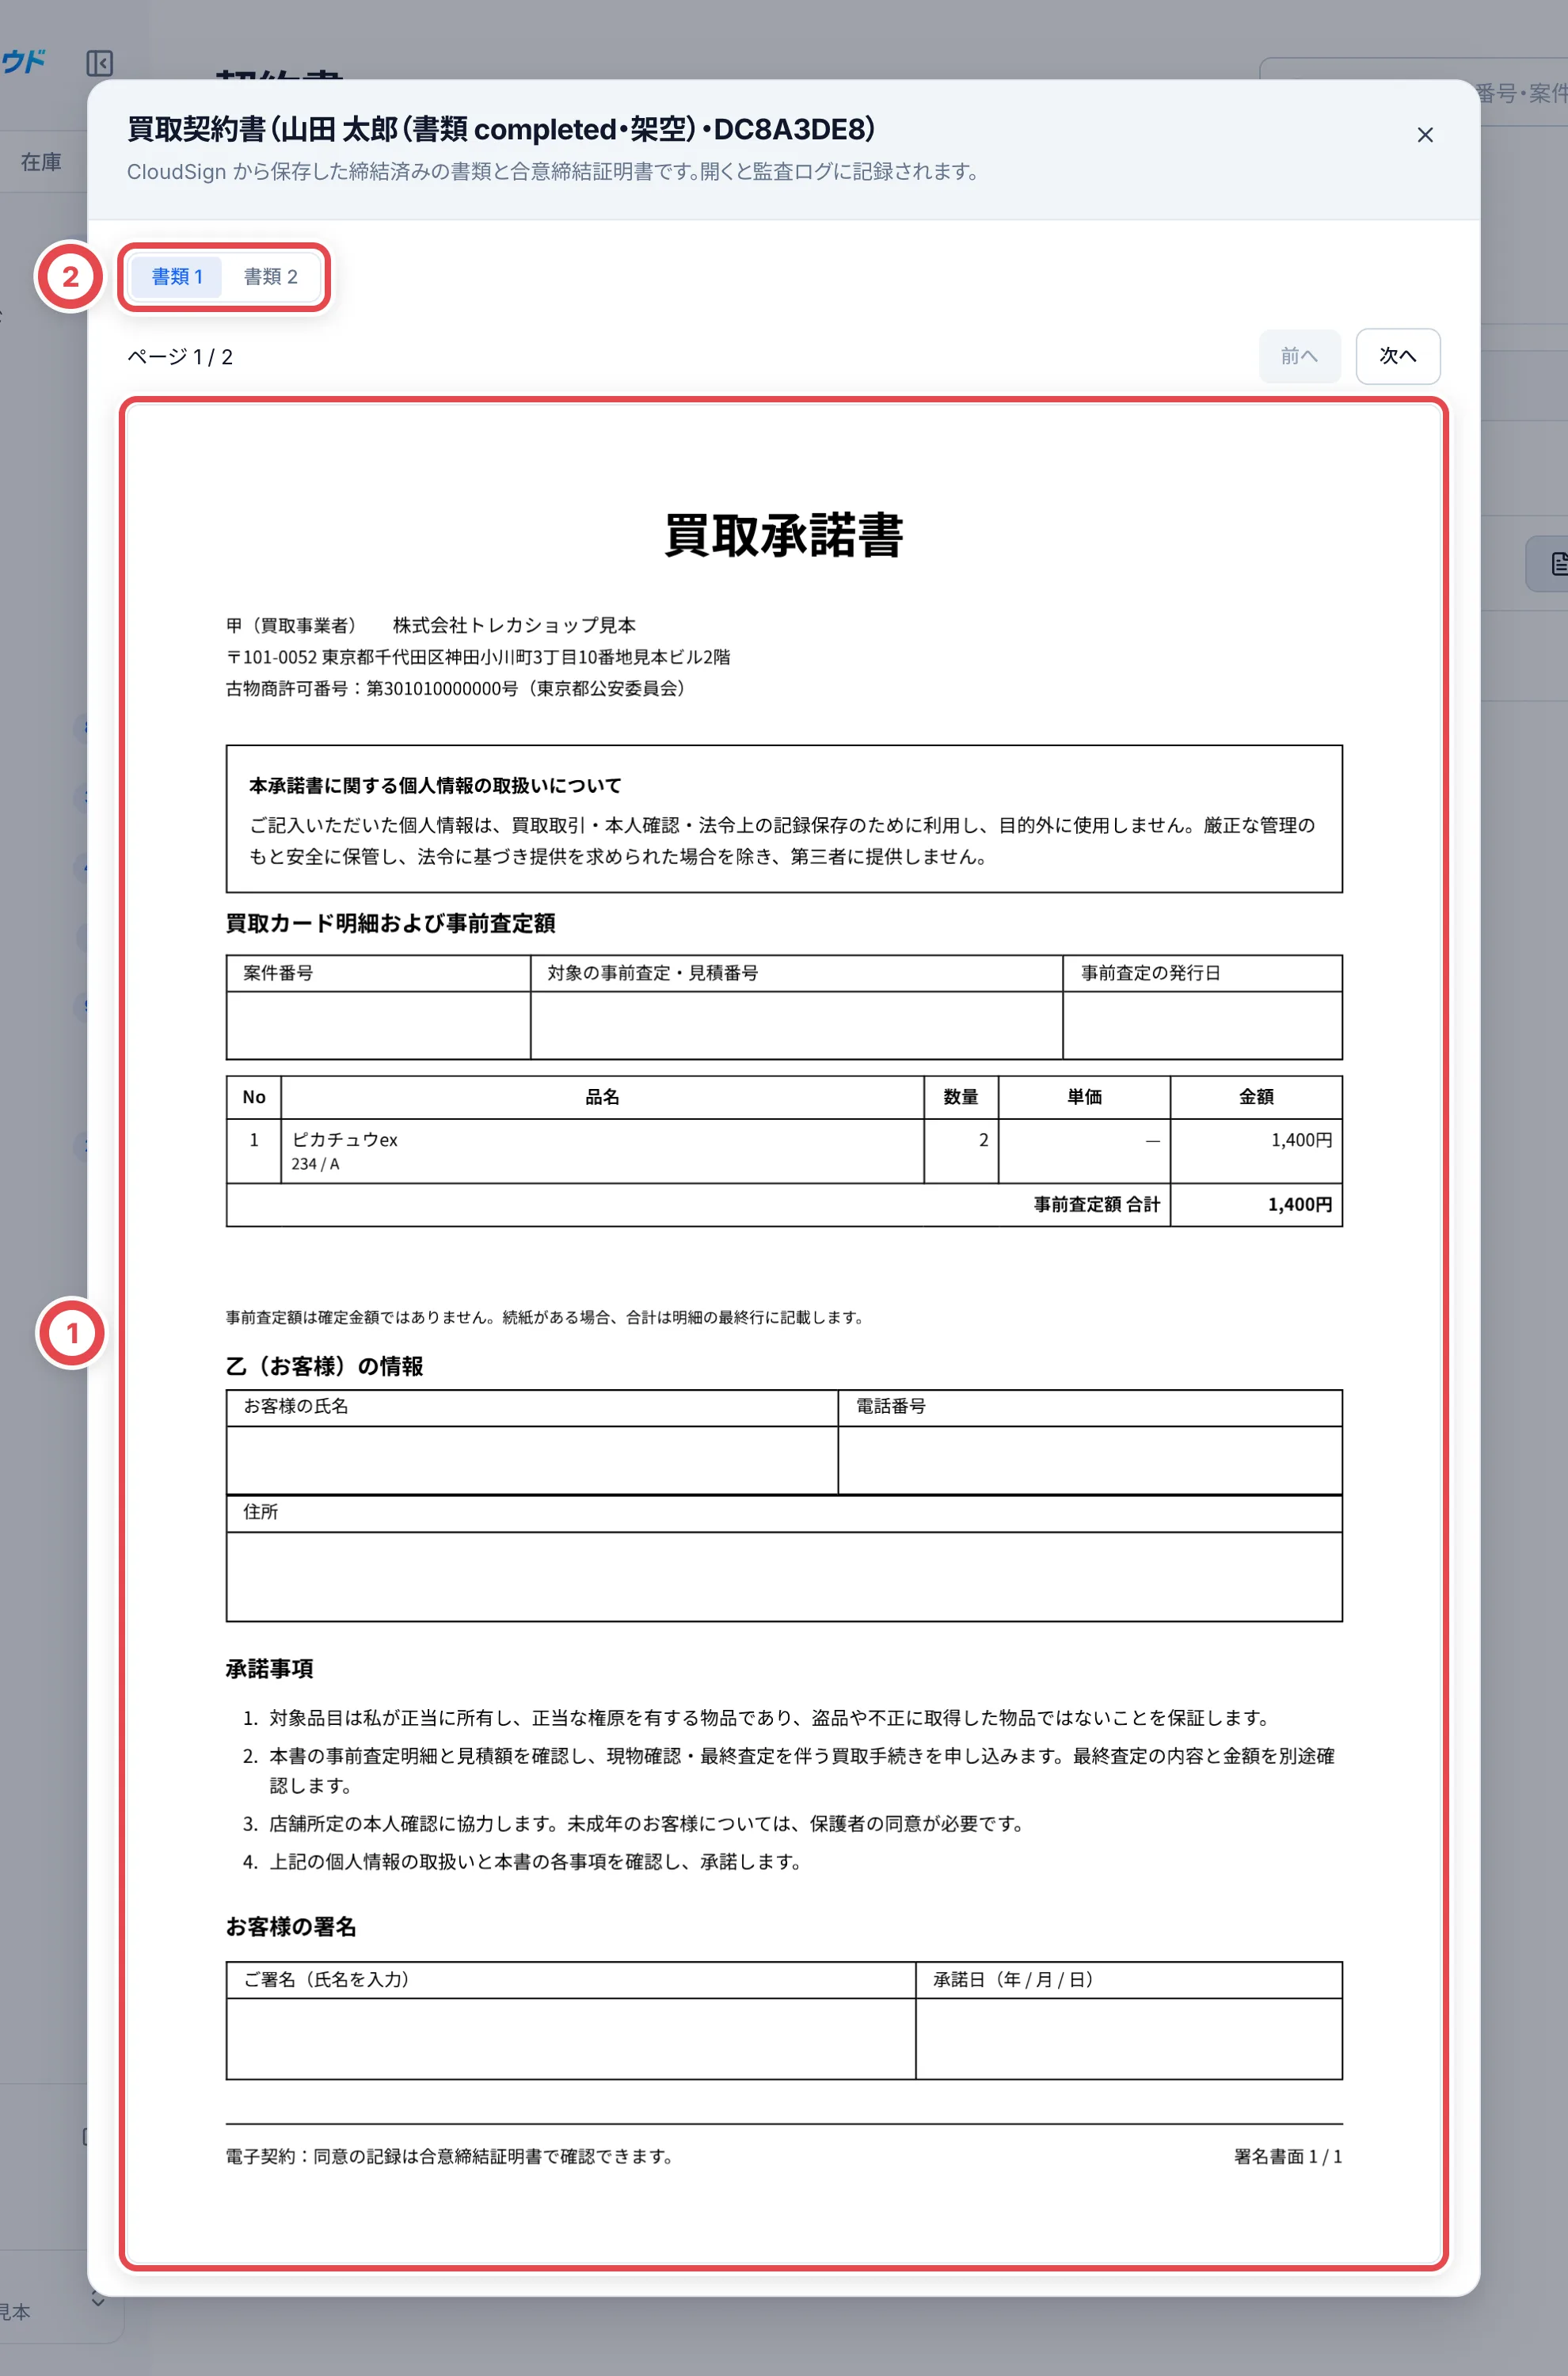 ## 3. 顧客から、そのお客様の書類を探す
顧客の「お客様情報」を開きます。①の「契約書」に、そのお客様の最近の書類が表示されます。②の「すべて見る」で、その顧客に絞った契約書一覧を開きます。全顧客を探す場合は、顧客の絞り込みを解除してください。
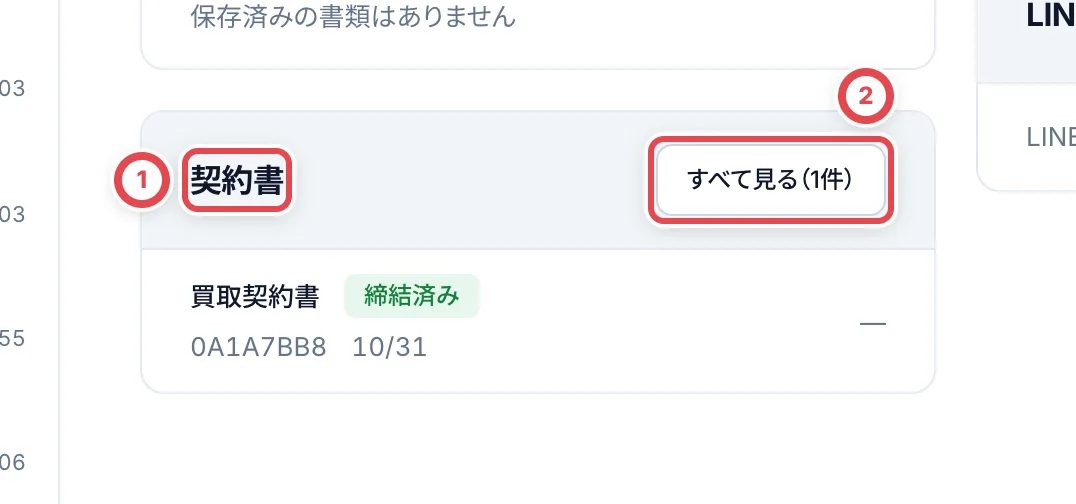 ## 困ったとき
| 起きていること | 確認すること |
| ---------------------- | ----------------------------------------------------------------------- |
| 取消済みが見つからない | 「すべて」ではなく「取消済み」を開きます。 |
| 書類が見つからない | 顧客、種類、期間、状態、テスト送信の条件を外して探します。 |
| PDFが表示されない | 手動記録か、保存済みPDFがあるか、閲覧権限と機能の有効状態を確認します。 |
新しい書類を送る手順は[クラウドサイン](/guides/settings/cloudsign)を参照してください。
---
# 法人取引と請求書
Source: https://docs.toreca-cloud.com/guides/purchase/corporate-deals
在庫登録後の金額・数量の訂正は、案件の三点メニューから[買取金額・数量と関連記録の訂正](/guides/purchase/amount-and-quantity-corrections)へ進みます。元の請求書と支払い記録は保持されます。
法人取引はサイドバーの「法人取引」で扱い、**請求書をもとに進めます**。個人の取引と違い、見積書の送付・見積への承諾・本人確認は求めません。
振込のときに、取引先が承諾したことの証拠(メールやチャットのスクリーンショットなど)を添付するのは、個人の取引と同じです。
## 最初に用意するもの
- 取引先の法人名・フリガナ・法人番号・所在地(初めての取引先のとき)
- 取引先が発行した請求書のPDF
- 取引先の振込先口座と、店舗の古物商許可
## 流れと一覧のタブ
| 順番 | やること | 一覧のタブ | 取引の状態 |
| ---- | ---------------------------------- | ---------- | ------------ |
| 1 | 法人取引を作る | 請求書待ち | 現物照合待ち |
| 2 | 請求書を登録する | 照合・査定 | 現物照合待ち |
| 3 | 商品・数量・単価の下書きを確認する | 照合・査定 | 現物照合待ち |
| 4 | 現物・調整額・差額理由を確認する | 照合・査定 | 現物照合待ち |
| 5 | 現物確認して振込へ進む | 振込 | 支払い待ち |
| 6 | 請求額と振込額を確かめて、振込へ | 振込 | 支払い待ち |
一覧の「次の操作」の列に、その取引で次に押すボタン(請求書を登録・現物を照合・査定を入力・成立を記録・振込ボードで開く など)が出ます。
## 1. 法人取引を作る
サイドバーの「法人取引」を開き、①の「法人取引を作成」を押します。上の②のタブで、段階ごとに取引を探せます。法人名・法人番号・案件番号での検索もできます。
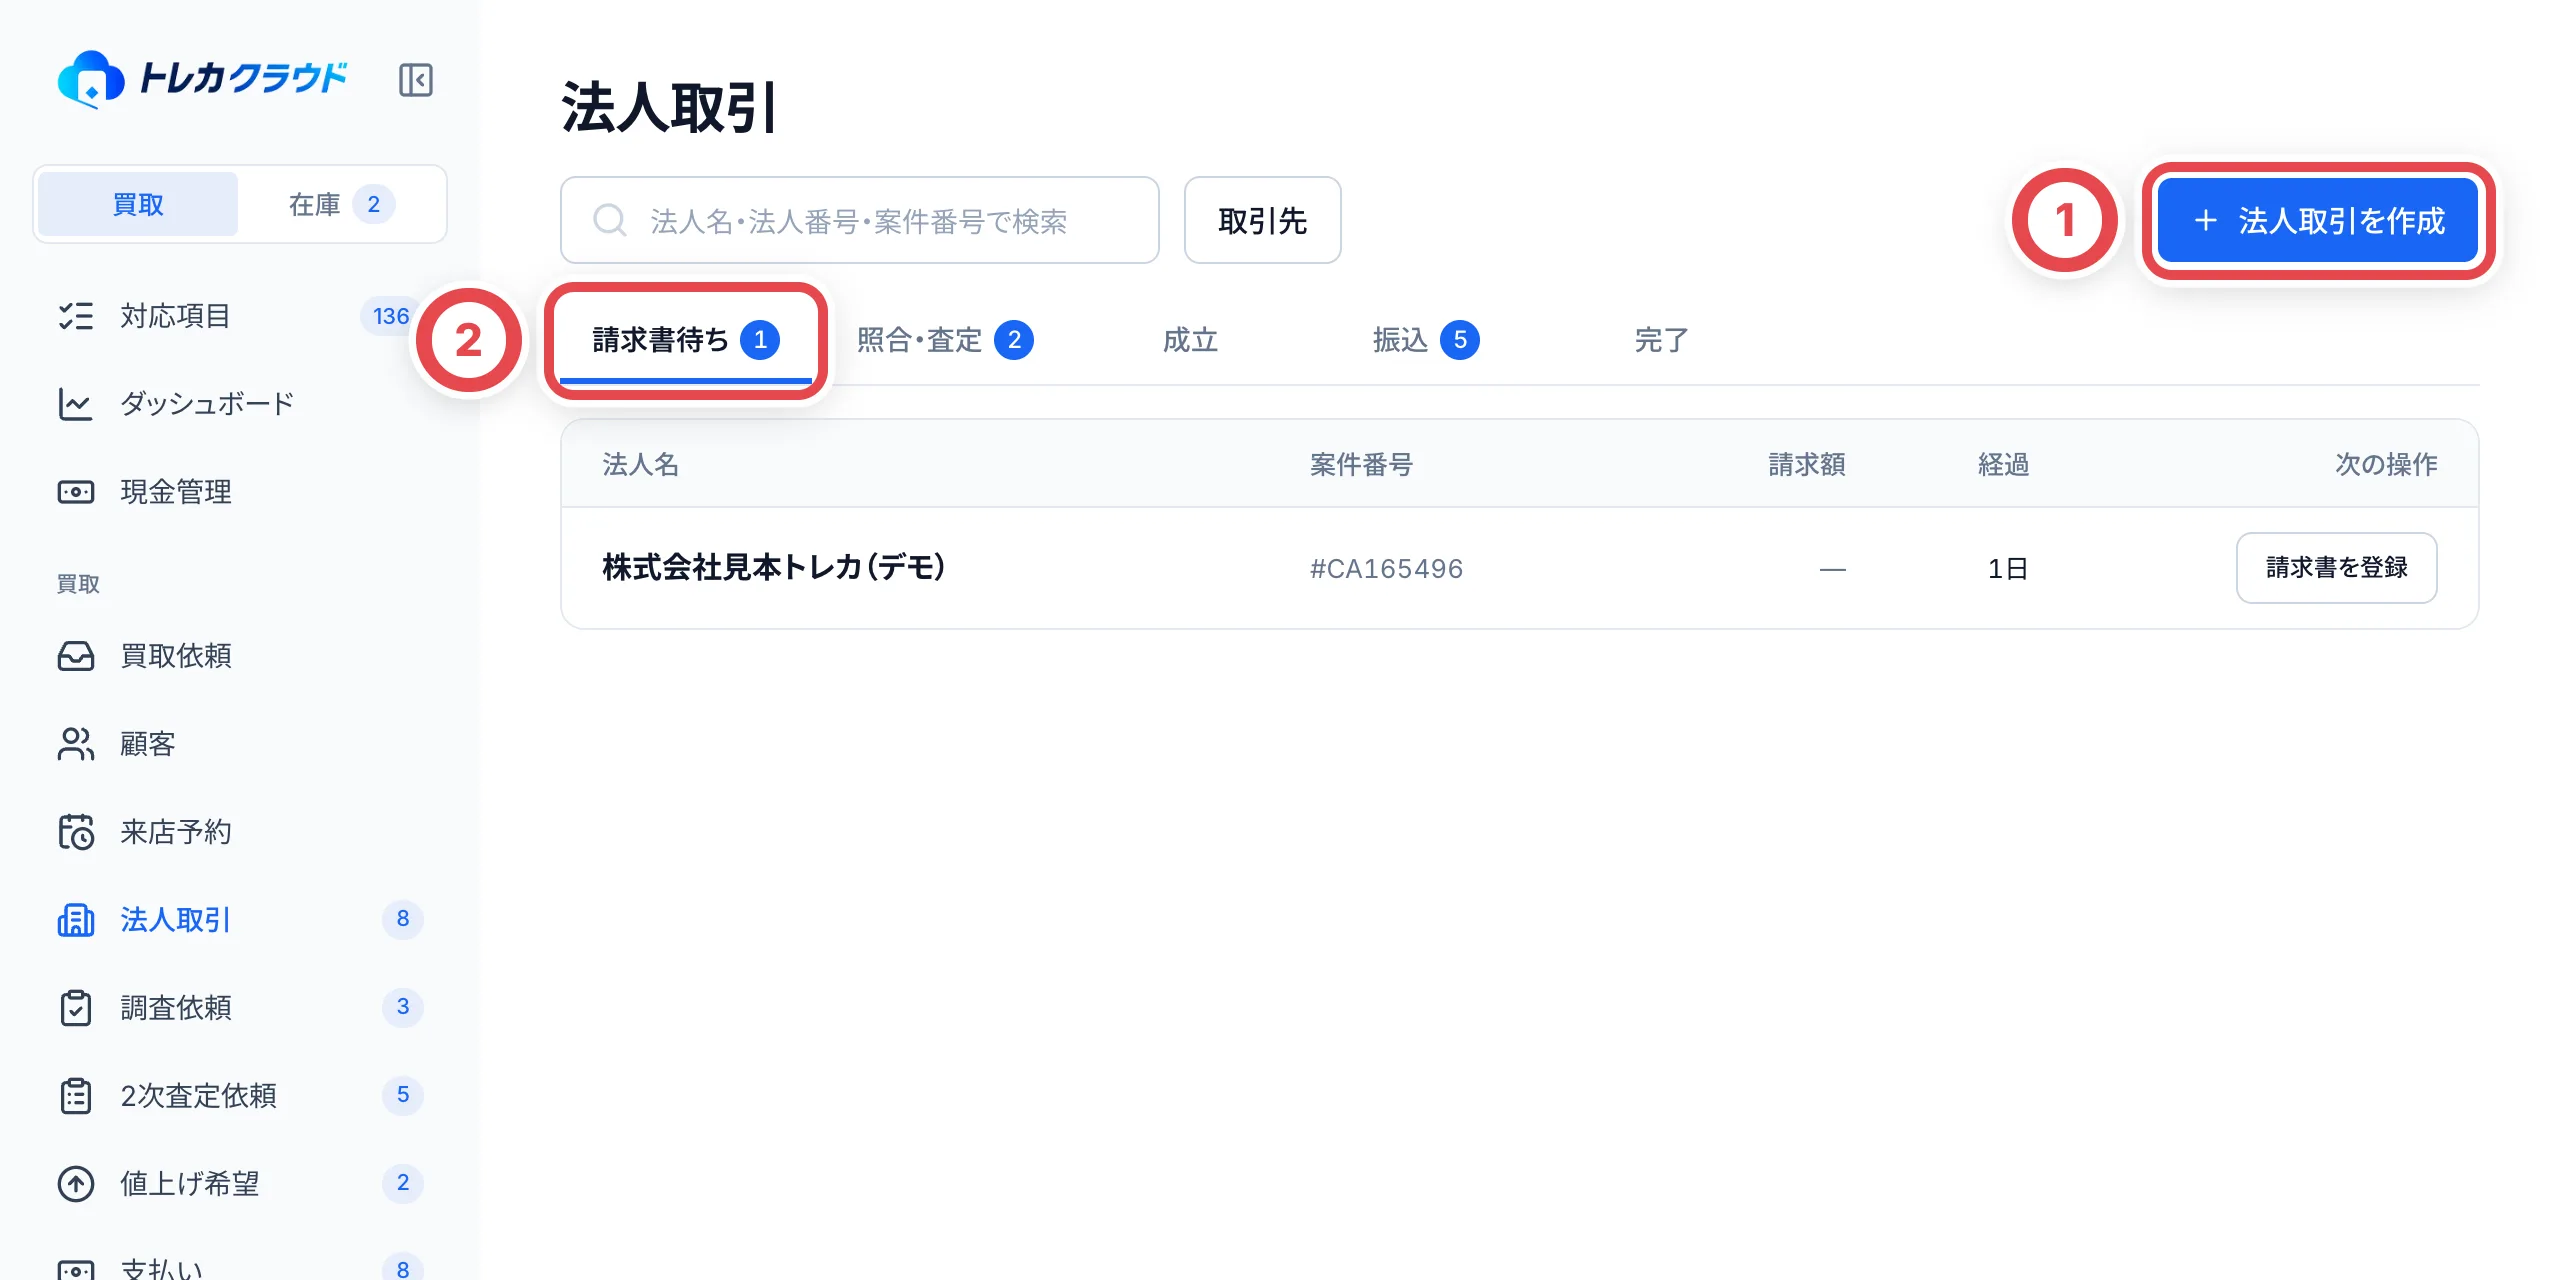 ①の取引先の欄に法人名か法人番号を入れて探し、登録済みの取引先を選びます。初めての取引先は「新しい取引先を追加」を選び、法人名・フリガナ・法人番号・所在地などを入れます(登録番号と建物名は任意)。②の「作成する」を押すと、取引ができて取引の画面が開きます。**押すとその場で作成されます。**
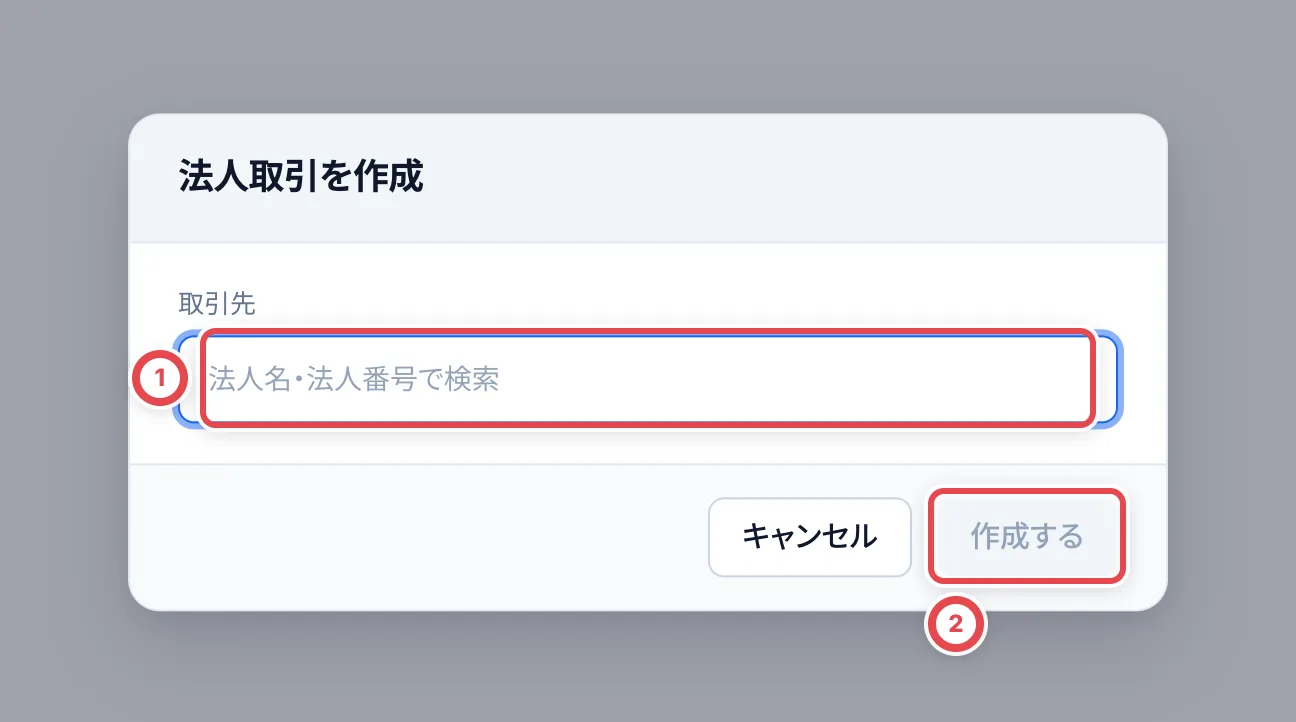 フリガナには「カブシキガイシャ」など法人の種類を含めず、法人名の読みを入力します。取引先の情報は、一覧の「取引先」からも確かめて直せます。
## 2. 請求書を登録する
取引の画面の「請求書」で「請求書を登録」を押します。①に請求書のPDFを選ぶと、発行者・登録番号・請求書番号・発行日・請求額などと、商品明細がAIで自動で読み取られます。
②の基本情報を原本と比べ、誤りがあればその欄を直接直します。読み取れなかったときは手入力します。最後に、原本と照合したことのチェックを入れ、③の「確認して登録・商品確認へ」を押します。**押すとその場で登録され**、続けて「商品と買取金額」の下書きを確認します。
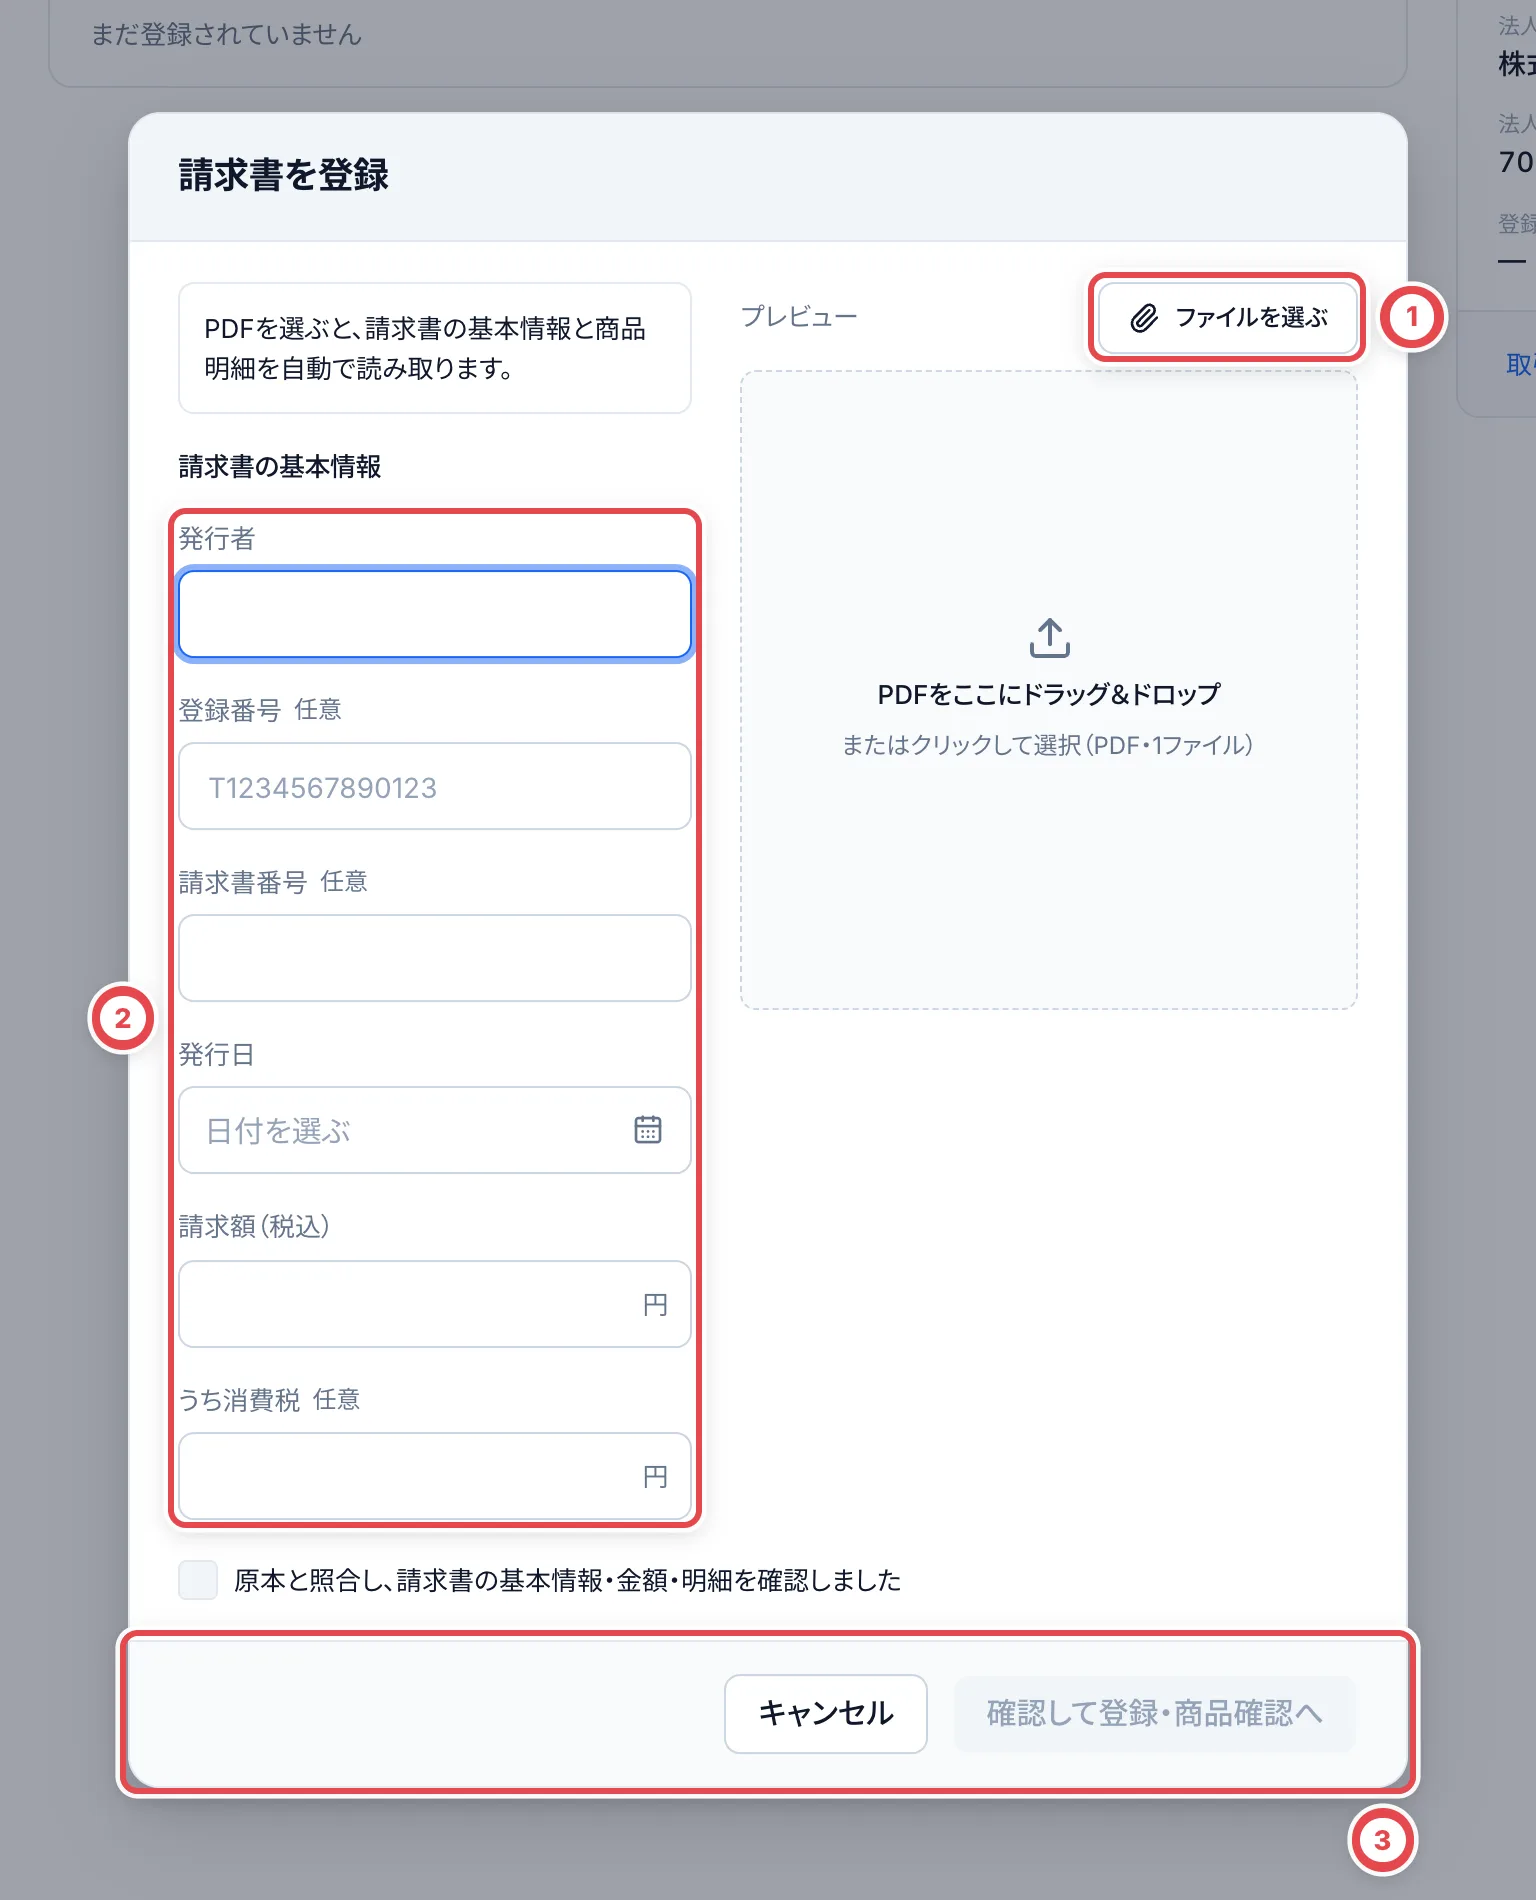 請求書に登録番号があるときは、「請求書」の「登録番号を照合」で、国税庁の公表サイトと照らし合わせた結果を記録できます。請求書を出し直してもらったときは「差し替え」で登録し直します。
## 3. 請求書の明細を確かめて登録する
請求書を登録すると、取引の「商品と買取金額」に読み取り結果の下書きが表示されます。請求書の原文を現物と照合しながら、次の順で確かめます。
1. ①「商品を変更」から、正しい商品・版を選びます。未特定なら「商品を検索」と表示されます。商品名だけで決めず、型番・セット・現物も照合します
2. ②「買取単価」と③「現物数量」を確認します。**商品の買取金額は単価×現物数量です。** 法人取引では時価・掛率を入力しません。鑑定品は「鑑定グレード」、BOX等は「包装の状態」も確認します
3. 欠品・返却・重複などで買い取らない行は④「買取対象から除外」を選び、理由を入れます。請求書に読み取れなかった商品は「商品を追加」から補います
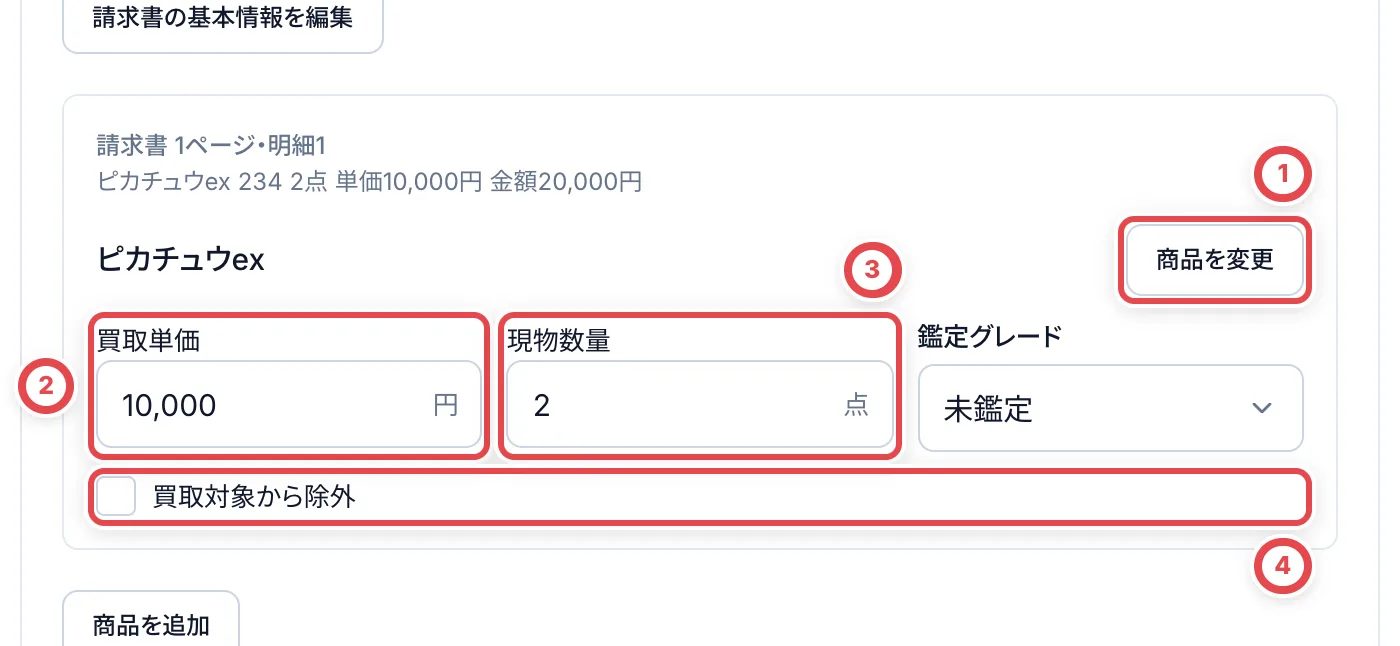 途中で作業を止めるときは「下書きを保存」を押します。再読み込みしても入力した数量・単価を引き継げます。**下書きの保存では、受領・在庫・振込は登録されません。**
請求書が未読取、読み取りに失敗、またはすでに現物の受け取りや見積の処理が進んでいる取引では、別の画面が表示されます。[以前の手順で進めている取引](#以前の手順で進めている取引)を参照してください。
## 4. 届いたカードを照合して、金額を入れる
届いた現物と請求書を並べ、商品・枚数・鑑定グレード・包装・状態を確認します。下書きの数量・単価は現物に合わせて直します。
①で「請求額」「買取合計」と、表示される場合は「差額」を見比べます。③「税・送料・値引き」では、買取合計に含める行のチェックと金額を確認します。値引きは負の金額として表示されます。原本と照合し、税・送料などを二重に加算しないようにしてください。
単価・数量・請求額や調整額を変更した場合は、②「差額理由」に取引先との合意内容を入力します。**合計が一致していても、元の明細金額や調整内容を変えた場合は理由が必要になることがあります。**
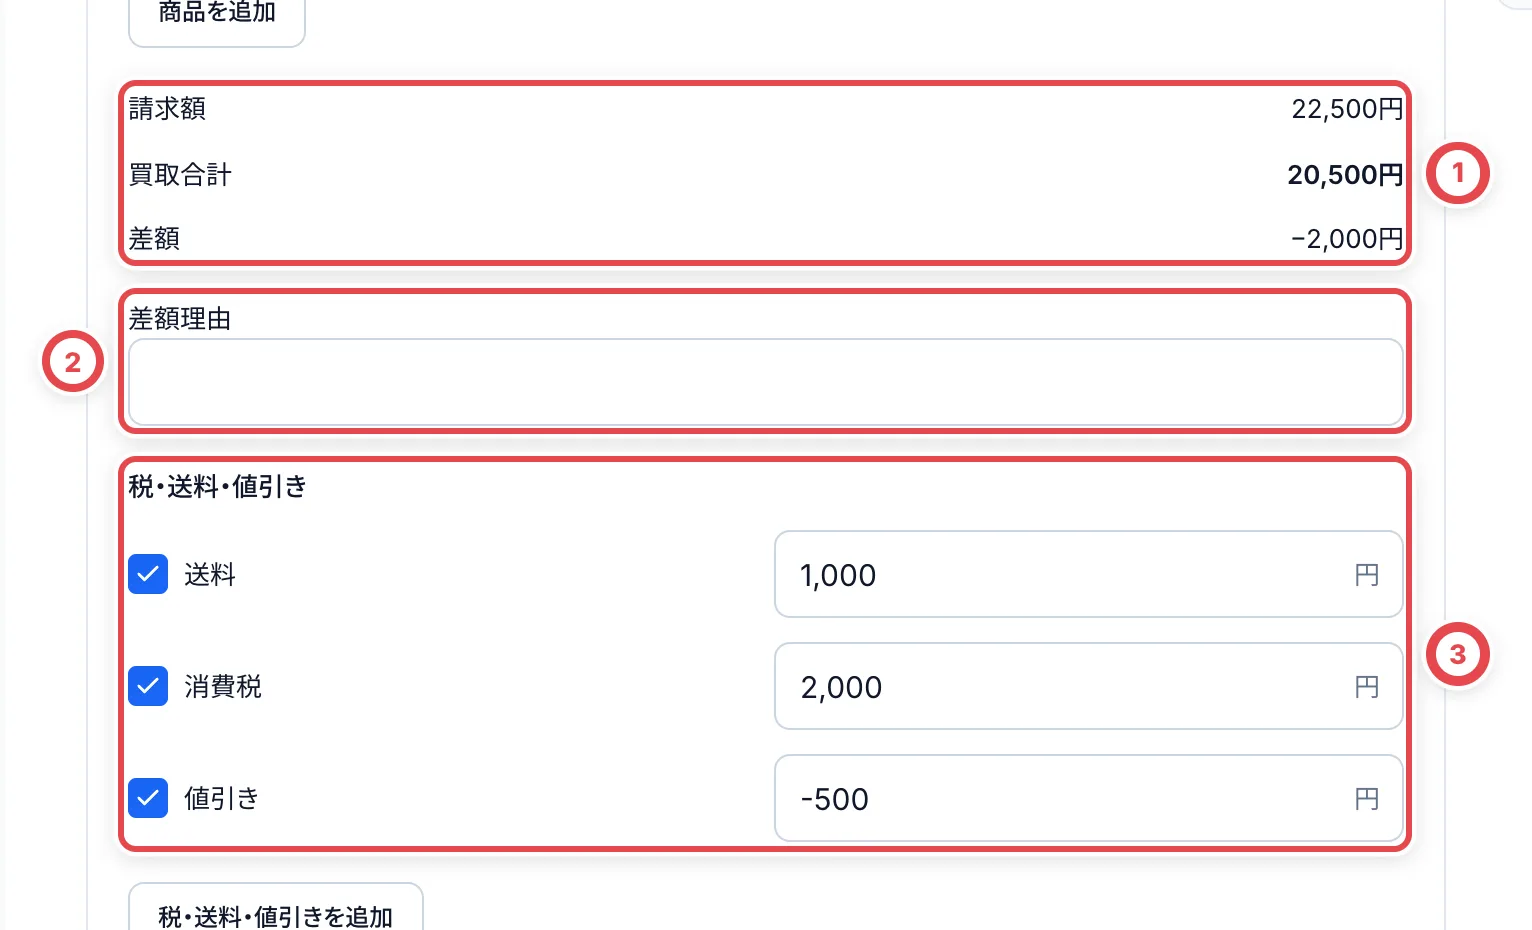 請求書そのものの基本情報を読み違えているときは「請求書の基本情報を編集」から直します。変更前の請求書と修正の記録は残ります。
読取が不完全な場合は、①「読取が不完全なため、原本の全ページと明細を確認・補完した」が表示されます。抜けた商品や金額を補い、全ページを確認してからチェックします。途中なら②で下書きを保存し、③へは進みません。
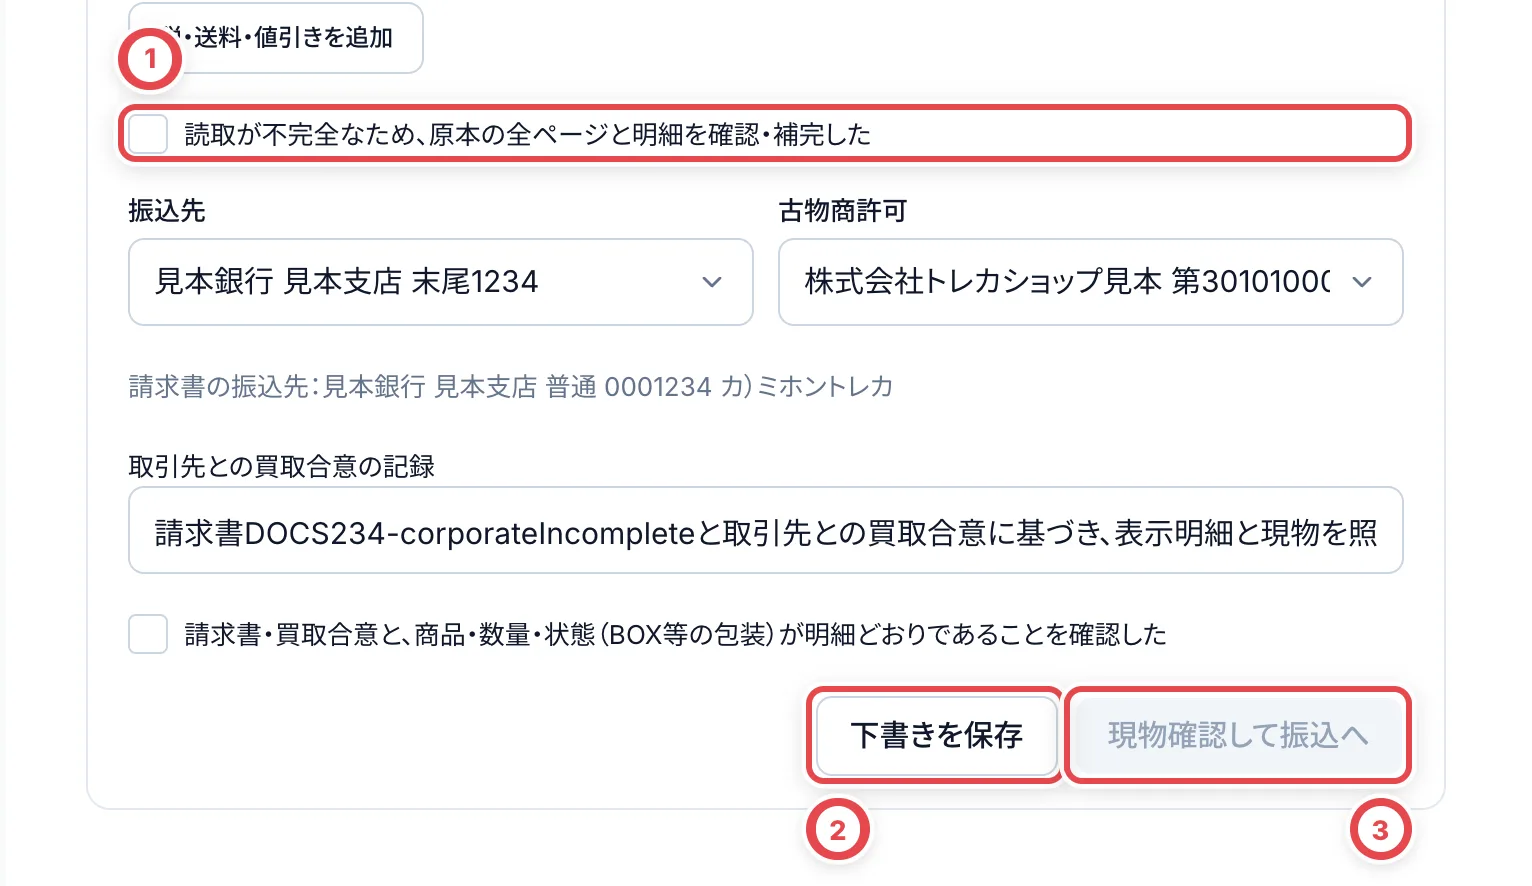 登録済みの商品がある場合は、請求書との重複・不足を確認するチェックも表示されます。
## 5. 成立を記録する
①「振込先」と「古物商許可」を確認します。請求書に口座の記載がある場合は、下に出る原文とも照合します。口座がない場合は「取引先の振込先を登録してください」から登録して戻ります。
②「取引先との買取合意の記録」に、何をいつ・どの方法で確認したかを記録します。現物と合意内容を確認してから、③の商品・数量・状態の確認にチェックを入れます。内容を変更した場合は、もう一度現物との一致を確認してください。
:::warning
⑤「現物確認して振込へ」を押すと、確認した明細の受領・最終査定・成立、在庫・古物台帳・振込依頼がまとめて登録されます。現物が届き、取引先との合意内容を確認できてから実行してください。銀行からの送金は実行されません。
:::
作業途中は④「下書きを保存」、確認が終わったら⑤「現物確認して振込へ」を押します。この動線では、別の2次査定依頼や「成立を記録」のダイアログを挟まず、支払いの申請・承認へ続きます。
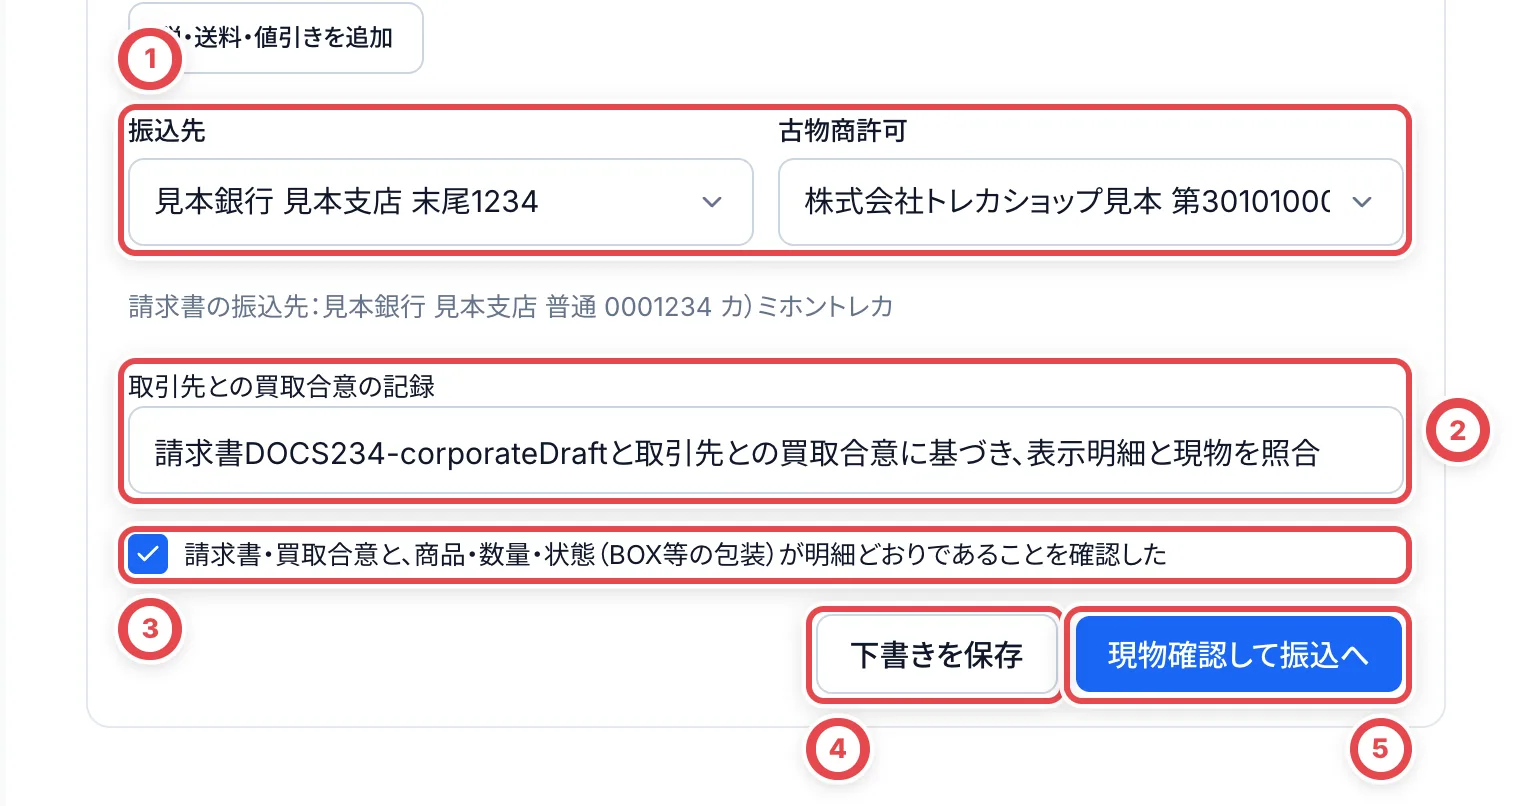 ## 6. 請求額と振込額を確かめて、振込へ
確認が終わると「支払い」の対象取引が開きます。取引が「支払い待ち」になっていること、振込合計・口座・承諾の証拠を確かめ、[振込の申請・承認](/guides/purchase/payouts)を進めます。法人取引の一覧からは「振込ボードで開く」で戻れます。
「取引先との買取合意の記録」と、申請時に確認する承諾証拠の添付は別です。メール・チャットなどの証拠がまだなければ、振込の申請画面で追加します。確認・申請だけでは、銀行からの送金は行われません。
### 振込額との差額を確認し直す
「請求額と振込額」で、①の金額と差額を見比べます。確認時に記録した差額理由が、今の請求額・振込額に対応しているか確かめます。理由が必要な場合は②「差額の理由を記録」へ進みます。
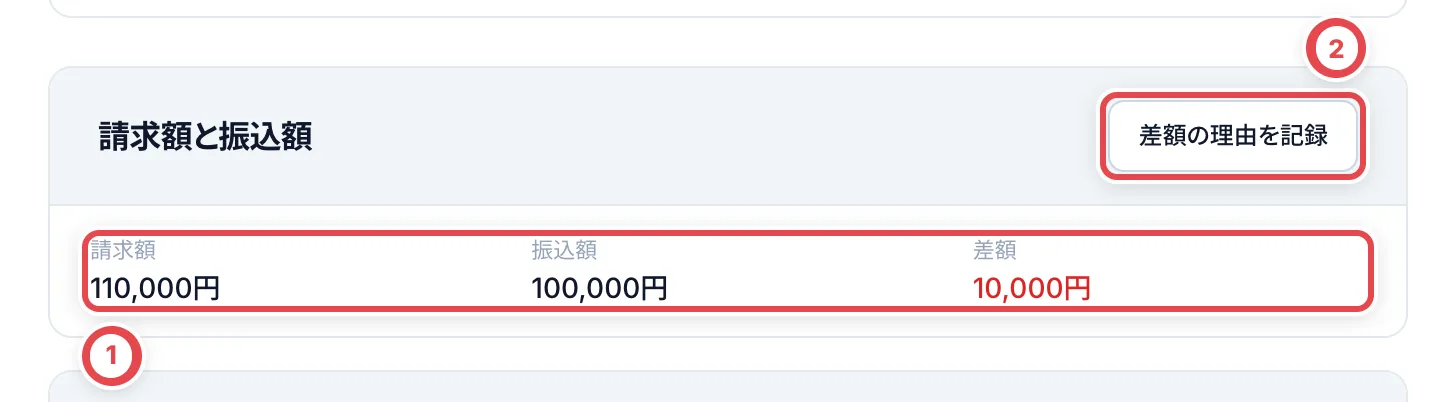 ①に理由を入れ、②「差額 N円 を記録」で保存します。保存後に請求額や振込額が変わった場合は、その金額で理由を記録し直します。
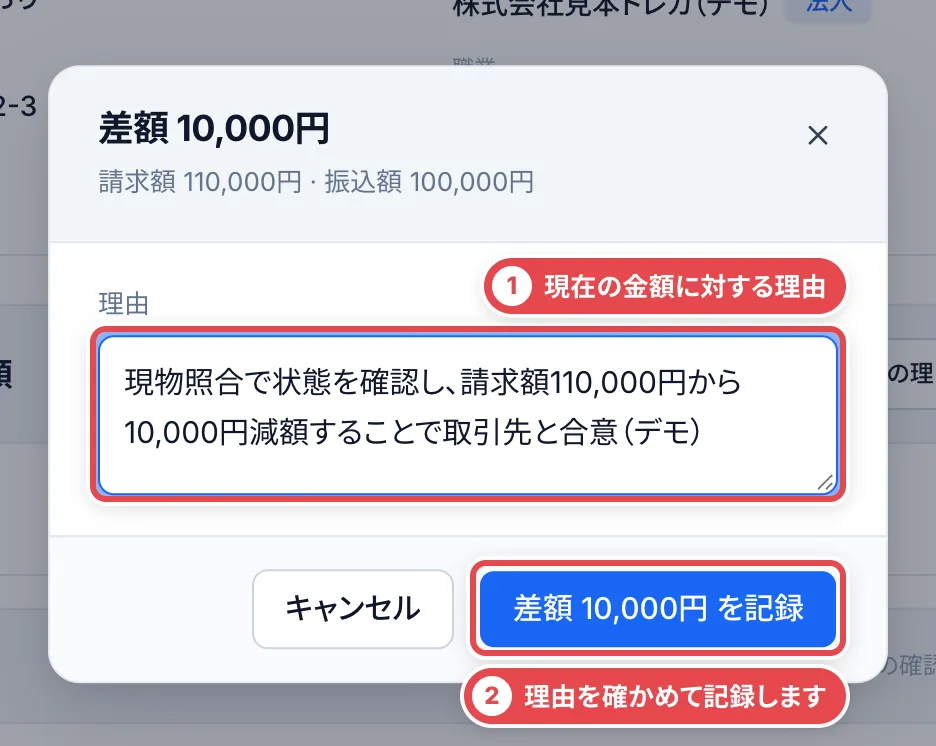 ## 以前の手順で進めている取引
すでに商品登録・受領・検品・見積提示や2次査定依頼が進んでいる取引では、請求書の下書きから一括確認する画面が出ないことがあります。現在の取引の「次の操作」から続けます。
「請求書の明細を確認」が開いた場合は、原文と商品候補を照合し、必要な修正を行います。「この商品・版と数量で合っていることを確認した」にチェックし、「確認した明細を登録」を押します。商品確認待ちの行が残っている間は、現物照合や成立へ進めません。
### 現物照合と買取金額の保存
カードが届いたら、「現物照合」の①の「現物を照合」を押します。**押すとその場で受け取りと到着の確認が記録されます。** カードが手元に届いてから押してください。このボタンは、明細があって、まだ受け取っていない取引にだけ出ます。
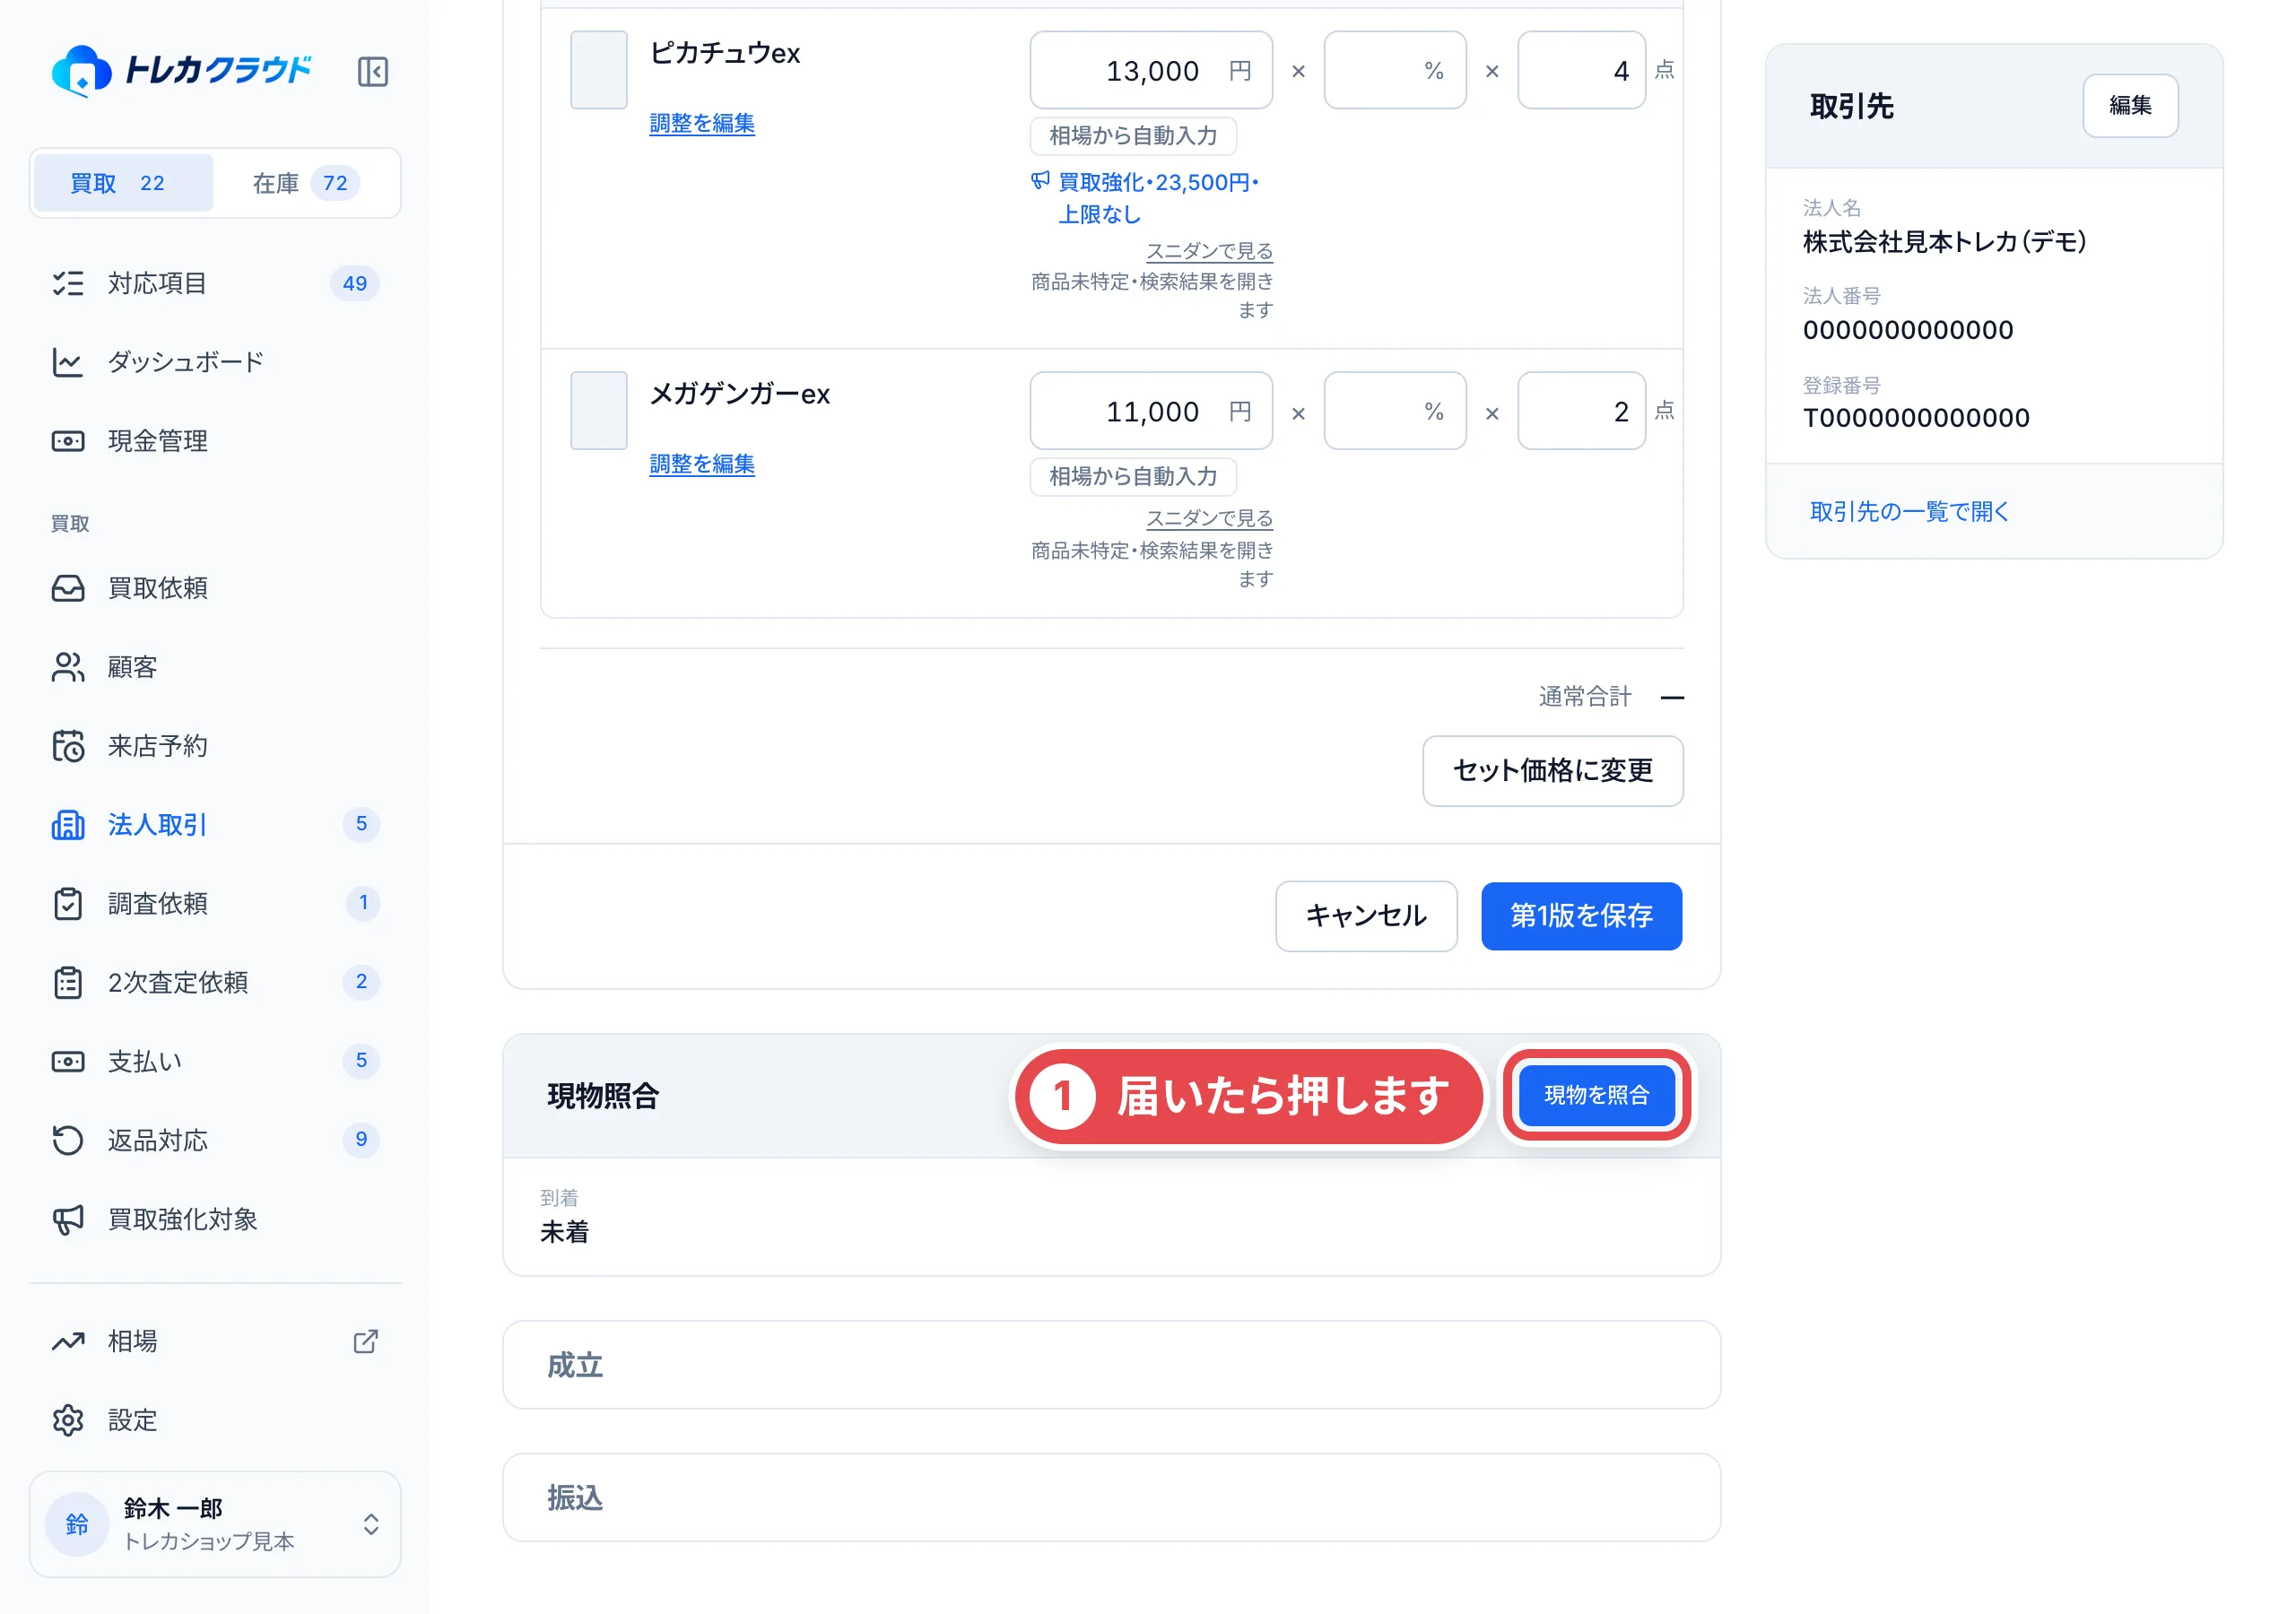 「商品と買取金額」で、届いた商品の「現物数量」と1点あたりの「買取単価」を確認し、「買取金額を保存」を押します。**法人取引では時価・掛率を入力しません。買取金額は買取単価×現物数量で計算されます。** 請求書で確認した単価が初期表示されます。現物照合前は表示のみで、照合後に編集できます。
BOX・パック・デッキは先に「状態を確認」で現物の状態と数量を記録します。商品確認待ちの行は一覧にも表示されるため、「商品を確認」から商品と数量を確認して登録します。未確認の行が残る間は現物照合に進めません。
保存すると見積を送らずに成立へ進めます。店舗の設定で2次査定が要るときは、先に2次査定を通します。
### 従来の成立画面で登録する
「成立」の「成立を記録」を押します。買取額・買い取るカード・振込先を確かめ、①の「成立を記録」を押します。**押すとその場で、在庫・古物台帳・振込が登録されます。** カードは入庫受付に入ります。登録しただけでは、銀行から送金はされません。
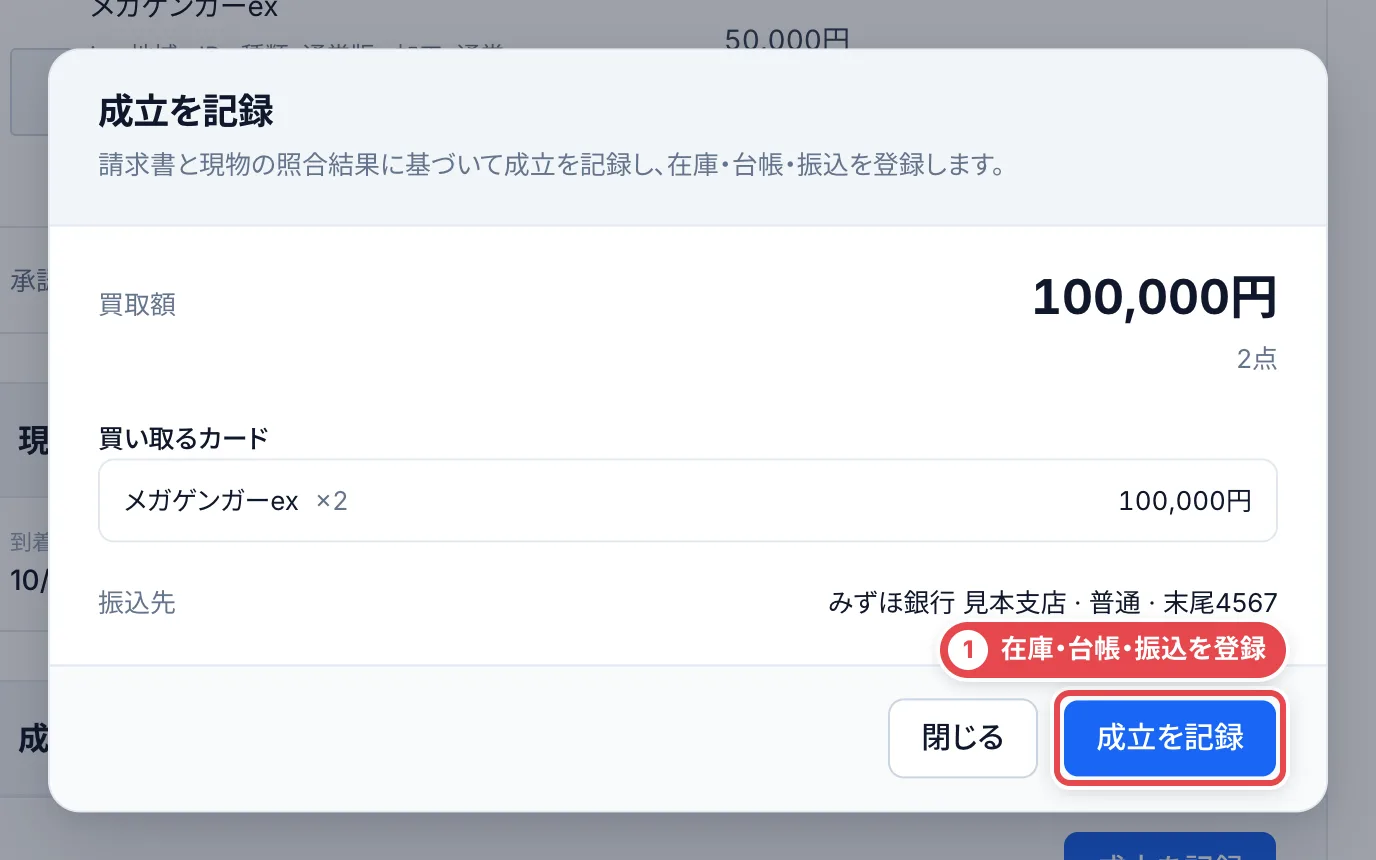 成立を記録するには、請求書(PDF)が登録されていて、現物照合の金額が保存されていること、振込先口座・古物商許可・拠点がそろっていることが必要です。足りないものがあると、ダイアログにその理由が出ます。
承諾証拠の添付と振込の申請・承認は[振込](/guides/purchase/payouts)へ続けます。
## 困ったとき
| 起きていること | 確かめること・直し方 |
| ---------------------------------------------- | -------------------------------------------------------------------------------------------------------------------------------------------- |
| PDFを選んでも読み取られない | 再読取するか、原本を見ながら基本情報を入力して登録します。保存済みでも明細の読取だけが失敗している場合は、請求書から再読取します |
| 商品が決まっていない | 「商品を検索」で正しい商品・版を選びます。買い取らない行は除外し、理由を入れます |
| 「現物確認して振込へ」が押せない | 全明細の商品・数量・単価・包装、差額理由、原本全ページの補完、登録済み商品の重複確認、振込先・許可・合意記録・現物確認のチェックを確かめます |
| 下書きは保存できるが、現物確認のボタンが出ない | 買取成立などの権限が必要です。権限のある担当者へ引き継ぎます |
| 「明細の下書きを取得できませんでした」 | 再読み込みします。読取済みの請求書を、古い画面のまま再登録しないでください |
| 他の担当者が更新した | 入力内容を控えて取引を開き直し、最新の請求書・明細と照合してから続けます |
| 「現物を照合」が見当たらない | 新しい下書きの画面では「現物確認して振込へ」を使います。以前の手順では、未確認の明細や受領状態を確認します |
| 振込が承認できない | 現在の請求額と振込額に対応する差額理由、承諾証拠、口座、申請者と承認者を確認します |
| 理由を記録したのに再び求められる | 保存後に請求額・振込額が変わった場合は、現在の金額に対して記録し直します |
| 「登録番号を照合」が出ない | 請求書に登録番号が入力されているか確認します |
---
# 店舗買取の流れ
Source: https://docs.toreca-cloud.com/guides/purchase/counter
来店受付から支払いまでの手順です。お客様にはスマートフォンまたは店頭タブレットで確認・署名してもらいます。
## 作業の順番
現金払いは手順1〜8、振込払いは手順1〜6のあと[振込で支払うとき](#振込で支払うとき)へ進みます。
:::note[始める前に]
- 現金管理を使う店舗は、営業開始時に「現金管理」でレジを開始しておきます。開始していないと、手順7で「営業中のレジがありません」と出て、お客様を待たせることになります([営業開始・点検・レジ締め](/guides/purchase/cash))。
- 鑑定なしのカードの相場を手順2で取り込むには、「設定」→「買取掛け率」の「単品カードの既定グレード」を決めておきます。決めていなくても、参考時価を手入力すれば進めます。
:::
1. [買取依頼を登録して、カードを追加する](#1-買取依頼を登録してカードを追加する)
2. [査定して保存する](#2-査定して保存する)
3. [見積PDFを確認する](#3-見積pdfを確認する)
4. [お客様の画面に表示する](#4-お客様の画面に表示する)
5. [お客様に確かめてもらい、同意と署名をもらう](#5-お客様に確かめてもらい同意と署名をもらう)
6. [対面で本人確認をする](#6-対面で本人確認をする)
7. [在庫と支払いを登録する](#7-在庫と支払いを登録する)
8. [完了を確認して、カードを格納する](#8-完了を確認してカードを格納する)
## 1. 買取依頼を登録して、カードを追加する
サイドバーの①「買取依頼」を開き、右上の②「買取依頼を登録」を押します。
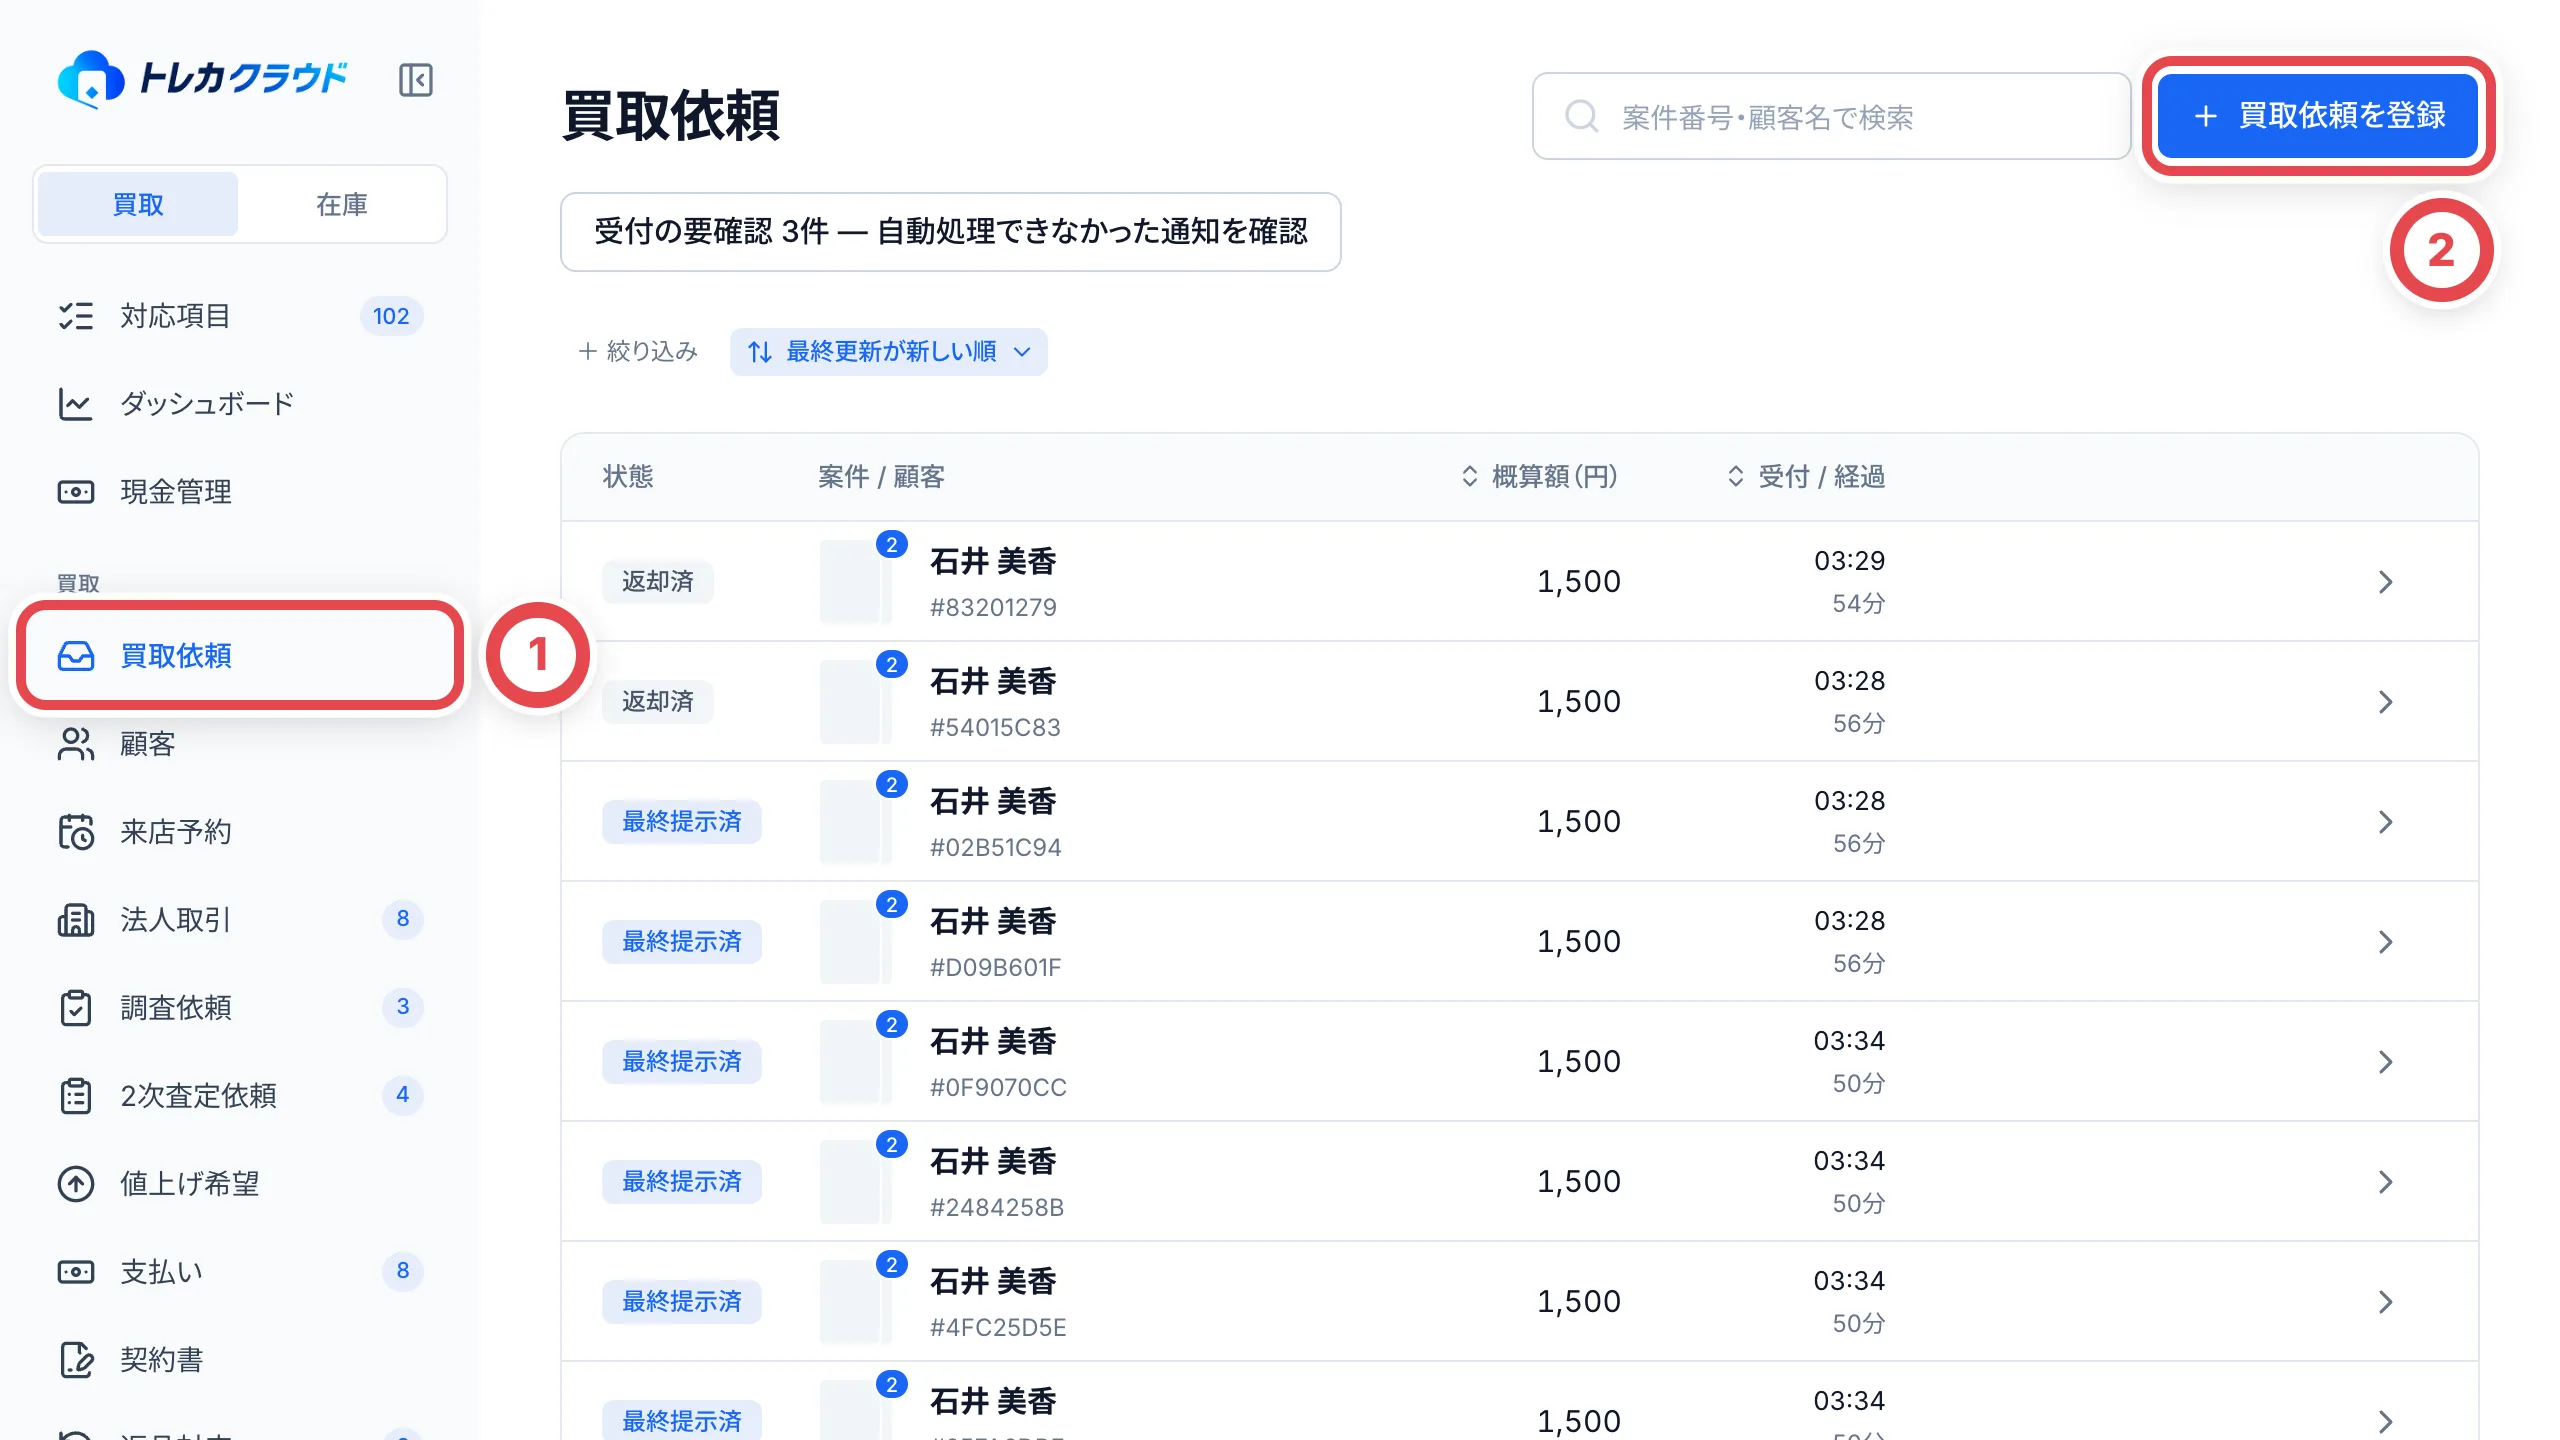 開いた画面で③「店頭」を選びます。オンライン買取を使っていない店舗では③は出ず、店頭の取引として登録されます。初めてのお客様は「新規顧客」のまま④に名前を入れ、来たことのあるお客様は「登録済みの顧客」を選んで検索します。⑤の「買取依頼を登録」を押すと取引ができ、取引の画面が開きます。
来店予約から来たお客様は、予約が入った時点で取引ができています。「来店予約」で受付すると取引の画面が開くので、カードの追加から始めます([来店予約](/guides/purchase/reservations))。
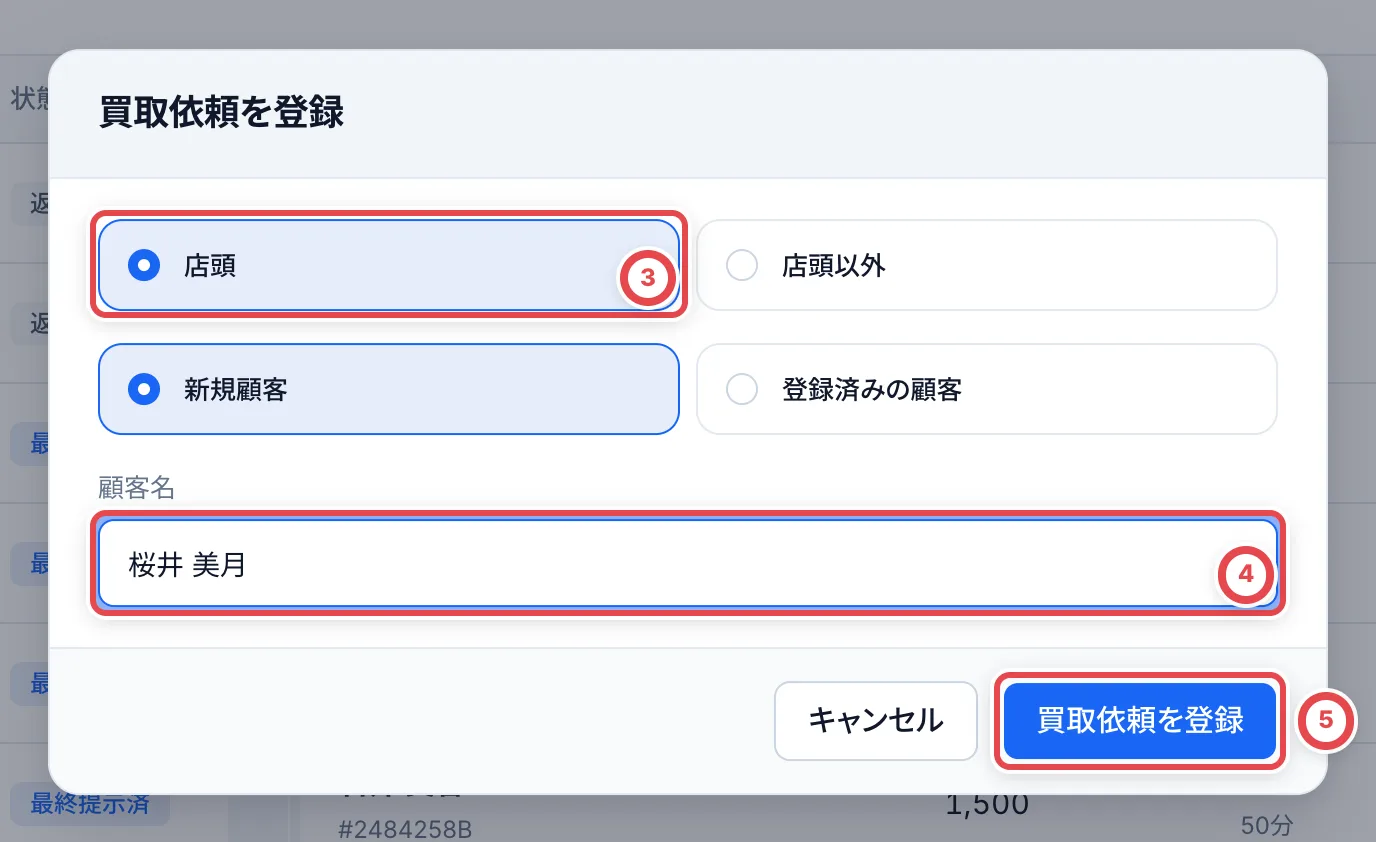 ### 追加画面を開く
①にいまの作業が表示されます。②「カードを追加する」を押すと、「商品を追加」の画面が開きます。
2枚目以降のカードを登録するときは、査定明細の右上にある①「商品を追加」を押します。
 ①「写真から探す」または②「キーワードで探す」を選びます。
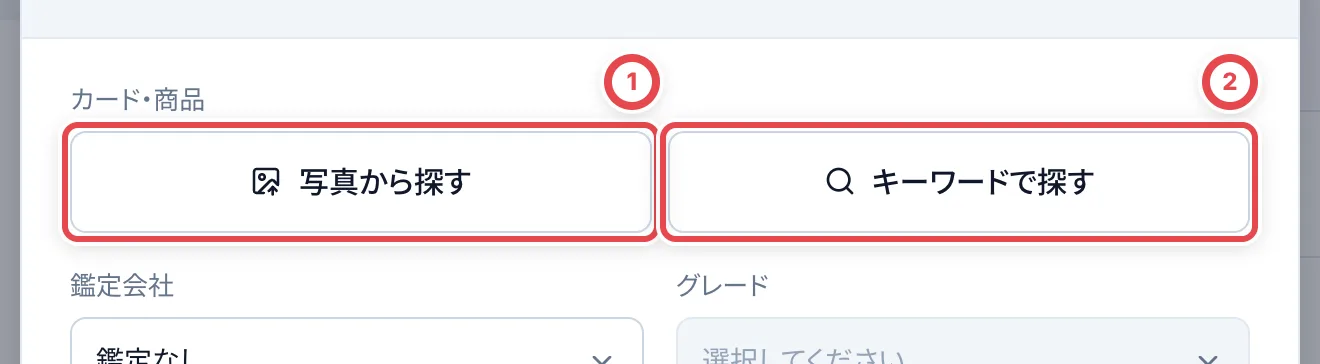 ### カードを検索して選ぶ
「カード・商品を選ぶ」の③にカード名や型番を入れます。候補の名前・型番・セット名を現物と照合し、一致する④のカードを押します。「商品を追加」に戻り、選んだカードが表示されます。
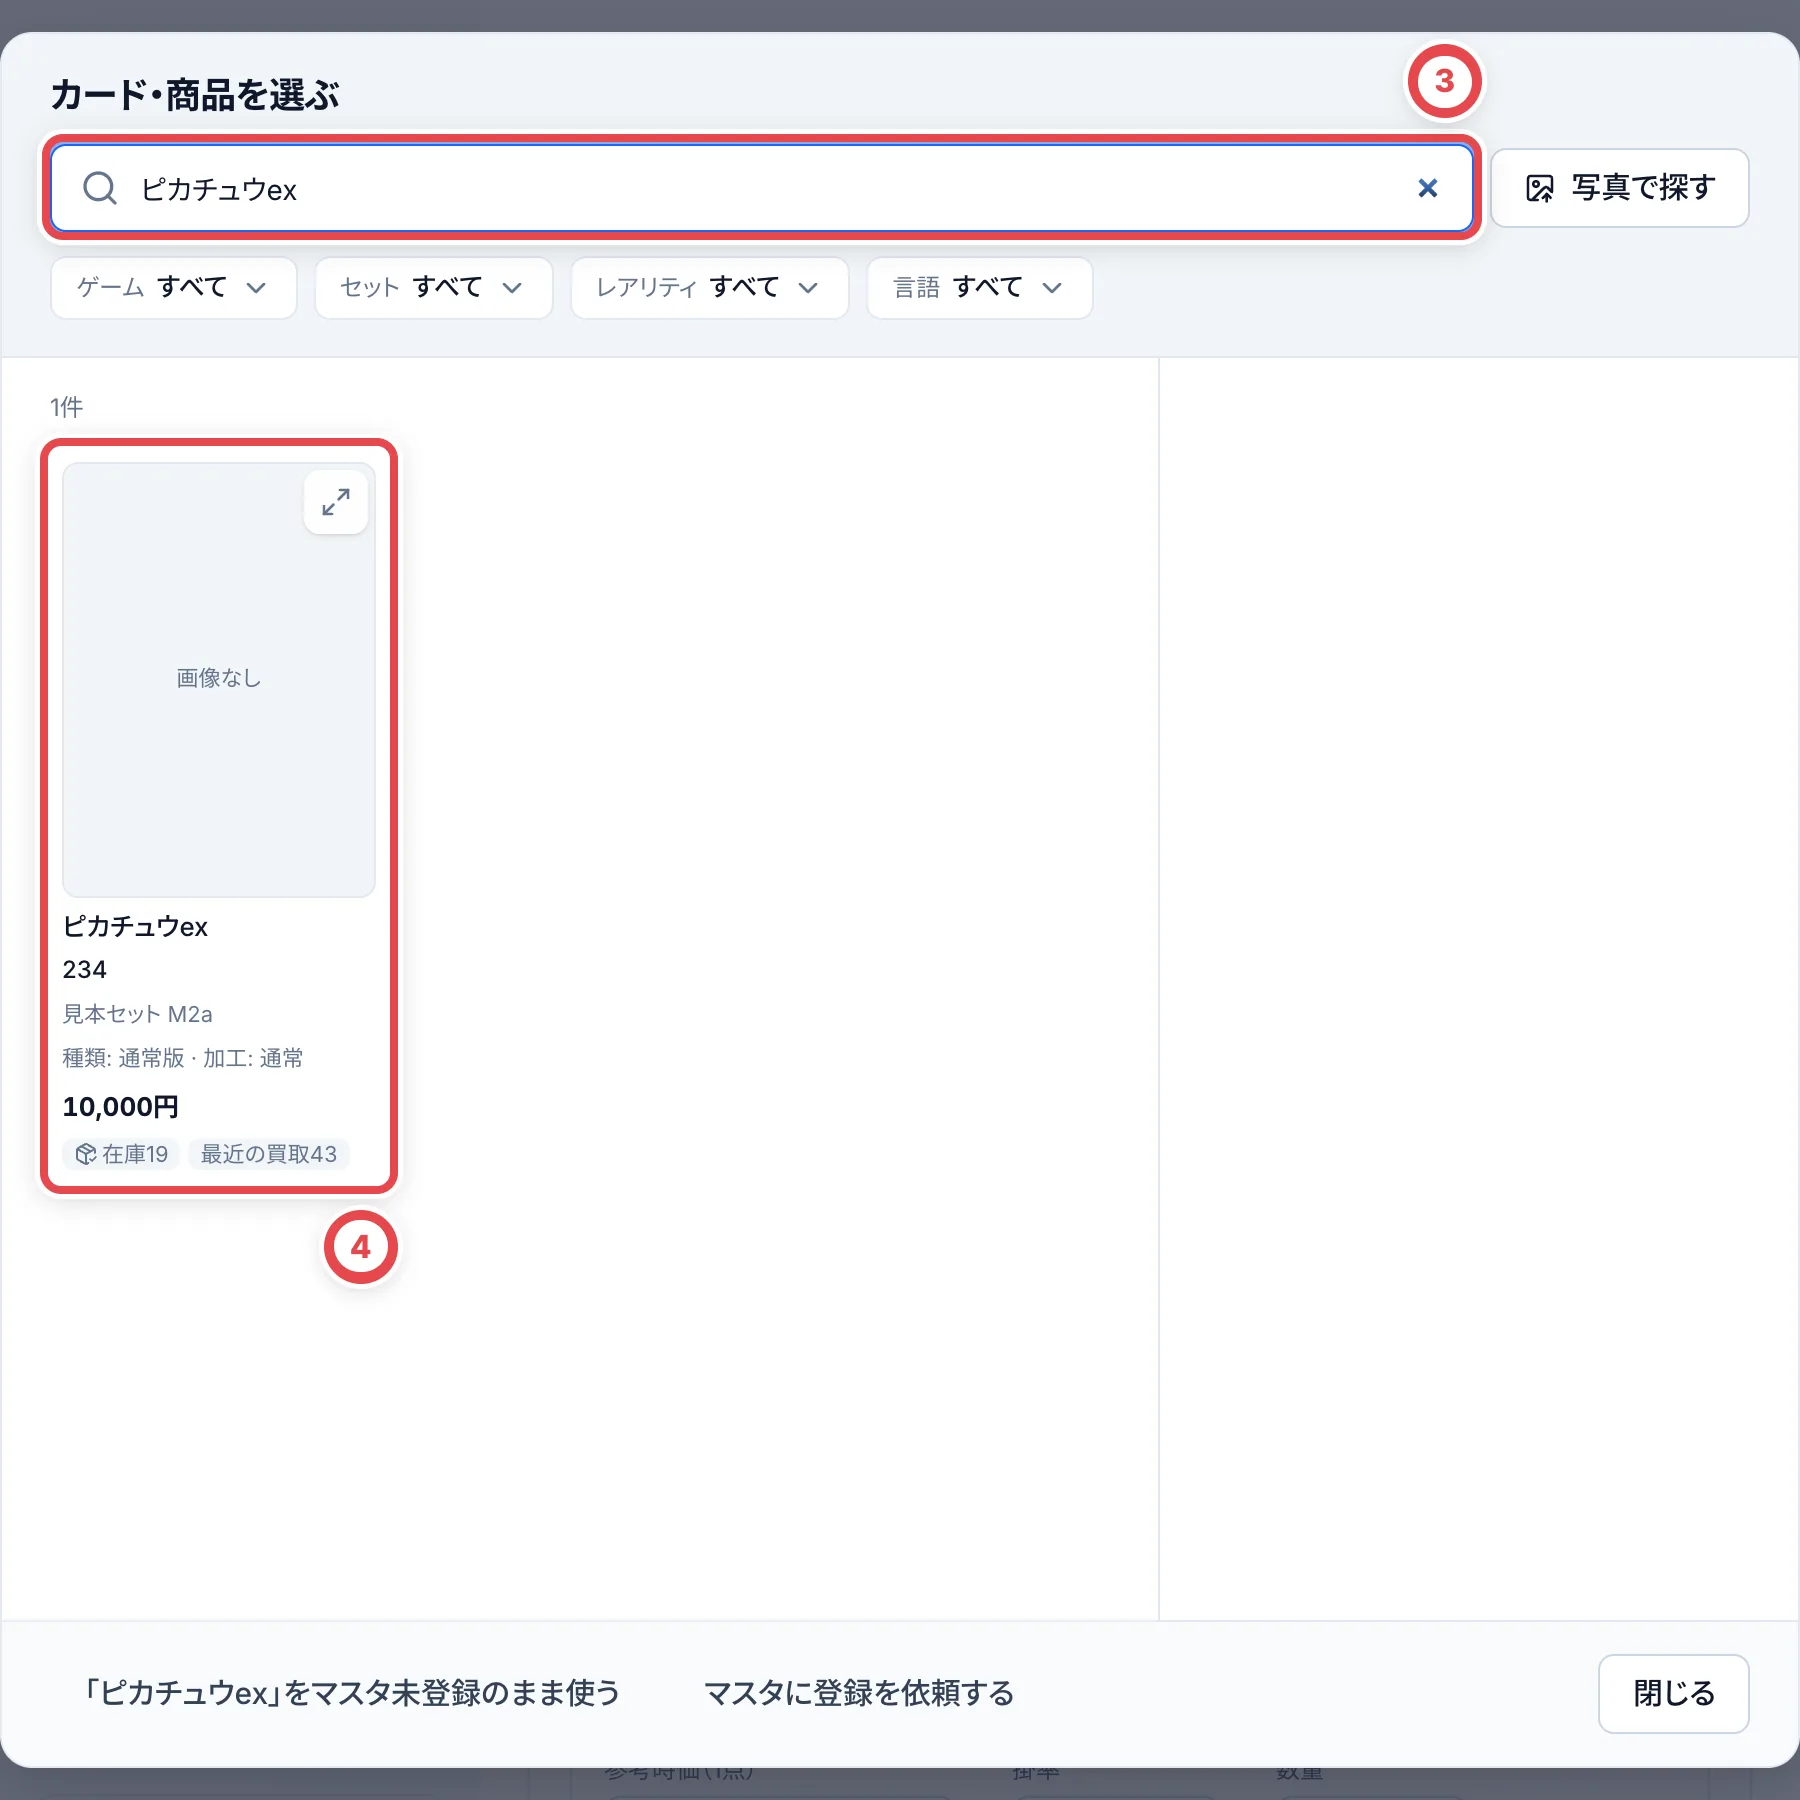 写真から探した場合も、読み取り後の候補を現物と照合して選びます。複数のカードが写っている場合は、追加するカードを確認して「選んだ○枚を追加」を押します。読み取れなかったときは、名前や型番で検索し直します。写真から読み取られた鑑定情報も、ケースのラベルと照合してください。
候補にない場合は検索する言葉を減らすか、型番で探します。マスタにないカードは、検索欄の名前が入った「〇〇」をマスタ未登録のまま使うボタンから名前だけで追加できます。写真だけを残して後でカードを選ぶ場合は、検索画面を閉じ、「現物の写真(任意)」に写真を入れます。
### 点数などを入れて明細に追加する
選んだカードを確認し、鑑定品は①「鑑定会社」と②「グレード」をケースのラベルに合わせます。1点の場合は鑑定番号も任意で入力できます。鑑定品でなければ「鑑定なし」のままにします。点数と必要な補足・写真を入力し、「明細に追加」を押します。PSA番号は支払い前に現物と照合して保存します。
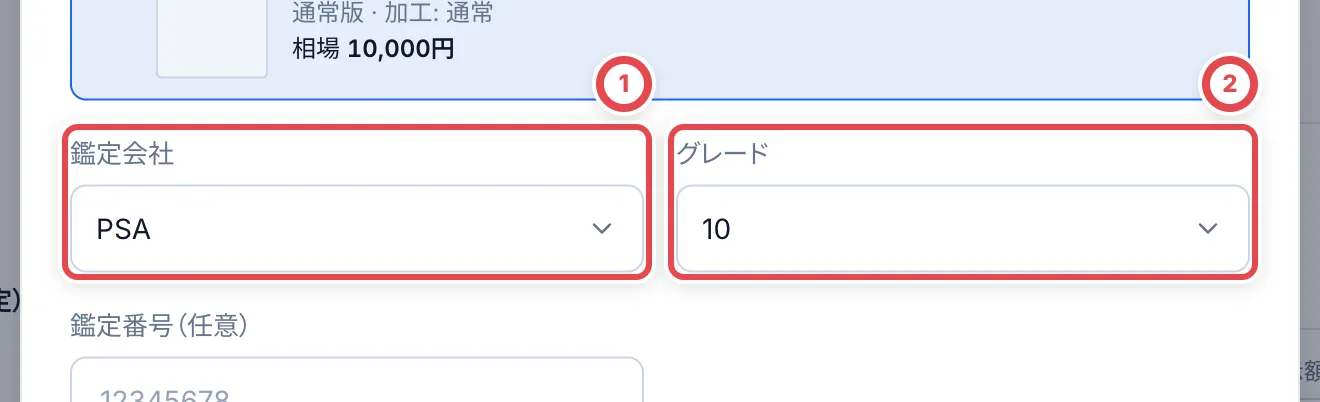 複数点の番号は、最終査定で1枚ずつ入力します。支払い前に不足や誤りが分かった場合は、「支払い」の「PSA番号を確認・修正」から補います。
カードと数量を確認し、必要なカードを追加します。変更は査定の保存時に確定します。
### 同じカードを複数枚登録する
同じカード・ランクを追加すると、既存の明細の数量が増えます。明細の「数量」を直接変更することもできます。
ランク、状態の補足、鑑定番号などが異なる場合や、写真・個別メモ付きの場合は別の明細になります。
## 2. 査定して保存する
査定の入力画面がまだ開いていなければ、「次の操作」の「査定を入力する」を押します。⑤の「相場を確認」で最新の相場を取り込みます。鑑定なしのカードで「グレードが決まっていないため相場を取り込めません」と出たときは、参考時価に確認した金額を入れるか、「設定」→「買取掛け率」で「単品カードの既定グレード」を決めてから取り込み直します。⑥の掛率が「店舗設定」なら、参考時価を入れる前から標準掛率が表示され、時価が揃うと条件に合わせて自動計算されます。掛率を直接直す場合は「手動入力」を選びます。カードの状態に合わせて⑦で金額を調整し、⑧で保存します。
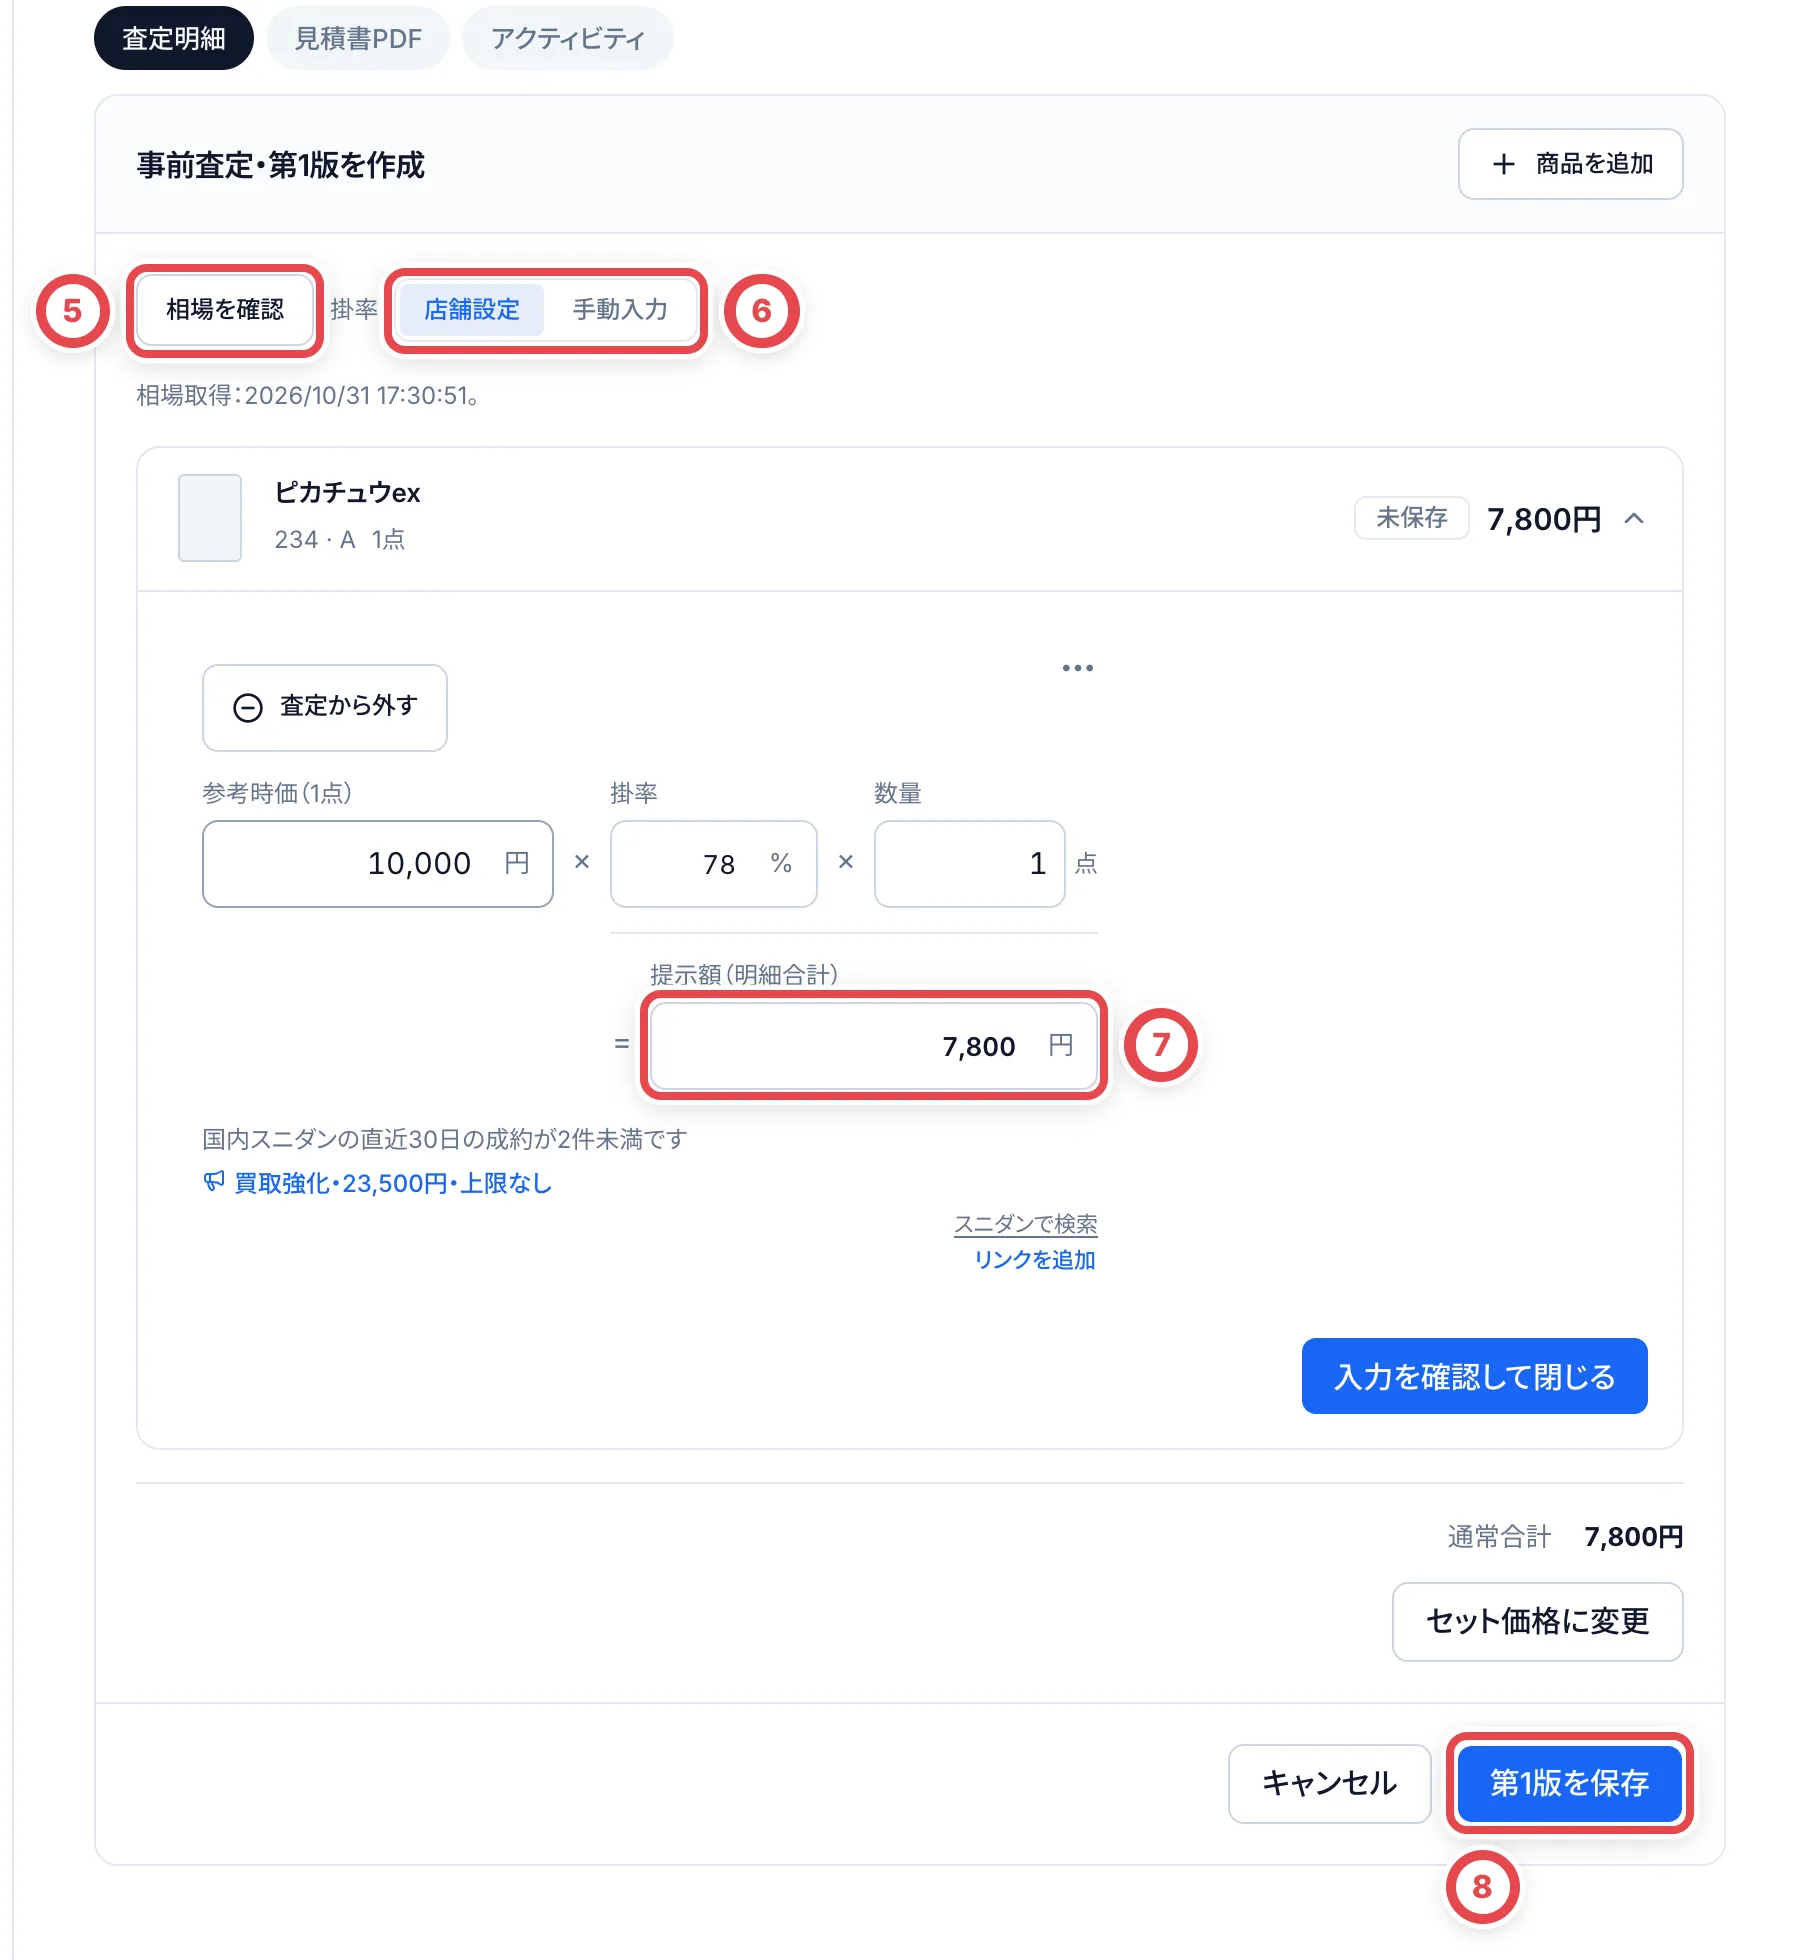 個別の査定額を残して合計の提示額だけを決める場合は、保存前に明細の下の「セット価格に変更」を使います。入口・保存・通常合計への戻し方は、[セット価格に変更する](/guides/purchase/set-price)を参照してください。
### 数量と提示額を確認する
店頭買取では相場調査を依頼しません。相場を取得できない場合は、確認した金額を「参考時価」に入力します。「提示額」はその明細の数量分の合計です。最初の保存後は最終査定の明細で1枚ずつ表示されます。①のカード・グレード・何枚目かと、②のその1枚の金額を確認します。金額・番号・買取可否の修正は「査定内容を修正」から[1枚ごとの最終査定](/guides/purchase/final-appraisal)へ進みます。
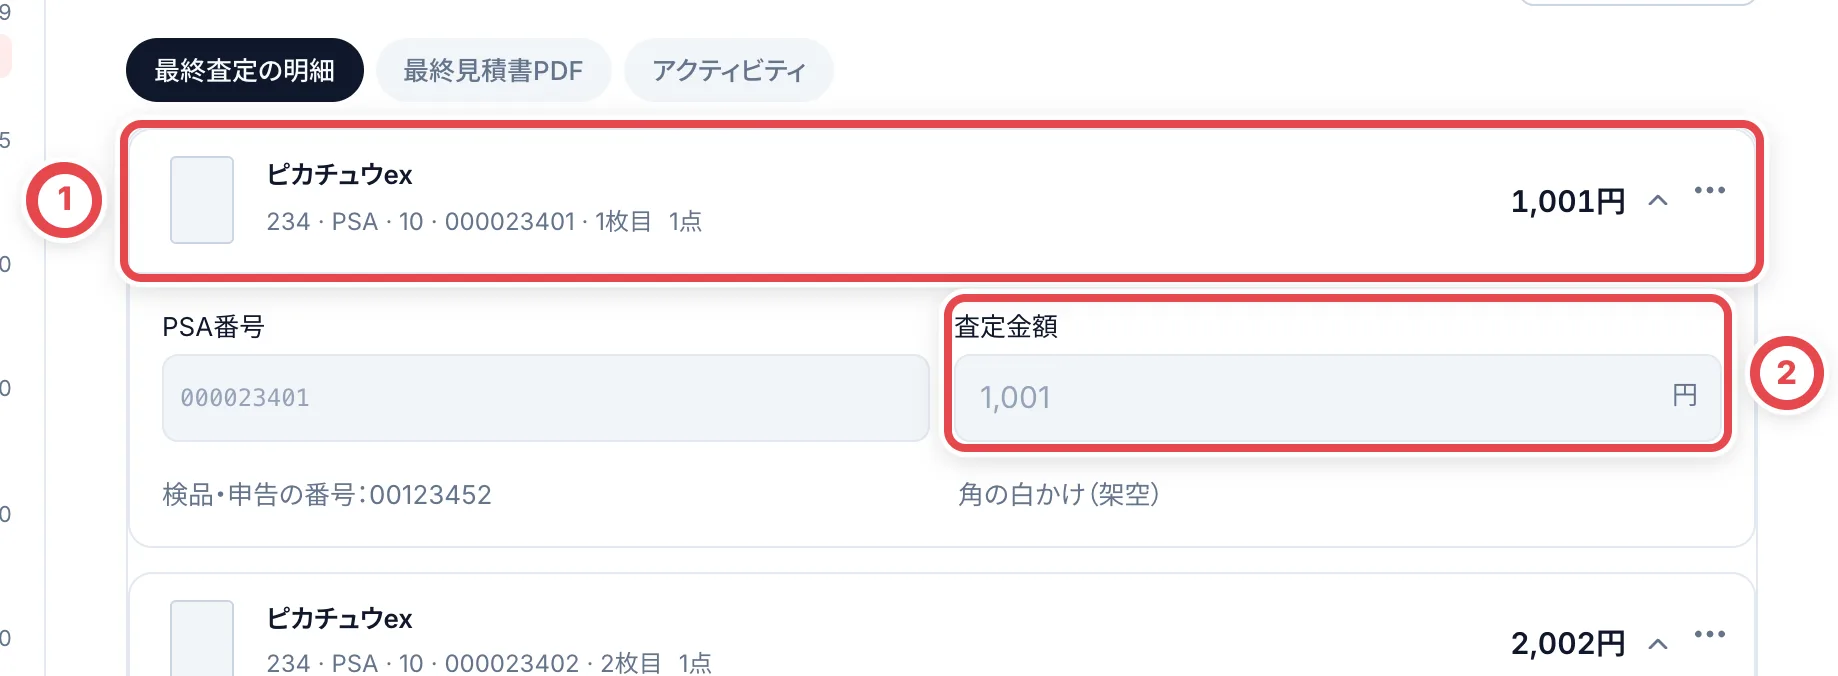 ### 査定から外す・保存前に戻す
最初の査定を保存する前は、編集中の明細で①「査定から外す」を押します。最終査定の1枚ごとの画面では三点メニューの「買取不可にする」を使います([買取不可と管理メモ](/guides/purchase/final-appraisal#3-買取不可と管理メモを記録する))。
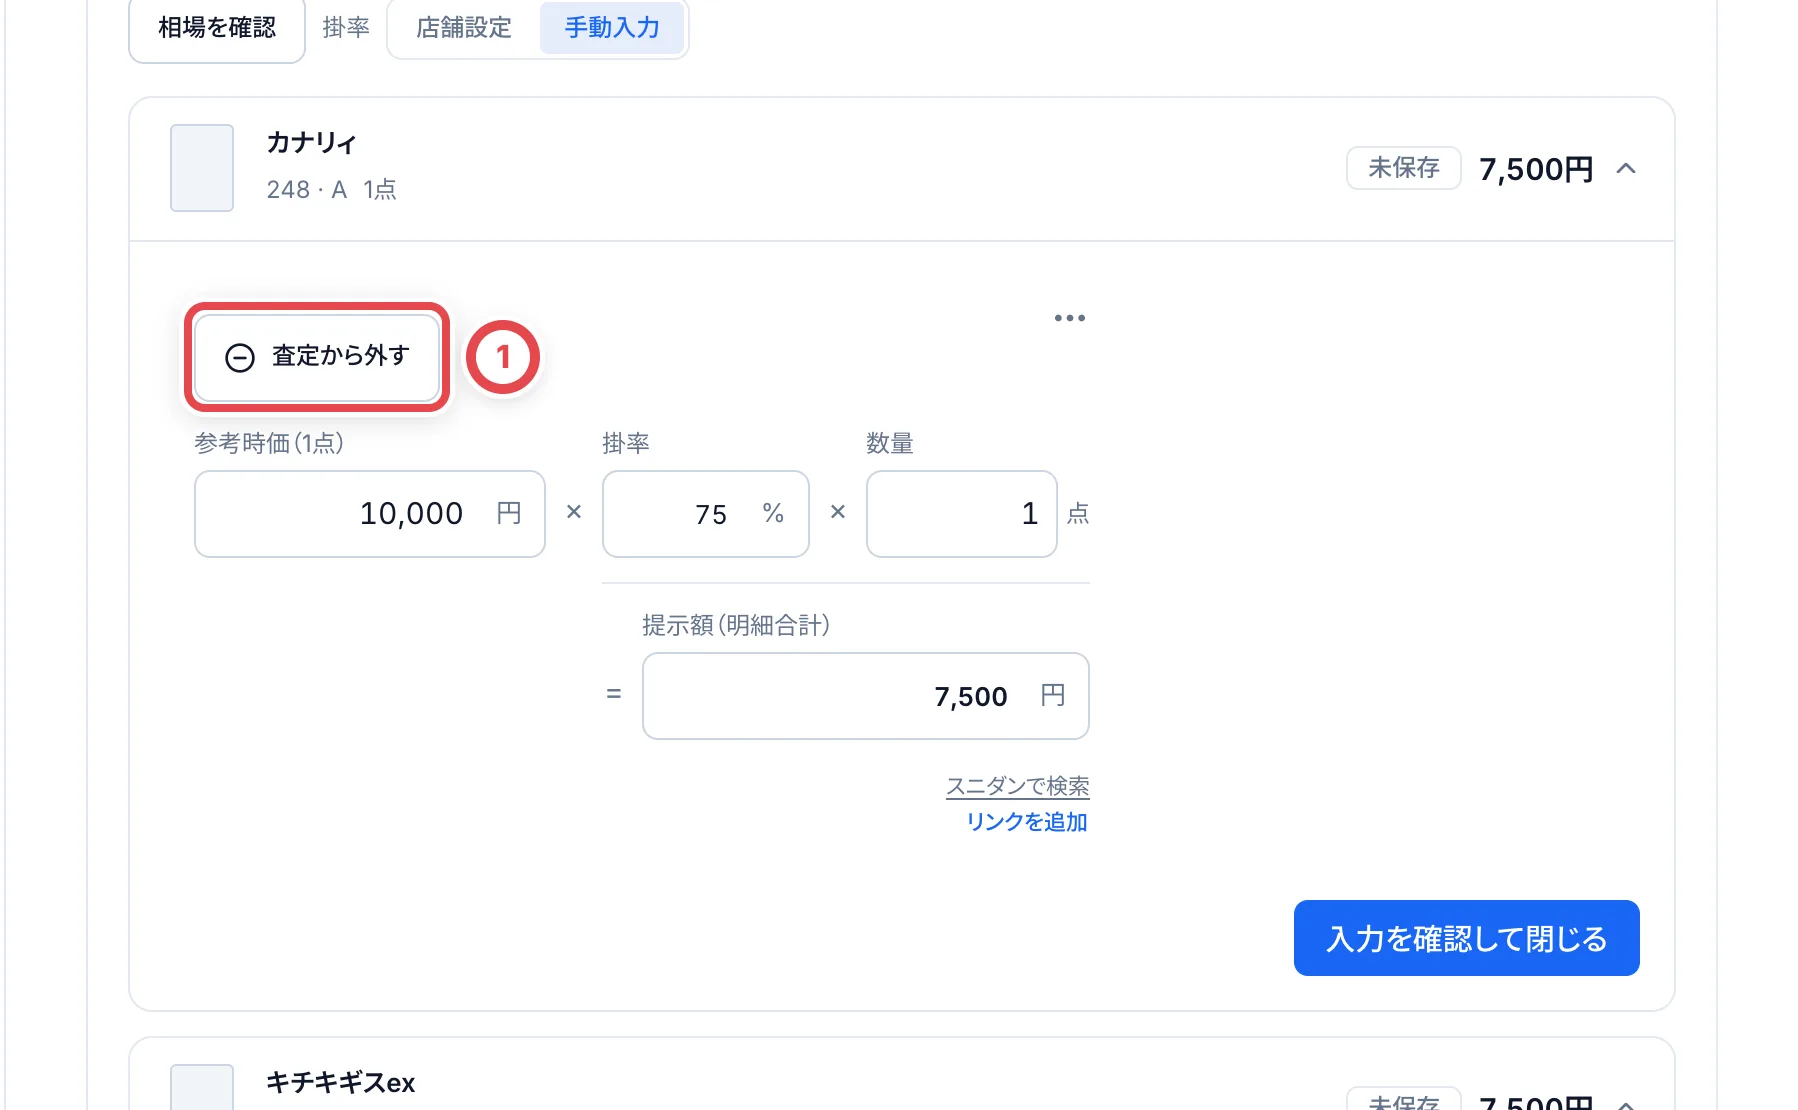 ②で外す理由を選びます。「その他」の場合は理由も入力します。保存前に取り消す場合は③「元に戻す」を押します。編集中に新しく追加したカードには「追加を取り消す」が表示されます。
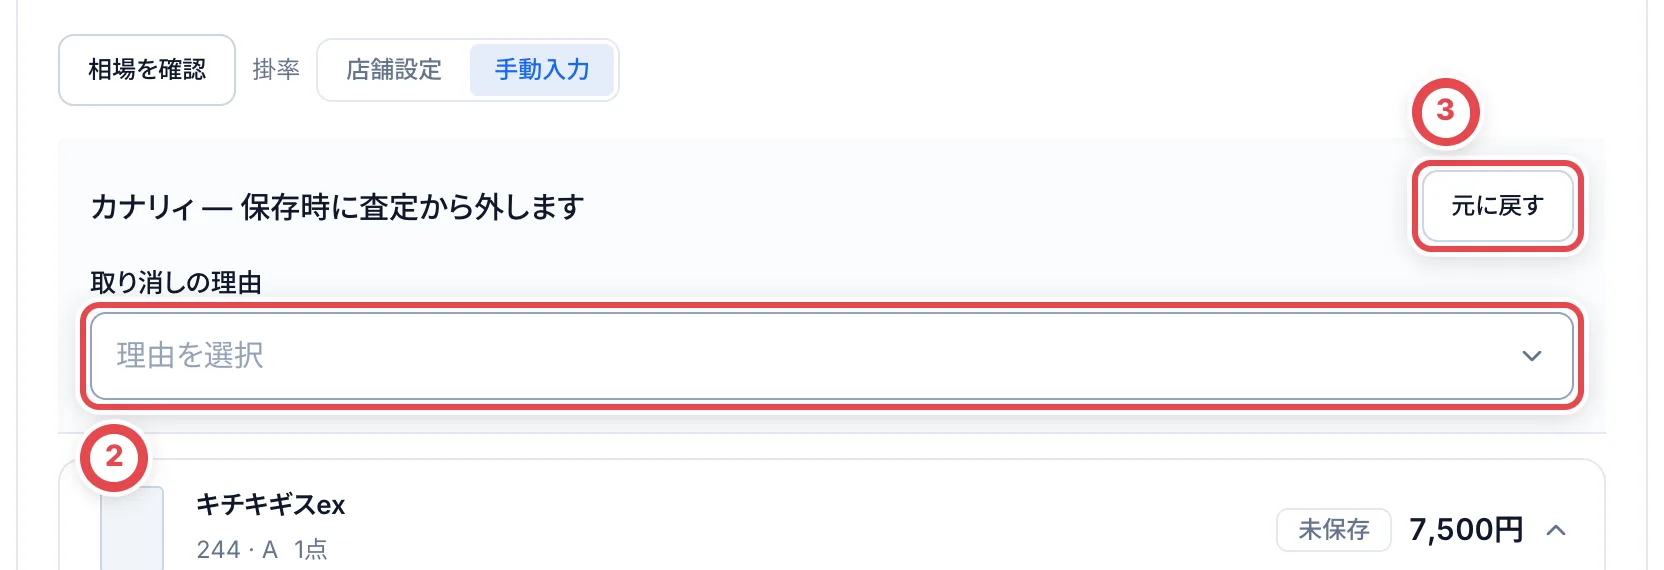 ### 社内用の査定写真
明細に「社内用の査定写真」が表示される画面では、そこから登録・確認できます。不要な写真は、その写真のごみ箱ボタンを押し、削除の確認画面で確定します。社内用の写真はお客様へ送信されません。「見積全体の社内用査定写真」が表示される画面では、「写真を追加」から登録できます。保存した写真はサムネイルを押して確認します。現在、カードを1枚ずつ入力する最終査定の画面には写真の操作が表示されません。写真の入口がない場合は、管理者に確認してください。
## 3. 見積PDFを確認する
①の「最終見積書PDF」で品物・数量・金額を確認します。保存済みの査定から再開する場合は、「次の操作」の「見積を確認する」を押します。
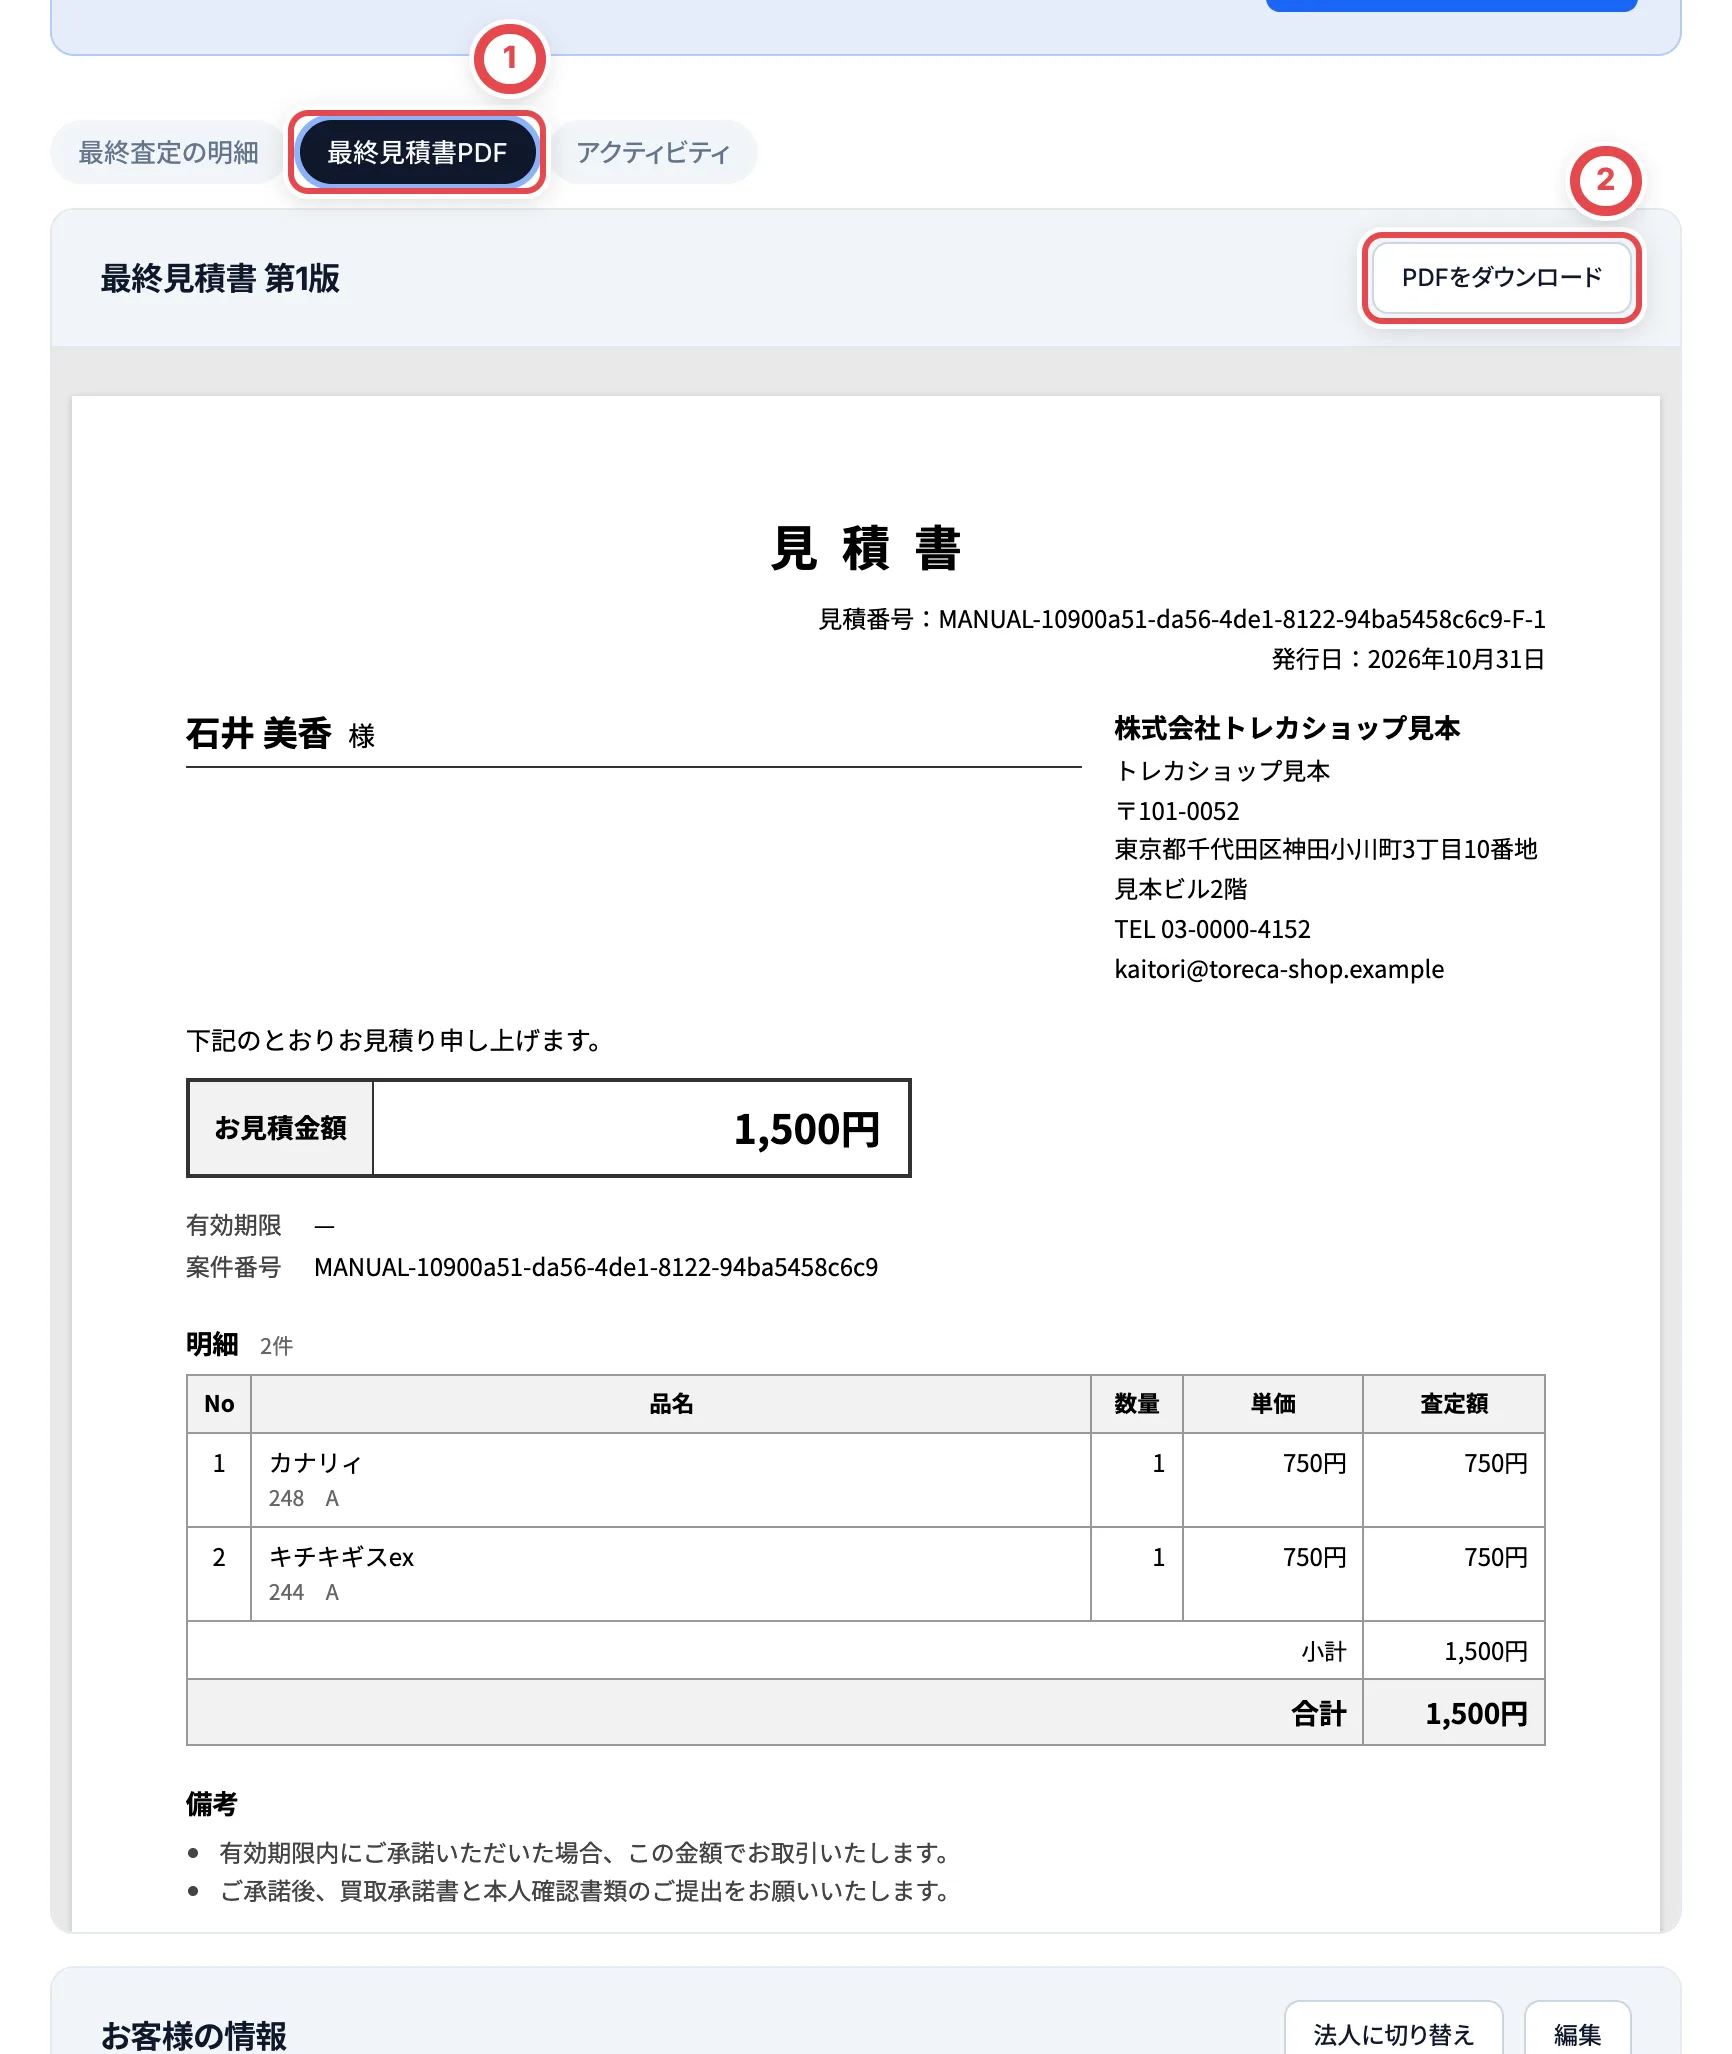 ①で最終見積書PDFを開いて内容を確認し、控えが必要な場合は②から保存します。
保存する場合は「PDFをダウンロード」を押します。金額を直す場合は「最終査定の明細」→「査定内容を修正」で修正・保存し、PDFを確認し直します。「状態の補足」はお客様にも表示されます。
## 4. お客様の画面に表示する
見積の内容が正しければ、「お客様に確認してもらう」を押します。
開いた画面の①で「お客様のスマートフォン」または登録済みの店頭タブレットを選び、②の「表示する」を押します。
タブレットは見積が表示されたことを確認してから渡します。端末の登録は[店頭の端末](/guides/purchase/counter-tablets)を参照してください。
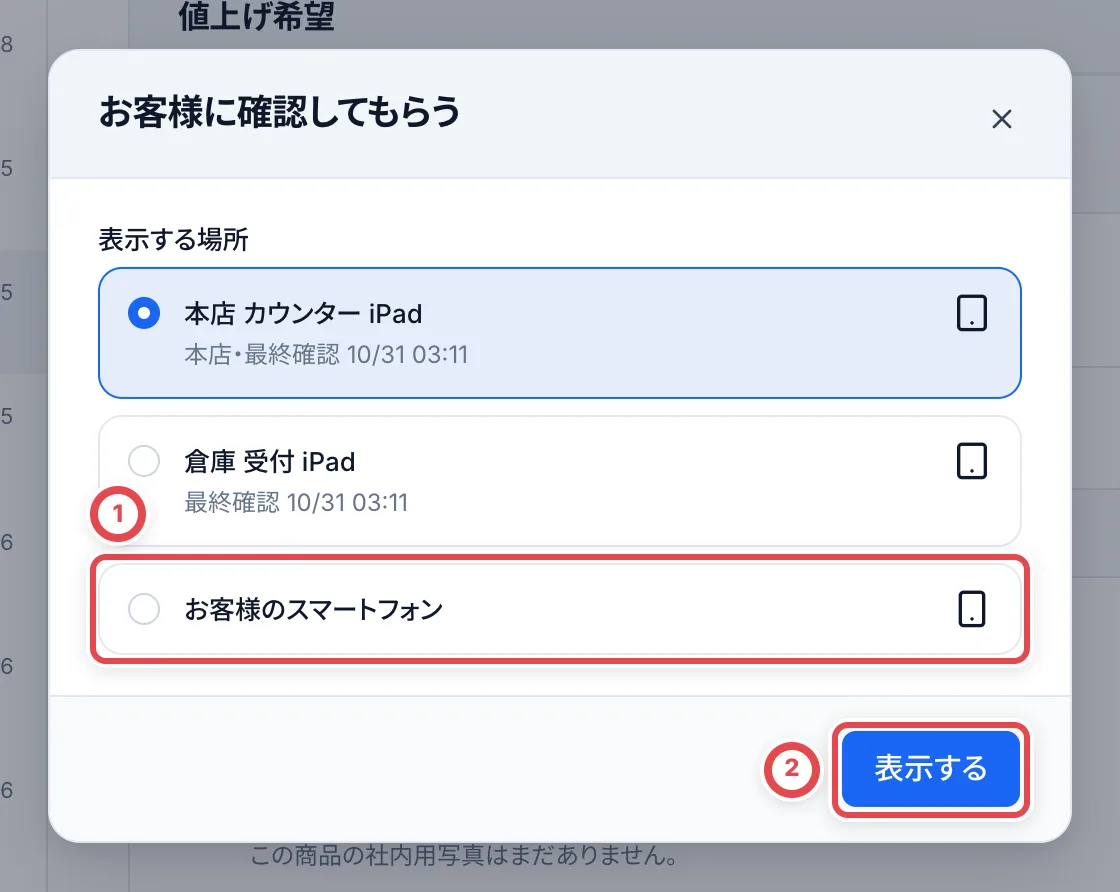 スマートフォンの場合は①のQRコードを読み取ってもらいます。有効期限は発行から20分(登録済みタブレットは30分)で、開き直しても延長されません。最初に開いた同じブラウザでは、期限内に同じQRやURLから保存された入力途中へ戻れます。署名は入力し直してください。別の端末・ブラウザでは「このQRコードは使用済みです」と表示されます。ブラウザの保存を許可しない場合や保存データを消した場合も、入力を復元できないことがあります。新しいQRの発行をスタッフに依頼します。
別の端末・ブラウザで開く場合や期限切れのときは、②「QRコードを再生成する」を押し、確認します。以前のQRと確認画面は無効になります。
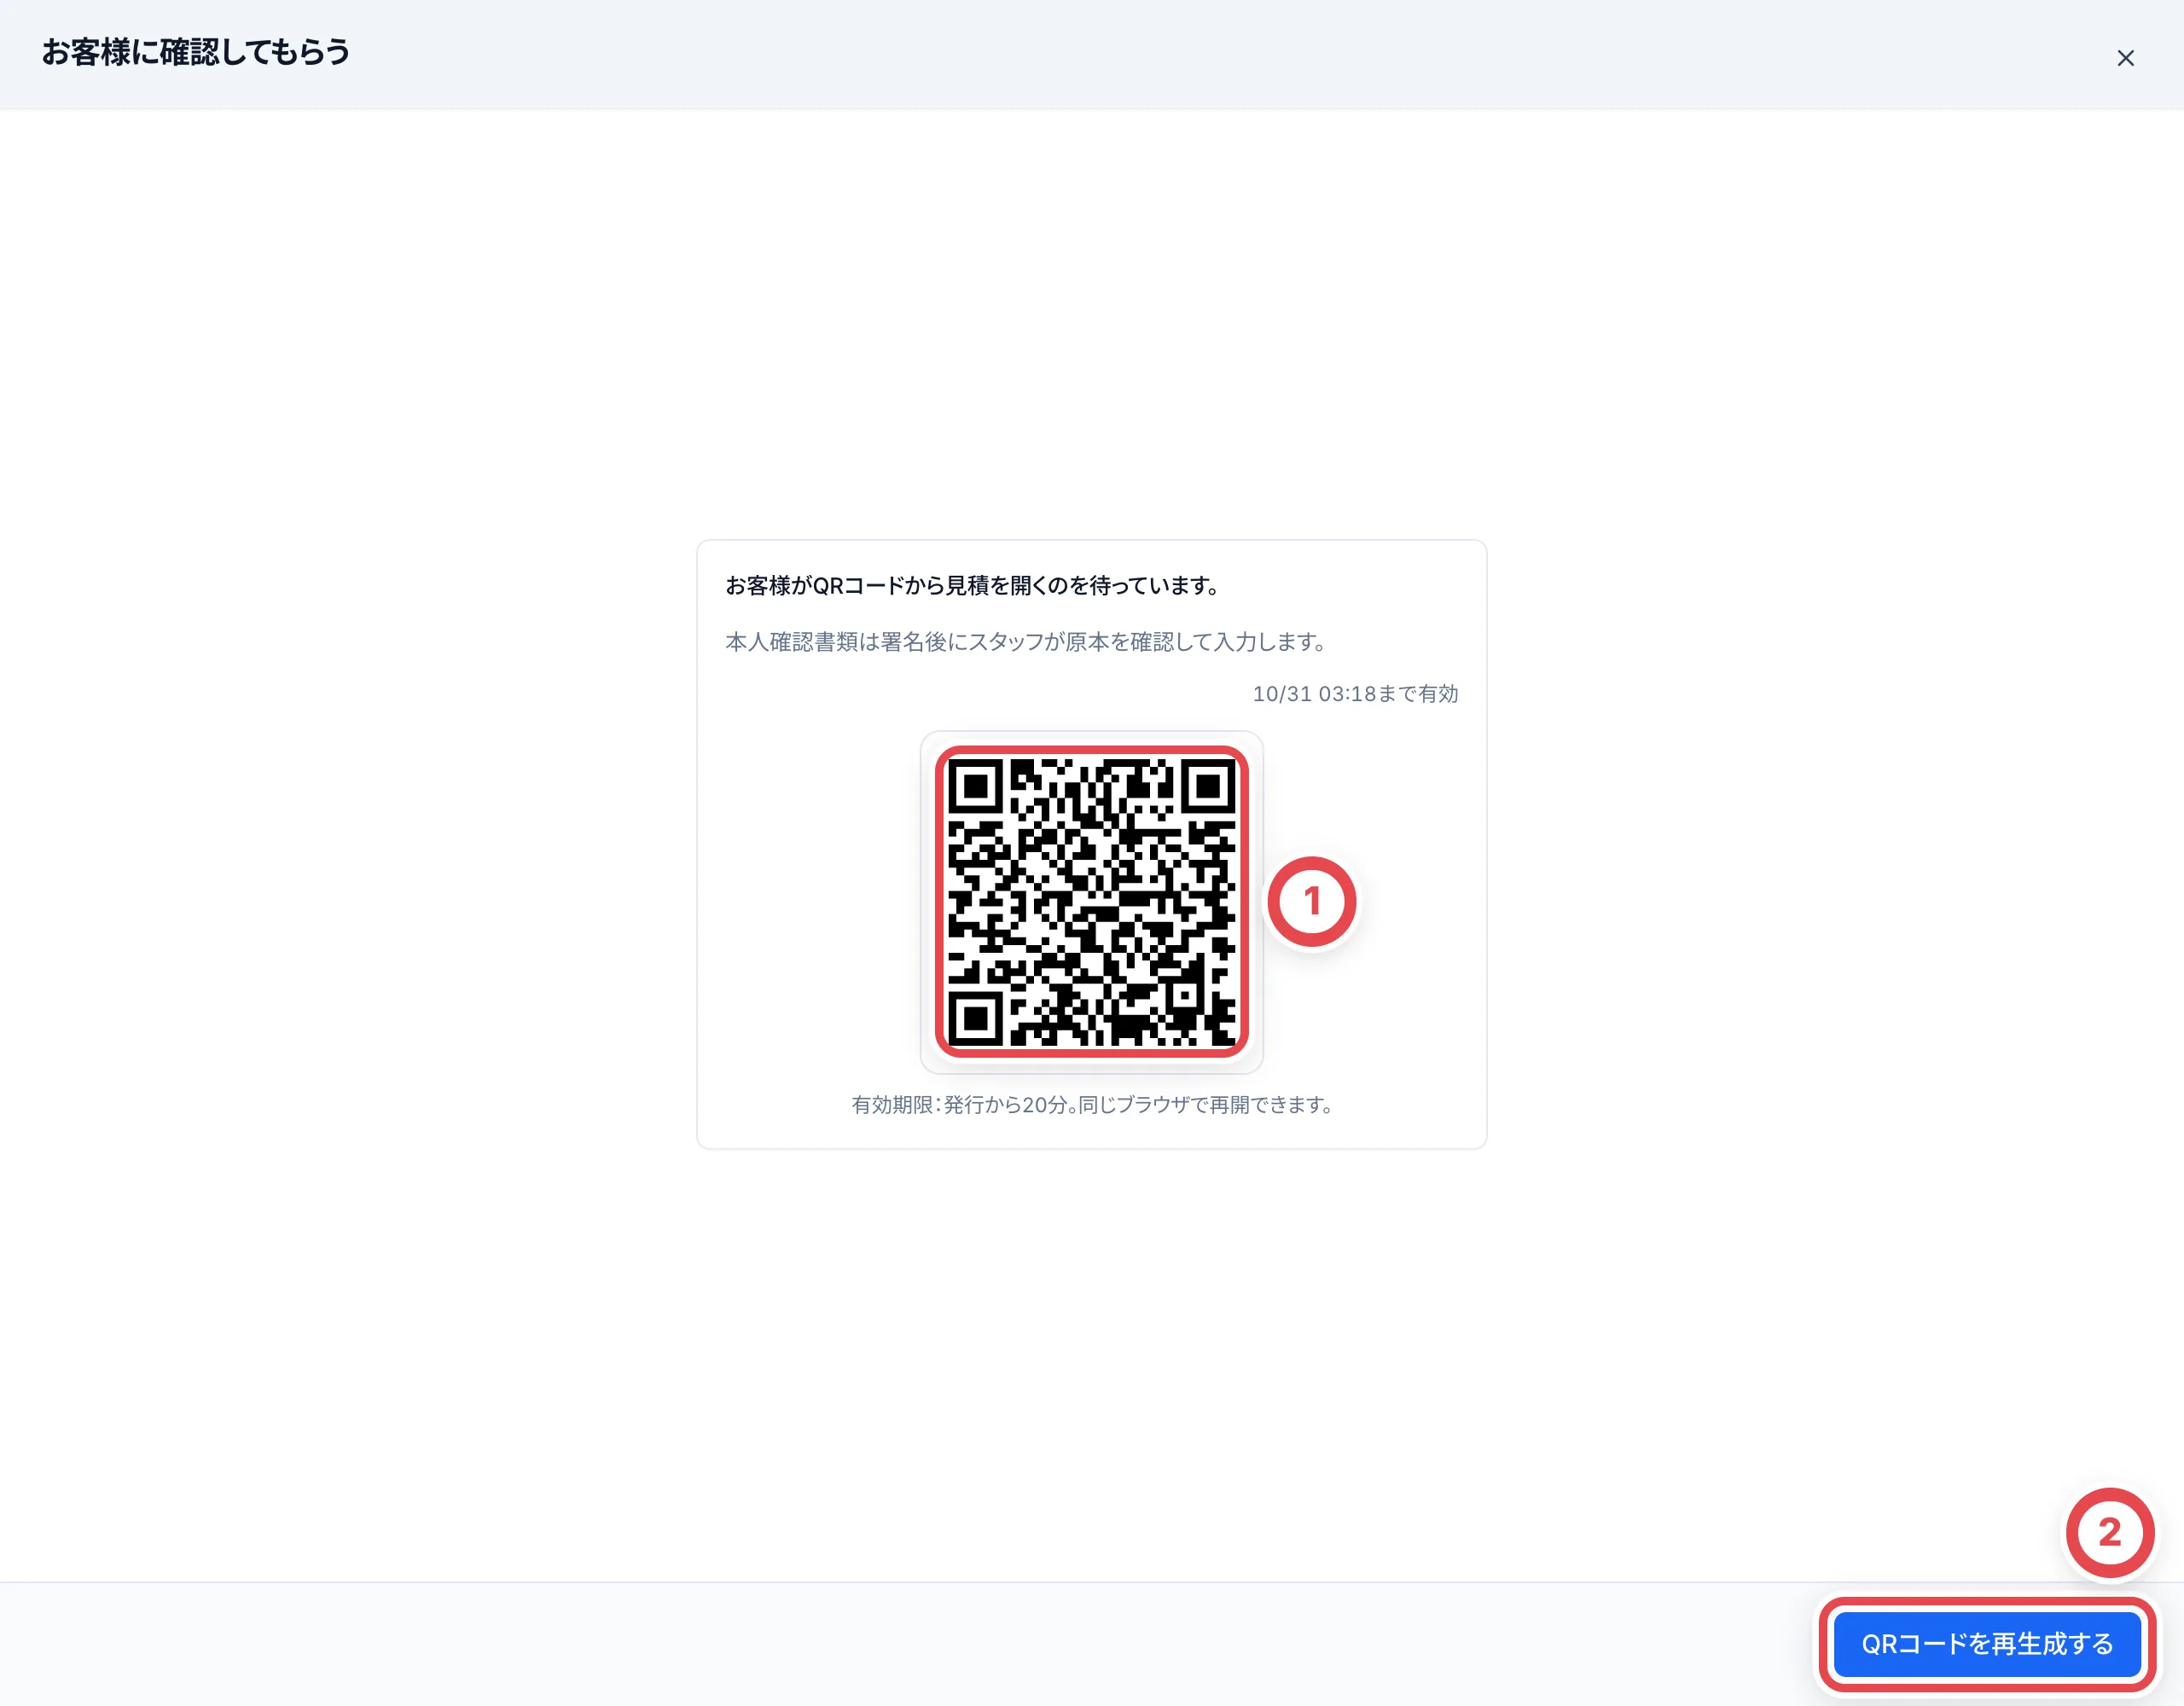 ## 5. お客様に確かめてもらい、同意と署名をもらう
お客様に、見積・お客様情報・同意と署名の順に操作してもらいます。お客様情報のあとに書類撮影が表示された場合は、[撮影の手順](#お客様に書類撮影が表示されたとき)を済ませてから署名へ進みます。
1. **買取内容のご確認**:金額・カード・注意書きを確認し、よければ②「査定内容を承諾する」を押してもらいます。変更が必要な場合は③「スタッフに相談する」を押してもらいます。
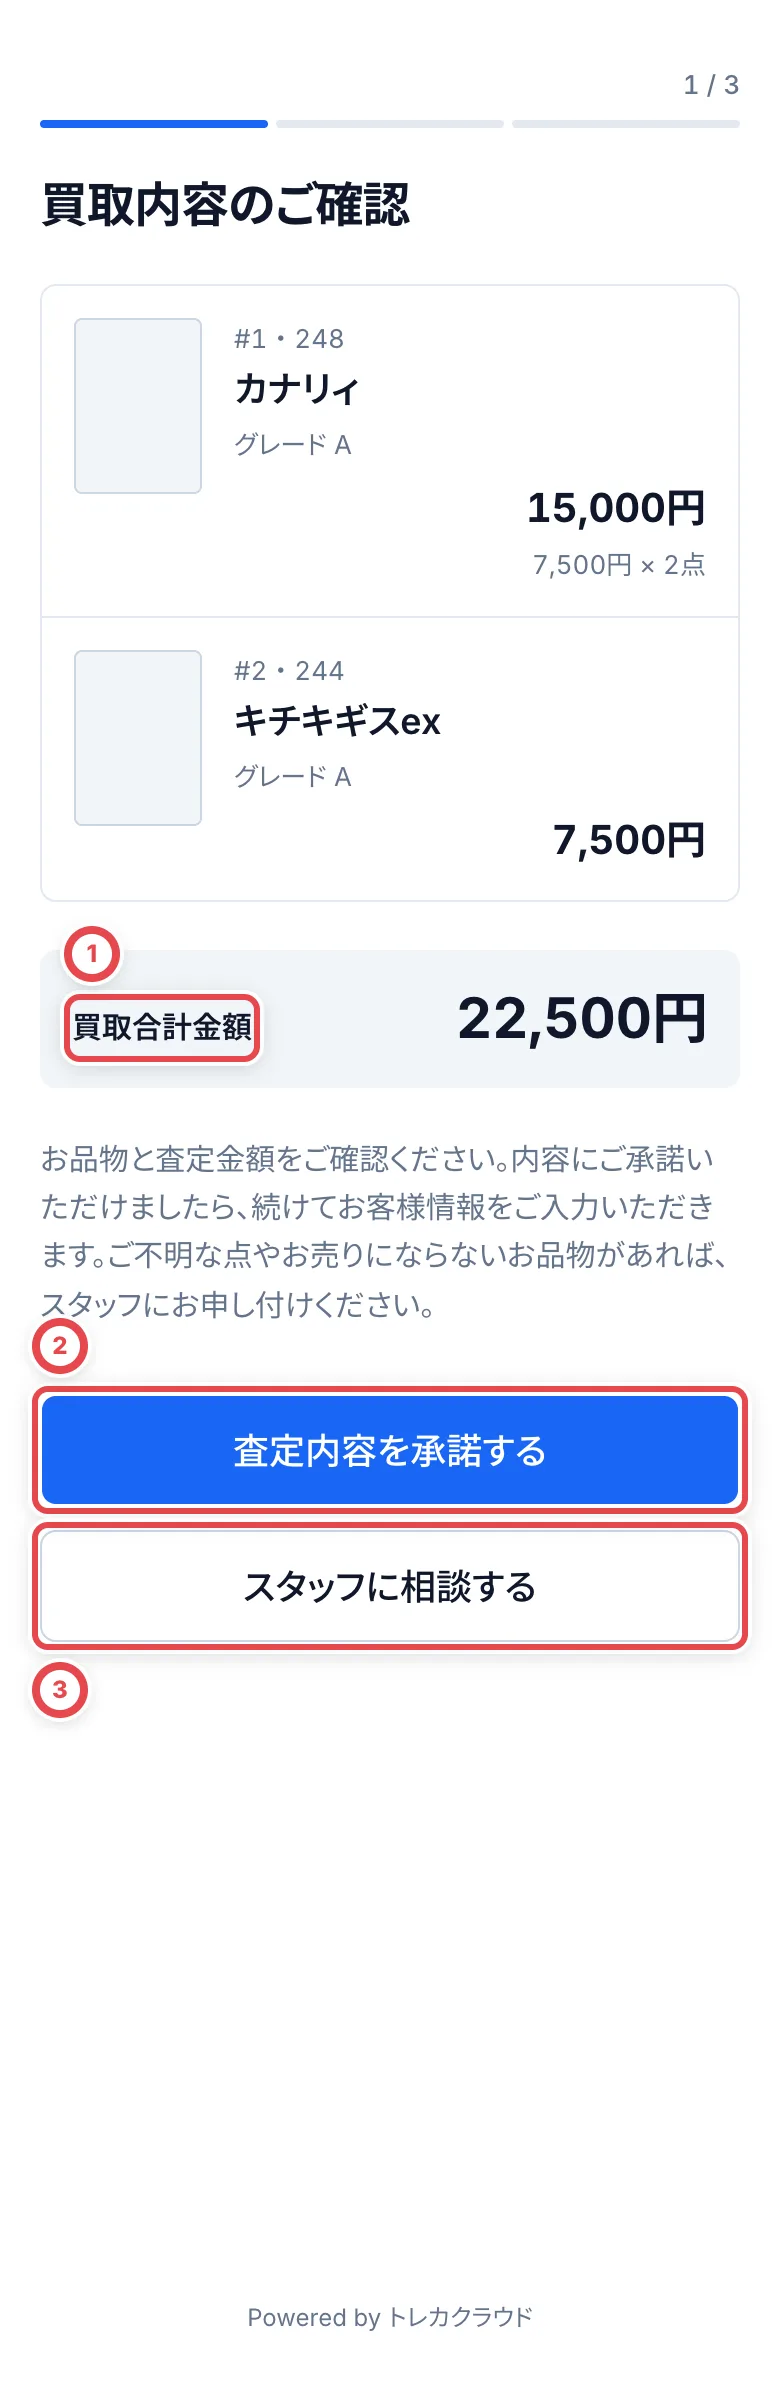 2. **お客様情報のご確認**:初めてのお客様は情報を入力します。受付で入れたお名前は最初から入っているので、違っていれば直してもらいます。登録済みのお客様は内容を確認し、変更がなければ①、修正する場合は②を押してもらいます。
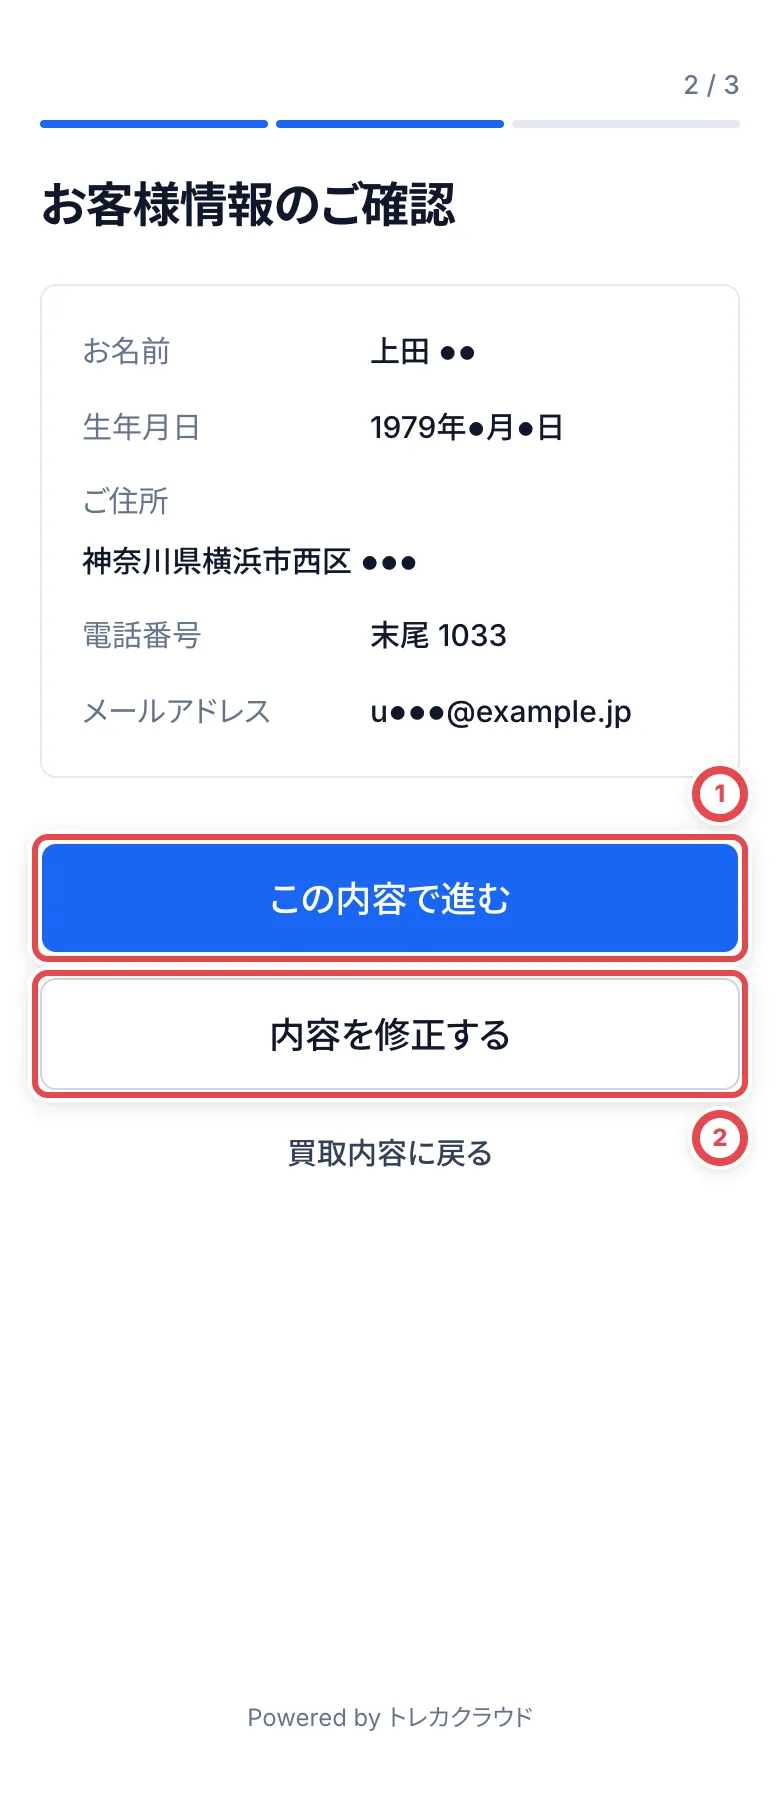 氏名は①で姓・名を分け、フリガナは②でセイ・メイを全角カタカナで入力します。生年月日・職業・住所を順に入力します。電話番号とメールアドレスは任意です。登録済み情報を修正する場合も、必要な項目を入力し直します。
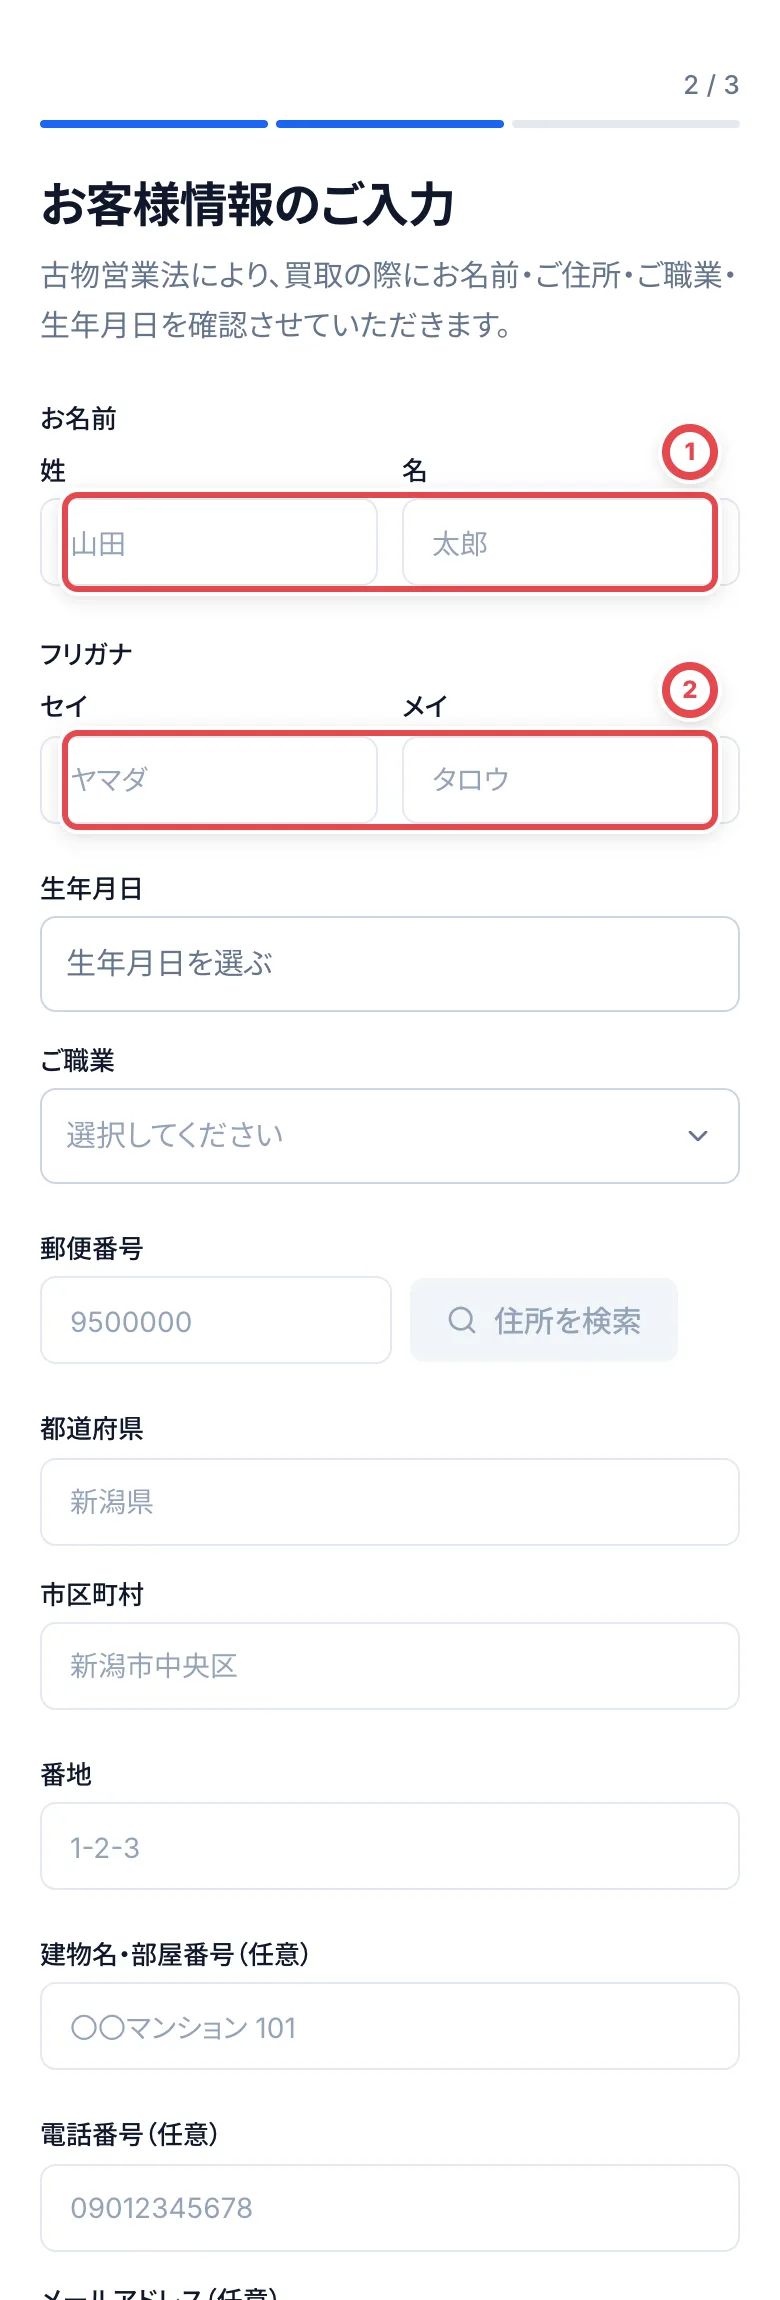 3. **ご同意とご署名**:買取明細・合計・同意内容を確認します。①にチェックすると署名欄が有効になります。チェック前は署名欄の上もスクロールできます。署名後、②「同意して送信する」を押してもらいます。
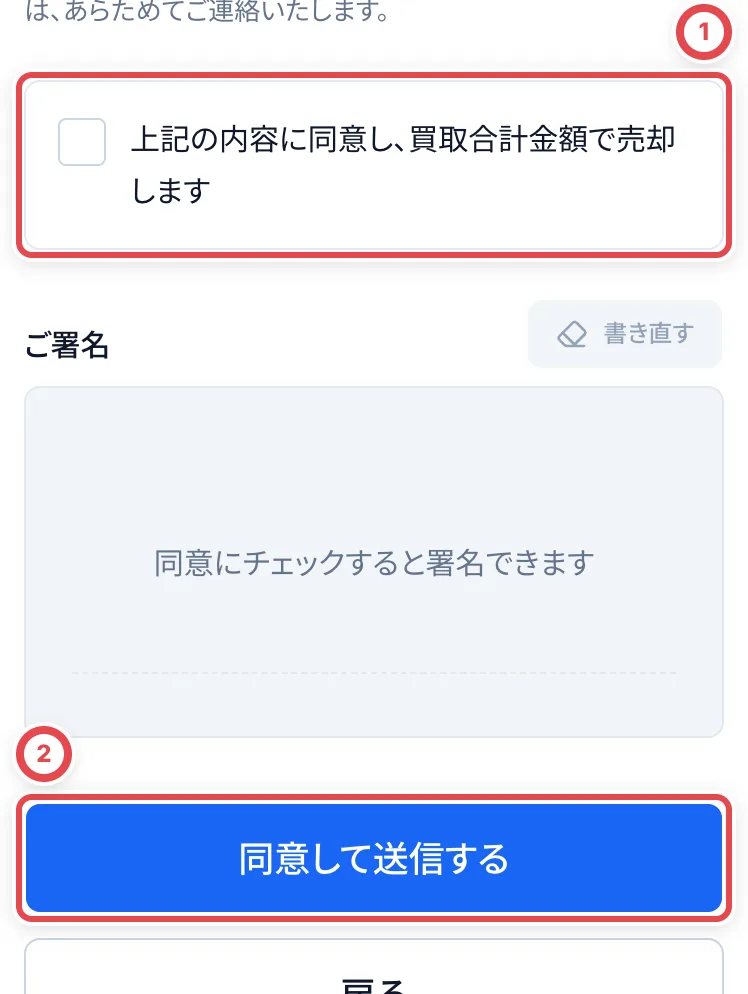 18歳未満のお客様は、お客様情報の入力で止まり、スタッフに声をかけるよう案内されます。
書類ごとの撮影・提出写真の照合・本人確認の保存後の画面は、[店頭での書類撮影と原本照合](/guides/purchase/counter-photos)で順に確認できます。
## 6. 対面で本人確認をする
| 本人確認の状態 | 次の操作 |
| -------------------------- | ------------------------------------------------------------ |
| 未記録(お客様の撮影なし) | 「対面で確認する」。原本を見て入力・記録します |
| 未記録(お客様の写真あり) | 「対面で確認する」。提出写真と原本・本人を照合して記録します |
| この取引で記録済み | 「買取を登録する」。手順7の登録画面を直接開きます |
本人確認が未記録なら、撮影の有無にかかわらず「対面で確認する」から記録します。過去の取引や解除済みの記録は使えません。
 顧客の「査定依頼」または「お客様情報」からも、下の「店頭の本人確認」を開けます。①で対象の取引を確かめ、②の「対面で確認する」を押します。
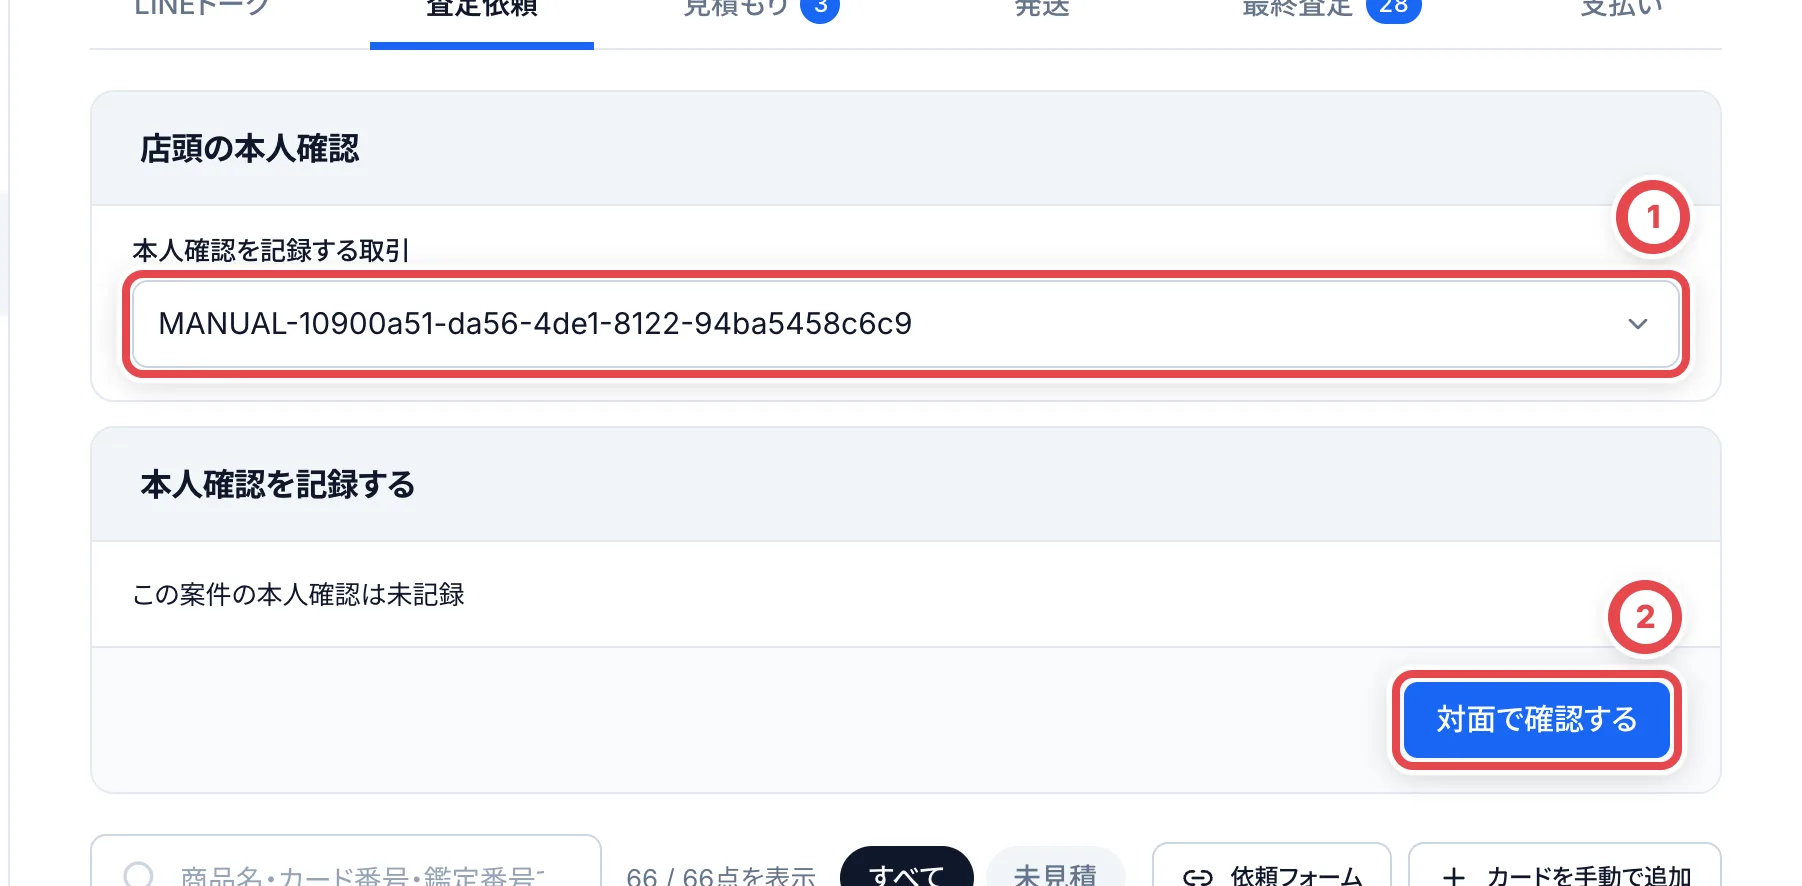 お客様から本人確認書類の原本を見せてもらいます。次の画面の①で種類を選び、②に番号、その下に有効期限を入れます。原本と申告が一致していることを確かめて③にチェックを入れ、④の「確認済みとして記録する」を押します。画像の読取を使う場合だけ「身分証の画像から入力する(任意)」を開きます。
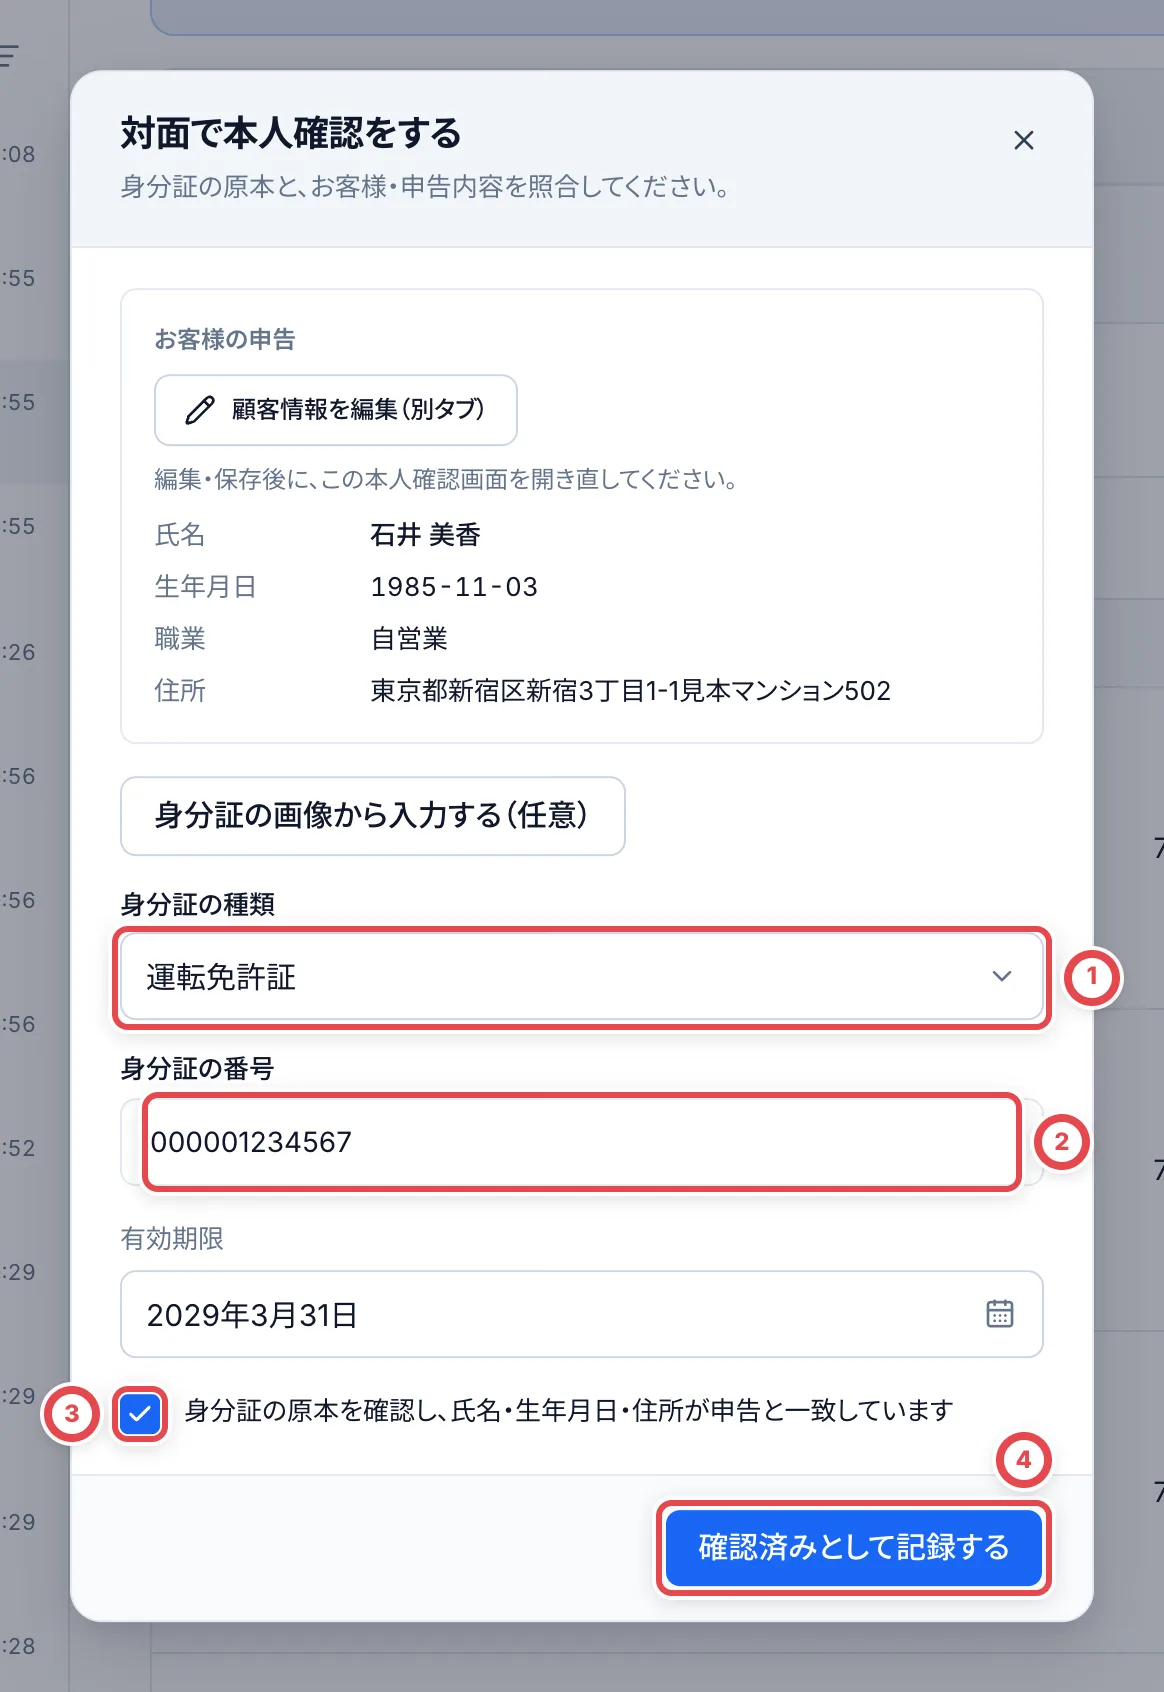 お客様が撮影した場合は、同じダイアログに「お客様が提出した本人確認書類」が出ます。写真と原本、目の前のお客様、申告された氏名・生年月日・住所を照合します。「提出された写真から入力する」は読取結果を入力する補助機能です。読み取った内容を確認・訂正してから記録してください。読み取り結果だけで確認済みにしないでください。
マイナンバーカードの個人番号は入力しません。書類の種類を間違えていた場合は、種類だけを変更せず、正しい書類で受付をやり直します。写真が開けないときはダイアログを閉じて開き直します。確認を記録するまでは、在庫と支払いの登録へ進みません。
お客様の氏名・生年月日・職業・住所がそろっていないと記録できません。
保存結果を確認できない場合は自動再試行を待ち、「同じ内容で再試行」が表示されたらそのボタンを押します。入力は保持されます。[保存結果を確認できないとき](/guides/purchase/counter-identity#保存結果を確認できないとき)を参照してください。
## 7. 在庫と支払いを登録する
:::warning
「N点を買い取り、現金を渡す」は、買取と同時に現金を渡した記録も残します。お客様に現金を渡せる状態で押してください。
:::
「次の操作」が「在庫と支払いを登録する」になります。「買取を登録する」を押すと、買取金額・カード・支払い方法の確認画面が直接開きます。お客様の署名をもう一度スタッフが記録する操作は不要です。「支払い方法」で、①の「現金で渡す」を選びます。現金管理を使う店舗では、②で現金を出すレジを選びます。内容を確かめて③を押します。
振込の場合は[振込で支払うとき](#振込で支払うとき)に進みます。
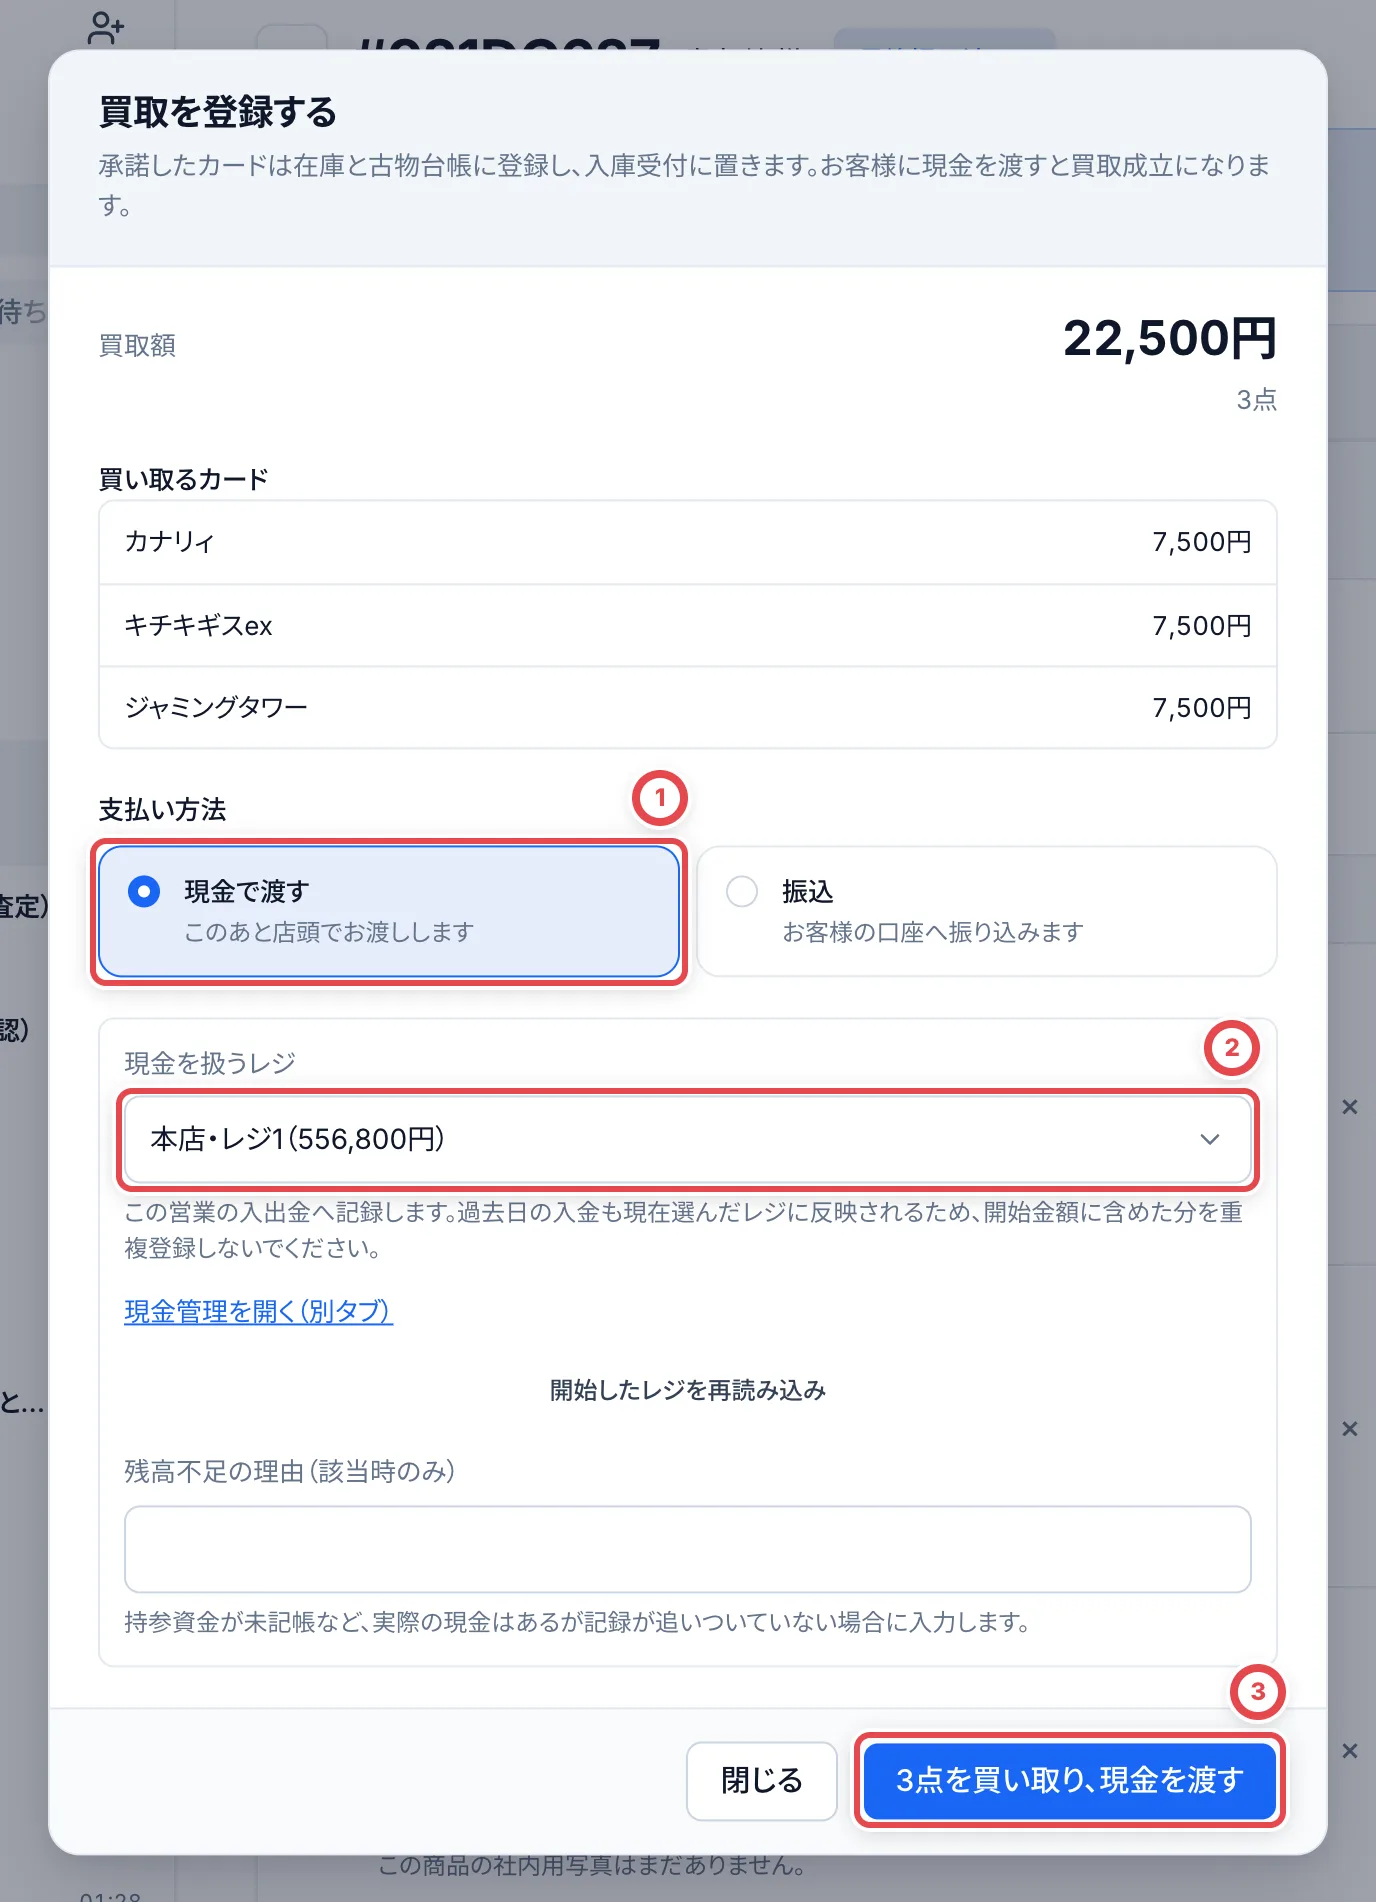 手渡しが記録されたことを確認し、手順8へ進みます。
PSA番号の不足などで手渡しを記録できなかった場合は、在庫の登録だけが済み、「支払い」へ進みます。買取の登録を繰り返さず、番号を補ってから「現金を渡したことを記録する」で手渡しを記録してください。すでに現金を渡している場合も、重ねて渡さず記録だけを完了します。
### PSA番号が未入力のとき・修正するとき
PSAカードの番号が不足している場合は、支払い前に「PSA番号を確認・修正」を開きます。カード名・グレード・画像を現物と照合し、ケースのラベルにある番号を1枚ずつ保存します。保存済みの番号は①「修正」から直せます。②の入力欄に正しい番号を入れ、「この番号を保存」を押します。画像はカードを見分けるための見本で、買い取る現物の写真とは限りません。
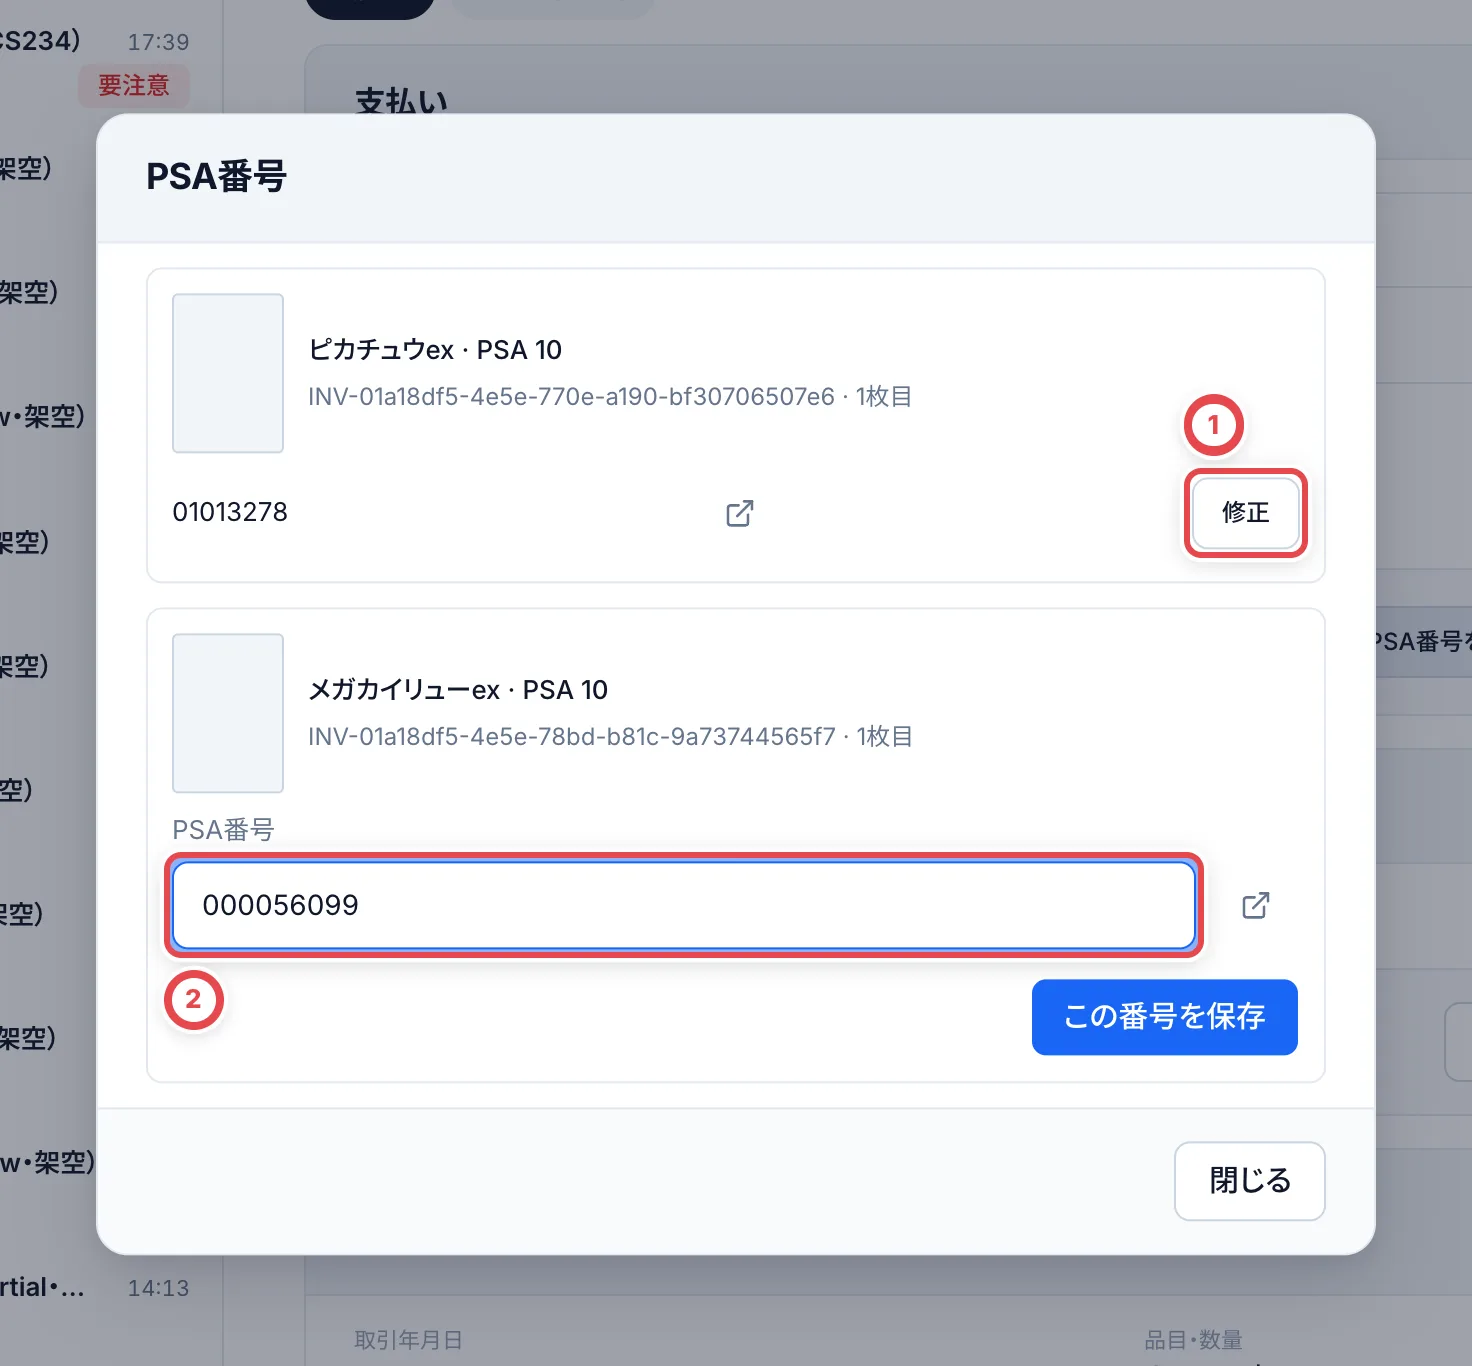 すべて保存した後も「支払い」に入口が残ります。支払い処理中・完了後は、この画面では変更できません。鑑定証明と連携済みの番号もここでは修正できません。
## 8. 完了を確認して、カードを格納する
現金の手渡しを記録すると、「買取が完了しました」とお渡し金額が表示されます。金額とお客様・取引番号を確認し、「取引の詳細を見る」を押すと、支払い結果や買取明細書の画面へ進みます。買ったカードにラベルを貼って棚に入れるときは、隣の「入庫・ラベル作業へ」を押します。この取引のカードだけに絞った入庫の画面が開きます。ほかの取引も見るときは「すべての取引を表示」を押します。
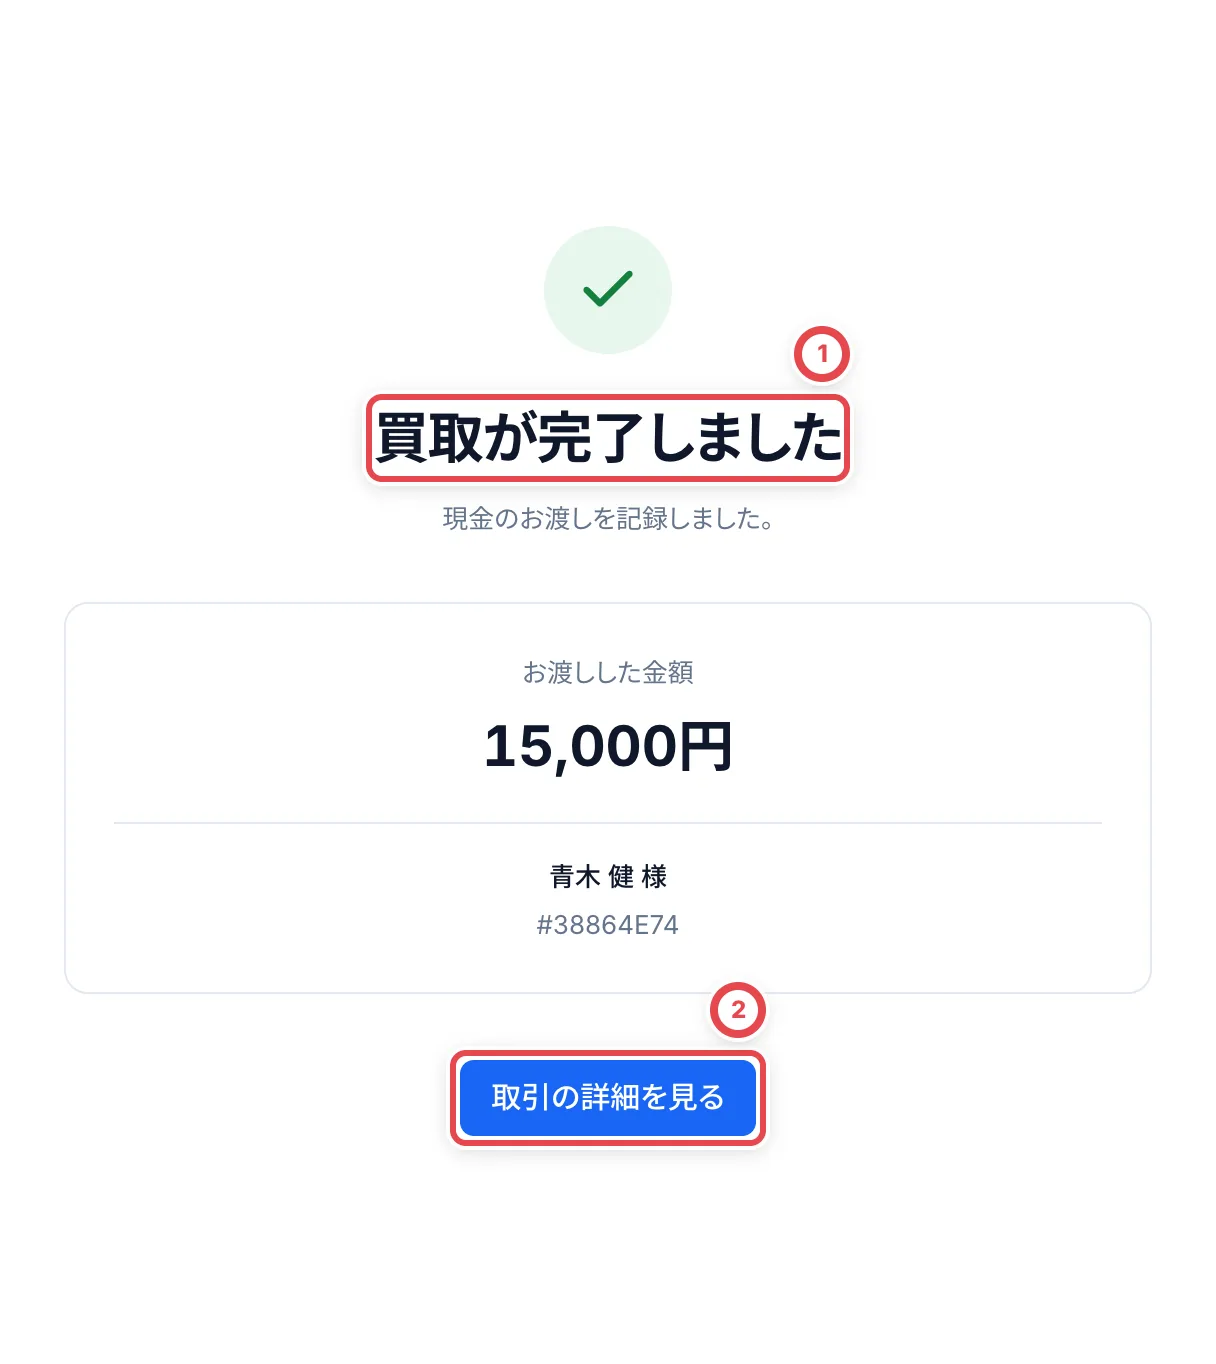 ①の完了表示と金額を確かめ、②で支払い結果・買取明細書へ進みます。
**接客を終える前の確認項目**
- 最新の見積に対する同意・署名がある
- 原本を見て本人確認を記録した。撮影だけで完了扱いにしていない
- 買い取るカード・数量・金額と、お返しするカードをお客様と確認した
- 在庫と支払いを登録し、実際の現金手渡し・振込の状態と記録が一致している
- 明細の宛先と送信履歴を確認した。メール不要なら自動送信の設定に従っている
- 共用タブレットが待機画面に戻り、前のお客様の入力が残っていない
現金を渡して記録したら、取引が「買取成立」になったことを確認します。買い取ったカードは[格納とQRラベル](/guides/inventory/putaway)へ進み、ラベルを貼って棚に格納します。現金の手渡しが未記録なら、[現金の手渡しをあとから記録するとき](#現金の手渡しをあとから記録するとき)へ進んでください。
## お客様に書類撮影が表示されたとき
スタッフ入力の設定、またはこの取引で本人確認を記録済みの場合は撮影画面が出ません。QRコードと店頭タブレットで共通です。写真を送ったら、[同意と署名](#5-お客様に確かめてもらい同意と署名をもらう)へ進みます。
**本人確認書類の撮影(お客様撮影の設定だけ)**:①で書類を選び、必要な面を撮影します。個人番号が写っていないことを確認してチェックし、「写真を送信して次へ」を押します。送信中はそのまま待ちます。
| 書類 | 撮影する面 | 確認すること |
| ------------------ | -------------- | ------------------------------------------------------ |
| 運転免許証 | 表面・裏面 | 裏面に変更事項がなくても、両面を撮影 |
| マイナンバーカード | 表面だけ | **個人番号が載る裏面・通知カード・暗証番号は送らない** |
| パスポート | 顔写真のページ | 四隅と記載が読める状態で撮影 |
| 在留カード | 表面・裏面 | 両面を別の写真で撮影 |
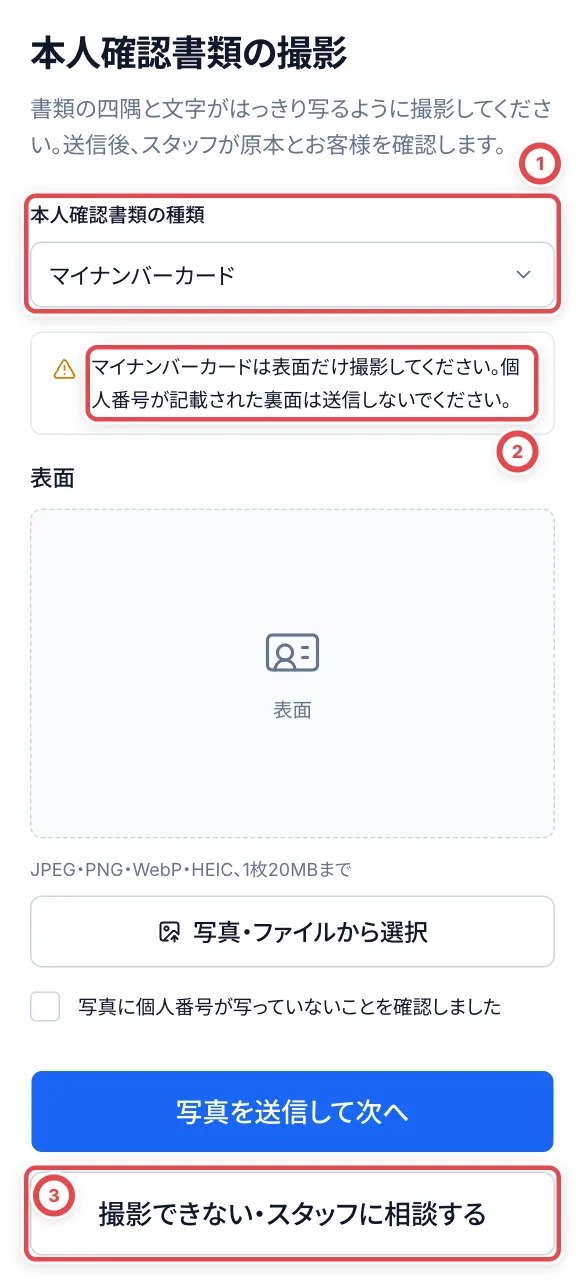 ①で書類を選びます。②の注意を読み、マイナンバーカードは表面だけを撮影します。撮れないときは③でスタッフを呼びます。
JPEG・PNG・WebP、合計20MB以下の写真を使用します。HEICは画面側で変換を試みます。変換できない場合は、JPEGで撮り直してください。書類の種類・面・写り方を確認できない写真は受け付けられません。同じ写真を表裏の両方に指定しないでください。
送信に失敗したときは画面内の案内を読み、同じ写真で再試行します。提出済みならそのまま次へ進めます。撮り直すときは書類を選び直します。署名後の写真は差し替えられないため、スタッフに相談して新しい受付を開始します。
## 本人確認の進め方を選ぶ
**スタッフが原本を対面で確認して記録する場合、事前の設定変更は不要です。** 顧客の「査定依頼」または「お客様情報」にある「店頭の本人確認」から、受付直後にも登録できます。詳しくは[店頭本人確認の登録と書類追加](/guides/purchase/counter-identity)を参照してください。
お客様の端末で書類を撮影してもらう場合は、次の収集方法を設定します。
「設定」→「支払い」→「変更」で、①の「店頭の本人確認」を選び、変更を保存します。設定を管理する権限が必要です。
| 設定 | お客様の操作 | スタッフの操作 |
| ---------------------------------------------------- | --------------------------------------------- | ---------------------------------------------------------- |
| 対面で身分証を受け取り、スタッフが記録する | 見積確認 → お客様情報 → 同意・署名 | 原本を見て種類・番号・有効期限を入力し、確認済みとして記録 |
| お客様がiPad・スマートフォンで本人確認書類を撮影する | 見積確認 → お客様情報 → 書類撮影 → 同意・署名 | 提出写真・原本・目の前のお客様を照合し、確認済みとして記録 |
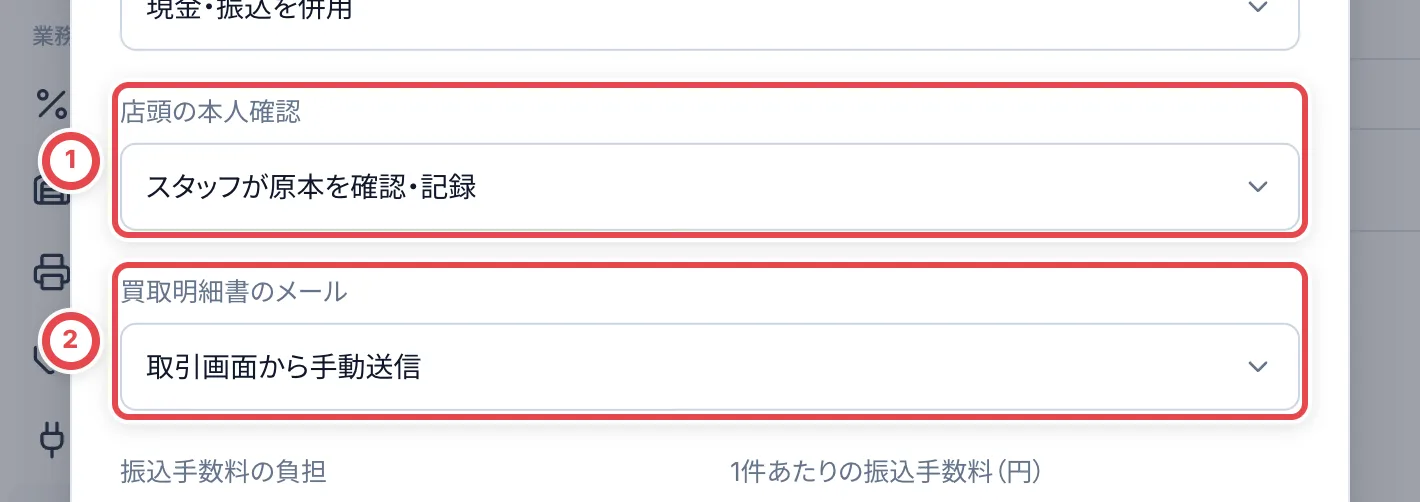 ①で書類を集める方法、②で支払い完了後に明細メールを自動送信するかを選びます。
変更は、次に「表示する」で開始する受付から適用されます。表示中のお客様の画面は途中で切り替わりません。同じ取引ですでに本人確認を記録済みの場合は、撮影を重ねて求めません。別の取引にも自動的に本人確認が引き継がれるわけではありません。
**どちらの設定でも、撮影や署名だけで本人確認は完了しません。** スタッフが原本と本人を確認して記録します。写真を開くには本人確認の閲覧権限、確認の記録とスタッフ入力への切り替えには本人確認の記録権限も必要です。
## 撮影できないときはスタッフ入力へ切り替える
1. お客様に「撮影できない・スタッフに相談する」を押してもらいます。
2. スタッフは「確認の状況を見る」→「撮影できない場合」を開きます。
3. ①の「切り替え理由」に、カメラを利用できないなどの理由を入力します。
4. ②の「スタッフ入力に切り替える」を押します。この受付だけが切り替わり、店舗全体の設定は変わりません。理由は取引の履歴に残ります。
5. お客様の画面に変更が反映されたら「入力を続ける」から同意・署名へ進んでもらいます。スタッフは署名後に原本を確認して入力します。
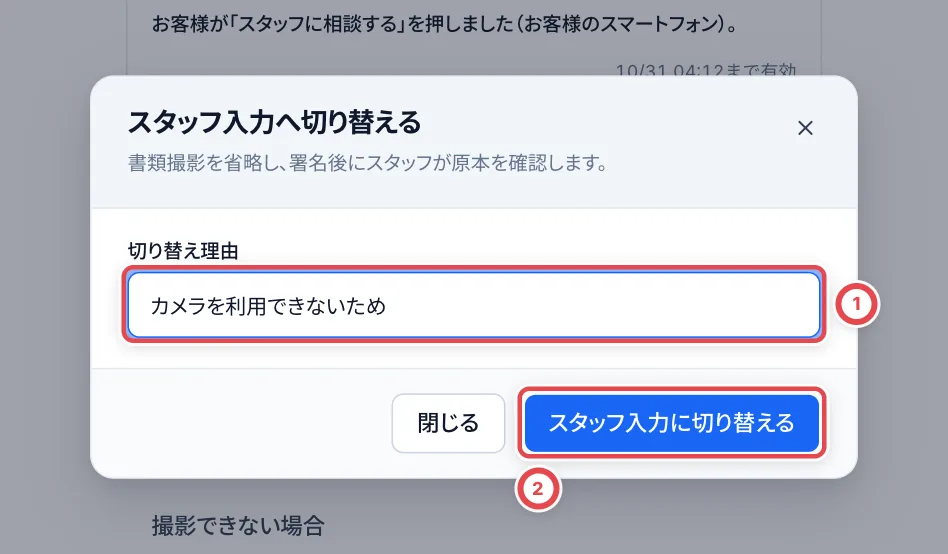 切り替えは署名前の有効な受付に対して行います。期限切れ・取り消し済みなら「お客様に確認してもらう」から新しい受付を開始します。署名済みなら原本を見て本人確認を記録してください。スマートフォンの有効な受付をやり直す場合は「QRコードを再生成する」、登録済みタブレットは「表示し直す」を使います。
 ## 現金の手渡しをあとから記録するとき
買取を記録したときに手渡しを記録できなかった場合(PSA番号の入力待ちなど)や、以前の設定で承認待ちのまま残っている支払いは、支払いの画面から進めます。承認待ちの支払いは「受渡し待ちに進める」で受渡し待ちにします。別の担当者の承認はいりません。
お客様に現金を渡し、支払いの画面の「お金を渡した」を押します。①で現金を出したレジを選び、②の「手渡しを記録」を押します。取引は「買取成立」になり、レジには買取代金の出金が記録されます。
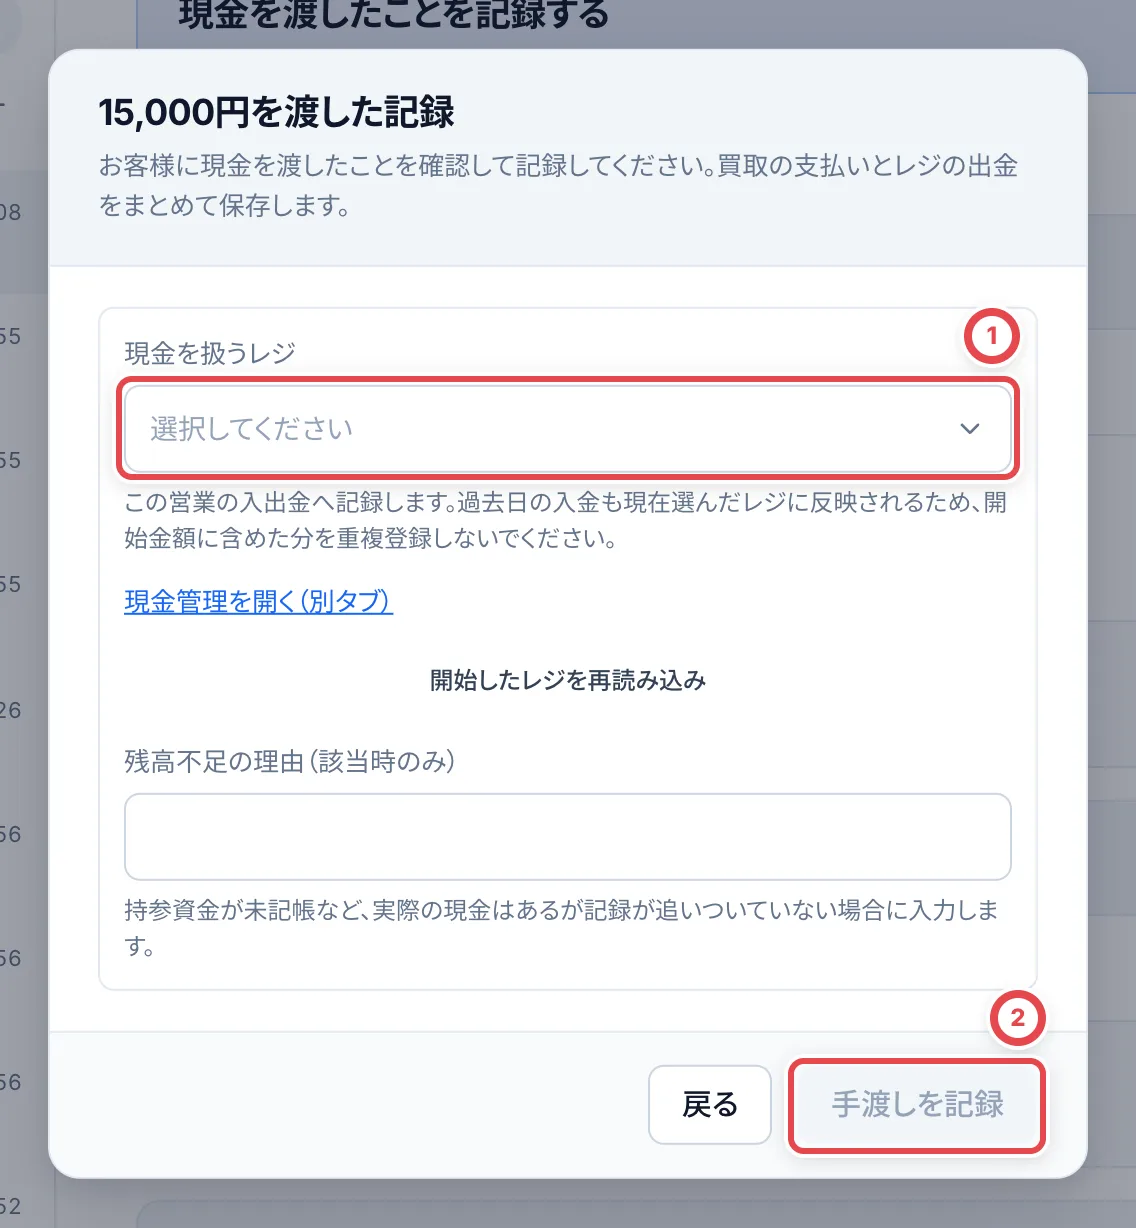 現金管理を使っていない店舗では、ボタンは「現金を渡したことを記録する」、確定は「渡したことを記録する」になります。レジは選びません。
:::warning
同じ買取代金を、現金管理の「入出金を記録」からもう一度入力しないでください。二重に出金した記録になります。
:::
## 振込で支払うとき
店舗の設定で振込が使えるときは、手順7で現金の代わりに振込を選べます。手順1〜6(本人確認まで)は同じです。振込のときは、お客様が店頭の画面で署名した契約書を「承諾の証拠」として添付します。
### 1. 「振込」を選んで、振込先を登録する
「在庫と支払いの登録」で「買取を登録する」を押します。「支払い方法」で①の「振込」を選びます。②の「振込先」が「未登録」のときは、「振込先を追加」を押して、お客様の口座を登録します。
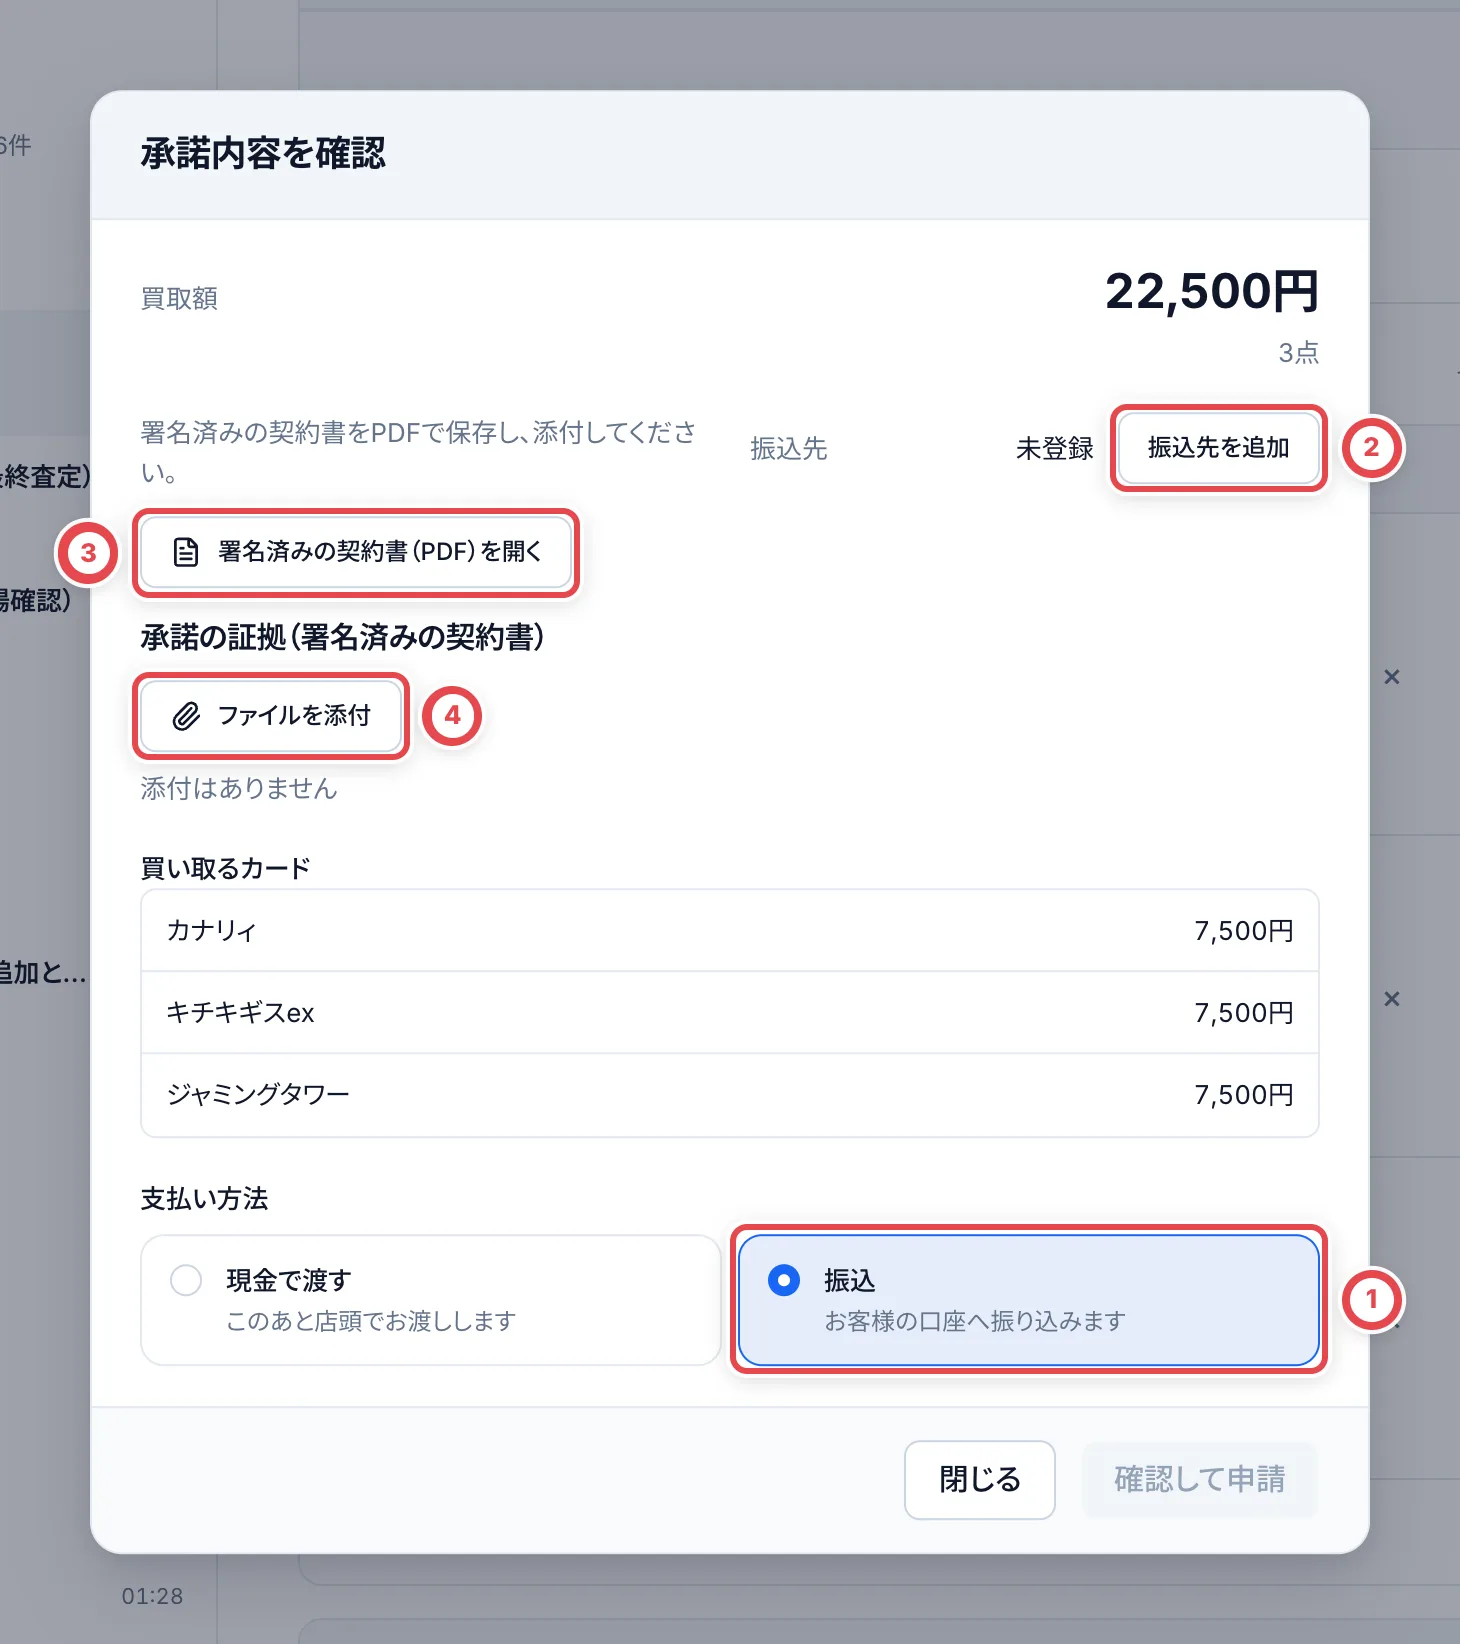 ①で「振込」を選び、②で口座を登録します。③で契約書を開いて保存し、④で添付します。
「振込先を追加」が開いたら、お客様の通帳やキャッシュカードを見ながら、①の銀行名・支店・口座番号・口座種別(普通・当座・貯蓄)・口座名義(カナ)を確認して入れます。ゆうちょ銀行のときは、上の「口座の種類」で「ゆうちょ銀行」を選んでから、記号と番号を入れます。②の「振込先を登録」を押すと、前の画面に戻り、「振込先」に登録した口座が出ます。
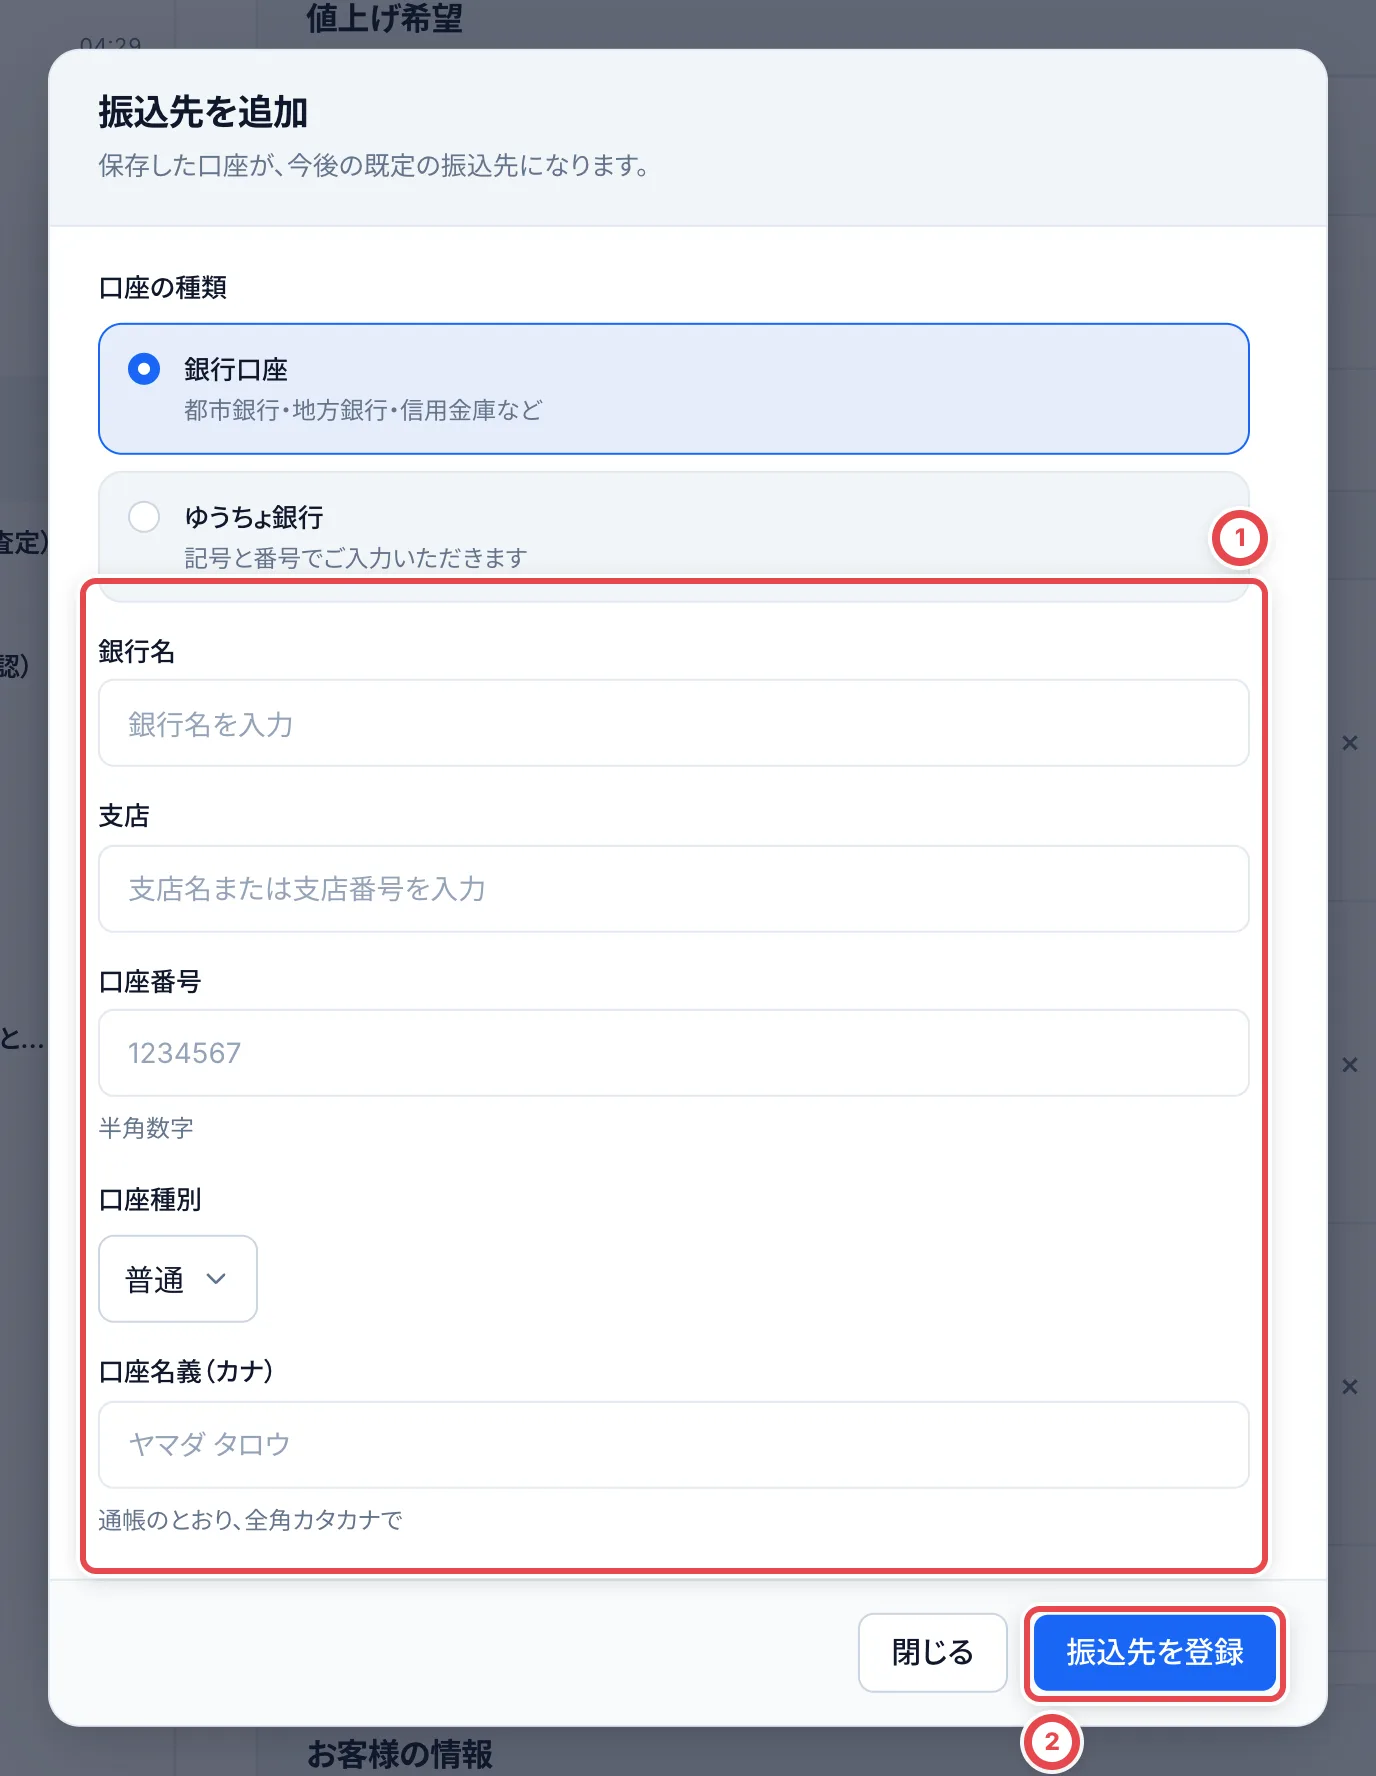 振込先の口座の名義が、お客様の名前と違うときは、振込の前に委任状が必要です([本人確認](/guides/purchase/identity)の「委任状が要るとき」)。
### 2. 契約書と口座を照合して申請する
同じ画面で、③の「署名済みの契約書(PDF)を開く」を押します。別のタブに契約書が開くので、パソコンに保存します。次に④の「ファイルを添付」を押して、保存した契約書を選びます。「添付はありません」の表示が、契約書のファイル名に変わったら添付できています。
振込を申請できる担当者には、口座の照合と「確認して申請」が表示されます。「口座番号・名義を表示」を押し、銀行・支店・口座種別・口座番号・名義を、本人確認書類や通帳と照合します。添付した署名済み契約書の品物・金額も確認してから「確認して申請」を押します。**この操作で、買取の登録と振込申請をまとめて行います。** 申請済みになったら、同じ支払いをもう一度申請する必要はありません。
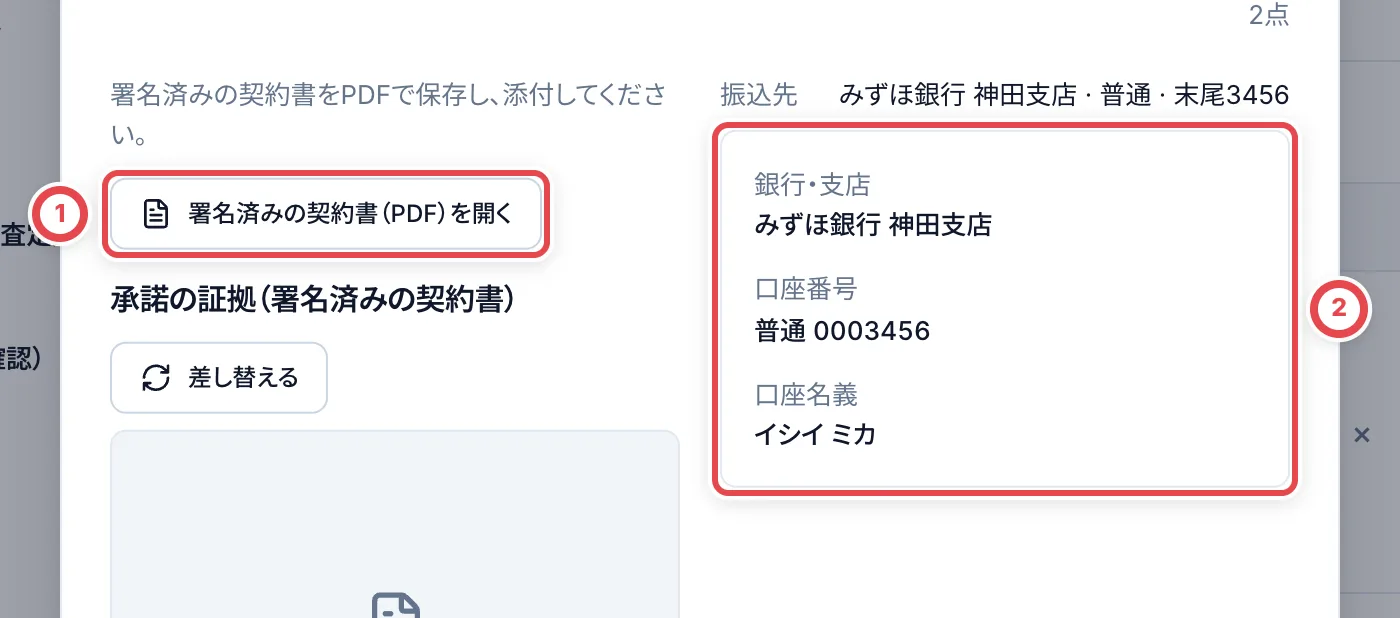 ①で契約書を開き、②の口座番号・名義を照合します。
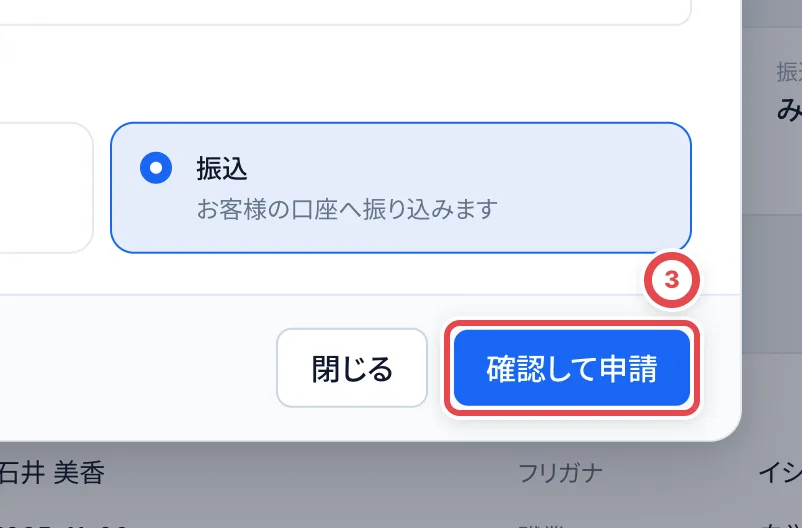 「N点の承諾を記録」など、買取の登録だけを行うボタンが表示される場合は、その操作後に振込担当者が次の手順で申請します。契約書の添付だけでは申請は完了しません。口座を変更した場合は、表示し直して最新の口座を照合します。
### 3. 申請後の支払いを進める
未申請の場合は「次の操作」に①の「振込を申請する」が出ます。②から申請画面を開き、署名済み契約書・金額・振込先を照合して申請します。すでに「確認して申請」で申請済みの場合は、支払いの状態に従って次へ進みます。承認待ちの場合は別のメンバーが承認し、銀行での振込、振込結果の記録、着金の記録と進みます。くわしくは[振込](/guides/purchase/payouts)の手順2〜5を参照してください。
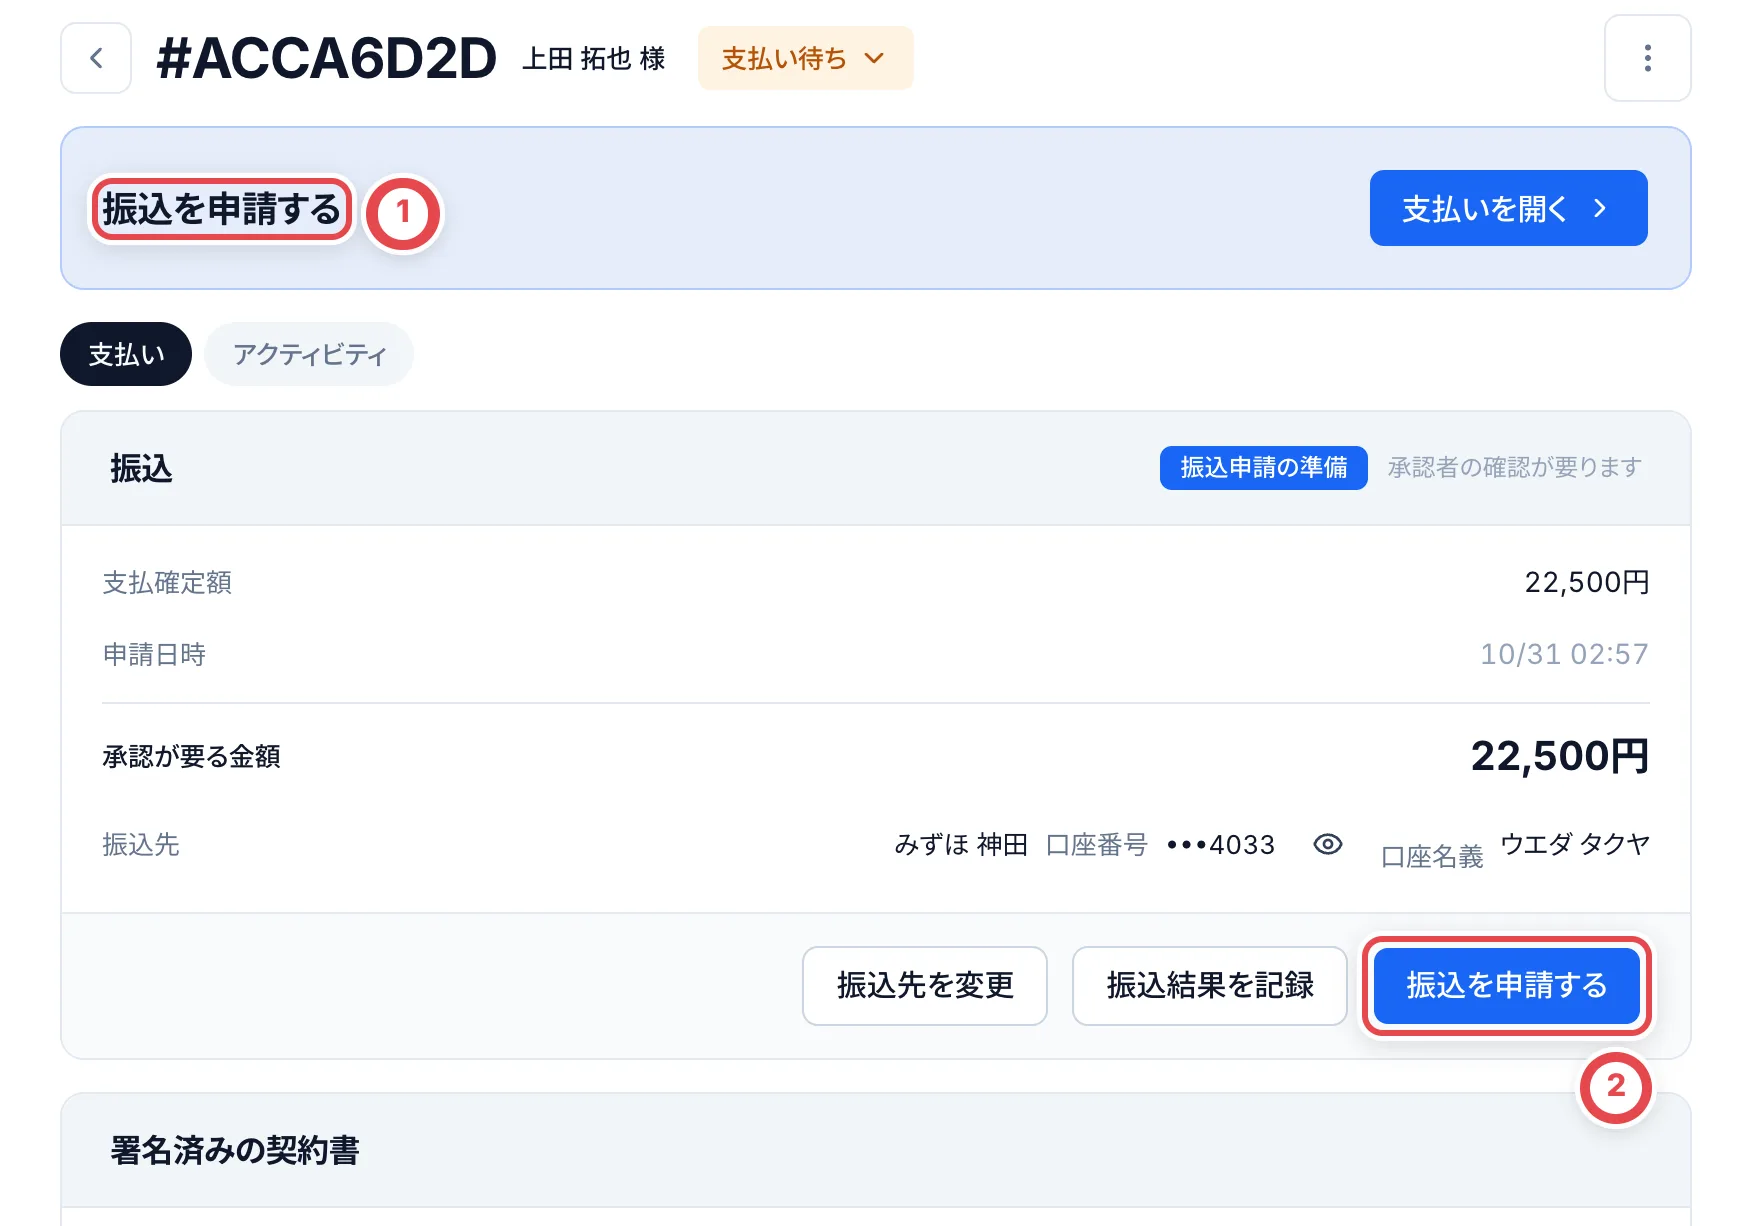 振込で支払う取引は、振込の結果を「成功」と記録した時点で「買取成立」になります。お客様には、振込の予定日などをその場でお伝えします。
## お客様に呼ばれたとき
お客様が、自分の画面の「スタッフに相談する」を押すと、お客様の画面は「スタッフがまいります」で止まり、お客様はその先へ進めなくなります。スタッフの画面の「次の操作」は、「お客様がスタッフを呼んでいます」になります。お客様のところへ行き、話を聞きます。
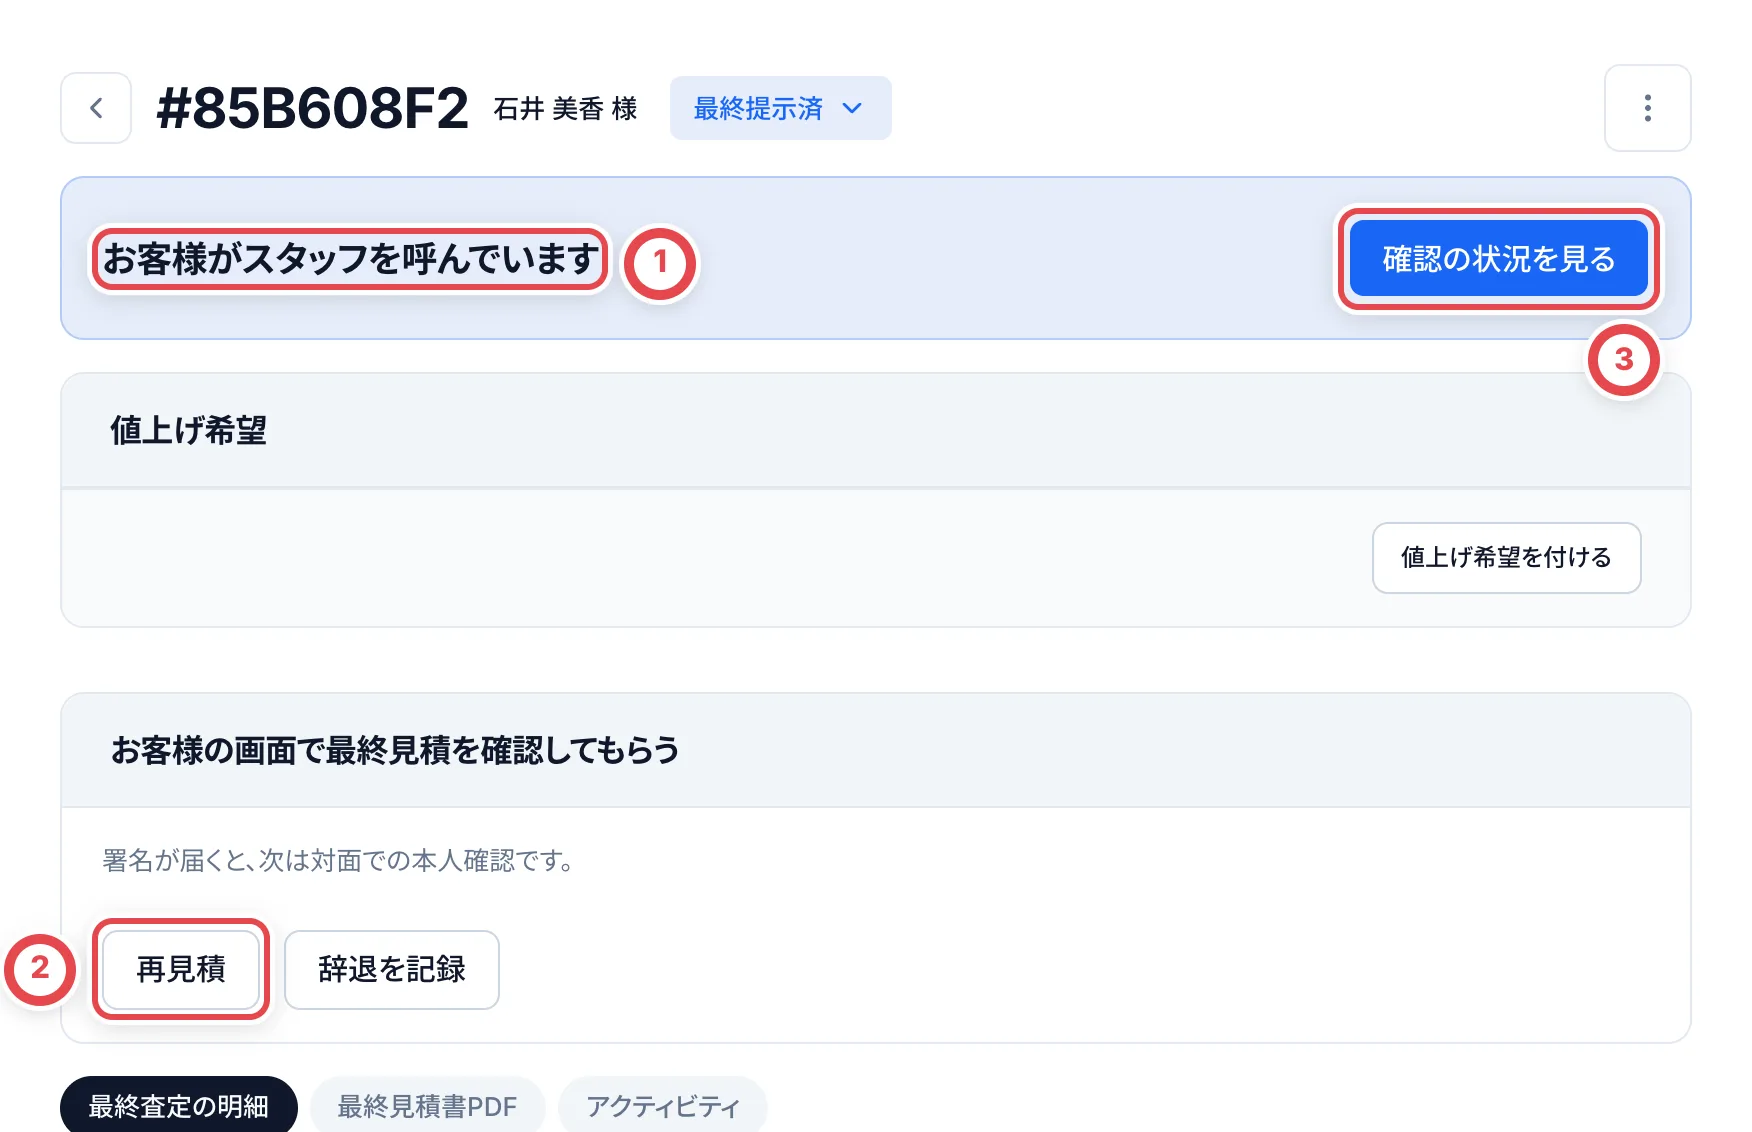 ①が出たらお客様の話を聞きます。内容を直す場合は②「再見積」、確認状況を見る場合は③です。
| お客様の話 | やること |
| -------------------------------------- | -------------------------------------------------------------------------------------------------------------------------------------------------------------- |
| 金額やカードの状態の説明に納得できない | 「再見積」で最終査定を直し、新しい見積を確認してもらいます(下の手順) |
| 一部のカードは売りたくない | 再見積で売らないカードを外し、新しい見積への同意・署名をもらいます([売らないカードがあるとき](#売らないカードがあるとき)) |
| 説明を聞いて納得した | 相談中の画面はそのままでは進めません。「確認の状況を見る」からスマートフォンは「QRコードを再生成する」、登録済みタブレットは「表示し直す」で確認をやり直します |
| 今日は売らない | 下の「全部売らないとき」に進み、品物を返して「辞退を記録」します |
金額を直すときは、次の順に進みます。
:::warning
「再見積」は、押した時点で最終査定の下書きが作られます。確かめる画面は出ません。金額を直すと決めてから押してください。
:::
1. お客様には操作を止めて待ってもらいます。登録済みタブレットを使っている場合は「確認の状況を見る」→「表示を取り消す」で待機画面に戻します。
2. 「再見積」を押し、最終査定の明細を修正します。「状態の補足」に書いた内容は、お客様の画面にも表示されます。
3. 保存された金額・数量と最終見積PDFを確認します。
4. 手順4の「お客様に確認してもらう」から、新しい見積を提示します。スマートフォンでは新しいQRコードを読み取ってもらいます。
5. お客様に新しい内容を確認してもらい、同意・署名をやり直してもらいます。
## 売らないカードがあるとき
:::warning
対象品物の変更や全件辞退は、お客様の同意・署名の前に確認してください。署名済みの店頭画面には「再見積」「辞退を記録」が表示されません。署名後に変更や辞退が必要になった場合は、買取・支払いの登録を進めず、店舗の管理者に確認してください。
:::
### 一部のカードを売らないとき
お客様の同意・署名後の登録画面では、カードを一部だけ外す操作は出ません。買い取る品物を変える場合は、同意・署名の前に「再見積」へ戻ります。
最終査定の三点メニューから、買い取らない1枚を「買取不可にする」で対象外にして保存し、品物・数量・金額が合った新しい見積を提示します。お客様にその内容で同意・署名をしてもらってから、手順6・7へ進みます。売らないカードはお客様にお返しし、引き渡す品物を照合してください。
### 全部売らないとき
お客様が今日は売らないと決めたときは、カードをすべてお客様にお返しします。お客様には操作を止めて画面を閉じてもらいます。登録済みタブレットの場合は、「確認の状況を見る」から「表示を取り消す」で待機画面に戻します。
「辞退を記録」を押します。「ほかの回答を記録」メニューを使う場合は「全件辞退・その場でお返しを記録」を選びます。①に理由を入力し、②ですべての品物をお返ししたことを確認して、③の「全件辞退を記録」を押します。全件の辞退と店頭でのお返しが同時に記録され、取引が終了します。オンライン買取を使っていない店舗でも記録できます。
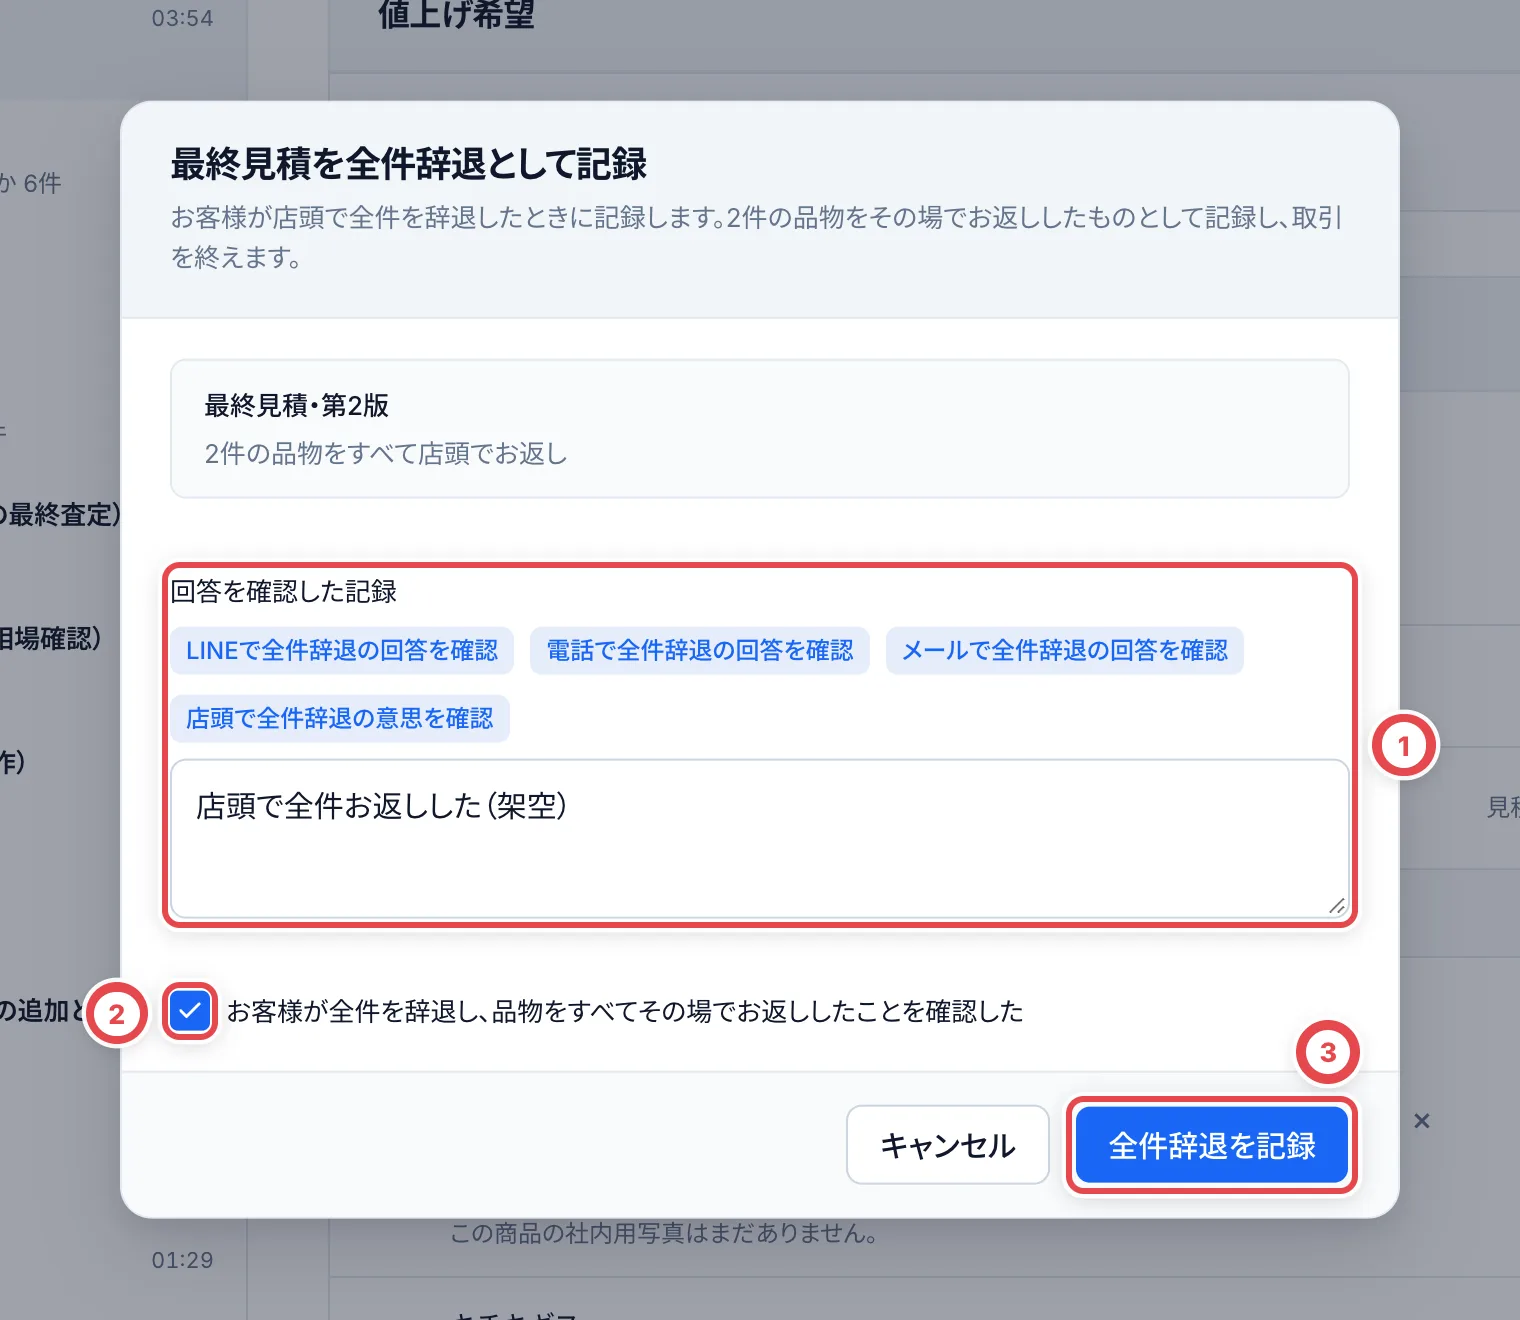 取引を開き直し、取引が終了して次の操作がないことを確認します。この操作では在庫や支払いは作られません。
 ## 18歳未満のお客様のとき
お客様が自分の画面で生年月日を入れたとき、18歳未満だと、お客様の画面は①の「スタッフにお声がけください」で止まります。スタッフの画面の「次の操作」は「お客様がスタッフを呼んでいます」になります。
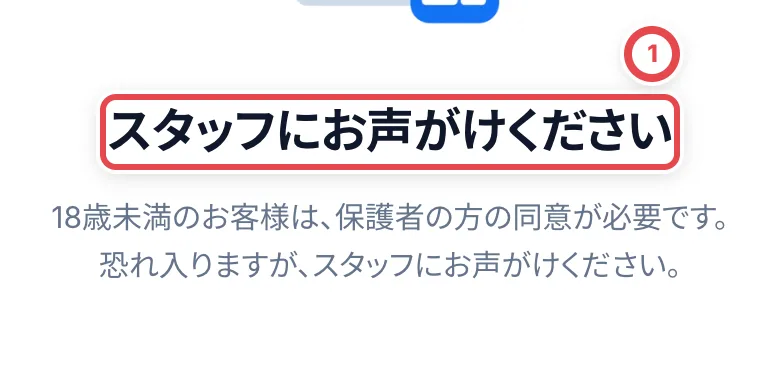 トレカクラウドの店頭の画面では、18歳未満のお客様の買取は受け付けられません。保護者の方の同意をもらう手順も、店頭の画面にはありません。カードをお返しし、[全部売らないとき](#全部売らないとき)の手順で辞退とお返しを記録します。18歳未満のお客様からの買取をどう扱うかは、店舗の決まりに従い、管理者に確認してください。
## 法人のお客様のとき
会社やお店がカードを持ち込んだときは、店頭の画面(お客様のスマートフォンや店頭の端末)は使えません。お客様の画面で送ろうとすると「法人のお取引は、この画面ではお受けできません。スタッフにお声がけください」と出ます。対面の本人確認も、法人のお客様には使えません。
法人のお客様からは、請求書と一緒に仕入れる手順で買い取ります。[法人取引と請求書](/guides/purchase/corporate-deals)を参照してください。
## メールが送られるタイミングと確認方法
| 操作・タイミング | お客様へのメール | スタッフの確認 |
| -------------------------------------- | ------------------------------------------------------------------------------ | --------------------------------------------------------------------- |
| 来店予約の受付・変更・取消 | 予約の通知設定と送信先に従って予約案内を送信 | 予約情報と宛先を確認。詳細は[来店予約](/guides/purchase/reservations) |
| 店頭の見積表示、書類撮影、同意・署名 | この操作自体ではメールを送らない | 画面上の進行状況と署名済み契約書を確認 |
| 現金の手渡し記録、振込の支払い完了記録 | 買取明細書を発行。自動送信が有効で、顧客のメールアドレスがある場合に送信待ちへ | 取引の「買取明細書」で宛先とメール履歴を確認 |
| 「メールで送る」→宛先確認→「送信する」 | 指定宛先へ明細PDF付きメールを送信待ちにする | 実行前に宛先を必ず照合 |
| 訂正内容を反映して再発行する | 自動では再送しない | 新しい明細の内容を確認して「メールで送る」を実行 |
「設定」→「支払い」の「買取明細書のメール」で、「支払い完了時に自動送信」か「取引画面から手動送信」を選びます。お客様情報のメールアドレスは任意です。入力しただけでは送信されず、署名済み契約書も自動ではメールに添付されません。
### メールが届かないとき
1. 支払いが完了しているか、買取明細書が発行されているかを確認します。署名しただけでは送信されません。
2. メール履歴がなければ、顧客のメールアドレスと自動送信の設定を確認します。あとからアドレスや設定を変えても過去の明細が自動で再送されるわけではないので、必要な明細から手動で送信します。
3. 送信待ち・送信中なら重ねて送らず、履歴を確認します。長く変わらなければ、取引番号・明細番号・表示された状態を管理者に伝えます。
4. 失敗なら宛先を確認します。一時的な送信サービスの障害は再試行されますが、不正な宛先などは訂正が必要です。長く失敗する場合は管理者に確認します。
5. 「送信済み」は送信サービスが受け付けた状態です。受信箱への到着保証ではありません。宛先の誤り、迷惑メール、受信制限を確認し、再送前にお客様に確認します。
明細の発行や送信に失敗しても、支払いを二重に記録しないでください。明細がない支払いは、取引の「買取明細書」から発行・送信をやり直します。
### 発行後の訂正を明細書に反映するとき
通常の買取完了後に再発行する必要はありません。発行後に古物台帳の氏名・商品明細や店舗情報の誤記を修正した場合は、「買取明細書」右上の「その他の操作」から「訂正内容を反映して再発行」を選びます。元の記録を先に修正し、再発行の理由を入力してください。
以前の明細書は取り消され、新しい番号で発行されます。支払いの記録は変わりません。内容を変えずにもう一度渡す場合は「PDFを保存」または「メールで送る」を使い、再発行はしません。
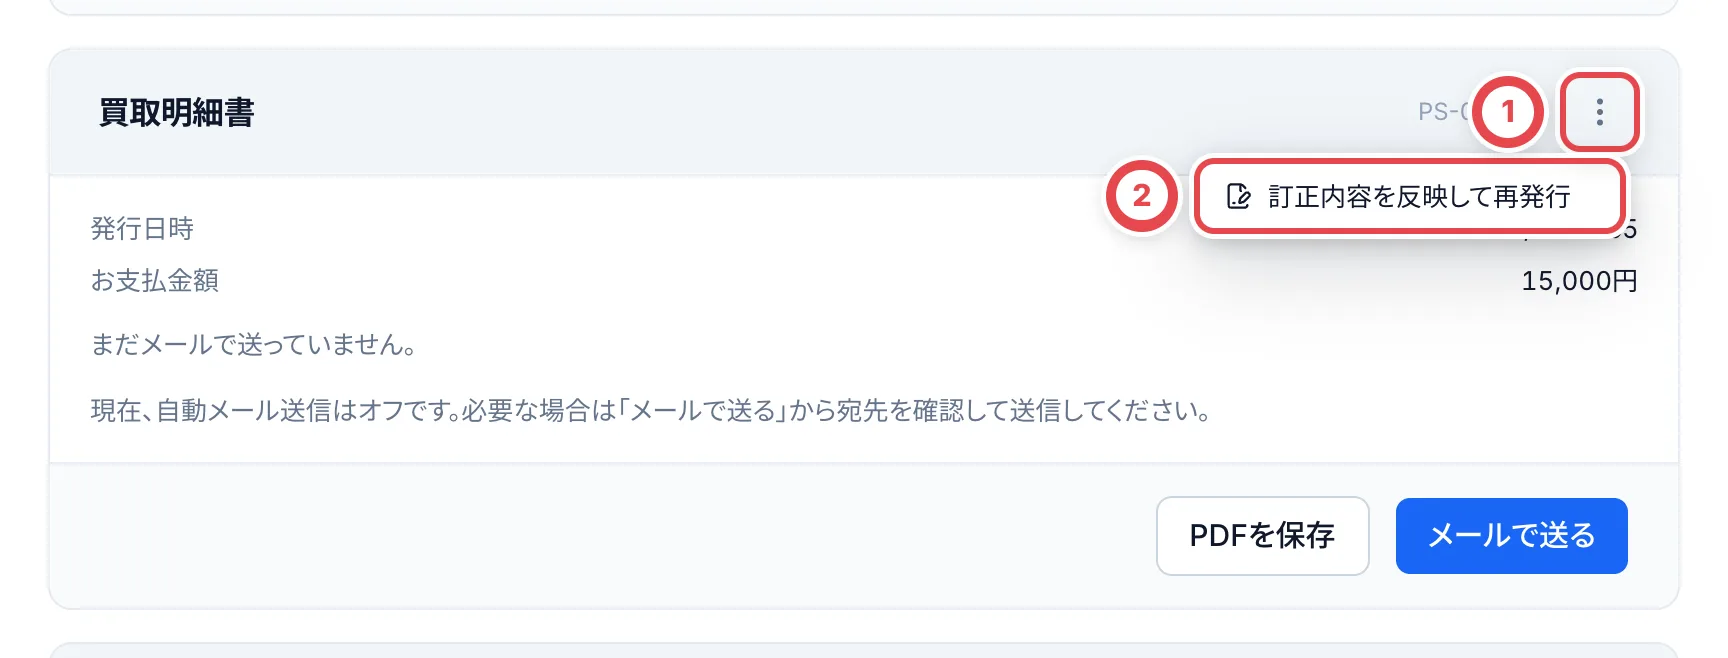 ①でメニューを開きます。元の記録を訂正した場合だけ②で再発行します。
## 困ったとき
| 起きていること | 確かめること・直し方 |
| -------------------------------------------------------------------------- | -------------------------------------------------------------------------------------------------------------------------------------------------------------------------------- |
| 受付の方法に「店頭」が出ない | 店舗で店頭買取が使えるようになっているか、管理者に確認してください。 |
| 「お客様に確認してもらう」でタブレットが選べない | 「設定」の「店頭の端末」で端末を登録します([店頭の端末](/guides/purchase/counter-tablets))。登録には「設定管理」の権限が必要です。それまではお客様のスマートフォンを使えます。 |
| お客様の画面に「このリンクは使えません」「このQRコードは使えません」と出る | 期限切れ、再生成、取引・見積の変更で無効になっています。現在の取引を確認し、「お客様に確認してもらう」から新しい確認を開始します。 |
| 「このQRコードは使用済みです」と出る | 最初に開いたスマートフォンの同じブラウザで開きます。別のブラウザや端末へ変える場合は、スタッフがQRコードを再生成します。 |
| 「この端末では別のお客様が確認中です」と出る | 前のお客様の確認が終わってから送ります。終わらないときは、前の取引で「表示を取り消す」を押します。 |
| お客様の画面に「見積の内容が更新されました」と出る | 表示したあとで最終査定を直しています。スタッフの画面から表示し直します。 |
| 本人確認を記録できない | 身分証の種類・番号・有効期限と確認のチェックが必要です。お客様の氏名・生年月日・職業・住所がそろっているかも確かめます。 |
| 「買取を登録する」が見当たらない | 画面上部の「次の操作」を確認します。お客様の同意・署名と手順6の本人確認がそろうと、登録へ進めます。 |
| 「営業中のレジがありません」と出て押せない | 現金管理でレジを開始して、「開始したレジを再読み込み」を押します。 |
| 「グレードが決まっていないため相場を取り込めません」と出る | 鑑定なしのカードにグレードが付いていません。参考時価を手入力するか、「設定」→「買取掛け率」で「単品カードの既定グレード」を決めます。 |
| 「記録上の現金が不足しています」と出る | レジの記録上の現金が支払額より少ないです。現金を補充して入金を記録するか、管理者に例外として記録してもらいます。 |
| 一部のカードだけ売りたいと言われた | [売らないカードがあるとき](#売らないカードがあるとき)の手順で、買い取るカードだけを選んで記録します |
| 「支払い方法」に「振込」が出ない | 店舗の設定が「現金のみ」です。「設定」の「支払い」の「店頭の支払方法」を、管理者に「現金・振込を併用」か「振込のみ」に変えてもらいます |
| 振込を選ぶと「N点の承諾を記録」が押せない | 「振込先」が「未登録」です。「振込先を追加」で、お客様の口座を登録します |
| 「署名済みの契約書(PDF)を開く」が出ない | お客様がまだ店頭の画面で署名していません。手順4・5でお客様に署名してもらいます |
| 「振込を申請する」が押せない | 承諾の証拠(署名済みの契約書)が添付されていません。[振込で支払うとき](#振込で支払うとき)の手順2で添付します |
| お客様の画面が「スタッフがまいります」で止まっている | お客様が「スタッフに相談する」を押しています。[お客様に呼ばれたとき](#お客様に呼ばれたとき)へ進みます |
| 撮影の画面が出ない | 受付開始時の「店頭の本人確認」の設定を確認します。すでに表示中の受付や、本人確認を記録済みの同じ取引には新しい設定で撮影を要求しません。 |
| 写真を送れない | 種類・必要な面・個人番号の有無・20MB以下かを確認します。カメラや通信・読取サービスの問題が続く場合はスタッフ入力へ切り替えます。 |
| 署名後なのに本人確認ボタンが使えない | 本人確認の閲覧・記録権限、最新の見積に対する署名、顧客情報の不足を確認します。 |
| 通信が不安定と表示される | 接続の復旧を待ちます。リンクの期限が切れた場合は表示し直します。ページの再読込で未送信の入力が失われる場合があります。 |
| マイナンバーカードの裏面を選んだ | 送信せず選び直し、表面だけを撮影します。個人番号をメモ欄にも転記しません。 |
## 店舗買取の前後に行う作業
来店前は[来店予約](/guides/purchase/reservations)、現金管理を使う店舗は[営業開始・点検・レジ締め](/guides/purchase/cash)を確認します。振込払いは[振込の申請から着金確認](/guides/purchase/payouts)まで終えてから完了を確認します。
書類・記録の訂正は[買取の共通操作](/guides/purchase/common-operations)、郵送での買取は[オンライン買取](/guides/purchase/overview)を参照してください。
---
# 店頭本人確認の登録と書類追加
Source: https://docs.toreca-cloud.com/guides/purchase/counter-identity
スタッフが原本を見て店頭の本人確認を記録する場合、本人確認方法の事前設定は不要です。買取の受付後、顧客の「査定依頼」または「お客様情報」から登録できます。
オンライン取引の書類確認を許可する場合は、[本人確認方法の設定](/guides/settings/identity)を参照してください。店頭の対面確認とは別の設定です。
| 今の状況 | 次の操作 |
| ------------------------------------ | ------------------------------------------------------------------------ |
| 受付したばかりで原本を確認できる | 対象取引を選び「対面で確認する」 |
| お客様が端末で撮影・署名している途中 | その完了を待つ。スタッフ入力にするなら「確認の状況を見る」から切り替える |
| すでに本人確認を記録した | 記録を確認し、「書類を確認・追加」で画像を確認・追加する |
## 1. 顧客と店頭取引を選ぶ
「買取依頼」または「顧客」から対象の顧客を開きます。「査定依頼」か「お客様情報」にある「店頭の本人確認」を確認します。①の「本人確認を記録する取引」で、いま目の前のお客様の取引を選びます。
対象が1件なら選択済みです。複数ある場合は、取引番号を確認して選んでください。②の「対面で確認する」を押します。
表示には買取・顧客・本人確認の閲覧権限、登録には買取と本人確認の記録権限も必要です。法人・アーカイブ済み顧客や、対象となる店頭取引がない場合は、この欄が出ません。
## 2. お客様の申告と原本を照合する
氏名・生年月日・職業・住所が、原本と一致していることを確認します。不足や誤りがあれば「顧客情報を編集(別タブ)」で直して保存し、このダイアログを開き直します。
①で身分証の種類を選び、②に番号、その下に有効期限を入力します。マイナンバーカードの個人番号は入力しません。「有効期限なし」は、在留カード本体に無期限と記載されている場合だけ選びます。
①で種類を選び②に番号を入力します。原本との一致を③で確認し、④で記録します。
### 画像から入力したい場合
「身分証の画像から入力する(任意)」で、写真やファイルを選べます。JPEG・PNG・WebP、合計20MBまでです。マイナンバーカードは表面だけを使い、裏面や個人番号・QRコードが写った画像は選びません。
確認チェックを付けて「画像を読み取る」を押すと、身分証の種類・番号・有効期限の入力を補助します。**読取結果を原本と照合し、必要なら直してから記録してください。** 読み取れない場合は画像を外して手入力できます。画像の読取だけでは本人確認は完了しません。
## 3. 確認済みとして記録する
原本と目の前のお客様を照合できたら、③の確認チェックを付け、④の「確認済みとして記録する」を押します。対象取引に本人確認の記録が結び付きます。閉じた後に画面を開き直し、記録の日時と対象取引を確認します。
入力した番号は暗号化して保存され、「書類を確認・追加」で開く記録には末尾4桁だけが表示されます。
記録の詳細にある「有効期限」は、店舗の本人確認ルールに基づく確認結果の期限です。原本から入力した身分証の有効期限とは別です。次の取引でも、対象の取引に本人確認が記録されているか確認してください。
### 保存結果を確認できないとき
通信が途切れるなどして保存結果を確認できない場合は、同じ内容で自動的に1回再試行します。処理中はそのまま待ちます。
それでも確認できない場合は、入力を保持したまま「同じ内容で再試行」が表示されます。そのボタンを押してください。入力欄が操作できないのは、同じ登録内容で確認を続けるためです。画面を閉じて別の登録を作り直す必要はありません。完了後に記録の日時と対象取引を確認します。
入力内容のエラーが表示された場合は、案内された項目を直してから記録します。
## 4. 記録した書類を確認・追加する
記録後は「書類を確認・追加」が表示されます。対象の記録を開き、登録内容・日時・書類を確認します。手入力だけで登録した場合も、この入口から画像を追加できます。
追加する前に、同じお客様・同じ本人確認記録の書類かを照合します。マイナンバーカードの裏面は追加しません。書類を追加しても、別の取引の本人確認を自動で完了する操作にはなりません。
お客様の端末で撮影した写真を照合する場合は、[店頭での書類撮影と原本照合](/guides/purchase/counter-photos)を参照してください。
買取の続きは[店頭買取をはじめる](/guides/purchase/counter)へ進みます。オンラインで届いた書類の承認は[本人確認](/guides/purchase/identity)を参照してください。
## 困ったとき
| 起きていること | 確認すること・戻り方 |
| ---------------------------------- | -------------------------------------------------------------------------------------------------------------------- |
| 店頭の本人確認が出ない | 個人顧客か、アーカイブされていないか、進行中の店頭取引と必要な閲覧権限があるかを確認します。 |
| 対象取引が未選択 | 取引番号で選びます。古いリンクの対象が消えた場合も、別取引へ自動的には切り替わりません。 |
| 撮影・署名待ちと出る | お客様の完了を待ちます。スタッフ入力に切り替える場合は、確認状況から「撮影できない場合」を開きます。 |
| お客様情報を直しても古い表示のまま | 別タブで保存した後、本人確認ダイアログを閉じて開き直します。 |
| 画像を読み取れない | 再試行するか、画像を外して原本を見ながら入力します。書類画像は記録後に追加できます。 |
| 読取が混み合っていると出る | しばらく待ってから再試行します。原本を確認できる場合は画像を外して手入力できます。 |
| 記録ボタンが押せない | 必須の顧客情報、種類・番号・有効期限、原本確認チェックと記録権限を確認します。 |
| 登録できたか分からない | 自動再試行の完了を待ち、表示された場合は「同じ内容で再試行」を押します。保存後の記録を確認し、別の登録を重ねません。 |
---
# 店頭での書類撮影と原本照合
Source: https://docs.toreca-cloud.com/guides/purchase/counter-photos
お客様がスマートフォンや店頭の端末で書類を撮影する場合の手順です。スタッフが原本を見て入力する場合は、[店頭本人確認の登録と書類追加](/guides/purchase/counter-identity)へ進みます。
撮影を使う設定と見積の表示は、[店頭買取をはじめる](/guides/purchase/counter)の手順1〜4で済ませます。お客様は見積を承諾し、お客様情報を確認・入力してから撮影へ進みます。お客様の画面は日本語です。
## 1. 書類を選び、必要な面を用意する
「本人確認書類の種類」で書類を選びます。JPEG・PNG・WebP、表裏の合計20MB以下の静止画像を使います。HEICを変換できない場合はJPEGで撮り直します。
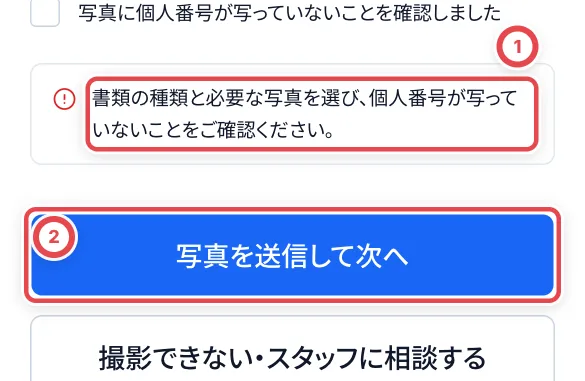 ①の案内が出たら、書類・写真と確認チェックをそろえて②から再試行します。
| 書類 | 必要な写真 | 確認すること |
| ------------------ | -------------- | ------------------------------------------------------ |
| 運転免許証 | 表面・裏面 | 裏面に変更事項がなくても両面。表裏に同じ画像を選ばない |
| マイナンバーカード | 表面だけ | 裏面・個人番号・通知カード・暗証番号は送らない |
| パスポート | 顔写真のページ | 四隅・顔写真・文字を切らない |
| 在留カード | 表面・裏面 | 両面を別の画像で用意する |
## 2. 写真を確認して提出する
「写真・ファイルから選択」または端末のカメラで写真を選び、プレビューで四隅と文字を確認します。違う写真なら「画像を削除」から選び直します。②の「写真に個人番号が写っていないことを確認しました」にチェックを入れ、③の「写真を送信して次へ」を押します。
:::warning
マイナンバーカードは表面だけを選びます。個人番号が写った画像は送信せず、選び直してください。書類の種類を変えると、選んでいた写真と確認チェックは解除されます。
:::
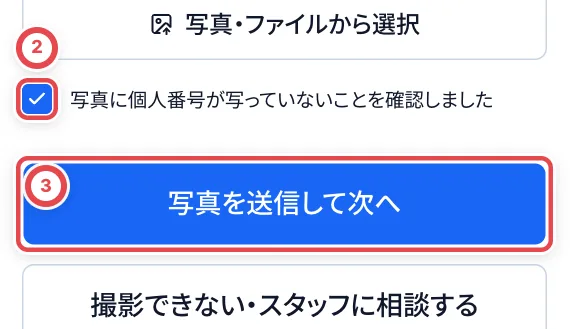 ### 運転免許証
①で「運転免許証」を選び、表面と裏面を別々に選びます。写真の確認後、上の②③で提出します。
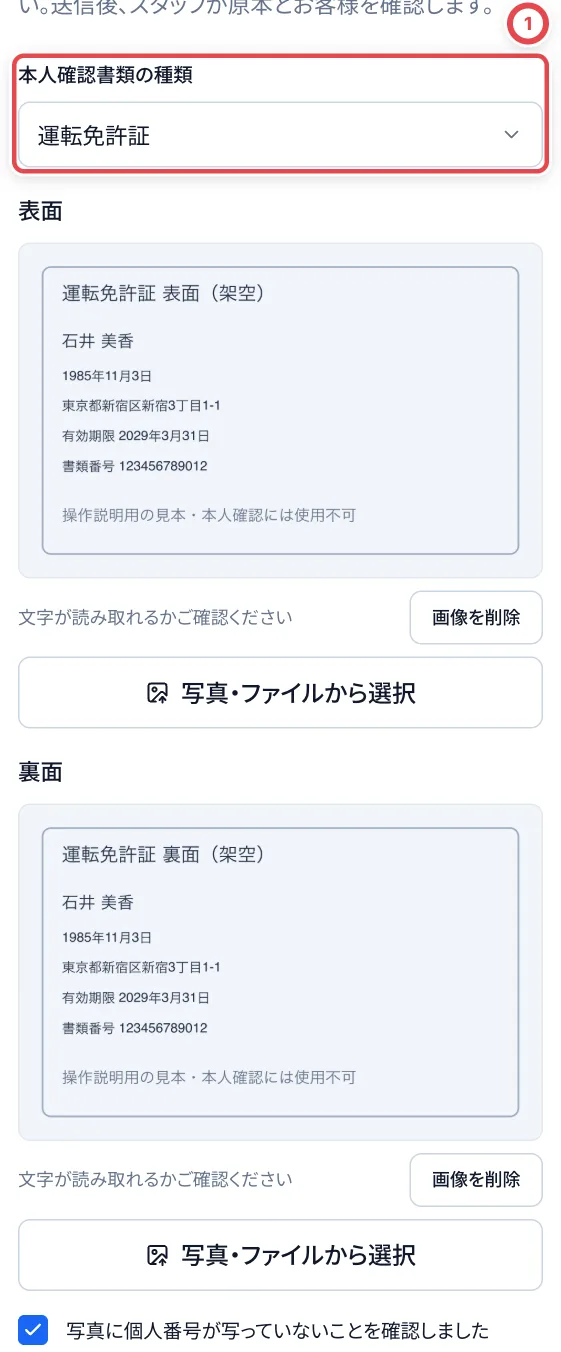 ### マイナンバーカード
①で「マイナンバーカード」を選ぶと、表面だけの入力になります。裏面の入力はありません。写真の確認後、上の②③で提出します。
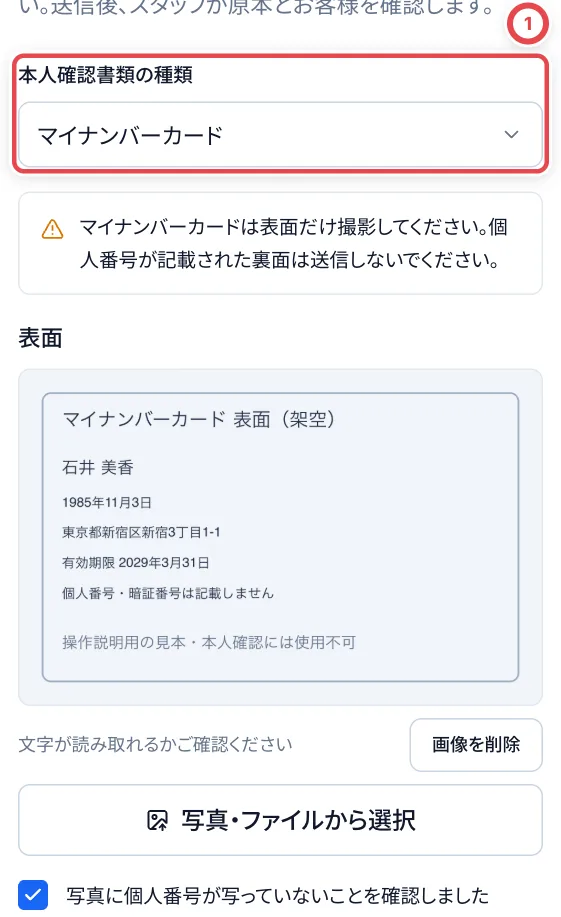 ### パスポート
①で「パスポート」を選び、「顔写真のページ」に写真を選びます。写真の確認後、上の②③で提出します。
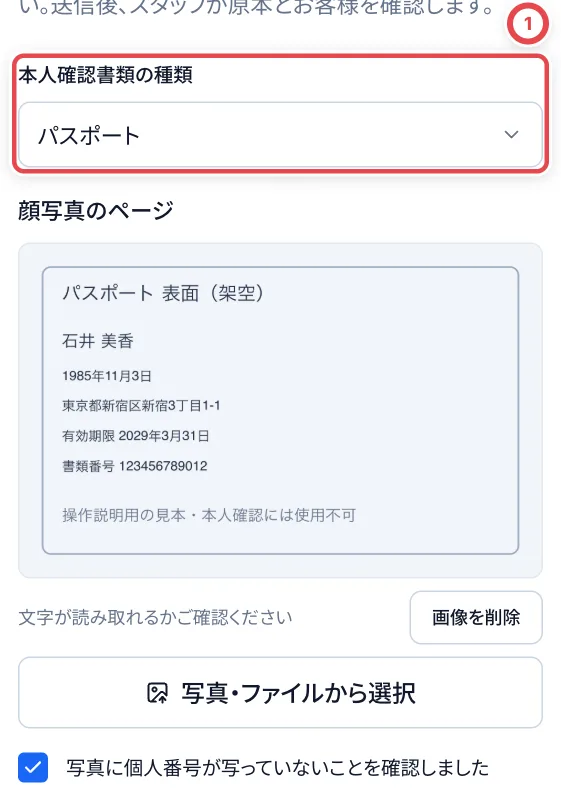 ### 在留カード
①で「在留カード」を選び、表面と裏面を別々に選びます。写真の確認後、上の②③で提出します。
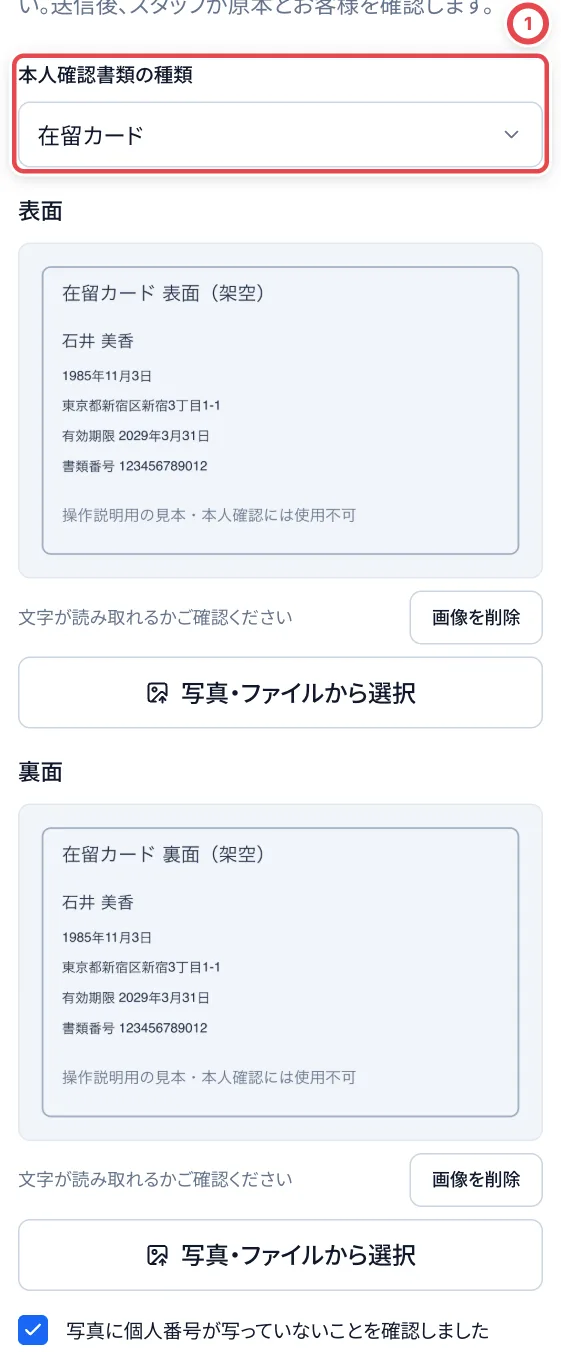 ### 写真の合計が20MBを超えたとき
①のエラーが出た場合、写真はまだ提出されていません。「画像を削除」から小さい写真に選び直し、確認チェックを付けて②から再試行します。表裏は1枚ずつの大きさではなく、合計で20MB以下にします。
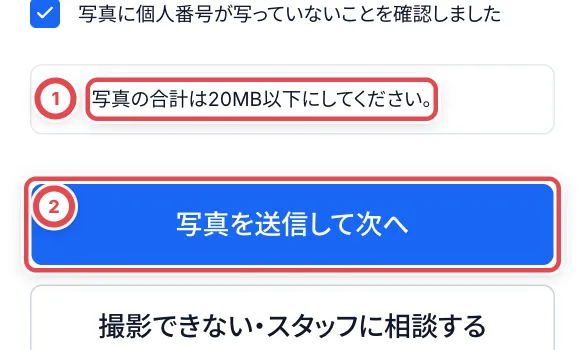 ## 3. お客様に同意・署名してもらう
写真の提出後に「ご同意とご署名」が開きます。同意事項を確認してチェックを入れ、①に氏名を署名してもらいます。間違えたときは「書き直す」で消してから署名し直します。②の「同意して送信する」を押します。
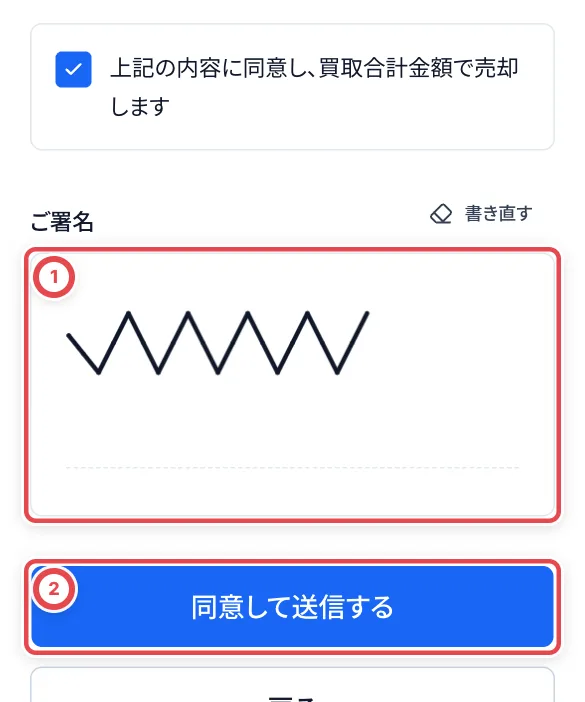 「送信しました」が出たら、お客様の入力は完了です。**この時点では、スタッフによる本人確認はまだ終わっていません。** お客様に原本を見せてもらいます。
 ## 4. スタッフが提出写真と原本・本人を照合する
スタッフは対象取引の「対面で確認する」を開きます。①の「お客様が提出した本人確認書類」で、写真・原本・目の前のお客様・申告された氏名や住所を照合します。②の「提出された写真から入力する」は種類・番号・有効期限の入力を補助します。読み取った結果を原本と照合し、必要なら訂正します。
### 運転免許証の確認
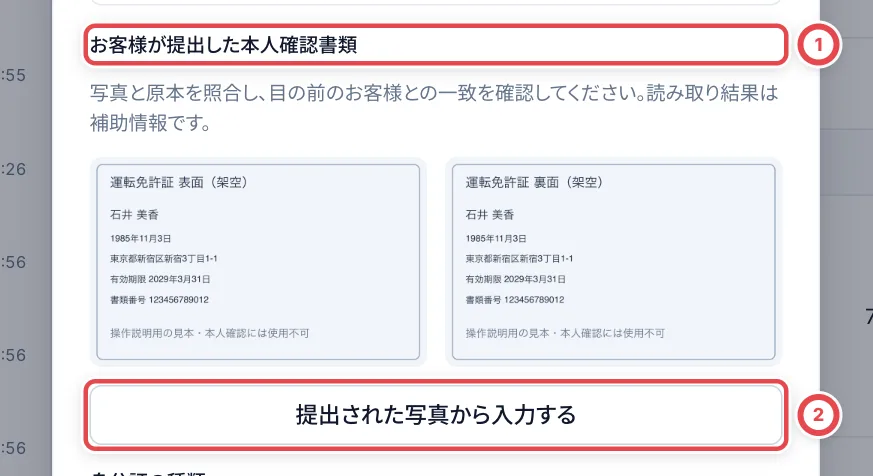 ①に表裏の提出写真が出ます。②は入力の補助で、本人確認の確定ではありません。
### マイナンバーカードの確認
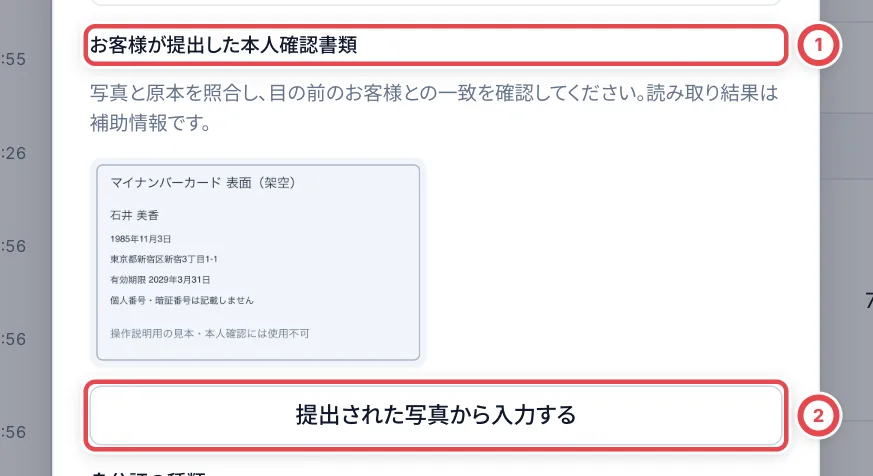 ①は表面1枚です。②で読み取っても、個人番号を入力する欄はありません。
### パスポートの確認
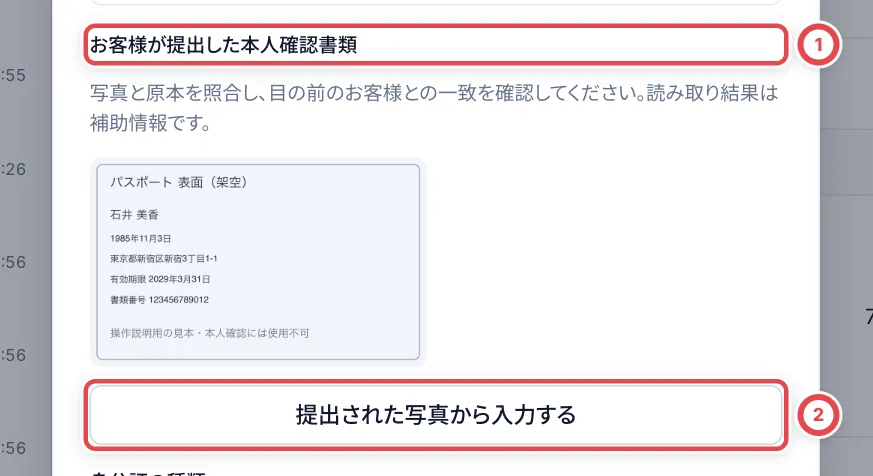 ①の顔写真ページを原本と照合します。②で読み取った内容も確認します。
### 在留カードの確認
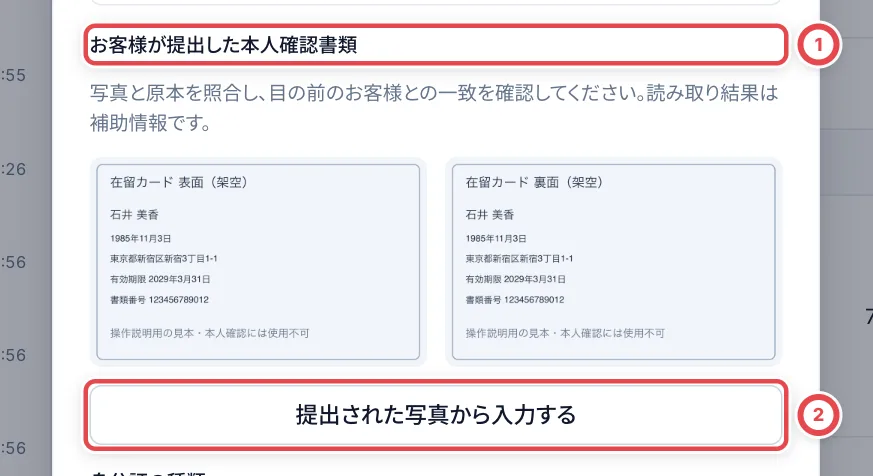 ①の表裏を原本と照合します。②で読み取った有効期限も確認します。
## 5. 確認済みとして記録し、買取へ進む
①の種類と、その下の番号・有効期限を原本で確認します。在留カードの「有効期限なし」は、カード本体が無期限の場合だけ使います。照合できたら②にチェックを入れ、③の「確認済みとして記録する」を押します。
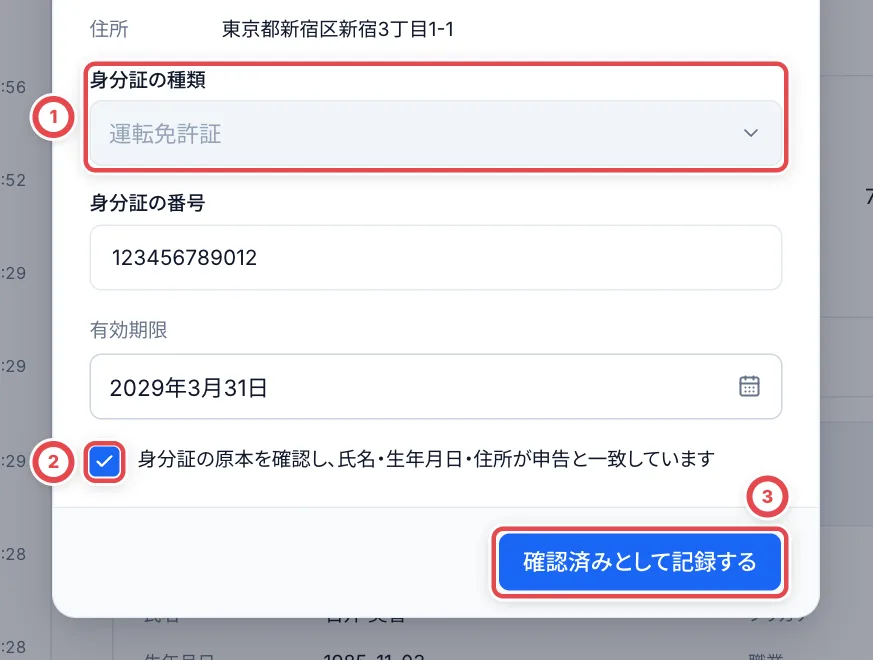 保存結果を確認できない場合は、自動再試行を待ちます。「同じ内容で再試行」が出たら、そのボタンから続けます。入力した内容と選択した画像は保持されます。[保存結果を確認できないとき](/guides/purchase/counter-identity#保存結果を確認できないとき)を参照してください。
記録後に取引を開き直し、本人確認が反映され、「次の操作」が在庫と支払いの登録に進んだことを確認します。[店頭買取](/guides/purchase/counter)の手順7へ戻ります。
 ## 困ったとき
| 起きていること | 確認すること・戻り方 |
| ------------------------------ | ------------------------------------------------------------------------------------------------------------------------------------------------------------------------------------------------------------------------------- |
| 送信できない | 種類、必要な面、20MB以下、確認チェックを確認します。表裏には別の画像を選びます |
| 写真の文字が読めない | 「画像を削除」から撮り直します。拡大しても読める写真を用意します |
| 通信や読取のエラー | 入力を残したまま同じ写真で再試行します。「写真は提出済みです」と出たら、提出し直さず署名へ進めます |
| カメラを使えない | 「撮影できない・スタッフに相談する」を押します。スタッフは確認状況の「撮影できない場合」で理由を記録し、スタッフ入力へ切り替えます。[切替手順](/guides/purchase/counter#撮影できないときはスタッフ入力へ切り替える)を参照します |
| スタッフの読取結果が違う | 原本を見て入力を訂正します。顧客情報自体が違う場合は「顧客情報を編集(別タブ)」で直し、本人確認画面を開き直します |
| 書類の種類を間違えた | 署名前は種類を選び直して撮影します。署名後はスタッフが新しい受付を開始し、正しい書類で撮影・署名してもらいます |
| 写真が開かない | 本人確認画面を閉じて開き直します。表示できないまま照合済みにしません |
| 署名したのに買取登録へ進めない | スタッフの本人確認記録、最新見積への署名、顧客情報と必要な権限を確認します |
| 読取が混み合っていると出る | しばらく待ってから同じ画面で再試行します。続けて押さず、原本で確認できる場合は手入力も使えます |
| 同じお客様の次の取引 | 別取引の本人確認は自動完了しません。対象の取引番号を確かめて記録します |
---
# 接客を始める前に
Source: https://docs.toreca-cloud.com/guides/purchase/counter-preparation
店舗買取の受付を始める前に、作業する店舗、店員が操作する端末、現金を渡すレジを確認します。準備ができたら、[店舗買取の流れ](/guides/purchase/counter)へ進んでください。
## 1. ログインして、店舗を確認する
[ログイン](/guides/getting-started/login)したら、サイドバーのいちばん下にある、自分の名前と店舗名のボタンを押します。①「組織」で、作業する店舗にチェックが付いているか確認します。別の店舗が選ばれていたら、作業する店舗を選び直してください。
表示する言語を変えるときは、同じメニューの②「言語」で選びます。
## 2. 店員が使う端末を用意する
接客に使うPCやタブレットで管理画面を開き、インターネットにつながることを確認します。受付・カードの登録・査定・本人確認の記録・支払いは、店員がこの管理画面で操作します。
## 3. 現金管理を使う店舗は、レジを開始する
サイドバーの「現金管理」を開き、支払いに使うレジを選びます。「営業中」なら、そのレジを使えます。「未開始」または「次回開始前」なら、「レジを開始」を押します。
1. ①「営業日」を確認します。
2. レジの現金を実際に数え、②「開始時の現金」に金種ごとの枚数を入れます。空欄の金種は0枚として数え、表の最後の行に合計が出ます。
3. 前回の繰越と金額が違う場合は、③「メモ・確認事項」に理由を書きます。
4. 「レジを開始」を押し、レジが「営業中」になったことを確認します。
すでに営業中のレジを、接客のたびに開始し直す必要はありません。前の営業日が残っている場合は、先にその営業を締めます。レジがない、現金管理が表示されない、現金を補充したい場合は、[現金管理とレジ締め](/guides/purchase/cash)を確認してください。
## 初めて店舗買取を使うとき
店舗の初期設定がまだなら、次の点を管理者に確認してください。
- 古物商許可の情報が登録されていること。
- 店頭買取が使えることと、店頭の支払い方法が決まっていること。
- 振込払いを使う場合は、申請後の承認・実行・結果記録を担当する人が決まっていること。
標準のスタッフは、店舗の承認ルールを満たした現金払いを手渡し完了まで進められます。振込払いは、申請前の口座・送料・承諾証拠・PSA番号を整えて申請するところまで担当します。申請後に内容を直す場合は、権限を持つ担当者に差戻しを依頼します。
## 準備ができたら
[店舗買取の流れ](/guides/purchase/counter)の「買取依頼を登録して、カードを追加する」へ進みます。来店予約があるお客様は、[来店予約](/guides/purchase/reservations)から受付すると、作成済みの取引を開けます。
## 困ったとき
| 起きていること | 確認すること |
| ------------------------------ | ------------------------------------------------------------------------------------------------------------- |
| 作業する店舗が「組織」に出ない | その店舗への招待と参加が済んでいるか、管理者に確認します |
| レジを開始できない | 前の営業が残っていないか、現金管理の操作権限があるか確認します([現金管理とレジ締め](/guides/purchase/cash)) |
---
# 店頭の端末
Source: https://docs.toreca-cloud.com/guides/purchase/counter-tablets
店頭の端末は、店頭の買取で、お客様に最終見積を確認してもらうために店に置くiPadなどの端末です。お客様は端末の画面で買取内容を確かめ、お客様情報の入力・同意・署名をします。お客様のスマートフォンを使う方法もあり、端末を登録しなくても店頭買取はできます。
取引そのものの進め方は[店頭買取をはじめる](/guides/purchase/counter)で説明しています。
## 最初に用意するもの
- 端末の登録・変更ができるのは、設定を管理する権限があるメンバーです(オーナーと管理者)。ほかのメンバーは一覧を見られます
- カメラのあるiPadなどの端末と、トレカクラウドにつながるインターネット
- 端末を置く拠点(任意)
## 流れと端末の状態
| 順番 | やること | 端末の状態 |
| ---- | ------------------------------------ | ------------ |
| 1 | 端末を登録して、QRコードを出す | 登録待ち |
| 2 | 端末のカメラでQRコードを読み取る | 利用中 |
| 3 | 取引から端末に最終見積を出す | 利用中 |
| 4 | (必要なら)登録し直す・利用を止める | 利用中・停止 |
QRコードを読み取らないまま10分たつと、状態は「未登録」になります。そのときは「登録し直す」で新しいQRコードを出します。
## 1. 端末を登録して、QRコードを出す
「待機画面のリンク」の「コピー」で、登録済み端末を開き直すURLをコピーできます。コピーできない場合は、URL欄を選択して手動でコピーしてください。このリンクを別の端末で開くだけでは登録されません。
「設定」の「店頭の端末」を開き、①の「端末を登録」を押します。
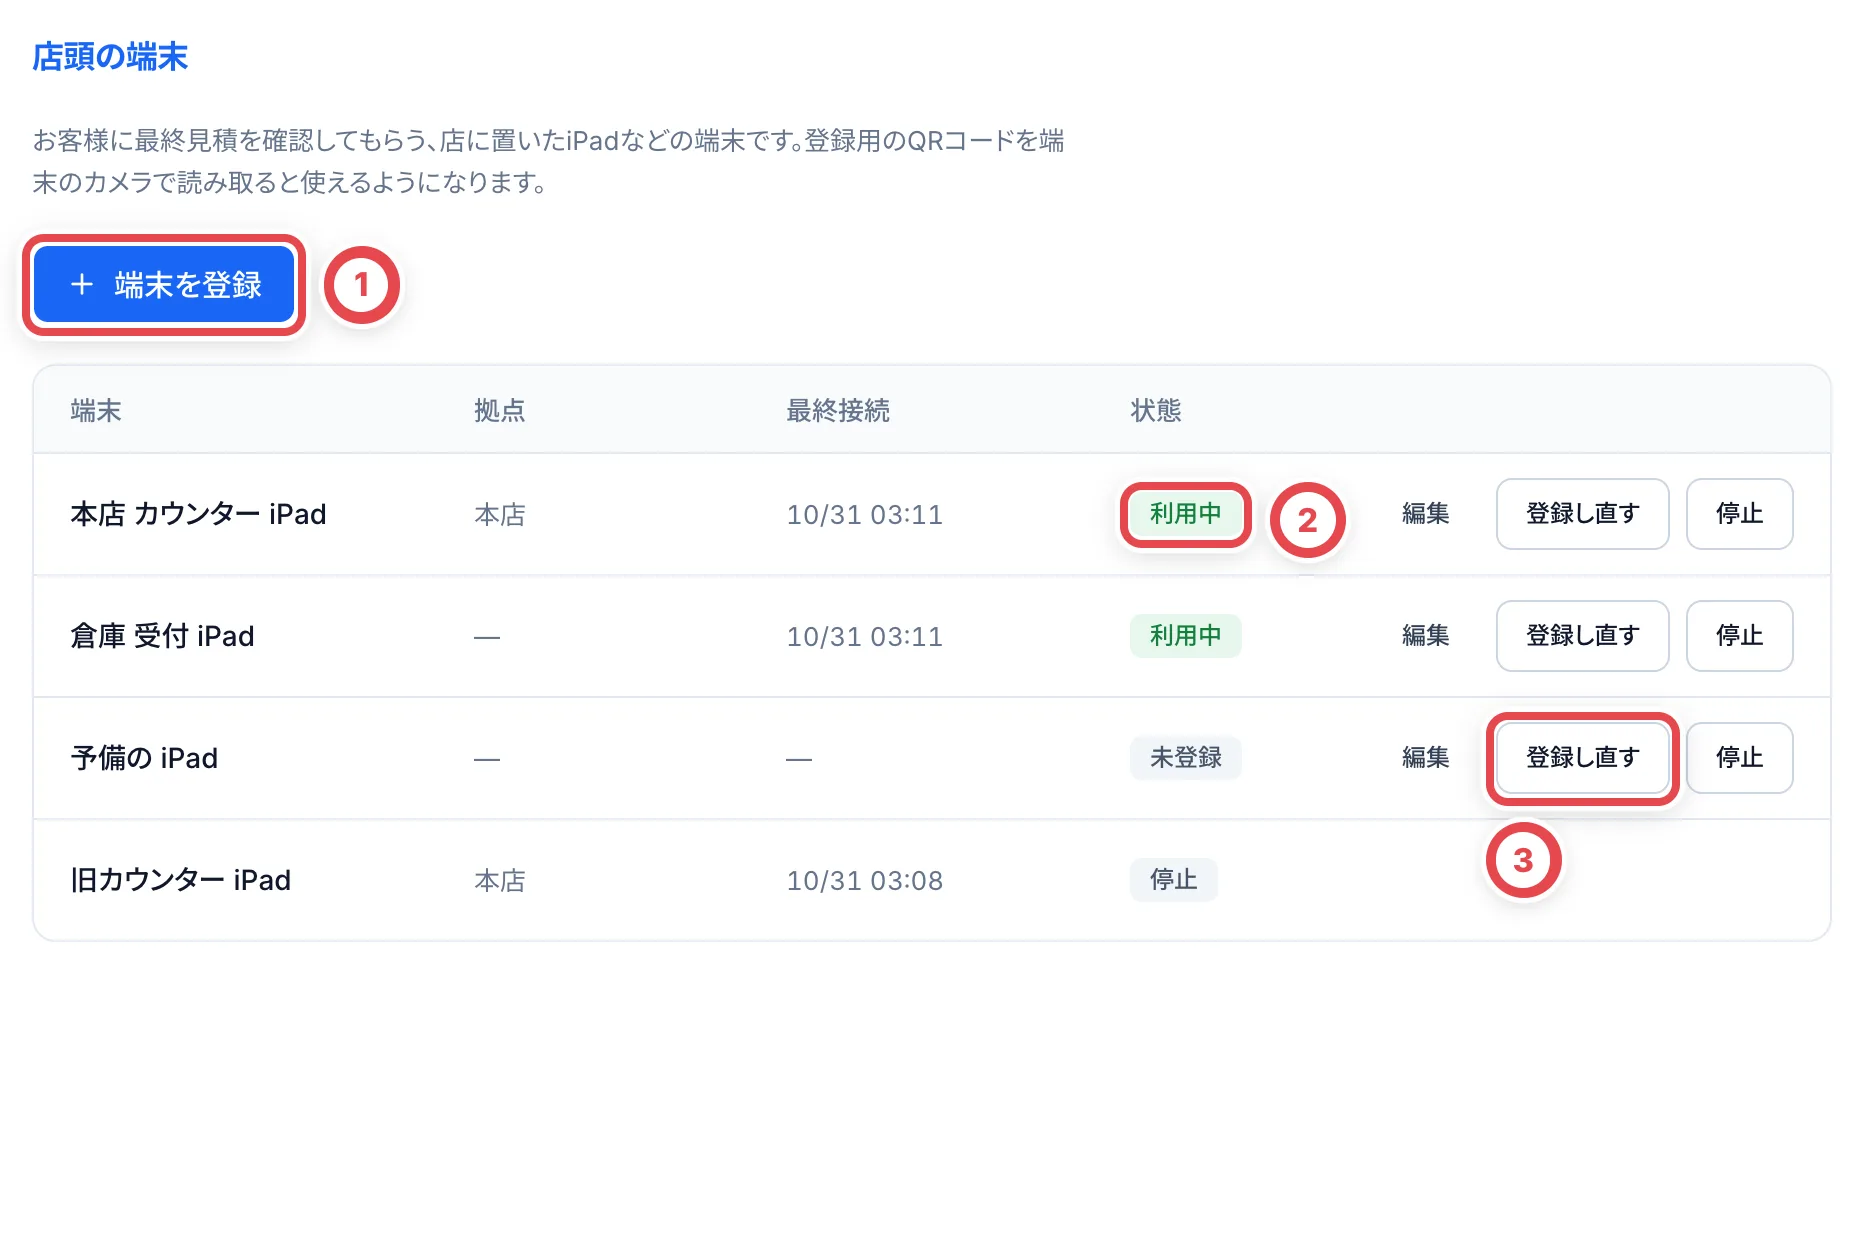 「店頭の端末を登録」が開いたら、①の「端末の名前」(60文字まで)と、②の「拠点」(任意)を入れます。名前は、スタッフが取引から送り先を選ぶときに表示されるので、置き場所が分かる名前にします。③の「登録用のQRコードを出す」を押します。
:::warning
「登録用のQRコードを出す」を押すと、その場で端末が一覧に加わります。
:::
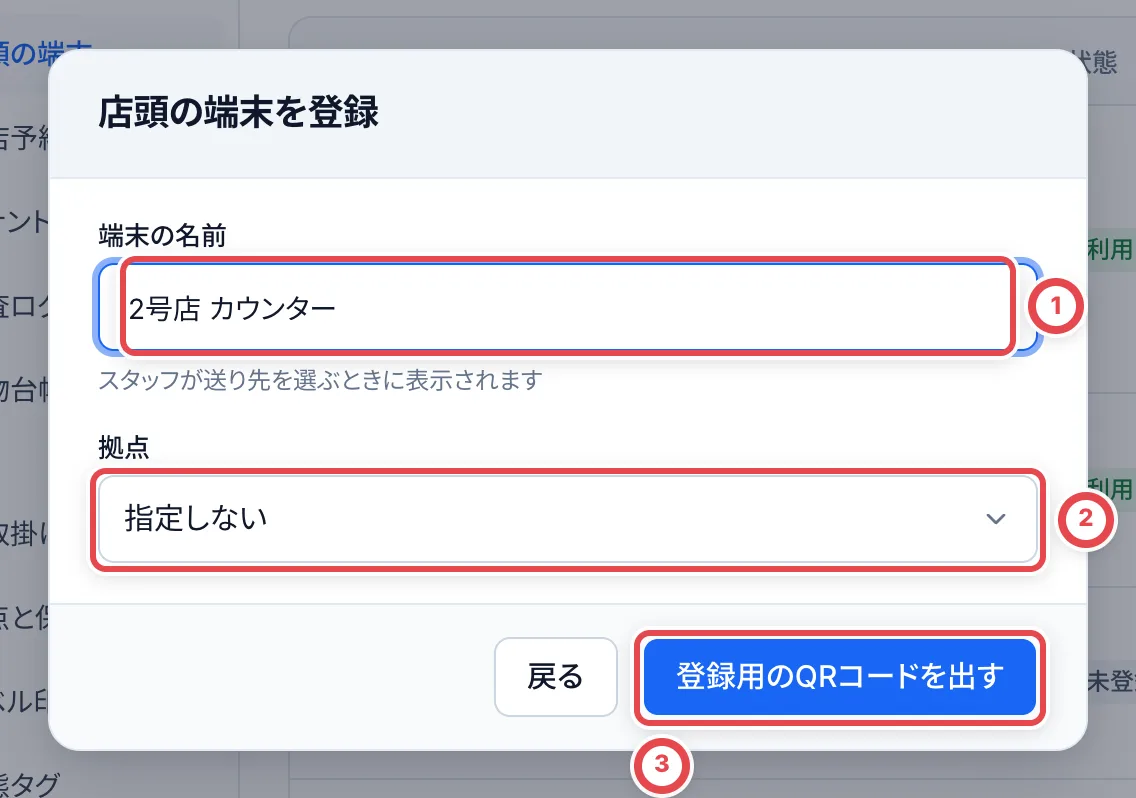 ## 2. 端末のカメラでQRコードを読み取る
「端末のカメラで読み取ってください」が開きます。登録するiPadのカメラで①のQRコードを読み取り、開いたページをそのまま置いておきます。これで端末の登録が終わります。読み取ると、管理画面のこのダイアログは数秒で自動的に閉じ、「(端末の名前)を登録しました」と表示されて、一覧の状態が「利用中」になります。
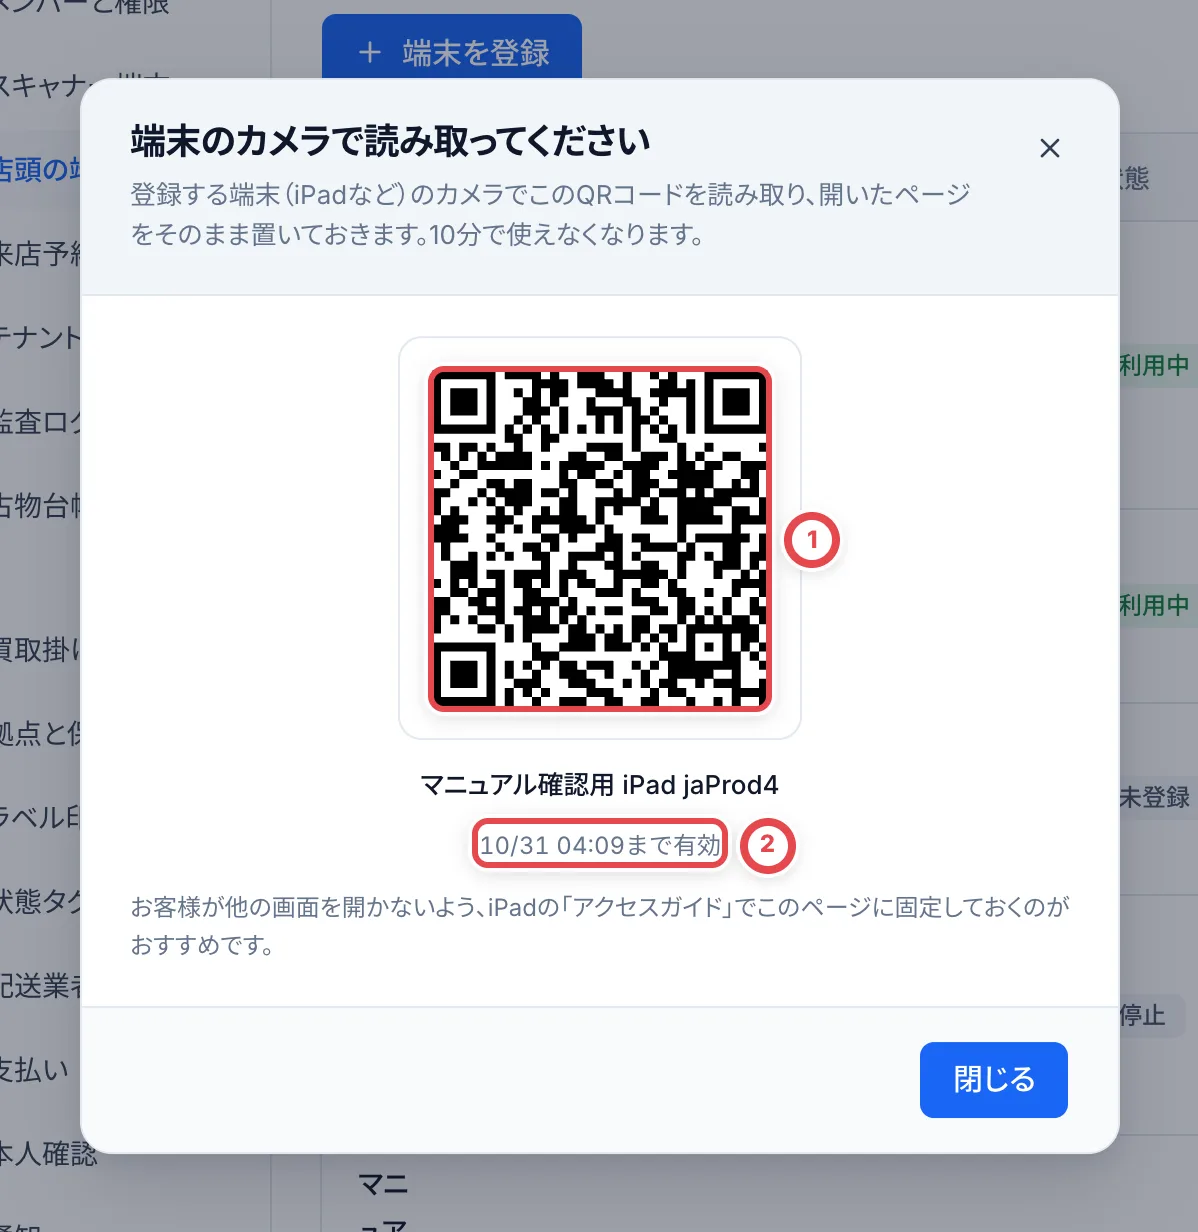 ①をiPadのカメラで読み取ります。②の時刻を過ぎると使えなくなります。
- QRコードは、出してから10分で使えなくなります。1回読み取ると、もう一度は使えません
- カメラで読み取れないときは、「登録用リンク」をコピーして登録する端末のブラウザで開けます。QRコードと同じ有効期限・1回限りのリンクです
- このダイアログを閉じると、同じQRコードはもう出せません。読み取る前に閉じたときは、一覧の「登録し直す」で出し直します
- お客様がほかの画面を開かないよう、iPadの「アクセスガイド」でこのページに固定しておくのがおすすめです
登録が終わった端末には、取引が届くまで「いらっしゃいませ」と表示されます。
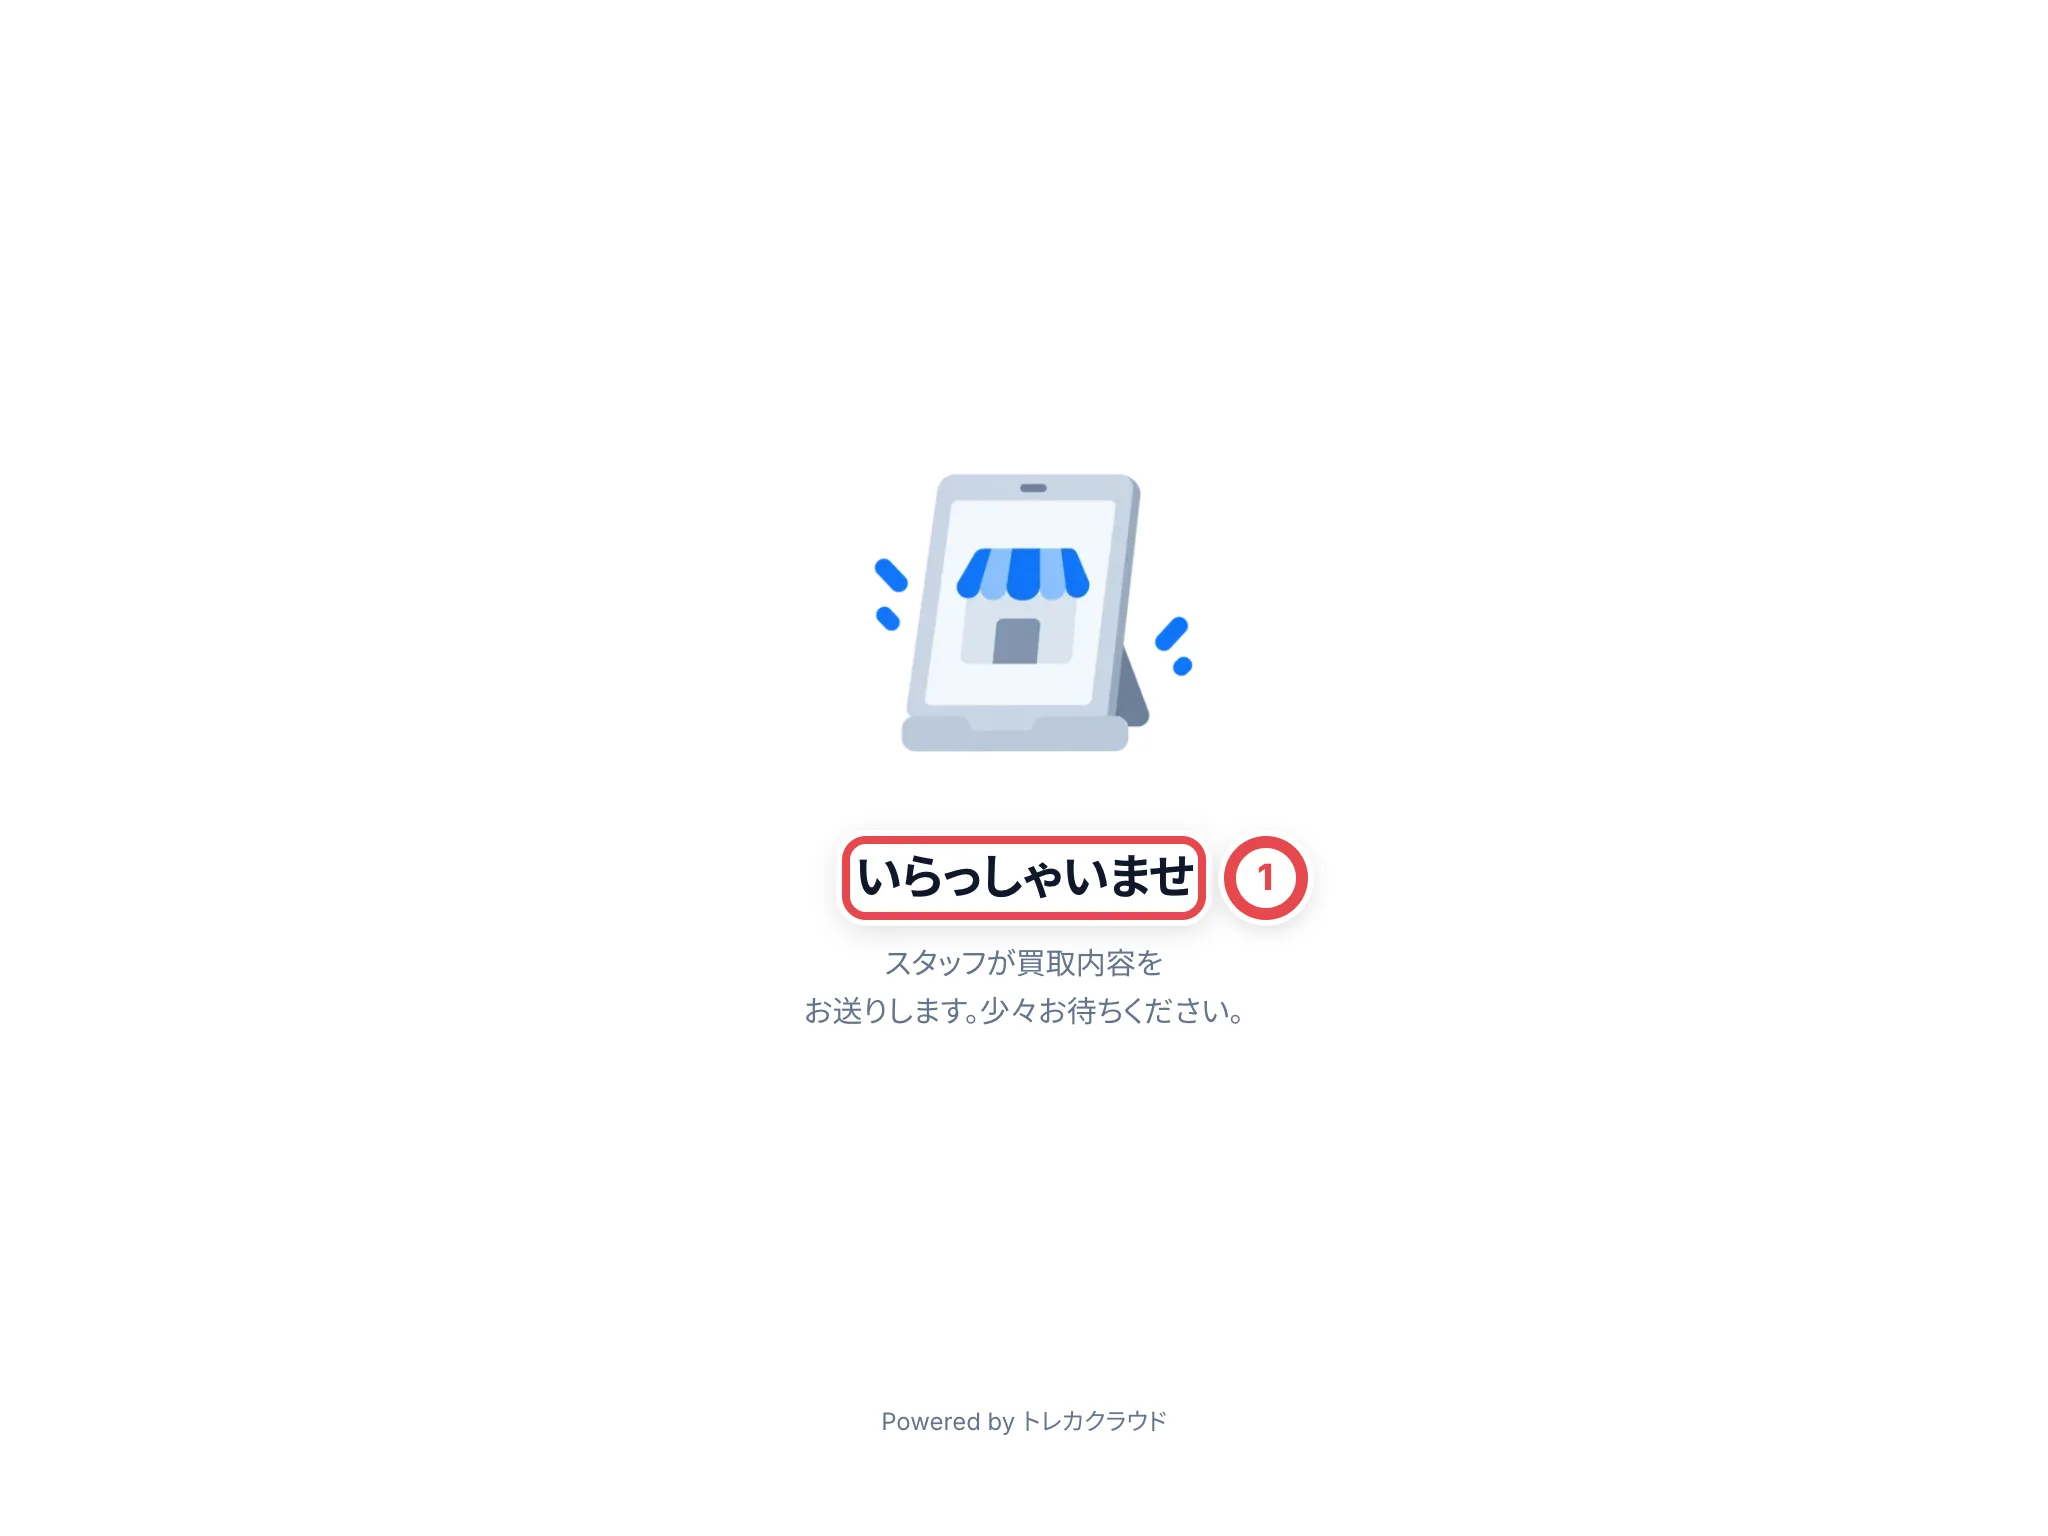 :::note
お客様の画面は日本語だけです。
:::
### 待機画面のスタッフ操作
「スタッフ用」から「スタッフとしてログイン」でログイン画面を開けます。端末の接続はスタッフアカウントとは別のため、ログインだけでは端末は登録されません。
「この端末の接続を解除」を選び、確認画面で確定すると、このブラウザの接続が無効になります。再び使うには、設定の「登録し直す」で発行したQRコードか登録用リンクをこの端末で開いてください。お客様が確認中の場合は、取引側で確認を終了してから解除します。
## 3. 取引から端末に最終見積を出す
査定の版を保存すると、最終見積のPDFが開きます。受け取りの確認操作は不要です。品物・数量・金額を確認し、「お客様に確認してもらう」で表示先を選びます。保存だけでは、お客様の承諾は記録されません。
店頭の取引で最終査定を保存すると、取引の画面の「次の操作」に「お客様に確認してもらう」が出ます。押すと「お客様に確認してもらう」が開き、「表示する場所」に、利用中の端末とお客様のスマートフォンが並びます。
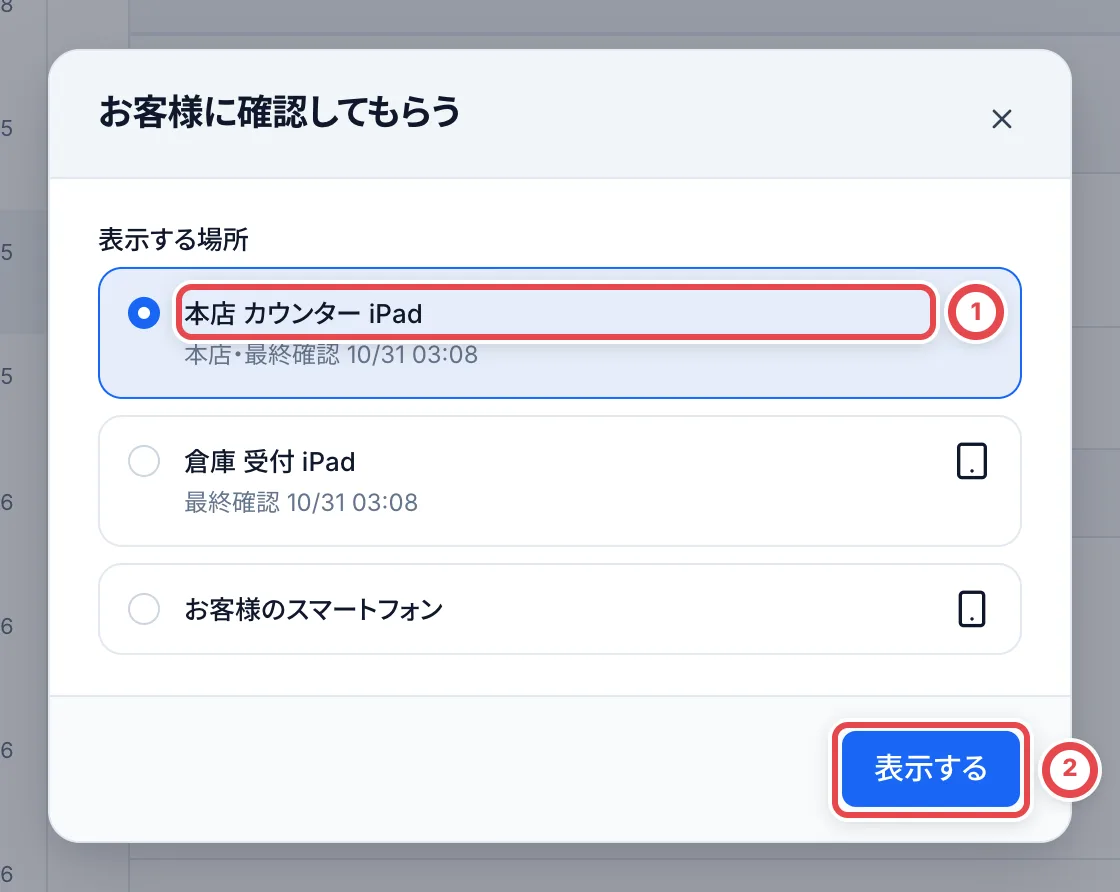 ①で端末を選び、②の「表示する」を押します。**押すとすぐ端末に出て、最終見積の提示も記録されます。** 端末には合計金額と「内容を確認する」が出るので、端末をお客様に渡します。
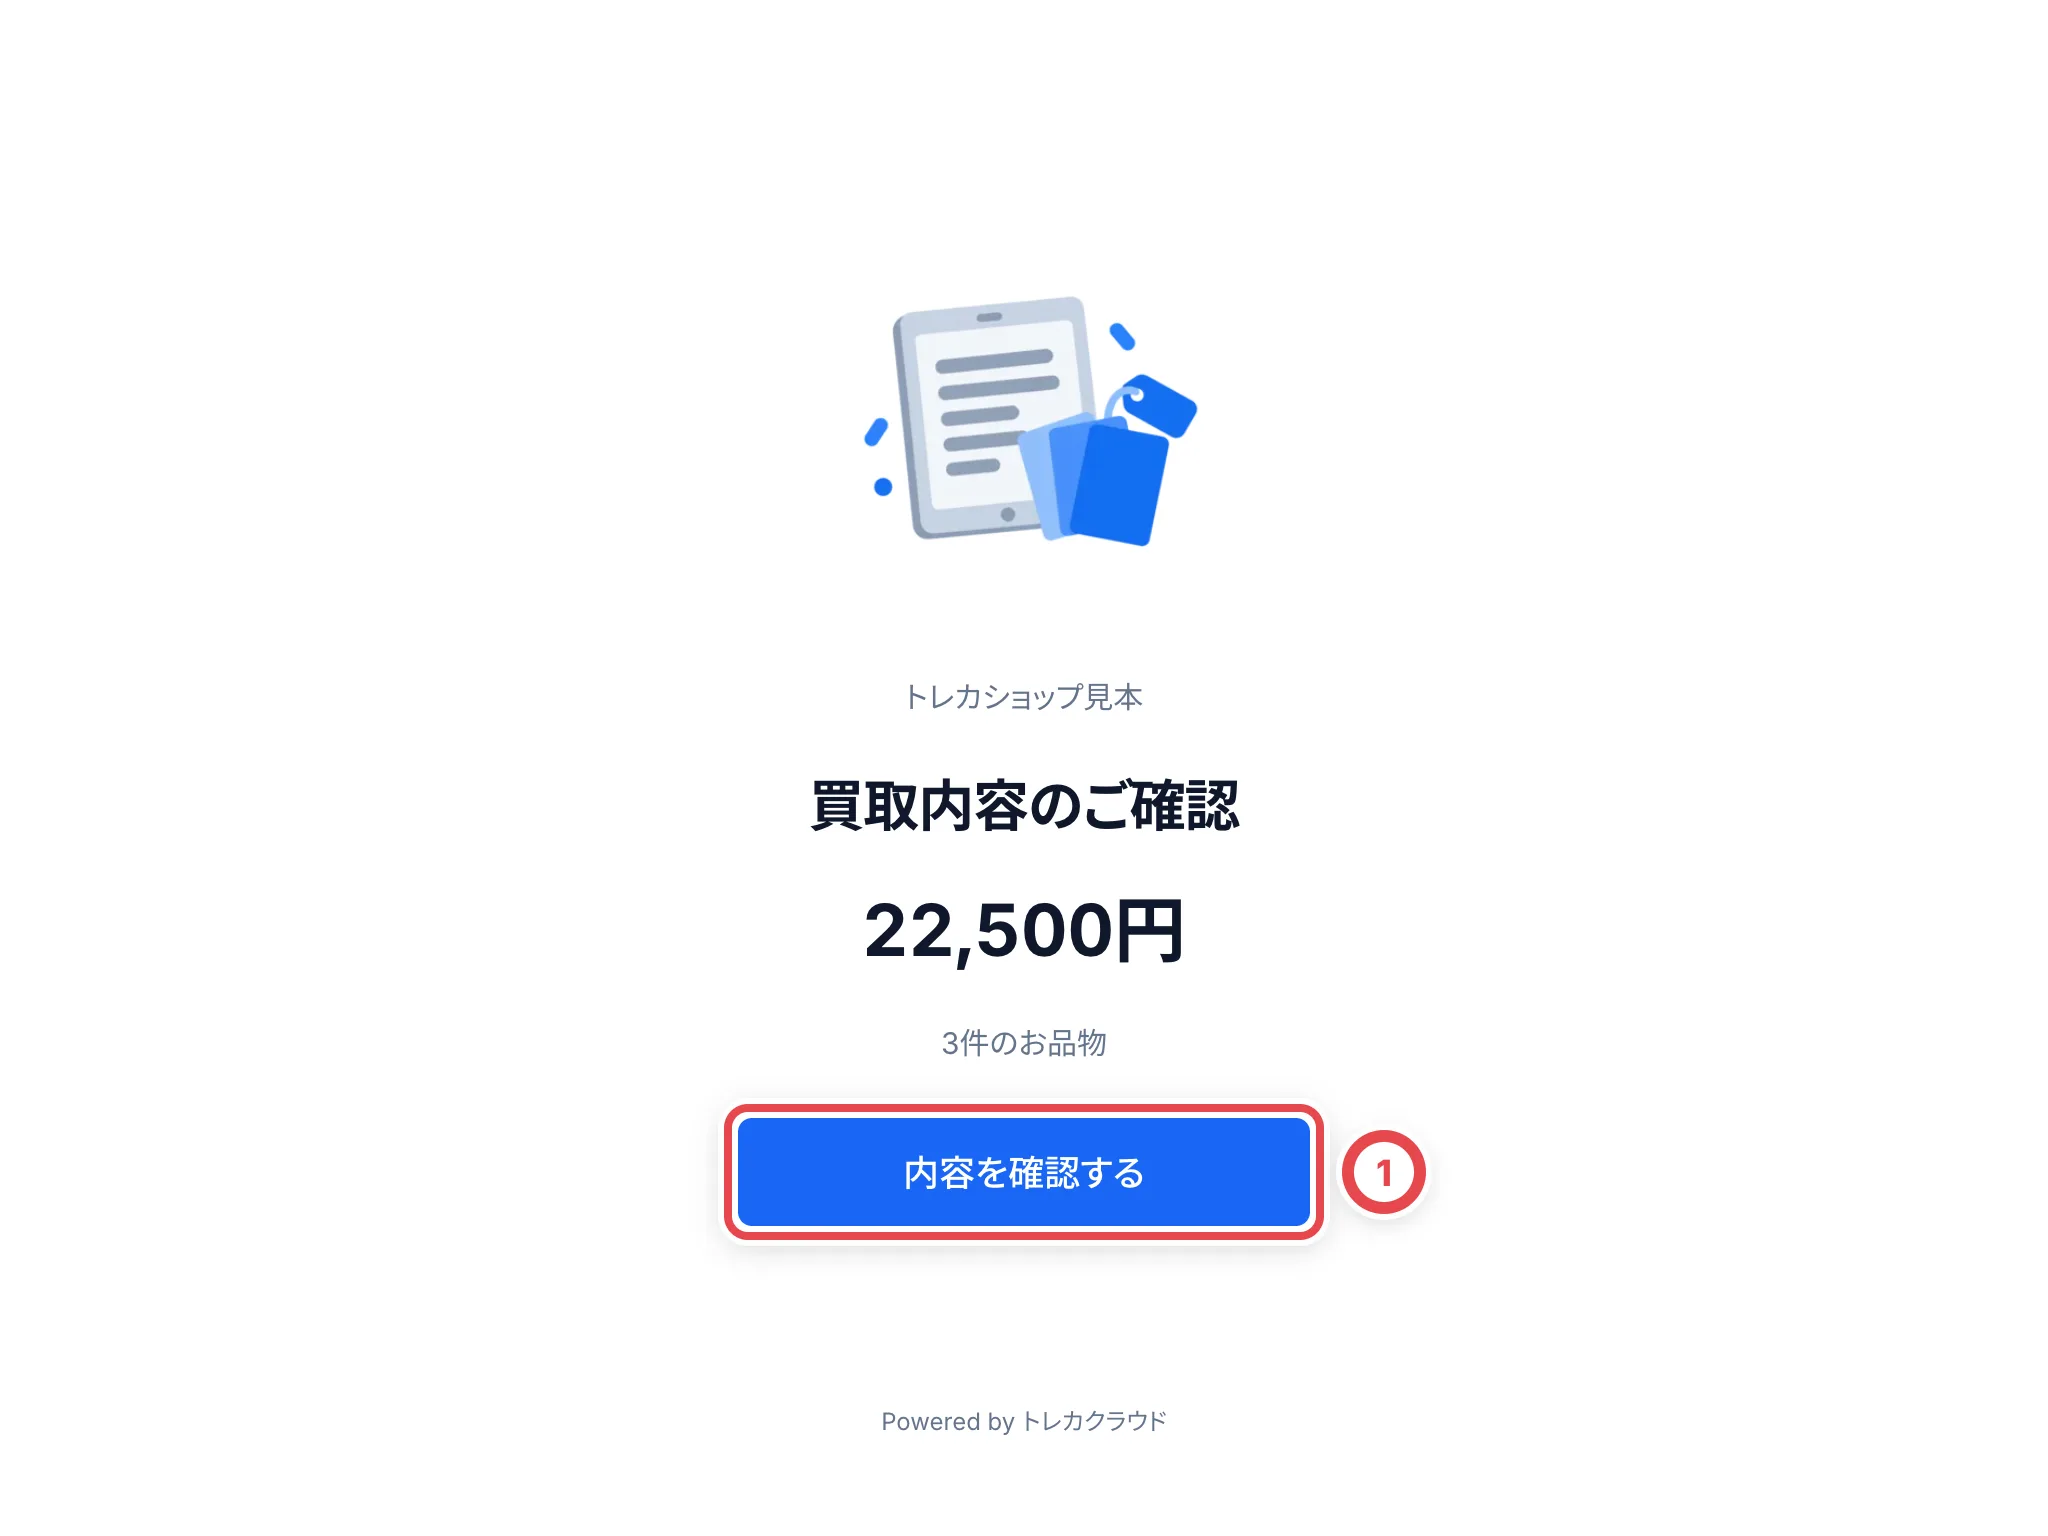 このあとお客様は、買取内容の確認・お客様情報・同意と署名の画面(お客様撮影の設定では、同意の前に本人確認書類の撮影も追加されます)を進みます。画面の中身と、スタッフ側での状況の見方は、[店頭買取をはじめる](/guides/purchase/counter)の手順5で説明しています。お客様が送信すると、端末は12秒後に待機画面に戻ります。
- 端末への表示は30分で切れます。切れたときは、取引の画面からもう一度表示します
- 1台の端末に出せるのは1件ずつです。ほかのお客様が確認している間は、その端末には送れません
## 4. (必要なら)登録し直す・利用を止める
### 名前や拠点を変える
一覧の「編集」で、端末の名前と拠点を変えられます。「変更を保存する」を押すとその場で保存されます。端末のつながりは切れません。
### 登録し直す
端末をなくしたとき、交換するとき、QRコードの期限が切れたときは、一覧の「登録し直す」を押します。
:::warning
確認の画面で①の「登録し直す」を押すと、今つながっている端末は使えなくなり、表示中の内容も取り消されます。
:::
新しいQRコードが出たら、使う端末で読み取ります。
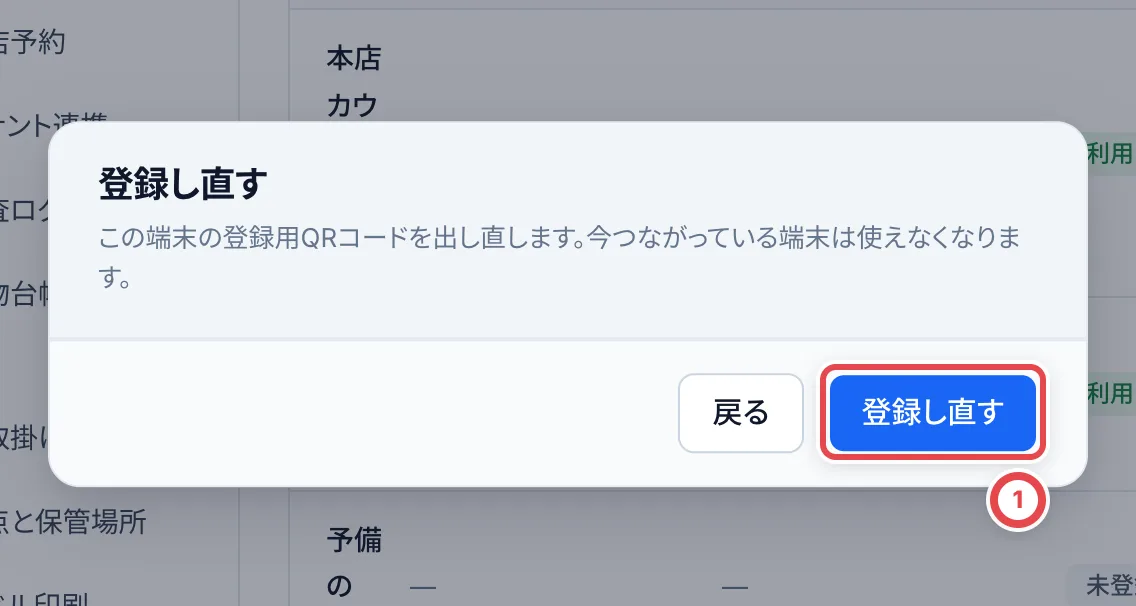 ### 利用を止める
使わなくなった端末は、一覧の「停止」を押します。
:::warning
確認の画面で①の「利用を止める」を押すと、元に戻せません。
:::
その端末にはお客様の画面を出せなくなり、表示中の内容も取り消されます。**止めた端末は元に戻せません。** また使うときは、新しい端末として登録します。止めた端末は、一覧に「停止」として残ります。
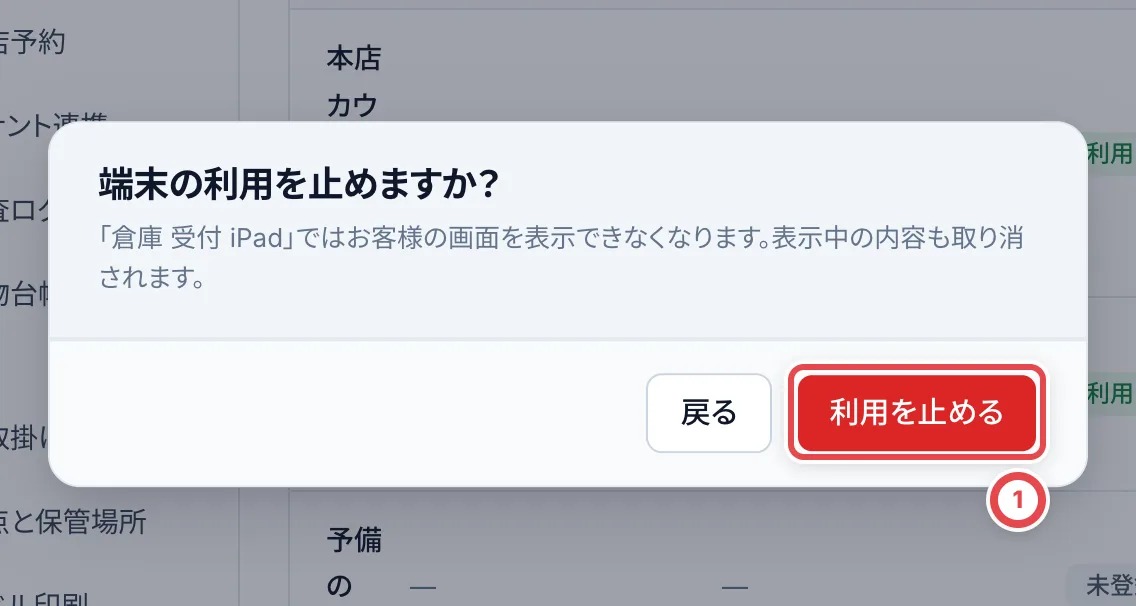 登録がない端末や、止めた端末でページを開くと、「この端末は登録されていません」と表示されます。
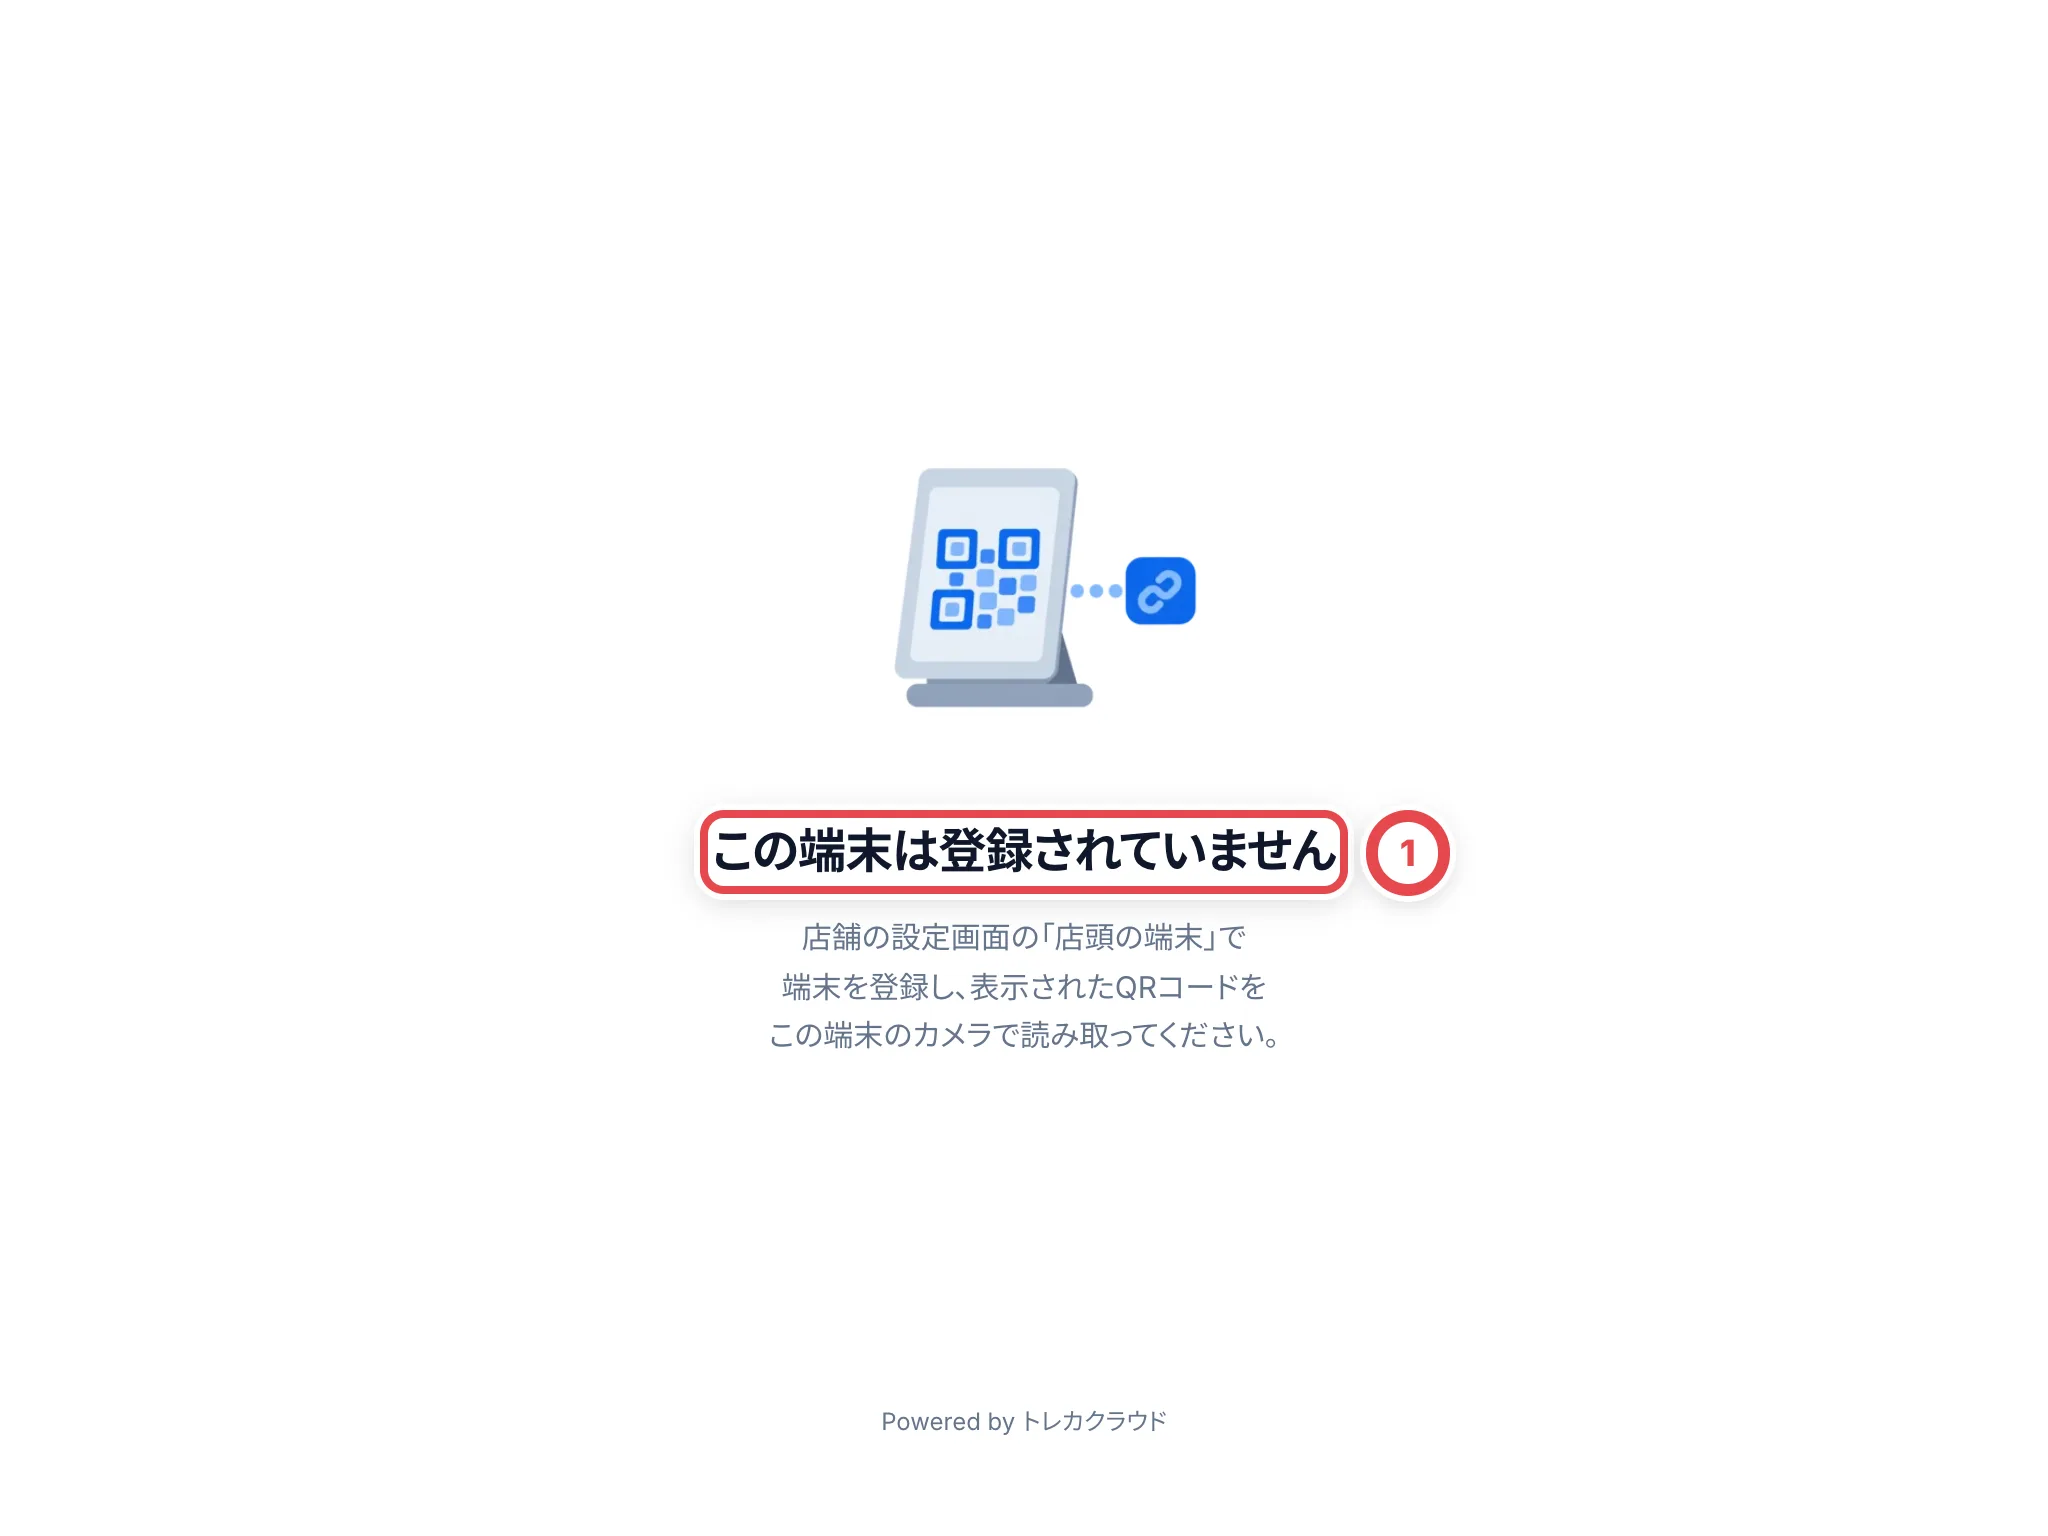 ## 困ったとき
| 起きていること | 確かめること・直し方 |
| ------------------------------------------------------------------------ | ------------------------------------------------------------------------------------------------------ |
| 「端末を登録」がない | 設定を管理する権限がありません。オーナーか管理者に頼みます。 |
| 「登録用のQRコードの期限が切れています」と端末に出る | 出してから10分過ぎています。一覧の「登録し直す」で出し直し、すぐに読み取ります。 |
| 状態が「未登録」になっている | QRコードを読み取らないまま10分過ぎました。「登録し直す」で出し直します。 |
| 取引の「表示する場所」に端末が出ない | 状態が「利用中」の端末だけが並びます。一覧で状態を確かめ、必要なら登録し直します。 |
| 「この端末では別のお客様が確認中です。終わってから送ってください」と出る | その端末でほかのお客様が確認しています。終わるのを待つか、別の端末やお客様のスマートフォンに出します。 |
| 端末に「この端末は登録されていません」と出る | 登録し直したか止めたため、この端末は使えません。もう一度登録して、出たQRコードを読み取ります。 |
| 端末に「通信が不安定です。接続が戻るまでお待ちください。」と出る | 端末のインターネット接続を確かめます。 |
---
# 顧客と取引
Source: https://docs.toreca-cloud.com/guides/purchase/customers
同じお客様の買取は、1つの顧客に取引を追加して管理します。査定・見積・振込は取引ごとに進めます。
## 最初に用意するもの
- 顧客の画面を見るには、顧客と買取を見る権限が要ります
- 顧客の追加・名前の変更・状態の変更・メモの編集には、顧客を変える権限が要ります
- LINEのタブ・お客様情報のLINEの欄・受付の要確認は、LINE連携を使っている店舗だけに出ます([LINEと通知](/guides/settings/line-and-notifications))
## この画面でやること
| 順番 | やること | いつ |
| ---- | ---------------------------- | -------------------------------------------- |
| 1 | 顧客を探す | お客様から連絡が来たとき・作業を再開するとき |
| 2 | 顧客を追加する | 初めてのお客様のとき |
| 3 | 顧客の画面で作業のタブを開く | 査定・見積・振込などを進めるとき |
| 4 | 名前を直す | LINEの名前のままで、だれか分かりにくいとき |
| 5 | お客様情報を確かめる | 住所・振込先・LINEのメモを見たいとき |
| 6 | 要注意・アーカイブにする | 注意が要るお客様、もう取引しないお客様のとき |
| 7 | 受付の要確認を片づける | だれのものか自動で決まらない受信が届いたとき |
| 8 | 買取依頼を登録する | 店頭や電話など、LINE以外で受け付けたとき |
| 9 | メモを書き残す | 次に対応する人に伝えたいことがあるとき |
## 1. 顧客を探す
サイドバーの「顧客」を押すと、顧客の画面が開き、左に顧客の一覧が並びます(画面の幅が狭いときは、顧客の画面の上の「顧客の一覧に戻る」から一覧を開きます)。
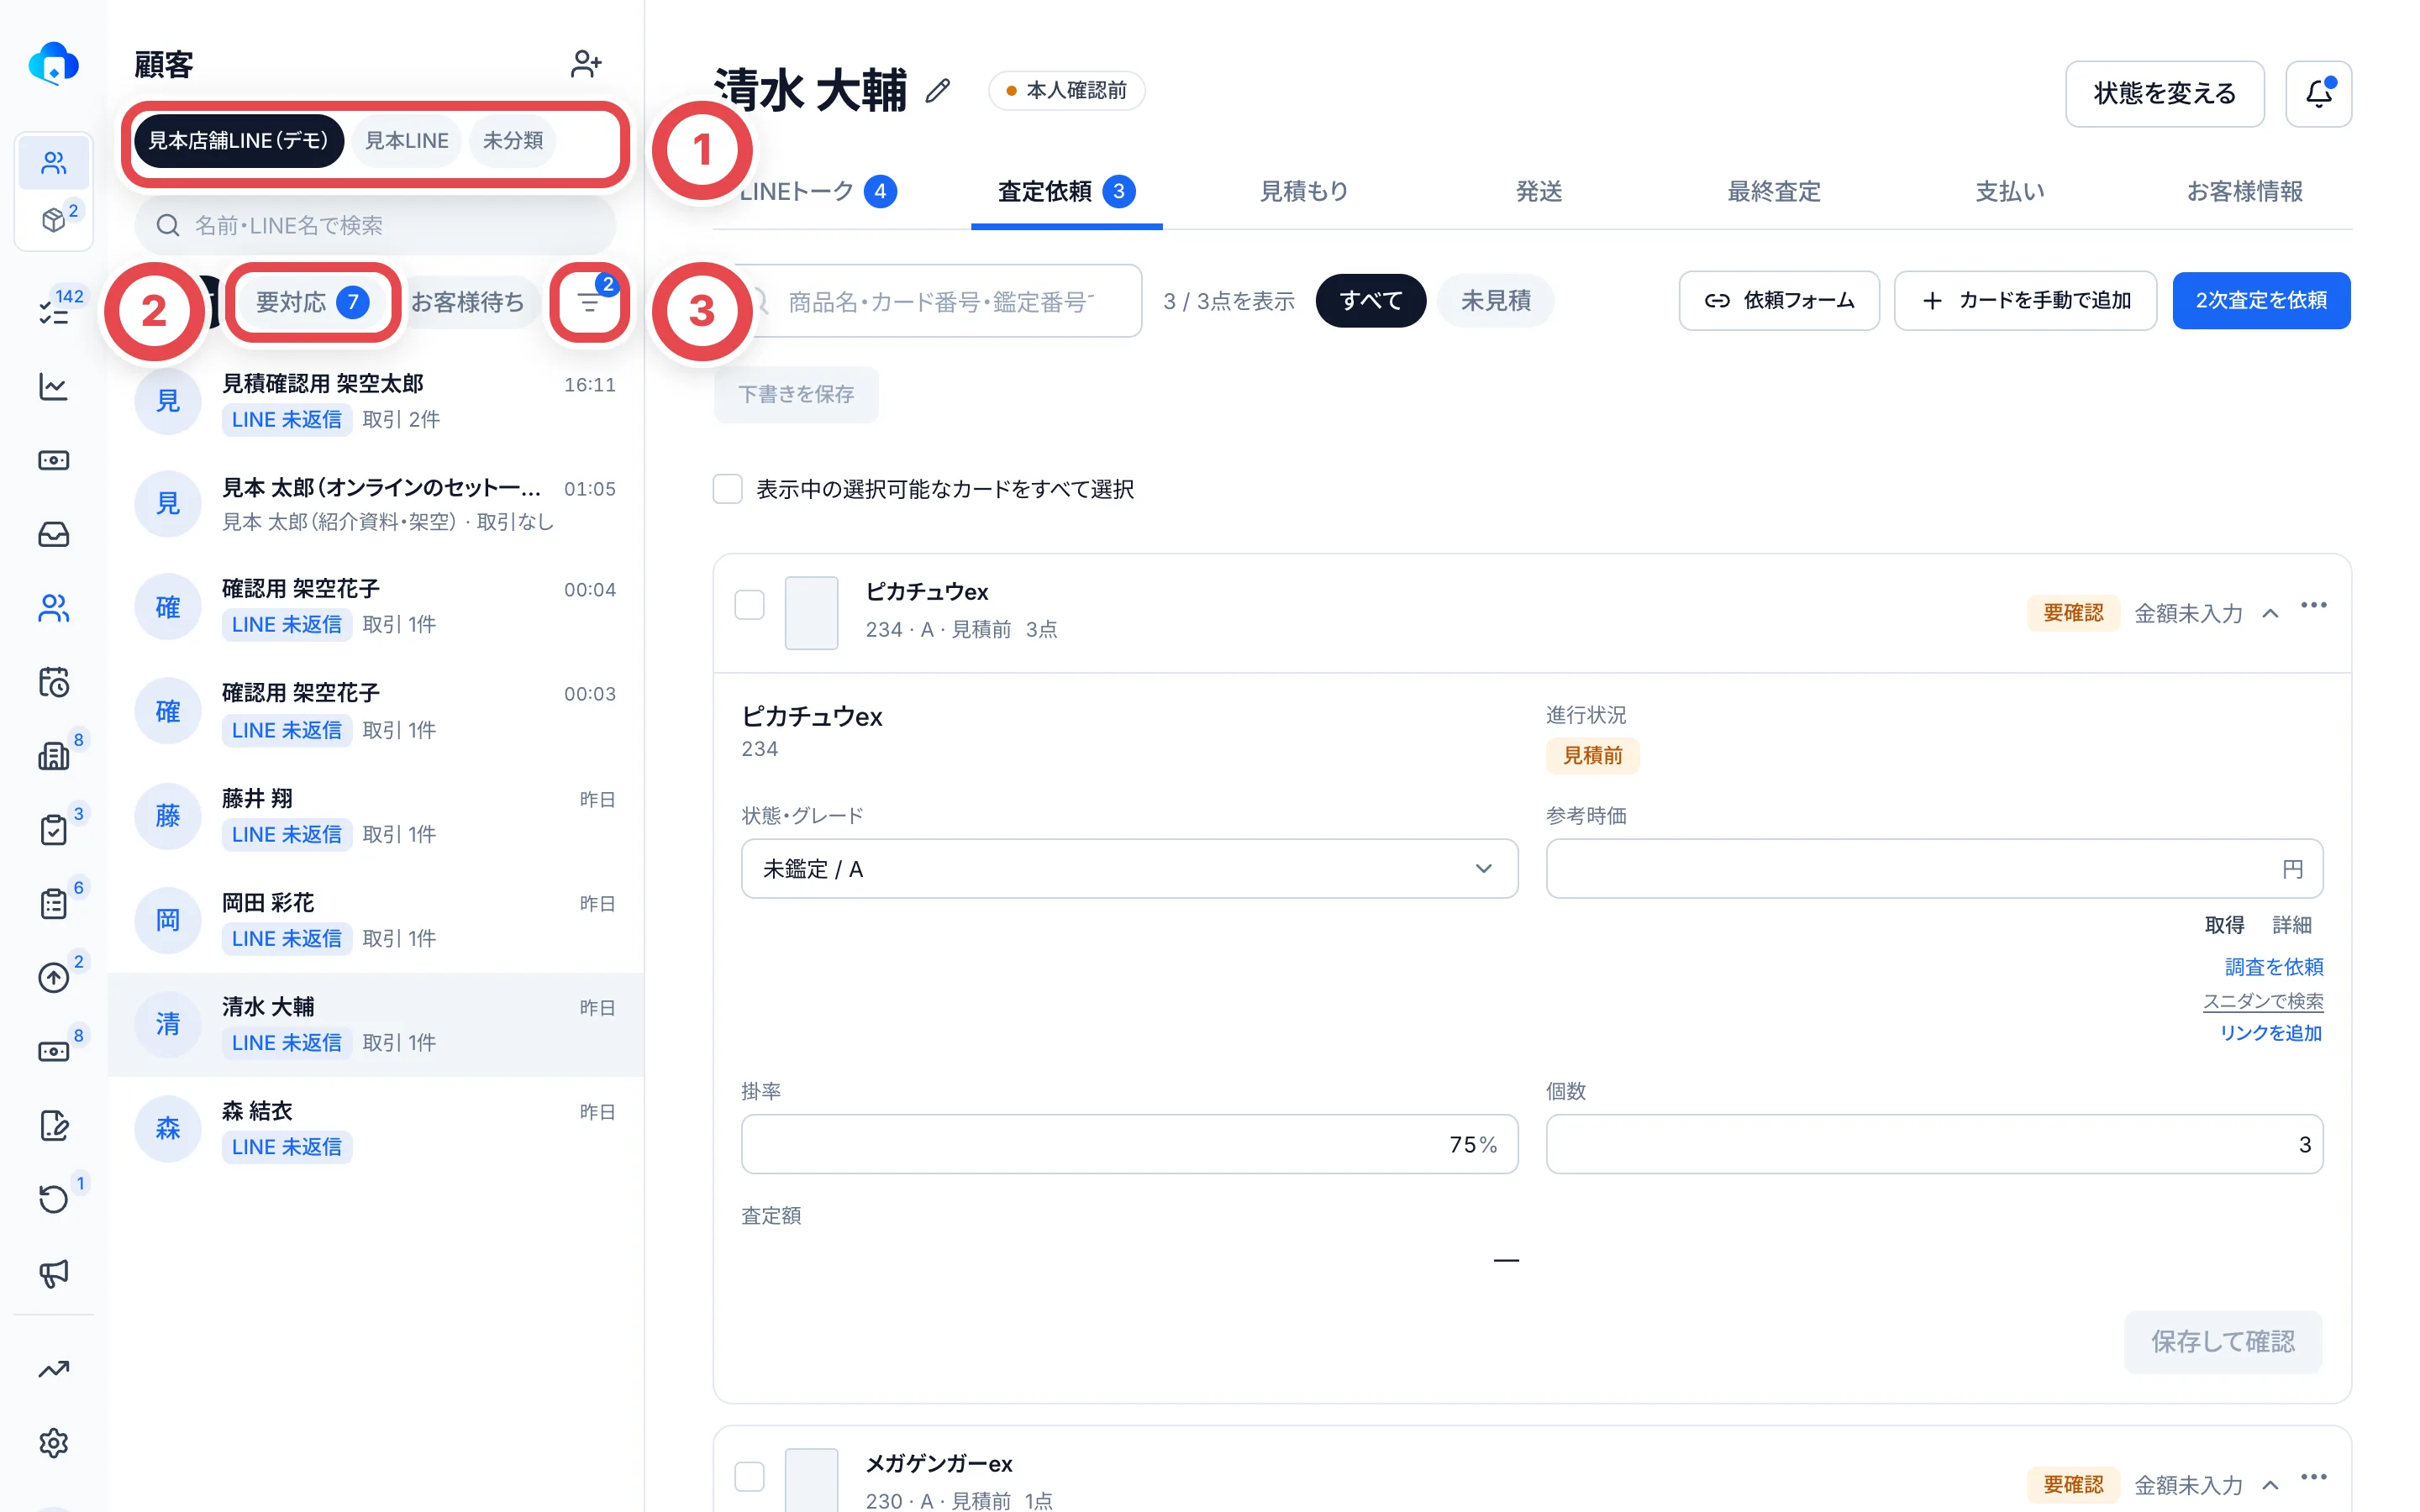 | 場所 | 使い方 |
| --------------------------- | ---------------------------------------------------------------------------------------------------------------- |
| ①アカウントのタブ | LINEの公式アカウントごとに顧客が分かれます。LINEで来ていない顧客や店頭の顧客は「未分類」に入ります |
| 検索 | 名前かLINEの名前の一部を入れます |
| すべて・②要対応・お客様待ち | 「要対応」は店が返信や査定をする番の顧客、「お客様待ち」はお客様の返事や発送を待っている顧客です。数字は件数です |
| ③ほかの絞り込み | 「LINE未登録の友だち」にチェックを入れると、LINEで話しかけてきたけれど、まだ顧客にしていない方が並びます |
一覧の各行には、「LINE 未返信」などの今の状況と、その方の取引の件数(「取引 2件」)が出ます。アーカイブにした顧客も一覧に残ります。
## 2. 顧客を追加する
一覧の上の「顧客」の右にある、人のマーク(顧客を追加)を押します。
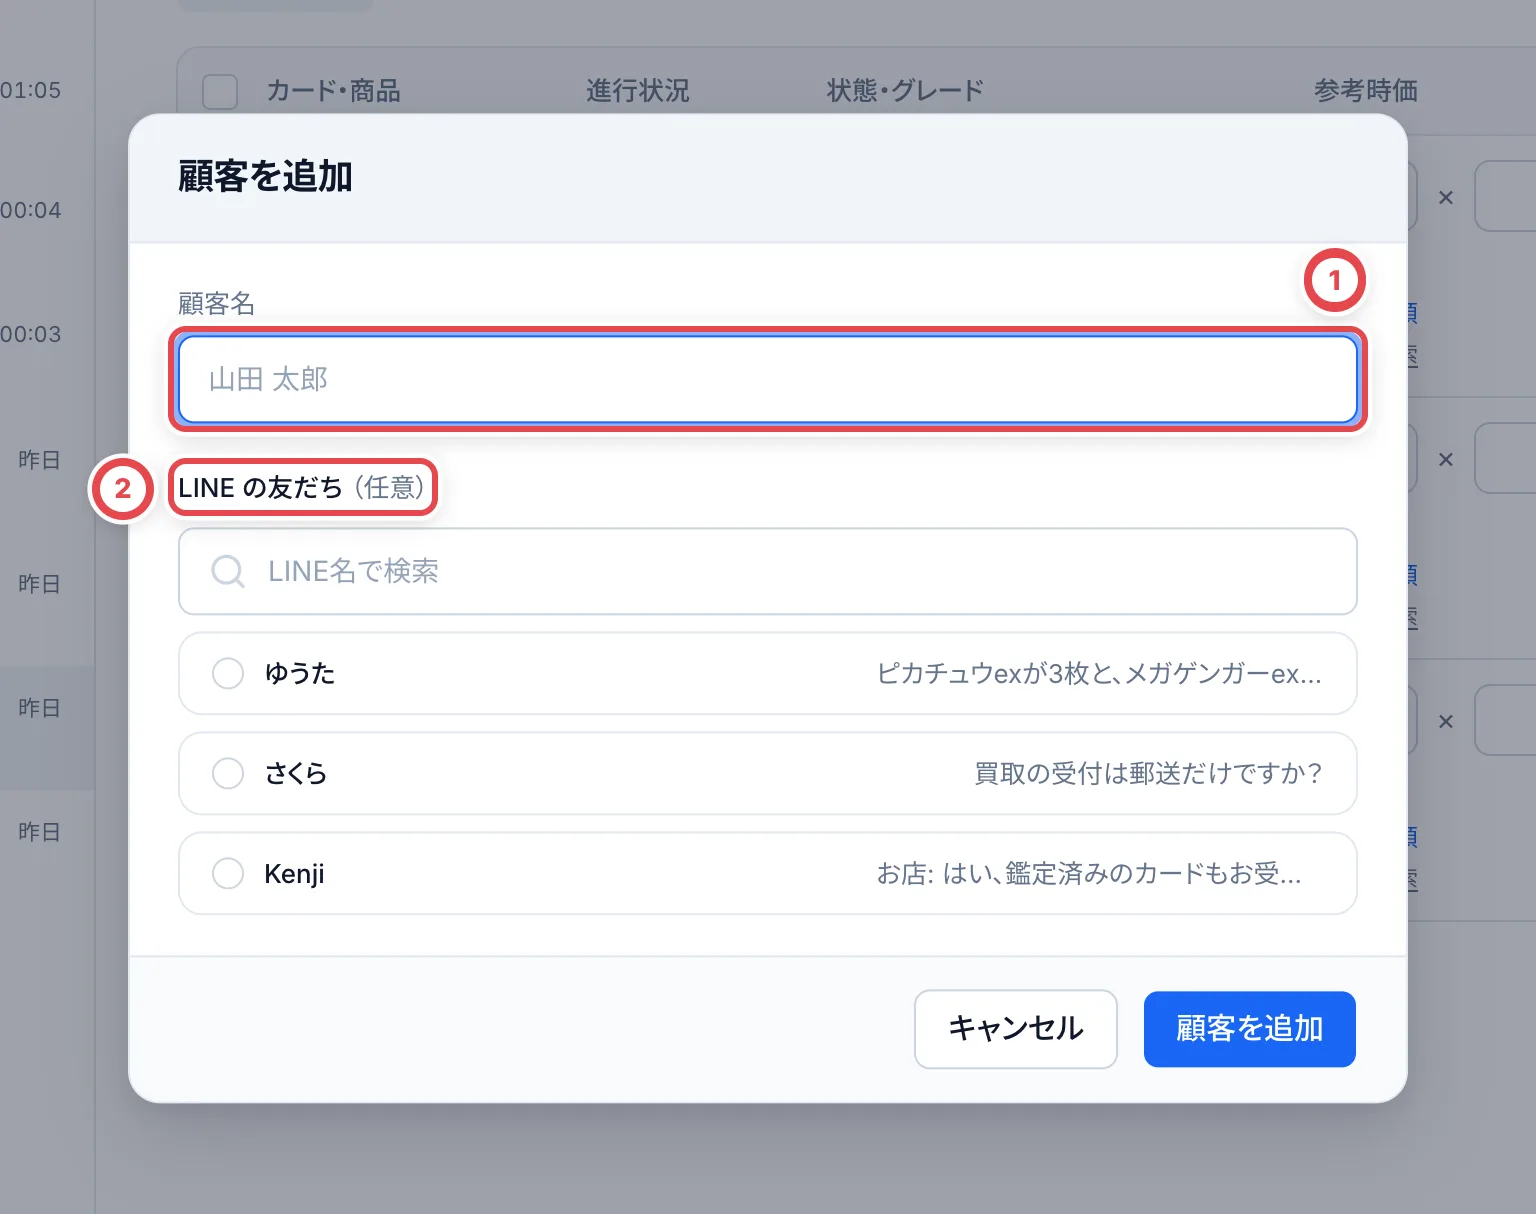 ①の顧客名を入れ、LINEで来ている方なら②の一覧からその方を選び、「顧客を追加」を押します。LINEの友だちは選ばなくてもかまいません。
- 同じような名前の顧客がすでにいると、入力欄の下に「似た名前の顧客」が出ます。同じ方なら、追加せずにその顧客を開いてください
- 顧客を追加しても、取引はまだできません。カードを預かったら、査定依頼のタブでカードを追加するか、8の「買取依頼を登録する」で取引を作ります
## 3. 顧客の画面の見かた
顧客を押すと、その方の画面が開きます。名前の横に、本人確認が済んでいるか(「本人確認済み」「本人確認前」)が出ます。
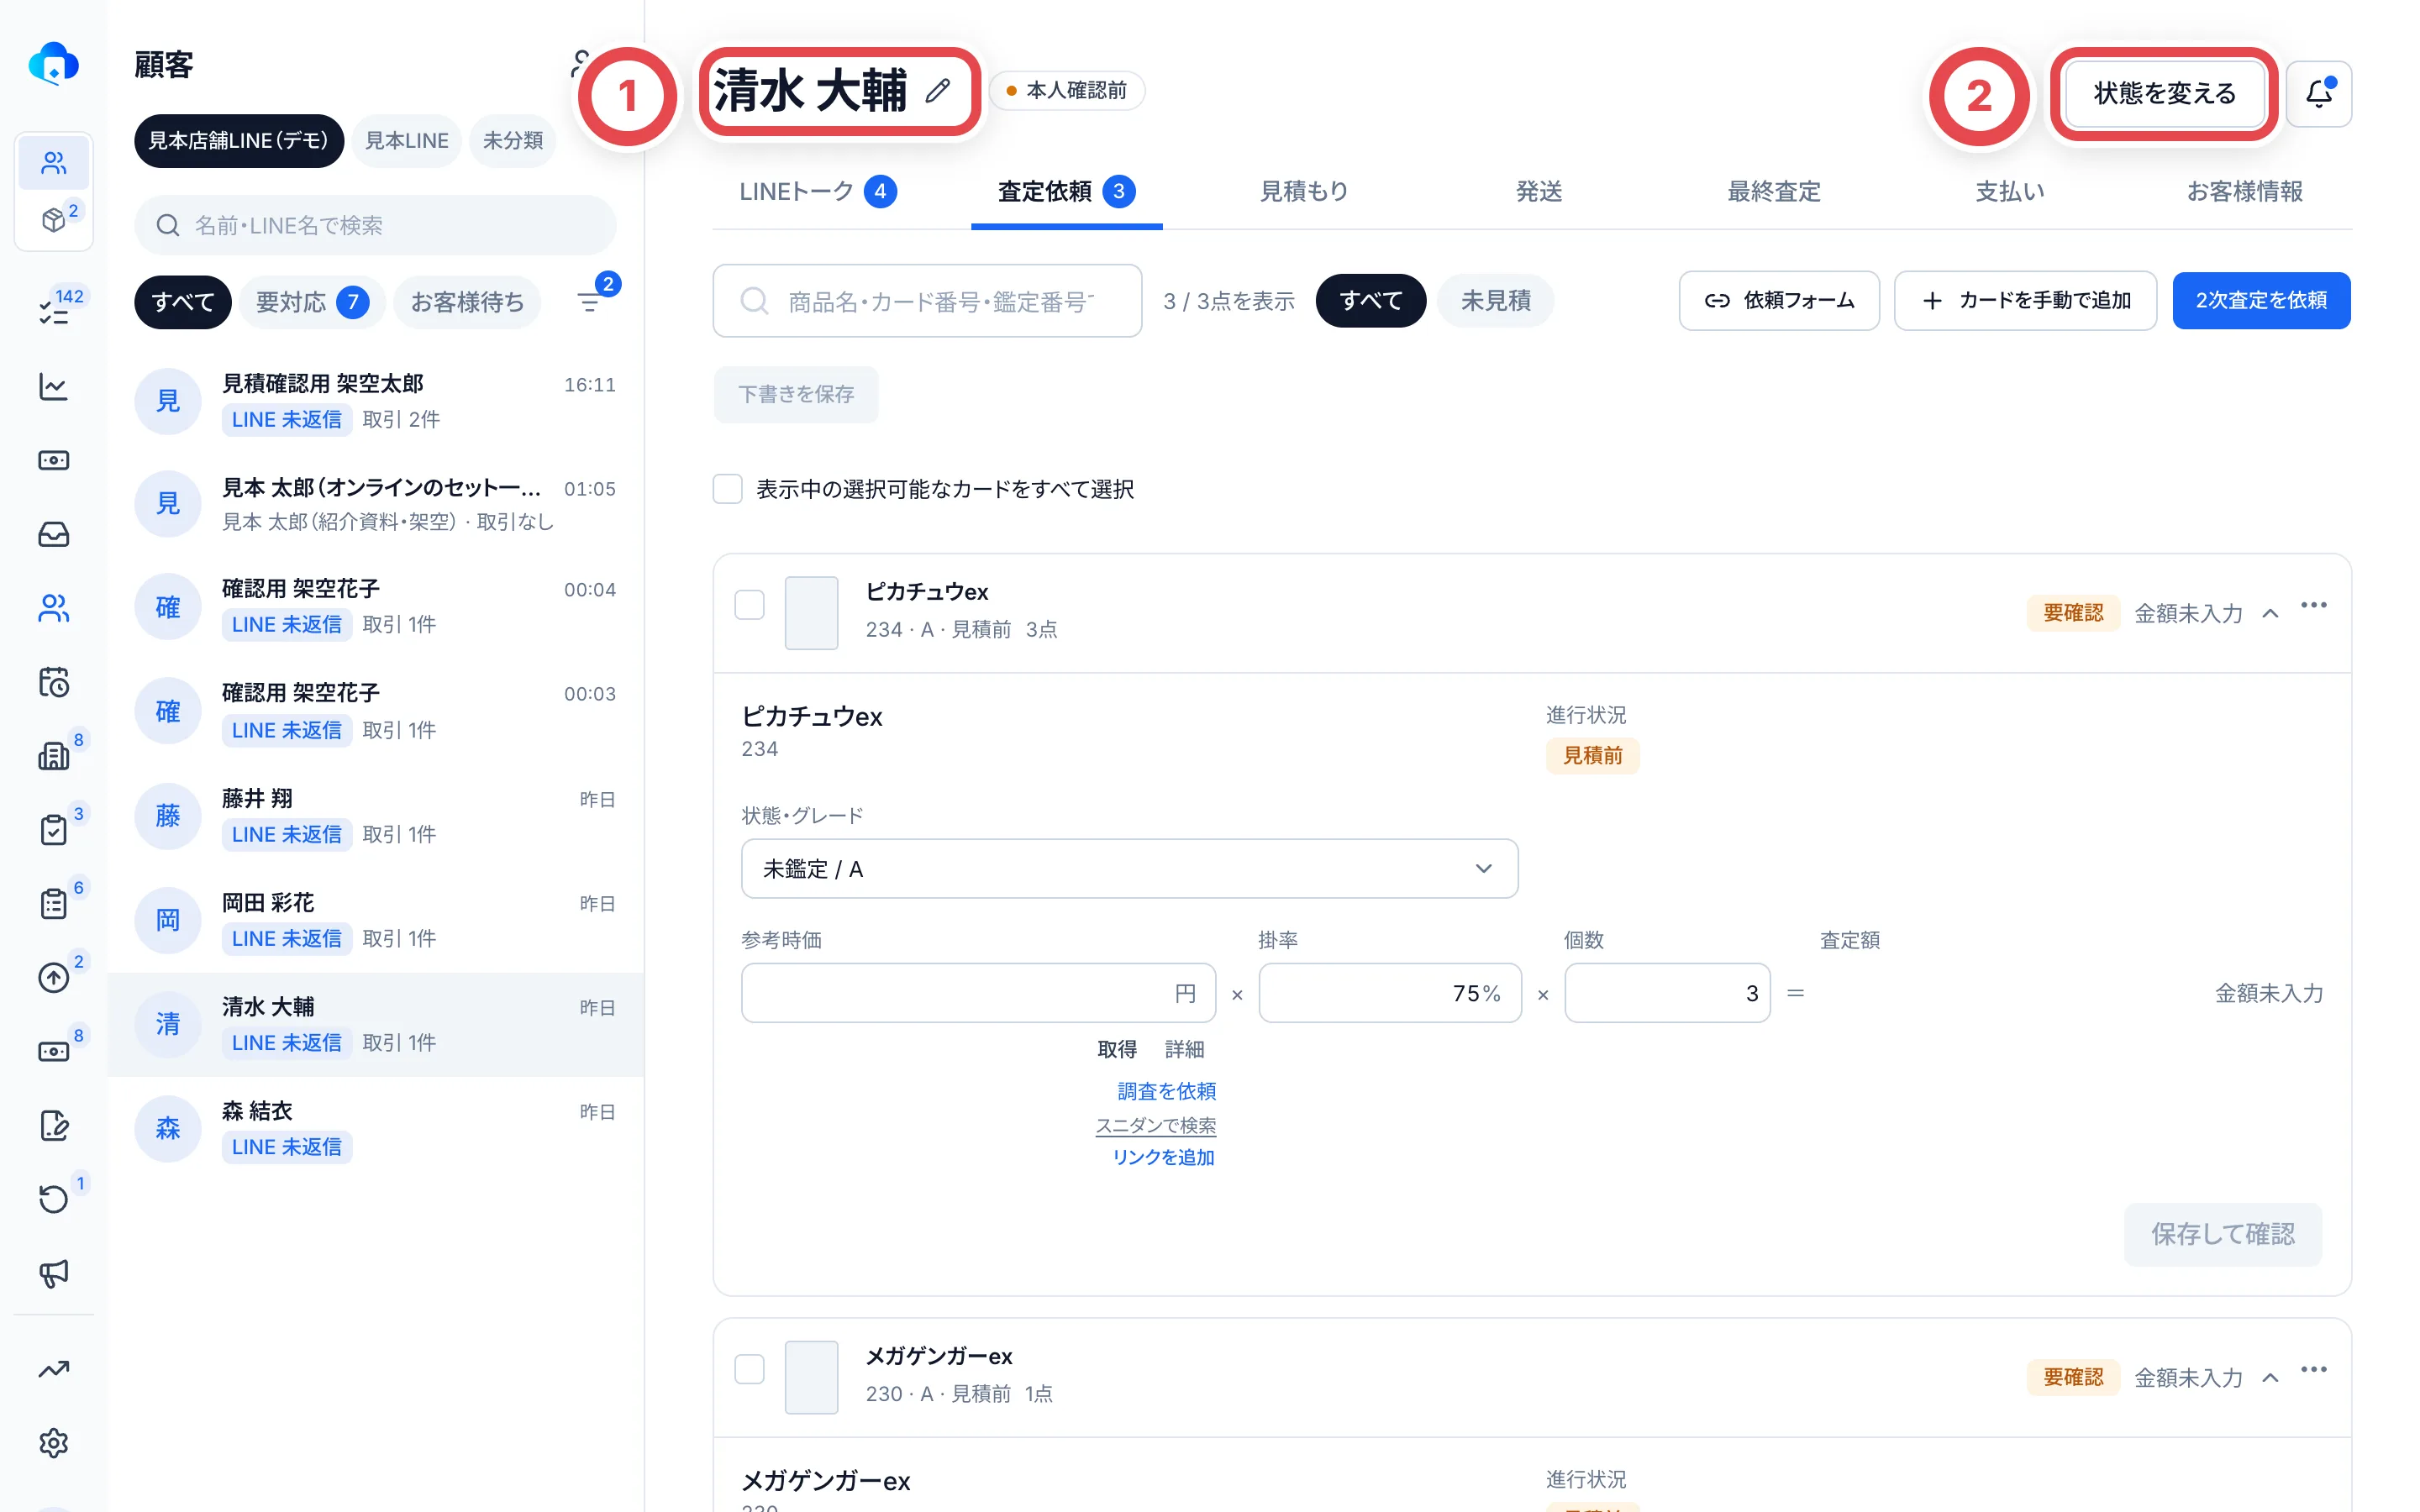 ①の鉛筆で名前を直します(4)。②の「状態を変える」で要注意・アーカイブにします(6)。
タブの数字は未対応の件数です。
| タブ | 中身 | 数字の意味 |
| ---------- | -------------------------------------------------------- | ---------------------------- |
| LINEトーク | お客様とのLINEのやり取りと、送られてきた写真 | まだ返信していないメッセージ |
| 査定依頼 | 査定を頼まれたカードの一覧 | まだ見積を出していないカード |
| 見積もり | お客様に出した見積 | |
| 発送 | お客様からの発送と、返送(オンライン買取を使う店舗だけ) | |
| 最終査定 | 届いたカードの最終査定 | |
| 支払い | 振込や現金での支払い | |
| お客様情報 | 氏名・住所・本人確認・振込先・LINE | |
右上のベルは、この顧客についての通知です。
## 4. 名前を直す
LINEから来た顧客は、最初はLINEの名前(「だいすけ」など)で並びます。店で呼ぶ名前に直すときは、名前の横の鉛筆を押します。
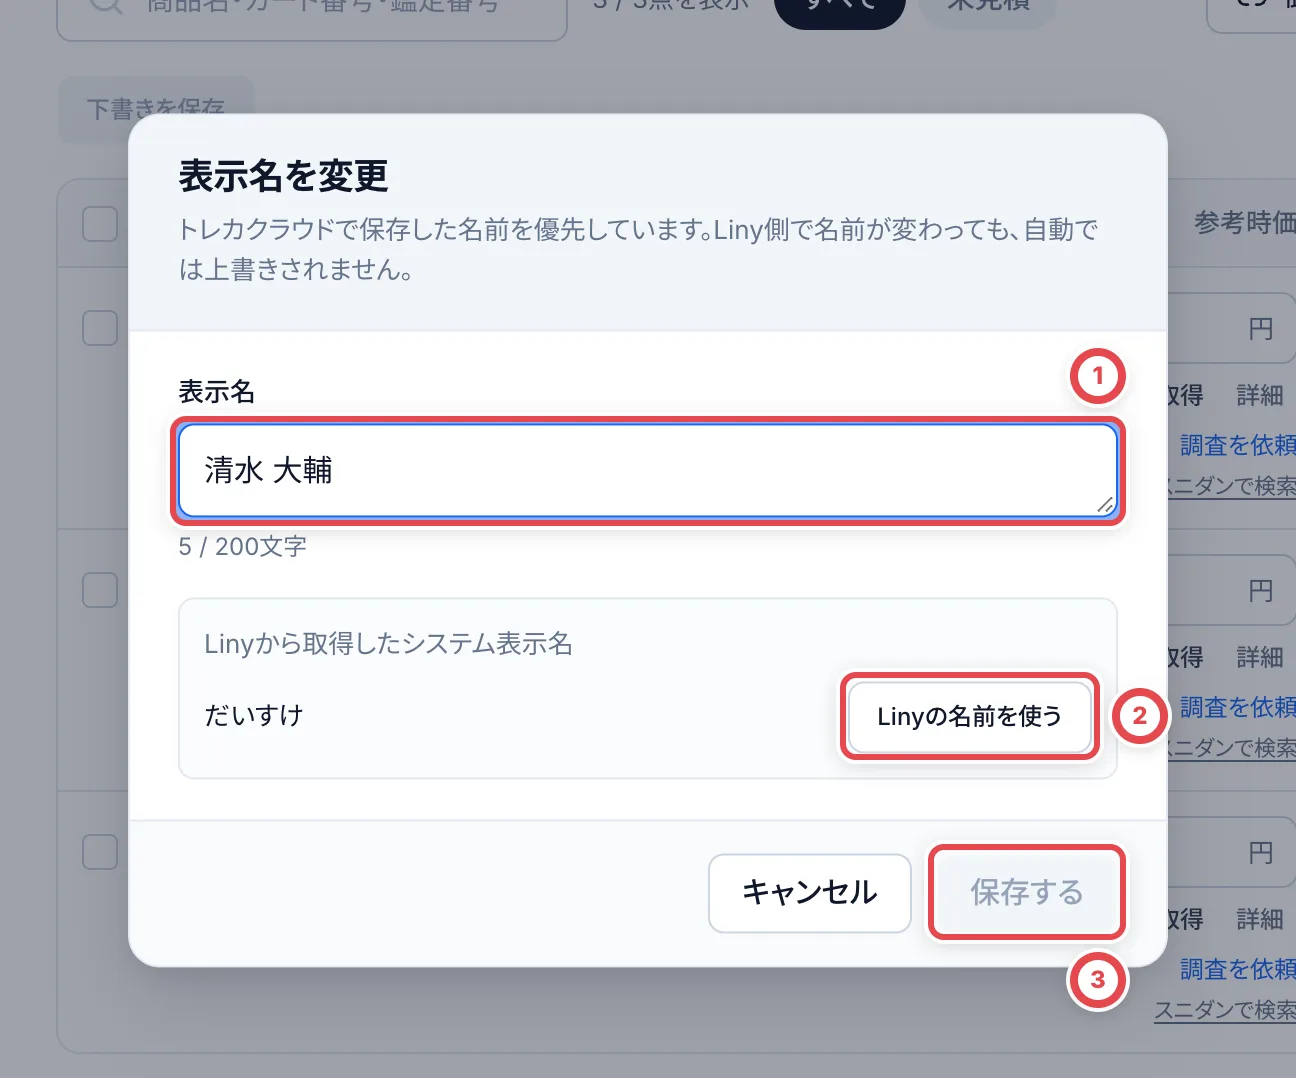 ①の名前を書き換えて、③の「保存する」を押します。**押すとすぐ名前が変わります。**
- 一度ここで保存すると、あとでお客様がLINEの名前を変えても、トレカクラウドの名前は変わりません。ダイアログの上の説明が「トレカクラウドで保存した名前を優先しています」になっていれば、この状態です
- まだ一度も保存していない顧客は、Linyの名前に合わせて自動で変わります
- ②の「Linyの名前を使う」は、Linyの名前を①に入れるだけです。戻したいときは、②を押してから③で保存します。保存したあとは、Linyの名前に合わせて自動で変わることはありません
- ここで変えても、Linyの名前は変わりません
- アーカイブにした顧客は、鉛筆が出ません
## 5. お客様情報を確かめる
店頭のお客様の原本確認は、「査定依頼」または「お客様情報」の「店頭の本人確認」から登録できます。[店頭本人確認の登録と書類追加](/guides/purchase/counter-identity)を参照してください。
既存のお客様に登録内容を確認・修正してもらう場合は、[取引専用リンクからの登録内容確認](/guides/purchase/registered-information)を案内します。本人認証後に、本人情報・今回の振込先・書類を確認できます。
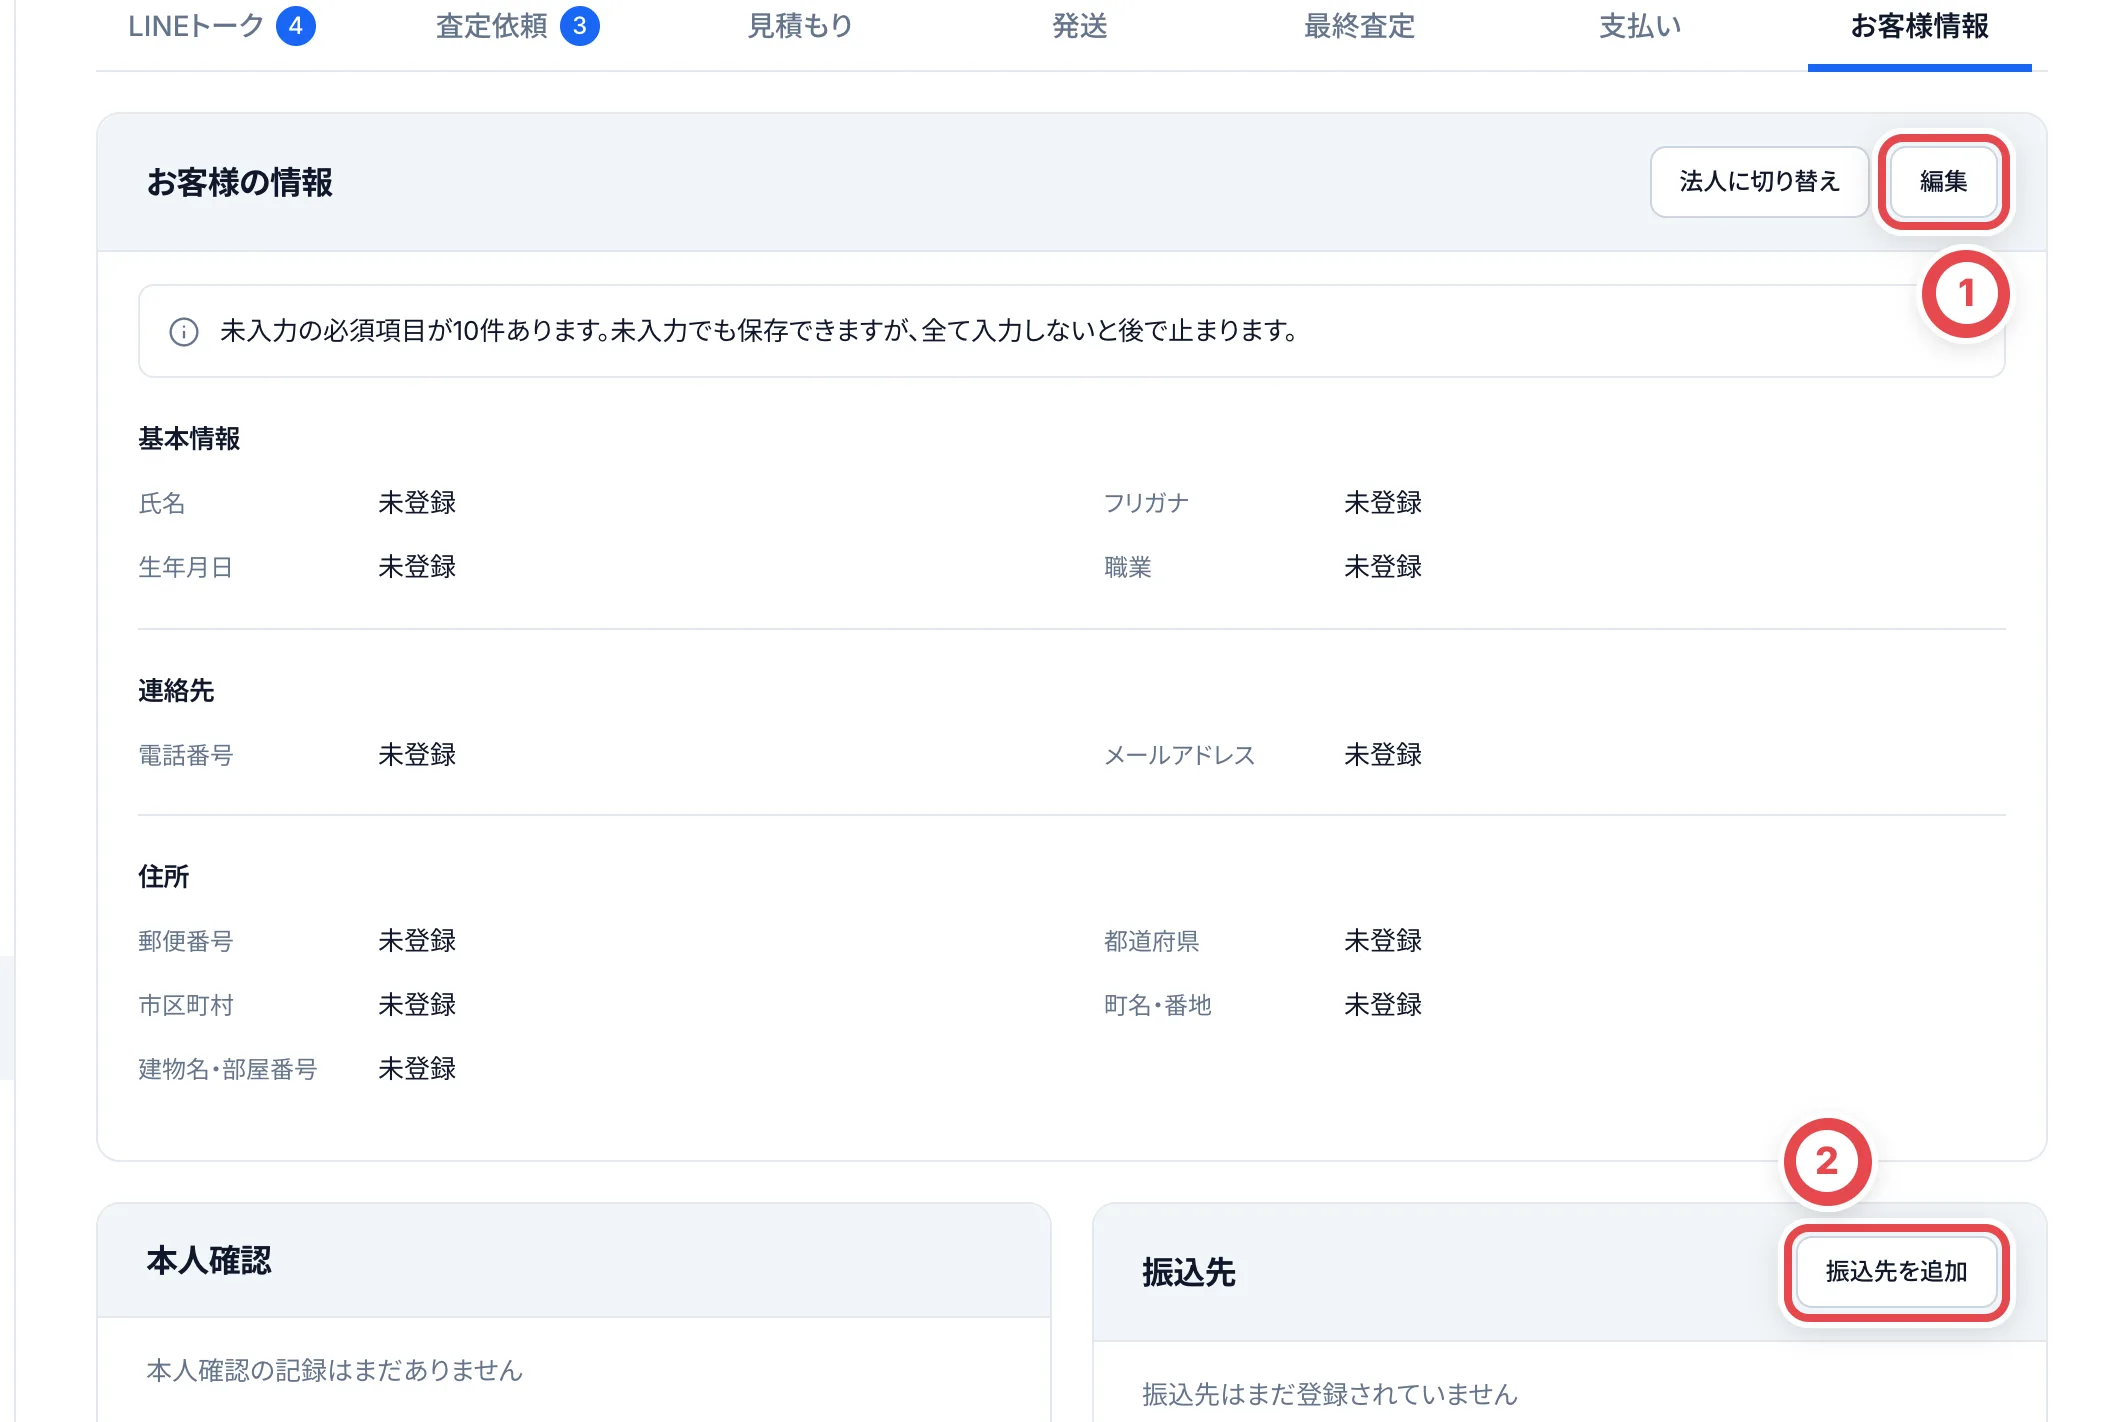 | カード | 中身 |
| ------------ | --------------------------------------------------------------------------------------------------------- |
| お客様の情報 | 氏名・フリガナ・生年月日・連絡先・住所。①の「編集」で入れます。法人のお客様は「法人に切り替え」を押します |
| 本人確認 | 本人確認の記録と、確認前に保存した書類 |
| 振込先 | 支払いに使う口座。②の「振込先を追加」で登録します |
| LINE | 結び付いているLINEの友だちと、Linyから届いた情報 |
個人のお客様は、本人確認の欄の「本人確認書類を登録」から画像を先に保存できます。JPEG・PNG・WebPで合計20MBまで、免許証と在留カードは表裏を選びます。マイナンバーカードは表面だけを選び、個人番号やQRコードが写った画像は登録しません。保存しただけでは本人確認は完了せず、自動では削除されません。閲覧には本人確認の閲覧権限、登録には記録権限が必要です。アーカイブ済みのお客様には追加できません。
オンライン取引では、発送画面の「本人確認を記録する」から「保存済みの書類から確認」を選びます。画像を開いて顧客情報と照合し、確認チェックと「確認済みとして記録」で取引に結び付けます。店頭ではこれまでどおり原本の対面確認を行います。
お客様情報は未入力の項目があっても保存できます。①の不足件数を確認し、②の氏名・生年月日などを分かる範囲で入力して保存します。**保存できても本人確認や買取登録に必要な情報がそろったことにはなりません。** 不足している項目は、その工程へ進む前に補います。
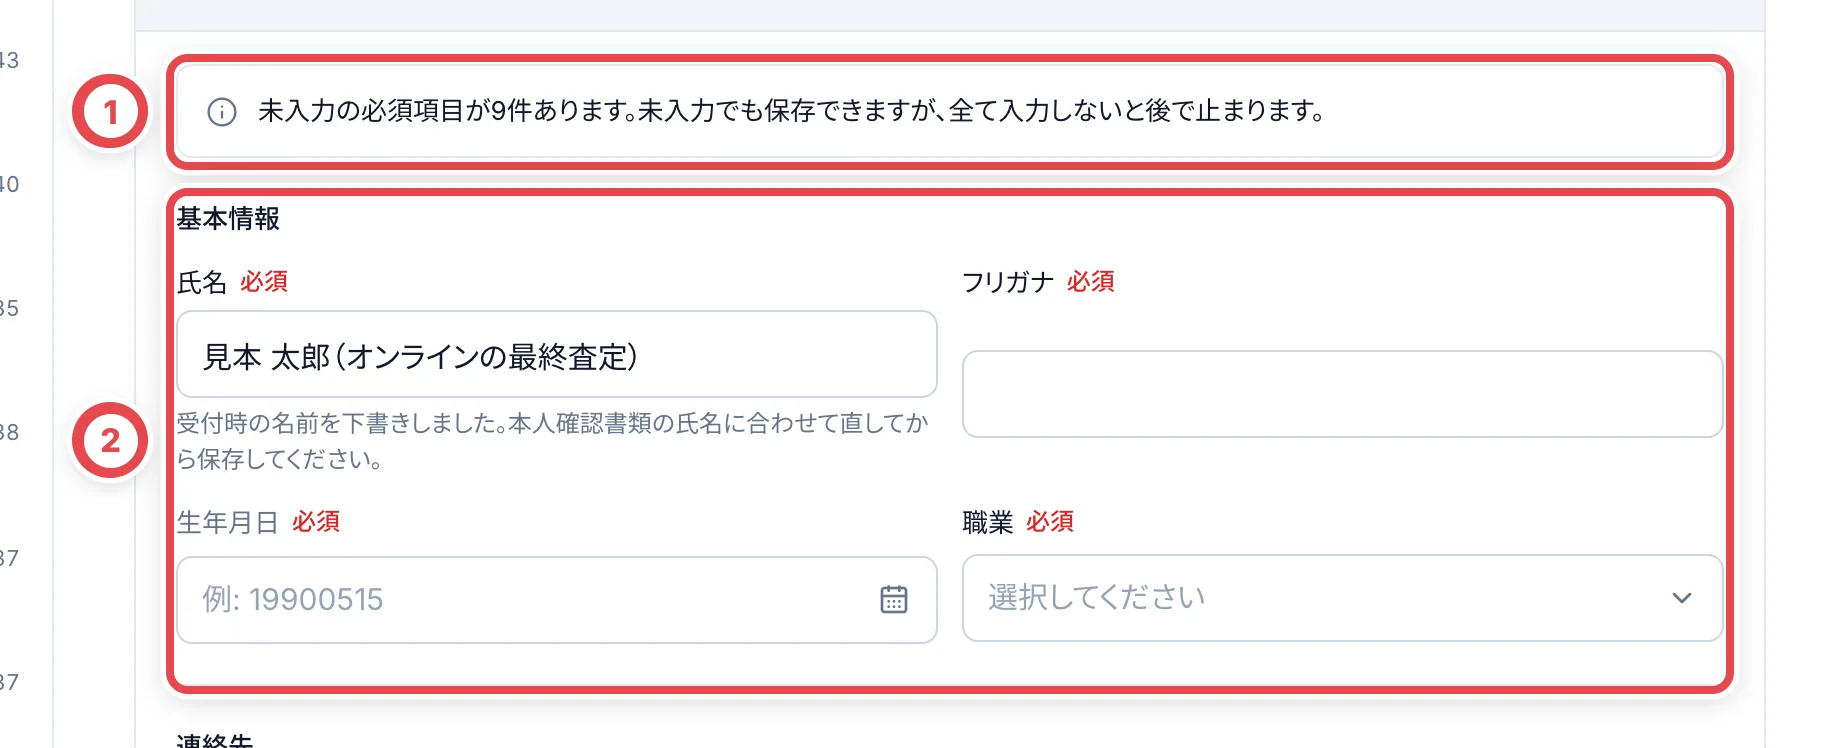
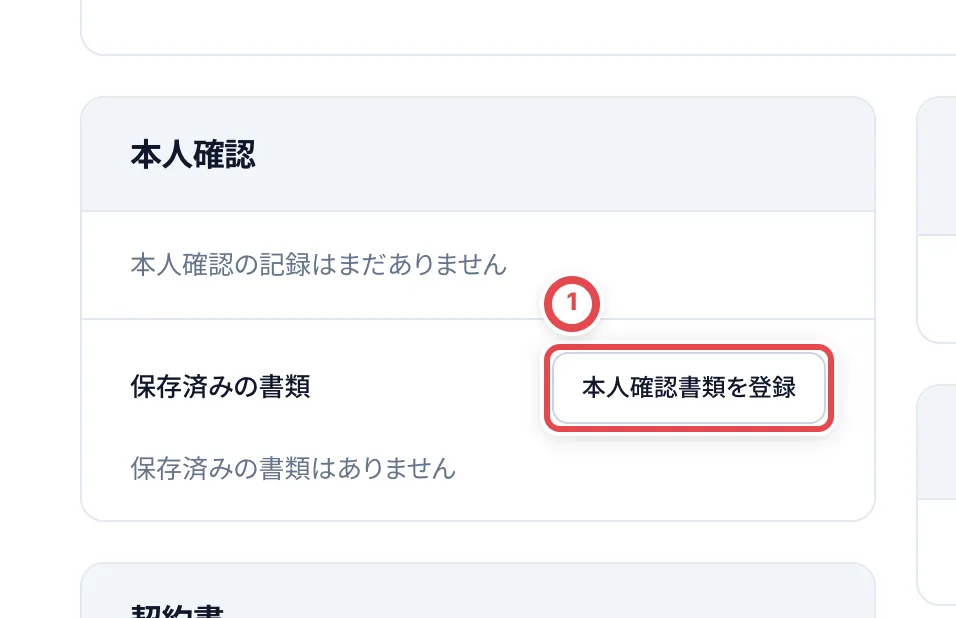 ①で書類の種類を選び、②で必要な面を選択します。③の安全確認を行って、④「保存」を押します。保存後に「保存済みの書類」に出ることを確認します。ここでは確認前の書類として保存され、本人確認済みにはなりません。
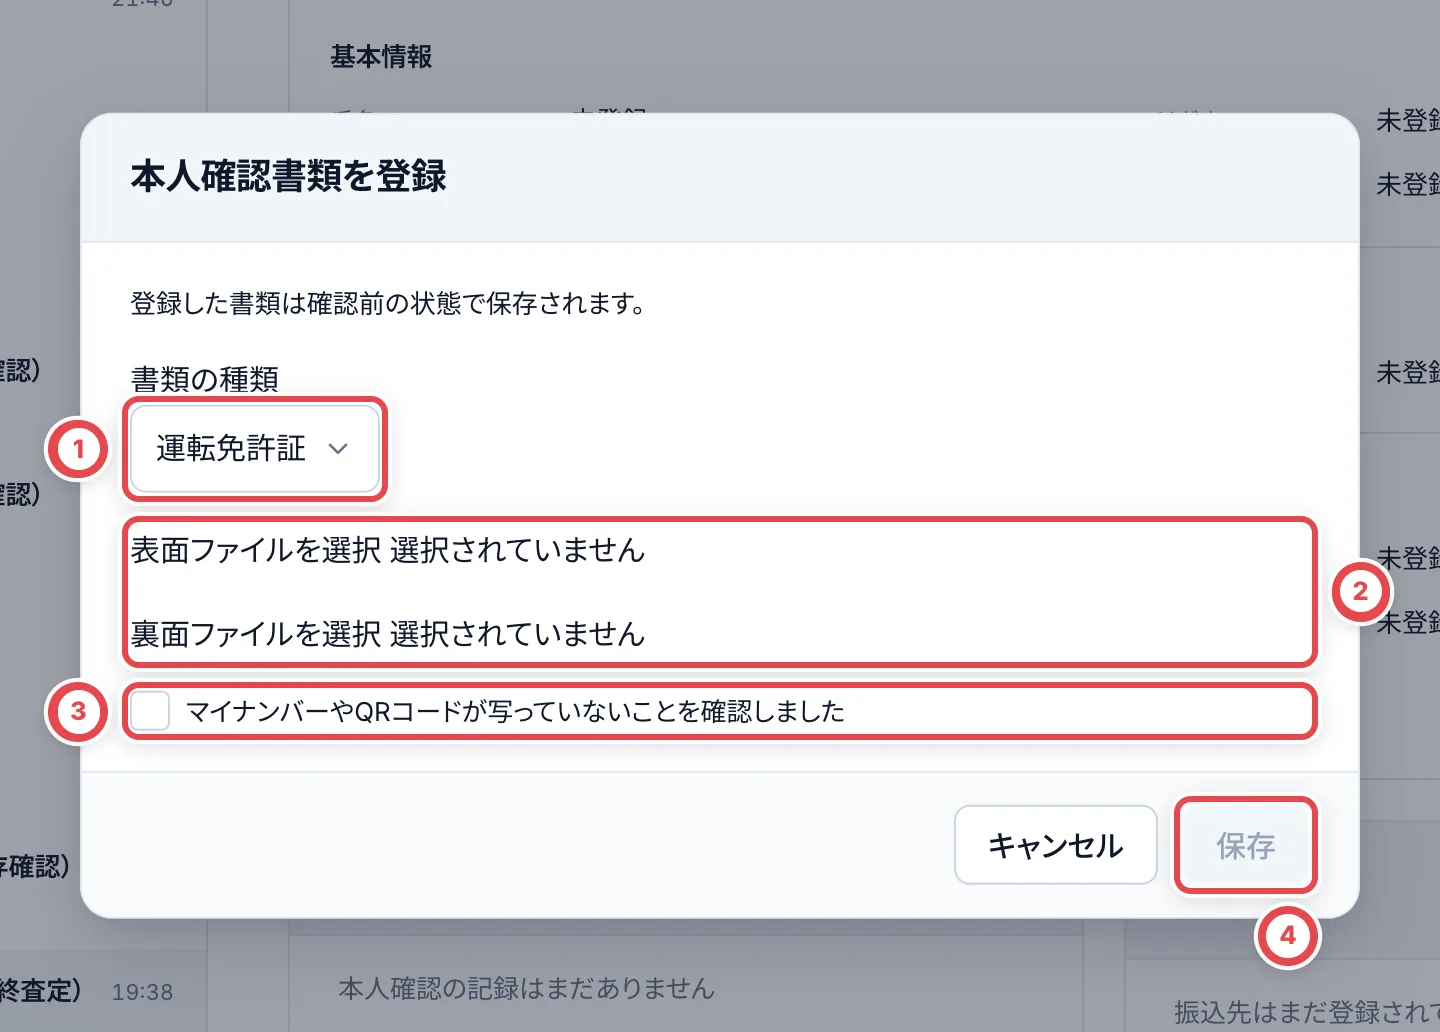 ### Linyの情報の読み方
LINEのカードの「Linyの情報」には、Linyで付けたタグ・メモ・友だち情報が写されています。**トレカクラウドで書き換えることはできません。** 変えたいときはLinyの画面で変えると、次の取り込みでここも変わります。
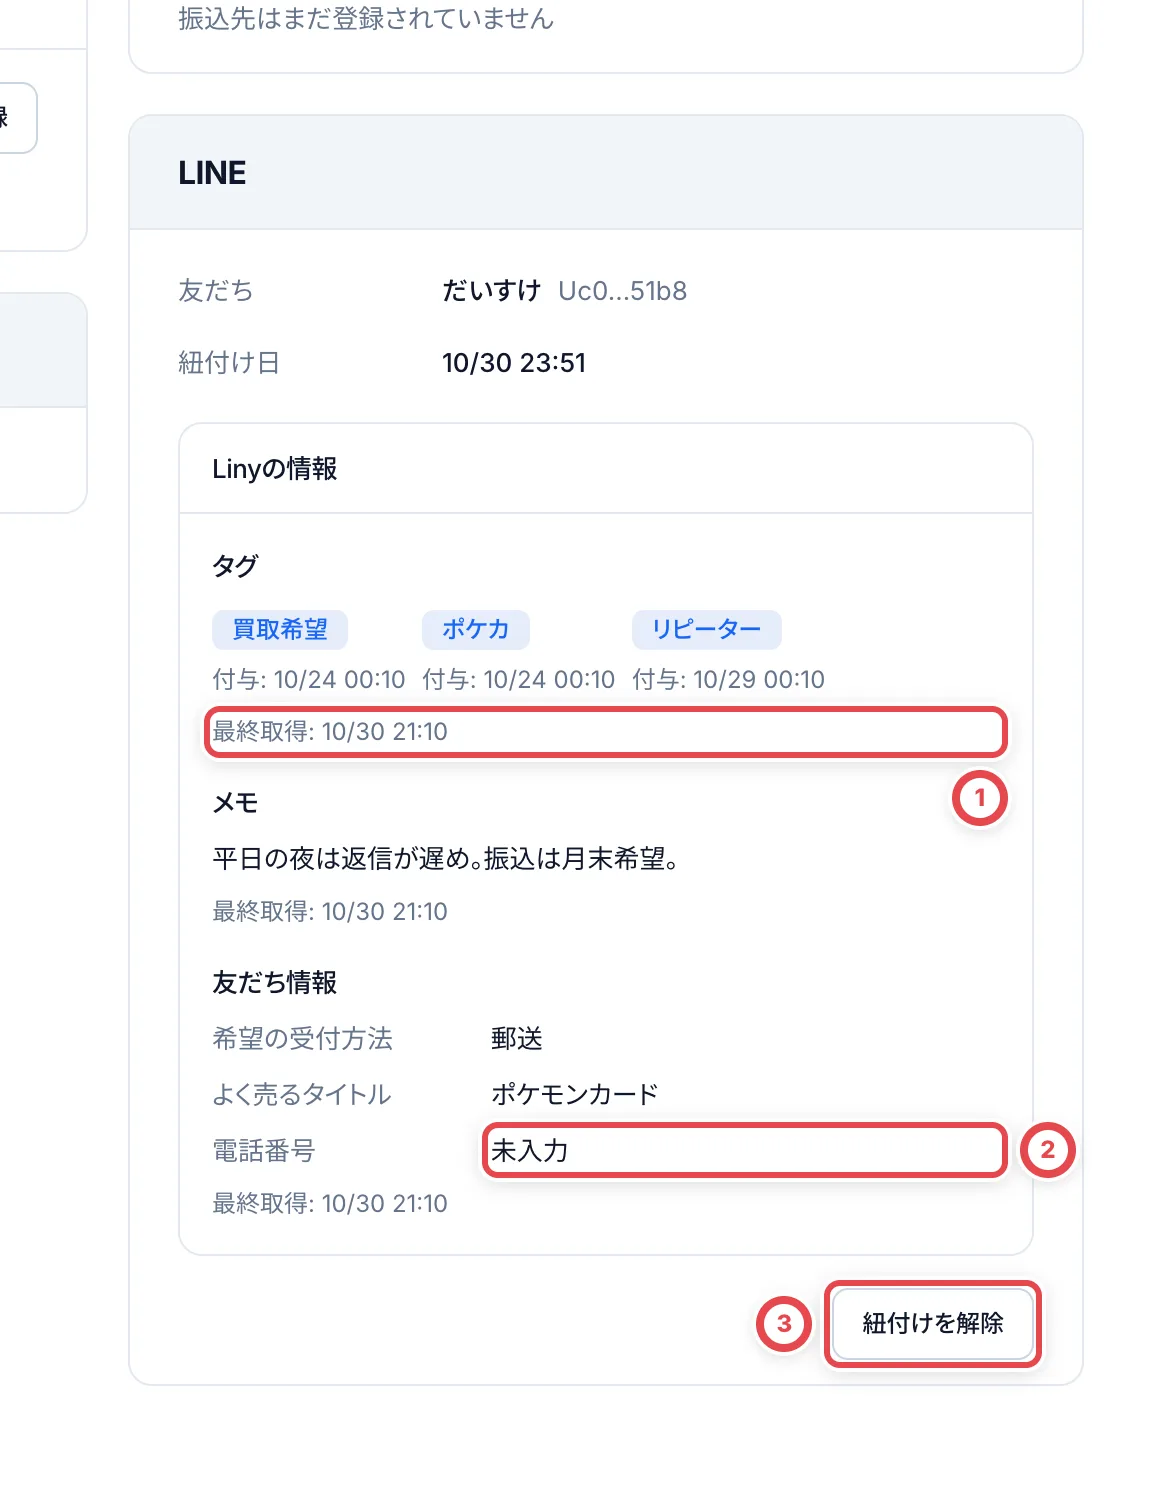 自動同期が稼働している環境では、タグ・メモ・友だち情報は、それぞれ1日に1回ほどLinyから写し直されます。Linyで変えた直後は、まだ前の内容が出ていることがあります。①の時刻で、いつの内容かを確かめてください。
| 出ている言葉 | 意味 |
| ------------------------------------------ | ------------------------------------------------------------ |
| 「未取得」「取得日時不明」 | まだ一度もLinyから写せていません。空欄かどうかは分かりません |
| 「タグなし」「メモなし」「友だち情報なし」 | Linyから写せていて、Linyでも何も付いていません |
| ②「未入力」 | 友だち情報の項目はあるけれど、Linyでその項目が空欄です |
「未取得」と「タグなし」は違います。「未取得」のときは、Linyでタグを付けていても、まだここに届いていないだけかもしれません。
③の「紐付けを解除」は、このLINEの友だちと顧客の結び付きを外します。理由の入力が要ります。別人と結び付けてしまったときに使います。
## 6. 要注意・アーカイブにする
画面右上の「状態を変える」を押します。
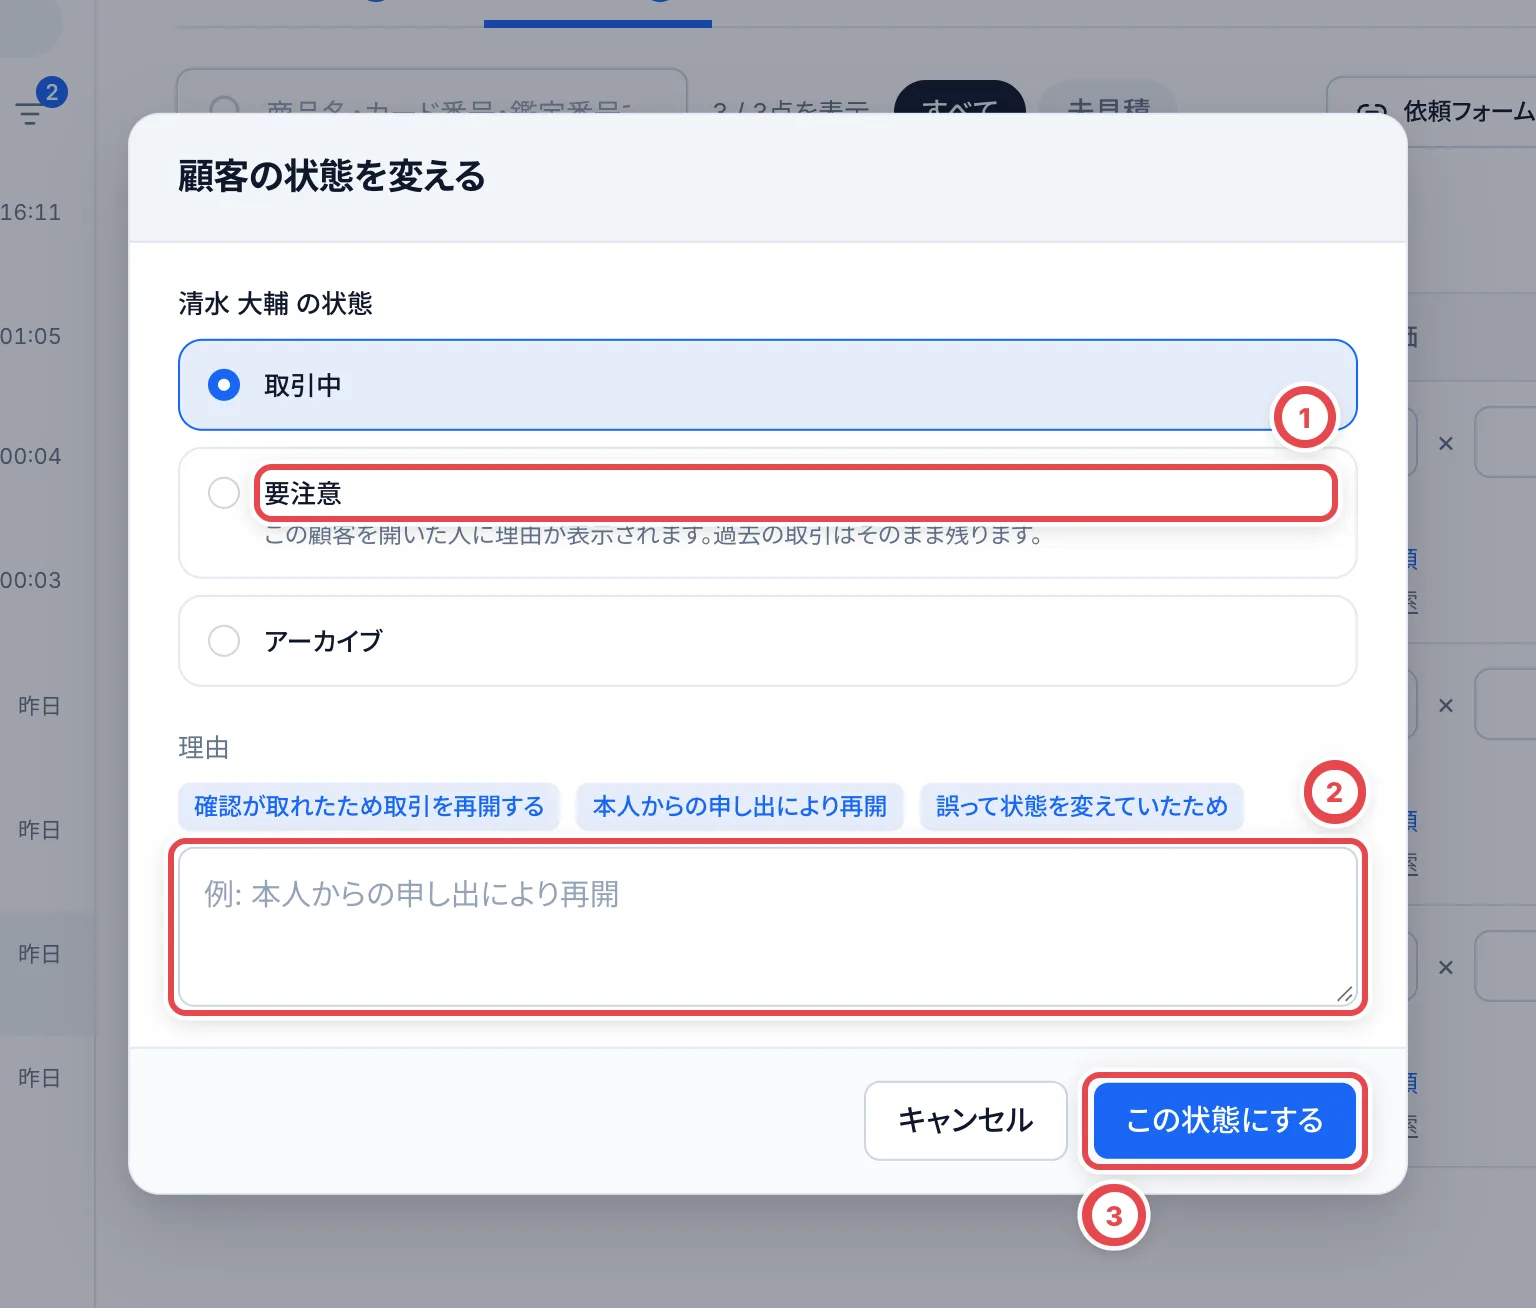 ①で状態を選び、②に理由を書いて、③の「この状態にする」を押します。**押すとすぐ変わり、理由はだれが変えたかと一緒に記録に残ります。** 元に戻すときも、同じ画面で「取引中」を選び、理由を書いて保存します。
| 状態 | 使う場面 | どうなるか |
| ---------- | ---------------------------------------- | --------------------------------------------------------------------------------------------------------------------------------------------------------------------------------------------------------------------- |
| 取引中 | ふだん | 何も止まりません |
| 要注意 | 申告と実物が食い違うなど、気を付けたい方 | 名前の横に「要注意」、画面の上に赤い帯で理由が出ます。**進んでいる取引の査定・見積・支払いは止まりません。** お客様の情報の編集・法人への切り替えと、受付の要確認やフォームの回答を取引に入れる操作はできなくなります |
| アーカイブ | もう取引しない方 | 一覧には残ります。要注意で止まるものに加えて、新しい見積・買取依頼の登録・LINEの写真の読み取り・名前の変更・振込先の登録・LINEの結び付けができなくなります。過去の取引は残ります |
要注意にした顧客を開くと、だれが開いても、画面の上に理由が出ます。
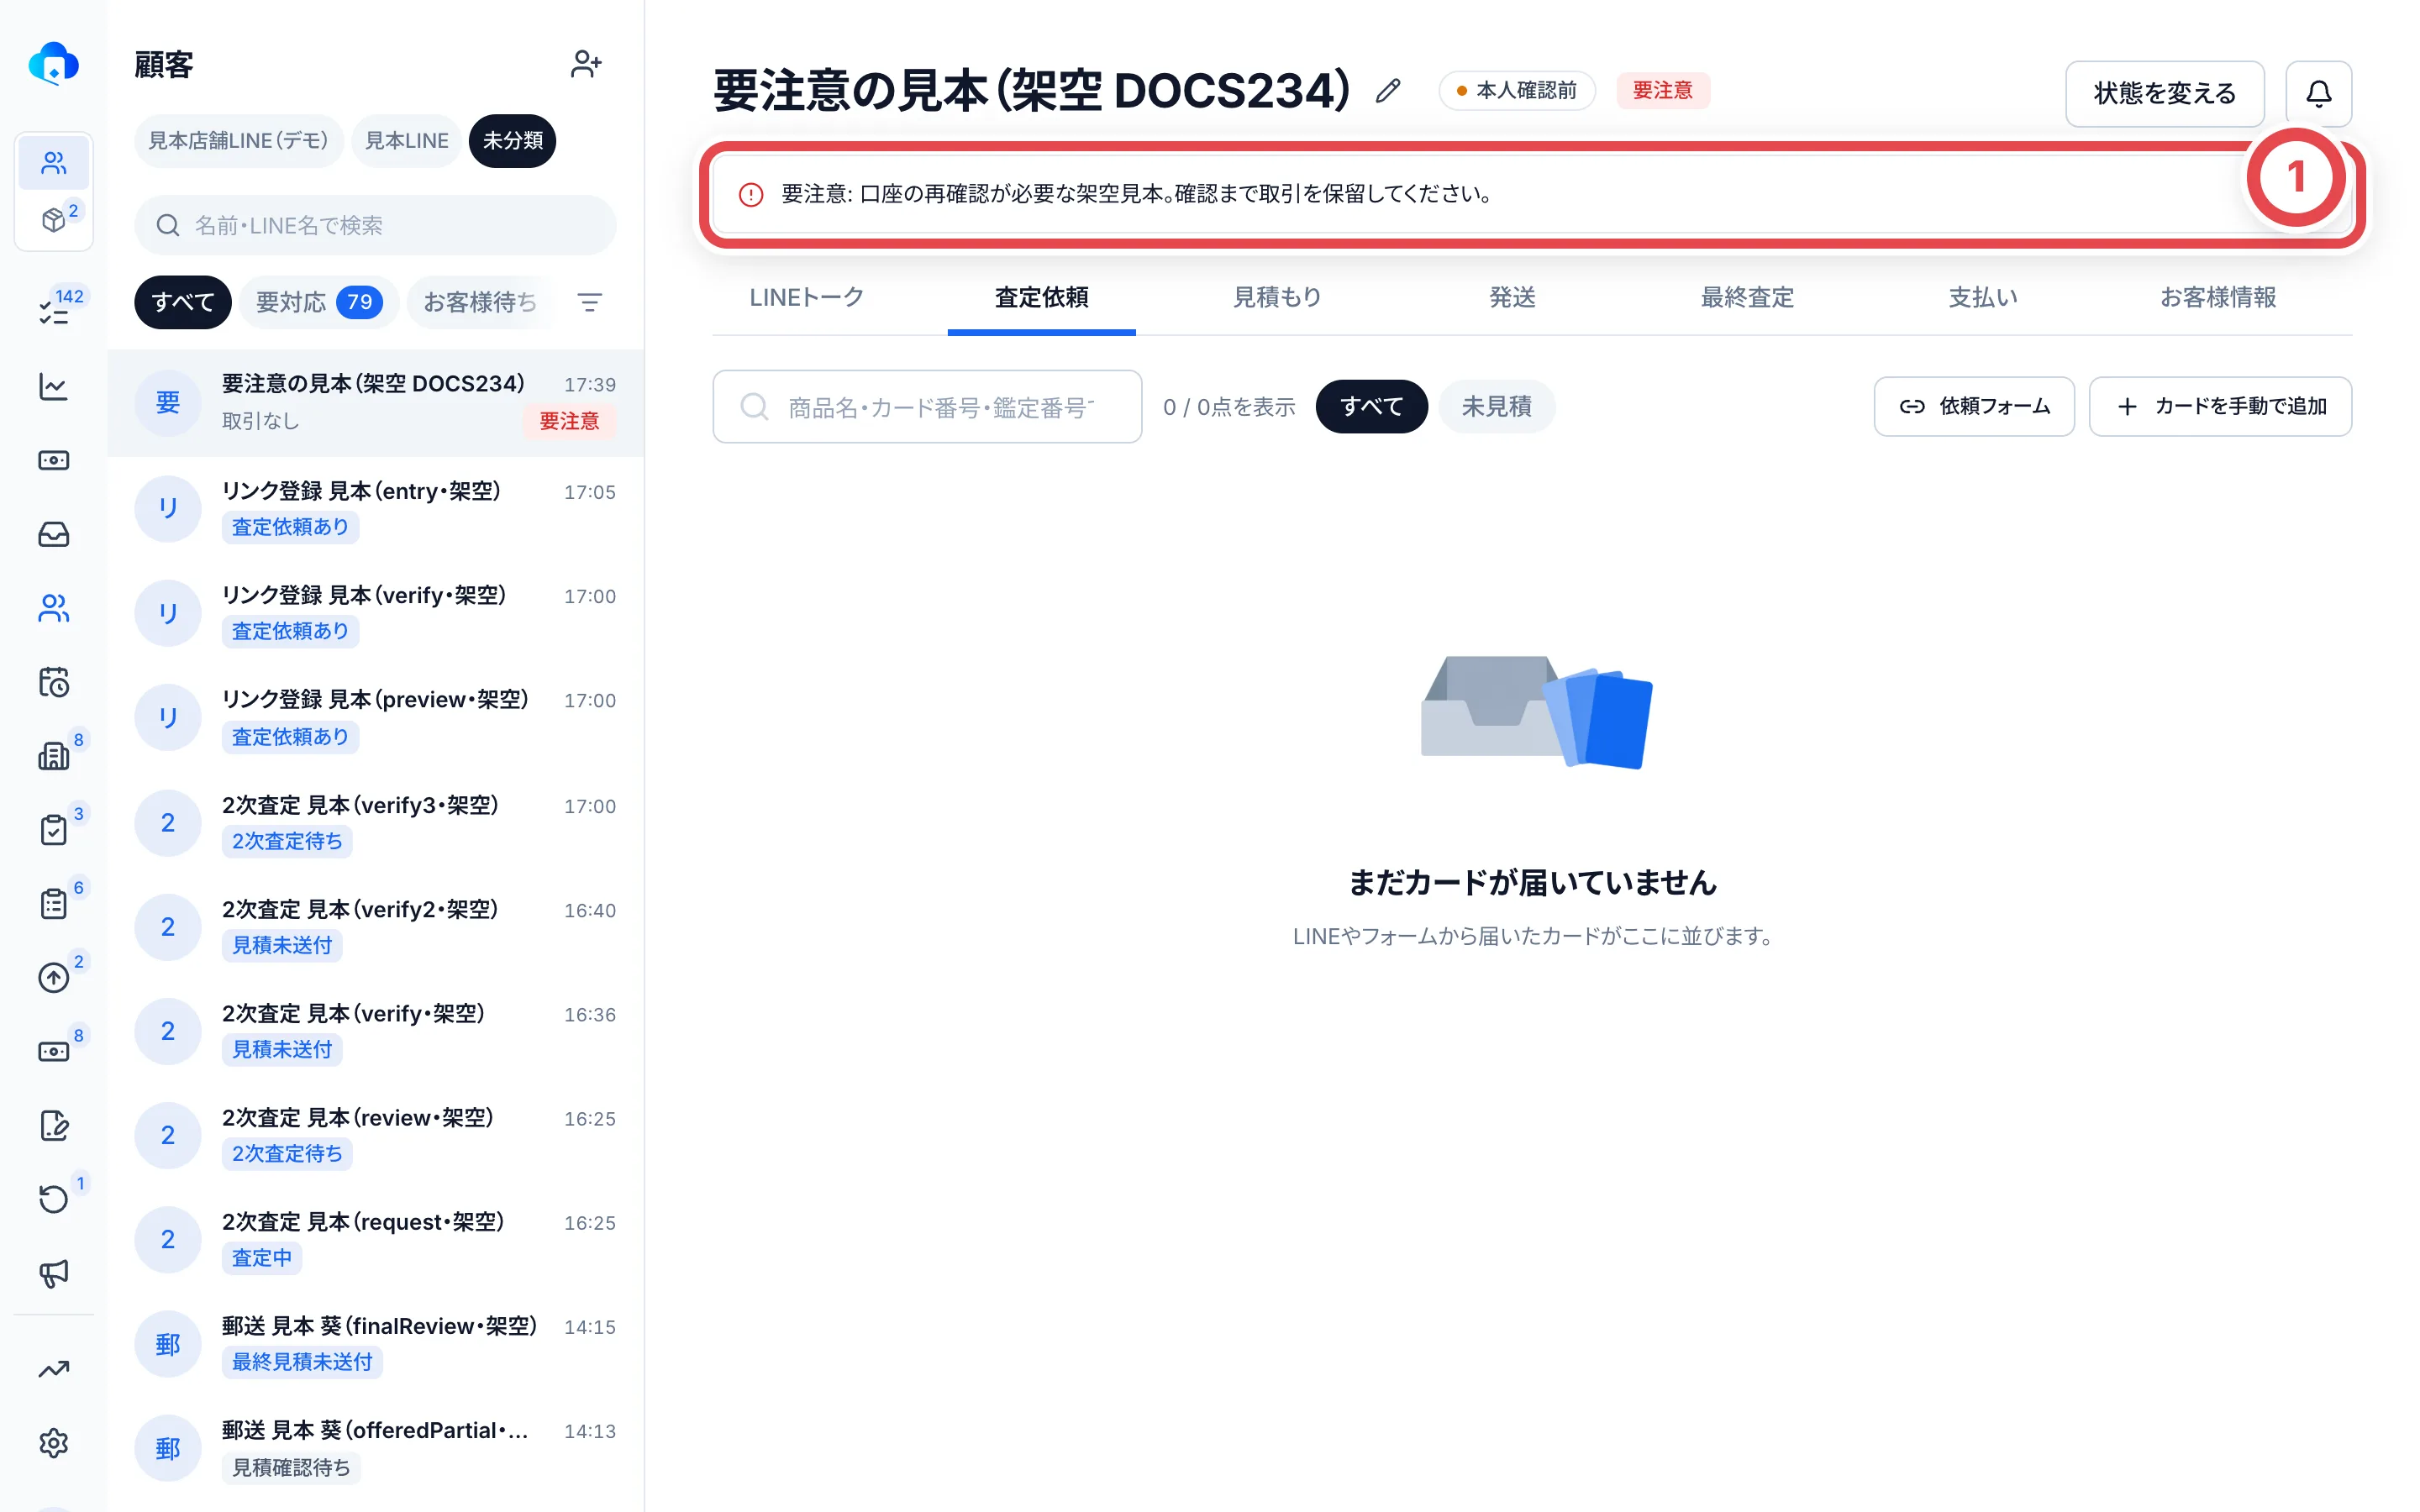 ## 7. 受付の要確認を片づける
Linyのフォーム(「買取のお申し込み」など)の回答は、だれの・どの取引のものかが分かれば、自動でその取引に入ります。分からなかったものだけが「受付の要確認」にたまります。
開き方は2つです。「買取依頼」の画面のボタンか、対応項目の「受付の要確認」の行から開きます。
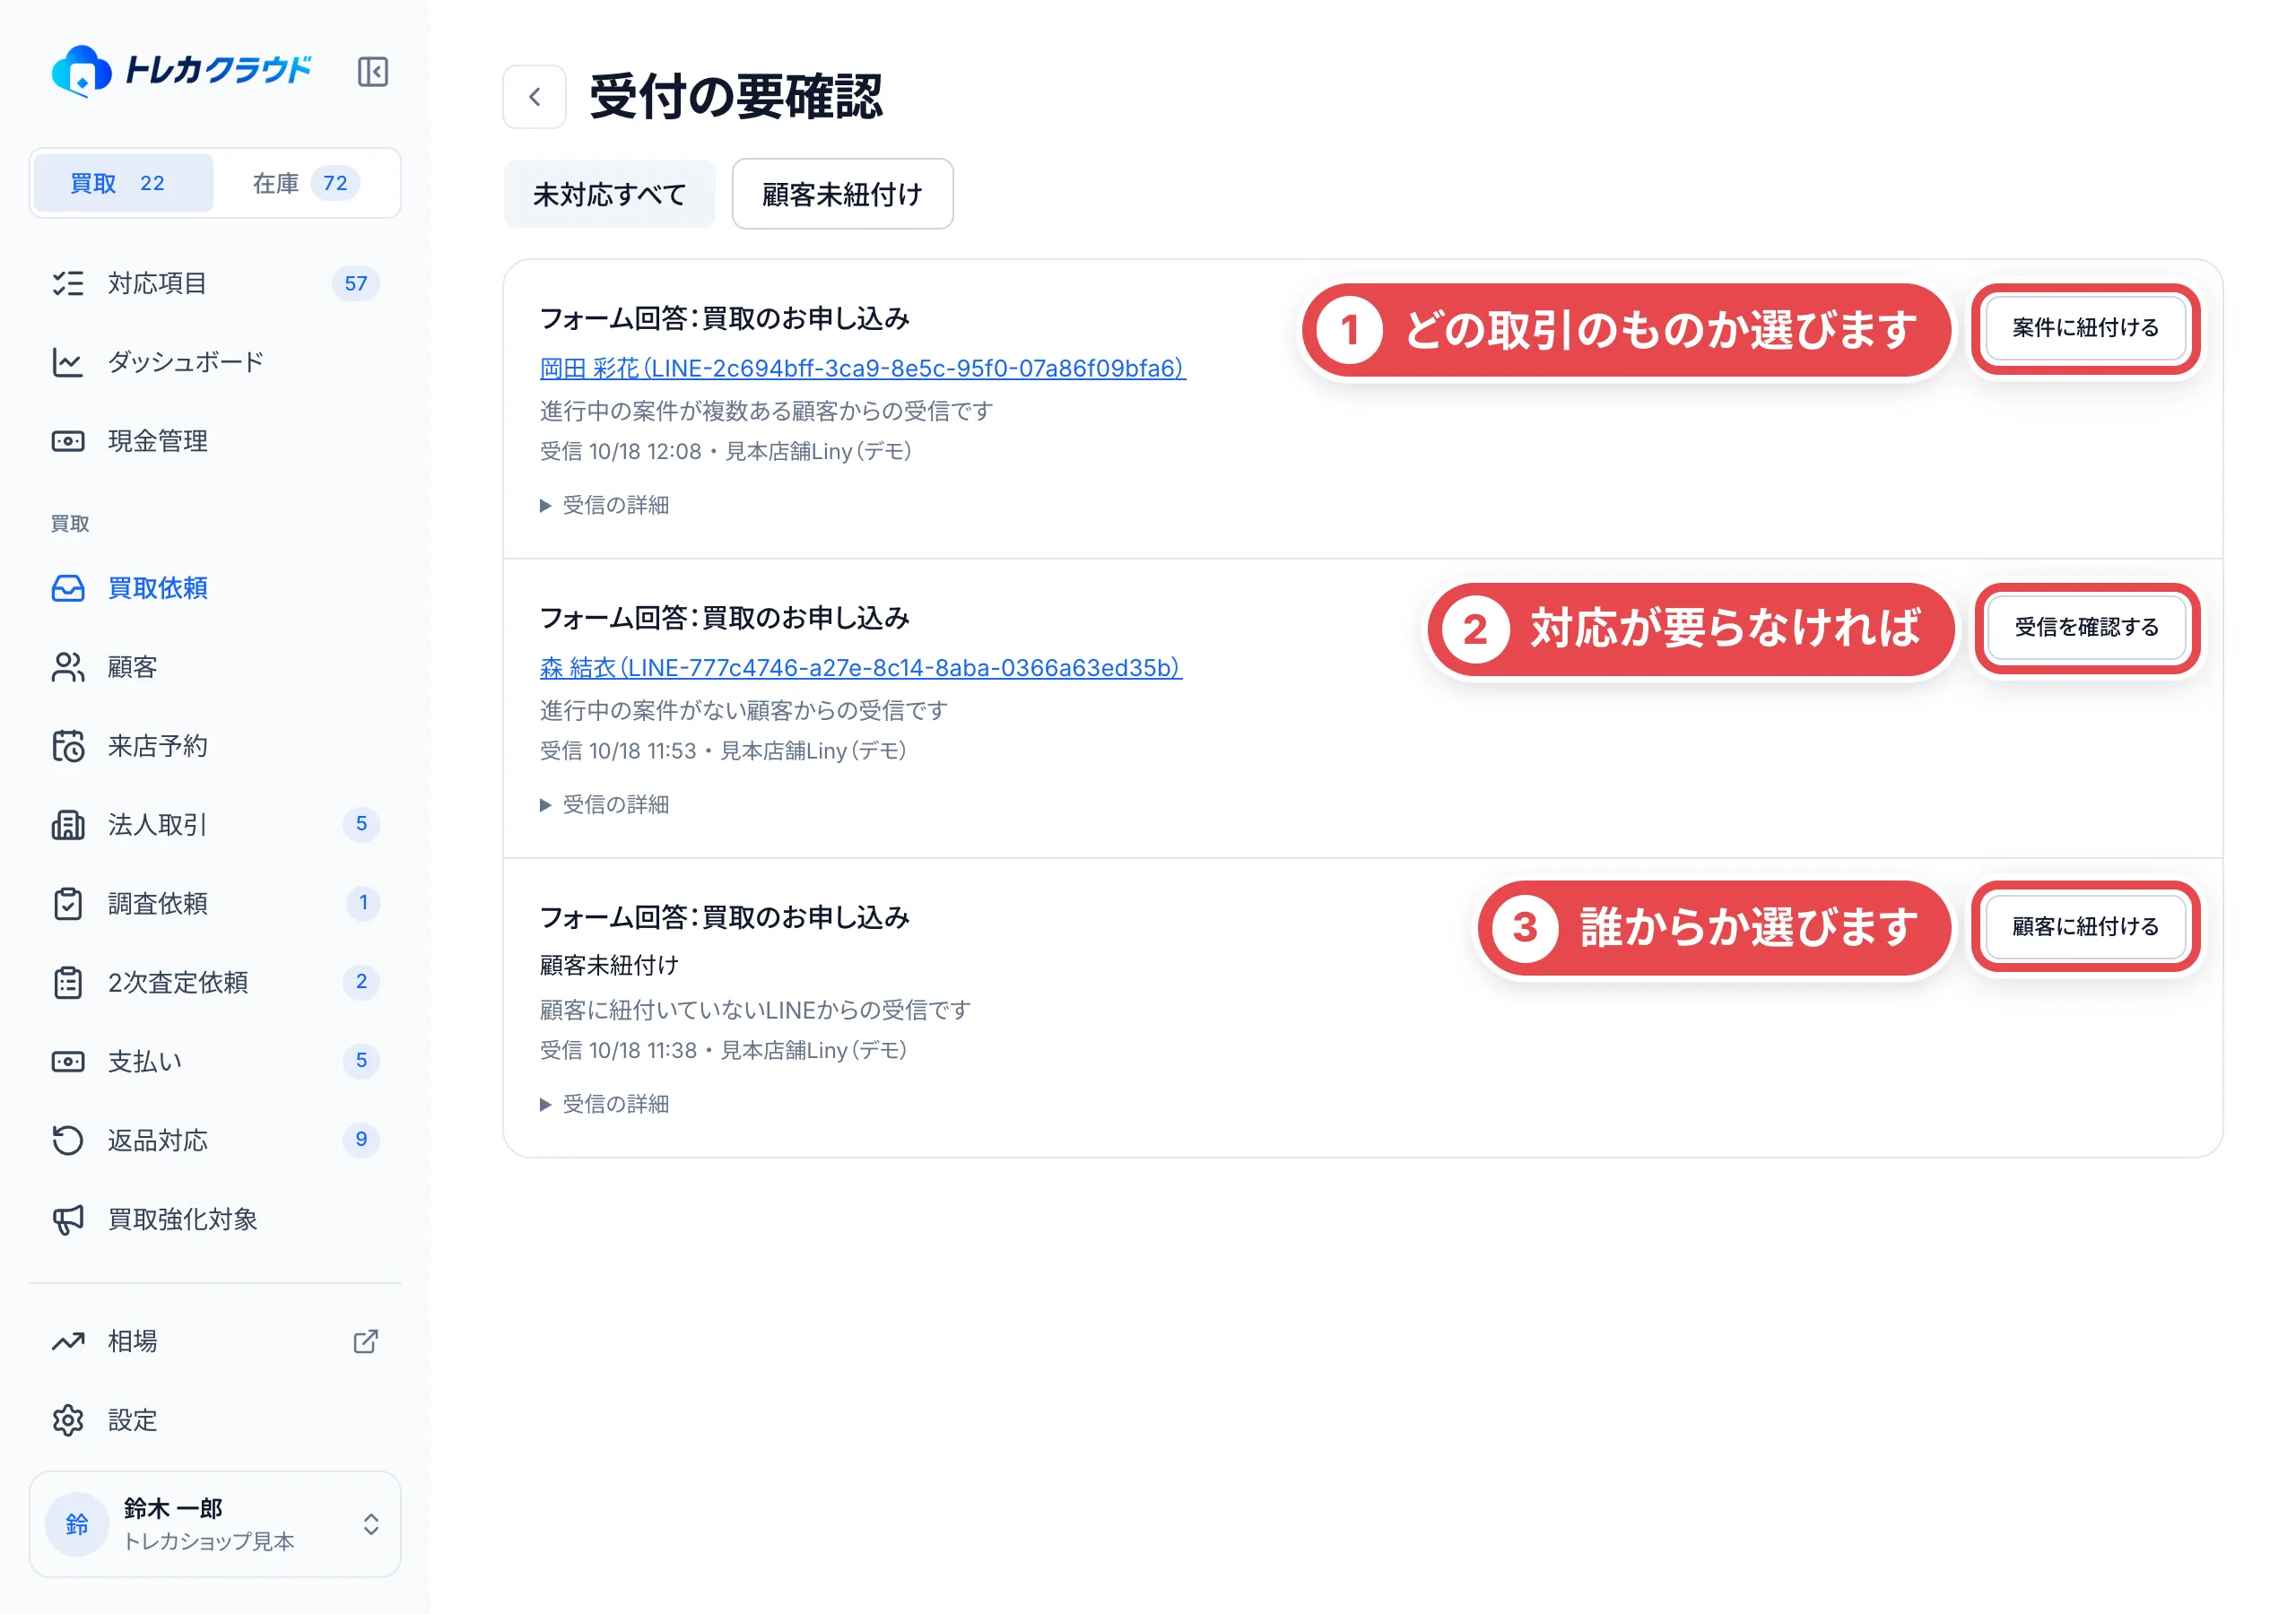 | 説明 | 何が起きているか | 押すボタン | 押したあと |
| ---------------------------------------- | ------------------------------------------------ | ------------------- | --------------------------------------------------------------------------------------------------------------------------------------- |
| 顧客に紐付いていないLINEからの受信です | 送ってきたLINEの友だちが、まだ顧客になっていない | ③「顧客に紐付ける」 | 顧客を検索して選ぶと、そのLINEの友だちが顧客と結び付きます。進行中の取引が1件ならその取引に入り、0件か複数件なら下の2つの行に変わります |
| 進行中の案件が複数ある顧客からの受信です | 取引がいくつもあって、どれのものか決められない | ①「案件に紐付ける」 | 進行中の取引から1つ選んで「紐付ける」を押します。顧客が「取引中」のときだけできます |
| 進行中の案件がない顧客からの受信です | 入れる取引がない | ②「受信を確認する」 | 「確認済みにする」を押すと、一覧から消えます。カードの依頼が書かれていたら、LINEトークから読み取って登録します |
行の顧客名を押すと、その顧客の画面が開きます。「受信の詳細」には、Linyの友だちIDと回答IDが出ます。Linyの画面で回答の中身を確かめるときに使います。
## 8. 買取依頼を登録する
店頭での持ち込みや電話など、LINE以外で受け付けた買取は、買取依頼として登録します。すべての取引を並べた「買取依頼」の画面は、サイドバーの「買取依頼」か、ダッシュボードの「いま止まっているもの」の件数から開けます。
1. **登録を始める**
「買取依頼」の画面で「買取依頼を登録」を押します。
2. **受付の方法と顧客を選ぶ**
①で「受付の方法」を「店頭」か「店頭以外」から選び、顧客を「新規顧客」か「登録済みの顧客」から選びます。「新規顧客」なら②に顧客名を入力し、「登録済みの顧客」なら検索して選びます。
3. **カードを追加する**
登録すると空の取引ができ、取引の画面が開きます。お預かりするカードは、取引の画面で追加します。
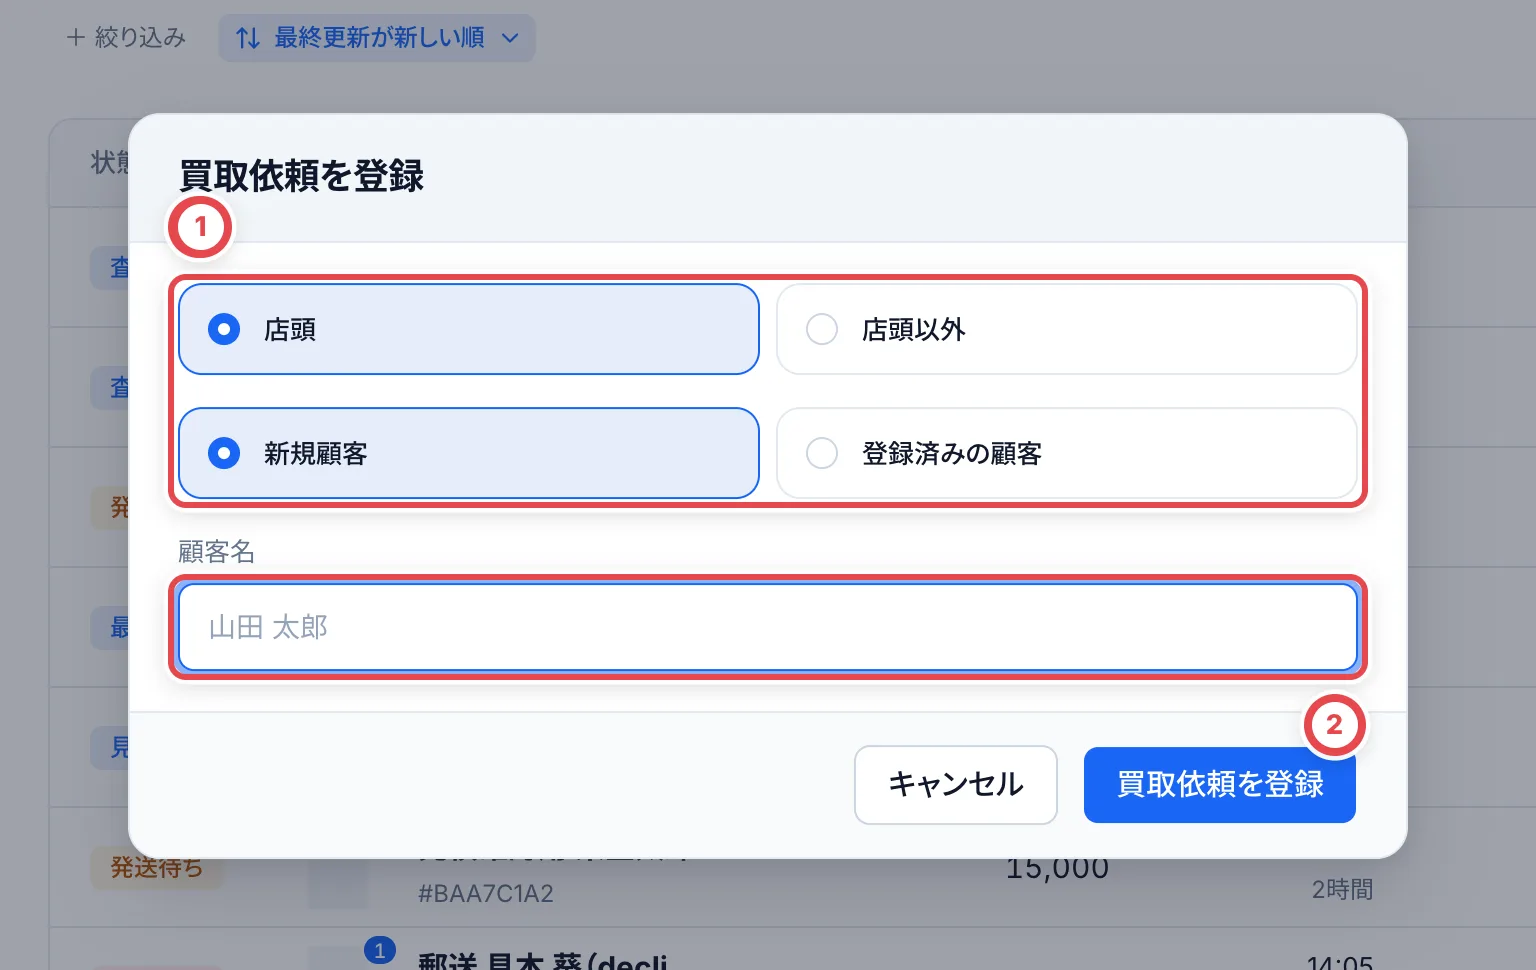 すでにいる顧客から新しい査定を受けるときは、顧客の画面の「査定依頼」タブで「カードを手動で追加」を押してもかまいません。「依頼フォーム」から査定依頼フォームのリンクを作り、お客様に送ることもできます。
LINEで届いた相談から見積を送るまでは、[LINEで受け付けて見積を送るまで](/guides/purchase/line-intake)に画面の順番でまとめています。LINEの返信は、LinyやLINEの管理画面から送ります。トレカクラウドで作った文面は、コピーして使います。
## 9. メモを書き残す
「概要」タブの「お客様情報」の中にある「メモ」には、そのお客様について覚えておきたいことを自由に書けます。お客様ごとに1つあり、お客様には見えません。
1. 「メモ」の横の「編集」を押します
2. 「2026/11/06 偽物のBOXを以前送ってきたことがある」のように、日付と内容を書きます。日付は自動では入りません
3. 「保存」を押します
- 消したいときは、該当の部分を消して保存します。全部消すと空に戻ります
- 同時にほかの人が保存していると、上書きせずにお知らせします。書いた内容を控えて、画面を読み込み直してください
- アーカイブにした顧客のメモは、見るだけで編集できません
## 困ったとき
| こんなとき | 確かめること・やること |
| ------------------------------------------------------------ | ---------------------------------------------------------------------------------------------------------------------------------- |
| 探している顧客が一覧にいない | 上のアカウントのタブが合っているか確かめます。LINEで来ていない方は「未分類」にいます。「要対応」に絞っていたら「すべて」に戻します |
| LINEで話しかけてきた方が一覧にいない | まだ顧客にしていない方です。③の「ほかの絞り込み」で「LINE未登録の友だち」を出して、そこから顧客にします |
| 名前の横に鉛筆が出ない | アーカイブにした顧客です。名前を直すなら、先に「取引中」に戻します |
| 名前を直したのに、Linyの名前に戻らない | 一度保存した名前は、Linyに合わせて自動では変わりません。「Linyの名前を使う」を押してから保存します |
| Linyで付けたタグが出てこない | Linyからは1日に1回ほど写し直します。「最終取得」の時刻を見て、それより後に付けたタグなら、次の取り込みを待ちます |
| LINEの友だちを顧客に結び付けられない | 顧客がアーカイブになっています。「取引中」に戻してから結び付けます(要注意の顧客には結び付けられます) |
| お客様の情報の「編集」で保存できない | 顧客が要注意かアーカイブになっています。お客様の情報を変えられるのは「取引中」の顧客だけです |
| 受付の要確認で「案件に紐付ける」「受信を確認する」が失敗する | その顧客が要注意かアーカイブになっています。中身を確かめ、取引を続けてよければ「取引中」に戻してから押します |
| アーカイブにした顧客で、見積や買取依頼の登録ができない | アーカイブの顧客では新しい作業ができません。また取引するなら、「状態を変える」で「取引中」に戻します |
| 受付の要確認が減らない | 進行中の取引がない方の受信は、自動では消えません。中身を確かめて「受信を確認する」を押します |
## 関連する操作
- [契約書・委任状を一覧から確認する](/guides/purchase/contracts)
---
# 最終査定を1枚ずつ記録する
Source: https://docs.toreca-cloud.com/guides/purchase/final-appraisal
同じカードが複数枚あっても、最終査定は「1枚目」「2枚目」のように1枚ずつ記録します。鑑定番号・査定金額・買取可否を同じ画面で確認できます。
| いまの作業 | 入口・続き |
| ------------------------------ | -------------------------------------------------------------------------------- |
| 郵送されたカードが届いた | [発送と最終査定](/guides/purchase/shipping-and-final)の到着確認から進みます |
| 店頭で最初の査定を保存した | [店舗買取](/guides/purchase/counter)の「最終査定の明細」を開きます |
| 請求書を使う法人取引 | 先に[法人取引](/guides/purchase/corporate-deals)で、請求書と現物の確認を進めます |
| 成立後の金額・数量を訂正したい | [成立後の訂正](/guides/purchase/amount-and-quantity-corrections)を使います |
## 1. 最終査定の入力を開く
取引の「最終査定の明細」を開きます。初めて最終査定を作るときは入力欄が開きます。保存済みの内容を直すときは「査定内容を修正」から開きます。
商品名のある見出しを押すと、その1枚の入力欄を開閉できます。「入力を確認して閉じる」は折りたたむ操作で、記録の保存は手順4の「保存」で行います。
商品名・型番・鑑定会社・グレード・「何枚目」かを現物と照合します。複数枚が同じ名前で並ぶので、現物を同じ順番に置いてから入力します。
BOX・パック・デッキに「状態を確認」が出る場合は、先に現物の状態と数量を確認します。未確認のものがある間は、金額の入力より先に状態確認が表示されます。
## 2. その1枚の番号・金額・理由を入れる
1. 鑑定品は①「PSA番号」または「鑑定番号」を現物のラベルと照合します。「未確認」が付いている番号は、申告・検品から引き継いだ候補です。照合した番号を入力し直して保存します。他の枚数分へ同じ番号をコピーしないでください
2. ②「査定金額」に、この1枚を買い取る金額を円で入力します。同じカードでも、状態が違えば金額を分けられます
3. 減額などの説明は③「査定理由(お客様向け)」へ入力します。お客様の見積にも表示されます
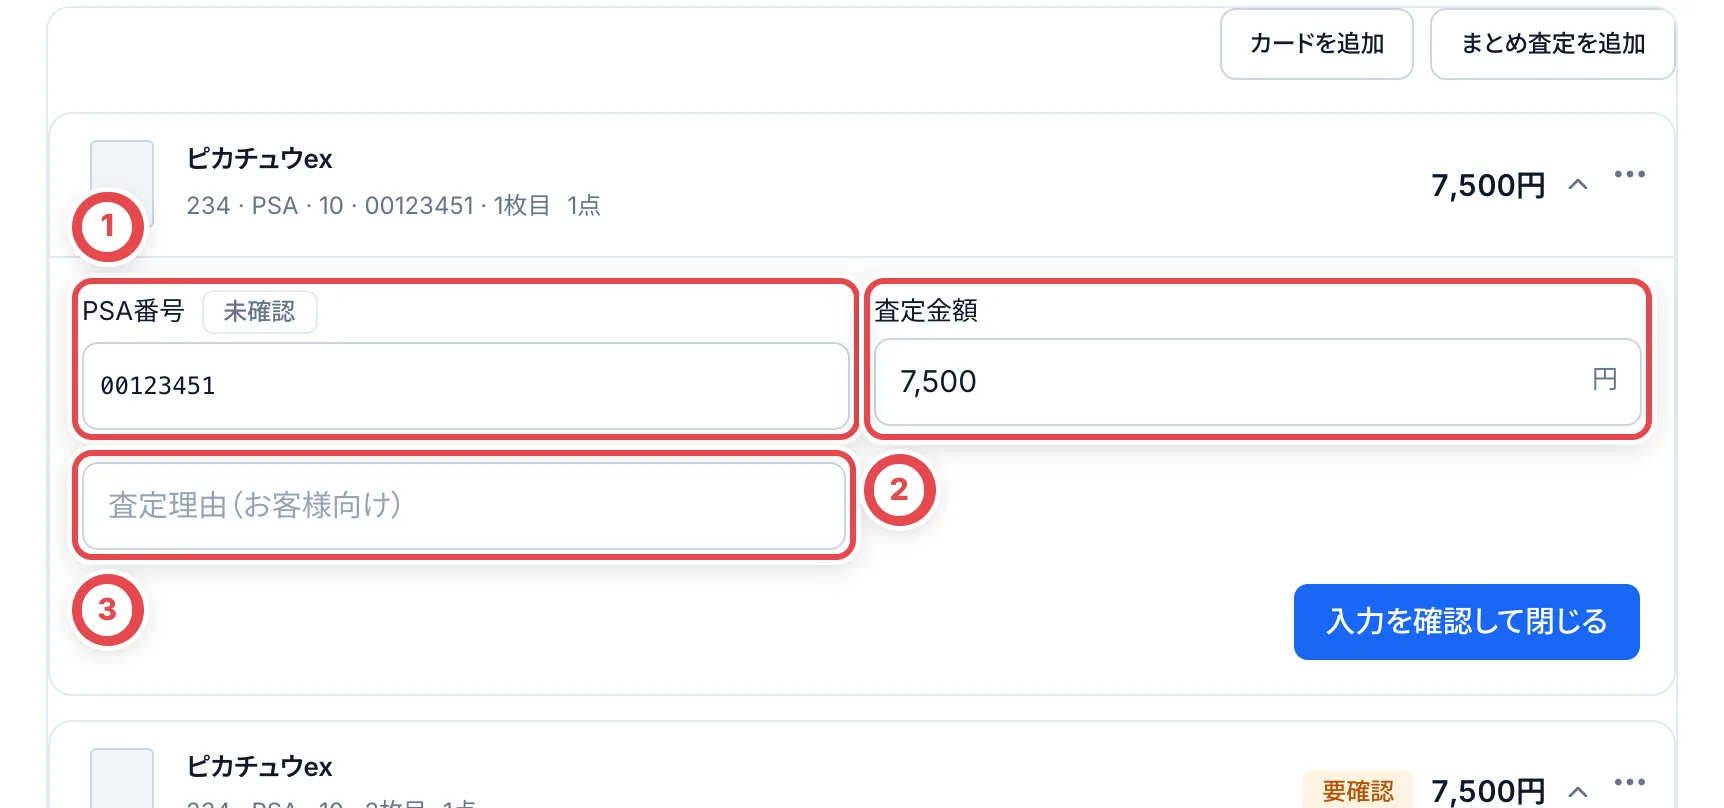 番号の先頭の0も含めて入力します。同じ鑑定番号を複数の個体へ入力すると保存できません。
カード1枚の金額に0円を入力することと、買取不可や欠品は別の記録です。買い取らないカードは次の手順で買取不可にし、届いていないカードは到着の確認を直します。
## 3. 買取不可と管理メモを記録する
その1枚を買い取れない場合は、①の三点メニューを開き、②「買取不可にする」を押します。③「管理メモ」は社内の記録です。お客様に伝える査定理由とは分けて入力します。
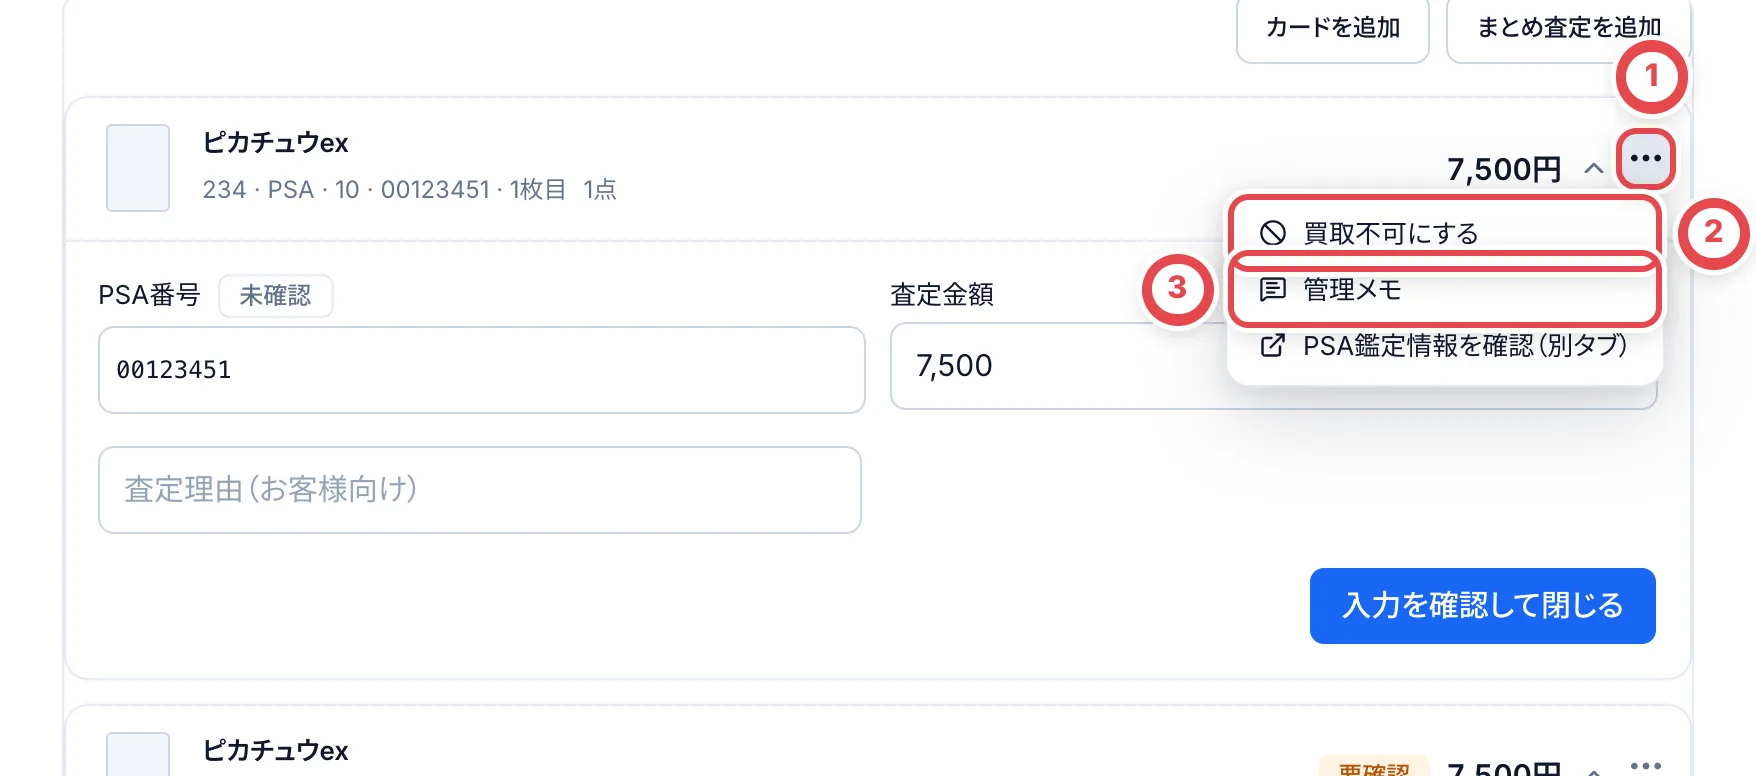 ①「理由」で「状態不良」「買取対象外」「その他」を選びます。「その他」は詳しい理由も入力します。買取不可のカードは、金額を入力する対象から外れます。変更は「保存」を押した時点で確定します。
間違えて選んだ場合は②の同じメニューから「買取不可を解除」を選びます。すでに買取不可を保存したカードを戻すときは「解除理由」も入力します。
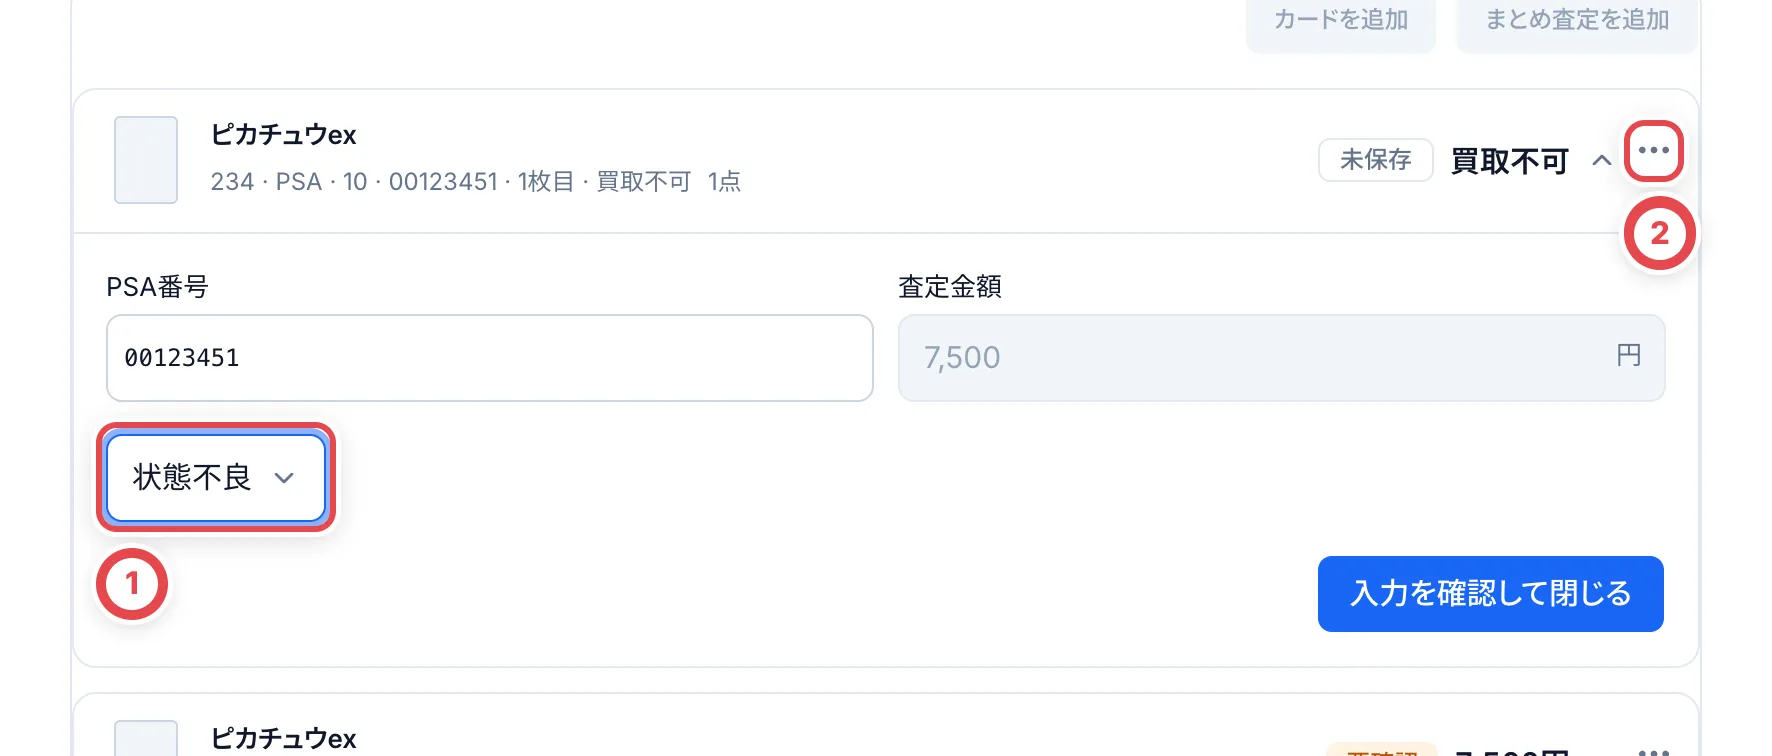 PSA番号が入っている場合、メニューの「PSA鑑定情報を確認(別タブ)」から鑑定情報を開けます。表示された情報と現物を照合してください。
## 4. 全カードを確かめて保存する
50枚を超える場合は「次へ」「前へ」でページを切り替え、最後のページまで確認します。ページを切り替えても入力中の変更は残り、「保存」でまとめて保存されます。
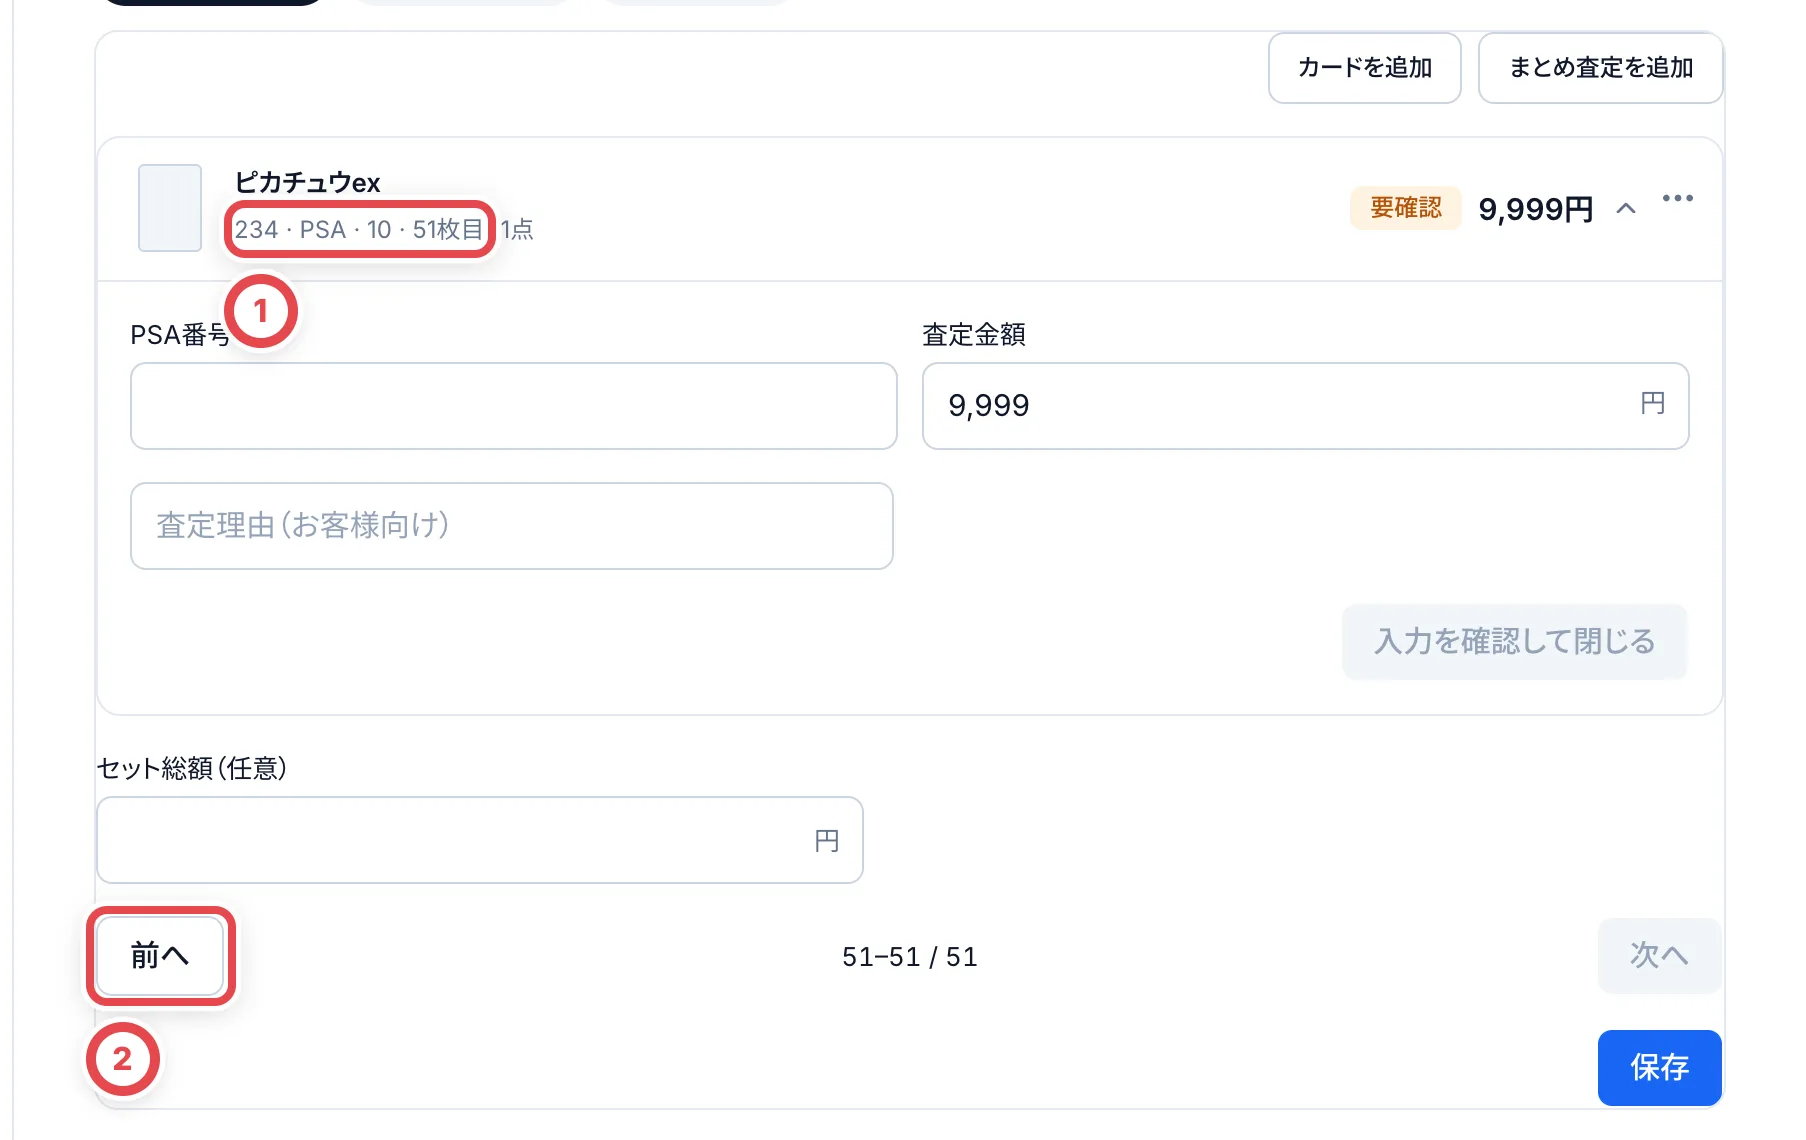 1枚ごとの合計とは別にセットの総額を決める場合だけ、①「セット総額(任意)」を入力します。通常の合計へ戻すときは空欄にします。セット価格の扱いは[セット価格](/guides/purchase/set-price)も参照してください。
全カードの入力が終わったら②「保存」を押します。金額・番号・買取可否・理由が一緒に保存されます。保存だけではお客様へ送信されず、支払いも実行されません。
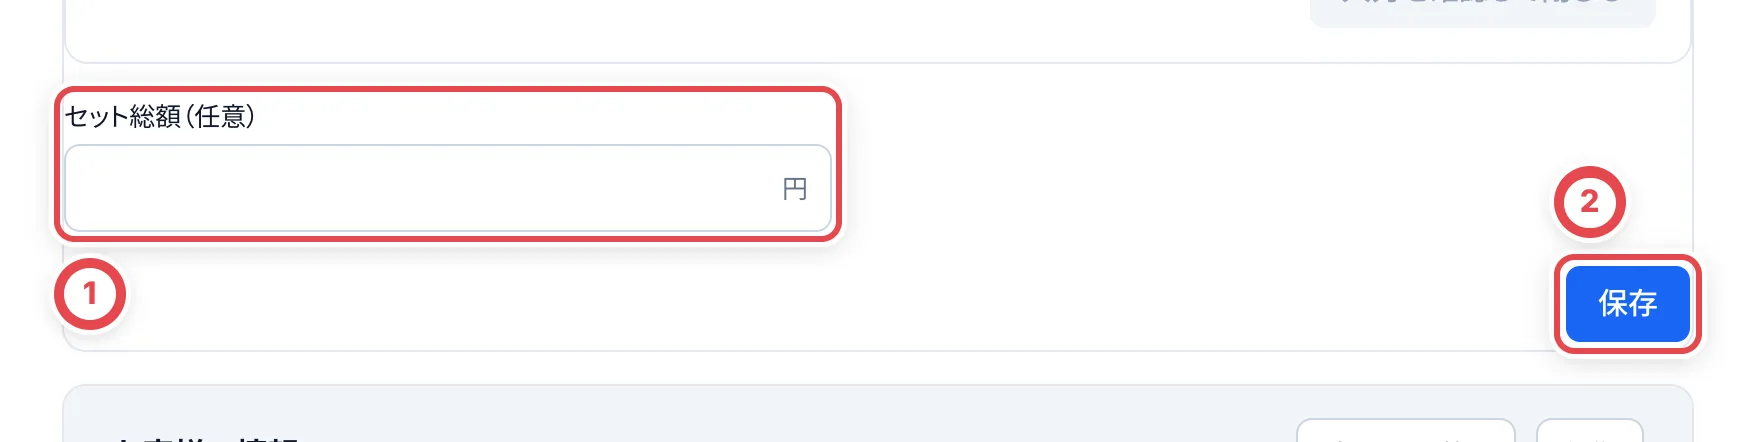 ## 5. 保存結果を確認して次へ進む
保存後は、再表示した明細の枚数・金額・買取不可の理由を確認し、「最終見積書PDF」でお客様へ見せる内容を確かめます。買取不可のカードは買取金額の対象に含まれません。
- 店舗買取は、[お客様の画面に表示する](/guides/purchase/counter#4-お客様の画面に表示する)へ進みます
- オンライン買取は、必要な[2次査定](/guides/purchase/research-and-reviews)を経て、[最終見積を提示](/guides/purchase/shipping-and-final#7-最終見積を2次査定に回して提示する)します
- オンラインで一部だけを売る場合は、提示した見積から承諾対象と配分額を確認します。[セット価格の一部承諾](/guides/purchase/set-price#オンラインで一部だけ買い取るとき)も参照してください
- 店頭で対象が変わる場合は、[再見積](/guides/purchase/counter#売らないカードがあるとき)で対象を揃え直し、新しい内容への同意・署名をもらいます
買取不可・辞退分の現物は返却対象、欠品は返却対象外です。店舗での返却か[オンラインの返送](/guides/purchase/returns)を続けます。
保存済みの査定を変更すると、以前の2次査定の承認をそのまま使えない場合があります。「次の操作」で、現在の版に必要な確認を進めてください。すでに提示した最終見積は直接書き換えず、再見積の手順へ進みます。
## 困ったとき
| こんなとき | 確かめること・やること |
| ------------------------------------------------------ | ----------------------------------------------------------------------------------------------------------------------- |
| 番号が「未確認」のまま | 現物と照合して、番号欄へ入力し直して保存します。画面に表示されているだけでは確認済みになりません |
| 「同じ鑑定番号が複数の個体に入っています」 | 同じ番号を入れたカードを探し、それぞれの現物の番号へ直します |
| 買取不可を解除しても保存できない | 「解除理由」と、その1枚の査定金額を入力します |
| 届いていないカードが買い取り対象になっている | 金額を0円にするだけで済ませず、到着の確認・不足の記録を見直します。「欠品」の行は最終査定から受領済みには変更できません |
| 「カードを追加」「まとめ査定を追加」が押せない | 先に入力中の最終査定を保存します。追加後は明細に戻り、追加分の金額や状態を確認します |
| 「相場調査を反映するか取り下げてから保存してください」 | 調査依頼の回答を反映するか、不要な依頼を取り下げてから最終査定を開き直します |
| 「検品を完了してから保存してください」 | 進行中の検品を完了してから戻ります |
| 案件や個体が更新されたと表示される | 入力内容を控え、画面を開き直して最新の明細と照合します。古い画面のまま上書きしないでください |
| 「査定内容を修正」が出ない | 買取の書き込み権限、取引の状態、2次査定や提示の状態を確認します。成立後は訂正手順を使います |
---
# 履歴から操作を取り消す
Source: https://docs.toreca-cloud.com/guides/purchase/history-and-undo
在庫登録後の金額・数量は、[買取金額・数量と関連記録の訂正](/guides/purchase/amount-and-quantity-corrections)を使います。履歴の内容・社内メモなどの誤りは[記録の訂正](/guides/inventory/record-corrections)で直します。操作の取り消しとは別の手順です。
査定の保存・承諾・到着など、復元情報が記録された操作を取り消せます。外部送信・署名・支払い・成立後の処理まで巻き戻す機能ではありません。店頭の一括受け渡しもこの履歴復元の対象外です。
| 今の状況 | 使う操作 |
| ---------------------------------- | ---------------------------------------------------------------------------------------------- |
| 保存した直後で、その後の変更がない | 完了メッセージの「取り消す」 |
| 履歴を見て戻す時点を選びたい | 「アクティビティ」の「この操作の前に戻す」「この時点に戻す」 |
| 承諾・到着など直近の段階を戻したい | 状態メニューの「前の段階に戻す…」。[発送と最終査定](/guides/purchase/shipping-and-final)を参照 |
## 1. 対象の案件と保存した操作を選ぶ
対象の案件で「アクティビティ」を開きます。①の「保存した操作」の種類・日時・担当者・金額・数量を確認します。②の「この操作の前に戻す」はその操作の直前、「この時点に戻す」はその操作の直後を基準にします。その後の対象操作も取り消される場合があるので、次の確認画面を必ず読みます。
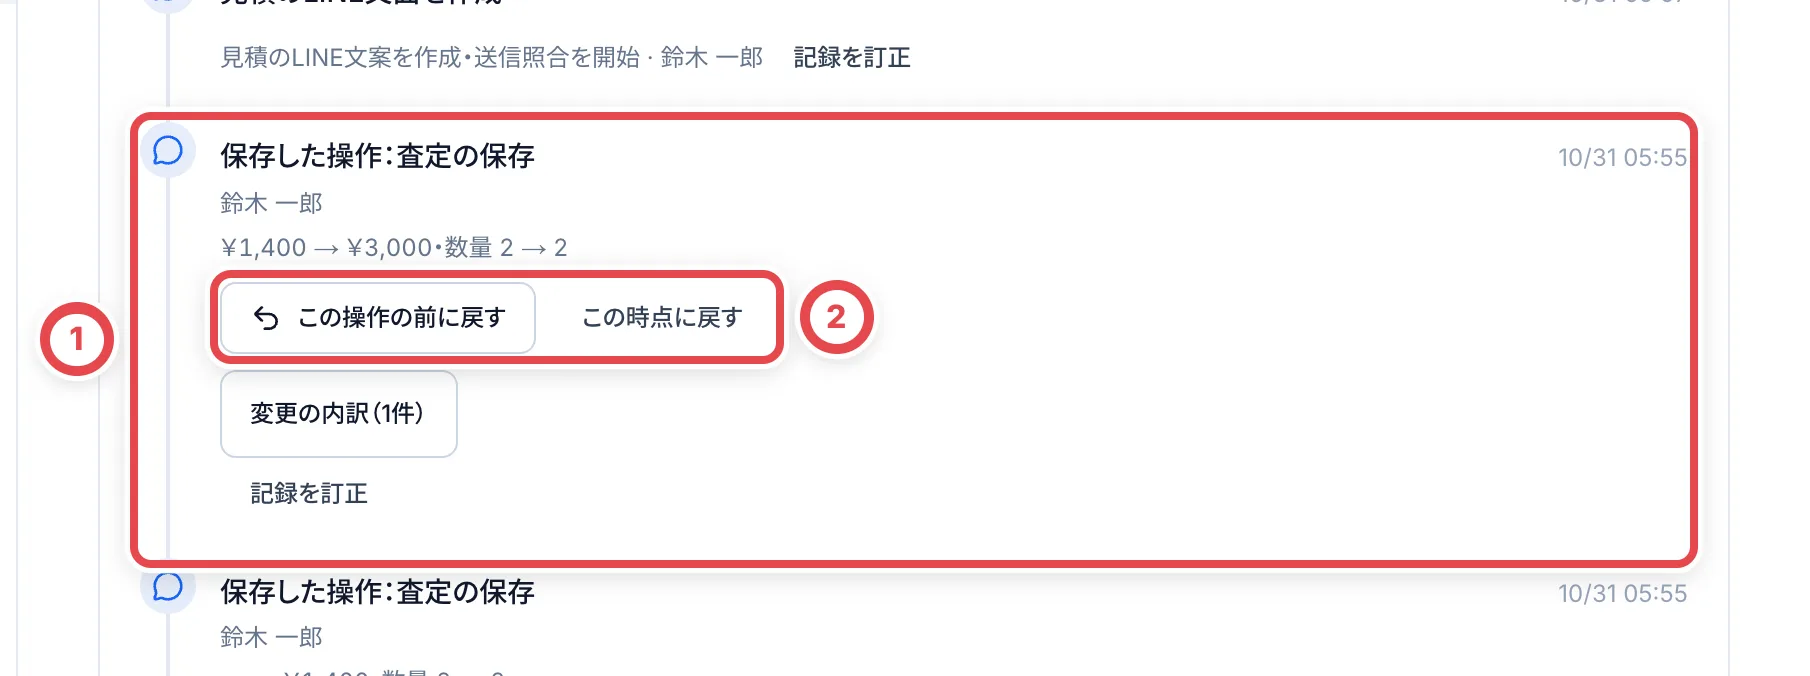 ## 2. 戻す内容と理由を確認して実行する
①の現在/復元後の進捗・下書き金額・数量と、取り消す操作の一覧を確認します。②に戻す理由を書き、③の「この内容で戻す」で確定します。元の操作履歴、メモ・写真・添付は残ります。過去の承認をそのまま引き継ぐものではなく、査定は新しい下書きとして扱われます。
保存後は履歴を開き直し、取り消しの記録と復元後の明細を確認します。戻せない理由が出た場合は、関連記録を確認して通常の訂正手順へ進みます。
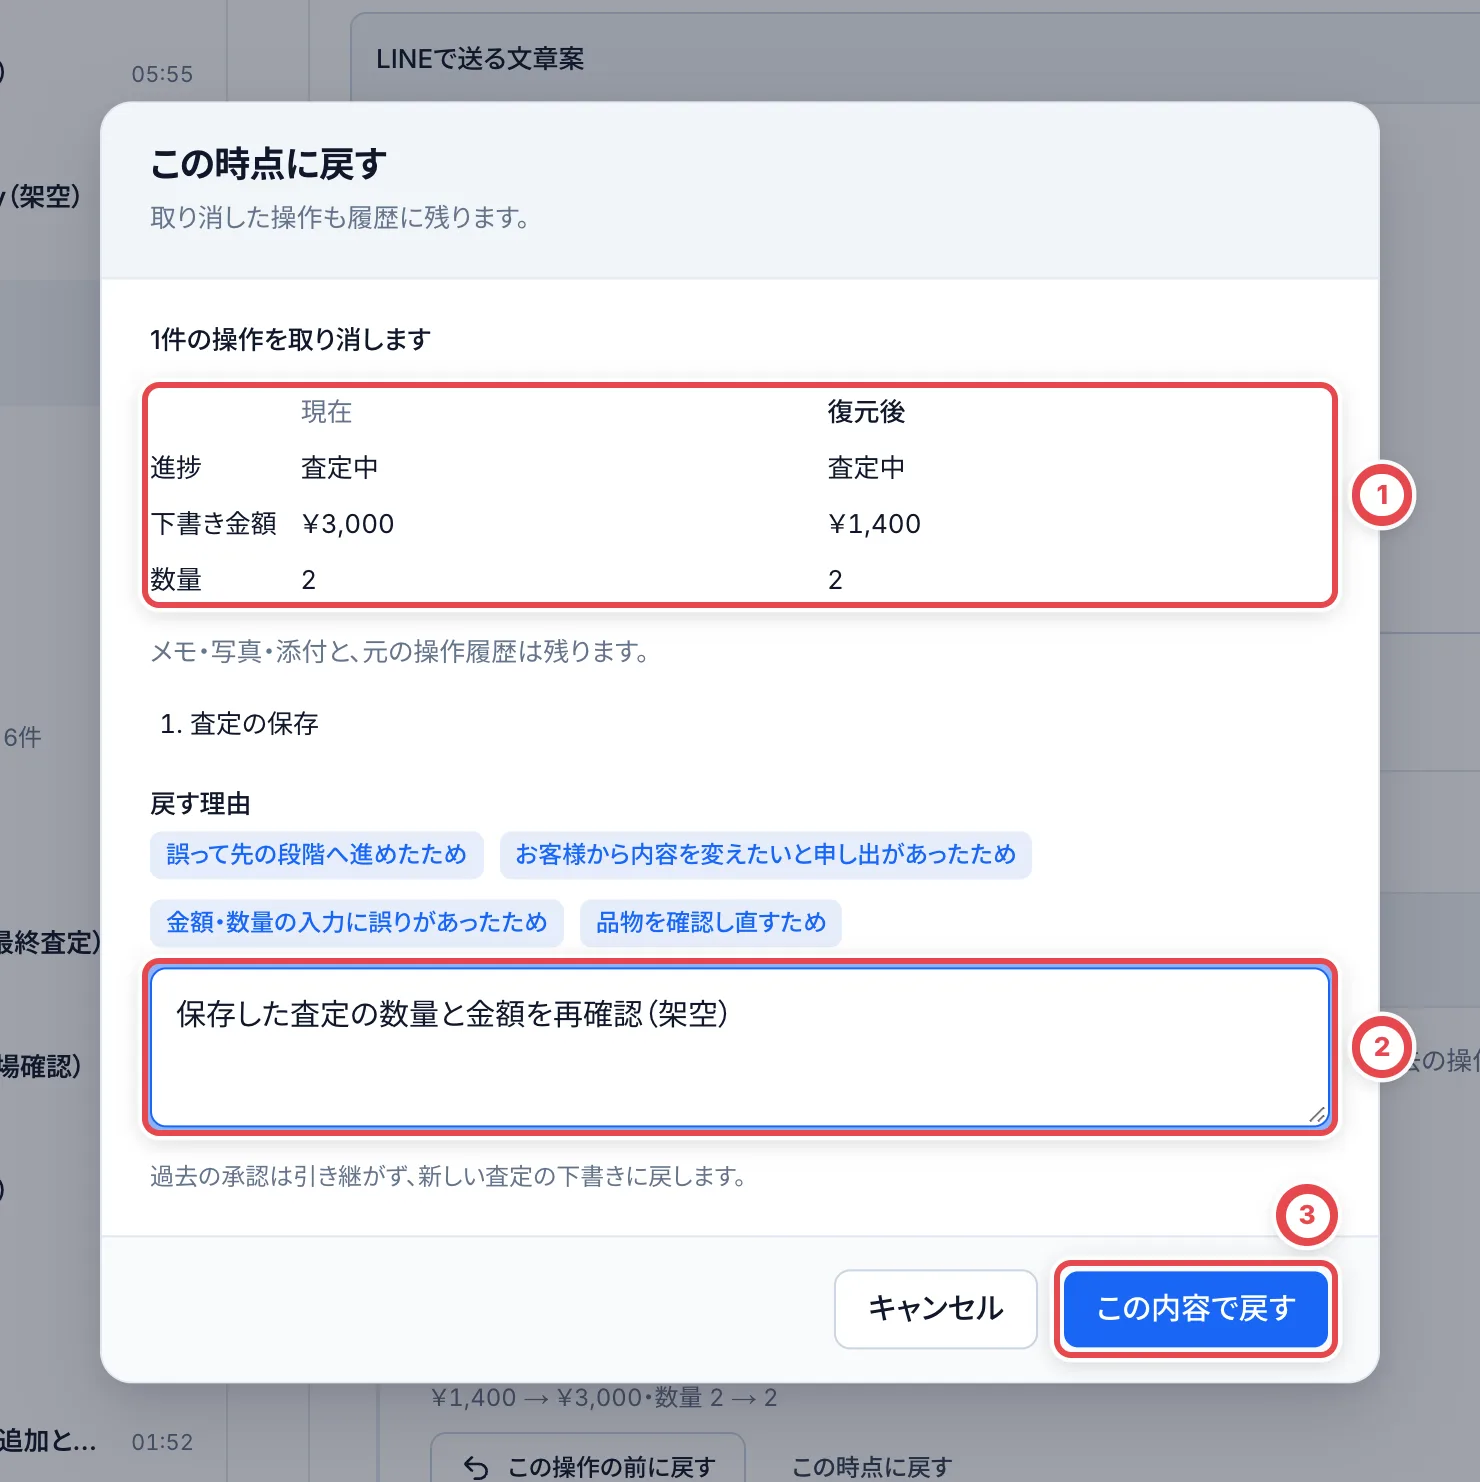 ## 3. 保存直後の取り消しを使う
対応する保存が終わると、画面下の①の完了メッセージに「取り消す」が約10秒表示されます。保存内容をすぐ戻したいときに使います。メッセージが消えた場合や、その後に操作した場合は、履歴を開いて対象を確認します。
権限が足りない場合は「履歴を見る」が表示されます。通信の結果が不明な場合も、入力を変えて別の復元を重ねず、同じ処理の再試行または履歴で結果を確認します。
 ## 困ったとき
| 起きていること | 確認すること |
| -------------------------- | ---------------------------------------------------------------------- |
| 戻すボタンがない | 復元情報のない古い操作や対象外の操作でないか確認します。 |
| その後の操作があります | 最新の履歴から戻したい基準を選び直します。 |
| 関連記録が更新されています | 回答・署名・書類・在庫・調査依頼など、画面に出た拒否理由を確認します。 |
| 成立後なので戻せない | 支払い・在庫・台帳の訂正手順を使います。 |
| 必要な権限がありません | 買取の編集と操作ごとの復元権限を管理者に確認します。 |
---
# オンラインの本人確認
Source: https://docs.toreca-cloud.com/guides/purchase/identity
古物の買取では、お客様の本人確認が必要です。トレカクラウドでは、**本人確認が記録されていないと、在庫と支払いを登録できません**(古物台帳に載せるためです)。
店舗で原本を確認する場合は[店頭本人確認](/guides/purchase/counter-identity)、店頭のお客様用画面で撮影する場合は[書類撮影と原本照合](/guides/purchase/counter-photos)へ進みます。
既存のお客様にオンラインで登録内容を見直してもらう場合は、[本人認証と登録内容の確認](/guides/purchase/registered-information)へ進みます。振込先の名義に関する[委任状](#委任状が要るとき)は、店舗買取で振込を選ぶ場合にも確認します。
## 最初に用意するもの
- 本人確認の記録や承認ができるのは、オーナー・管理者・スタッフ・スタッフ(調査兼務)です
- お客様情報に、氏名・生年月日・職業・住所がそろっていること(そろっていないと承認できません)
## フォームで書類を出してもらう
| 順番 | やること | だれが |
| ---- | ------------------------------ | ------ |
| 1 | フォームのリンクを送る | 店舗 |
| 2 | 書類の種類を選んで、写真を出す | お客様 |
| 3 | 届いた書類を確かめて、承認する | 店舗 |
### 1. フォームのリンクを送る
取引の「発送」の画面の「発送をお願いする」に、お客様情報・本人確認・送り状をまとめて入力してもらうフォームのリンクがあります。リンクは「LINEで送る文章案」に入っているので、文章案ごとコピーしてLINEで送ります。**リンクは自動では送られません。**
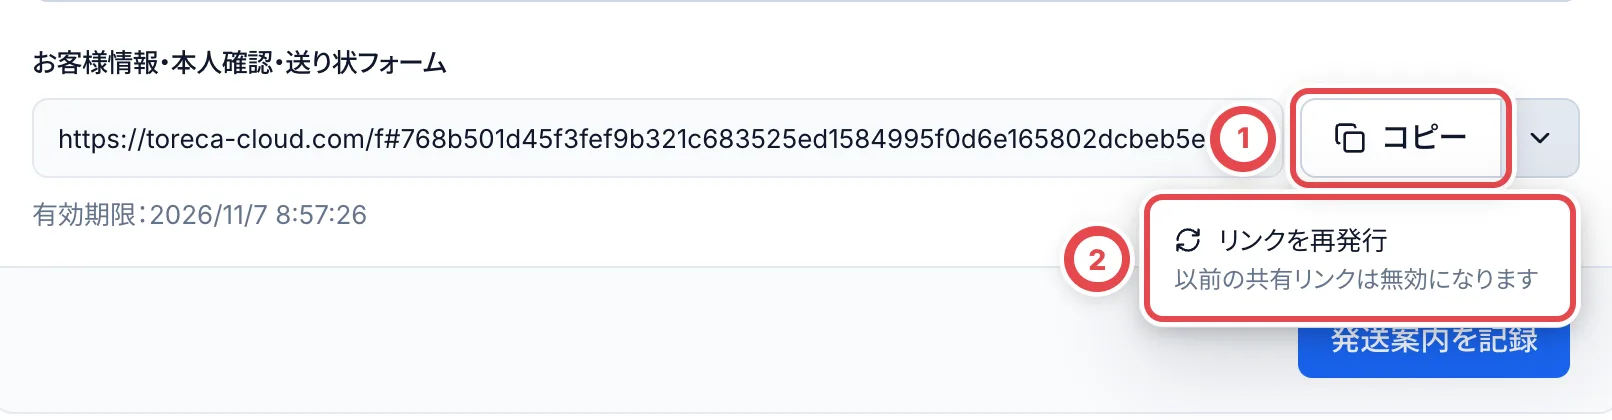 リンクだけを送るときは、①の「コピー」を使います。リンクを作り直すときは、横の下向きの矢印から②の「リンクを再発行」を選びます。**再発行すると、前のリンクはすぐ使えなくなります。** リンクには有効期限があり、リンクの下に出ています。
### 2. お客様が書類を出す
お客様がリンクを開くと、まだ出していない項目から順に案内されます。本人確認が残っていれば、①の「提出を開始する」から始まります。
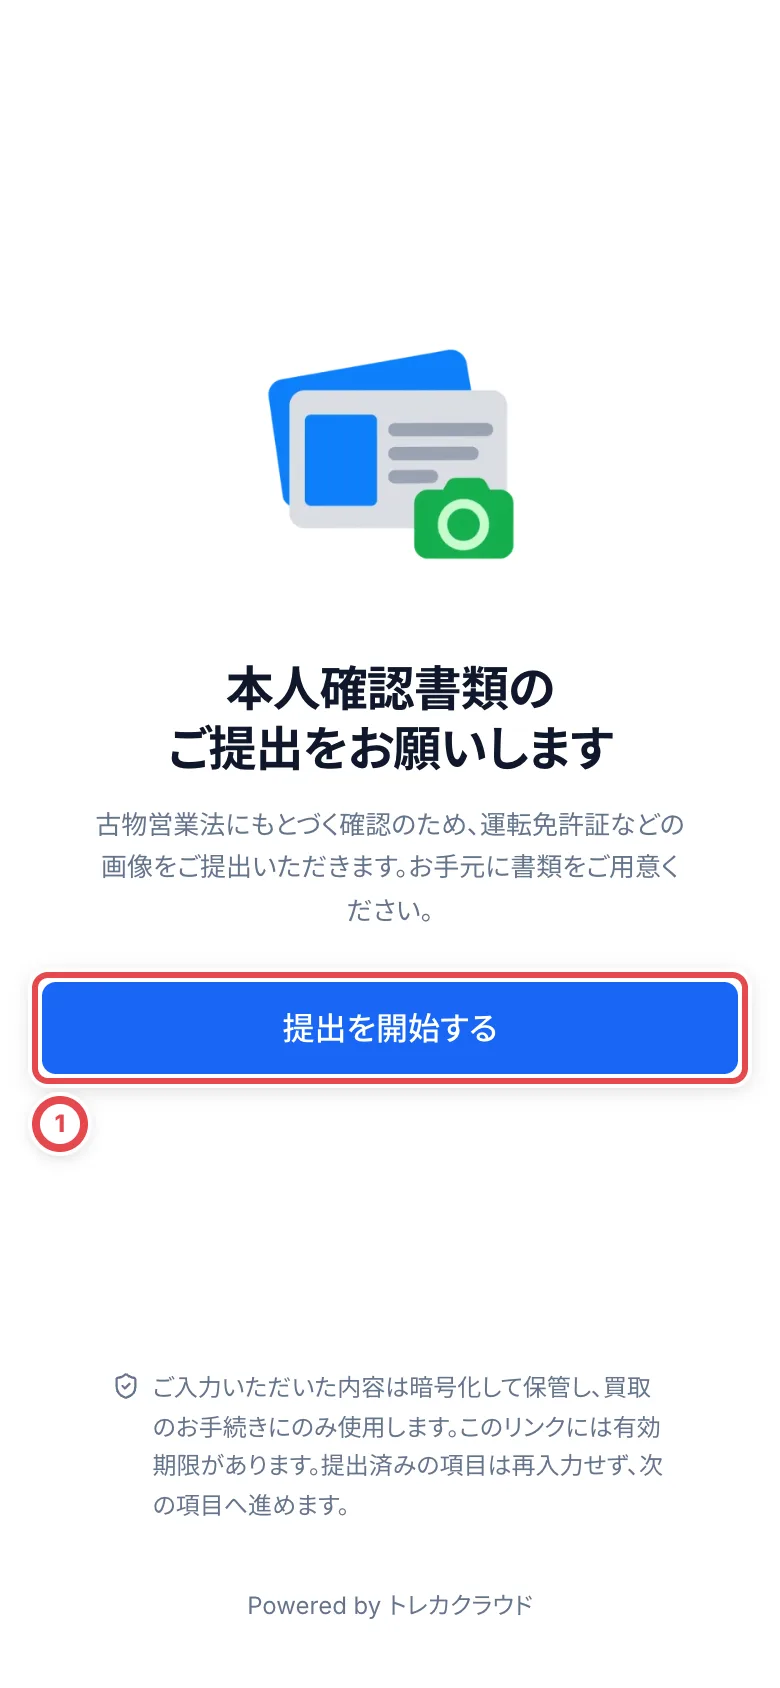 次に、手元の書類を選びます。書類によって、撮ってもらう写真の枚数が変わります。
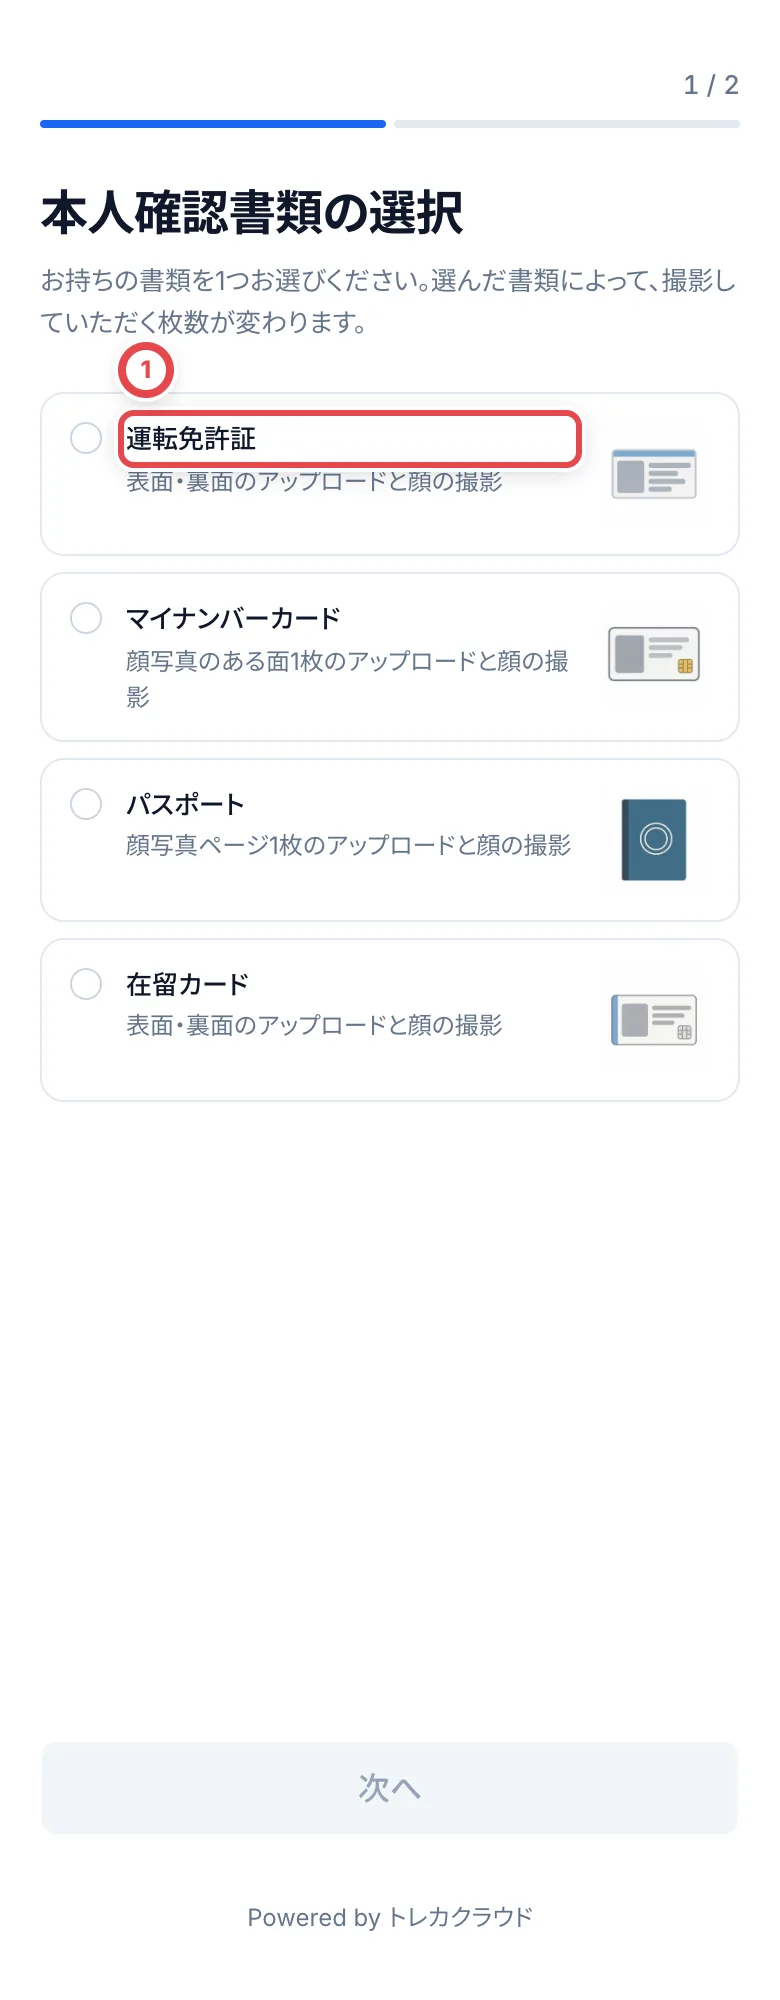 | 書類 | お客様が出すもの |
| ------------------ | -------------------------------------------------- |
| 運転免許証 | 表面・裏面と、顔3方向の写真 |
| マイナンバーカード | 顔写真のある表面1枚と、顔3方向の写真(裏面は不要) |
| パスポート | 顔写真ページ1枚と、顔3方向の写真 |
| 在留カード | 表面・裏面と、顔3方向の写真 |
### 3. 届いた書類を確かめて承認する
書類が届くと、対応項目に「フォーム回答」として出て、ダッシュボードの「本人確認書類の承認待ち」にも件数が出ます。件数を押すと本人確認の一覧が開き、「承認待ち」「再提出が必要」「承認・記録済み」などで絞り込めます。
1. 一覧で「提出書類を確認」を押すと、書類を確かめる画面が開きます
2. 書類の画像と、お客様情報の氏名・生年月日・職業・住所を見比べます
3. 問題がなければ「承認」を押し、「承認を確定する」で確定します。本人確認が記録され、取引に結び付きます
**書類が出されただけでは、本人確認は終わりません。** 必ず店舗で確かめて承認してください。
写真がぼやけている・書類が見切れている・期限が切れているなどのときは、「再提出を依頼」を押し、理由を選んで「この理由で再提出を依頼」を押します。お客様は同じリンクから出し直せます。
:::note
お客様情報に氏名・生年月日・職業・住所のどれかが欠けていると、承認できません。先にお客様情報を確かめてください。
:::
### パソコンで開いているお客様の顔撮影
「スマートフォンで本人確認を完了」が表示されたら、カメラ付きのスマートフォンでQRコードを読み取ります。顔を正面・右・左から撮影し、書類と顔の画像を確認して、**スマートフォン側で提出まで完了**します。顔の撮影が終わっただけでは提出完了ではありません。
提出が完了すると、パソコン側にも反映されます。QRの期限が切れた場合は新しいQRを表示します。撮り直しもスマートフォンで行えます。電話番号・郵便番号の確認画面では、半角数字に整えられた値と先頭の0を見直してください。
## 店舗で受け取った書類画像を登録する
店頭取引の対面確認は、[店頭本人確認の登録と書類追加](/guides/purchase/counter-identity)を使います。以下は店頭以外の取引で、店舗が受け取った書類画像を登録する手順です。
店舗の設定で「担当者による書類確認」が許可されている必要があります。「この店舗では書類確認が許可されていません」と出たら、設定を管理できる担当者が[本人確認方法の設定](/guides/settings/identity)を確認し、許可したあとに登録画面を開き直してください。
取引の「発送」の画面のいちばん下、「本人確認を記録する」の欄を開きます。
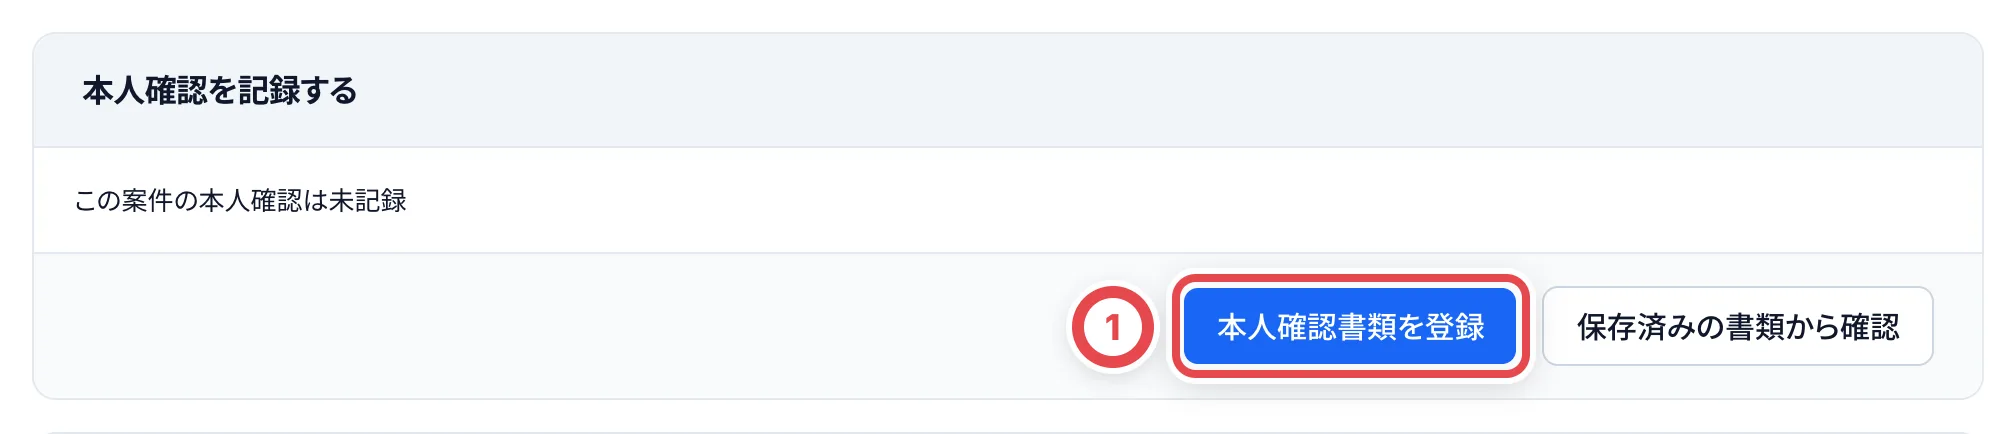 開いた画面で、①のお客様情報と書類を見比べ、②で書類の種類を選び、③に書類の画像を登録します。運転免許証と在留カードは、裏面も登録します。④の「登録する」を押すと、**その場で本人確認が記録されます**(承認の手順はありません)。
画像はJPEG・PNG・WebPで、表裏の合計20MB以下です。表面と裏面には、それぞれ別の画像を選びます。必要な画像がそろうまで「登録する」は押せません。
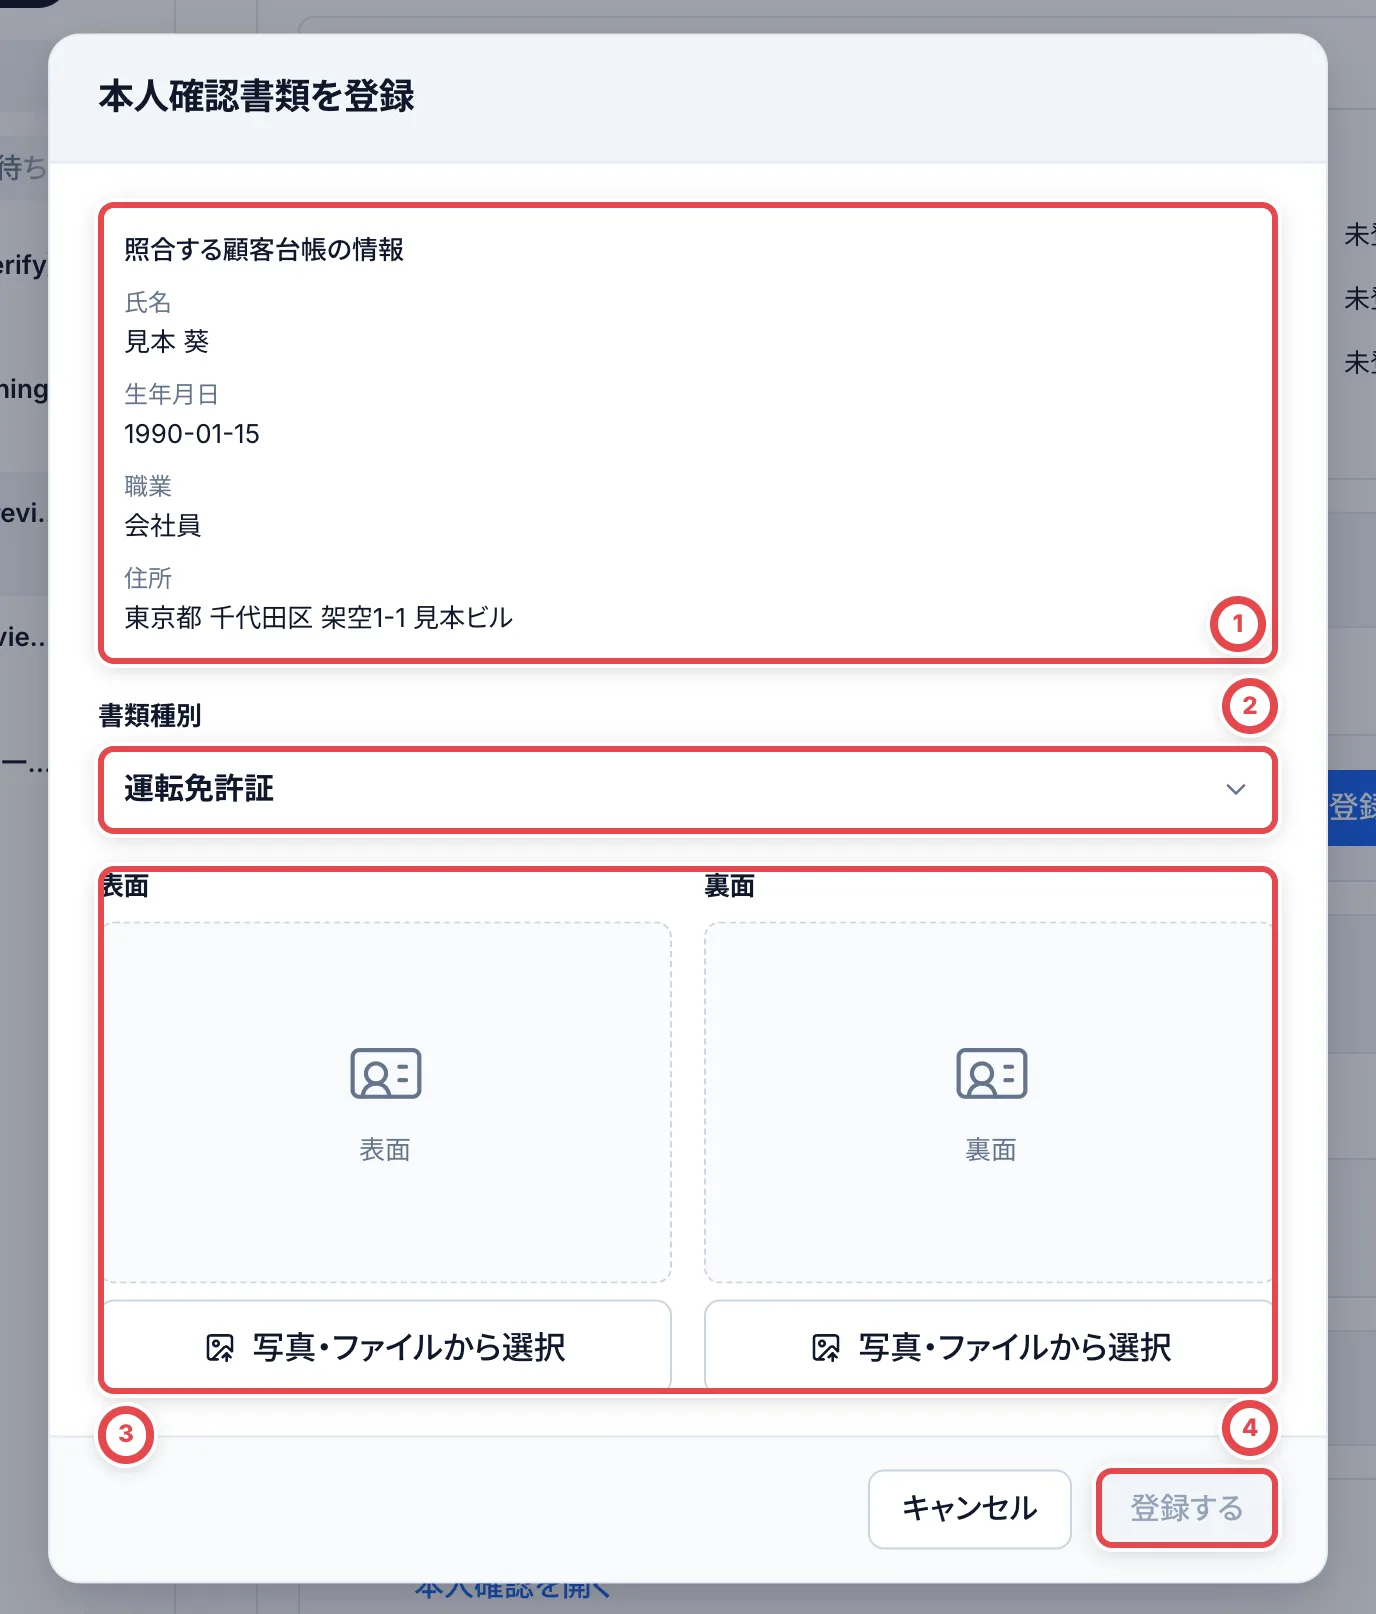 ## 記録されたあと
本人確認が記録されると、顧客の画面の名前の横が①「本人確認済み」になり、「お客様情報」の本人確認の欄に記録が並びます。
取引に本人確認が結び付いたあとは、同じ取引へ新たに登録する入口は表示されません。発送の「書類を確認・追加」、または顧客の本人確認の「詳細」を開き、「書類を表示」で保存済みの画像を確認します。書類の追加は、その記録の中で行います。
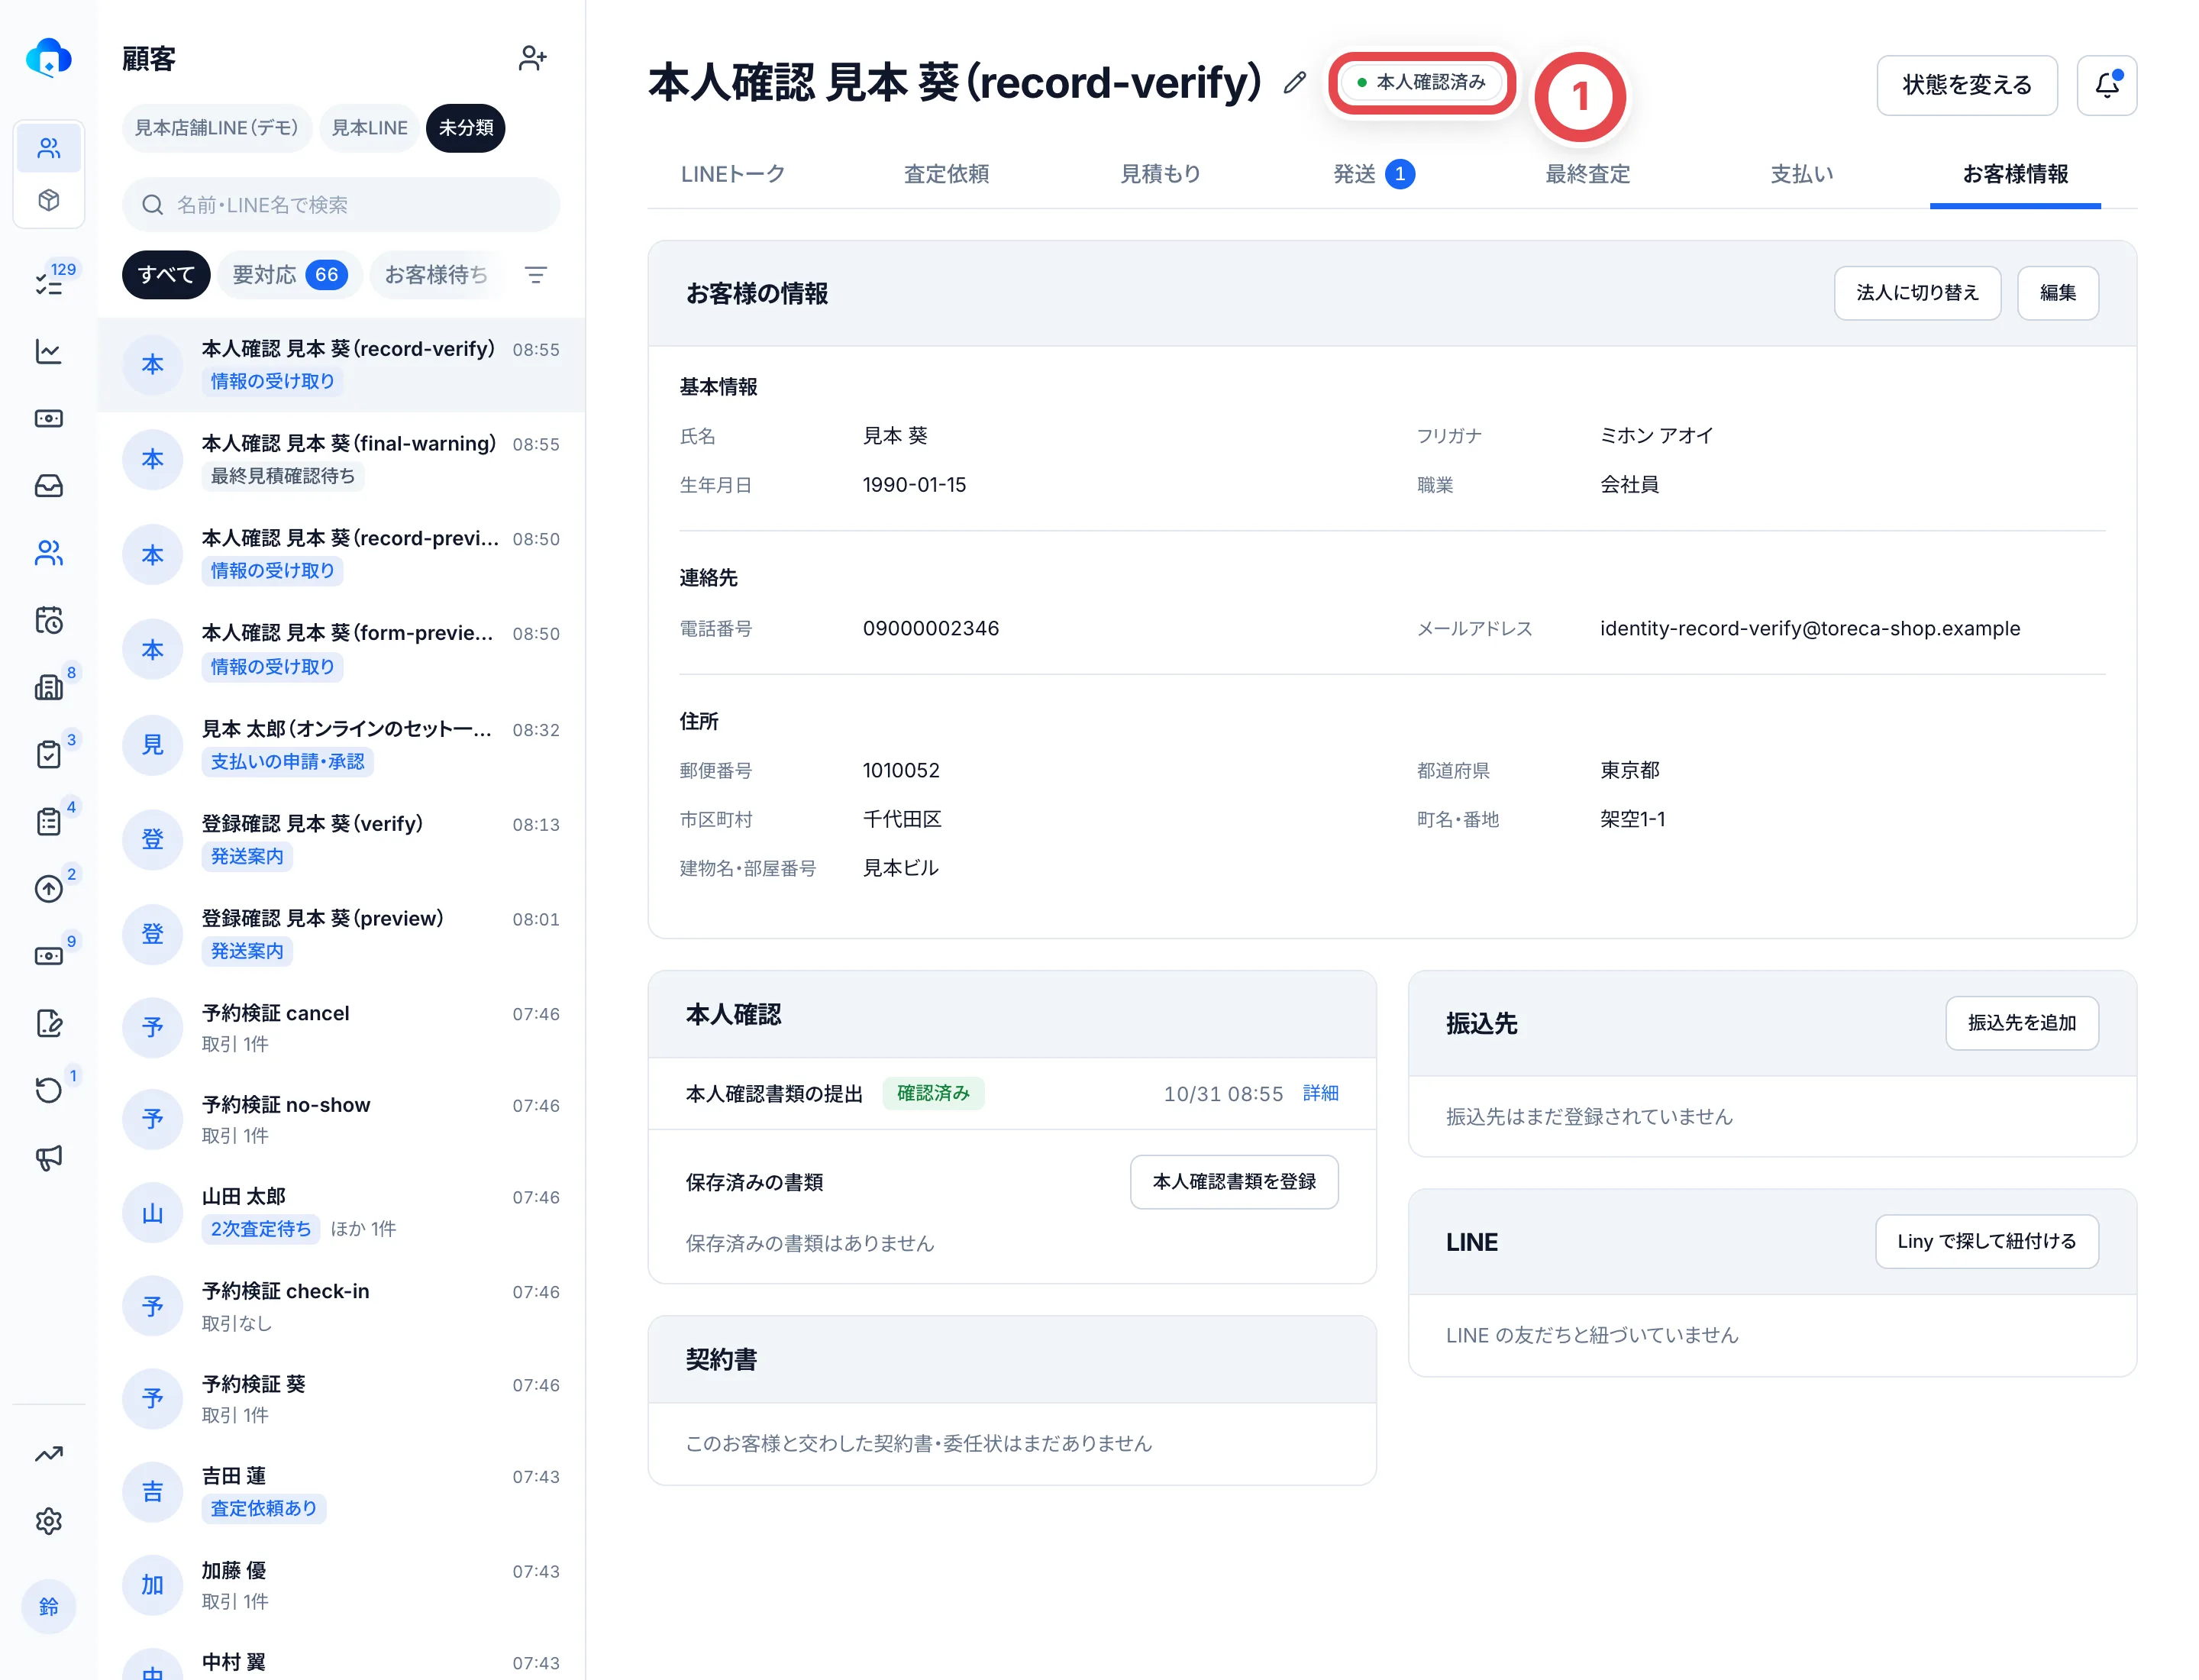 ## 本人確認と承諾の順番
本人確認は、最終見積の承諾を記録する前に済ませるのが基本です。まだのときは、最終査定の画面の「お客様の回答」に「本人確認が記録されていません」と出ます。
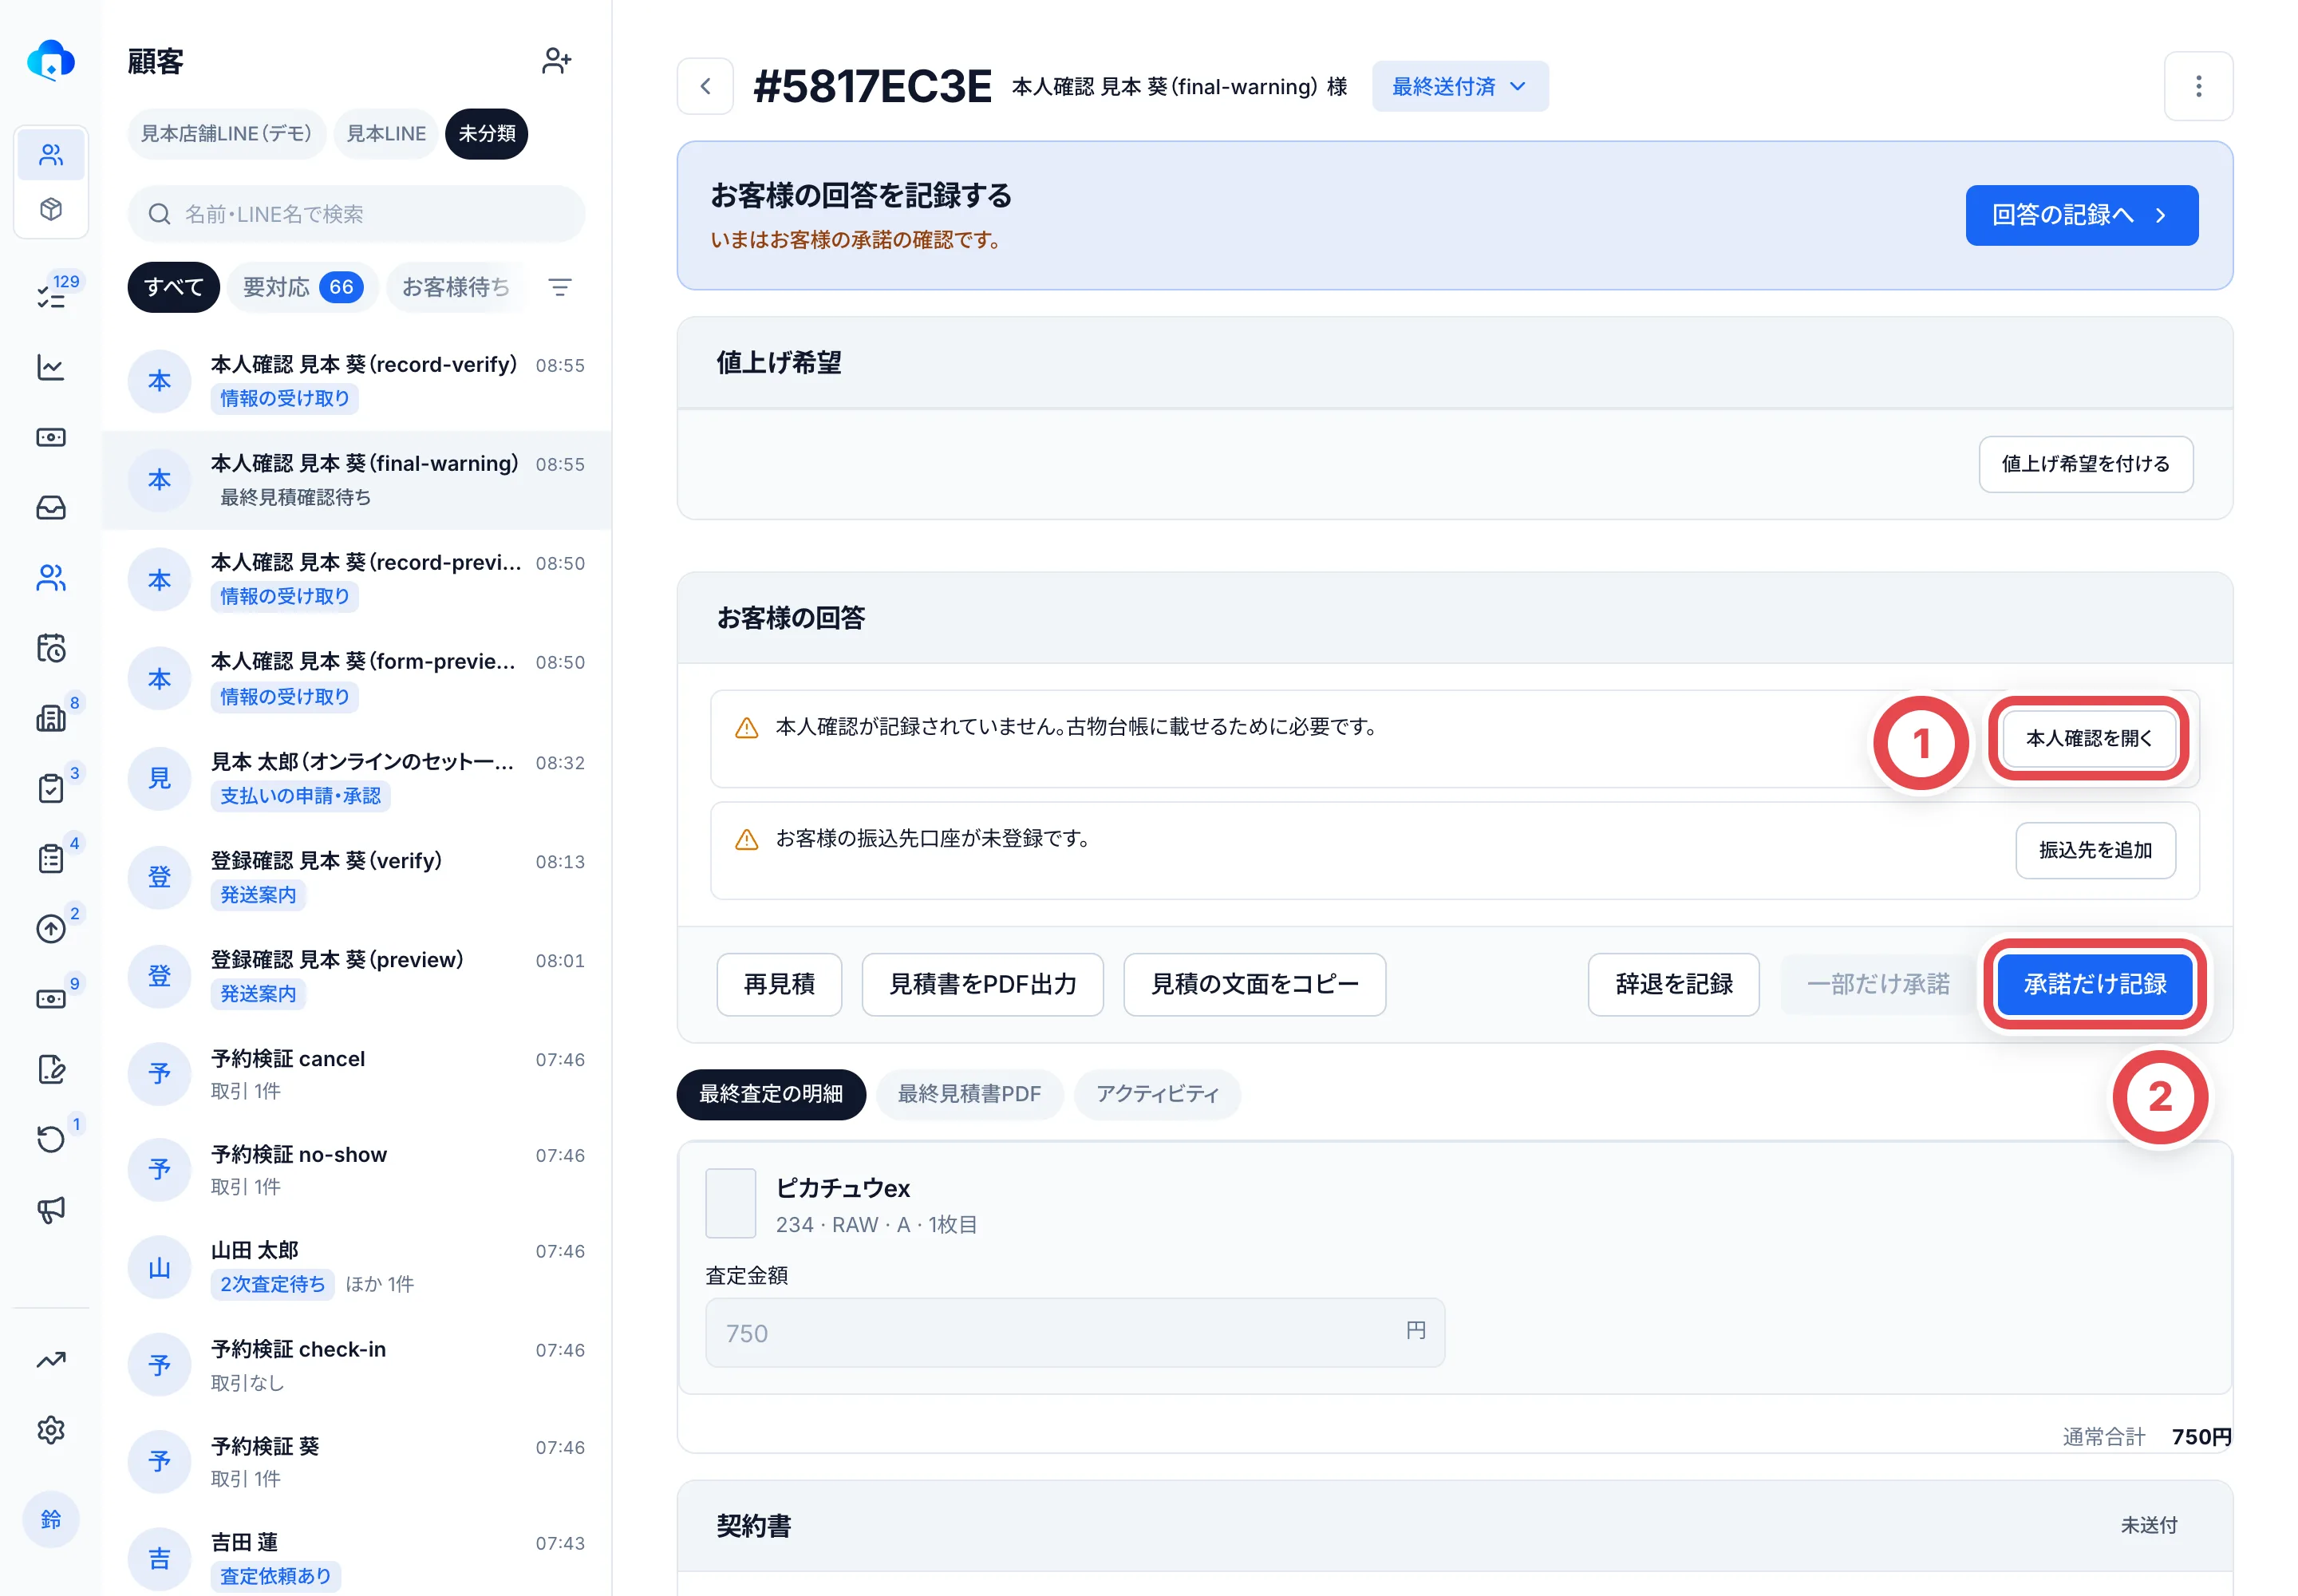 ①から本人確認の記録へ進めます。②の「承諾だけ記録」で、承諾だけ先に記録することもできます。
本人確認がまだでも、②の「承諾だけ記録」で承諾だけを先に記録できます。そのあと本人確認を記録してから、「在庫と支払いを登録」に進みます。手順は[発送と最終査定](/guides/purchase/shipping-and-final)を参照してください。
## 委任状が要るとき
振込先の口座の名義がお客様と違うときは、振込の前に委任状が要ります。取引の画面に「委任状」の欄が出て、口座名義が「お客様と異なる」と表示されます。
| やり方 | 操作 |
| -------------------------------------- | -------------------------------------------------------------------------------------------------------------------------------------------------------- |
| クラウドサインで委任状を交わす | API連携では「書類を準備」からPDF・宛先を確認して送信し、状態を同期します。従来の手動運用ではクラウドサイン側で送り、「送付済み」「締結済み」を記録します |
| お客様本人の口座と分かった(旧姓など) | お客様の申告と確認書類を見て、「ご本人の口座と確認する」から委任状を不要にする |
| 委任状なしで進める | オーナーか管理者が「不要にする」を選ぶ(理由は任意。記録は取引の経緯と監査ログに残ります) |
**委任状を締結済みにするか、不要にするまで、その振込は承認できません。**
## 困ったとき
| こんなとき | 確かめること・やること |
| ------------------------------------------ | ---------------------------------------------------------------------------------------------------------- |
| 在庫と支払いを登録できない | 本人確認が記録されていません。フォームの書類を承認するか、店舗で記録します |
| 書類が届いたのに「本人確認済み」にならない | フォームで出された書類は、承認するまで記録になりません。本人確認の一覧の「承認待ち」から承認します |
| 承認できない | お客様情報に氏名・生年月日・職業・住所のどれかが欠けています。お客様情報の「編集」で入れてから承認します |
| お客様が「リンクが開けない」と言う | リンクの有効期限が切れているか、再発行して前のリンクが使えなくなっています。リンクを再発行して送り直します |
| 写真が読めない書類が届いた | 「再提出を依頼」で理由を選んで送ります。お客様は同じリンクから出し直せます |
| 振込を承認できない | 振込先の名義がお客様と違い、委任状が済んでいません。上の「委任状が要るとき」のどれかで片づけます |
## 関連する操作
- [クラウドサインで書類を作成・送信する](/guides/settings/cloudsign)
## 本人確認を記録したら
[発送と最終査定](/guides/purchase/shipping-and-final)へ戻り、最終見積への回答と在庫・支払いの登録を進めます。オンライン全体の段階は[オンライン買取の流れ](/guides/purchase/overview)で確認できます。
---
# 受付フォーム
Source: https://docs.toreca-cloud.com/guides/purchase/intake-form
受付フォームは、オンライン買取の申し込みを受けるための、店舗に1つの共通フォームです。リンクはずっと同じなので、LINEのリッチメニューやあいさつのメッセージに置いておけます。お客様情報を新しく提出すると、そのたびに新しい顧客と取引ができます。
## 取引ごとの入力リンクとの違い
| | 受付フォーム(このページ) | 取引ごとの入力リンク |
| ---------- | -------------------------------------------------- | -------------------------------------------------------------------------------------- |
| 使う場面 | まだ取引のないお客様に、最初の申し込みをしてもらう | 取引のあるお客様に、足りないもの(査定の申し込み・本人確認・送り状など)を入れてもらう |
| リンク | 店舗に1つ。ずっと同じ | 取引ごと。7日間で使えなくなり、出し直せる |
| 申し込むと | 新しい顧客と取引ができる | その取引に反映される |
| 出す場所 | 「設定」の「受付フォーム」 | 顧客の画面の「依頼フォーム」や、発送タブの「発送をお願いする」など |
取引ごとの入力リンクは、[顧客と取引](/guides/purchase/customers)と[発送と最終査定](/guides/purchase/shipping-and-final)で説明しています。
## 最初に用意するもの
- 受付フォームの設定を変えられるのは、連携を管理する権限があるメンバーです(オーナーと管理者)。設定を保存するには、顧客と取引を見る・変える権限も要ります
- お客様に案内するLINE公式アカウント(またはLiny・Lステップ)
## 流れと取引の状態
| 順番 | やること | だれが | 取引の状態 |
| ---- | ------------------------------------------ | ------ | ---------- |
| 1 | 受付フォームを配信して、リンクをコピーする | 店舗 | ― |
| 2 | リンクをLINEなどで案内する | 店舗 | ― |
| 3 | お客様情報を入れて提出する | お客様 | 新着 |
| 4 | お品物を申告して申し込む | お客様 | 新着 |
| 5 | 届いた申し込みを査定する | 店舗 | 査定中 |
## 1. 受付フォームを配信して、リンクをコピーする
「設定」の「受付フォーム」を開き、「受付フォームの配信」の「変更」を押します。①の「配信状況」を「配信中」にし、「フォームの見出し」(1〜100文字)を決めて、「変更を保存」を押します。**保存するとすぐフォームに反映されます。** 最初に保存したときに、共通リンクができます(それまでは「未発行」)。
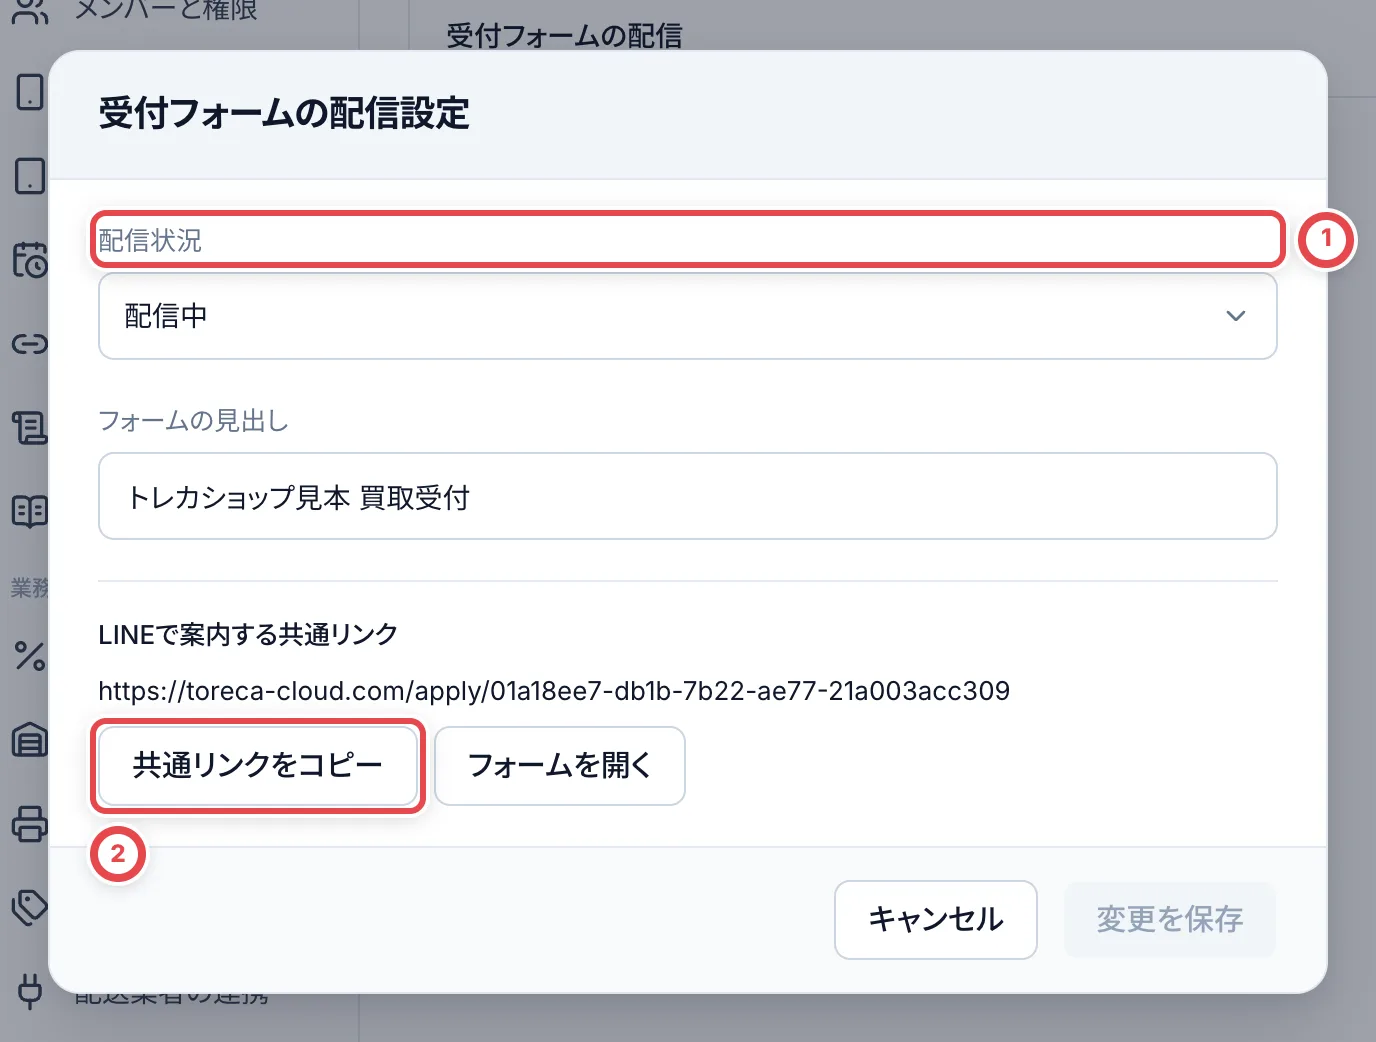 ②の「共通リンクをコピー」でリンクをコピーします。リンクは、見出しや配信状況を変えても変わりません。「停止中」にすると、新しい申し込みを受けなくなります(すでに出した取引ごとの入力リンクは使えるままです)。
## 2. リンクをLINEなどで案内する
コピーしたリンクを、LINE公式アカウントやLiny・Lステップのリッチメニュー、あいさつのメッセージなどに置きます。トレカクラウドからLINEに自動で送ることはありません。
## 3. お客様情報を入れて提出する(お客様)
お客様がリンクを開くと、①にお店が決めた見出しが出ます。②の「お客様情報を入力する」から始めます。
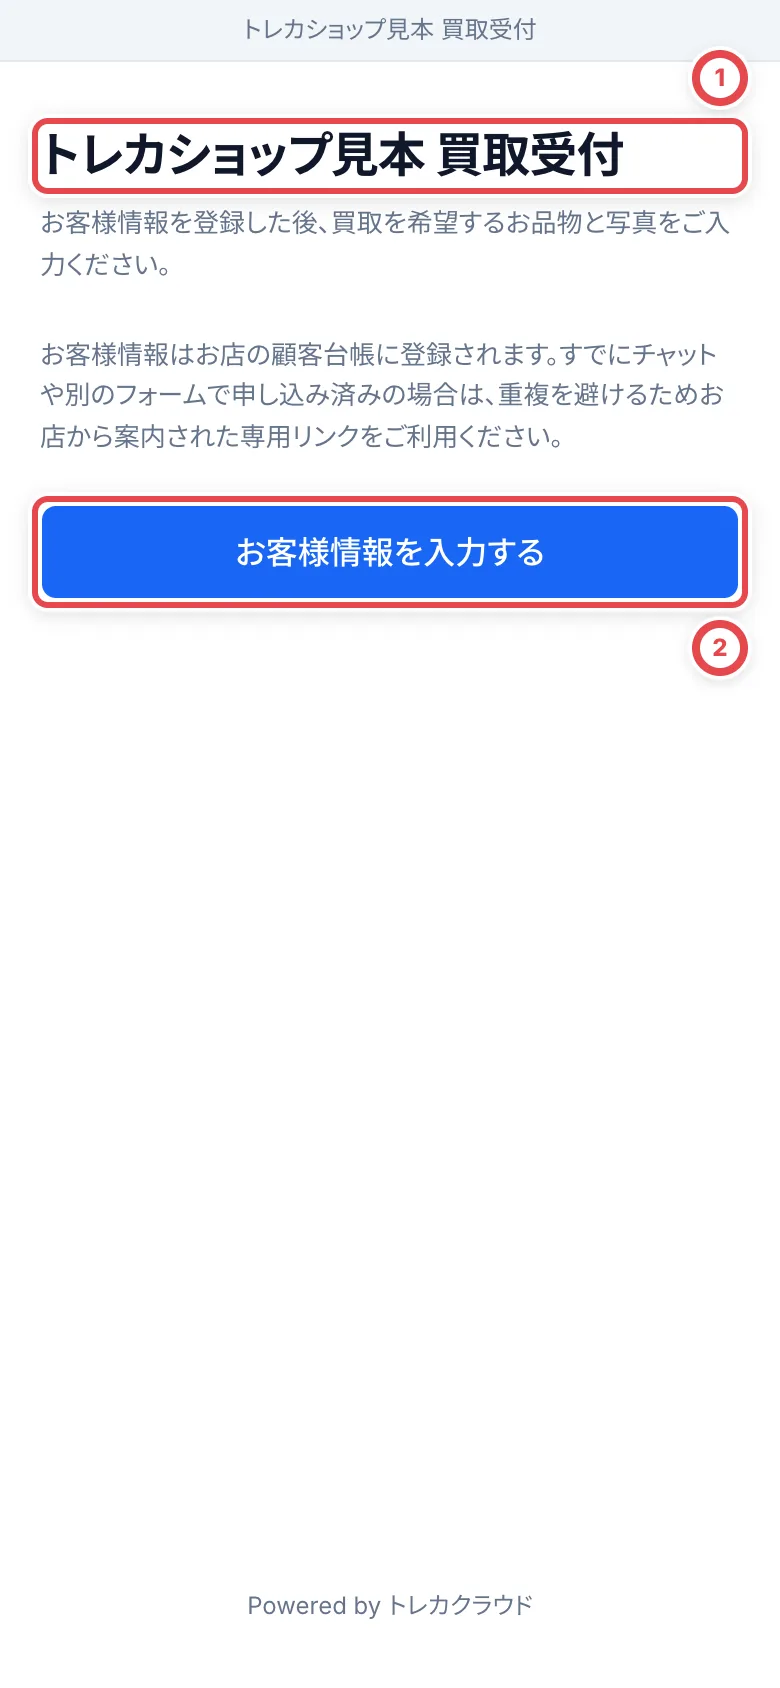 お客様情報は、①のように5つの画面で入れます。
1. ご本人の情報(お名前・フリガナ)
2. 生年月日とご職業(古物営業法で確認が要る項目)
3. ご連絡先(電話番号・メールアドレス)
4. ご住所
5. 入力内容の確認
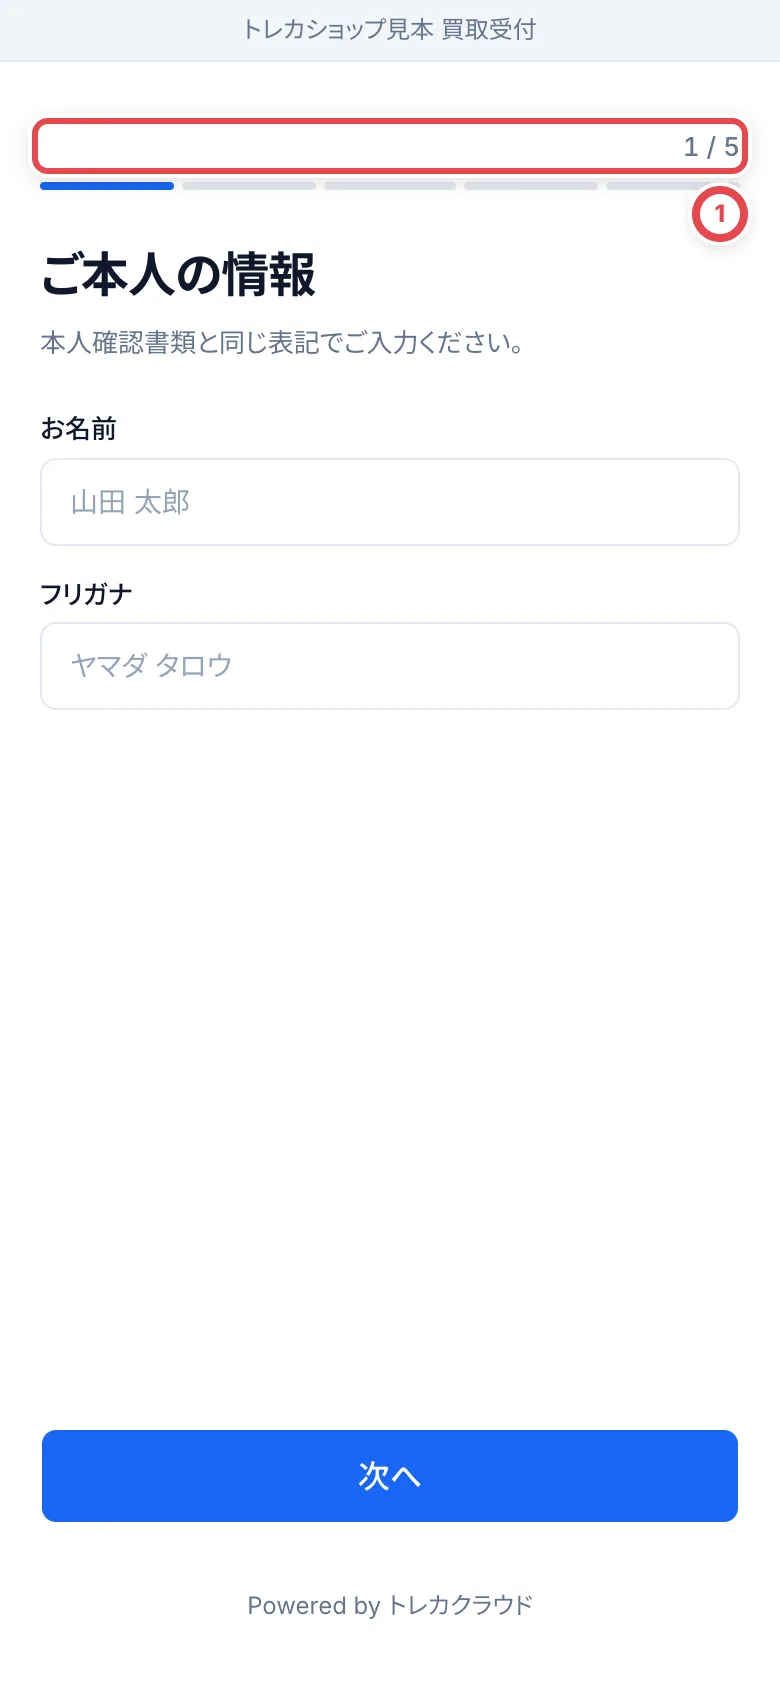 最後の画面で「この内容で提出する」を押すと、**その時点で新しい顧客と取引(状態は「新着」)ができます。** 名前や電話番号が同じ顧客がいても、まとめられずに別の顧客になります。銀行口座と本人確認書類は、ここでは聞きません(あとで取引ごとの入力リンクで入れてもらいます)。
:::note
お客様の画面は日本語だけです。
:::
## 4. お品物を申告して申し込む(お客様)
お客様情報を提出すると、続けてお品物の申告に進みます。この先の画面は、取引ごとの「査定依頼」の入力リンクと同じです。①の「申し込みを始める」を押します。
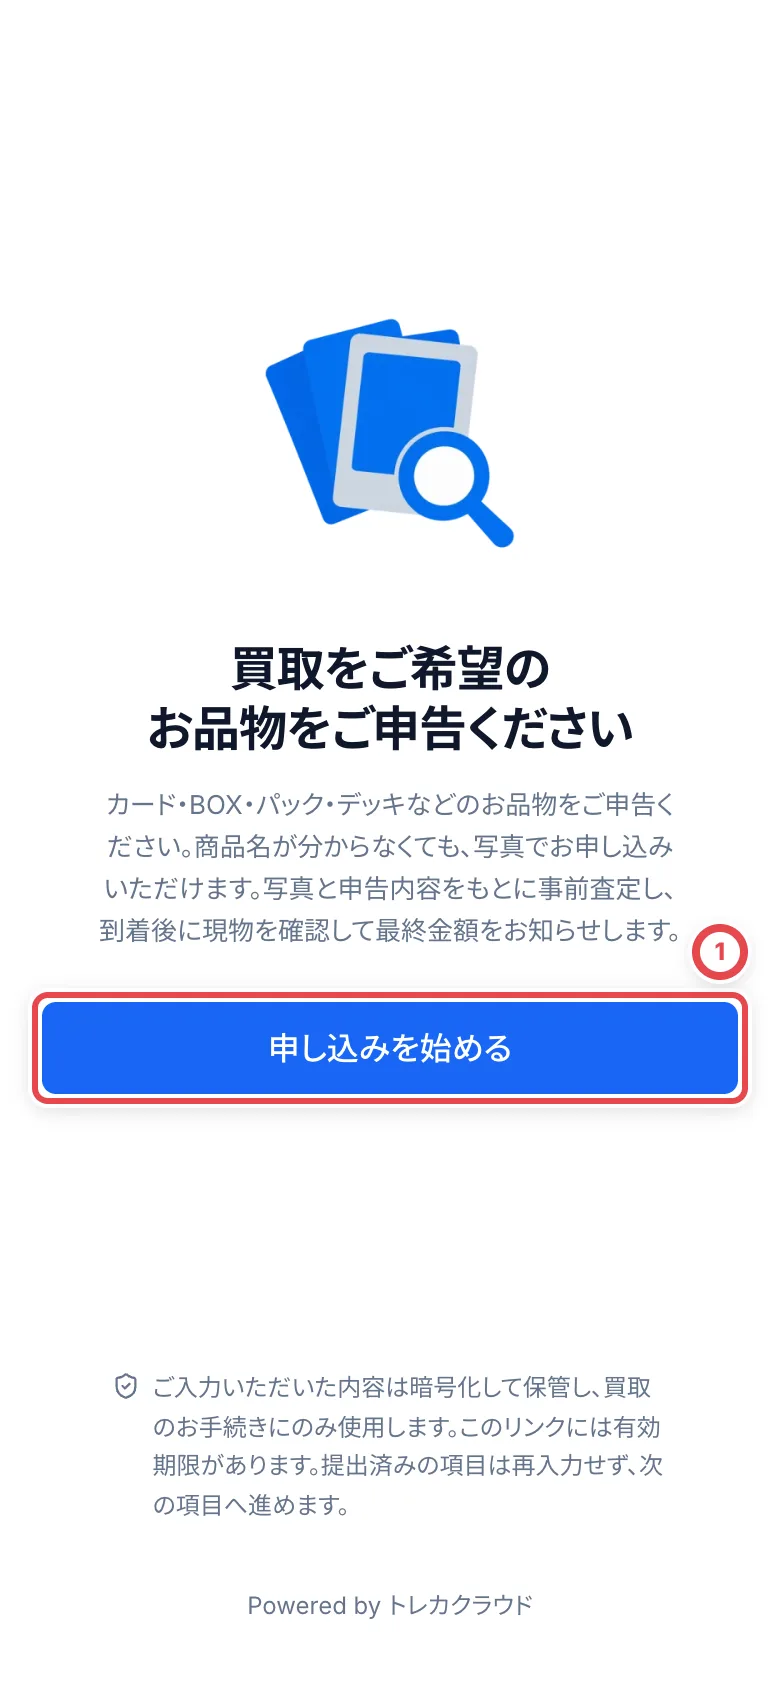 「お品物のご登録」で、①の「お品物を追加する」を押して、お品物を1件ずつ足します。まとめ売りは1件にまとめられます。途中でやめるときは「一時保存する」を押し、再開用のリンクを控えておきます。
お客様情報を提出したタブで共通リンクを開き直すと、「前回のお申し込み」が表示され、「前回の申し込みを開く」から続けられます。「別のお品物で新しく申し込む」は別の受付を作る入口です。別のタブや端末で同じ受付が開くとは限らないため、続きは控えた再開用リンクから進めてください。
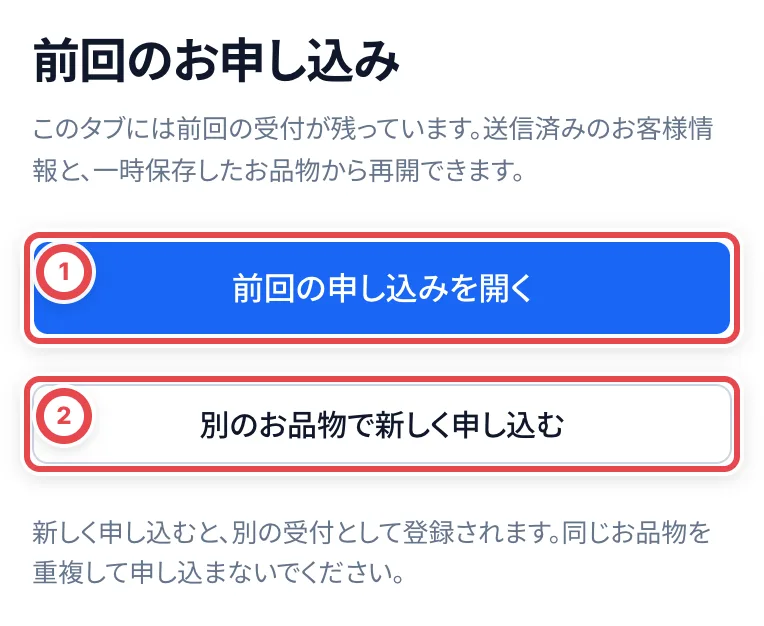
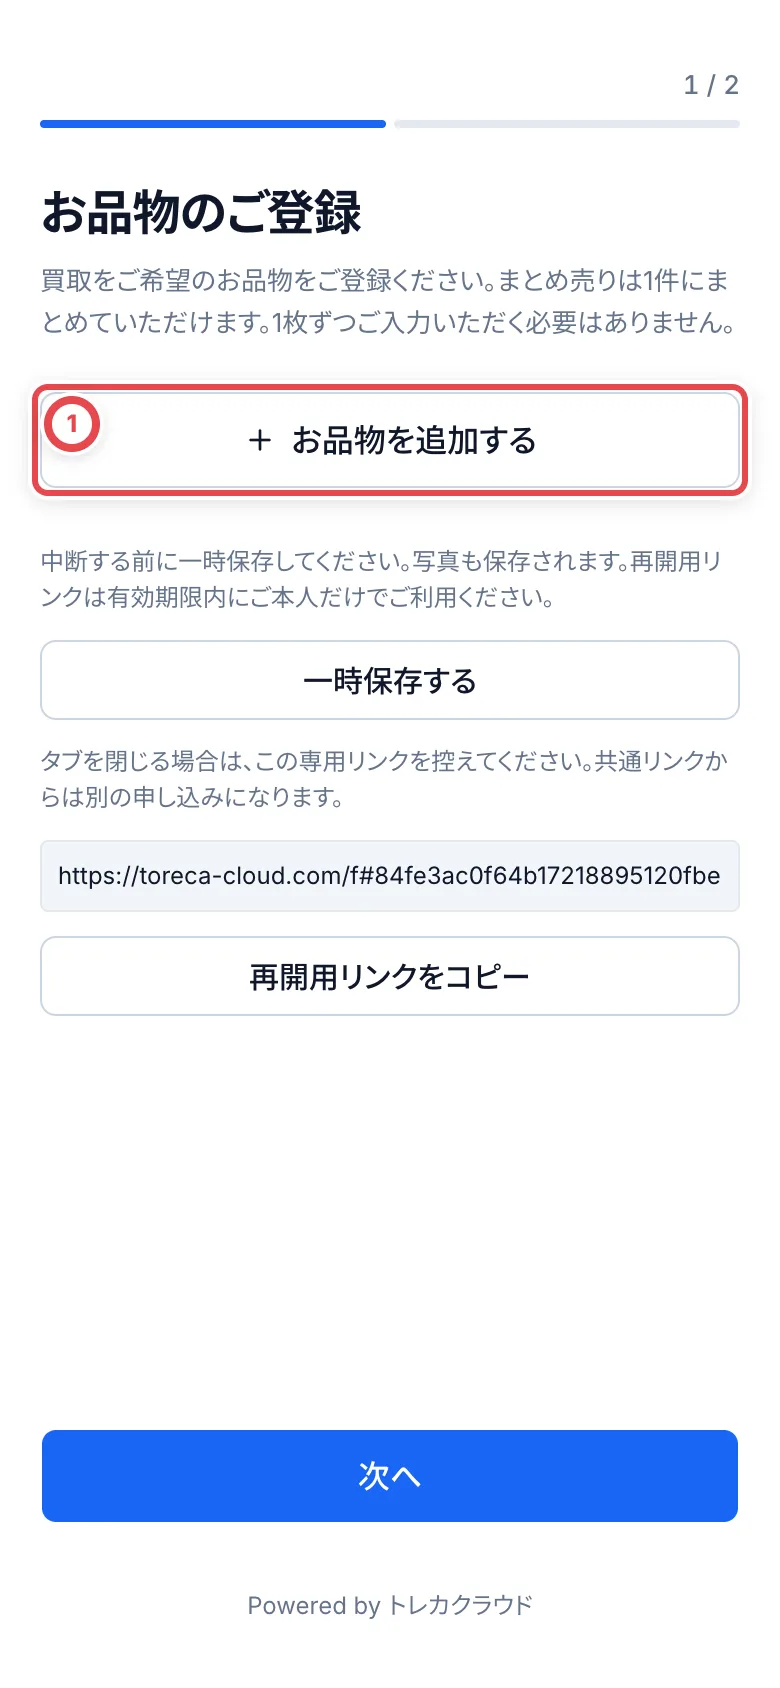 お品物の種類は、カード(単体)・BOX・パック・構築済みデッキ・まとめ売りから選びます。種類によって聞く内容が変わります。
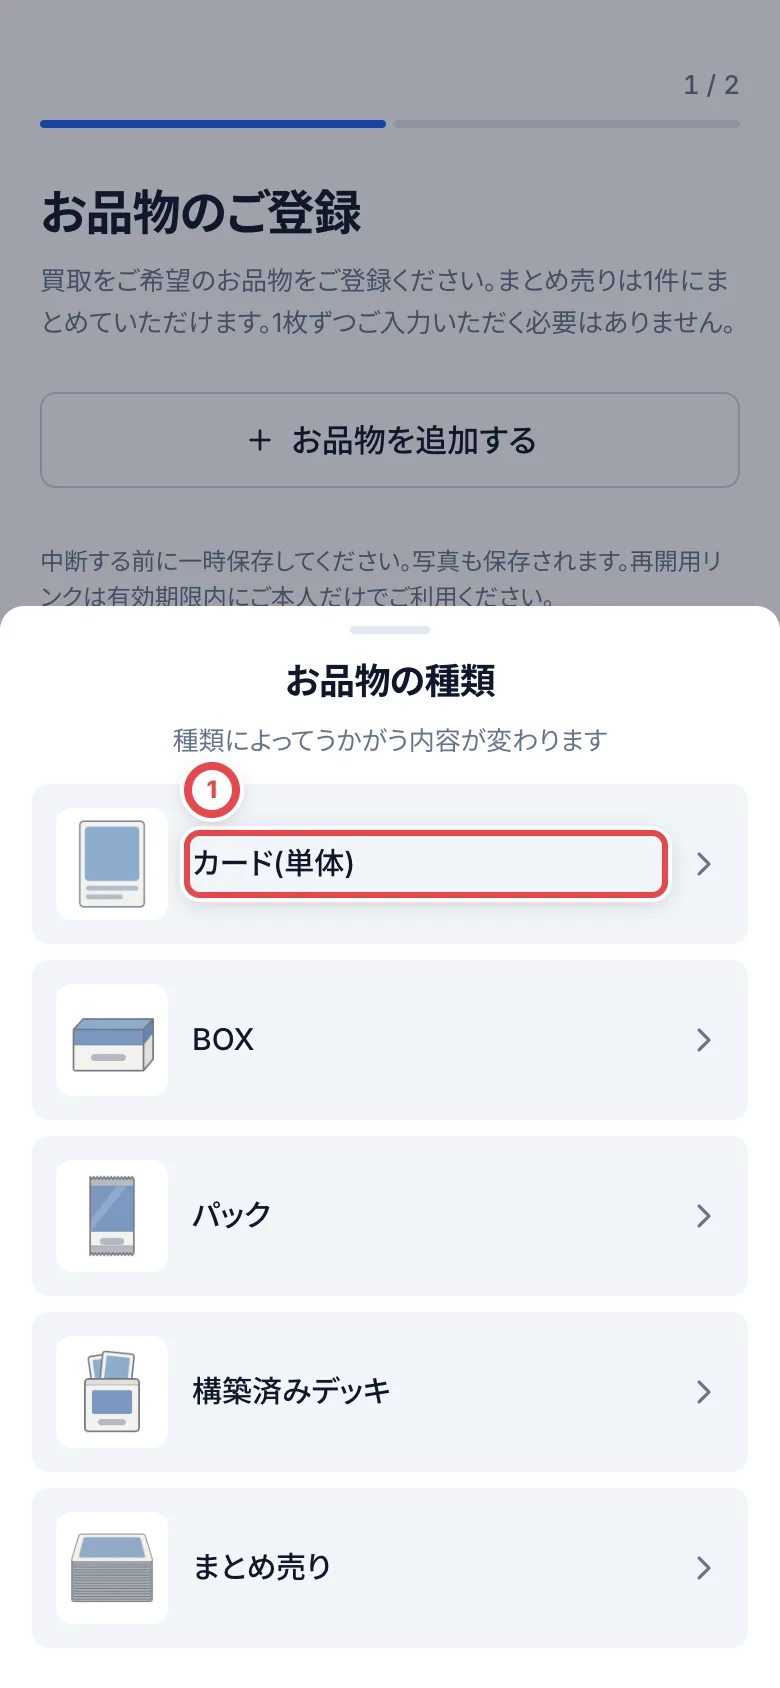 お品物の画面では、名前が分からなければ①の「写真を選ぶ」で写真を付けます(1件に3枚まで)。②のカード名・商品名は分かる範囲で入れます。名前か写真のどちらかがあれば、③の「この内容で追加する」を押せます。
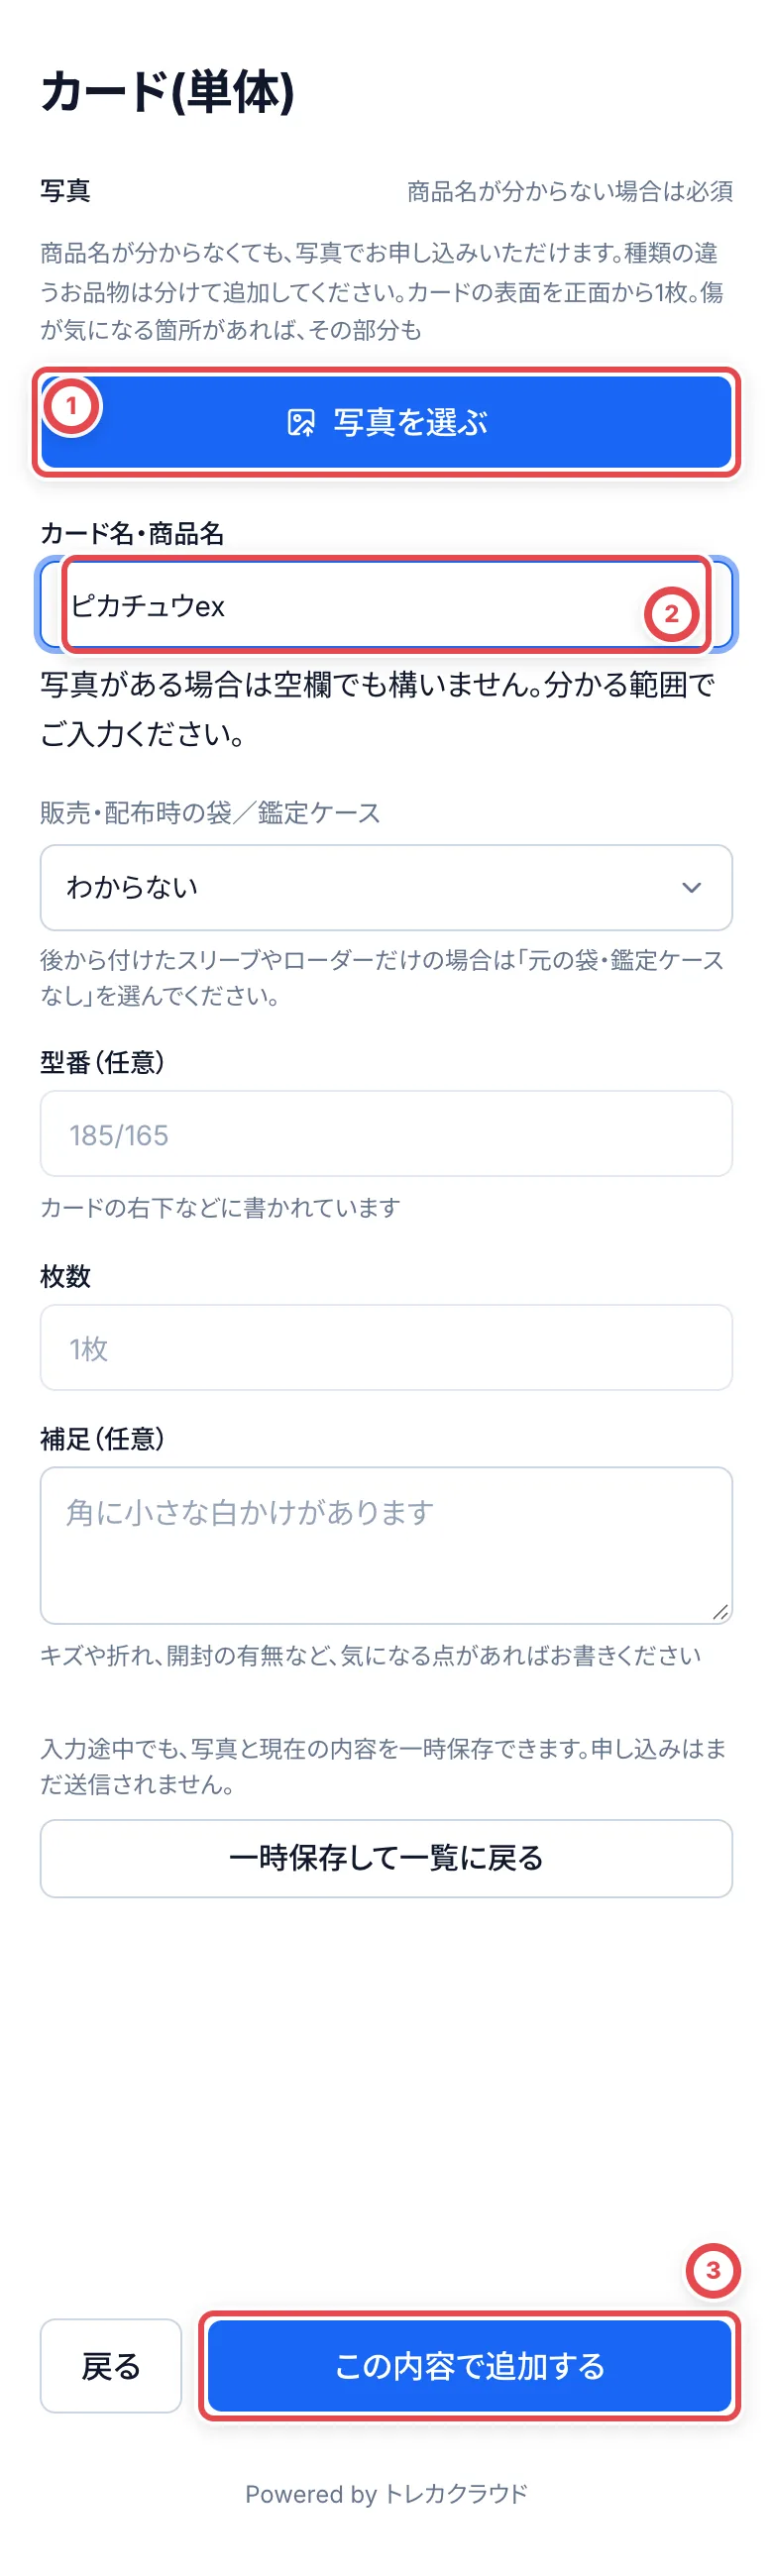 カードは「販売・配布時の袋/鑑定ケース」も選びます。後から付けたスリーブやローダーだけなら「元の袋・鑑定ケースなし」です。「鑑定ケース(PSAなど)」を選ぶと、鑑定機関・評価を入力できます。分からない場合は「わからない」を選びます。BOX・パック・構築済みデッキでは、包装の状態と数量を確認します。
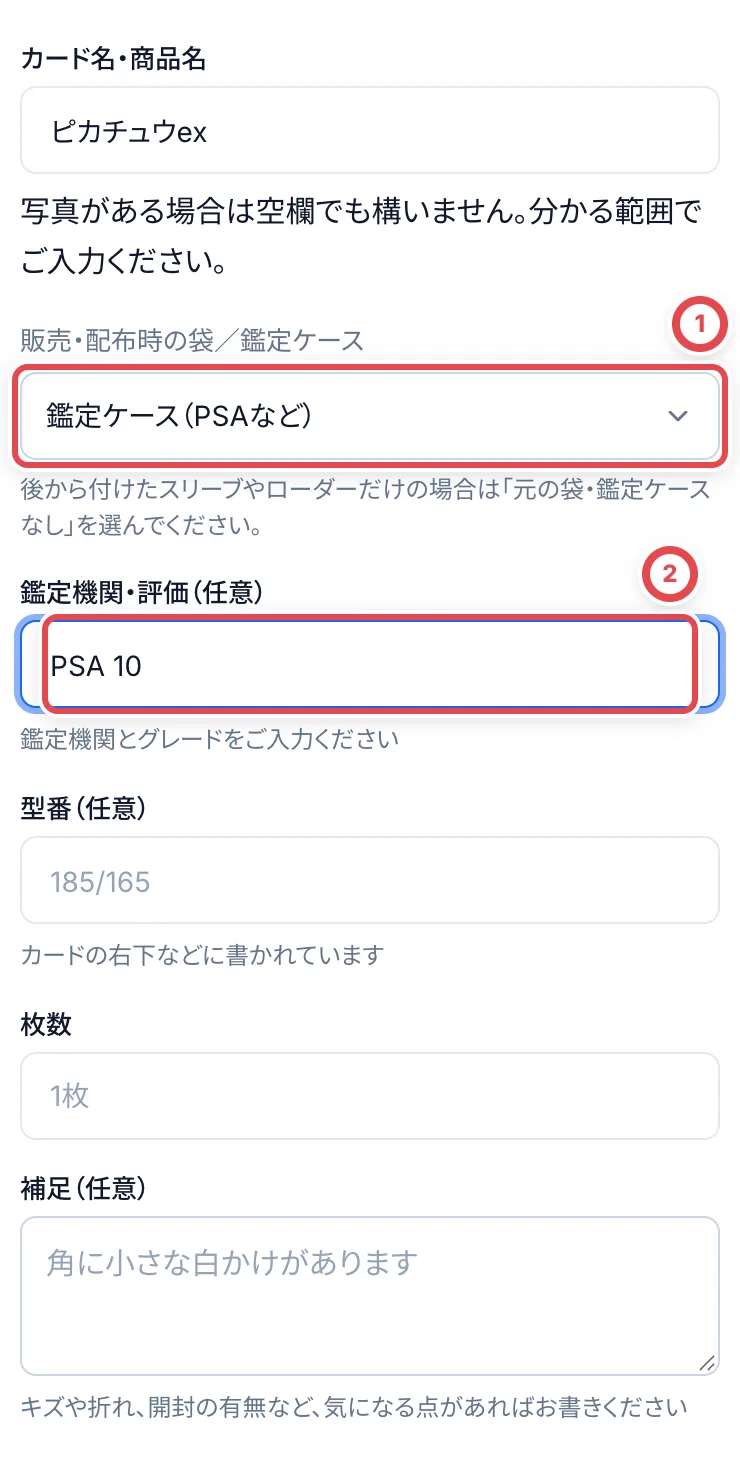 一覧で「次へ」を押すと「お申し込み内容の確認」が出ます。①の「この内容で申し込む」を押すと、**お品物がその取引の申告に入り、店舗に通知が届きます。** お客様の最後の画面は「ご入力ありがとうございました」です。
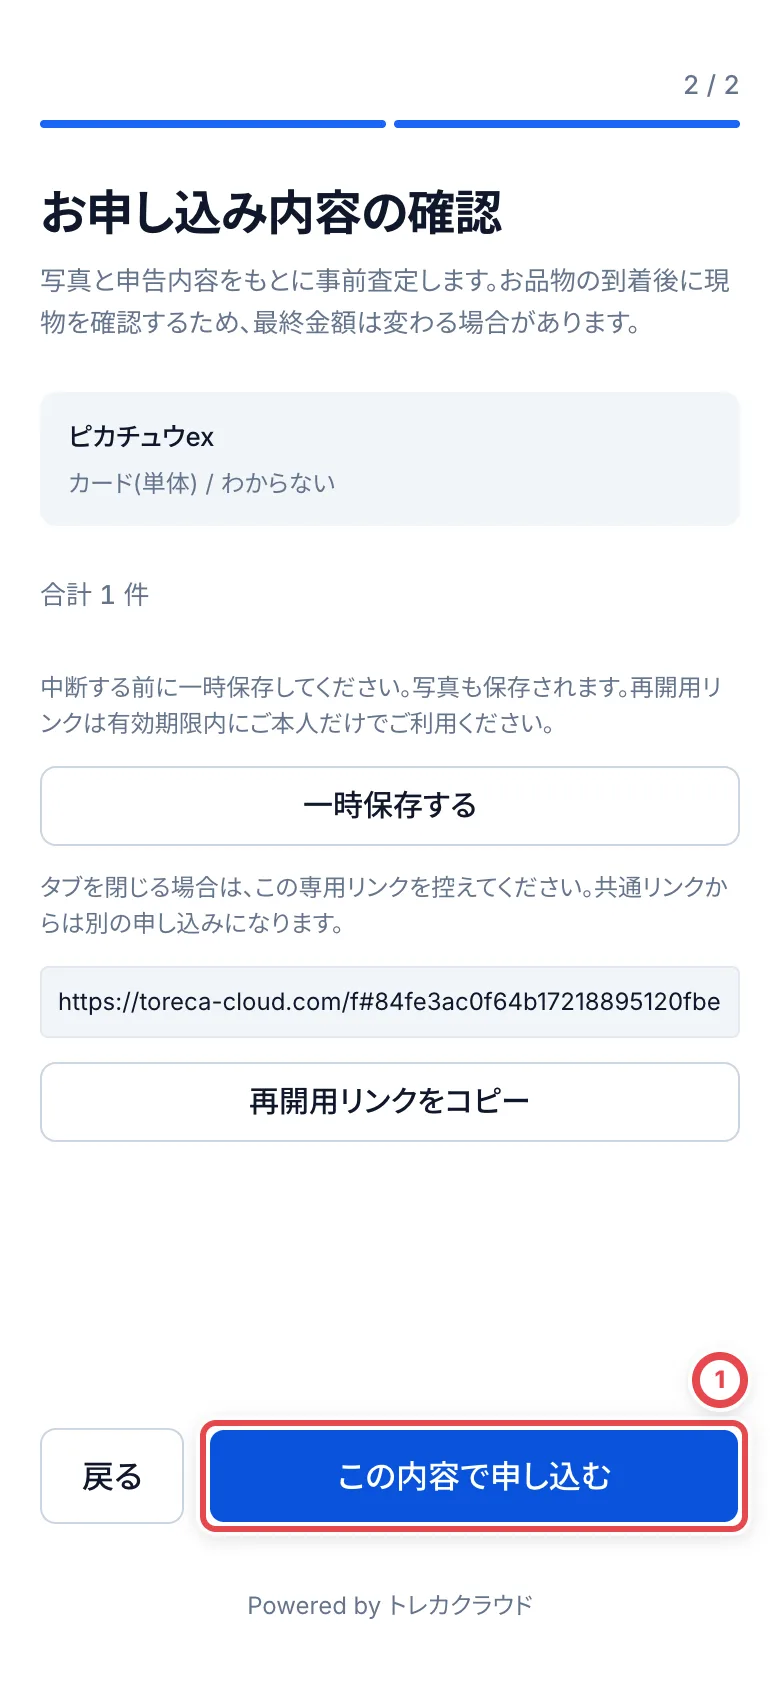 - お品物は1〜20件、写真は合計20枚までです。写真はJPEG・PNG・WebPで、1枚20MBまでです
- お品物の名前や写真は事前査定に使います。最終金額は、届いた現物を確かめて決まります
## 5. 届いた申し込みを査定する
申し込みが届くと、次のように分かります。
- 通知:「新しい買取依頼」(お客様情報を提出したとき)と「フォームの回答」(お品物を申し込んだとき)。送り先は[LINEと通知](/guides/settings/line-and-notifications)で決めます
- 「買取依頼」の一覧:状態が「新着」の取引として並びます
- 取引の経緯:「共通フォームから顧客情報を受付(LINE未照合)」と残ります
ここからは、通常のオンライン買取と同じく、申告されたお品物を査定して見積を出します。流れは[買取の流れ](/guides/purchase/overview)と[査定と見積](/guides/purchase/appraisal)で説明しています。
## 困ったとき
| 起きていること | 確かめること・直し方 |
| -------------------------------------------------------------------------------------------- | ------------------------------------------------------------------------------------------------------------------------------------------------------------------------------ |
| 「設定」に「受付フォーム」がない | 店舗でオンライン買取が有効になっていません。トレカクラウドの運営にお問い合わせください。 |
| 共通リンクが「未発行」 | 「受付フォームの配信設定」で一度「変更を保存」を押すと発行されます。 |
| 「変更」が押せない | 顧客と取引を見る・変える権限が要ります。オーナーか管理者に頼みます。 |
| お客様に「この受付フォームは現在利用できません」と出る | 配信状況が「停止中」です。開いたときに出たら、「配信中」にして保存します。入力の途中で停止中にした場合は、送信したときに出るので、配信中に戻してからもう一度送ってもらいます。 |
| お客様に「受付フォームを開けませんでした。再試行するか、お店へお問い合わせください。」と出る | 通信に失敗しました。電波の良い場所で「再試行」を押してもらいます。 |
| お客様に「この受付は送信済みか、受付設定が変わりました」と出る | 送信の途中で設定が変わりました。お客様に、同じ内容のままもう一度送ってもらいます。 |
| 同じお客様の顧客が2つできた | 別の受付としてお客様情報を提出すると、別の顧客と取引になります。同じタブの「前回の申し込みを開く」か再開用リンクから続けてもらいます。 |
---
# LINEで受け付けて見積を送るまで
Source: https://docs.toreca-cloud.com/guides/purchase/line-intake
この手順は、LINEで受け付けて郵送で品物を受け取るオンライン買取向けです。来店予定のお客様との事前相談の場合は、来店後に[店舗買取](/guides/purchase/counter)の手順へ進みます。
見積を伝えたあと(お客様の承諾、発送、最終査定、振込)は、[発送と最終査定](/guides/purchase/shipping-and-final)と[振込](/guides/purchase/payouts)に続きます。
## 最初に用意するもの
- LinyまたはLステップとの連携。LINEの友だちとトークは約5分ごとに取り込まれます。設定は[LINEと通知](/guides/settings/line-and-notifications)を参照してください
- 2次査定をしてくれるもう1人のメンバー。査定を作った本人は承認できません
- LinyやLINEの管理画面。トレカクラウドで作った見積の文章は、そこに貼り付けて送ります
## 流れと取引の状態
| 順番 | やること | どこで | 取引の状態 |
| ---- | -------------------------------------------- | -------------------- | ------------ |
| 1 | LINE未登録の友だちを開く | 顧客 | (取引なし) |
| 2 | 写真とトークを確かめて、顧客として登録する | LINEの友だち | (取引なし) |
| 3 | 写真からカードを読み取る | 顧客 › LINEトーク | (取引なし) |
| 4 | 読み取ったカードを確かめて、査定依頼に入れる | 読み取った品物を確認 | 新着 |
| 5 | 状態と金額を確かめて、2次査定を頼む | 顧客 › 査定依頼 | 査定中 |
| 6 | 別のメンバーが見積を確かめて承認する | 2次査定依頼 | 査定中 |
| 7 | 見積の文章をコピーしてLINEで送り、記録する | 顧客 › 見積もり | 見積送付済 |
## 1. LINE未登録の友だちを開く
サイドバーの「顧客」を開きます。①の上のタブで、LINEの公式アカウントを選びます。LINEに紐付いていない顧客は「未分類」に入っています。
まだ顧客にしていない友だちを見るには、検索欄の下の「ほかの絞り込み」(漏斗のアイコン)を押し、②の「LINE未登録の友だち」を選びます。アイコンの数字は、未登録の友だちのうち返信していない人数です。
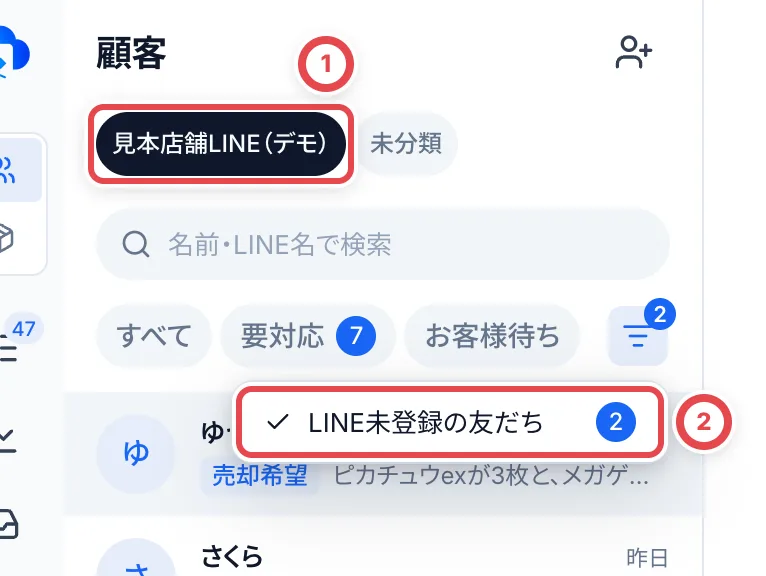 一覧の友だちには、状態が付いています。「売却希望」は、お客様が売りたいと伝えた友だち、「LINE 未返信」は最後のメッセージがお客様からのままの友だち、「返信済み」はお店が最後に返信した友だちです。
## 2. 写真とトークを確かめて、顧客として登録する
①で友だちを選ぶと、右にトークが出ます。②のように送られてきた写真も並びます。写真を押すと拡大表示が開きます。左右のボタンや矢印キーで次の写真へ移れます。別タブで開く操作も拡大画面にあります。
買取の相談だと確かめたら、③の「顧客として登録」を押します。
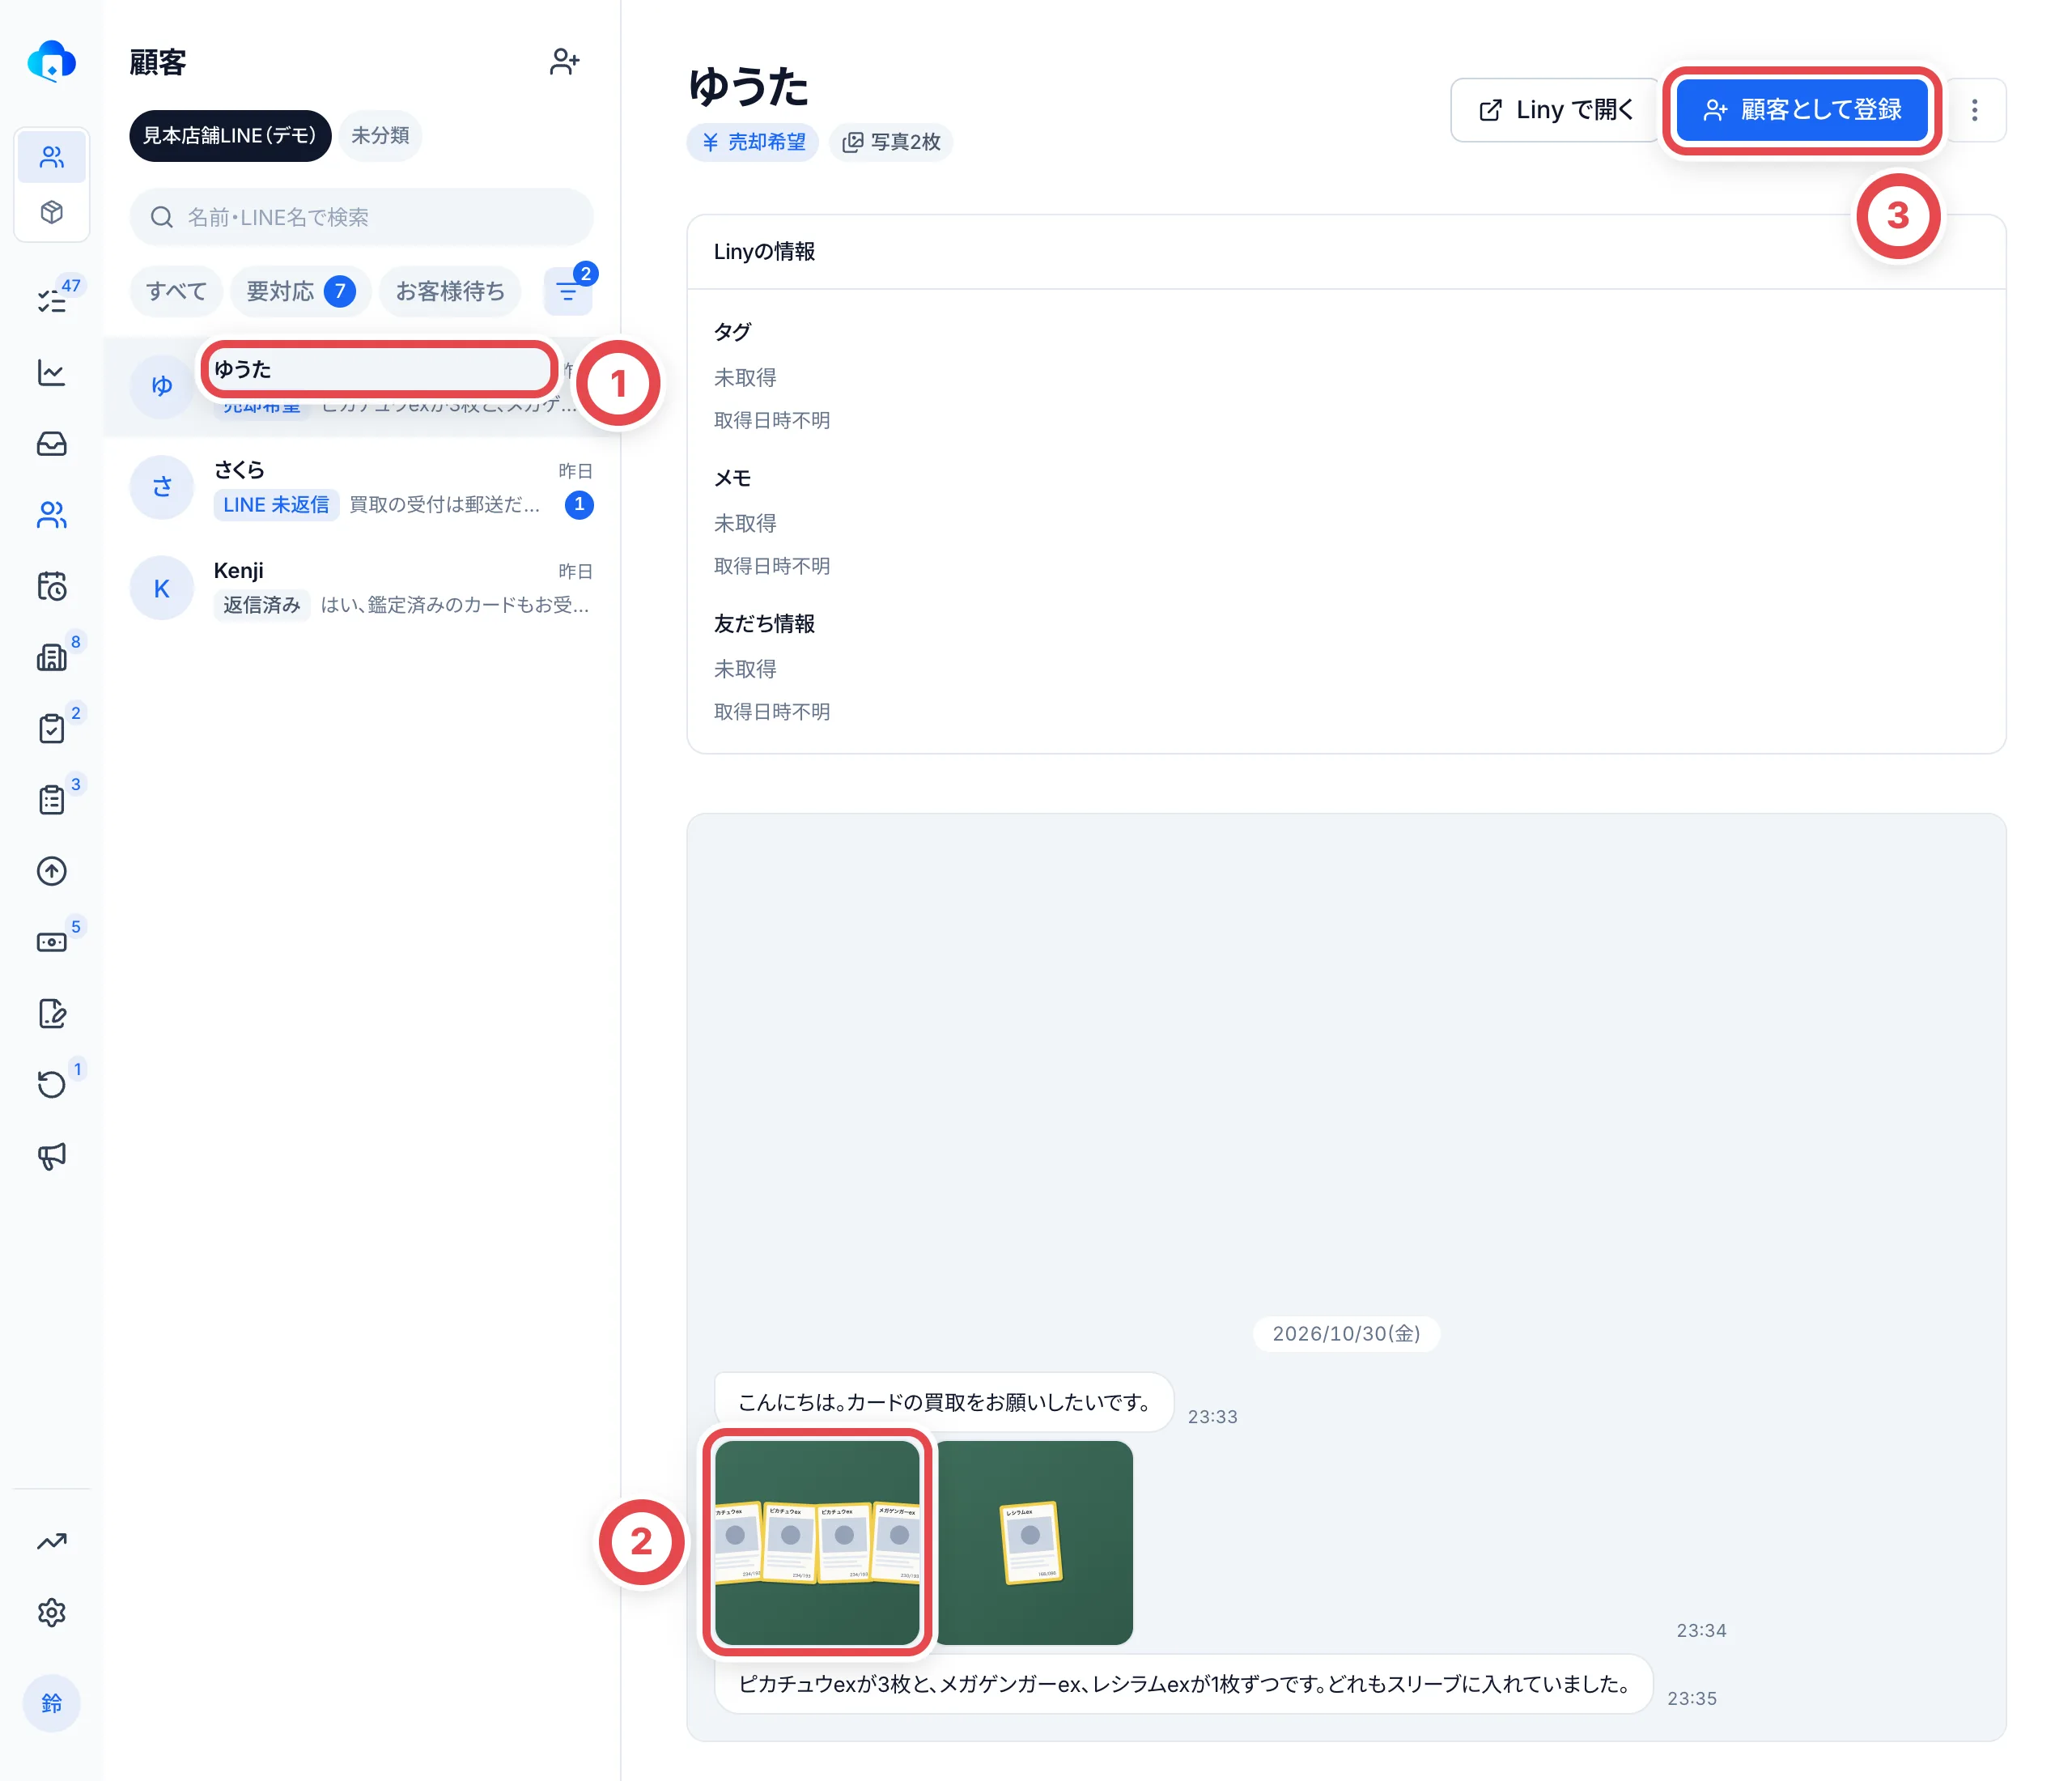
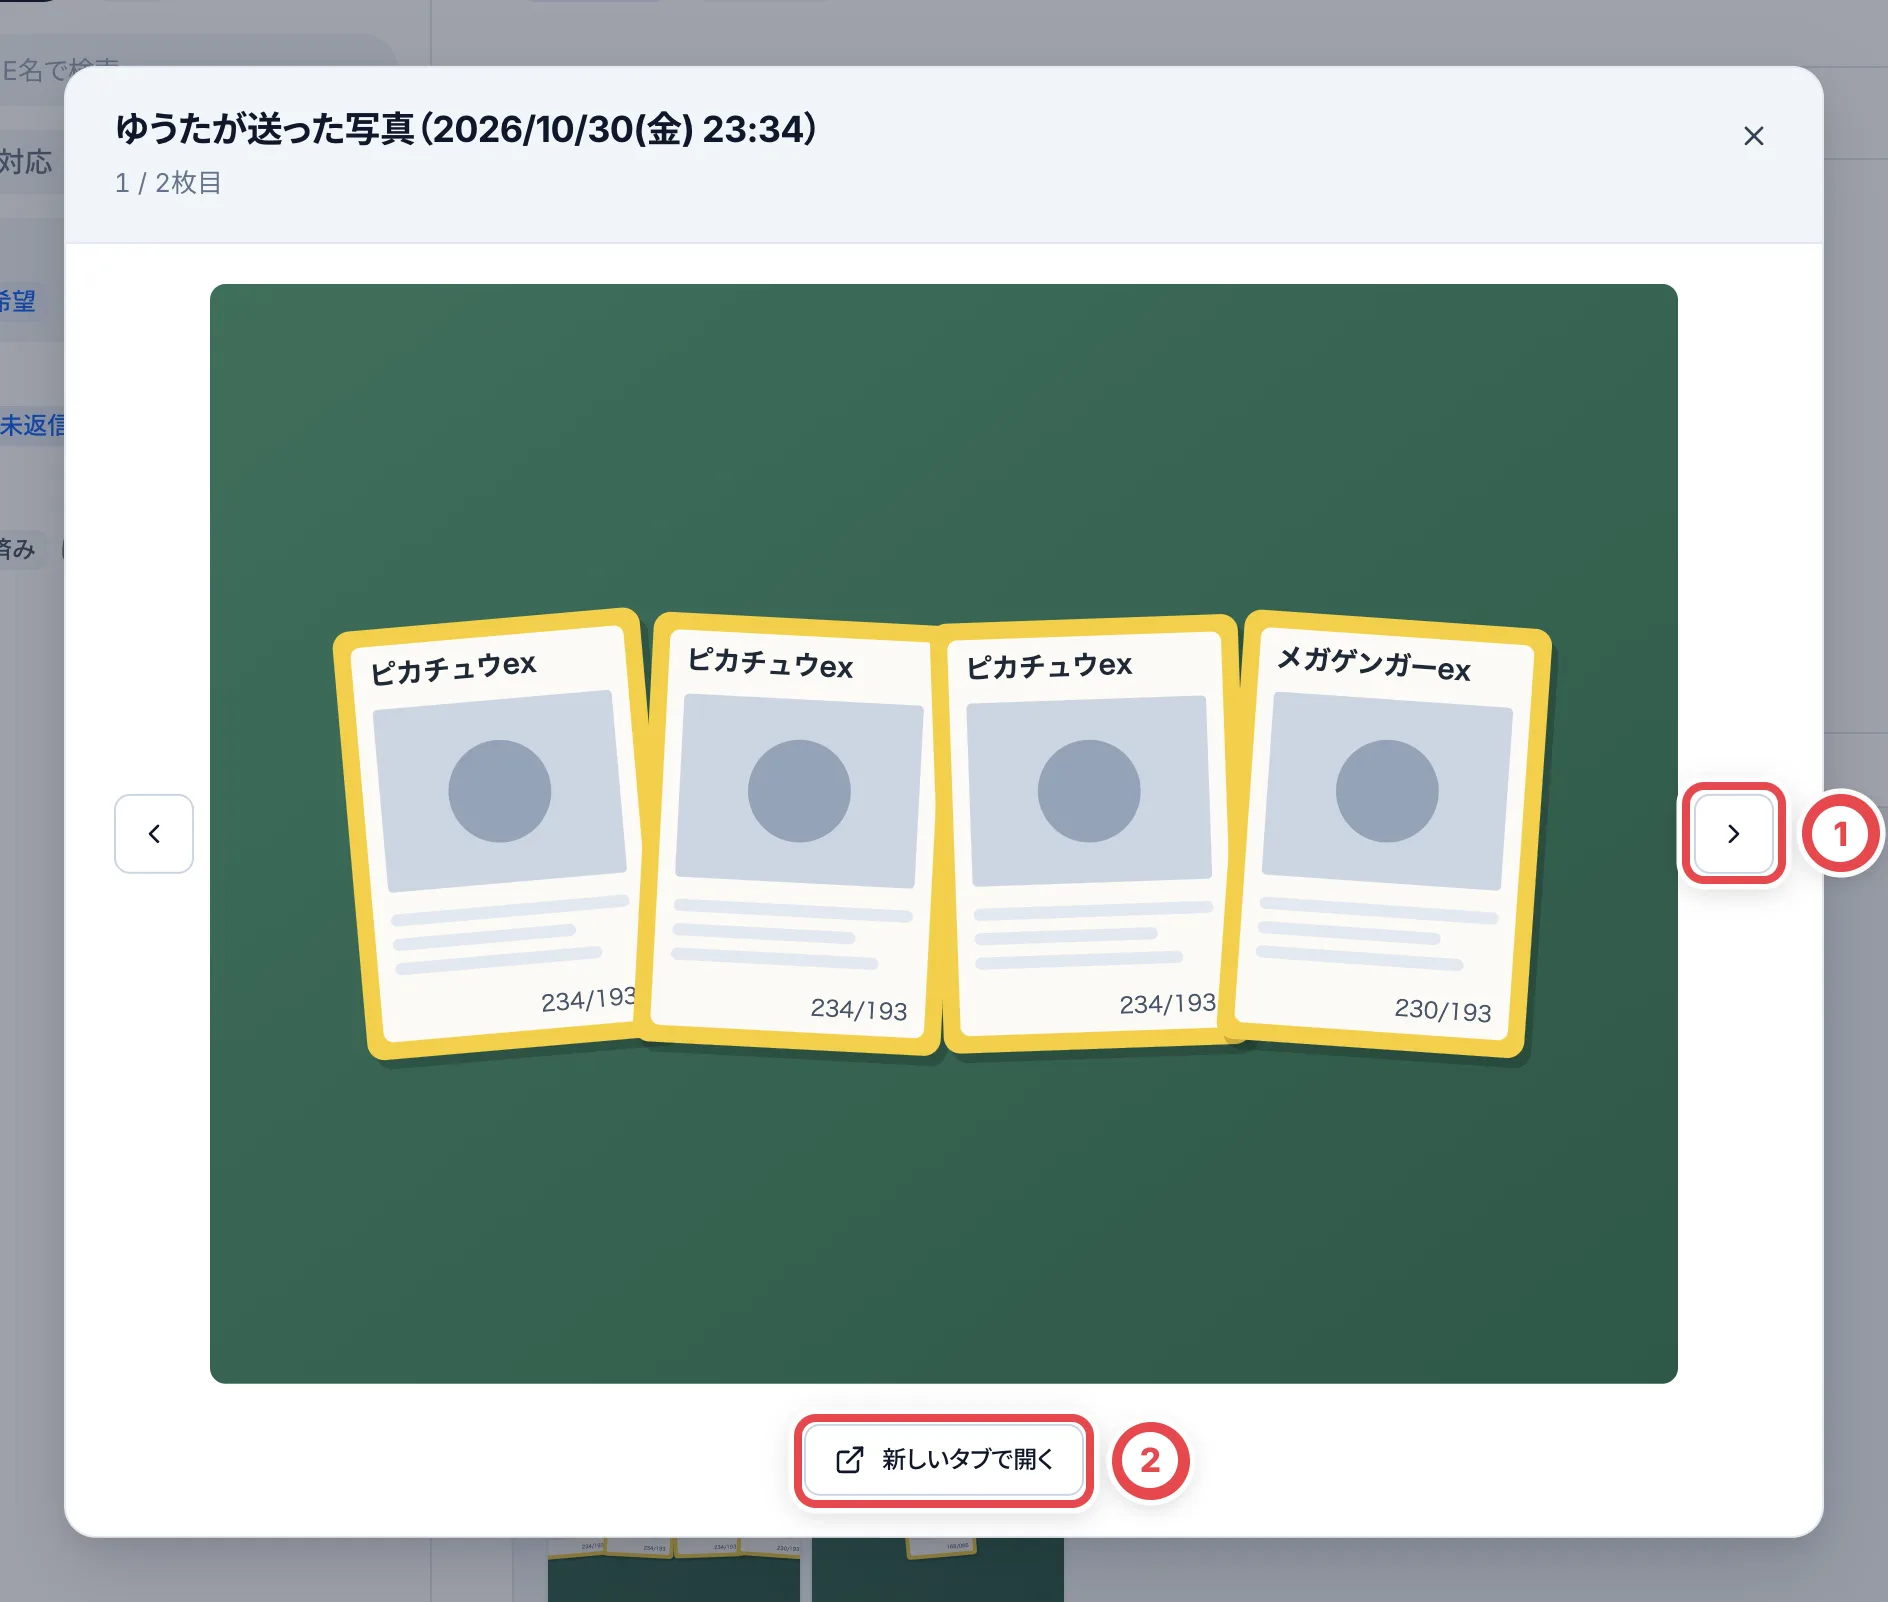 初めてのお客様は、①の「新しい顧客」のままにします。②の顧客名にはLINEの名前が入っているので、分かっていれば本名に直します。③の「顧客として登録」を押すと顧客ができ、その顧客の「LINEトーク」タブが開きます。この時点では、まだ取引はできていません。
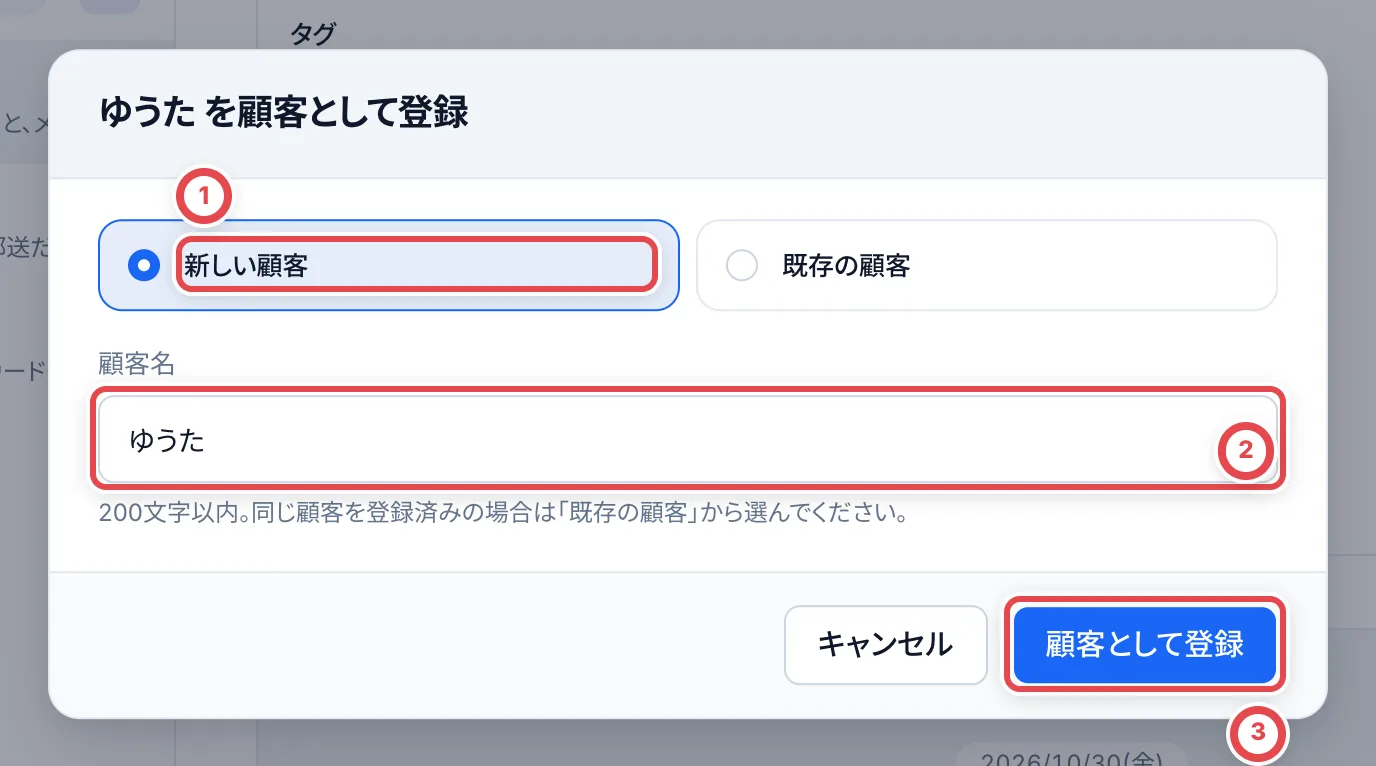 前にも取引したことのあるお客様が別のLINEから連絡してきたときは、「既存の顧客」を選んで、その顧客を検索して紐付けます。買取の相談ではない友だちは、右上のメニュー(︙)の「対象外にする」で一覧から外します。
英語表示では、対応ブラウザが日本語のトークをブラウザ内で翻訳します。「原文を表示」で元の文を確認できます。初回は翻訳機能の準備に時間がかかる場合があり、使えないブラウザや準備に失敗した場合は原文のまま表示します。翻訳表示と、次の写真からのカード読み取りは別の操作です。
## 3. 写真からカードを読み取る
顧客の「LINEトーク」タブでは、お客様が送った写真とメッセージから、AIがカードと枚数を読み取ります。読み取りが終わっていると、トークの上に「写真2枚・メッセージ4件から品物3件を読み取りました」のような帯が出ます。①の「確認する」を押して、結果を確かめます。
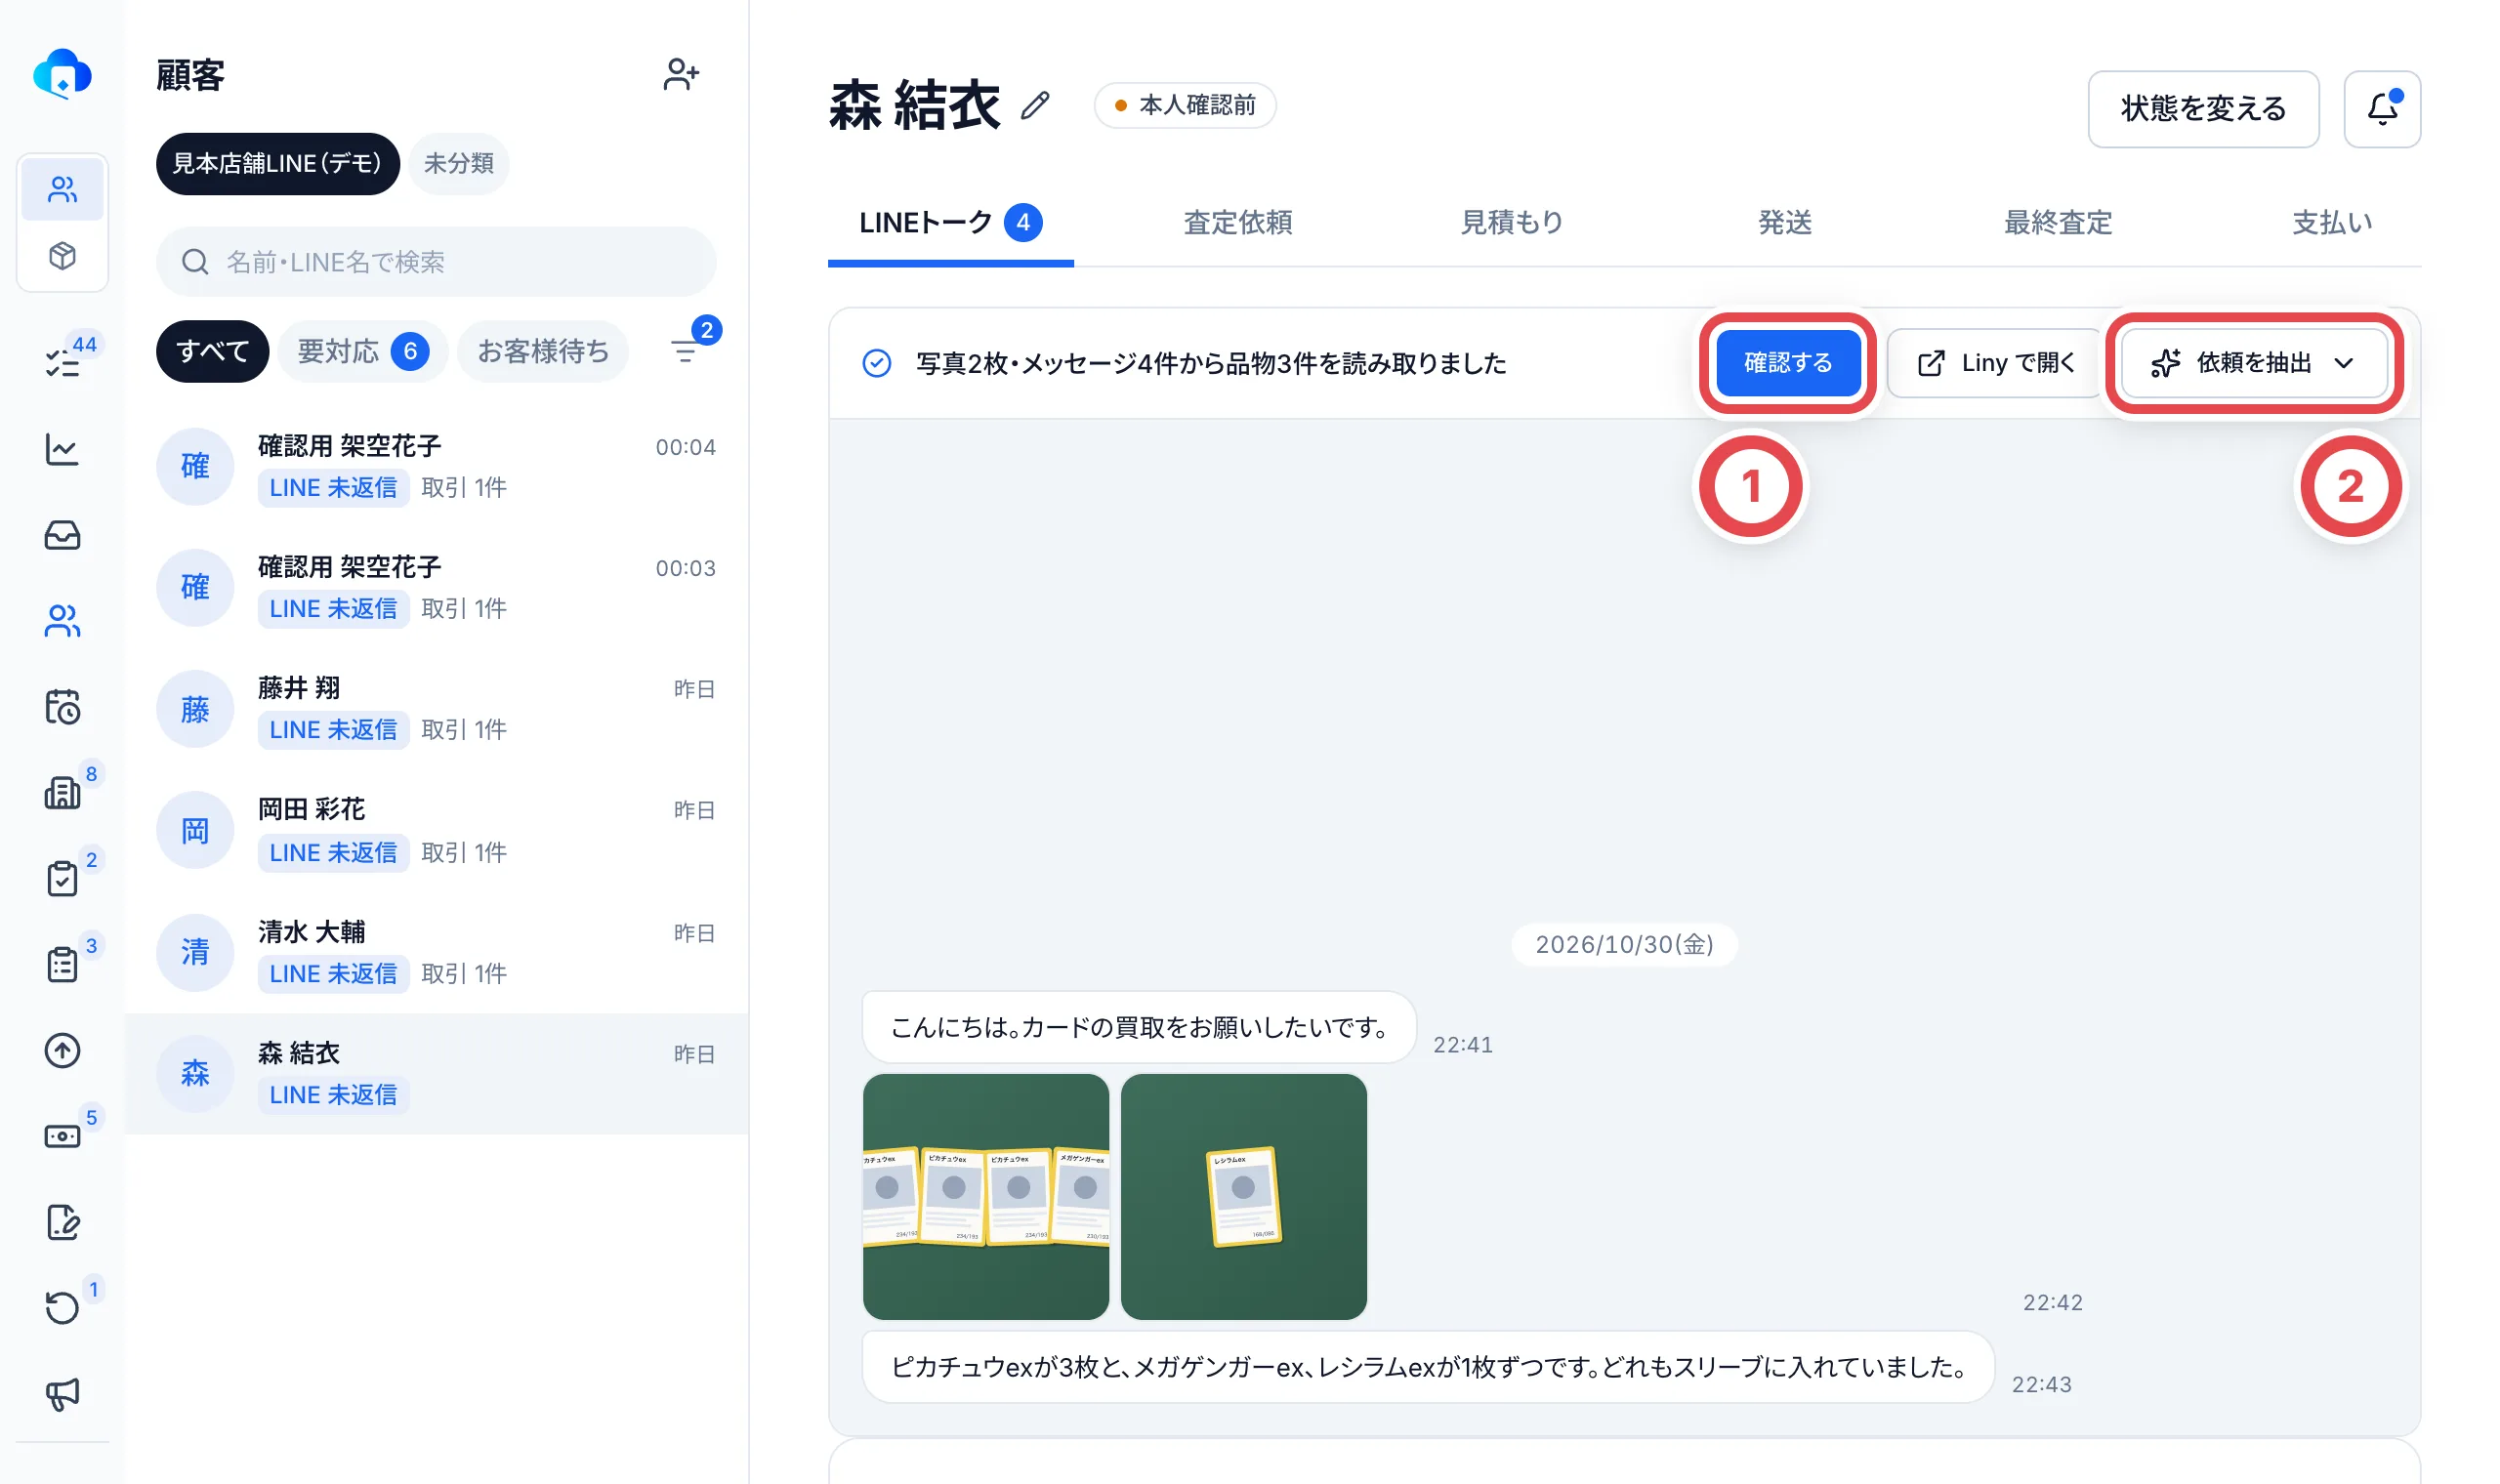 帯が出ていないとき、新しい写真が届いたあとに読み直したいときは、②の「依頼を抽出」を押します。トークの全部を読むときは「トーク全体から抽出」、特定の写真やメッセージだけを読むときは「メッセージを選んで抽出」を選び、メッセージを選んでから「選んだメッセージから抽出」を押します。読み取りには少し時間がかかります。画面を離れても処理は続き、戻ると結果を確認できます。
トーク全体からの読み取りは、最新の写真16枚・テキスト80件までが対象です。メッセージを選ぶ場合は写真64枚・テキスト80件までで、選択そのものは300件までです。アルバムは全体でも写真1枚ずつでも選べます。写真が取得中・取得失敗のときや上限を超えたときは、対象を外すか写真の取得を待ってから実行します。
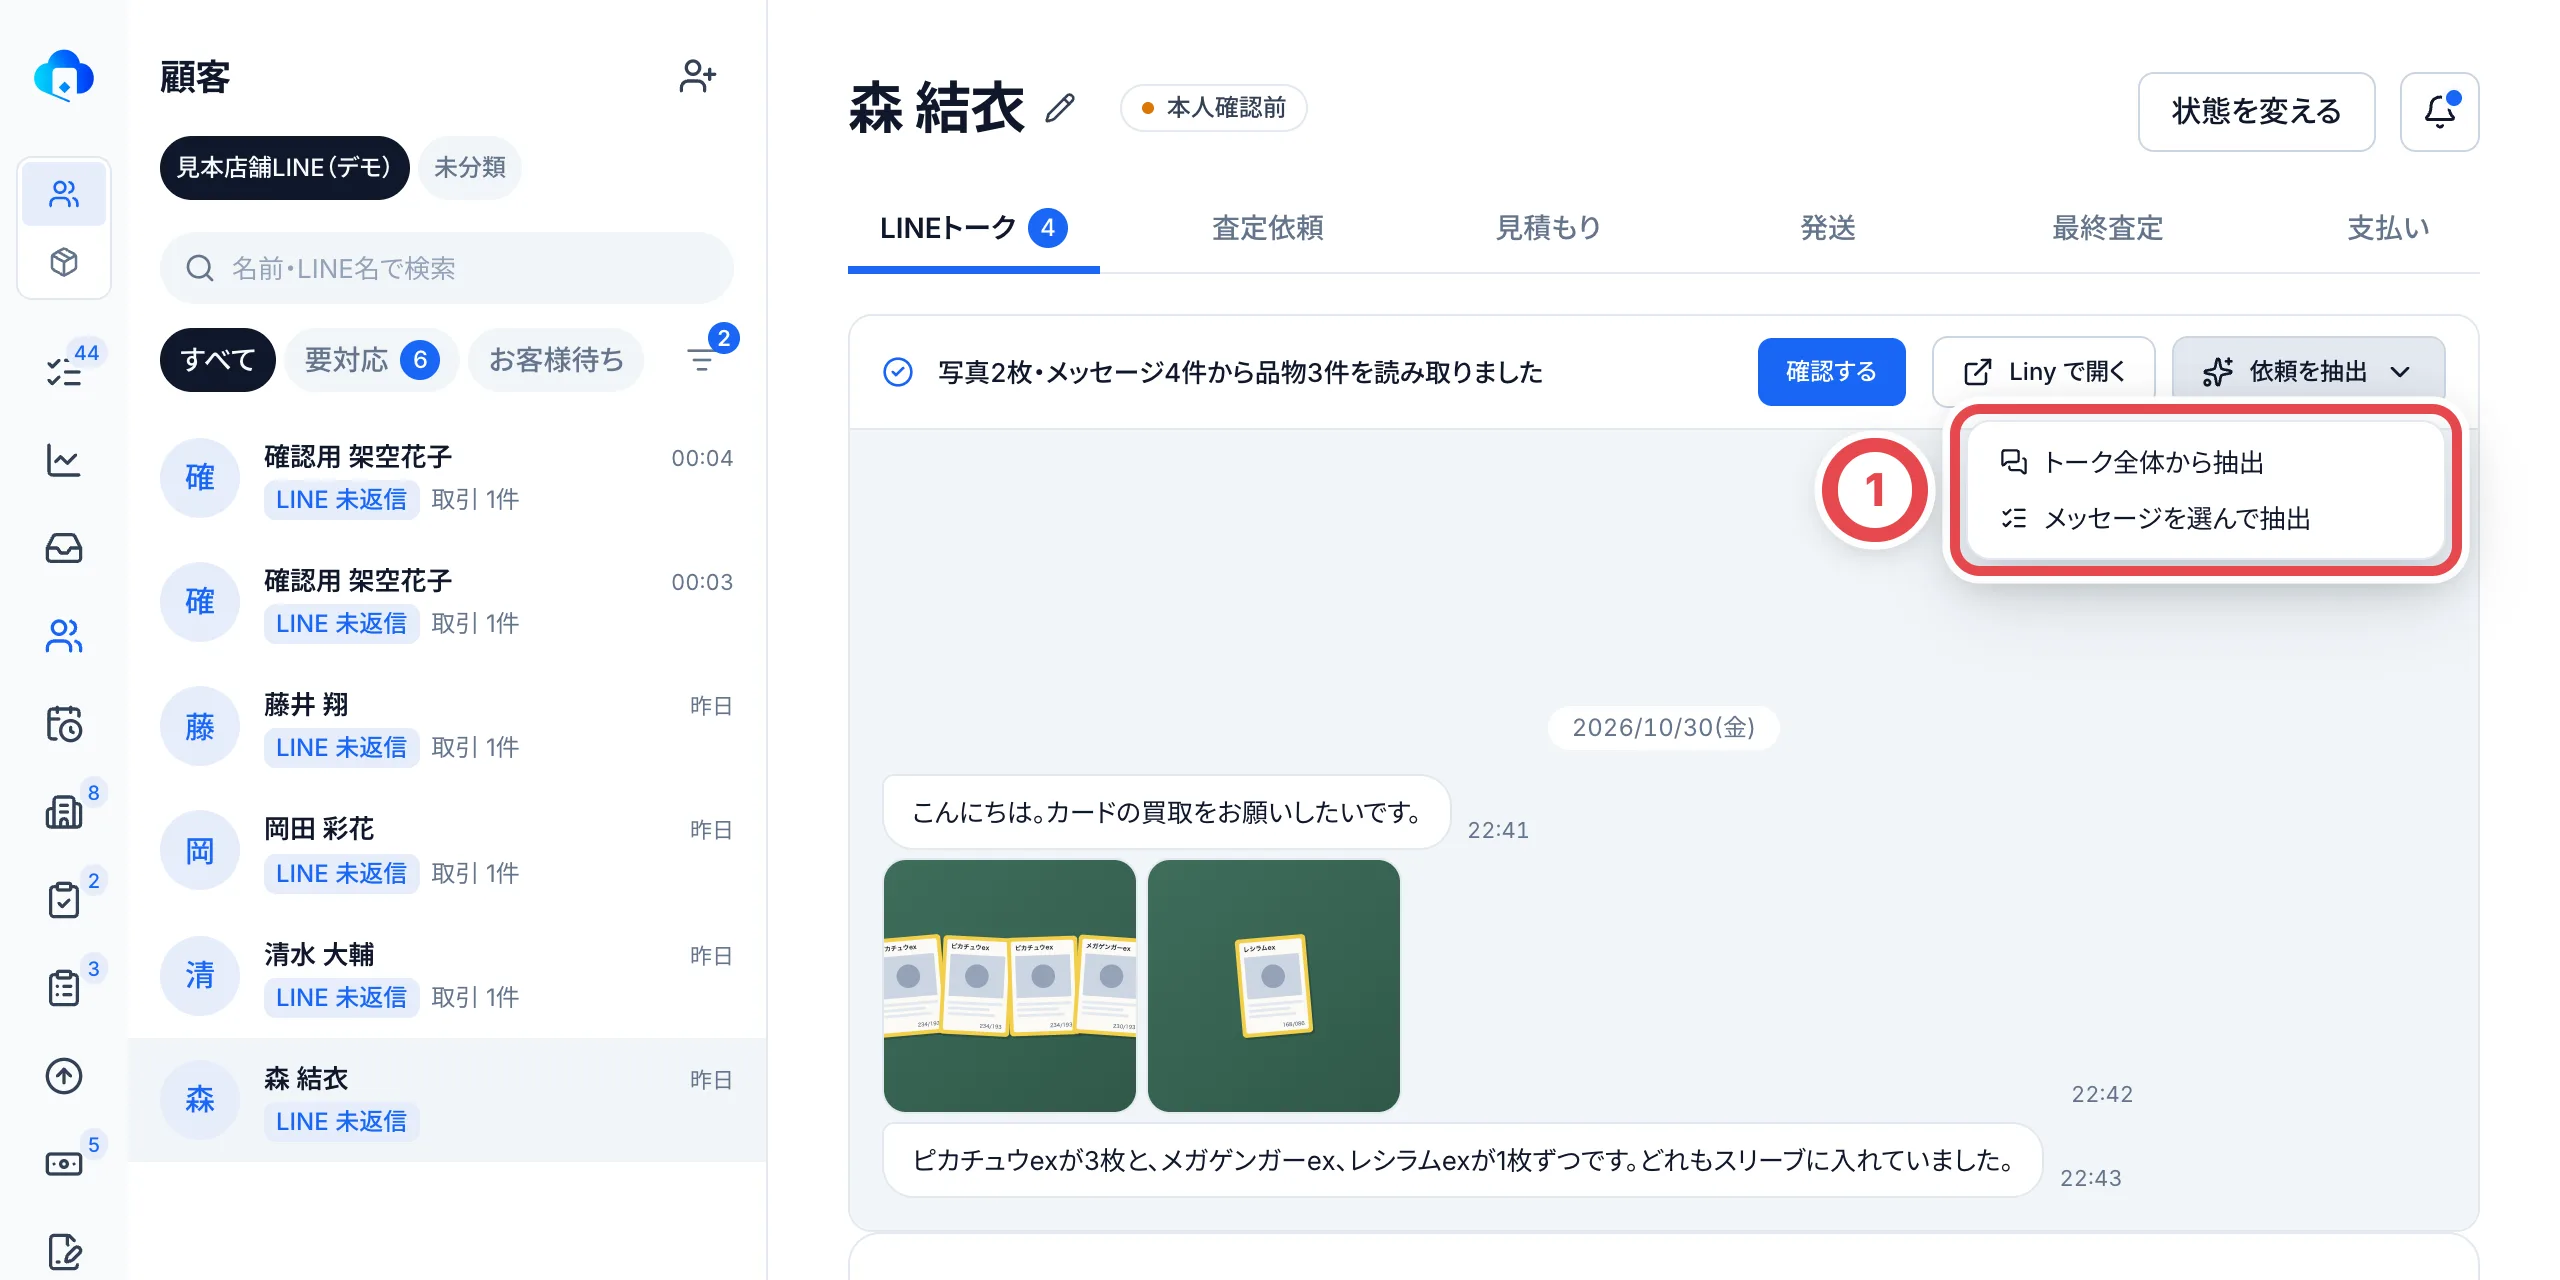
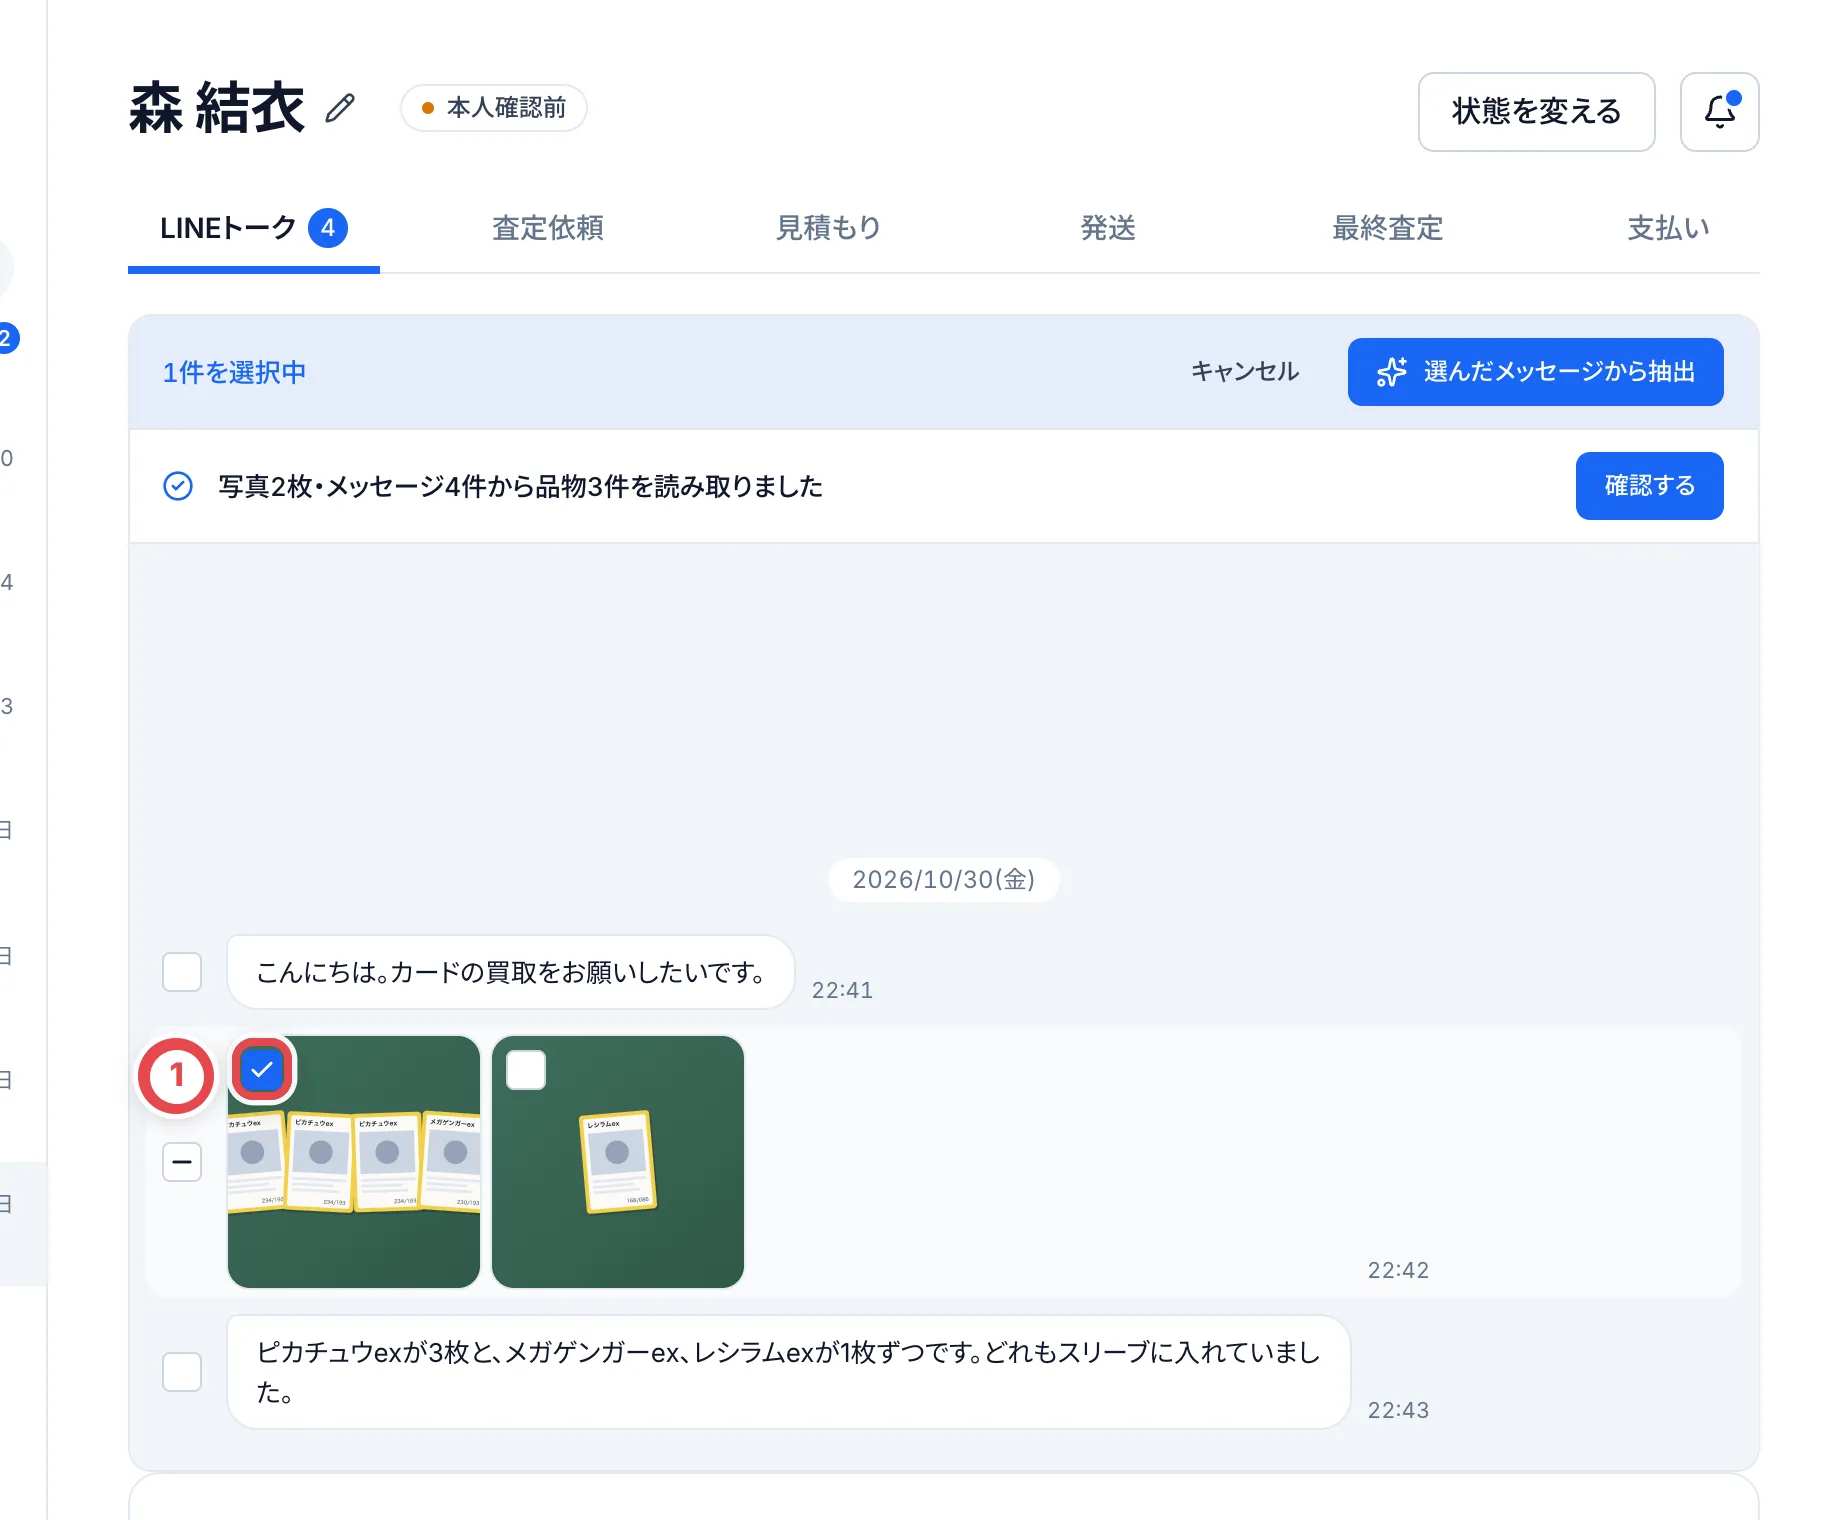 ## 4. 読み取ったカードを確かめて、査定依頼に入れる
「読み取った品物を確認」が開き、品物を1つずつ確かめます。①がお客様の写真、②がAIが読み取ったカードです。写真と見比べて、カードの名前・型番が合っているか、③の数量が写真やメッセージと合っているかを確かめます。
マスタに画像が登録されていない場合は「画像なし」と表示されるため、名前・型番・版の情報も照合します。
合っていれば④の「確定して次へ」を押します。カードではないもの(スリーブや箱だけ、など)は⑤の「除外する」で外します。この段階では、確定・除外した品物はまだ査定依頼に追加されません。管理メモは品物右上のメニューから別に保存するため、確認を閉じても残ります。
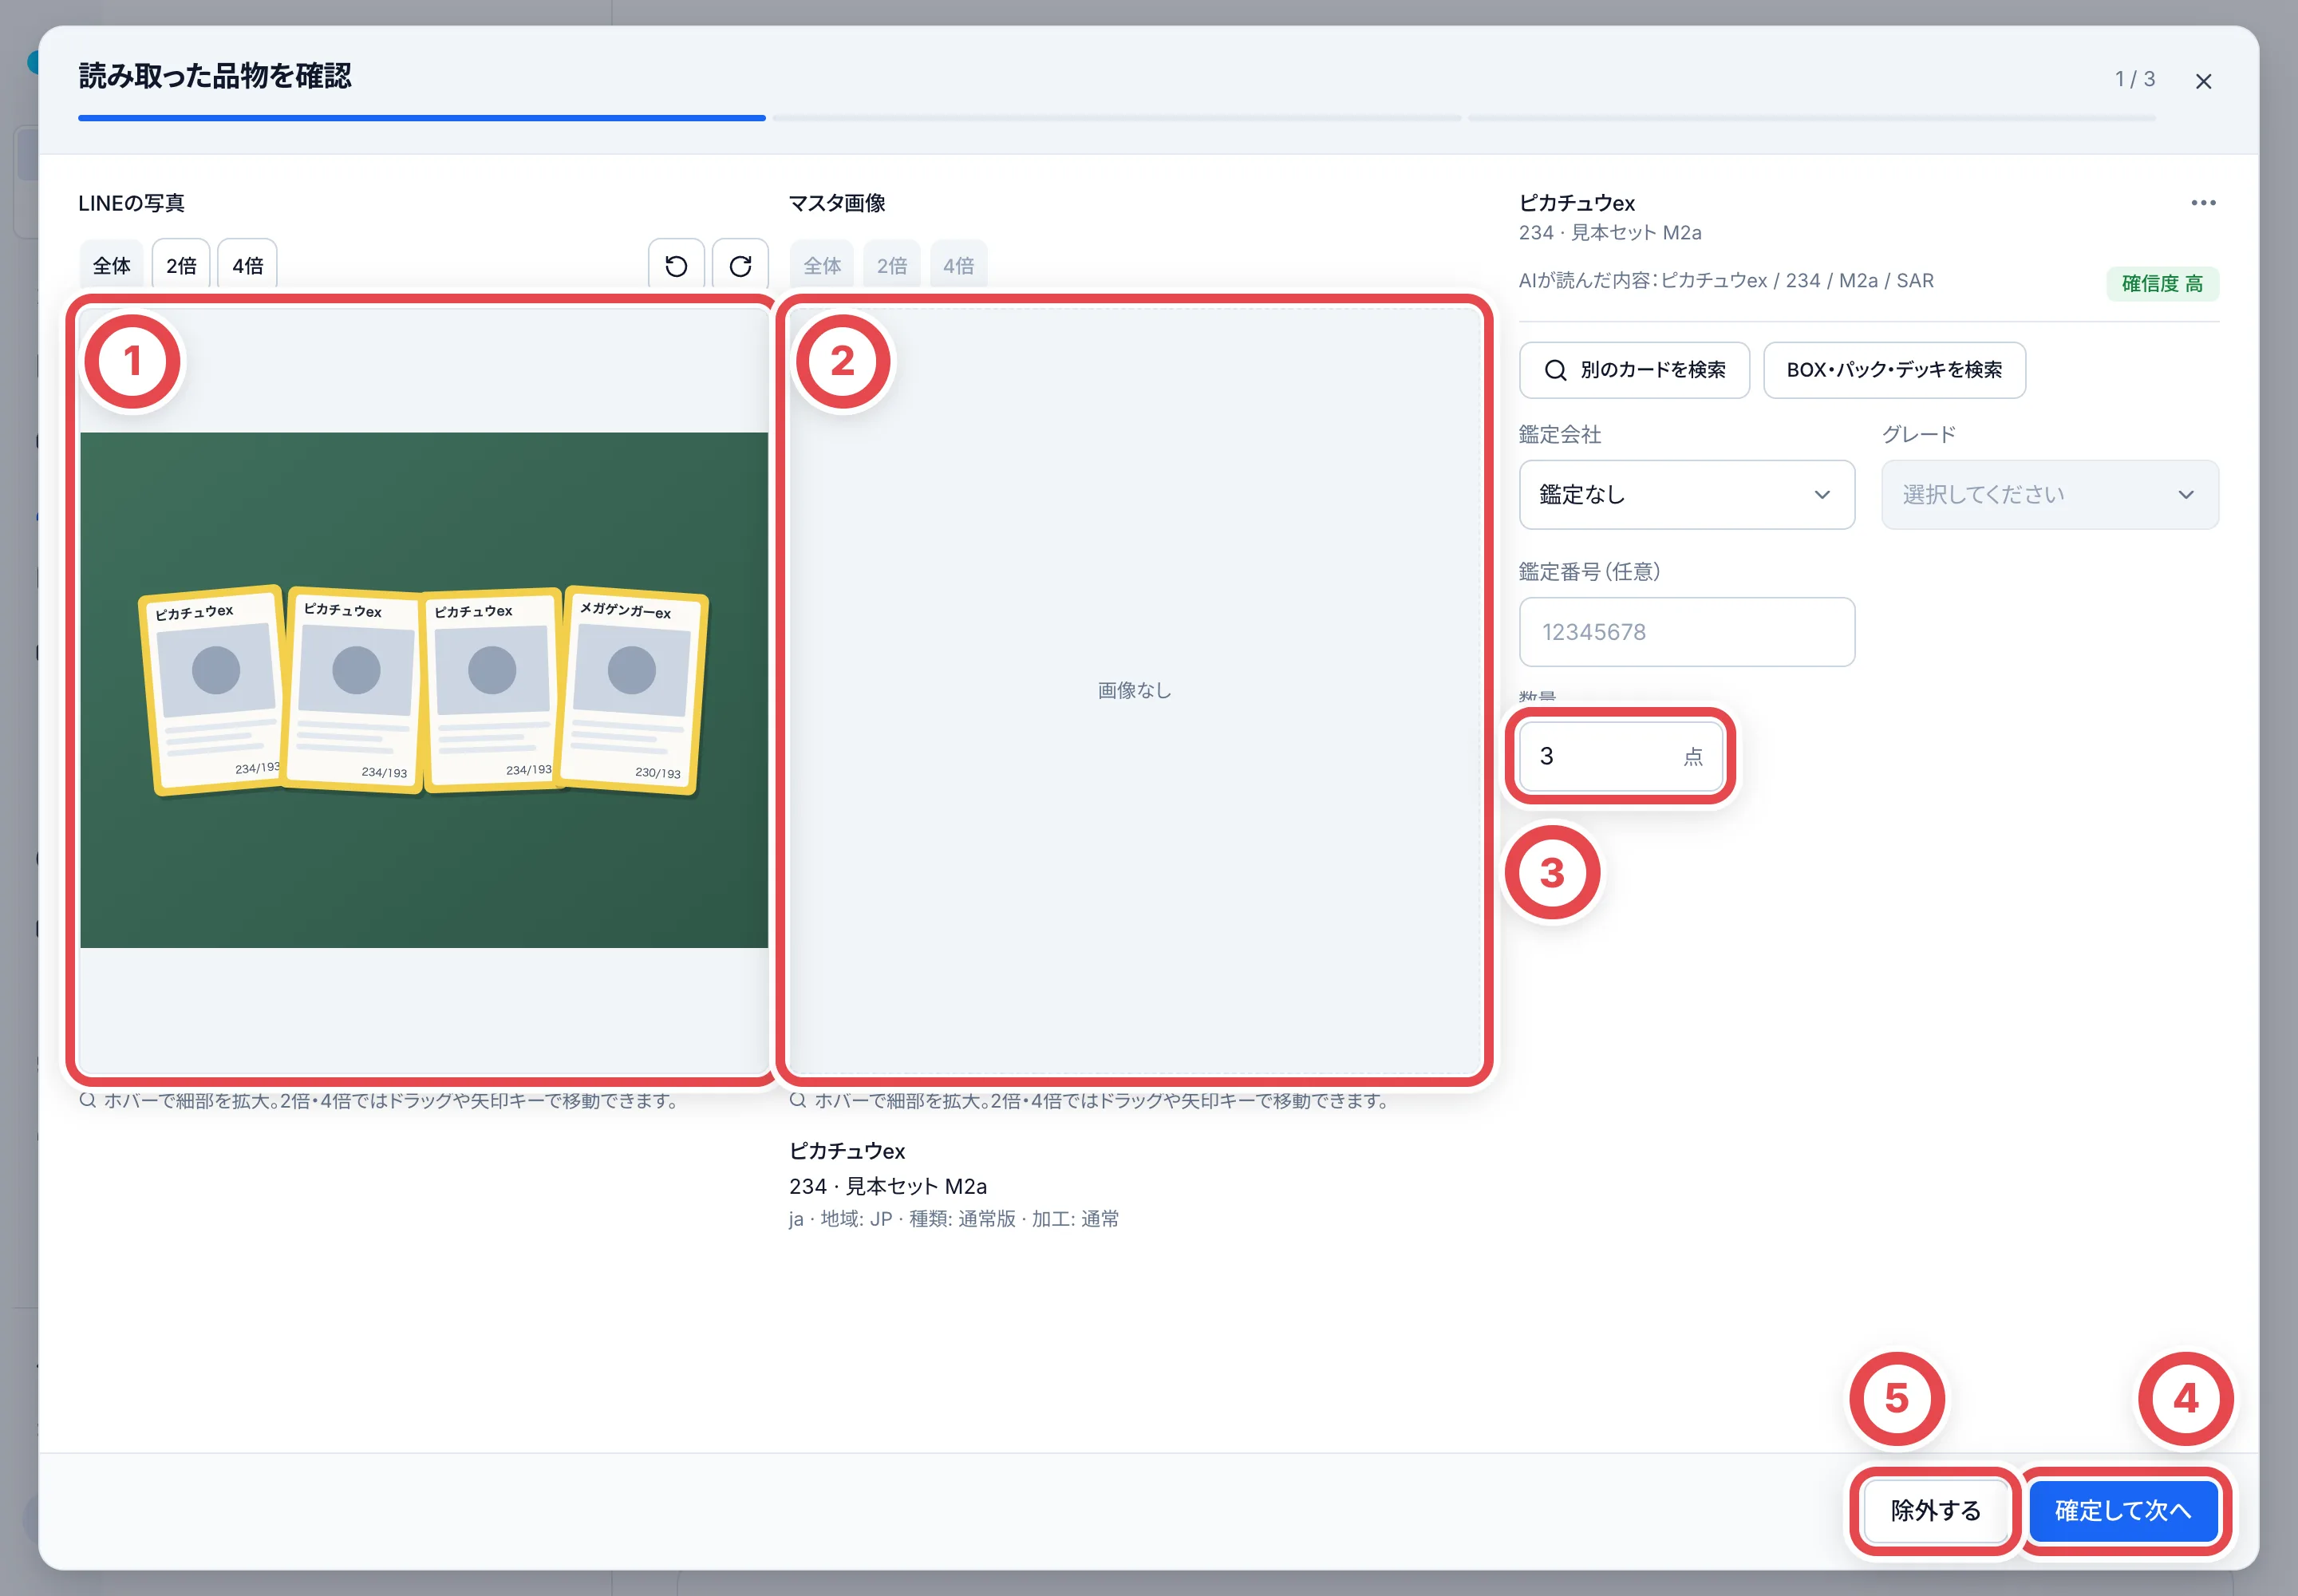 読み取りに自信がない品物には、①のように「確信度 中」などが付き、その理由が書かれます。②の「候補から選ぶ」に並ぶ画像付きの候補を押して選び直すか、「別のカードを検索」で正しいカードを探します。写真とマスタ画像は、画面内の「2倍」「4倍」で拡大できます。横向きで届いた写真は、「LINEの写真」の右上のボタンで90°ずつ回せます。
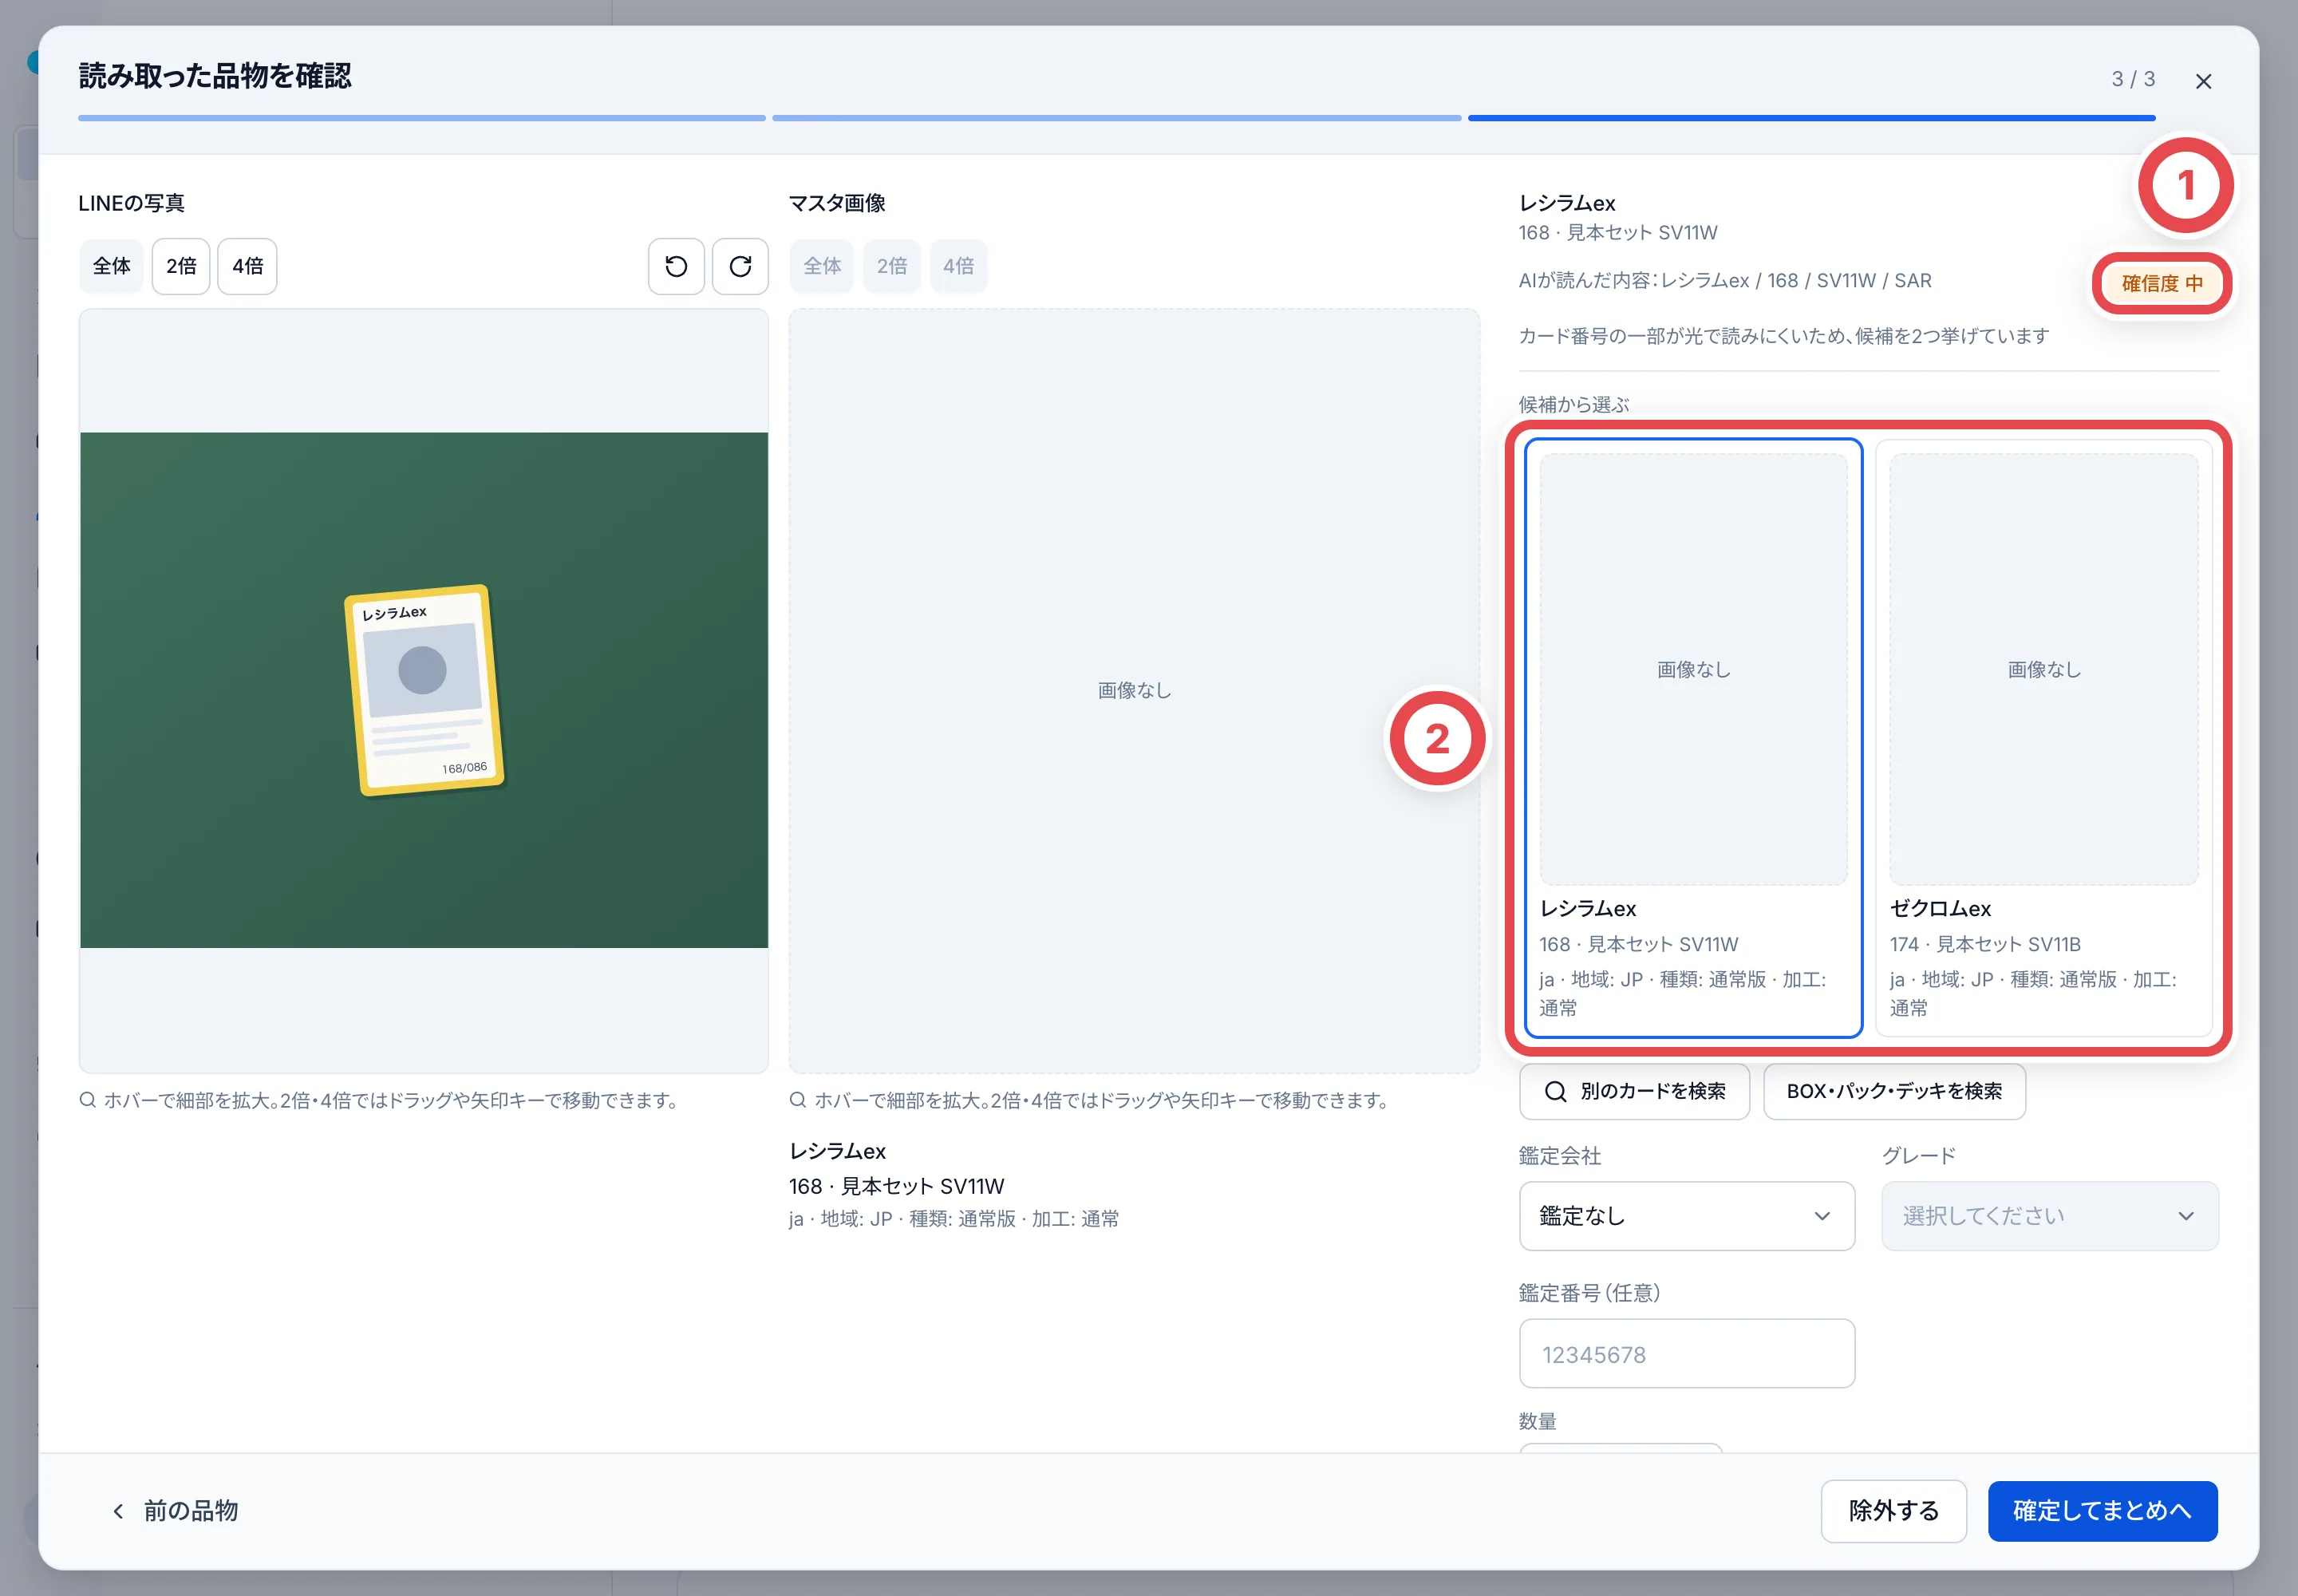
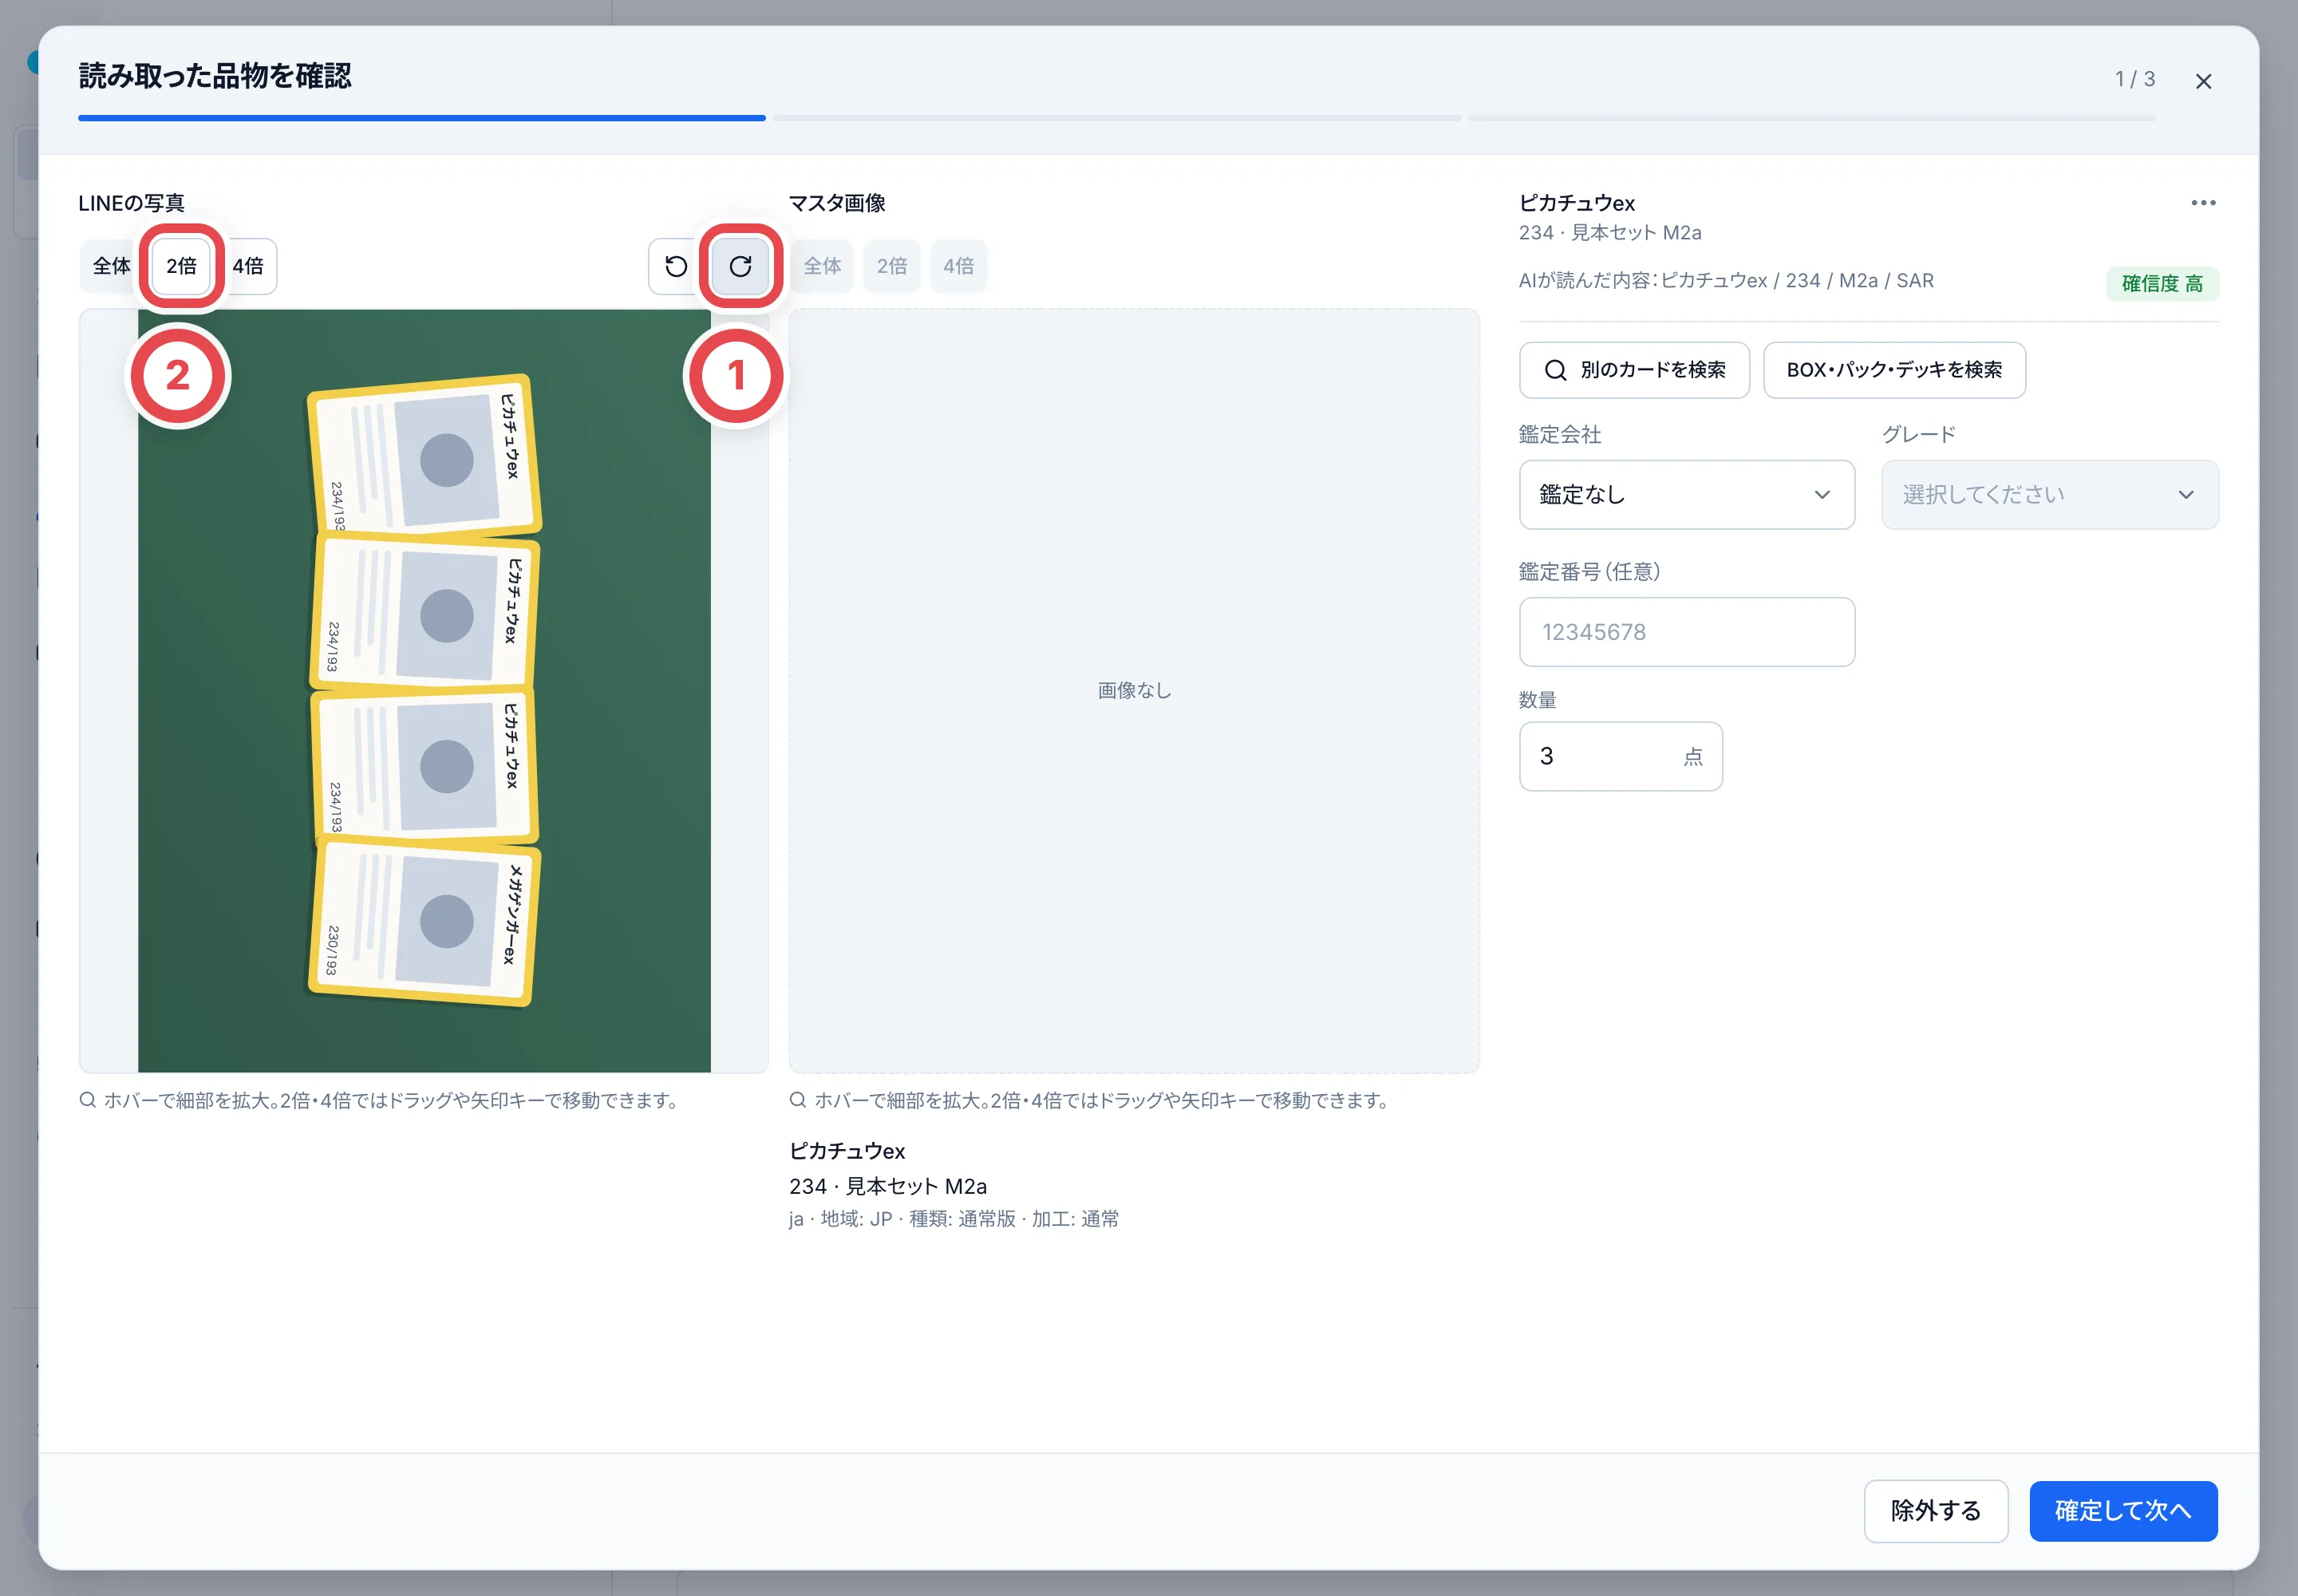 鑑定済みのカードは、鑑定会社と鑑定番号も読み取られます。現物の写真と照らして直してください。同じカードでも、鑑定番号が違えば別の個体として扱います。数量が複数で番号が1つだけ読み取られた場合は、代表の番号として使う確認が必要です。カードの版・言語・型番も画像の下で確認します。BOX等の商品なら商品を選び、マスタが見つからないカードは登録依頼を準備できます。登録依頼も、最後に「査定依頼に追加する」を押したときに反映されます。
最後の品物で「確定してまとめへ」を押すと、「追加する品物」に一覧が出ます。①で品物と枚数を確かめ、直すときは鉛筆のアイコンを押します。②の「査定依頼に追加する」を押すと、取引ができ、カードが顧客の「査定依頼」タブに入ります。
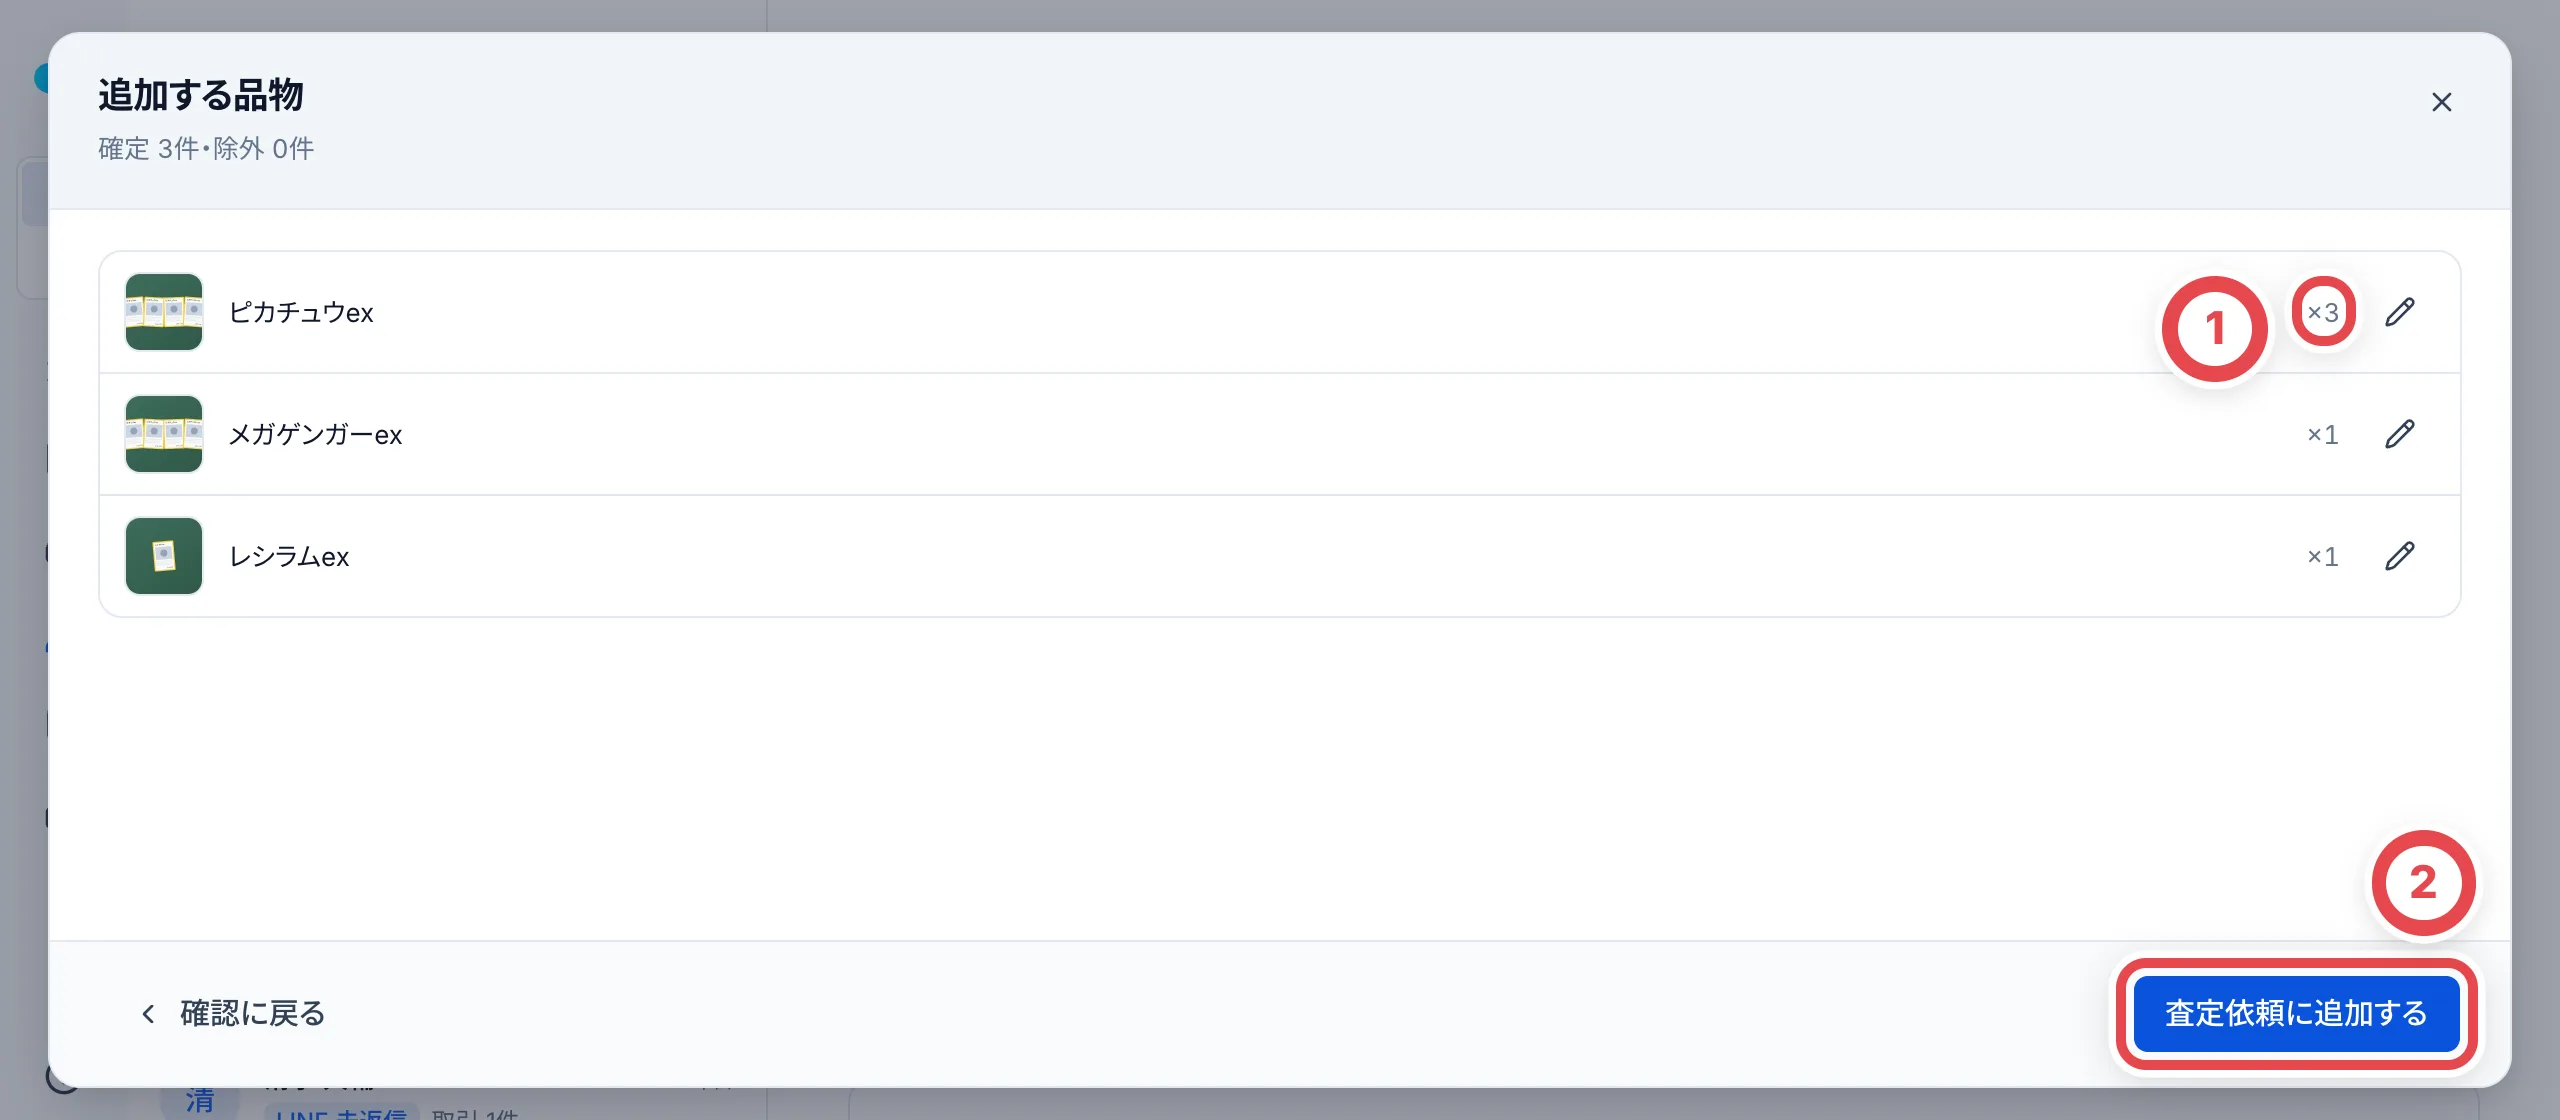 読み取りでは金額は付きません。金額は次の査定で決めます。
## 5. 状態と金額を確かめて、2次査定を頼む
顧客の「査定依頼」タブの「未見積」に、追加したカードが並びます。カードごとに、①で状態とグレードを選びます。「参考時価」と「掛率」は、相場と店舗の掛率から入っています。写真のカードの状態に合わせて直します。右端に1行ごとの金額が出ます。
見積にするカードを②のチェックで選び(見出しのチェックで全部を選べます)、画面の下に出る③の「選択した査定を進める」を押します。参考時価が空のカードがある場合は、確認画面で相場調査を頼むか、「調査せず2次査定に進める」かを選びます。入力が揃っている場合は確認画面の金額を確かめ、「2次査定に進める」で進みます。必要ならここでセット総額も設定できます。数量を変更した場合は先に保存します。0円で埋める必要はありません。詳しい手順は[調査依頼と2次査定依頼](/guides/purchase/research-and-reviews)を参照してください。
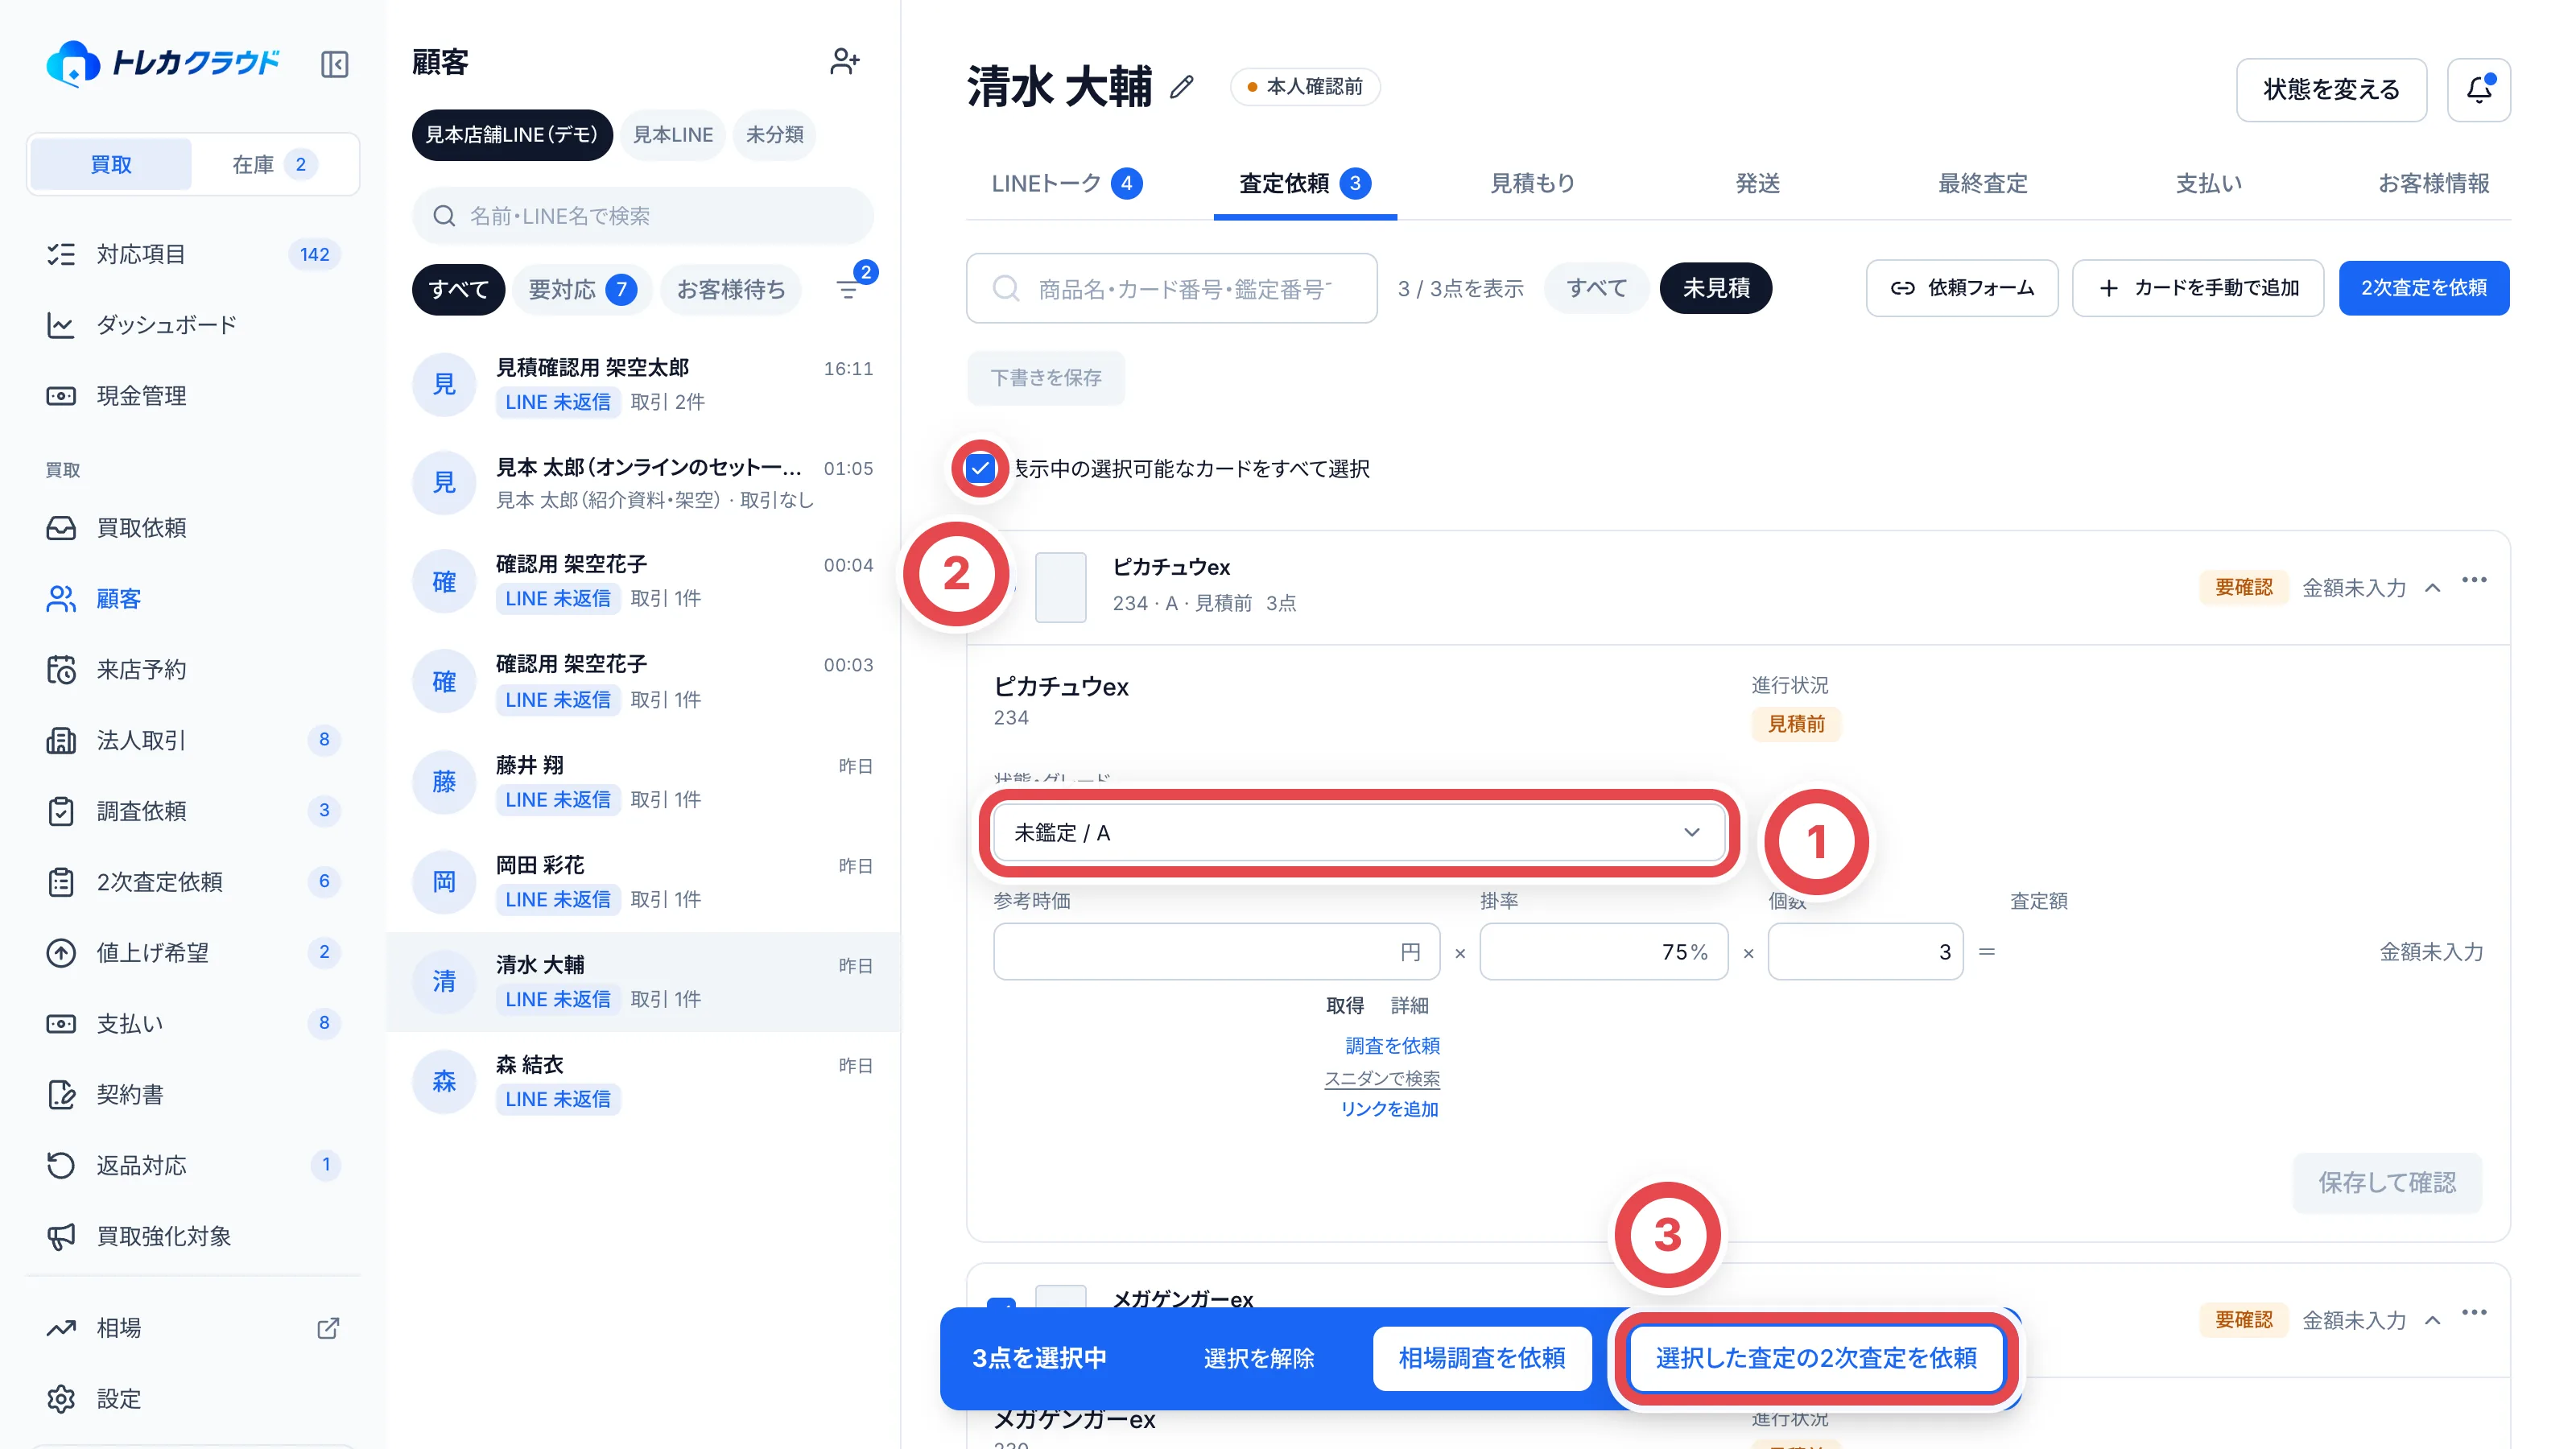 相場が取れないカードは、参考時価が空欄になります。その下の「調査を依頼」で調べてもらうか、自分で金額を入れます。調査は①で選んでいるグレードで頼みます。回答が届くと、調査担当が確かめたグレードが①に入ります。①で選んだグレードや下書きに保存したグレードがあるときは、そちらのままです。①が回答と違うグレードのときは、回答のグレードと価格が参考時価の下に出ます。調査したグレードから①を変えるときは、変えてよいかを聞かれ、そのまま新しいグレードで調査を頼めます。調査の頼み方は[調査依頼と2次査定依頼](/guides/purchase/research-and-reviews)を参照してください。
状態・グレード、参考時価、掛率を変えたら、表の上の「下書きを保存」を押します。保存した値は画面を離れても残り、ほかのメンバーが開いても同じ値が出ます。相場調査の回答を待つカードがあるときは、ほかのカードの値を保存して画面を離れ、回答が来てから全部まとめて2次査定を頼めます。
- 変えたのに保存していない値があると、ボタンの横に「保存していない変更 3か所」のように出ます。保存する前に画面を読み込み直すと、最後に保存した値に戻ります
- 保存していない変更があるまま、画面のタブやリンクで別の画面に移ろうとすると、確認が出ます。「変更を捨てて離れる」を押すと、変えた値は元に戻ります。ブラウザの戻る・進むでは確認が出ずに元に戻ります
- 変えていない欄は保存されず、開くたびに相場や調査の回答から入り直します。参考時価を保存するときは、そのとき行に出ている状態・グレードも一緒に保存します。保存した参考時価とグレードは、あとから調査の回答が来ても書き換わらず、欄の下に「調査回答 ○円」と出ます
- 2次査定を頼むと、そのカードの下書きは消え、値は見積に移ります
- 下書きの参考時価が登録相場から反映したもので、その登録相場が確認から30日を過ぎたか無効になったときは、欄の下にそう出ます。そのカードを選んで2次査定を頼むか見積にまとめると、手入力の値として進めるかを聞かれます。「手入力として進む」を押すと、同じ金額を手入力の参考時価として見積に入れます。登録相場の金額として使うときは、登録相場を再確認して登録し直します
- 保存したあとに別のカードに特定し直すと、下書きの参考時価は消えます。BOXなどの商品に特定し直すと、下書きは全部消えます
依頼後は、別のメンバーが「2次査定依頼」から確認します。すでに金額を保存した見積の2次査定では、見積の画面に①「2次査定を開く」が出ます。
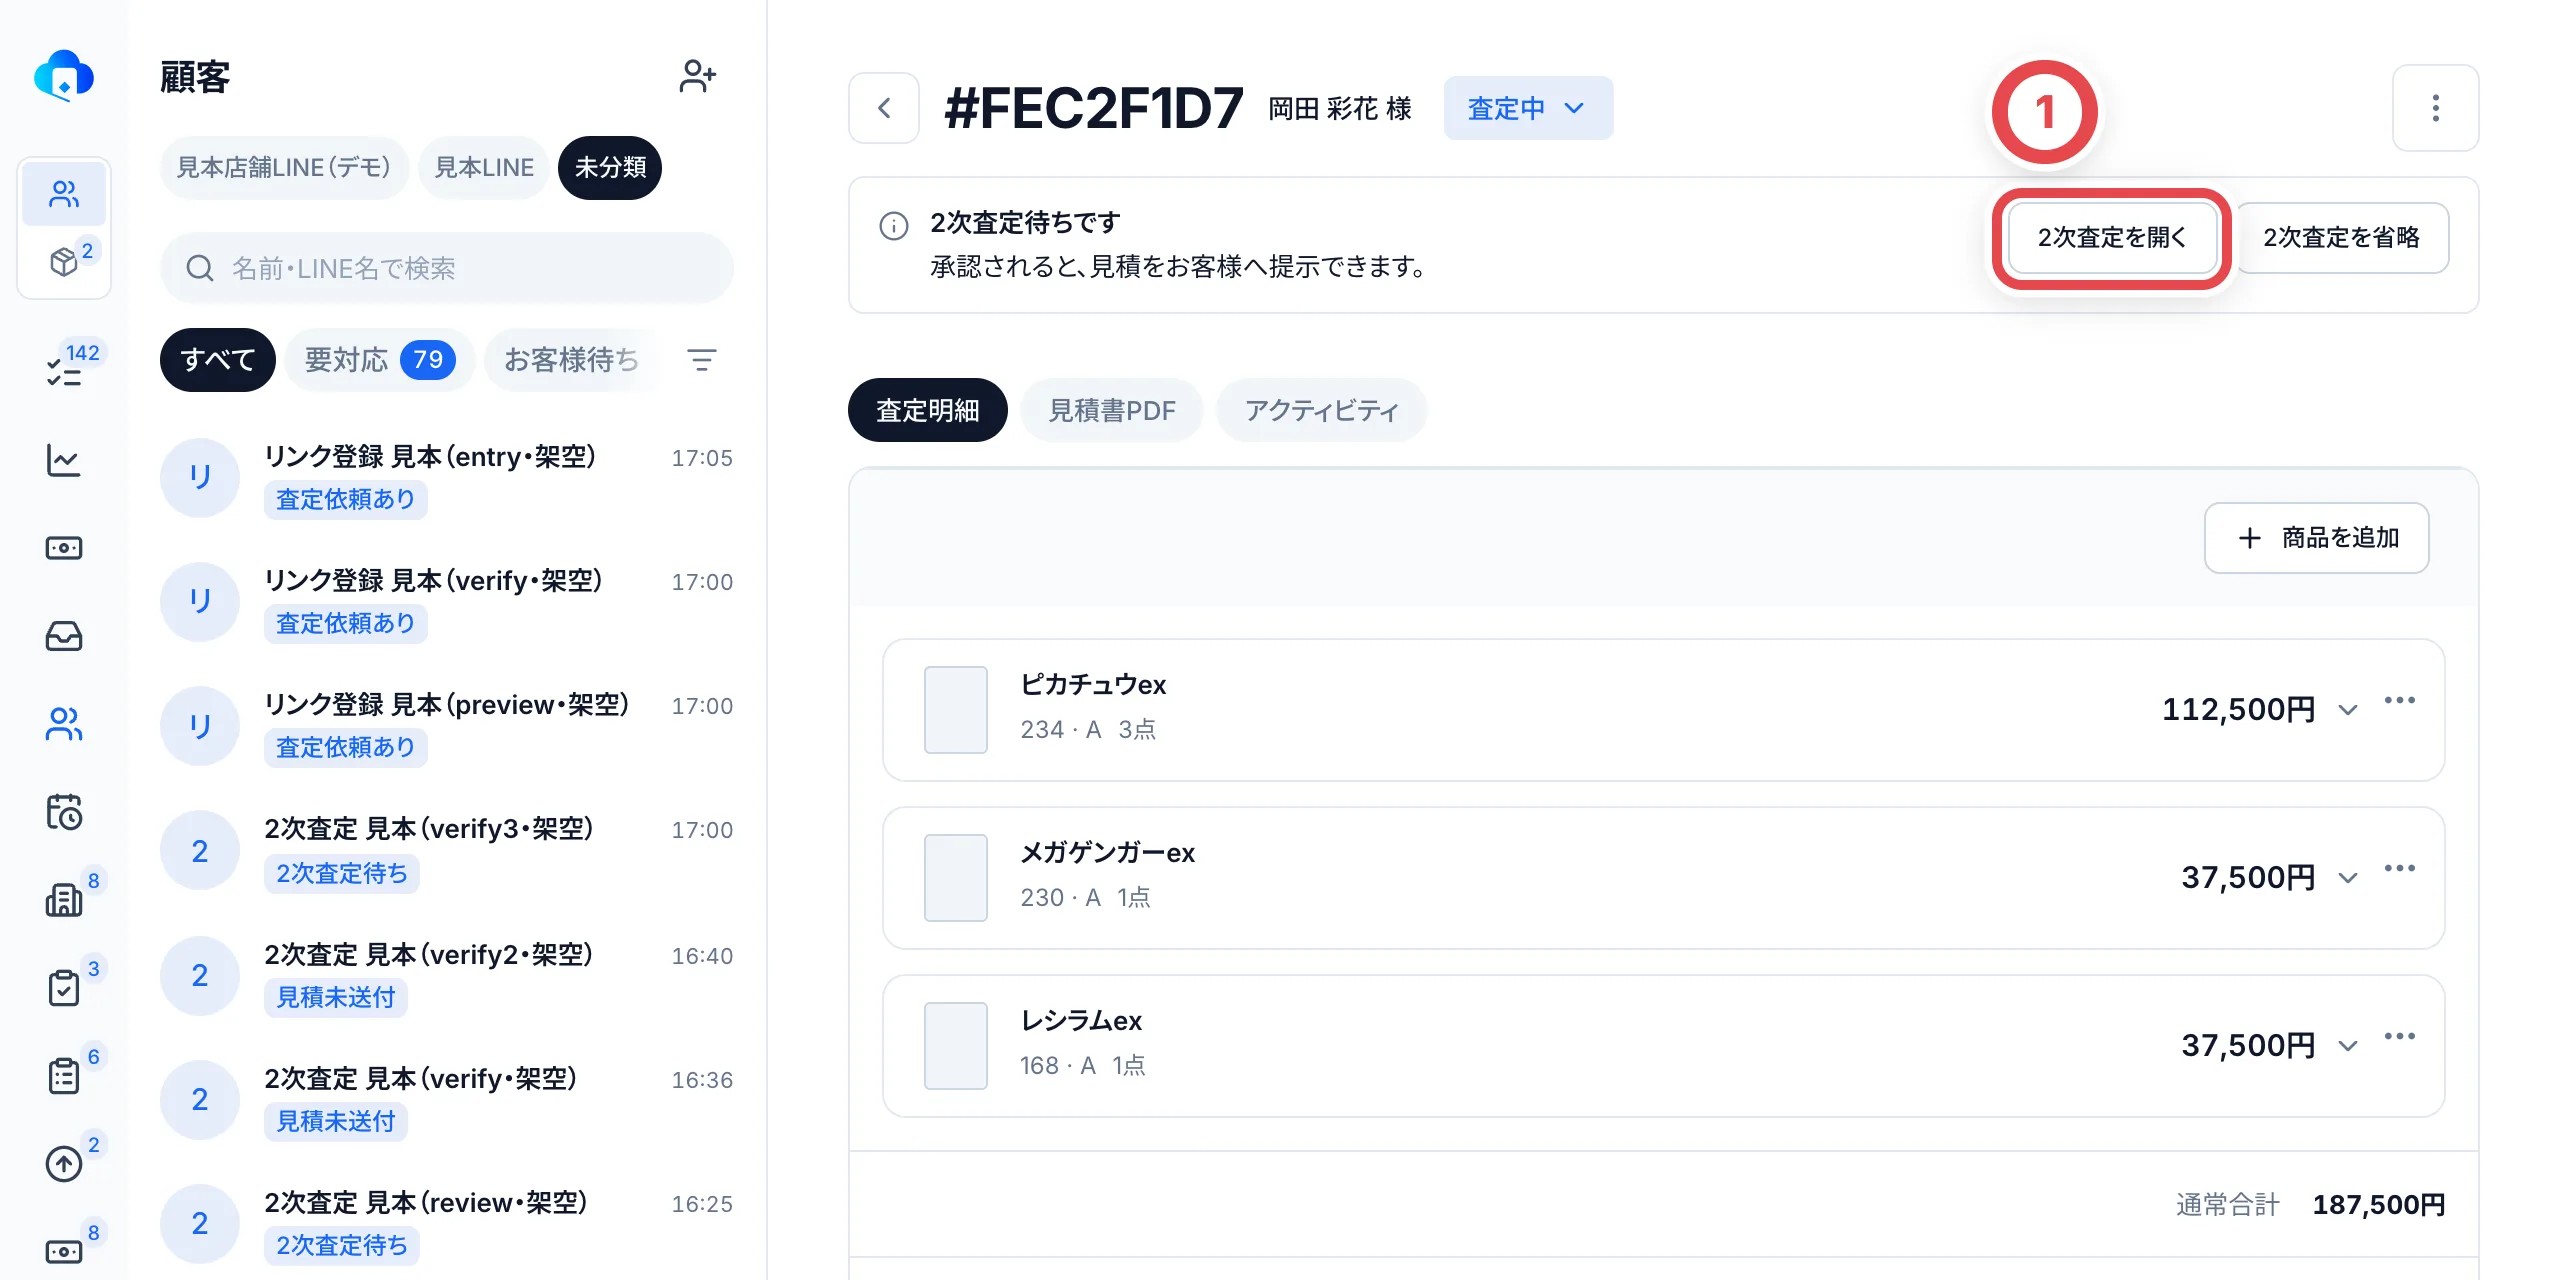 ## 6. 別のメンバーが見積を確かめて承認する
査定依頼から渡された品物は、[2次査定の準備画面](/guides/purchase/research-and-reviews)でカードの特定・グレード・時価・掛率を補い、内容を確認して承認します。
すでに保存された見積の2次査定をするメンバーは、サイドバーの「2次査定依頼」か、見積の画面の「2次査定を開く」から、「事前見積を確認」を開きます。①の提示額を、時価と数量に照らして確かめます。直したいときは、その場で金額を書き換えられます(書き換えると「査定額を修正して承認」になります)。②の「レビューコメント」に気づいたことを残し、③の「確定」を押して承認します。
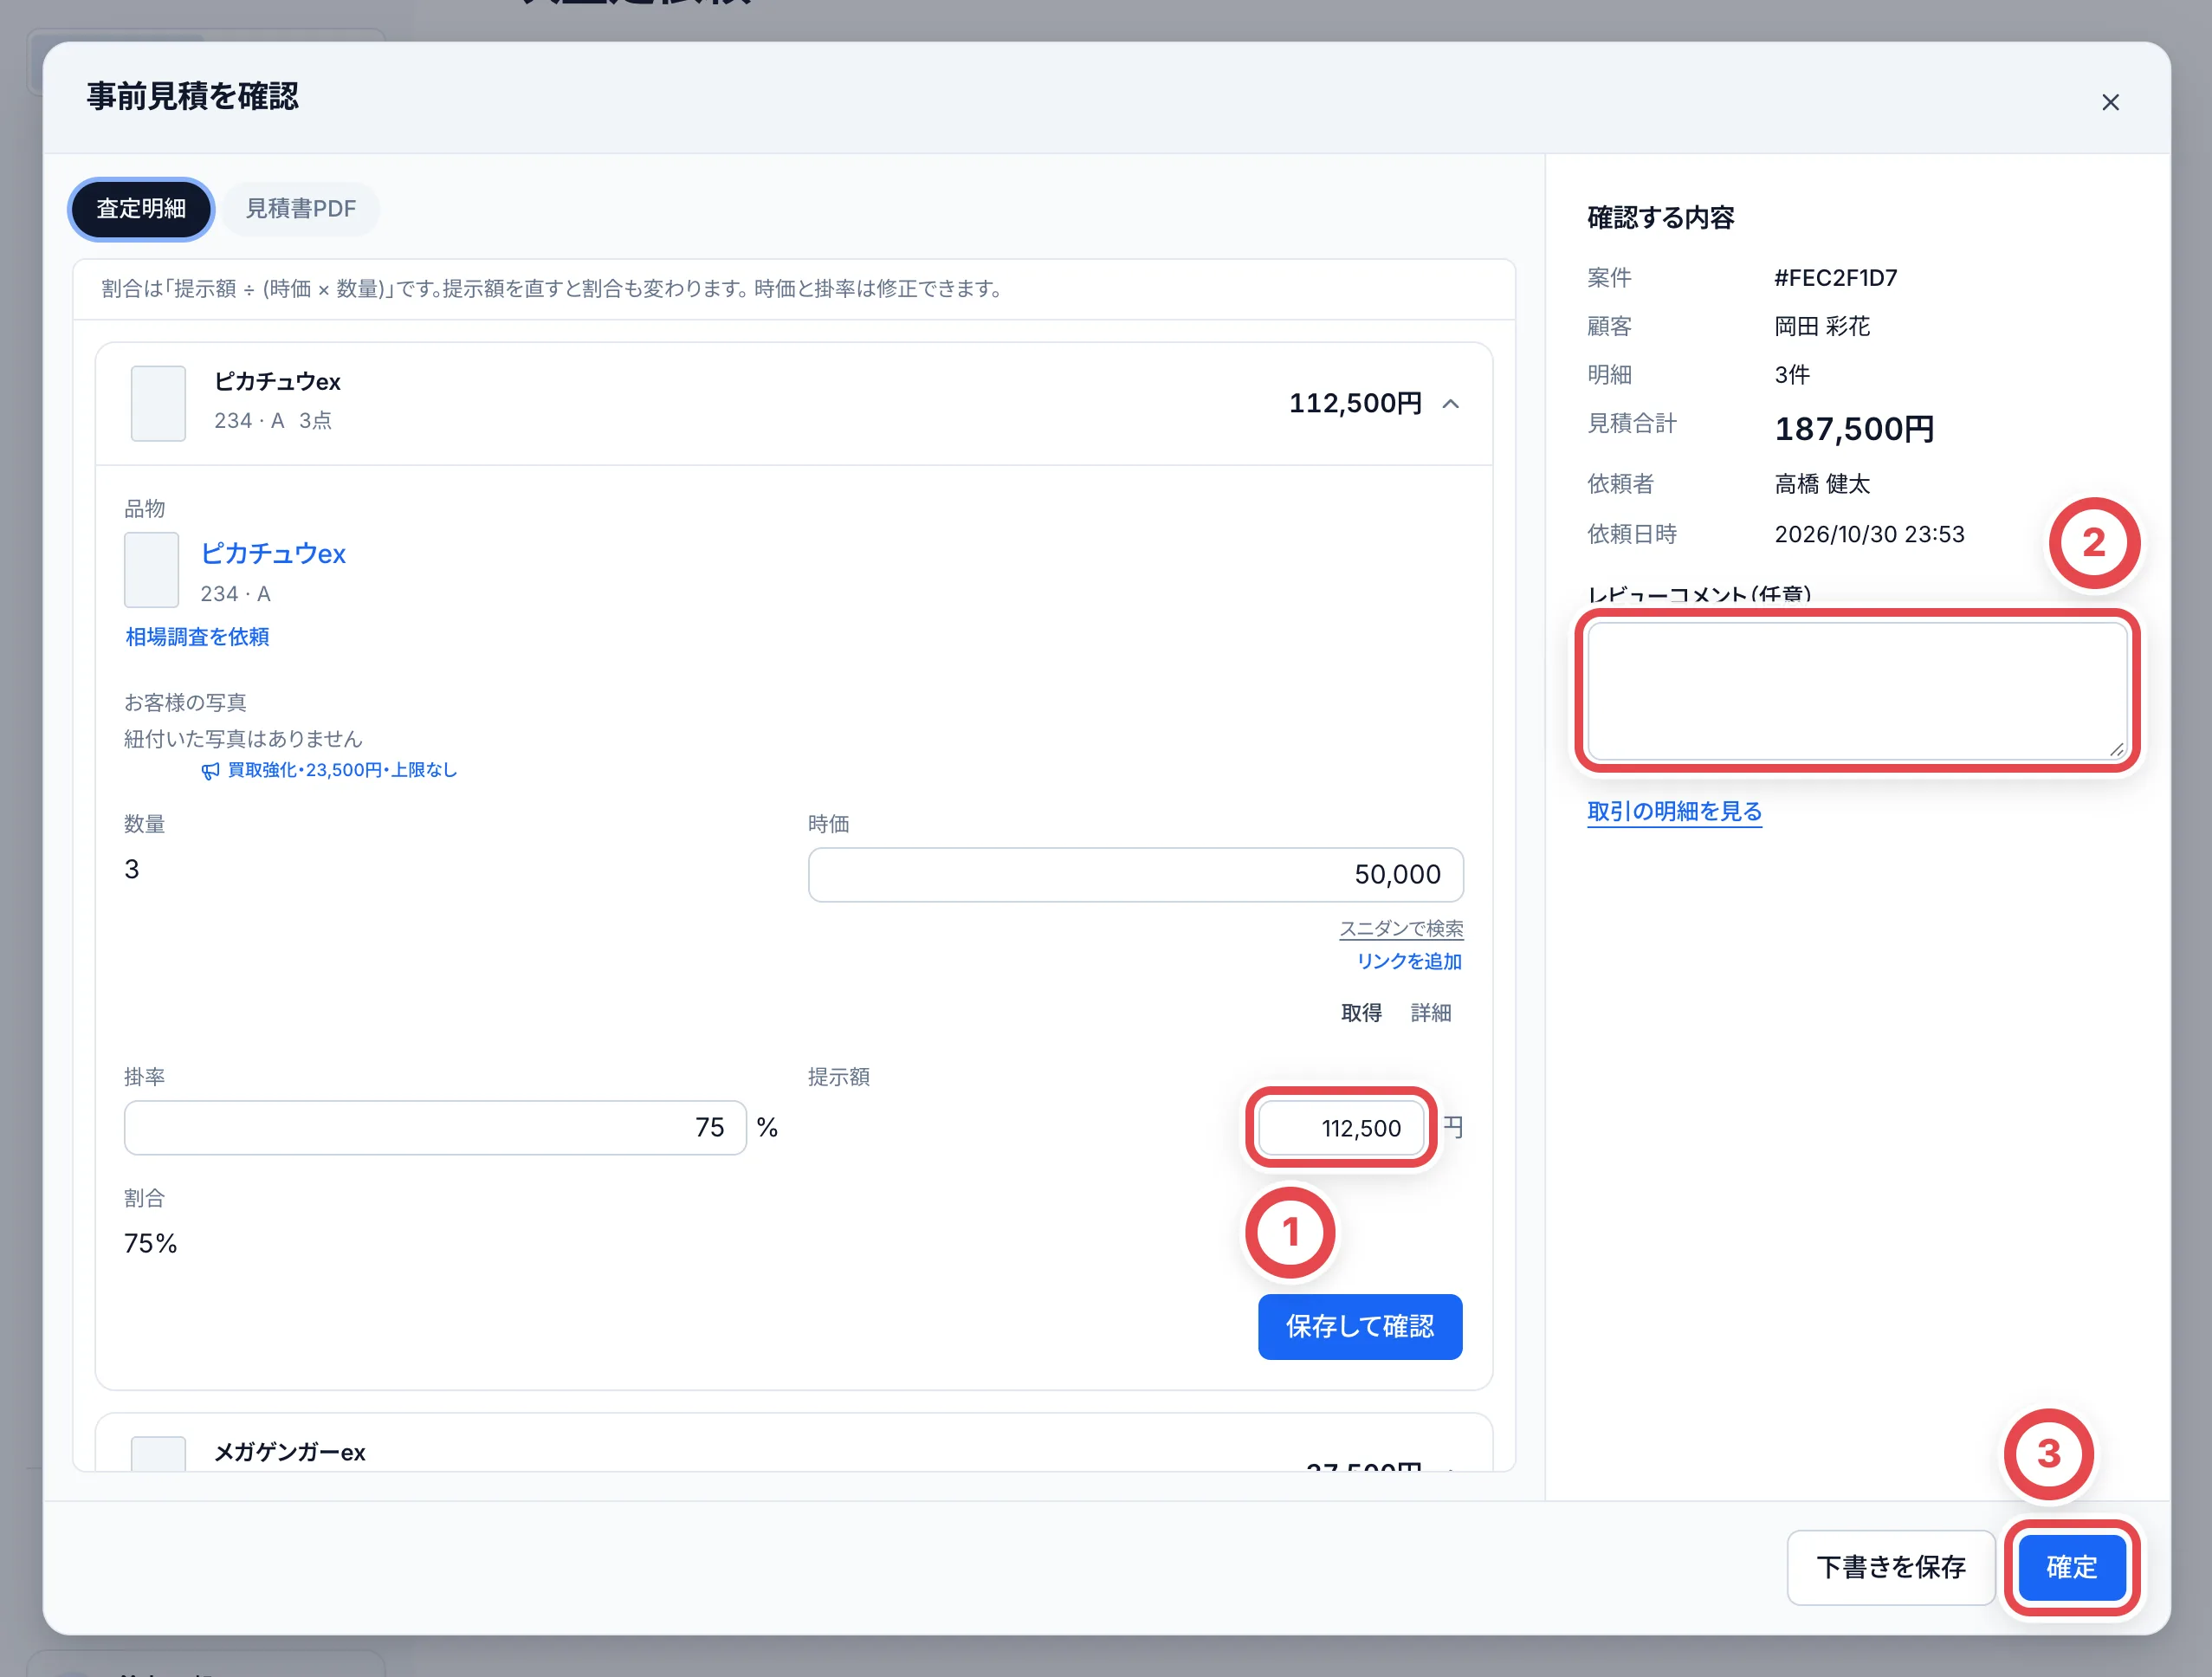 査定を作った本人は、自分の見積を承認できません。急ぎで2次査定を飛ばすときは、見積の画面の「2次査定を省略」を押します。省略したことは記録に残り、そのときは金額を直せません。
## 7. 見積の文章をコピーしてLINEで送り、記録する
承認された見積の画面には、「見積を提示する」が出ます。①の「LINEで送る文章案」に、お客様に送る文章が入っています(店舗が 設定 › LINEの文面 で決めた形です)。②の「コピー」を押し、LinyやLINEの管理画面のトークに貼り付けて送ります。お店のテンプレートがあれば、文章案の上の「テンプレート」で切り替えられます。文章案はその場で手直しでき、手直しした文章で送ったメッセージを照合します。
送ったら、③の「提示済みにする」を押します。取引画面では確認が出るため、提示したことを確かめて確定します。対応項目から開く専用ダイアログでは、「別の方法で伝えた」を選んだあとの確定ボタンが記録操作です。お客様に送る前には押さないでください。
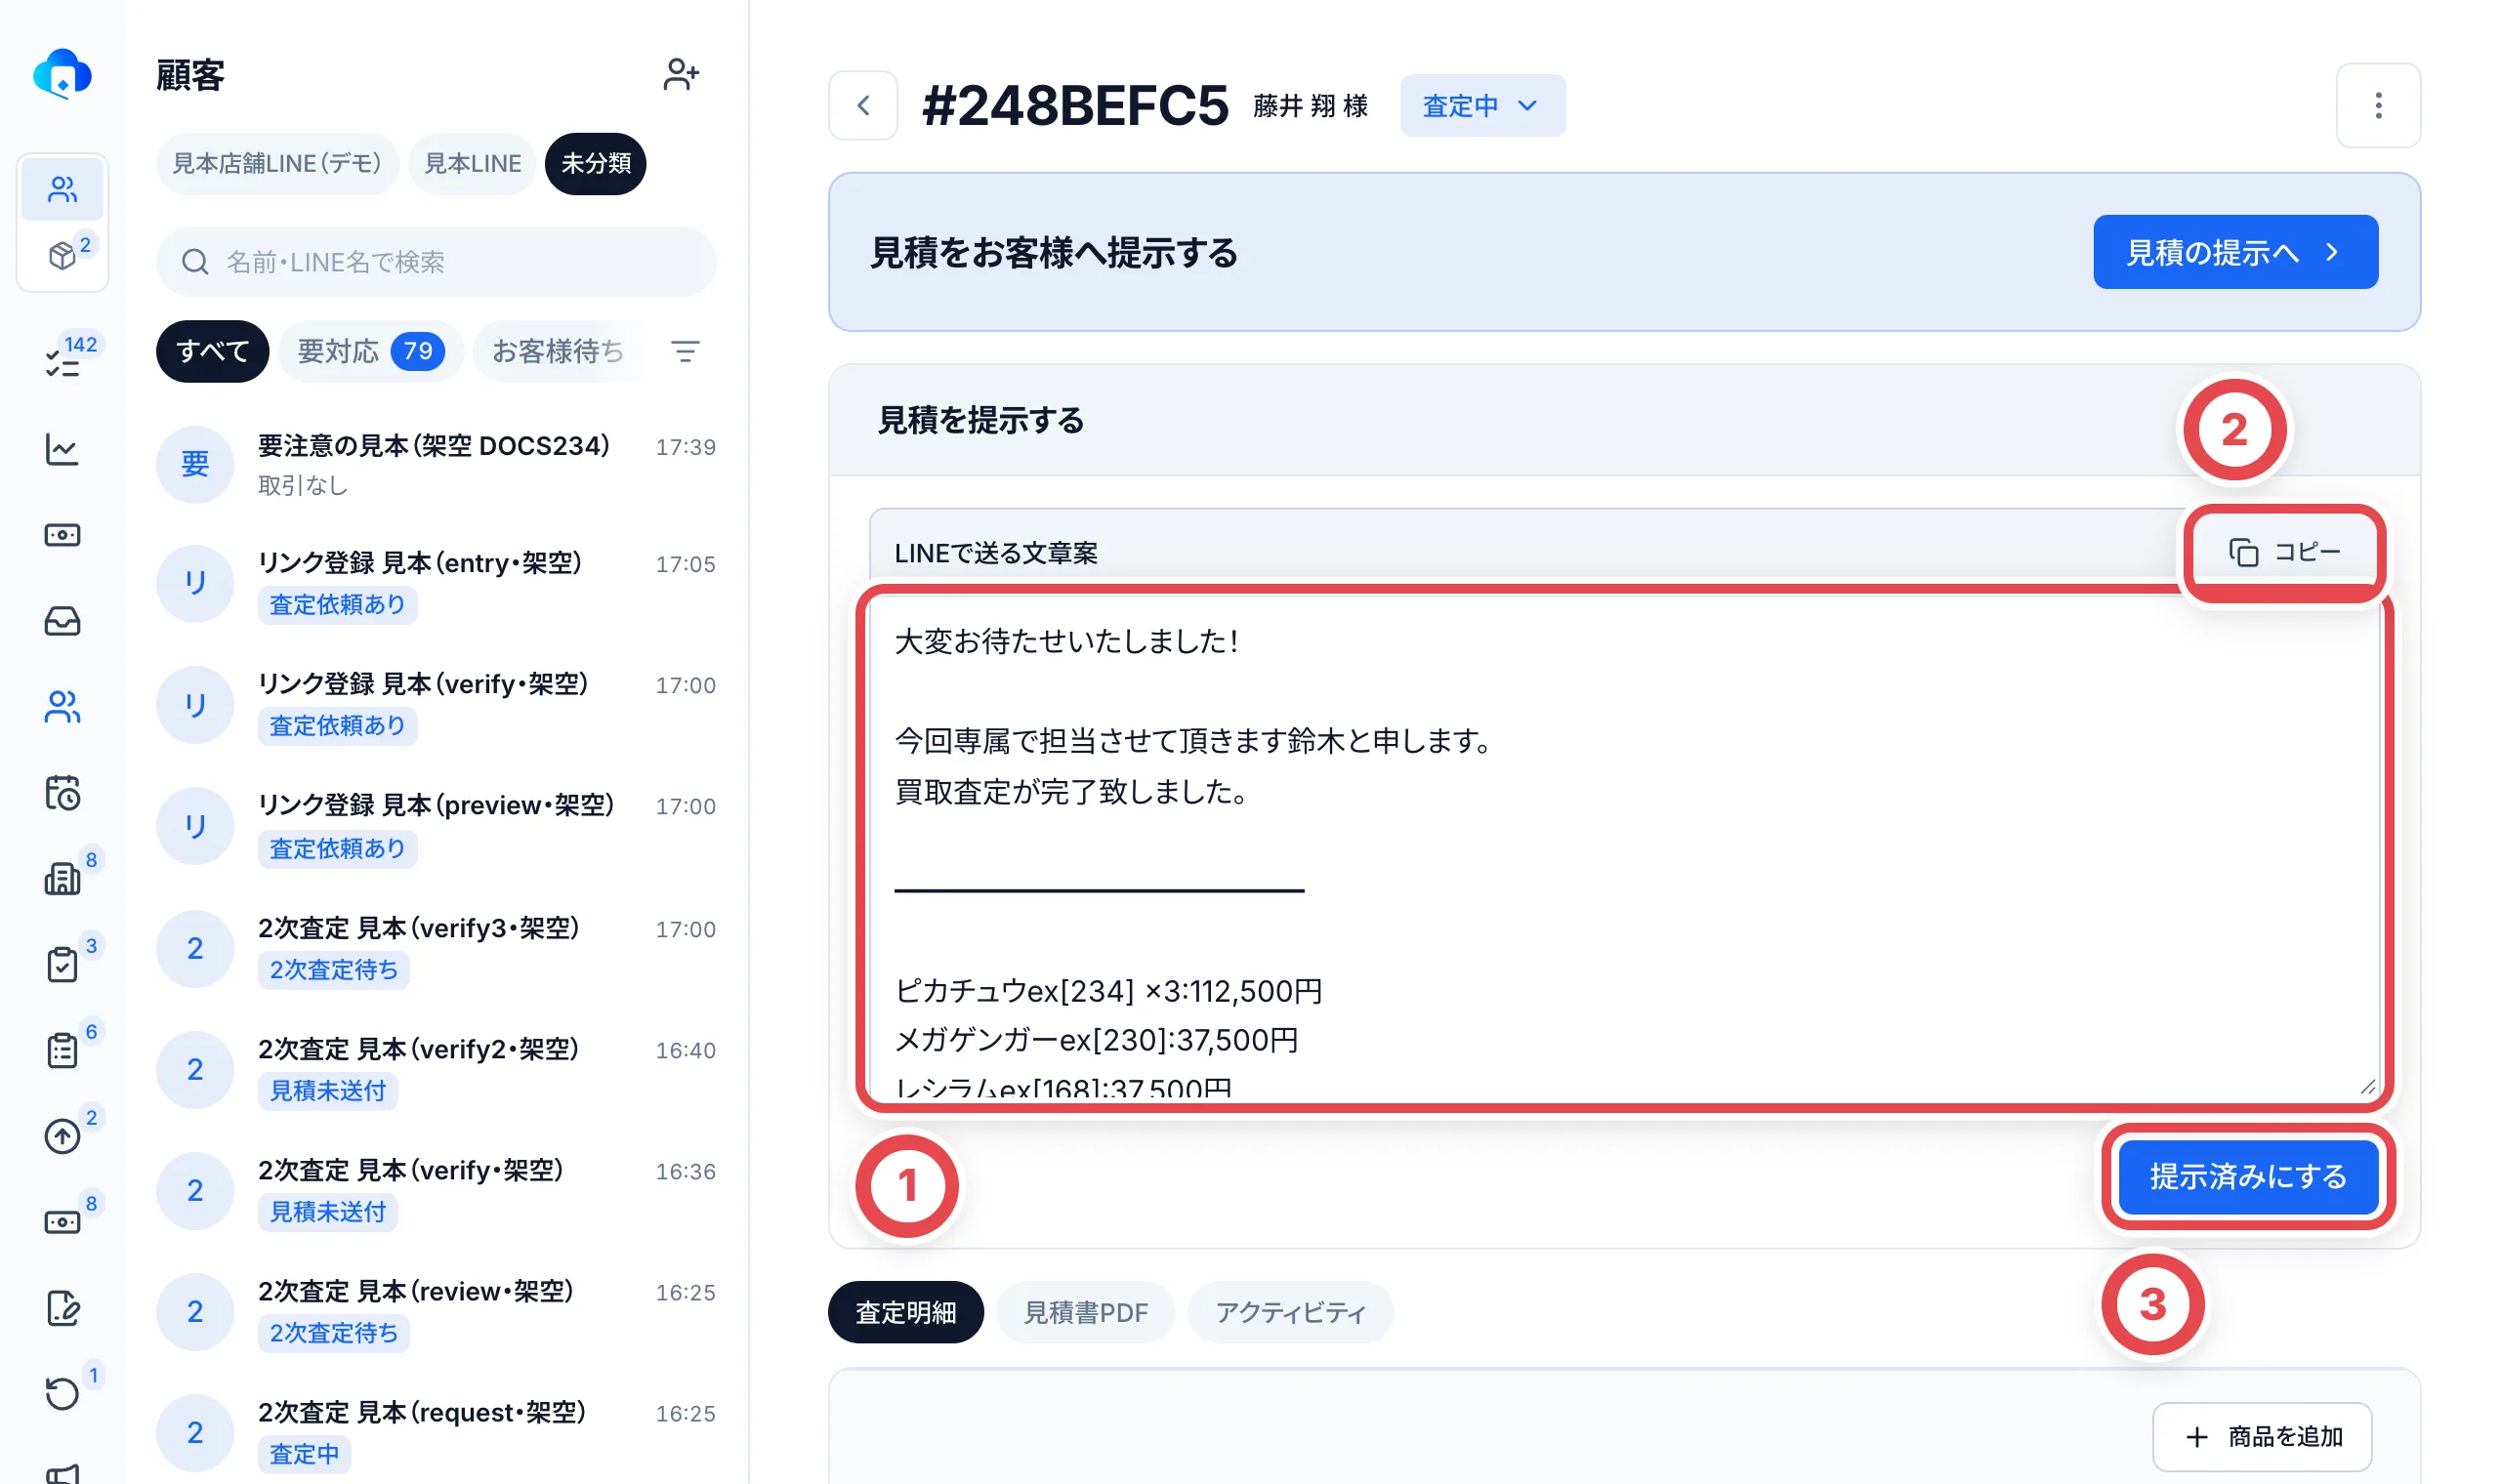 文章の金額は、見積の合計と同じでなければいけません。前回の金額などを書き足すときは、「査定額」「合計」という言葉を付けないでください。照合が合わなくなります。
LINE連携で「見積の提示」を自動で送る設定にしている店舗では、「LINEで見積書を送る」も出ます。その場合はボタンから直接送れます。
このあと、お客様の返事(承諾・一部だけ承諾・お断り)を記録し、発送の案内に進みます。続きは[発送と最終査定](/guides/purchase/shipping-and-final)を参照してください。
## 困ったとき
| 起きていること | 確かめること・直し方 |
| --------------------------------------------------------------- | --------------------------------------------------------------------------------------------------------------------------------------------------------------------------------------------- |
| 「LINE未登録の友だち」に、来たはずの友だちがいない | 上のタブで、その友だちのLINEアカウントを選んでいるか確かめます。取り込みは約5分ごとです。顧客として登録済みの友だちは出ません。 |
| 写真が「LINEから取得中」のまま | LINEから写真を取り込んでいる途中です。少し待って開き直します。「LINE連携の設定が必要です」と出るときは、[LINEと通知](/guides/settings/line-and-notifications)を確かめます。 |
| 写真に「画像を取得できませんでした」と出る | LINEから写真を取り込めませんでした。お客様にもう一度送ってもらいます。 |
| 読み取りの帯が出ない | まだ読み取っていないか、読み取りから7日過ぎています。「依頼を抽出」から読み直します。 |
| 読み取ったカードが違う | 「候補から選ぶ」か「別のカードを検索」で正しいカードに変えます。カードでないものは「除外する」で外します。 |
| 同じ写真のカードが二重に入りそう | トーク全体からの読み取りでは、査定依頼へ取り込み済みの写真を外します。メッセージを明示的に選ぶと再読込できるため、確認画面の既存依頼の警告と数量を確かめ、二重追加を避けます。 |
| 「選択した査定を進める」で止まる | 選択対象と確認画面のメッセージを確認します。未特定・価格未入力は2次査定へ渡せます。変更した数量は先に保存します。見積として承認・提示する前には、担当者が特定と価格を仕上げる必要があります。 |
| 2次査定で「査定を作成した本人は、この版を承認できません」と出る | 別のメンバーに確定してもらいます。急ぎのときは見積の画面の「2次査定を省略」を使います。 |
| 「提示済みにする」を、送る前に押してしまった | 取引の画面の「アクティビティ」に記録が残ります。管理者に相談してください。 |
## 関連する操作
- [値上げ希望を記録して対応する](/guides/purchase/price-increase-requests)
---
# 郵送で届いたカードを在庫に入れる
Source: https://docs.toreca-cloud.com/guides/purchase/mail-in-to-stock
LINEを使わずに受け付けた品物や、すでに到着した品物を在庫に登録します。
標準のスタッフは、顧客フォームで情報を集め、通常の買取業務から振込の準備・申請まで進められます。申請後の承認・振込実行・結果記録は、権限を持つ担当者へ引き継ぎます。店舗が個別に変更したロールでは、管理者に権限を確認してください。
## どちらの方法で入れるか
| やりたいこと | 使う方法 | トレカクラウドに残るもの |
| ---------------------------------------------------------------------------------------------- | ----------------------------- | ---------------------------------------------- |
| 在庫に入れて、仕入額を残したい。お客様とのやり取りや支払いは、トレカクラウドの外で管理している | 方法1 入庫伝票で入れる | 入庫伝票と、仕入額つきの在庫 |
| お客様・金額・本人確認・振込まで、買取として残したい | 方法2 買取依頼として記録する | 取引、本人確認、振込の記録と、仕入額つきの在庫 |
方法2では、お客様情報・振込先・本人確認が必要です。使う方法は店舗の管理者に確認してください。
## 方法1 入庫伝票で入れる
### 1. 入庫伝票を開く
サイドバー上部の①で「在庫」に切り替え、②の「入庫」を開きます。③の「入庫伝票」を押すと伝票の一覧が開くので、右上の「入庫を記録」を押します。入庫伝票を作る画面が開きます。
### 2. 区分・入庫先の棚・由来を入れる
①の「区分」で「その他」を選びます。②の「入庫先の棚」で、カードを置く拠点の「入庫受付」を選びます。③の「由来・理由」には、いつ届いた何の分かを書きます。あとから伝票を開いた人が、在庫が増えた理由を分かるようにするためです。
例:「10/16着 郵送買取分(買取の記録は別管理)」
「入庫日」には今日の日付が入っています。荷物が届いた日と違うときは直します。
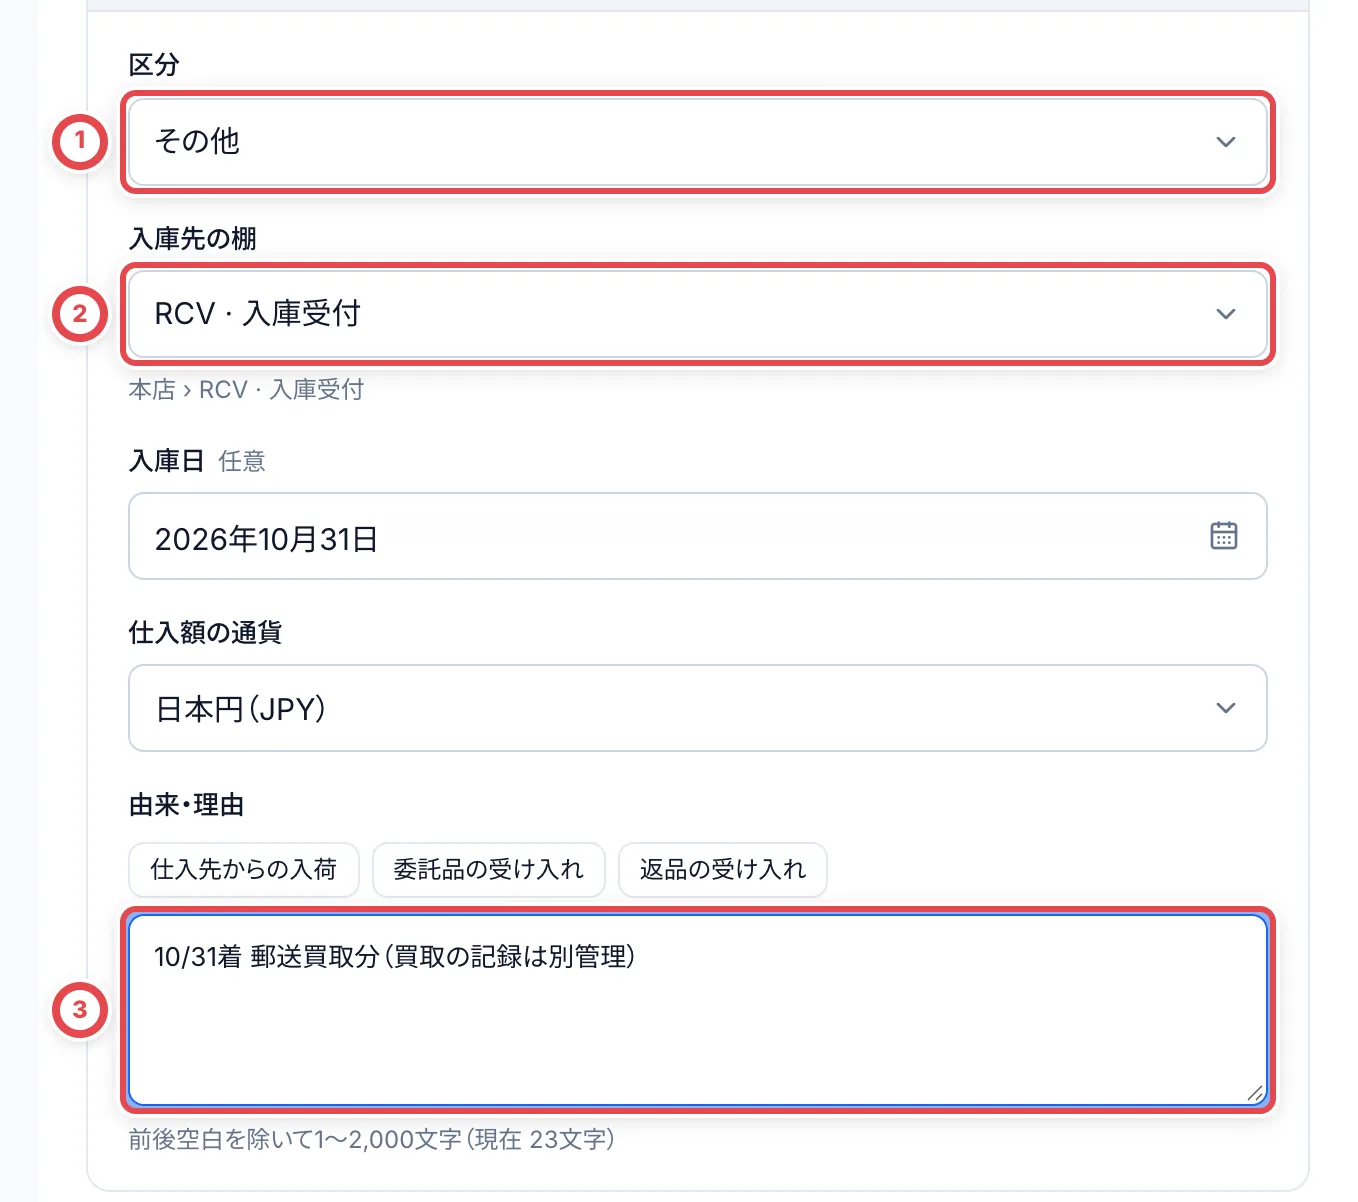 棚の一覧は、拠点ごとに分かれています。①の拠点名を確かめてから、②のその拠点の「入庫受付」を選びます。拠点が違うと、カードが別の拠点の在庫になります。
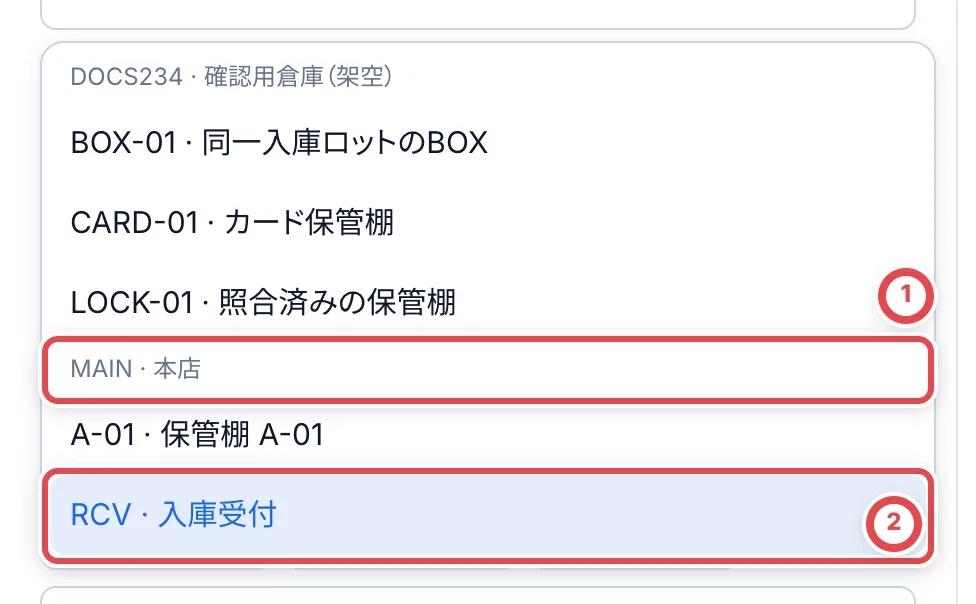 ### 3. カードを選ぶ
「入庫するカード」の「カードを検索して選ぶ」を押します。①にカード名か型番を入れ、②の候補から型番とセットを確かめて選びます。同じ名前のカードが並ぶことが多いので、型番まで見て選んでください。
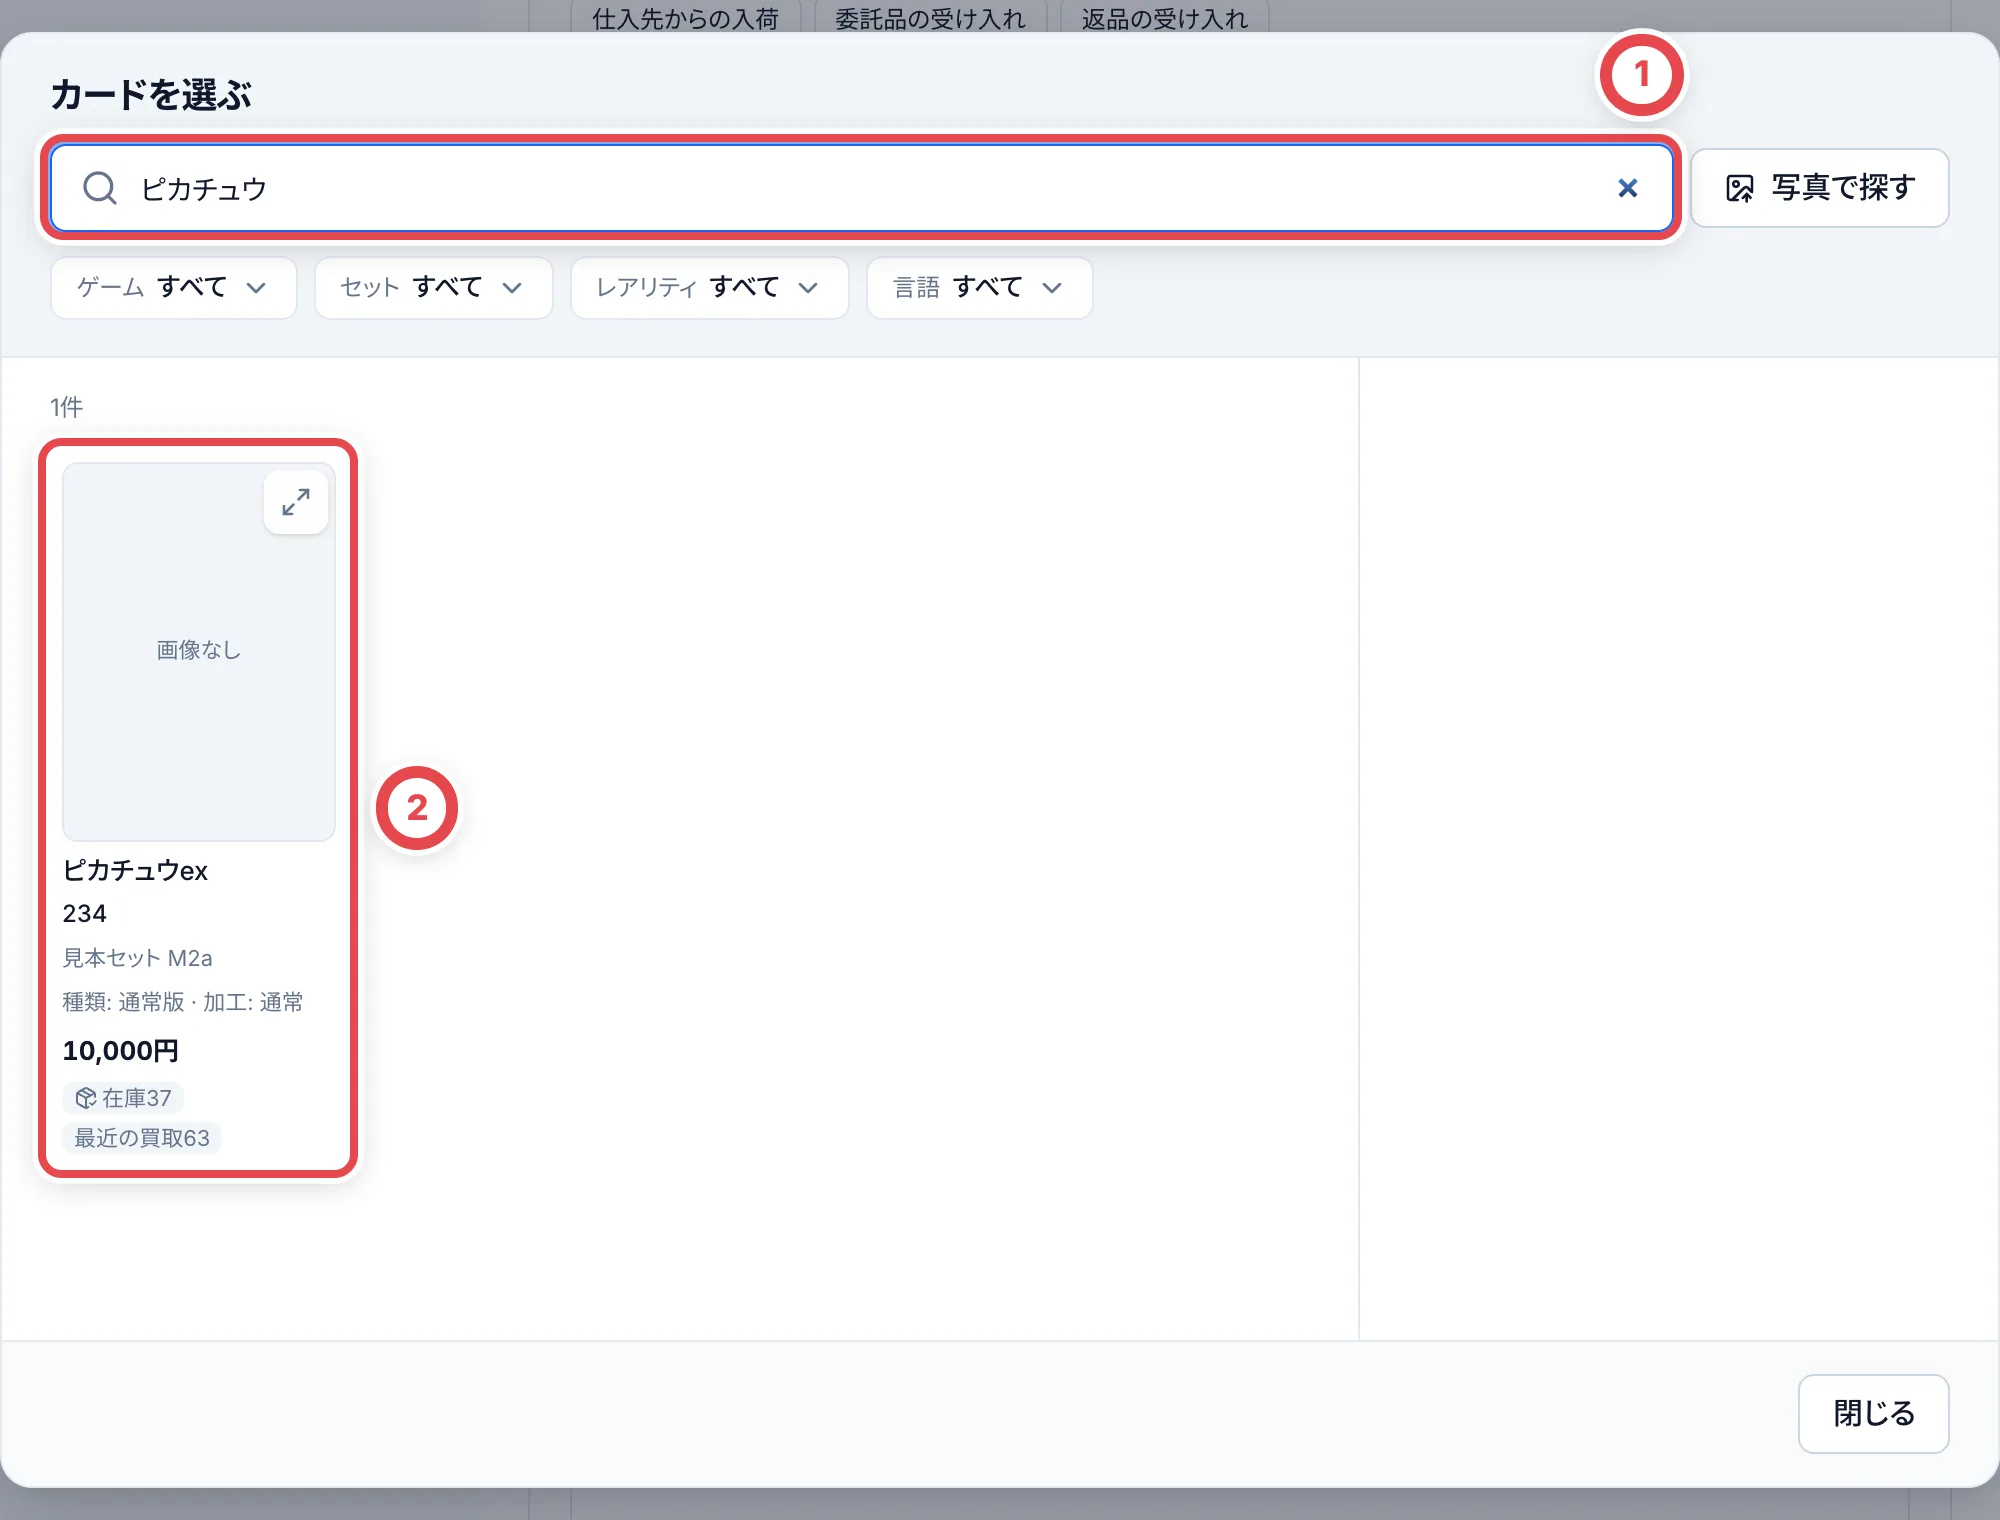 ### 4. 数量と仕入額を入れる
①の「数量」と、②の「1点あたりの仕入額」を入れます。仕入額は、お客様に支払った金額を1点あたりで入れます。 未確定の仕入額は空欄にします。0円で確定しているときだけ「0」を入力します。原価が未確定でもラベルの印刷と格納は続けられます。
PSAなどの鑑定品は、1枚ごとに別の行にします。明細に表示される③のグレードで鑑定会社とグレードを選び、④にケースのラベルにある認定番号を入れます。認定番号は、数量が1点で、外部鑑定のグレードを選んだときだけ入れられます。状態メモも同じ明細で入力できます。
カードを増やすときは、「カードを追加」で行を足します。1件の入庫伝票には、100行、合計500点まで入れられます。
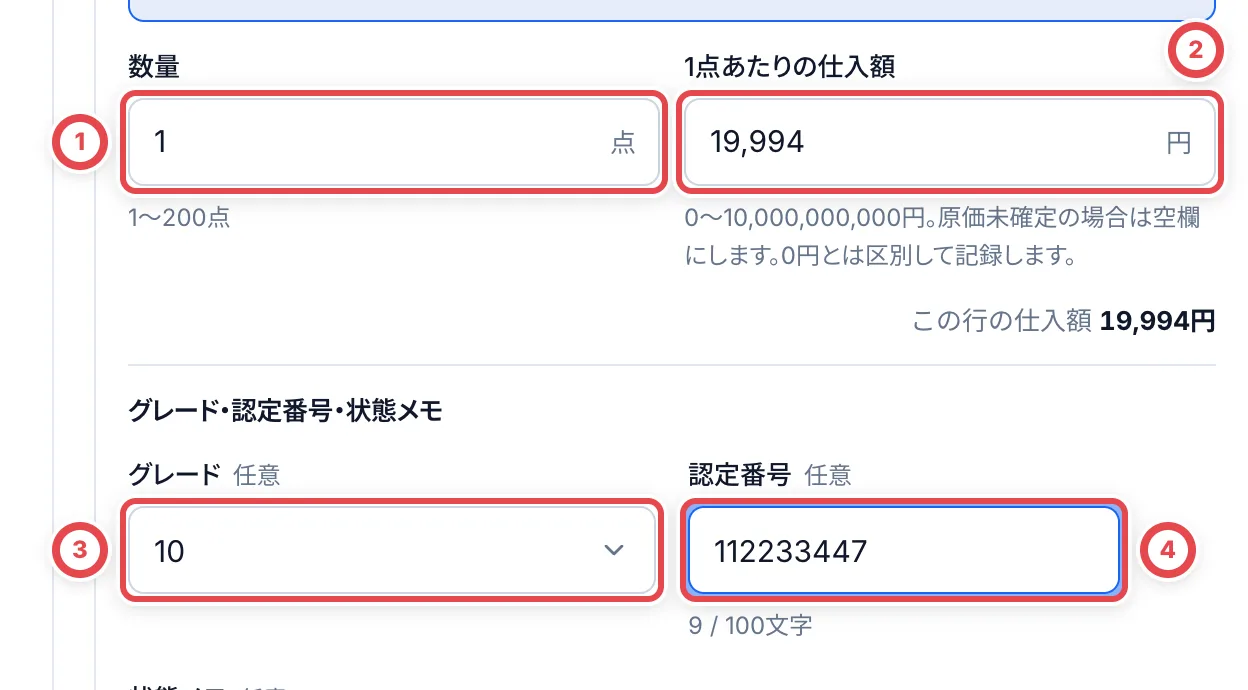 ### 5. 内容を確かめて確定する
「内容を確認」を押すと、確定前の確認が開きます。区分・入庫先・由来とカードの明細を見直して、①の「入庫を確定」を押します。直すところがあれば「戻って修正」を押します。
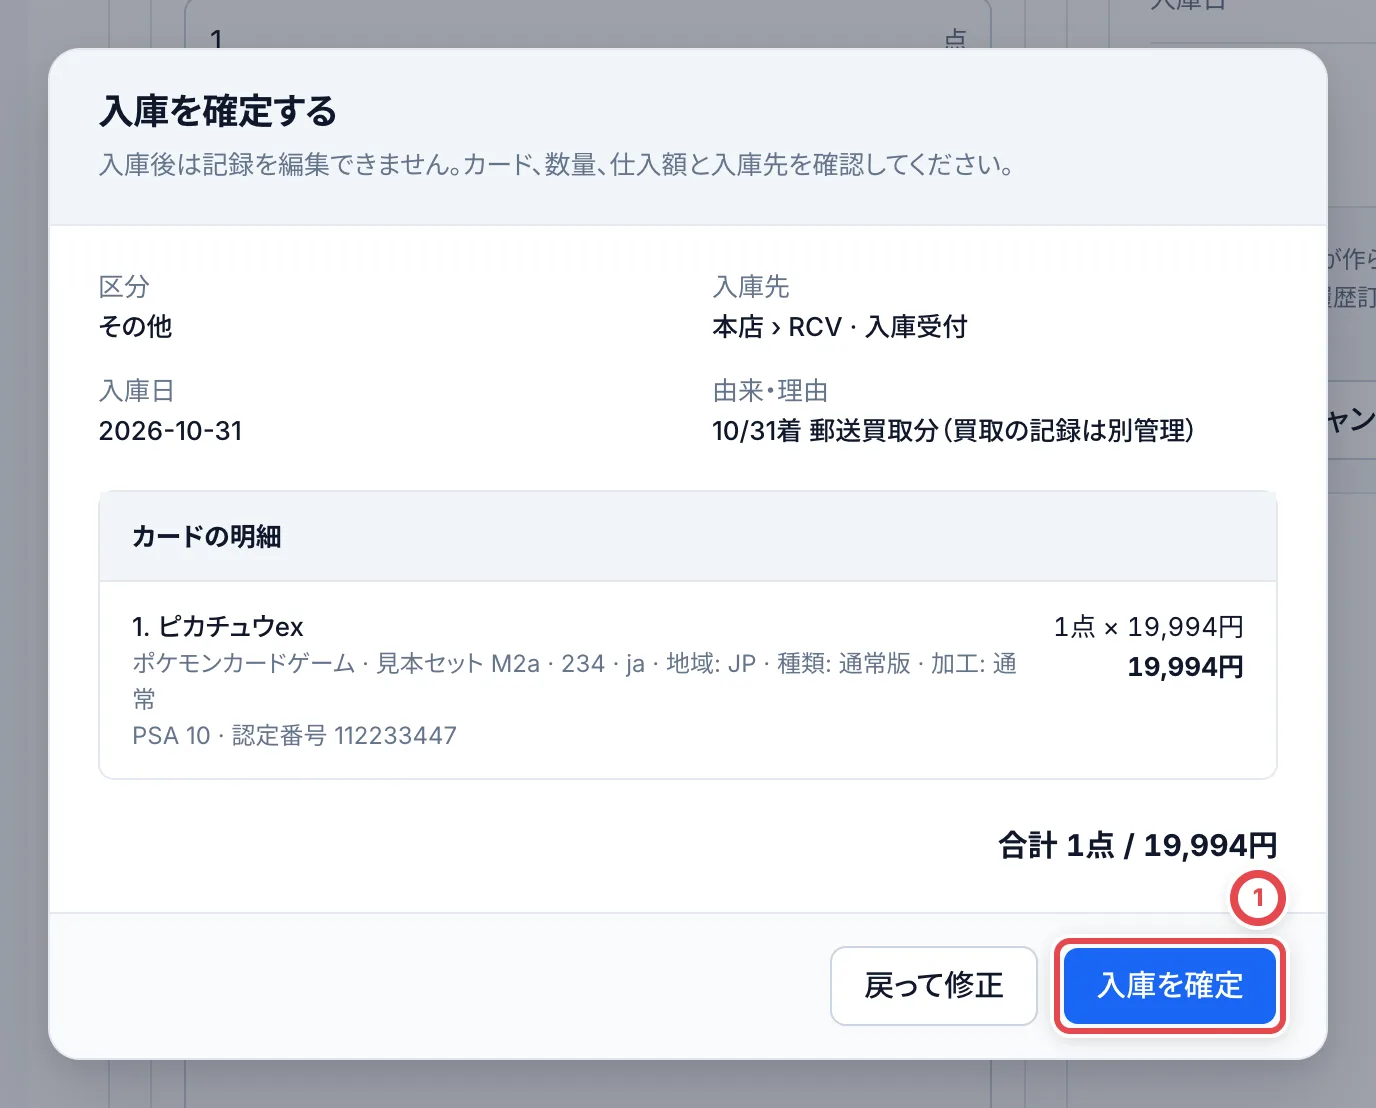 :::warning
間違えて入庫したカードは、入庫伝票の「カードを選んで登録を取り消す」で対象だけを選び、理由を入力して確定します。元の記録と取消履歴は残ります。正しい内容で入れ直す場合は、別の個体・ラベルとして登録されます。
:::
### 6. ラベルを印刷して格納する
確定すると、入庫伝票の画面が開きます。①に由来・理由が残ります。カードは1枚ずつ在庫になり、③の個体の番号から詳細を確かめられます。同じ内容の個体がまとまっている場合は、その行を押して開きます。②の「ラベルを印刷」で在庫ラベルを印刷してカードに貼り、棚に格納します。印刷と格納の手順は[格納とQRラベル](/guides/inventory/putaway)を参照してください。
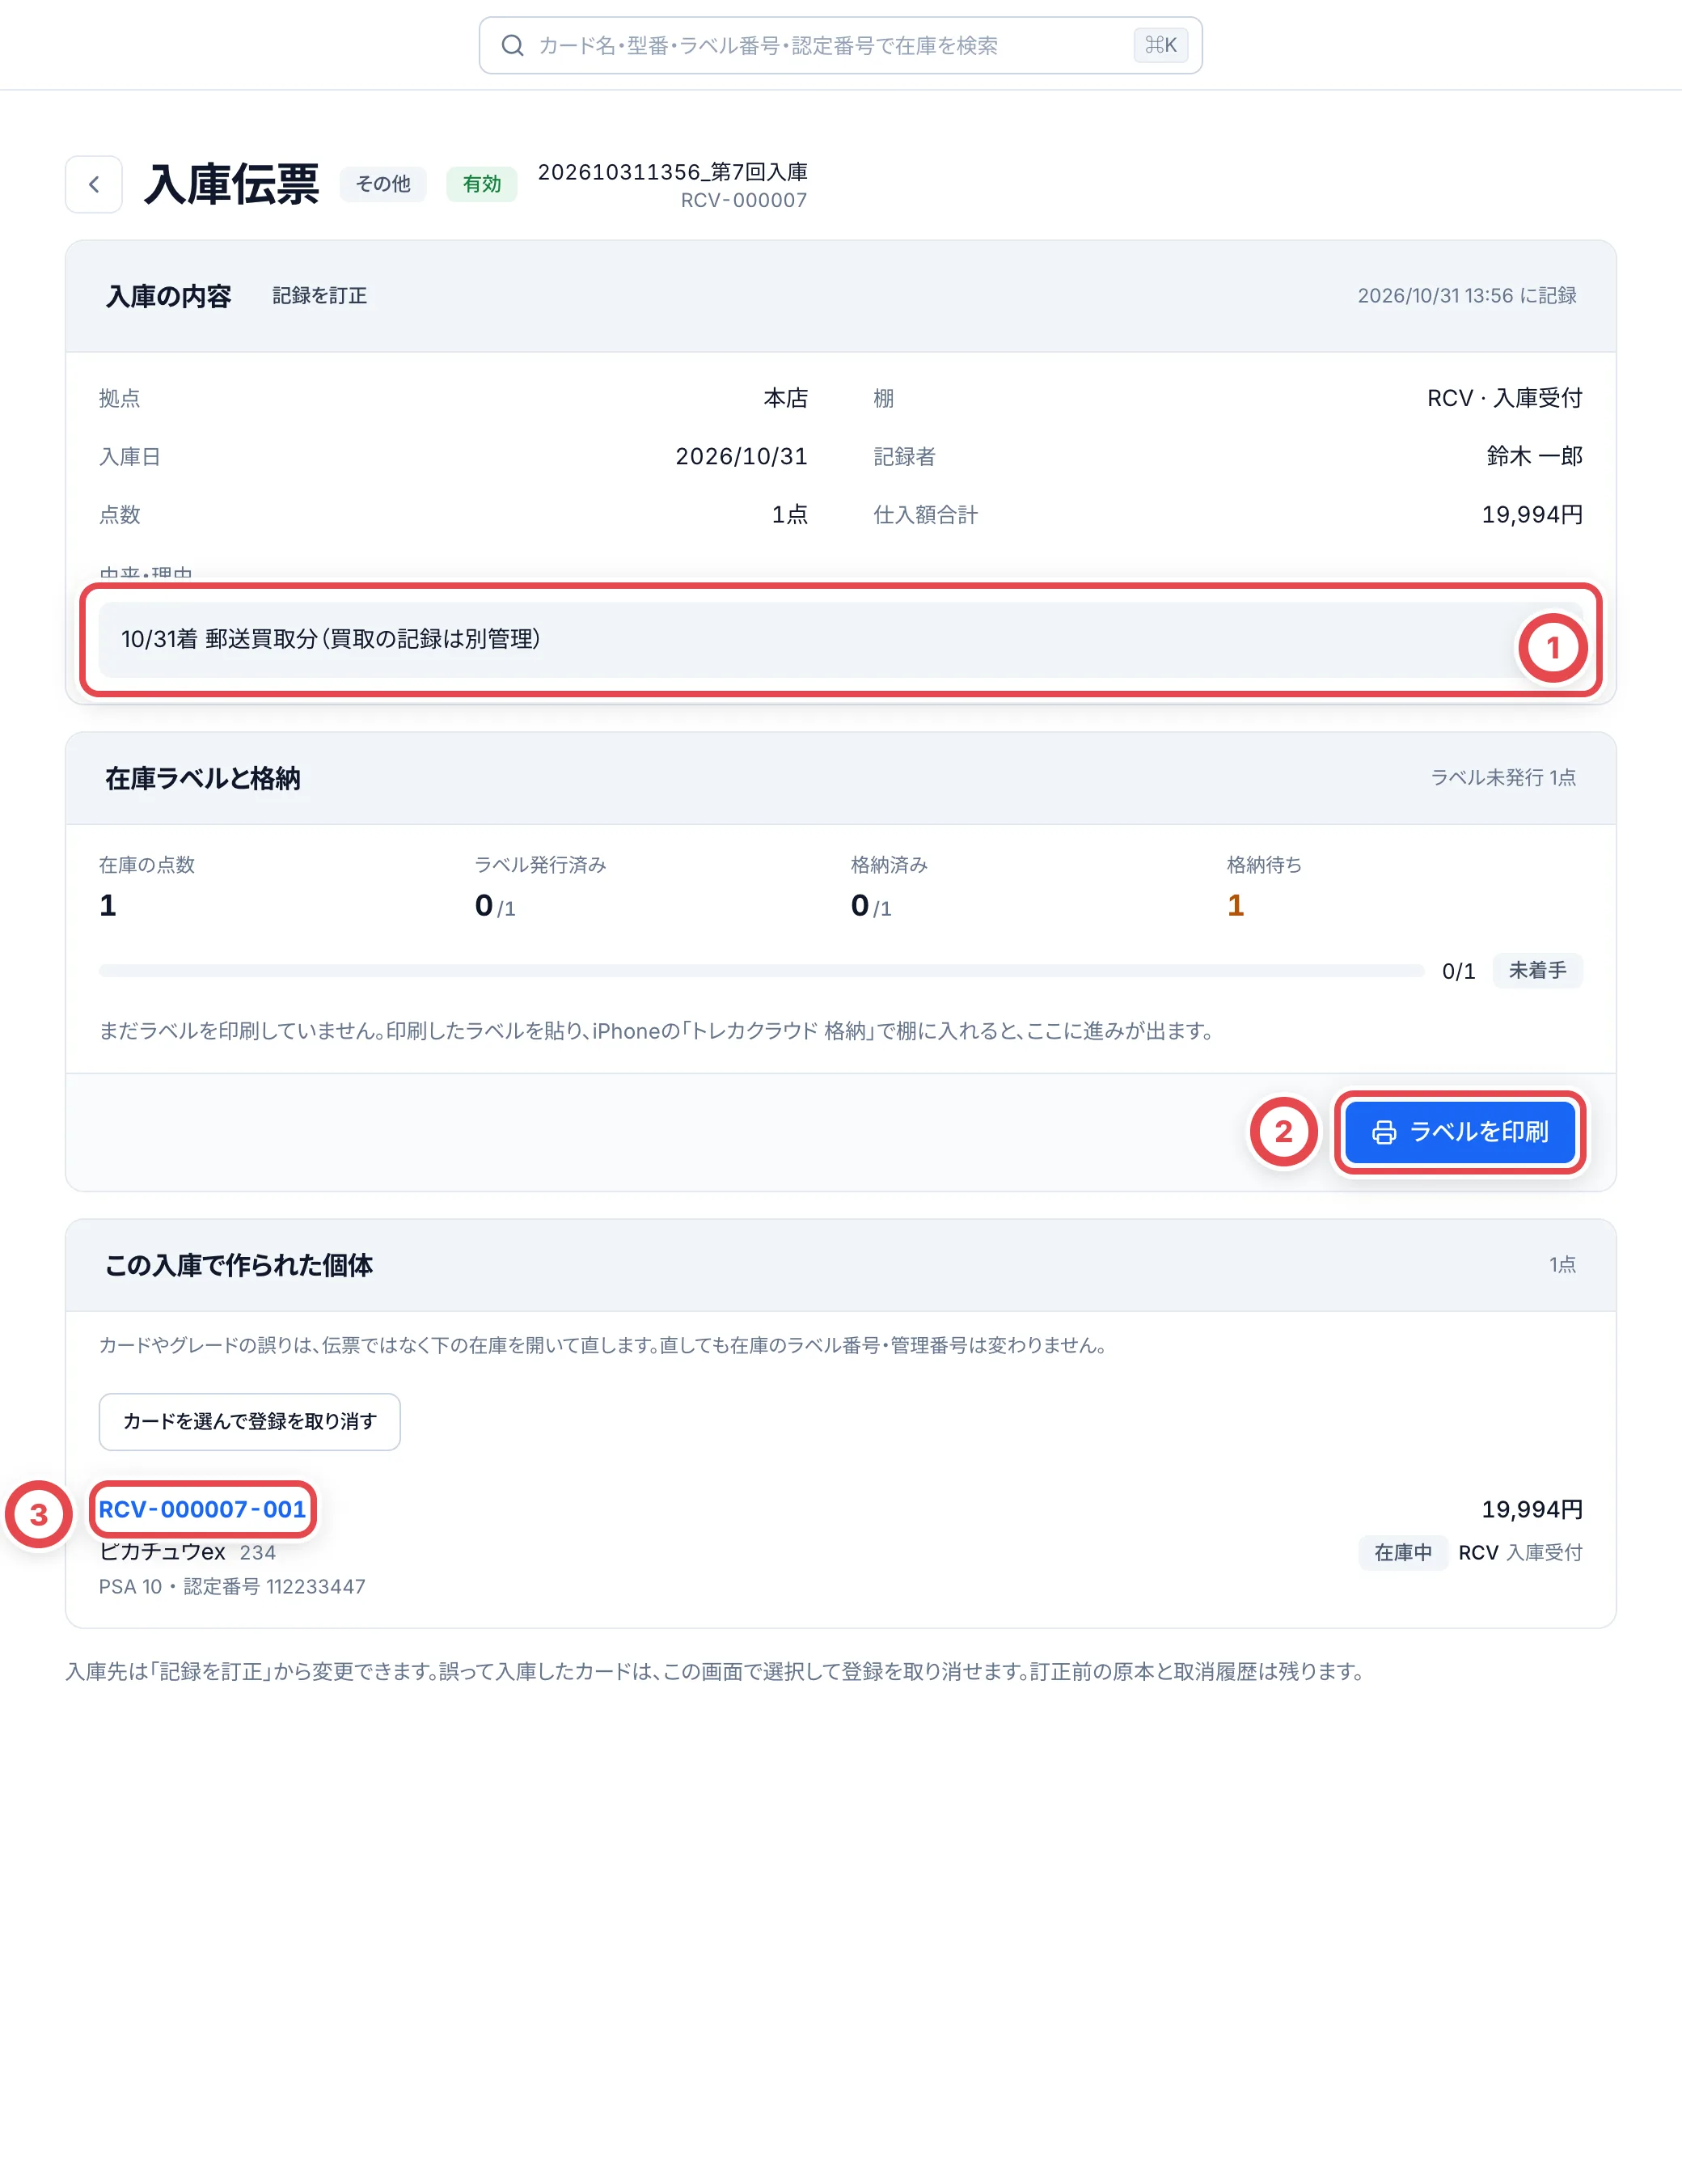 ## 方法2 買取依頼として記録する
お客様ごとに1件の取引を作り、見積、承諾、最終査定、在庫と支払いの登録の順に進めます。LINEを使わずに、スタッフがお客様とのやり取りを記録しながら進めます。
取引の画面の上部にある「次の操作」には、その時点でやることが表示されます。次に何をするか迷ったら、「次の操作」のボタンを押してください。
| 順番 | やること | 取引の状態 |
| ---- | -------------------------------------------------- | ----------------------- |
| 1 | 買取依頼を登録して、カードを追加する | 新着 |
| 2 | 事前査定の金額を保存する | 査定中 |
| 3 | 見積をお客様に伝えて、提示済みにする | 見積送付済 |
| 4 | 事前見積への承諾を記録する | 承諾済 |
| 5 | 発送案内を記録する | 発送待ち |
| 6 | 最終査定を入力して、最終見積を提示する | 最終査定中 → 最終送付済 |
| 7 | お客様の情報・振込先・本人確認をそろえる | 最終送付済 |
| 8 | 最終見積への承諾を記録して、在庫と支払いを登録する | 支払い待ち |
| 9 | 振込を申請・承認して、振込結果を記録する | 支払い待ち → 買取成立 |
| 10 | 着金を記録する | 完了 |
:::note
荷物がもう届いているときも、5の発送案内は記録します。発送案内を記録するまで、最終査定に進めないためです。お客様にあらためて案内を送る必要はありません。
:::
### 1. 買取依頼を登録して、カードを追加する
サイドバーを「買取」に切り替え、「買取依頼」を開いて「買取依頼を登録」を押します。
①で「店頭以外」を選びます。初めてのお客様は「新規顧客」のまま、②に名前を入れます。以前に買い取ったことのあるお客様は「登録済みの顧客」を選んで検索します。③の「買取依頼を登録」を押すと取引ができて、取引の画面が開きます。
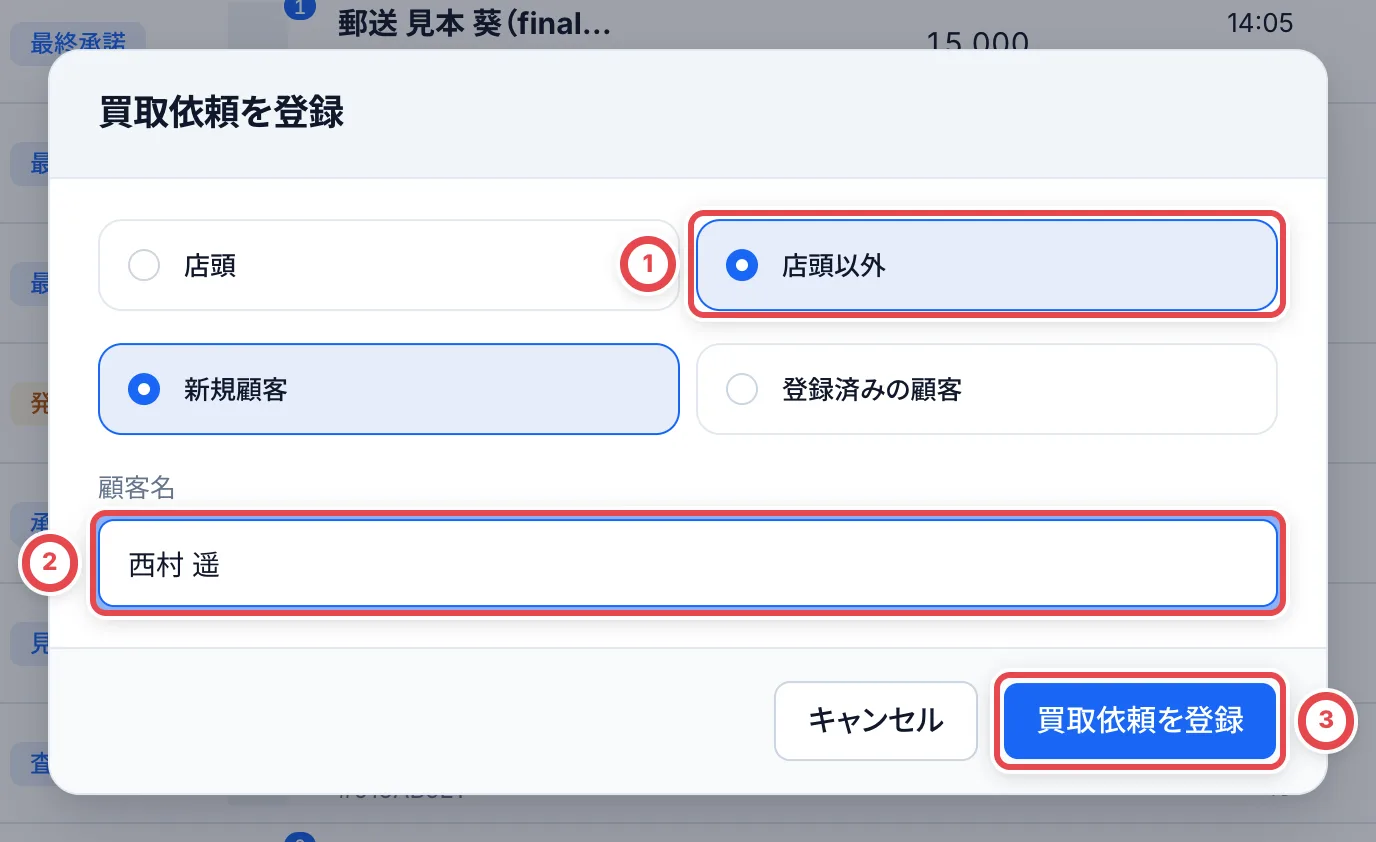 「店頭以外」が表示されない店舗は、オンライン買取がオフになっています。店舗の管理者に確認してください。
取引の画面では、①の「次の操作」にいまやることが出ます。②の「カードを追加する」で査定明細へ移り、「商品を追加」を押して追加画面を開きます。
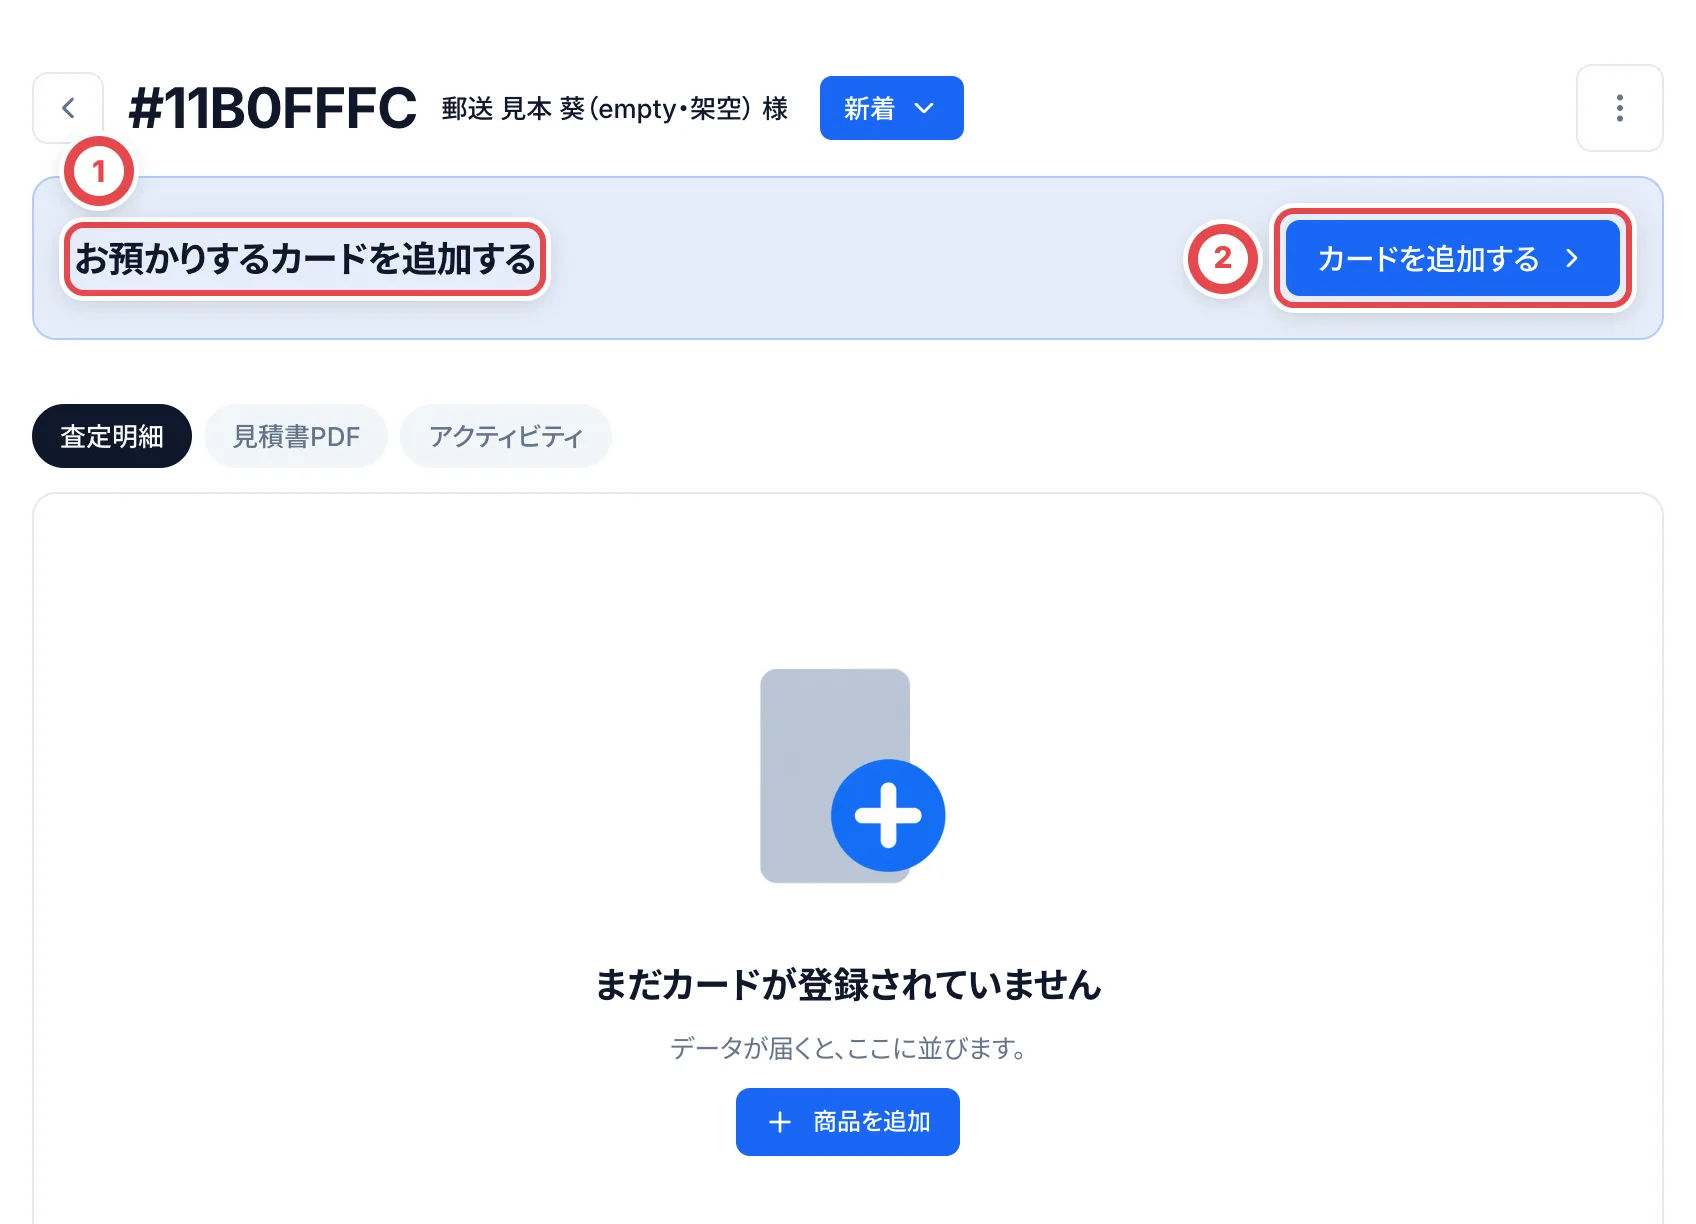 ①の「キーワードで探す」でカードを選びます。鑑定品なら、②で鑑定会社を選びます。③に届いた枚数を入れ、④の「明細に追加」を押します。カードの種類の数だけ繰り返します。
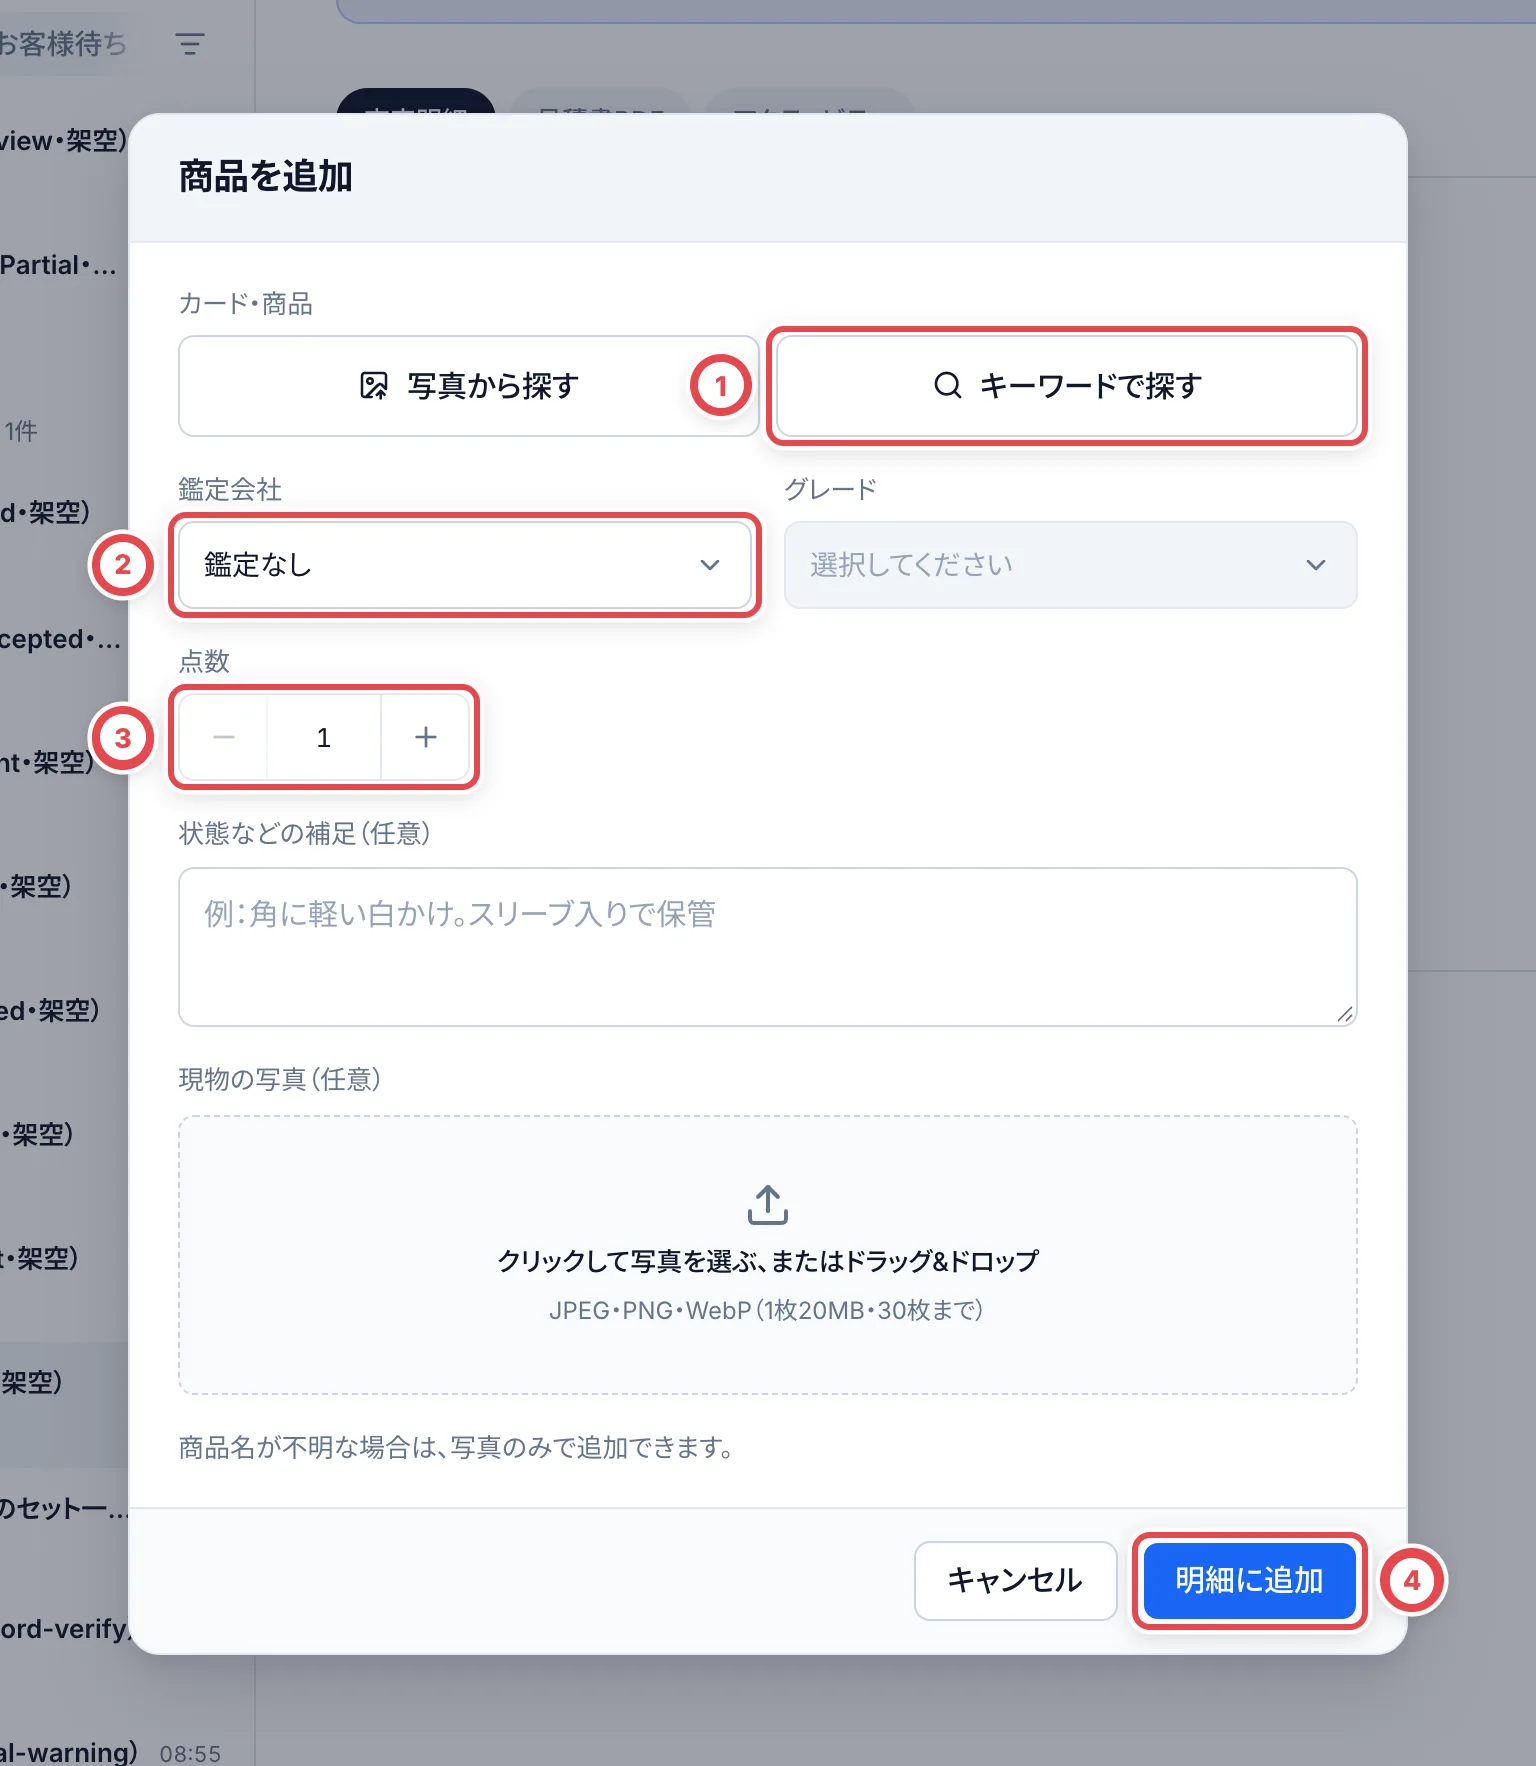 ### 2. 事前査定の金額を保存する
カードを追加すると、「査定明細」で金額を入れられます。⑤の「相場を確認」で最新の相場を取り込みます。⑥の「店舗設定」では標準掛率が最初から表示され、時価が揃うと条件に合わせて自動計算されます。掛率を直接直す場合は「手動入力」を選びます。お客様と決めた金額があるときは、⑦で1枚ずつ金額を調整します。金額がそろったら、⑧で保存します。
合計の提示額だけを決める場合は、保存前に明細の下の「セット価格に変更」を使います。入力・保存・解除の手順は[セット価格に変更する](/guides/purchase/set-price)を参照してください。
「次の操作」に「2次査定を依頼する」が出たときは、別のメンバーに金額を確かめてもらいます。承認されるまで、見積を提示できません。手順は[調査依頼と2次査定依頼](/guides/purchase/research-and-reviews)を参照してください。
### 3. 見積をお客様に伝えて、提示済みにする
「次の操作」が「見積をお客様へ提示する」になったら、「見積を提示する」の欄を使います。①の「コピー」で文面をコピーし、メールや電話などでお客様に伝えます。伝えたら、②の「提示済みにする」を押し、確認画面で記録します。
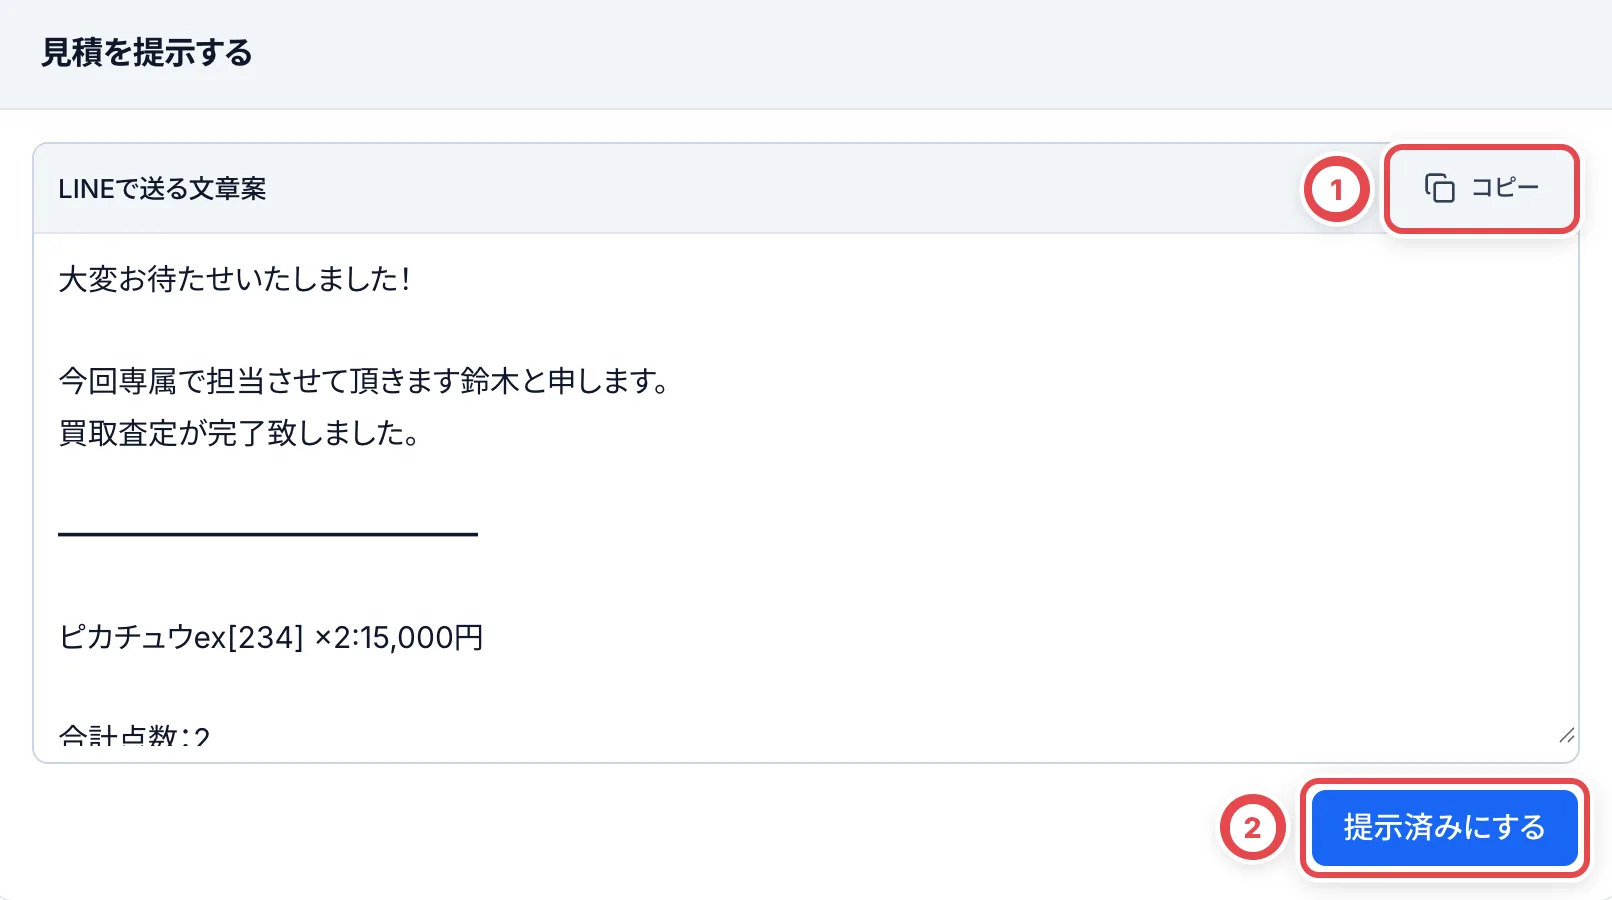 :::warning
取引画面では確認画面を経て記録します。対応項目のダイアログから「ほかの方法で伝えた」を選んだ場合は、最後の「提示済みにする」が確定の操作です。いずれも、お客様に伝え終わってから記録してください。
:::
### 4. 事前見積への承諾を記録する
お客様から返事が来たら、「お客様の回答を記録する」の欄で記録します。すべてのカードに承諾されたときは、①の「事前見積への承諾を記録」を押し、確認の画面で記録します。一部のカードだけ承諾されたときは②の「一部だけ承諾」、金額が合わなかったときは③の「再見積」を使います。
 ### 5. 発送案内を記録する
取引が「承諾済」になると、発送の画面が開きます。①の「発送案内を記録」を押し、確認の画面で「記録する」を押します。
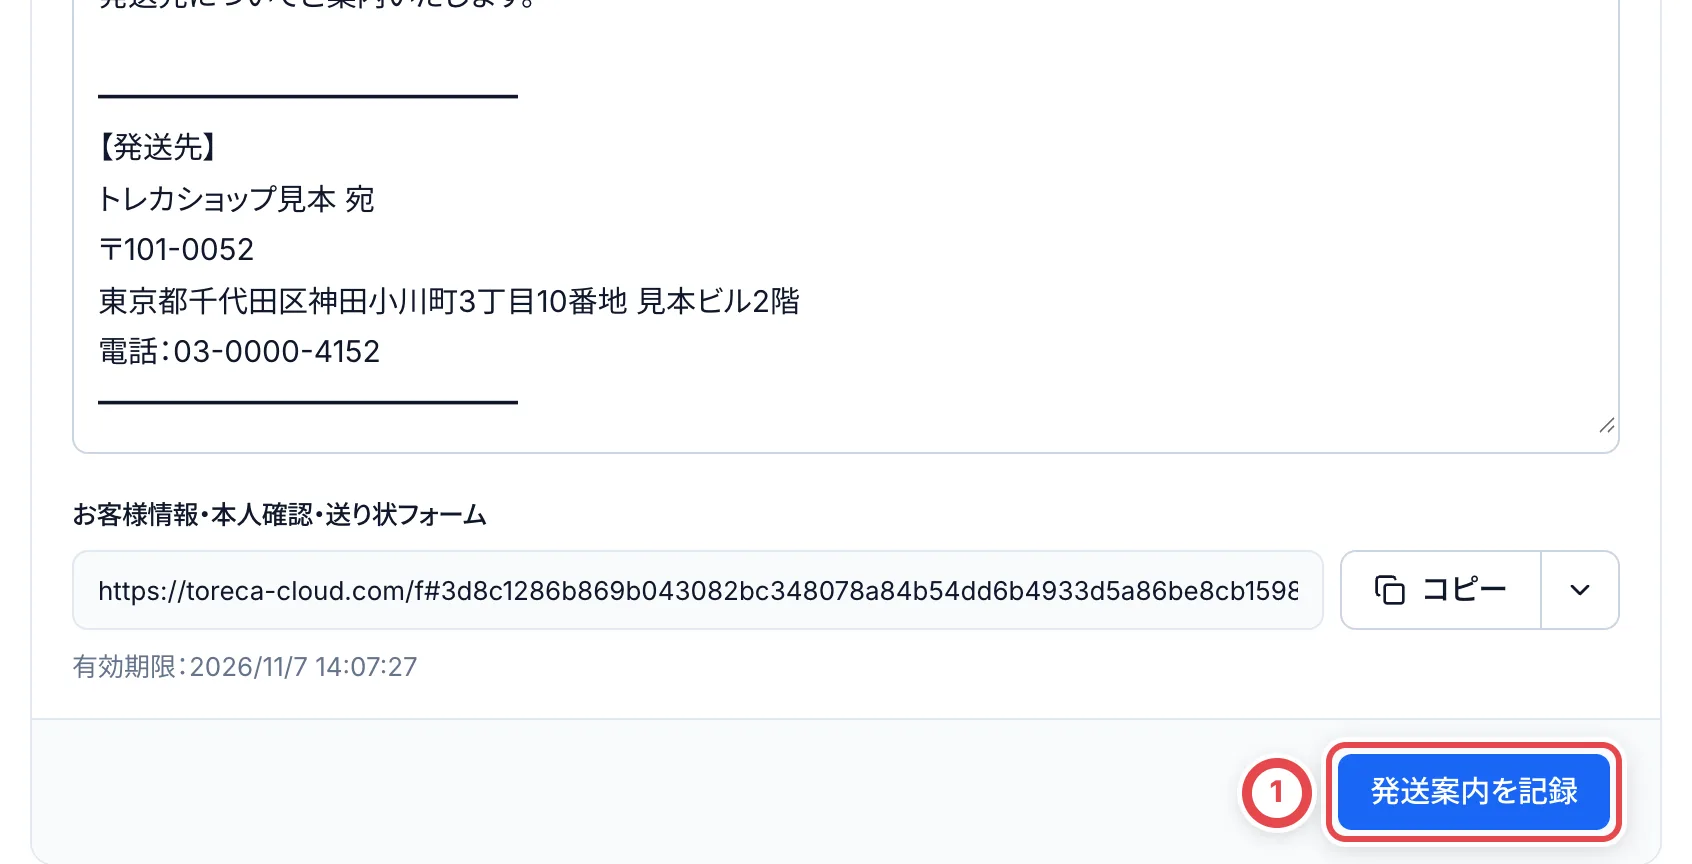 ### 6. 最終査定を入力して、最終見積を提示する
「次の操作」が①の「届いたカードで最終査定を始める」になります。②の「最終査定を入力する」を押し、「届いたカードを選択」で今回届いた明細にチェックを入れます。「最終査定へ」で到着を記録し、到着済みのカードだけを査定します。
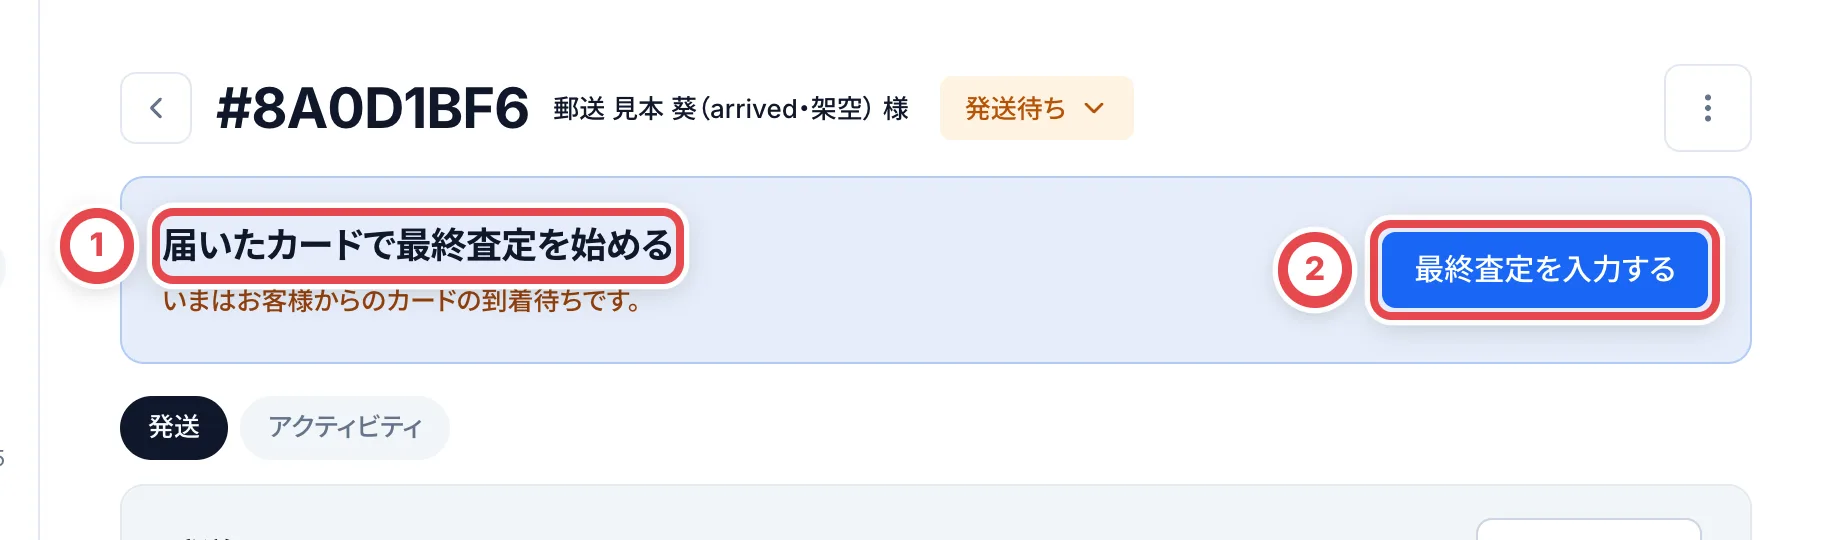 :::note
未選択の明細は未到着のまま残り、査定・在庫・古物台帳・返送に入りません。後から届いた場合は、入力中の査定を保存してから「到着分を追加」で追加し、追加分を含めて査定を保存し直します。最終見積の提示済みの場合は、再査定へ戻してから追加してください。成立後の追加到着は別取引として扱います。
:::
最終査定は「1枚目」「2枚目」のように現物1枚ごとに入力します。①で鑑定番号を照合し、②「査定金額」にこの1枚の金額、③「査定理由(お客様向け)」に説明を入れます。買取不可や欠品の扱い、保存後の確認は[最終査定の手順](/guides/purchase/final-appraisal)を参照してください。
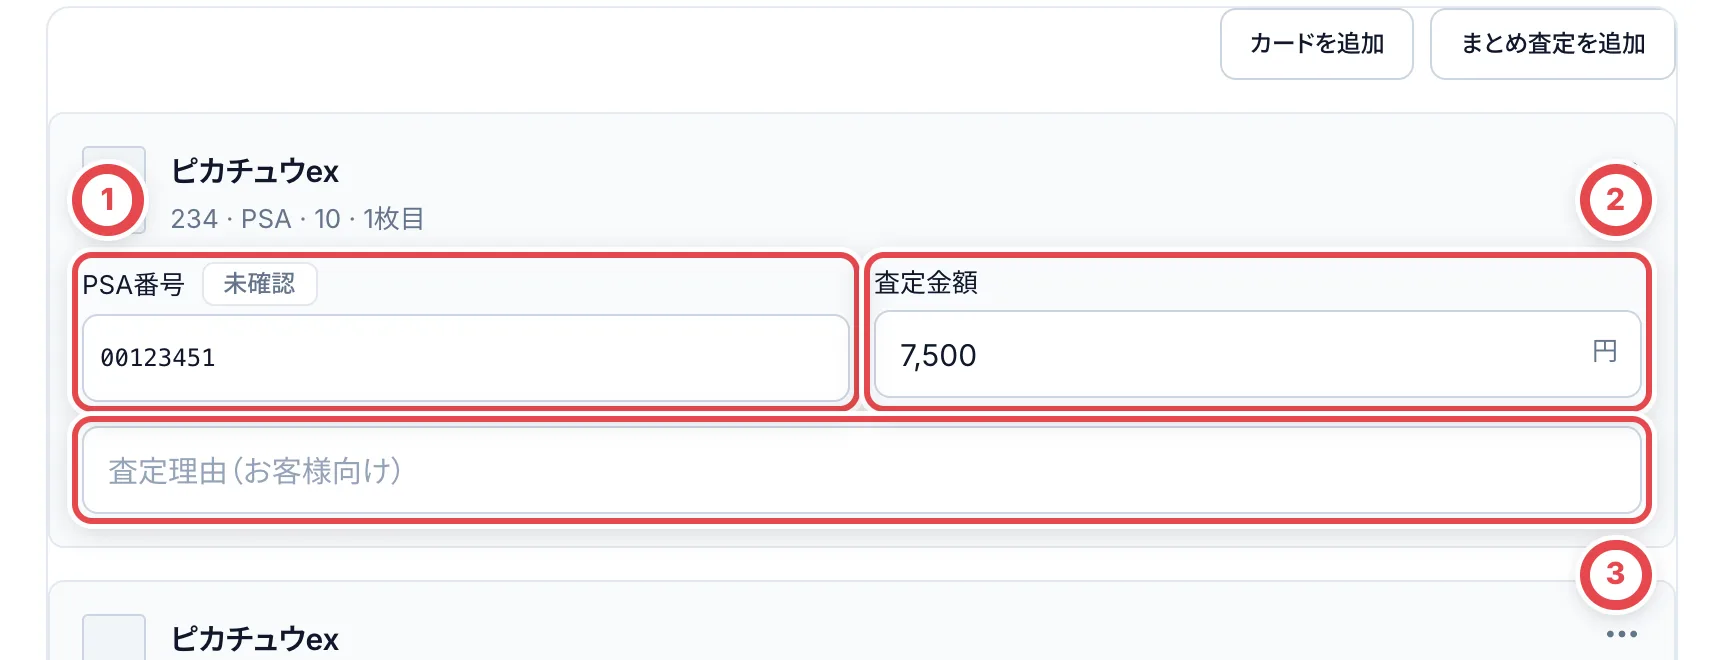 保存したら、事前査定と同じように、必要なら2次査定を受けてから、3と同じ手順で最終見積をお客様に伝えて「提示済みにする」を押します。
### 7. お客様の情報・振込先・本人確認をそろえる
在庫と支払いを登録するには、お客様の情報、振込先、本人確認の記録が必要です。発送の画面を下に進み、①の「お客様の情報」の「編集」で、氏名・住所・生年月日・職業を入れます。②の「振込先を追加」で、振込先の口座を登録します。③の「本人確認書類を登録」で、本人確認を記録します。
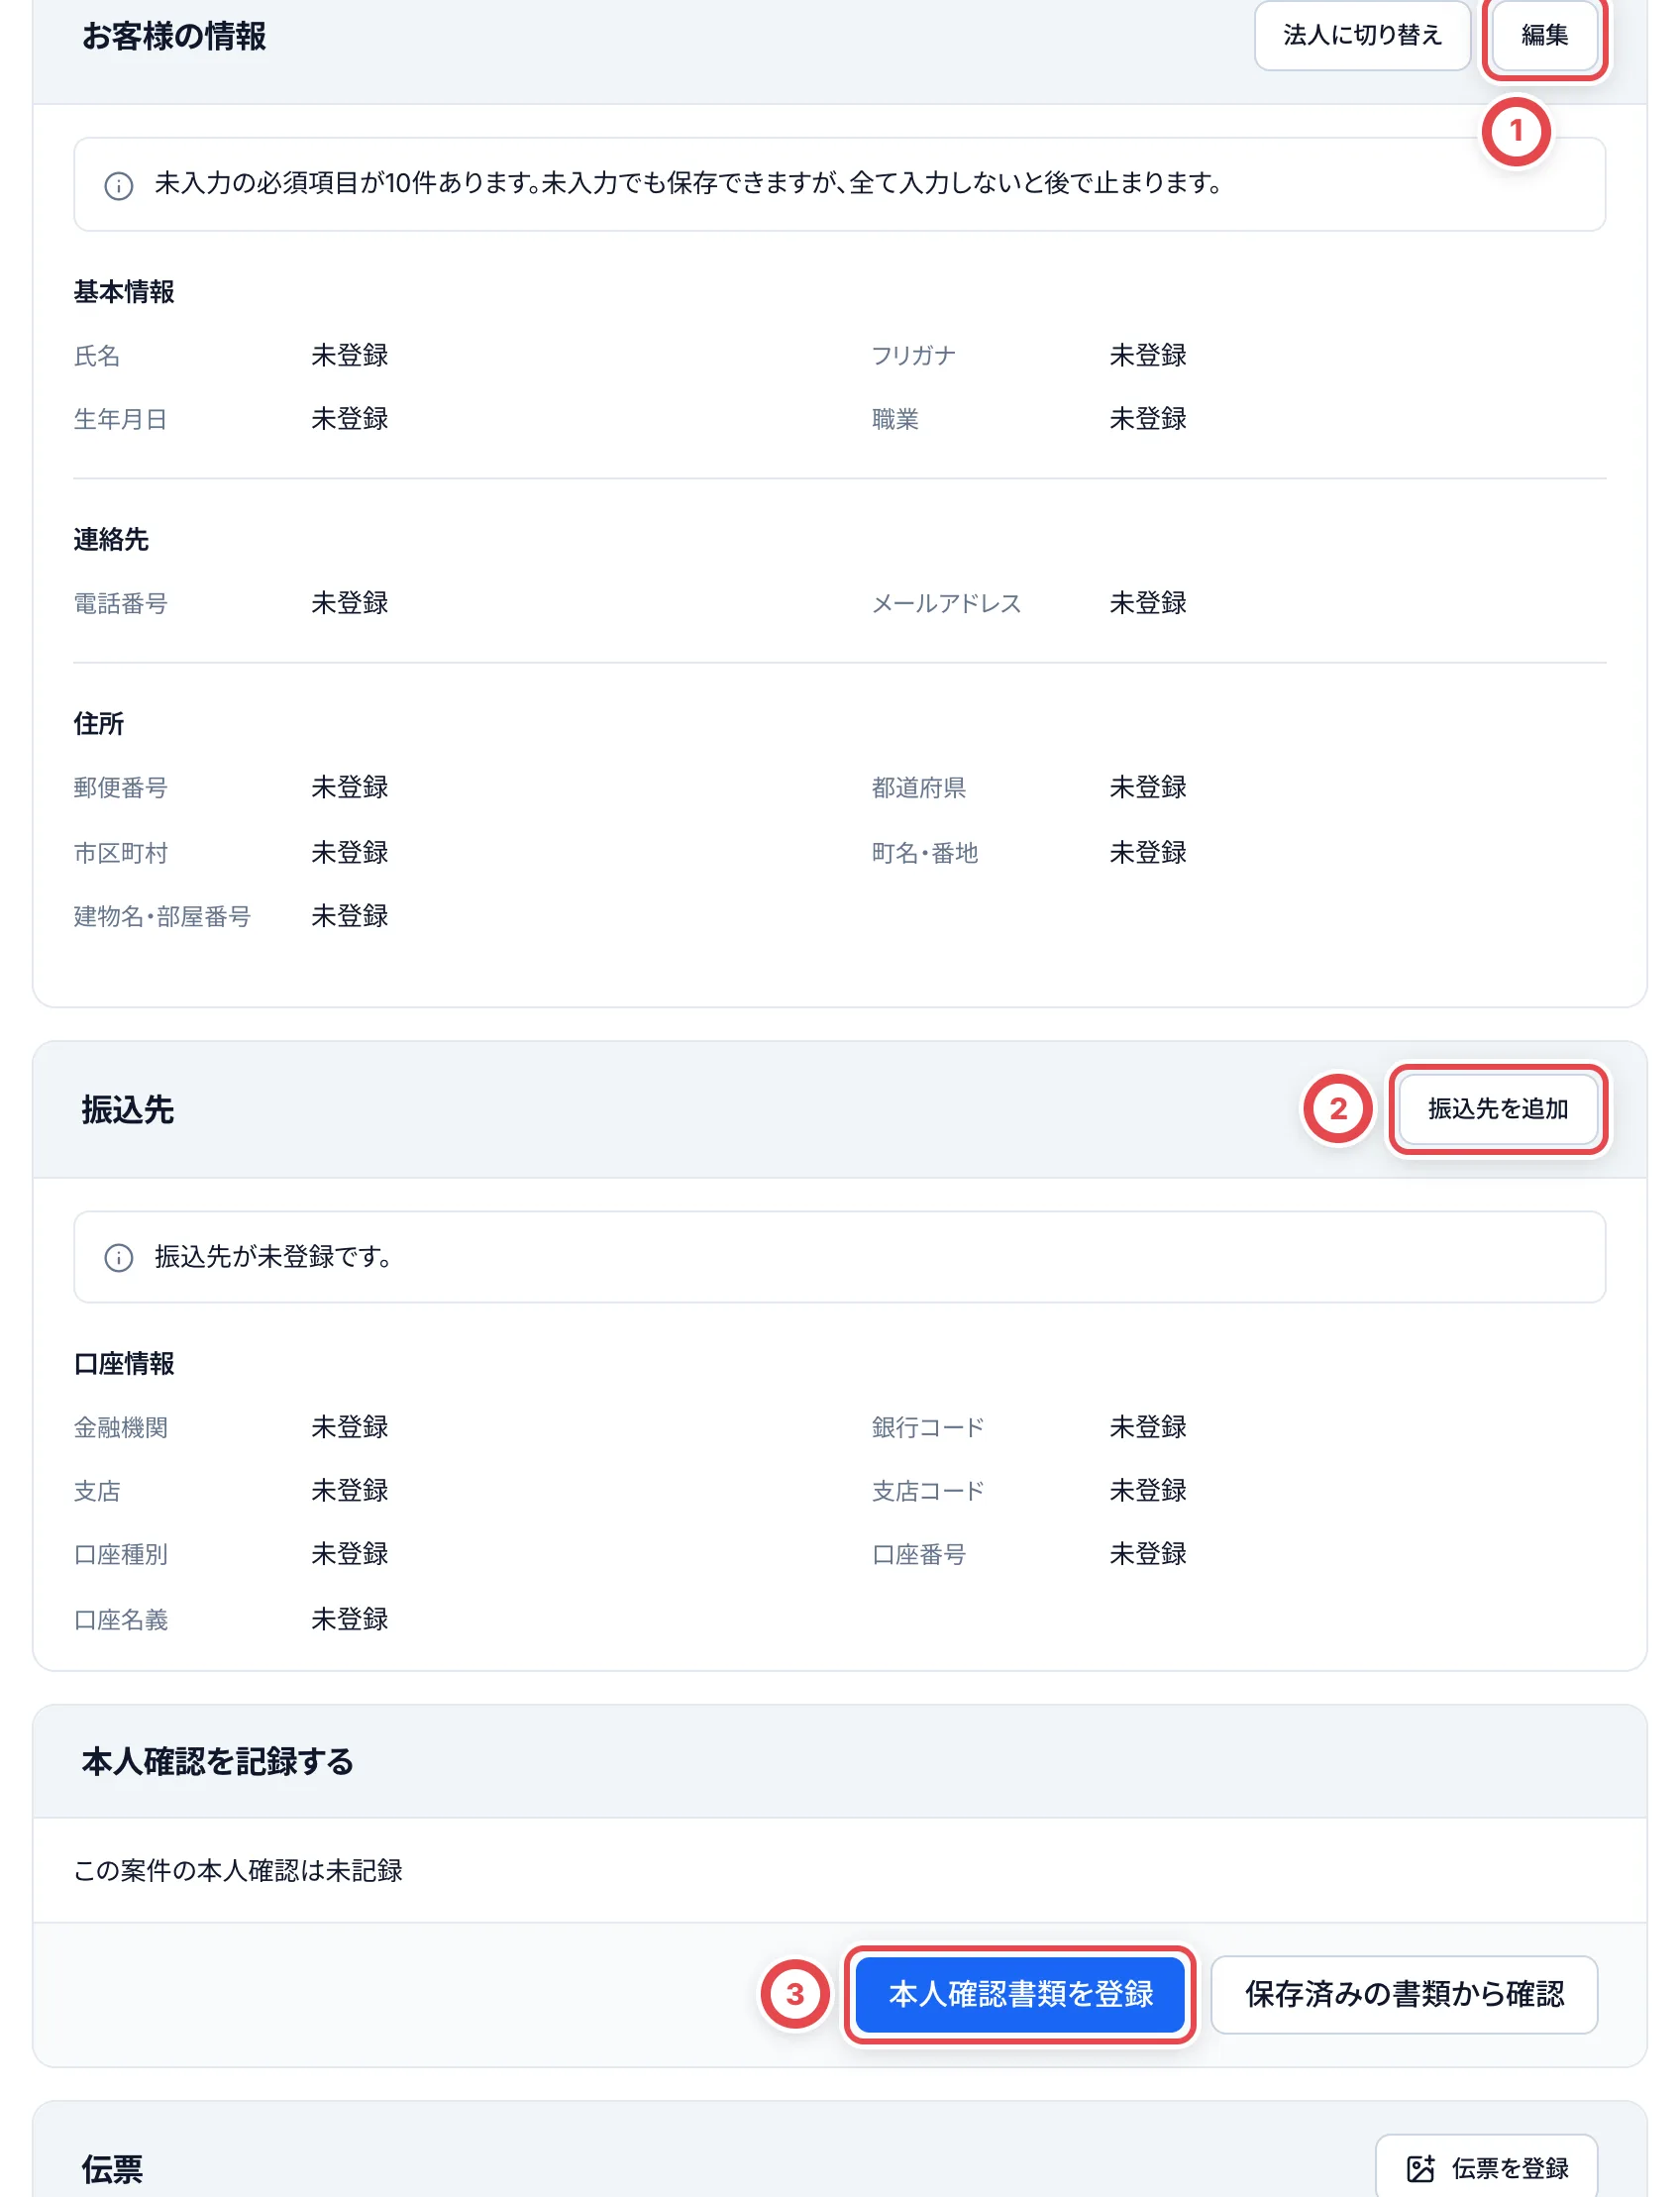 本人確認書類を登録する画面では、①の顧客台帳の情報と書類を見比べ、②で書類の種類を選び、③で書類の表と裏の画像を登録します。④の「登録する」で記録されます。詳しくは[本人確認](/guides/purchase/identity)を参照してください。
### 8. 最終見積への承諾を記録して、在庫と支払いを登録する
お客様が最終見積に承諾したら、「お客様の回答」で記録します。承諾を記録する画面では、お客様が承諾した連絡(メールやメッセージの画面など)のスクリーンショットを、①の「ファイルを添付」で保存します。この画像は、9で振込を申請するときに必要です。
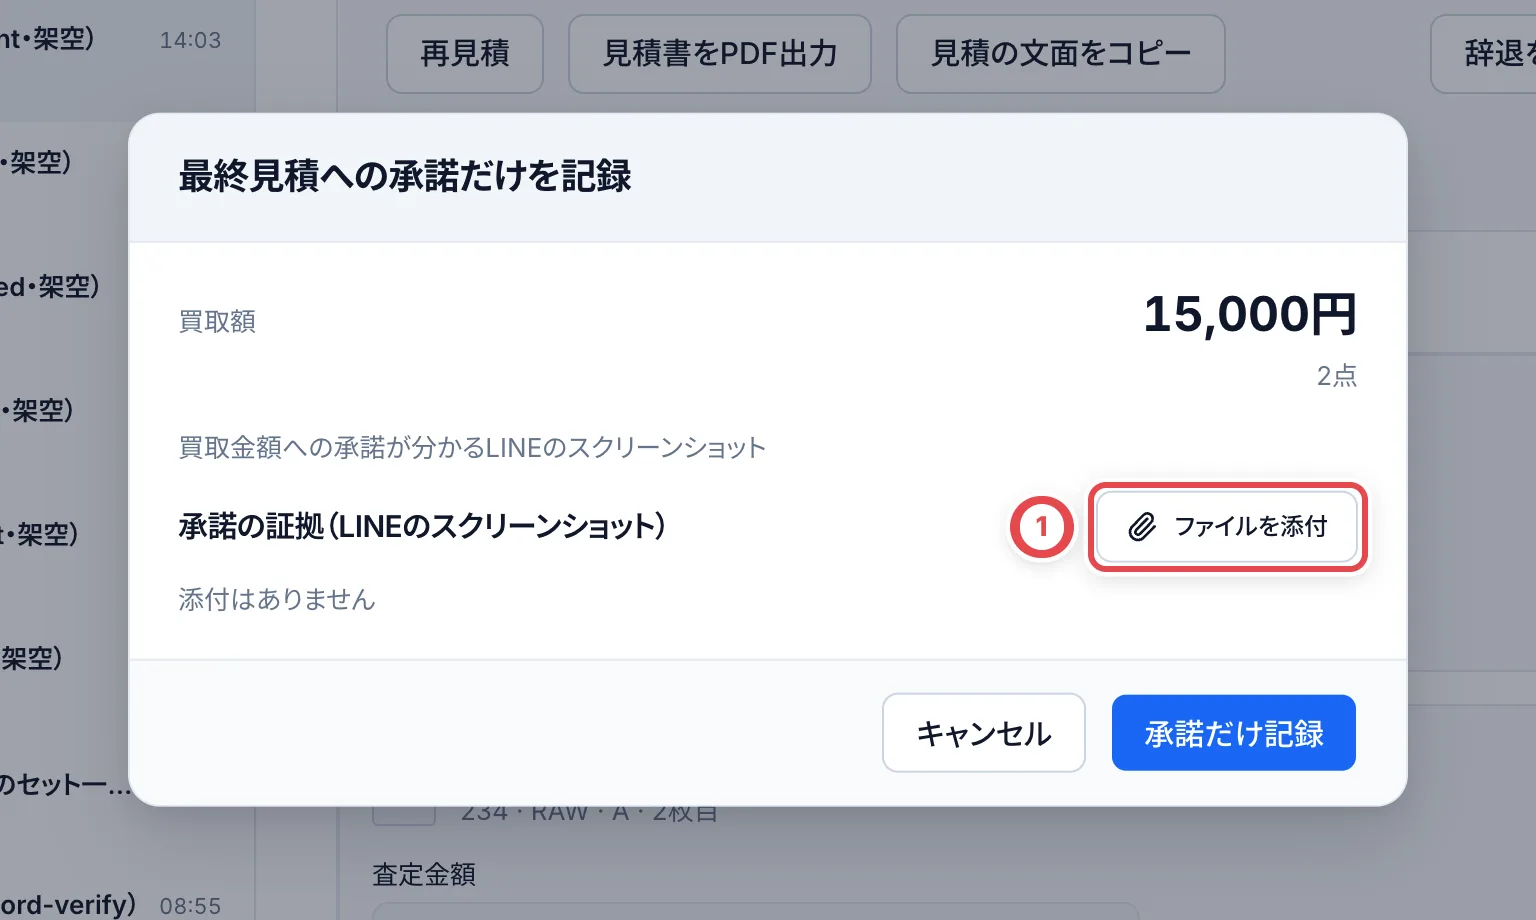 **本人確認が済んでいる**
「最終見積への承諾を記録」を押して確定します。承諾と同時に、買い取ったカードが在庫に登録され、振込の依頼が作られます。
**本人確認がまだ**
②の「承諾だけ記録」を押して確定します。7で本人確認を記録したあとで、「在庫と支払いの登録」の「在庫と支払いを登録」を押します。
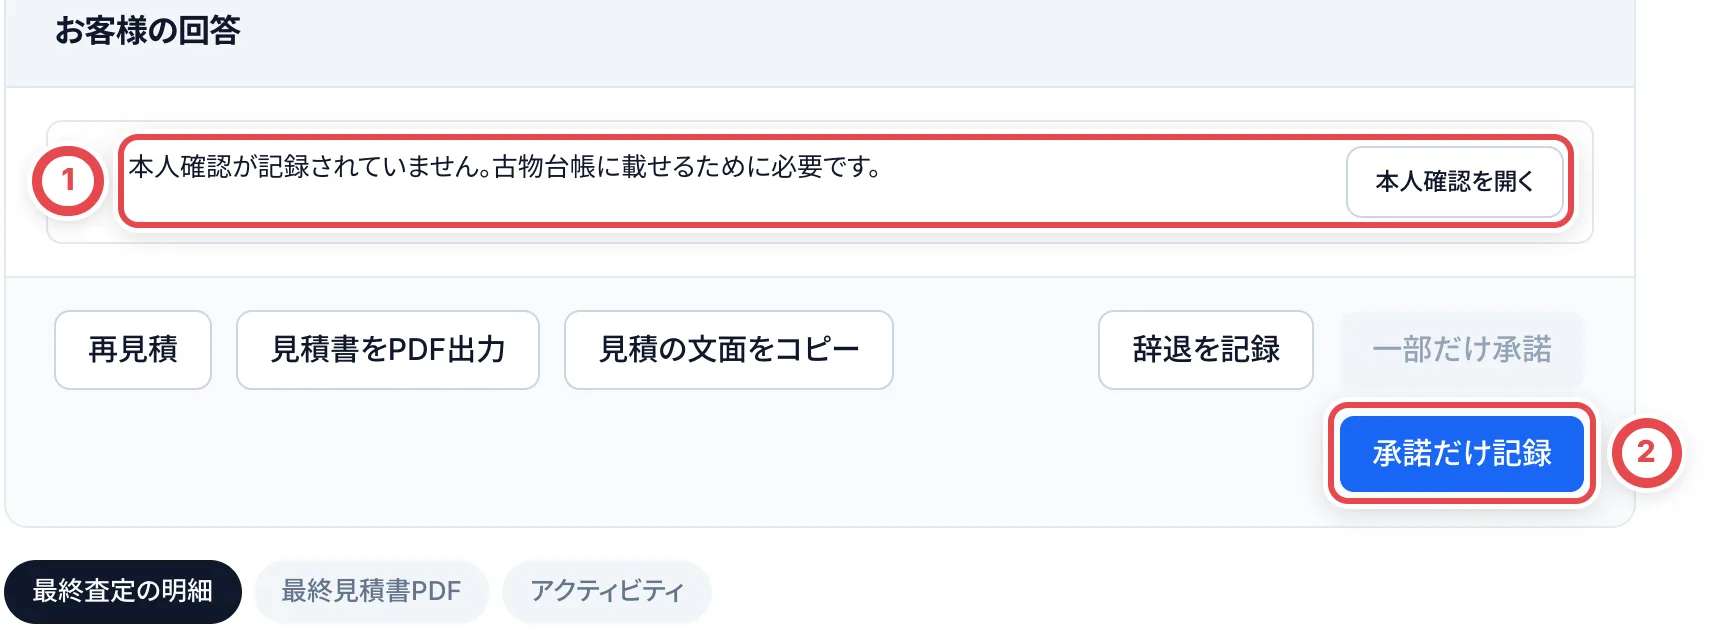 ### 9. 振込を申請・承認して、振込結果を記録する
在庫と支払いを登録すると、支払いの画面が開きます。①の「振込を申請する」を押します。
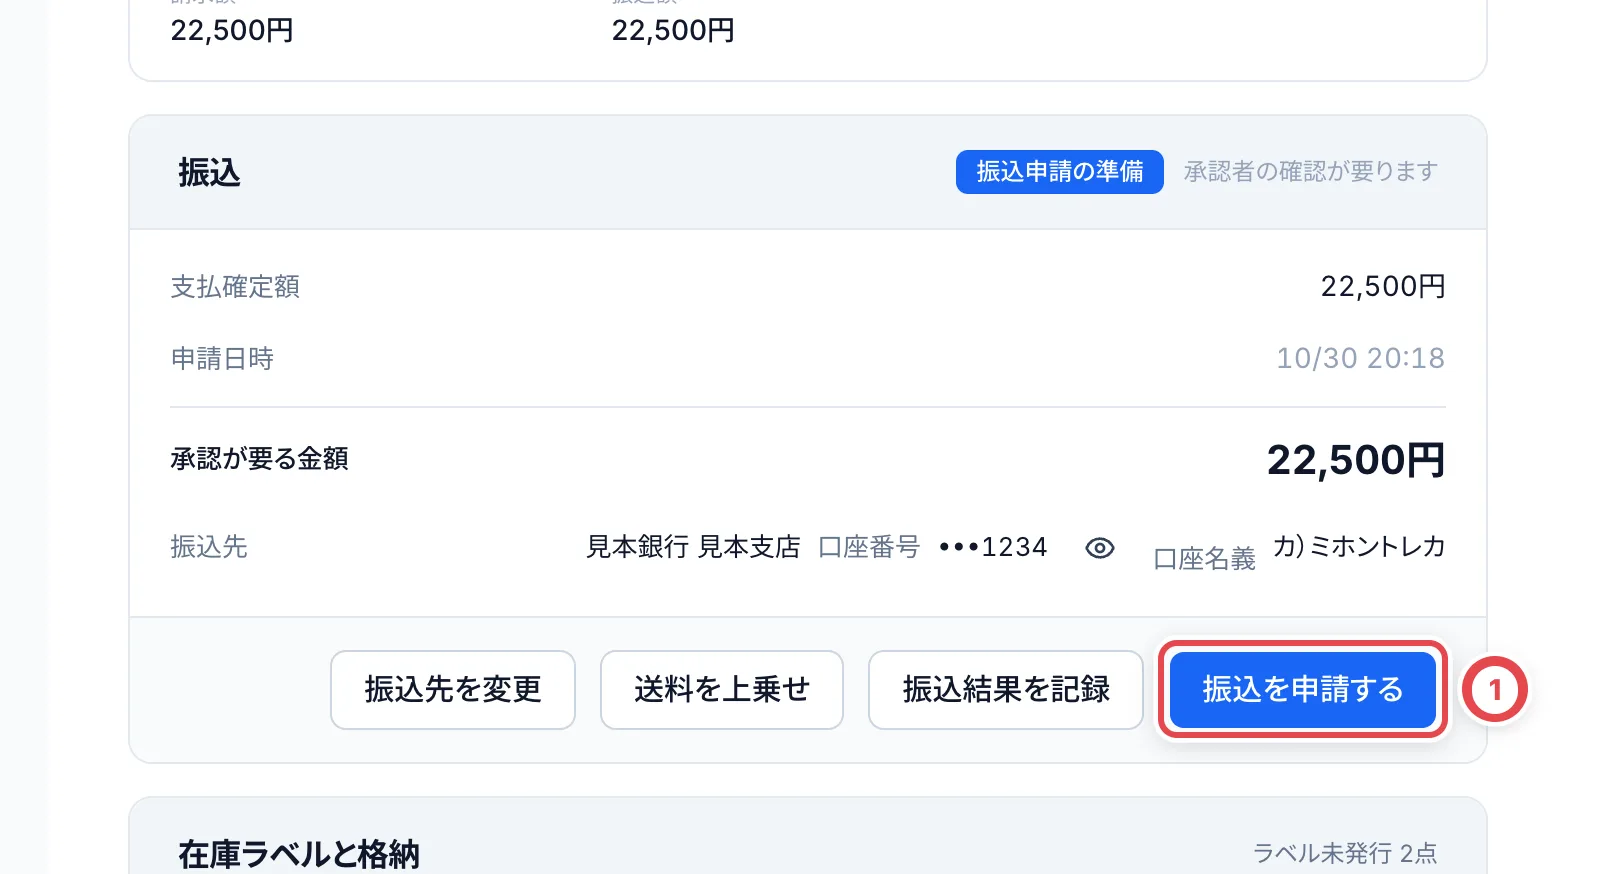 申請画面で、①の保存済みの画像を開き、承諾の内容と金額を確かめます。問題がなければ、②の「振込を申請する」を押します。
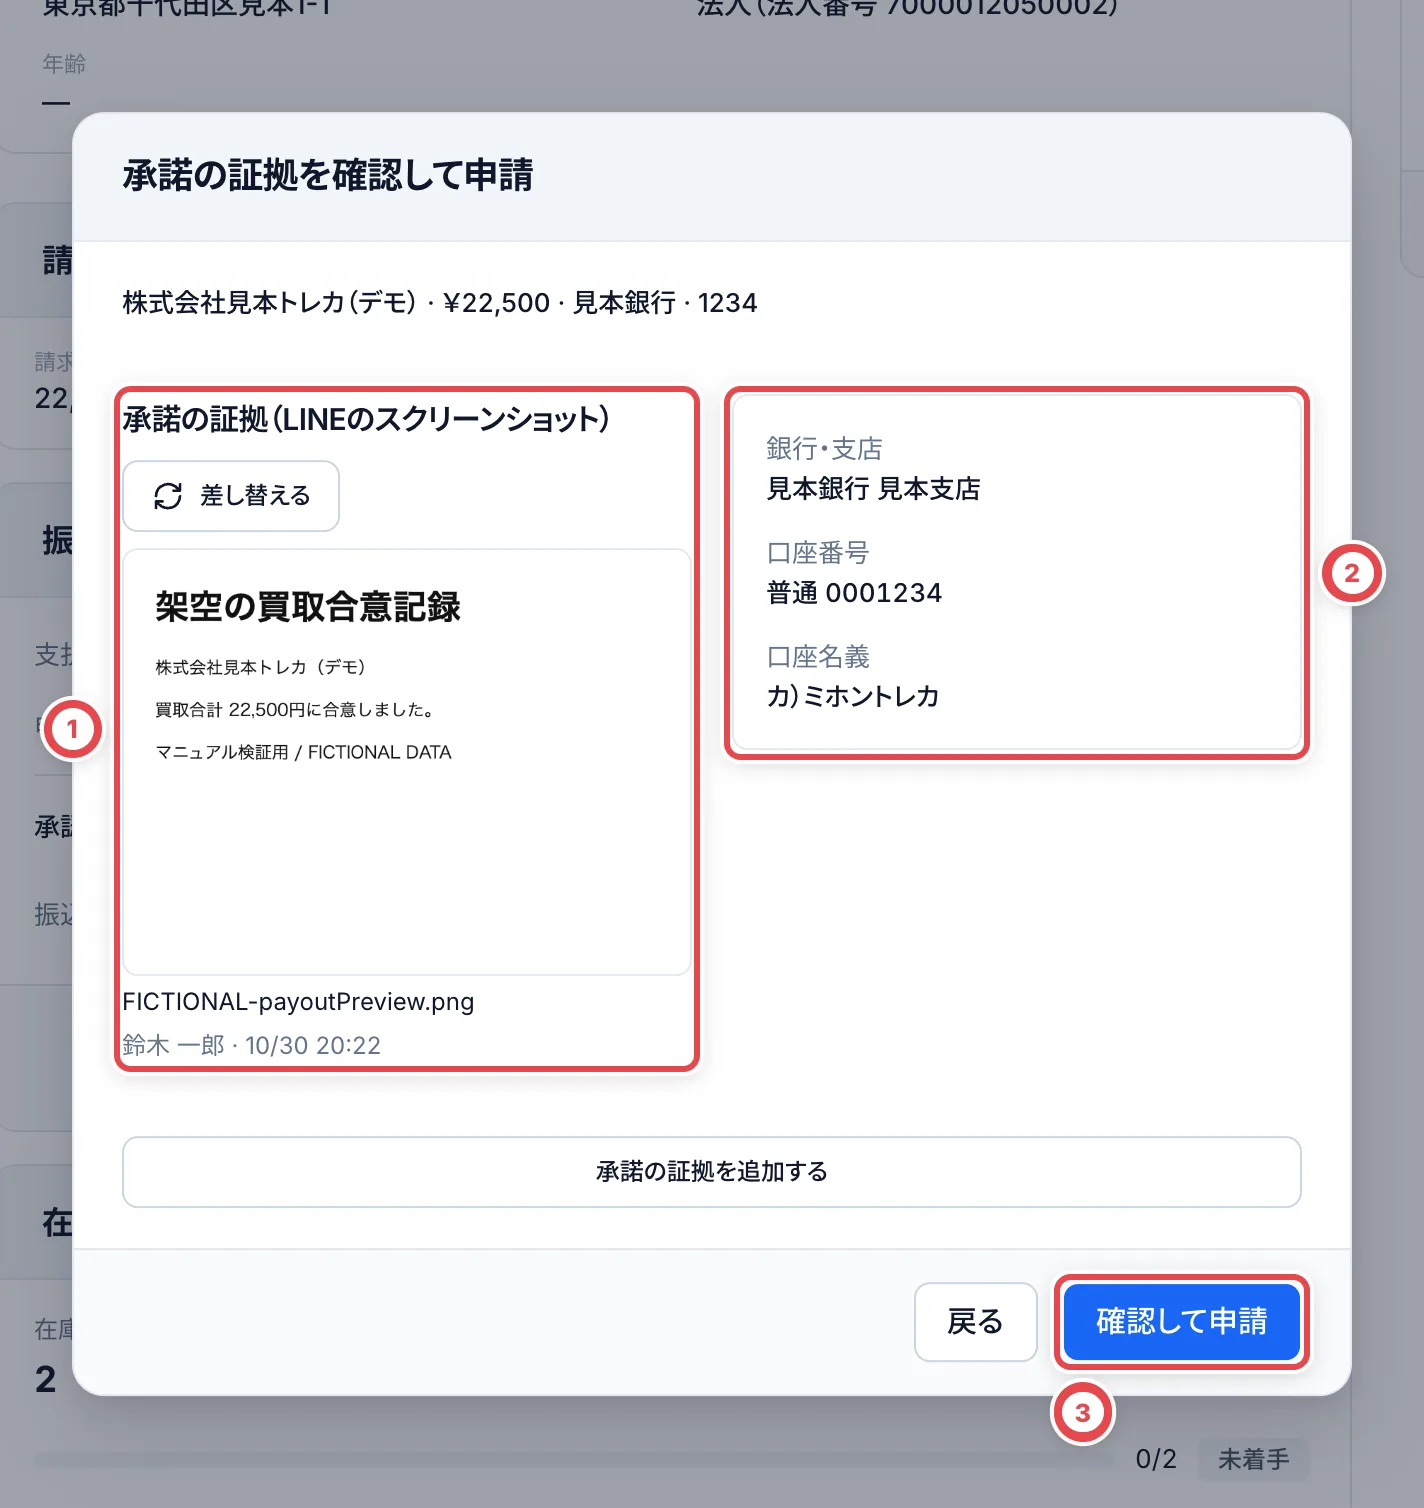 申請した人とは別のオーナーか管理者が、サイドバーの「支払い」の「承認待ち」から承認します。①で承諾の証拠・金額・振込先を照合し、②にチェックを入れて承認します。
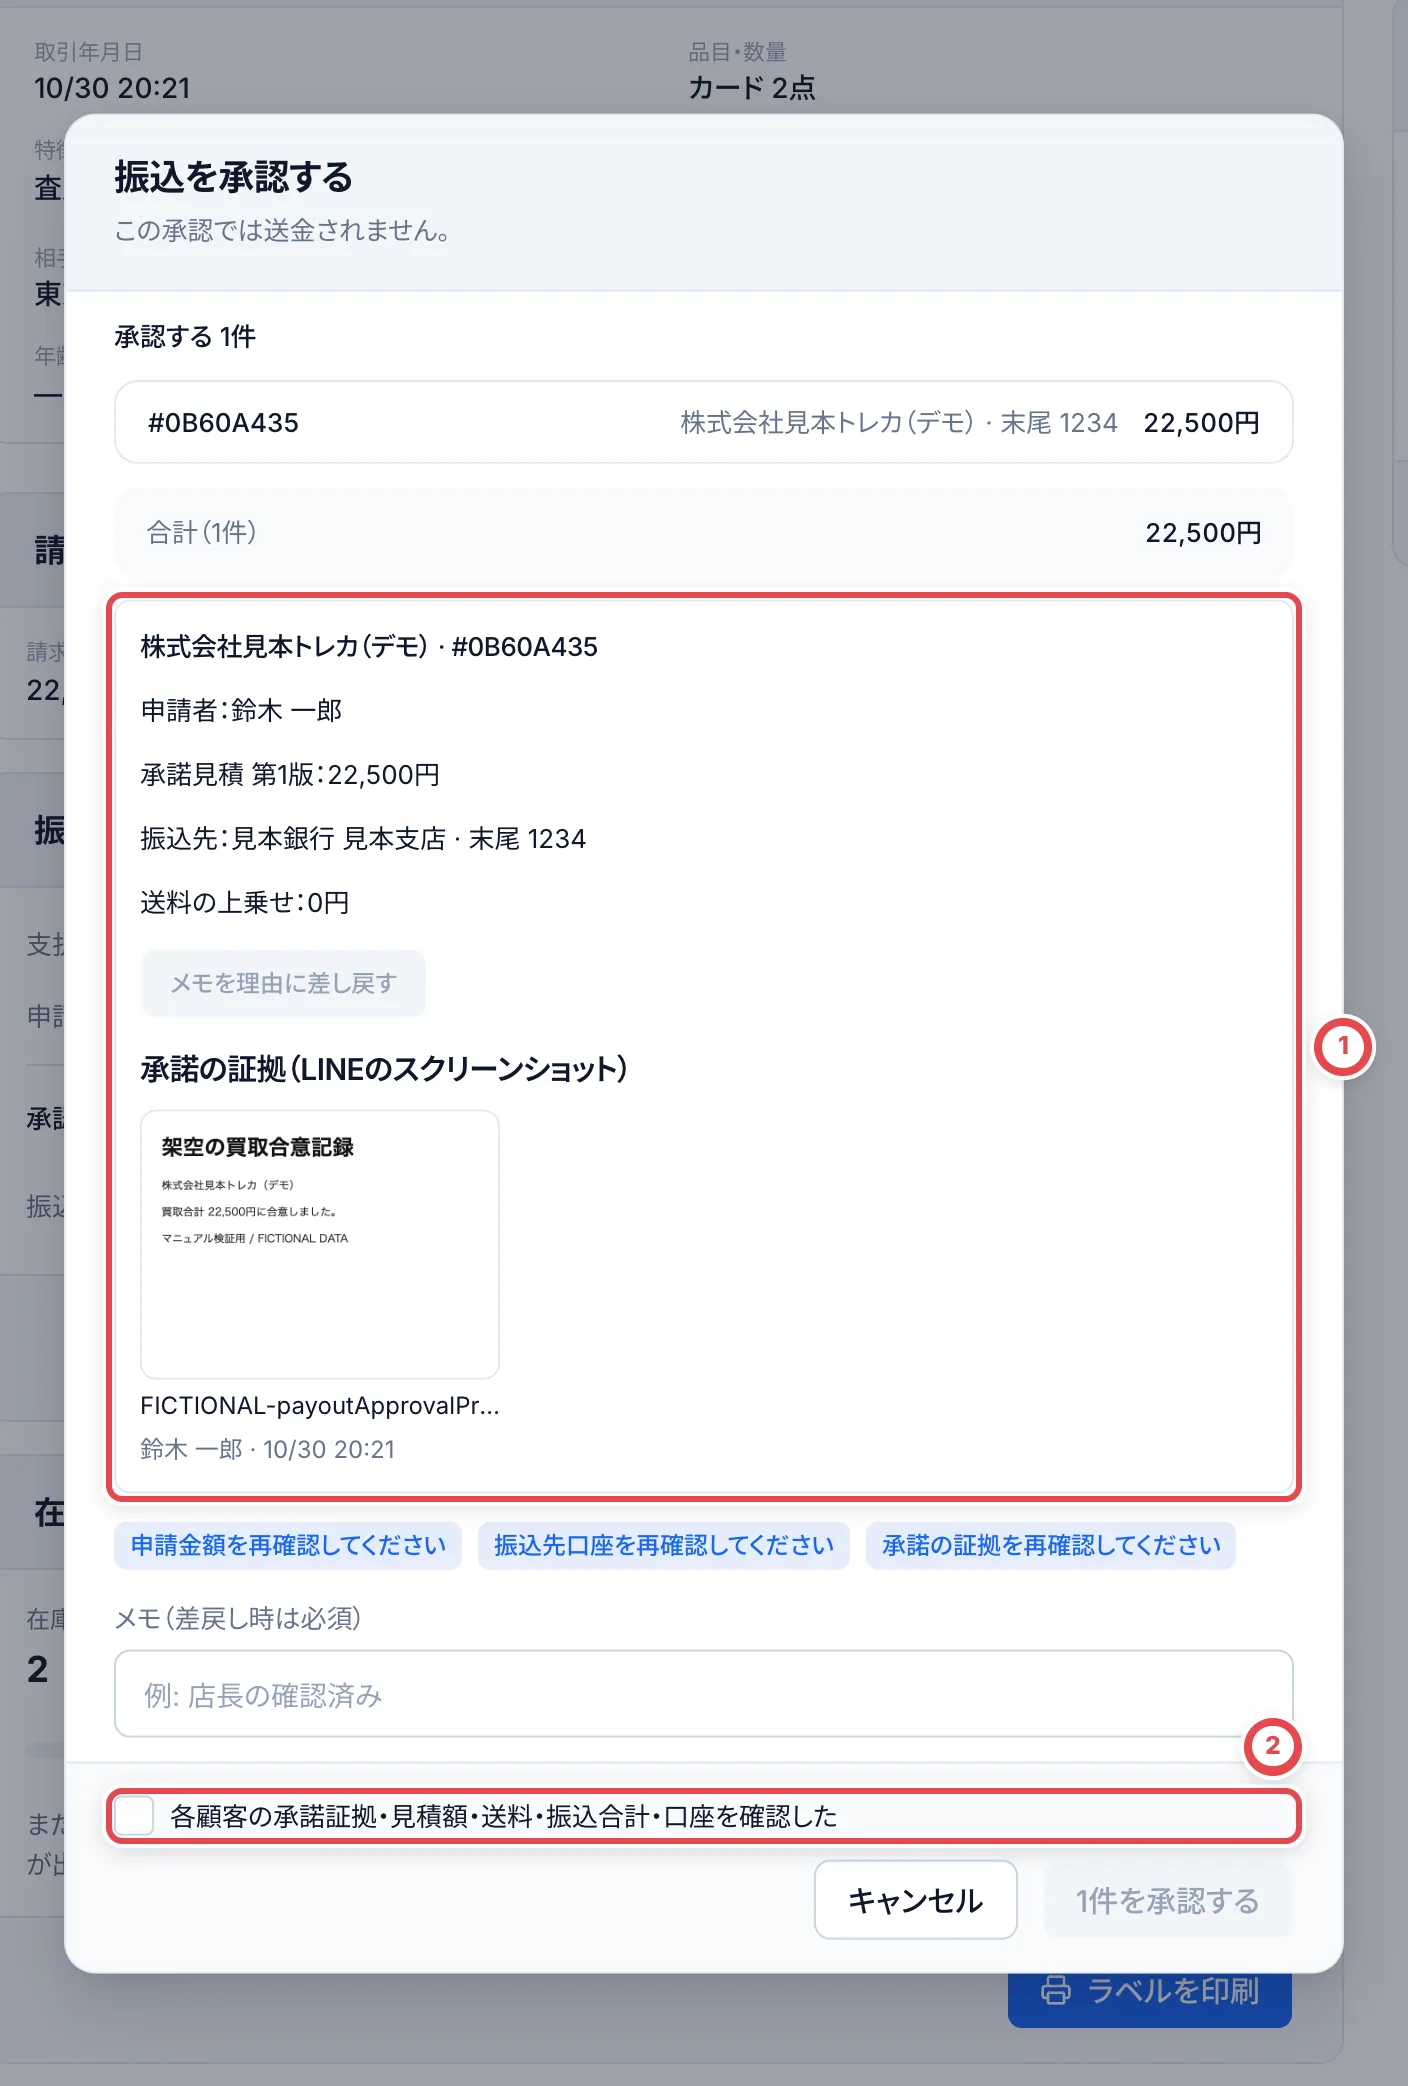 銀行で振り込んだら、取引の支払いの画面で「振込結果を記録」を開きます。振り込めたときは①で「成功」を選び、「結果を確定」を押します。振り込めなかったときは「失敗」を選びます。
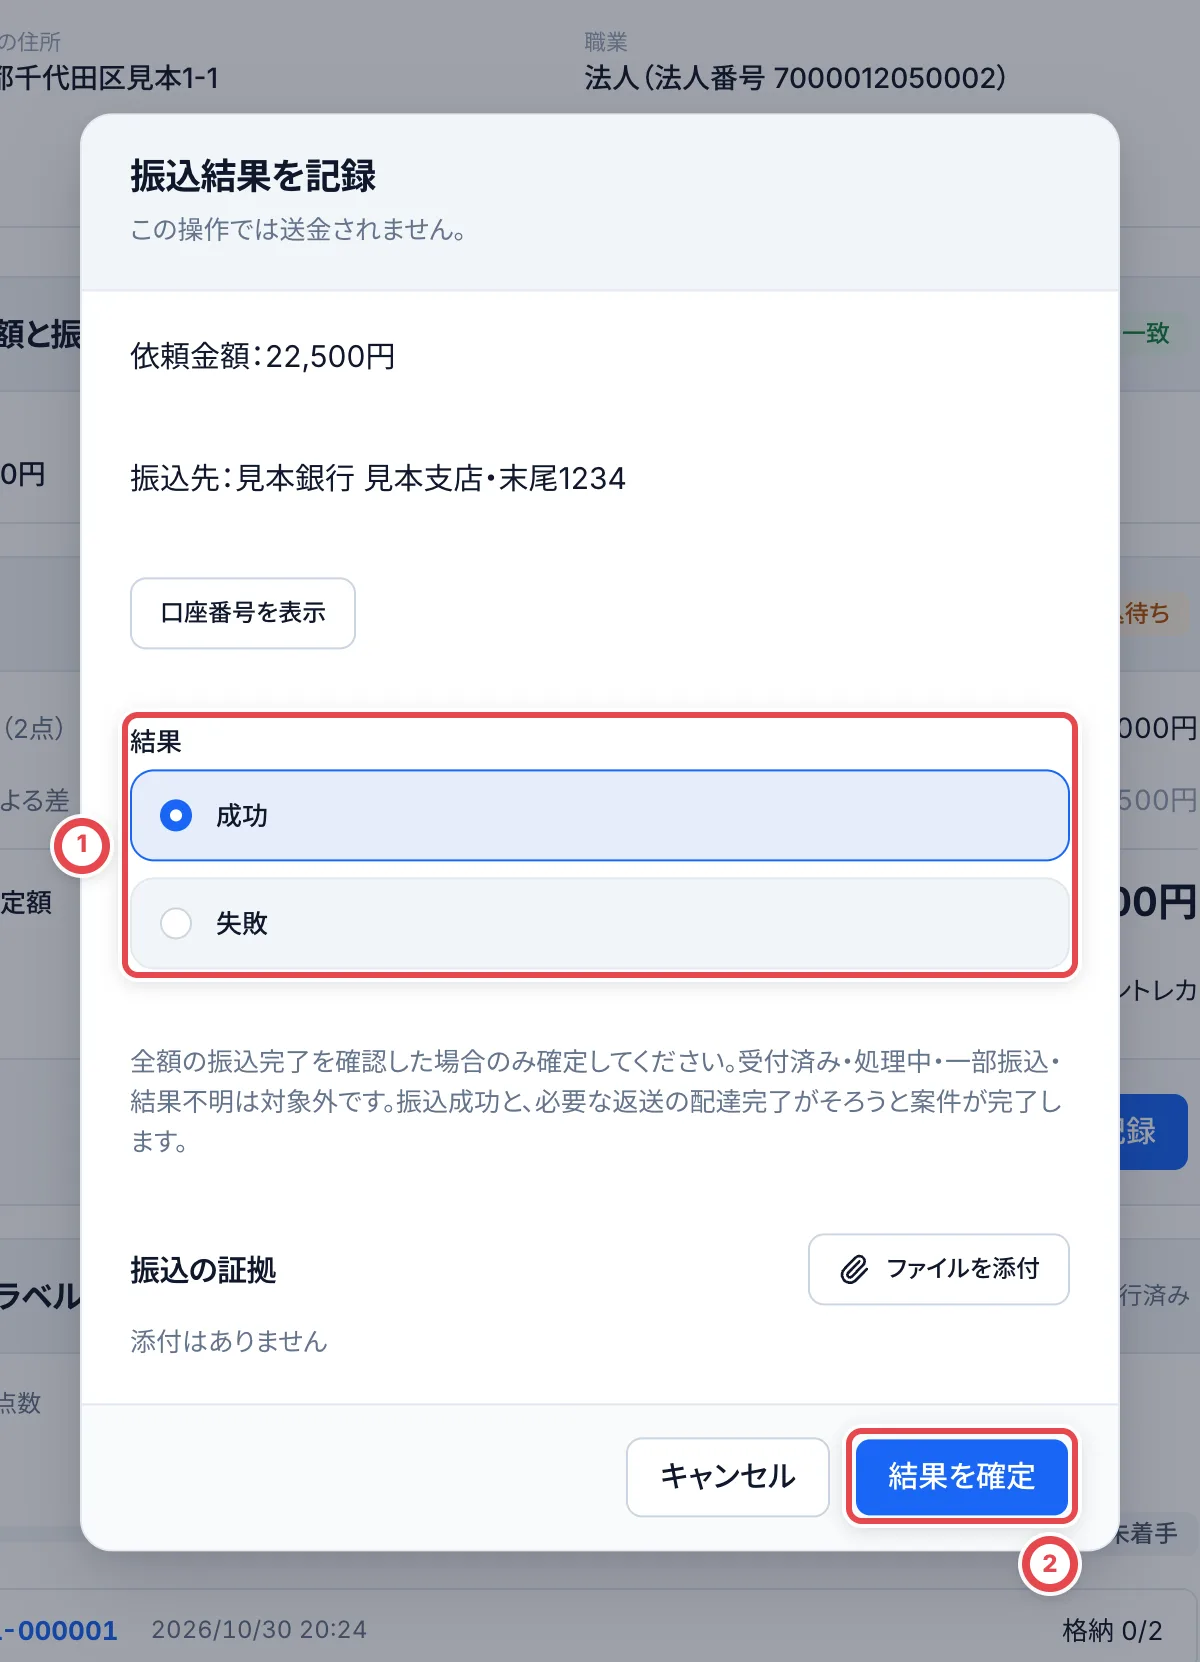 :::note
お客様への支払いを、トレカクラウドの外ですでに済ませている荷物も、同じ手順で申請・承認し、振込結果を「成功」で記録します。この操作で送金されることはありません。
:::
### 10. 着金を記録する
サイドバーの「支払い」の「着金確認待ち」で、取引の「着金を記録」を押します。①の「コピー」で振込完了の文面をコピーしてお客様に送り、お客様が受け取ったことを確かめたら、②の「記録する」を押します。
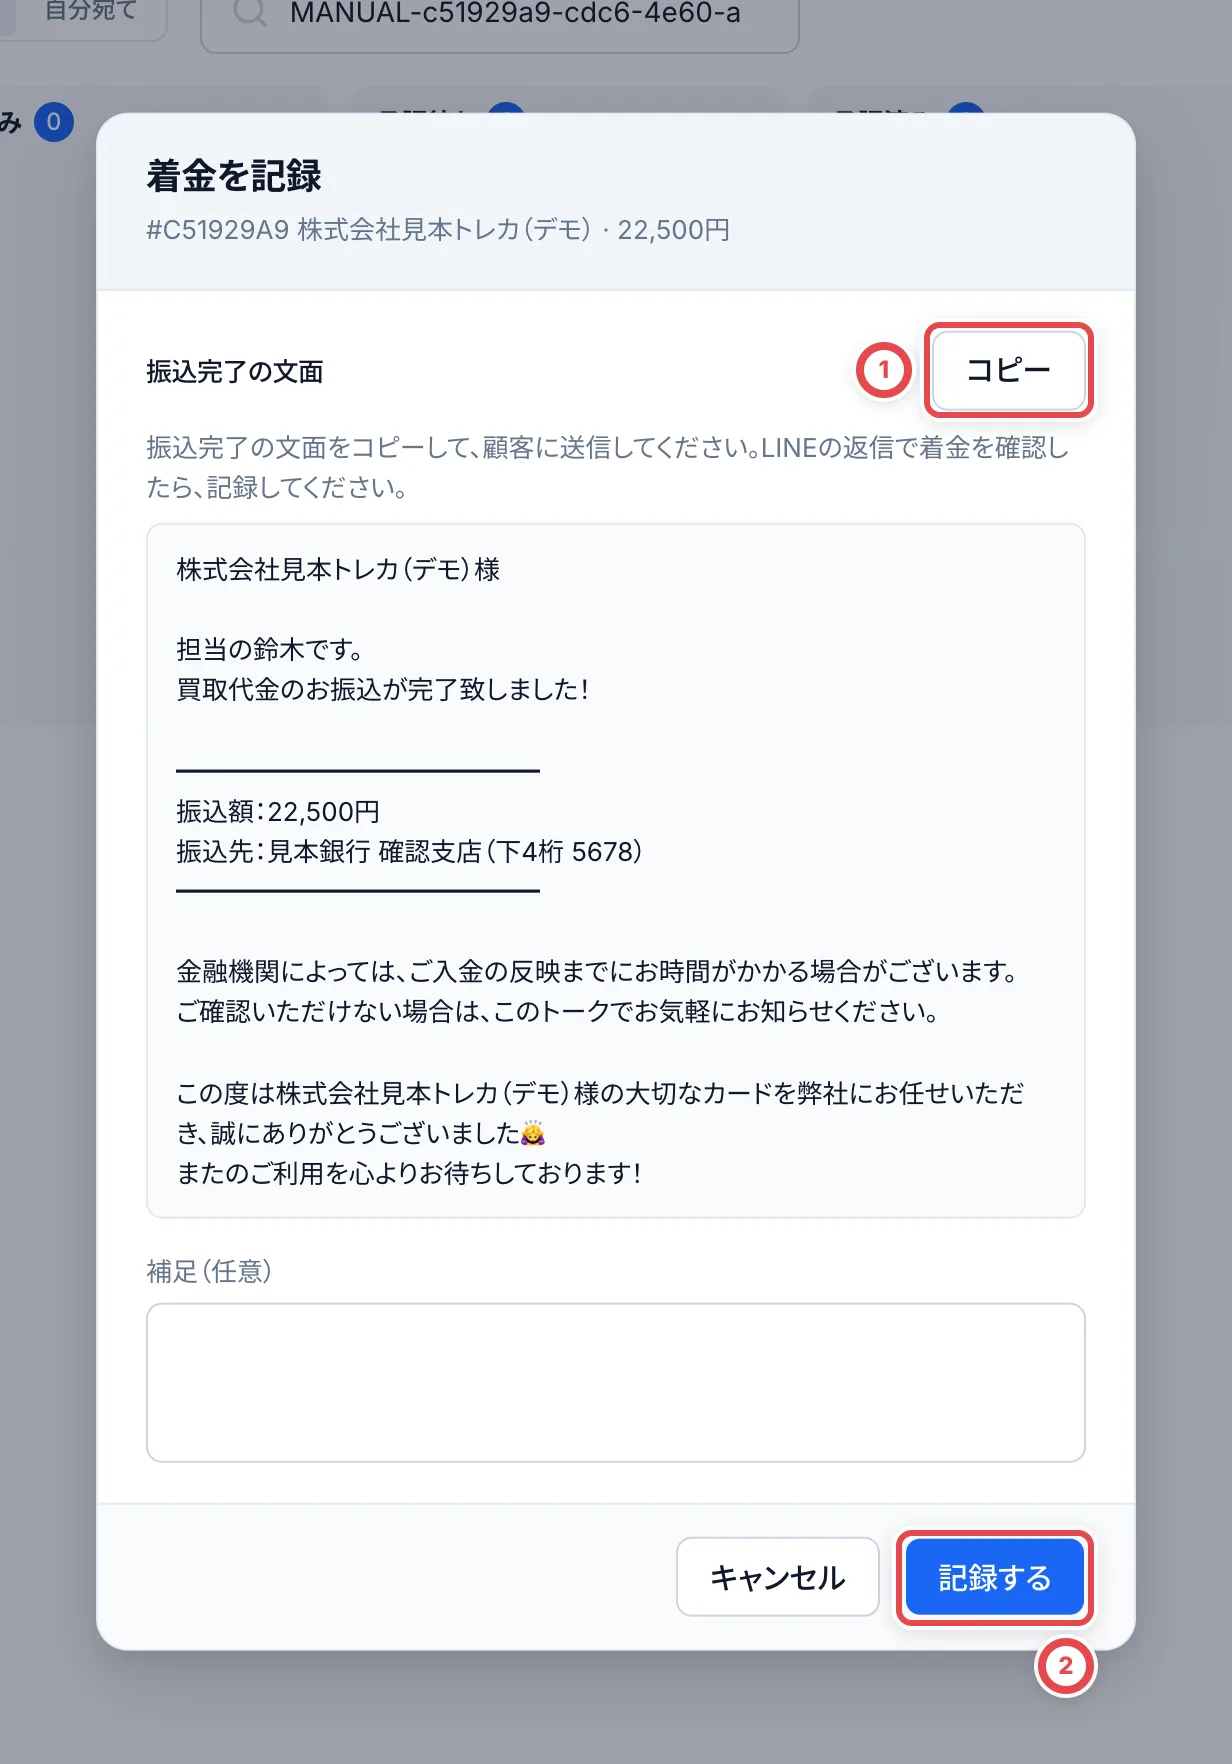 着金を記録するまで、買い取ったカードは在庫で「着金確認待ち」のままです。このあいだも、ラベルの印刷・格納・同じ拠点内での棚移動はできます。出庫や別の拠点への移動は、着金を記録してからできるようになります。
### 在庫に入ったことを確かめる
サイドバーを「在庫」に切り替え、「入庫」を開きます。①のタブで、カードがどの段階にあるかを確かめます。着金を記録したカードは「入庫待ち」に移ります。③の「QRを印刷」でラベルを印刷し、格納します。
①のタブで段階を選び、②で絞り込みます。選んだカードのラベルは③で印刷します。
## 困ったとき
| 起きていること | 確かめること・直し方 |
| ------------------------------------------------ | ---------------------------------------------------------------------------------------------------------------------------------------------- |
| カードが検索で見つからない | カード名の一部や型番だけで探し直します。それでも出ないカードは、カードマスタにありません。入庫も買取もできないので、管理者に連絡してください。 |
| 認定番号が入れられない | その行の数量を1点にして、グレードで鑑定会社のグレード(PSA 10など)を選びます。 |
| 入庫伝票を間違えて確定した | 入庫伝票で対象カードを選び、登録を取り消します。正しい内容で入れ直す場合は新しい個体・ラベルになります。 |
| 「店頭以外」が表示されない | 店舗でオンライン買取がオフになっています。管理者に確認してください。 |
| 「最終査定を入力する」が出ない | 発送案内を記録したかを確かめます。カードが特定されていない明細や、解決していない差分の記録が残っているときも進めません。 |
| 見積の期限が切れている | 以前に期限を入れた取引だけで起きます。期限は画面から変えられないので、トレカクラウドの運営にお問い合わせください。 |
| 「在庫と支払いを登録」が押せない | 下の画像の①に、足りないものが表示されます。本人確認・お客様の振込先・古物商許可・カードを置く拠点がそろうと押せます。 |
| 振込を自分で承認できない | 申請した人は承認できません。別のオーナーか管理者に承認を頼みます。 |
| 買い取ったカードを出庫や別拠点への移動に使えない | 着金を記録するまで「着金確認待ち」のままです。10の手順で着金を記録します。同じ拠点内の棚移動は先にできます。 |
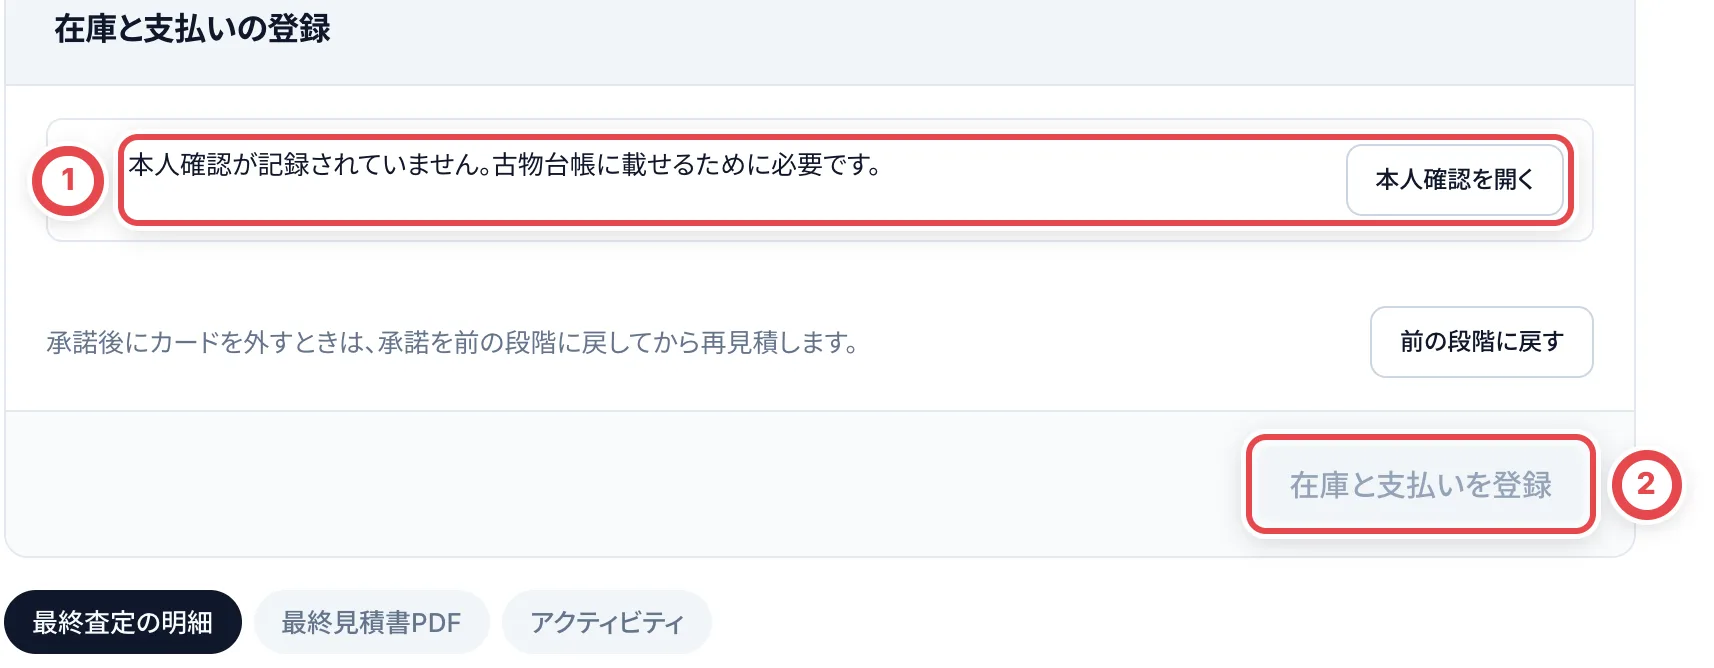 本人確認がまだの取引です。①に足りないものが並び、すべてそろうと②を押せます。
## 買取としての完了を確認する
方法2を使った場合は、[オンライン買取の完了条件](/guides/purchase/overview#完了を確認して次へ進む)を確認します。一部だけ買い取る、または全部辞退する場合は[最終見積への回答と返送](/guides/purchase/shipping-and-final)へ進みます。方法1の入庫伝票だけでは、買取としての完了は記録されません。
---
# オリパ需要
Source: https://docs.toreca-cloud.com/guides/purchase/oripa-demand
オリパ需要は、外部連携でつないだオリパのアプリから届く、当選したのにまだお客様に渡せていないカードの一覧です。店舗の在庫と買取強化を同じ行に並べるので、どのカードをどれだけ仕入れればよいかがわかります。足りないカードは、この画面から買取強化対象に追加できます。
## 最初に用意するもの
- 外部連携が有効で、オリパのアプリが接続して需要を送っていること。接続は[外部連携](/guides/settings/partners)を参照してください
- 買取強化対象を見られる権限
- 買取強化を追加するときは、買取の操作ができる権限
外部連携が無効の店舗と、買取強化対象を見られないメンバーには、サイドバーに「オリパ需要」が出ません。
## 1. 一覧を開く
サイドバーの「買取強化対象」の下にある「オリパ需要」を開きます。
画面の上には、連携先ごとに「FLIPONE・11/8 12:30に受信」のように最後に届いた日時が出ます。最後に届いてから24時間以上たった連携先があると、「(連携先)から24時間以上届いていません」と警告が出ます。その連携先の行は数が古いかもしれないので、連携先に送信が止まっていないか確かめます。
一覧は「不足が多い順」に並びます。不足が同じなら、発送依頼が古い順です。
## 2. 列の見方
| 列 | 意味 |
| -------------- | ------------------------------------------------------------------------------------------------------- |
| カード | カード名・型番・収録セット・レアリティ。連携先が2つ以上あるときは、どの連携先の行かも出ます |
| 等級 | 連携先が求める品質を、トレカクラウドの等級に読み替えたもの(下の表) |
| 発送待ち | お客様が発送を依頼したのに、まだカードを割り当てていない数。下の「11/02〜」は最も古い発送依頼の日付です |
| 保有中 | お客様がアプリで持っていて、まだカードを割り当てていない数 |
| 未抽選 | 販売中のパックに残る枠のうち、カードを確保していない数 |
| 当選 7日/30日 | 直近7日と直近30日に当選した数 |
| 在庫 | 店舗の在庫中の個体の数。出庫予約で確保している個体と、売れた個体は数えません |
| 不足 | 発送待ちから在庫を引いた数(0より小さければ0)。1以上なら赤で出ます |
| 補充リクエスト | 連携先からの補充の依頼。枚数・依頼日・メモが出ます |
| 買取強化 | そのカードの、終了していない買取強化。強化価格・グレード・残り枚数・期間が出ます |
等級は次のように読み替えます。在庫も、この等級で数えます。
| 連携先が求める品質 | 等級の表示 | 在庫の数え方 |
| --------------------------------------------------------------------- | -------------------------------- | -------------------------------- |
| 未鑑定の Near Mint・Lightly Played・Moderately Played・Heavily Played | 未鑑定 A・B・C・D | その等級の在庫 |
| 鑑定済み(PSA 10 など) | PSA 10 など | 同じ鑑定会社・同じグレードの在庫 |
| 指定なし | 全等級 | そのカードのすべての在庫 |
| トレカクラウドにない品質(Mint・Damaged・TAG 10 など) | 等級未照合と、連携先が求める品質 | そのカードのすべての在庫 |
カードが決まっていない行は、次の印が付きます。どちらも在庫は数えず、不足は発送待ちと同じ数です。
- **おまかせ**:連携先が「SAR おまかせ」のように条件だけを決めている行です。条件がカード名の下に出ます
- **未リンク**:連携先が送ったカードが、トレカクラウドのカードマスタで見つからない行です
## 3. 絞り込む
「絞り込み」から、ゲーム・不足(不足ありのみ)・補充リクエスト(ありのみ)で絞り込めます。一覧は100件ずつ表示します。
## 4. 買取強化に追加する
足りないカードの行で「買取強化に追加」を押すと、「買取強化を追加する」が開きます。次の項目は最初から入っています。
- 対象:その行のカード
- グレード:等級が1つに決まるときだけ、その等級。全等級・等級未照合のとき、照合した等級が2つ以上あるときは「指定しない(すべてのグレード)」のままです
- あと何枚まで買い取るか:不足と補充リクエストの枚数のうち多い方。どちらも0なら1
「強化価格(1枚あたり)」と「掲載期間(日本時間)」を入れ、入っている値を確かめます。
:::warning
「追加する」を押すと、その場で買取強化対象に掲載されます。オリパ需要の画面が買取強化を自動で追加することはありません。
:::
追加したあとは、ほかの買取強化と同じように編集・一時停止・終了します。詳しくは[買取強化対象](/guides/purchase/purchase-boosts)を参照してください。
## 困ったとき
| 起きていること | 確かめること・直し方 |
| -------------------------------------------------------- | -------------------------------------------------------------------------------------------------------------------------------------------- |
| サイドバーに「オリパ需要」がない | 外部連携が無効か、買取強化対象を見る権限がありません。 |
| 「オリパ需要はまだ届いていません」と出る | 接続している連携先が、まだ需要を送っていません。連携先に確かめます。 |
| 「いま需要はありません」と出る | 連携先は需要を送っていますが、足りないカードがありません。 |
| 「(連携先)から24時間以上届いていません」と出る | 連携先の送信が止まっています。連携先に確かめます。接続を解除した連携先の需要は、一覧から消えます。 |
| 「買取強化に追加」が押せない | おまかせ・未リンクの行です。カードを決めてから、[買取強化対象](/guides/purchase/purchase-boosts)で追加します。 |
| 「買取強化に追加」がない | 買取の操作ができる権限がないか、買取強化の機能が無効です。 |
| 「グレード」が出ない | 設定を見る権限がないメンバーは、グレードを選べません。すべてのグレードを対象に追加されます。 |
| 「同じカード・グレードの買取強化がすでにあります」と出る | 終了していない同じ組み合わせがあります。「買取強化」の列に出ているものを、[買取強化対象](/guides/purchase/purchase-boosts)で編集します。 |
| 在庫があるのに不足が減らない | 数えるのは在庫中の個体だけです。出庫予約で確保している個体と、等級の違う個体は数えません。等級未照合の行は、カードのすべての在庫を数えます。 |
---
# オンライン買取の流れ
Source: https://docs.toreca-cloud.com/guides/purchase/overview
郵送で品物を受け取り、オンラインで見積への回答や本人確認を進める買取の手順です。
## どの手順書を読むか
| 今の状況 | 始める手順 |
| ------------------------------------------------------ | ----------------------------------------------------------------------------------------- |
| お客様に申し込みから入力してもらう | [受付フォーム](/guides/purchase/intake-form) |
| LINEで写真付きの相談が届いた | [LINEで受け付けて見積を送るまで](/guides/purchase/line-intake) |
| 電話・メールで受け付ける、または荷物がすでに届いている | [郵送買取を手動で記録する](/guides/purchase/mail-in-to-stock#方法2買取依頼として記録する) |
| 事前見積は提示済みで、お客様の回答から続ける | [発送と最終査定](/guides/purchase/shipping-and-final) |
来店して現物を査定する場合は、[店舗買取](/guides/purchase/counter)へ進みます。LINEで事前相談を受けた場合も、対面で進める買取は店舗の手順を使います。
## オンライン買取の流れ
| 順番 | やること | だれが | 取引の状態(主なもの) | 作業する画面 |
| ---- | -------------------------------- | ------------ | -------------------------------- | ------------ |
| 1 | 受け付ける | 店舗 | 新着 | 買取依頼 |
| 2 | 写真で査定して、見積を出す | 店舗 | 査定中 → 見積送付済 | 見積もり |
| 3 | 見積に返事をする | お客様 | 承諾済 | 見積もり |
| 4 | 本人確認をして、カードを送る | お客様・店舗 | 本人確認待ち → 発送待ち → 配送中 | 発送 |
| 5 | 届いたカードで最終査定をする | 店舗 | 入荷済 → 最終査定中 → 最終送付済 | 最終査定 |
| 6 | 最終見積に返事をする | お客様 | 最終承諾 | 最終査定 |
| 7 | 在庫と支払いを登録して、振り込む | 店舗 | 支払い待ち → 振込処理中 | 支払い |
| 8 | 振込の結果を記録する | 店舗 | 買取成立 | 支払い |
取引の状態は、手で選んで変えるものではありません。見積の提示や承諾の記録などの操作をすると、その結果として次の状態に進みます。
## 1. 受け付ける
[受付フォーム](/guides/purchase/intake-form)から申し込みが届くと、取引ができます。LINEの友だちからの相談は[LINEの受付手順](/guides/purchase/line-intake)で顧客と取引に結び付けます。電話・メールなどで受け付けたときは、「買取依頼を登録」で「店頭以外」を選びます。荷物がすでに届いている場合も、[手動受付の方法2](/guides/purchase/mail-in-to-stock#方法2買取依頼として記録する)で必要な段階を記録します。
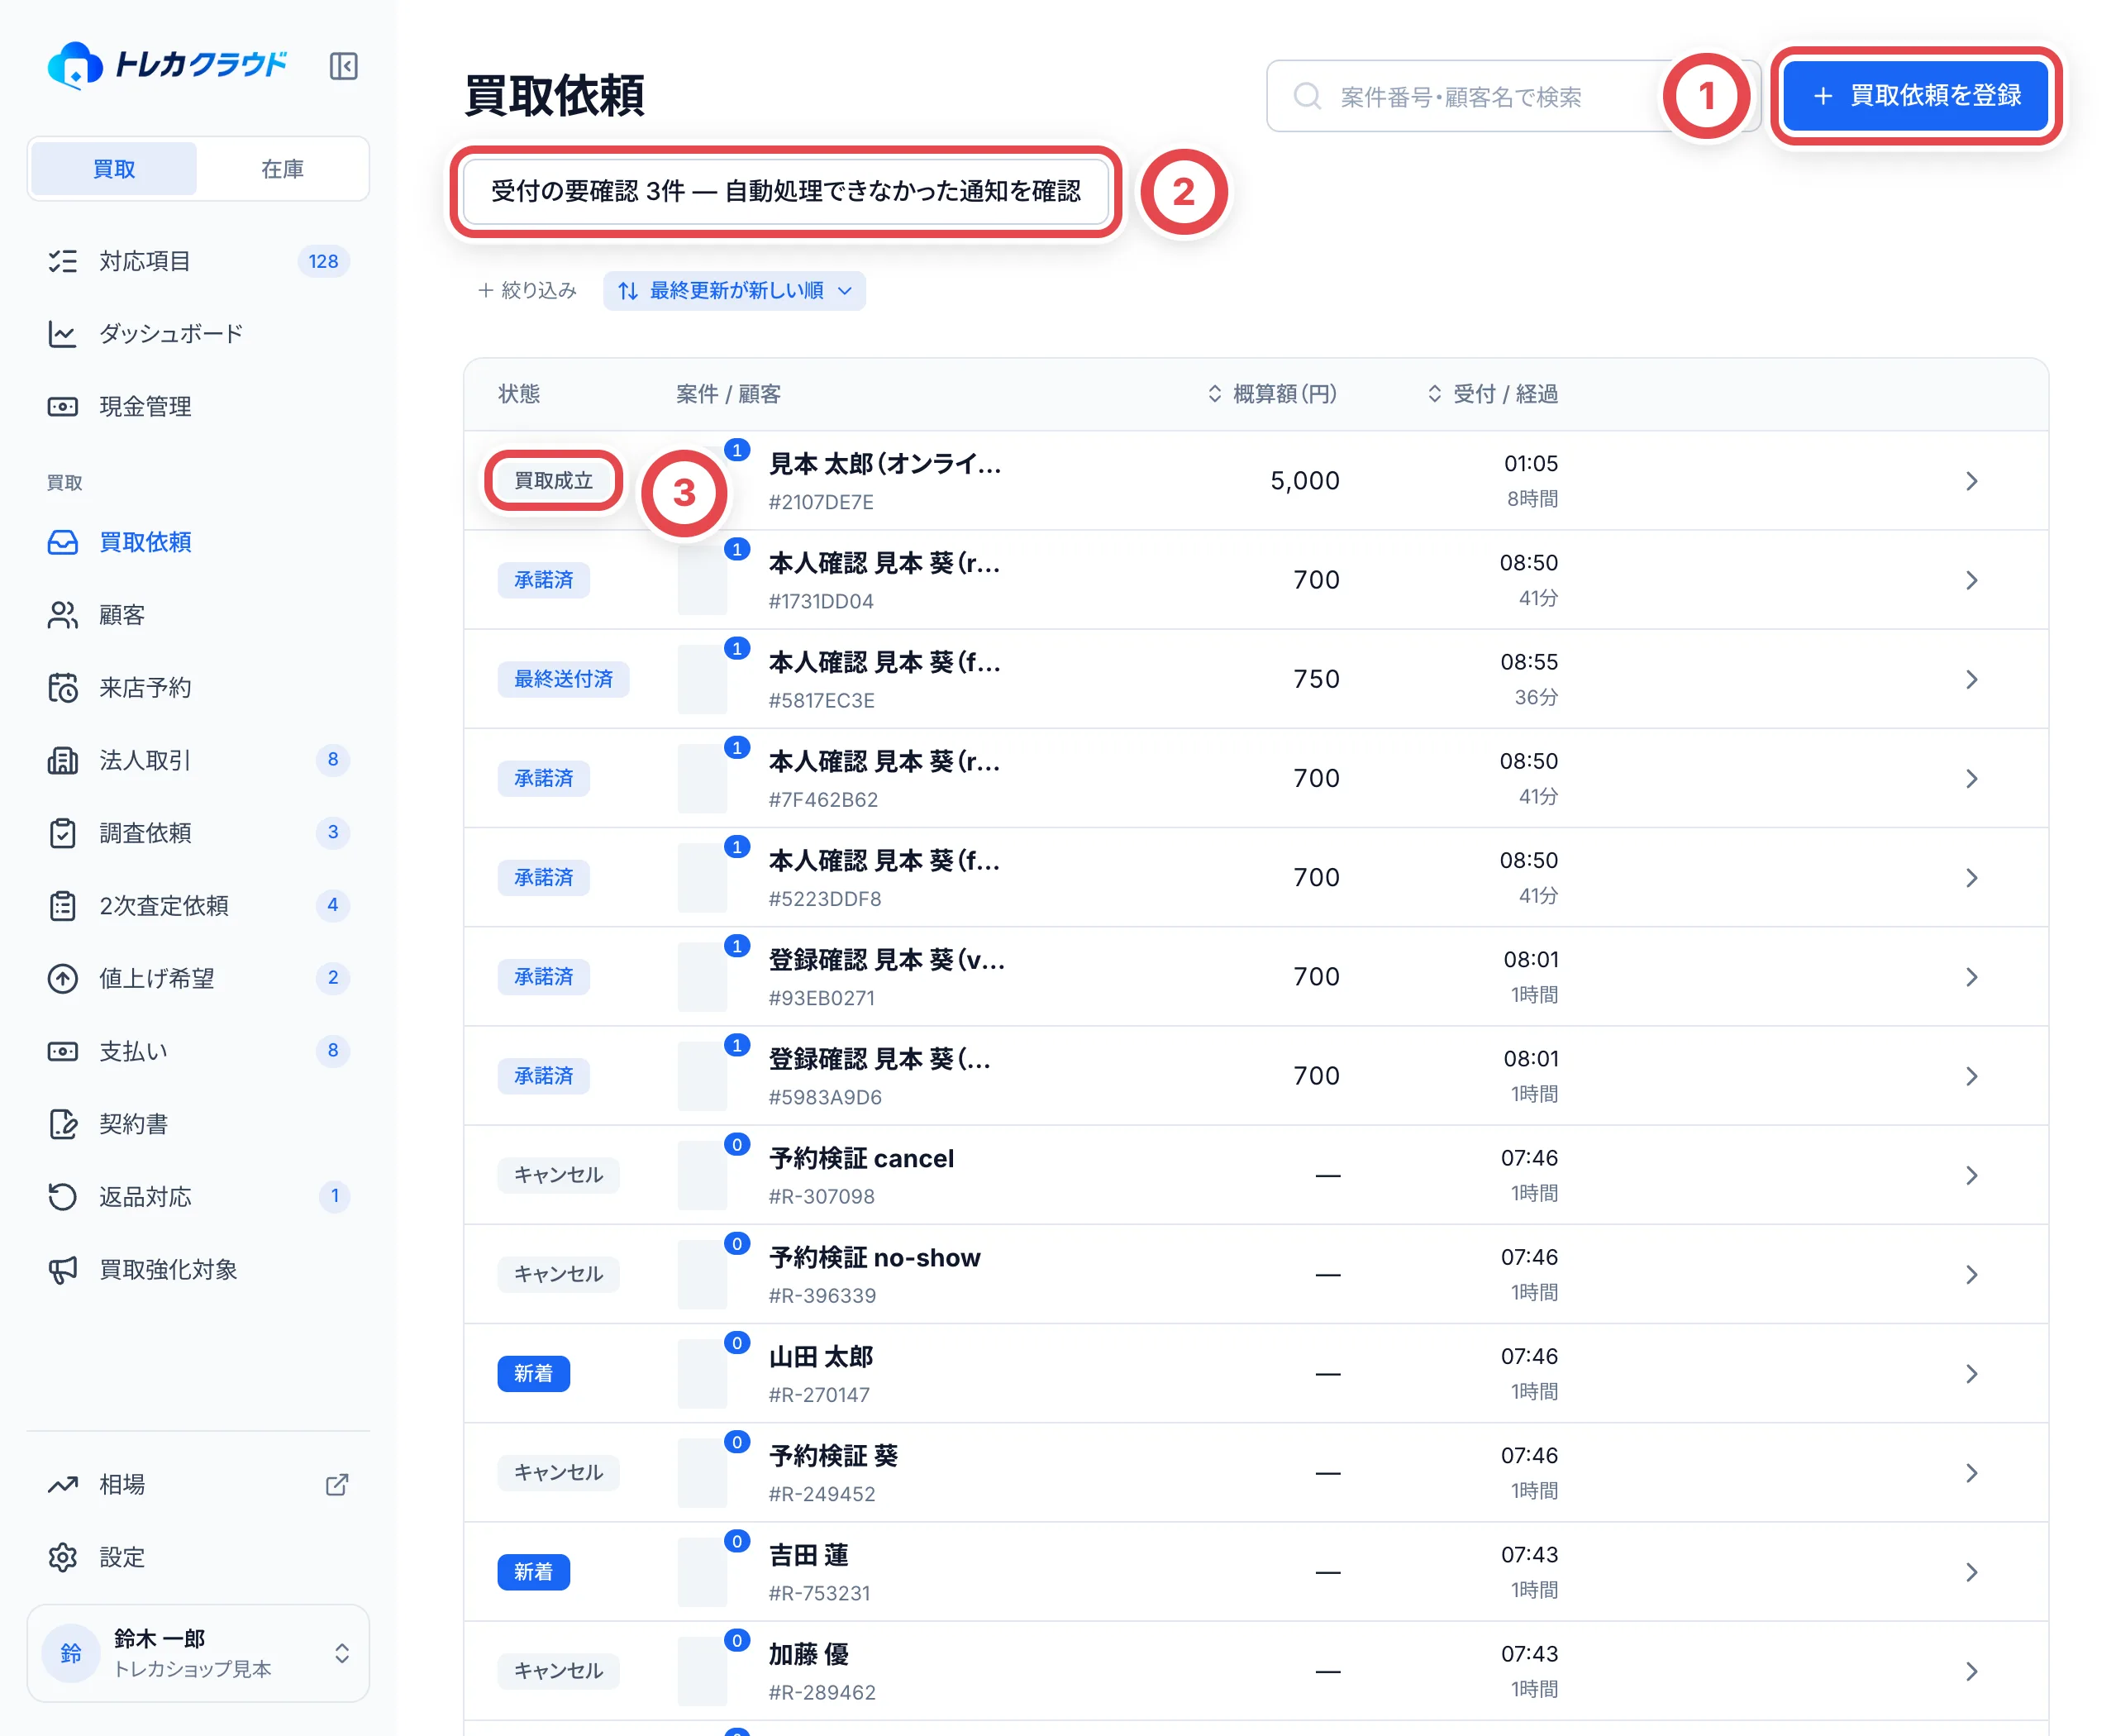 ①で電話などの手動受付を登録します。②には、自動処理できなかった通知がたまります。③の列で、取引がいまどの状態かが分かります。
「買取依頼」には、店舗の取引が、初期状態では最終更新が新しい順に並びます。サイドバーの「買取依頼」から開きます。行を押すと、その取引の画面が開きます。
→ くわしくは [顧客と取引](/guides/purchase/customers)
## 2. 取引の画面の見かた
取引の画面は、どの段階でも同じ形です。上に取引の番号とお客様の名前、その横に①の取引の状態が出ます。その下の青い枠が「次の操作」です。
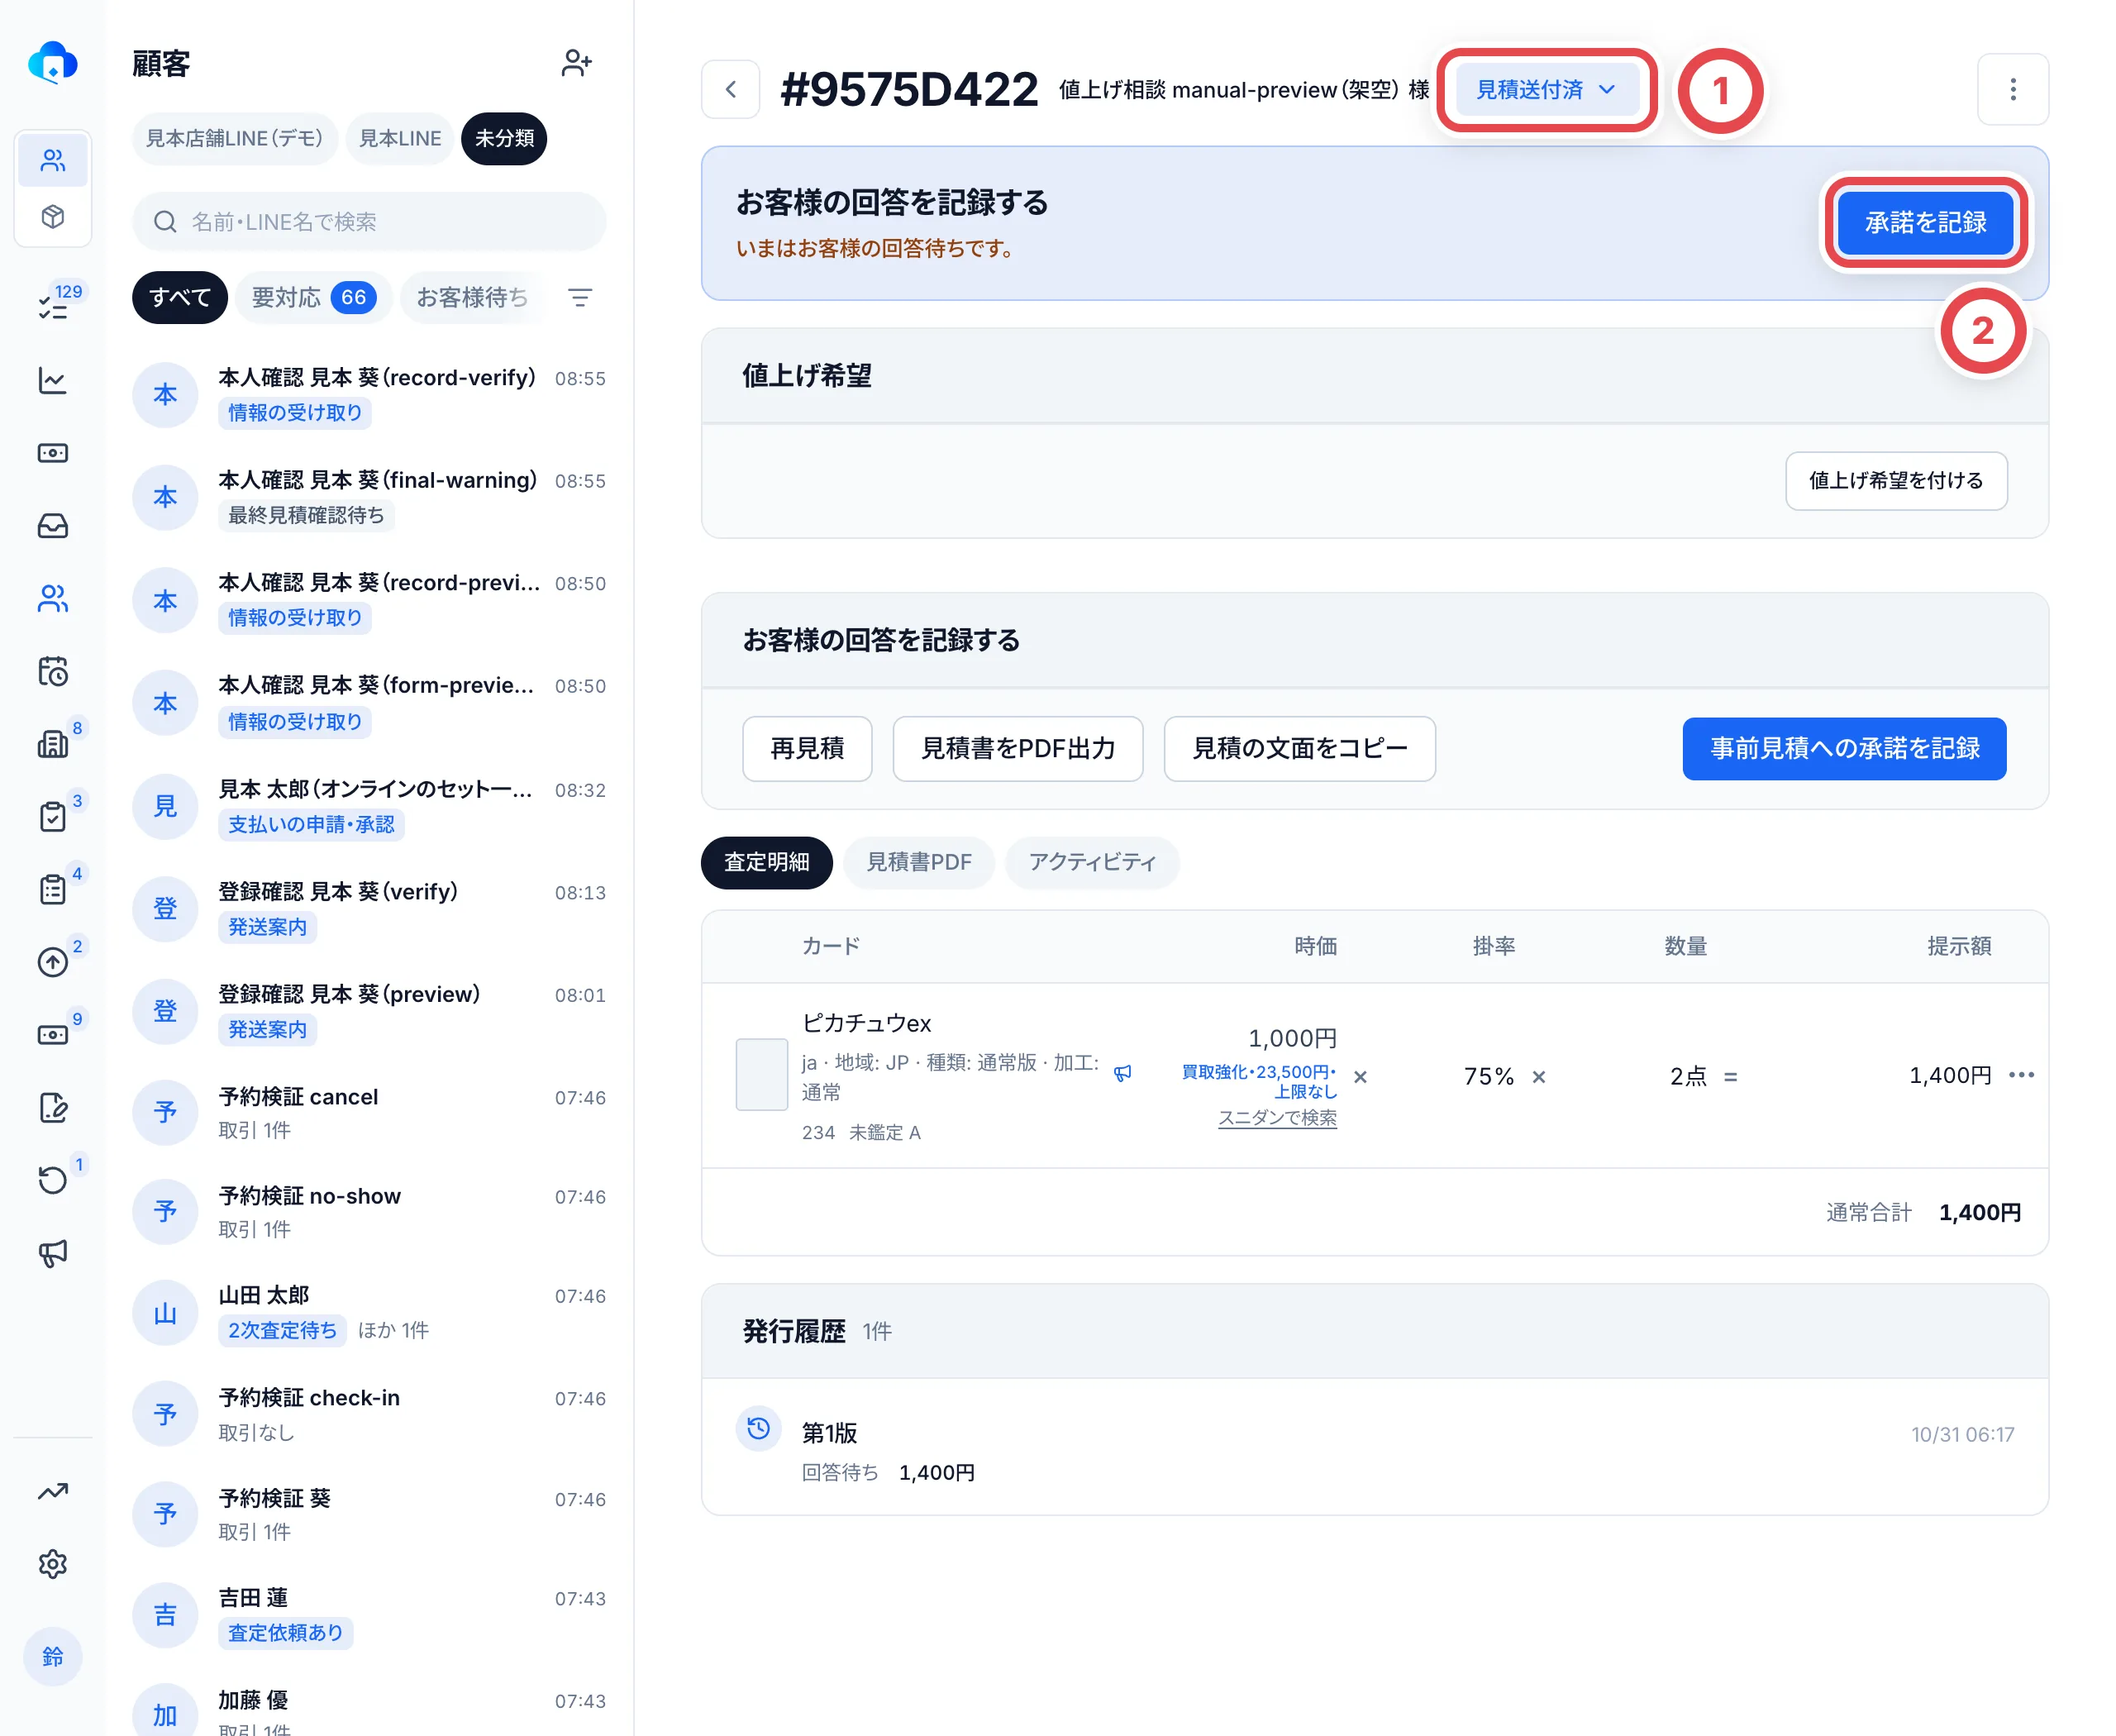 ①の状態を押すと、この取引で次に進める操作が出ます。②の「次の操作」のボタンで、いま行う作業の画面へ進みます。
**迷ったら、まず「次の操作」を見てください。** いま行う作業と、その画面を開くボタンが表示されます。お客様や調査担当の回答を待っている場合は、待ち先も表示されます。本人確認などが先に必要な場合は、その作業が次の操作になります。
 事前見積のお客様の回答待ちの例です。①が次の作業、②が待ち先、③が承諾を記録するボタンです。
①の状態を押すと、この取引で次にできる操作の一覧が出ます。ここから記録できる操作(承諾の記録など)は、押すと記録の画面が開きます。別の画面で行う操作は、どこで行うかが書かれています。
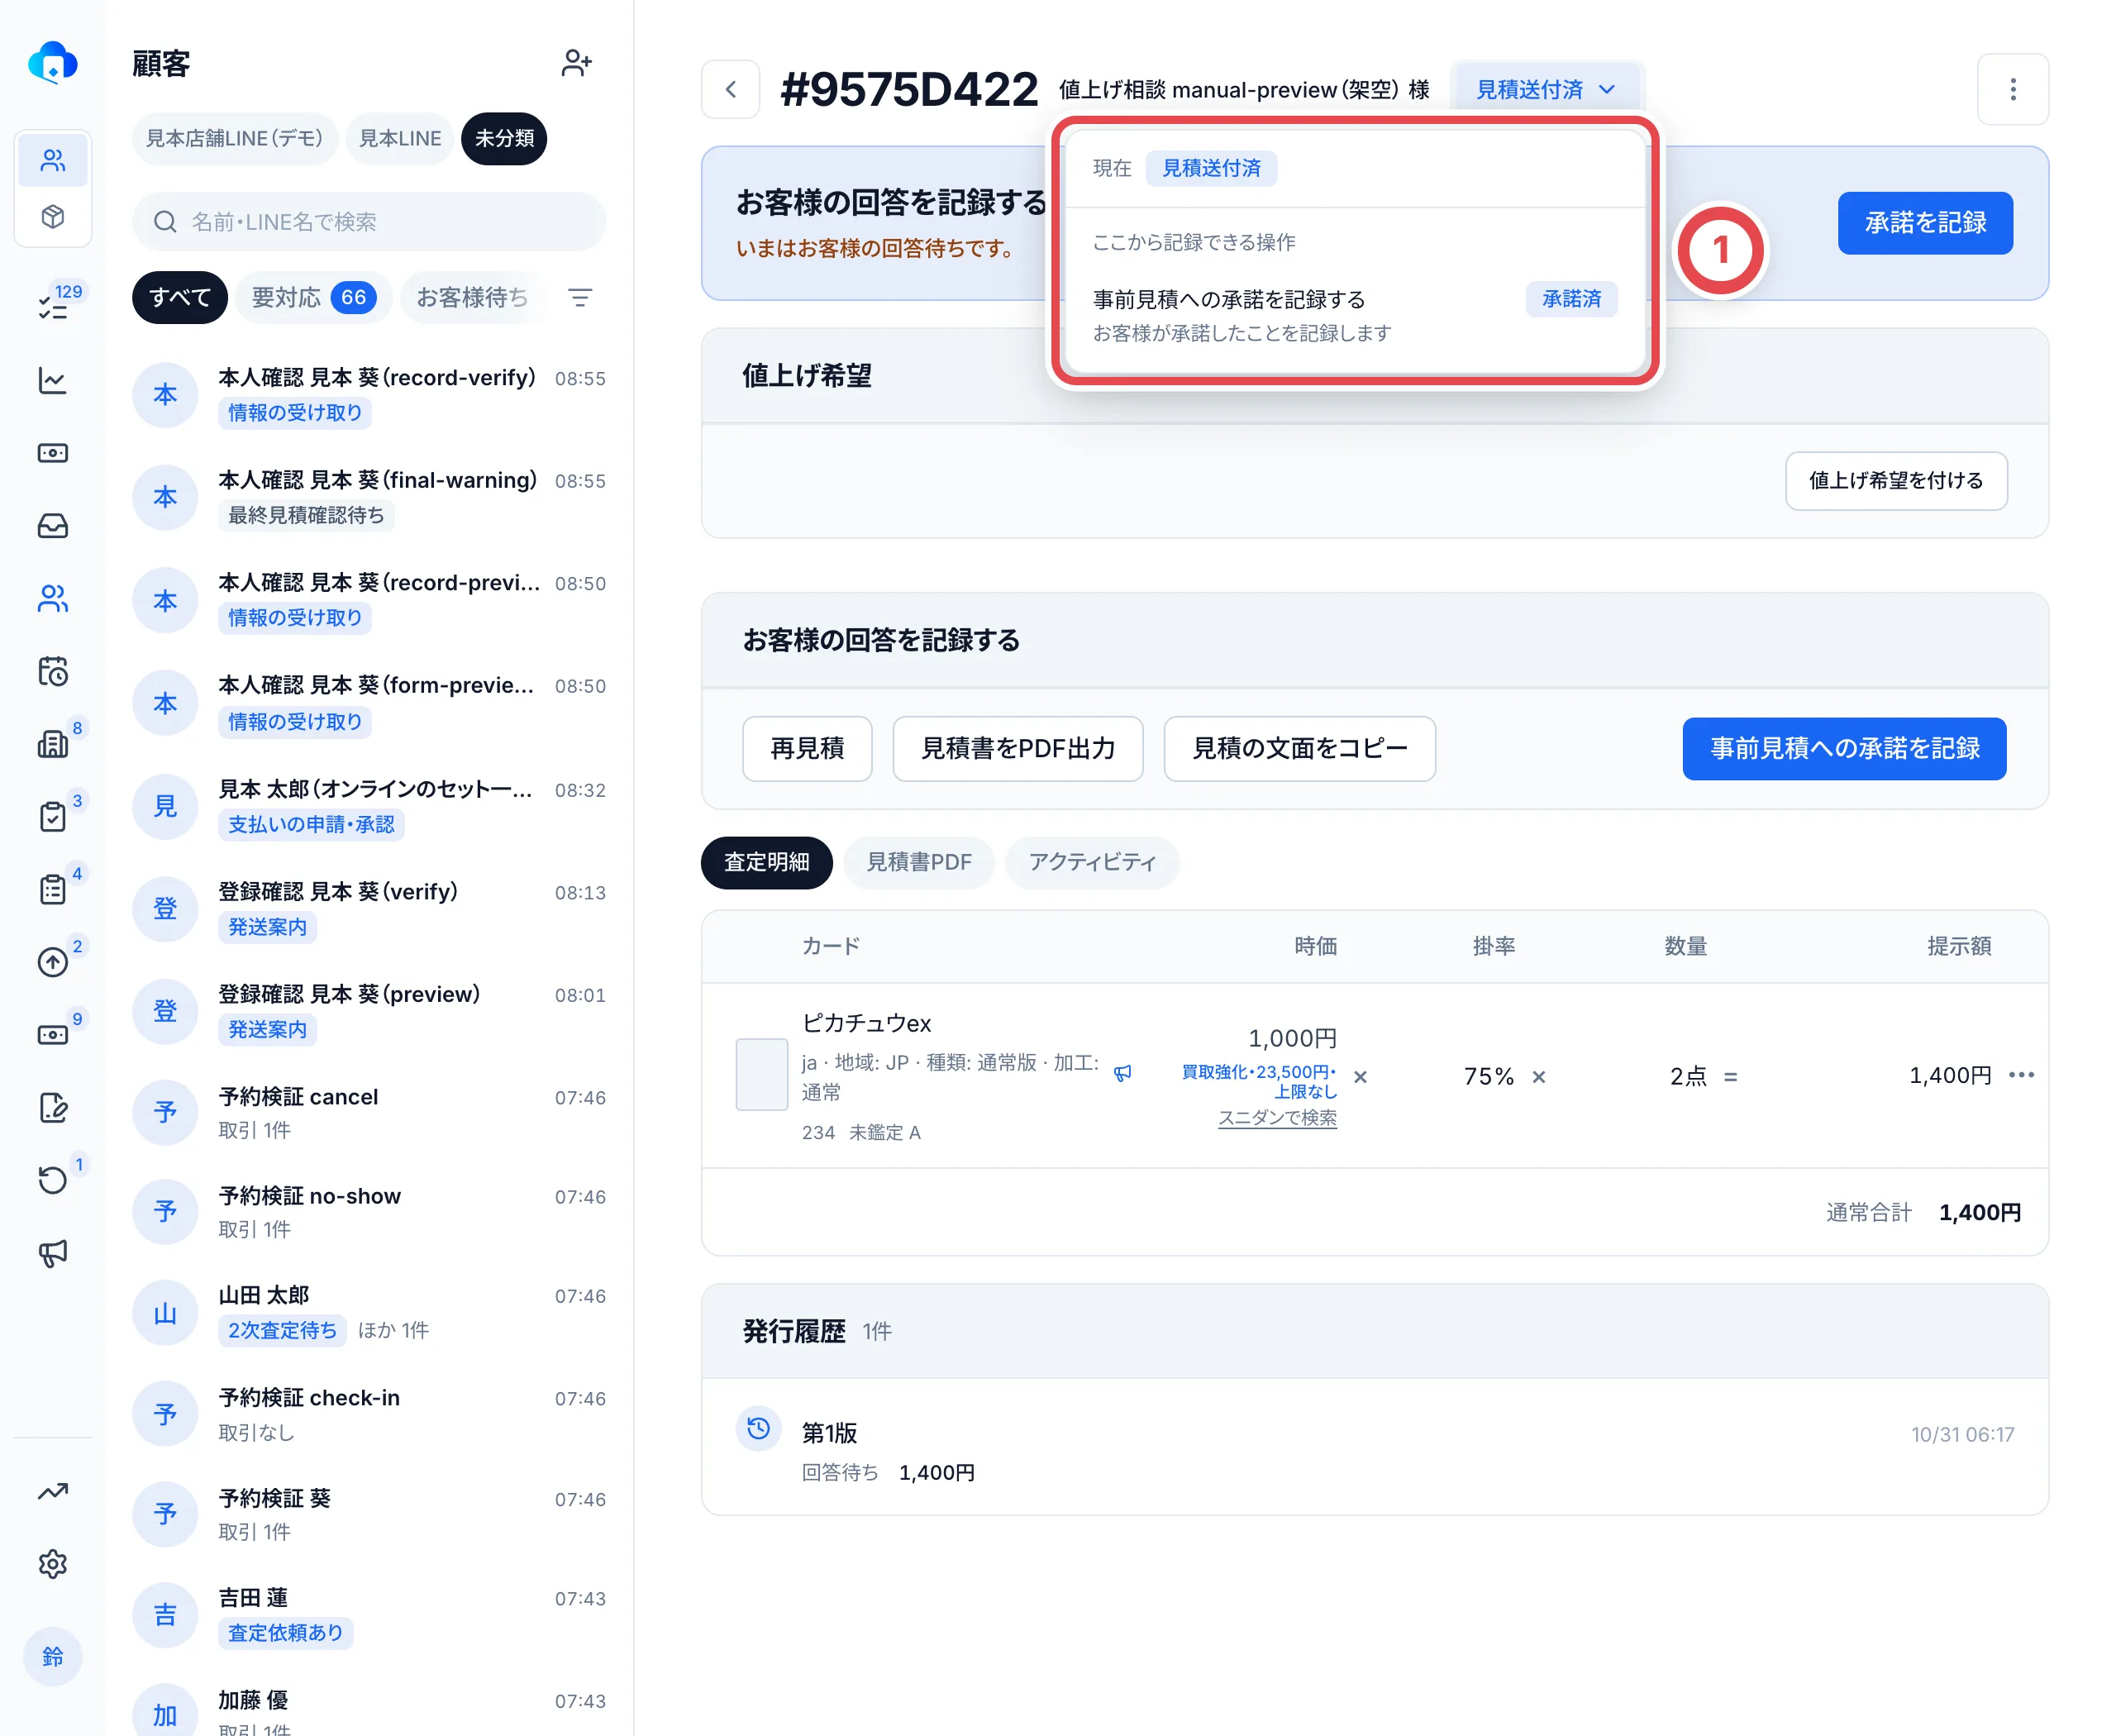 ## 3. 写真で査定して、見積を出す
お客様から届いた写真や申告をもとに、カードを特定して金額を付け、見積を出します。見積はLINEで送るか、別の方法で伝えて「提示済みにする」を押します。お客様が承諾したら、①で承諾を記録します。
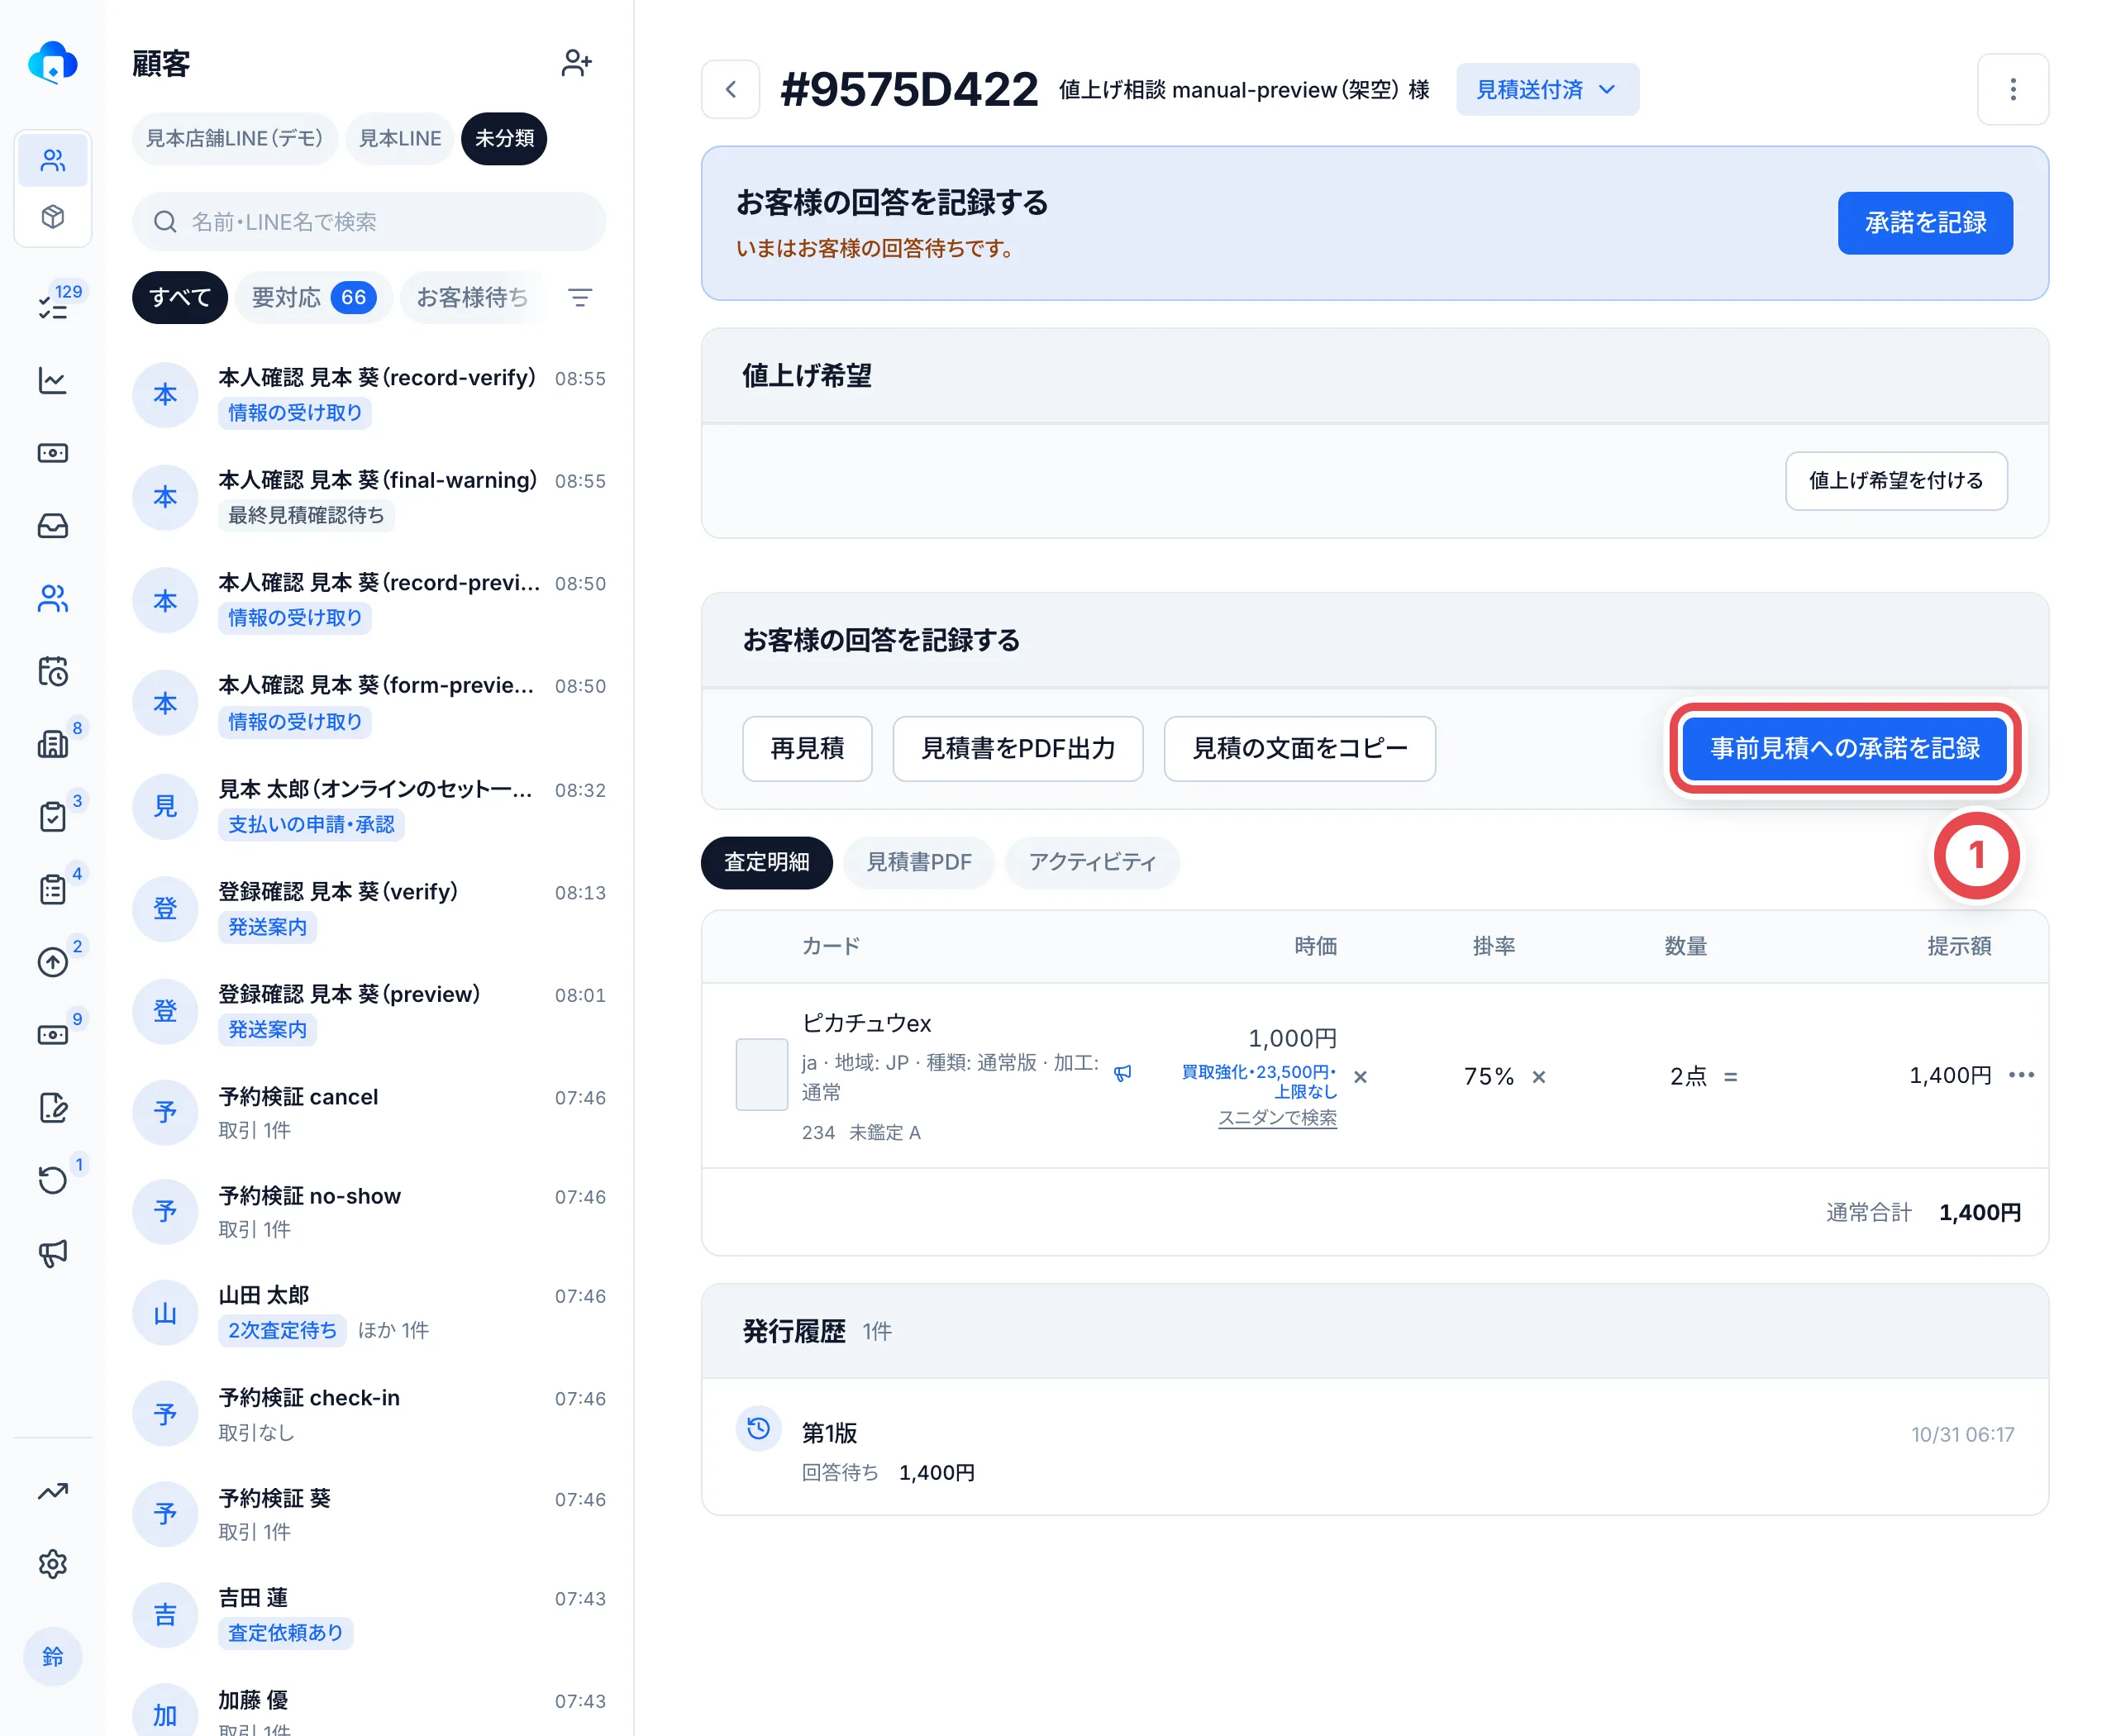 相場の分からないカードは調査依頼に回し、高額のカードは2次査定で別のメンバーが確かめます。束に金額を付けたり、何枚かの合計で金額を決めたりすることもできます。
→ くわしくは [査定と見積](/guides/purchase/appraisal)・[調査依頼と2次査定依頼](/guides/purchase/research-and-reviews)・[セット価格に変更する](/guides/purchase/set-price)
## 4. 本人確認をして、カードを送ってもらう
承諾したお客様に、発送先と、本人確認・送り状のフォームを案内します。LINEを使う店舗では②の文章案をコピーして送り、使わない場合は[手動受付の発送案内](/guides/purchase/mail-in-to-stock)に沿って記録します。案内後に①の「発送案内を記録」を押します。カードが届いたら、その段階で表示される「最終査定を入力する」から受け取りと到着を記録します。
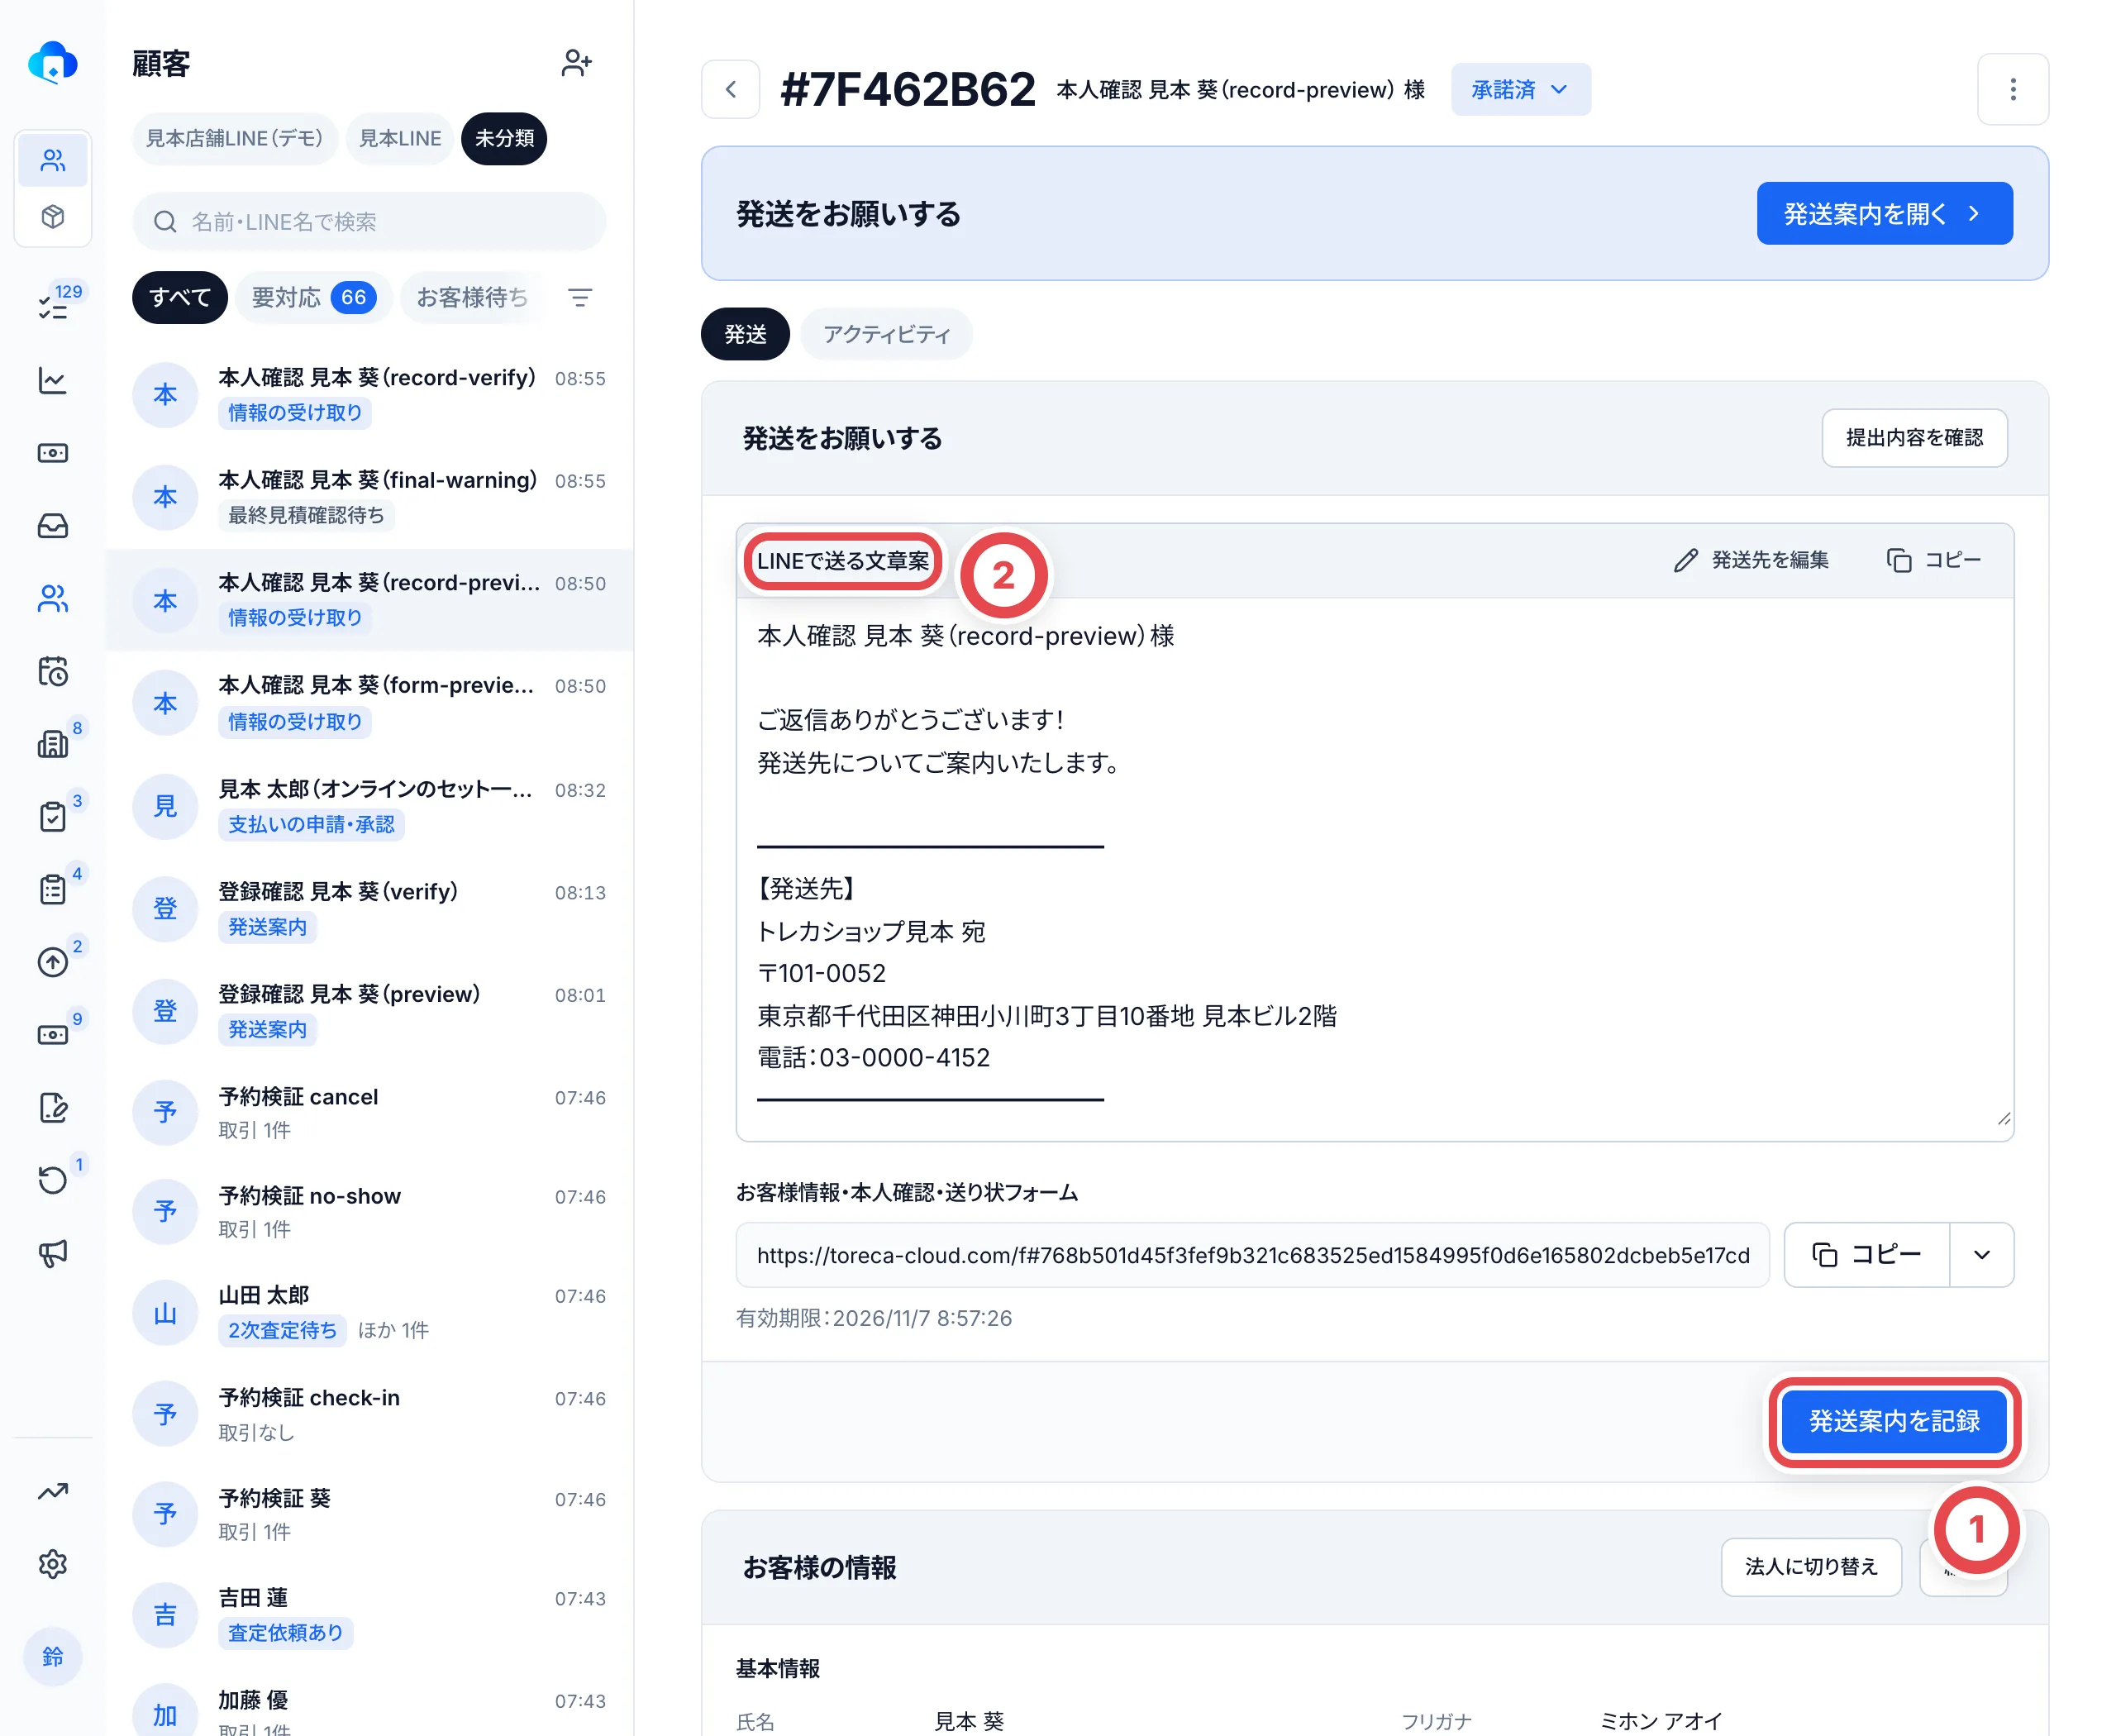 本人確認は、お客様がフォームから出した書類を確かめて記録します。最終見積の承諾より前に済ませても、あとから記録してもかまいません。
→ くわしくは [発送と最終査定](/guides/purchase/shipping-and-final)・[本人確認](/guides/purchase/identity)
## 5. 届いたカードで最終査定をする
届いたカードを1枚ずつ確かめて、最終の金額・グレード・番号を付け、保存して最終見積を出します。届かなかったカードは、到着差分・不足の記録を確認します。0円の査定に置き換えないでください。買い取れない個体は、その行のメニューで理由を付けて「買取不可にする」を選びます。お客様が承諾したら、②で記録します。①のように足りないもの(本人確認・振込先)があると、その場で知らせてくれます。
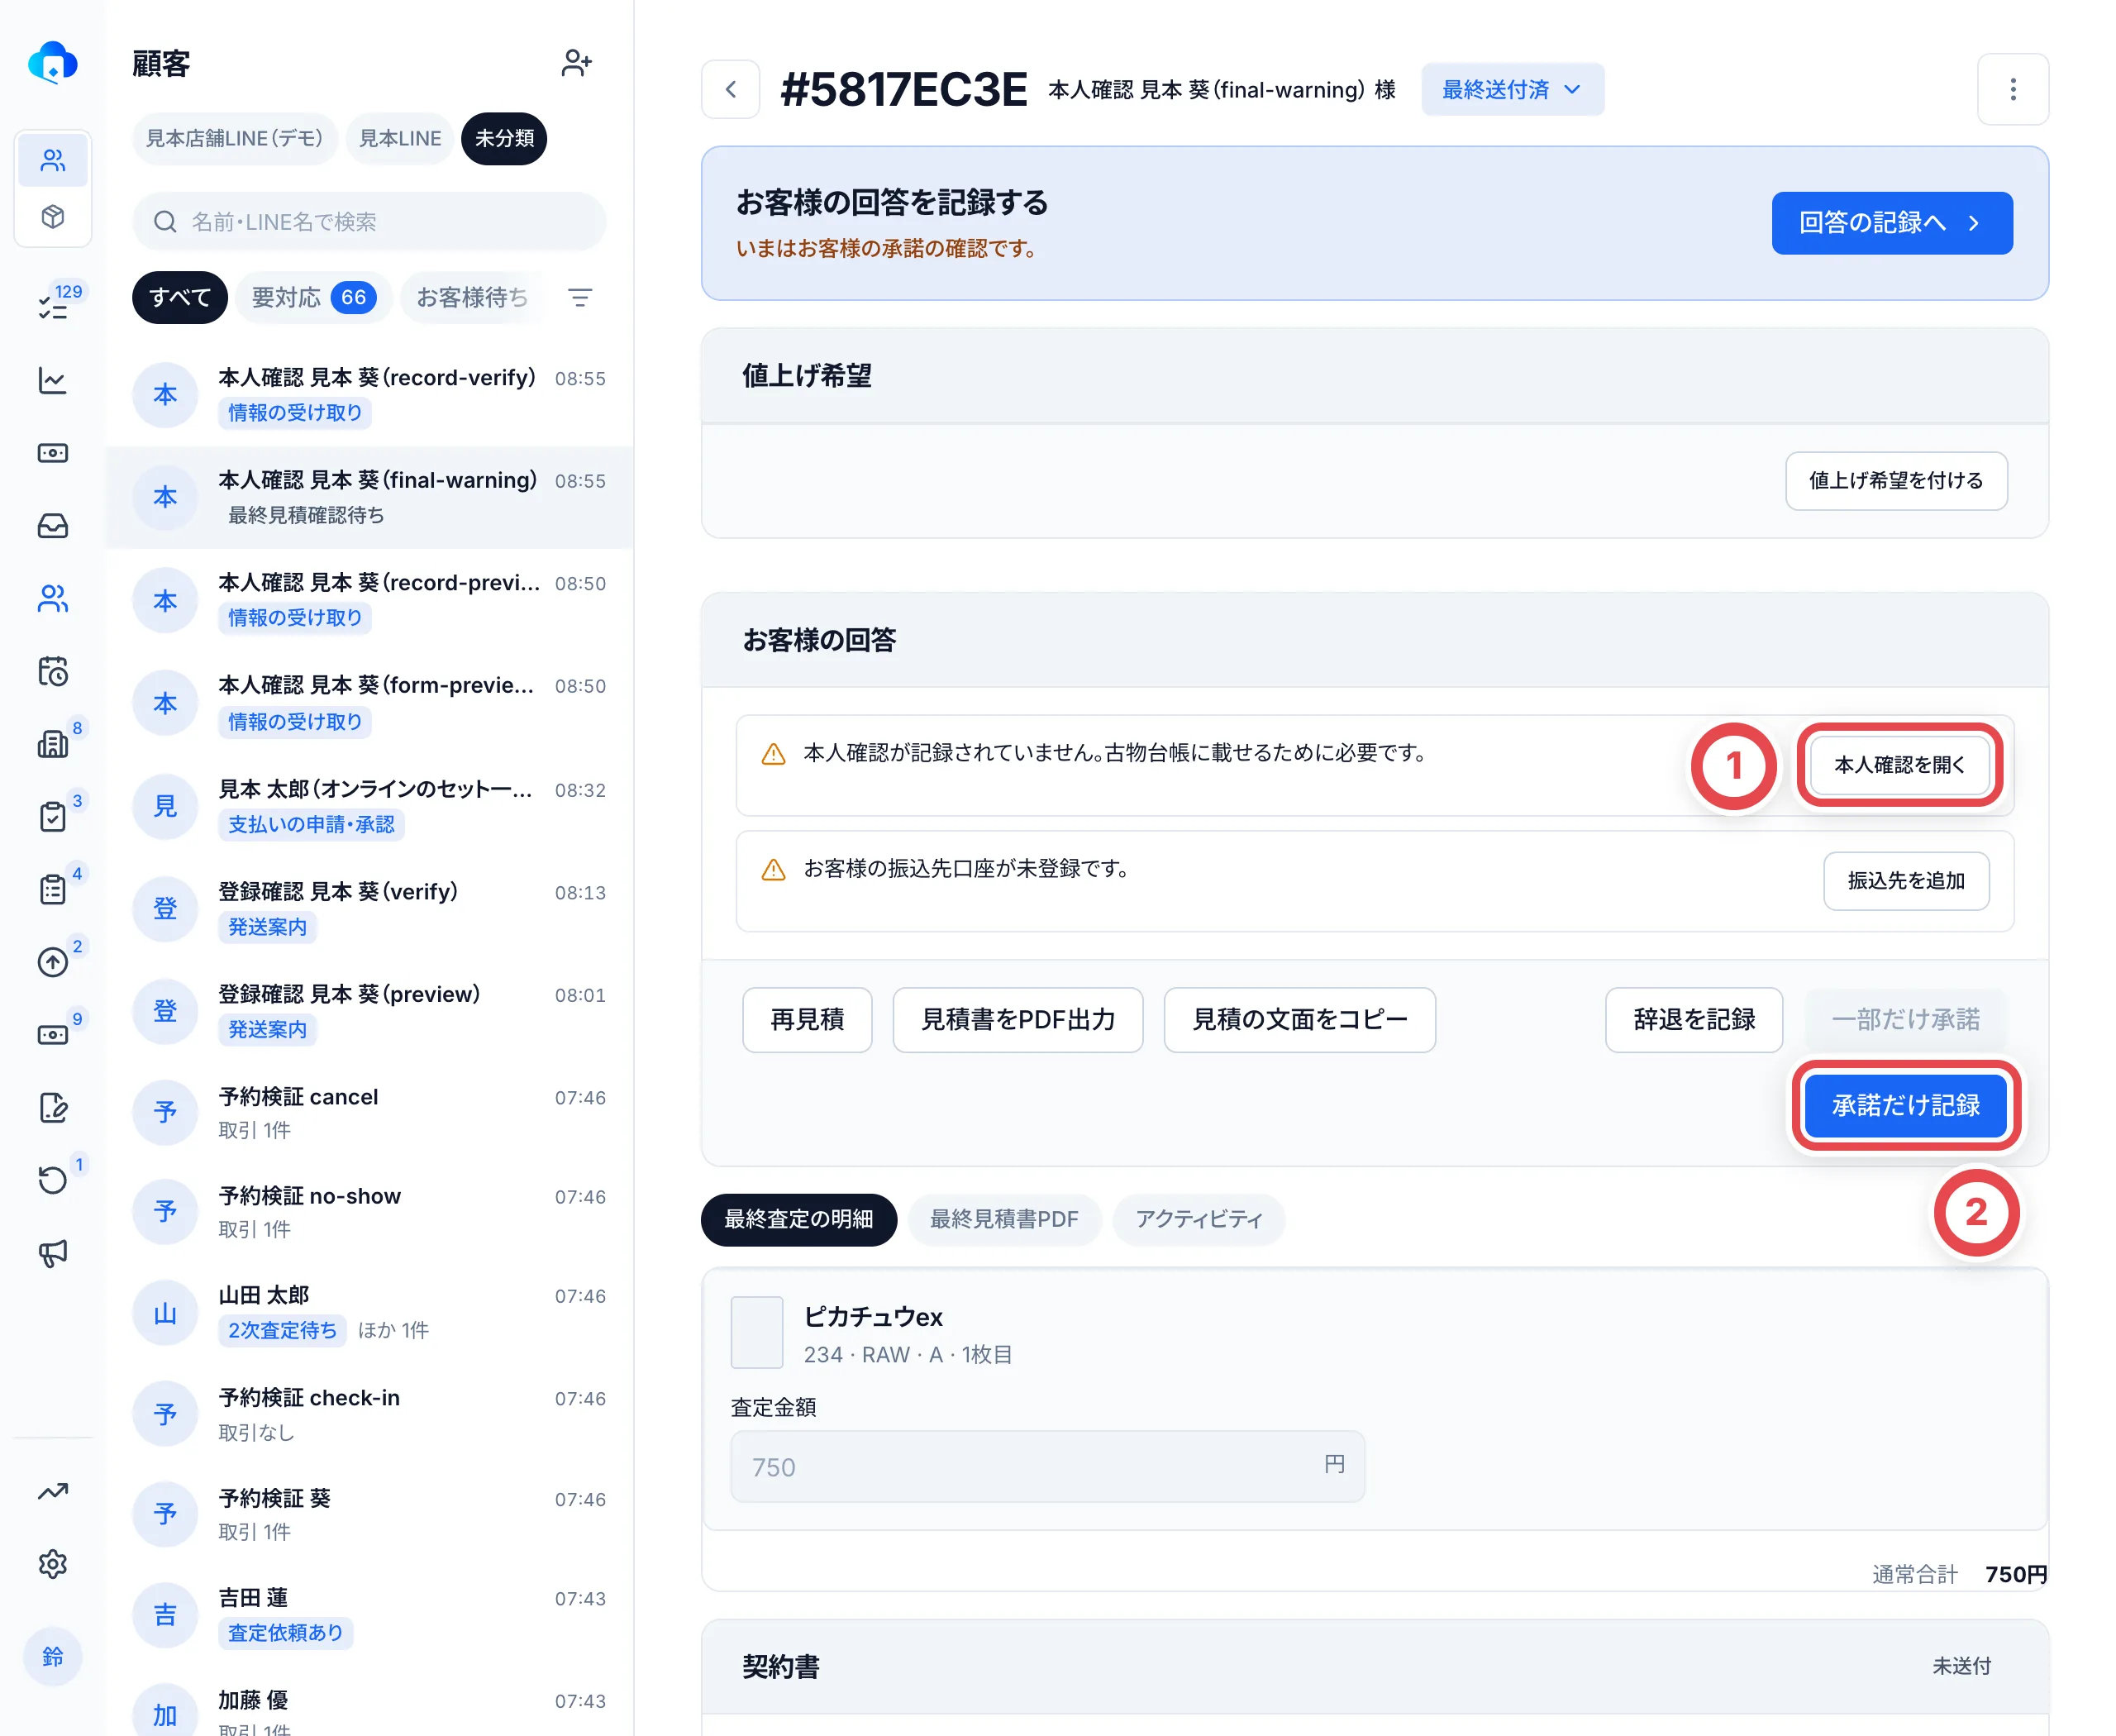 承諾・本人確認・振込先がそろったら、「在庫と支払いの登録」を行います。買い取ったカードが在庫に入り、古物台帳に記録され、支払いの準備ができます。最終査定で買い取らなかったカードは、[返品対応](/guides/purchase/returns)でお客様に返送します。
→ くわしくは [発送と最終査定](/guides/purchase/shipping-and-final)
## 6. 振り込む
支払いの画面で、金額と振込先を確かめて①の「振込を申請する」を押します。**申請したあとは、別のメンバーが承認します。** 承認されたら振込を行い、結果を記録します。
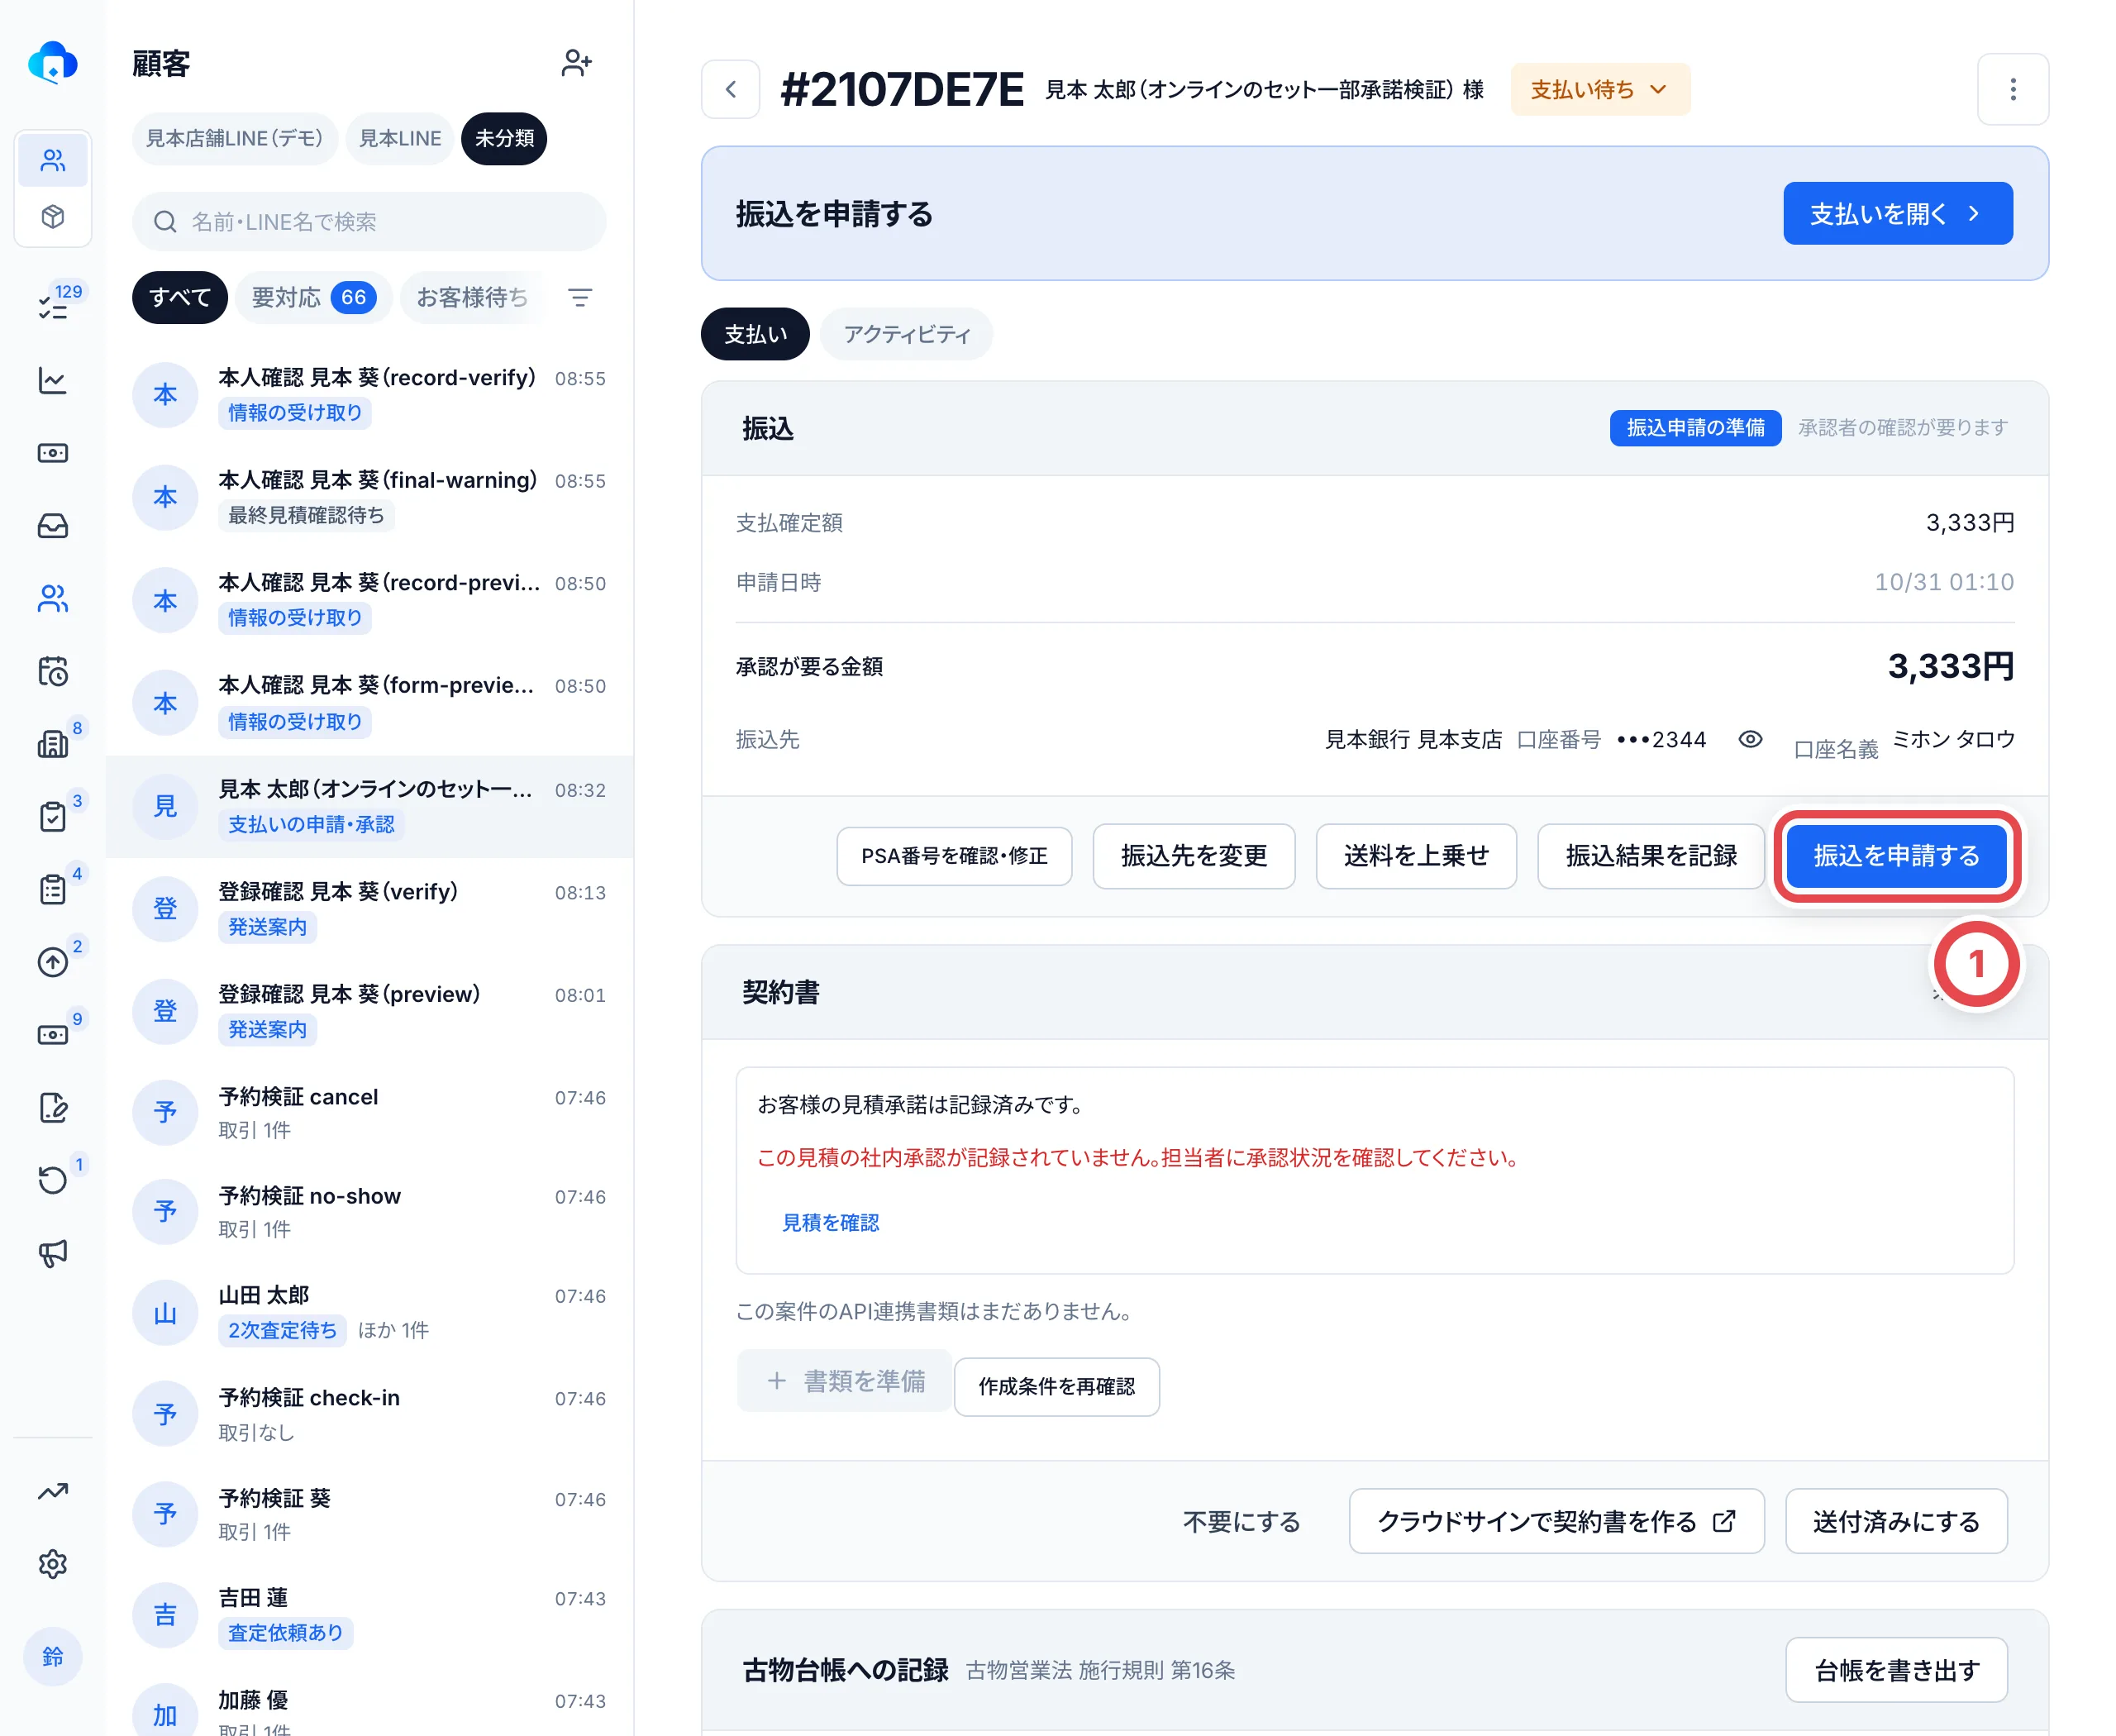 → くわしくは [振込](/guides/purchase/payouts)
## 7. 買取成立と着金の確認
振込の結果を「成功」と記録すると、①の状態が「買取成立」になります。最後に、お客様が着金を確かめたことを、②の「支払いを開く」から記録します。着金の確認を記録すると、買い取ったカードを販売や出庫に使えるようになります。
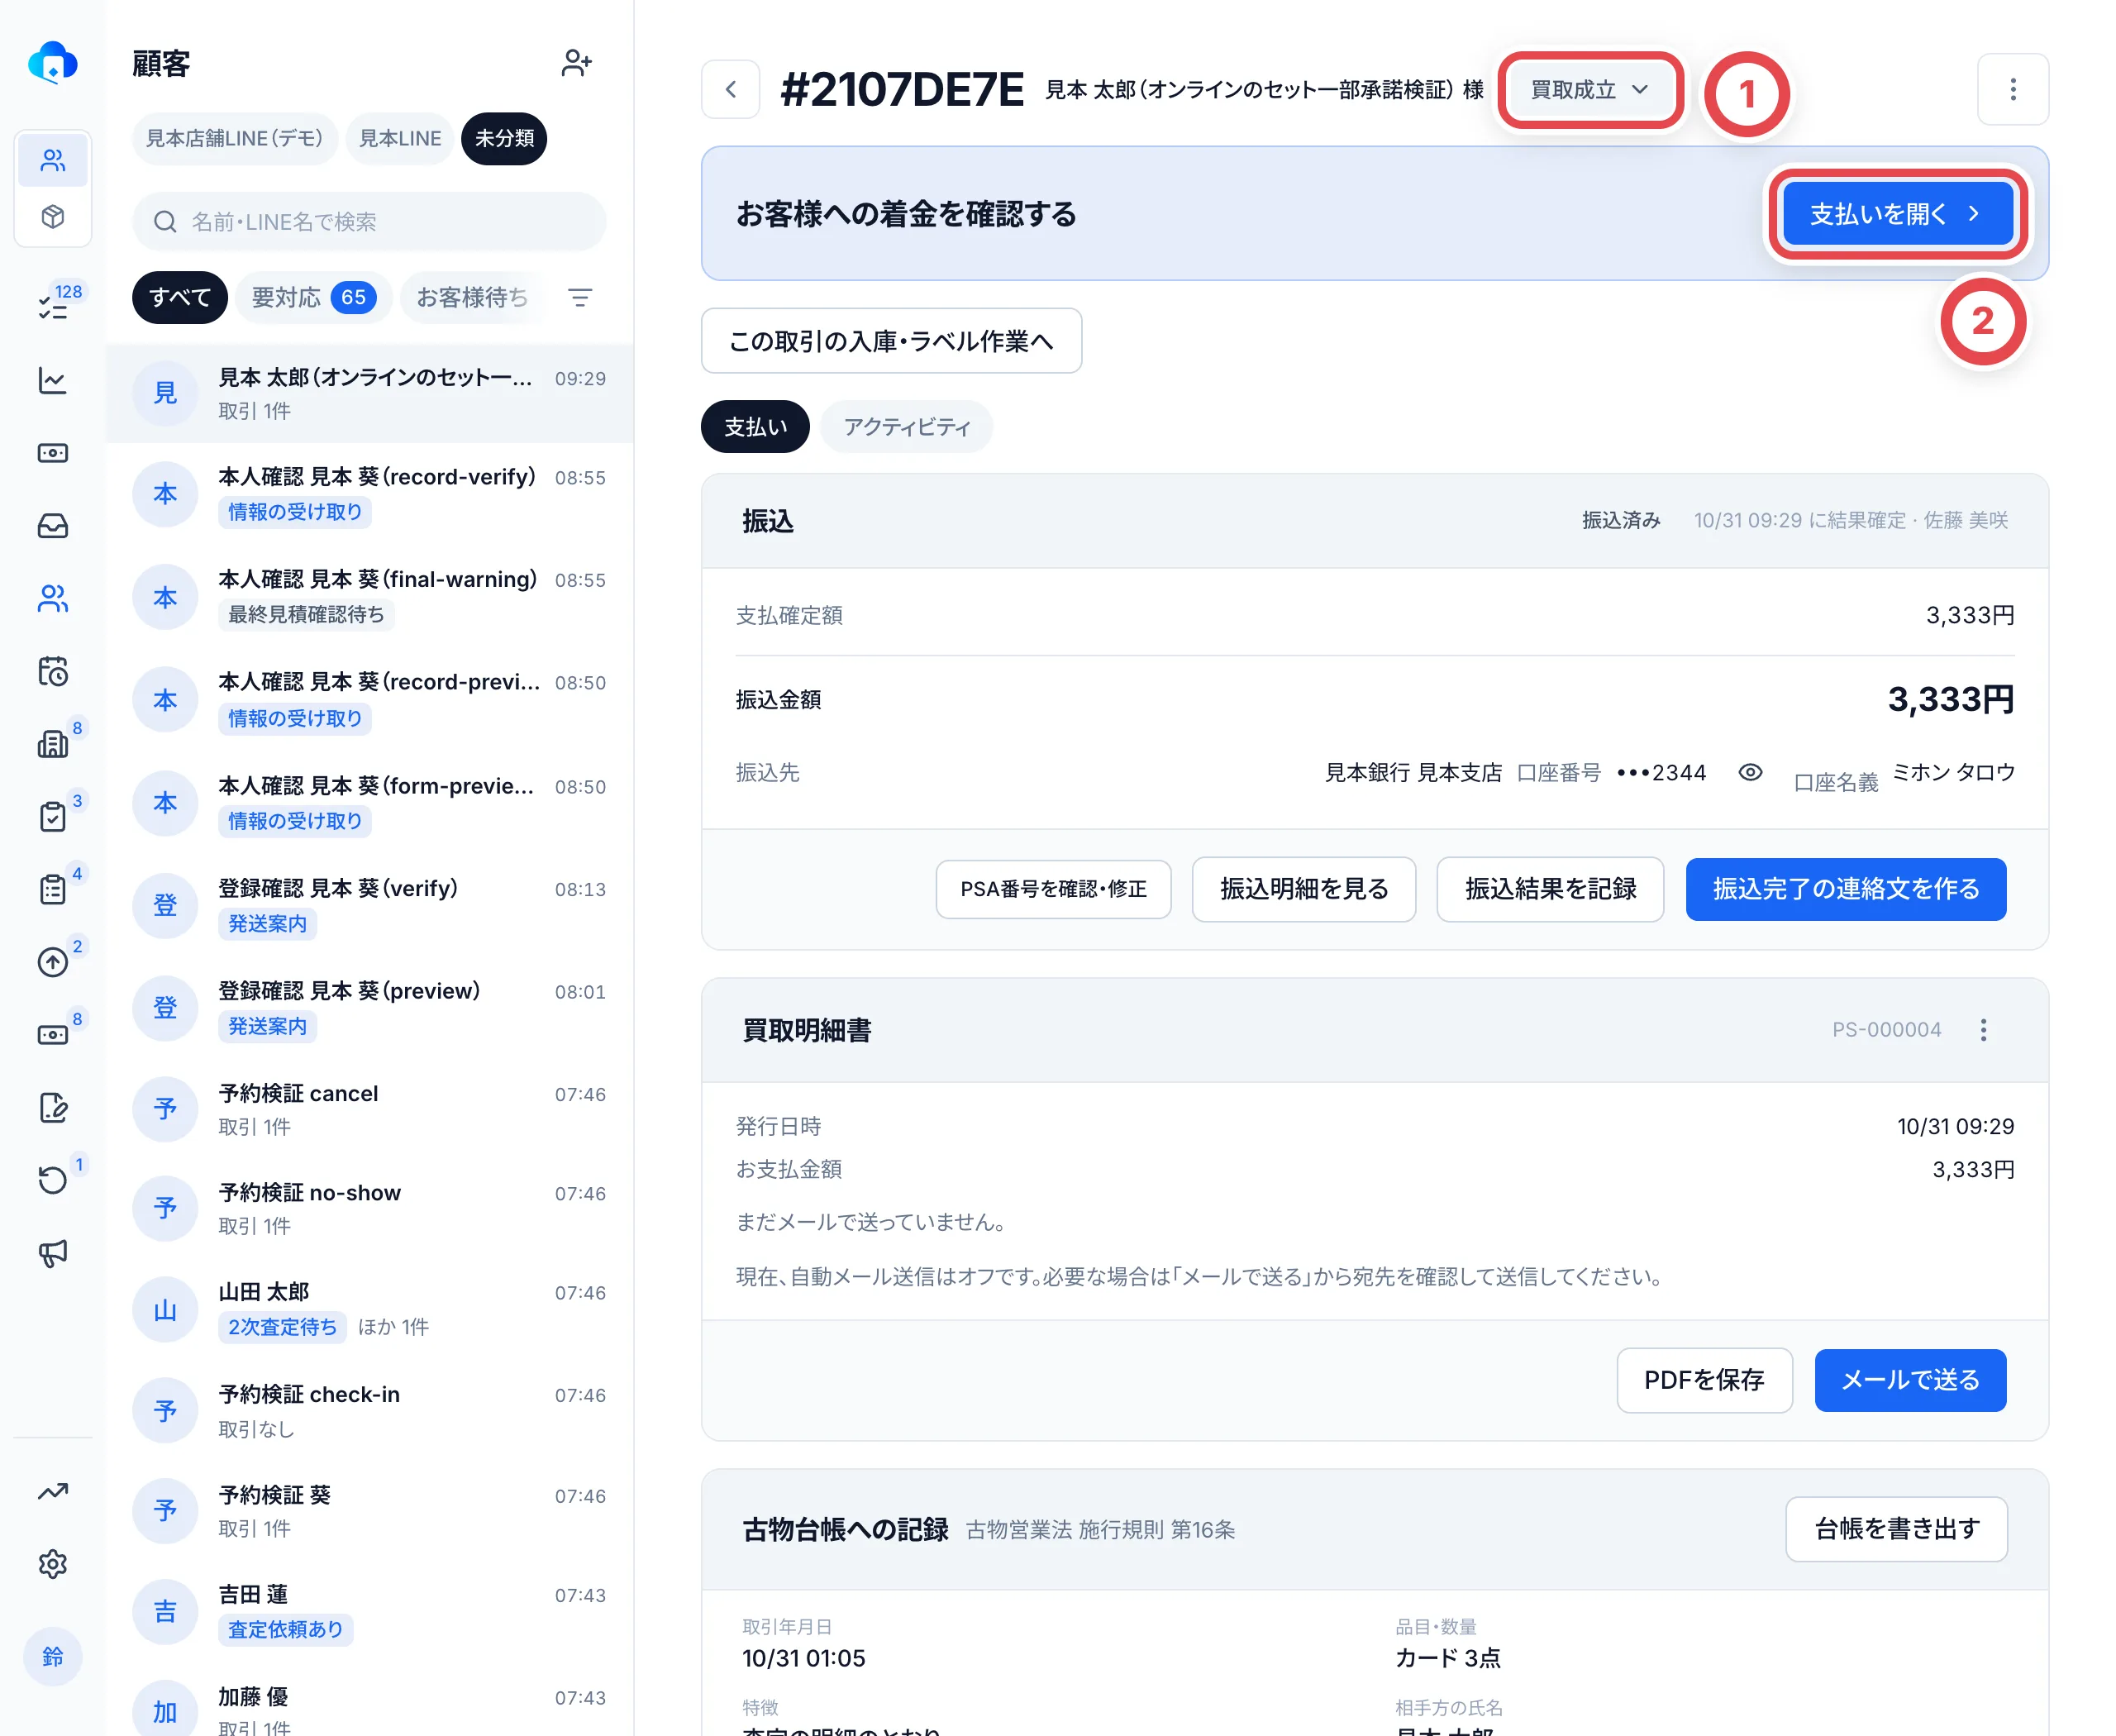 :::note
オンライン買取では、最終見積の承諾を記録しただけでは、買取成立にはなりません。振込の結果を「成功」と記録した時点で買取成立になります。返送が必要な取引は、返送の発送案内と配達完了も記録してから成立します。
:::
## 取引の状態とタブ
| タブ | 並ぶ取引の状態 |
| -------- | -------------------------------------------------------------------- |
| 査定依頼 | 受付したばかりで、まだ査定を始めていないもの |
| 見積もり | 新着、査定中、見積送付済 |
| 発送 | 承諾済、本人確認待ち、発送待ち、配送中、最終辞退、返送手配中、返送済 |
| 最終査定 | 入荷済、鑑定中、差分確認中、最終査定中、最終送付済、最終承諾 |
| 支払い | 支払い待ち、振込処理中、買取成立 |
最終見積を断られた取引(最終辞退)や返送中の取引は、カードをお返しする作業があるので「発送」に並びます。
## 困ったとき
| こんなとき | 確かめること・やること |
| ---------------------------------------- | ------------------------------------------------------------------------------------------------------------ |
| 次に何をすればよいか分からない | 取引の画面の「次の操作」を見ます。表示された作業を進め、回答待ちなら待ち先を確かめます |
| 状態を手で変えたい | 状態は操作の結果で進みます。状態を押して出る一覧から、次に記録できる操作を選びます |
| 最終見積を承諾したのに買取成立にならない | 在庫と支払いの登録、振込の申請・承認、振込結果の記録が残っています。「次の操作」で次の作業を確かめます |
| 在庫と支払いの登録に進めない | 本人確認か振込先が足りていません。最終査定の画面の「お客様の回答」に出ている項目を片づけます |
| 振込の申請を自分で承認できない | 承認は、申請した人とは別のメンバーが行います |
| 取引がどの段階か分からない | 「買取依頼」の一覧の状態の列か、取引の画面の上の状態を見ます。上の「取引の状態とタブ」の表で段階が分かります |
## 完了を確認して次へ進む
- 買い取るカードの承諾、本人確認、在庫と支払いの登録がそろっている
- 振込結果を記録し、お客様の着金を確認して記録している
- 一部買取・全件辞退で返送がある場合は、[返送の配達完了](/guides/purchase/returns)まで記録している
買い取ったカードは[格納とQRラベル](/guides/inventory/putaway)へ進みます。振込失敗は[振込に失敗したとき](/guides/purchase/payouts#振込に失敗したとき)、記録の誤りは[共通操作の訂正・取消](/guides/purchase/common-operations#返却訂正取消)から再開します。
---
# 振込
Source: https://docs.toreca-cloud.com/guides/purchase/payouts
在庫と支払いの登録後、銀行振込の申請を行います。
| ここまで進めた方法 | 振込の前に終える手順 |
| ------------------ | ------------------------------------------------------------------------------------------------------- |
| オンライン買取 | [発送と最終査定](/guides/purchase/shipping-and-final)の在庫と支払いの登録 |
| 法人買取 | [法人取引と請求書](/guides/purchase/corporate-deals)の現物確認・成立の登録 |
| 店舗買取 | [振込で支払うとき](/guides/purchase/counter#振込で支払うとき)の口座登録・署名済み契約書の添付・承諾記録 |
店舗の現金払いは[店舗買取](/guides/purchase/counter)と[現金管理](/guides/purchase/cash)の手順を使います。
トレカクラウドは、振込の申請・承認と、結果の記録を受け持ちます。**送金そのものは、店舗がネットバンクなどで行います。**
## 最初に用意するもの
- 在庫と支払いを登録した取引(取引の状態が「支払い待ち」)
- 買取額への承諾が分かる証拠(申請画面でも添付できます)(LINEのスクリーンショットや店舗の署名済み契約書など)
- 申請する人と、承認する人。申請には振込申請の準備または管理権限、承認には振込の管理・承認権限が必要です。**申請した人は自分で承認できません**
## 流れと「支払い」の列
サイドバーの「支払い」を開きます。
| 順番 | やること | 誰が | 列 |
| ---- | -------------------------------------- | -------------------------------- | ----------------------- |
| 1 | 支払いの一覧で、次にやることを見る | だれでも | すべて |
| 2 | 振込を申請する | 振込申請の準備・管理権限のある人 | 承認待ち(申請前) |
| 3 | 別のメンバーが承認する | 申請者以外のオーナー・管理者 | 承認待ち → 承認済み |
| 4 | 銀行で振り込み、振込結果を記録する | オーナー・管理者 | 承認済み → 着金確認待ち |
| 5 | お客様に確かめて、着金を記録する | 取引を扱えるスタッフ | 着金確認待ち → 完了 |
| ― | (失敗したとき)振込先を直して出し直す | オーナー・管理者 | 振込失敗 → 承認待ち |
「振込待ち」「振込中」の列は、全銀データ(銀行の総合振込に取り込むファイル)を使う店舗だけが使います。全銀データははじめは使えない状態です([全銀データを使う店舗](#全銀データを使う店舗))。
## 1. 支払いの一覧で、次にやることを見る
①の「承諾済み」は、最終見積が承諾されて、まだ在庫と支払いを登録していない取引です。②の「承認待ち」には、申請前の振込と、申請して承認を待っている振込が並びます。③の「承認済み」は、承認が済んで振り込むのを待っている振込です。
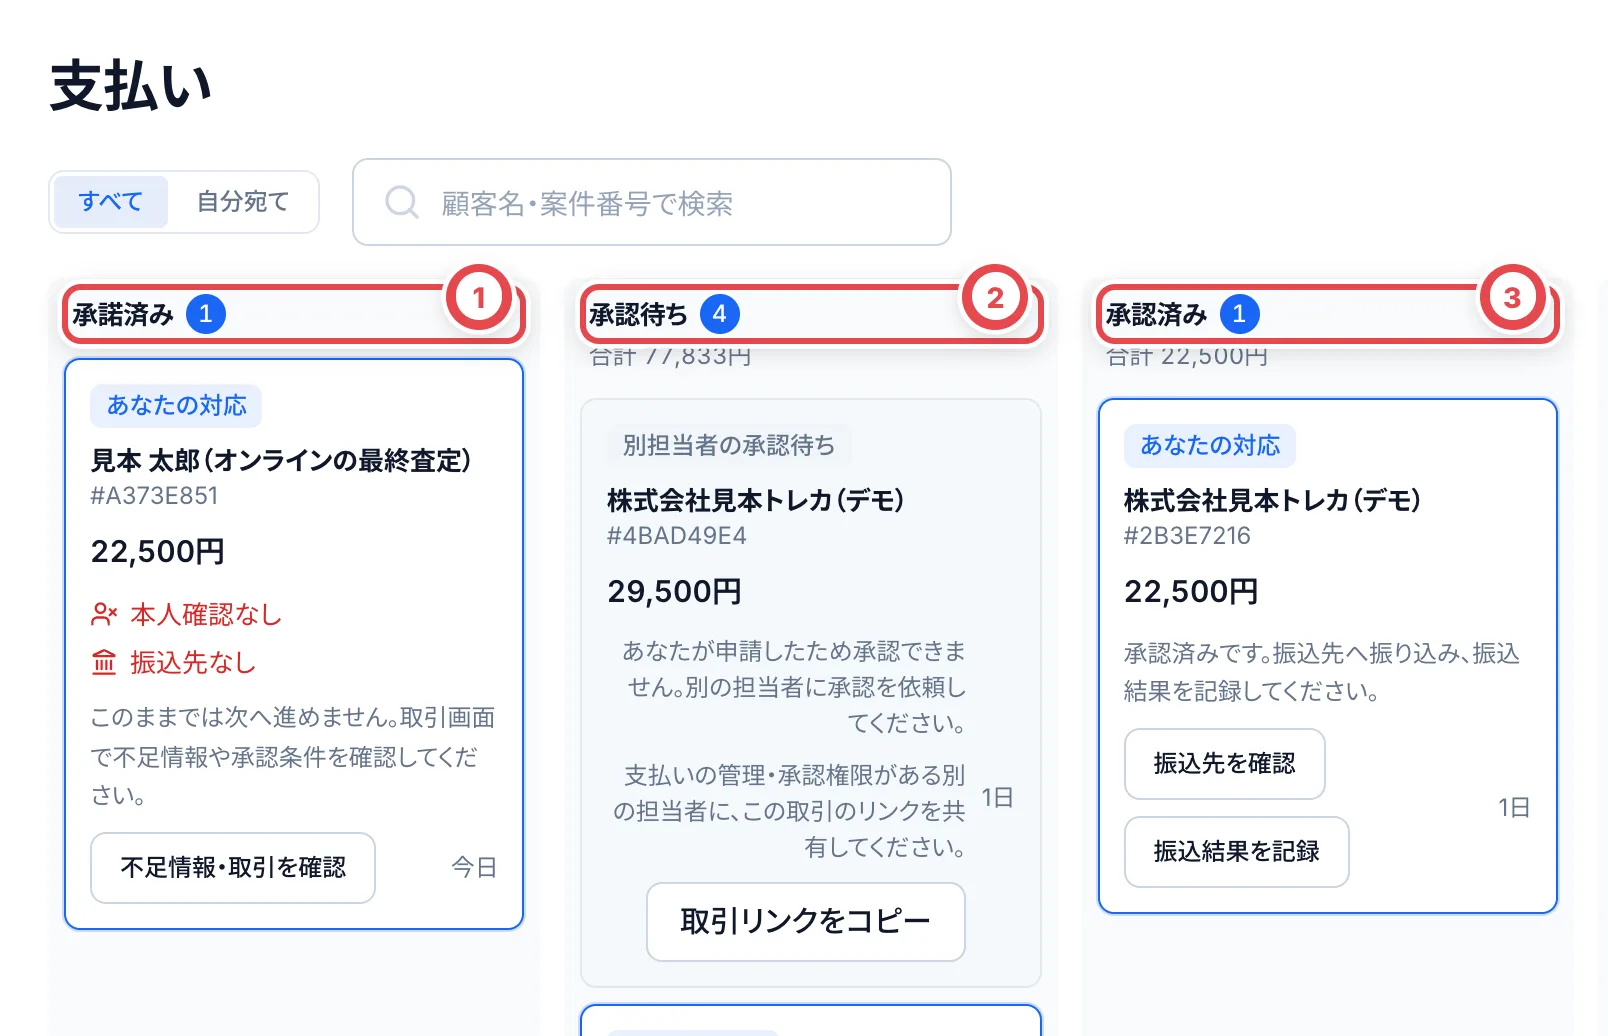 カードには、お客様の名前・案件番号・金額と、次にやることが出ます。①の「本人確認なし」「振込先なし」「委任状なし」のように先に進めない理由も出ます。②のボタンから、そのカードの次の操作に進みます。③の「自分宛て」で、自分が対応するカードだけに絞れます。
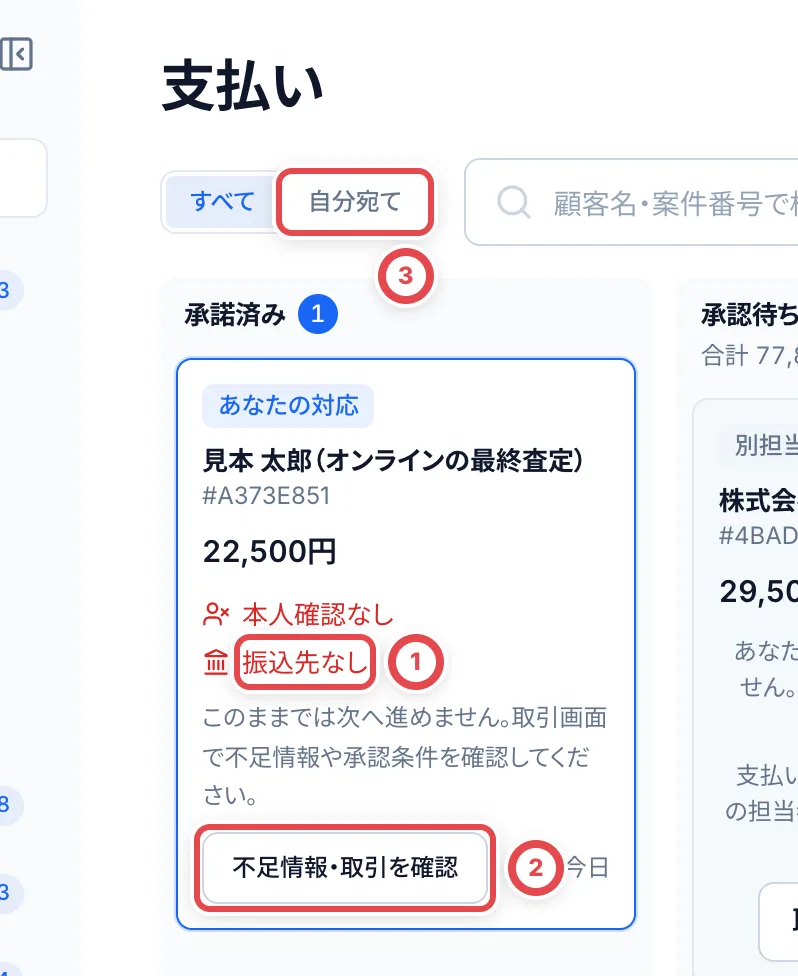 パソコンでは、カードを次の列へドラッグすると、その操作の画面が開きます。ドラッグしただけでは何も変わらず、画面で確定したときに列が移ります。
## 2. 振込を申請する
取引の「支払い」タブを開きます(一覧のカードの「振込を申請する」からも開けます)。「振込」の欄が「振込申請の準備」になっていることと、「支払確定額」「承認が要る金額」、振込先を確かめて、①の「振込を申請する」を押します。
「承諾の証拠を確認して申請」が開きます。証拠がなければ①「ファイルを添付」で、買取額への承諾が分かる画像やPDFを選びます。保存済みの証拠がある場合は「差し替える」から置き換えられます。②の証拠で、お客様・承諾内容・金額を照合します。画像は押すと拡大できます。JPEG・PNG・WebP・PDF、1ファイル20MBまでです。送信中・再試行待ちのまま申請しないでください。
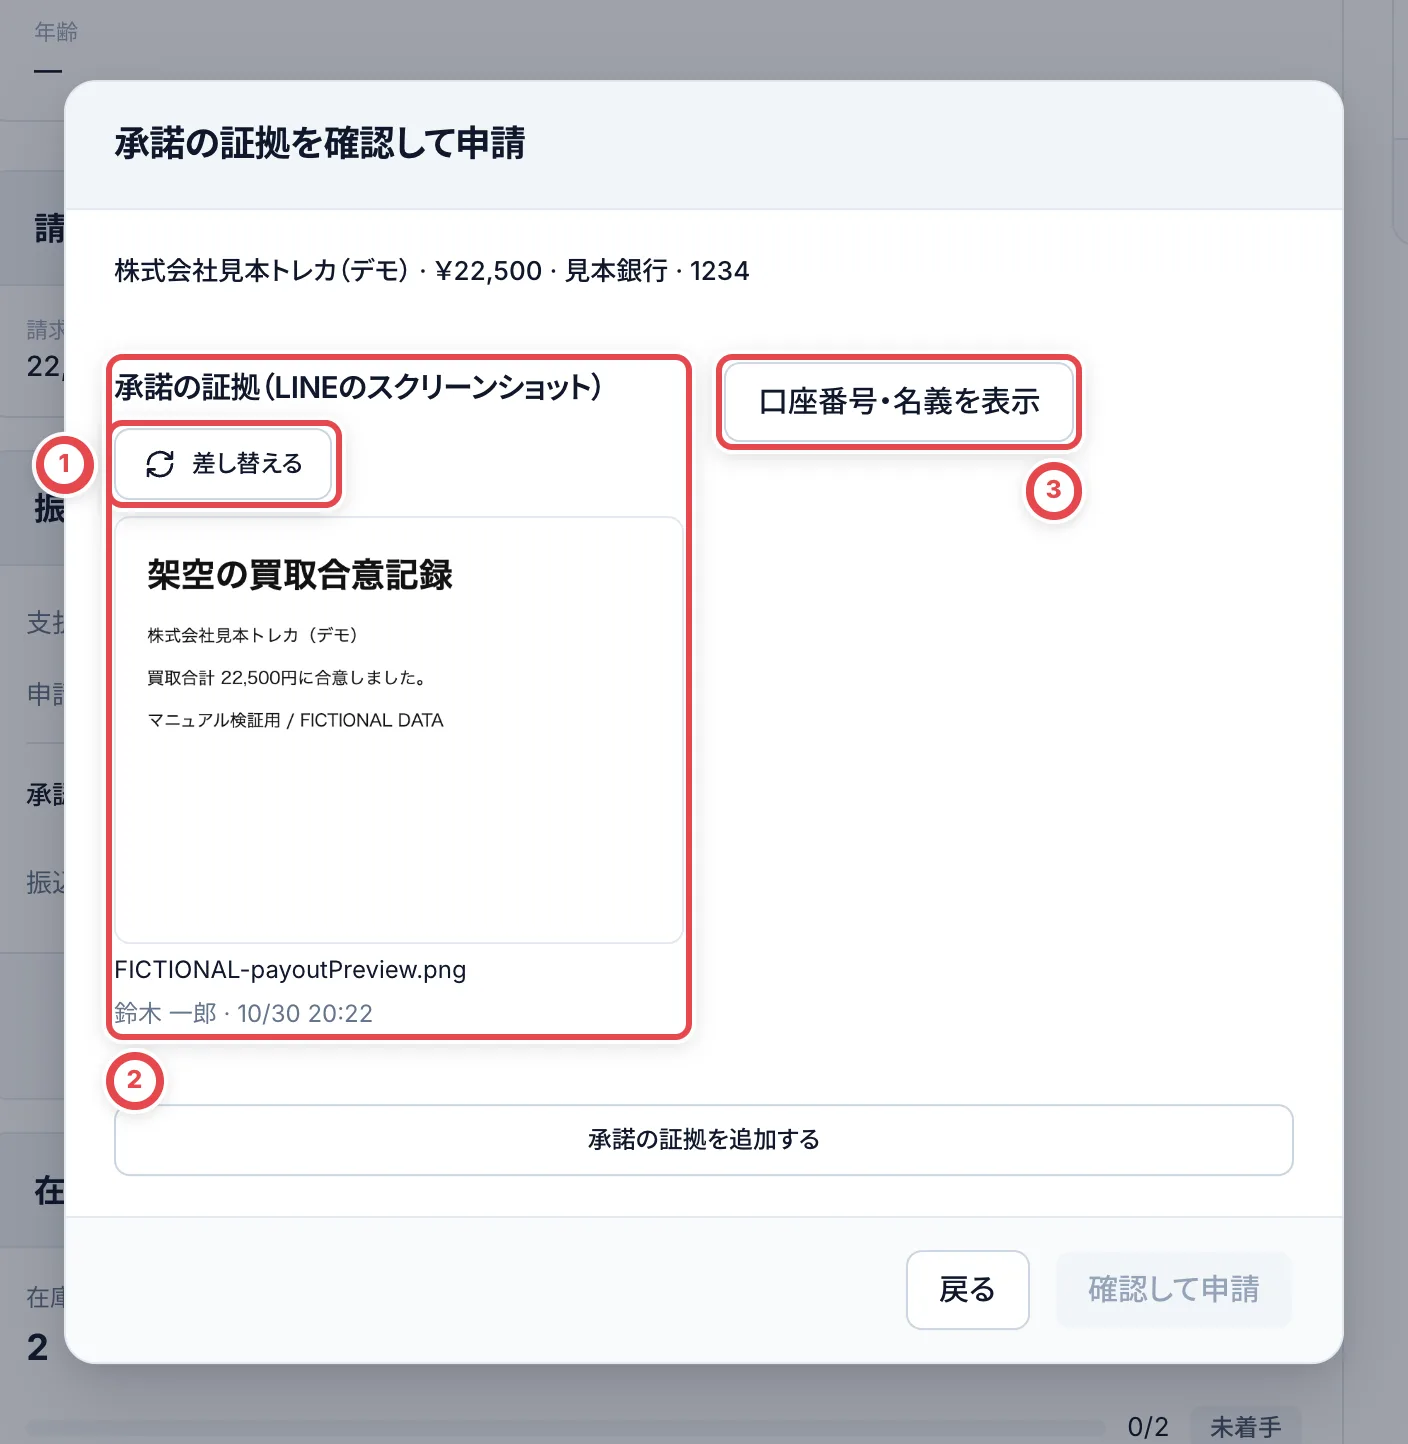 振込の管理権限がある人は「口座番号・名義を表示」を押し、②の銀行・支店・口座種別・番号・名義を原本と照合します。①の証拠、お客様名・振込合計も確かめて、③「確認して申請」を押します。**押すとその場で申請されます。** 口座や申請内容が更新された場合は、画面を開き直して確認し直します。
振込申請の準備権限だけがある担当者は、証拠を添付して「振込を申請する」で引き継げます。この場合、口座全体の確認は管理権限のある担当者が行います。「承諾の証拠を追加する」は、取引の承諾記録へ戻って確認する場合に使います。
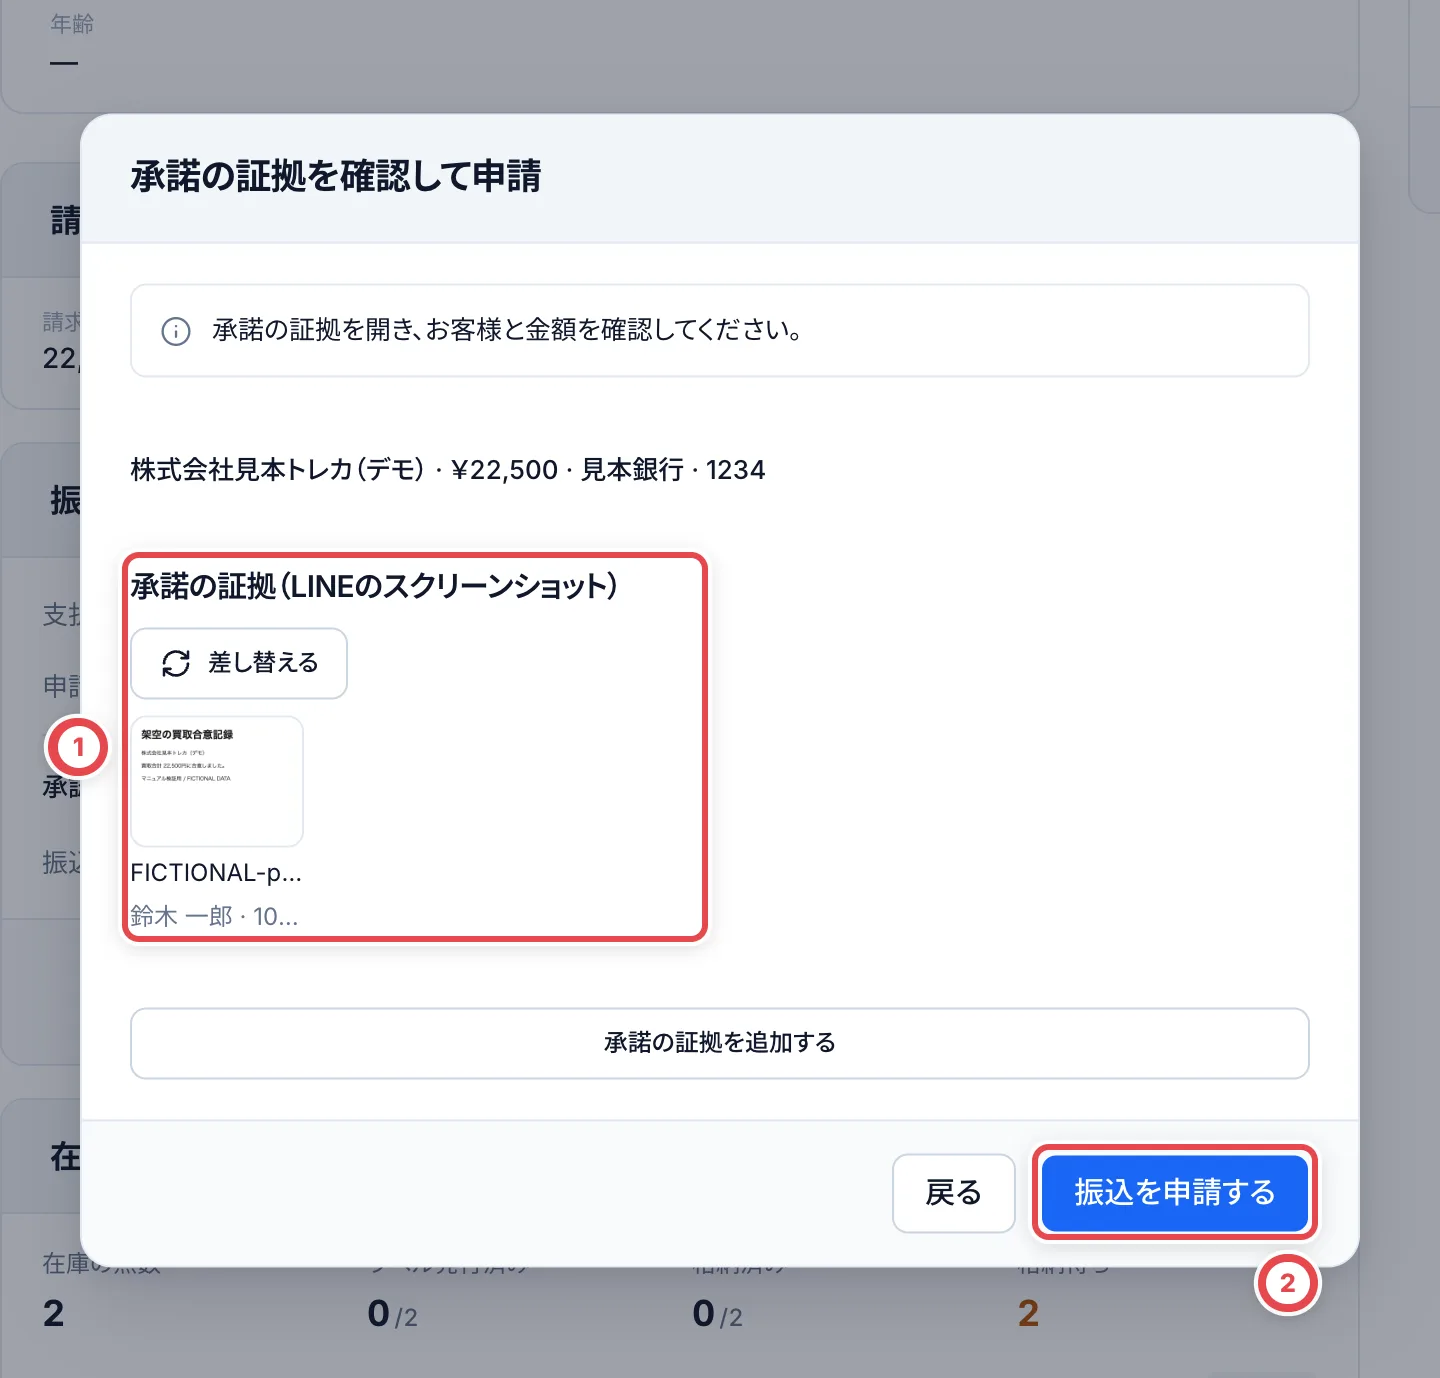 ### 現在の振込口座を確認・コピーする
取引の「支払い」の現在の振込口座では、通常は番号の末尾だけが表示されます。振込の閲覧・結果記録・管理権限がある担当者は、①の目のボタンで番号を表示し、②「コピー」で番号全体をコピーできます。確認後は同じ目のボタンで隠します。登録済みの別口座を使う場合は「振込先を変更」から変更し、必要な再申請・承認へ進みます。
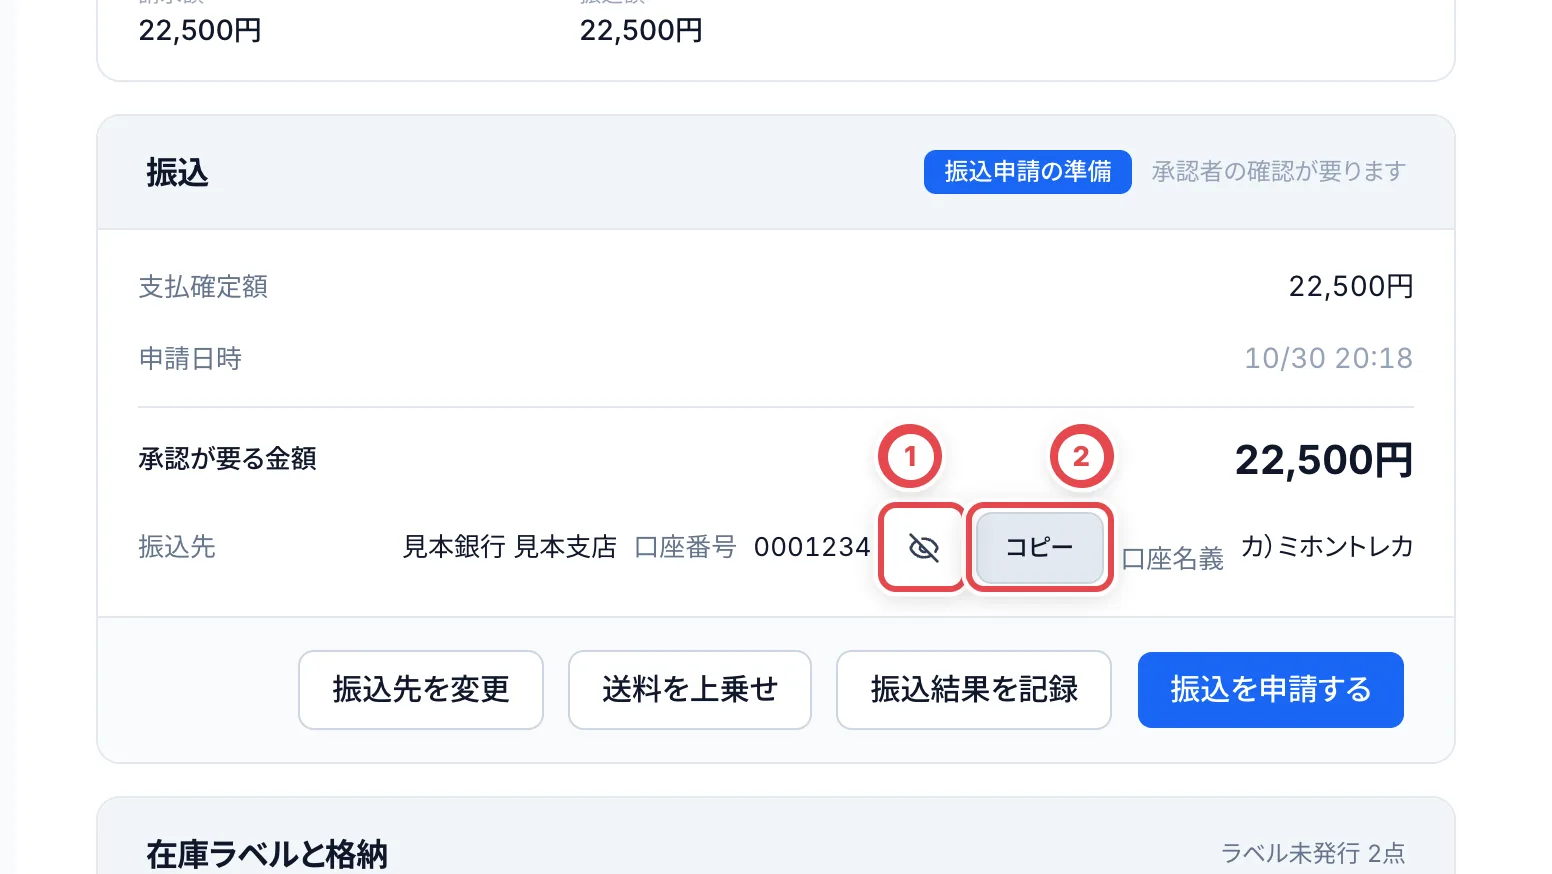 買取対象にPSAのカードがあるときは、先に「PSA番号を確認・修正」で1枚ずつ番号を保存します。番号が足りないままでは申請・承認に進めません。番号は先頭の0を含めて40桁以内の数字で、ほかの個体で使っている番号は保存できません。 入力後も取引の「支払い」に入口が残ります。支払い前に番号を直す場合は、対象カードの「修正」を押して保存します。支払い処理中・完了後は、この画面では変更できません。
## 3. 別のメンバーが承認する
申請した人とは別のオーナーか管理者が、一覧の「承認待ち」のカードで「承認する」を押します。①の申請者・承諾見積の版と金額・振込先・送料を確かめ、承諾の証拠を開いて、同じ金額に承諾しているかを照合します。
すべて確かめたら、②の「各顧客の承諾証拠・見積額・送料・振込合計・口座を確認した」にチェックを入れ、「1件を承認する」のような件数入りのボタンを押します。**押すとその場で承認されます。** 承認しても、銀行への送金はされません。
内容に不足があるときは、メモに理由を書いて「メモを理由に差し戻す」を押します。振込は申請前に戻り、申請者が直して申請し直します。複数のカードを選んで「まとめて承認する」こともできます。
「設定 › 支払い」の「承認が必要になる金額」を超える振込は、一覧からは承認できません。カードに「〇〇円を超えるため、取引の画面で承認します」と出るので、取引の「支払い」タブの「承認する」から承認します。
お客様と名義の違う口座に振り込むときは、委任状を締結済みにするまで承認できません。[本人確認](/guides/purchase/identity)を参照してください。
## 4. 銀行で振り込み、振込結果を記録する
承認した振込を、ネットバンクなどで振り込みます。振り込んだら、一覧の「承認済み」のカードの「振込結果を記録」を押します。画面の「口座番号を表示」で振込先全体を照合し、「コピー」で番号をコピーできます。
振込の結果を①で選びます。全額の振込が終わったことを確かめてから「成功」を選び、「結果を確定」を押します。受付済み・処理中・一部振込・結果不明の段階では成功にしません。「振込の証拠」に、ネットバンクの完了画面などを添付することもできます(任意)。成功を記録すると、カードは「着金確認待ち」に移り、取引は「買取成立」になります。
振り込めたら①で「成功」を選び、②で結果を確定します。
ネットバンクの振込の受付一覧(CSV)を取り込んで、まとめて結果を記録することもできます。画面上部の「振込の受付一覧を取り込む」を使います。
## 5. お客様に確かめて、着金を記録する
「着金確認待ち」のカードの「着金を記録」を押します。①の「コピー」で振込完了の文面をコピーし、LINEでお客様に送ります。お客様から受け取ったと返事が来たら、必要なら補足を書いて、②の「記録する」を押します。カードは「完了」に移ります。
:::warning
着金を記録するまで、その取引で買い取ったカードは在庫で「着金確認待ち」になります。出庫予約・拠点間移動・テナント間移管・連携先への割り当てには使えません。
:::
記録を間違えたときは、「完了」のカードの「記録を見る」から、理由を書いて「取り消す」を押します。カードは「着金確認待ち」に戻ります。「完了」には直近7日の分が並び、それより前は「履歴を見る」から開きます。
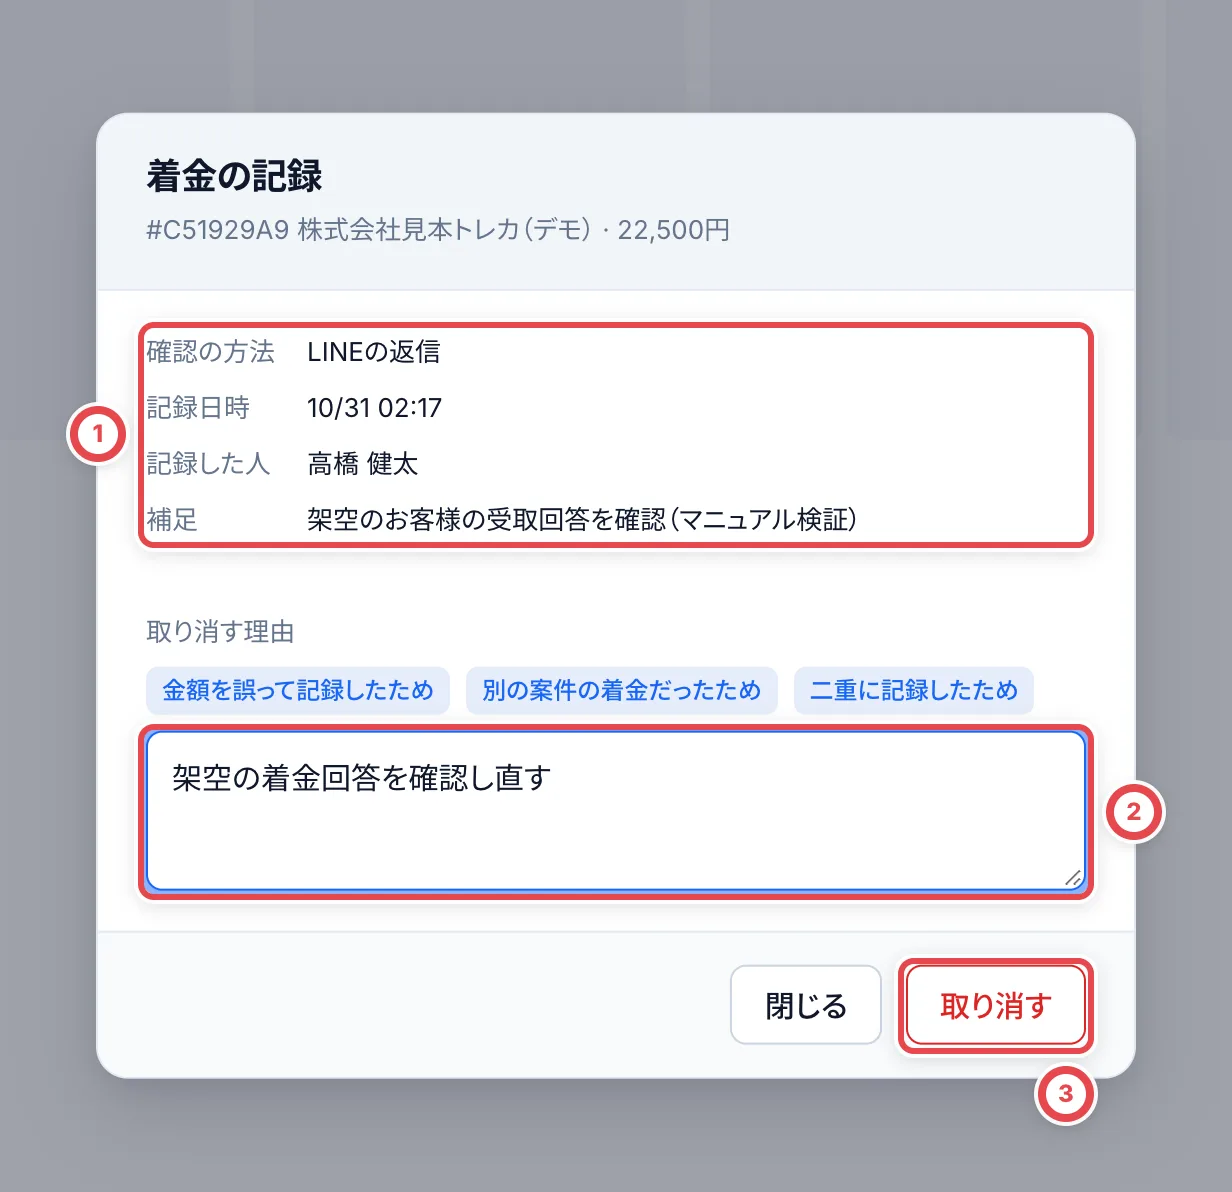 ①で元の記録を照合し、②に取り消す理由を入れ、③で着金確認待ちへ戻します。銀行への送金は取り消しません。
## 振込に失敗したとき
失敗を記録した振込は、「振込失敗」の列に移ります。口座の誤りなどで別の口座に振り込むときは、①の「振込先を直す」を押します。
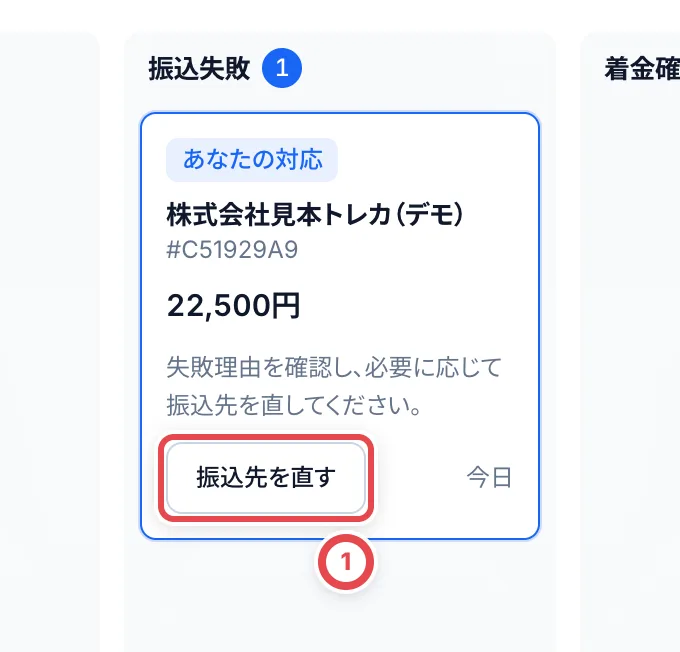 「振込先を変更」が開き、①の振込先に今の口座が出ます。①を押して、新しい振込先を選びます。正しい口座がまだ登録されていなければ、一覧の最後の「振込先を追加」で、その場で登録します。登録した口座が選ばれます。変更理由を書き、お客様に確認した口座と一致し、再承認が必要なことの確認にチェックを入れ、②の「変更して再承認を依頼」を押します。振込は申請前に戻るので、もう一度申請して、別のメンバーが承認します。
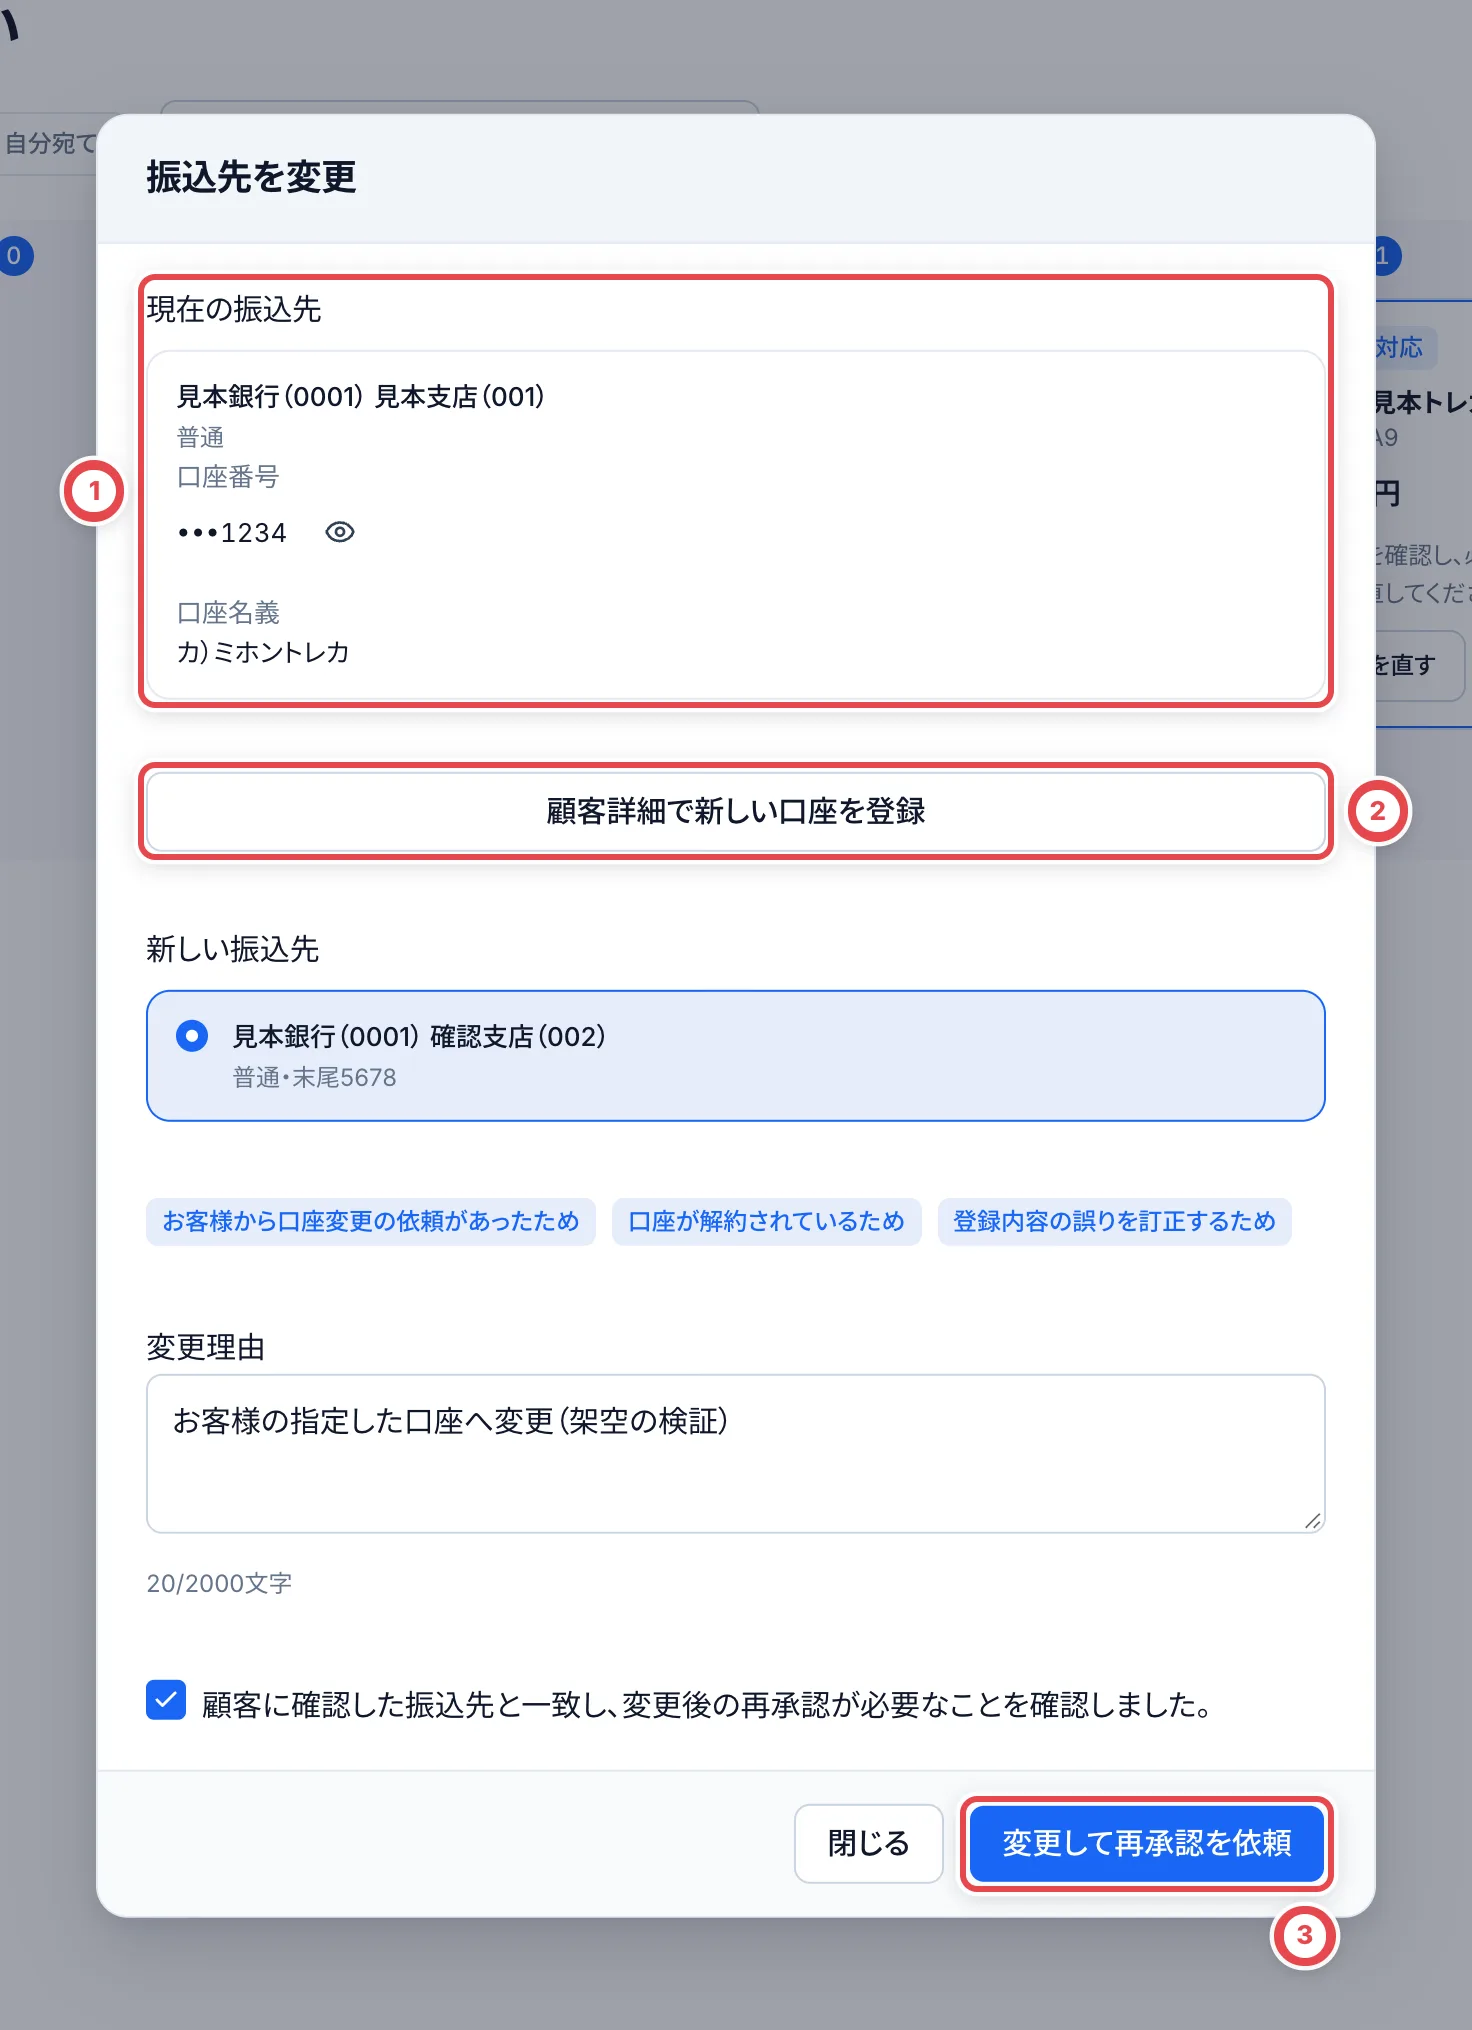 同じ口座に振り込み直すときは、もう一度振り込んでから、取引の「支払い」タブの「振込結果を記録」で「成功」を記録します。一覧では、カードを「振込失敗」から「着金確認待ち」へドラッグしても、同じ画面が開きます。
組戻し(銀行に依頼して振込を取り消すこと)は銀行で手続きします。振込の受付一覧を取り込むときに「資金返却」の行を「資金返却で戻す」にすると、成功として記録した振込を失敗に戻せます。
## 全銀データを使う店舗
全銀データは、承認した振込を1つのファイルにまとめて、銀行の総合振込に取り込む機能です。店舗ごとに有効にする機能で、はじめは使えない状態です。使う前に「設定 › 支払い」で依頼人コード・依頼人名・振込元の口座を登録します。
1. 「承認済み」のカードを選び、「振込データを作る」を押します。「振込指定日」(土日・祝日・年末年始を除いて提案されます)を確かめ、「作成してダウンロード」を押すと、カードは「振込待ち」に移ります
2. 「振込内容を確認」でファイルの内容を確かめ、銀行の総合振込に取り込んで依頼したら、「銀行に依頼済みとして記録」を押します。カードは「振込中」に移ります
3. 銀行で振込が終わったら、「振込中」のカードの「振込結果を記録」から振込データを選び、振り込めなかった明細にチェックを入れて「振込結果を記録する」を押します。チェックのない明細は振込済みになります
作ったファイルは、画面上部の「作成済みの振込データ」から、もう一度ダウンロードしたり取り消したりできます。
## 困ったとき
| 起きていること | 確かめること・直し方 |
| ---------------------------------------------------- | ---------------------------------------------------------------------------------------------------------------- |
| 「振込を申請する」が出ない・押せない | 振込申請の準備または管理権限が必要です。カードに「本人確認なし」「振込先なし」などが出ていれば、先にそろえます。 |
| 申請で「承諾の証拠」がないと言われる | 申請画面の「ファイルを添付」から証拠を保存し、送信完了を確認します。 |
| 「確認して申請」が押せない | 証拠の保存完了と、管理権限がある場合は口座番号・名義の表示を確かめます。更新通知が出たら開き直します |
| 「承認する」が押せない・「別担当者の承認待ち」と出る | 申請した本人は承認できません。別のオーナーか管理者に頼みます。 |
| 一覧から承認できず「取引の画面で承認します」と出る | 承認が必要になる金額を超えています。取引の「支払い」タブの「承認する」から承認します。 |
| 「PSA番号が未入力」で進まない | 「PSA番号を確認・修正」で、買い取るPSAカードの番号を1枚ずつ保存します。 |
| 「委任状なし」と出る | お客様と名義の違う口座です。委任状を締結済みにします([本人確認](/guides/purchase/identity))。 |
| 振込先を直そうとしたら、選べる口座がない | 振込先の一覧の最後の「振込先を追加」で、その場で正しい口座を登録します。 |
| 間違えて「成功」を記録した | 振込の受付一覧の取り込みで「資金返却で戻す」を使うか、管理者に相談します。 |
| 在庫のカードが「着金確認待ち」で動かせない | 着金を記録するまで、出庫予約や移動には使えません。「着金を記録」を済ませます。 |
| 「振込待ち」「振込中」の列がいつも空 | 全銀データを使っていない店舗では使いません。承認済みから直接「振込結果を記録」へ進みます。 |
## 支払い後に戻る手順
オンライン買取は[完了条件と返送の確認](/guides/purchase/overview#完了を確認して次へ進む)、店舗買取は[完了確認と格納](/guides/purchase/counter#8-完了を確認してカードを格納する)へ戻ります。買い取ったカードの格納は[格納とQRラベル](/guides/inventory/putaway)で進めます。
---
# 値上げ希望を記録して対応する
Source: https://docs.toreca-cloud.com/guides/purchase/price-increase-requests
提示した見積に対して「もう少し高くしてほしい」と相談されたときは、値上げ希望を案件に付けます。価格を変更する操作や、お客様に返事を送る操作とは別です。
| 相談の入り方 | 操作 |
| ---------------------------- | --------------------------------------------------------- |
| 店舗で相談を受けた | 案件の「値上げ希望を付ける」 |
| LINEの新着会話から候補が出た | 「値上げ希望」→「LINEからの確認候補」で根拠を確認して登録 |
| 対応が終わった | 案件で「対応済みにする」 |
オンライン買取など必要な機能と閲覧権限がある店舗で使えます。登録・除外・対応の記録には、買取を編集する権限が必要です。
## 1. 未対応の希望を探す
サイドバーの「値上げ希望」を開きます。①で「LINEからの確認候補」「未対応」「対応済み」を切り替えます。②の案件・顧客・対象見積を照合し、案件を開きます。件数は候補と登録済みの希望で別々です。
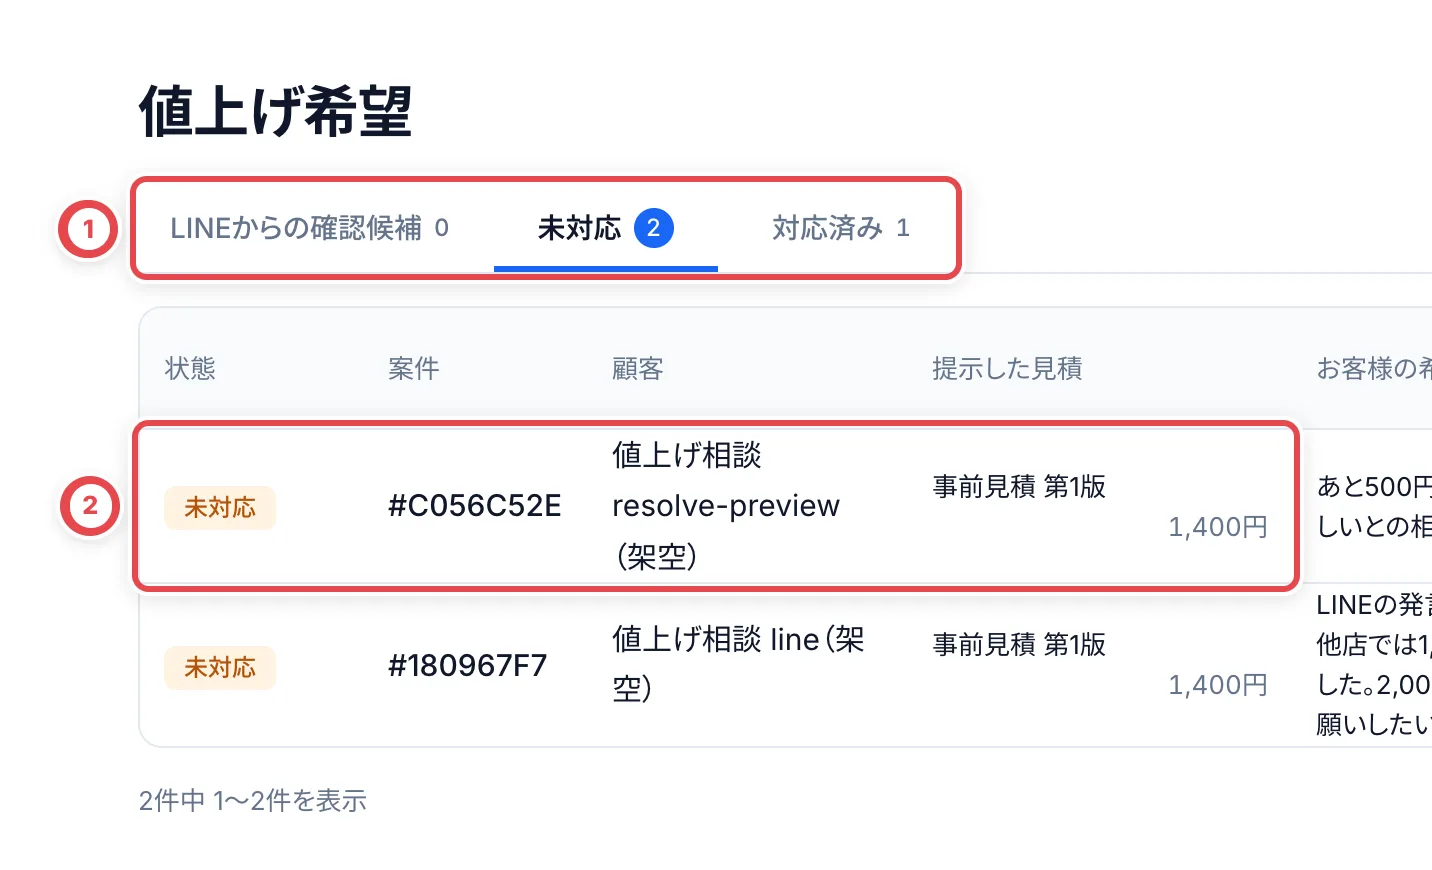 ## 2. LINE候補の根拠を確認して登録する
①の発言、明示された希望額・他店の提示額を確認します。AIの候補をそのまま価格決定に使わず、必要なら案件とLINEの会話を開きます。②の対象案件・見積を選び、③の「値上げ希望に登録」を押します。該当しなければ「該当しない」で除外します。
登録しても、見積金額は変わらず、お客様へのメッセージも送られません。LINE同期後に候補が処理されるため、相談から表示まで時間がかかることがあります。過去の全会話をまとめて候補にする機能ではありません。
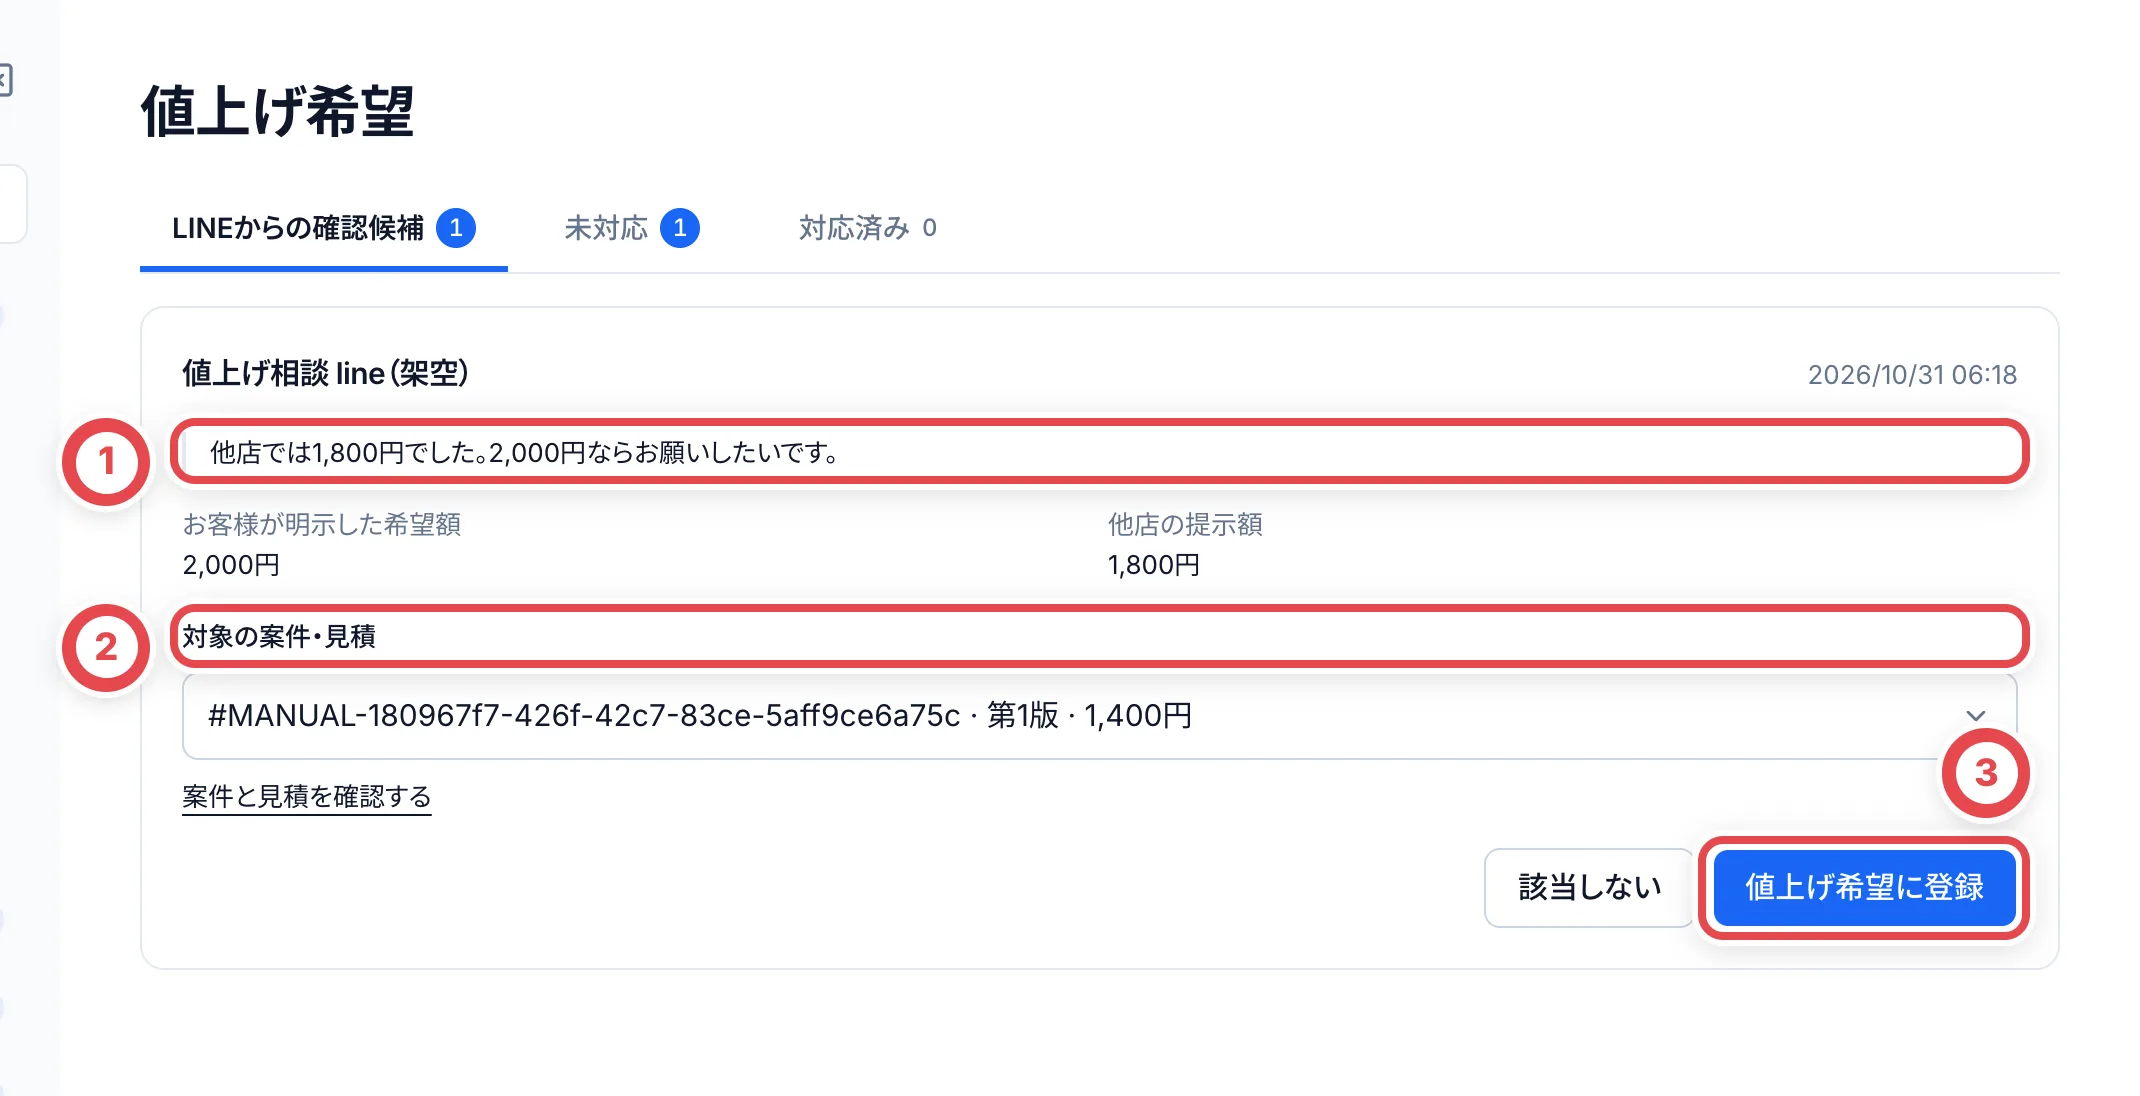 ## 3. 手動で希望を付ける
対象の案件で「値上げ希望を付ける」を押します。①にお客様の希望・メモを書き、②の「付ける」で記録します。対象の提示済み見積に結び付き、担当者への内部通知と履歴が作られます。付け間違いは案件の「付け間違いを外す」から記録して外します。
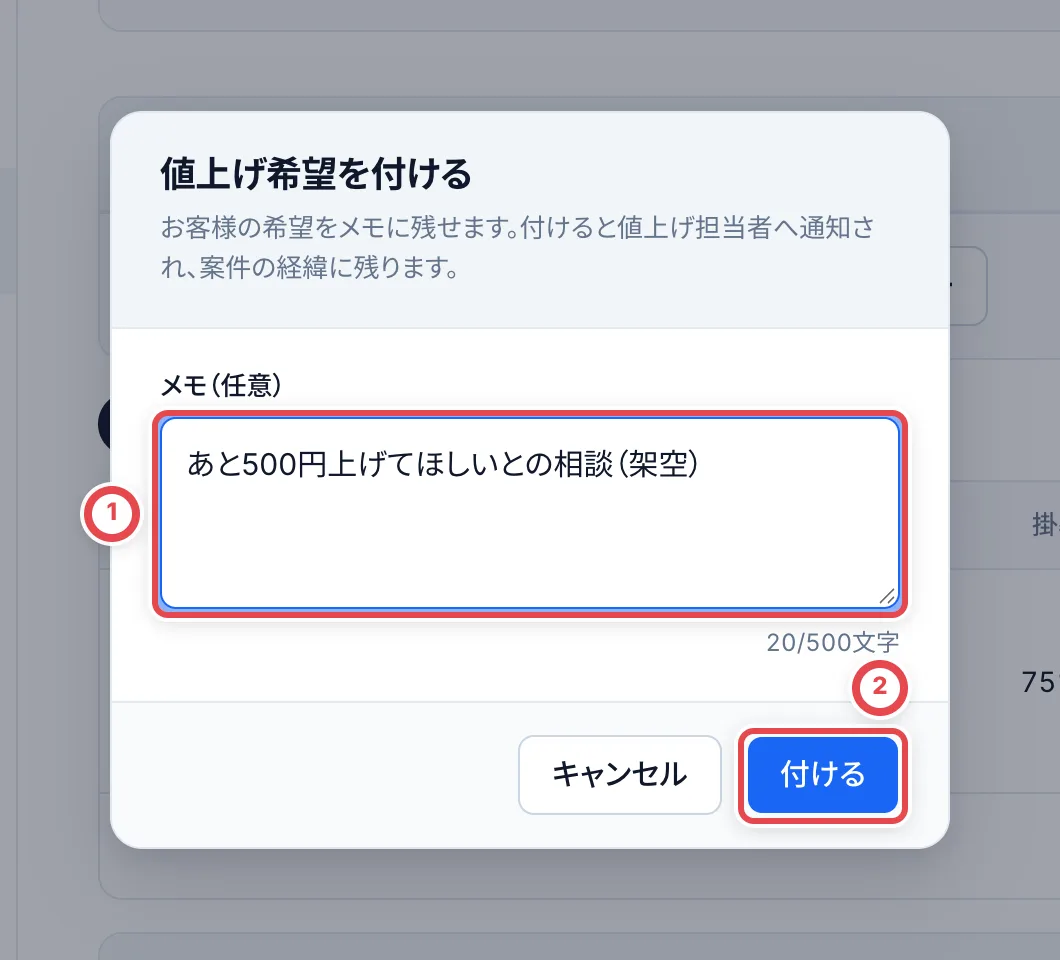 ## 4. 回答したあとで対応済みにする
案件で見積を検討し、再見積または金額据え置きの連絡を実際に行います。そのあと①の「対応済みにする」を開き、②に対応内容を残して確定します。一覧が「対応済み」に移り、履歴に残ります。値上げ希望を対応済みにするだけでは、再見積の送信やお客様の承諾は記録されません。
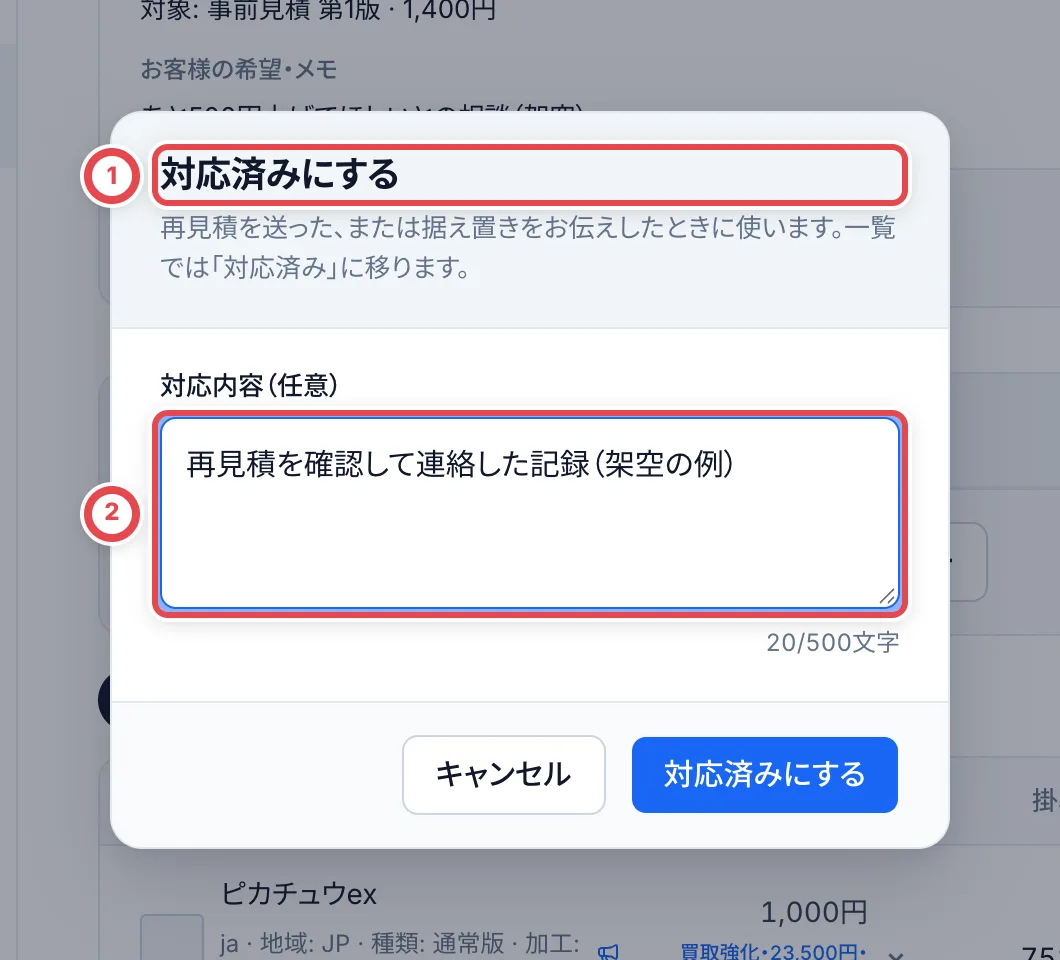 ## 困ったとき
| 起きていること | 確認すること |
| ---------------------------- | -------------------------------------------------------------------------------- |
| 候補がない | LINE同期・AI設定・提示済み見積を確認します。必要なら案件から手動登録します。 |
| 読み取りに失敗と出る | 再試行を予約し、後で候補と件数を確認します。 |
| 対象にできる見積がない | 見積の更新・承諾・案件終了・すでに対応済みでないか確認し、古い候補は除外します。 |
| 登録時に状態が変わったと出る | 最新の案件・見積を開き直して対象を確認します。 |
| 閲覧のみと出る | 登録・除外・対応には編集権限が必要です。 |
---
# 買取強化対象
Source: https://docs.toreca-cloud.com/guides/purchase/purchase-boosts
買取強化対象は、店舗がいつもより高く買い取りたいカードやBOXの一覧です。1枚あたりの強化価格と、あと何枚まで買い取るかを決めて登録します。登録した内容は査定の画面に表示され、外部連携を使えば連携先のアプリ(LPなど)にも表示できます。
## 最初に用意するもの
- 買取の操作ができる権限。閲覧だけのメンバーには「閲覧のみ」と出て、追加・編集はできません
- 強化するカードと、1枚あたりの強化価格・買い取る枚数・期間
## 流れと状態
| 順番 | やること | 状態 |
| ---- | ------------------------------ | --------------- |
| 1 | 一覧を開く | ― |
| 2 | 買取強化を追加する | 開始前 → 掲載中 |
| 3 | 査定の画面で確かめる | 掲載中 |
| 4 | (必要なら)編集・一時停止する | 掲載中・停止中 |
| 5 | 終わったら終了する | 終了 |
状態は、掲載中(期間内で受け付けている)・開始前(開始日になっていない)・上限に到達(残り枚数が0)・期限切れ(終了日を過ぎた)・停止中(一時停止している)・終了 の6つです。
## 1. 一覧を開く
サイドバーの「買取強化対象」を開きます。②のタブで「掲載中・予定」と「終了」を切り替えます。「掲載中・予定」には、停止中・上限に到達・期限切れのものも並びます。カード名・型番・商品名で検索もできます。③の状態のバッジで、それぞれの状態がひと目でわかります。
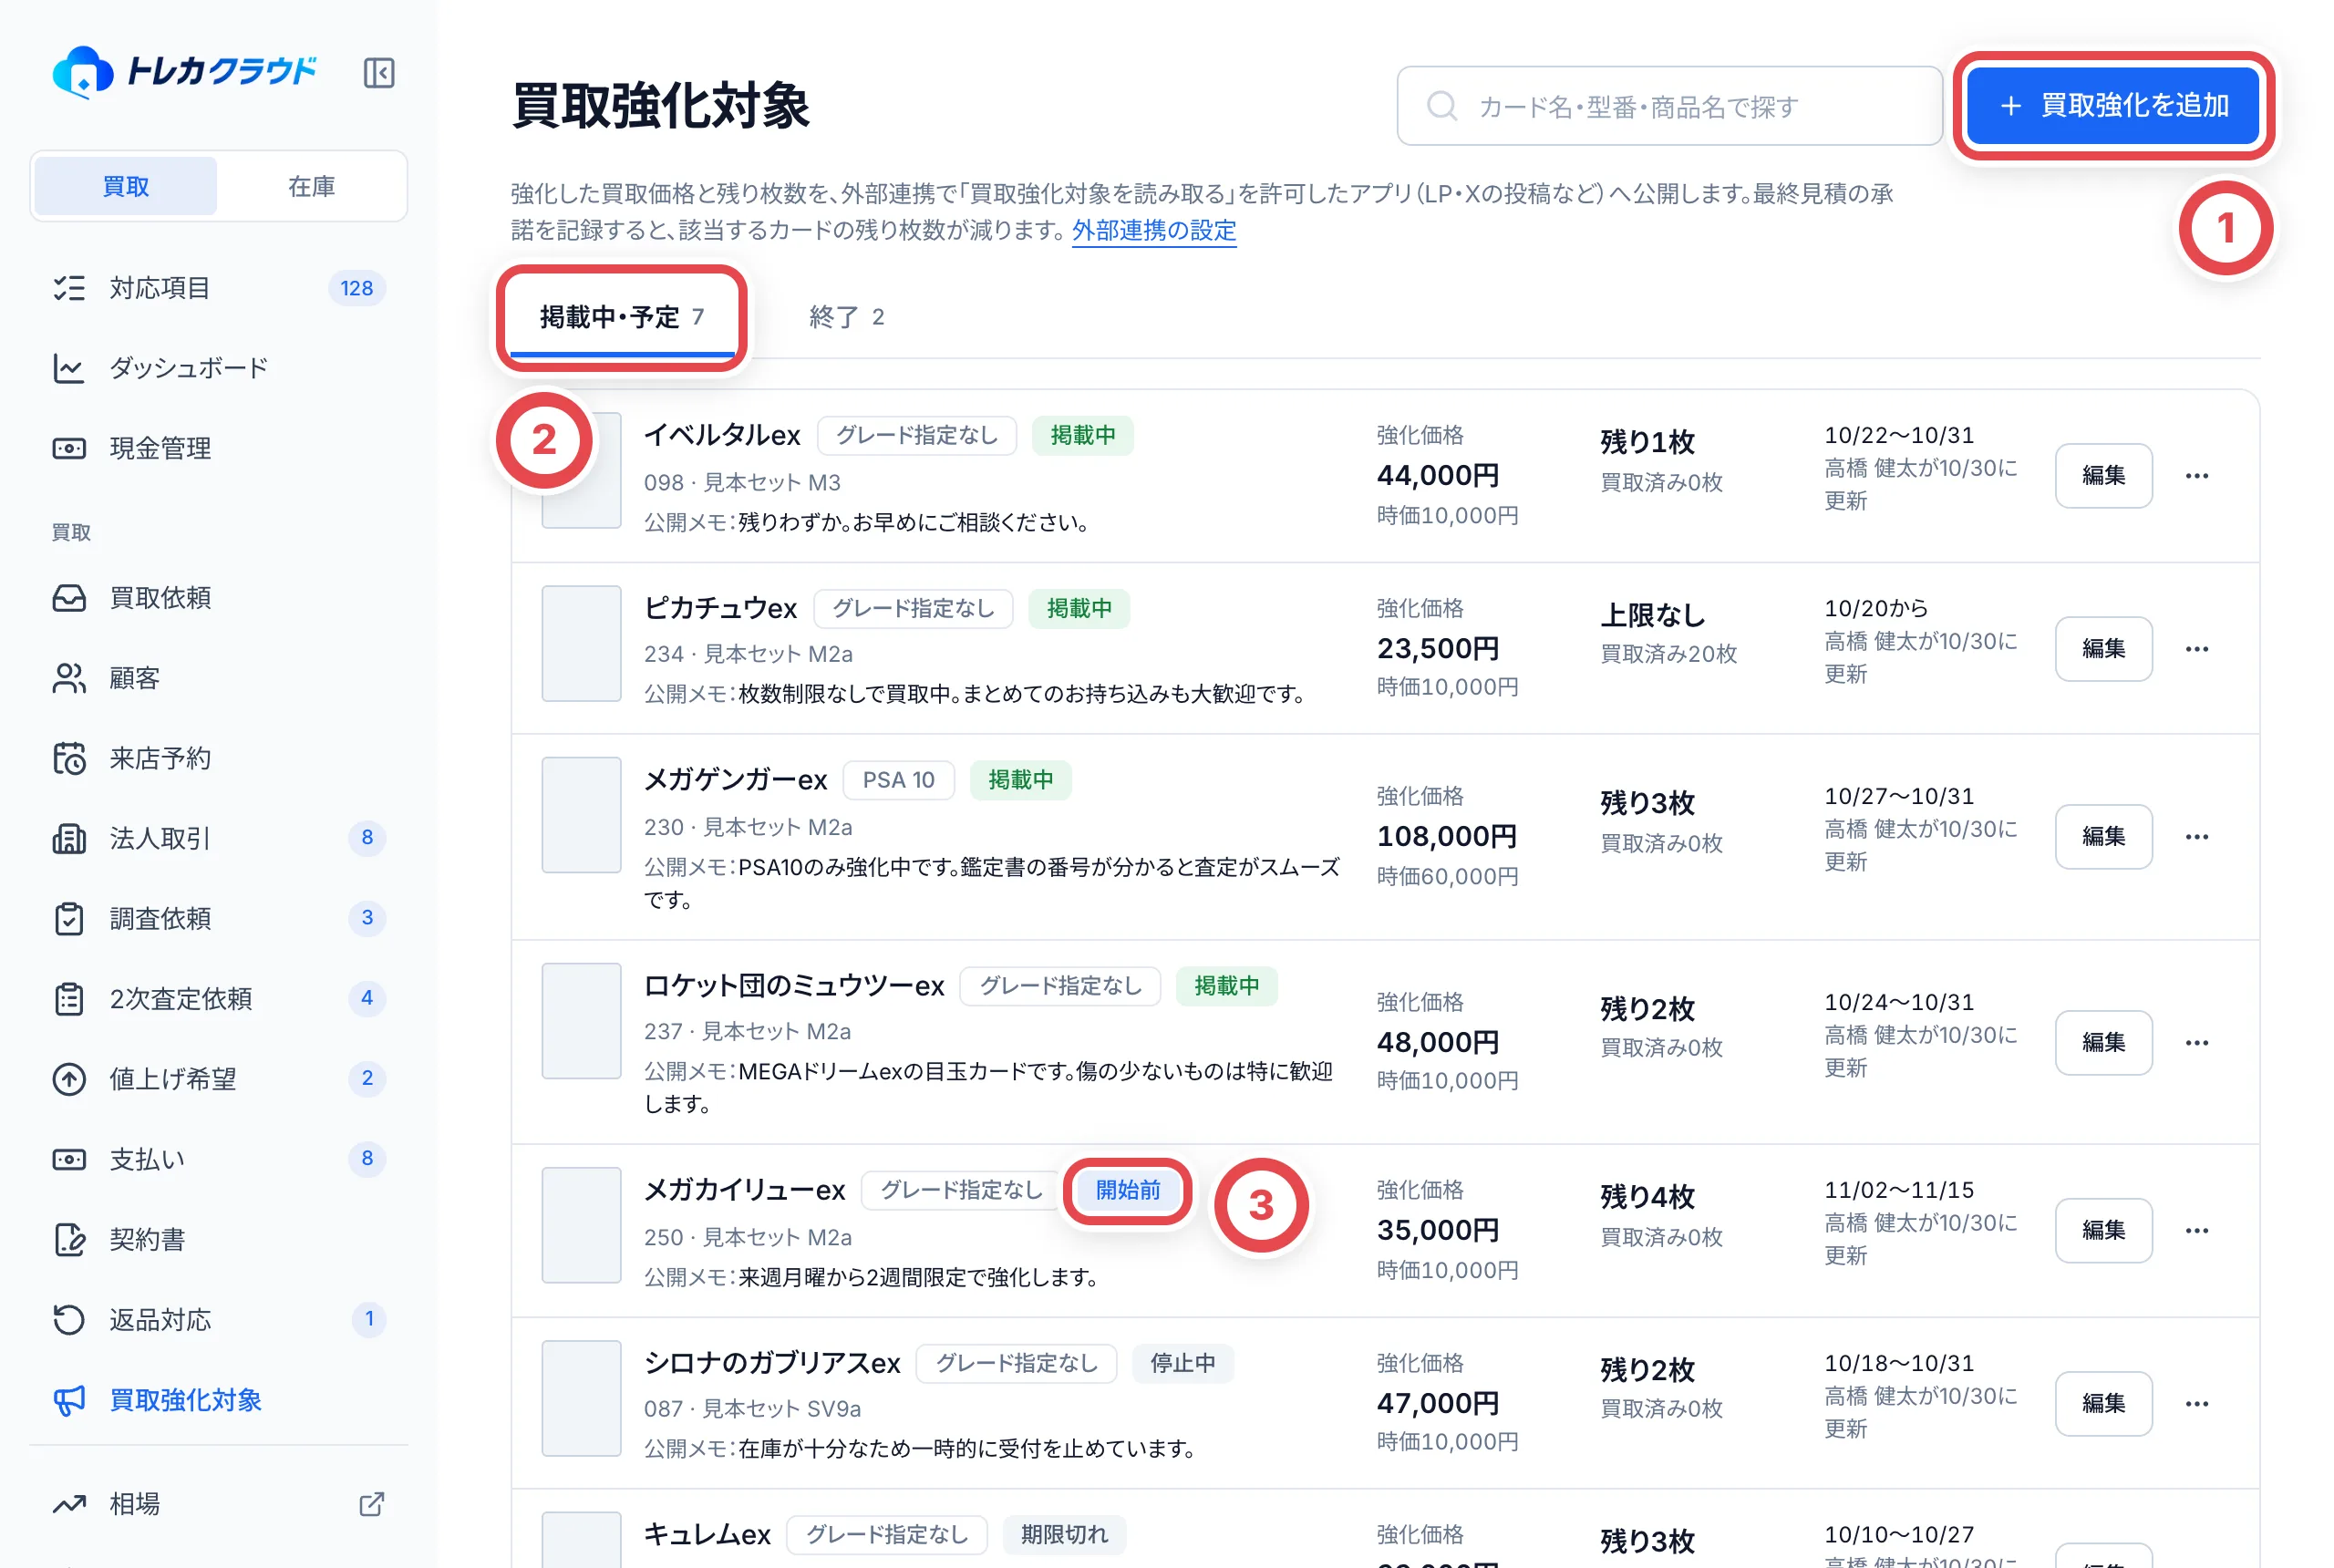 ①で追加します。②でタブを切り替え、③で状態を確かめます。
各行には、強化価格・時価・残り枚数(または「上限なし」)・買取済みの枚数・掲載期間・公開メモが出ます。
## 2. 買取強化を追加する
①の「買取強化を追加」を押すと、「買取強化を追加する」が開きます。
1. ①の「カード・BOXを探す」で、強化するカードを選びます。BOX・パック・デッキも選べます
2. 「グレード」は、PSA 10 だけを強化するときなどに指定します。指定しなければ、すべてのグレードが対象です
3. ②に1枚あたりの強化価格、③にあと何枚まで買い取るかを入れます。枚数を決めないときは「上限を決めない」にチェックを入れます
4. 「掲載期間(日本時間)」で開始日と終了日を入れます。開始日が空欄なら今すぐ始まり、終了日が空欄なら期限なしです。④の「今日まで」「3日間」「1週間」「期限なし」で終了日をすばやく選べます
5. 連携先に添える一言があれば「公開メモ(任意)」に書き、⑤の「追加する」を押します。**押すとその場で掲載されます**
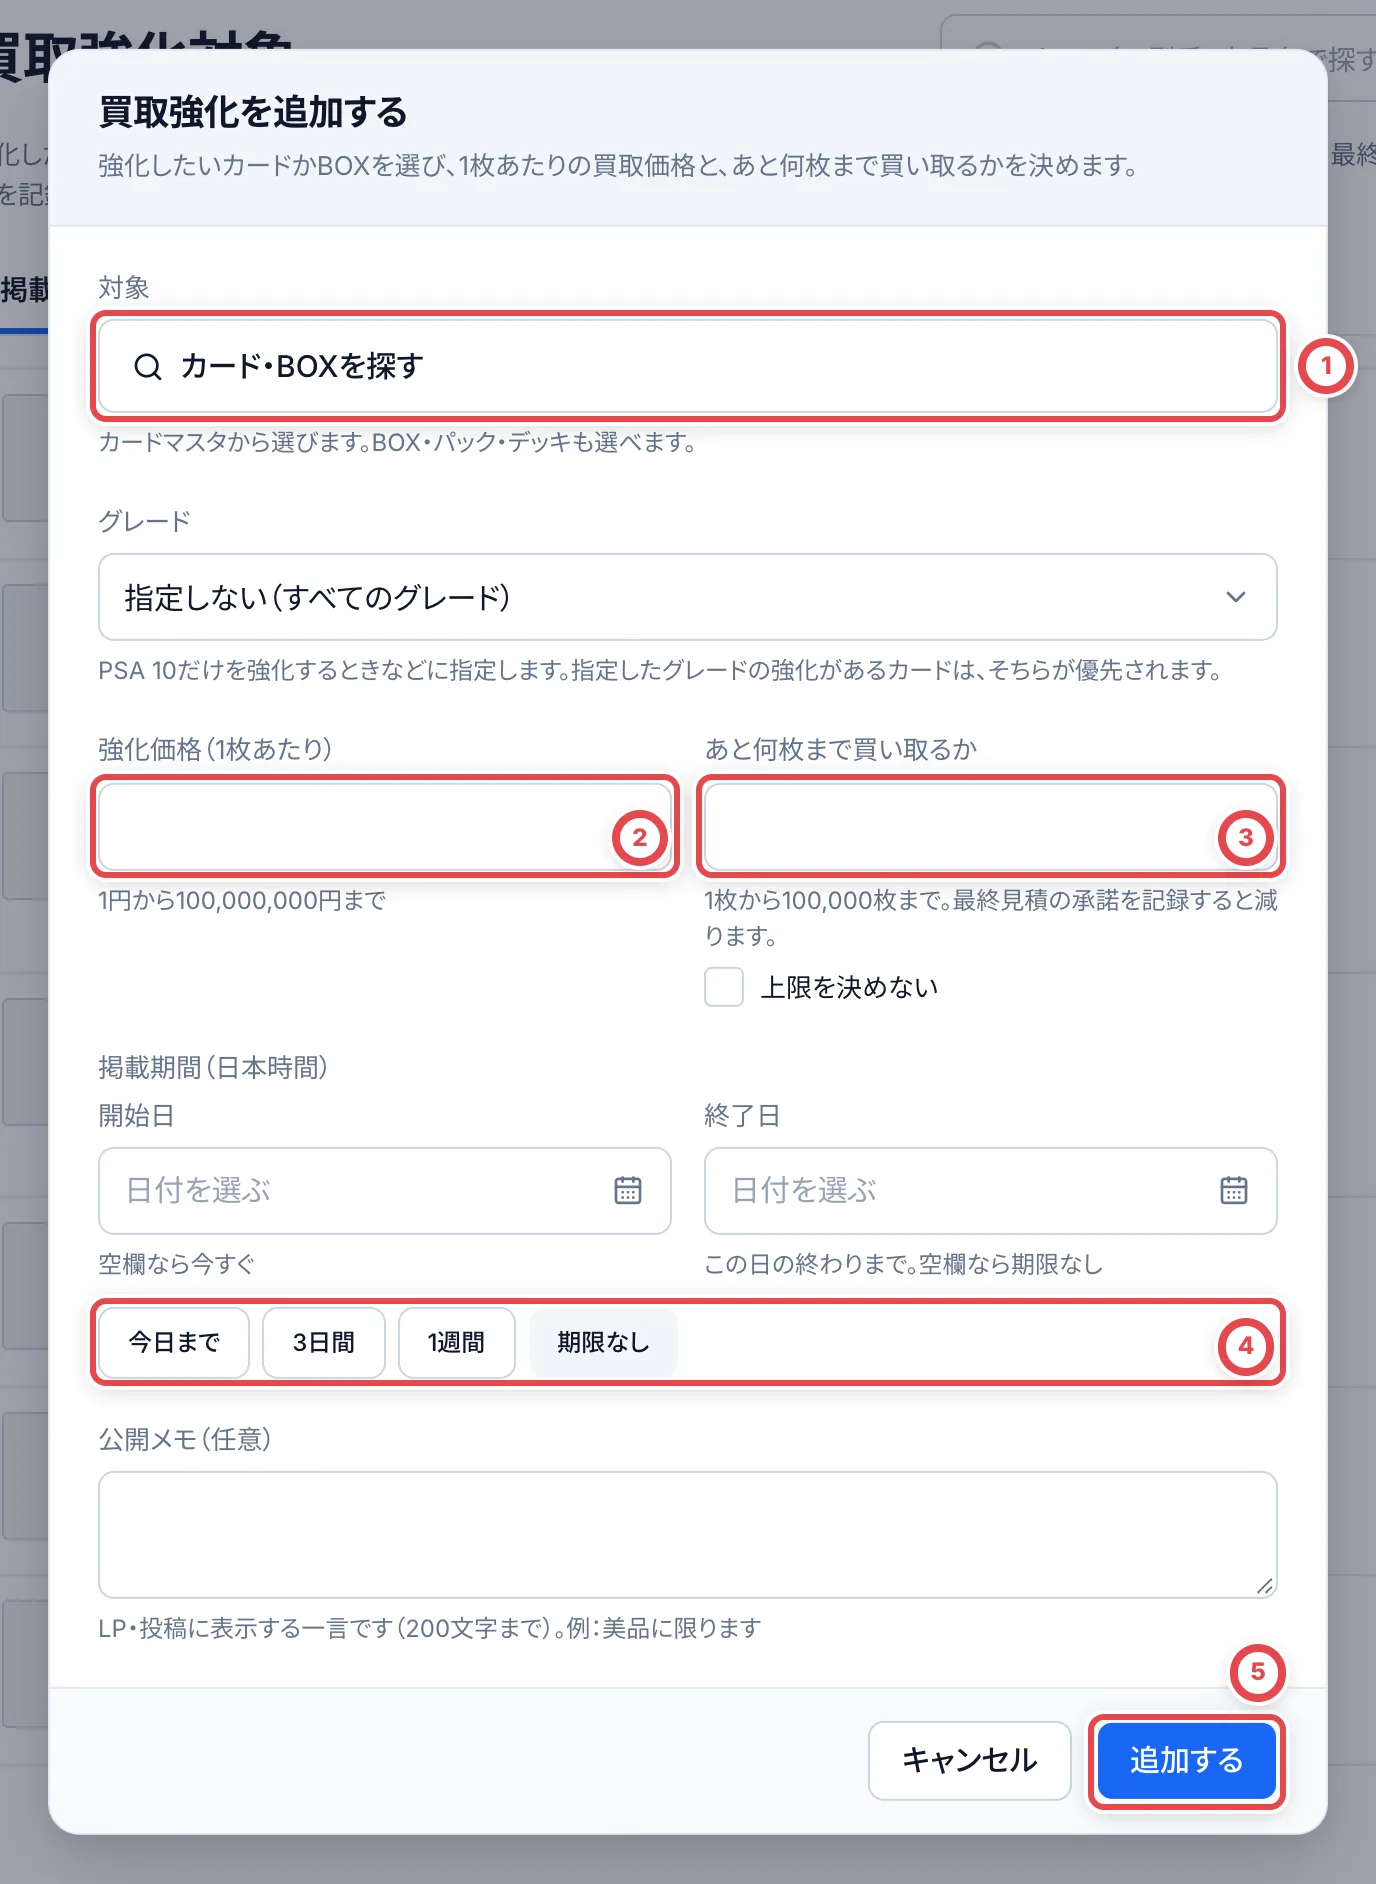 同じカードとグレードの組み合わせで、終了していない買取強化は1件しか登録できません。登録できるのは500件までです。
オリパの連携先で足りないカードは、[オリパ需要](/guides/purchase/oripa-demand)の「買取強化に追加」からも追加できます。カード・グレード・枚数が入った状態でこのダイアログが開きます。
## 3. 査定の画面で確かめる
査定の明細では、買取強化対象に当てはまるカードの時価の下に、①の「買取強化・23,500円・上限なし」のように表示されます。2次査定の画面にも同じように出ます。掲載中でない買取強化は「(停止中)」のように状態を添えて表示されます。
:::note
強化価格は、査定額に自動では反映されません。強化価格で買い取るときは、査定の画面で金額を調整してください。下の図の②は保存済みの提示額1,400円で、強化価格23,500円とは別の金額です。
:::
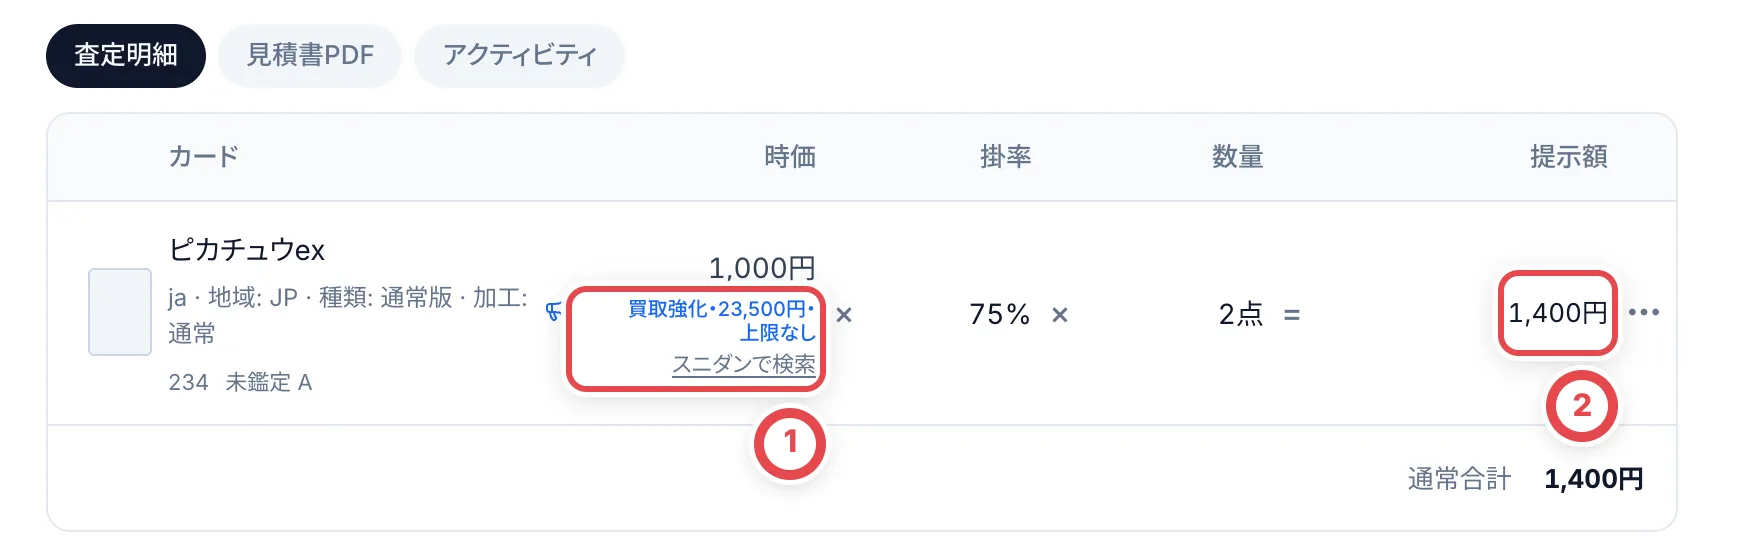 残り枚数は、最終見積への承諾を記録したときに、見積に入っている枚数だけ減ります(承諾を記録しないまま成立したときは、成立のときに減ります)。減るのは掲載中の買取強化だけです。グレードを指定した買取強化と指定していない買取強化の両方に当てはまるときは、グレードを指定したほうから減ります。承諾したあとで一部のカードを見送ると、その分は残り枚数に戻ります。
## 4. (必要なら)編集・一時停止する
行の「編集」を押すと、強化価格・残り枚数・掲載期間・公開メモを変えられます。残り枚数は「今からあと何枚か」です。0にすると受付を締め切ります。対象のカードは変えられないので、変えたいときは終了して追加し直します。
①の「一時停止する(連携先から外します)」でも一時停止できます。②の「買取の記録」には、どの取引で何枚買い取ったかが並びます。変えたら「保存する」を押します。
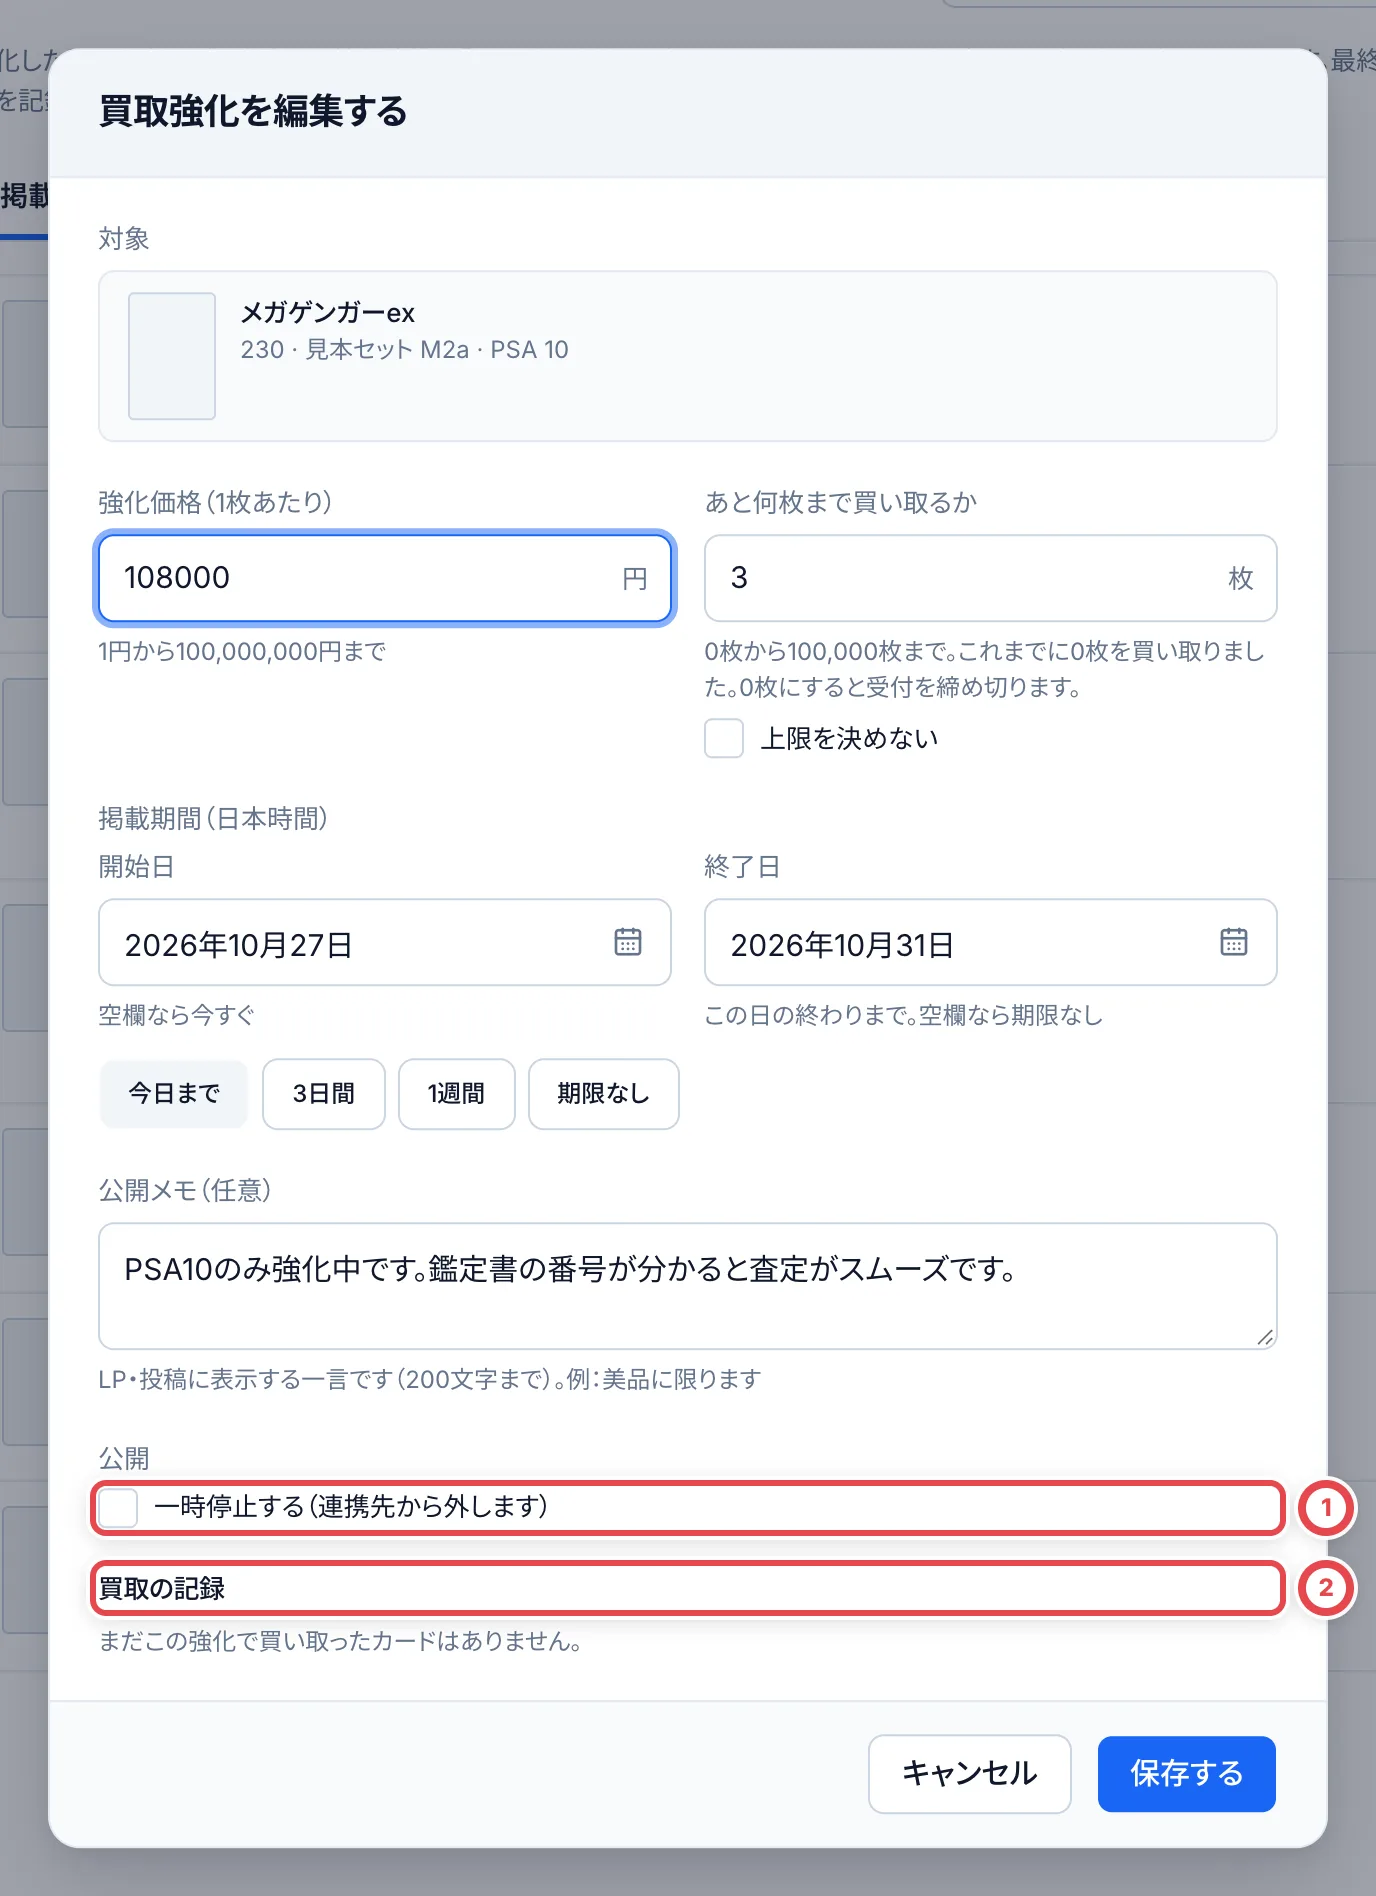 行の右端の「…」を押すと、①のメニューから「一時停止」と「終了」を選べます。**「一時停止」は押すとすぐ停止します**(確認の画面は出ません)。止めたものは同じ場所の「再開」で戻します。
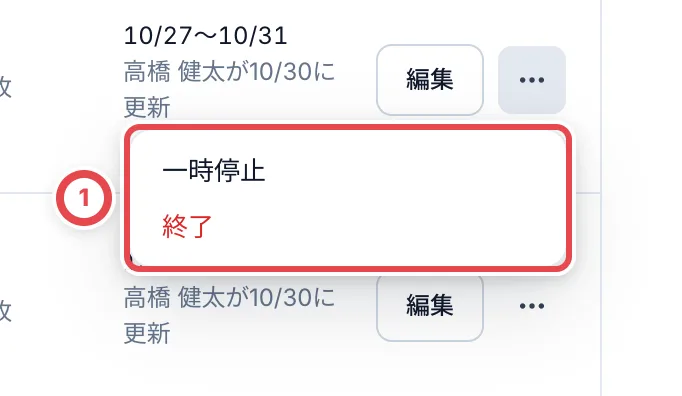 ## 5. 終わったら終了する
「…」の「終了」を押すと、確認の画面が出ます。①の「終了する」を押すと、連携先のアプリからも消えます。**終了は元に戻せません。** これまでの買取の記録は残ります。
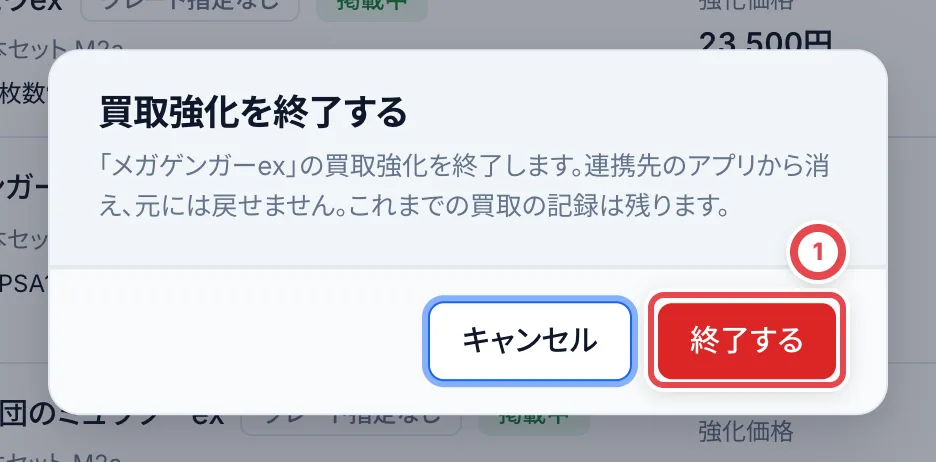 終了した買取強化は、①の「終了」のタブに、買取の記録とともに残ります。
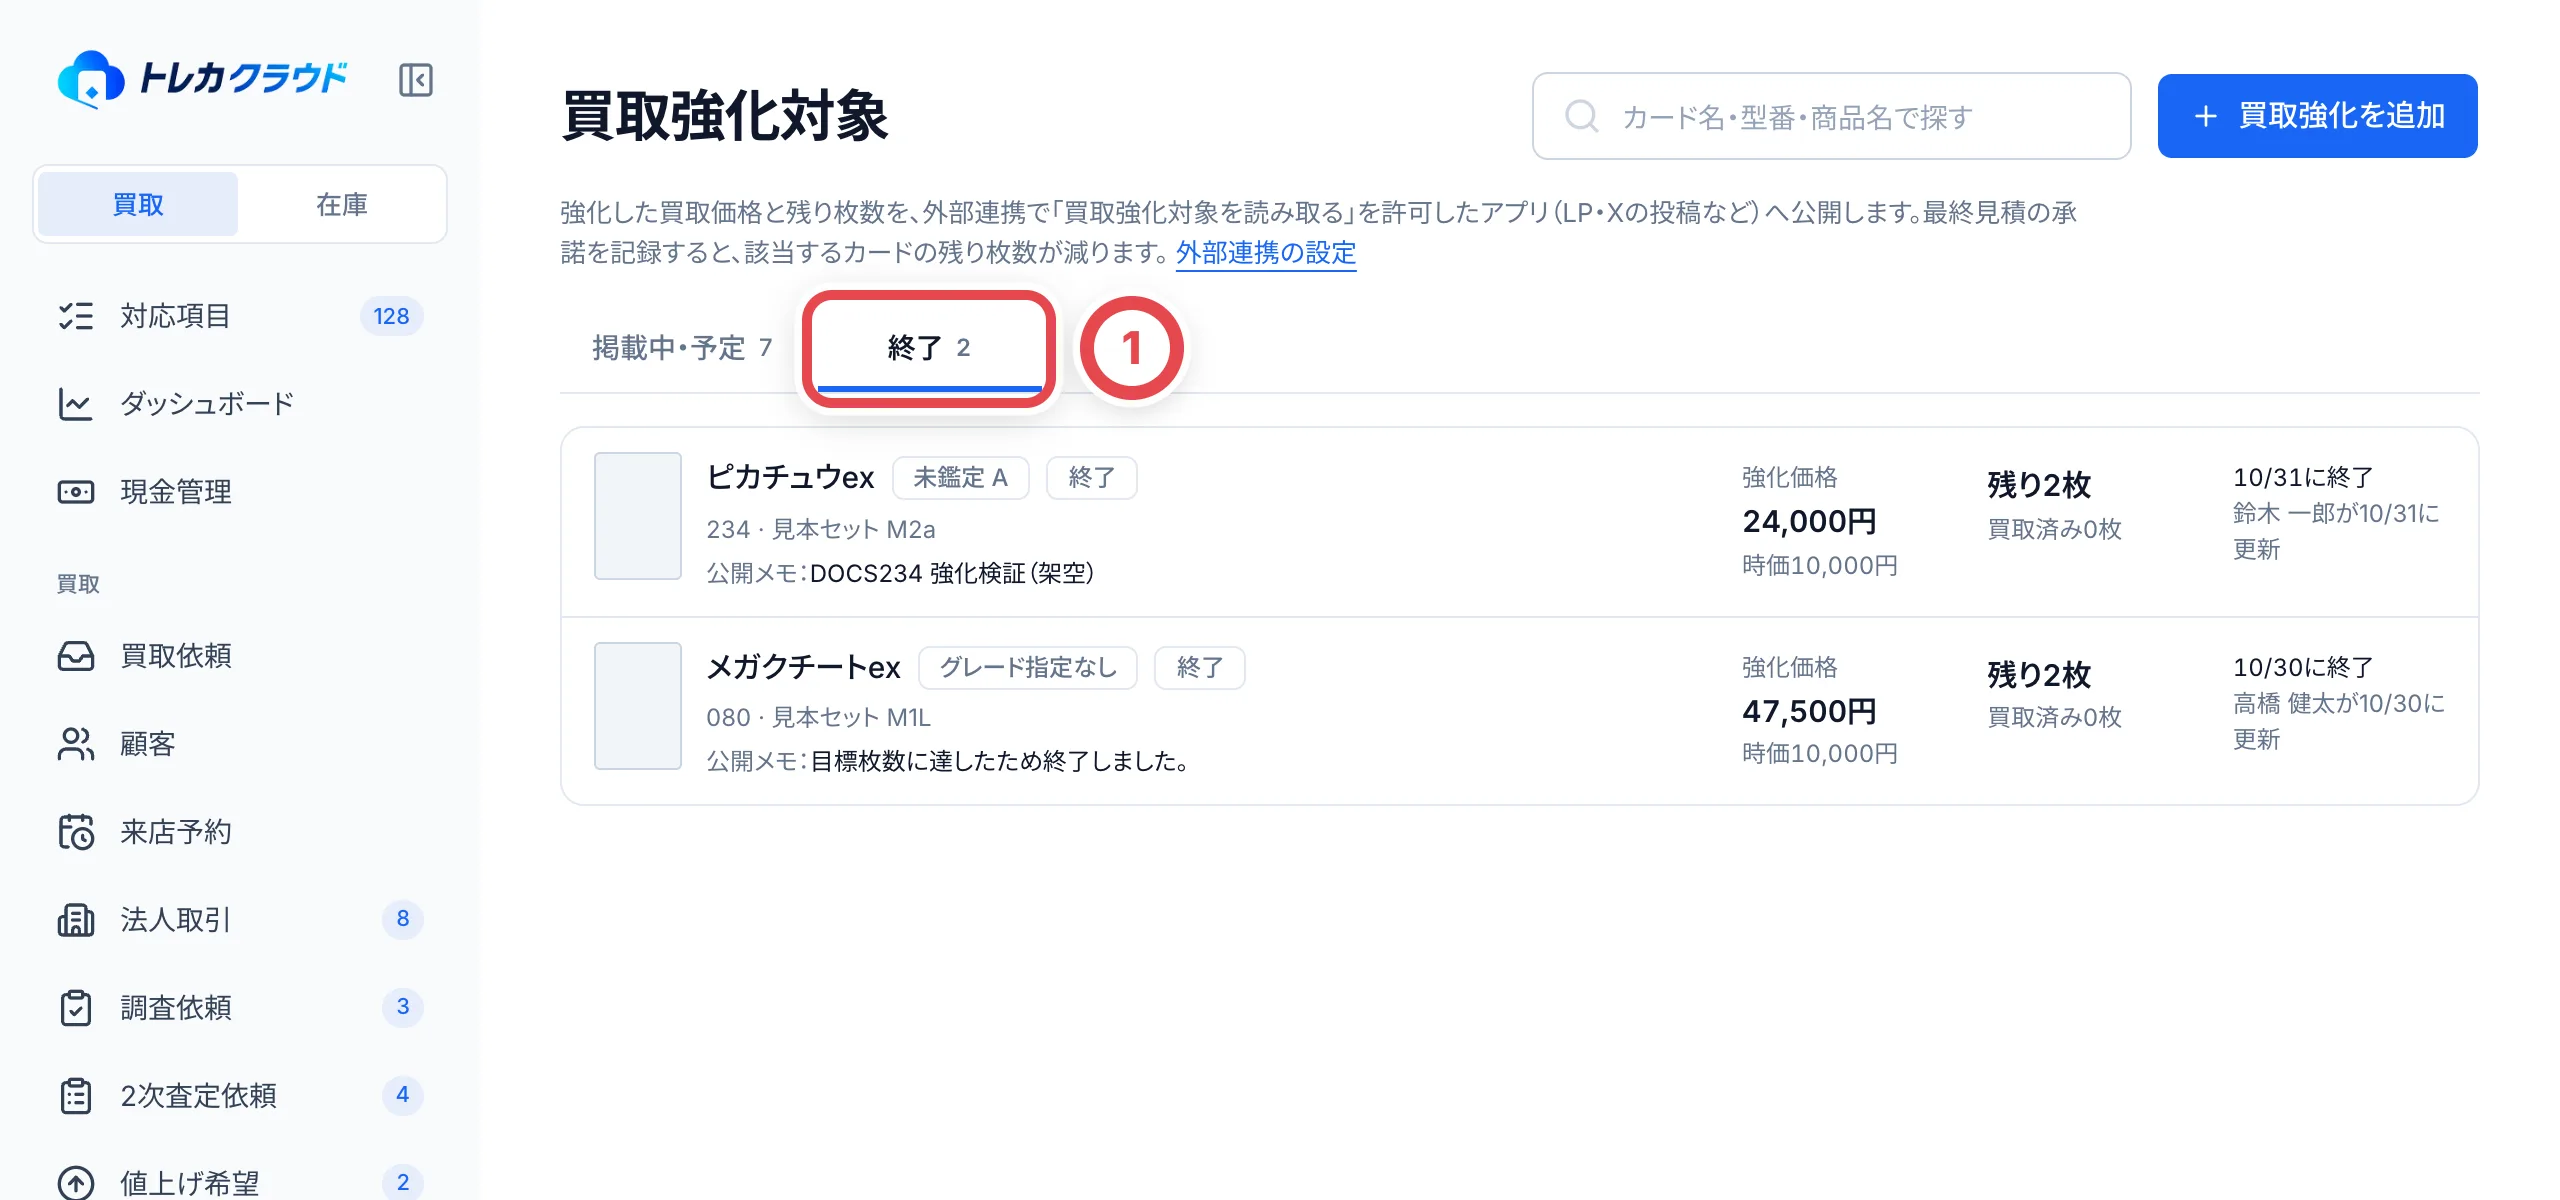 ## 連携先のアプリに表示する
外部連携で、連携先に「買取強化対象を読み取る」を許可すると、掲載中の買取強化を連携先のアプリ(LPなど)に表示できます。一時停止や終了をすると、連携先からも外れます。設定は[外部連携](/guides/settings/partners)を参照してください。
## 困ったとき
| 起きていること | 確かめること・直し方 |
| -------------------------------------------------------- | ------------------------------------------------------------------------------------------------------ |
| 「同じカード・グレードの買取強化がすでにあります」と出る | 終了していない同じ組み合わせがあります。そちらを編集します。 |
| 「買取強化を追加」がない | 閲覧のみの権限か、登録が500件に達しています。使わないものを終了します。 |
| 強化価格が査定額に入らない | 強化価格は自動では反映されません。査定の画面で金額を合わせます。 |
| 残り枚数が減らない | 減るのは、掲載中の買取強化で、最終見積の承諾(または成立)を記録したときです。期間・状態を確かめます。 |
| 間違えて一時停止した | 「…」の「再開」で戻します。 |
| 間違えて終了した | 終了は元に戻せません。同じ内容で追加し直します。 |
---
# 登録内容を確認・修正する
Source: https://docs.toreca-cloud.com/guides/purchase/registered-information
すでに登録のある個人のお客様には、事前見積への承諾後や発送用の入力リンクから、登録内容を確認してもらえます。変更がなければそのまま進み、変更がある項目だけを修正します。
| 入口 | 使う場面 | 入力後の扱い |
| ---------------------------- | -------------------------------------------- | ---------------------- |
| 取引ごとの登録・発送用リンク | 既存顧客の本人情報・今回の振込先・書類を確認 | 同じ顧客・取引へ反映 |
| 店舗共通の受付フォーム | まだ取引のないお客様の申し込み | 新しい顧客と取引を作成 |
法人や査定依頼だけのリンクには、この個人用確認を使いません。
:::note
お客様の入力画面は日本語です。店舗側の画面を英語にしても、お客様の入力画面の言語は変わりません。
:::
## 1. 店舗が取引の入力リンクを案内する
対象の顧客と取引を開きます。最新の事前見積への承諾後の登録リンク、または発送の案内にある取引専用の入力リンクをコピーして案内します。発送側の操作は[発送と最終査定](/guides/purchase/shipping-and-final)を参照してください。
同じ名前のお客様の別取引や、店舗共通フォームを送らないよう、顧客と取引番号を確認します。リンクの表示やコピーだけでは、お客様への送信は行われません。
標準のスタッフも、顧客フォーム管理と買取・顧客・本人確認の権限があれば、入力リンクのコピー・再発行と回答の確認・反映を行えます。振込管理の権限は不要です。権限を変更した店舗では、管理者が「設定 → メンバー」の権限設定を確認してください。
## 2. お客様が本人として認証する
送り状の入力が必要な場合は、先に写真を送るか「あとで送る」を選びます。その後、①の「ご本人の確認」が表示されます。送り状の入力が不要な場合は、直接この画面に進みます。②の「登録済みメールに確認コードを送る」を押します。コードは、店舗に登録済みのメールアドレスへ届きます。この画面で別のアドレスを入力して認証先に変えることはできません。
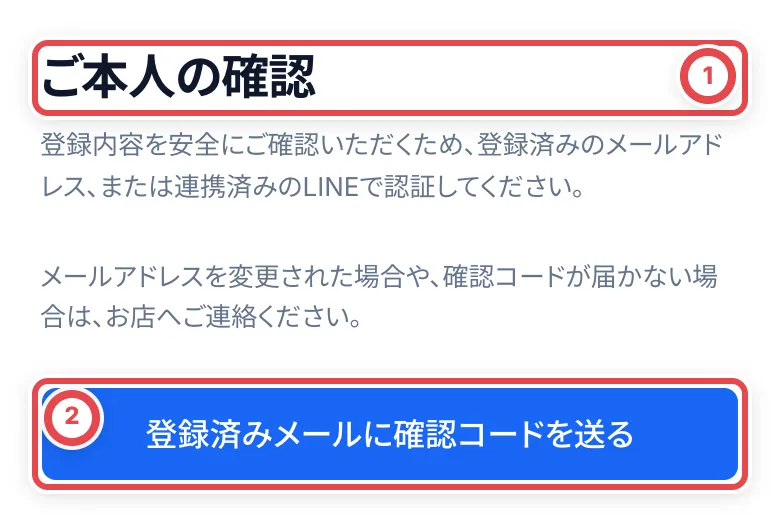 店舗でLINEログインが設定され、お客様のLINEが連携済みの場合は「LINEで認証する」も選べます。LINEから戻ったら同じ登録内容の確認へ進みます。未設定の店舗では表示されません。
届いた半角数字6桁のコードを①に入力し、②の「認証して登録内容を確認する」を押します。有効期限は10分です。再送は1分後からで、新しいコードを発行すると前のコードは使えなくなります。
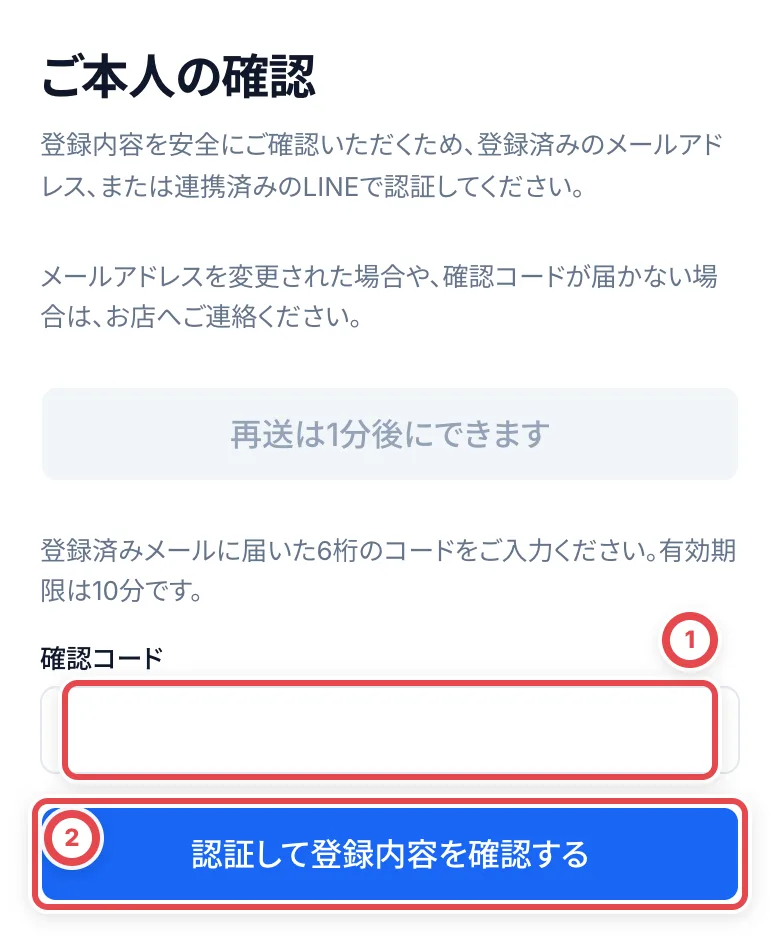 登録メールを使えない・メールが未登録・LINEで認証できない場合は、お店へ連絡してもらいます。リンクだけで住所や口座情報を開くことはできません。
## 3. ご本人の情報を確認する
氏名・フリガナ・生年月日・職業・電話番号・メール・住所を確認します。①に現在の登録内容が表示されます。変更があれば②の「修正する」を押します。
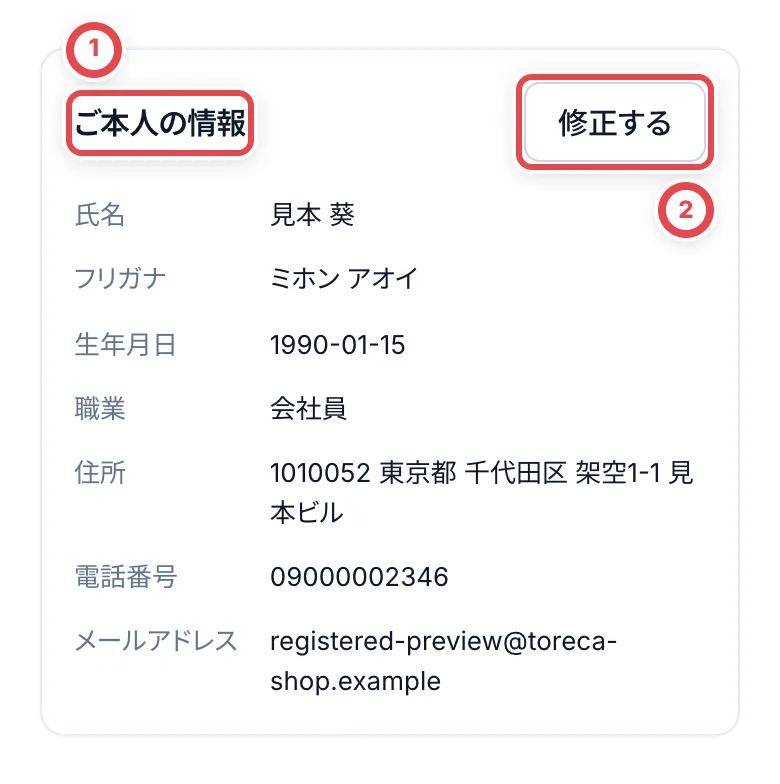 ## 4. 変更する項目を修正して提出する
登録済みの値が入った入力画面が開きます。①の内容を修正し、②の「次へ」で確認画面まで進みます。電話番号と郵便番号は、全角数字やハイフンを含めて入力・貼り付けても、確認時に半角数字へ整えられます。最後の確認で先頭の0も含めて見直します。
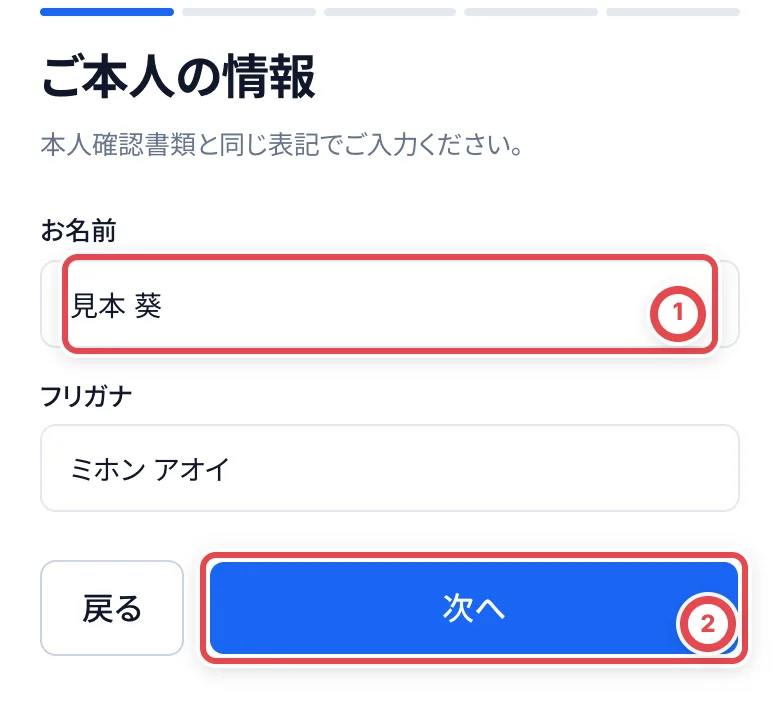 最後の「この内容で提出する」で保存され、一覧へ戻ります。**提出する前に、変更内容を確認してください。** 入力だけでは変更は完了しません。やめる場合は「戻る」で一覧へ戻ります。
保存後の一覧で新しい情報を確認します。氏名や住所など本人確認に関わる内容を変更した場合は、最新の本人確認書類の提出が必要になります。過去の取引や発行済み書類を、この修正で遡って書き換えることはありません。
## 5. 今回の振込先と本人確認書類を確認する
①の「お振込先」で、金融機関・支店・口座種別・末尾4桁を照合します。複数口座がある場合は、今回使う口座を1つ選びます。**口座を選んだ時点で、今回の選択が記録されます。** 必要な場合だけ「口座番号を確認する」で全桁を表示します。
口座の名義を含む詳しい内容は、この欄の「修正する」から開く入力・確認画面で見直します。変更した場合は、最後の提出まで進めて保存します。口座だけの変更で一律に書類の撮り直しになるわけではありませんが、名義違いや委任状の確認は別に必要です。申請済みの振込など、変更できない状態では画面の案内に従います。
②の「本人確認書類」では、書類の種類、提出・確認日、確認状態を見ます。表示できる書類画像がある場合は内容を照合します。顔撮影の画像は、この一覧には表示されません。
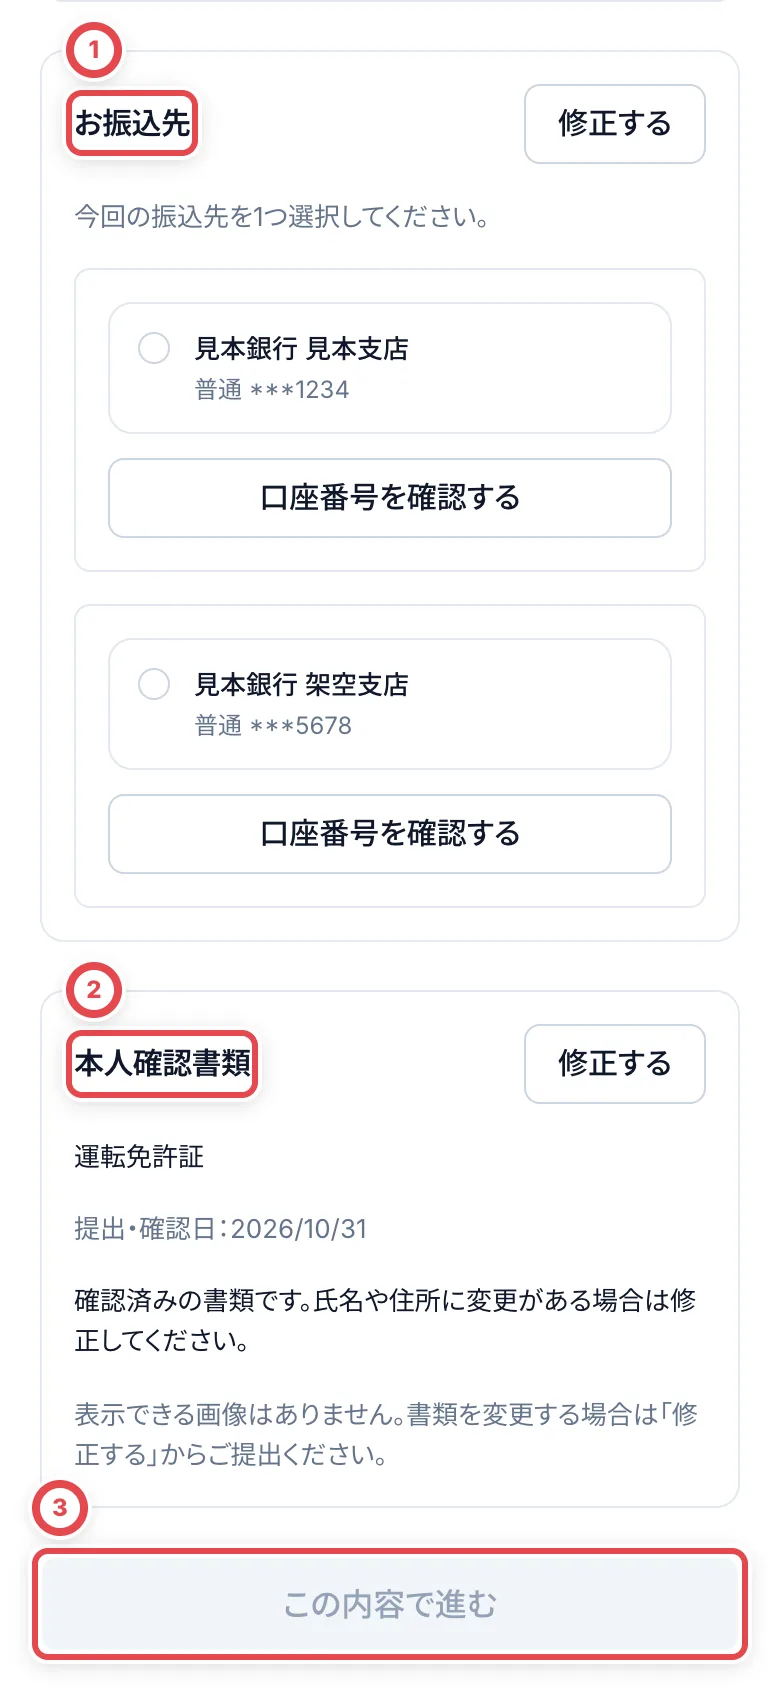 ①で今回の振込先、②で本人確認の状態を確認します。必要な情報が揃うと③から先へ進めます。
「最新の書類をご提出ください」と出たら、その欄の「修正する」から提出します。書類の再提出が必要な状態では、古い承認だけで先へ進めません。店舗は、届いた最新版を[本人確認](/guides/purchase/identity)の手順で確認します。
## 6. 内容を確かめて進む
本人情報・今回の振込先・書類を確認し、③の「この内容で進む」を押します。確認した内容が記録され、残っている入力項目へ進みます。送り状を「あとで送る」にした場合は、リンクの有効期間内に同じリンクから写真を送れます。
同じ取引で確認済みの内容は再読み込み後も保持されます。確認後に店舗や別の画面で登録内容が変わった場合は、最新の内容をもう一度確認します。
## 困ったとき
| 起きていること | 確認すること・戻り方 |
| ------------------------------ | ------------------------------------------------------------------------------------------------------ |
| コードが届かない | 登録済みメールの受信箱・迷惑メールを確認します。別のアドレスへ自分で送り先を変えず、お店へ連絡します。 |
| コードが一致しない・期限切れ | 最新の6桁を確認します。10分を過ぎた場合は再送します。再送直後は古いコードを使いません。 |
| コードの再送や入力が制限された | 画面の待ち時間に従います。再送は1分間隔、1時間5回まで、確認試行は1コード5回までです。 |
| 「この内容で進む」が押せない | 今回の振込先を選んでいるか、最新書類の提出が必要でないか確認します。 |
| 口座の番号が一部しか見えない | 最初は末尾4桁だけの表示です。必要な場合に番号を確認する操作を使います。 |
| 書類画像がない | 手入力の確認など、表示できる画像がない記録もあります。書類の変更が必要なら「修正する」から提出します。 |
| 他の画面で更新されたと出る | 「最新の登録内容を読み直す」で最新情報を確認してから修正・確認をやり直します。 |
| リンクを開けない | 期限切れや再発行前のリンクでないかを店舗に確認します。別取引のリンクは使いません。 |
---
# 調査依頼と2次査定依頼
Source: https://docs.toreca-cloud.com/guides/purchase/research-and-reviews
| 仕組み | 何を頼むか | いつ使うか | 受ける人 |
| ----------- | -------------------------- | --------------------------------------------------------------------------------------------------- | -------------------------- |
| 調査依頼 | カードの相場を調べてもらう | オンライン買取で相場が自動で入らないとき(スニダンの直近30日の成約が2件未満・カードが特定できない) | 調査担当 |
| 2次査定依頼 | 見積の中身を確かめてもらう | 「2次査定が要る下限額」以上のカードが見積に入っているとき | 査定した人とは別のメンバー |
**オンライン買取では調査の回答待ちや2次査定待ちのあいだ、その見積をお客様に提示できません。店舗買取では相場調査・2次査定の依頼を行いません。** どちらもサイドバーの「買取」に一覧があります。
## 調査依頼
調査依頼はオンライン買取で使います。店舗買取では個別・一括の調査依頼は表示されません。相場を取得できない場合は、確認した参考時価を入力して査定します。2次査定依頼もオンライン買取で使います。
### 1. 調査を依頼する(査定する人)
取引の見積もりの画面では、カードの行の①「相場調査を依頼」を押します。カードが特定できていない行では「カード・相場の調査を依頼」と出ます。顧客の画面の「査定依頼」タブでは、その場では依頼せず、カードを「調査に追加」しておいて「選択した査定を進める」でまとめて頼みます(下の「査定依頼タブで調査に追加する」)。
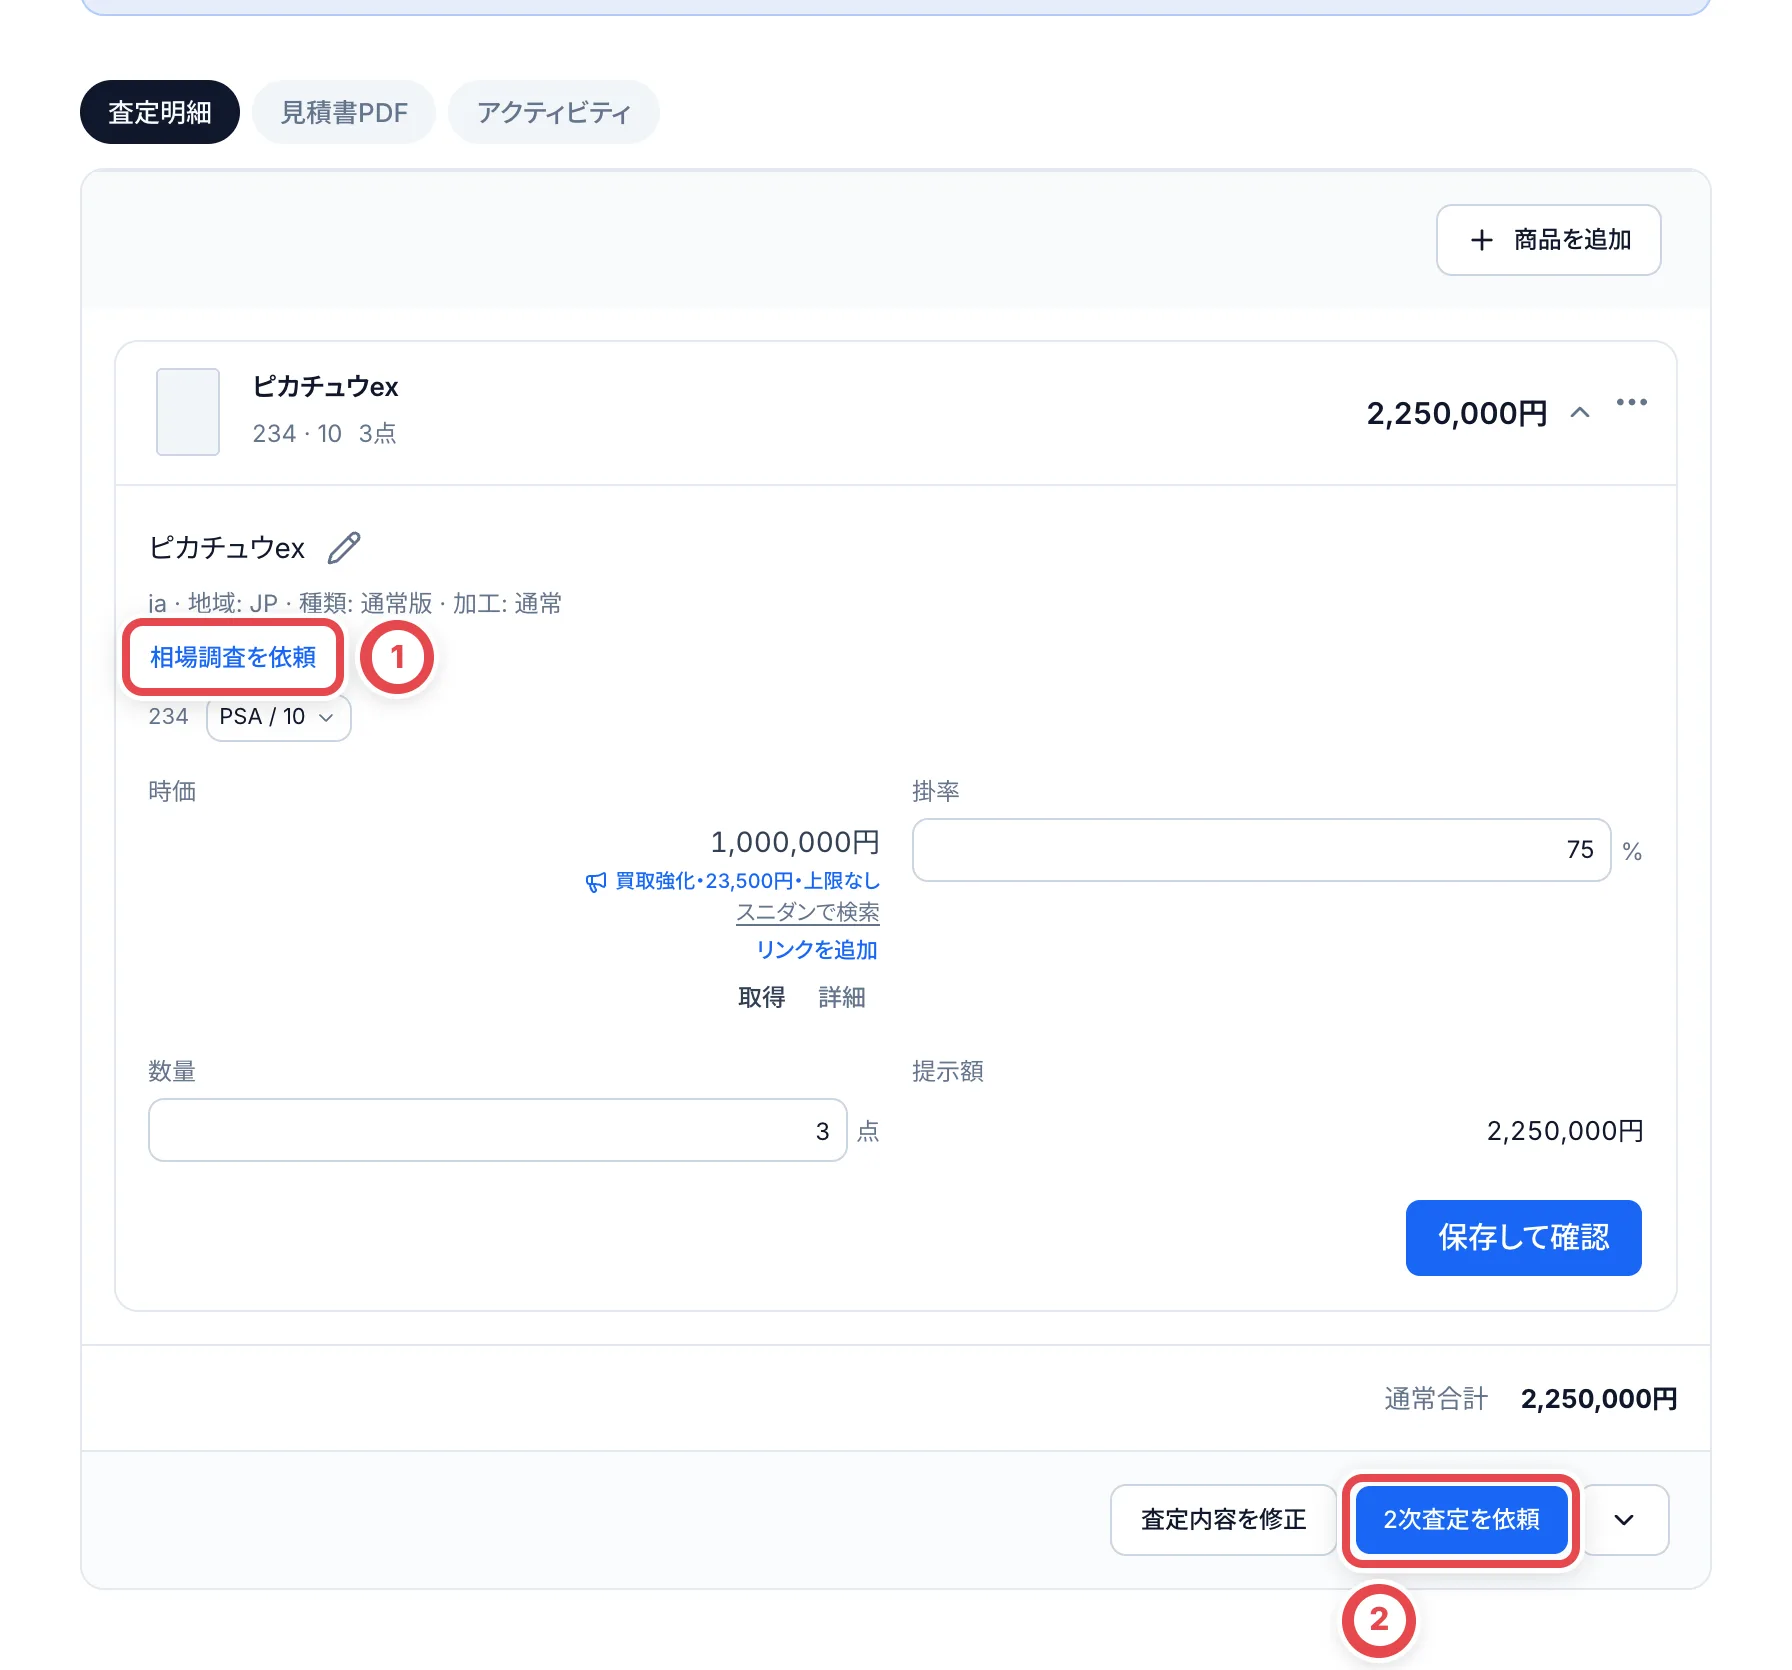 開いた画面で、①の「依頼理由・補足」を確かめます。候補を押すと理由が入り、欄に書き足せます。担当を決めたいときは②の「調査担当(任意)」で選びます。選ばなければ、手の空いた調査担当が引き受けます。最後に「調査を依頼する」を押します。
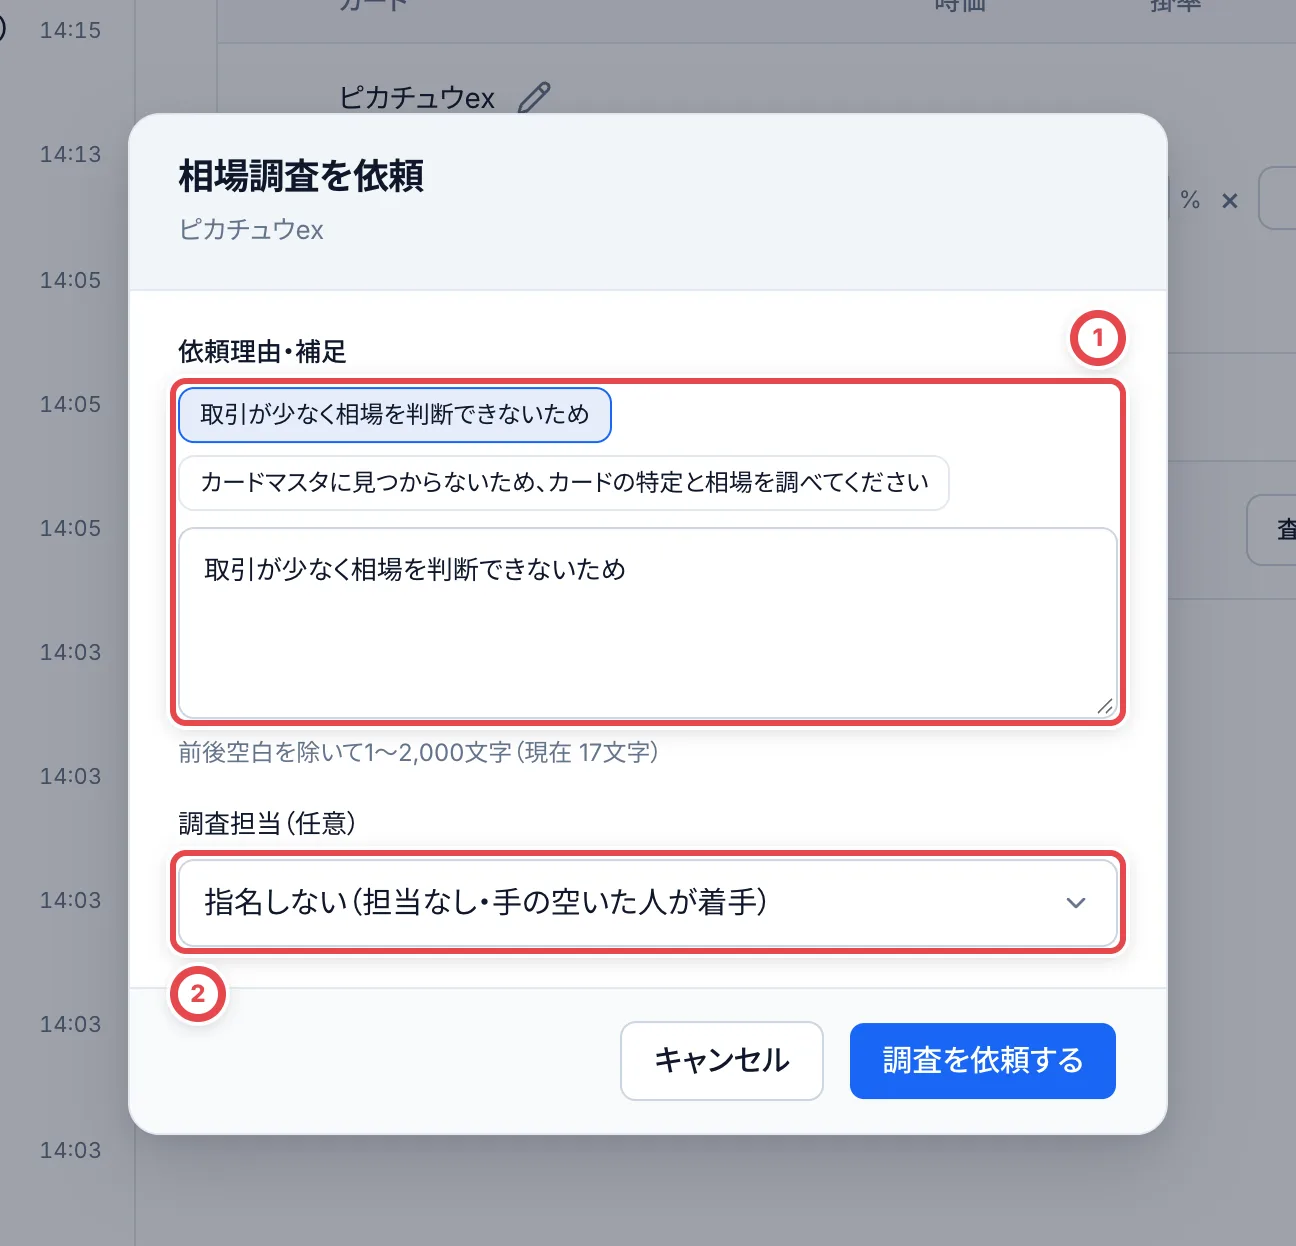 何枚かまとめて頼むときは、「まとめて相場調査を依頼」を使います。商品未特定を含む場合は「まとめて調査を依頼」と表示されます。対象・理由・担当者を確認して依頼します。1回100明細までです。すでに調査中などで対象外の行があれば、作成した件数と残った行が表示されます。複数案件で途中まで依頼できた場合も、作成済みの依頼は残るため、最新の状態で残りを確認します。
### 査定依頼タブで調査に追加する
顧客の「査定依頼」タブでは、カードの下の「調査に追加」を押し、「依頼理由・補足」と「調査担当(任意)」を決めて「調査に追加」を押します。この時点では調査担当に依頼は届きません。カードには「調査予定」の札が付きます。札は再読み込みしても残り、ほかのメンバーにも見えます。
札を押すと、理由と担当を直して「保存する」か、「調査から外す」を選べます。「査定依頼」タブからは、その行の「状態・グレード」で選んでいるグレードの相場を頼みます。グレードを選んでいなくても追加できます。
### 調査が終わったら、まとめて2次査定に進める
顧客の「査定依頼」タブでカードを選んで「選択した査定を進める」を押すと、相場調査をまとめて頼み、回答がそろったら選んだカードを1つの2次査定依頼にできます。見積も1つになります。調査に回るのは、選んだカードのうち次のカードです。
- 「調査予定」の札が付いたカード。追加したときの理由と担当で依頼します
- 札が付いていないが、参考時価が空のカード。確認画面に「調査に追加されていないが、参考時価が空なので調査に回す」と分けて出るので、「依頼理由・補足」を入れます
選ばなかったカードの「調査予定」はそのまま残ります。確認画面では次の2つも選びます。
| 選ぶこと | 選択肢 | 動き |
| ------------------------------ | ------------------------------------------- | ---------------------------------------------------------------------- |
| 相場調査が完了したら | 自動で2次査定に進む | 選んだカードが1つの依頼になり、回答がそろうと自動で2次査定に進みます |
| 相場調査が完了したら | 回答を確認してから、自分で2次査定を依頼する | 相場調査を頼むだけです。回答を見てから、もう一度カードを選んで進めます |
| 相場調査で価格が返らなかったら | 止めて、自分で対応する | 依頼が止まり、枠の中のボタンで次の対応を選ぶまで2次査定に進みません |
| 相場調査で価格が返らなかったら | 参考時価が空のまま2次査定に進む | 空のまま2次査定に進みます。2次査定者が査定額を確認します |
「調査せず2次査定に進める」を押すと、調査を頼まずに参考時価が空のまま2次査定に進みます。選んだカードに「調査予定」があるときは出ないので、調査しないカードは札から「調査から外す」を選びます。相場調査を頼めるのはオンライン買取のカードだけです。BOX・パック・デッキは参考時価が空なら空のまま進みます。「調査予定」のカードがなく、全部のカードに参考時価が入っていれば調査は挟みません。
押したあとの査定依頼タブでは、選んだカードが「依頼 · 3枚」のような枠に入ります。枠の中のカードは、ほかの相場調査や2次査定の依頼に入れられません。調査しないカードの札は「保留」で、回答を待つ間も参考時価と掛率を直せます。「依頼を取り消す」を押すと、カードは手元に戻り、回答待ちの調査依頼は取り下げられます。
「価格が返らない」のは、調査の回答が「差し戻し」か「カードマスタに無い」のときです。調査依頼を取り下げたときも同じ扱いです。止める設定の依頼では、次のどれかを選びます。
- 再調査を依頼する
- 参考時価が空のまま全部を進める
- そのカードを外して残りを進める。外したカードは査定依頼タブに戻ります。ほかに調査待ちのカードがあれば、その回答を待って進みます
- 依頼を取り消す
回答がそろったとき、全部のカードの査定額が「2次査定が要る下限額」未満なら、2次査定に進まず見積の下書きで止まり、依頼した人に戻ります。ほかに2次査定ができるメンバーがいないお店も同じです。参考時価が空のカードが残るときは金額を判定できないので、2次査定に進みます。
### 2. 調査に回答する(調査担当)
調査担当は、サイドバーの「調査依頼」を開きます。③の「調査待ち」に、まだ回答していない依頼が並びます。④の「自分の担当」「担当なし」で絞り込めます。
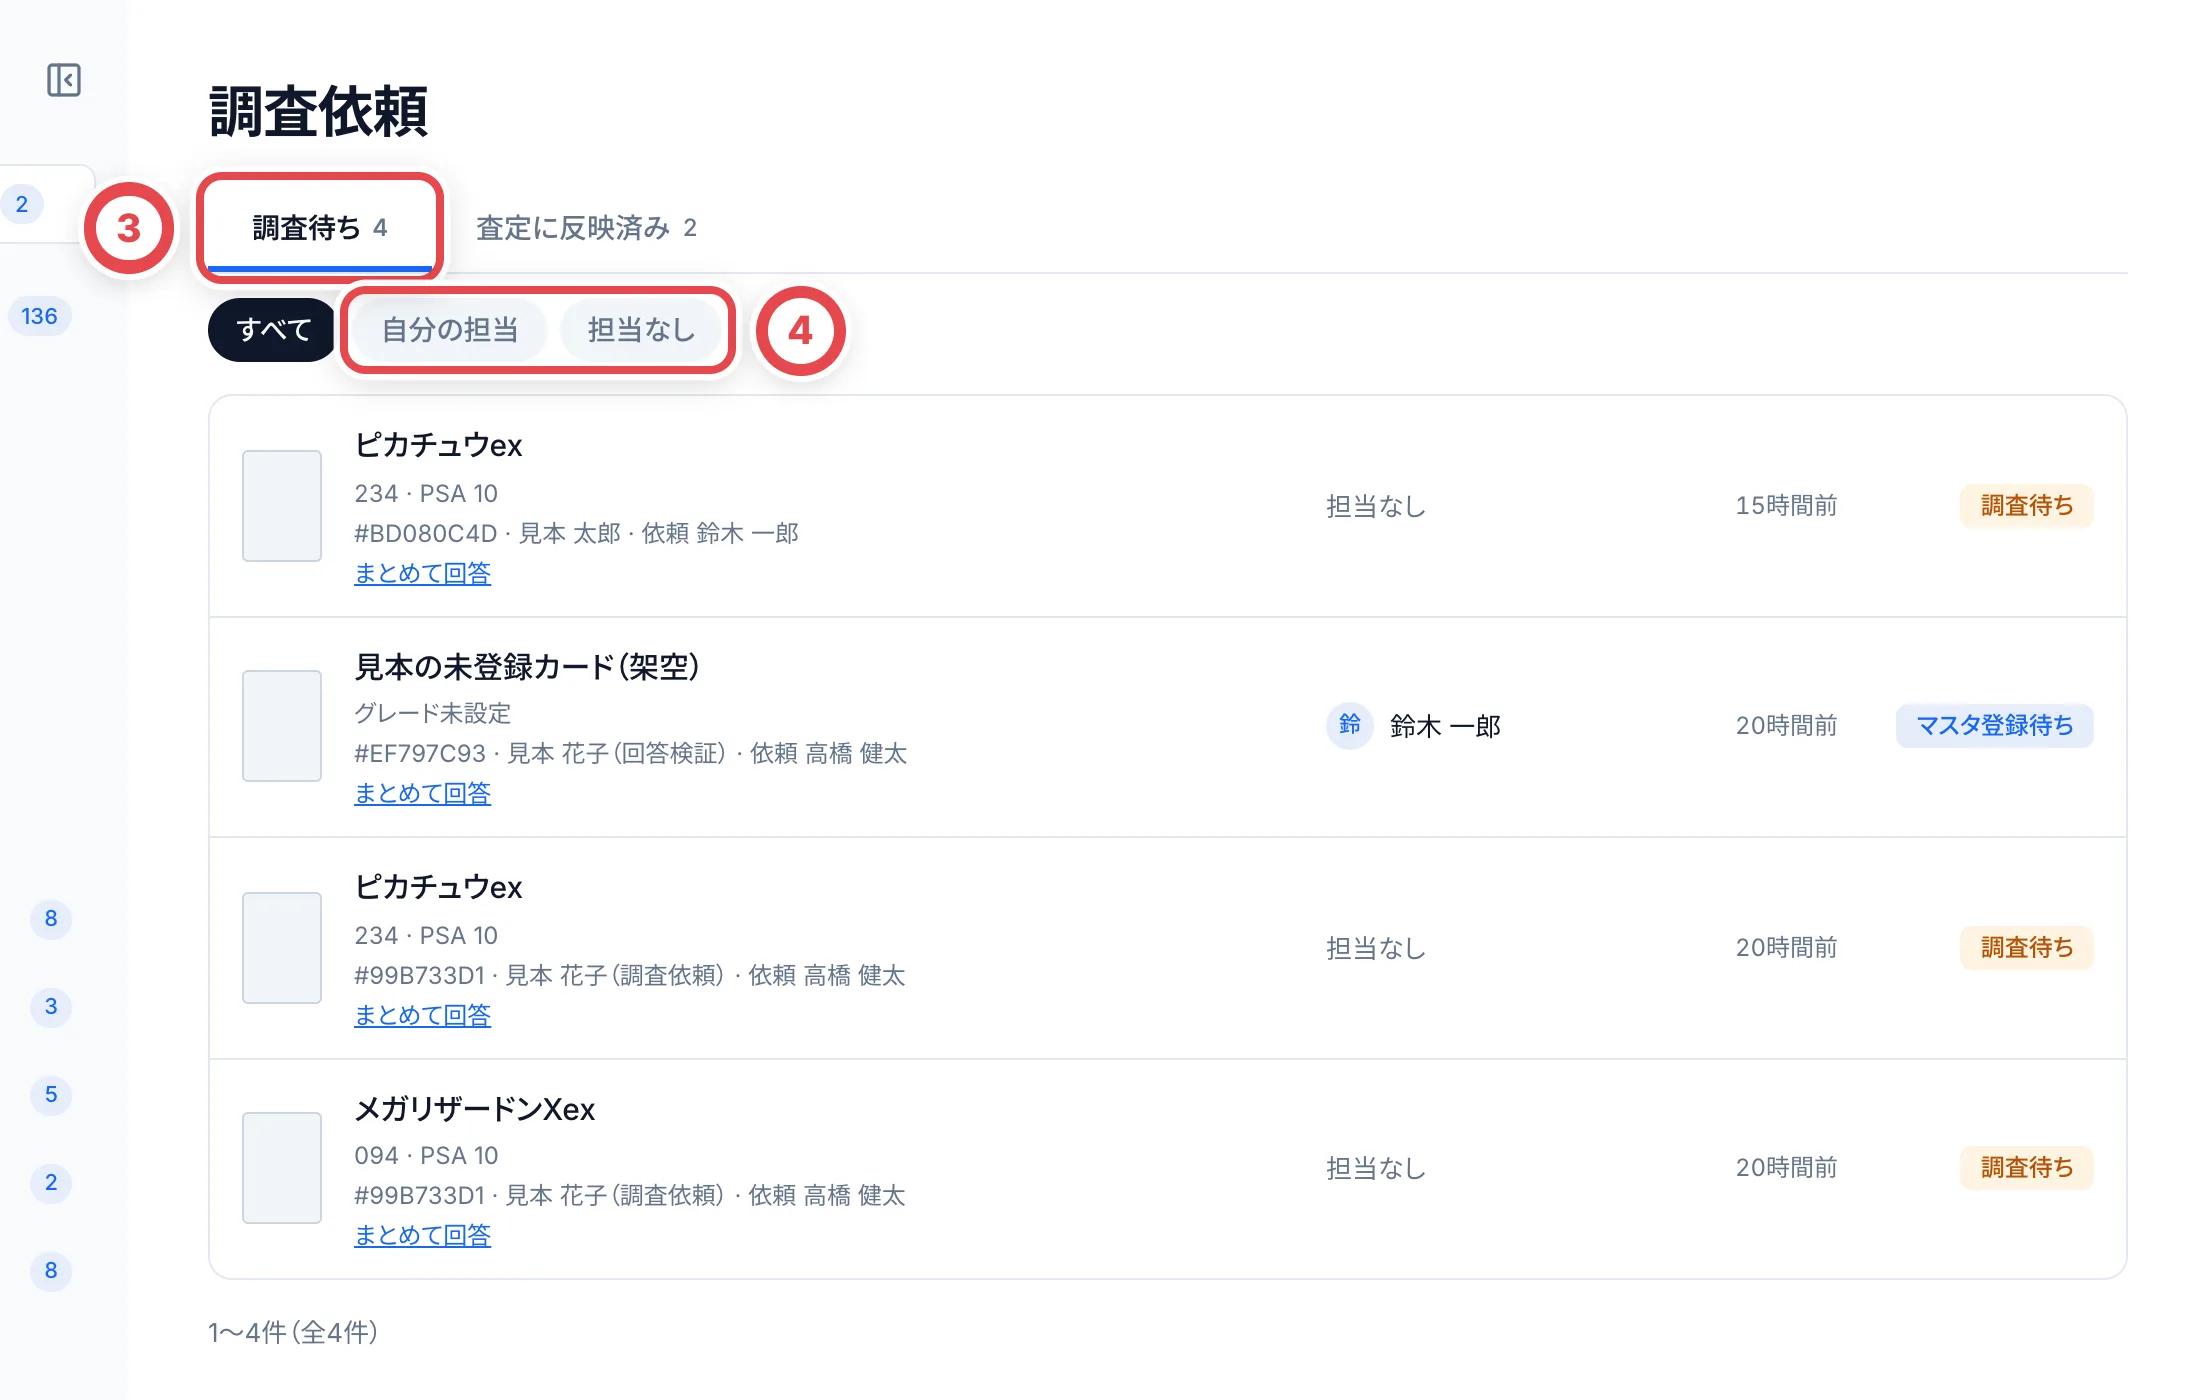 依頼を押すと、カードの写真とお客様の補足、⑤の依頼理由、「相場の記録」が出ます。
1. 「相場の記録」に参考になる記録があれば、「この価格で回答」を押します。価格と参照元が回答欄に入り、その記録のグレードが「グレード」に入ります
2. 「グレード」で、相場を調べたグレードを確かめます。最初は依頼のグレードが入っています。依頼にグレードがないときや、違うグレードで調べたときは選び直します。相場価格を回答するときは、グレードが必要です
3. ⑥の「相場価格(1枚)」を入れ、必要なら⑦の「メモ(任意・参考URLもここへ)」を書きます
4. ⑧の「調査結果を送信」を押します
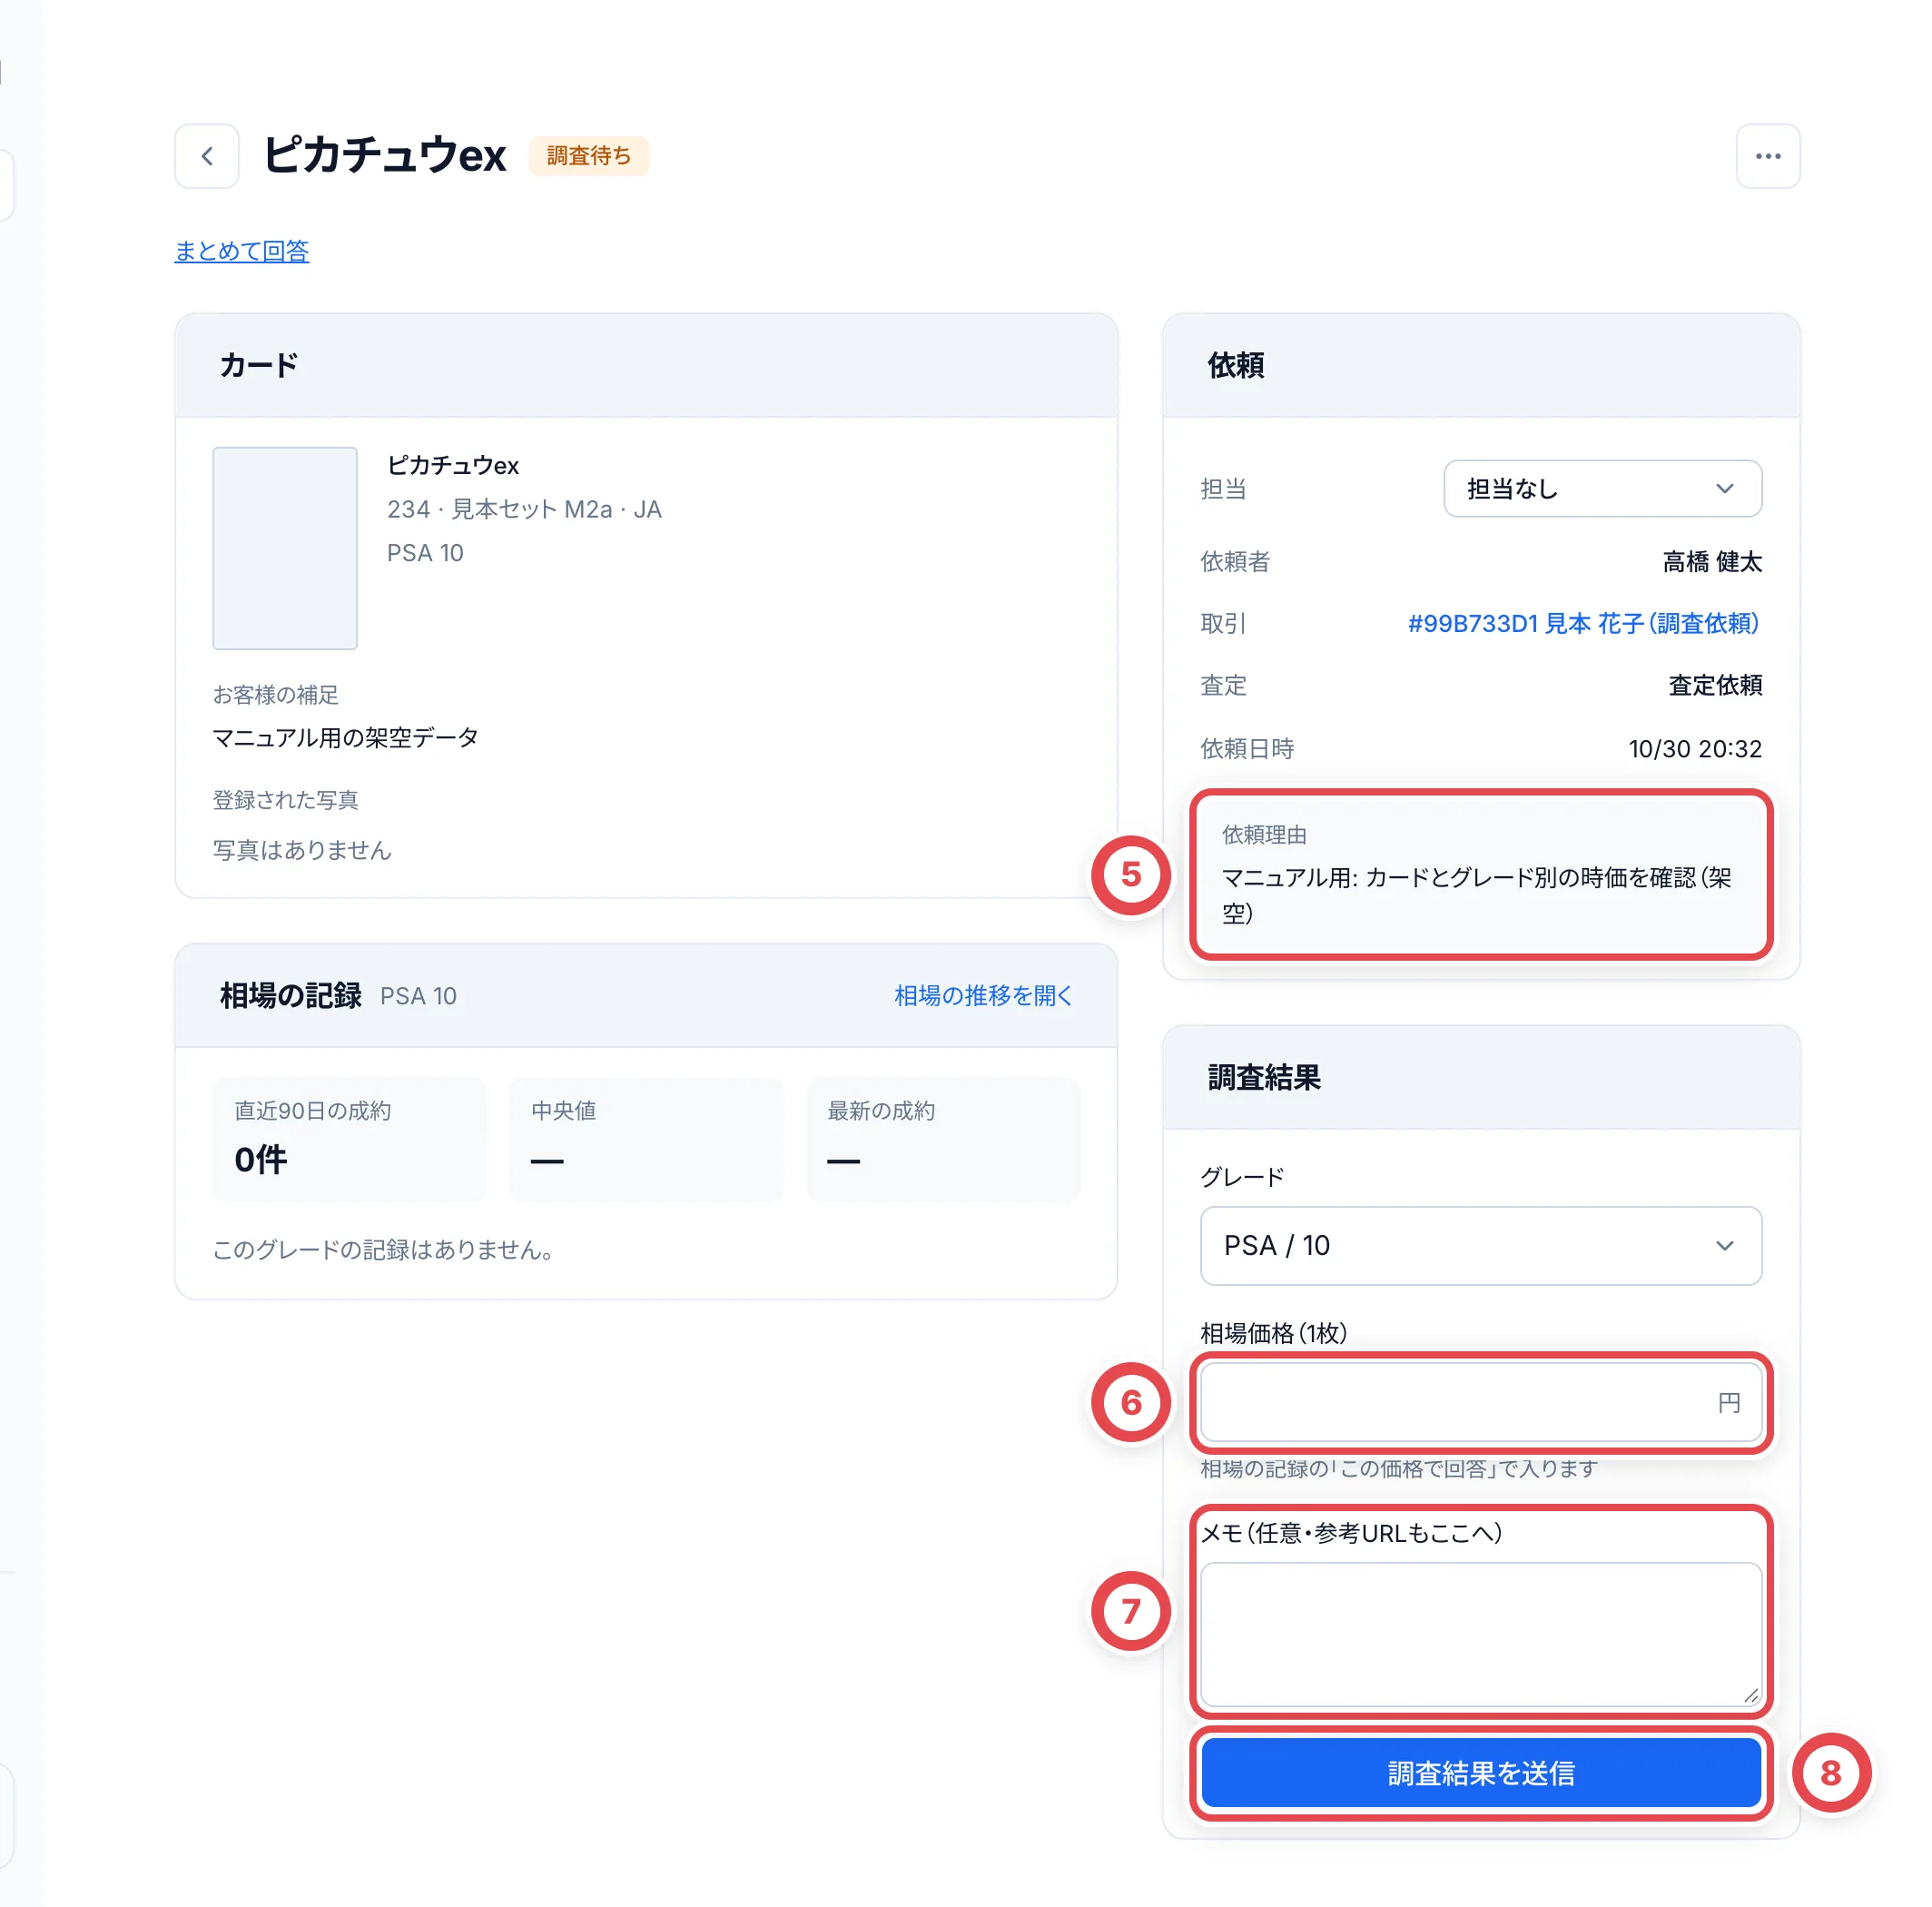 カード・グレード・出典と1円以上の価格が揃った回答は、同じショップの別案件でも使える登録相場になります。0円・出典なしなどの回答は登録されません。確認と訂正・無効化は[ショップの相場を登録・再利用する](/guides/purchase/appraisal#ショップの相場を登録再利用する)を参照してください。
### 複数の依頼へまとめて回答する
一括で頼まれた依頼では、詳細上部の「まとめて回答」から同じ依頼回のカードを開けます。①のチェックが付いた行だけを保存します。②の「グレード」と③「相場価格(1枚)」を確認し、④のメモに根拠・参考URLを記録します。
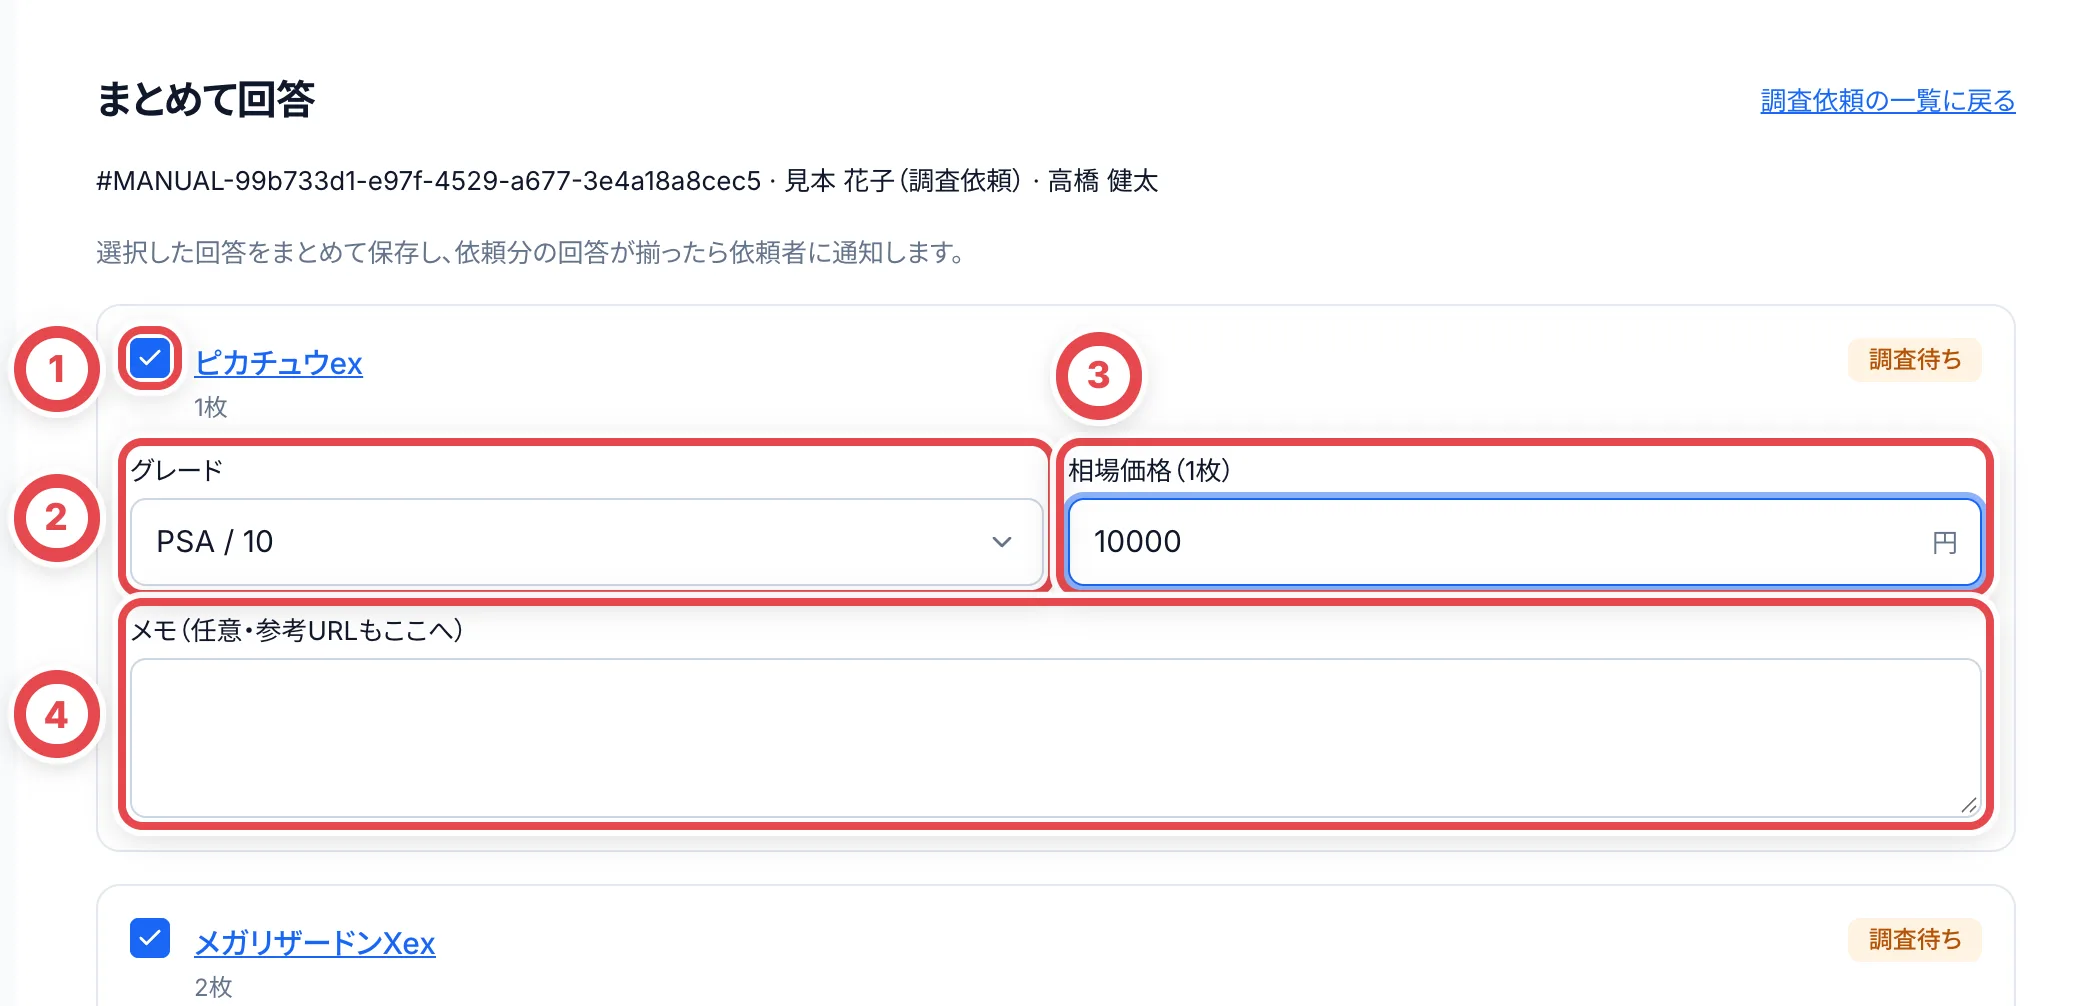 未特定のカードは「回答の種類」で「カードマスタに無い」を選べます。カード名・型番を確認し、価格も分かった場合だけ価格とグレードを入れます。価格が不明なときに0円で埋める必要はありません。
①「N件をまとめて回答」で、選んだ行を保存します。途中の行だけ回答しても構いません。**一括依頼は、その依頼回の回答が揃ったときに依頼者へ通知されます。** 取り下げた行があれば、その分を除く回答のまとまりとして扱います。個別の古い依頼は、回答ごとの通知が続きます。
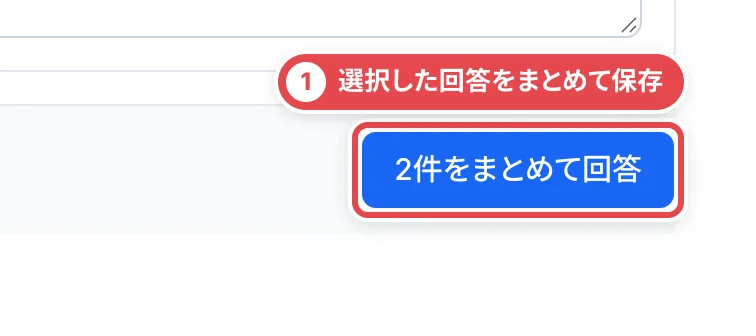 「ほかの担当者が対応中」「別の依頼回へ移動済み」「回答対象外」の行は変更できません。保存時に更新が通知された場合は、入力を控えて「最新の状態を読み込む(入力はリセット)」から開き直します。
### 3. 回答を受け取る(査定する人)
回答後は、対象カード・回答したグレード・価格・根拠を照合します。価格の反映先は、現在のグレードや見積の下書きによって変わります。依頼した人の対応項目の「調査回答」から確認し、見積の作成や2次査定へ進みます。
調査担当が回答で確かめたグレードは、「査定依頼」タブの行の「状態・グレード」に入ります。ただし、画面で選んだグレード、下書きに保存したグレード、前回の見積のグレードがあるときは、そちらのままです。参考時価に回答の価格が入るのは、行のグレードが回答のグレードと同じときです。違うときは、参考時価の下に「調査回答 PSA 9 · 9,000円」のように回答のグレードと価格が出ます。見積の下書きにあるカードは、下書きのグレードも回答のグレードに変わります。
### グレードを変えて調べ直す(査定する人)
「査定依頼」タブで、調査を頼んだグレードのまま「状態・グレード」を変えようとすると、「既に今のグレードで調査されていますが、変えますか?」と聞かれます。「変えて再調査を依頼」を押すと、グレードが変わり、そのまま新しいグレードで調査を頼む画面が開きます。「キャンセル」なら何も変わりません。
| 調査の状態 | 調べ直すと |
| ------------------ | ------------------------------------------------------------------ |
| 調査待ち・調査中 | 同じ依頼が新しいグレードに変わります。担当の調査担当に通知されます |
| 回答済み・反映済み | 新しいグレードで調査を頼み直します。前の回答は残ります |
前の回答(価格・グレード・回答した人・メモ・日時)は、調査依頼の画面の「これまでの回答」で見られます。
### カードマスタに無いカードのとき
カードが特定できない依頼では、調査担当が「回答の種類」で「カードマスタに無い」を選べます。カード名と型番を書いて送ると、運営にカードの登録が頼まれます。登録されたら、依頼した人が「登録されたカードで特定して再調査を依頼」で調査をやり直します。
### 取り下げる・辞退する
| こんなとき | だれが | 操作 |
| -------------------- | ---------- | -------------------------- |
| 依頼が要らなくなった | 依頼した人 | 「依頼を取り下げる」 |
| 自分では調べられない | 調査担当 | 「辞退して担当なしに戻す」 |
## 2次査定依頼
2次査定は、オンライン買取の見積をお客様に出す前に、査定した人とは別のメンバーが中身を確かめる仕組みです。「2次査定が要る下限額」は[買取掛け率](/guides/settings/pricing)で決めます。
### 1. 2次査定を依頼する(査定する人)
顧客の「査定依頼」タブで、商品未特定・グレードや金額が未入力の行を選んでいても「選択した査定を進める」から依頼できます。相場調査を頼めるカードが無いときは①の確認画面で対象件数を確かめ、②「依頼する」で商品特定と査定額の確認を引き継ぎます。頼めるカードがあるときは、確認画面の「調査せず2次査定に進める」で同じように引き継ぎます。入力済みの査定額も担当者へ渡ります。未保存の数量変更は先に解消します。
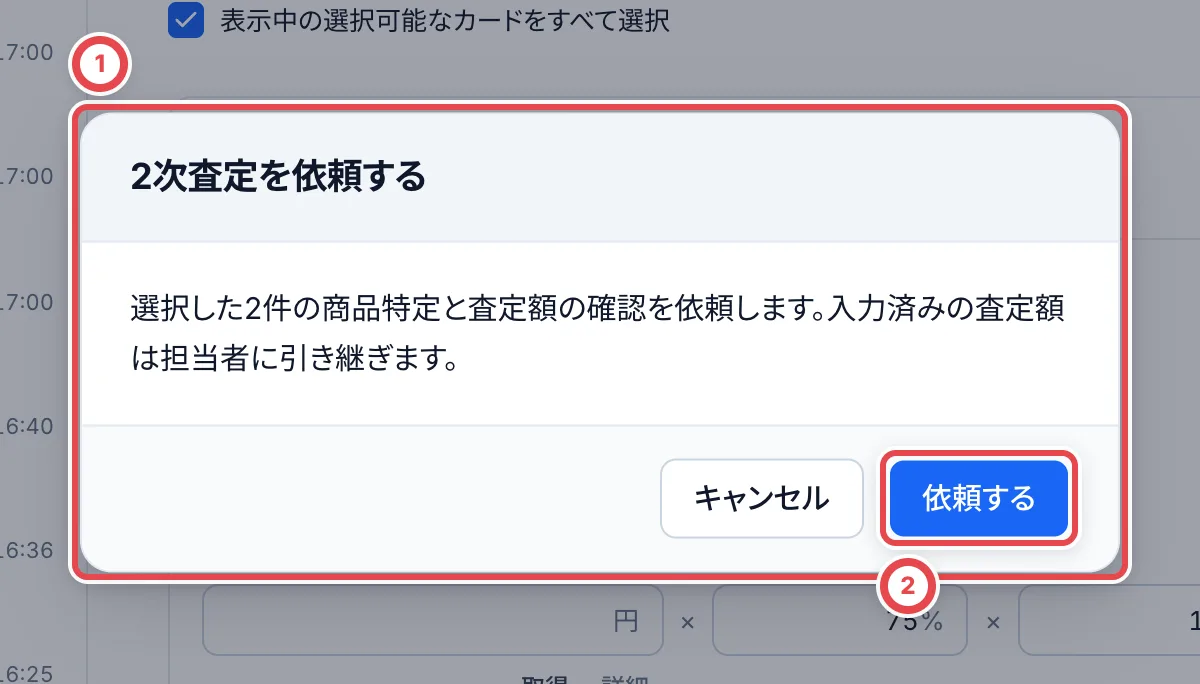 すでに金額を保存した見積を確認してもらう場合は、次の手順です。
査定額をすべて保存してから、明細の下の②「2次査定を依頼」を押します(上の画像の②)。**依頼したあとは、見積の中身が固定されます。** 価格の条件を直して保存すると、下限額に応じて依頼し直しが要ります。
依頼せずに省略するときは、最終査定では「2次査定を依頼」横の「2次査定を省略」を、事前査定ではボタン横のメニューから選び、理由を入力します。省略する権限が必要です。依頼通知は送られず、理由と操作した人が記録され、見積を提示できるようになります。見積の提示は別に行います。
カードを見積から外す・数量だけを変える再見積は、2次査定が要りません。元の見積と時価・掛率・状態・金額の調整が同じなら、保存したあとそのまま提示できます。カードを足したときや価格の条件を変えたときは、下限額に応じて2次査定が要ります。
### 商品未特定・査定額未入力の依頼を受ける
一覧の「商品・査定額の確認待ち」から「確認する」を押します。通常の見積確認ダイアログとは別の2次査定画面です。
1. ①「カードを特定」または「商品を特定」で商品・版を確認します。BOX等は包装状態を選びます。商品を特定する操作は、その場で保存されます
2. ②カードのグレードと、③参考時価・掛率を確認します。まとめ査定は「まとめ査定額」を確認します
3. 全商品の特定と価格が揃い、合計を照合してから「確認して承認」を押します。確認画面でも「確認して承認」を押すと、その内容で2次査定が承認されます
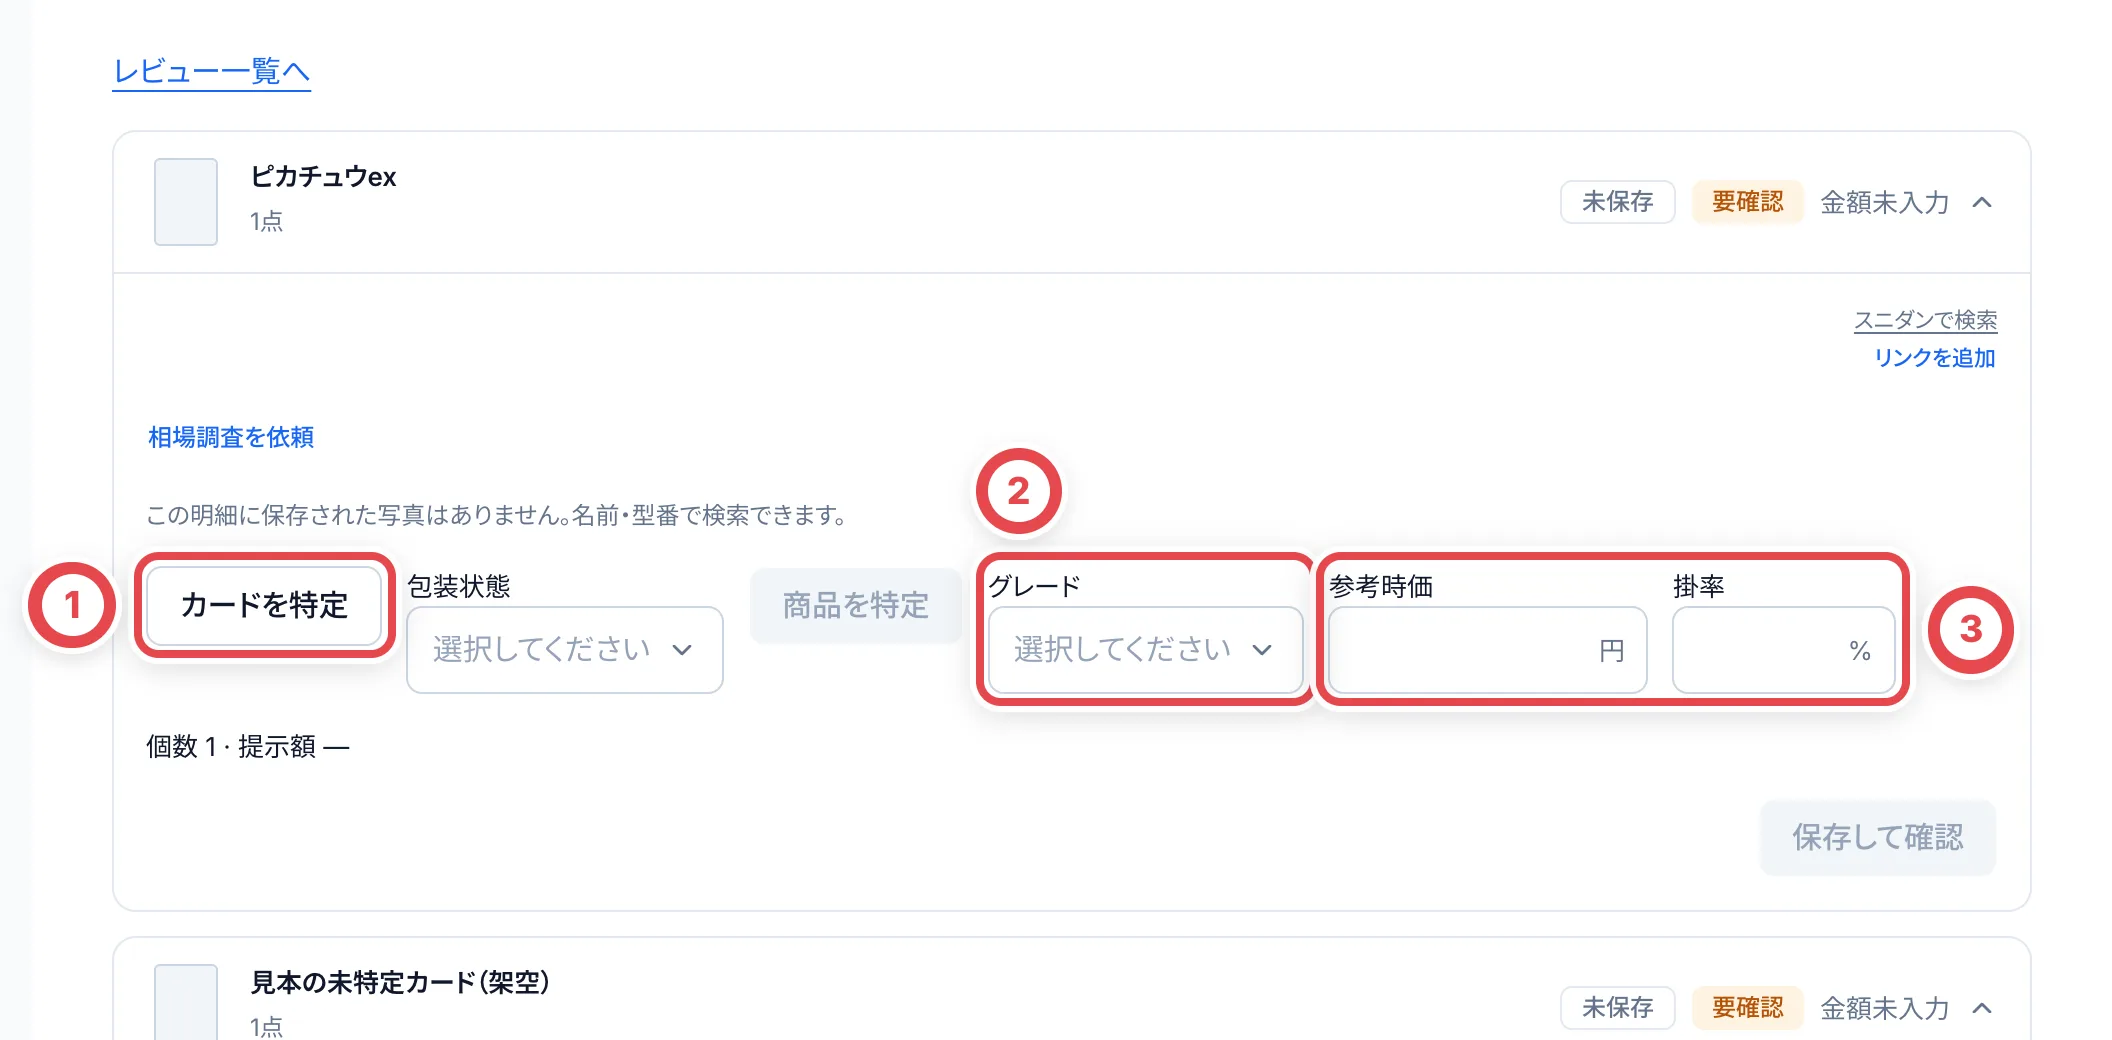 ①「確認して承認」は、全商品・価格を確認するまで押せません。依頼者本人も承認できません。②「依頼を取り下げる」は確認を挟み、取り下げても見積の明細は残ります。承認後の見積提示は別に行います。
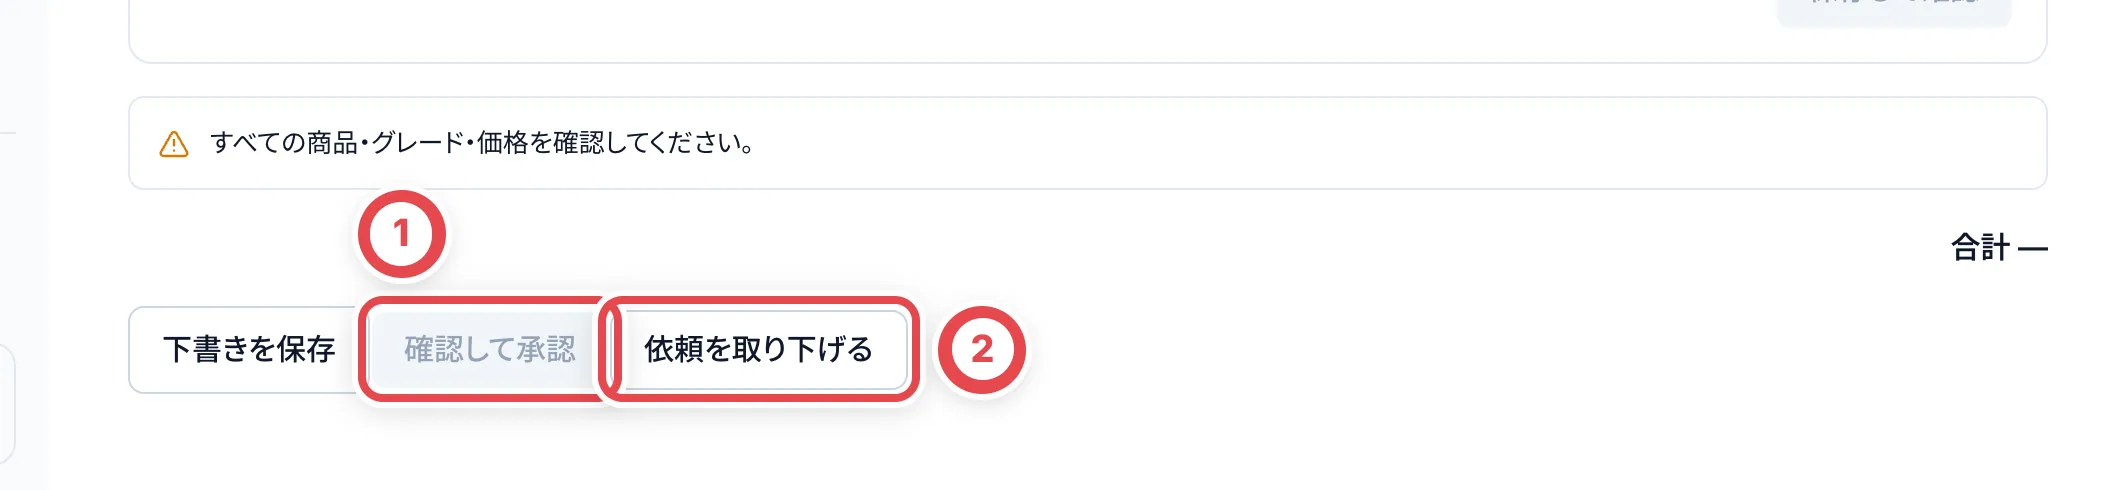 ### 2. 見積を確かめる(確かめる人)
2次査定の依頼は、対応項目と、サイドバーの「2次査定依頼」に出ます。
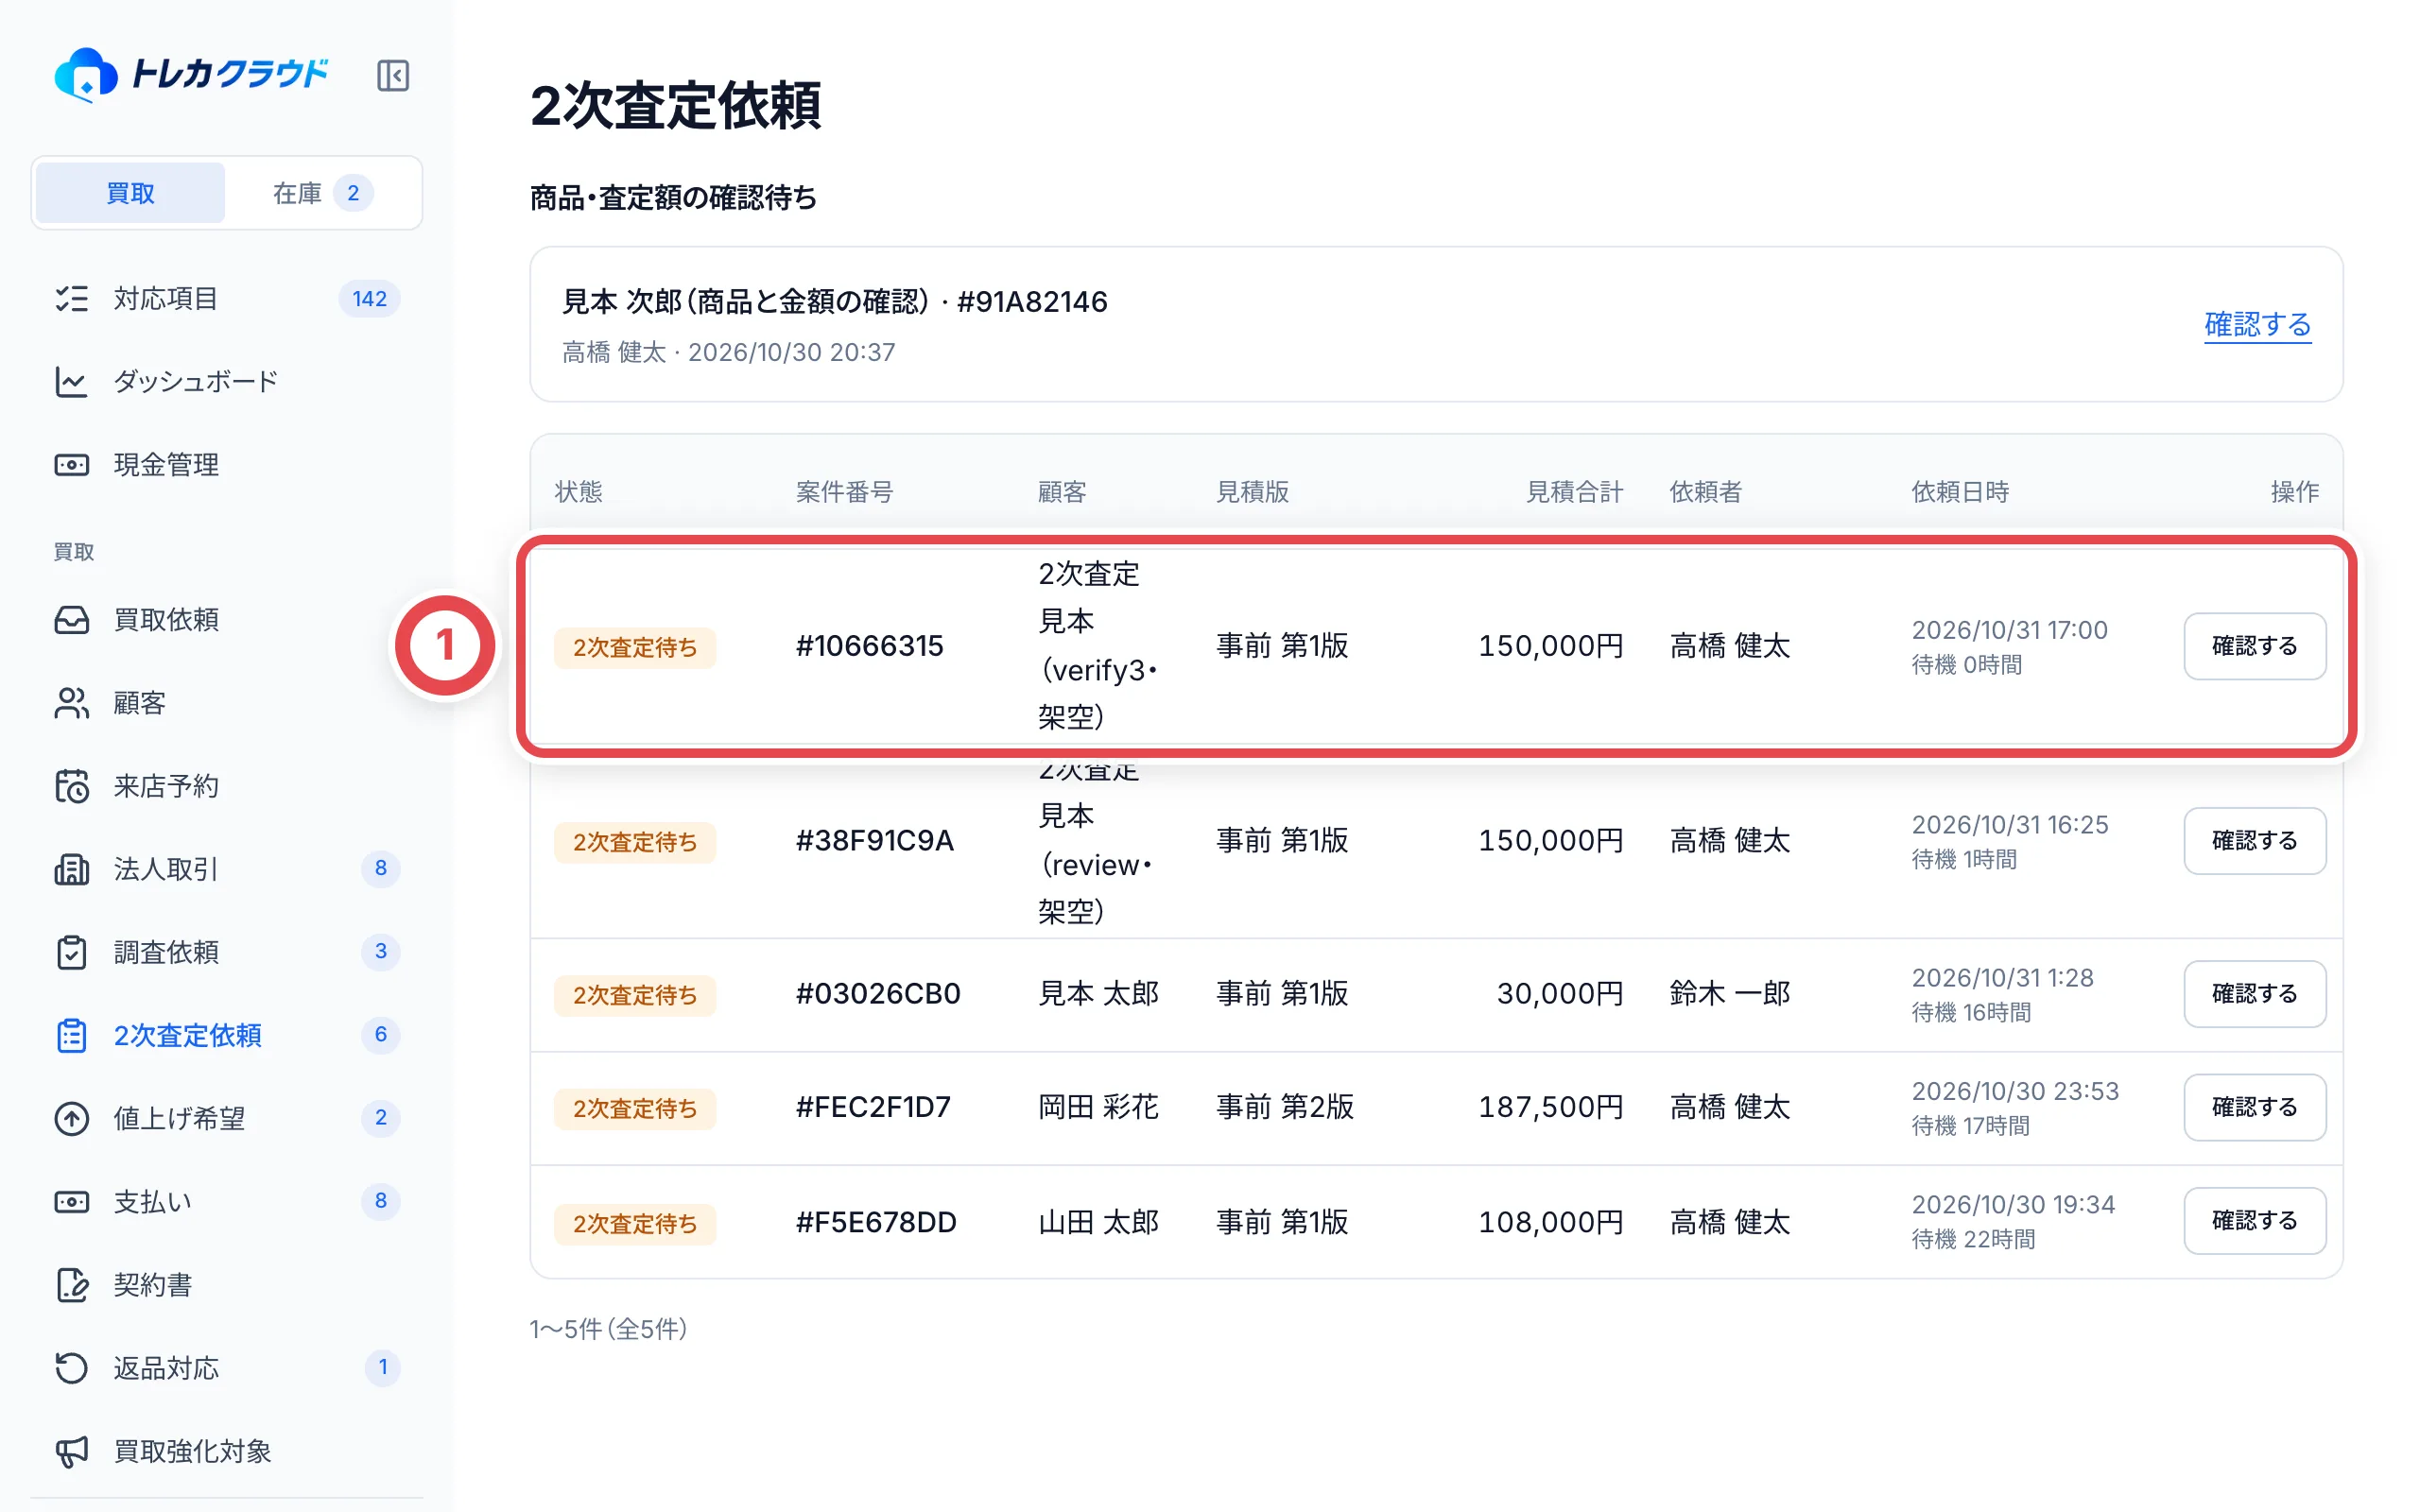 「確認する」を押すと、見積を確かめる画面が開きます。
1. ①の「査定明細」と「見積書PDF」のタブで中身を確かめます。カード名を押すと、カードの詳細が新しいタブで開きます。時価の下には、その時価の出どころ(「スニダン成約」「調査回答」「登録相場」「手入力」)が出ます。「調査回答」を押すと、調査依頼の画面が新しいタブで開きます
2. 金額を直すときは、明細の②「提示額」を書き換えます。提示額は、その明細の数量分の合計です。通常のカード明細では時価・掛率も修正でき、再計算した合計を確認します
3. 必要なら③の「レビューコメント(任意)」を書きます。コメントは確定と一緒に記録されます
4. 問題がなければ④の「確定」を押し、確認の画面でもう一度「確定」を押します。直した明細があると、確認の画面に直す前と後の金額が並ぶので、見比べてから確定します
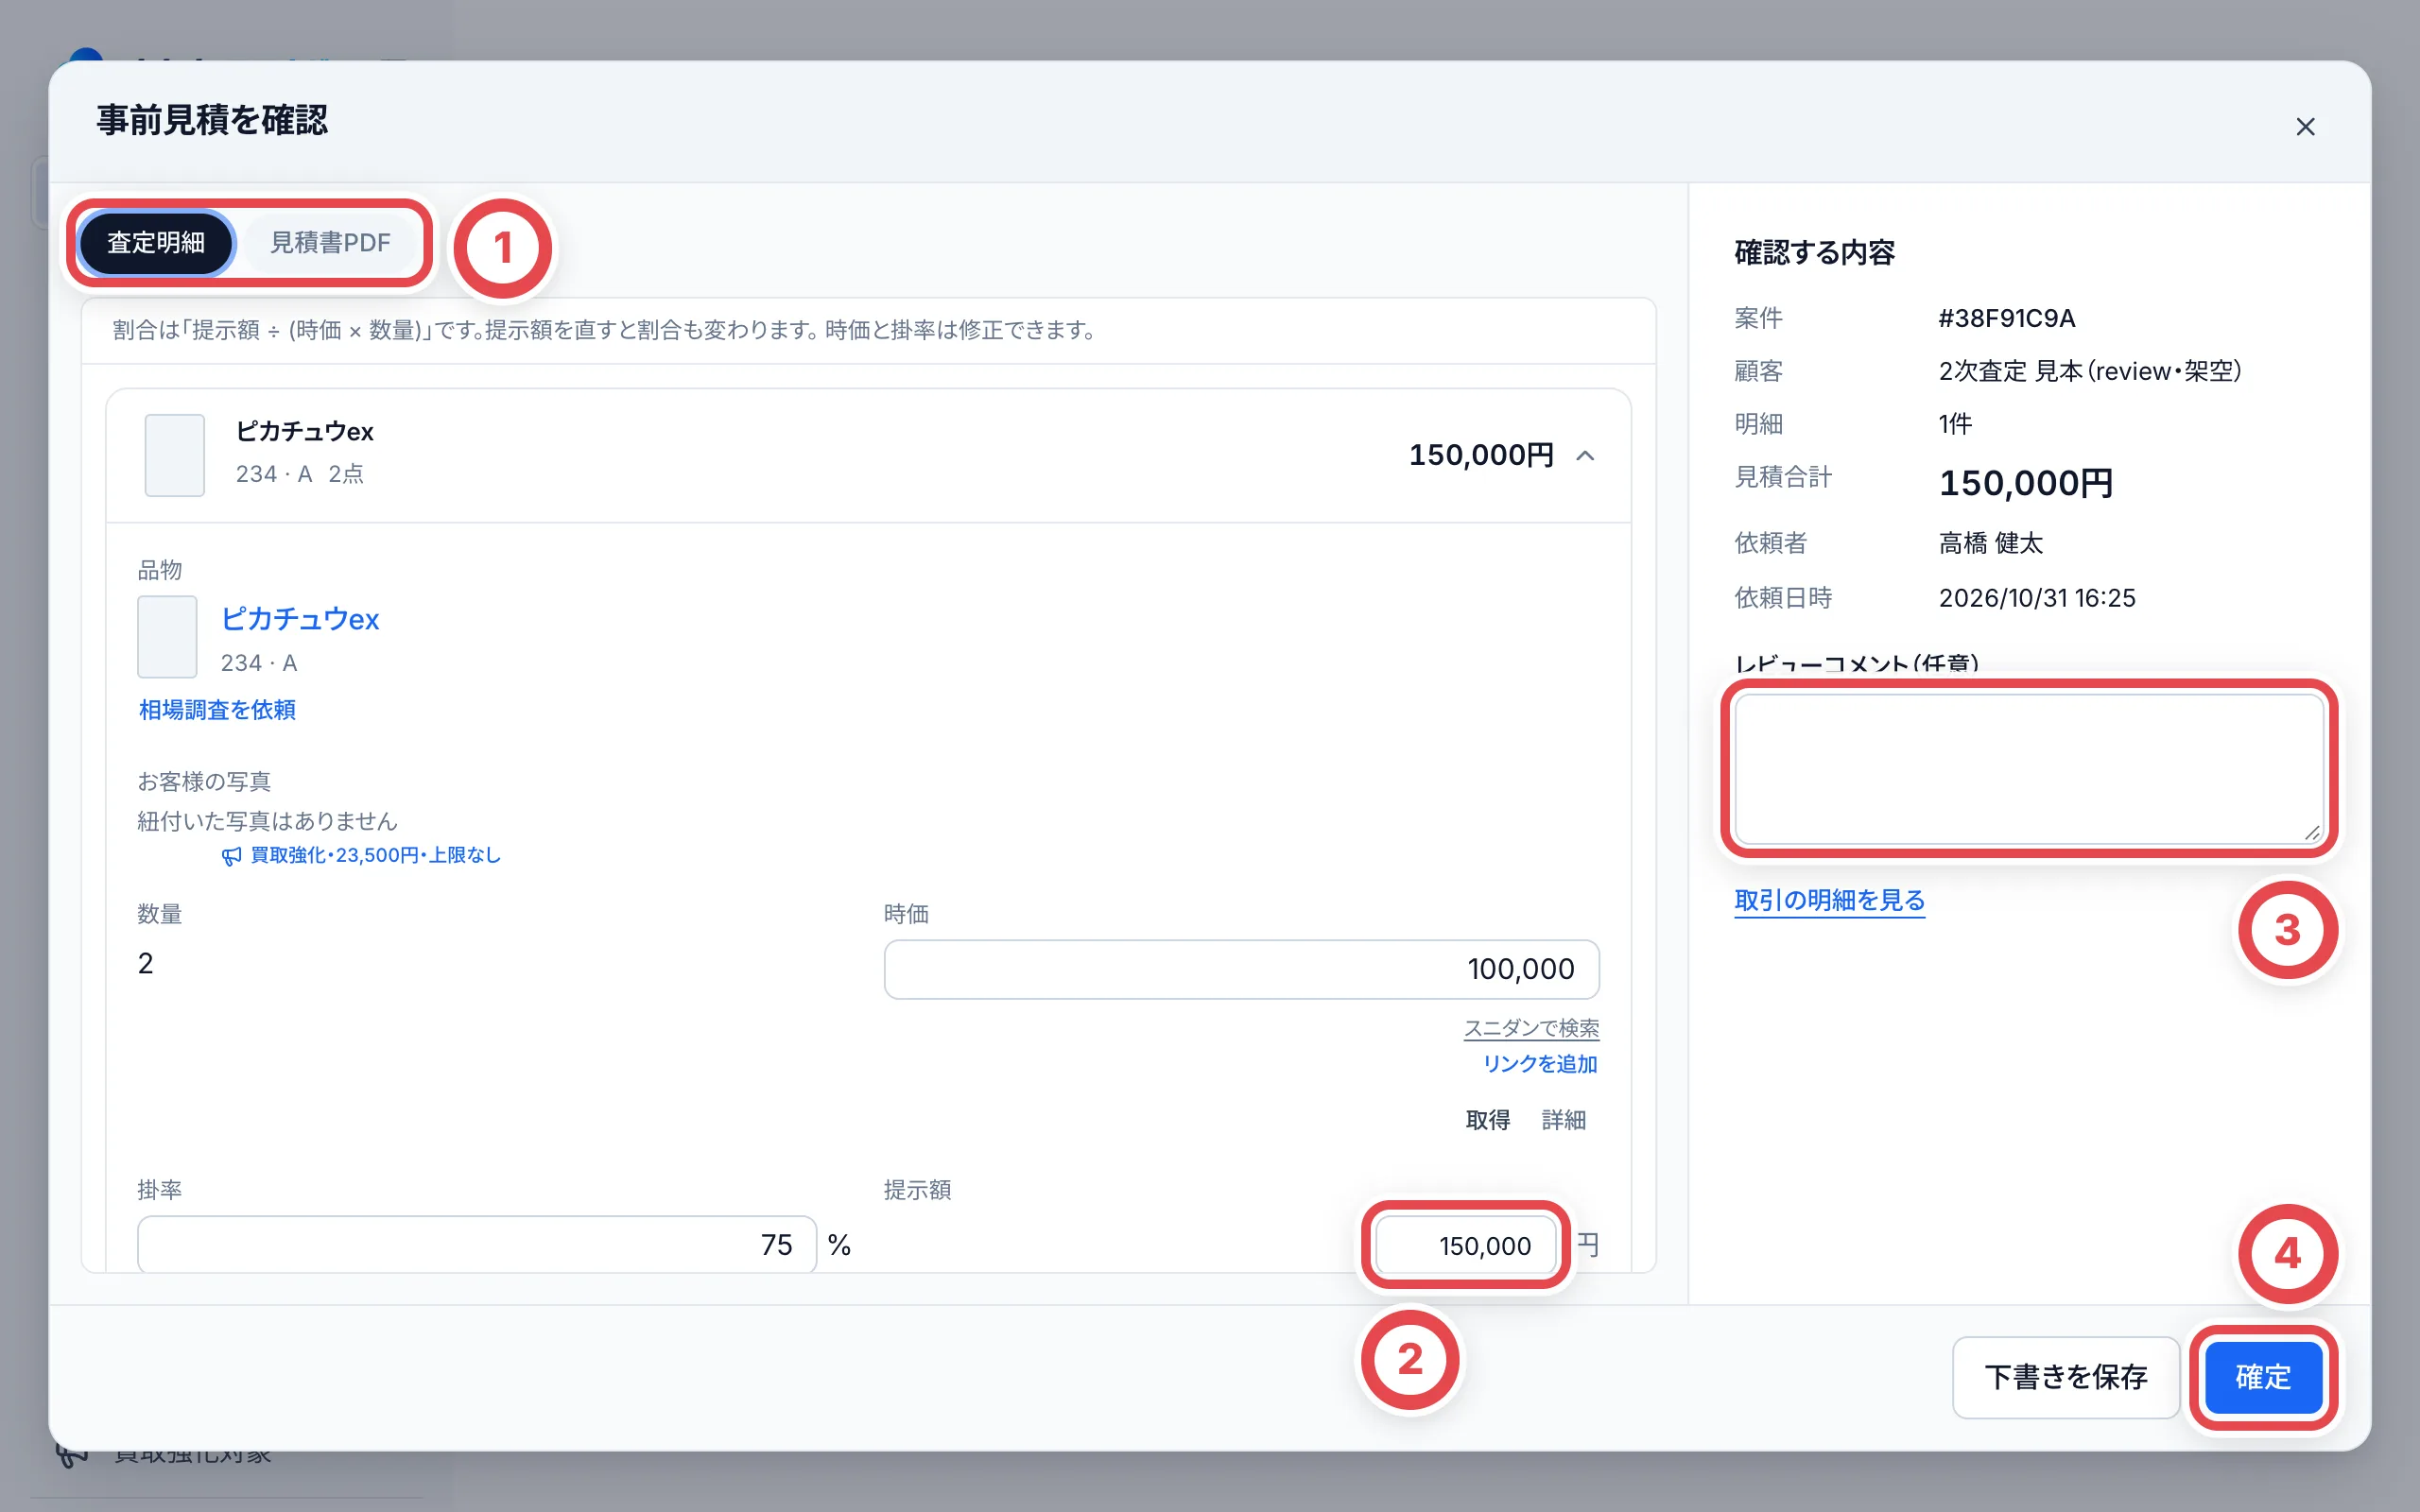 個体ごとの最終査定の確認画面は、各個体の鑑定番号・金額を照合する画面で、ここでは金額を編集できません。修正が必要なら、取引の最終査定から直して確認を依頼し直します。
確定すると、見積を提示できるようになります。
:::note
査定を作った本人は、その見積を確定できません。「2次査定を省略」を選ぶと、2次査定をせずに見積を提示できるようになります。省略した人の名前は記録に残ります。
:::
### 下書きと確認の進捗を保存する
2次査定を途中で止めるときは「下書きを保存」を押します。通常の見積確認では時価・掛率・提示額・コメント、商品・査定額の確認画面ではグレード・時価・掛率・包装などの途中入力を引き継げます。**下書きを保存しただけでは2次査定は承認されず、見積も提示されません。**
明細の「保存して確認」は下書きとその明細の確認状態を保存し、カードを折りたたみます。保存後に開き直して続けられます。内容を直した明細の確認は解除されます。別の担当者と同じ下書きを更新した場合は、入力を控えてから開き直し、最新の内容を確認します。査定の元データが変わった場合は、古い下書きやチェックは自動適用されません。
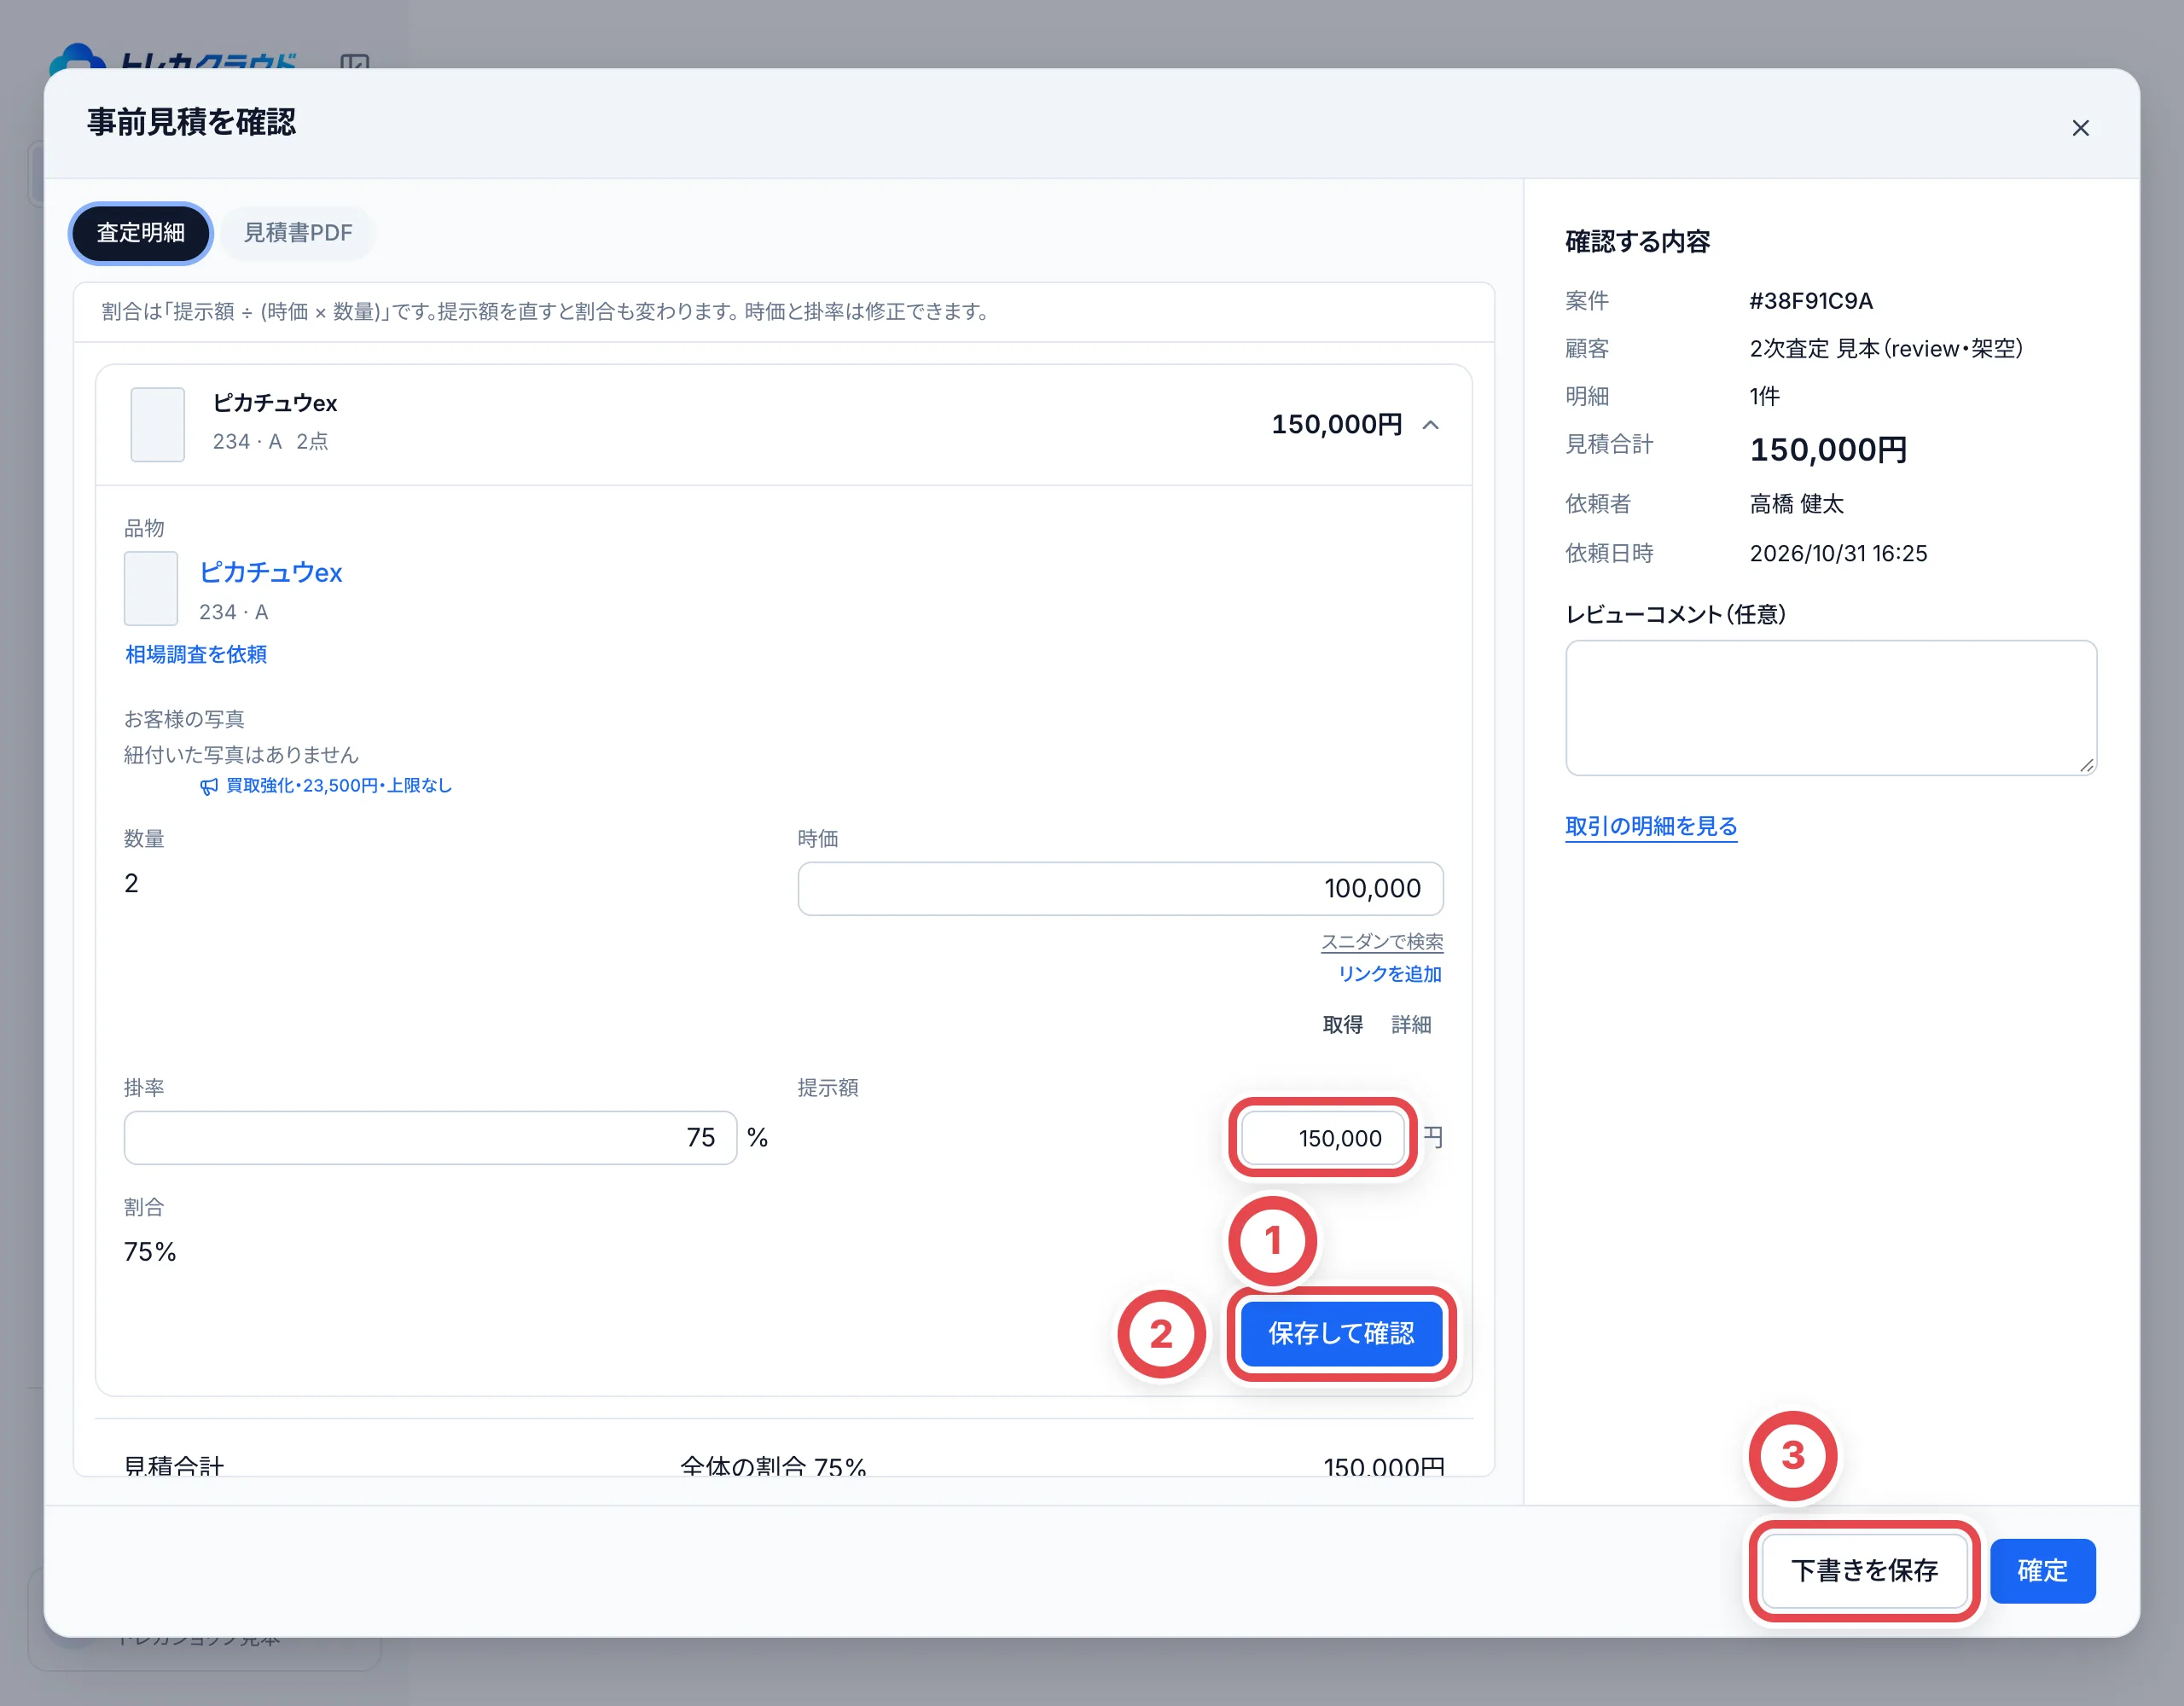 ①の入力を直し、②で明細の確認を保存、③で途中の入力を保存します。承認は「確定」で別に行います。
 ①の「確認済み」は保存した確認状態です。見出しを押すと、折りたたんだ内容を再表示できます。
### 2次査定から相場調査を依頼する
2次査定の明細からも「相場調査を依頼」を開けます。途中の入力は先に下書きへ保存し、調査理由・対象のグレード・担当を確認して依頼します。調査の回答だけで2次査定が承認されたことにはなりません。
回答の取引リンクから確認へ戻り、反映されたグレードと相場、保持された掛率・ほかの明細を見直します。商品・査定額の確認中は、回答がその下書きへ戻り、確認状態は解除されます。個体ごとの最終査定は、相場価格を全個体の買取額へ自動適用しません。最終査定で1枚ずつ金額を入力して保存し、2次査定を依頼し直します。
## 困ったとき
| こんなとき | 確かめること・やること |
| ------------------------------------ | ---------------------------------------------------------------------------------------------------------------------------------------------------------------------------------------------------------------------------------------------------- |
| 見積を提示できない | オンライン買取では調査の回答待ちか、2次査定待ちです。店舗買取では相場調査・2次査定待ちにはなりません。取引の画面の「次の操作」で何を待っているかを確かめます |
| 調査を頼んだのに、だれも引き受けない | 担当を指名していないときは、手の空いた調査担当が引き受けます。急ぐときは、依頼の画面の「担当」で調査担当を決めます |
| 自分の見積を確定できない | 査定を作った本人は確定できません。別のメンバーに確かめてもらうか、「2次査定を省略」を選びます |
| 依頼したあとに金額を直したい | 依頼したあとは見積が固定されます。直して保存すると、下限額に応じて2次査定を依頼し直します |
| 時価の出どころが出ない | BOX・まとめ査定の明細には出ません。カードの明細でも、出どころを確かめられない時価(保存までにスニダンの相場が変わった、出どころを記録していない古い明細など)には出ません。2次査定で時価を書き換えると出どころは消え、確定すると「手入力」になります |
| 「2次査定を依頼」が出ない・押せない | 顧客の「査定依頼」では未特定・未入力でも依頼できます。未保存の数量変更と相場調査待ちを解消します。保存済み見積の画面では対象額・状態・依頼権限と「次の操作」を確認します |
## 関連する操作
- [検索にないカードの登録を依頼する](/guides/purchase/card-registration-requests)
---
# 来店予約
Source: https://docs.toreca-cloud.com/guides/purchase/reservations
来店予約は、お客様が店頭に持ち込む日時を、予約ページから先に予約してもらう機能です。予約が入ると、その方の店頭の取引ができあがります。来店したら「受付」をして、そのまま[店頭買取](/guides/purchase/counter)の手順に進みます。
## 最初に用意するもの
- 予約の設定を変えられるのは、設定を管理する権限があるメンバーです(オーナーと管理者)
- 受付・来店なし・キャンセルには、顧客と取引を見る・変える権限が要ります
- 種類が「店舗」の拠点(「設定」の「拠点と保管場所」で作ります)
## 流れと予約の状態
| 順番 | やること | だれが | 予約の状態 |
| ---- | ---------------------------------------- | ------ | ------------------ |
| 1 | 予約ページを作る | 店舗 | ― |
| 2 | 予約ページから予約する | お客様 | 予約中 |
| 3 | (必要なら)日時を変える・キャンセルする | お客様 | 予約中・キャンセル |
| 4 | 来店予約で予定を見る | 店舗 | 予約中 |
| 5 | 来店したら受付する | 店舗 | 受付済み |
| 6 | 来なかったときは来店なしにする | 店舗 | 来店なし |
予約が入った時点で、その方の顧客(仮の登録)と、店頭の取引(状態は「新着」)ができます。取引の番号は予約番号(`R-` と6桁の数字)と同じです。
## 1. 予約ページを作る
「設定」の「来店予約」を開くと、店舗ごとのカードが並びます。初めては「予約ページを作る」、作ったあとは③の「設定を変更」を押します。
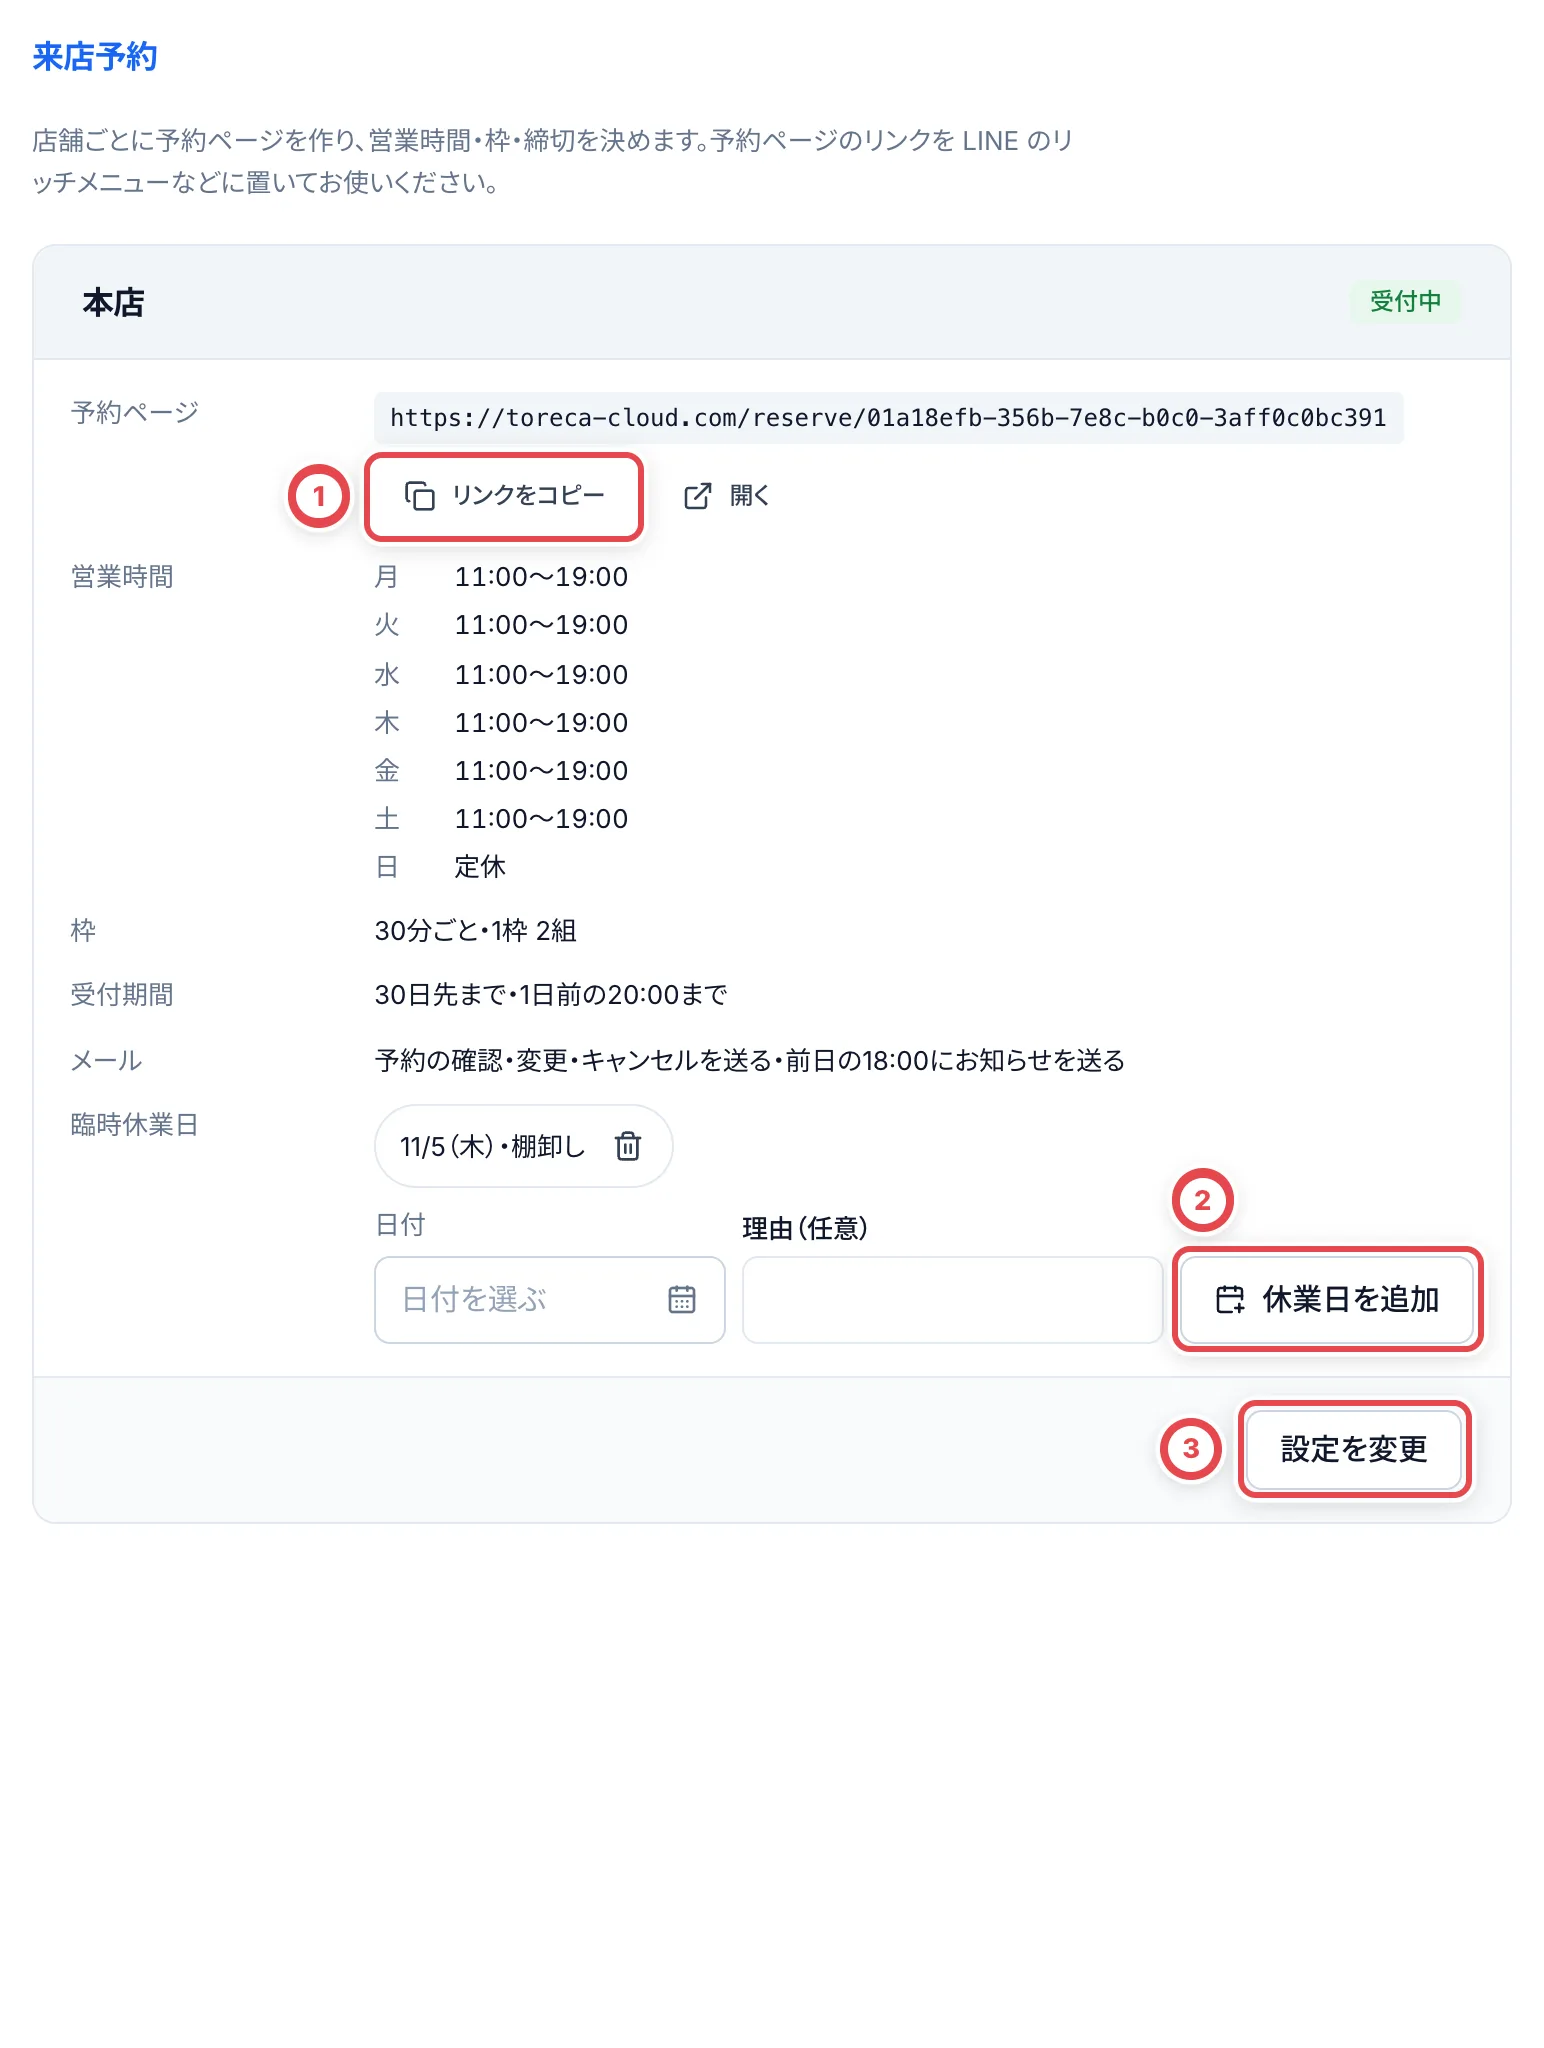 設定の画面で、次のものを決めて、④の「設定を保存する」を押します。**保存するとすぐ予約ページに反映されます。**
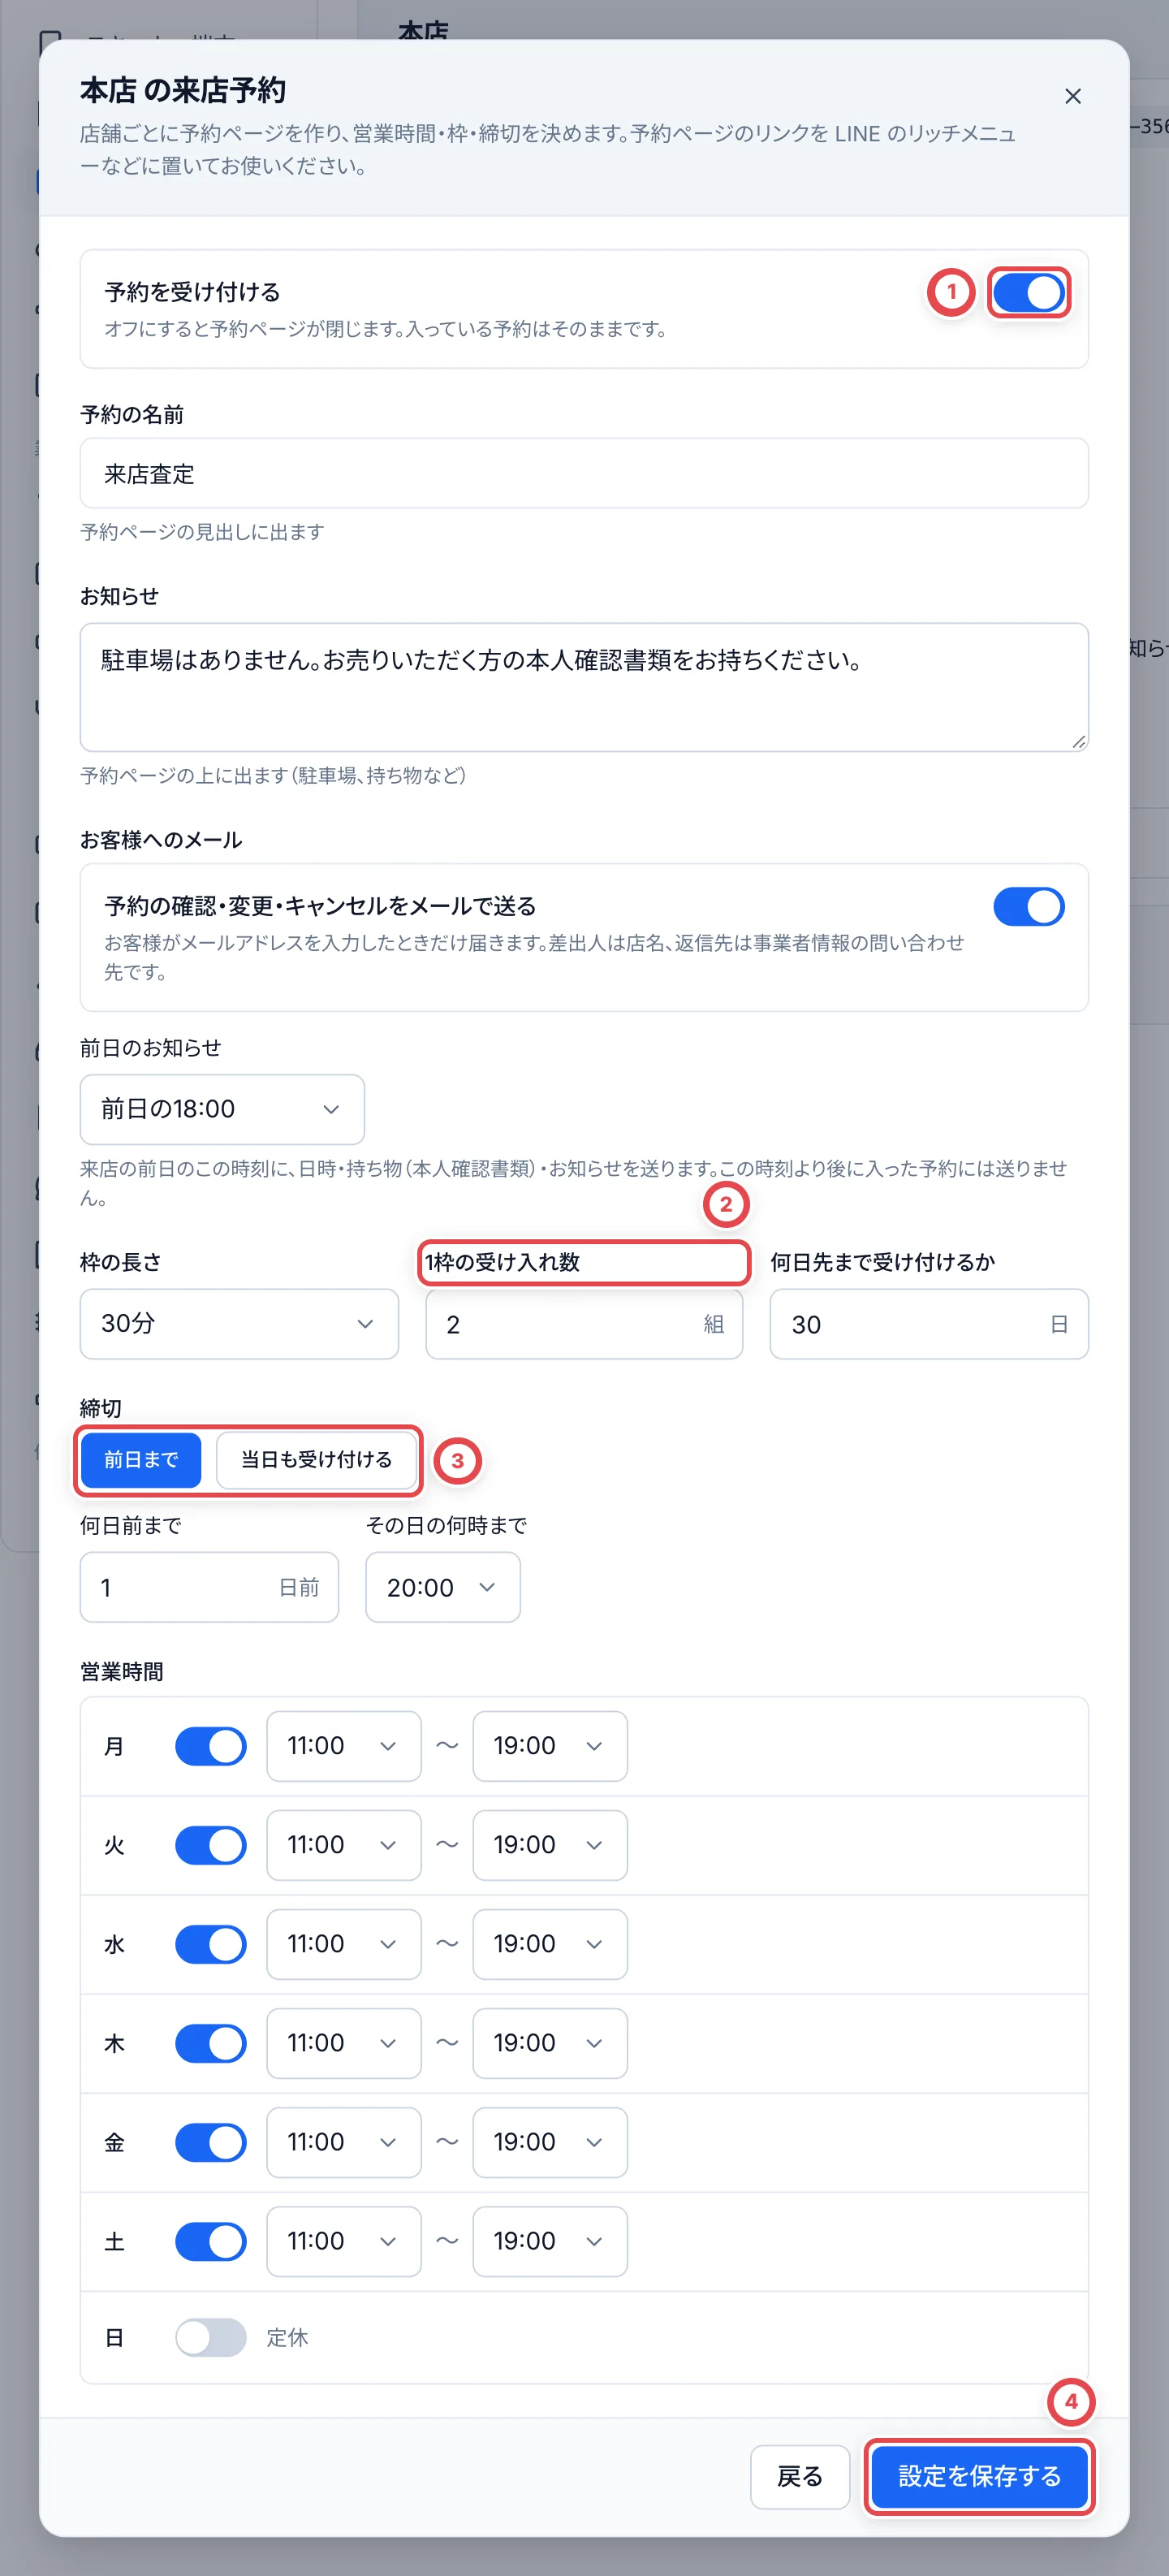 | 項目 | 決めること |
| -------------------------- | ---------------------------------------------------------------------------------------------------------------- |
| ①予約を受け付ける | オフにすると予約ページが閉じます。入っている予約はそのままです |
| 予約の名前・お知らせ | 予約ページの見出しと、上に出る案内(駐車場・持ち物など) |
| お客様へのメール | 予約の確認・変更・キャンセルをメールで送るかと、前日のお知らせの時刻。メールアドレスを入れたお客様だけに届きます |
| 枠の長さ・②1枠の受け入れ数 | 予約の枠を何分ごとに区切るかと、同じ枠に何組まで受けるか(1〜20組) |
| 何日先まで受け付けるか | 今日を1日目として、何日先まで予約できるか(1〜90日) |
| ③締切 | 「前日まで」(何日前の何時まで)か、「当日も受け付ける」(開始の何分前まで) |
| 営業時間 | 曜日ごとの開店・閉店の時刻。スイッチがオンの曜日だけ予約を受けます |
予約ページのリンクは①の「リンクをコピー」でコピーし、LINEのリッチメニューなどに置きます。
受付をオフにした間は、お客様による日時変更・キャンセルのボタンも表示されません。発行済みの予約専用リンクでは内容を確認できますが、変更が必要な場合は店舗で対応します。予約番号と電話番号での検索には、受付中の予約ページが必要です。
臨時の休業日は、カードの下で日付と理由(任意)を選んで②の「休業日を追加」を押します。**押すとすぐその日の予約を受けなくなります**(入っている予約はそのままです)。外すときは、休業日のゴミ箱を押します。
## 2. 予約ページから予約する(お客様)
お客様は予約ページで、①の空いている枠(○ △)を押します。△は残り1組、×は満席か受付の終わった枠です。
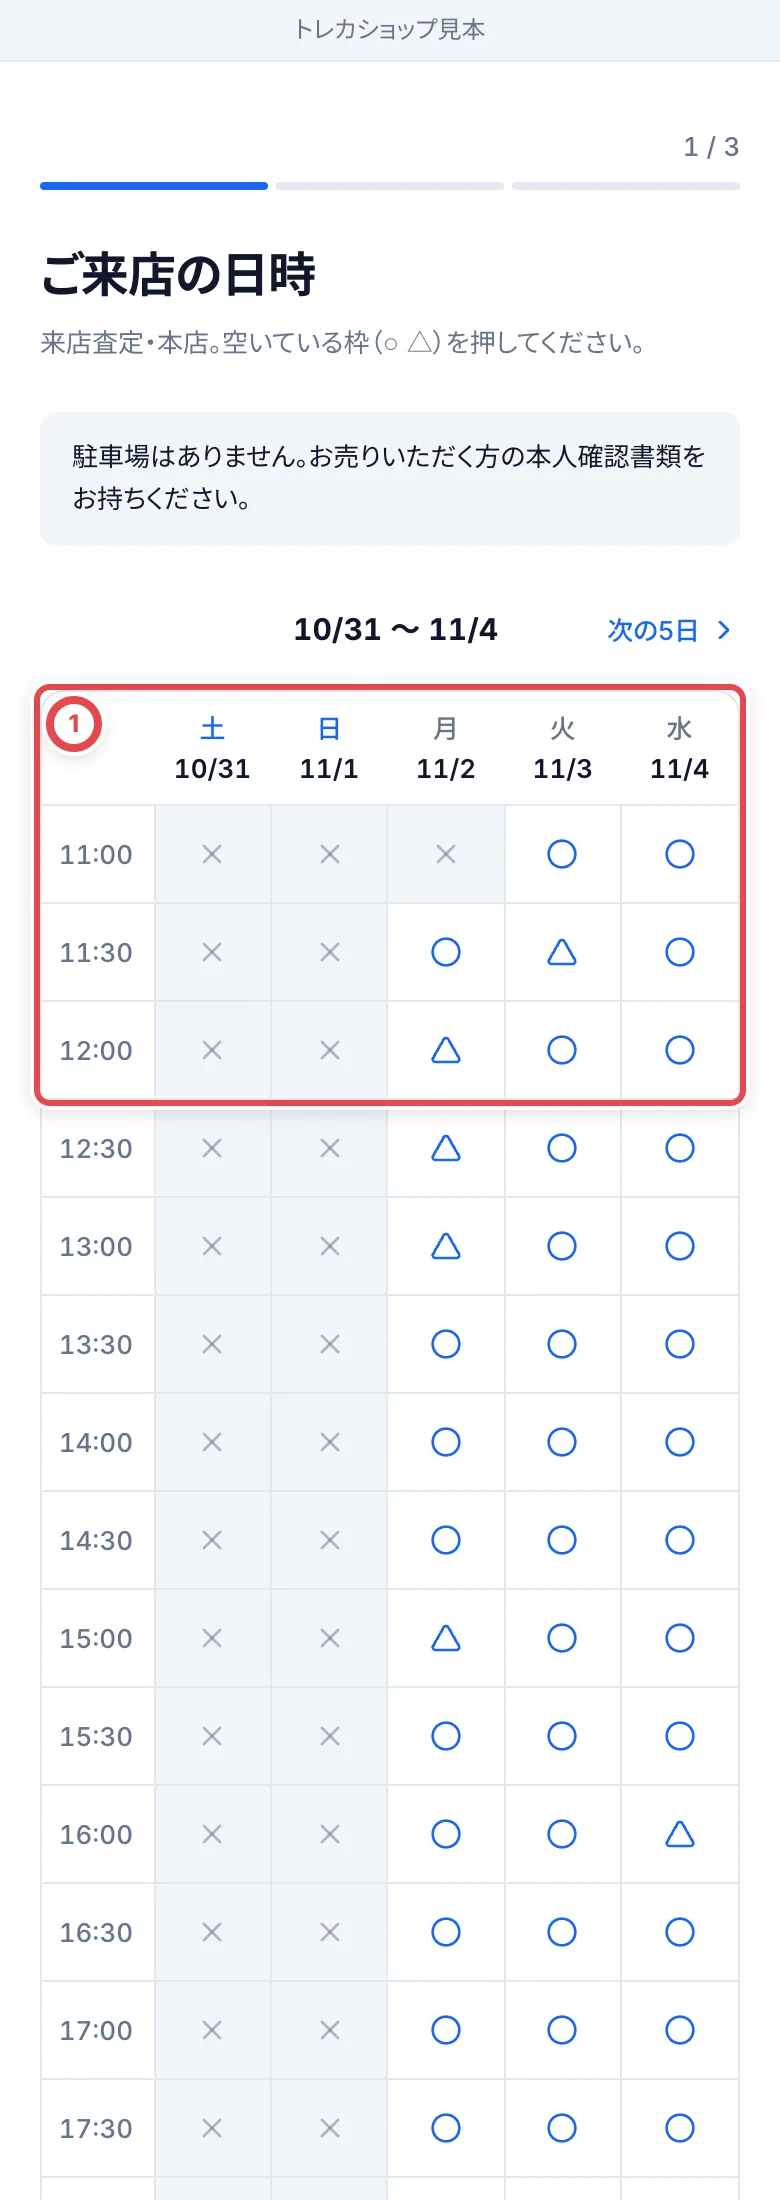 続けて、お名前・フリガナ・電話番号・メールアドレス(任意)・持ってくるカードの種類・おおよその枚数を入れ、③の「確認へ進む」から「予約する」を押すと、予約番号が出ます。
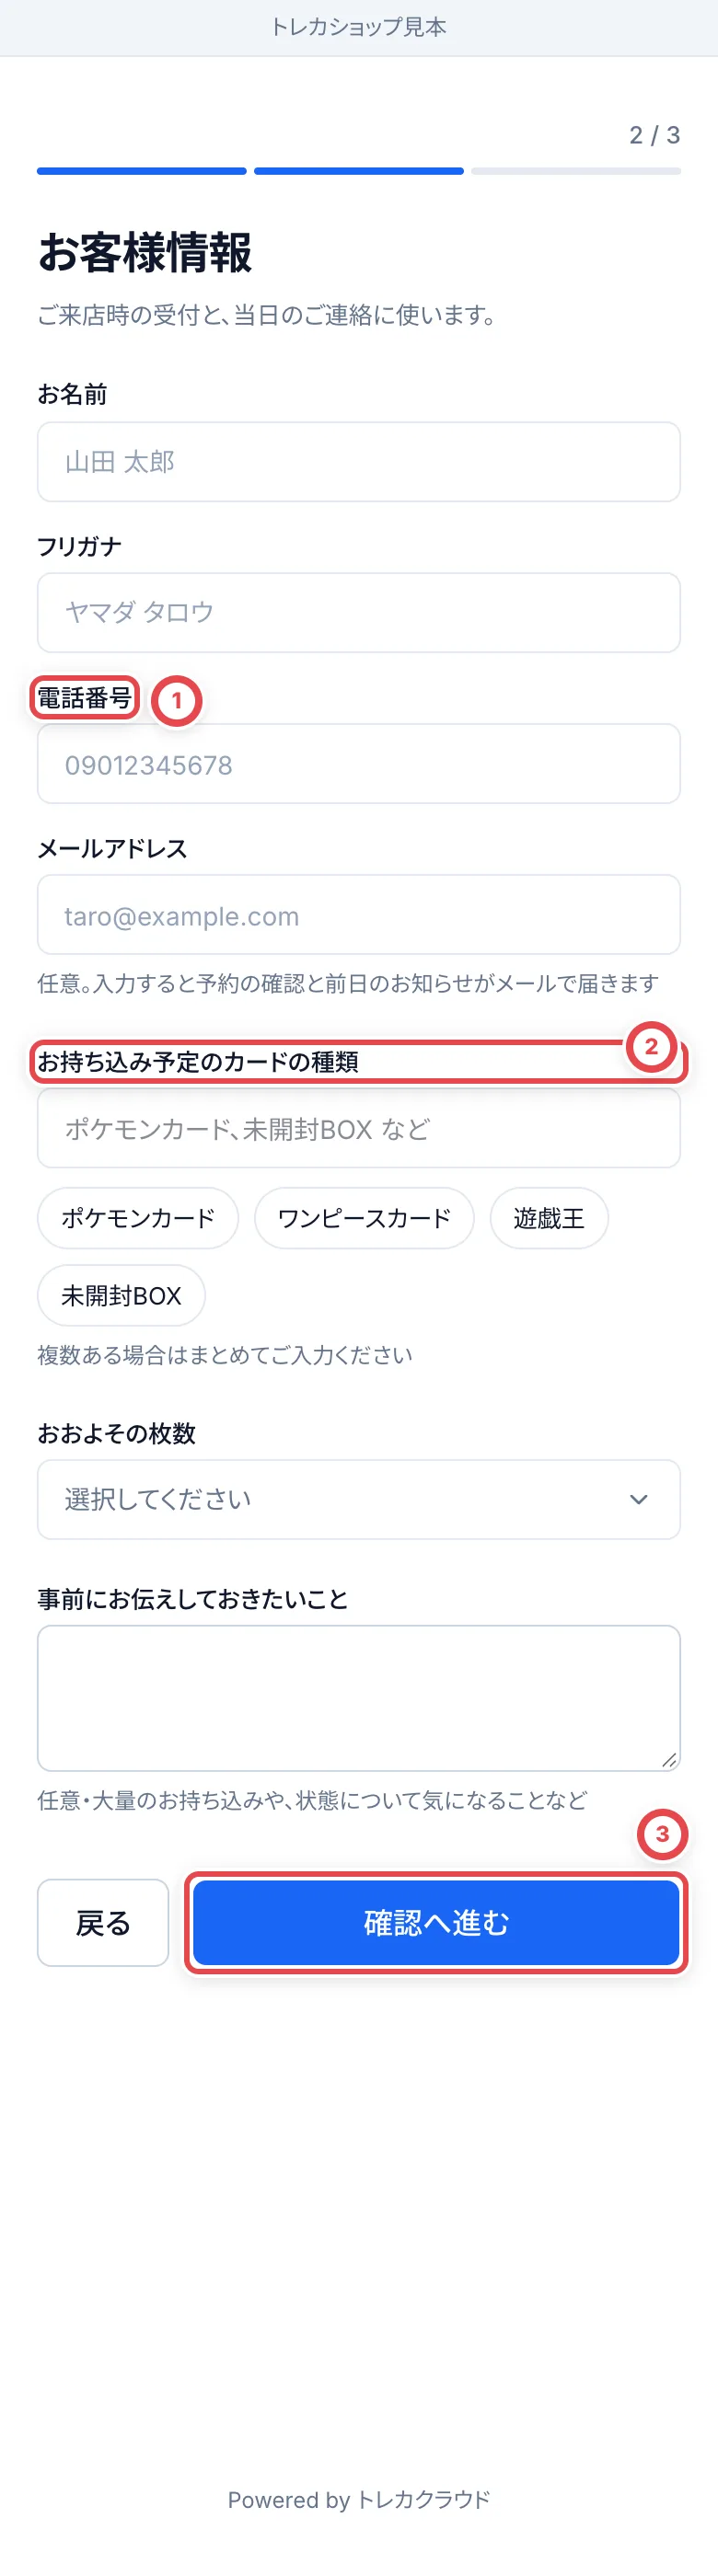 ①の電話番号は当日の連絡に使います。②に持ってくるカードを入れ、③で確認に進みます。
スマートフォンでは「おおよその枚数」を押すと画面下の選択肢が開きます。枚数を選び、「確認へ進む」で日時・店舗・連絡先を確認してから予約します。完了画面の予約番号と「予約の確認・変更」のリンクを控えてもらいます。同じタブで予約ページを開き直すと完了画面が残るため、別の予約を始める場合は「別の日時でもう1件予約する」を押します。
:::note
お客様の画面は日本語だけです。
:::
## 3. 日時を変える・キャンセルする(お客様)
お客様は、予約完了の画面やメールのリンク、または予約ページの「予約の確認・変更・キャンセルはこちら」から、予約番号と電話番号で予約を開けます。①の「日時を変更する」で空いている枠に移せます。②の「キャンセル」は元に戻せません。
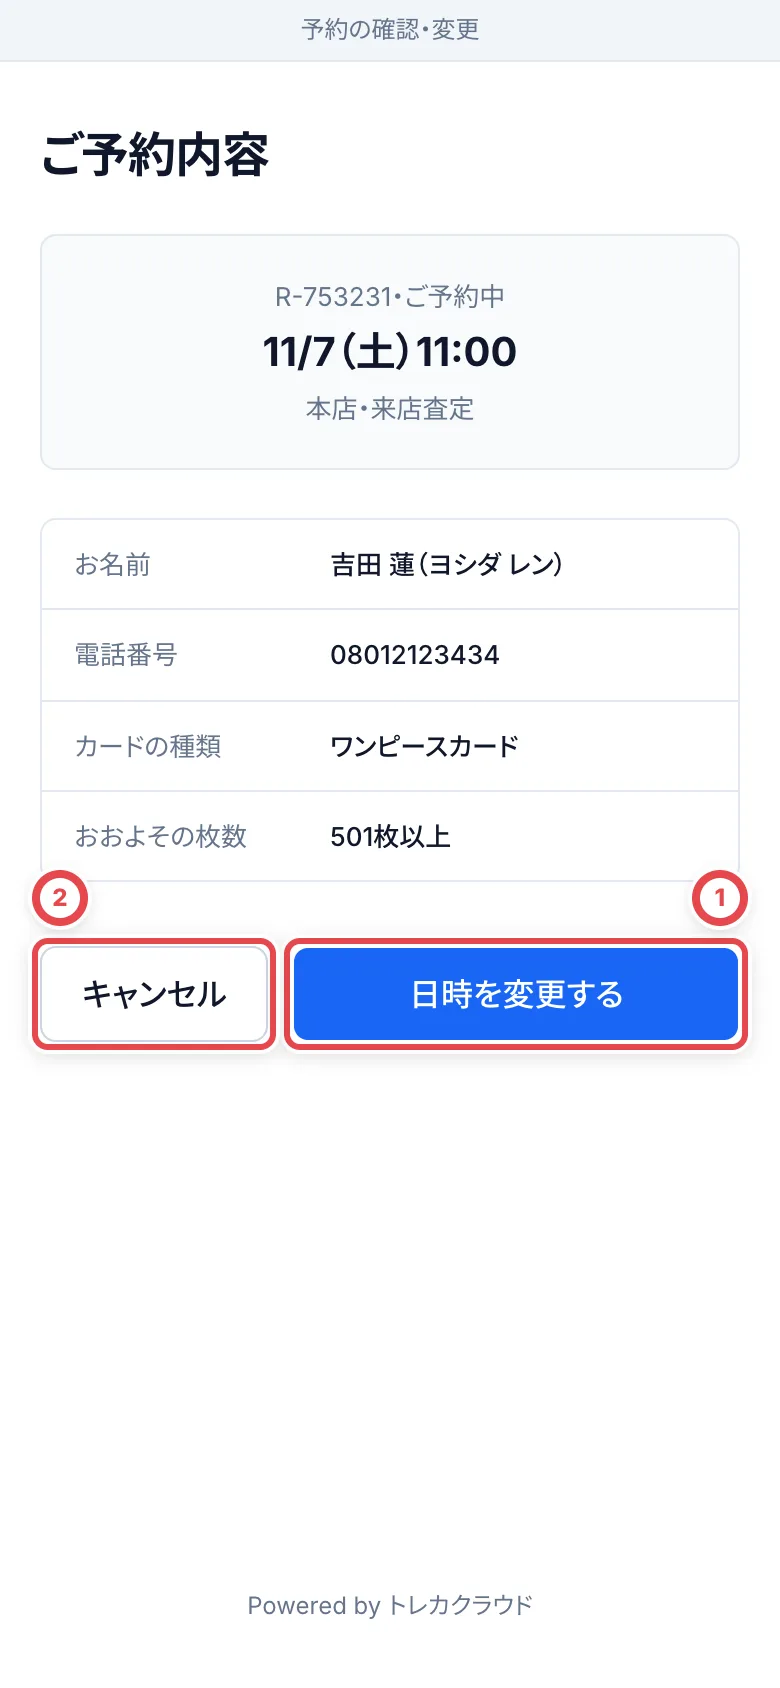 - 予約が「予約中」で予約ページが受付中の間は、来店時刻前まで日時変更・キャンセルができます。変更先には締切前の枠だけ選べます
- お客様が日時を変えたりキャンセルしたりすると、スタッフに通知が届きます(通知の種類「来店予約の変更・キャンセル」)。キャンセルされた予約の取引は、取り下げになります
## 4. 来店予約で予定を見る
サイドバーの「来店予約」を開くと、週のカレンダーが出ます。予約は名前とおおよその枚数で並び、①のように押すと詳しく見られます。臨時休業日の列には②の「休業」が出ます。
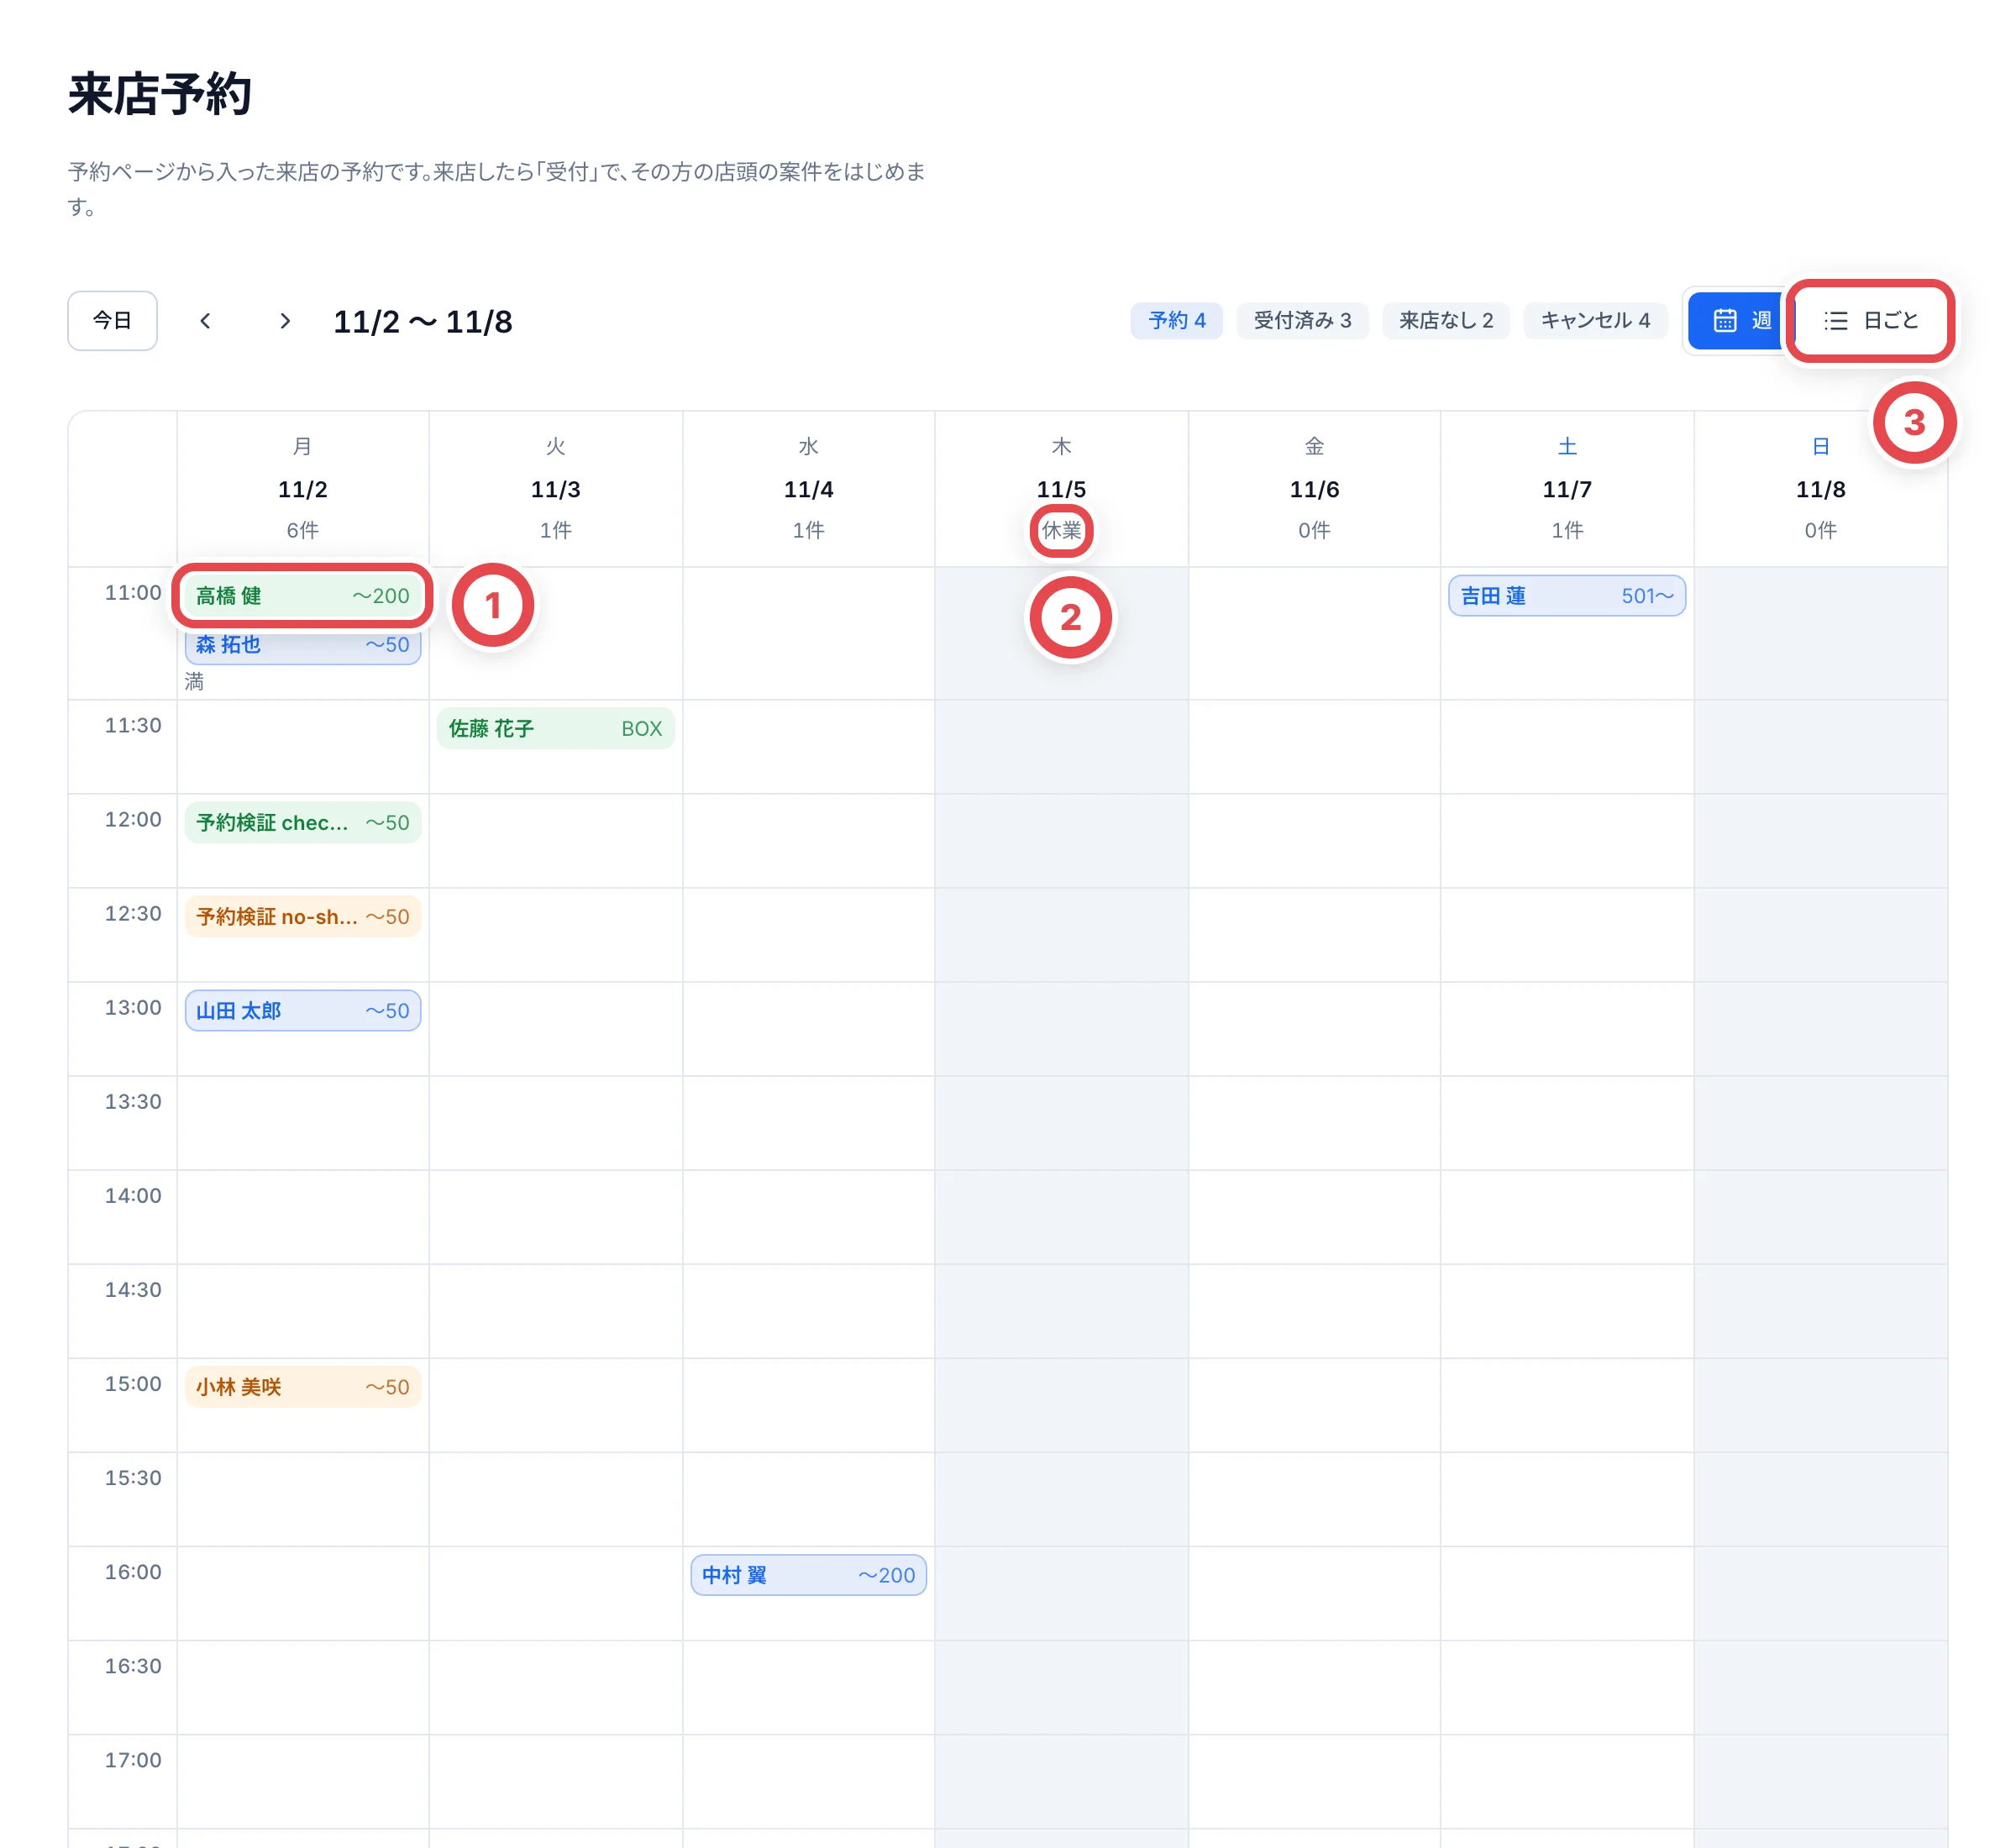 ③の「日ごと」に切り替えると、その日の予約がカードで並び、カードの種類・電話番号・メモ・予約番号を見られます。上の帯で、これから2週間の予約数も分かります(受付済み・来店なしを含み、キャンセルは除きます)。キャンセルされた予約は、日ごとの一覧にだけ出ます。
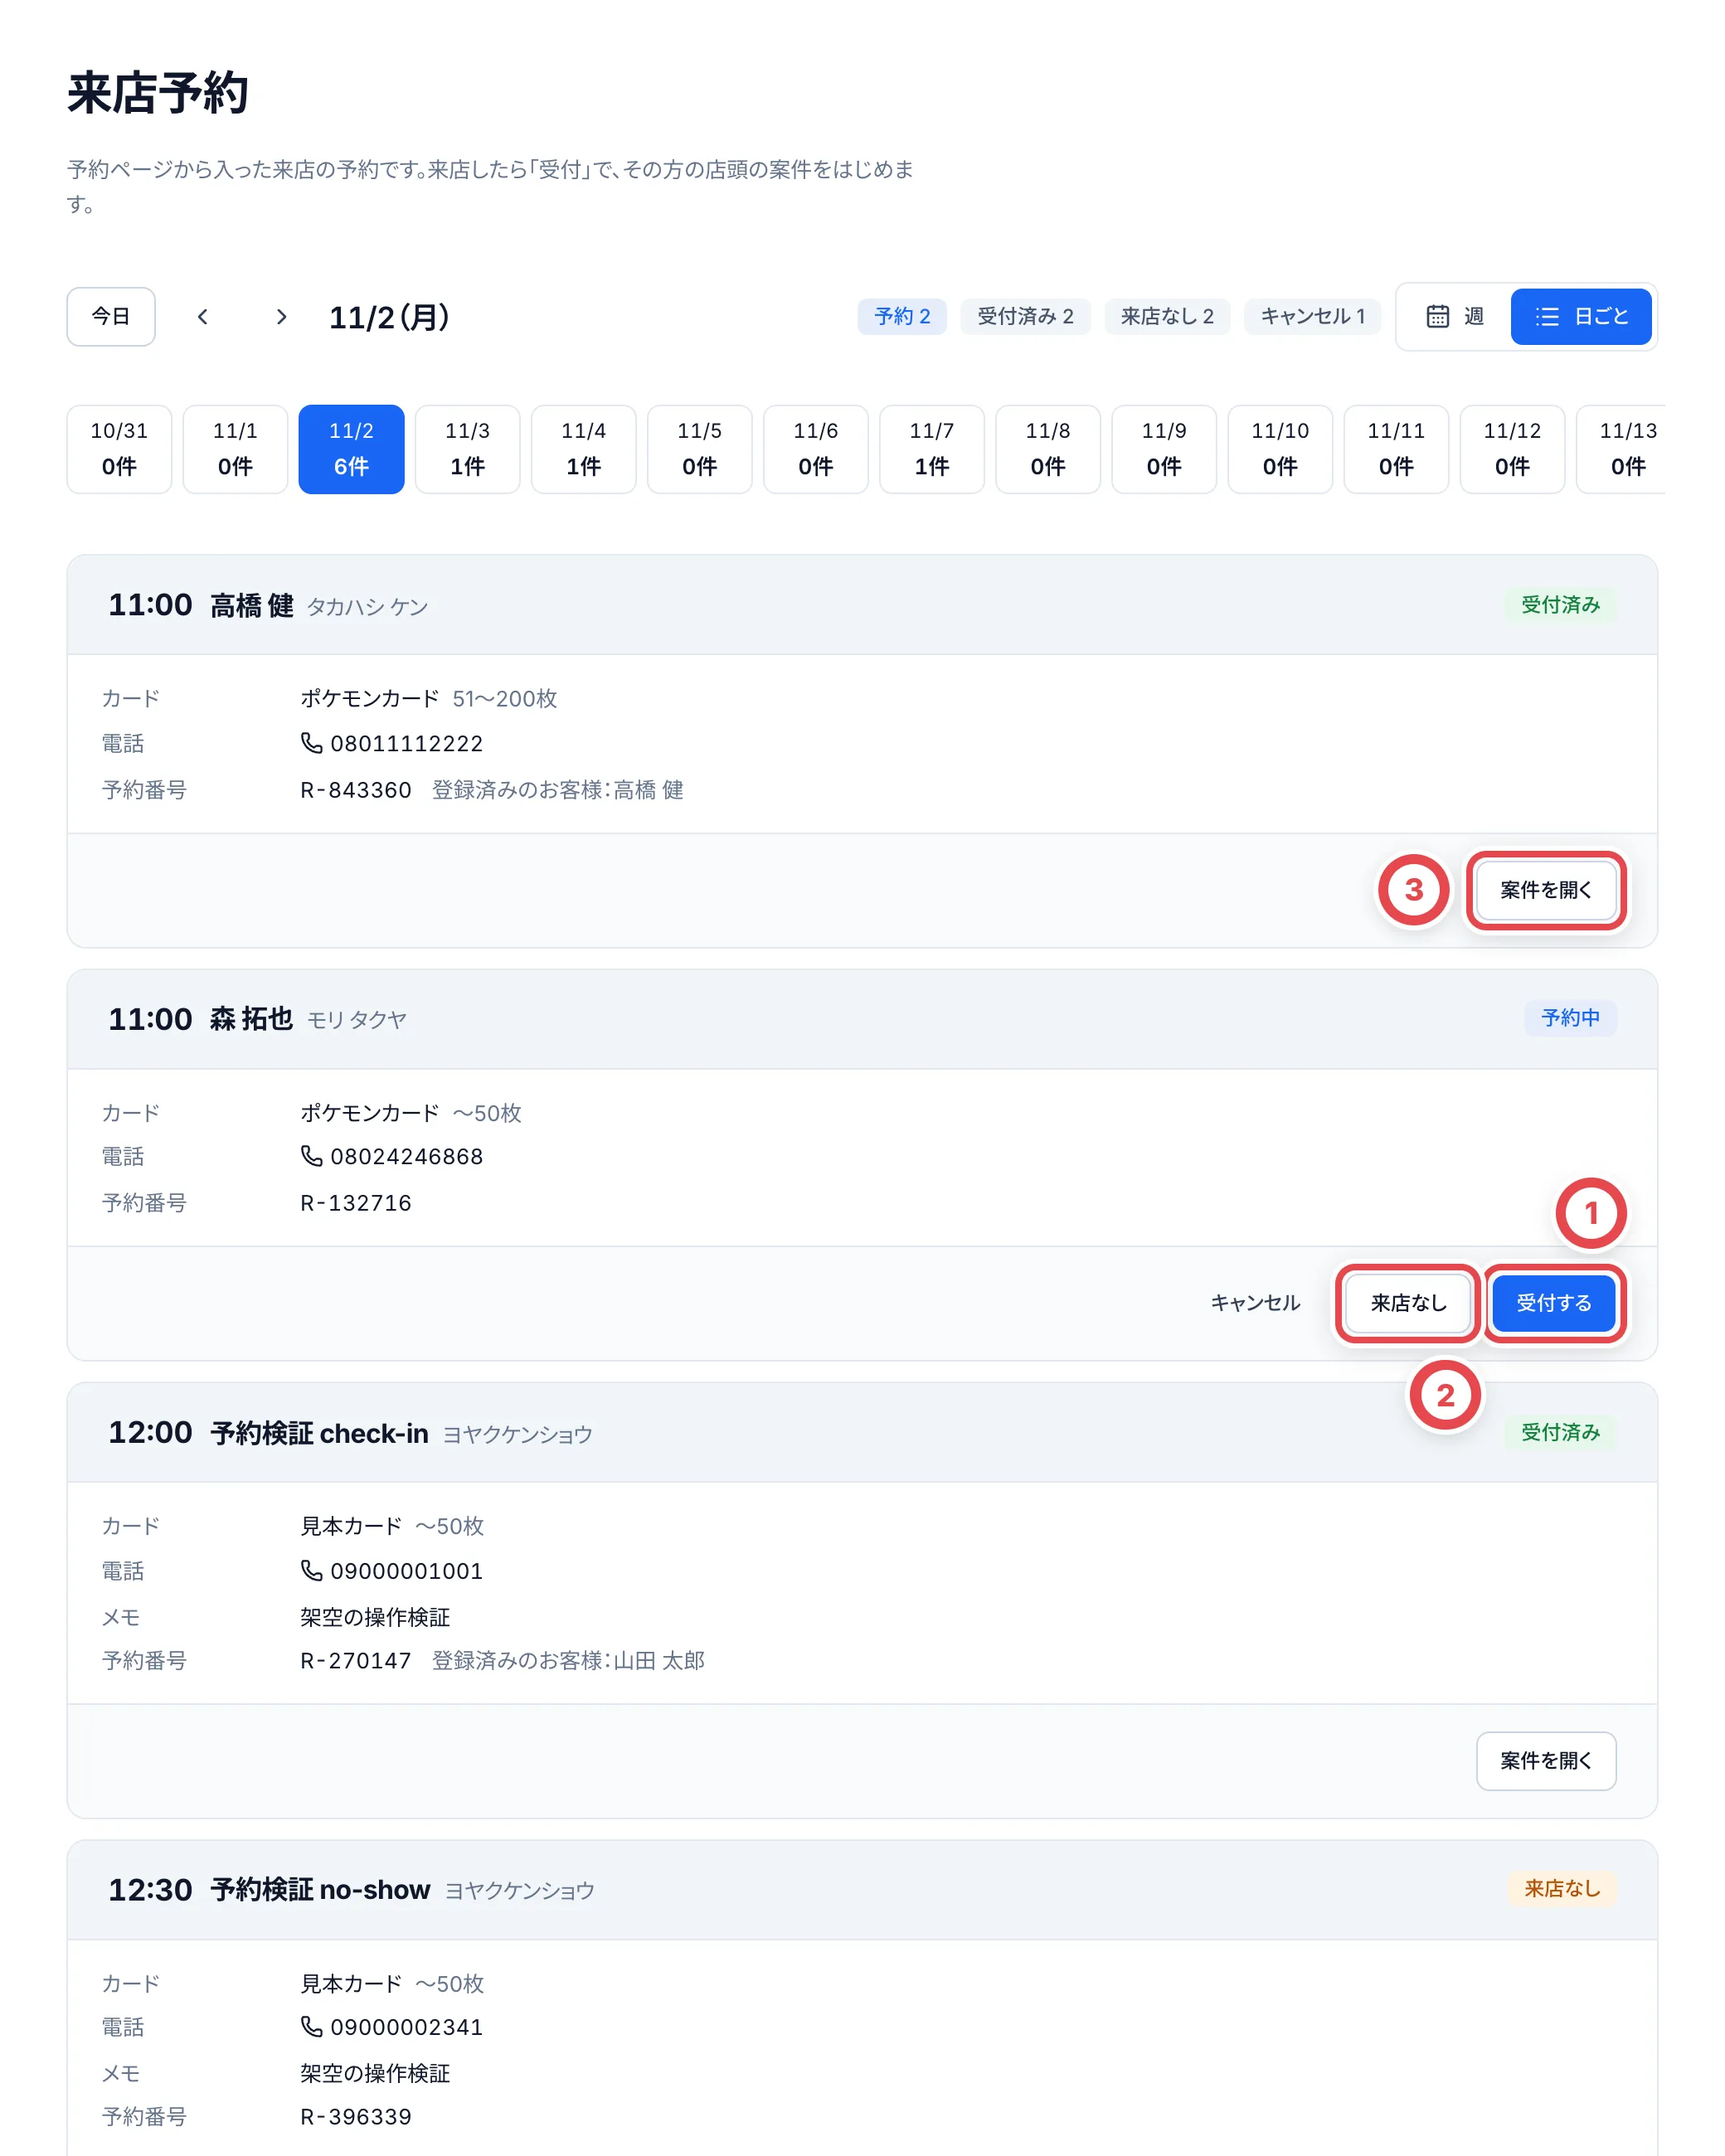 ## 5. 来店したら受付する
お客様が来たら、予約の①の「受付する」を押します。「〇〇 様を受付」が開くので、どのお客様として受け付けるかを選びます。
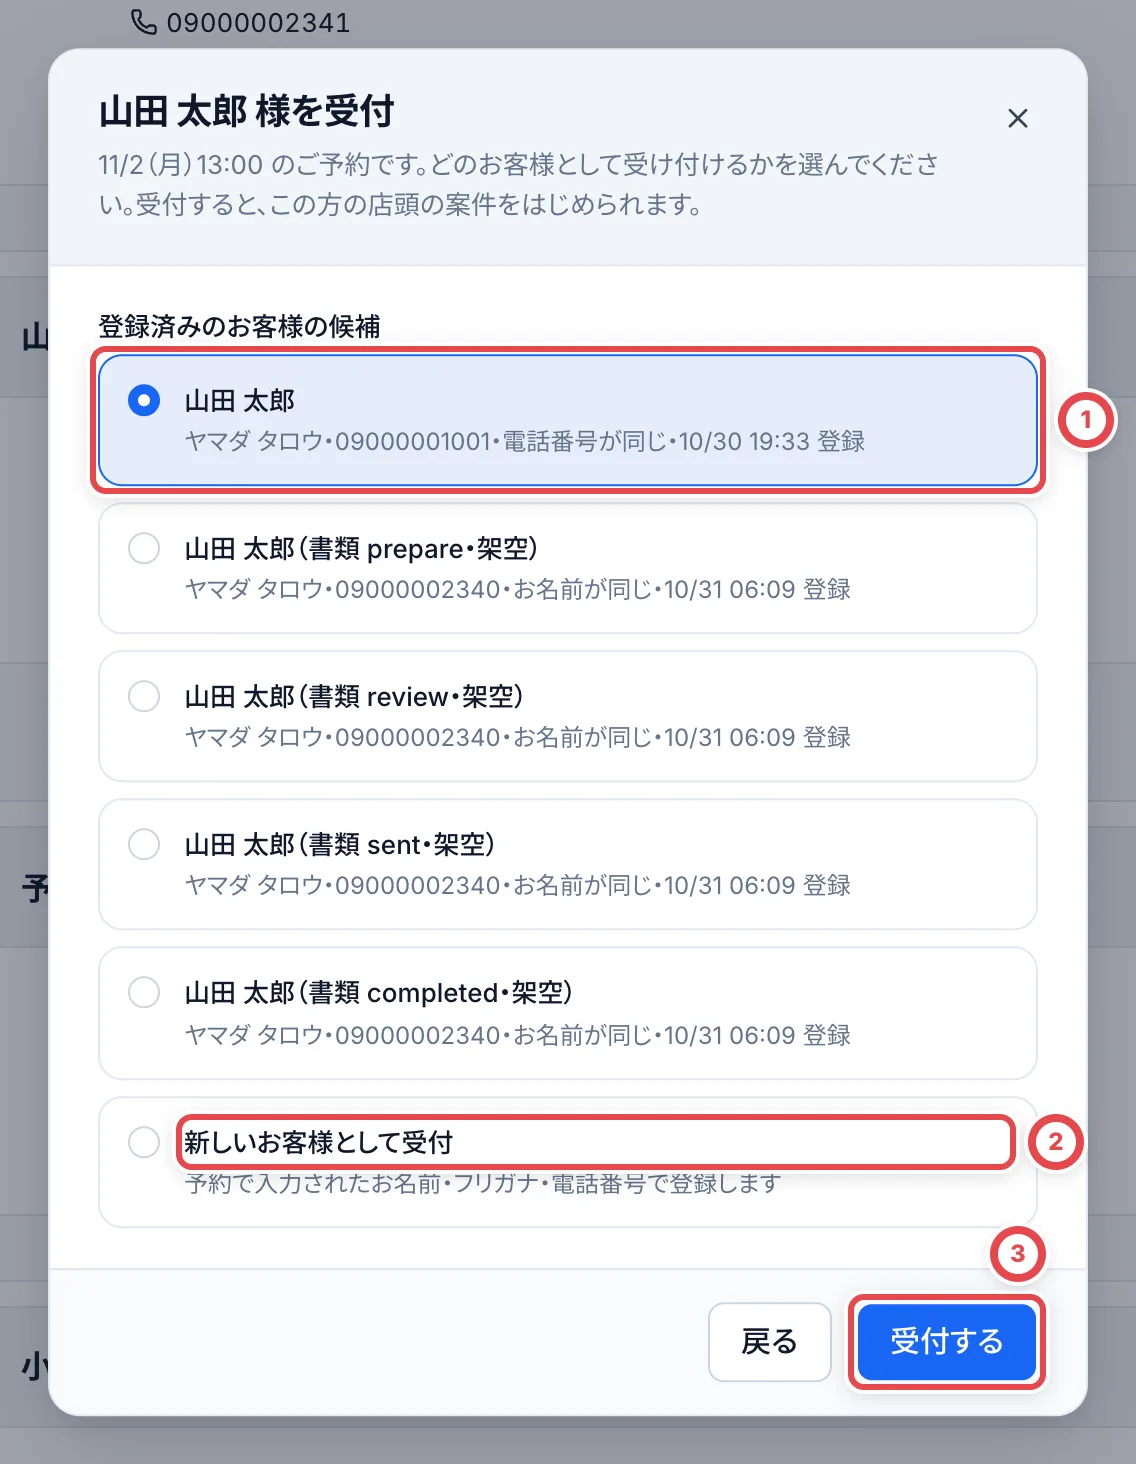 - 電話番号やお名前が同じ登録済みのお客様がいると、①のように候補に出ます。選ぶと、取引がそのお客様に付け替わり、予約で作った仮の顧客は使われなくなります
- 初めての方は、②の「新しいお客様として受付」を選びます。予約で入力されたお名前・フリガナ・電話番号で登録されます
③の「受付する」を押すと、予約が「受付済み」になり、その方の取引の画面が開きます。ここからは[店頭買取をはじめる](/guides/purchase/counter)の手順どおりに、カードを追加して査定します(買取依頼を登録し直す必要はありません)。**受付は元に戻せません。**
## 6. 来なかったときは来店なしにする
来なかった予約は「来店なし」を押し、理由(任意)を入れて①の「来店なしにする」を押します。**予約の取引も取り下げになり、元に戻せません。** 来店なしの枠は空かないままです。
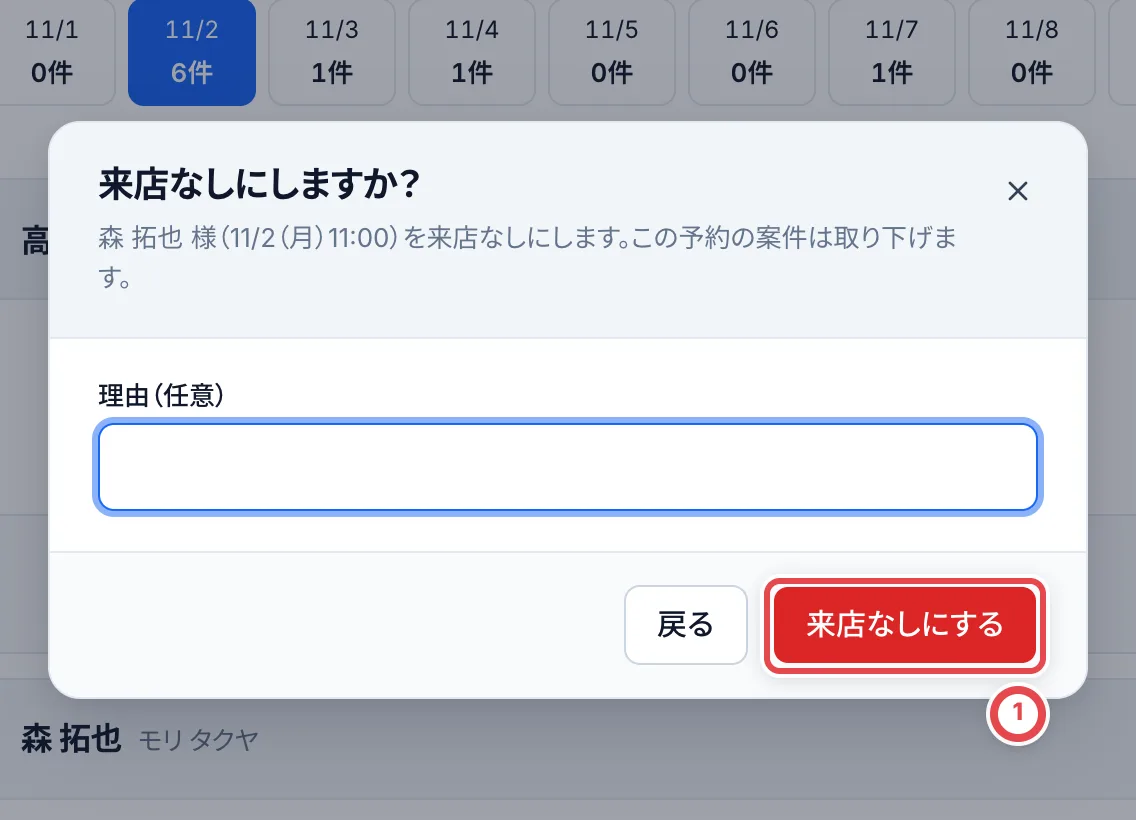 お店の都合で予約を取りやめるときは、予約の「キャンセル」を押します。取引は取り下げになり、枠は空きます。お客様がメールアドレスを入れていれば、キャンセルのメールが届きます(理由は書かれません)。
受付・来店なし・キャンセルは、予約が「予約中」のときだけできます。取引の作業が進んでいる予約は、来店予約からは扱えないので、取引の画面から扱います。
## 困ったとき
| 起きていること | 確かめること・直し方 |
| ---------------------------------------------------------------------------- | ------------------------------------------------------------------------------------------------------ |
| 「店舗の拠点がありません」と出る | 「設定」の「拠点と保管場所」で、種類が「店舗」の拠点を作ります。 |
| 予約ページを開くと「この予約ページは現在利用できません」と出る | 「予約を受け付ける」がオフか、予約ページをまだ作っていません。設定を確かめます。 |
| 今日の枠が選べない | 締切が「前日まで」だと、今日の枠は予約できません。当日も受けるなら「当日も受け付ける」にします。 |
| 予約ページの枠が全部 × になっている | 営業時間・休業日・何日先まで受け付けるかを確かめます。 |
| 受付の候補に、来たお客様が出ない | 電話番号もお名前も違うと候補に出ません。「新しいお客様として受付」で受け付け、あとで顧客をまとめます。 |
| 「この予約の取引は作業が進んでいるため、取引の画面から扱ってください」と出る | 取引の作業が始まっています。取引の画面から取り下げなどをします。 |
| 「予約が更新されています。画面を開き直してください」と出る | ほかのメンバーやお客様が先に変えました。画面を開き直します。 |
---
# 返品対応
Source: https://docs.toreca-cloud.com/guides/purchase/returns
オンライン買取で、受け取った品物を配送でお返しする手順です。店舗でその場でお返しする場合は、[店舗買取の一部買取・全件辞退](/guides/purchase/counter#売らないカードがあるとき)へ進みます。
**連絡・承諾・集荷・発送はどれも店舗が自分で行い、トレカクラウドにはそれを「記録」します。** 各工程の記録ボタンでは、お客様への送信や集荷の手配はされません。写真のLINE送信は、手順2の確認画面から別に行います。
返品対応ができるのは、次のカードです。買い取ったカードは入りません。
- 最終見積を一部だけ承諾して、外したカード
- 最終見積を全件辞退したカード
- BOXなどの状態確認で、返品の対象にしたもの
事前見積の段階での一部承諾や辞退では、まだ現物を受け取っていないので、返品対応は作られません。辞退の記録は[発送と最終査定](/guides/purchase/shipping-and-final)の手順10で説明しています。
## 流れと段階
発送後は、送り状番号の案内と配達完了の記録が両方表示されることがあります。
| 順番 | やること | 返品対応の段階 |
| ---- | -------------------------------------- | ------------------ |
| 1 | 返品対応を開く | ― |
| 2 | (必要なら)返送するカードの写真を残す | ― |
| 3 | 返送先を確かめて保存する | 住所確認前 |
| 4 | 住所確認の連絡を送って、記録する | 住所確認前 |
| 5 | お客様の承諾を記録する | 住所承諾待ち |
| 6 | 集荷を頼んで、記録する | 集荷・発送待ち |
| 7 | 発送を記録する | 集荷・発送待ち |
| 8 | 送り状番号を案内して、記録する | 送り状番号案内待ち |
| 9 | 配達完了を記録する | 返送中 → 完了 |
## 1. 返品対応を開く
サイドバーの「返品対応」を開きます。①のボタンで、段階ごと(未完了・住所確認前・住所承諾待ち・集荷・発送待ち・送り状番号案内待ち・返送中・完了・すべて)に絞れます。顧客名・取引番号・送り状番号で検索もできます。②の「対応する」で、その返品を開きます。
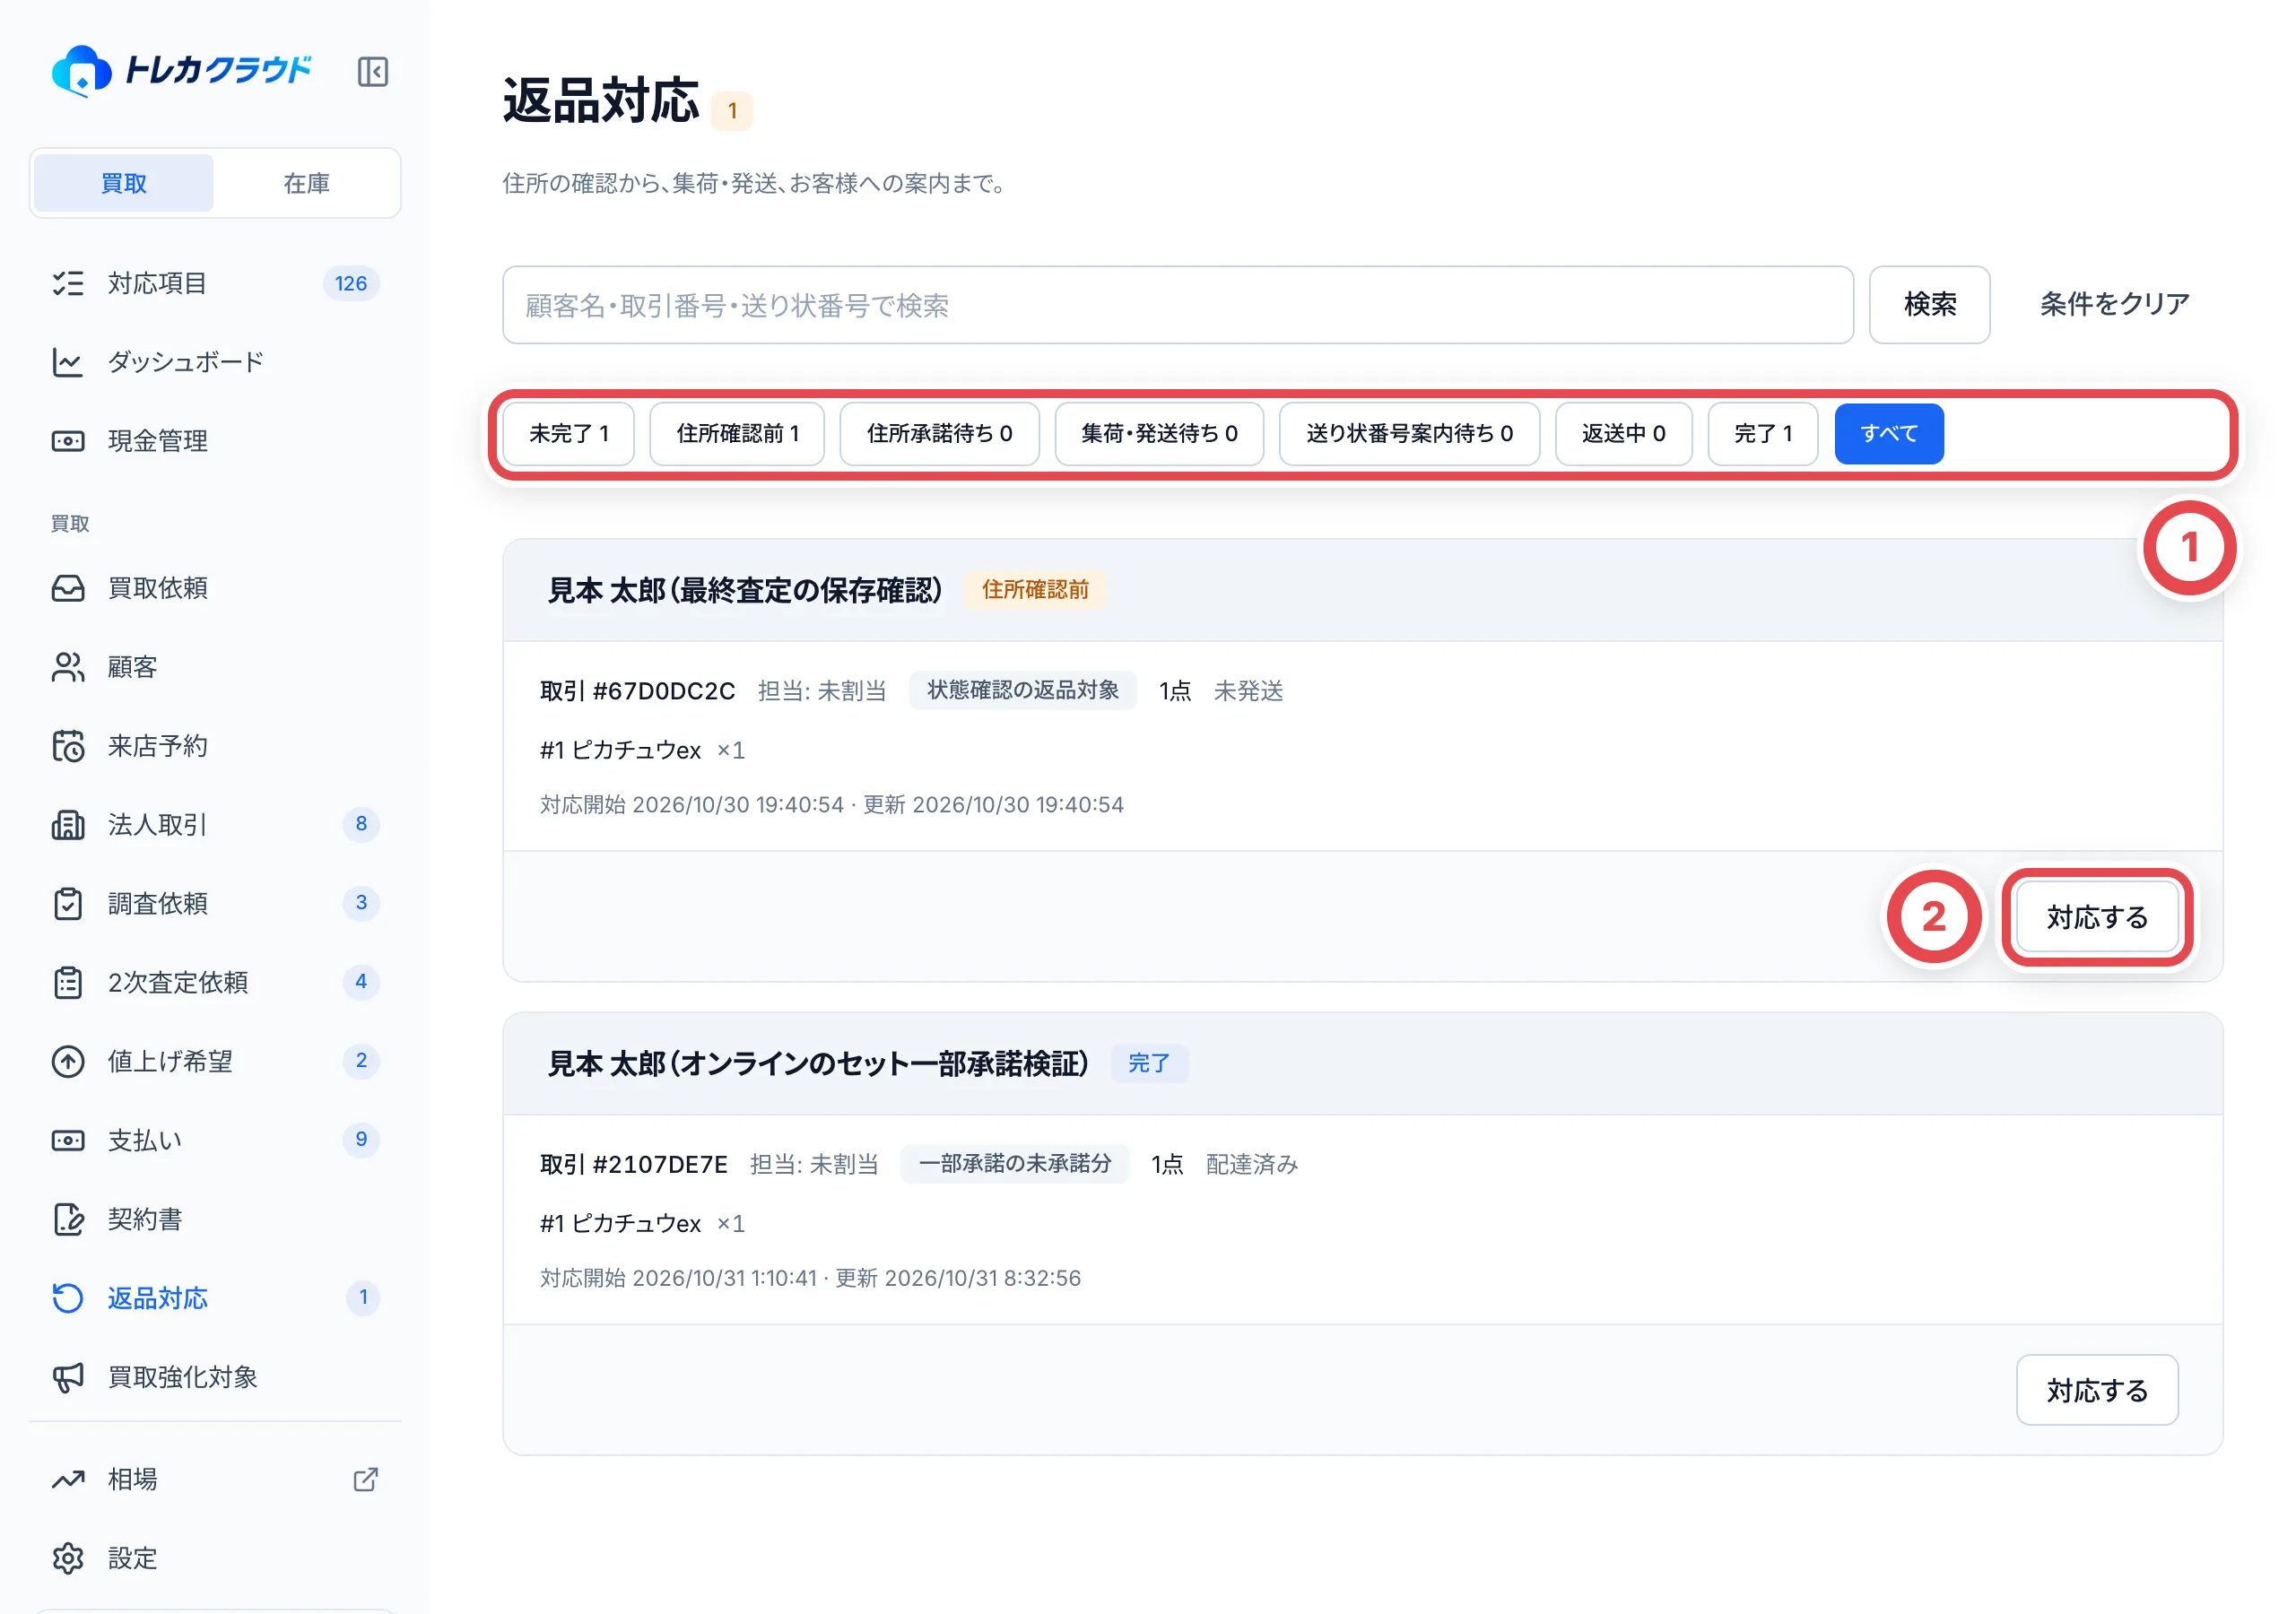 取引の画面からも開けます。「発送」タブでは「次の操作」の「返送を開く」か「返送を手配・記録する」の「返品対応」、「支払い」タブでは「未承諾商品の返品」の「返品手続きへ」を押します。開いたら、右の「返品対象」でカードと返送する数量を確かめます。
## 2. (必要なら)返送するカードの写真を残す
返送する前のカードと梱包の状態を写真で残すときは、「返品の商品・梱包写真」の①の「写真を追加」を押します。JPEG・PNG・WebPの写真を選び(1枚20MB、一度に30枚まで)、「写真を保存」を押します。保存しただけでは、お客様には送られません。
LINE連携を使い、このお客様のLINEが取引に結び付いている場合は、②でお客様に送る写真を選び(4枚まで)、③の「顧客への送信内容を確認」から、メッセージを確かめて「この内容でLINE送信」を押します。**「この内容でLINE送信」は押すとすぐに送られます。** 確認の画面は、到着時の写真と同じです([発送と最終査定](/guides/purchase/shipping-and-final)の手順4)。
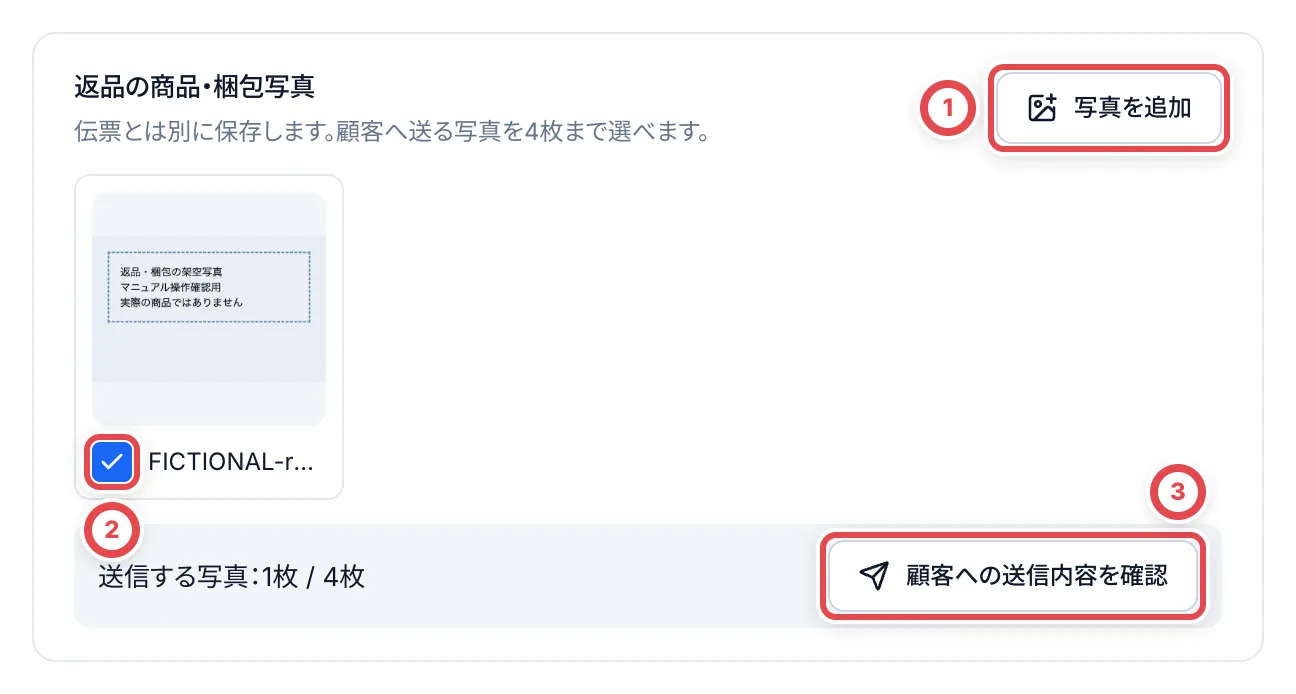 写真を保存・送信しても、住所確認や発送の記録は進みません。下の手順を順番に行います。
## 3. 返送先を確かめて保存する
「返送先住所」には、お客様の登録情報から宛名・郵便番号・住所・電話番号が入っています。①で内容を確かめて直し、②の「返送先を保存」を押します。
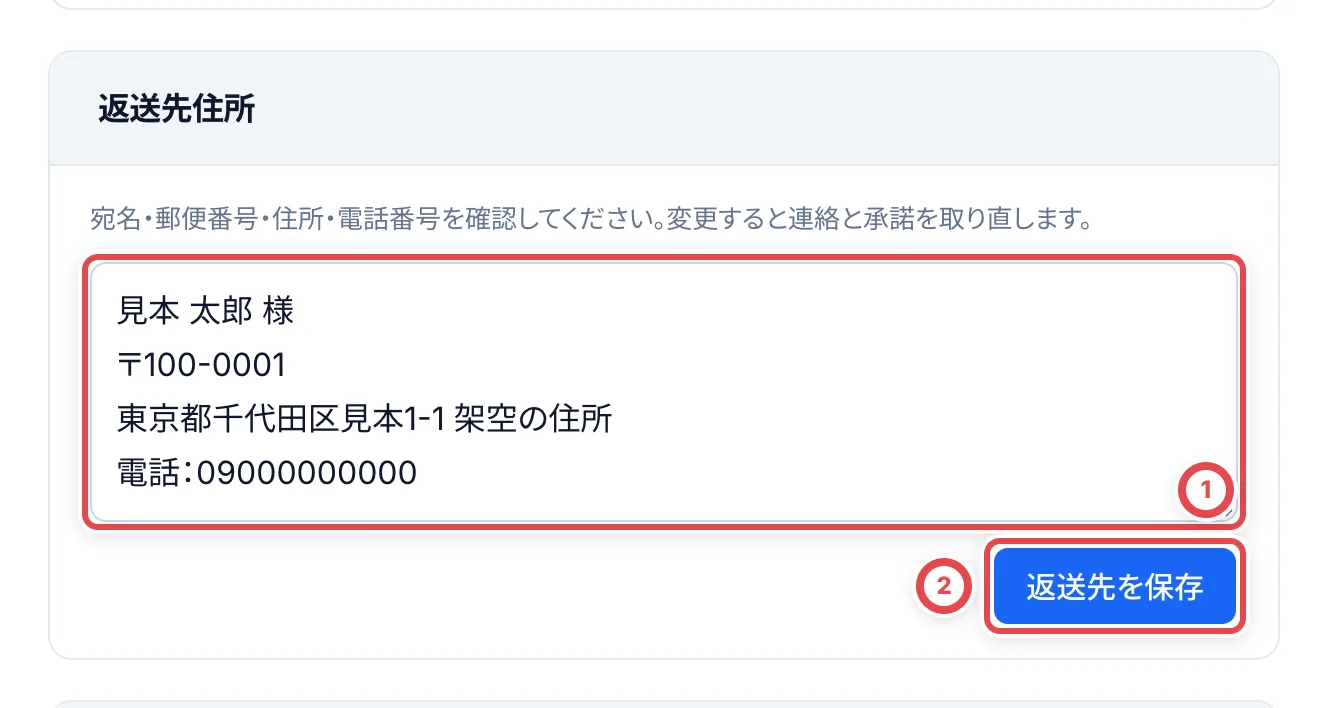 ## 4. 住所確認の連絡を送って、記録する
「1. 住所確認の連絡」に、保存した返送先を入れた文面が入っています。①の「文面をコピー」でコピーし、LINEなどでお客様に送ります。送ったら、②の「住所確認の連絡を記録」を押します。
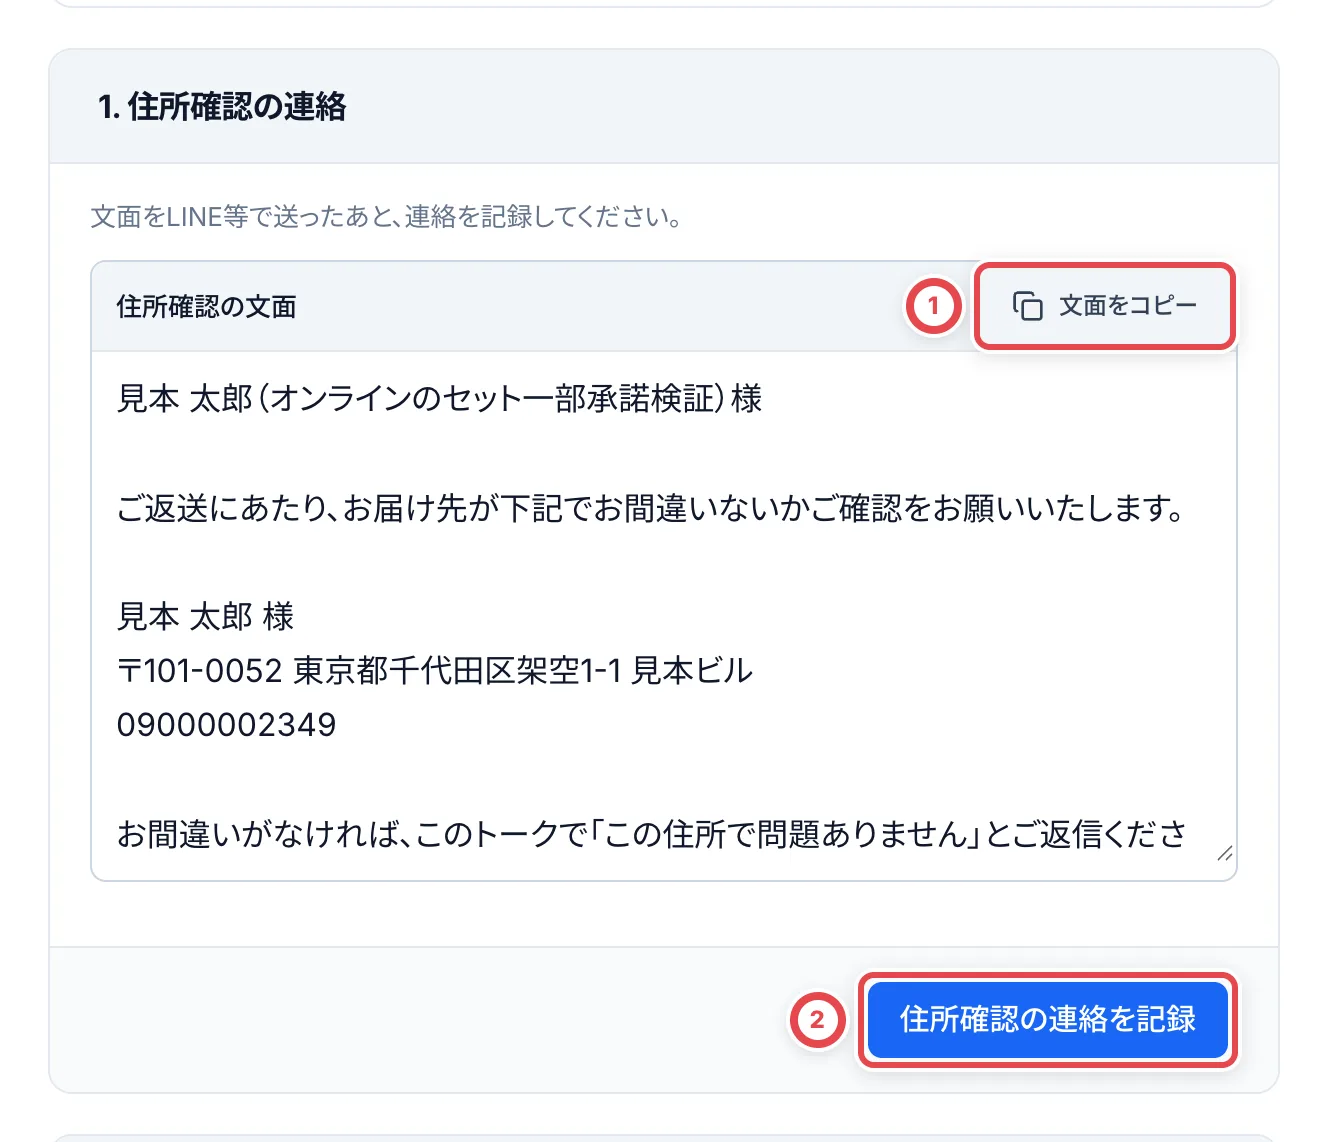 ## 5. お客様の承諾を記録する
お客様から「この住所で問題ありません」と返事が来たら、「2. お客様の住所承諾」の①の「住所の承諾を記録」を押します。**承諾を記録するまで、集荷・発送には進めません。**
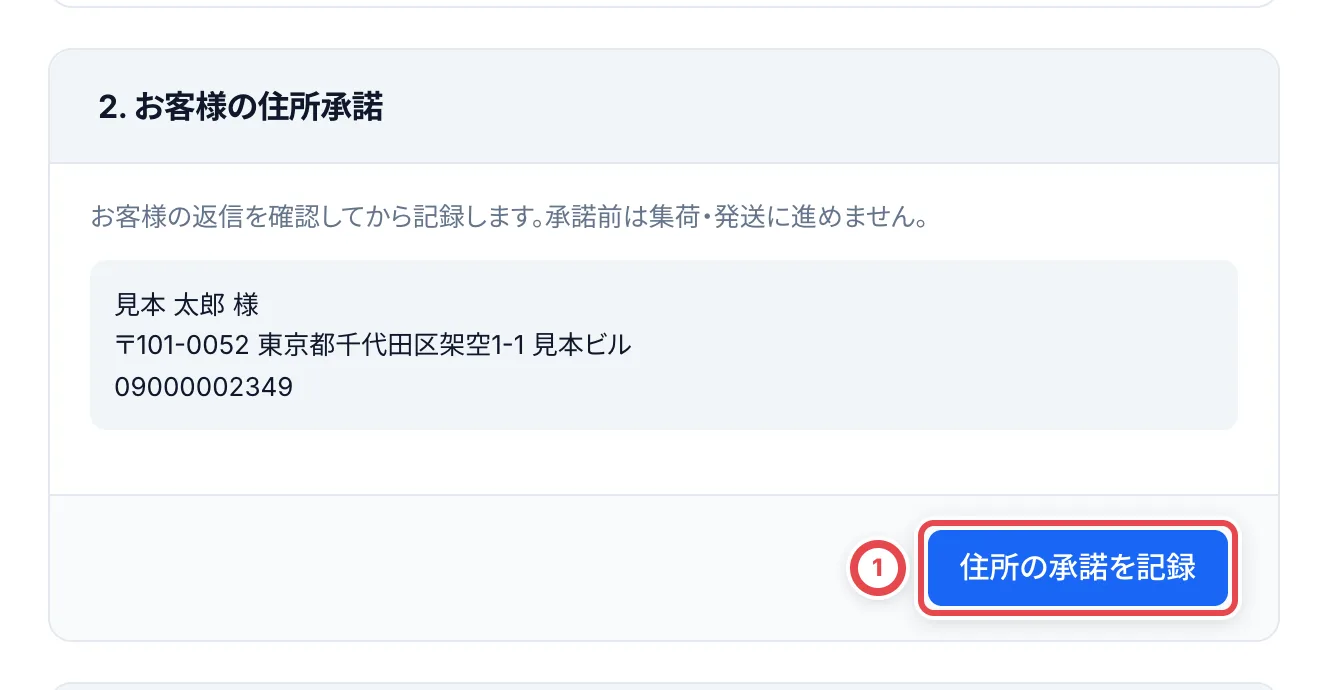 ## 6. 集荷を頼んで、記録する
配送業者(ヤマト運輸など)に集荷を頼んだら、「3. 集荷の依頼」の①の「集荷依頼を記録」を押します。
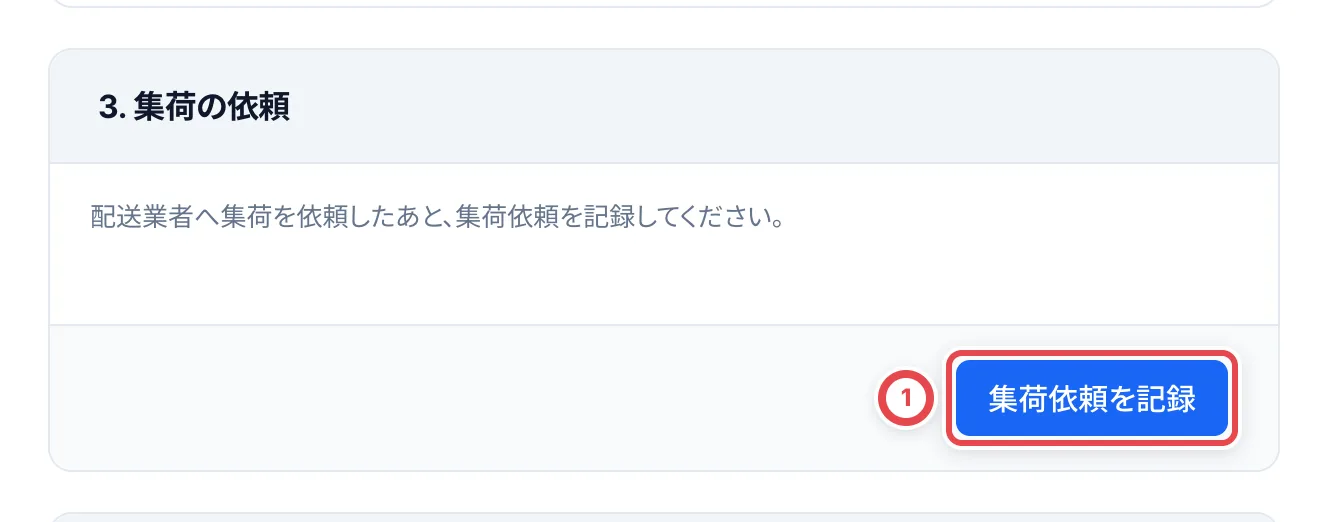 ## 7. 発送を記録する
荷物を渡したら、「4. 集荷・発送の記録」の①に配送業者、②に送り状番号を入れます(どちらも必須)。発送元の宛名・住所、送料の負担者、返送料も確かめて、③の「発送を記録」を押します。
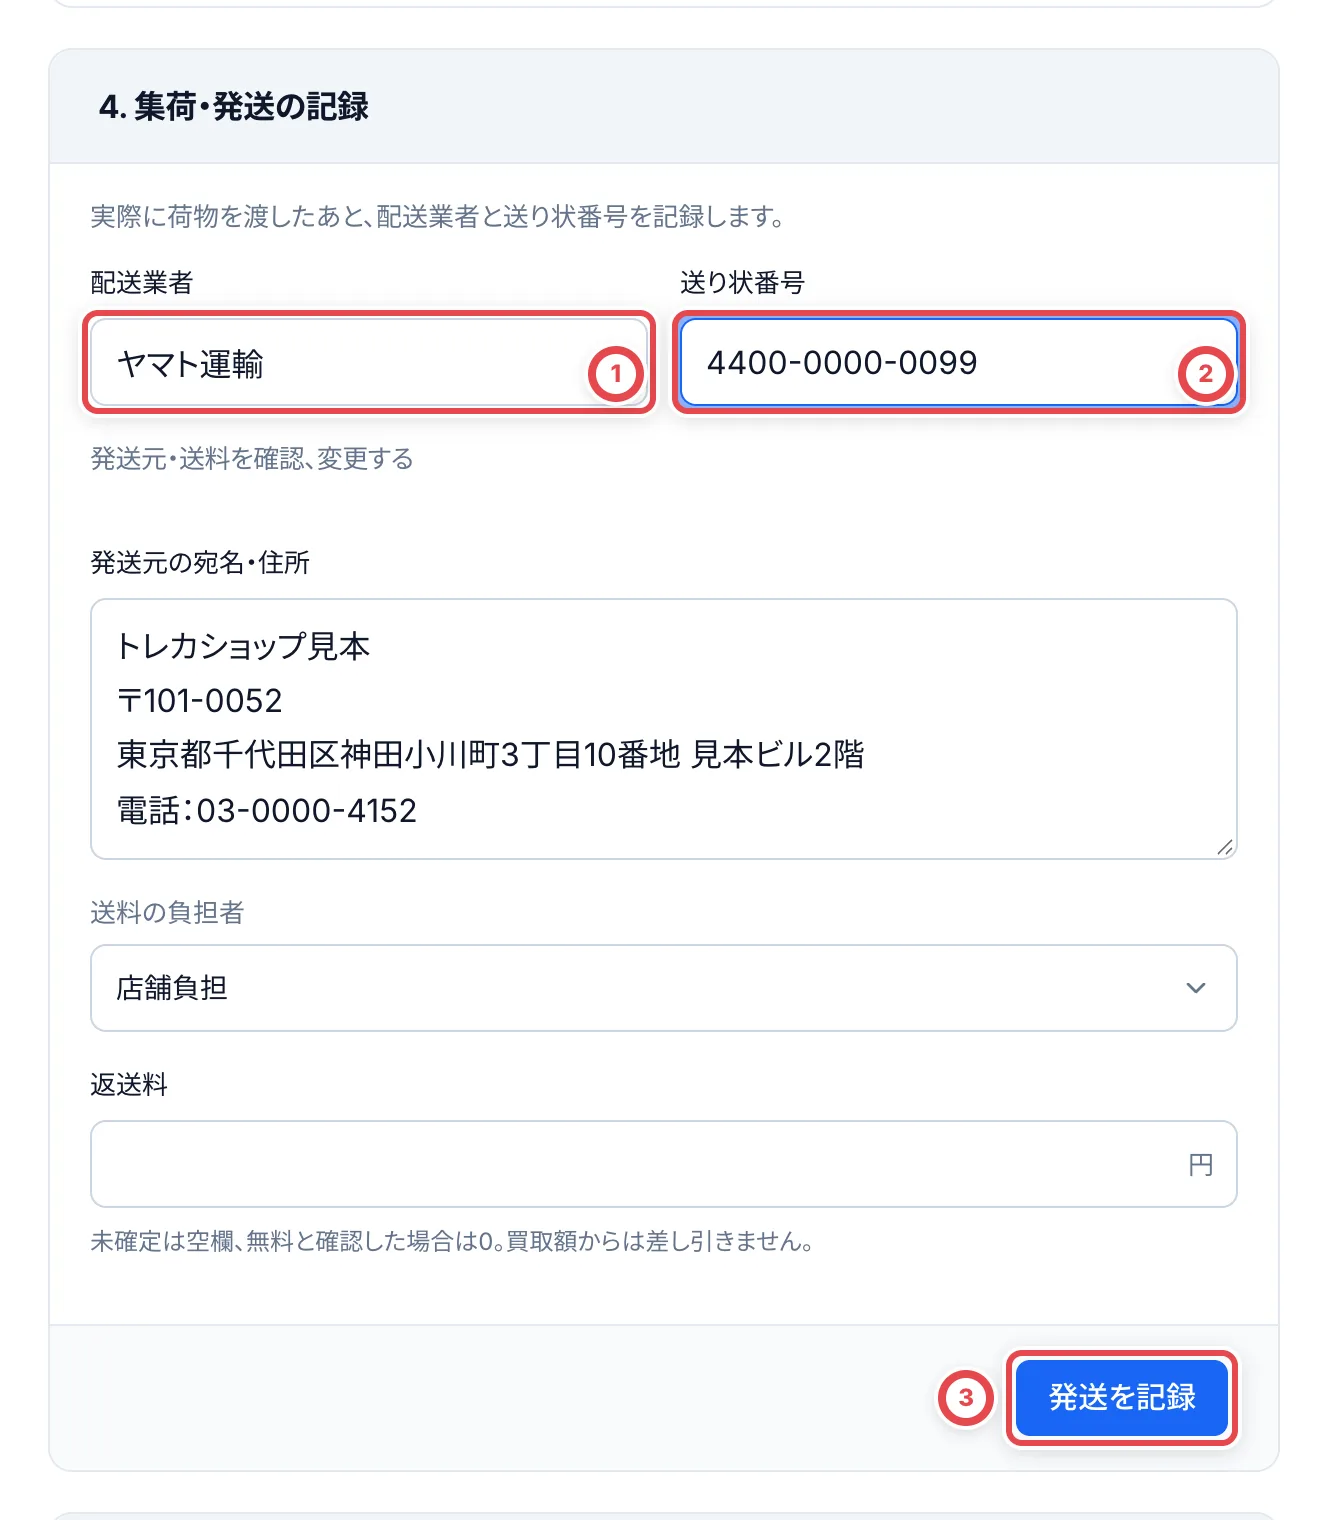 「返送料」は、まだ金額が分からなければ空欄にし、無料と確かめたときだけ0を入れます。「送料の負担者」で店舗負担かお客様負担かを選びます。記録した返送料は、買取額や振込額から自動では差し引かれません。
## 8. 送り状番号を案内して、記録する
「5. 送り状番号の案内」に、配送業者と送り状番号を入れた文面が入っています。①の「文面をコピー」でコピーしてお客様に送り、送ったら②の「発送案内を記録」を押します。
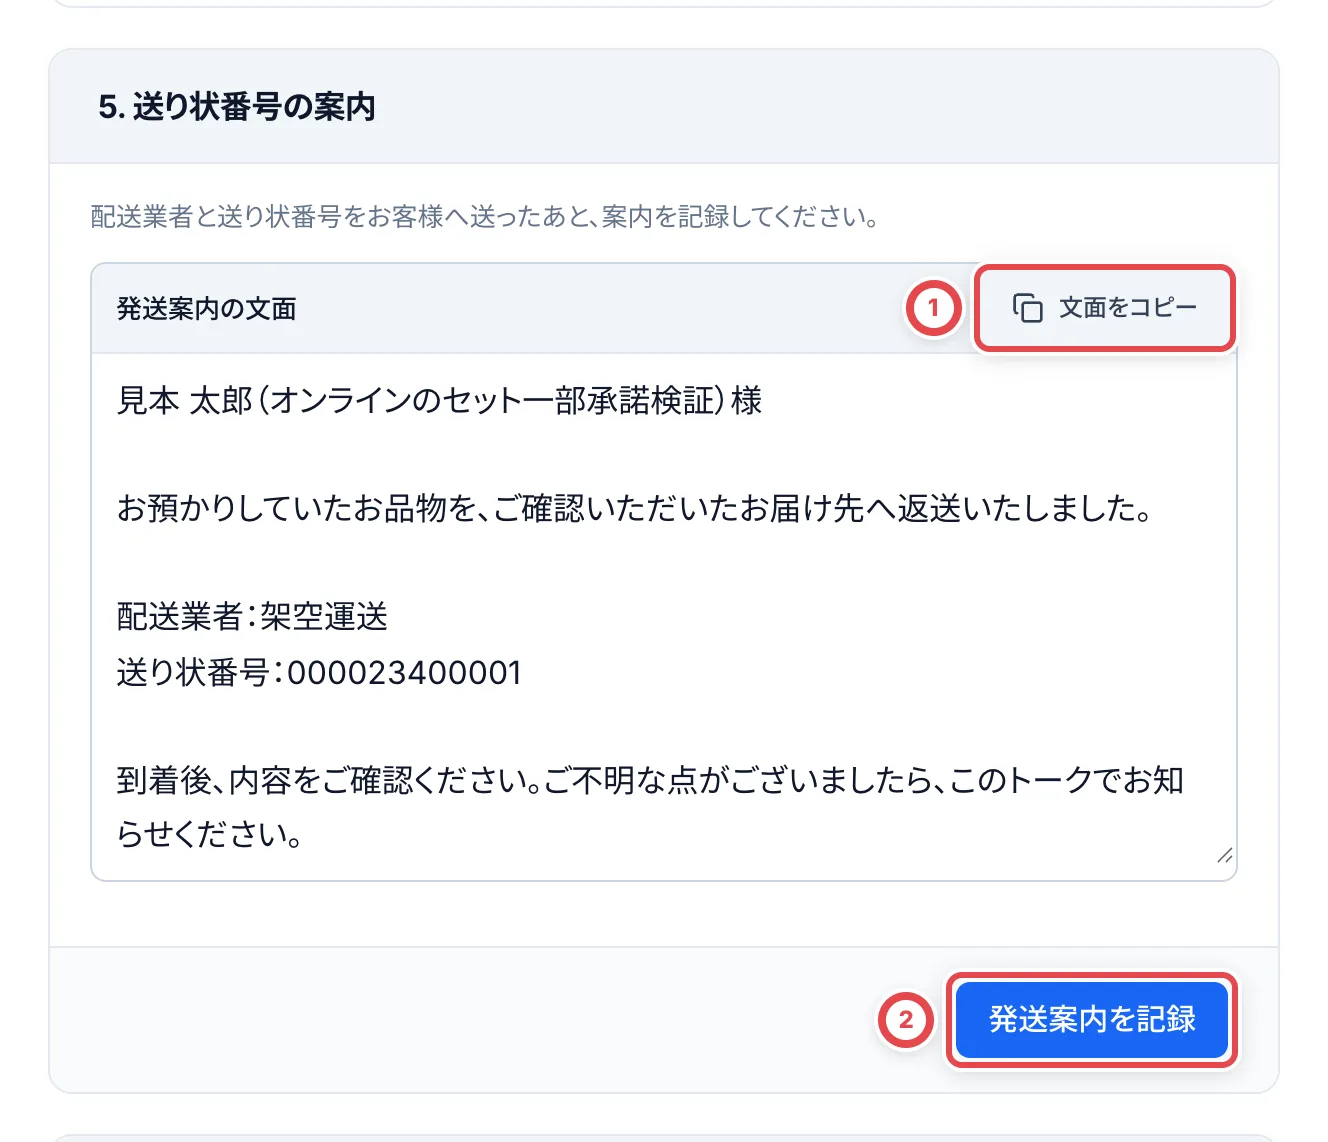 ## 9. 配達完了を記録する
配送業者のサイトなどで配達されたのを確かめたら、「6. 配達完了」の①の「配達完了を記録」を押します。送り状番号の案内も記録済みなら、返品対応は「完了」になります。案内がまだなら「送り状番号案内待ち」に残るので、手順8を済ませます。
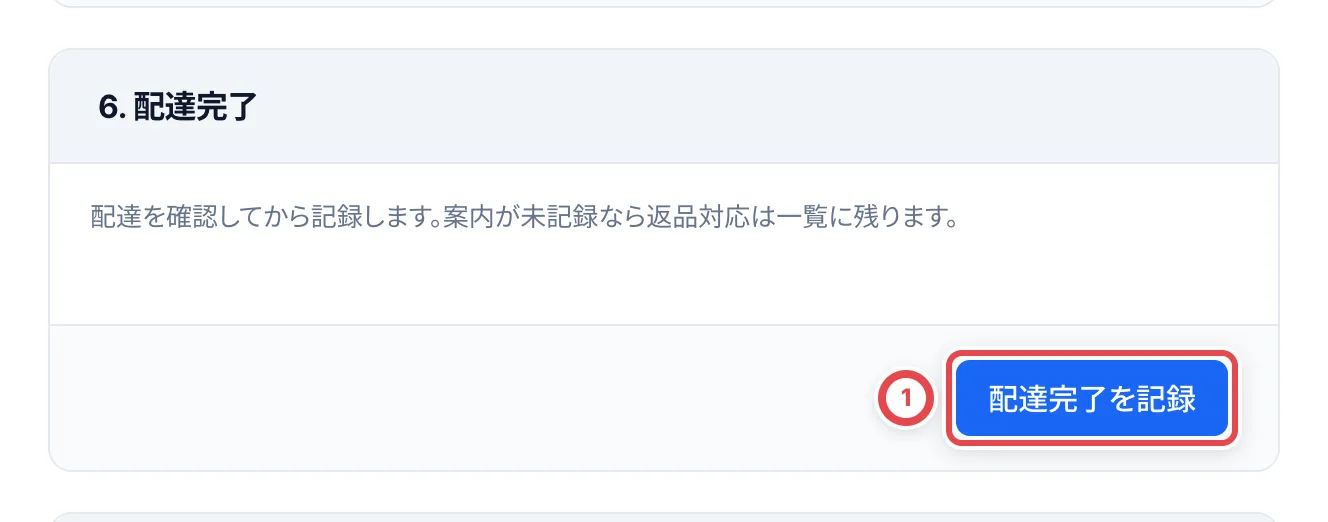 「対応履歴」には、①のように、記録した作業と日時、記録した人が新しい順に並びます。
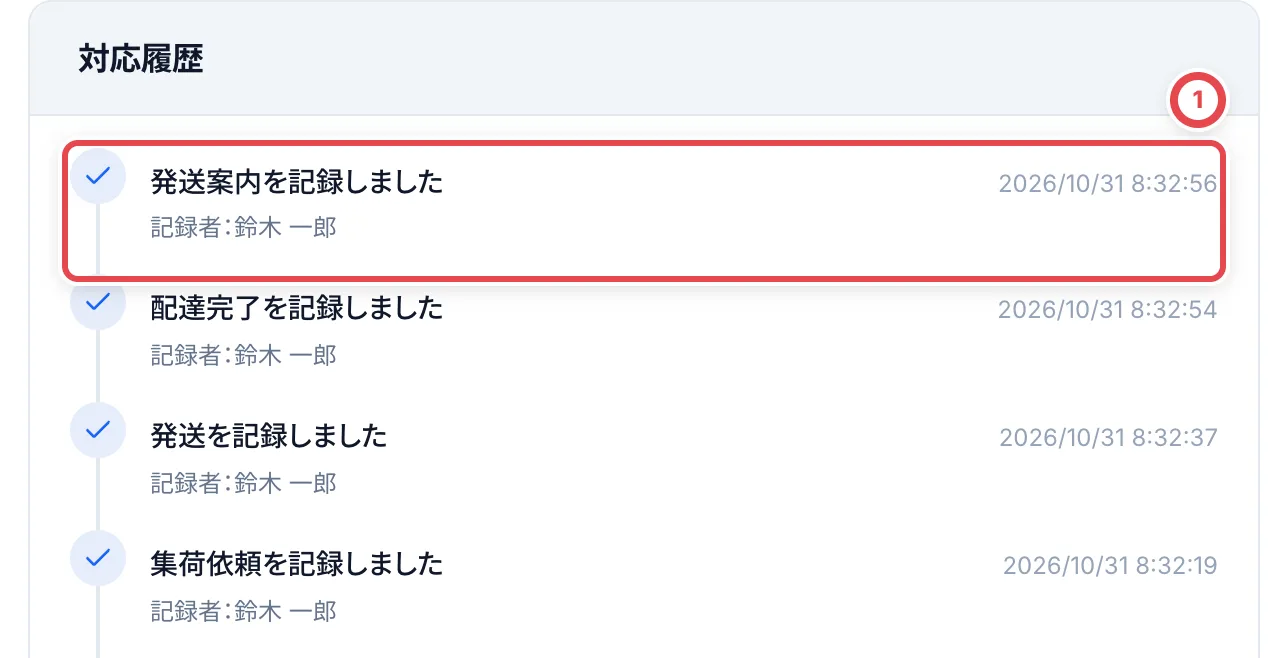 :::warning
文面のコピーだけでは、連絡や案内は記録されません。実際に連絡や配送の手配をしたあとで、それぞれのボタンを押してください。押すと日時と担当者がその場で記録されます。
:::
## 住所を変更するとき
発送前なら、「返送先住所」の「返送先を修正」で変更できます。変更すると、住所確認の連絡・お客様の承諾・集荷依頼を記録し直す必要があります。最新の住所の承諾と集荷依頼がそろうまで、発送は記録できません。発送後の返送先は変更できません。
## 返品と振込が両方ある取引
一部承諾の取引では、振込と返送のどちらを先に進めてもかまいません。振込の手順は[振込](/guides/purchase/payouts)を参照してください。
配達や振込が終わっても、送り状番号の案内が未記録なら、返品は「送り状番号案内待ち」として「未完了」に残ります。取引の状態だけで判断せず、返品対応に残っている次の作業を確かめてください。
## 困ったとき
| 起きていること | 確かめること・直し方 |
| ---------------------------------------------------------------------- | ---------------------------------------------------------------------------------------------------------- |
| 返品対応が一覧にない | 事前見積の段階での辞退や一部承諾では作られません。最終見積の回答(辞退・一部承諾)を記録したか確かめます。 |
| 「返品対応で住所の承諾と集荷依頼を記録してから発送してください」と出る | 最新の住所での承諾と、集荷依頼の記録がそろっていません。手順5・6を記録してから発送します。 |
| 住所を直したら、承諾や集荷依頼が消えた | 住所を変えると記録し直しになります。新しい住所で手順4〜6をもう一度行います。 |
| 写真の「顧客への送信内容を確認」が出ない | 写真を1枚以上選んでいないか、LINE連携を使っていません。写真の保存だけはできます。 |
| 配達も振込も終わったのに「未完了」に残っている | 送り状番号の案内(手順8)が未記録です。案内を送って「発送案内を記録」を押します。 |
| 返送料を買取額から引きたい | 返送料は自動では差し引かれません。差し引くときは、最終見積の金額に含めてお客様の承諾を取ります。 |
## ほかの担当者が更新したとき
「ほかの操作で更新されています」と表示されたら、「最新の状態を読み込む」を押して記録済みの作業を確認します。保存済みか分からないまま、同じ連絡や発送を重ねて記録しないでください。
## 返送を終えたら
配達完了を記録したら、[オンライン買取の完了条件](/guides/purchase/overview#完了を確認して次へ進む)を確認します。一部買取で振込が残っている場合は[振込](/guides/purchase/payouts)へ進みます。全件辞退の品物は、買取在庫へ格納しません。
---
# セット価格に変更する
Source: https://docs.toreca-cloud.com/guides/purchase/set-price
カードごとの査定額はそのまま残し、**見積全体でいくら提示するか**を決めるときに「セット価格」を使います。例えば、通常合計207,000円の見積を、セット総額200,000円として保存できます。カードの数量や個別の査定額を書き換える必要はありません。
| やりたいこと | 操作 |
| ----------------------------------------------------- | --------------------------------------------------------------------------- |
| 査定の入力中に合計の提示額を決める | [「セット価格に変更」から入力して保存する](#見積の編集でセット価格にする) |
| 保存したセット価格を直す・やめる | [編集画面で修正・削除して保存する](#保存したセット価格を直す通常合計に戻す) |
| 「査定依頼」タブで選んだカードをまとめて2次査定に回す | [「セット価格表示」をオンにする](#2次査定に回すときに決める) |
ノーマルカード300枚で100円など、束を1つの明細として査定する場合は[まとめ査定](/guides/purchase/bulk-and-set-price#まとめ査定)を使います。
:::warning
オンライン買取の1枚ごとの最終査定で一部だけ買い取る場合は、承諾画面で対象と各カードの配分額を確認します。セット総額を全対象の個別査定額に応じて配分し、選んだ分の合計が買取額になります。選んだカードだけでセット総額を配り直す操作ではありません。店頭ではお客様の確認・署名前に対象を揃え、対象が変わったら再見積して確認し直します。事前見積のセット価格は一部承諾できないため、対象を選び直して再見積します。お客様と別の総額で合意し直す場合も、新しい金額を提示してください。
:::
## 1枚ごとの最終査定でセット総額を決める
「1枚目」「2枚目」と表示される最終査定では、明細の下にある①「セット総額(任意)」に総額を入力し、②「保存」を押します。変更するときも同じ欄を使い、通常合計へ戻すときは空欄にして保存します。
各カードの金額・買取可否は[最終査定の手順](/guides/purchase/final-appraisal)で確認してください。事前査定など「セット価格に変更」がある画面では、次の手順を使います。
## オンラインで一部だけ買い取るとき
最終見積の「一部だけ承諾」を開き、②のチェックで買い取らない個体を外します。①の買取額と、各カードに表示される配分額を確認します。
例えば、個別査定が1,000円・2,000円・3,000円、セット総額が5,000円なら、配分は833円・1,667円・2,500円です。1枚目と3枚目を買い取ると、買取額は3,333円になります。選択後に5,000円へ戻すための自動調整はしません。
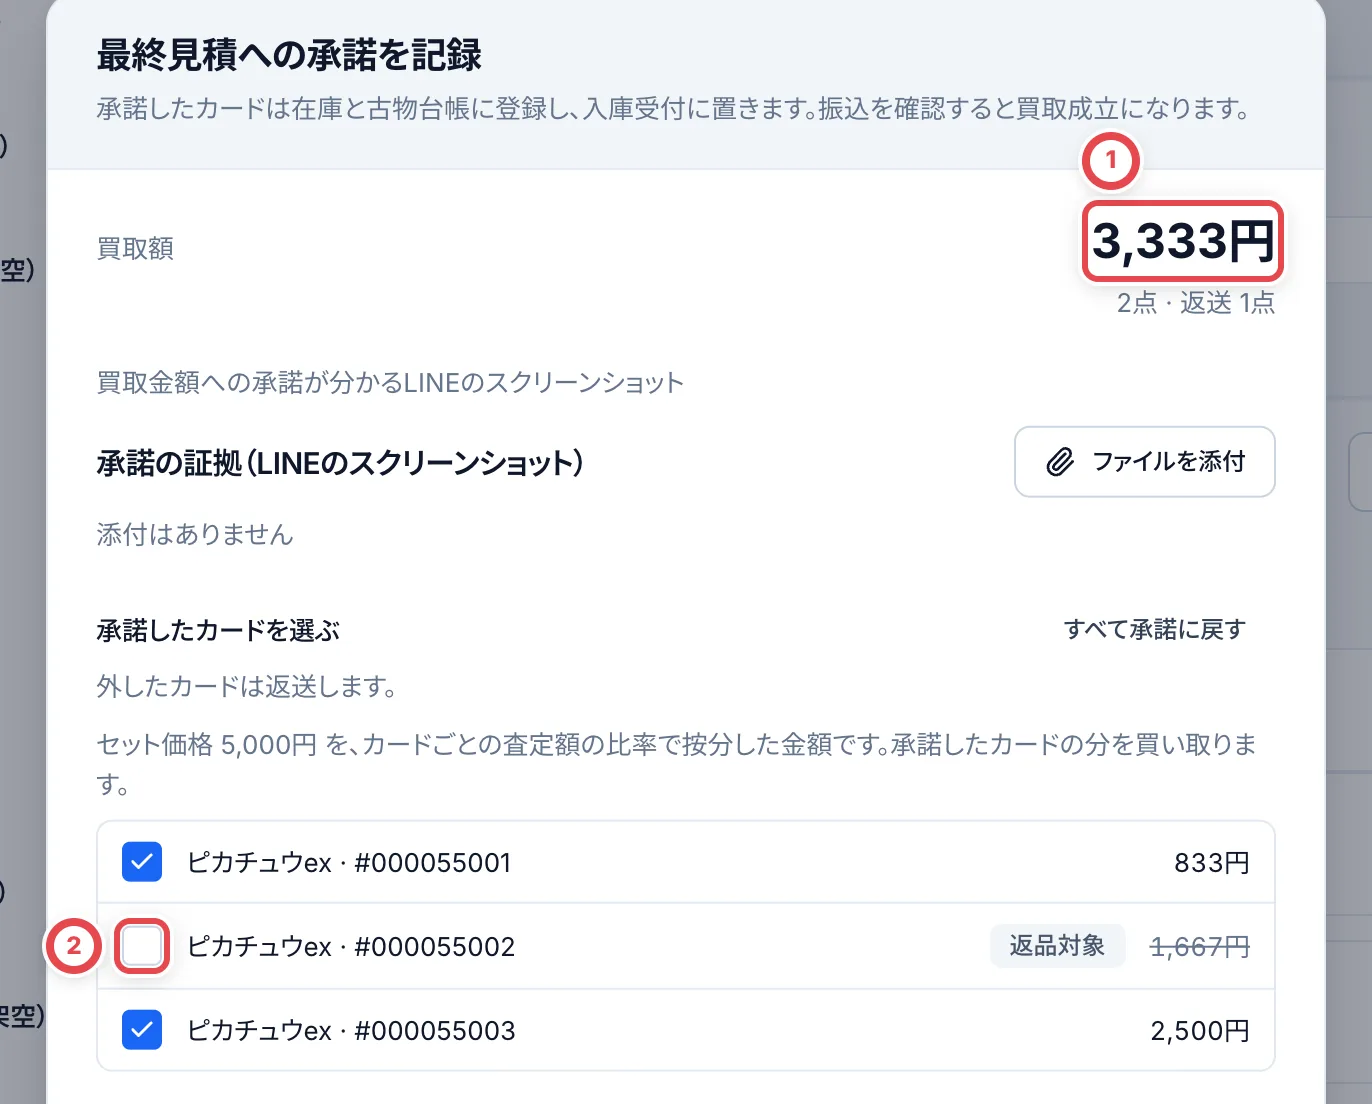 登録後は[振込](/guides/purchase/payouts)と[返送](/guides/purchase/returns)を続けます。承諾・入庫の登録だけで、銀行への振込は実行されません。
## 見積の編集でセット価格にする
### 1. 通常合計を確認して「セット価格に変更」を押す
「セット価格に変更」が表示される査定の入力画面で、先に各カードの金額と数量を入れます。保存済みの査定を直すときは、査定明細の「査定内容を修正」から開きます。
明細の下まで進み、①の「通常合計」を確認して、②の「セット価格に変更」を押します。この時点では保存されません。
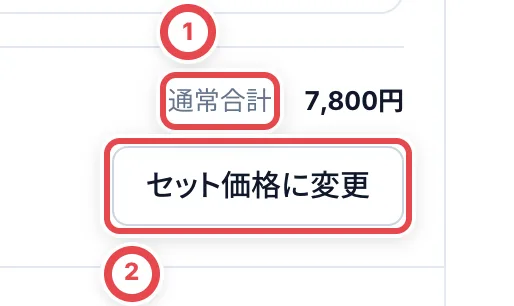 ### 2. セット総額を入力して保存する
③の「セット総額」に、見積全体でお客様に提示する金額を入れます。画像の例では、通常合計7,800円に対してセット総額7,000円を入力しています。
金額を確認し、④の「セット価格として保存」を押します。セット総額と、編集中の明細が一緒に査定の版として保存されます。個別の査定額は残ります。
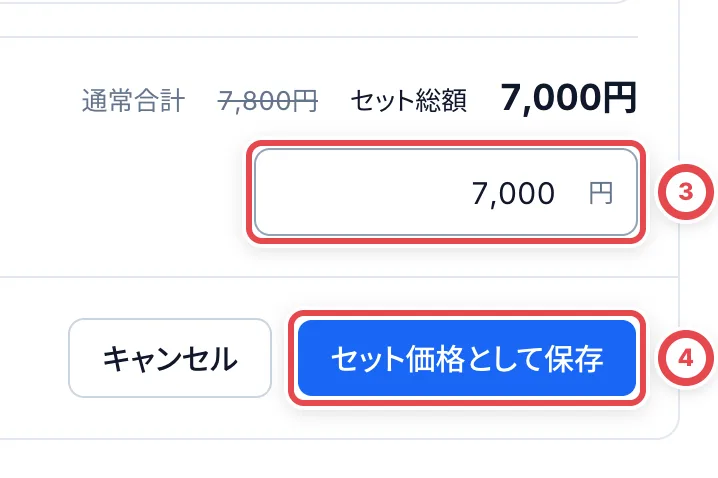 セット総額の入力中に「キャンセル」を押すと、セット価格の変更をやめて、元の査定編集に戻ります。
保存だけでは、お客様への提示や承諾の記録は完了しません。「次の操作」に従って見積の確認・提示へ進みます。オンライン買取では、金額に応じて先に2次査定が必要です。続きは[店舗買取](/guides/purchase/counter#3-見積pdfを確認する)、オンラインの場合は[査定と見積](/guides/purchase/appraisal)を参照してください。
## 保存したセット価格を直す・通常合計に戻す
対象の査定明細で「査定内容を修正」を開き、明細の下にある合計の欄で操作します。
| やりたいこと | 操作 | 保存後 |
| ------------------ | ------------------------------------------------------------------ | -------------------------------------- |
| セット総額を直す | 「セット価格を修正」→「セット総額」を入力→「セット価格として保存」 | 新しいセット総額になります |
| セット価格をやめる | 「セット価格を削除」→通常合計を確認→「第○版を保存」 | 個別の査定額を足した通常合計に戻ります |
**「セット価格を削除」を押すだけでは保存されません。** カードの明細は削除されません。画面に表示される版番号の保存ボタンを押して、変更を確定します。
## 2次査定に回すときに決める
オンライン買取では、顧客の「査定依頼」タブでカードを選び、「選択した査定を進める」を押すと、全部のカードに参考時価が入っていれば確認画面が開きます。
①の「セット価格表示」をオンにし、②の「セット総額」に合計の提示額を入れます。対象のカードと金額を確認して「2次査定に進める」を押すと、その金額で2次査定に回ります。
省略する権限がある場合は、同じ画面で「2次査定を省略」を選び、理由を入力して確定できます。2次査定の依頼通知は送られません。お客様への提示は別の操作です。
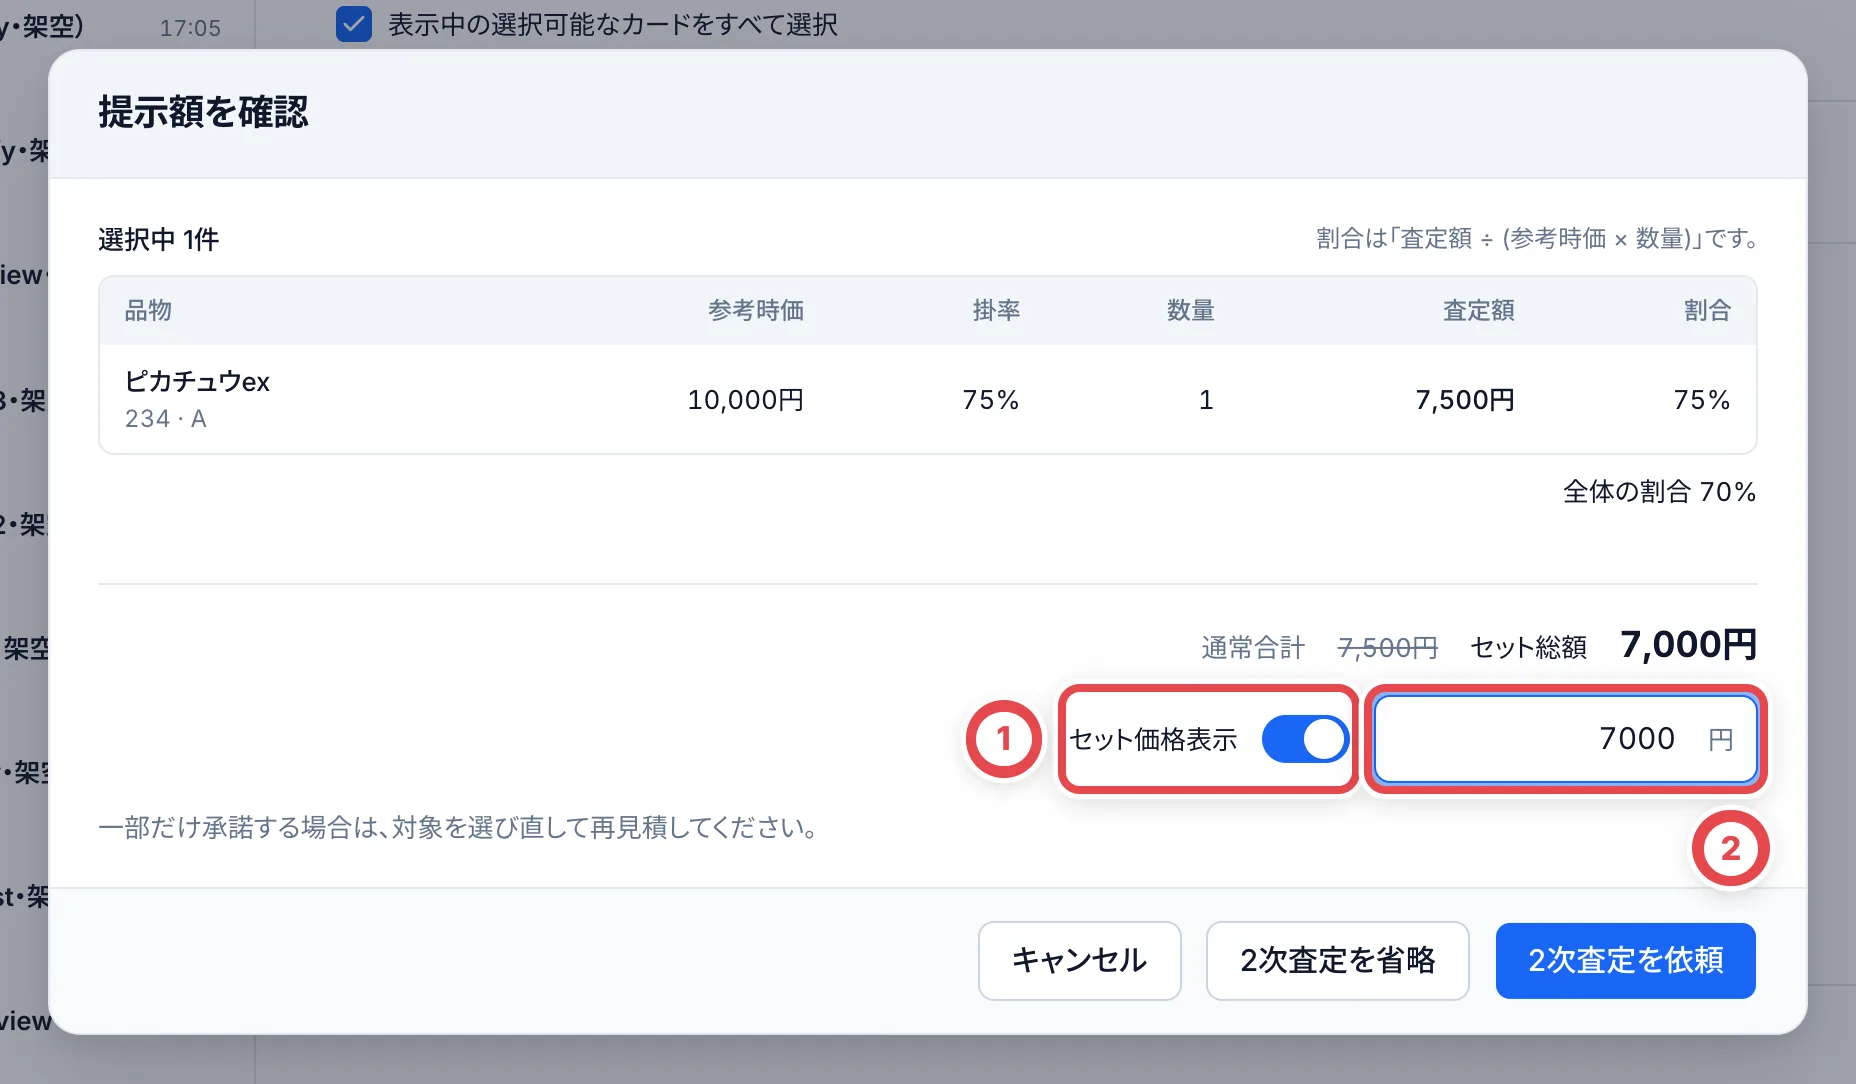 承認の手順は[調査依頼と2次査定依頼](/guides/purchase/research-and-reviews)を参照してください。
## 困ったとき
| こんなとき | 確かめること・やること |
| ---------------------------------- | -------------------------------------------------------------------------------------------------------------------------------------- |
| 「セット価格に変更」が見当たらない | 査定の入力画面を開き、明細の下まで進みます。設定済みの場合は「セット価格を修正」と表示されます |
| 「セット価格として保存」を押せない | セット総額に1円以上の整数を入れます。カードの明細があり、金額などの入力にエラーがないか、計算処理が終わっているかも確認します |
| 0円にしてセット価格をやめたい | 0円は入力できません。1枚ごとの最終査定は「セット総額(任意)」を空欄にして保存します。その他の画面は「セット価格を削除」して保存します |
| 一部のカードだけ買い取りたい | 承諾画面で対象のカードと配分額を確認します。別の総額で合意する場合は再見積します |
| 明細の金額や数量を直した | セット総額は個別の査定額とは別です。保存前に通常合計とセット総額の両方を確認します |
---
# 発送と最終査定
Source: https://docs.toreca-cloud.com/guides/purchase/shipping-and-final
オンライン買取の発送・到着から進める手順です。LINEを使わない受付や、事前見積の記録がないまま荷物が届いた場合は、[手動受付の方法2](/guides/purchase/mail-in-to-stock#方法2買取依頼として記録する)から始めます。店舗での現物の受け取りは[店舗買取](/guides/purchase/counter)へ進みます。
見積を送るまでは[LINEで受け付けて見積を送るまで](/guides/purchase/line-intake)、このあとの振込は[振込](/guides/purchase/payouts)に続きます。
法人のお客様の取引は「法人取引」の画面で進めます。[法人取引](/guides/purchase/corporate-deals)を参照してください。
## 最初に用意するもの
- 事前見積を提示済みの取引(取引の状態が「見積送付済」)
- 発送先にする拠点。設定 › 拠点と保管場所 で登録します
- お客様の本人確認と振込先。最終見積への承諾を記録する前にそろえます([本人確認](/guides/purchase/identity))
## 流れと取引の状態
| 順番 | やること | タブ | 取引の状態 |
| ---- | ---------------------------------------- | -------- | --------------------- |
| 1 | 事前見積へのお客様の回答を記録する | 見積もり | 見積送付済 → 承諾済 |
| 2 | 発送の案内を送って、記録する | 発送 | 発送待ち |
| 3 | (必要なら)届いた伝票を記録する | 発送 | 発送待ち・配送中 |
| 4 | (必要なら)到着時の写真をお客様に送る | 発送 | 発送待ち・配送中 |
| 5 | 届いたカードで最終査定を入力する | 最終査定 | 最終査定中 |
| 6 | (必要なら)社内用の査定写真を残す | 最終査定 | 最終査定中 |
| 7 | 最終見積を2次査定に回して、提示する | 最終査定 | 最終送付済 |
| 8 | 最終見積への回答を記録する | 最終査定 | 最終承諾 / 支払い待ち |
| 9 | 在庫と支払いを登録する | 最終査定 | 支払い待ち |
| 10 | (辞退のとき)辞退を記録して、返送に回す | 最終査定 | 最終辞退 → 返送手配中 |
次にやることは、取引の画面の上の「次の操作」にいつも出ています。迷ったらそこを見ます。
## 1. 事前見積へのお客様の回答を記録する
「見積もり」タブの「お客様の回答を記録する」で、LINEなどで受け取った回答を記録します。全部売ると言われたら①の「事前見積への承諾を記録」を押し、確認の画面で「記録する」を押します。記録すると「発送」タブに移ります。
一部のカードだけ売ると言われたら、②の「一部だけ承諾」で売るカードを選びます。選ばなかったカードは、査定依頼の「未見積」に戻ります(返送にはなりません)。
事前見積には「辞退」のボタンはありません。金額が合わなかったときは、③の「再見積」で見積をやり直します。**「再見積」は押すとその場で記録されます**(確認の画面は出ません)。
## 2. 発送の案内を送って、記録する
「発送」タブの「発送をお願いする」に、発送先と送り方をまとめた文章が入っています。①の「コピー」で文章をコピーし、LinyやLINEの管理画面からお客様に送ります。
文章には②のリンクが入っています。お客様の情報や本人確認がまだのときは「お客様情報・本人確認・送り状フォーム」、そろっているときは「送り状フォーム」のリンクです。タブを開くと自動で作られます。
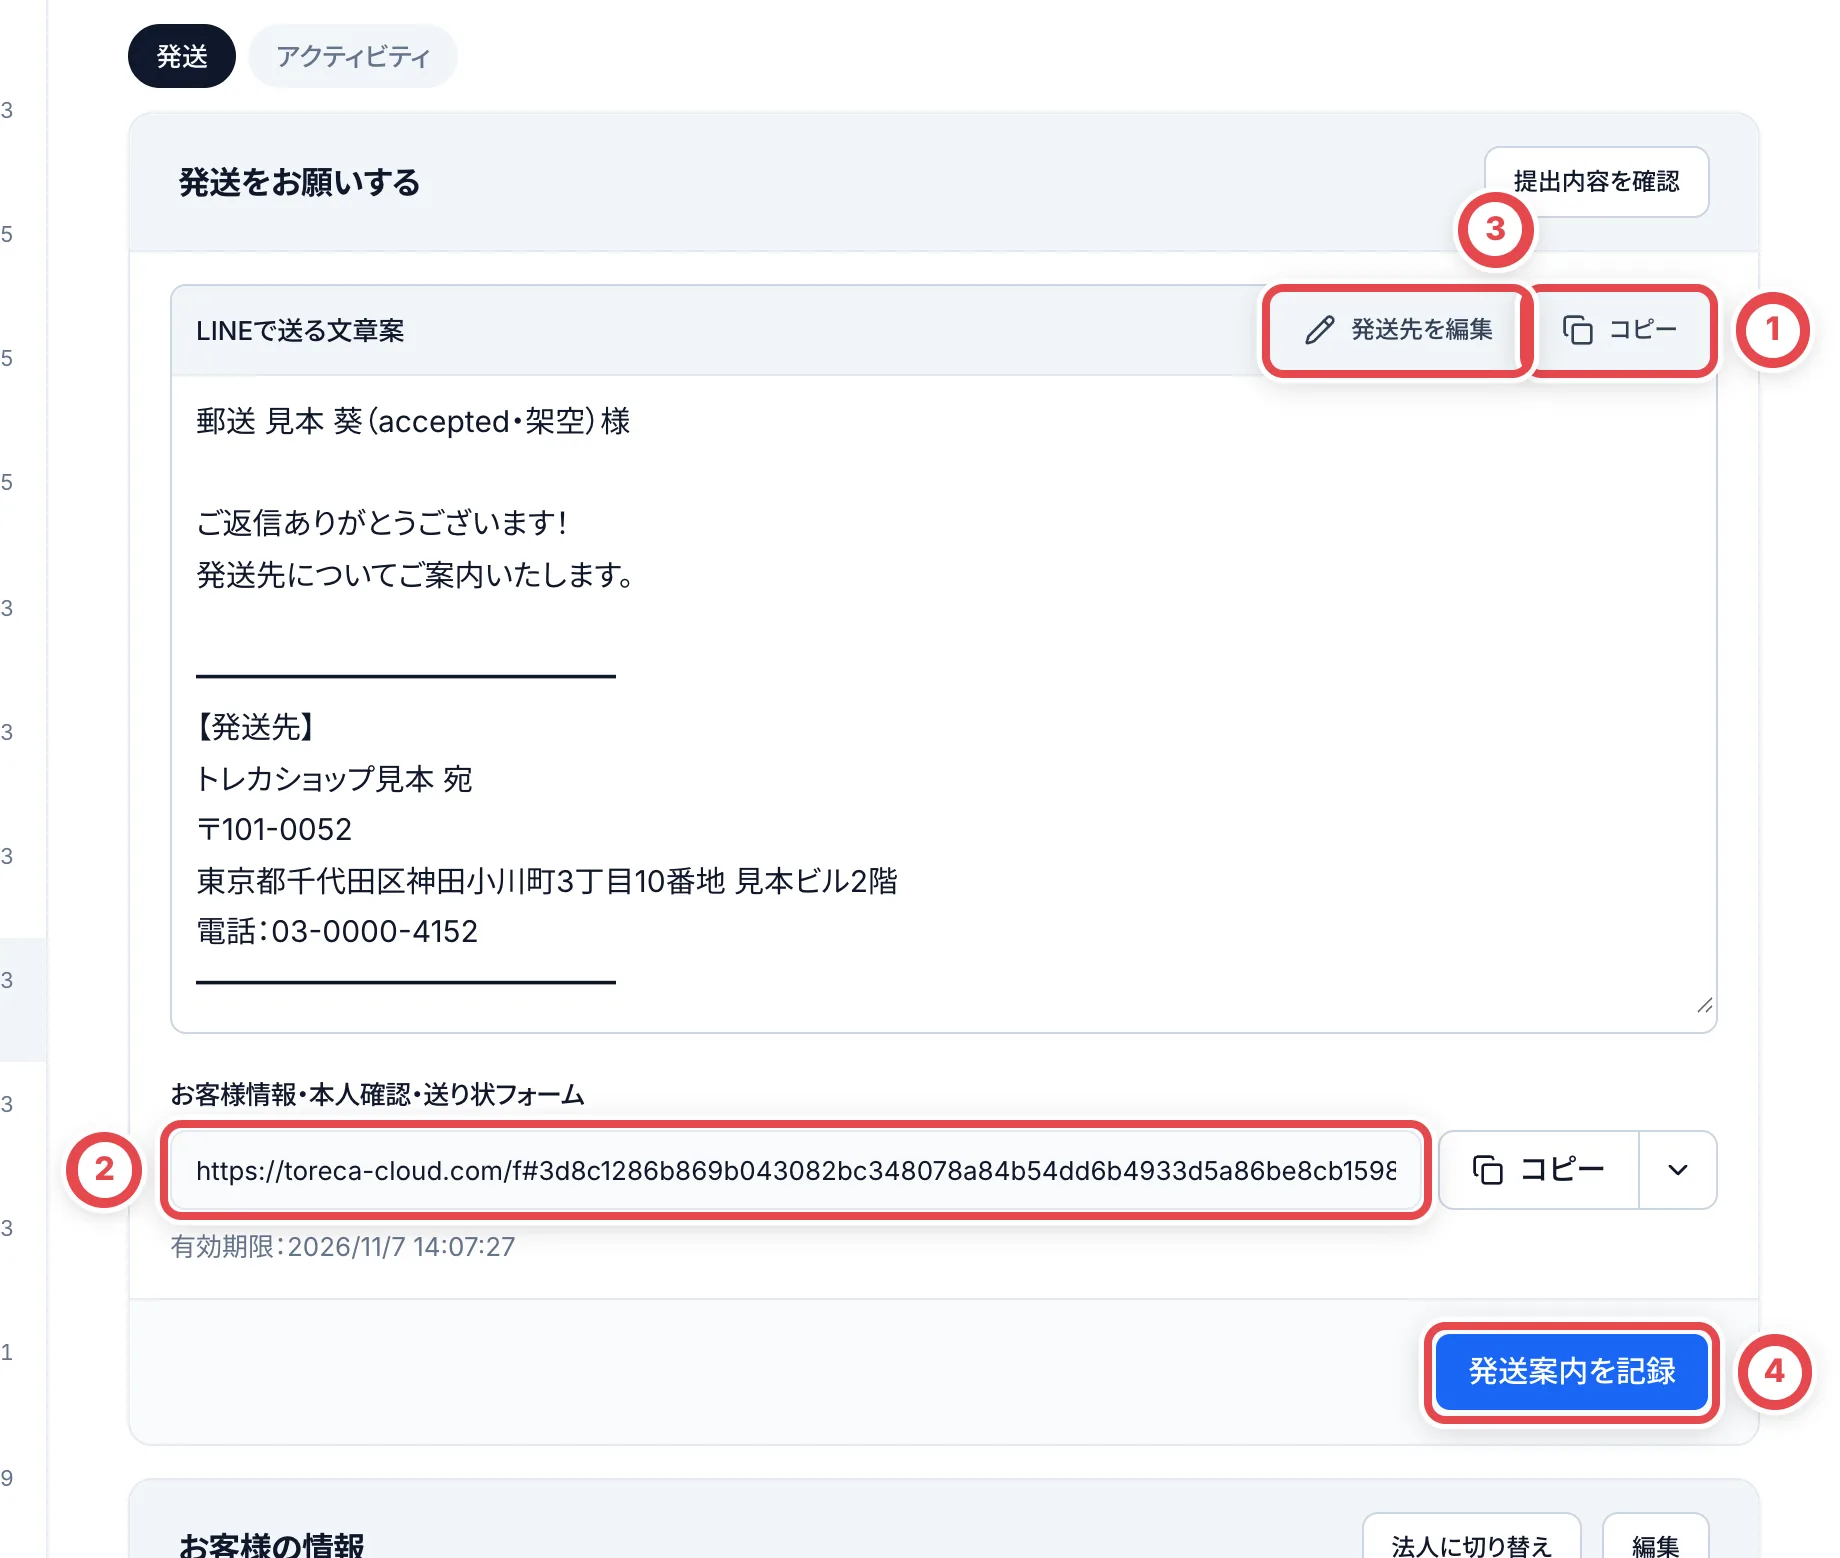 ①で文章をコピーして送ります。②がお客様に入力してもらうフォームのリンクです。発送先の拠点は③で変えます。送ったら④で記録します。
送ったら、④の「発送案内を記録」を押し、確認の画面で「記録する」を押します。取引は「発送待ち」になります。
既存の個人顧客は、送り状の写真を送るか「あとで送る」を選んだ後、[本人認証と登録内容の確認・修正](/guides/purchase/registered-information)へ進みます。書類の再提出が必要な場合は、最新の書類を提出してもらいます。
## 3. (必要なら)届いた伝票を記録する
お客様がフォームで送り状を出すと、「伝票」に写真が並びます。電話やLINEで伝票番号を聞いたときは、①の「伝票を登録」で記録します。送り状の写真は必須、追跡番号は任意です。②に追跡番号と配送業者が出ます(お店で登録した伝票は「配送業者は未確認」と出ます)。
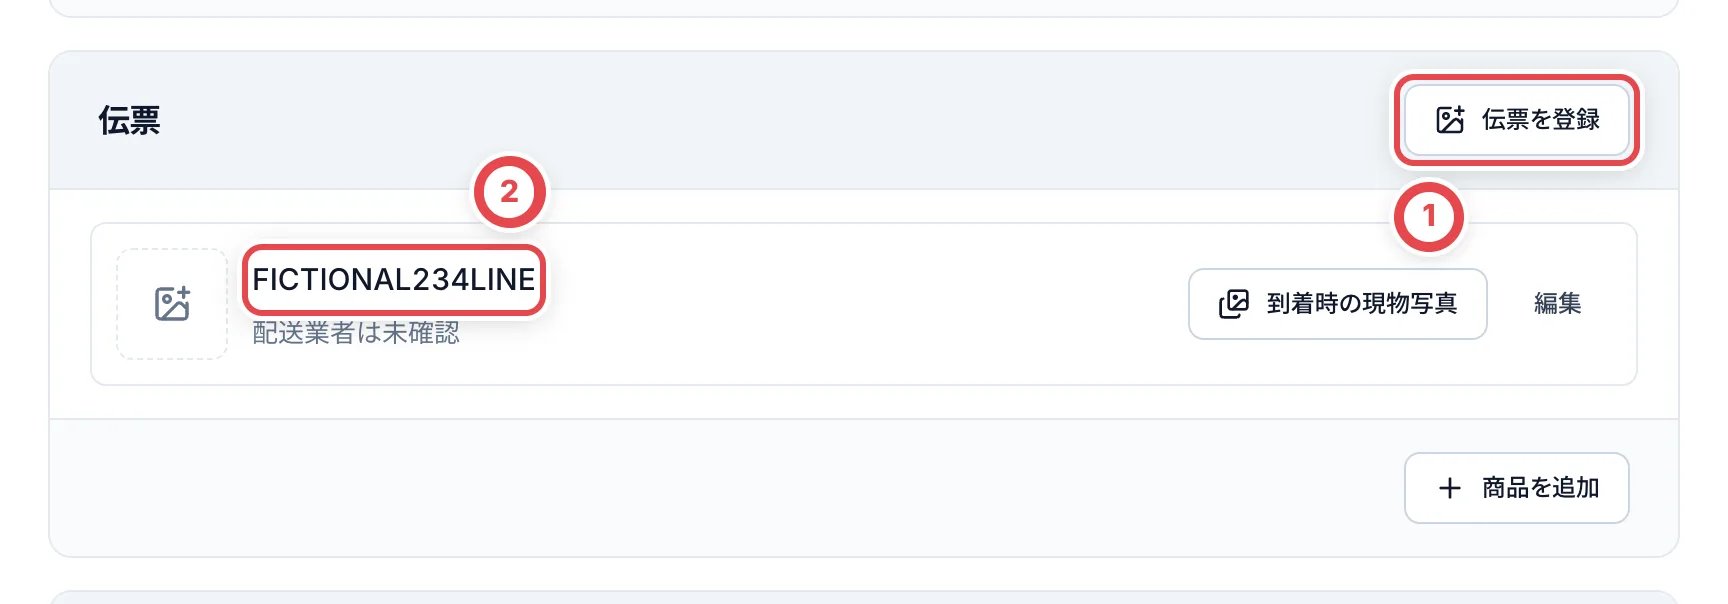 ## 4. (必要なら)到着時の写真をお客様に送る
カードが届いたことをお客様に写真で伝えるときは、伝票の行の「到着時の現物写真」を押します。①の「写真を追加」で写真を選んで保存します。写真は伝票とは別に残ります。
送る写真は、ファイル名の横の②のチェックで選びます(4枚まで)。③の「顧客への送信内容を確認」を押すと、送る前の確認の画面が開きます。
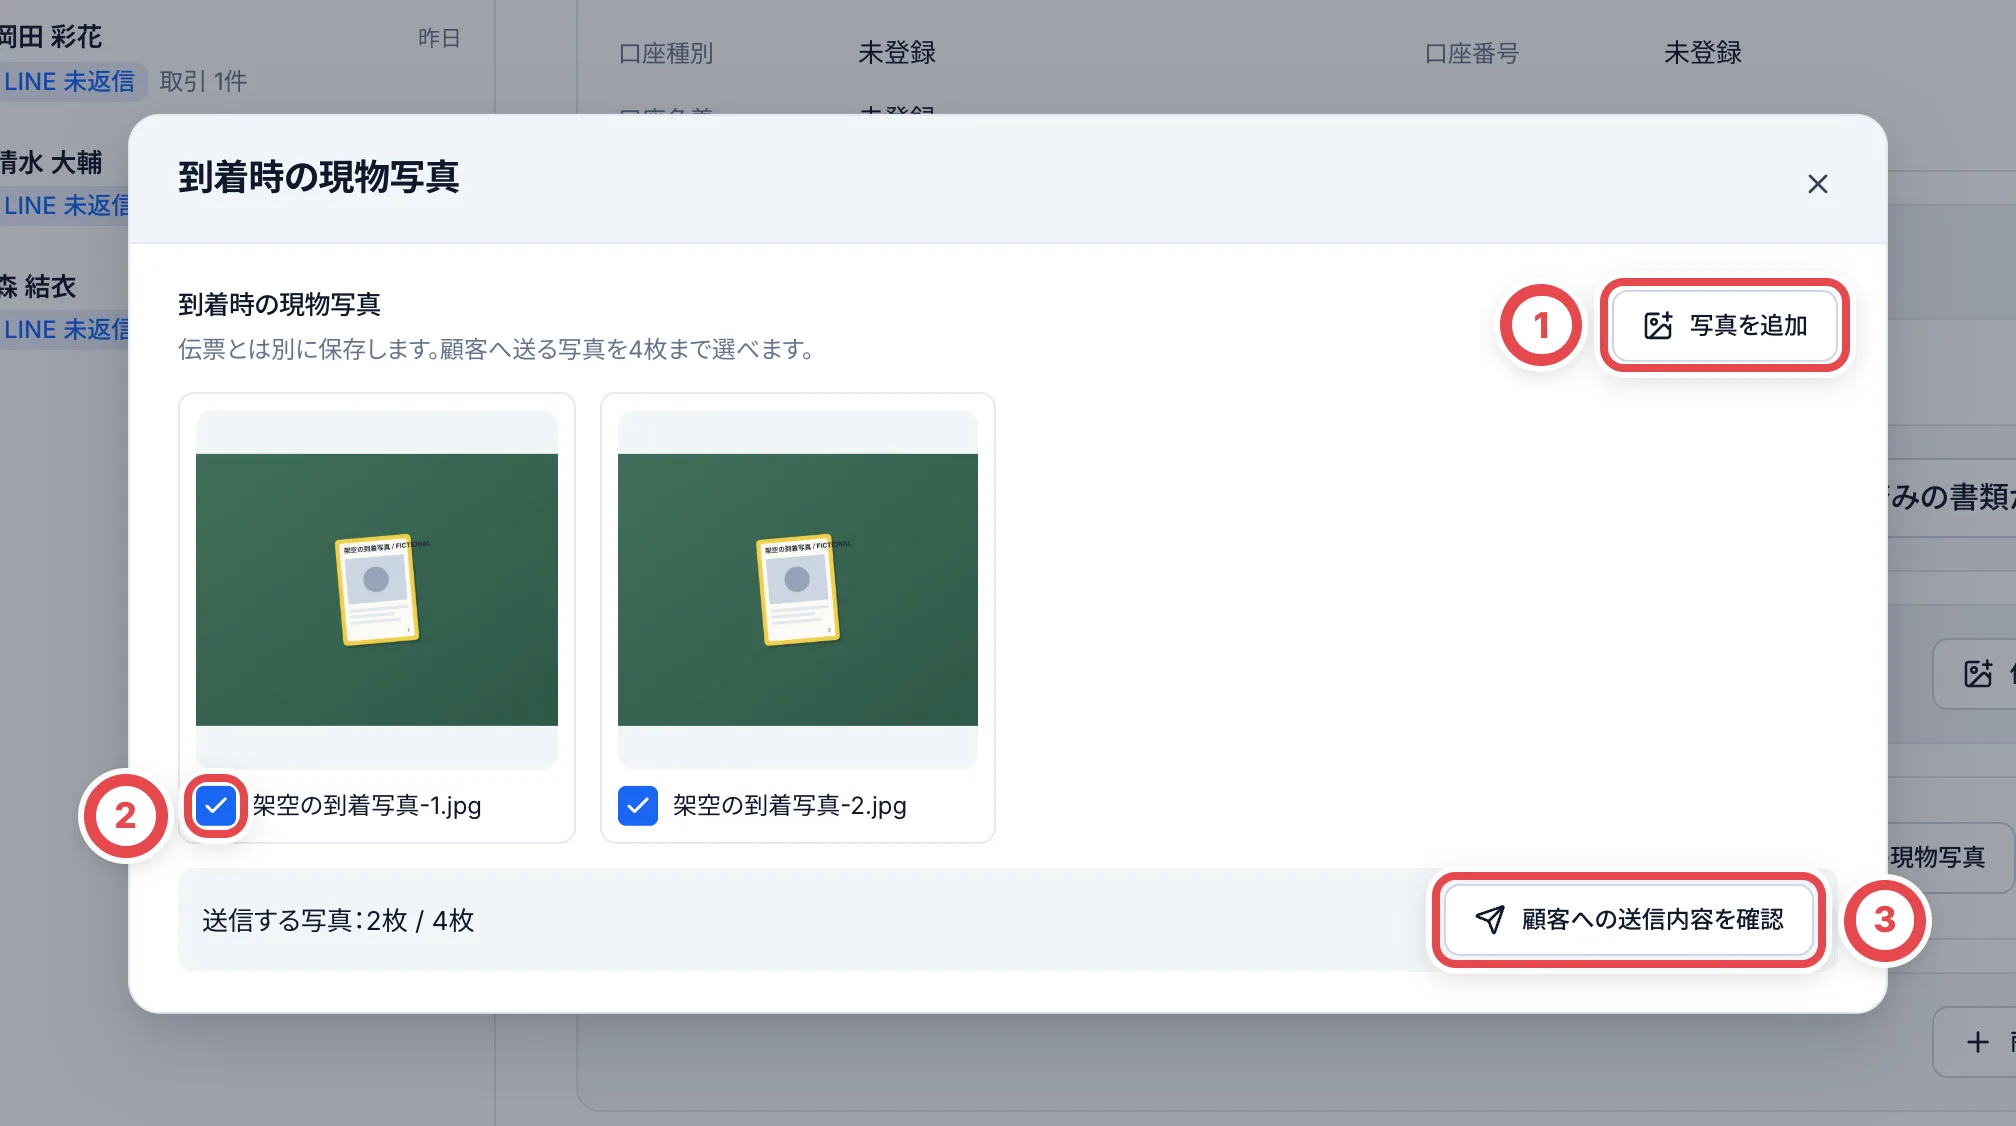 確認の画面では、送り先のお客様と写真が出ます。①のメッセージは書き換えられます。②の「この内容でLINE送信」を押すと、**その場でお客様のLINEに送られます**。社内用の査定写真は含まれません。
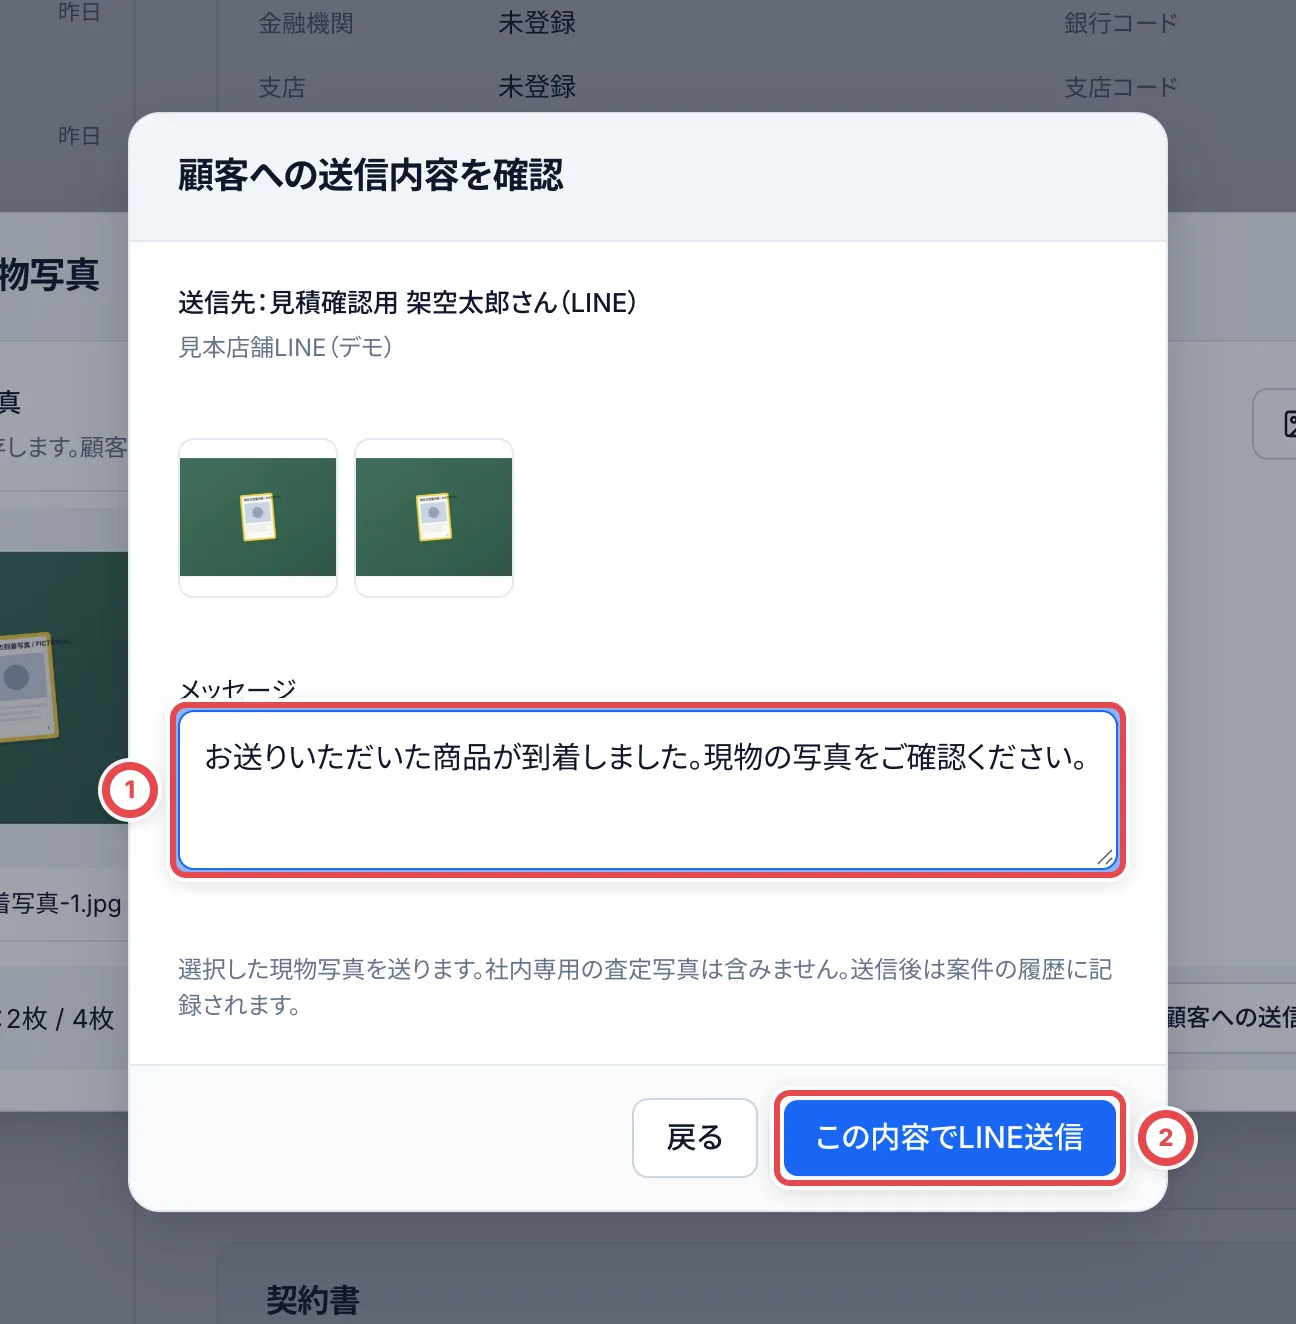 写真を選んで送れるのは、LINE連携を使っている店舗だけです。
顧客は、送信先のLINE公式アカウントに紐付いている必要があります。LINEに紐付いていない顧客は、この画面から送信先を取得できません。その場合は、店舗で使っている連絡手段から案内します。
送信結果が確認できない場合は、写真・文面を変えて新しく送り直さず、画面の再確認・再試行の案内に従います。同じ送信の結果を確認してから次の送信へ進みます。送り先の情報が変わったと表示されたときは、最新の送り先を確認し直してください。
## 5. 届いたカードで最終査定を入力する
カードが届いたら、「次の操作」の①「届いたカードで最終査定を始める」にある「最終査定を入力する」を押します。このボタンは、発送案内を記録したあと(「発送待ち」「配送中」)だけ出ます。
「届いたカードを選択」で今回届いた明細にチェックを入れ、「最終査定へ」を押します。選択した分と到着記録済みのカードだけが最終査定に引き継がれます。未選択分は未到着のままです。後着分は、入力中の査定を保存してから「到着分を追加」で追加し、査定を保存し直してください。提示済みの見積がある場合は再査定へ戻してから追加します。成立後の到着は別取引として扱います。
最終査定では、同じカードが複数枚あっても「1枚目」「2枚目」のように1枚ずつ表示されます。①の「PSA番号」または「鑑定番号」を現物と照合し、②「査定金額」にその1枚を買い取る金額を入れます。お客様に伝える減額理由などは③「査定理由(お客様向け)」へ入力します。
買い取れない1枚は、その行の三点メニューから「買取不可にする」を選び、理由を入力します。**届かなかったカードは、0円の査定に置き換えず、到着差分・不足の記録を確認します。** 「欠品」の個体は、この画面では受領済みに変更できません。
申告になかったカードは「カードを追加」、束は「まとめ査定を追加」から登録します。入力途中の変更があると追加ボタンが押せないため、先に保存します。鑑定品は「現物のグレード」でPSAなどのグレードを選び、番号は追加後に入力します。追加後は、追加分の現物・状態・金額を確かめてください。
全ページを確認し、必要な場合だけ「セット総額(任意)」を入れて「保存」を押します。番号・金額・買取可否の詳しい入力、管理メモ、保存後の確認と復旧は、[最終査定を1枚ずつ記録する](/guides/purchase/final-appraisal)を参照してください。保存だけではお客様へ送信されません。
## 6. (必要なら)社内用の査定写真を残す
明細に「社内用の査定写真」が表示される場合は、そのボタンを開き、「写真を追加」で写真を保存します。保存した写真はお店の中だけで見られ、お客様への送信や商品の検索には使われません。
現在、カードを1枚ずつ表示する最終査定の画面には、写真の操作が表示されません。写真の入口がない場合は管理者に確認してください。到着時の写真と社内用査定写真は用途が違うので、お客様への送信対象を取り違えないようにします。
## 7. 最終見積を2次査定に回して、提示する
最終査定を保存すると、「次の操作」に①の「最終見積の2次査定を依頼する」が出ます(店舗の設定で2次査定が要るとき)。②の「2次査定の依頼へ」から、別のメンバーに確かめてもらいます。
 2次査定の承認と、見積の文章をLINEで送って「提示済みにする」までは、事前見積と同じ操作です。[LINEで受け付けて見積を送るまで](/guides/purchase/line-intake)の手順6・7を参照してください。提示済みにすると、取引は「最終送付済」になります。
## 8. 最終見積への回答を記録する
お客様から返事が来たら、「最終査定」タブの「お客様の回答」で記録します。出るボタンは、本人確認が済んでいるかどうかで変わります。
- **本人確認がまだのとき**:①のお知らせが出て、②の「承諾だけ記録」になります。承諾だけを記録し、取引は「最終承諾」になります。在庫と支払いは、本人確認を記録してから手順9で登録します
- **本人確認が済んでいるとき**:同じ場所が「承諾を記録」になります。押すと承諾と一緒に在庫と支払いまで登録され、取引は「支払い待ち」になります。振込先・古物商許可・入庫先の拠点がそろっていないと押せません
一部のカードだけ売ると言われたら、「一部だけ承諾」を使います。本人確認のあとで使えます。セット価格の場合は選んだカードへの配分額も確認します。売らないカードは、あとで返送します。
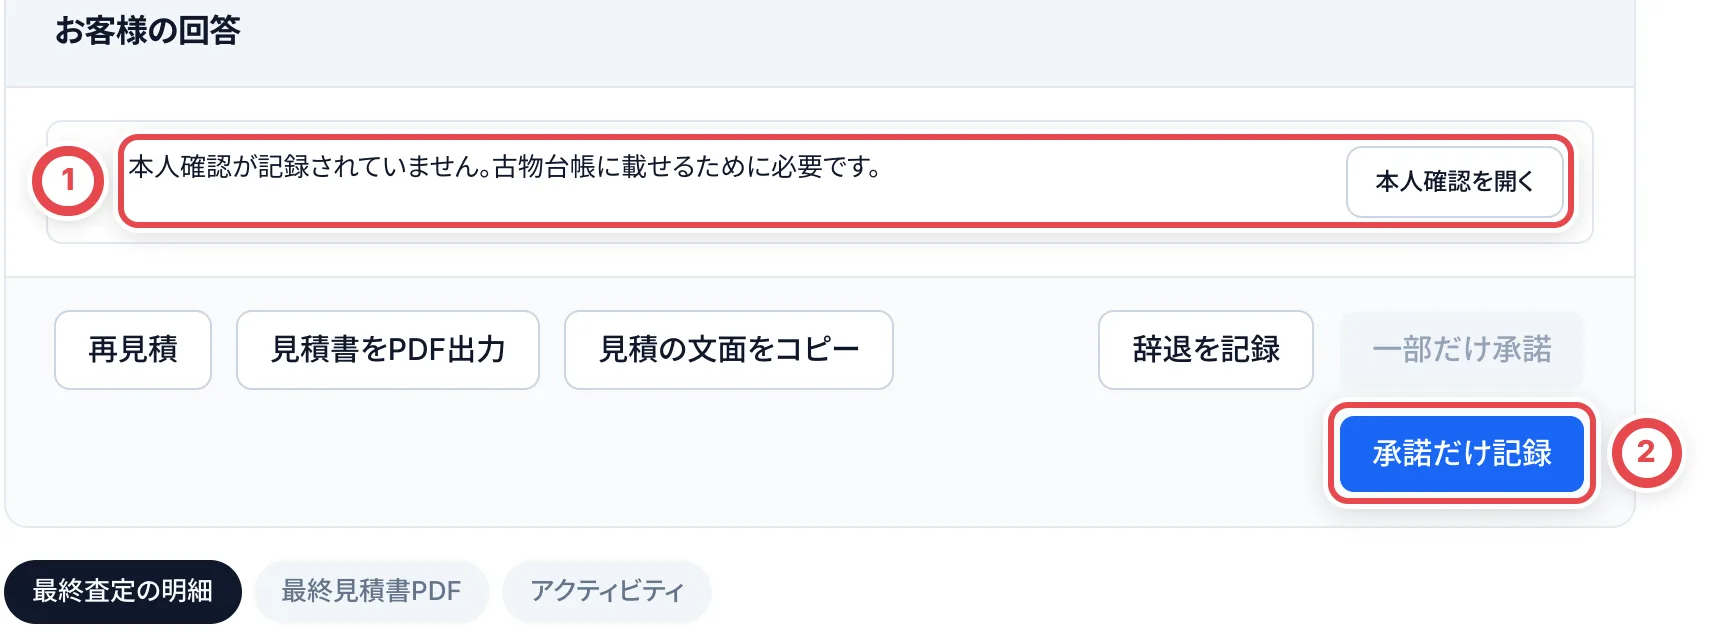 振込で支払うときは、記録の画面の①「承諾の証拠」に、お客様が承諾したLINEのスクリーンショットを「ファイルを添付」から添付します(添付済みなら「差し替える」になります)。振込を申請するときに、この証拠を確かめます(添付しないと申請できません)。
## 9. 在庫と支払いを登録する
承諾だけを記録した取引では、「在庫と支払いの登録」に、①のように足りないものが並びます。本人確認や振込先をそろえると、②の「在庫と支払いを登録」が押せるようになります。開いた画面で内容を確かめ、「N点を在庫と支払いに登録」を押します。
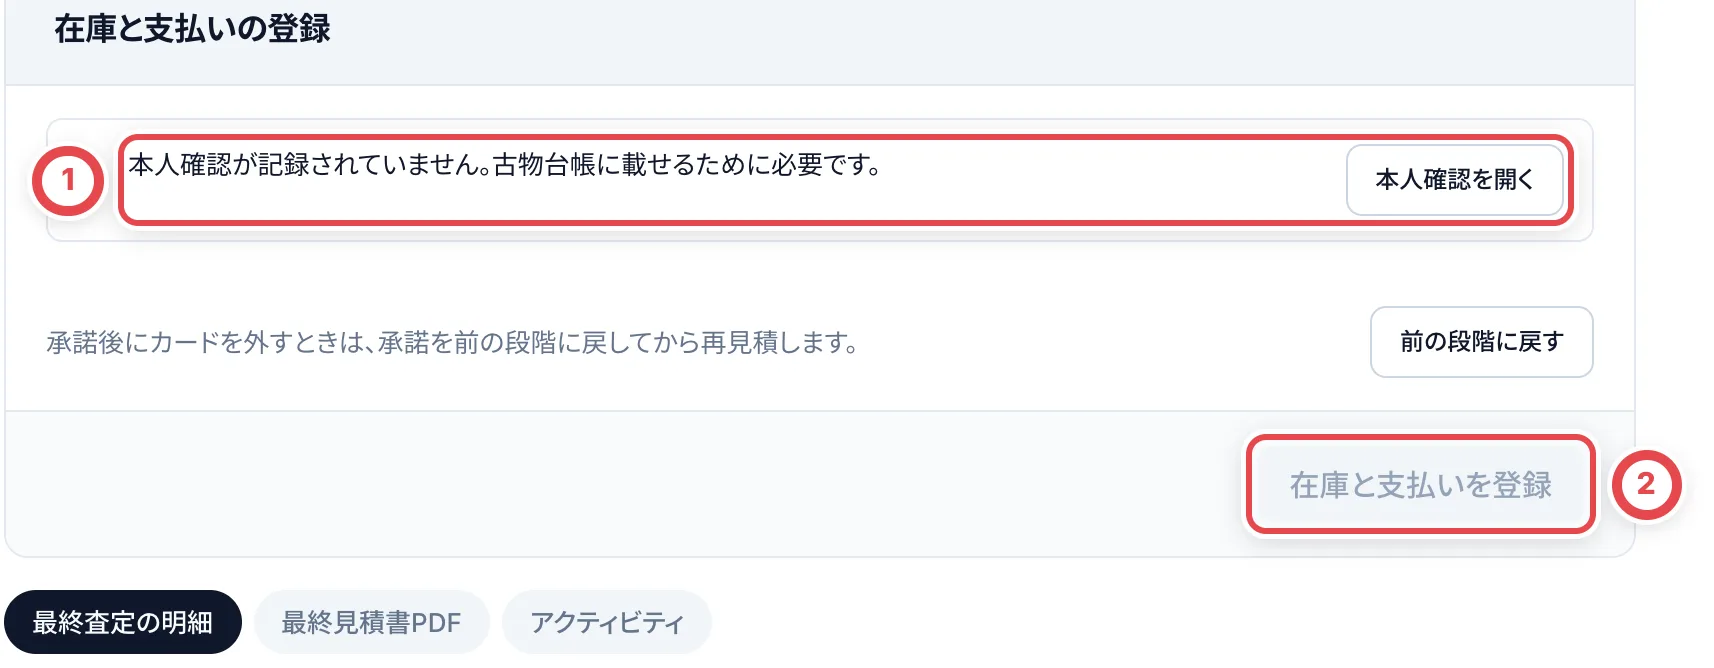 登録すると、カードが在庫に入り、取引は「支払い」タブに移ります(「支払い待ち」)。振込の進め方は[振込](/guides/purchase/payouts)を参照してください。
## 10. (辞退のとき)辞退を記録して、返送に回す
お客様が最終見積を全部断ったときは、「お客様の回答」の「辞退を記録」を押します。①の「回答を確認した記録」に、どう確かめたか(例:LINEで全件辞退の回答を確認)を書き、②のチェックを入れて、③の「全件辞退を記録」を押します。届いたカードがすべて受け取り済みのときだけ使えます。
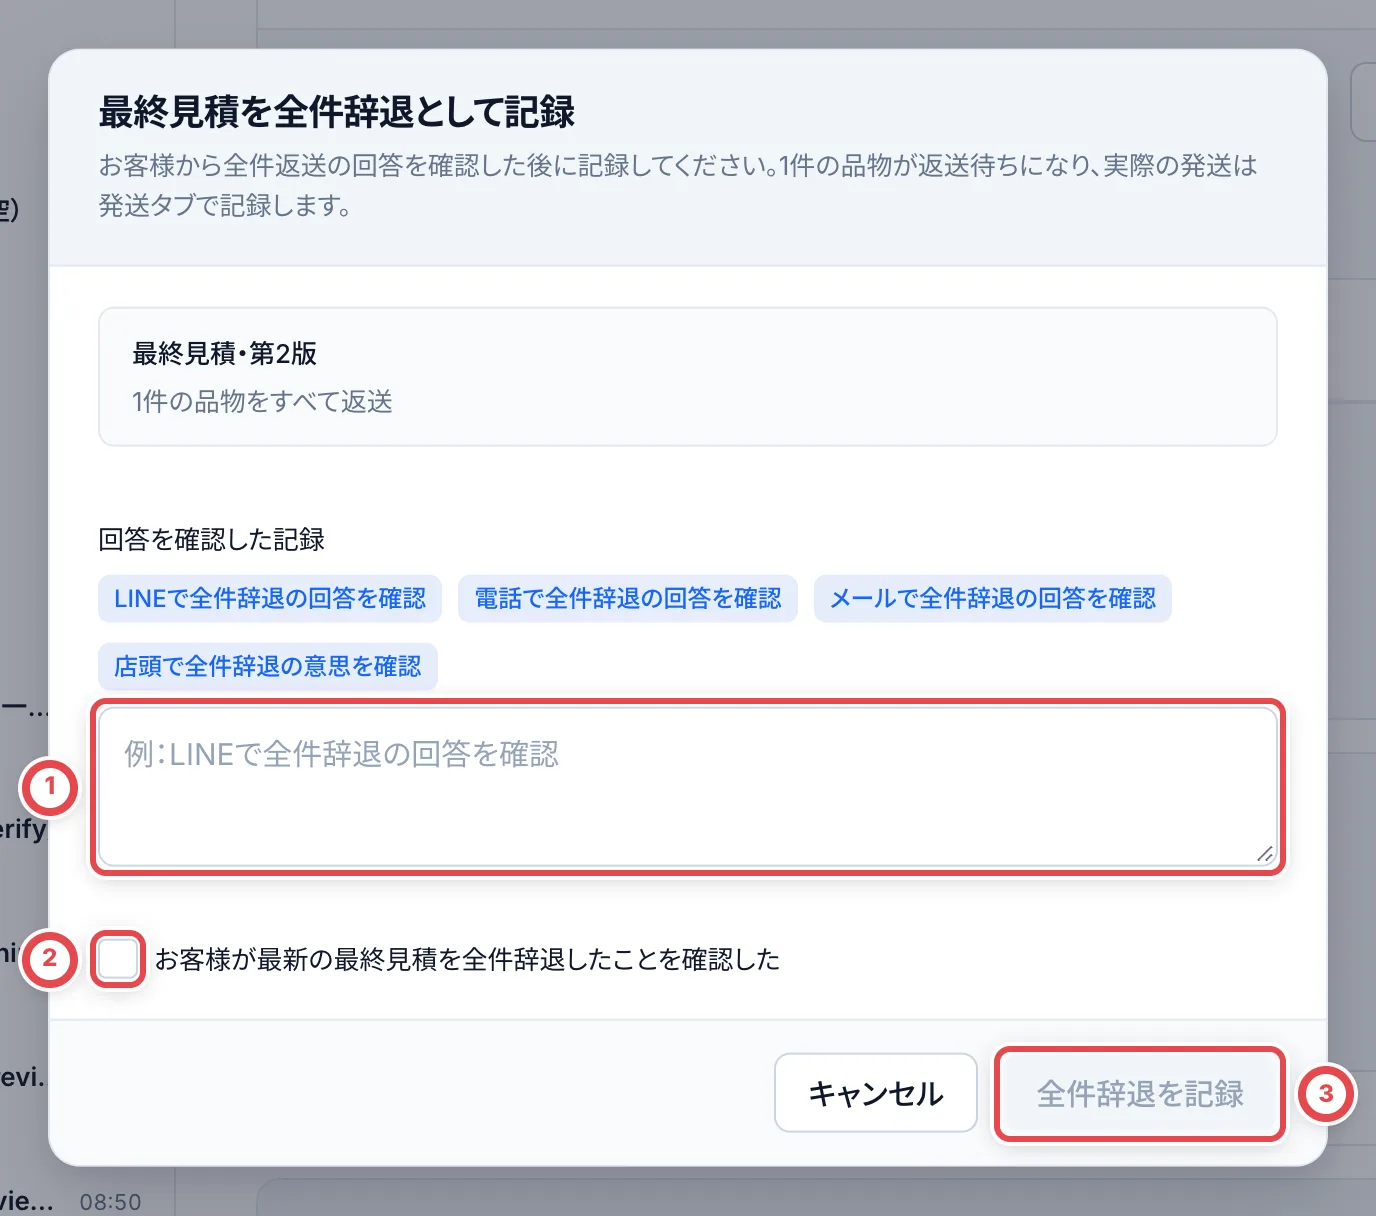 取引は「最終辞退」になり、①の次の操作に「返送を記録する」が出ます。②の「返送を開く」から返品対応へ進み、対象の個体、返送先、発送と到着を記録します。続きは[返品と返送](/guides/purchase/returns)を参照してください。
 ## 誤って進めた段階を前に戻す
承諾・到着・最終査定を押し間違えたときは、取引の画面の上にある状態のメニュー(現在の状態の右の「▾」)から「前の段階に戻す…」を選びます。
1. **戻せる段階を確認する**
「前の段階に戻す…」を開くと、いまの状態から戻せる段階と、戻したあとの状態が出ます。「戻すと変わること」に、取り消される記録が並びます。
2. **理由を入力して戻す**
「戻す理由」を入力して「戻す」を押します。理由は取引の履歴と監査ログに残ります。
3. **もう一度やり直す**
戻した段階は、最初から記録し直せます。
| 戻す操作 | いまの状態 | 戻ったあとの状態 |
| ------------------------ | ---------------------------------------- | -------------------------------------------------- |
| お客様の承諾の記録を戻す | 事前見積の承諾済み/最終見積の承諾済み | 事前見積の提示済み/最終見積の提示済み |
| 到着の記録を戻す | 入荷済み(一部だけ届いた状態を含む) | 記録する前の状態(発送待ちなど)。カードは未受領に |
| 最終査定の段階を戻す | 最終査定(到着確認のあと、見積を出す前) | 入荷済み。入力した最終査定は取り消し |
- 戻せるのは、直近の段階を1つずつです。成立(古物台帳・在庫・振込依頼の作成)より前の段階だけが対象で、成立のあとは取り消さずに訂正します(古物台帳は訂正の行を足して直し、在庫は在庫の画面で調整します)
- 戻せない条件があるときは、「いまは戻せません」にその理由と、代わりの訂正の方法が出ます。承諾のあとにお客様がフォームに回答している、署名や締結済みのクラウドサインの書類がある、鑑定や差分の記録がある、在庫が登録済み、などです
- 戻す操作ごとに権限が分かれています。権限がないときは、画面に必要な権限の名前が出ます。はじめは、オーナーと管理者だけが戻せます([メンバーと権限](/guides/getting-started/members-and-roles)で変えられます)
- 見積の期限が過ぎているときは、戻したあとに承諾を記録し直すには見積を作り直します
## 困ったとき
| 起きていること | 確かめること・直し方 |
| ------------------------------------------------ | ------------------------------------------------------------------------------------------------------------------------------------------------------------------------------------------------------- |
| 「最終査定を入力する」が出ない | 発送案内を記録していません。「発送」タブの「発送案内を記録」を先に押します。 |
| 「最終査定を入力する」を、届く前に押してしまった | 到着の記録は、状態のメニューの「前の段階に戻す…」から戻せます(権限が必要です)。成立の前でなければ戻せません。届いていないカードがある場合は、到着差分と不足の記録を確認し、正しい受領状態に直します。 |
| 押したのに「入荷済」のまま最終査定に進まない | 特定できていないカードか、未解決の差分があります。「次の操作」の「カードを特定する」か「到着時の差分を解決する」から片づけます。 |
| 申告になかったカードが届いた | 最終査定の入力を保存してから、「カードを追加」で登録します。束なら「まとめ査定を追加」を使います。 |
| 「差分の記録」が出た | 届いたカードと申告が違います(未着・予定外・カード相違・状態相違・破損など)。お客様に確かめて「解決を記録する」で記録します。 |
| 写真の「顧客への送信内容を確認」が出ない | 写真を1枚以上チェックしていないか、LINE連携を使っていません。写真の保存だけはできます。 |
| 「承諾を記録」が押せない | 振込先・古物商許可・入庫先の拠点のどれかが足りません。「次の操作」に出ている項目からそろえます。本人確認がまだなら「承諾だけ記録」を使います。 |
| 「一部だけ承諾」が押せない | 本人確認や振込先など、成立に必要な項目をそろえます。セット価格の場合は、選んだカードへの配分額も確認します。 |
| 「辞退を記録」が出ない | 届いたカードをすべて受け取ってから使えます。 |
| 振込を申請しようとしたら、承諾の証拠を求められた | 最終見積への承諾を記録したときに証拠を添付していません。「支払い」タブの申請の画面から追加できます。 |
| 事前見積の期限が切れている | 以前に期限を入れた取引だけで起きます。期限は画面から変えられないので、トレカクラウドの運営にお問い合わせください。 |
## 関連する操作
- [履歴から操作を取り消す](/guides/purchase/history-and-undo)
- [クラウドサインで書類を作成・送信する](/guides/settings/cloudsign)
---
# クラウドサインで書類を作成・送信する
Source: https://docs.toreca-cloud.com/guides/settings/cloudsign
| 使う方式 | 操作する場所 | 完了の確認 |
| -------------- | ----------------------------------------------- | ------------------------------------ |
| API連携 | 案件の「書類を準備」から進む | 書類の送信・締結状態を同期する |
| 従来の手動運用 | 登録したテンプレートURLからクラウドサインを開く | 実際に送付・締結してから手動記録する |
設定には設定管理、書類の作成・送信にはそれぞれのクラウドサイン権限が必要です。
## 1. 接続と稼働準備を確認する
「設定」→「クラウドサイン」を開きます。①でテスト環境/本番環境を照合し、「APIキーを追加」または「APIキーを更新」から、その環境のAPIキー(クライアントID)を登録します。②のAPIキー更新操作を確認します。ページの「稼働準備」も確認します。キーを更新するときは接続先のアカウントと店舗を先に照合してください。
「Webhook・戻り先URL」に表示される案内に沿ってクラウドサイン側も設定します。画面内で署名してもらう方式は、SMSなどの事業者側の準備も必要です。設定を保存するだけでは書類を送信しません。
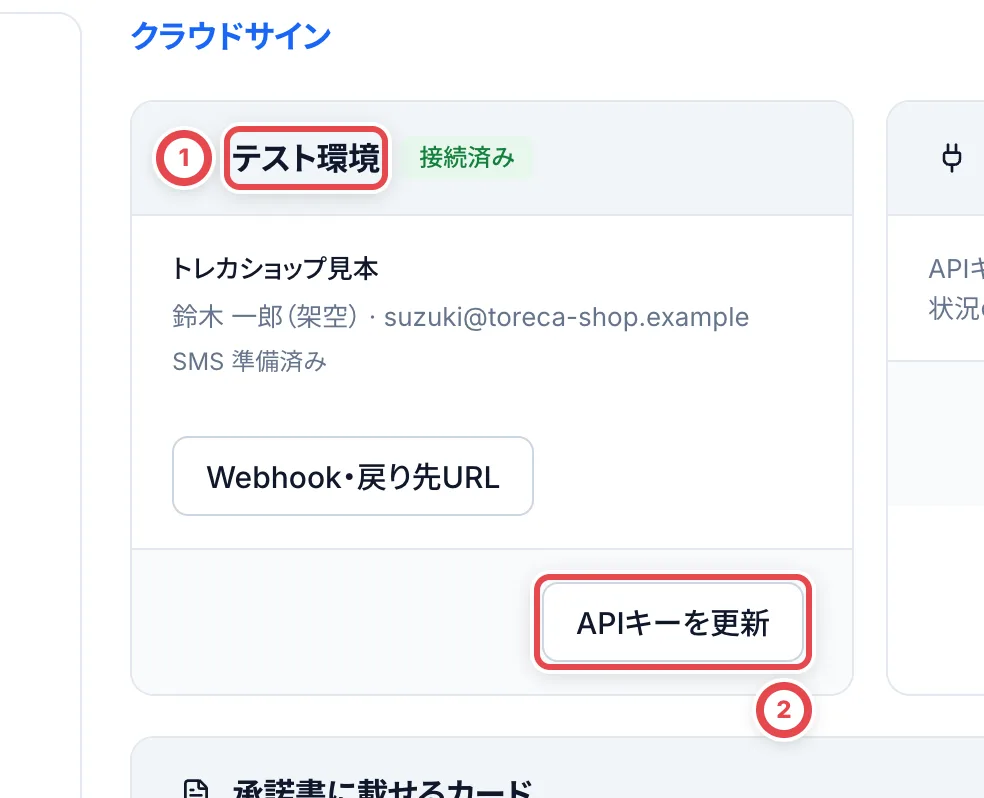 ## 2. 標準書類と初期選択を決める
①の「承諾書に載せるカード」で、すべてのカードかPSA10だけを初期選択するか、1枚あたりの金額で初期選択から外すかを設定します。書類作成時に対象を確認し直せます。
②の「標準書式の文言」では、金額の呼び方と表題を設定します。「確定金額」は現物到着前に金額を保証する場合の文言です。運用に合うものを選びます。書類テンプレートの「PDFプレビュー」で、事業者情報・古物商許可・印影・明細の見え方を確認します。変更は次に作る書類から反映され、作成済みの書類は変わりません。
「書類テンプレート」では、各テンプレートの「書類名の形式」を設定できます。案件番号・顧客名・書類種別のボタンで変数を追加し、例を確認して保存します。空欄なら案件番号と書類種別が使われます。案件でテンプレートを選ぶと書類名が入り、作成前に個別に変更できます。この書類名はPDF内の表題とは別です。設定変更は作成済みの書類には反映されません。
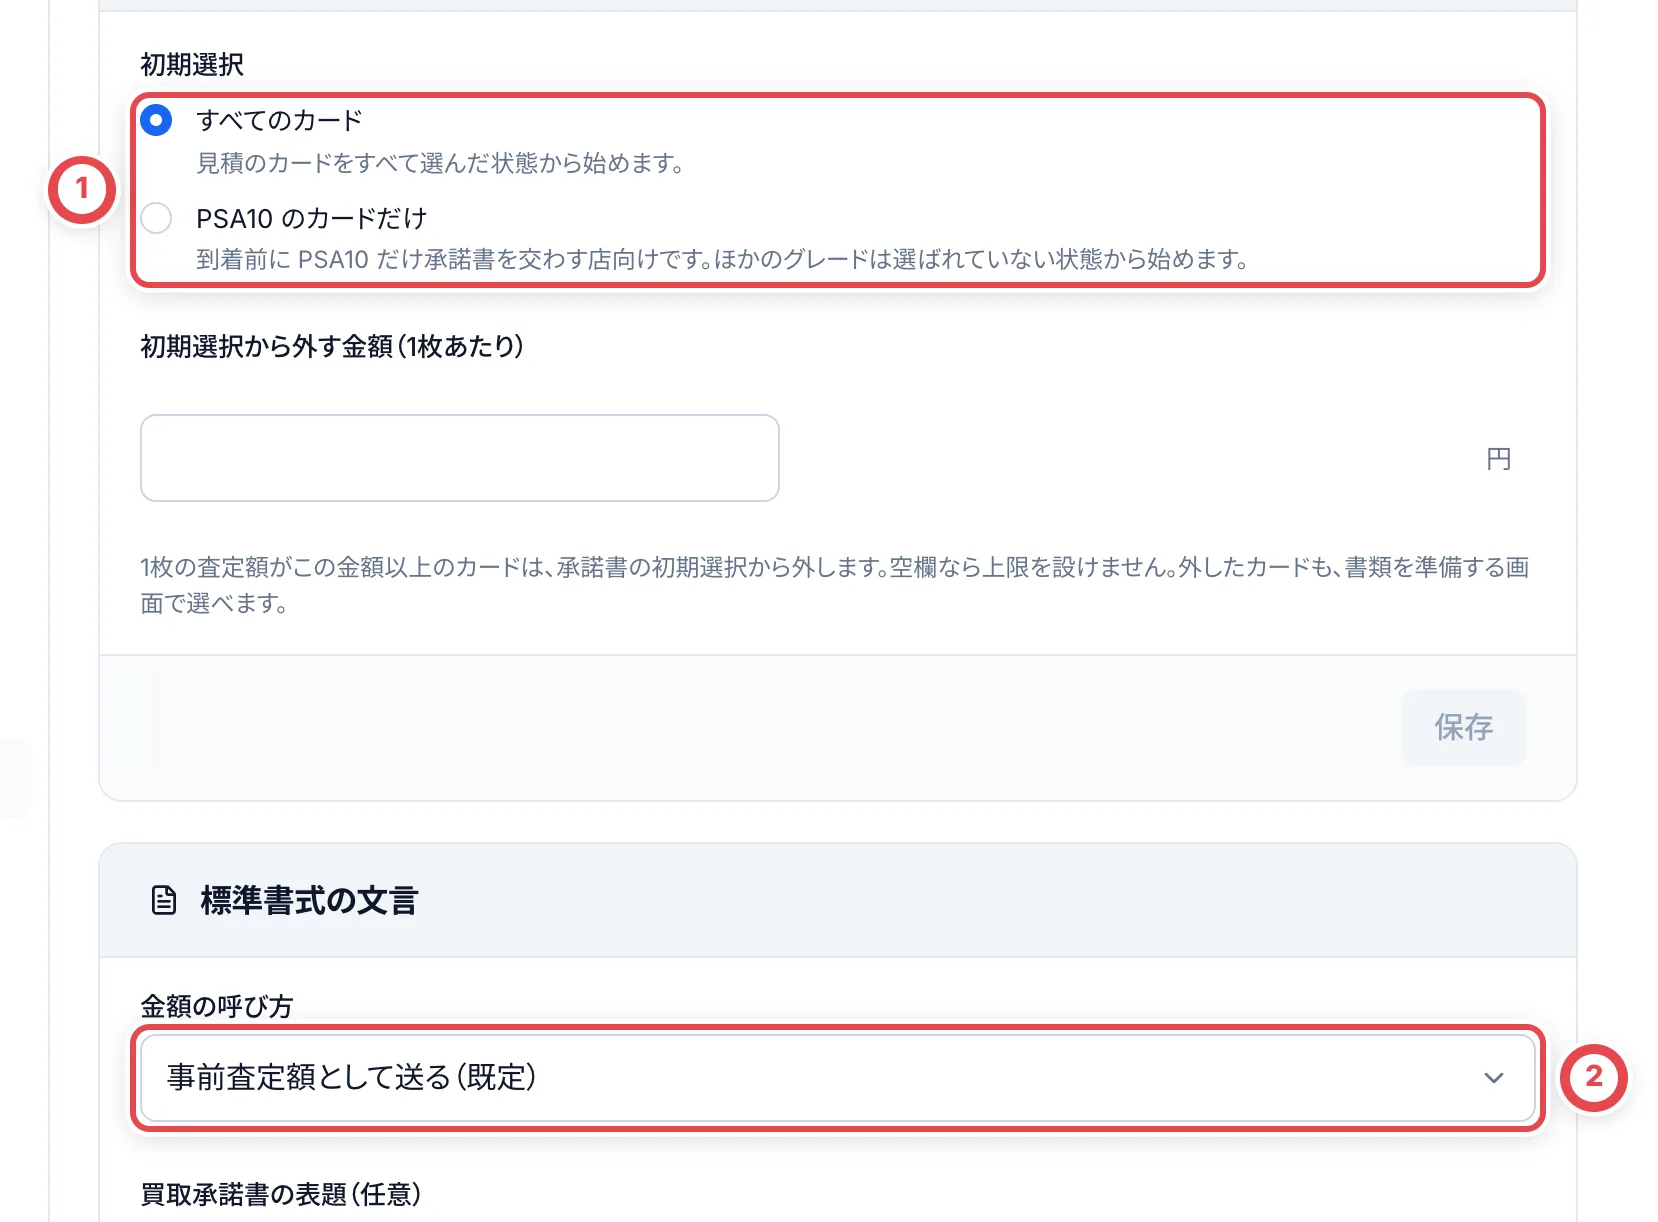
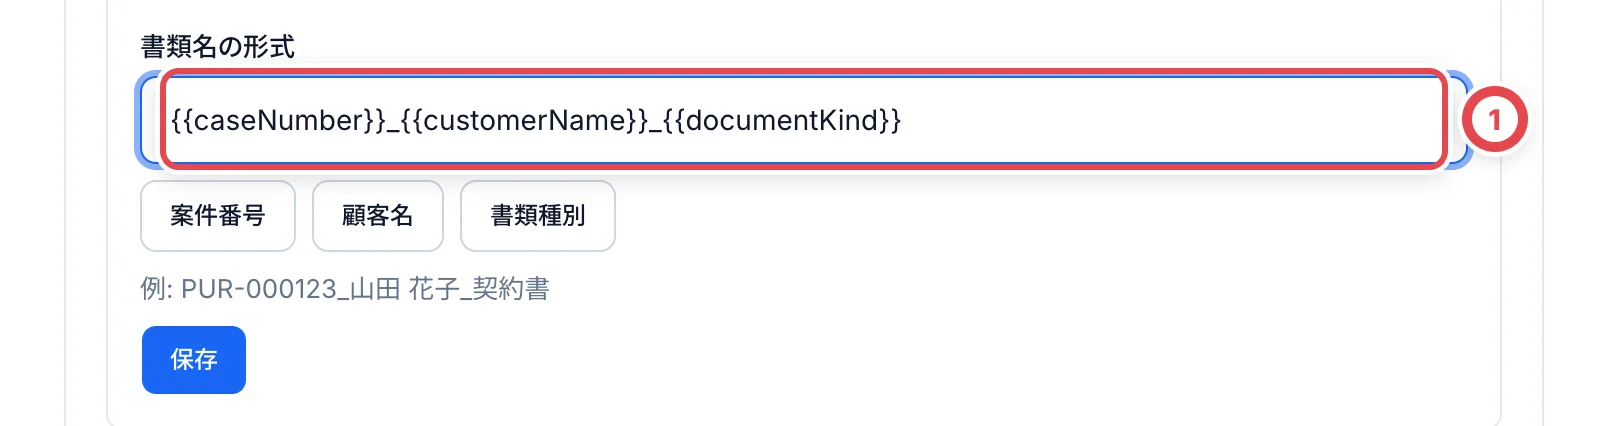 ## 3. 案件から対象商品・発送先・宛先を選ぶ
対象の顧客と案件の「発送」を開き、「買取契約書」または「委任状」の「書類を準備」を押します。①の接続設定でテスト環境/本番環境を照合し、書式を選びます。発送先に対応する書式では②で登録済み拠点を選びます。発送先の追加・変更は「設定」→「拠点と保管場所」で行います。
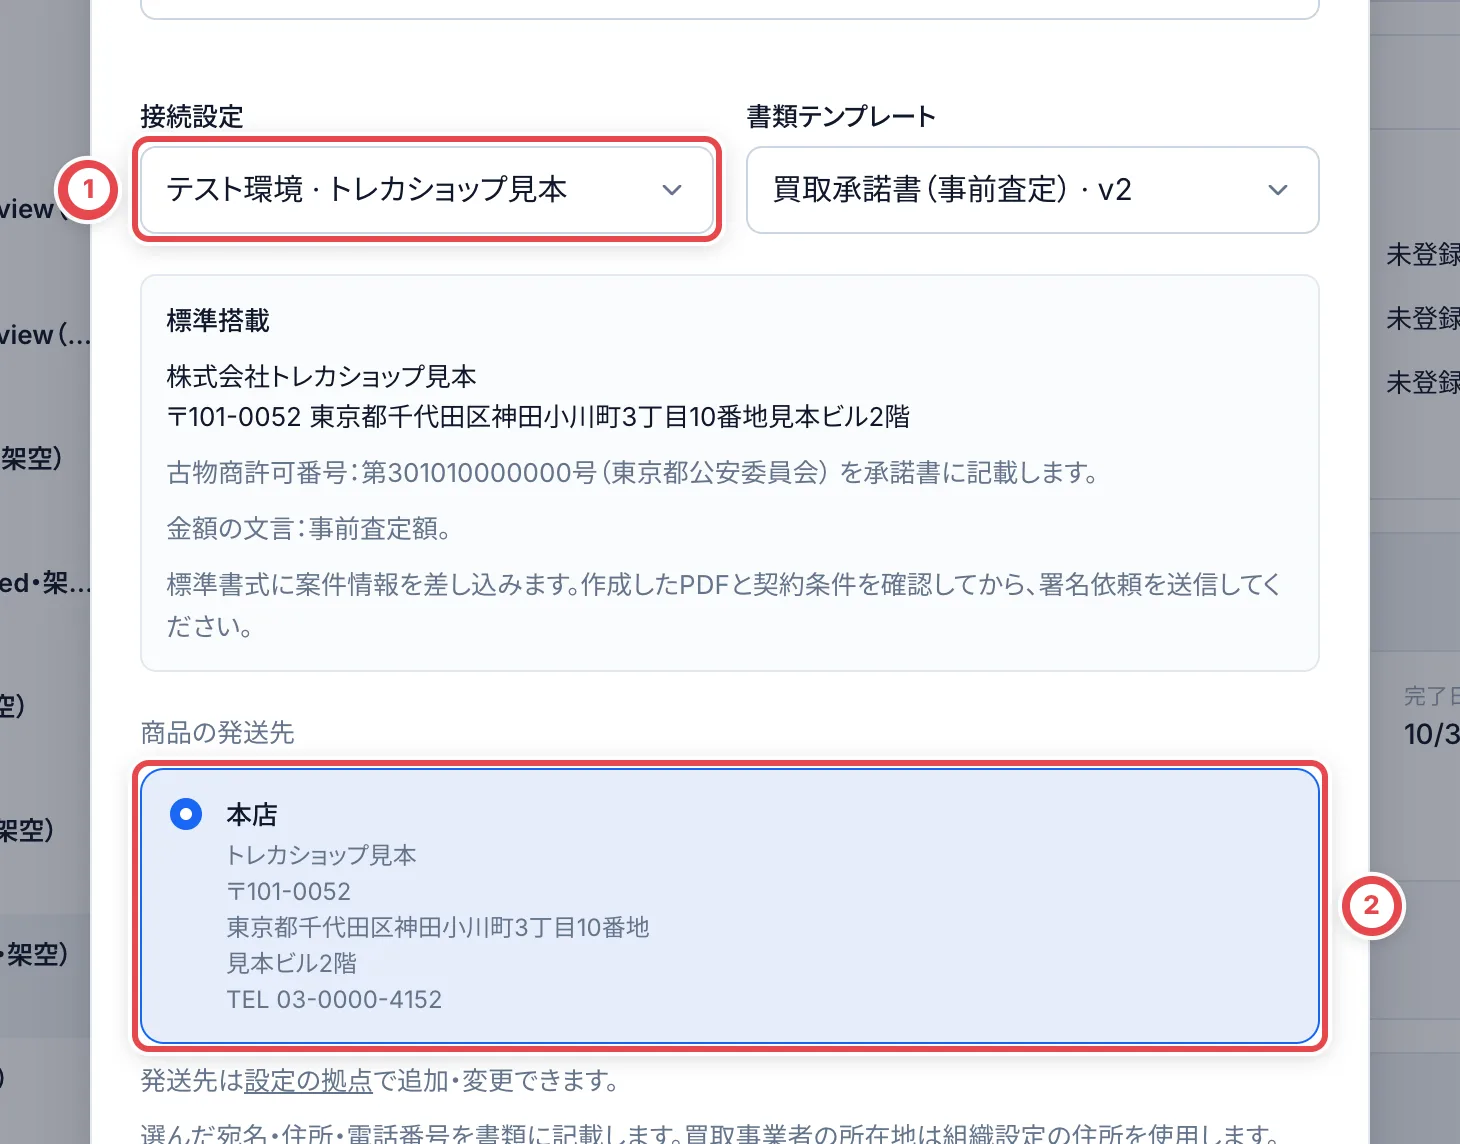 画面を下にスクロールし、①の対象商品・数量・合計を見積と照合します。セット価格は全体の金額なので、個別商品だけに分けません。②の宛先氏名・メールアドレス、必要な場合の電話番号を確認します。別の顧客や別案件の宛先を流用しないでください。ここで準備しただけでは送信されません。
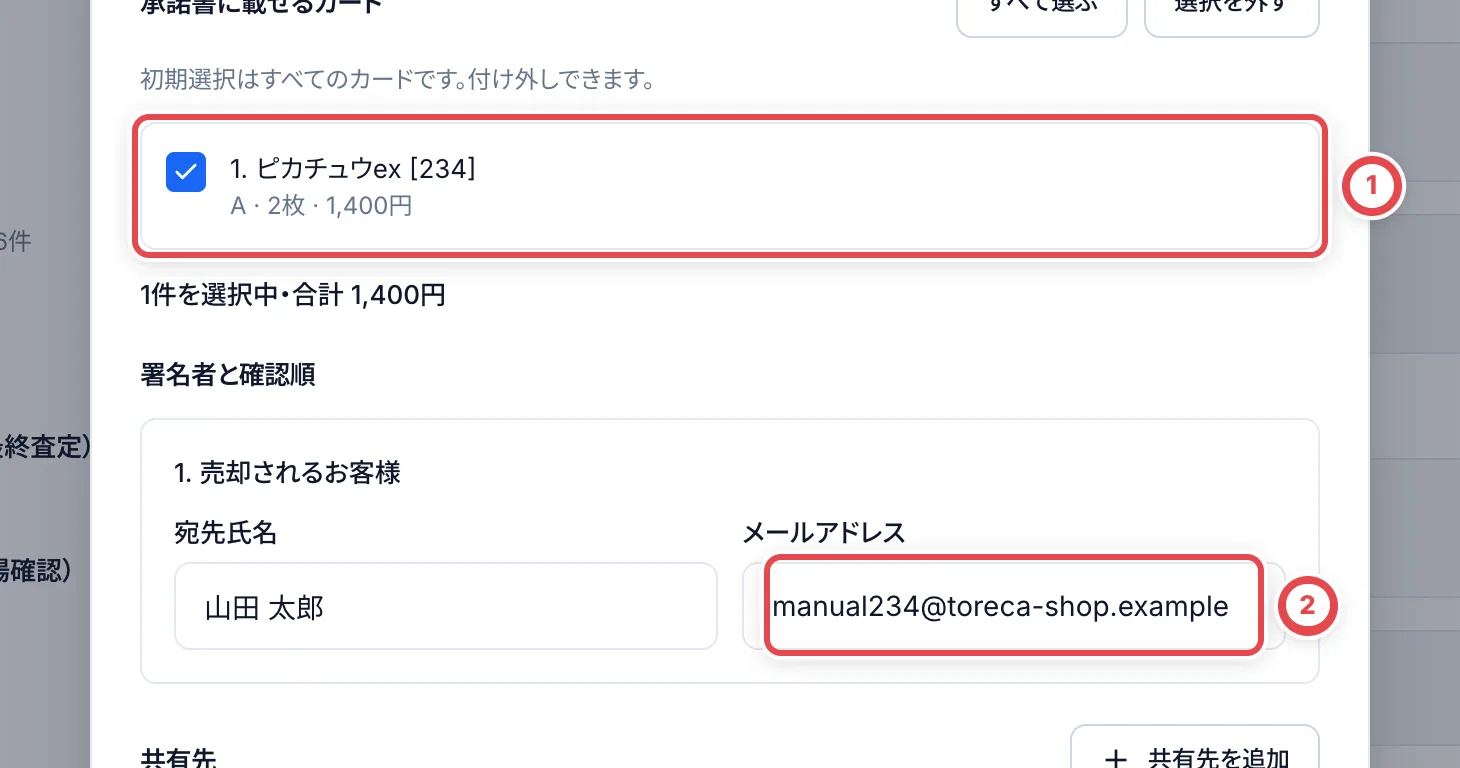 ## 4. PDFを確認して送信する
準備が終わったら①のPDFを開き、表題・お客様・事業者・商品・数量・金額・発送先を確認します。宛先と送信方式も確認します。画面を下にスクロールし、「書類・宛先・操作内容を確認しました」にチェックしてから「この内容で送信」を押します。
:::warning
②の送信操作を確定すると、クラウドサインへの実際の送信処理が始まります。テスト環境か本番環境か、宛先と書類を確かめてから実行してください。
:::
見積や宛先が変わったと表示された場合は、古い確認内容のまま送らず、最新の内容を準備して確認し直します。
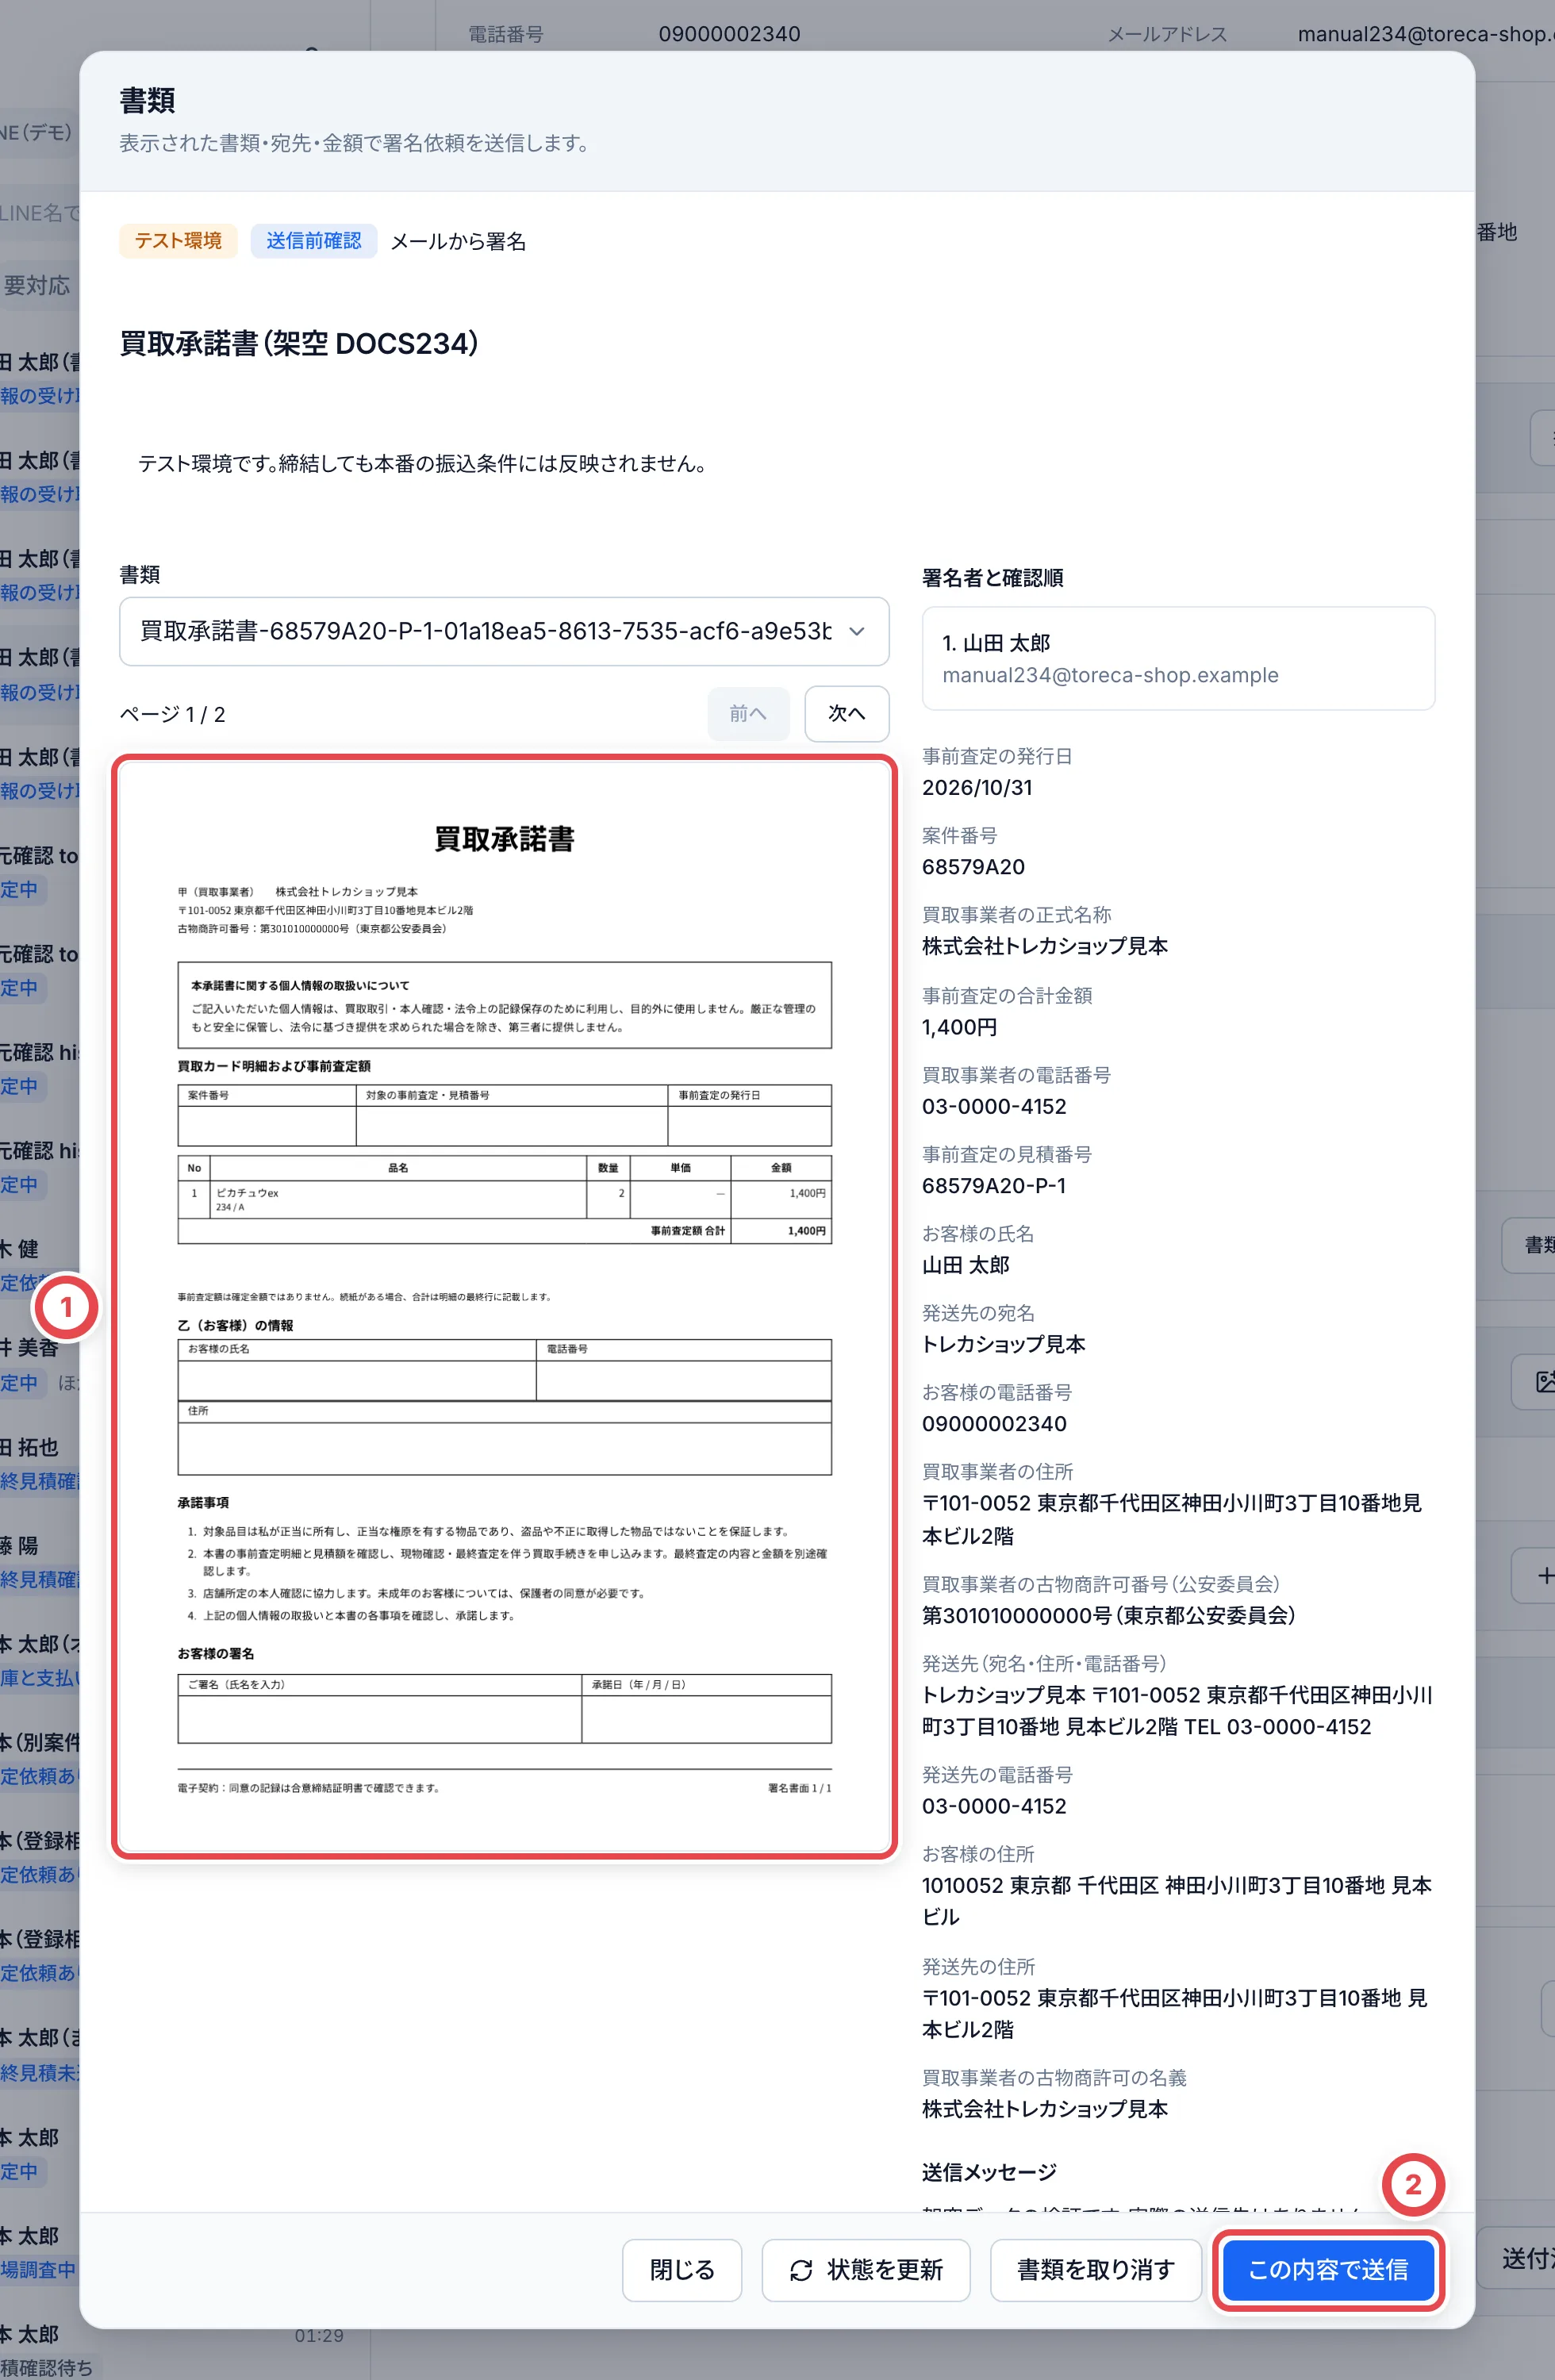
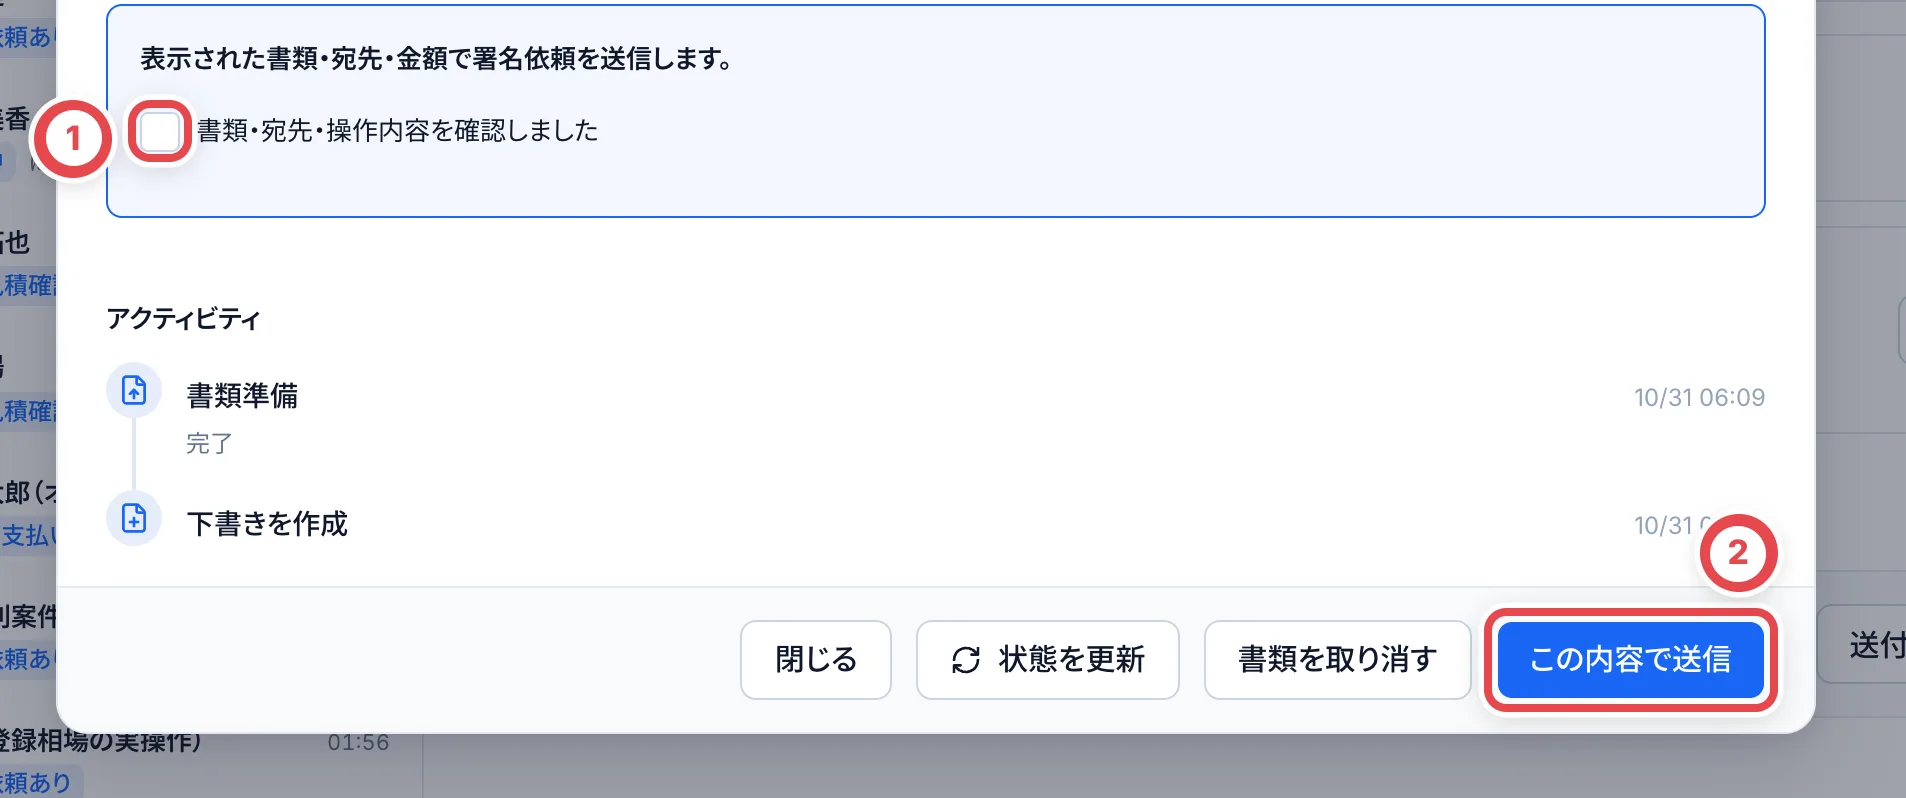 ## 5. 送信・締結の状態を確認する
書類の①の状態と履歴を確認します。送信中は処理が終わるまで待ちます。締結後は、締結済みのPDFと合意締結証明書を確認できます。[契約書一覧](/guides/purchase/contracts)からも探せます。
結果不明・要確認・同期エラーのときは、②の状態確認・同期の案内に従います。新しい書類を重ねて送る前に、既存書類がすでに送信・締結されていないか確認してください。再送・取消も実際の事業者処理になるので、対象と状態を照合します。
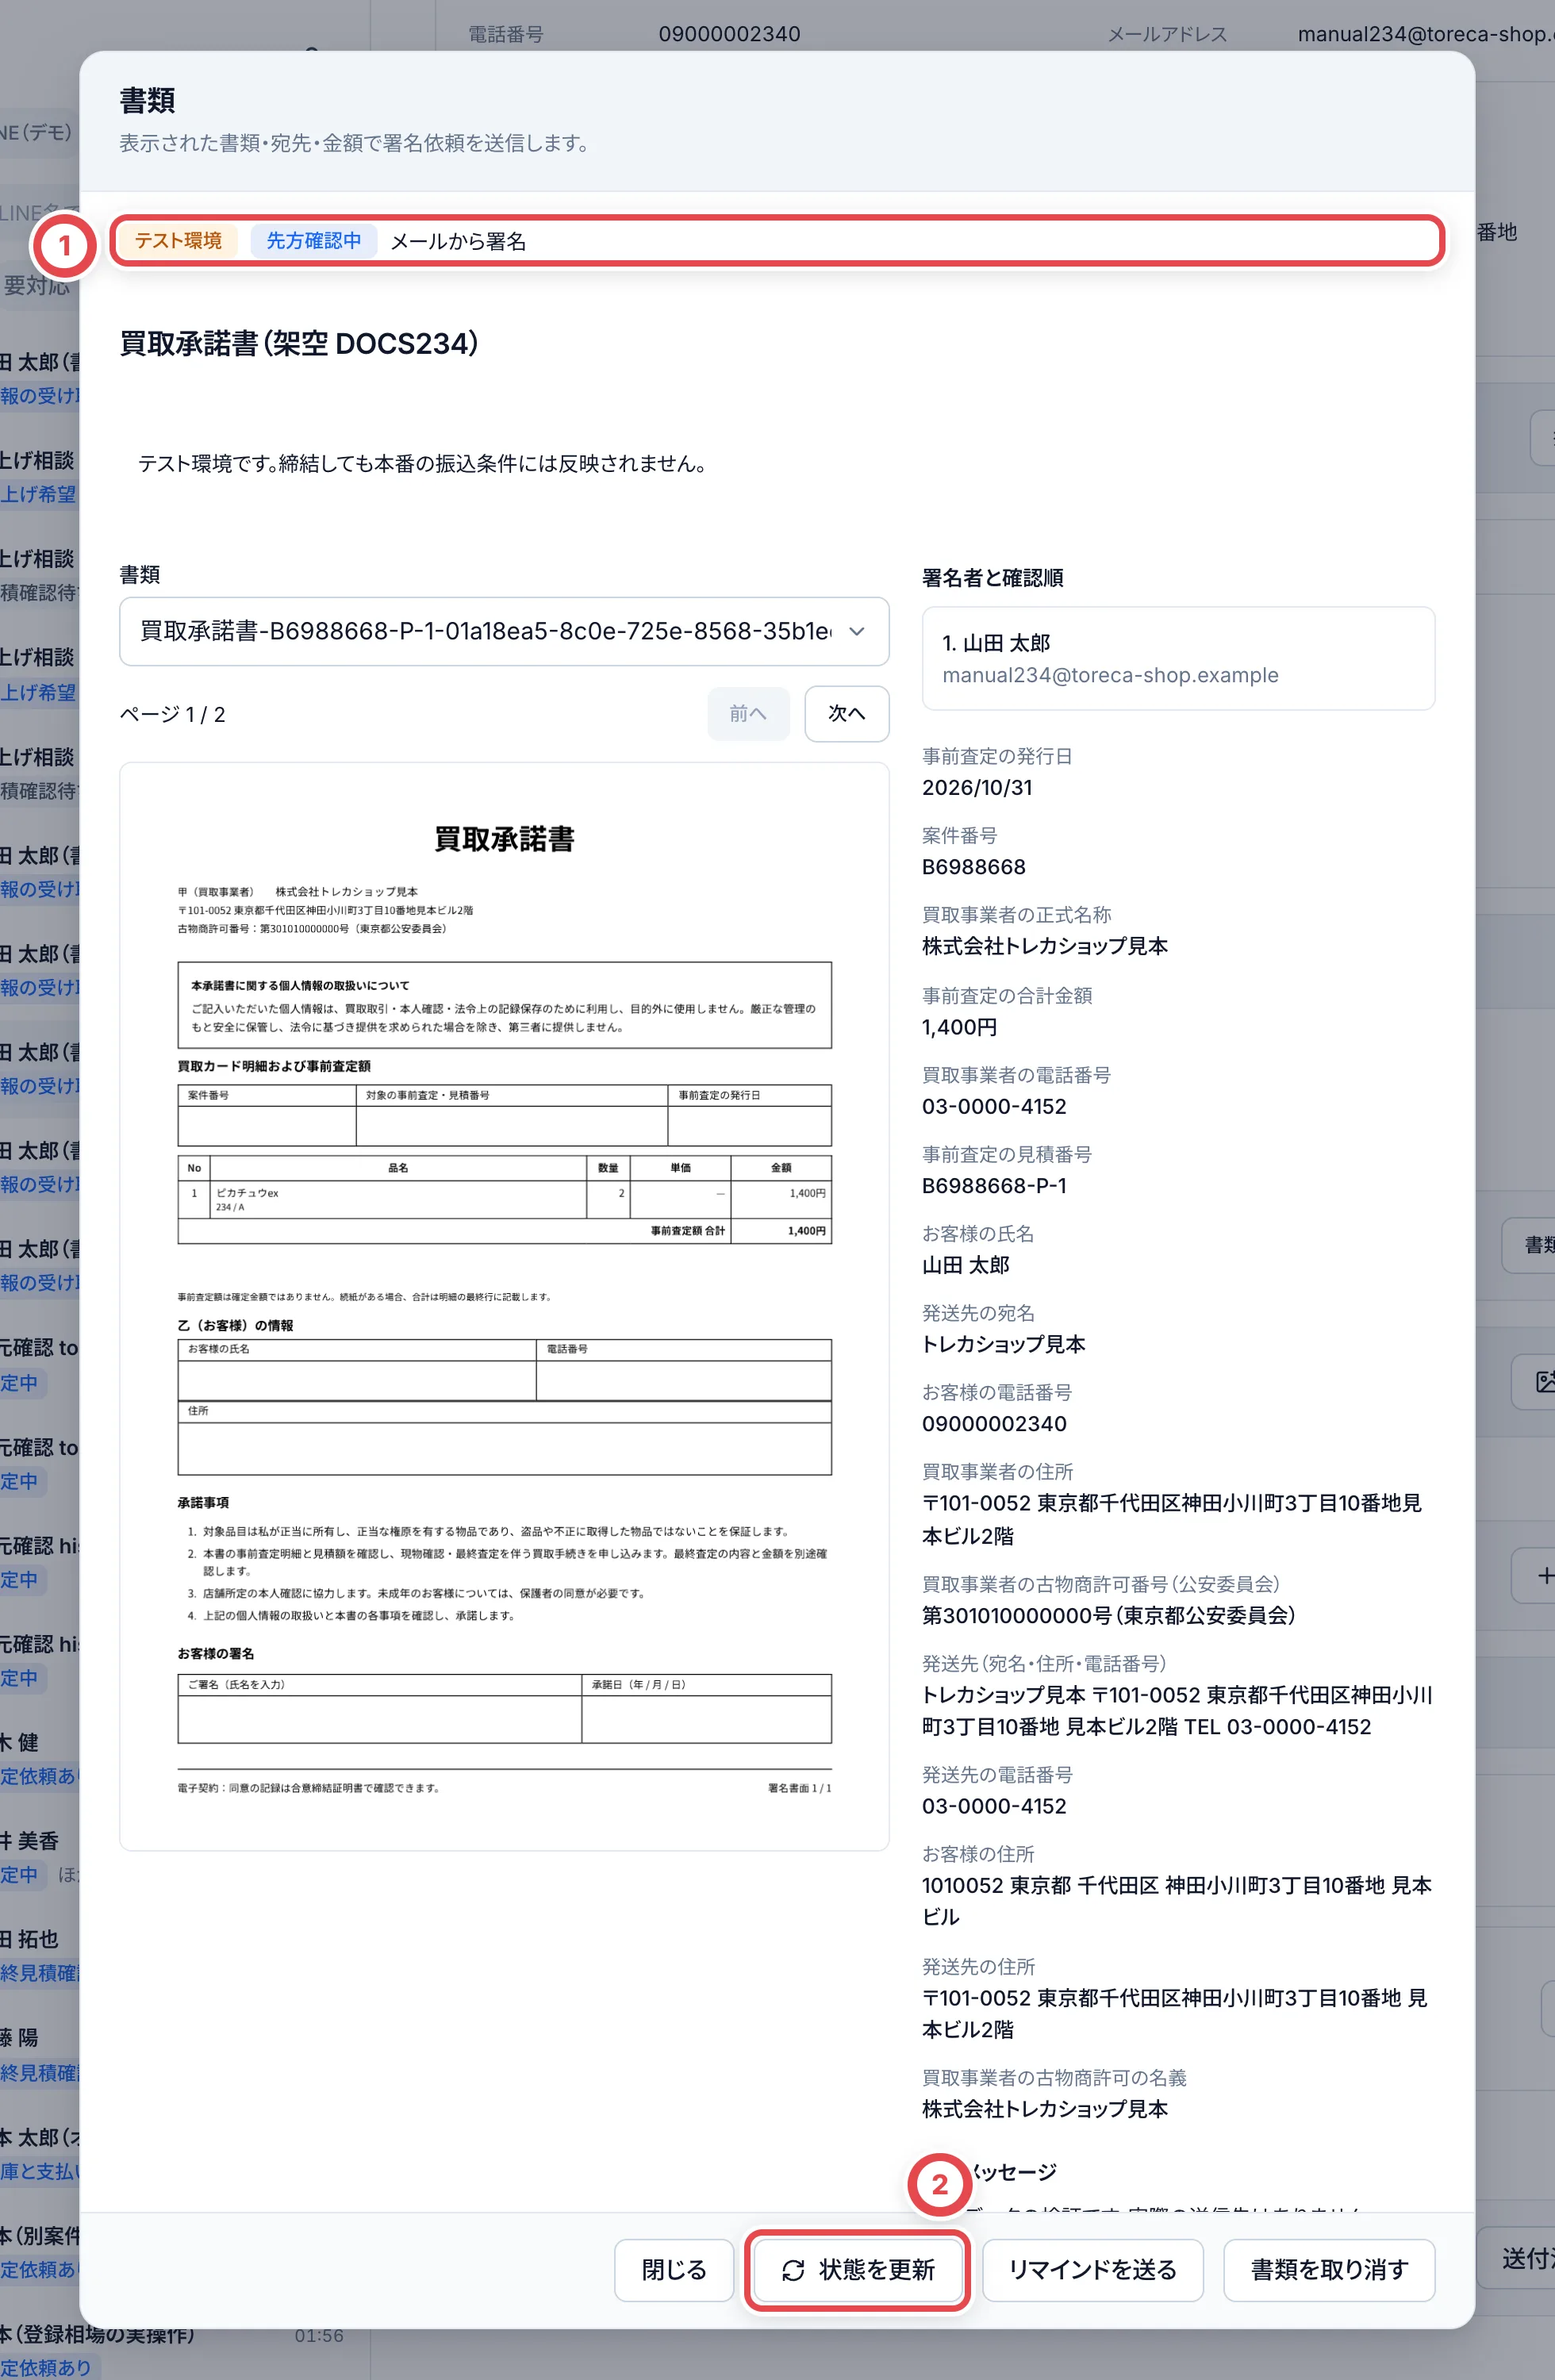 ## 困ったとき
| 起きていること | 確認すること |
| ---------------------------- | -------------------------------------------------------------------------- |
| 書類を準備できない | 接続先、権限、準備状態、本人確認など案件に表示された前提条件を確認します。 |
| 発送先を選べない | 対応する書式かと、発送先にする拠点の登録を確認します。 |
| 古い金額・商品と表示される | 対象の見積を再確認し、最新の内容で書類を準備します。 |
| 送信結果が分からない | 重複送信せず、同じ書類の状態を確認・同期します。 |
| 手動の送付済みボタンが出ない | API管理の書類はAPI側の状態で管理します。従来の手動記録と混ぜません。 |
---
# 本人確認方法の設定
Source: https://docs.toreca-cloud.com/guides/settings/identity
店舗が受け取った書類画像をオンライン取引に登録するときは、店舗の設定で「担当者による書類確認」を許可します。**設定を許可しただけでは、お客様が本人確認済みになることはありません。** 書類と顧客情報を照合し、取引に本人確認を記録する作業が別に必要です。
## どの手順を使うか
| やりたいこと | 使う手順 |
| ---------------------------------------------------- | ---------------------------------------------------------------------------------------------------------------------------------------------- |
| オンライン取引に、店舗が受け取った書類画像を登録する | このページで「担当者による書類確認」を許可してから、[オンラインの本人確認](/guides/purchase/identity#店舗で受け取った書類画像を登録する)へ進む |
| お客様がフォームから提出した書類を承認する | [フォームでの書類提出と店舗の承認](/guides/purchase/identity#フォームで書類を出してもらう)へ進む |
| 店頭で原本を確認して記録する | [店頭本人確認](/guides/purchase/counter-identity)へ進む。店頭の対面確認は標準で利用可能 |
| 店頭のお客様用画面で書類を撮影してもらう | [書類撮影と原本照合](/guides/purchase/counter-photos)へ進む。方式は「設定 → 支払い」で選ぶ |
:::warning
外部eKYCは、現在の本番環境では利用できません。「外部eKYC」が「許可する」と表示されていても、外部サービスの接続完了を意味しません。**オンライン取引で書類を登録する店舗は、「外部eKYC」だけを残して「担当者による書類確認」を外さないでください。**
:::
## 変更する前に
- 設定を変更する担当者には「設定管理」権限が必要です。標準のオーナー・管理者が該当します。カスタム権限は[メンバーと権限](/guides/getting-started/members-and-roles)で確認してください。
- 書類の確認・登録を行う権限と、店舗の確認方法を変更する権限は別です。「変更」がない場合は、「設定管理」の権限を持つ担当者に依頼してください。
- 対象の店舗をアカウントメニューで確認してください。変更は、その店舗の確認方法に適用されます。
## 1. 本人確認の設定を開く
サイドバーの「設定」を開き、設定一覧の①「本人確認」を選びます。現在の確認方法と、有効期間・再利用の設定が表示されます。方法を変えるときは、②「変更」を押します。
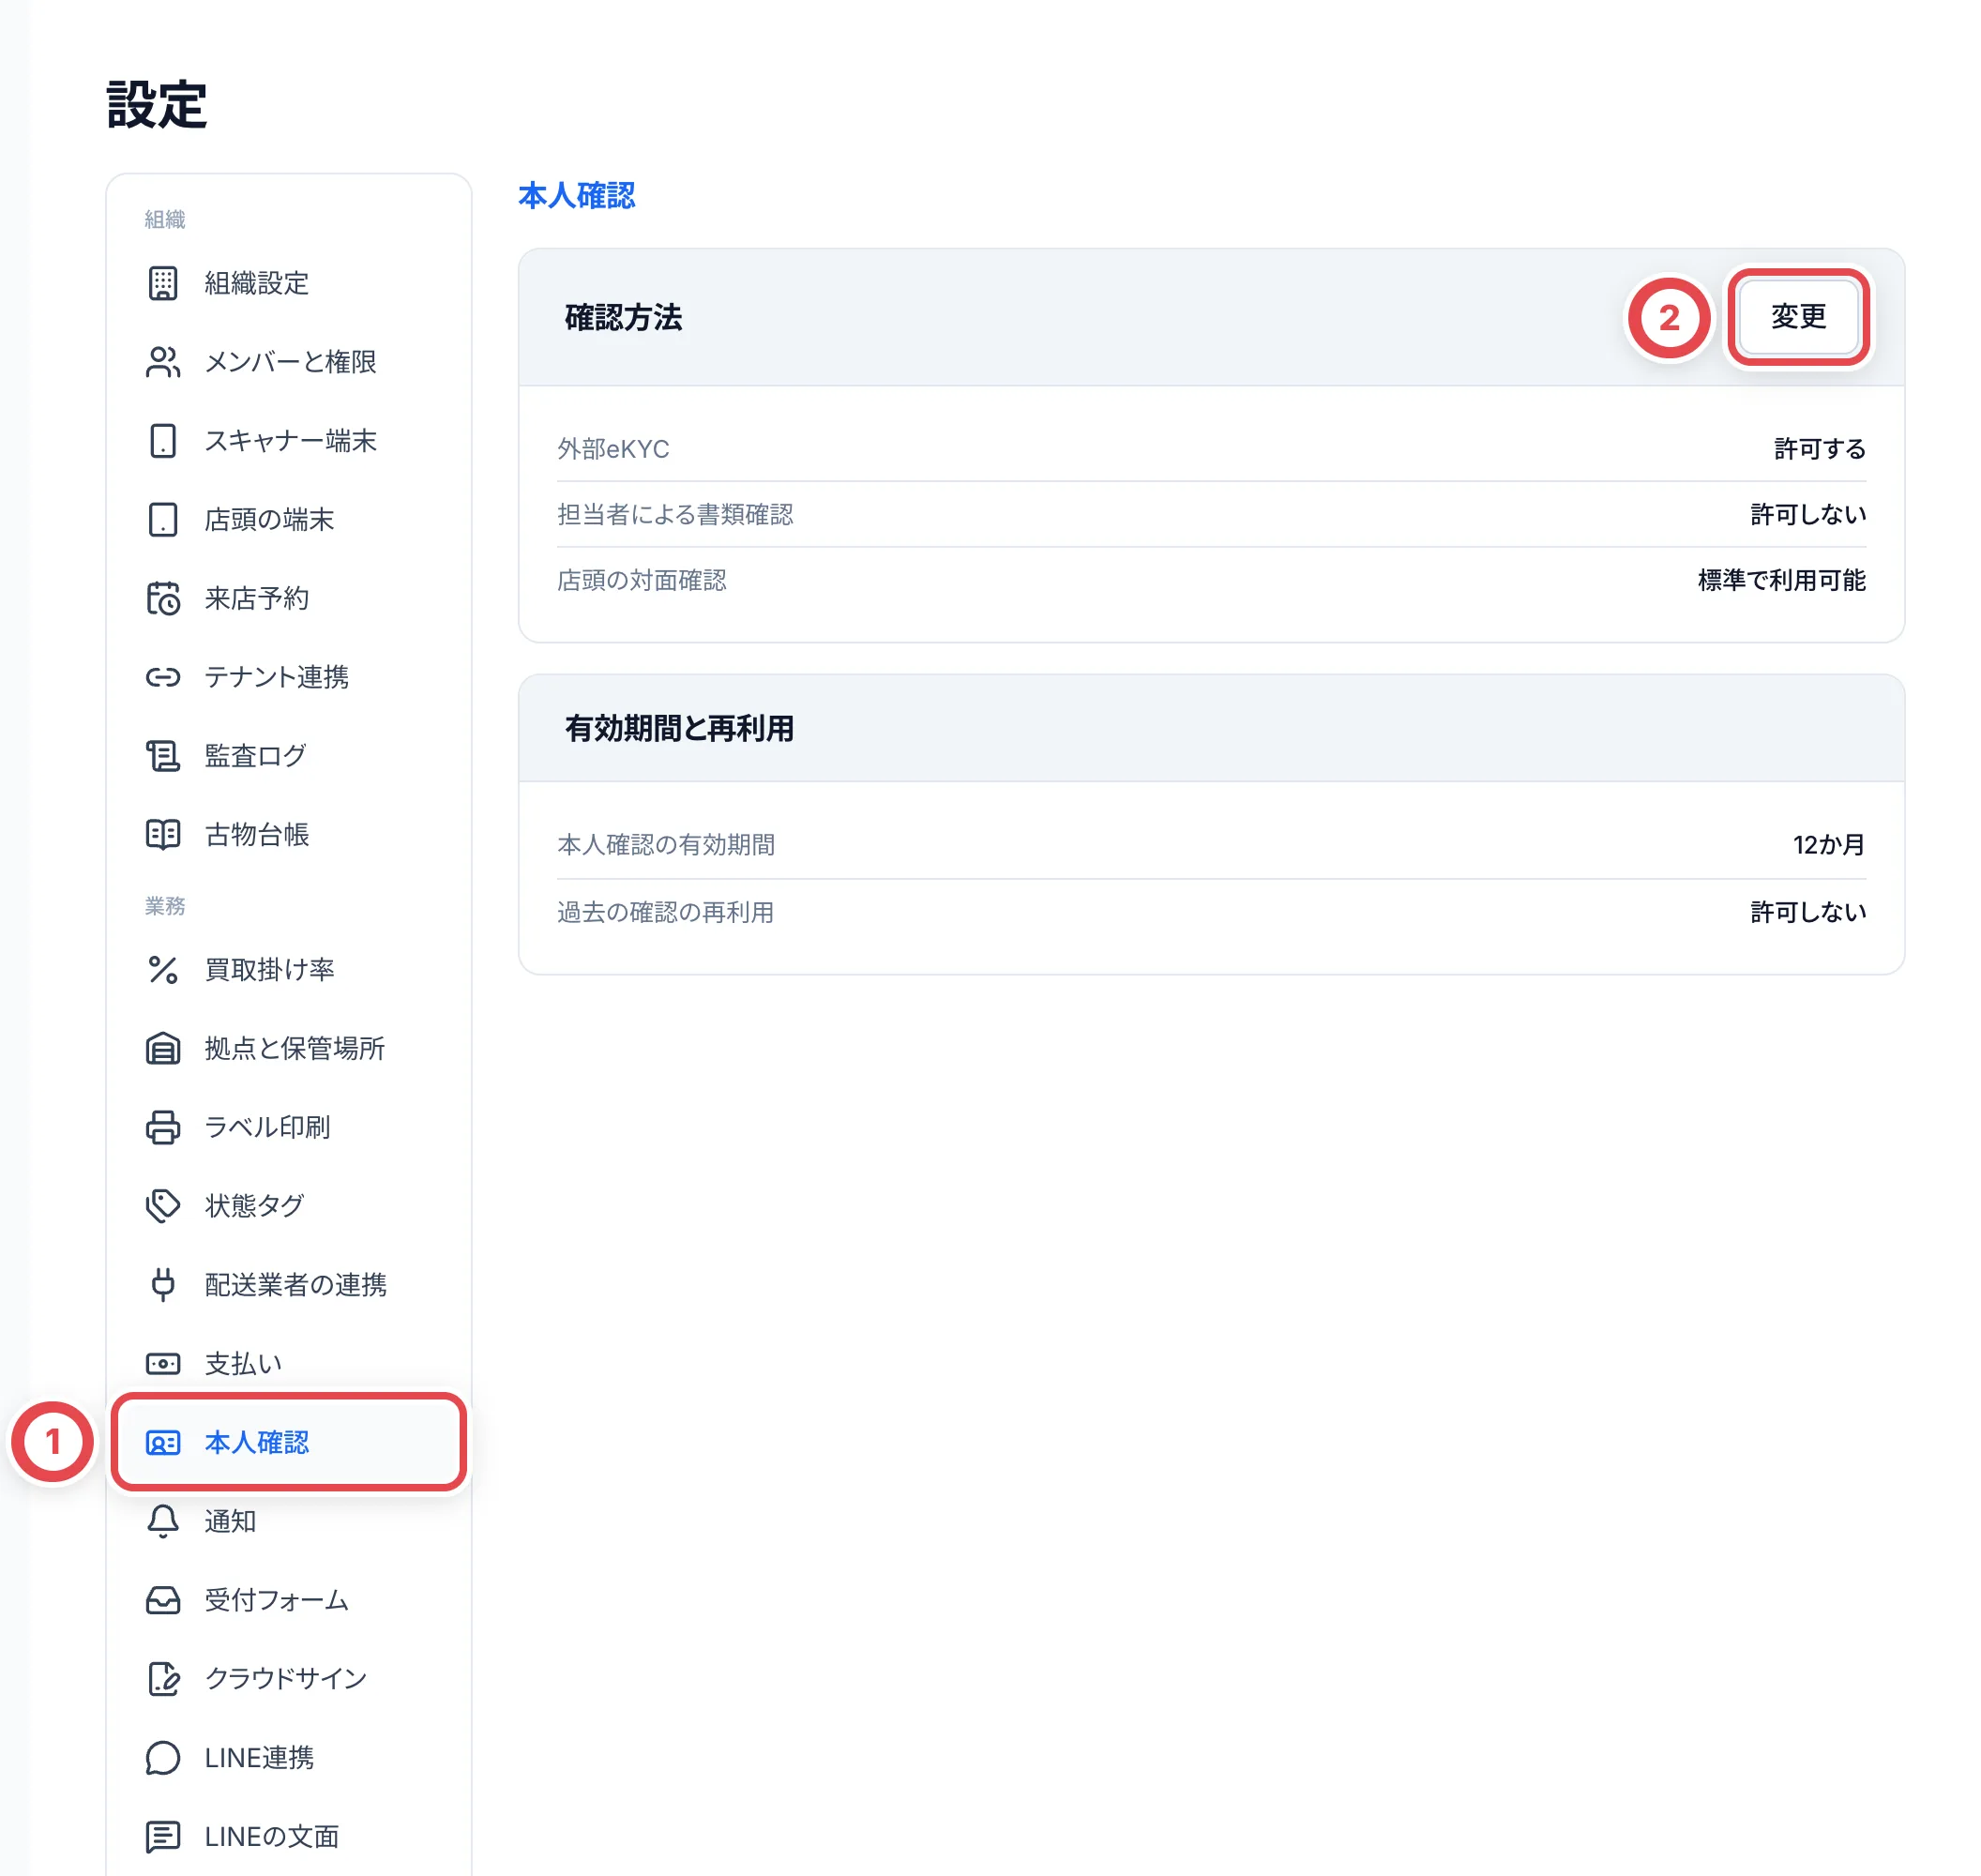 「店頭の対面確認」が表示される店舗では、「標準で利用可能」と確認できます。この画面のチェック項目とは別の扱いなので、対面確認を使うためにオンラインの書類確認を変更する必要はありません。
## 2. 書類確認を許可して保存する
①「担当者による書類確認」にチェックを入れます。新たに許可すると、書類と顧客情報を照合した担当者が、本人確認済みとして登録できることが表示されます。
:::warning
「保存」は、担当者が書類確認を使えるようにする店舗設定の変更です。店舗の運用として担当者による確認を行うことを確かめてから保存してください。
:::
②「保存」を押します。変更をやめる場合は「キャンセル」を押します。何も変更していない場合は「保存」は表示されません。
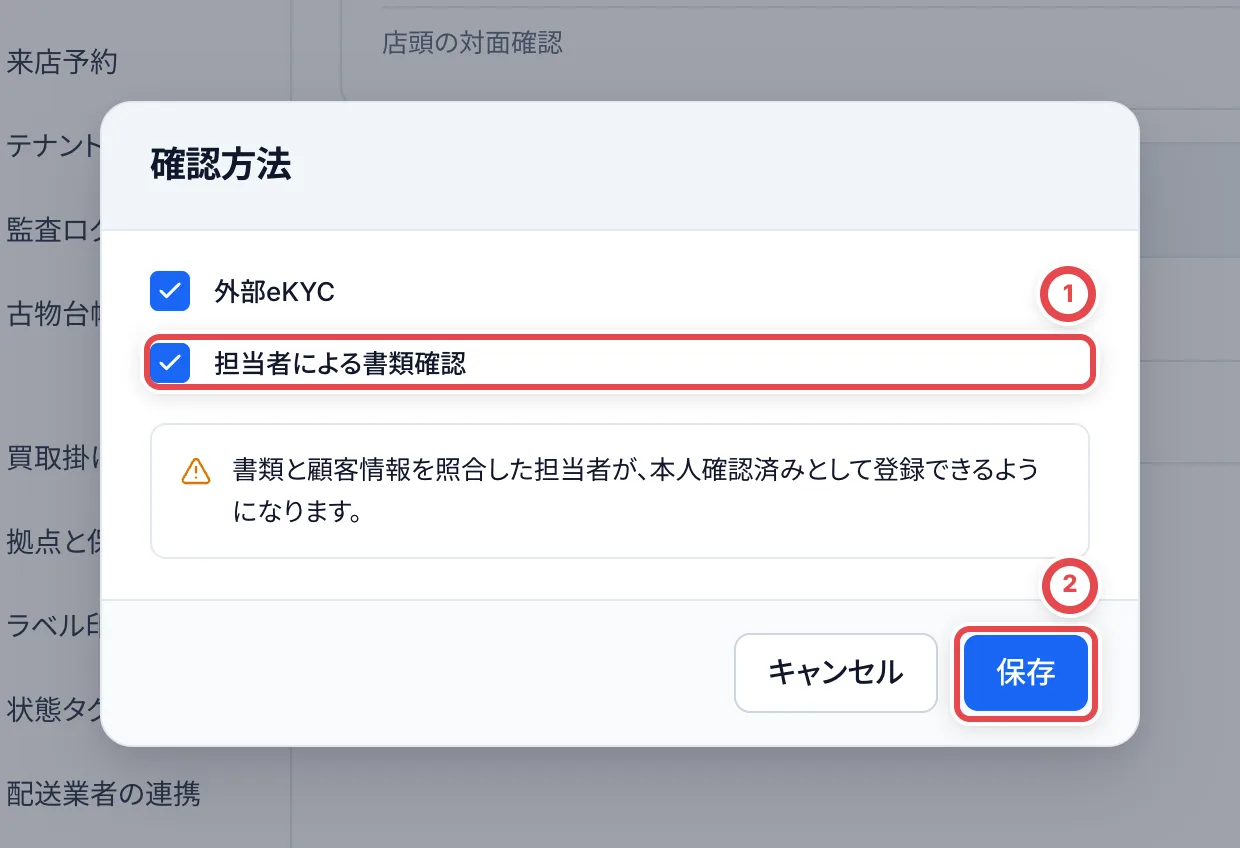 ## 3. 設定を確認して、取引へ戻る
画面に戻ったら、「担当者による書類確認」が「許可する」になったことを確認します。必要に応じてページを開き直し、設定が残っていることを確かめます。
オンライン取引の「発送」へ戻り、「本人確認を記録する」から「本人確認書類を登録」を開き直します。手順は[店舗で受け取った書類画像を登録する](/guides/purchase/identity#店舗で受け取った書類画像を登録する)を参照してください。**書類を登録する担当者が、書類と氏名・生年月日・職業・住所を照合してから記録します。**
確認方法を変更しても、過去の本人確認の記録は書き換わりません。有効期間と再利用の設定も、そのまま保持されます。
## 有効期間と再利用
「本人確認の有効期間」と「過去の確認の再利用」は、保存されている値の確認欄です。**現在、この画面では期間や再利用の値を変更できません。** 画像は有効期間12か月・再利用を許可しない設定の例で、店舗によって異なります。
有効期間が「未設定」の場合、確認方法だけを保存し直しても、オンラインの書類登録が進まないことがあります。店舗名と表示されたエラーを添えて、トレカクラウドの運営に設定の確認を依頼してください。本人確認書類の画像や番号を問い合わせに添付する必要はありません。
## 困ったとき
| 表示・状態 | 確認すること・次の操作 |
| ---------------------------------------------------------------------------------- | -------------------------------------------------------------------------------------------------------------- |
| 「この店舗では書類確認が許可されていません」など、店舗で使えないというエラーが出る | 「設定 → 本人確認 → 変更」で「担当者による書類確認」を許可する。保存後、取引の登録画面を開き直す |
| 「変更」が表示されない | 「設定管理」の権限を持つ担当者に依頼する。本人確認を登録できる権限だけでは設定を変更できない |
| 「確認方法を1つ以上選択してください。」と出る | 利用する方法にチェックを入れる。外部eKYCだけを残さず、書類確認を使う店舗では書類確認を選ぶ |
| 「本人確認の設定が更新されています。画面を開き直してください。」と出る | 別の担当者が更新した可能性がある。「キャンセル」で閉じ、ページを再読み込みして最新の内容を確認してから変更する |
| 「本人確認設定の有効期間(月)が未設定です」と出る | この画面の期間欄を確認し、運営に設定の確認を依頼する。方法の再保存だけでは直らない |
| 書類確認を許可したが、お客様は本人確認済みにならない | 設定の変更だけでは記録されない。取引で書類登録、または提出書類の承認を行う |
| 店頭での対面確認を記録したい | この画面の方法変更ではなく、[店頭本人確認](/guides/purchase/counter-identity)へ進む |
## 関連する操作
- [オンラインの本人確認](/guides/purchase/identity)
- [店頭本人確認の登録と書類追加](/guides/purchase/counter-identity)
- [設定の一覧](/guides/settings/overview)
---
# LINEと通知
Source: https://docs.toreca-cloud.com/guides/settings/line-and-notifications
お客様とのやり取りに使うLINEの設定と、スタッフが受け取る通知の設定は、「設定」の「業務」にまとまっています。
| 画面 | 決めること |
| ------------ | -------------------------------------------------------------- |
| LINE連携 | LINE公式アカウントと運用ツール(Liny・Lステップ)のつなぎ方 |
| 受付フォーム | オンライン買取の受付フォームの配信と、LINEで案内する共通リンク |
| LINEの文面 | お客様に送るLINEの文面のひな形 |
| 通知 | スタッフが受け取る通知の送り先と、通知する出来事 |
## 最初に用意するもの
- LINE連携の変更には「連携管理」、LINEの文面と通知の変更には「設定管理」が必要です。標準の役割ではオーナーと管理者が操作できます。独自の役割は、割り当てられた権限で変わります
- 受付フォームの配信設定には「連携管理」に加えて、買取と顧客の閲覧・編集の権限がすべて必要です
- LINE DevelopersのMessaging APIチャネルの「チャネルID」と「チャネルシークレット」
- Liny・Lステップを使うなら、その管理画面で発行したAPIトークン(あとからでも入れられます)
## LINE連携
「設定」の「LINE連携」を開きます。1つのカードが、1つの運用ツールと、対応するLINE公式アカウントの組み合わせです。
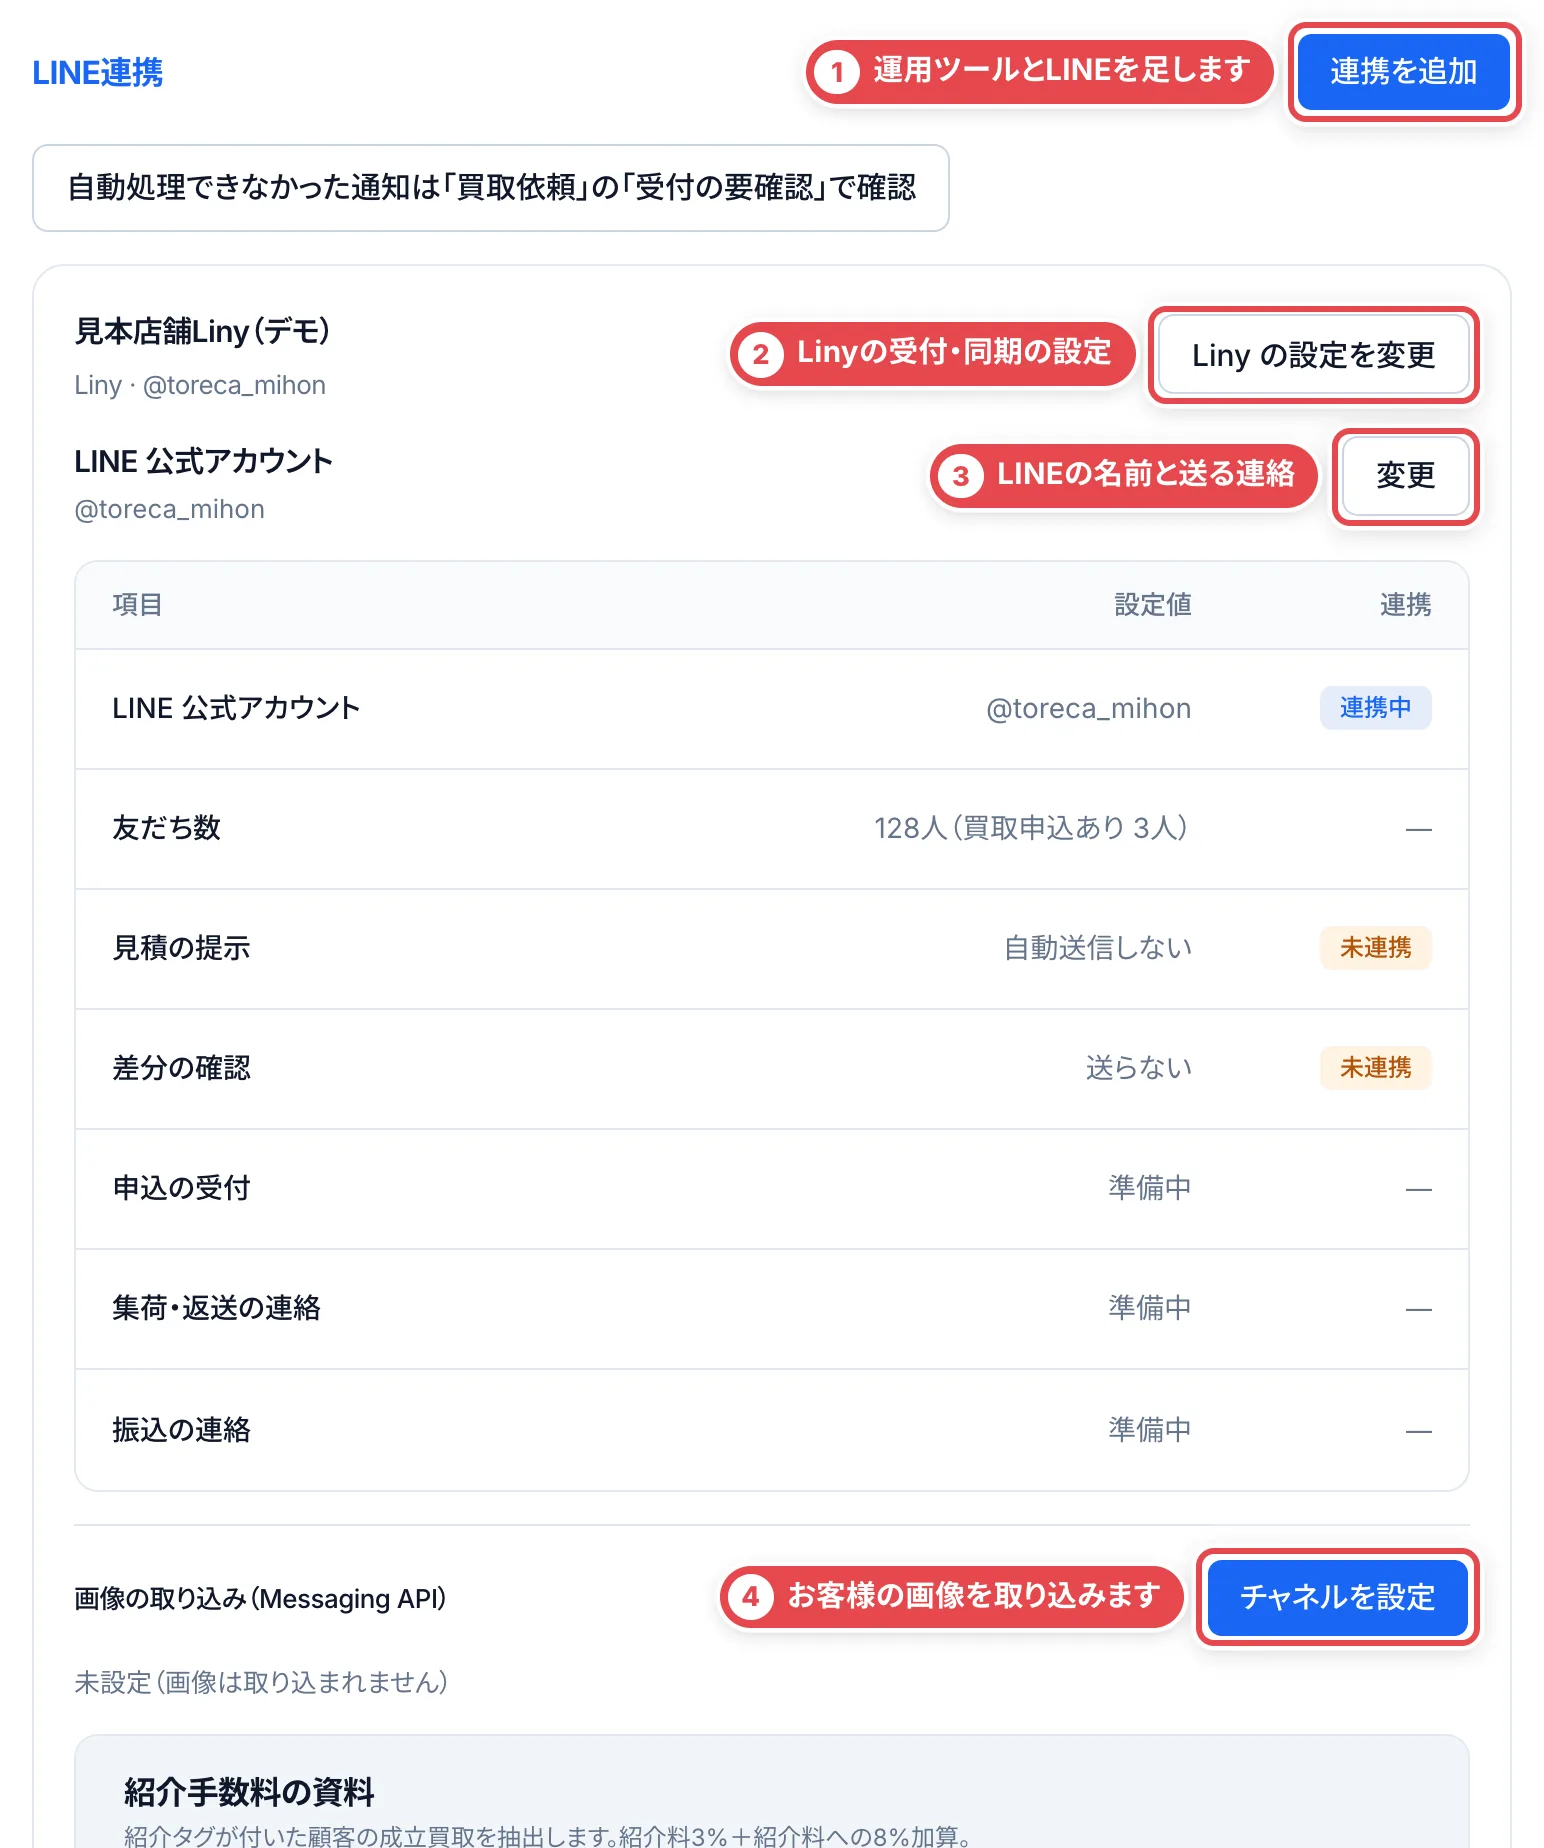 ①で運用ツールとLINEを足します。②はLinyの受付と同期、③はLINEの名前と送る連絡、④はお客様の画像の取り込みの設定です。
カードには、LINE公式アカウントのID・友だち数(買取申込のある人数)・「見積の提示」「差分の確認」の設定が並びます。「申込の受付」「集荷・返送の連絡」「振込の連絡」は準備中です。
### 1. 連携を追加する
①の「連携を追加」を押すと、「連携を追加」が開きます。
1. 「1. 運用ツール」で「ツール」(Liny・Lステップ)を選び、店舗で区別できる「連携名」を入れます
2. ①の「APIトークン(任意)」に、運用ツールで発行したトークンを入れます。まだ発行していなければ空欄のまま登録でき、運用ツールは準備中のまま残ります
3. 「2. LINE公式アカウント」の②の「対応する LINE 連携」で、「新しく登録する」か、運用ツールが未設定の登録済みLINEを選びます。新しいLINEでは「公式アカウントのID」も入れます
4. LINE Developersの「チャネルID」と「チャネルシークレット」を入れ、③の「登録して接続を確認」を押します。登録済みLINEの保存済みチャネルを使うときは、チャネルIDとシークレットを両方とも空欄にします
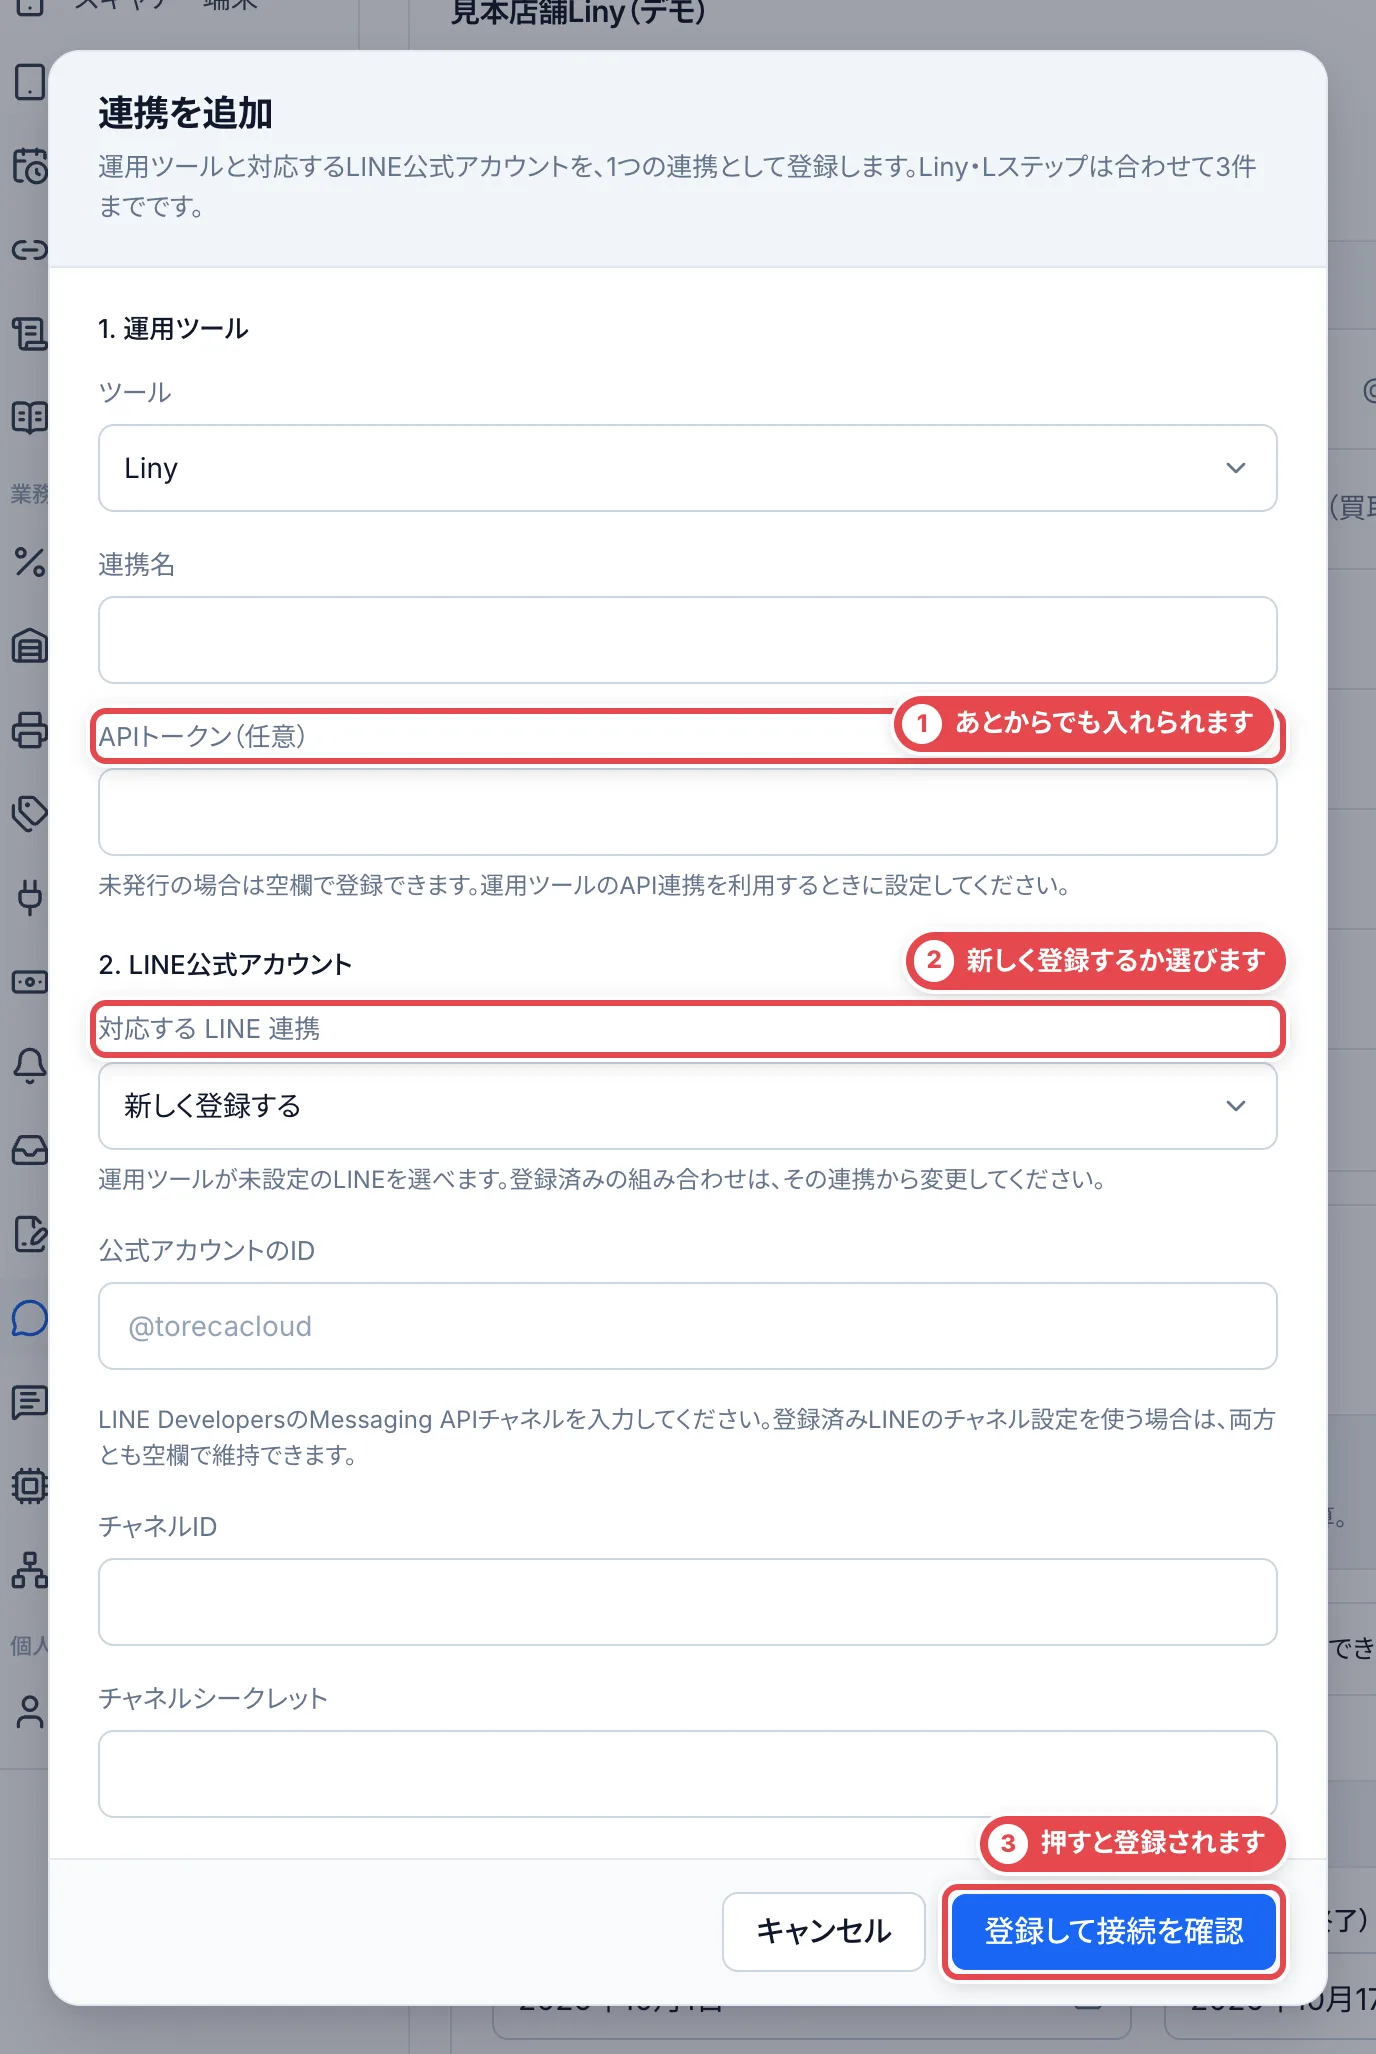 **「登録して接続を確認」を押すと、その場で登録されます。** 接続の確認に失敗しても、登録した内容は残ります。ダイアログで入力を直してもう一度押すか、閉じたあとにカードの「チャネルを設定」や「Liny の設定を変更」から続けます。APIトークンとチャネルシークレットは暗号化して保存し、保存したあとは表示しません。
運用ツールがまだ設定されていないLINEは、「運用ツールが未設定のLINE」の下に並びます。その「連携を追加」から運用ツールを設定できます。すでにツールが設定されているLINEは、新しい連携では選べません。
### 2. LINEの名前と送る連絡を決める
LINE 公式アカウントの「変更」を押すと、「LINE 連携の設定を変える」が開きます。「アカウント名」「公式アカウントのID」と、①の「送信する連絡」を決めて、②の「変更を保存」を押します。
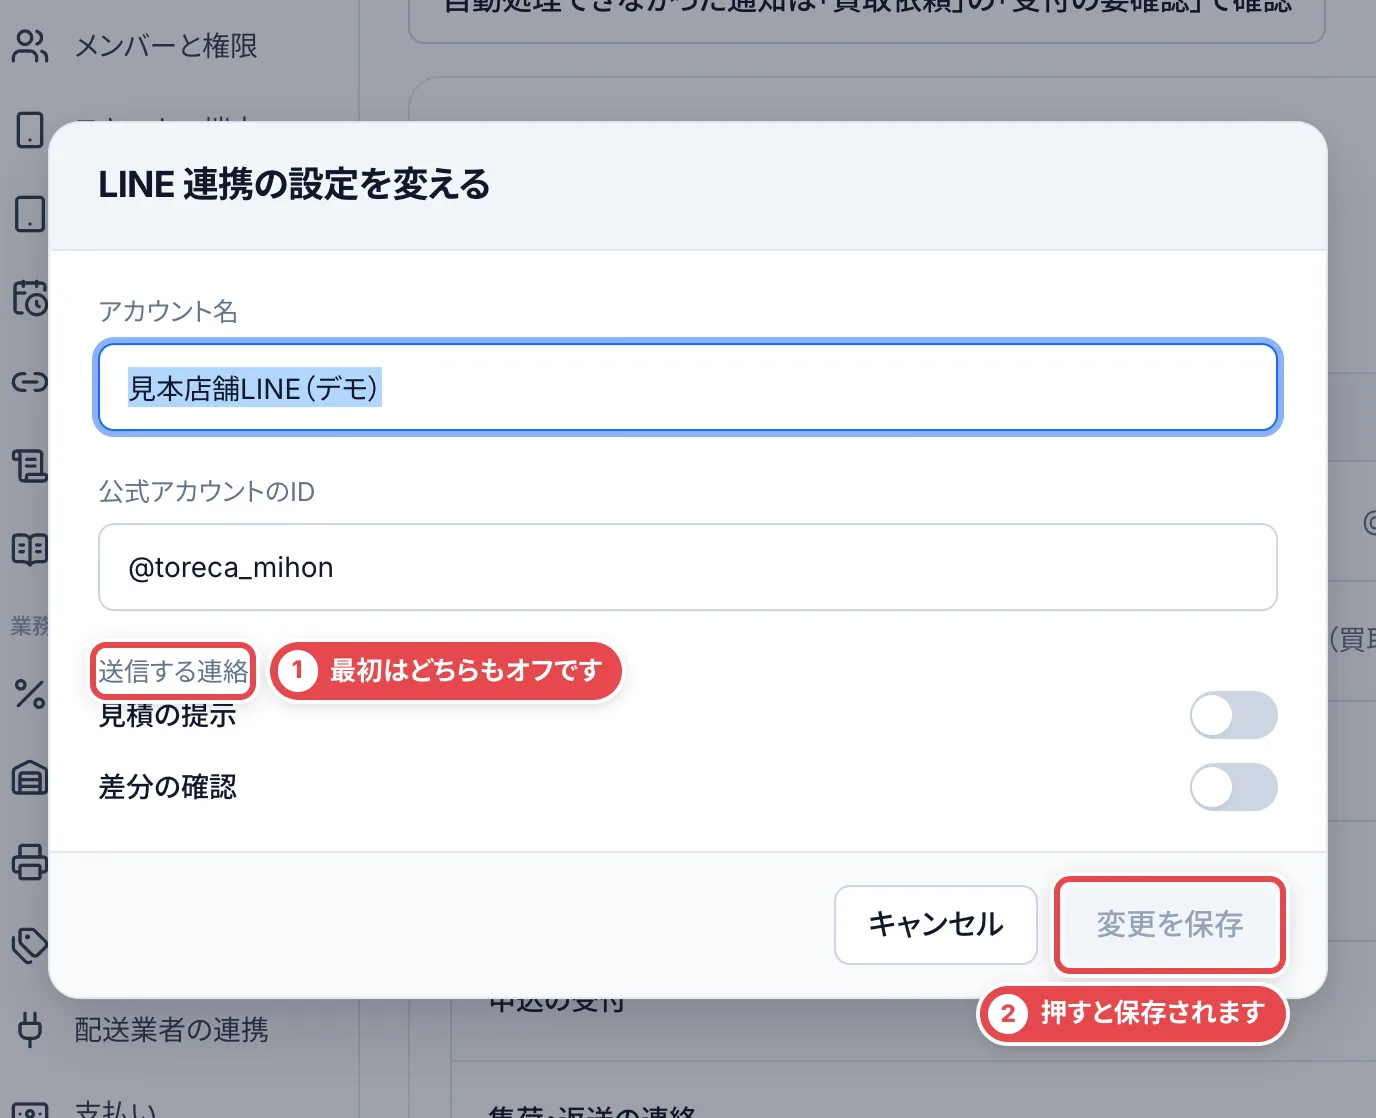 - 「見積の提示」をオンにすると、見積の画面に「LINEで見積書を送る」が出ます(LINEの連携が「連携中」のときだけ)
- 「差分の確認」をオンにすると、届いたカードと申告の違いを、案件からLINEで確認できます
到着写真と返送写真は、それぞれの写真一覧で1〜4枚を選び、送信の確認を経て送ります。操作は[発送と最終査定](/guides/purchase/shipping-and-final)と[返品対応](/guides/purchase/returns)を参照してください。
:::note
通常のトークへの返信は、LinyやLINEの管理画面から送ります。トレカクラウドでは、下の「LINEの文面」のひな形から文面を作ってコピーできます。
:::
### 3. お客様の画像を取り込む
お客様がLINEで送った画像をトレカクラウドに取り込むには、「画像の取り込み(Messaging API)」の「チャネルを設定」を押します。「チャネルID」(6〜20桁の数字)と「チャネルシークレット」(32文字)を入れて、「確認して保存」を押します。チャネルシークレットは、保存したあとは表示されません。
保存したあとは、同じ場所が「チャネルを変更」になります。**ダイアログの「削除」は、押すとその場で保存済みのチャネルを消します**(確認の画面は出ません)。元に戻すには、チャネルシークレットを入れ直します。
### 4. Liny・Lステップの受付と同期を決める
カードの「Liny の設定を変更」(Lステップなら「Lステップ の設定を変更」)を押すと、運用ツールの設定が開きます。連携して状態が「接続」になると、自動同期が稼働している環境では、LINEの友だちとトークが約5分ごとにトレカクラウドへ取り込まれます。
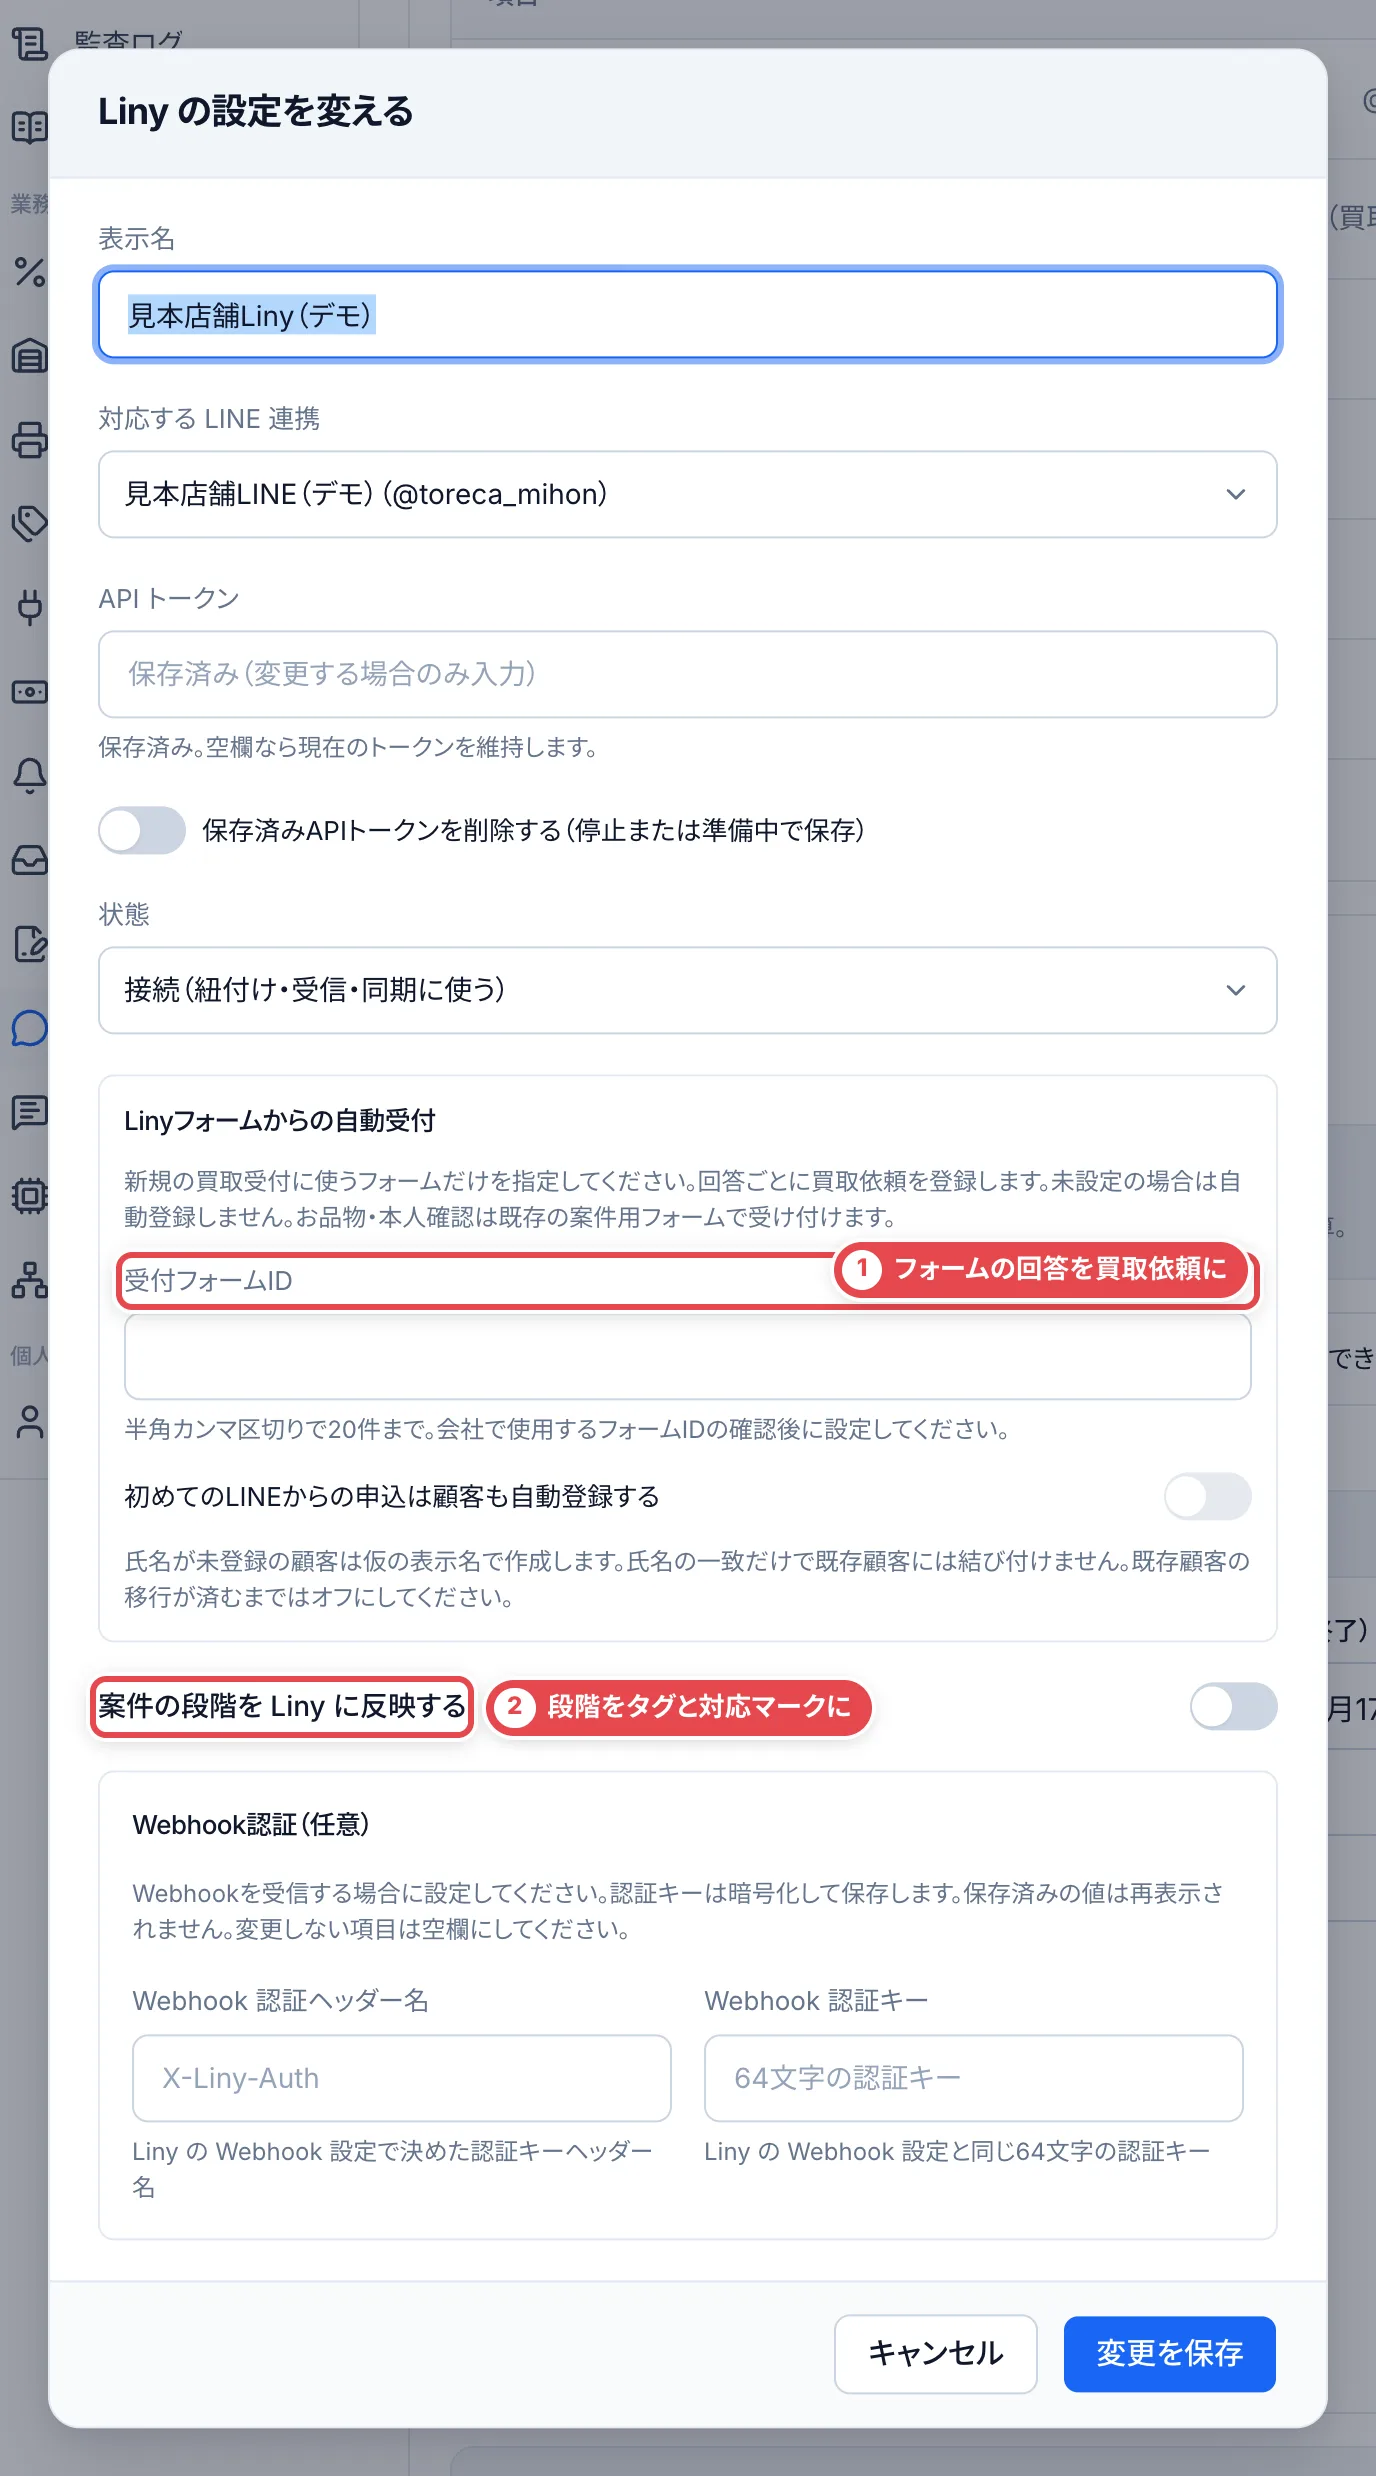 - 「API トークン」には、Linyの「API連携」→「認証」で発行したトークンを入れます。保存済みなら空欄のままで今のトークンを使い続けます
- 「状態」は、準備中(まだ使わない)・接続(紐付け・受信・同期に使う)・停止から選びます
- 「Linyフォームからの自動受付」の①「受付フォームID」に、半角カンマ区切りで20件まで登録すると、フォームの回答ごとに買取依頼が登録されます。「初めてのLINEからの申込は顧客も自動登録する」をオンにすると、初めて申し込んだ人を顧客として登録します
- ②の「案件の段階を Liny に反映する」をオンにすると、案件の進み具合を、段階ごとに選んだLinyのタグと対応マークに反映します(APIトークンを保存してから選べます)
- Webhookを受け取るときは、「Webhook認証(任意)」に、Linyで決めた「Webhook 認証ヘッダー名」と「Webhook 認証キー」を入れます
決めたら「変更を保存」を押します。カードの「詳細・接続診断」を開くと、トークンの状態・Webhookの受信URL・同期の診断履歴(最新30件まで)を確かめられます。「接続を確認」と「同期を手動実行」もここにあります。**「同期を手動実行」は、押すとすぐLinyへ反映を送ります。**
紹介手数料の資料は、買取の一覧の「書き出す」から作ります。[紹介手数料の資料](/guides/settings/referral-reports)で説明しています。
## 受付フォーム
「設定」の「受付フォーム」では、オンライン買取の受付フォームを配信するかと、LINEで案内する共通リンクを扱います。「受付フォームの配信」の「変更」を押すと、「受付フォームの配信設定」が開きます。お客様の画面と、届いた申し込みの扱いは[受付フォーム](/guides/purchase/intake-form)で説明しています。
①の「配信状況」と「フォームの見出し」(1〜100文字)を決めて、「変更を保存」を押します。②の「共通リンクをコピー」で、お客様にLINEで案内するリンクをコピーできます。リンクは、一度保存したあとに表示されます(それまでは「未発行」)。
## LINEの文面
「設定」の「LINEの文面」では、お客様に送るLINEの文面のテンプレートを用意します。テンプレートは、案件の画面で「LINEの文面を作る」を押したときや見積を提示するときに使われ、案件の金額や名前が差し込まれます。
1つの文面につき、名前を付けたテンプレートを20件まで登録できます(例:最終査定のご連絡に「未鑑定向け」「PSA向け」)。そのうち1件を「既定」にしておくと、送るときはその文面から始まり、送る画面で別のテンプレートに切り替えられます。
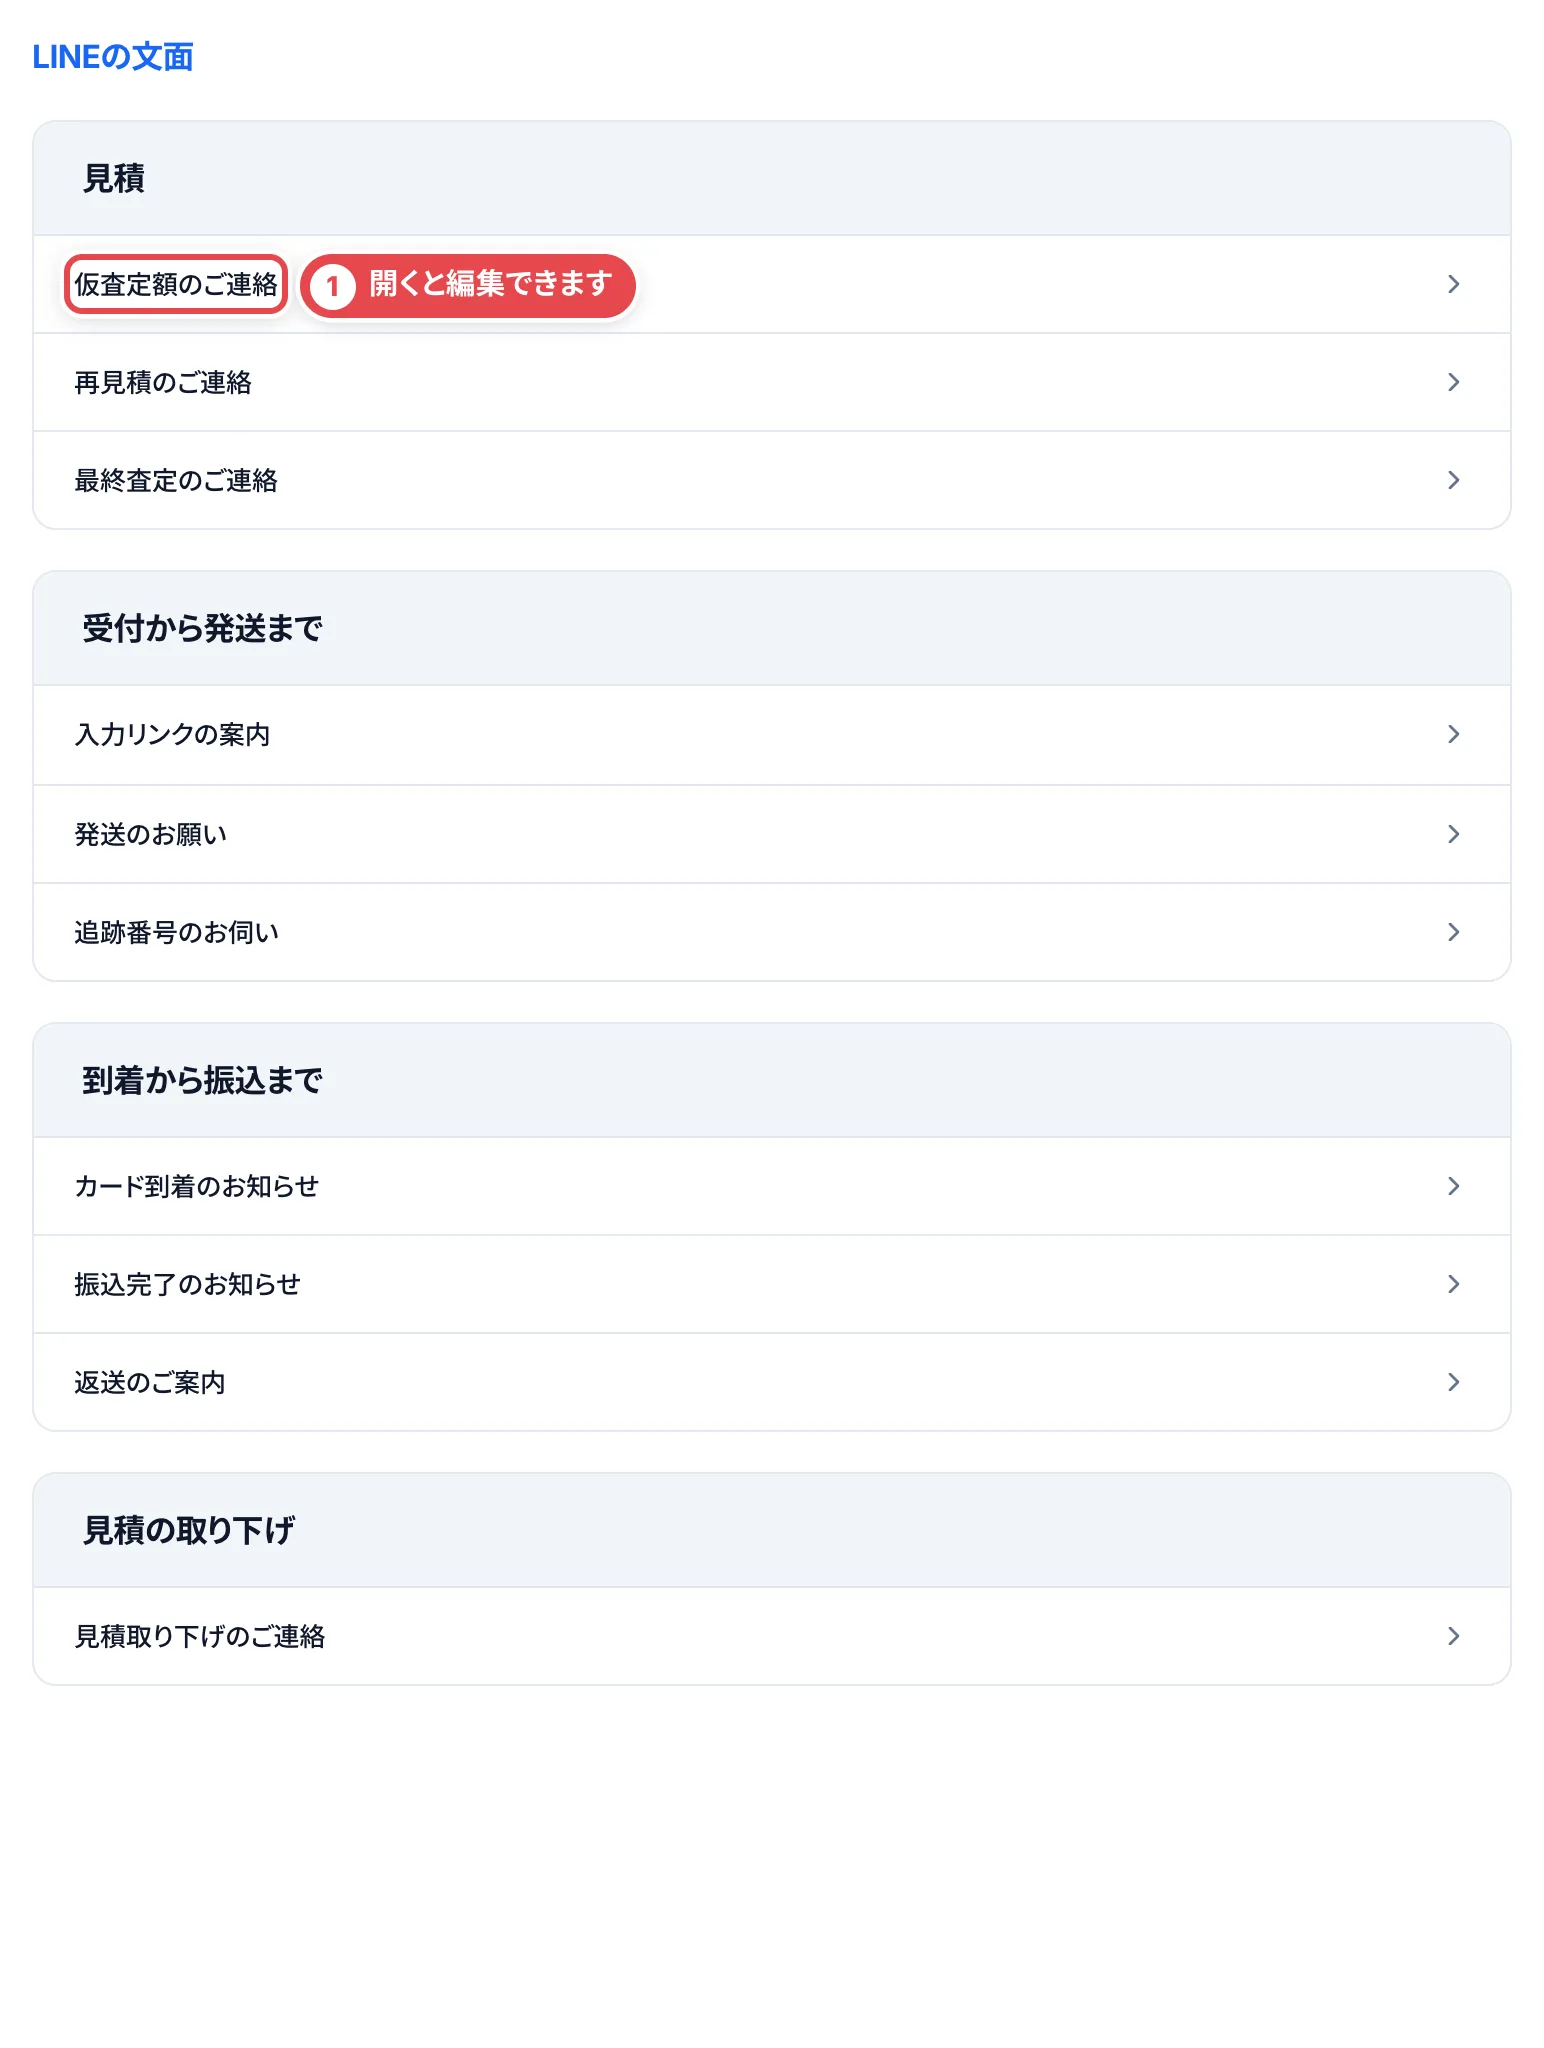 文面は、買取の流れの順に4つの区分に並んでいます。①のように開くと、その文面のテンプレートが並びます。
| 区分 | 文面 |
| ---------------- | ------------------------------------------------------ |
| 見積 | 仮査定額のご連絡、再見積のご連絡、最終査定のご連絡 |
| 受付から発送まで | 入力リンクの案内、発送のお願い、追跡番号のお伺い |
| 到着から振込まで | カード到着のお知らせ、振込完了のお知らせ、返送のご案内 |
| 見積の取り下げ | 見積取り下げのご連絡 |
一覧には、テンプレートの件数と、どれが既定かが表示されます。
### テンプレートを追加する
文面を開くと、「初期の文面」(トレカクラウドが用意している文面。編集はできません)と、お店で登録したテンプレートが並びます。
1. 「テンプレートを追加」を押します。登録済みのテンプレートや初期の文面の「これをもとに作る」から始めると、その文面が入った状態で開きます
2. 「テンプレート名」に、送るときに選ぶ名前を入れます(40文字まで。同じ文面の中で同じ名前は使えません)
3. ①の本文を書き換えます(3,000文字まで)。「`{`」を打つと、差し込める値の候補が出ます
4. ③の「差し込める値」の「差し込む」で、お客様の名前や金額などの値をカーソルの位置に入れます
5. ②の「サンプル」で、値を入れたときの見え方を確かめます
6. ④の「テンプレートを追加する」を押します。「このテンプレートを既定にする」にチェックを入れておくと、追加と同時に既定になります
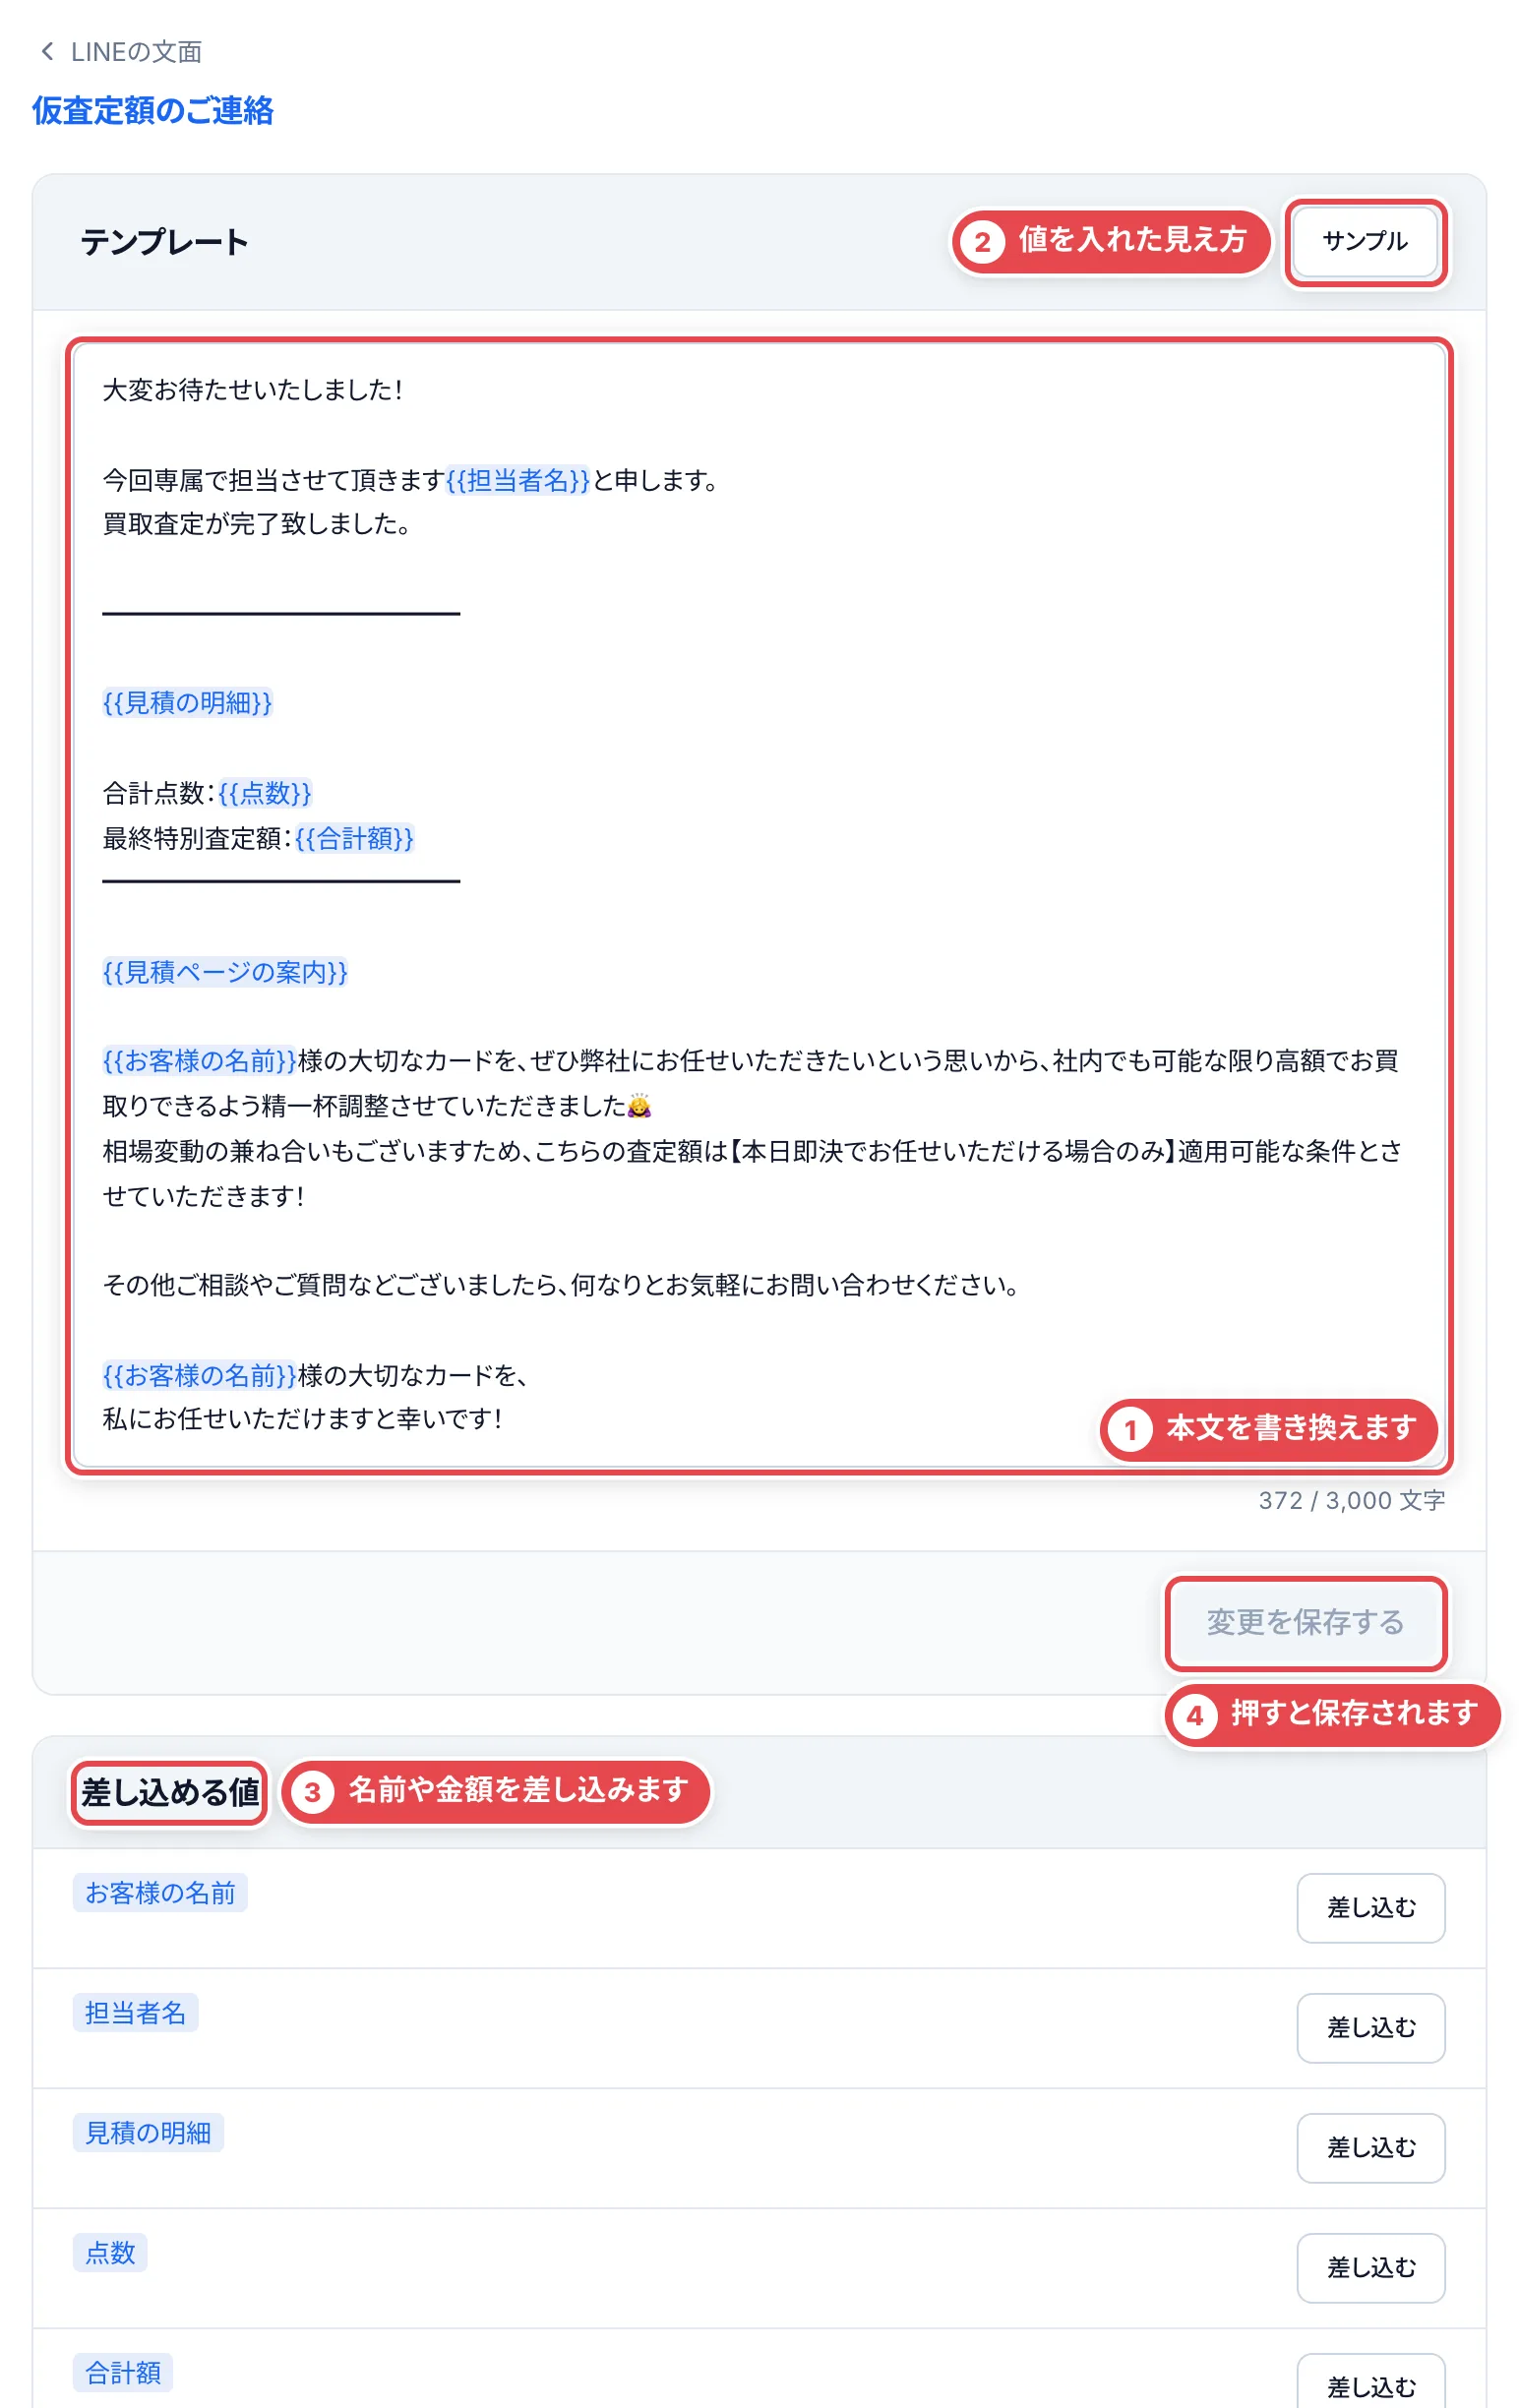 「サンプル」では、編集中の文面にサンプルの値を入れた見え方と、LINEの上限(5,000文字)に対する文字数が出ます。
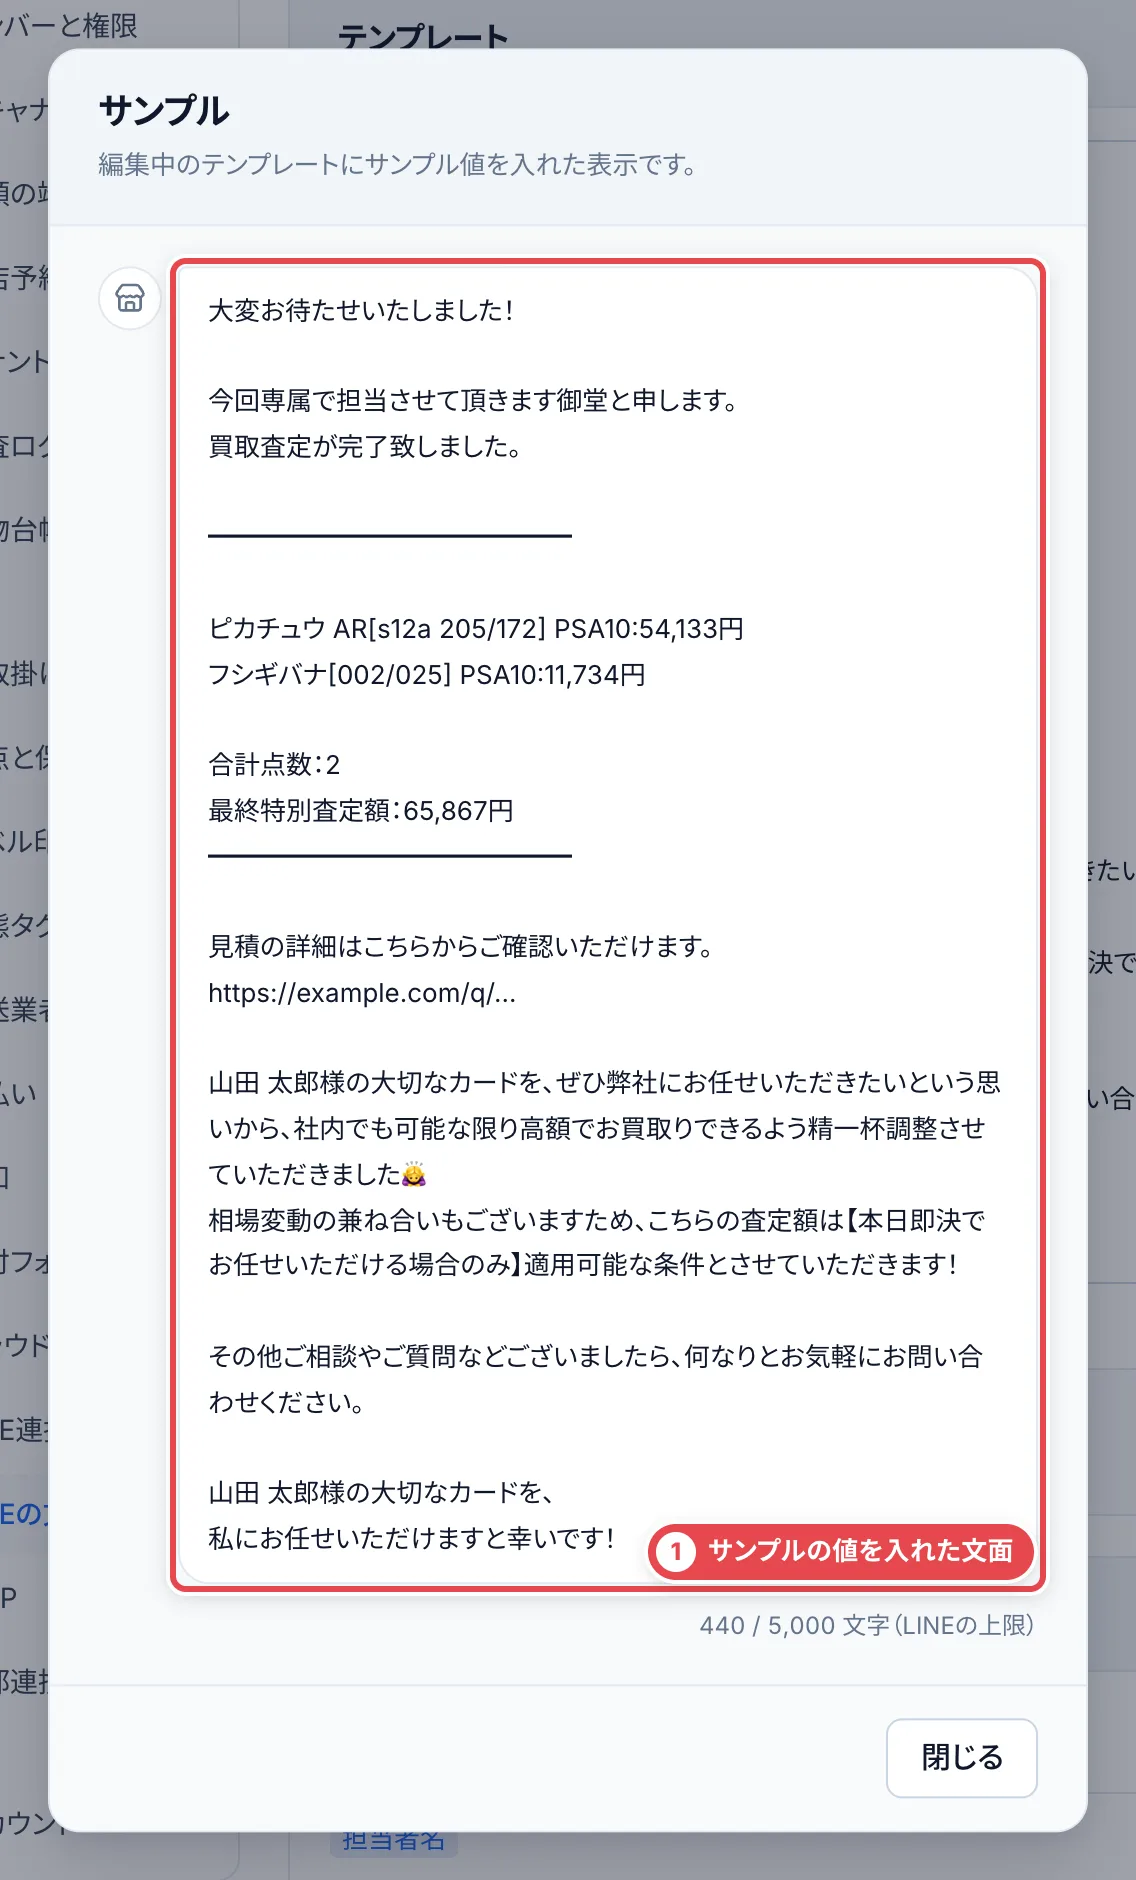 見積の文面では、「買取不可のカード」を差し込めます。買取不可にしたカードが「【買取不可のカード】」の見出しの下に並びます。買取不可の理由は入りません。買取不可のカードがない見積では、その行ごと消えます。
### 既定を変える・テンプレートを直す
- 文面の一覧で、テンプレートの「既定にする」を押すと、その場で既定が切り替わります。初期の文面に戻すときは、「初期の文面」の「既定にする」を押します
- 登録済みのテンプレートを開くと、名前と本文を直して「変更を保存する」で保存できます。本文だけ初期の文面に戻すときは、「初期の文面に戻す」を押してから保存します
- 「削除する」で消せます。これまでに作った文案や送ったメッセージには影響しません。既定のテンプレートを消したときは、初期の文面が既定になります
### 送るときに選ぶ・手直しする
見積を提示する画面や「LINEの文面を作る」では、「テンプレート」で使う文面を選べます(お店のテンプレートが1件以上あるときに出ます)。既定のテンプレートには「(既定)」が付いています。
文面はその場で書き換えてからコピーできます。テンプレートを選び直すか、「テンプレートの文面に戻す」を押すと、手直しは消えます。
:::note
見積の文面を手直しするときは、合計額を「合計査定額:12,000円」のように「査定額」か「合計」の直後に残してください。送ったメッセージは、この合計額で見積と照合されます。合計額が見つからない文面や、別の金額にも「査定額」「合計」が付いた文面は、コピーする前に止まります。
:::
## 通知
「設定」の「通知」では、スタッフが受け取る通知の送り先と種類を決めます。
### 1. 送り先を決める
送り先は、メール・Telegram・デスクトップ通知の3つです。
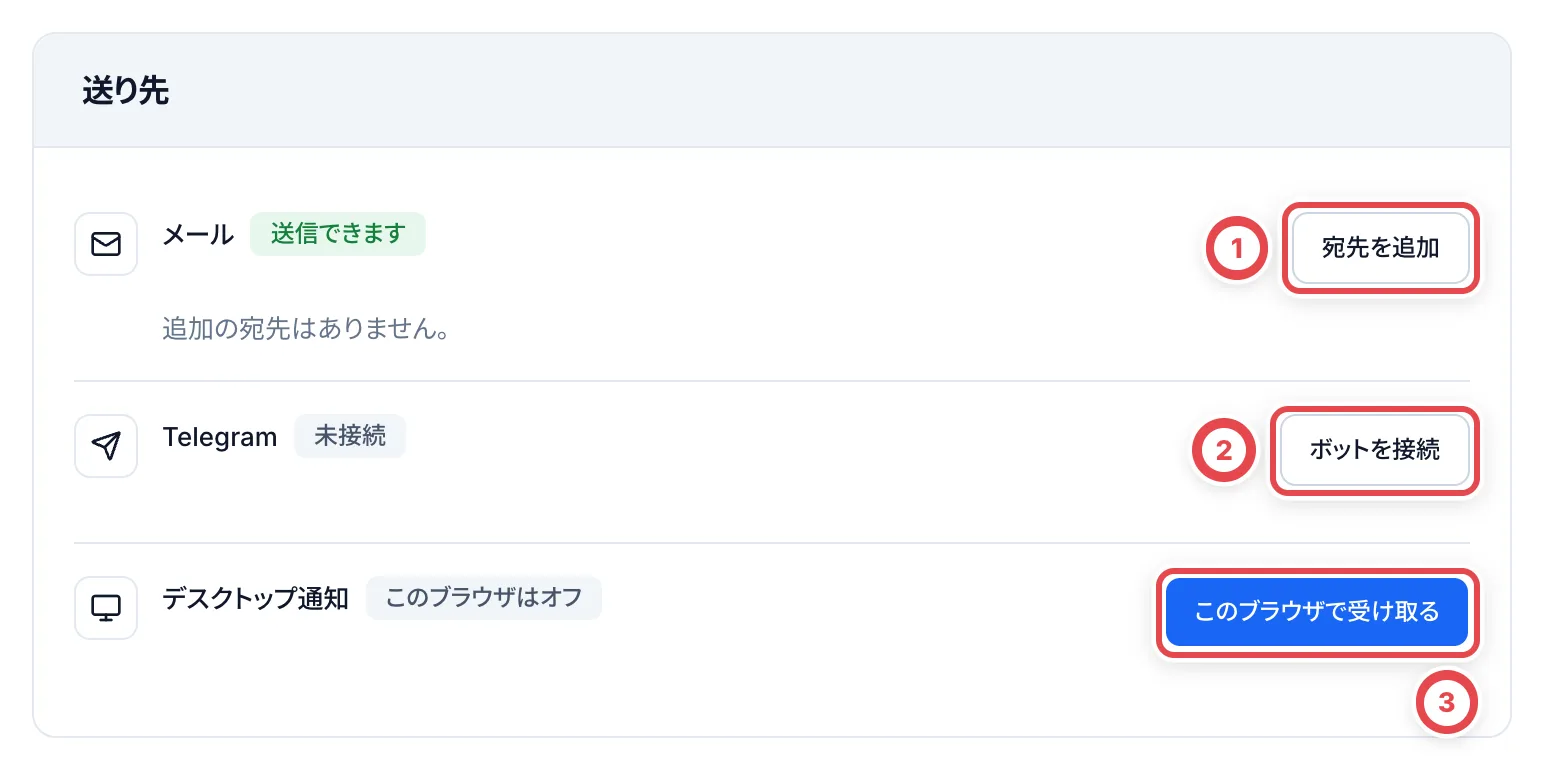 - **メール**:出来事ごとに決まったメンバーに届きます。①の「宛先を追加」で、メンバー以外のアドレスを10件まで足せます。**追加の宛先は、「追加する」を押すとその場で保存されます**(下の「変更を保存する」とは別です)。外すときは宛先の「×」を押し、確認の画面で「外す」を押します
- **Telegram**:②の「ボットを接続」でボットのトークンを登録し、「グループを追加」で通知を送るグループを選びます。「テスト送信」で届くか確かめられます(実際にグループへ送られます)
- **デスクトップ通知**:③の「このブラウザで受け取る」を押し、ブラウザの許可を出すと、このブラウザに届きます。メンバーが自分で設定し、「アカウント」の画面からも設定できます
### 2. 通知の種類を選ぶ
「通知の種類」の表で、どの出来事をどの送り先に通知するかを選びます。
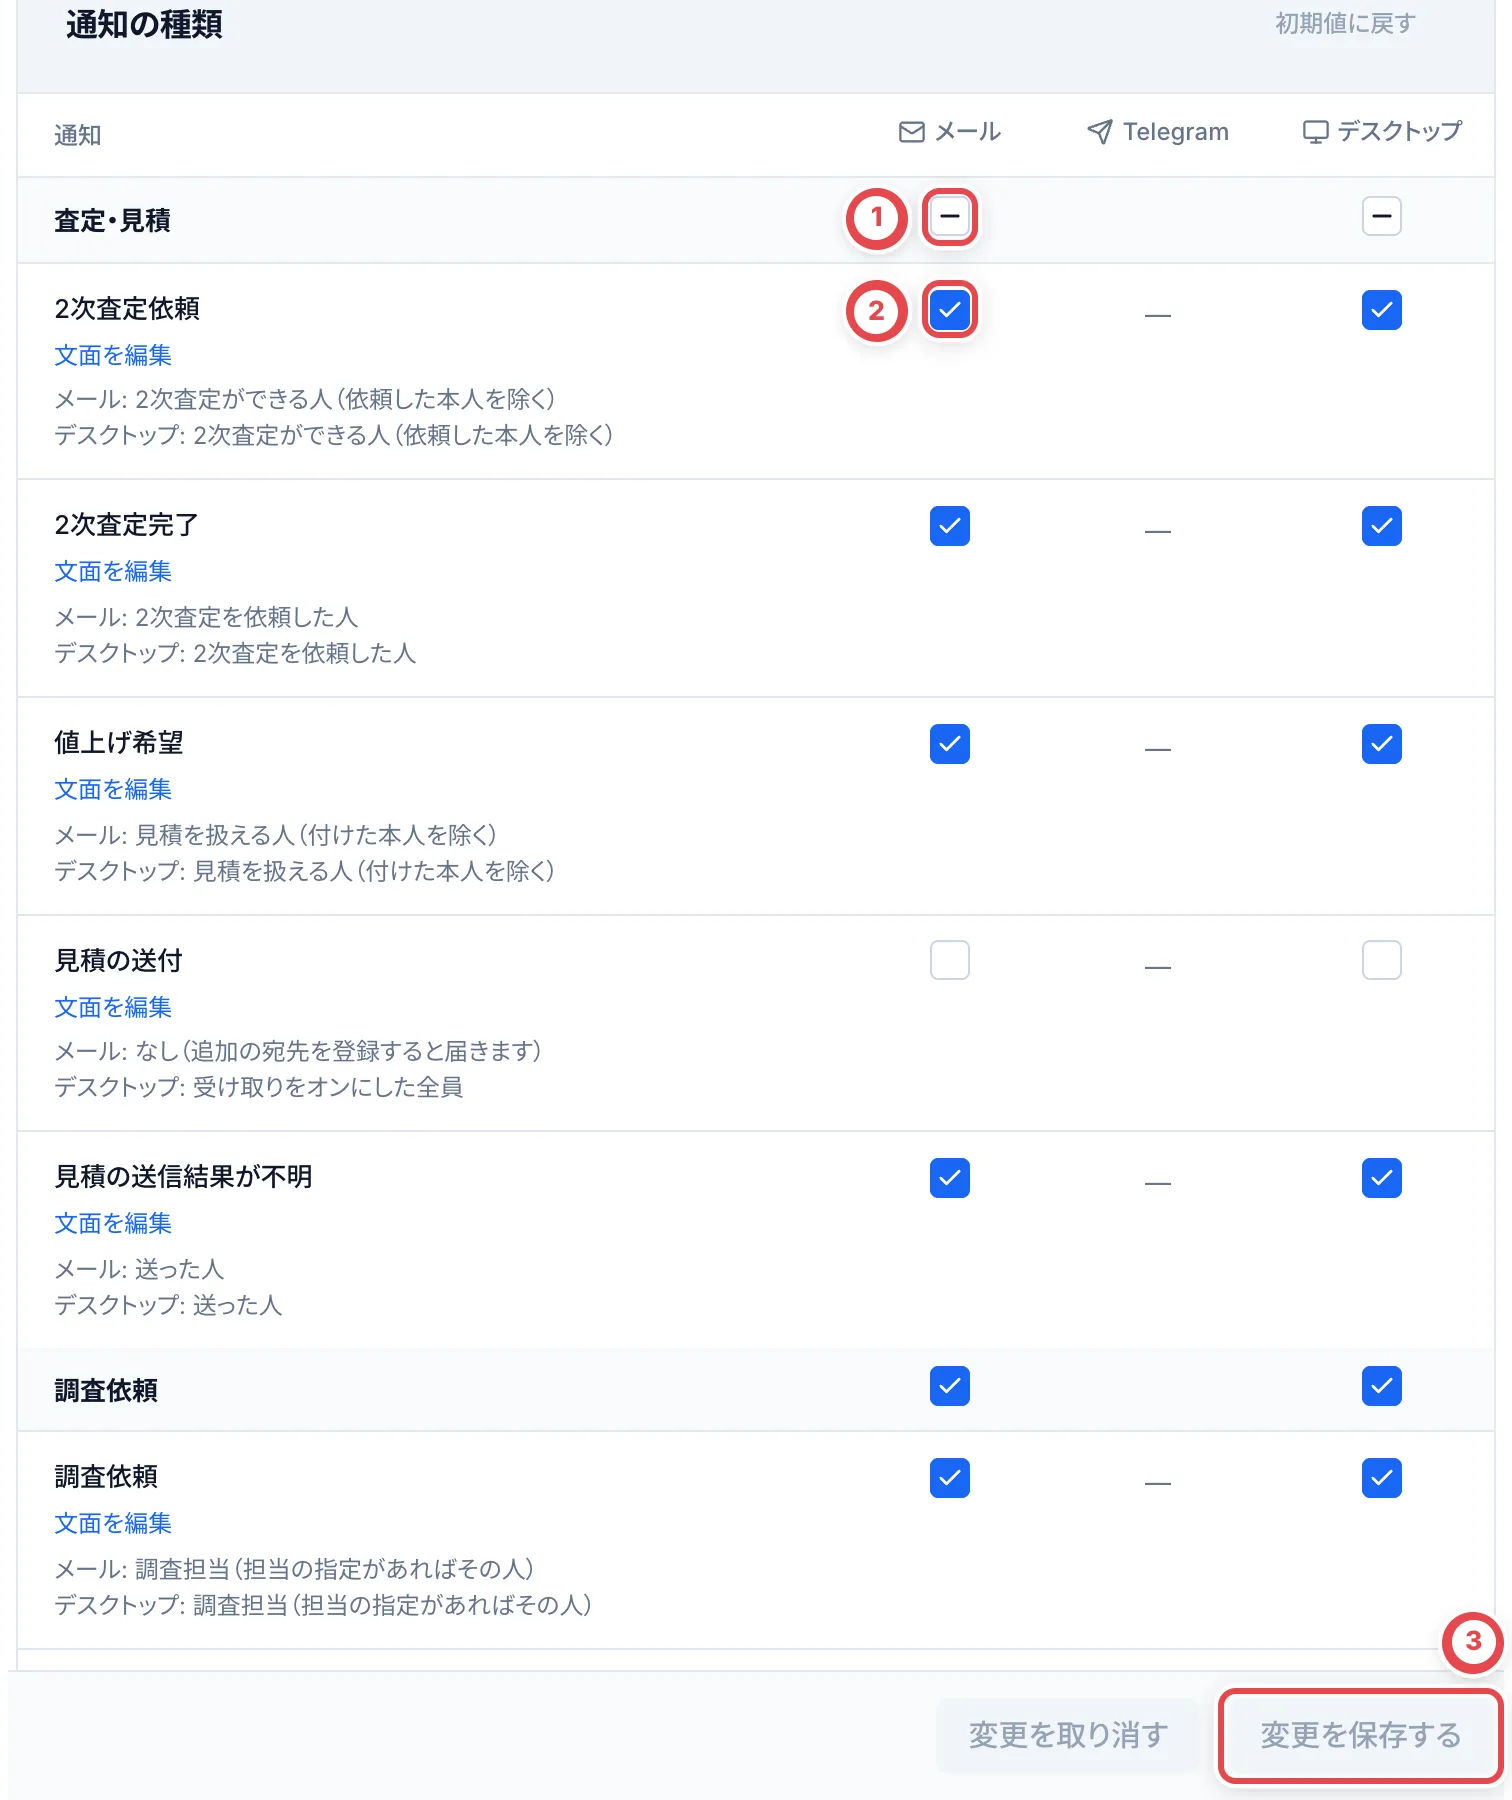 出来事は、「査定・見積」「調査依頼」「受付・LINE」「お客様の動き」「到着・検品」「成立・振込」「在庫」「販売・入金」の8つの区分に分かれています。各行には、メールとデスクトップ通知がだれに届くかが書かれています。
- ①の区分の行のチェックで、その区分の出来事をまとめて選べます
- ②の行のチェックで、出来事を1つずつ選べます
- 選び終えたら、③の「変更を保存する」を押します。「変更を取り消す」で保存前の状態に戻せます。「初期値に戻す」は、表を初期の選び方に戻します(保存するまでは反映されません)
自分が行った操作は、メールとデスクトップ通知では自分には届きません(Telegramのグループと追加の宛先には届きます)。通知が届かないときは、ページ下の「最近の送信」で直近30件の送信結果を確かめます。
### 通知の文面を編集する
通知の種類を変更中は「文面を編集」が隠れます。先に変更を保存するか、取り消してください。
表の「文面を編集」から、①「通知のタイトル」(120文字まで)と②「通知の本文」(1,000文字まで)を変更できます。表示される差し込み値を使って文面を作り、③「サンプル」で確認してから④「変更を保存する」を押します。必要な差し込み値は削除できません。案件などの明細とリンクは自動で付きます。初期の文面に戻すときは「初期の文面に戻す」を押してから保存します。
保存後に作られる通知から、メール・Telegram・デスクトップ通知に共通の文面が使われます。既に送信待ちの通知は変わりません。差し込み後の文面が通知の上限を超える場合は、初期の文面で送信されます。編集には「設定管理」の権限が必要です。「文面を編集」がない通知は初期の文面で送られます。
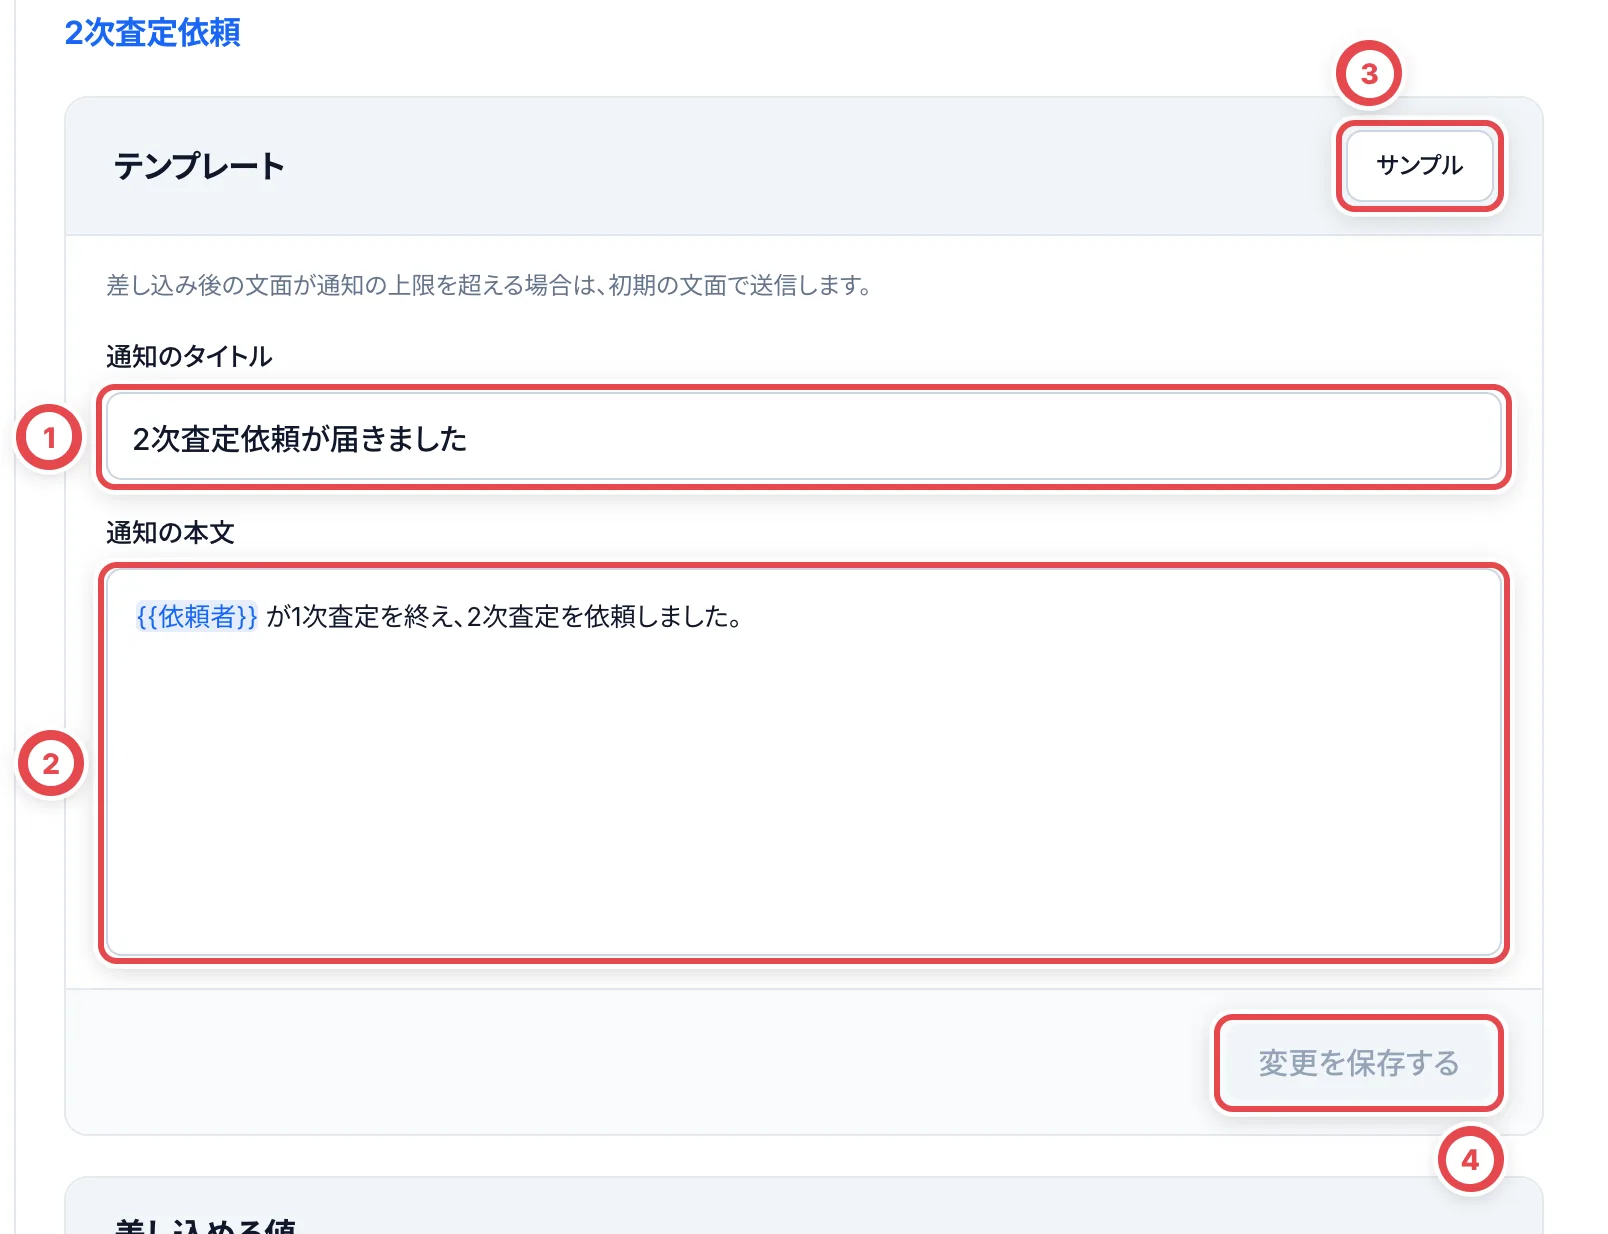 ### 3. クラウドサインの締結完了を受け取る
「お客様の動き」の①「クラウドサインの締結完了」を選びます。初期値はOFFです。Telegramのグループを複数登録している場合は、②でこの通知の送り先を選んでから「変更を保存する」を押します。本人確認書類の提出・差分への回答と同じグループにも設定できます。
 本番API連携の契約書・委任状の締結を確認したときに届きます。メール・デスクトップの標準宛先は、クラウドサインを送信でき、案件とお客様を閲覧できるメンバーです。メールの追加宛先にも届きます。書類を作成した本人も対象です。
手動の締結記録・店頭署名・テスト環境は対象外です。PDFの保存完了を知らせる通知ではありません。同期と配信の待ち時間があるため、締結直後に届かない場合があります。
既に完了確認済みの書類や、通知OFF・送り先なしで確認した過去分は、有効化してもまとめて送られません。外部で締結済みでも、トレカクラウドで初めて確認する書類は通知される場合があります。クラウドサイン機能がOFFの場合、この行は表示されません。
## 困ったとき
| 起きていること | 確かめること・直し方 |
| ------------------------------------------------------------------------ | ------------------------------------------------------------------------------------------------------------------ |
| 「チャネルIDまたはチャネルシークレットが正しくありません」と出る | LINE DevelopersのMessaging APIチャネルの値を確かめて、入れ直します。 |
| 運用ツールが「準備中」のまま | APIトークンが入っていないか、状態が「準備中」です。「Liny の設定を変更」でトークンを入れ、状態を「接続」にします。 |
| 「LINEで見積書を送る」が出ない | 「見積の提示」がオフか、LINEの連携が「連携中」ではありません。「変更」から確かめます。 |
| 受付フォームの共通リンクが「未発行」 | 「受付フォームの配信設定」で一度「変更を保存」を押すと発行されます。 |
| メールの列が「—」で選べない | この環境ではメール送信が設定されていません。トレカクラウドの運営にお問い合わせください。 |
| 「ほかの人が通知設定を変更しました。画面を読み込み直してください」と出る | ほかのメンバーが先に保存しました。画面を読み込み直してから、選び直します。 |
| 通知が届かない | 「最近の送信」で失敗していないか確かめます。デスクトップ通知は、ブラウザ側で通知を許可しているかも確かめます。 |
---
# 設定の一覧
Source: https://docs.toreca-cloud.com/guides/settings/overview
サイドバー下段の①「設定」を開きます。
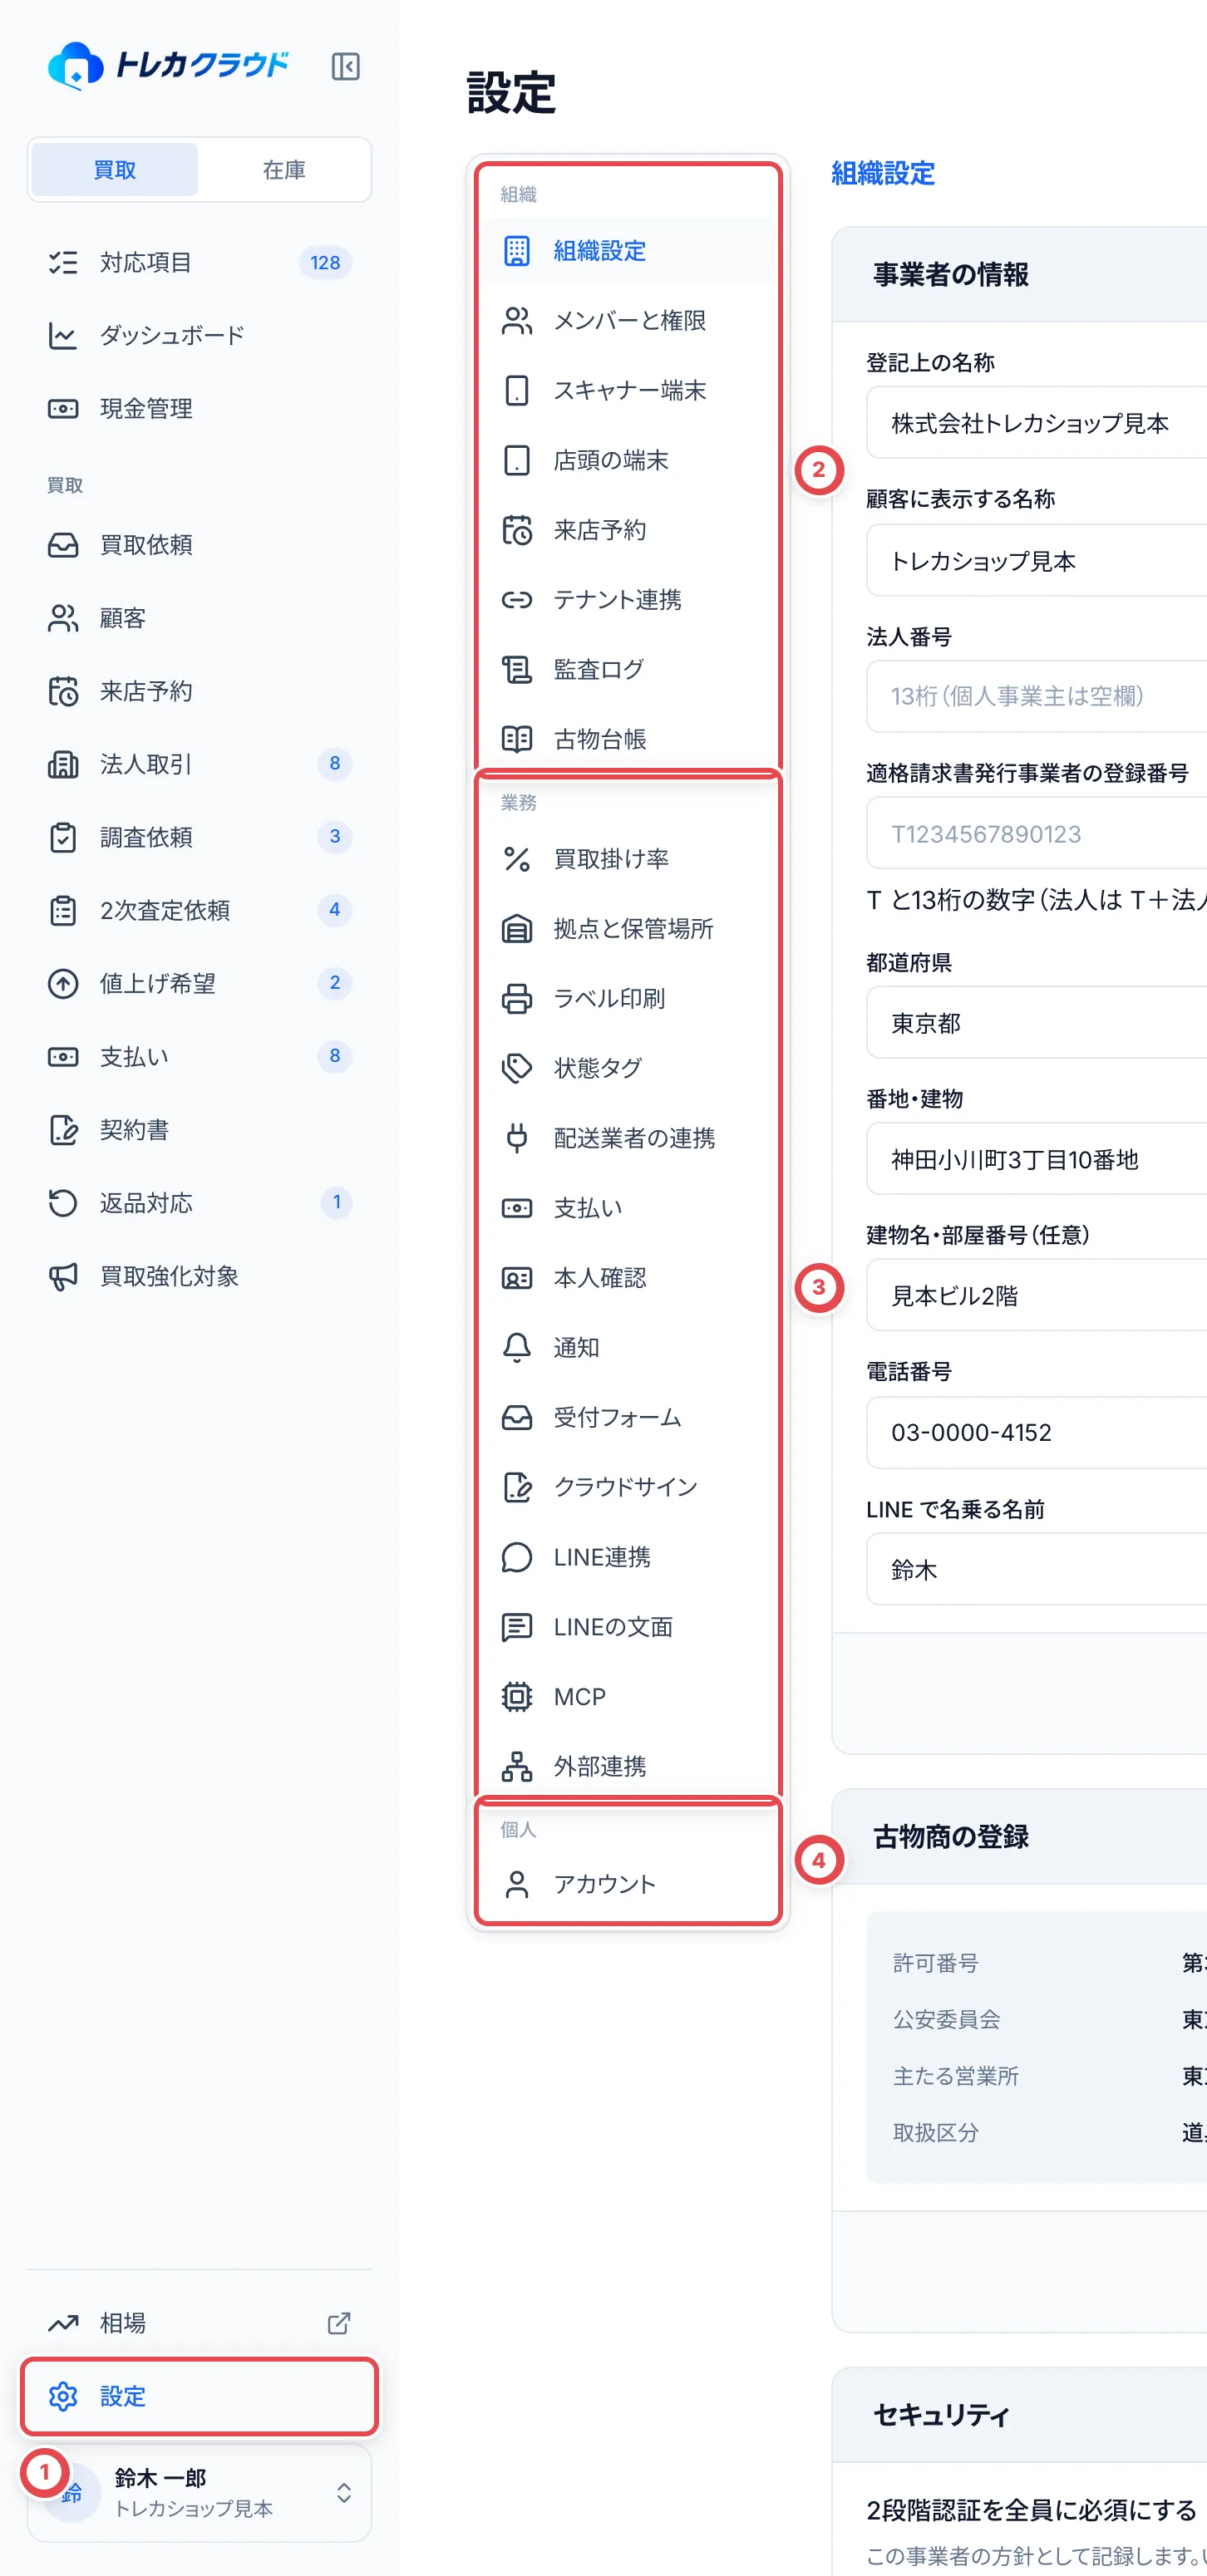 設定を変更できるのは、基本的にオーナーと管理者です。ほかのメンバーには、多くの設定が閲覧のみで表示されます。
## 組織
| 項目 | 内容 |
| -------------- | ------------------------------------------------------------------------------------------------------------------------------------------------------------------------------------------------ |
| 組織設定 | 事業者の名称・所在地・連絡先・古物商許可・会社の印影を登録します。ここで登録した情報は見積や古物台帳に載ります |
| メンバーと権限 | メンバーの招待、権限の変更、アクセスの停止を行います。[メンバーと権限](/guides/getting-started/members-and-roles)を参照してください |
| スキャナー端末 | 格納アプリにログインしたiPhoneの一覧です。使わなくなった端末は「失効」で使えなくします |
| 店頭の端末 | お客様に最終見積を確認してもらう、店に置いたiPadなどの端末です。「端末を登録」で出るQRコードを端末のカメラで読み取ると使えます。[店頭の端末](/guides/purchase/counter-tablets)を参照してください |
| 来店予約 | 店舗ごとに予約ページを作り、営業時間・予約の枠・締切を決めます。予約ページのリンクはLINEのリッチメニューなどに置きます。[来店予約](/guides/purchase/reservations)を参照してください |
| テナント連携 | ほかの店舗とつながり、在庫を移管できるようにします |
| 監査ログ | 誰がいつ何を操作したかの記録です。期間や操作の種類で絞り込み、CSVに書き出せます |
| 古物台帳 | 買い受けた品物の台帳です。CSVでの保存と印刷ができます |
### 組織設定
「事業者の情報」には、登記上の名称・顧客に表示する名称・住所・電話番号・問い合わせ先メールなどを入力します。「古物商の登録」には、古物商許可の許可番号や公安委員会を登録します。許可を登録していないと、古物台帳やお客様向けの書類に許可番号が載りません。
「会社の印影」に印影の画像を登録すると、見積のPDFの発行者欄に印影が入ります。画像はPNGかJPEGで、1MB以下にします。
「セキュリティ」の「2段階認証を全員に必須にする」は、店舗の方針を記録する設定です。現在はログイン時の必須化を強制しません。各メンバーは「アカウント」で2段階認証を設定し、「メンバーと権限」で設定状況を確認します。
### スキャナー端末とテナント連携
スキャナー端末の「失効」を押すと、その端末では格納・棚卸し・ピッキングができなくなります。失効は取り消せません。
テナント連携では、自分の店舗の「組織ID」を相手に伝え、「連携を申請」で相手の組織IDを入力して申請します。相手が承認すると連携中になり、在庫を移管し合えます。お客様、案件、在庫の一覧は共有されません。移管の手順は[出庫と移動・移管](/guides/inventory/outbound-and-transfers)で説明しています。
### 監査ログと古物台帳
監査ログは、メンバーの操作と、外部連携のアプリの操作を分けて絞り込めます。「CSV を書き出す」で期間と出力形式(CSV・JSON Lines)を選び、1回に1万件まで書き出せます。画面で選んだ担当者・操作・連携元の絞り込みも反映されます。
古物台帳は、オンライン買取の「在庫と支払いの登録」や店頭の買取確定で、在庫・支払いと一緒に記録されます。「承諾だけ記録」だけでは台帳は作られません。「CSVで保存」で書き出し、「印刷する」で紙に残せます。標準の役割で古物台帳を見られるのは、オーナーと管理者です。店舗独自の役割では、監査ログ・買取・顧客・本人確認の読み取り権限がすべて必要です。CSV・印刷は1回に5,000明細までです。超えるときは期間や条件を絞ります。
## 業務
| 項目 | 内容 |
| -------------------- | ------------------------------------------------------------------------------------------------------------------------------------------------------------------------------ |
| 買取掛け率 | 相場から買取価格を出すときの掛け率と、端数の丸め方を決めます。[買取掛け率](/guides/settings/pricing)を参照してください |
| 拠点と保管場所 | 店舗や倉庫などの拠点と、その中の棚を登録します。[在庫の全体像](/guides/inventory/overview)を参照してください |
| ラベル印刷 | QRラベルを印刷するときの位置合わせを調整します。[格納とQRラベル](/guides/inventory/putaway)を参照してください |
| 状態タグ | 在庫の個体に付ける状態のタグを管理します |
| 配送業者の連携 | 使っている配送業者と契約番号を記録します |
| 支払い | 店頭の支払方法、全銀ファイルの振込元、振込の承認の決まりを設定します |
| 本人確認 | オンラインの書類確認を許可する方法と、店頭対面との違い。[本人確認方法の設定](/guides/settings/identity)を参照してください |
| 通知 | 通知の送り先と、通知する出来事を選びます |
| 受付フォーム | オンライン買取の受付フォームを配信するかと、その見出しを決めます。LINEで案内する共通リンクもここでコピーします。[受付フォーム](/guides/purchase/intake-form)を参照してください |
| クラウドサイン | 契約書と委任状のテンプレートを登録します |
| LINE連携、LINEの文面 | LINE公式アカウントとの連携と、お客様に送る文面を設定します |
| MCP | AIアシスタントとの接続の一覧です |
| 外部連携 | 外部のアプリに在庫や買取強化対象を読み取らせます。[外部連携](/guides/settings/partners)を参照してください |
通知、受付フォーム、LINE連携、LINEの文面は[LINEと通知](/guides/settings/line-and-notifications)で詳しく説明しています。
「拠点と保管場所」では、[ロット専用棚](/guides/inventory/sealed-lot-shelves)と[スキャン移動のロック](/guides/inventory/shelf-protection)も設定できます。「ラベル印刷」からは、[印刷アプリのダウンロード・接続・プリンター登録](/guides/inventory/desktop-print-app)へ進めます。
### 状態タグ
状態タグは、在庫の個体にカードの状態を記録するためのタグです。「状態タグを追加」で作り、「名前を変更」や「利用停止」もできます。名前を変えると、すでにタグが付いている個体の表示と、外部連携で送る在庫データの名前も変わります。利用停止にしたタグは新しい個体には付けられませんが、付いている個体からは外れません。停止したタグは「再開」で新しい個体にも再び使えるようにできます。
### 配送業者の連携
配送業者の連携には、使っている配送業者と、契約番号やお客様コードを記録します。トレカクラウドから配送業者のシステムには接続しません。集荷の予約と送り状の発行は配送業者に直接手配し、追跡番号や送り状の画像を案件に記録します。
### 支払い
「支払い」では、買取の代金の払い方を決めます。変更は右上の「変更」から行います。
- ①の「店頭の支払方法」では、店頭の買取で使う支払い方法を「現金のみ」「振込のみ」「現金・振込を併用」から選びます。最初は「現金のみ」です。変える前に成立した取引の支払い方法は変わりません
- ②の「承認が必要になる金額」は、振込を使う店舗で使います。この金額を超える振込は、支払い一覧でまとめて承認できず、取引の画面で個別に確かめてから承認します。店頭の現金払いに、別の担当者の承認はいりません
- ③の「買取明細書のメール」では、支払いが完了したときに明細書をお客様へ自動で送るか、取引の画面から送るかを選びます
- 「振込手数料の負担」では、振込手数料を店舗とお客様のどちらが負担するかを選びます
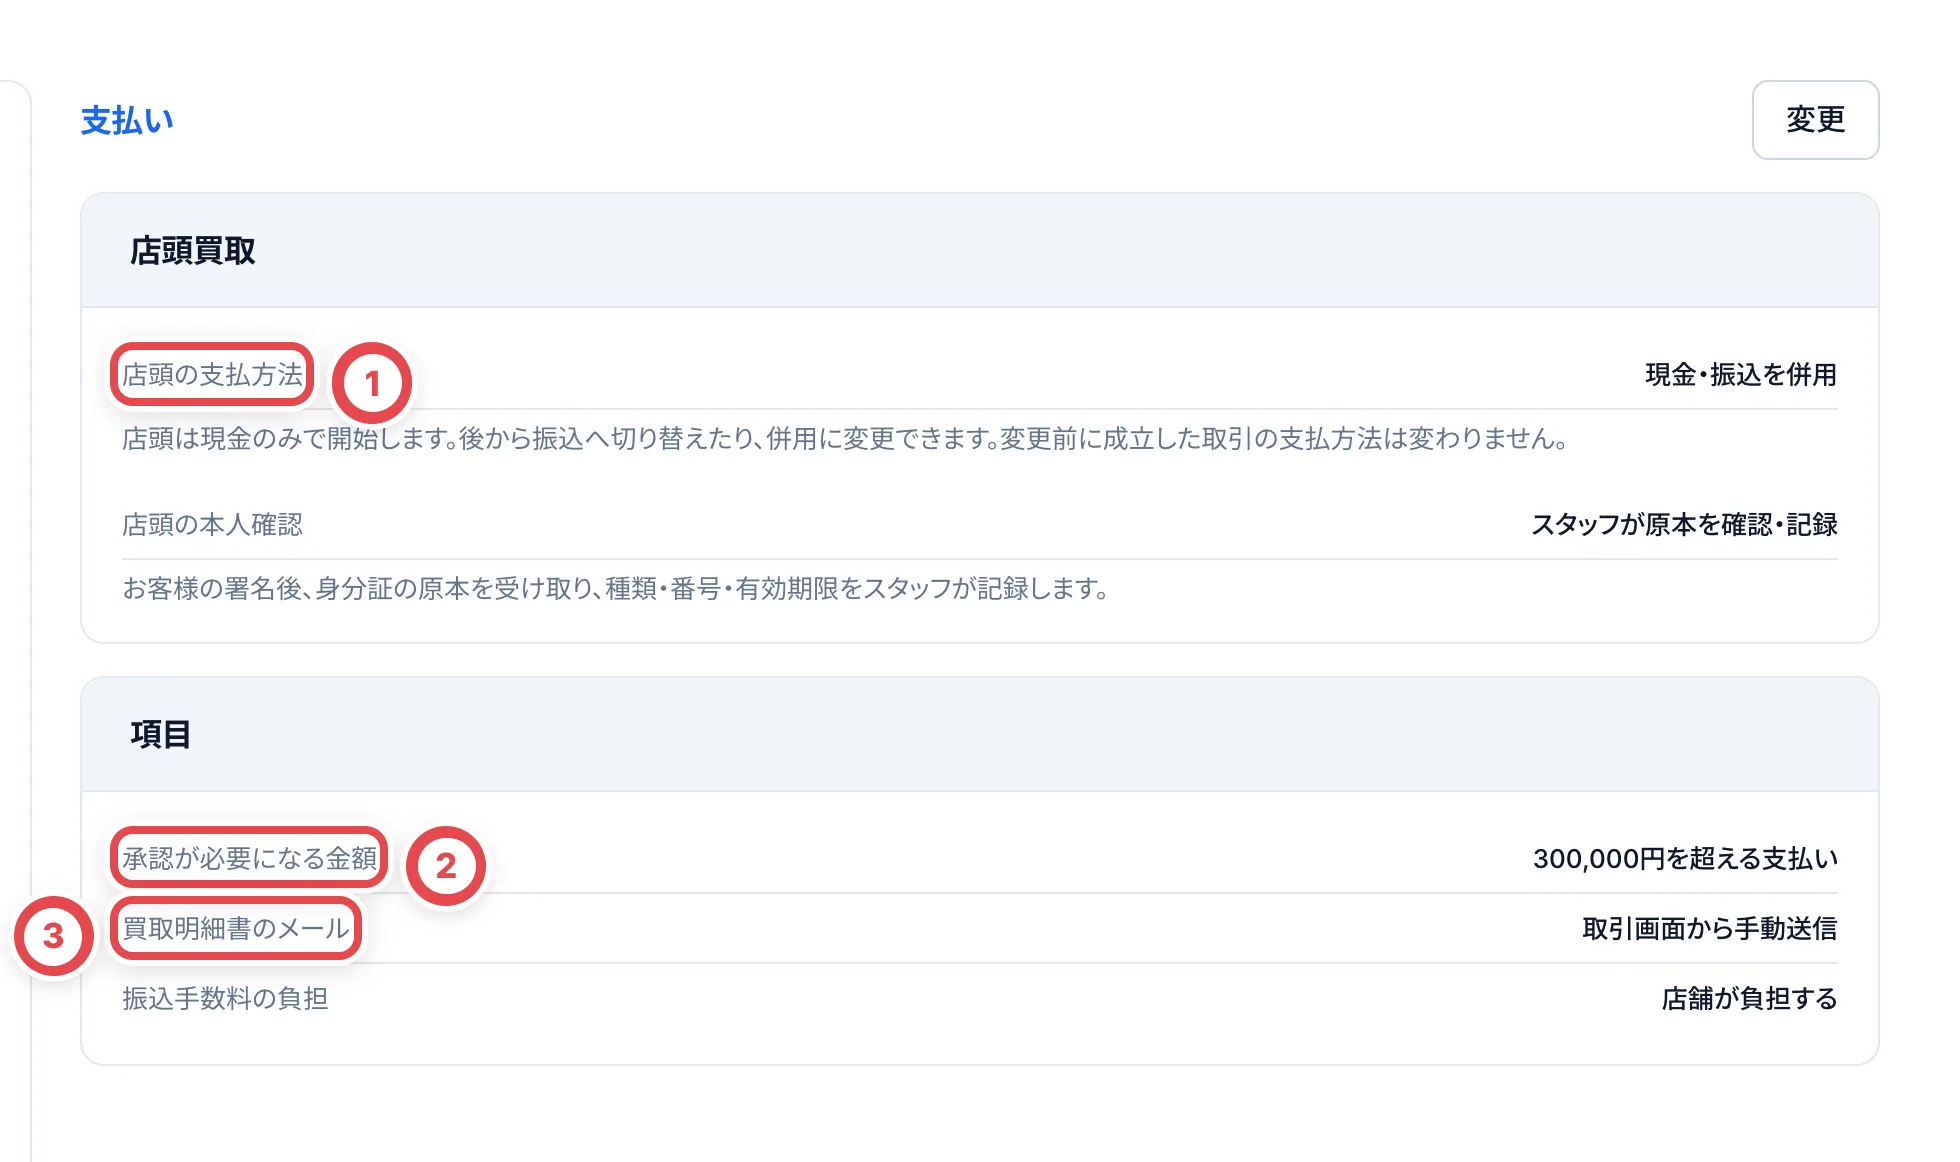 全銀データ(全銀ファイルの書き出し)を使う店舗では、振込元の依頼人コード(10桁)・依頼人名(カナ)・振込元の口座と、振込指定日の初期値もここで登録します。ゆうちょ銀行の口座は振込元に使えません。全銀データは店舗ごとに有効にする機能で、使えるかどうかはトレカクラウドの運営にお問い合わせください。
支払いの作業そのものは[振込](/guides/purchase/payouts)で説明しています。
### クラウドサイン
API接続を設定した店舗では、案件から書類を準備し、PDFと宛先を確認して送信できます。接続先・標準書類・商品の初期選択は[クラウドサインの設定と送信](/guides/settings/cloudsign)を参照してください。従来のテンプレートURLによる運用では、クラウドサイン側で送り、結果を手動記録します。委任状は振込先の口座名義がお客様本人と違うときに使います。
### MCP
MCPの画面では、ClaudeなどのAIアシスタントを店舗につなぐ手順と、接続中のアシスタントの一覧を確かめられます。接続のしかたは[AI連携(MCP)](/mcp)を参照してください。
## 個人
「アカウント」では、自分の表示名とプロフィール画像を設定します。パスワード・2段階認証・パスキー・デスクトップ通知の設定もここで行います。詳しくは[ログインと店舗の選択](/guides/getting-started/login)を参照してください。
---
# 外部連携
Source: https://docs.toreca-cloud.com/guides/settings/partners
外部連携を使うと、店舗の在庫や買取強化対象を外部のアプリから読み取れるようにできます。たとえば、オリパのサイトに在庫を同期したり、LPやXの投稿に買取強化の価格を載せたりできます。お客様の情報・買取案件・査定の所見は、どの連携先にも共有されません。
:::note
外部連携は、店舗ごとに利用を有効にしてから使える機能です。「設定」に「外部連携」が表示されていない場合は、トレカクラウドの運営にお問い合わせください。
:::
## 最初に用意するもの
- 連携先の登録・停止・解除ができるのは、オーナーと管理者です。ほかのメンバーは、接続の状態を閲覧できます
- 連携先の開発者から聞いた「戻り先URL」(https で始まるもの)
- 連携先に何を読ませるか(在庫か、買取強化対象か)
## 流れと状態
| 順番 | やること | だれが | 連携先の状態 |
| ---- | ---------------------------------- | -------------- | -------------------- |
| 1 | 連携先を登録する | 店舗 | 有効(まだ接続なし) |
| 2 | シークレットを連携先の開発者に渡す | 店舗 | 有効(まだ接続なし) |
| 3 | 連携先のアプリから接続を許可する | 店舗のメンバー | 接続中 |
| 4 | (必要なら)停止・解除する | 店舗 | 停止中・解除済み |
画面には「接続中の連携先」と「この事業者が登録した連携先」が分かれて並びます。登録しただけでは接続中にはならず、手順3で許可したときに接続中になります。
## 1. 連携先を登録する
「設定」の「外部連携」で「連携先を登録」を押すと、「連携先を登録する」が開きます。
1. ①の「表示名」を入れます。接続の許可画面と一覧に表示されます(100文字まで)
2. 「種類」をオリパ・マーケットプレイス・業務システム・その他から選び、「連絡先メールアドレス」を入れます
3. ②の「戻り先URL」に、連携先の開発者から聞いたURLを1行に1件ずつ入れます(10件まで、https で始まるものだけ)
4. ③の「許可すること」で、連携先に読ませる情報を選びます(次の表)
5. ④の「登録する」を押します
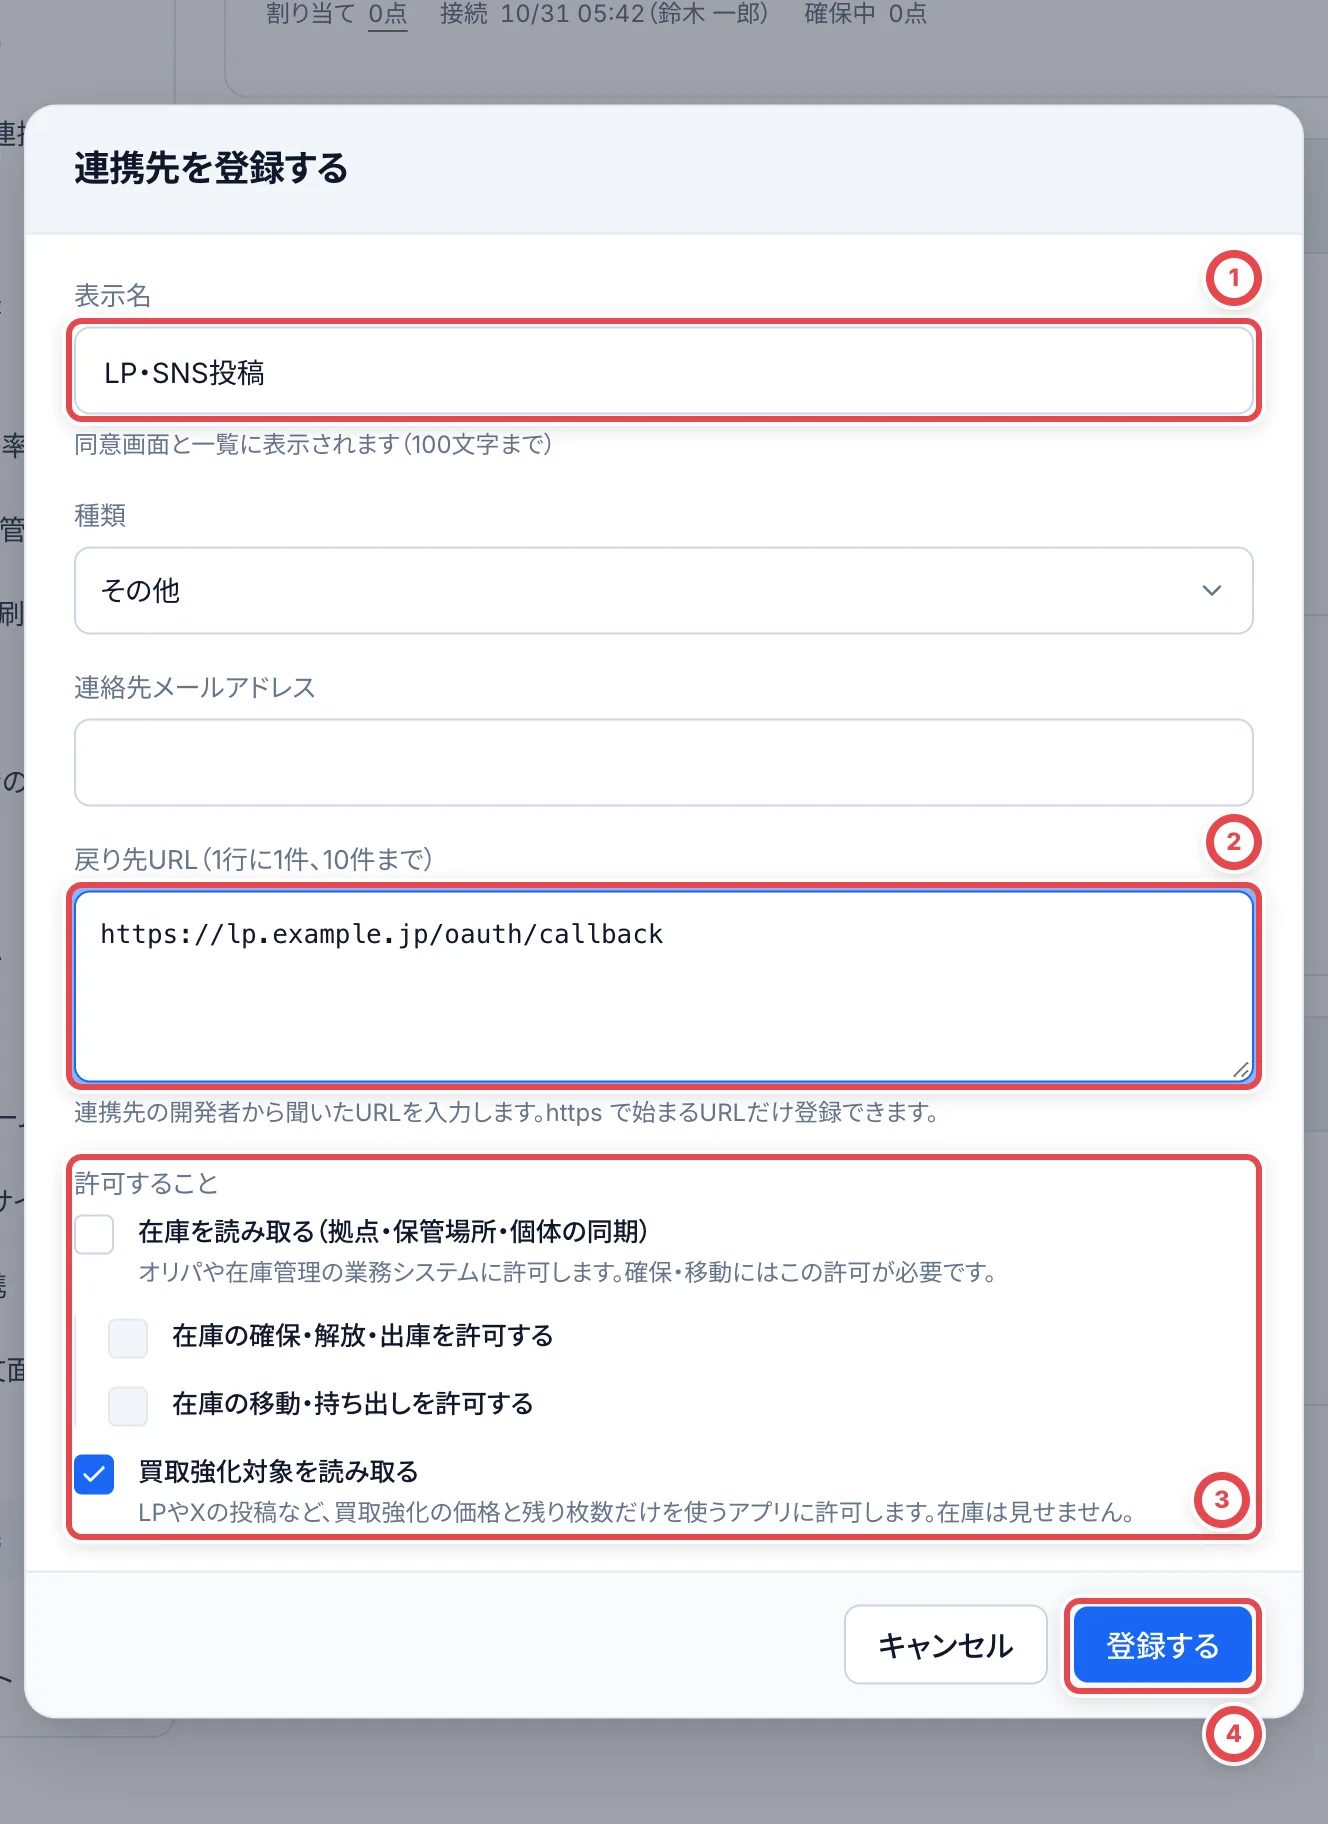 在庫と買取強化対象の、少なくとも一方の読み取りを許可する必要があります。
| 項目 | 内容 |
| -------------------------------------------- | -------------------------------------------------------------------------------------- |
| 在庫を読み取る(拠点・保管場所・個体の同期) | 拠点、保管場所、在庫の個体を連携先に同期します。オリパや在庫管理の業務システム向けです |
| 在庫の確保・解放・出庫を許可する | 連携先が在庫を確保し、出庫まで進められます。在庫の読み取りを許可したときだけ選べます |
| 在庫の移動・持ち出しを許可する | 連携先が在庫を移動したり持ち出したりできます。在庫の読み取りを許可したときだけ選べます |
| 買取強化対象を読み取る | 買取強化の価格と残り枚数を連携先に公開します。在庫は見せません |
LPやXの投稿のように、買取強化対象だけを使うアプリには「買取強化対象を読み取る」だけを許可します。連携先に公開される内容は、[買取強化対象](/guides/purchase/purchase-boosts)で確かめられます。
オリパのアプリが当選したカードの需要を送るには、「在庫の確保・解放・出庫を許可する」も許可します。届いた需要は[オリパ需要](/guides/purchase/oripa-demand)で見られます。
## 2. シークレットを連携先の開発者に渡す
登録すると、「クライアントID」「クライアントシークレット」「リソース(resource)」が表示されます。これらを、連携先の開発者に安全な方法で伝えます。
:::warning
クライアントシークレットは、この画面を閉じると二度と表示できません。失くした場合は、連携先の「シークレットを再発行」で作り直します。
:::
「シークレットを再発行」を押すと、確認の画面が出ます。①の「再発行する」を押すと新しいシークレットが表示され、**それまでのシークレットはすぐに使えなくなります。** 連携先には新しいシークレットに差し替えてもらいます。
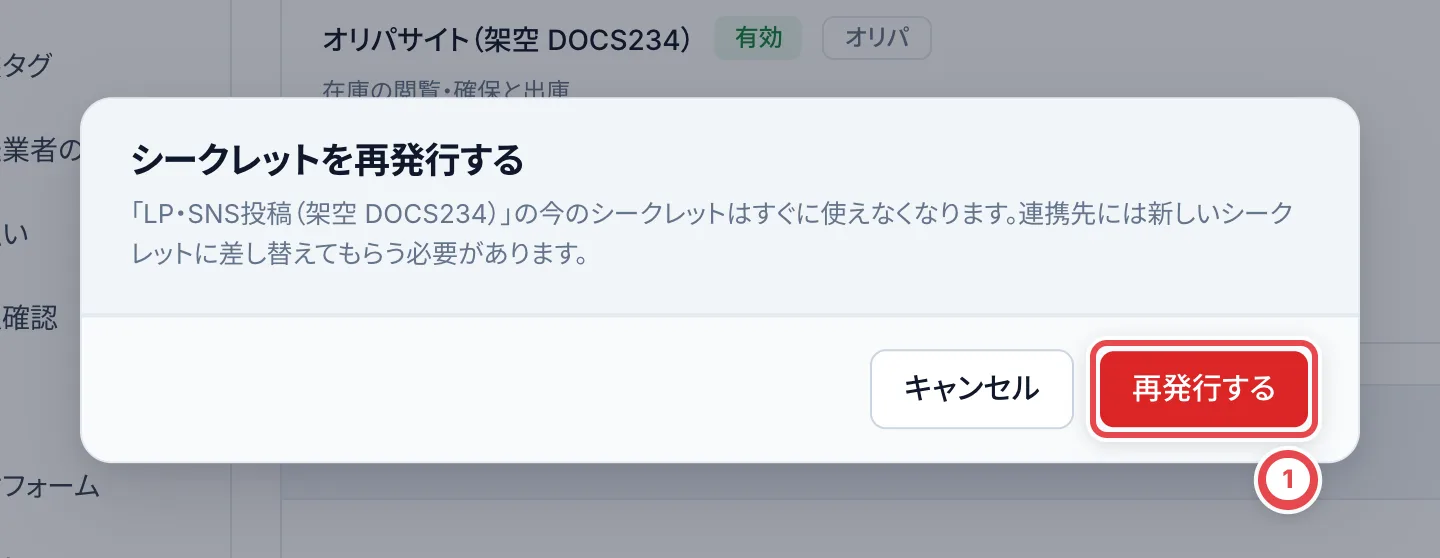 連携先のアプリ側の作り方は、開発者向けの[APIリファレンス](/api)にまとめています。
## 3. 連携先のアプリから接続を許可する
連携先のアプリから接続を始めると、トレカクラウドの許可画面が開きます。店舗のメンバーがログインし、許可する内容を確かめて「許可する」を押すと、接続が完了します。
接続すると、①の「接続中の連携先」に並びます。連携先ごとに、許可している内容と、接続した日時・メンバーが表示されます。
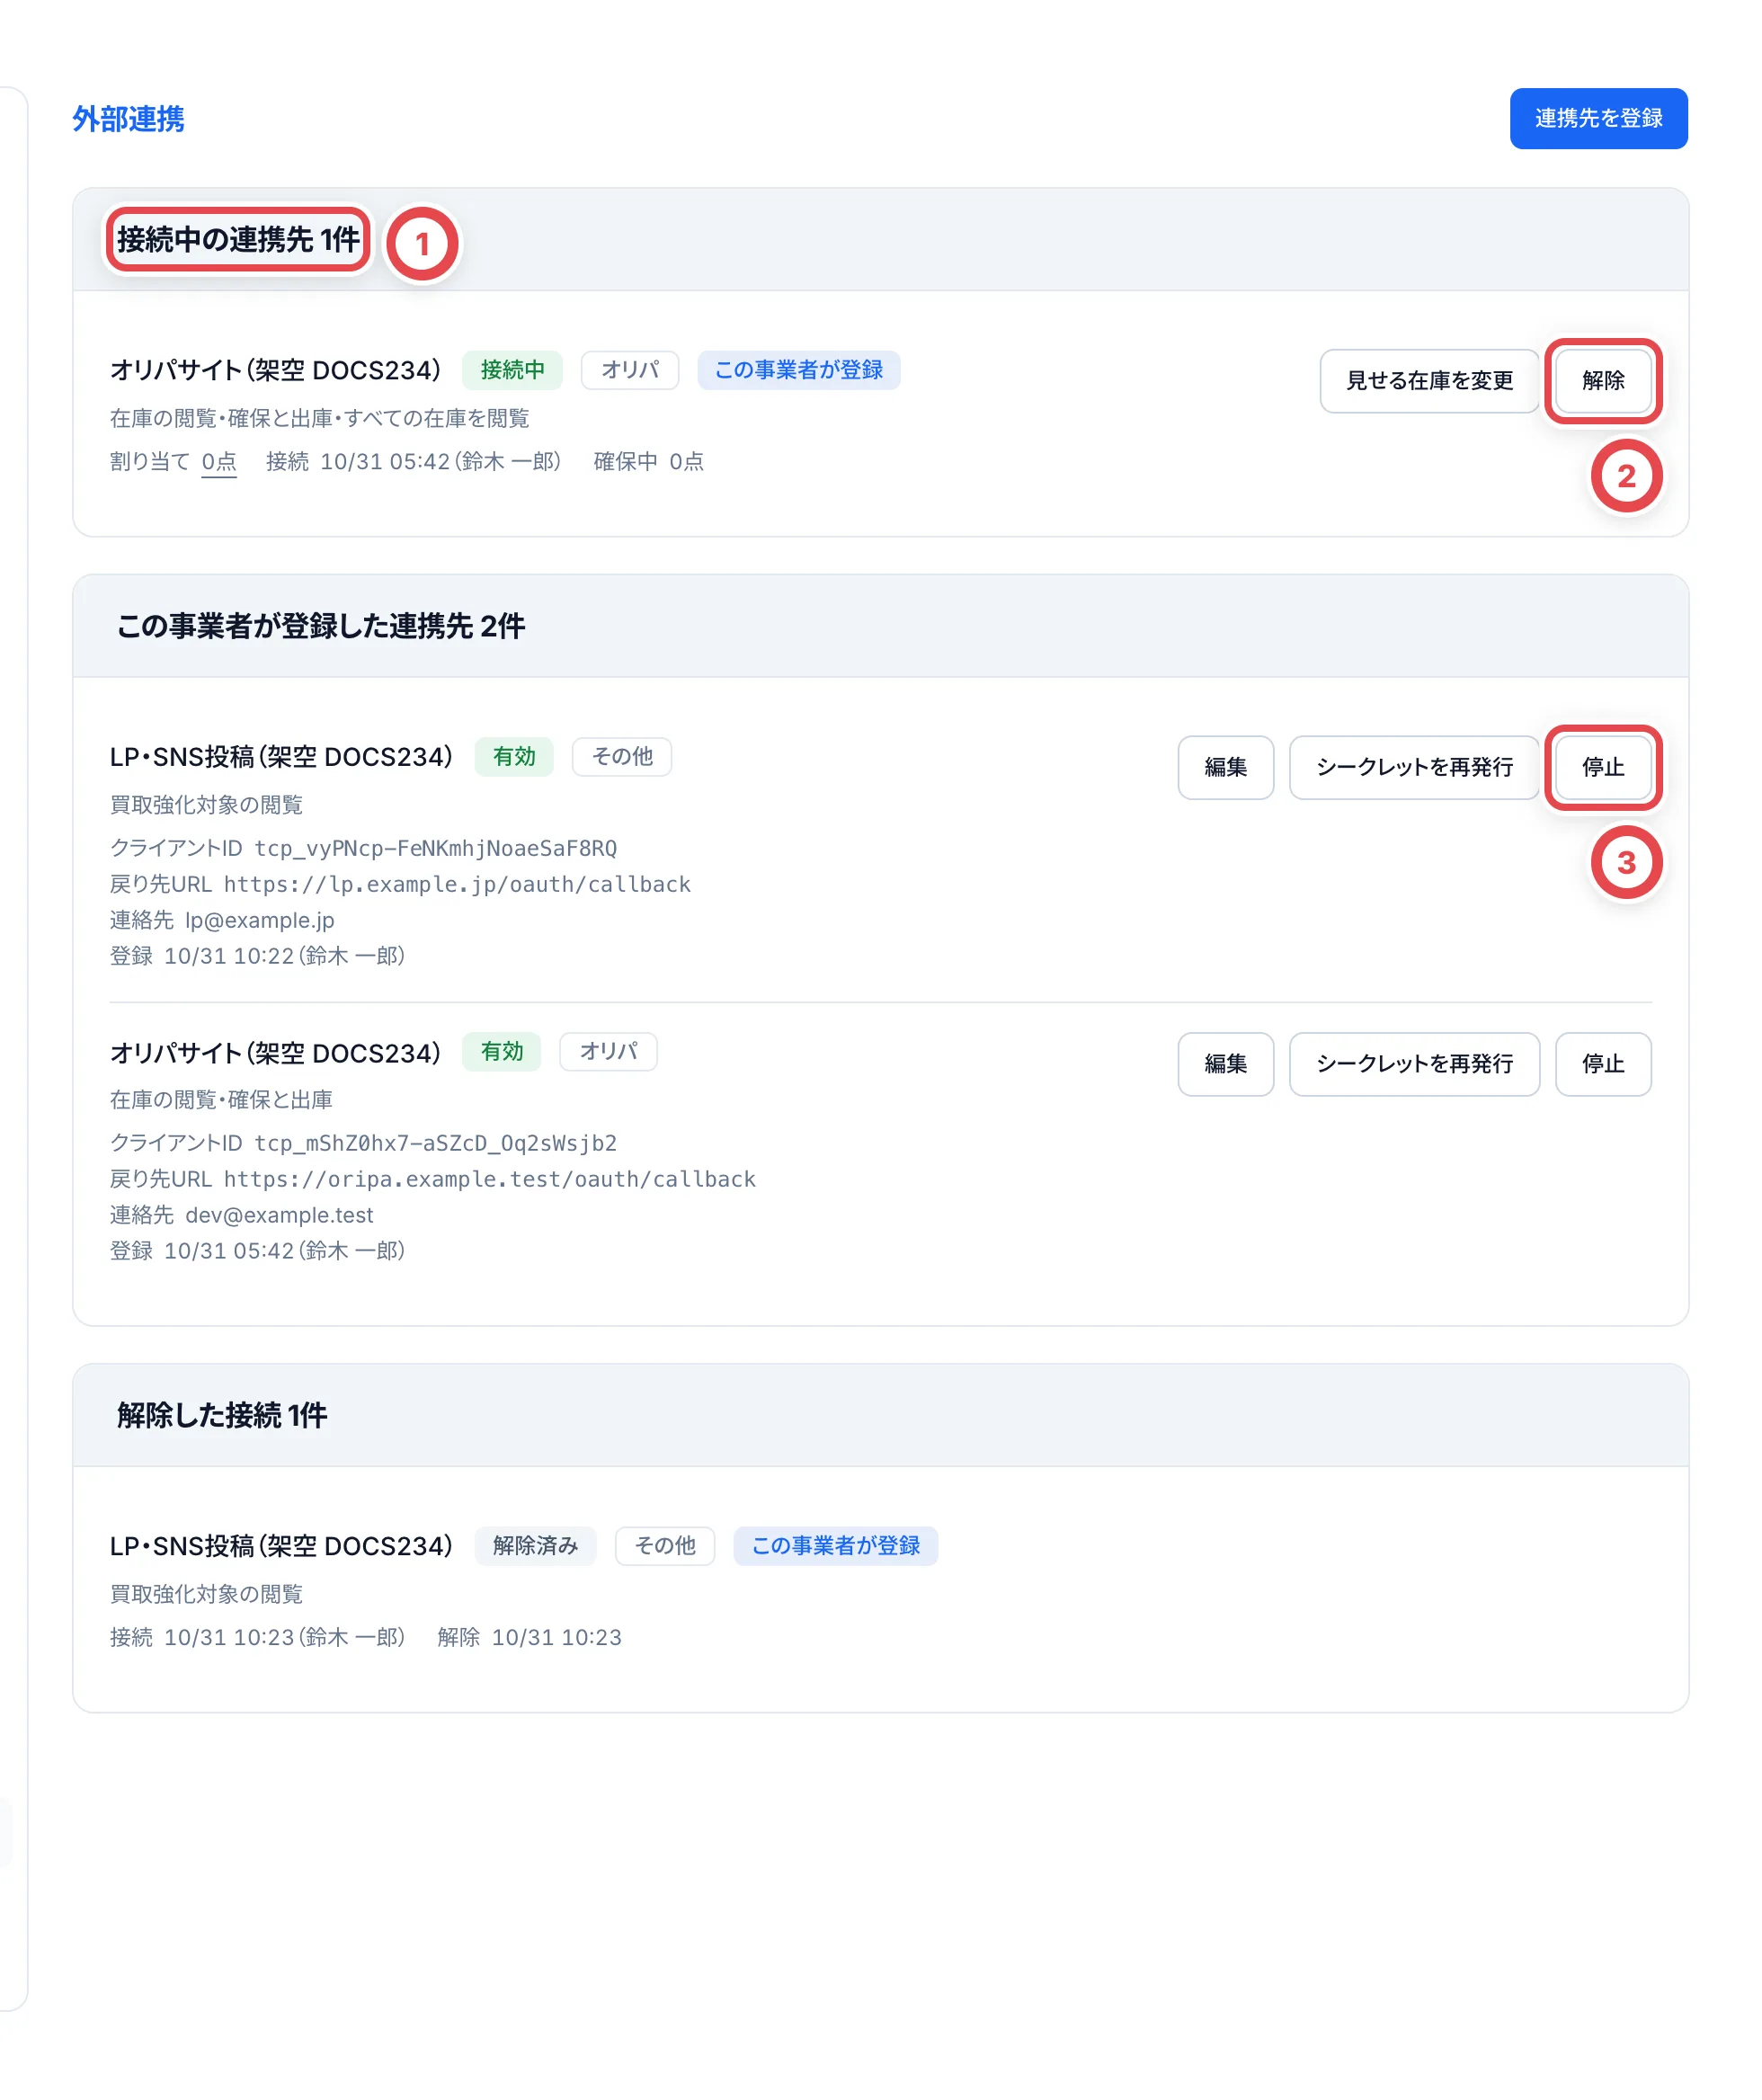 ①に接続中の連携先が並びます。②で接続を解除し、③で連携先を一時的に止めます。
Webhookを登録した連携先には、直近の配信成功日時や失敗日時・エラーも表示されます。失敗が表示されている場合は、連携先の開発者に受信先の状態を確認してもらいます。
在庫を読み取る連携先には、見せる範囲を決められます。「見せる在庫を変更」を押し、「すべての在庫」か「割り当てた在庫だけ」を選んで「保存する」を押します。「割り当てた在庫だけ」にすると、連携先は在庫の「連携先への割り当て」で割り当てた個体だけを読み、確保できます。
## 4. (必要なら)停止・解除する
### 一時的に止める
登録した連携先の「停止」(上の図の③)を押すと、確認の画面が出ます。①の「停止する」を押すと、接続していても在庫や買取強化対象を読めず、在庫の確保や出庫もできなくなります。すでに確保されている個体はそのまま残ります。同じ場所の「再開」で元に戻せます。
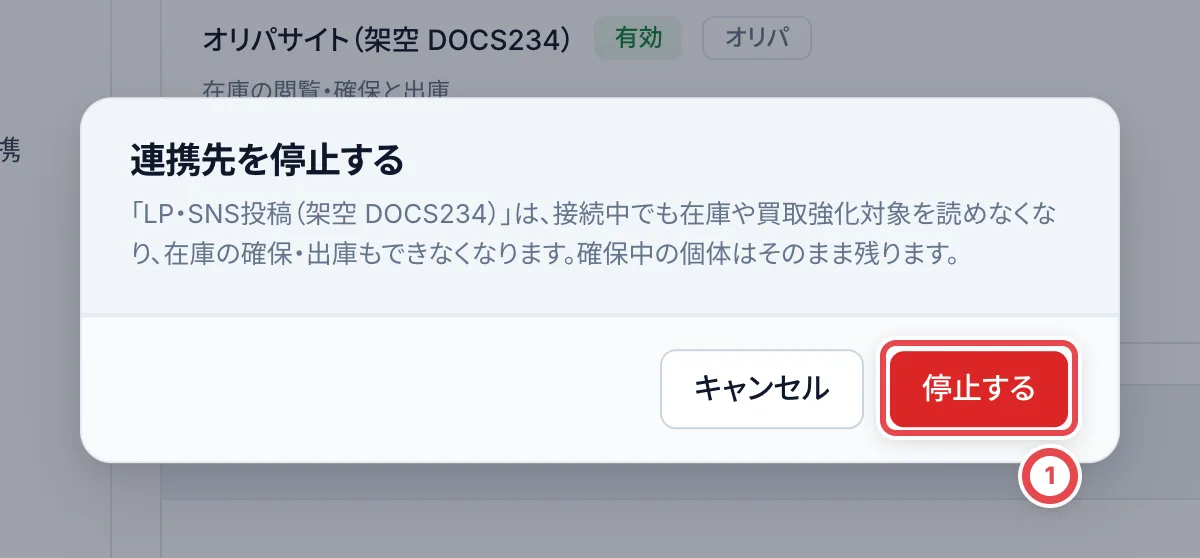 ### 接続を解除する
「接続中の連携先」の「解除」(上の図の②)を押すと、「接続を解除する」が開きます。①に解除する理由を書き、②の「解除する」を押します。
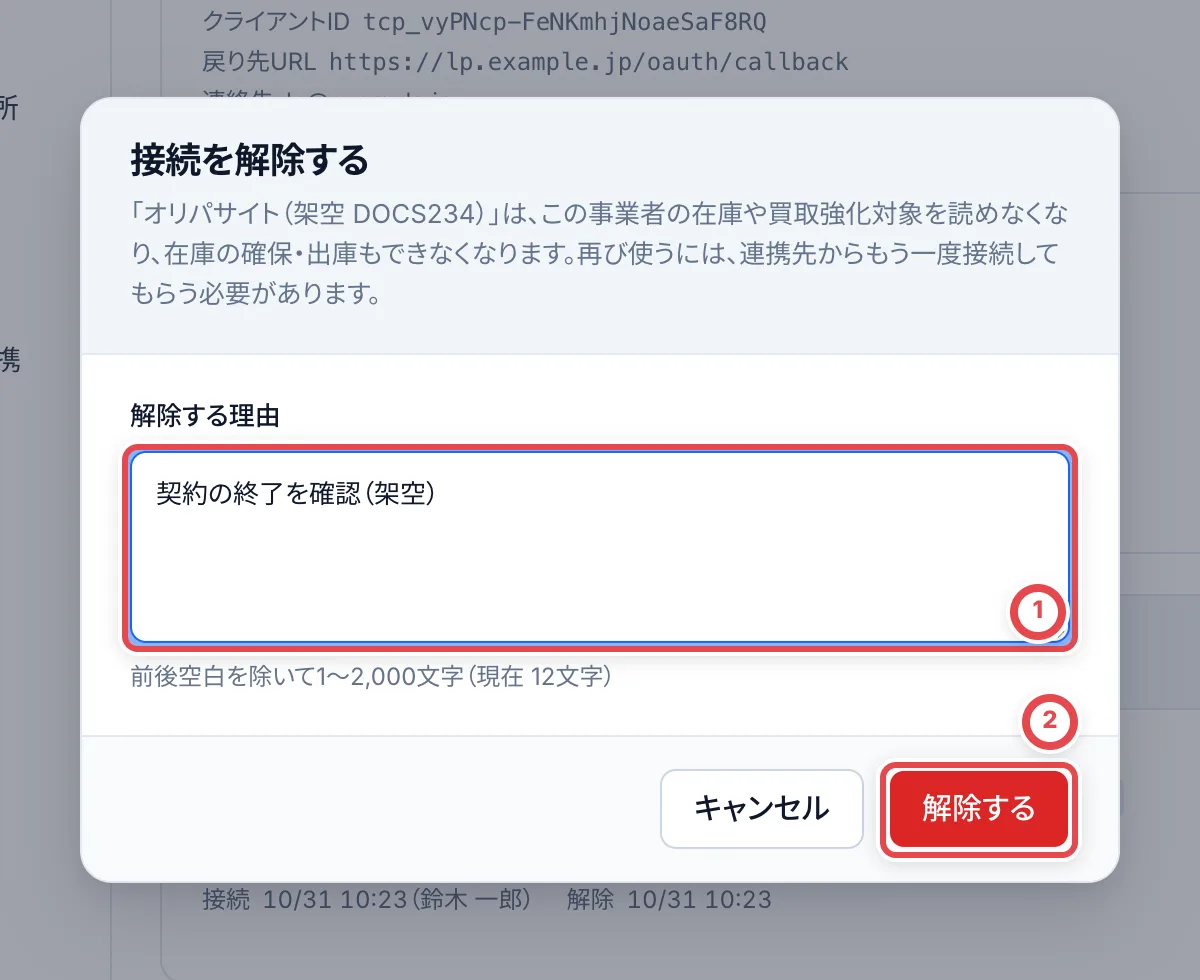 解除すると、連携先はこの店舗の在庫や買取強化対象を読めなくなり、在庫の確保や出庫もできなくなります。**解除は元に戻せません。** もう一度使うには、連携先から接続し直してもらいます。
:::warning
解除しても、連携先が確保していた個体の確保は残ります。確保中の個体があると、解除の画面にその点数が出ます。在庫の出庫予約の画面から、出庫するか取り消してください。
:::
登録・変更・シークレットの再発行・停止・解除などの操作は、すべて監査ログに残ります。監査ログでは「連携先の操作(すべて)」に絞り込んで確かめられます。
## 困ったとき
| 起きていること | 確かめること・直し方 |
| -------------------------------------------------------------------------- | -------------------------------------------------------------------------------------------------------------------- |
| 「設定」に「外部連携」がない | 店舗で外部連携が有効になっていません。トレカクラウドの運営にお問い合わせください。 |
| 「連携先を登録」がない | 閲覧のみの権限です。オーナーか管理者に頼みます。 |
| 「在庫か買取強化対象の、少なくとも一方の読み取りを許可してください」と出る | 「許可すること」で、「在庫を読み取る」か「買取強化対象を読み取る」の少なくとも一方を選びます。 |
| 戻り先URLが登録できない | https で始まるURLだけ登録できます。連携先の開発者に確かめます。 |
| シークレットを失くした | 「シークレットを再発行」で作り直し、新しいシークレットを連携先に伝えます。今のシークレットはすぐに使えなくなります。 |
| 連携先が在庫を読めない | 連携先が停止中か、「見せる在庫」が「割り当てた在庫だけ」になっています。「再開」や割り当てを確かめます。 |
| 「この接続はすでに解除されています。画面を更新してください」と出る | ほかのメンバーが先に解除しています。画面を更新します。 |
---
# 買取掛け率
Source: https://docs.toreca-cloud.com/guides/settings/pricing
買取掛け率は、カードの相場に掛けて買取価格を出すための割合です。新規査定では「店舗設定」が選ばれ、参考時価を入力する前から標準掛率が表示されます。時価が揃うと、ここで決めた条件で自動計算します。保存済みの査定額は、設定を変えただけでは書き換わりません。新しい設定で計算し直すには査定を編集し、掛率が「店舗設定」になっていることを確認して保存します。「手動入力」を選んだ査定では、手入力した掛率が維持されます。
## 最初に用意するもの
- 設定を管理する権限(オーナーと管理者)。ほかのメンバーには値だけが表示され、「変更」は出ません
- 単品カード・BOXなどの基本の掛け率と、価格帯ごとに変えたい掛け率
## 流れ
| 順番 | やること |
| ---- | ------------------------------------- |
| 1 | 基本の掛け率とグレードを決める |
| 2 | (必要なら)価格帯ごとのルールを作る |
| 3 | 端数の丸め方と2次査定の下限額を決める |
## 買取価格の決まり方
査定額は、カードの参考時価に掛け率を掛け、端数を丸めて決まります。たとえば参考時価が10,000円で掛け率が80%なら、査定額は8,000円です。
掛け率は、次の順番で決まります。
1. BOX・パック・デッキで、「BOX・パック・デッキの掛け率」を決めているときは、その掛け率を使います(価格帯のルールは見ません)
2. 有効になっているルールを、番号の小さい順に確かめます。参考時価がルールの価格帯に入っていて、ルールに条件(「外部鑑定品のみ」など)があればそれにも合うとき、**最初に当てはまったルール**の買取率を使います
3. どのルールにも当てはまらないときは、「デフォルトの掛け率」を使います
## 1. 基本の掛け率とグレードを決める
「設定」の「買取掛け率」を開きます。上の3つの「変更」で、それぞれ値を変えます。
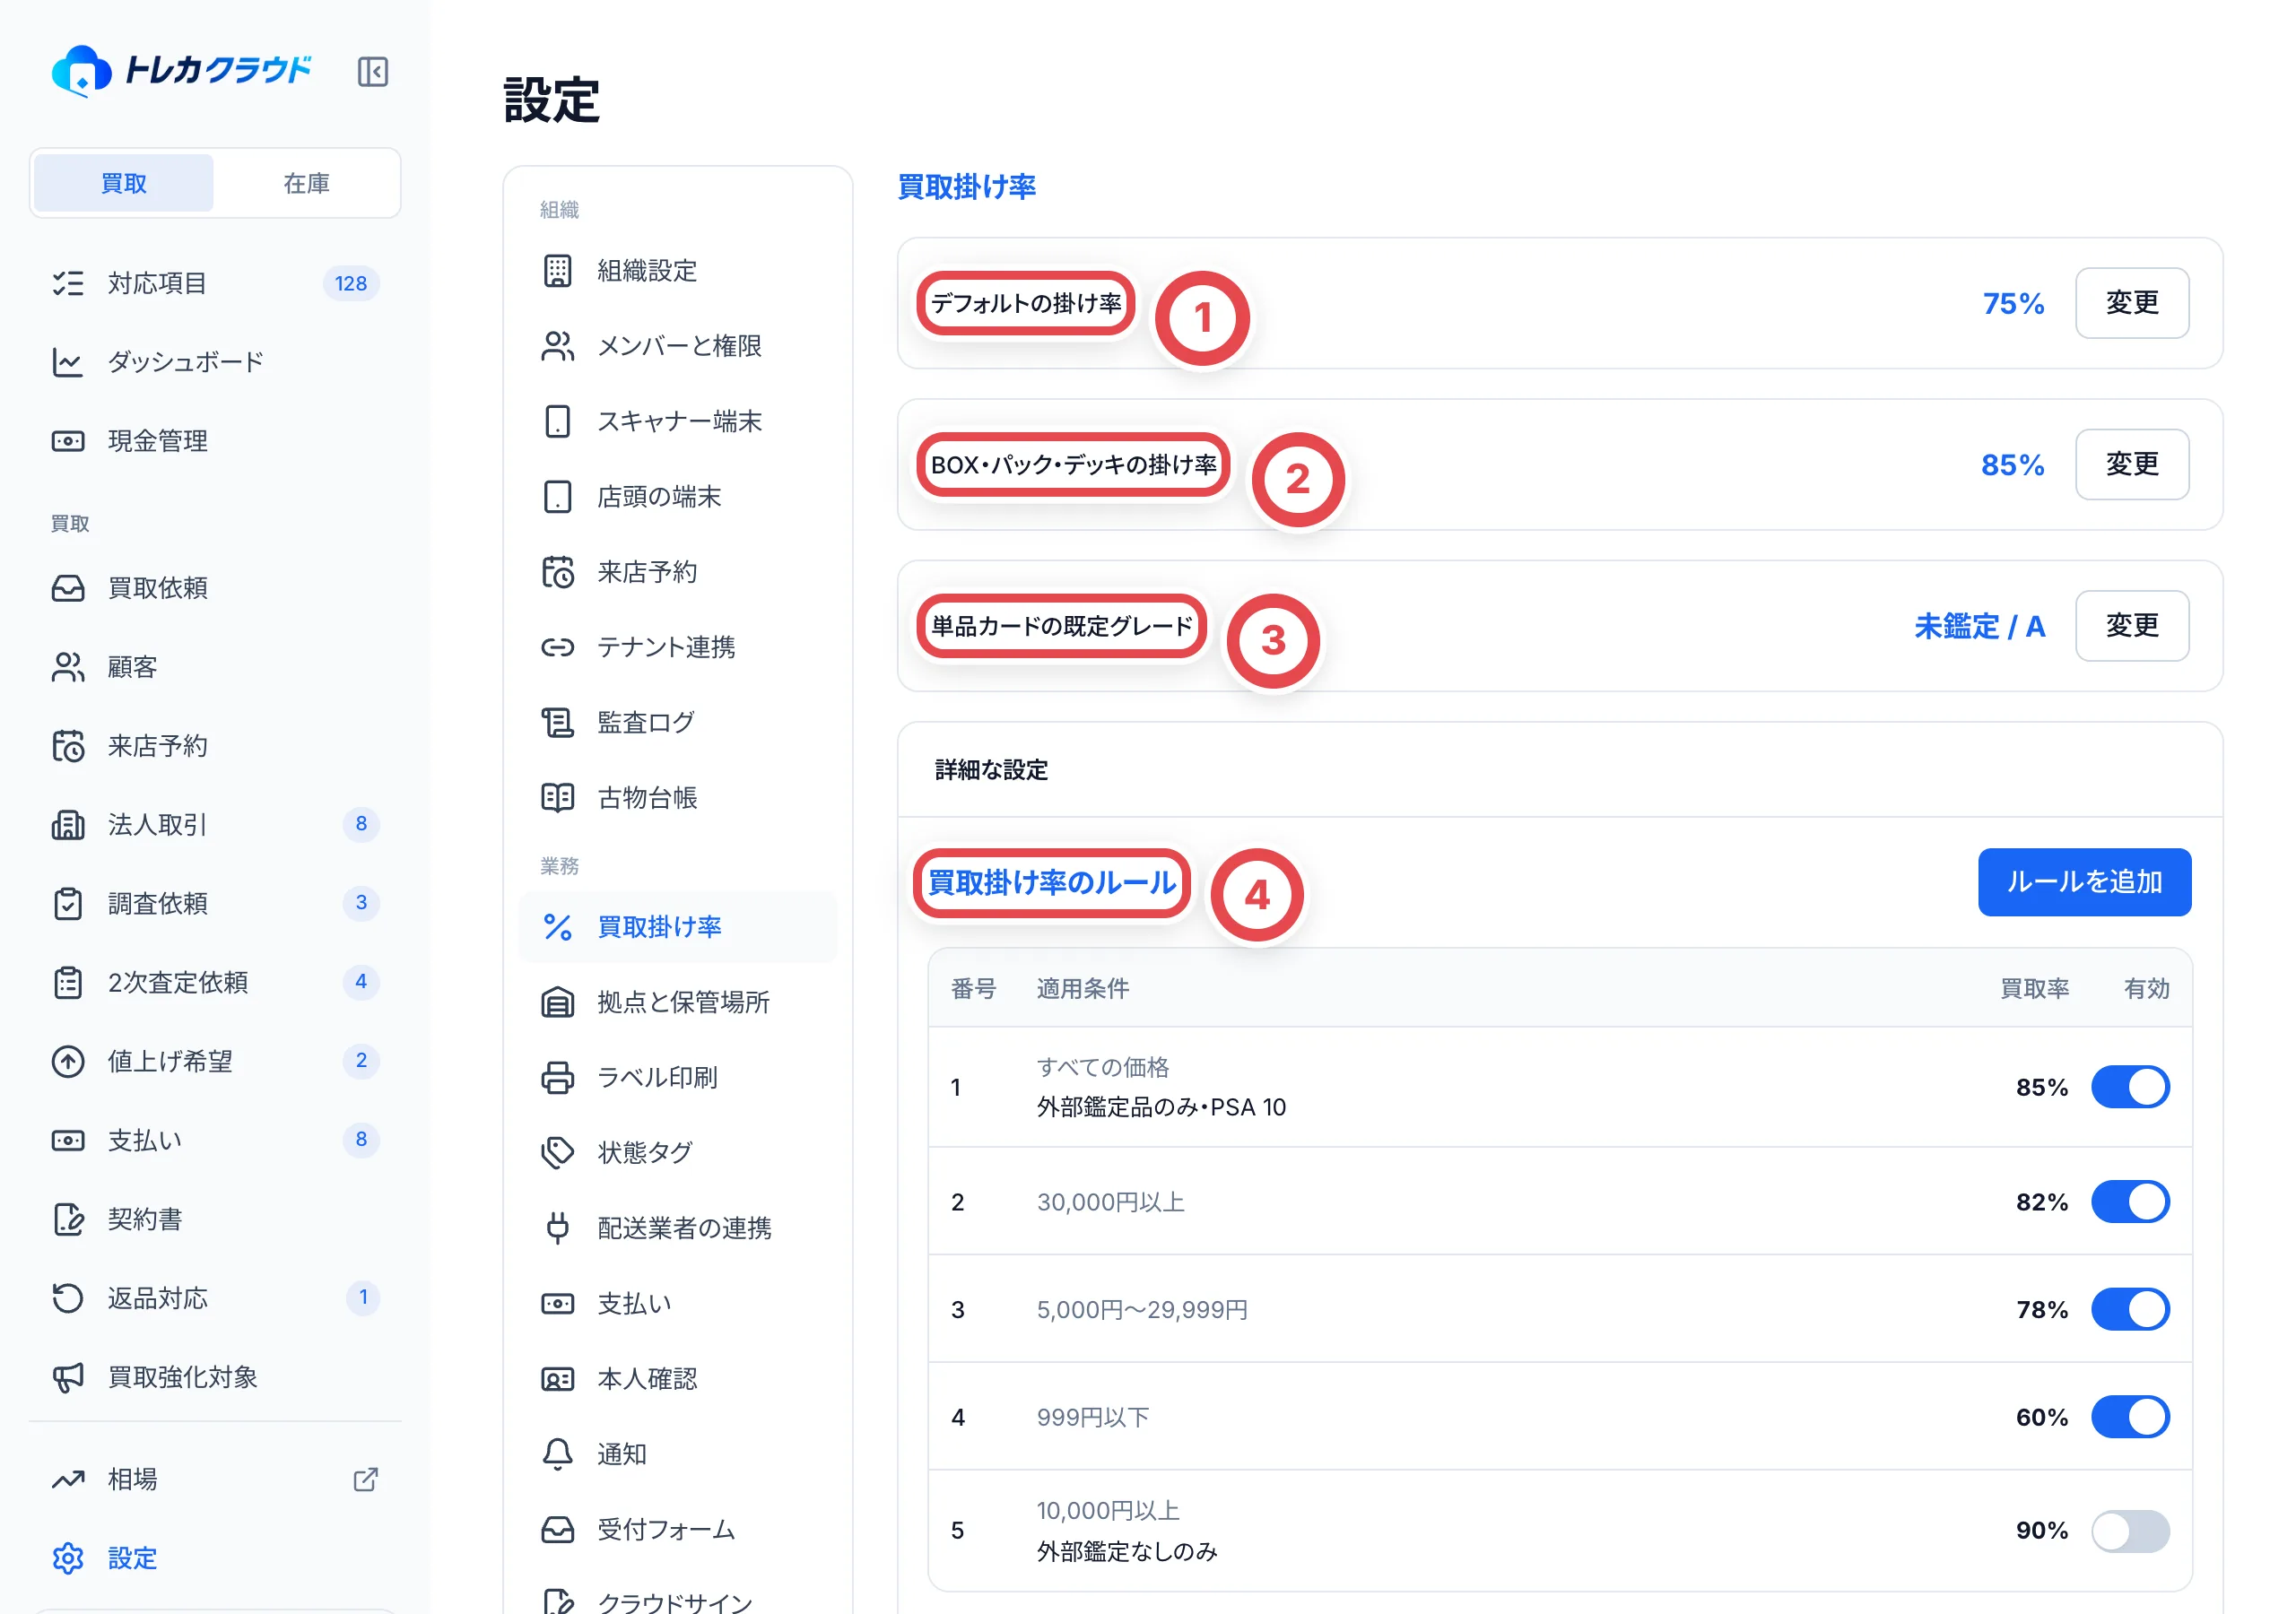 ①はルールに当てはまらないときの掛け率、②は未開封の商品の掛け率、③は査定で最初に選ばれるグレードです。④のルールも同じページに表示されます。
| 項目 | 内容 |
| ---------------------------- | ------------------------------------------------------------------------------------------ |
| ①デフォルトの掛け率 | ルールに当てはまらないカードに使う掛け率です。0〜100%で、小数2桁まで入力できます |
| ②BOX・パック・デッキの掛け率 | 未開封の商品に使う掛け率です。空欄なら「デフォルトと同じ」になり、ルールも当てはめます |
| ③単品カードの既定グレード | 査定でカードを追加したときに、最初に選ばれるグレードです。「なし(毎回選ぶ)」にもできます |
「デフォルトの掛け率」の「変更」を押すと、①の欄に今の掛け率が入っています。%で入れ直し、②の「変更を保存」を押します。**押すと、その場で掛け率が切り替わります。**
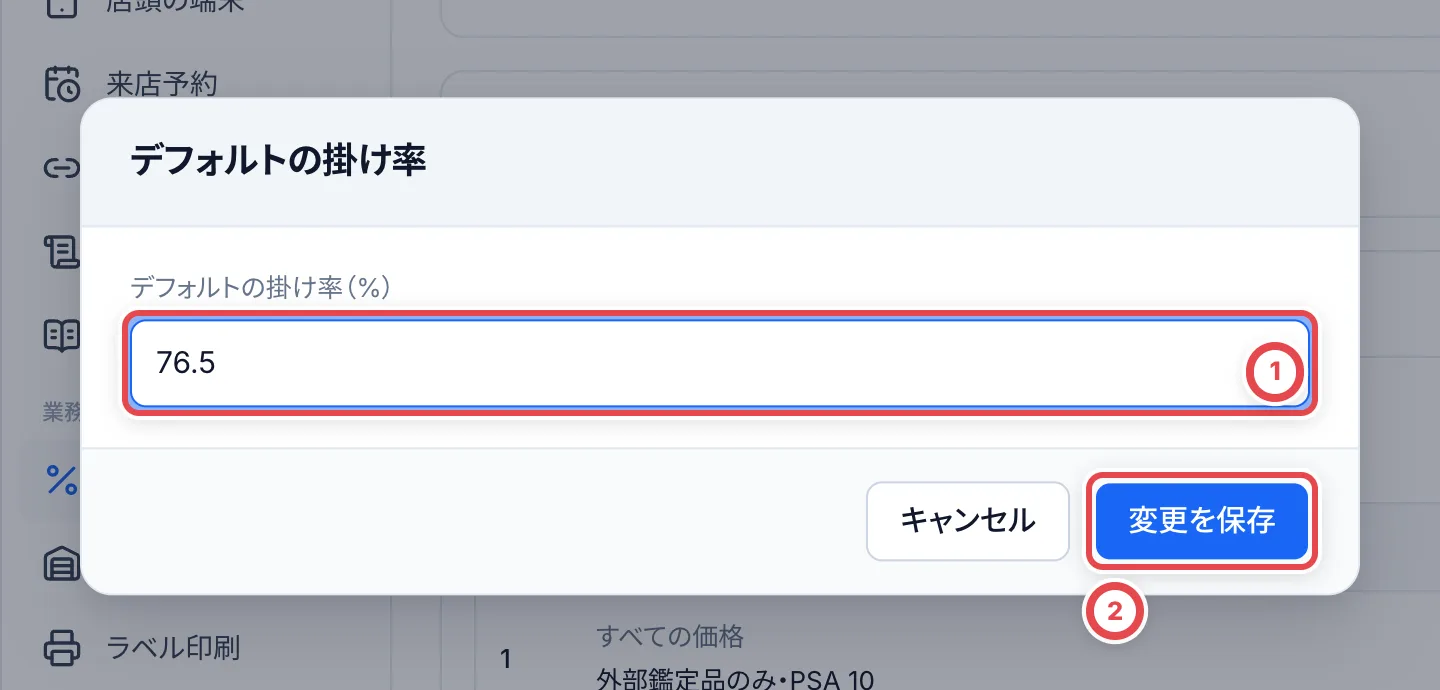 ## 2. (必要なら)価格帯ごとのルールを作る
ページ下部に「買取掛け率のルール」が常に表示されます。表には、番号・適用条件・買取率と、有効かどうかのスイッチが出ます。適用条件には価格帯が出て、価格帯のほかに条件があるルールは、その下に「外部鑑定品のみ・PSA 10」のように条件が出ます。
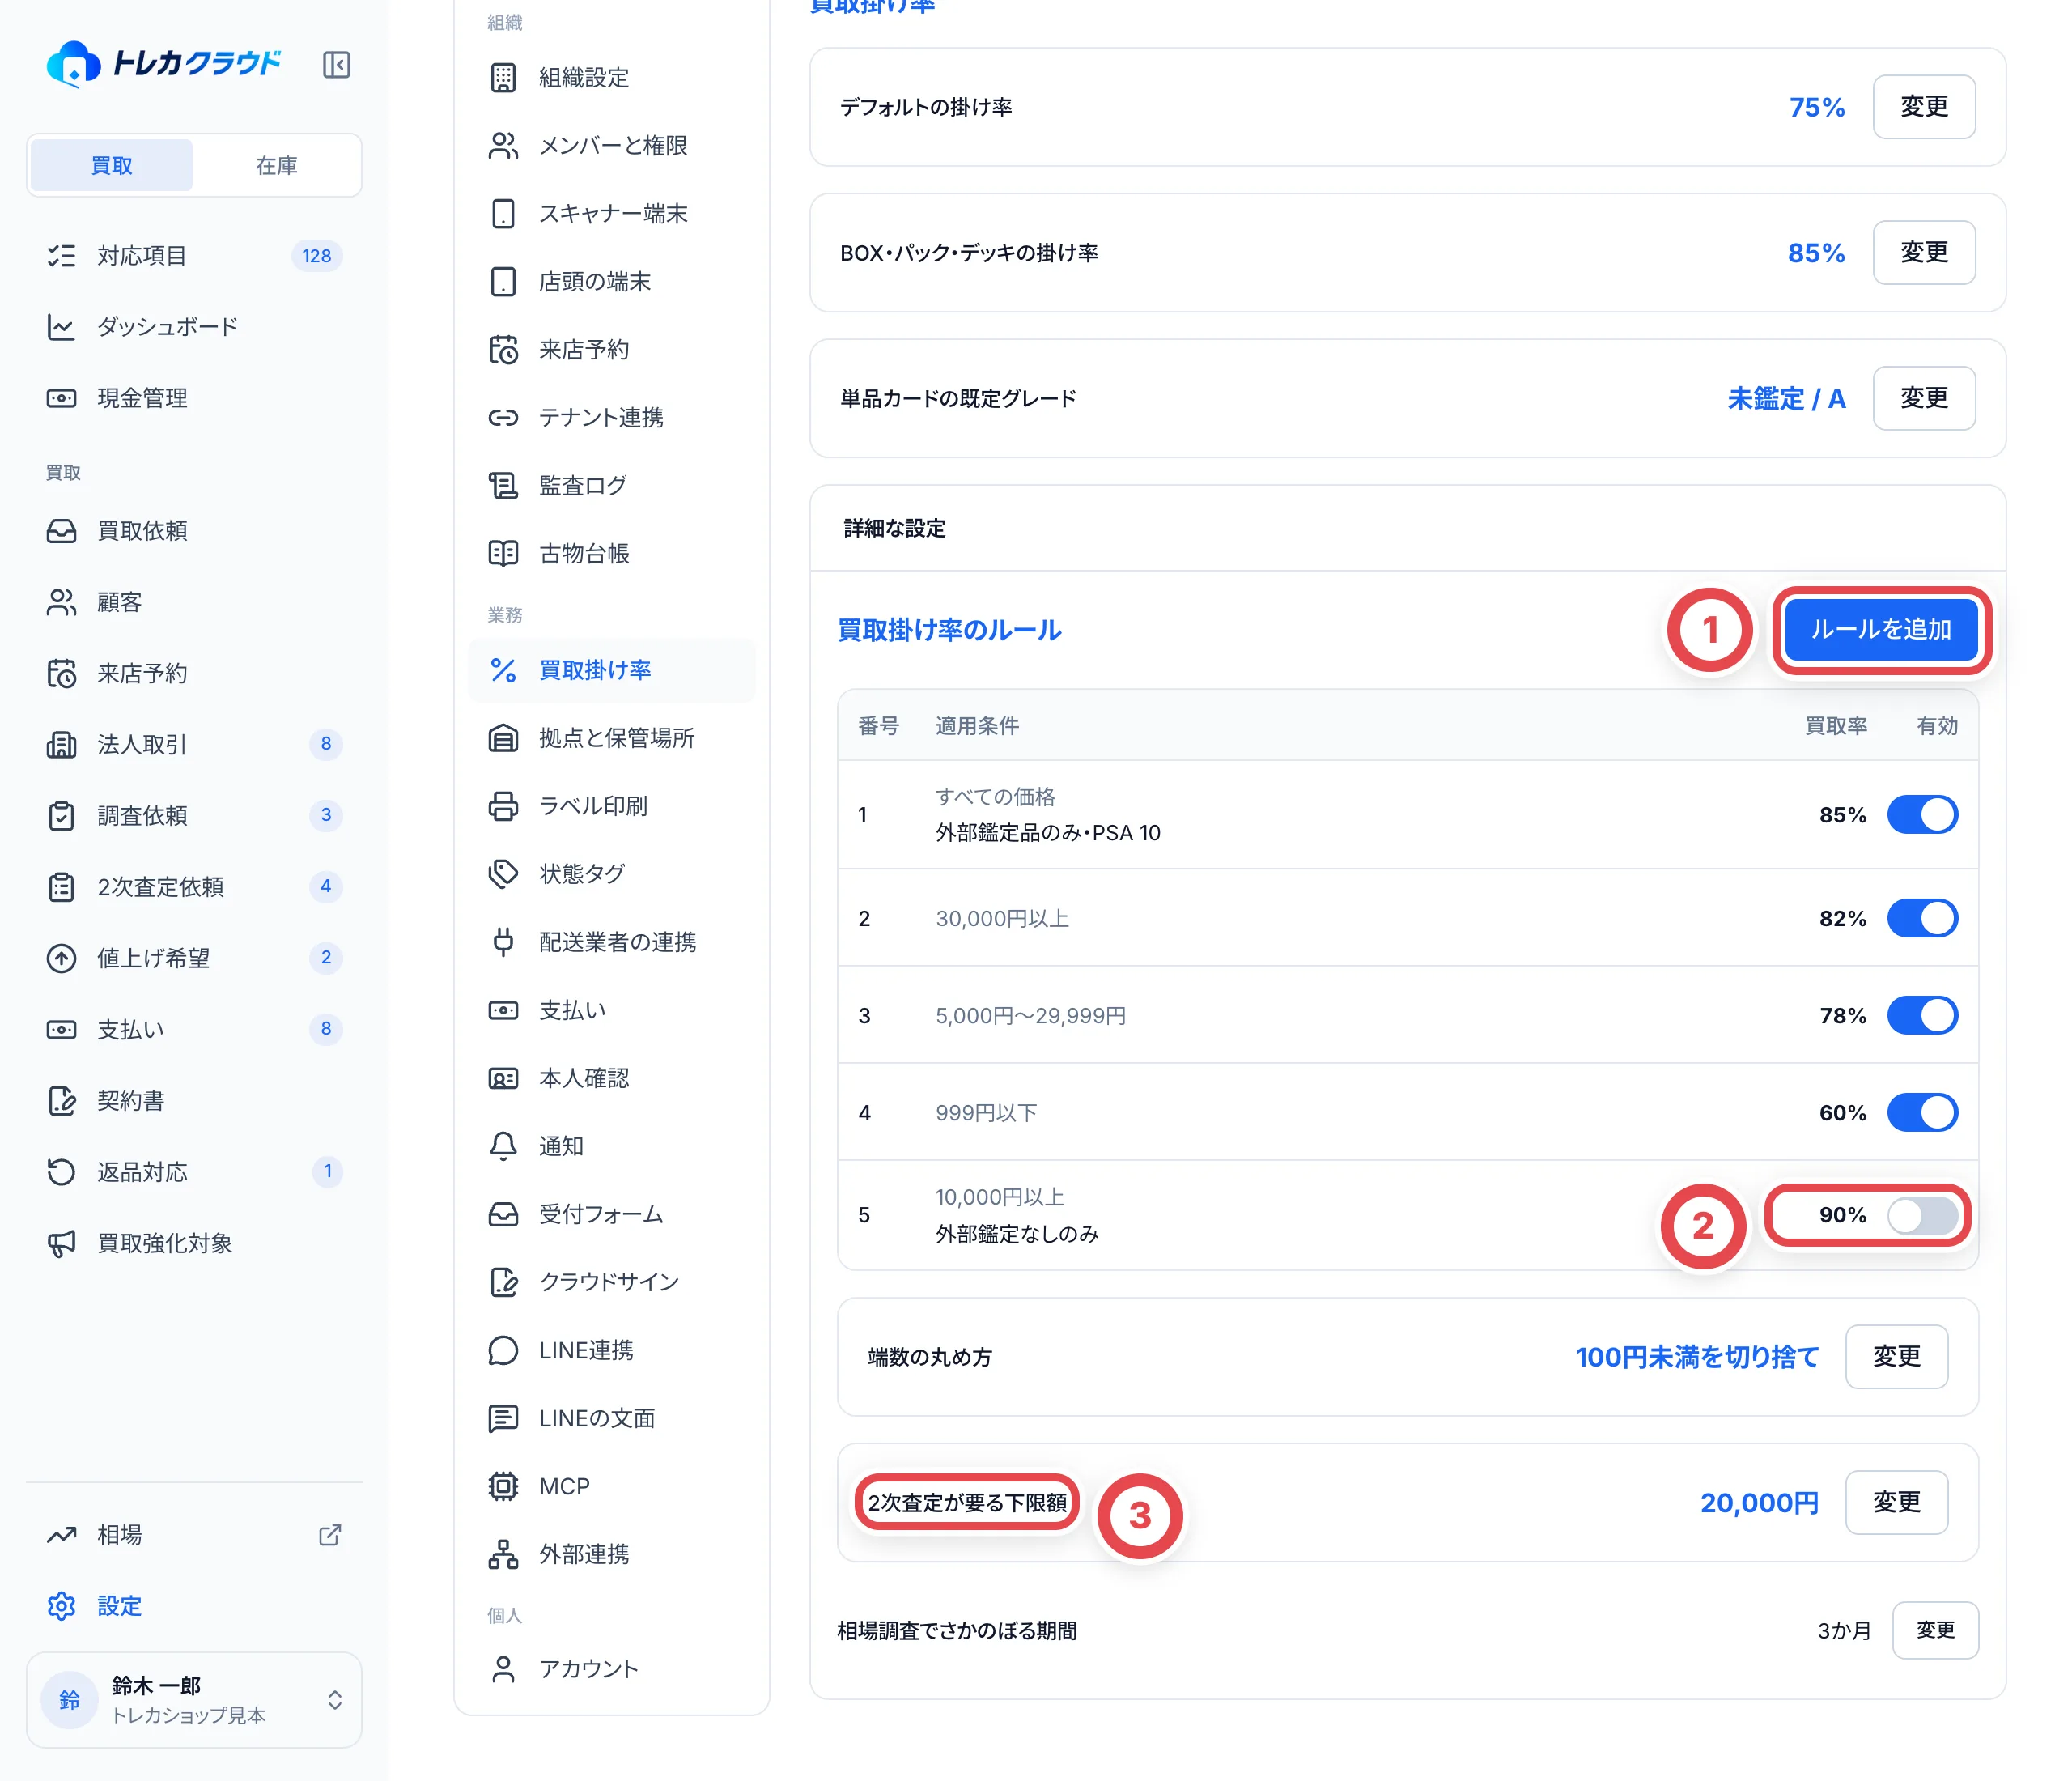 - ①の「ルールを追加」で、新しいルールを一番下に足します
- ②のスイッチで、ルールの有効と無効を切り替えます。**押すとその場で保存されます**(確認の画面は出ません)。無効のルールは、決まり方の順番に入りません
- 番号を押すと、そのルールを編集できます
ルールの画面では、①の「下限価格(円)」「上限価格(円)」と、②の「買取率(%)」を入れて「変更を保存」を押します。下限と上限の金額もその価格帯に含まれます。空欄にした側には制限がありません。
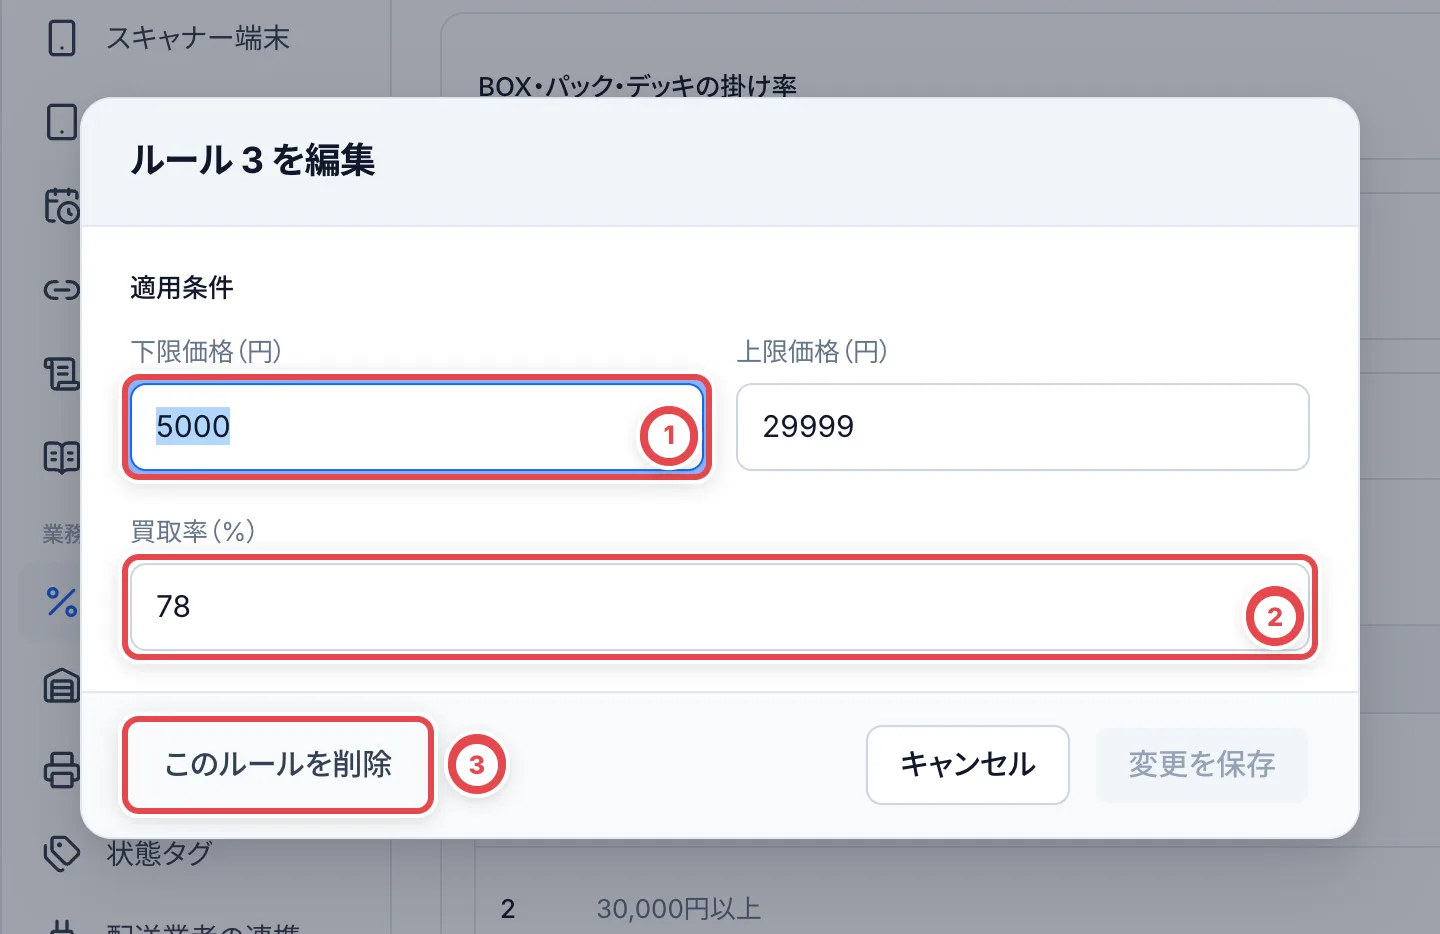 **③の「このルールを削除」は、押すとその場で削除されます**(確認の画面は出ません)。消したあとは番号が詰め直されます。
ルールは上から順に確かめ、最初に当てはまったものを使います。たとえば「すべての価格」のルールを1番にすると、2番以降のルールは使われません。範囲の狭いルールを上に置きます。
### 条件が付いているルールを編集する
以前の設定や MCP で作ったルールには、価格帯のほかに「外部鑑定品のみ」「PSA 10」などの条件が付いていることがあります。この画面で新しく作るルールは価格帯だけで、条件は付けられません。
条件が付いているルールを開くと、①に条件が出ます。価格帯と買取率を変えて保存しても、**条件はそのまま残ります**。
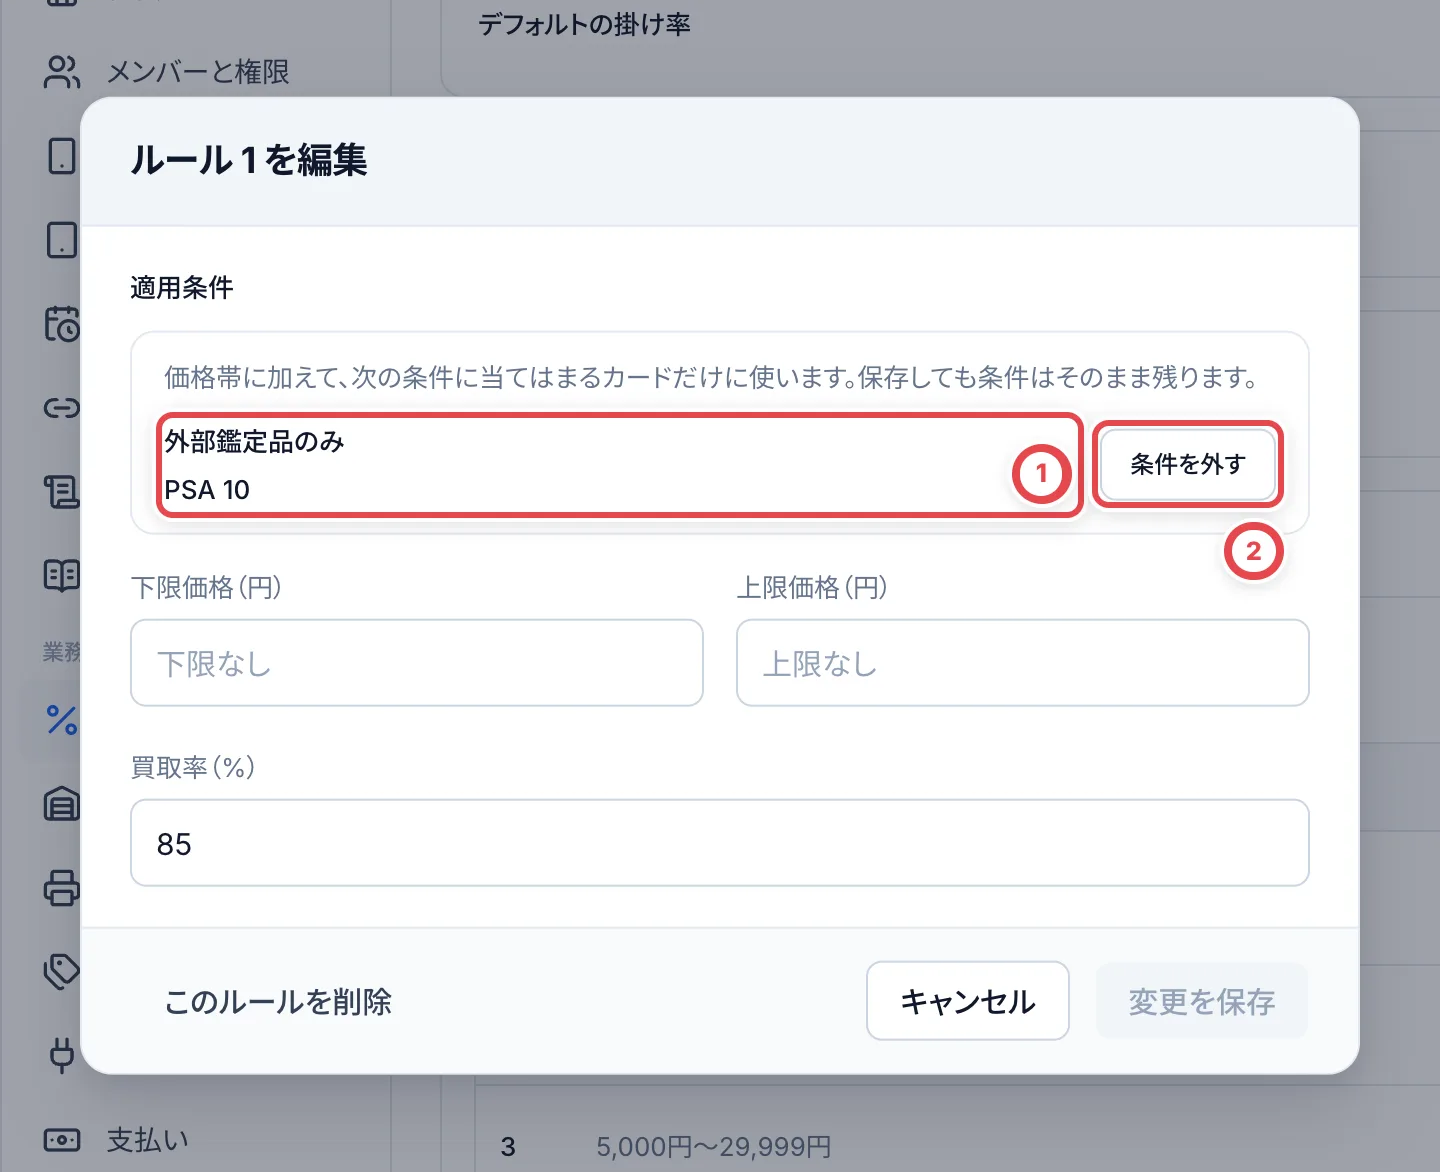 「コンソールで扱えない条件」と表示されるルールが有効なあいだは、査定で掛け率を自動計算できません。設定担当者に条件の確認を依頼します。対象カードの範囲を確認せずに条件を外さないでください。
条件を外したいときは、②の「条件を外す」を押してから「変更を保存」を押します。押し間違えたら、保存する前に「元に戻す」で戻せます。
:::caution
条件を外したルールは、価格帯に入るすべてのカードに当たります。価格帯も空なら「すべての価格」のルールになり、それより下のルールは使われなくなります。外す前に、ルールの番号を確かめてください。一度外した条件は、この画面では付け直せません。
:::
## 3. 端数の丸め方と2次査定の下限額を決める
「詳細な設定」の下のほうで、次の3つを決めます。どれも「変更」から変えます。
| 項目 | 内容 |
| ------------------------ | ------------------------------------------------------------------------------------------------------------------------------------------ |
| 端数の丸め方 | 査定額の端数を「切り捨てる」「切り上げる」「四捨五入する」「丸めない」から選び、丸める単位を1円・10円・100円・1,000円から選びます |
| 2次査定が要る下限額 | オンライン買取では、査定額がこの金額以上のカードは見積を出す前に2次査定が必要です。0円にすると、すべてのカードで2次査定が必要になります |
| 相場調査でさかのぼる期間 | 相場調査の詳細で表示する記録を、何か月前までさかのぼるかを1〜121か月で決めます。査定に自動で入る相場は、設定にかかわらず直近30日の成約です |
店頭買取では2次査定を依頼しません。オンライン買取と法人取引をどちらも使っていない店舗では、2次査定の下限額と相場調査の期間は表示されず、サイドバーにも「調査依頼」「2次査定依頼」は出ません。オンライン買取の2次査定の流れは[調査依頼と2次査定依頼](/guides/purchase/research-and-reviews)で説明しています。
:::note
閲覧のみ以外のメンバーが1人しかいない店舗では、2次査定を頼める相手がいないため、2次査定を待たずに見積を出せます。
:::
## 困ったとき
| 起きていること | 確かめること・直し方 |
| ----------------------------------------------------------------- | -------------------------------------------------------------------------------------------------------------------------------- |
| 「変更」が出ない | 設定を管理する権限がありません。オーナーか管理者に頼みます。 |
| 掛け率を変えたのに、査定額が変わらない | 保存済みの査定額は設定変更だけでは書き換わりません。査定を編集し、掛率を「店舗設定」にして計算結果を確認・保存します。 |
| 価格帯のルールが使われない | 上にあるルールに先に当てはまっています。番号の順番と、「すべての価格」のルールがないかを確かめます。無効のルールも使われません。 |
| BOXにルールが当たらない | 「BOX・パック・デッキの掛け率」を決めていると、BOXなどにはルールを当てはめず、その掛け率を使います。 |
| 「上限価格は下限価格以上にしてください。」と出る | 上限価格を、下限価格と同じかそれより大きい金額にします。 |
| 「買取率は0〜100(小数2桁まで)の数字で入力してください。」と出る | 0〜100の数字で入れます。小数は2桁までです。 |
| 間違えてルールを削除した | 元には戻せません。「ルールを追加」で同じ内容のルールを作り直します。 |
---
# 紹介手数料の資料
Source: https://docs.toreca-cloud.com/guides/settings/referral-reports
紹介手数料の資料は、Linyで紹介タグを付けた顧客の買取(成立したもの)を抽出し、紹介元に払う紹介手数料を計算してCSVにする機能です。**資料を作っても、紹介元への送金や連絡はされません。** 支払いは店舗で行います。
## 最初に用意するもの
- 「設定」の「LINE連携」で、Linyとつながっていること(接続が使えないと、資料は作れません。保存済みの資料のダウンロードはできます)
- 顧客と取引を見る権限と、連携を見る権限
- Linyで、紹介された顧客に紹介タグを付けていること
## 流れ
| 順番 | やること |
| ---- | ------------------------------------- |
| 1 | 紹介タグを取得して選ぶ |
| 2 | 期間と端数処理を選んで、資料を作る |
| 3 | 結果を確かめて、CSVをダウンロードする |
## 1. 紹介タグを取得して選ぶ
「買取」の一覧を開き、検索欄の隣の「書き出す」から「紹介手数料の資料…」を選びます(以前は「設定」の「LINE連携」にありました)。Linyアカウントが複数あるときは、最初にアカウントを選びます。①の「タグを取得」を押すと、Linyのタグが「紹介タグ」の欄に並びます(押すまで選べません)。紹介に使っているタグを選びます。紹介タグは、Linyで紹介元から来た友だちに付けているタグのことです。
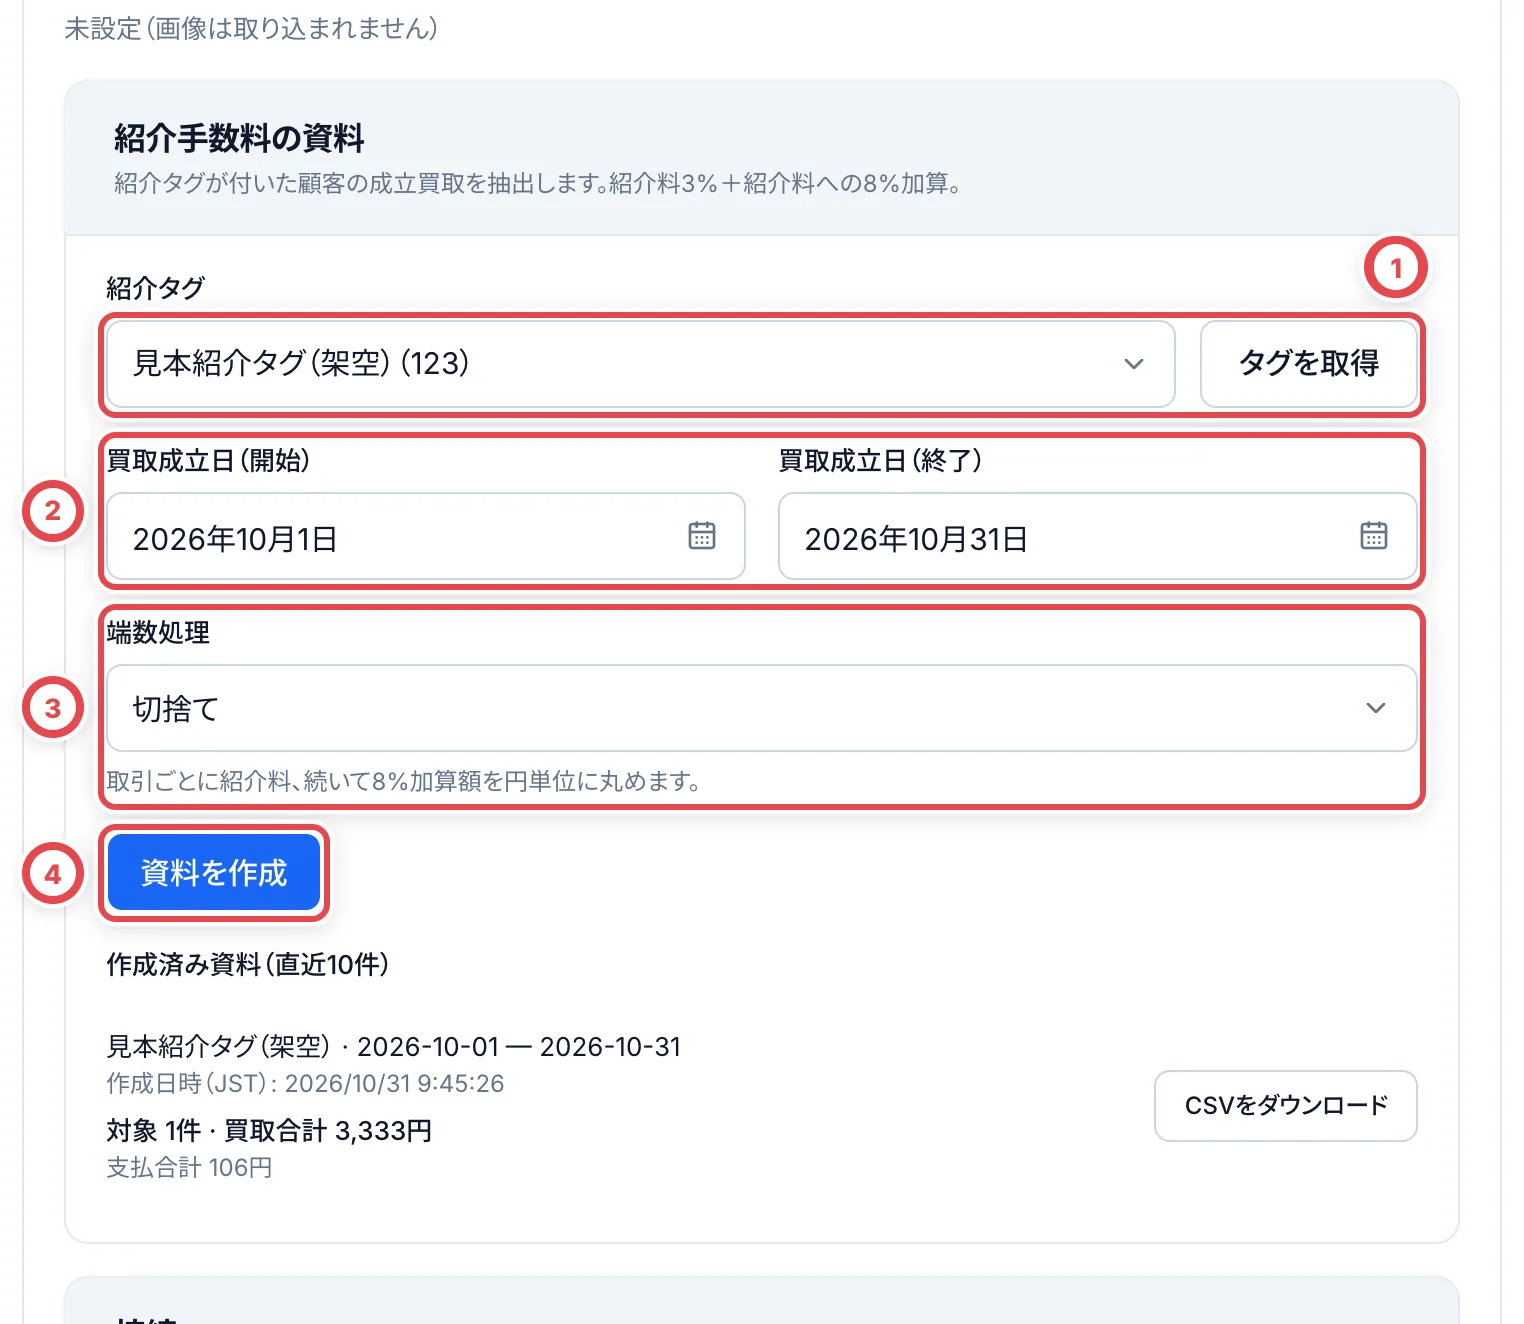 ①で紹介タグを取得して選び、②の成立日と③の端数処理を選んで、④で資料を作ります。
タグ一覧は先頭1,000件までです。一覧にないタグは選べません。
## 2. 期間と端数処理を選んで、資料を作る
②の「買取成立日(開始)」「買取成立日(終了)」に期間を入れます(最初は今月1日から今日まで)。期間は日本時間で両日を含みます。③の「端数処理」を、切捨て・四捨五入・切上げから選びます。
タグ・期間・端数処理がそろったら、④の「資料を作成」を押します。**押すとその場で資料が保存されます**(お金は動きません)。顧客ごとにLinyに確かめるので、少し時間がかかります。
## 3. 結果を確かめて、CSVをダウンロードする
作り終わると、対象の件数と買取合計、「紹介手数料(3%)」「消費税相当額(紹介料の8%)」「支払合計」が出ます。「CSVをダウンロード」で保存します。
作った資料は「作成済み資料(直近10件)」に並びます。①でタグと期間・支払合計を確かめ、②の「CSVをダウンロード」でいつでももう一度保存できます。
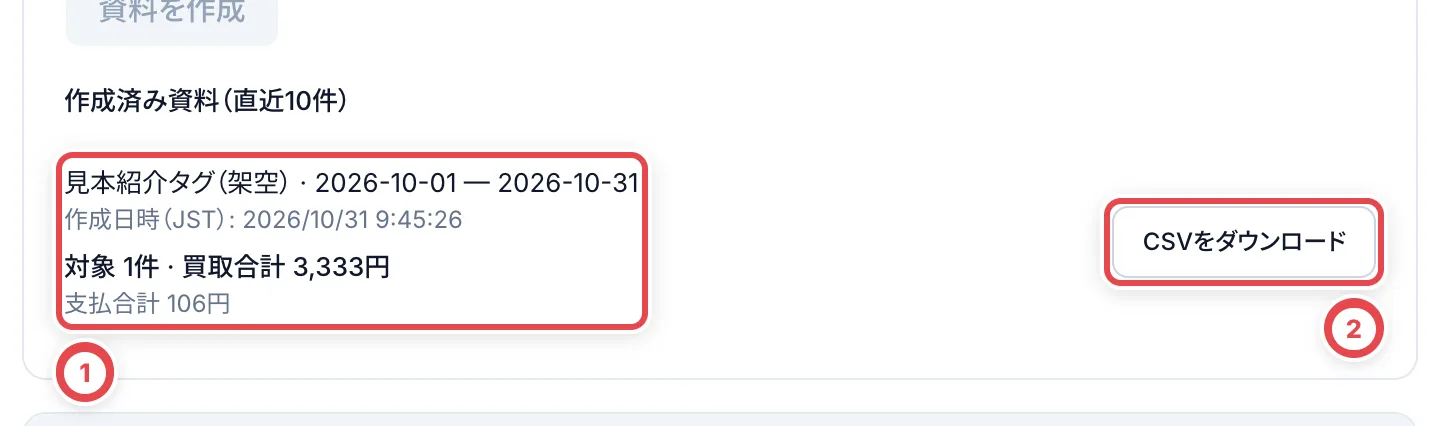 保存済みの資料は、あとからタグや買取金額が変わっても自動では書き換わりません。最新の内容が必要なときは、新しく作ります。
紹介タグ未確認の取引は、件数の注意表示に残りますが、合計と共有CSVの明細には入りません。Linyの取得失敗やUID不一致では、不完全な資料を保存せずエラーになります。
CSVには、紹介日時・顧客ID・顧客番号・取引番号・買取成立日時・買取金額・紹介料率・紹介手数料・加算率・消費税相当額・支払合計の列と、最後に合計の行が入ります。紹介日時はLinyでタグを付けた日時で、分からない行は「日時未確認」になります。
## 対象と計算の決まり
対象は、期間内に成立した円建ての買取です(古物台帳の成立日時で判断します)。金額を訂正した買取は最新の訂正額を使い、取り消した取引は入りません。初回とリピートは区別しません。 作成時点でその紹介タグが付いている顧客を対象にするため、タグを付ける前の買取も、成立日時が指定期間内なら含まれます。紹介日時は対象期間を絞る条件ではありません。
紹介手数料は買取金額の3%です。その紹介手数料に対して、8%(消費税相当額)を加えます。取引ごとに、まず紹介手数料、次に消費税相当額を、選んだ端数処理で1円単位に丸めます。合計は各取引の結果を足した金額です。
たとえば買取金額が100,000円なら、紹介手数料は3,000円、消費税相当額は240円、支払合計は3,240円です。8%は買取金額全体ではなく、紹介手数料に掛けます。料率は画面では変えられません。
## 困ったとき
| 起きていること | 確かめること・直し方 |
| ------------------------------------------------------------ | -------------------------------------------------------------------------------------------------------------- |
| 「タグを取得」「資料を作成」が押せない | Liny連携の接続が使えません。「設定」の「LINE連携」で、Linyと対応するLINE連携の状態を確かめます。 |
| 「紹介タグ未確認の…取引は資料と合計に含めていません」と出る | 顧客のLINEの紐付けか、Liny側の友だち・タグを確認できなかった取引があります。紐付けとタグを直して作り直します。 |
| 「5000取引を超えています。成立期間を短くしてください」と出る | 期間内の取引(タグの有無に関係なく)が多すぎます。期間を短くして、分けて作ります。 |
| 「500顧客を超えています。成立期間を短くしてください」と出る | 期間内に買取が成立した顧客が多すぎます。期間を短くして、分けて作ります。 |
| 「Linyへの同期を実行中です」と出る | 少し待ってから、もう一度押します。 |
| 「成立買取またはLINEの紐付けが変更されました」と出る | 作っている間に内容が変わりました。もう一度作ります。 |
---
# AI連携(MCP)のしくみ
Source: https://docs.toreca-cloud.com/mcp
トレカクラウドは、AIエージェントとつなぐためのMCP(Model Context Protocol)の窓口を用意しています。接続には、リモートHTTP接続と、このサーバーのOAuth方式に対応したアプリが必要です。Claude Code、Claude、Cursorなどの登録方法と認証の条件は[アプリにつなぐ](/mcp/connect)で確認してください。
つなぐと、AIエージェントに「ピカチュウの在庫はどの棚にある?」のように頼むだけで、エージェントがトレカクラウドを調べて答えます。在庫の移動や入庫の登録も、許可した範囲で任せられます。
## 接続先
操作方法をAIに調べてもらうだけの場合は、[AIでヘルプを読む](/mcp/help-center)を参照してください。以下は、店舗の在庫や買取を扱うための接続先です。
| 項目 | 値 |
| ---------- | --------------------------------------------------- |
| MCPのURL | `https://api.toreca-cloud.com/mcp` |
| 認証 | OAuth(ブラウザでトレカクラウドにログインして許可) |
| 接続の期限 | 許可するときに選ぶ(1日〜無期限、はじめは1日) |
APIキーを発行する必要はありません。アプリにURLを登録すると、初回にブラウザが開きます。トレカクラウドにログインして作業ロールを選ぶと、接続が完了します。
## 安全のためのしくみ
- 接続のたびに作業ロールを選びます。ロールによって、AIエージェントに見せる操作が変わります([作業ロールと接続の期限](/mcp/roles))。
- AIエージェントの操作は、ログインした人の権限を超えません。メンバーの権限で禁止されている操作は、MCPからもできません。
- 操作は画面と同じ処理を通り、監査ログに残ります。
- 本人確認書類の画像や振込先の口座番号の全体は、MCPには渡しません。
## 次に読む
**[アプリにつなぐ](/mcp/connect)**
Claude Code、Claude、Cursorへの登録手順です。
**[使い方の例](/mcp/examples)**
在庫探しや棚卸しでの頼み方の例です。
---
# アプリにつなぐ
Source: https://docs.toreca-cloud.com/mcp/connect
どのアプリでも、登録するのはMCPのURL `https://api.toreca-cloud.com/mcp` だけです。登録したあとの初回の接続で、ブラウザでの許可を求められます。
**Claude Code**
ターミナルで次のコマンドを実行します。
```bash
claude mcp add --transport http torecacloud https://api.toreca-cloud.com/mcp
```
Claude Codeで `/mcp` を開き、`torecacloud` を選んで認証します。ブラウザが開いたら、トレカクラウドにログインして許可してください。
**Claude(claude.ai・デスクトップ)**
「カスタマイズ(Customize)」→「コネクタ(Connectors)」からカスタムコネクタを追加し、URLに `https://api.toreca-cloud.com/mcp` を入力します。認証を使う設定にし、OAuthクライアントを選ぶ画面ではClaudeの公開IDを使う推奨の方式を選びます。追加後に「接続」からトレカクラウドにログインして許可し、使う会話でもコネクタを有効にします。組織のプランでは管理者による追加が必要な場合があります。
**Cursor**
`~/.cursor/mcp.json`(またはプロジェクトの `.cursor/mcp.json`)に次の設定を足します。
```json
{
"mcpServers": {
"torecacloud": { "url": "https://api.toreca-cloud.com/mcp" }
}
}
```
Cursorの設定でMCPの一覧を開き、`torecacloud` の認証を進めます。
## ブラウザで許可する
1. **ログインする**
トレカクラウドのアカウントでログインします。複数の店舗に所属している場合は、使う店舗を選んだ状態にしてください。許可の画面の①で、つなぐ店舗を確かめられます。
2. **作業ロールを選ぶ**
②で、これからする作業に合うロールを選びます。迷ったら「閲覧のみ」から始めてください([作業ロール](/mcp/roles))。
3. **許可する**
③の「許可する」を押すとアプリに戻ります。設定の「MCP」に接続が並び、状態が「接続中」になれば完了です。
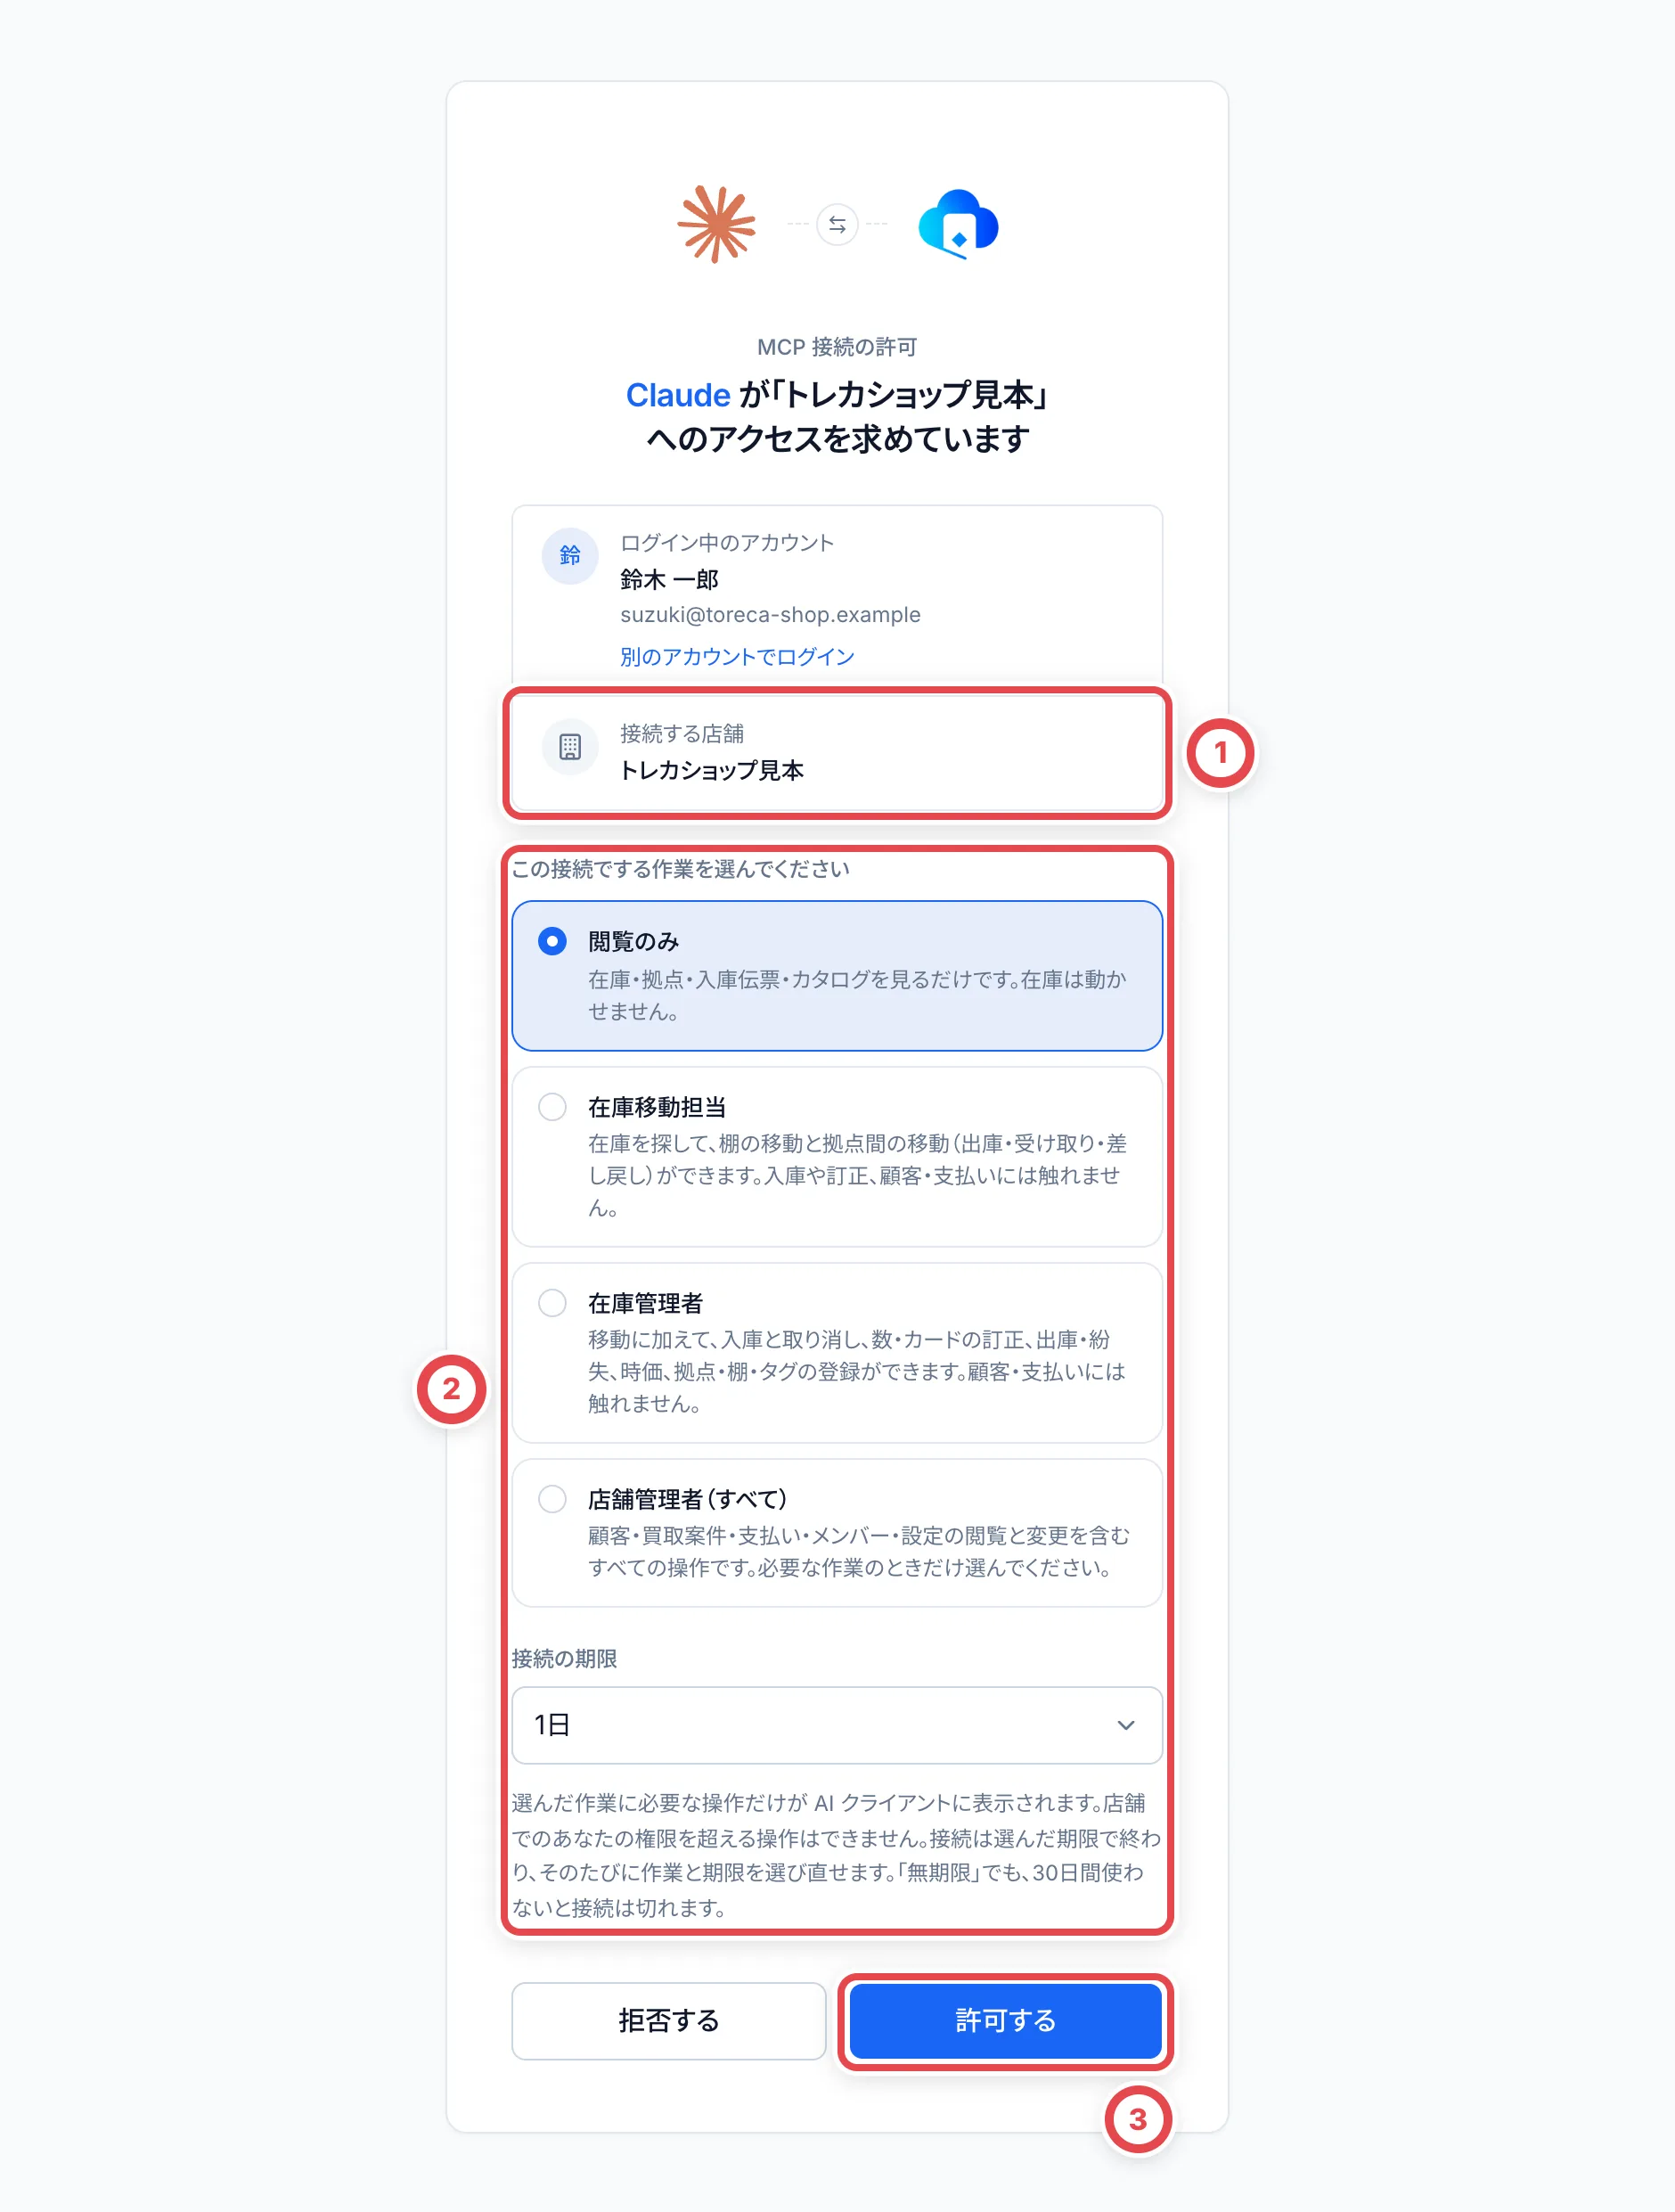 ①で店舗を確かめ、②で作業ロールを選んでから③を押します。
## つながったか確かめる
AIエージェントに「トレカクラウドのwhoamiを実行して」と頼みます。ログインしたアカウントと店舗、使える権限が返れば、正しくつながっています。
:::tip
接続は許可するときに選んだ期限(1日〜無期限、はじめは1日)で切れます。切れたら、Claude Codeでは `/mcp` から認証し直し、ほかのアプリでも同じように再接続してください。
:::
## アプリ側の設定が違うとき
メニュー名や認証の選択肢はアプリのバージョン・組織の設定によって異なります。[Claude Codeの公式手順](https://code.claude.com/docs/en/mcp)、[Claudeのカスタムコネクタ](https://support.claude.com/en/articles/11175166-get-started-with-custom-connectors-using-remote-mcp)、[CursorのMCP設定](https://cursor.com/docs/mcp)も確認してください。
接続に失敗する場合は、エラー内容とアプリ名・バージョンを運営に伝えてください。ログイン情報やアクセストークンを設定ファイルへ直接書かないでください。
---
# 使い方の例
Source: https://docs.toreca-cloud.com/mcp/examples
AIエージェントには、画面で探すときと同じ言葉で頼めます。カード名や型番、棚の名前を入れると、目当ての情報に早くたどり着きます。
## 在庫を探す(閲覧のみ)
- 「リザードンex SARの在庫を、拠点と棚ごとに数えて」
- 「管理番号000123の個体はいまどこにある?履歴も見せて」
- 「PSAの認定番号12345678のスラブは在庫にある?」
- 「東京本店のA-01棚にある在庫を一覧にして」
## 在庫を動かす(在庫移動担当)
- 「A-01棚のPSA10を全部B-03棚へ移して」
- 「東京本店から大阪店へ送る拠点間移動を作って。対象は昨日入庫したBOX」
移動のように在庫が変わる頼みごとでは、AIエージェントは実行の前に対象と件数を確かめます。内容を確認してから進めてください。
## 入庫や訂正をする(在庫管理者)
- 「この一覧を入庫伝票にして。まずは登録せずに検証だけして」
- 「管理番号000456のグレードをPSA9に訂正して。理由は鑑定書の見間違い」
入庫は、登録しないで中身だけを確かめる検証から始められます。件数や金額を確かめてから、本番の登録を頼んでください。
- (スラブの写真を添えて)「シンガポールの在庫で、写真のスラブの認定番号を同じカード・グレードの個体に紐付けて。まずは検証だけして」
認定番号は在庫の中で1点にしか付きません。すでにほかの個体に付いている番号は、その個体の管理番号と場所を示して断ります。
## 棚卸しをする
- 「B棚の棚卸しを始めて」
- 「進行中の棚卸しで、まだ確認していない個体を出して」
## 買取や振込を確かめる(店舗管理者)
- 「今日の対応項目を教えて」
- 「承認待ちの振込を金額の大きい順に並べて」
:::note
AIエージェントの答えは、トレカクラウドから取得した情報をもとにしています。金額や数量を確定する前に、画面でも確かめることをおすすめします。
:::
---
# AIでヘルプを読む
Source: https://docs.toreca-cloud.com/mcp/help-center
使い方をAIに調べてもらうための入口です。店舗の在庫や買取データへの接続は必要ありません。
## ヘルプを検索するMCP
MCPに対応したアプリの接続先に、次のURLを登録してください。
```text
https://docs.toreca-cloud.com/docs-mcp
```
公開ヘルプを読むための接続なので、トレカクラウドへのログインは不要です。ヘルプの検索、ページ本文の取得、ページ一覧とナビゲーションの取得ができます。在庫の変更や買取の登録はできません。
例えば「店頭買取で、本人確認の次に何をするかヘルプから調べて、参照ページと一緒に教えて」と依頼できます。
このページの「MCPに接続」から、接続先URLのコピーや対応アプリへの登録もできます。「チャットで開く」は、このページを参照するための入口です。店舗データへのアクセスを許可する操作ではありません。
## URLからヘルプを読む
MCPを使わず、URLを読み取れるAIに次のリンクを渡す方法もあります。
| リンク | 内容 |
| ------------------------------------------------------------------- | ------------------------------------------------------------------------ |
| [ヘルプの索引(llms.txt)](/llms.txt) | 読むページを探すための索引 |
| [ヘルプ全文(llms-full.txt)](/llms-full.txt) | ヘルプをまとめたテキスト。長いため、通常は索引から必要なページを選びます |
| [機械向けの案内(agent-readability.json)](/agent-readability.json) | MarkdownやMCPなどの公開先一覧 |
| [MCPの接続情報](/.well-known/mcp.json) | ヘルプ用MCPを見つけるための情報 |
各ガイドは、URLの末尾に `.md` を付けるとMarkdownで読めます。例えば、[店頭買取ガイドのMarkdown](/guides/purchase/counter.md)をAIに渡せます。
## 店舗データを扱いたいとき
在庫の検索や買取の操作には、別の[業務用MCPへの接続](/mcp/connect)が必要です。接続先は `https://api.toreca-cloud.com/mcp` で、ログインと権限の許可が必要です。
---
# 作業ロールと接続の期限
Source: https://docs.toreca-cloud.com/mcp/roles
作業ロールは、AIエージェントに任せる仕事の範囲です。接続のたびに許可の画面で選び、選んだロールの操作だけがAIエージェントに見えます。
| 作業ロール | できること |
| -------------------- | ------------------------------------------------------------------------------------------------------------------------------ |
| 閲覧のみ | 在庫・拠点・入庫伝票・カタログを見るだけです。在庫は動かせません。 |
| 在庫移動担当 | 在庫を探して、棚の移動と拠点間の移動(出庫・受け取り・差し戻し)ができます。入庫や訂正、顧客・支払いには触れません。 |
| 在庫管理者 | 移動に加えて、入庫と取り消し、数・カードの訂正、出庫・紛失、時価、拠点・棚・タグの登録ができます。顧客・支払いには触れません。 |
| 店舗管理者(すべて) | 顧客・買取案件・支払い・メンバー・設定の閲覧と変更を含む、MCPが対応している全操作です。必要な作業のときだけ選んでください。 |
画面の操作すべてがMCPに用意されているわけではありません。接続先が公開しているツール一覧で対応を確認し、必要な操作がなければ該当の画面で進めます。
## ロールとメンバーの権限
作業ロールは、見せる操作を絞るだけです。メンバーの権限を広げることはありません。たとえば振込を承認できないメンバーが「店舗管理者(すべて)」を選んでも、振込の承認はできません。
## 接続の期限
接続の期限は、許可の画面で作業ロールと一緒に選びます。1日・3日・7日・1ヶ月・3ヶ月・1年・無期限から選べ、はじめは1日が選ばれています。期限が来ると、AIエージェントの操作は認証エラーになり、設定の「MCP」では「切断」と表示されます。アプリから再接続し、そのときの作業に合う作業ロールと期限を選び直してください。
「無期限」でも、30日間まったく使わなかった接続は切れます。
広いロールのまま接続が残らないように、広いロールほど短い期限を選んでください。
## 接続を確かめる・止める
設定の「MCP」に、つないでいるアプリと接続したメンバー、権限、最終アクセス、状態(「接続中」か「切断」)が並びます(①)。心当たりのない接続があれば、店舗の管理者に連絡してください。
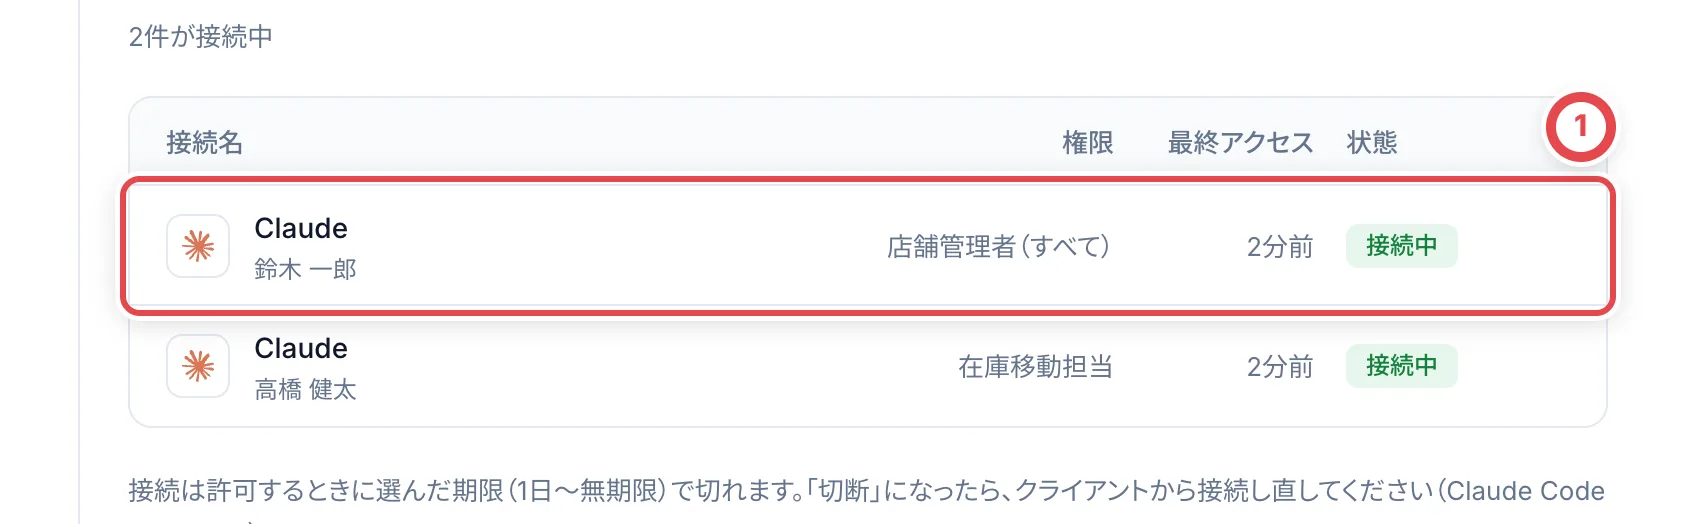 ①に、接続中のアプリと選んだ作業ロールが並びます。
---
# うまくつながらないとき
Source: https://docs.toreca-cloud.com/mcp/troubleshooting
## 認証エラーが出る
接続は許可するときに選んだ期限(はじめは1日)で切れます。アプリから再接続して、作業ロールと期限を選び直してください。Claude Codeでは `/mcp` を開き、`torecacloud` を選んで認証し直します。
## 使いたい操作が見つからないと言われる
選んだ作業ロールに、その操作が含まれていない可能性があります。再接続して、作業に合うロールを選んでください([作業ロール](/mcp/roles))。
ロールを広げても失敗するときは、メンバーの権限を店舗の管理者に確認してもらいます。そもそもMCPに対応する操作がない場合は、権限を広げても追加されません。接続先のツール一覧を確認し、最終査定やBOXの状態確認などは画面から進めてください。
## 別の店舗の情報が出る
AIエージェントが扱う店舗は、許可したときに選んでいた店舗です。別の店舗を扱うときは、トレカクラウドで店舗を切り替えてから再接続してください。
## 許可の画面が開かない
アプリがブラウザを開けない環境では、アプリに表示されたURLをコピーしてブラウザで開いてください。社内のネットワークで `api.toreca-cloud.com` への通信が止められていないかも確かめてください。