

Record an in-store ID check and add documents
Staff can record an in-person check of the original ID without configuring an identity method first. After reception, open the customer’s Appraisal requests or Customer details tab.
To allow document review for online deals, see Identity verification methods. This setting is separate from in-person checks at the counter.
| Current situation | Next step |
|---|---|
| Just received the request and can check the original | Select the deal and click Check in person |
| The customer is photographing their ID or signing | Wait for completion, or switch to staff entry from View confirmation status |
| Verification is already recorded | Review the record and use View or add documents |
1. Select the customer and in-store deal
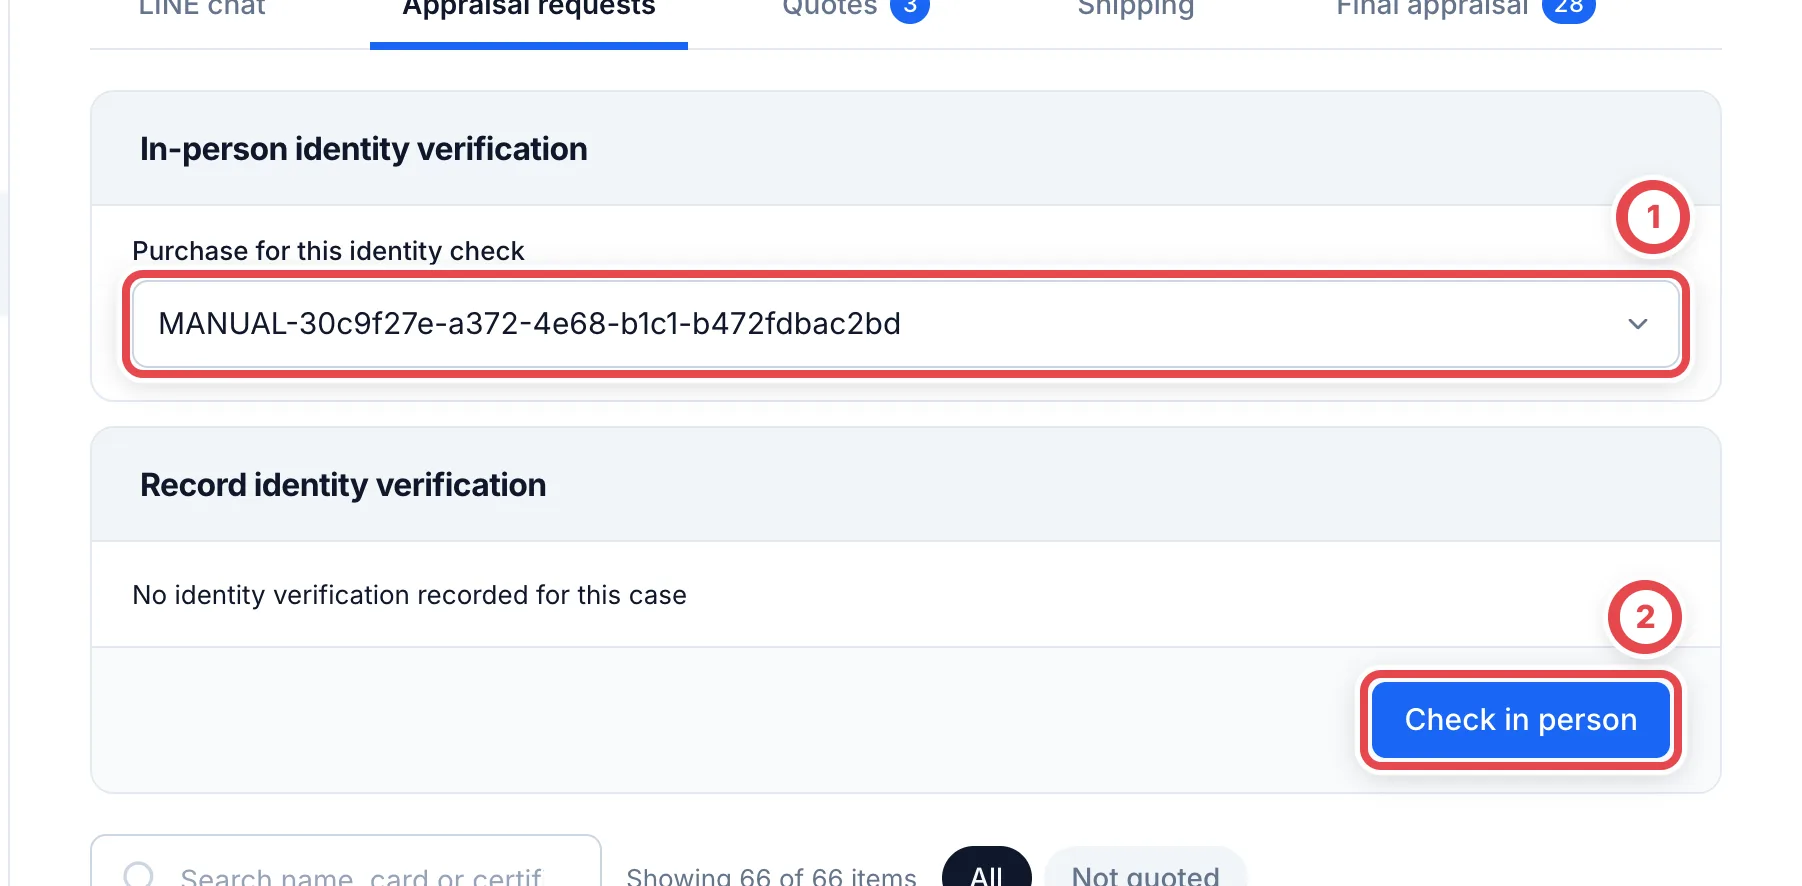
Open the customer from Purchase requests or Customers. Find In-person identity verification on Appraisal requests or Customer details. Select Purchase for this identity check at ①.
A single eligible deal is selected automatically. With multiple deals, match the deal number before choosing. Click Check in person at ②.
Viewing requires purchase, customer and identity read permissions; recording also requires purchase and identity write permissions. The section is absent for businesses, archived customers or customers without an eligible in-store deal.
2. Compare the declaration with the original ID
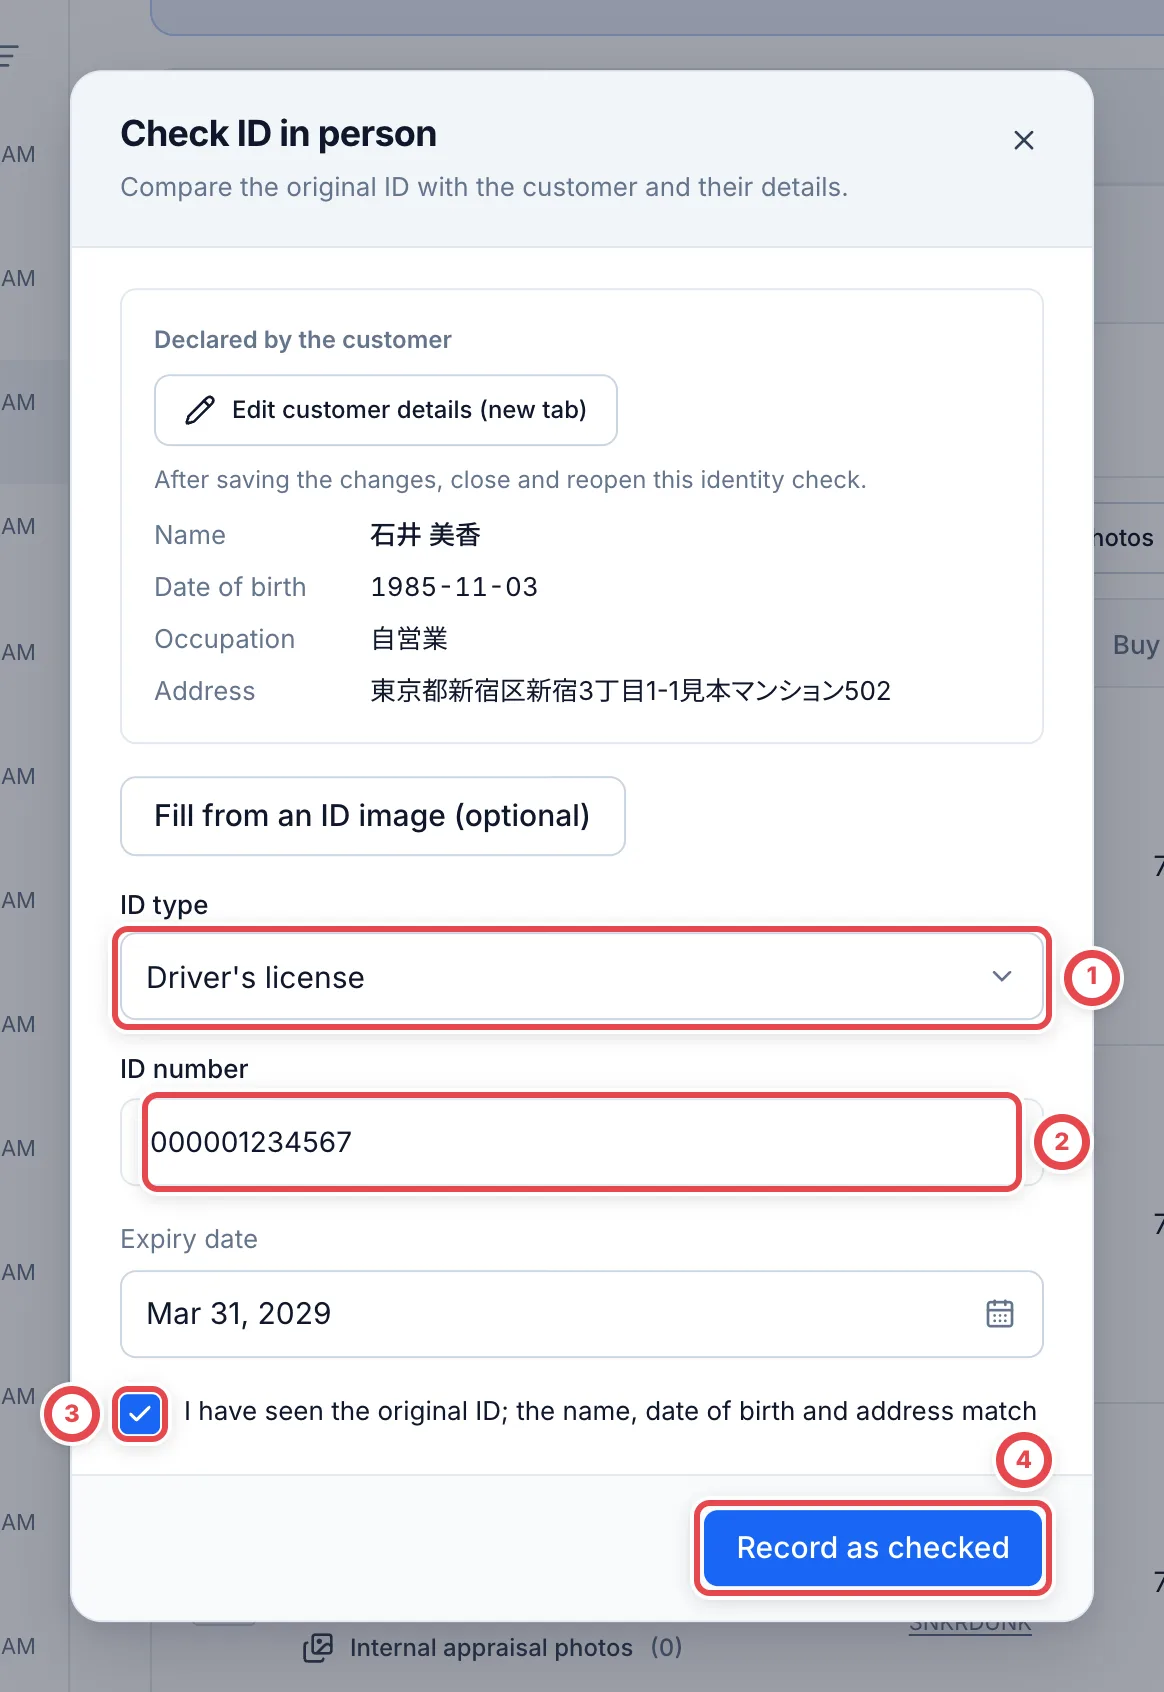
Check the name, date of birth, occupation and address against the original. If details are missing or wrong, use Edit customer details (new tab), save, then close and reopen this dialog.
Choose ID type at ①. Enter ID number at ② and the expiry date below it. Never enter the personal number on a My Number card. Use the no-expiry option only when the residence card itself states it has no expiry.
Optional entry from images
Use the optional image-entry section to choose photos or files: JPEG, PNG or WebP, up to 20 MB in total. For a My Number card, use the front only. Do not select the back or images containing its personal number or QR code.
Check the image confirmation and read the images to assist entry of the ID type, number and expiry date. Compare and correct the results against the original before recording. If reading fails, remove the images and enter the details manually. Reading an image alone does not complete verification.
3. Record as checked
Once you have compared the original with the person present, select the confirmation at ③ and click Record as checked at ④. The verification is linked to the selected deal. Reopen the page and check its timestamp and target deal.
The ID number is encrypted; only its last four characters appear in the record opened with View or add documents.
The expiry in the record’s details is the verification result’s expiry under the shop’s identity policy. It is separate from the document expiry entered from the original ID. Check that verification is recorded for the correct deal when serving the same customer again.
When the save result cannot be confirmed
If a connection interruption or similar problem prevents confirmation, the app automatically retries once with the same details. Wait while it is processing.
If the result still cannot be confirmed, your input is retained and Retry with the same details appears. Click that button. The fields remain locked so the same registration can be checked safely. You do not need to close the dialog and create another registration. After completion, check the record’s timestamp and target deal.
If an input error is shown instead, correct the indicated field before recording again.
4. Review or add document images
After recording, View or add documents appears. Open that record to check its details, timestamp and documents. You can add images here even if you originally entered the check manually.
Match the documents to the same customer and verification before adding them. Never add a My Number card’s back. Adding images does not automatically verify another deal.
For photos submitted on the customer’s device, follow Counter ID photos and the original-ID check.
Continue with In-store purchases. For approval of documents received online, see Identity verification.
Troubleshooting
| What’s happening | What to check and how to recover |
|---|---|
| The in-person section is missing | Check that this is an active individual customer with an eligible in-store deal and the required read permissions. |
| No deal is selected | Select by deal number. A stale link does not silently switch to another deal. |
| The customer is still photographing or signing | Wait, or use the photography fallback from the confirmation status to switch to staff entry. |
| Edited customer details still look old | Save the other tab, then close and reopen the identity dialog. |
| Images cannot be read | Retry or remove them and enter the details from the original. Images can be added after recording. |
| Image reading is busy | Wait before retrying. You can remove the images and enter details from the original manually. |
| Record is disabled | Check the required profile, ID type, number, expiry, original-check confirmation and write permissions. |
| The save result is unknown | Wait for the automatic retry, then use Retry with the same details if shown. Check the saved record without creating another registration. |